


iMustBeCrazy
-
Posts
840 -
Joined
-
Last visited
Content Type
Profiles
Forums
Gallery
Events
Posts posted by iMustBeCrazy
-
-
-
4 minutes ago, Jack-in-the-Blue said:
the one thing that every viewer of a model asks
Just say 'several lifetimes, but it seemed to go faster than that'.
-
-
A little progress, seven strakes of the first planking. I added temporary spacers for setting the gap between the deck and the sheer using rubber cement, this sets the position of the bulwarks.
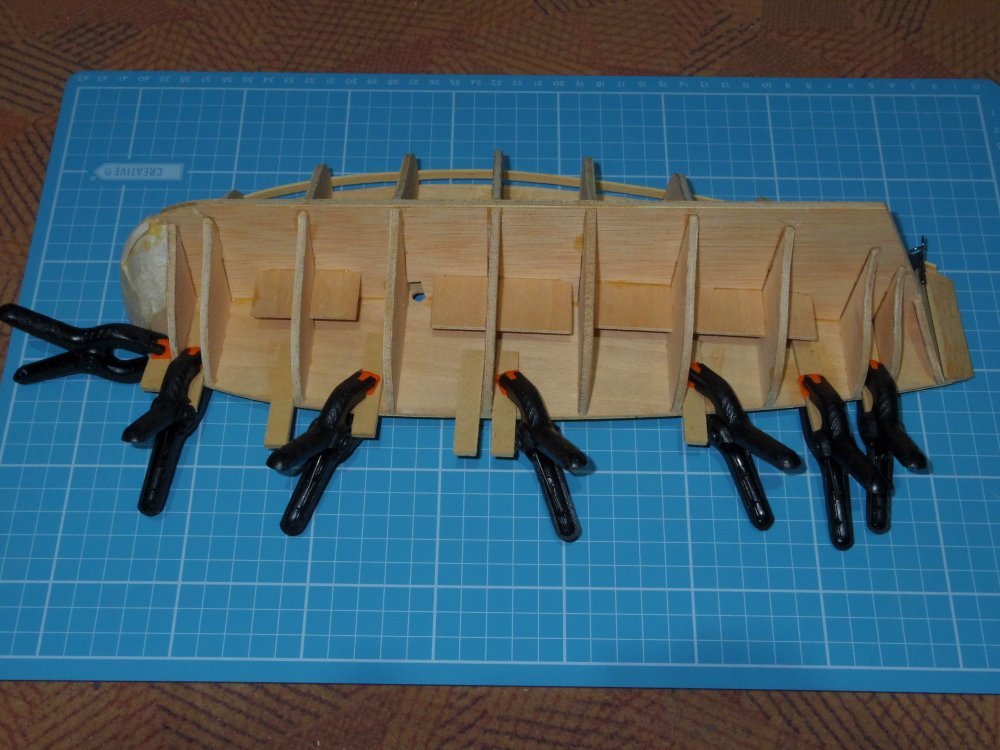
Holding the bulwarks in position proved difficult and there was nowhere to clamp them so I added tabs inside the sheer strakes.
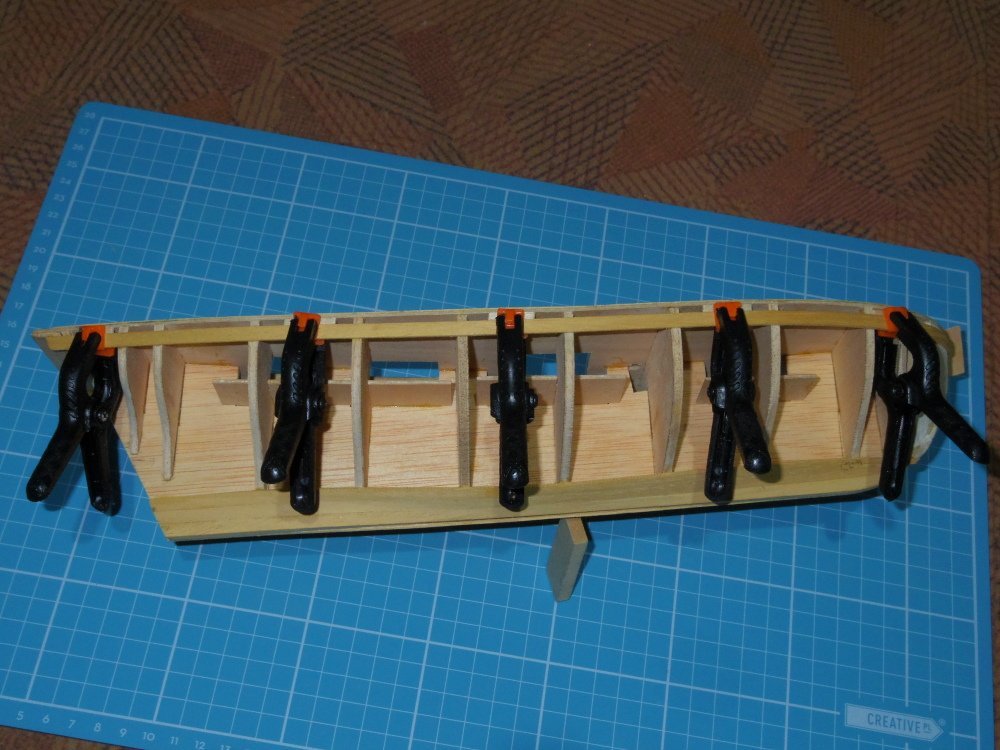
That worked well but means I will be fitting the bulwarks before I finish the first layer of planking.
I also looked at doing a 'proper' carriage for the guns. It's still a little too tall.
- DocRob and Knocklouder
-
 2
2
-
24 minutes ago, vaddoc said:
I think now is a bit too late!
Not really, on my launch I used shellac and a cheap (stiffish) artists paintbrush. One coat and only enough brushwork to make sure I didn't miss anywhere and that it wasn't too thick (no pooling). Really quick and it looks like bare wood. See posts 65 & 66.
-
-
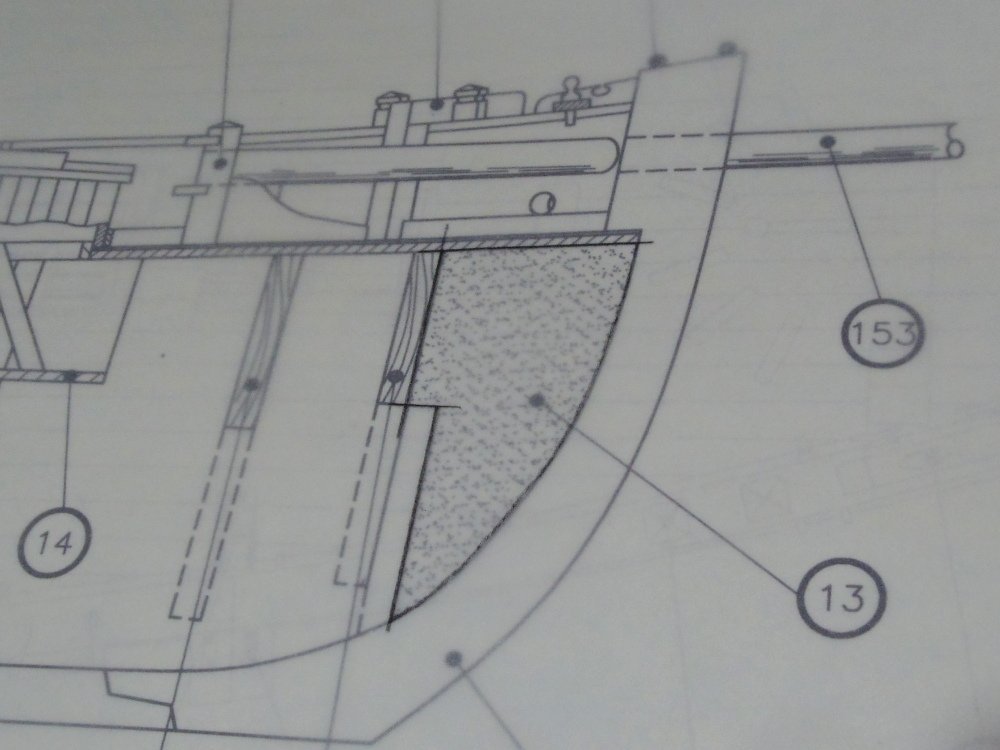
The reasons are complicated but it boils down to 'I have to move the stem forward by this much':
For those complicated reasons mentioned above, I thought (incorrectly) that it should touch the deck as in the pic in post #22.
(Note: balsa has already been added to fill out to the end of the deck compared to the pic in post #22.)
- Jack-in-the-Blue, clearway and bruce d
-
3
-
13 minutes ago, Jack-in-the-Blue said:
Can you use that gap as a rabbet to tuck the ends of your planks into? It looks perfect for the job just like the most modern kits. (I’ll add a photo when I get out of bed)
That was and still is the plan, the stem will just be further forward than I had pictured in my mind but where it is supposed to go.
-
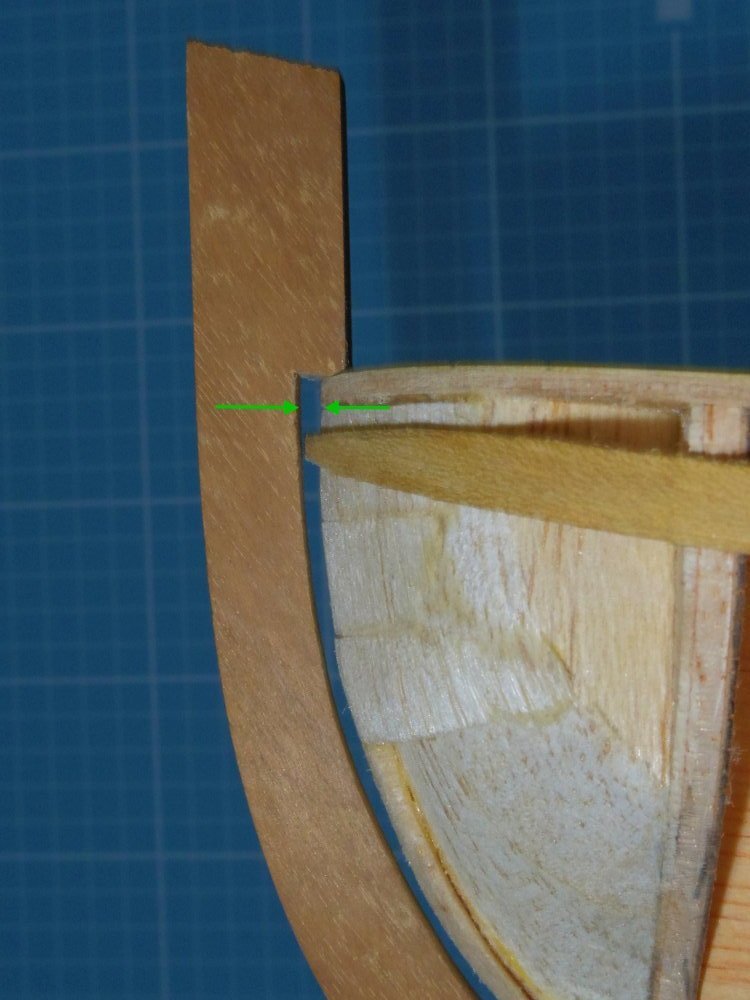
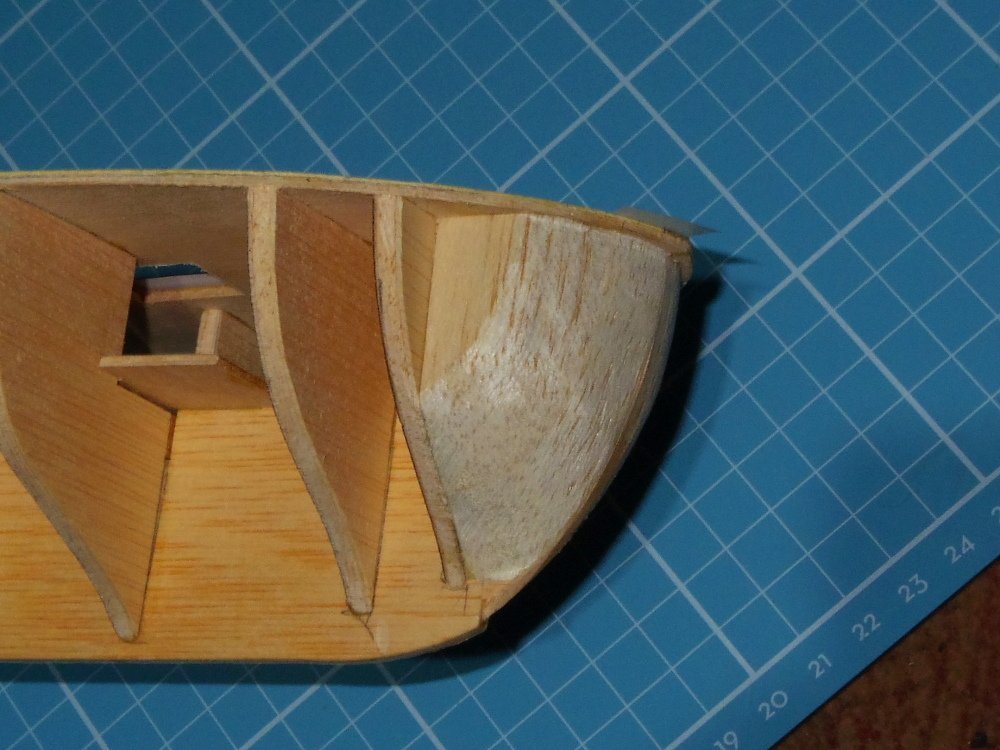
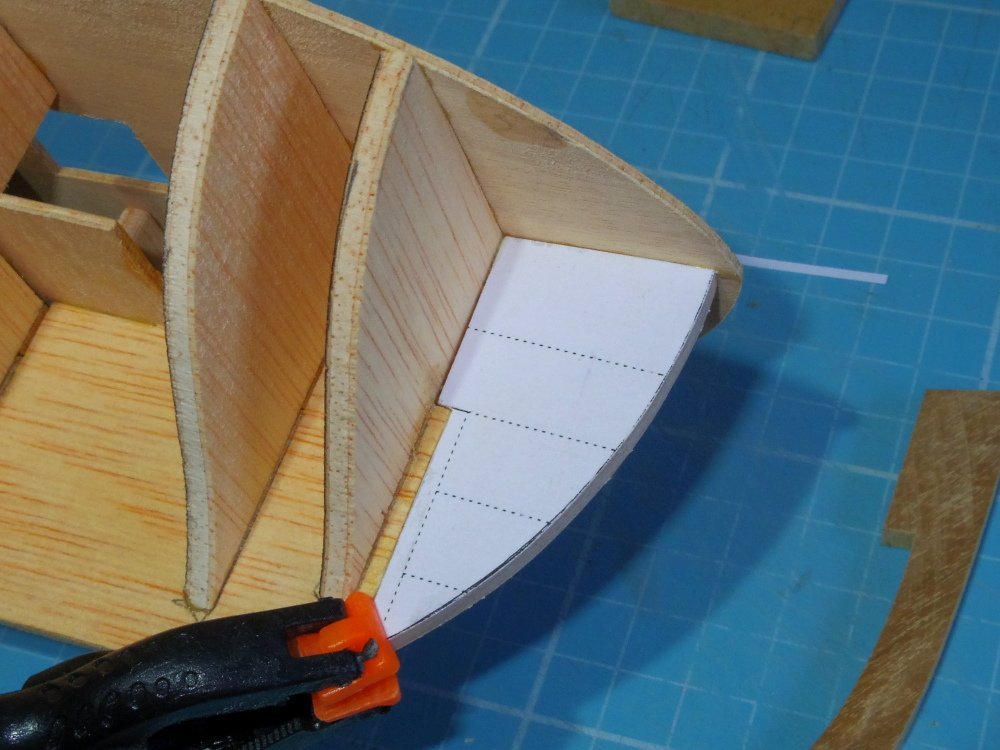
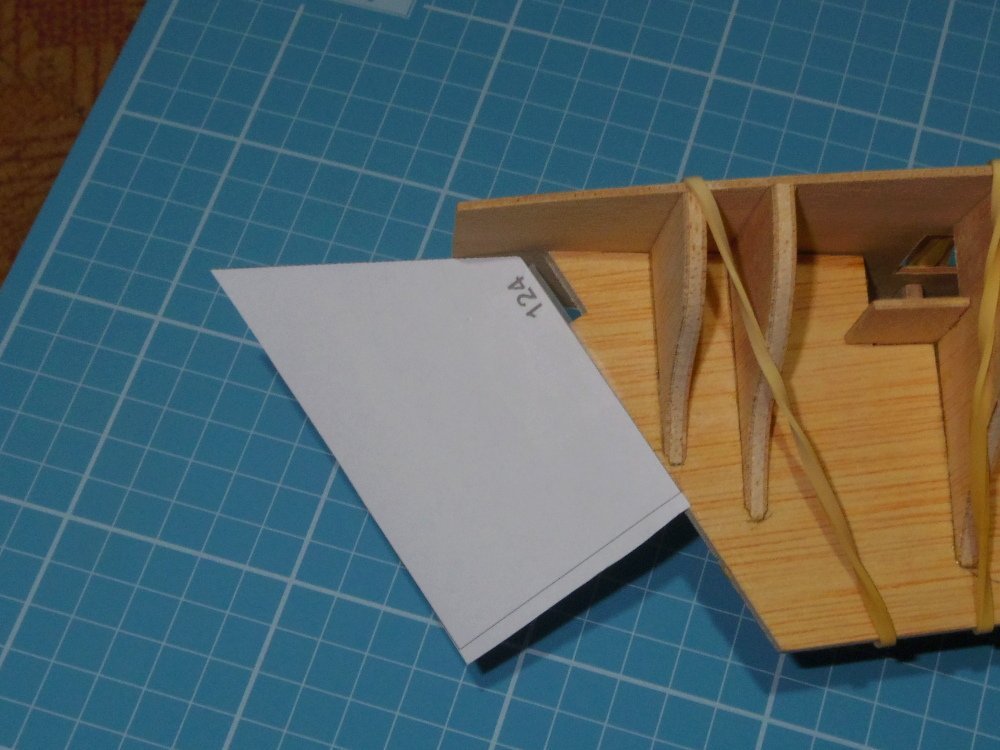
Ok, I made a boo-boo.
When making my balsa bow filler I assumed that the planking finished inside the stem (which it does) but I forgot, didn't understand that the stem is intended to be fitted after the planking is finished. As a result I made the filler to accommodate the planking allowing it to fit inside where I thought the stem should be but the stem is actually going to be about 2.5 mm further forward. (don't worry, the picture will help).
This is with the stem in the position I thought it should be:
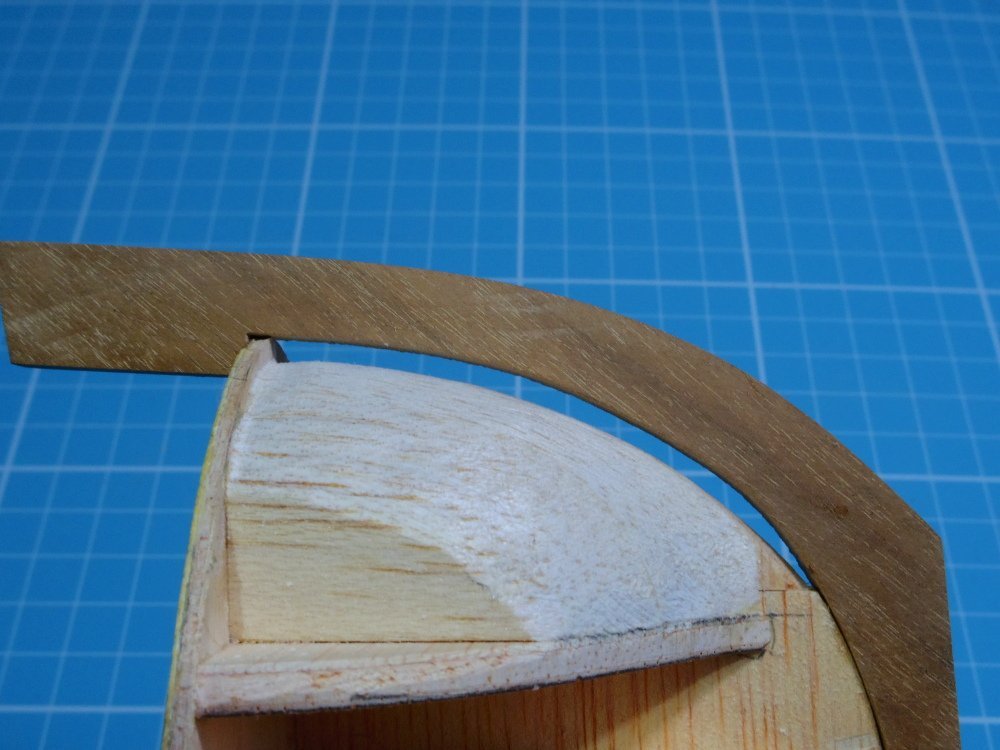
What I now have to do is fill this gap, later the stem will be fitted the same distance further forwards.
- bruce d and Jack-in-the-Blue
-
2
-
3 hours ago, iMustBeCrazy said:
Two other drawings I have show just above and just below the deck.
Looking it seems 'just below the gun ports' might be the standard.
2 hours ago, Jack-in-the-Blue said:But a painting of USS, Lexington shows the channels in the usual place level with the deck. Everything is more complicated than we think.!
Ultimately a painting is just a data point, now if you could come up with a photograph... 😁
- bruce d and Jack-in-the-Blue
-
1
-
 1
1
-
-
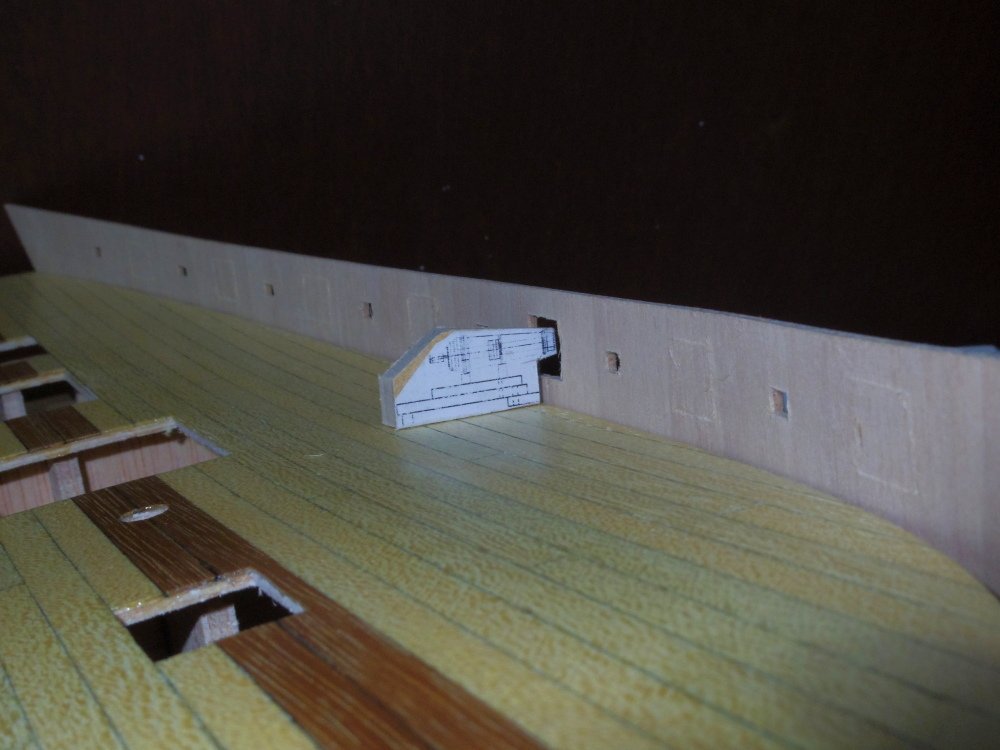
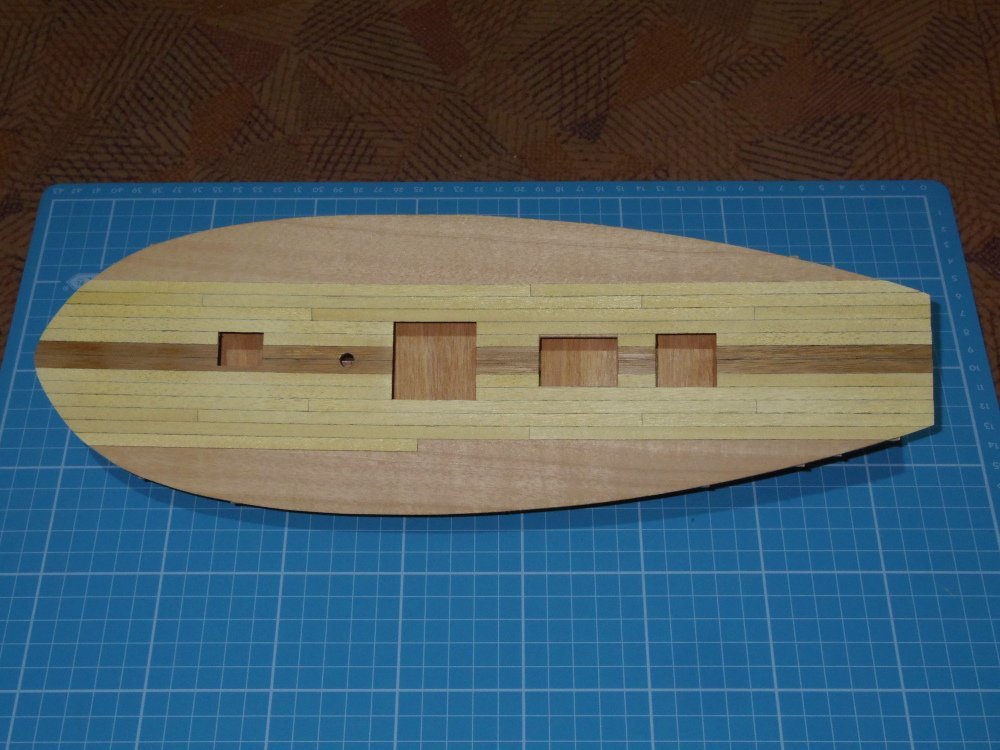
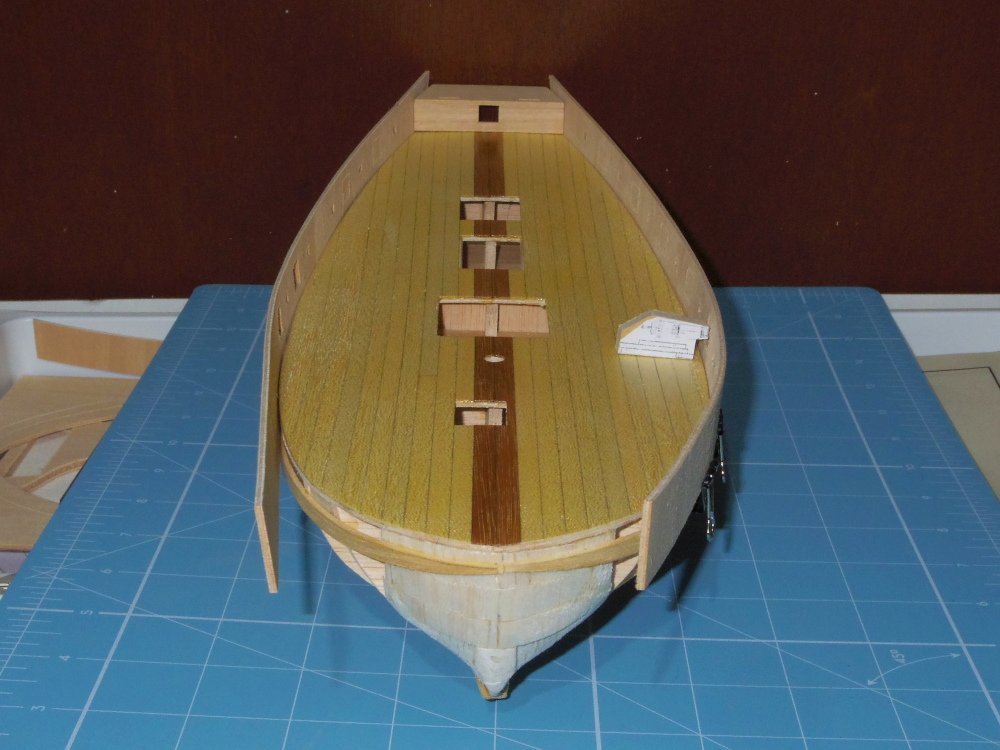
Ok, deck planked. That took longer than I expected. It showed up some asymmetry forward:
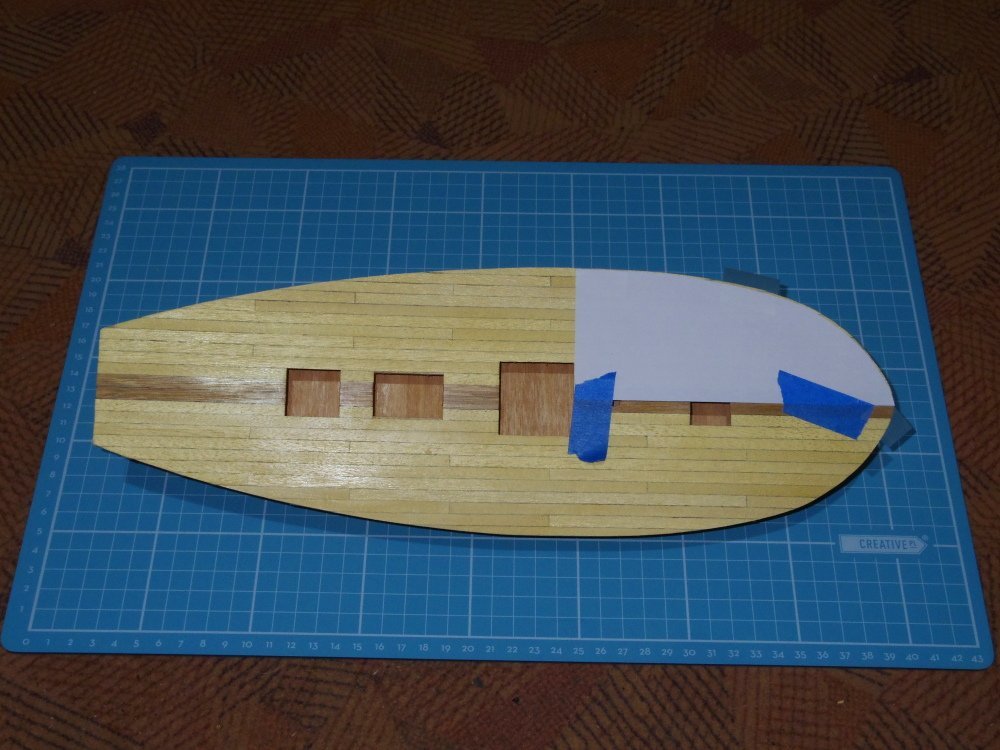
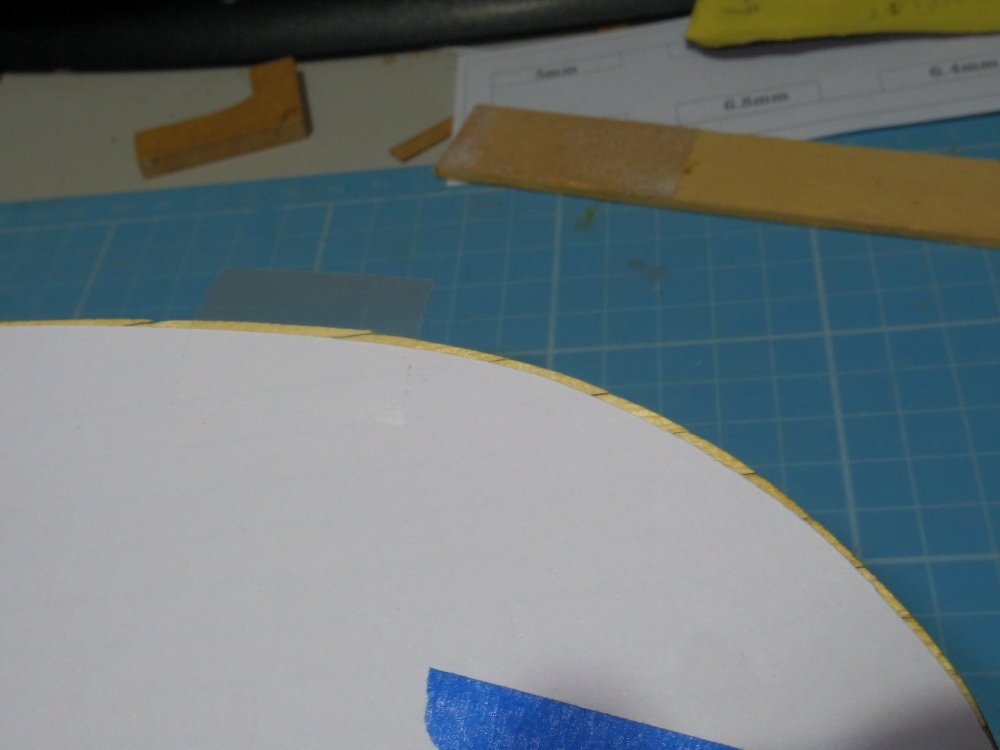
And some shots of the new bow fillers:
- Jack-in-the-Blue, catopower and DocRob
-
3
-
22 minutes ago, theoracle09 said:
I do want a messy deck as if it's being lived and worked in. Do you have any suggestions on how to achieve the effect?
Leave it lying around my shipyard for a week?
")
-
1 hour ago, Jack-in-the-Blue said:
My version of the model also has the channels fitted in a very strange position at the top of the bulwarks just below the rail.
So does this one, well that's going to change.
-
20 minutes ago, HakeZou said:
They look more like rope to me, but could be steel cable.
Starboard side aft of the aft stanchion it bends up, there is also a kink aft of the next stanchion forward, I really doubt it's rope.
- HakeZou and theoracle09
-
2
-
17 minutes ago, clearway said:
you could add a couple of forward facing bulkheads and just plank to the bows like on my Terror
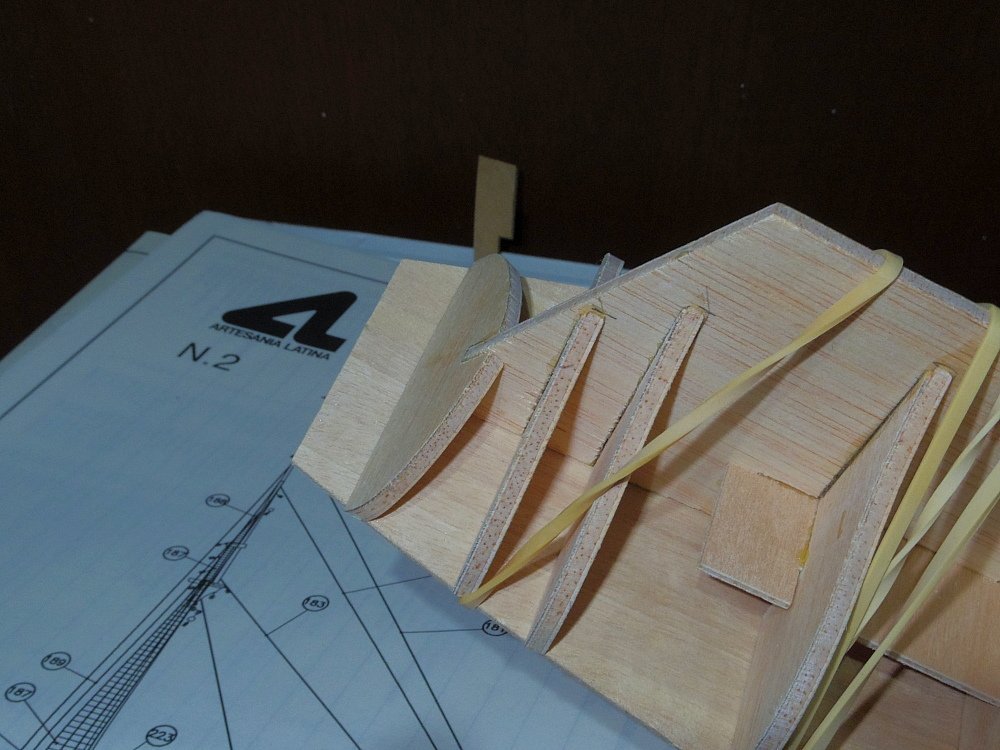
Thanks Keith. I have balsa blocks in now, roughly shaped but I need to think in 'double planked' which is new to me. The general idea with it seems to be 'make it boat shaped' instead of the shape of a specific 'boat' (understandable as a model of a replica of a generic French cutter I suppose).
A 12 year old would just slap it together and be happy, maybe I'm just too pedantic.
Anyway, I think I'm going to have to fit a strake then fair for the next one, then rinse and repeat until the shape finds itself. I may have to fit the keel and step about 5 steps early. We'll see.
-
2 hours ago, theoracle09 said:
The rest of them look like they have a rope or steel braided cable running through them.
From the kinks in it and the guy sitting on it my guess would be galvanised steel cable. The colour was probably dull grey with rust flecks. You could look at braided fishing line (probably with CA or epoxy wiped into it) or multi strand stainless fishing leader.
- theoracle09 and clearway
-
2
-
Relax, no you just have to make her pretty.
1 hour ago, EvanKeel said:I ended up with a kinda significant gap at the stern end of the planks.
It's a smaller gap than mine (see the last two pics in my post above).
1 hour ago, EvanKeel said:I think I'll attempt some shims to fill in those gaps
I called mine 'splinter planks'.
1 hour ago, EvanKeel said:before pulling out my trusty wood filler
What's that?
") 1 hour ago, EvanKeel said:
1 hour ago, EvanKeel said:Always learning!
When you stop learning, you're dead.
-
2 hours ago, Jack-in-the-Blue said:
I like the dark wood down the deck centreline. Very artistic.
You get to claim credit for some of the inspiration.
2 hours ago, Jack-in-the-Blue said:I’m keen to move along to the rigging.
I'm not.
-
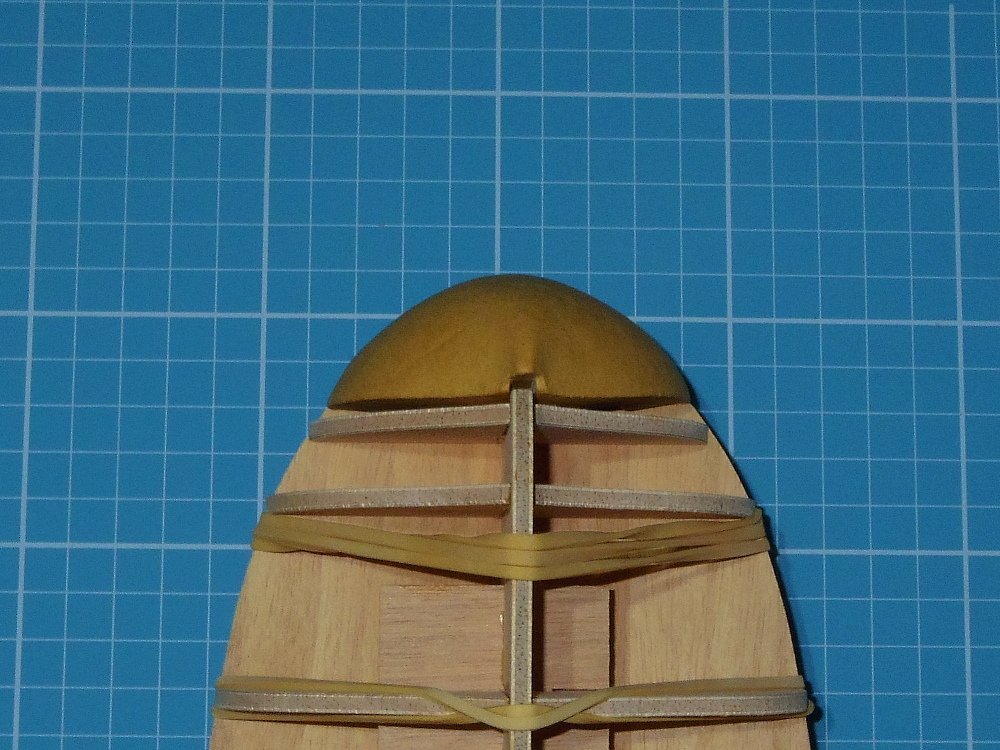
On 9/14/2023 at 3:19 PM, Jack-in-the-Blue said:
She appears to have a sonar dome on the bow.
The 'sonar dome' is going away!
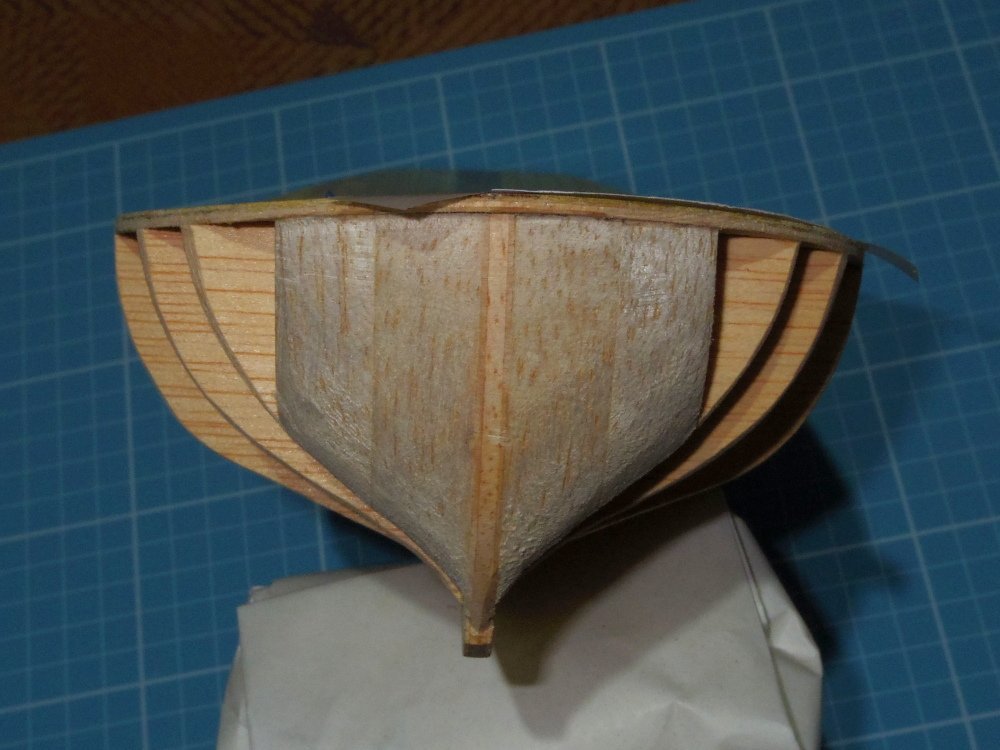
There is a drawing that shows it in profile. I took a tracing, did some measurements, drew it in CAD, cut it out from an off cut of the original ply and glued it on. Looks almost original. I still need to add balsa fillers but I'm on the way.
Deck planking is a little over half done.
- Artesania Latina, DocRob, Waitoa and 3 others
-
6
-
4 minutes ago, Jack-in-the-Blue said:
That’s a good idea, thanks.
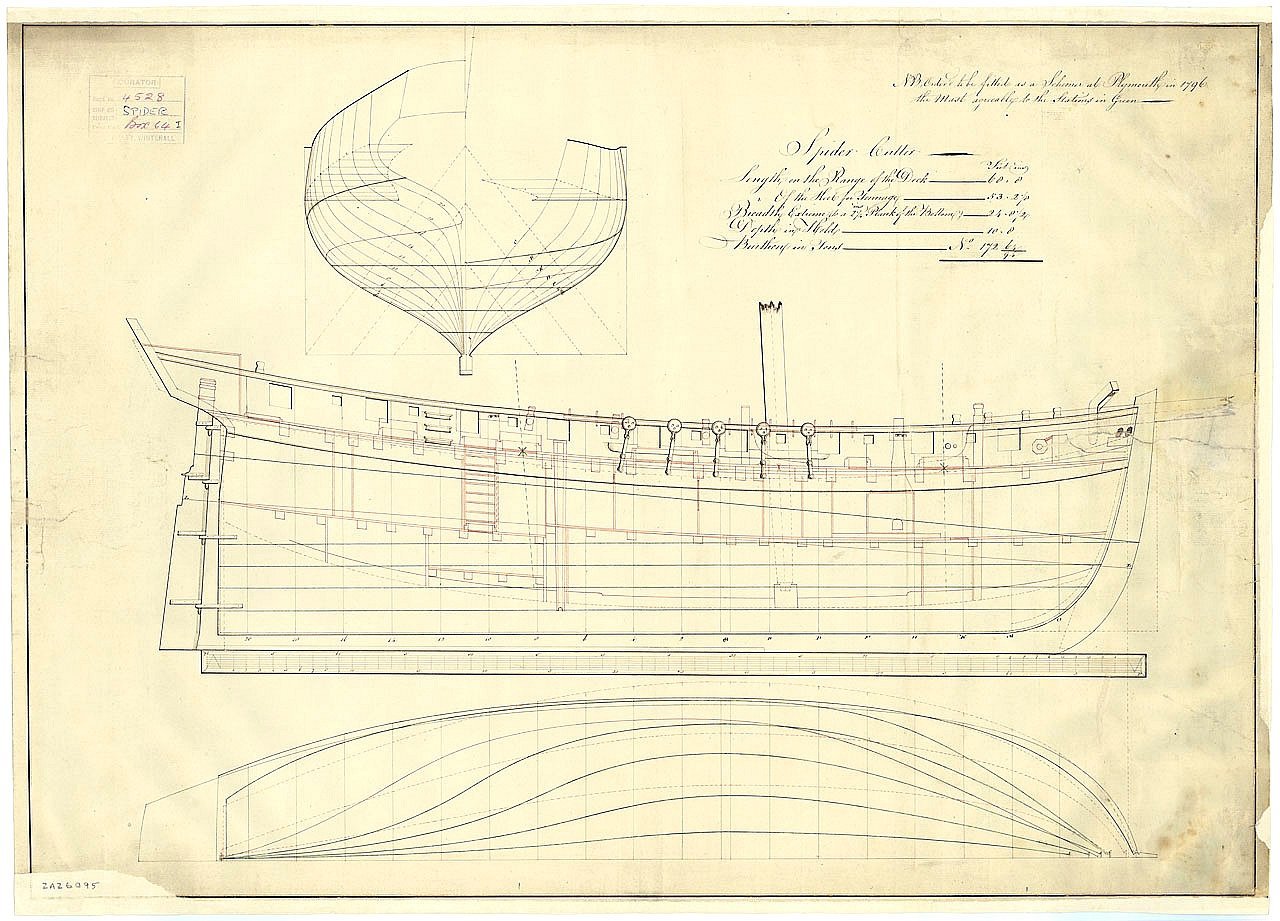
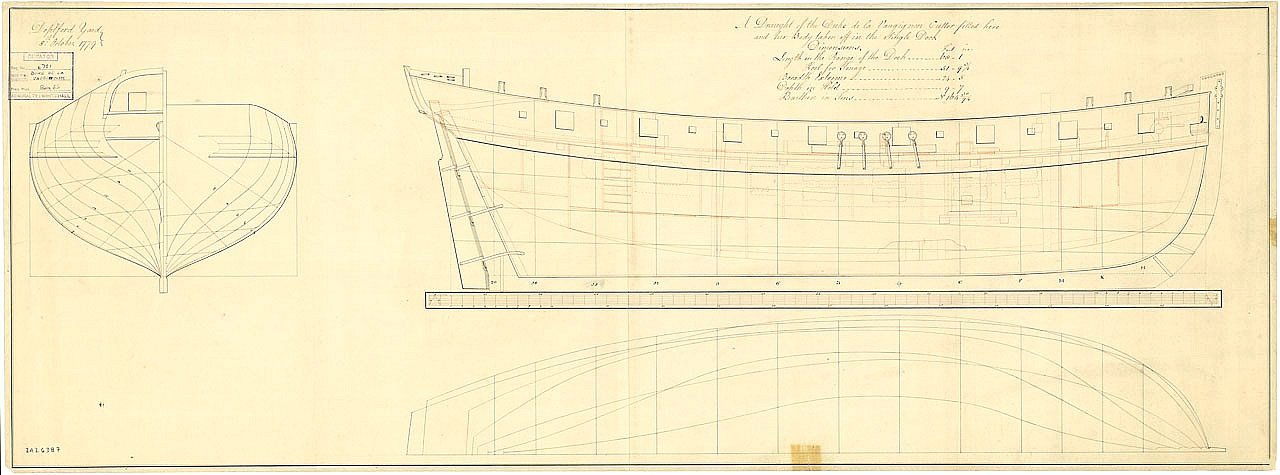
If you download my cutter plans (see the build log) they're on page 1.
-
32 minutes ago, Jack-in-the-Blue said:
A scratch built dingy!
If it works.
It's certainly not a first for this forum. For example allanyed built a 1:64 Bounty launch. Mine can carry my Renard and this cutter would make it look like an aircraft carrier.
-
42 minutes ago, Jack-in-the-Blue said:
Does your deck have camber?
Yes, she does.
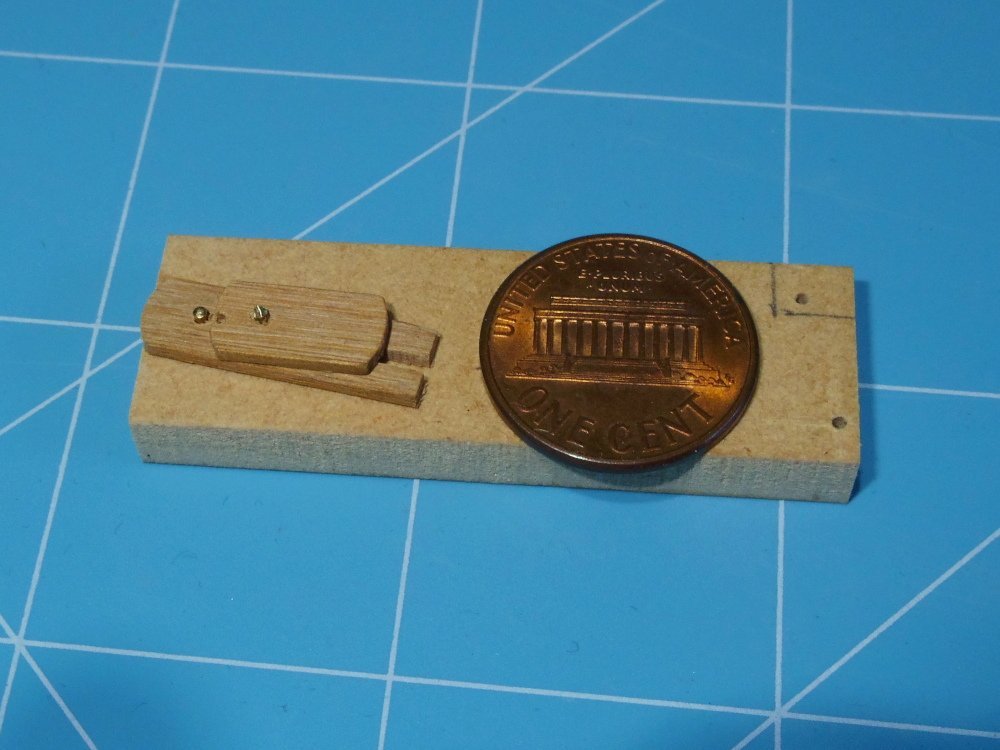
Hopefully this is the start of a 1:48 9 foot cutter. (or 8'8" in 1:50)
So far everything is in 1mm plywood. I'll probably fill it with balsa, fair it, cut grooves for 3 'frames', then plank it.
- Jack-in-the-Blue and DocRob
-
1
-
 1
1
-
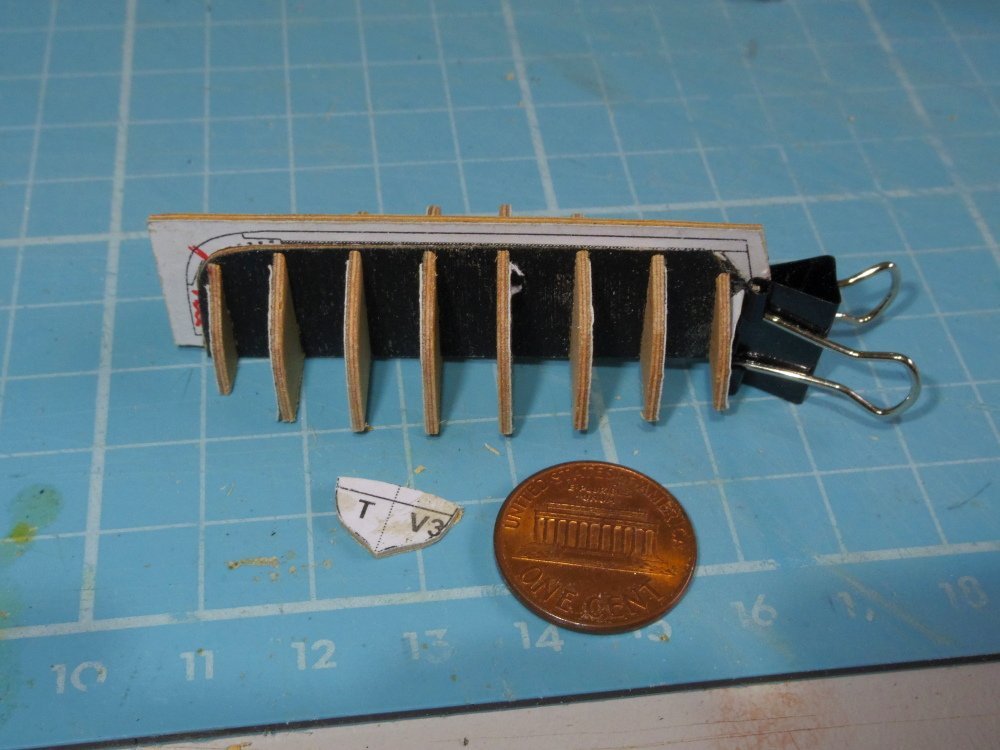
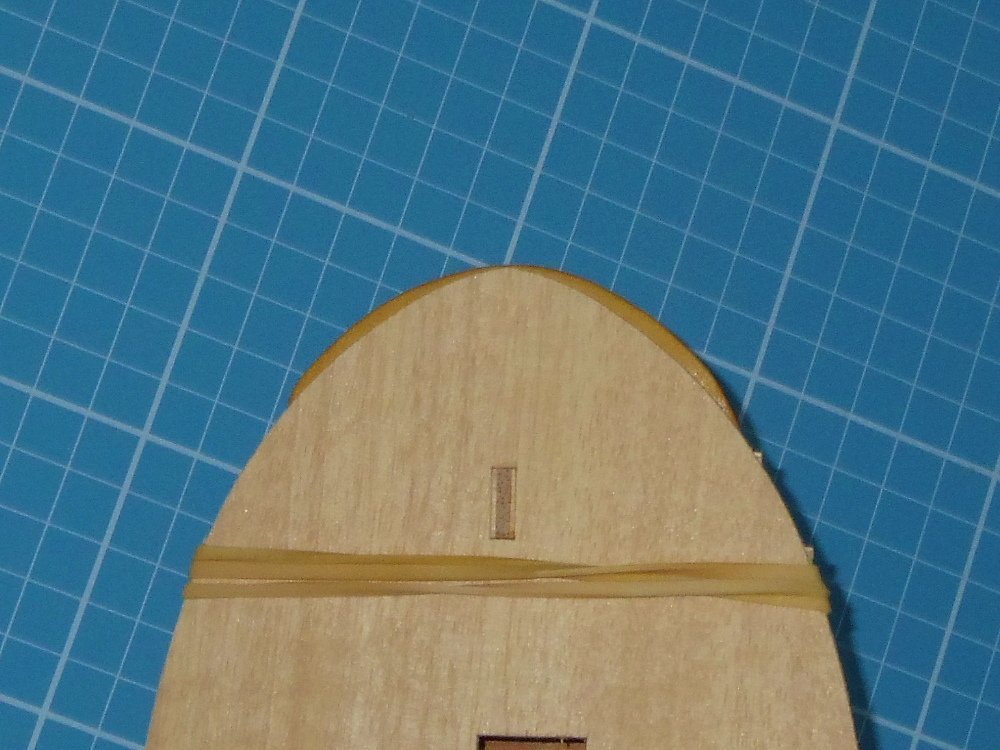
Ok, 'that little problem' has been fixed.
As I said, I had the false deck fitted with 'many rubber bands'.

The top of the aft mould (the problem one) needs to be bevelled for the false deck (one of the many things not mentioned in the 'instructions'). Since I drew and made a number of angle 'gauges' for setting my bench sander I used them for checking the angle needed.
Not quite 124°, probably 122° but I don't have one of those so it's either make another or fudge it.

So I fudged it and tested it on a piece of scrap.
It worked fine.
Problem fixed.
Next problem, this kit comes with a bow filler block made of some composite material (something like dough with a lot of sawdust the consistency of a rubber eraser).
Again no instructions, and no build logs that I can find that show this step.
Apparently the first layer of planking finishes at this filler block then the joint is filled and sanded into submission. I'm not crazy about that idea so I'll have to think about it.
Meanwhile I think I'm stuck with a side project, making a teeny tiny boat to replace the metal one.
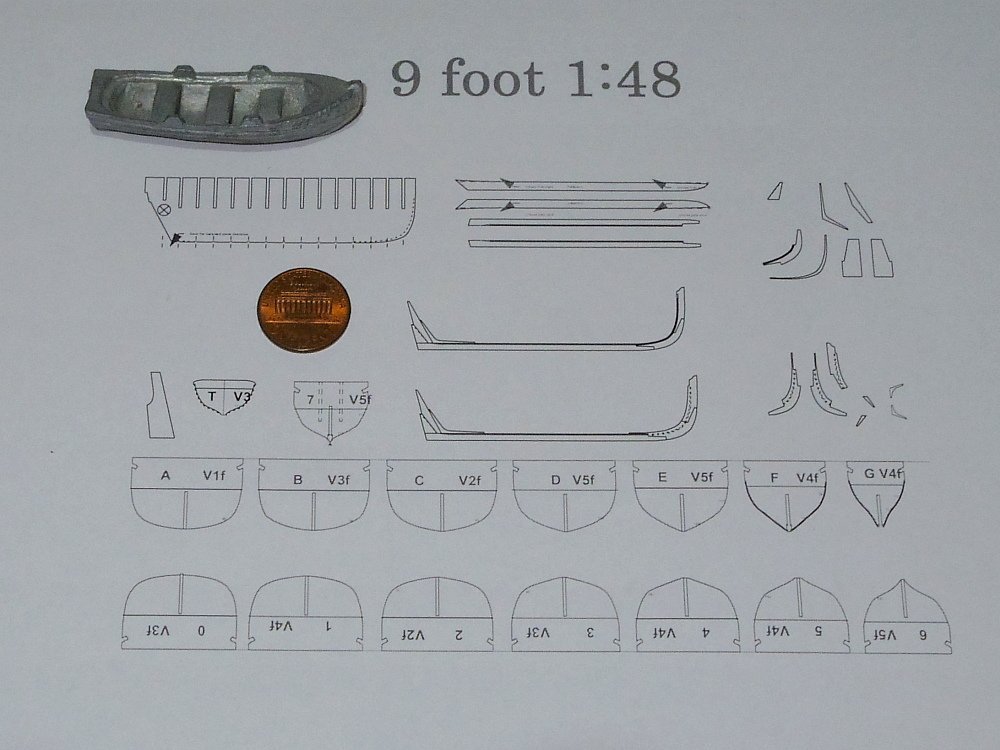
Le Renard 1812 by iMustBeCrazy - Artesania Latina - 1:50 - early kit version 20305
in - Kit build logs for subjects built from 1801 - 1850
Posted
Getting there, getting there.