HOLIDAY DONATION DRIVE - SUPPORT MSW - DO YOUR PART TO KEEP THIS GREAT FORUM GOING! (Only 36 donations so far out of 49,000 members - C'mon guys!)
×


Wacom
-
Posts
205 -
Joined
-
Last visited
Content Type
Profiles
Forums
Gallery
Events
Everything posted by Wacom
-
 Chapter seven is finished as is the stove, no pictures at present, these will follow. I am now between a rock and a hard place with the build. As you know the USPS will no longer deliver to New Zealand or Australia which leaves the following options. use UPS or similar (too expensive) continue the build as a total scratch (not sure my skill level is up to it) or, worse case put the boat into storage until shipping resumes.🤔🤔🤔 I have read elsewhere that the reason USPS wont ship is that NZ and AU wont accept mail from the US, this is not the case.
- 137 replies
-
- 1
-

-
- winchelsea
- Syren Ship Model Company
- (and 1 more)
-
Very neat👍
-
Your ship is looking really good, photos can be very hard on anyones work, ask me how I know🤪
-
Thanks for the comments, I found (with jittery fingers, poor eyesight etc etc etc) that this part of the build probably took longer than it should. The “ping factor” being very high🥴🤔 I have seen photos which showed the opes hanging on wooden cleats but found these jut too fiddly to make.
- 137 replies
-
- 2
-
-
- winchelsea
- Syren Ship Model Company
- (and 1 more)
-
A very clean tidy build👌
-
Very impressive Bob👌
-
Those frames are looking good, take your time with the fairing, its the foundation for eveything else👍👍
-
Good progress Bob, I like your treatment of the stantions.
-
Thanks Timmo, having therapy on my eyes right now🥺🥺🥺
- 137 replies
-
- 2
-
-
- winchelsea
- Syren Ship Model Company
- (and 1 more)
-
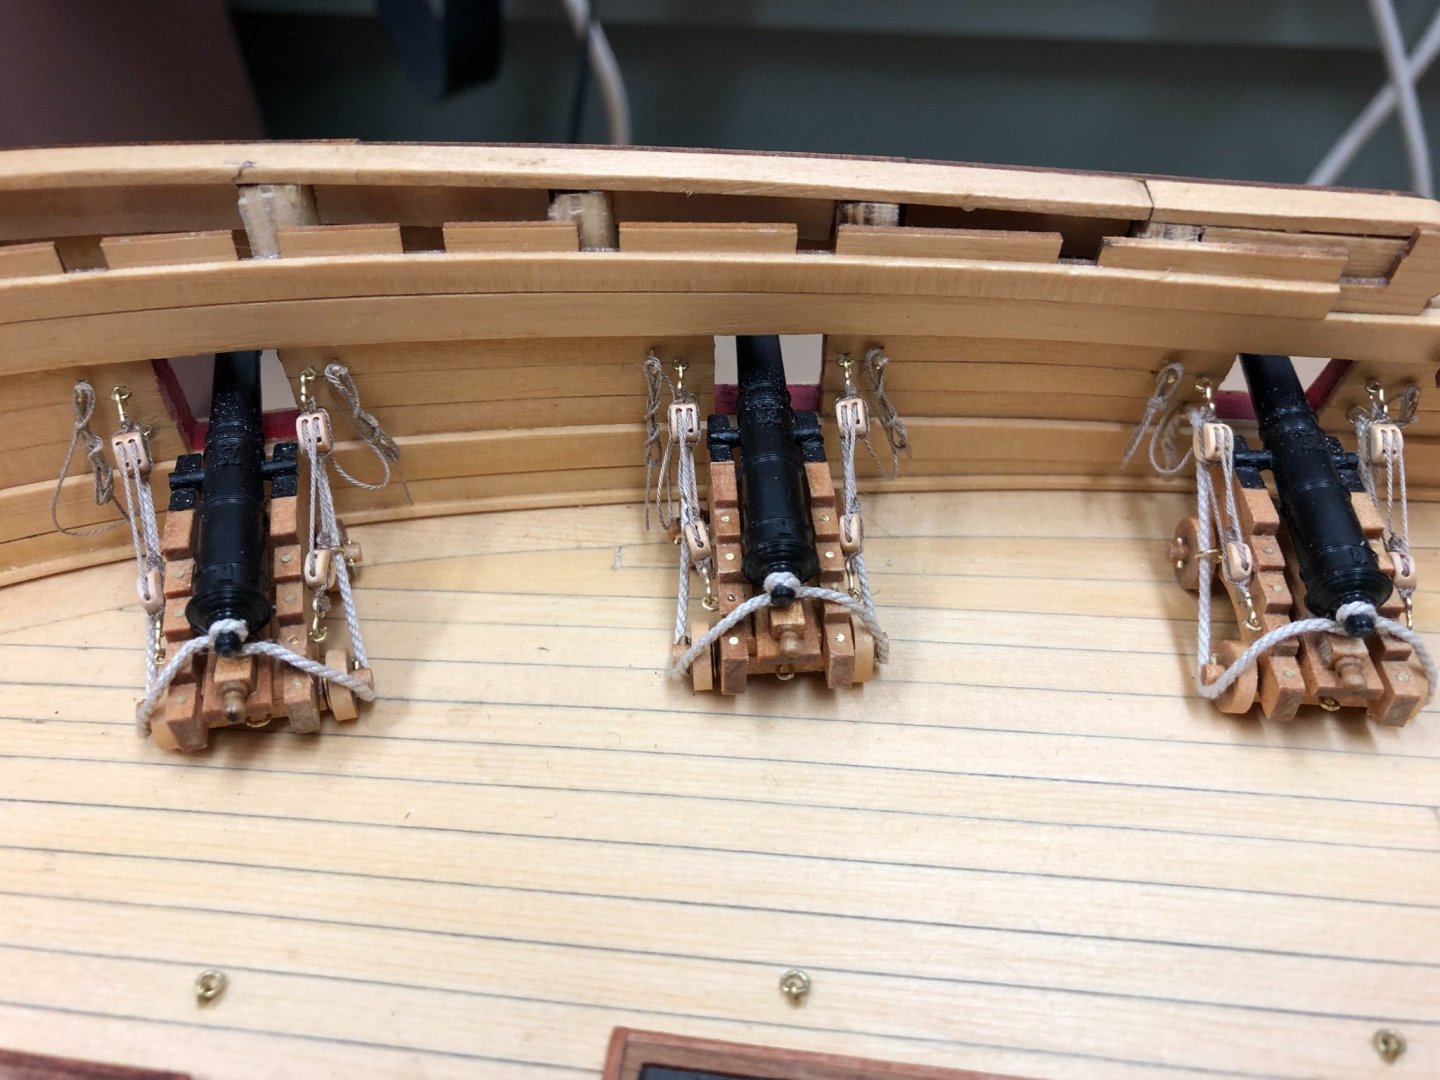
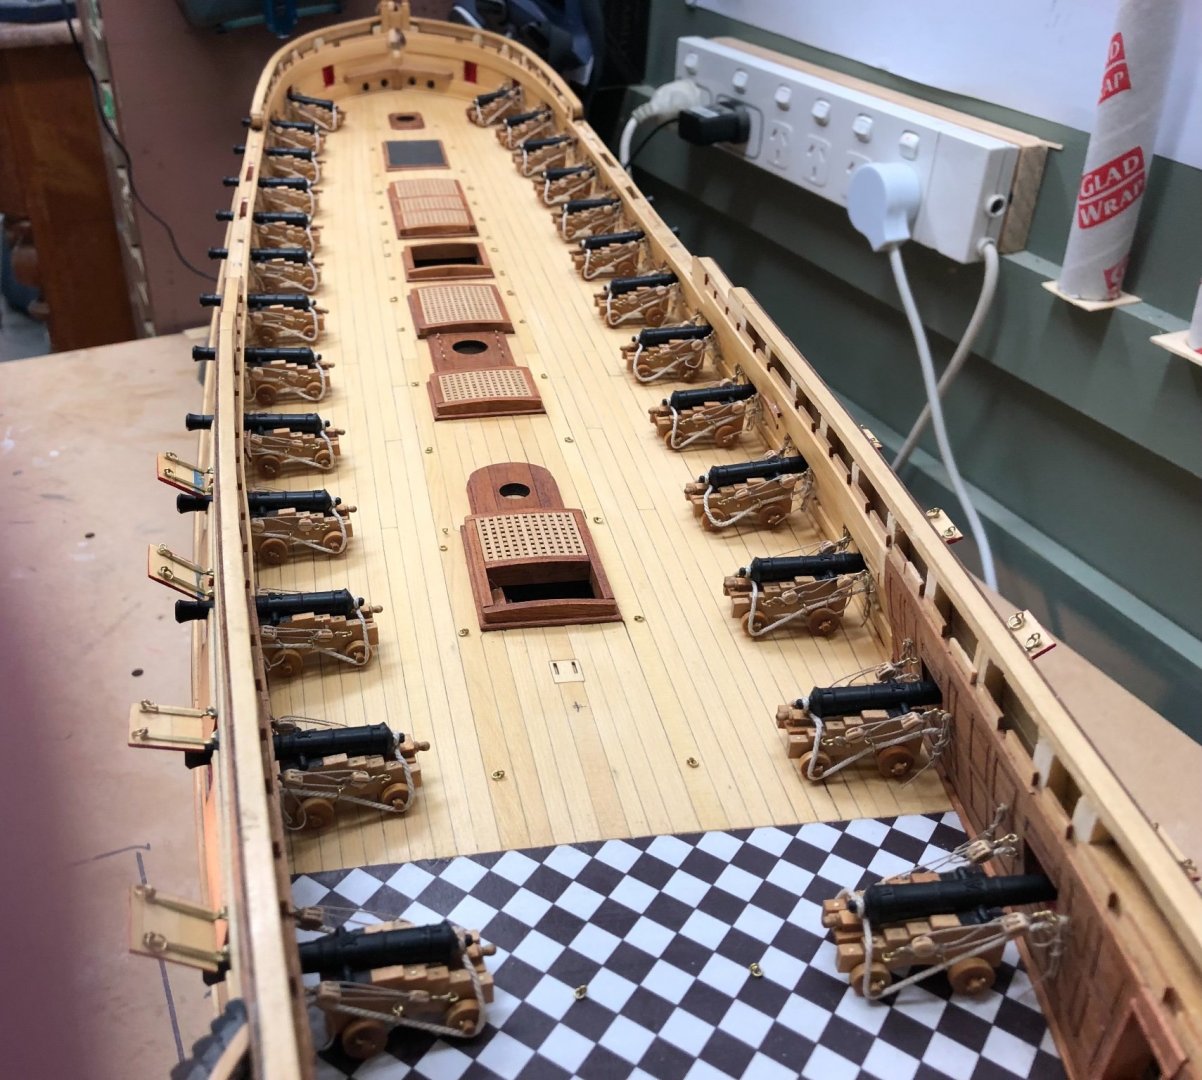
Those cannons look really good. On my Winnie I used thick acrylic paint for the capsquares, at that scale its difficult to tell any different. 😎
- 114 replies
-
- 1
-
-
- Lady Nelson
- amati
- (and 1 more)
-
Fowler Class Z7 Steam Ploughing Engine by wefalck - 1:76 scale
Wacom replied to wefalck's topic in Completed non-ship models
Congratulations on producing a very realistic looking engine, a credit to uou. -
Thanks JJ, my feeling is the guns look good either painted or natural, its really down to personal preference.
- 137 replies
-
- 3
-
-
- winchelsea
- Syren Ship Model Company
- (and 1 more)
-
Thanks for the likes and encouraging comments from, Chuck, Bob, Fred and “Polly”. Bob your build was the inspiration in my deciding to rig the cannon👍 Fred, by my reckoning around two hours to rig each gun including making all the sub assemblies and rope, of course if your fingers dont twitch around like mine it could be done quicker🤔
- 137 replies
-
- 2
-
-
- winchelsea
- Syren Ship Model Company
- (and 1 more)
-
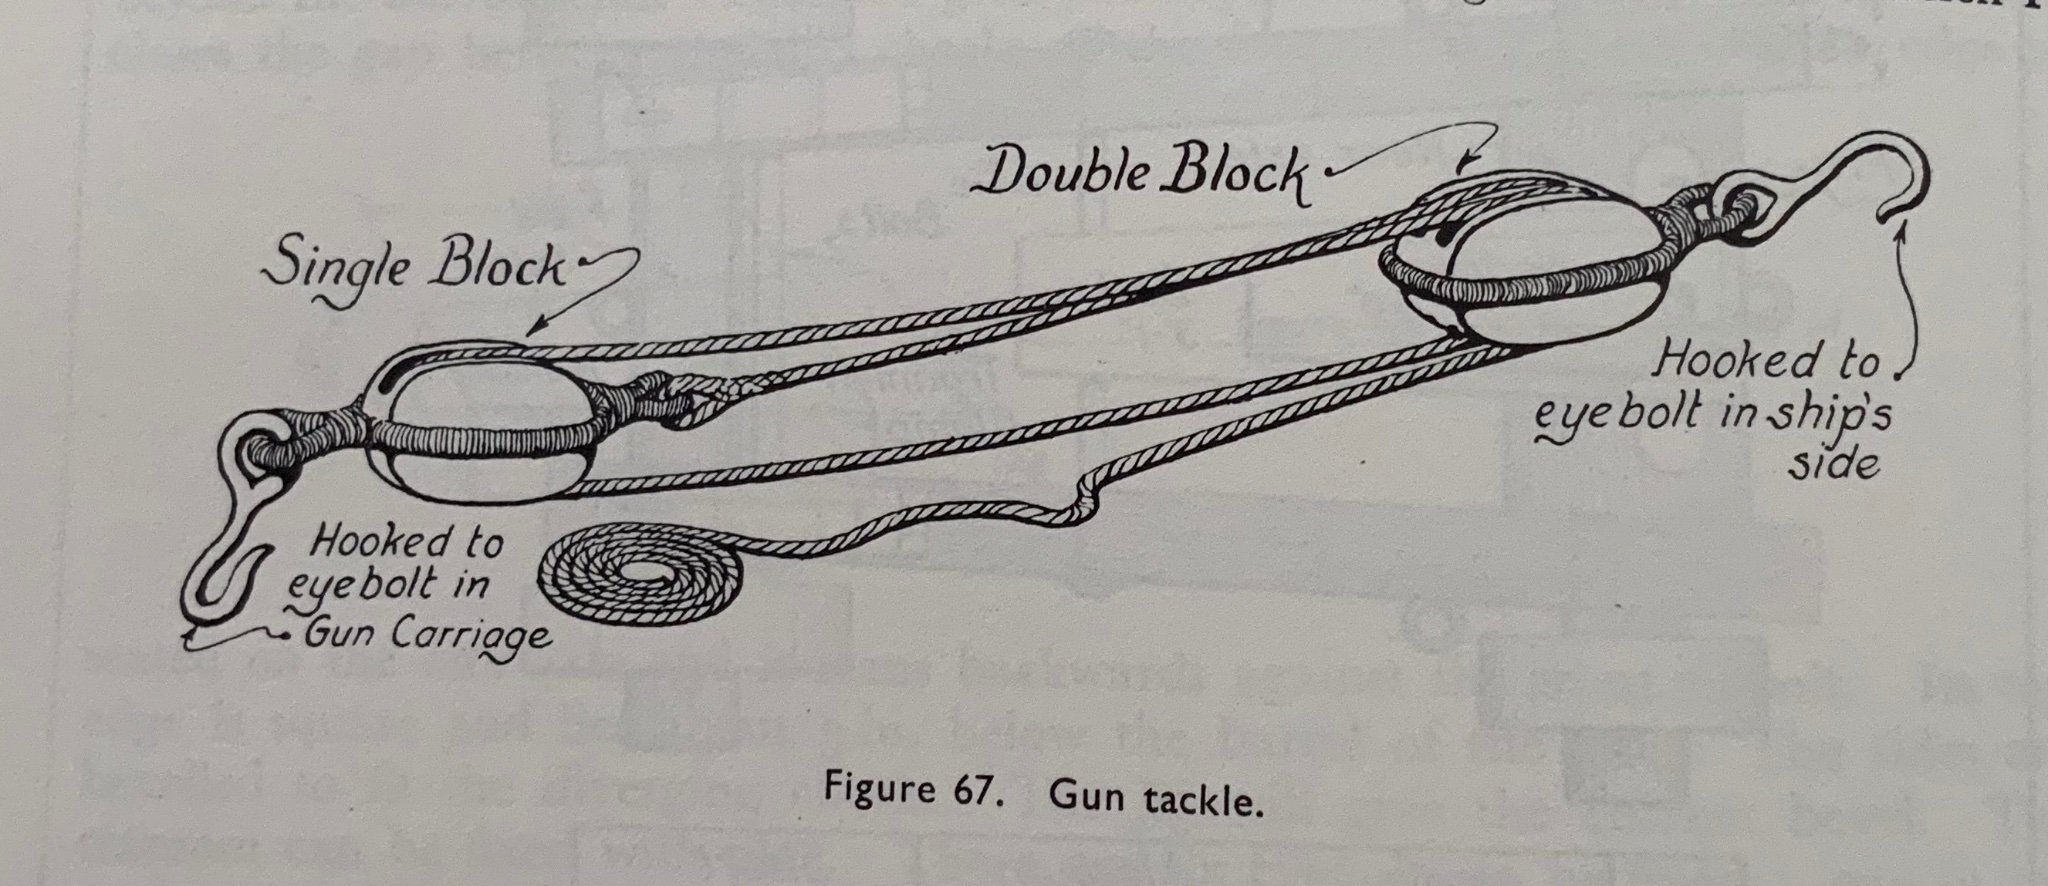
While waiting for Chapter Seven parts to arrive I took the opportunity to mount the cannon using a method borrowed from C. Nepean Longridge’s book “THE ANATOMY OF NELSONS SHIPS”. This was achieved By drilling a .8mm hole through both carriage cheeks , rear axle and deck, then by inserting .8mm brass pins into these holes the carriages are held firmly in place with the advantage that they can be removed should the need arise. Having purchased the blocks from Chuck some time ago I decided to have a go at rigging the cannon. First off was to make some rope, 1mm for the breaching and .4mm for stropping plus the purchase for hauling the cannon into the firing position. Next up a jig was made to strop the single block, form a becket at one end and attach a hook at the other. The double block was stropped with its hook on the same jig. I chose to use this configuration after coming across the drawing in Doctor Longridge’s book. (Mods please delete anything that may violate copy-write)

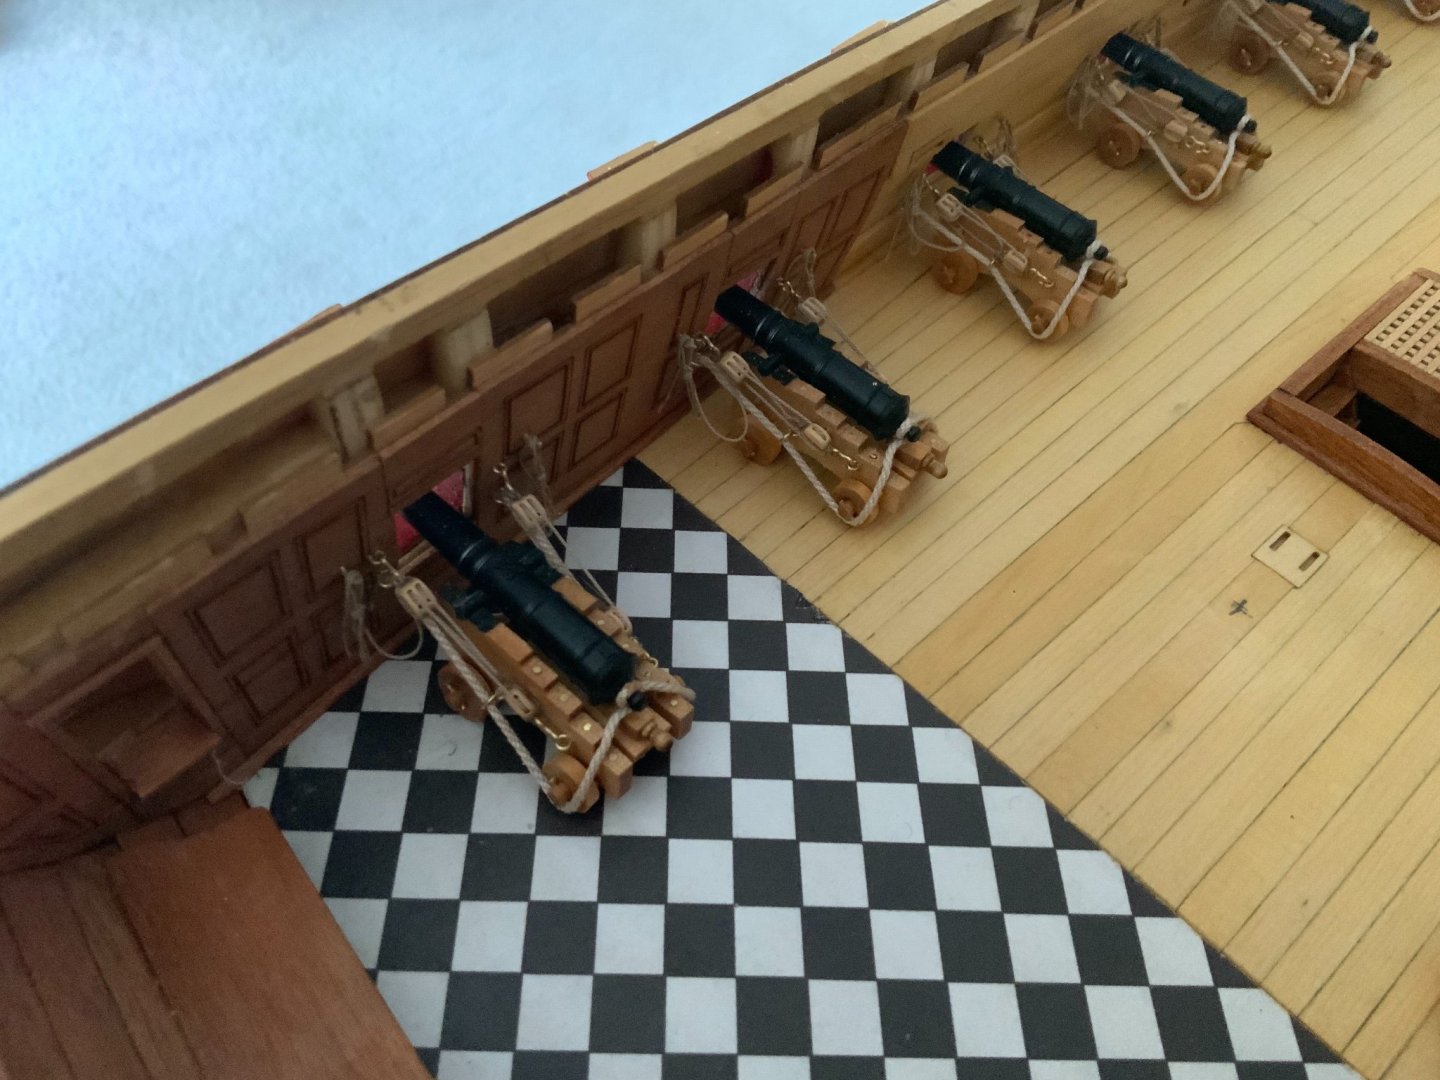
- 137 replies
-
- 13
-
-

-
- winchelsea
- Syren Ship Model Company
- (and 1 more)
-
Best of luck with your build, I attempted this kit in the Eighties before the days of the internet. Lack of experience and knowledge put an end to my build after the hull was planked🥴 She is a beautiful ship, I will be following with interest.
- 48 replies
-
- 2
-
-
- norske love
- billing boats
- (and 1 more)
-
Suburb work👍
-
Thanks for the likes guys + your comment Malcolm, I see we share the name Robbie for our dogs🦴
- 137 replies
-
- 1
-
-
- winchelsea
- Syren Ship Model Company
- (and 1 more)
-
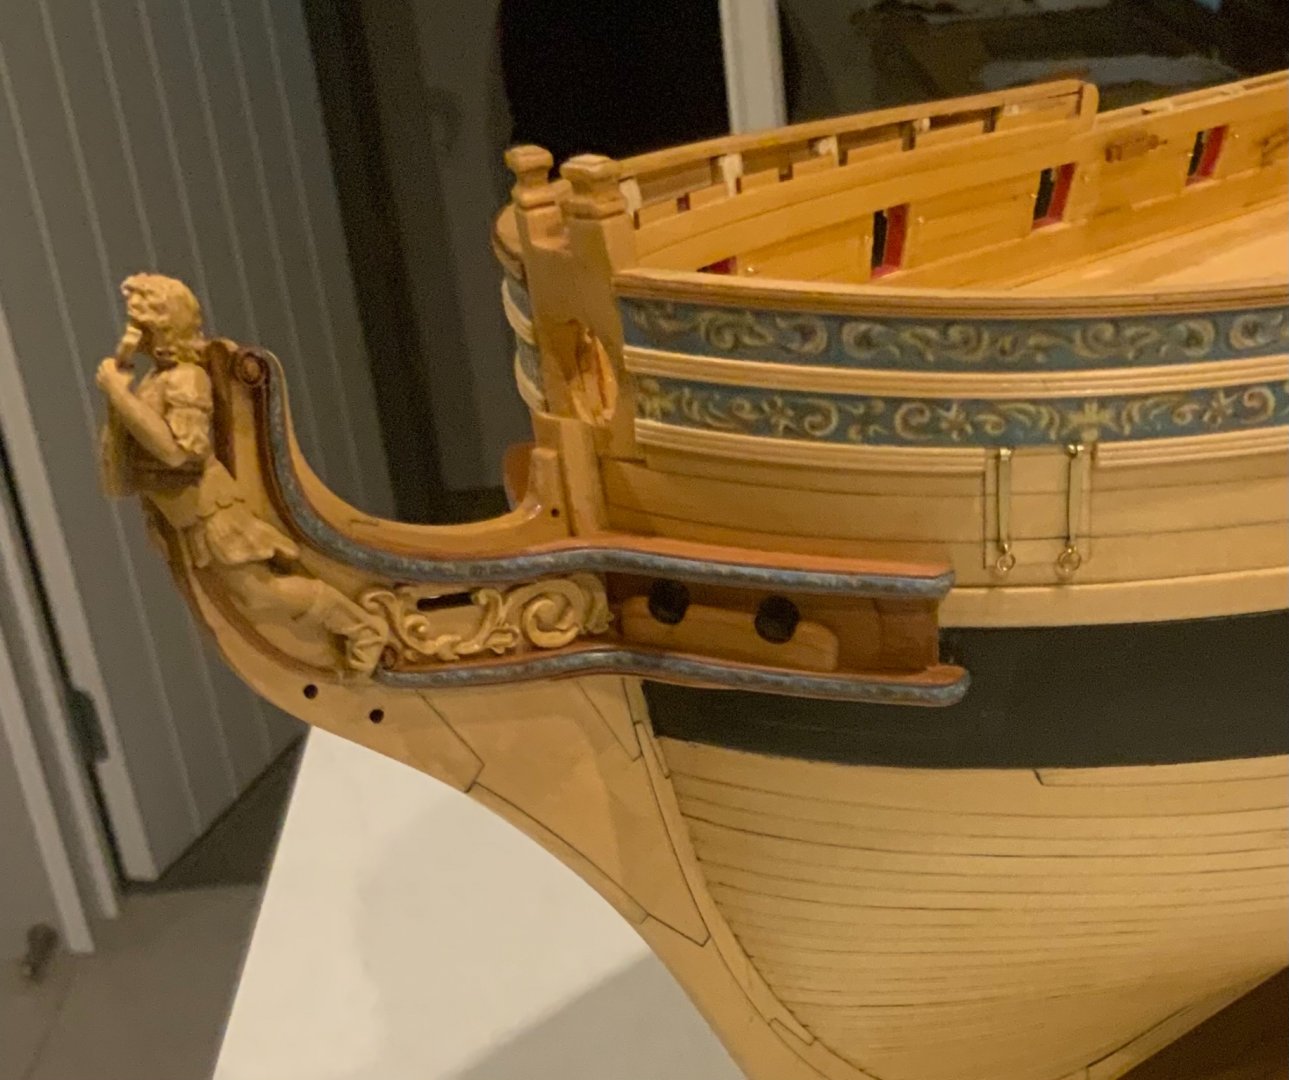
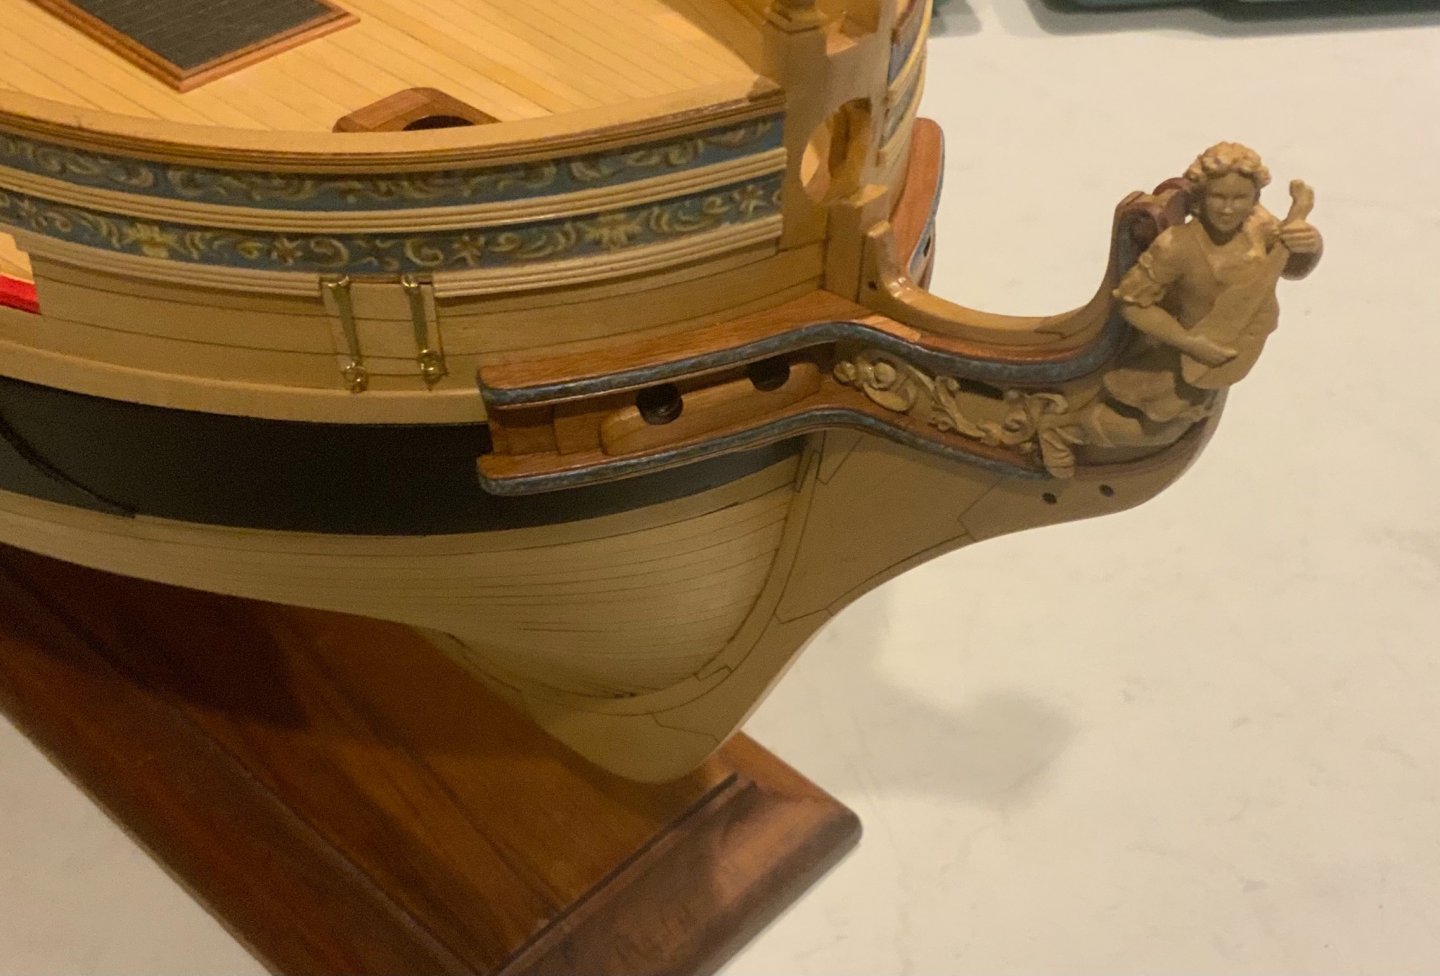
Thanks Timmo, always good to hear from “them up North”😁 My latest offering are photos of the hair brackets just finished today. Not as difficult as I thought they may be, Chucks instructions are easy to follow. Eagerly awaiting the parts for chapter seven.

- 137 replies
-
- 13
-
-
- winchelsea
- Syren Ship Model Company
- (and 1 more)
-
Thanks for the comments and likes guys, really appreciated.
- 137 replies
-
- 1
-
-
- winchelsea
- Syren Ship Model Company
- (and 1 more)
-
This is still very much in my future🥱 any tips for staying awake while I do them? (They certainly add to the ship)
-
Thanks Don, I only hope my hair brackets measure up to yours.
- 137 replies
-
- 2
-
-
- winchelsea
- Syren Ship Model Company
- (and 1 more)