HOLIDAY DONATION DRIVE - SUPPORT MSW - DO YOUR PART TO KEEP THIS GREAT FORUM GOING! (Only 24 donations so far out of 49,000 members - C'mon guys!)
×


Peter Cane
-
Posts
240 -
Joined
-
Last visited
Content Type
Profiles
Forums
Gallery
Events
Everything posted by Peter Cane
-
That is the question Nils. My son was under the impression that because it is a scaled down version of the real, it should sail. I dont know much about boats but certainly when we build flying model aircraft we have to compensate. The real bluenose was several hundred tons which kept her sleek lines from cap sizing. The model obviously cannot realise that weight because of its size. When the plans first arrived I was quite shocked to see that under the waterline there wasn't much ship below waterline to prevent capsize. I had always thought as you do in that an extra weighted bolt on keel will be needed. To that end I am going to make her oak keel deeper as on the plan so as to facilitate a bolt on false keel. I am useless with mass, physics etc so it is going to be quite a project to determine how longer false keel and what weight. Fortunately the house we look after has a swimming pool so Bluenose will be named and floated there. I will take with me various pieces of lead and keep adding till she displaces to waterline. I will then pull down the masts until the water almost passes the gun whales and hope she rights herself. Does this sound about right? Thanks for your advice and looking in on us. Pete
-
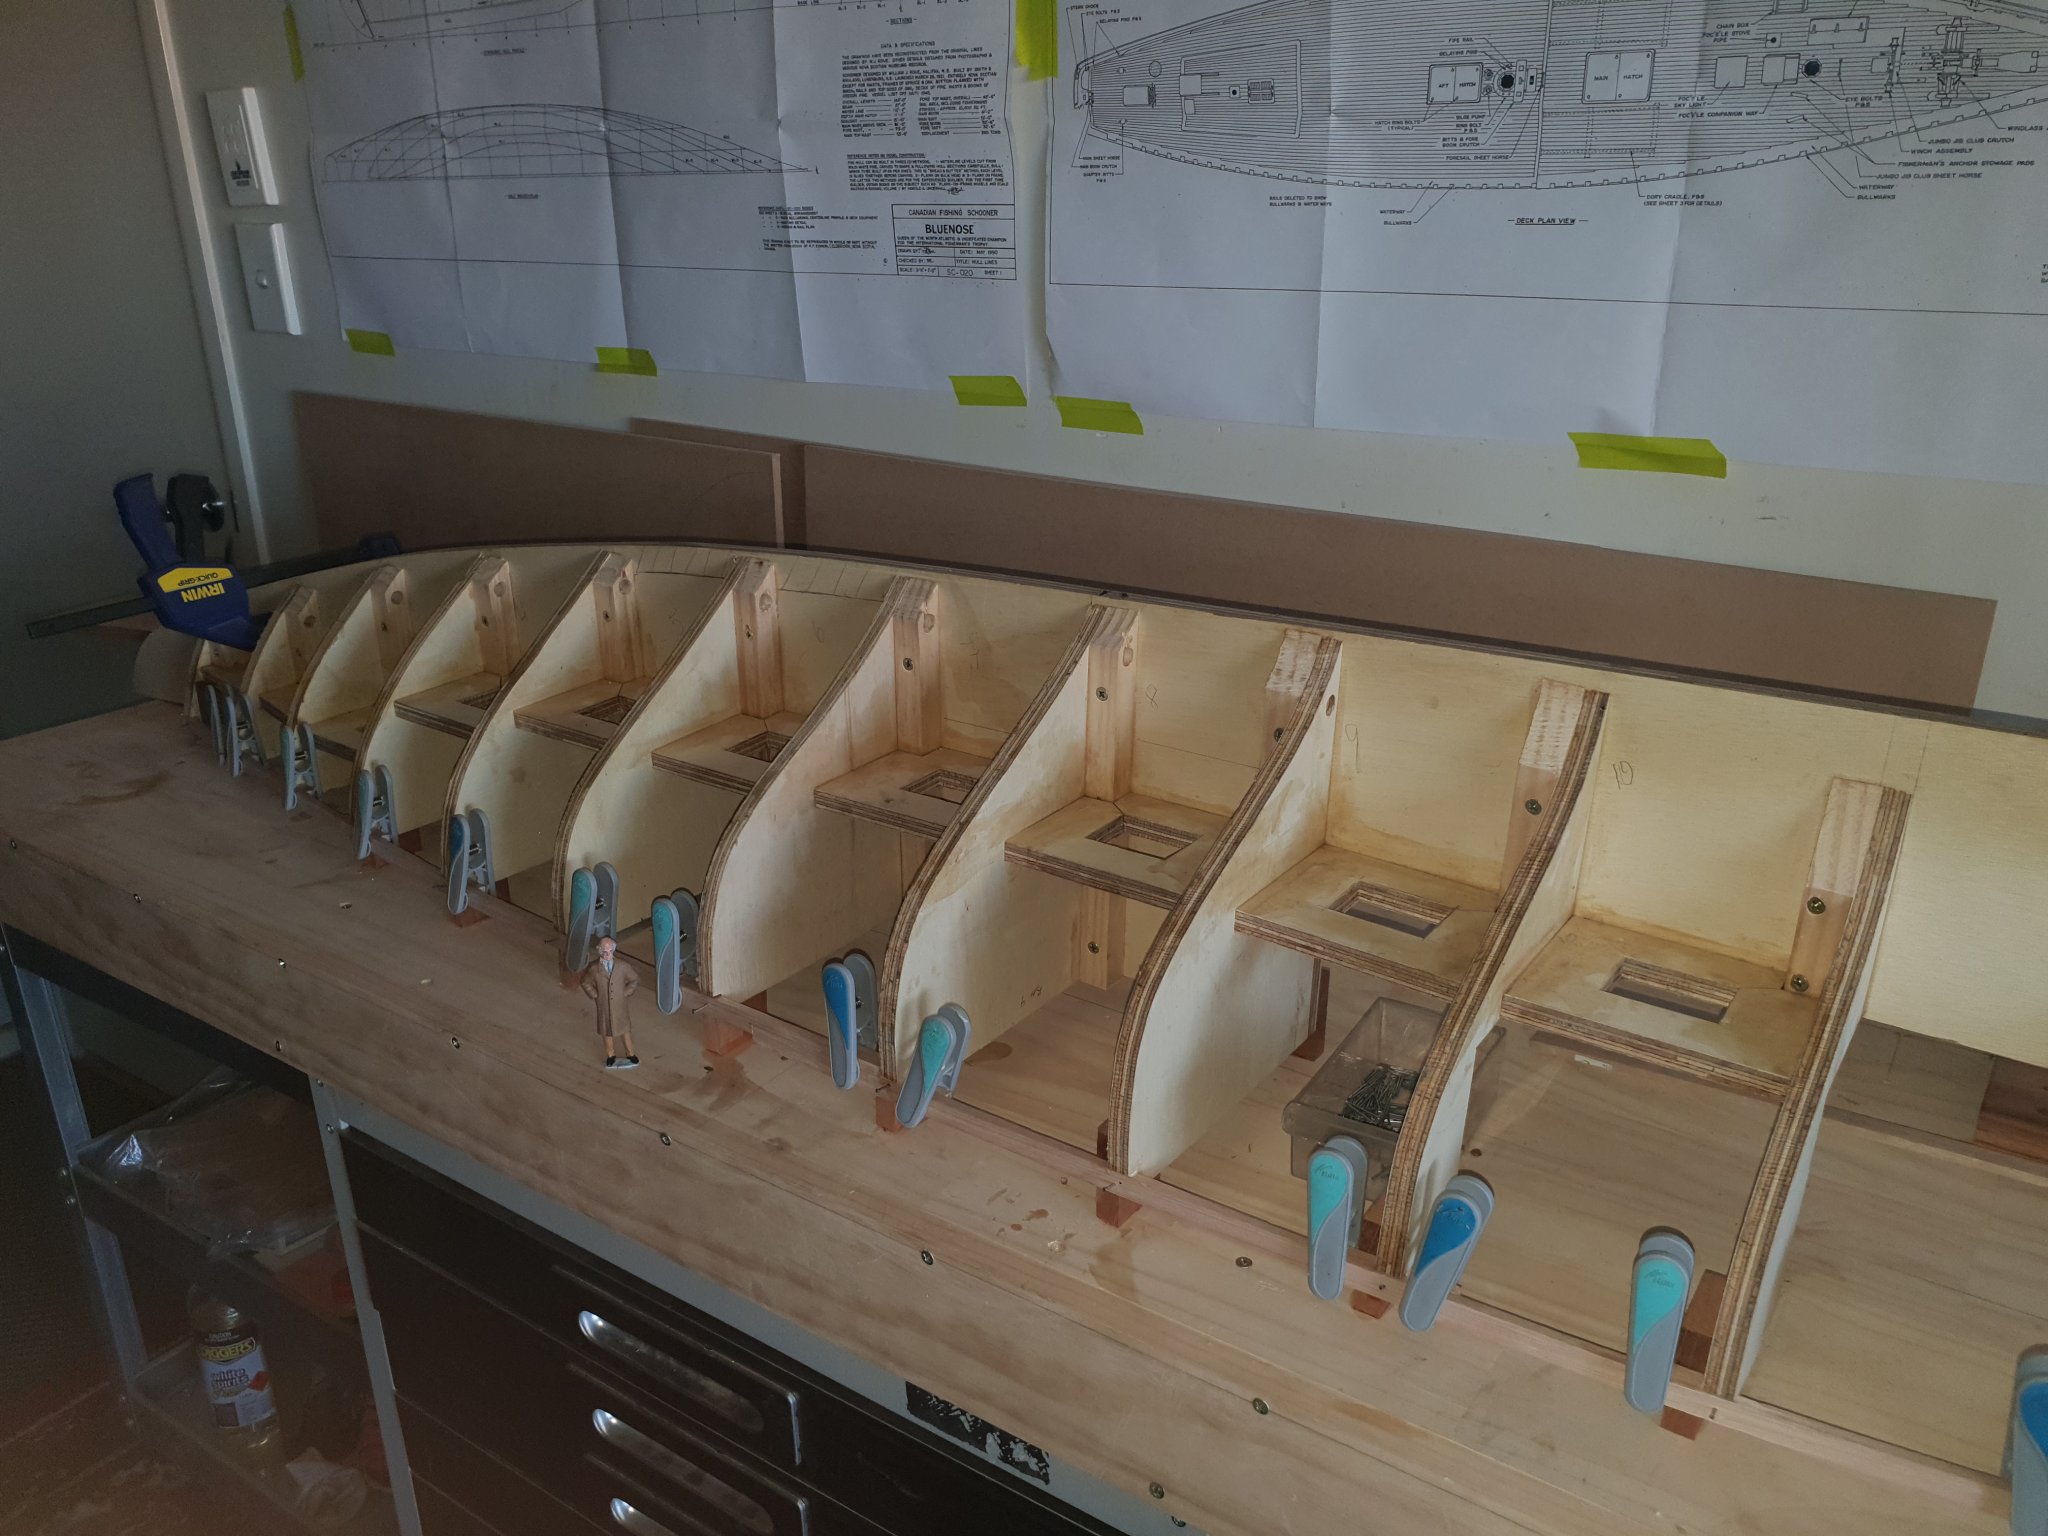
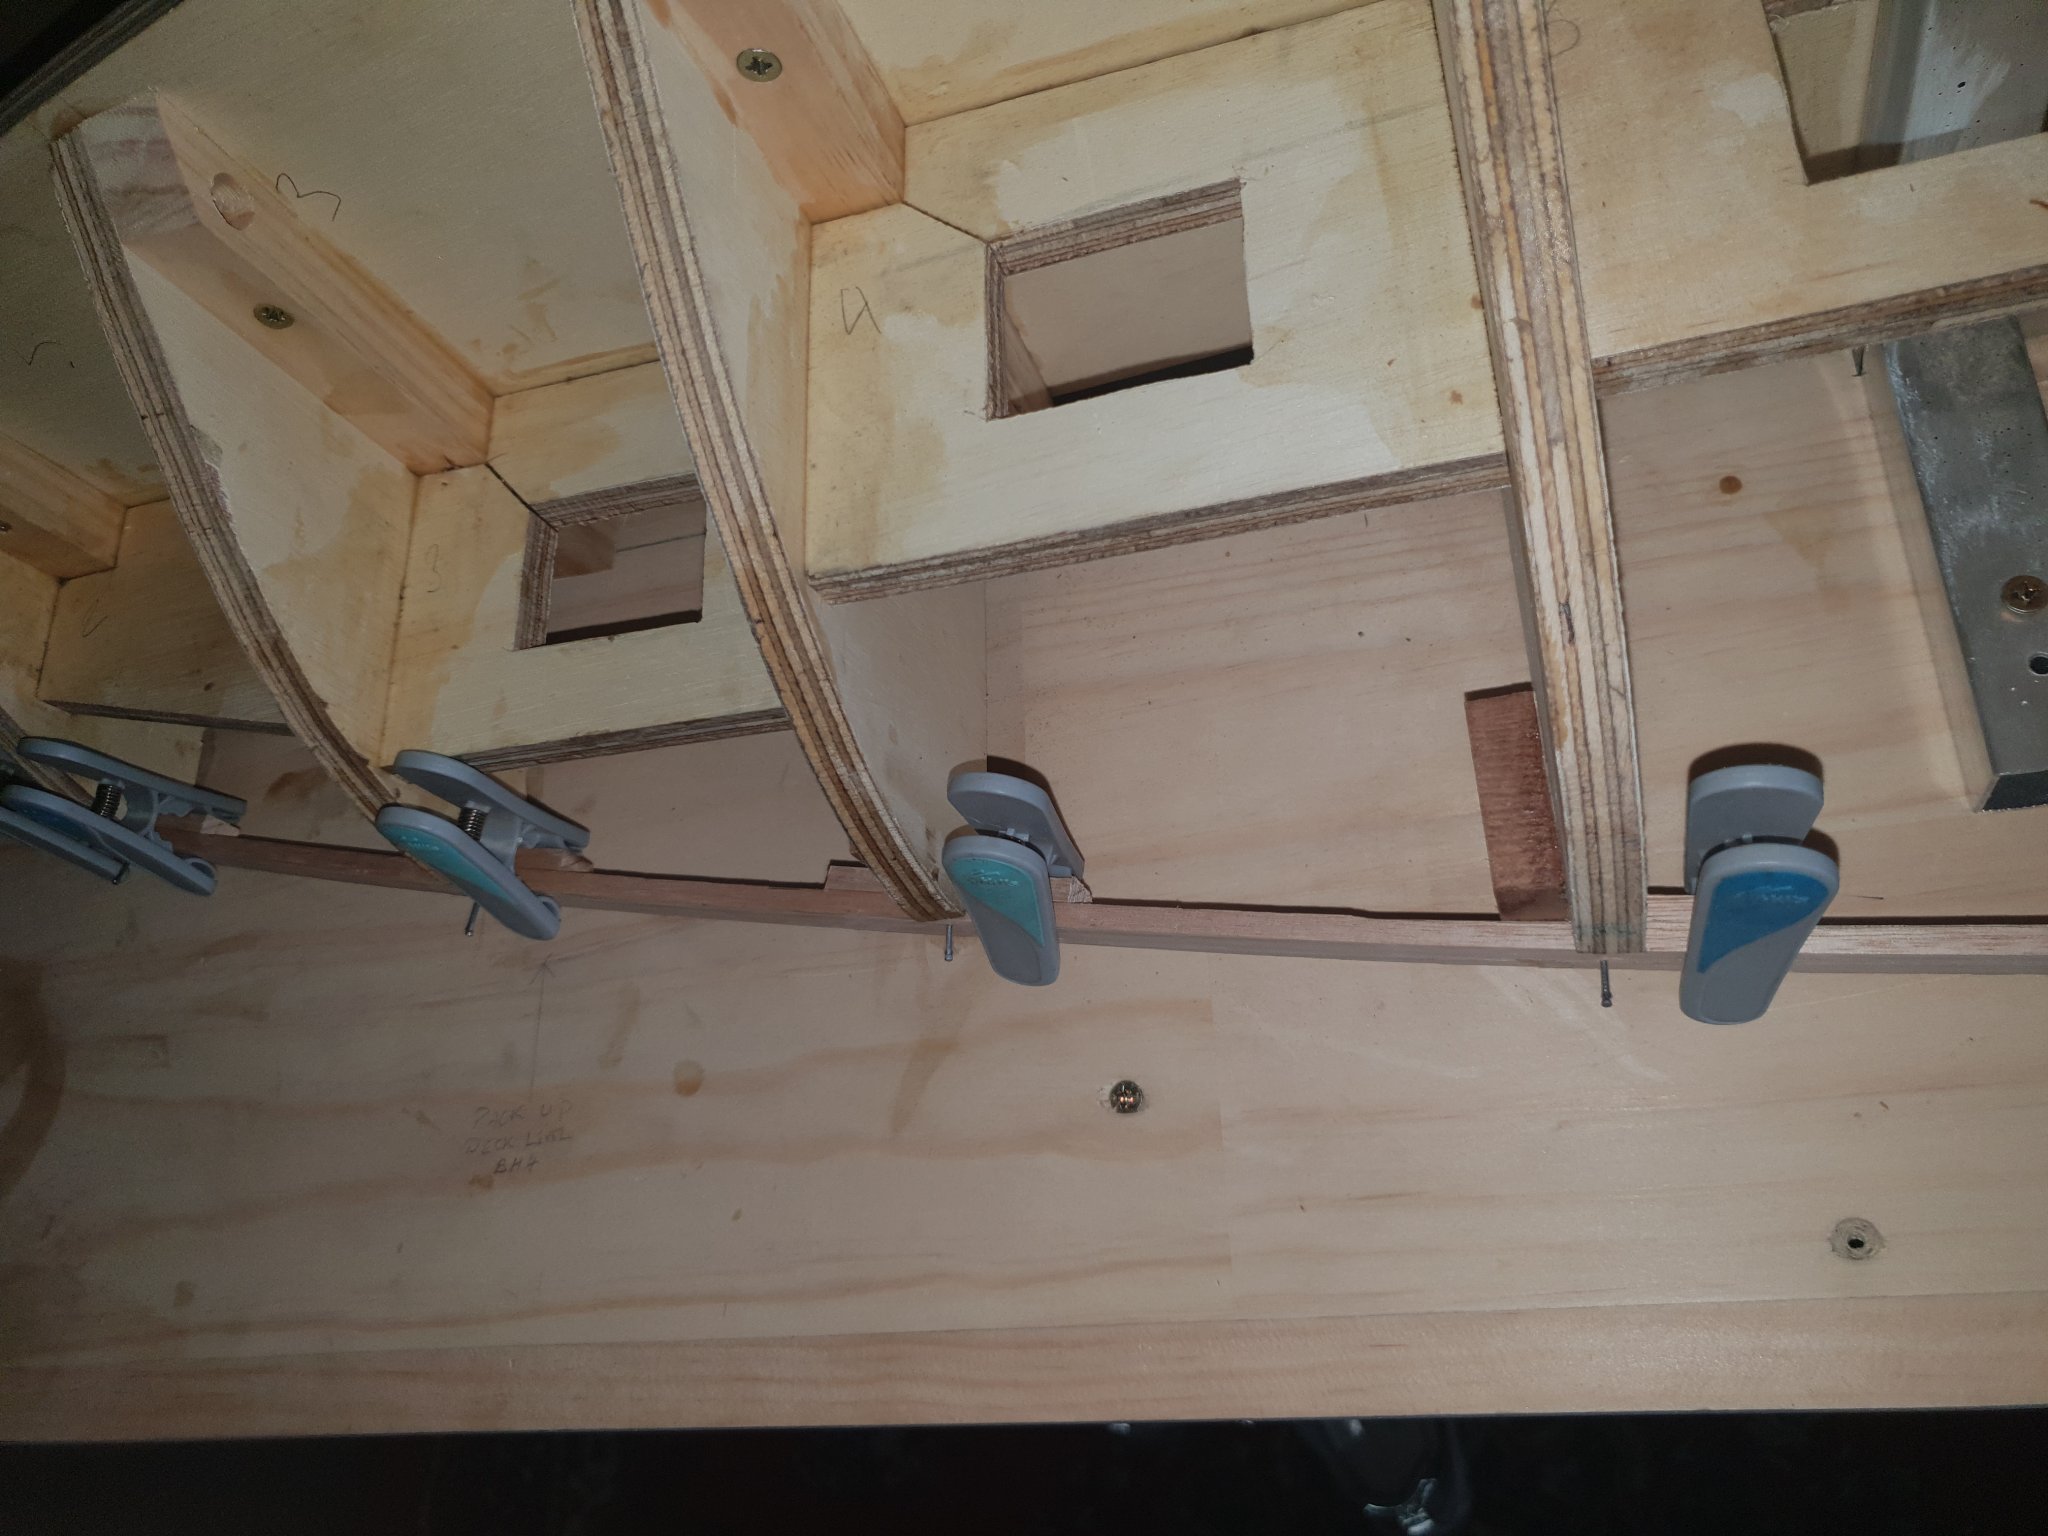
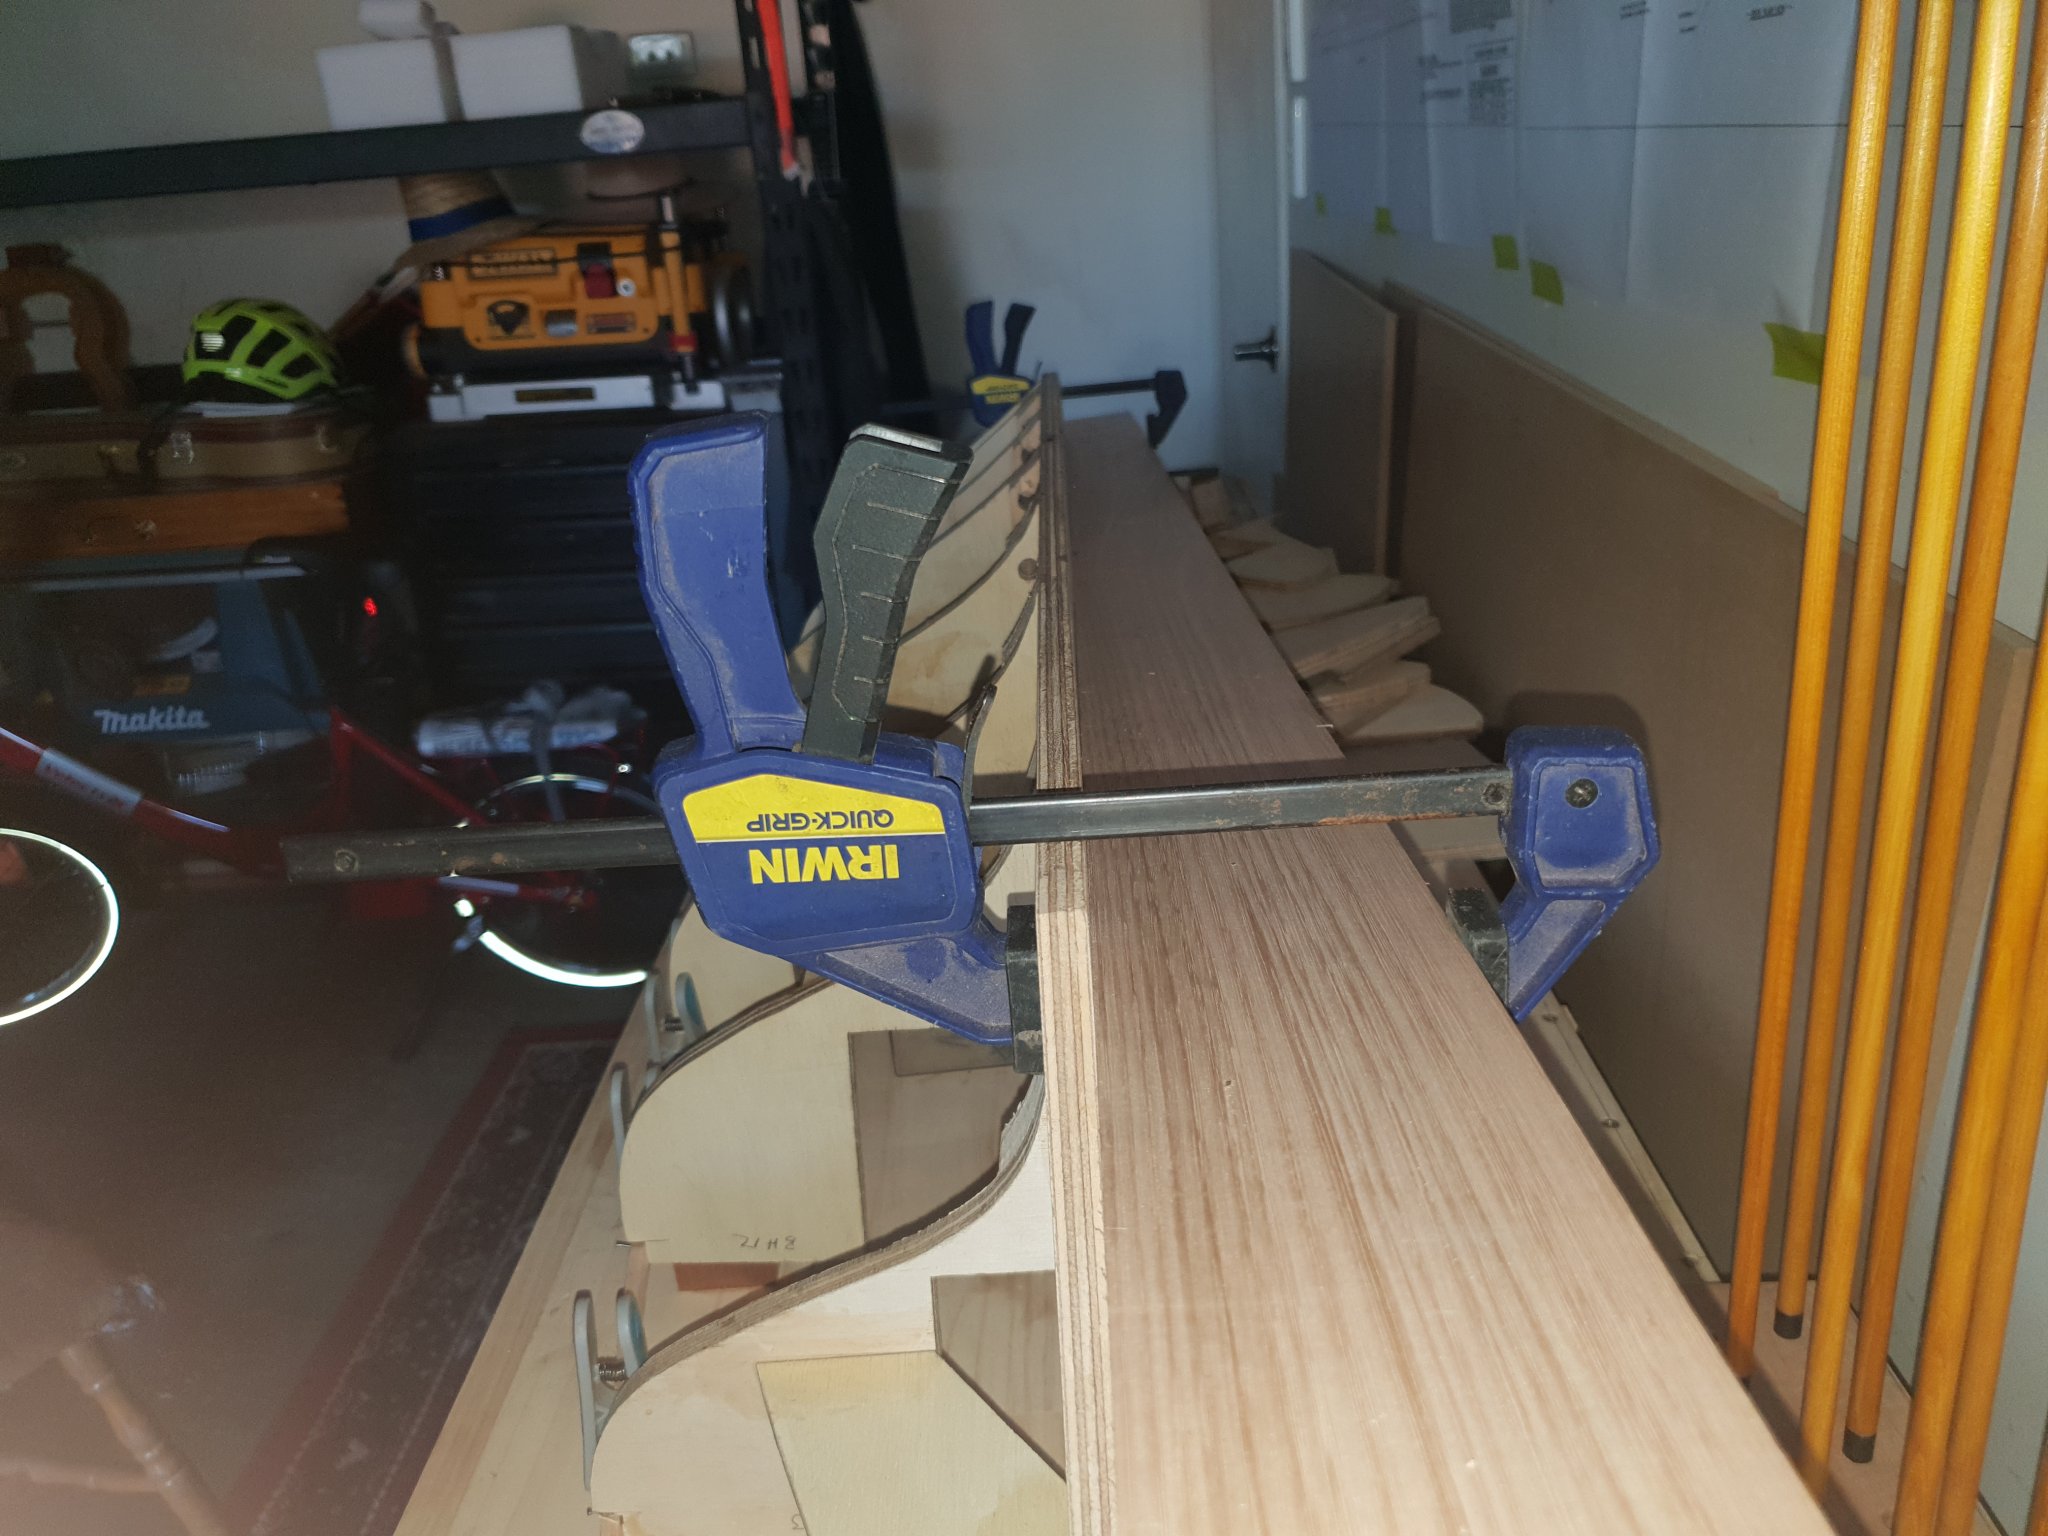
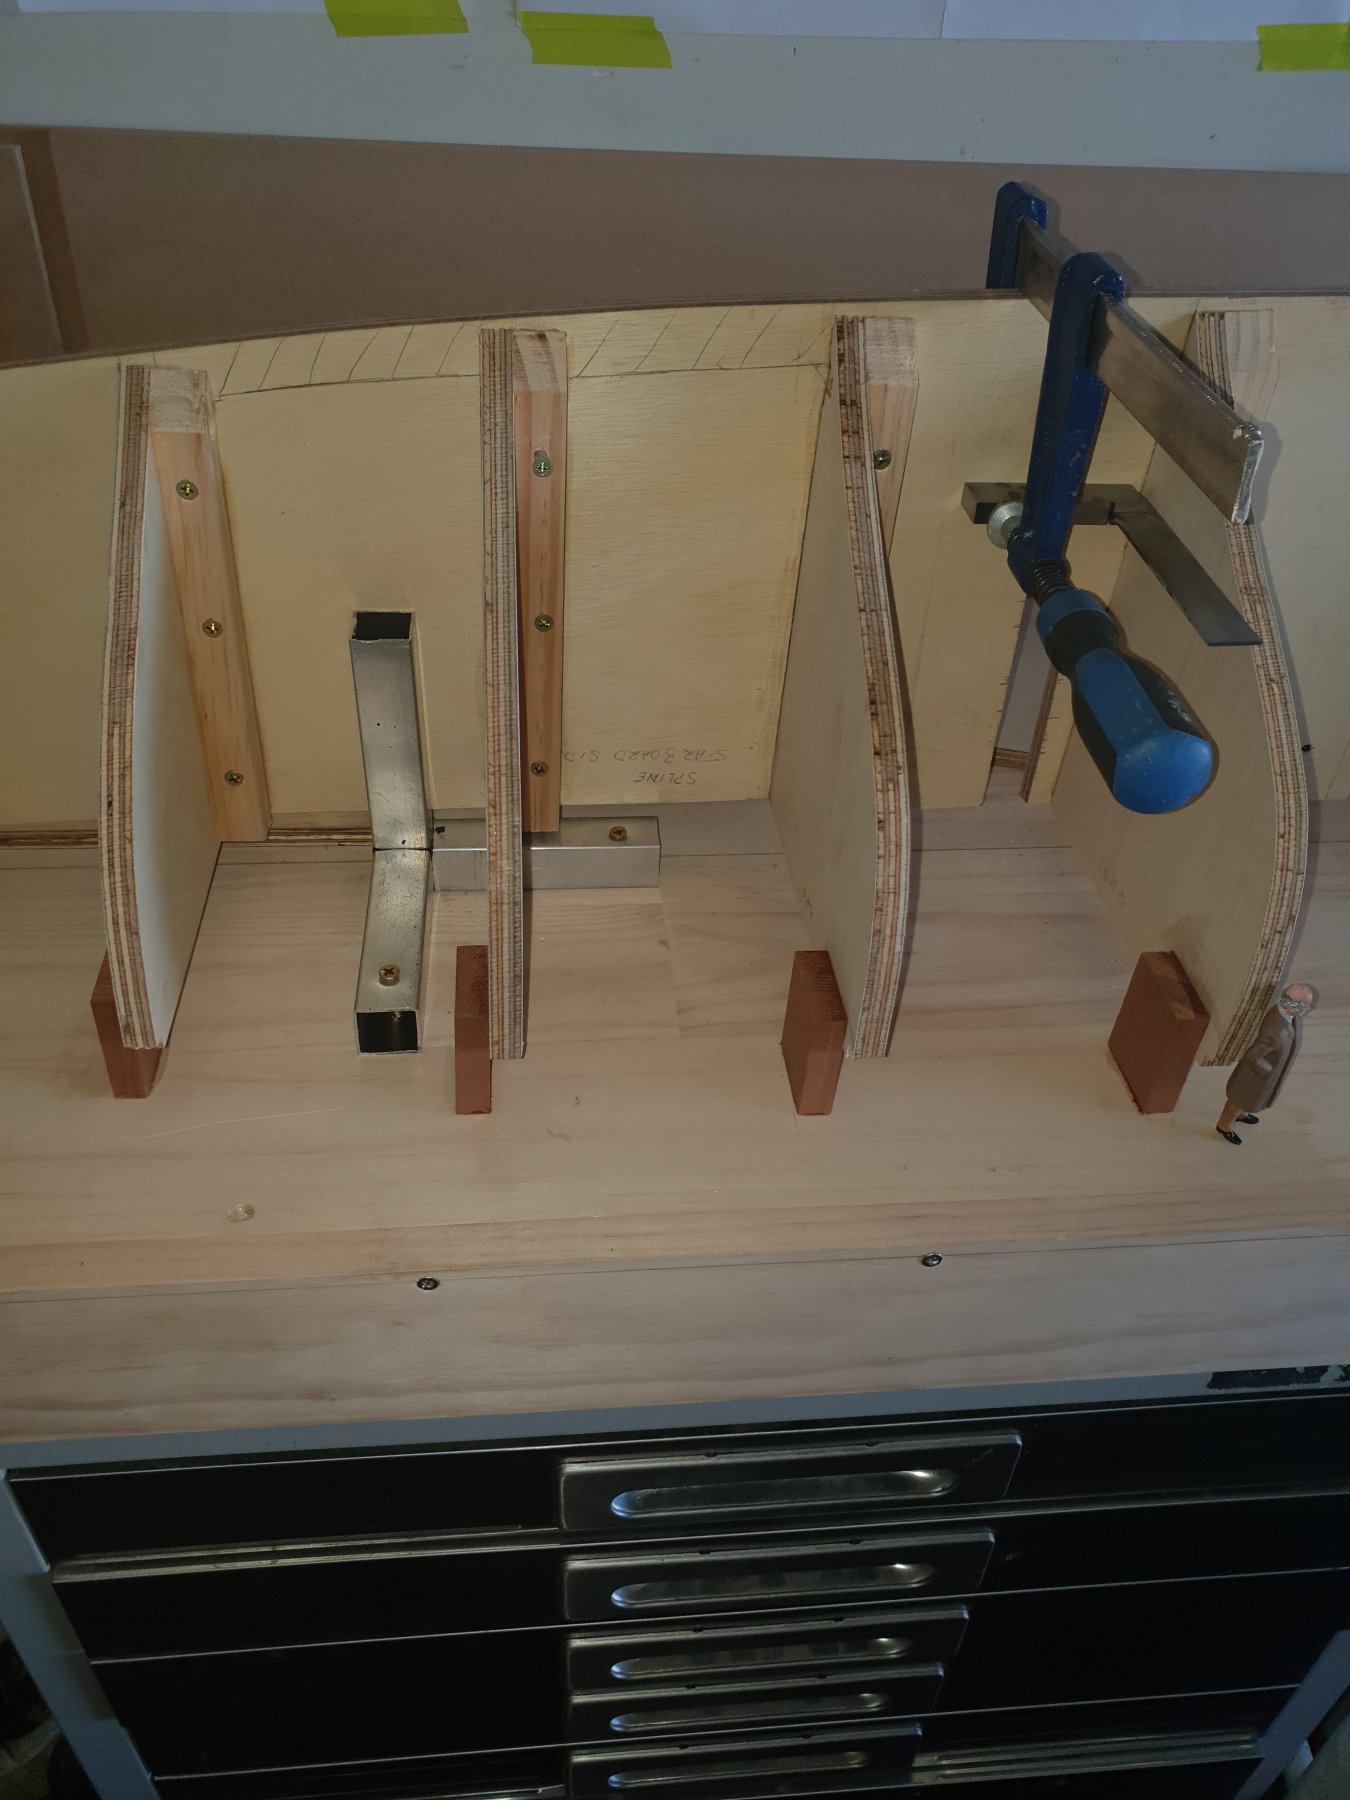
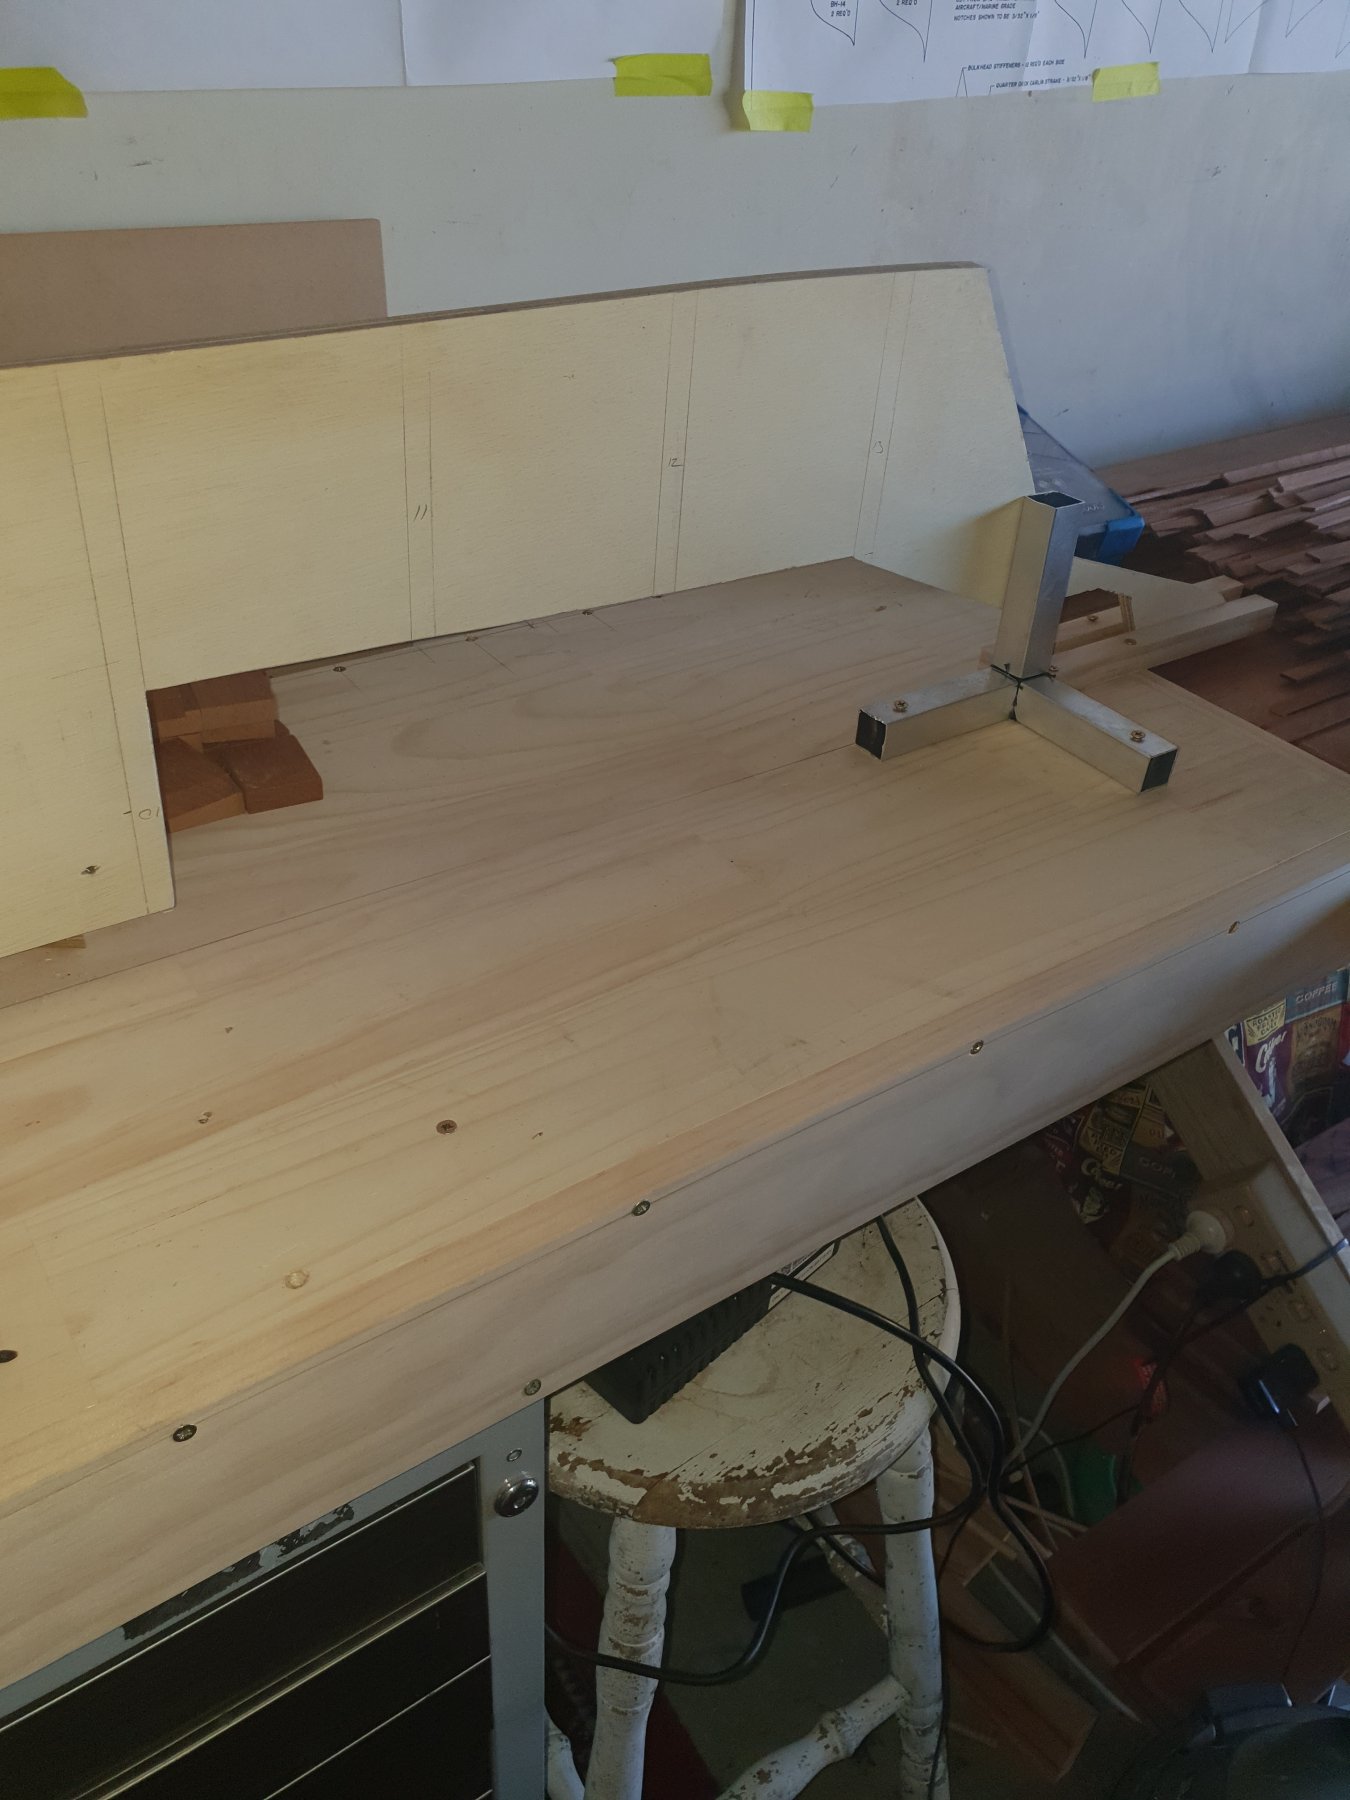
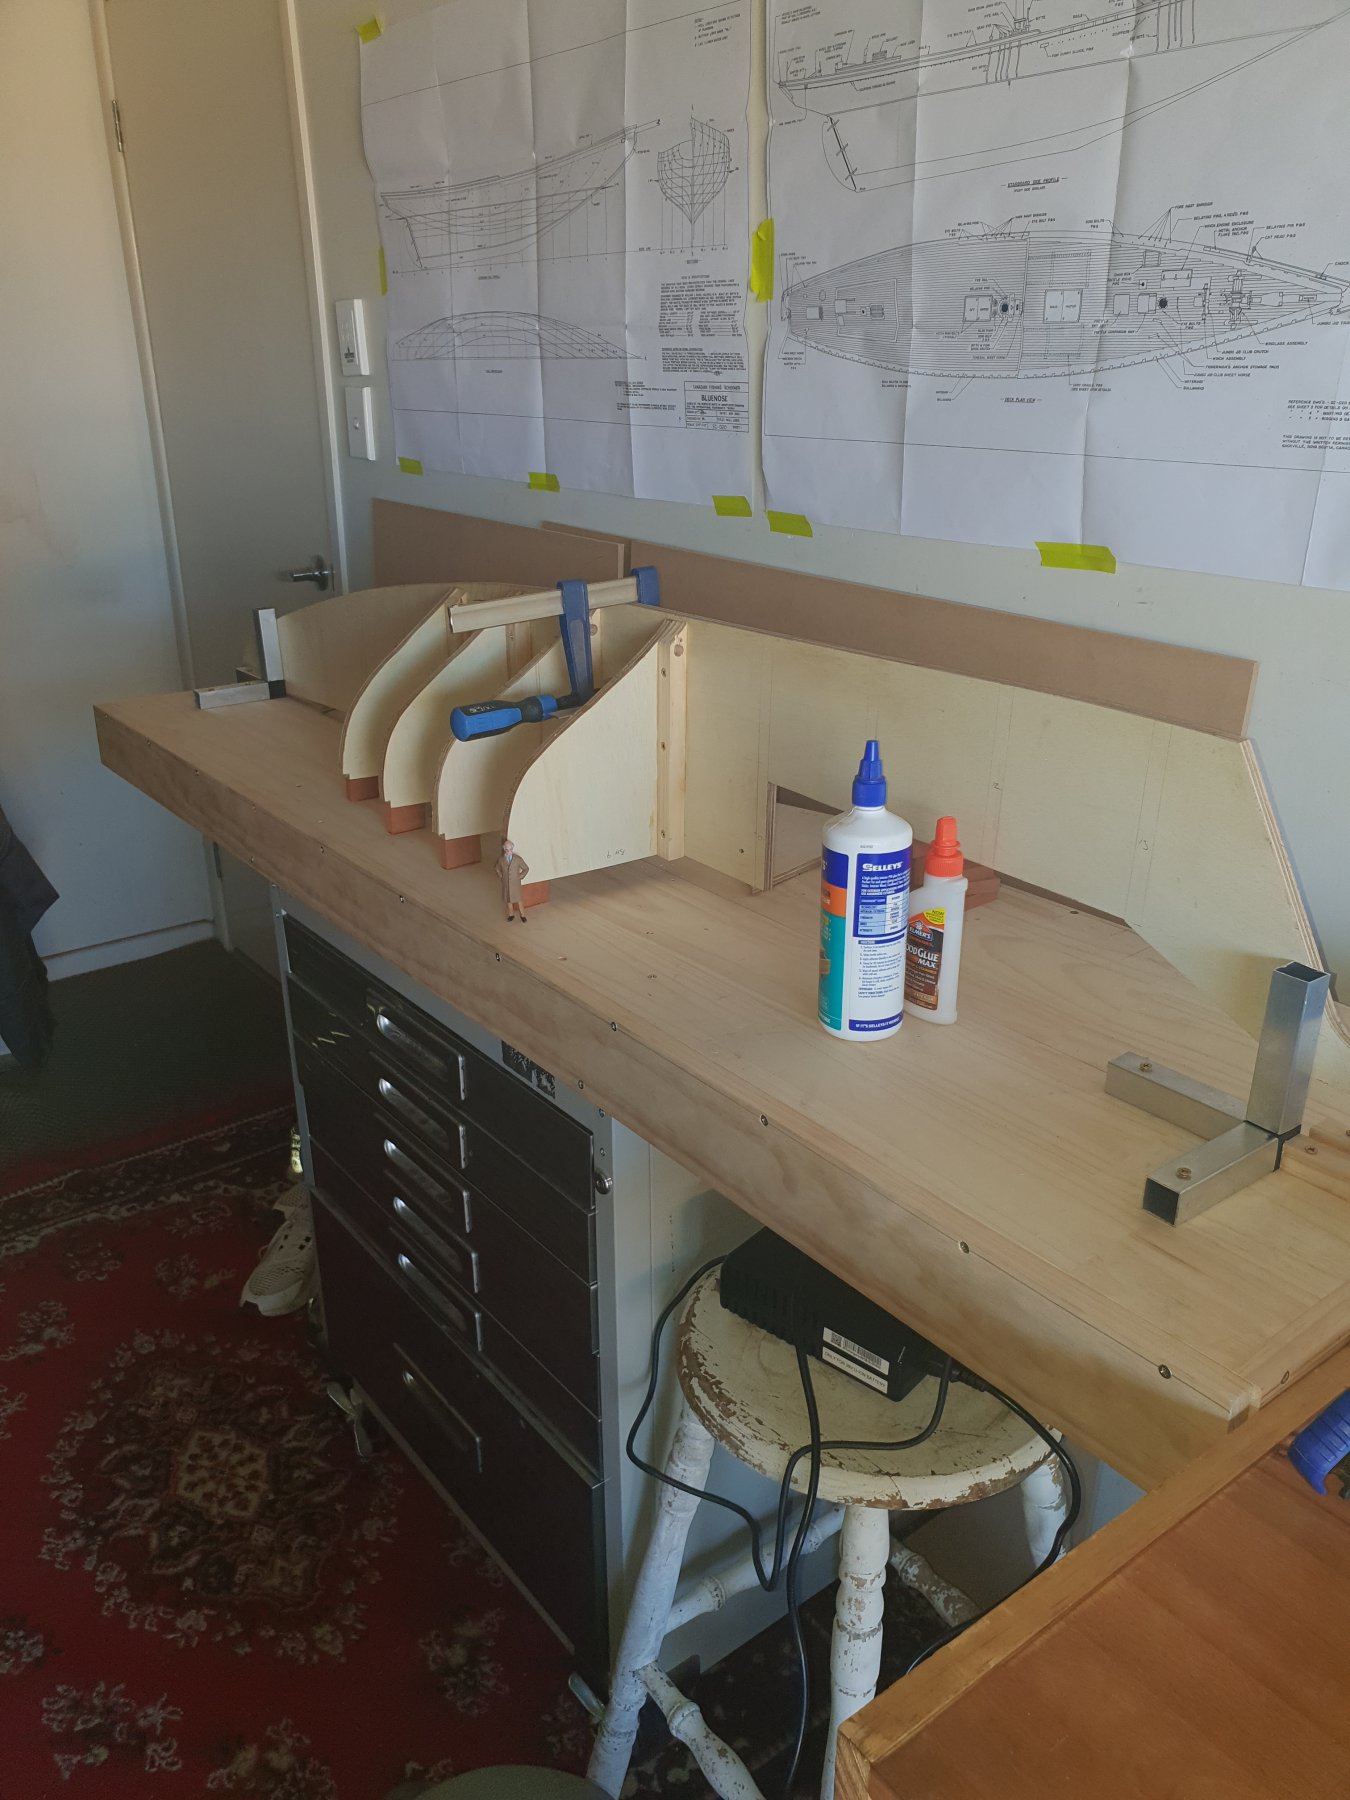
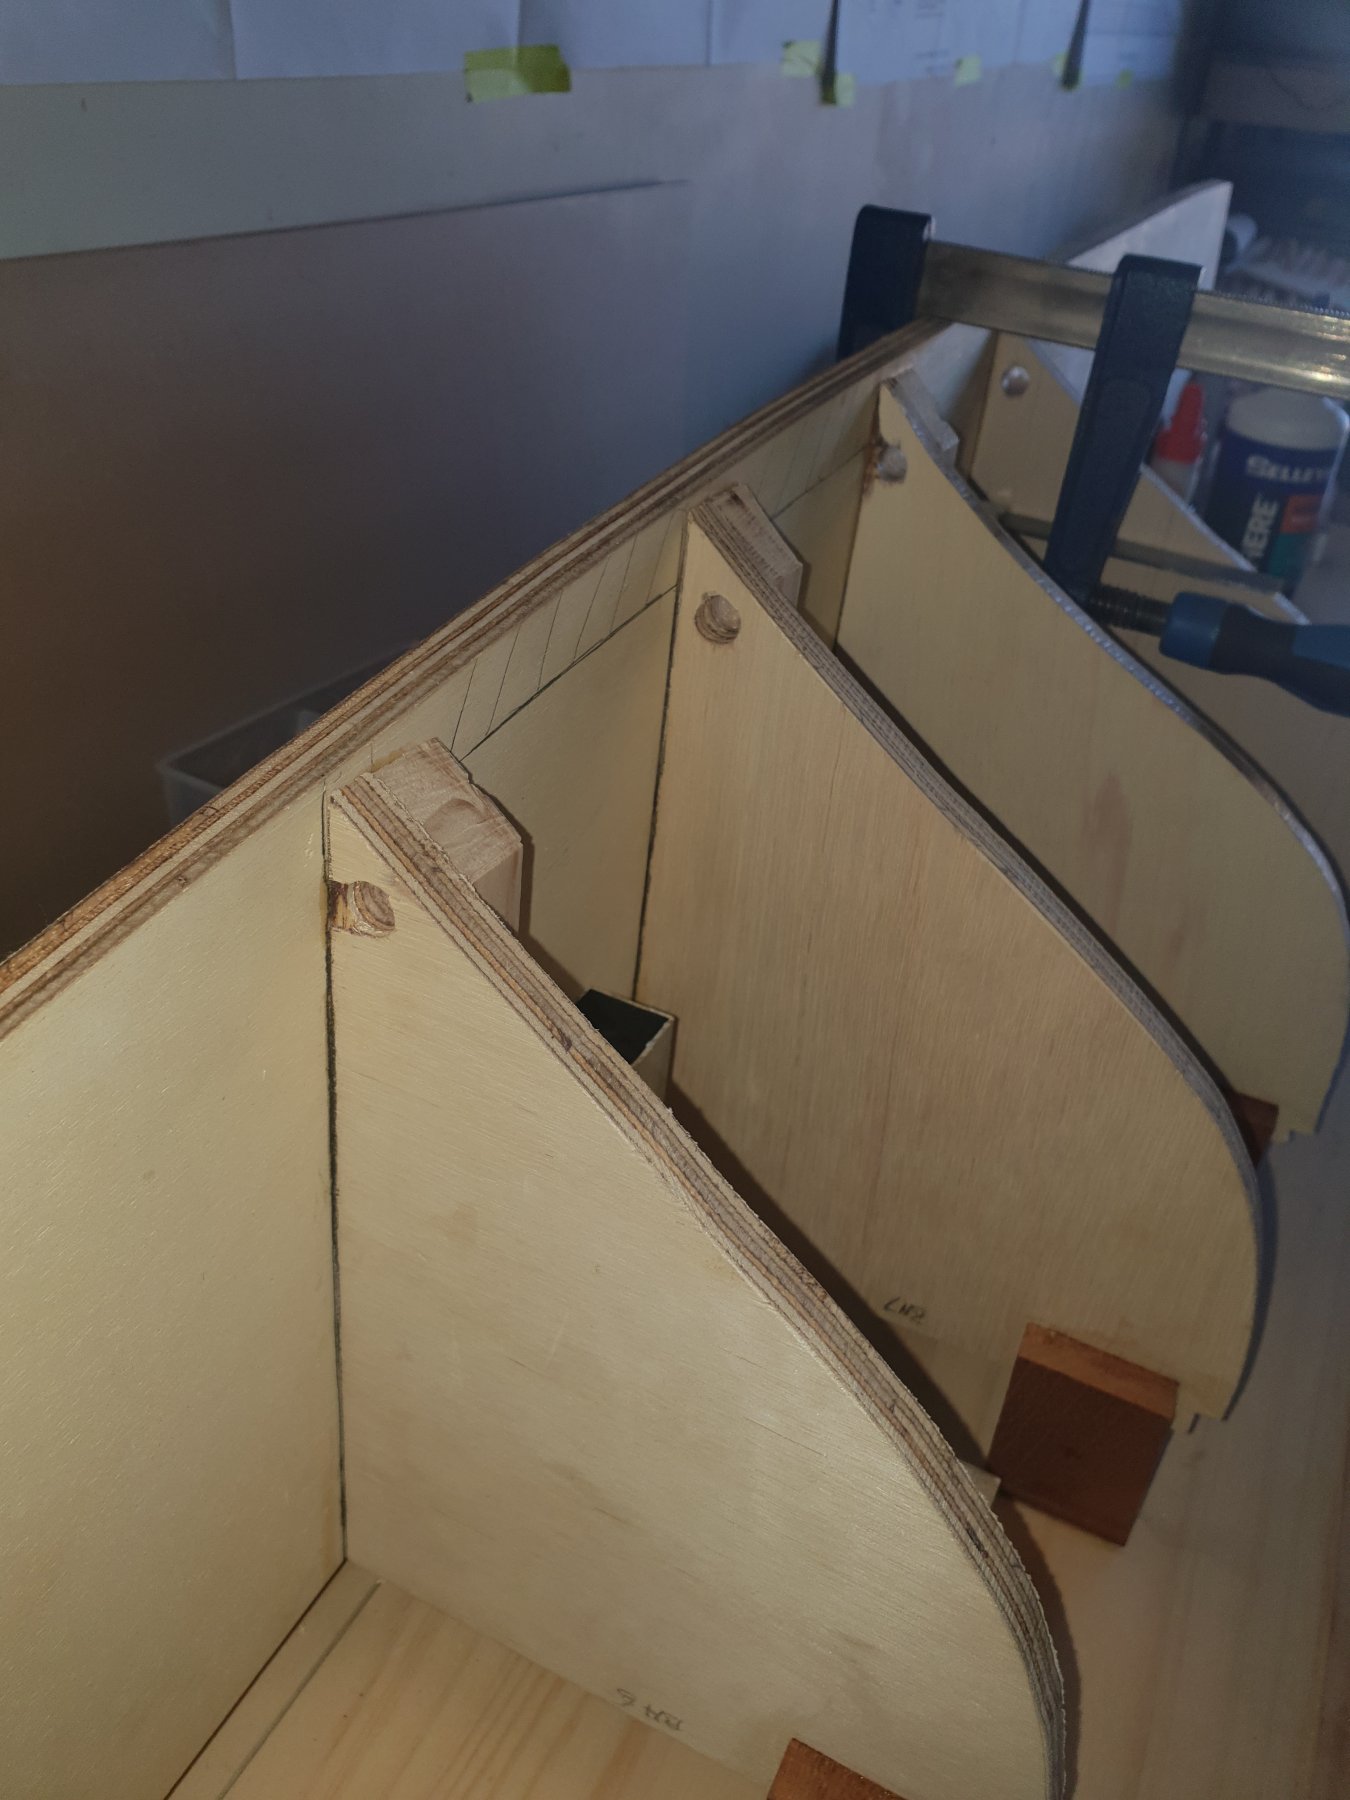
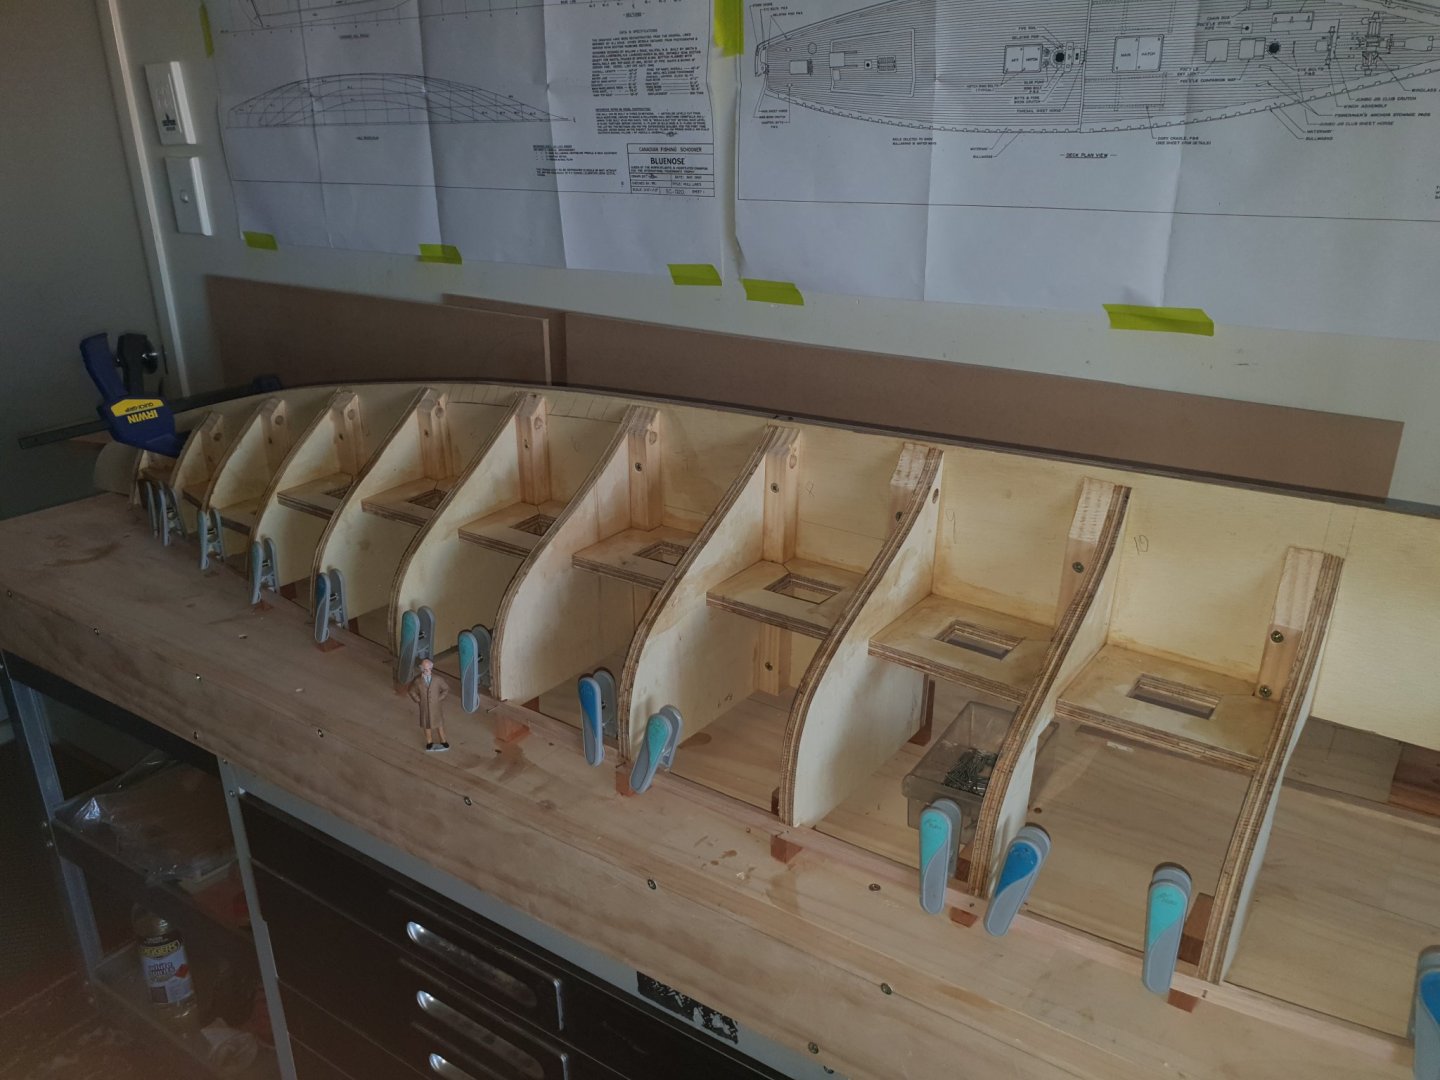
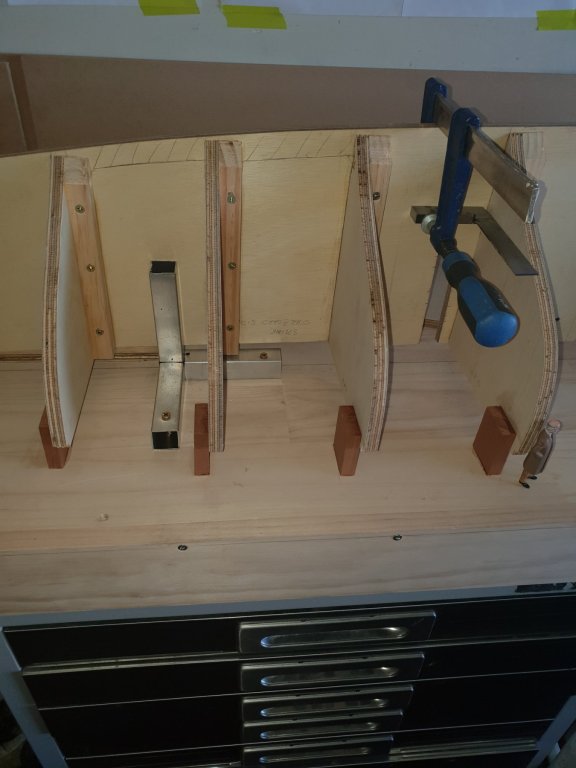
A few stages further on reveal all the bulkheads secured and the Carlin strake fitted. The reinforcement blocks between the bulkheads have a square hole in them. This is to allow the addition of ballast weight dropped through hatches above if needed. I have faired the bulkheads as well but will recheck them in the morning....and again the next morning! Next is to fit the bow and stern filler blocks from red cedar and then to cut the Garboard strake rabbett. A straight plank of Tasmanian oak is clamped to the spline to hold all true. In nautical terms this is known as " A straight plank "! I am splitting my sides laughing as I learn all these nautical terms for parts of a ship. Well tomorrow I will make sure she has a nice rounded Buttocks being careful to keep her Transom also good looking. I will try not to make a bollards of it all and keep a careful watch on her buttocks....sorry Futtocks. What a load of row locks. Pete


-
It's okay! I have downloaded David Antscherl's project on planking and it has given me all I need to know. Whoever was responsible ( besides David himself) Thank you very much for making this valuable information available. It is indeed a Rabbett and not a champfer. It is now merely a matter of doing it. Childsplay!.... ahem!!!....NOT!!! Pete
- 1 reply
-
- 3
-

-
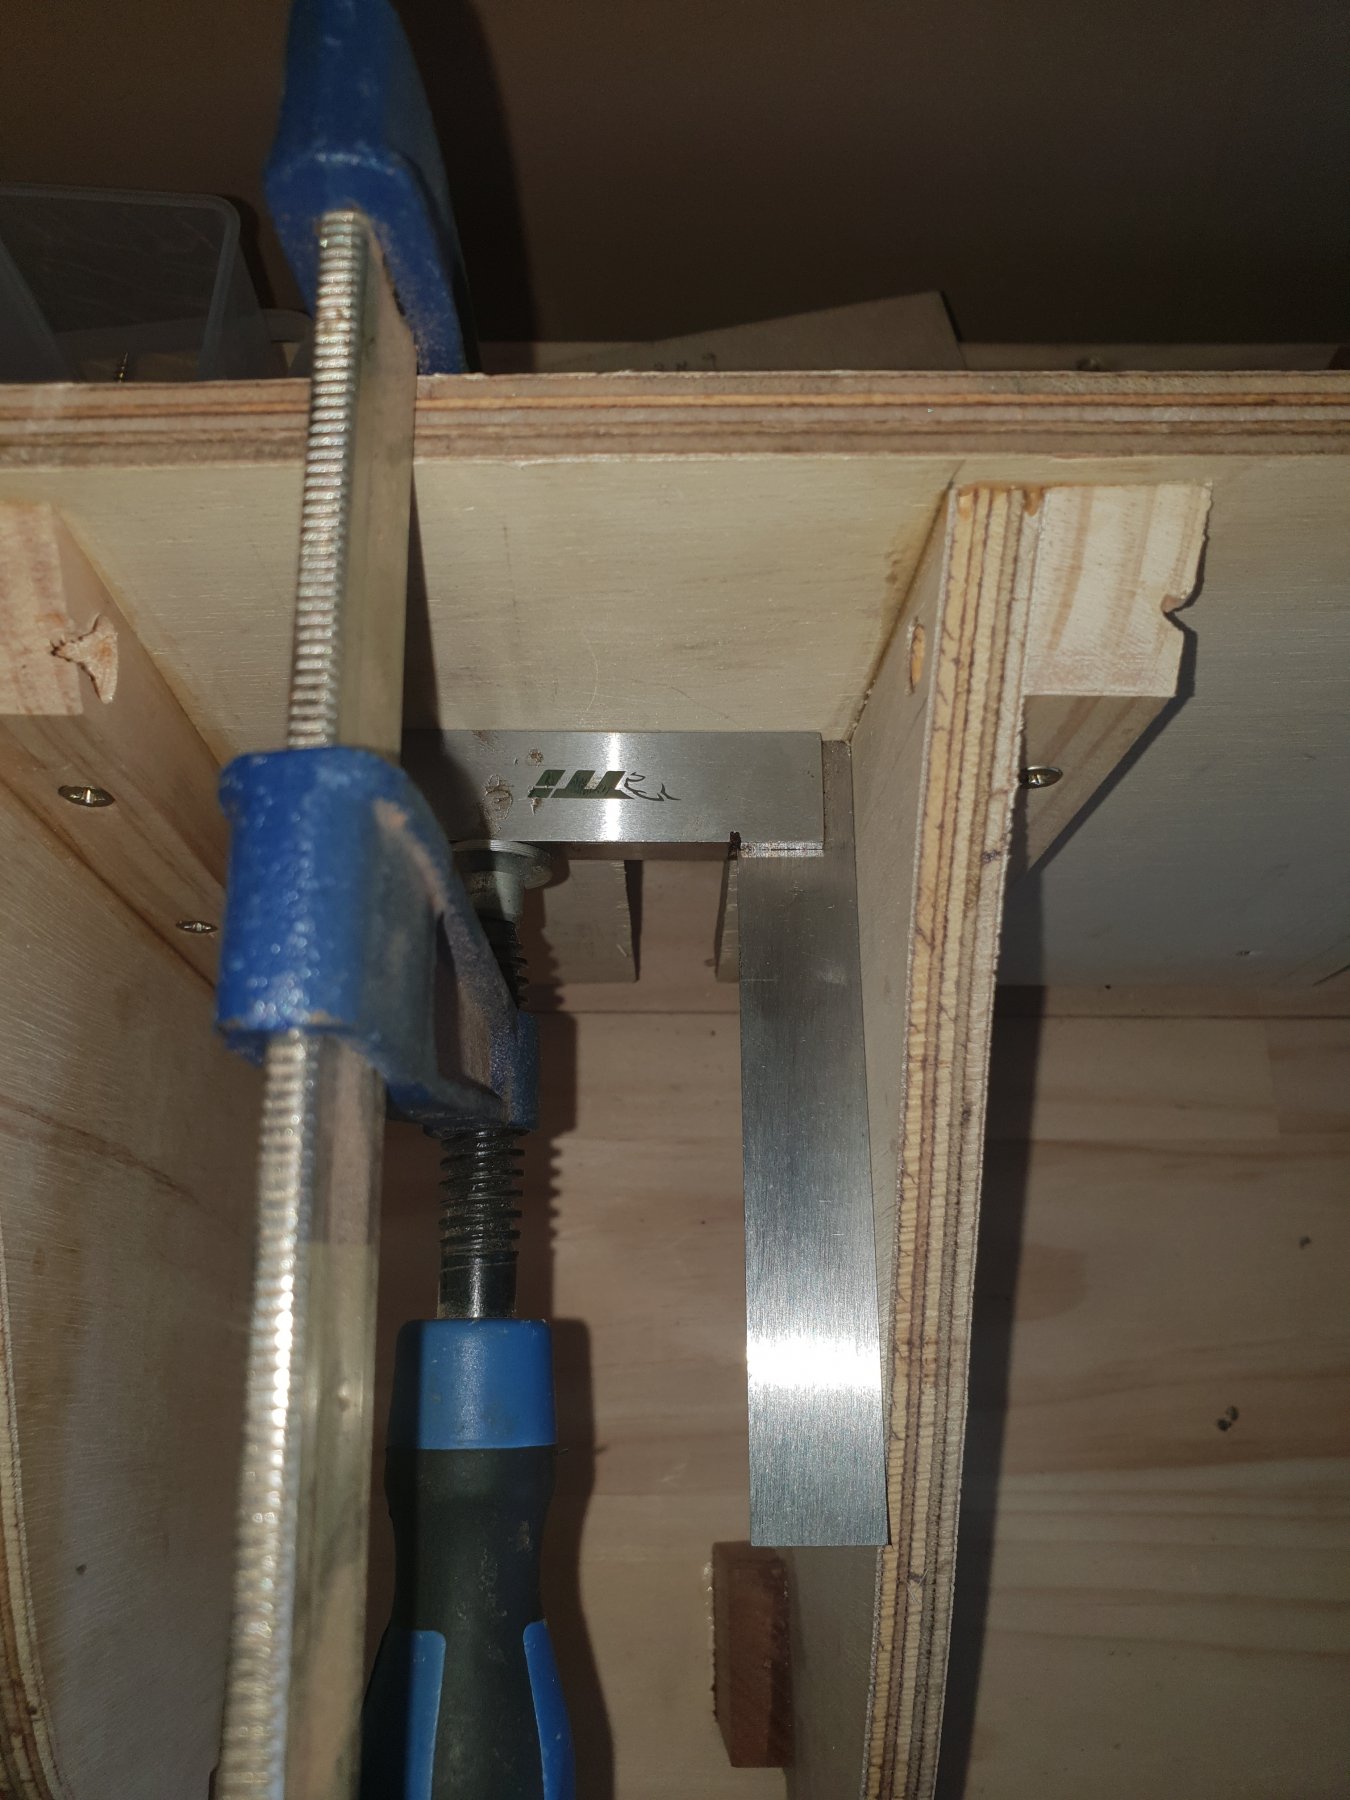
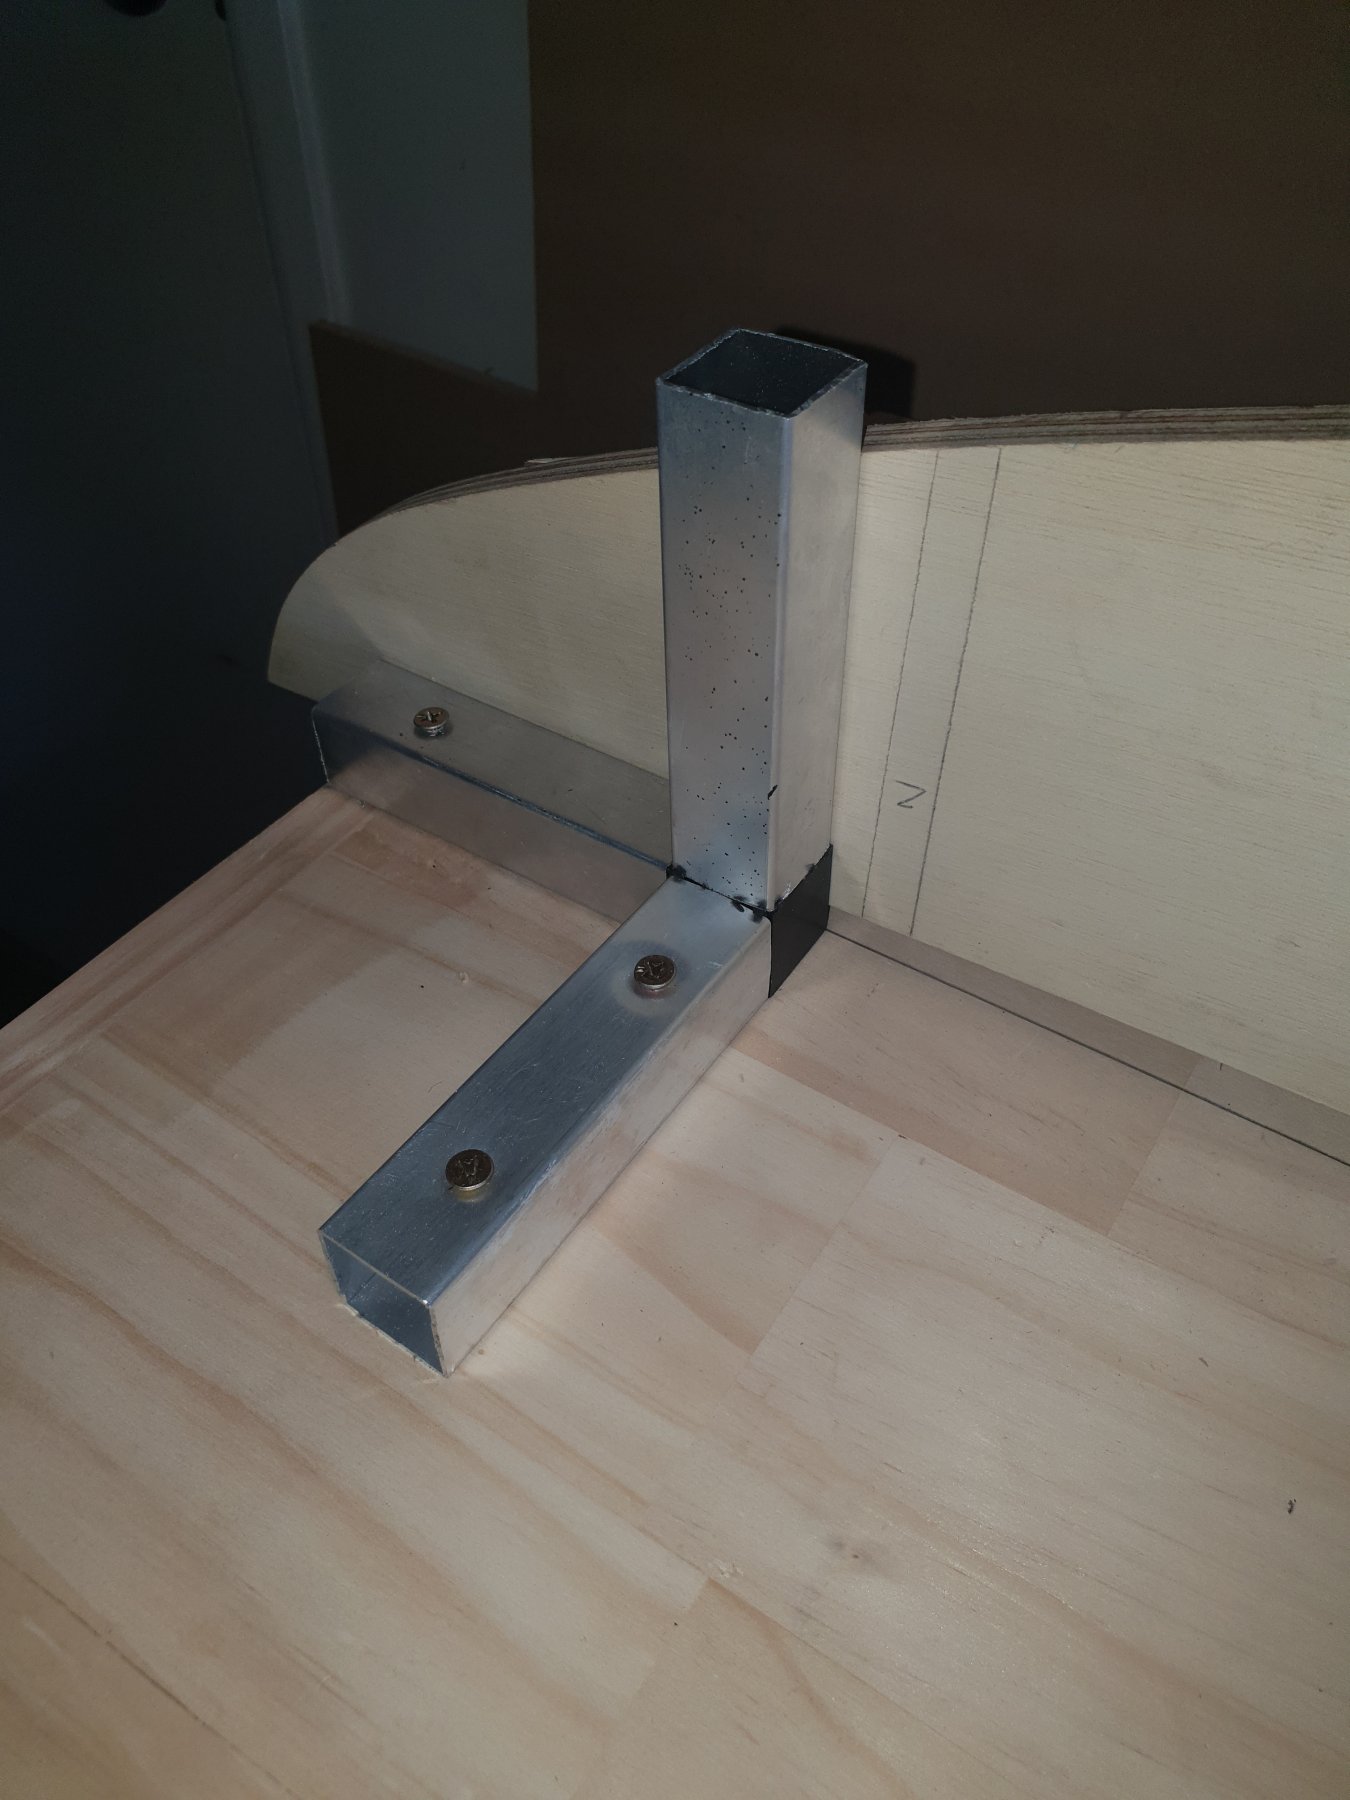
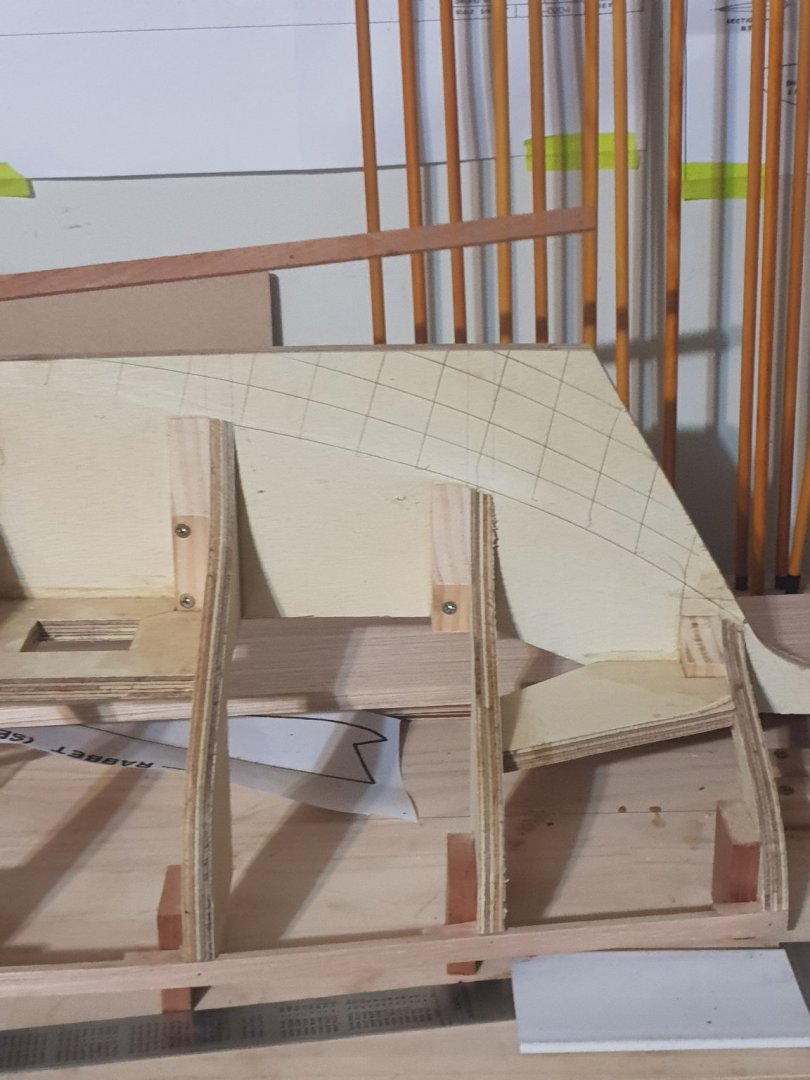
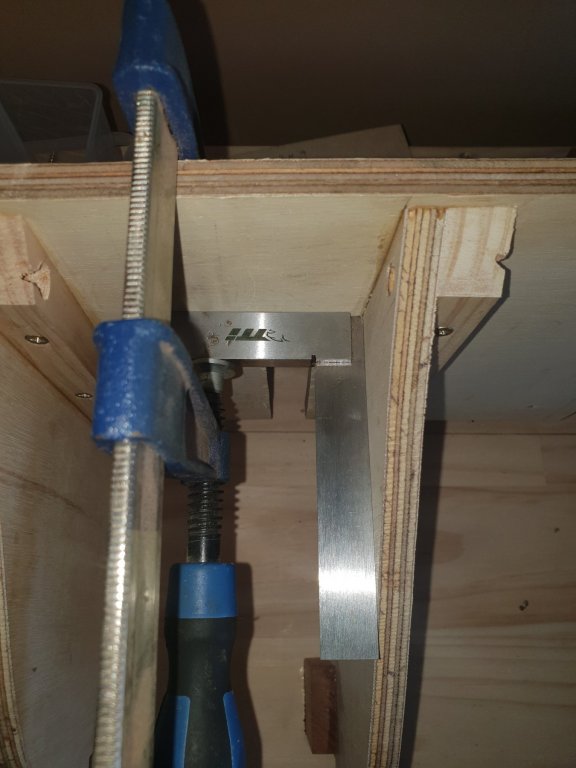
Hello all. I need a bit of help please. On my Bluenose plan it indicates a rabbet in the keel to accept the garboard strake. I think they mean a champfer? Here us a pic of what I think the plans mean. Is this right?. Do I champfer the spline near the rudder department( the hatched in area)? What is the best way about getting the size and shape of a garboard strake please?. Many thanks for reading this. Pete.

- 1 reply
-
- 2
-
-
I have just read through your entire build log. You must be very proud of your accomplishments. My....you had some staying power! She is a handsome ship I will say. Loved the use of garlic netting too! Also other Genius tips. I do not think you should continue to doubt your skills after that little lot. Hat off to you Sir. Beautiful detailed model. The works! Thanks for sharing that. Pete
-
I like the building frame. Genius idea. Could you show some more pictures of the Garboard strake notch please as I have to learn how to do this. The model will be fantastic. I like your choices of wood too. Thanks. Pete
-
Superb Nils. I can see you are really going for it now! Wow!! Keep going...I love it. Pete
-
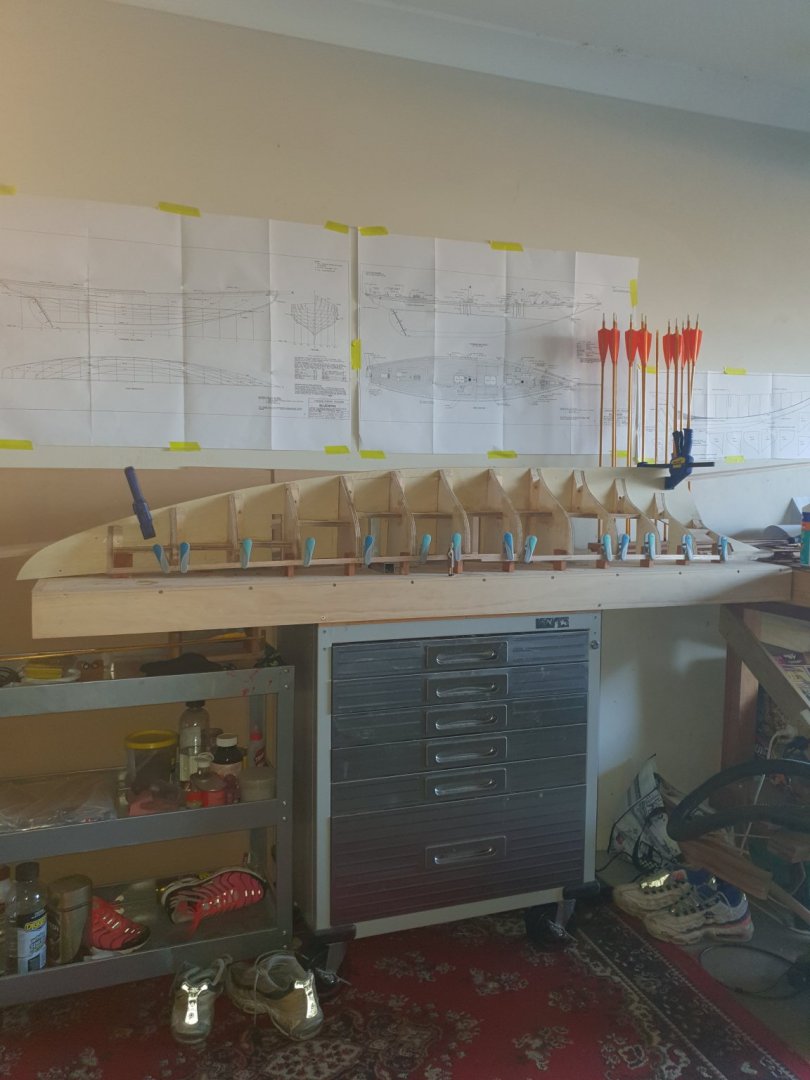
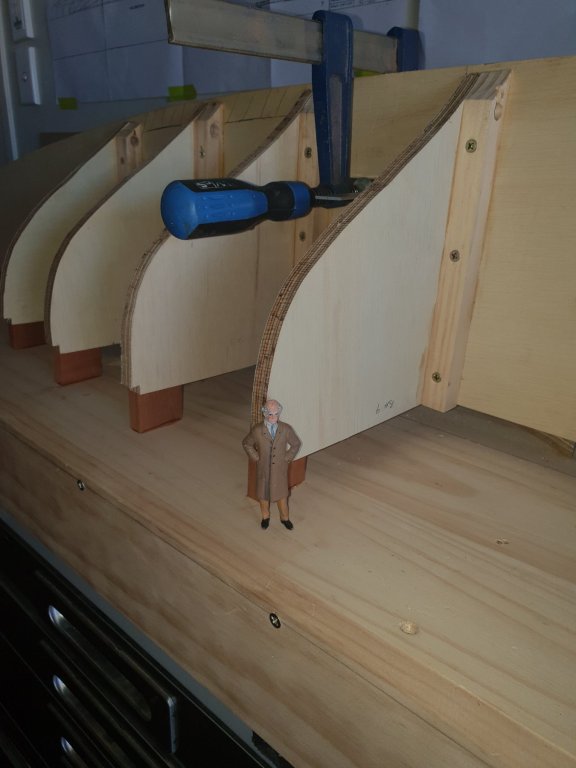
Thank you Michel. Progress is such that the spline is laid and true with spiders covering all three planes. All bulkheads have now been fashioned. Numbers 6 , 7, 8 and 9 are glued and screwed into position. Water holes have been drilled in each bulkhead so as to facilitate the ship " taking water". In this event the ship will be tipped to stern so as to allow the water to flow ( if any) to aft and can then be recovered via a sponge through the main cabin opening. A visible opening aft of the ship's spline is to accommodate the radio and rudder linkages. It is hoped to enable helm rotation comensurate to rudder direction. This will need some thought as the main shaft has both a left and right hand thread. Cedar wood blocks are glued to the bulkheads and building board to aid rigidity and hold all fast. On completion of both port and starboard planking the blocks will be removed by a flush cut saw. The area to the bottom of the water holes will be filled to the hatched line shown and glass resined. I will explain later why only one side is having the bulkheads fitted at the present. The figure seen is 1:24 scale and is 3" tall. This may give some incite to scale. Happy modelling Pete


-
Greetings from Nova Scotia, Canada
Peter Cane replied to NovaStorm's topic in New member Introductions
Robin. Thanks. That drawing explains it all. I am now wondering if my skills can extend to as well as the RC servo operating the rudder, to also turn the wheel at the same time. That would be cool. Mhhh.....now you have me going! Thanks again. Pete. C -
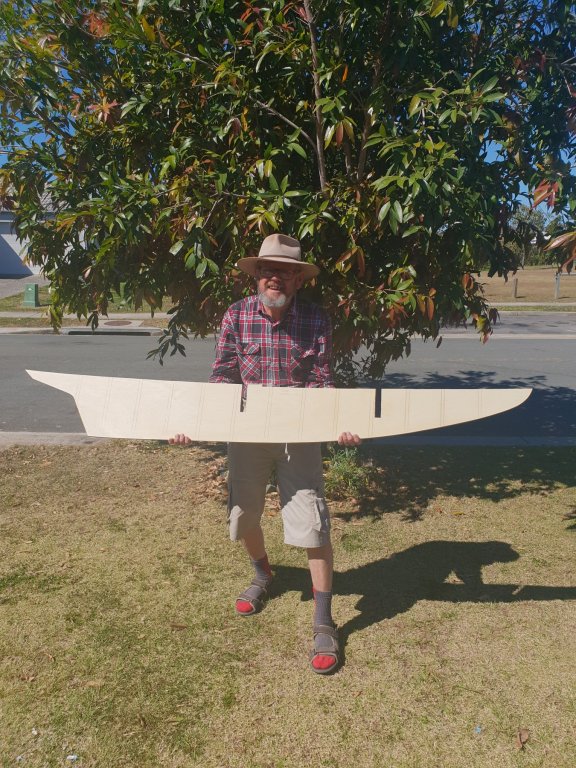
I have read the long Epilogue to " Beginners be warned that you do not take on too much that you cannot swallow". Really good advice ...But..... I do not know at this stage or later as to whether or not I can swallow and seal it. We will have to see. I am a musical instrument maker so have an idea on long projects. Ship building is definately a longer haul. I have a ton of patience , time and I will get there so do not worry my friends, you WILL see this sailing!!!. Currently I have not witnessed a model Bluenose in sail. I have asked Jond if he ever got around to sailing his RC version but appreciate that he is very busy and has not found the time to respond. My son has contacted a guy here in Oz that has a 6ft RC Bluenose but has not yet sailed it. He is on the brink right now of sailing her. I am very interested to know whether or not this "Queen " needs a false keel or not. My son's theory is that she is a drawn replica of the original yacht and therefore should not capsize!!! I look at her profile and always think.. Mhhhh....I think there should be more underneath . But hell....she won the race 18 years running so mine is only a miniature version of the real. But having a realization of model aircraft and their prototypes, I also am conversant with amendments that have to be made to a model in order that it works/sails/flies.... This is a big adventure for me. I not only want a huge Bluenose but want to sail her as well! Ahem!!!......cough....splurt !!!!... It will either sail or sink and that's my risk. Anyway, the plans arrived and have been enlarged to three times the size. It is now 6ft 6" long bow to stern. I have hacked out the spline from 12mm thick AA grade marine ply. This is really nice close grained wood. I think it is Birch ply. It cost $100 Australian dollars a large sheet which is enough to do all the bulkheads in addition. So I hope will be good quality. The interior and exterior will be resin coated anyway . About the red socks!! I am as I am. It is how it is. No frills mate. But she's a whopper ain't she! Crikey! Pete. Australia.
-
Greetings from Nova Scotia, Canada
Peter Cane replied to NovaStorm's topic in New member Introductions
Hi Robin. Just checked out your Bluenose blog. You sure know what you are doing. I liked the deck planking mid ships to aft as they showed they were put in singularly and with dark staining here and there which showed they were individual planks. It looks so realistic. Isn't Bluenose beautiful!!!! I think the most graceful Schooner ever built. By design it could be Italian for its beauty. But William Roue sounds more French than Italian. Even known as " Queen of the North Atlantic" and unbeaten. Perhaps that's why. How does one beat a Queen? My son asked " why is the helm ( wheel ) set at an angle?" I explained that it was to do with the angle the rudder post was at. I guessed but hope I was right? Maybe you could advise. Happy ship building. Pete. -
Yippee my plans arrived today. I have had them scaled up exactly three times which gives me a 6ft 6" long hull. Nice and big which is what I am after. I am still deciding on the best method to build the hull. I have a question please that would help me considerably if someone can advise. The plan calls for bulkheads glued to a central spine and then to be planked. At this size the central spine and solid bulkheads will be made from 12mm marine ply. Will this be too heavy for a sailing working model? I am going to fibre glass resin the inside and out. I will drill holes at the bottom of each bulkhead so that if she takes water it will run along and through the holes towards the stern. I can then drop in a sponge through the removable main cabin. Is this a good build process for a working model? Pete
-
Greetings from Nova Scotia, Canada
Peter Cane replied to NovaStorm's topic in New member Introductions
No. I do not have any roots from Nova Scotia. My plans arrived today. Thanks for your kind offer of help and I now know who to turn to. I will look out for your build logs. Mine comes under " Bluenose RC sailing version by Peter Cane" Happy building. Pete -
Greetings from Nova Scotia, Canada
Peter Cane replied to NovaStorm's topic in New member Introductions
Welcome Robin. I am a newbie here myself. As soon as I read Nova Scotia I immediately thought " Bluenose". I was right!...you have built one. Thanks for the picture. I am learning all about her and waiting for the plans to arrive from Canada. There are a good many first rate modellers here. I find this my main source of inspiration and a tonic to " keep modelling" it will get there eventually. Pete Australia. -
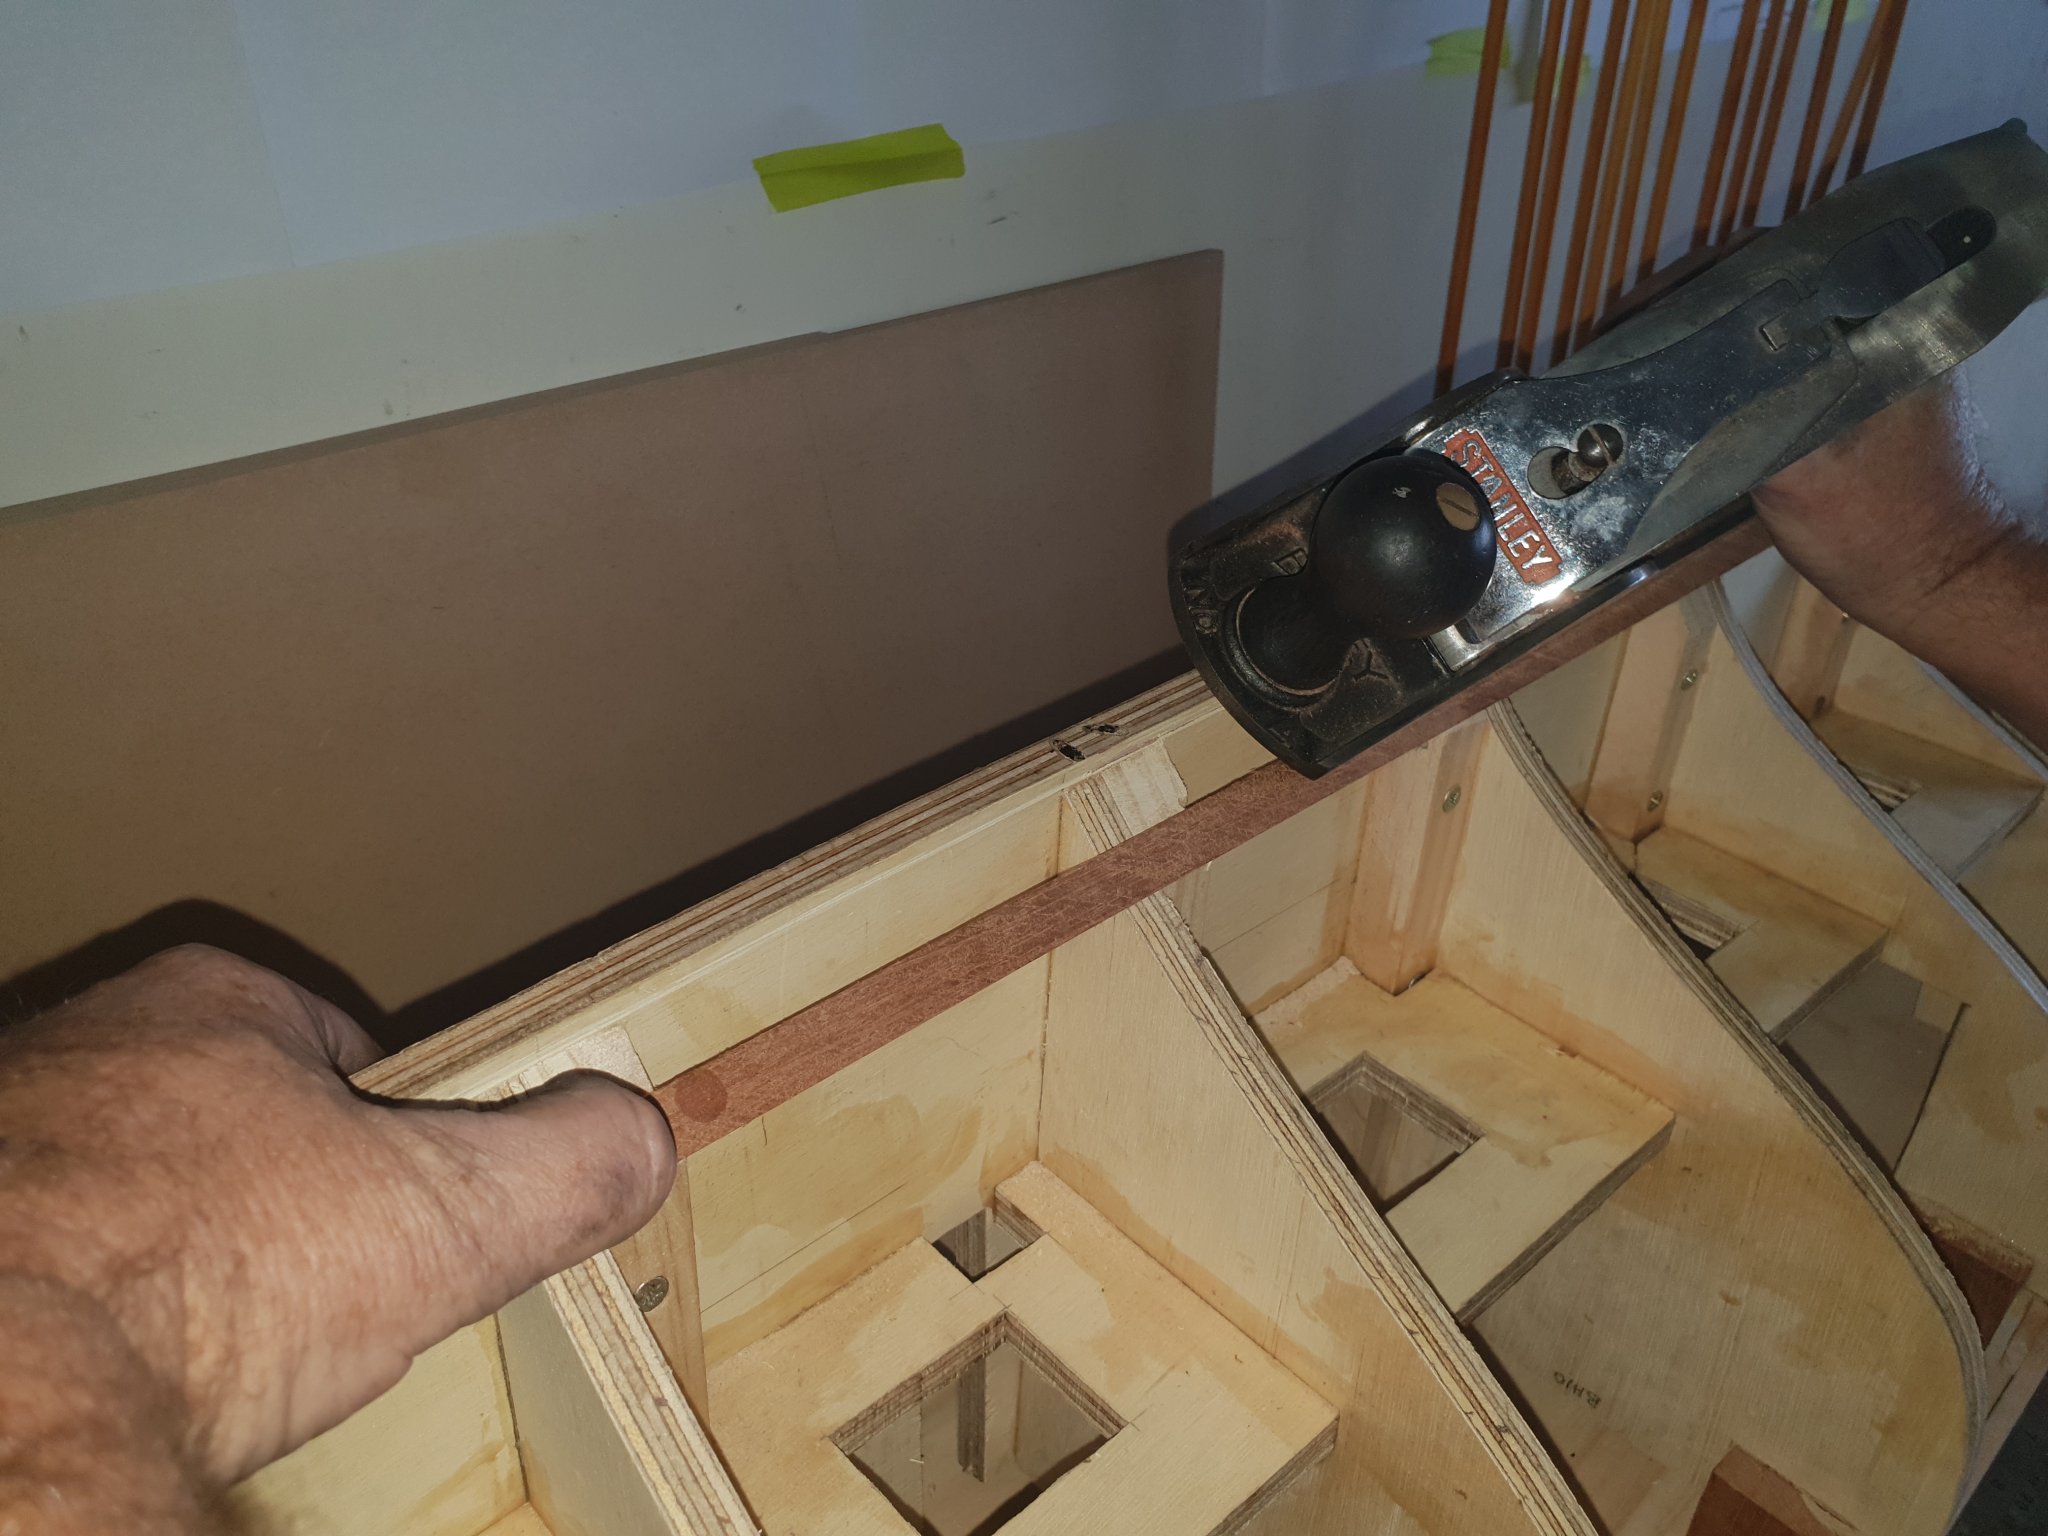
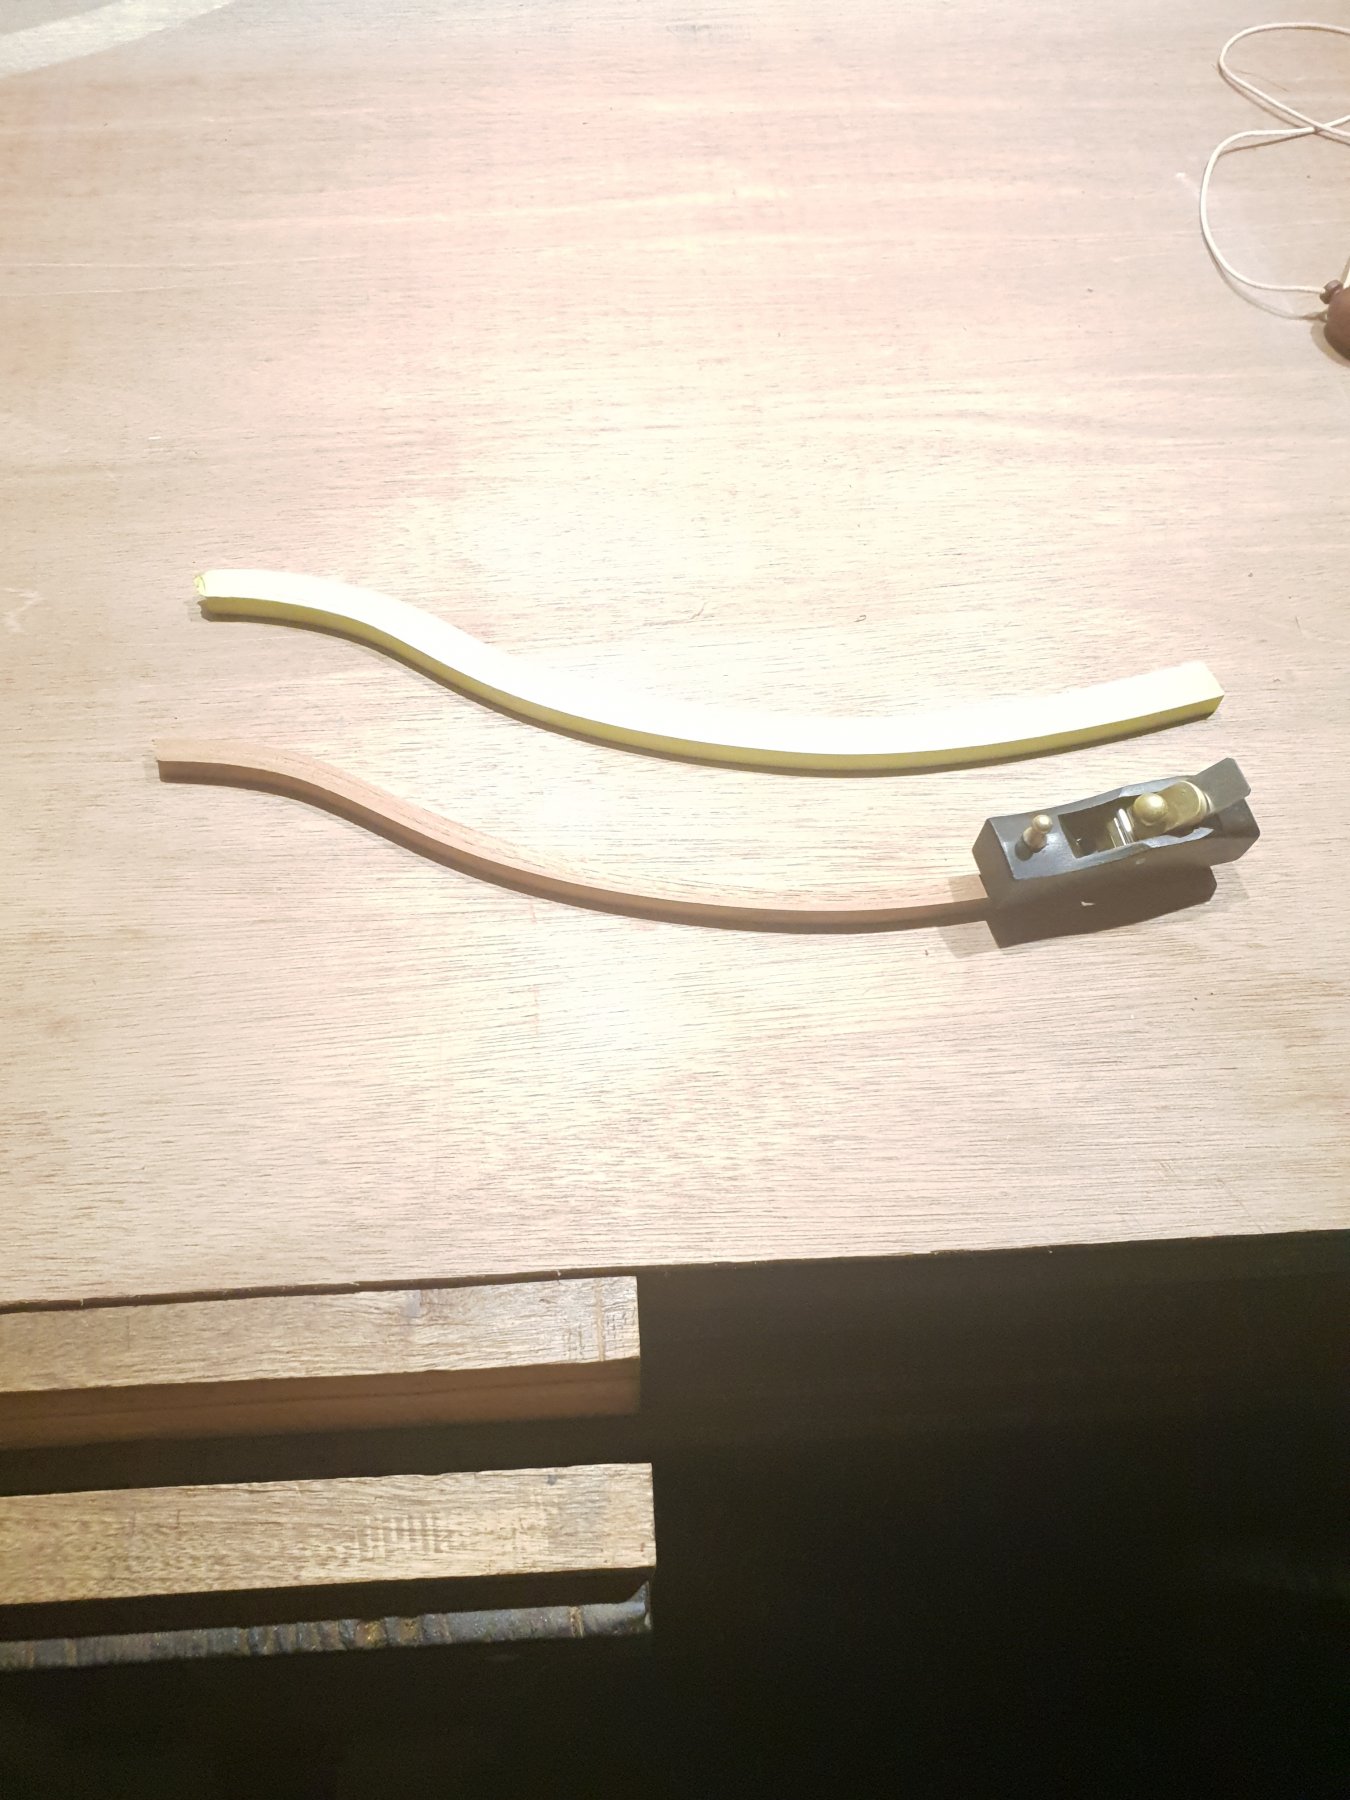
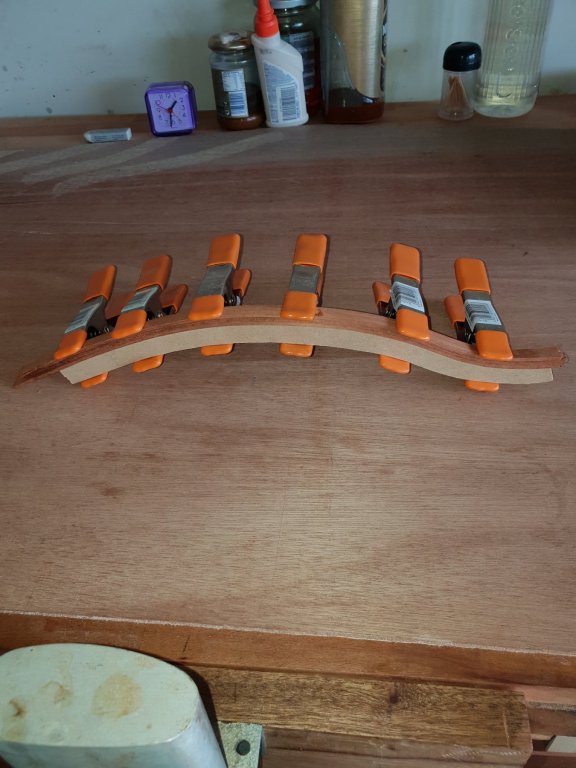
Here is the planed finished result. It stayed in keeping with the former. I am happy with this method of constructing the frames. They are strong and keep their shape. The small plane is a Chinese instrument makers plane which performs particularly well with time taken to sharpen the blade to a razor sharp. How they produce these from Rosewood and brass for a " bowl of rice " price is totally beyond my comprehension. It is just not fair. Exploitation. I am guilty as I buy Chinese goods. Anyway....my mind meanders . Sorry...I am too deep . Pete

-
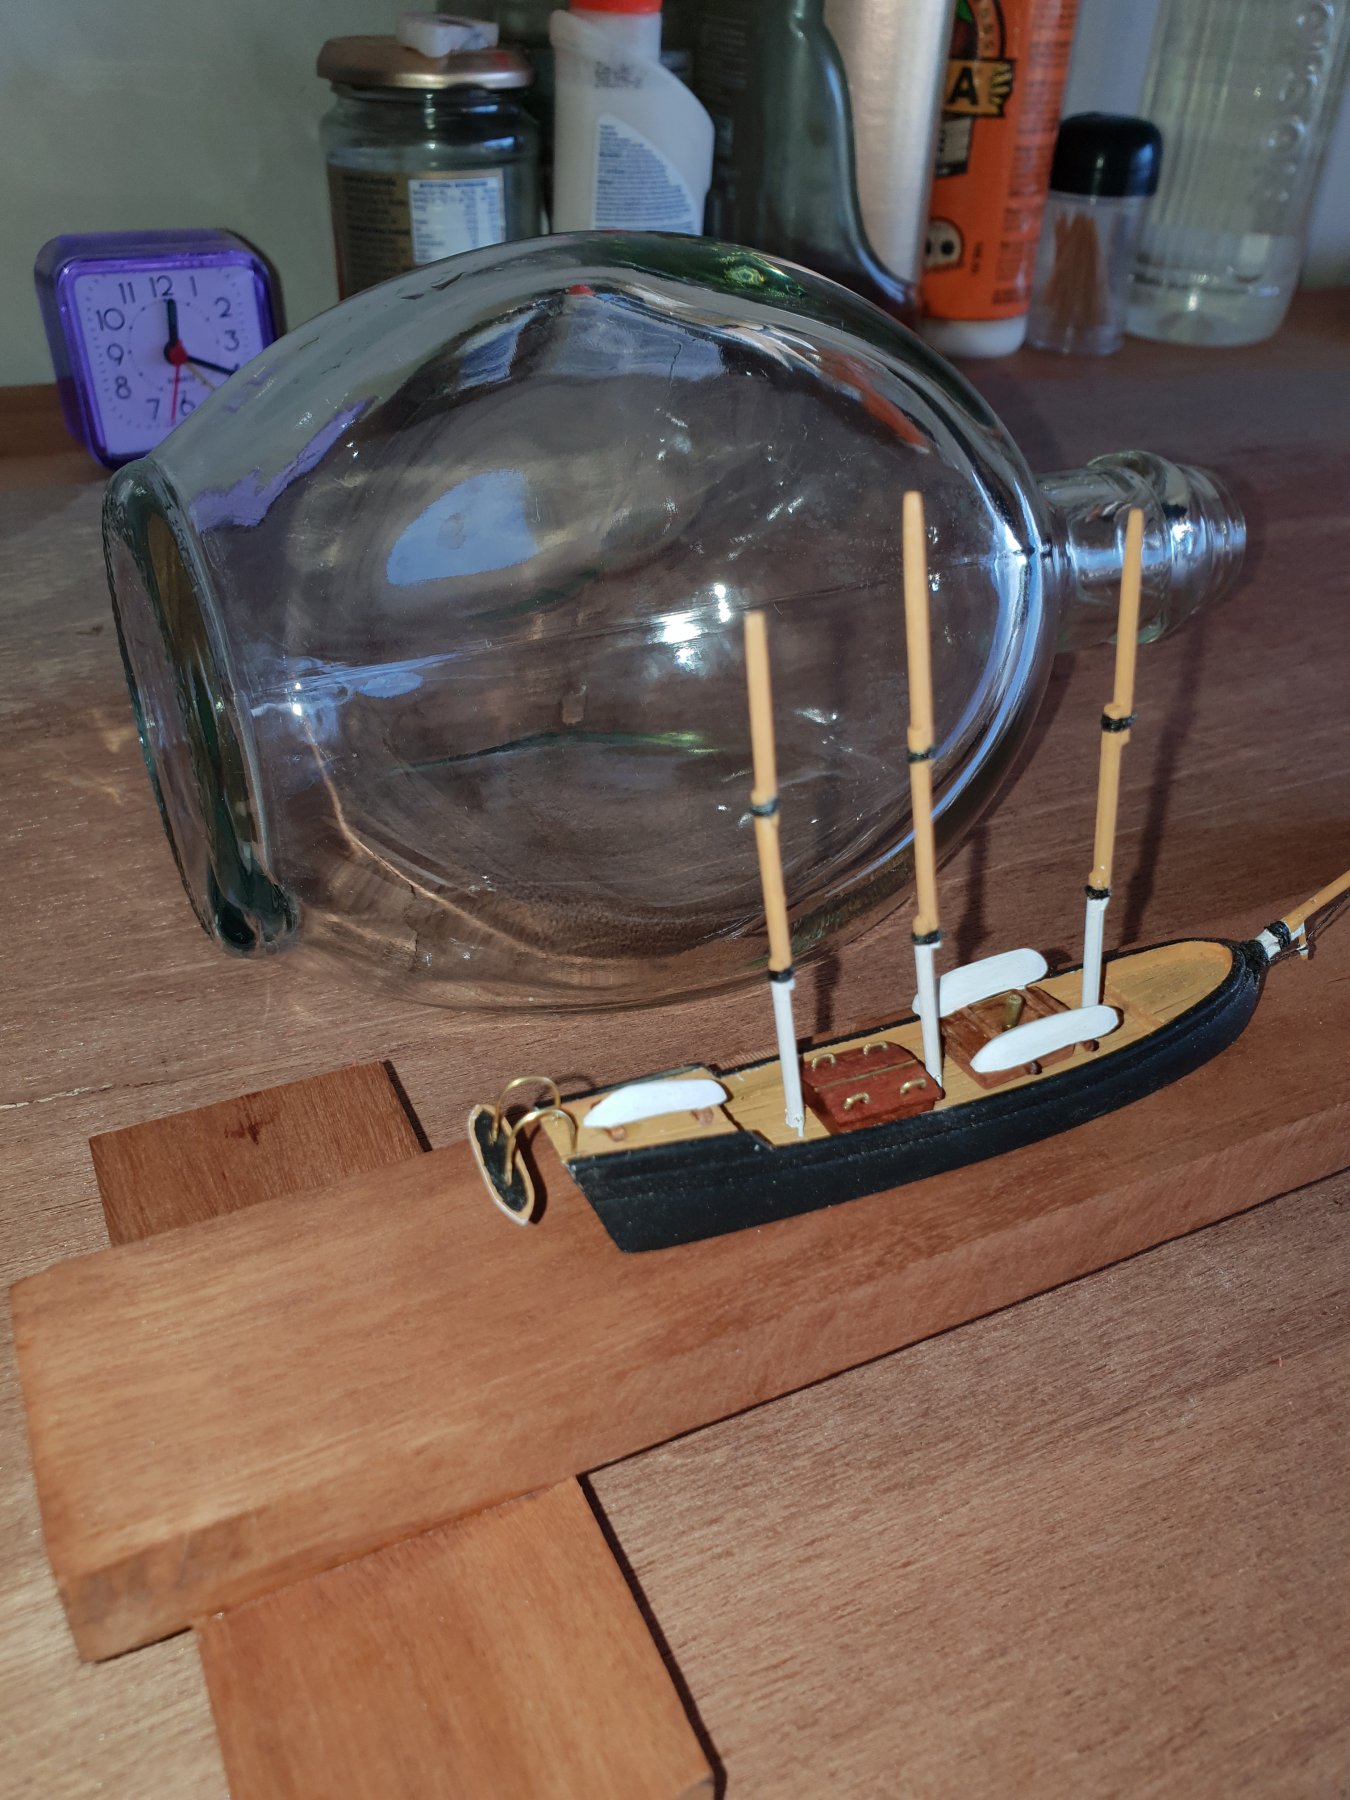
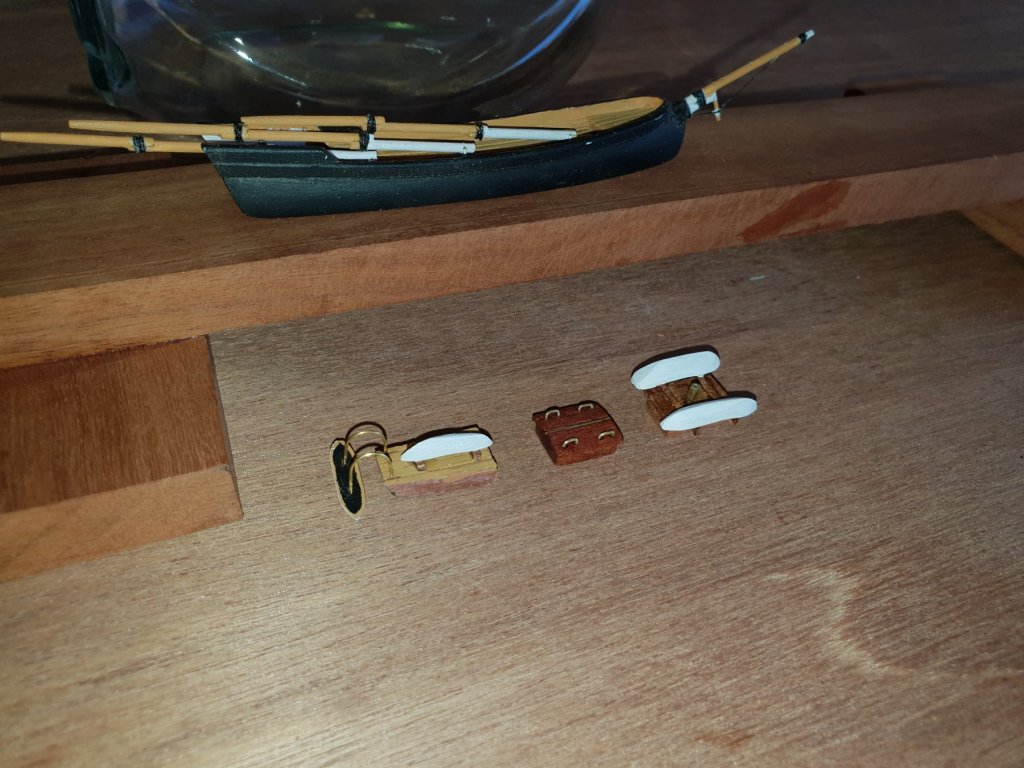
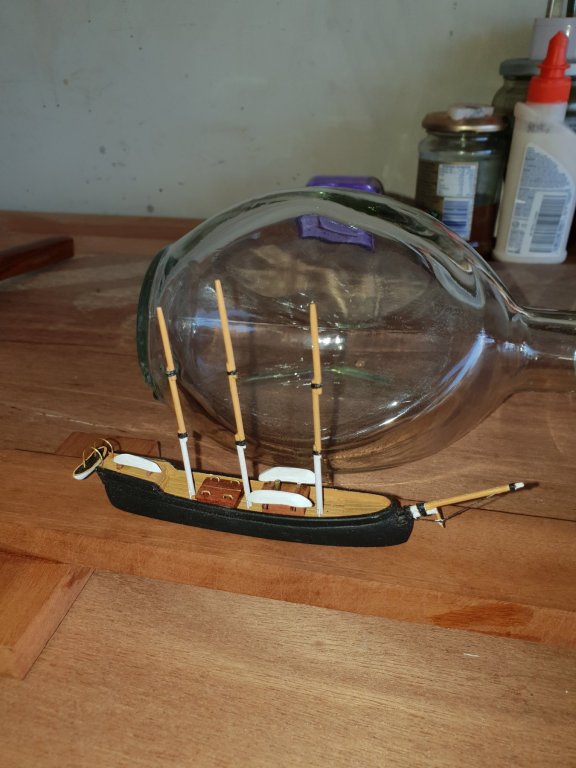
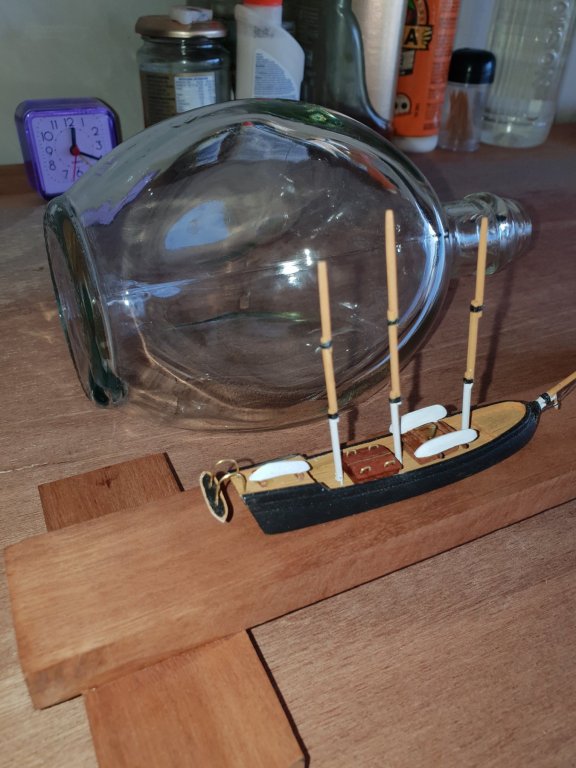
I hope I am in the right department here. If I am moved by administration please advise me and my apologies in advance. I have dabbled with SIB for some time. I make one every ten years on average. This is supposed to be HMS Beagle. I do not work from drawings. ( should do ) All is eyesighted and let's say...artists impression? I have seen some of the most exquisite models built by guys on this forum which leave me very humbled. They are just brilliant with all their tiny detail. I love ships but am a bit of a bluffer. I put in what I think looks good and ignore scale as it is too much for me. It is supposed to carry seven boats I read. This, on this scale will be too overpowered. I have tried my best. I am a non nautical but love what I see in ships . I have the boat hanging over the stern on Daviits which should be a give away for HMS Beagle. Plus all the other boats on board for the expedition. When I see what some modellers have achieved I should be ashamed as I have not applied myself fully to it. Anyway, here are my results so far. The main thing here is.....FUN! and I get plenty of it. Your ships though my brothers are an inspiration to me. We cannot hope to build anything without this. I have an attraction to Dimple bottles of the smaller variety. They have their own stand. Trouble is I get quite Ill for five days having downed a bottle in one evening! Maybe I WAS a sailor in my past life? Ha ha. I do know though that us modellers have a vivid imagination of the past and that's why we do what we do. Here's the pics. " Weigh Anchor and set sail me boys" Or have I got it the wrong way around? Said I was bluffer!!! In hindsight...I Christen this ship..." HMS Bluffer ". Pete
-
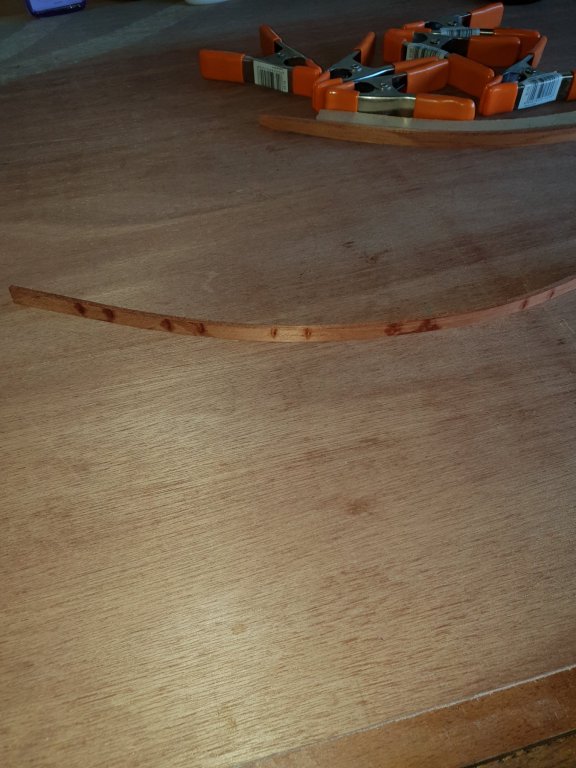
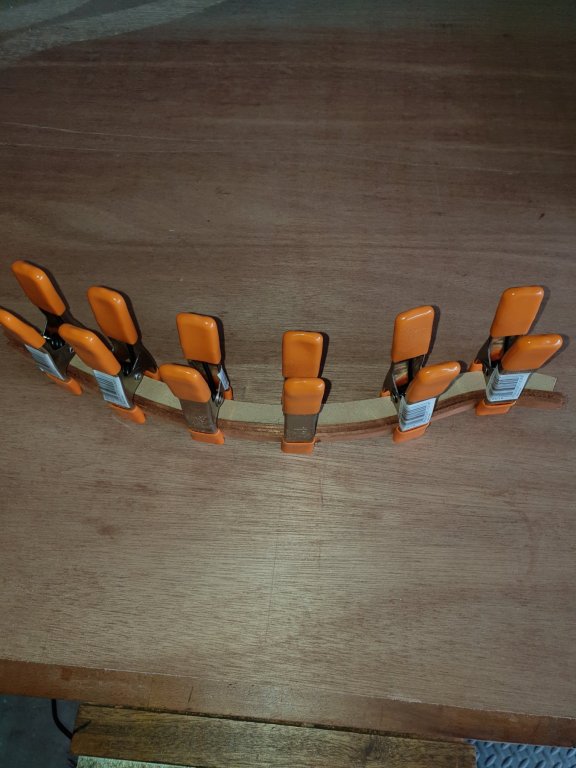
The clamps were so powerful they bruised the wood severely. So I cut a strip of bicycle inner tube and that clamps it all nicely together. Is cascamite powder glue still available? I remember my woodwork teacher making superb sailing dinghies with it.( full size) It was an Amazon. Beautiful lines. Someone here would have heard of them. Era 1960s. Showing age now!!! Here's the new clamping arrangement and it's cheap. Pete

-
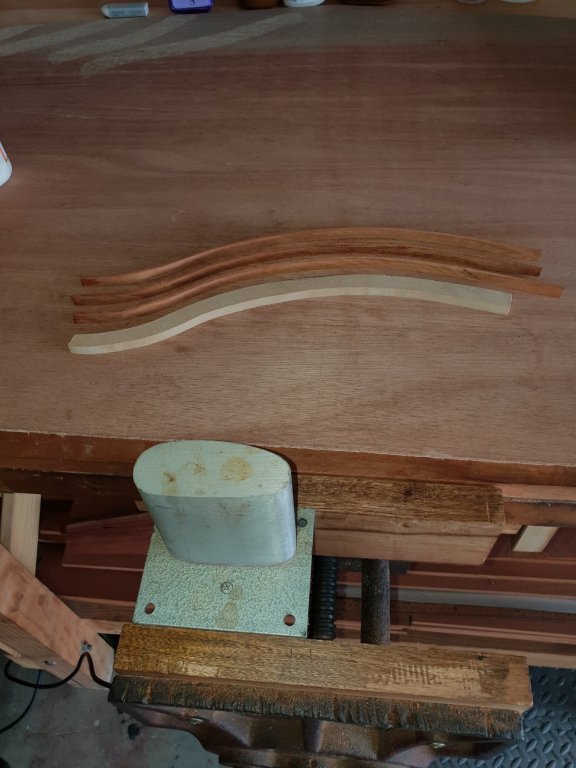
Been having a play and experimenting with laminated frame construction. I have band sawn an MDF mould/former then bent the laminations to near shape and clamped them on the former. The former is only a rough shape and size of the formers I will be making when the plans arrive. I just need to arrive at a method and stick to it. I am now going to wax the former and glue them up. It should work okay. I used an electric bending iron that used for bending violin and ukelele sides to shape. It is surprisingly fast. Question is ...will cedar be okay for frames? It bends nicely. Pete
-
Whilst waiting for the plans I have been pondering on which method to use to build the frames. At first I was going to build them using the method that Jond used using MDF sacrificial frame holders but now thinking about it, it may make more sense to actually build real frames from hard wood a la the real thing. I have read that a real ships frames are made up in sections. Has any one out there got any advise for me on how to build the frames for a large scale model please? Pictures and sketches will be most welcome. I prefer to do it this way as I can then glue and clamp the planking on to each frame. I am not too fussed about the exact number of frames as per the real thing as it will be a working model and they will be hidden anyway. It is just that I think it is the way ahead as this is how they were built. My first thoughts are to make a sacrificial former from MDF and then to laminate the frames to them using four thicknesses of 3mm thick strips?......or should I build them in sections? Should I use hard wood or my already sawn Western red cedar? Any advice will be very welcome. Thanks Pete
-
Yes. Any adjoining pipe work would have to have a flange. I was going to suggest it but it t is your project and you need time to do these refinements. So I kept quiet in anticipation. I thing I am just as enthusiastic as you Nils about your model. I must zip my mouth and keep watching. Brilliant. Pete
-
It really looks the part Nils. Making cut always is a good idea to show off the otherwise hidden detail. Will you do this for the births as well? Pete Pss. I like the bolts! ...its worth the expense I think.
-
Nils and Tarbrush. Thank you. I dare say when the plans arrive I shall have some entertainment for us ( me included) I wanted to build something huge, impressive and an heirloom. Bluenose is perfect. It will certainly tax my skills. I am very excited about it. I dont thing I did my lungs any good sawing up all that cedar but hey ho. Should have worn a mask. One thing that worries me is if I have to build a false keel to sail her??? My son ( 47 ) reckons not to bother as it is a scaled down version of the real thing that did actually float and ...well....beat the Americans 18 years running so that sounds pretty good to me. I will fill the keel with lead for a starters and see what happens. I am reckoning the masts will be some 7 ft high or more. That's a lot if sail area!. Pete
-
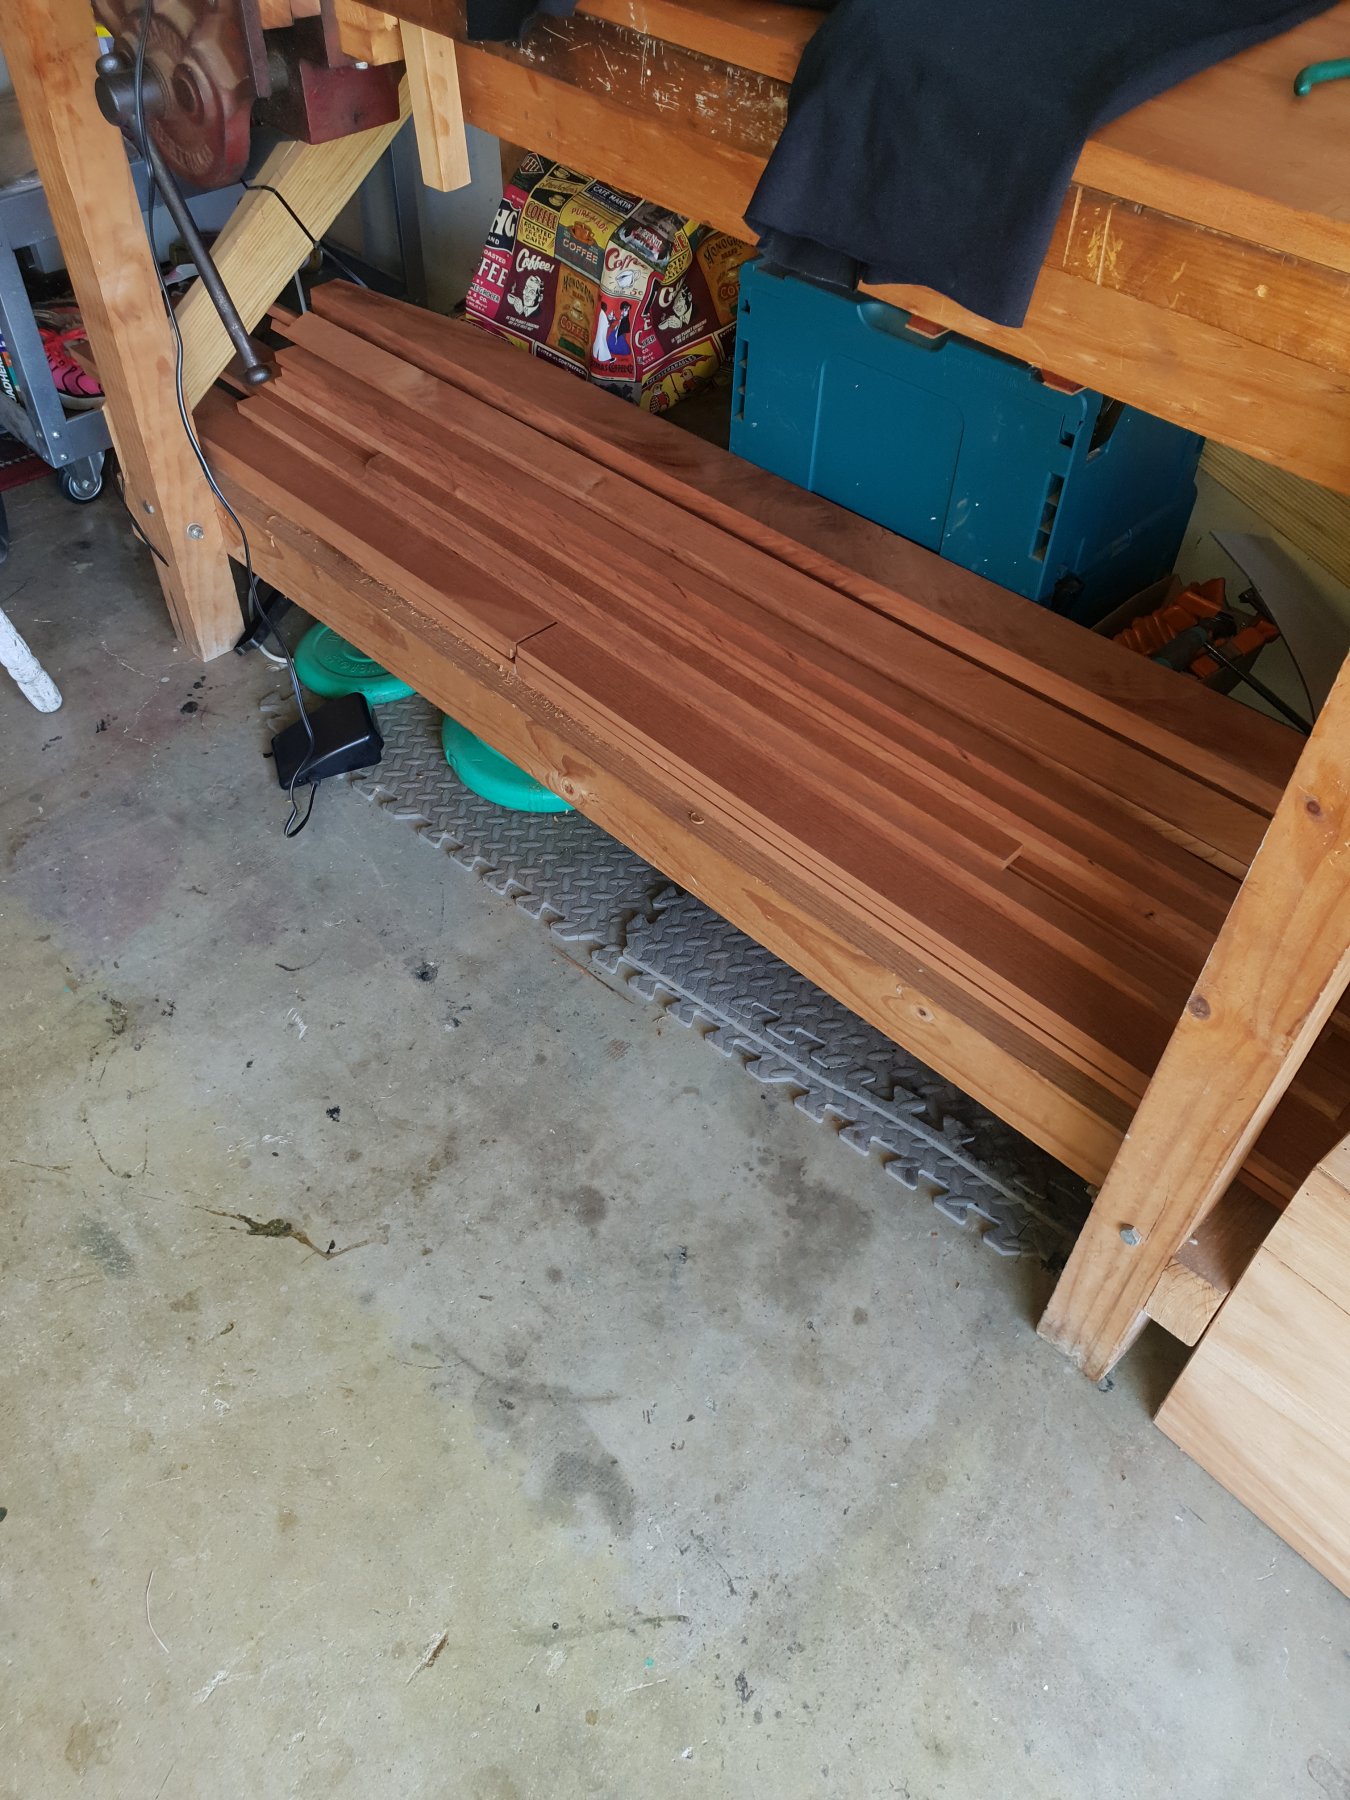
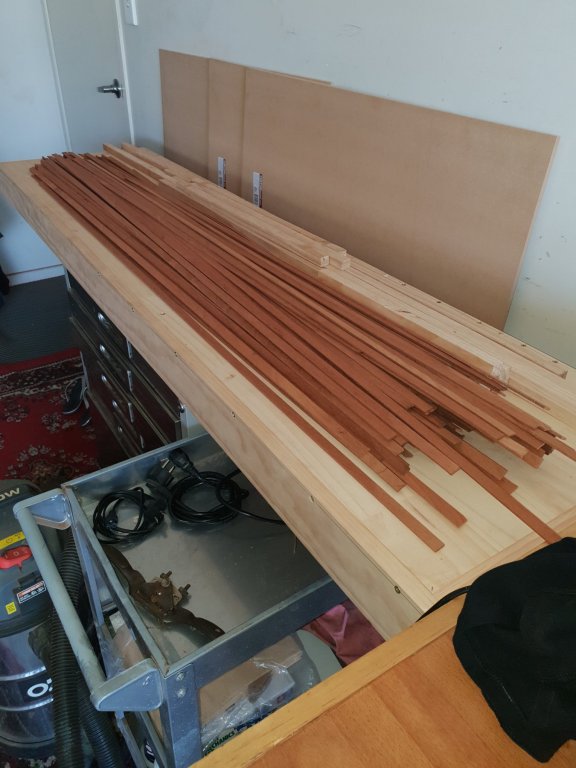
I spent the day with the table saw and planer/ thicknesser. I now have enough to plank the hull. Three is still stacks more cedar under the work bench so cedar us not a problem. Still waiting for the plans now. It's as much as I can do until they arrive. Pete

- 45 replies
-
- 11
-
-
Great. You are an excellent modeller and will therefore realise that small details like this make the model. I will continue to view your blog. What will you call her? I have a suggestion .... Tuc Tuc??? Ha ha. Pete