realworkingsailor
-
Posts
3,271 -
Joined
-
Last visited
Content Type
Profiles
Forums
Gallery
Events
Everything posted by realworkingsailor
-
 Does your ship have sails in the plans? If not, chances are that the pin rail would allow you to belay some of the associated lines there, should you decide to add them. Andy
 -
Lalalalalala.... I can't hear you... Lalalala...
-
Looking through my log after seeing the "server upgrade" thread, I've noticed a few photos are missing. If anyone is really desperate to see them I'll re-add them in, but otherwise I'm going to leave everything as is. Since it seems to be rather random which photos are still here and which are missing..... Andy
-
I think in this case I'd go for a full on sandblasting.... But failing that a deck scaler would have to do. (For those who don't know what that is, just picture the lawnmower from hell) Thanks for the kind words, unfortunately I can see cold and wet on the horizon. My seasonal suffering could start at anytime..... No news yet though.... Andy
- 382 replies
-
- 2
-

-
- stadacona
- sylvan scale models
- (and 1 more)
-
Take a grease gun, a few buckets of grease and have at 'er. Start with the grease points on the hatches, then move on to the winches. When that's done grab a wire brush, and a rag and clean and regrease all the threads on the booby-hatch dogs and..... Eh? What? Yeah well, never admit to the first mate you're bored or what to do for exercise..... Andy
- 382 replies
-
- 4
-
-
- stadacona
- sylvan scale models
- (and 1 more)
-
So....not much to report. Saturday went well. Aside from the clinics, I couldn't get away from my ship there were too many people asking lots of questions. I didn't manage to get any photos of the other models on display.... Not sure if there were any.. I expect the RPM site to have some photos posted soon, and when they are I'll let everyone know. Andy
- 382 replies
-
- 2
-
-
- stadacona
- sylvan scale models
- (and 1 more)
-
Very, very nice! She's looking as good as Chuck's prototype! Andy
- 2,191 replies
-
- 1
-
-
- confederacy
- Model Shipways
- (and 1 more)
-
Very nice work on the head rails. They really improve the look of the ship. Andy
-
She's on hold for the time being. When I get this big beastie finished, I'll return to rigging full time. The way things are going, probably by next winter. Andy
- 382 replies
-
- 1
-
-
- stadacona
- sylvan scale models
- (and 1 more)
-
Excellent work! Congratulations on completion! Andy
-
So carrying on..... The fairleads for #3 and #4 have now been cut in to the aft bulwark. Bits have also been added along the length of the spar deck. I did have to make some modifications to the aft end of the spar deck, namely adding extra deck space to allow for the winches to be mounted together aft of #20 hatch. This ties in with alterations that needed to be made to the afterhouse. The kit supplied afterhouse needed to be shortened, and a new superstructure for the promenade deck built. Looking back, these are the two issues that bugged me about my original attempt, so not they're being dealt with. Shortening the afterhouse improved the overall look of the vessel considerable, bringing everything into better context. For anyone in the area interested I will be displaying my ship at the Toronto Railway Prototype Modelers meet tomorrow, at Humber College. For Info: Toronto RPM Andy
- 382 replies
-
- 13
-
-
- stadacona
- sylvan scale models
- (and 1 more)
-
Wife... Uh yeah... Still workin' on the girlfriend thing at the moment... (Wait! What!? Andy has no admiral to answer to?! Lucky shmuck...) Yeah... Sure..... All kidding aside, thanks for stopping by, David Andy
- 382 replies
-
- 8
-
-
- stadacona
- sylvan scale models
- (and 1 more)
-
That's what I was referring to when I was talking about the "chock" Glad I could help Andy
- 382 replies
-
- 1
-
-
- stadacona
- sylvan scale models
- (and 1 more)
-
Eamonn (and others): http://aylard.ca/sites/default/files/imagecache/1000/marine-7226_0.jpg Sjors, thanks for stopping by. Yes it is a big change from wood, but I'm having fun with it. I think I'm going to push to get this finished before I get back to Pegasus. As I mentioned wayyy back, when I got home in November, I really couldn't get back in to working on Pegasus, so I gave it a pause and started this mega-project. Kevin, I think I caught you talking about the SD14 a couple weeks ago. That looked like an impressive model. BE, I know what you mean about the appeal, but for me, it's close to home. As for paint, well...yeah... she's gonna take a LOT.... I've already begun stockpiling Andy
- 382 replies
-
- 5
-
-
- stadacona
- sylvan scale models
- (and 1 more)
-
Aside from regular greasing (like any moving part requires), the only thing that potentially ever needs changing are the sheaves. Very easy to access the pins through the open 1/4 circular spaces. Half an hour with a good spanner and a hammer and you can have 'em both swapped out. I've never seen any situation where the whole chock has to be changed. Any time I've ever seen any kind of problem, it was simply a matter of flushing out the old grease with a little diesel, add new grease and everything is back in order. Andy
- 382 replies
-
- 1
-
-
- stadacona
- sylvan scale models
- (and 1 more)
-
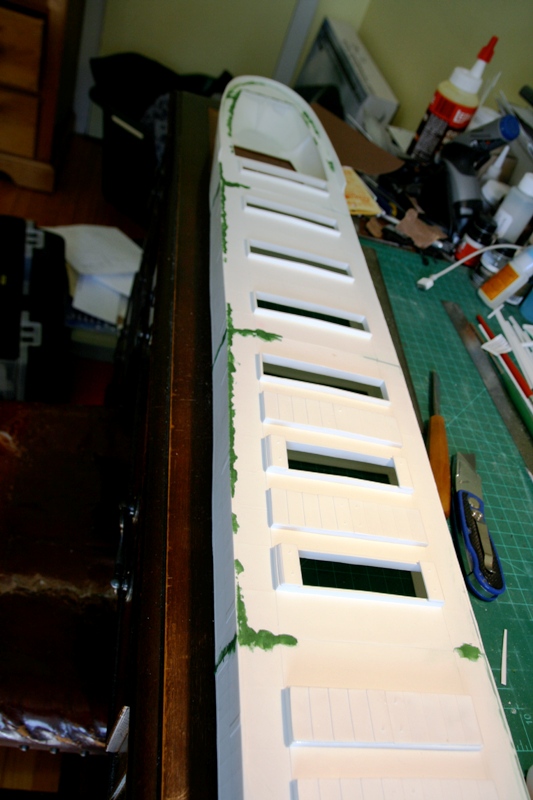
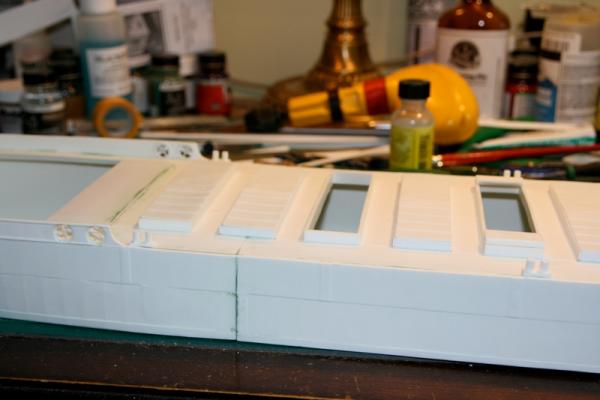
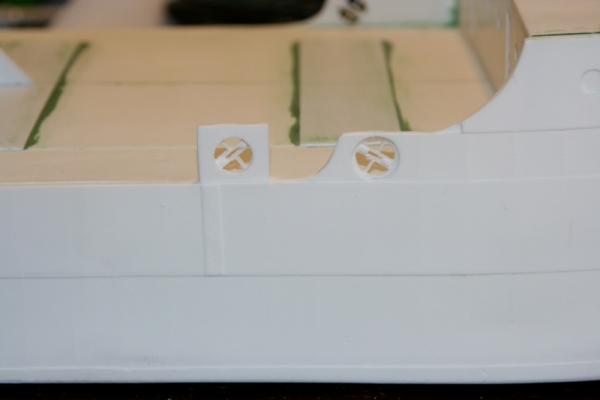
A bit more progress. Things appear to be slowing down a bit because there are numerous small jobs that all require attention, each producing a small net change overall. Let me introduce you all to the Port Colborne fairlead (Ostensibly named for the town where it was invented). This is a multi-directional fairlead specifically designed for use with wire mooring lines. They are found pretty much exclusively on vessels in the inland fleet. A PC fairlead consists of a large rotating chock, this carries two scalloped sheaves (or "shives" in Newfie-speak, with the "i" pronounced like in "if"). They are superior to roller fairleads found on saltwater vessels namely because of the reduction in the number of moving parts, however since salties don't use wires after leaving the seaway, roller fairleads allow them to use their ropes. Ships transiting the seaway and canal locks typically tie up using 4 wires. For simplicity we don't use the traditional names given to mooring lines (head line, forward spring, stern spring and stern line), rather they are numbered: 1, 2, 3, & 4. The PC fairleads came with the kit, however some modification was necessary in their mounting arrangement. I've completed the four required for the bow (the starboard #2 fairlead is just sitting on deck for demonstration purposes). The next four at the stern will all be bulwark mounted, so it's a matter of drilling out an opening, and inserting the chock, as per the #1 fairlead in the photo. In the mean time, the hatch farm continues to grow, with more hatches being added every day, I have just three more to add. And as always, still waiting on detail parts to show up. Andy
- 382 replies
-
- 13
-
-
- stadacona
- sylvan scale models
- (and 1 more)
-
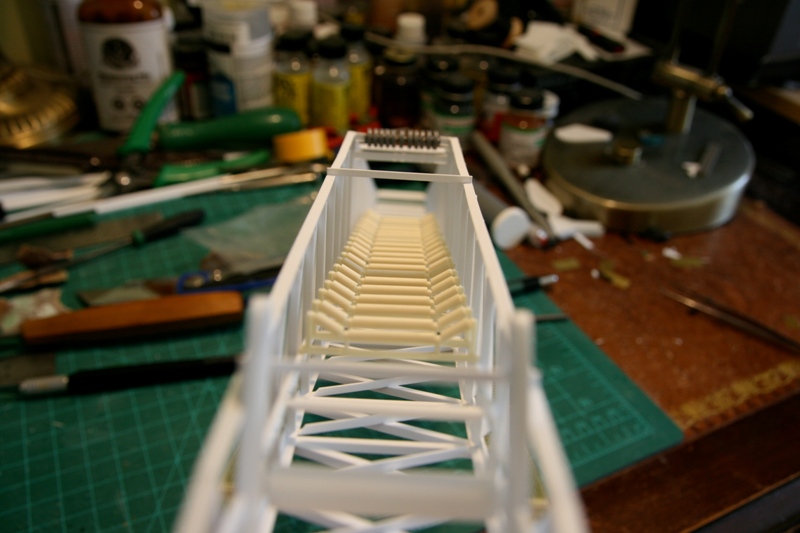
As promised, I started work on the roller carriages on the boom. 20 have been cast so far (out of an estimated 50 needed), so not a bad start. I commenced in the middle of the boom as that is the deepest part of the truss, and by corrollary the hardest area to reach. I can also start work on the transverse and top bracing in that section as well. Finally an overview shot of some of the filling done. I've alread gone down the port side and sanded off the excess filler. More will have to be done after priming, as I'm sure more holes will appear at that point.... they always do. Andy


- 382 replies
-
- 16
-
-
- stadacona
- sylvan scale models
- (and 1 more)
-
Thanks everyone. Just got back from the railway club with a couple of small parcels of boom roller castings. Maybe tomorrow I'll have a look at getting started on attaching them. I need a break from green filler dust Andy
- 382 replies
-
- 5
-
-
- stadacona
- sylvan scale models
- (and 1 more)
-
Best of luck with take two! Hopefully everything goes better this time (it has to...right?) Andy
-
Thanks everyone, glad you managed to sort of the length thing I expect her to grow by only another couple of inches when I get around to adding the spear pole and flag staff. Robbyn, if is spend money on a new desk, I'll have less for tools, parts, and other kits Michael, she's not all styrene. The hull is made from polyurethane resin castings. It's going to take me a few more days of sanding and filling before I start adding more details, but soon enough I'll get there. Andy
- 382 replies
-
- 5
-
-
- stadacona
- sylvan scale models
- (and 1 more)
-
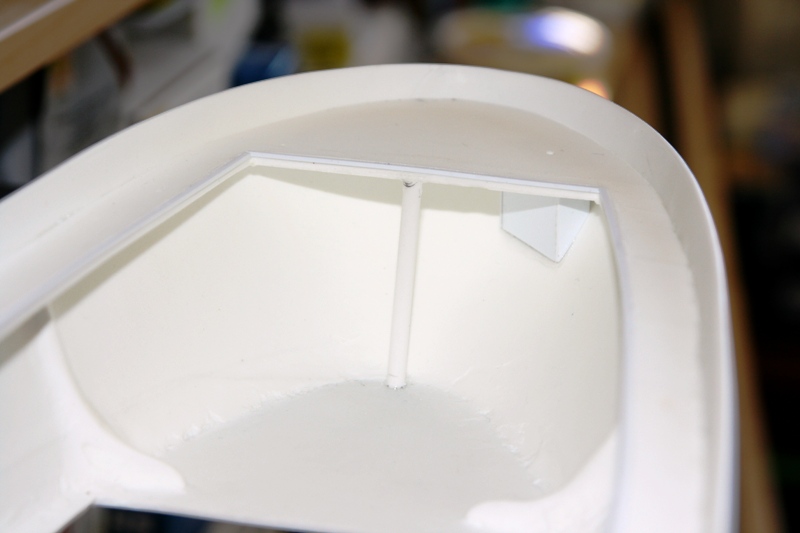
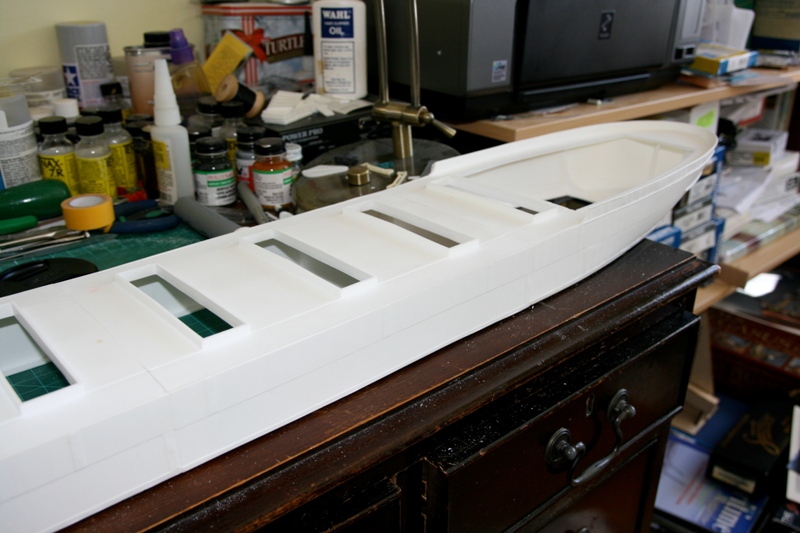
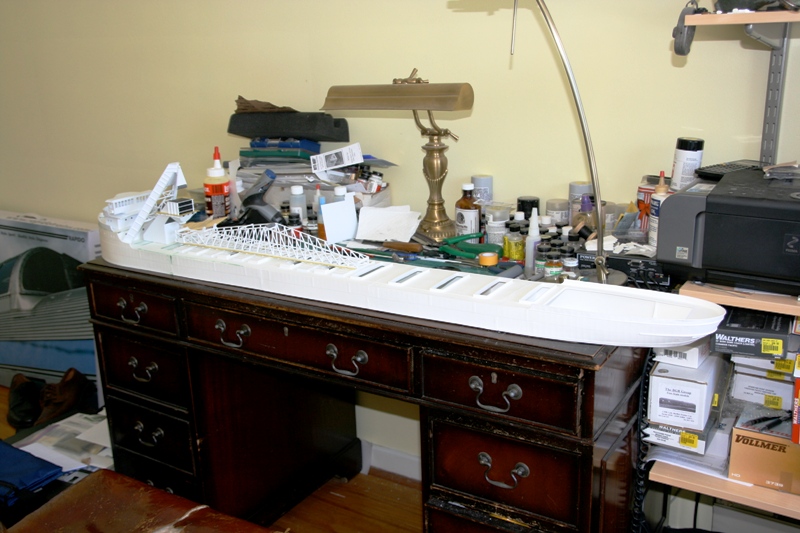
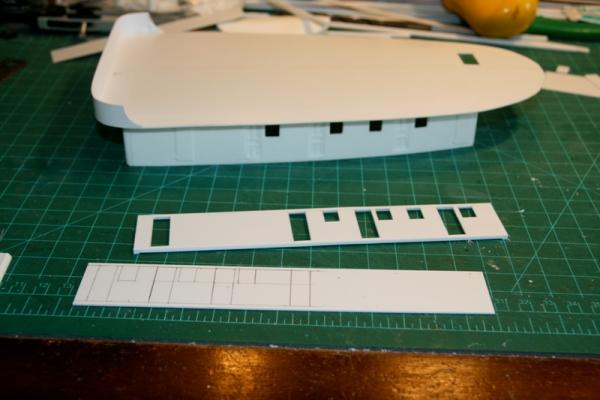
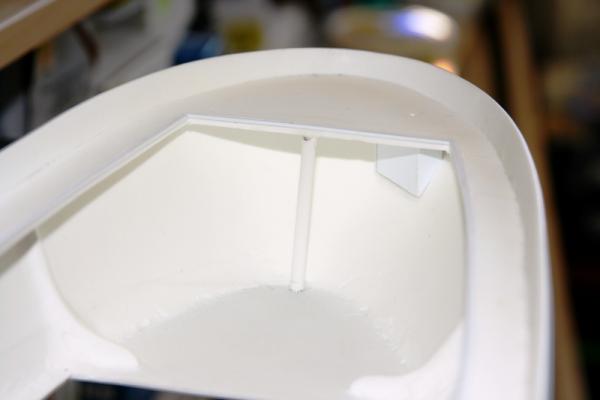
Alright, photos as promised. The stern anchor pocket is little more than a light baffle on the model. Given the confines of the area, and the limits of actual visibility, not much more is needed. The pillar in the middle is to correct a downwards bow in the deck at that point, and will remain in place. As I said earlier, all the hull sections are now in place, as well as now the last remaining deck section. There is a considerable ammount of filling and sanding needed in order to clean everything up. Having the hull finished means I can also get to work installing some of the deck fittings, bollards and fairleads and the like. Since they will all start out being painted the same colour as the deck, I'm not worried about work arounds at this time. Anyway, one more overview shot, from the stern this time. Yes... she's big.... 4' 8" long... Andy


- 382 replies
-
- 23
-
-
- stadacona
- sylvan scale models
- (and 1 more)
-
Well, I was out of town last week, so there was no progress in the yard to really report. Until this morning. The hull has now reached its full length, and the last remaining deck section has been dry fit. Currently both ends now overhang my desk.... Another day or so and it will be time to break out the green filler putty and go to town.... I'll have some photos at a later date, just thought I would give everyone a heads up Andy
- 382 replies
-
- 6
-
-
- stadacona
- sylvan scale models
- (and 1 more)
-
Glad you kept her light underneath. The contrast does look nicer in my humble opinion. Andy
- 2,191 replies
-
- 1
-
-
- confederacy
- Model Shipways
- (and 1 more)
-
Very nice... Nothing like doing over a tedious job, but better to do it now.... Especially since the new ones look amazing. Andy
- 1,319 replies
-
- 1
-
-
- caldercraft
- Victory
- (and 1 more)