.jpeg.9d9bab3fa66f4349cae83f4155046894.jpeg)
rkwz
-
Posts
241 -
Joined
-
Last visited
Content Type
Profiles
Forums
Gallery
Events
Everything posted by rkwz
-
.thumb.jpeg.d239701c2f7247a100a3f432822c4eda.jpeg) Thank you for your tips, Daniel. Your Victory has been a treasure trove of ideas for my humble beginners build! The kevels were painted with toothpicks for the fine details which I learnt from you I know I've been procrastinating getting the hammock netting in. The forecastle and slope of the poop deck to me is going to be a challenge for this step. I could shape some copper wire to represent the stanchions and CA them on, then add the netting after using your method of pressing tulle with paper and sticks. Noticed the Heller model has a thinner channel above the deadeye channels for the stanchions to attach to, so I could try attaching black plastic card 🤔 Forgive my ignorance, but I can't find any images of the netting covered with sail cloth for reference. I still like the look of the exposed netting though, which allows a glimpse of the details on the topdeck... Thank you also for enlightening me about the rudder hinges. I will redo them with copper paint later. I did notice someone raving about Revell Aqua copper paint which has a better sheen and not as dull looking as the Humbrol paint I used. Or I might even try weathering the hull below the waterline but having had no experience in this, I will have to do some test runs for practice first before I make a total mess of it! Will we be seeing more of your Victory now that you've settled in to your new man cave?
Thank you for your tips, Daniel. Your Victory has been a treasure trove of ideas for my humble beginners build! The kevels were painted with toothpicks for the fine details which I learnt from you I know I've been procrastinating getting the hammock netting in. The forecastle and slope of the poop deck to me is going to be a challenge for this step. I could shape some copper wire to represent the stanchions and CA them on, then add the netting after using your method of pressing tulle with paper and sticks. Noticed the Heller model has a thinner channel above the deadeye channels for the stanchions to attach to, so I could try attaching black plastic card 🤔 Forgive my ignorance, but I can't find any images of the netting covered with sail cloth for reference. I still like the look of the exposed netting though, which allows a glimpse of the details on the topdeck... Thank you also for enlightening me about the rudder hinges. I will redo them with copper paint later. I did notice someone raving about Revell Aqua copper paint which has a better sheen and not as dull looking as the Humbrol paint I used. Or I might even try weathering the hull below the waterline but having had no experience in this, I will have to do some test runs for practice first before I make a total mess of it! Will we be seeing more of your Victory now that you've settled in to your new man cave?.jpeg.e311f294a438d1526bde9e3a2e82c221.jpeg)
-
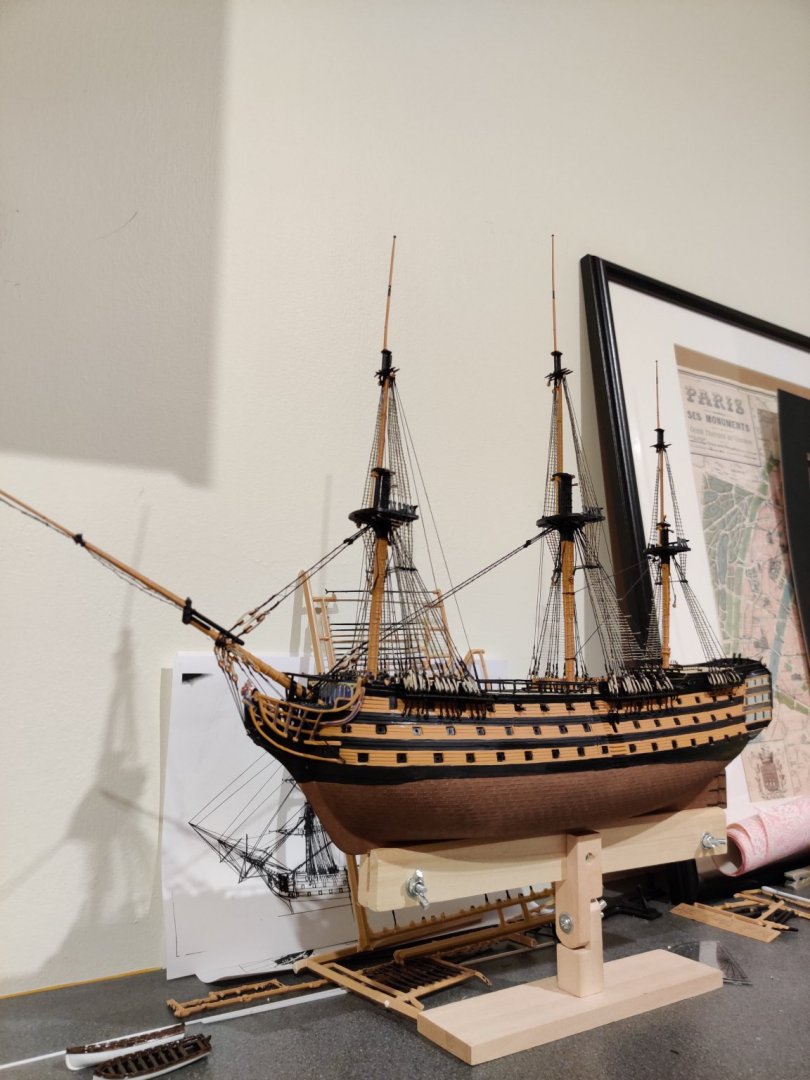
Kevels painted , drilled holes in them and inserted 0.5mm copper wire to bite into the upper deck. Fingers crossed it won't snap from tying off later.
-
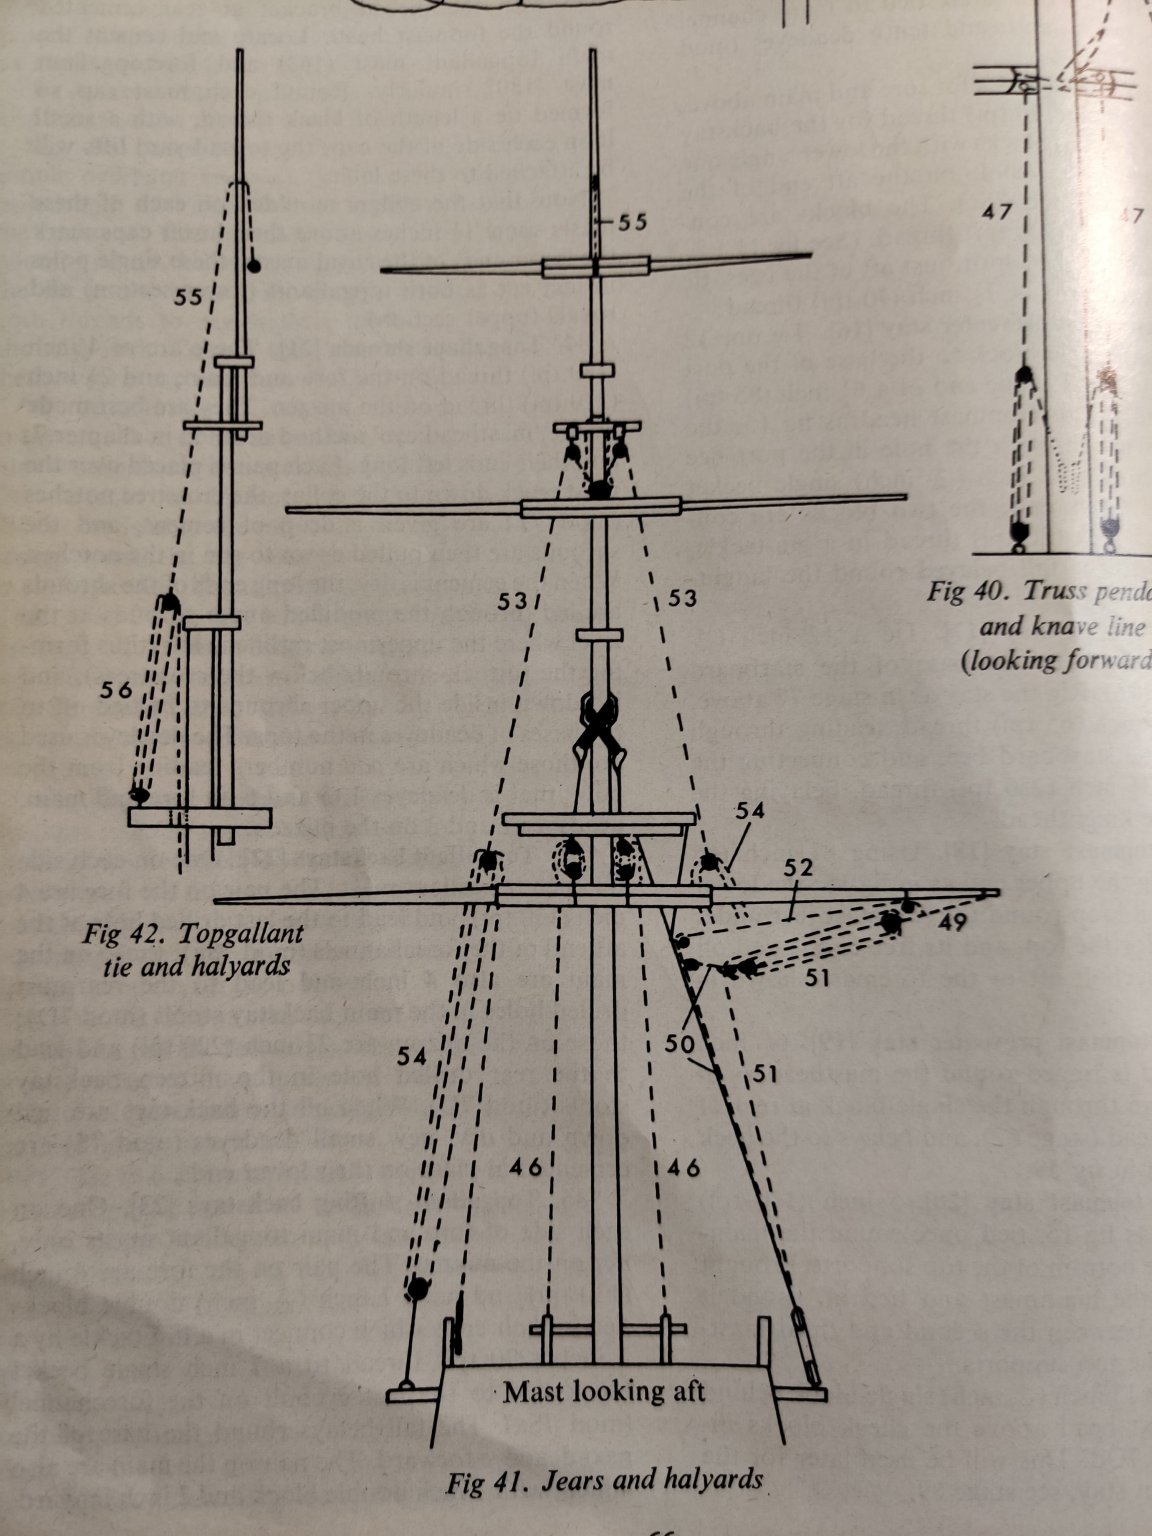
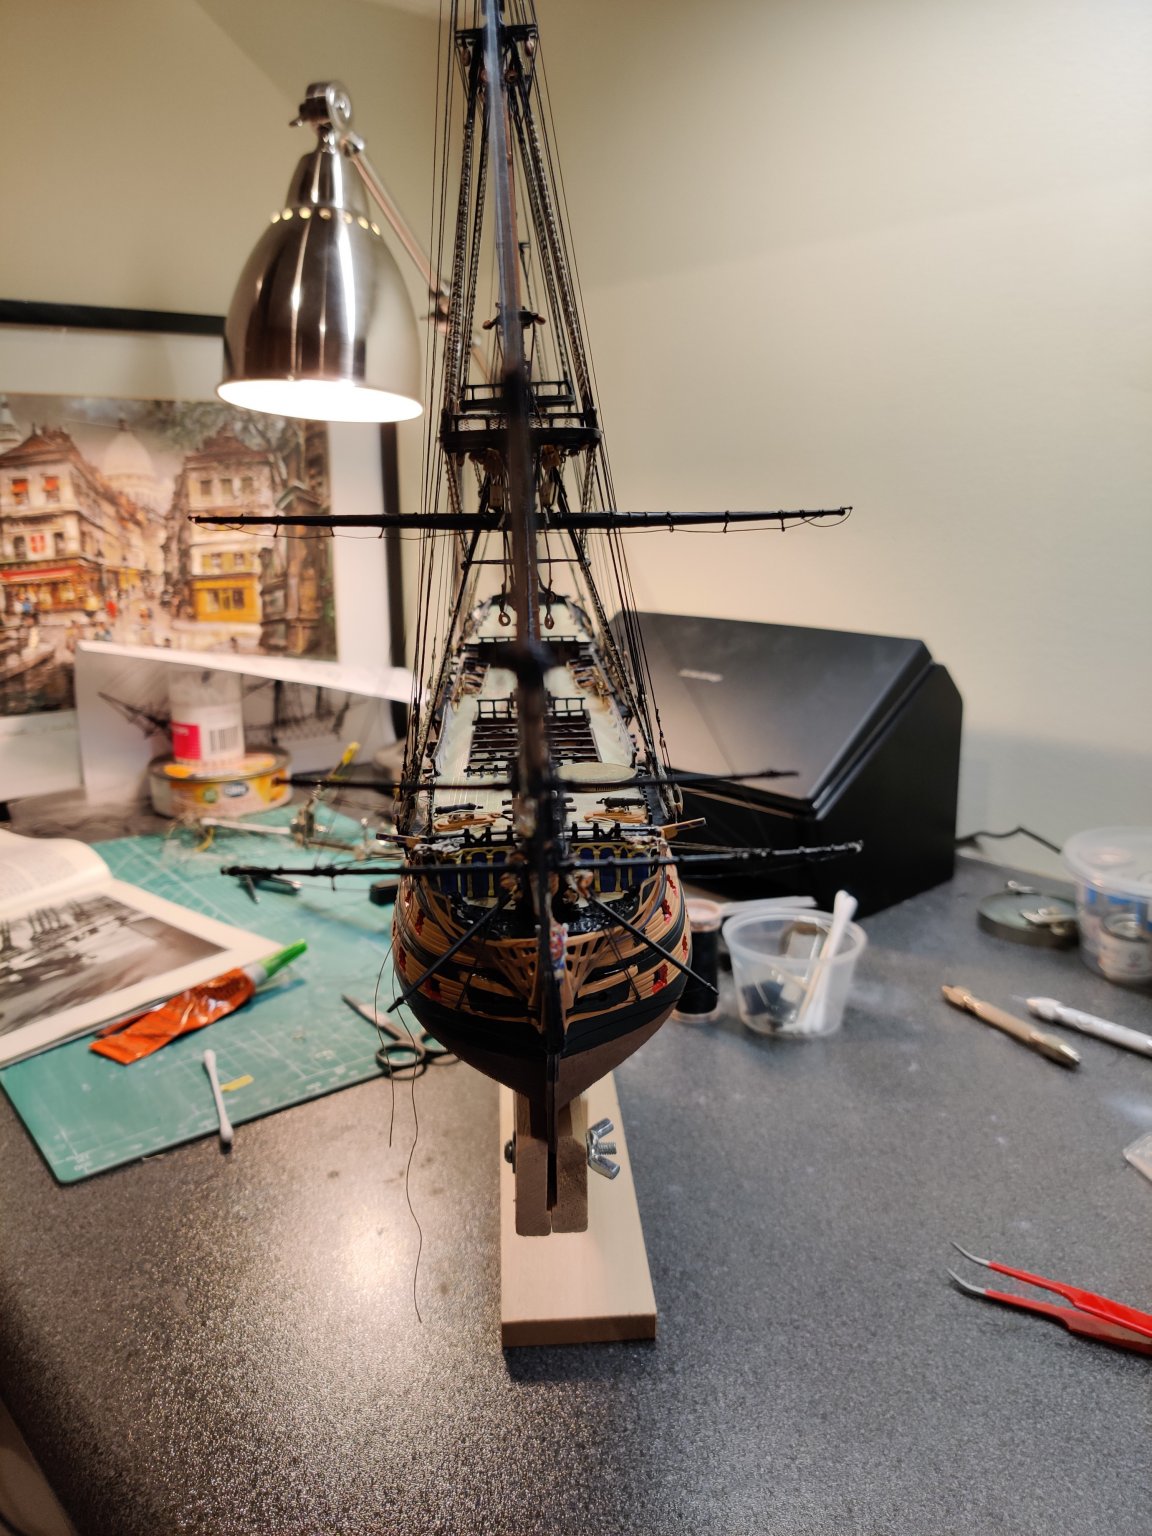
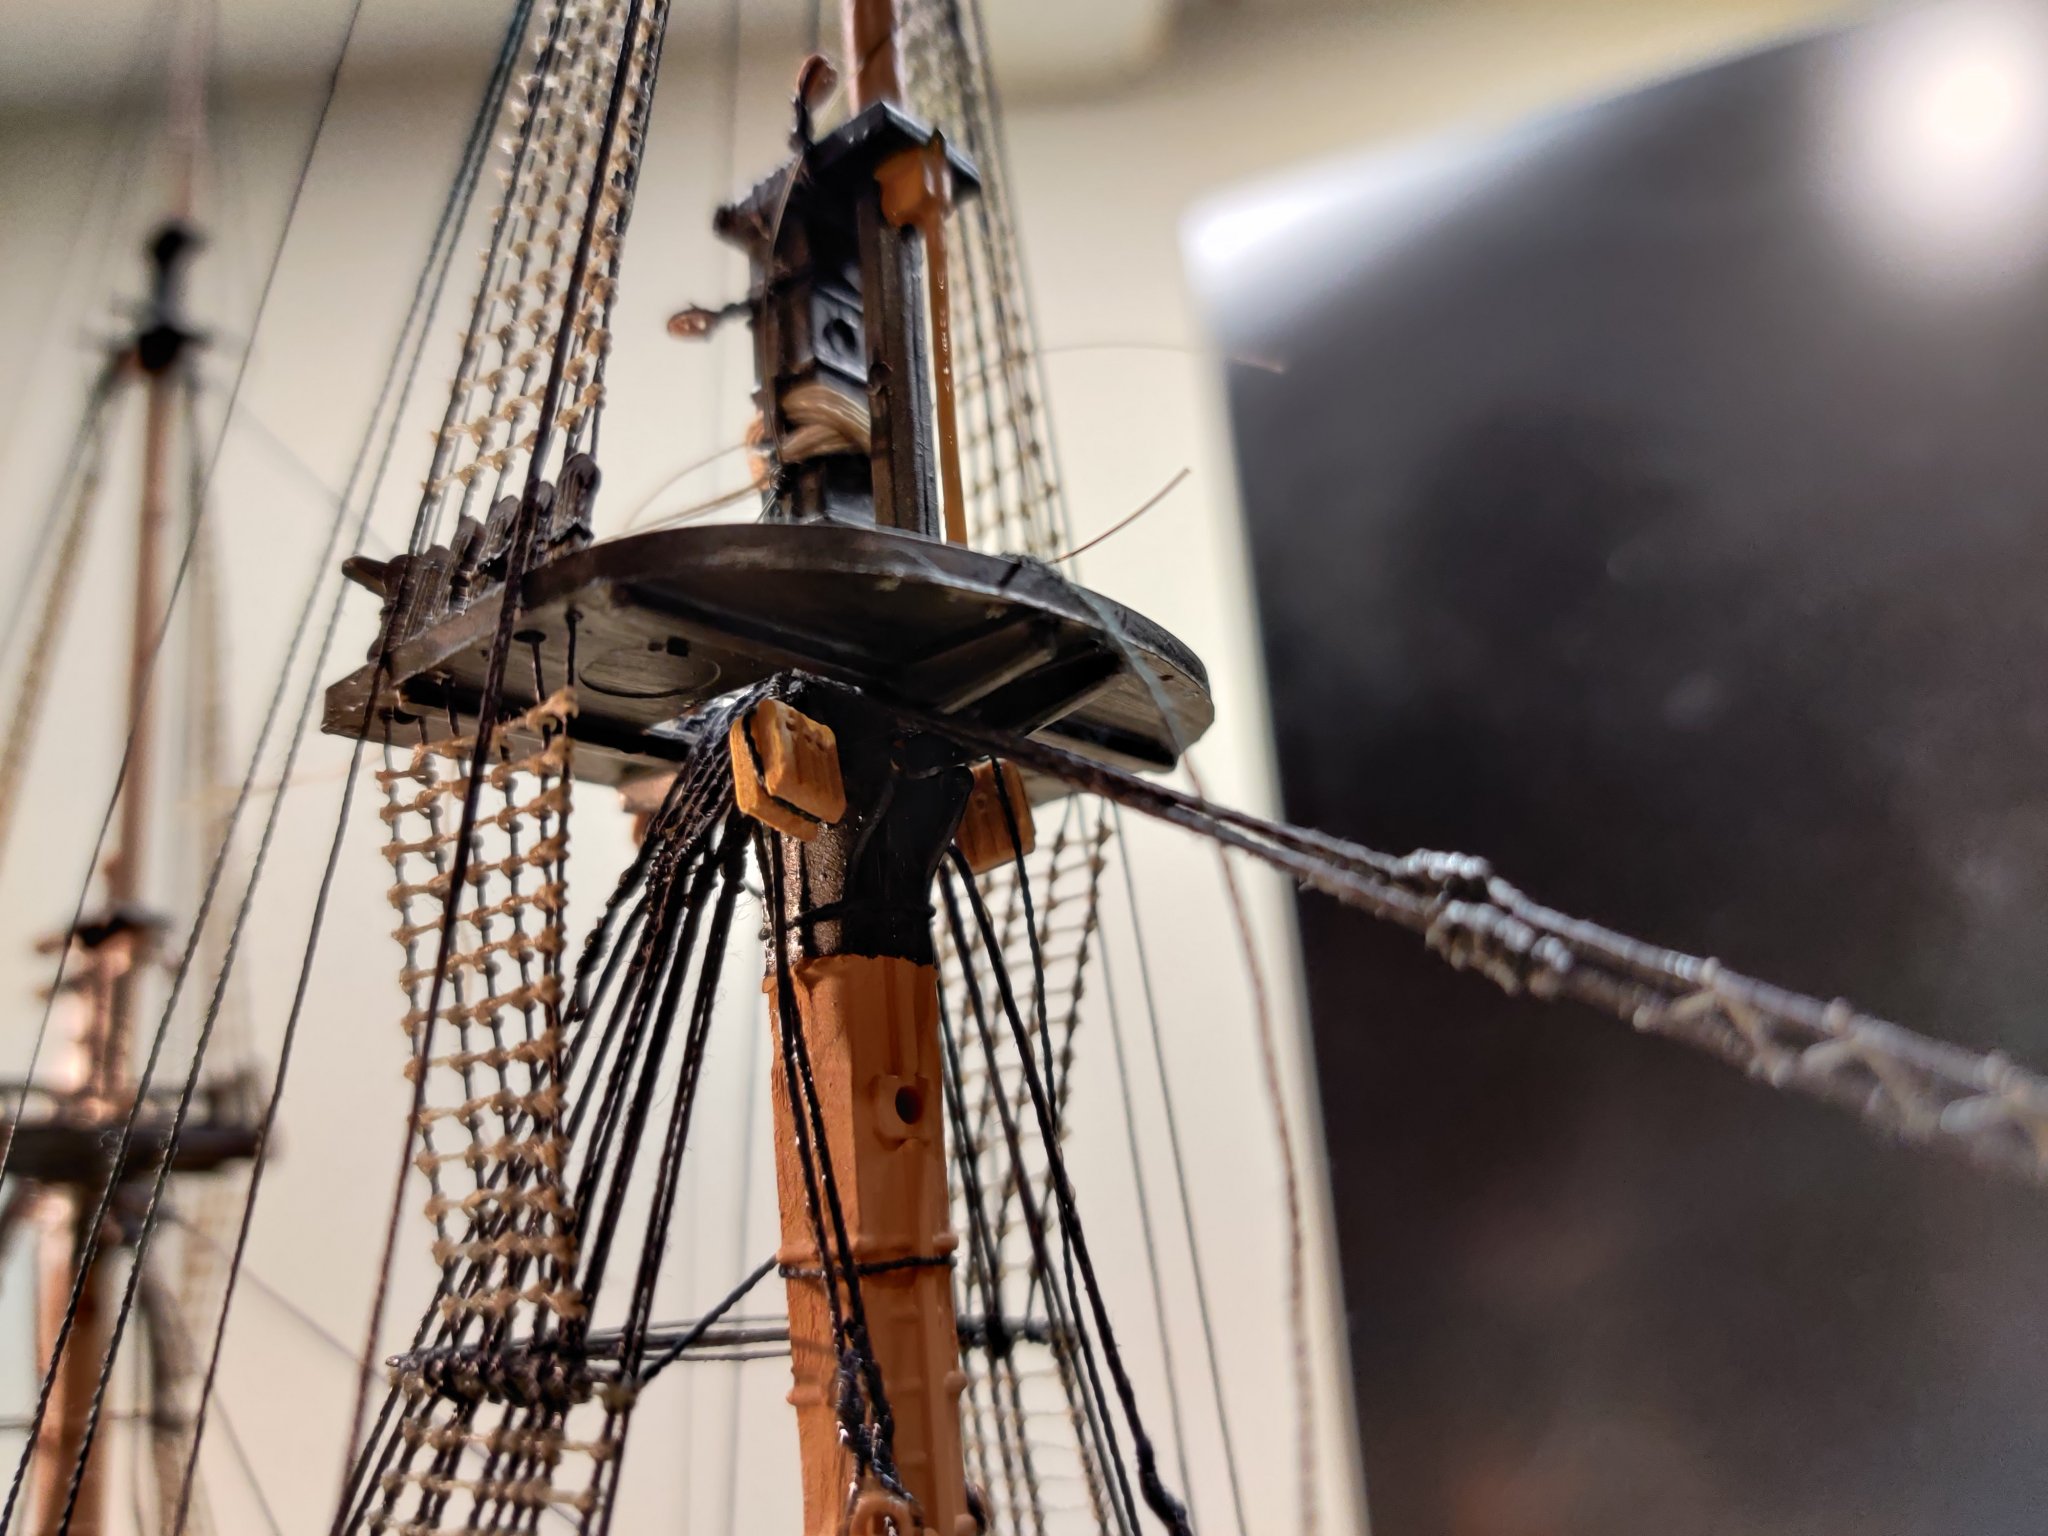
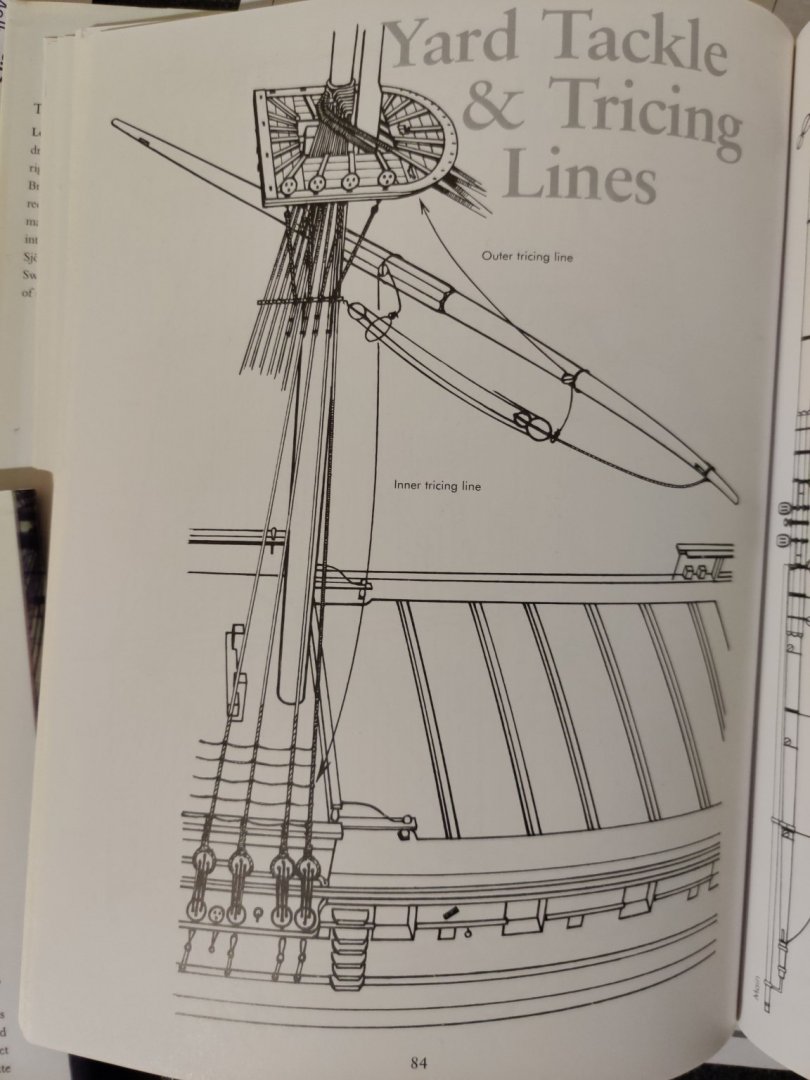
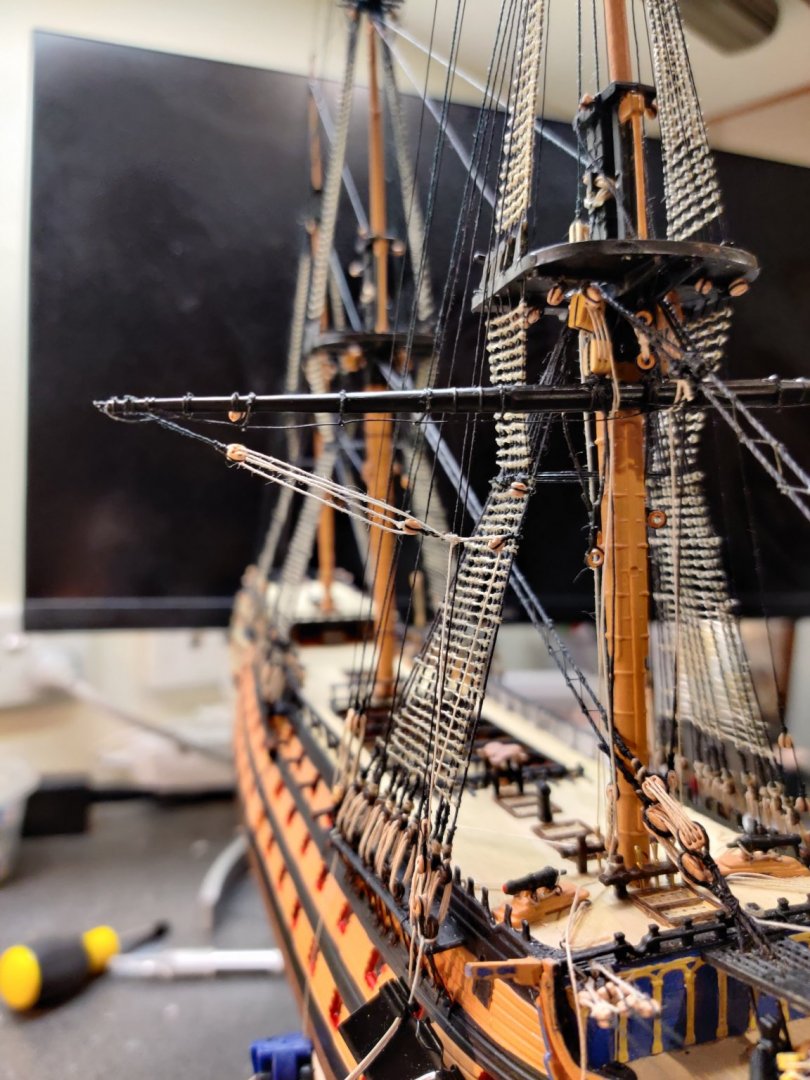
Battling the yard lifts at a snails pace of 1 yard every 1-2 days. My punishment for not reading the manual carefully earlier... Threading through the mast cap blocks to form a pseudo becket block. And it was here that I noticed a little error in Hackney's manual... The sprit topsail yard lifts are tied around the end of the jibboom not the flying jibboom (61), although his written instructions were correct. And yet more punishment for skimping on the kevels during the early part of the build. Can't tie down the fore yard lifts and fore topsail yard halyards till these are painted and installed...


-
I can totally relate to your experience. Sometimes it's better to step back and revisit the ship later with fresh ideas when inspiration strikes again. Sad to see a pause to your build but I will jump across and follow your new build too 😉
-
That's real fine work, Phil! You'll need to microscope to get a better image of the bucket handle 😄
-
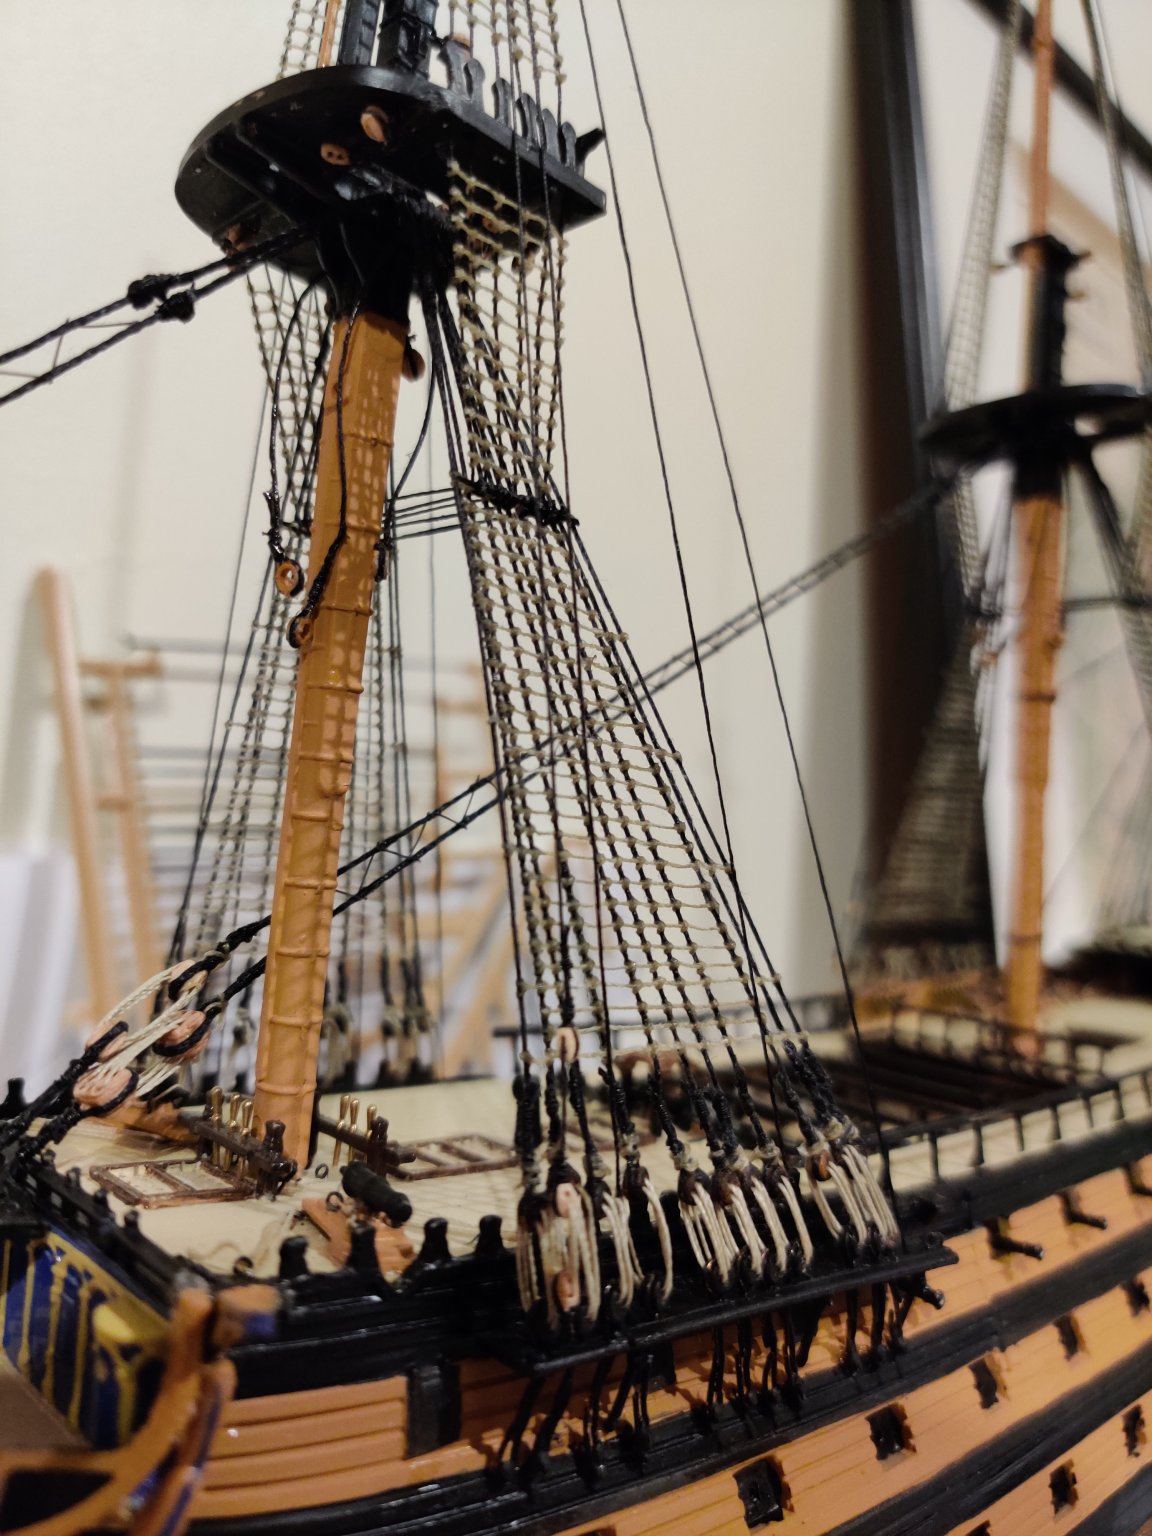
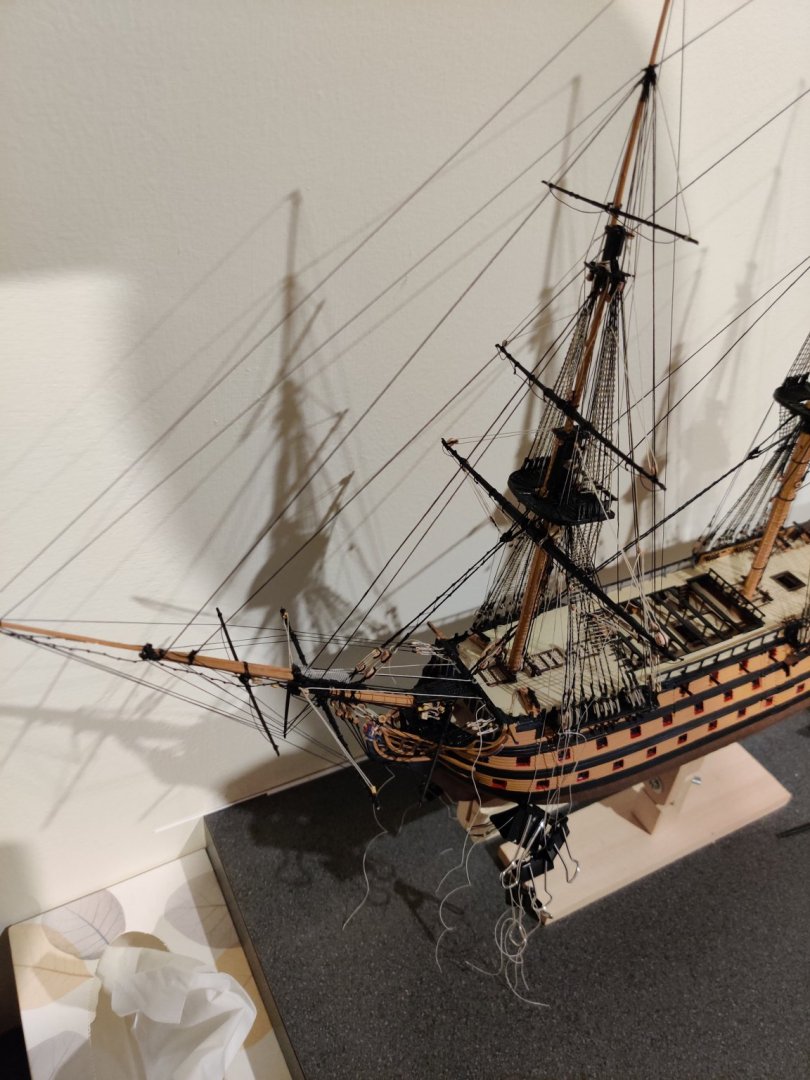
Inner and outer tricing lines completed, the becket block hooks were inelegantly rigged before so I had to redo them again.
-
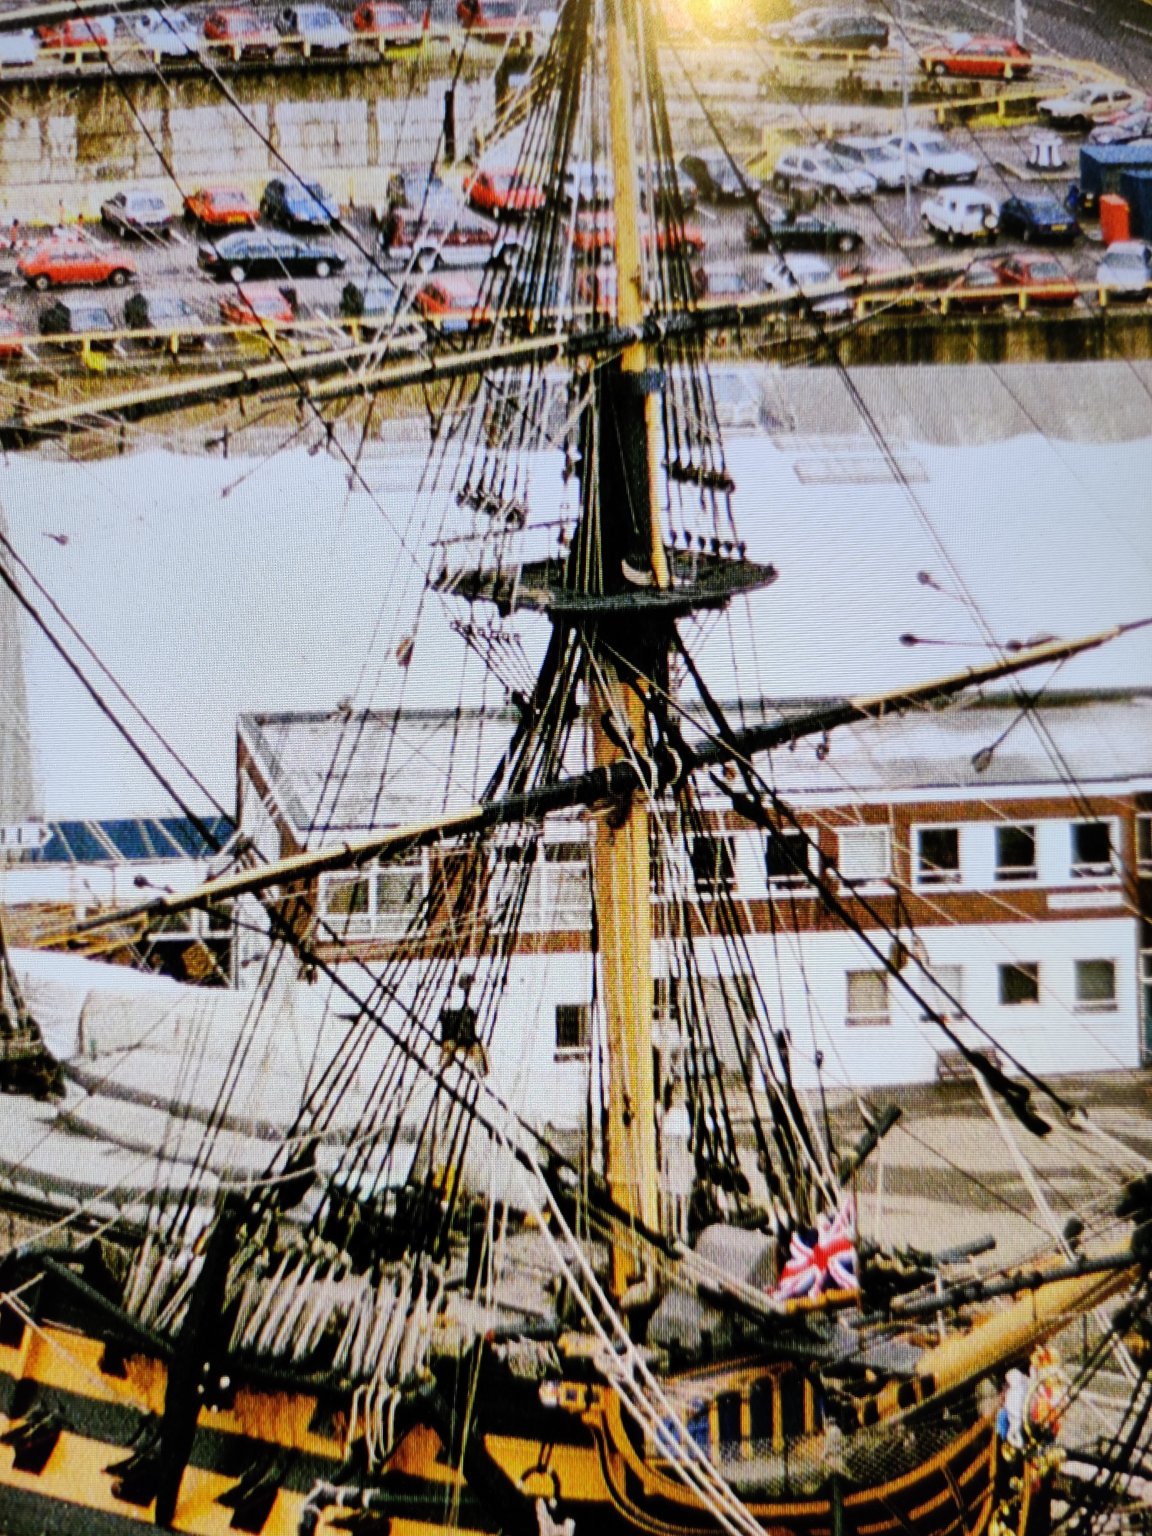
Hi Patrick, you have a keen eye for detail as ever! Yes, I did wonder about that and both Hackney and Longridge mention lashing a single block to the foremost lower shroud (below the level of the futtock stave) and another approx 5 ratlines below the first block. Lennarth Peterson also has a drawing suggesting it is hooked on to the futtock stave I think but this is based off a model of the frigate Melampus. I have a grainy photo of the Victory during the 1970s before the topmasts were taken down for renovations which barely shows the blocks on the foremast shrouds... Maybe I should have gotten my hands on the 100-Gun Ship Victory for clearer images in hindsight.
-
Thanks, Backer! Thank you for your encouragement, it means a lot! But knowing the error is there certainly plays on my mind.... And there are many issues with my build that I guess will be written off and hopefully avoided for any future projects. Tackling the tricing lines for the fore yard. I haven't been able to find many images online for reference so far. So I guess I will have to trust in Longridge's and Hackneys explanations for this step. Outer tricing line to be done, but I will need to tread carefully now as it does pull the yard lower and I haven't rigged the yard lifts yet to counter the tension.
-
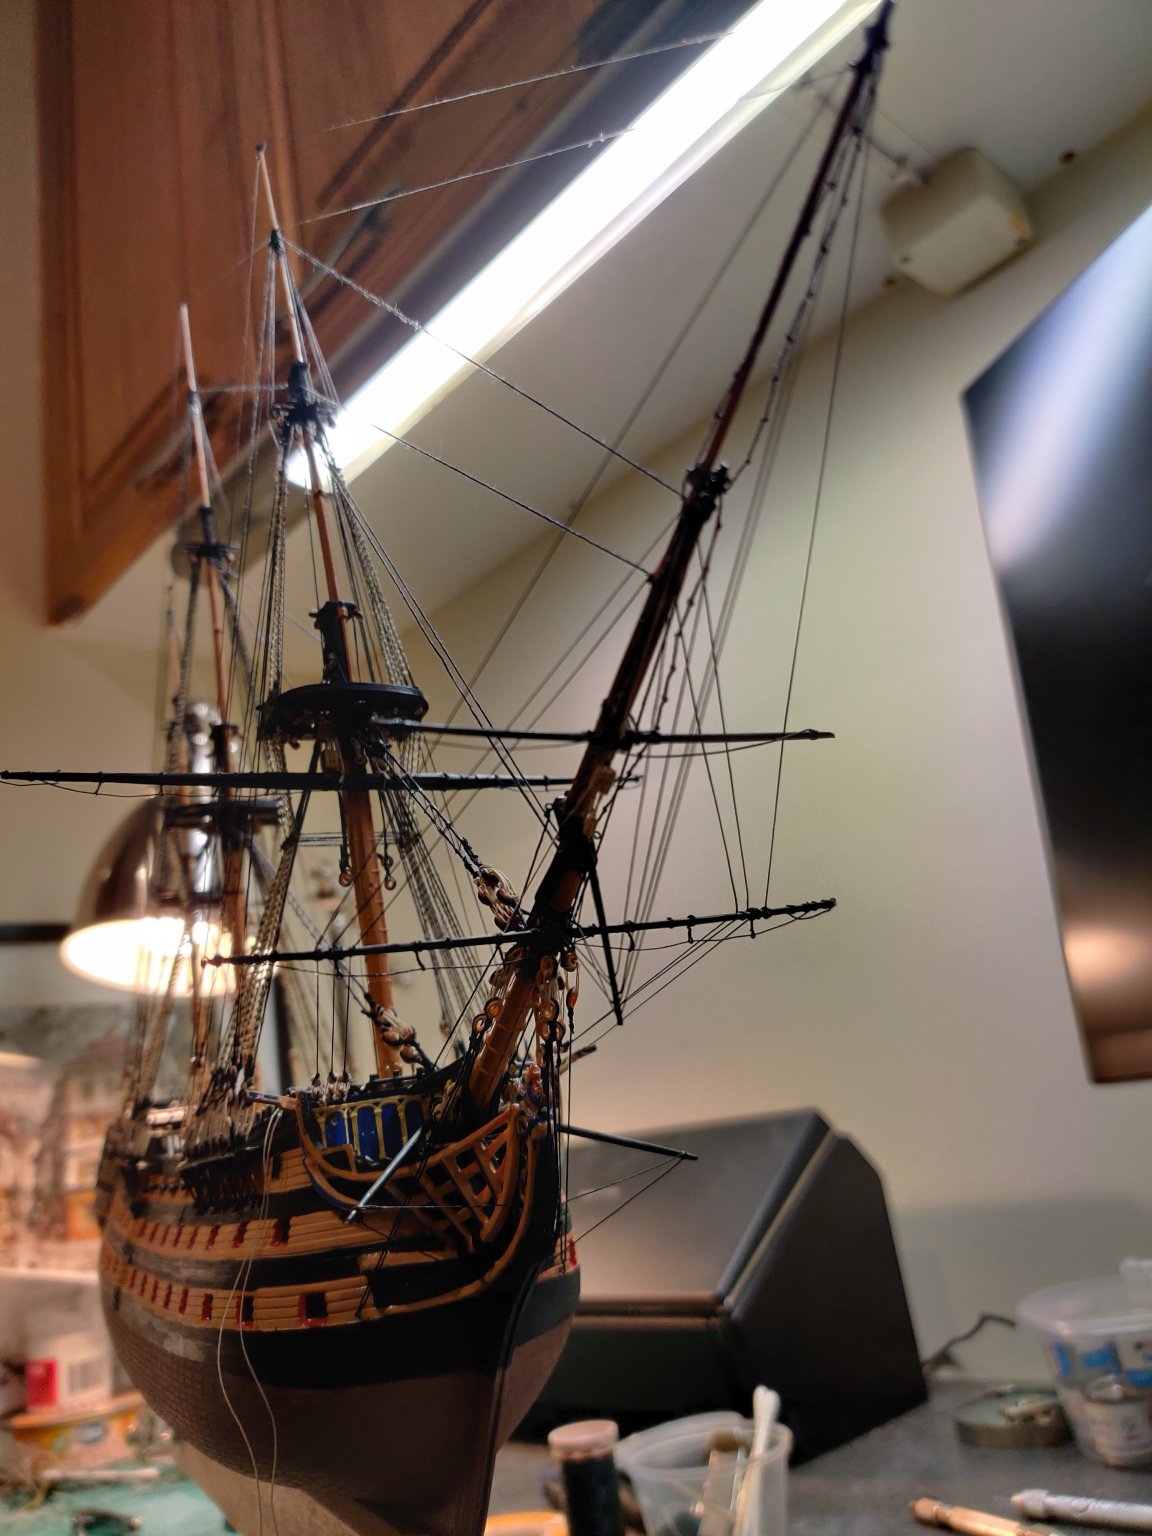
Rigged the bowsprit. Slack for the horses on the yards was achieved by rolling a toothpick coated with a little CA glue over the lines. But in my haste to finish the job, I just realised the starboard section of the spritsail yard has been pulled back further. Damn Had a go at the foremasts. Access to the jeer blocks wasn't easy and took a good hour to rig them. I would advise anyone tackling this to perhaps drop those blocks an extra 1-2mm below the mast caps.


-
I would pay for that. You should get them published ! Thank you for sharing your knowledge on this amazing forum.
- 335 replies
-
- 4
-

-
- alert
- vanguard models
- (and 1 more)
-
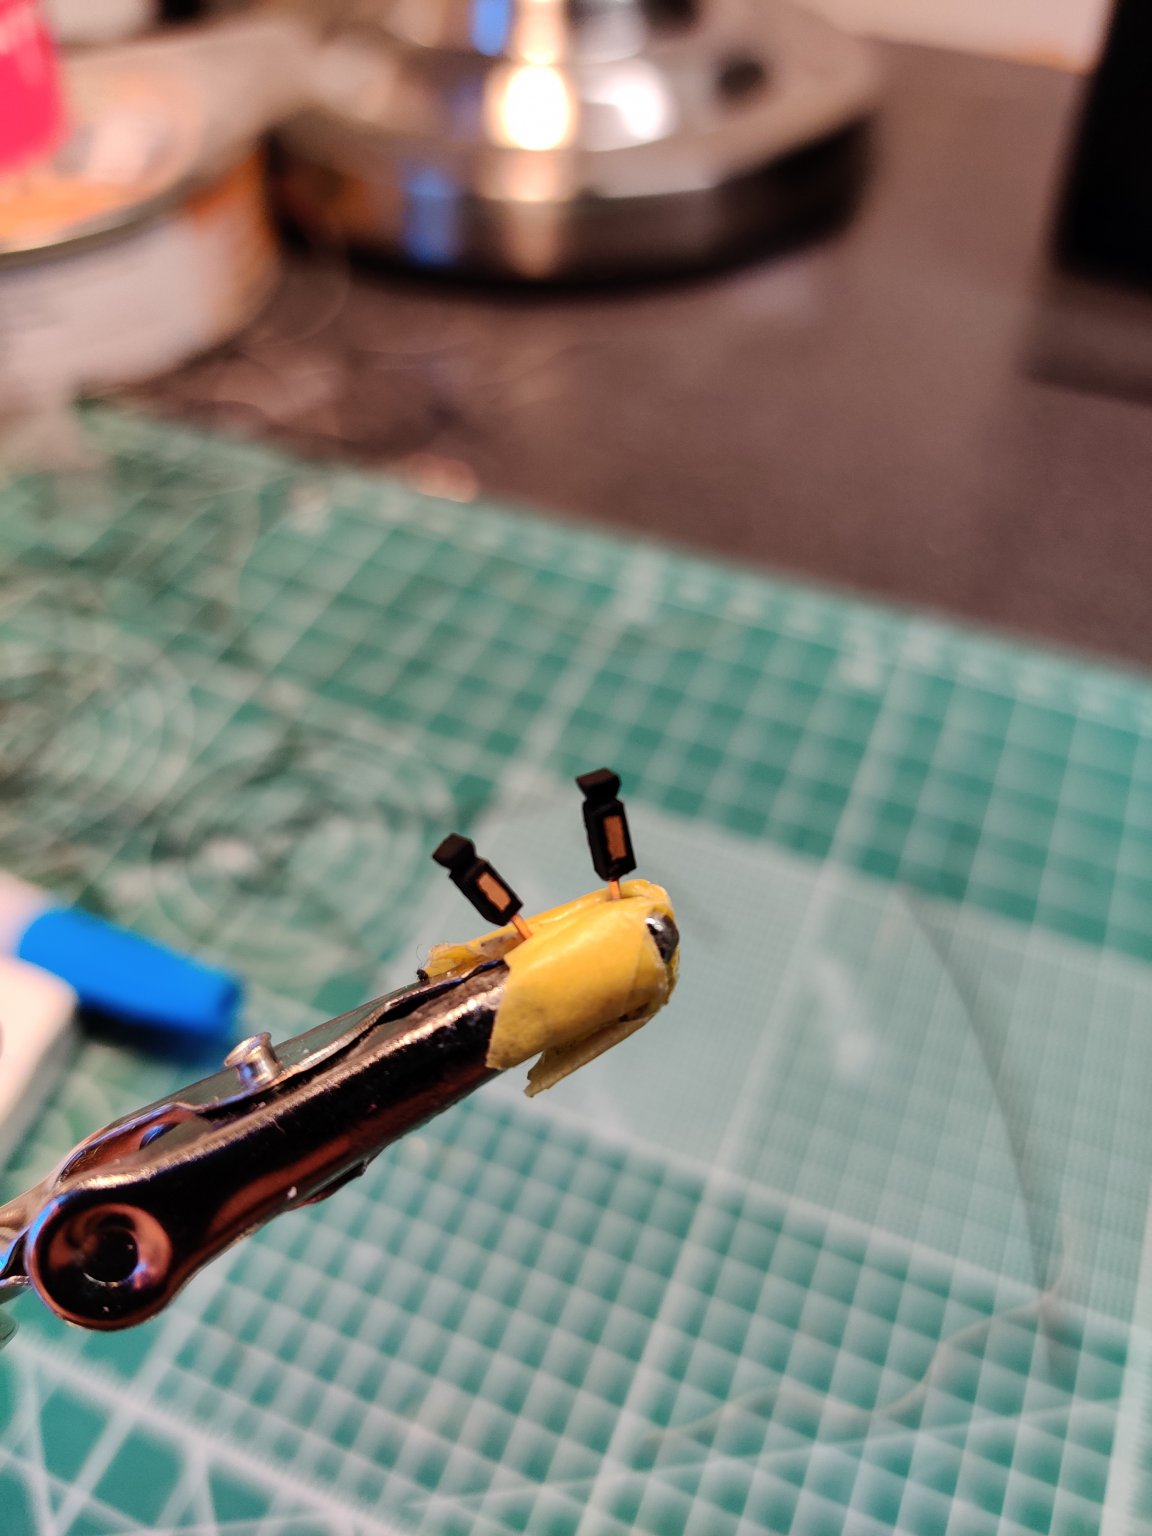
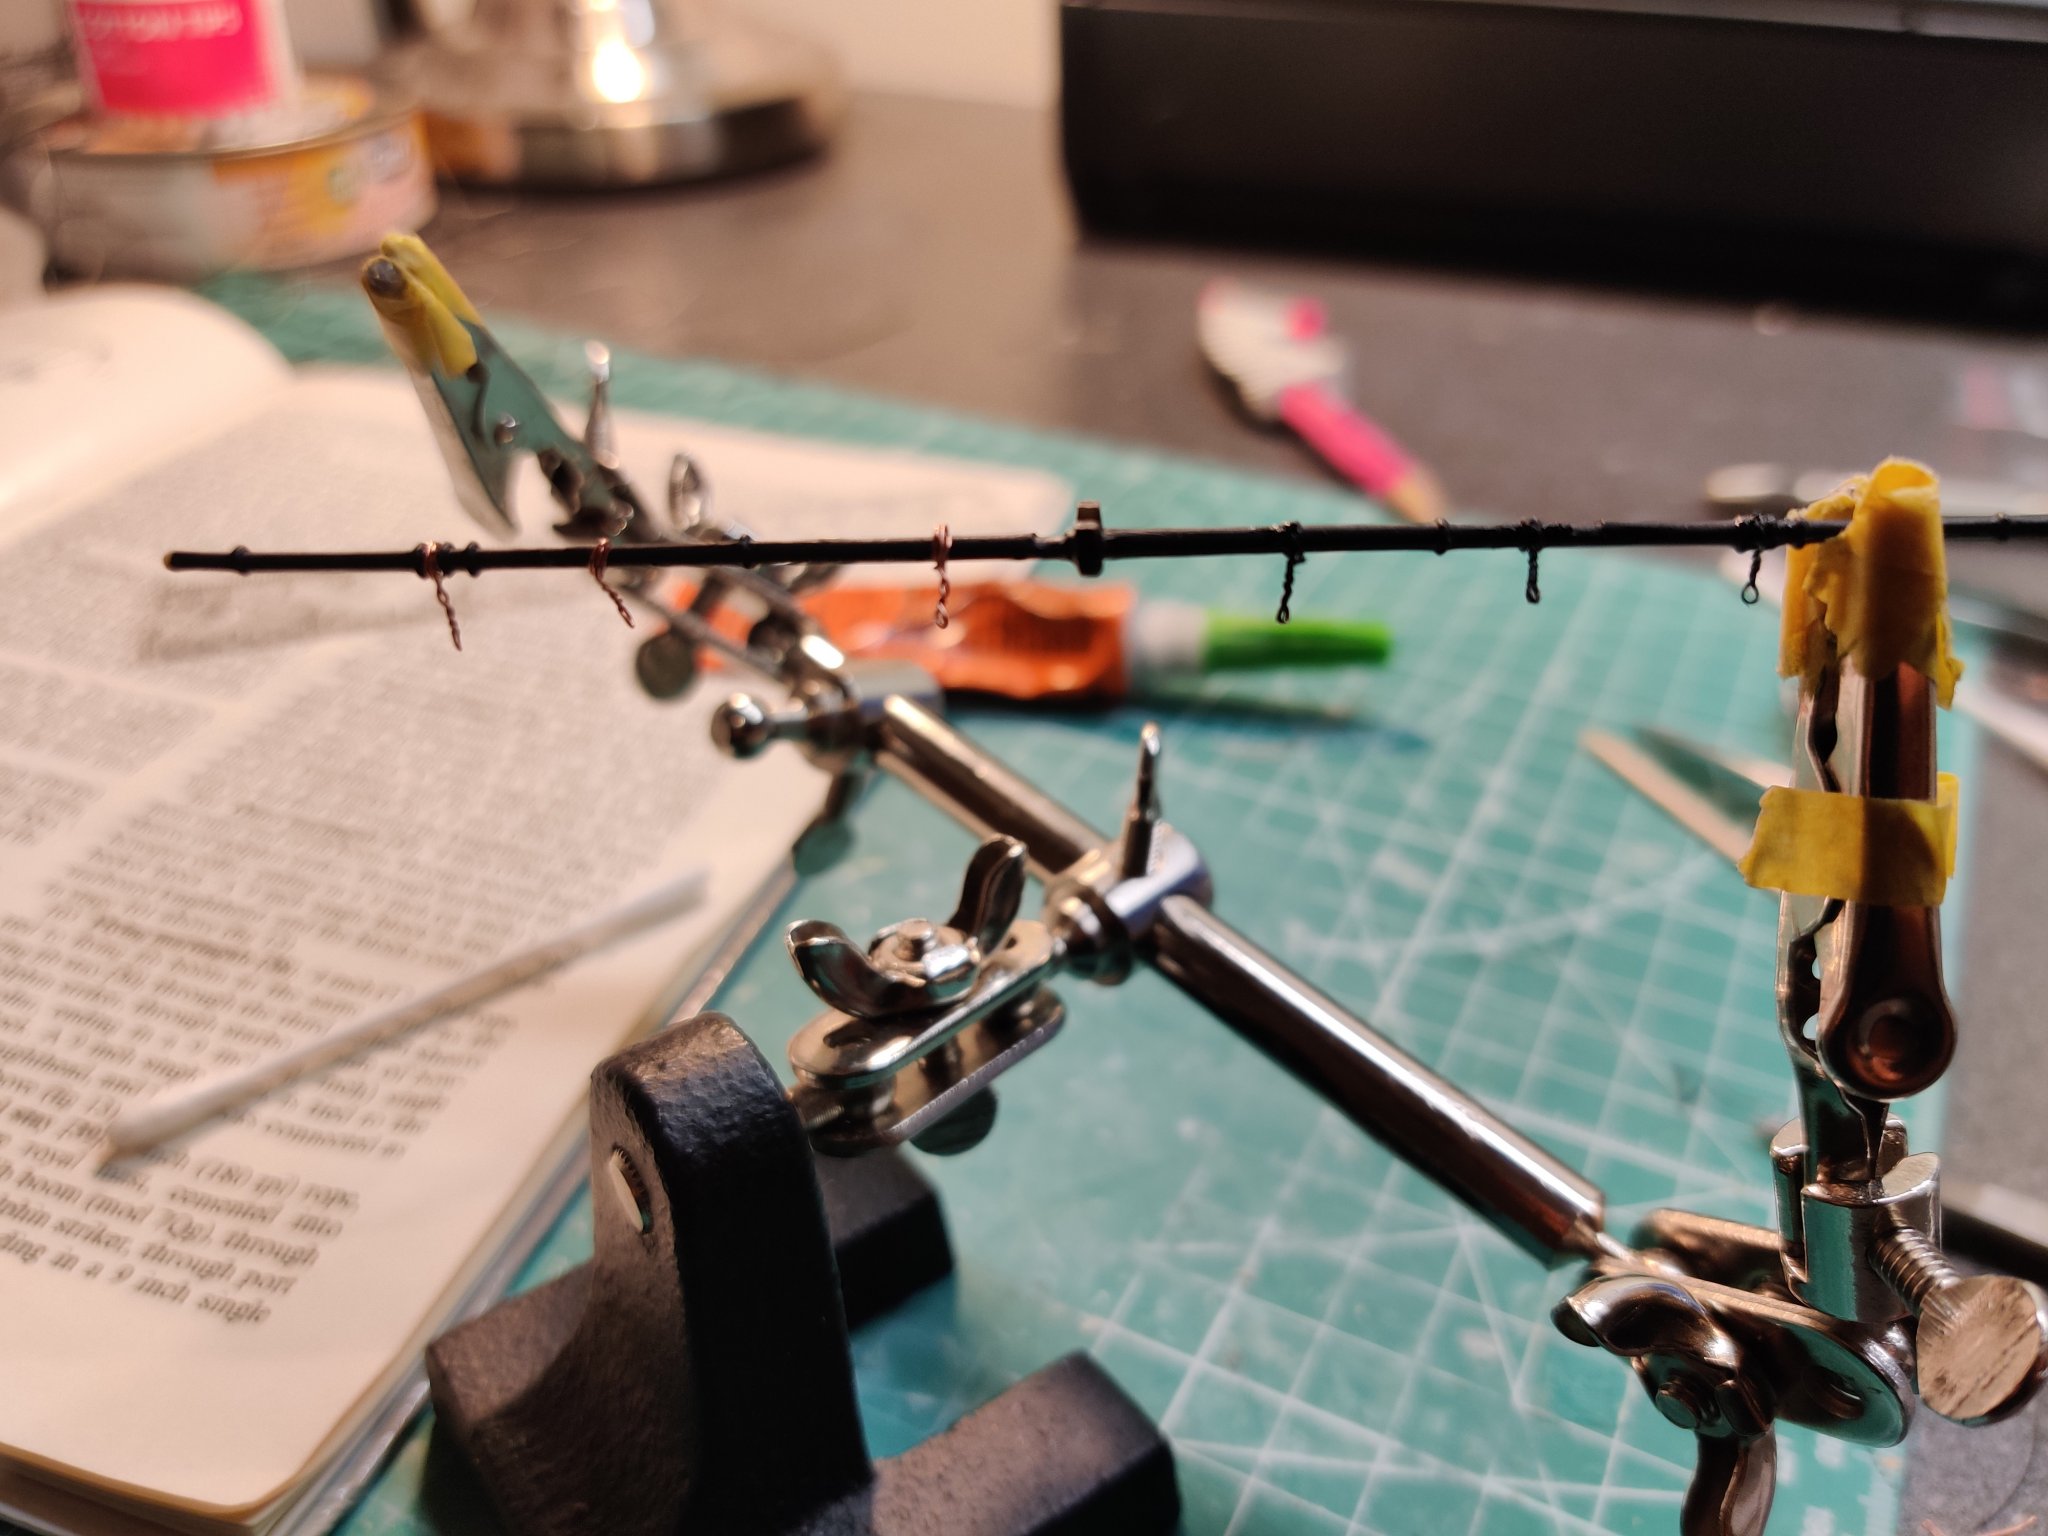
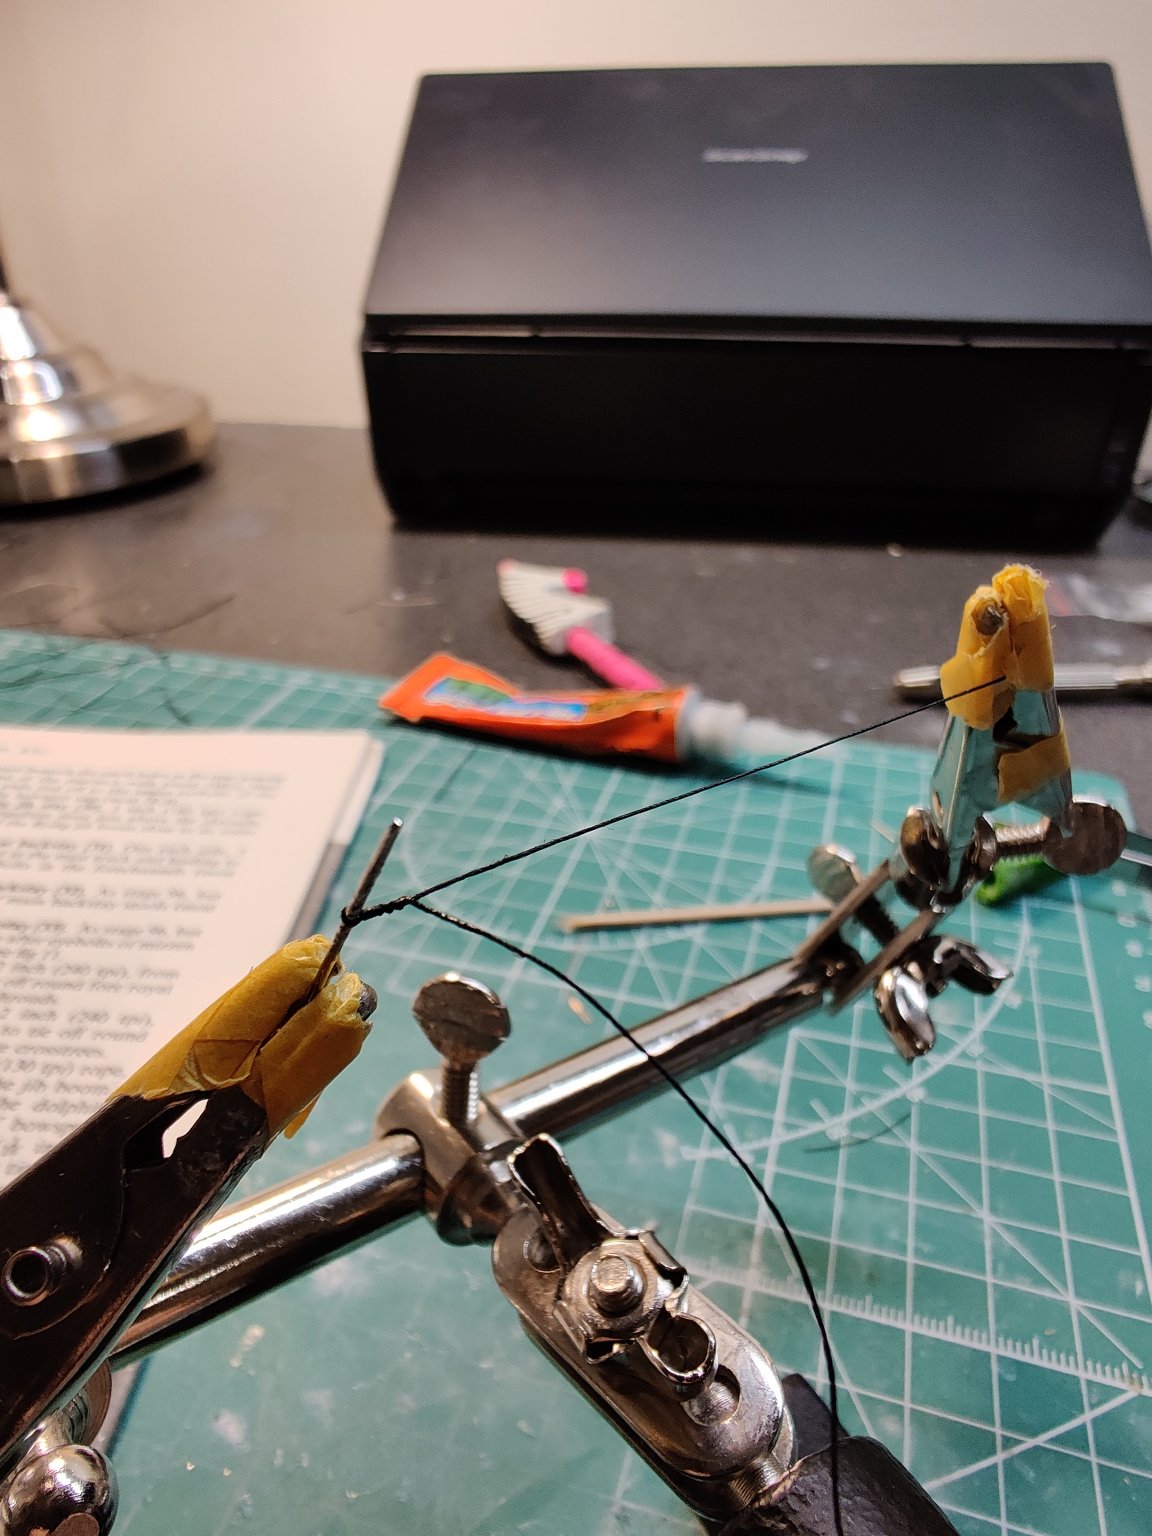
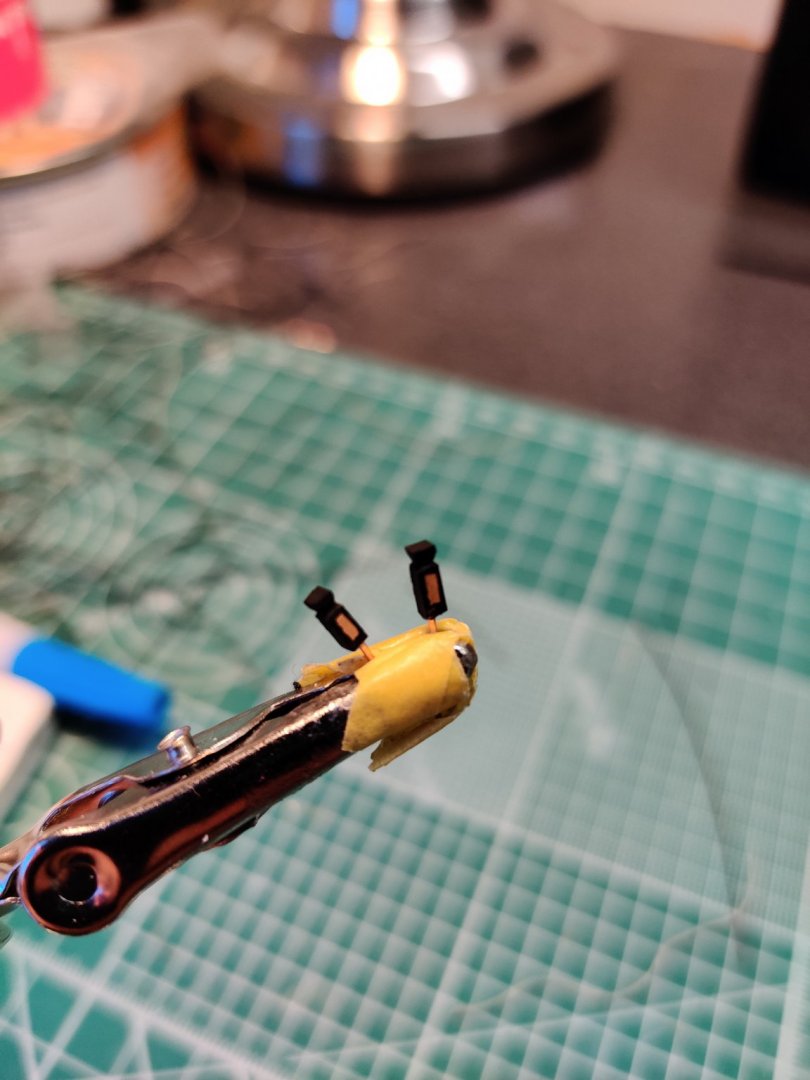
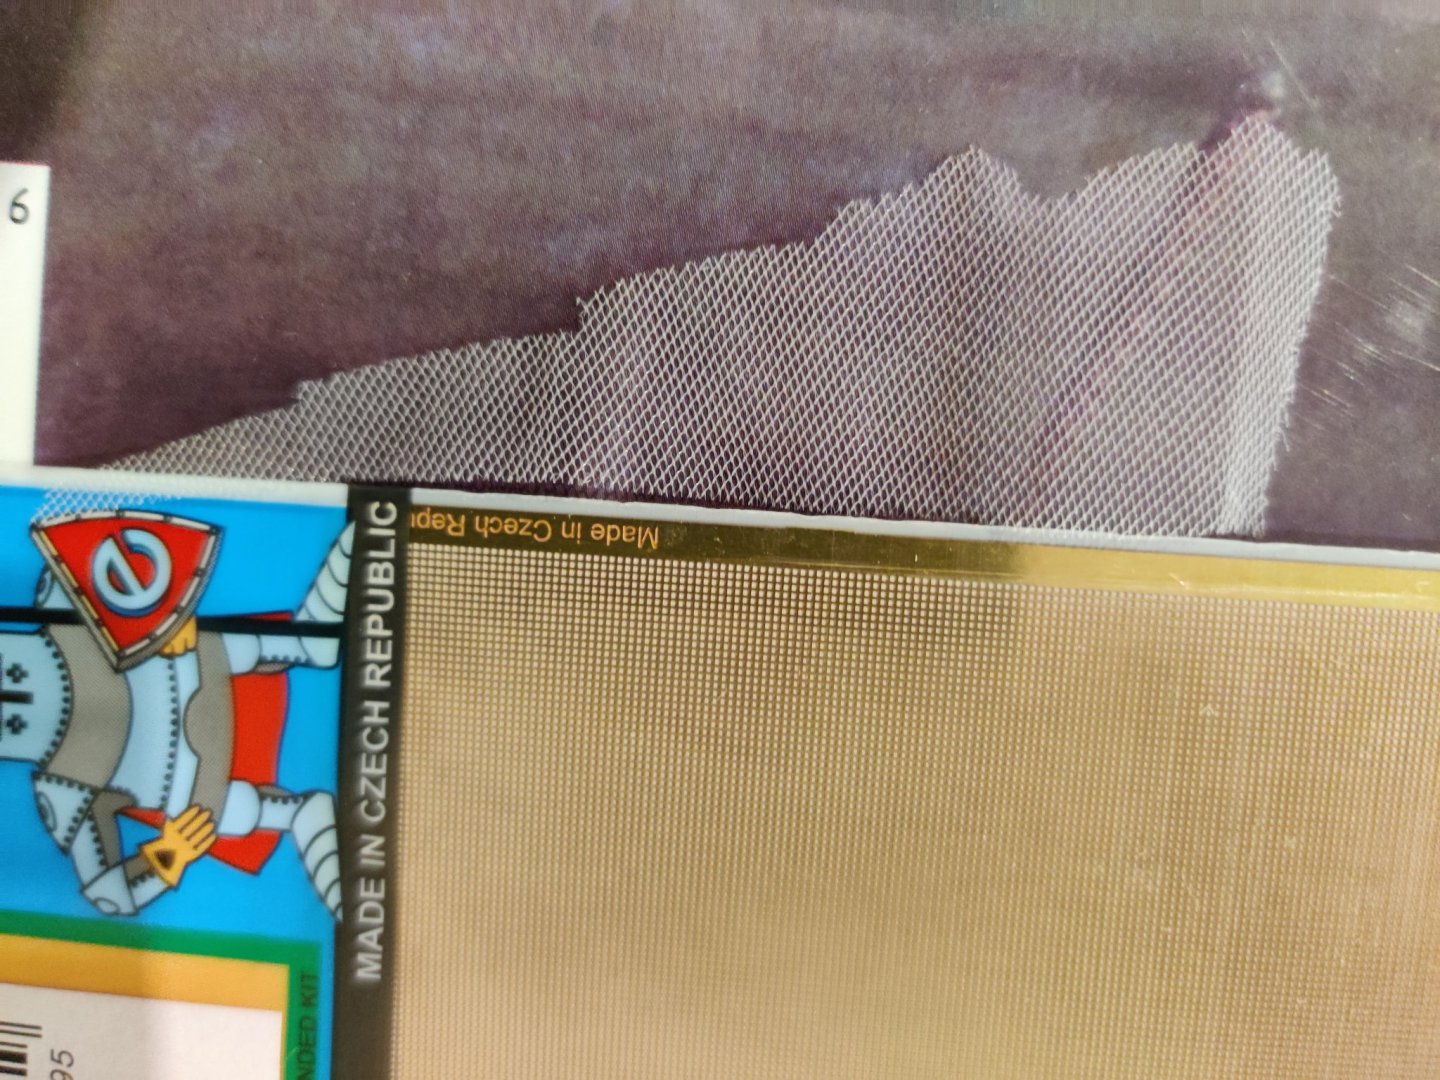
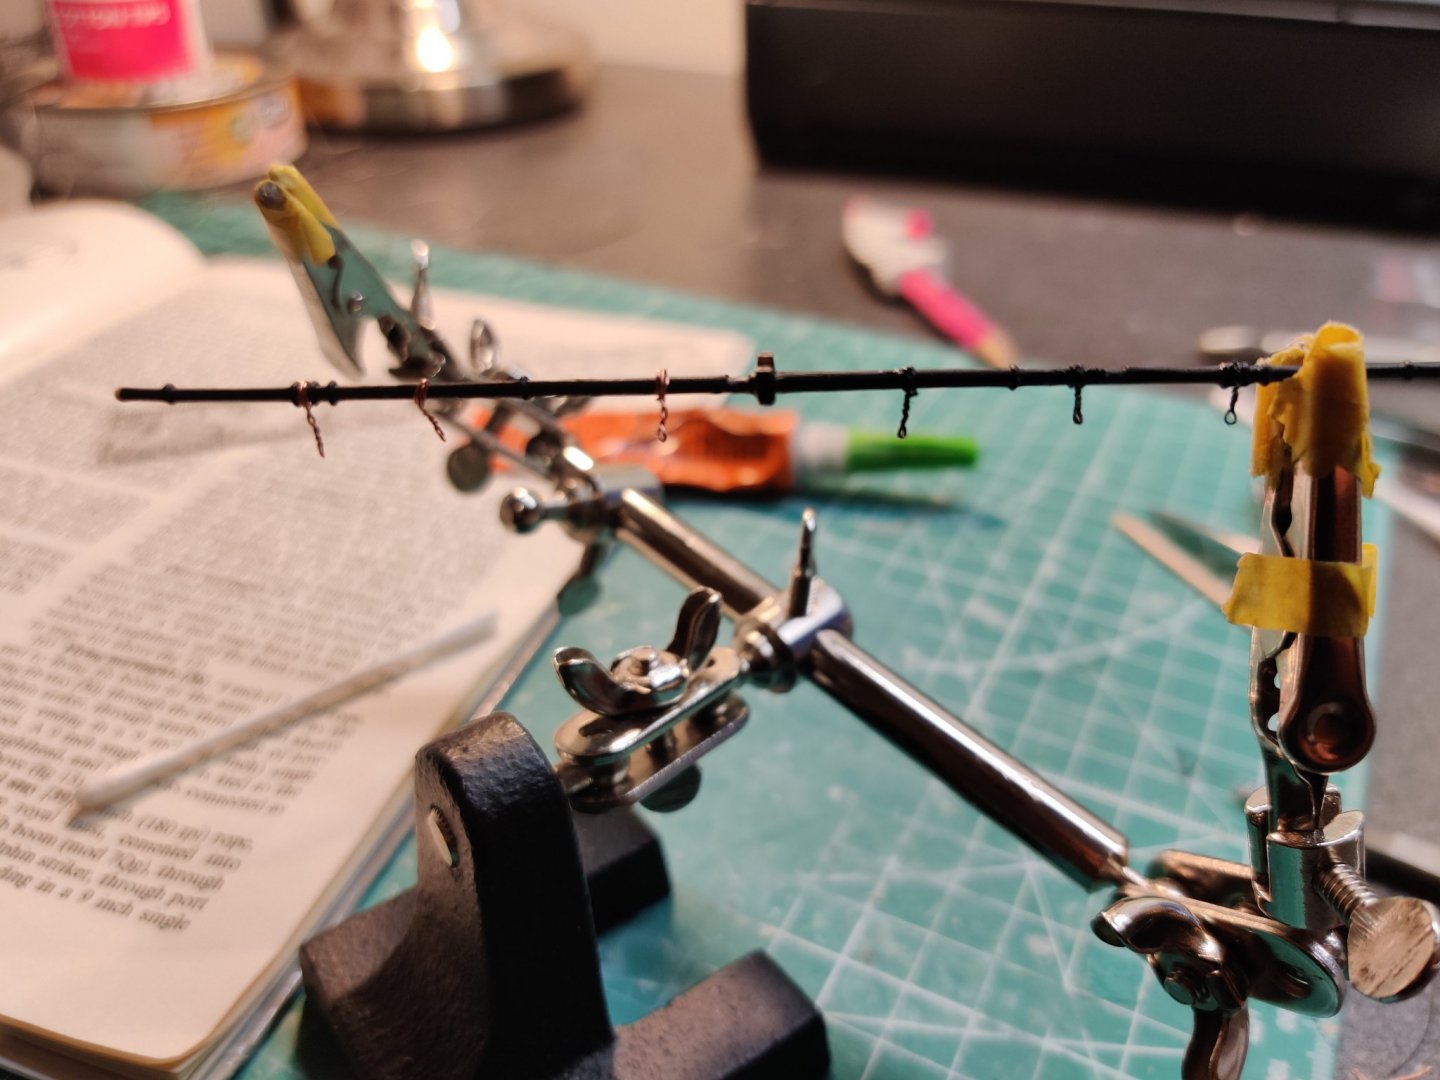
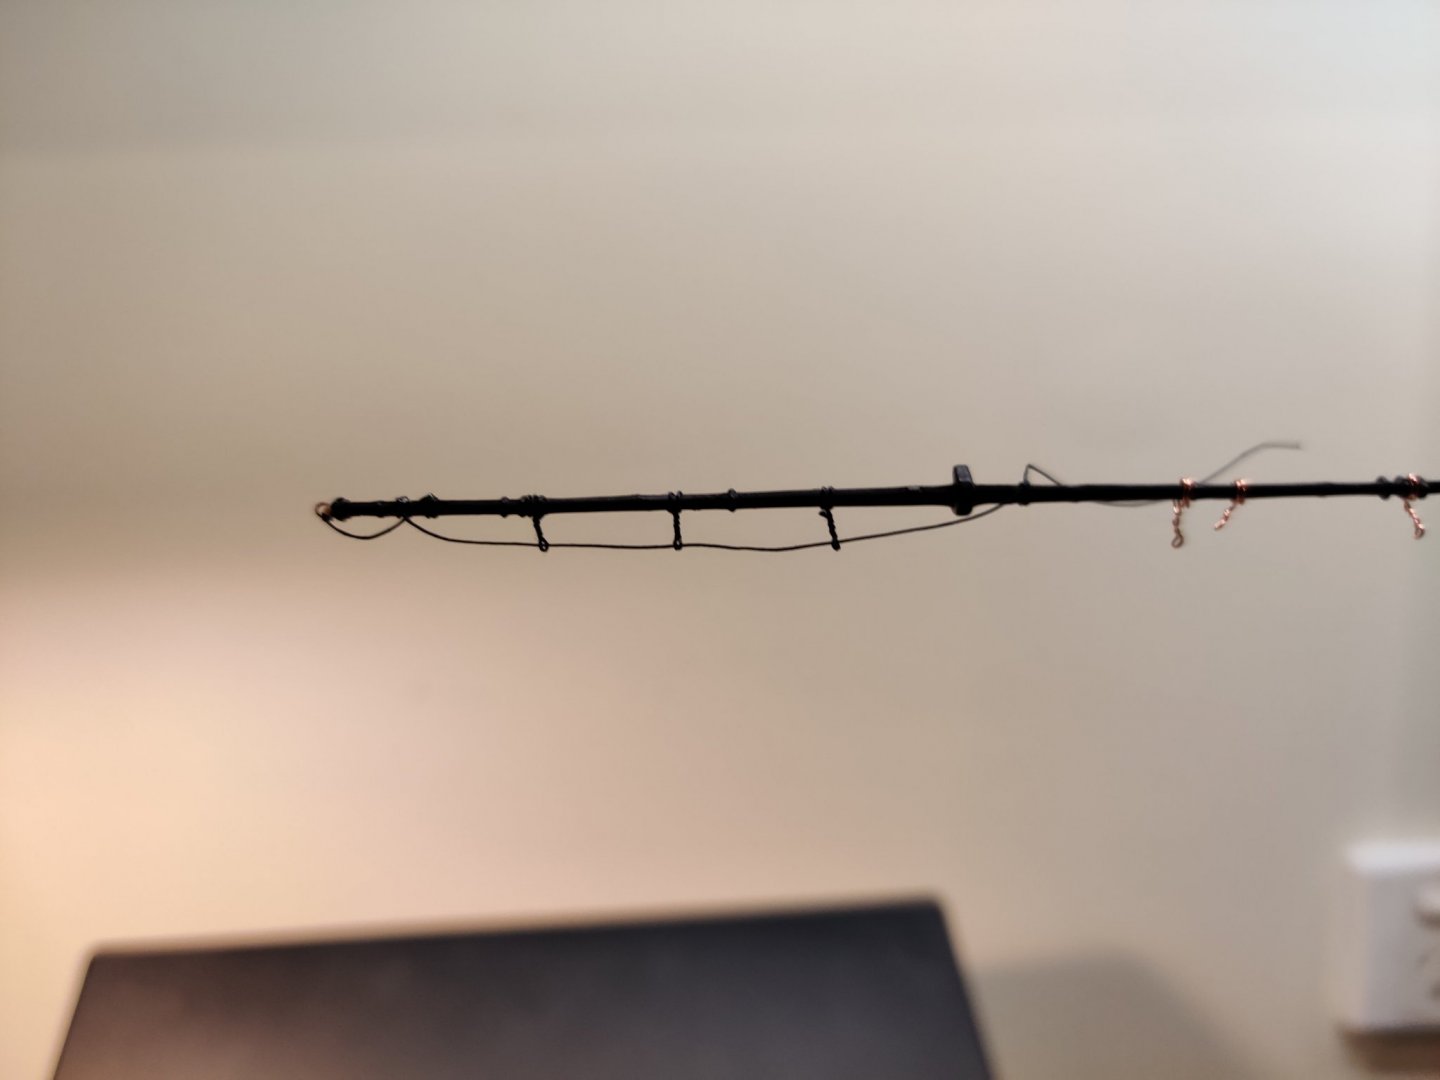
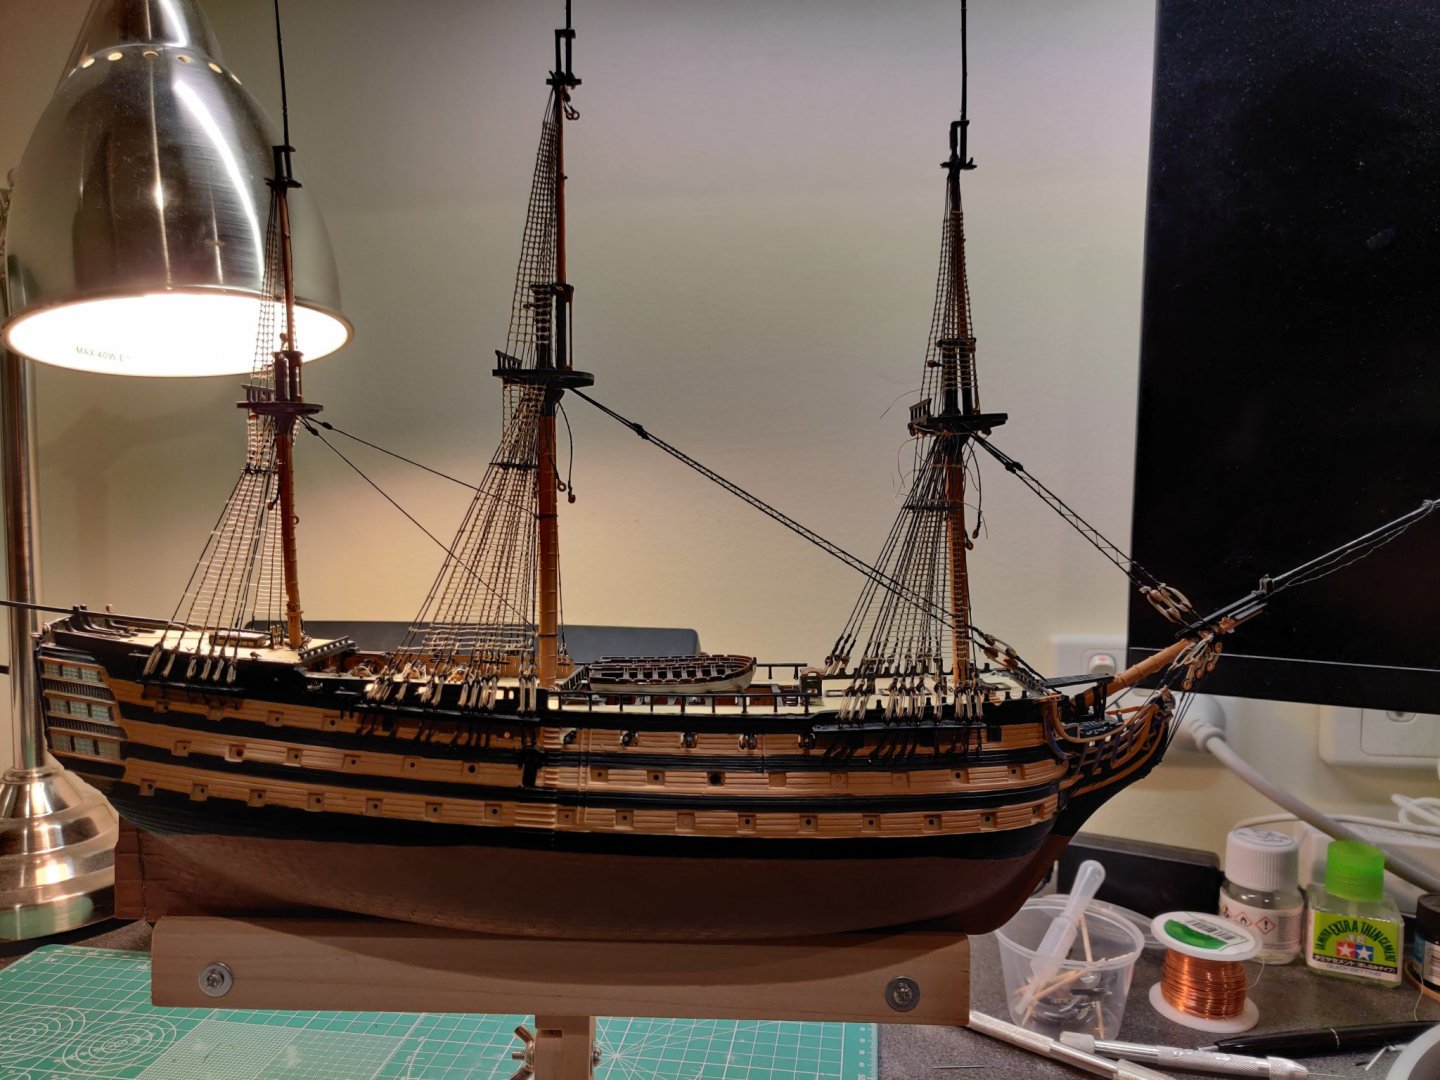
Thanks Keith, I did get my hands on some etch for the hammock netting but opted to use tulle instead as I felt it looked better. I haven't had the guts yet to tackle hammock netting throughout the ship. The Airfix kit hull walls are quite thin, so will need to come up with something creative to solve this. I might redo the top rails one day as the kit supplied parts look quite bulky (had a go at using copper wire earlier but gave up. I think sprue will work better). Currently working on the spritsail yard. Took me a while to find a method that works for me for the stirrups... Black thread wound several times over a sewing needle and CA'ed for stidfness. Looks a little better (right) compared to my earlier attempts with 0.25mm copper wire (left)! Too small to drill the eyebolt in place on the yard end, so I cheated a bit and CA's the bolt onto the end and lashed it with some fine thread. Now to figure out how to get some sag into the line...

-
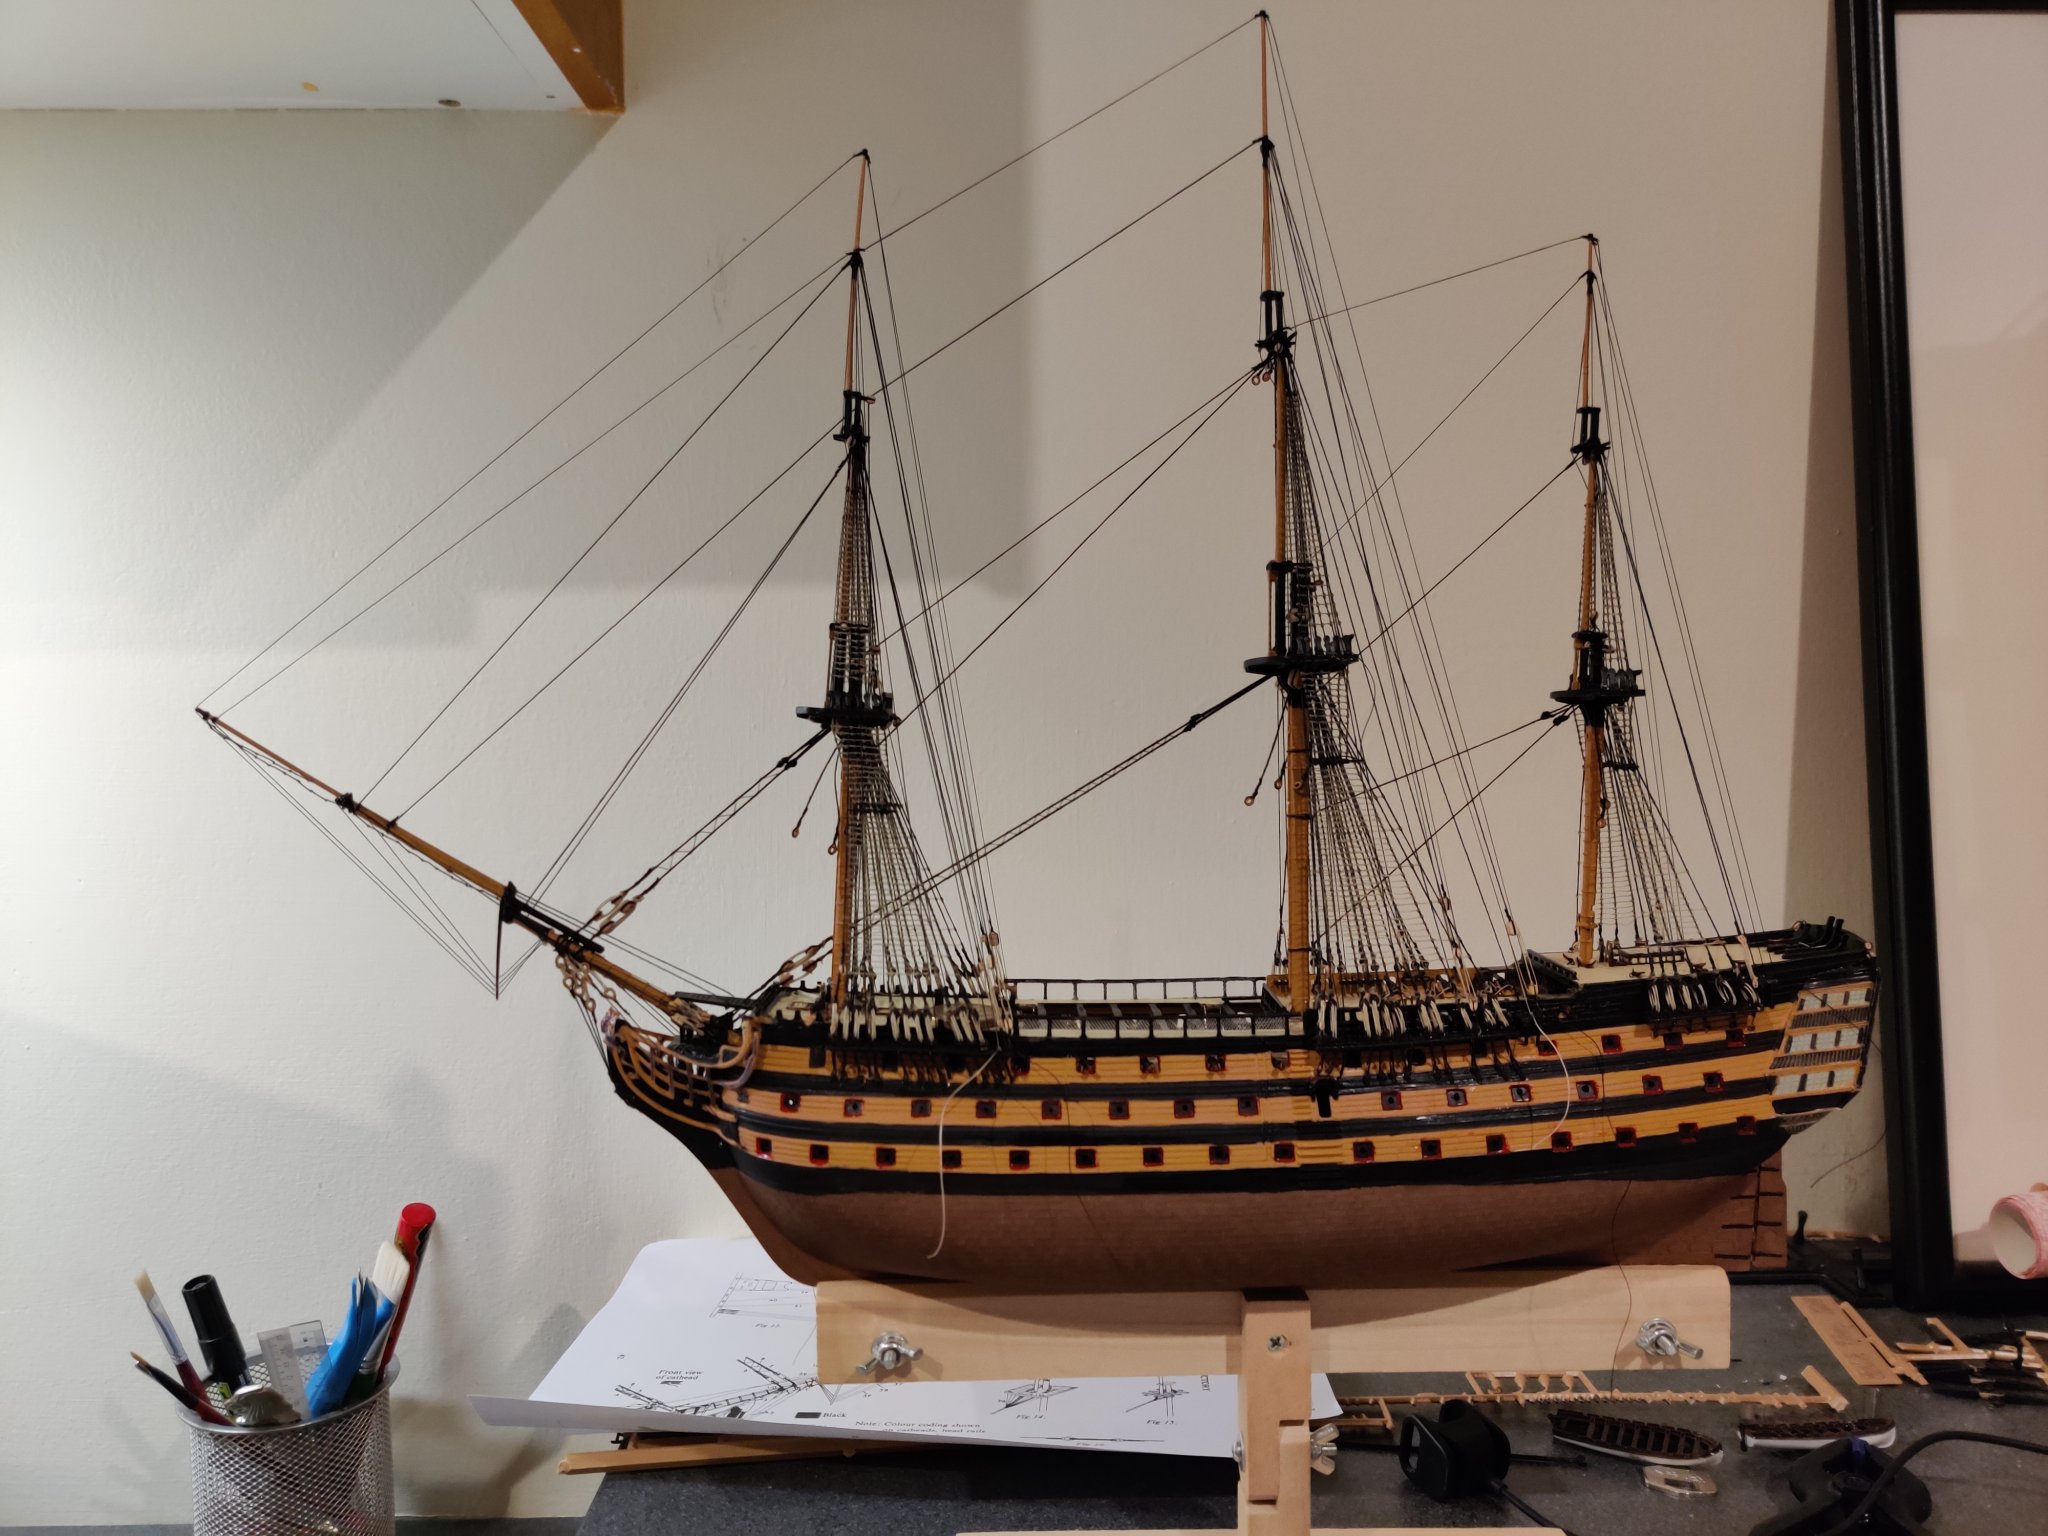
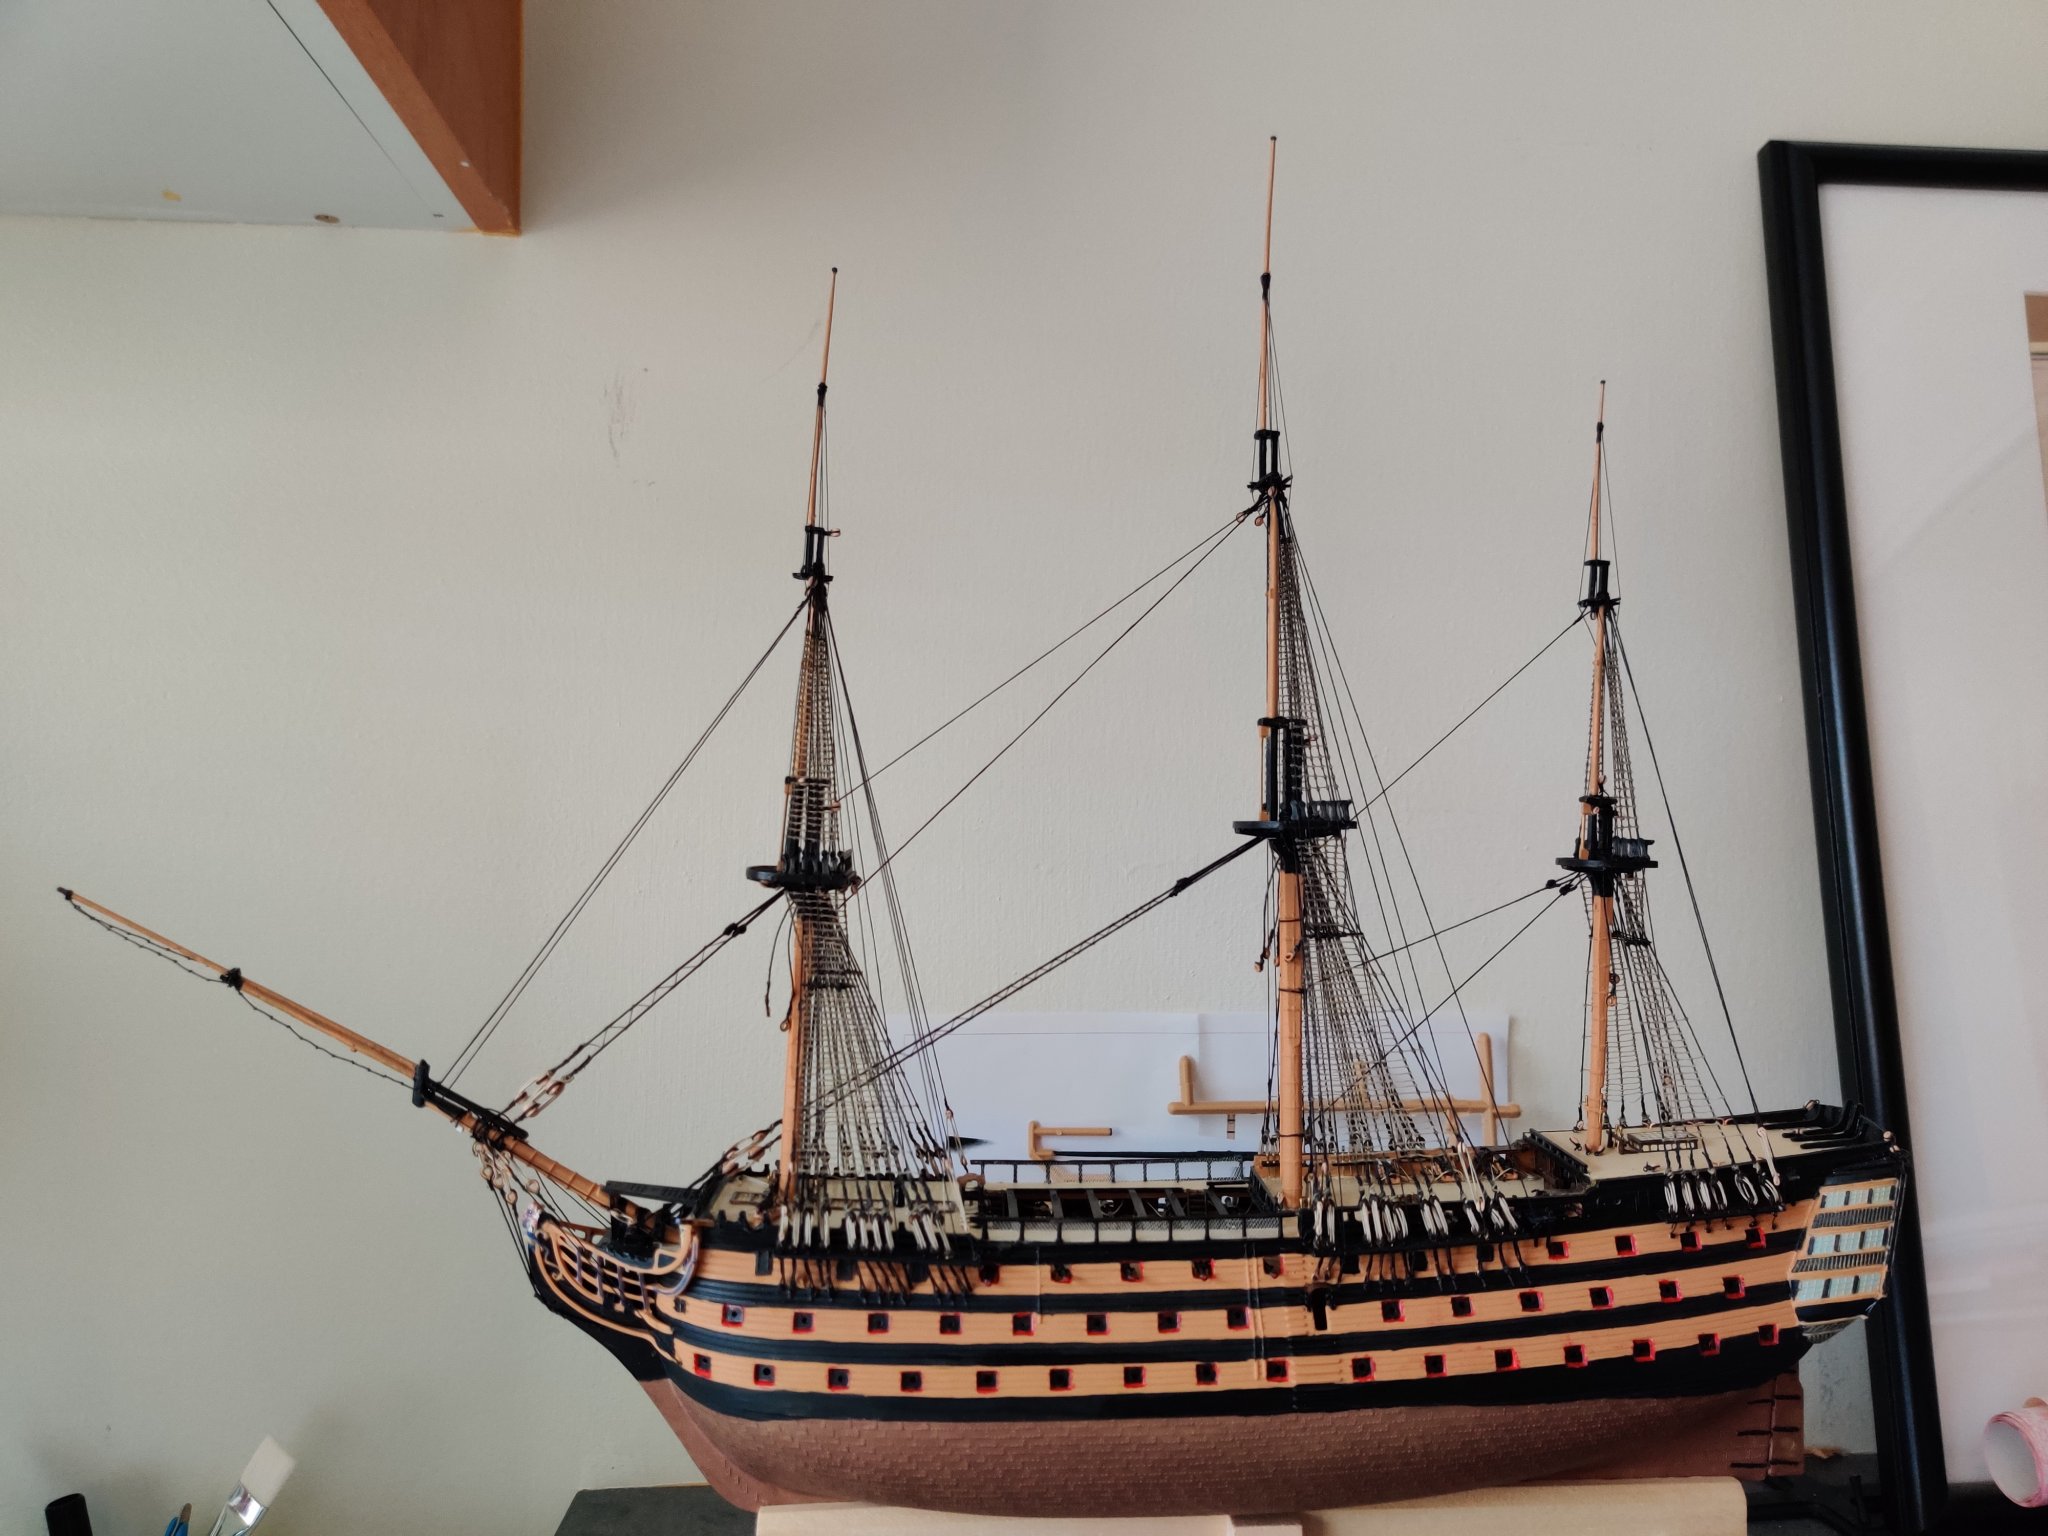
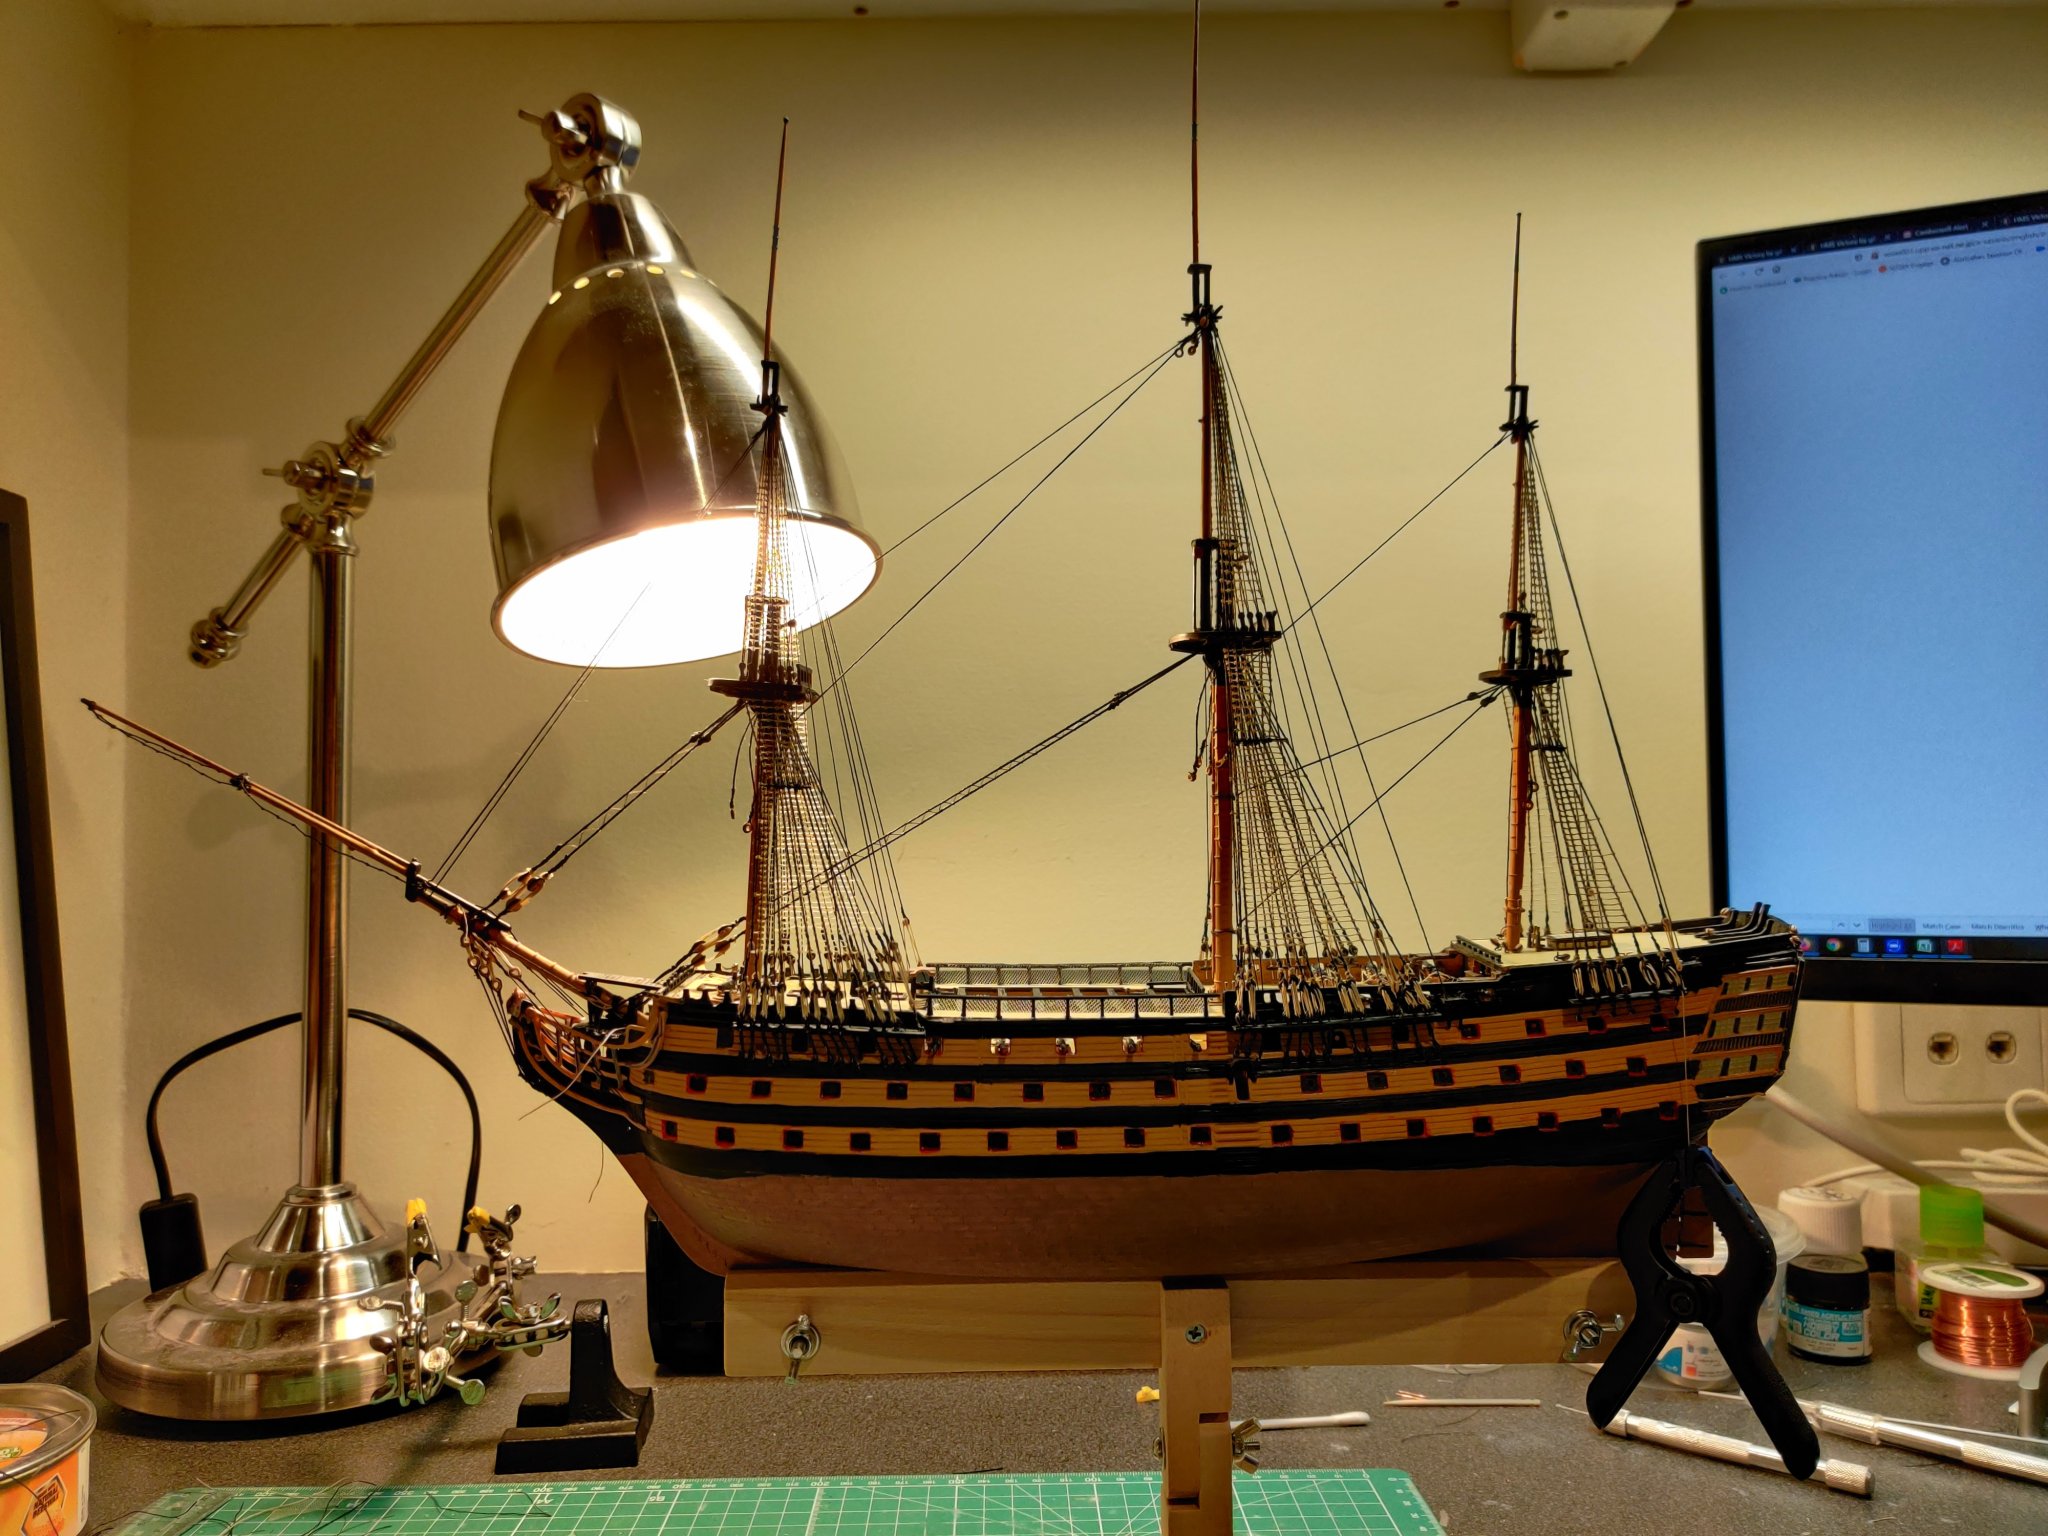
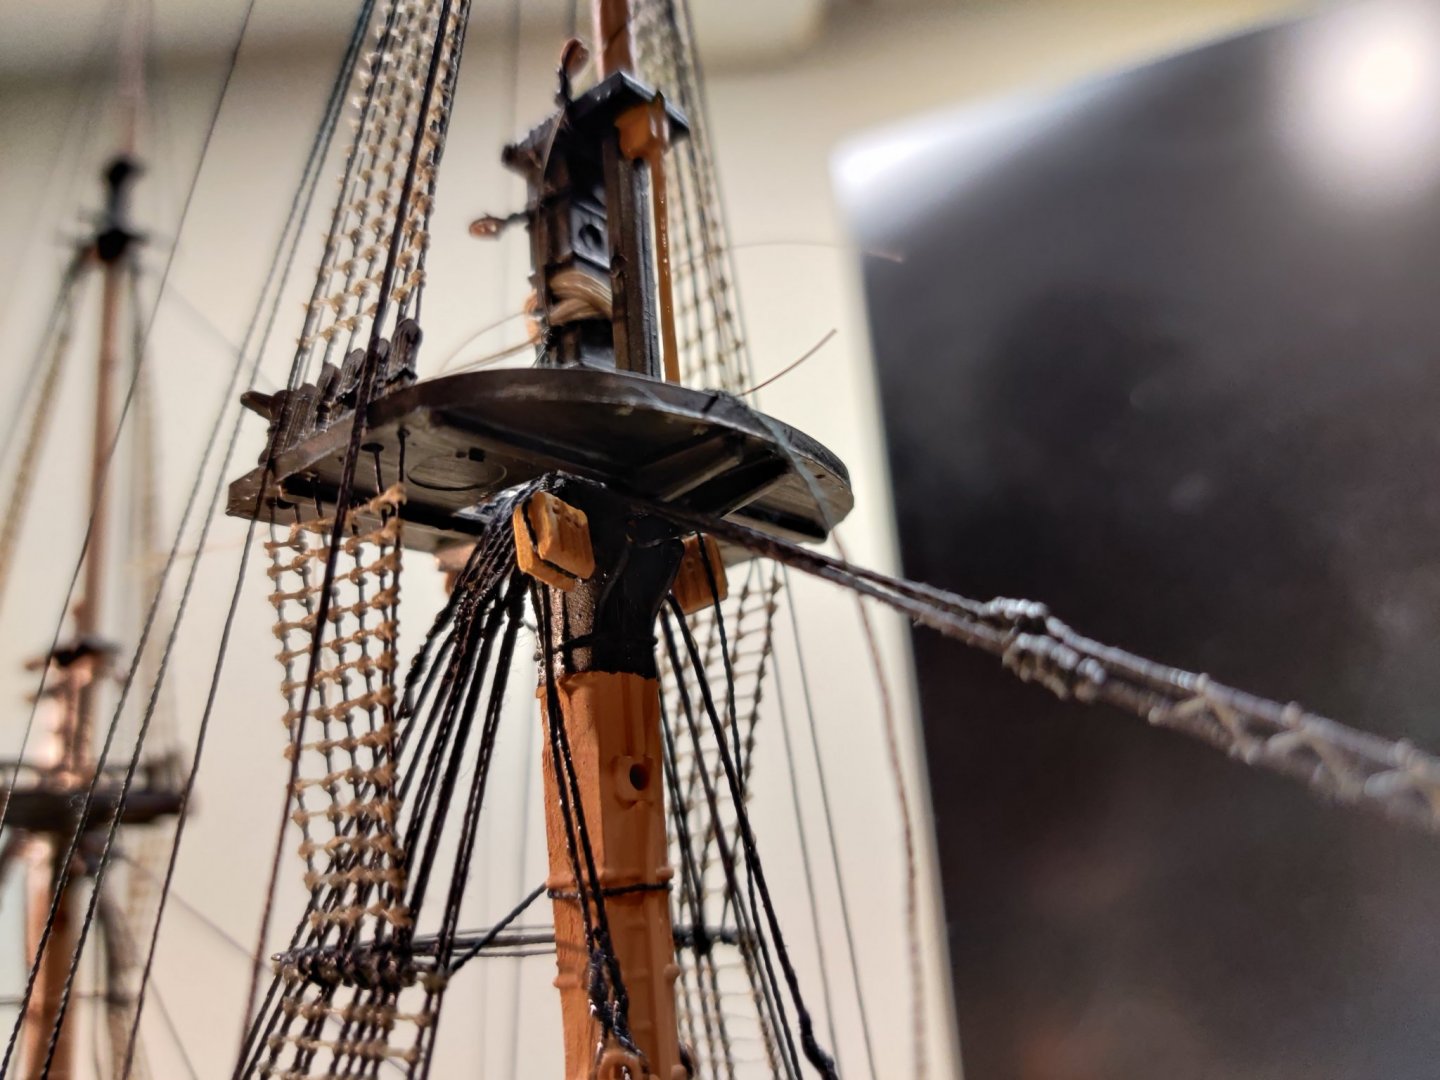
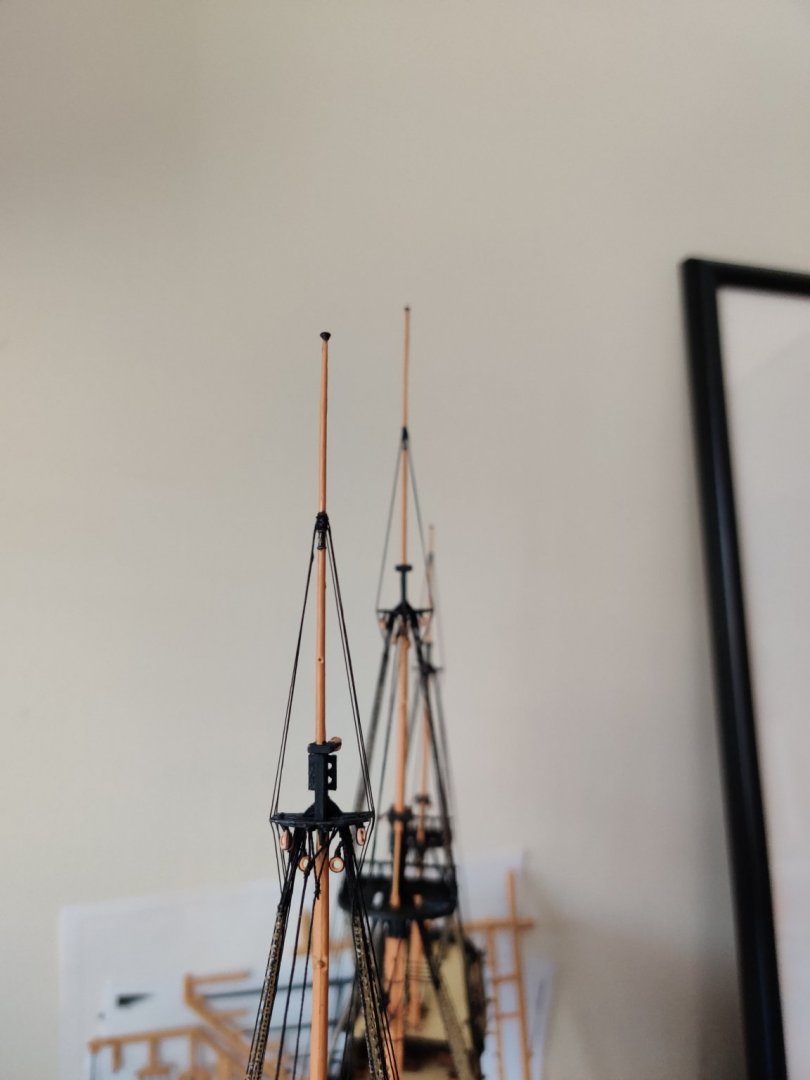
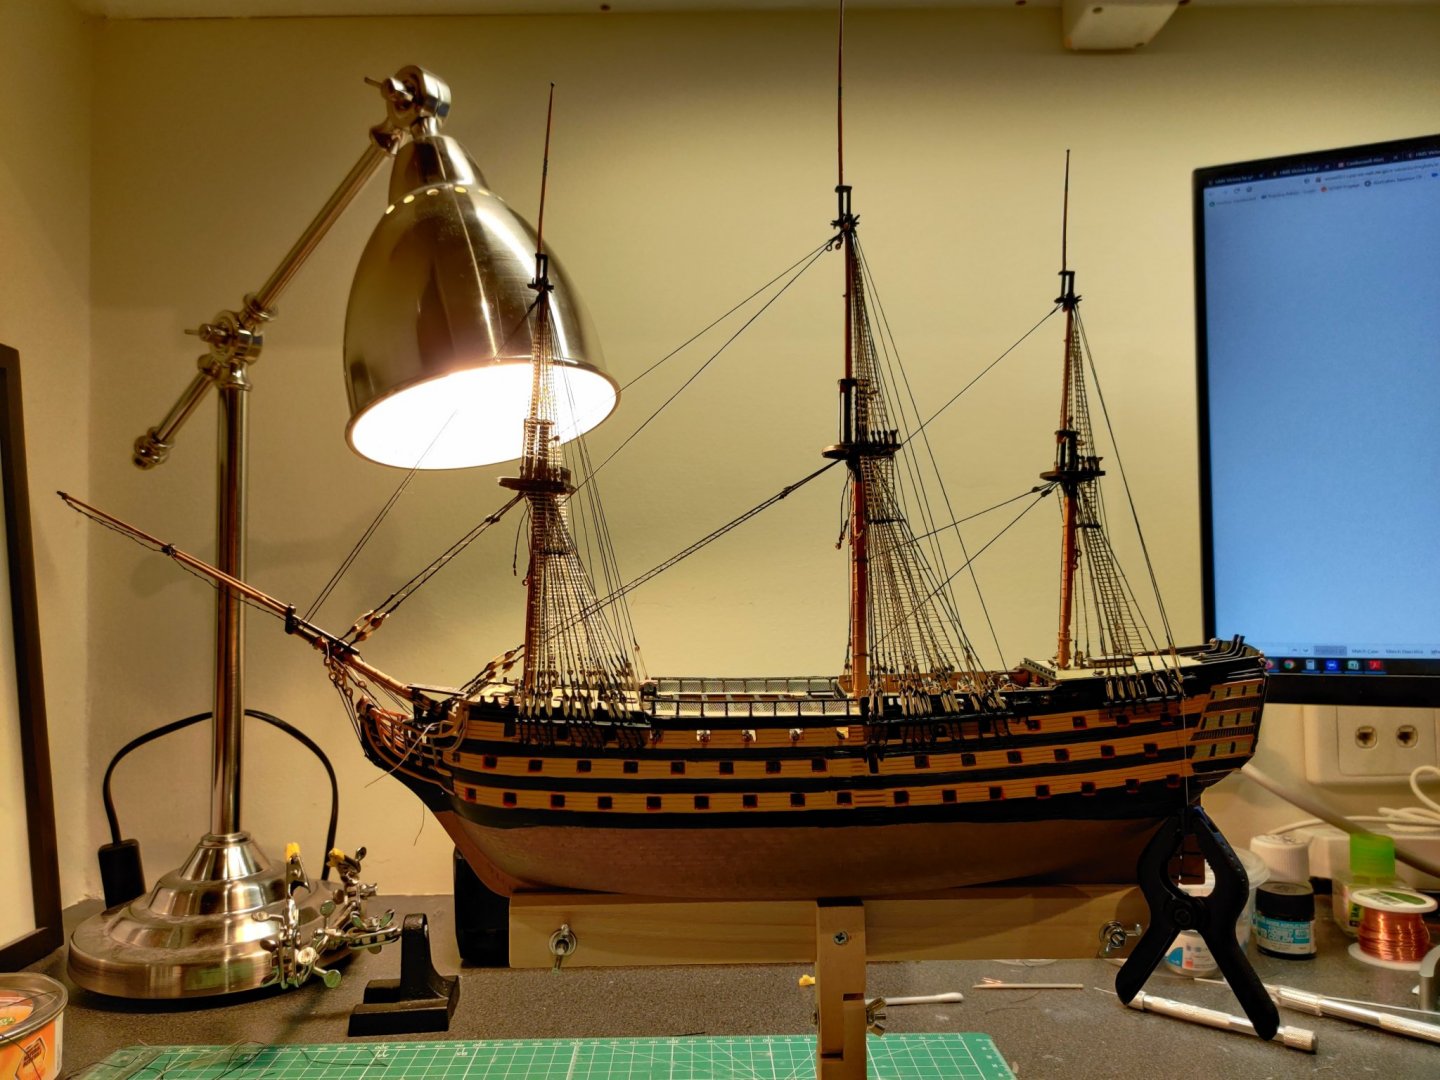
Standing rigging nearly complete! The mizzen topgallant mast snapped when tensioning the stay. I should have used a finer drill bit (0.343mm Excel #80 bits recommended) for the sheave hole drilled just below the collar. The fine drill bits worked well for the dolphin striker and although Hackney warns against this method, I didn't run into any problems snapping it when rigging the martingales. I opted to seize each line around the masts, but certainly clove hitches would've saved a lot of trouble and time. I would have loved to show catenary curves for the stays but as the masts were earlier incorrectly cemented at a slight angle, they needed to be corrected via tensioning. This is something I will need to research and plan better for future models!

-
Thanks, shipman I couldn't find any in Gil Middleton's excellent blog either. Not going to risk removing the catharpins I've placed in the lower shrouds as it's CA'd quite firmly in place. A lesson learnt for my next Victory... I cannot thank all of you enough for recommending Hackney's manual. Each rigging step is explained clearly, although some drawings would've helped but that's what this gem of a forum is for I suppose!
-
Just stumbled on your Victory log, Emmet. If you don't mind, I'd like to hop on board to learn from your progress. Looking forward to more updates!
-
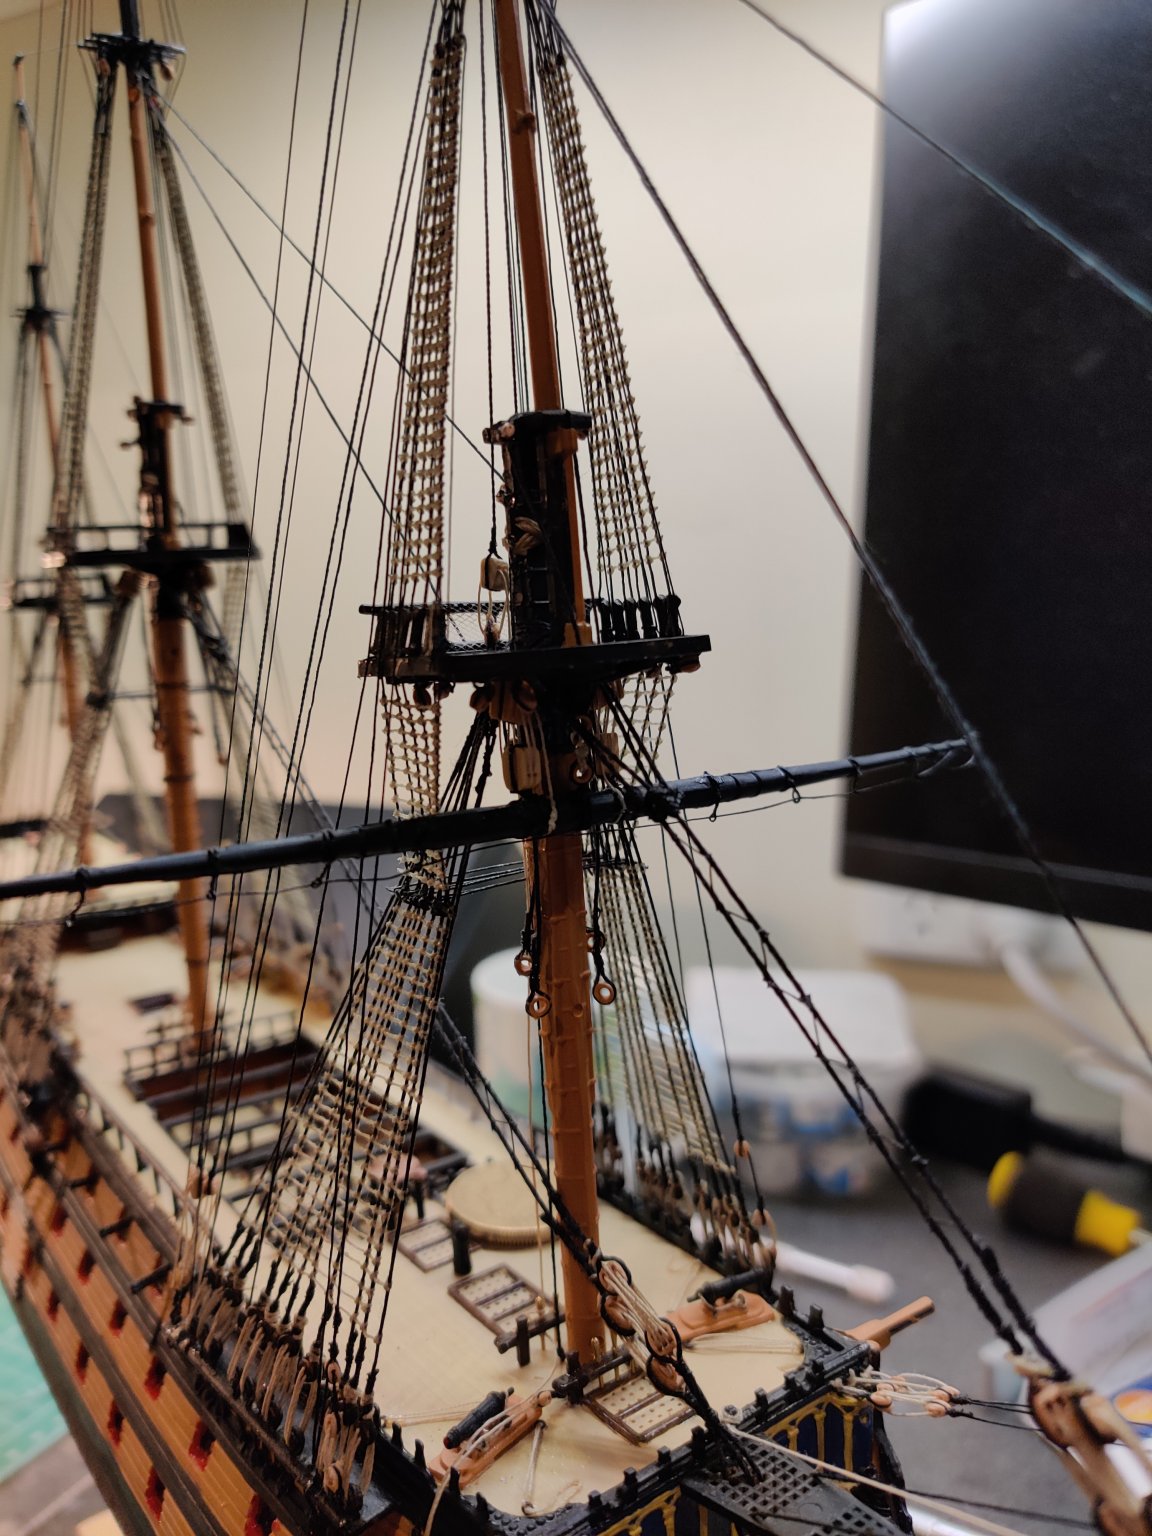
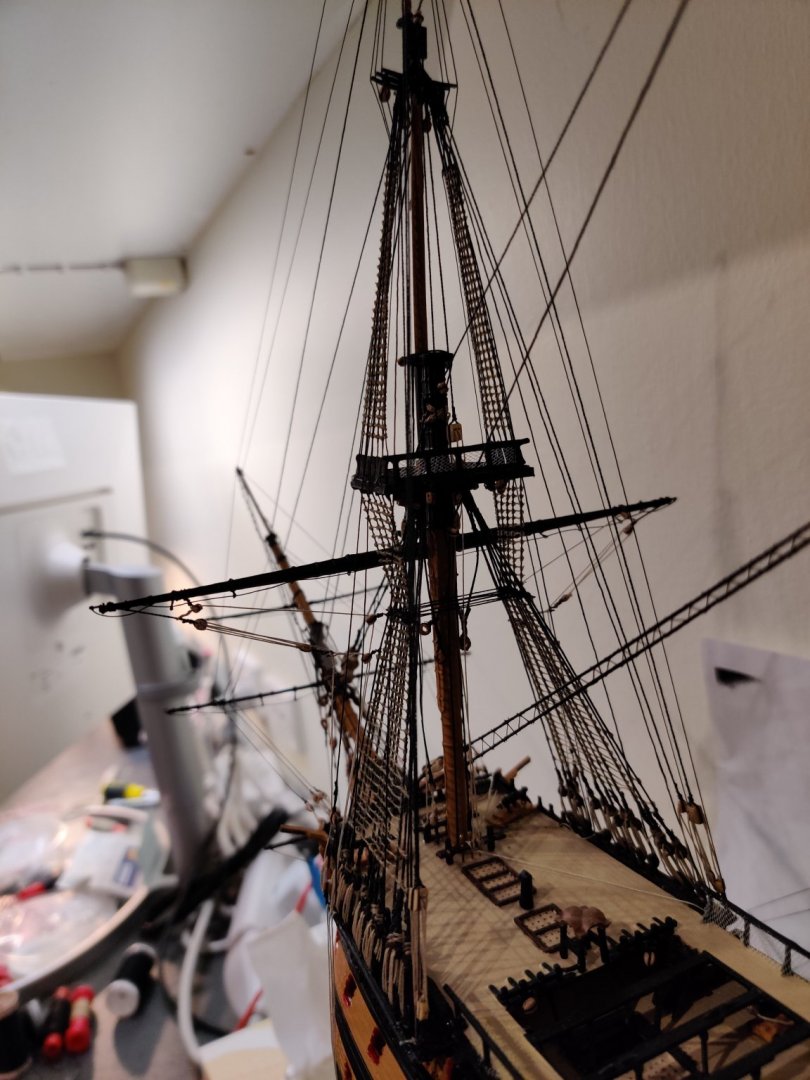
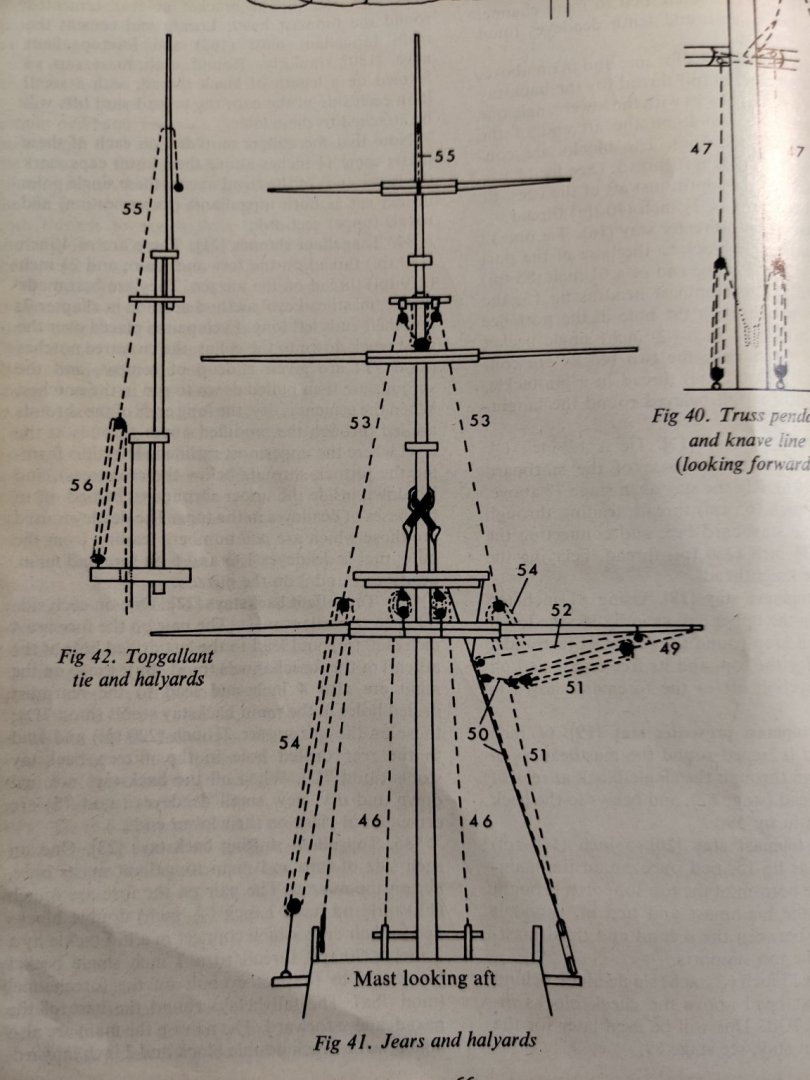
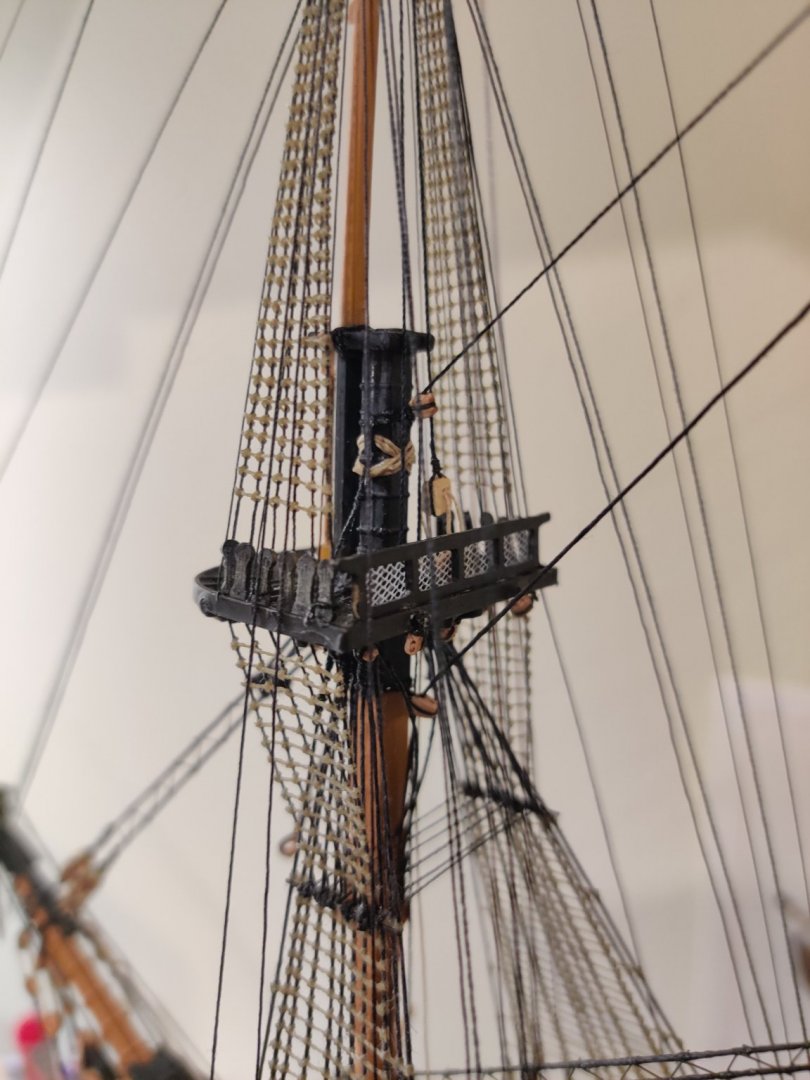
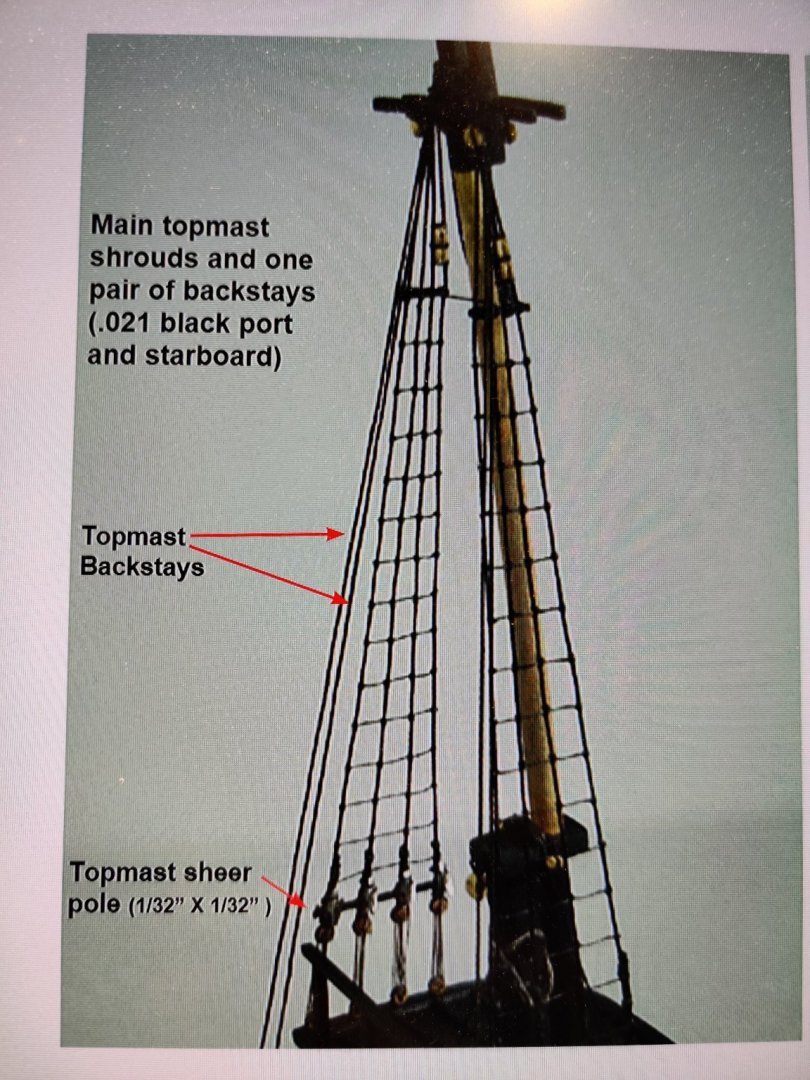
Can't seem to find any information on catharpins for the topmast shrouds (some sources suggest 1 per mast). Also after reading Longridge's book, I realised I'd placed too many catharpins for the lower shrouds. Guess I will leave the upper shroud catharpins till later unless anyone could enlighten me on this? 🙏 Happily, I managed to find a gem of a (bricks & mortar) store selling blocks and rigging accessories so finally got around to rigging the Jeer blocks. To date, I haven't received any of my other online orders (3 and counting). Would have been less fiddly if I had them before the backstays and topmast shrouds were rigged...
-
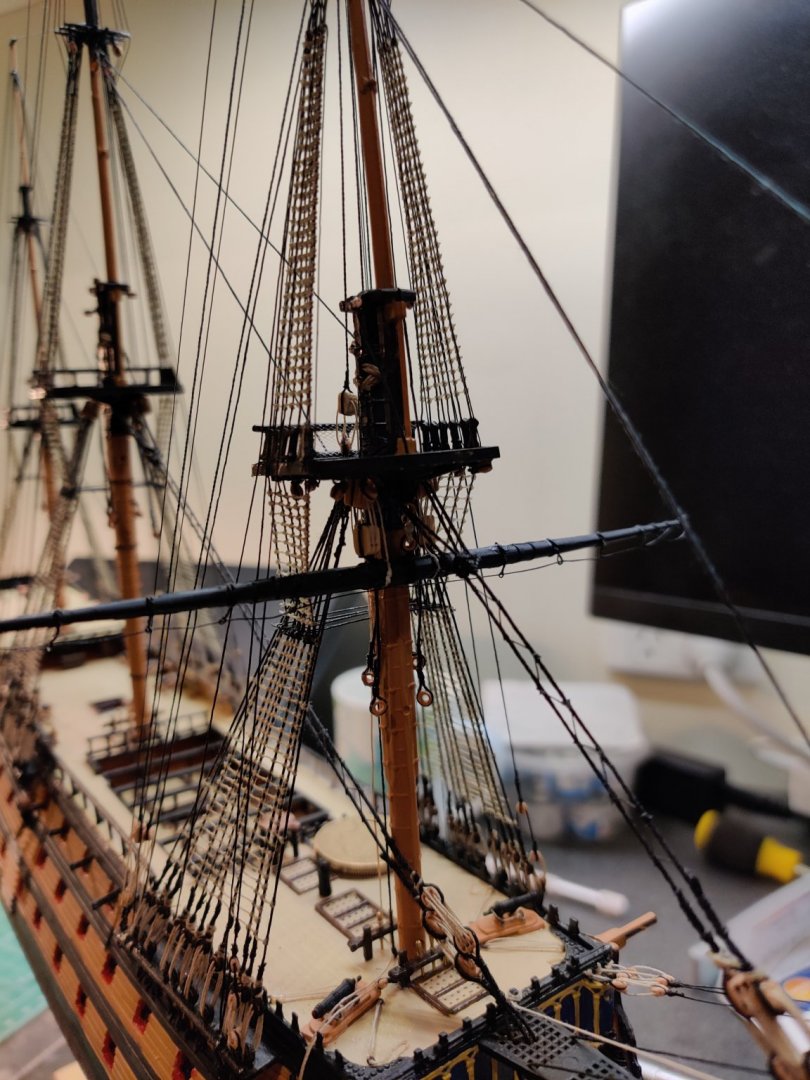
Topgallant shrouds added. Would have been so much easier if I hadn't snapped my finest needle file earlier (crostrees needed to be notched to tension the thread over them). Rigging seems to be progressing quickly now, having cleared the shroud and ratline hurdles. Catharpins to be added next.

-
I managed to get my hands on tulle labelled as "champagne" colour and saved having to stain it for the netting. Looking forward to more updates!
-
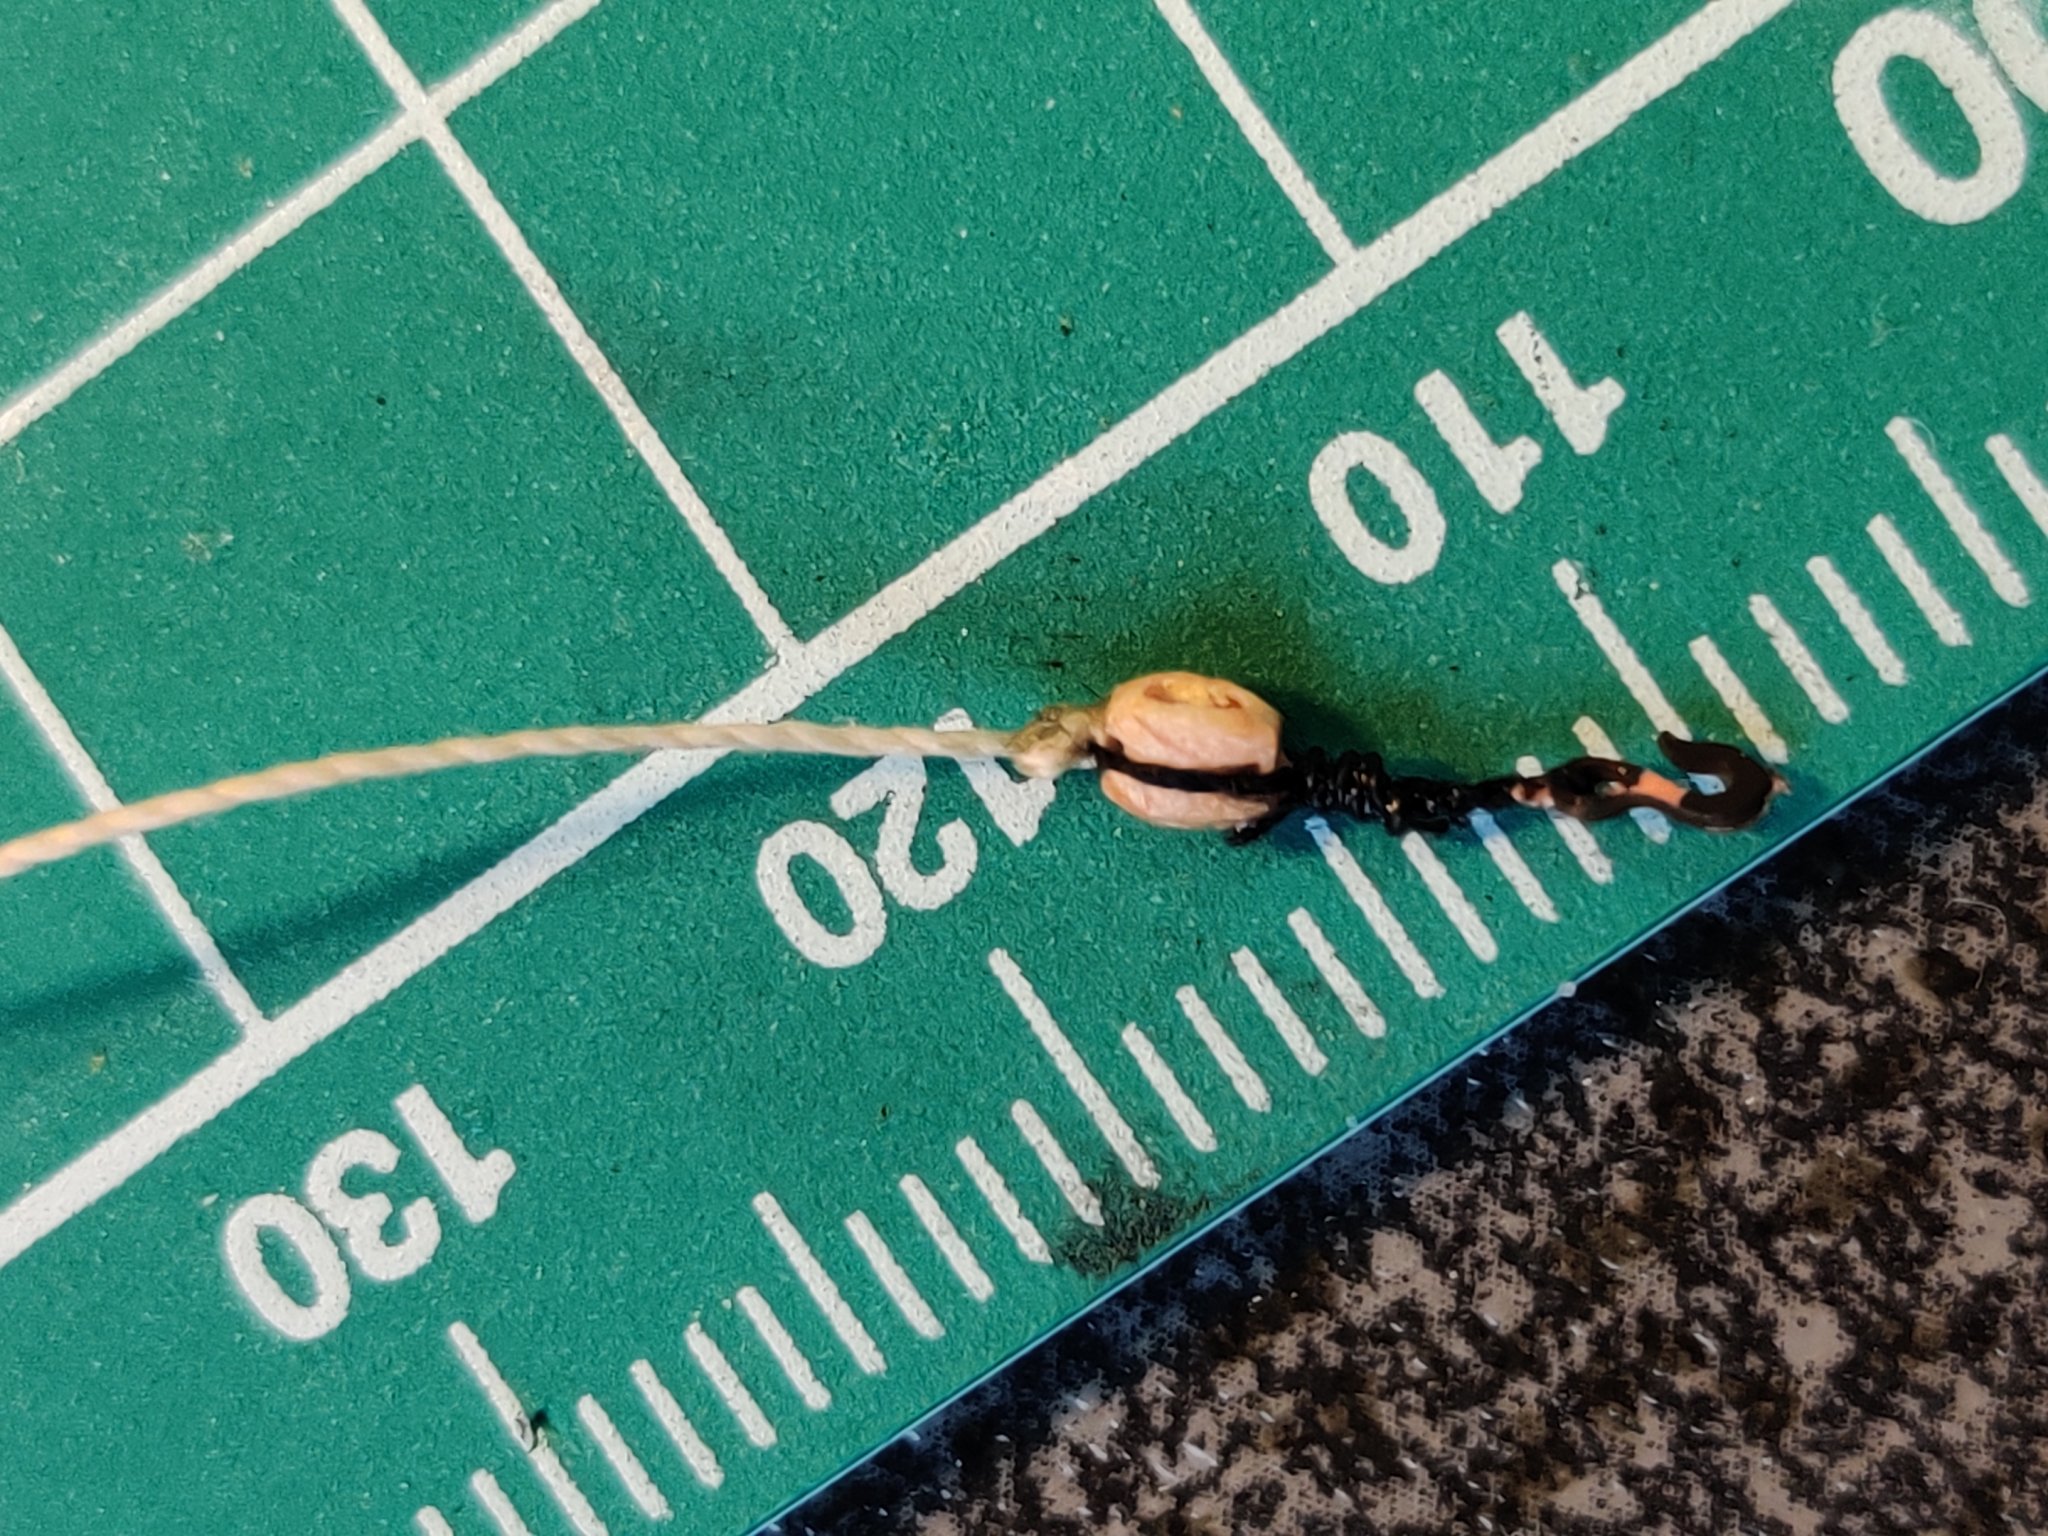
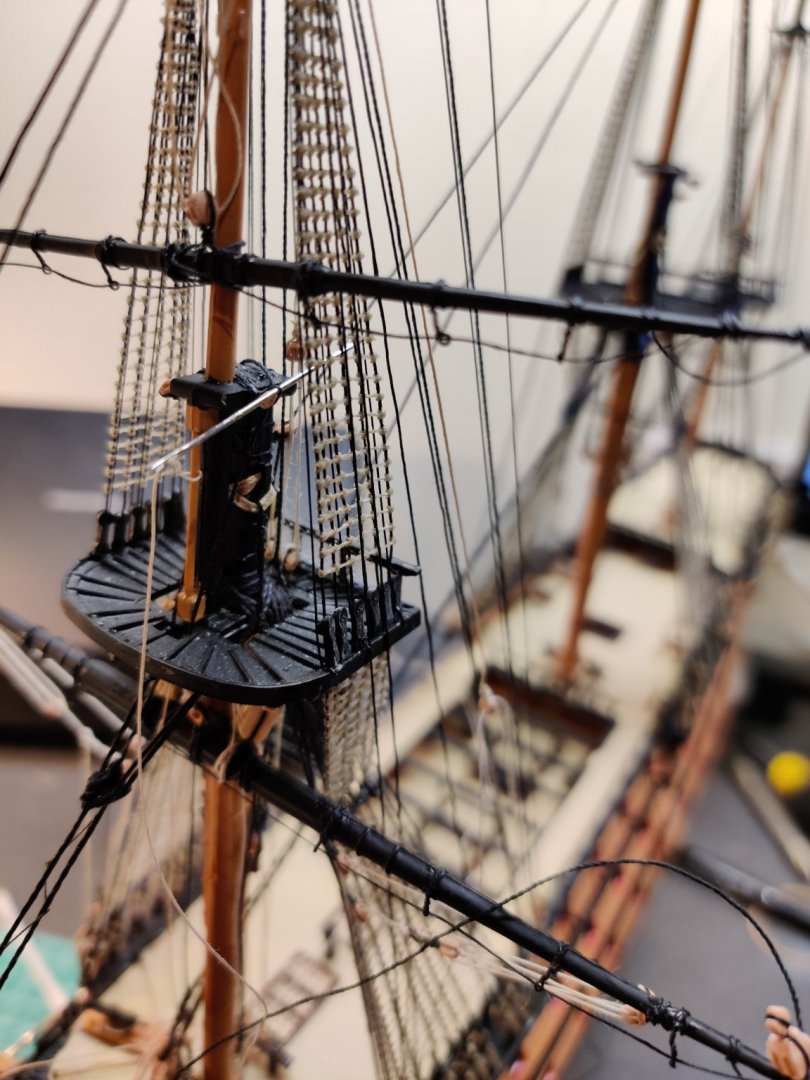
Had a fairly productive day today. Completed the standing and shifting/sliding backstays. Topmast stays also rigged. Access is beginning to get tricky but so far so good. Found a way to make becket blocks at this scale... Tie a knot with beige thread over the black thread that goes around the blocks first, then position in place (leaving sufficient length for the tackle). Above image is an example of a block used for the shifting back stays.

-
Masterful work. Love the detail with soot on the bricks!
- 756 replies
-
- 5
-
-
- galleon
- golden hind
- (and 2 more)
-
Completed breast back stays, fore and main mast standing and shifting back stays. Finally ran out of 0.25mm black thread so will have to put my rigging on hold until my order arrives. With COVID-19 affecting international parcels, I have a bad feeling about my orders from the Czech republic (already lost one last month in the mail)... Curses. So I finally got around to painting the gunports black as well as the gunports lids,(pretend) cannons and rudder hinges. Also fixed some paint colour errors for the topgallant masts and flying jib boom which were earlier painted brown based on Hackneys colour scheme.

-
I'm really enjoying seeing all the custom hand crafted work here, Phil!
-
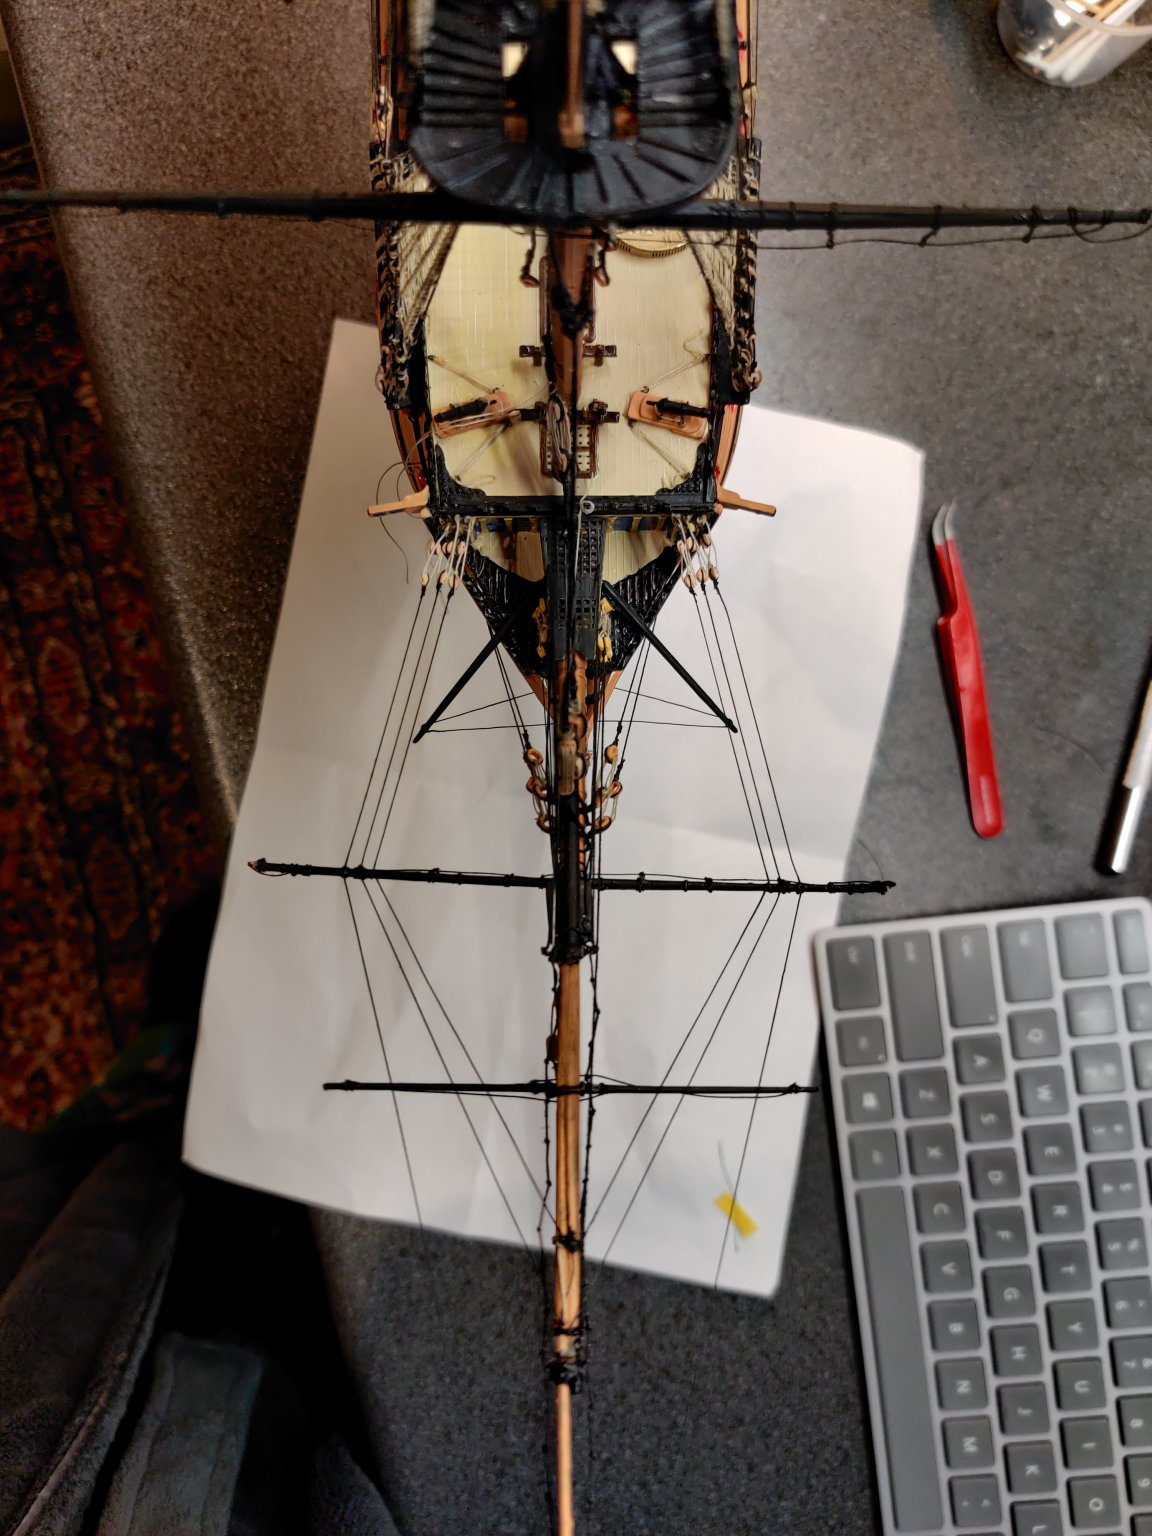
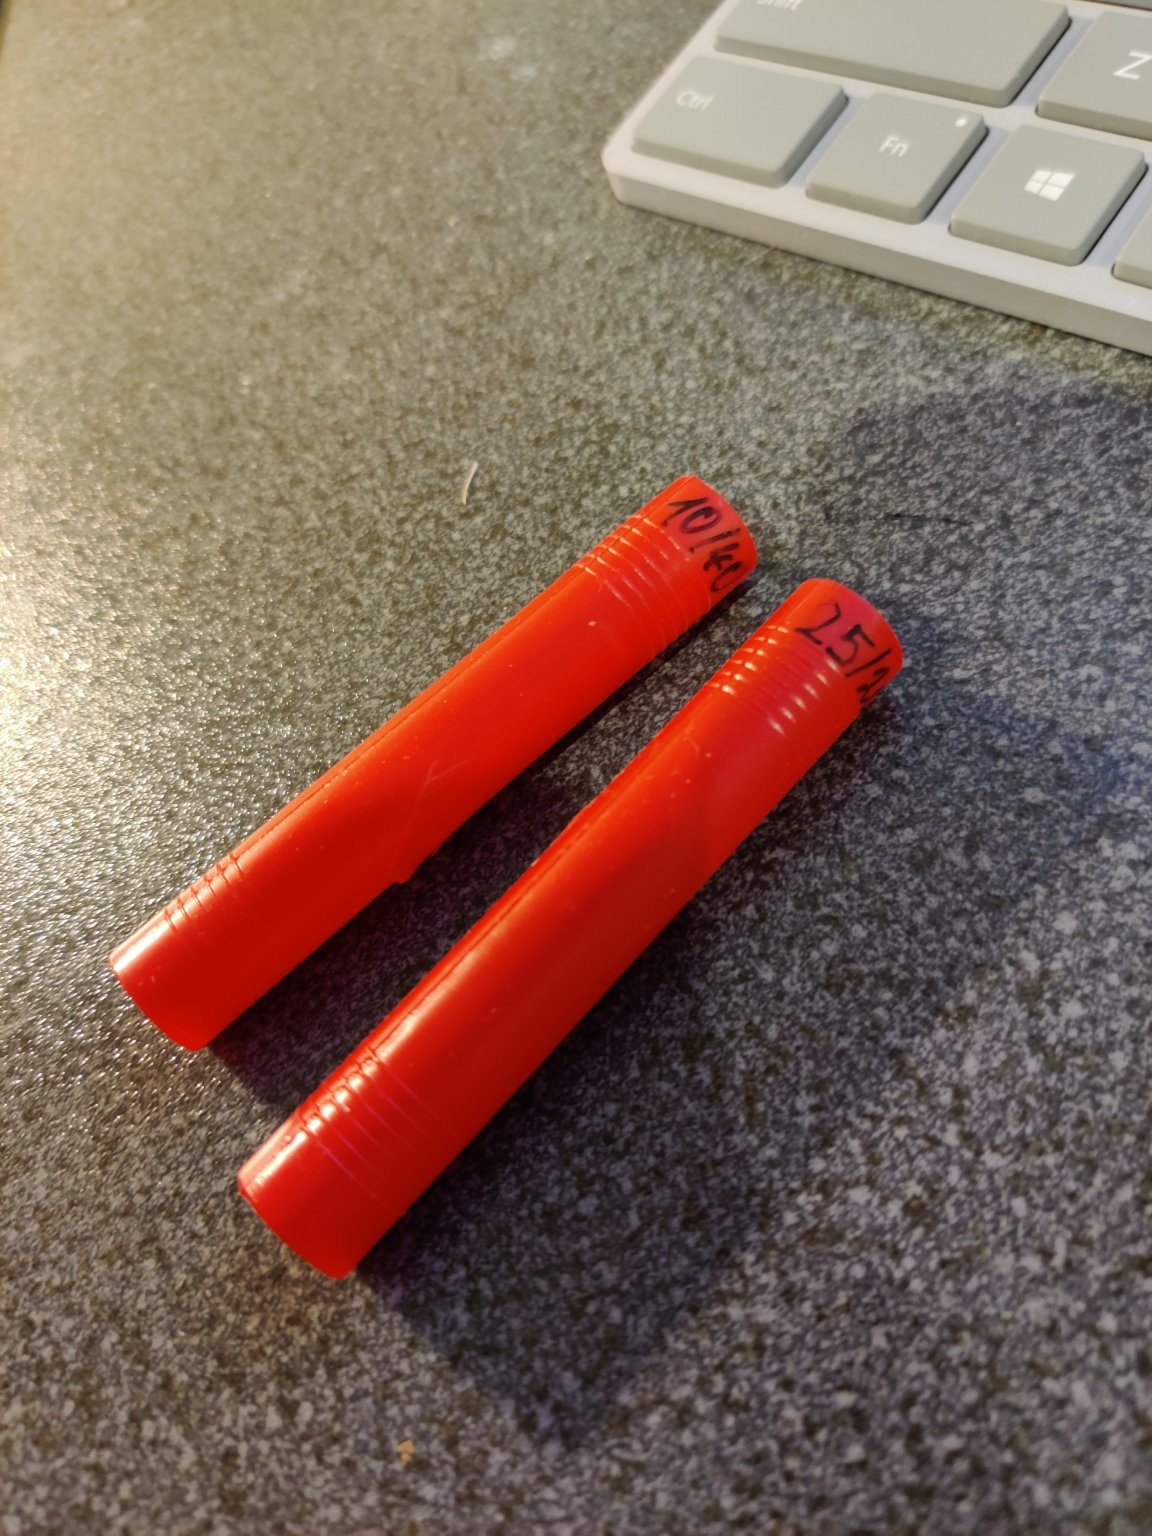
That moment when you realise you're about to run out of thread... 40m used up pretty quickly! Pretty much done with upper mast ratlines, guess I'll have to leave the ratlines for the fore mast futtock shrouds till my order arrives. *I stand corrected. Found a few lines of scrap thread in the trusty old rubbish bin and finished the rest of the ratlines! (dances a pirate jig) Finally I can push on with the stays!
-
Wow, she's looking fantastic with your additions. Nothing as rewarding as customising your own model
-
Excellent carving! Wouldn't have believed that's your first time.
- 756 replies
-
- 2
-
-
- galleon
- golden hind
- (and 2 more)