MORE HANDBOOKS ARE ON THEIR WAY! We will let you know when they get here.
×


Mirabell61
-
Posts
7,403 -
Joined
-
Last visited
Content Type
Profiles
Forums
Gallery
Events
Everything posted by Mirabell61
-
 Hello Kees, it Looks so realistic with the weathered paint and those hydraulic tubes, well done ! Nils
 -
Thank you very much David, Nils
-
Michael, the adjustable chuck blocks and the stand supports for your cutters "winter Depot" place look great. They compete with those in the actual boats shed, very realistic, well done ! Nils
-
Looking great David, I like those Little Details, windowrims, doors, ladders and Gangways, etc Do you use AC glue for the card Nils
-
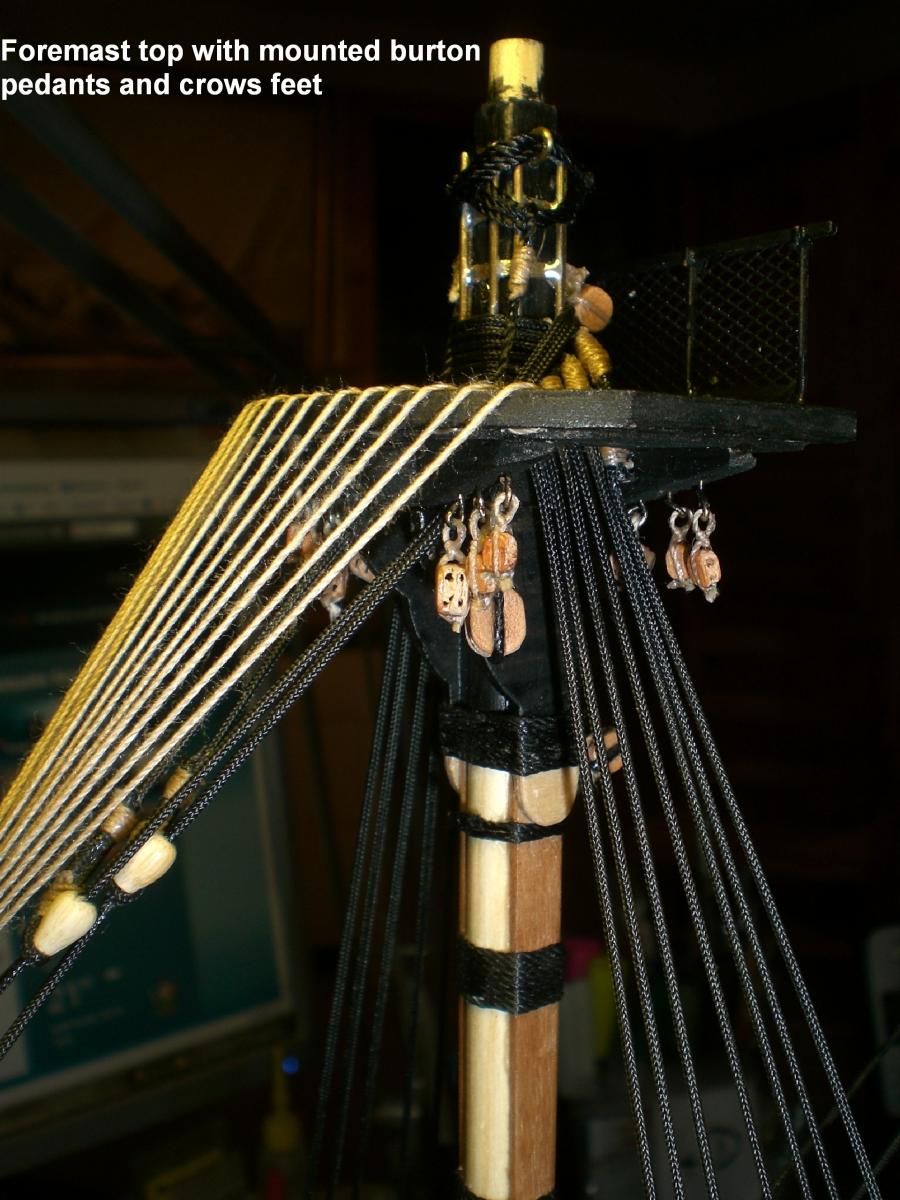
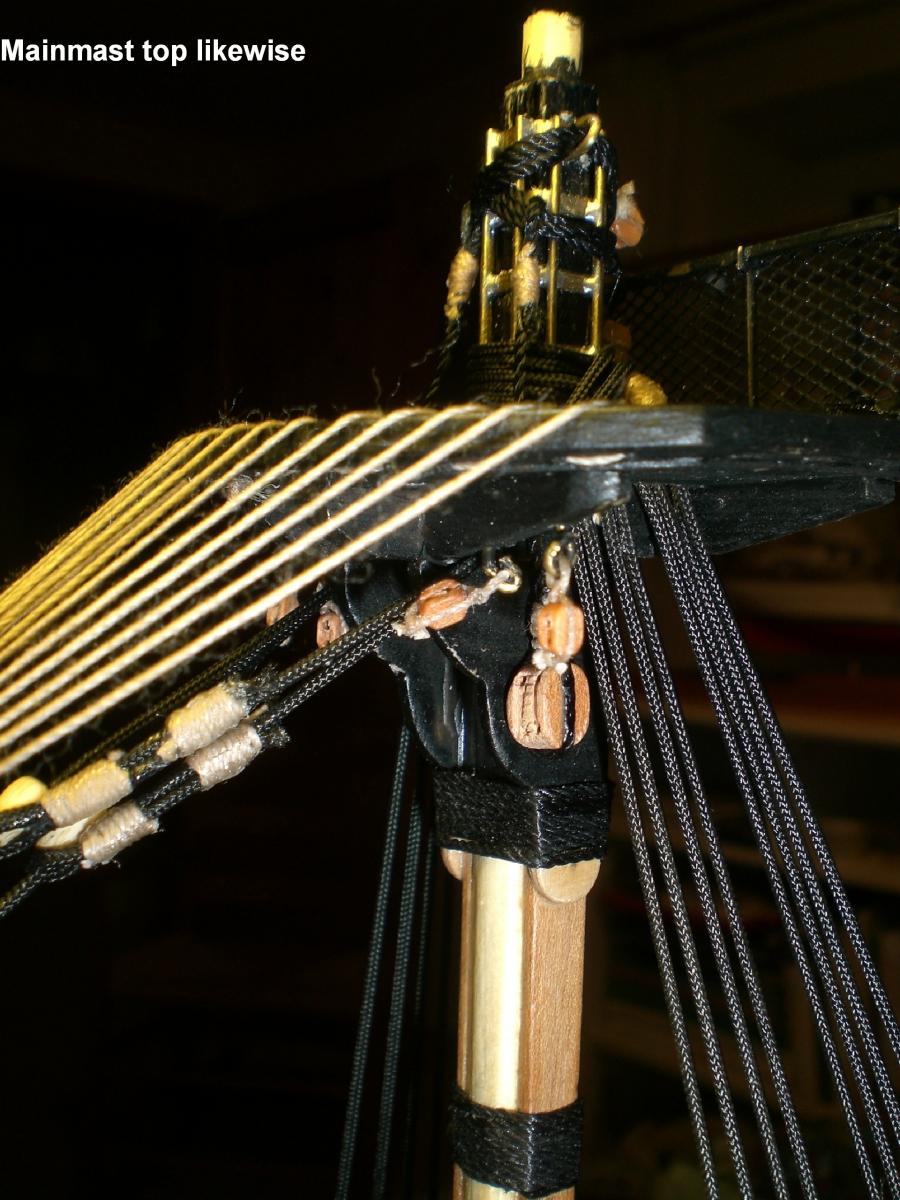
Popeye, thank you very much, nice appreciative words of yours, since the Little one is there it realy gives me a happy Feeling as if I have wings, I became grandpa with 66 and some of our freinds also are having already 5 grandchildren, I hope this lets Forget the own steady plus on years. Congrats to your four... The rigging Progress on Pegasus provides much fun, and up to date fortunately most work sequences worked out right the first time. I am really proud of the full alignment of the Shrouds and backstays relating to the preplaced chainplates angles. Here I was a bit uncertain for some time, because if the alignment Fails it probably would have looked at me for ever after Nils
-
Thank you for your words Juergen, I`m happy that you like it. I just had an Update look into your very fine looking HMS Leopard, thats a great build Nils
-
Hi Juergen, I just caught uo with your HMS Leopard, a lovely build, and a pleasure to watch it grow... Nils
-
Alfons, sorry, my mistake, the filmtitle is "The world in his arms", I had saved it as the Boston man..... enjoy if you should find it on u-tube or so.. Nils
-
Hi Alfons, those Barrels are beatiful made, also the ship is a delight to see, I love those Gloucester fishing schooners with their high seaworthy hulls, every time I see one I must think of the Film "The Boston man", staring amoungst others, Gregory Peck as the Skipper with his gloucester shooner "Pilgrim of Salem", also featuring the best bluewater schooner race at its Limits, I ever saw on film Nils
-
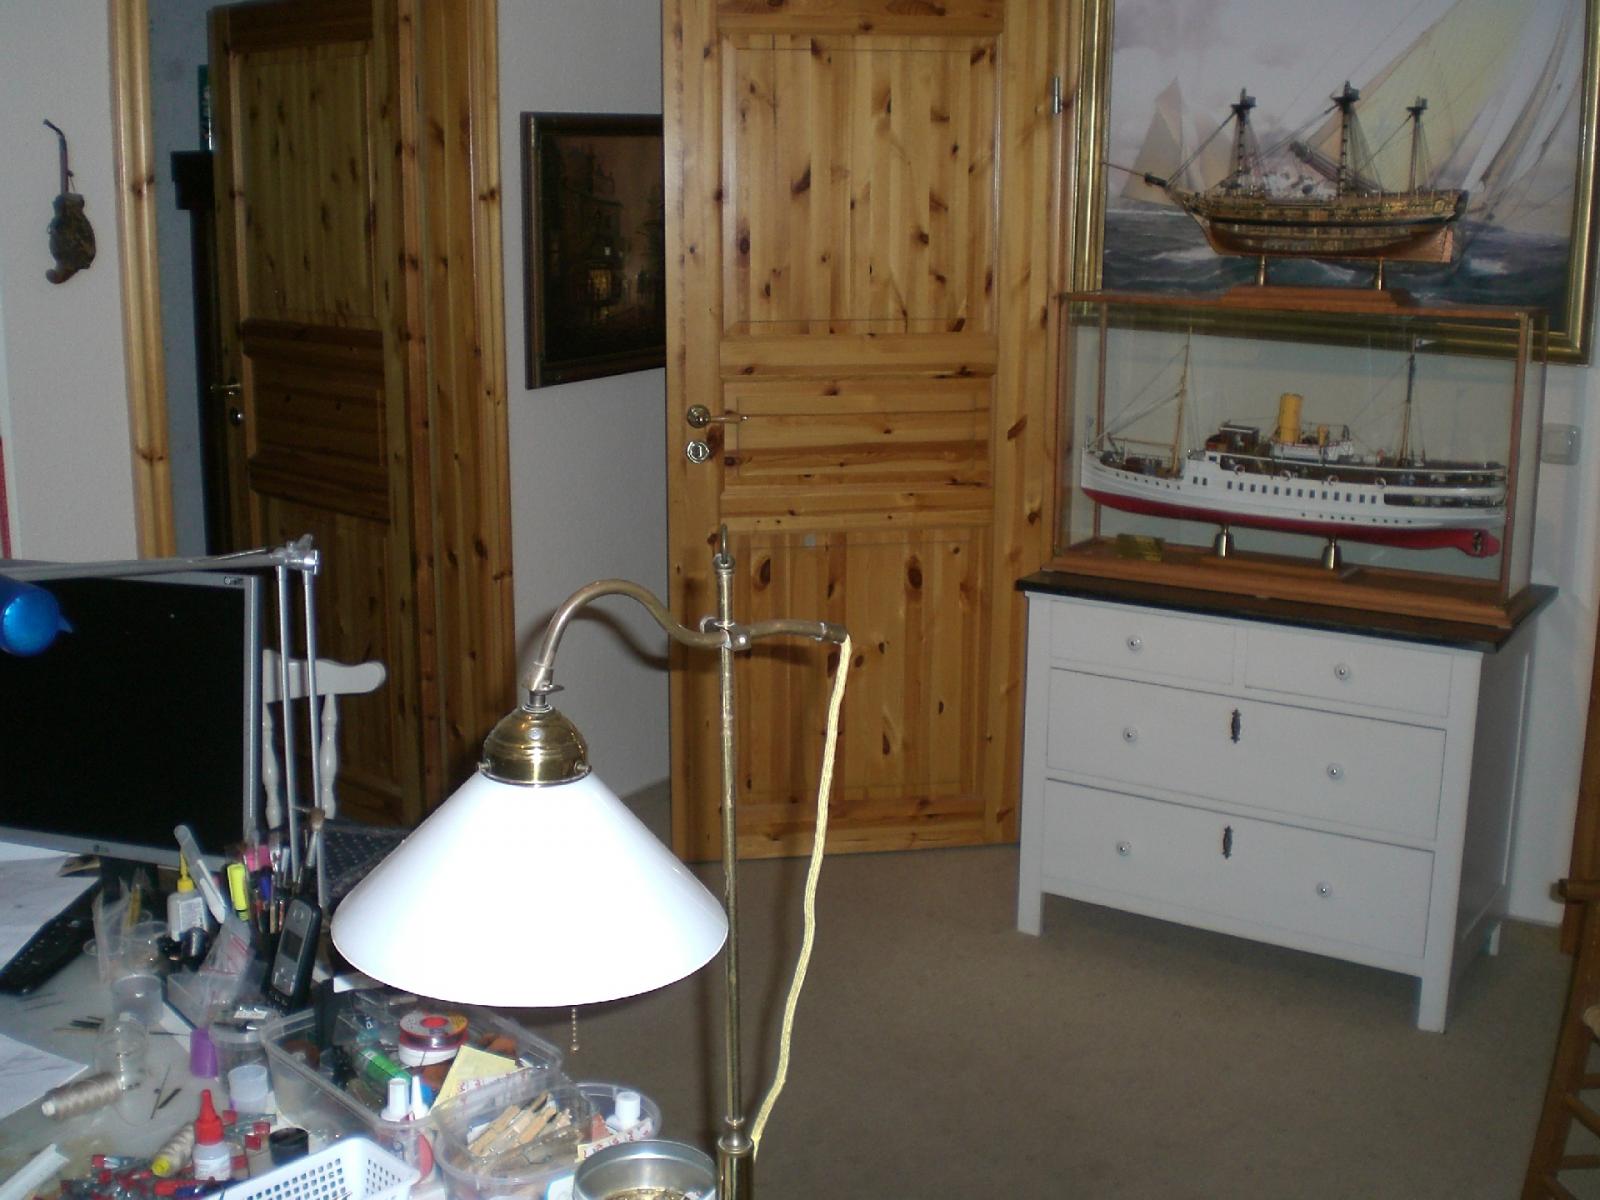
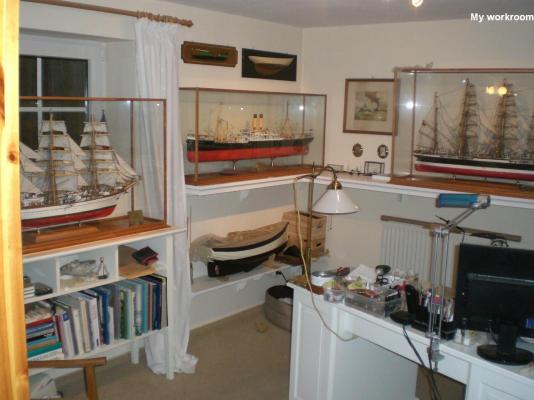
Hi Martin, mny thanks for your very Kind words, and also for my work room. It is in the cellar of our house, I have a carpet floor, a warm water heating for the winter and my own sanitary room connected to it. I wish I had such a room at entrance level with view into the garden, I had that in our previous home North of Hamburg. Nils
-
thanks Bob, of course I could`nt wait to get the Pilot Cutter ready for sail, but she was launched (RC controlled with and by Motor power) already some years ago. I was very pleased with the Performance so far.. Nils
-
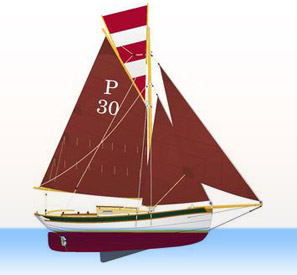
Pete, thats a nice boat you are doing, these double enders are not seen so often, the Stern reminds me a bit of the stern of my "CUX 87" Northfriesian shrimp net fisher (Billing Boats) My Cornish Pilot Cutter is about the same length as Michael Mott`s Bristol Pilot cutter, I I imagine the bowsprit on it and rigged up it could fit on that trolley Michael had built Nils
-
Hi Richard, your boats are looking lovely, nice lines, tidy work. Are the boats foreseen with the kit, or are you scratch.building These ? Nils
- 55 replies
-
- 1
-

-
- mercury
- victory models
- (and 1 more)
-
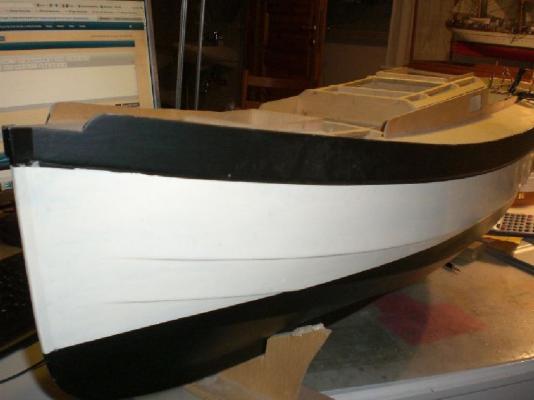
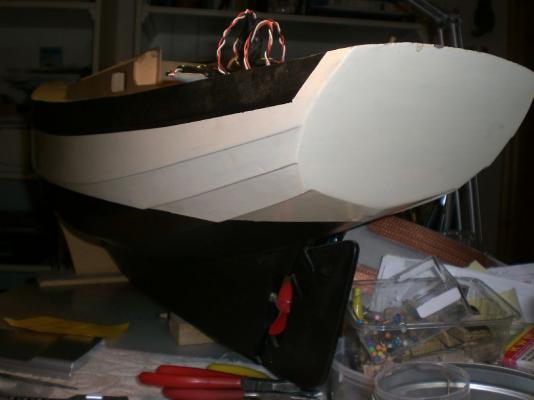
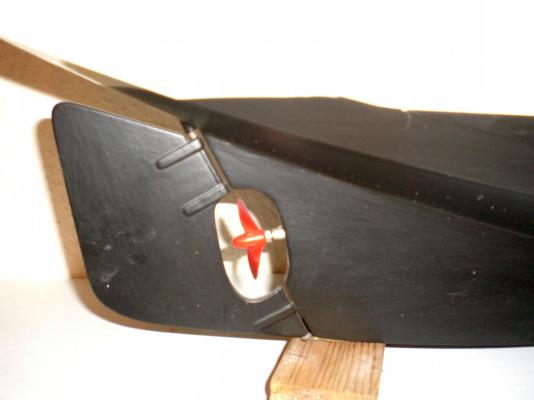
Hi Pete, thank you very much... The model hull on the shelf is 1m Long (hull only), as I like cutters so much, the actual 30ft Pilot cutter built by Cornish Crabbers, Cornwall, was shown on an anual boats Exhibition in Düsseldorf many years ago, and I decided to build a model, because of the nice lines. Rating was taken from Pictures out of broshures and the frameplan and lines I did myself. You are correct, ist a multichine hull (also the model) and built plank on Frame. The build was "frozen in" when we moved to our new house, because it would turn out too large for it. The cutter rig is foreseen in gaff mode with toppsail and it is representing those typical Cornish work boats. As a model it would turn out about the size of the cutter that member Michael is currently building. It is prepared for sail RC control and with auxilliary engine. The Ballast is put into the swing out centerboard here some pics, to give the Impression.... Nils
-
Thank you very much Dirk, I`ve been told that also Little Girls love to build ship models, not a bd thought or ?... Nils
-
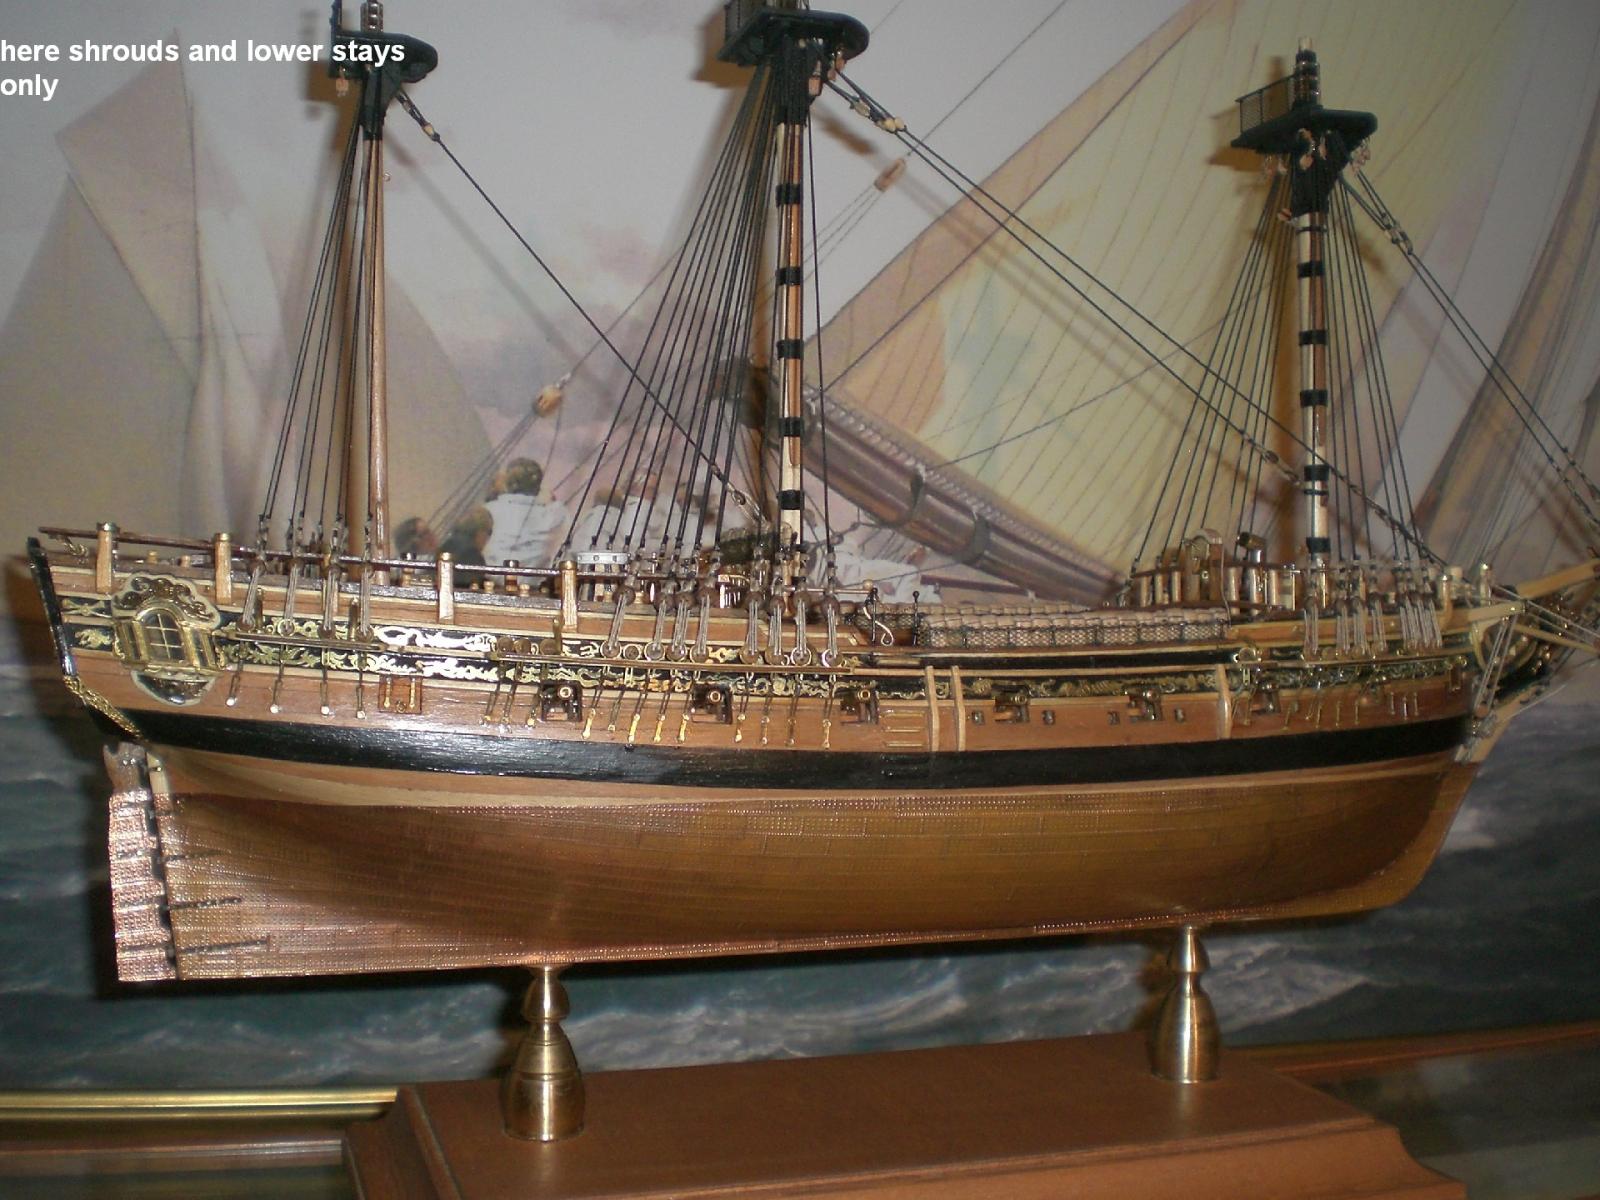
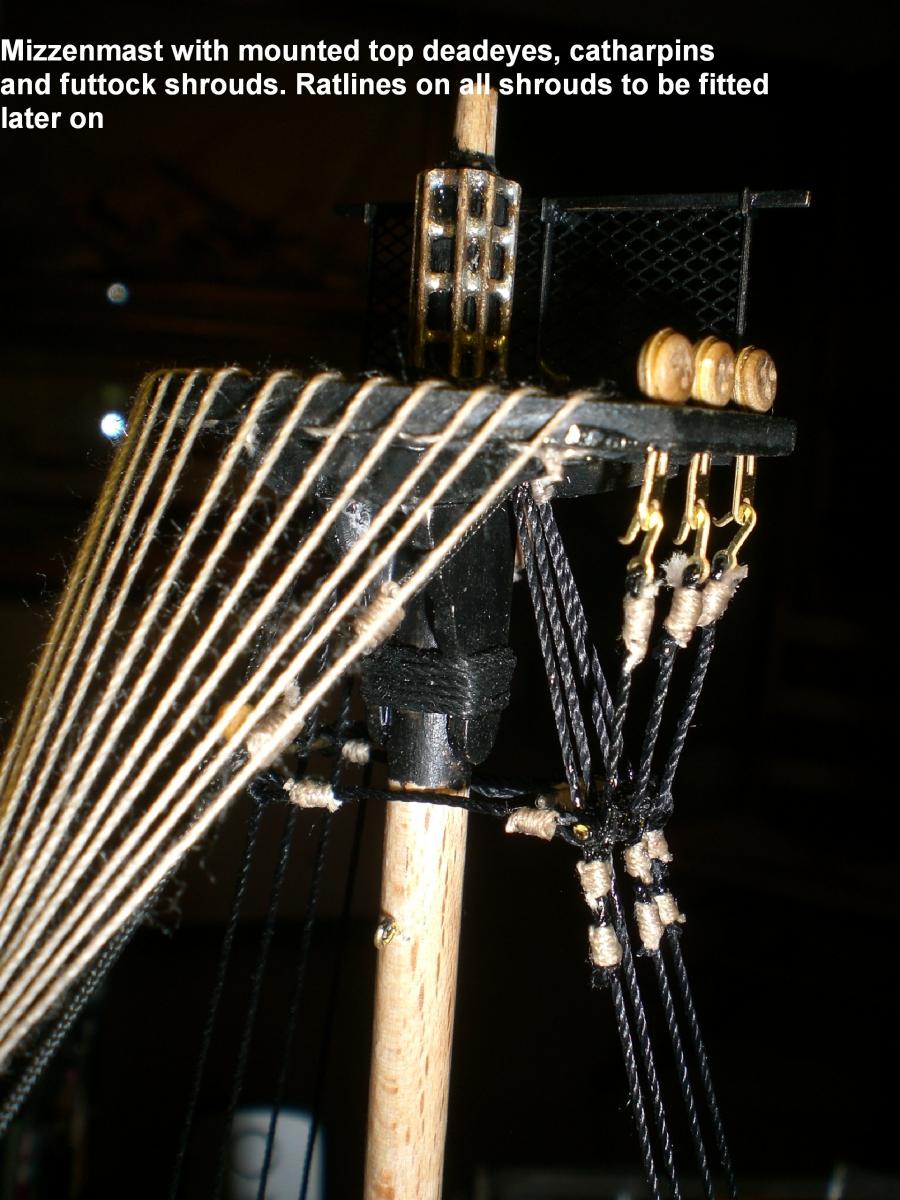
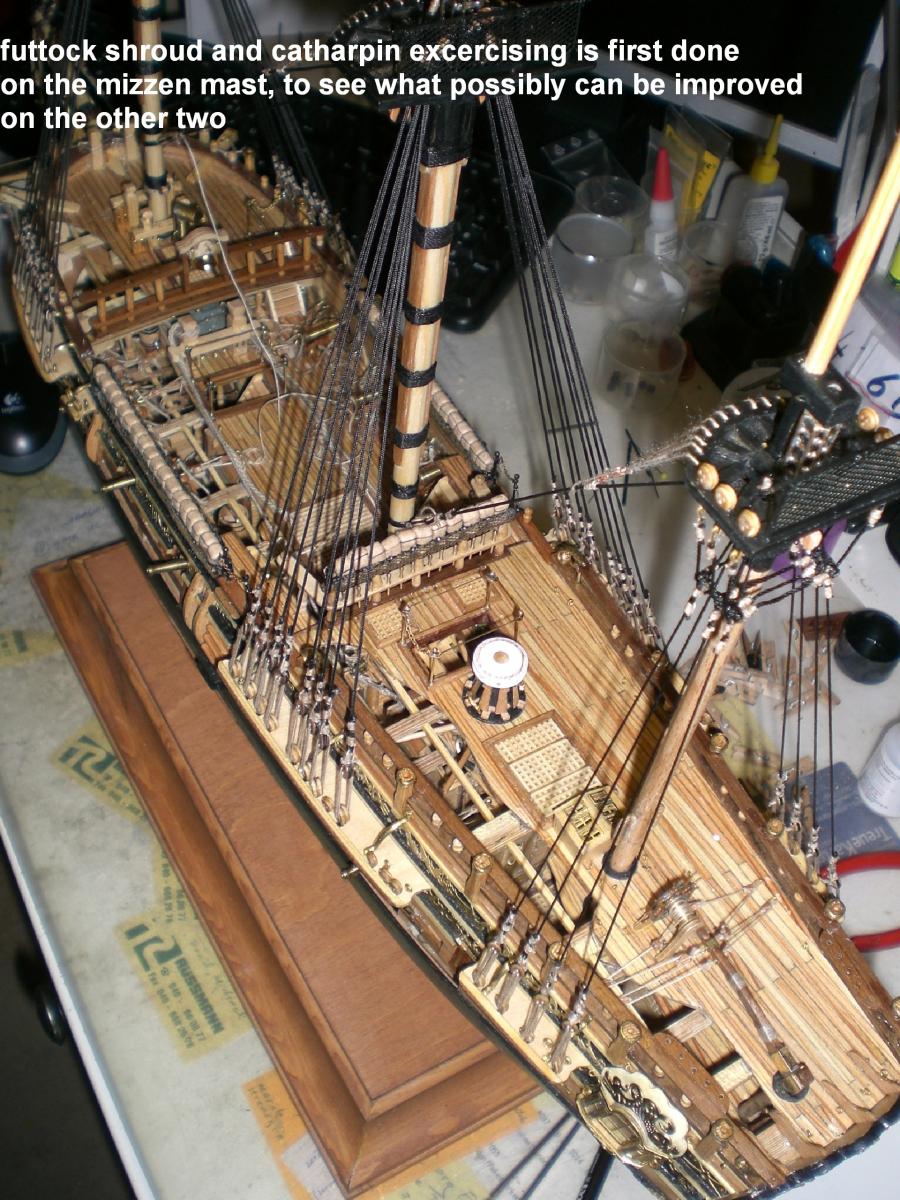
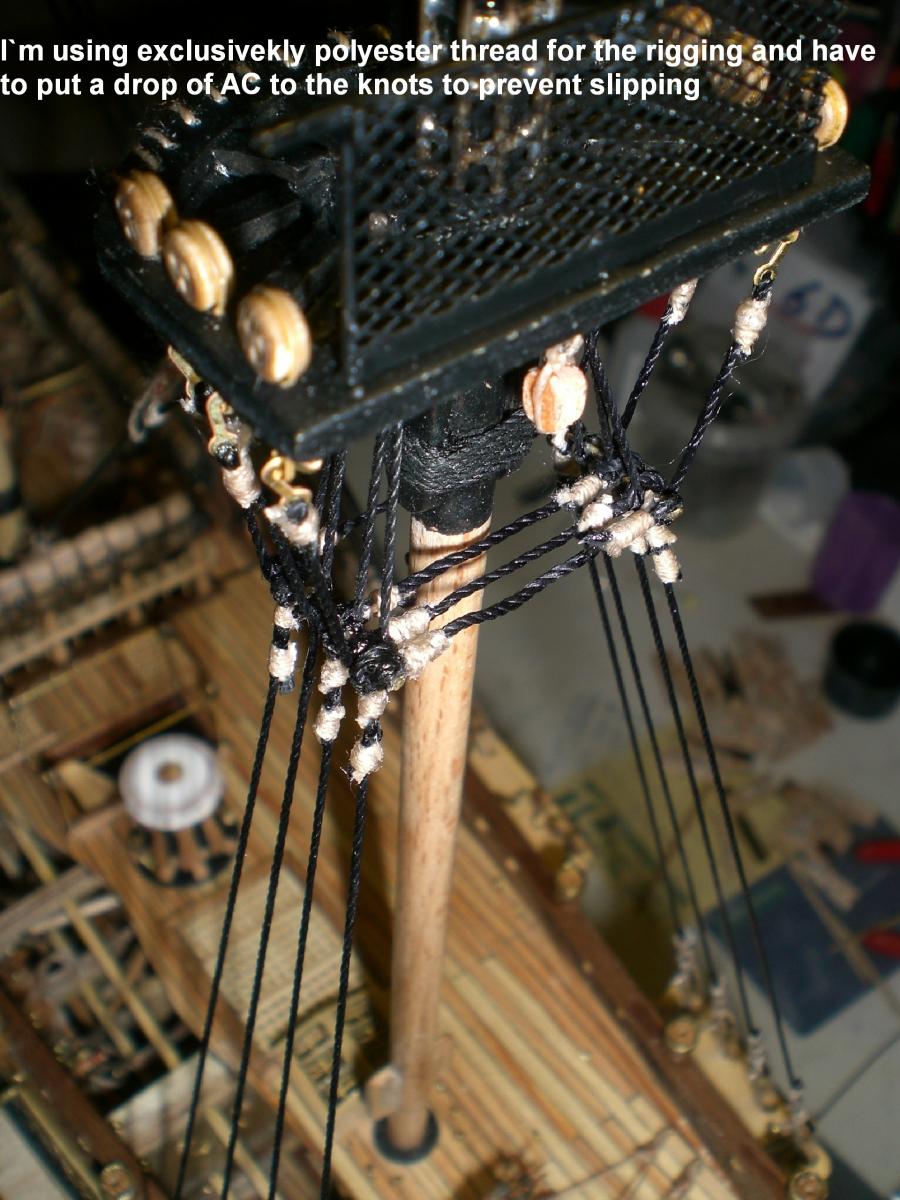
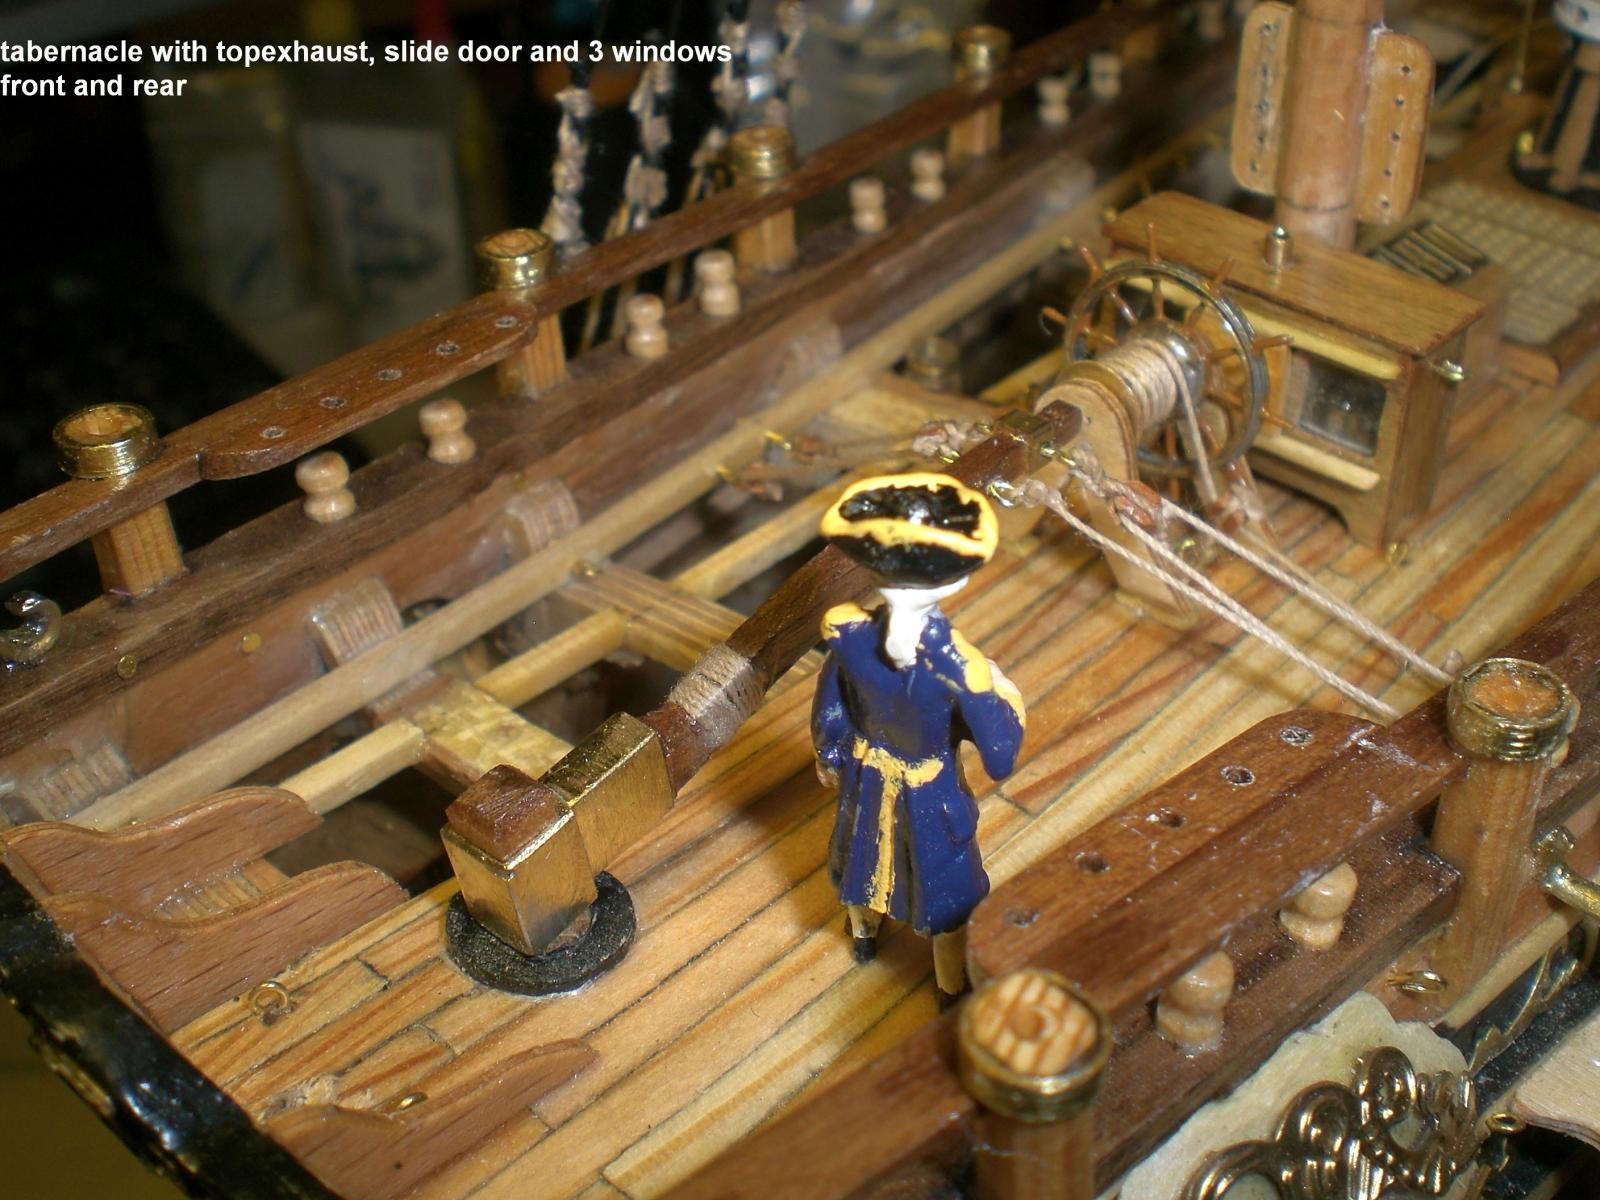
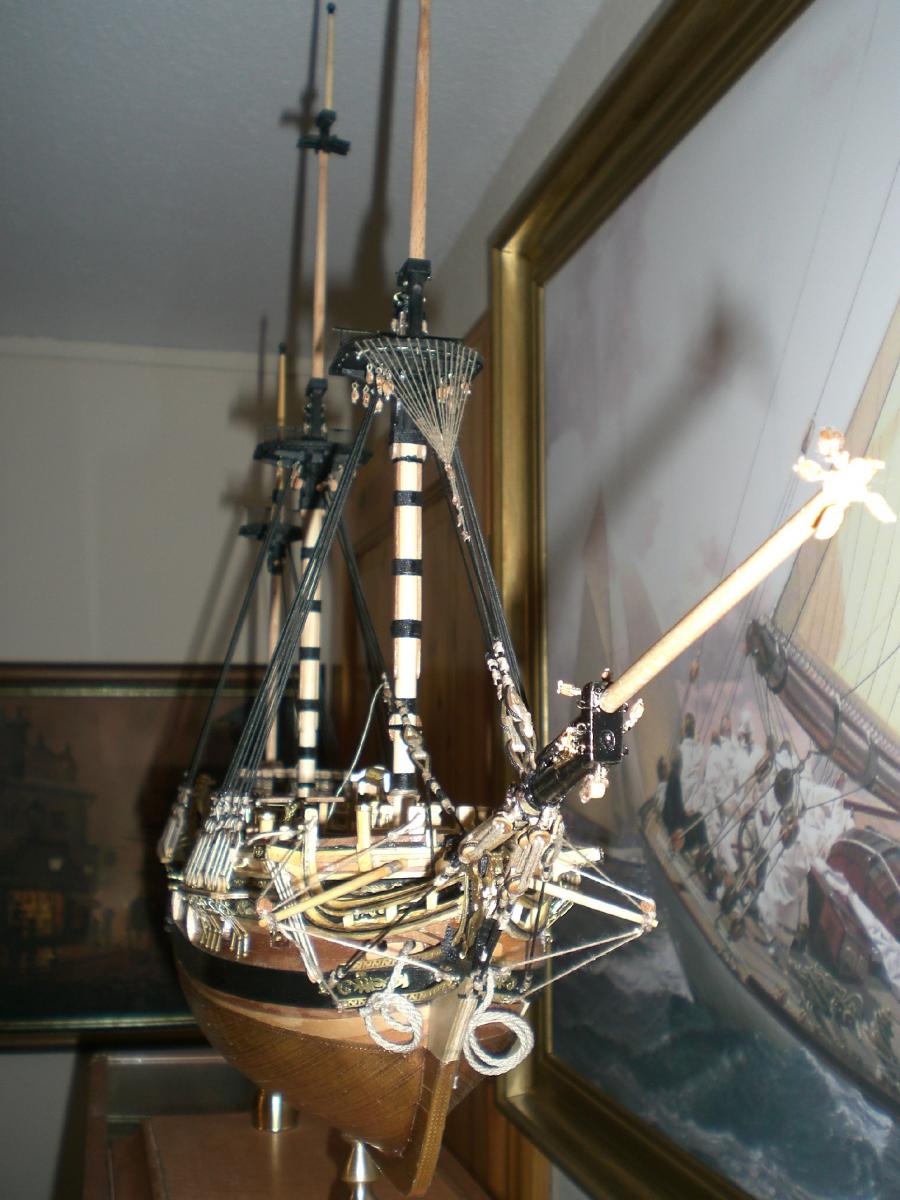
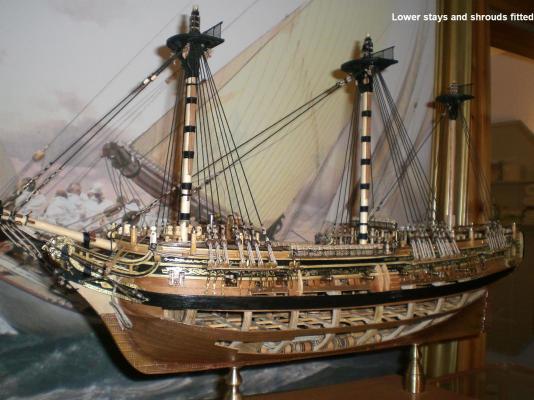
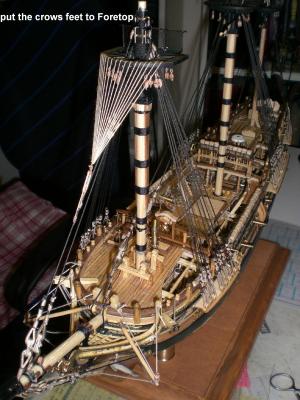
Build log part 61 here a Little update... but first a big update... My wife and I are proud of our first grandchild, a Little "Nina" she was Born on 10th Sept, she is so sweet, and we are so happy and thankful that all went well...., you can consider me the proudest grandpa These days... One can sure wonder how many lace thread goes into the crowfoot lacing, it is 180 cm Long. I had to undo it when I was halfway through, remove the too short lace-thread and redo it, Those Little blocks for tensioning are only 2,5mm Long, was quite a fiddling Job,. Nils


-
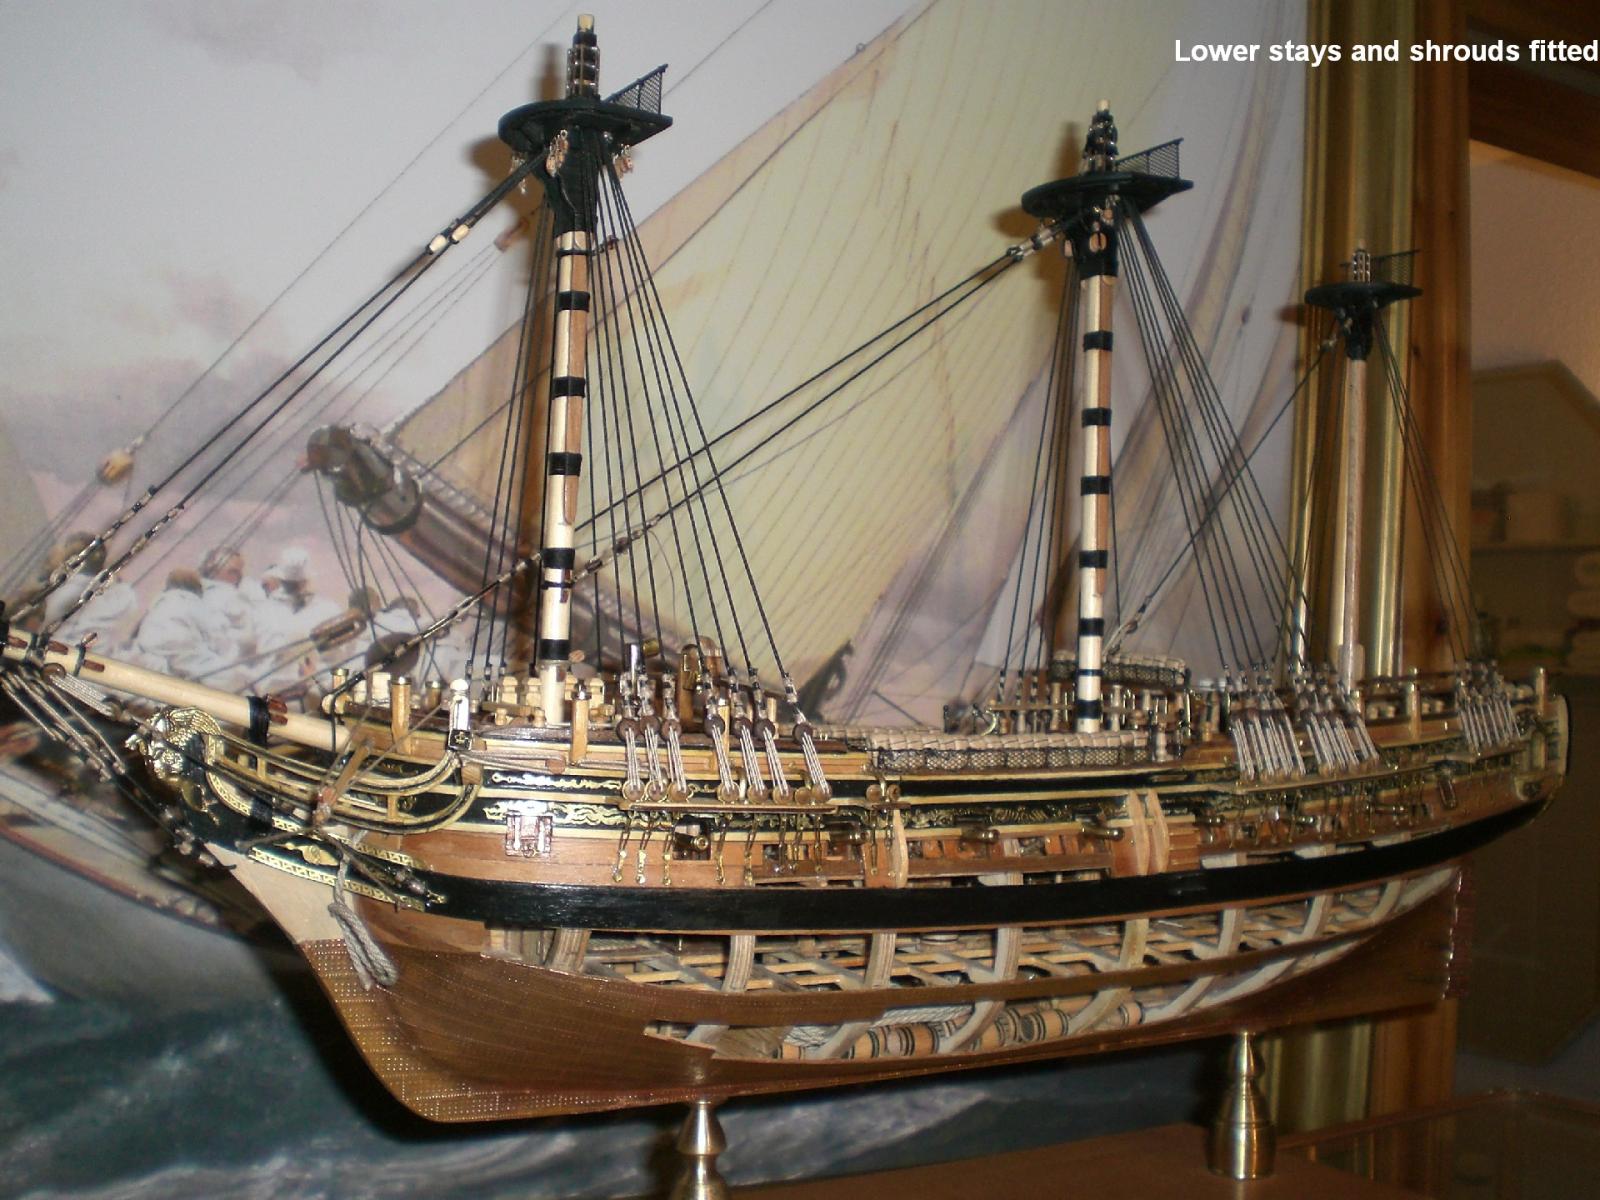
Thank you very much Pete, I have just finished the lower Standing rigging and the 3 masts are Standing firm and riged and well aligned now... Nils
-
beautiful done Omega, you realy are master of small scales, and the mode of all those cutaway sections, and interior Fitting out, fantastic Nils
-
Congrats Mauro, you have produced a very nice looking schooner, I always admire your skill in handsewing the sails (beautiful sails !), also the differnt Color of the sails, due to their wear in duty time. The Crew is probably just having their midday break. I love models under sail, it`s like the Sauce to the meat What are you planing next Mauro, and to share with us ? Nils
-
Super Bob, your Essex is built so nice accurate and clean, it could be an demonstrator object for the next kits box-cover, Very well done ! Nils
-
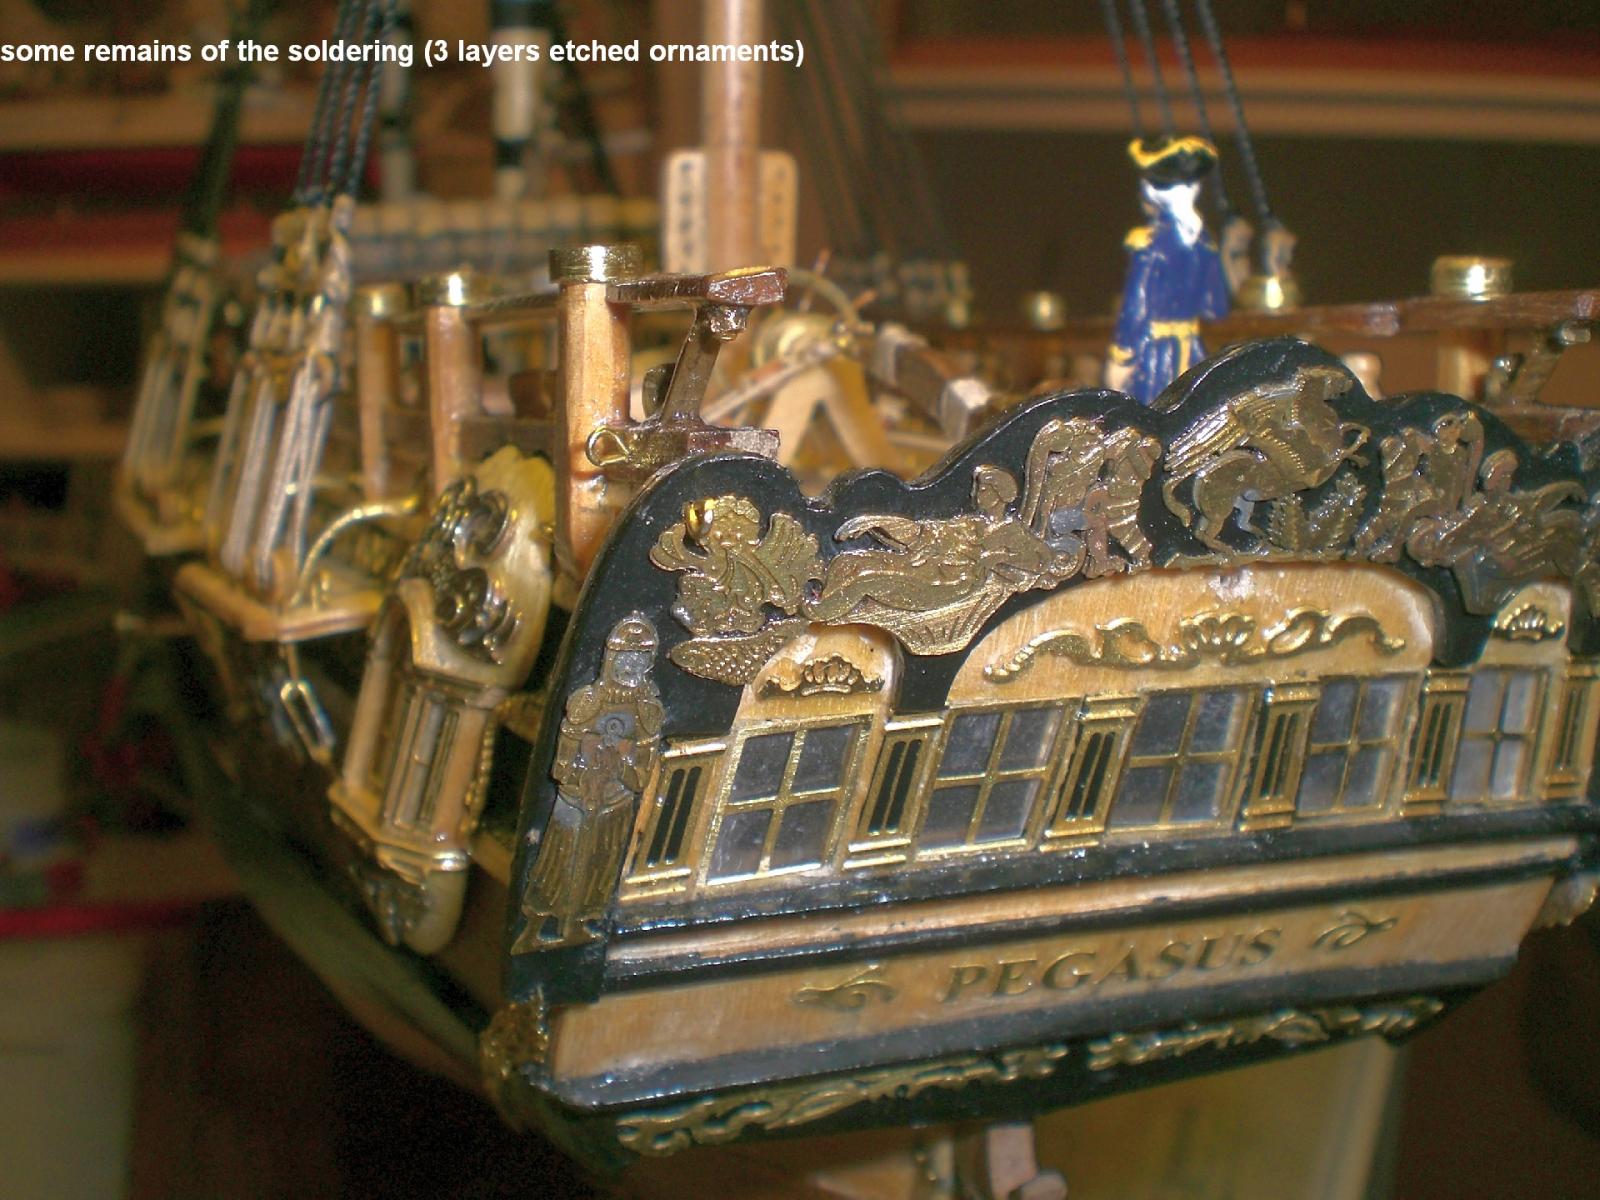
Thank you Bob (rafine), rigging is well under steam now... Keith, thanks for your nice comments Hi Omega, here some length Ratings for your orientation... bowpost (without figurehead) to sternplate, without lantern = 548 mm (21,5") outmost Point of jibboom to outmost Point of driverboom = 810mm (31,5") David, thank you very much, I`m glad you like it nice appreciation Piet, thank you very much Nils
-
Bob, Thanks very much for your words Nils
-
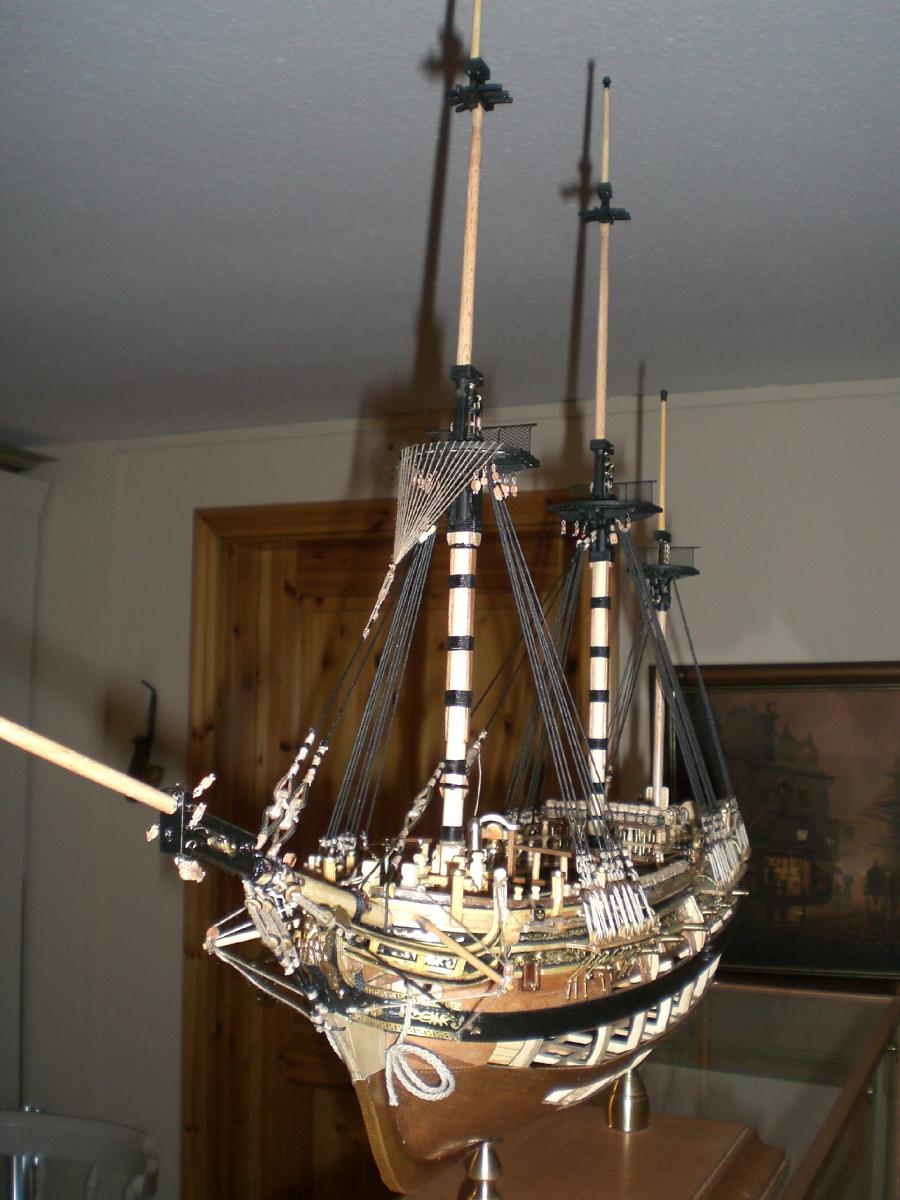
You find me smiling a wide grin Popeye, that preliminary "stay" is just a dummy string to secure the foremast for attaching the shrouds, with a slight backwards orientated lean of the foremast. The two forestays with their slings, mouses, heartblocks etc, are already prepared to be fitted where they should be, and to bing the mast in an perpendicular Position, this is at the same time gently tensioning the foremast shrouds in common mode. First the lacing Ends have to be tied to the shrouds above the upper deadeyes. Nils