Mirabell61
-
Posts
7,390 -
Joined
-
Last visited
Content Type
Profiles
Forums
Gallery
Events
Everything posted by Mirabell61
-
 Thank you very much for your nice comment Rob, Nils
- 2,625 replies
-
- 4
-

-
- kaiser wilhelm der grosse
- passenger steamer
- (and 1 more)
-
Danke Karl, your compliment is much appreciated.... Nils
- 2,625 replies
-
- 3
-
-
- kaiser wilhelm der grosse
- passenger steamer
- (and 1 more)
-
I agree Michael, Thats exactly what gives the spice into the meal, as well as a good overview drawing / plan and a lot of enthusiastic scratch modeling and fun.... Nils
- 2,625 replies
-
- 6
-
-
- kaiser wilhelm der grosse
- passenger steamer
- (and 1 more)
-
Yes Michael, those were lovely ships, and force 10 must be a bit frightening experience in your memory Nils
- 749 replies
-
- 4
-
-
- albertic
- ocean liner
- (and 2 more)
-
thank you very much Denis, Nils
- 2,625 replies
-
- 4
-
-
- kaiser wilhelm der grosse
- passenger steamer
- (and 1 more)
-
Hi MIchael, looking at the wide knowledge and skill you have and the techniqes you are using I can imagine that you perhaps one day might be tempted to build a complete and beautiful model of a steam driven passenger liner of your choise, out of the era of the "Albertic" early 1900`s or so.... Nils
- 749 replies
-
- 7
-
-
- albertic
- ocean liner
- (and 2 more)
-
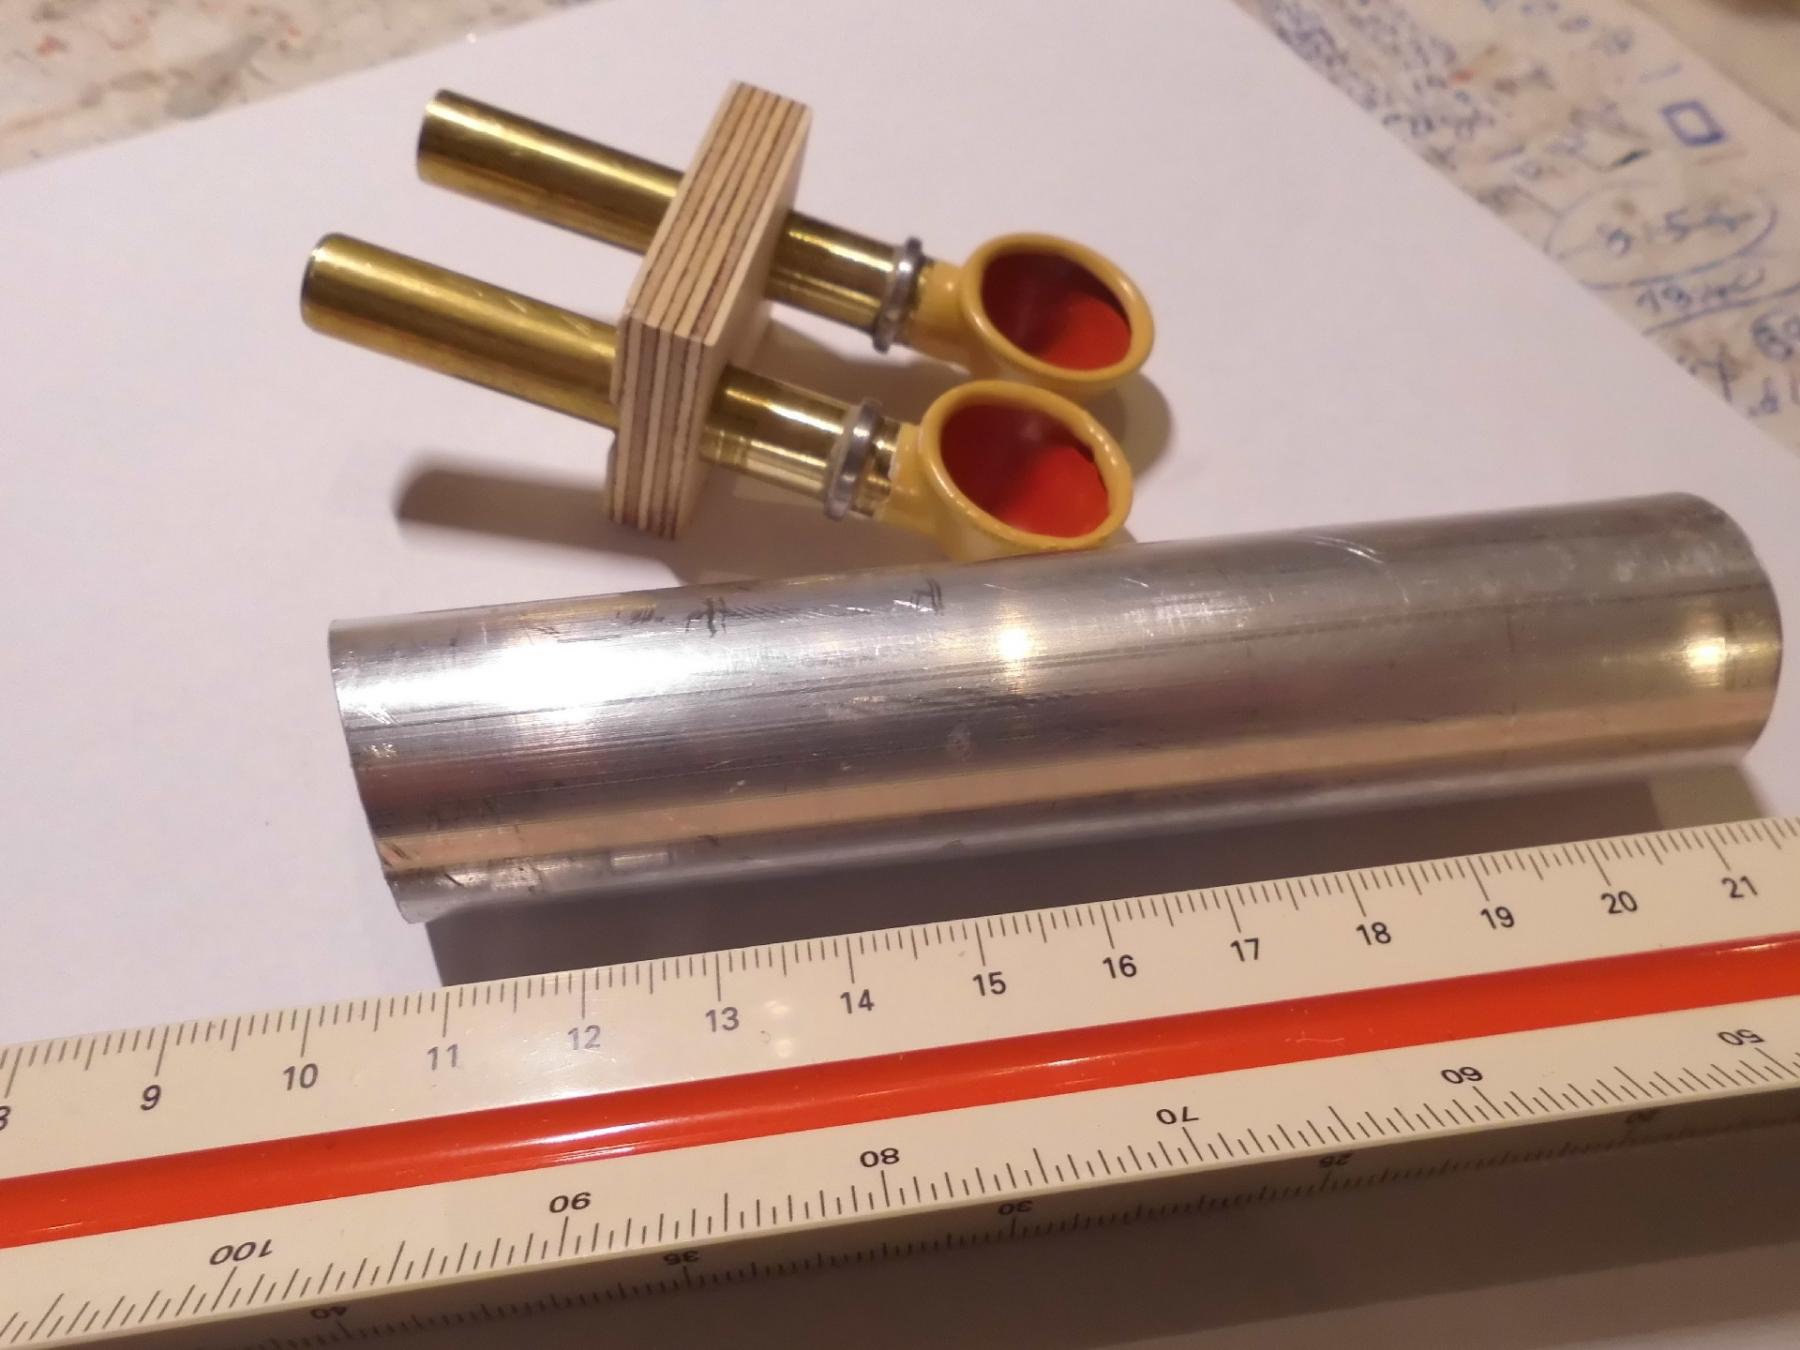
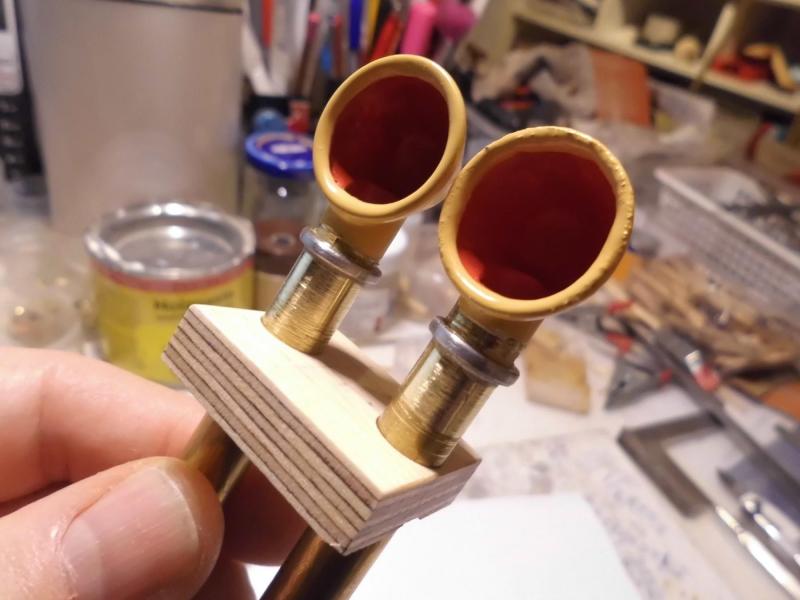
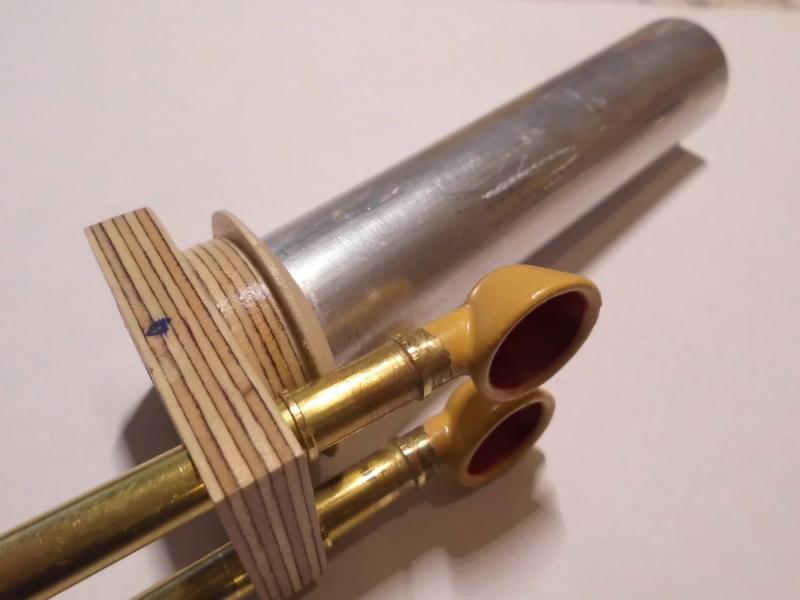
Hi Carl, Thanks for your comment... some of the making of details depend on the available material of the fore-products I use. The vent scoops (bag feet) are of thin pressed nickel coated steel plate, which is easy for soft soldering together with brass. In case of brass and aluminiun connections there is still CA allowing a lastable connection... For the funnels I use Alum. tube OD 26 x 1,5 mm, whereby it was initialy intended to use 26 x 0,5 brass tube, but that supplier let me down. Weightwise it would be round about the same on the ship. Nils
- 2,625 replies
-
- 7
-
-
- kaiser wilhelm der grosse
- passenger steamer
- (and 1 more)
-
Hi Greg, thanks for your nice comment. The copper stripe is in an anealed rather "soft" condition and stays just as bent (no bounce back). I am using two sorts of etched railing, one with 3 wires and one of 4 wires each plus handrail. The later is very fragile and a few mis-bends, staightening again and corrective rebending can cause the very thin wires to break. So its worth it investing in a bend template. Nils
- 2,625 replies
-
- 3
-
-
- kaiser wilhelm der grosse
- passenger steamer
- (and 1 more)
-
Thank you very much B.E. for your kind compliment, I`m pleased you like the build. It is in the moment hauled alongside the fitting out quay of my yard..., workers processing at all corners Nils
- 2,625 replies
-
- 3
-
-
- kaiser wilhelm der grosse
- passenger steamer
- (and 1 more)
-
Hi Hartmut, thanks for your nice comment, and I`m pleased to note that the Gorch Fock 3-mast barque will be your next project. You do her justice as she was nearly sentenced for break down these days ( now repair has been luckily approved once more) I will be pleased to give any assistance I can, feel free to contact me whenever you wish.... Nils
- 2,625 replies
-
- 5
-
-
- kaiser wilhelm der grosse
- passenger steamer
- (and 1 more)
-
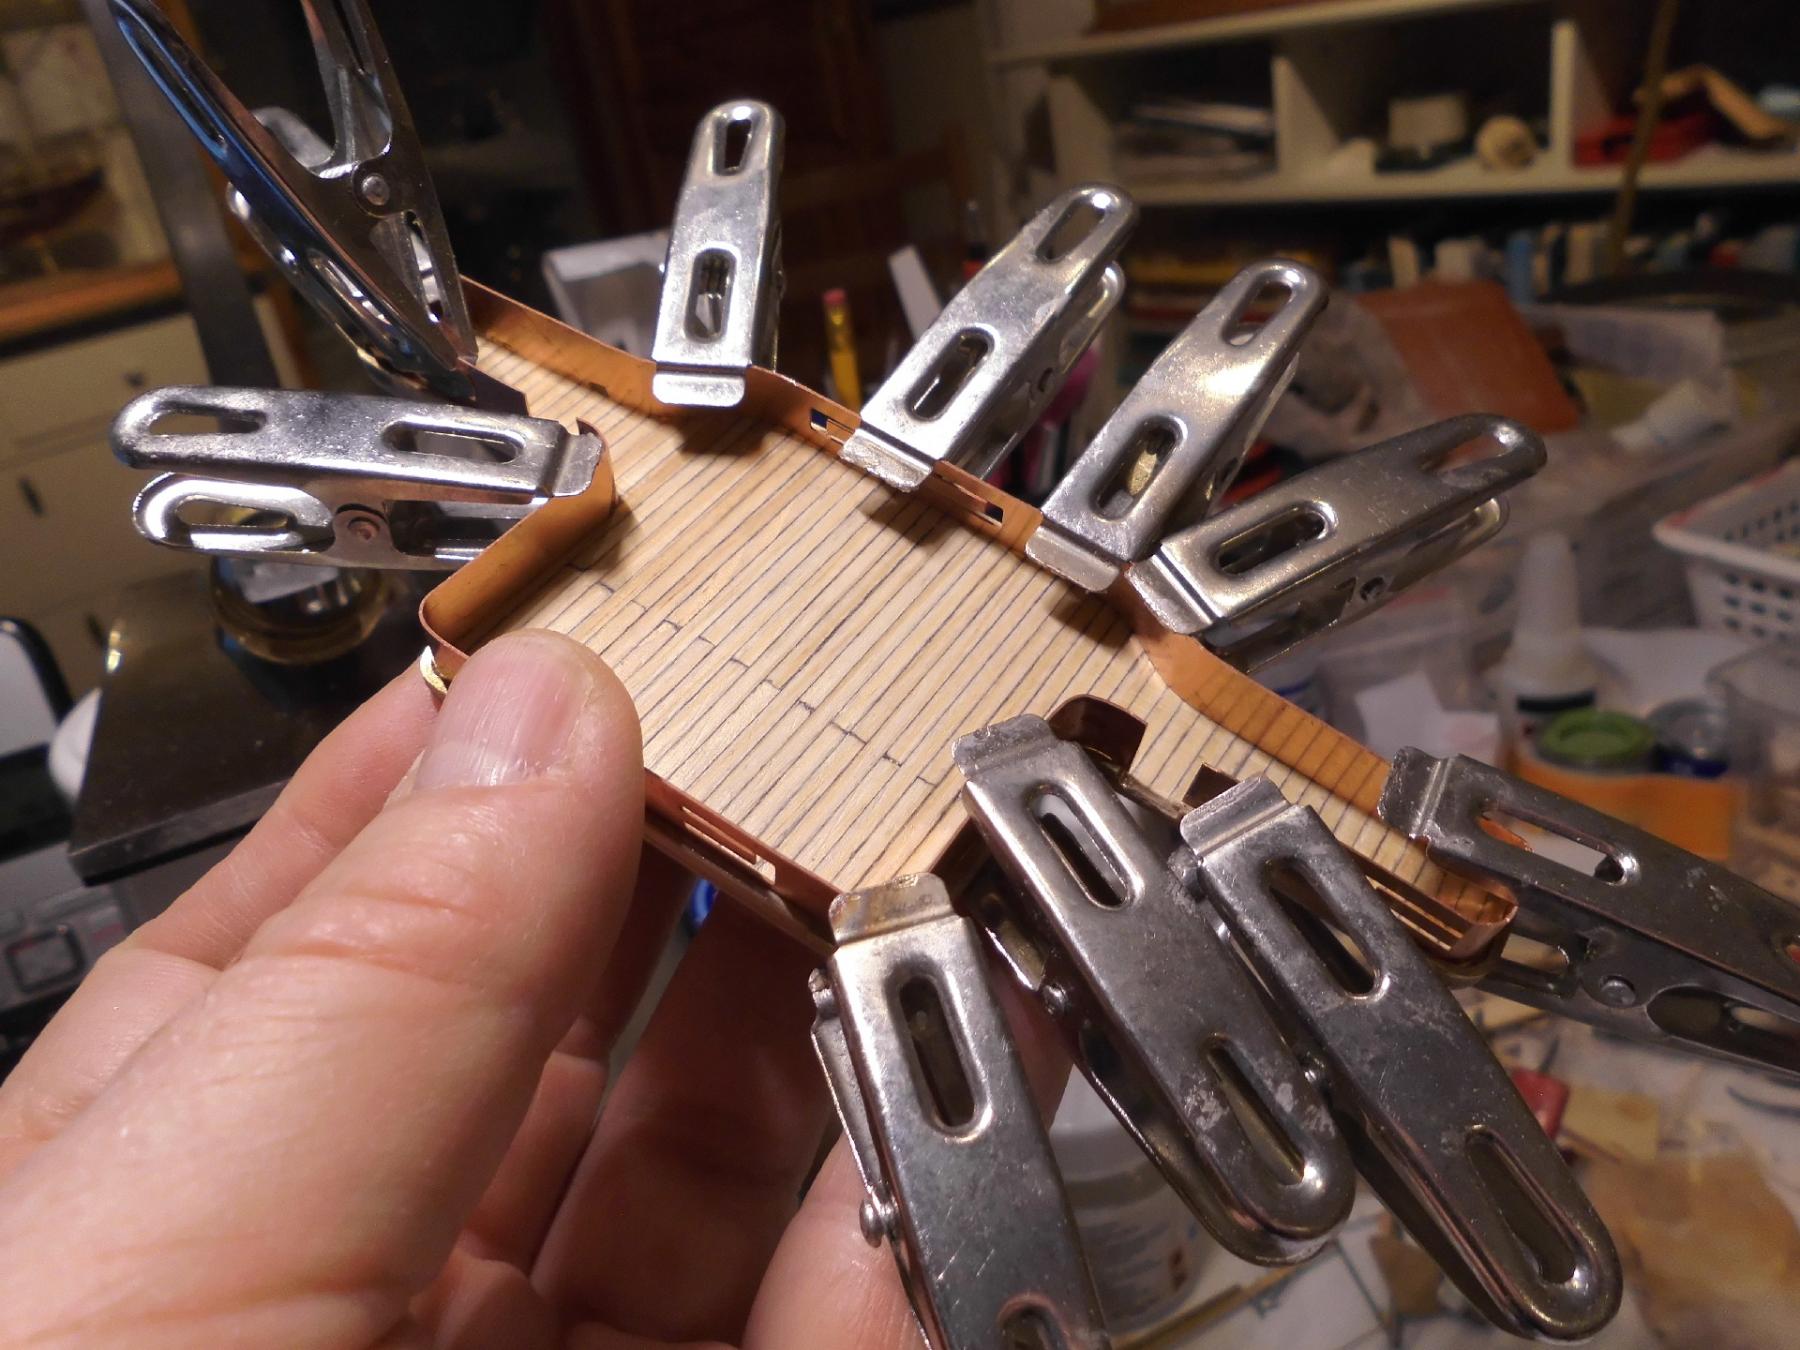
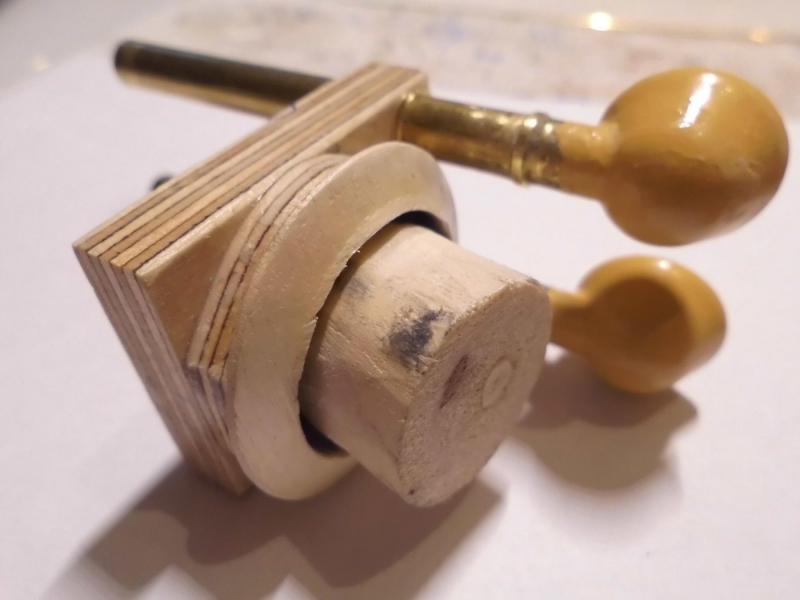
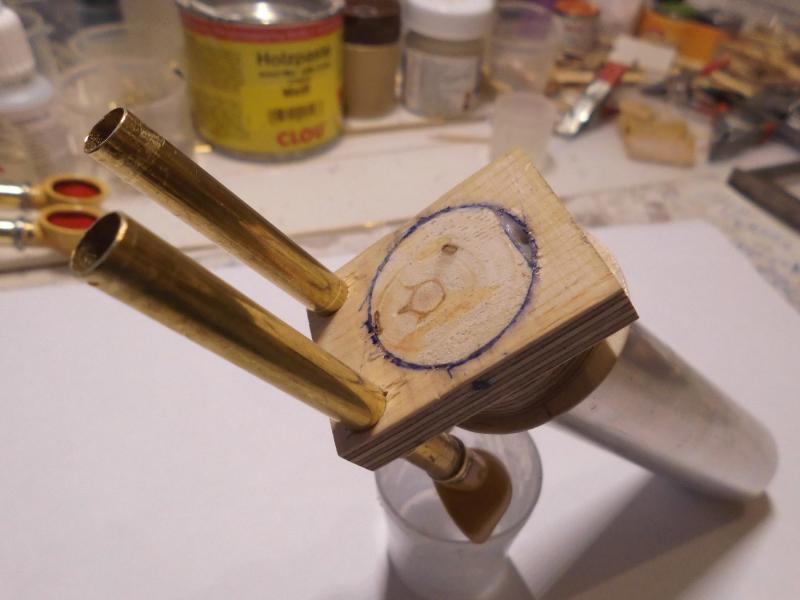
Update : funnel sockets and some vent enbeddings on the upper deck, also doing a bending template for one of the upper platforms (with waste 8 mm copper stripe), before bending the rather fragile and expensive etched railing material... The vent tubes still have to be cut to length at a later time Nils here the first raw funnel socket comprising the short center dowel, with 10 ° backward rake, (the hole made with the hole-saw tool as introduced before) The structures are made from 7-layer water tight ply. The socket design worked out exactly as it was intended to be the bottom funnel-end will be shifted appr. 12mm into the foreseen close-fit socket the centering dowel sits rock tight (glued) in the structure plate these are two of the four largest vents on the ship, bringing required amount of air down to the boiler furnaces. Member, Bill of Idaho, will probably have noticed that here the "Brad-Point drills" have come in the game for making the clean cut vent-tube holes. here the wooden layers can be seen quite well in unpainted condition.... this is a bending template for the railing of one of the upper platforms, before bending and glueing on the etched railing


- 2,625 replies
-
- 17
-
-
- kaiser wilhelm der grosse
- passenger steamer
- (and 1 more)
-
excellent work Mike, its all so acurate and clean.... Nils
- 452 replies
-
- 3
-
-
- cheerful
- Syren Ship Model Company
- (and 1 more)
-
very nice work on the railing / stanchions Michael, is the top handrail made of wood ? Nils
- 749 replies
-
- 5
-
-
- albertic
- ocean liner
- (and 2 more)
-
Hi Hartmut, your carving came out looking excellent ! Nils
-
ancre Chebece 1750 by Jeronimo - FINISHED
Mirabell61 replied to Jeronimo's topic in - Build logs for subjects built 1501 - 1750
beautiful work on these fragile frames Karl , Nils -
thank you very much Piet and Greg, for your nice compliments... Also thanks to all the "likes", much appreciated... Piet, thanks for looking in and catching up, I`m pleased that you like the model... Greg, nice comment and compliment, thanks very much.. Nils
- 2,625 replies
-
- 4
-
-
- kaiser wilhelm der grosse
- passenger steamer
- (and 1 more)
-
again, many thanks Rob, Nils
- 2,625 replies
-
- 3
-
-
- kaiser wilhelm der grosse
- passenger steamer
- (and 1 more)
-
Thank you very much Rob, much appreciated... Nils
- 2,625 replies
-
- 3
-
-
- kaiser wilhelm der grosse
- passenger steamer
- (and 1 more)
-
thanks for sharing your idea Gregory, Nils
-
Thanks Carl, that sinks my doubts to zero for possible electro chemical corosion. You`re so right, one of the three "knockout criteria" is the missing electrolyt in this case. The final paint coat will be resin based paint (Kunststoffbasis Farbe) Nils
- 2,625 replies
-
- 6
-
-
- kaiser wilhelm der grosse
- passenger steamer
- (and 1 more)
-
many thanks Bob and Bob, for both your nice compliments.... I`ll put in an overview pic appr. once a month, if its worth showing the progress.... Nils
- 2,625 replies
-
- 4
-
-
- kaiser wilhelm der grosse
- passenger steamer
- (and 1 more)