Ras Ambrioso
-
Posts
662 -
Joined
-
Last visited
Content Type
Profiles
Forums
Gallery
Events
Everything posted by Ras Ambrioso
-
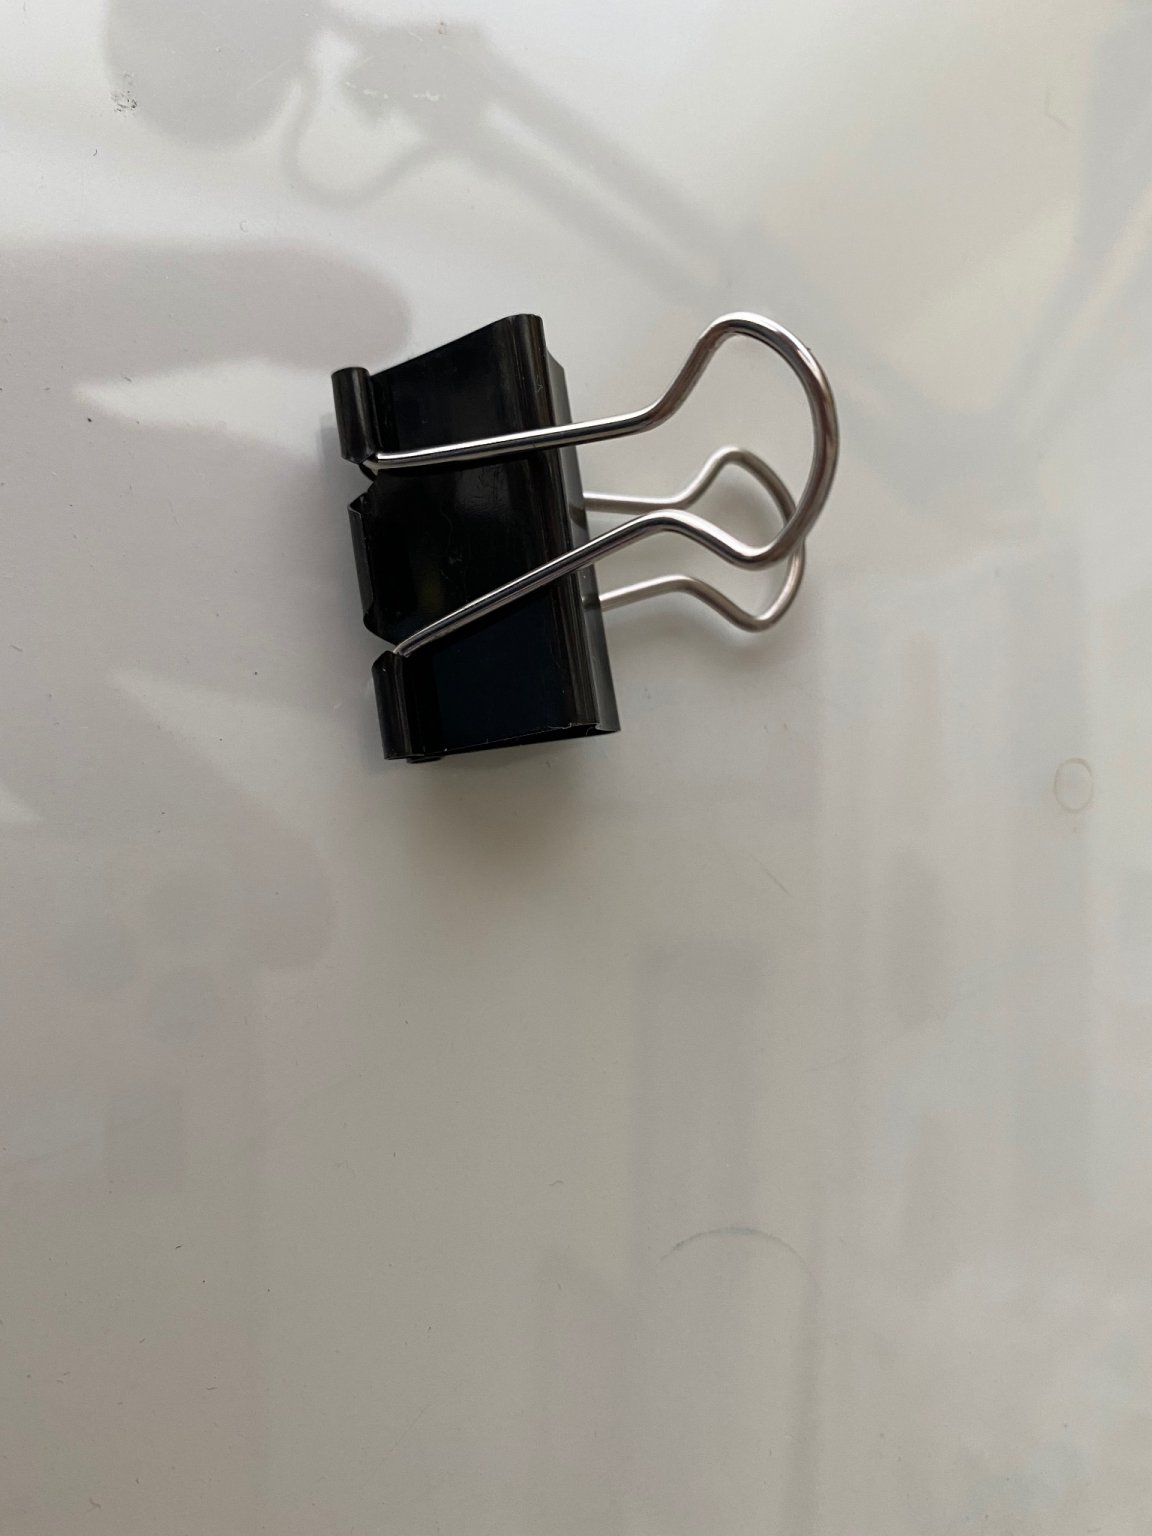
 Eamonn...the clip shot was supposed to be a still photo . I take those pictures with my phone and the darn thing is too sensitive to my blunt fingers. I wind up shooting a video instead of a photo. Anyway, the clips are great and easy to make. All you need is two office paper clips. You have to disassemble one to remove the levers and this will give you two separate levers. You may have to use a plier to open up the center of the clips body as shown with the arrow. Then you slip the single lever in the other whole clip. It will snap in place. I am writing this and trying to get picture to show you but I can only find large clips and their levers are shorter that the base of the clip. The ones I use in the shop were made with smaller size clips so, you will have to check. The photos here will show the larger clip disassembled. Did a little more planking today but my eagerness to start planking made me cut corners in the fairing of the frame and I have been having trouble getting the planks to settle in the proper place. Had to use fillers and cheaters all along. Today I completed the seven planks. This includes two planks on on each side of the garboard. I plan to continue planking from the end towards the center. Having fun, though.

-
Boy, I am envious. Love your hold detail. But tell us about your door. I guess that you took a photo of a door with the poster and glued it to the balsa door. Great idea, in my book, for other details that cannot be fully seen on the finished model. Then I certainly see you work real fast and the planking looks flawless. Compare that to mine which is going to require a lot of sanding and filling to match your. Congratulations and I will be following you.
- 79 replies
-
- 1
-

-
- Fifie
- Victory Models
- (and 1 more)
-
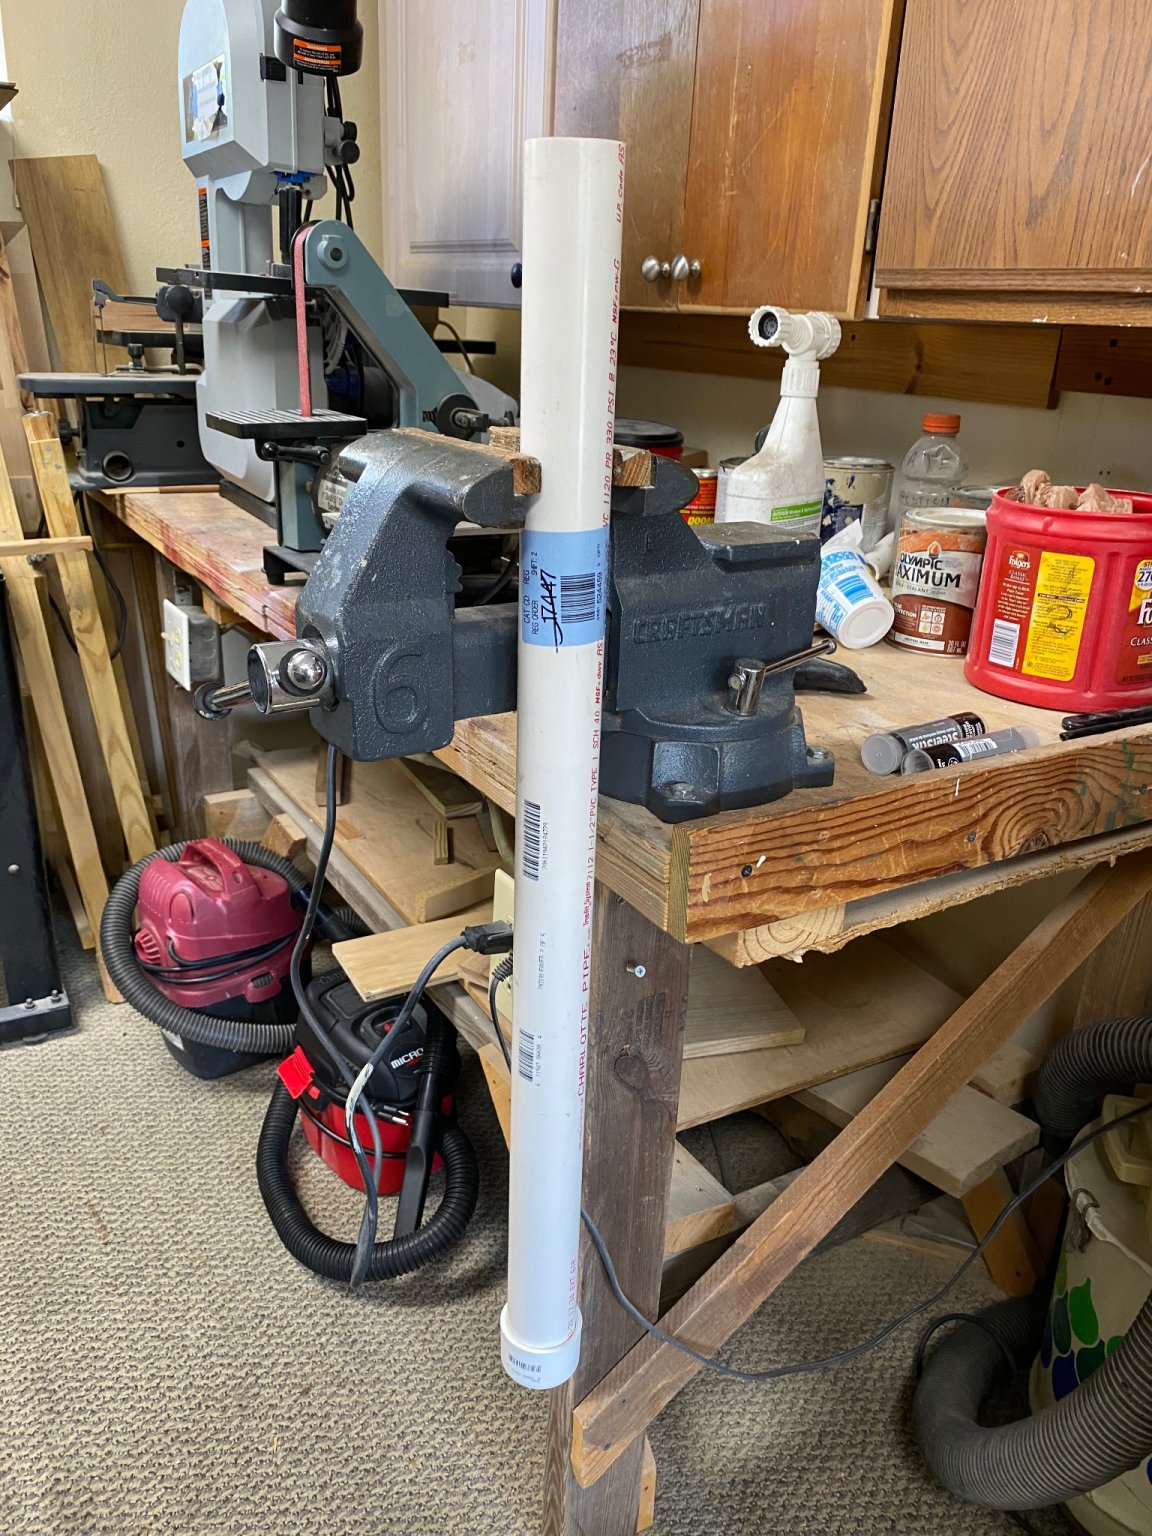
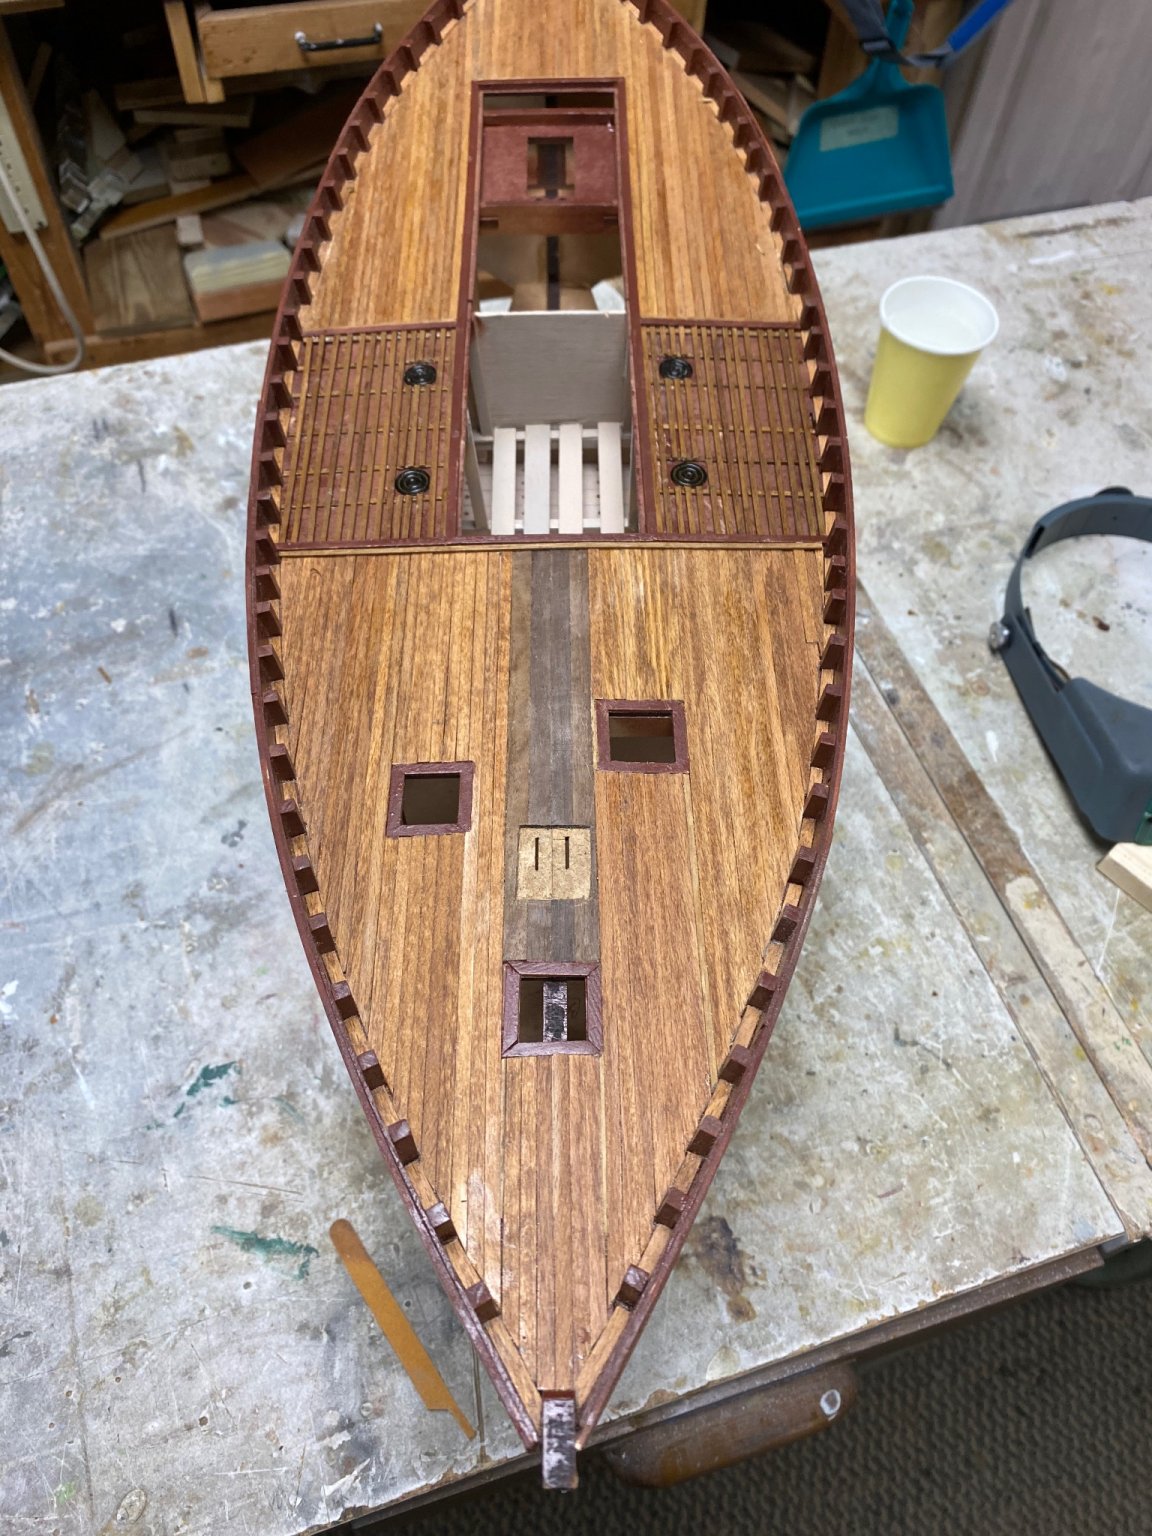
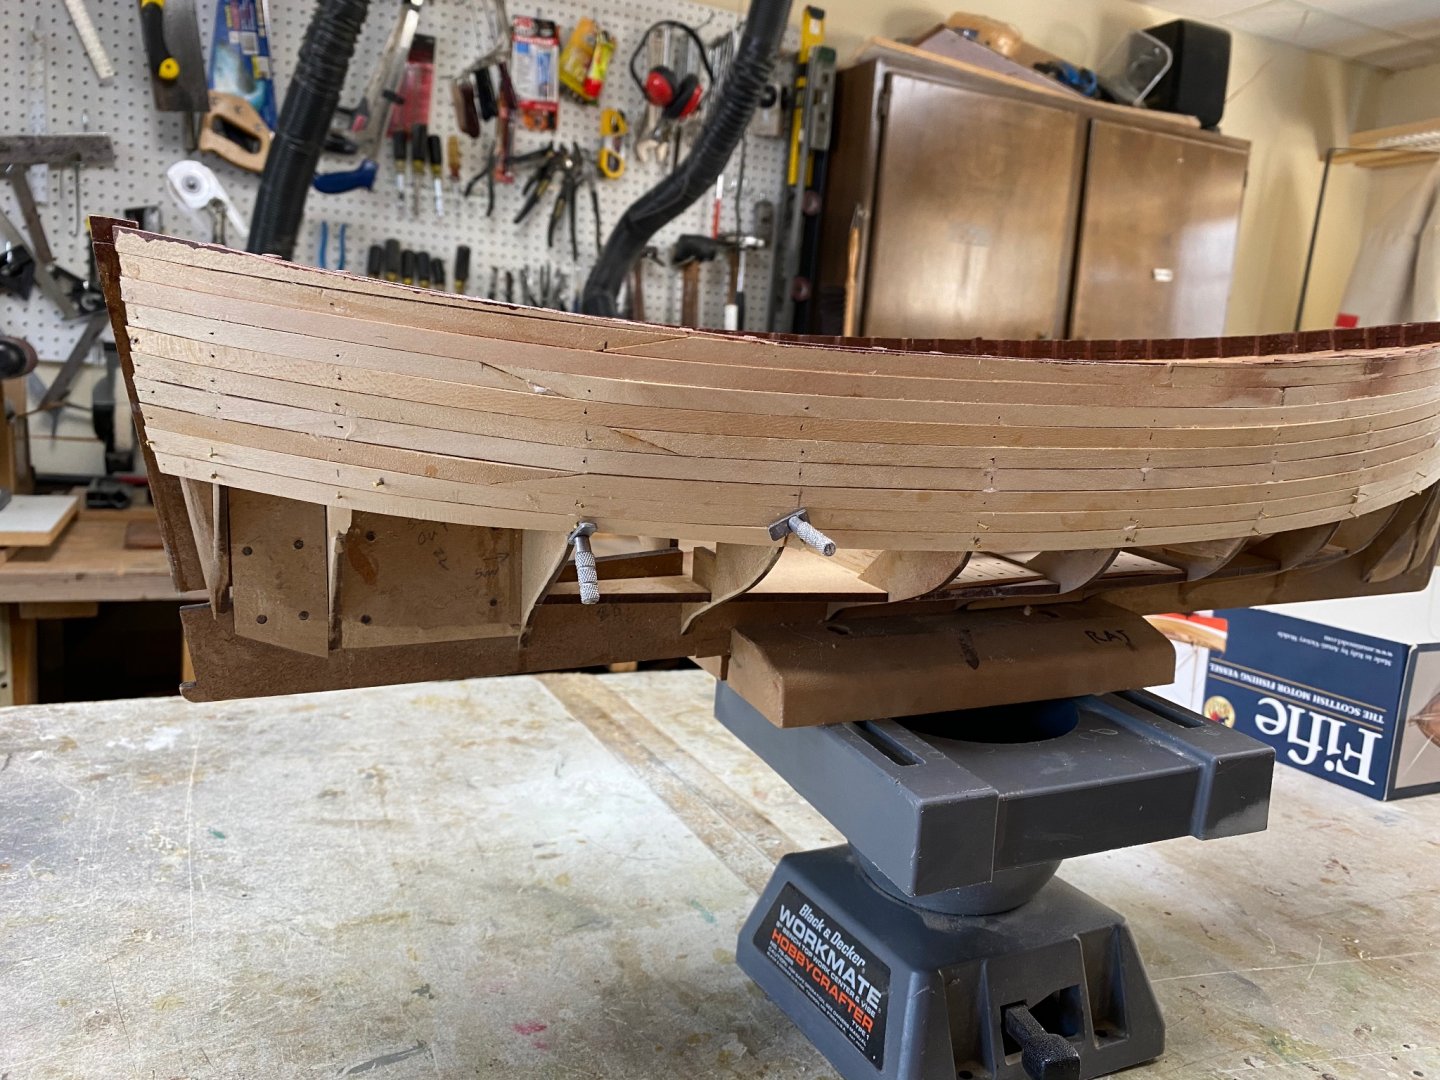
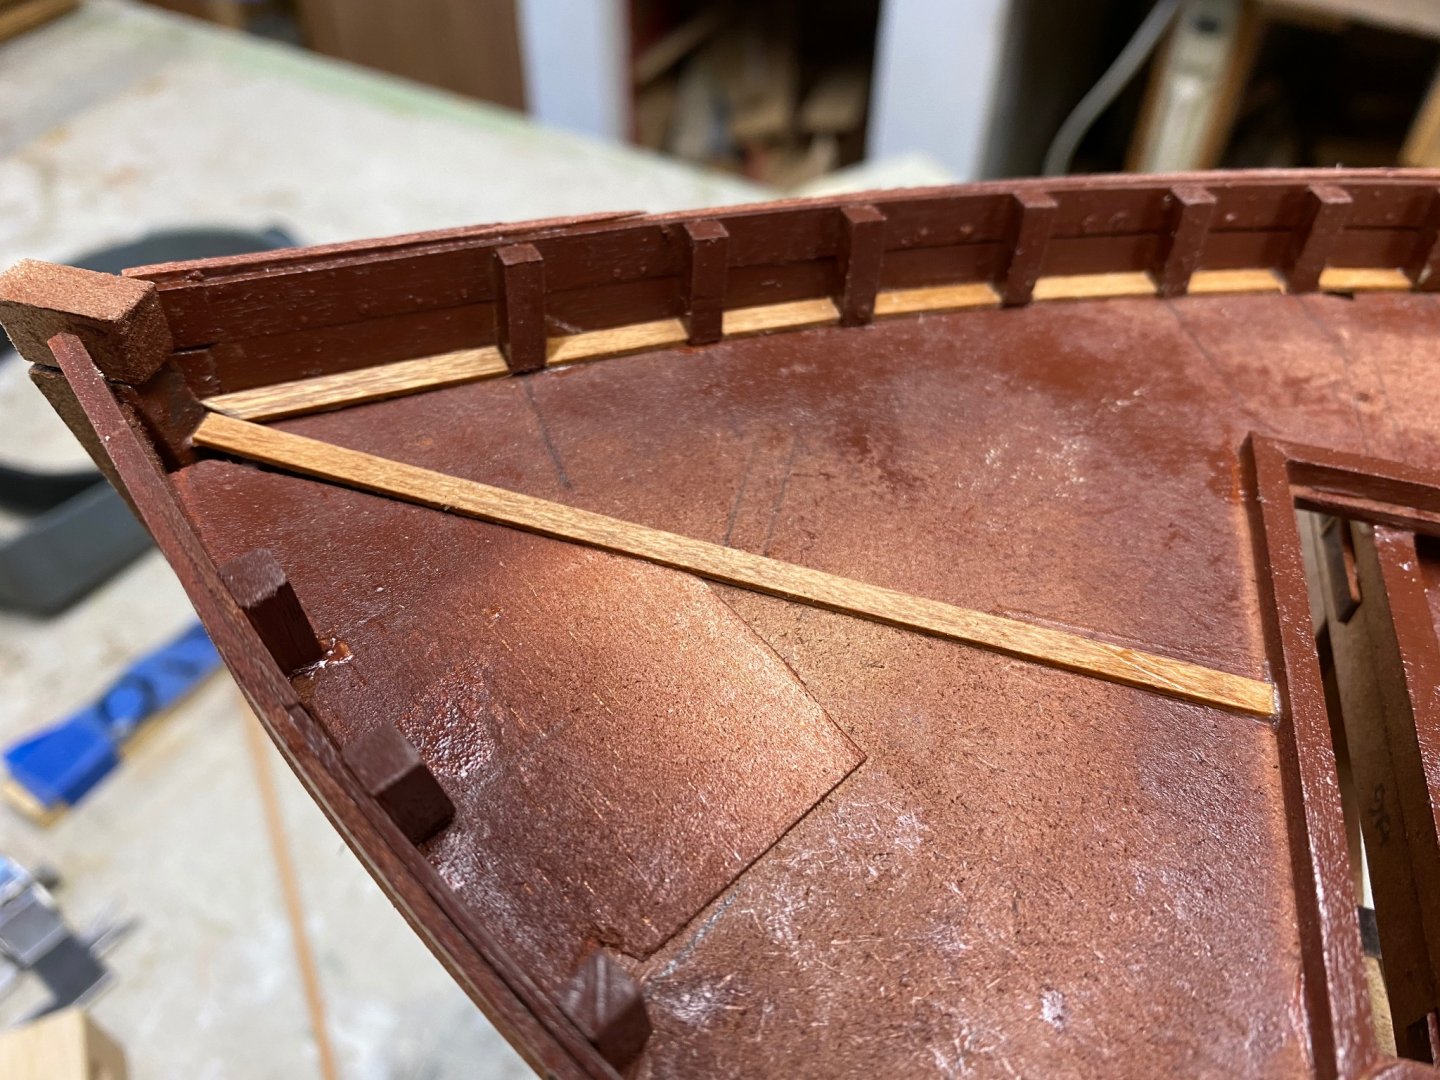
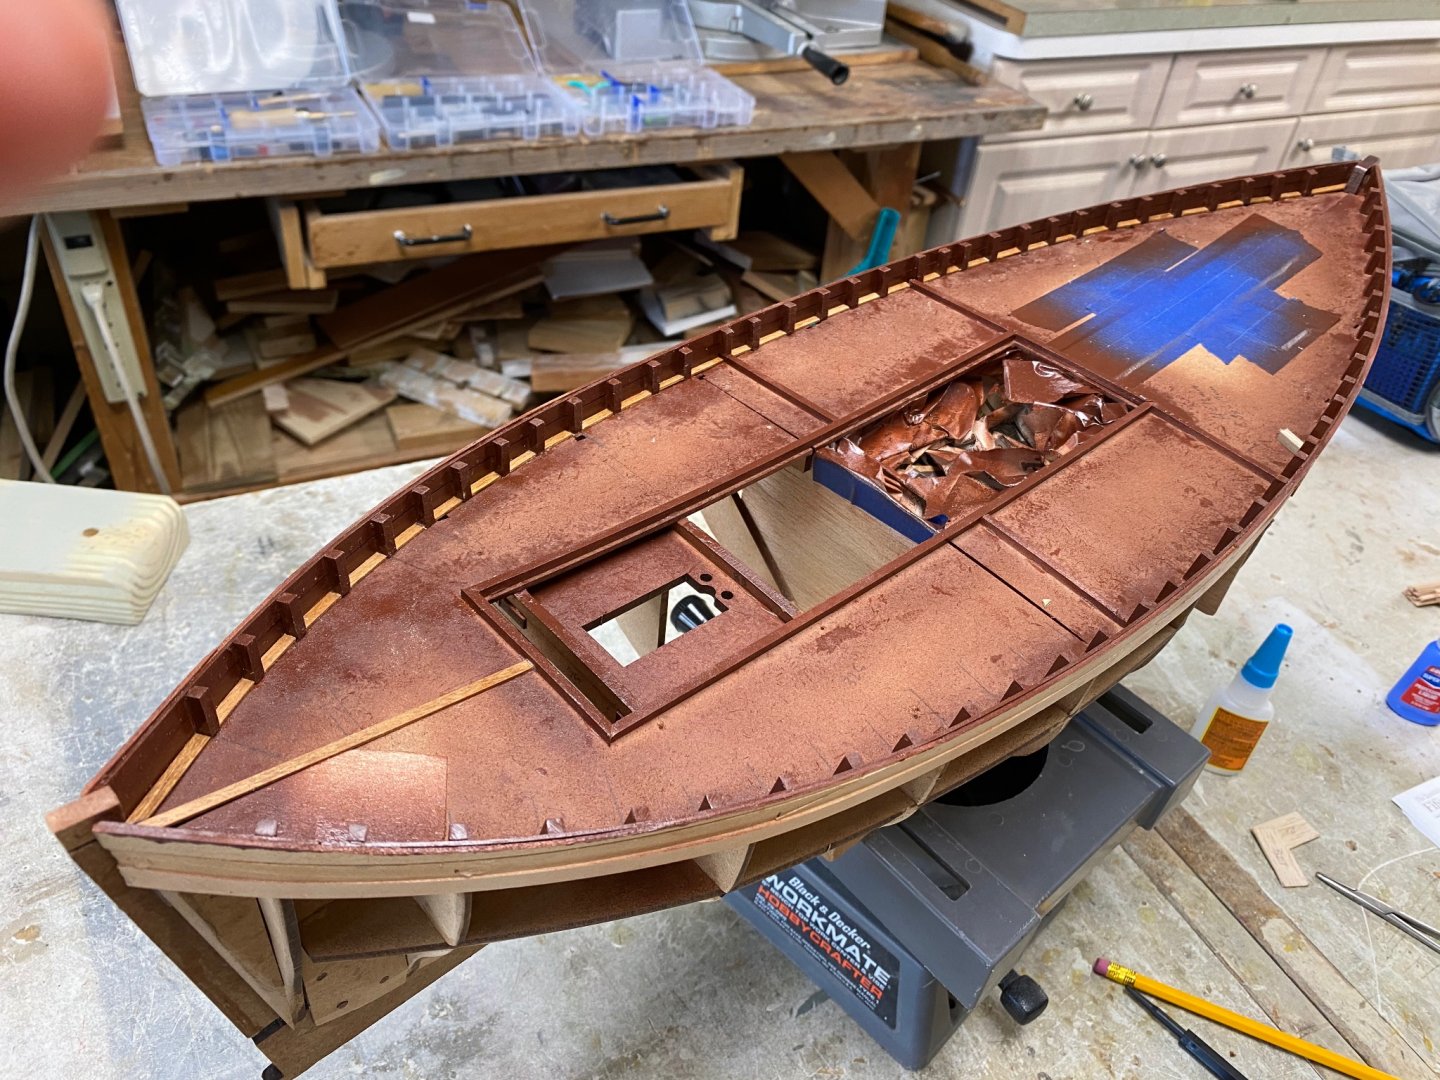
As I continued the planking I felt it was going to be necessary to soak the planks for half an hour before doing the big bends. As I I told you on previous posts, I live in a community and our wood shop has no bathtubs. The planks for the fifie are 30" long so I devised the following "soaker". A long piece of 1-1/2" PVC pipe with the corresponding cap. I filled it with water, inserted the planks and, lo and behold, they popped out. Senior moment, of course. Then, as smart as I am, I took the paper cup you see in the bench behind the vise, and capped the top. Problem solved. Now back to the serious business of planking. I have read time and time again about the need to fair the frames before planking. I though I've done it but found that, as the planking closed on the first bilge, I had to provide either fillers or sanding at the frames. I marked the location of the frames on the plank and pre started the mini nails. Then I laid the soaked plank on the frames and, in addition to the nails, used the magic clamps, shown below, whose design I borrowed from one of you fellows in this forum. They worked like a charm. IMG_6794.MOV Then, this is the result of my labor today. Looks ugly but sanding and filler will do the miracle

-
Thanks for the compliment egkb. Yes she is big and we live in a small apartment in a senior facility. I do my building in the facilities workshop. Once I finish this model I will probably loan it to the building for display in the lobbies. My office looks like a museum and the rest of apartment can only handle three models and it is full. Before starting the models I thought of building model airplanes so that I could hang them from the ceiling. LOL. By the way I started planking yesterday. Did 4 planks in 2 hours. Slow progress.
-
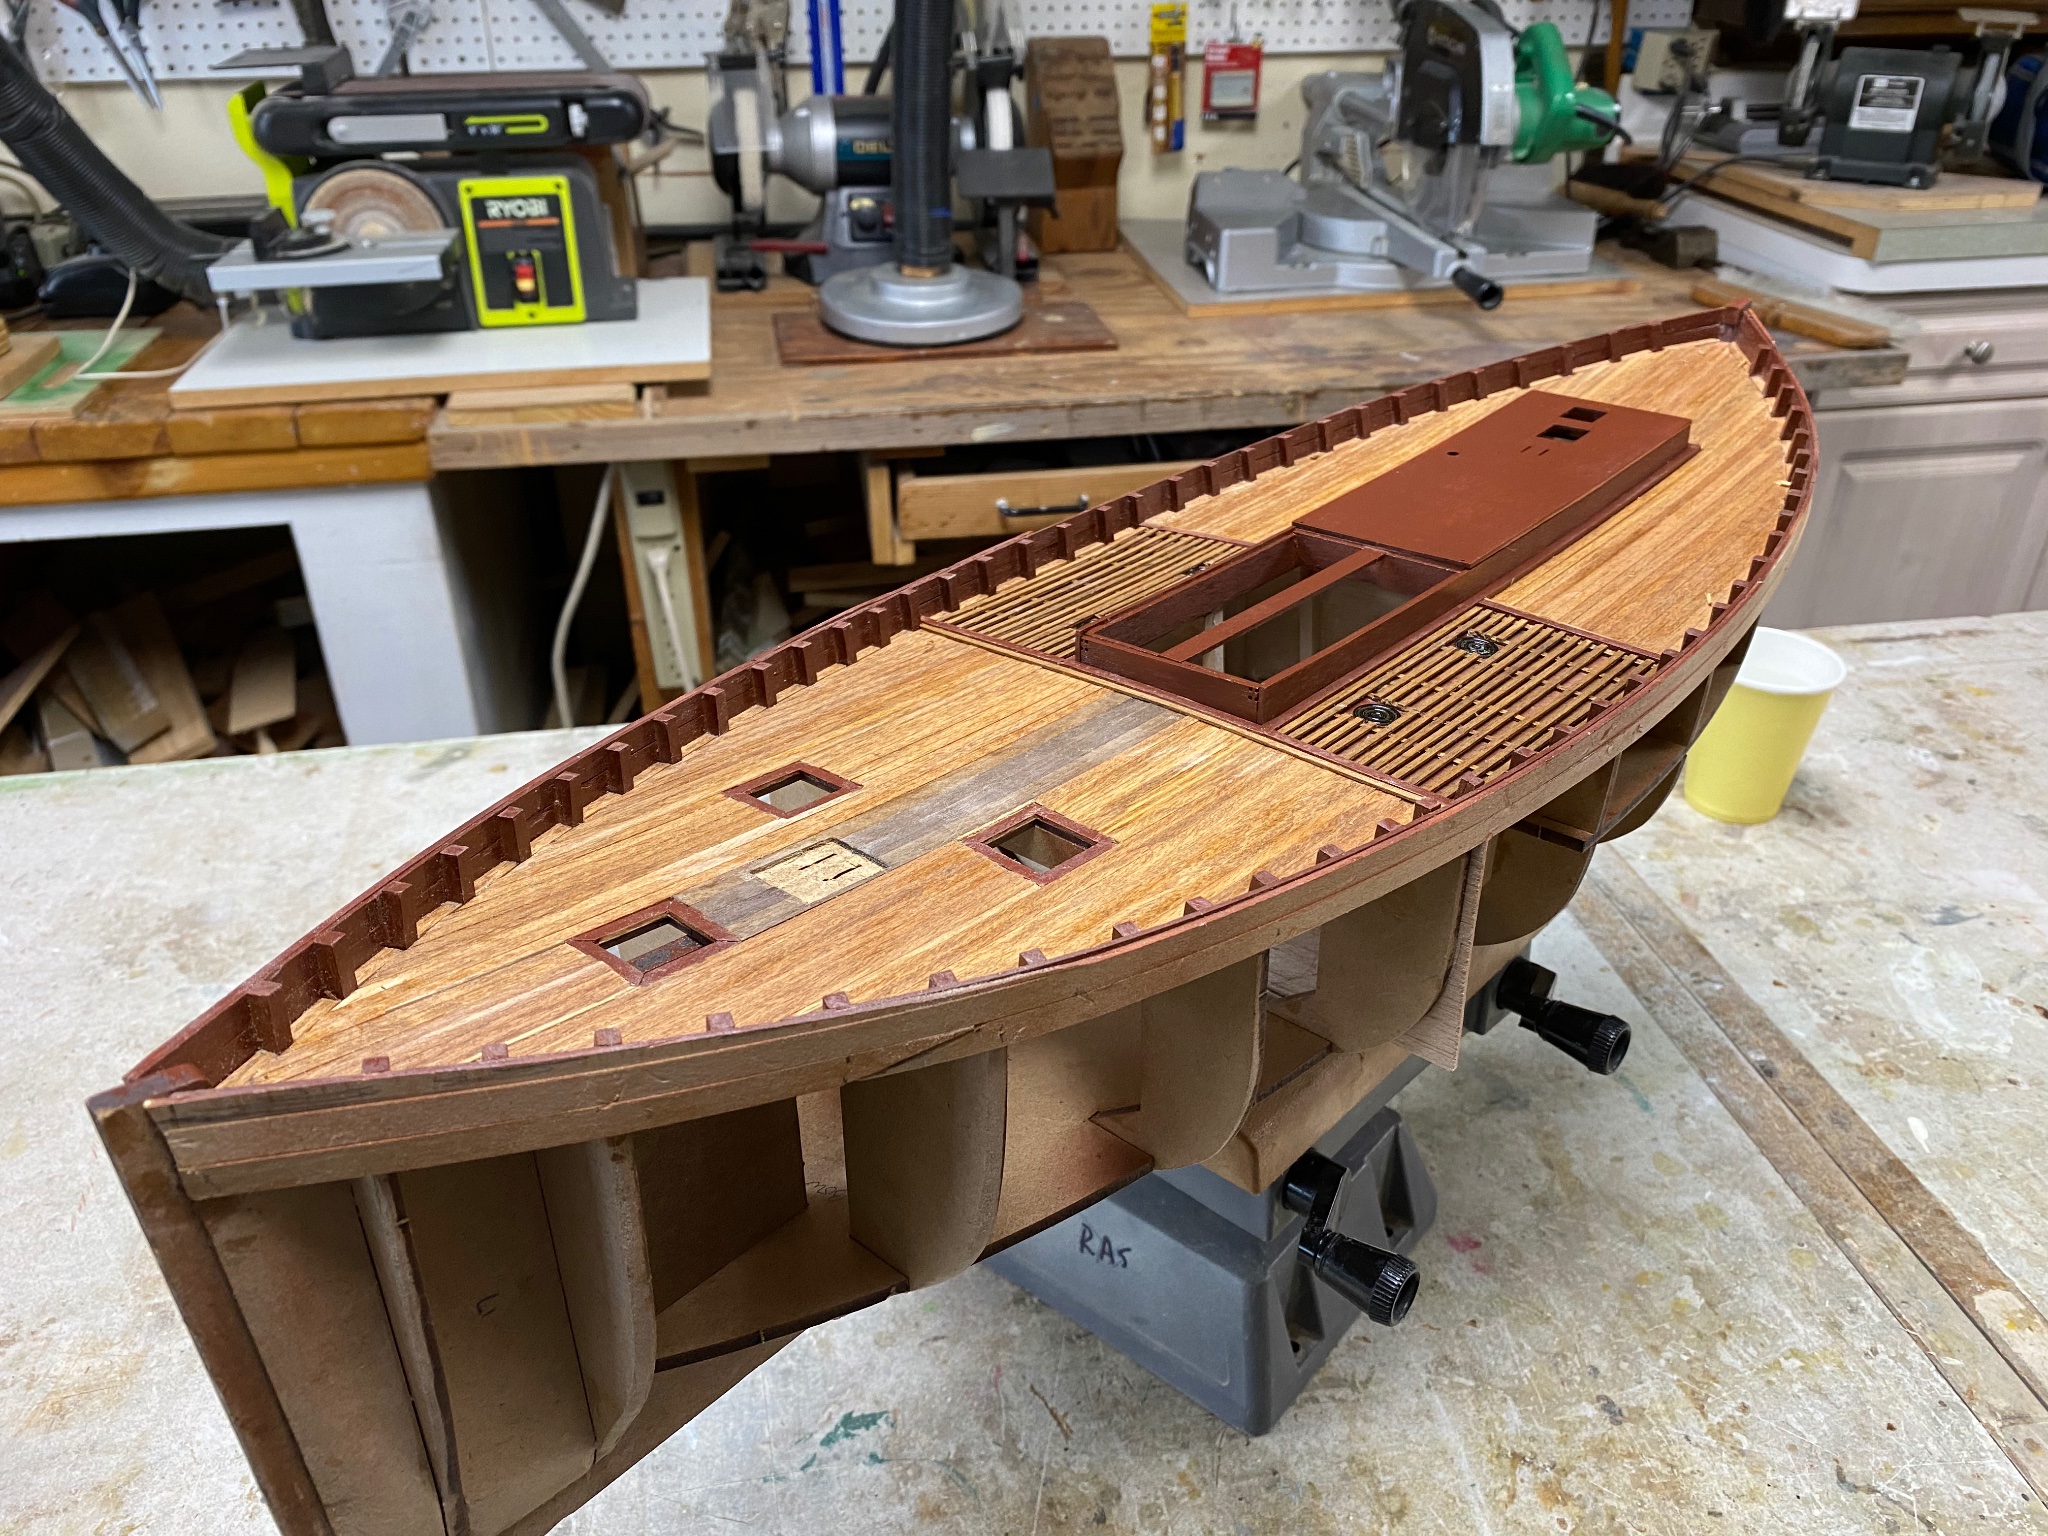
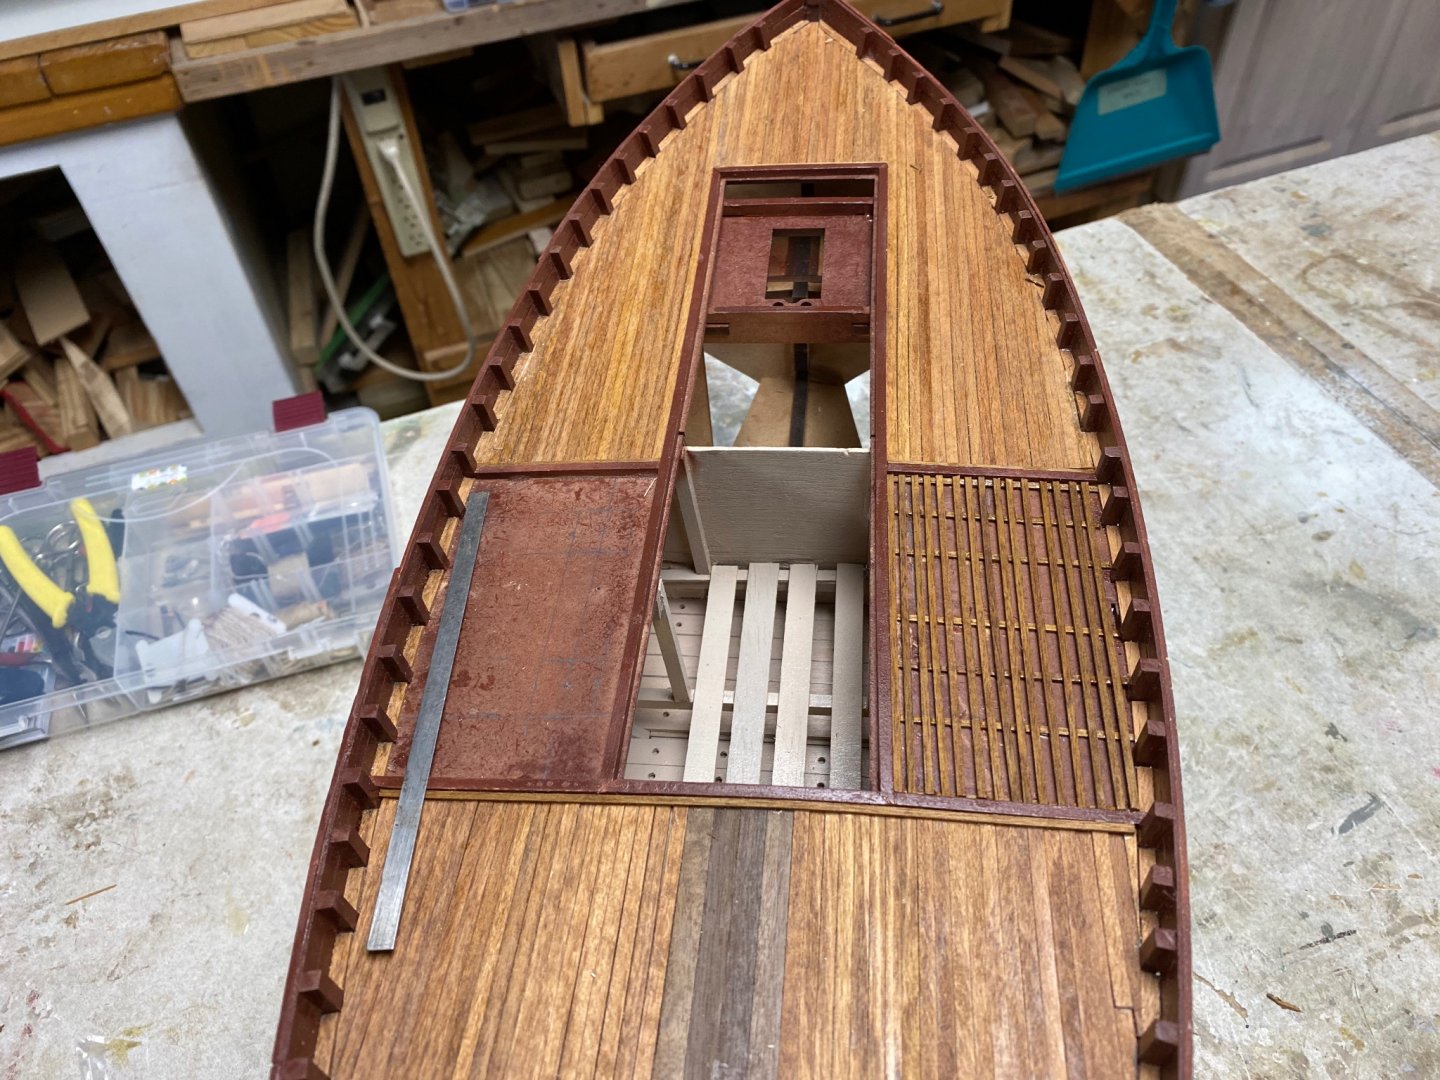
Before I proceed with the hull planking there was one last thing to do to the deck. That is the midship slated part of the deck with the fish scuttles. I hesitated between PVA and CA to glue the slats. I finally decided on CA because my shaking old fingers were going to mess up the spacing of the slats. The result is the following photo. It didn't come out perfect but I am doing this for fun. Took me four hours to get those slats in a fairly even separation.
-
Well, deck planking successfully completed. Do not mind a couple of booboos but I am still learning the tricks of the POF building. Still need to add the framework for the fish scuttles. Enjoy Next chapter is the first hull planking and, in between, I will try to make a cran basket.
-
Beautiful pieces. Are there two winches or a double decker?
- 4 replies
-
- 2
-
-
- capstan
- winchelsea
- (and 1 more)
-
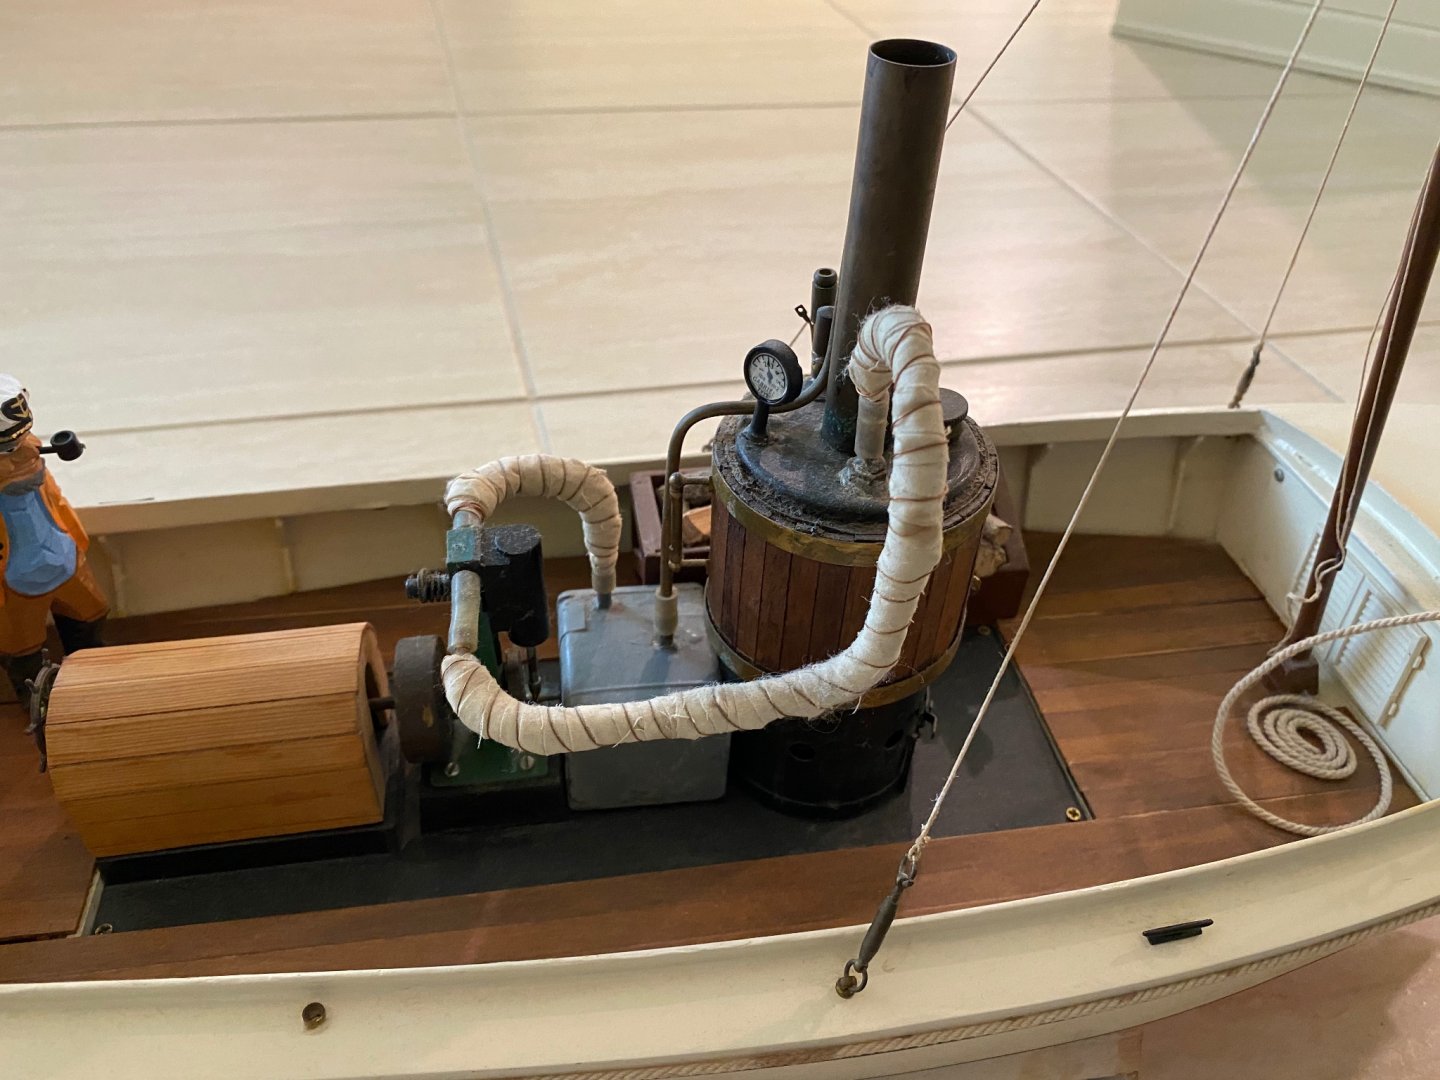
Michael, I did have in the water. I had made a live steam power plant and installed in this model. Unfortunately the little engine had no power at all. Thats when I decided to install the elctric motor. That worked just fine and I had a lot of fun with this model.
-
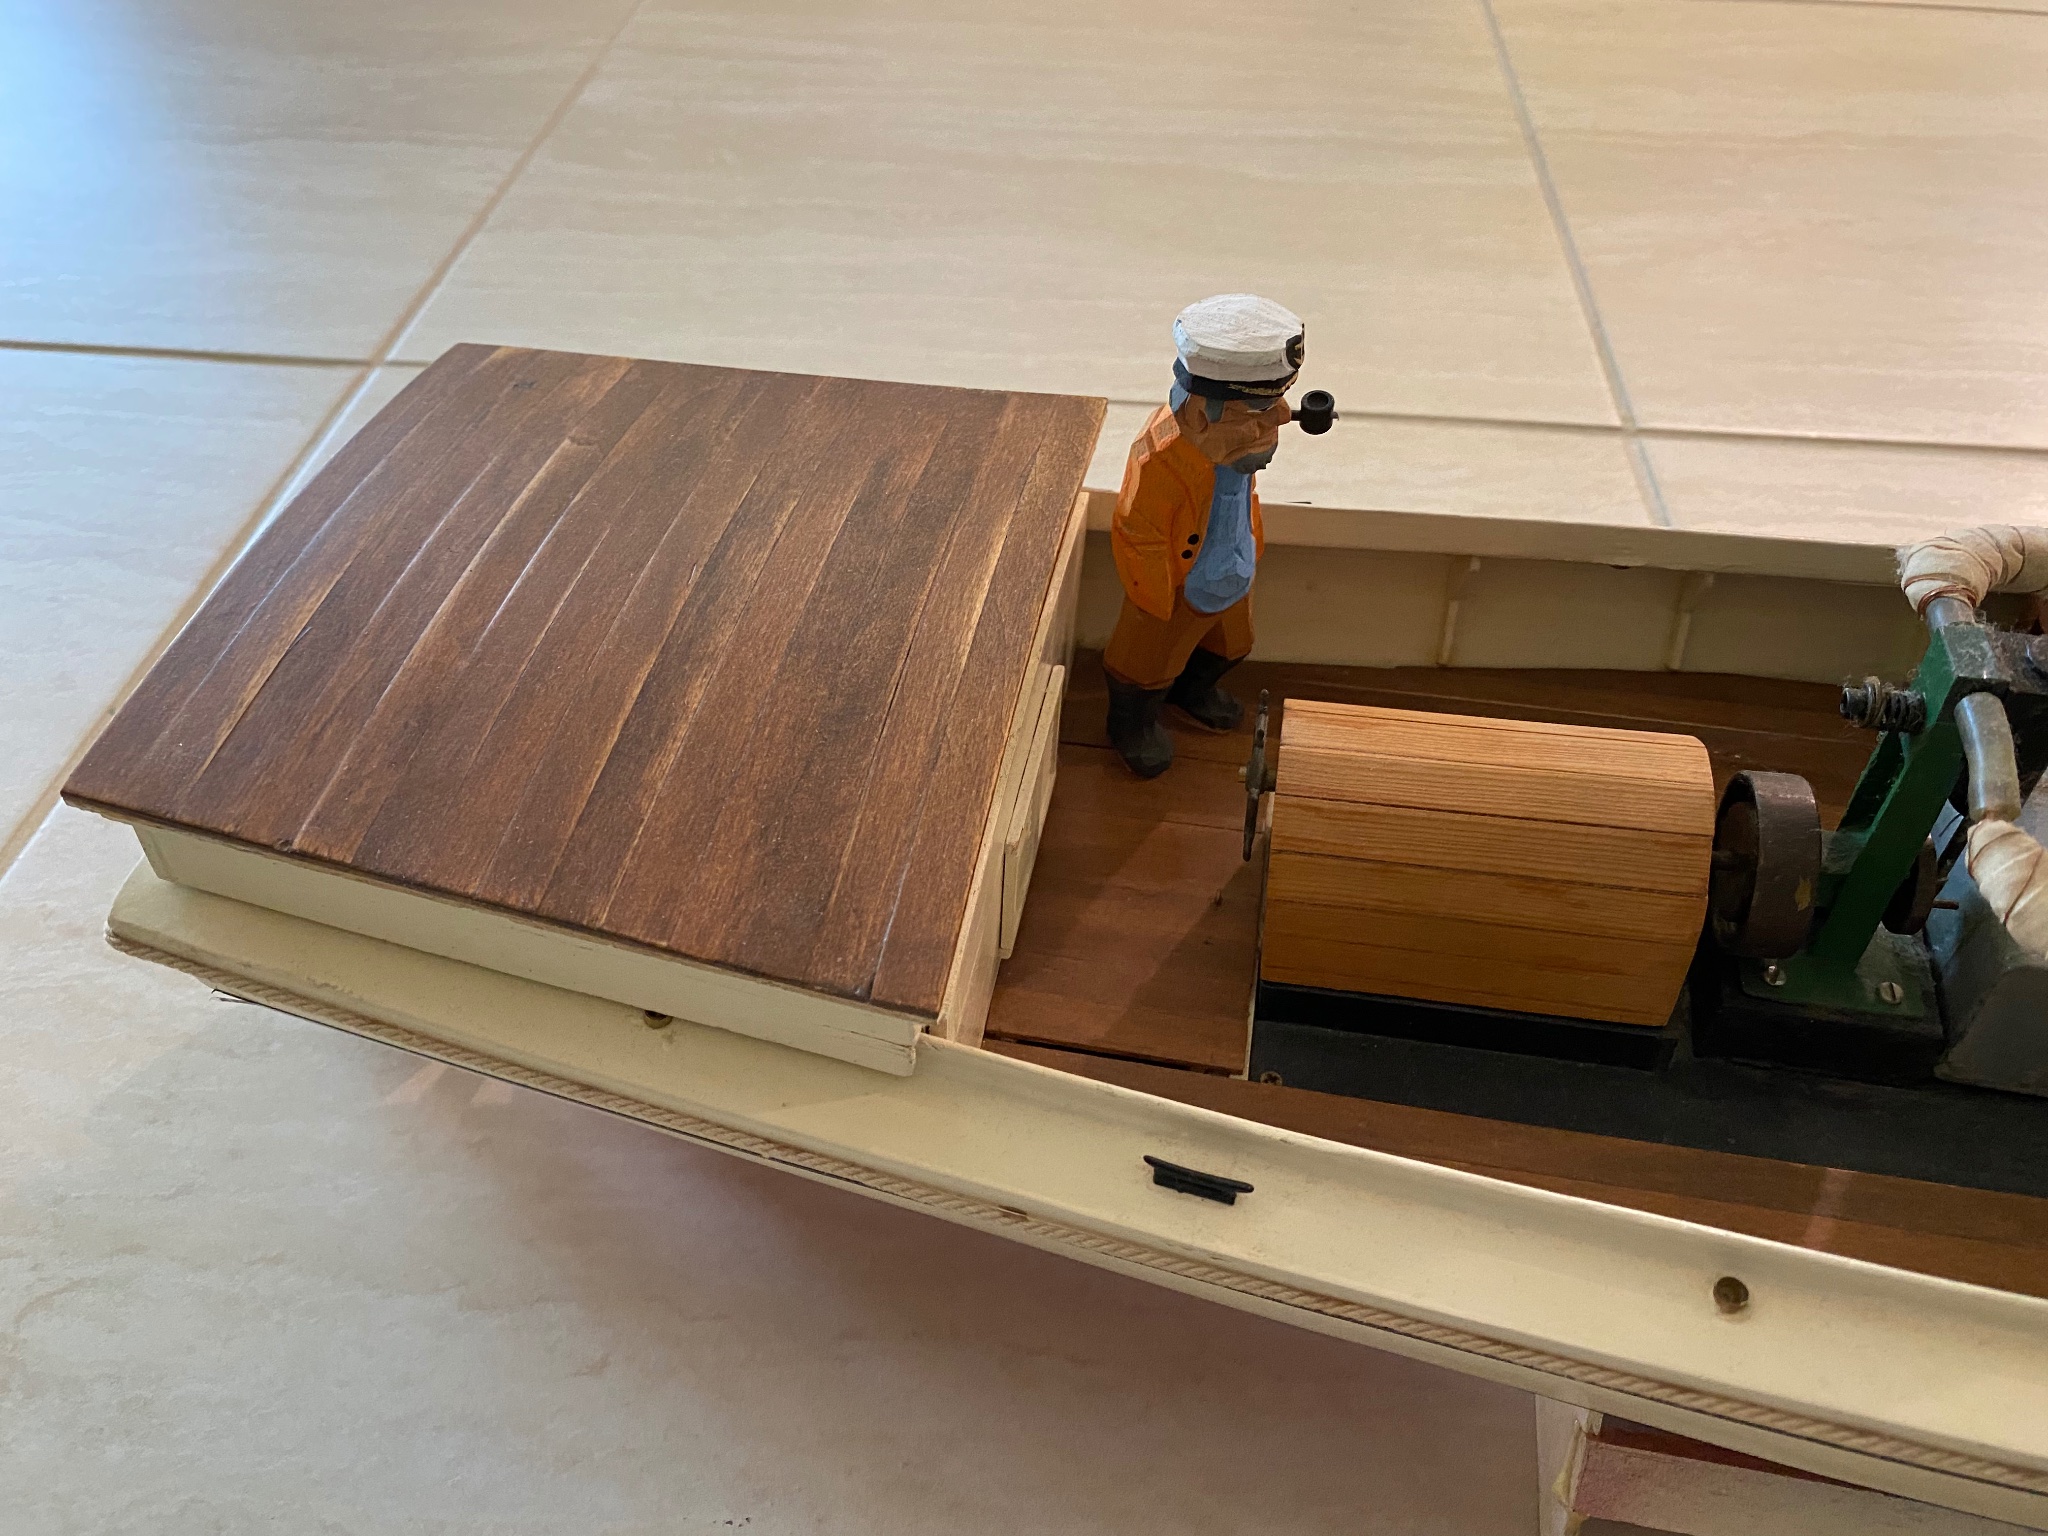
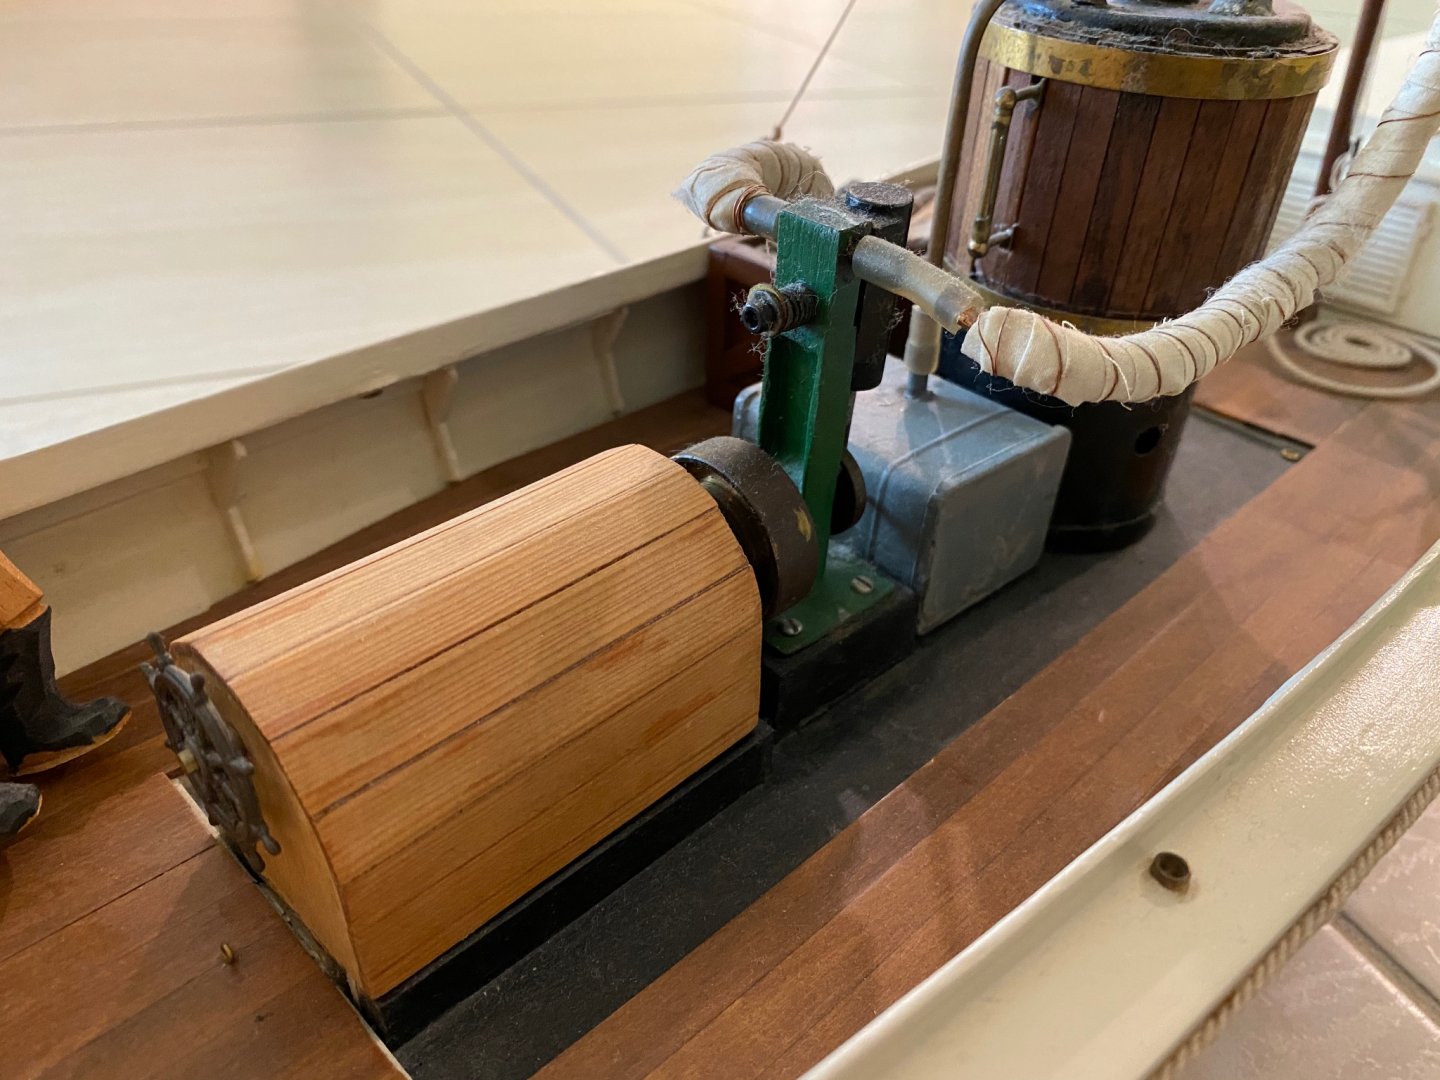
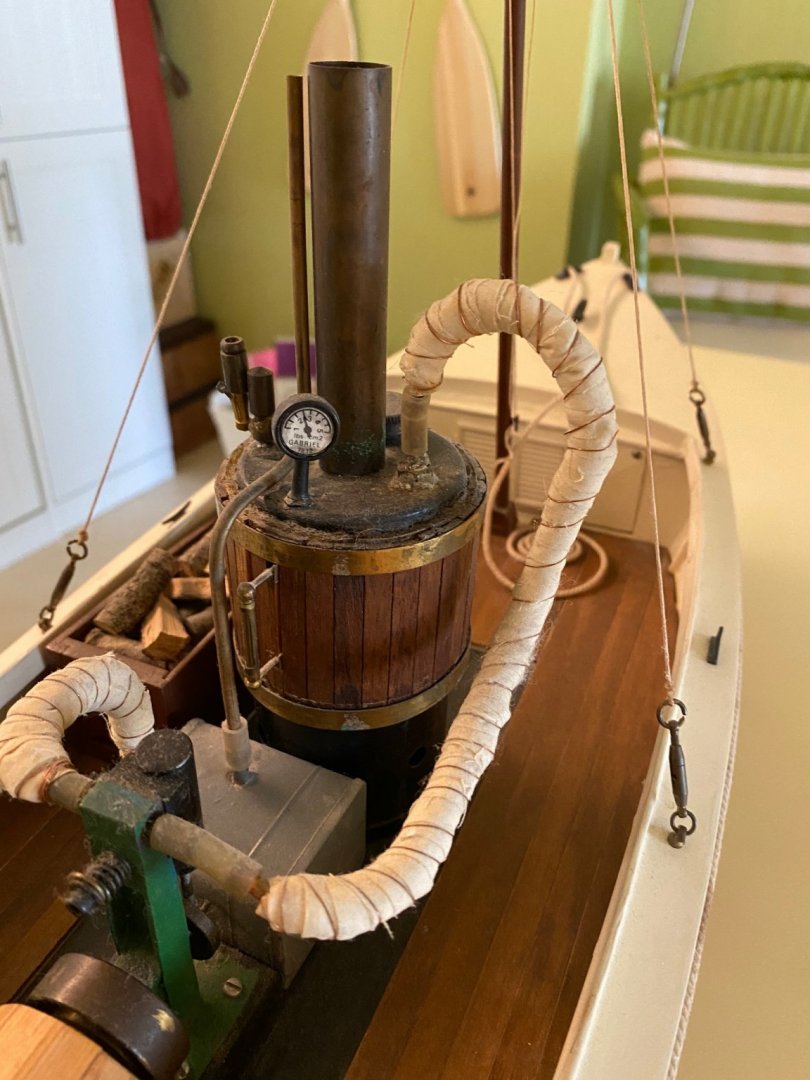
Snug and Keith, thanks for your comments. The boiler and engine in the kit are plastic miniatures. I had actually built the power plant separately and installed on this model. WhenI put the boat in the water the engine was putt-putting but the boat barely moved. Thats when I decided to installed the electrical power and in part the reason I made the covered cabin to cover the electronics and the battery. I placed the motor switch under the log crate.
- 5 replies
-
- 1
-
-
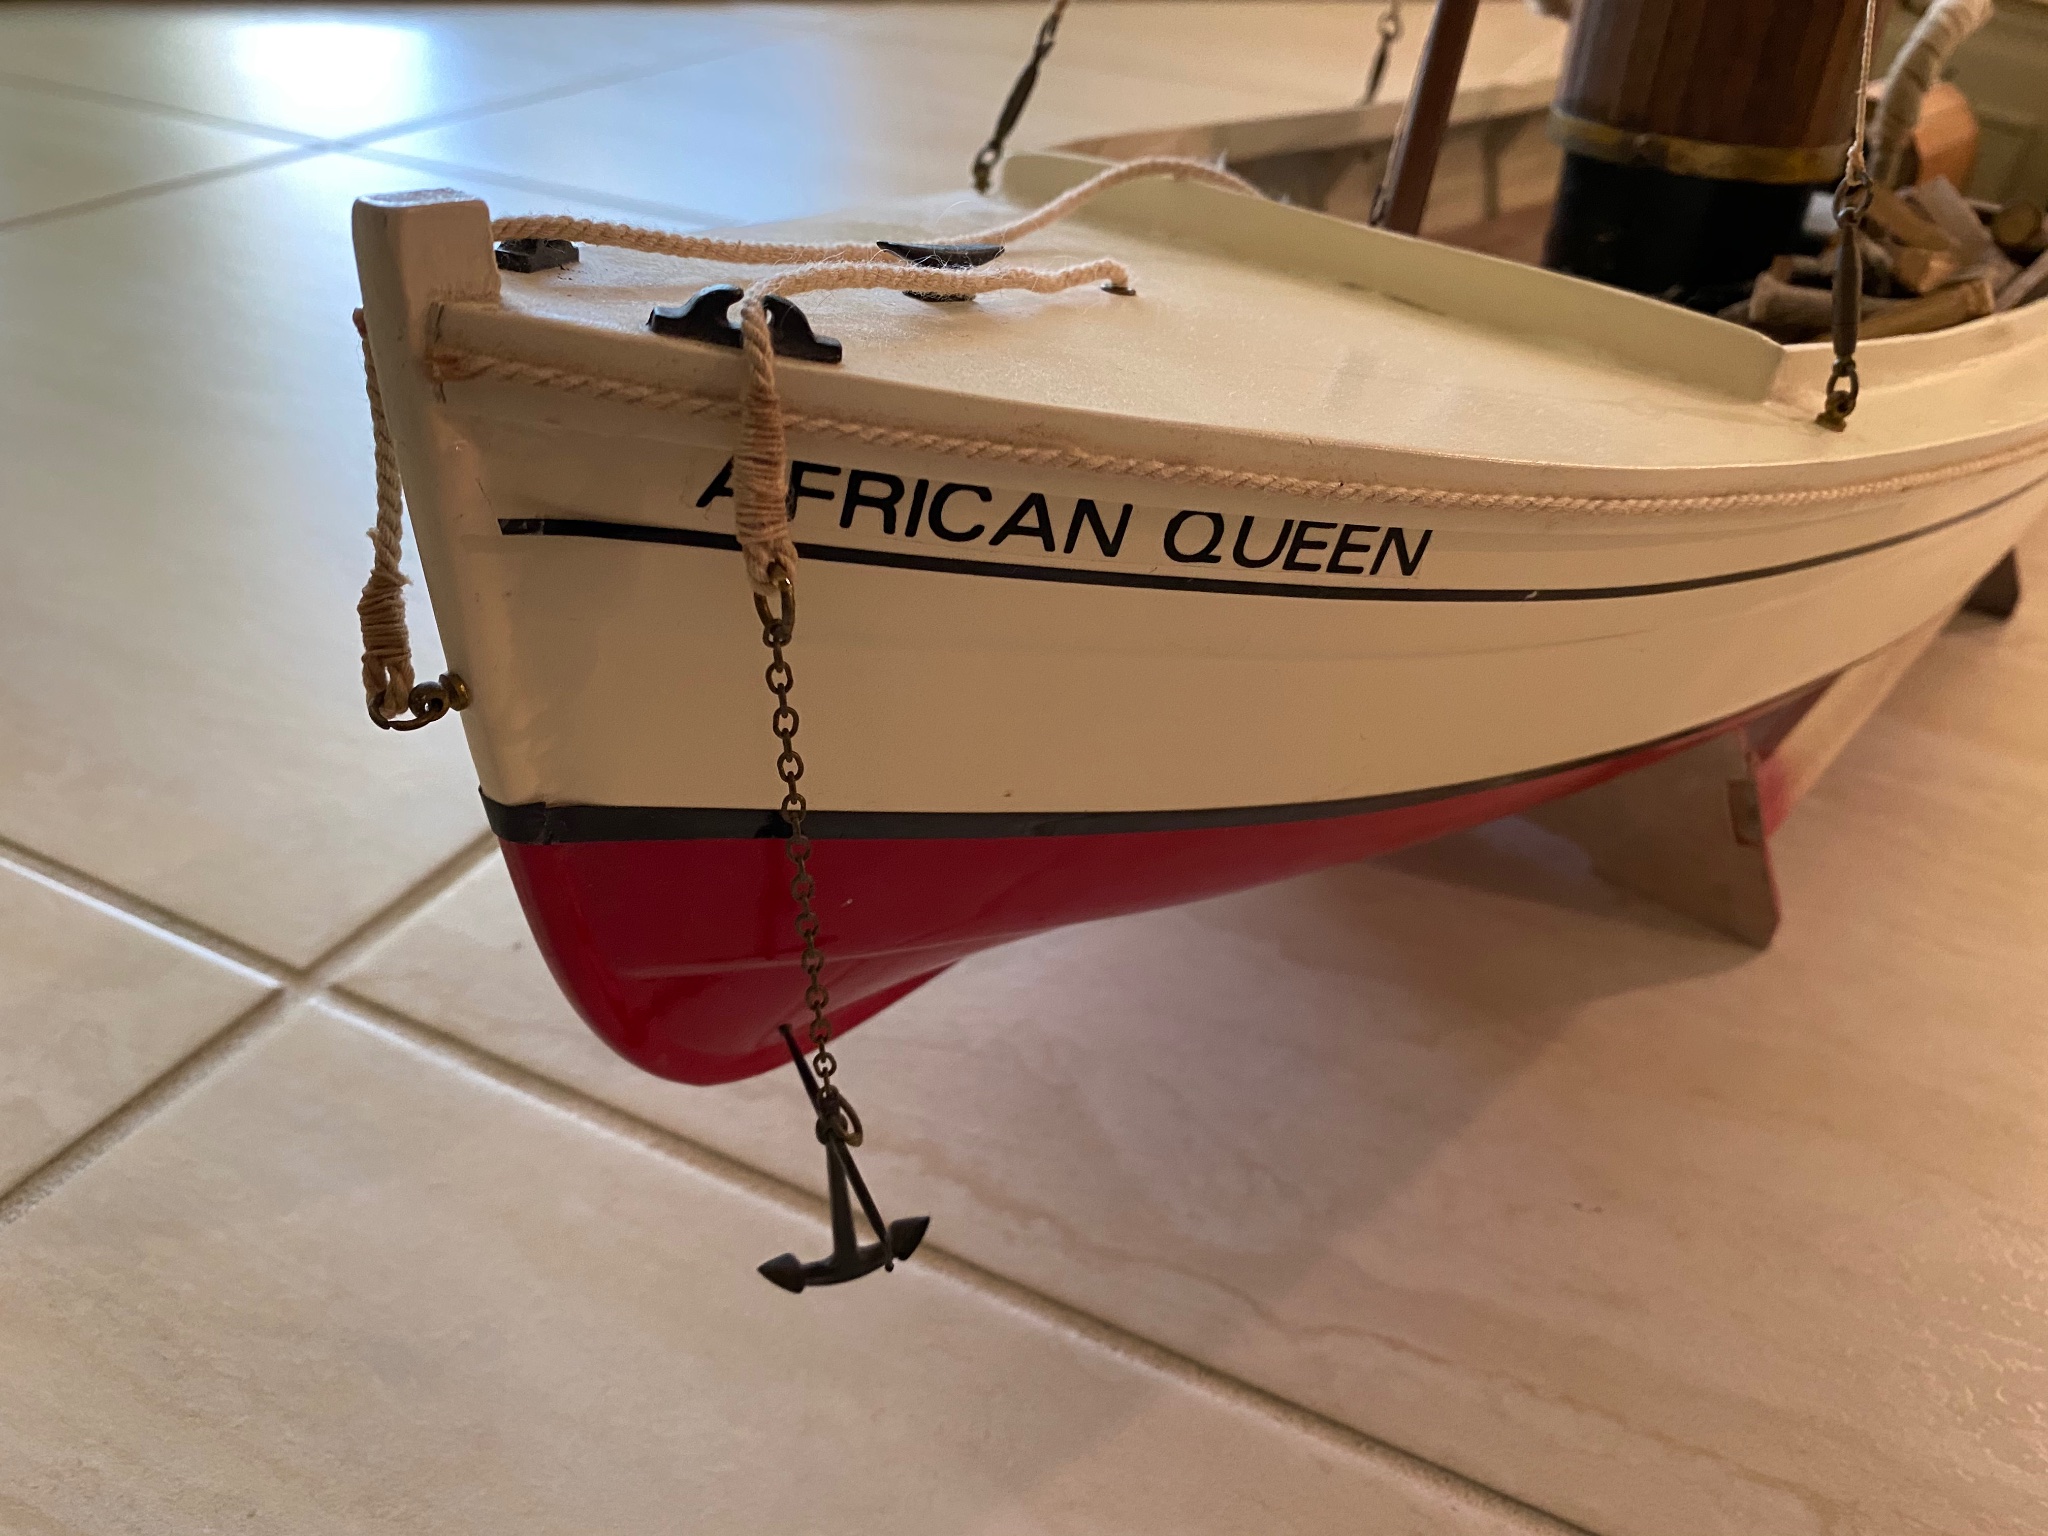
- African Queen
- Billing Boats
- (and 1 more)
-
to ccoyle: I was trying to post this content in the gallery of completed kit. How can I move it to the gallery. I am new in this forum and I am still learning how t use it. Thanks in advance.
-
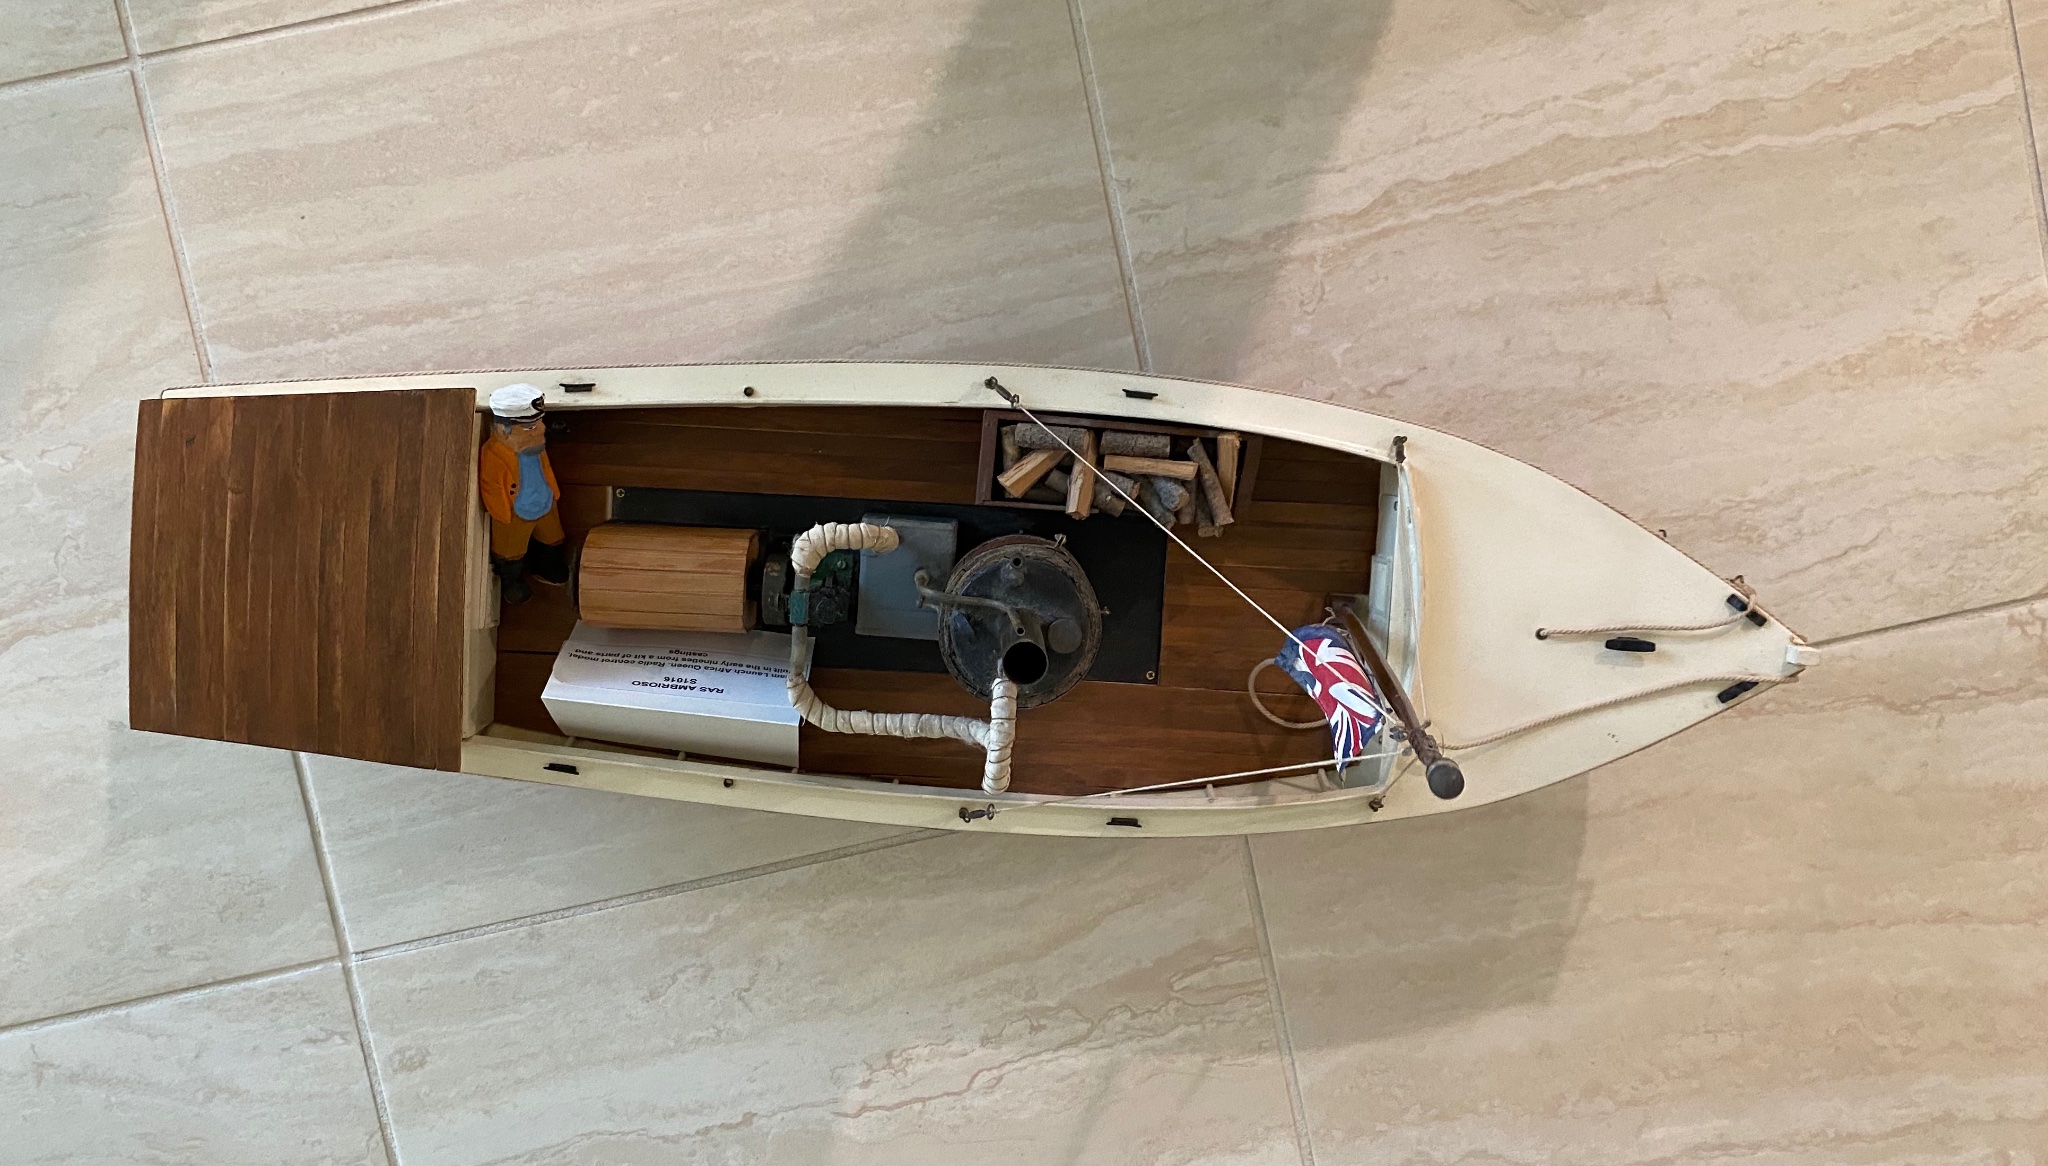
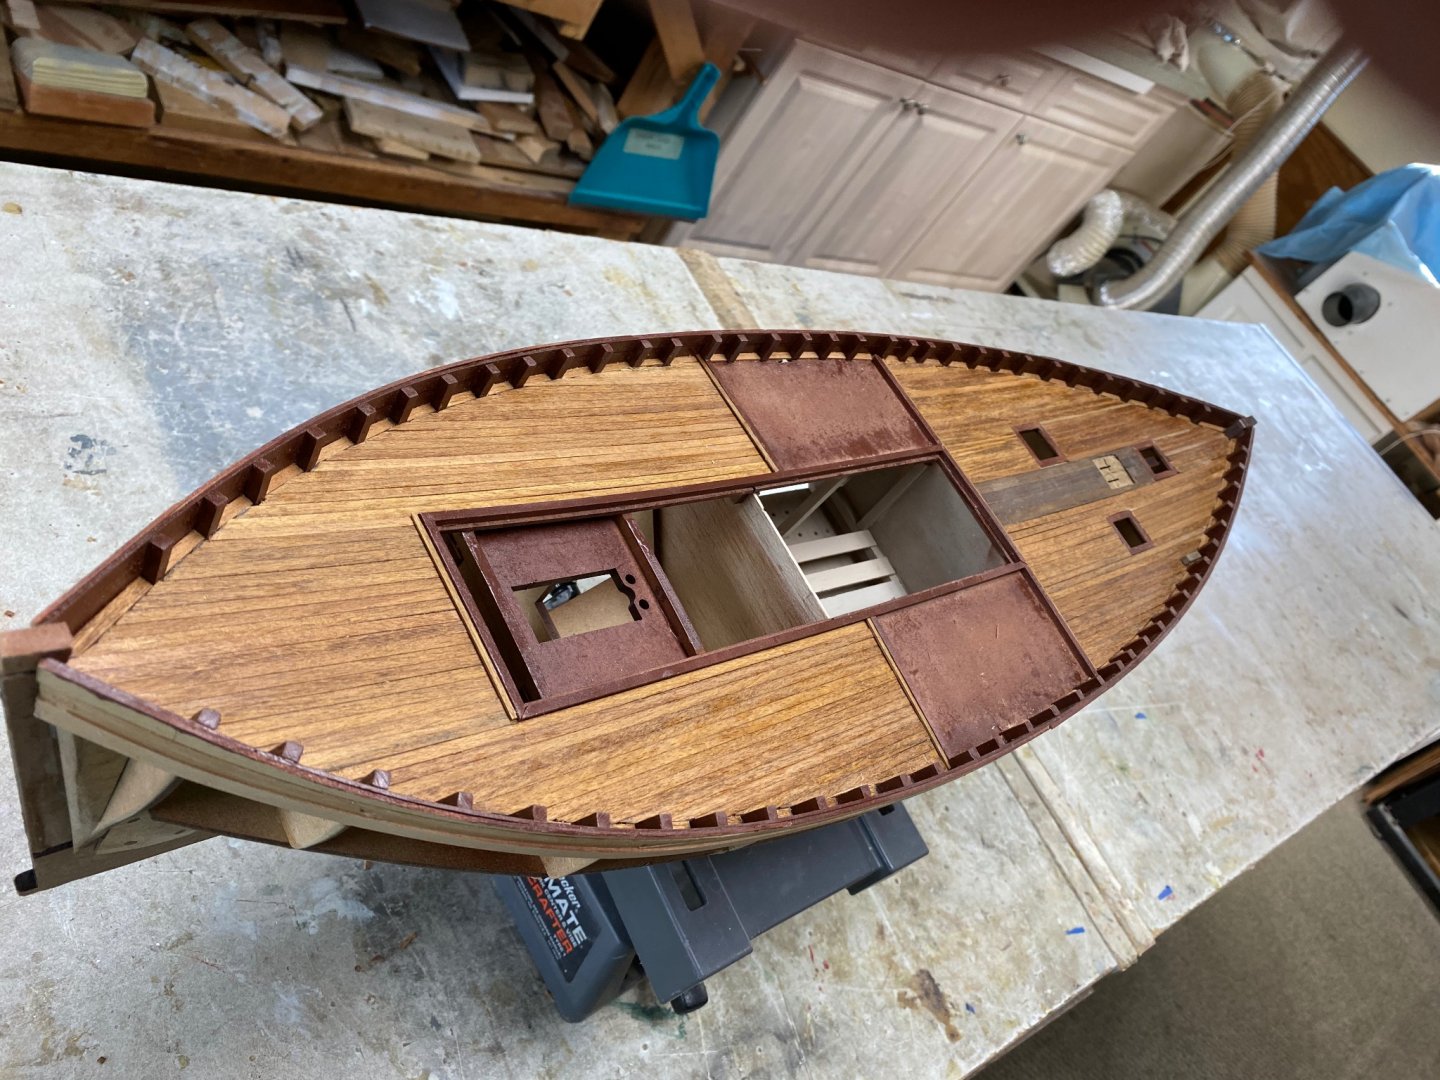
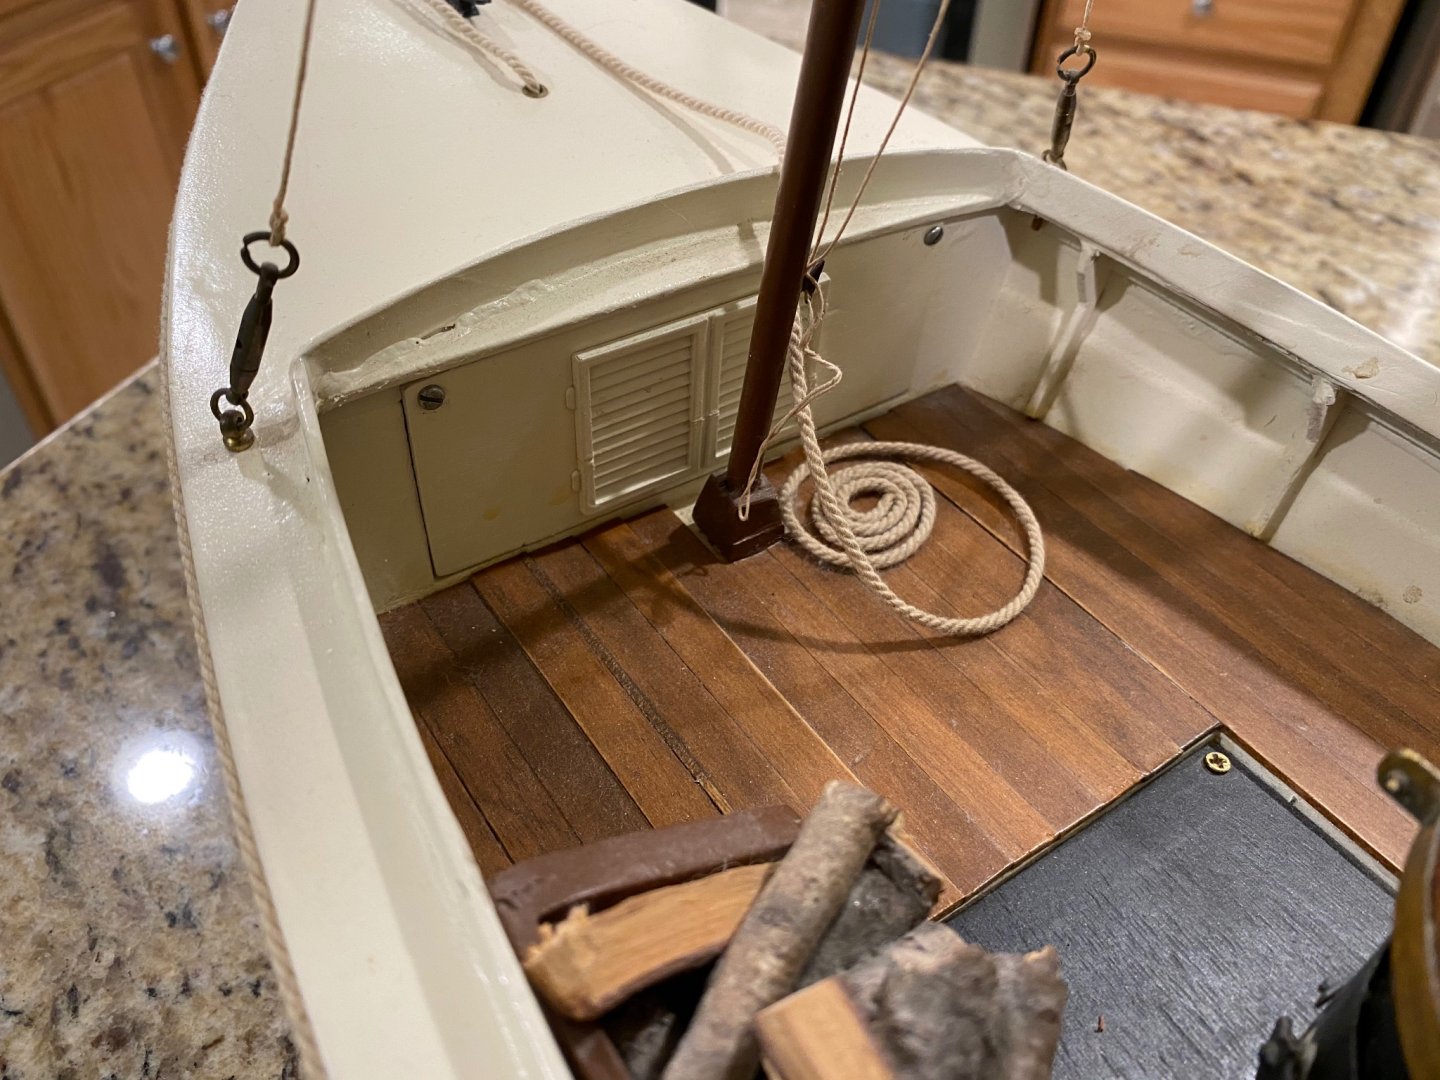
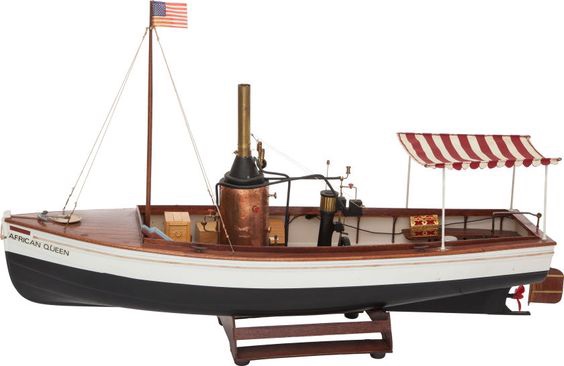
I built this R/C steam launch in eighties. As you may see in the photos I changed the design a bit to make room for the electronics. The engine provided in the kit, a single oscillating cylinder, was not capable of moving the boat so I cheated a bit by installing an electric motor and covered it with the structure that you can see in the photos that provided a good spot for the steering wheel. The captain is one my tokens from the time I purchased my first real boat. The first photo shows the kit's version with the seating arrangement and the canvas sun cover.


- 5 replies
-
- 6
-
-
- African Queen
- Billing Boats
- (and 1 more)
-
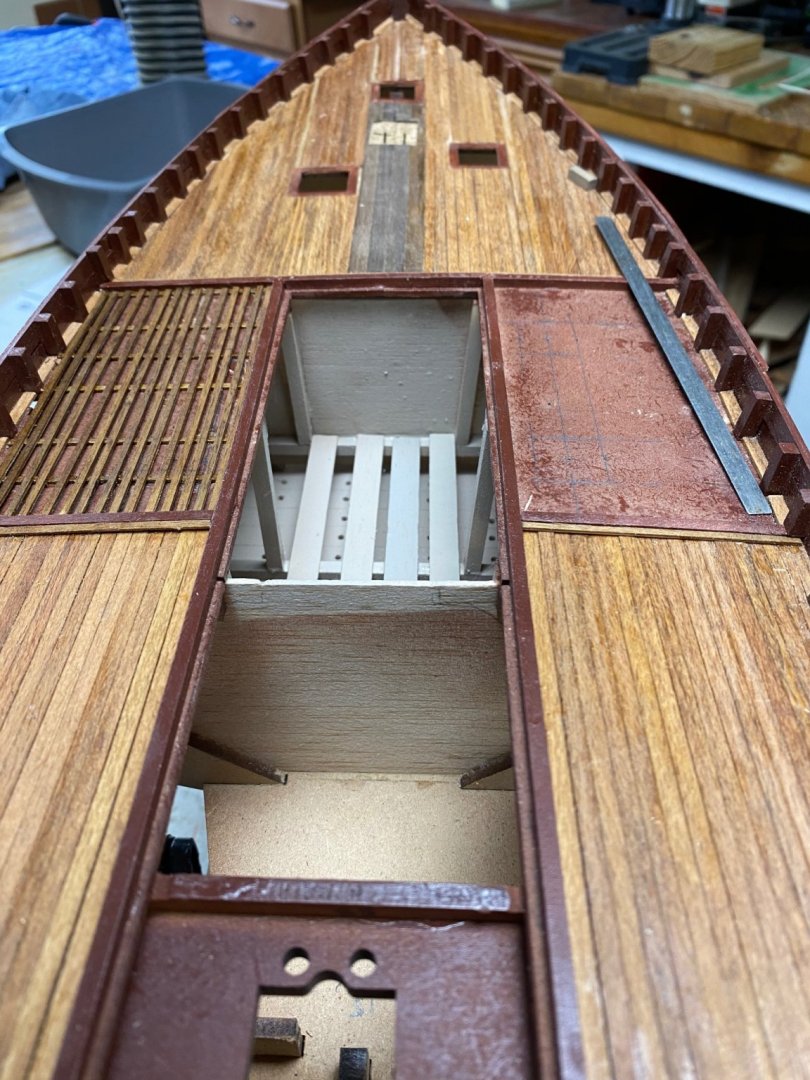
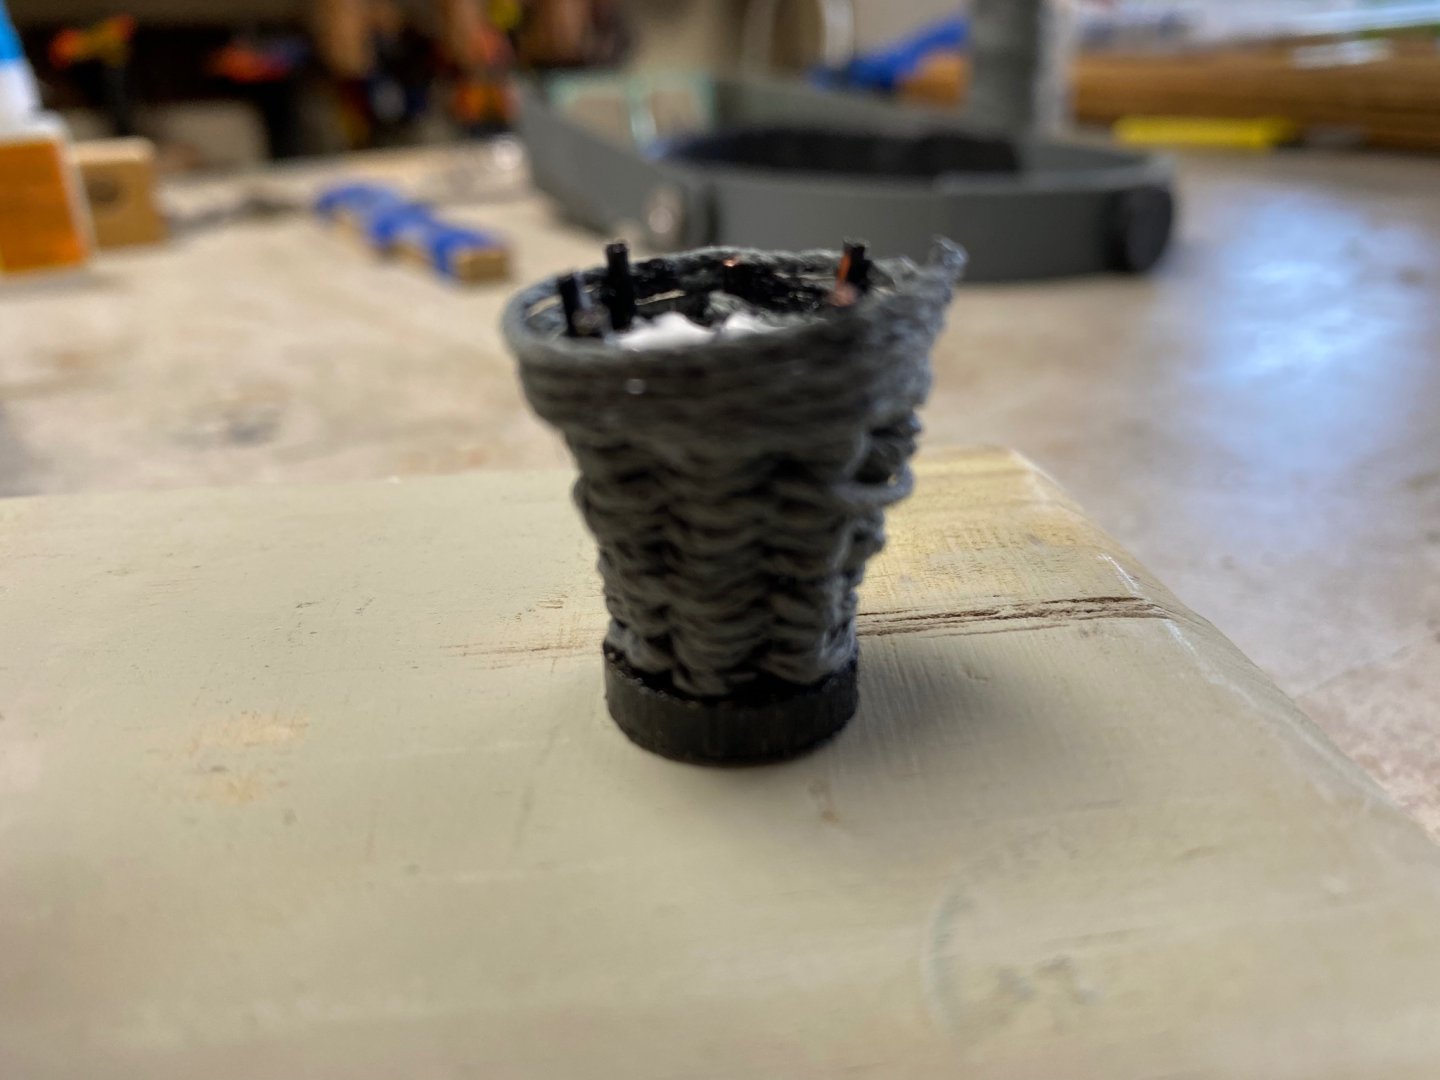
I continue with my madness of building the cran baskets but I have to admit that I actually flunked weaving in Kindergarten. Following are my recent failures But, if at first (or second or third) you don't succeed, try again. So I went back to the tedious deck planking. I followed one of you guy's advise and instead of planking to bulwarkI filled the space between stantions (timberheads). This made the planking of the deck easier. Today I completed half of the aft deck.

-
My ideas for the pilot house have been based on the fact that to navigate any seas you are going to need not only a compass but charts, charts, clocks, barometer and, for a diesel engine you will need instruments to give you the fuel capacity, engine rpm, engine temperature and cooling water temperature and the corresponding switches and levers for lighting, throttle and gear change. That is assuming that these boats were converted to diesel or steam power early in the 20th century and owned by poor fishermen that may have not been able to fill up their boat with many extras. In my internet research I came over a forum of the Model Boat magazine in the UK. In this forum "Banjoman" has built a large scale model of a Clyde Puffer named the "Eilean Mor". His attention to detail is in your same category: superb. Following is a link and look for the latest posts where he detailed the pilot house. you will be surprised how much detail this guy have thrown into this model. By the way the Eilean Mor is sold by Mountfleet Models as the "Highlander" kit. And it is an expensive kit. https://www.modelboats.co.uk/forums/postings.asp?th=101076&p=1 For our Fifie my thoughts were that the steering mechanism was too complicated to be left uncovered and that a box type could include some of the items I mentioned above. The pilot house offered by Amati is too bare and plain. Considering the the picture I uploaded here is for a model vessel it may give a better feel for what we need in the Fifie. I really liked what you did for the throttle, I looks really vintage.

-
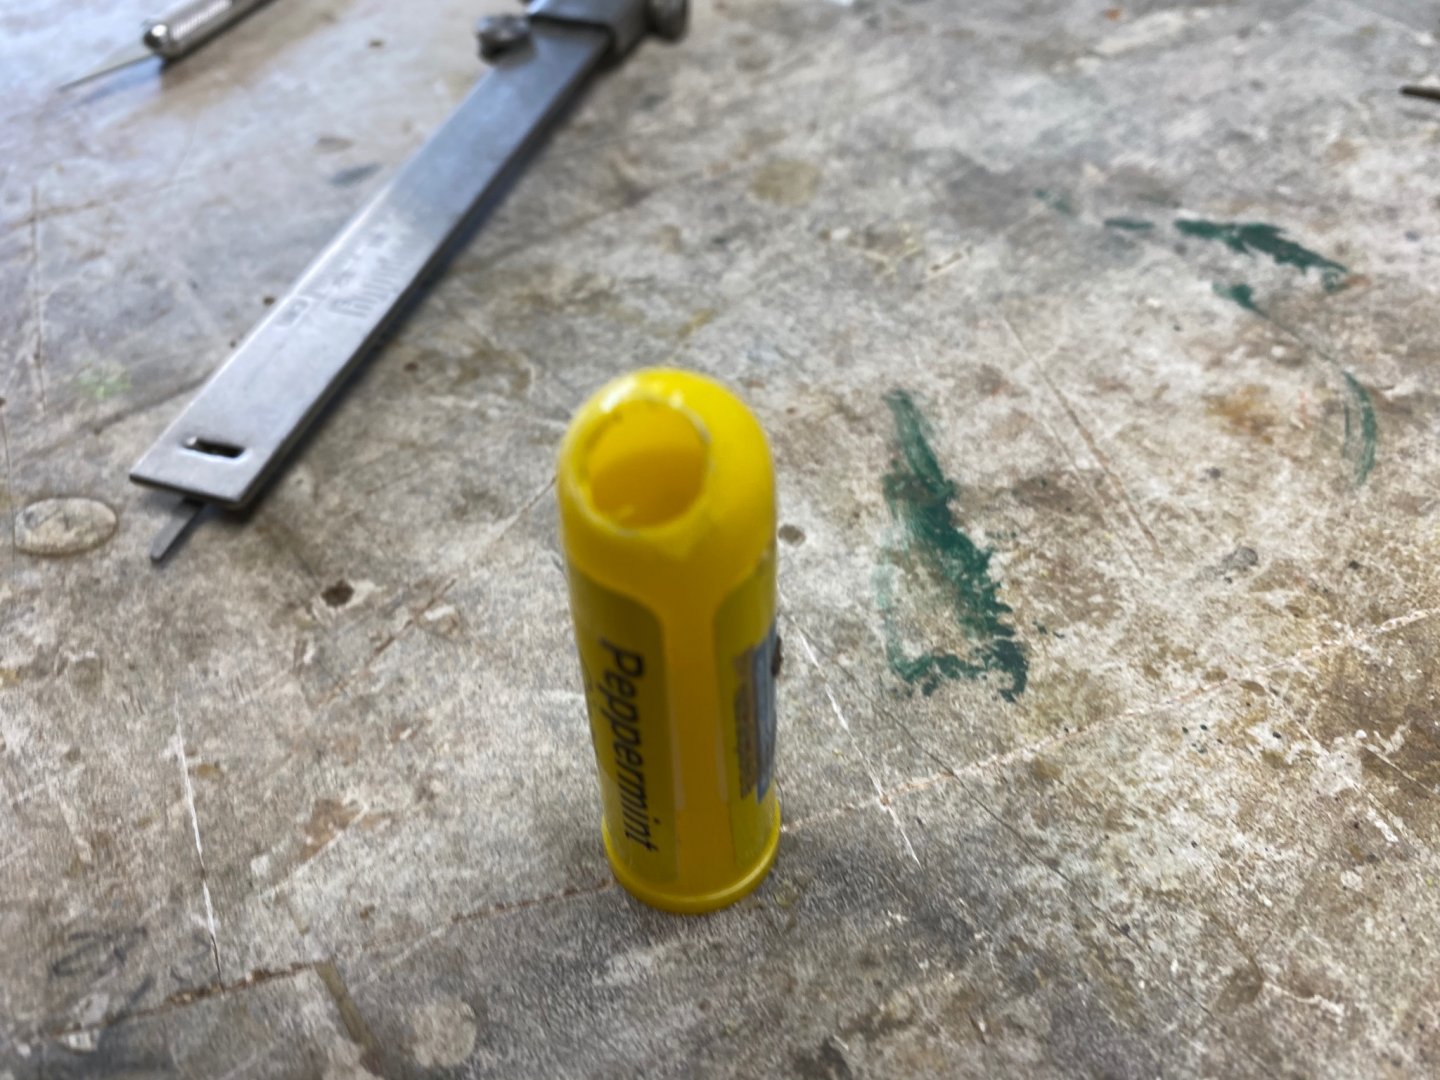
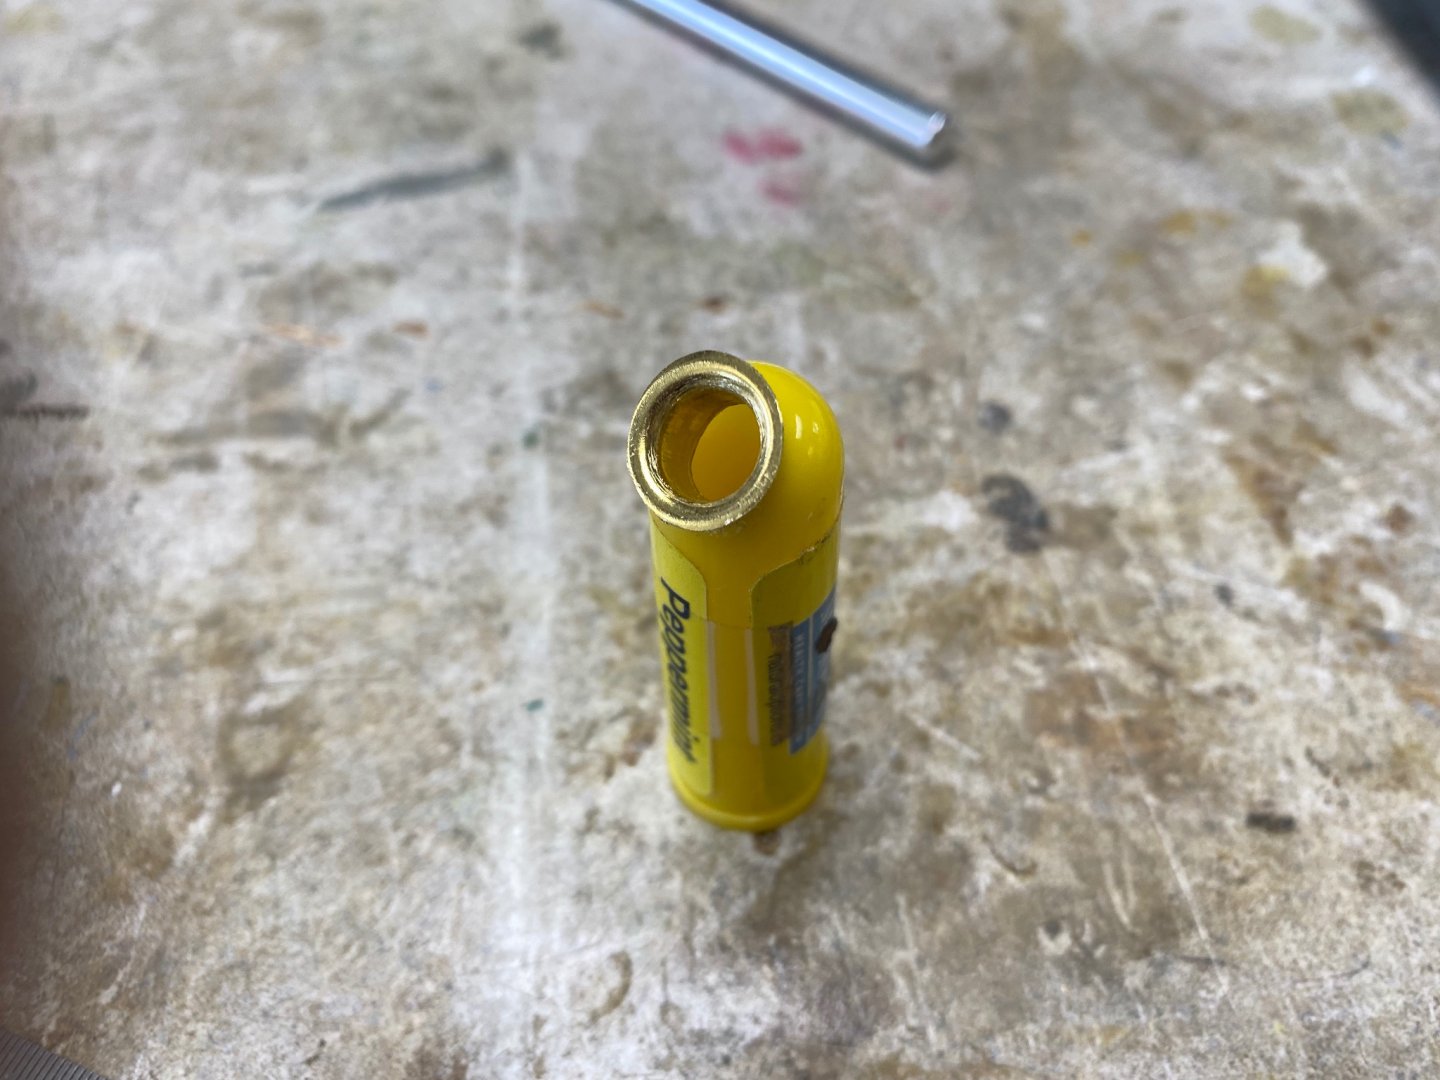
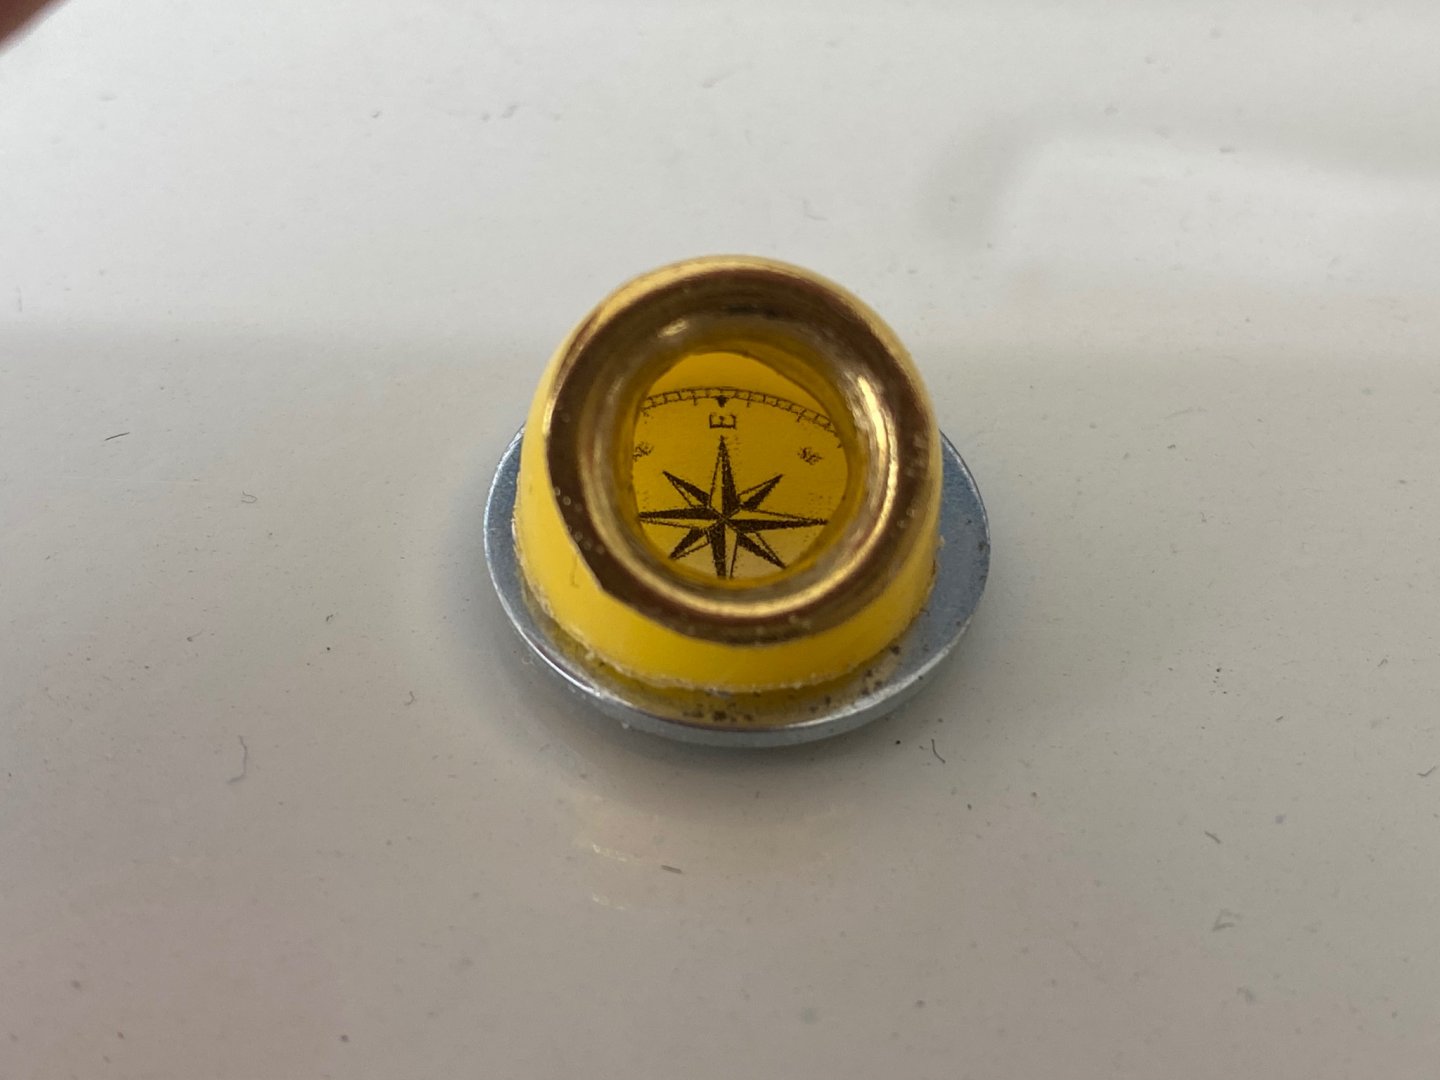
I am back from a family reunion in Texas. Lots of BBQ brisket and , of course, Lone Star beer. Back to work. Today I completed the boring subject of gluing 96 stanchions to the bulwark. As a relief, I went back to the detailing of the pilot's helm. In a previous post, PJG had agreed that the steering mechanism should have some sort of cover that will allow the addition of controls for the engine plus the the navigation binnacle. He detailed his idea in his post #128. I picked up the idea and started the fabrication of my own binnacle. The following photos show my results for today. The first photo shows the basis for the compass. Of all things an old inhaler.Next, I drilled a slanted hole Using brass portholes I created the bezel for the compass A saw cut and finally a washer and a print of the compass rose. I need to complete the painting in a brassy color. The compass will be located on to of the wood steering cabinet and will be provided with the calibration steel balls in red and green. Thanks a lot PJG for the inspiration.
-
Being a native Cuban I am looking forward to see you complete this build. Steel hull, that's a first one for me.
-
Outstanding details. You keep building my interest to see what else can you think of. Great inspiration. Thanks
-
Nice job Hugo. Looking forward to your next build.
-
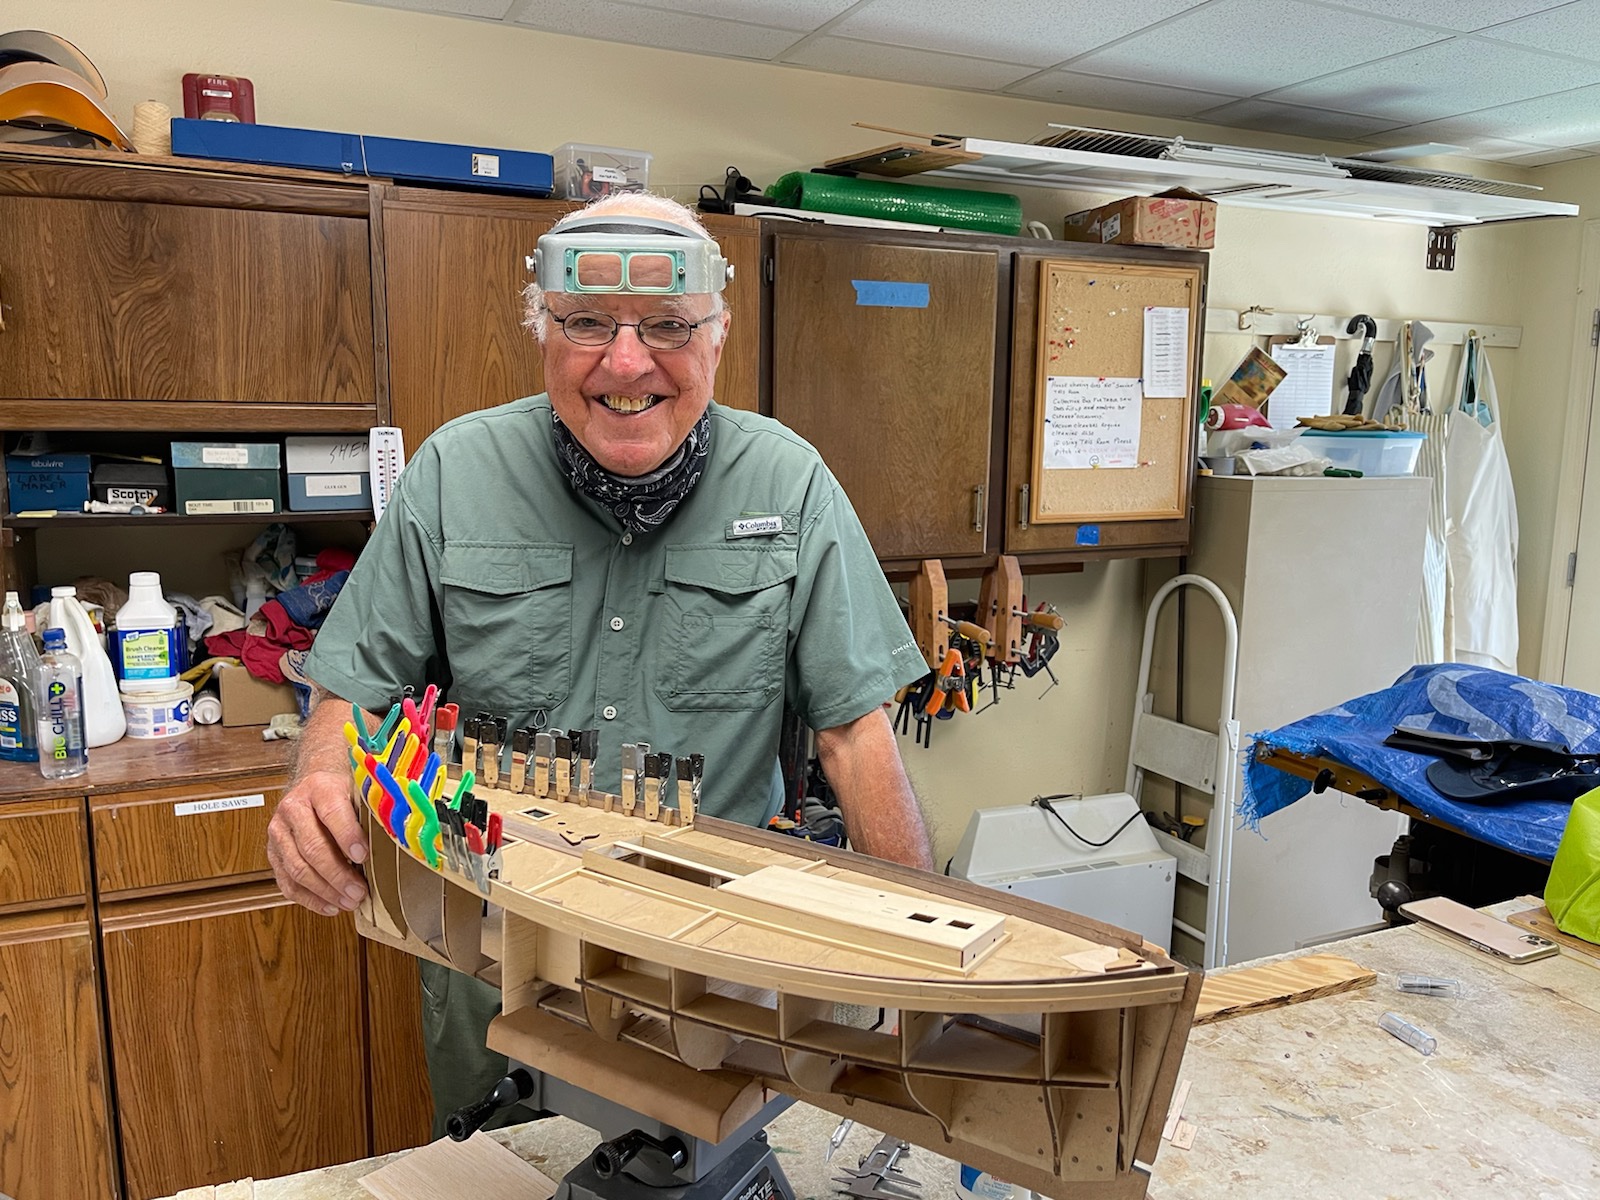
Continued working on the deck and placed the timberheads in the bulwark. BUT, as Bob Garcia says: "Measure once, cuss twice", I had installed more than 40 of the timberheads until I realized something was wrong. I had picked the wood as 4mmX2mm rather than the one called from plans: 4mmX4mm. I had to carefully remove the thin stanchions and replace it with the proper size. Need to remember that the devil is in the details. I am also going to be out of town next week but I'll keep following y'alls progress. The following picture was taken by my wife just this morning. Shows a very happy fellow

-
Have a question for the moderators. Can I start a gallery for each of my previous steam boats: The African Queen (Billings)and The Patricia (Krick).
-
Incidentally, is that you on the bow of your ship?
-
Your last details are great. I thought about a similar treatment in my Fifie. An open pipe make get rain into the stove and the engine. I also thought that at least the lower four feet of the stacks should be insulated. Those pipes get hot and that will be a very busy deck when fishing. Also the condensate discharge from the winch, that is running on the deck, should also be insulated and perhaps provided with a step to prevent the crew from tripping on it. Sorry, that is the old engineer on me, also looking for the peoples safety and OSHA rules. Anyway, your work is fantastic.
-
Big Dan, you are the man! love your s details and hope you don’t mind copycats
-
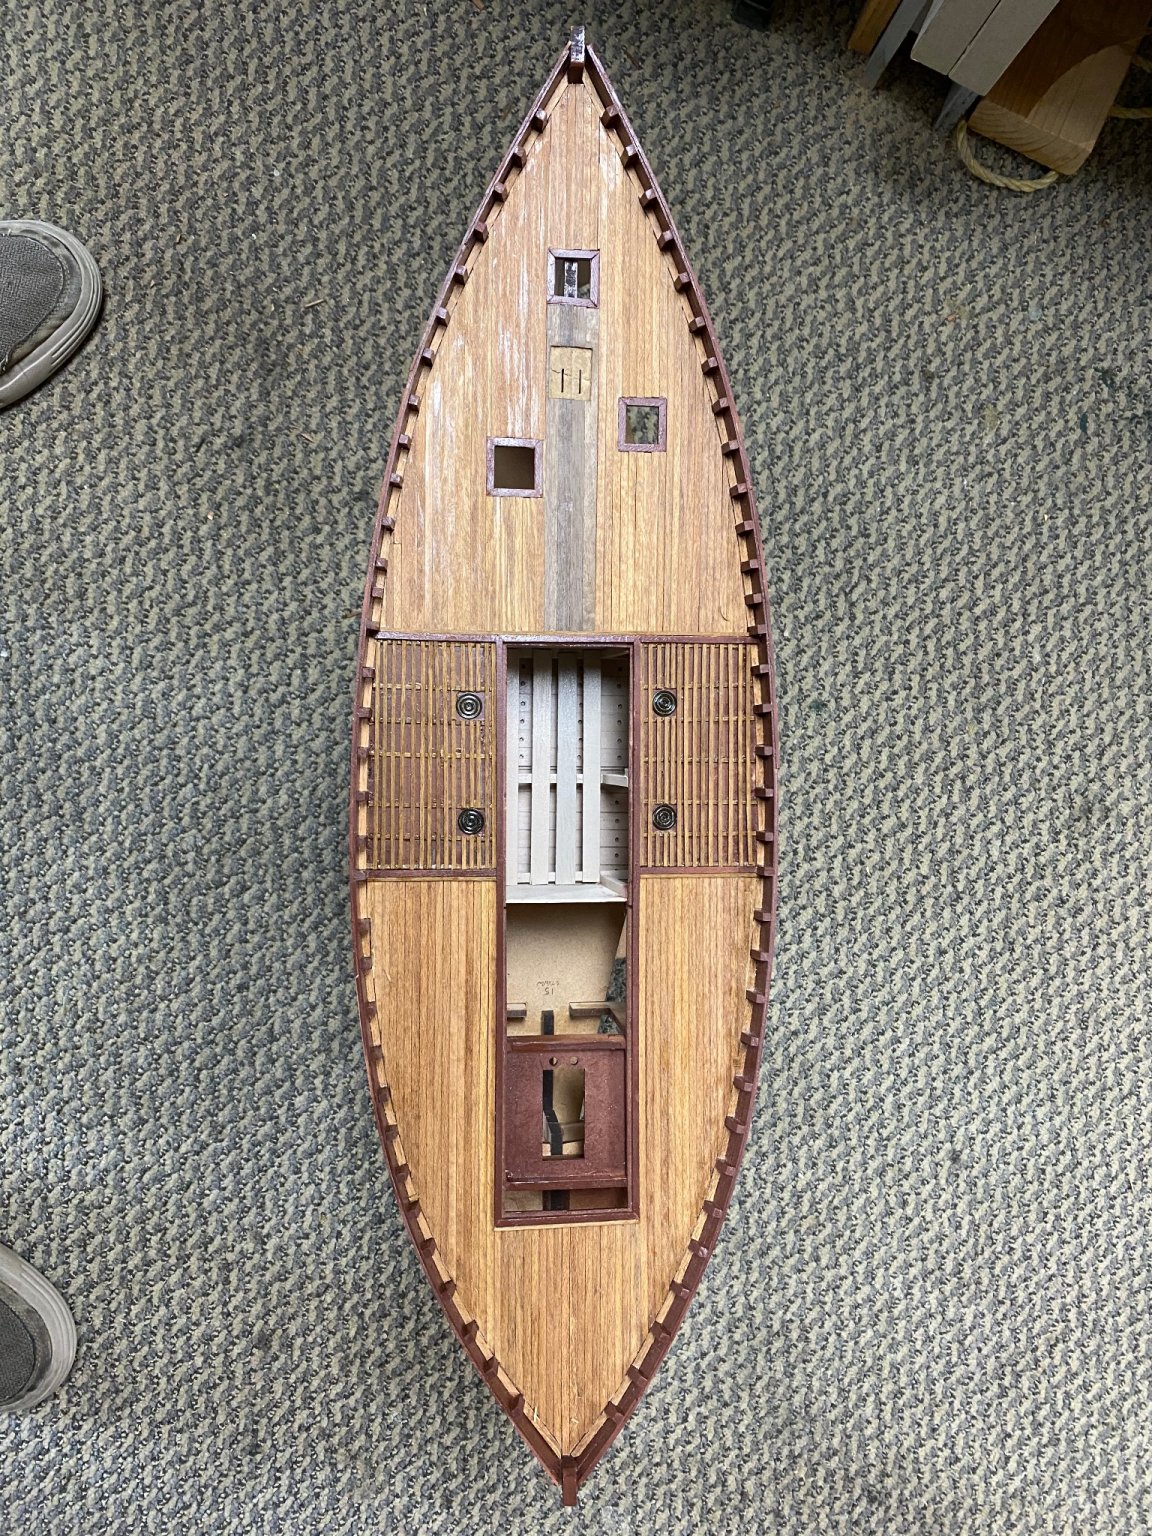
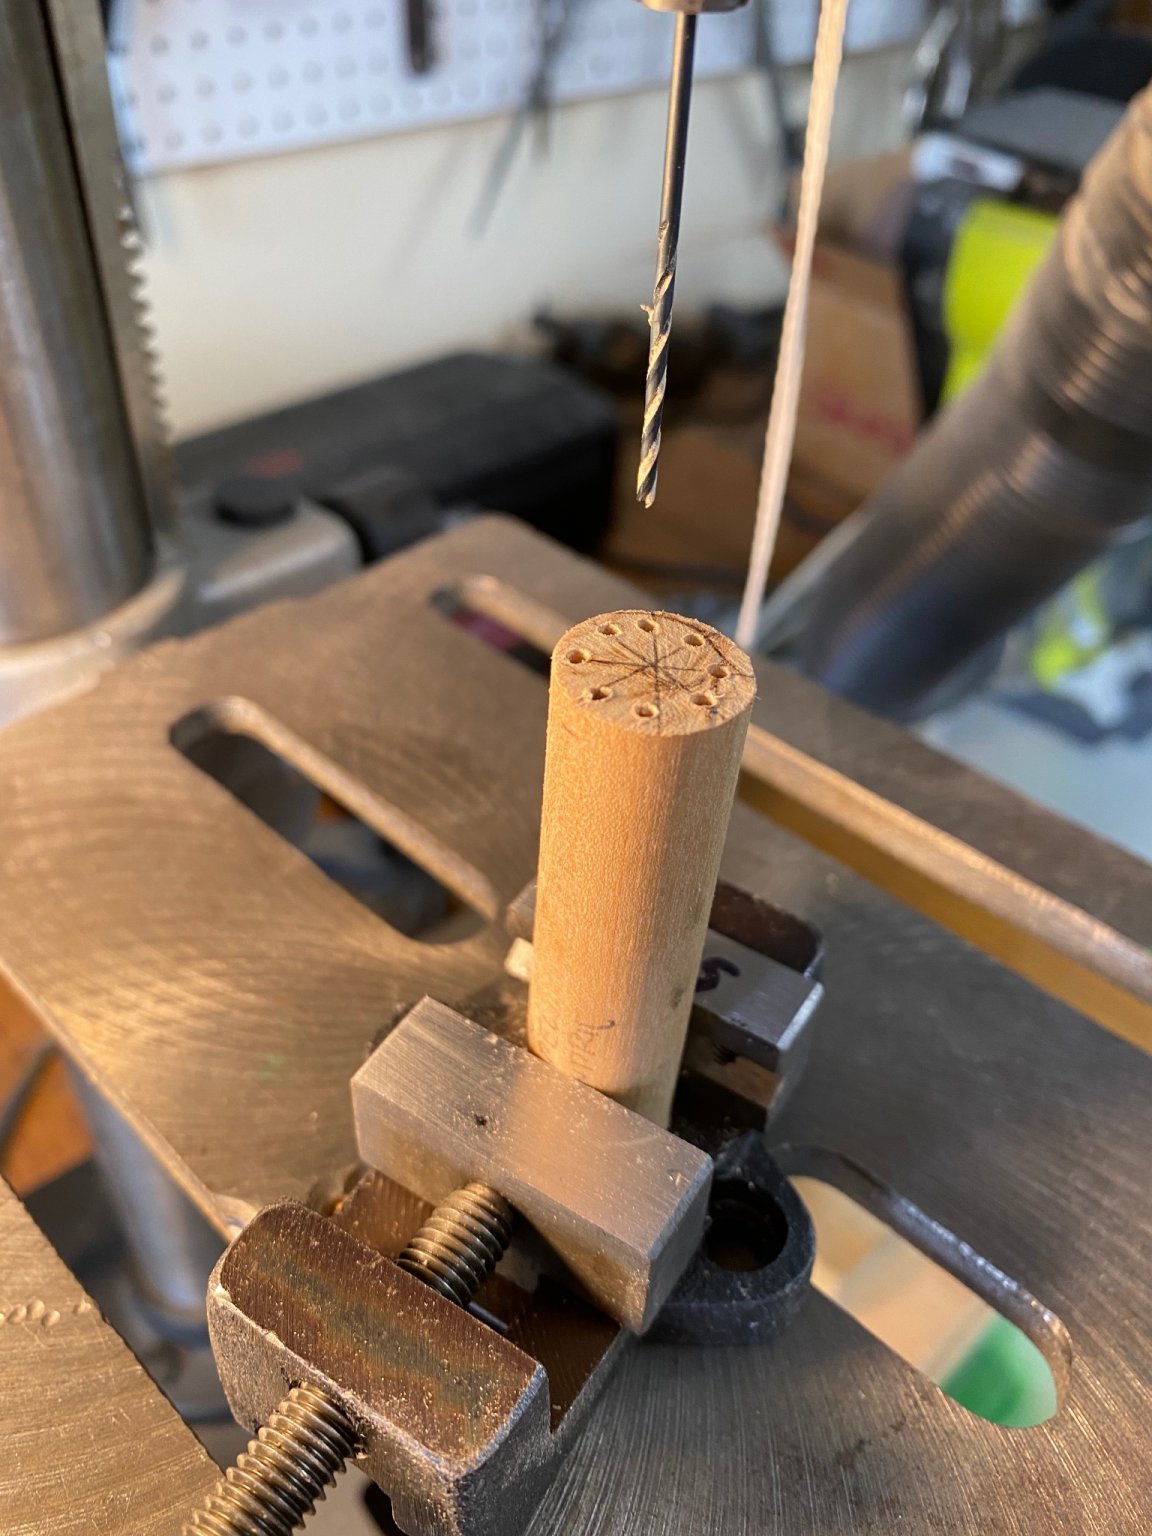
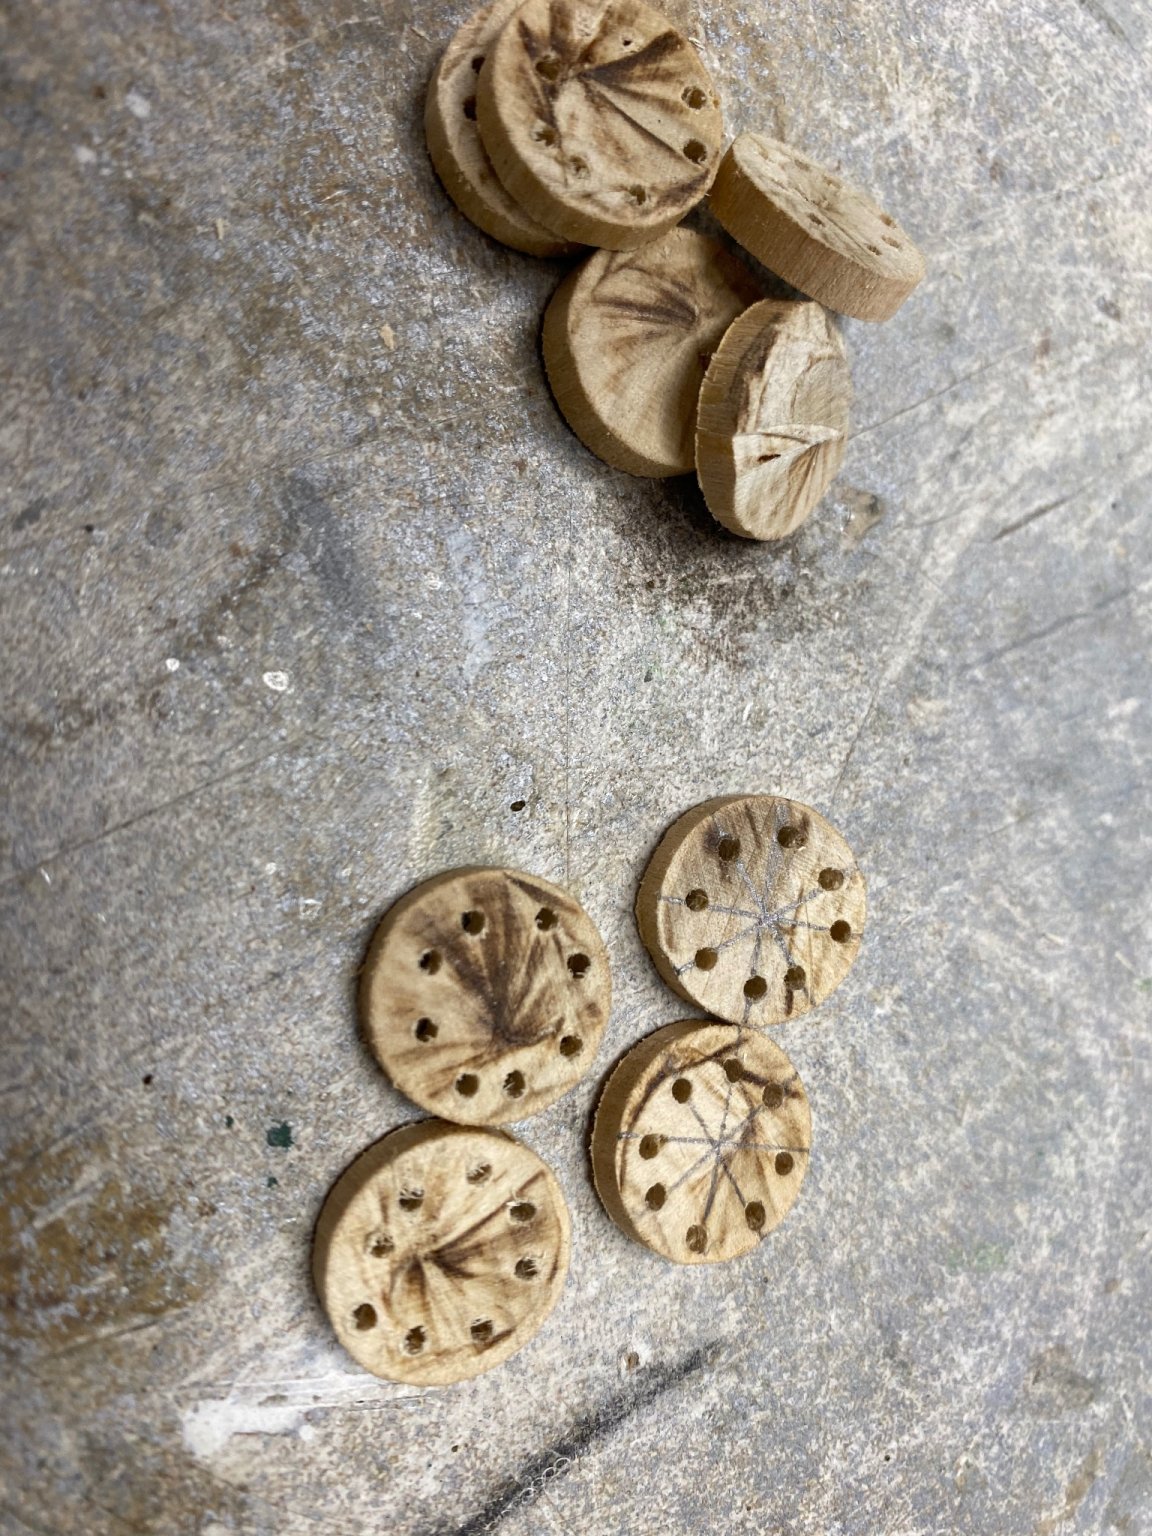
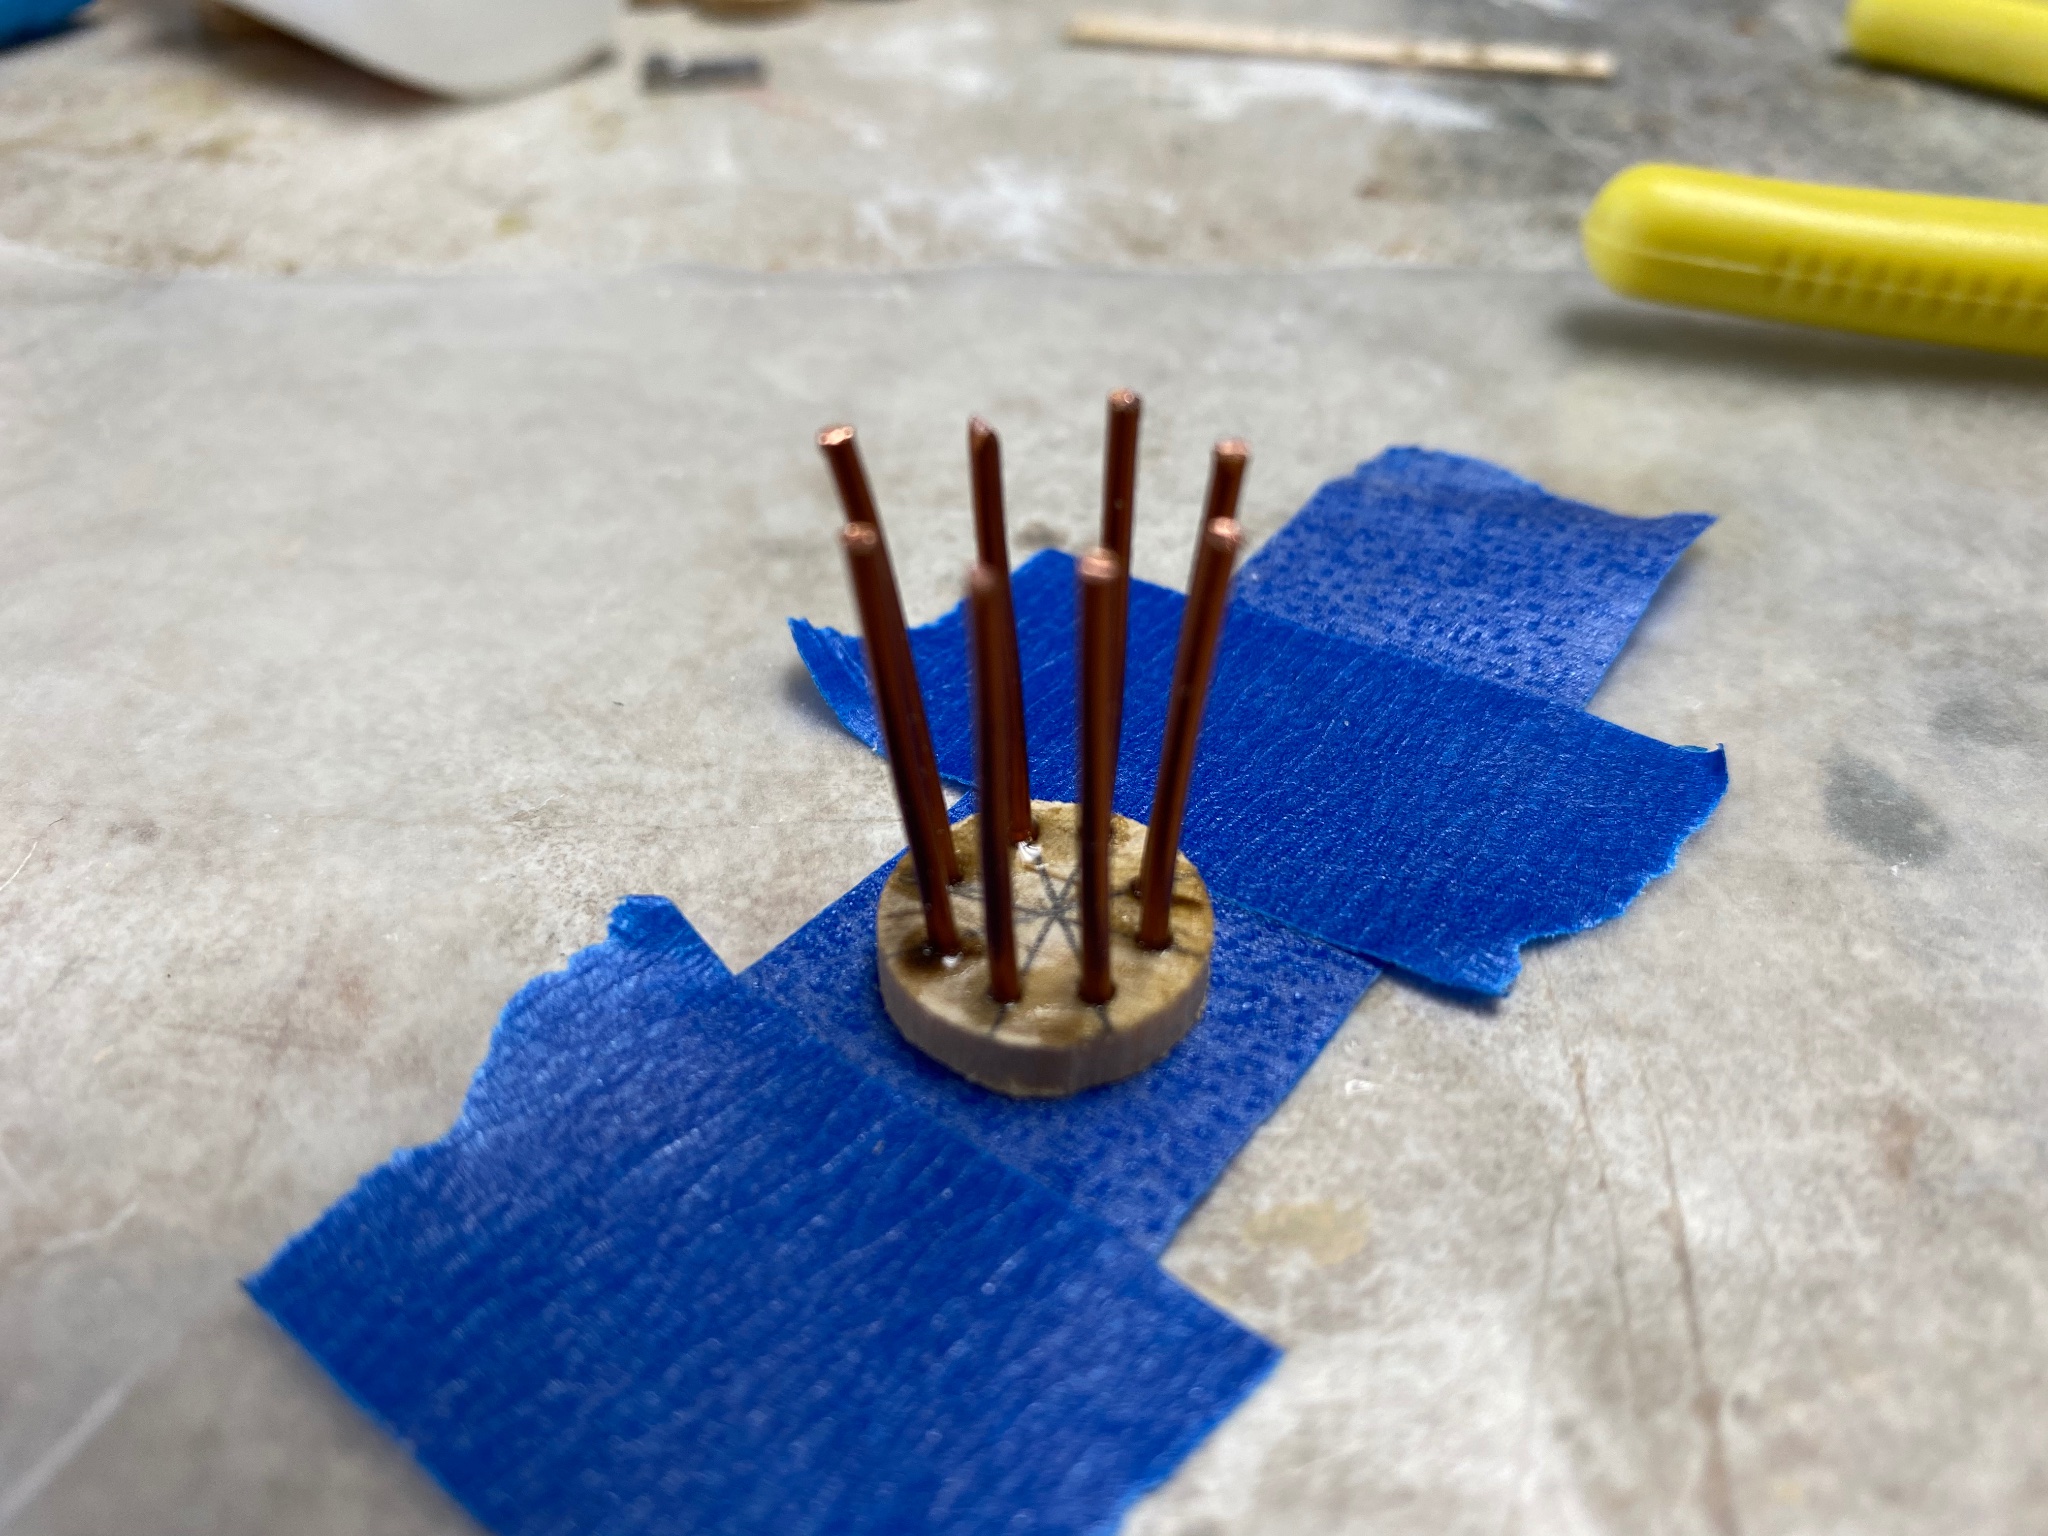
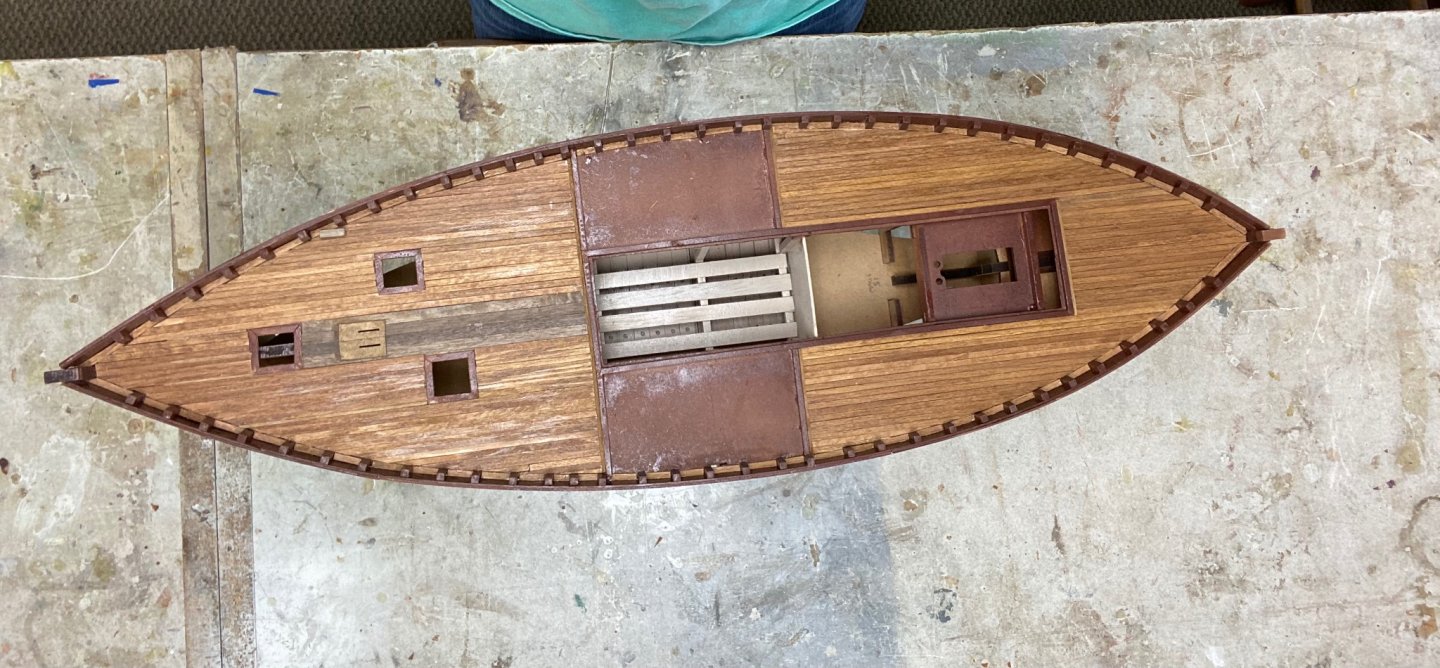
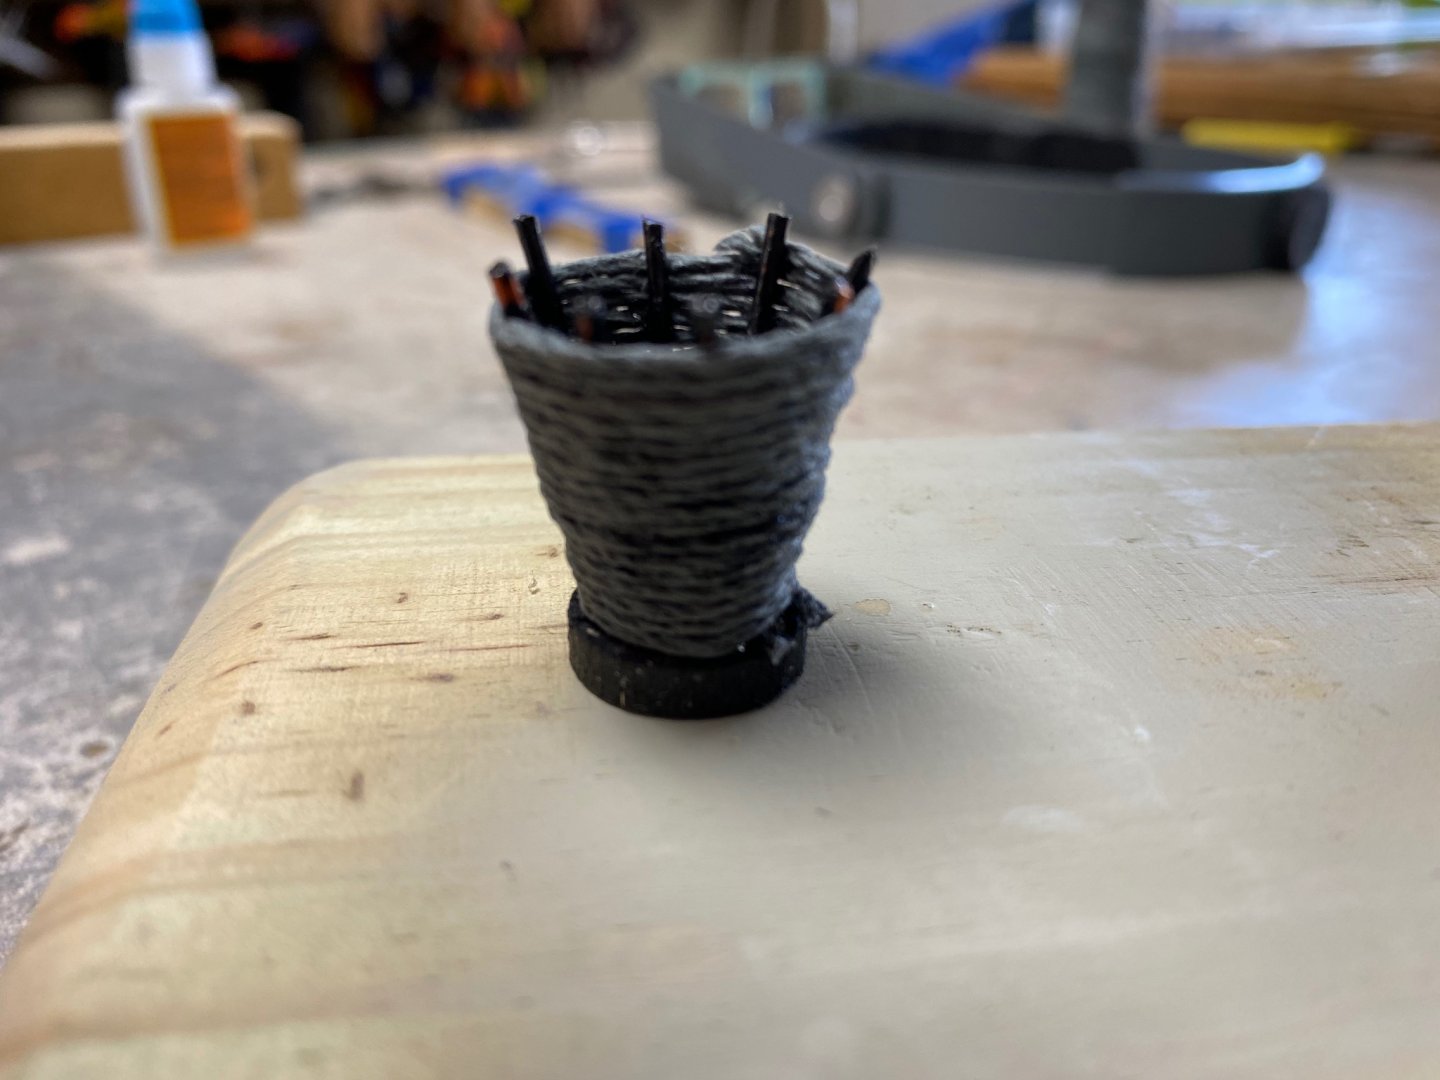
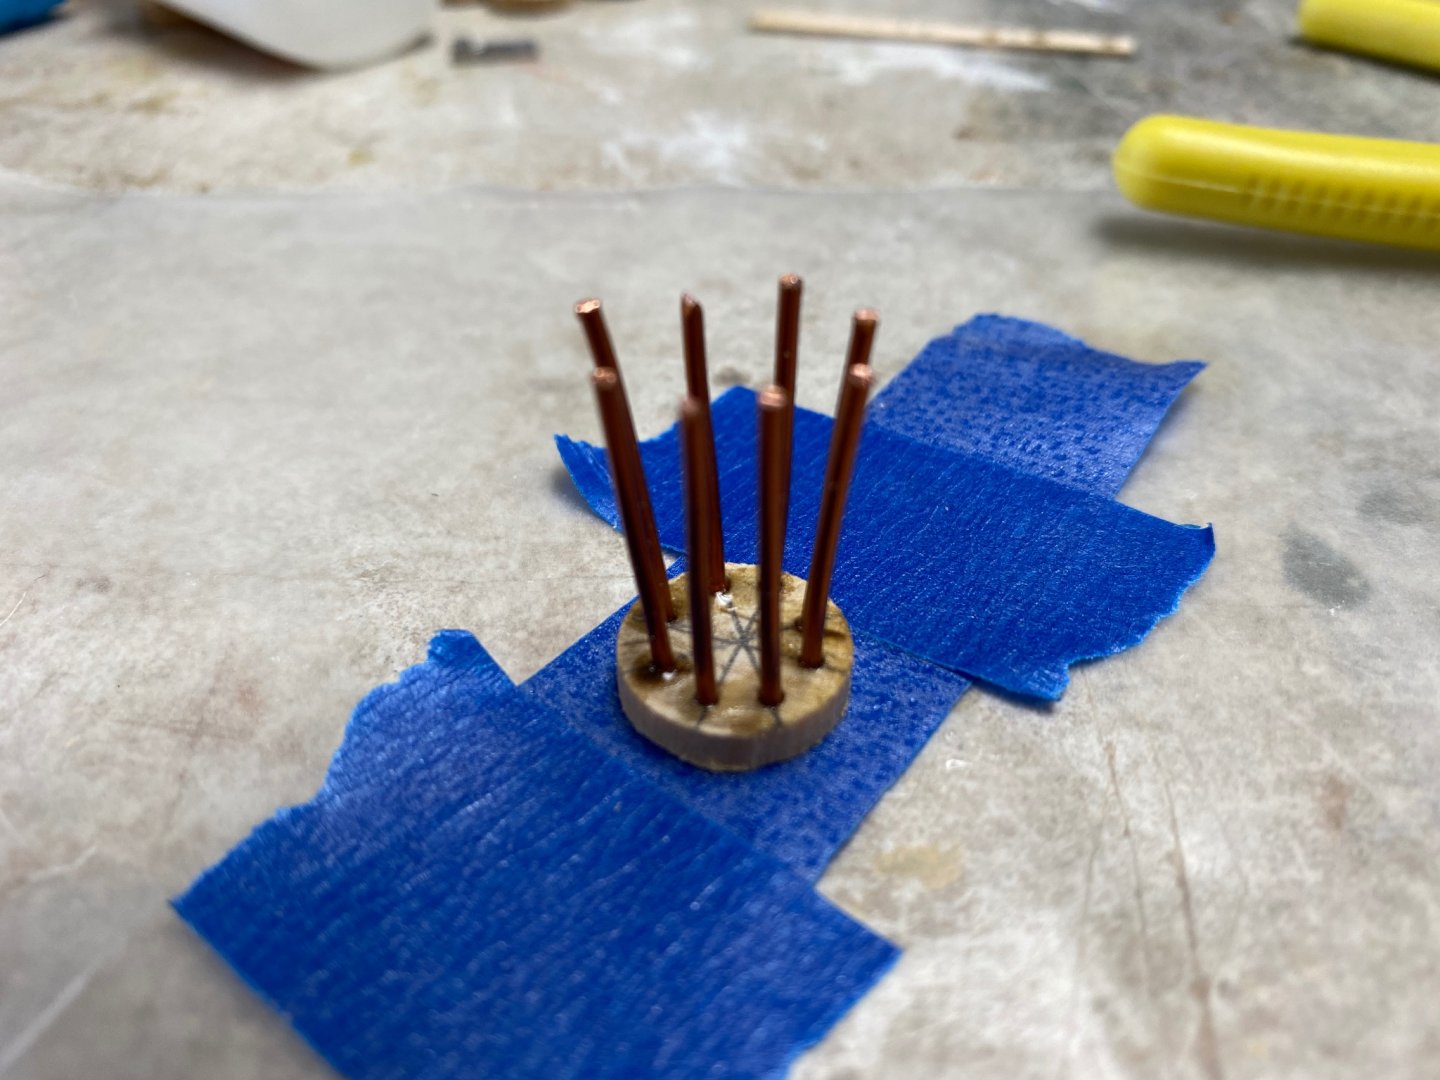
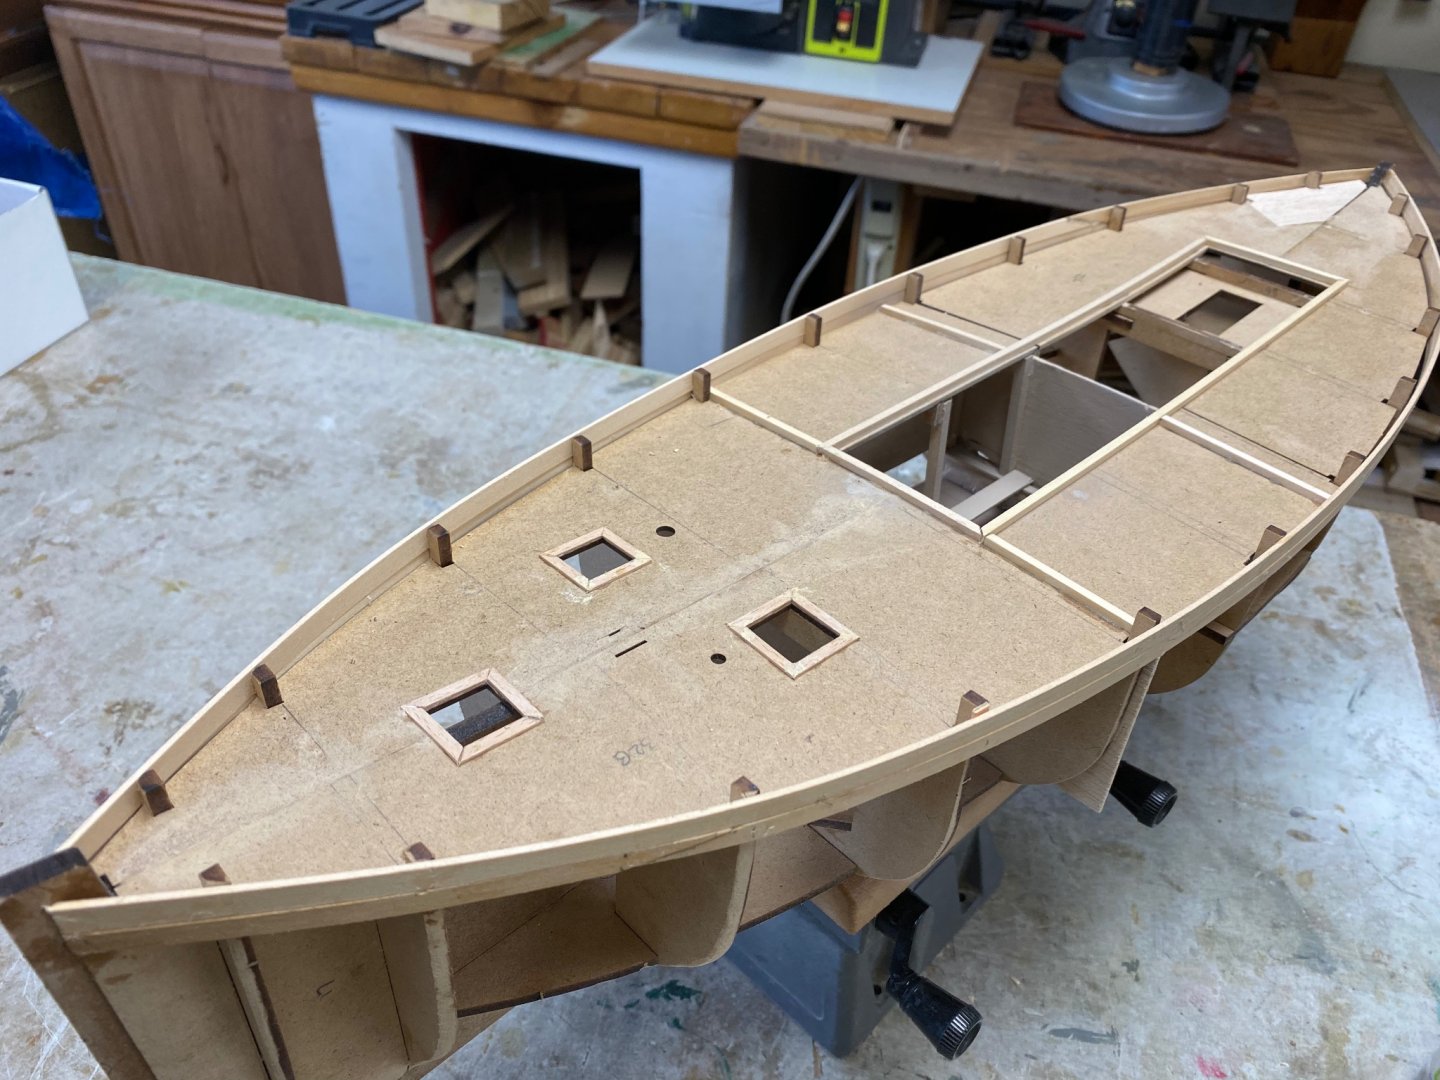
Being busy these last few days. The false deck was completed and the planking started. While I was was waiting for the glue to dry, I decided in taking a shot at building the "cran" baskets used to measure the fish during the unloading. I have seen what Big Dan had done and I liked it. There is a lot of information in the net about these baskets being used to measure the fish volume. The following pictures tell the story better that I can and Here is one of the crans I started by drilling hole in a dowel of the proper scale and then cut it in disks. Which BTW came out too thick. Then I used copper wire and fabricated the cages as you see in the pictures And this is final final product after weaving the basket Several mistakes were made: I wove it too tight, the basket has to be a little more conical, the base is too thick and I used to thick a rope. But it looks cute and the others will be an improved version. I resumed fabrication and completed the first two planks port and starboard But the I realized that if I was was going to detail the hold following PJG's build, I better do it before I complete the planking and find myself trying to work through the small hatch opening. Following are the results of my concept and appreciate the input by PJG Then I completed the false deck. And I think I will fishing the deck planking before getting back to the hull planking. Thanks for watching. I am enjoying this build very much. Y'all are an inspiration


-
Nils, appreciate your quick reply to my inquiry about the fish. I checked the site and it is fabulous. However, the shipping to the US was 39 euros for a 19 euro order. In addition, for payment, they only accept bank transfers and I was kind of leery about doing that. I prefer to use something like Pay Pal. Anyway, your information also offered another shop for the etched fish but they didn't have a selection for English language. But, most of the fun of these builds is to do the research and accommodate current materials to represent scale stuff. I will continue to follow your build. Thanks again for the response