
Gaffrig
-
Posts
132 -
Joined
-
Last visited
Content Type
Profiles
Forums
Gallery
Events
Posts posted by Gaffrig
-
-
-
Hello all!
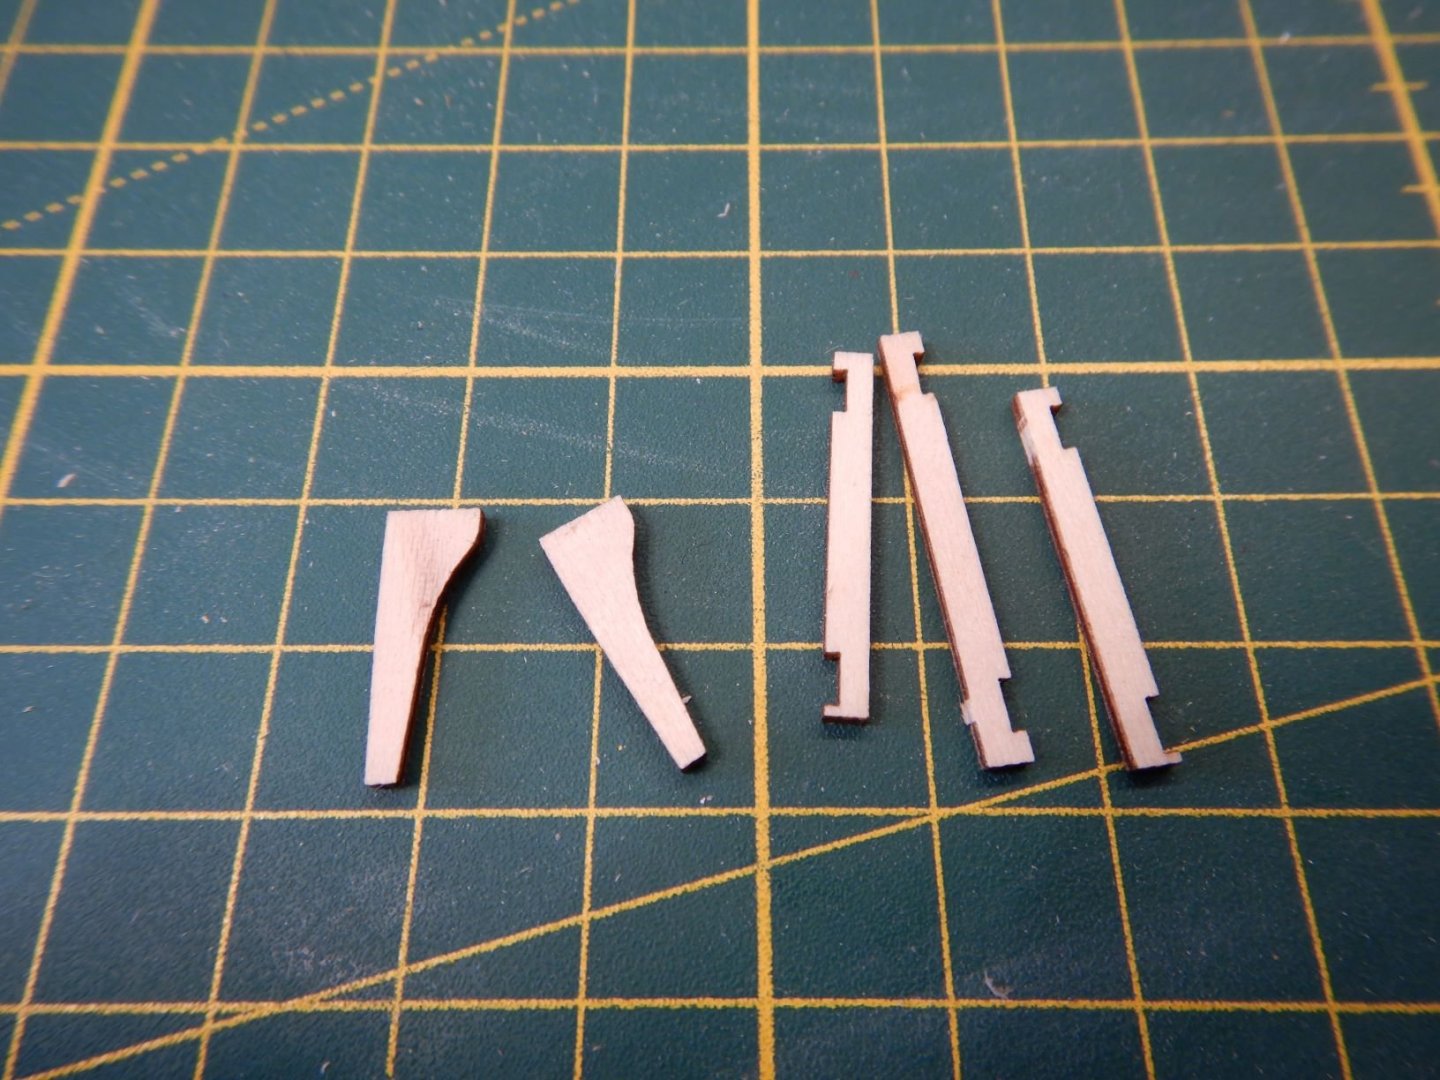
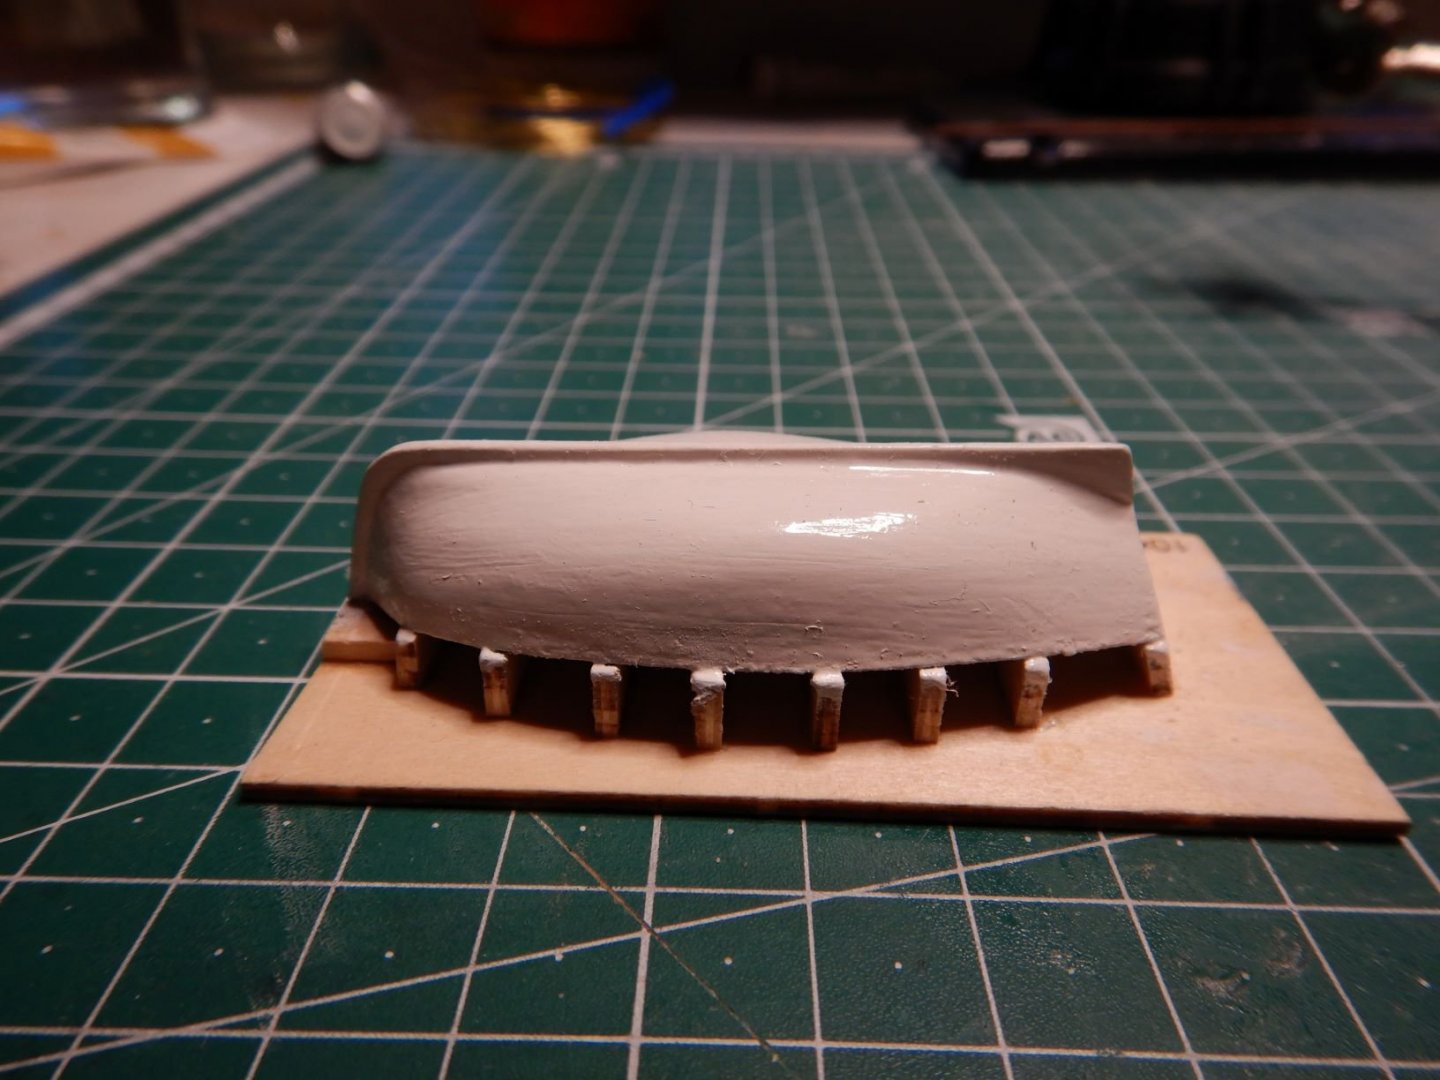
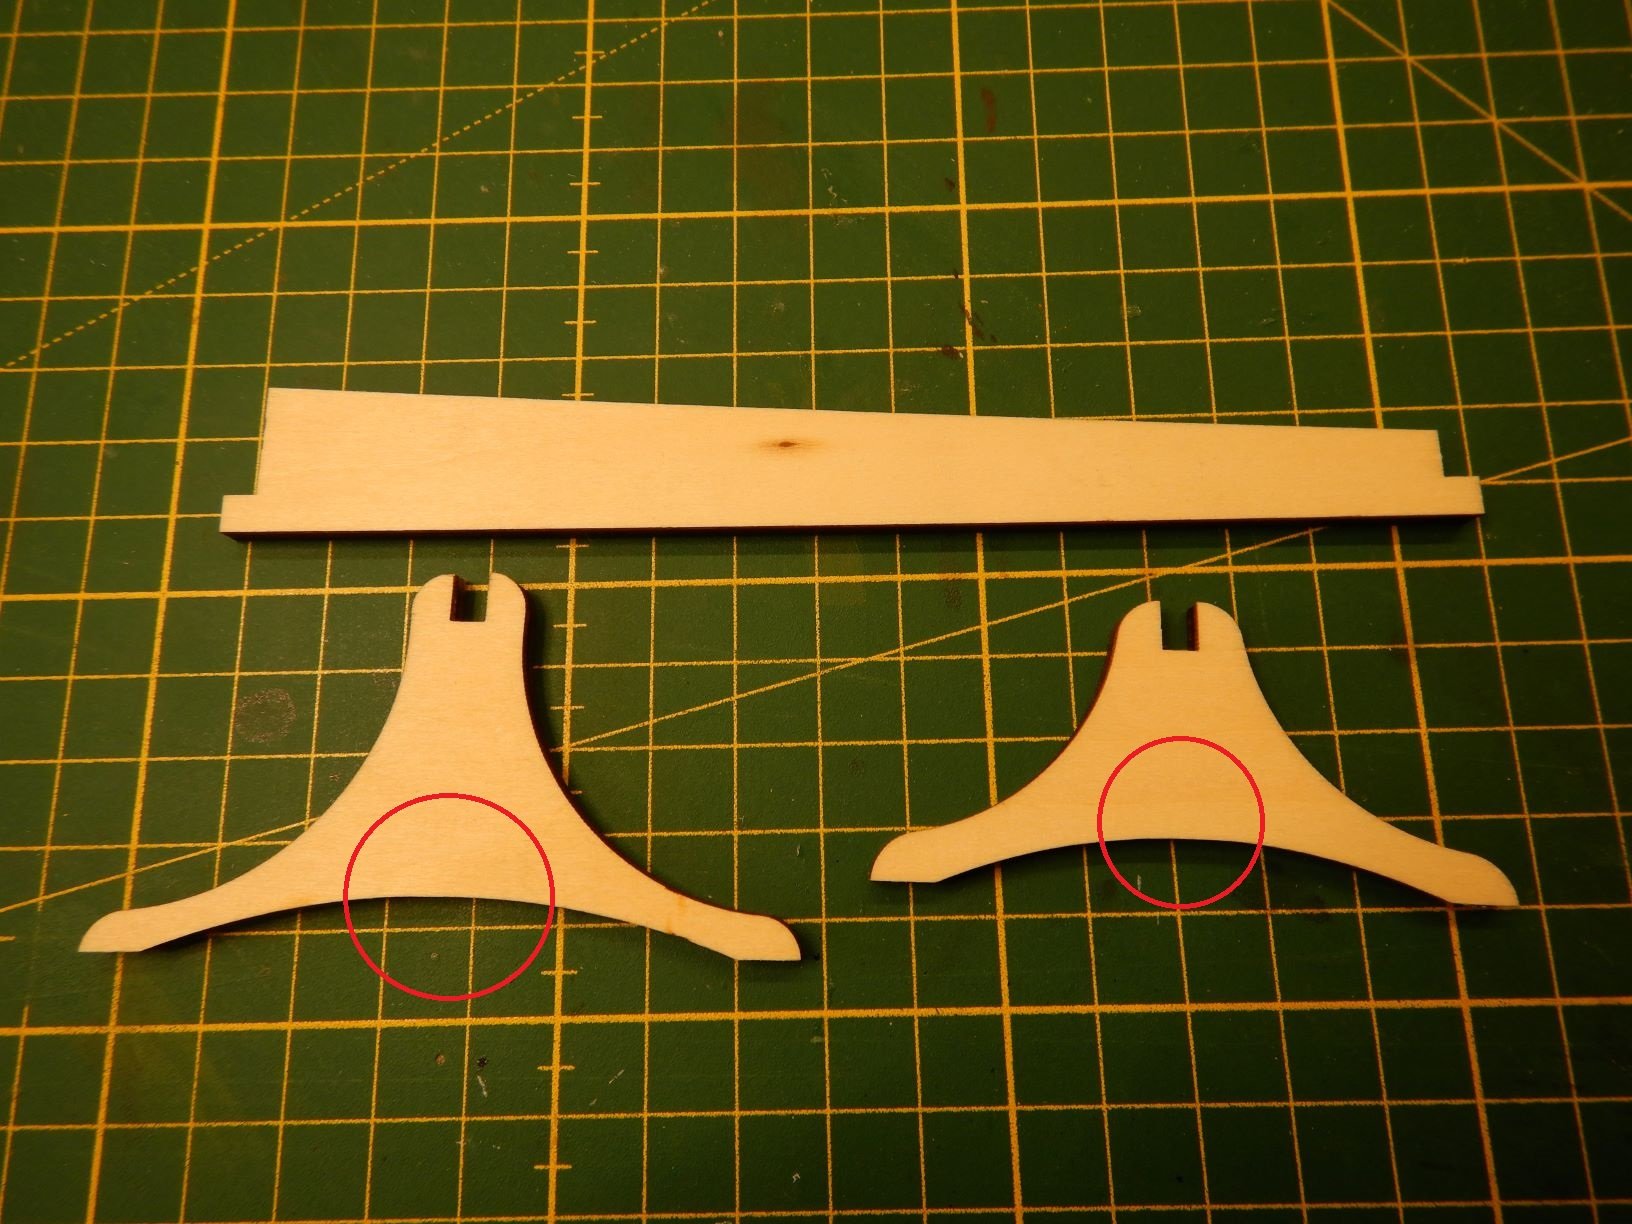
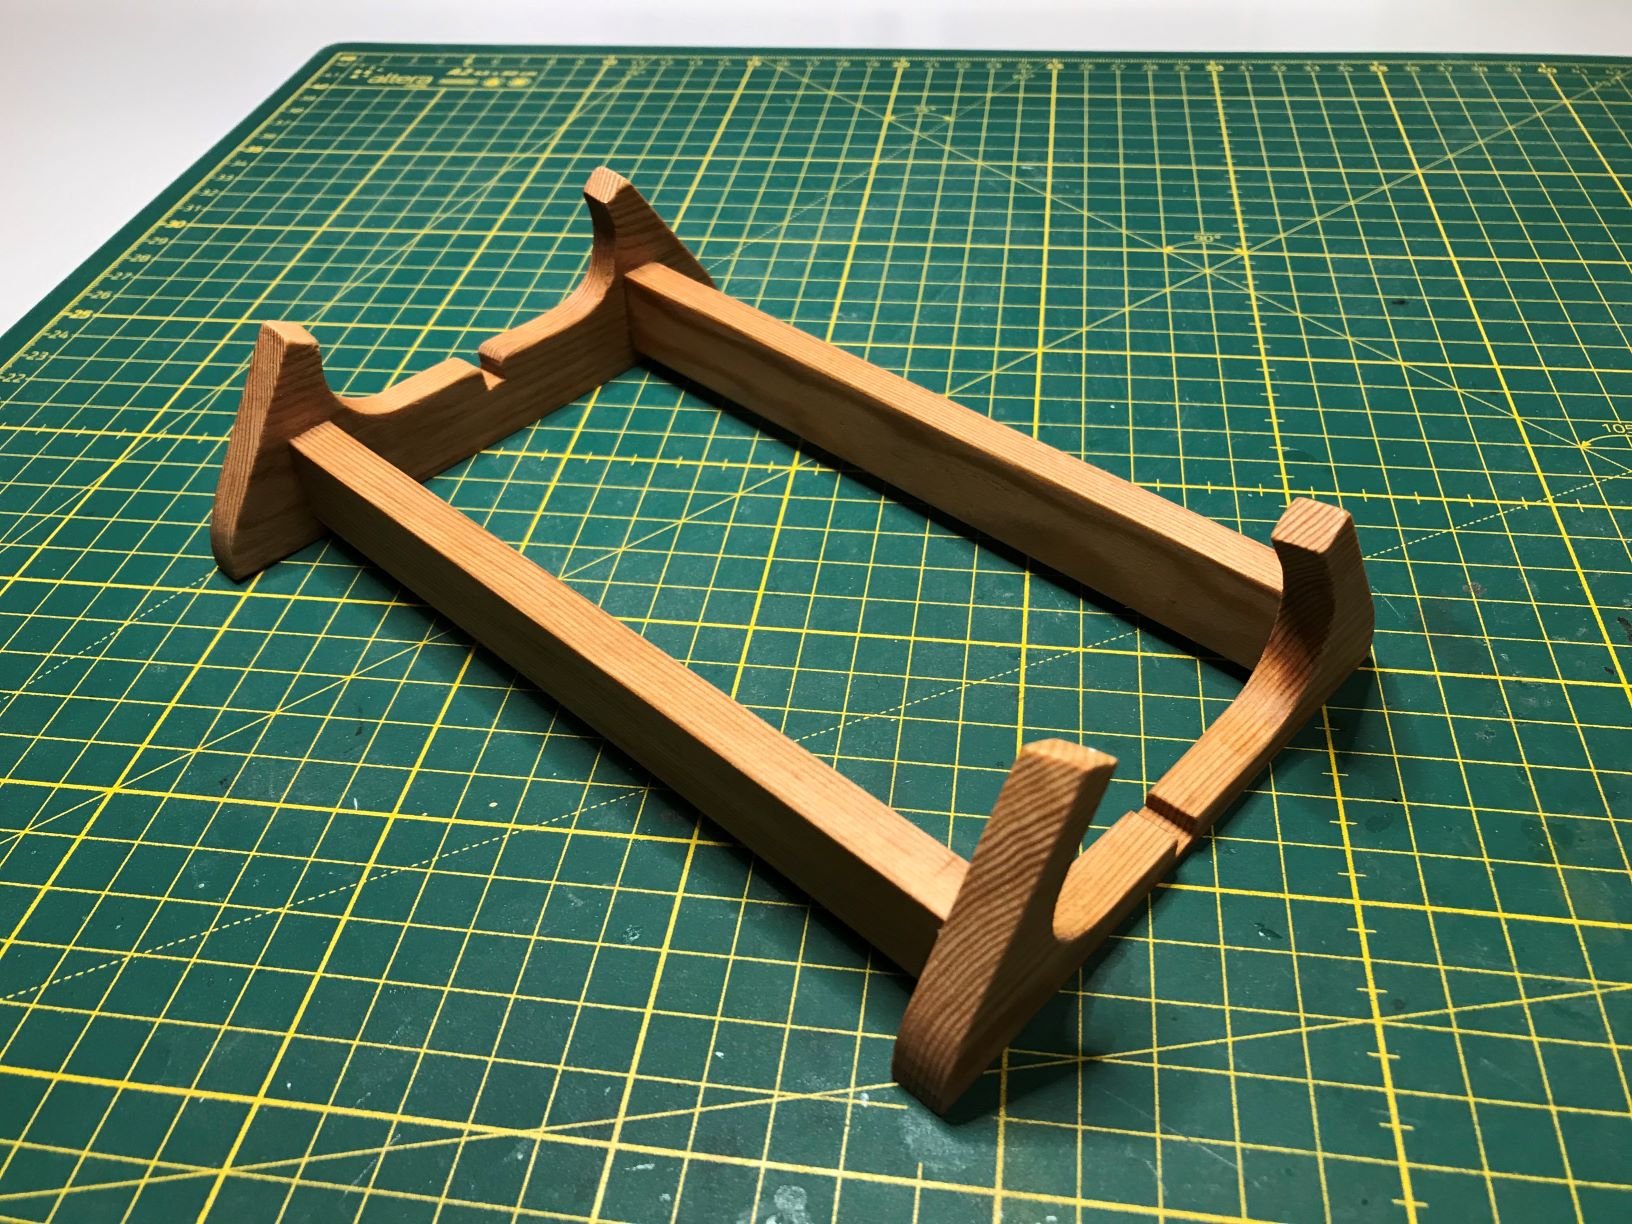
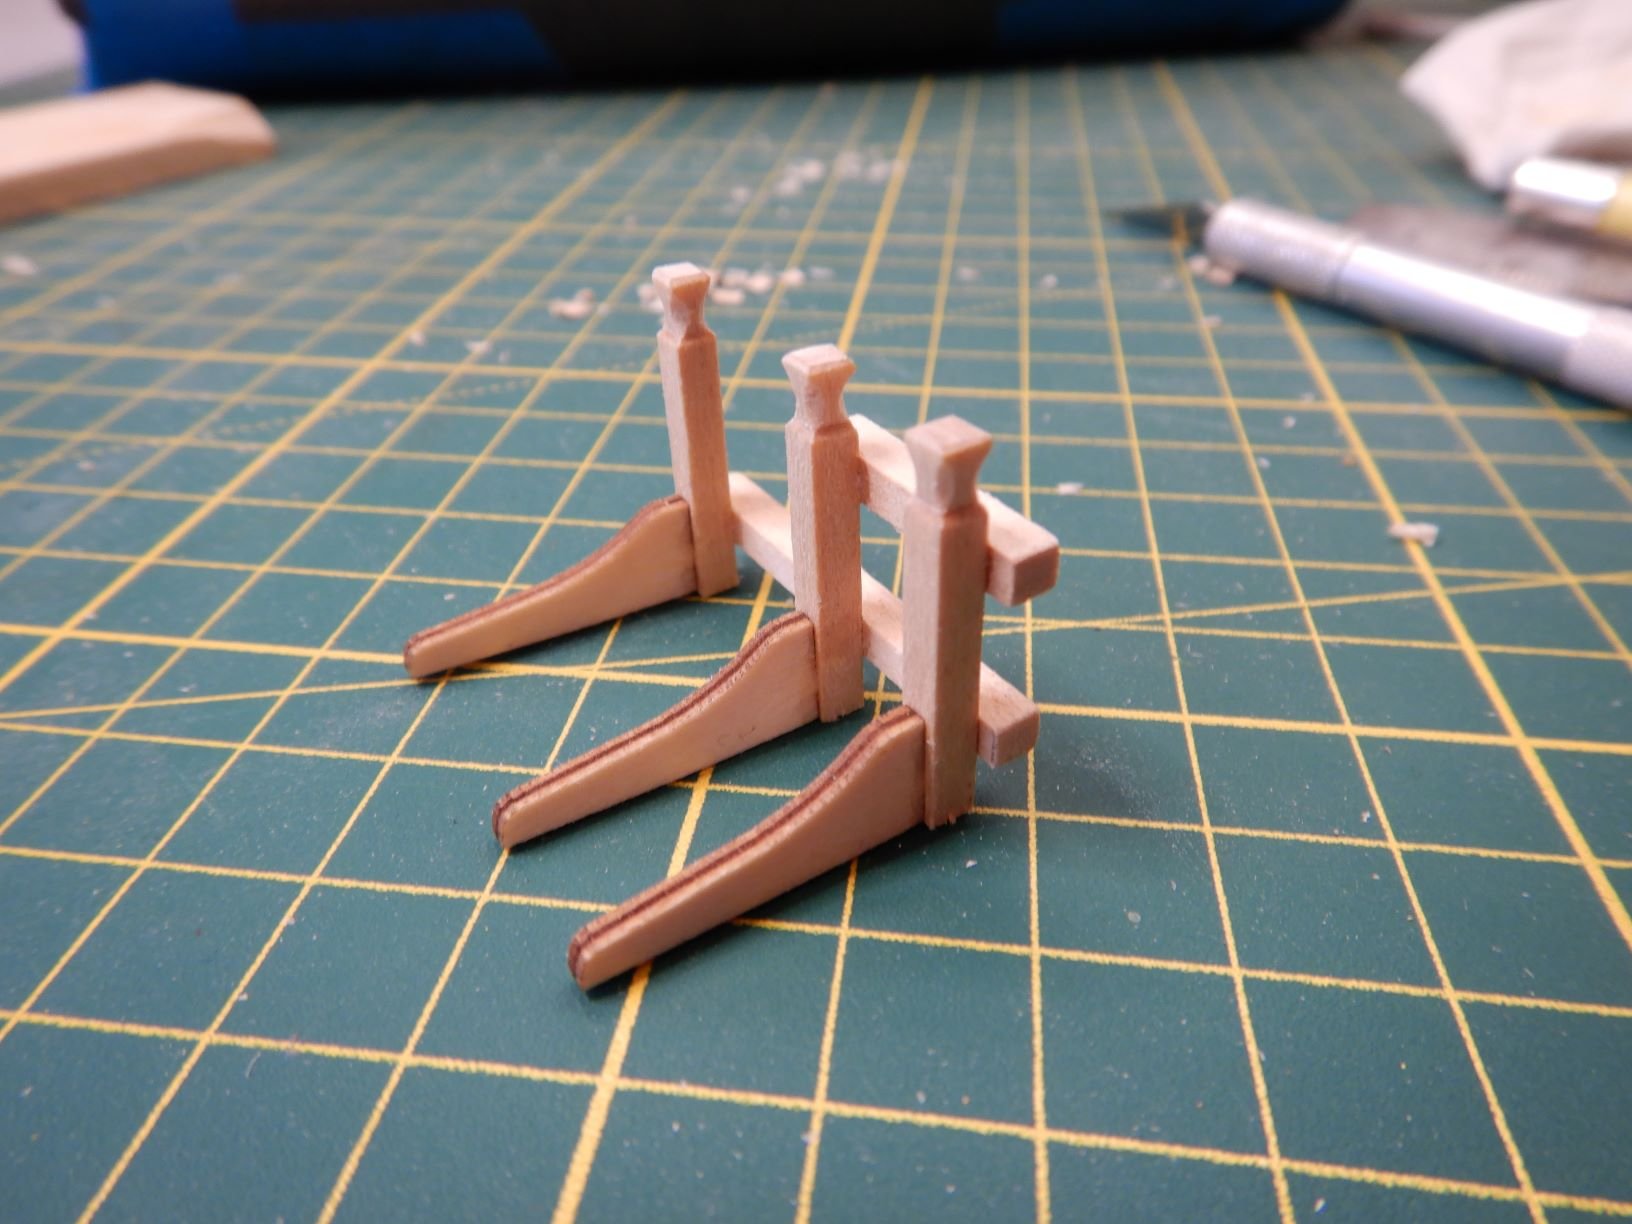
In between all the rope coiling, I started the cradle that comes with the kit.
It seem like there has been a glitch in the lasercutting as the pieces in the kit are missing the two notches for the crosspiece.
(see red circles in pictures)
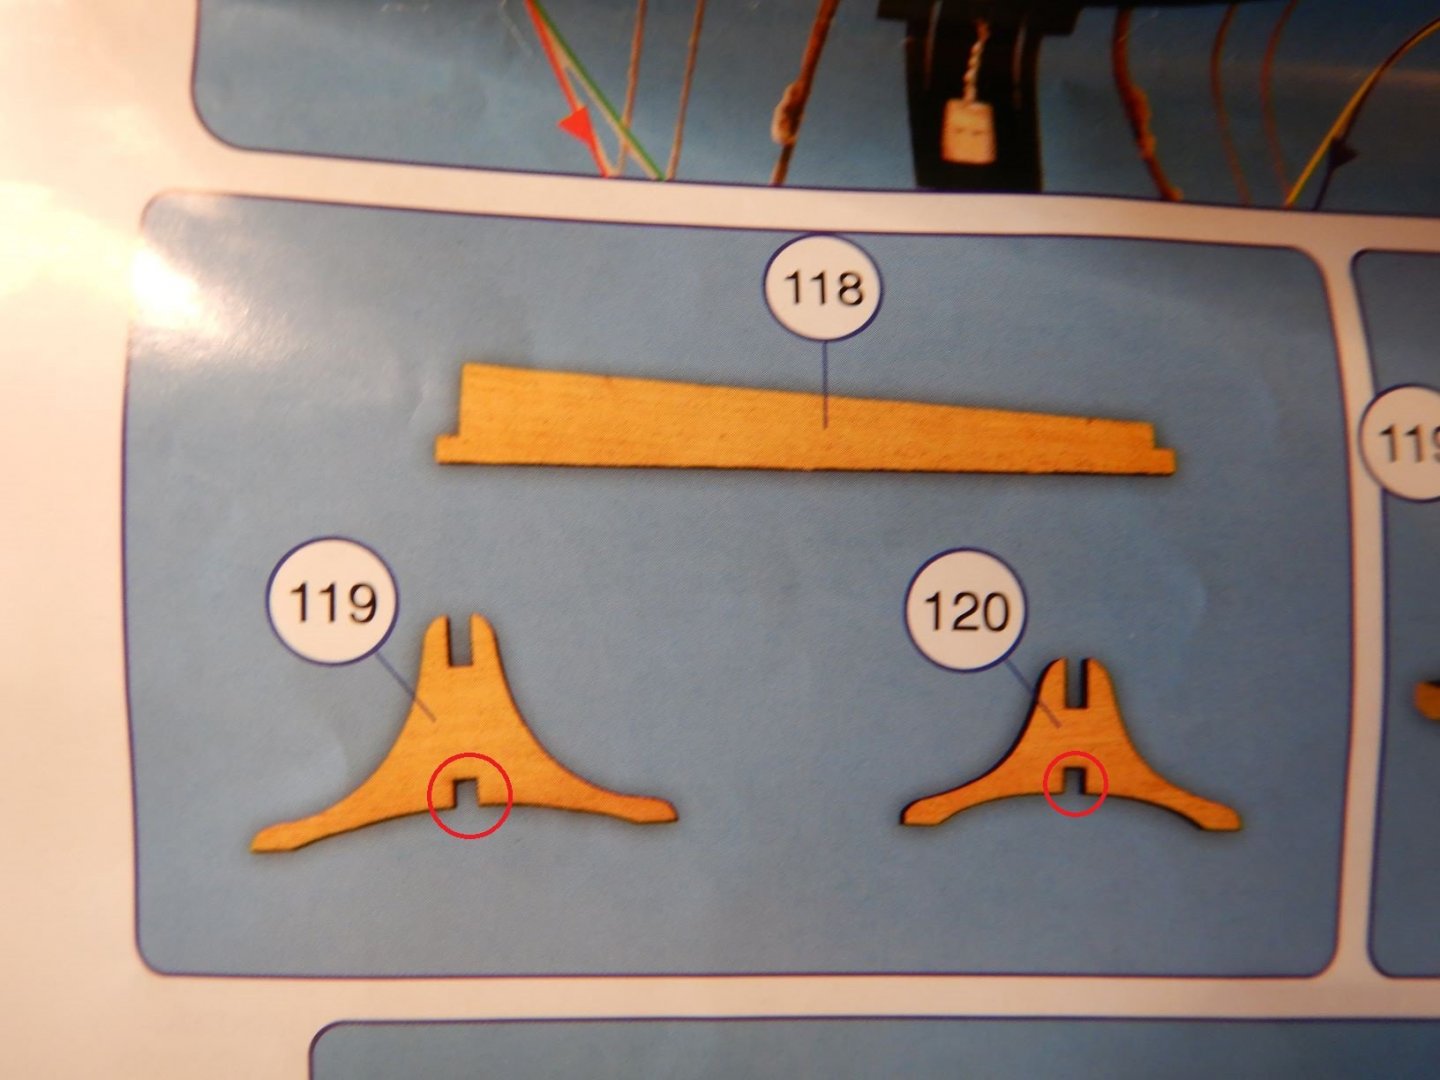
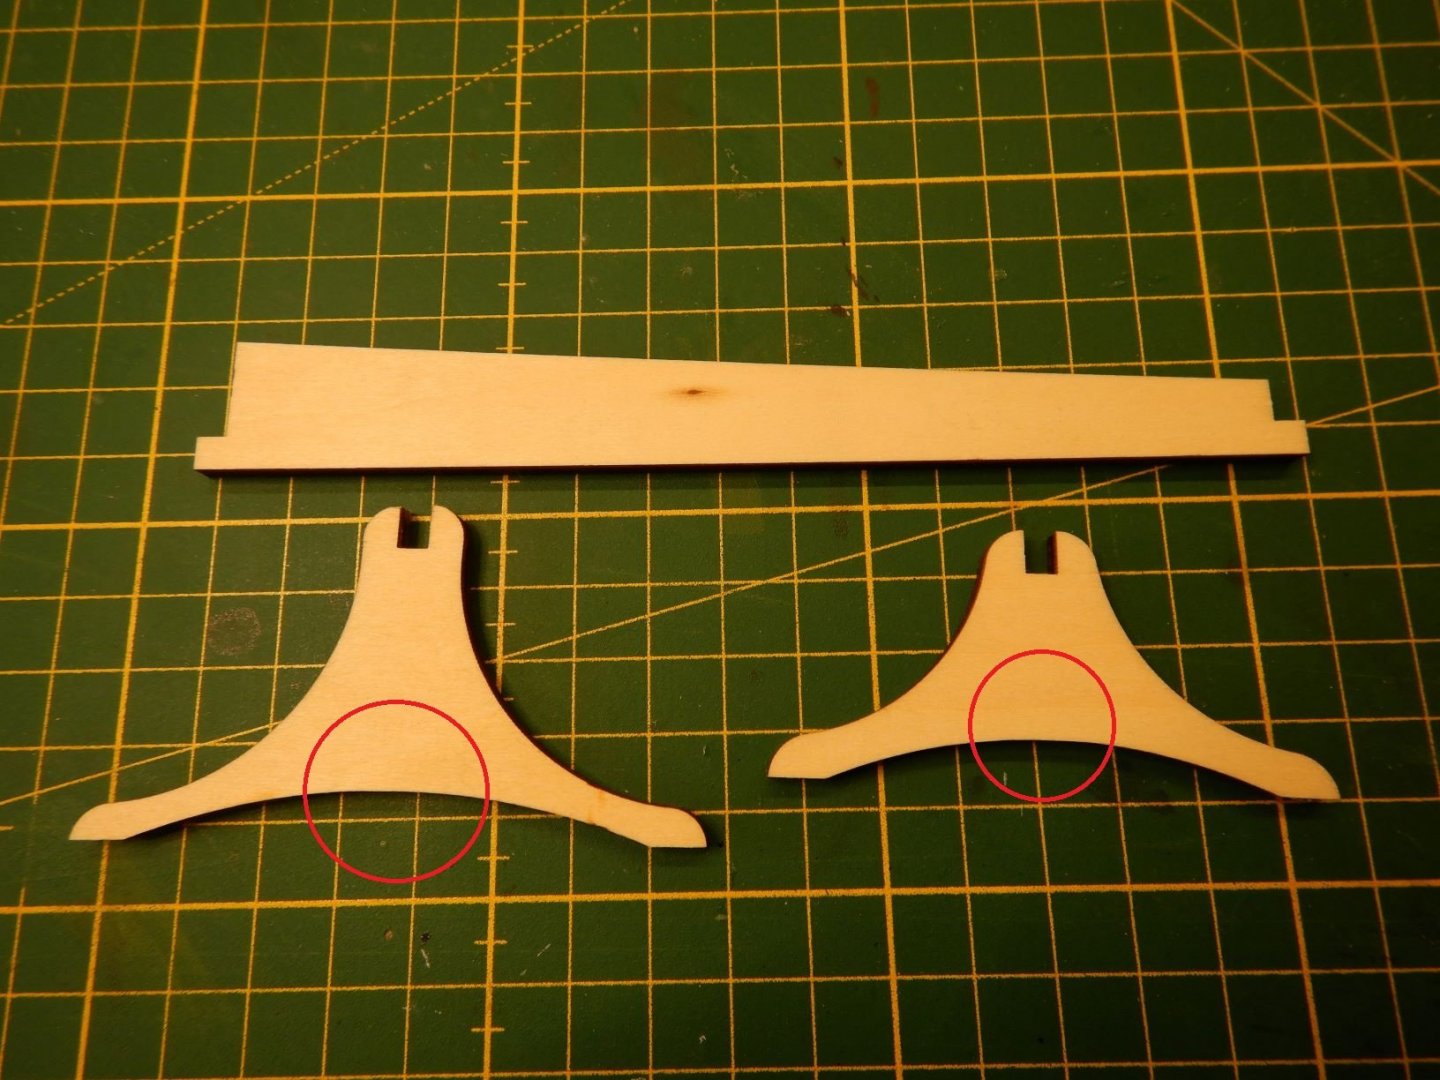
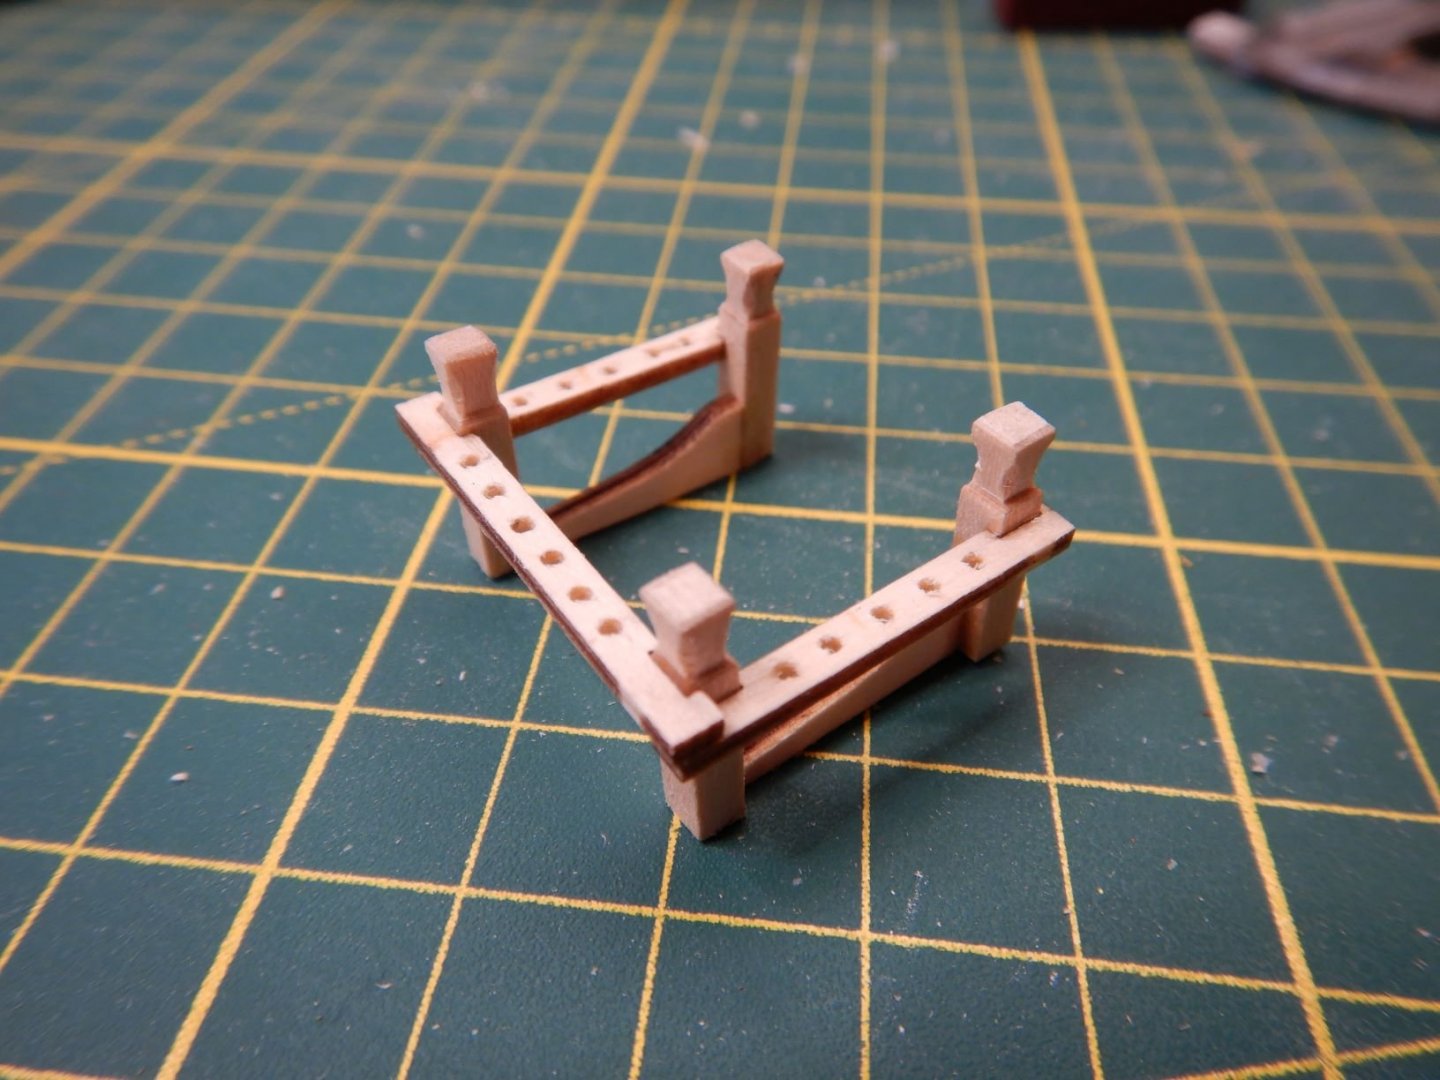
I cut out the notches, but then decided to make a different cradle alltogether.
I don't like the idea to have the model balancing with the keel in two small notches.
So i cut out and glued together a contraption of some wood I had laying around..
Gave it a couple coats of oil and ended up with this..

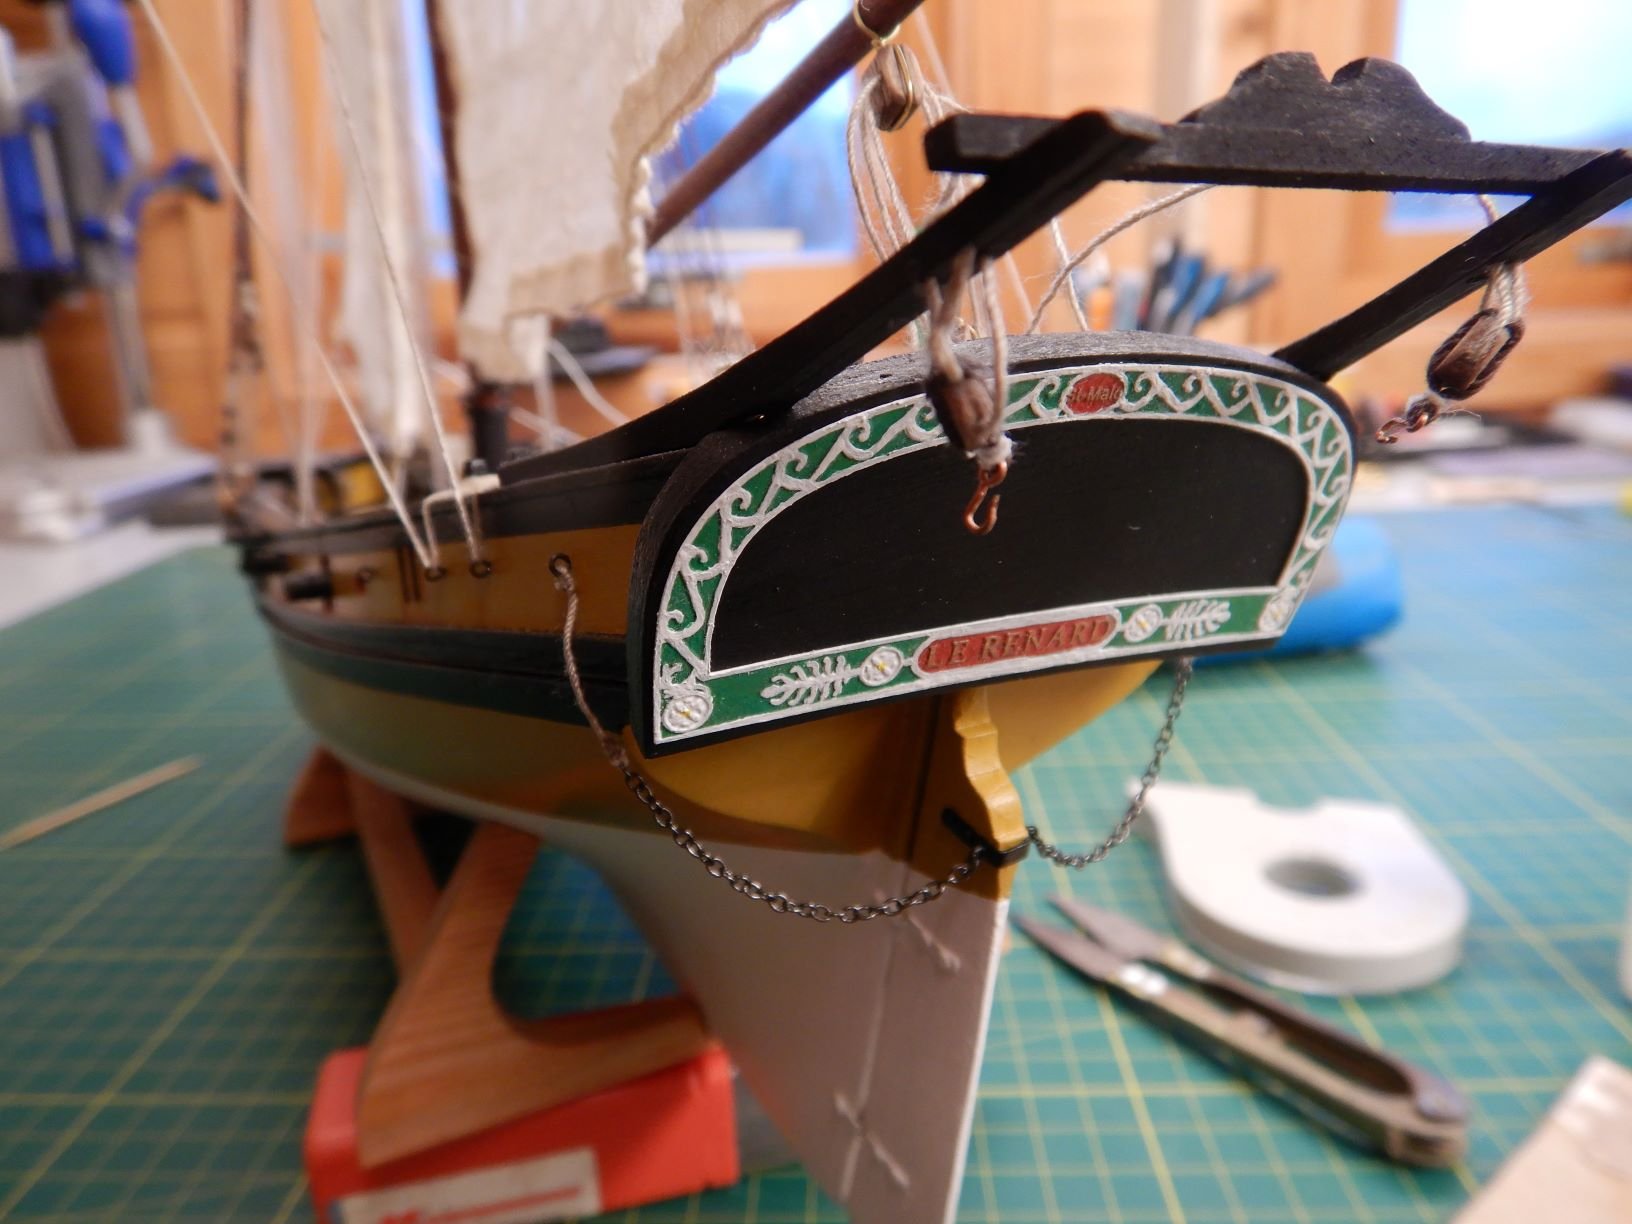
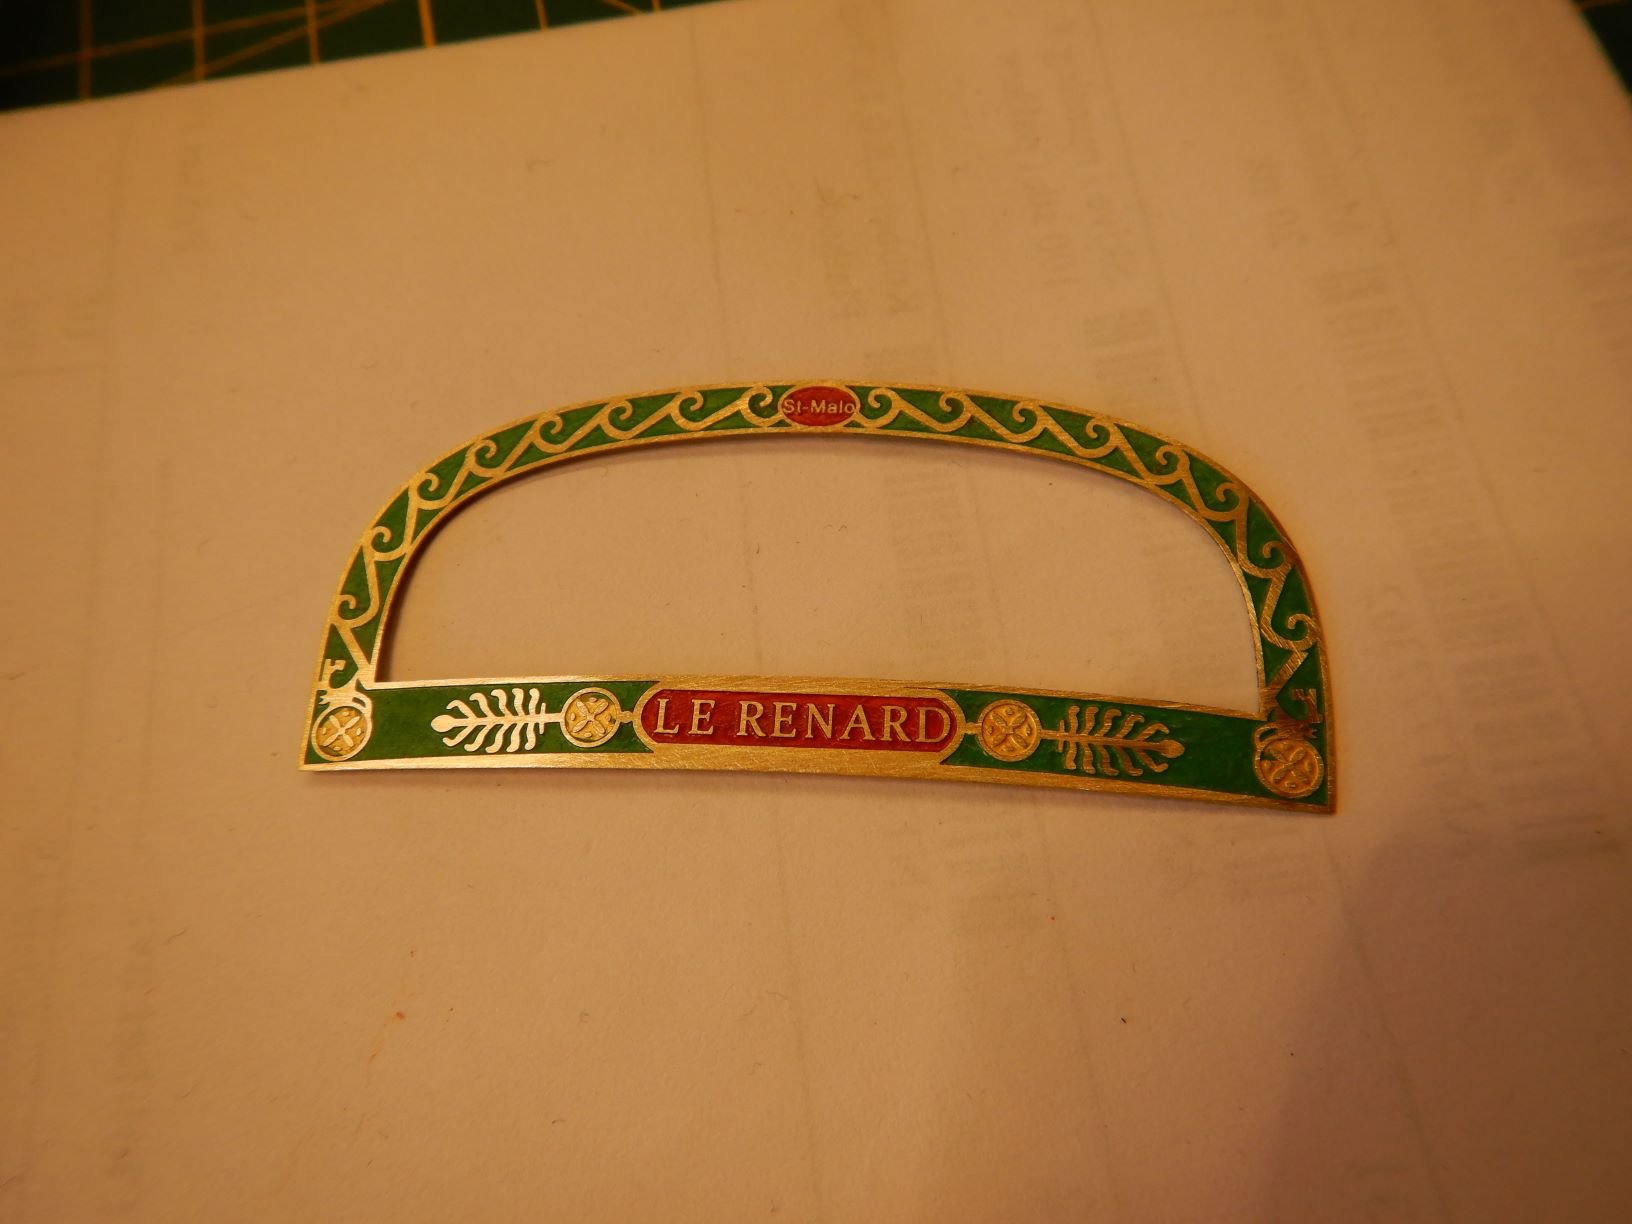
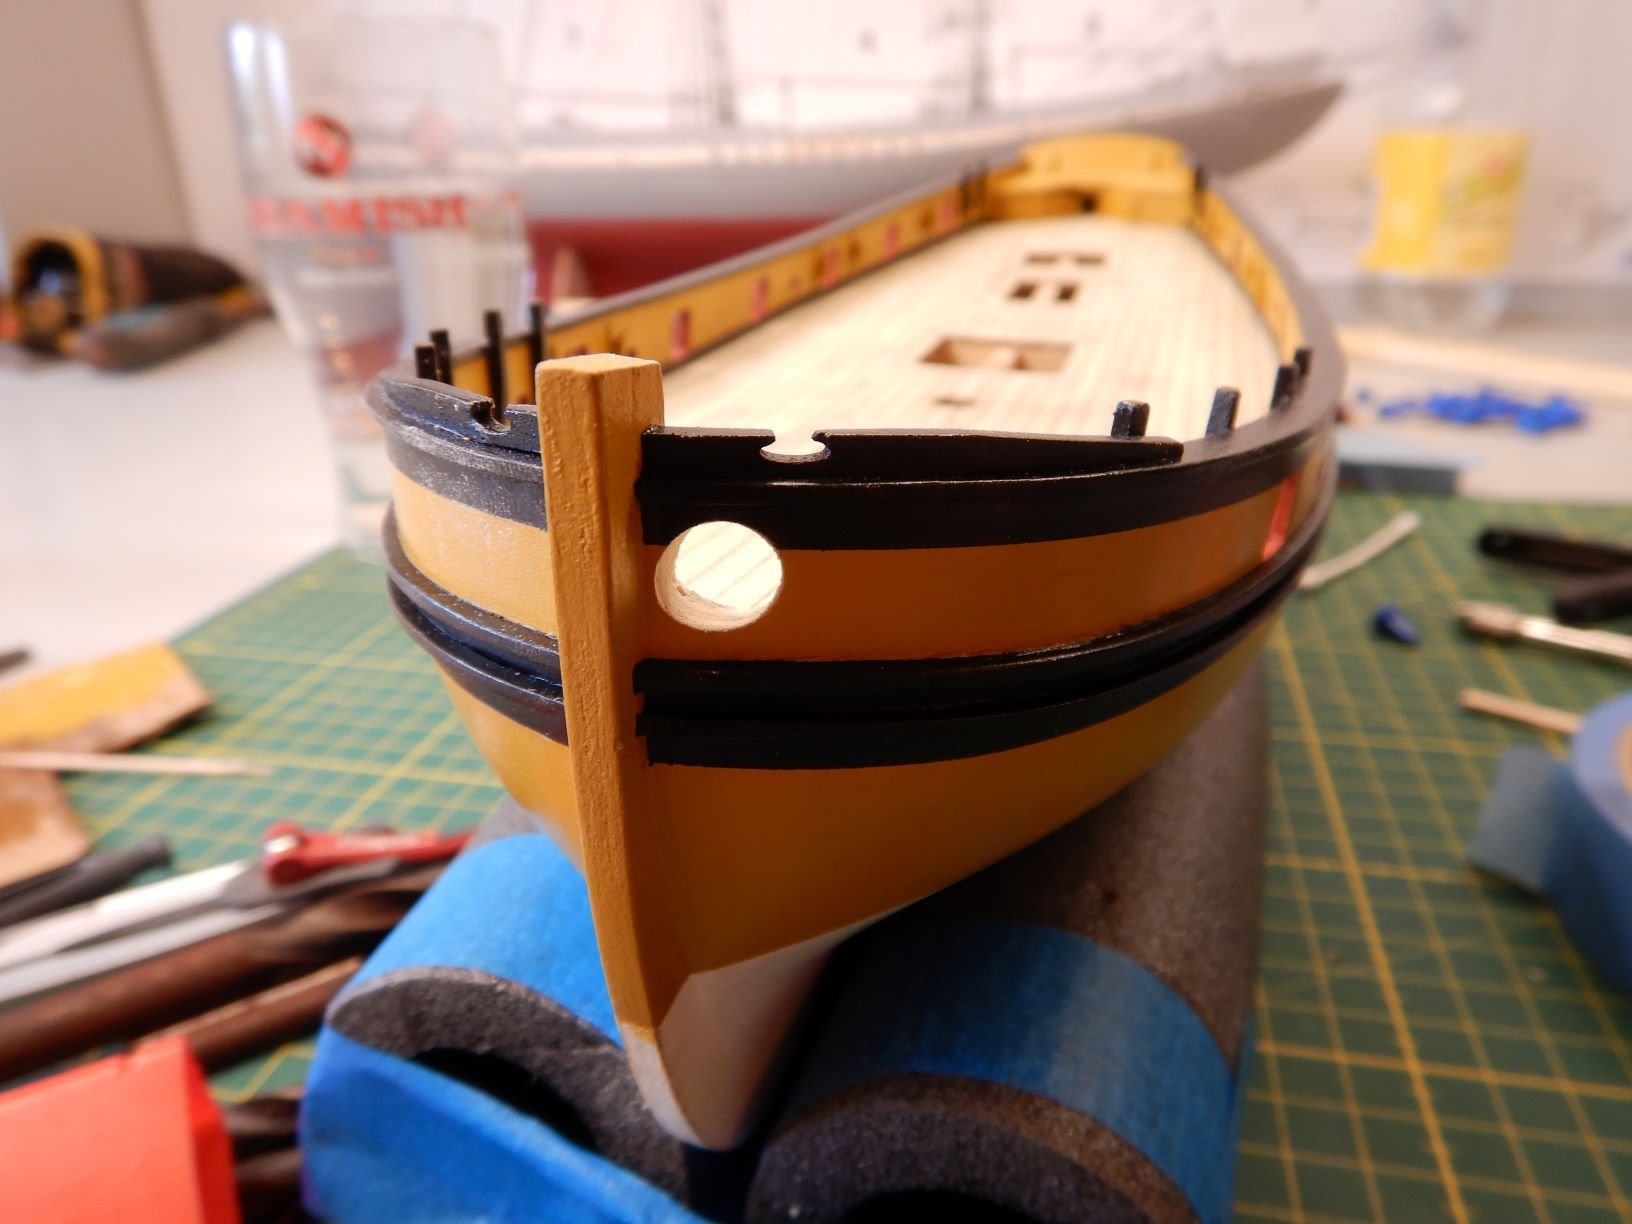
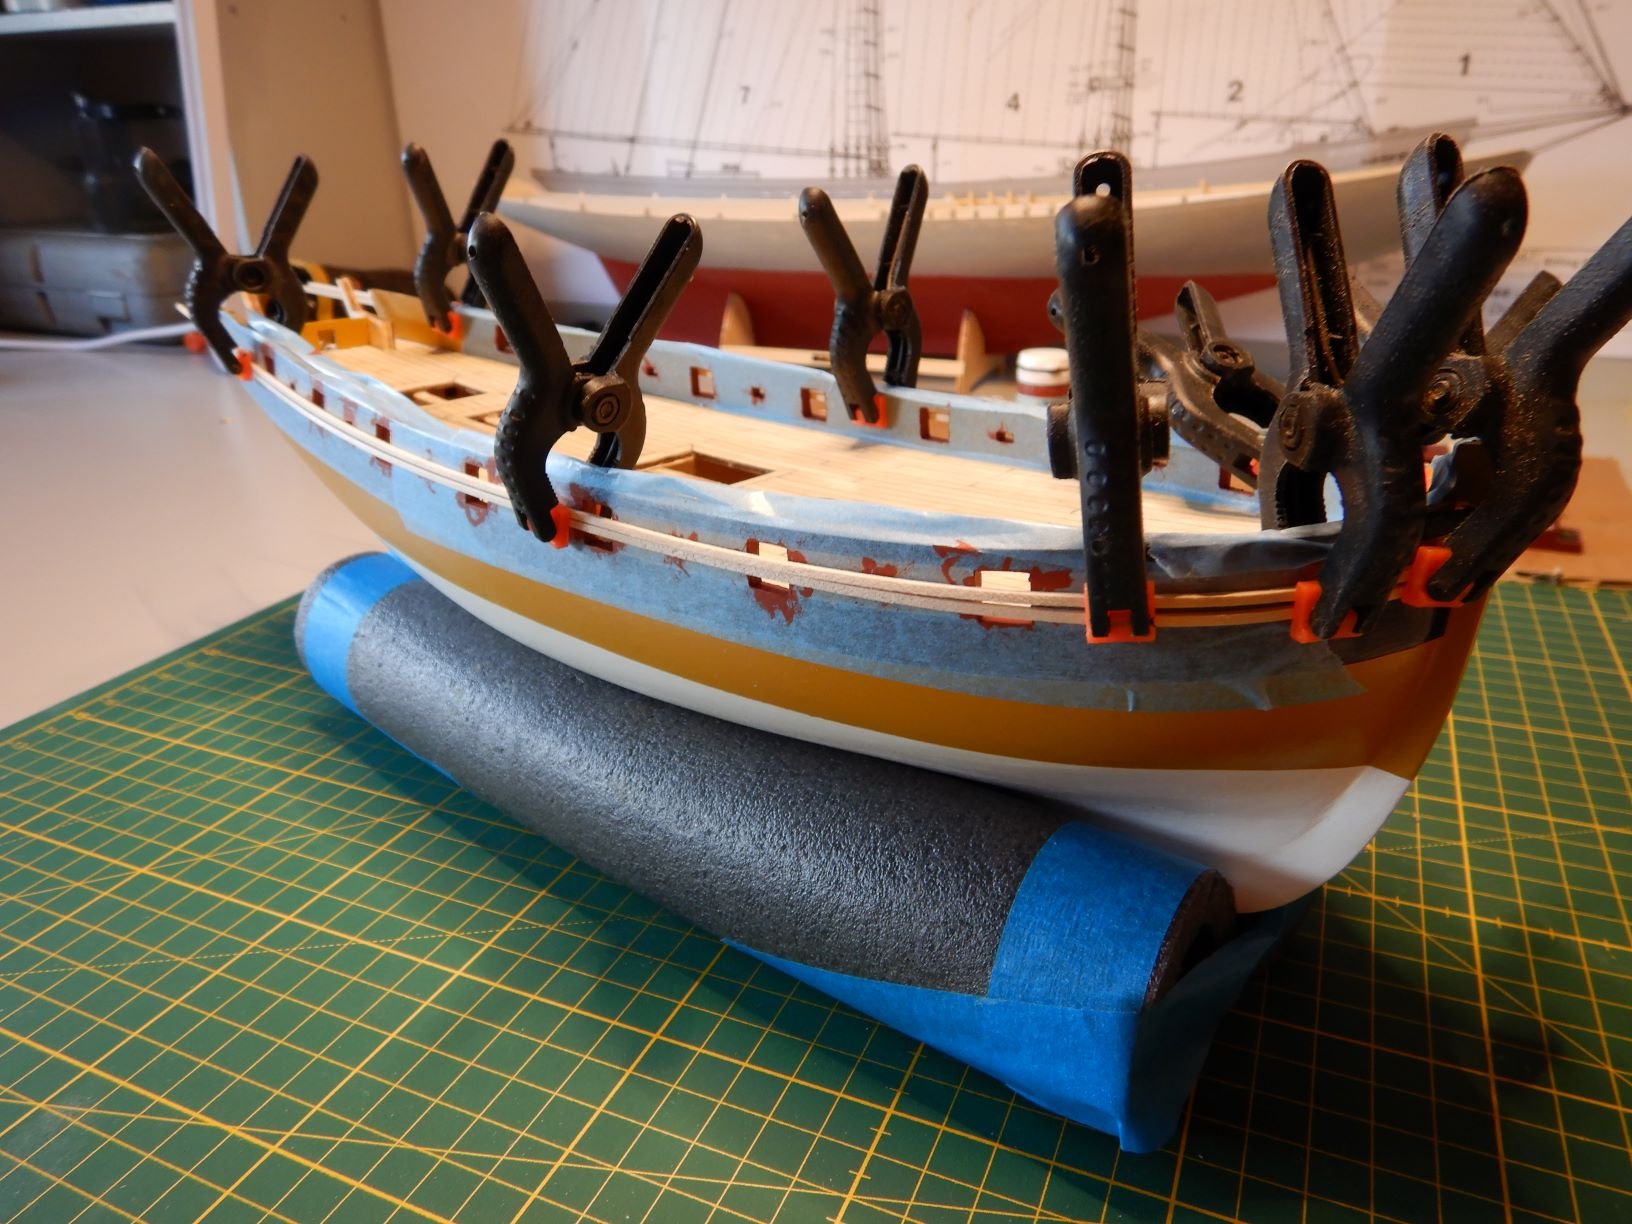
I finished painting the scrollwork/nameplate and glued to the transom. I'm not happy with the result of the whit paint here, but I couldn't get it better with my limited painting skills. If anyone has a tip for painting small photoetched brass parts in more than one colour, feel free to share them!
I also finished the crossbeam on the davits and added the "boomkin" piece as suggested by Rick01.
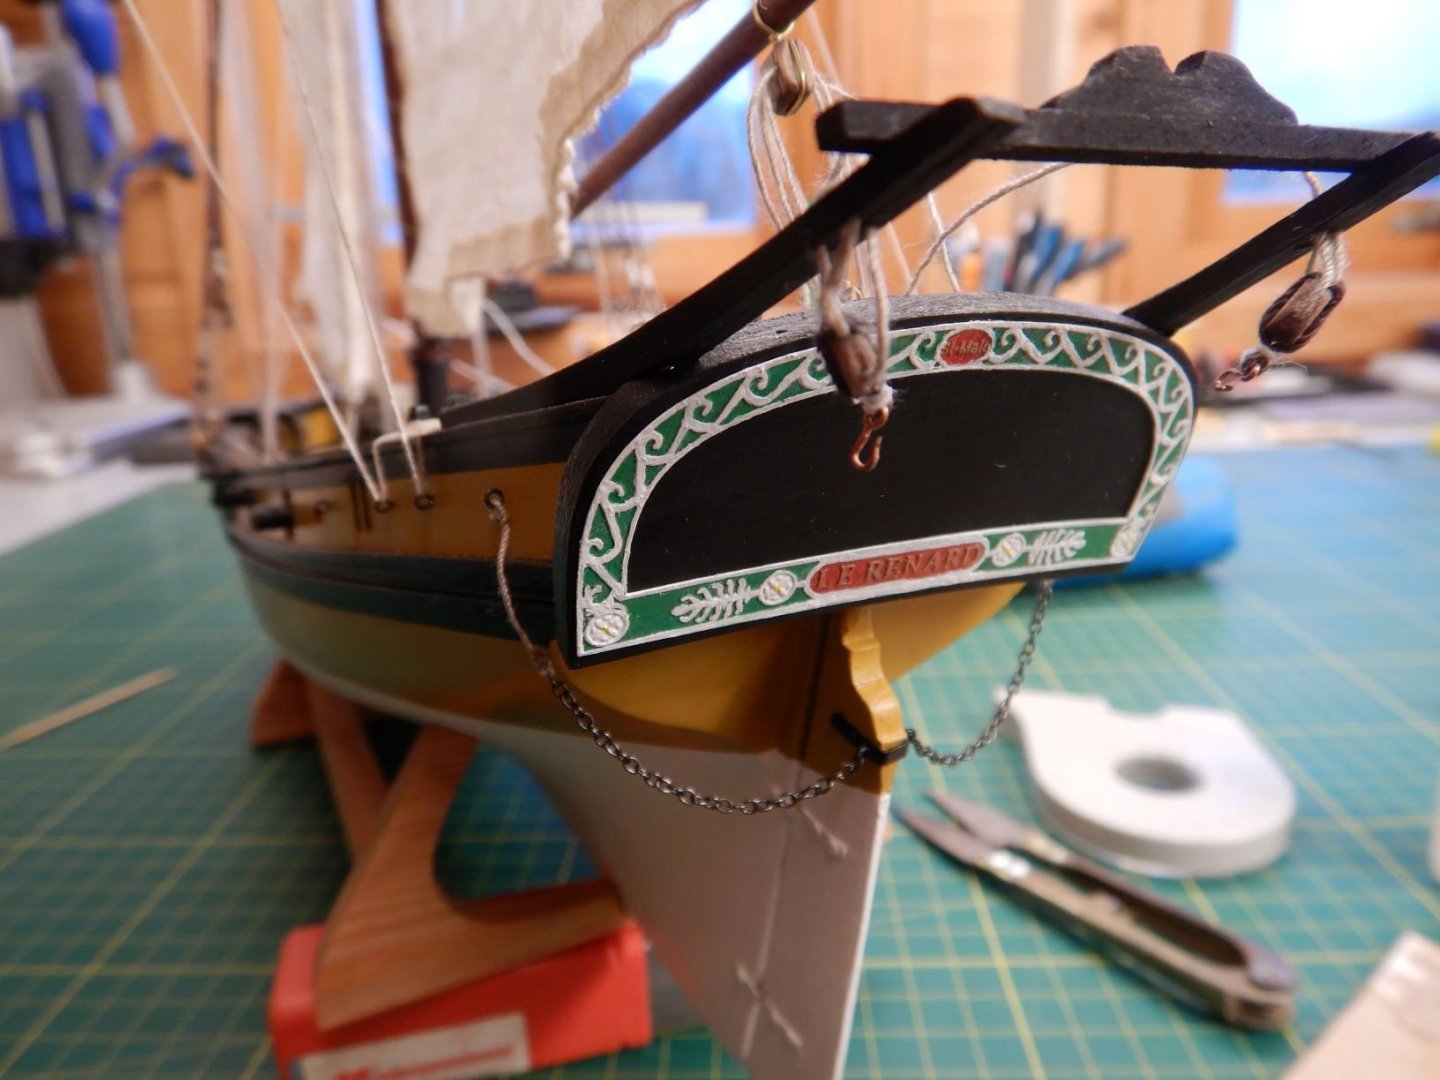
I also replaced the blocks and hooks for the dinghy hoist with smaller size ones.

Now the dinghy comes up pretty snug to the davits and I think this looks better.
Stay safe out there, and happy modelling to all.
Gaffrig.
- Rick01 and Jack-in-the-Blue
-
 1
1
-
 1
1
-
Rick01, thank you for the tip.
I've actually thought about exactly that, that a boomkin of sort would be good.
I'll probably go for the same solution.
Gaffrig
-
Hello all!
A small update of todays work.
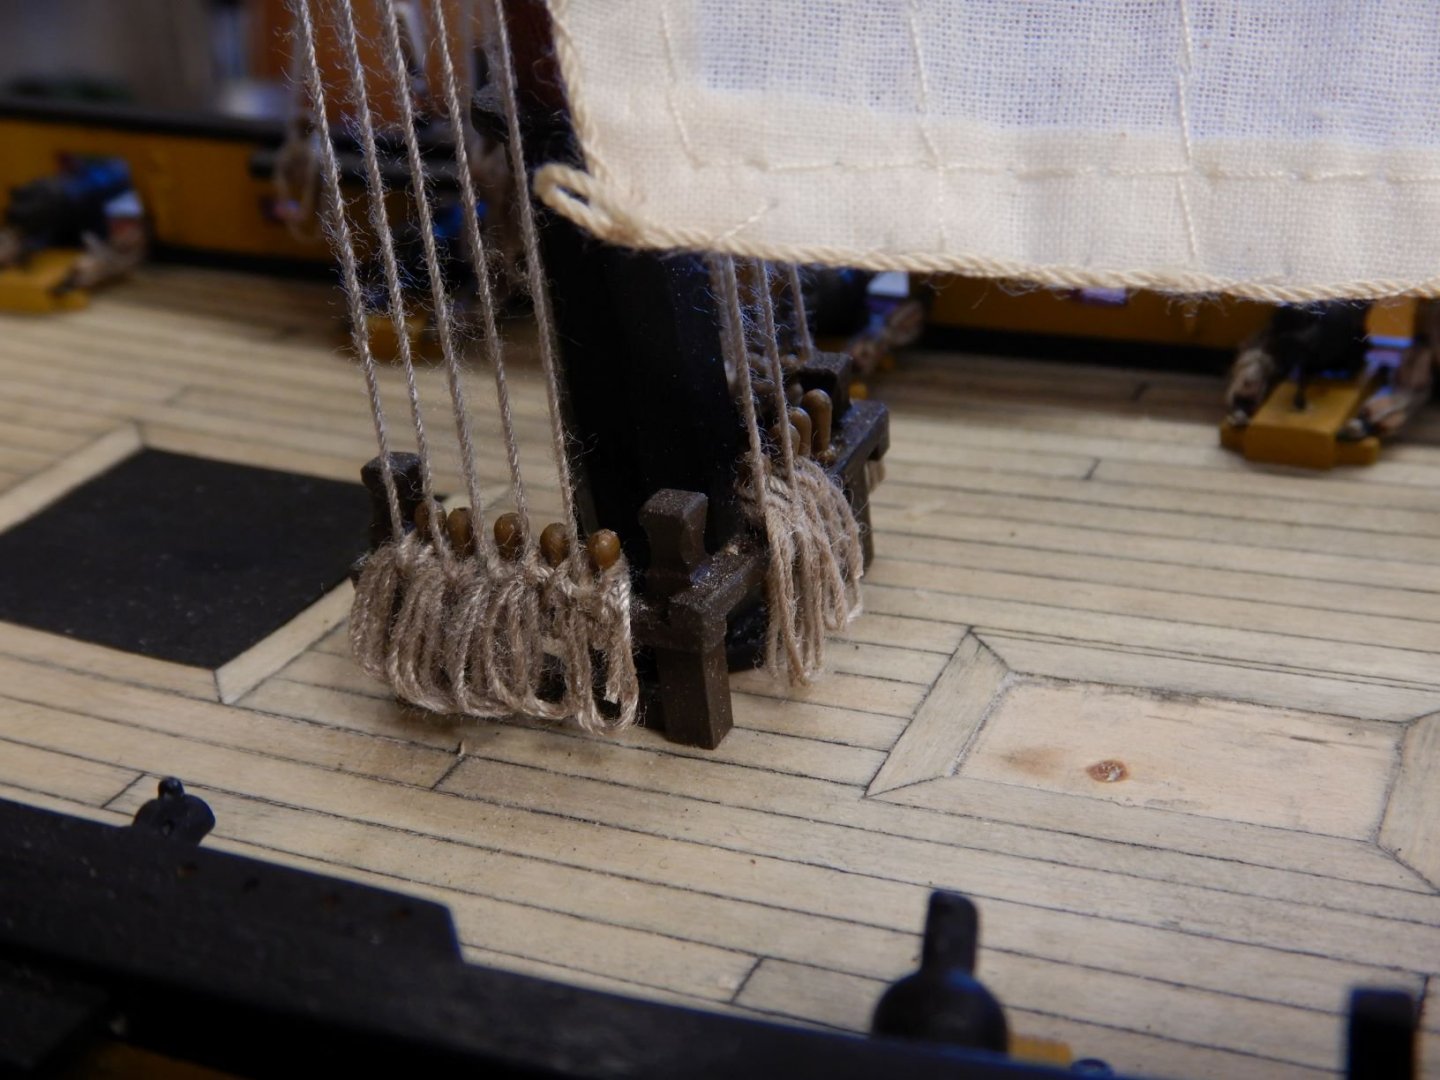
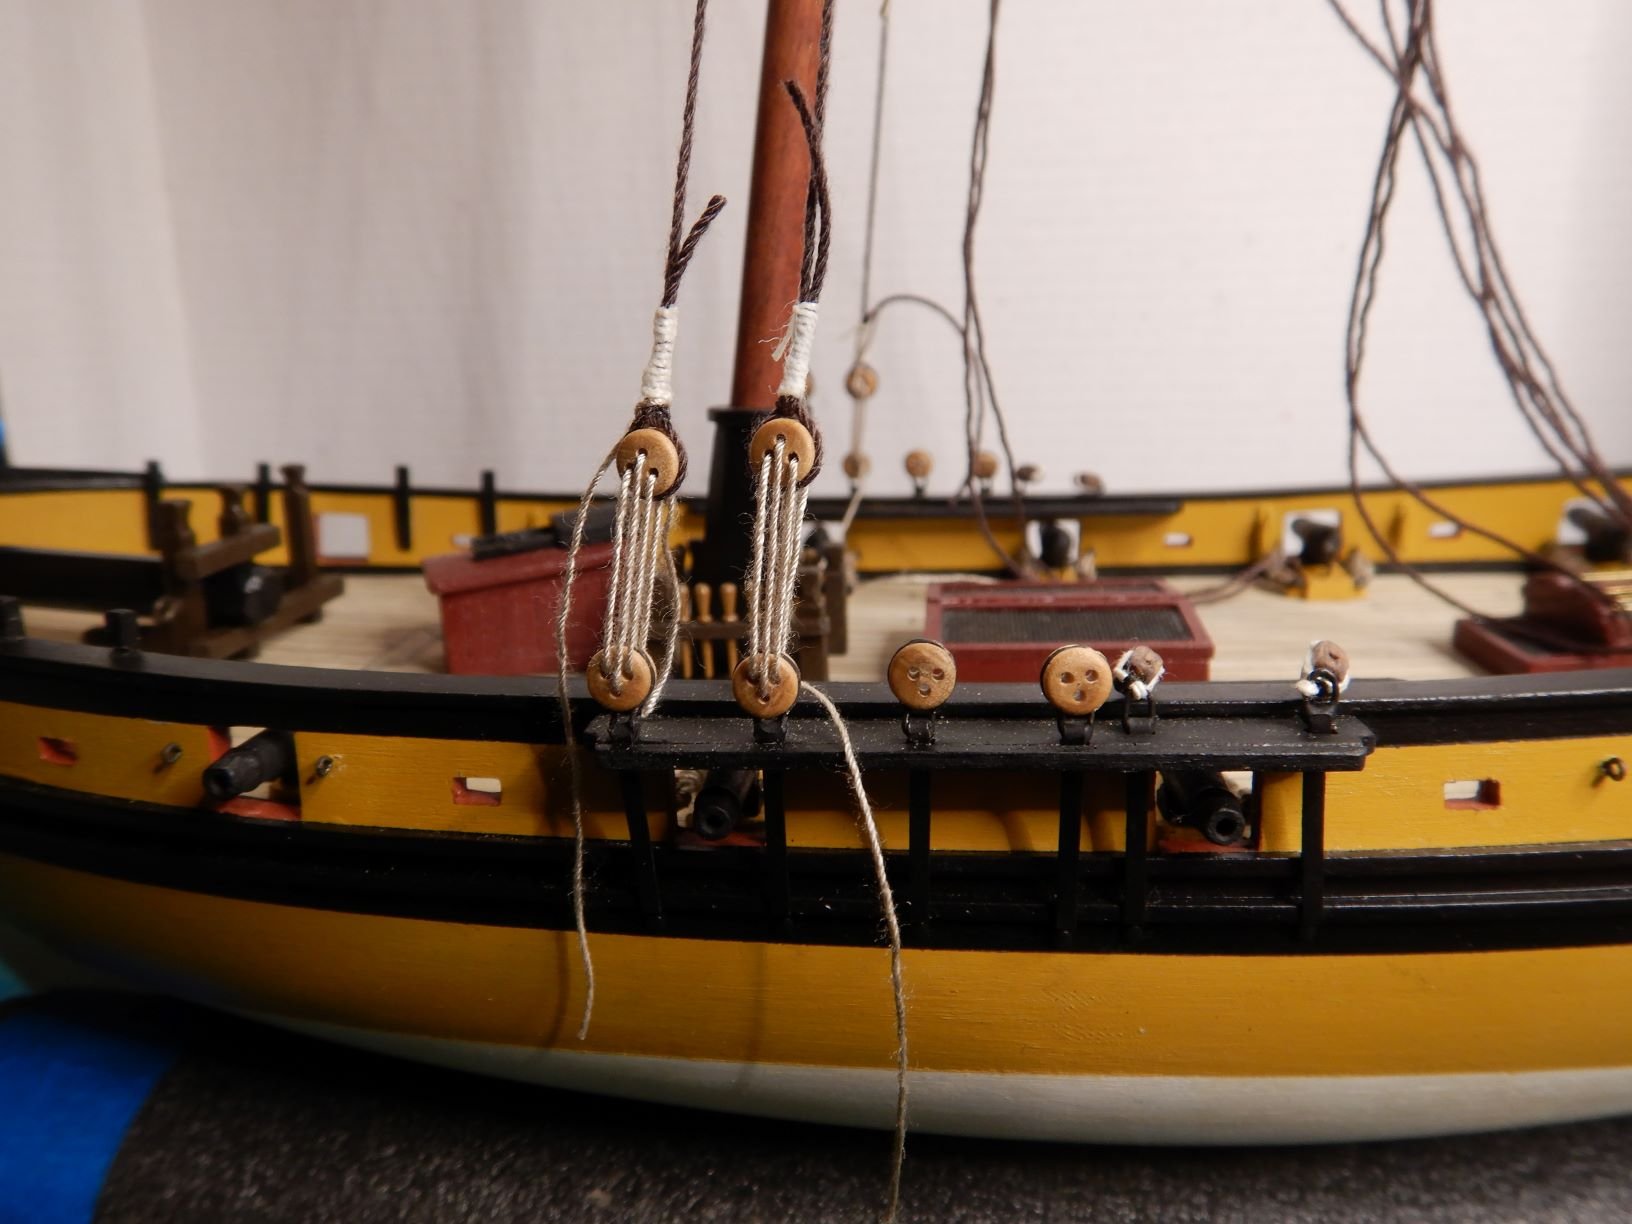
Have been working on ropecoils for the most part, and have finished up (I think!) the coils on the pinrail around the mast.
I'm using a mix of toothpicks and tweezers to get the coil to hang as I like it and then brushing some dilluted wood glue on it.
Seem to work ok, although a little time consuming.
The thread supplied is quite "hairy" but it is what I have. It seems worse in the pictures I think.
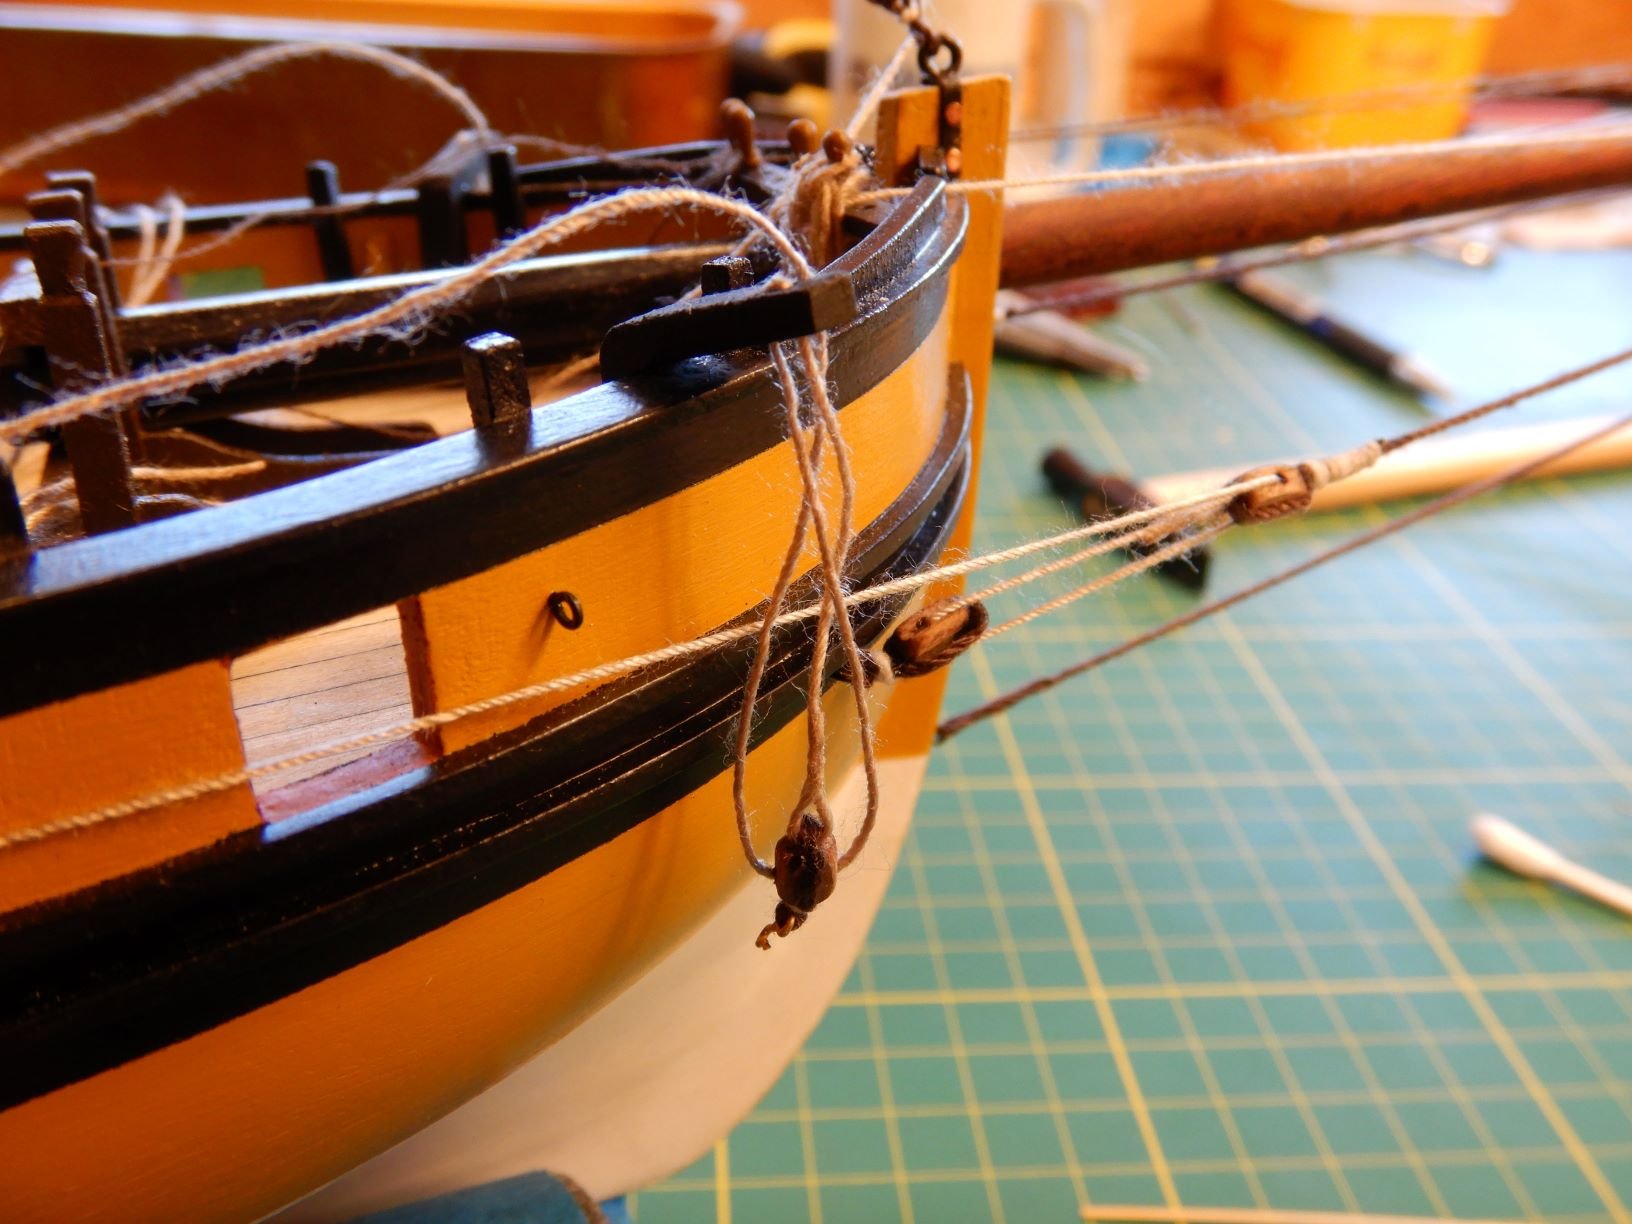
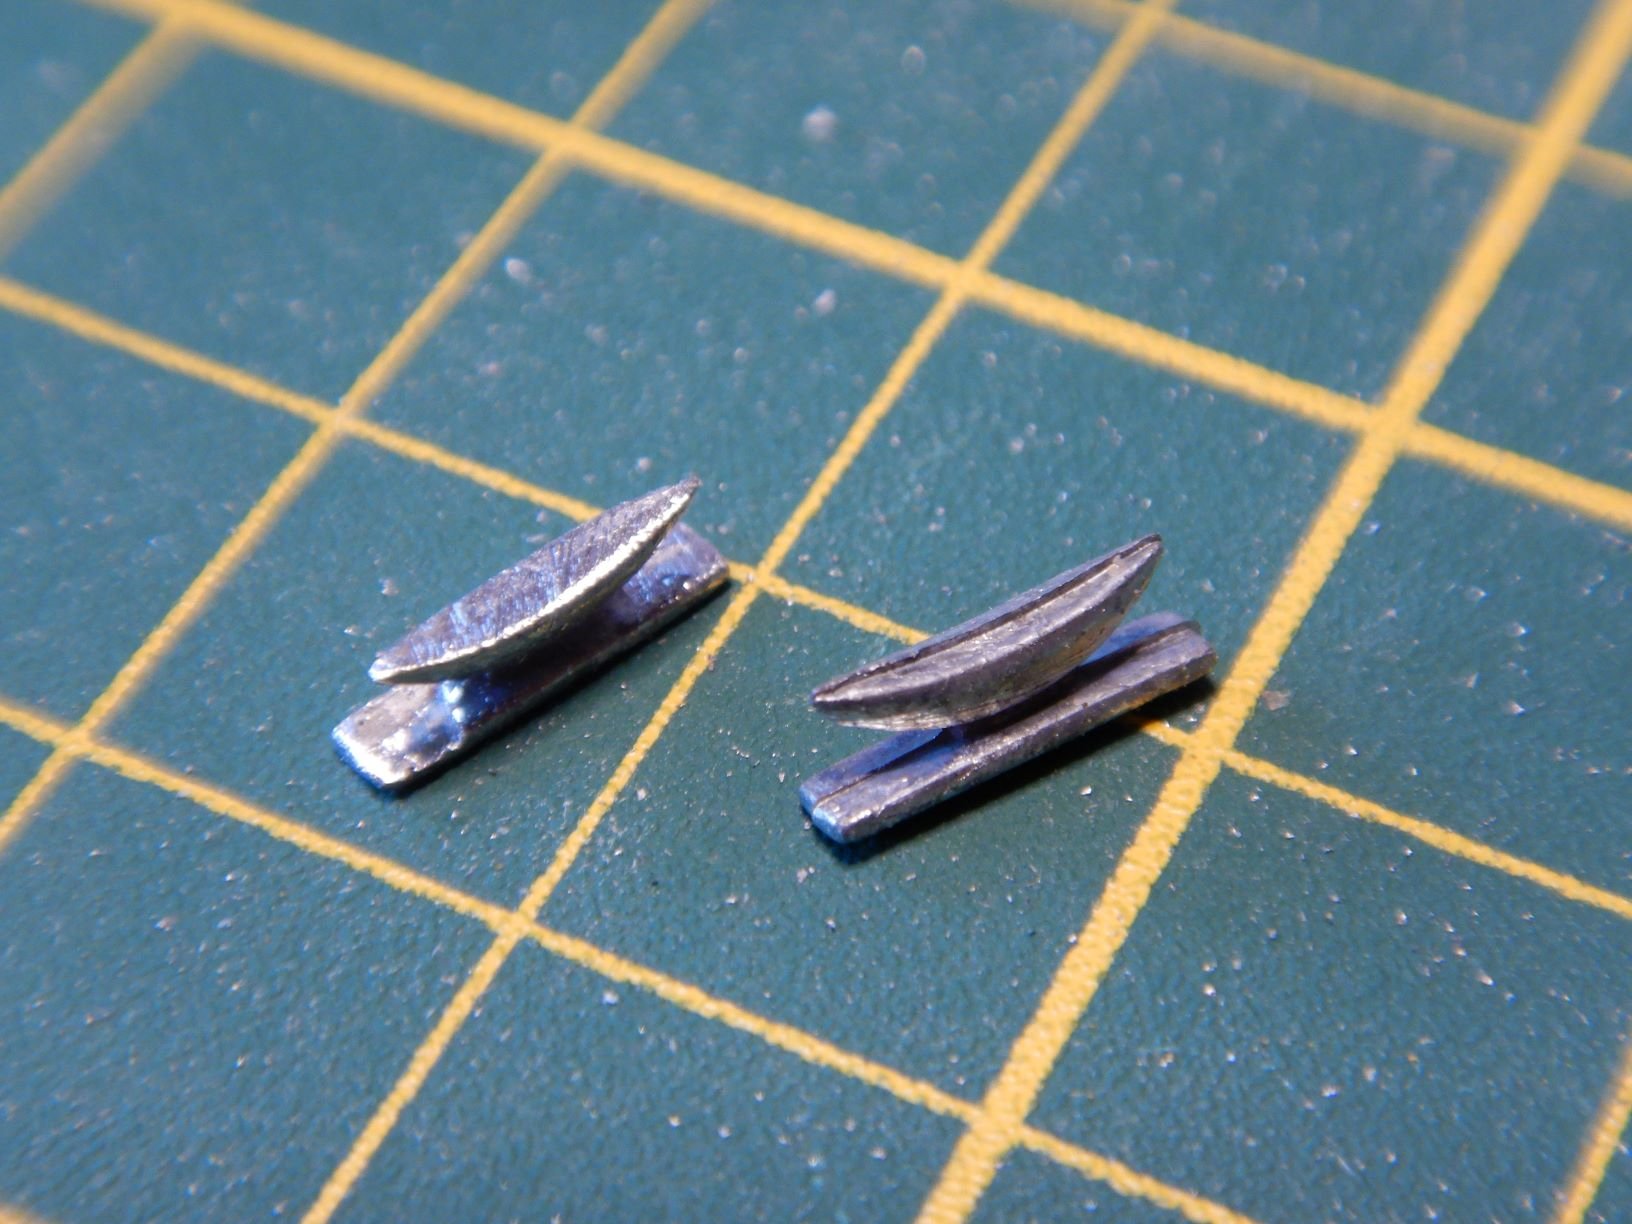
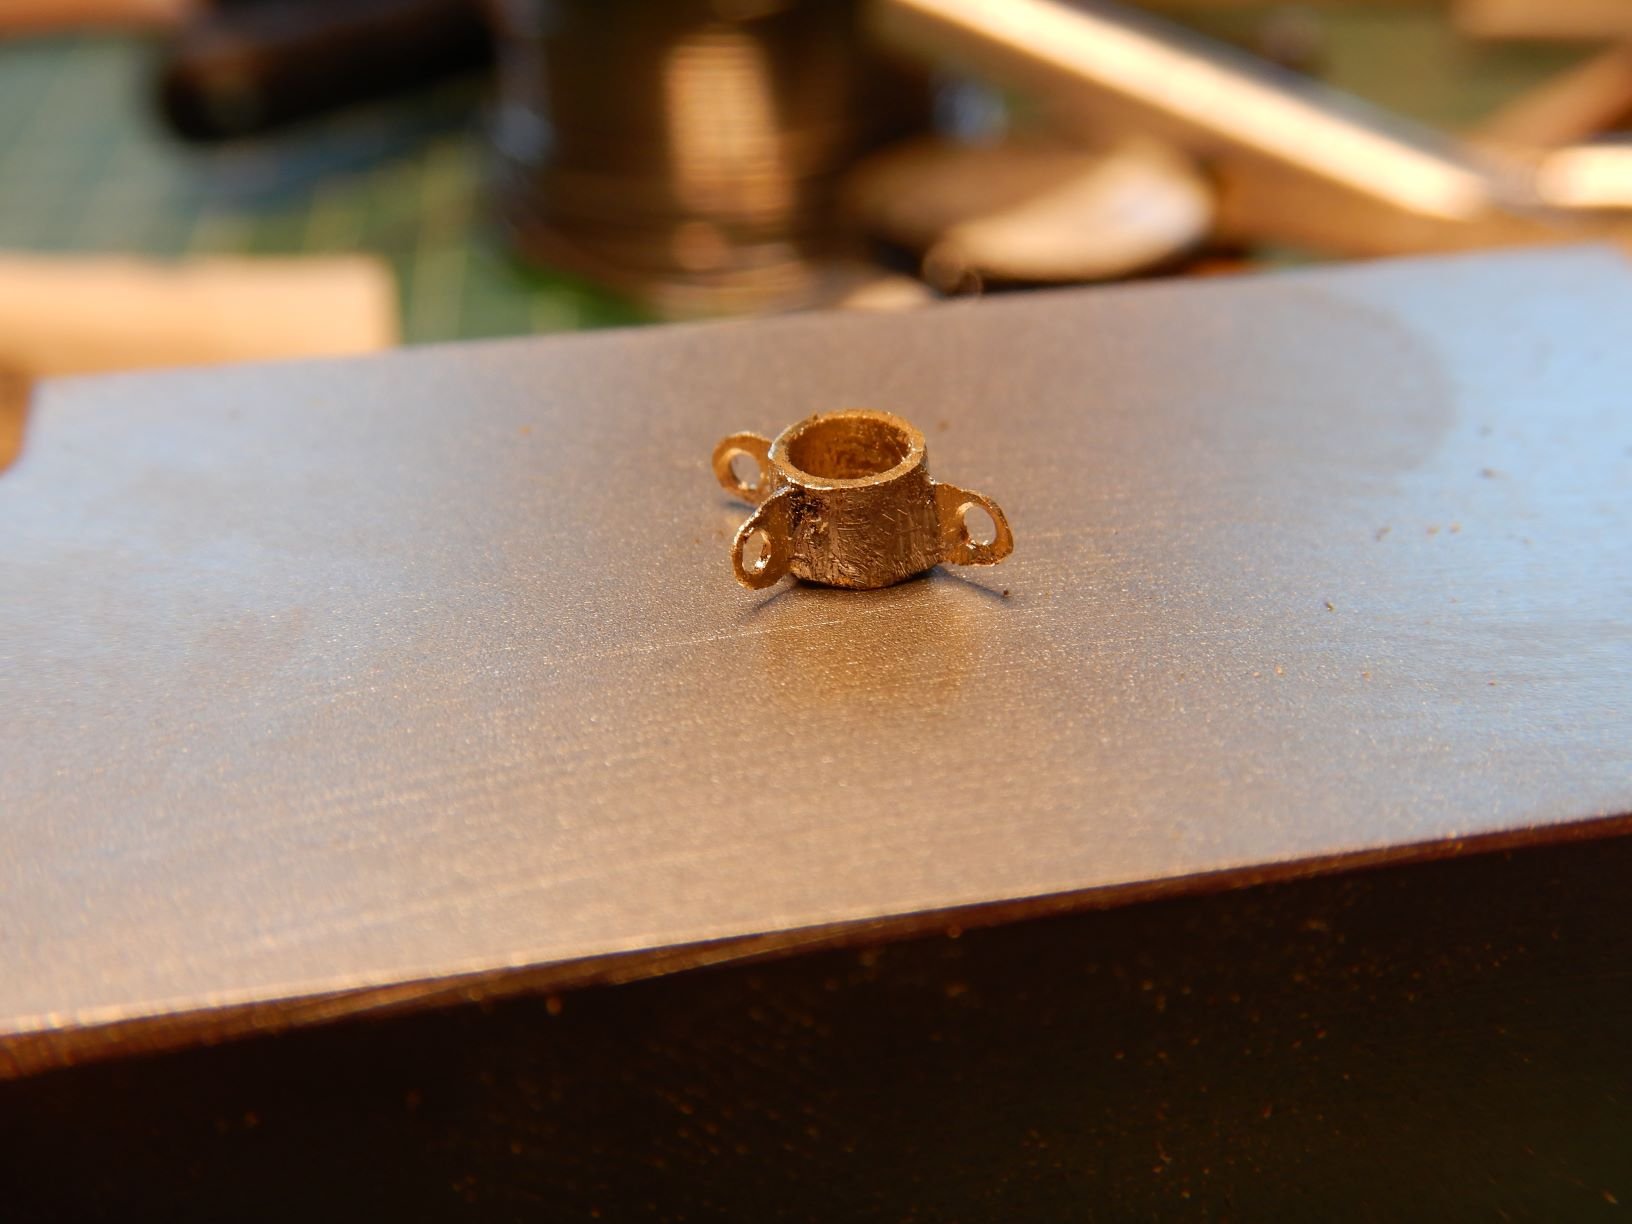
Between coiling I have finished the anchor, and dressed(?) the ring. Or is this called served?
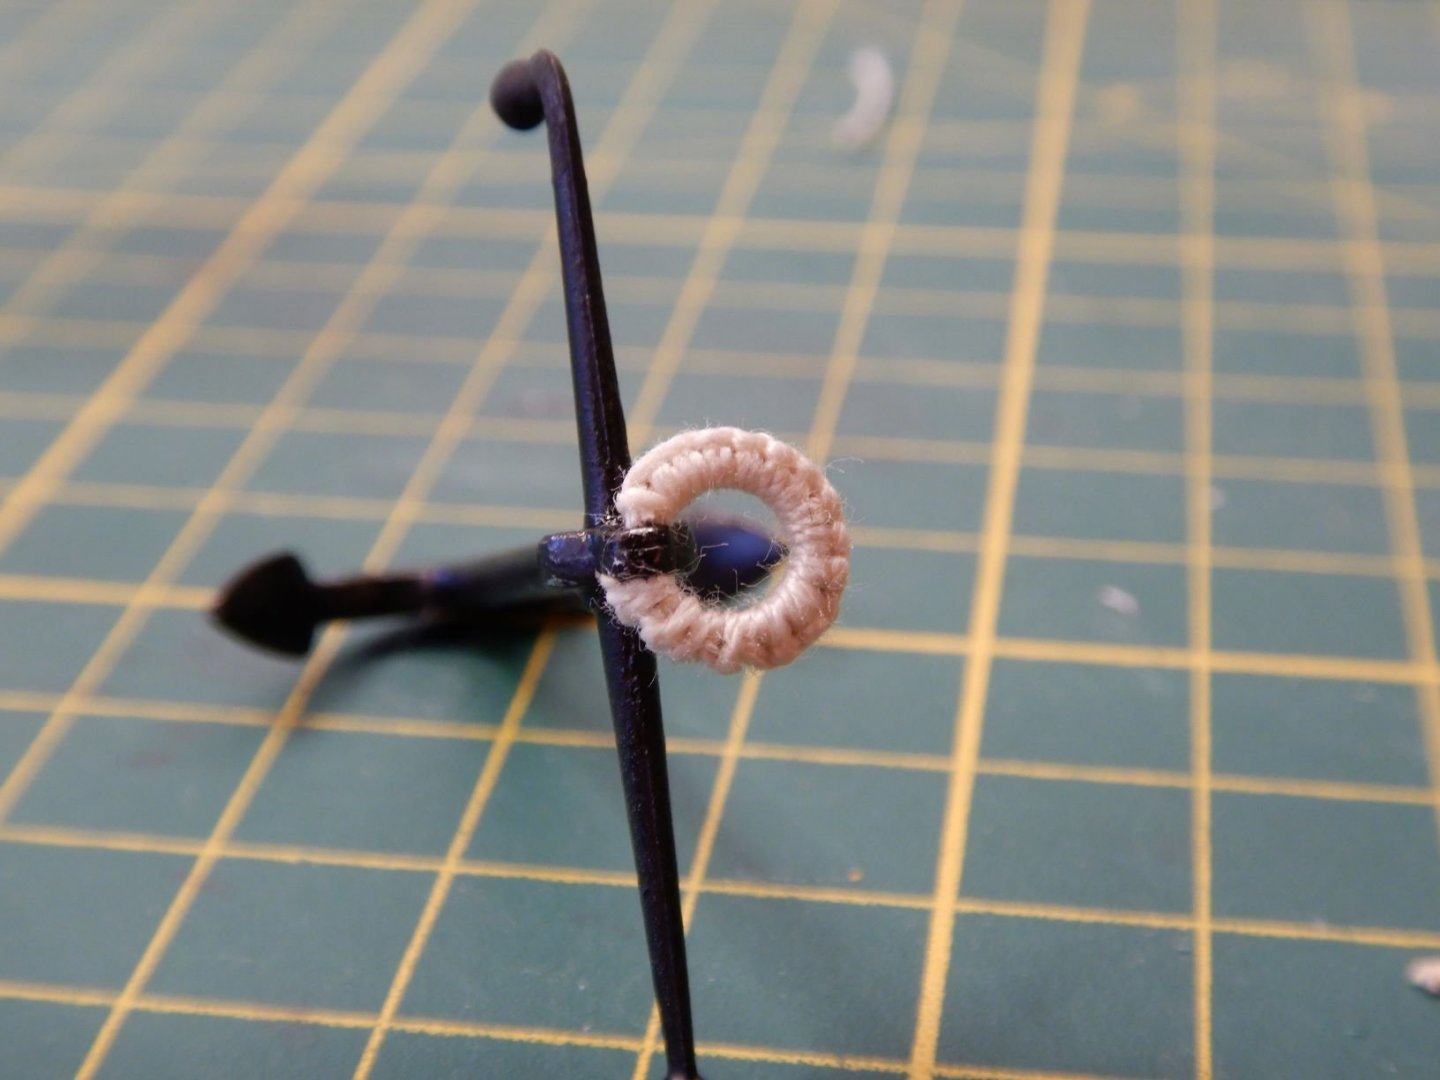

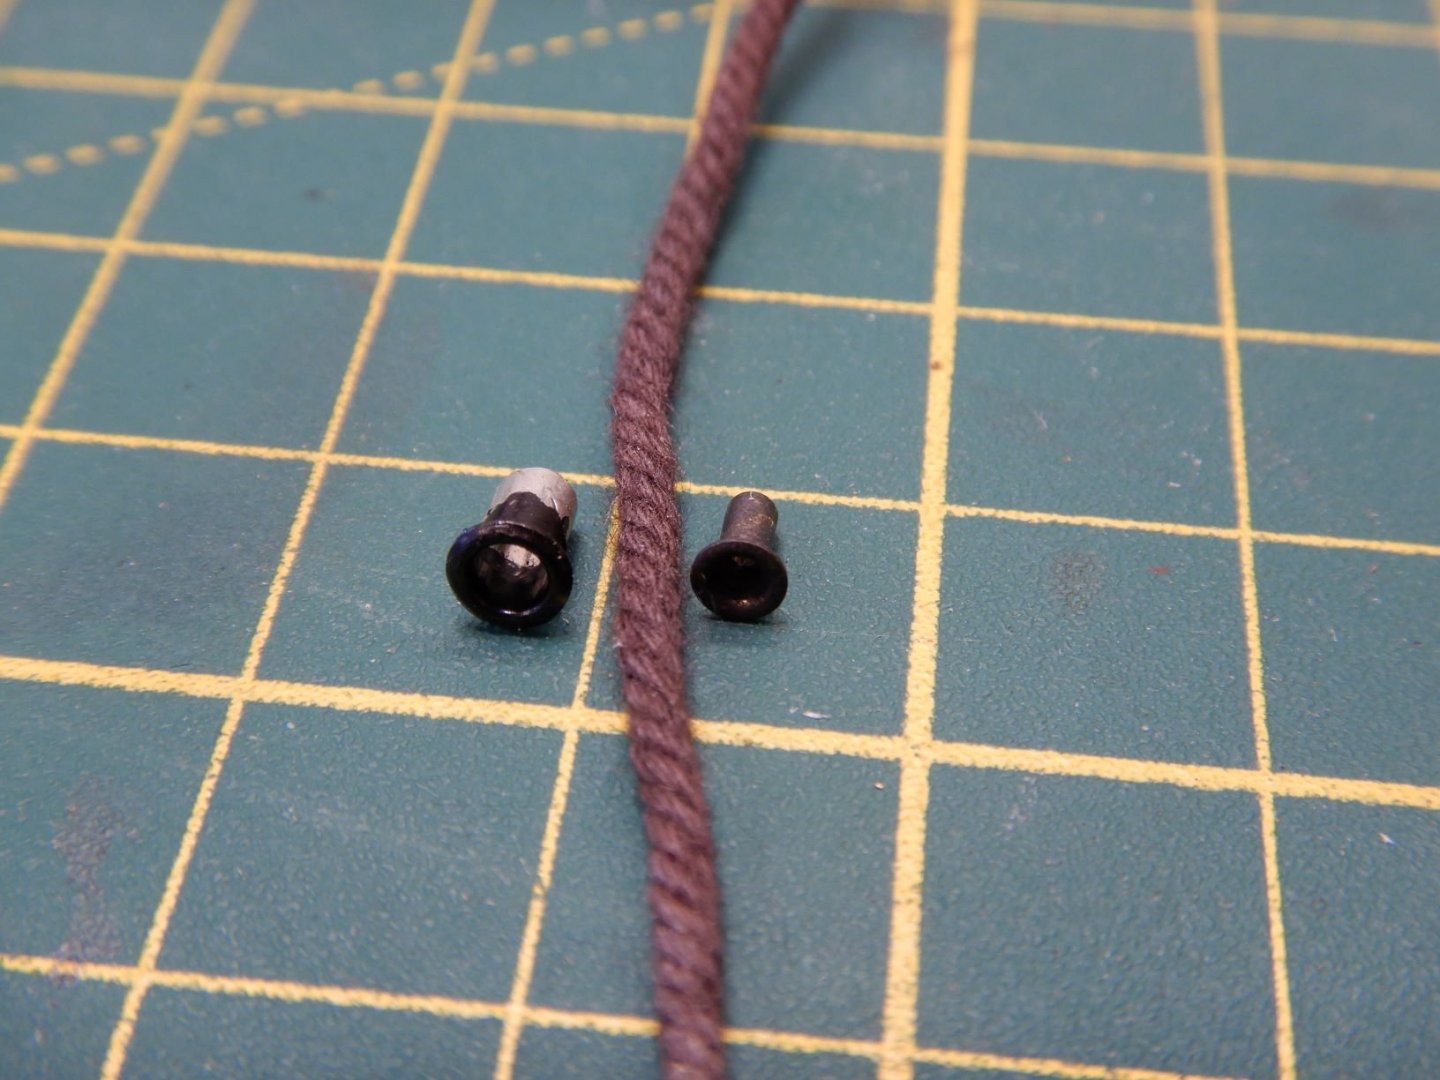
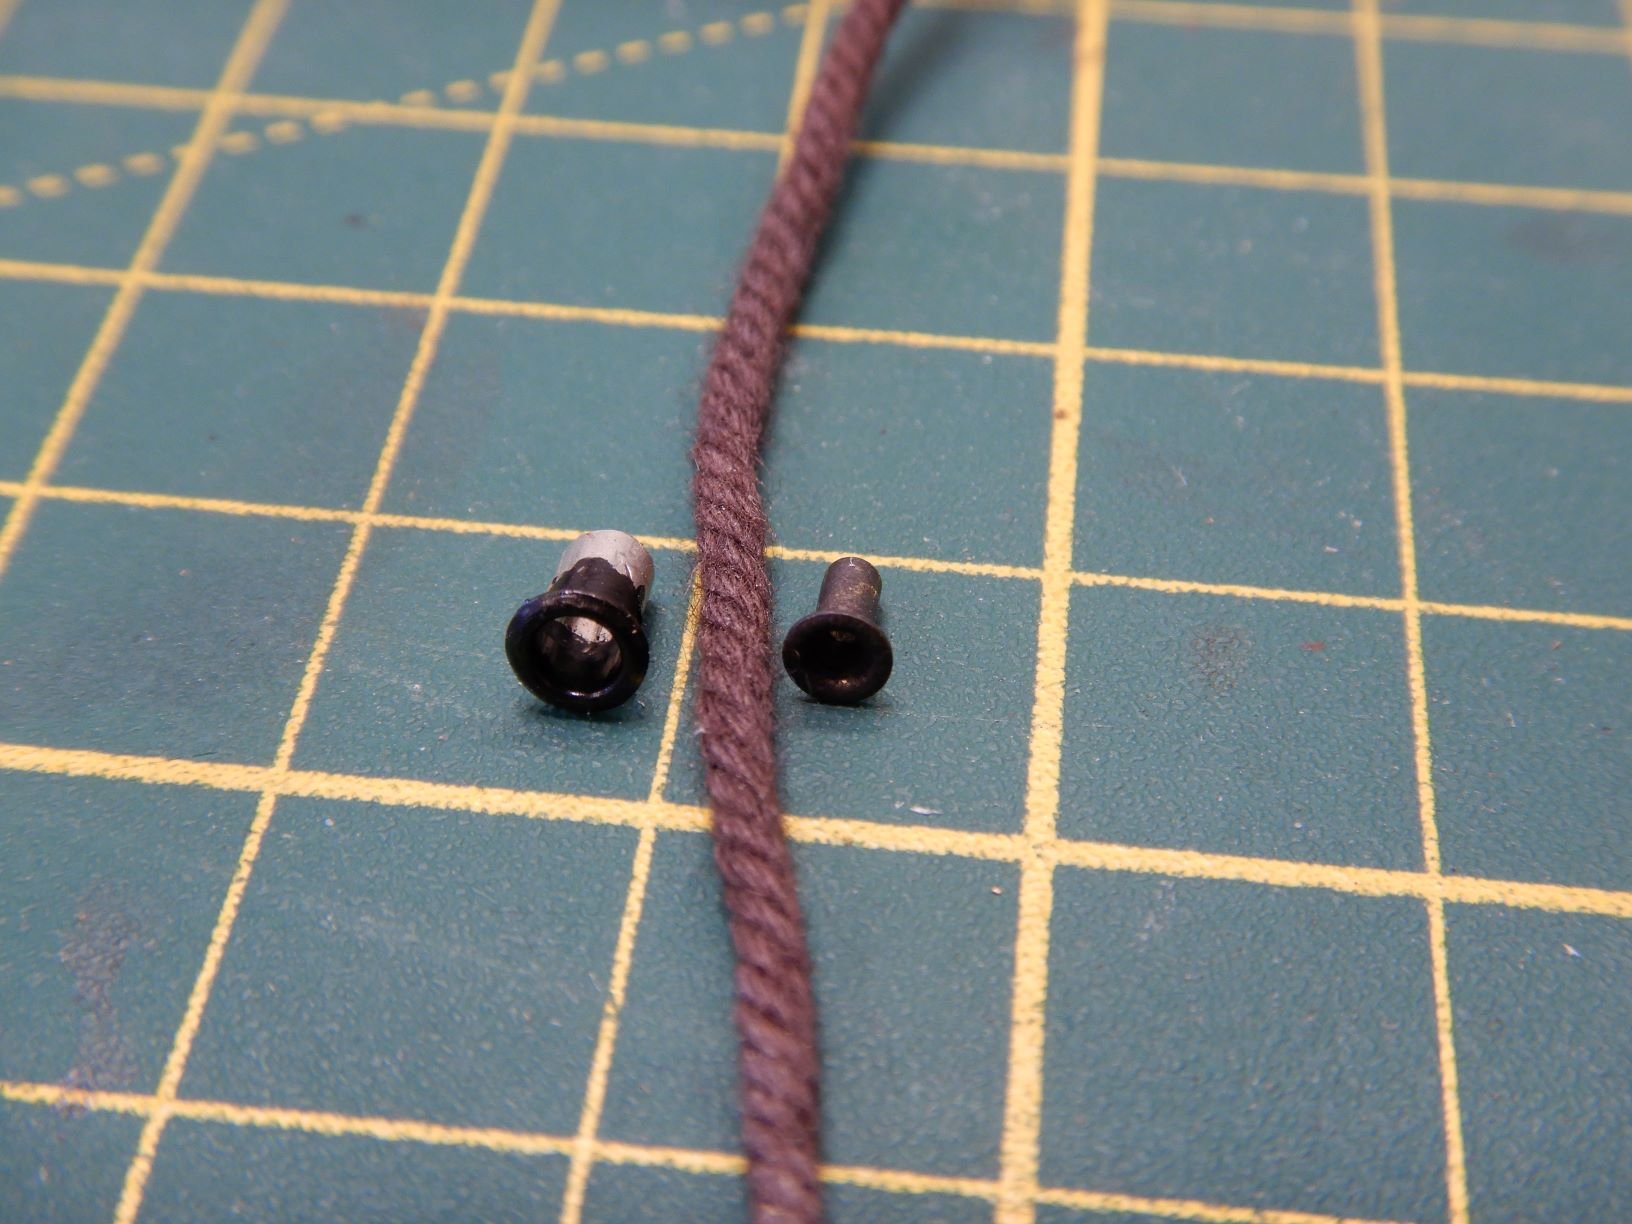
Upon testing the anchor cable through its fairlead I realised the fairlead was to small. (or the cable to thick)
I decided to find a replacement for the fairlead and got the idea that end terminals for electric cable would be good.
So I found one of right diameter and hammered the end a little more to get a nice flange, and painted it black.
Picture shows kit supplied part to the right.
Homemade to the left.
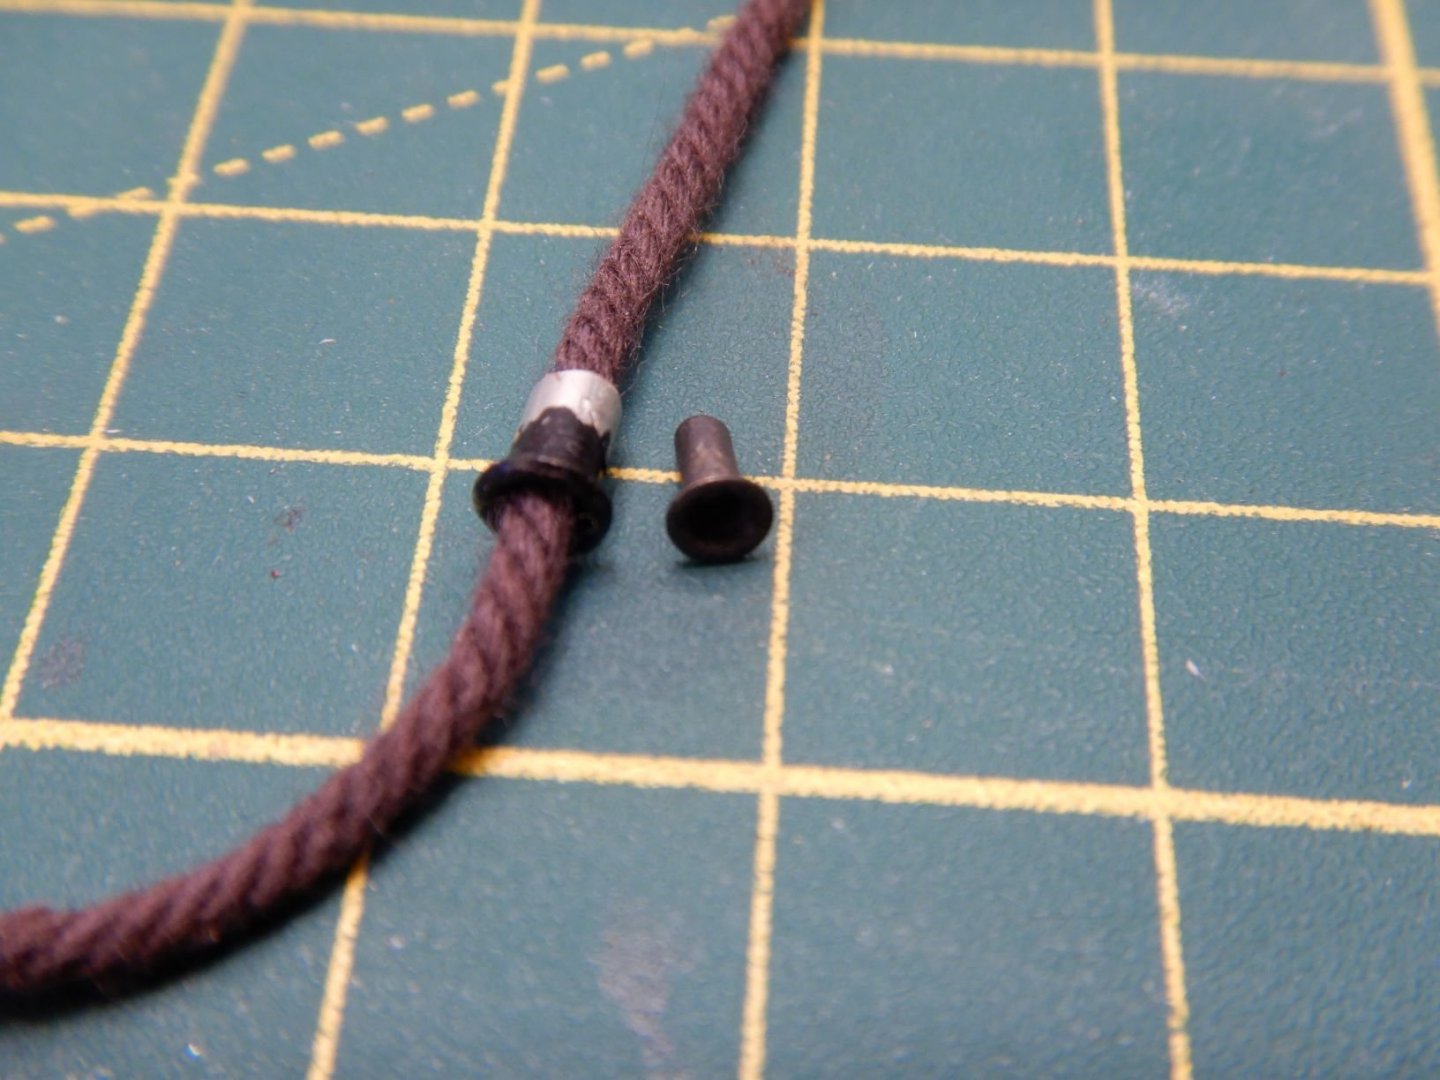
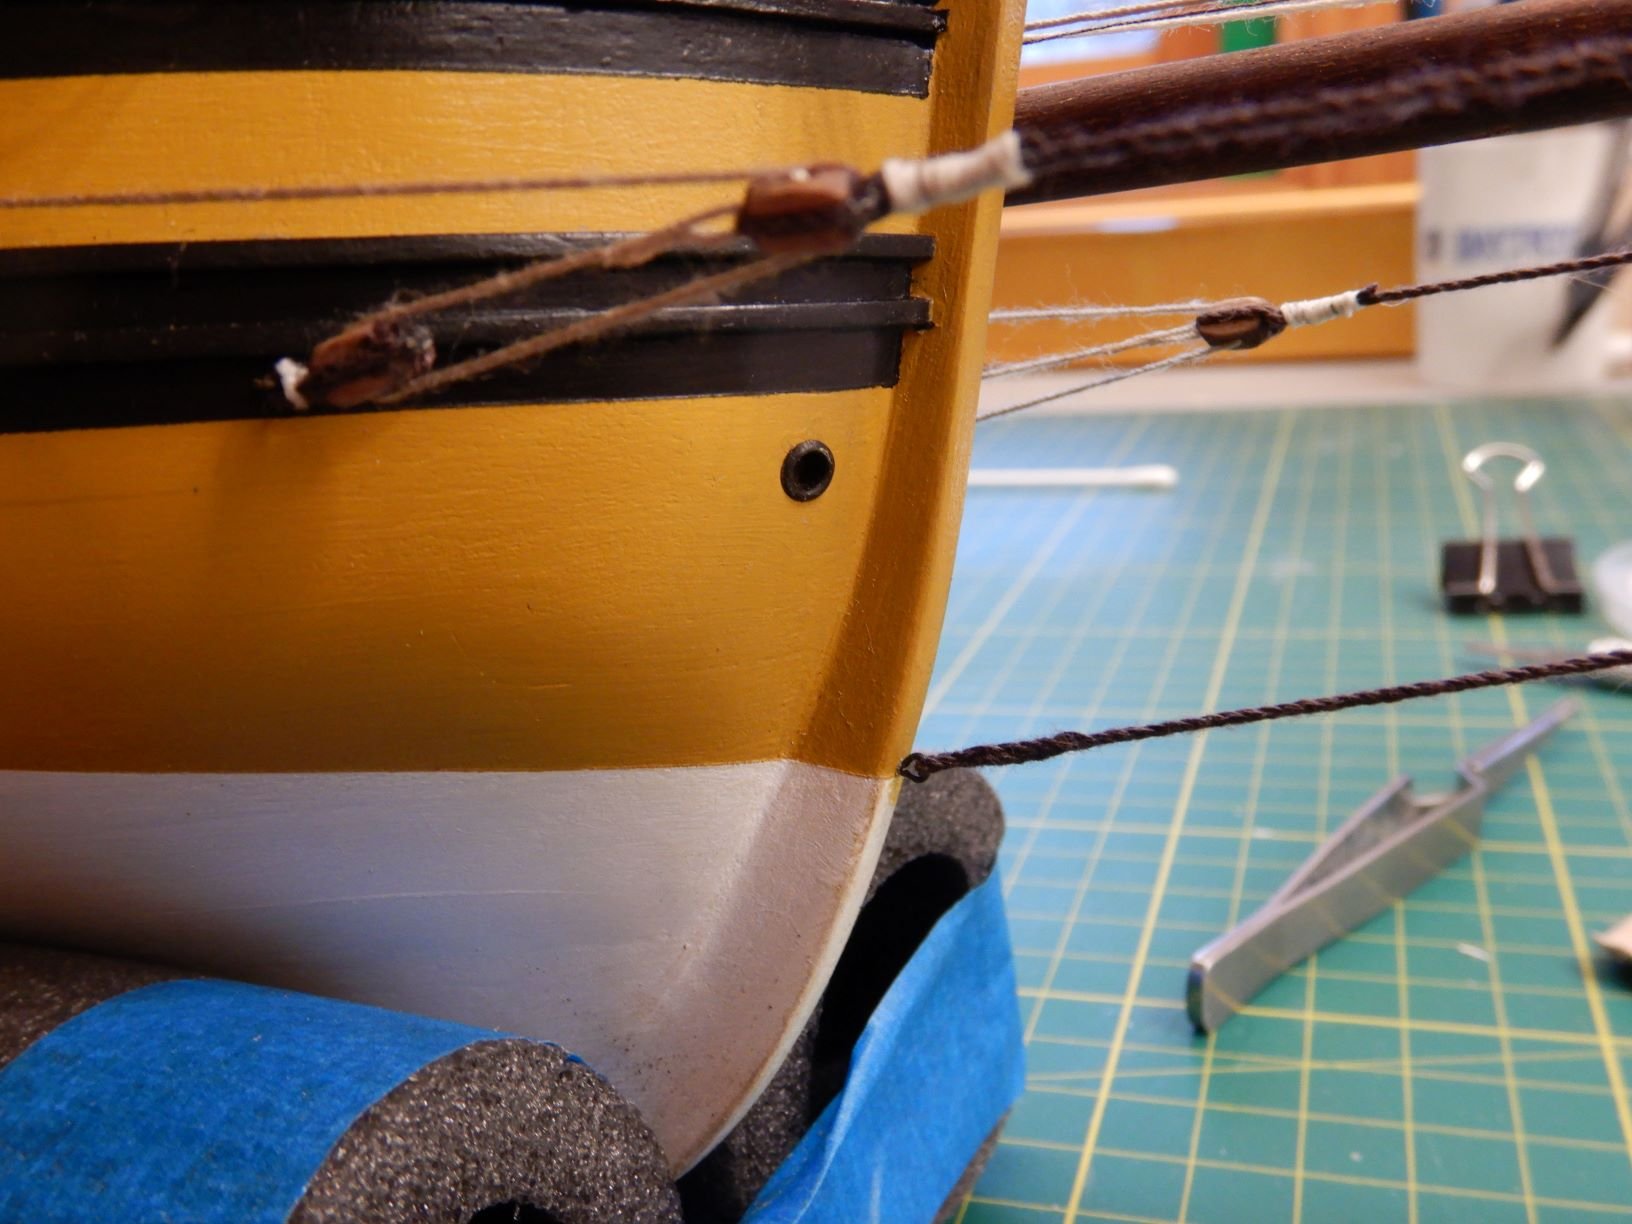
Then I drilled a hole in the bow and glued inplace.
This, as discussed before in this thread is probably historically uncorrect but I have decided to follow kit instructions here..
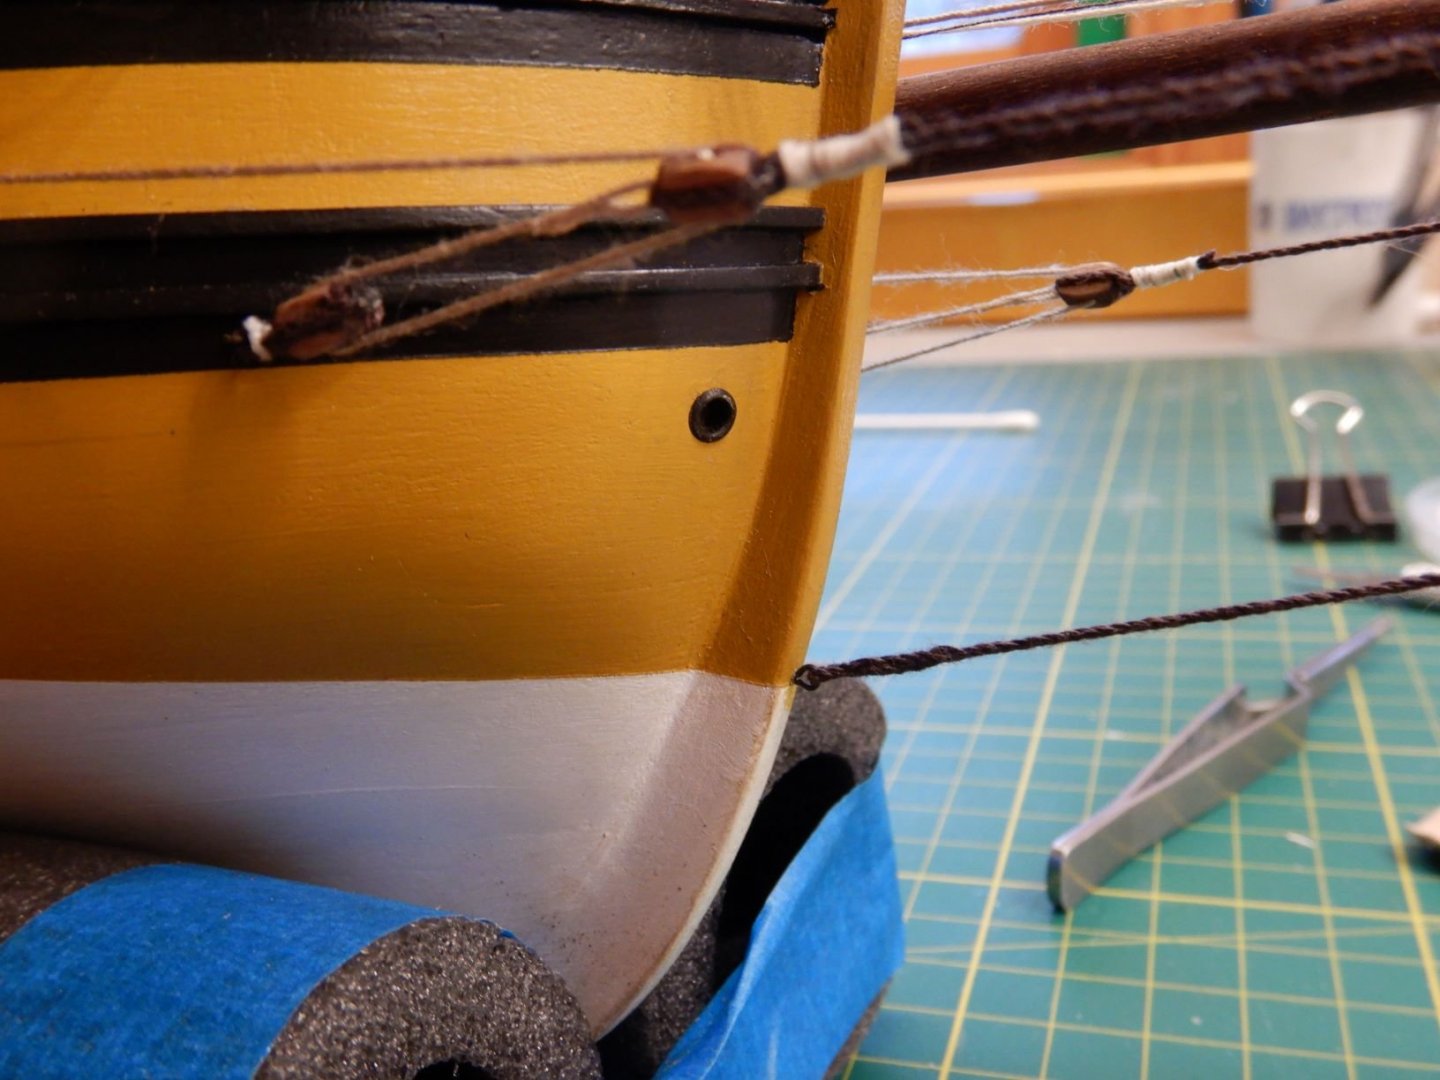
I then proceeded to tie the cable to the anchor and mounted the anchor to the rail.
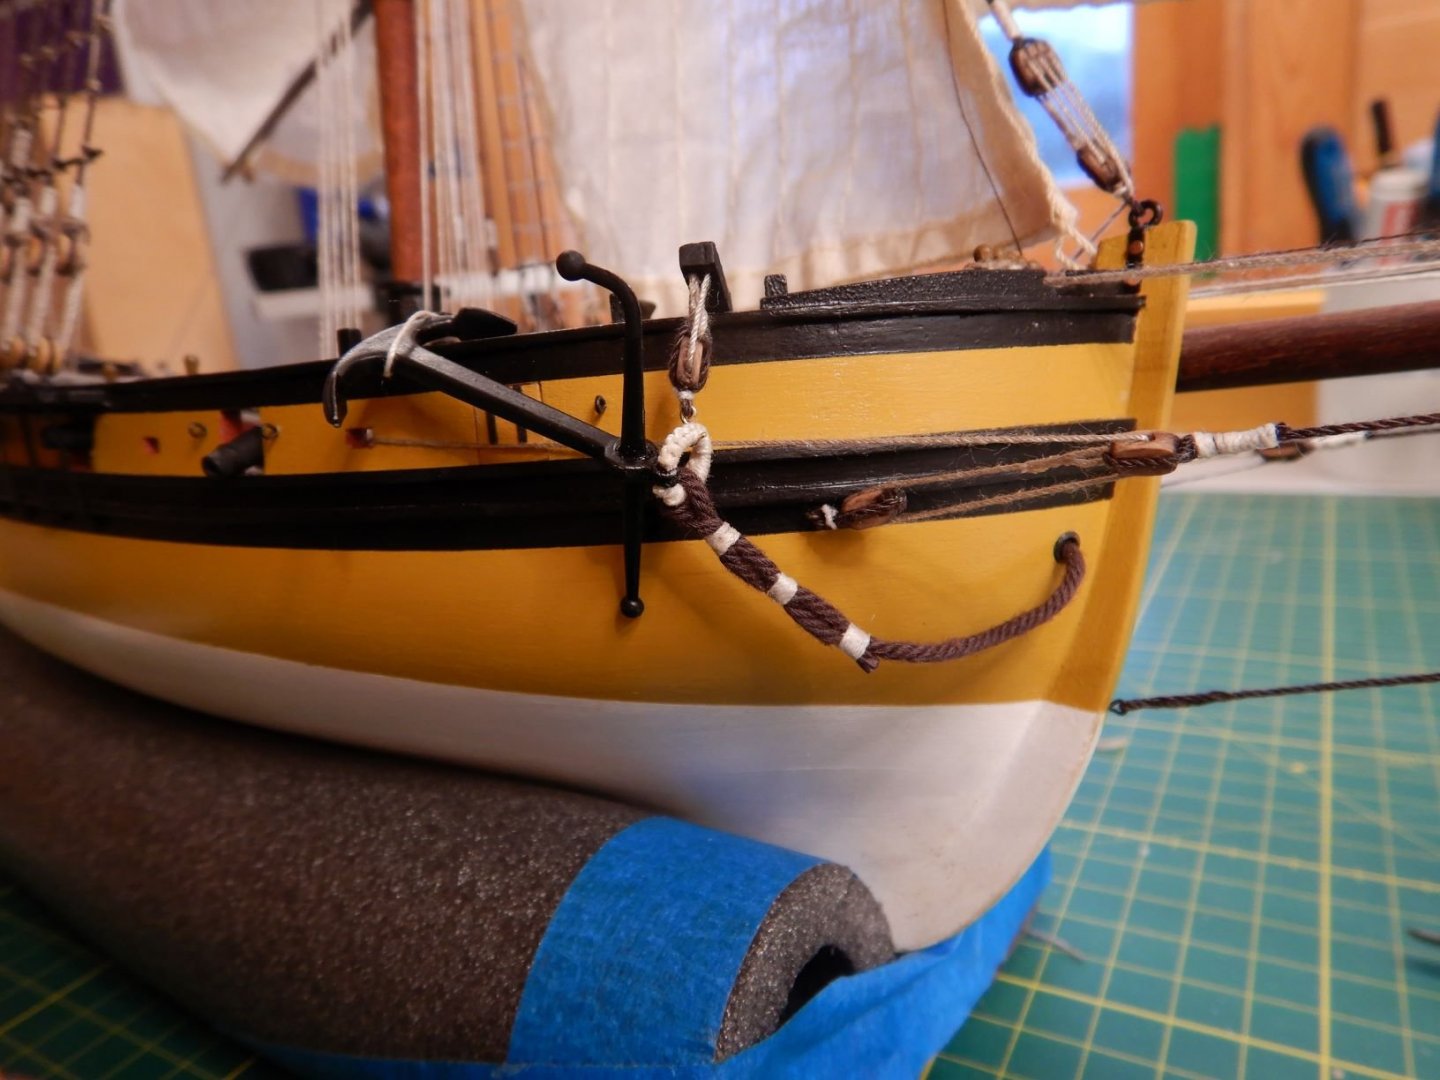

I'm happy with the result!
Now on to more tying lines and coiling!
Gaffrig.
-
Barkeater, thank you!
Rick01, I’m also making a few changes from the instructions, so I’ll probably end up around that number!
Gaffrig. -
Hello.
The work continues.. Have mounted the stern davits, following Rick01's advice and beefed them up to double thickness.
This looks a lot better to my eye. Still needs the crosspiece in the back.
Had to testfit the dinghy and I think I'm gonna replace the hoist blocks to smaller ones to get the dinghy closer to the davits.

I also gave the catheads the same treatment, and beefed them up to double thickness.

The first ropecoil inplace..
I see a lot of coiling in my near future!
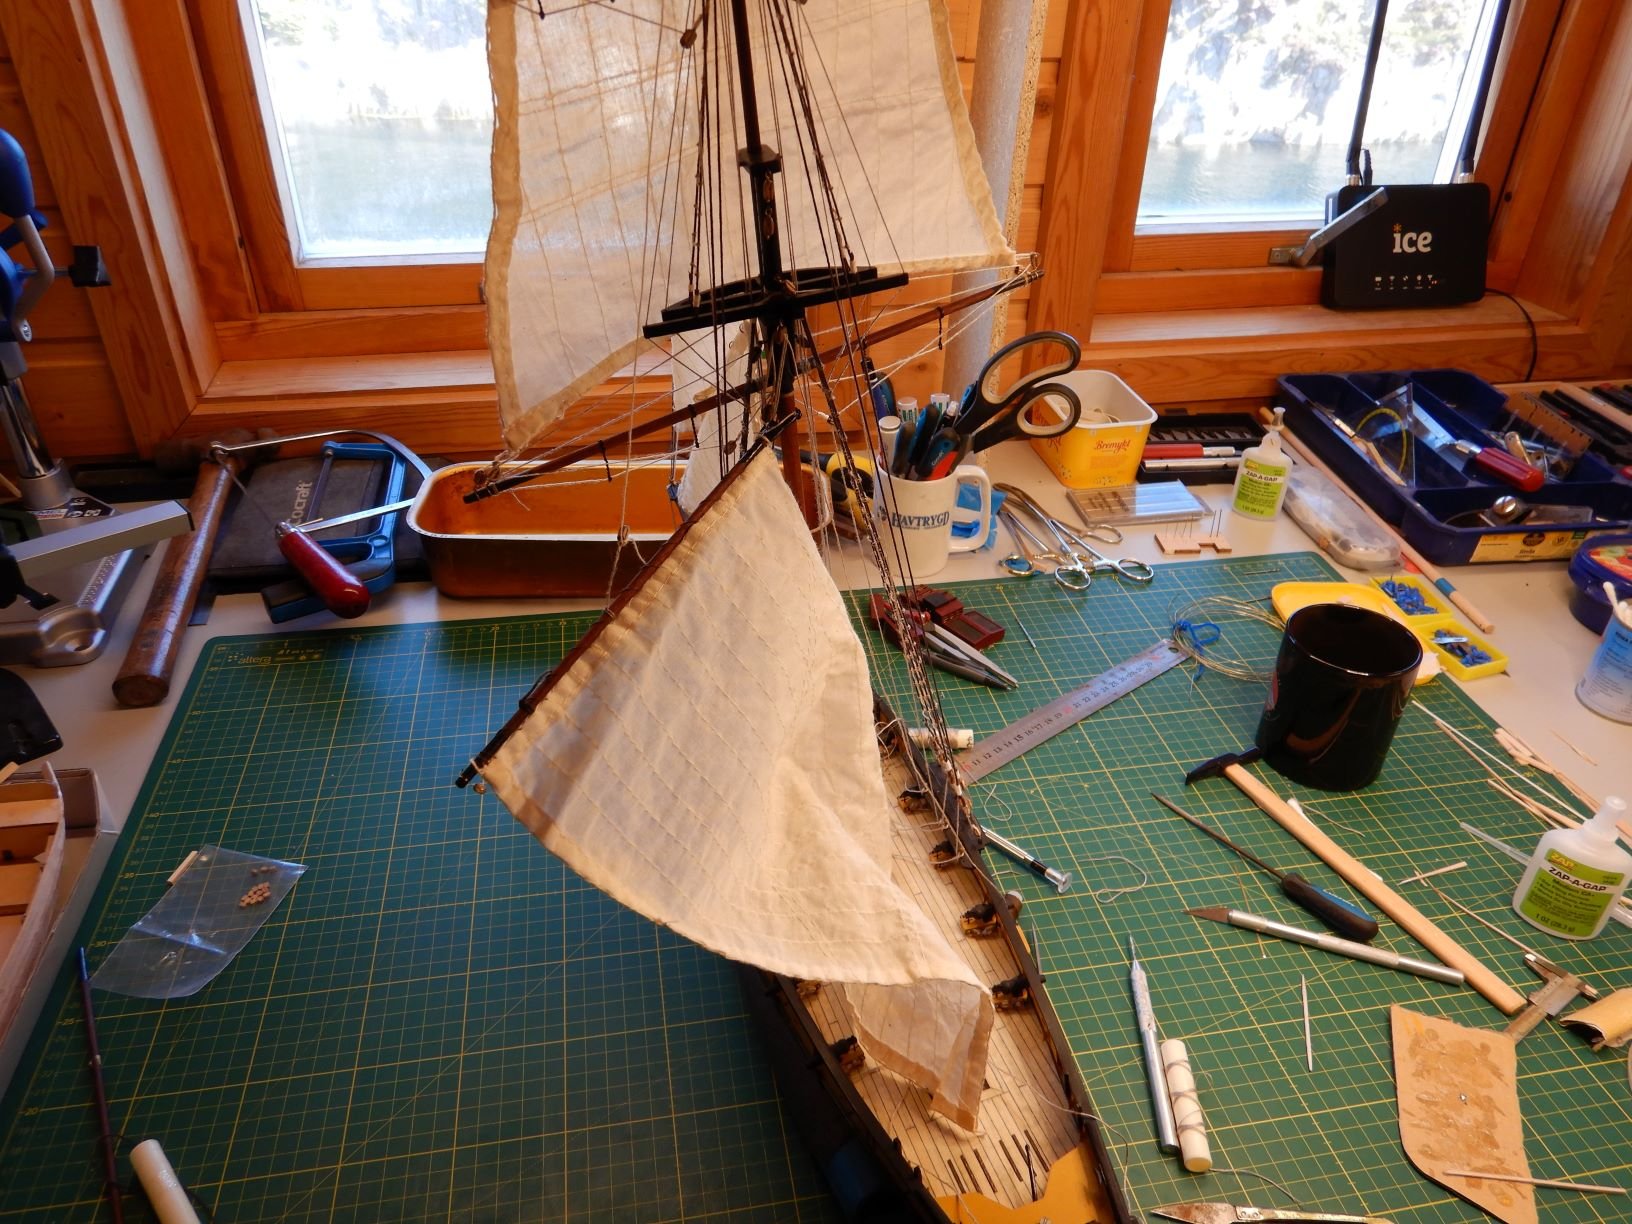
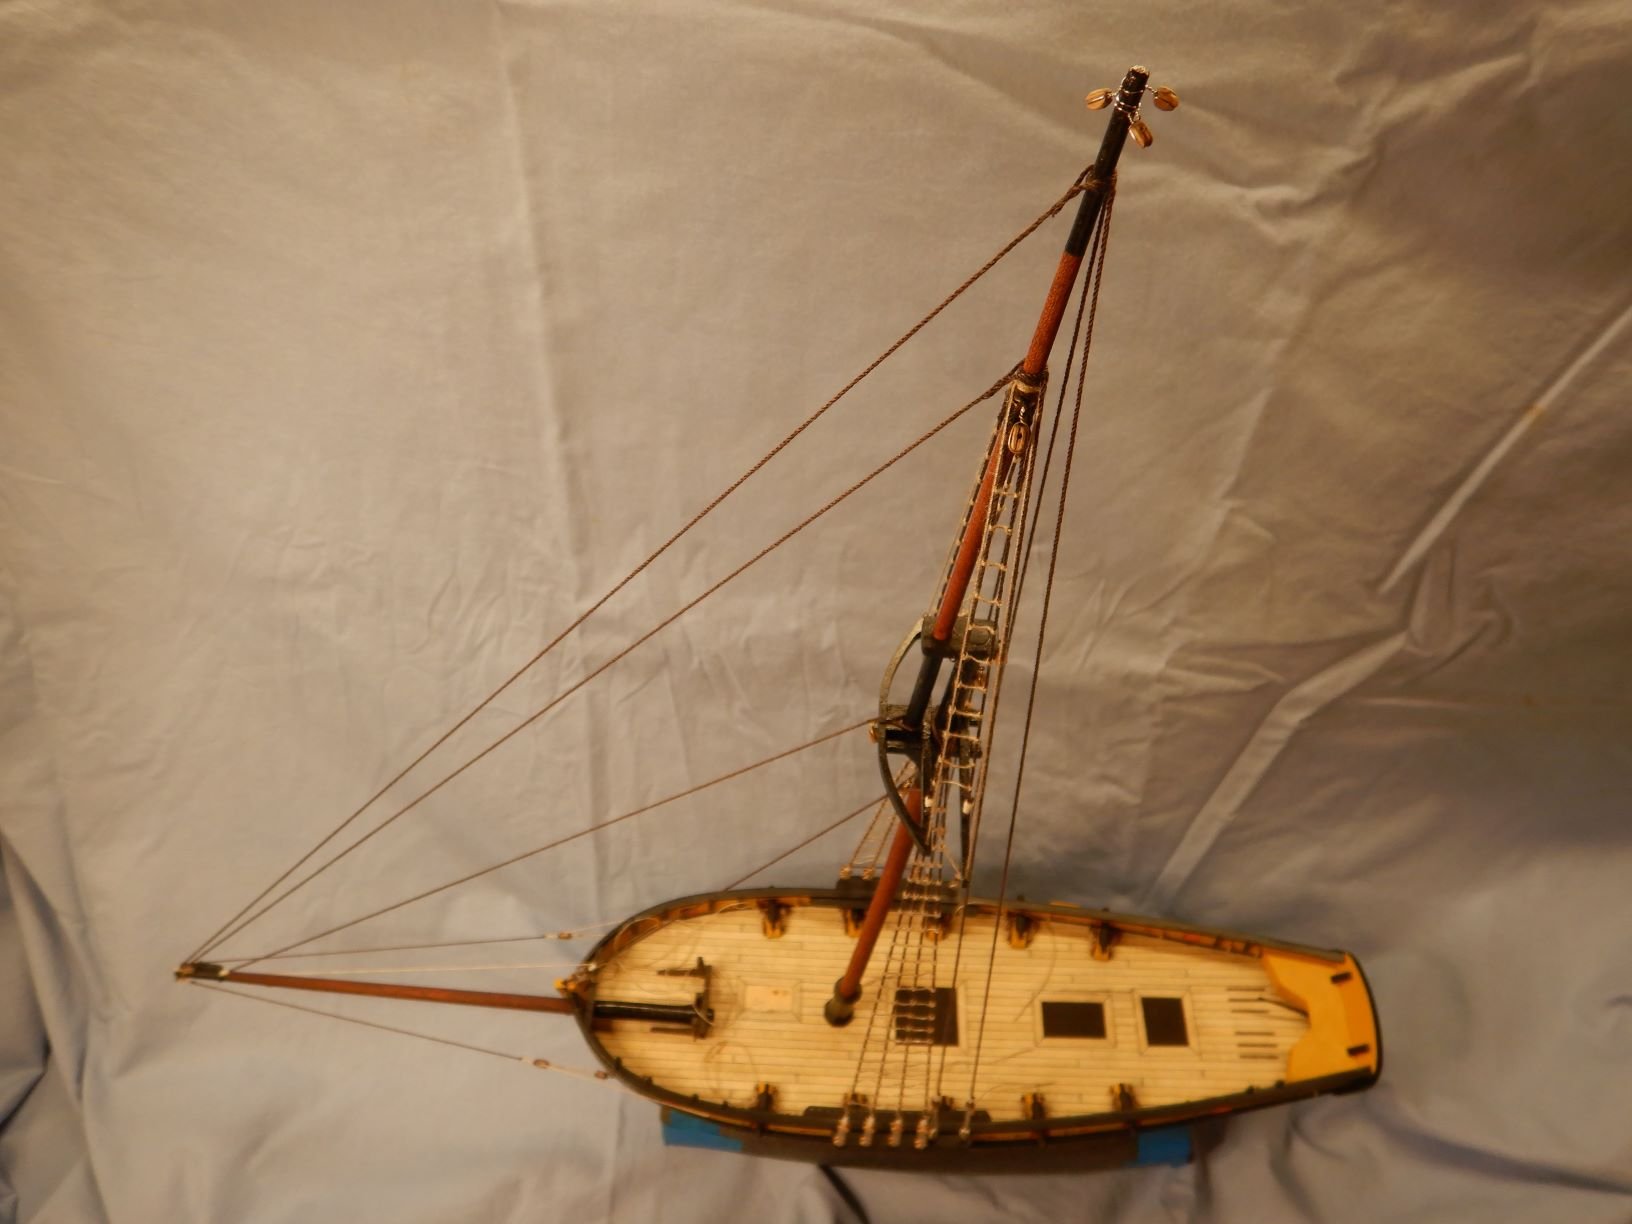
Got the outer jib on, and started on the mainsail.
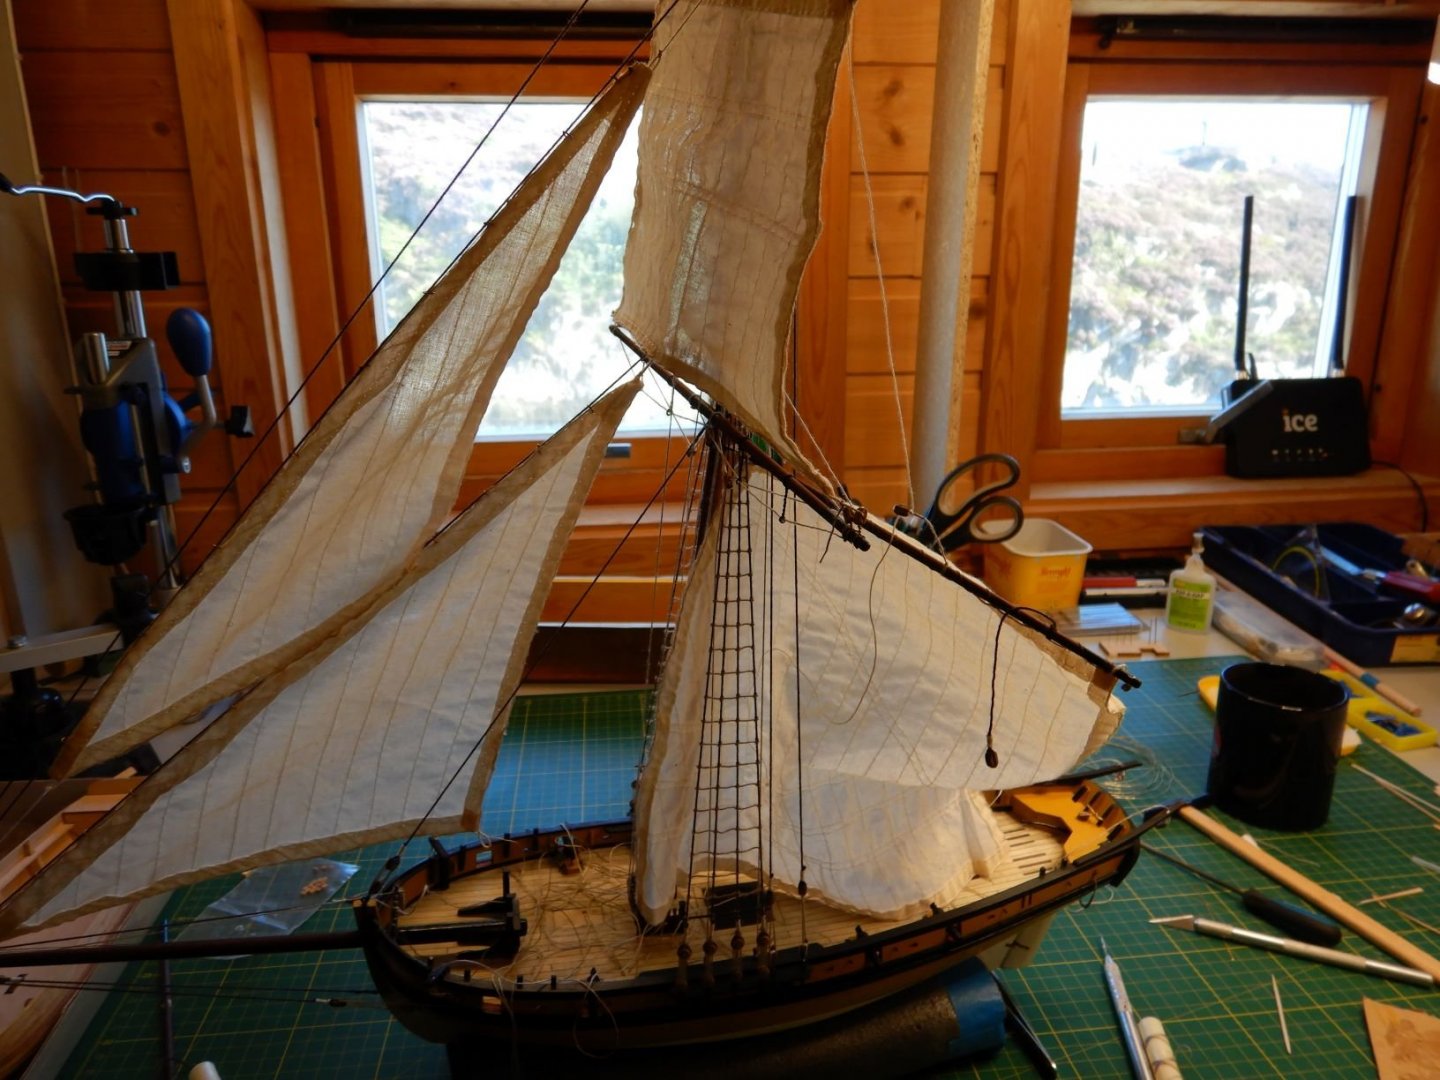

I'm not superexcited with how the kit supplied sails look, but have decided to use them anyway.
Gaffrig.
-
Hello.
Tompslattery, thank you!
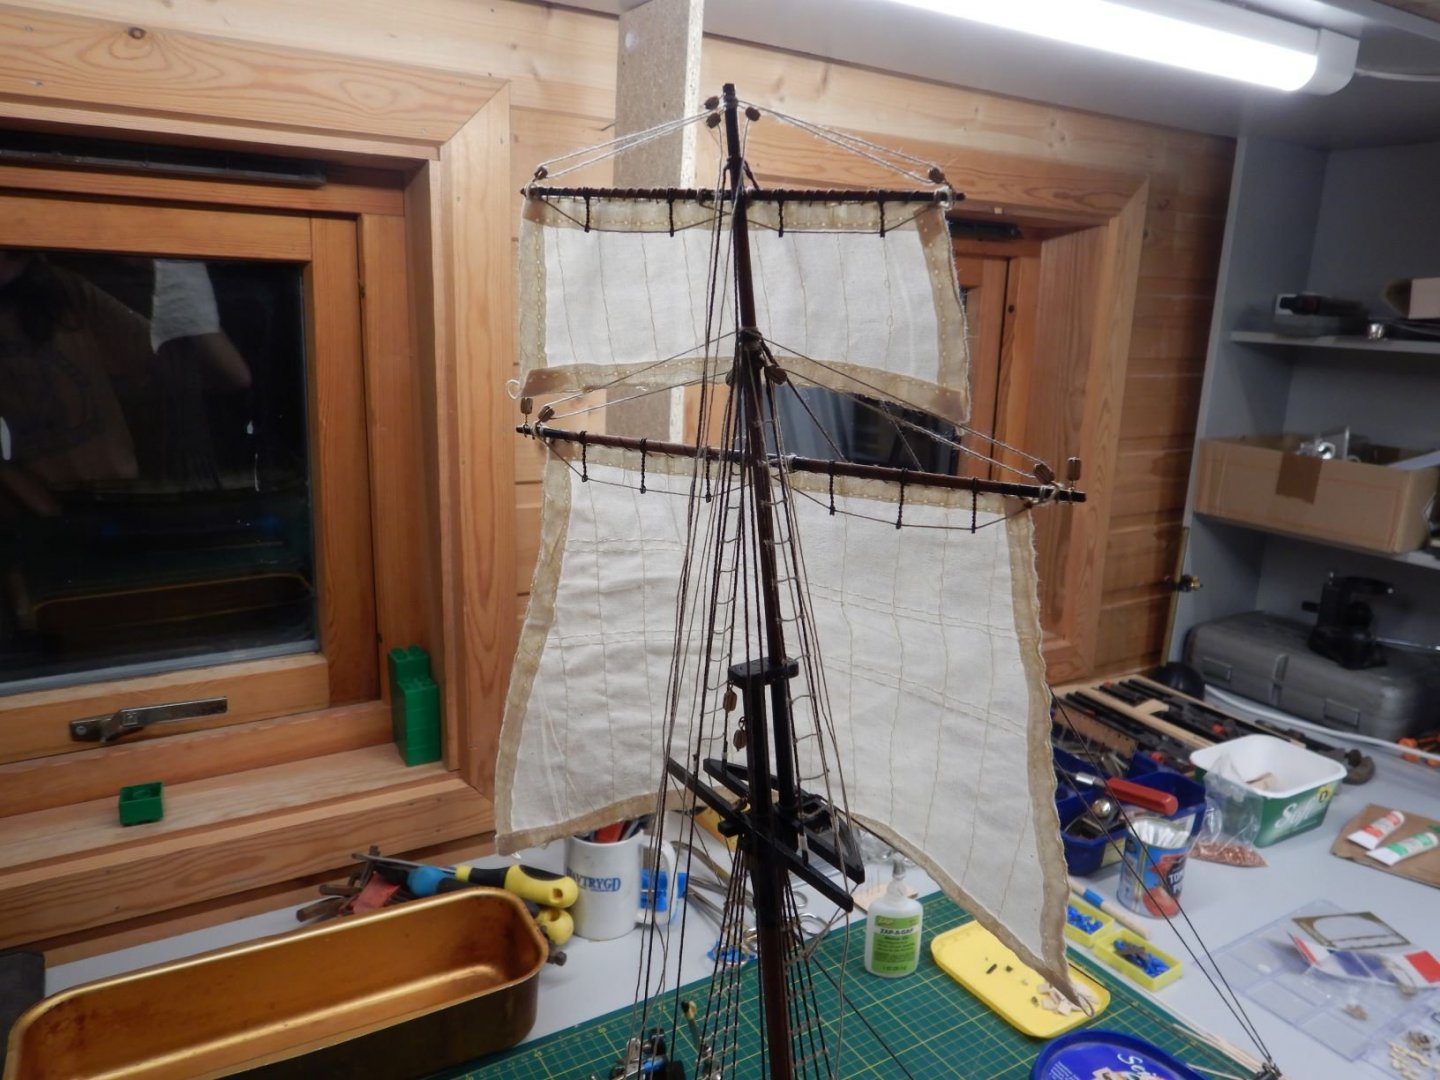
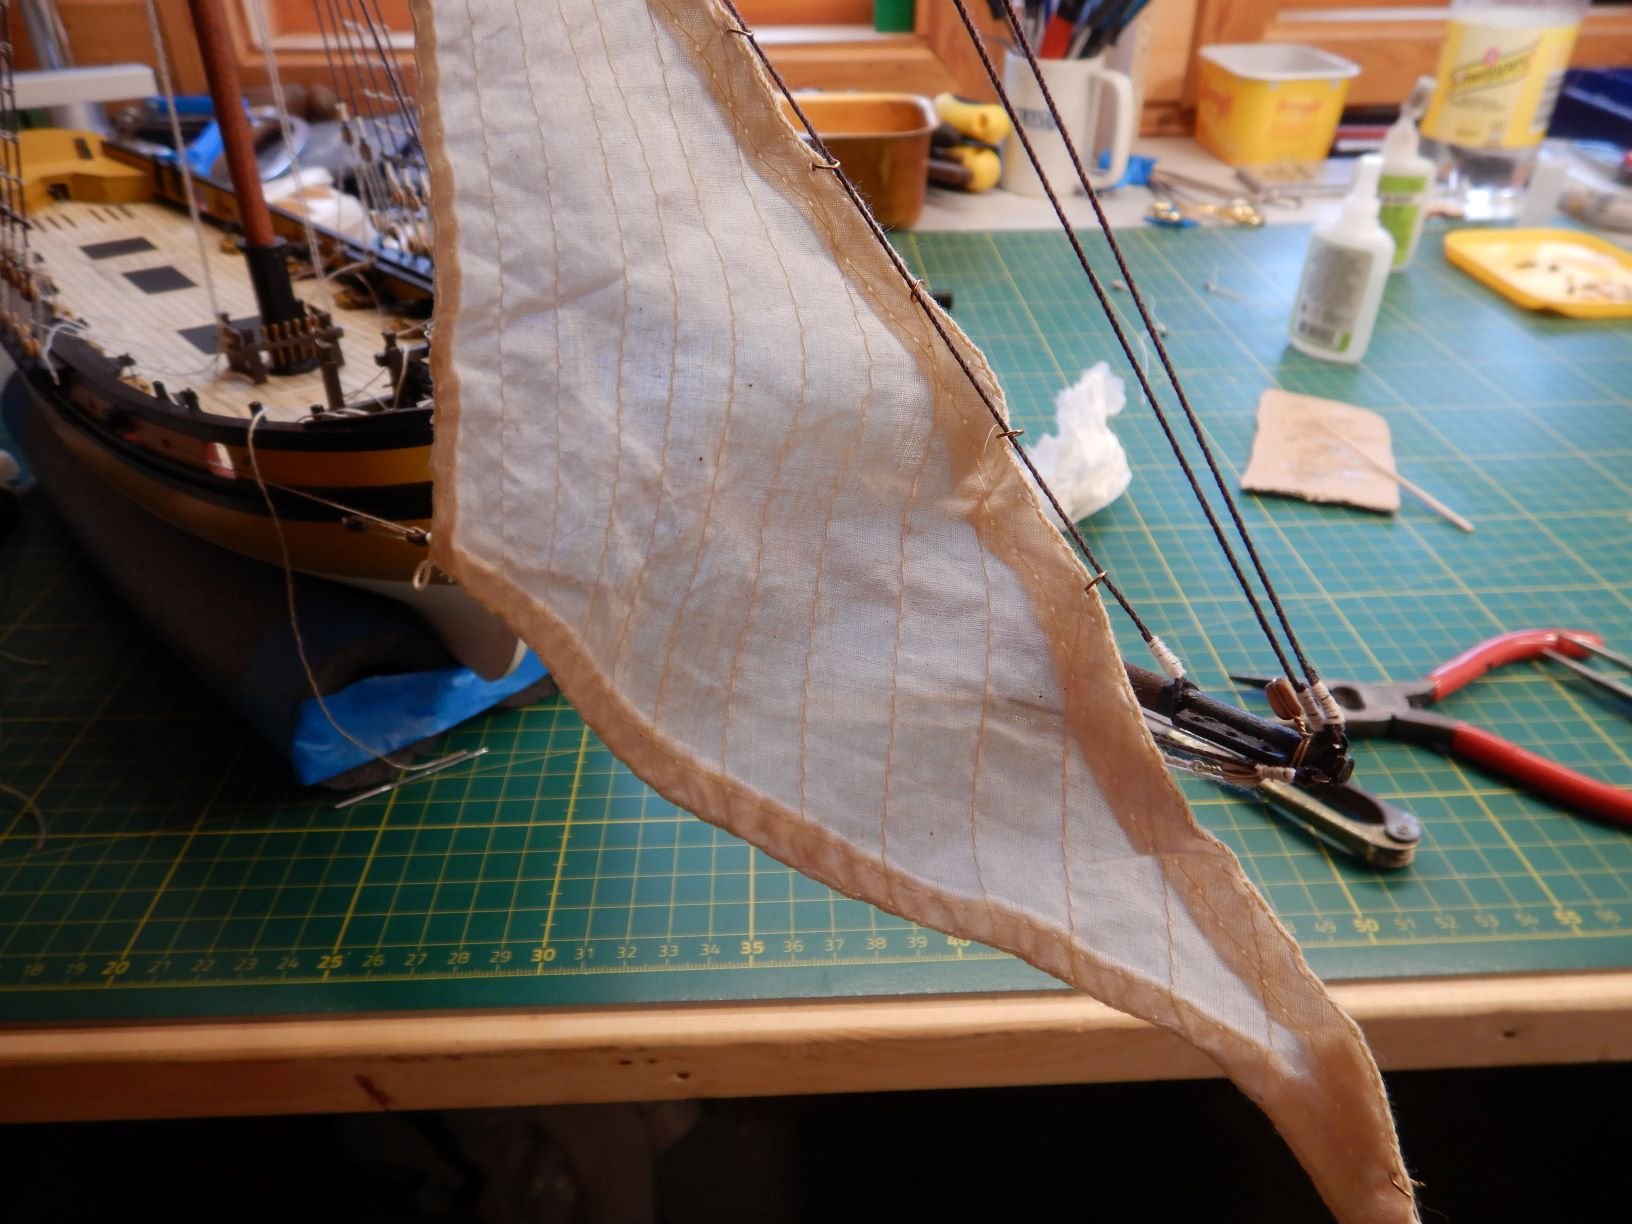
Another small update, have started with the sails and their running rigging.
Started with the squaresails on the yards.
These were lashed to the yardarms using thin sewingthread and needle.
The yards were then rigged to the mast as per the instructions.
The sheets are still missing in this photo.
Got the jib in place using the small brass rings supplied.

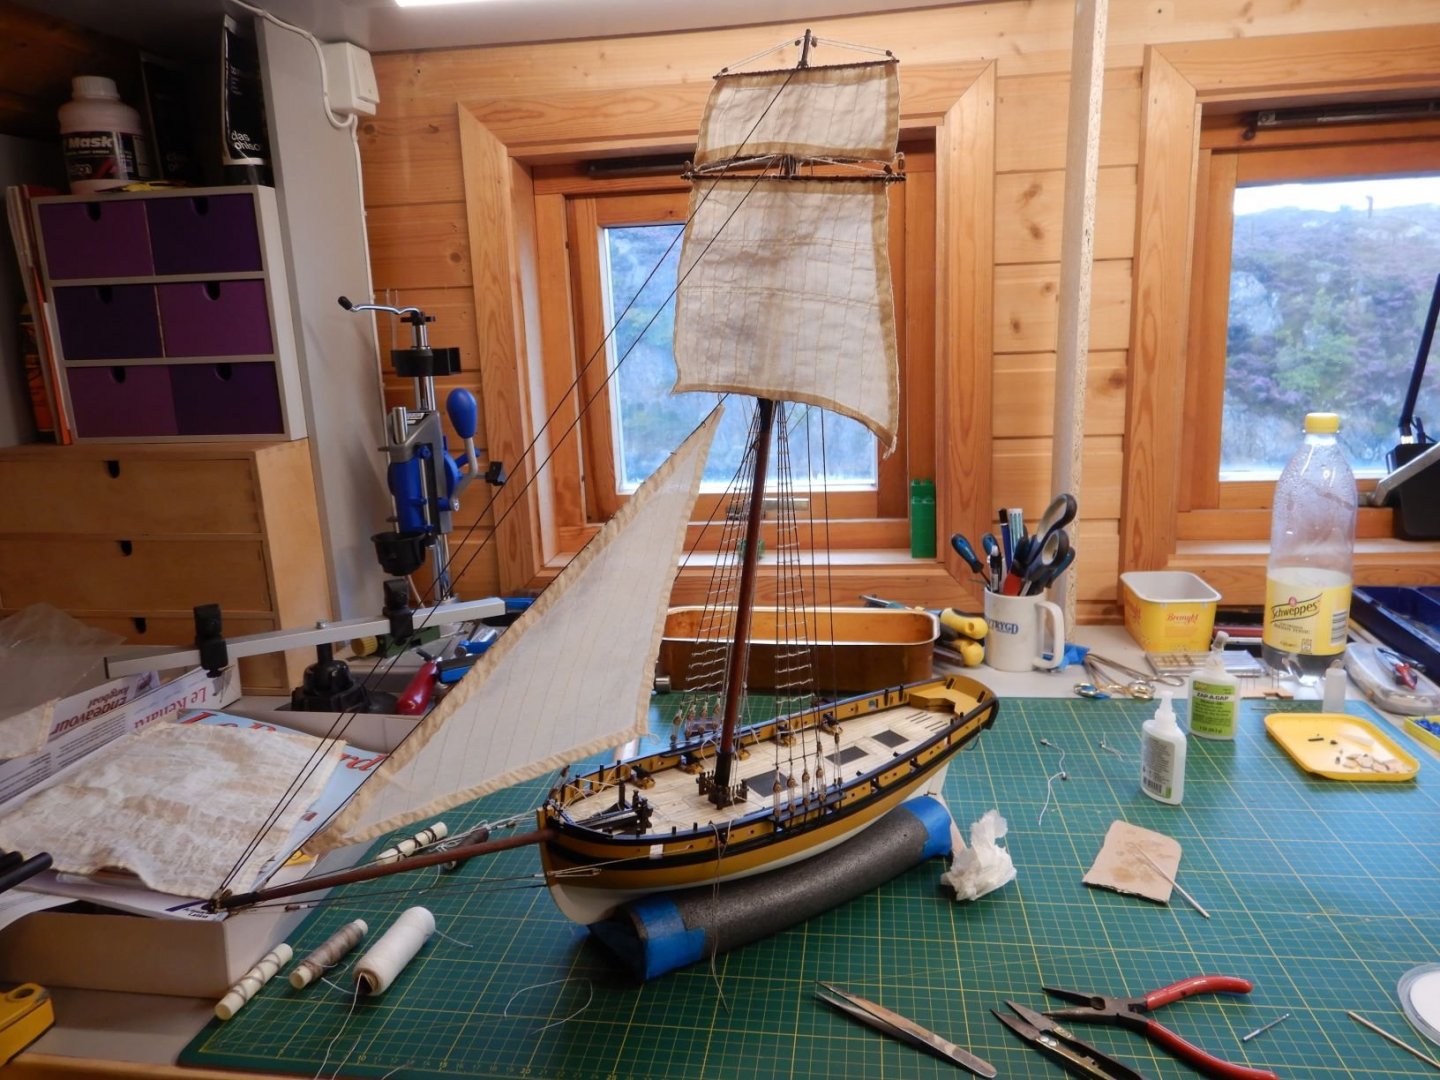
Things are slowly coming together here..
Also started painting the stern ornament/nameplate. Still needs white paint where there is bare brass in the picture.

That's it for todays update.
Stay safe and happy modelling in 2021!
Gaffrig.
-
Hello to all.
Sorry for the long abscense here. Got a waterleak in the bathroom that ended with a complete rebuild... This has eaten up all my modelling time the past month and a half. Seeing the end of the bathroom fix now, and hopefully some more modelling!
Tompslattery, those instructions look even worse than the ones I have. I have the same ones that Moltinmark posted.
Have done a little bit in between bathroom work.
Have finished the standing rigging.
Really enjoy the rig work. Even the ratlines was fun to do!


Time to start the sails and the running rigging.
Feels like I'm getting closer to the finish line!
Stay safe out there and a happy new year to all!
Gaffrig.
- Ian_Grant, Tompslattery and Rick01
-
3
-
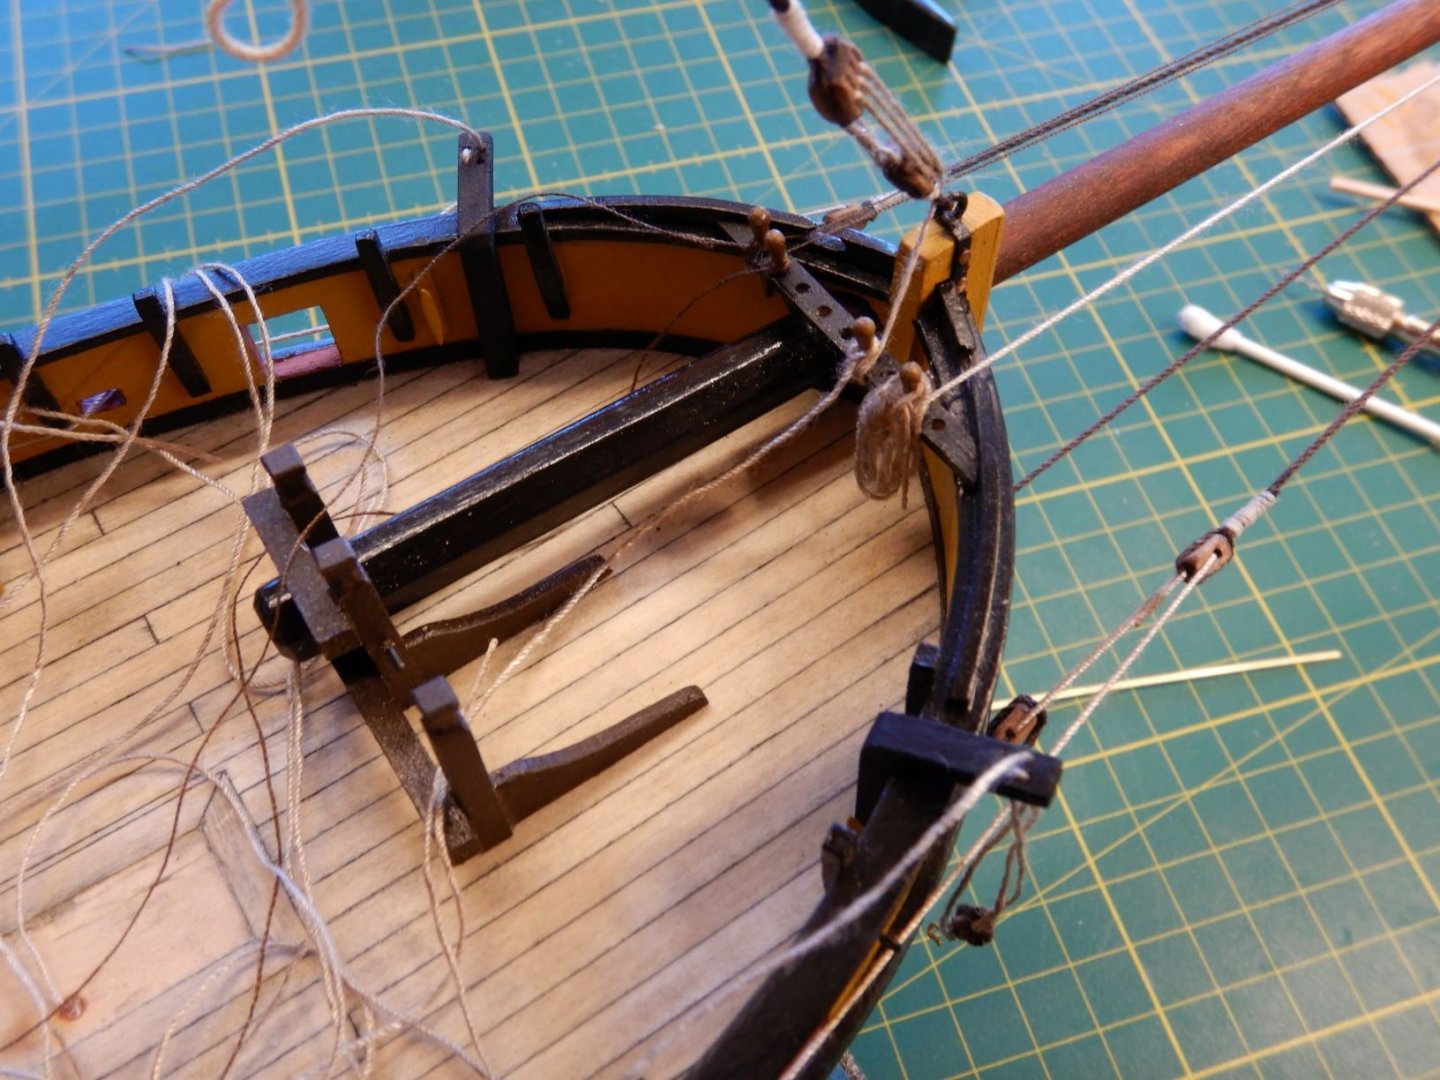
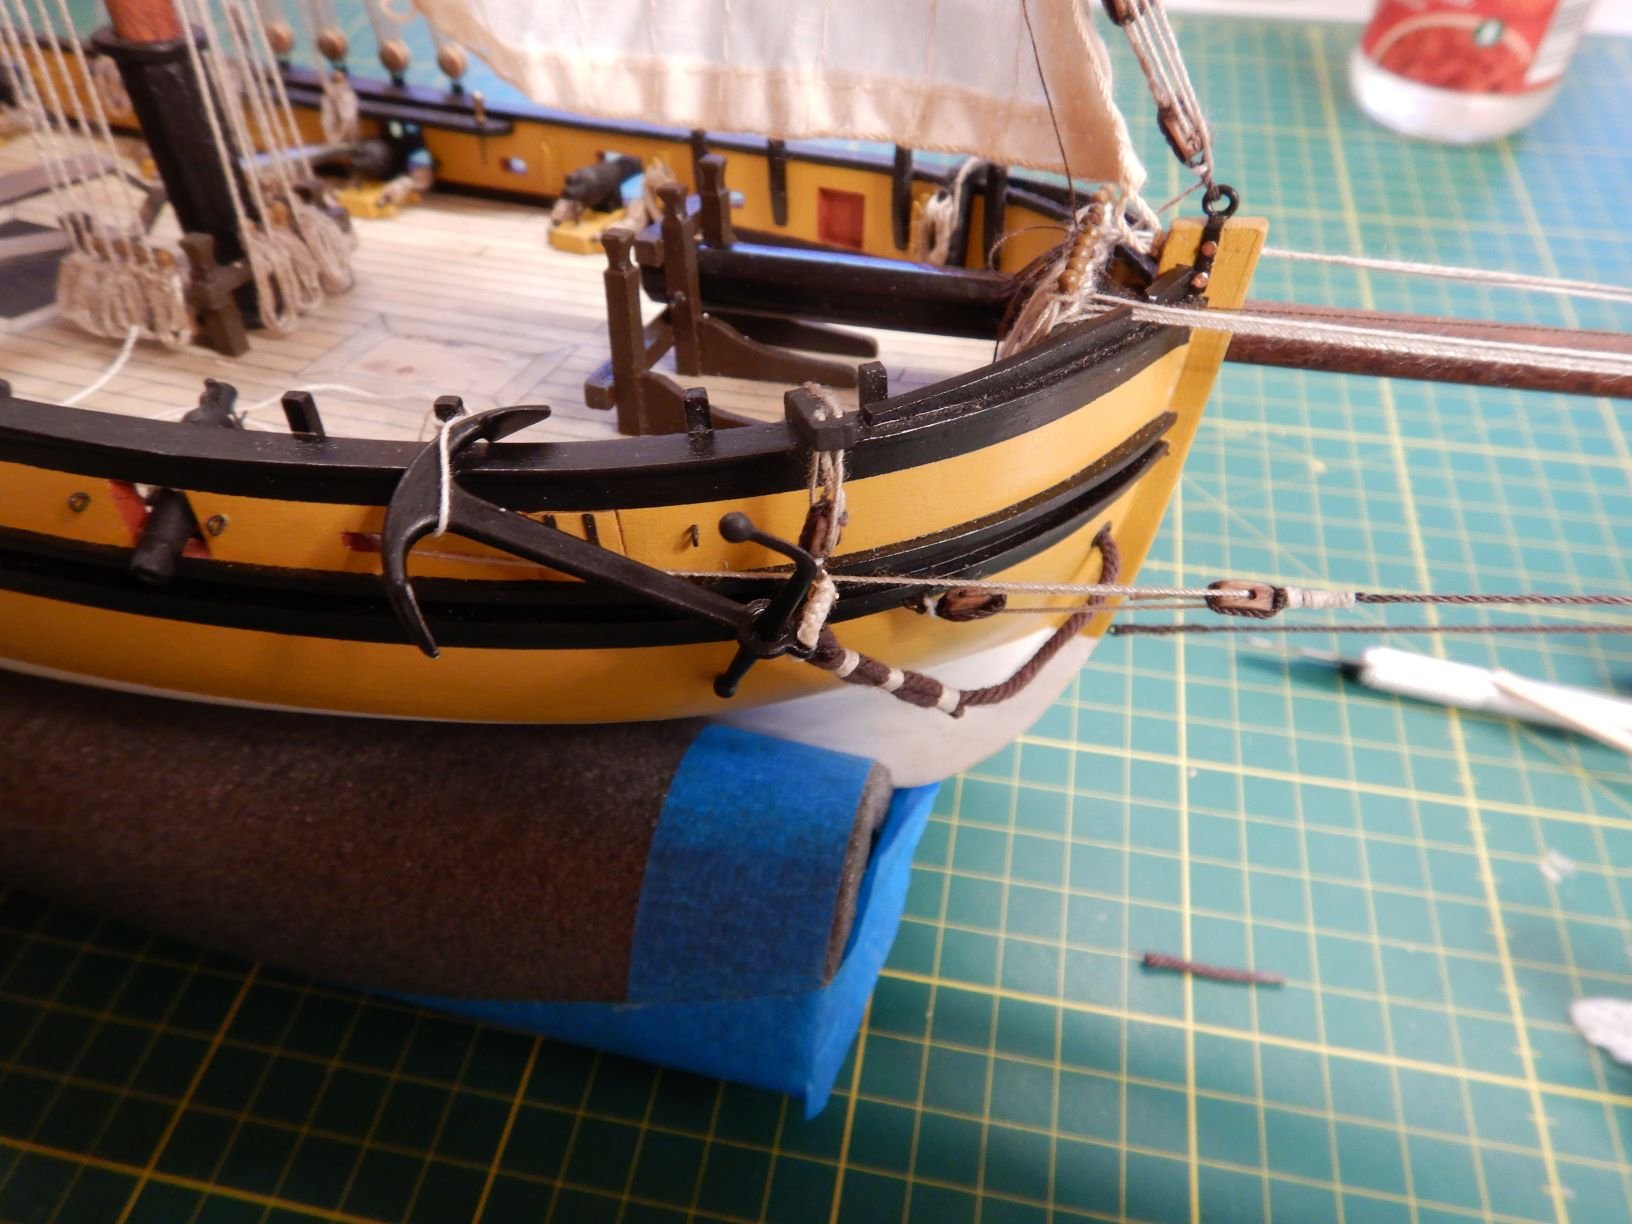
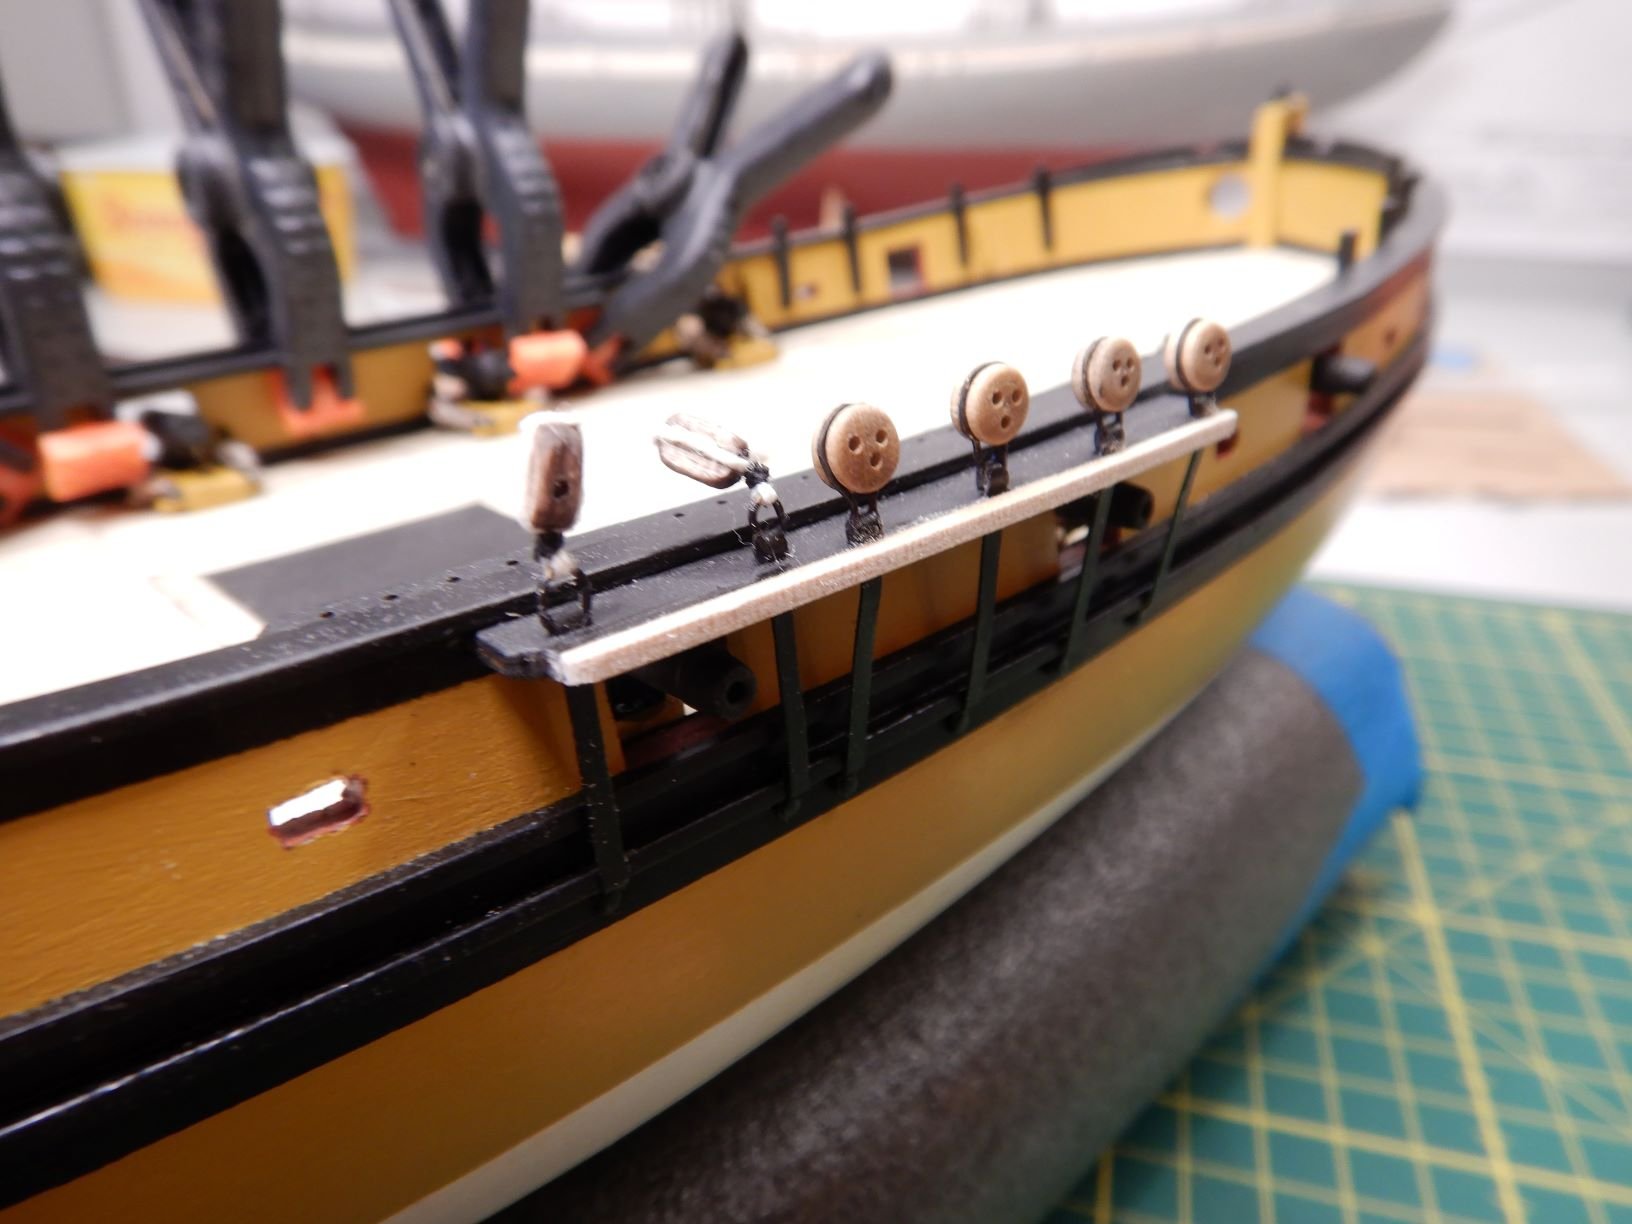
Hello all!
Another update here as the work continues.
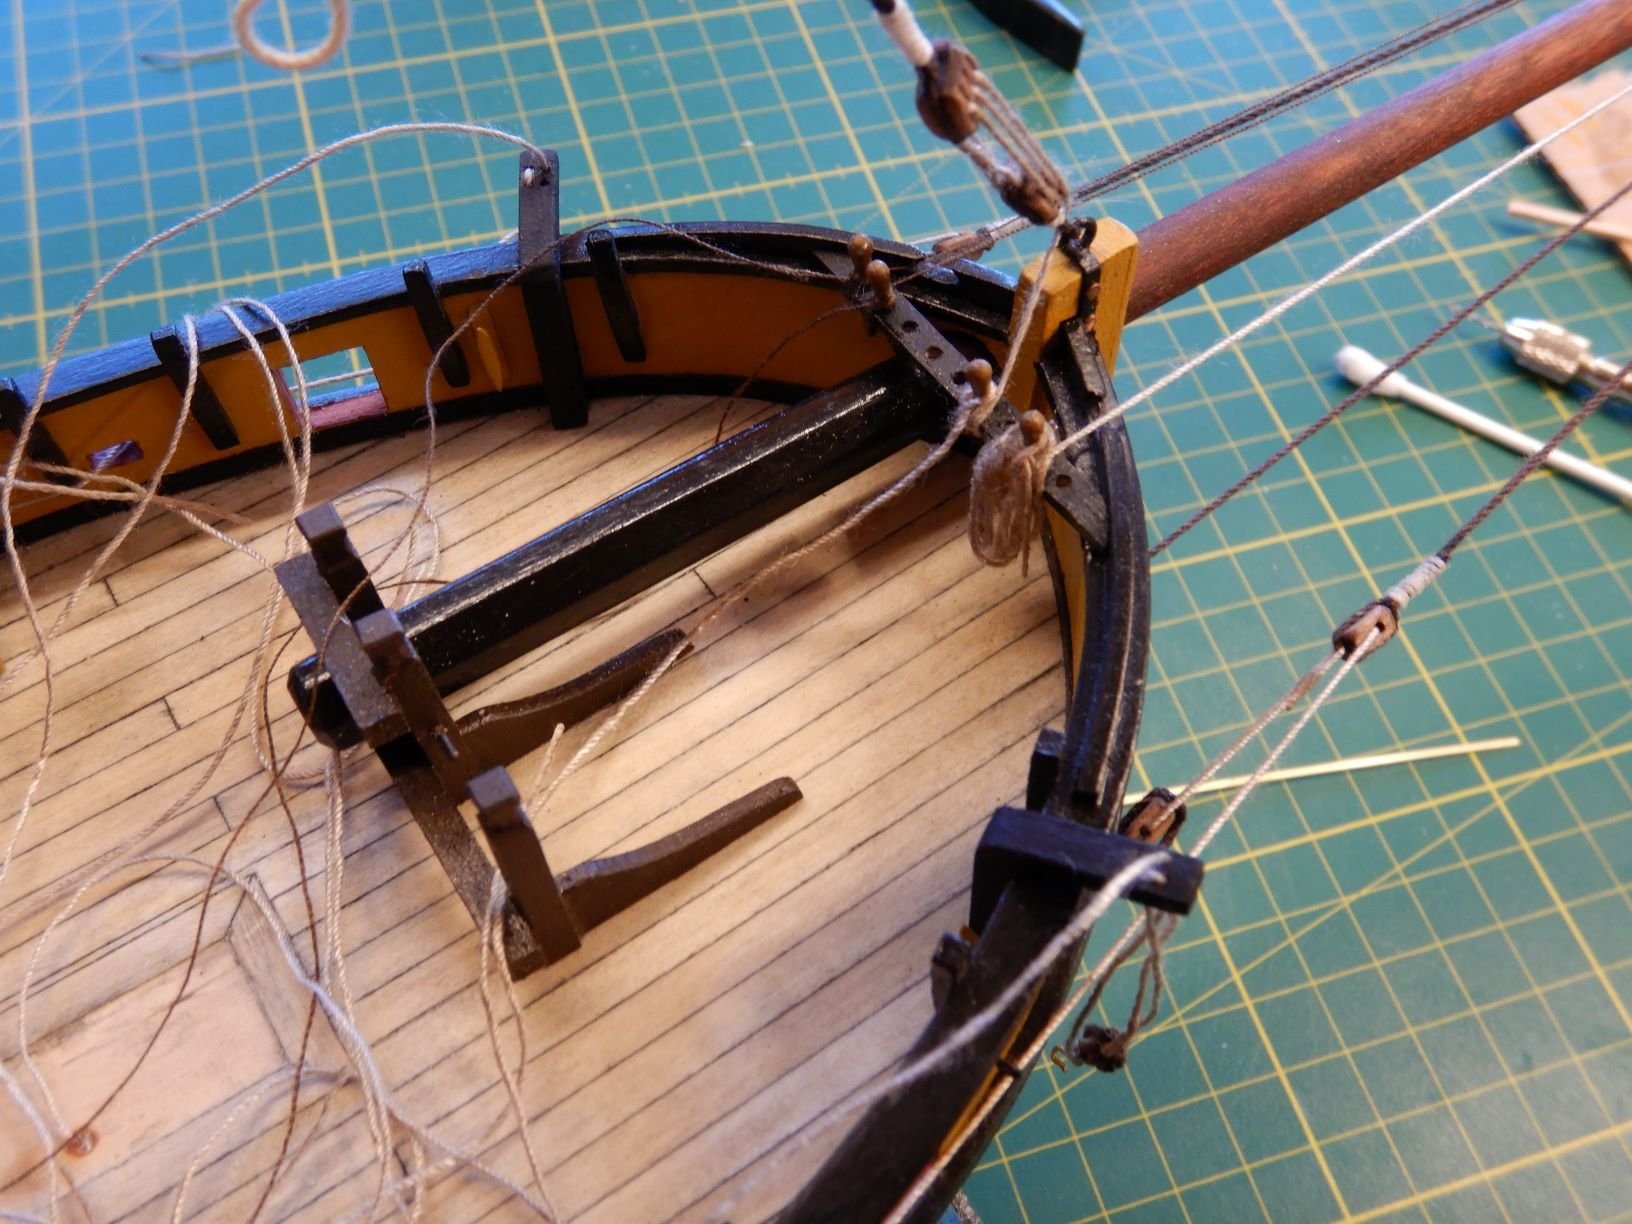
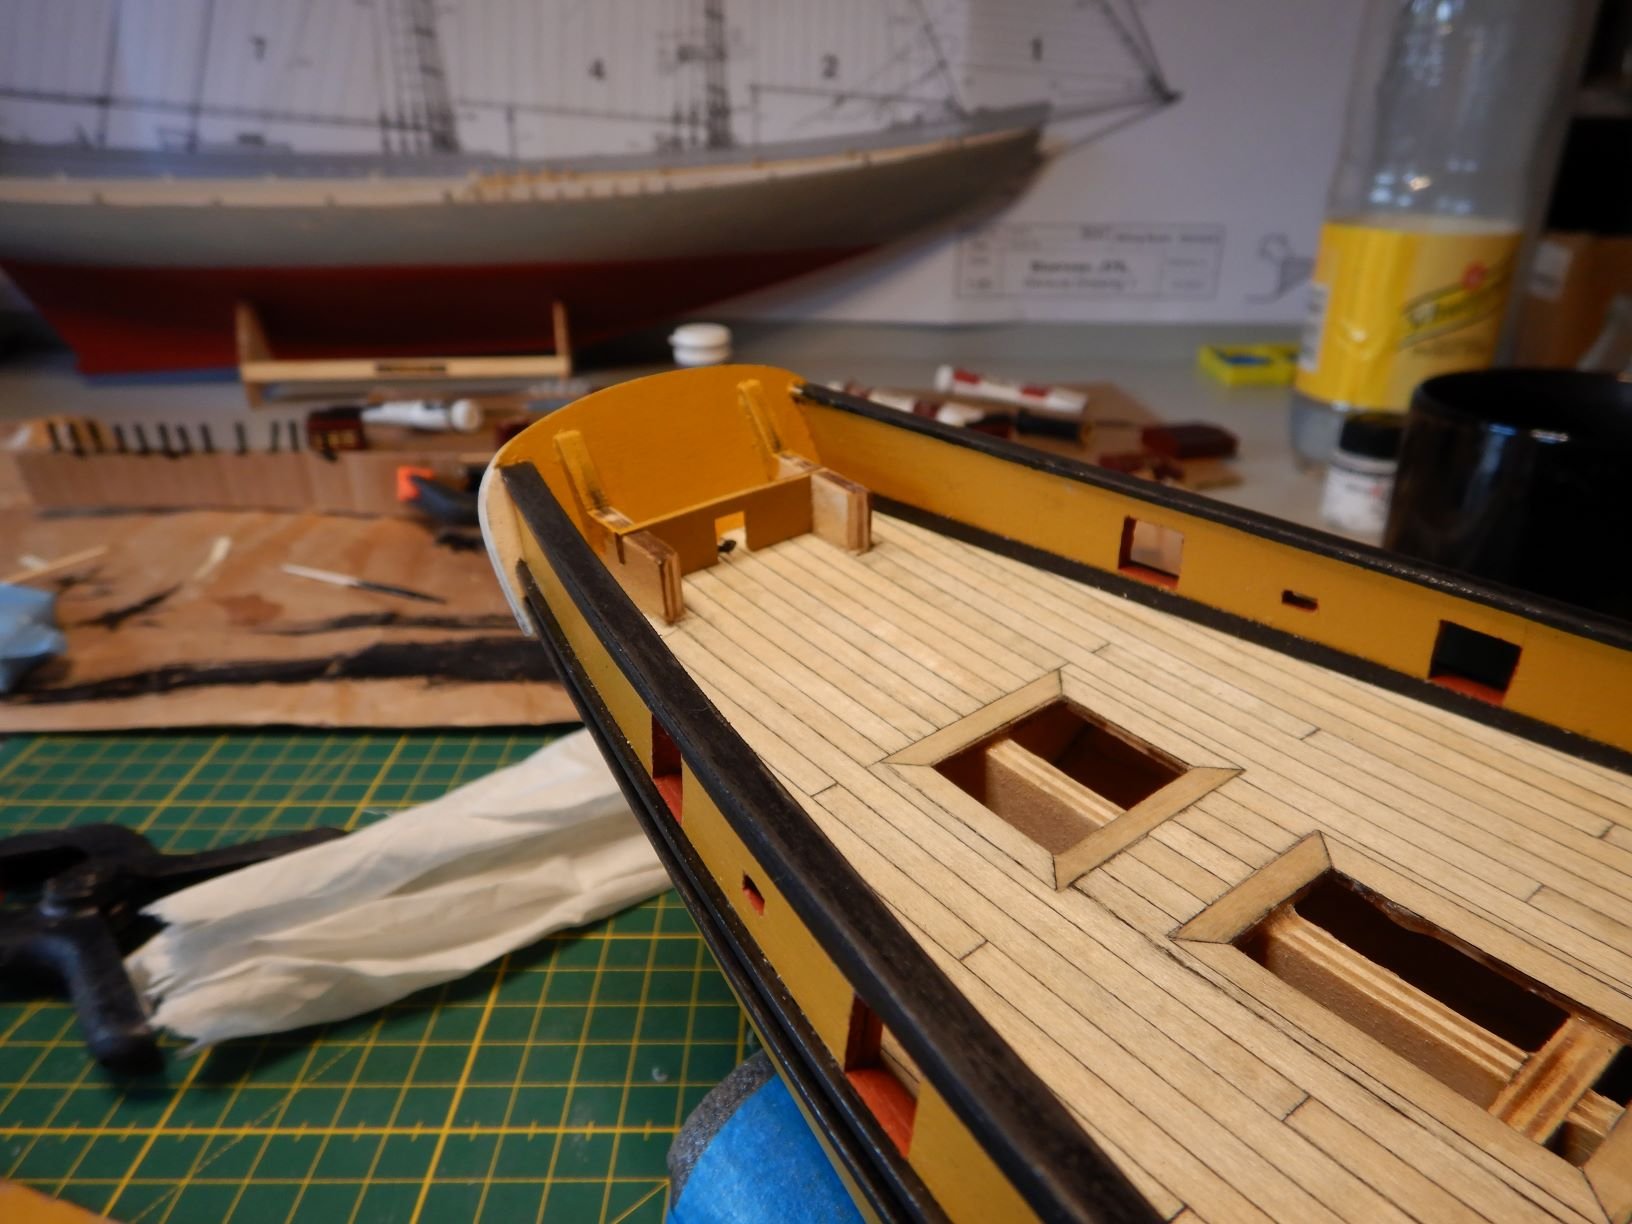
I've made the bitts/samson posts for the bowsprit.

Painted them and mounted them and the bowsprit to the boat.
I decided to make a bolt to hold the bowsprit. The instructions just say use glue.
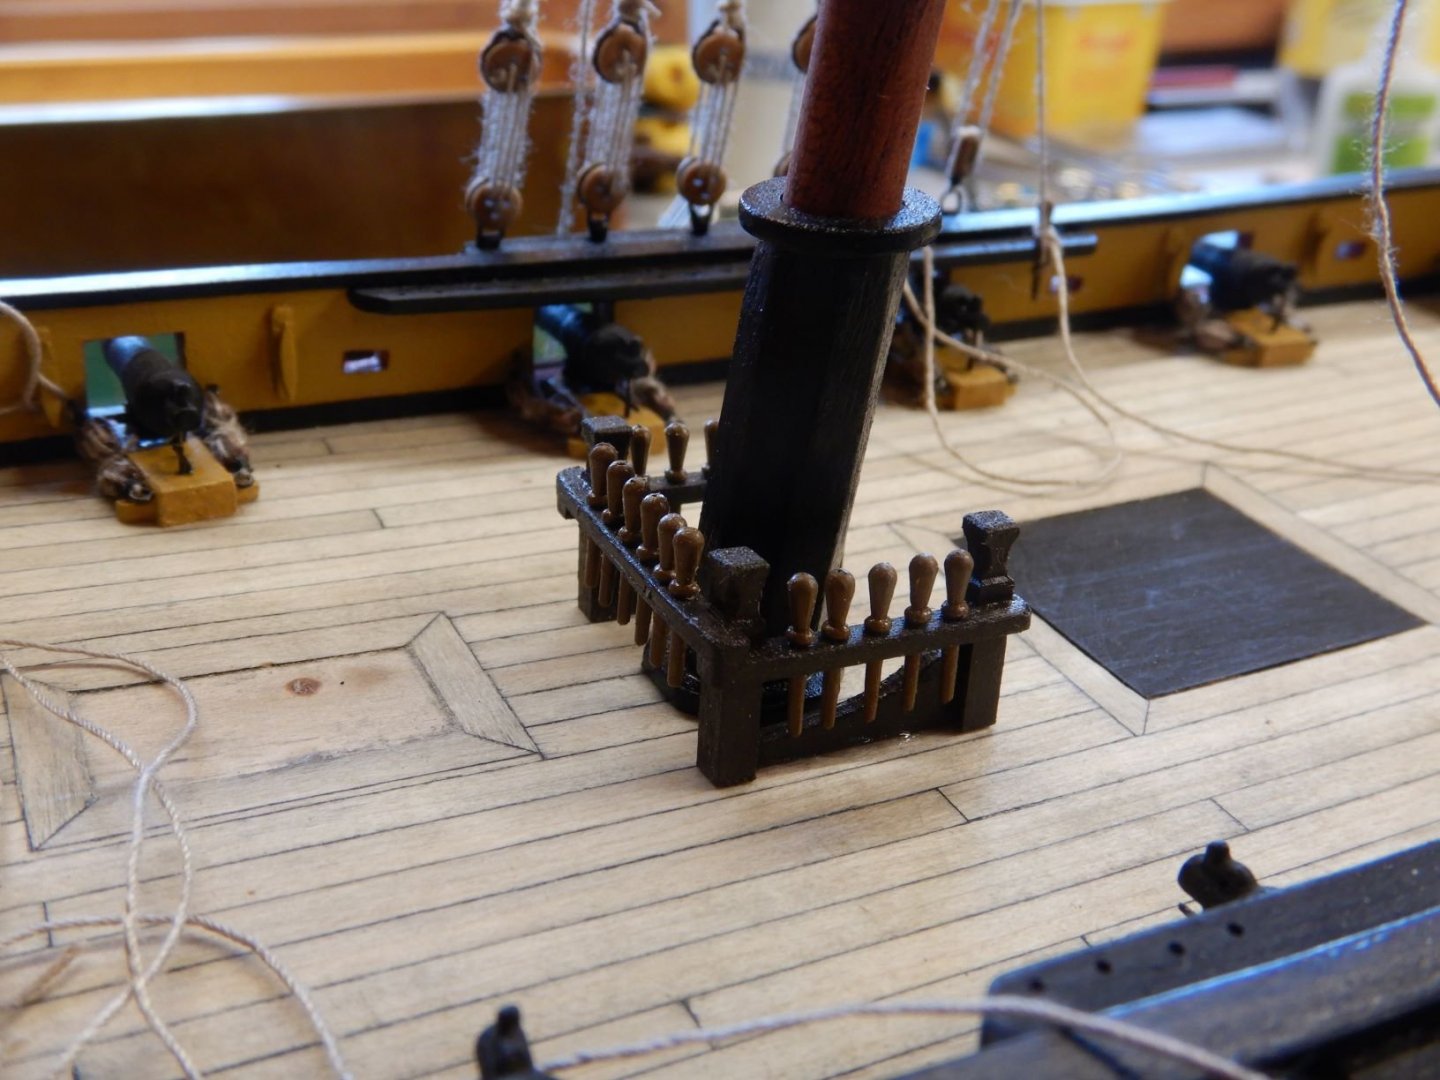
I've made the pinrail around the mast and painted and mounted on the boat..
I've stepped the mast and got the lanyards in and tightened..

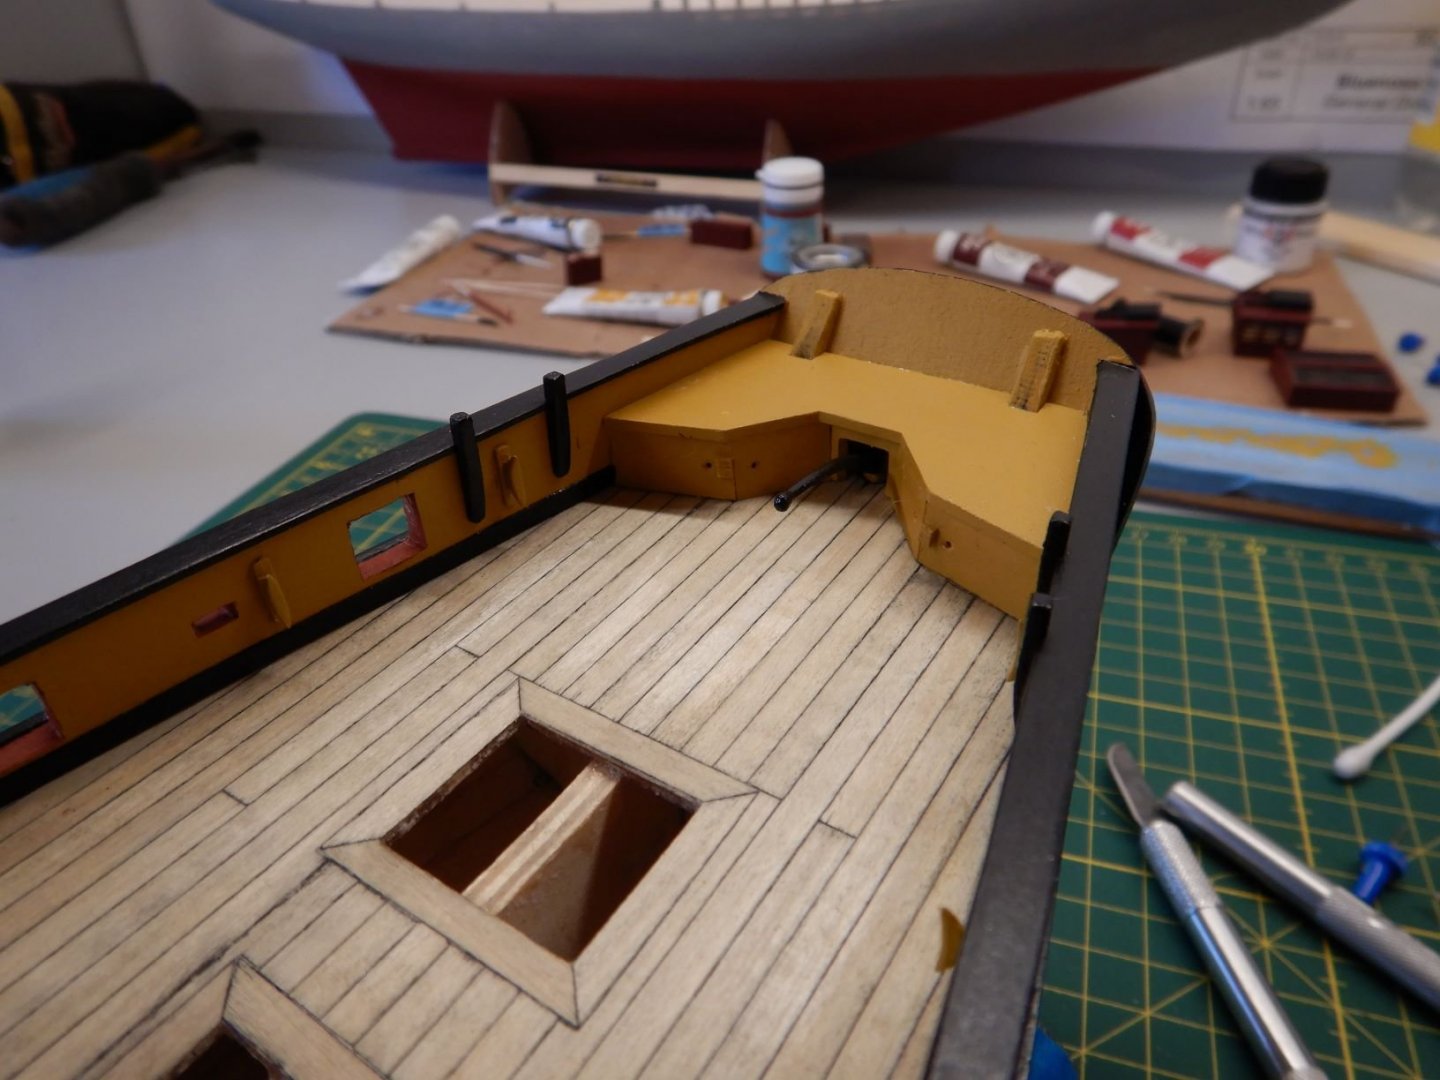
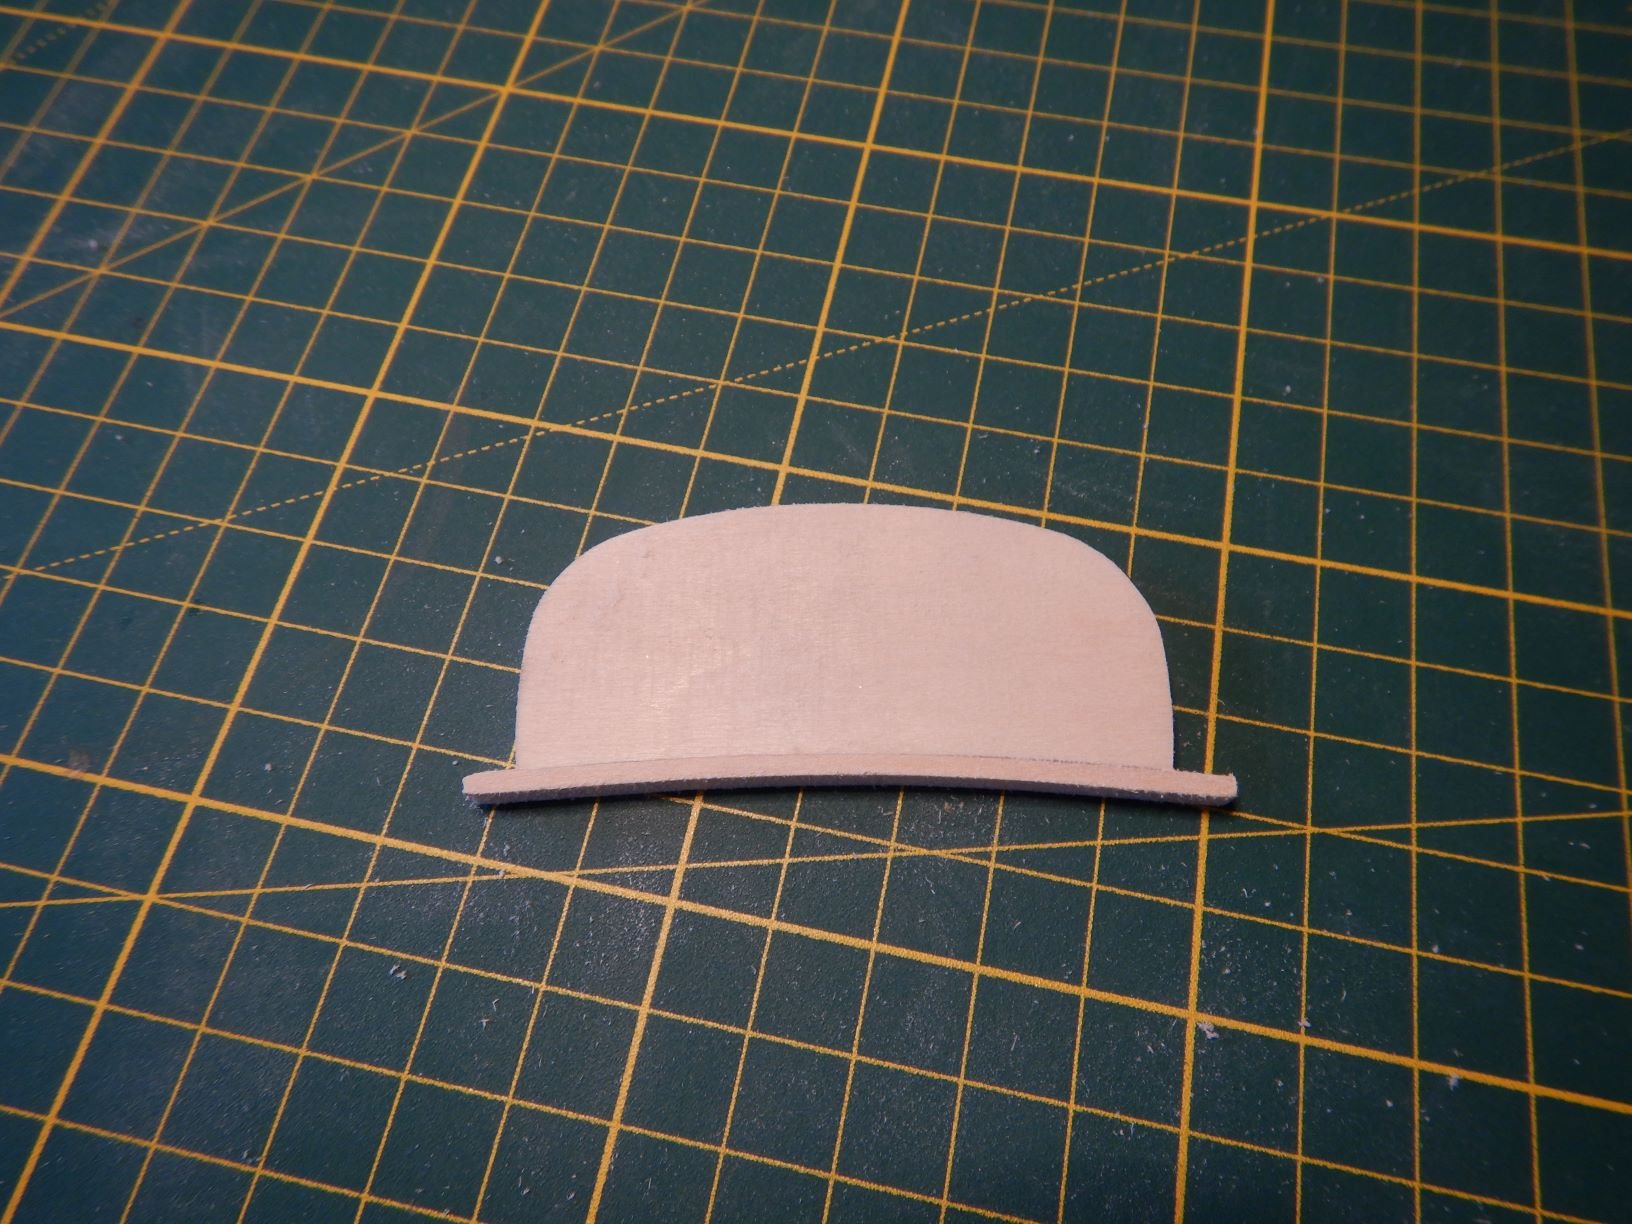
Dryfitting of the deckhouses/ skylights. The forward companionway is a little off in this picture.. 😂🤣
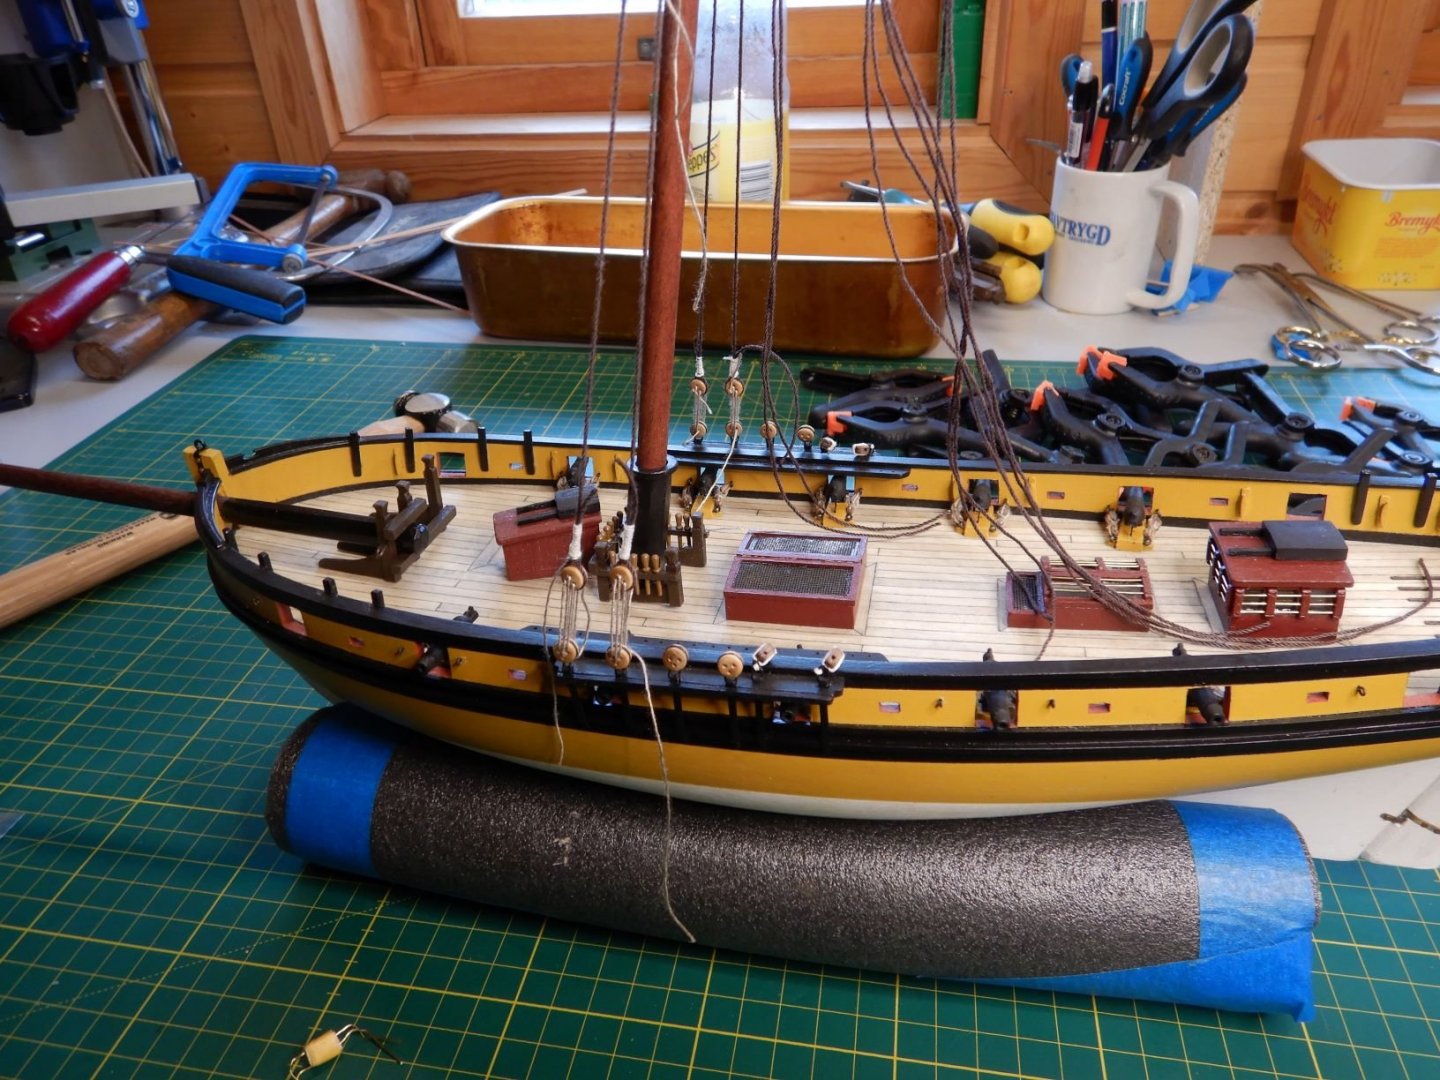
The pinrail in it's final position..
Started tying the ratlines..

I'm really enjoying this part of the build, the rigging that is..
The rigging instructions is not very good and self contradicting many times.
I do have expert help in reading them, but the expert doesn't understand either... 🙄

That's it for todays update.
Stay safe, and happy modelling!
Gaffrig.
- WalrusGuy, Jack-in-the-Blue and Gregory
-
2
-
 1
1
-
Hello.
Thanks for the kind comments and likes!
Another update here.
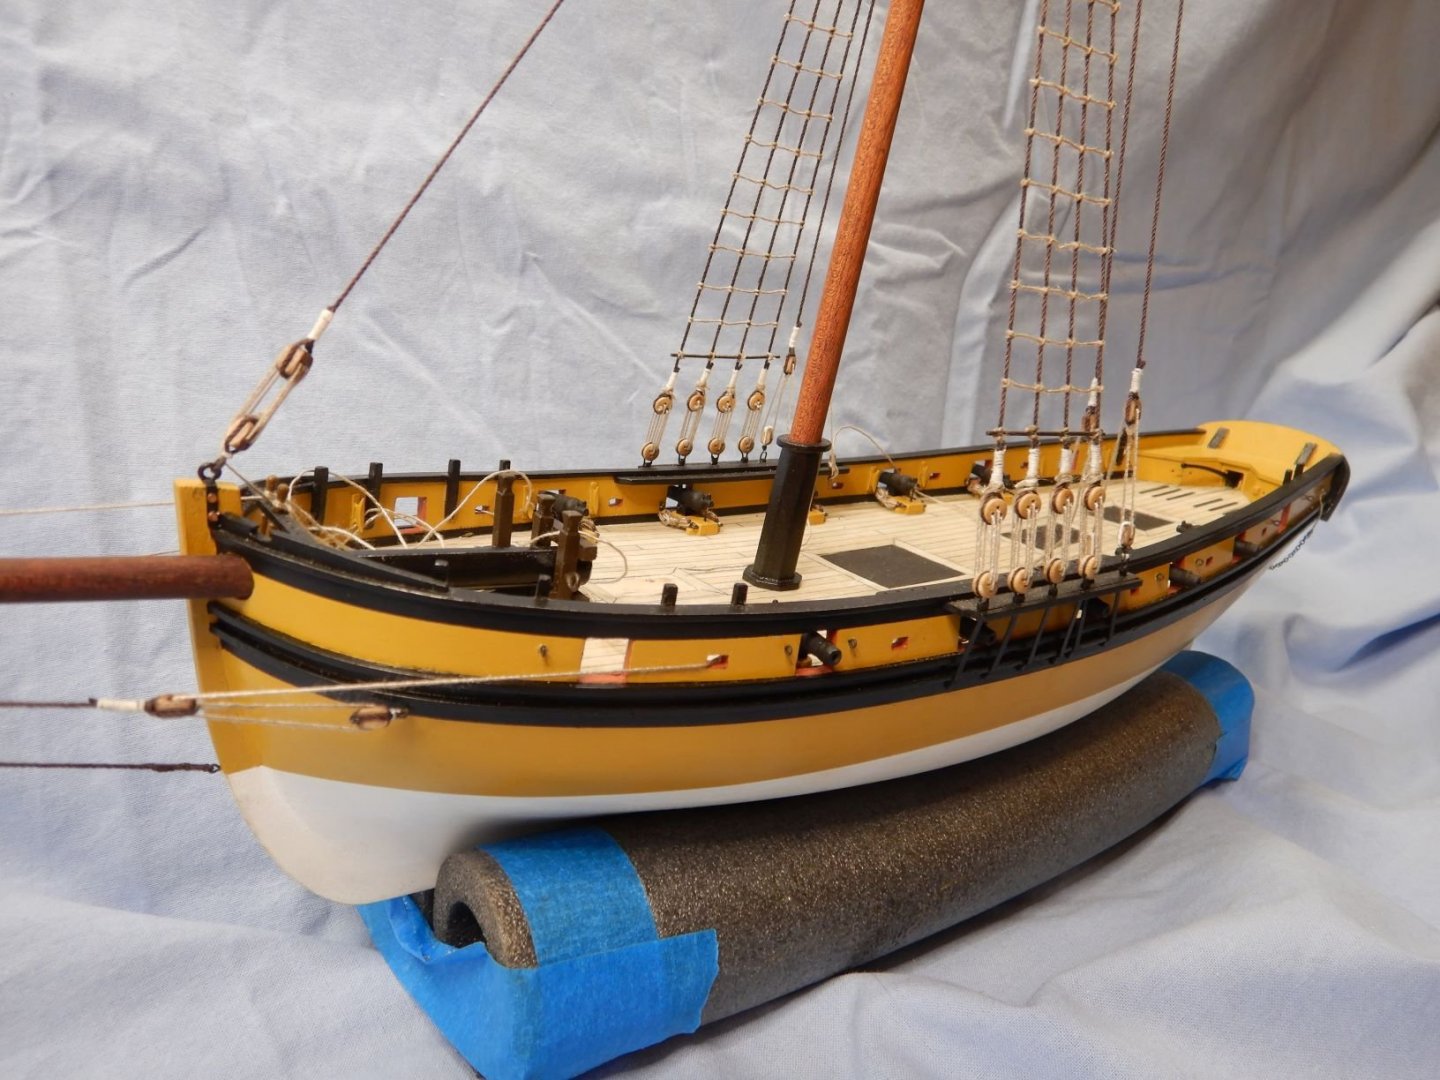
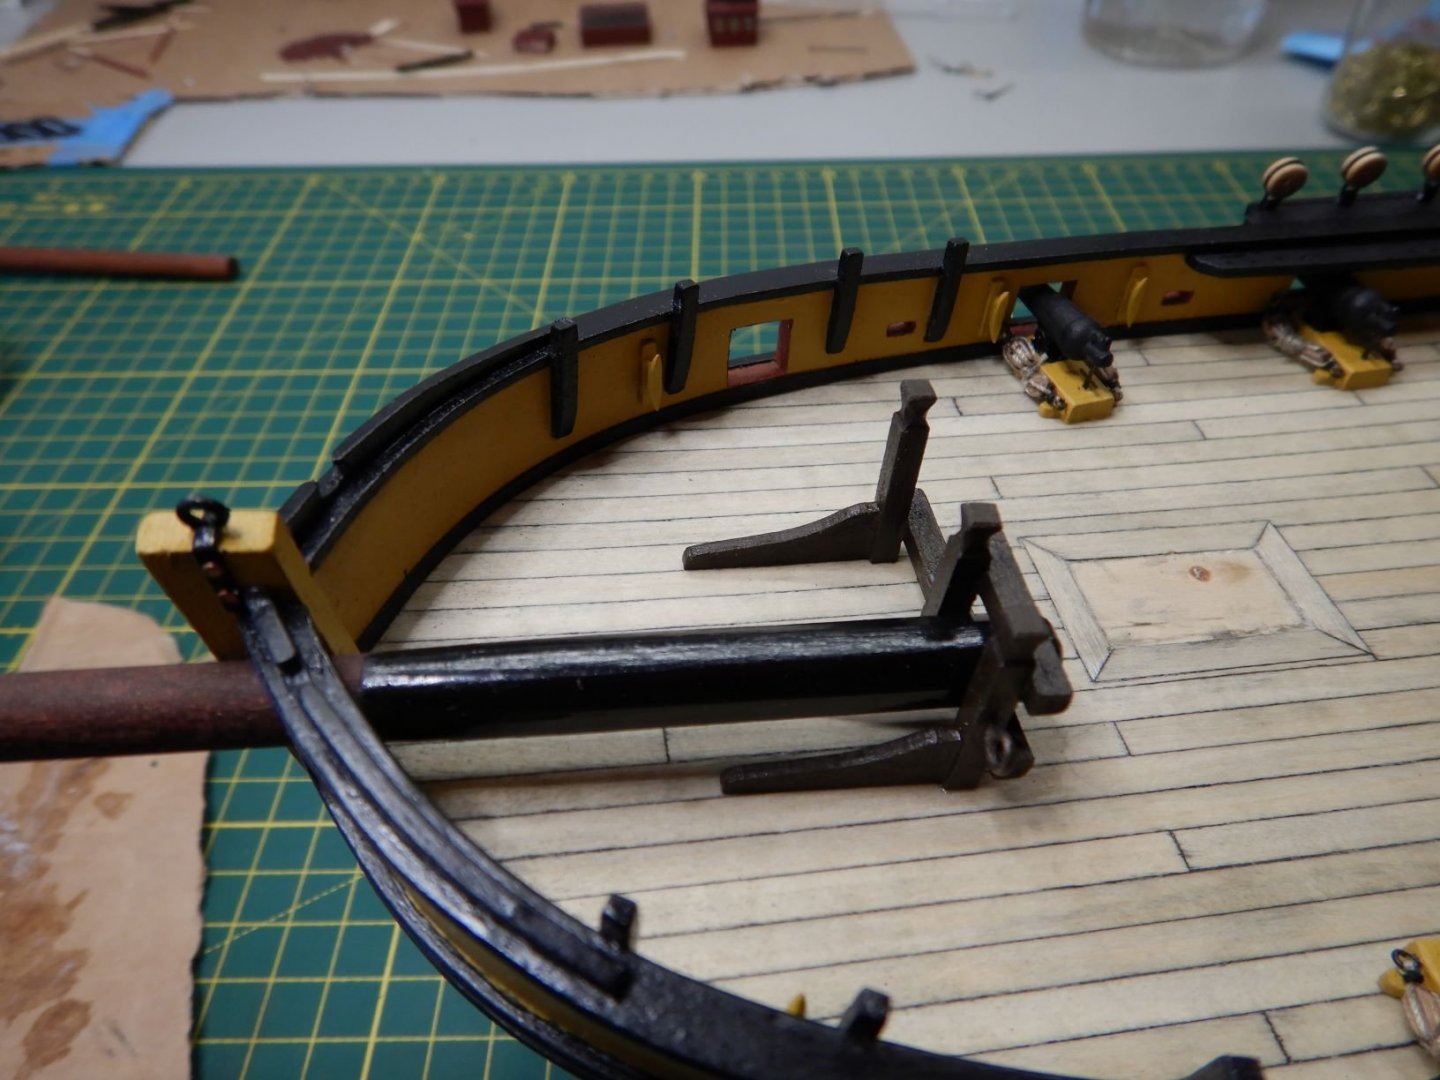
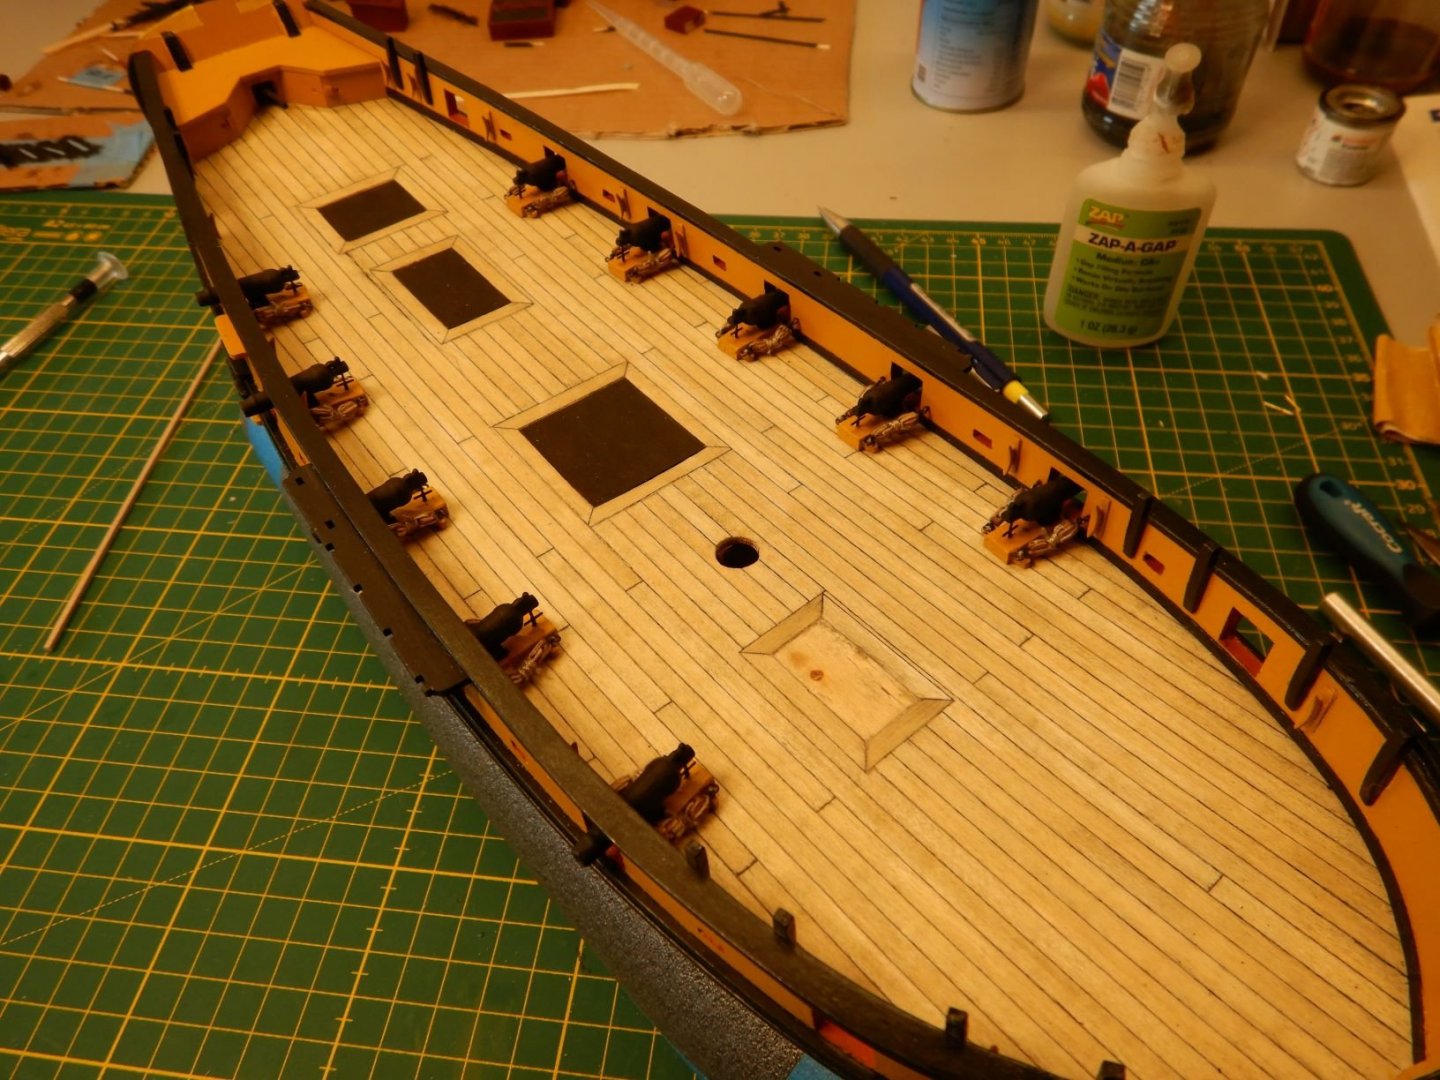
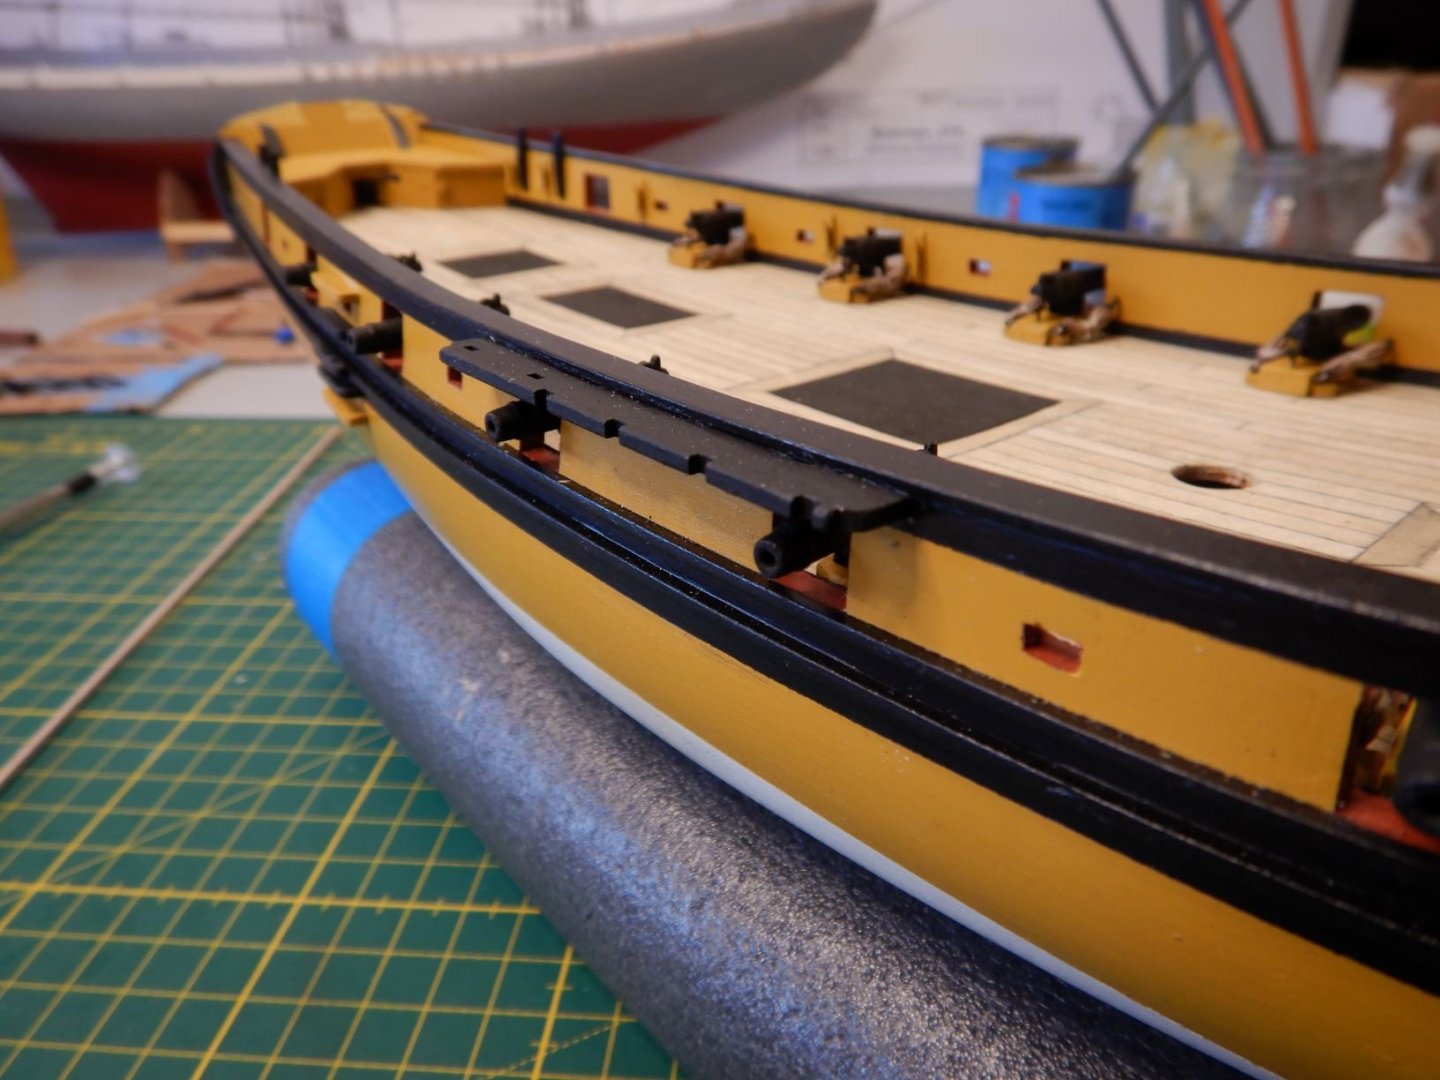
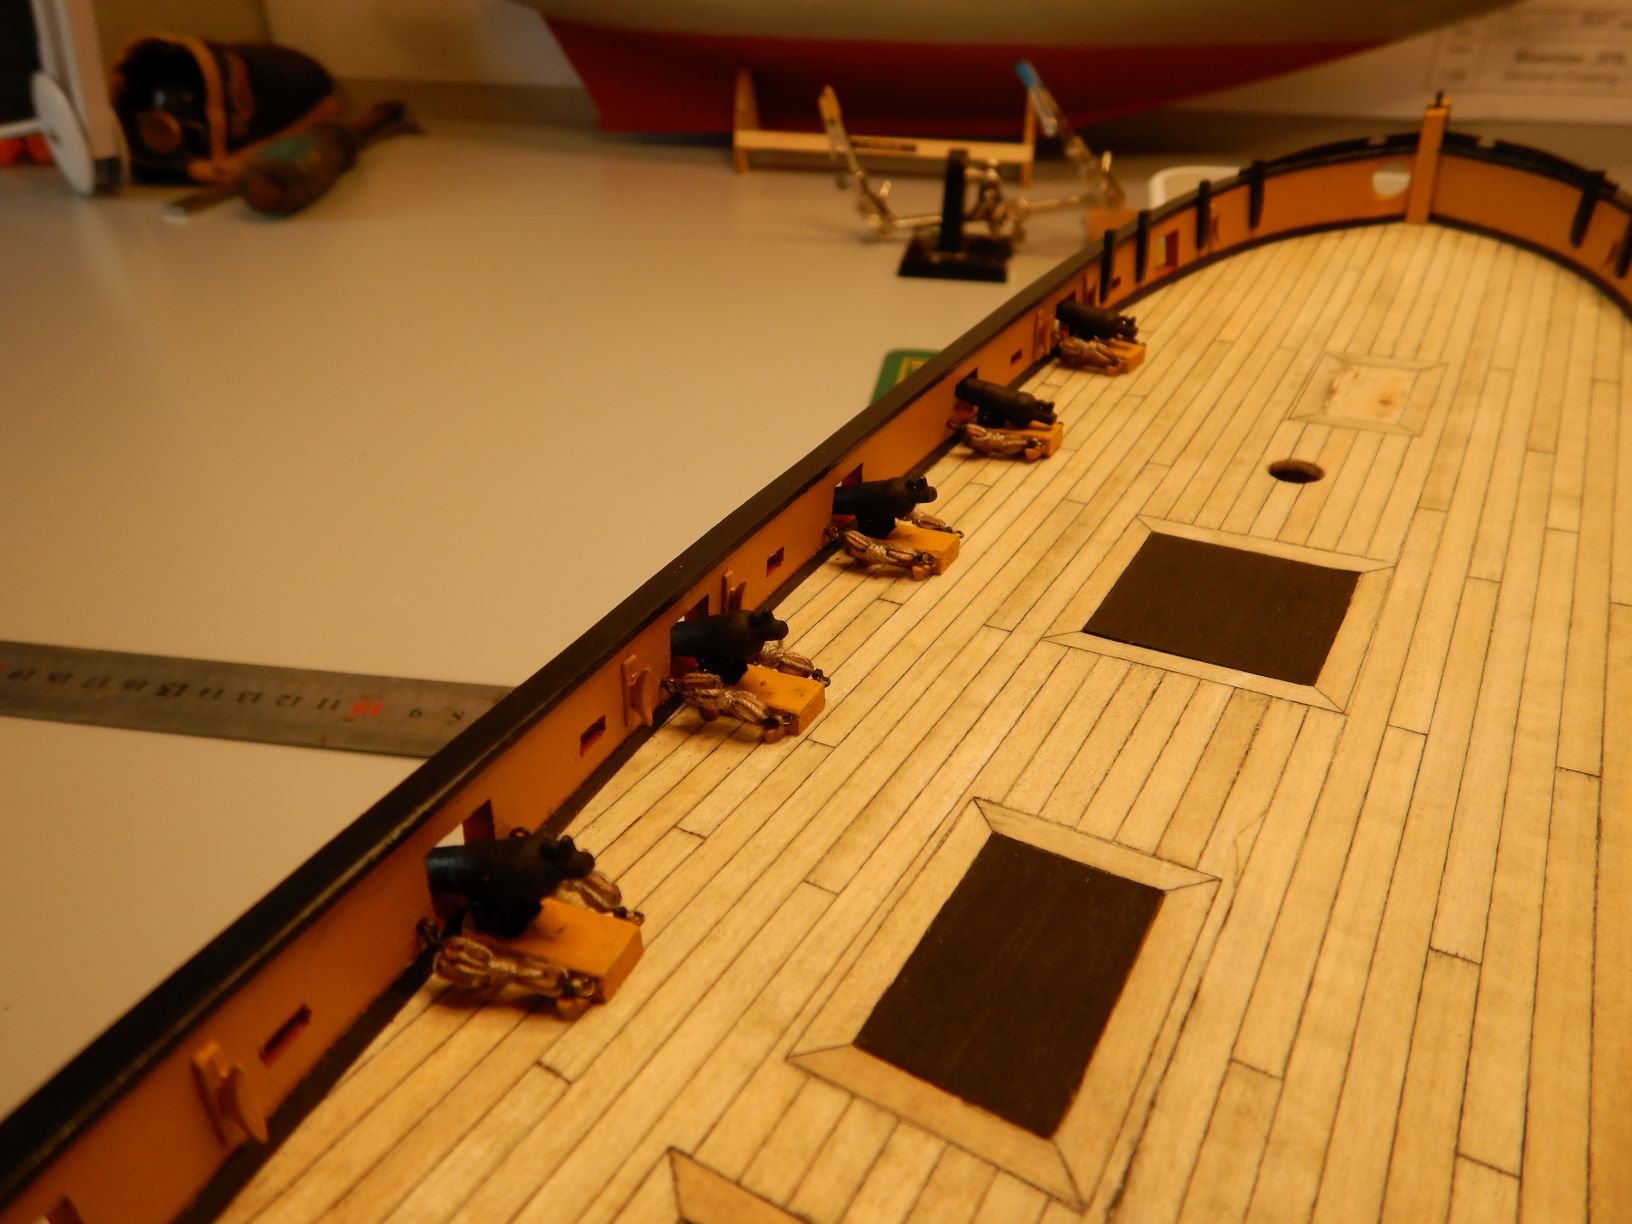
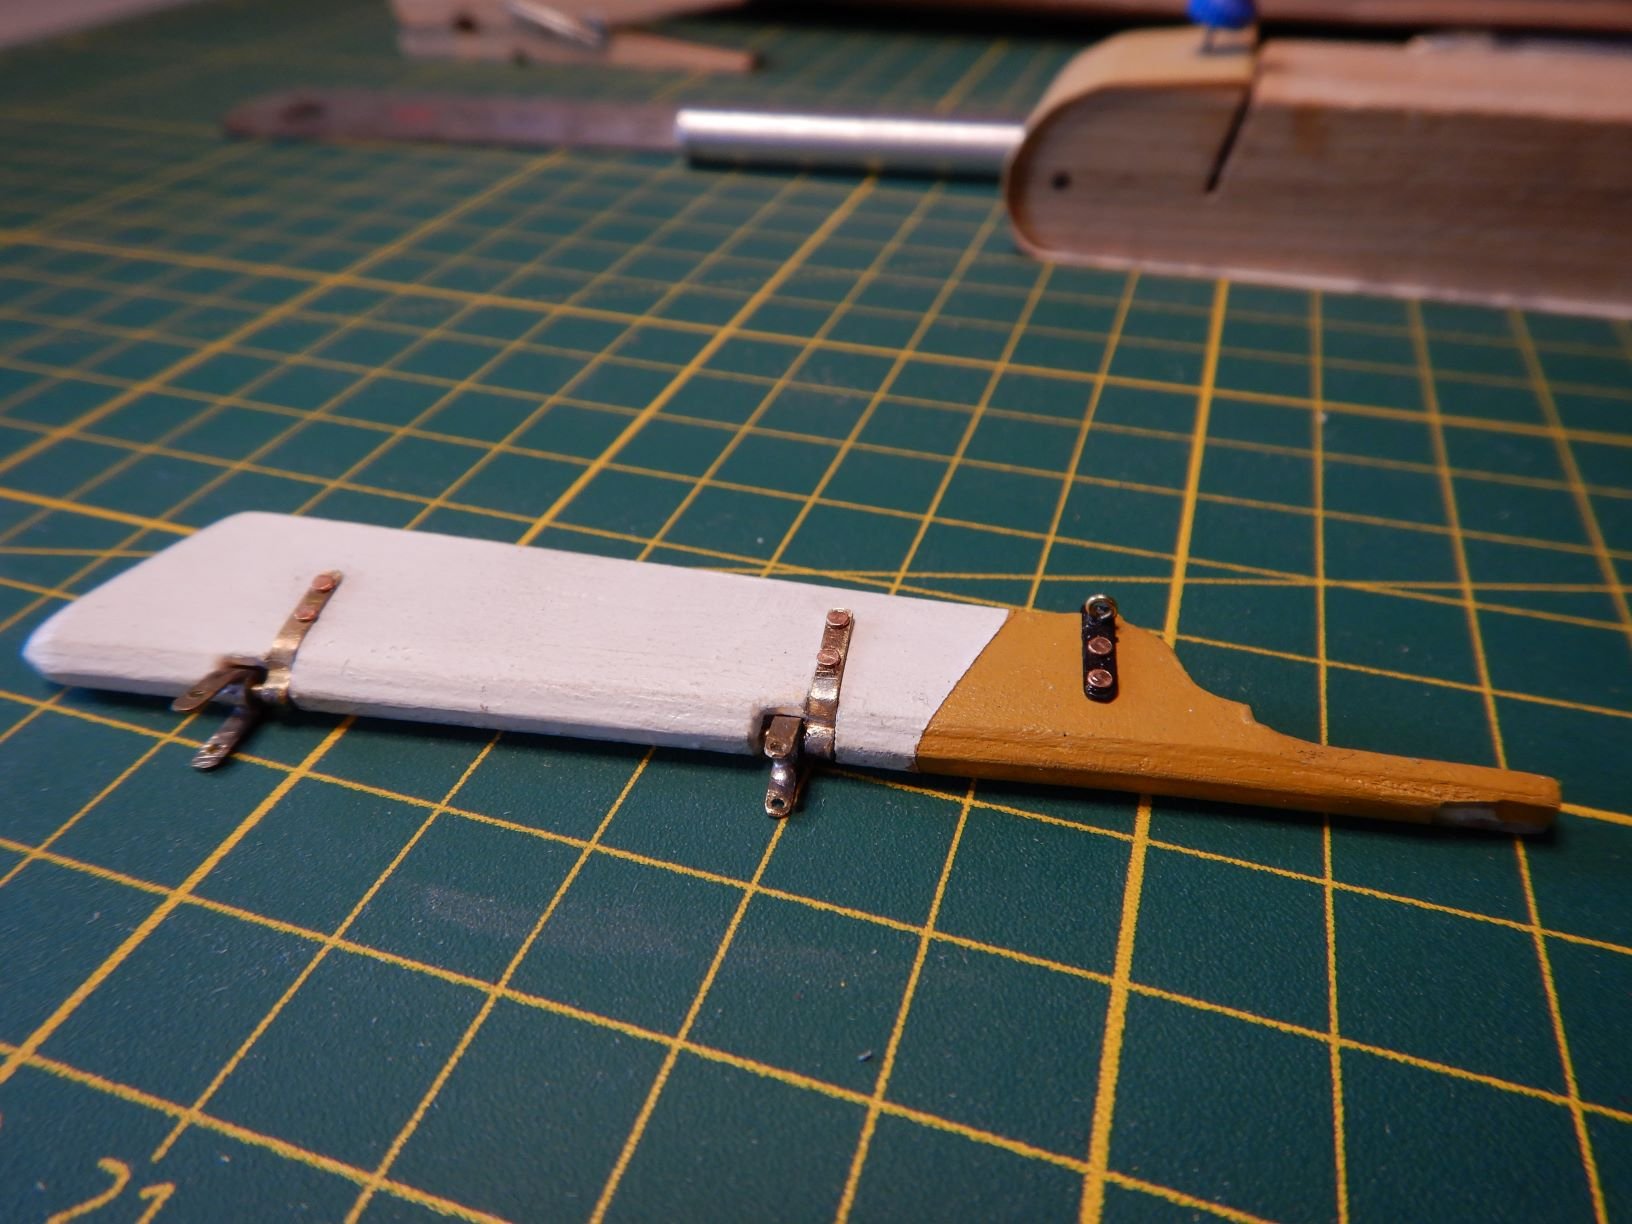
Got the "height adjusters" in place so the gunbarrels are more or less straight.
Painted the channels (I think this is the right word for the "chainplate spreaders") and glued in place.
Made and glued on the steps.
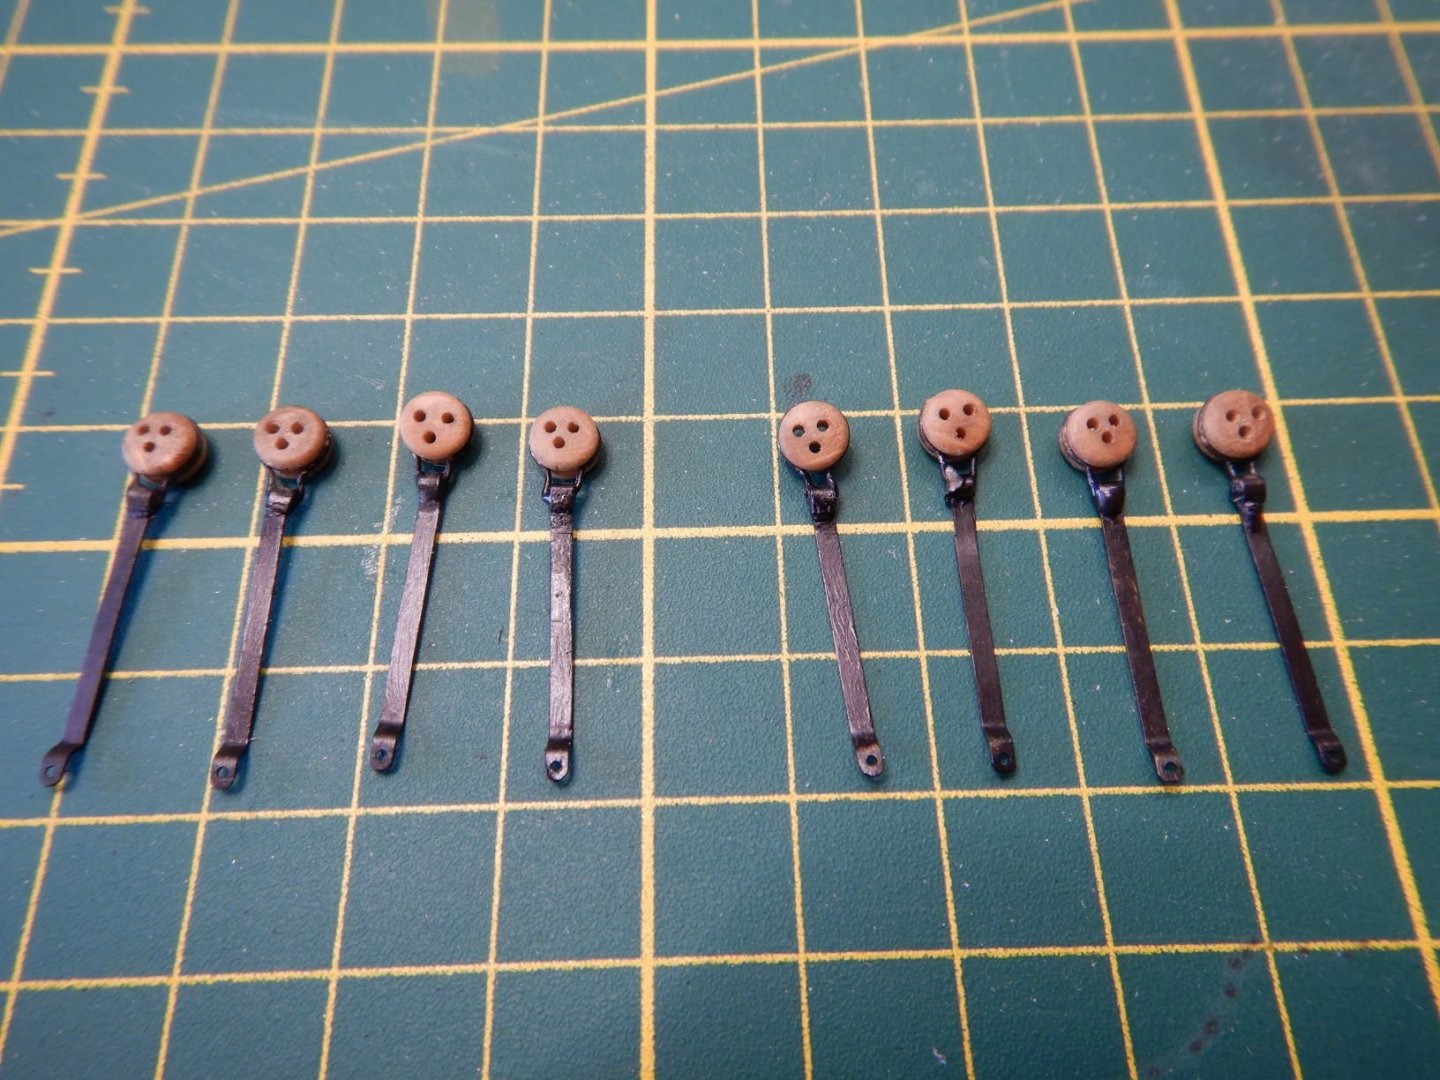
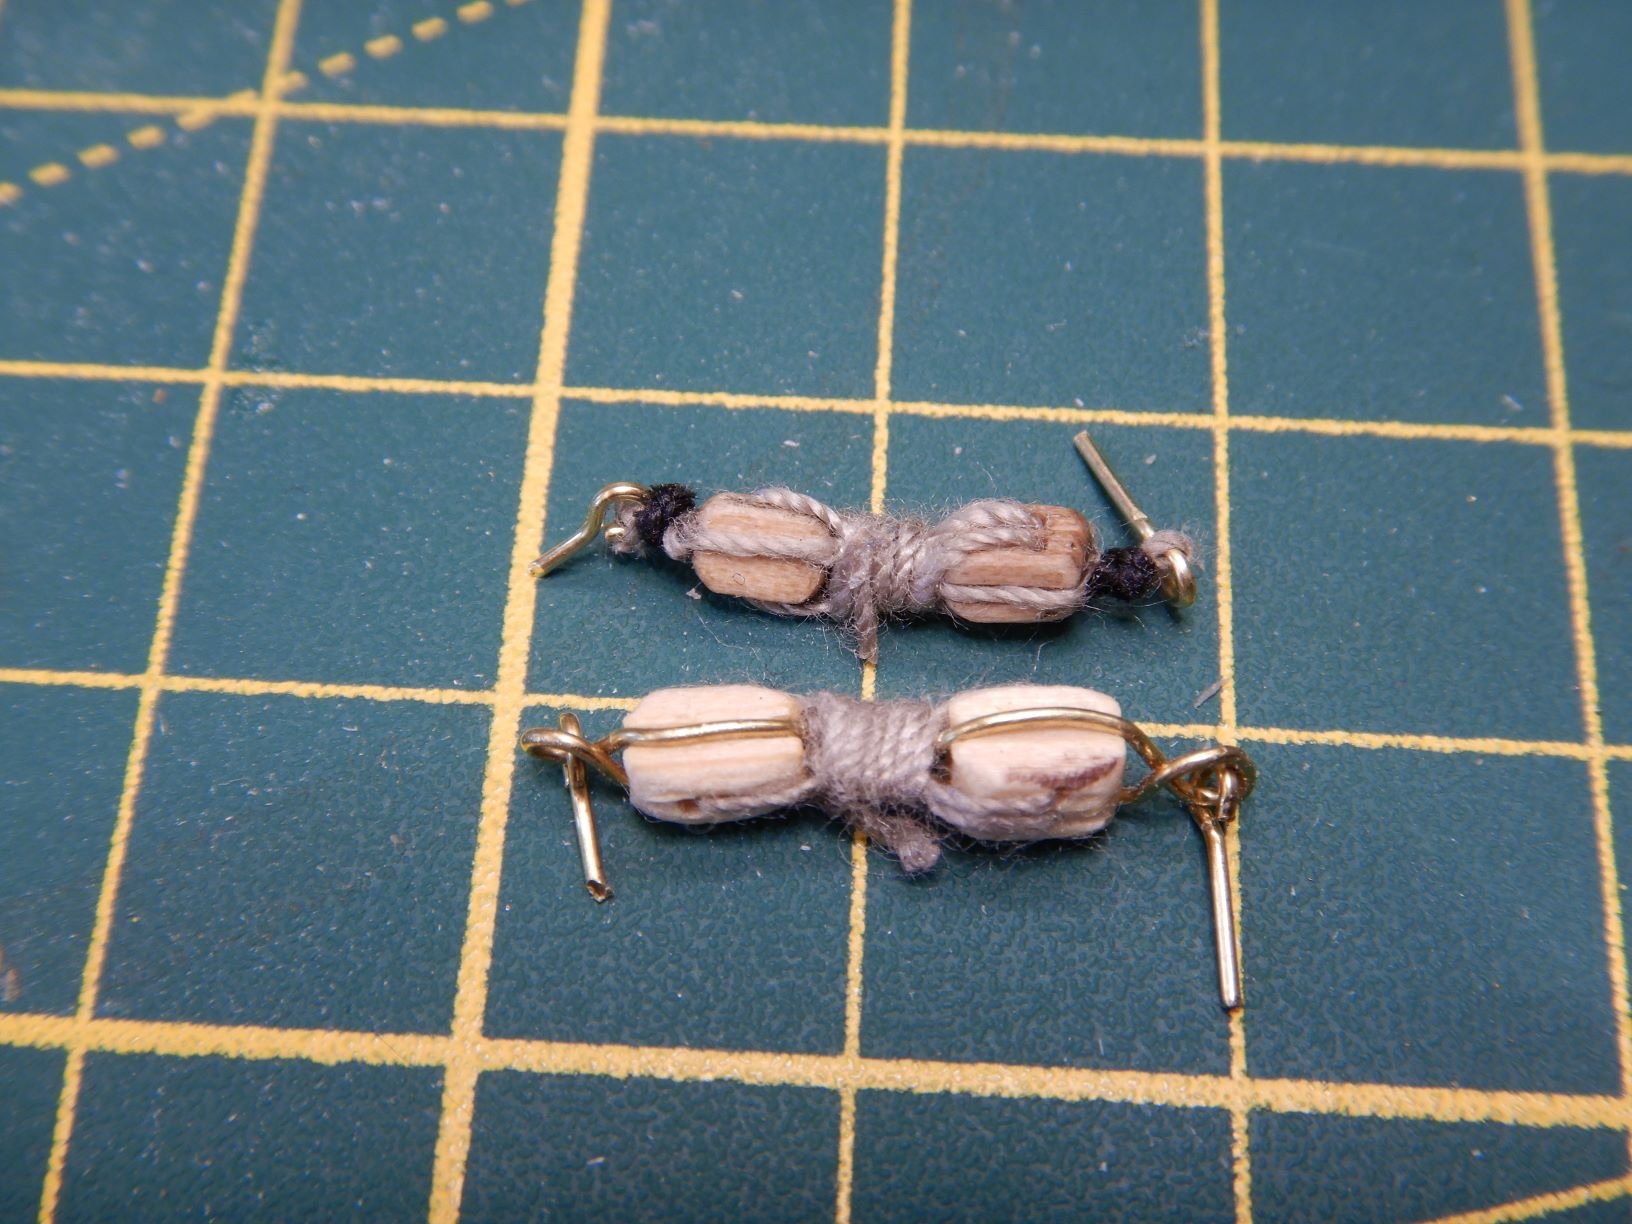
I made the chainplates. I decided to solder a ring to the chainplate instead of just twisting a wire around the deadeye as the instructions say.
I've painted and glued on the pinrails..


And I've mounted the chainplates. Things are starting to come together, and it is looking more and more like a boat!

That's it for now.
Stay safe out there, and happy modelling!
Thanks again to everyone for taking the time to read and comment here. It's really inspiring!
Gaffrig.
-
Hello.
No worries about hijacking! It's all good info.
I have been looking at the rigging instructions and there seem to be a lot of simplified solutions compared to the real ship.
I will probably make some adjustments as necessary.
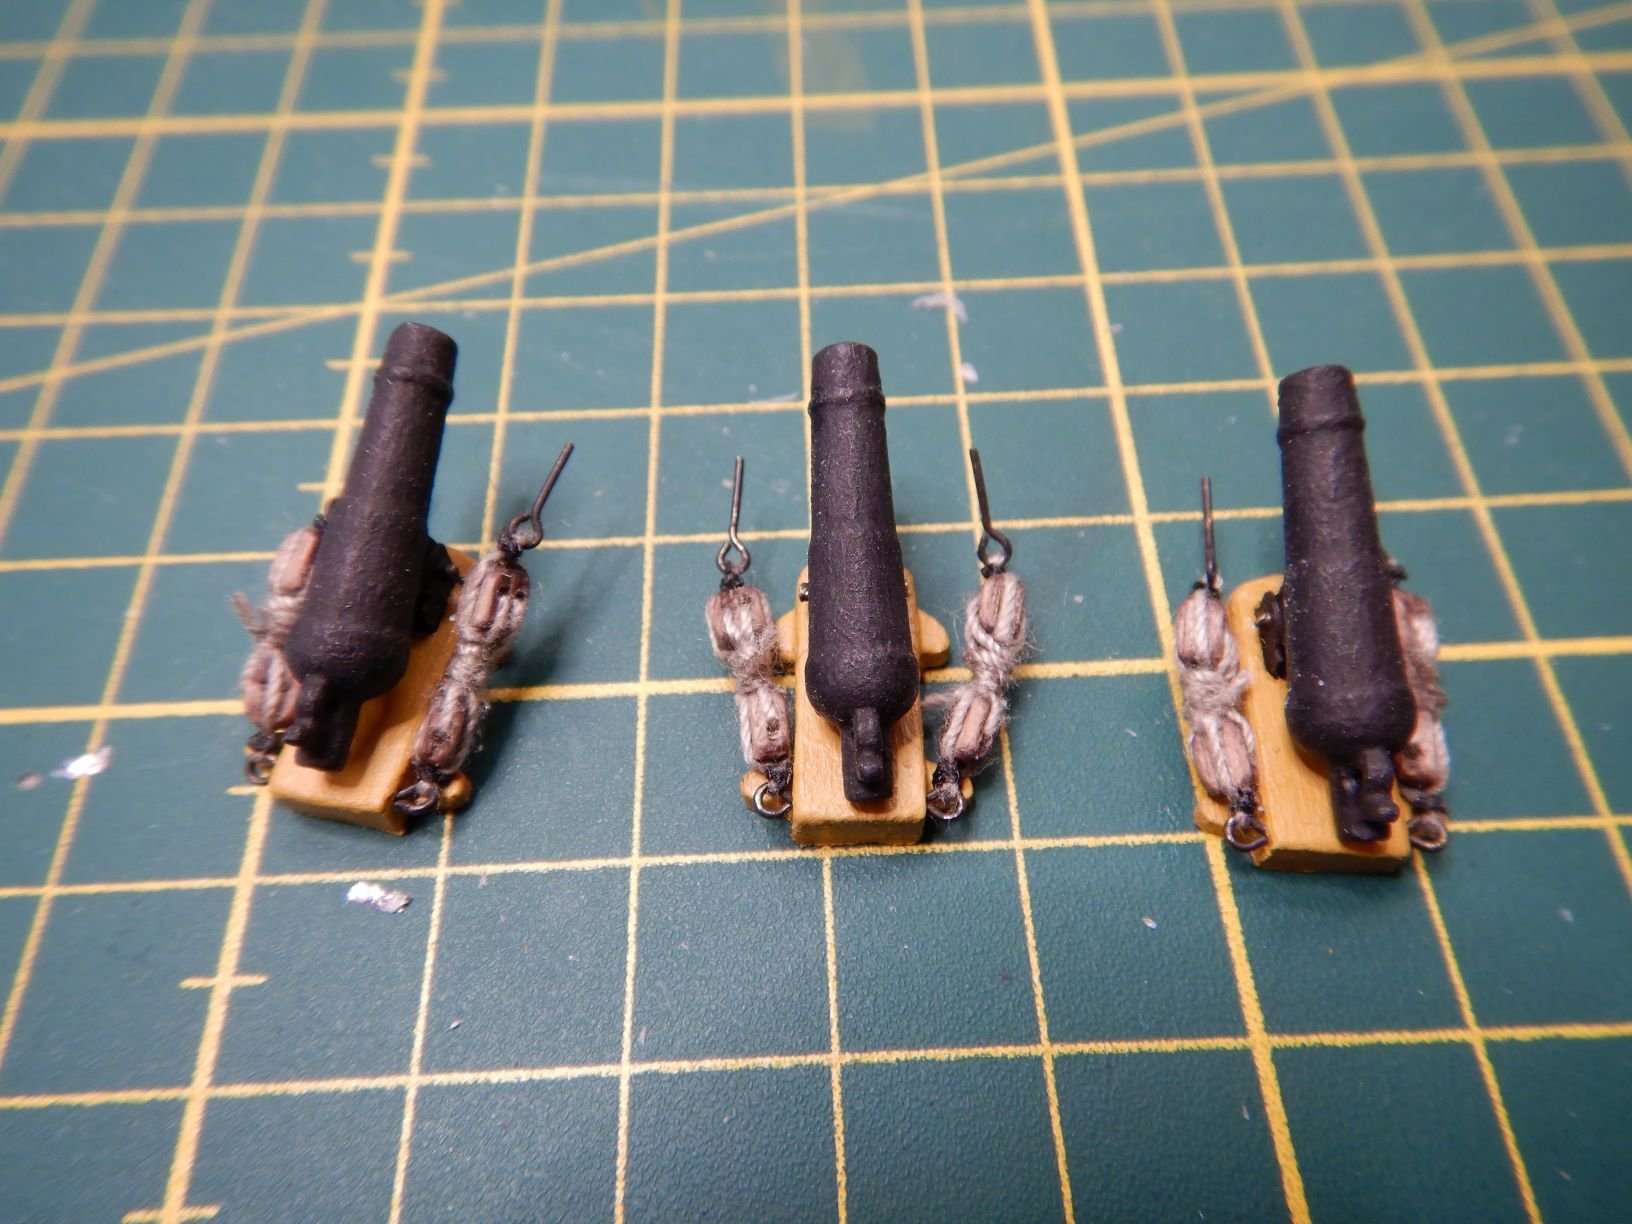
A small update for today.
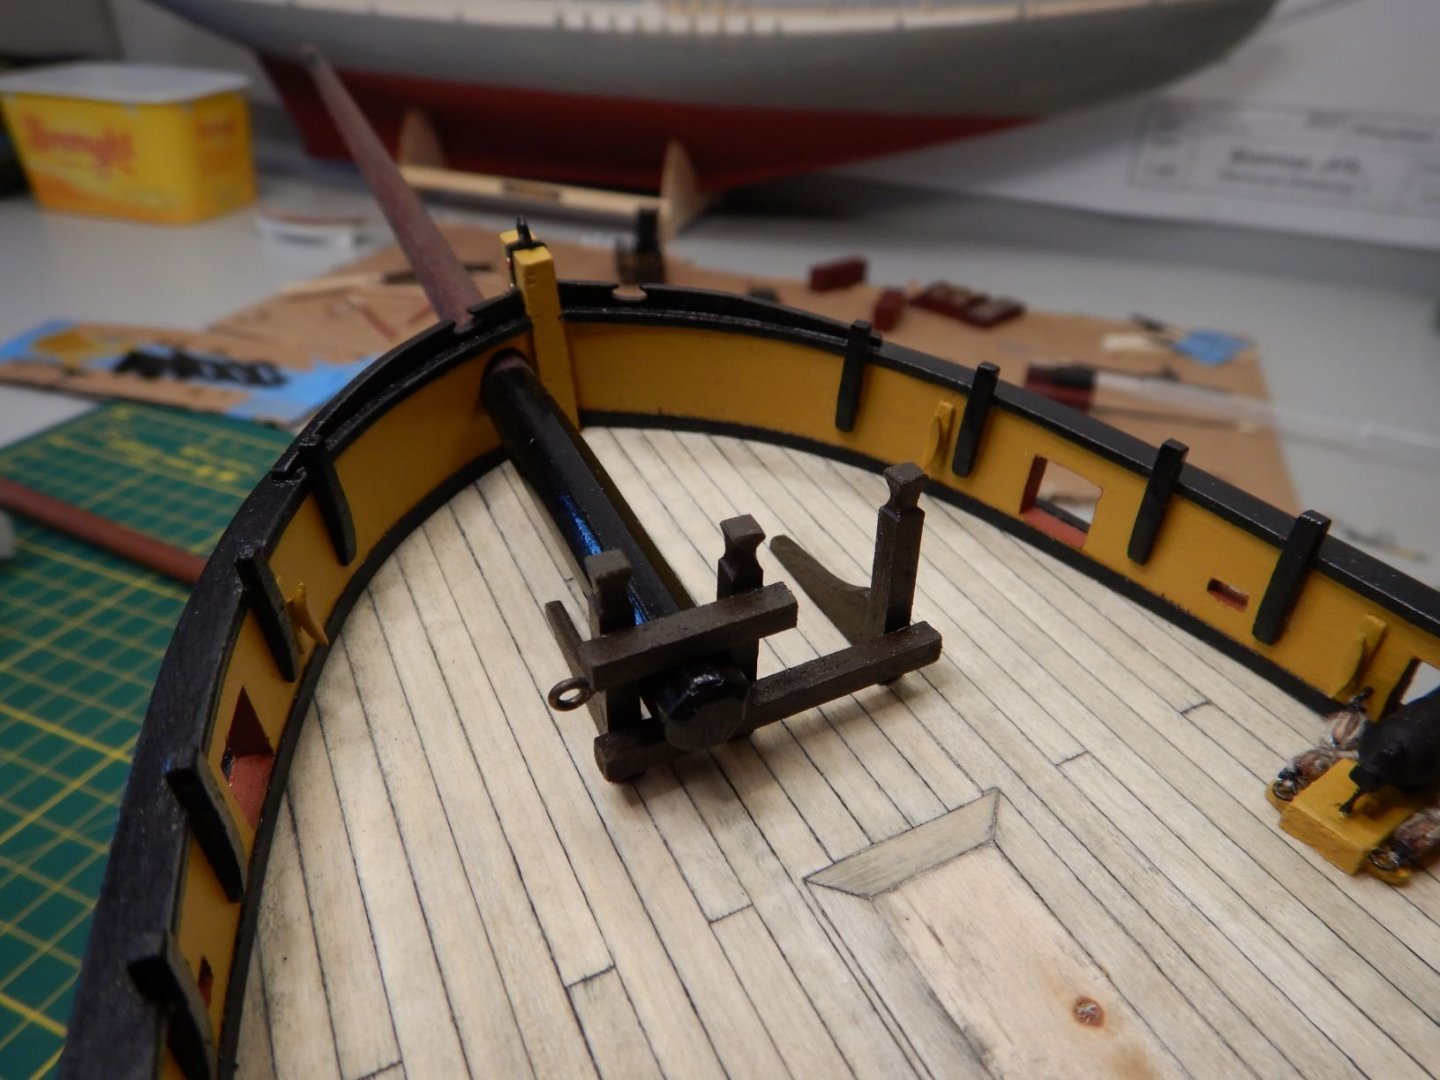
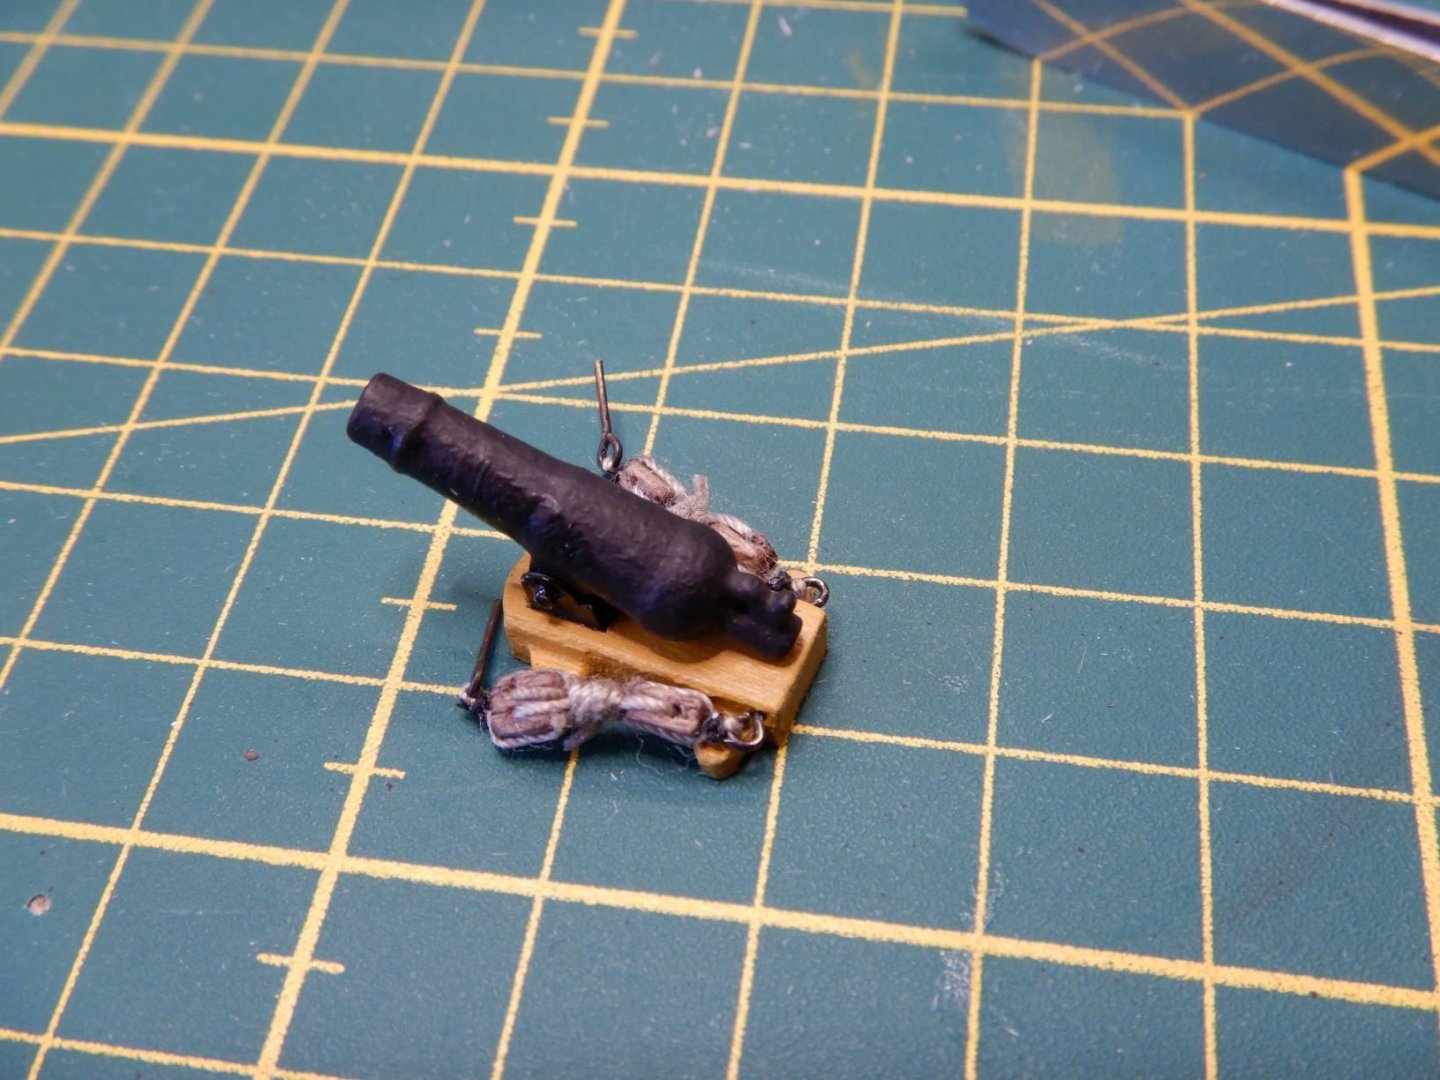
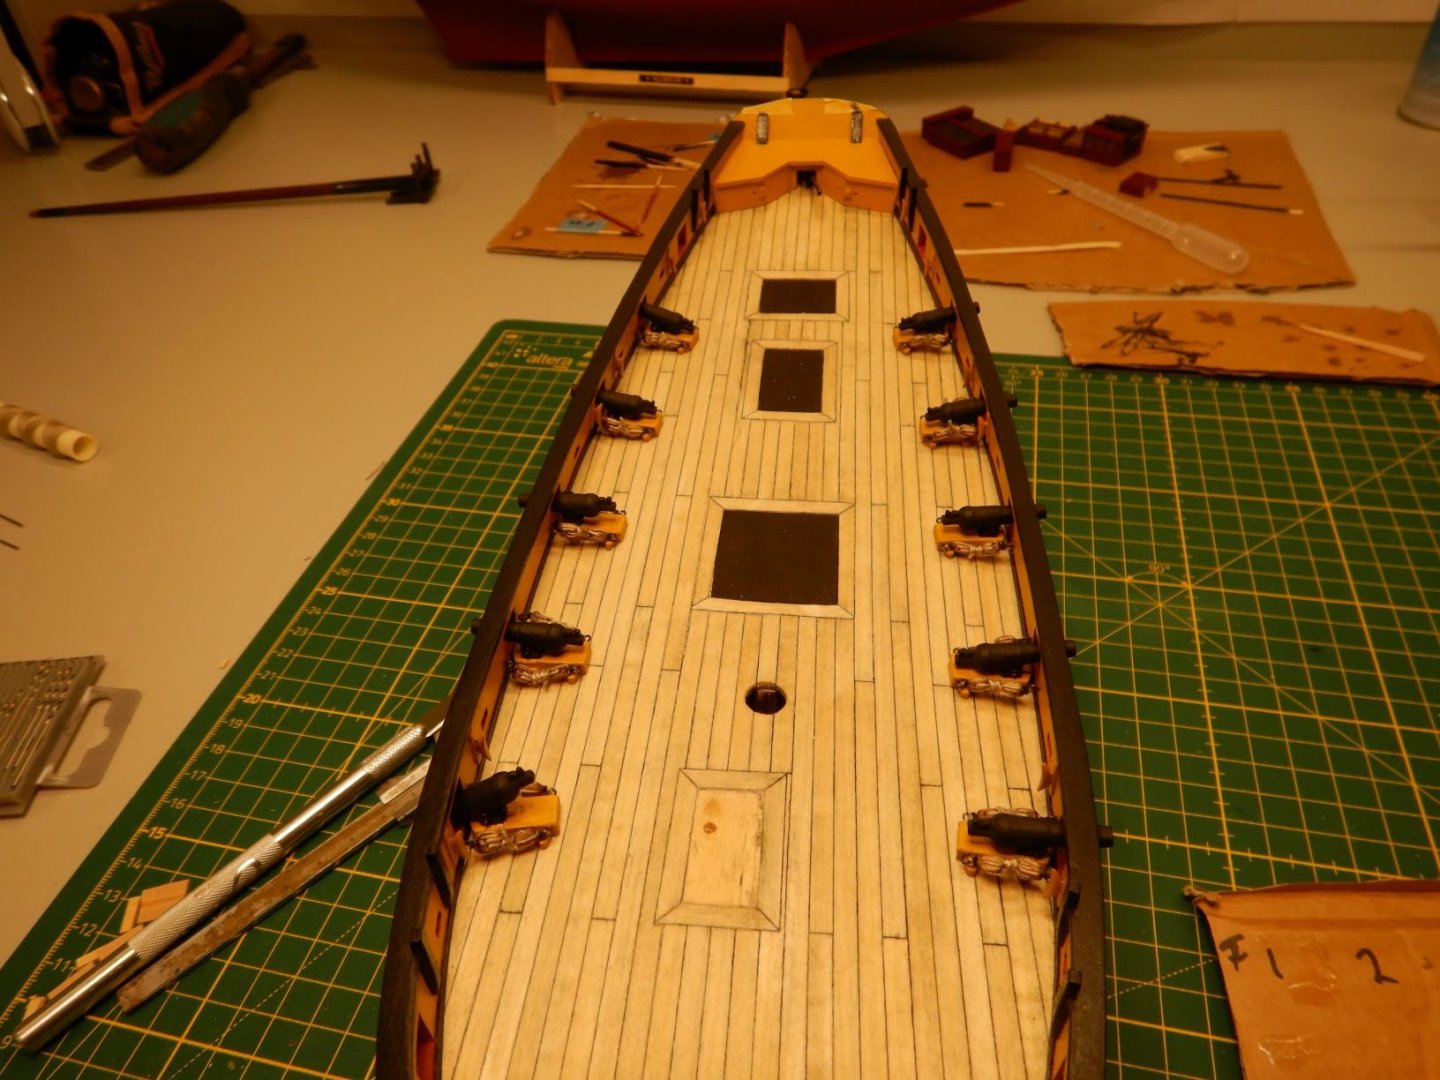
Have finished the rigging of the carronades as I think this will be good to get done before I start the rigging of the mast.
I think the access after the mast is up will be limited.
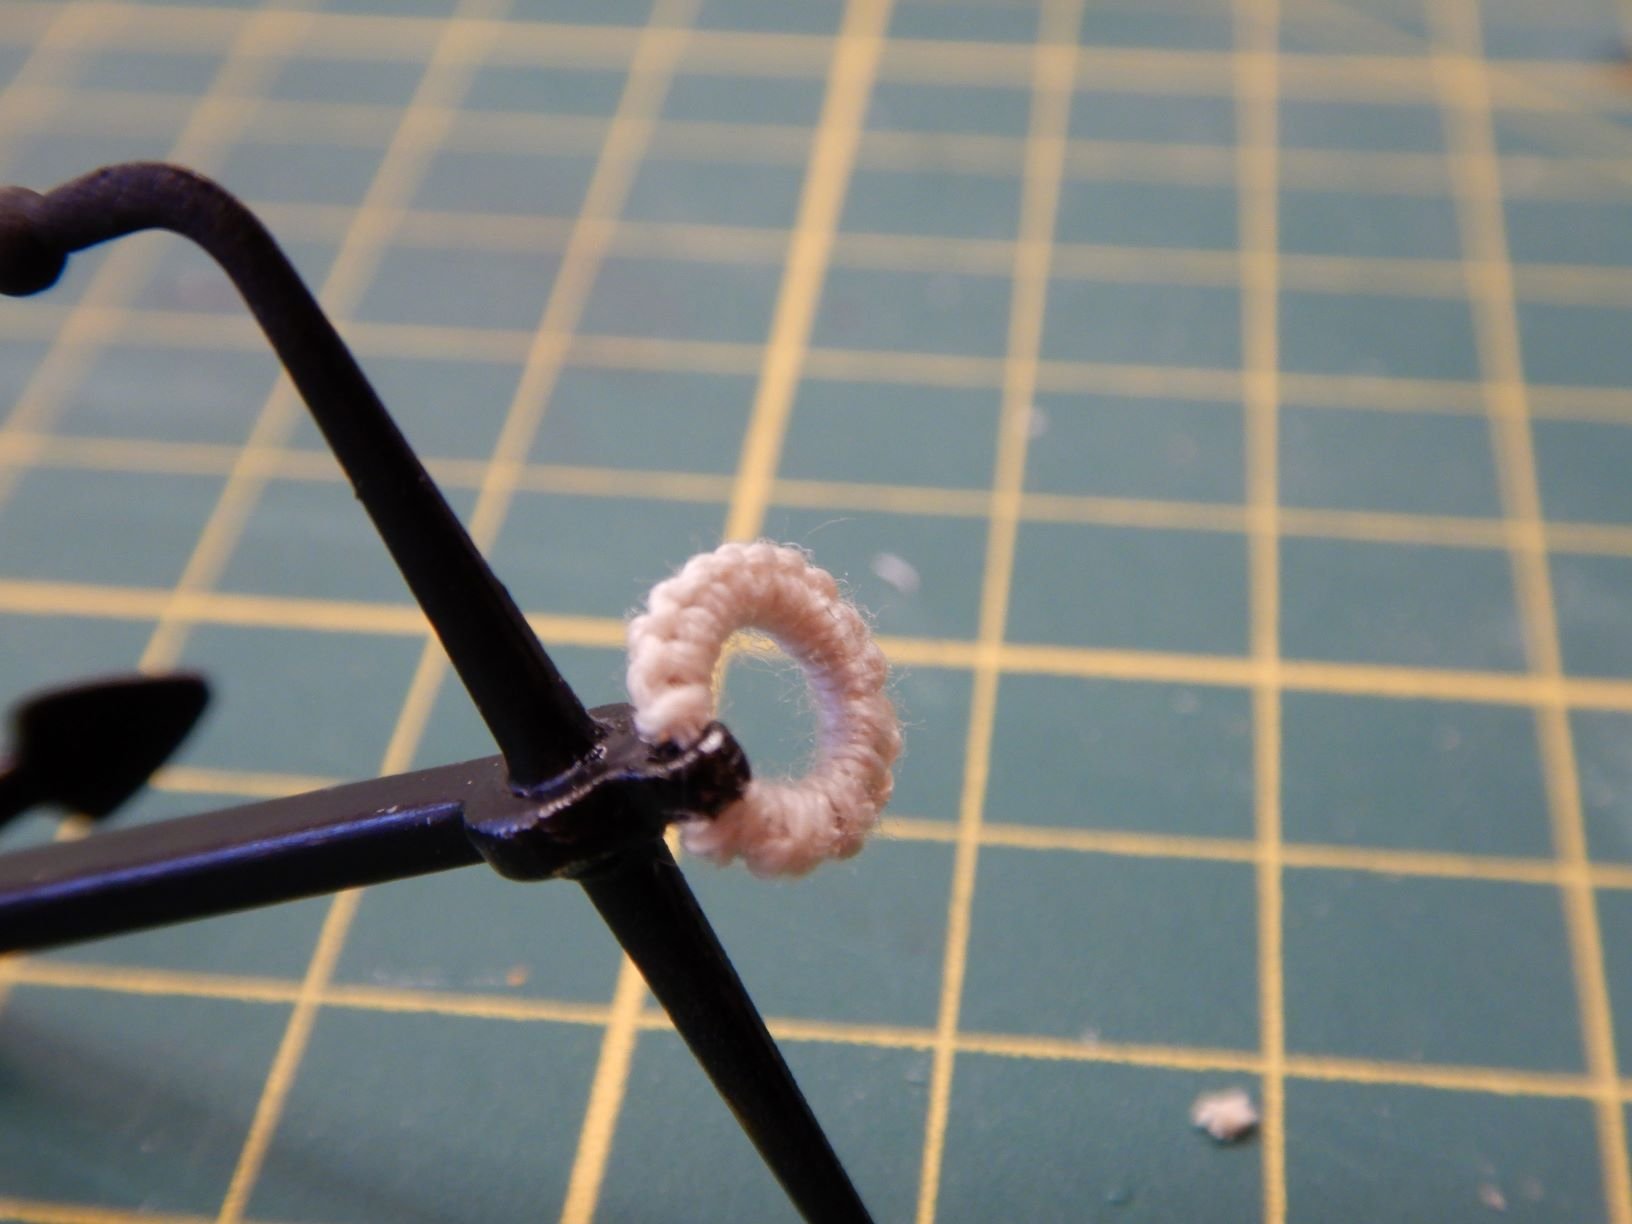
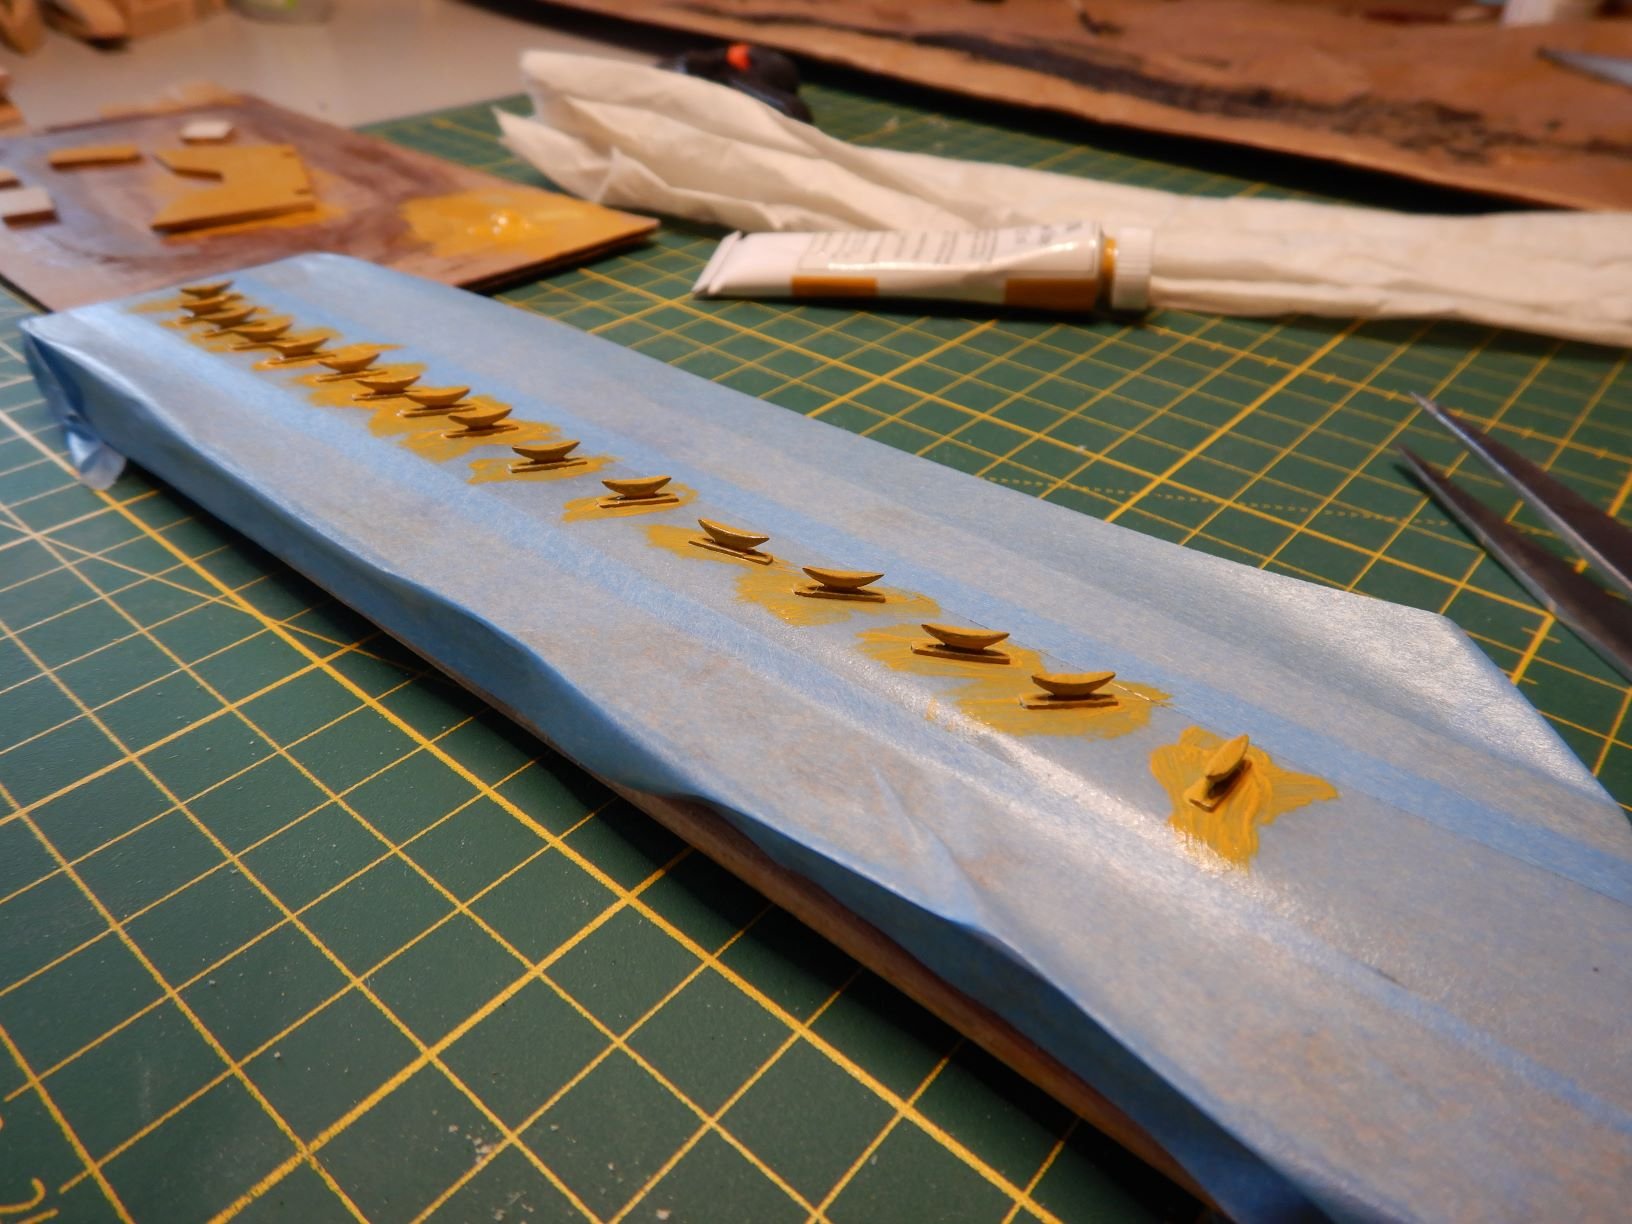
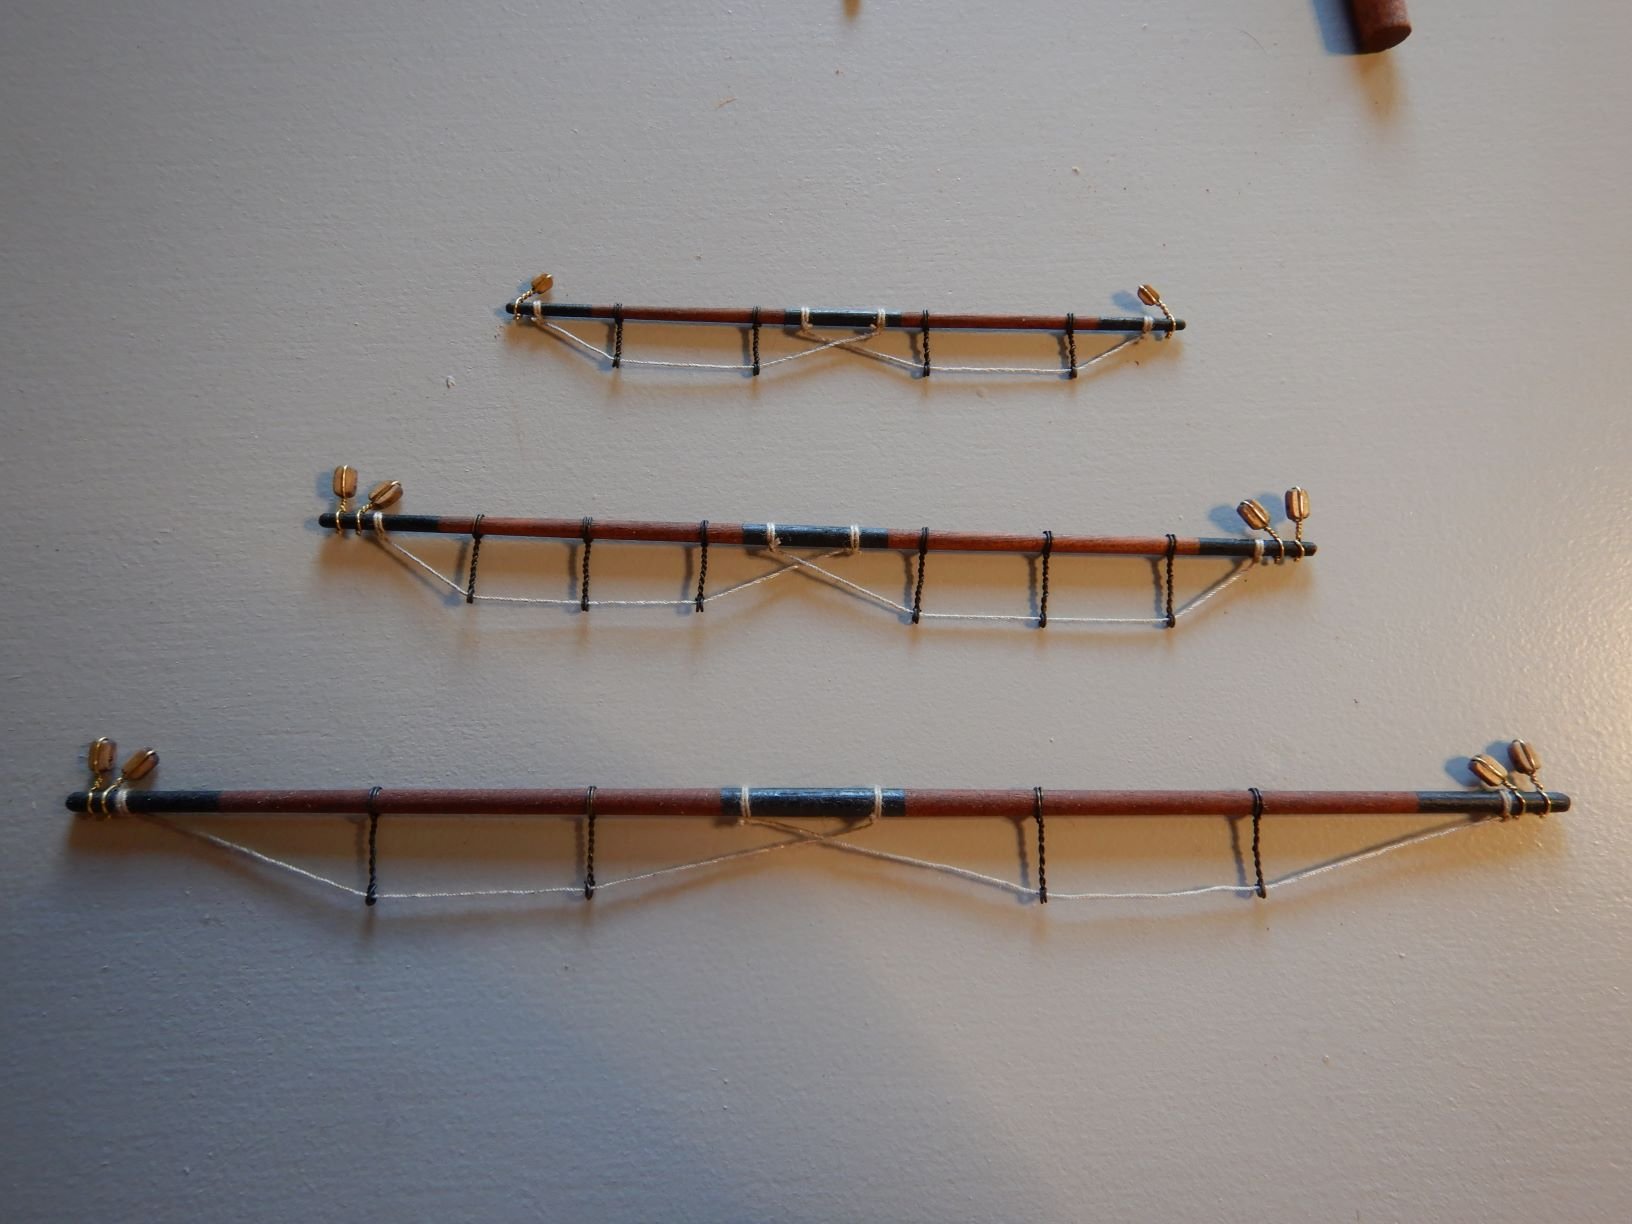
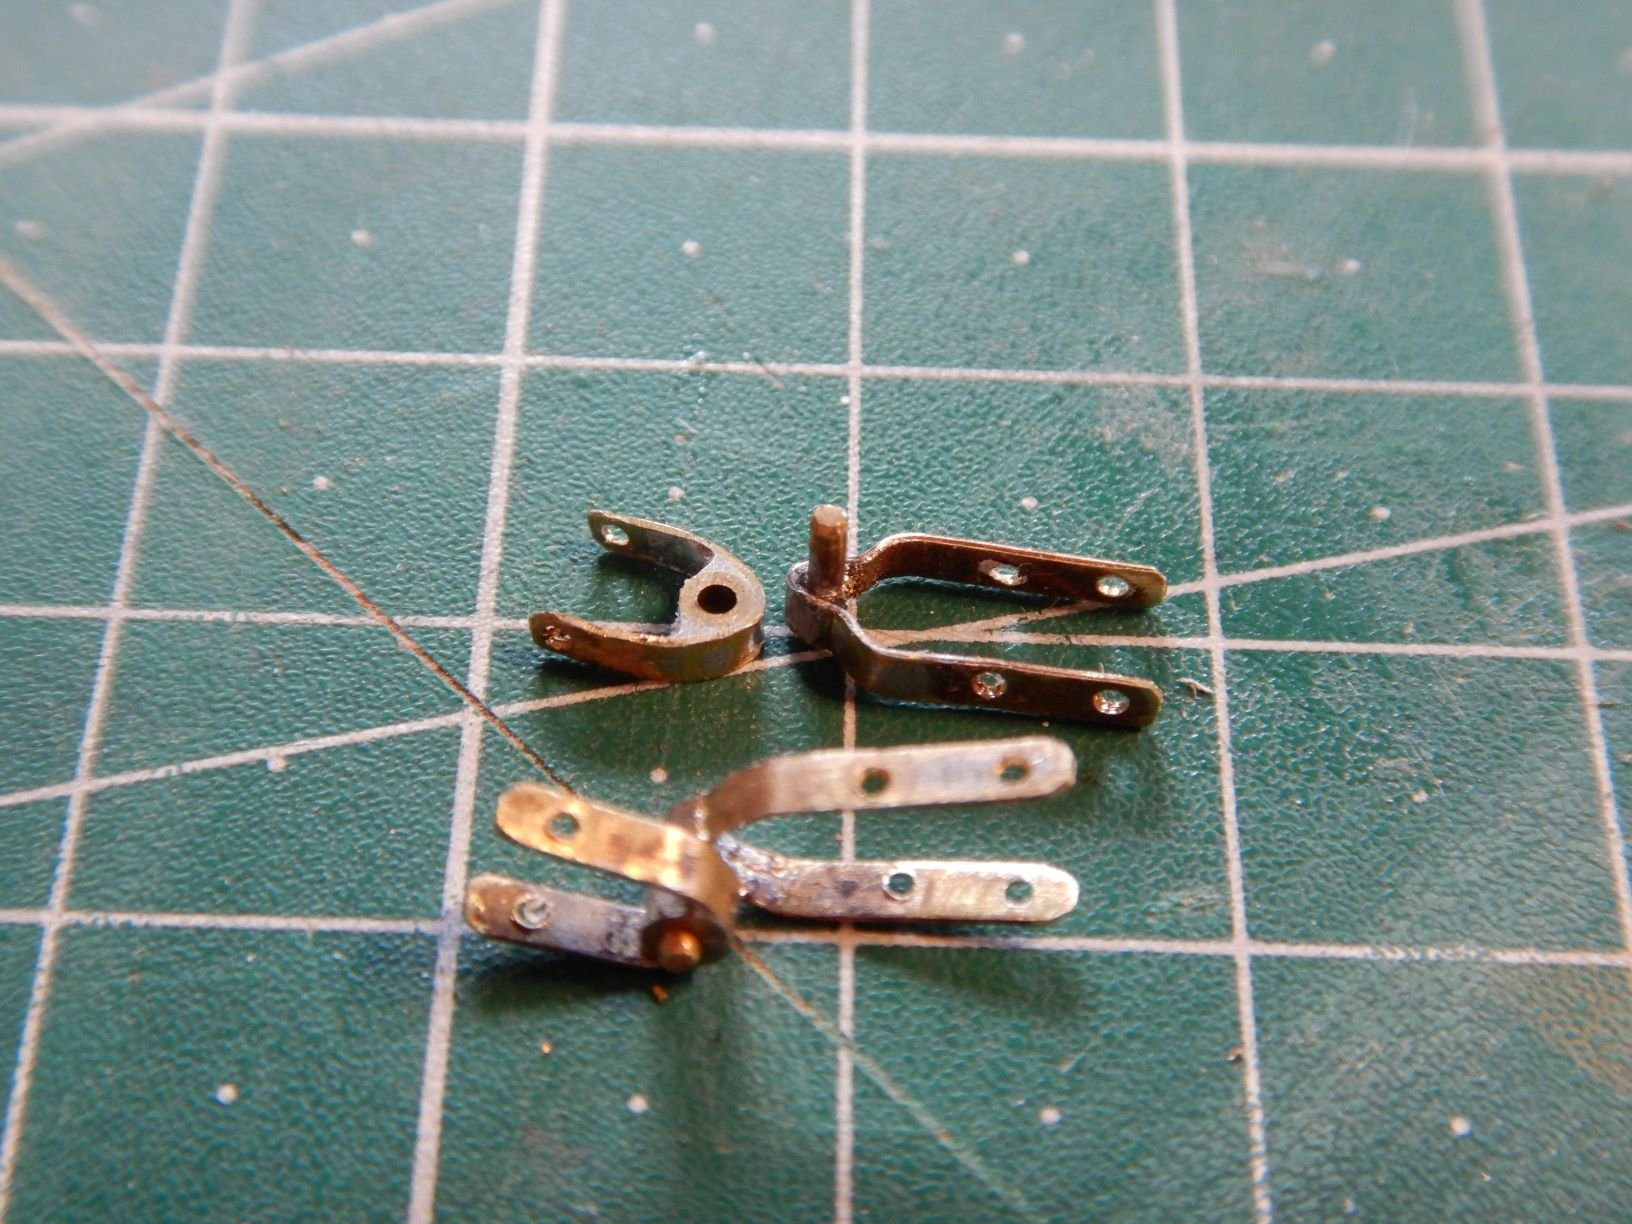
I made up two tackles, one with the kit supplied blocks, and one with aftermarket 3mm blocks, as suggested by Rick01.
I decided to rig the blocks with rope instead of wire as I think this was easier and better looking.
When using the kit supplied blocks the whole tackle ended up too long to fit, so I went with the aftermarket ones.
The first one fitted on deck..

Time for some mass production..

Quite time consuming making all these small tackles, but a good feeling when they are all in place!
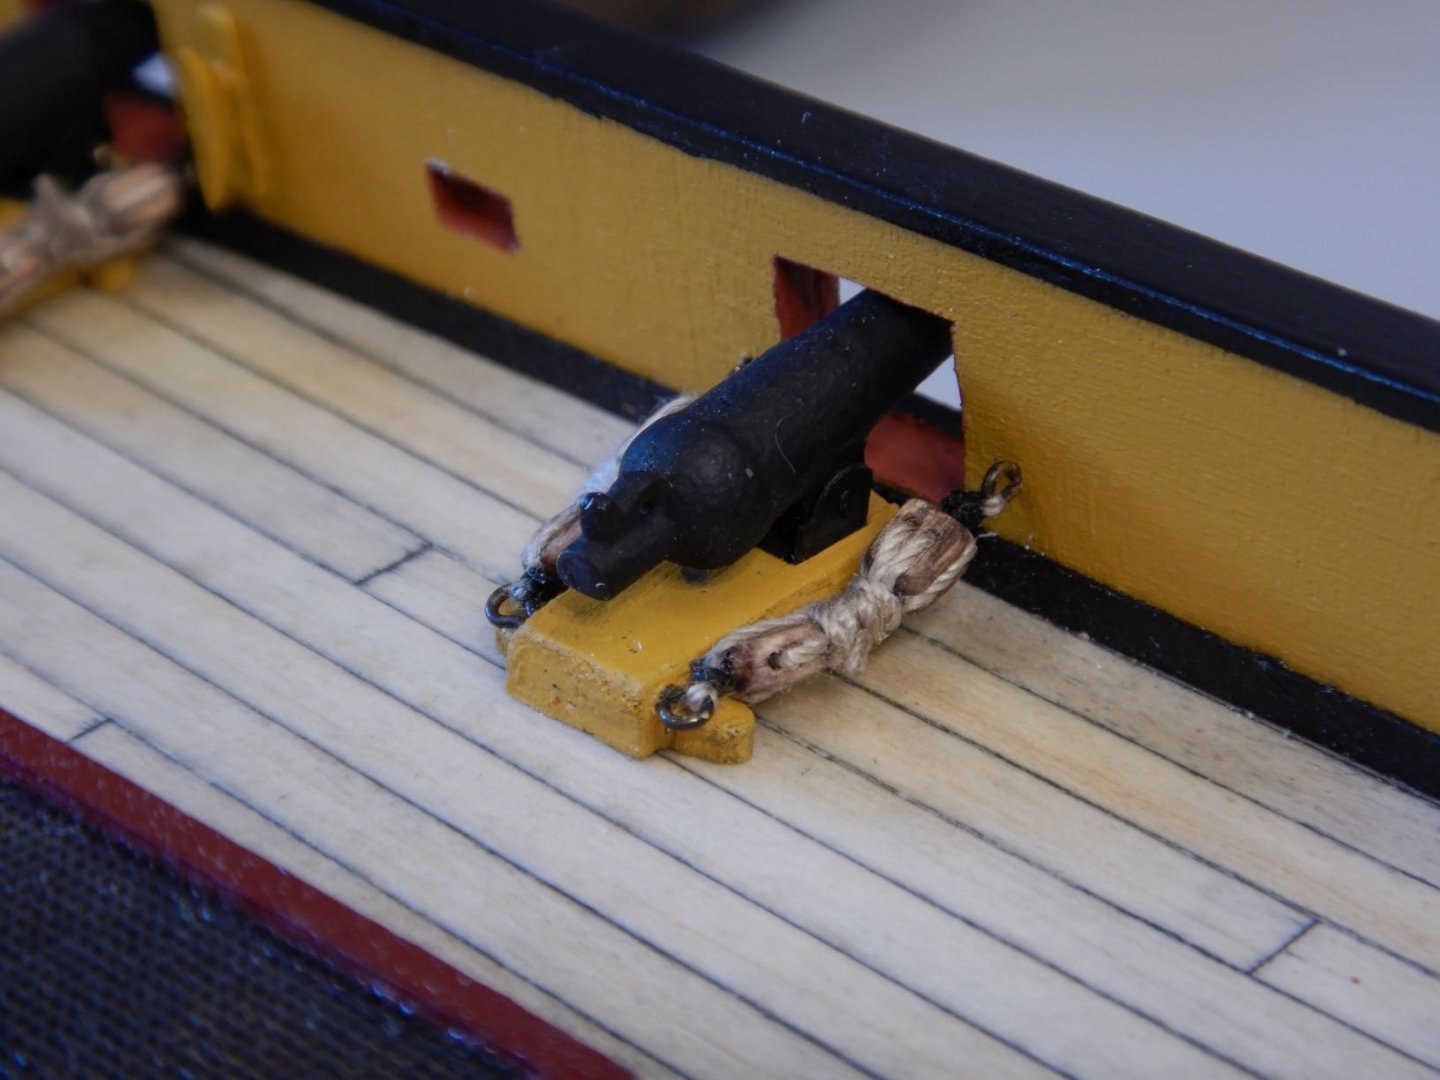
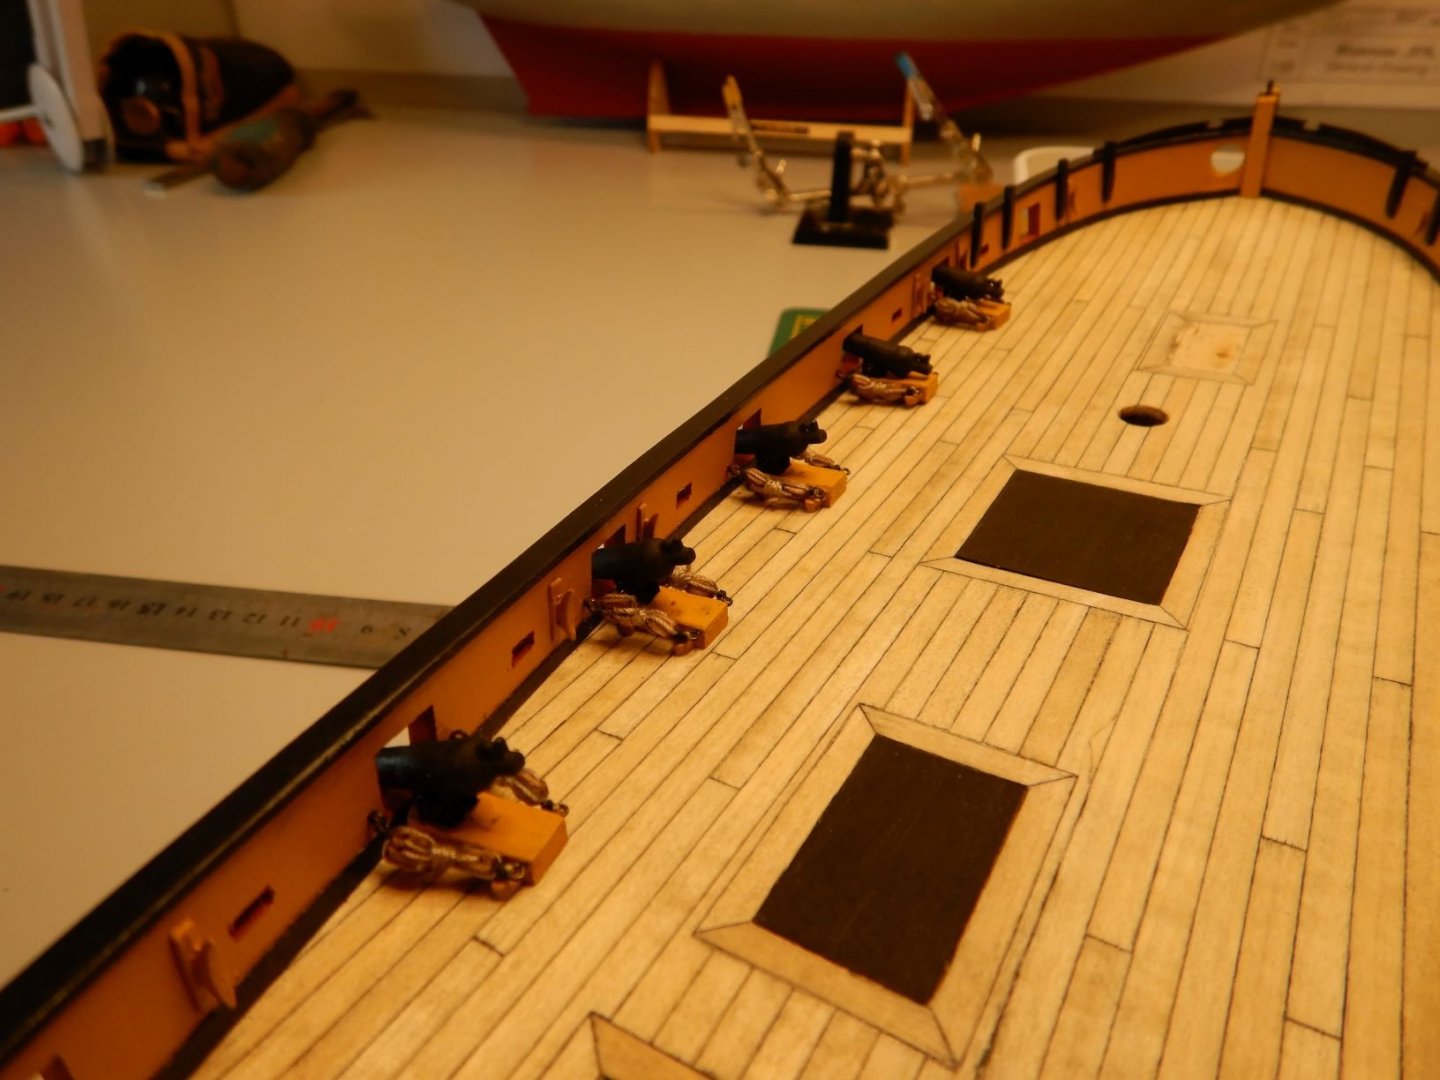
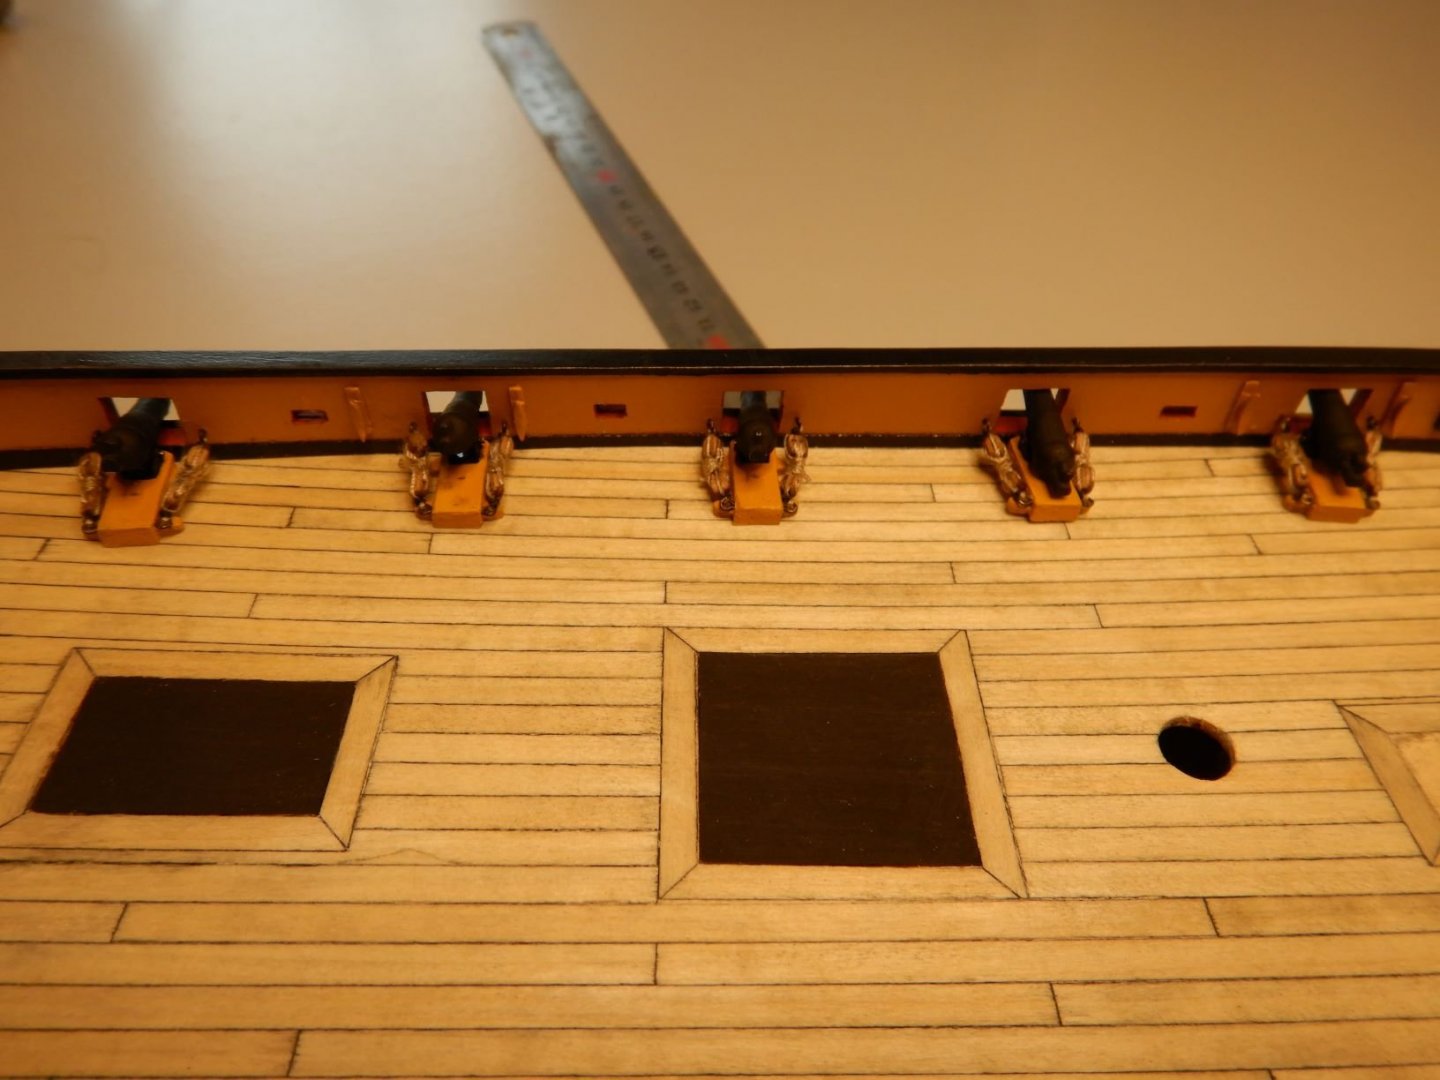
Now I need to glue in place all the little "height adjusters" to get the barrels straight.
That's it for now!
Stay safe!
Gaffrig.
-
Rick01,
That looks great!
Congratulations on the finished model! 👍
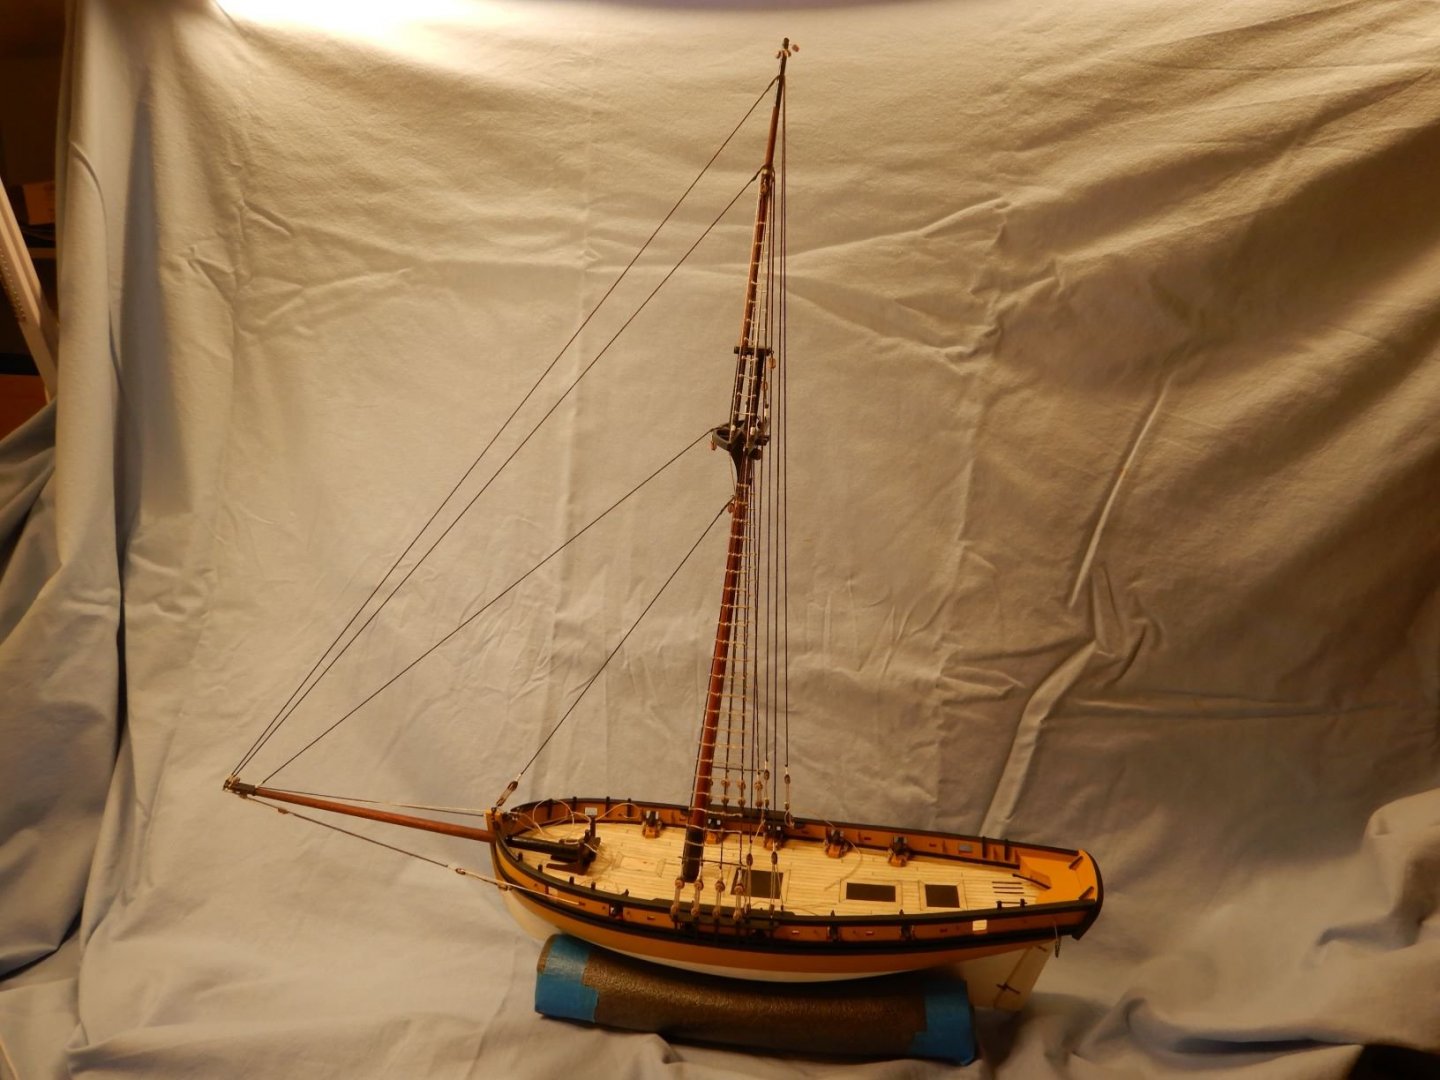
I see that you have made a diffrent stand for it, I’ve thougt about the same thing as the kit supplied one is a little wonky..
Are you gonna add the sails?
The ones supplied are not the greatest but I’m gonna use them anyway.
I like how the dinghy turned out. It may be a little to «yacht like» for this model, but that’s how it will be!
Thanks to everyone for looking in and liking!
Gaffrig.
- Edwardkenway and Dutchman
-
2
-
Hello!
Another small update.
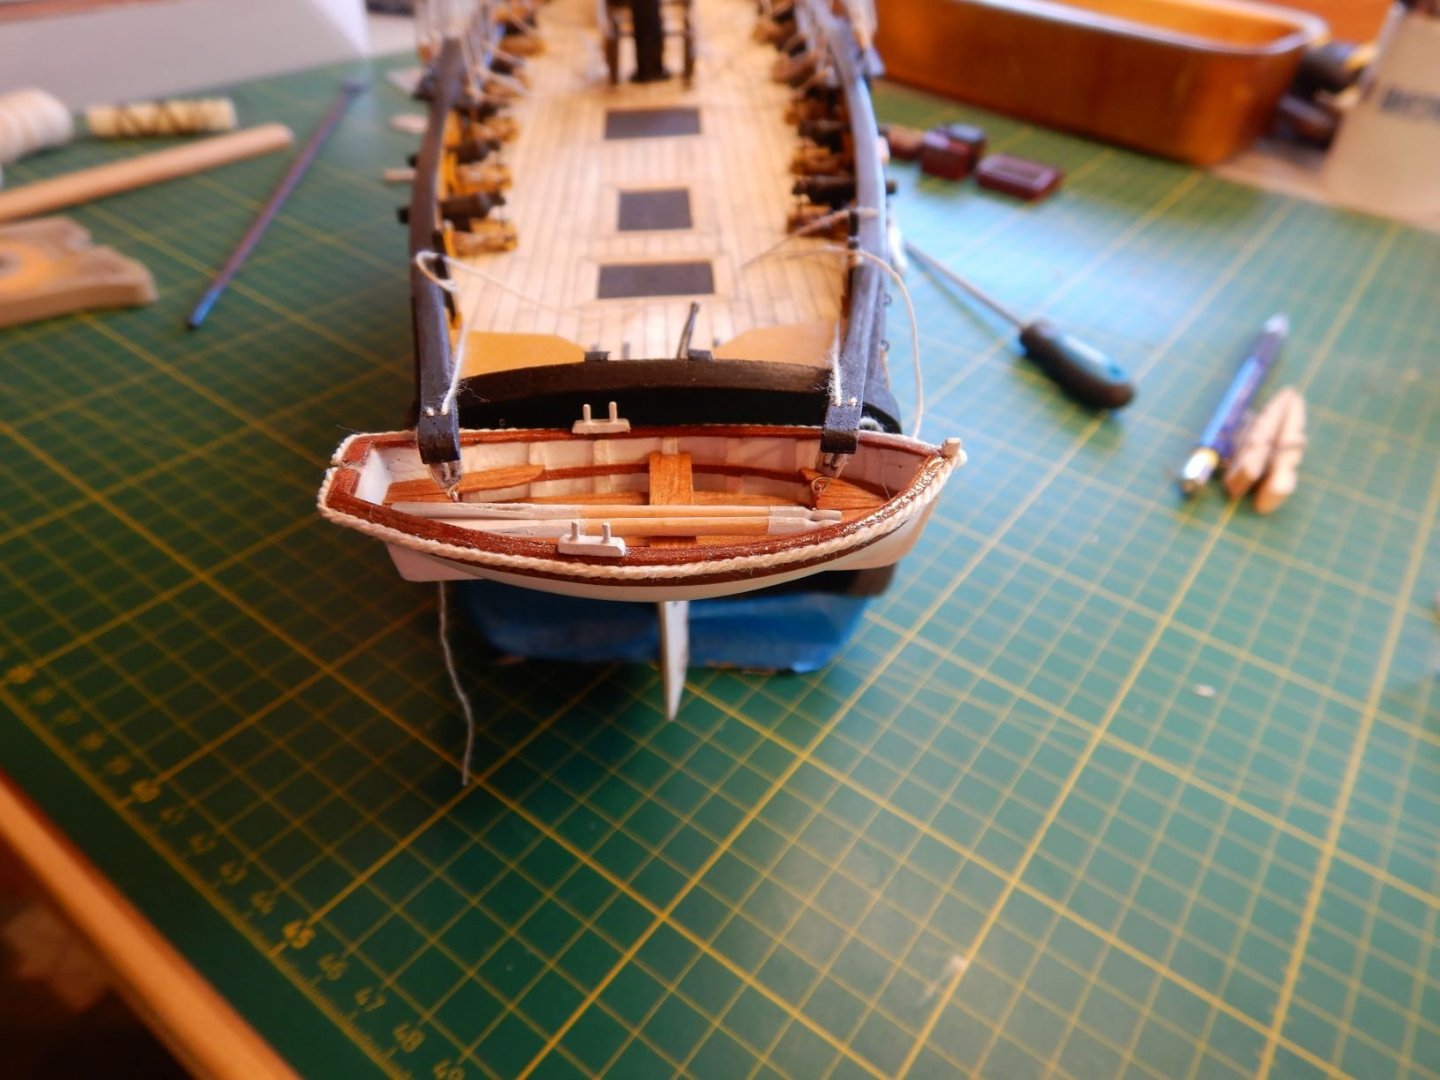
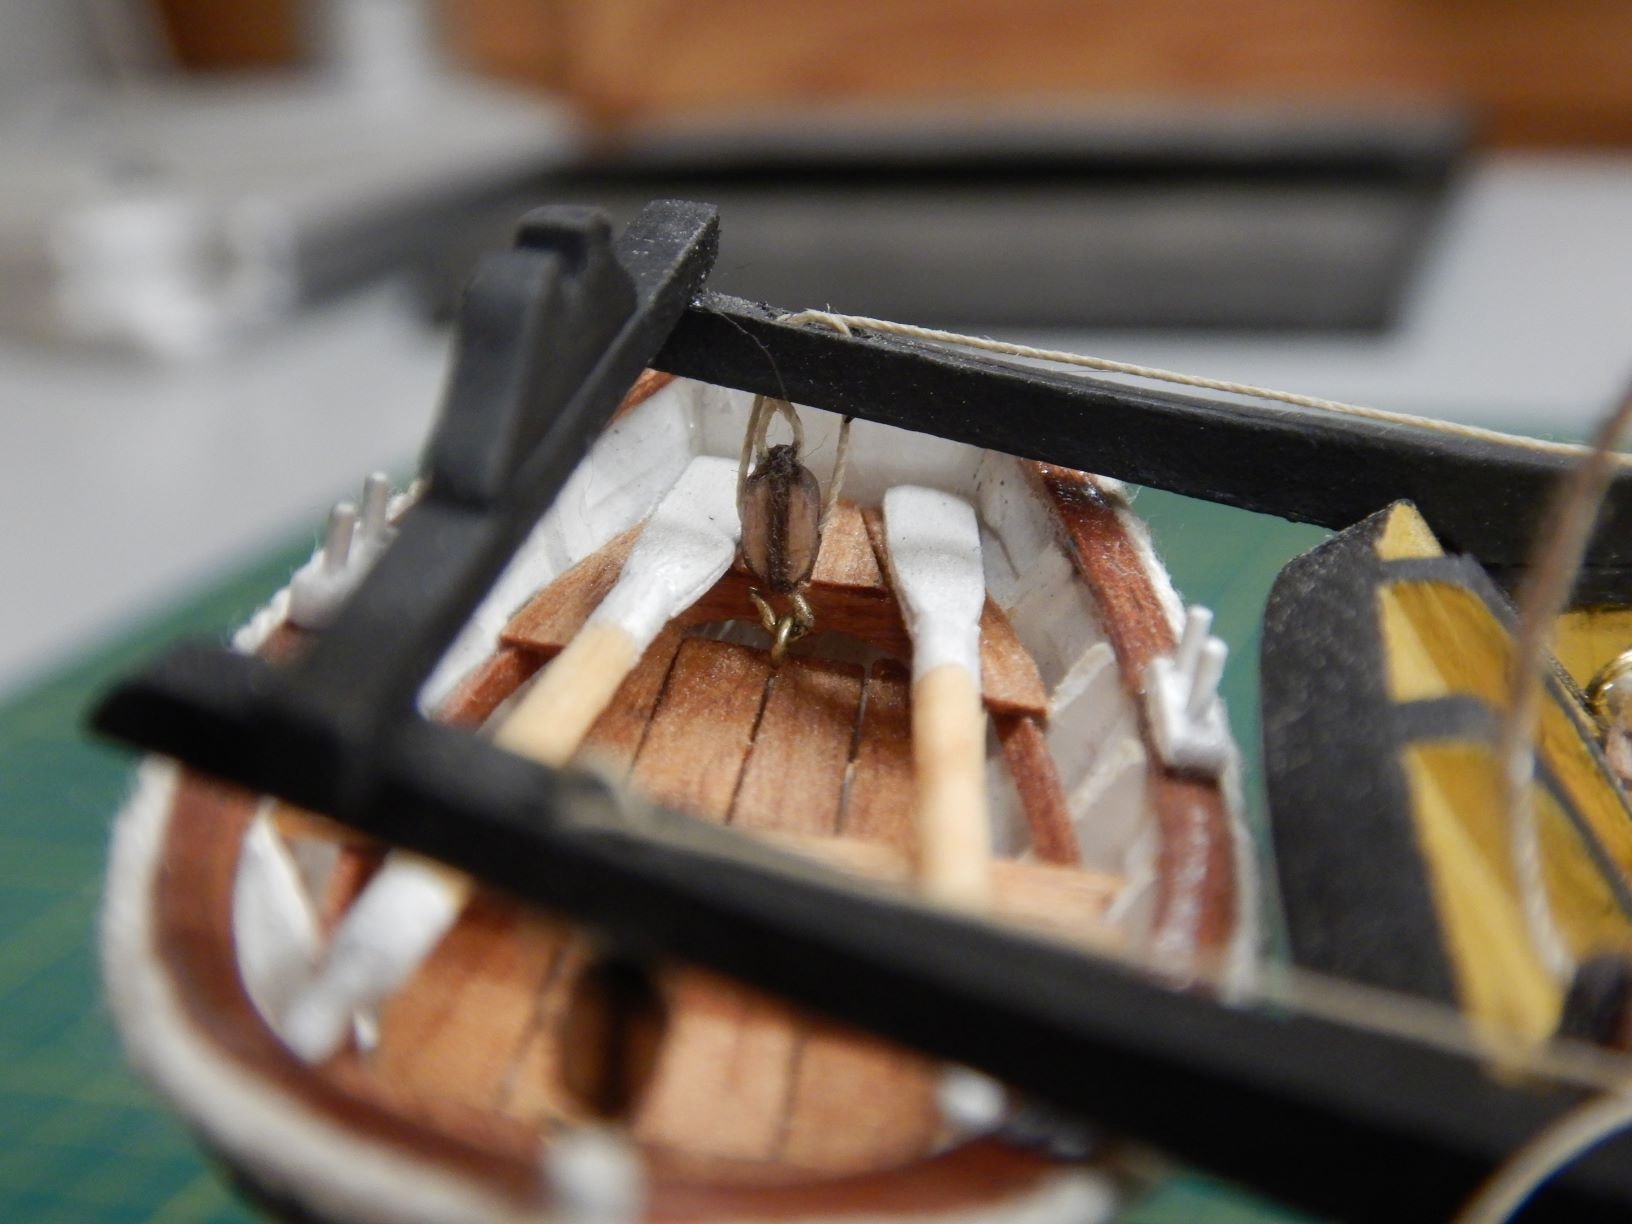
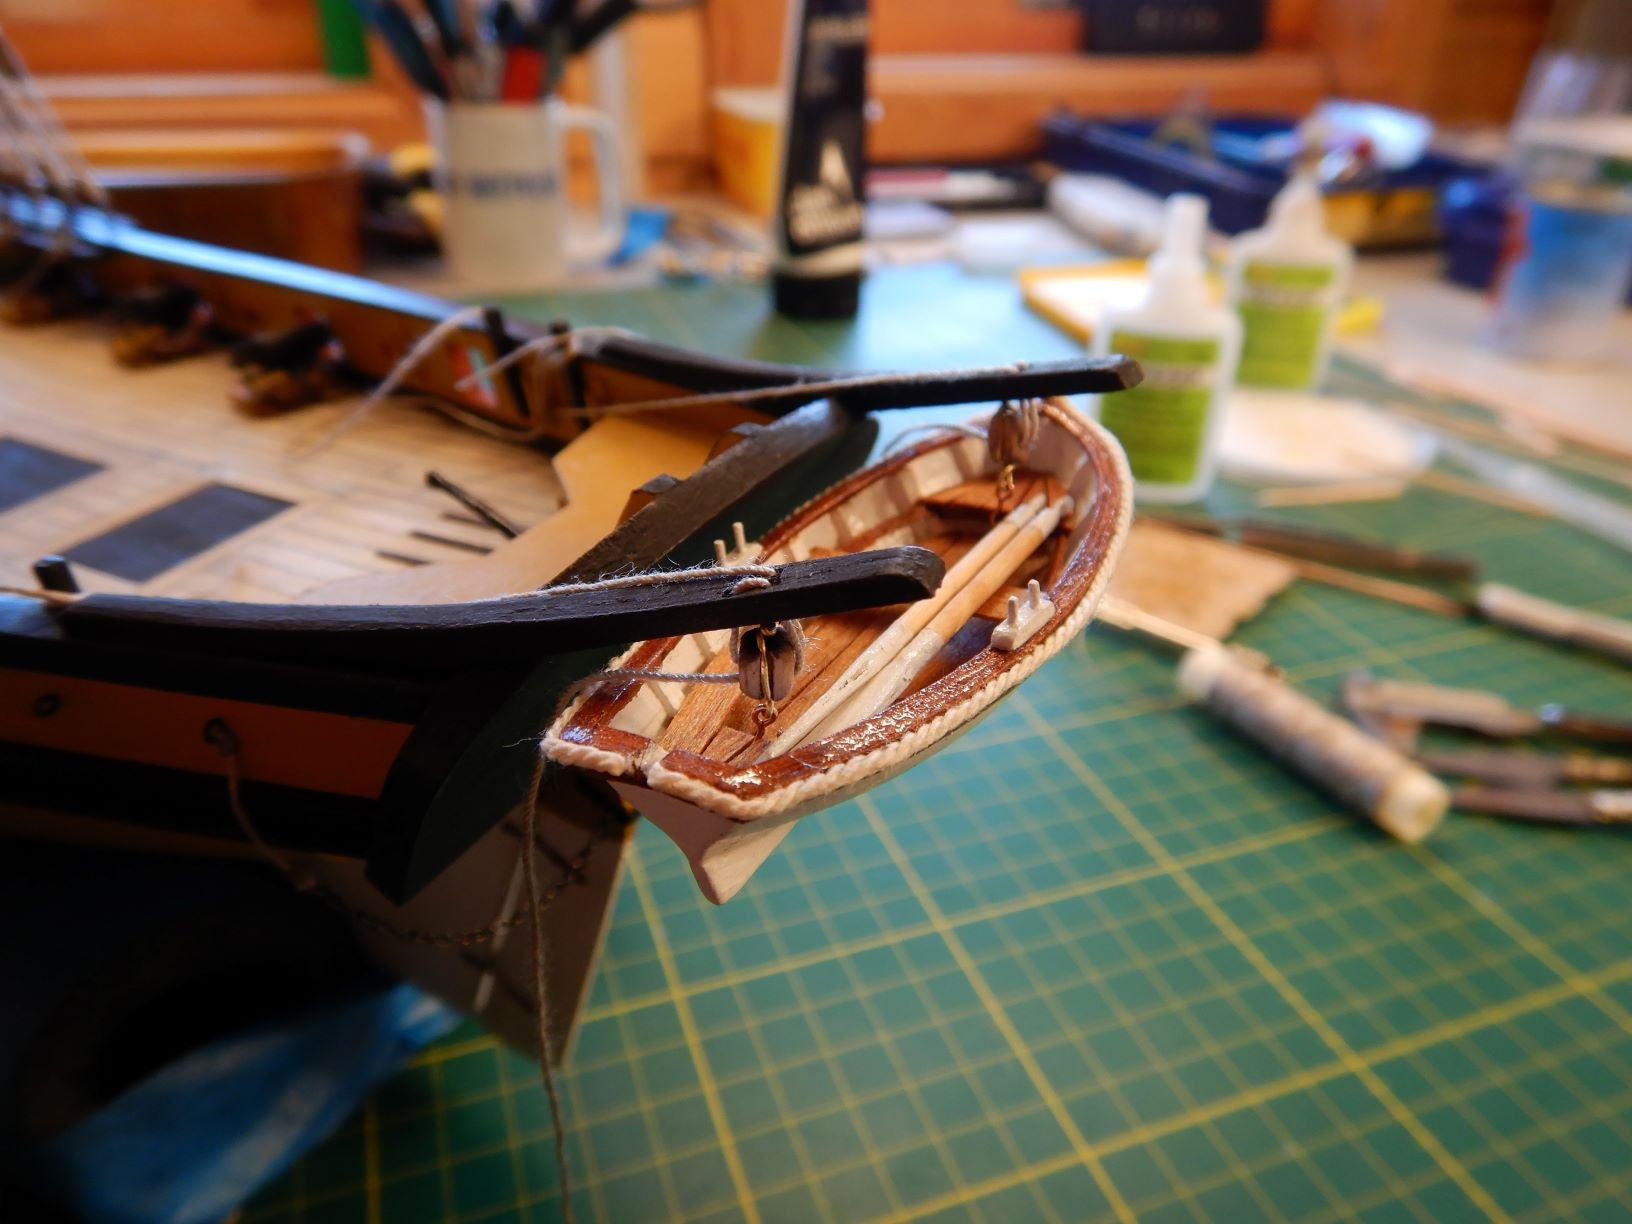
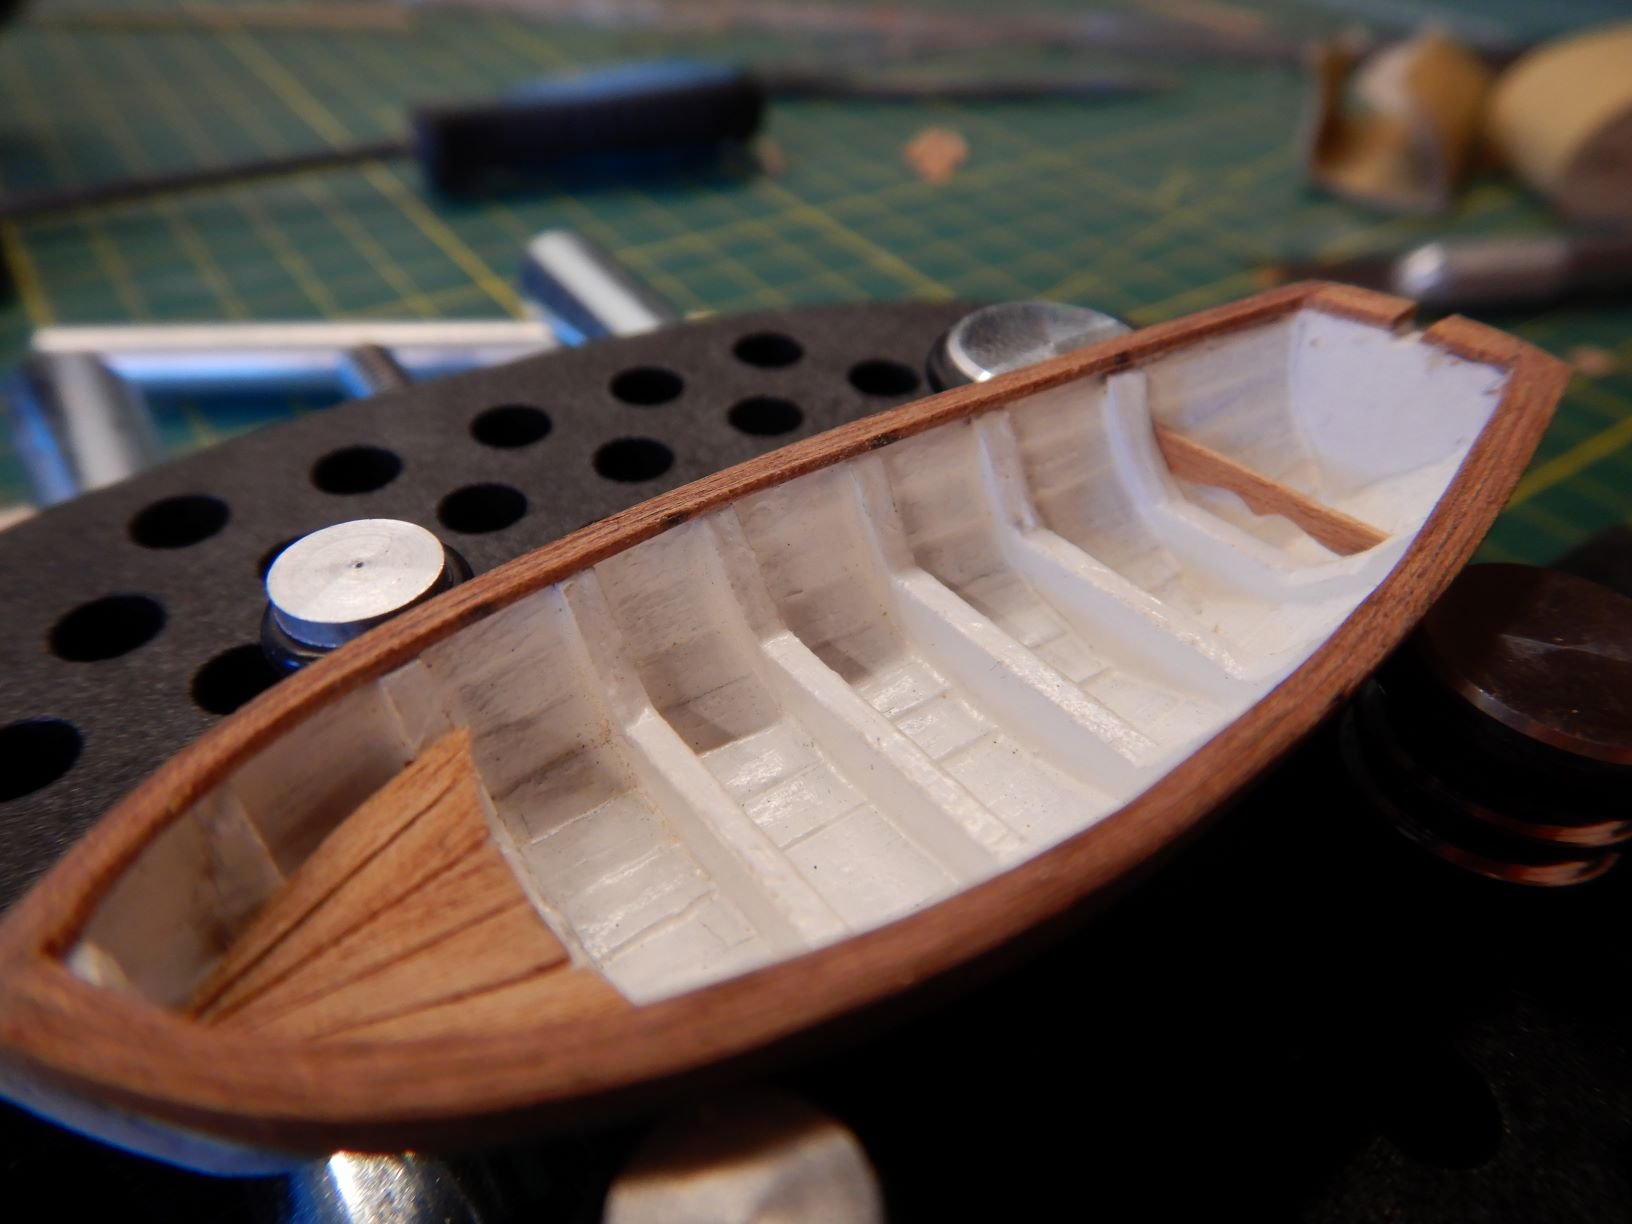
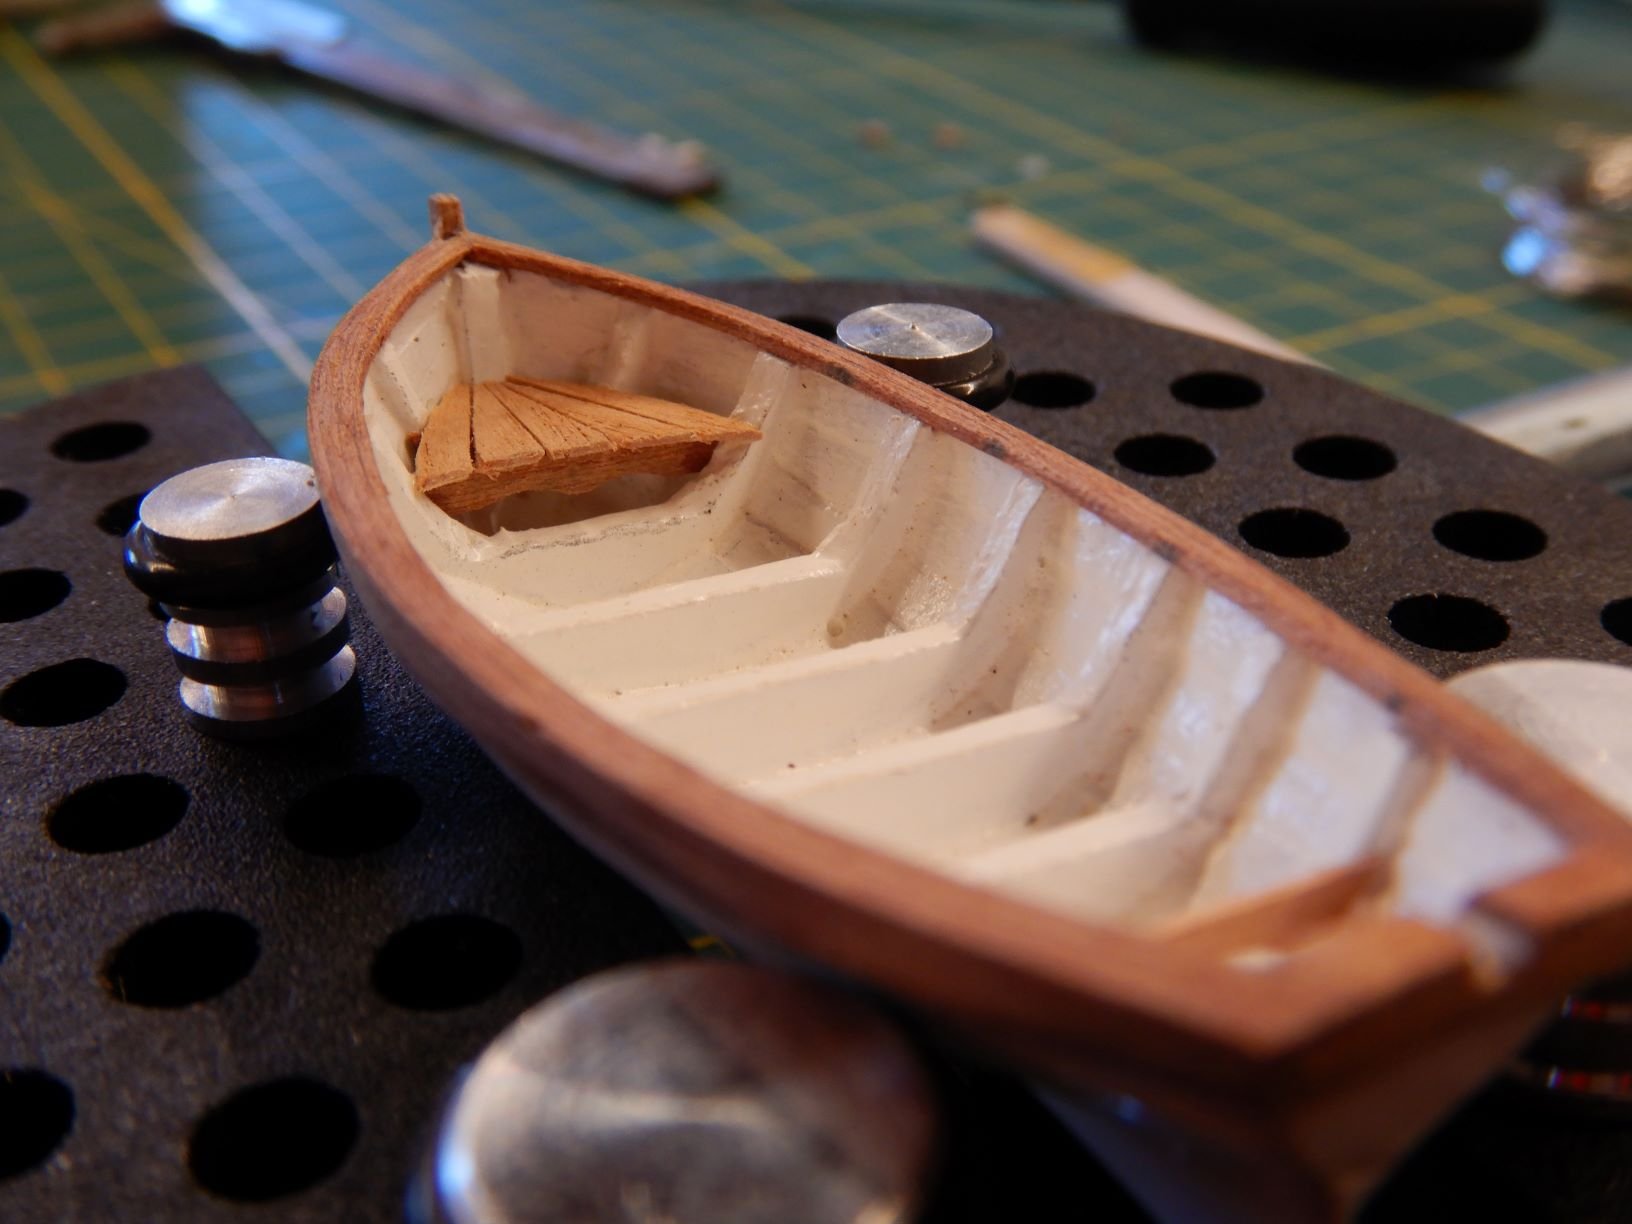
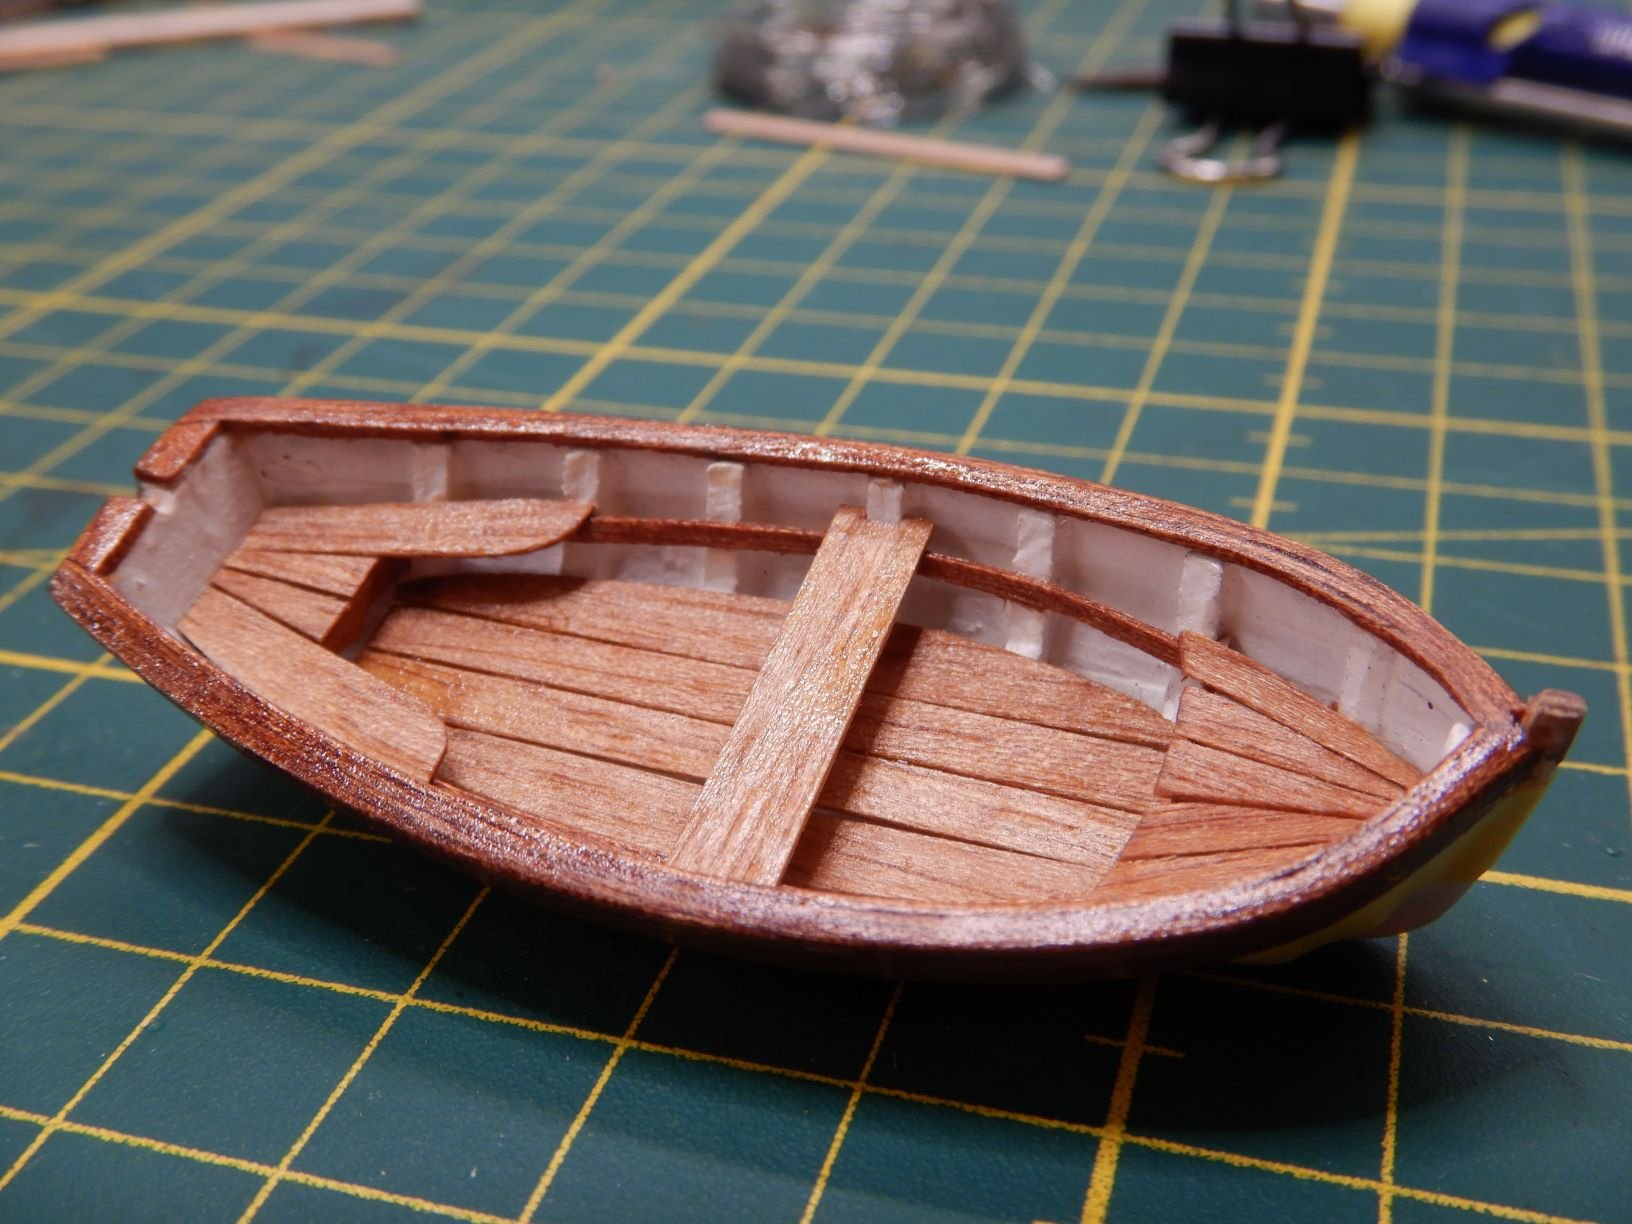
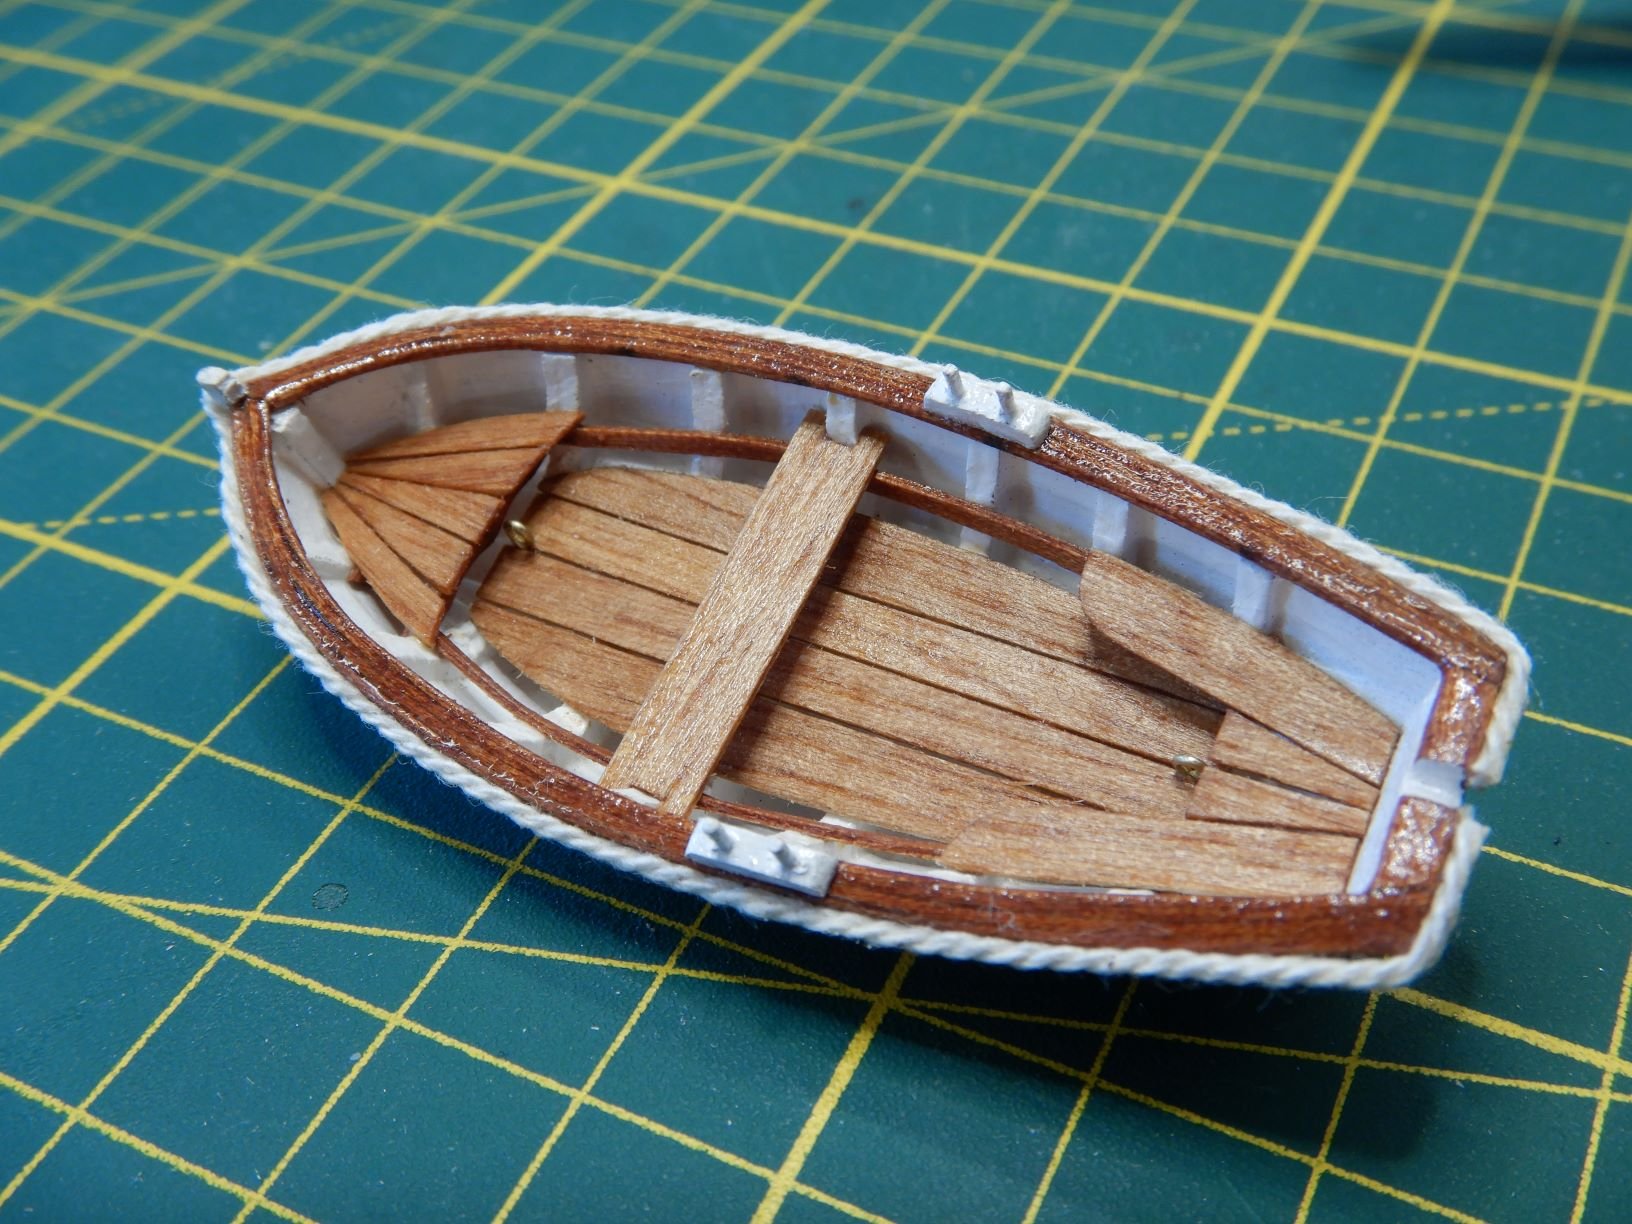
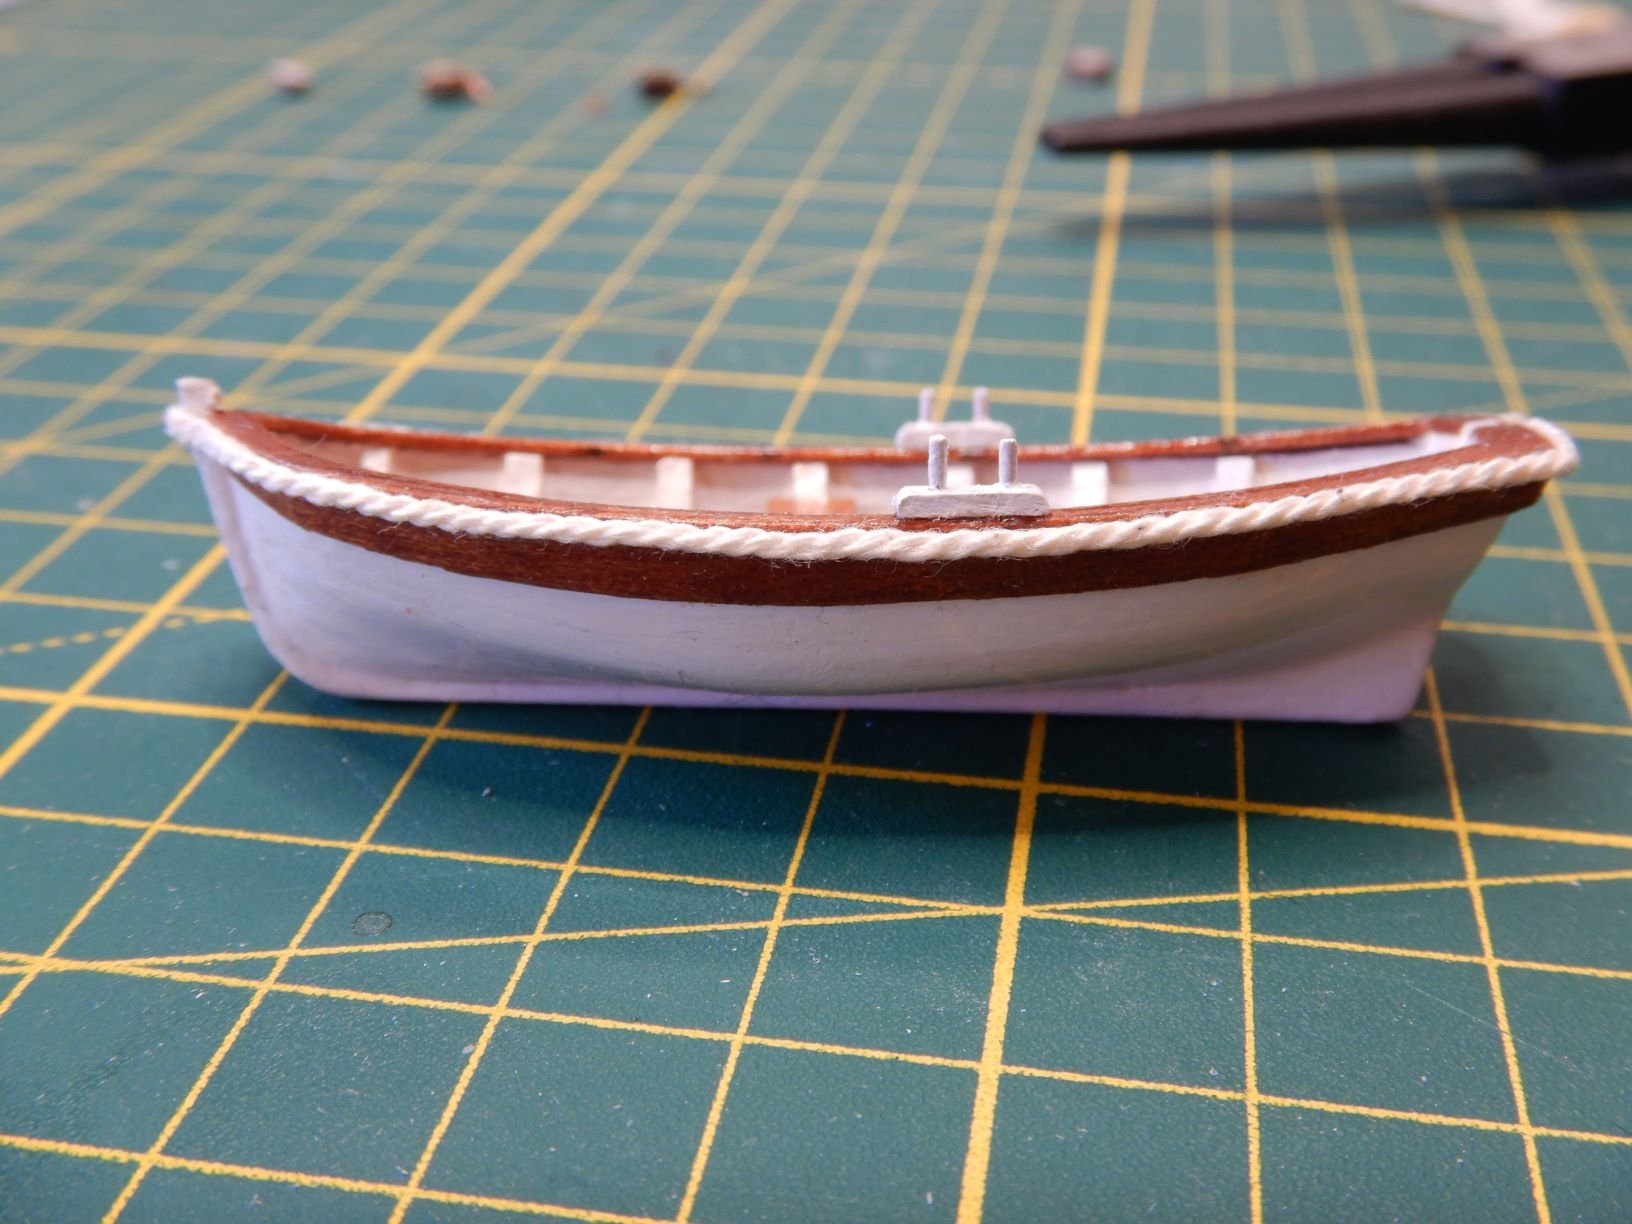
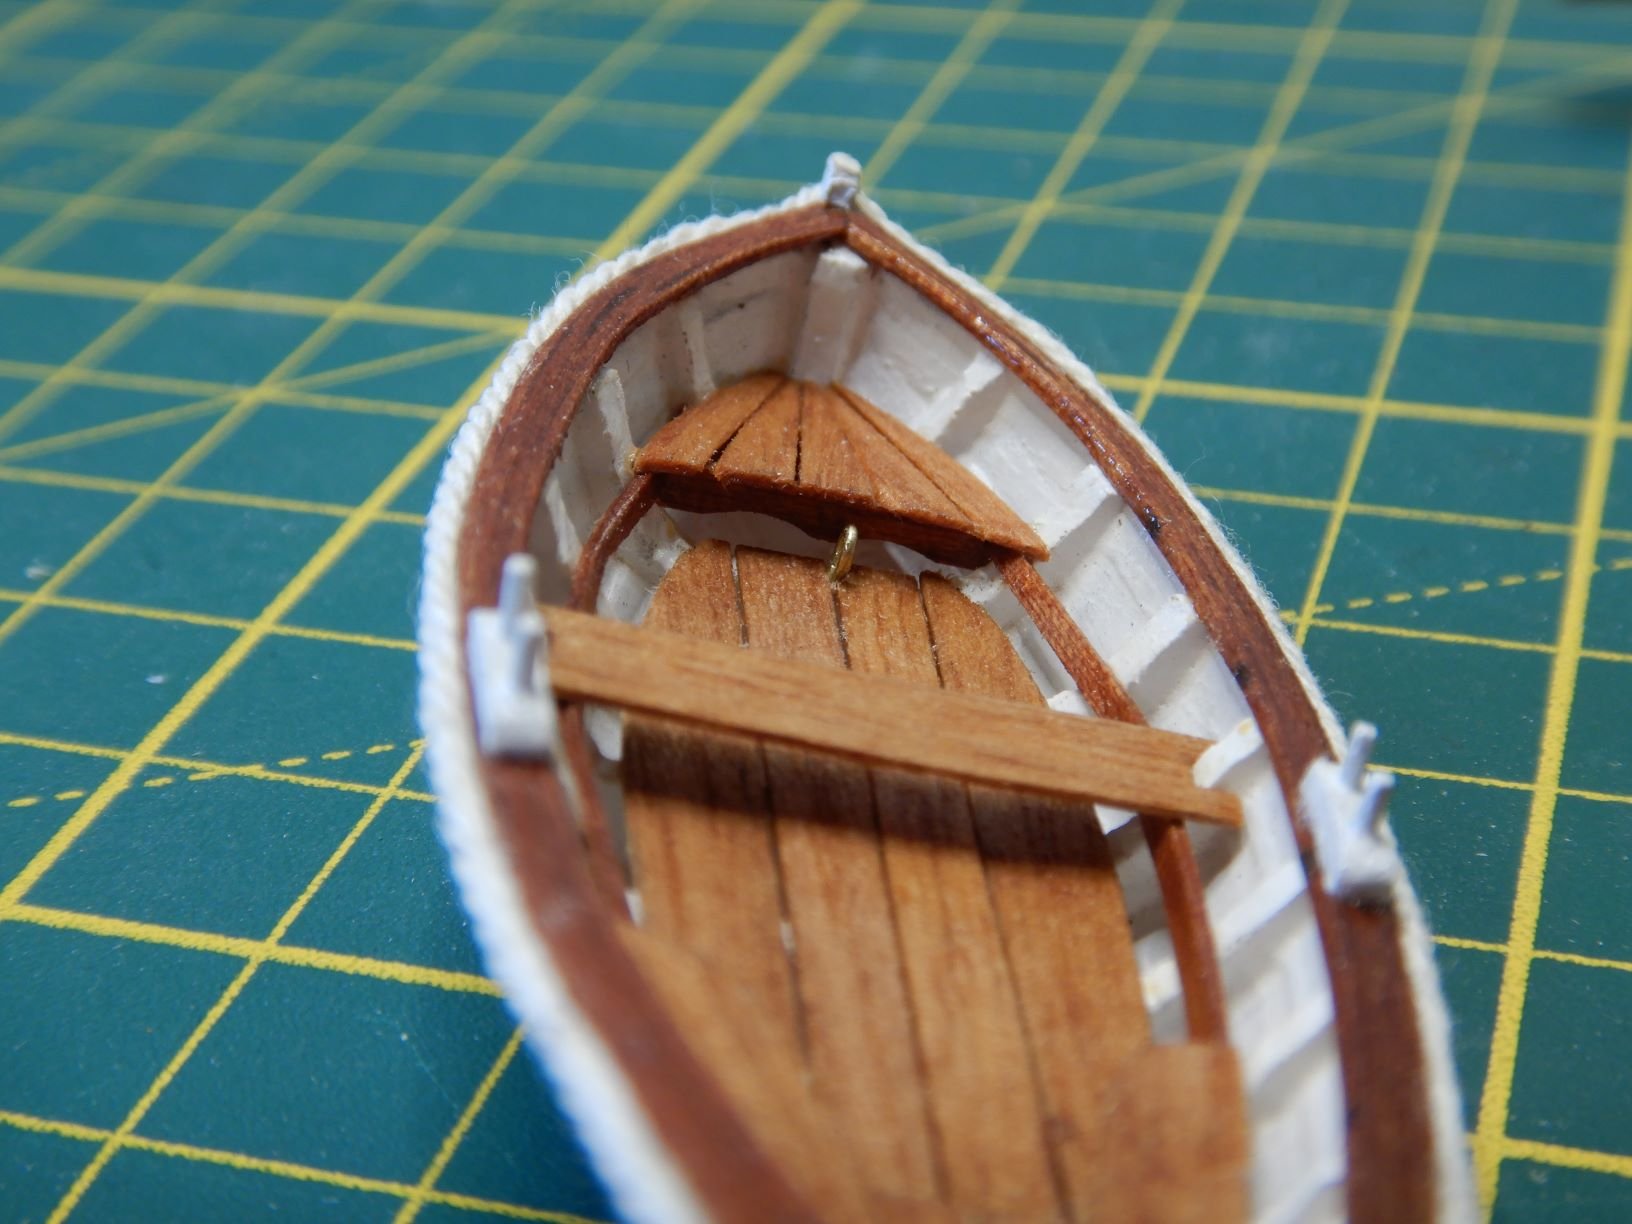
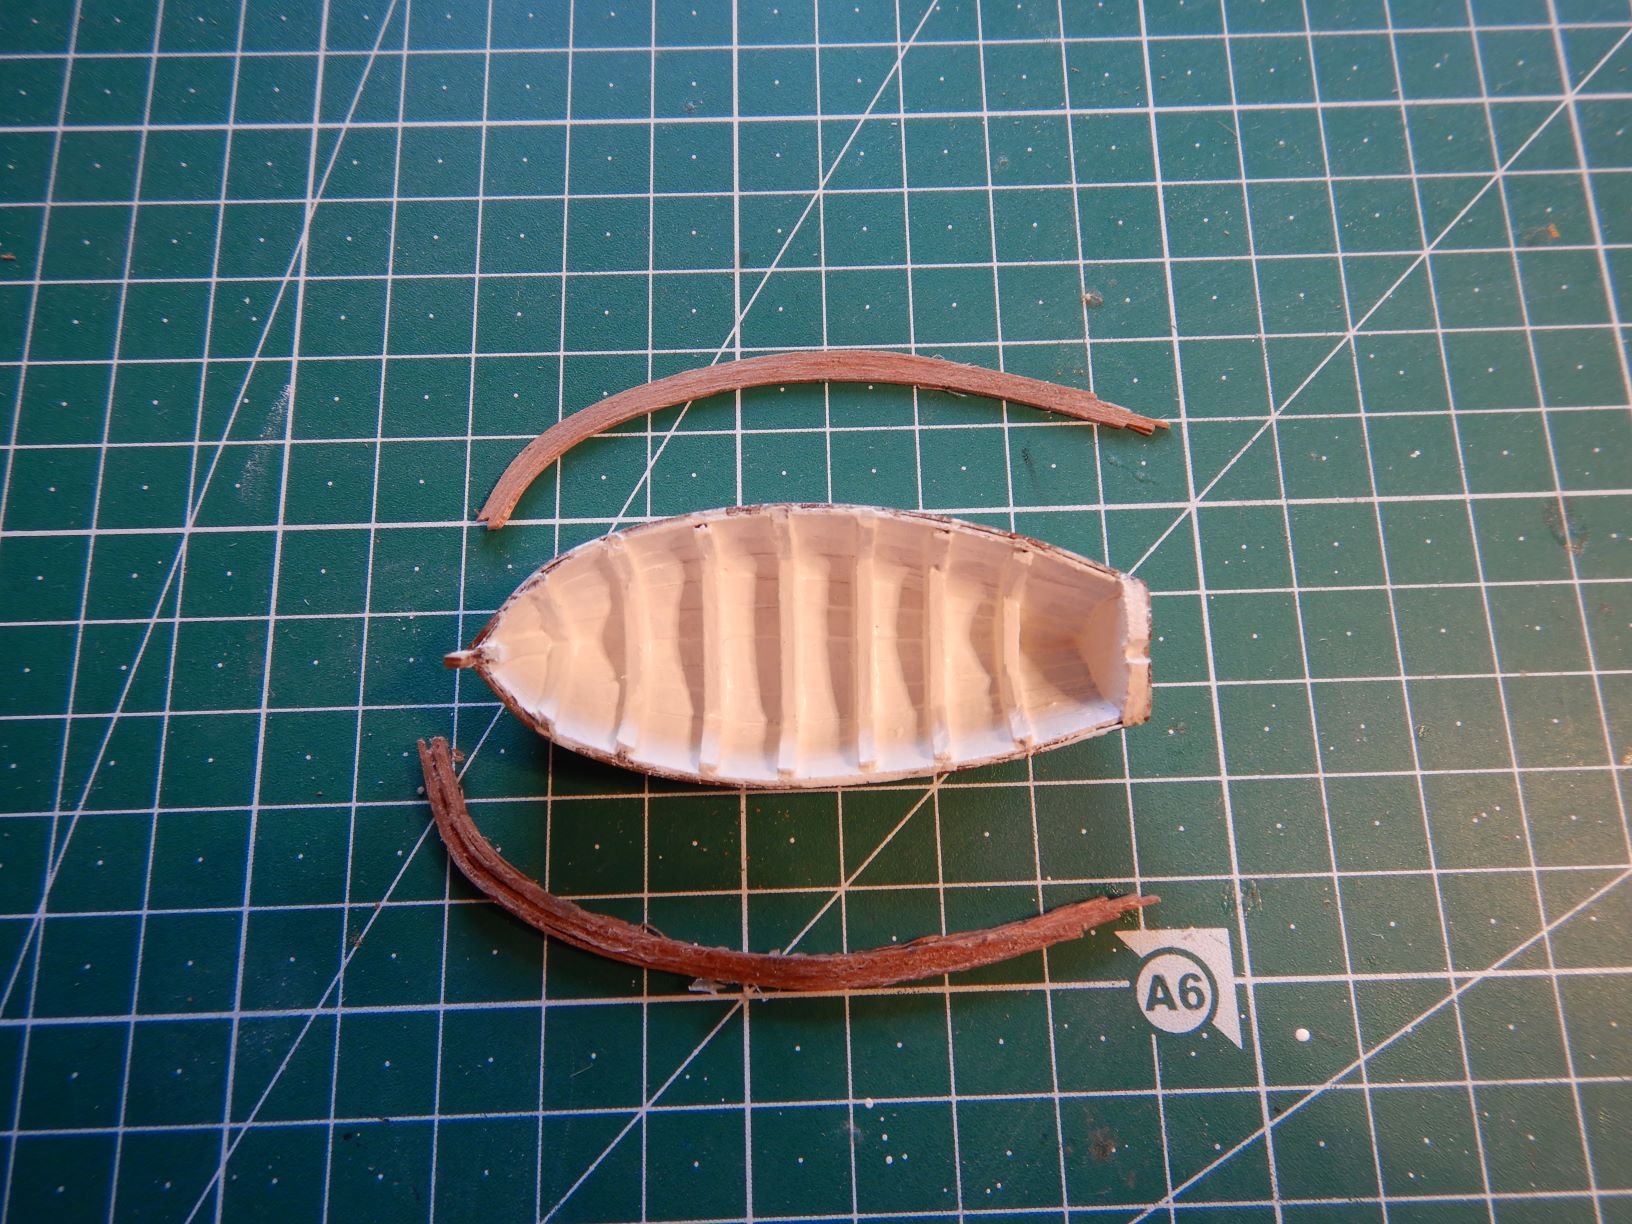
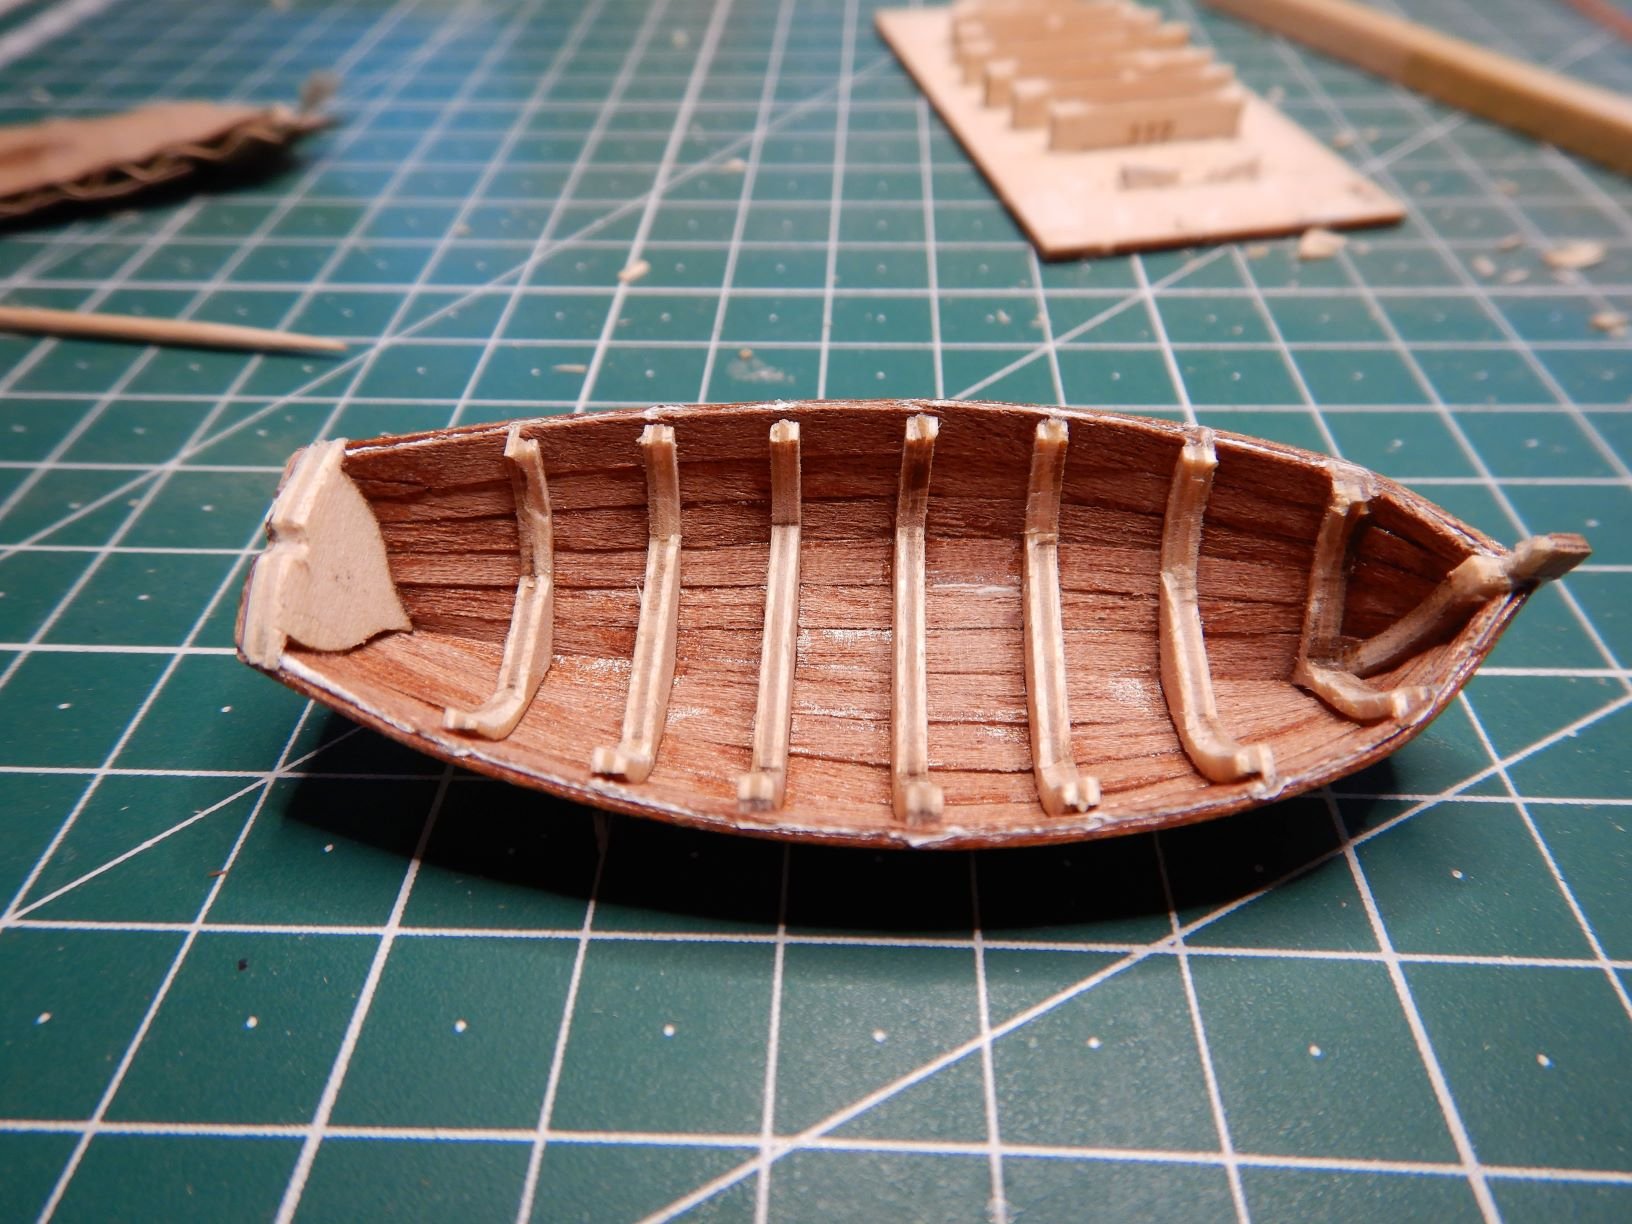
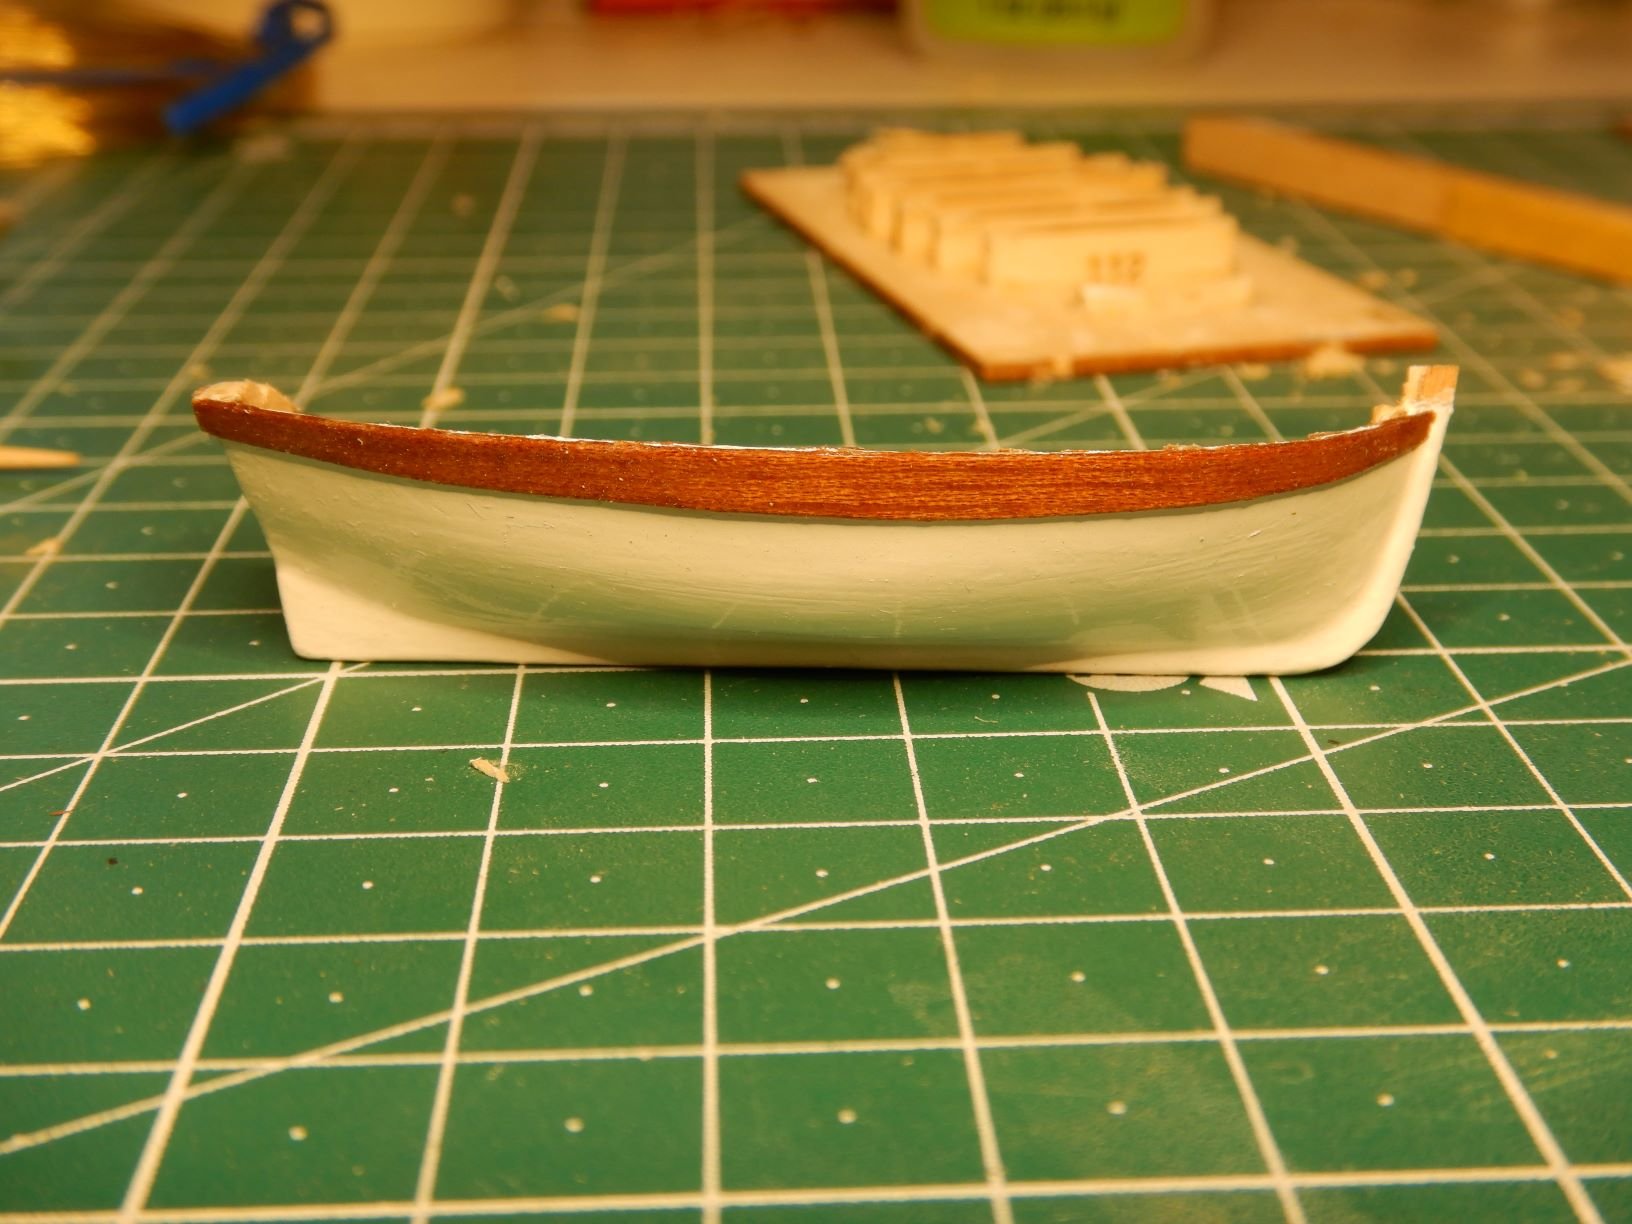
Been working on finishing the dinghy.
Finished the caprails, and made the thwarts and floorboards.
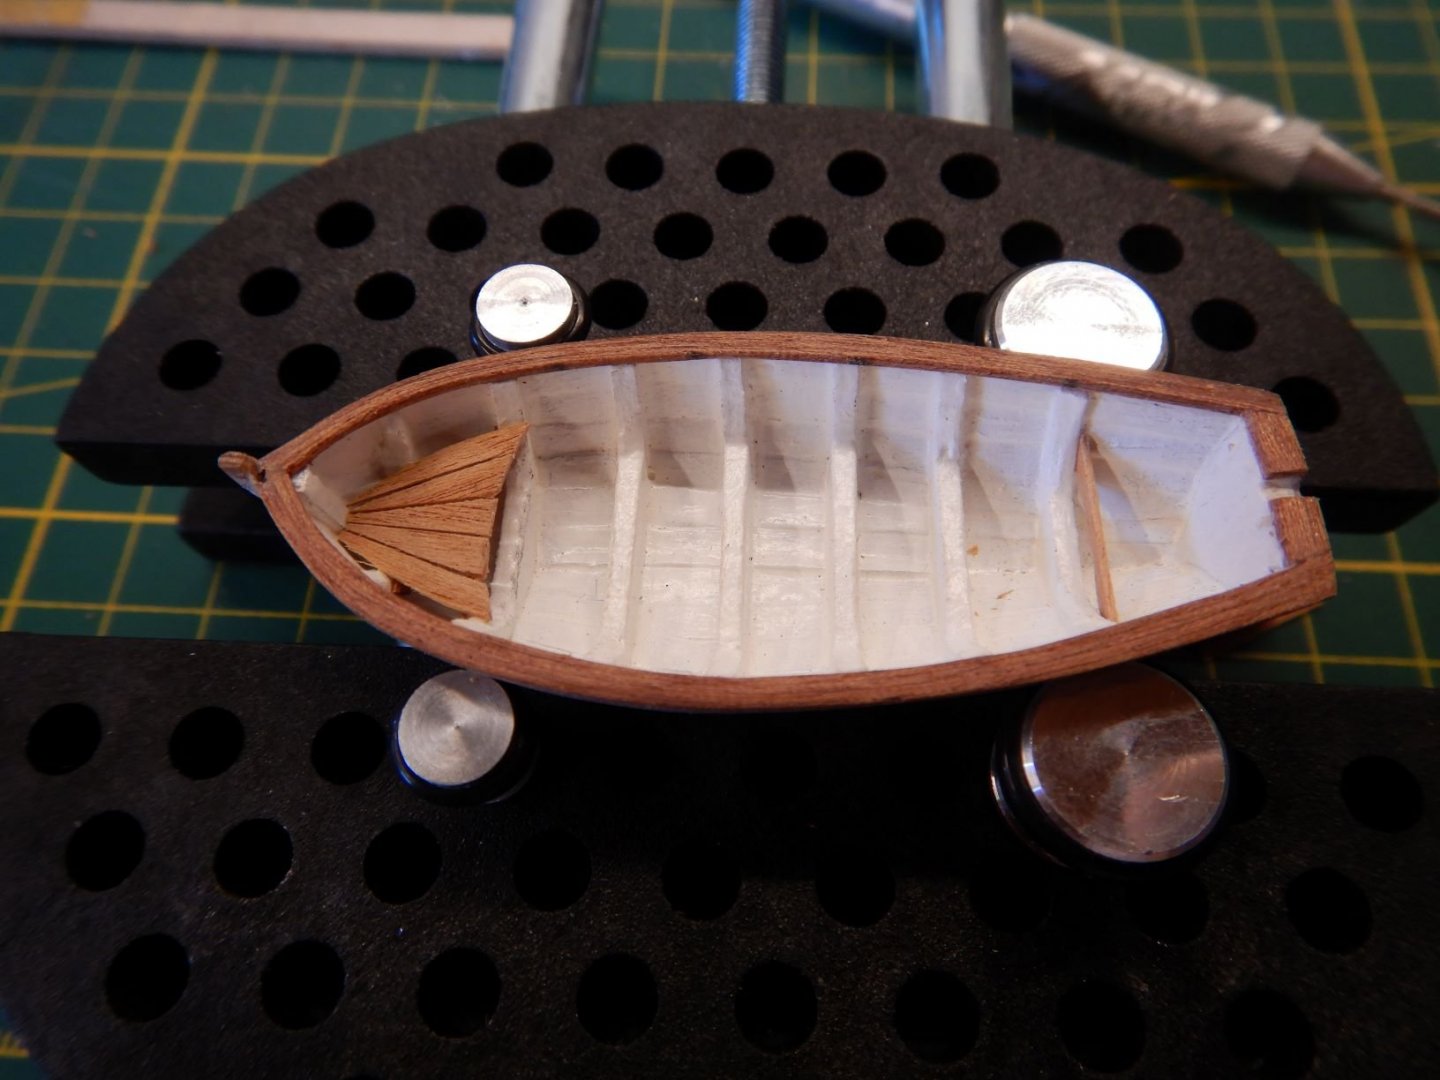


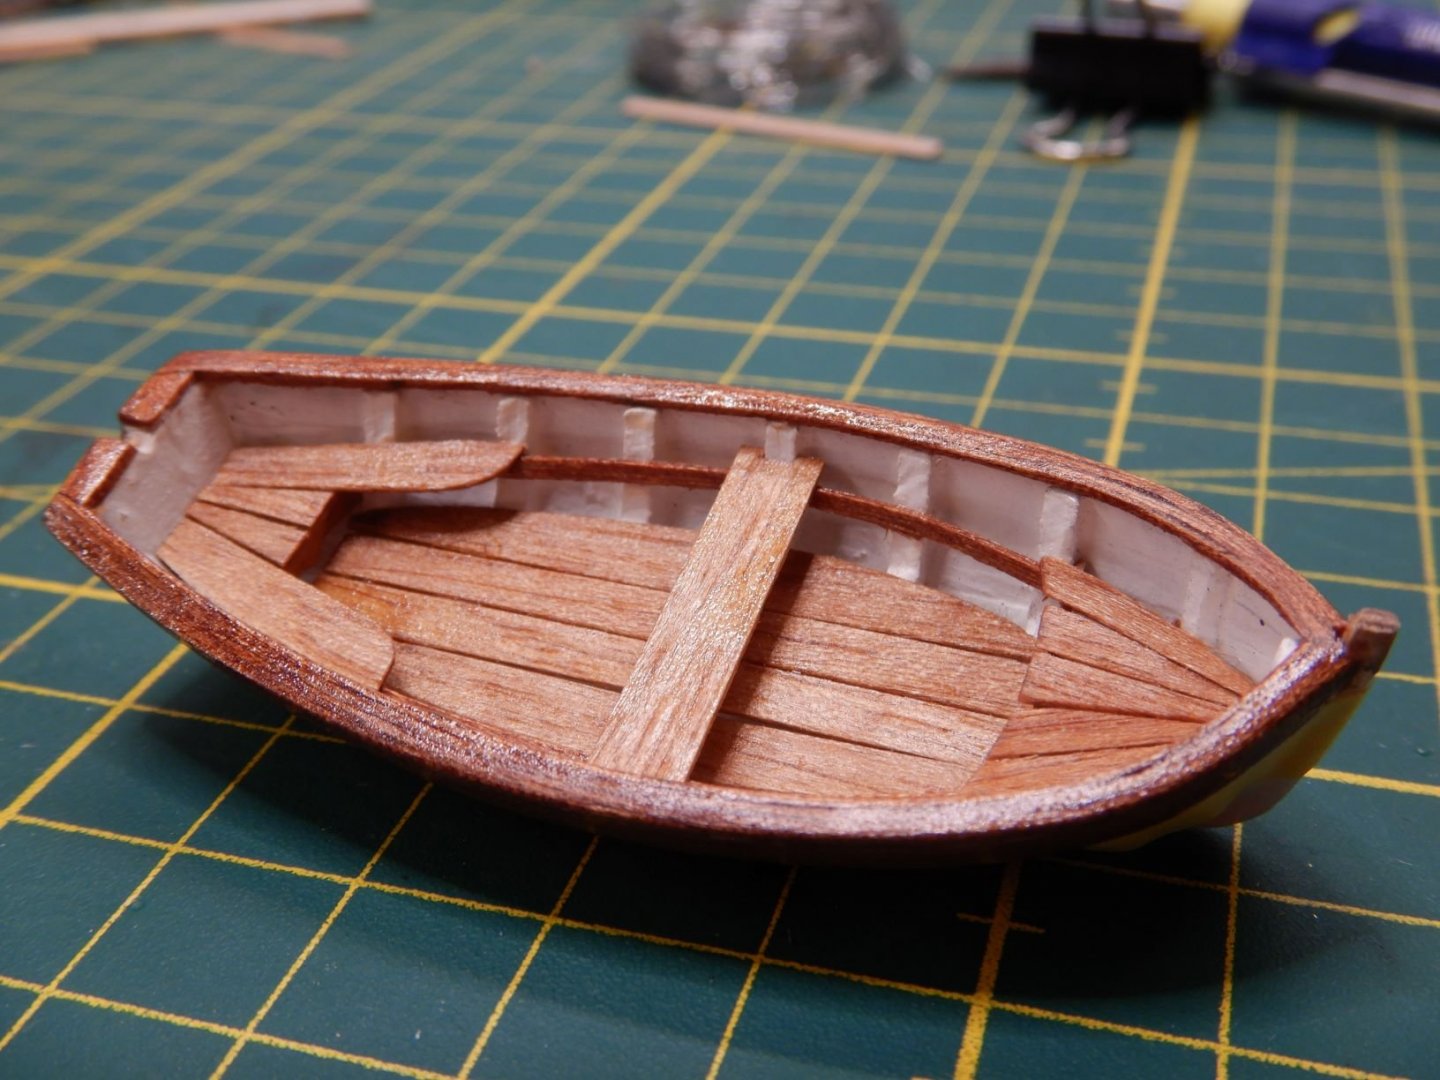
Made the rowlocks and decided to put a rope fender along the rail.
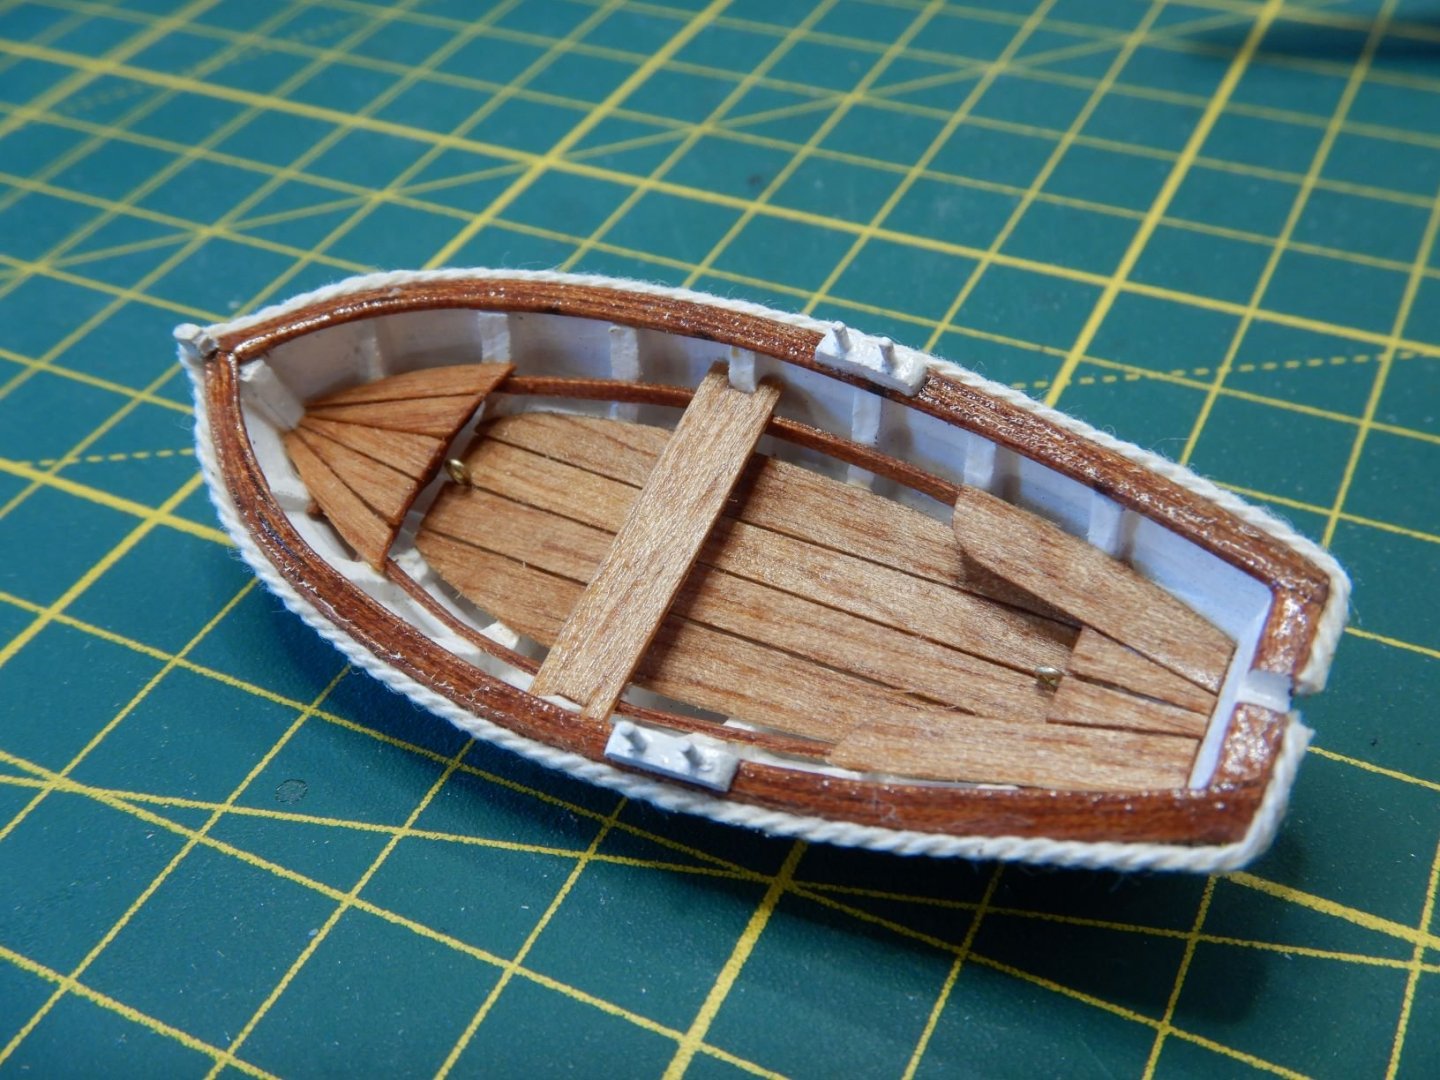


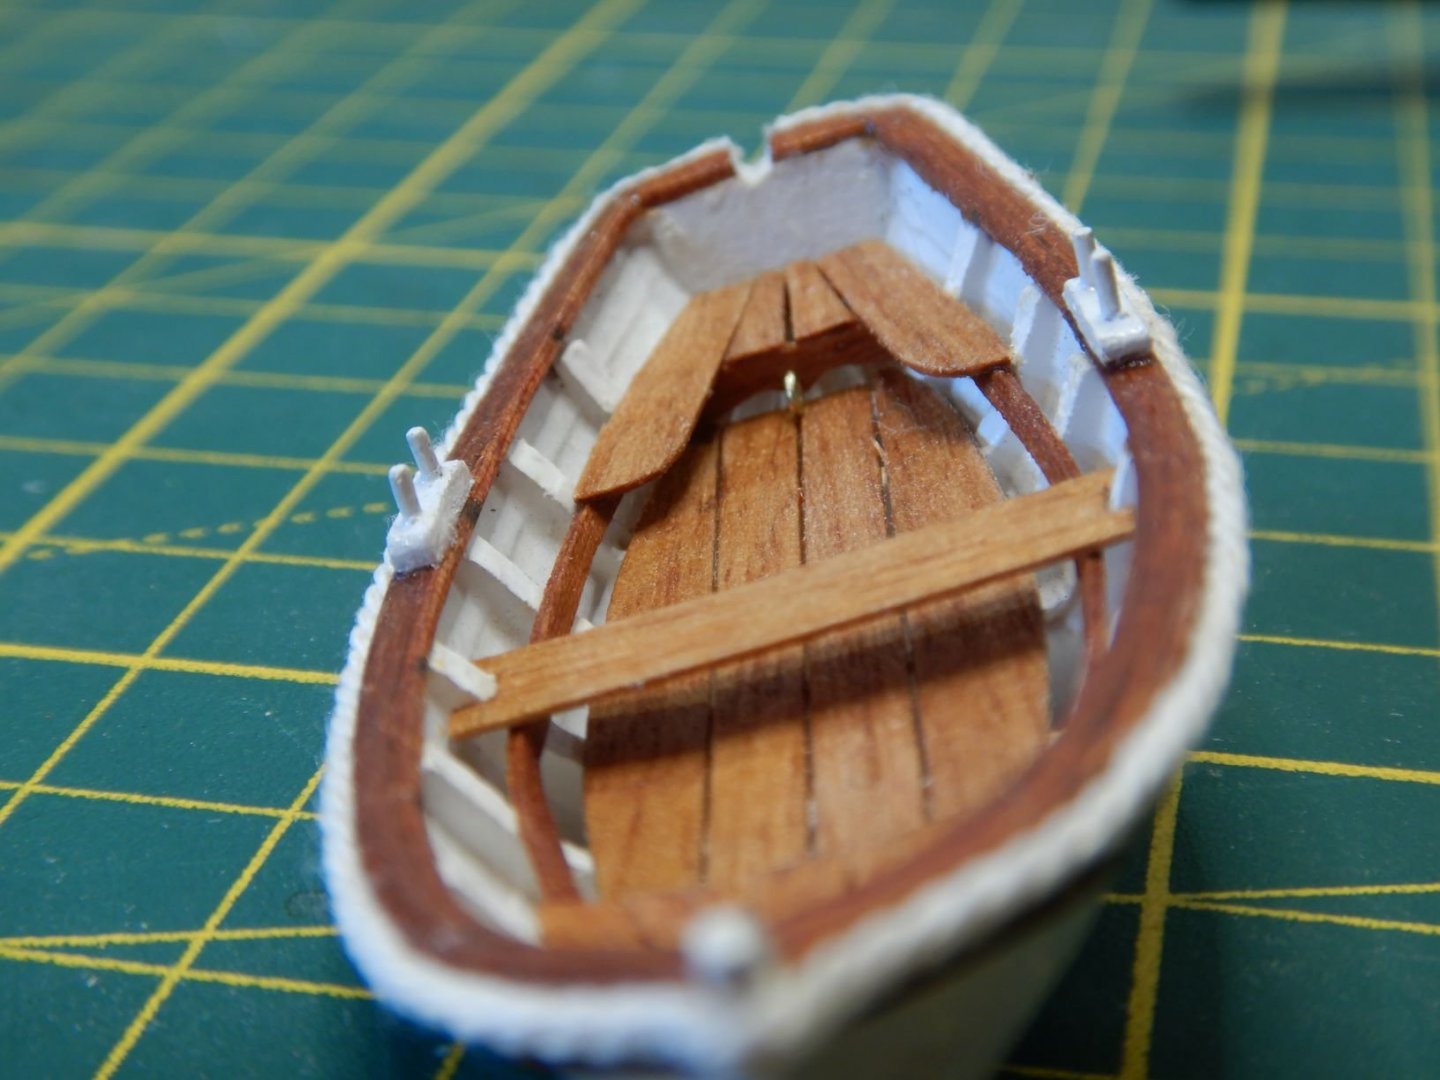
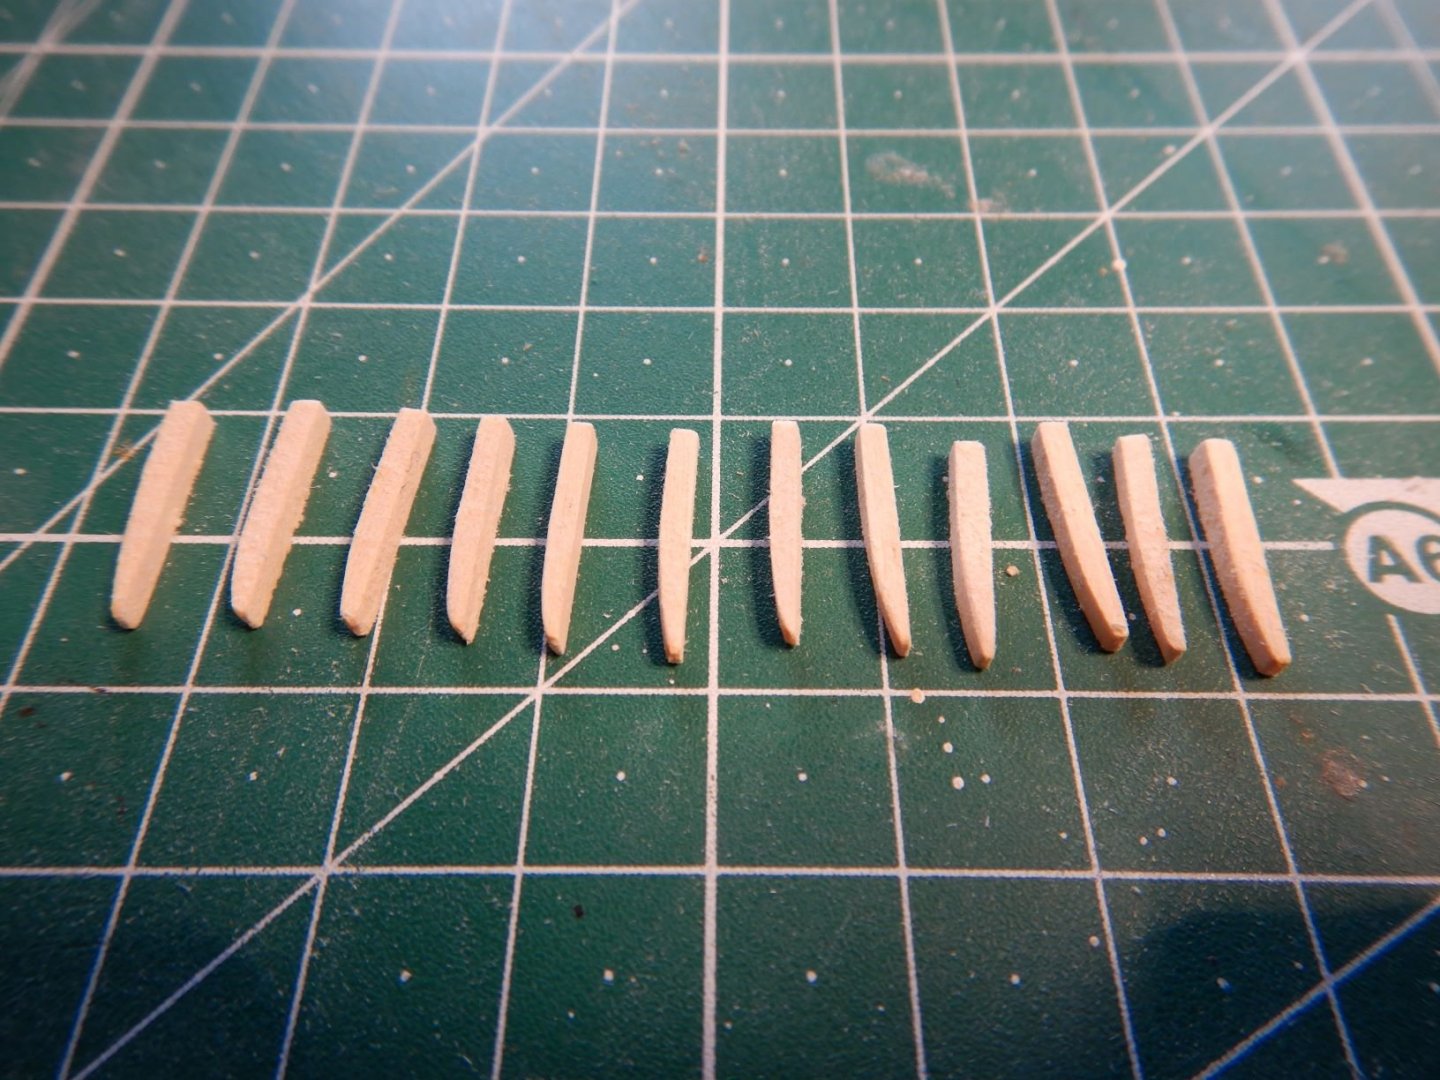
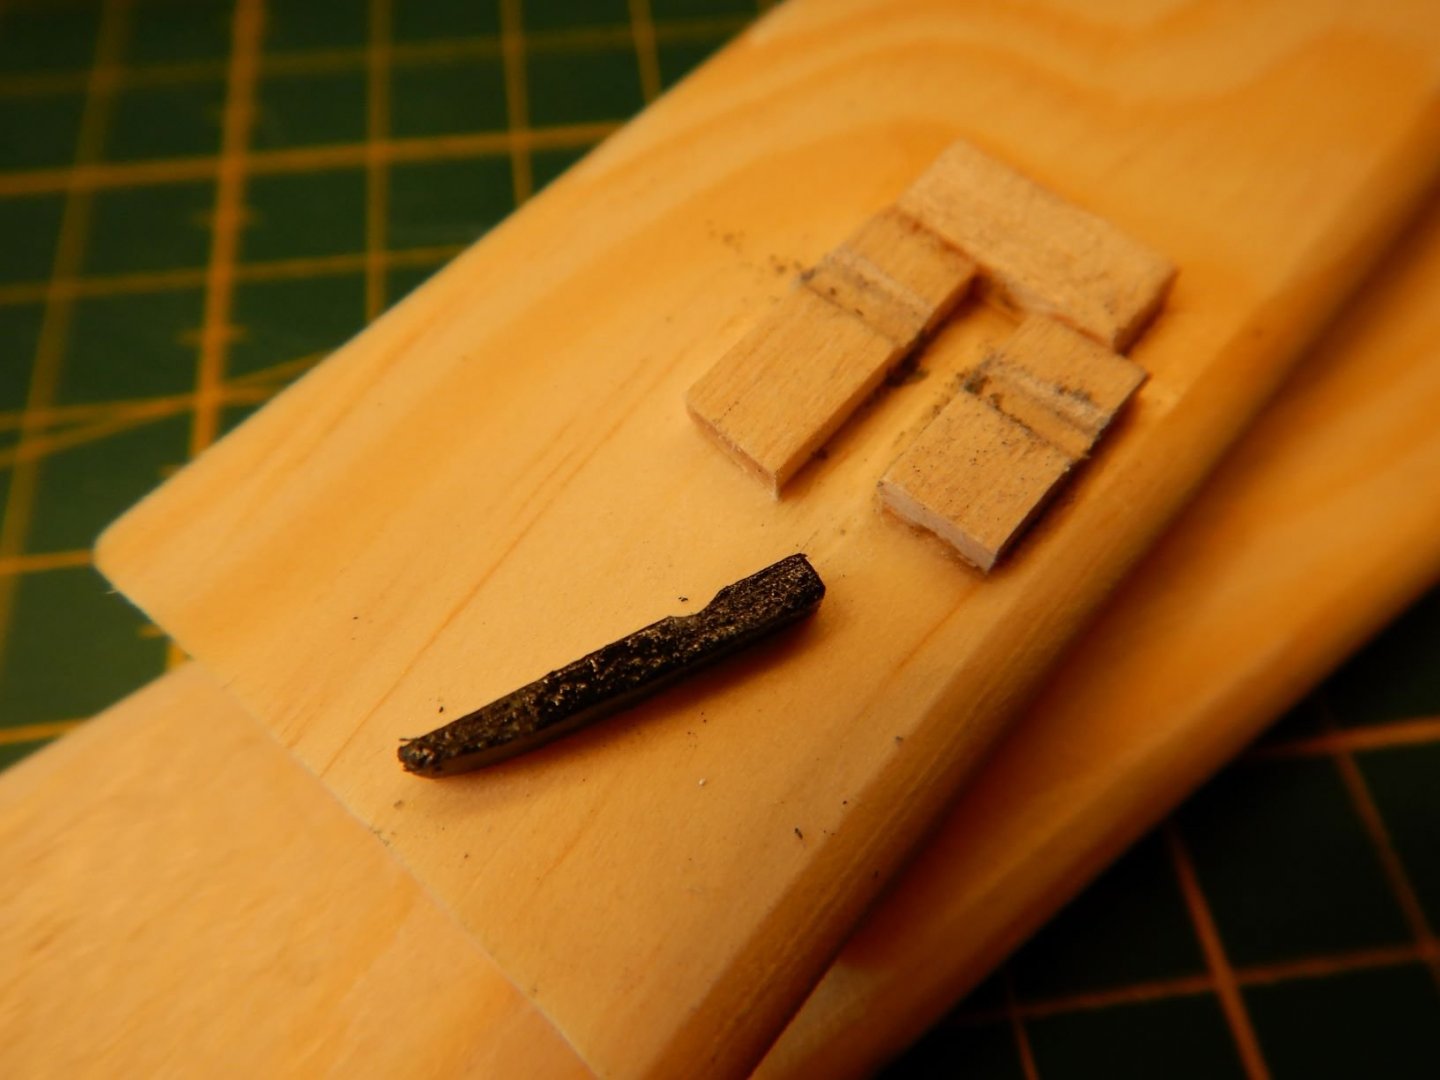
Finally I made a pair of oars out of toothpicks and scrapwood.
Also mounted two eyebolts to take the hoist from the davits.
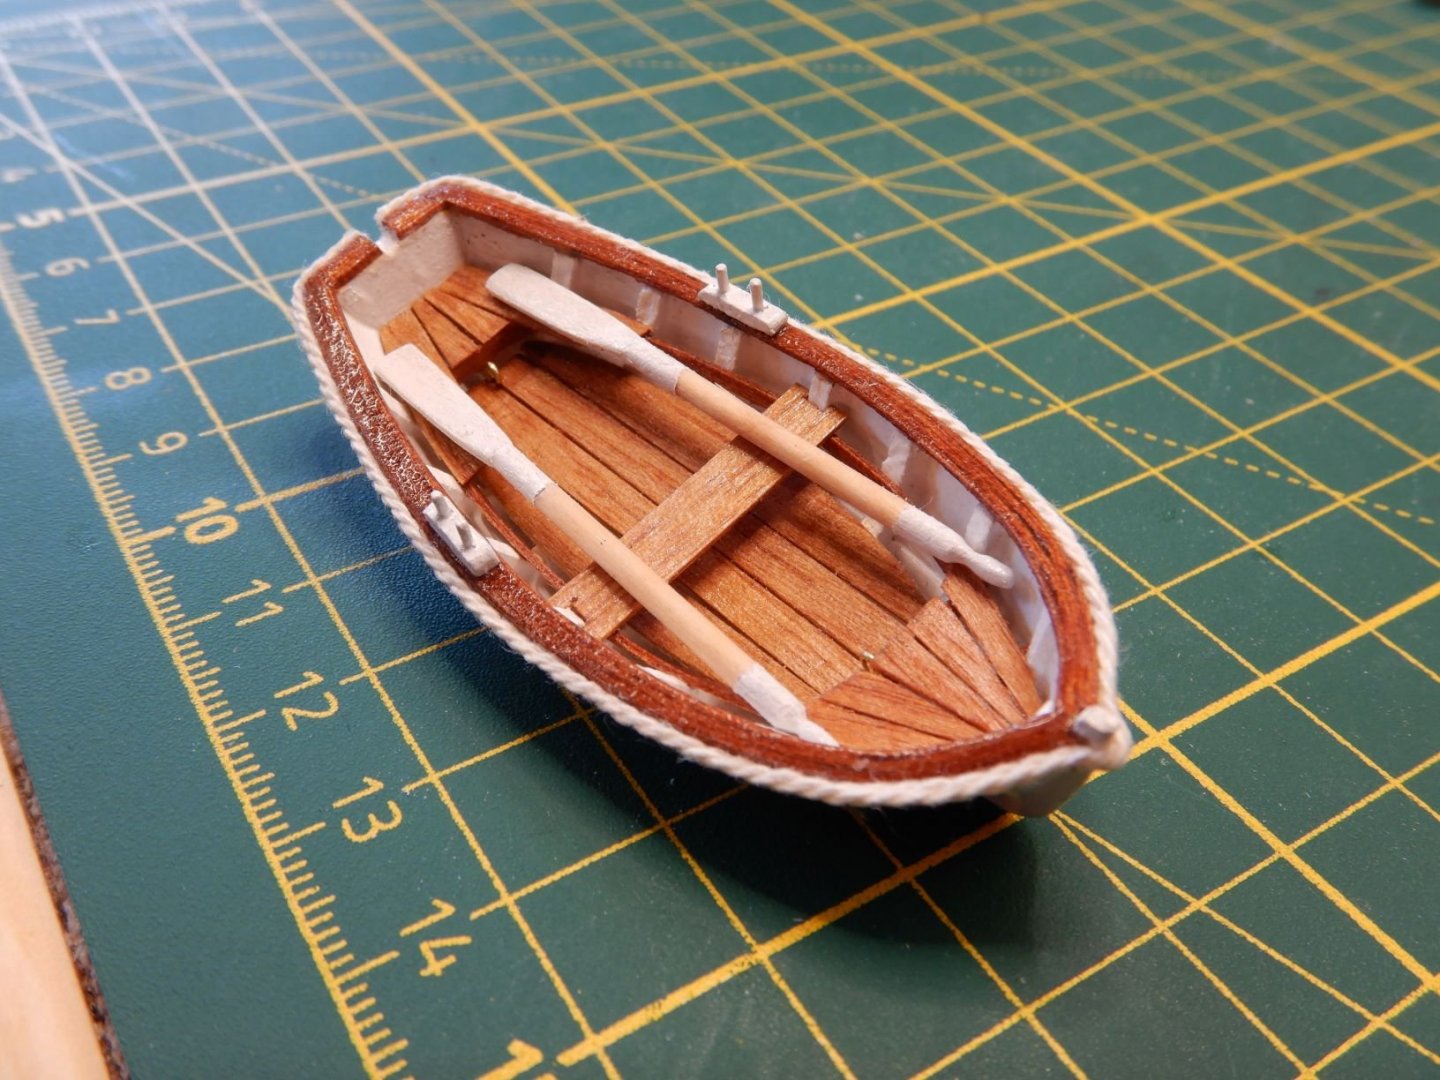
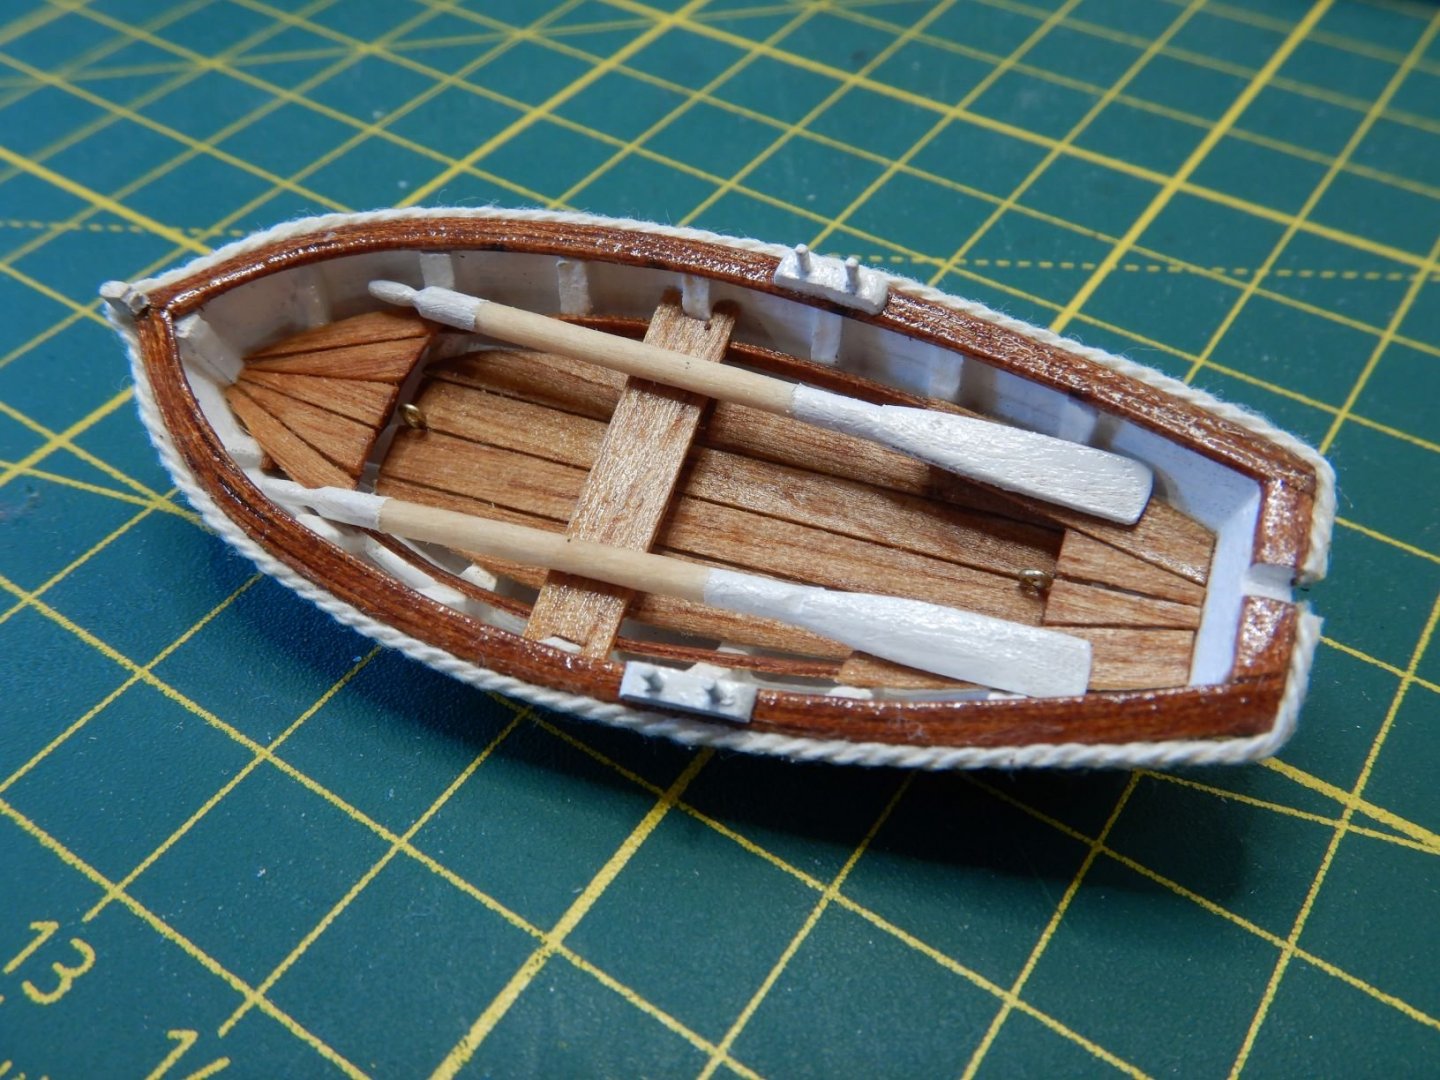
With this I think I'll call the dinghy finished!
Stay safe!
Gaffrig.
-
Hello all!
Long time since the last update here..
Now that fall is here there will be more time for me in the shipyard again.
Some work has been done on Le Renard inbetween other chores..
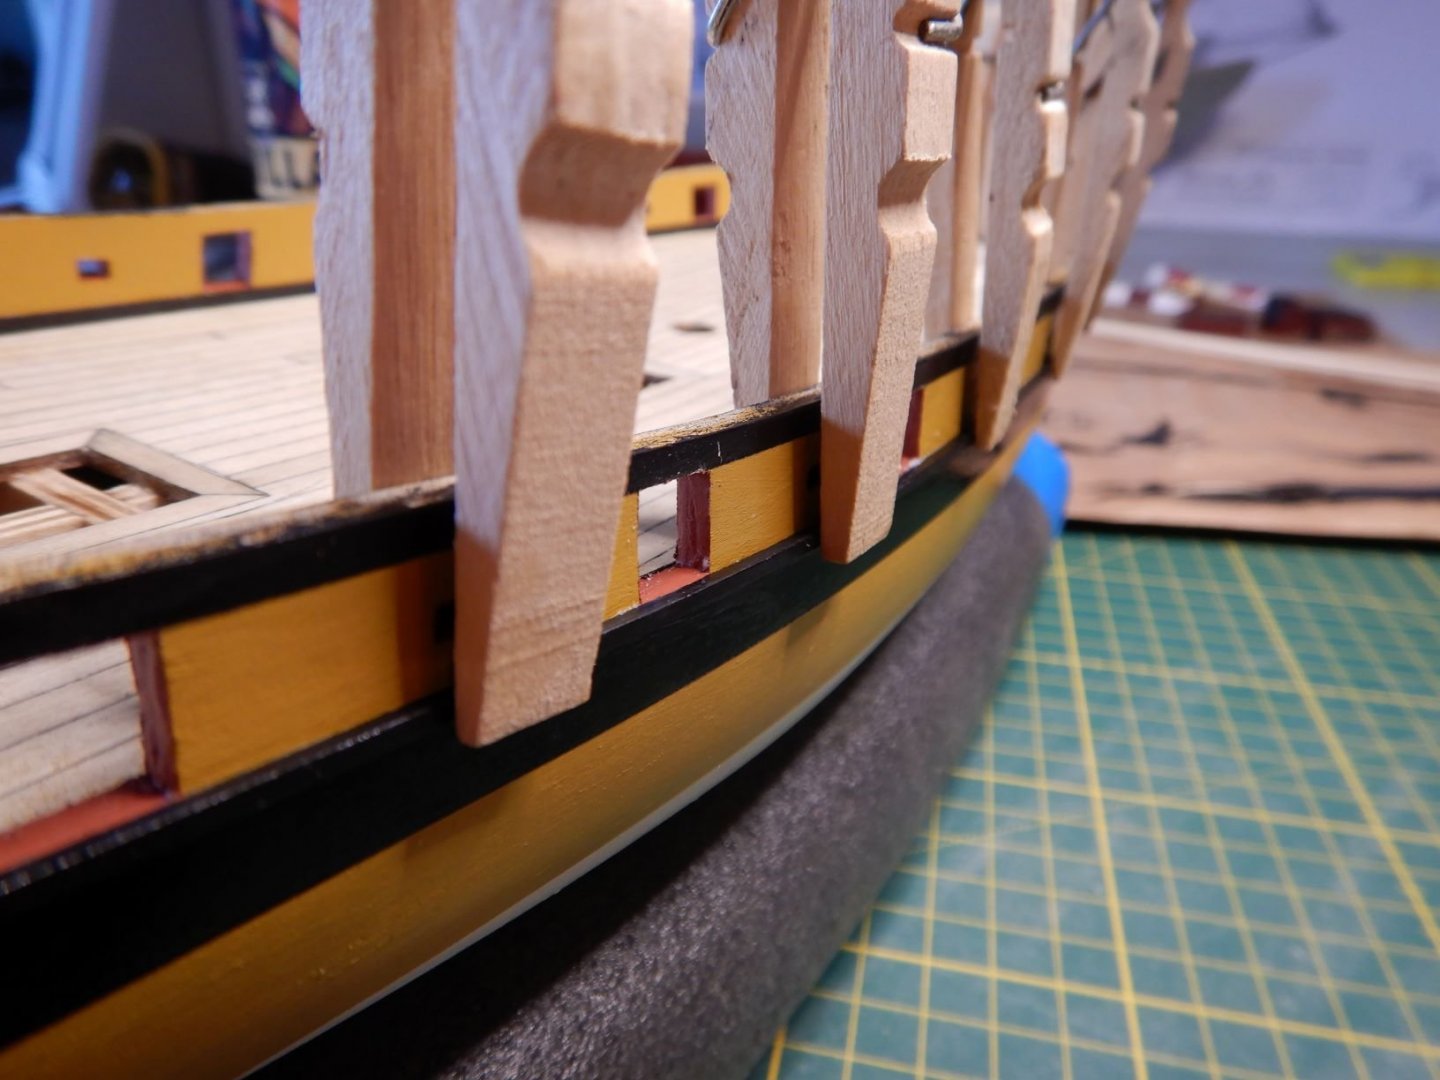
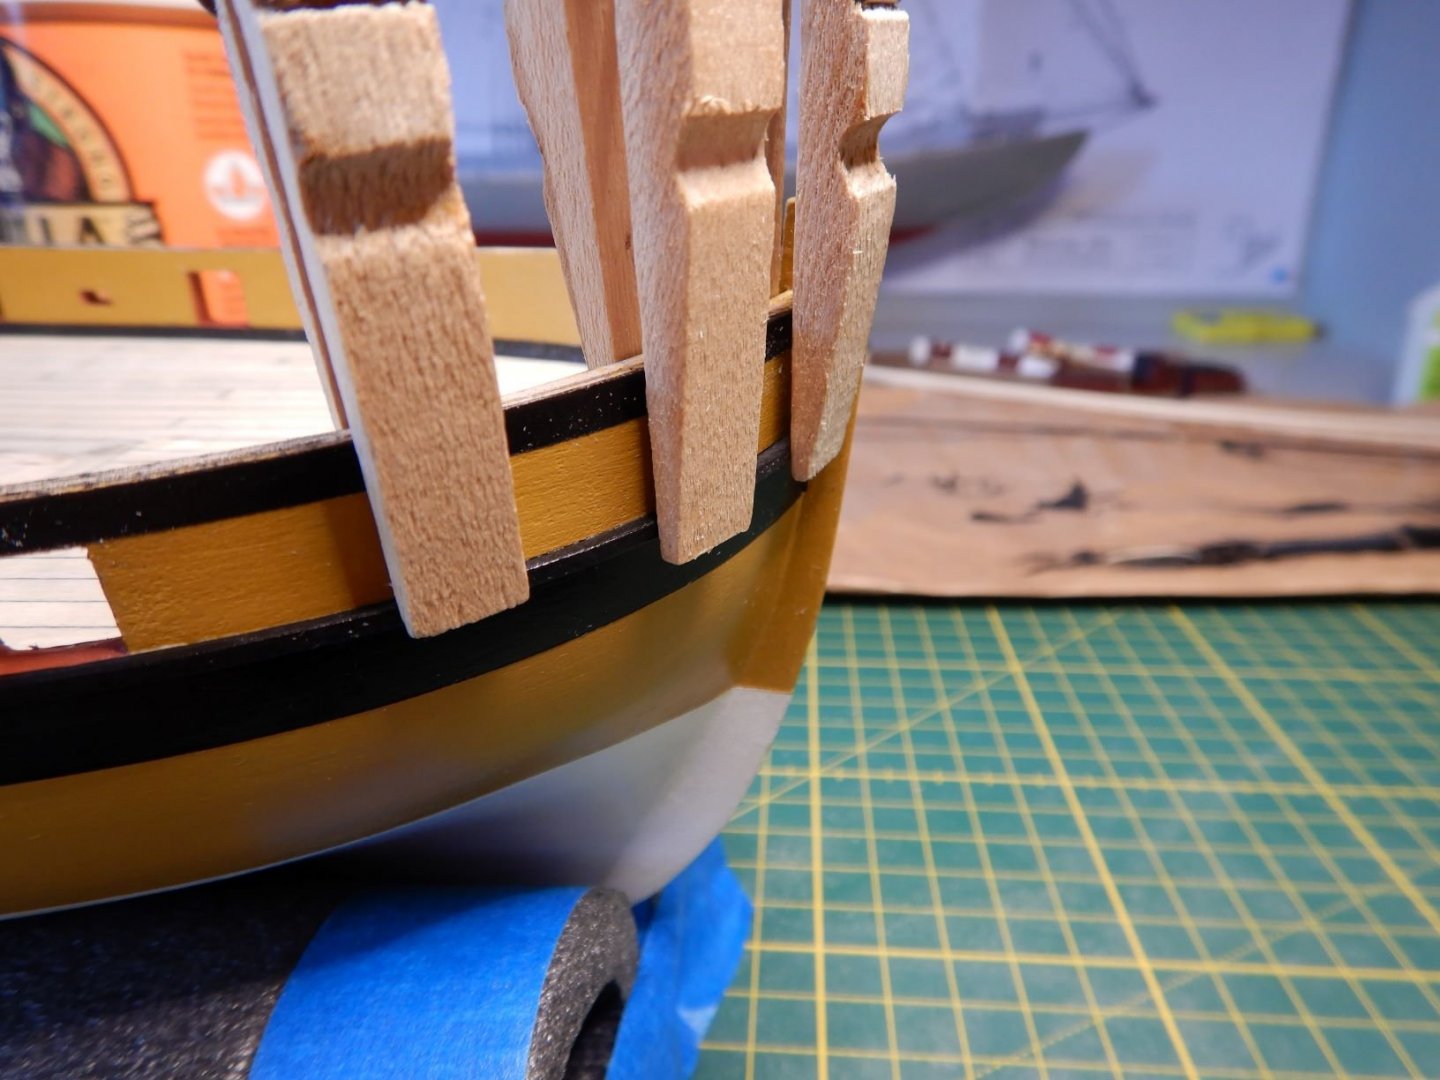
I've made the bollards to go inside the bulwarks.
I've painted them, and made a small jig to file out a small groove for the caprail, since I made the caprail a little wider this was needed.


I've filed/sanded the cleats that also go on the bulwarks, and painted them. A lot of burrs/edges that needed trimming on these.


I've finished the "bench" in the stern over the tiller, and mounted all the bollards and cleats.
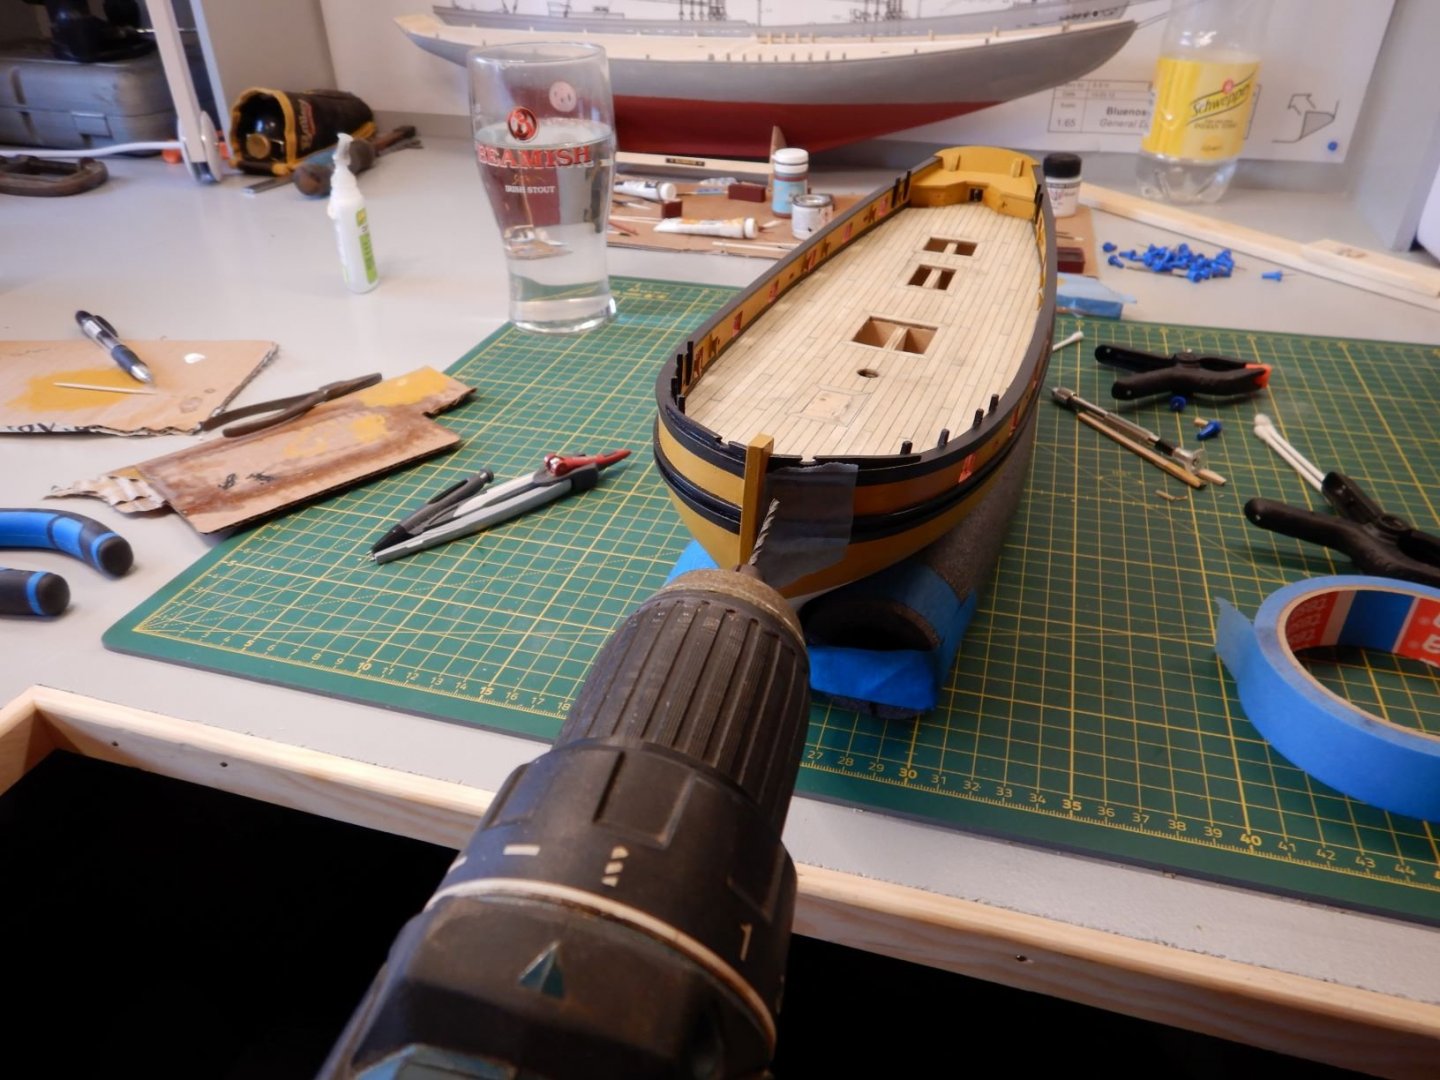
I've drilled the hole for the bowsprit. Must say I was a little scared to do this, but with a sharp drillbit it went great!
I've also finished the mast, booms and yards.

All in all, things are coming together here, and I look forward to start rigging!
All the best,
Gaffrig.
-
Hello all!
Been a few days without internet here, but that translates into more time for modeling!
Rick01, Thanks for the link, great pictures of a beautiful model. And probably a great book too.
Regarding a traveler, looking at the pictures in that link, that is the way the travelers was rigged.
I think I'll follow the Instructions more or less as they are, and rig without a traveler.
The weatherforecast came true, with lots of rain and indoor time. 😆
So quite a bit has been done on the model.
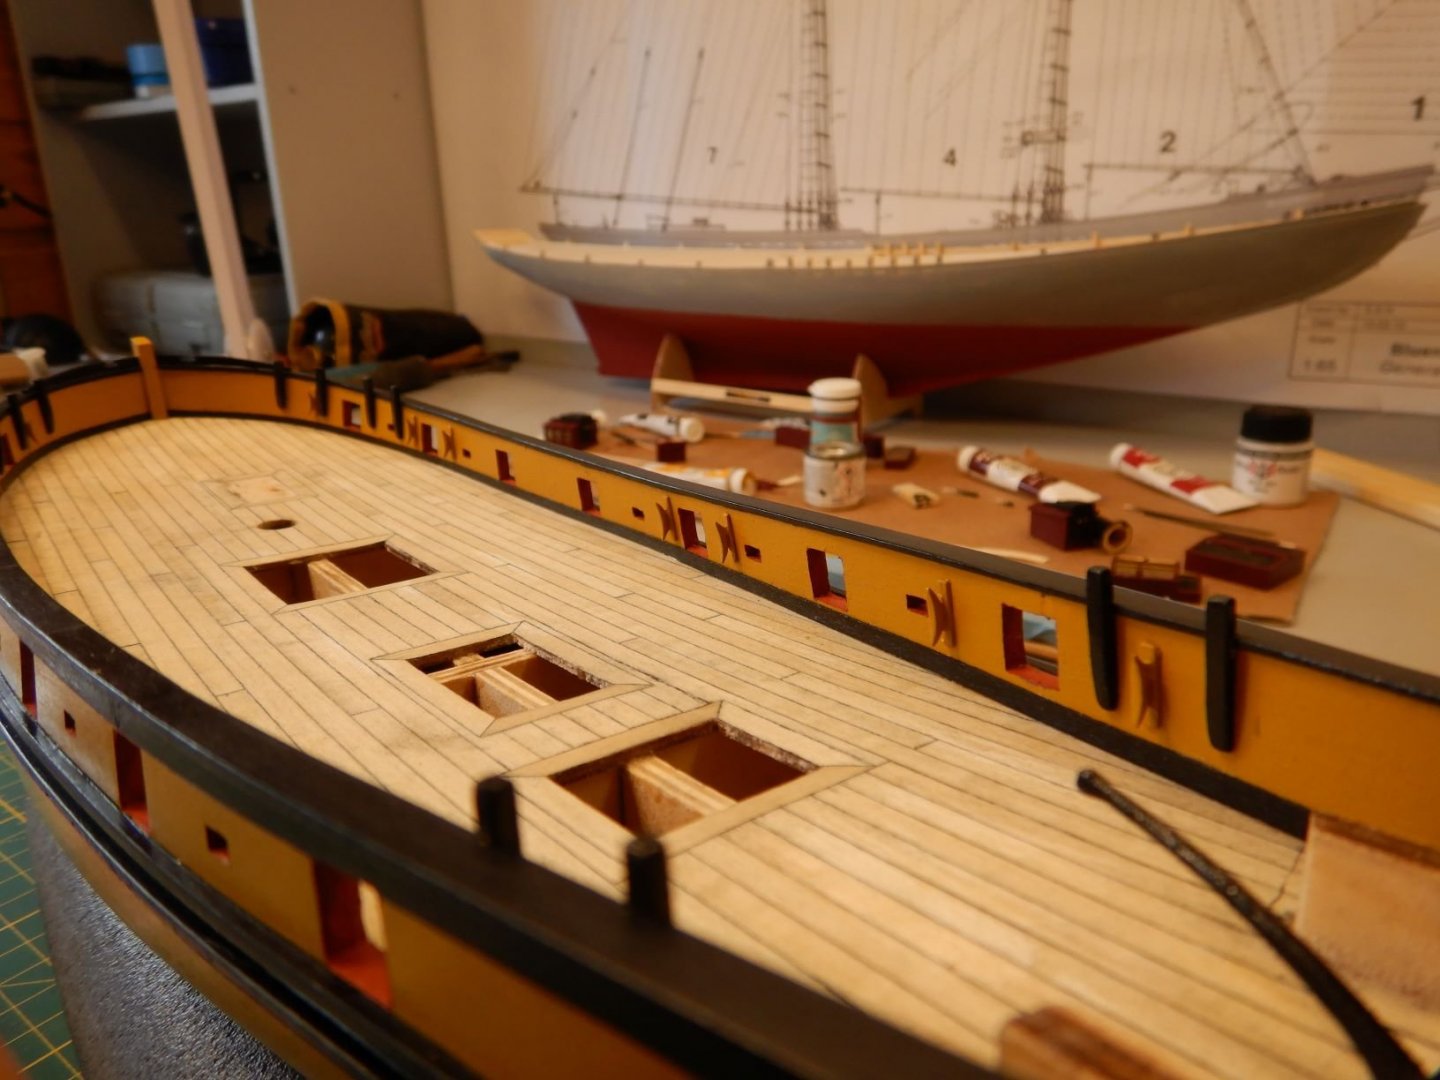
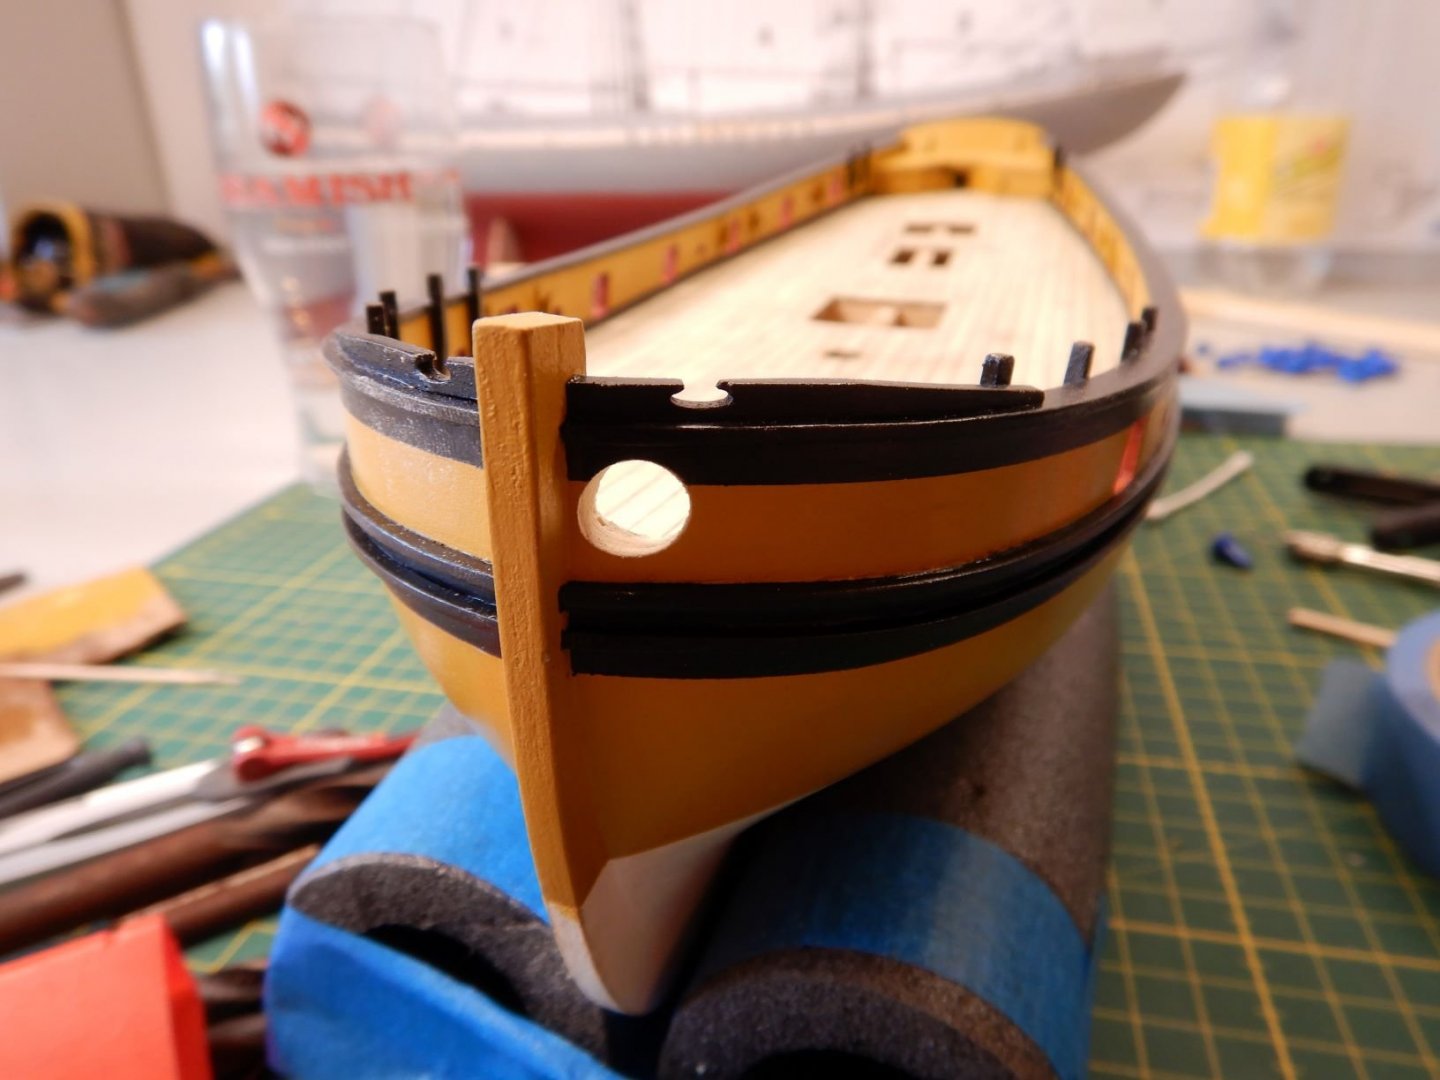
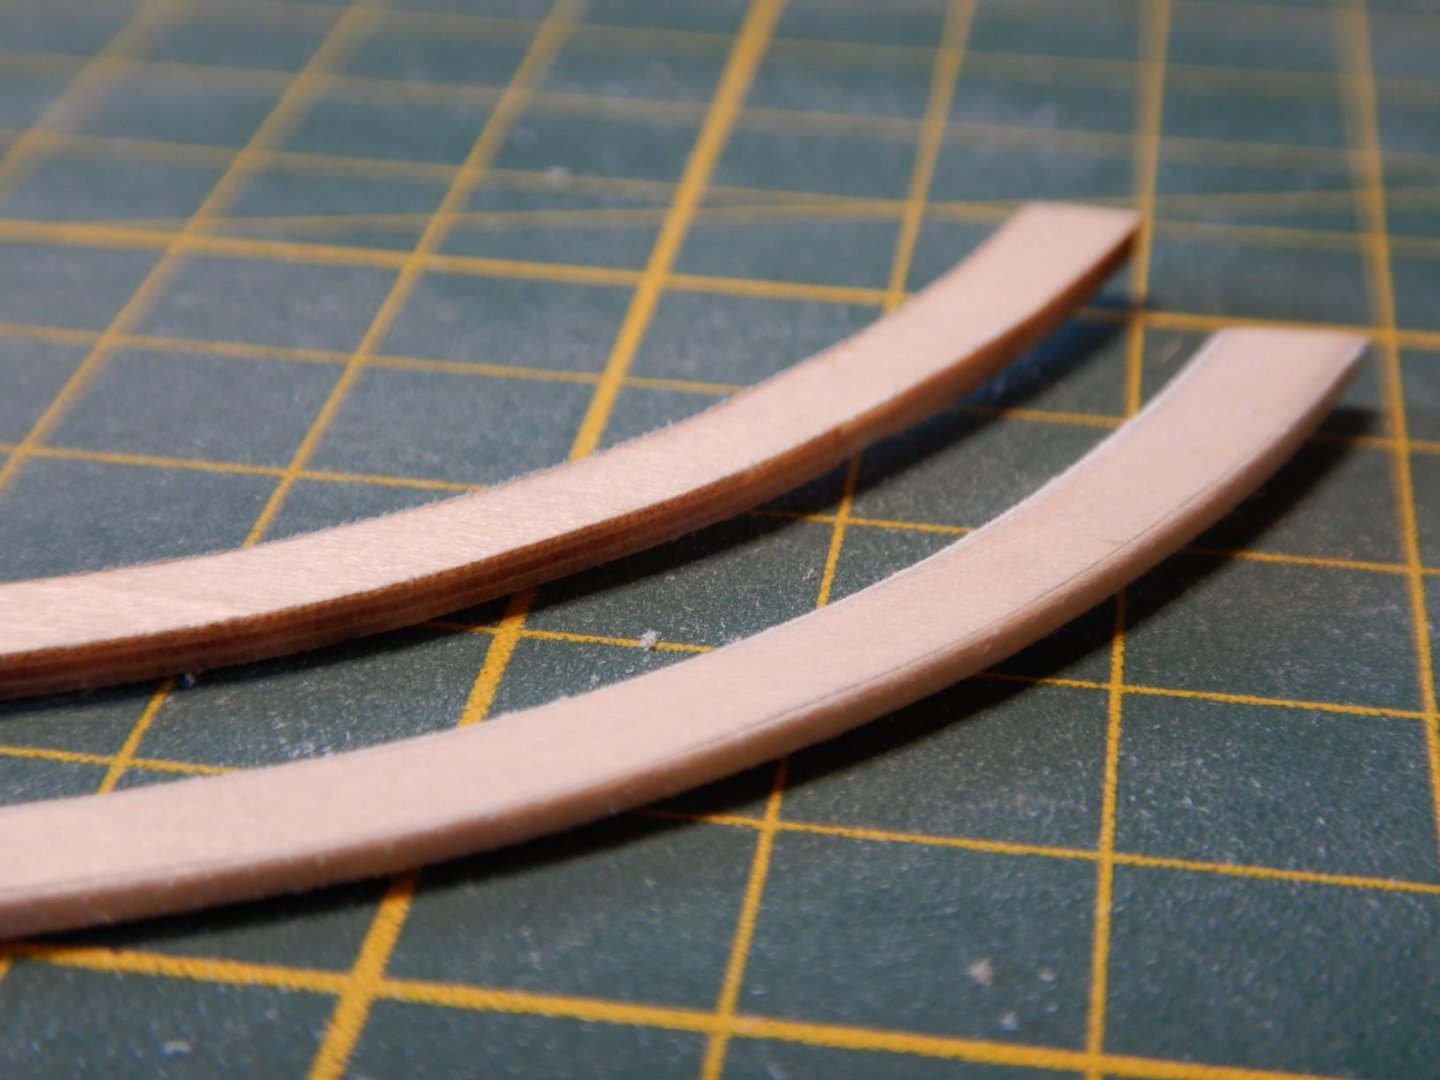
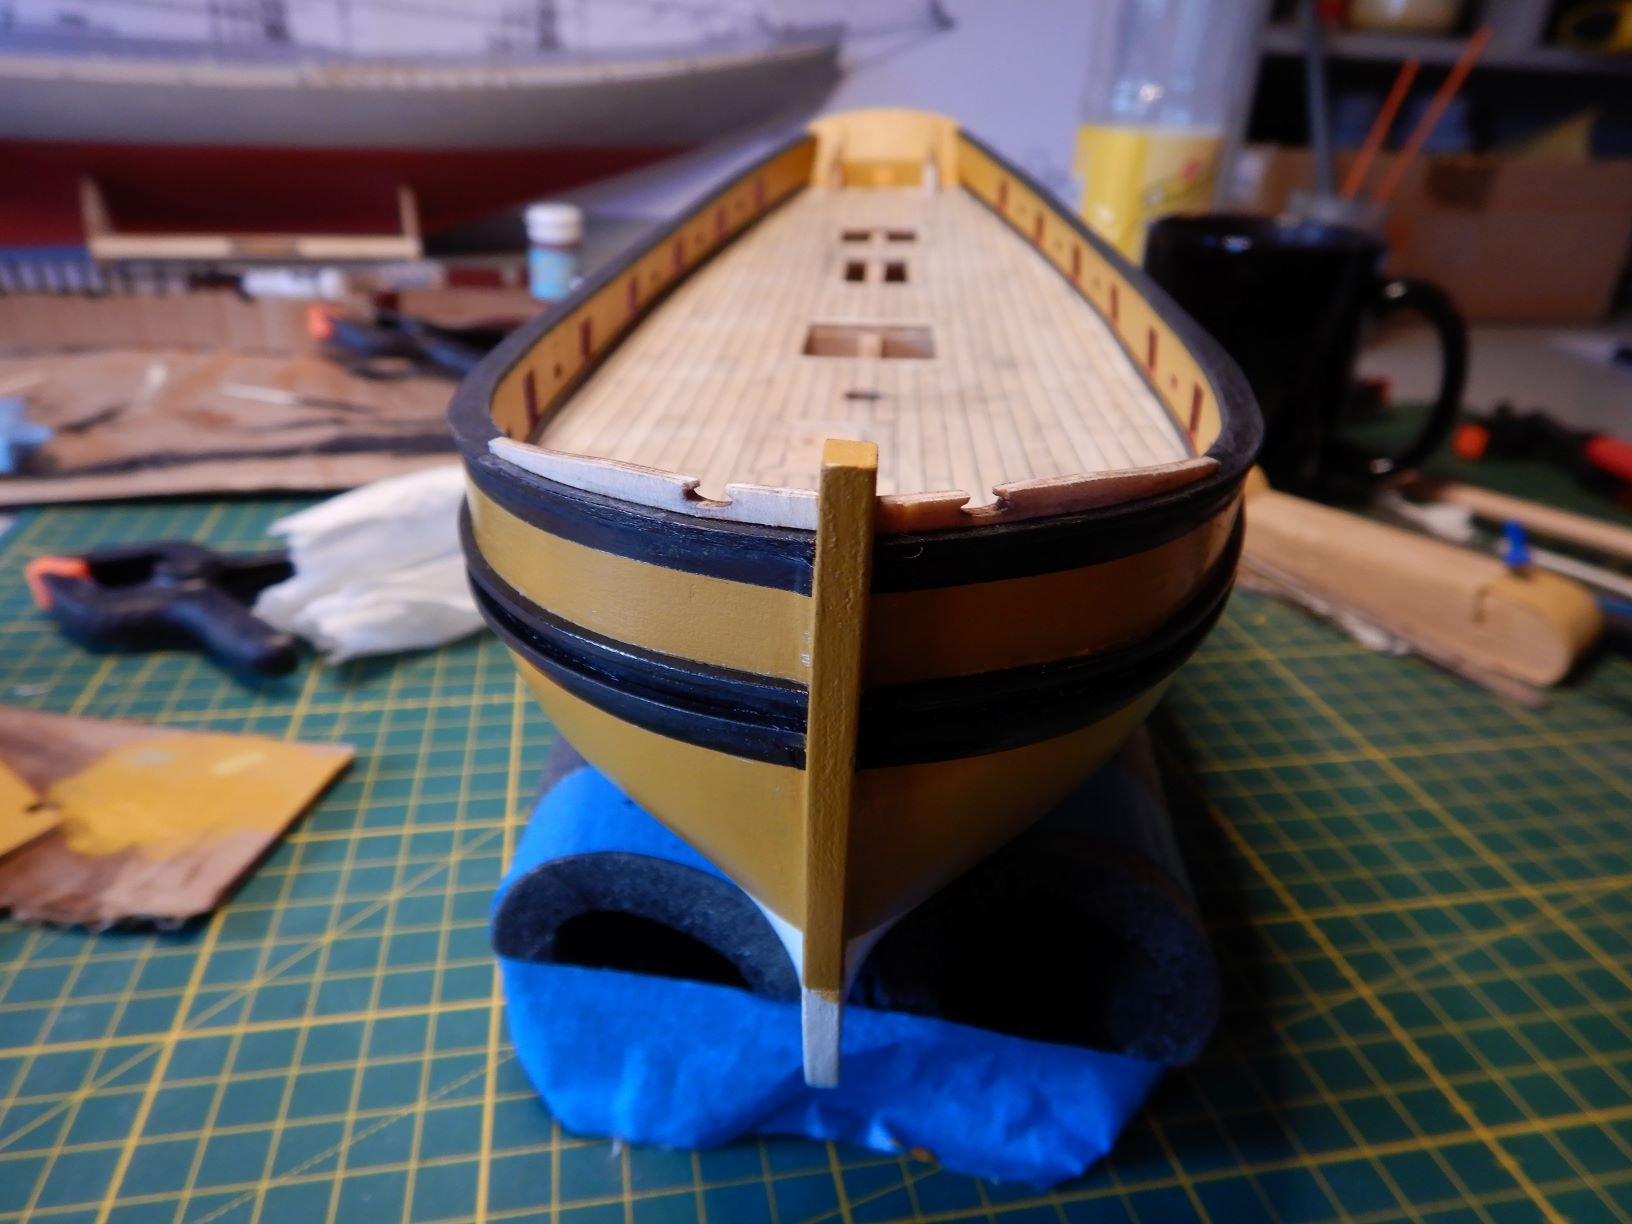
I've got the caprails painted and mounted.
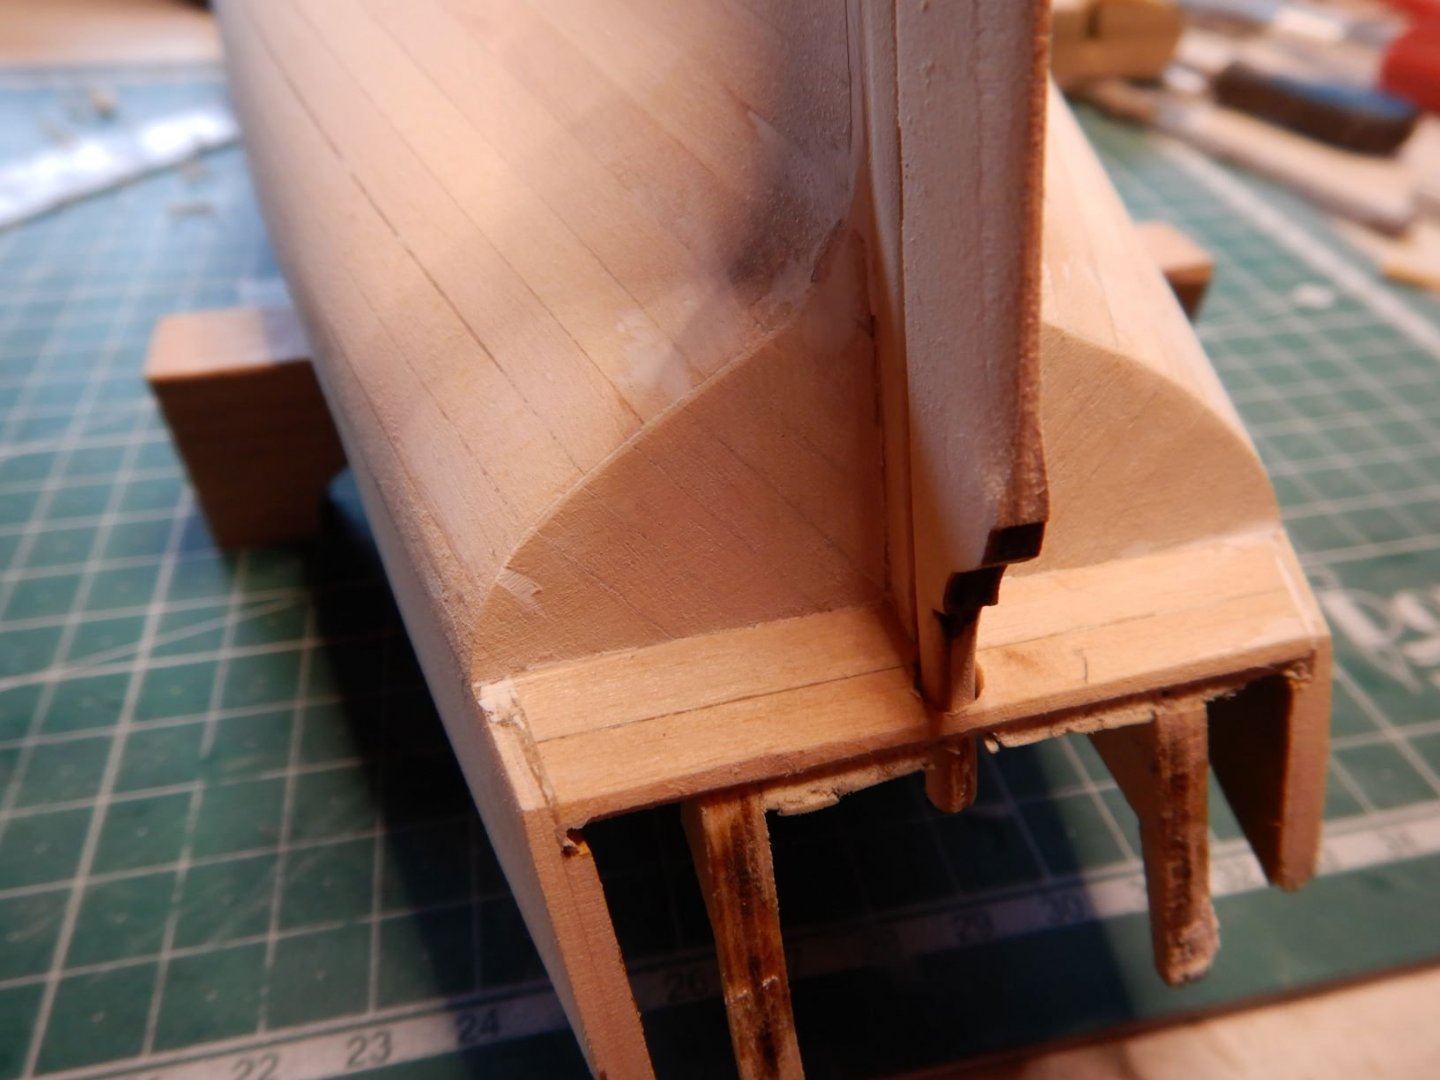
When dryfitting the transom I was not happy with the way it fit, so I glued on a strip of wood to the bottom to make it a little higher, and that made it fit much better.

I've made the rudder fittings and fitted the rudder.


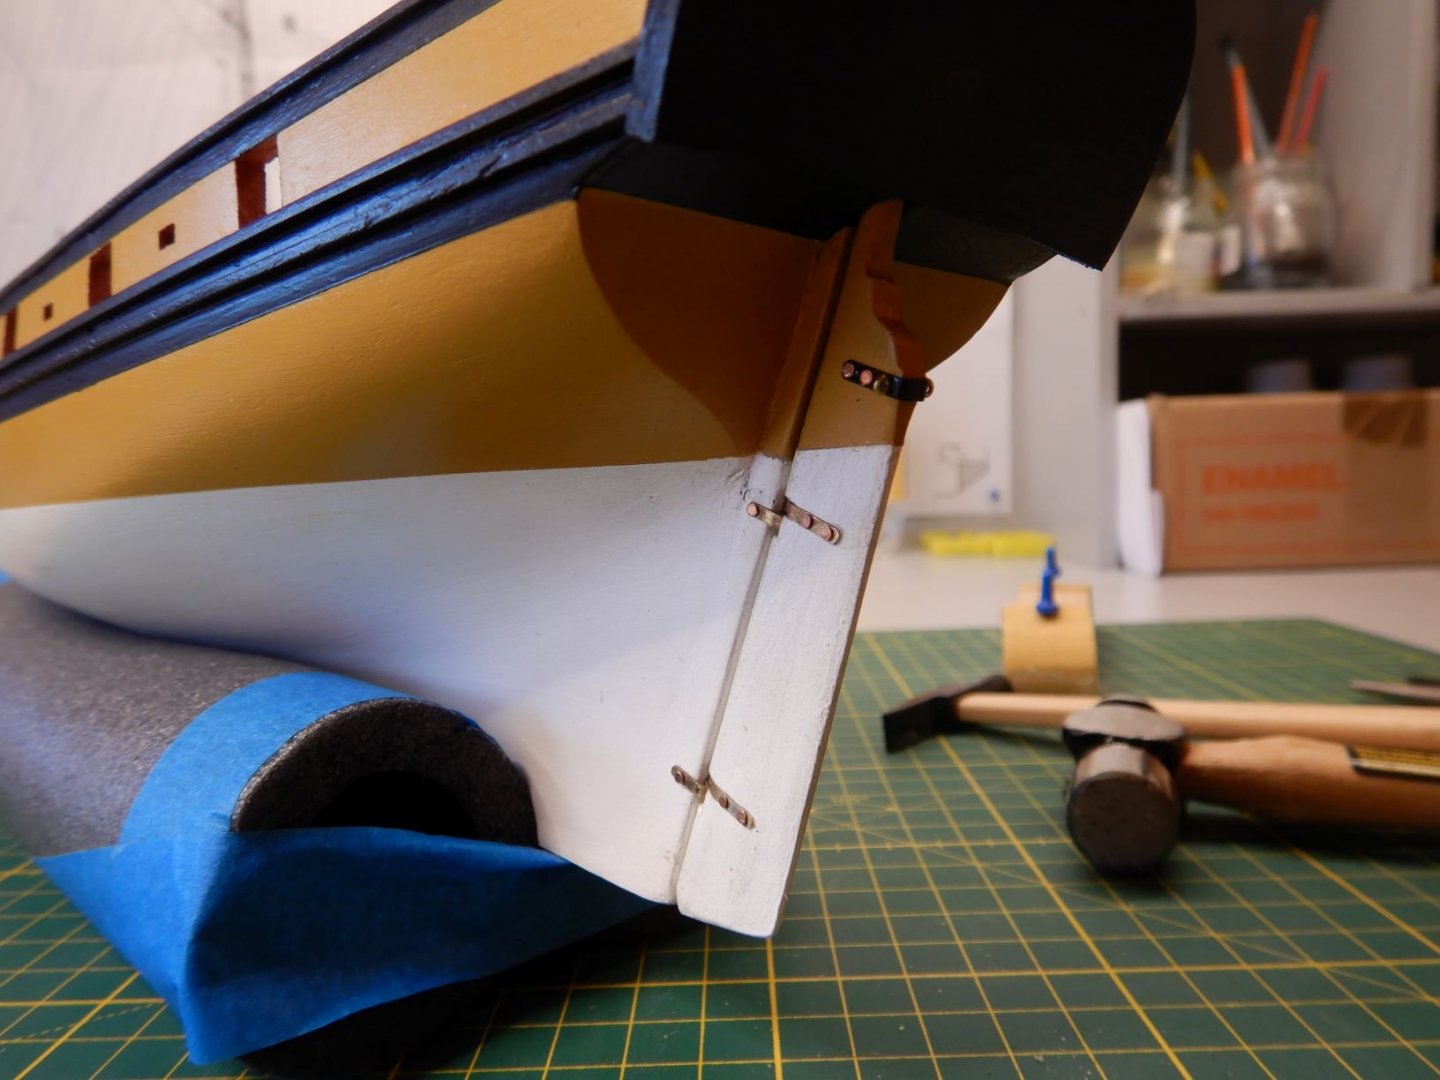
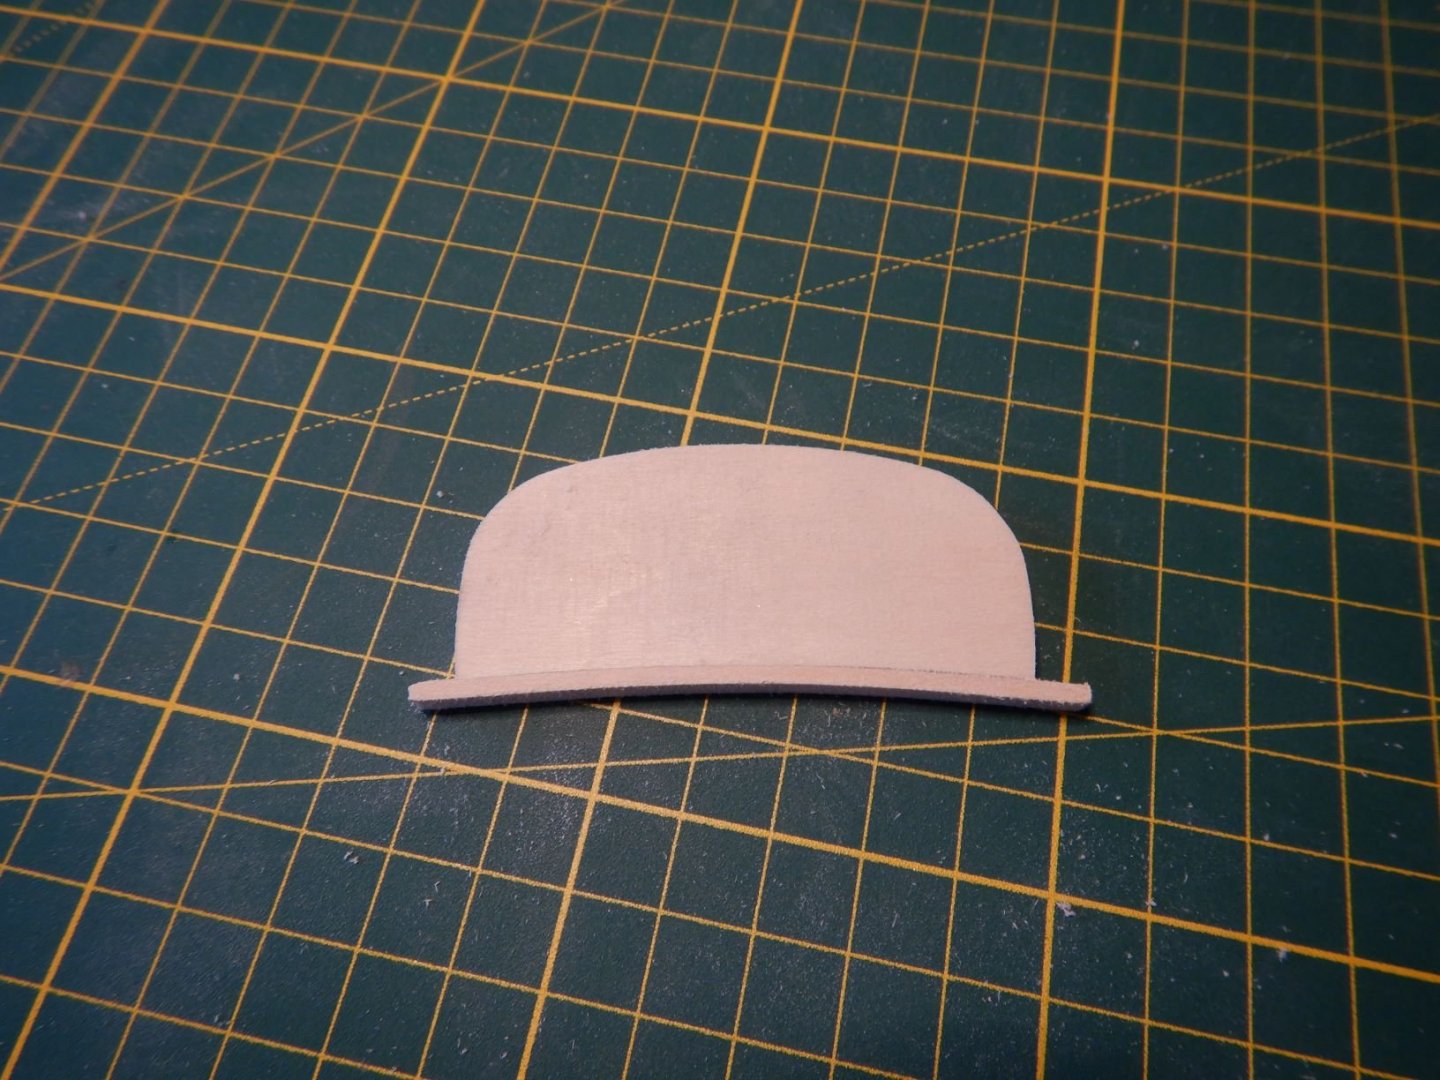
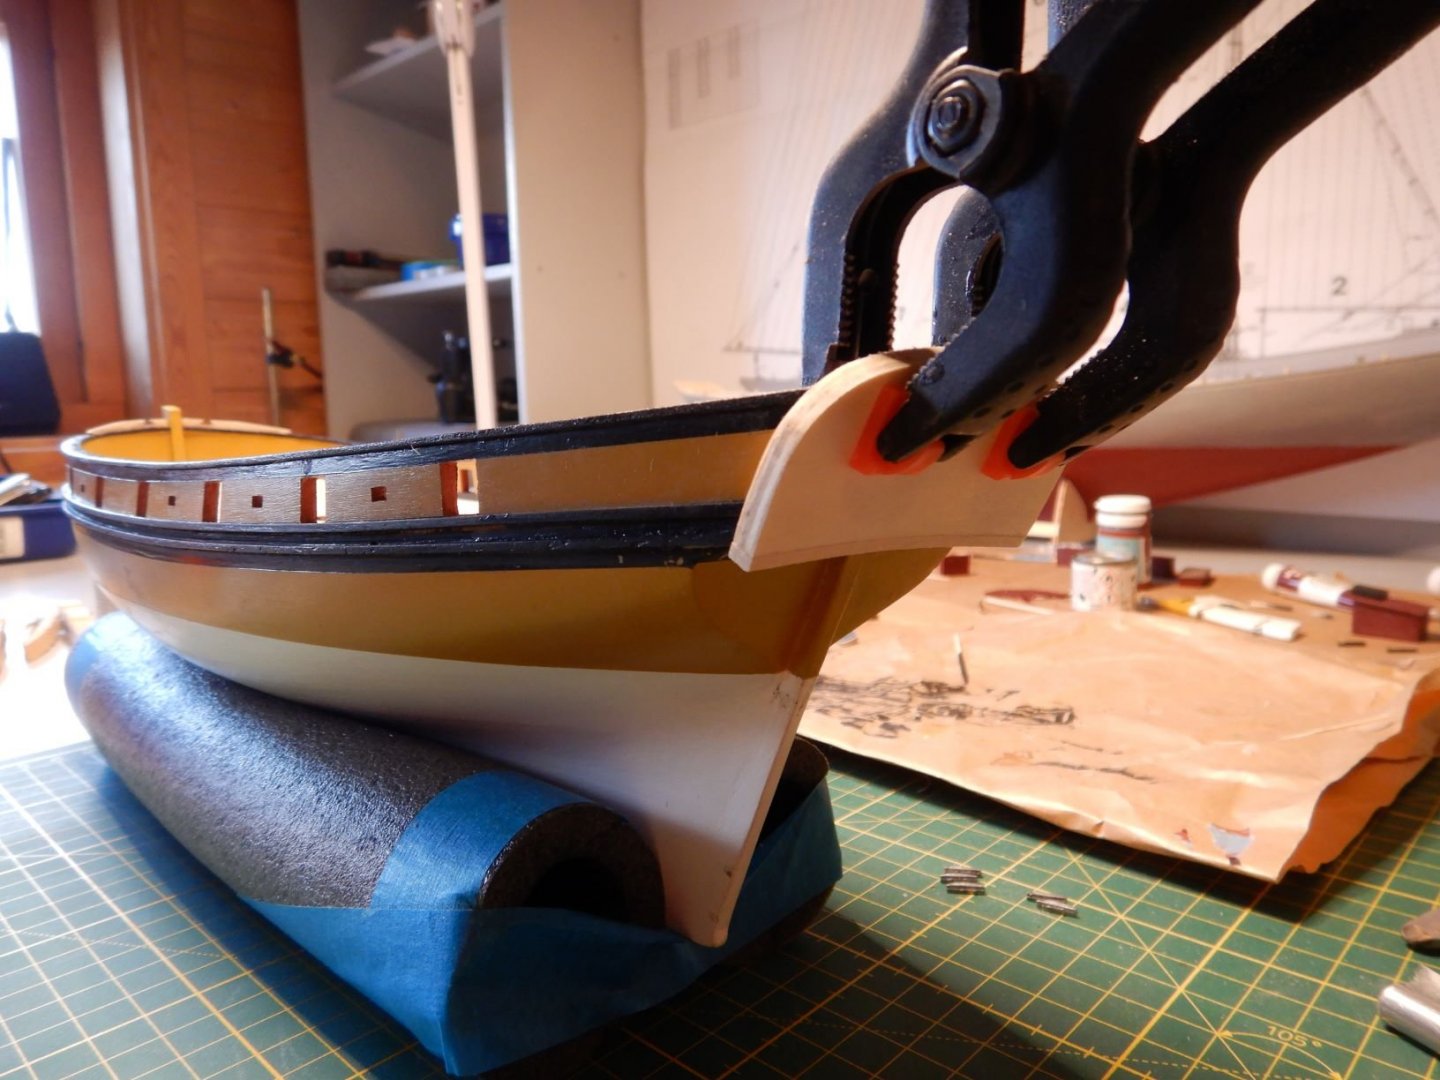
I've fitted the "thingys" on the bow, don't know the english word for these...

I've made the caprail(?) for the dinghy. I ended up laminating this from mahogany to get the right shape.
And painted the interior white.

Here one side is glued and sanded, the other waiting to be glued..

So, all in all a pretty productive weekend.
Looking forward to start rigging.
Gaffrig.
-
Hello all!
Sorry for the long abscense, but we've had a couple of weeks of absolutely beautiful summer weather!
So sailing and playing with fullsize boats has been enjoyed!
Now there's a weekend of heavy rain forecast, so great modeling weather on the horizon!
Rick01, Thanks for all the tips. they are much appreciated.
About the rigging plan, it seems to be much simplified in many places. Single blocks on foresail halyards is one example..
I would think that the bowsprit in a vessel this size would be retractable and the tackles on the bobstay and sidestays also suggests this.
Both of the jibs however is hanked on, and this would mean that no in/outhaul would be fitted. In/outhaul is normally used when the sail is set flying with or without stay.
This is just my own (limited) knowledge of how it is done on boats I have sailed on.
When it comes to books, I don't have any specific ones regarding vessels from this era, but I do have some more general ones.
I think I'm going to build/rig this more or less as the plans show, even though this is not completely accurate.
Also many thanks to all others for liking and commenting!
It is very much appreciated and very motivating!
Not much progress lately because of sailing, but some has been done.
Glued on the rubrails and I made the mistake of gluing the top one first, which made clamping the lower one difficult.
Did this lower one first on the other side!
Also glued on the trim(?) along deck inside the bulwarks.

I've also prepped the caprails with glueing on a thin strip on either side to hide the plywood endgrain and make them a little wider, as they barely cover the top of the bulwarks as is.

Next up is to get them painted and mounted so I can mount the transom.
That's it for now!
Stay safe!
Gaffrig.
-
Hello to all.
Been away sailing for a while, gotta play a little with the big boats too!
Have been back at it for a couple of days and here's a little update.
Rick01, I like your beefed up davits, they look great! Definetly something I'll copy when I get there if you don't mind.
Your version of the forward pinrail looks great too! Something to think about.
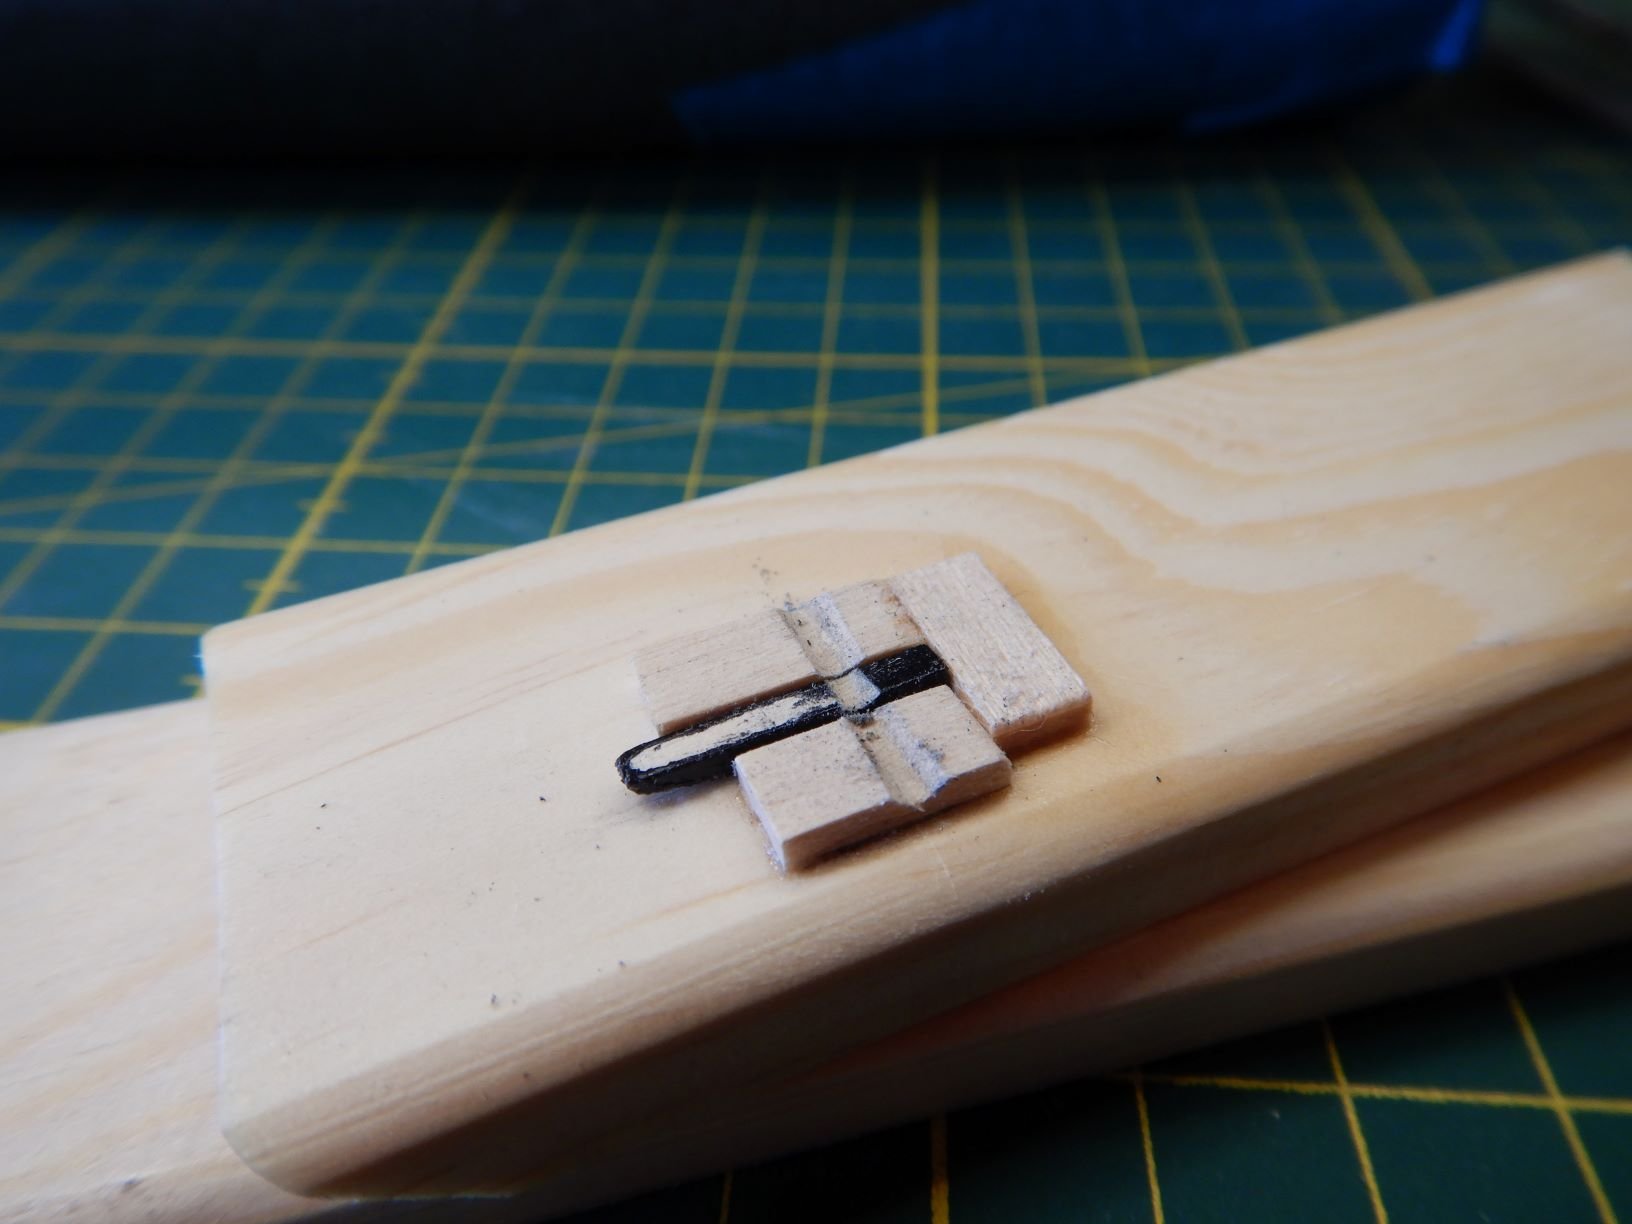
I've been thinking about the anchorcable, and maybe it would work to make a horisontal capstan on the bollards/bitts that holds the bowsprit?
Might be tight between that and the forward companionway though.
Rick01, you mention the bowsprit, here's how I did that.
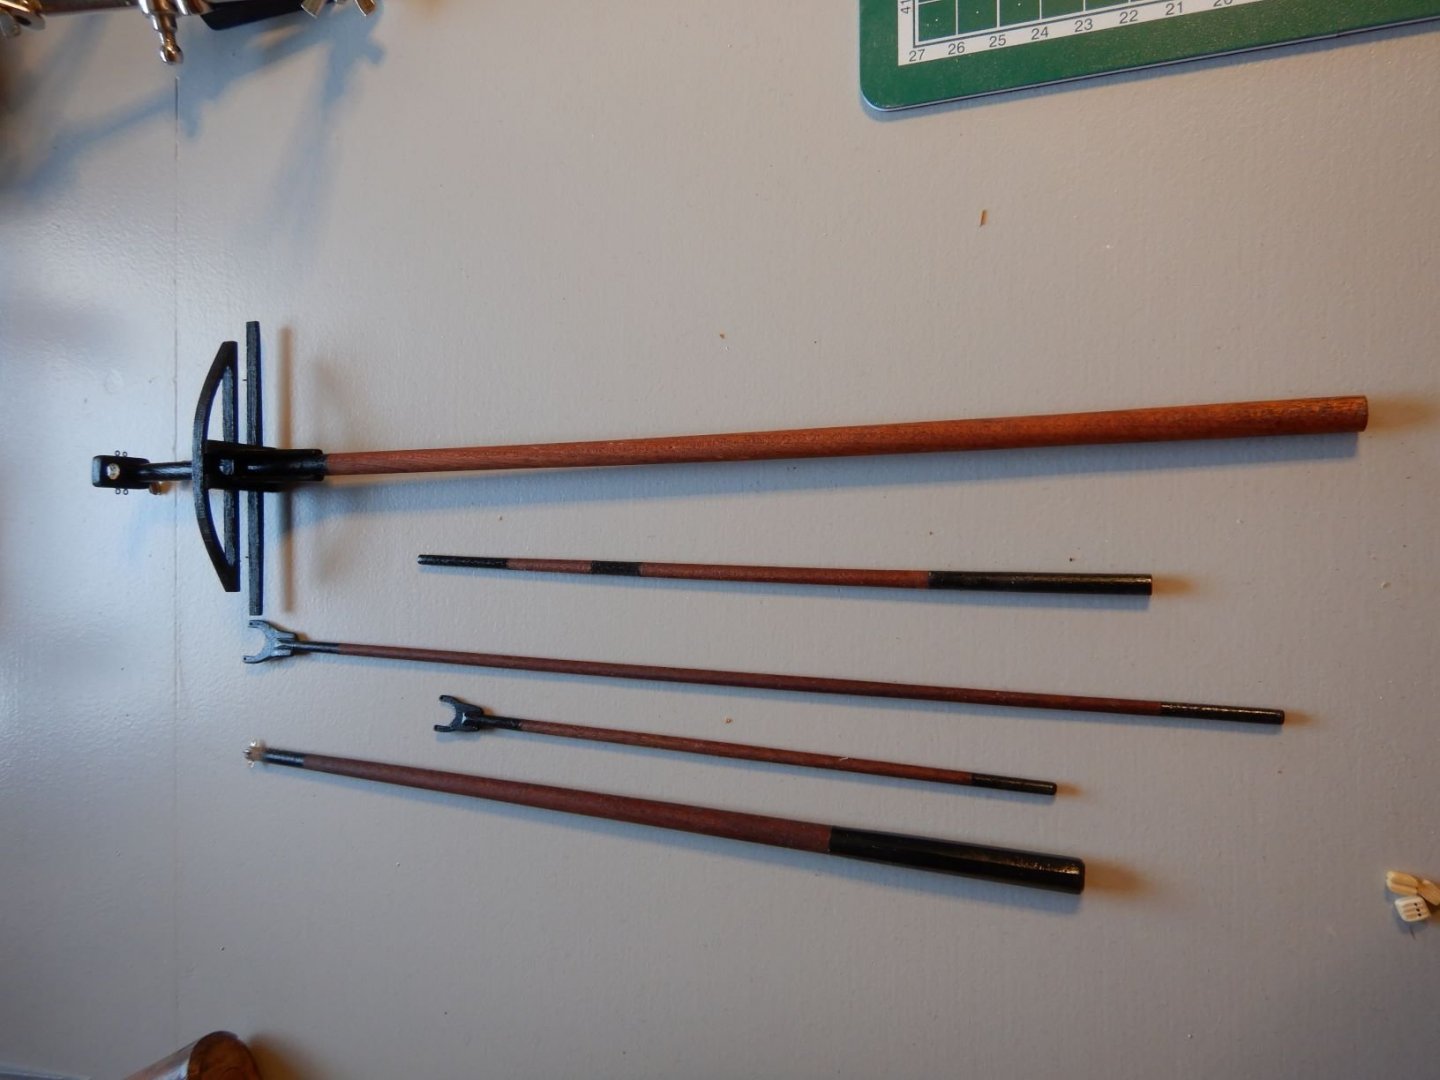
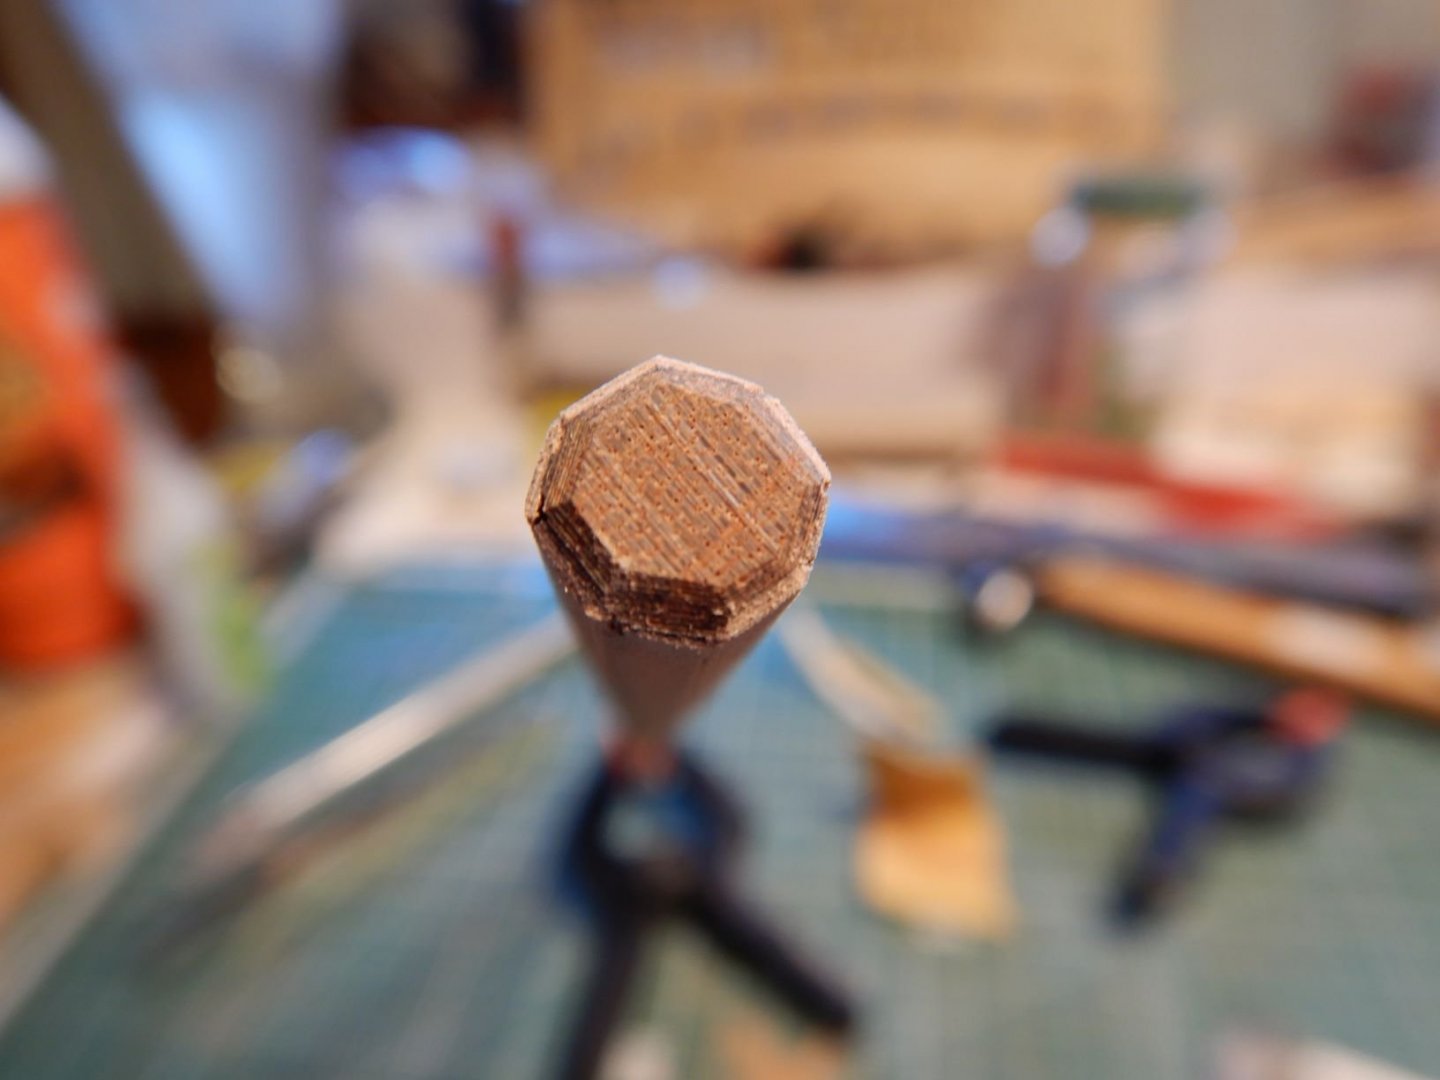
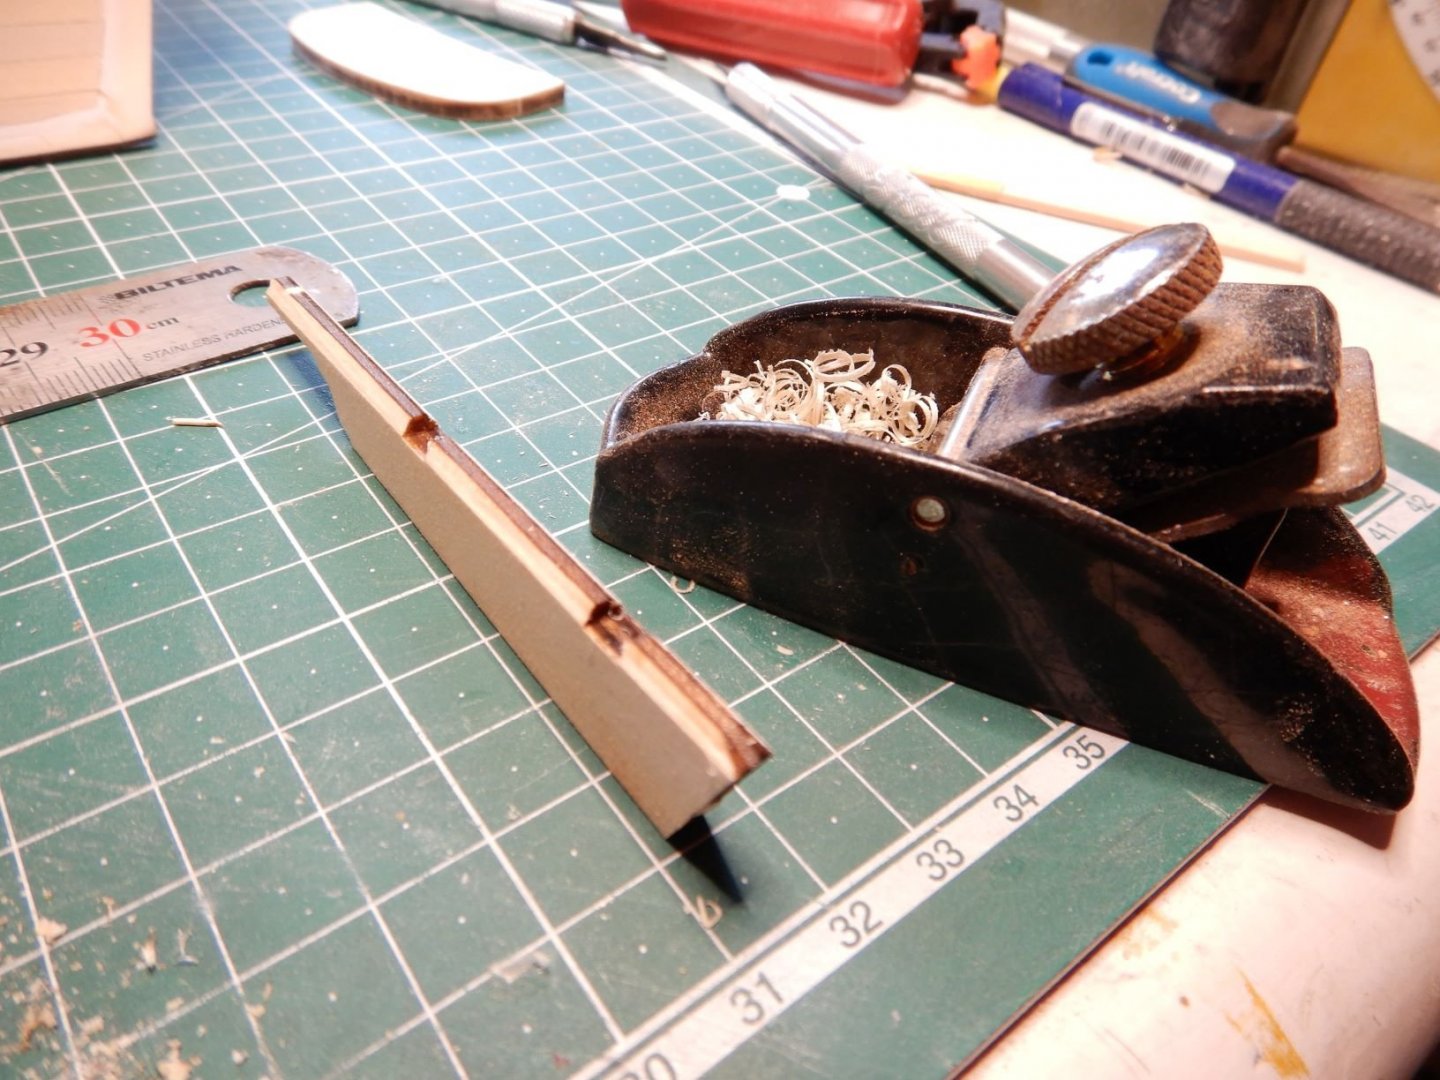
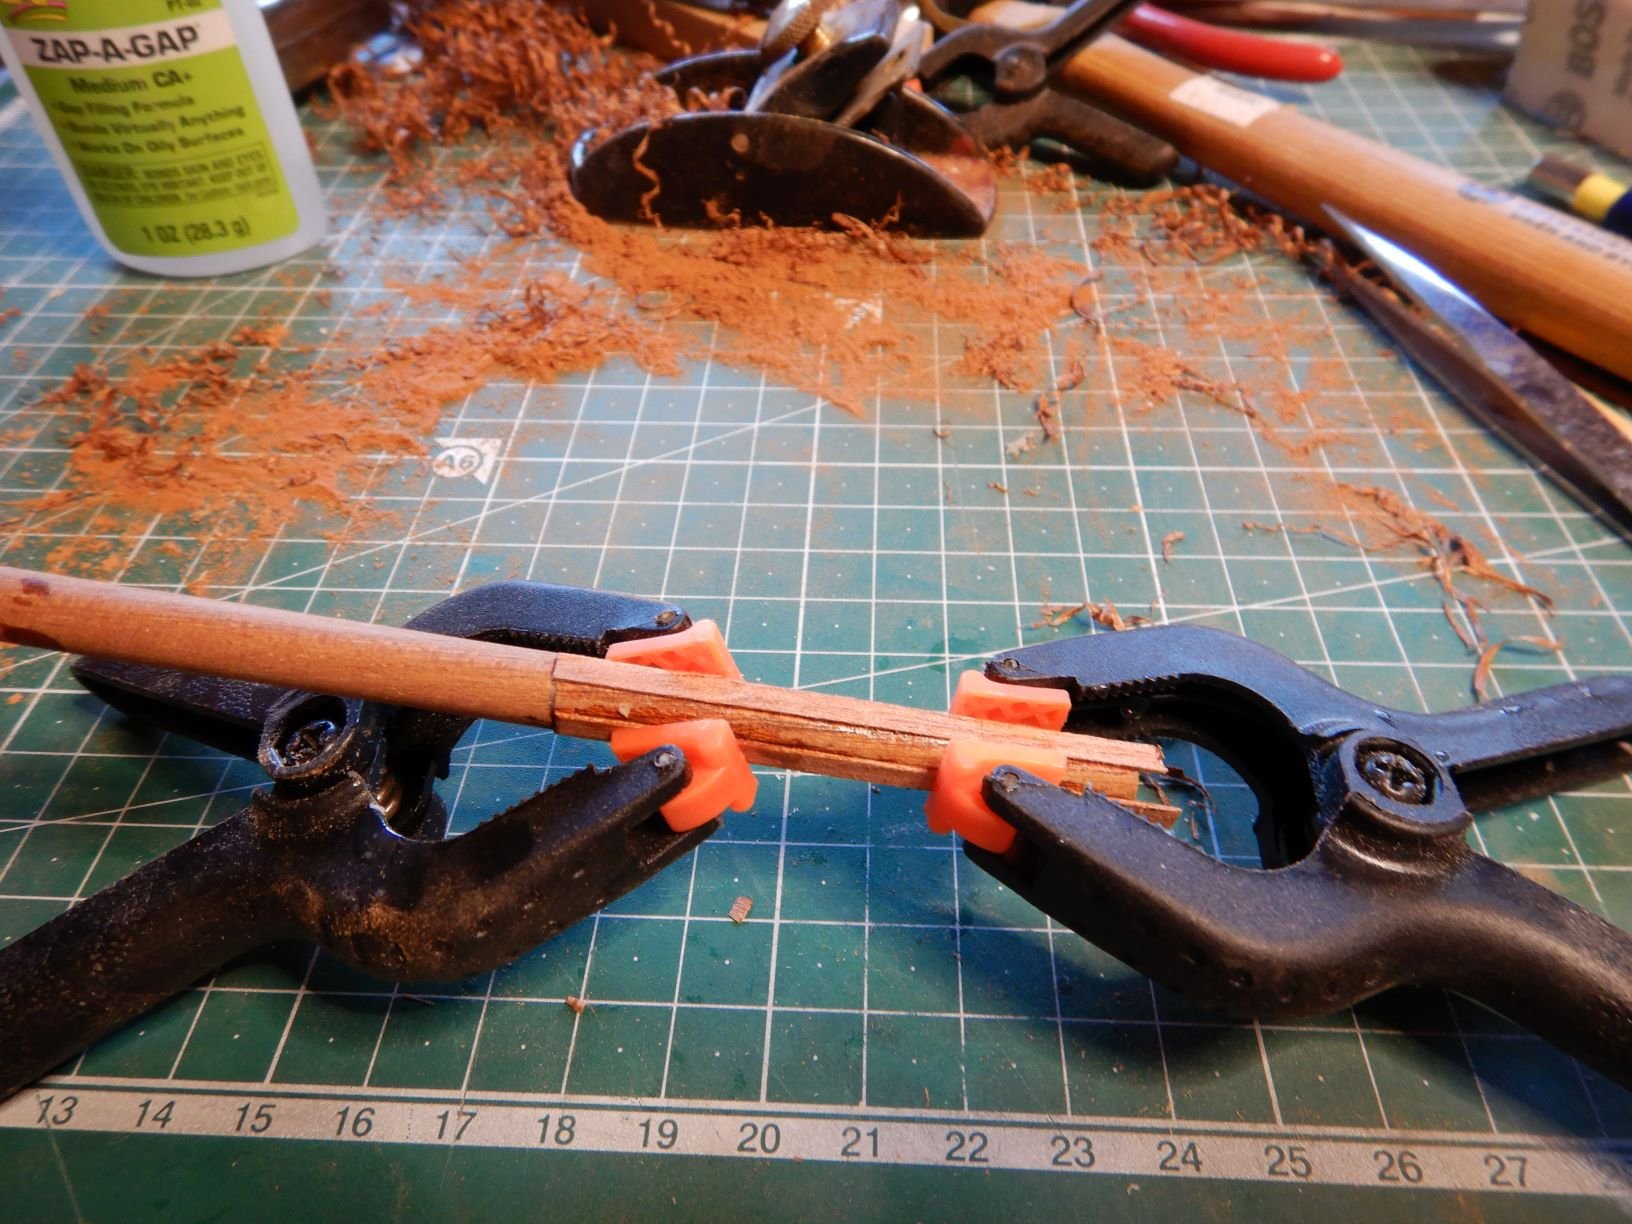
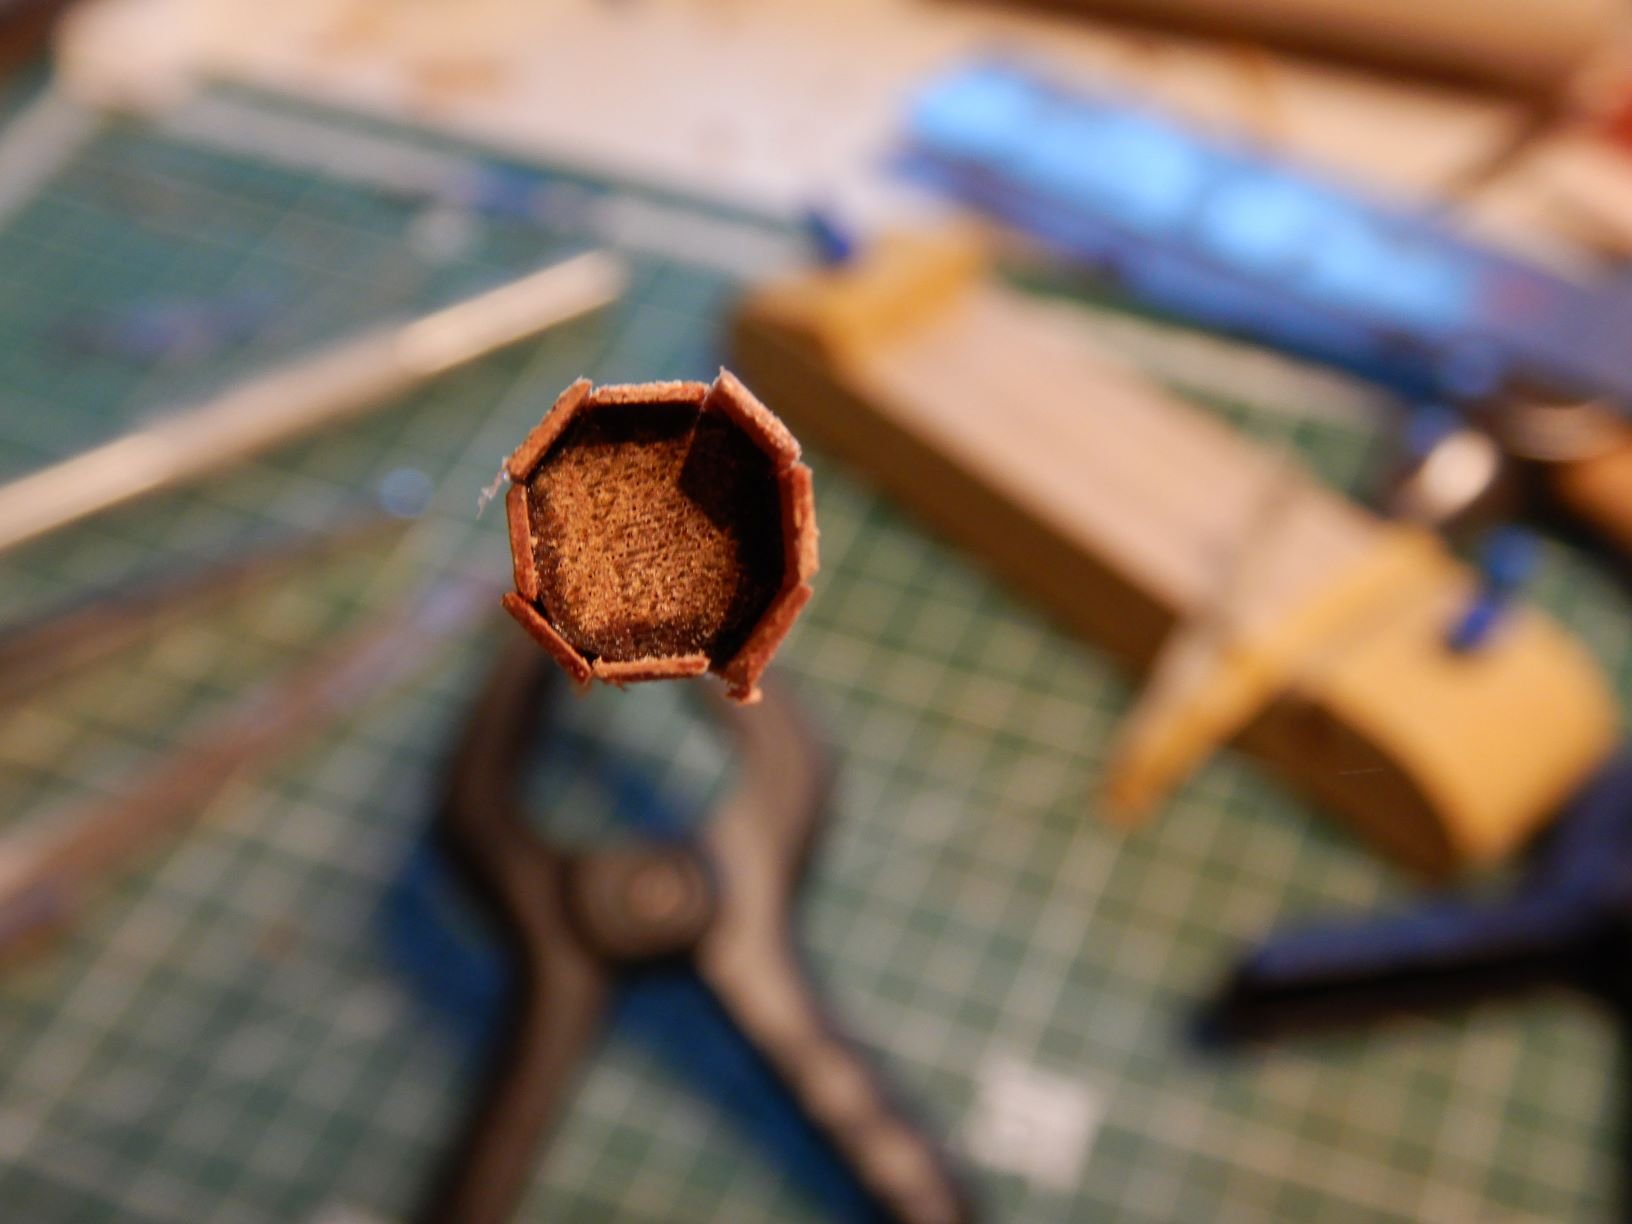
In between different coats of paint I have made the bowsprit. The kit supplies a 8mm round dowel that is supposed to be formed into a 8x8mm octagon...
There's an interesting task for you! 🤣😂
I ended up sanding it square and glueing on pieces of 0,5x3mm mahogany from the Bluenose deck I'm not using. Then sanding "between" the square to get the octagonal shape. This turned out good enough.

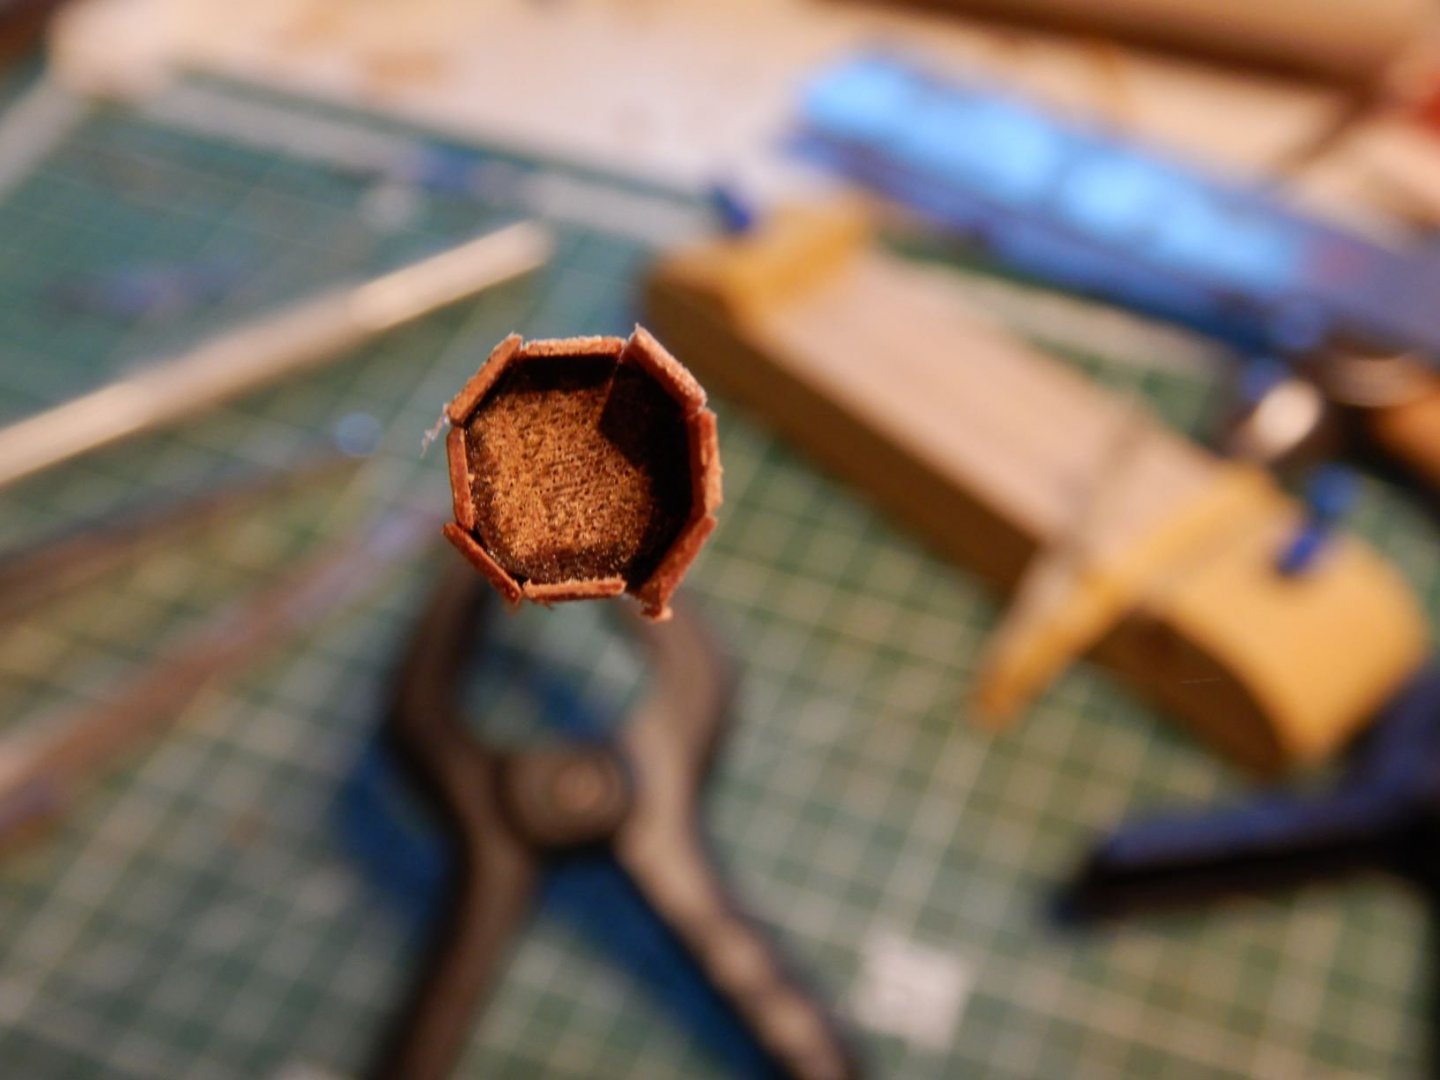
After sanding..
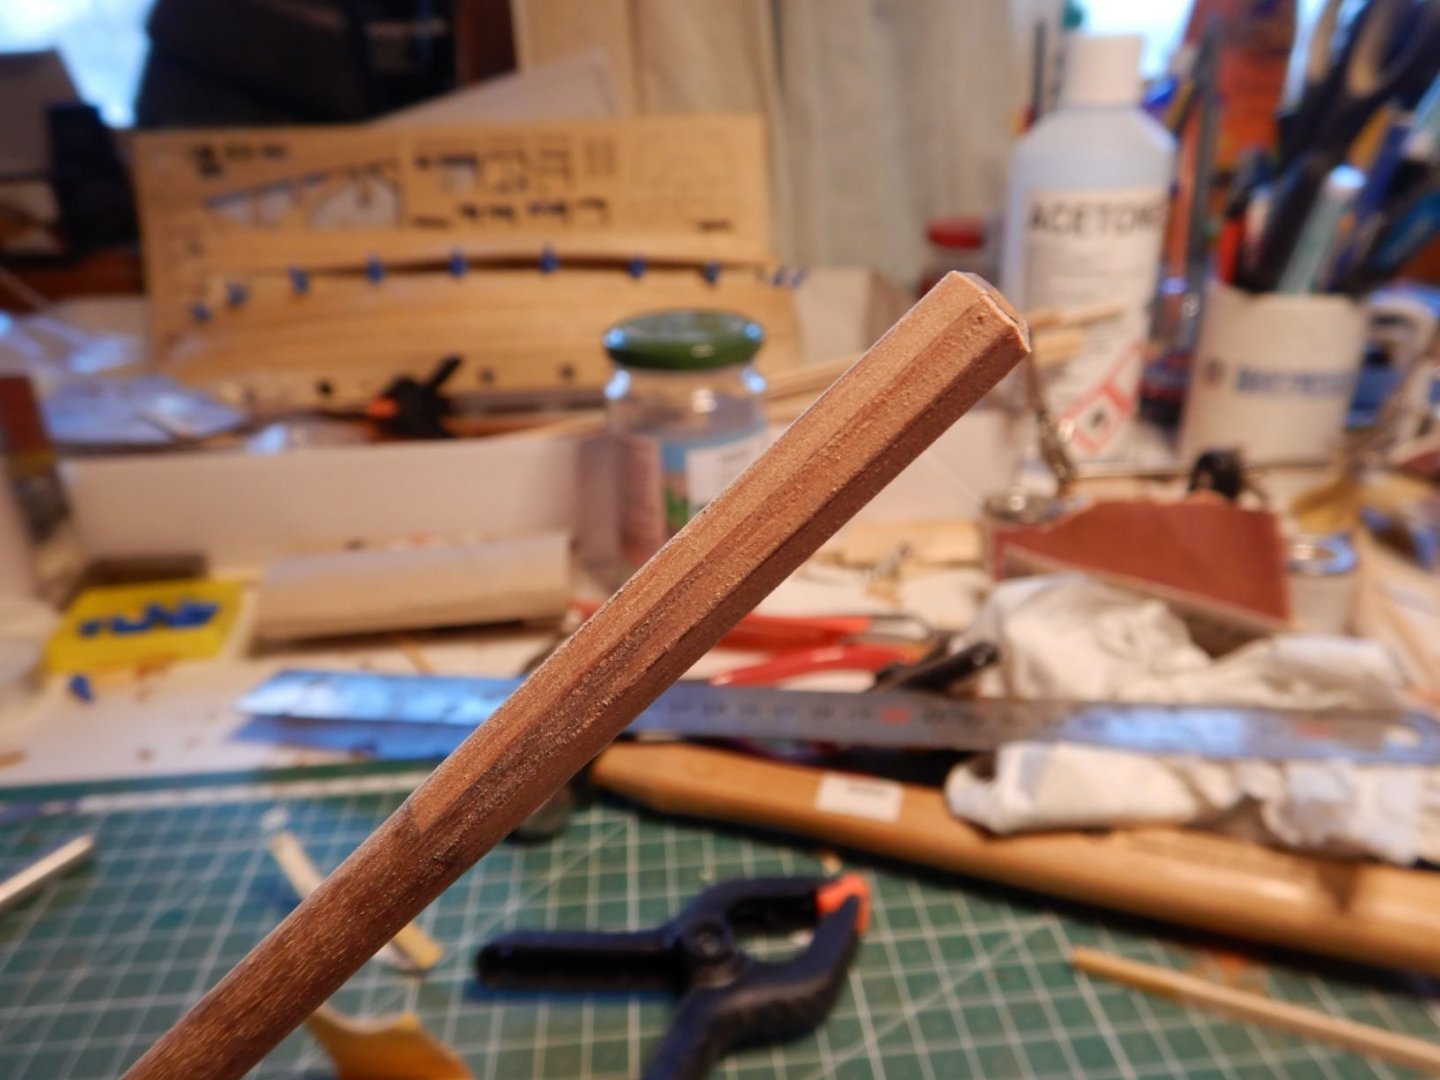
And painting..

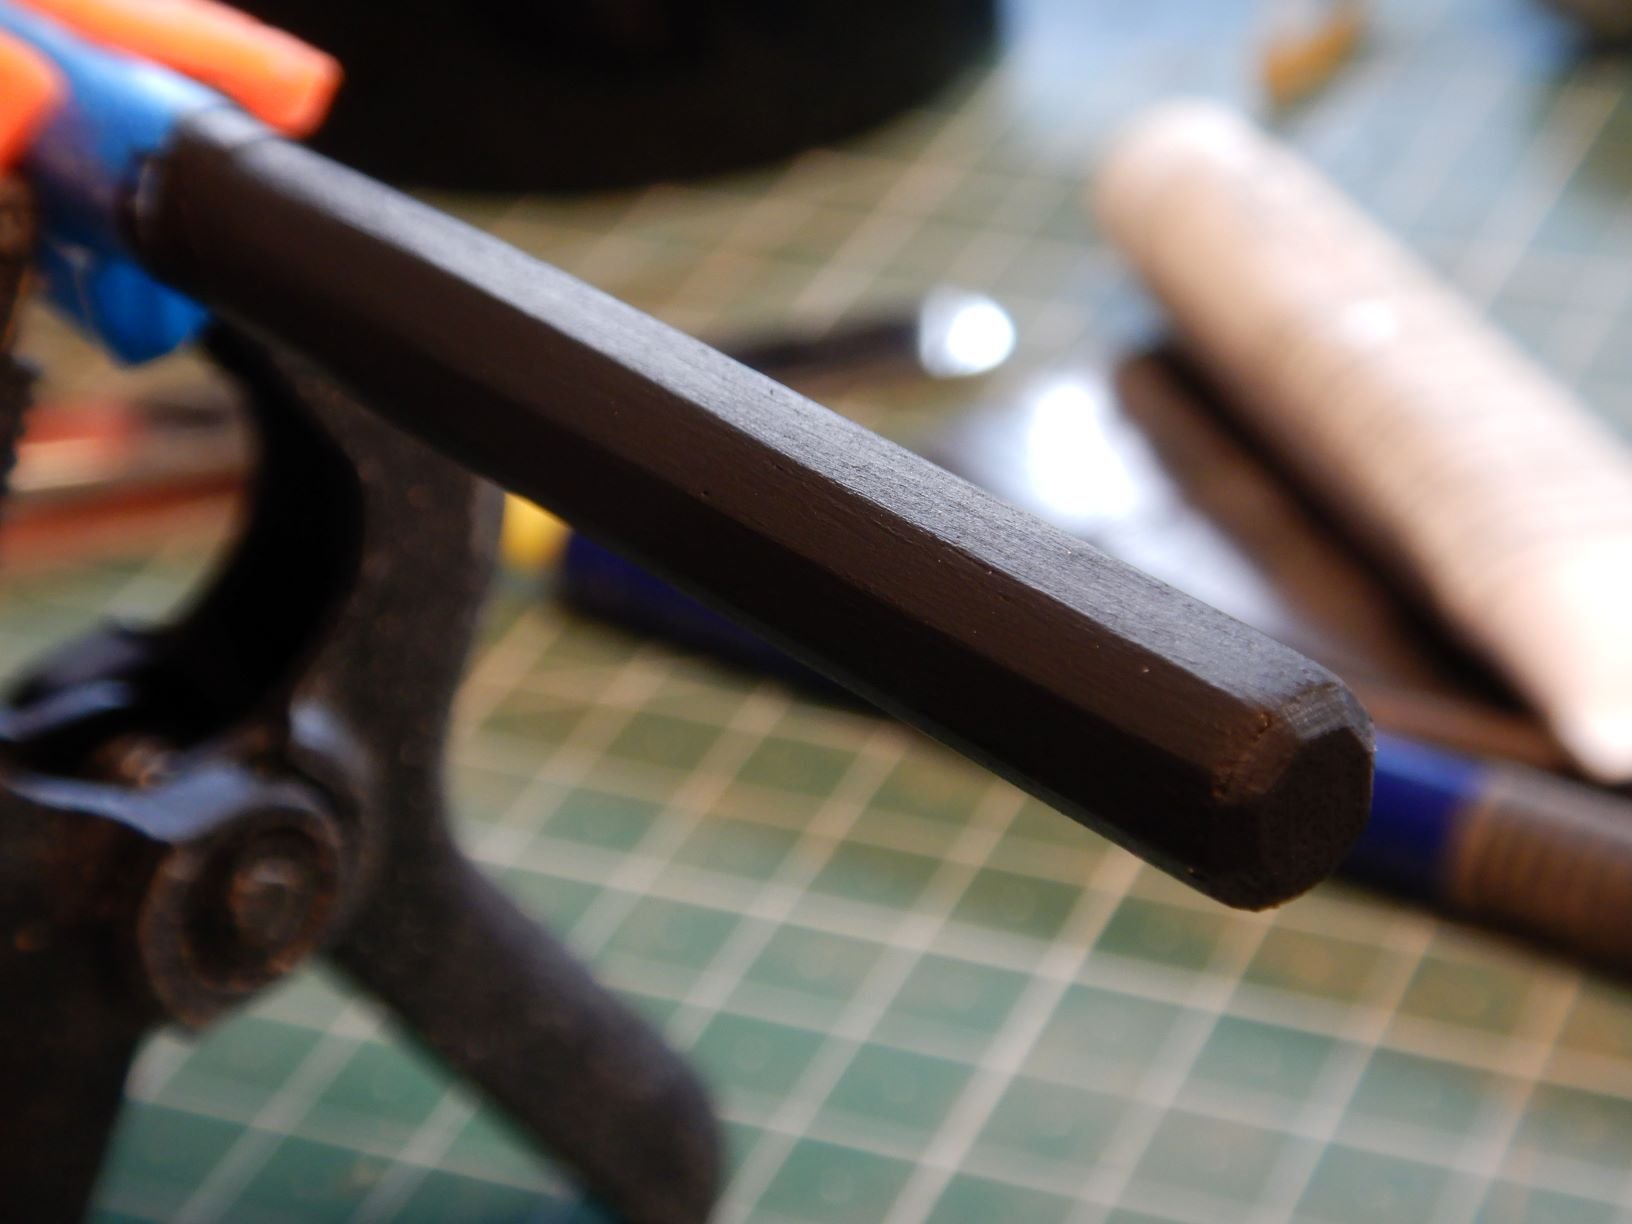
For shaping the rest of the bowsprit I used a small planer first, and then put the whole thing in a battery drill and sanded it smooth.
Finished it of with linseed oil.
Also made a new fitting for the tip.

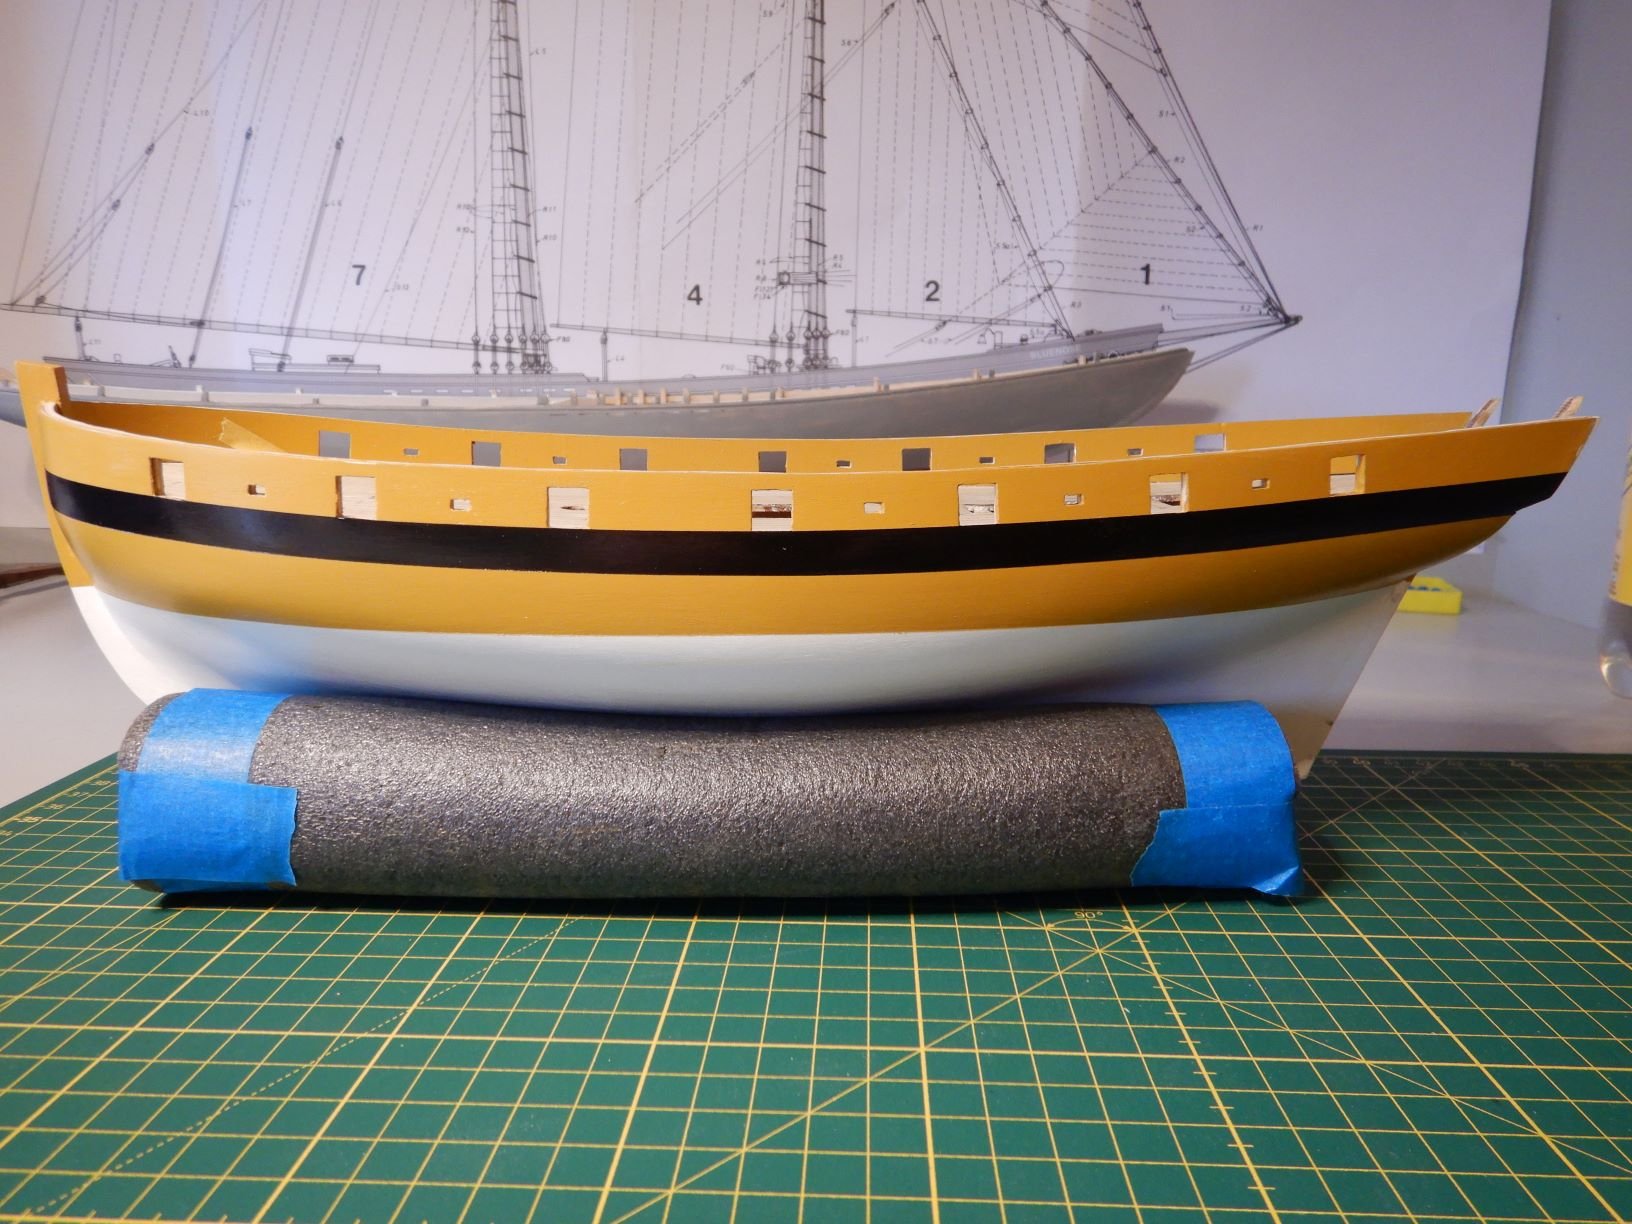
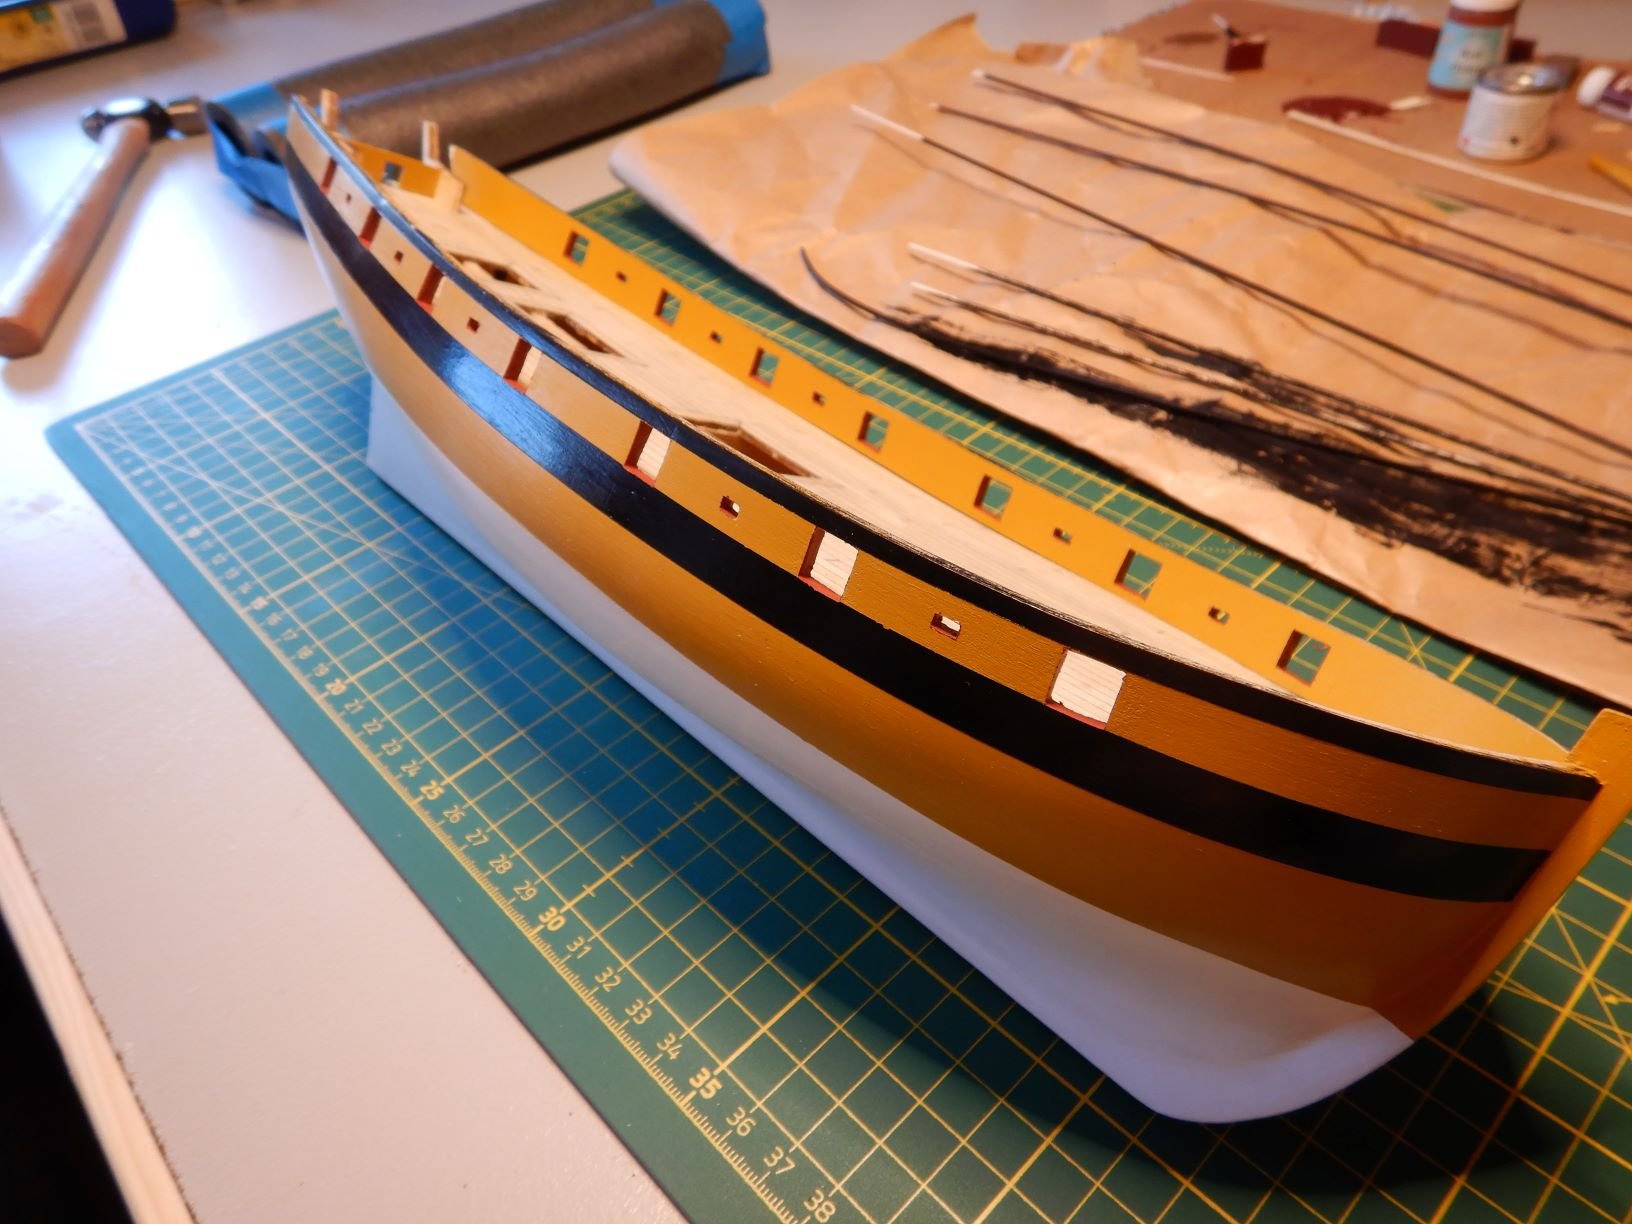
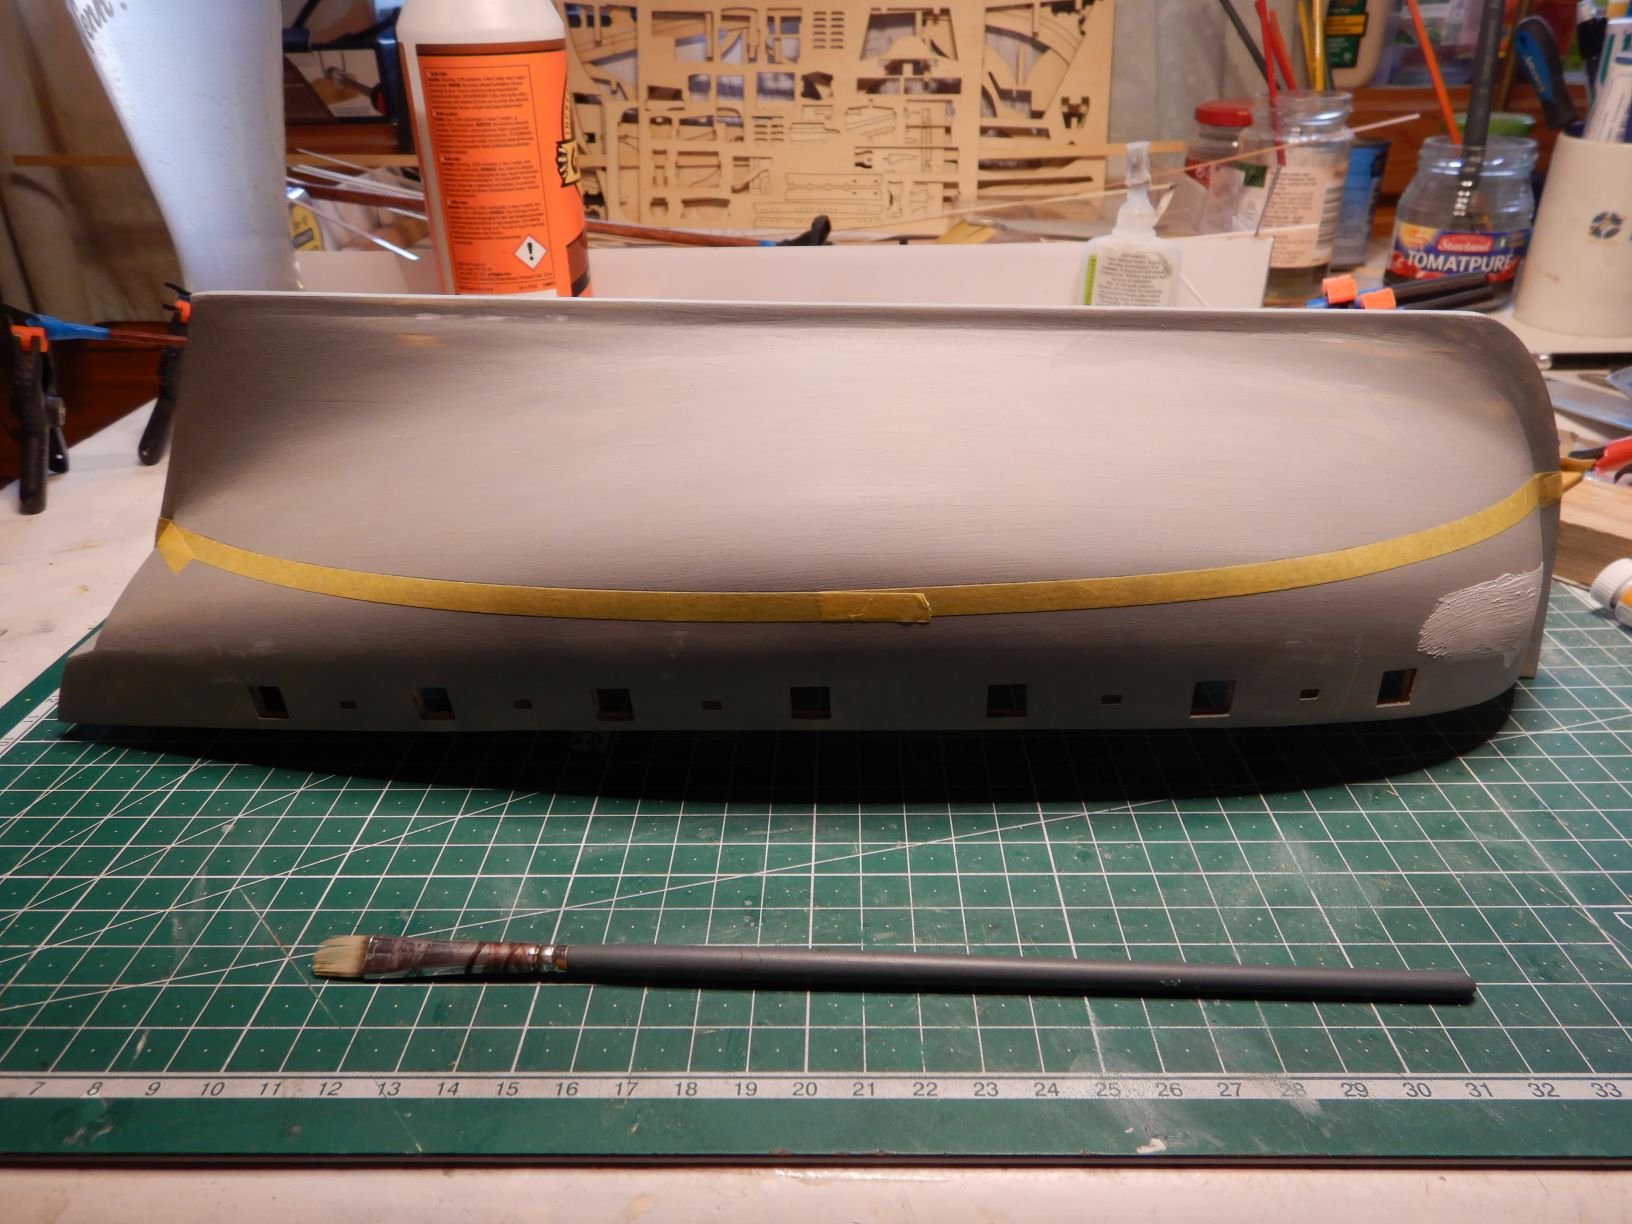
I've soaked and shaped the rubrails, and started painting them
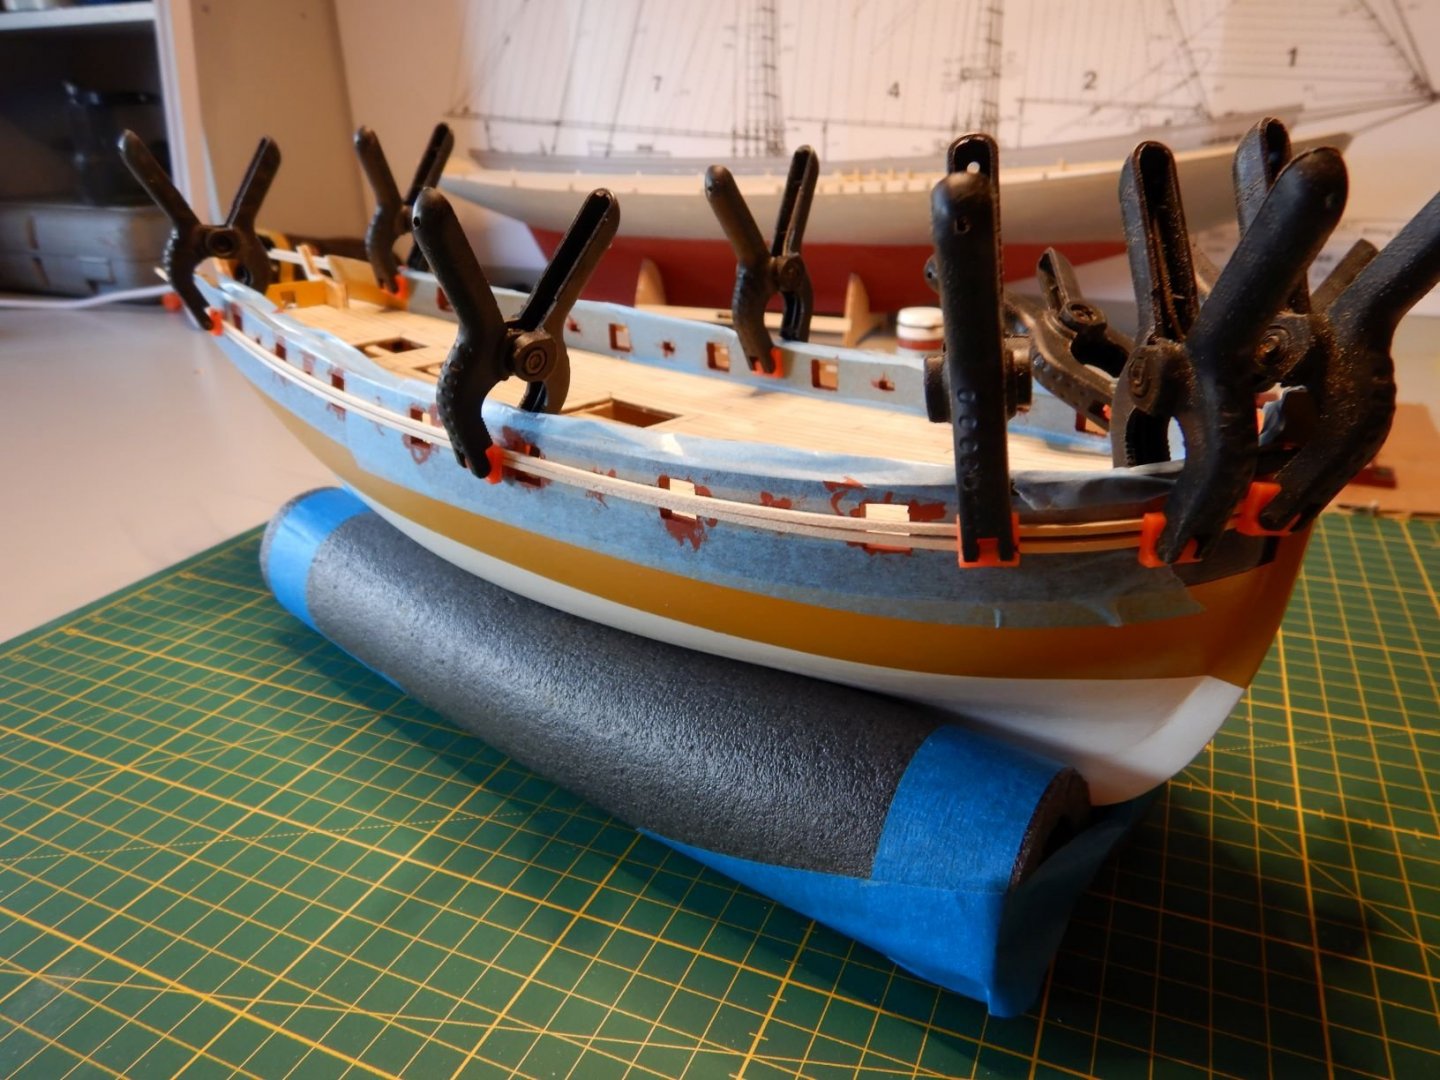
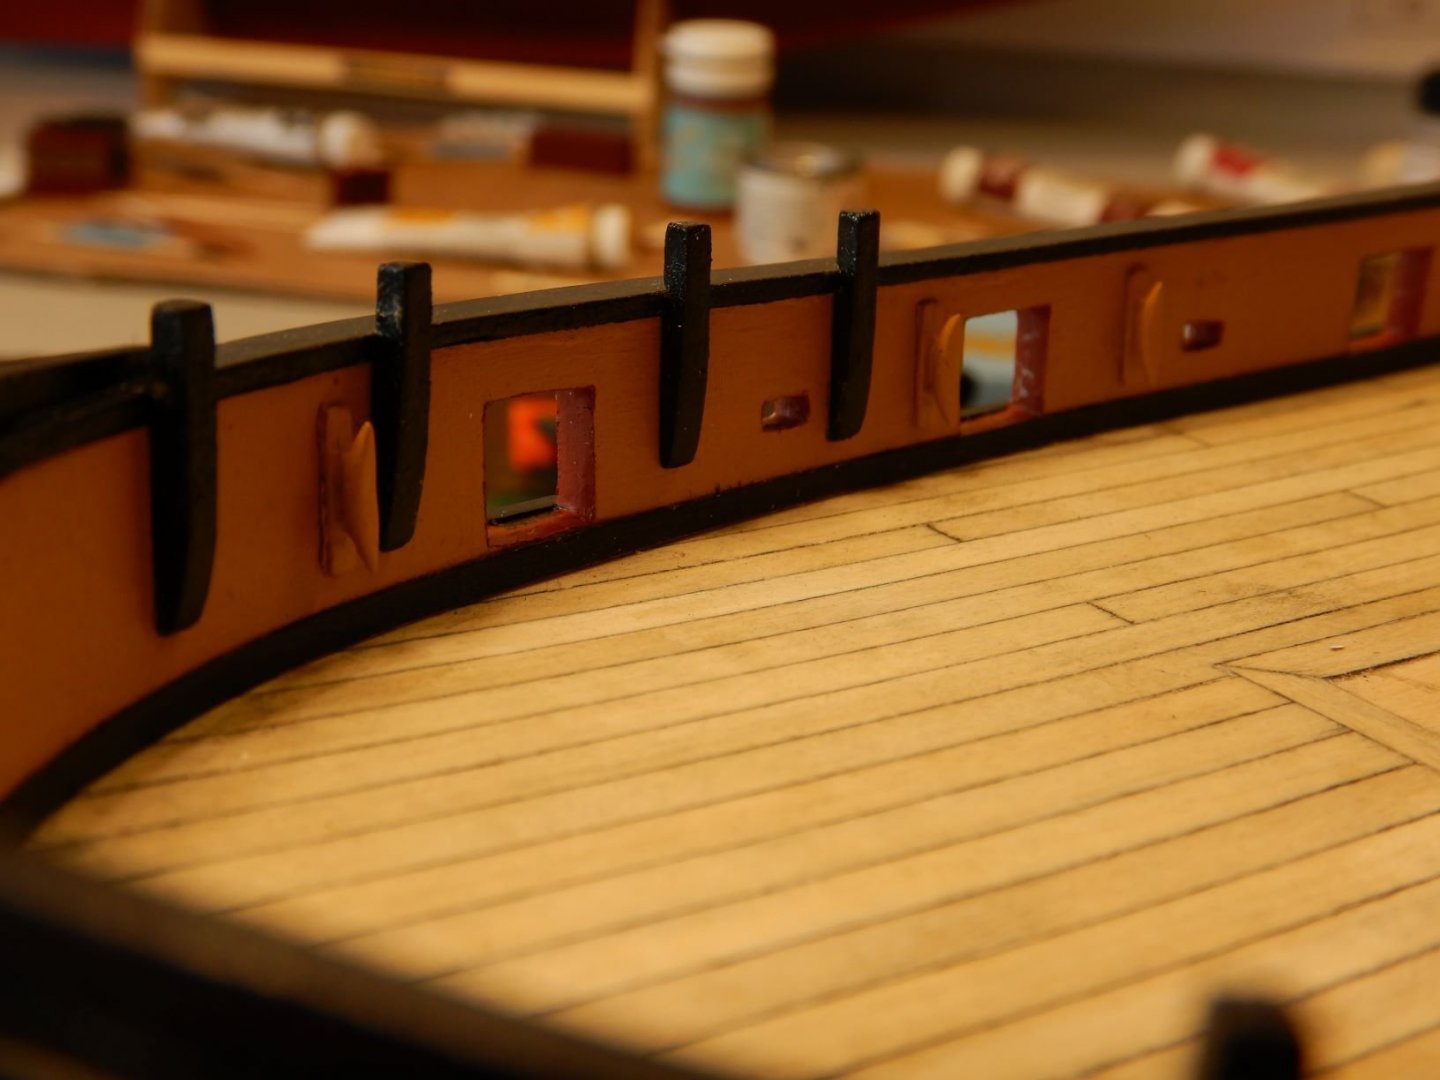
I've masked and painted the black stripes, and cleaned up and painted the insides of the gunports.
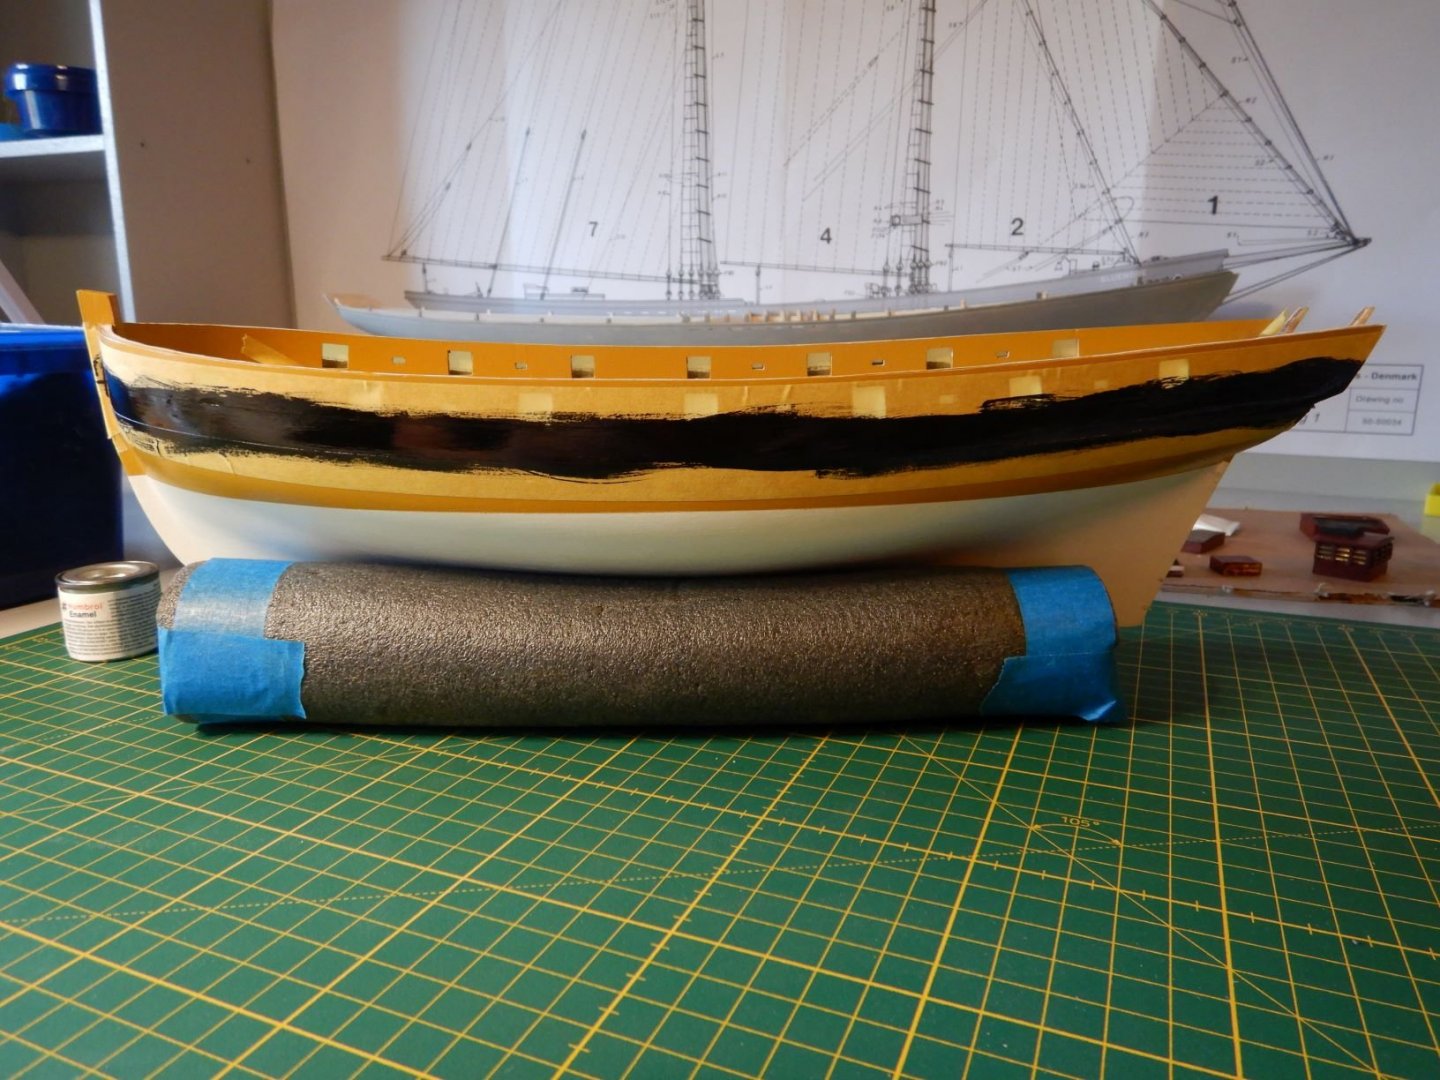

Still need a little "cleanup" here and there, but all in all I'm happy with the result.
Gaffrig.
- Rick01, Dutchman, Jack-in-the-Blue and 4 others
-
7
-
Rick01,
That’s something I am afraid might happen. Also getting the correct length on the rubrails to fit between the stem and transom.
I think it will be easier to fit all the rubrails and the caprails, and then cut them of and sand to make the transom fit snugly against them all.
Gaffrig.
-
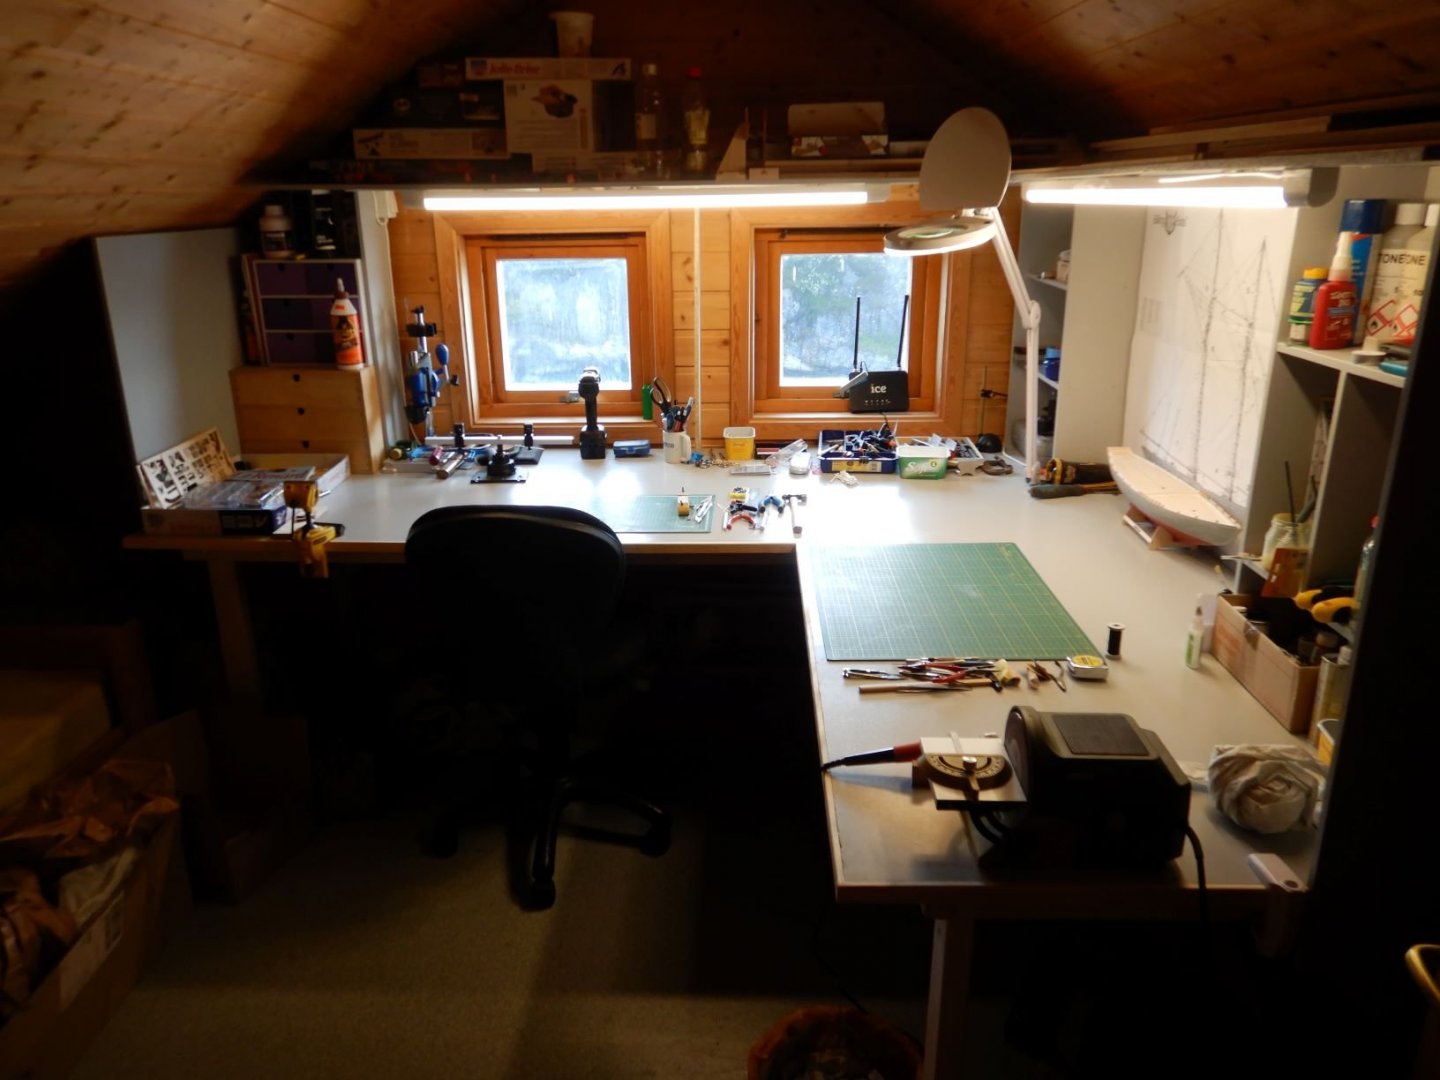
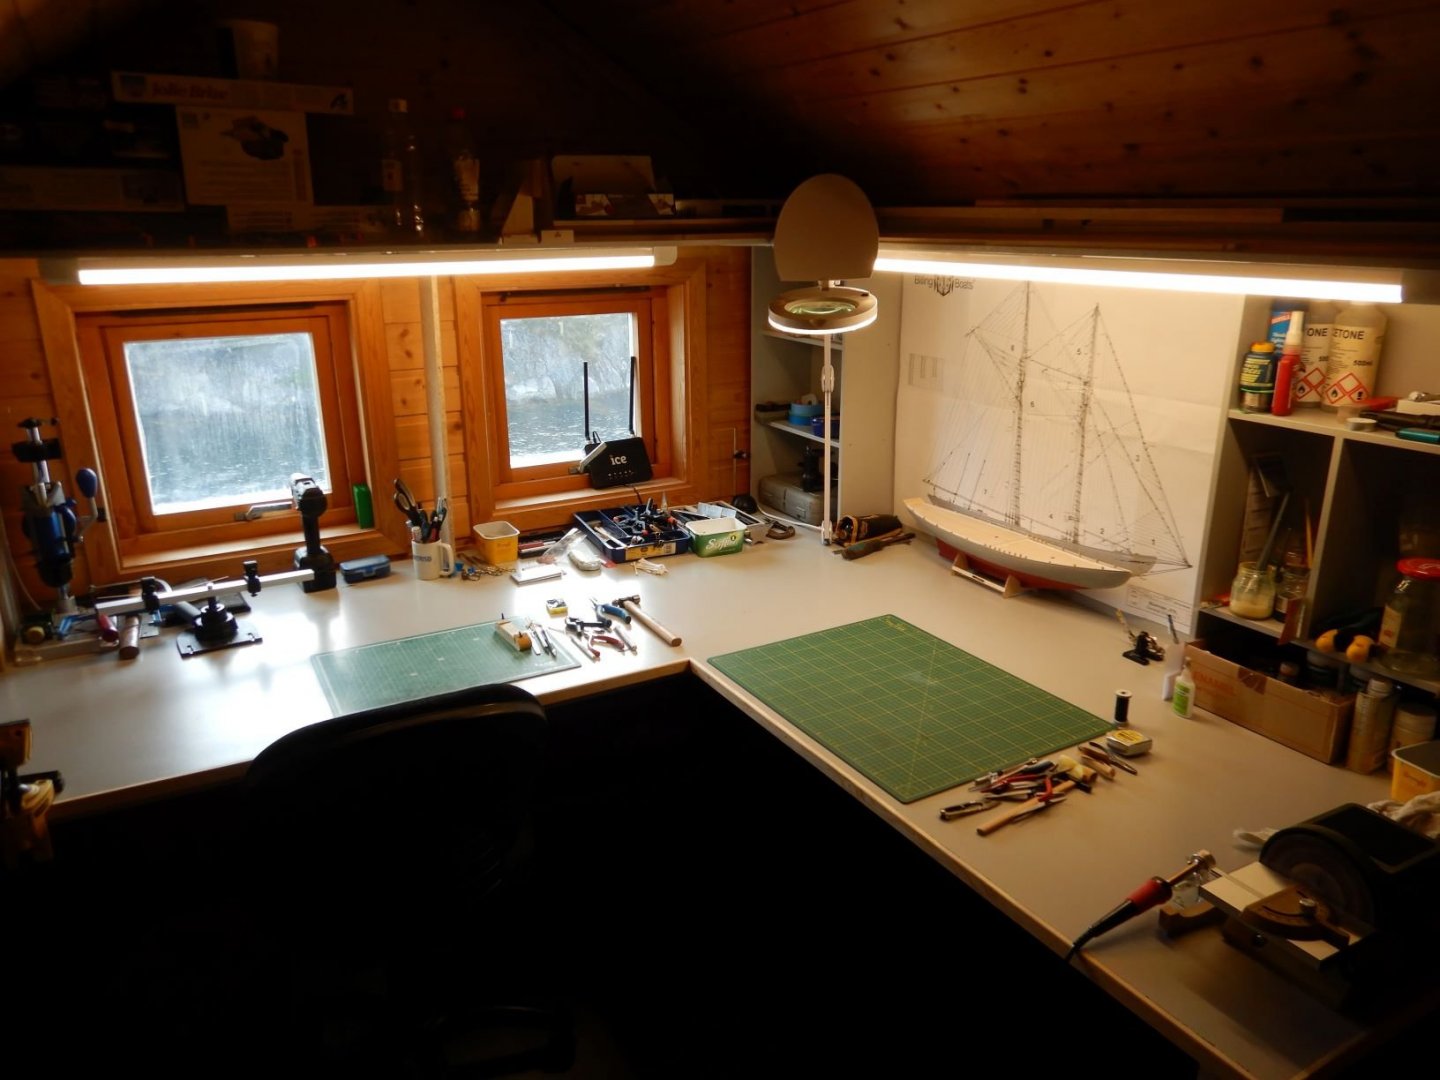
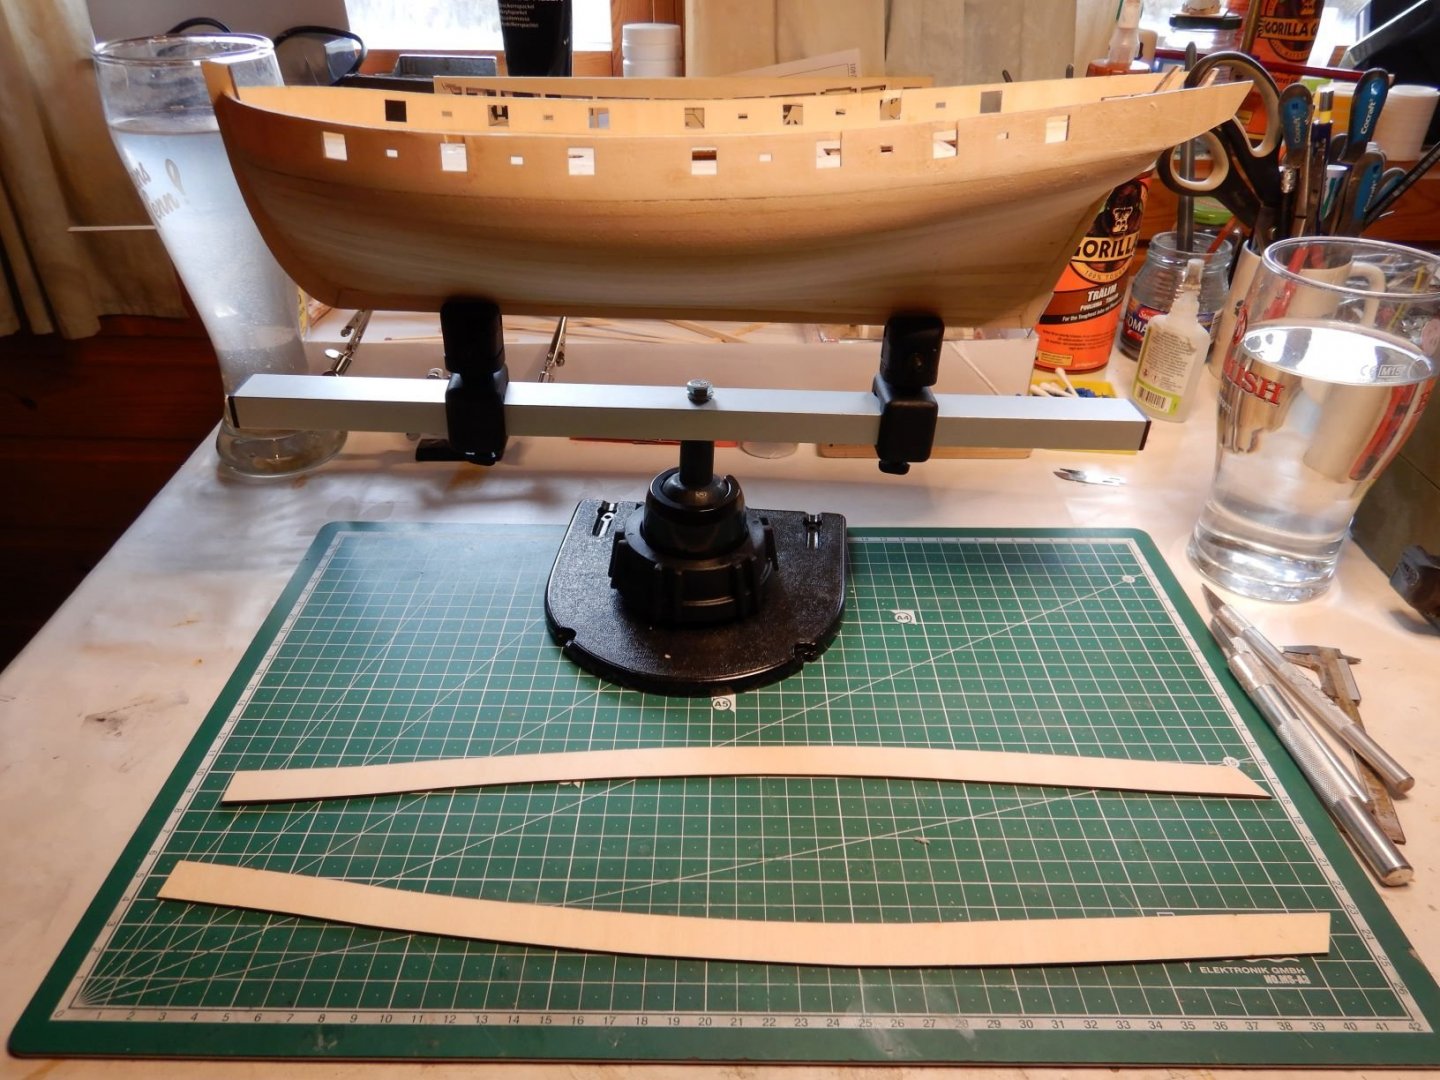
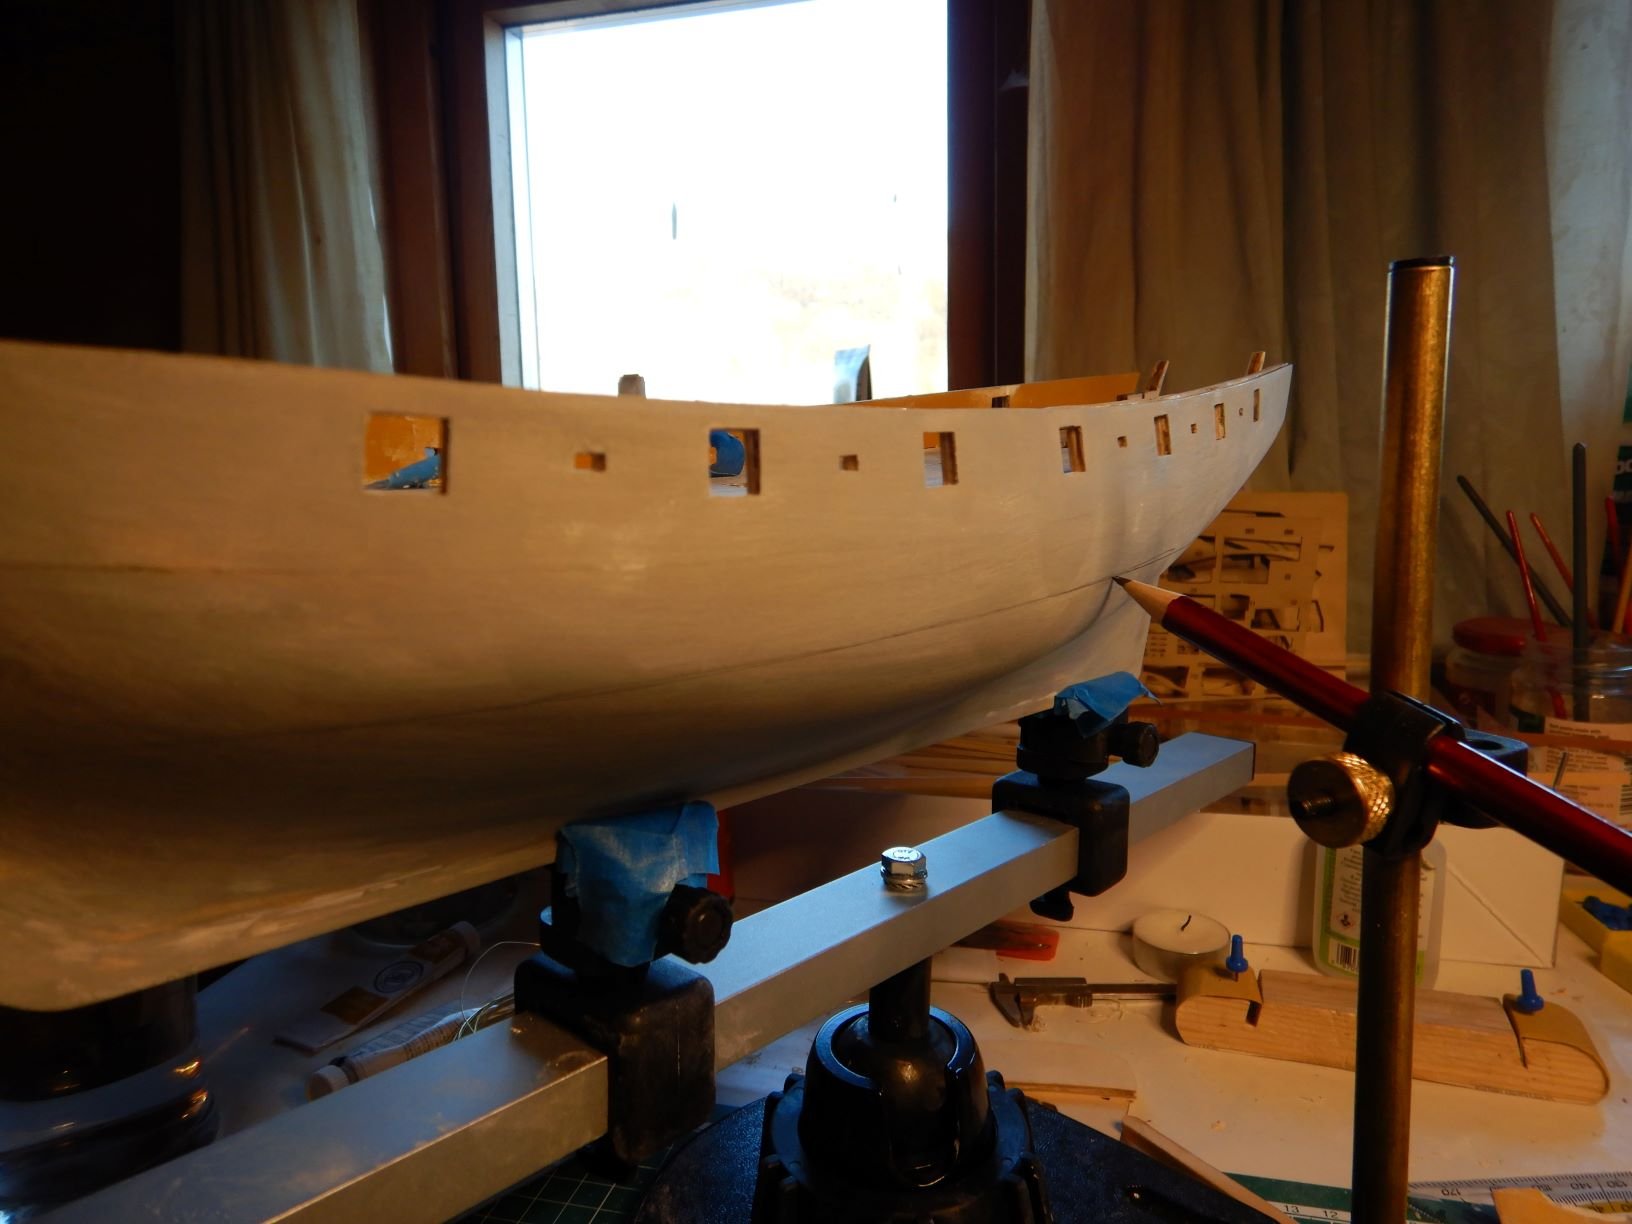
Hello all!
Getting settled on my new workbench, the work continues on Le Renard.
I have cleaned up the gun ports using a square file, and I have finished painting above and below the waterline. I have used acrylic paint for this.
The skylights/deckhouses are getting close to finished also.
I have also shaped the rudder and drilled the hole to fit through.
I want to finish the rudder, caprail and rubrails before glueing on the transom.
This is a different order of things than the instructions call for, but I think it will be easier.
That's todays update. More to come..
Must say I really enjoy having more space to work on.
Gaffrig
-
I’ll tell you, I’m well on my way to clutter it up! 😆
-
Hello to all.
Rick01, thanks for the links, lots of good information there.
Great modifications to the catheads's. The illustration you have shows how they should look. Regarding the binnacle, I agree with you regarding the glass, but it could be that the replica has removable lids to hide modern navigation electronics. They probably have a magnetic compass too somewhere though.
About the caprails, I did a dryfit, and they barely cover the thickness of the bulwarks, so I think I'll glue on a strip on either side to make it a little wider and to hide the plywood edge. This will hopefully give the little ledge needed to fit the forward pinrail. Thanks for all the tips! My 3mm blocks for the gun rigging arrived yesterday, so that's something to start soon!
Your model looks great, keep up the good work! 👍
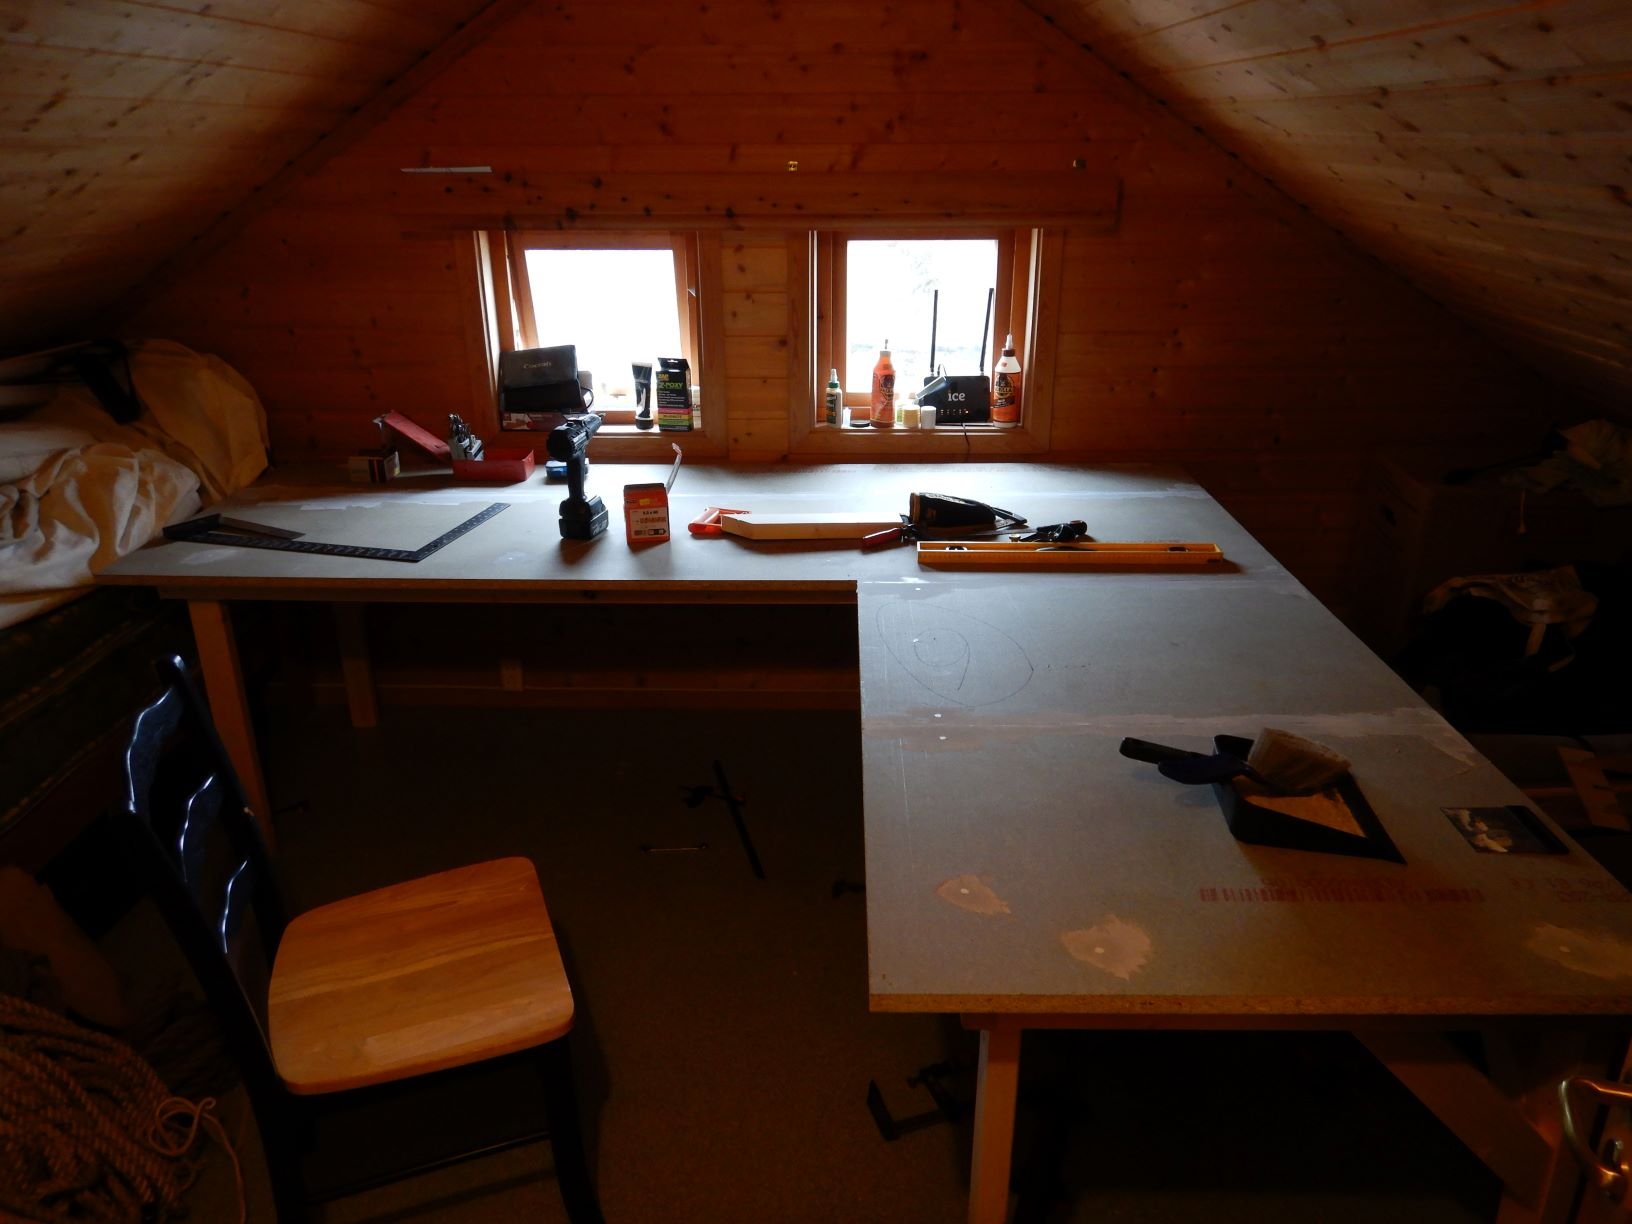
As to my build, it has not been done as much lately as I had hoped. I decided it was time to take some action regarding my shipyard status...
I have been home alone this past week, and me and the cats agreed that a new building table was in order. 😎
My previous shipyard, a total mess floating out on the floor due to lack of tablespace..
Some drastic measures are needed!
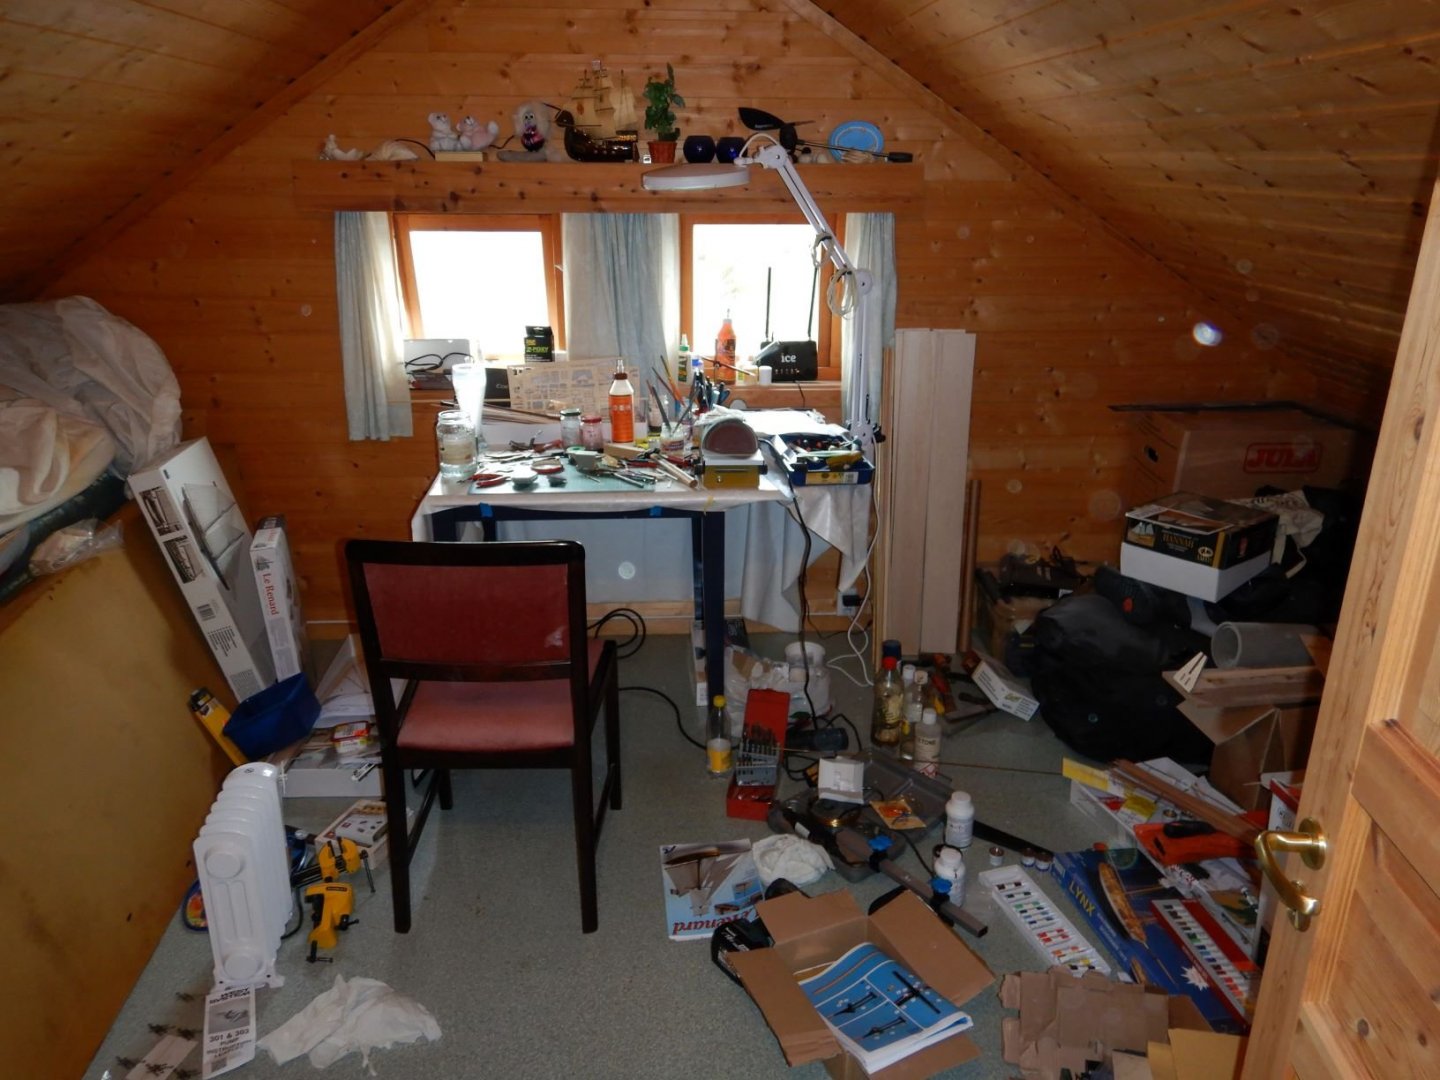
So I took a trip to the local lumberyard and got some woodfibre board (don't know the correct english word for this) and some wood for framing and legs and got to work.
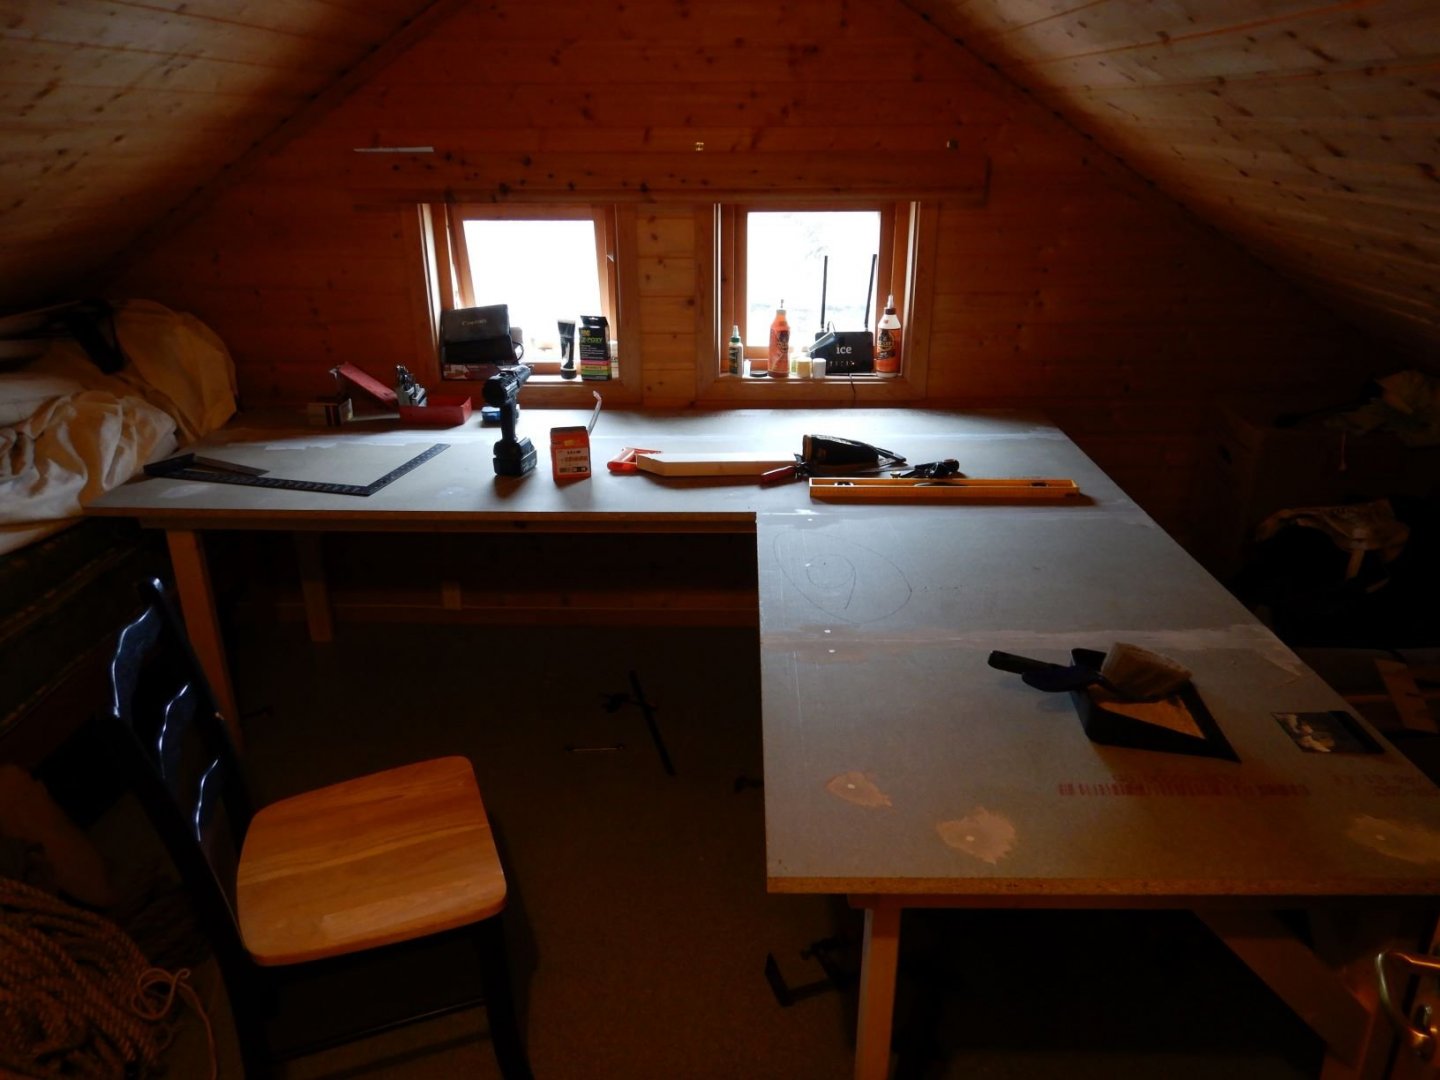
Decided to make some shelves..
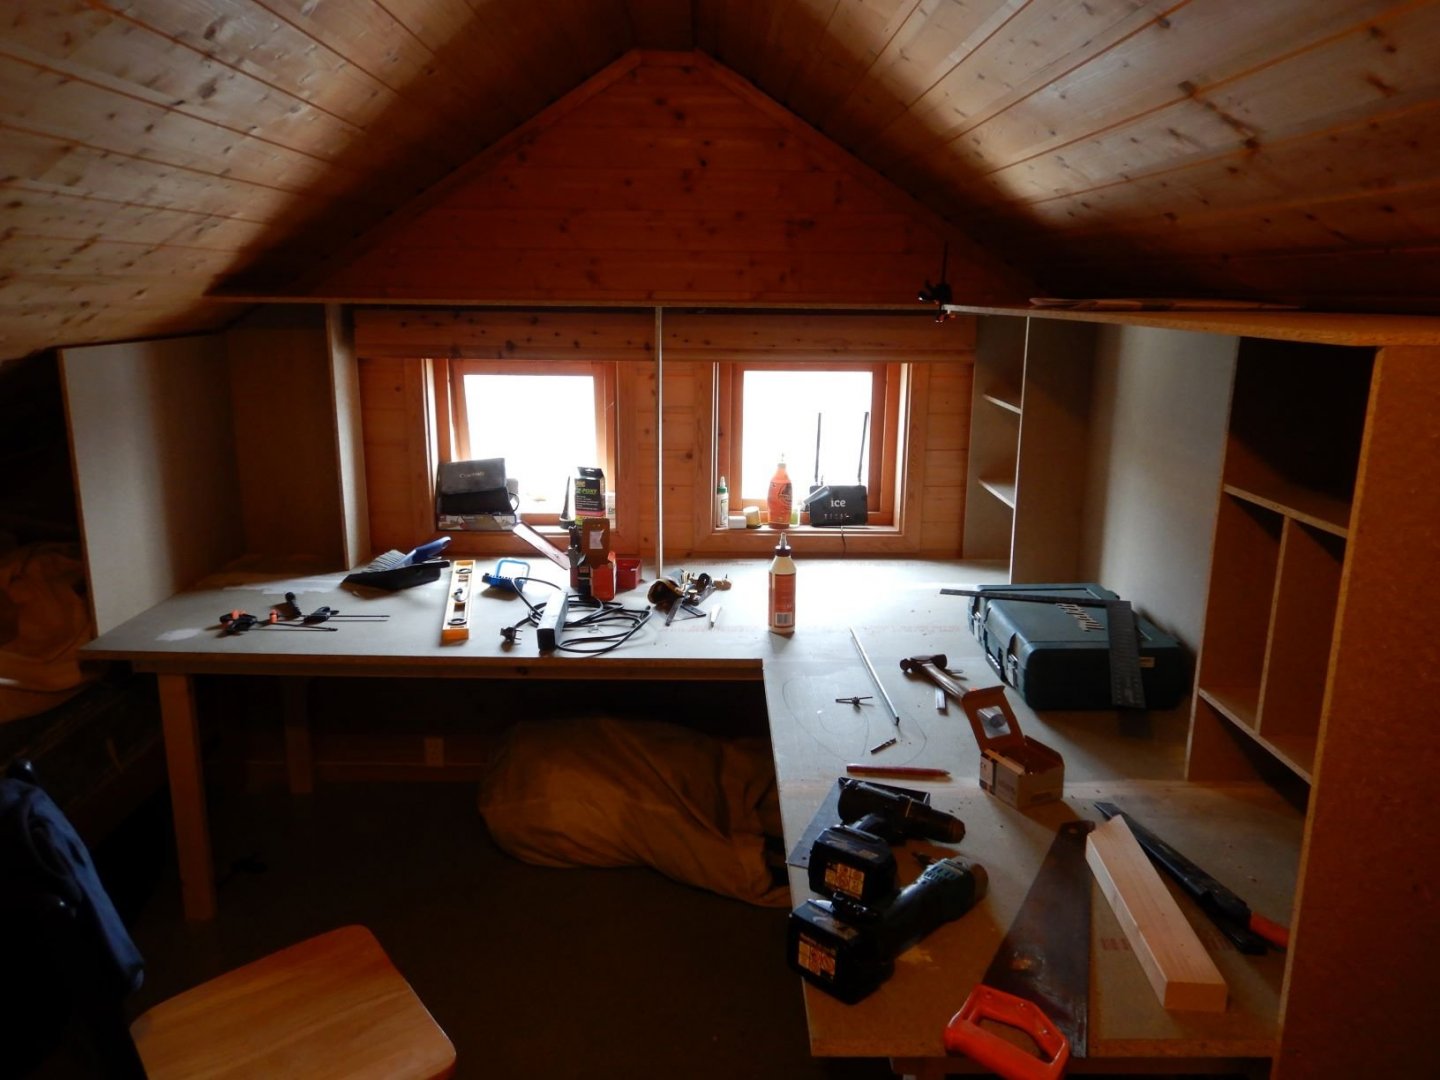
And a couple of coats of paint.. Used regular floorpaint for this.
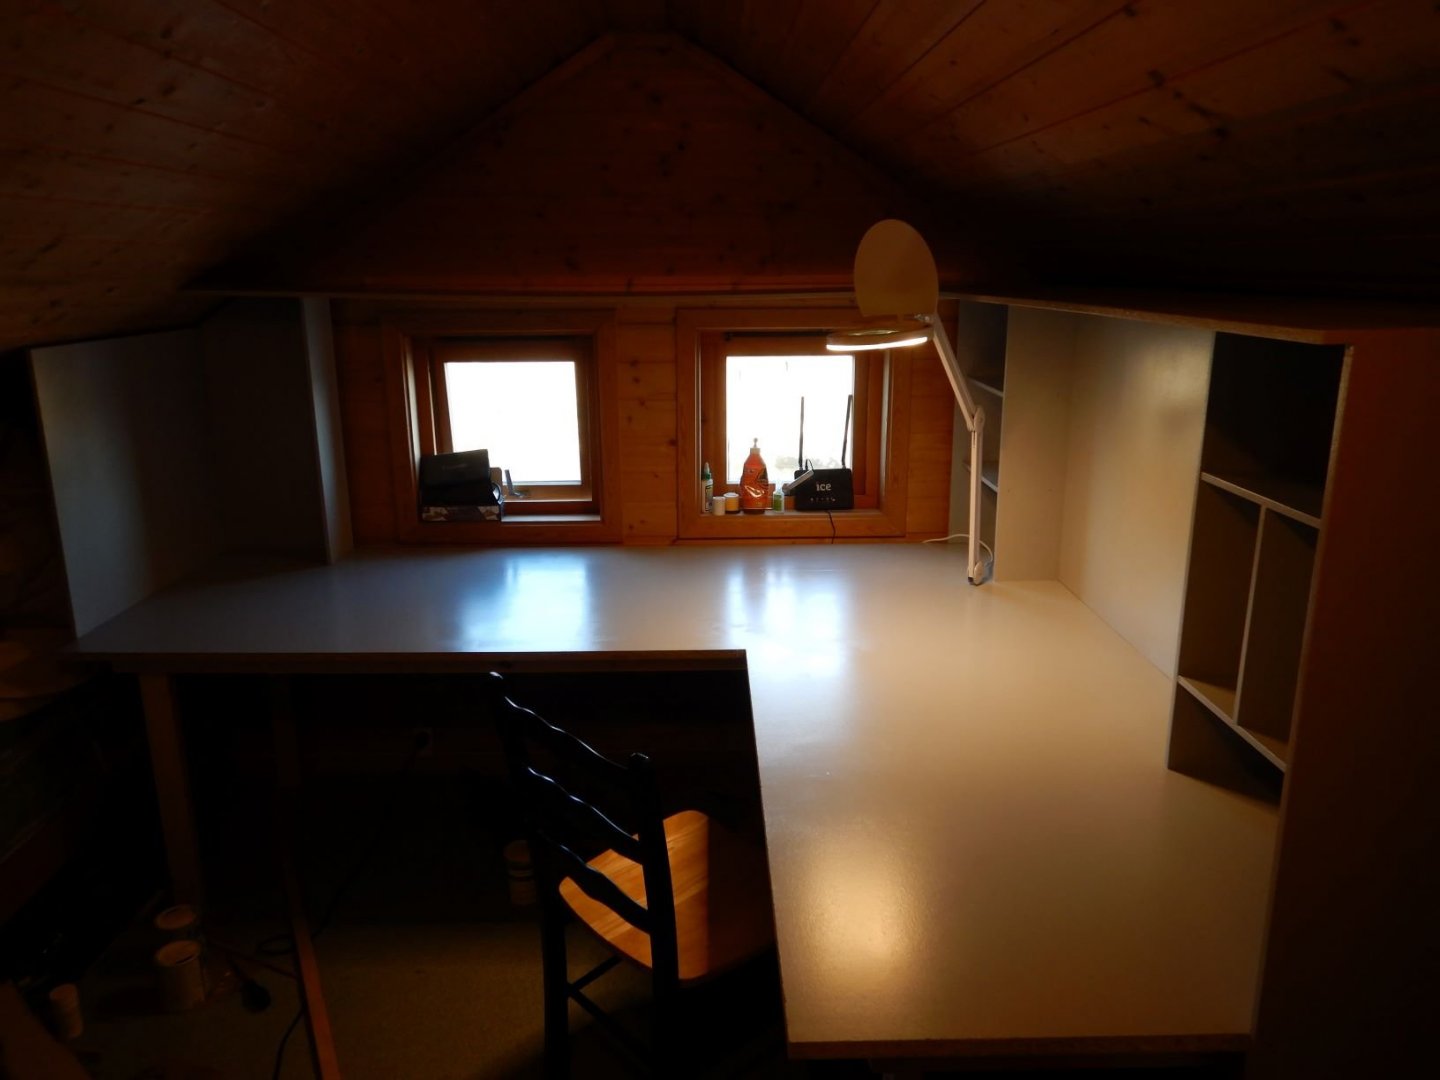
Added some decent lighting and all the "stuff"
Must say I'm very pleased with the result. Made a dedicated space for hanging drawings. Still need to make a few more shelves and a better support for the big shelf over the windows, but I ran out of materials.
Some work has been done on Le Renard too, I've painted the bottom and started painting the topsides, but no pictures of this as this has been done in between building the new "shipyard"!
All the best,
Thanks for all the comments and likes!
Gaffrig.
-
Hello all!
Rick01, the carronades look great. I tried making up a tackle but as you say, the supplied blocks are a little to big. It doesn't look very good in the instructions either.
3mm blocks is ordered!
The extra cannon, is that something you add just because you want to? or is there some source you found that says it should be there?
Tompslattery, in my kit there was two lasercut pieces glued on top of eachother to make up the gun sled. Then a small PE brass bracket to hold the gun barrel.
It seems your kit is an older version.
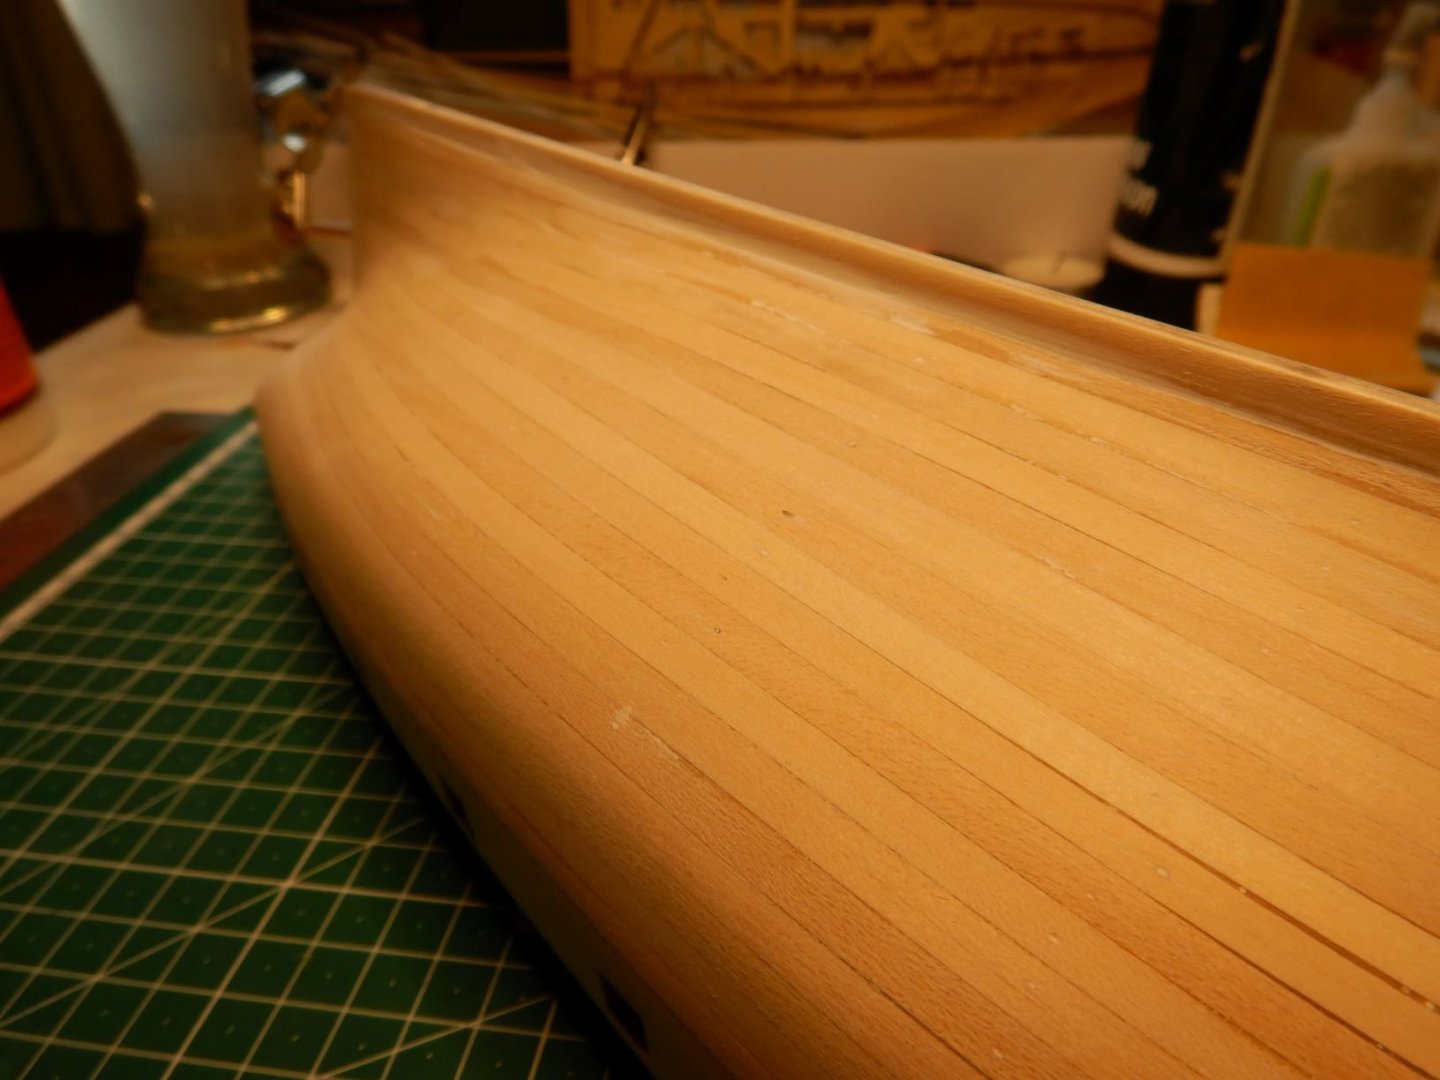
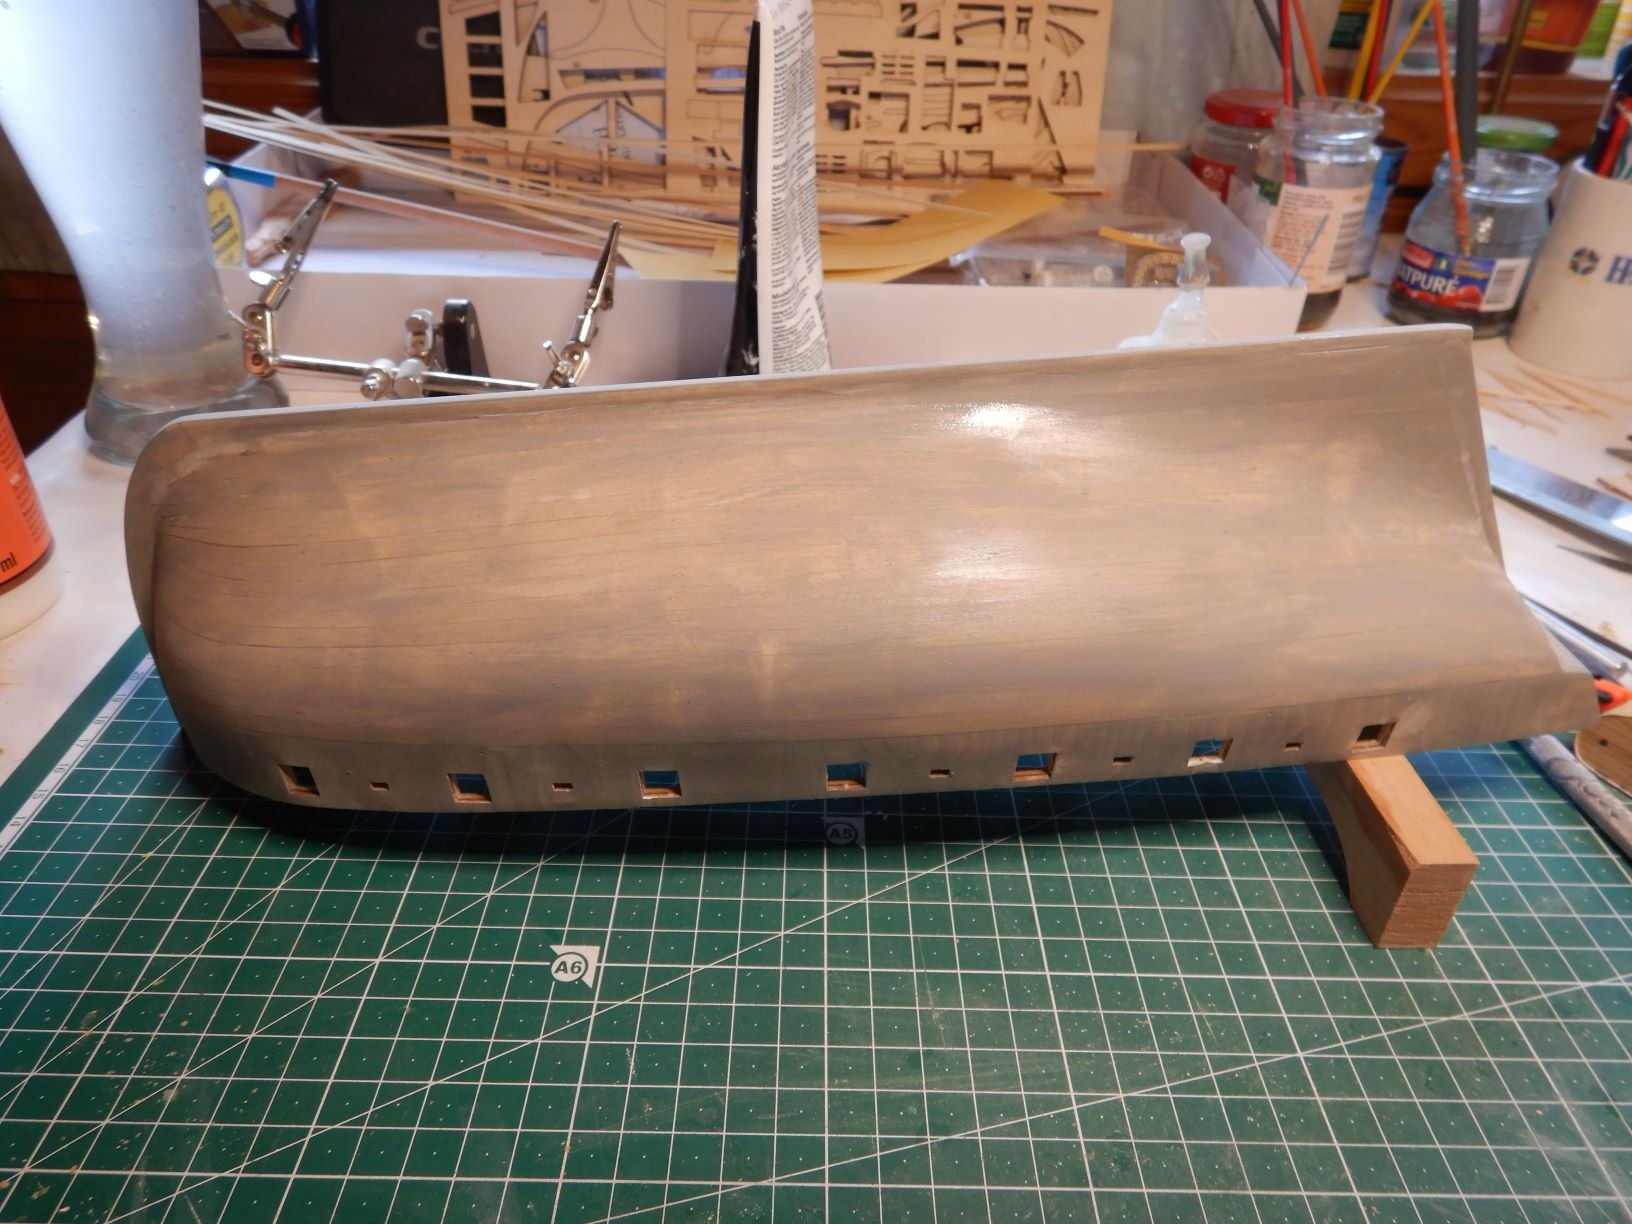
The hull is getting ready for some paint shortly.
A little more filler and sanding has been done.
Marking the waterline..


Masked and ready for paint below the waterline.
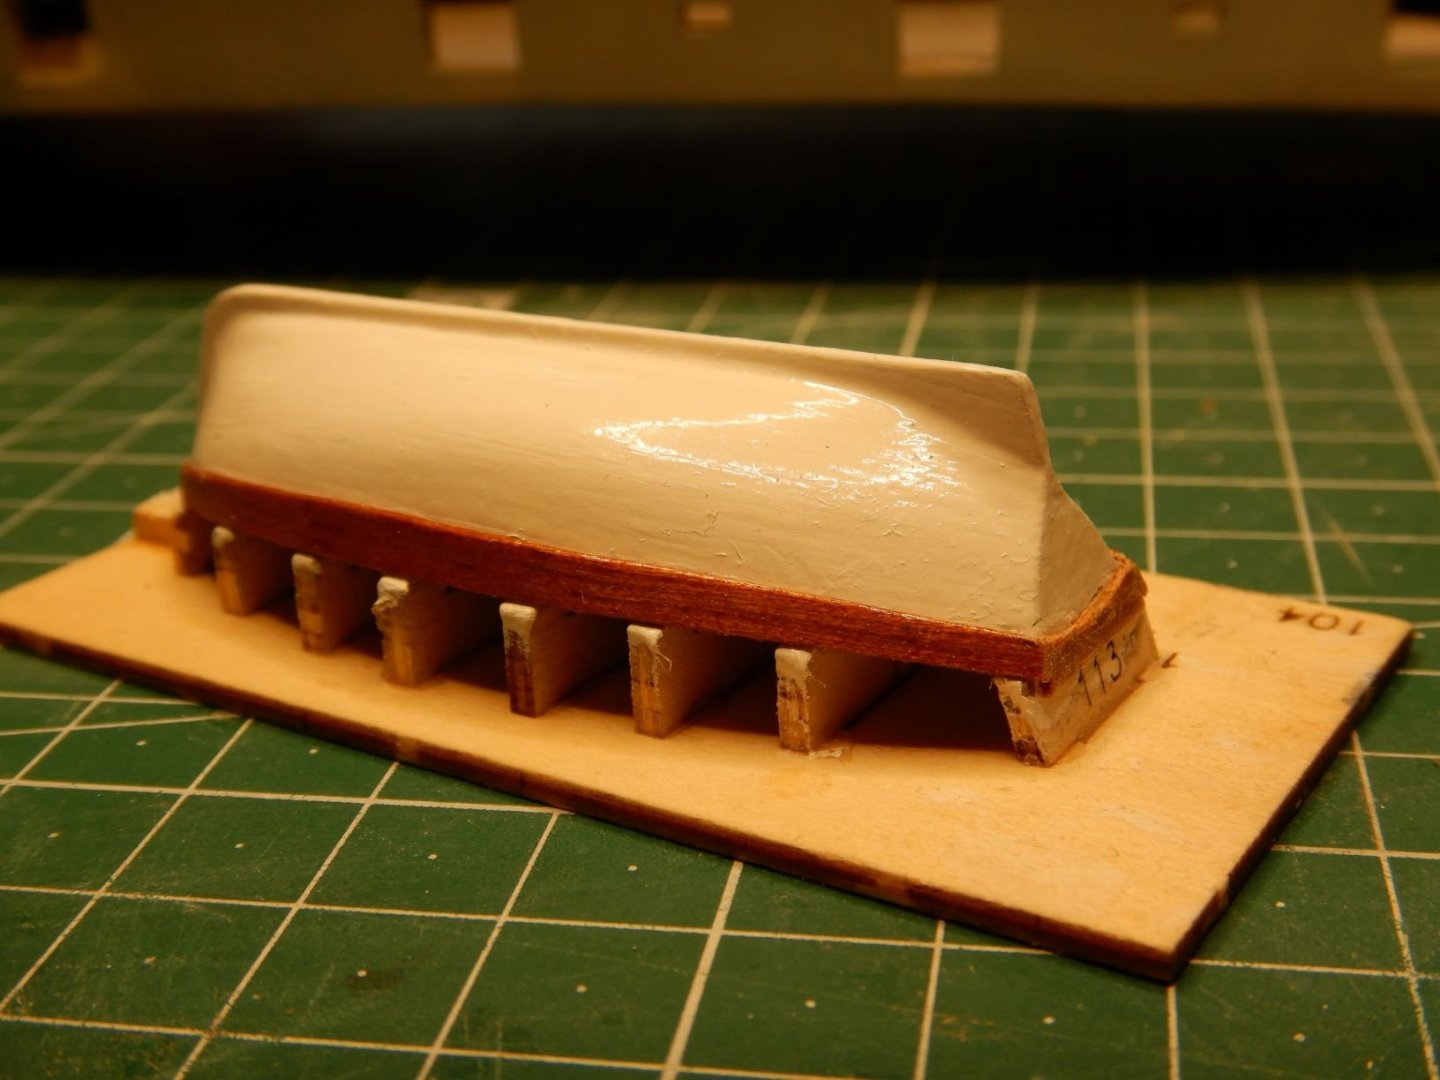
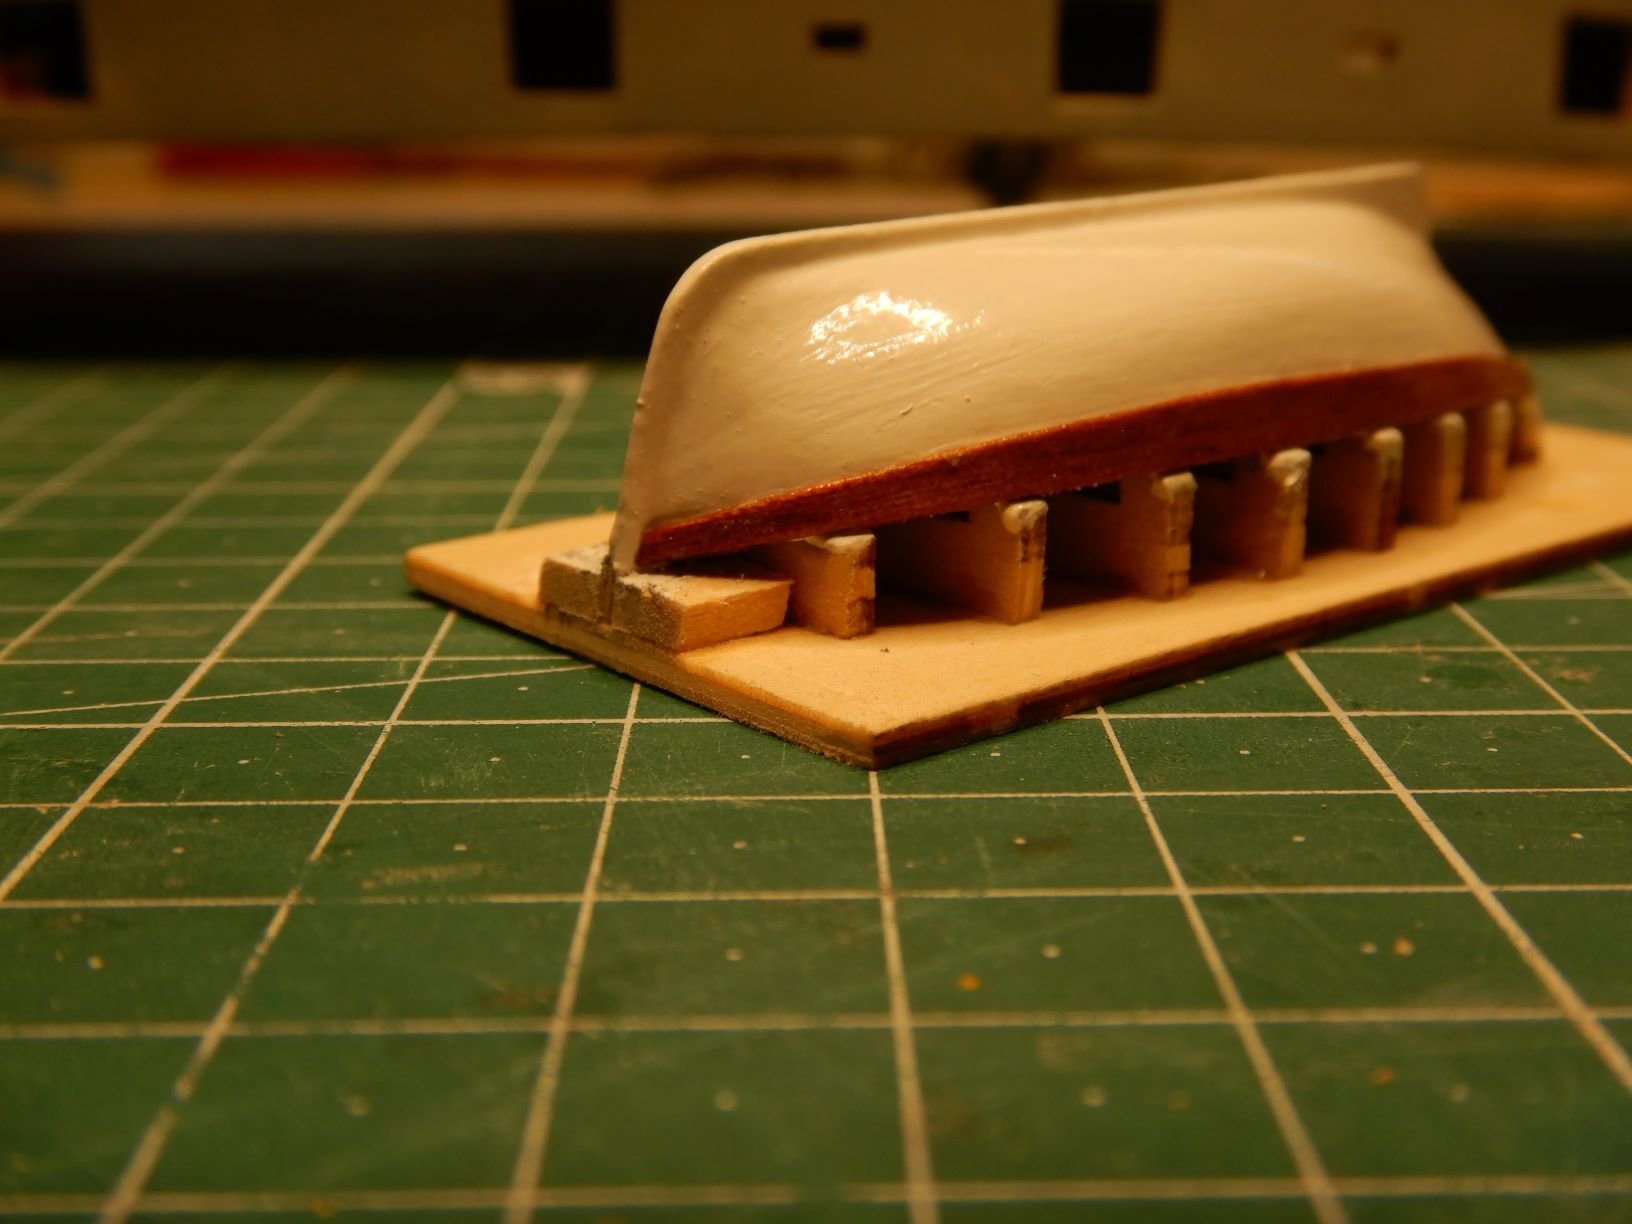
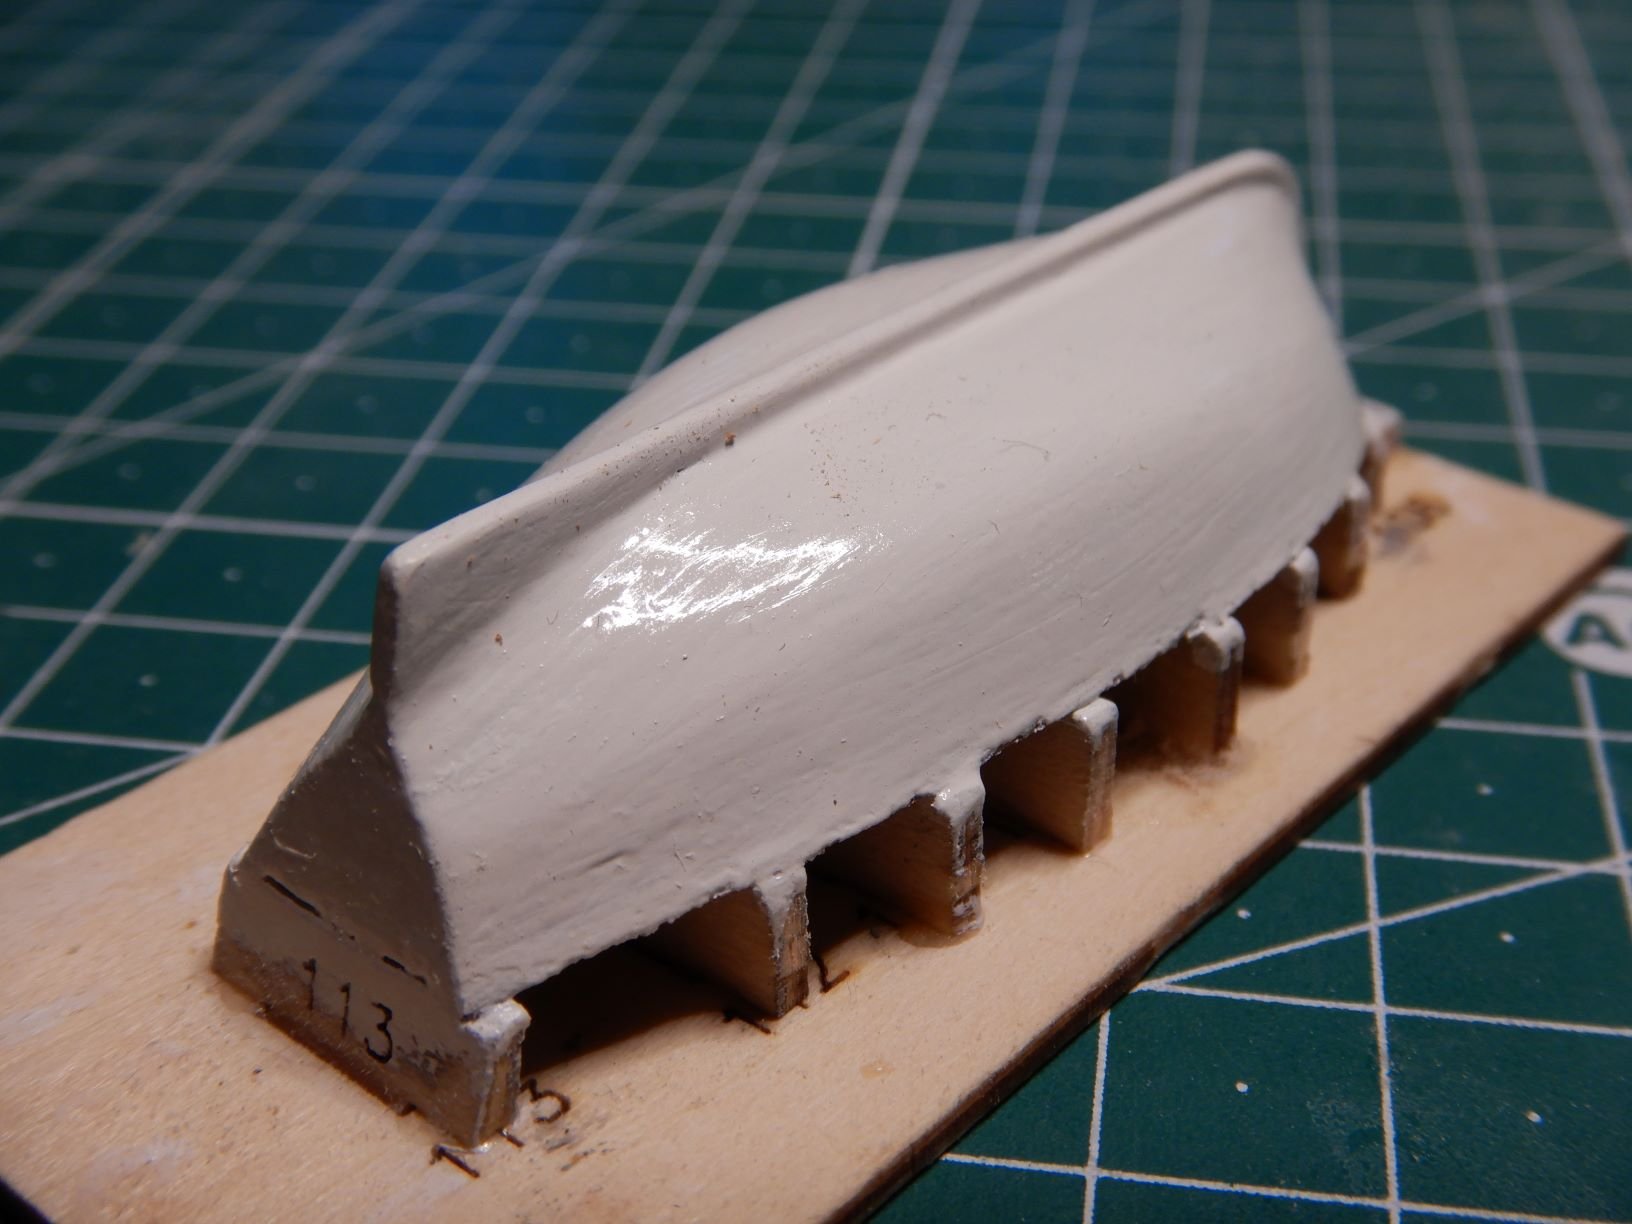
The dinghy has been removed from the jig, and is ready to be finished inside.

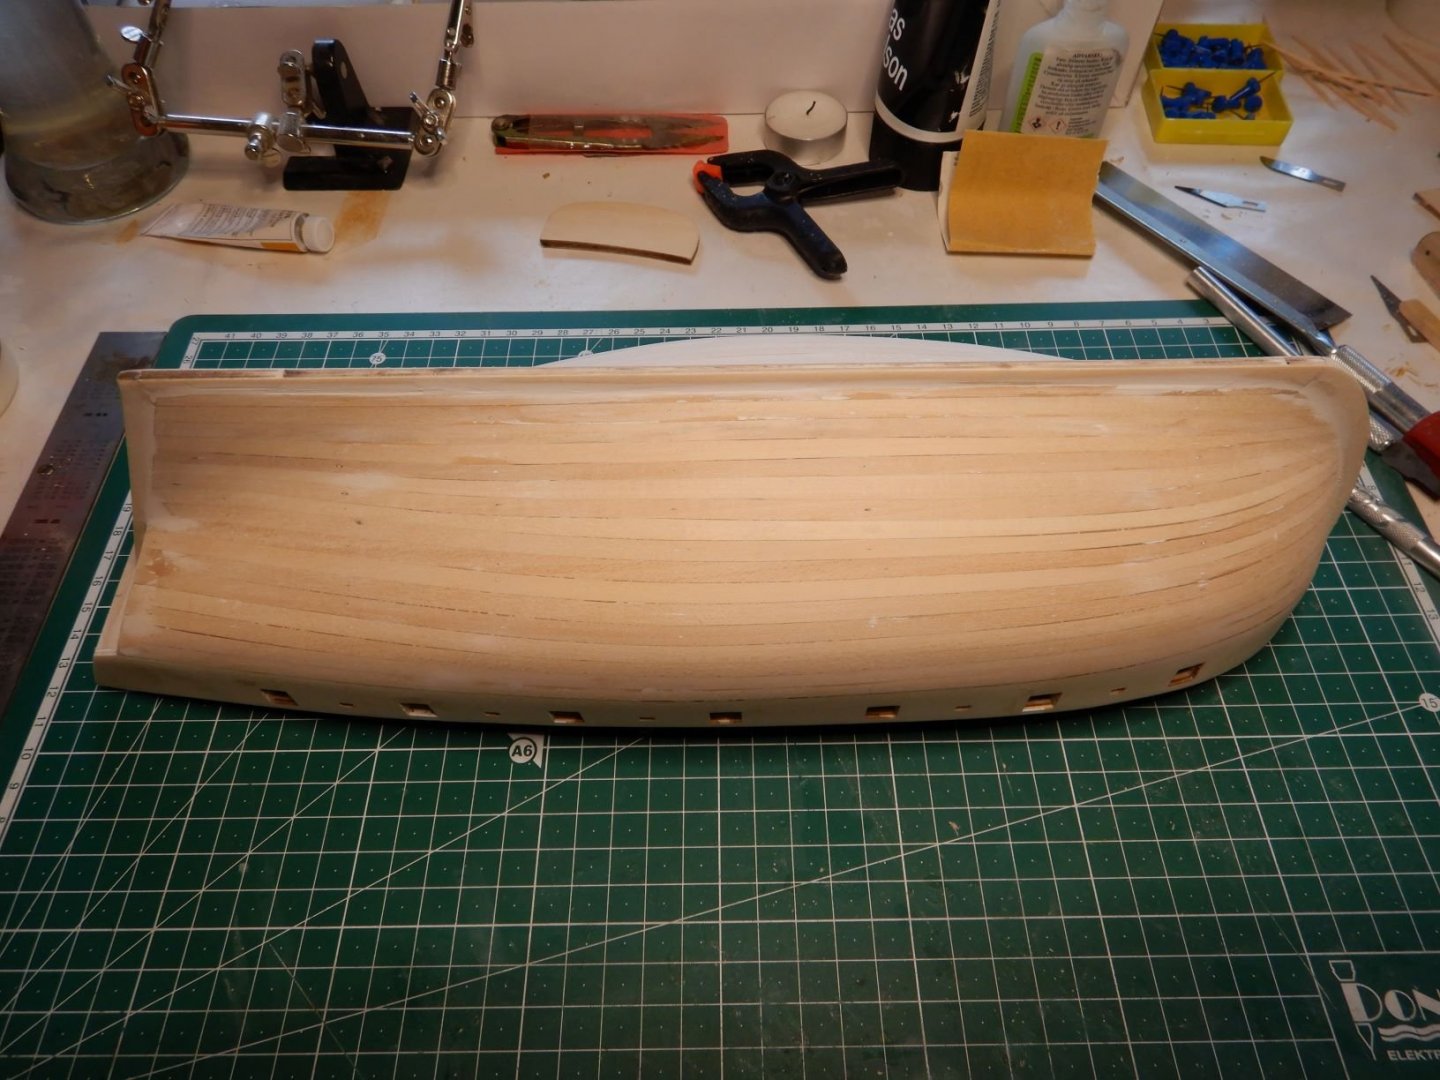
And after sanding of the frametops..

I'm happy with the way the sheer of the boat turned out. It was very straight as the jig was before modification.

That's it for now.
Gaffrig.
- coxswain, Arjan, Jack-in-the-Blue and 2 others
-
5
-
Hello to all!
Rick01, Thanks for the tip. It seems I have done the same as you, and a couple of the carronades need a little adjusting before mounting..
Tompslattery, Thank you!
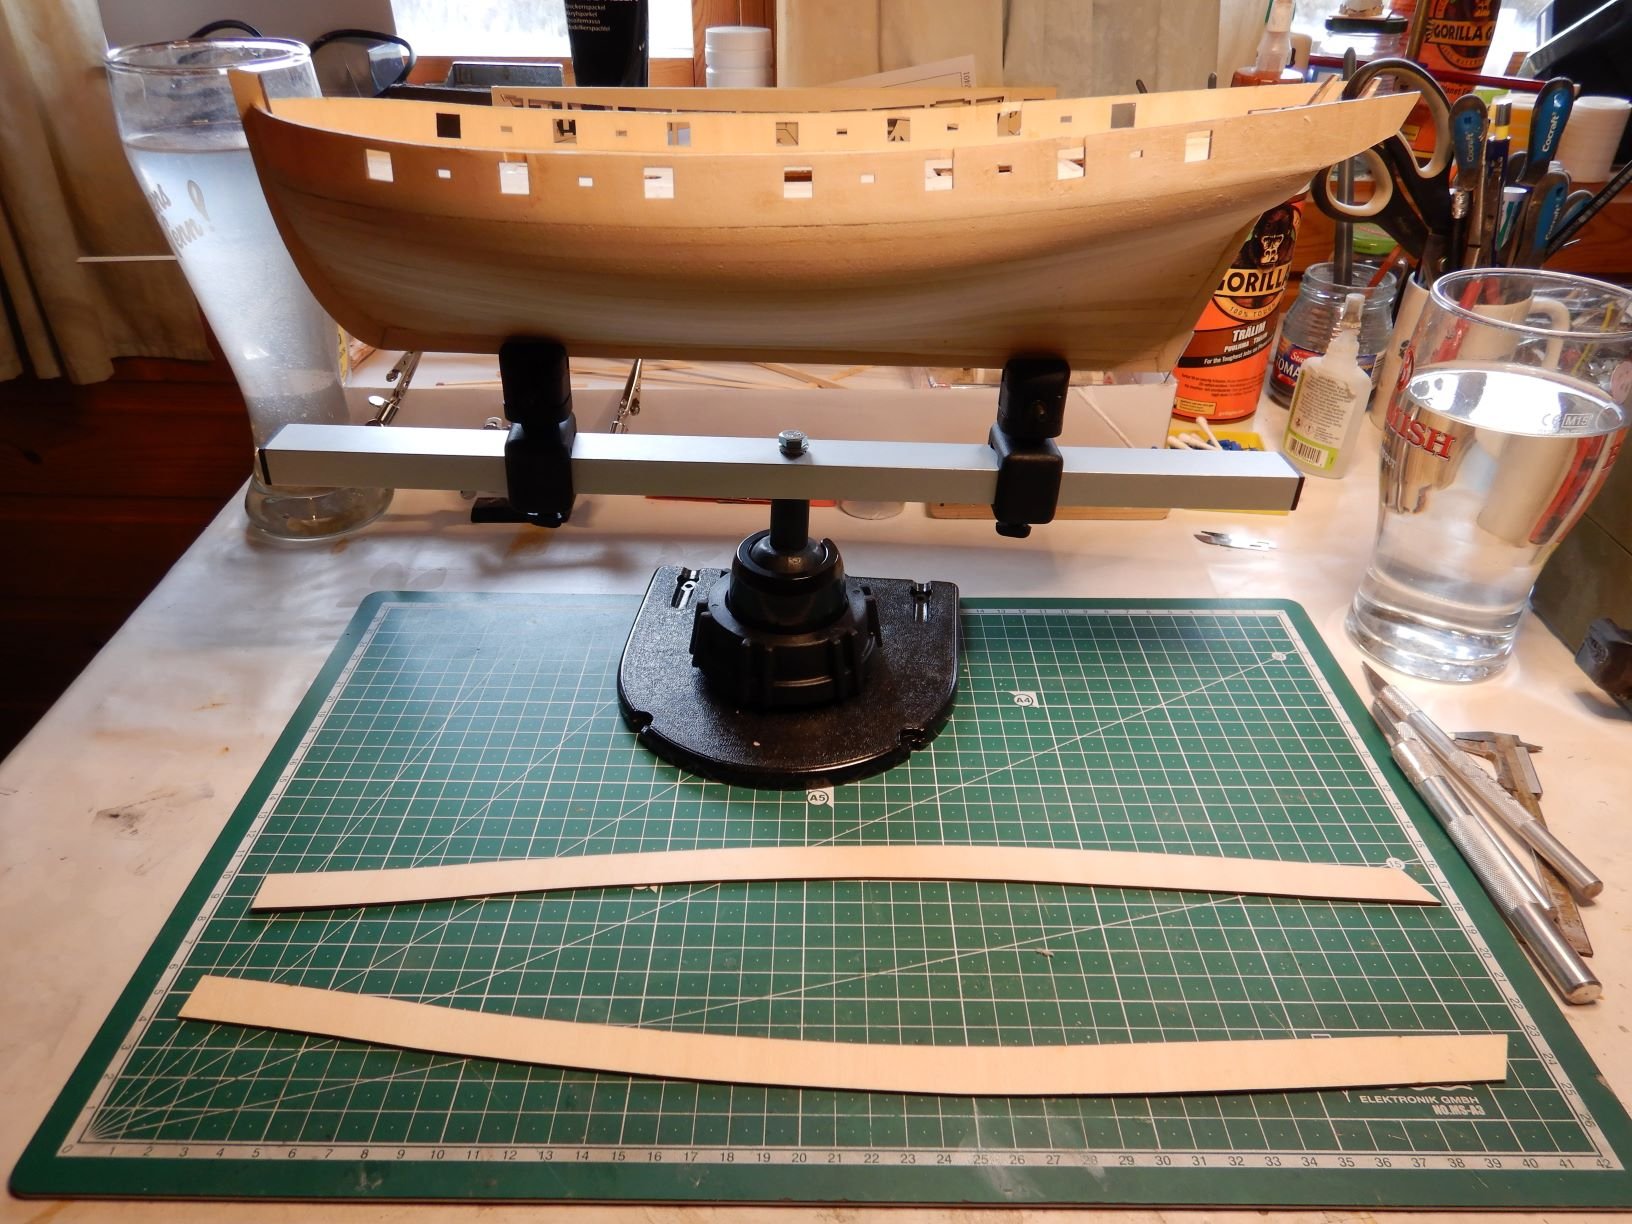
After mounting the inner bulwarks, they stiffened up quite nice, and I'm no longer as nervous for breaking them when handling the model.
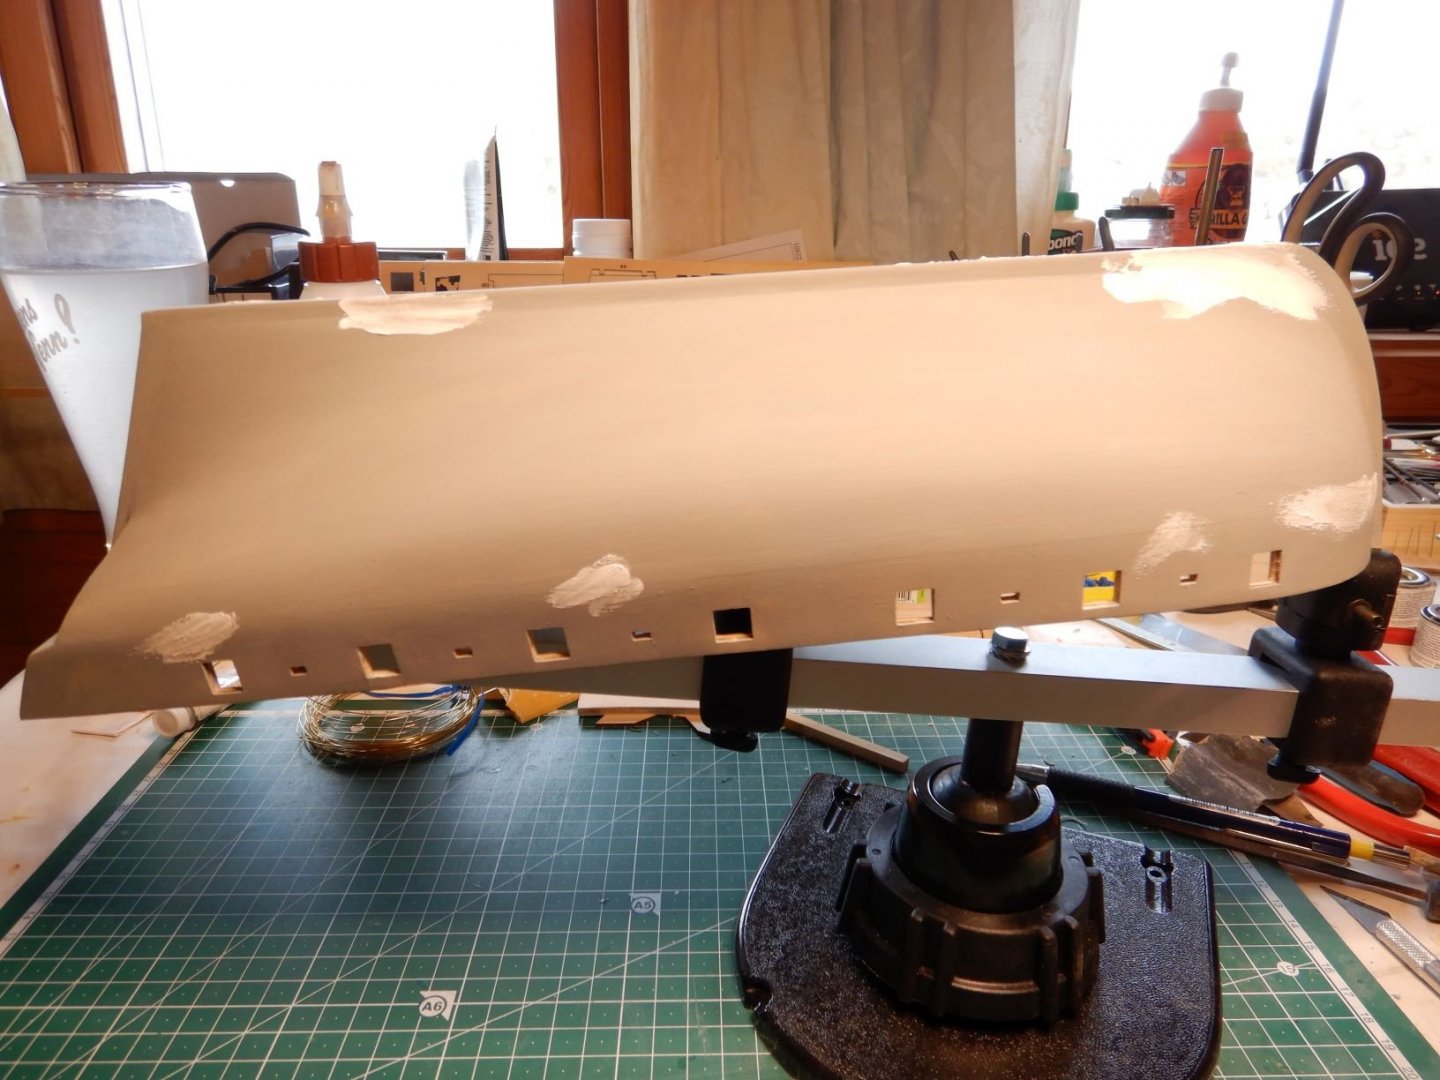
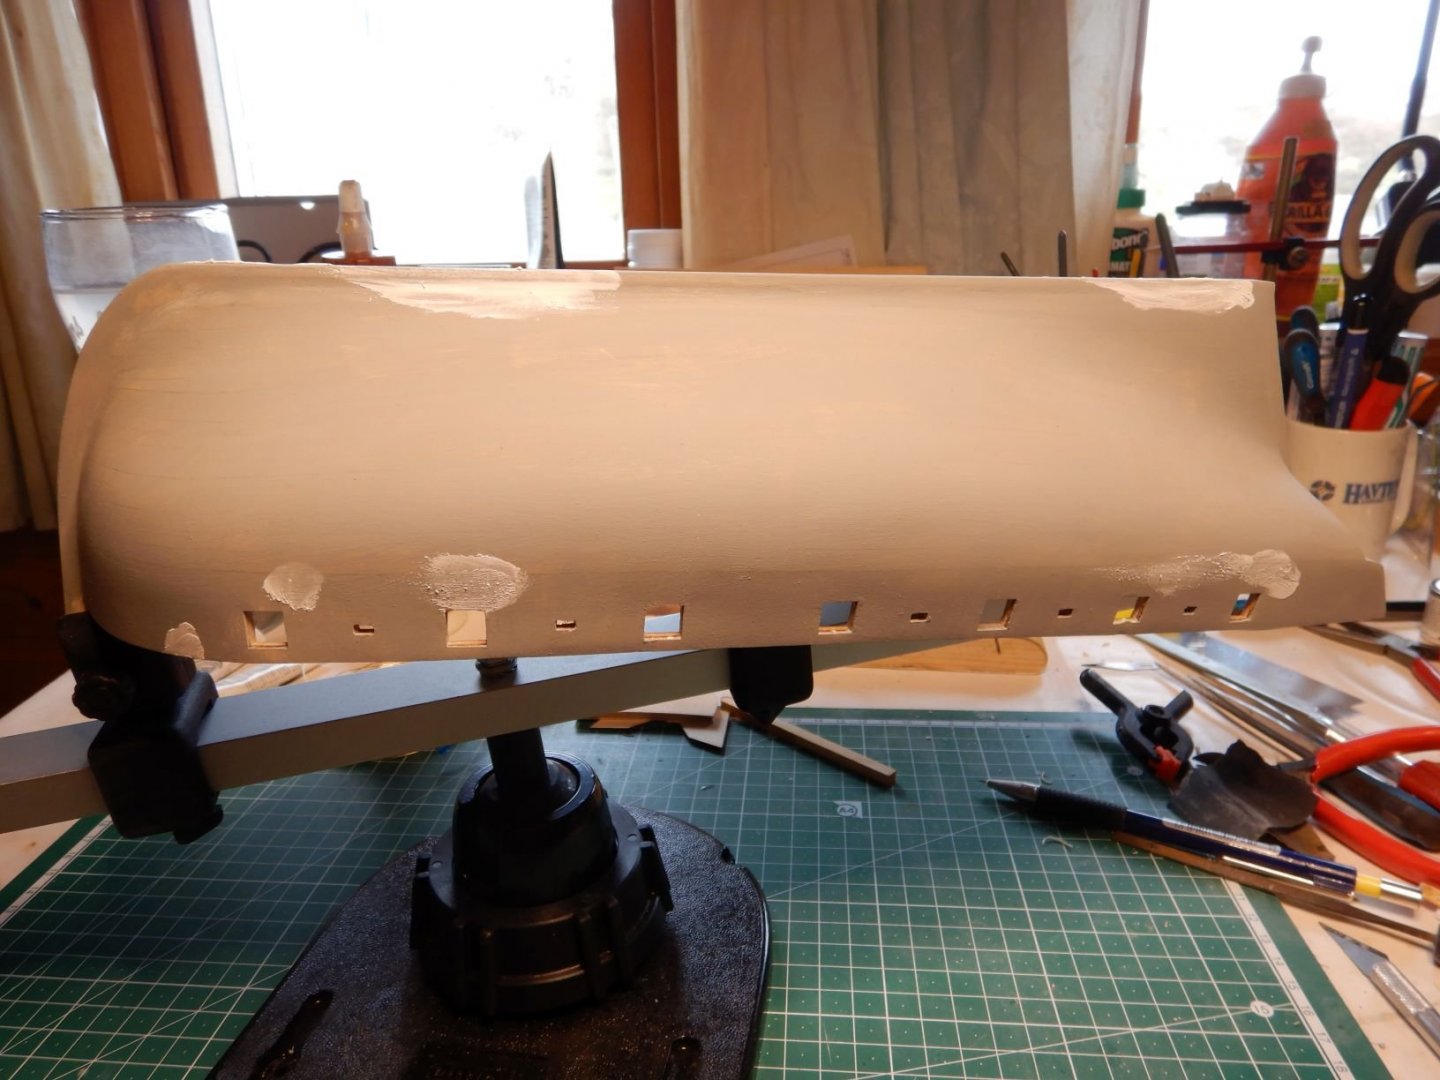
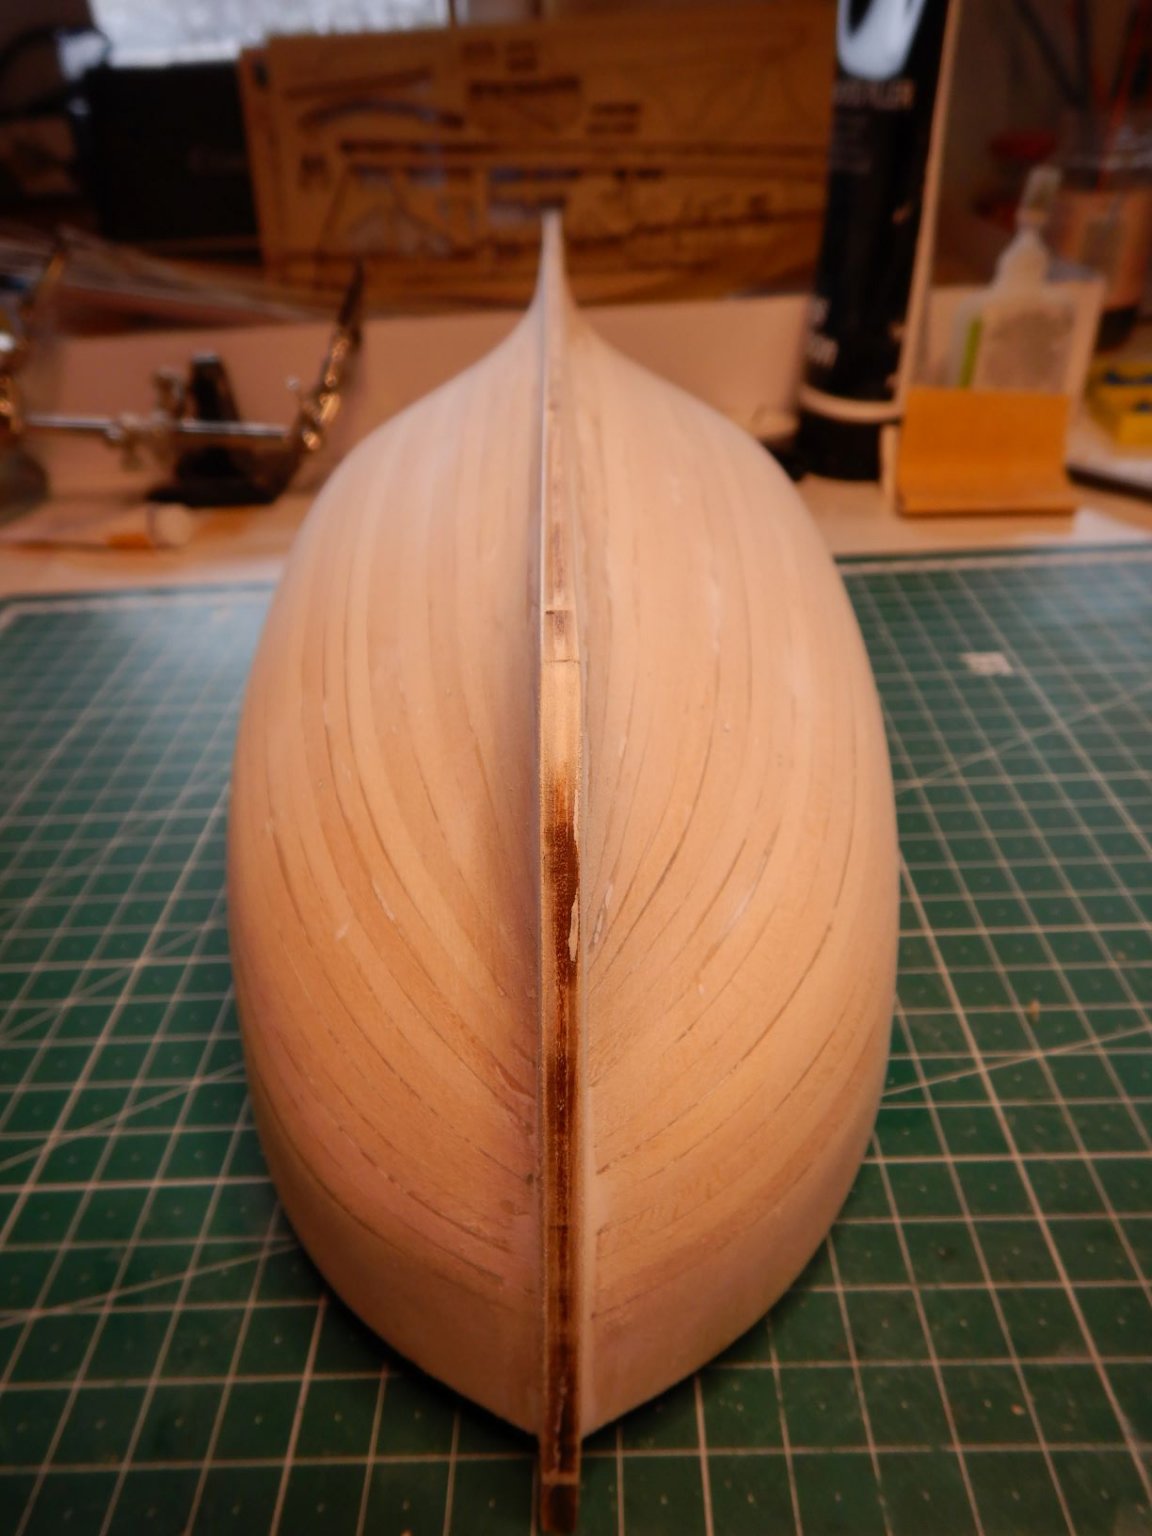
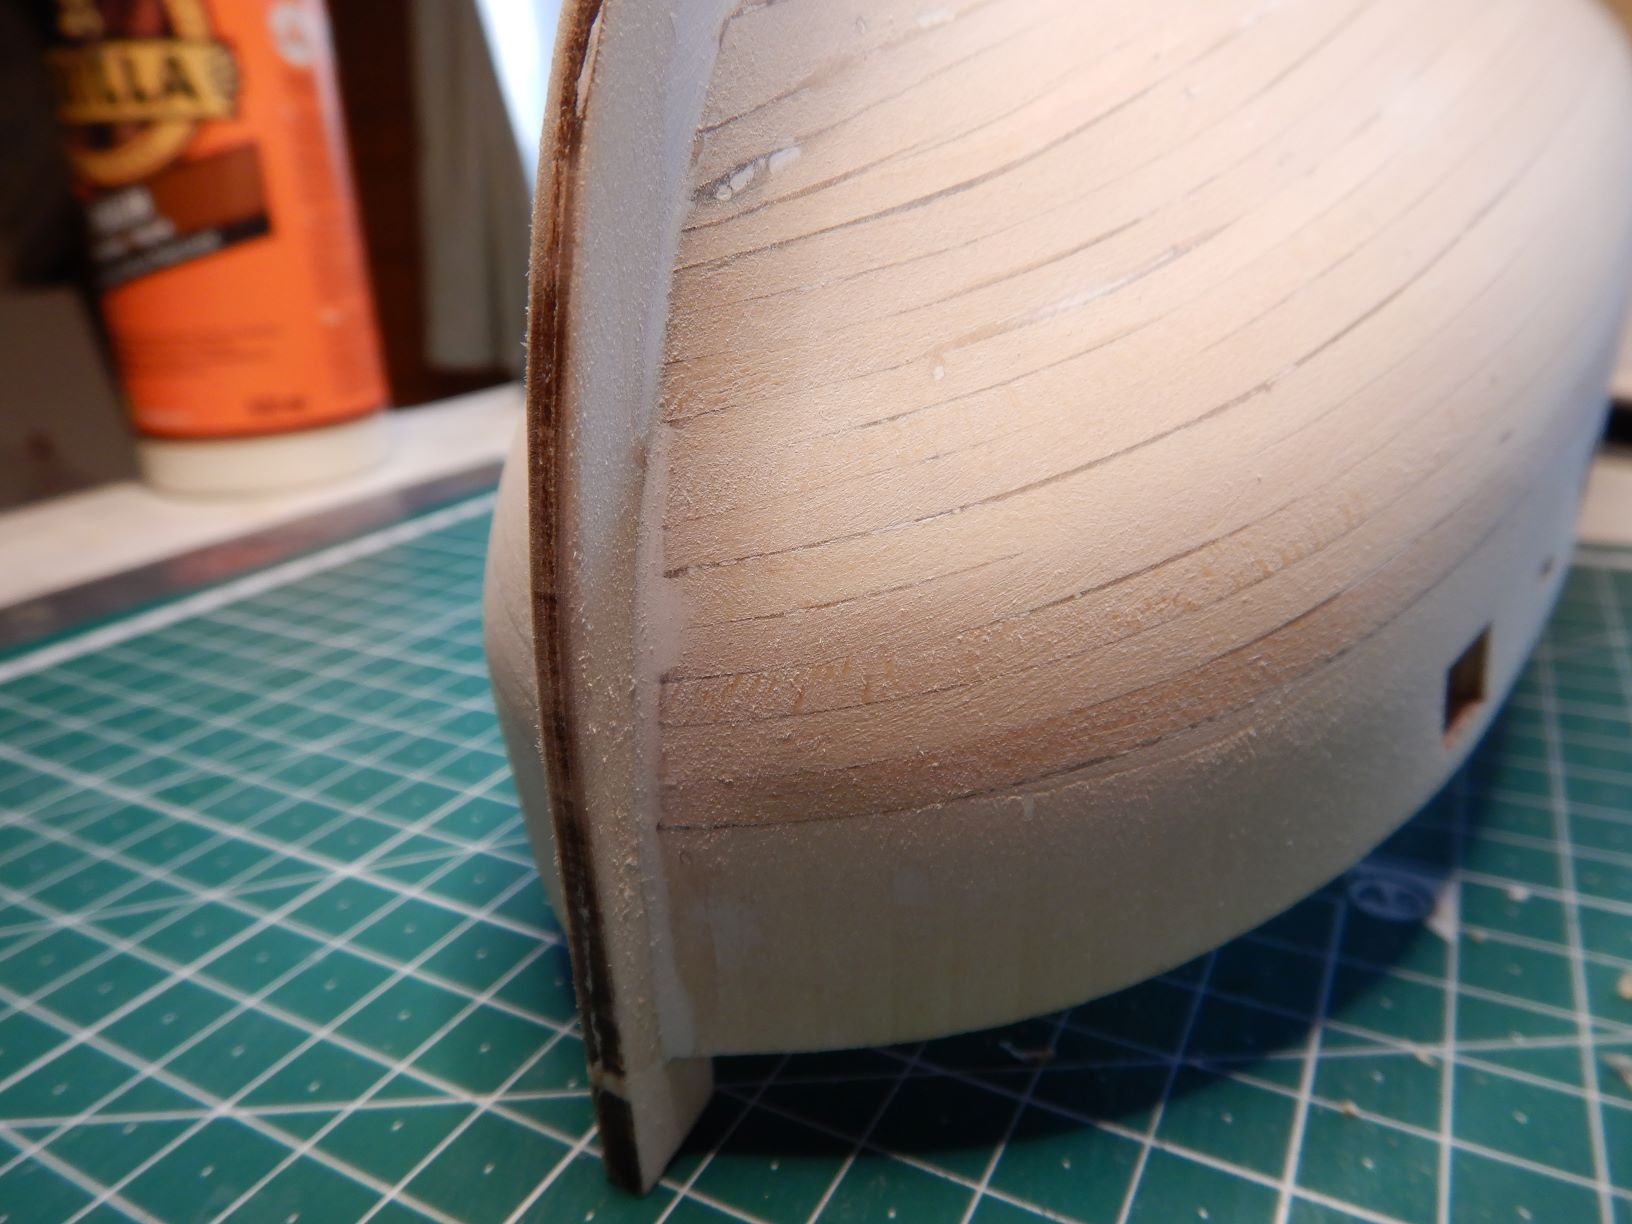
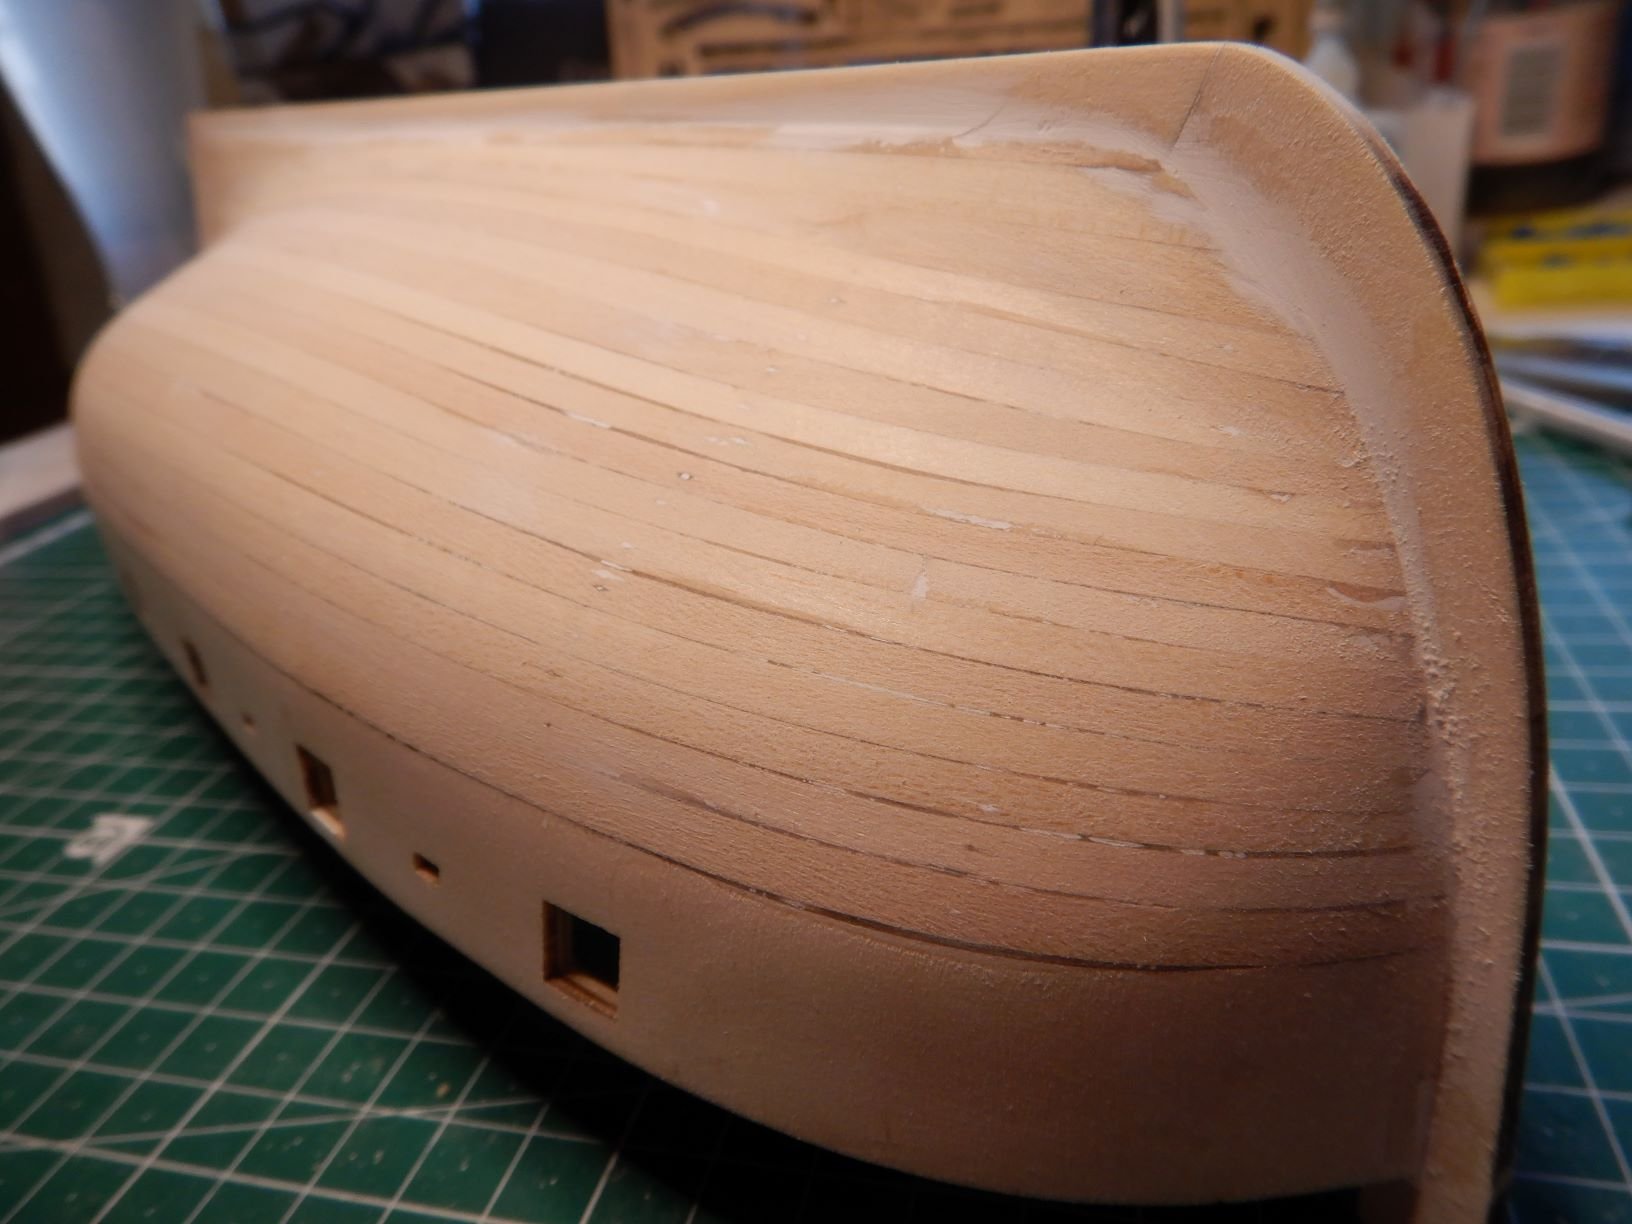
I have now sanded and filled and sanded and filled to get the hull as smooth and true as possible.
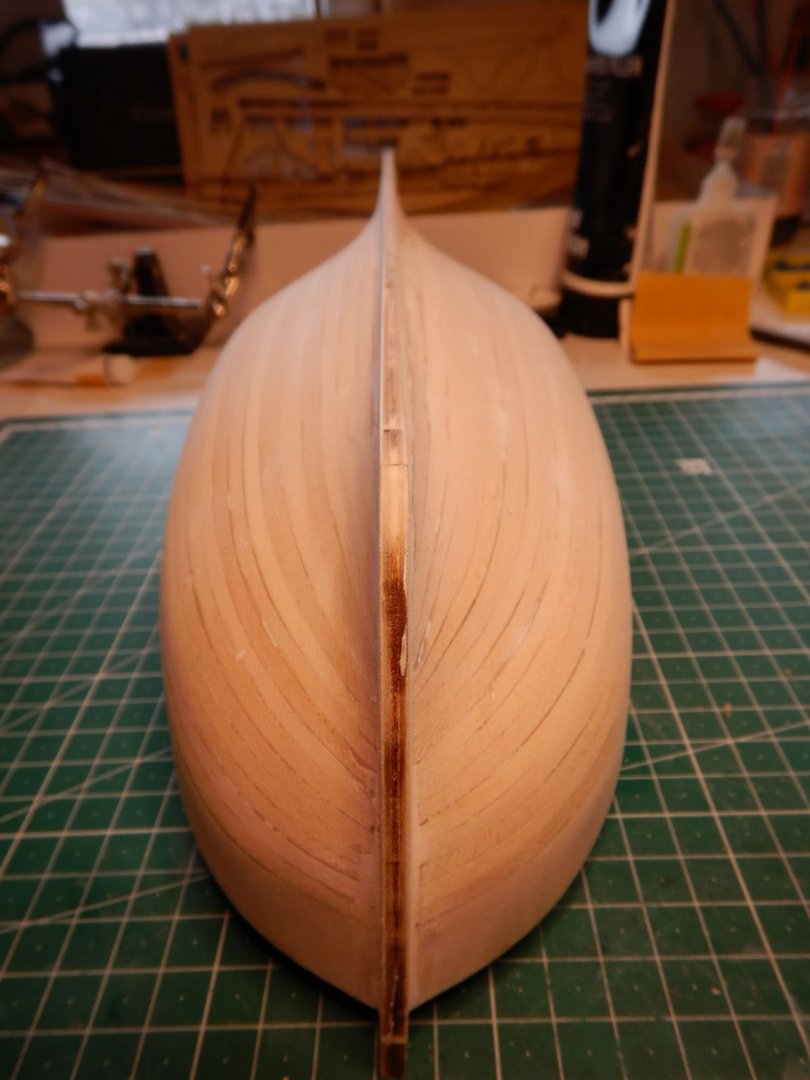


So, I gave the hull a coat of primer, to see the places I need to fill and sand some more...

Still some to do, but I'm sure I'll get there soon!
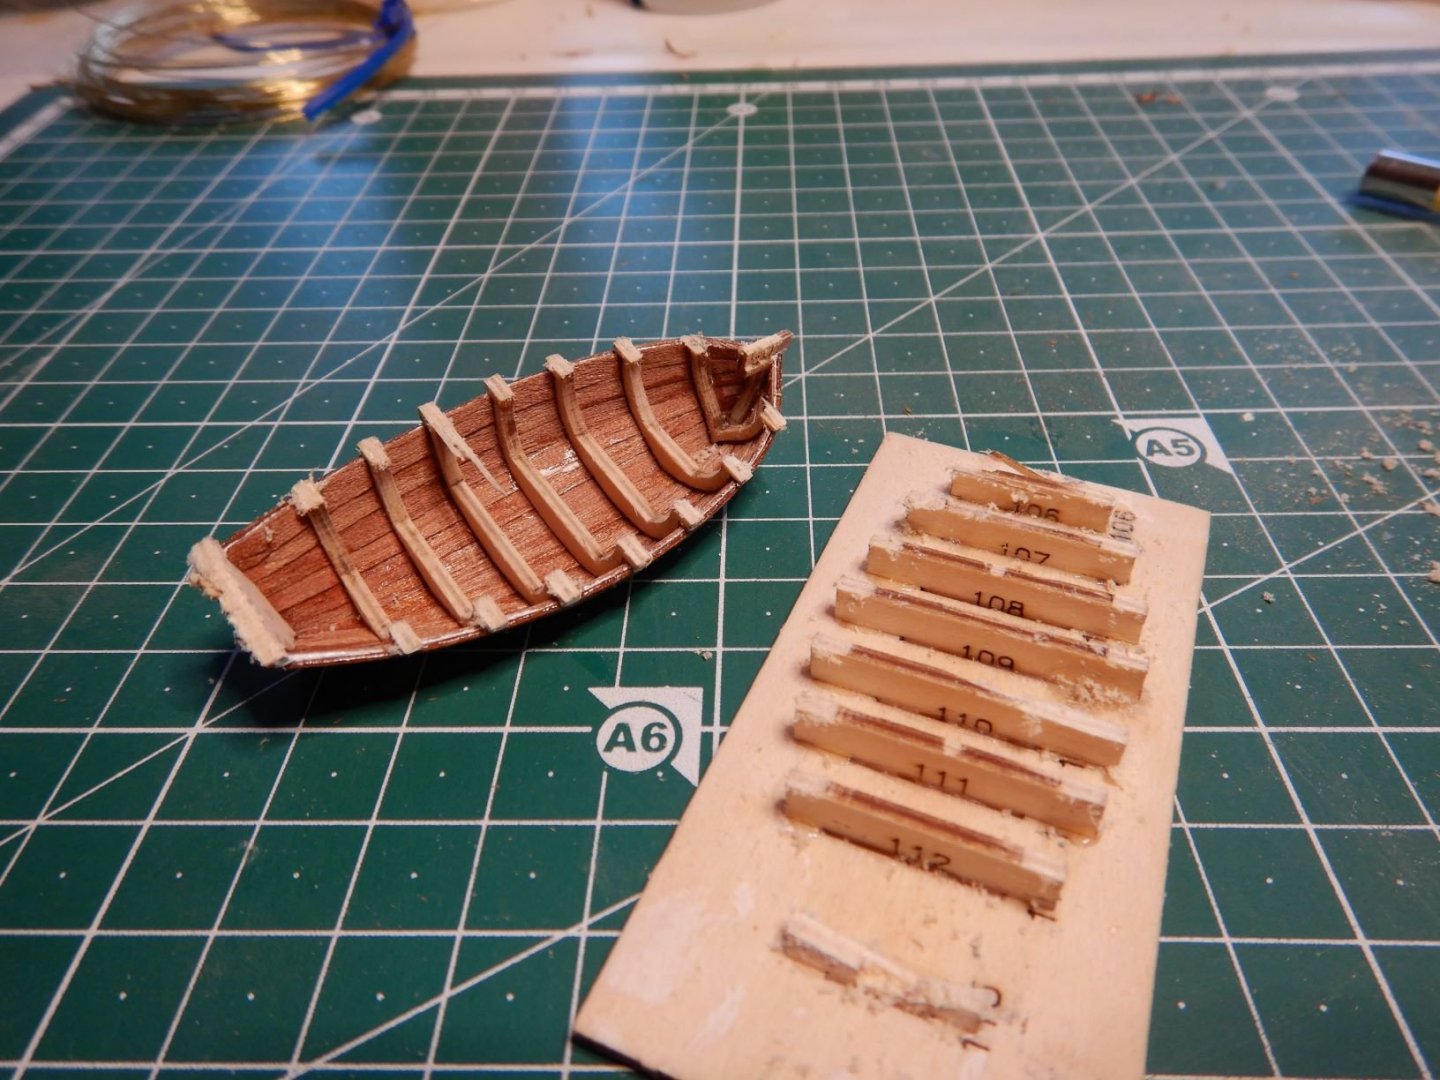
The dinghy has got it's sheerstrakes and a little varnish. Soon to be released from the jig.
I decided to use mahogany for the sheerstrakes too.

That's it for now.
Gaffrig.
-
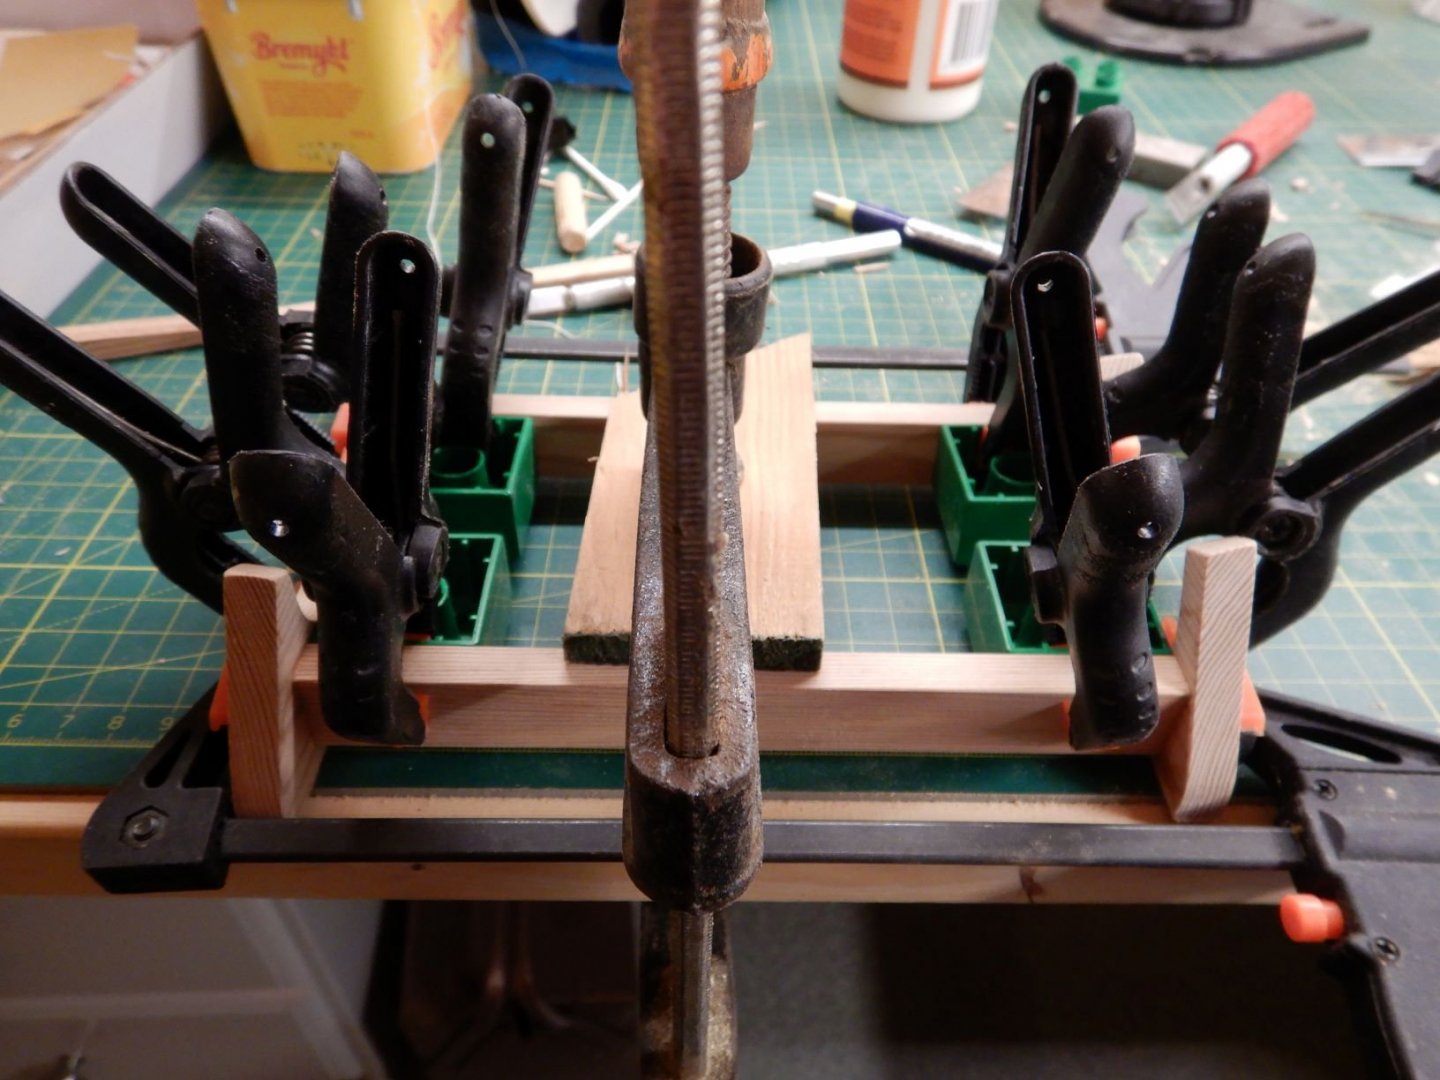
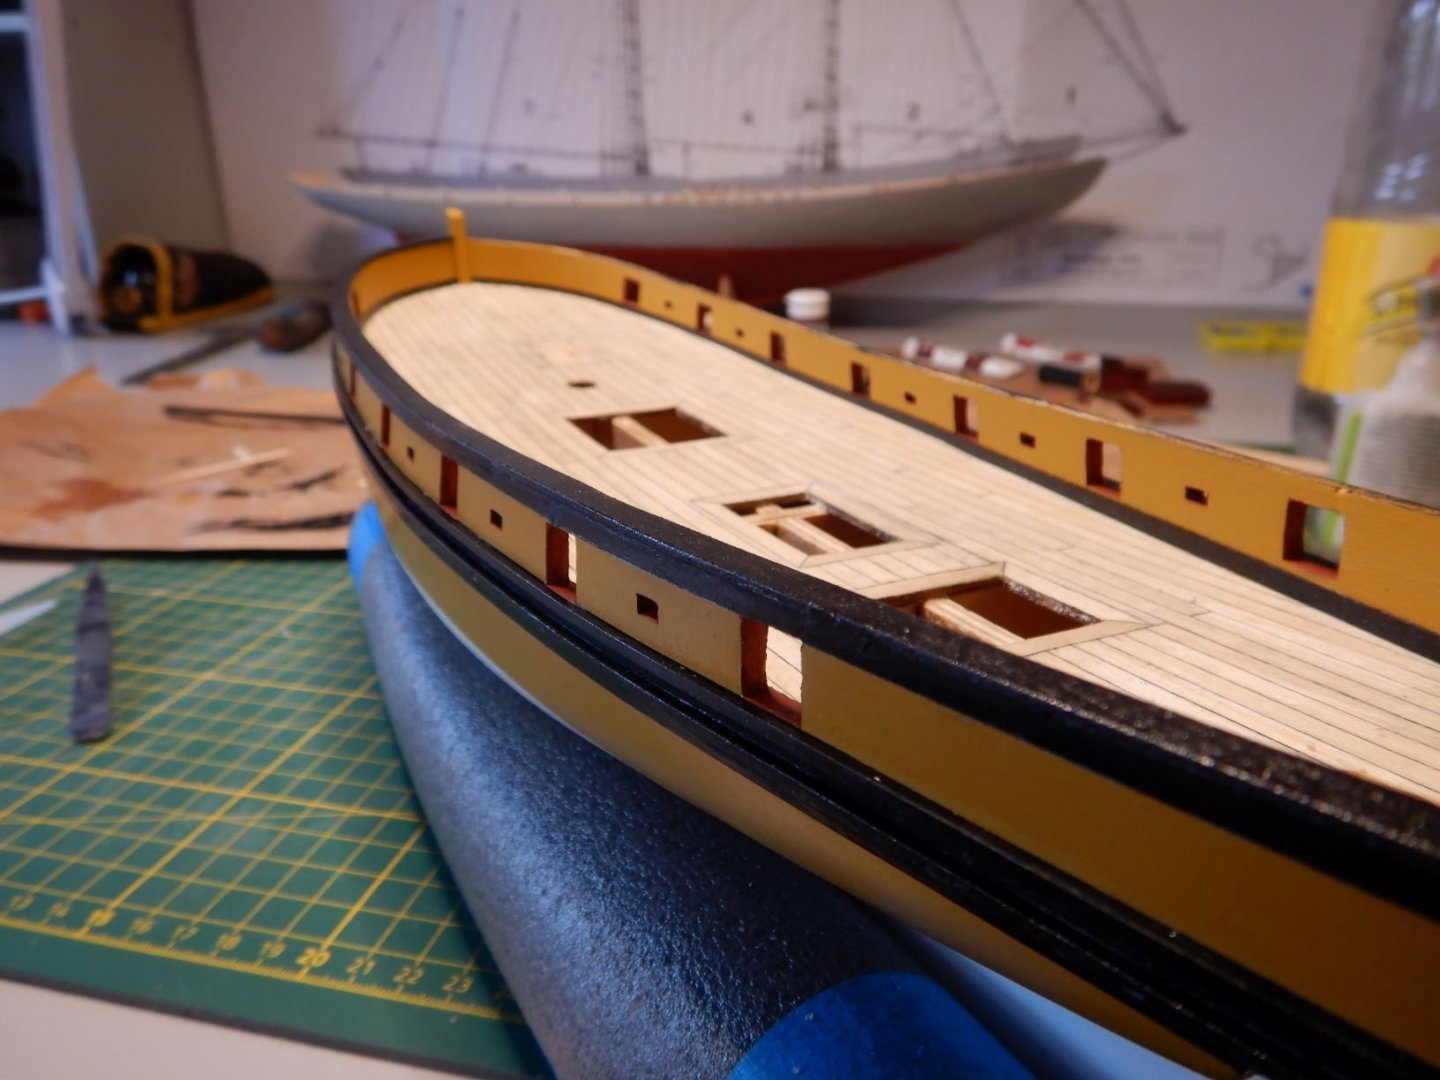
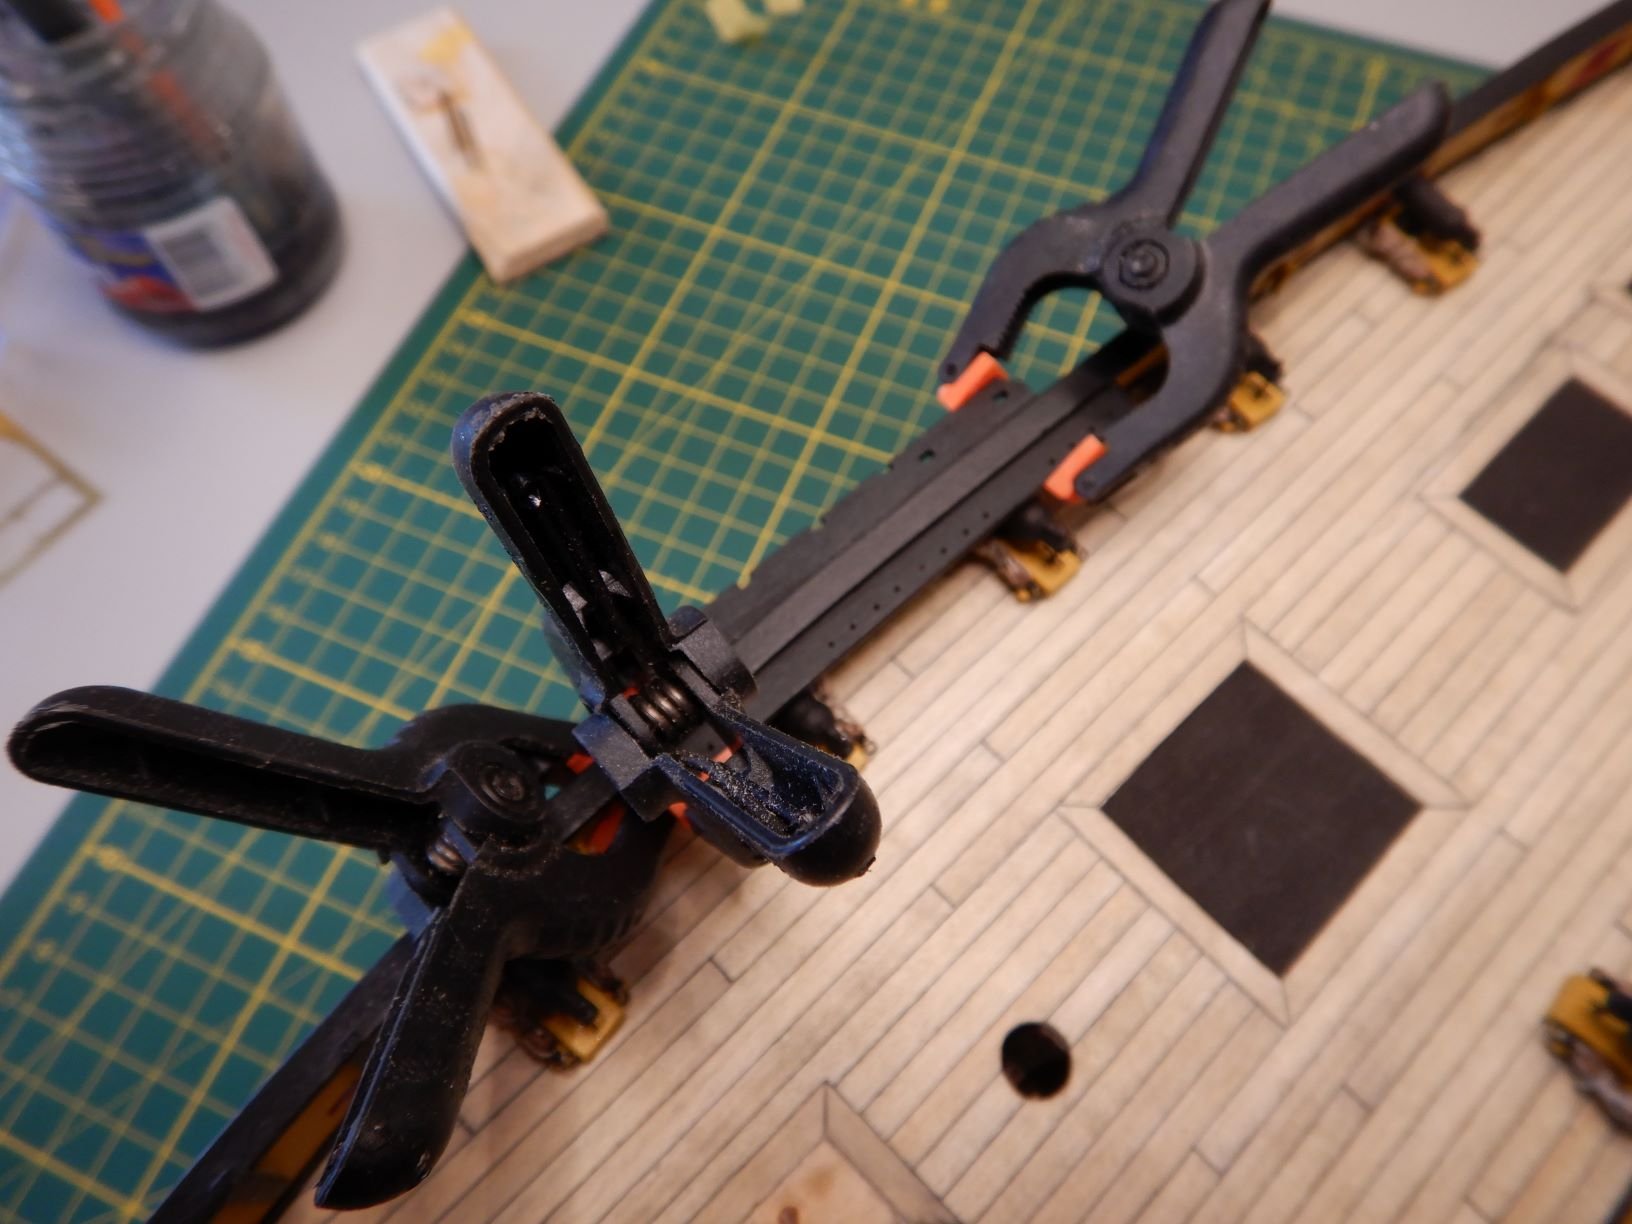
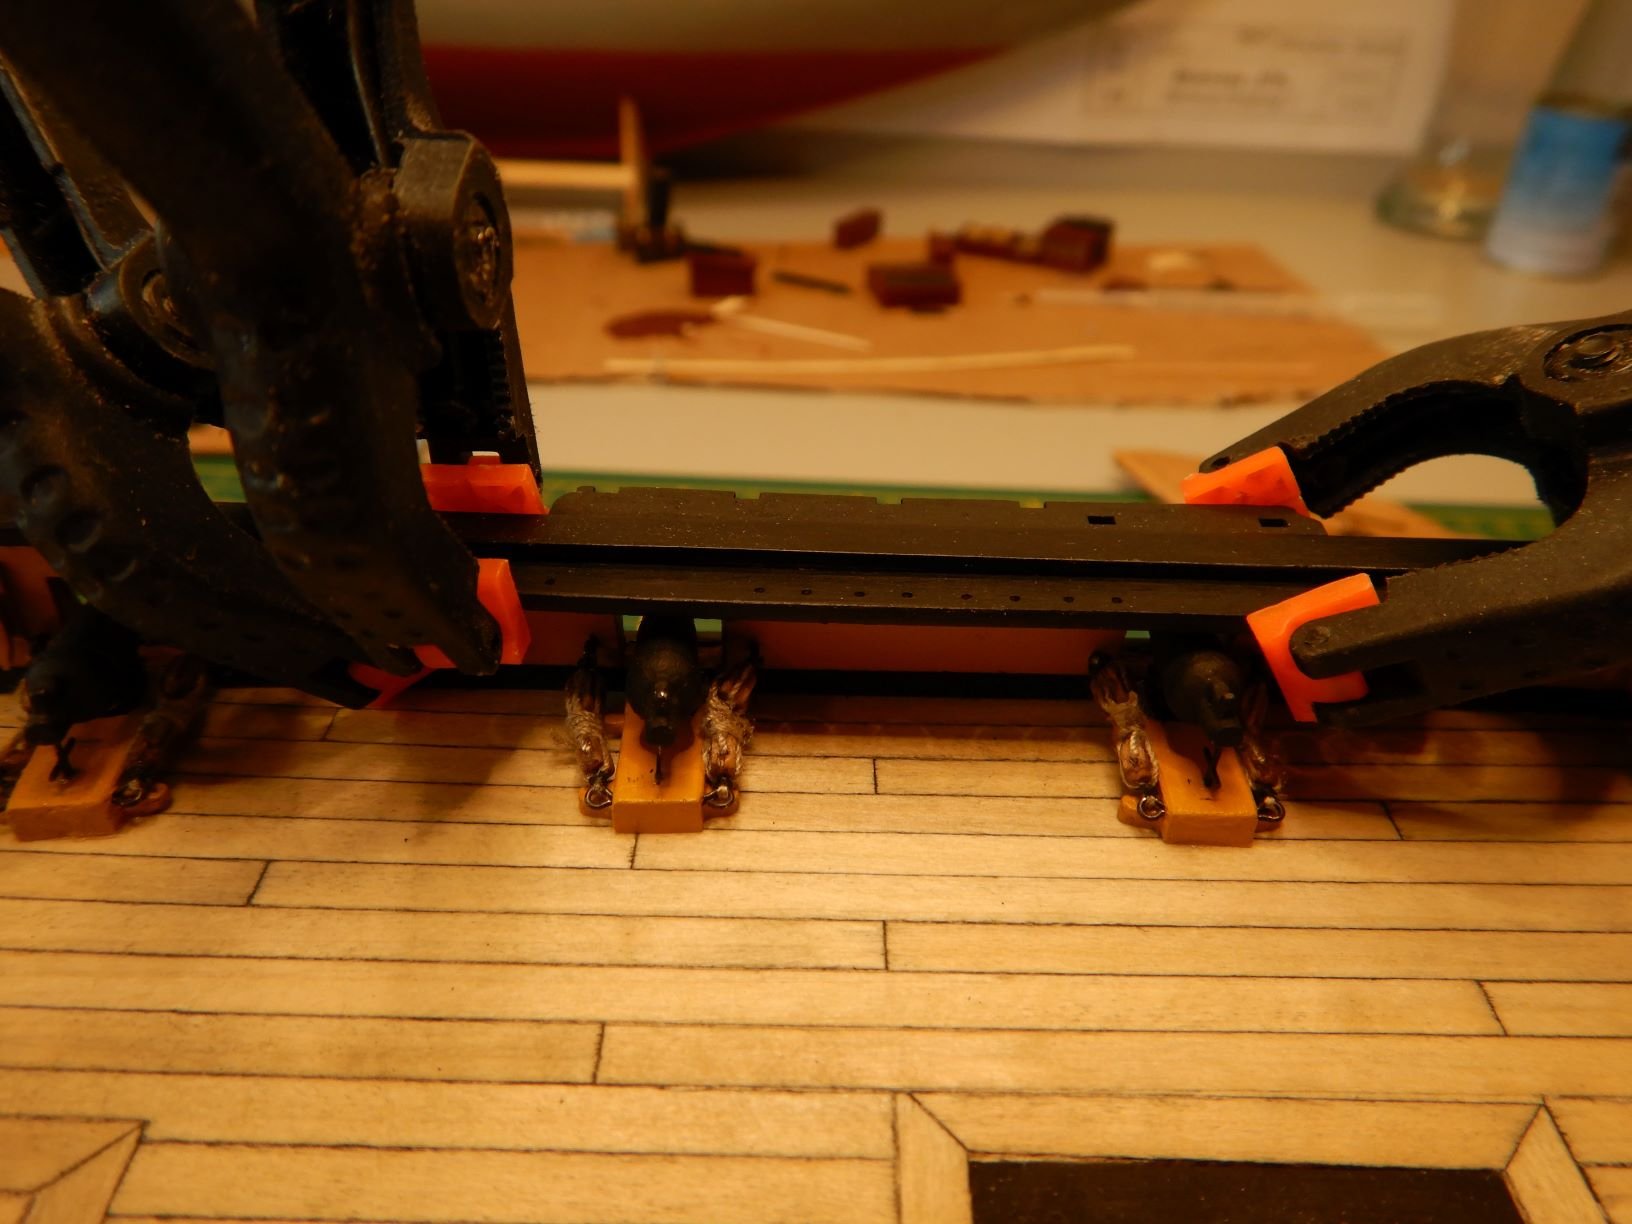
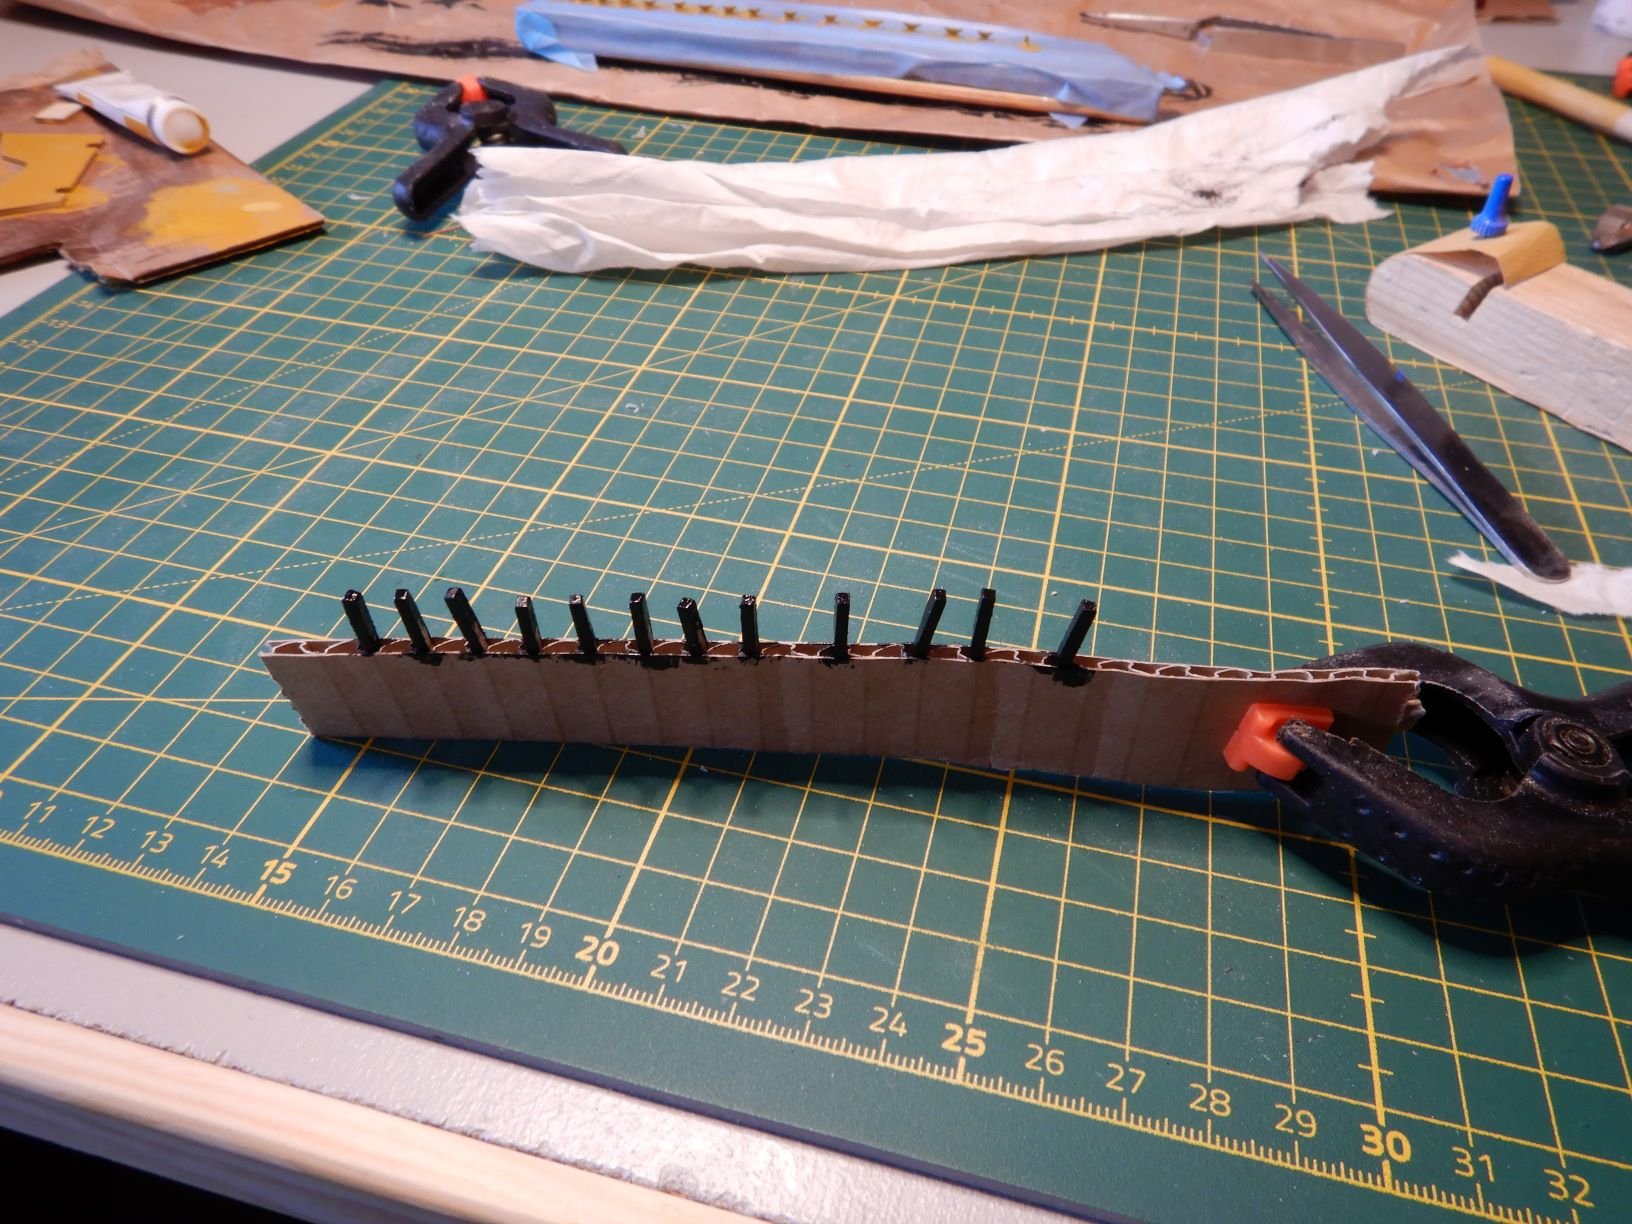
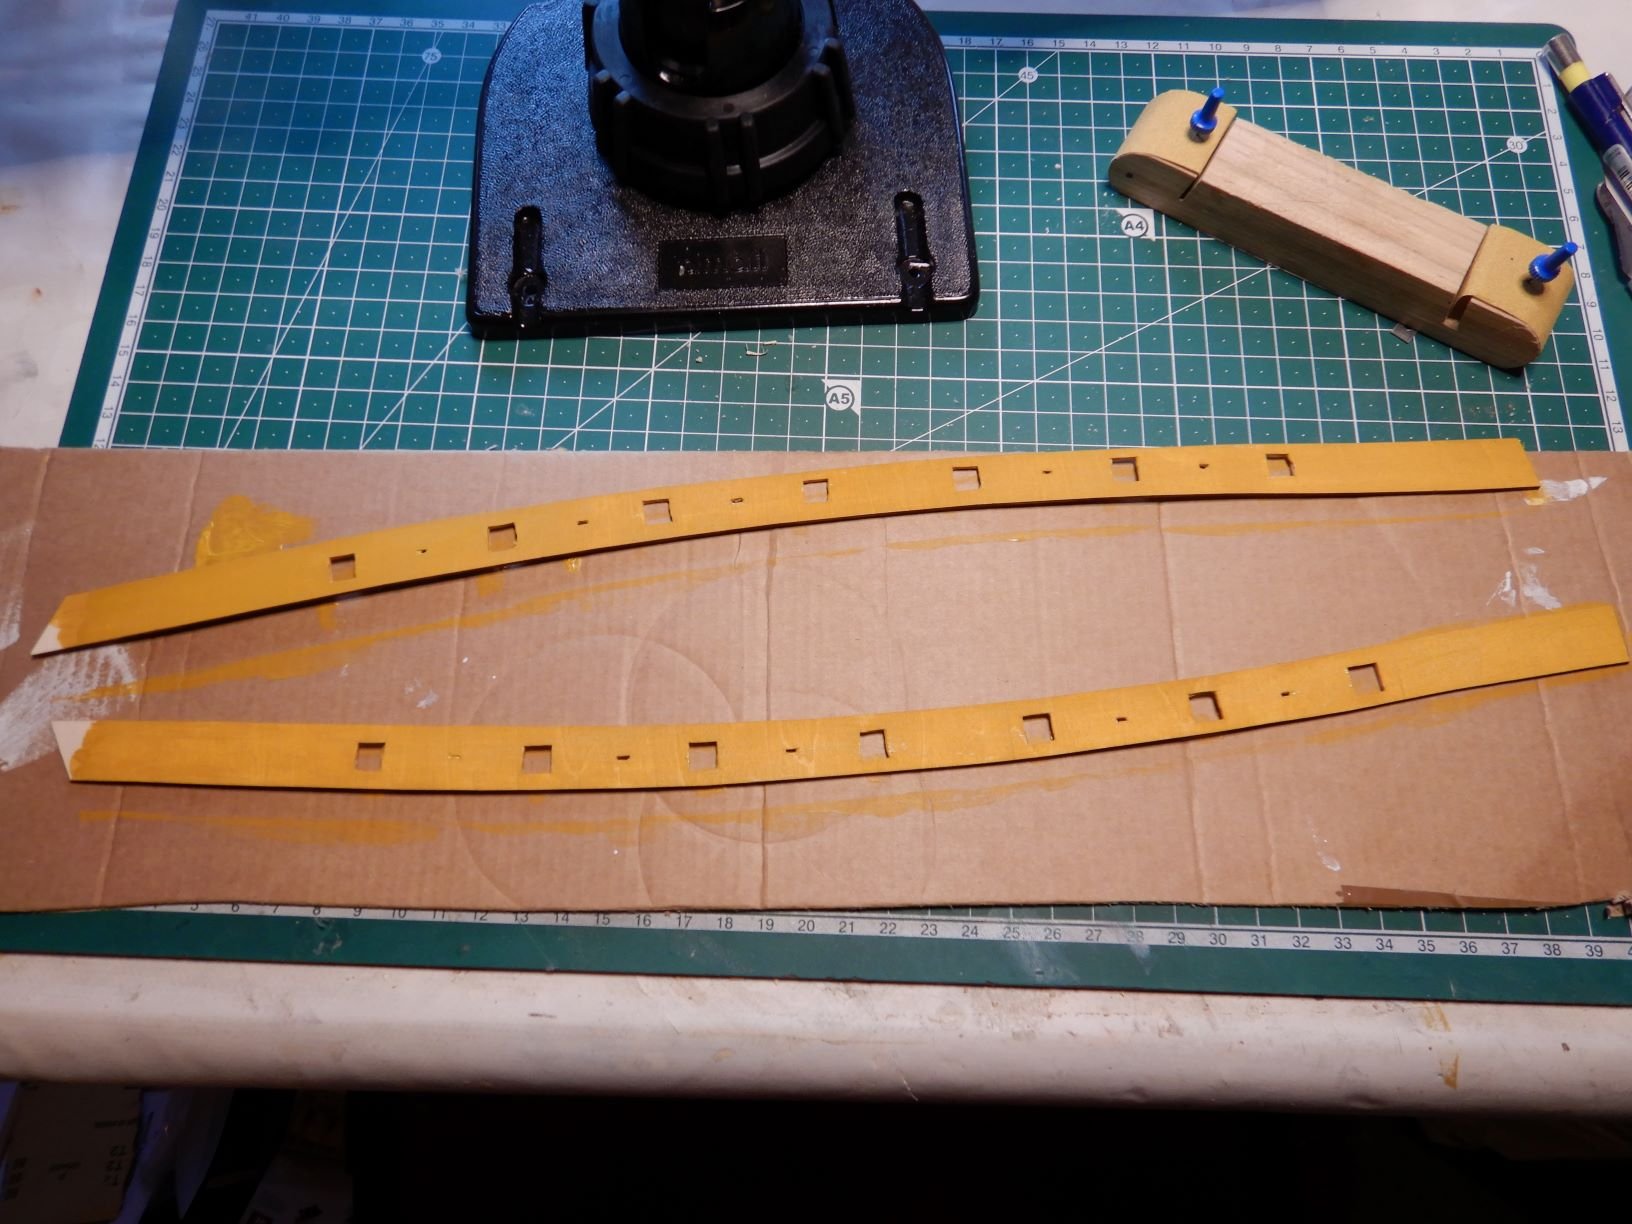
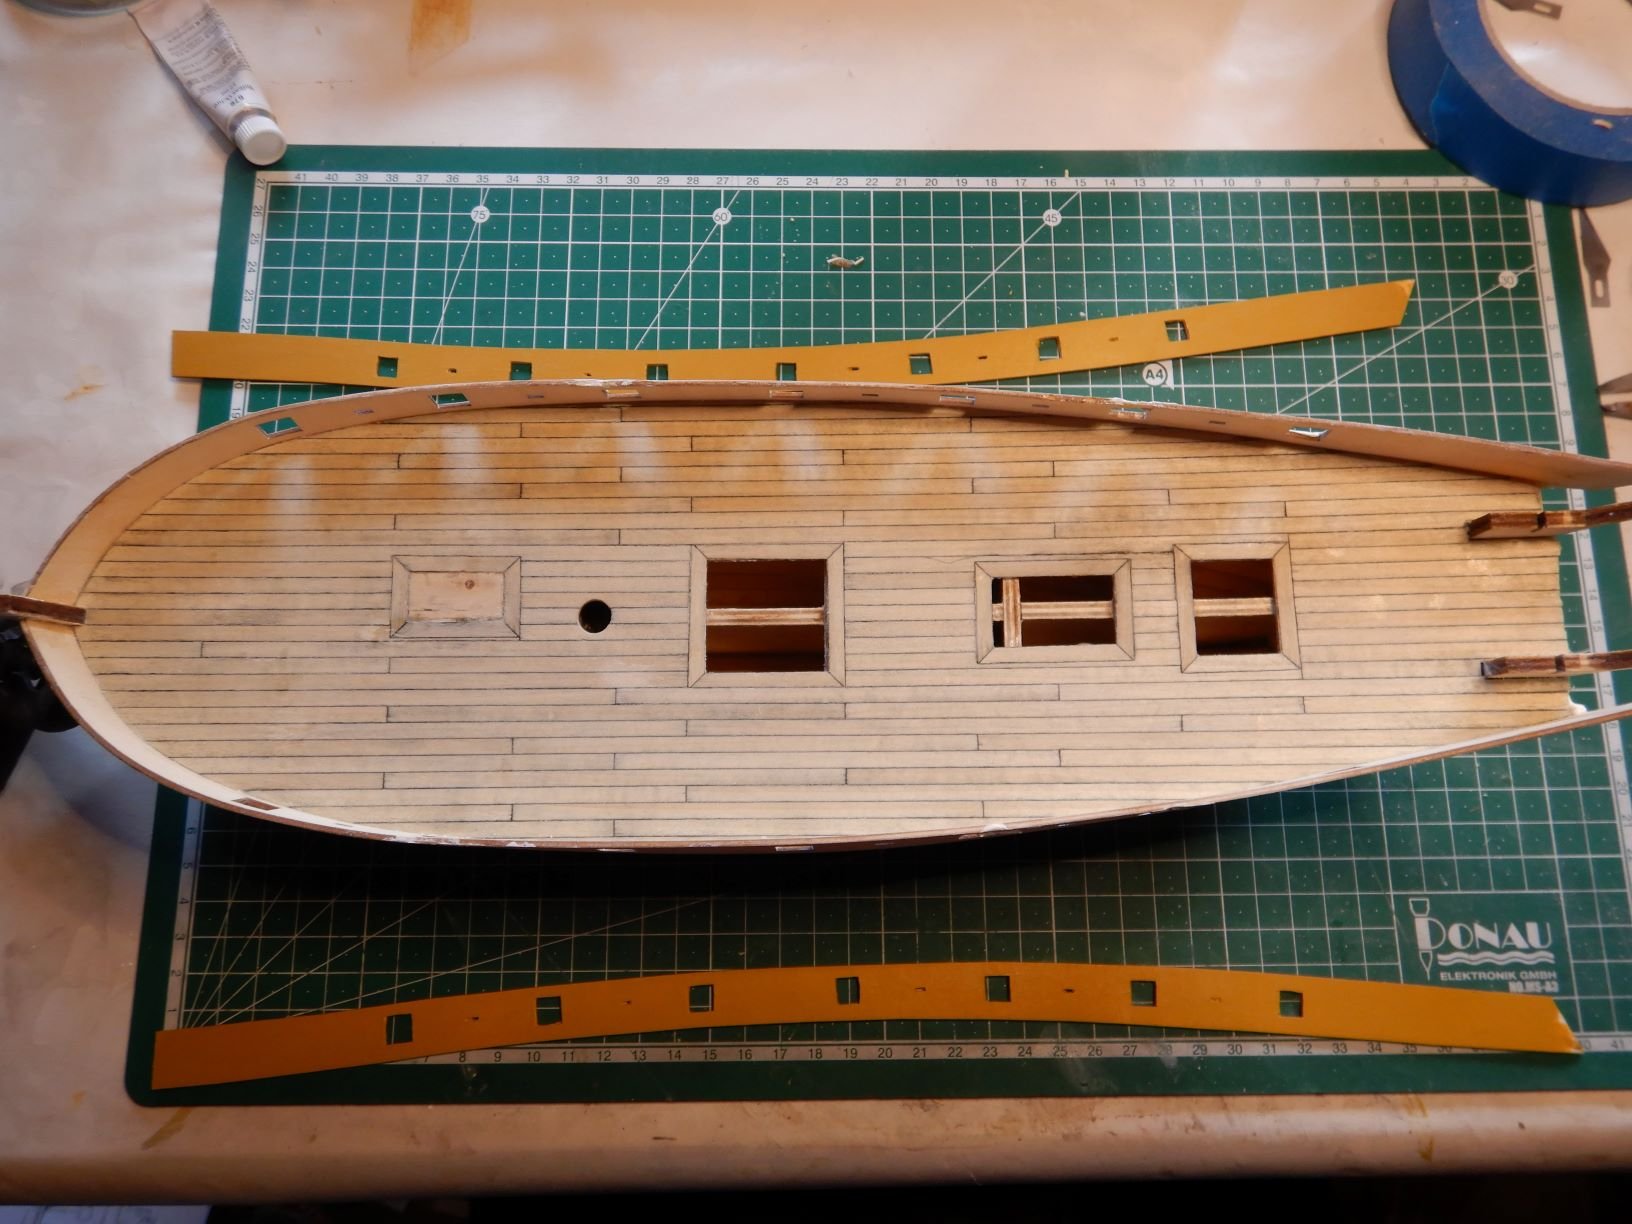
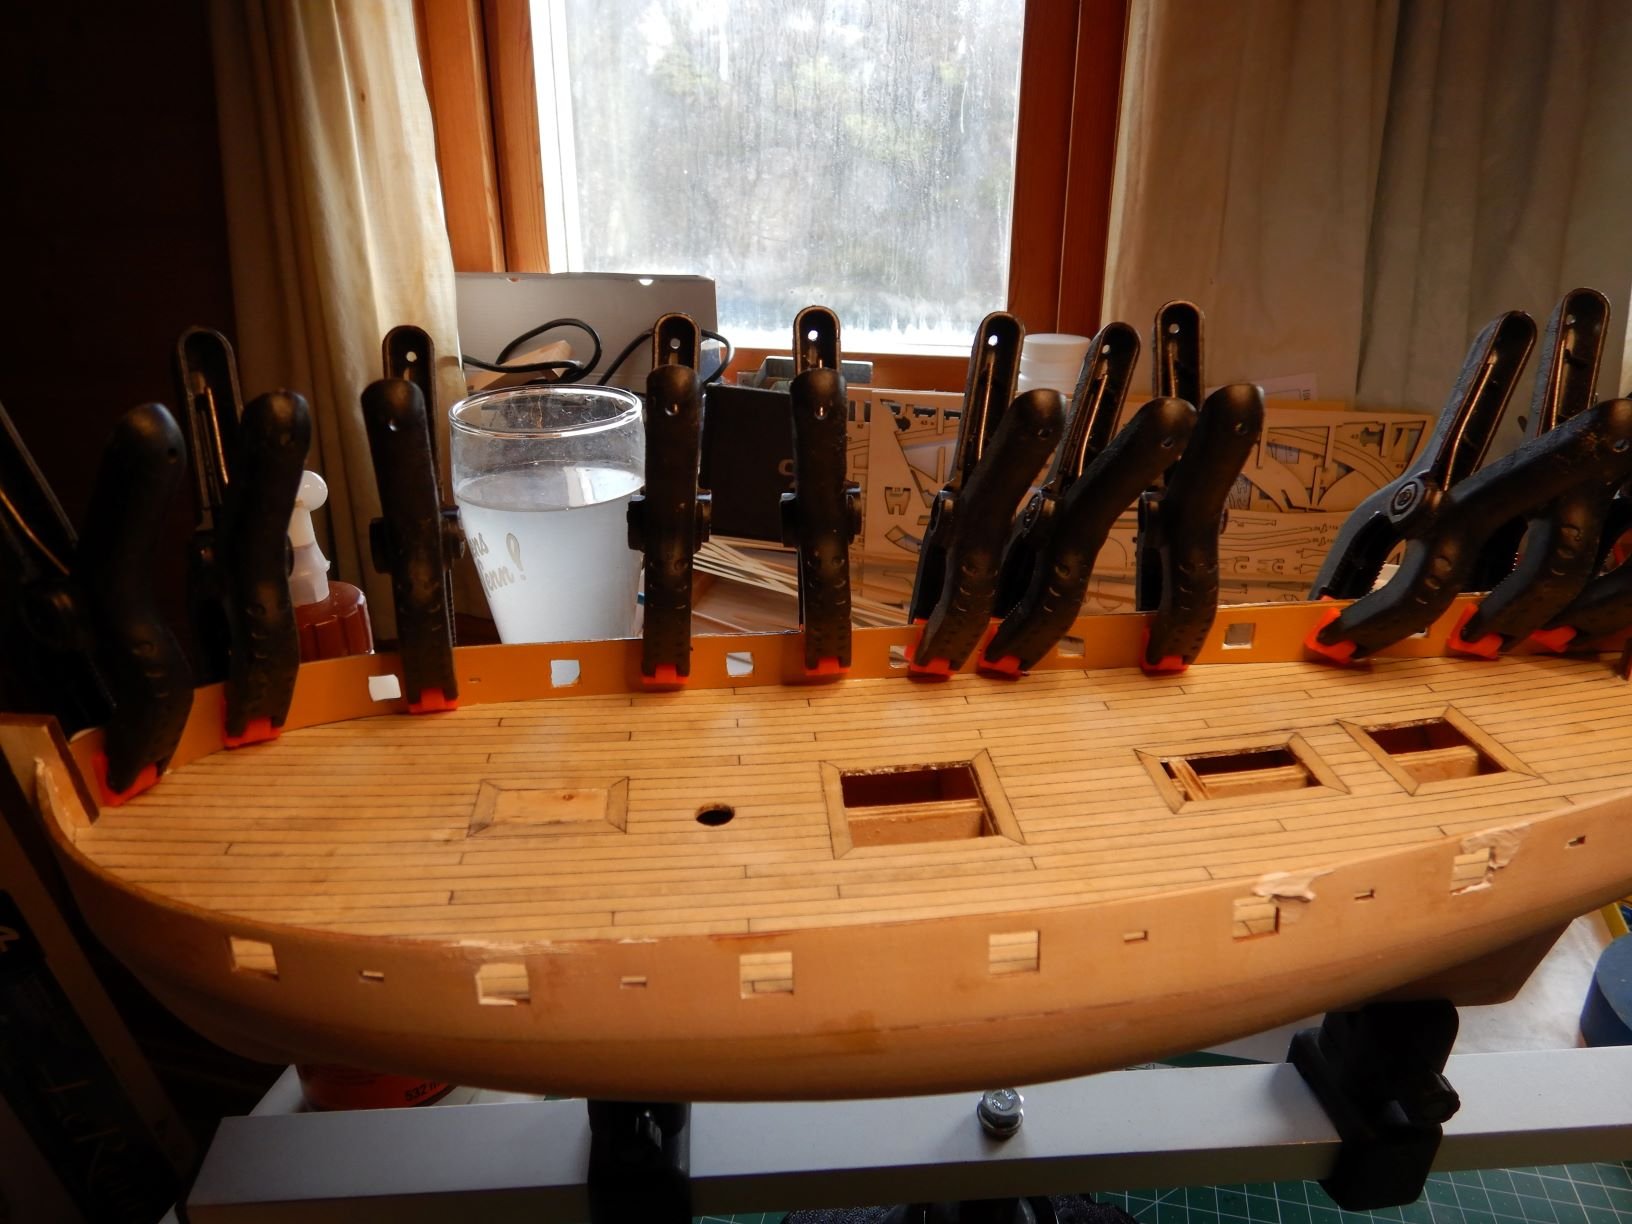
The build continues...
Next step is the inside of the bulwarks. Another strip of plywood goes on the inside of the first one.
I really like the new keel clamper!
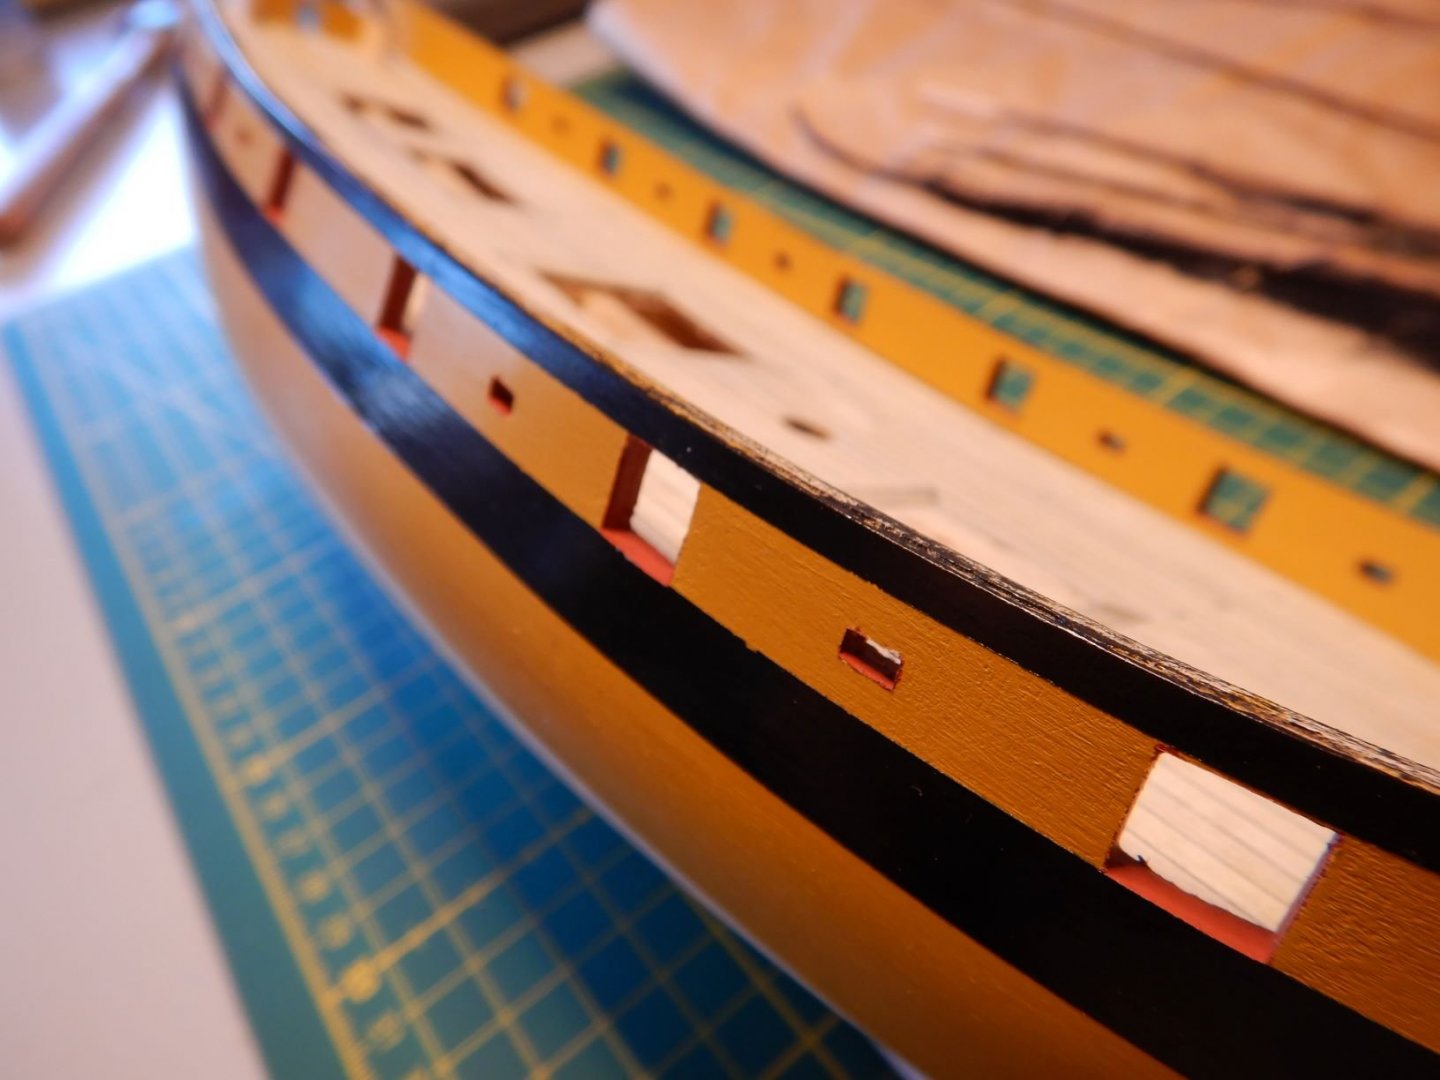
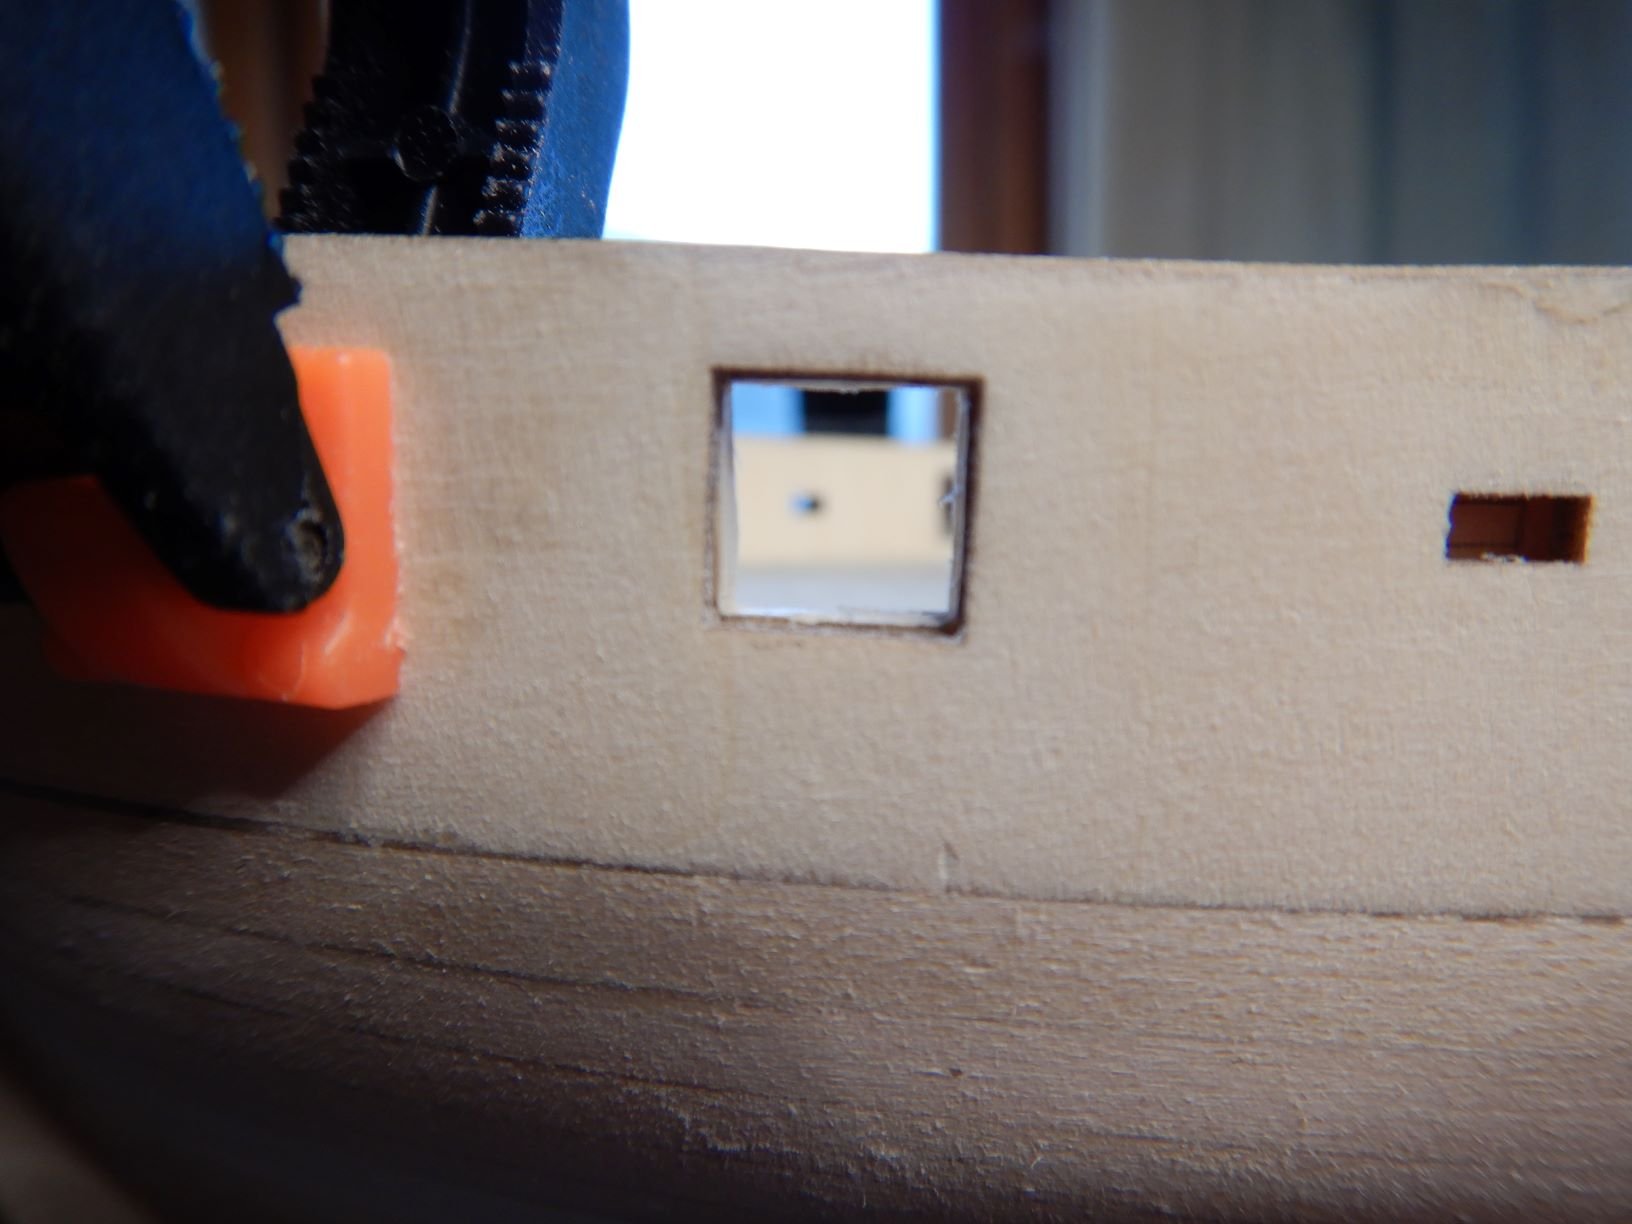
Before glueing this in place, I need to mark and cut out the gunports.
I dryfitted the inner bulwarks with clamps, and marked the gunports with a pencil and cut them out with a scalpel.
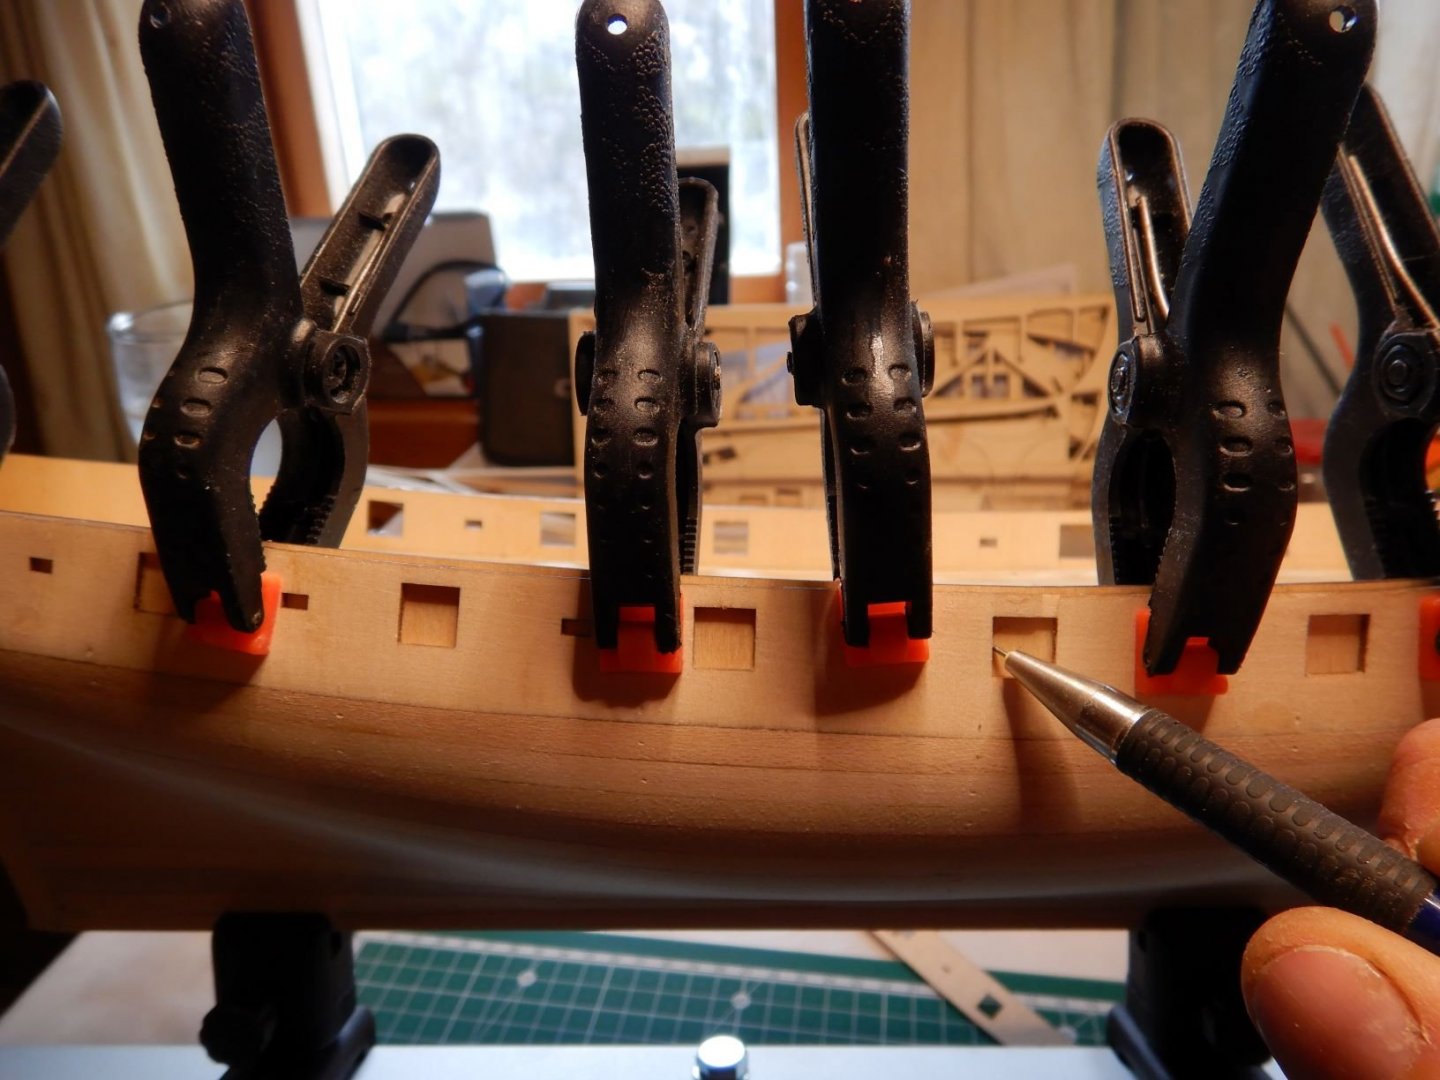
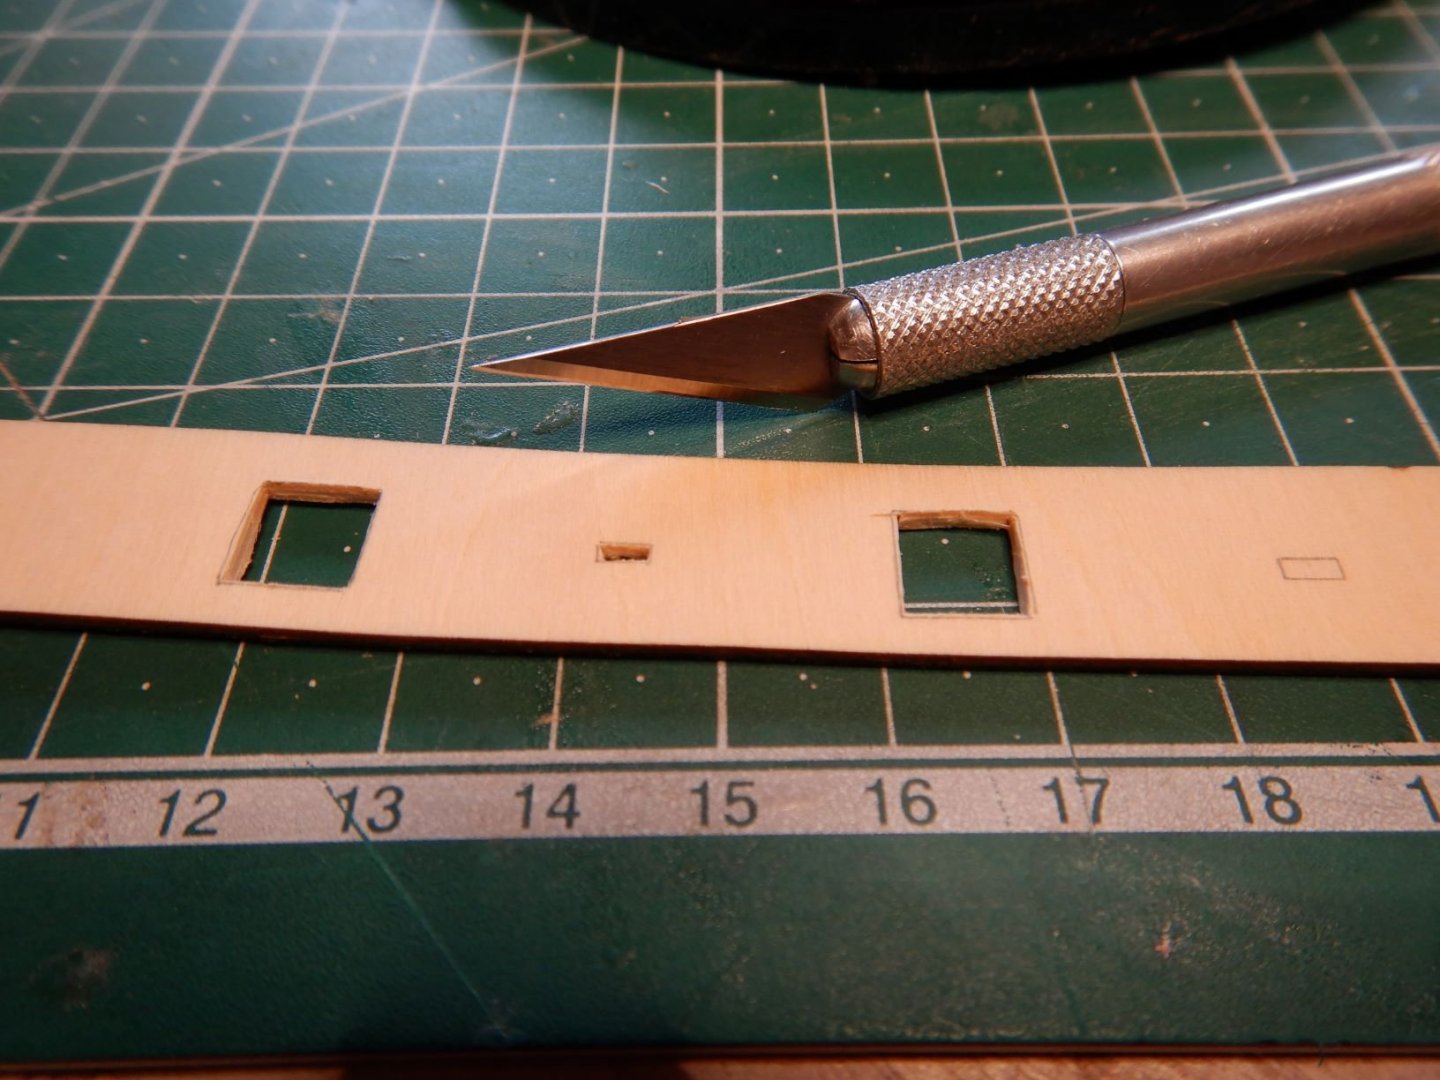
I made the cuts a little small, to have some material for adjusting after glueing.

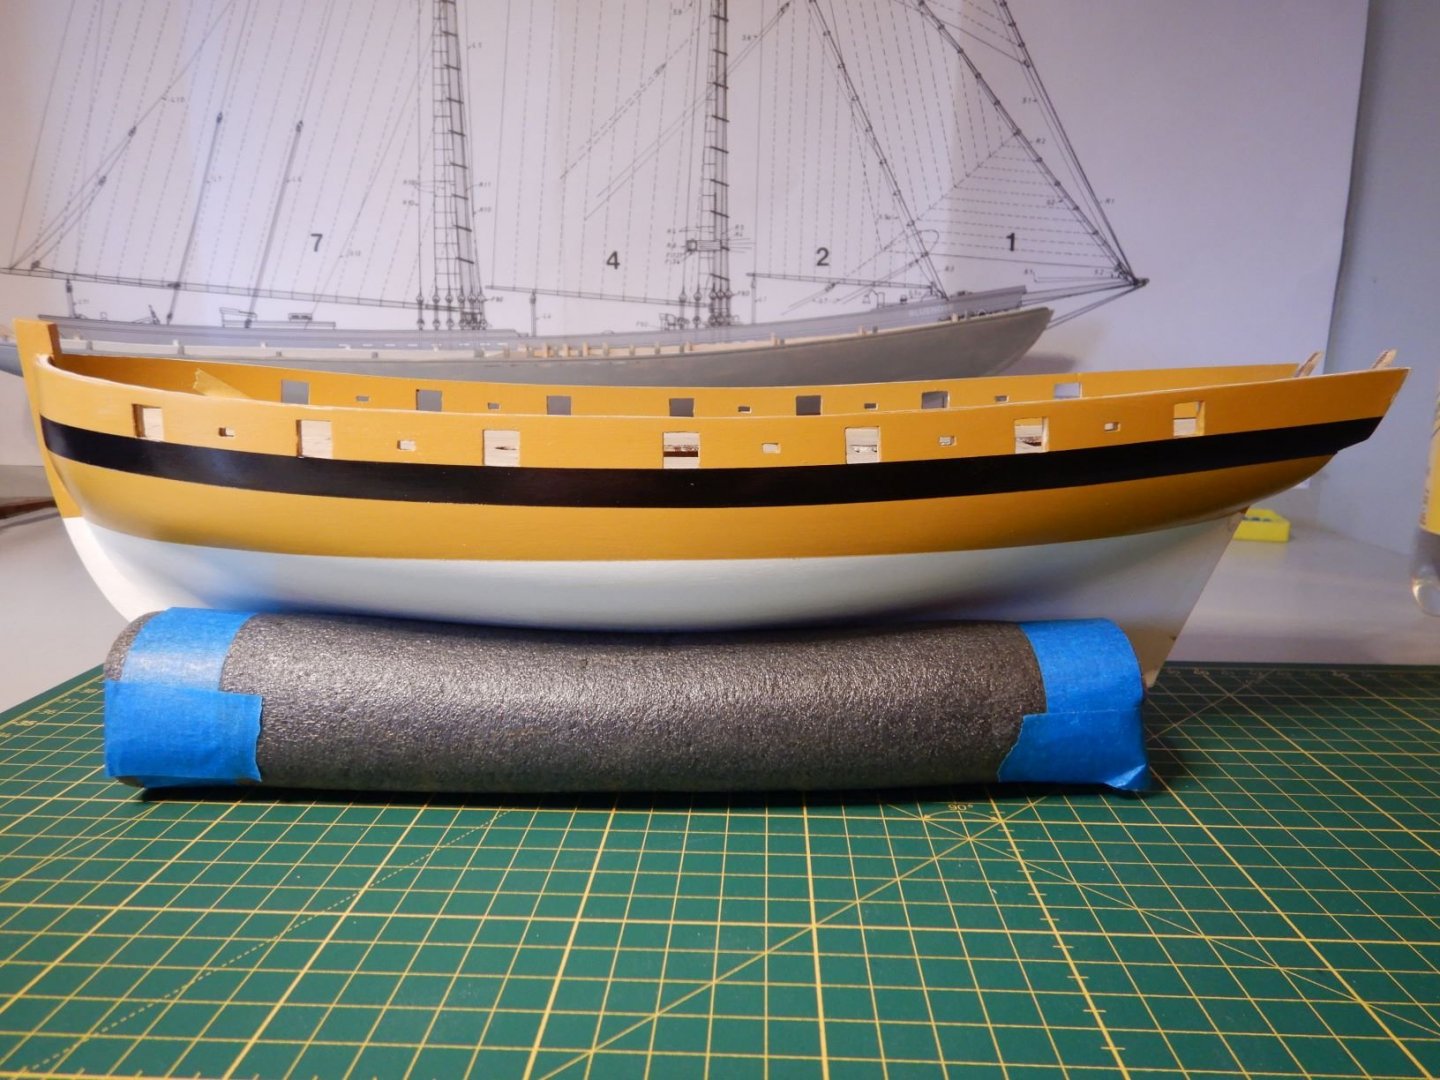
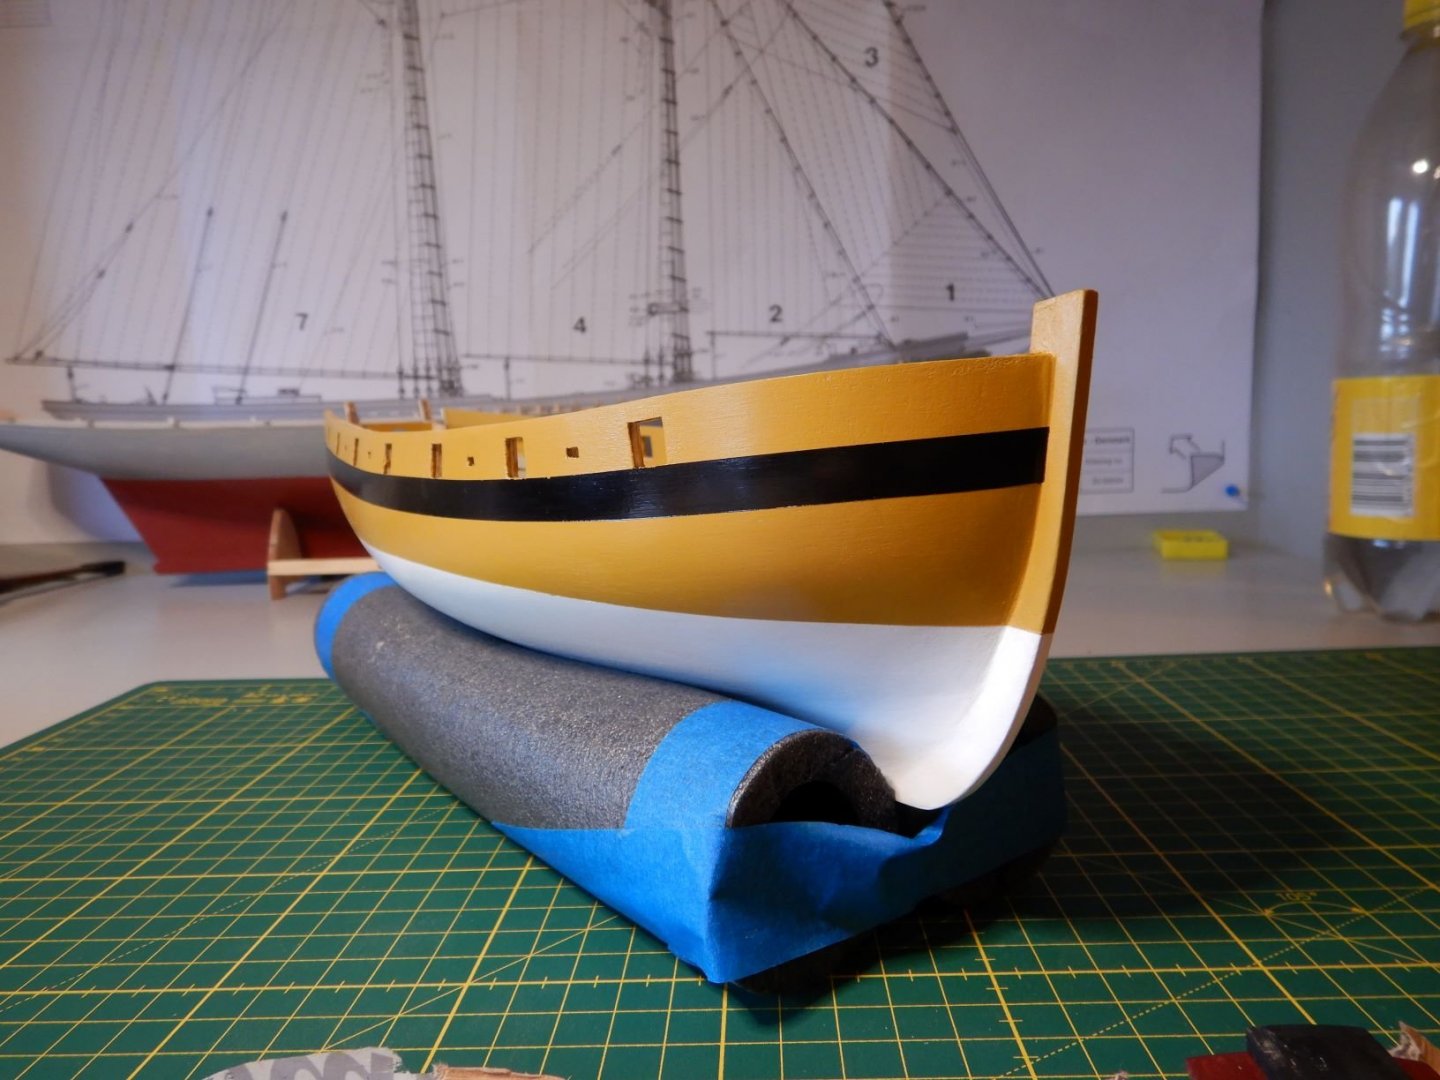
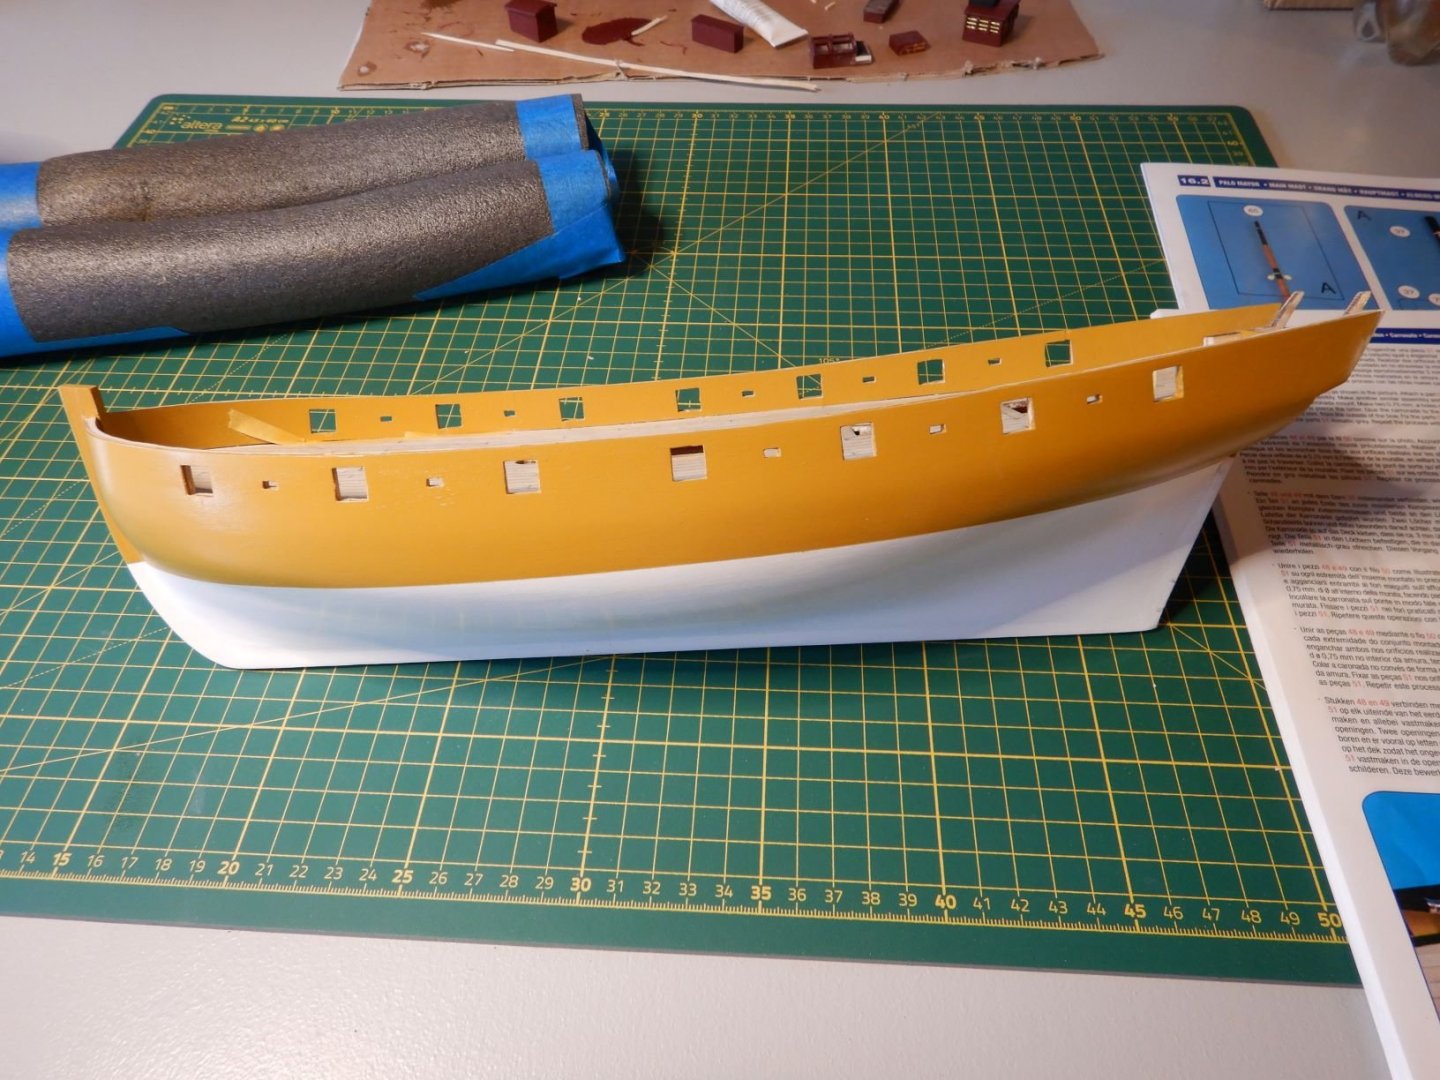
Then some yellow paint, and they are ready to be mounted.


I glued them on, one side at a time. Not enough clamps to do both sides at once!

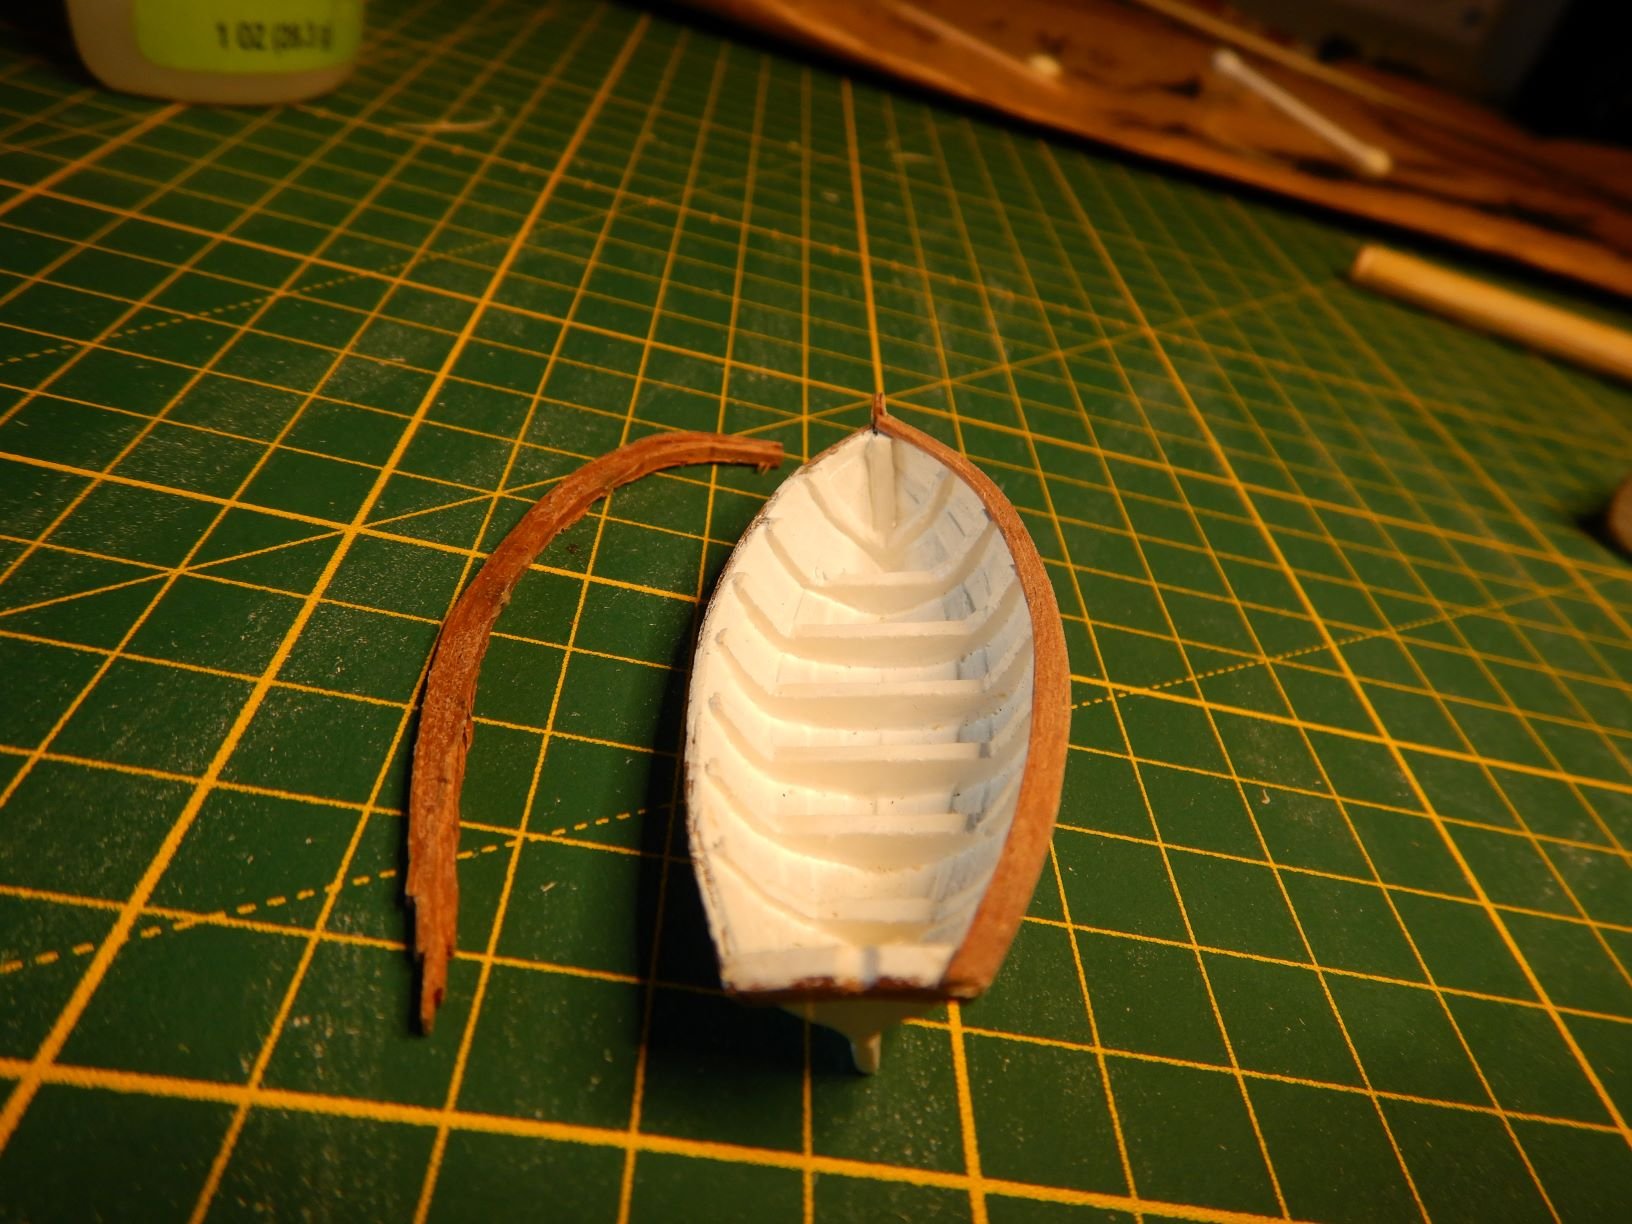
I also made some more progress on the dinghy. Got the primer sanded and some white paint on it.

It's coming together, next up will be the sheerstrake and then time to cut it loose from the jig. It will be fun to see how it will look inside!
Thank's for the comments and likes!
Gaffrig.


Le Renard by Gaffrig - FINISHED - Artesania Latina - Scale 1:50
in - Kit build logs for subjects built from 1801 - 1850
Posted
Tompslattery, that’s great to hear!
Glad to be of some help.
This makes keeping the buildlog going a lot more fun, knowing that it is useful to others! 😀
Gaffrig.