HOLIDAY DONATION DRIVE - SUPPORT MSW - DO YOUR PART TO KEEP THIS GREAT FORUM GOING! (Only 53 donations so far out of 49,000 members - C'mon guys!)
×


drjeckl
-
Posts
196 -
Joined
-
Last visited
Content Type
Profiles
Forums
Gallery
Events
Everything posted by drjeckl
-
 Karl, my stupid mistake. Totally missed the project.🤐
 -
Magnificent work, really! Curious as to why you didn't deploy a train tackle for each carriage. It's only one tackle each and it would make use of the rings midship. They kind of stick out with nothing connected. .John
-
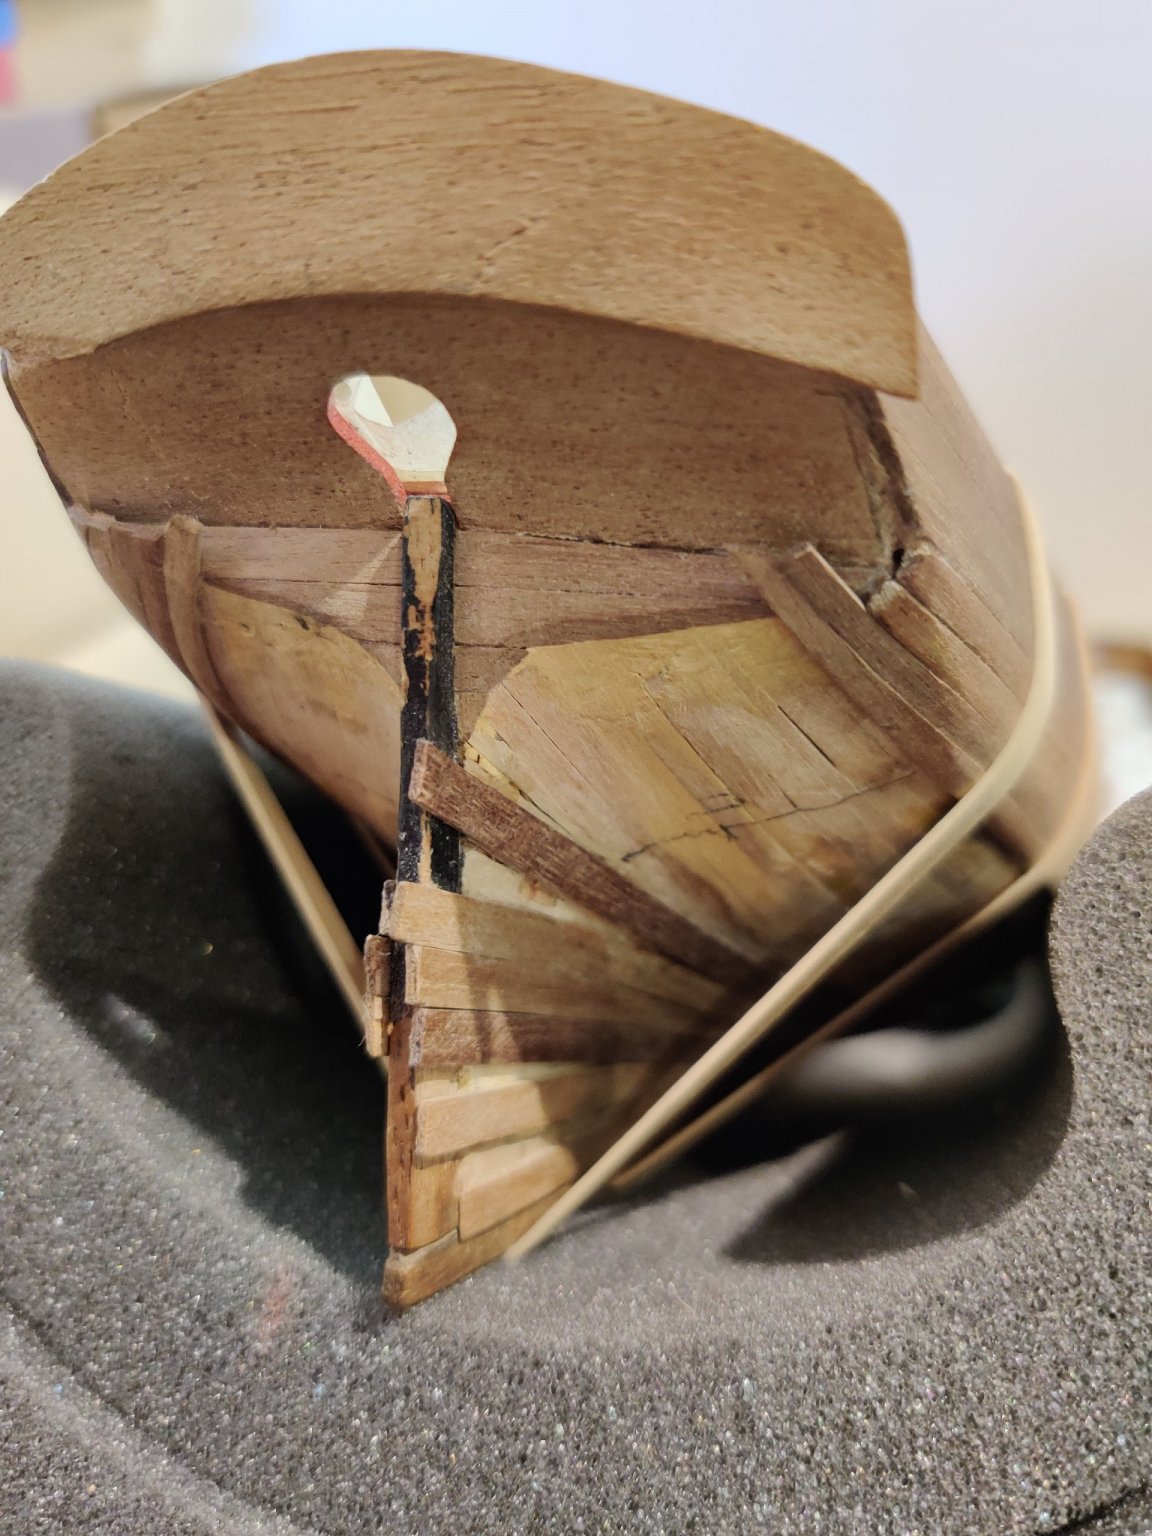
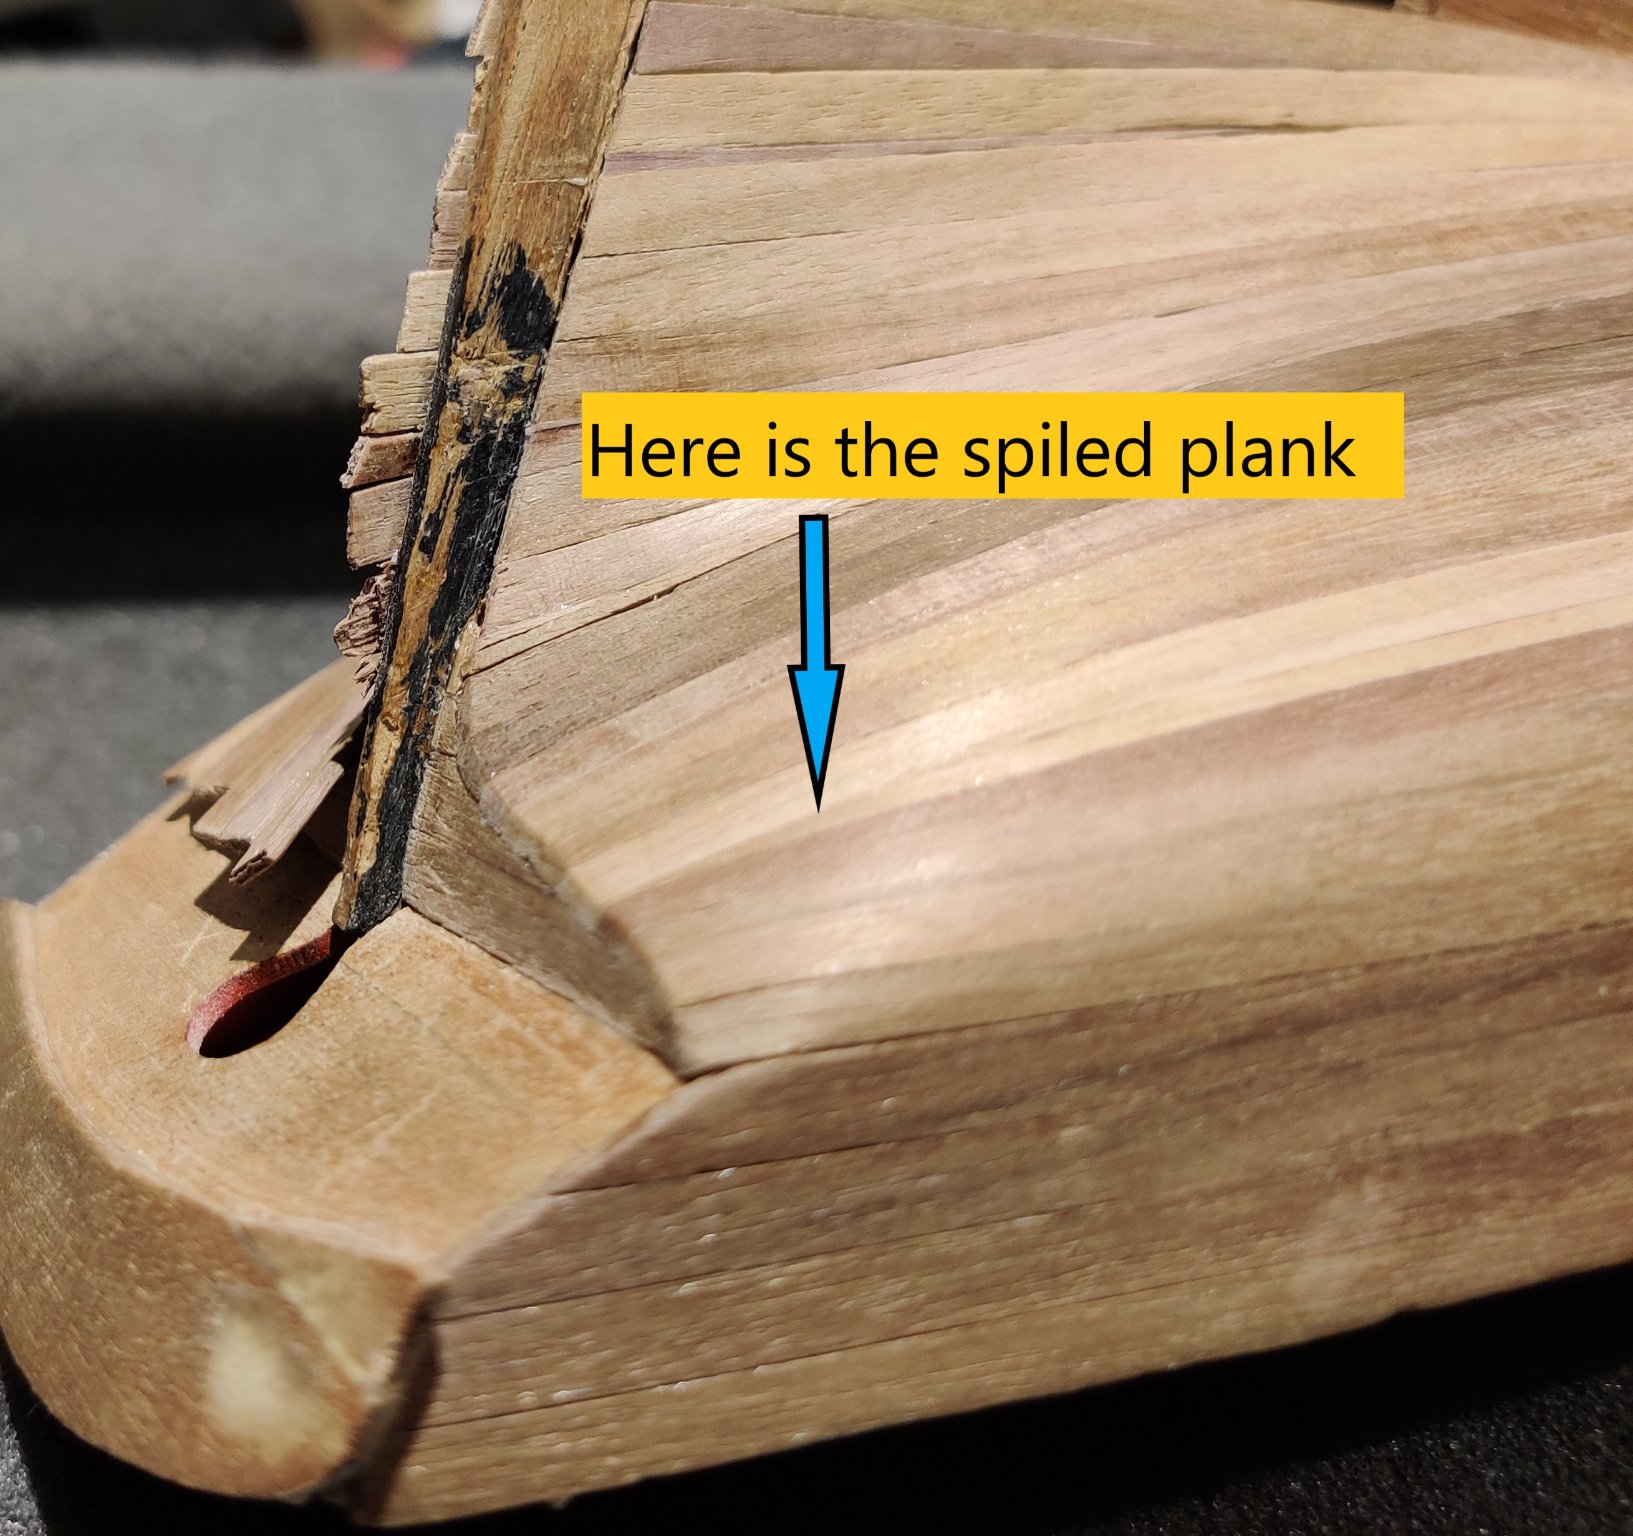
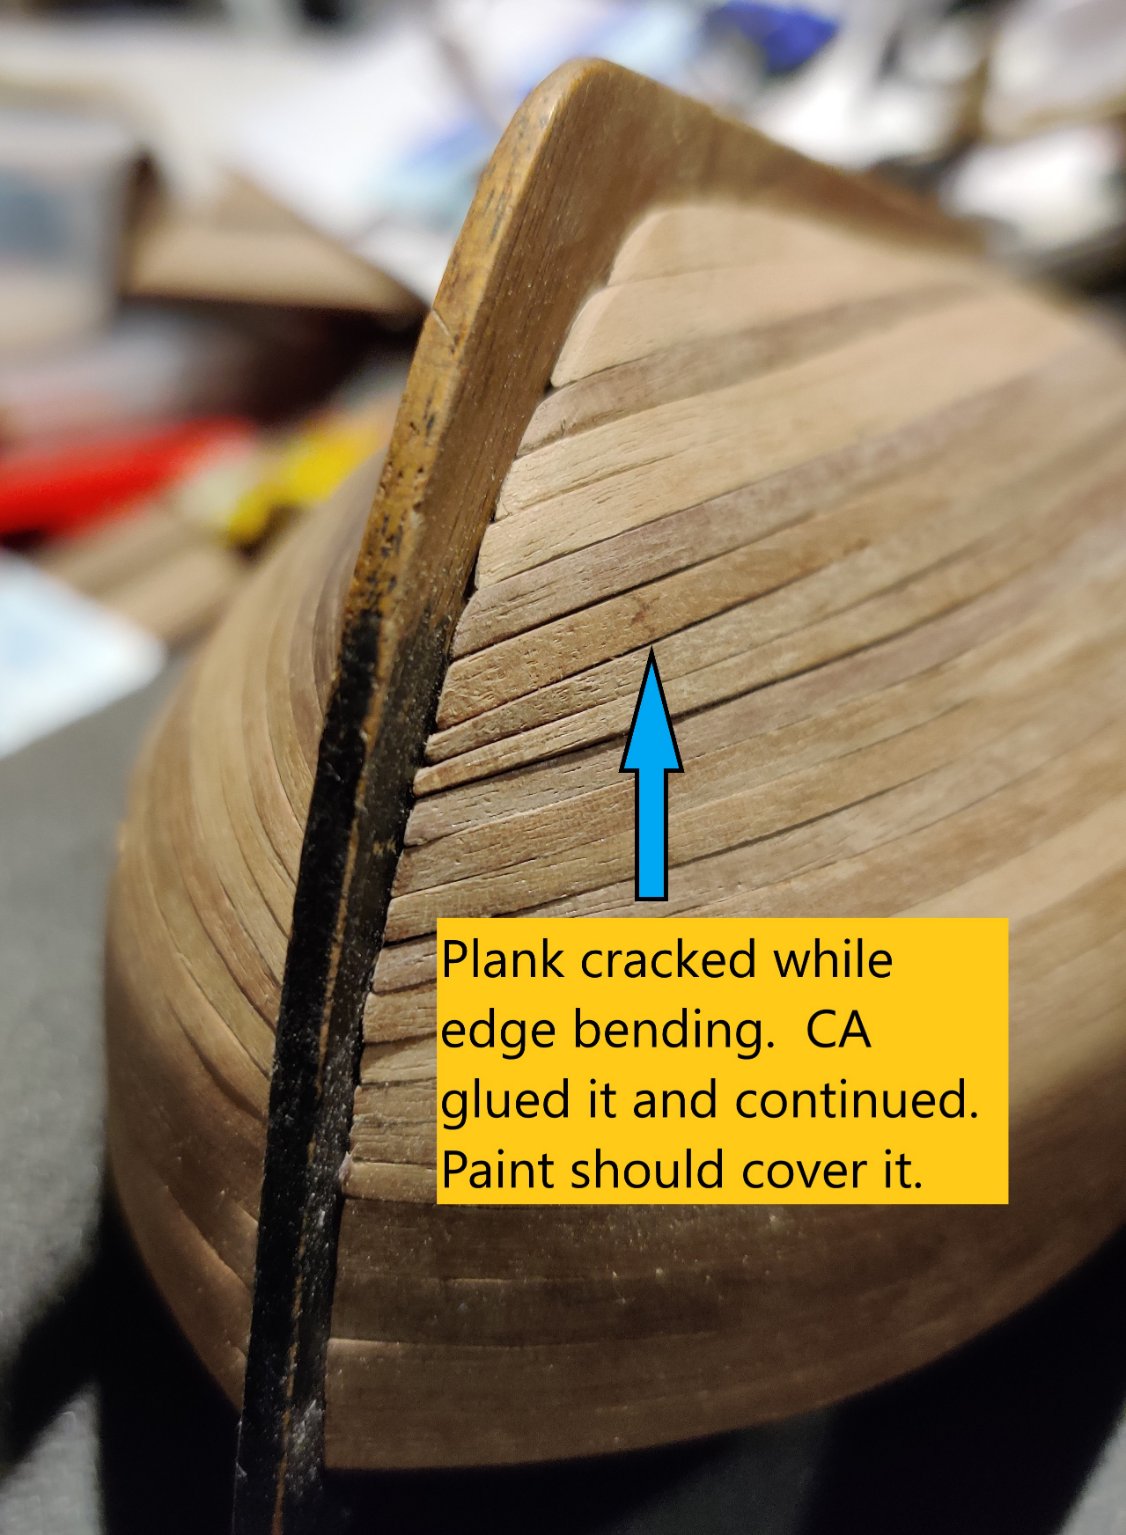
2nd Planking Complete!!! Warts and All. One of my takeaways from the Amati video LN build log series https://www.facebook.com/amatimodel/videos/1702831086404935 that I started following, before finding MSW, was to keep an eye out for when the last plank you added results in a non-straight, or wavy, edge that your next plank will butt up against. Repeatedly use a batten to see how straight the edge is. If it isn’t, it’s time to spile the last plank you added. Here are photos of the first plank I spiled (Note that I am planning to paint the hull white below the waterline, so I’m not concerned with the shades of the planks that I use below it.): Also note that most of the wood cut off of this plank is at the stern and little at the bow end. Here’s how I prepared to mark the spile line: I did a pretty lousy cut of the line. In fact, my skill with the knife needs a lot of practice. I’m much better with using a wood plane. Anyway, after I did this the next planks at the stern went down much straighter. To get the clean effect on the port side of the planked bulkhead #10 above, I did the following: With a jeweler’s saw (https://www.amazon.com/gp/product/B07PJYDFVV/ref=ppx_od_dt_b_asin_title_s00?ie=UTF8&psc=1) for $13 US, I trimmed off the bulk of the waste, leaving about 1/4-inch left With the smaller sanding drum for my rotary tool, grit 120, carefully zipped off the remaining stock Here’s a photo where the last plank went in. It had the same taper as the one before it. I just needed to sand the edge until it fit. Went very slowly and went: sand little, fit, repeat. In general, I’m pretty satisfied with the job. Did have some nicks and breaks that I have to clean up. In the shots below, the starboard side has not had any sanding and the port has had some preliminary sanding. I’ll be interested to see how my sanding mouse cleans this up. I used it for the 1st planking and it worked pretty well, so we’ll see. I’m also going to test drive using Elmer’s Carpenter’s Wood Filler for the gaps between planks and some gouges. I have the Clear, Walnut and Golden Oak. I saw one of Chuck’s posts that you can mix these to different shades. I’m going to try that also. Lastly, I have gathered enough plank dust to try that technique (mix with 50% diluted PVA to get a paste-type substance). Will report on that when I finish it. .John


.thumb.jpg.1f8eae18c5c1fd80027f962194048a15.jpg)

- 26 replies
-
- 5
-

-
- First Build
- lady nelson
- (and 2 more)
-
Glenn, It appears that the lower right deadeye got rotated 180 degrees from a previous view. Compare it to the other 3. .John
-
Alan and Allan, I'm not sure you understand my issue which is my fault. I edited my first post and hopefully it is clearer now. I didn't actually install the 2nd plank I was dry fitting. I just built up, with water-based filler, what would be under that plank. The port side is complete with 25 x planks, I have 6 x planks left to install on the starboard side and I'm done with planking the hull, all using CA (well maybe not the plank under discussion). Thanks...John
-
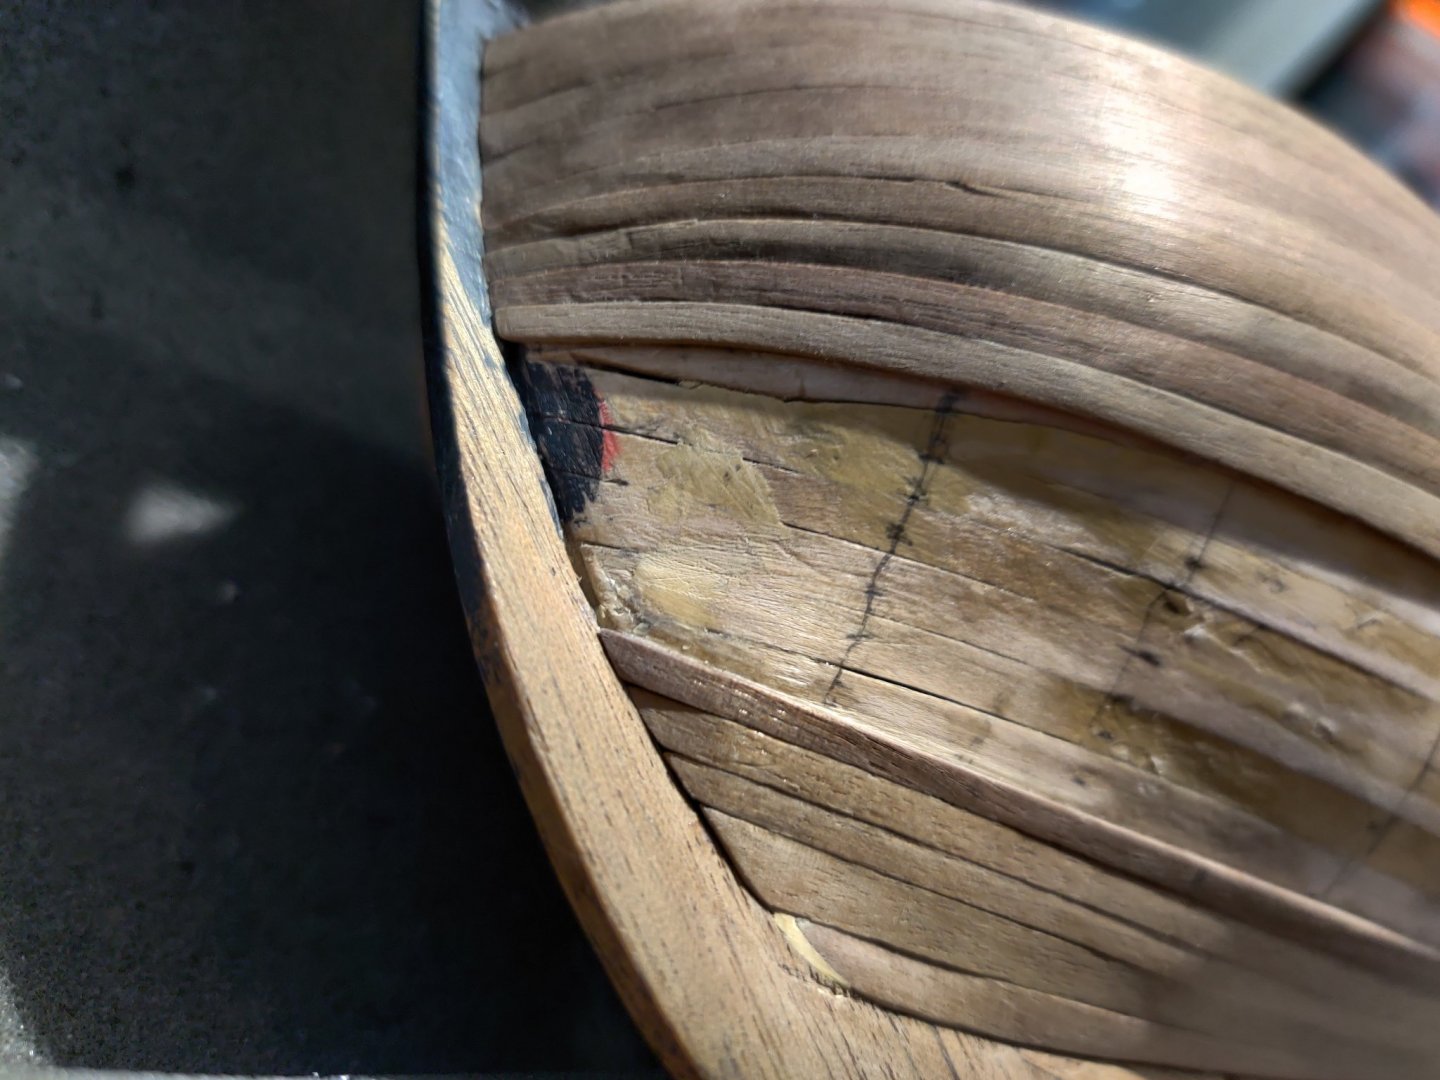
Experiment, no doubt, and probably with some redoes. Pre-internet brings up some of my professional history. For my first job out of college, in 1973, I landed a gig with an outfit that had a multi-year contract with the US Advanced Research Projects Agency (ARPA) to study topological designs for packet-switching networks, the first being the ARPANET. Won't get into the details of the ARPANET; just Google it. Got lucky enough to be added as a co-author on 5 or 6 technical papers on the subject. Our office on Long Island had a connection to the closest node on the net, NYU, at a whopping 9600 bps, which we then divided down into 4 x channels of 2.4 Kbps. And we thought that was really fast. Those were the days. Looking back at it, it was pretty exciting being in on it at the early stage. Although at that point, who knew it would turn into this. Anyway, I started clipping grating pieces off, and I did leave some left to be sanded off. Unfortunately, the stress of a cut dislodged one of the pieces. Guess I didn't put enough PVA in the diluted mixture I enmeshed the gratings in. I'll try to be a little less stressful with the cuts and after the trimming, dunk the hatches back into another diluted mixture with a higher ratio of PVA. Maybe I didn't apply enough pressure when I took them out of their bath. Will know next time to do so. John
-
You're correct. That would be my plan Z. 😁 Next?
-
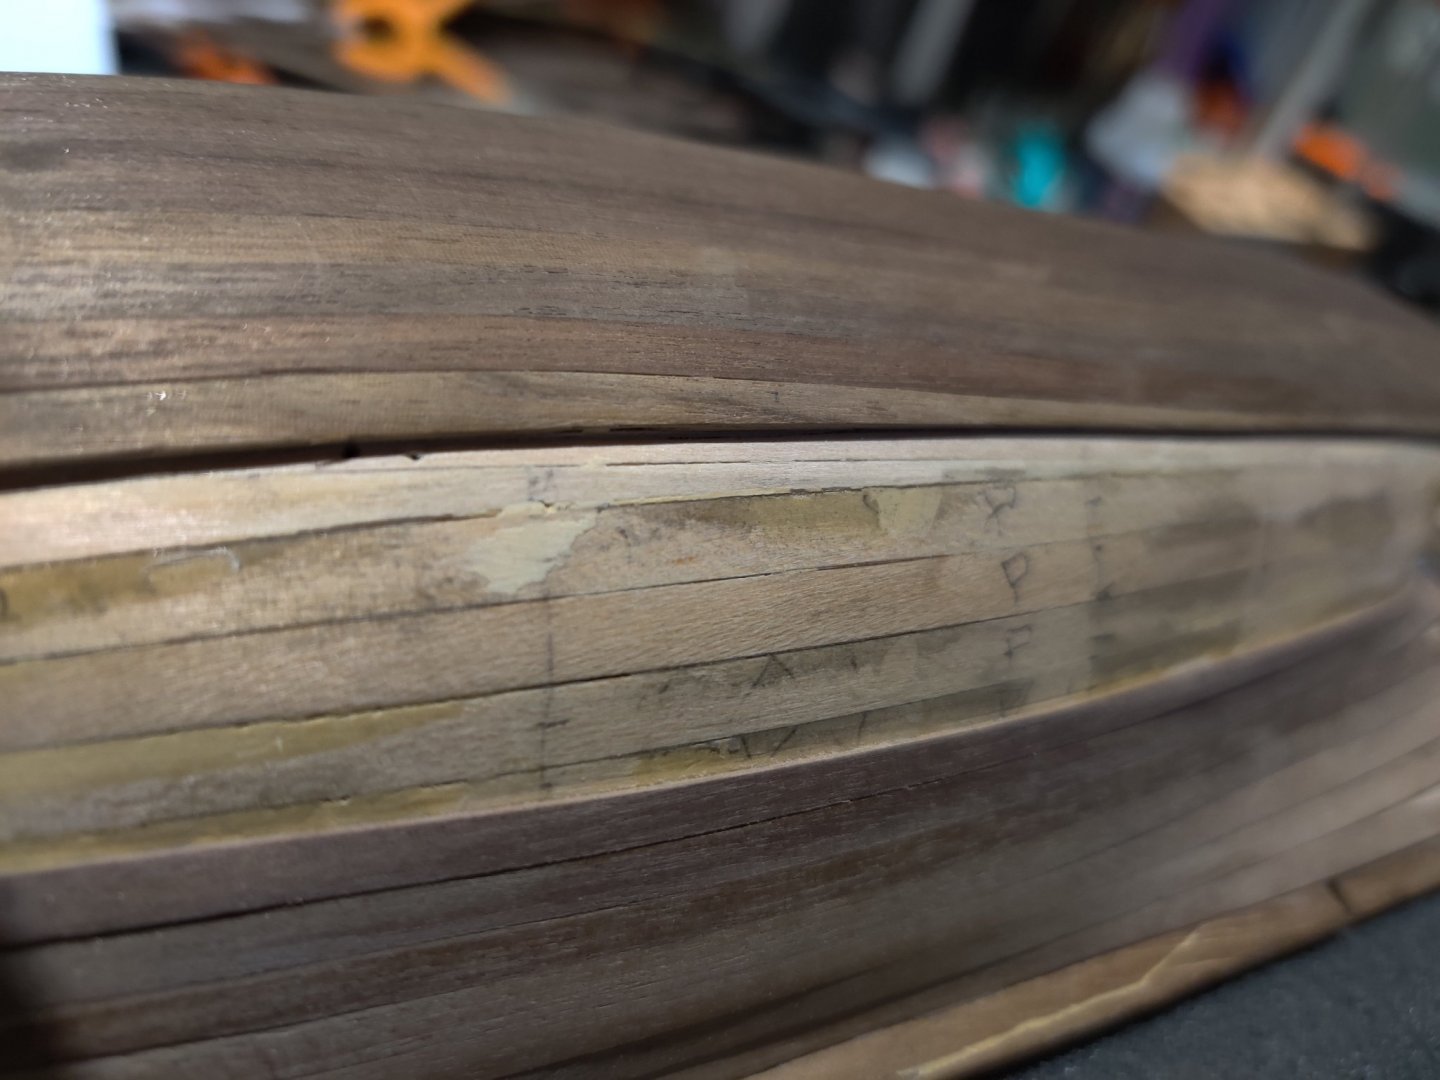
I'm nearly finished 2nd planking my Lady Nelson. The 1st planking gaps were filled with Elmer's Color Change Wood filler. I am using CA to glue the 2nd planks and have not had any adhesion problems, yet. While dry fitting a 2nd plank, I took off too much of what it was going to lay on, a continuos run amidships of about 5 inches. As a result the plank was would be significantly lower than it's adjacent plank. So I filled that run the underlying area for that plank with the same Elmer's filler and waiting for it to dry. My question is can I continue to use CA for this plank or should I go to PVA? Thanks...John
-
Thanks to you all. I have all three in my in my tool kit, just haven't used them yet. Will give it a go. That's what's so great about this place. Rather than experiment or go on an exhaustive search, Just go ask the help line! John
-
Simple and quick question from a noobie: After building the hatch grates with the egg crate pieces, what is best practice (without a belt sander) to clip off the tabs: Cut them off with a knife or cutters Use a Dremel with Drum Sander Sanding Sleeves Use the Micro-Mark Sand-It (I have one and tried it; needs a lot of elbow work) Anything else Looked everywhere: MSW, Google, some books. It's such a basic task that apparently nobody wants to document it. Thanks...John
-
Glenn, Why did you not include a wire ring connected to the eyebolt? I have seen in numerous example that that is the 'nominal' sequence: eyebolt, ring and the breeching rope seized to the ring, not the eyebolt. Or at least using a hook. Your technique locks the cannon in; can't be moved. Thanks...John
-
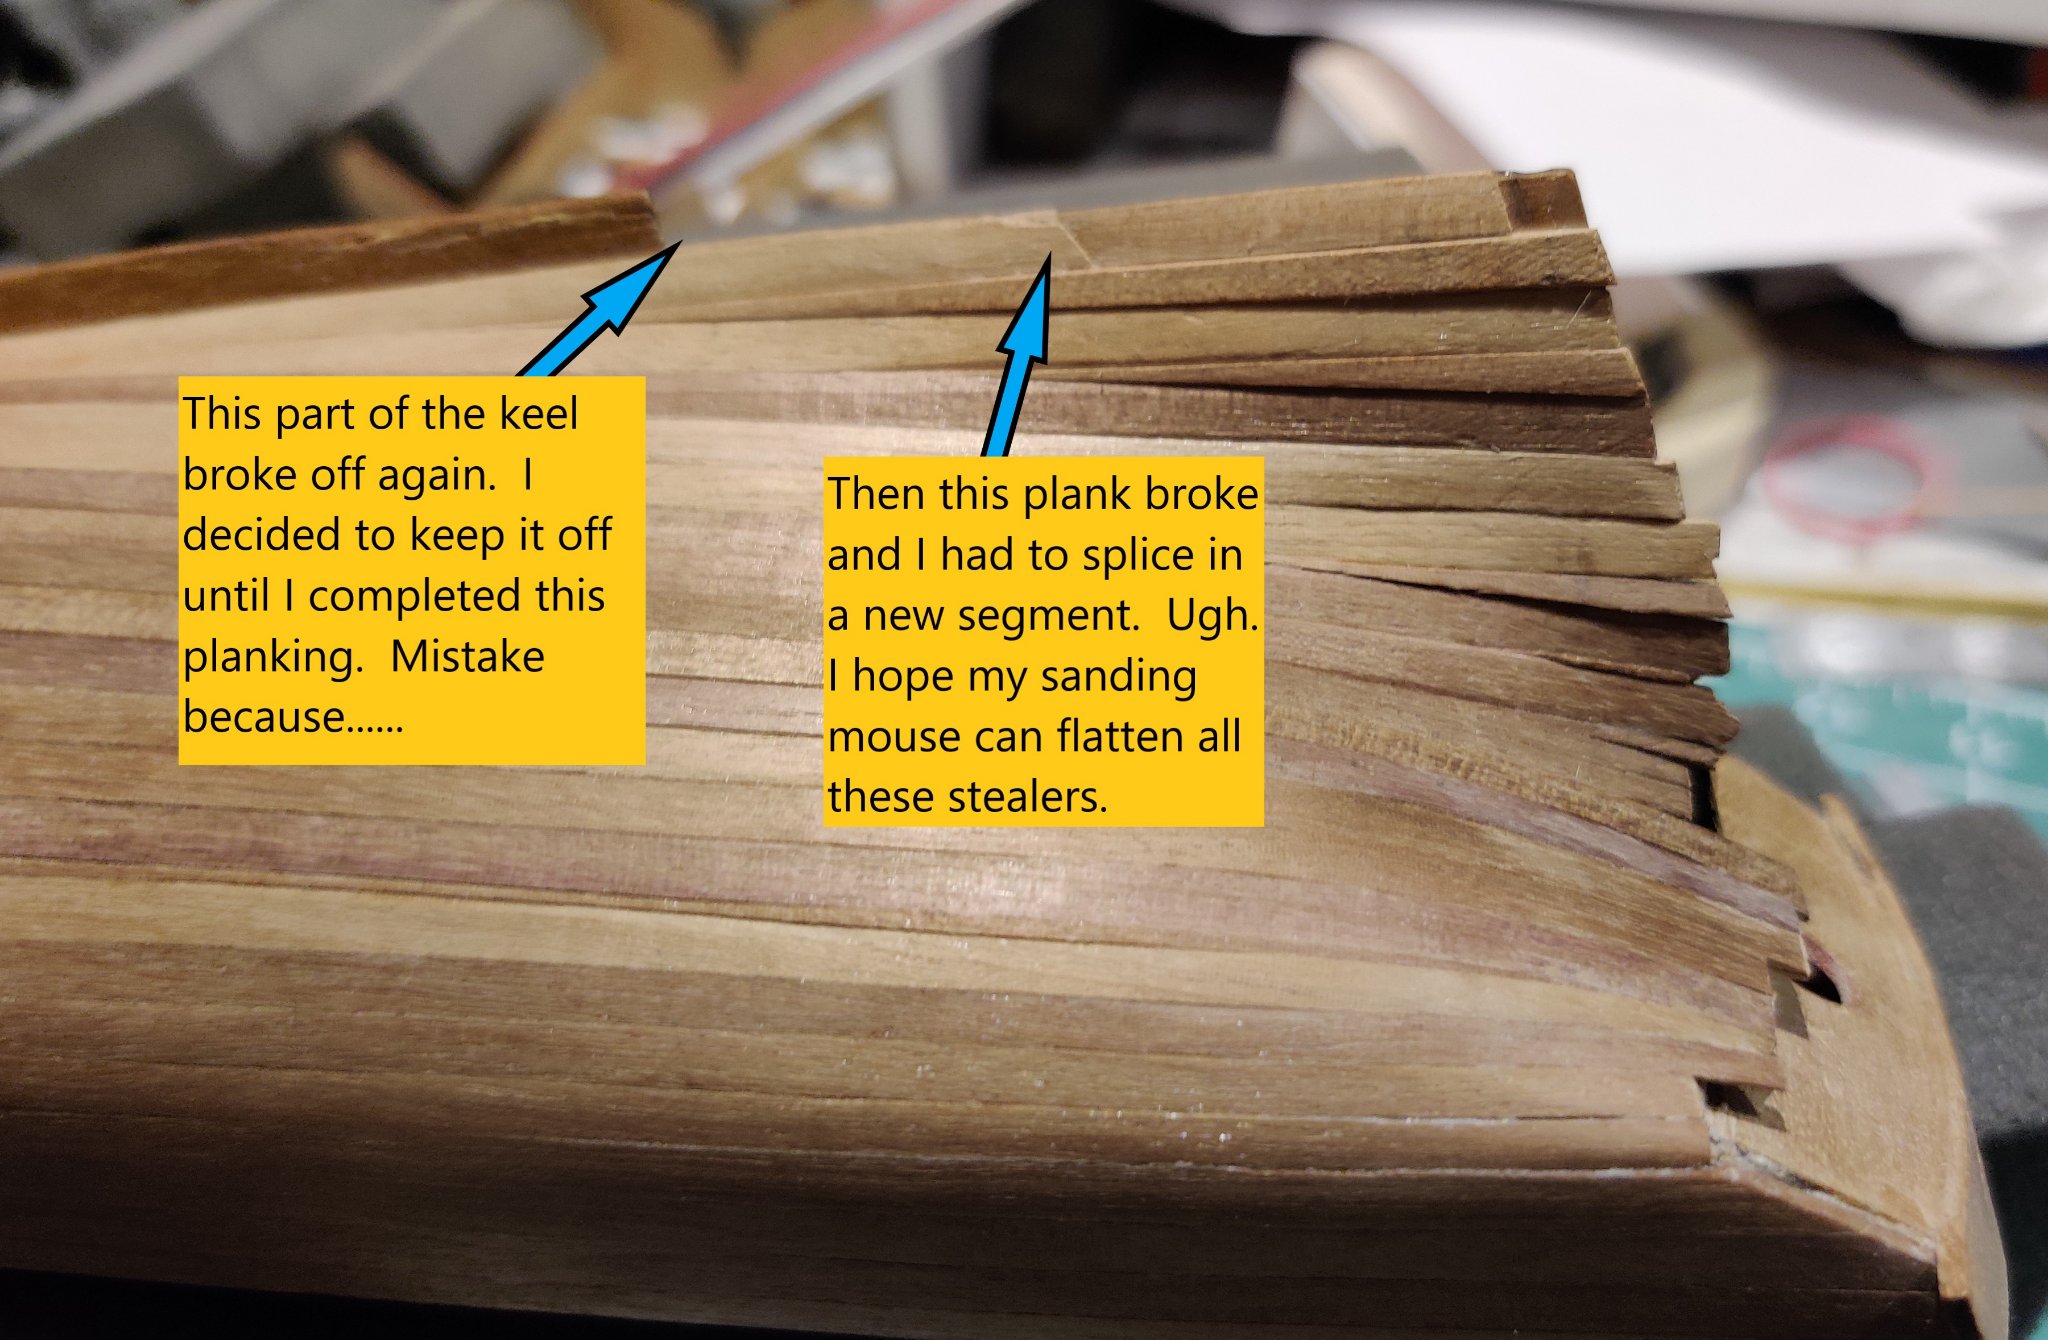
Again, I'm a noobie too but I can tell you that I put the keel pieces on before 1st planking and I wish I hadn't. During that planking, I broke the keel, bow stem and stern piece several times. I initially used PVA glue to add those pieces and again, after they broke. Finally, after maybe the 3rd or 4th break, I used epoxy to add them. This held until the last break I showed in my build log. I would recommend that you check out my log here and then follow it: Bottom line is having gone what I went through, I would wait to add the keel pieces until after the 1st planking. Not sure what ramifications you will run into by doing that. Stay in touch...John
- 18 replies
-
- 1
-
-
- Lady Nelson
- Amati
- (and 2 more)
-
You may want to take a little more off at the stern end; where the char is; the transition to the deadwood could be a little bumpy. Other than that, I think it looks real good. Have you run a plank from bow to stern and see how it hits each bulkhead? .John
- 18 replies
-
- 2
-
-
- Lady Nelson
- Amati
- (and 2 more)
-
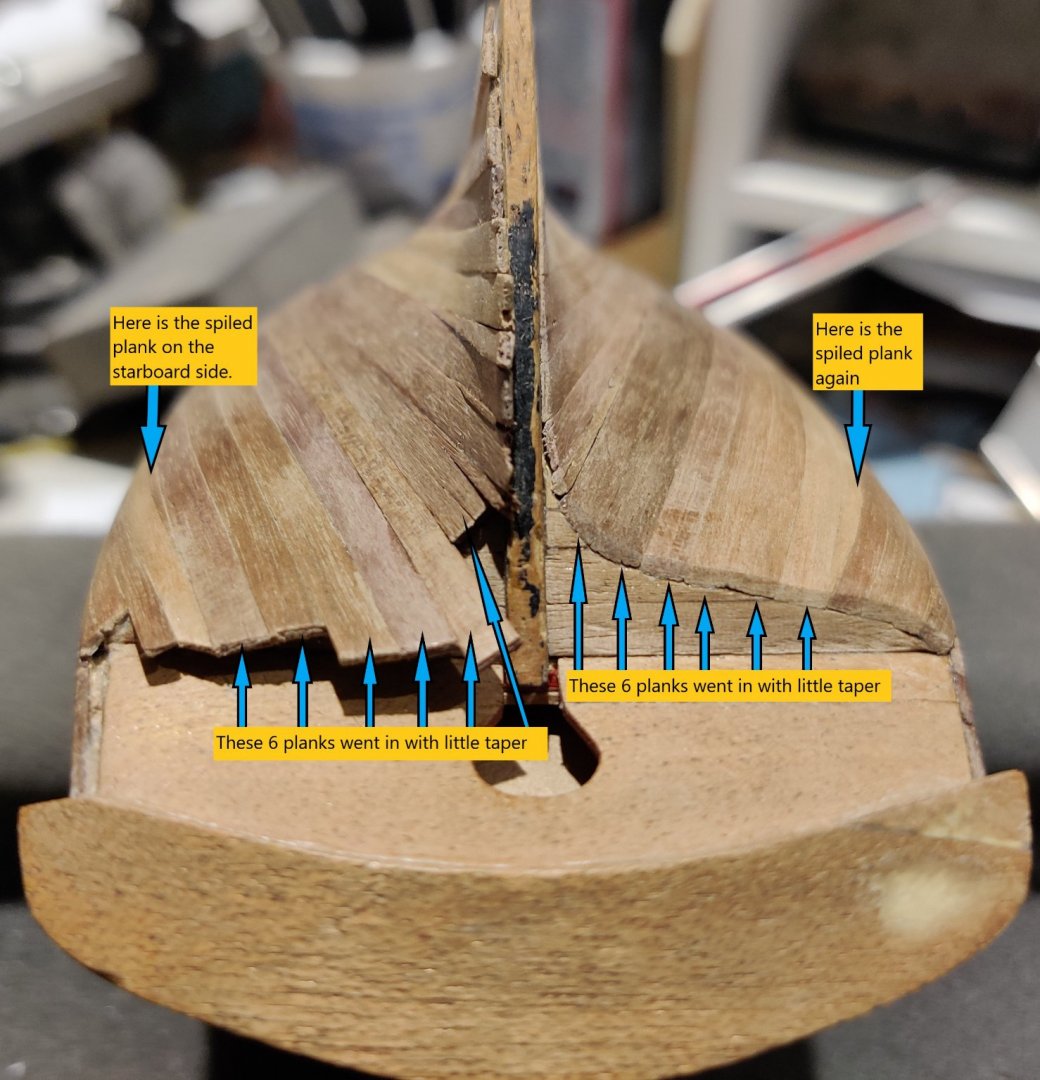
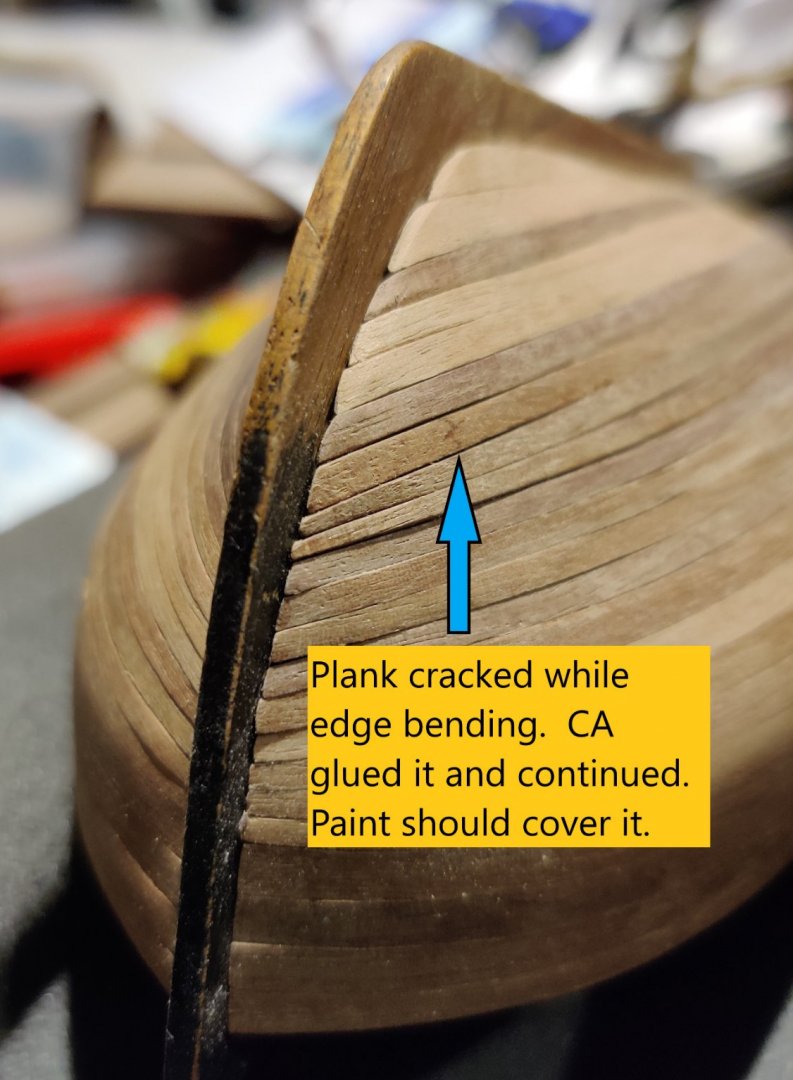
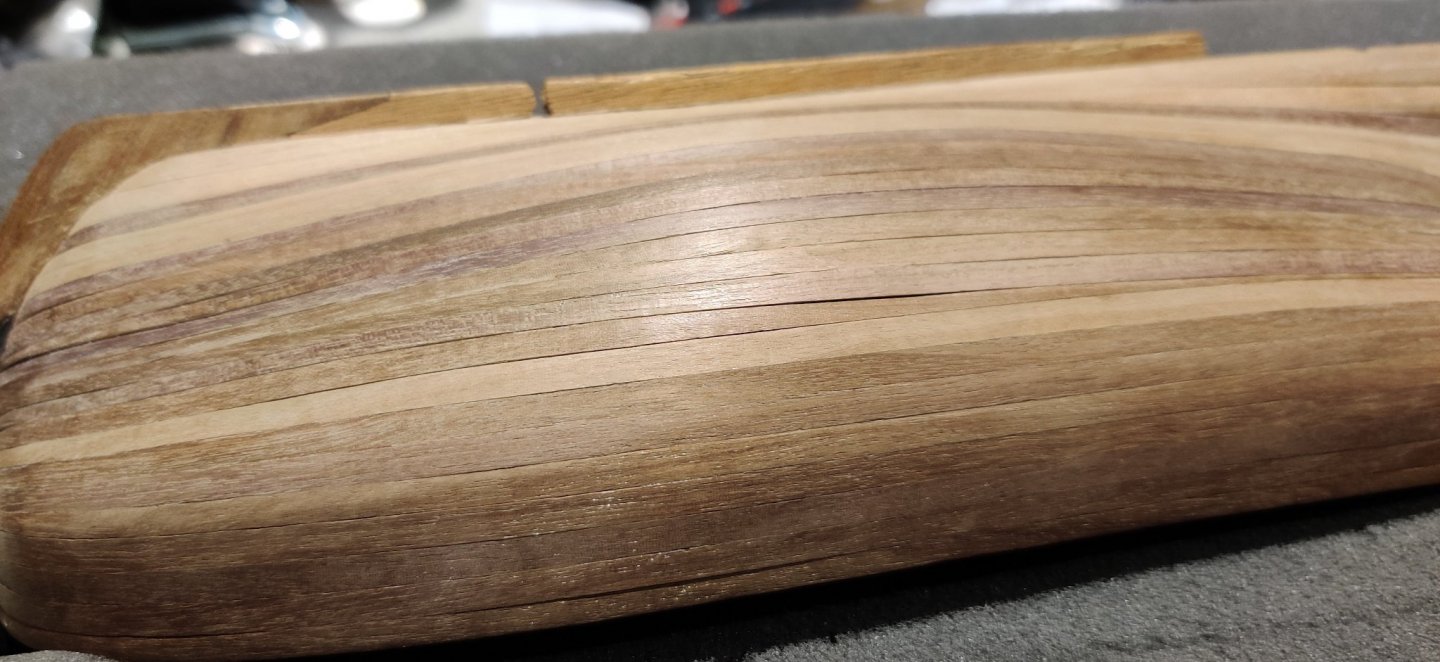
Just an update, primarily for those new noobies who are beginning the LN just to give them some hope that they can build a good model on the first time but not to expect the quality of a model built by the MSW veterans. Be prepared that you may break things; I have. But most importantly, take your time. As I've seen repeatedly on this site, "treat each piece you add as it's own model". So far, starting in June, I have completed the following: First planking, after ripping off 10 x planks and moving to Chuck's edge bending technique. What a difference that made! Prepped and painted the gun carriages (learned how to use an air brush) Planked and painted the inner bulwarks Planked the deck, after ordering some wider deck planks for the margin plank (learned what that is) Halfway through 2nd planking the hull. Also needed more planks because my edge bending broke enough. The photos below show port, starboard, bow and stern views of my 2nd planking. I started at the bulwarks and installed 4 x planks on each side without tapering. Then I added the Garboard plank at the keel and the blank above that (the First plank). At that point I calculated the tapering needed. Between those gaps, I determined that I would need 15 x planks to complete the 2nd planking and created two bands, one with 8 x planks and the other with 7. So I started downward from the bulwarks and started the tapering on both plank ends. Here's a result: Full view (left side is the bow end; right side stern end): The amount of tapering is a result of following numerous planking guides found on MSW. Here's closeups: Bow: Stern: I use a plank clamping device, (Mantua Model 8155 Strip Clamp and Hull Holder for Model Ship Building, see a photo above in post #16) to hold the planks and a low-angle block plane to make the taper. Each of these planks could go on either port or starboard. Each plank was edge-bent as per Chuck Passaro's plank videos and then bent to fit the curve of the hull: Here's how I do that: After completing about half of the first band downward, I started in the second band moving up from the keel. Here's what the starboard side looks like: Note the following: After completing the 1st planking, I decided to drill the holes in the keel for the pedestals. While installing one of the lower planks, I leaned on the aft end of the keel and it snapped off. Just have to glue it back on! My plan was to install a pair of planks after tapering; one for the port side, one for the starboard side. In the photos below, there are different number of planks installed on either side. This is a result of, during the edge bending, a plank snapped and the pairing was disrupted. As can be seen on the stern, I will need to install 3 x stealers to fill the gaps. May need more as the planking continues. Each stealer location will need no more than plank. Here's views of both sides and both ends: After I balance the same number of planks on each side at both top and bottom, I will re-calculate the taper amounts for the remaining planks to be installed. After all planks and stealers installed, sanding, filling gaps with plank dust accumulated during the process, determine the waterline, airbrush paint the hull below the waterline (primer, white, matt varnish; all Vallejo) Hull Done!!! Wish me luck...John
.thumb.jpg.8f4c4dfeea0d436d4d853730adec3435.jpg)
.thumb.jpg.b55ee21d05cc31d0ca5bb8771fe7b950.jpg)
.thumb.jpg.1756c8f6d9e91449bd761df27473af51.jpg)
.thumb.jpg.6c795e238bc3f7c3d1f9bf8777e7996e.jpg)


- 26 replies
-
- 4
-
-

-
- First Build
- lady nelson
- (and 2 more)
-
Grimmy, my first build was also the LN. I did a lot of researching on this site before I got too far along. There are two build logs that I highly recommend. The first is: Vossie is a very experienced carpenter who sometimes goes off on way off tangents but I learned a lot about this hobby and how he built the LN from this guy. Unfortunately, he fell off the map before completing the build. But it's worth going through his entire log. The other log is: Glenn is an experienced builder who got back into the hobby with the LN. Same here: learned a lot about this hobby and how he built the LN from this guy too. His log is shorter but very informative. Also, before starting planking, I highly suggest you watch Chuck Passaro's videos on the process (search Chuk's videos). Edge bending of the planks is essential to getting a good outcome. I didn't watch them before I started and got a result that I was advised to start over and I needed to rip off 10 planks, buy replacement stock and start over. Just trying to give you a heads up. Another good tip is to follow some of the good build logs to get good building tips. I'm in the middle of the second planking and I started this in June. Being very patient in this hobby is a key to success. Good luck and welcome to MSW and the LN club. John
- 8 replies
-
- 2
-
-
- first build
- lady nelson
- (and 2 more)
-
Great job Tim, she looks great! Thank you for the build log. It was very educational following along. John
- 436 replies
-
- 2
-
-
- vanguard models
- alert
- (and 1 more)
-
Chris, Just wanted to congratulate you on your deal with Modelers Central. I just got their monthly email that discusses this: The Vanguard Models range of model ship kits are the highest quality model ship kits currently on the market. They are for the discerning model ship builder wanting to build a quality model that is a "cut above" all the other brands. All the Vanguard Model range of kits are designed and developed by Chris Watton, a world-renowned designer of wooden model ship kits and is best known for his work with companies such as Amati/Victory Models. Each kit in the Vanguard Models range is expertly designed and presented. Pearwood is used as the second layer of planking along with many laser cut parts. The building instructions are full colour A3 size showing every step of the model’s construction. The Vanguard Model range of wooden model ship kits are truly the pinnacle of modeling perfection. Pretty nice endorsement (my highlighting) . I bought your Speedy back last year and it's still on deck to be my 2nd build. If (when) I make it through Speedy, I can't wait to see what choices Vanguard will have for me then. Again, congratulations and keep up the extradorinary work. John
-
I found this on Etsy. I saw Chuck suggest this in one of his tutorials (fogot which ship.) Haven't used it yet. The black will imitate black rope for the strop; no painting needed. I got the 34 guage; I think Chuck recommended 33. Delivery was quick; shipping free. Seller: CraftBistro 29,000 sales|5 out of 5 stars Black Artistic Wire Tarnish Resistant Craft Wire (14, 16, 18, 20, 22, 24, 26, 28, 30, 32, 34 Gauge) $6.35+ .John In stock
-
I got this outfit from one of Chuck's posting: https://drillbitsunlimited.com/ . They are in the States, are very resonably priced and come in a case. I would bet they have what you are looking for. John
-
Bulging 2nd Planks
drjeckl replied to drjeckl's topic in Building, Framing, Planking and plating a ships hull and deck
Thanks. -
Bulging 2nd Planks
drjeckl replied to drjeckl's topic in Building, Framing, Planking and plating a ships hull and deck
Nirvana, Thanks for advice. One question: Use PVA out of the bottle, or diluted? If diluted, to what ratio? Will undiluted wick into the bulge enough? And presumably, use white PVA, not yellow? Thanks...John -
Bulging 2nd Planks
drjeckl replied to drjeckl's topic in Building, Framing, Planking and plating a ships hull and deck
-
Looks awesome. In terms of cases, not sure if I found it here but I bookmarked this site: https://www.acrylicjob.com/shop/ . Have no experience with them but they are in the States, CA. Can't wait to see it in a case. John
- 436 replies
-
- 3
-
-
- vanguard models
- alert
- (and 1 more)
-
Bulging 2nd Planks
drjeckl replied to drjeckl's topic in Building, Framing, Planking and plating a ships hull and deck
But is brushing diluted PVA where the bulges are the best method for these bulges? -
Bulging 2nd Planks
drjeckl replied to drjeckl's topic in Building, Framing, Planking and plating a ships hull and deck
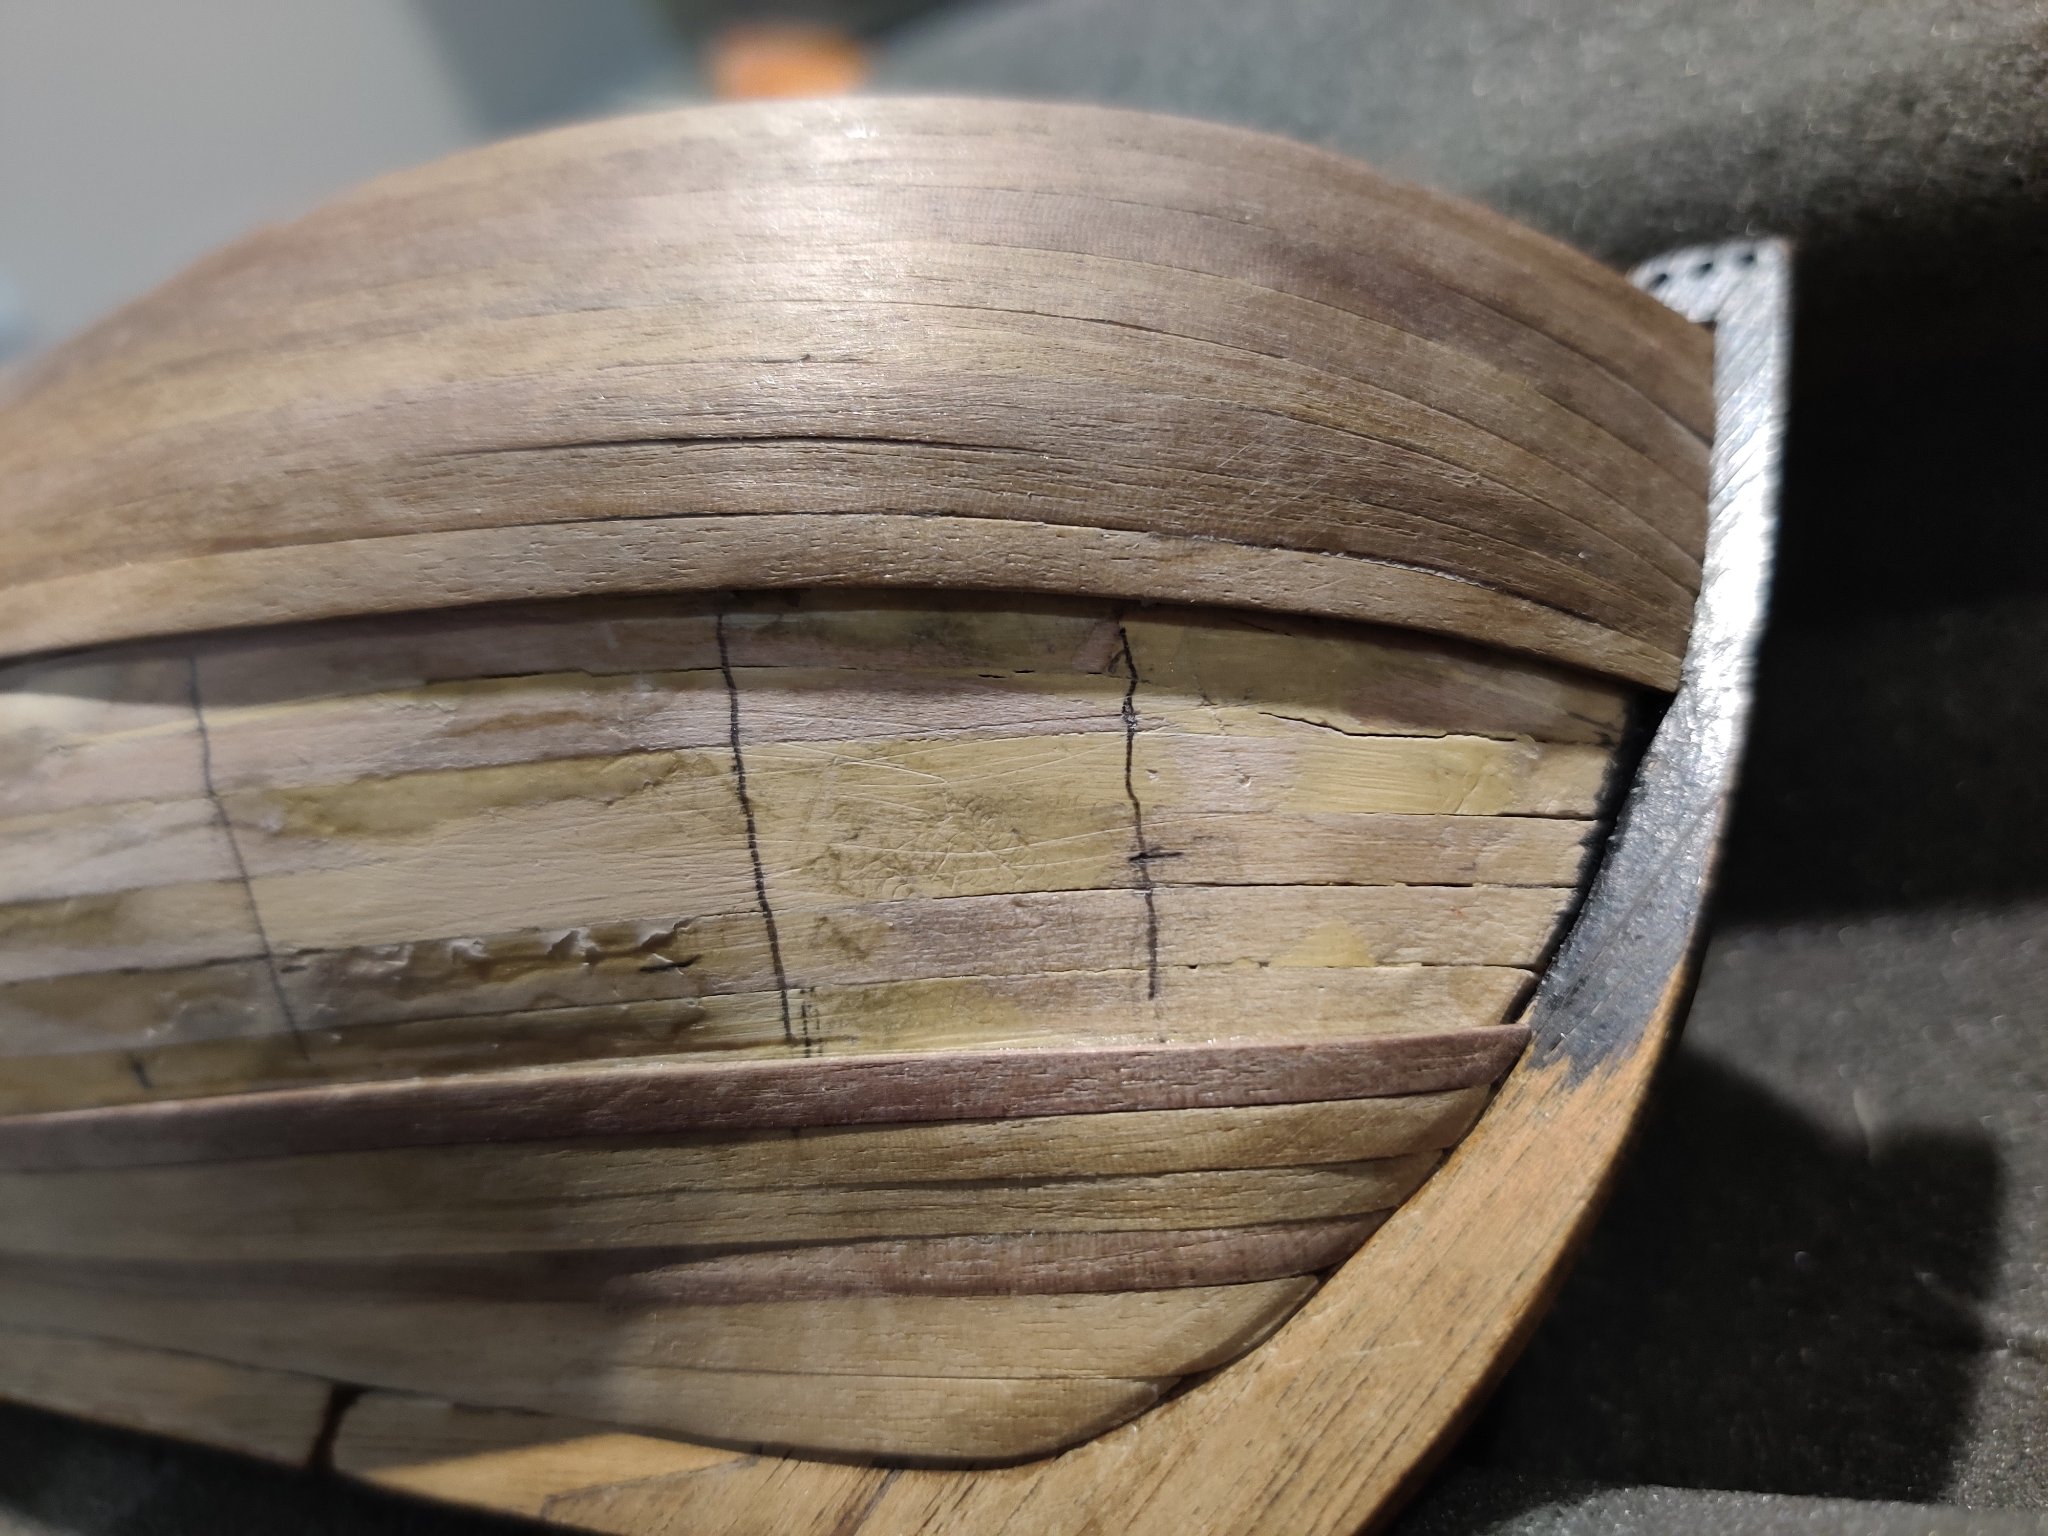
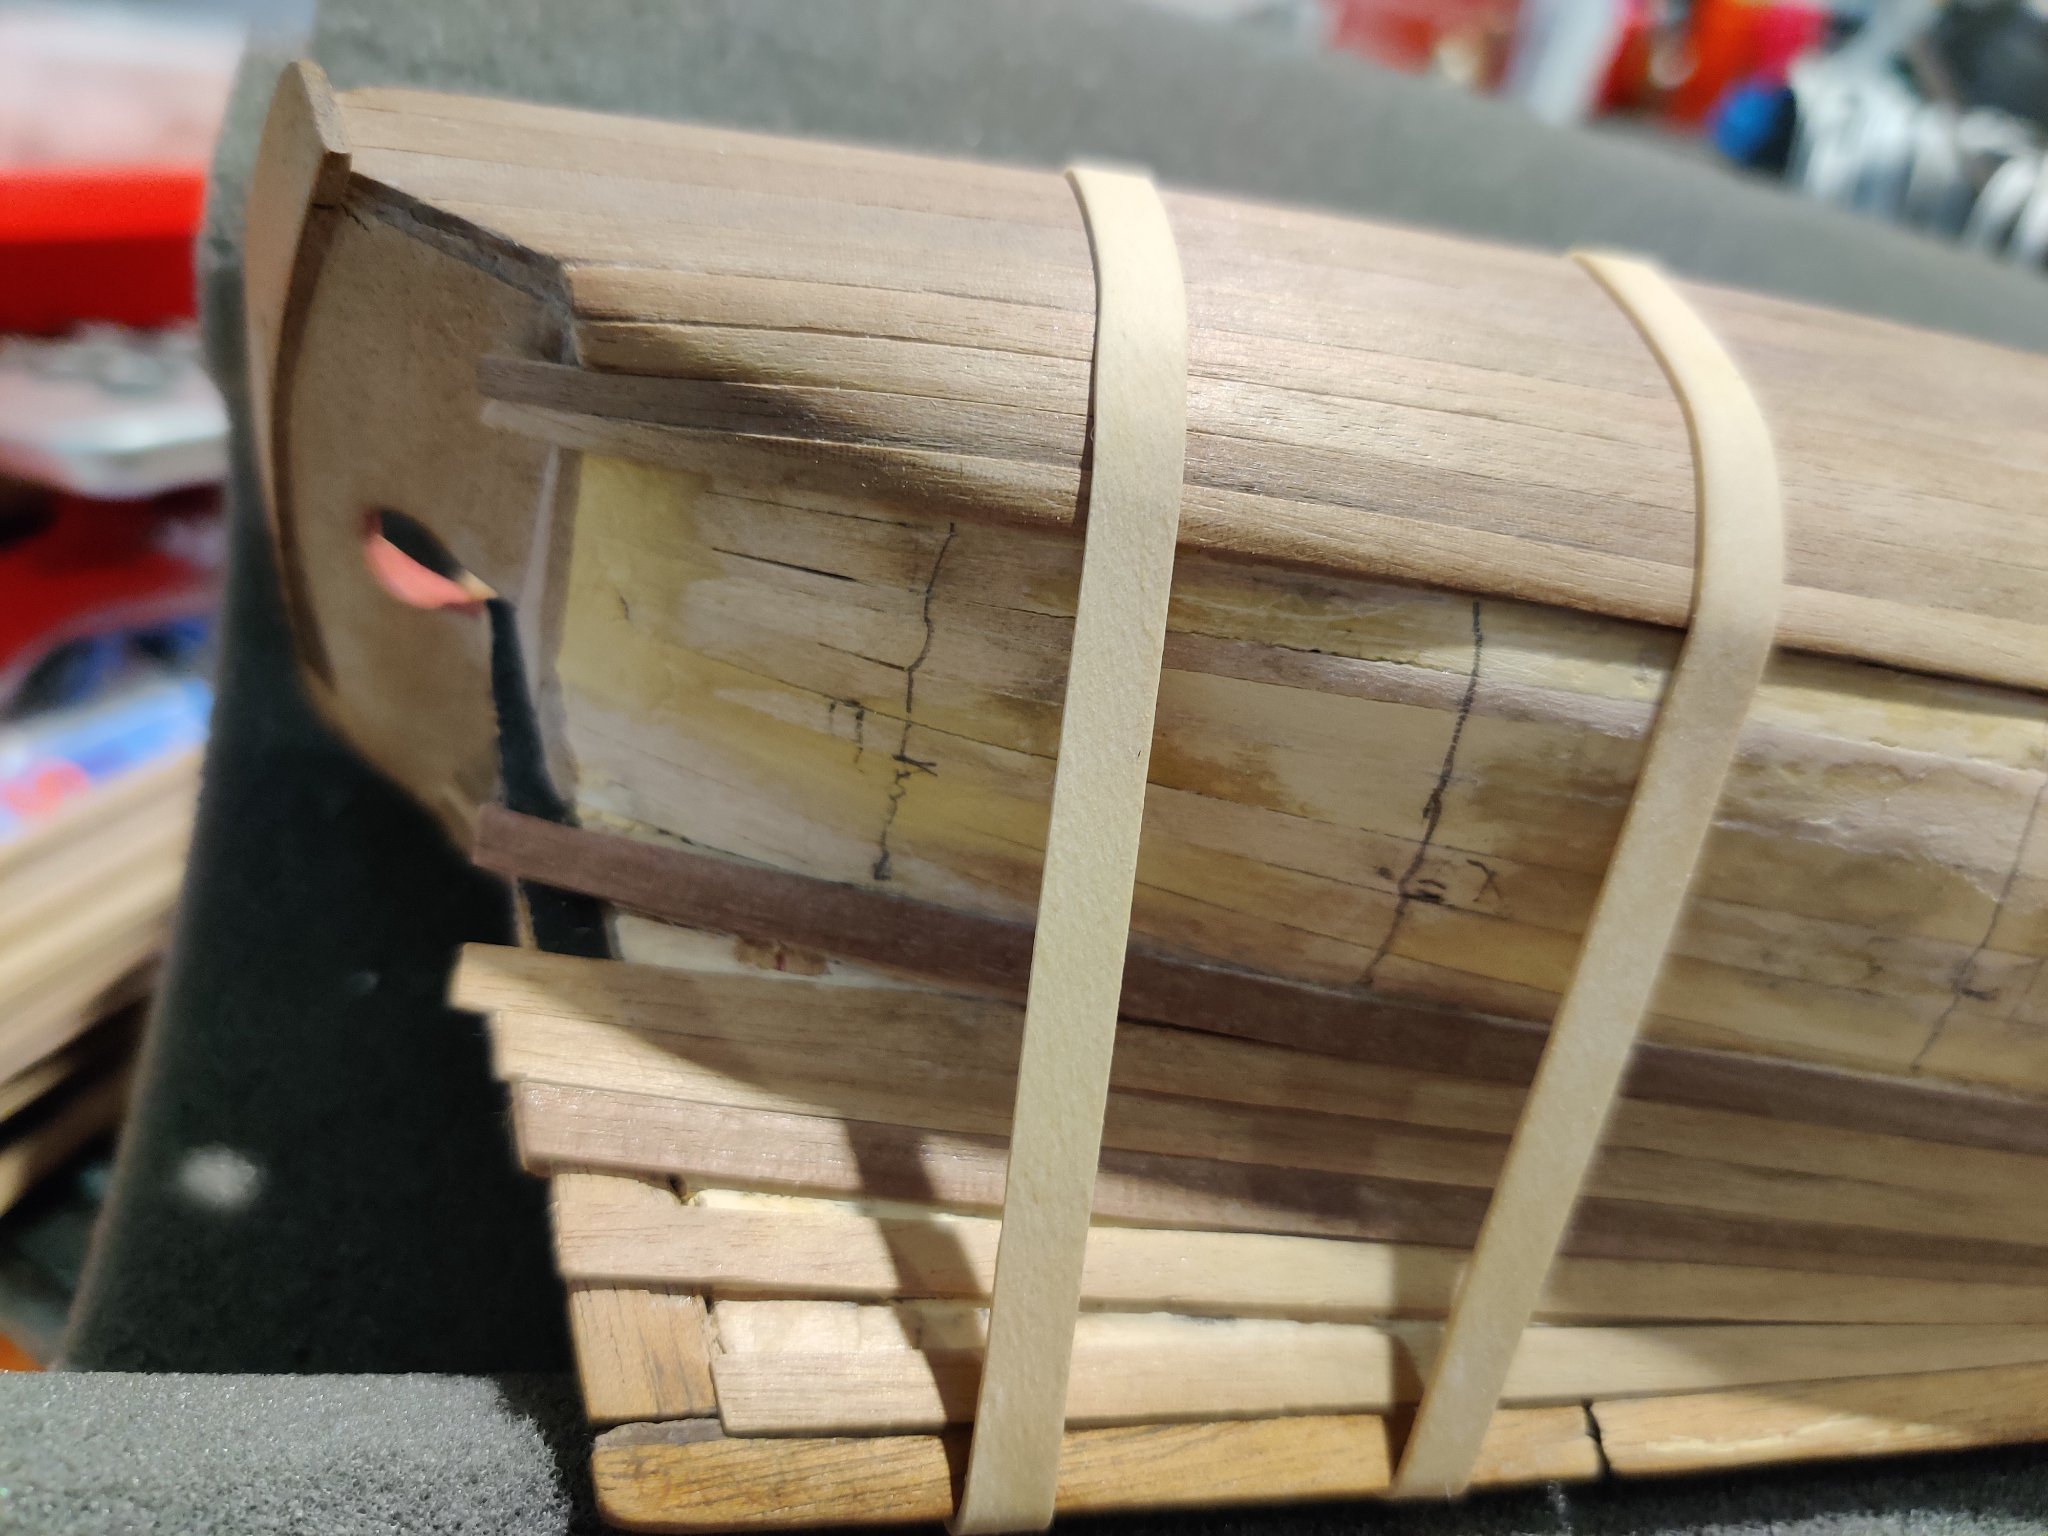
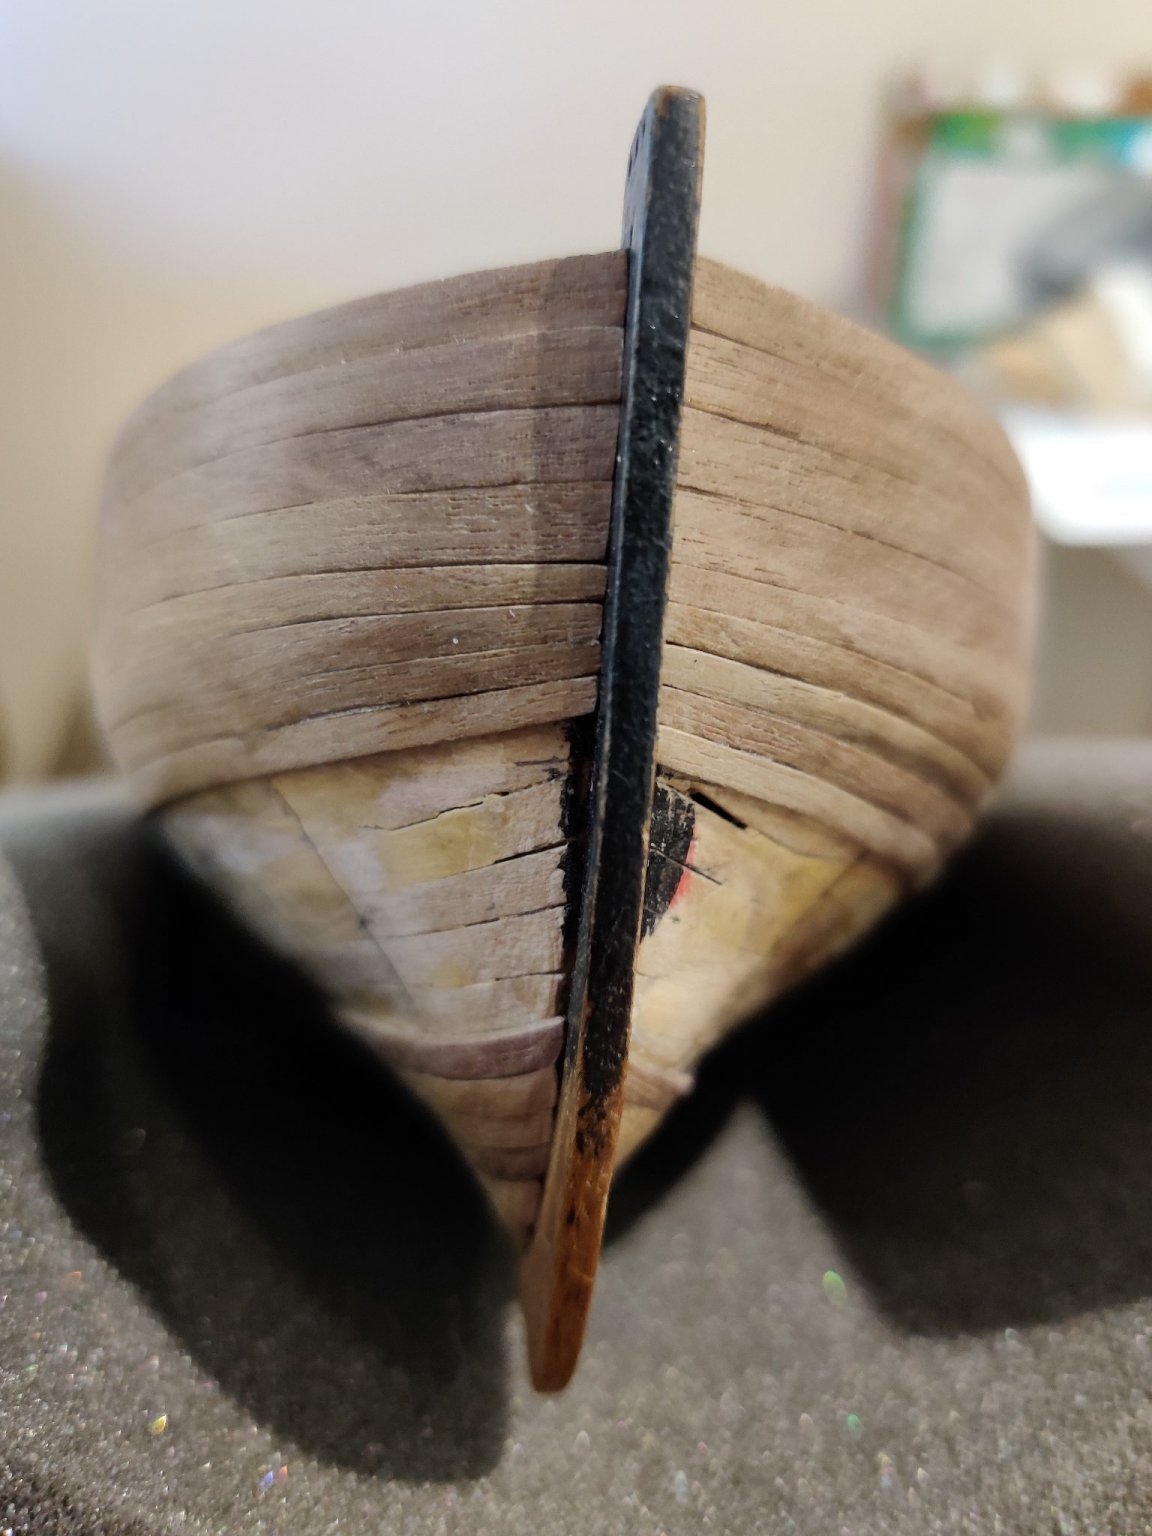
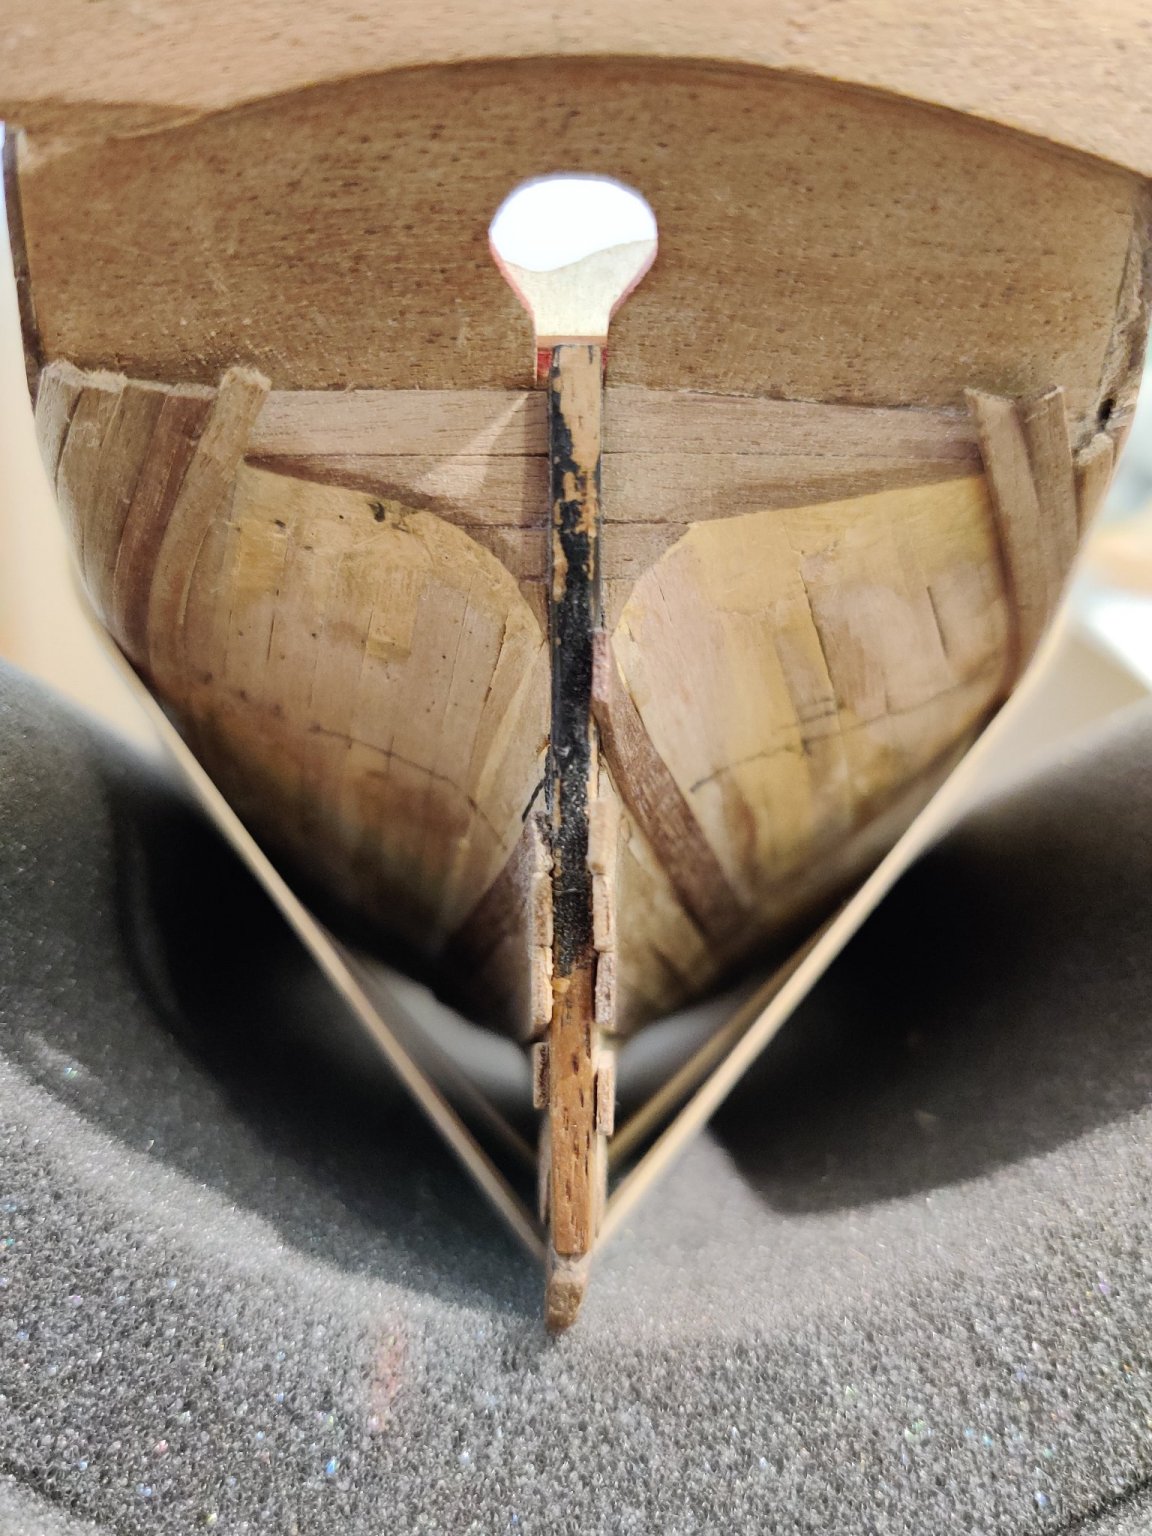
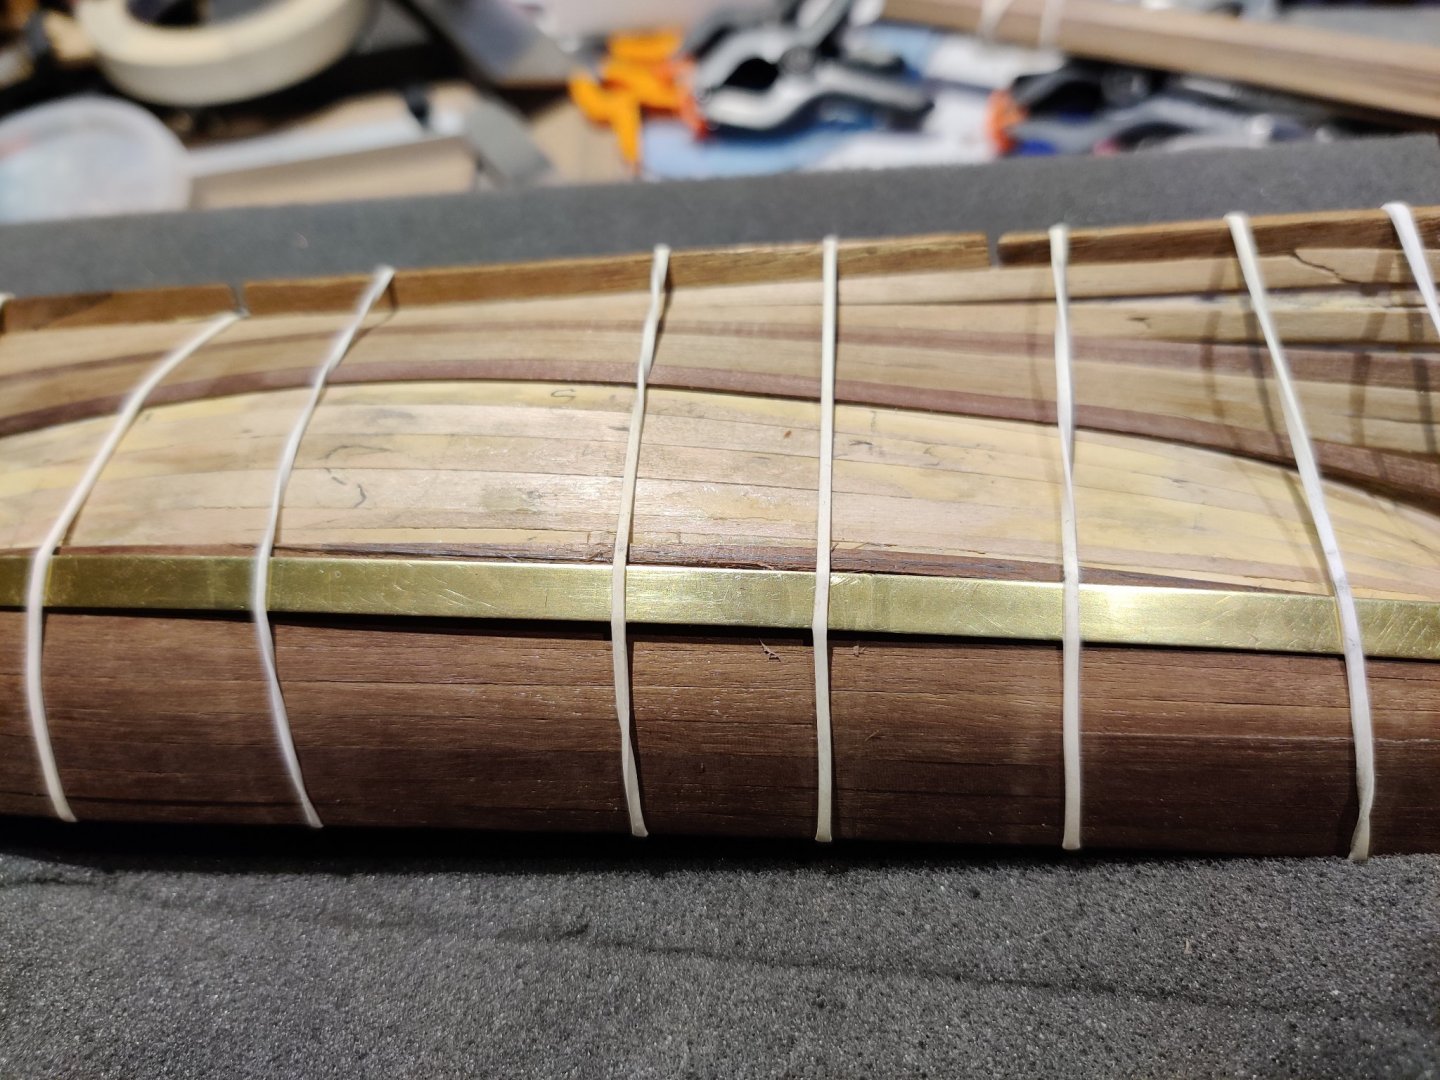
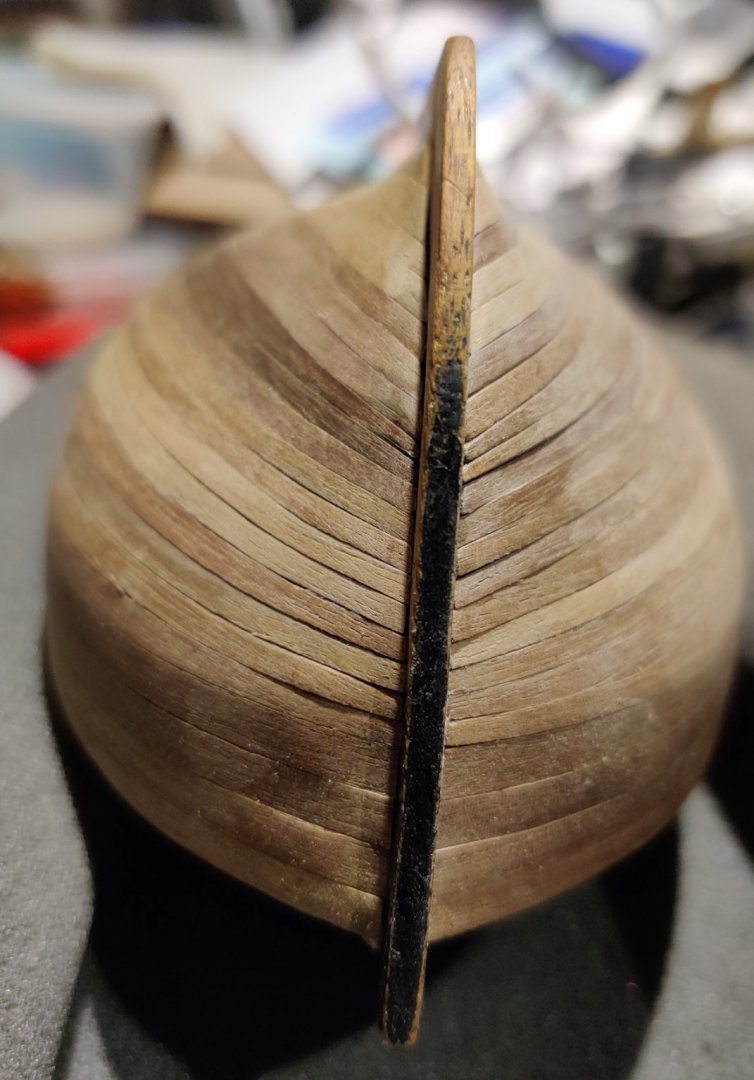
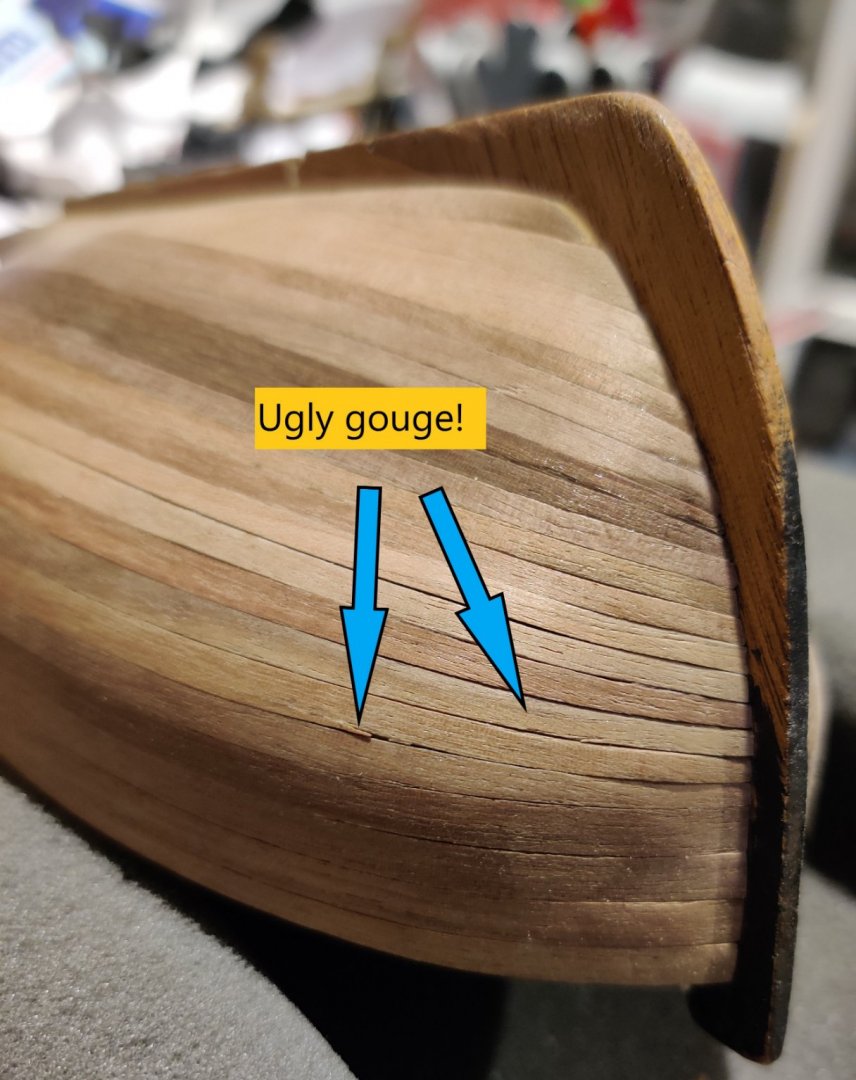
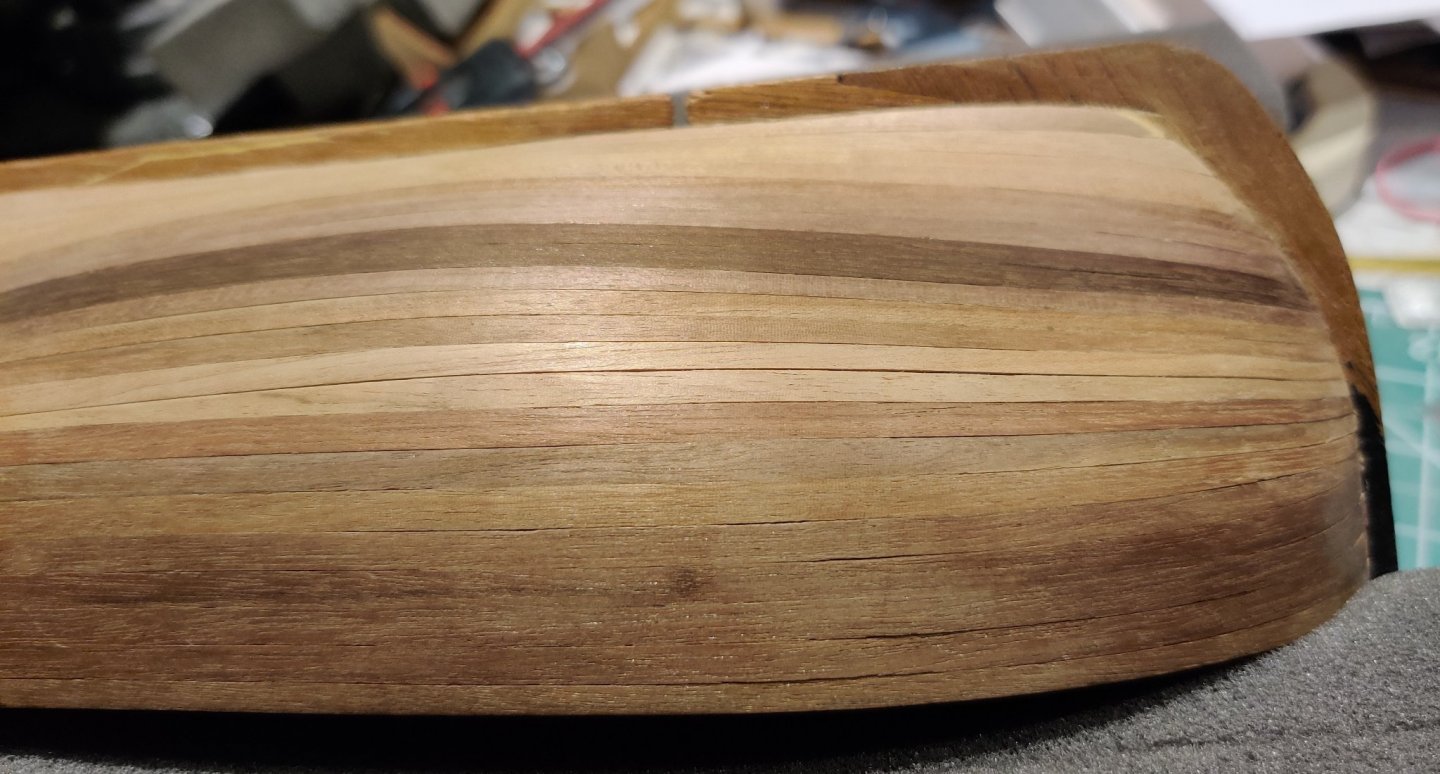
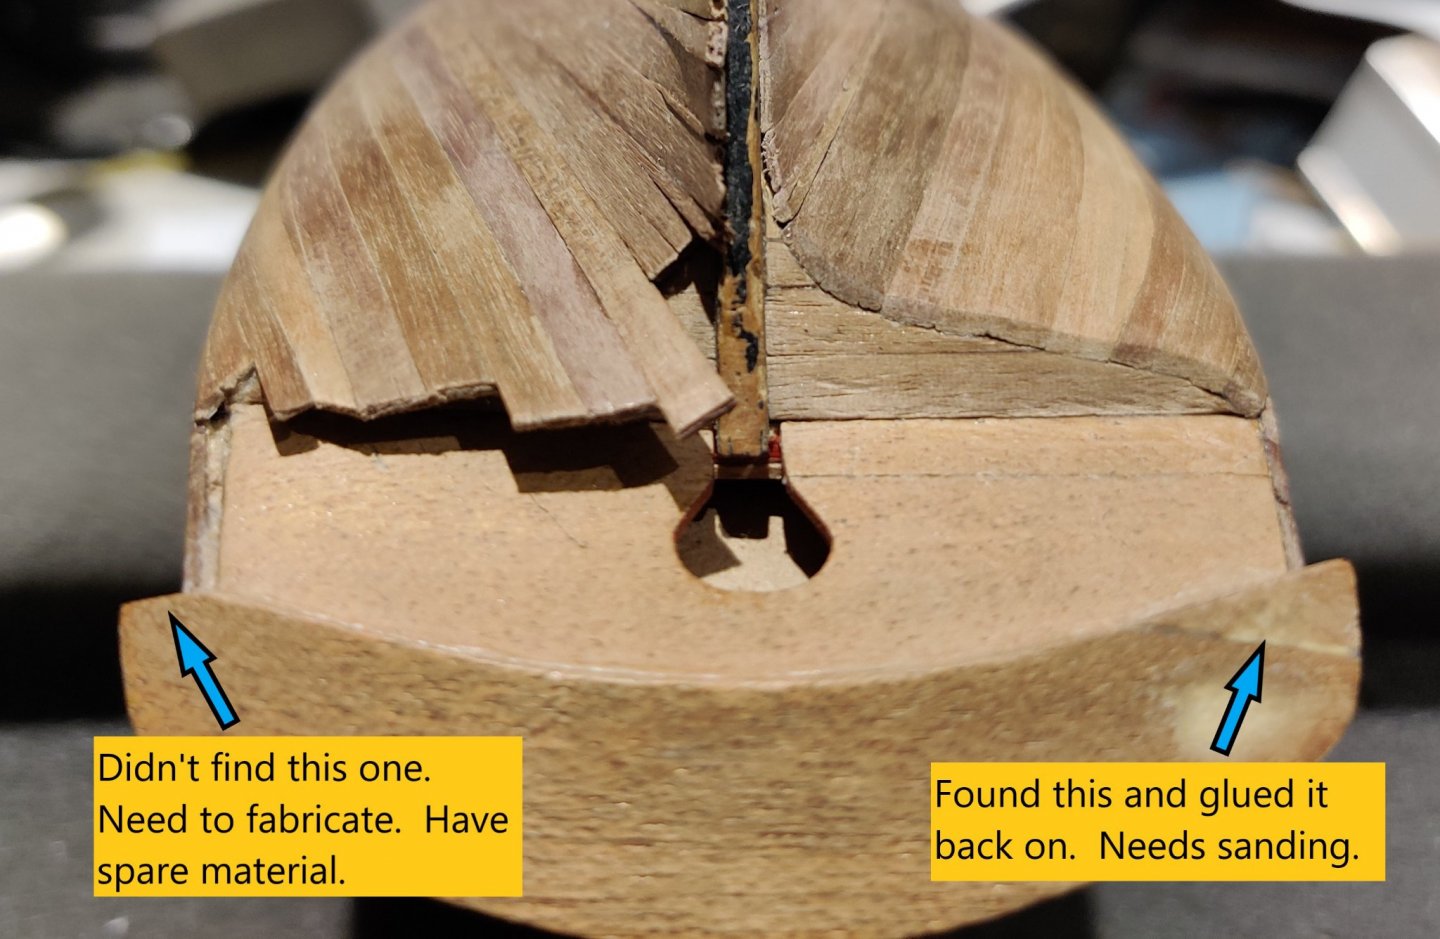
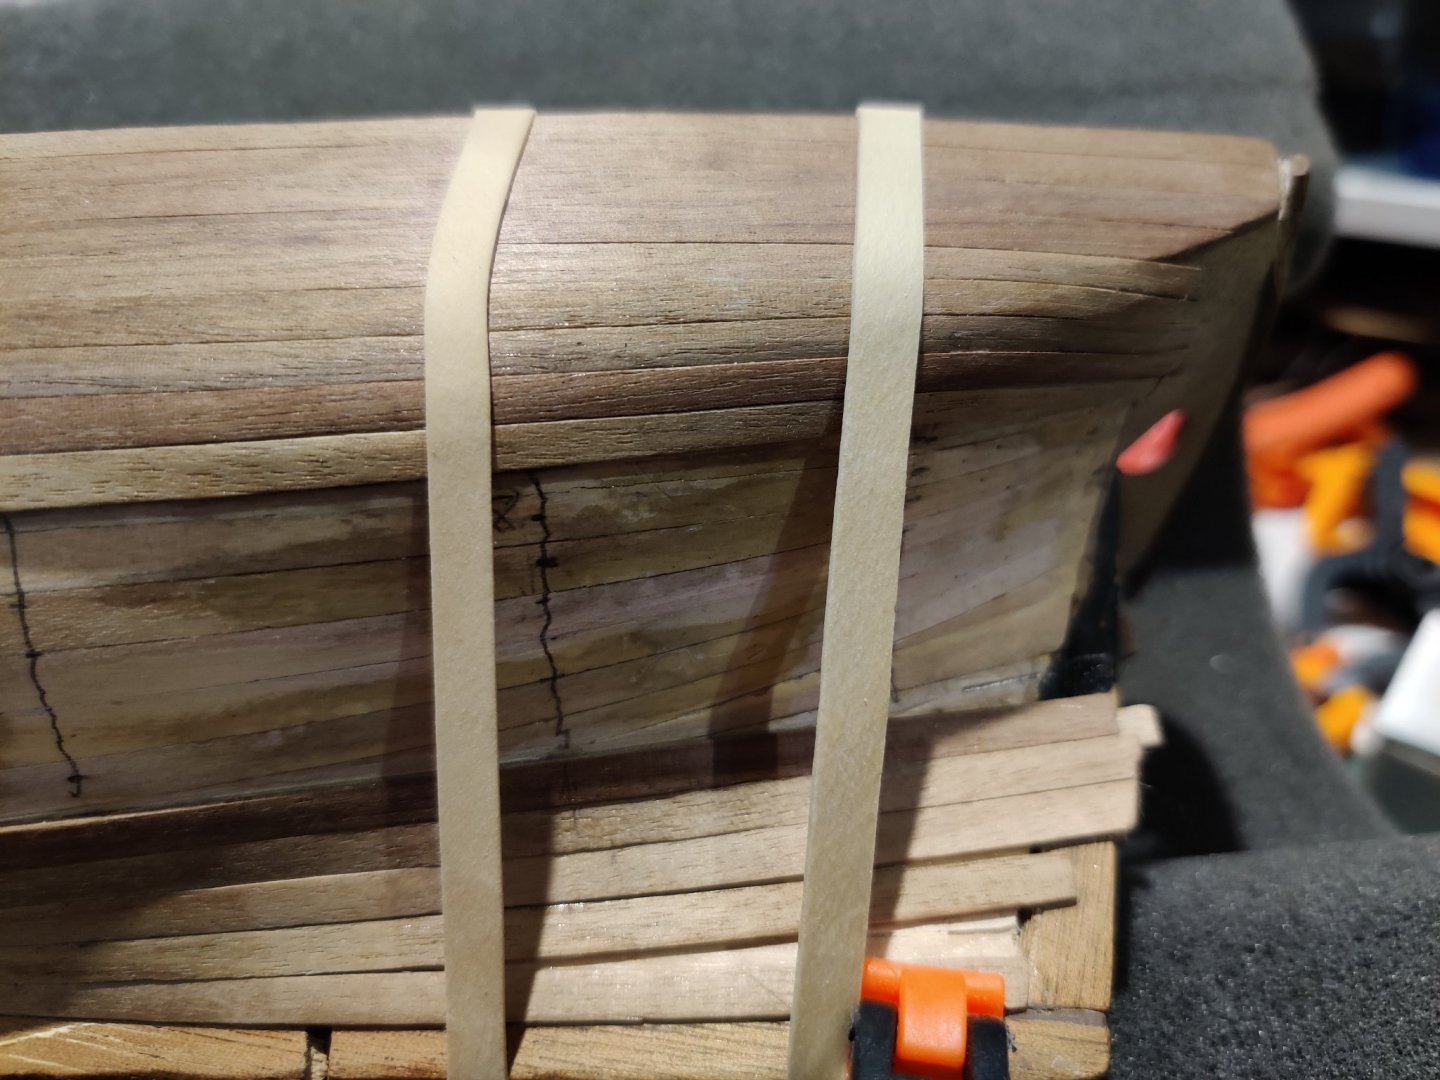
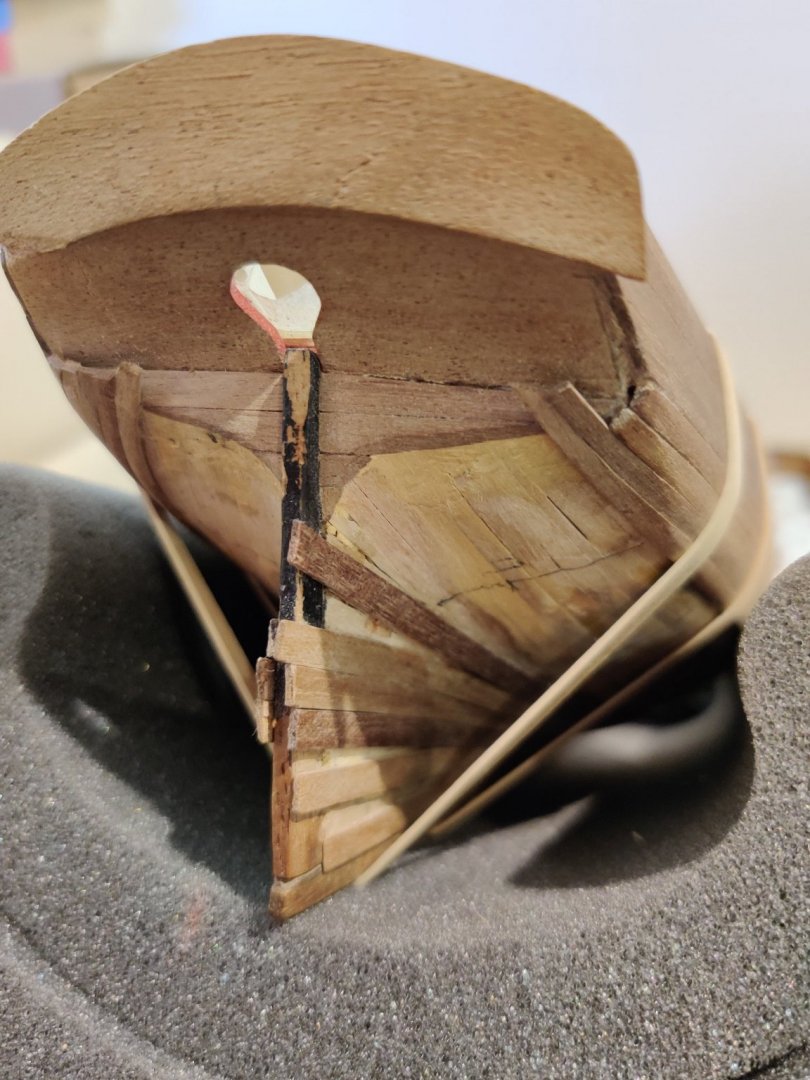
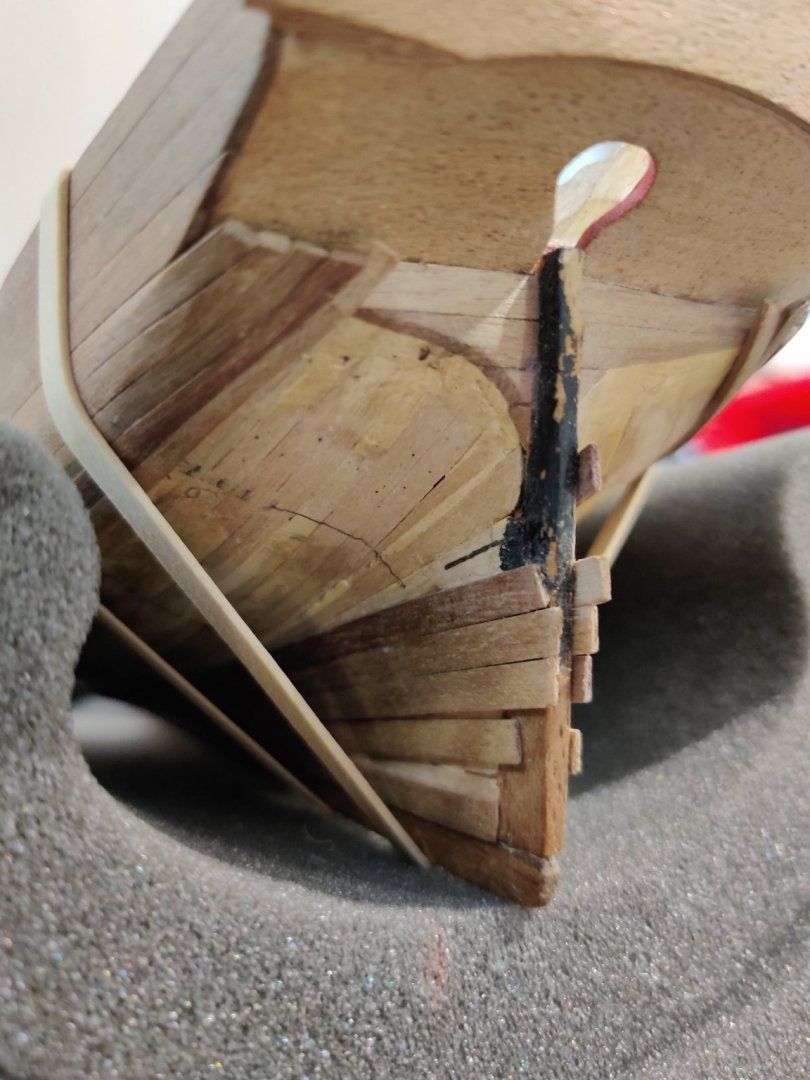
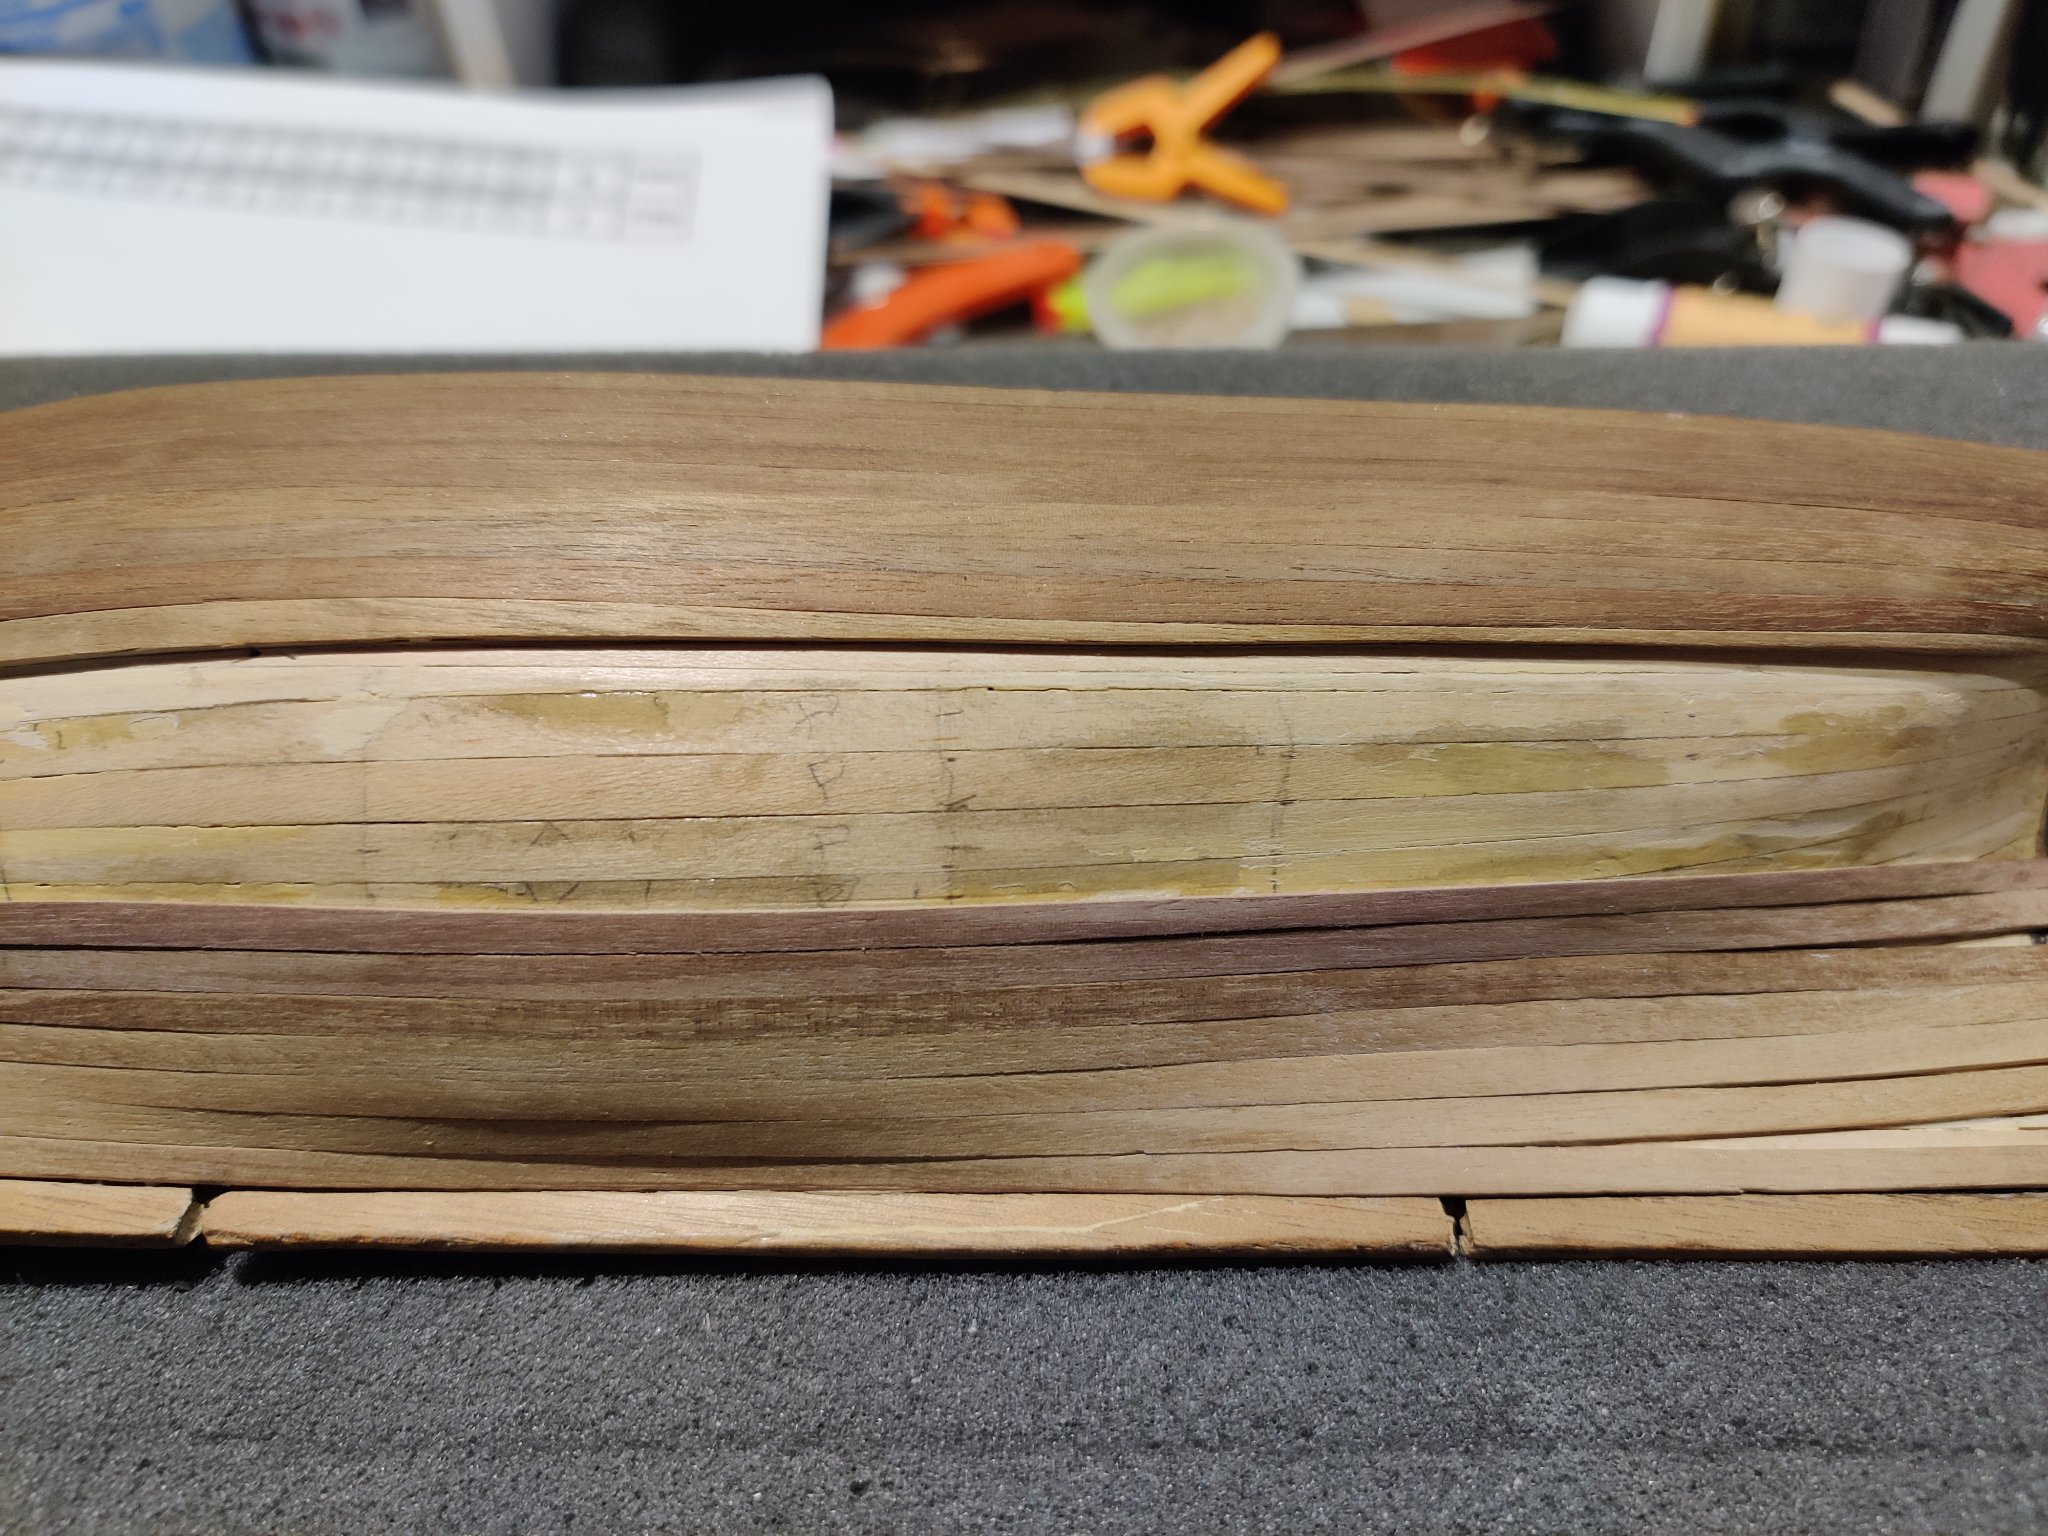
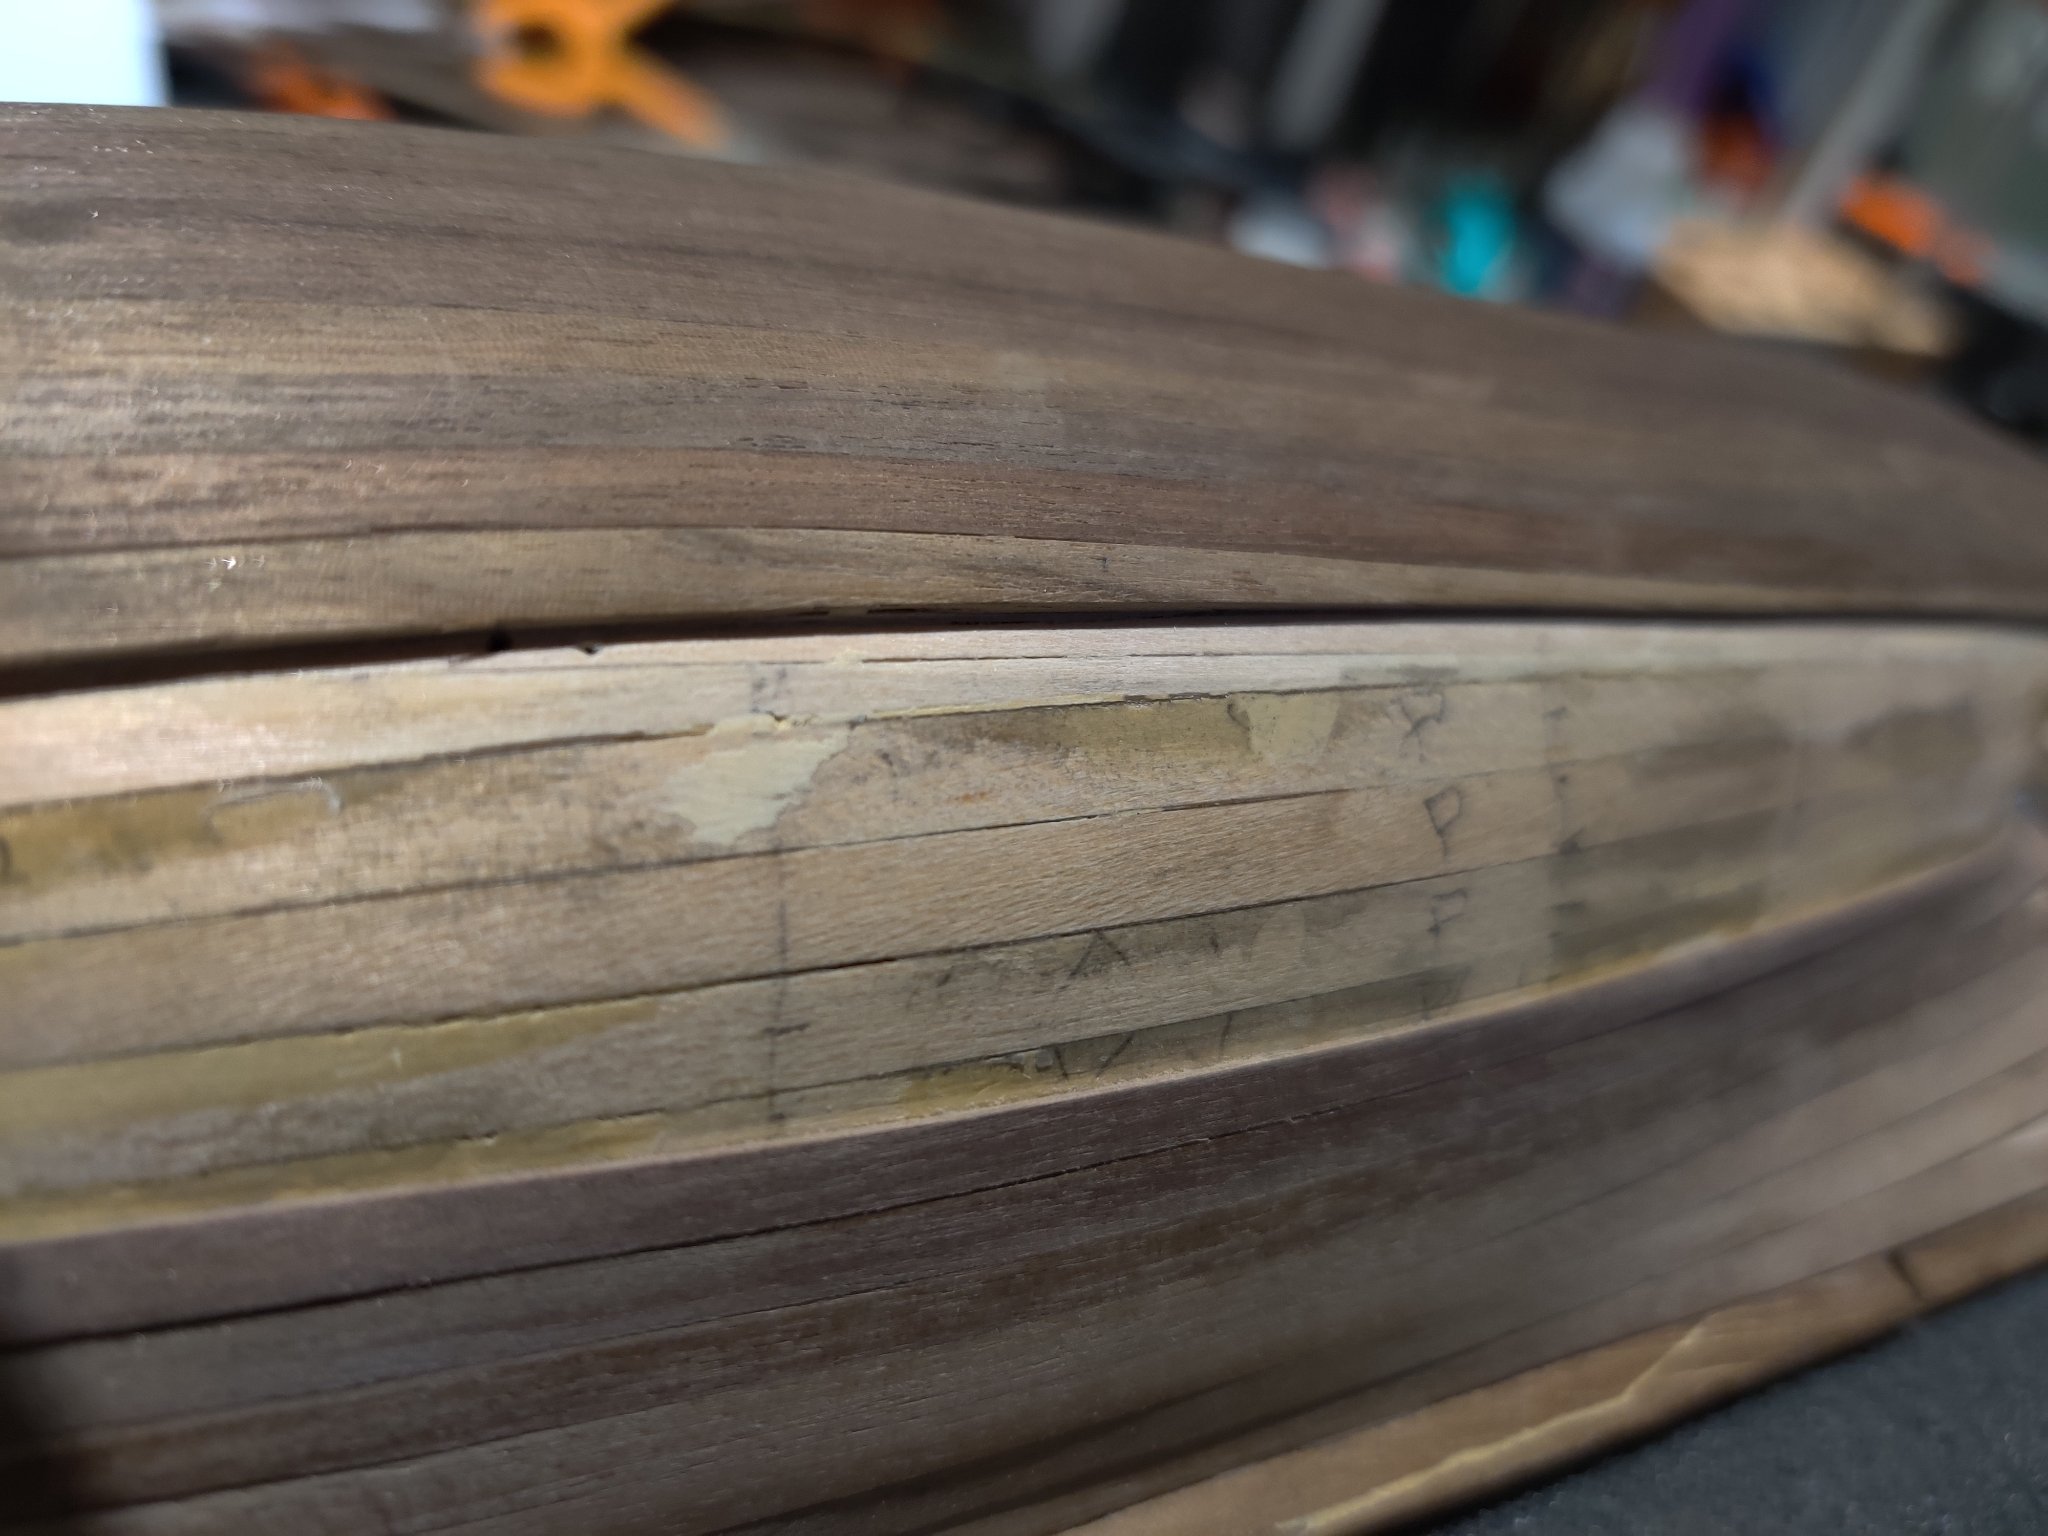
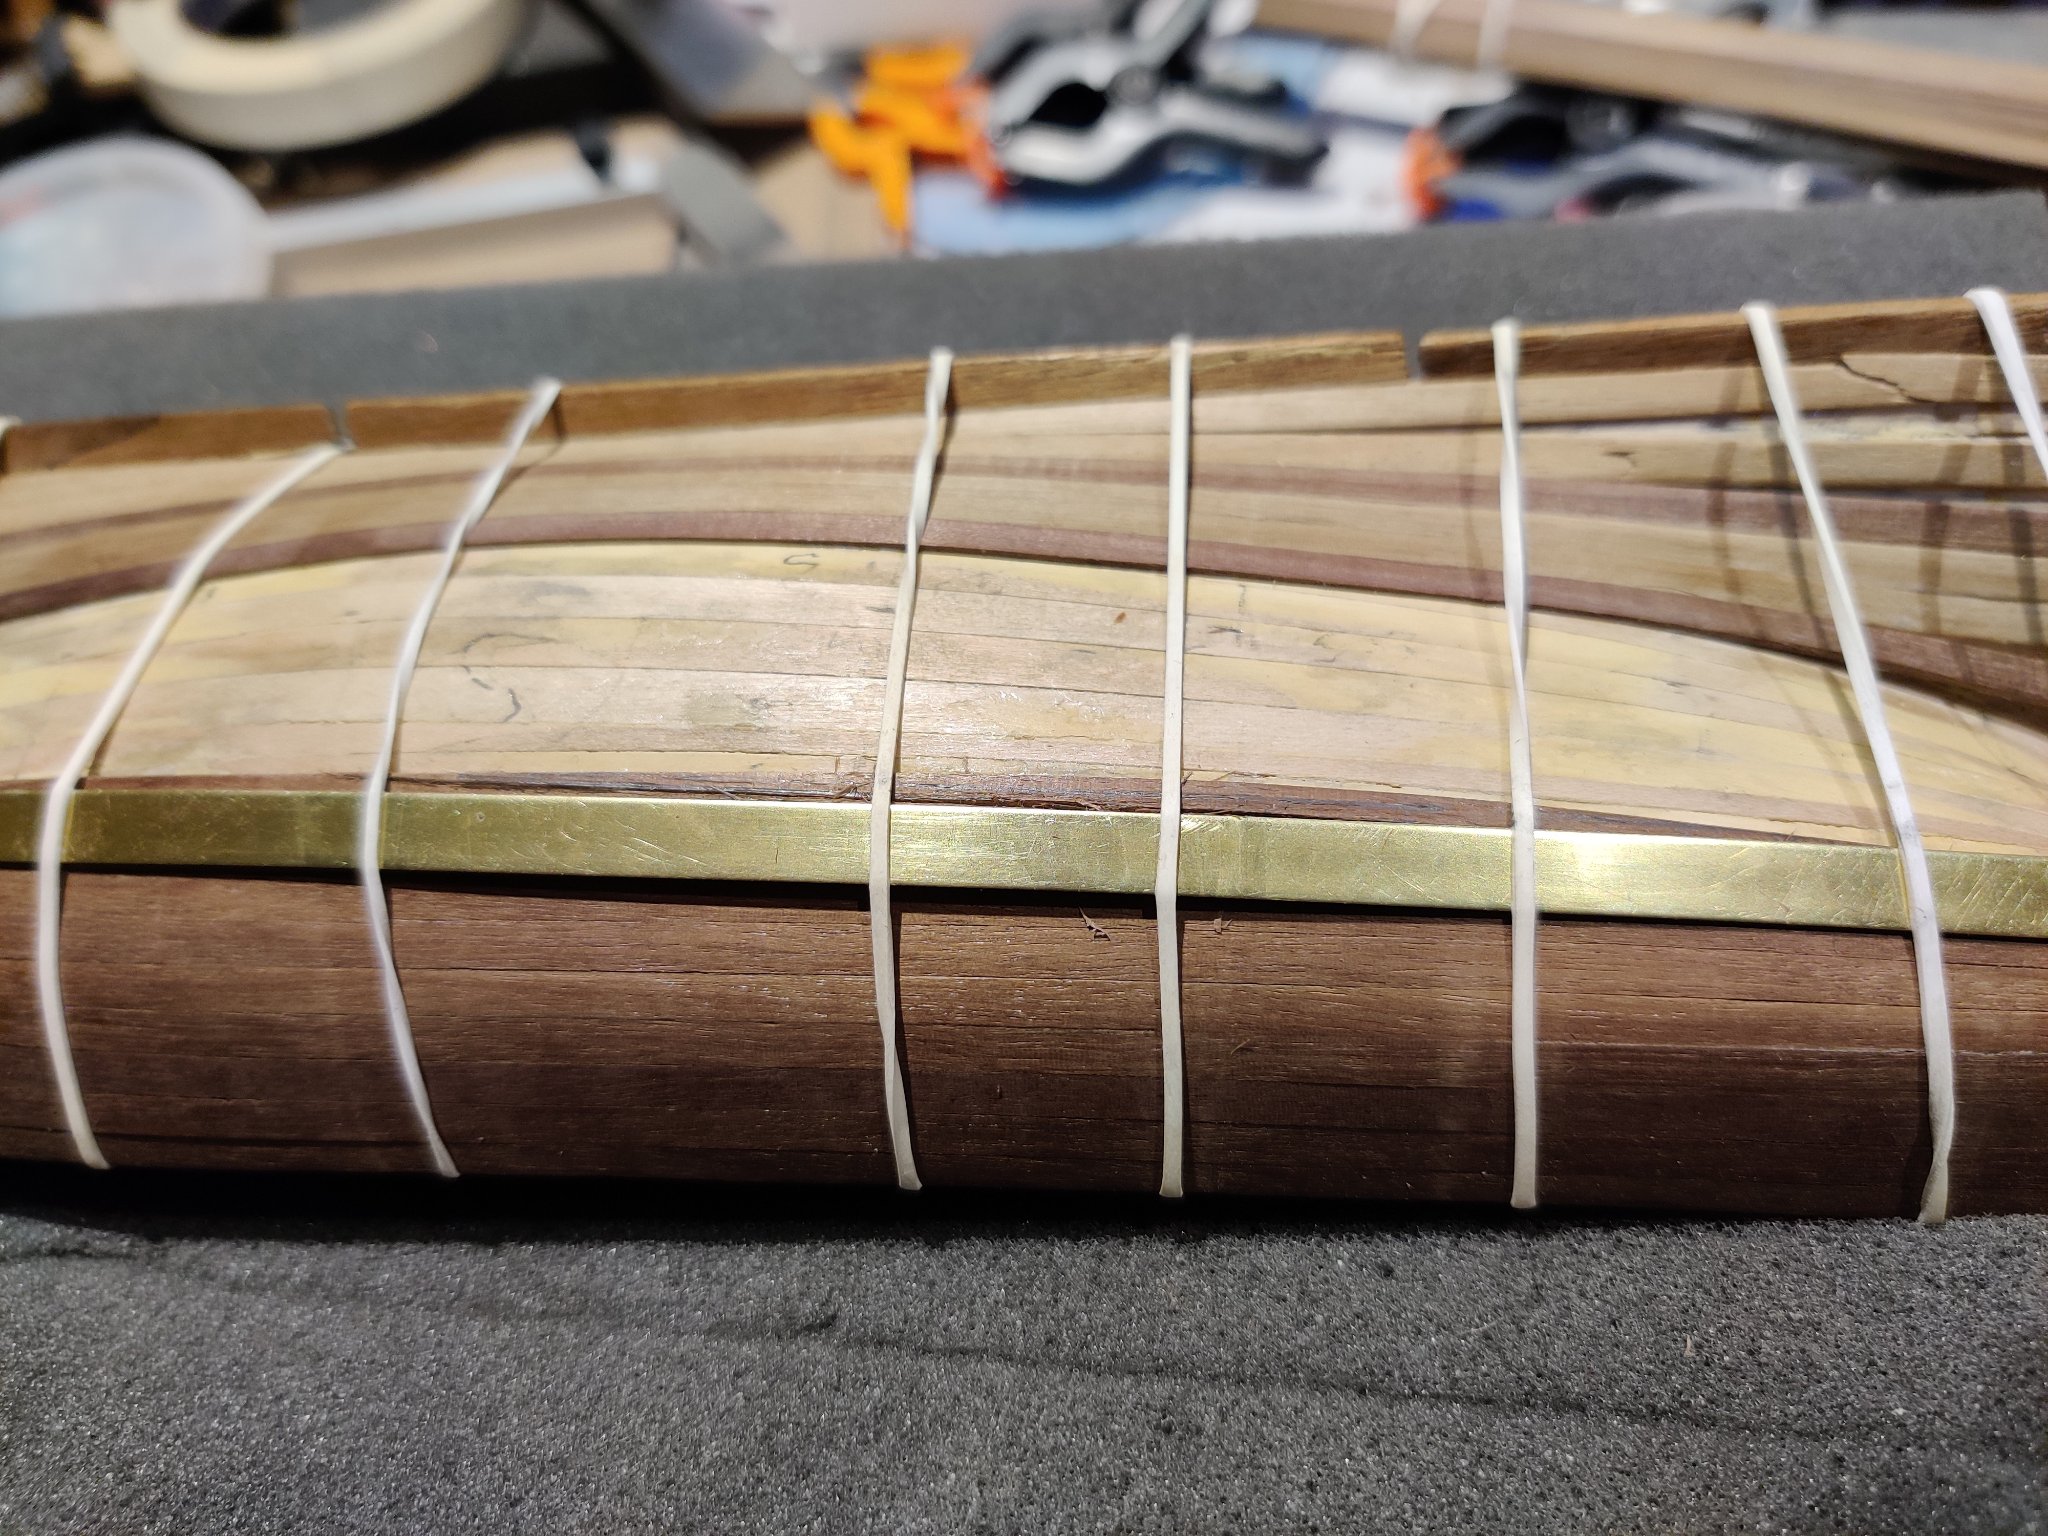
If I should fix this (I think I should), what's the best technique? I could brush in some diluted PVA where the bulges are but how do I hold down those areas while the PVA sets where I can't get clamps to work? I've seen some people use rubber bands with erasers holding down planks while the glue sets. I may try that. Any other thoughts?

.jpg.8f6724f39fed0d802de6a09748ba8ae6.jpg)


.jpg.196a980164bf5b04a82fc08ff12fb84b.jpg)
.jpg.8208b0adc1bf2be52eb0ca9948293ff8.jpg)
.jpg.95a04ad37a6d1a37e56b46fc5d256510.jpg)
.jpg.e18027731f661d775956a37e42c7a0c2.jpg)