HOLIDAY DONATION DRIVE - SUPPORT MSW - DO YOUR PART TO KEEP THIS GREAT FORUM GOING! (89 donations so far out of 49,000 members - C'mon guys!)
×


Papa
-
Posts
1,305 -
Joined
-
Last visited
Content Type
Profiles
Forums
Gallery
Events
Everything posted by Papa
-
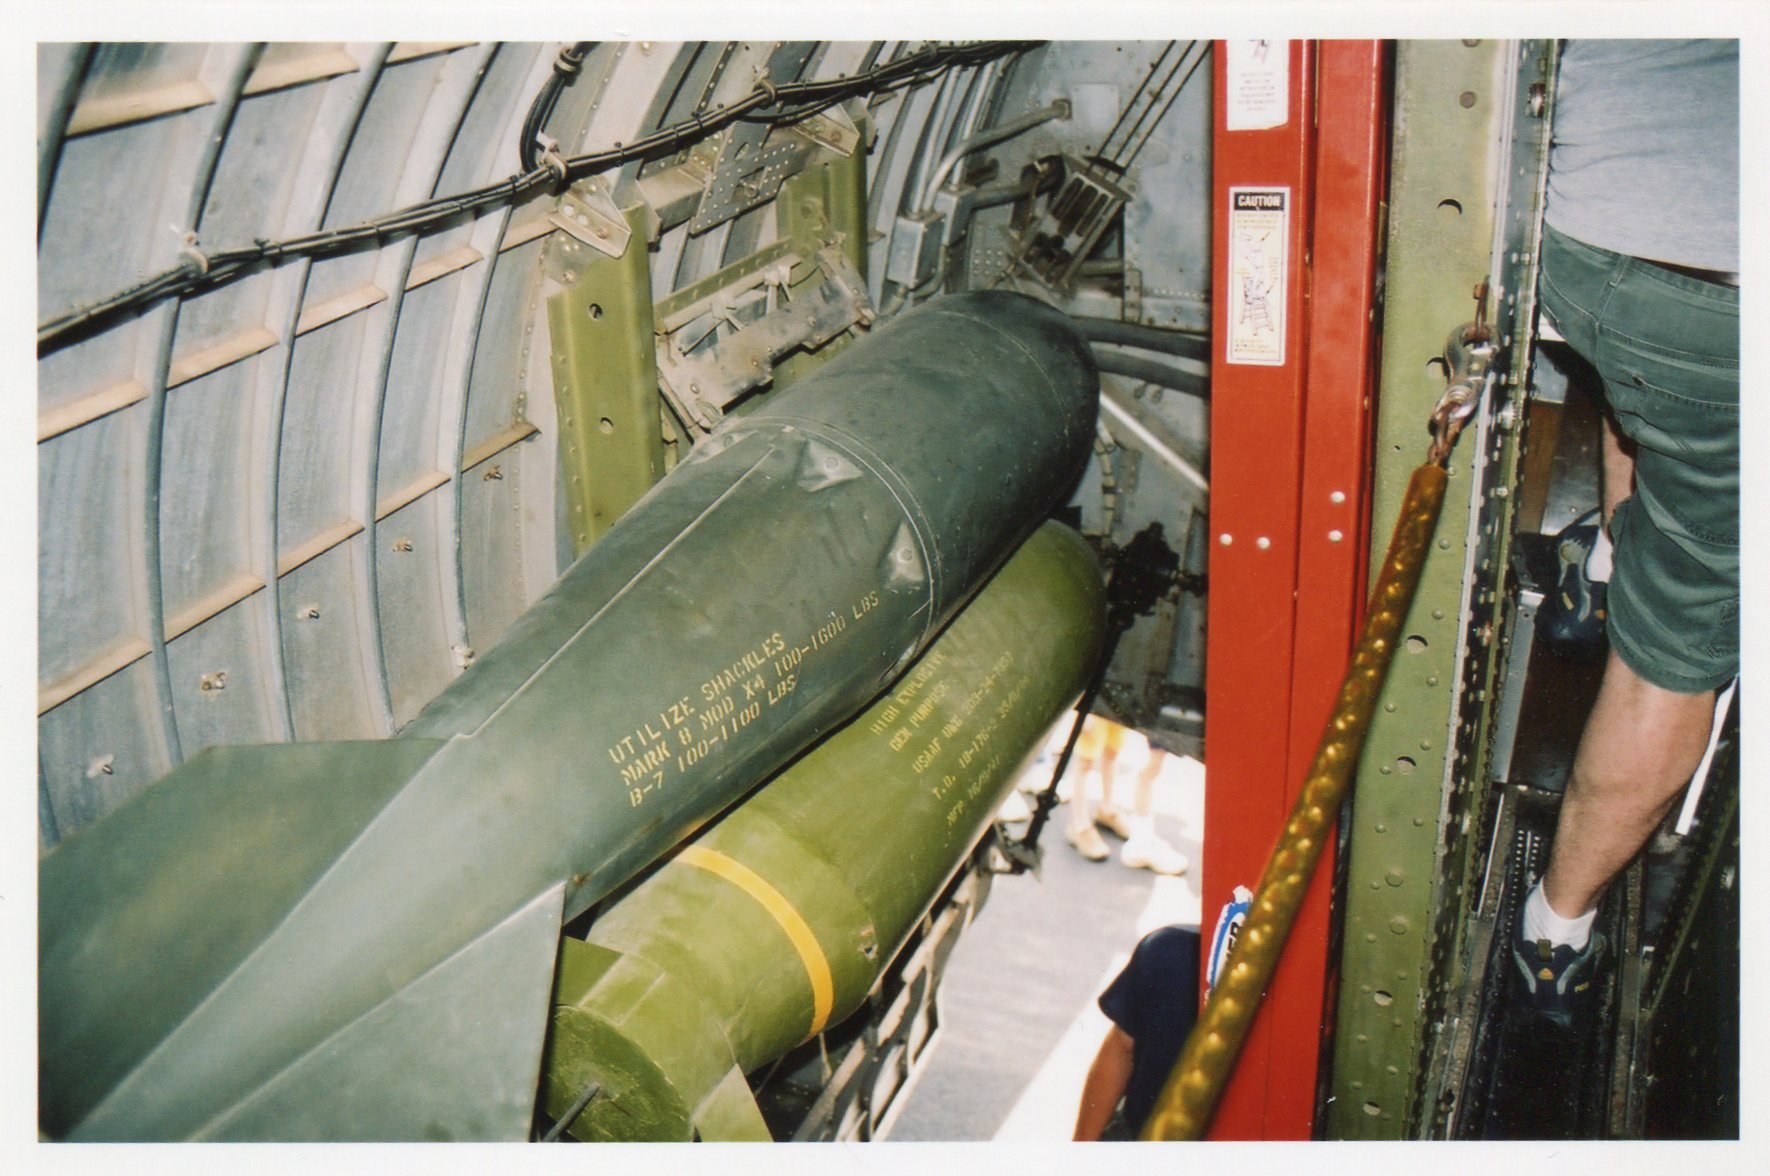
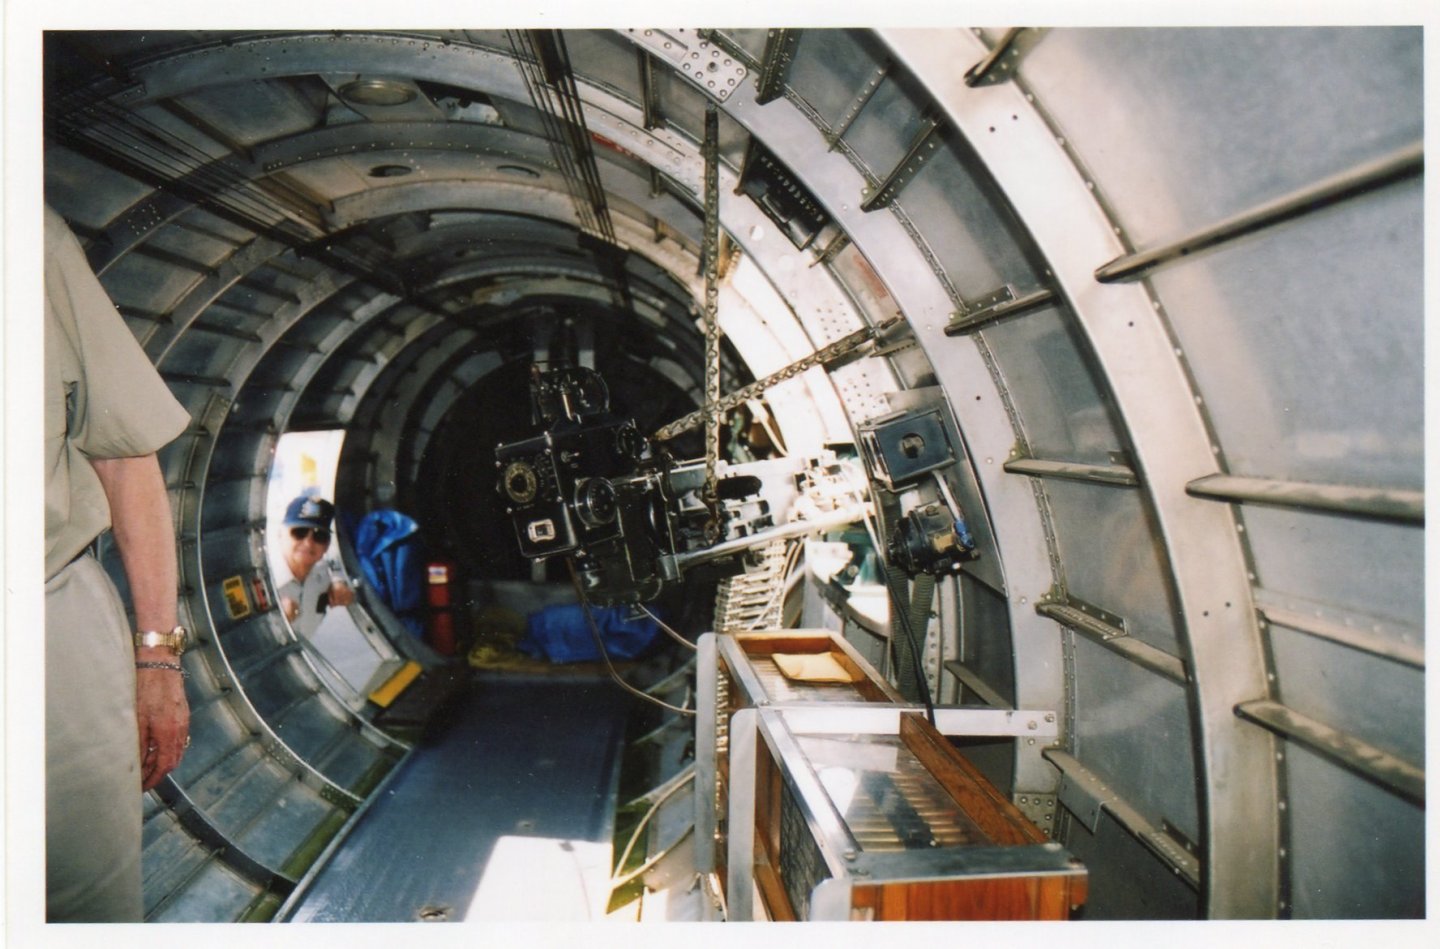
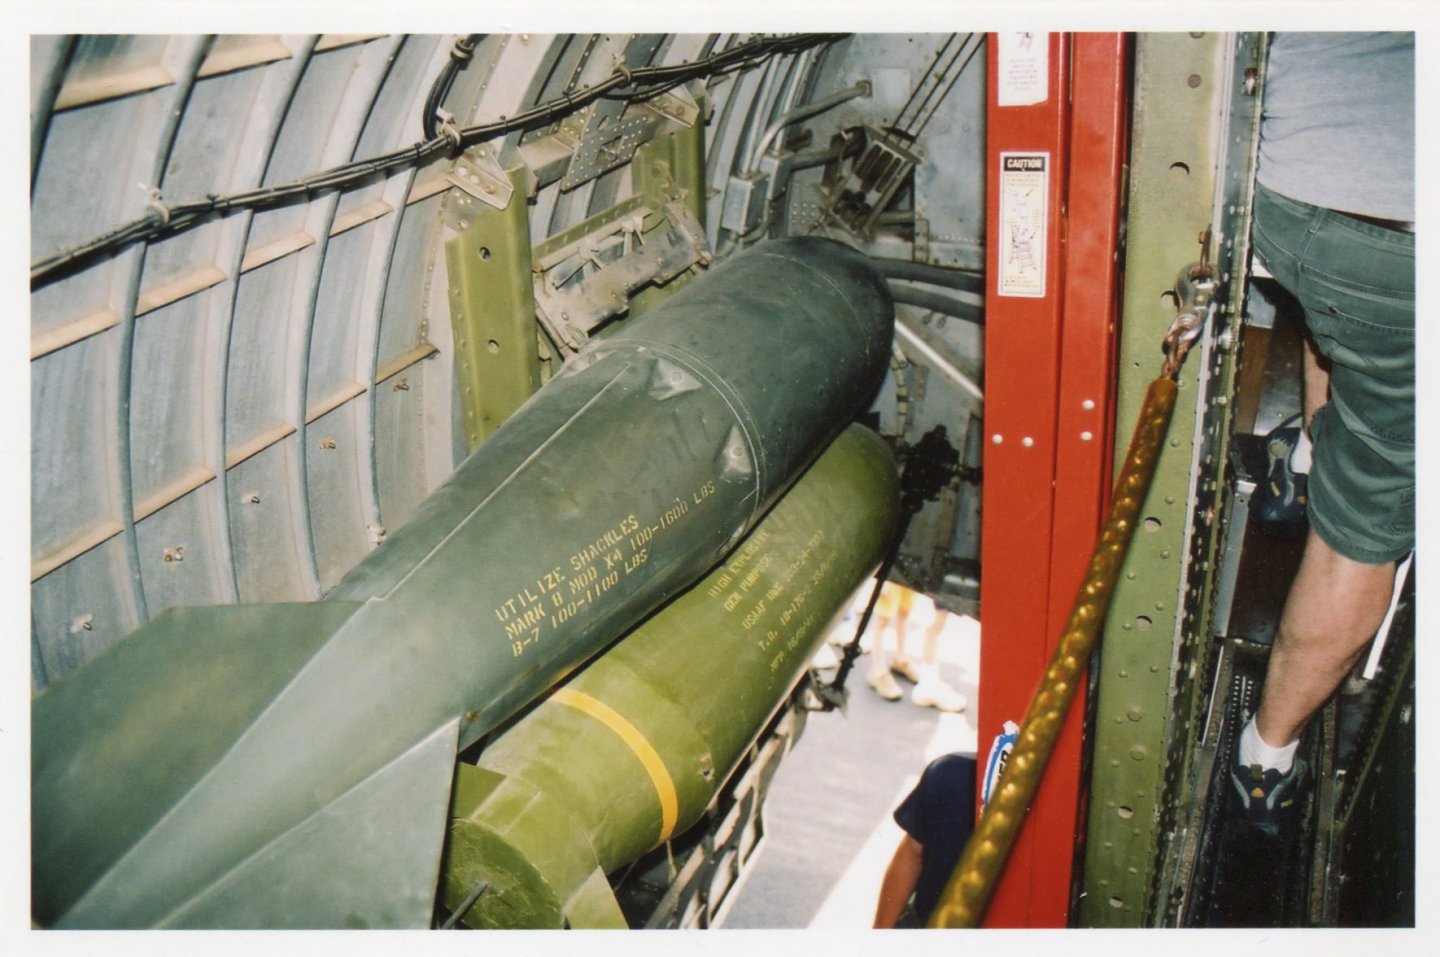
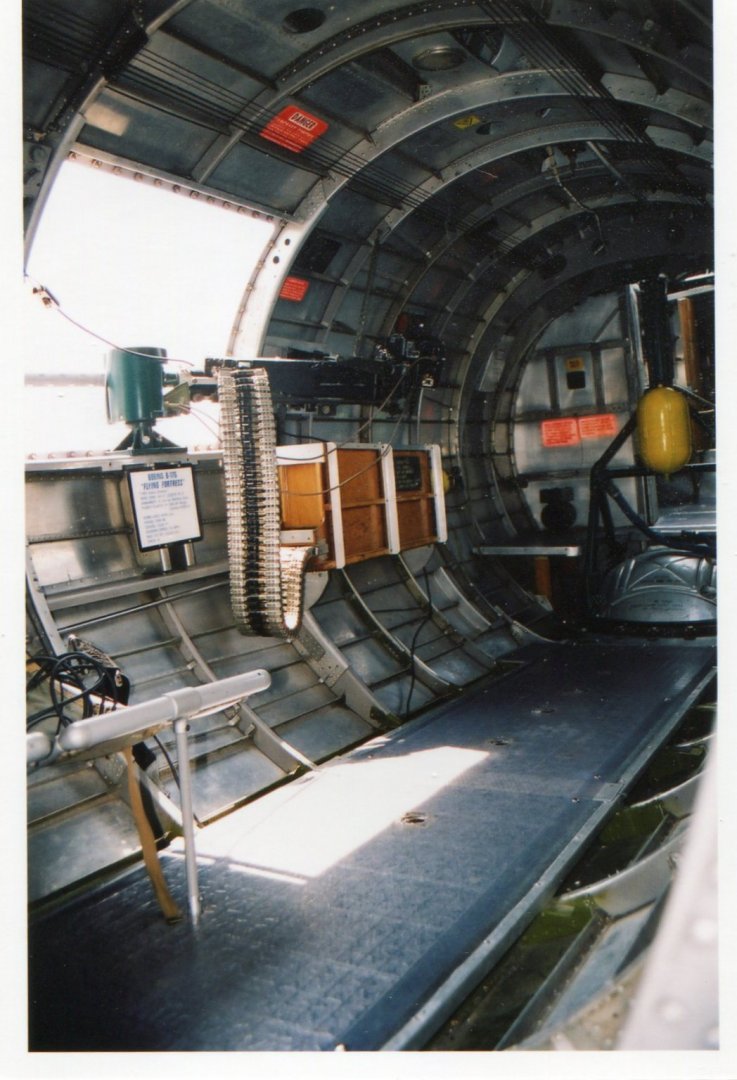
 Glad you enjoy the interior shots. During my tour of the plane I concluded when passing through the bomb racks that the crew would need to be selected with considerably smaller waistlines than I had at the time. LOL By the way, I see you are in the Manchester, New Hampshire area. About 1/2 of my family are from NH going back to its founding in the 17th century. I graduated from the University of New Hampshire way back in 1965. Ron Gove PS, my last name has only 4 letters, and no “r”, although most people I meet want to put the “r” in there.😁
 -
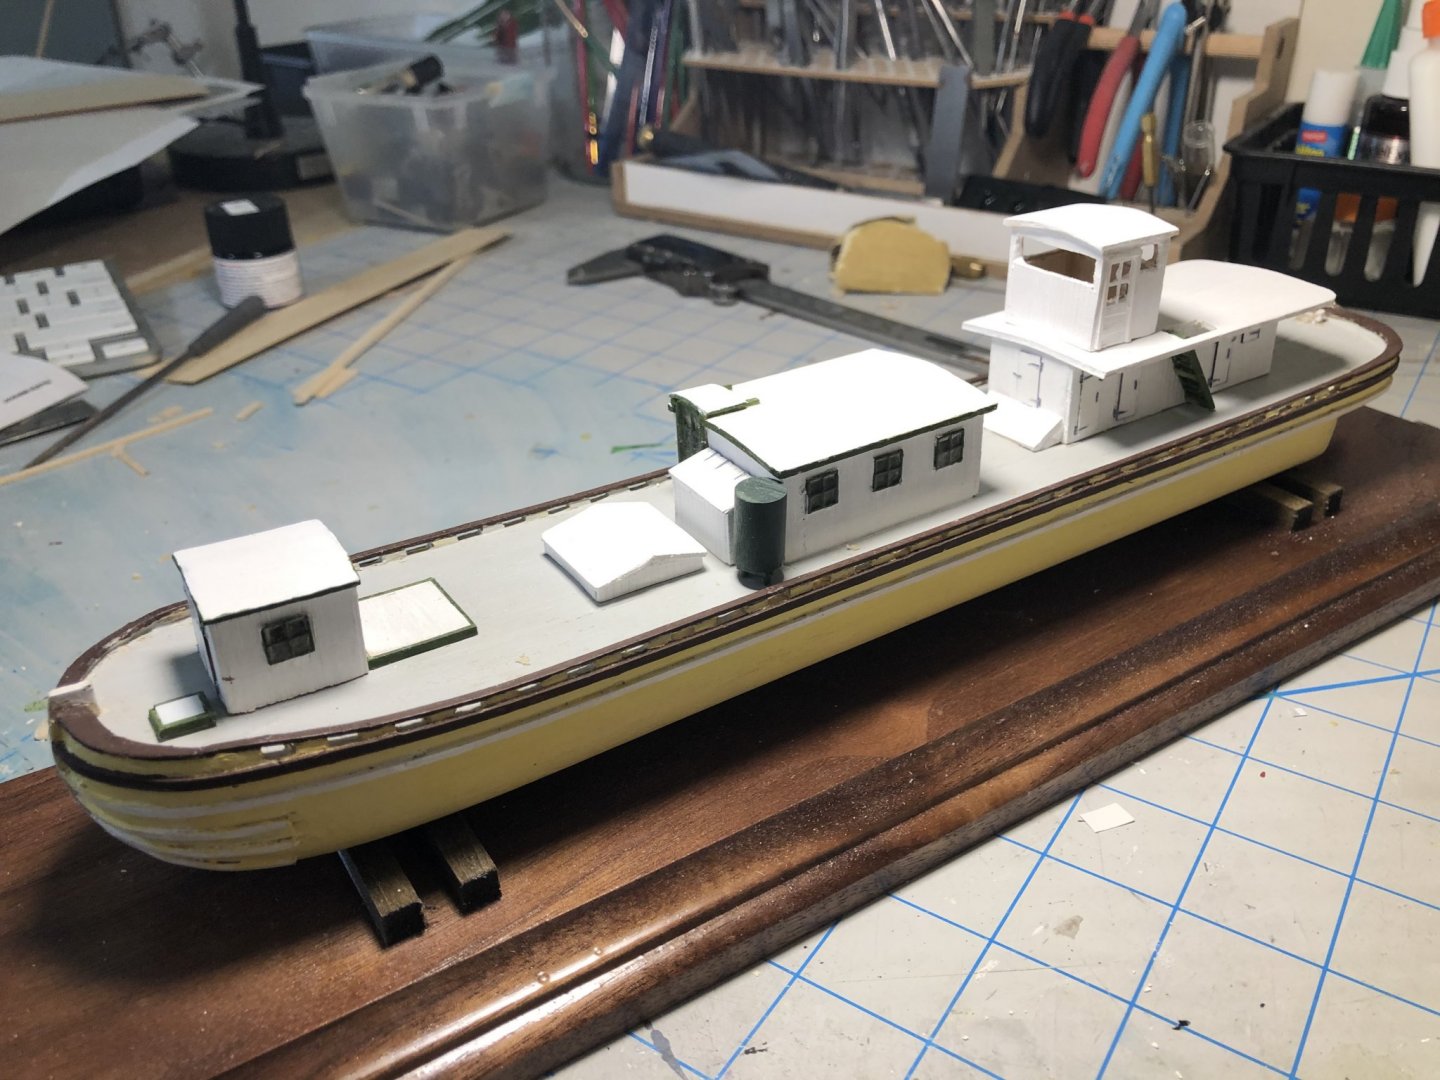
Doing the finishing touches now. Touching up the paint etc. I still need to make some “City of Pekin” sign boards and to construct a windlass. The kit provided two Britannia metal capstans with which to make a windlass, but the drawing is very small and only has a top view. I’ll muddle through some how.

- 26 replies
-
- 4
-

-
- city of pekin
- model shipways
- (and 1 more)
-
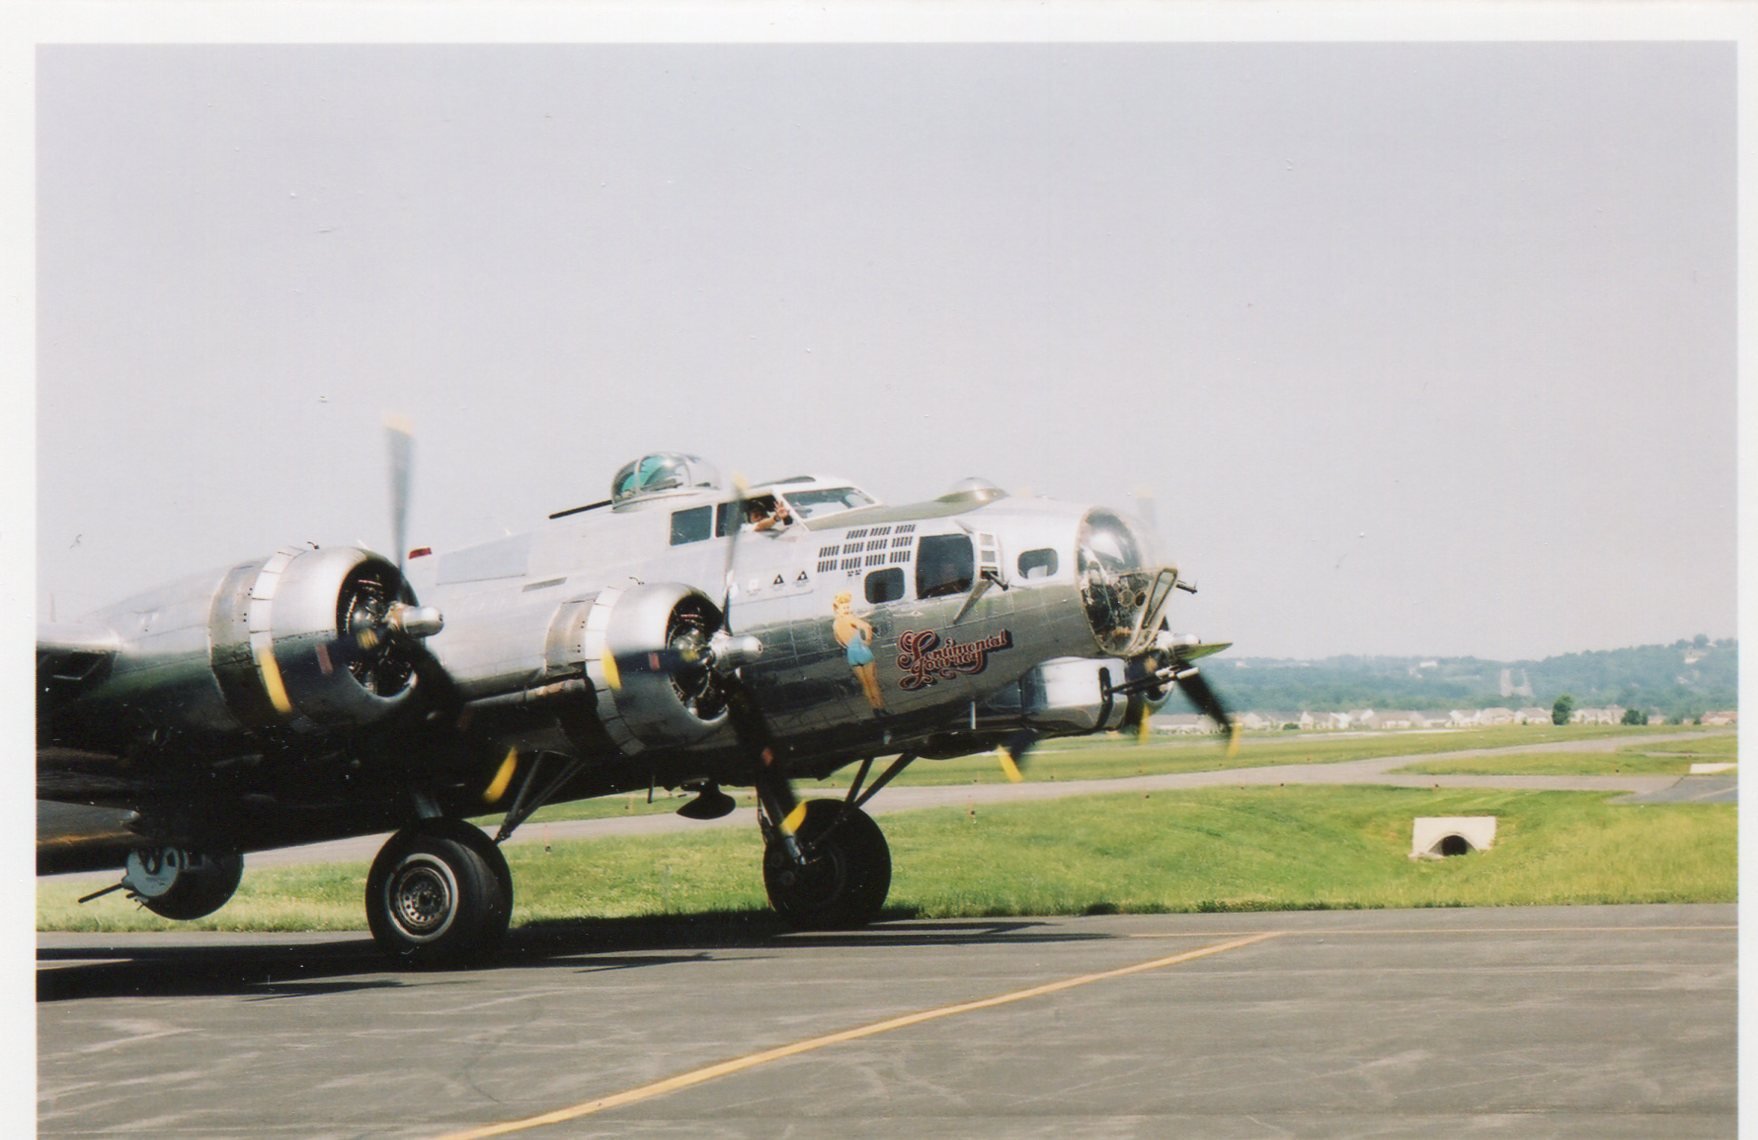
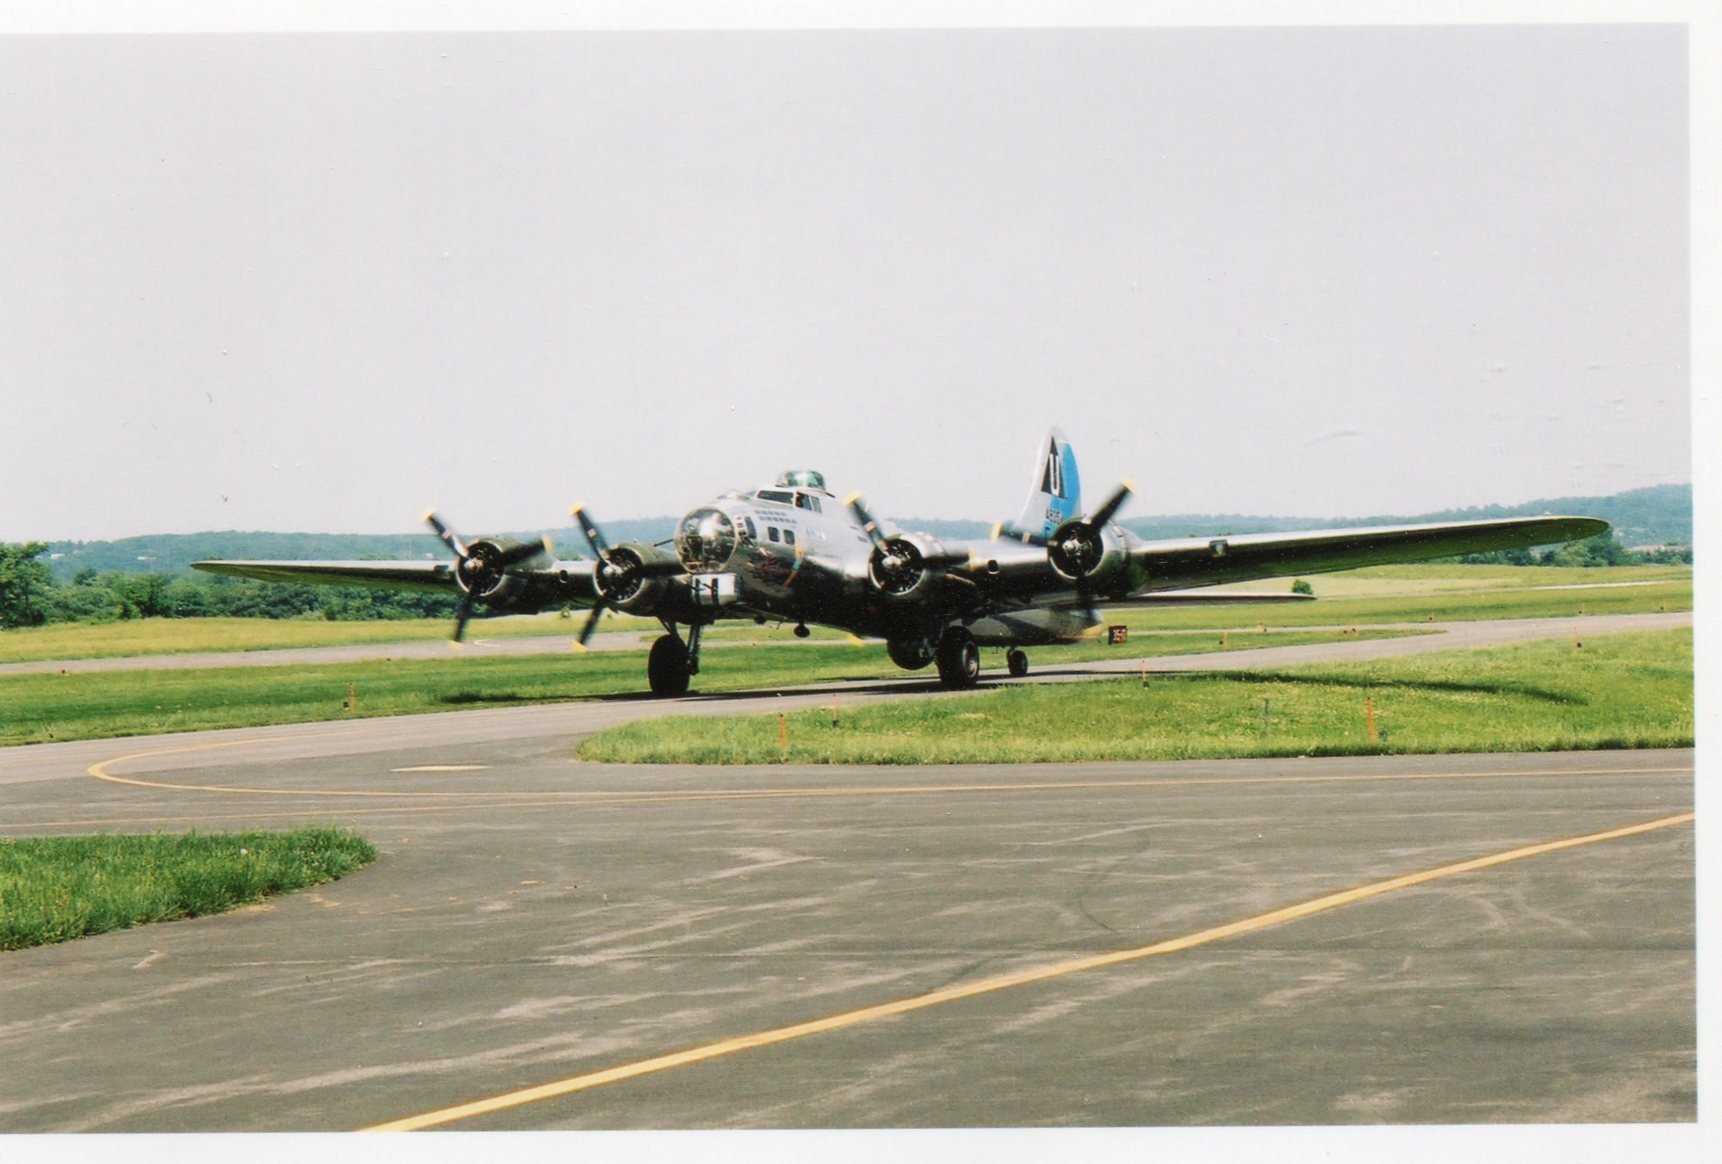
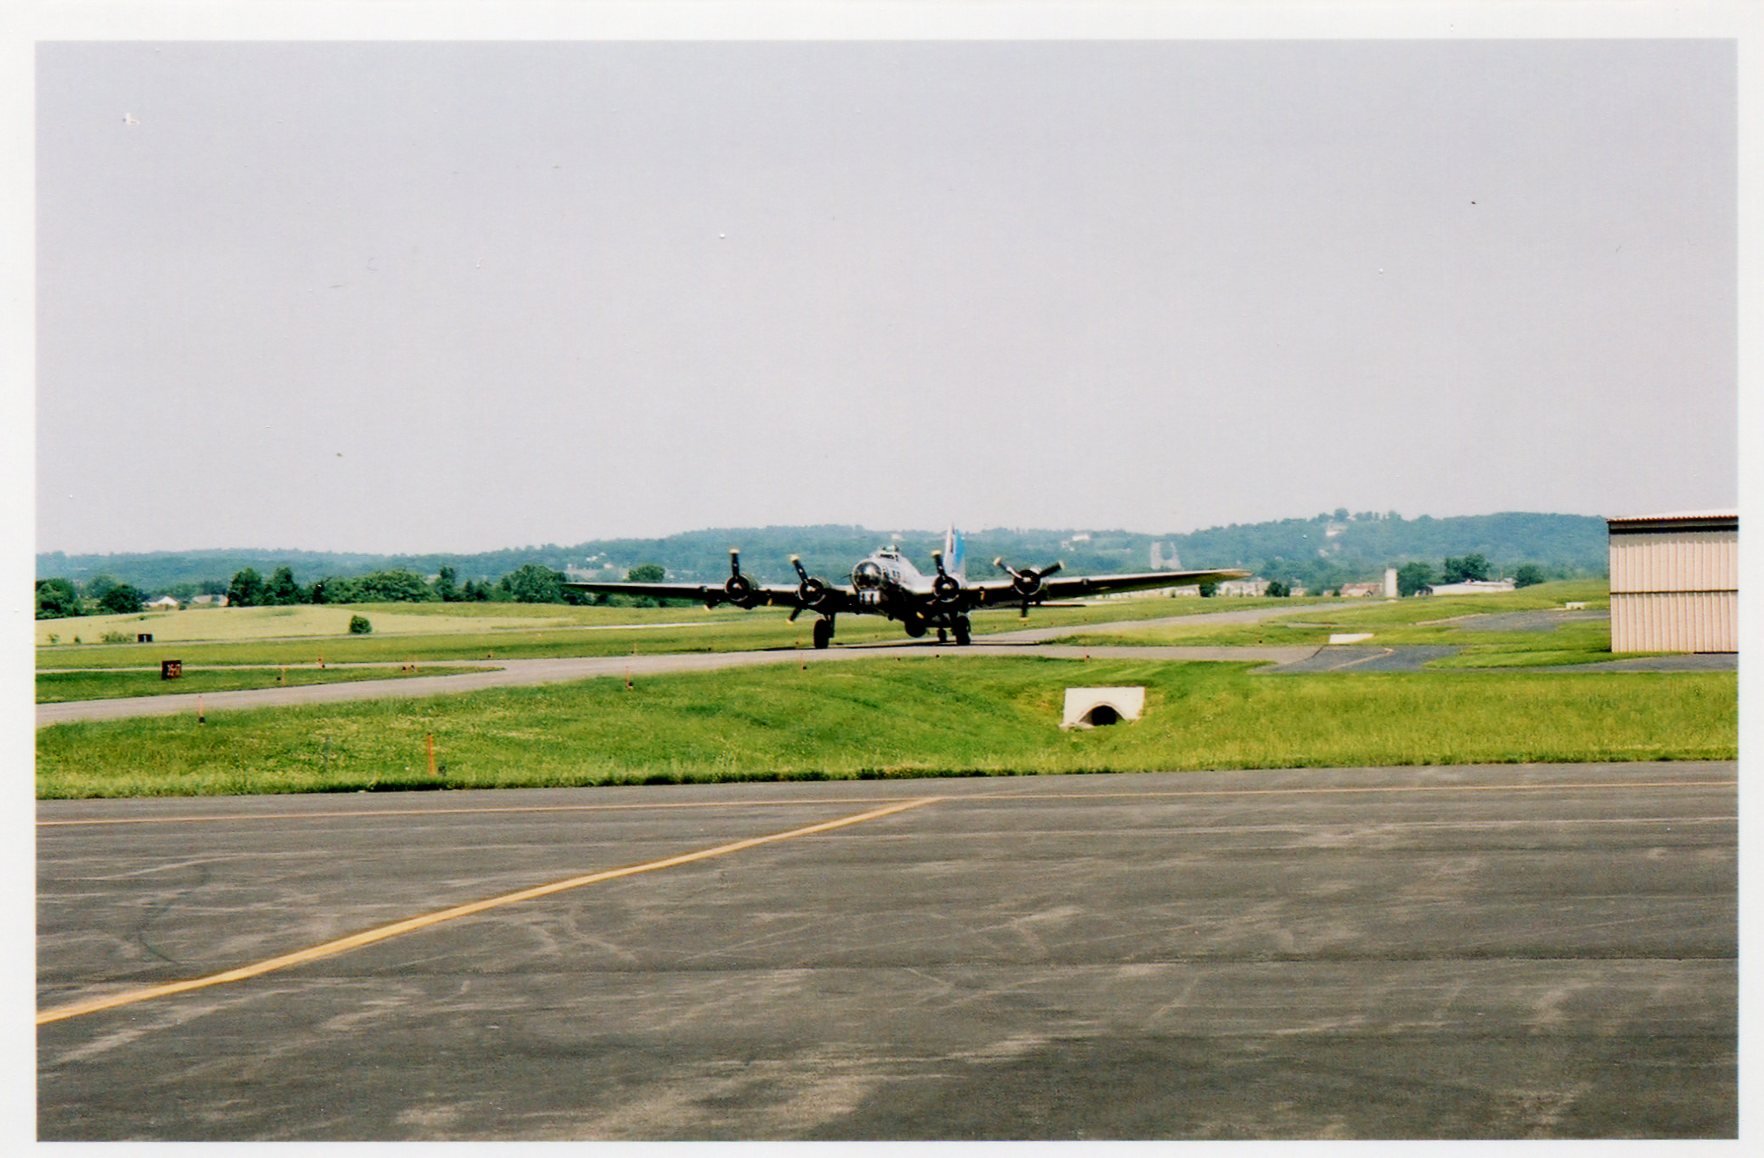
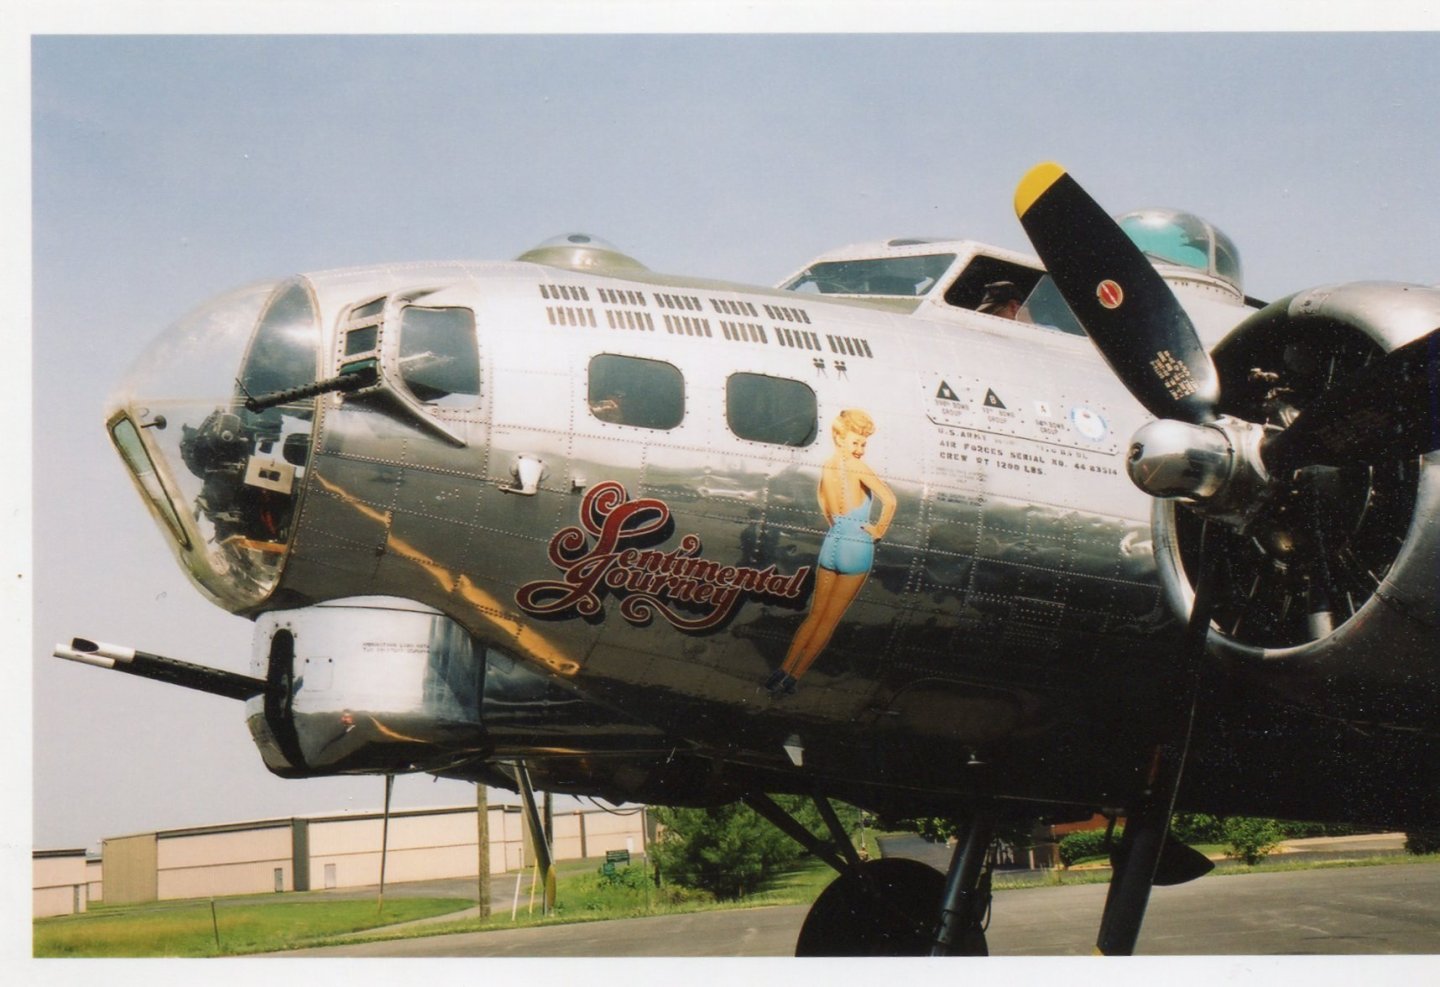
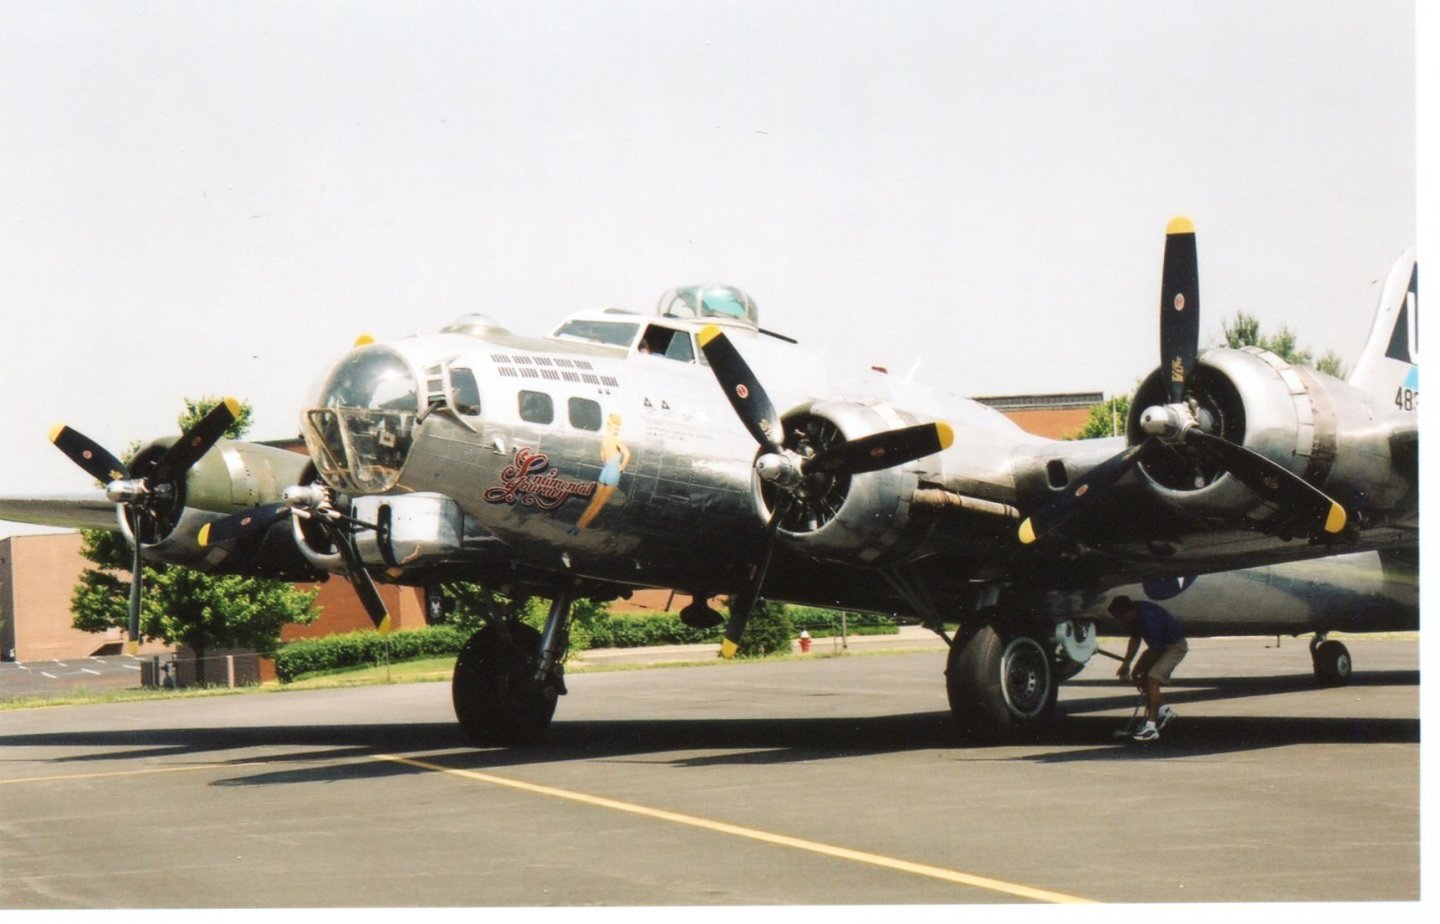
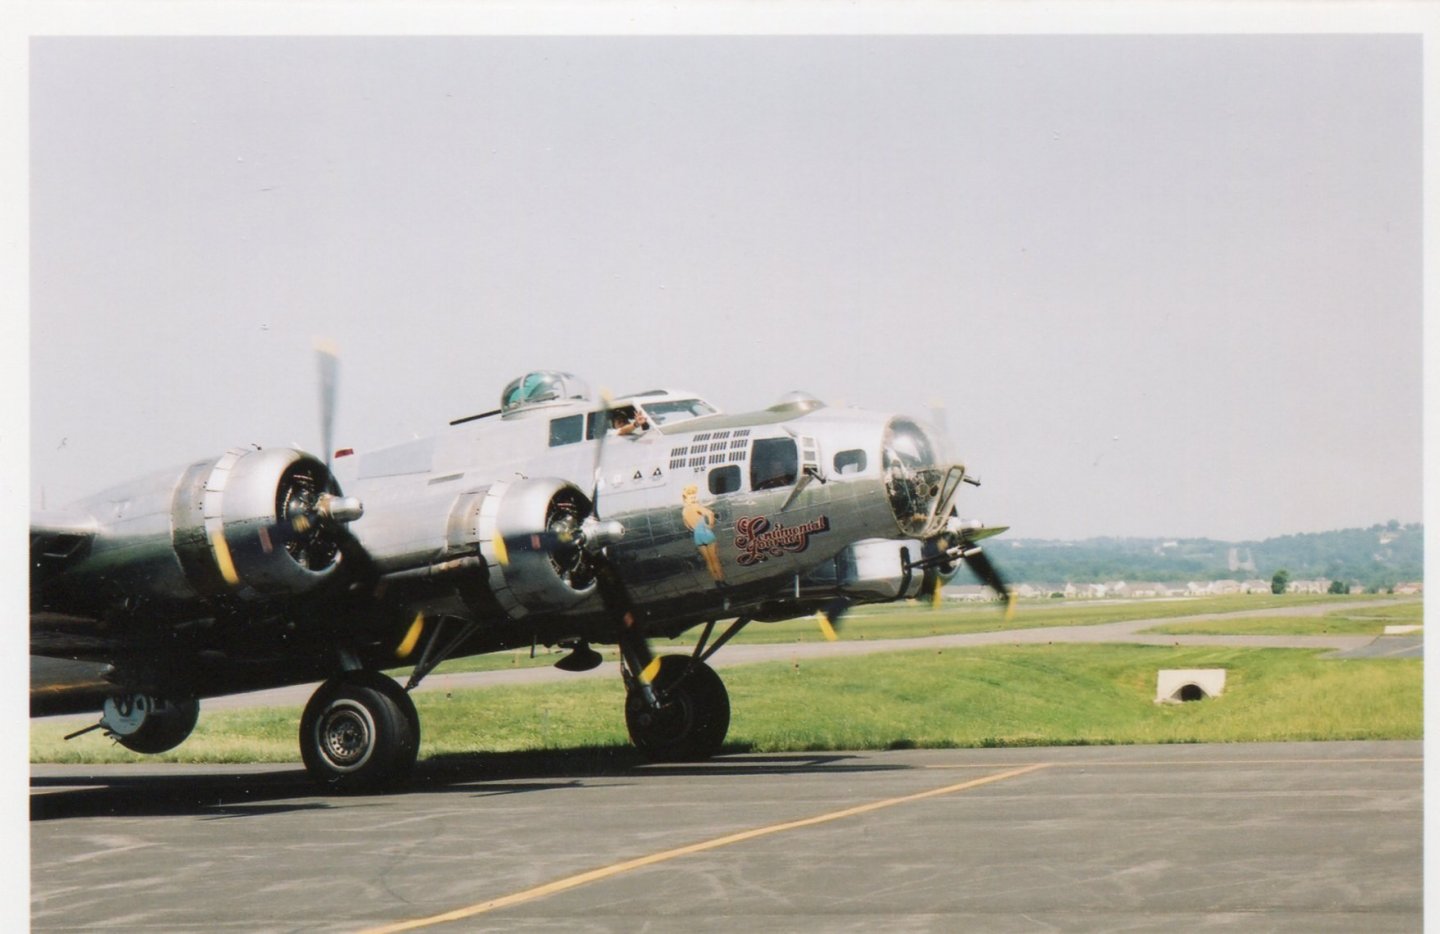
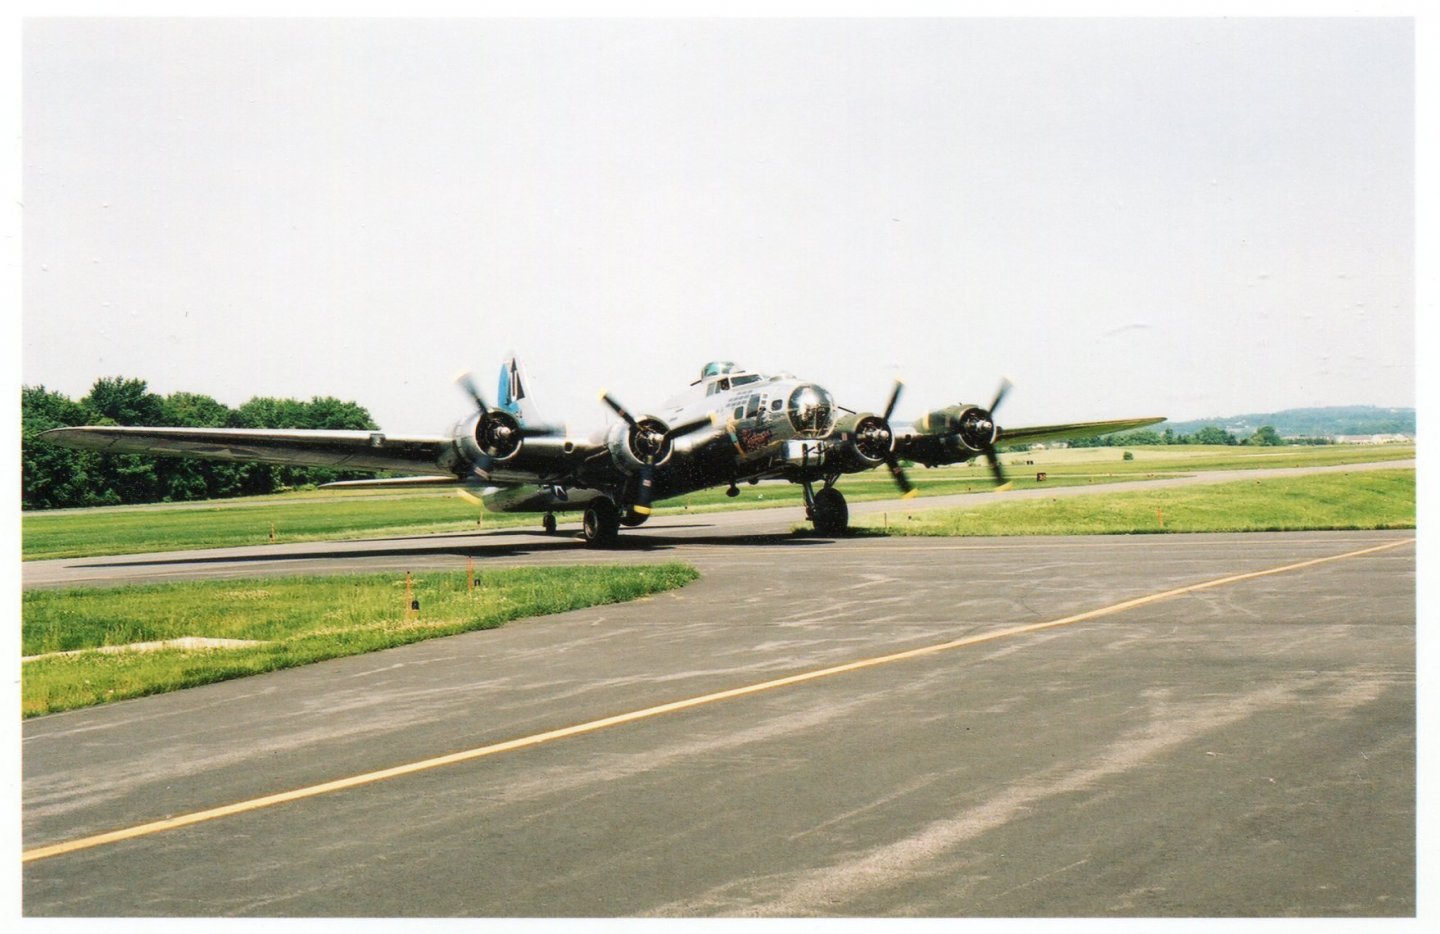
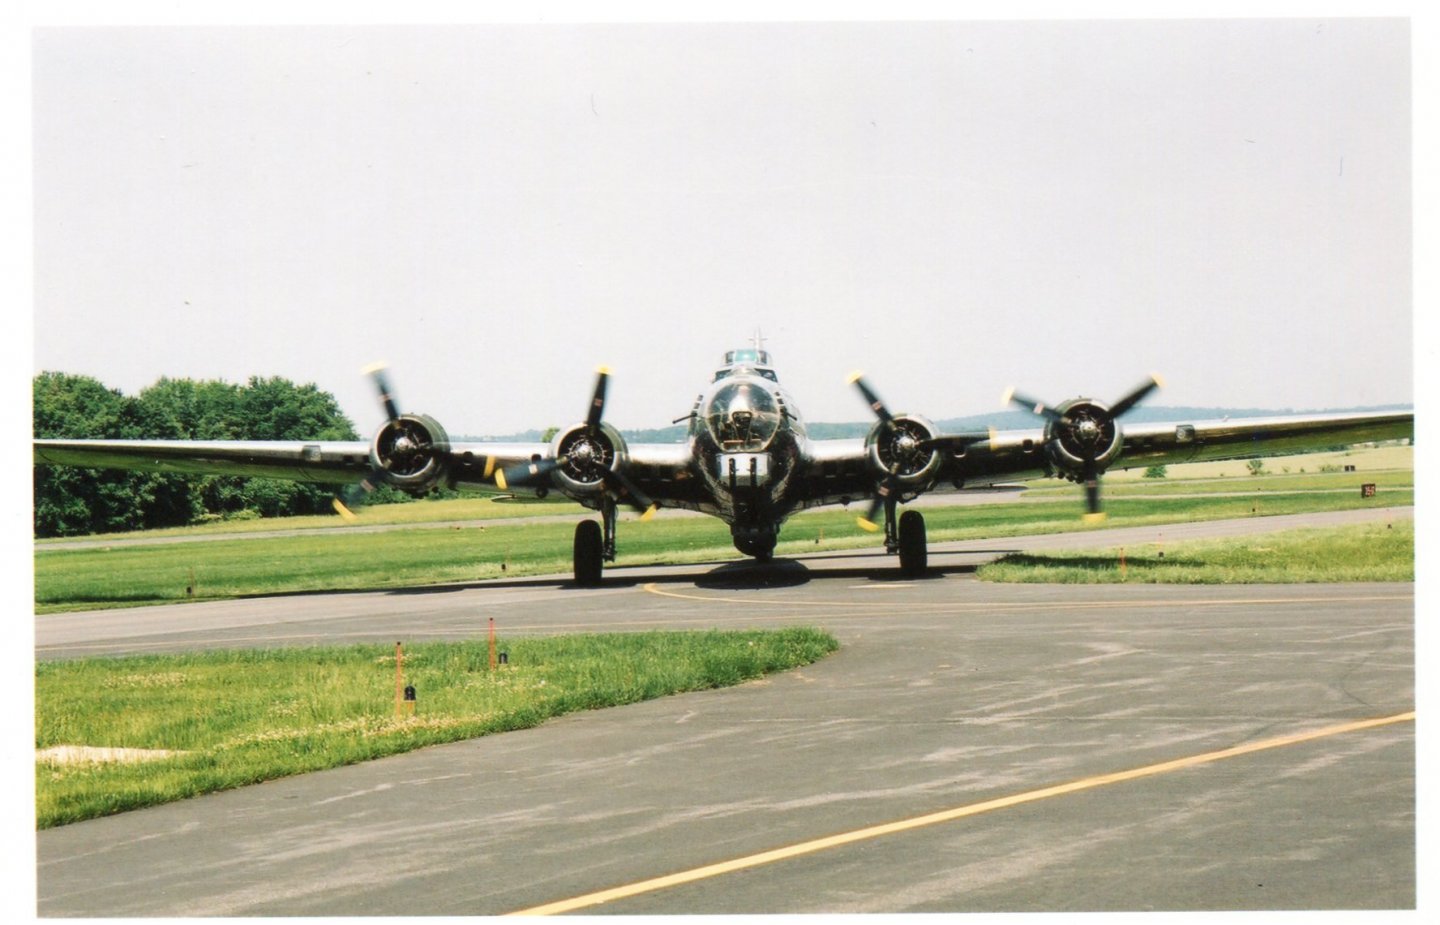
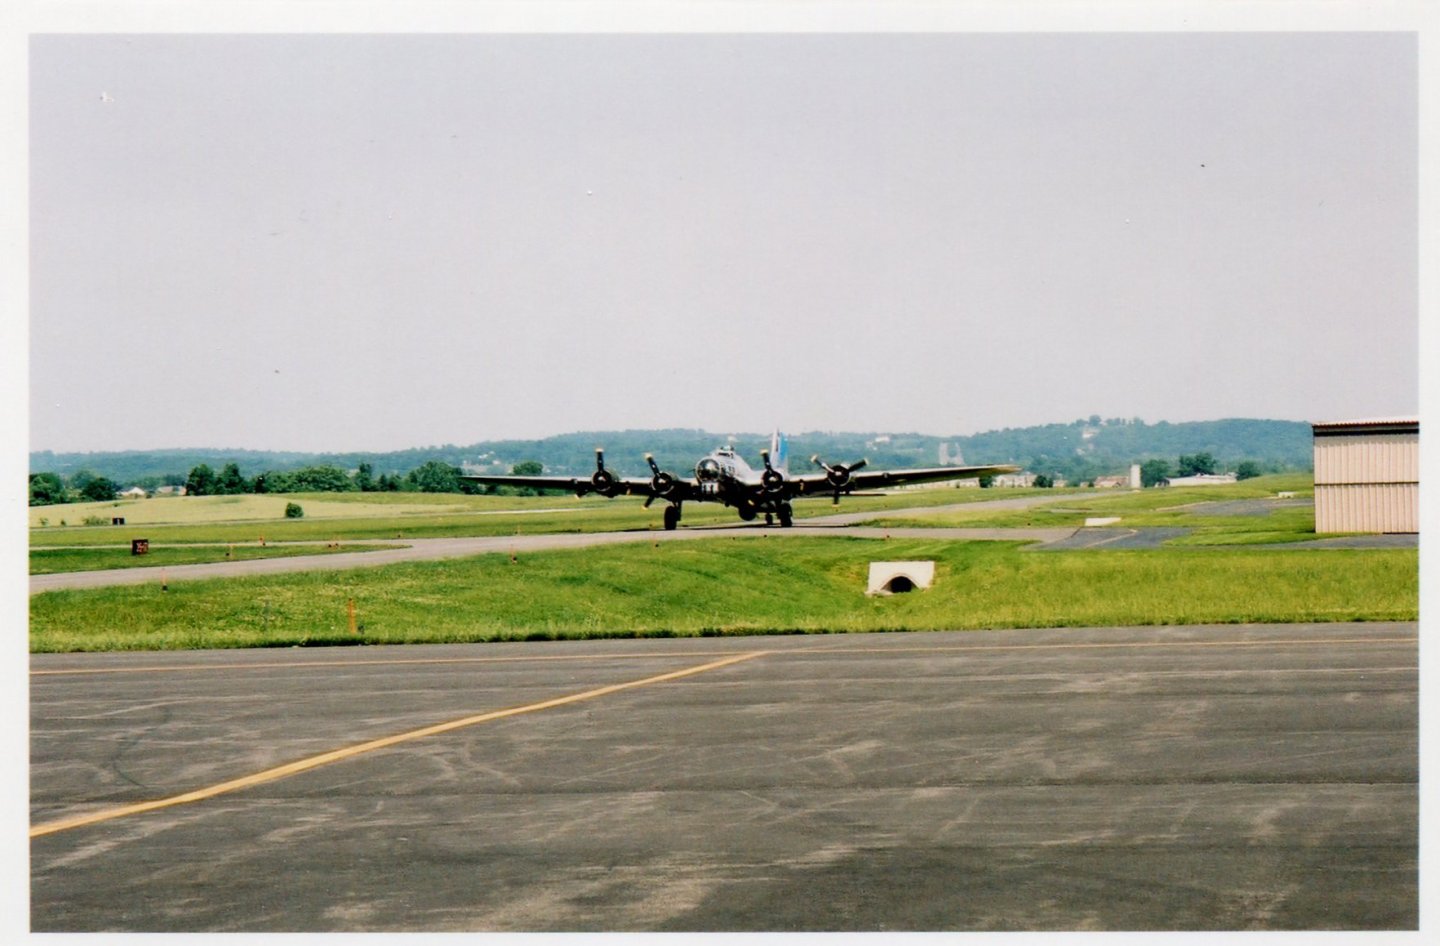
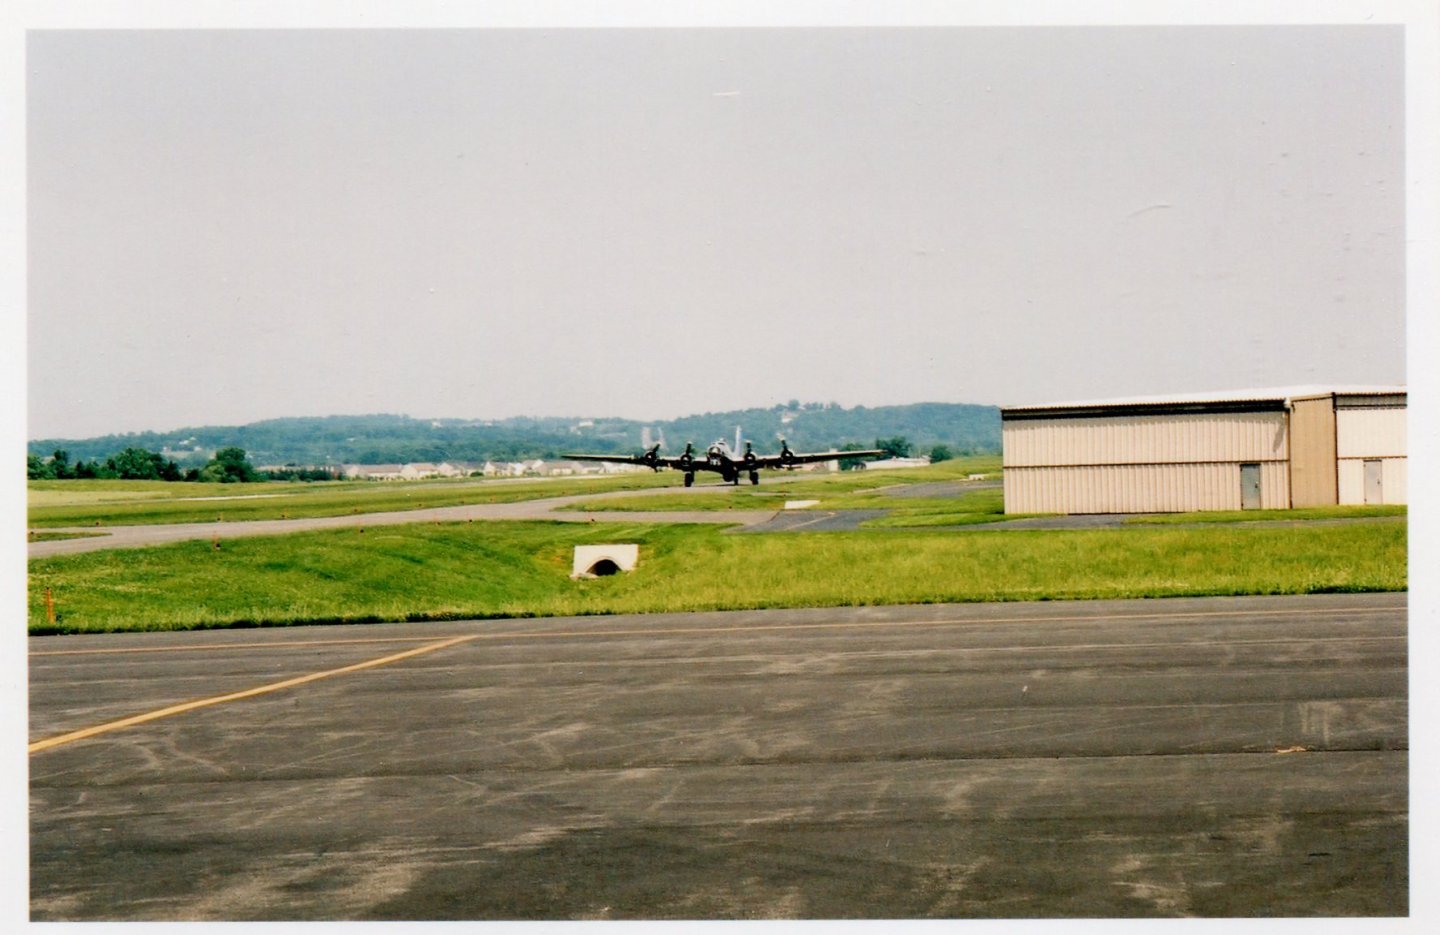
Some further information, for those folks old enough to remember the radio/TV personality Arthur Godfrey, here is a paragraph from the airport's history: In 1950, radio and TV personality Arthur Godfrey purchased the Leesburg Airpark and donated the property to the Town of Leesburg under the condition that the property continue to be used as a public airport for 20 years. Godfrey flew in and out of the Leesburg Airport for his weekly commute to New York City and popularized it on his national radio show as the "Old Cow Pasture."
-
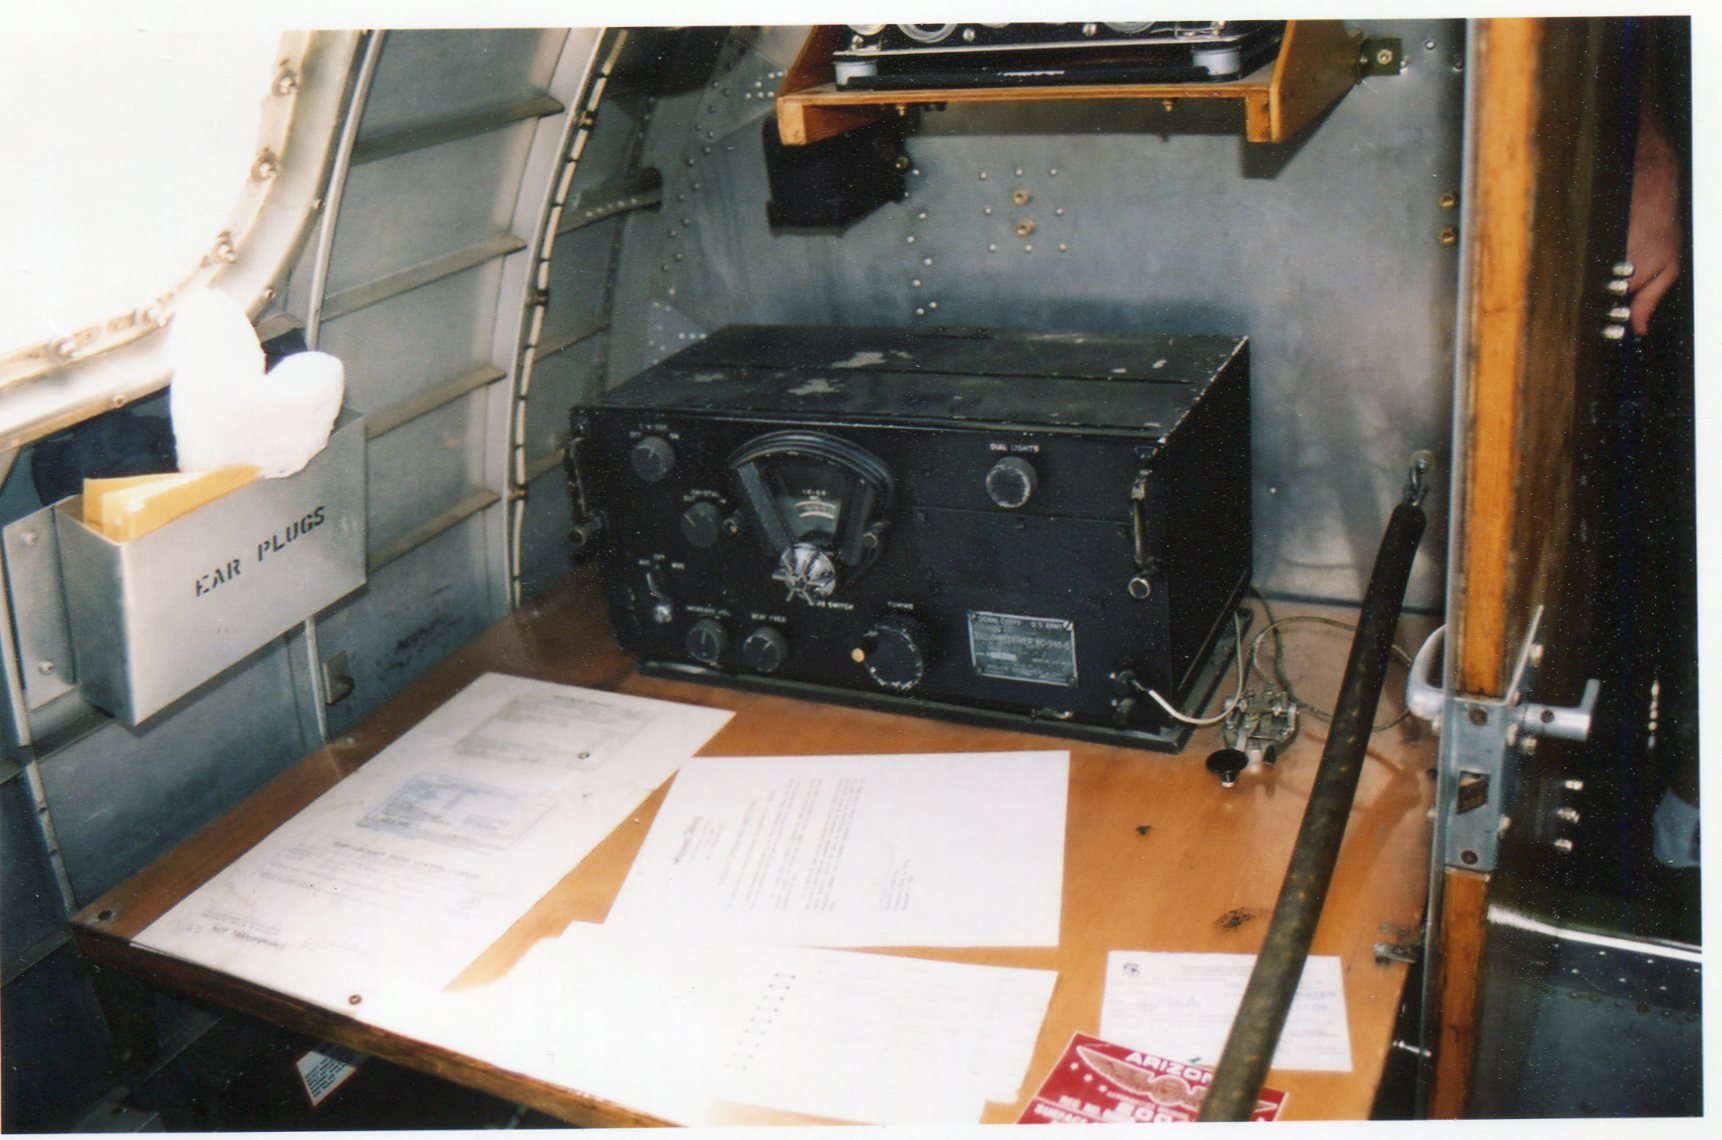
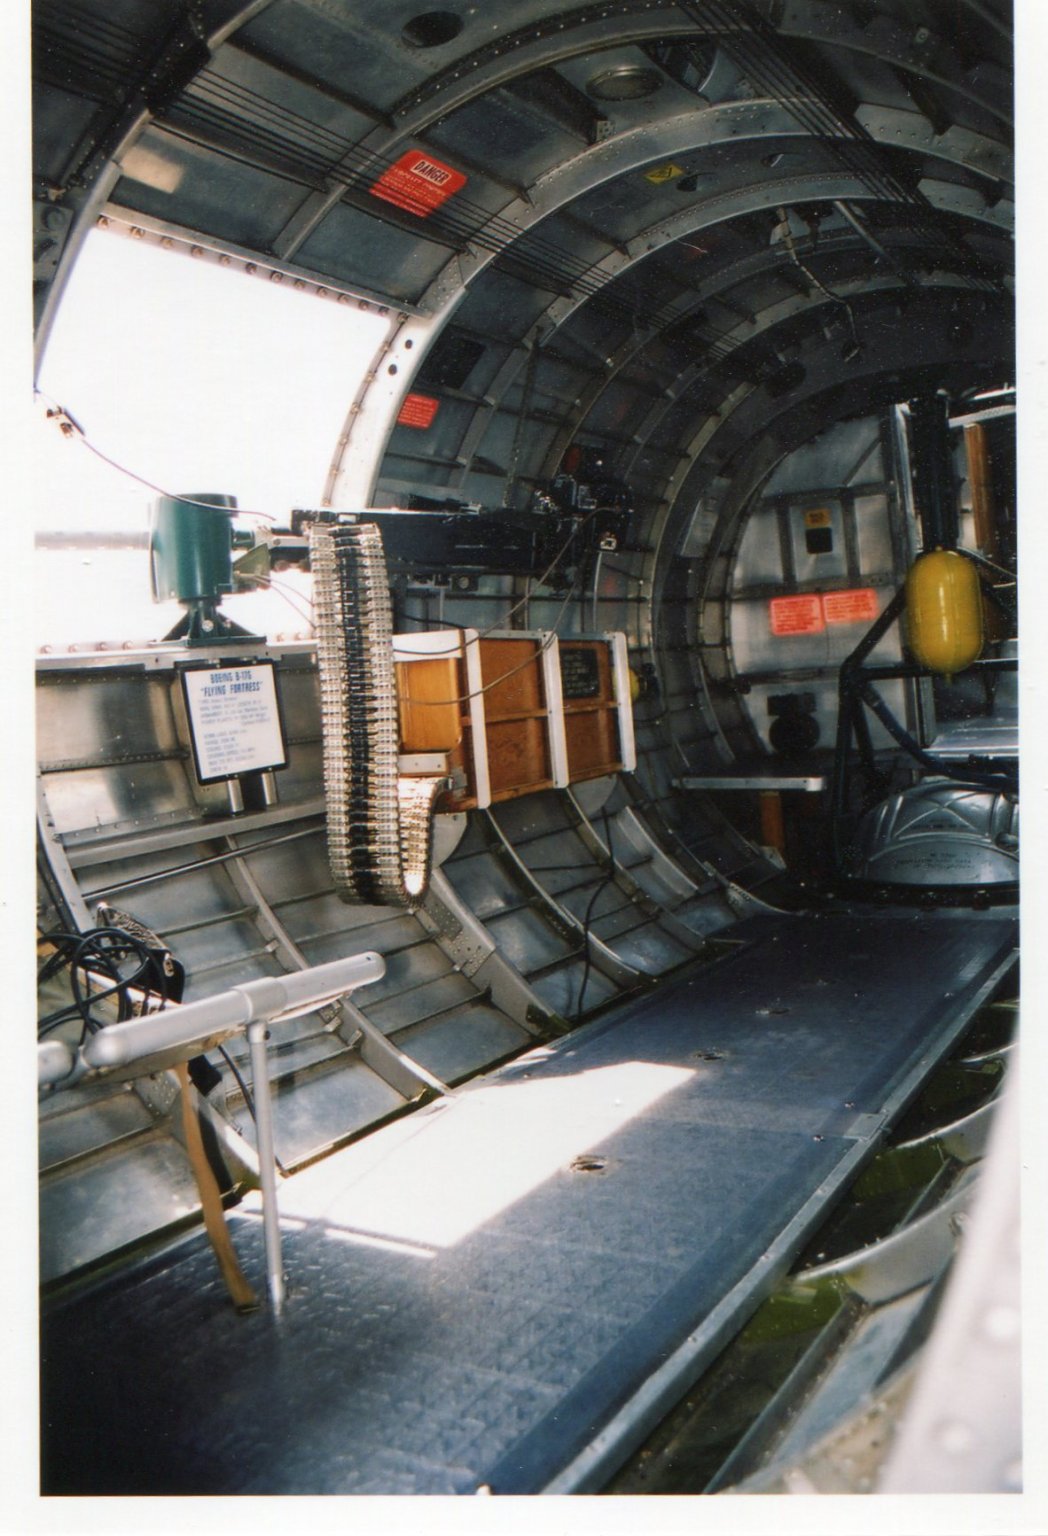
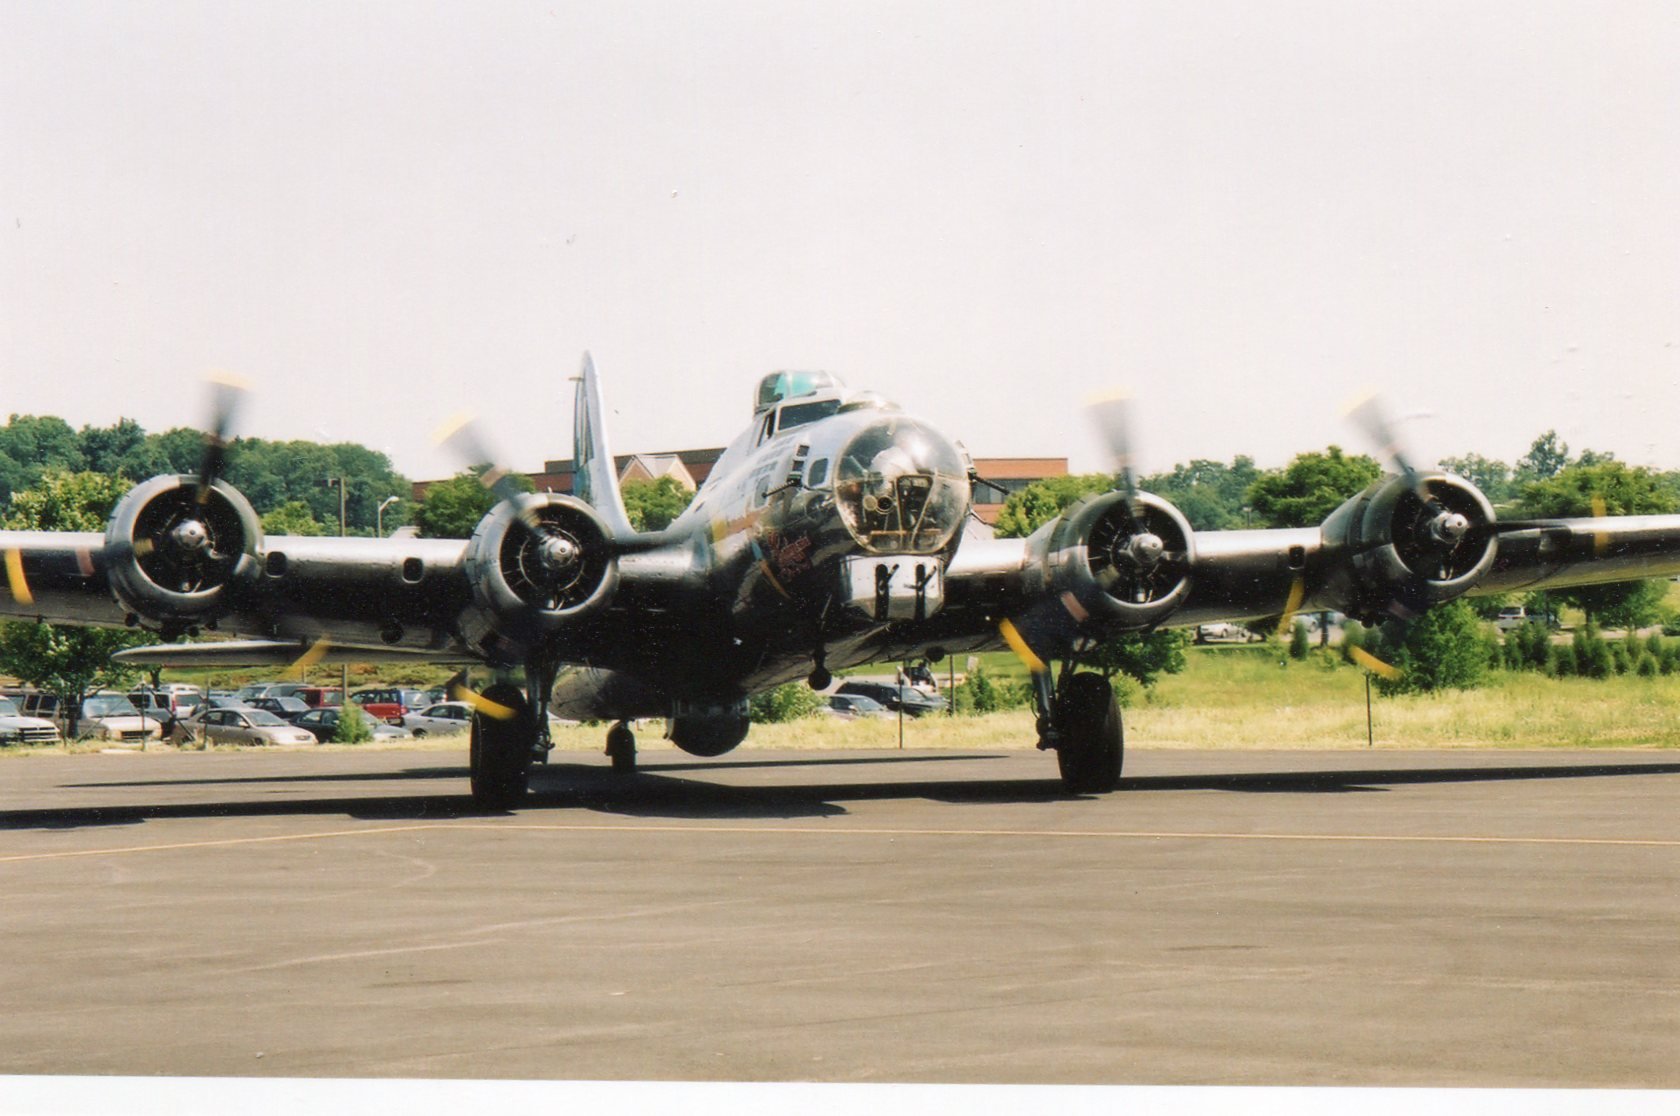
I have been looking for these photos since this build first started. I hope they are still of some interest. The are in the reverse order that i intended. Start with the taxiing and go up. The location is the Leesburg, VA airport.


-
“Ragove, that's way cool about your distant cousin owning that ship! Do you have any more info on it, such as a photograph or two?“ no photos I’m afraid. I read a book about the ship and it mention her owners near the end of her life. One was a Captain Gove (I don’t recall the first name now). There was enough info to find him in “The History and Genealogy of the Family of Gove” an extensive book on our family. Turns out I’m also a very distant cousin of Mark Twain, we are both descendants of one Edward Gove who came to Massachusetts in the 1640s. Edward Gove was also a very interesting character. Google his name.
-
I’ve looked too, since I discovered a distant cousin who owned her some time after she found floating with no crew. There doesn’t even seem to be a decent set of plans for scratch building.
-
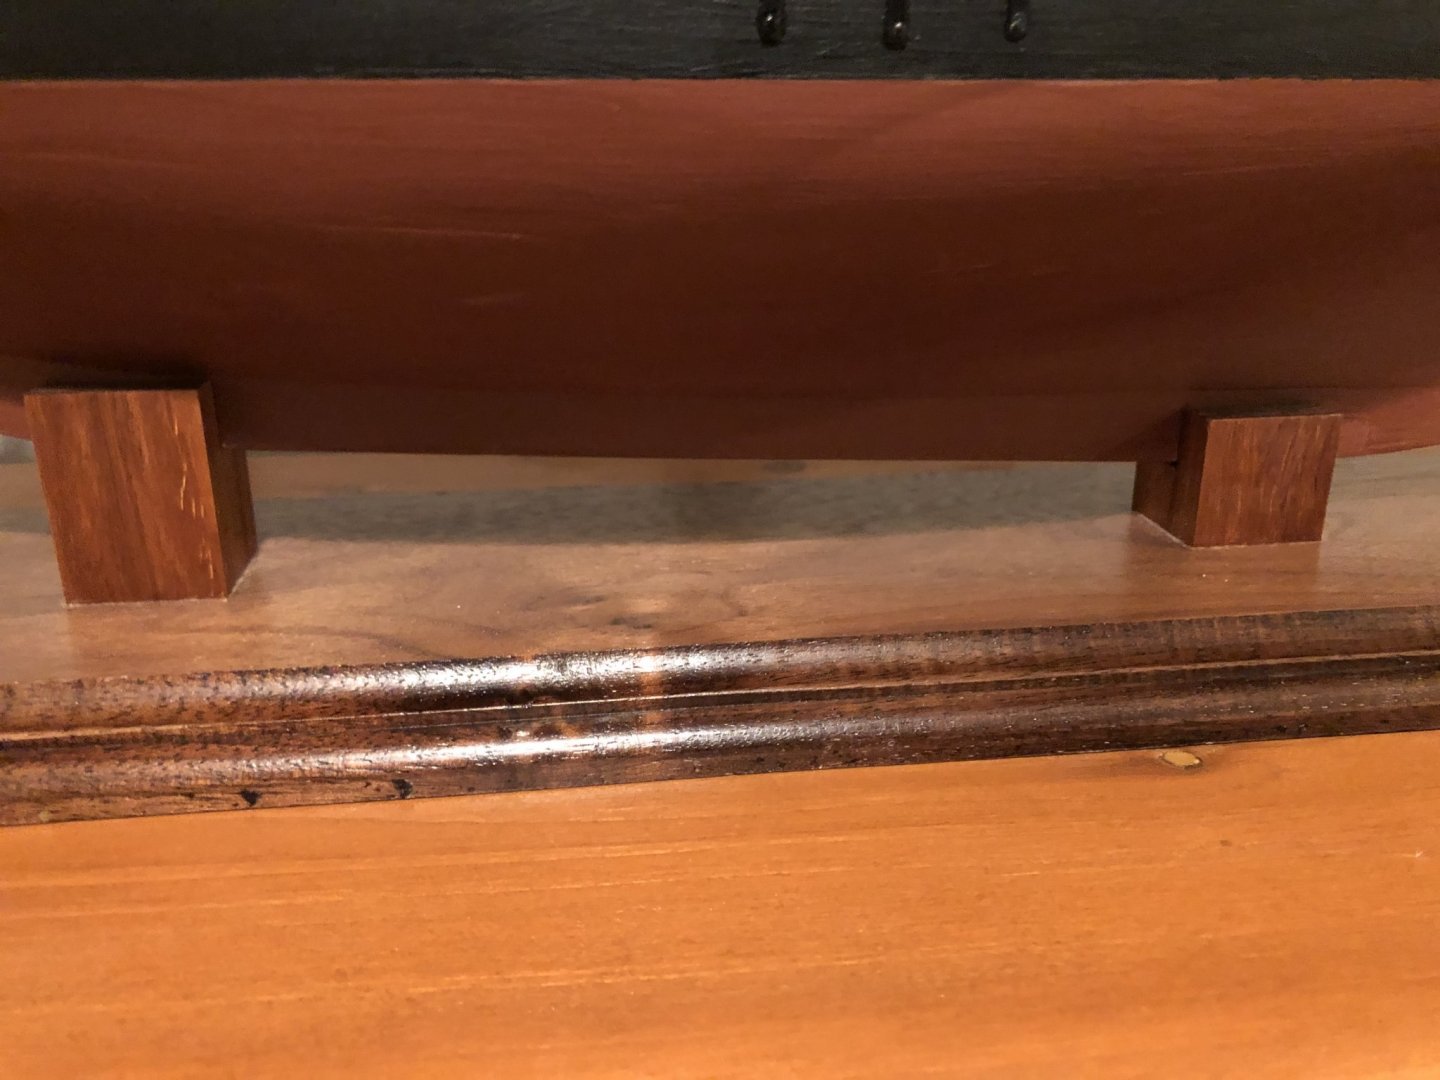
I mounted my Benjamin W Latham (similar profile to the Bluenose) using 2 walnut blocks with the same cross section but different heights.
-
It turns out that I hadn’t lost the decals. I put them in a “safe” place. Which really means hidden away until you run across them by accident after they are no longer needed.
-
The rails are now green.
-
Good point Kurt. I think I’d better paint them. 😁. I’ve been thinking about weathering the CoP, but not sure if I could do a proper job. There aren’t many photos of the CoP from which to work.
- 26 replies
-
- 1
-
-
- city of pekin
- model shipways
- (and 1 more)
-
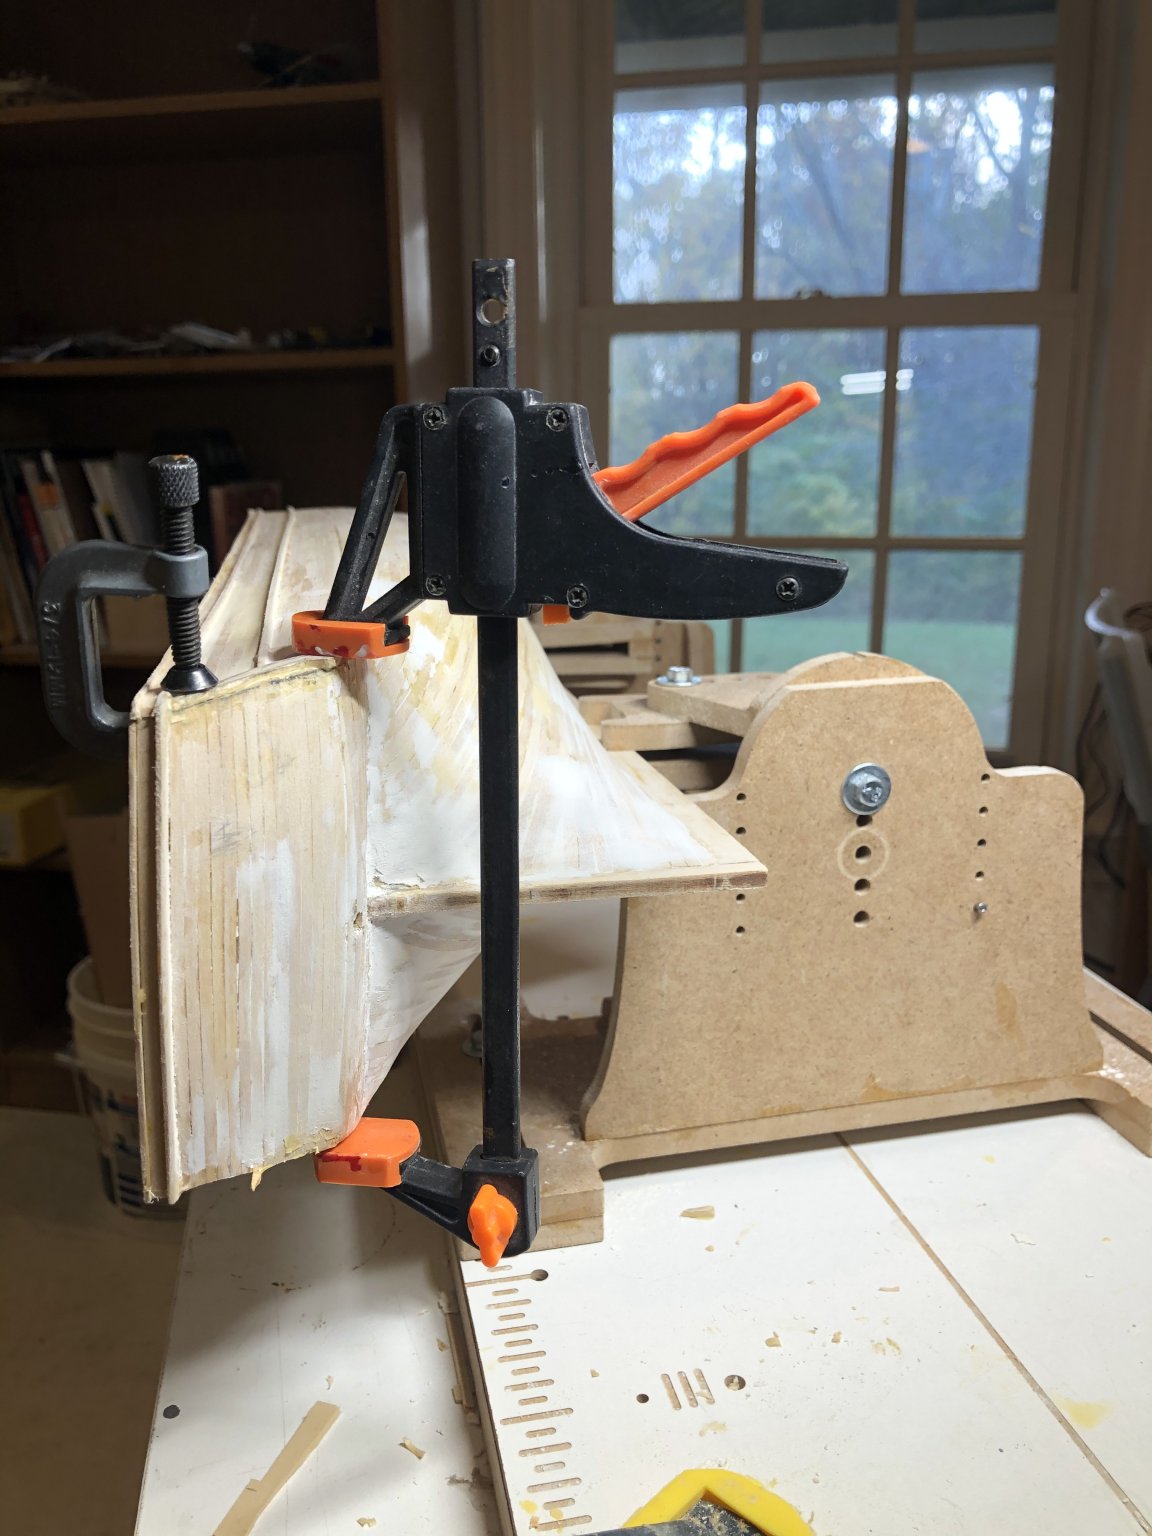
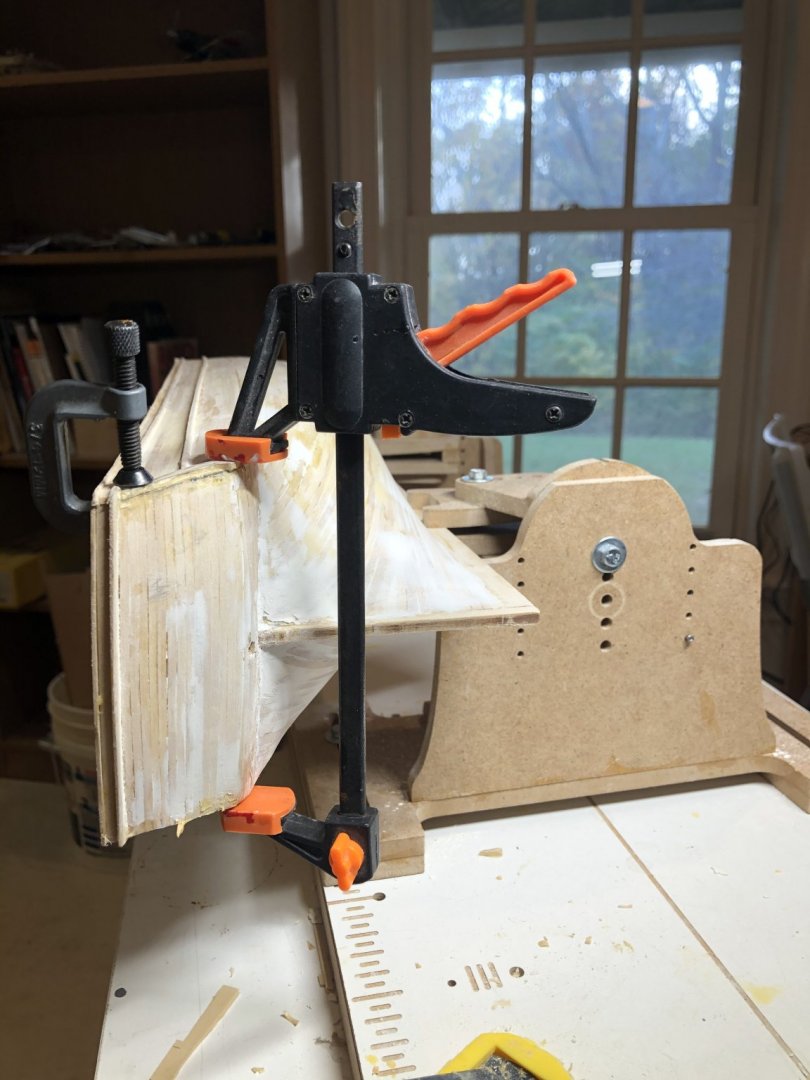
While trying to fit the fashion pieces at the stern I realized that my stern and transom did not agree with the plans. I had to rip out some planking and reshape the stern block. I should have been more careful with the shaping when I first did it. Maybe I learned a good lesson. Once again the building slip shows it’s versatility.


- 294 replies
-
- 3
-
-
- charles w morgan
- model shipways
- (and 1 more)
-
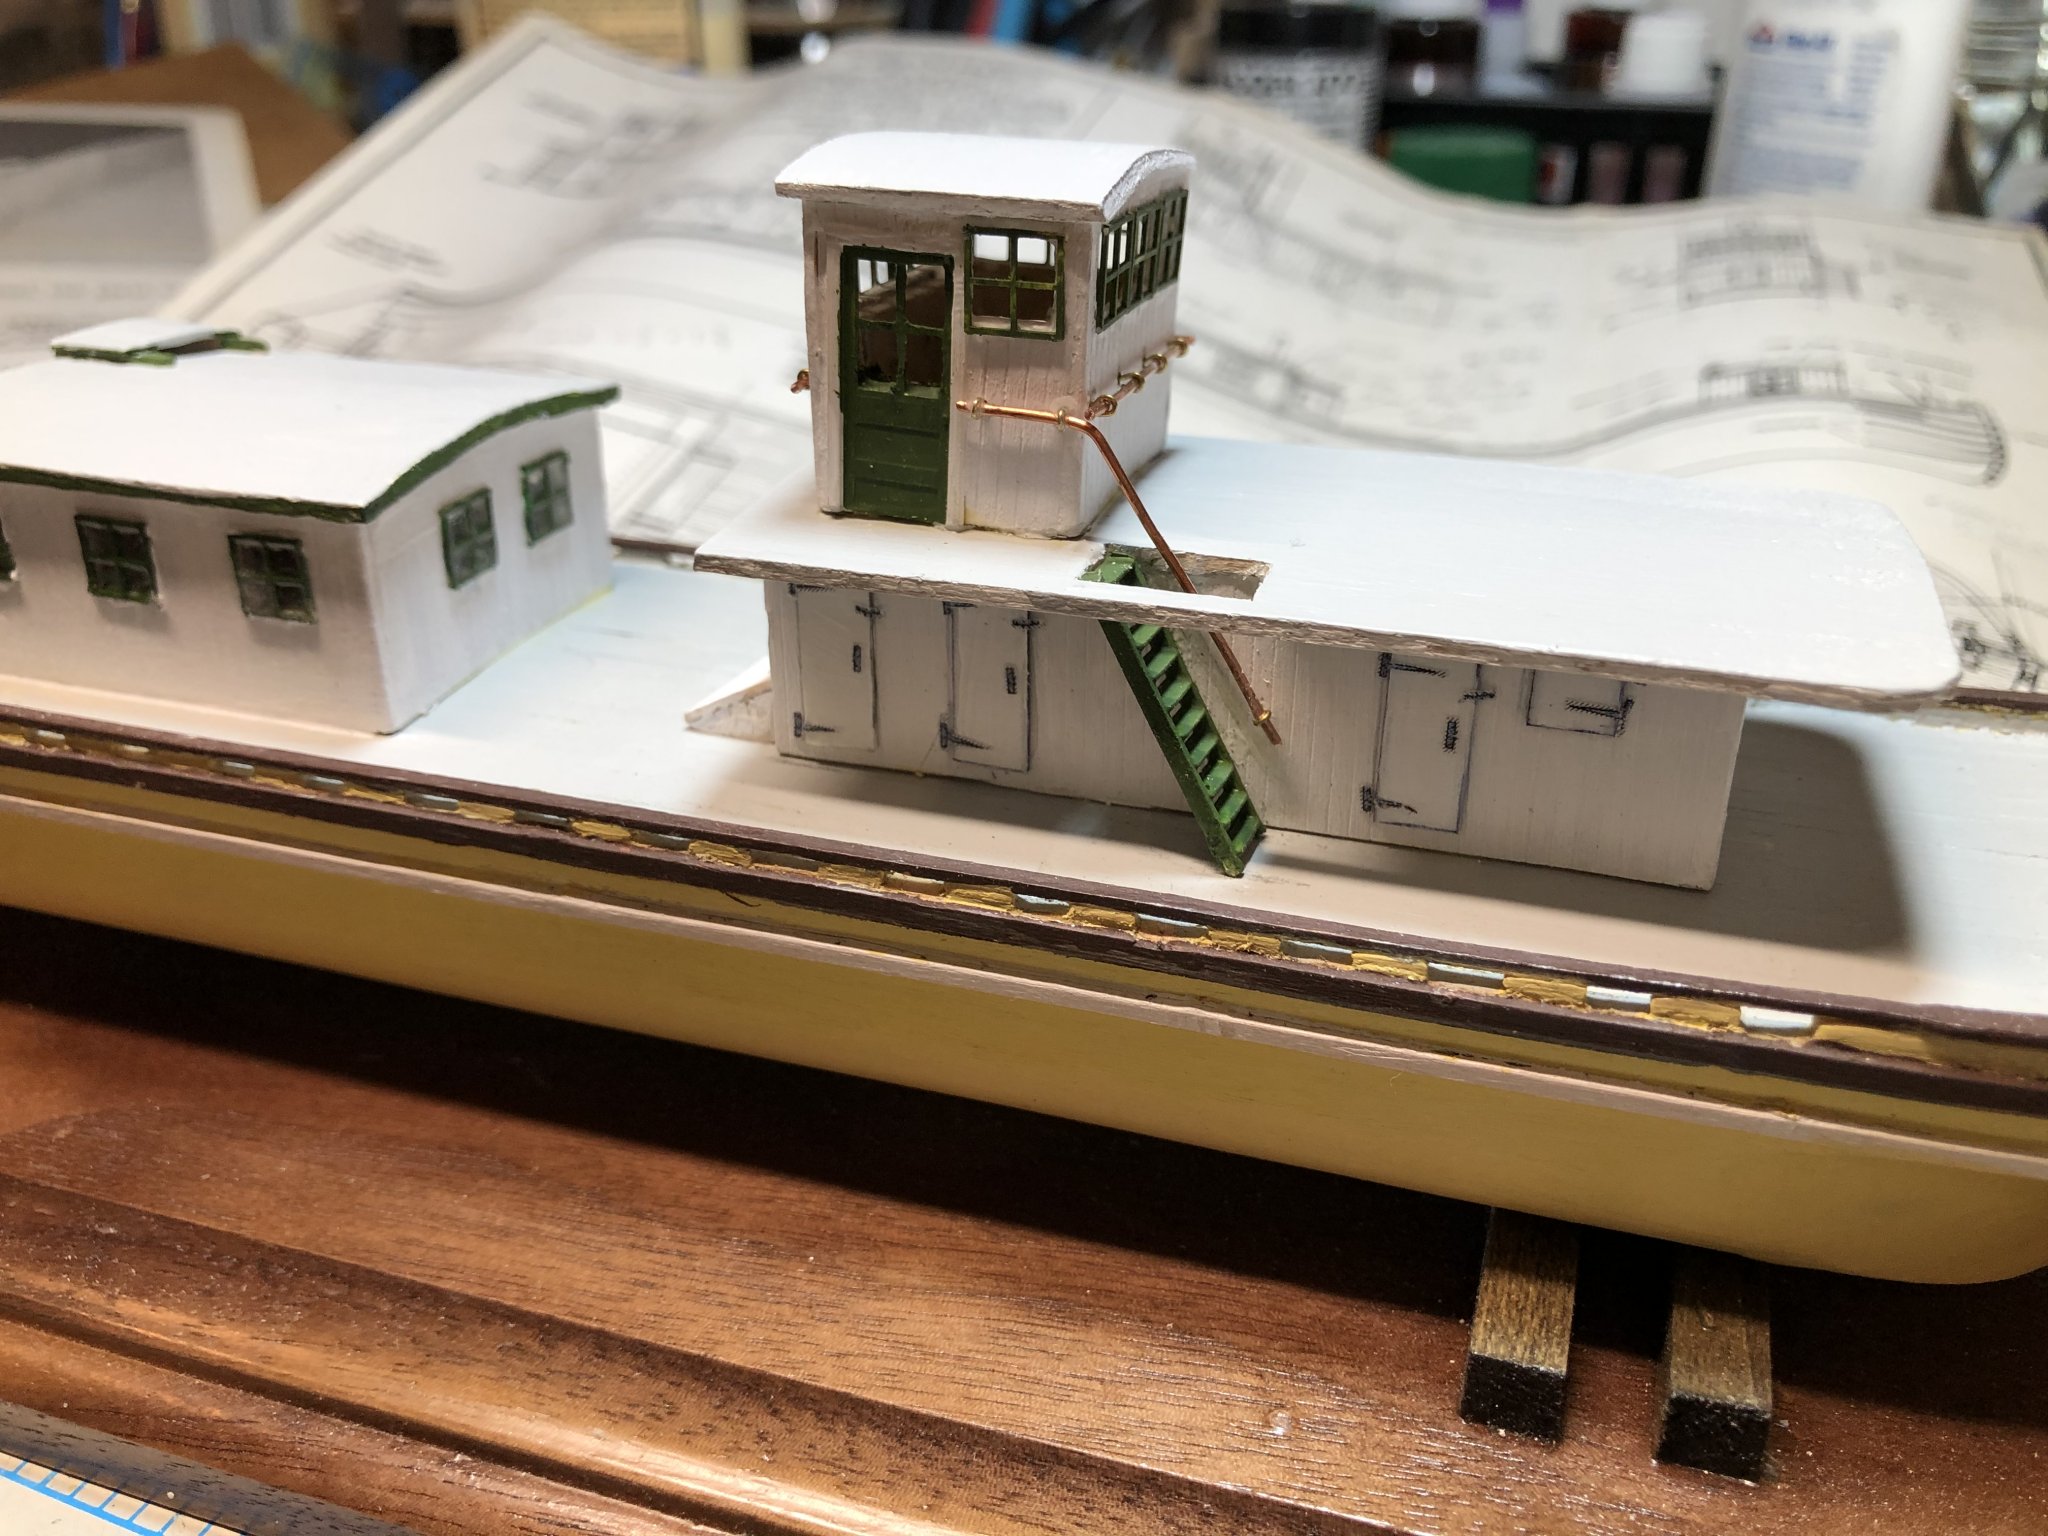
The captain of the CoP likes his new shiny rails on the pilot house but wonders if they should be painted green to match the other trim.

- 26 replies
-
- 5
-
-
- city of pekin
- model shipways
- (and 1 more)
-
When I was looking for an L10 kit I think my first hit was a hobby shop in Australia. Eventually I found a US store with it but I no longer remember where. I do know it wasn’t eBay. I don’t remember the price but is was probably around $40
-
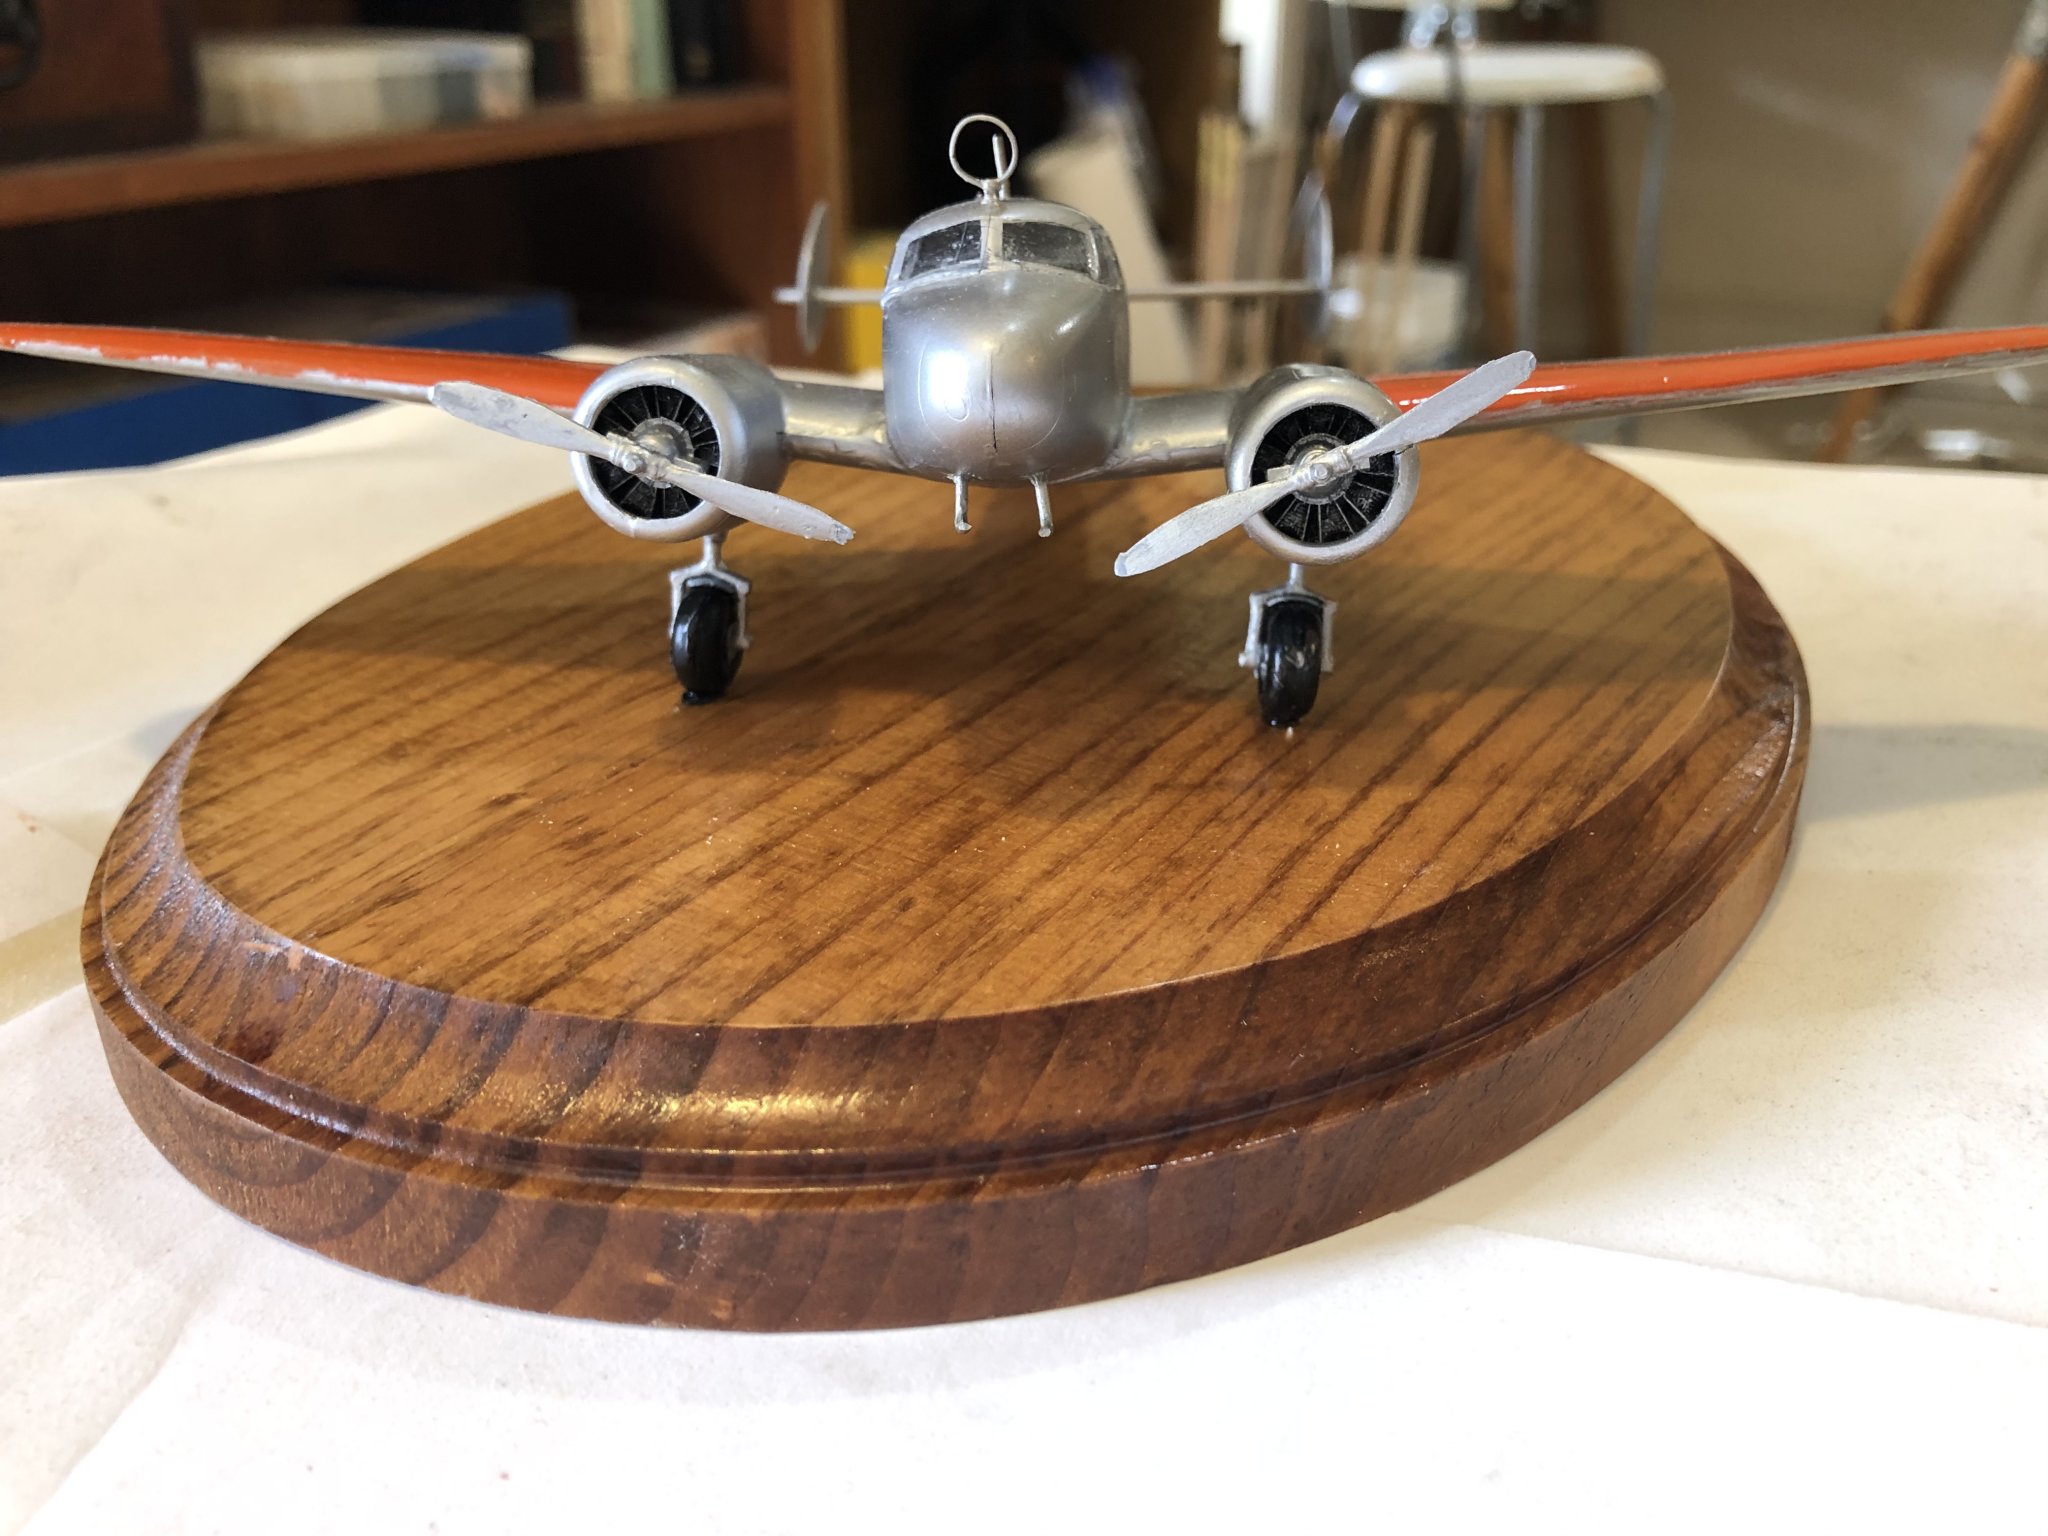
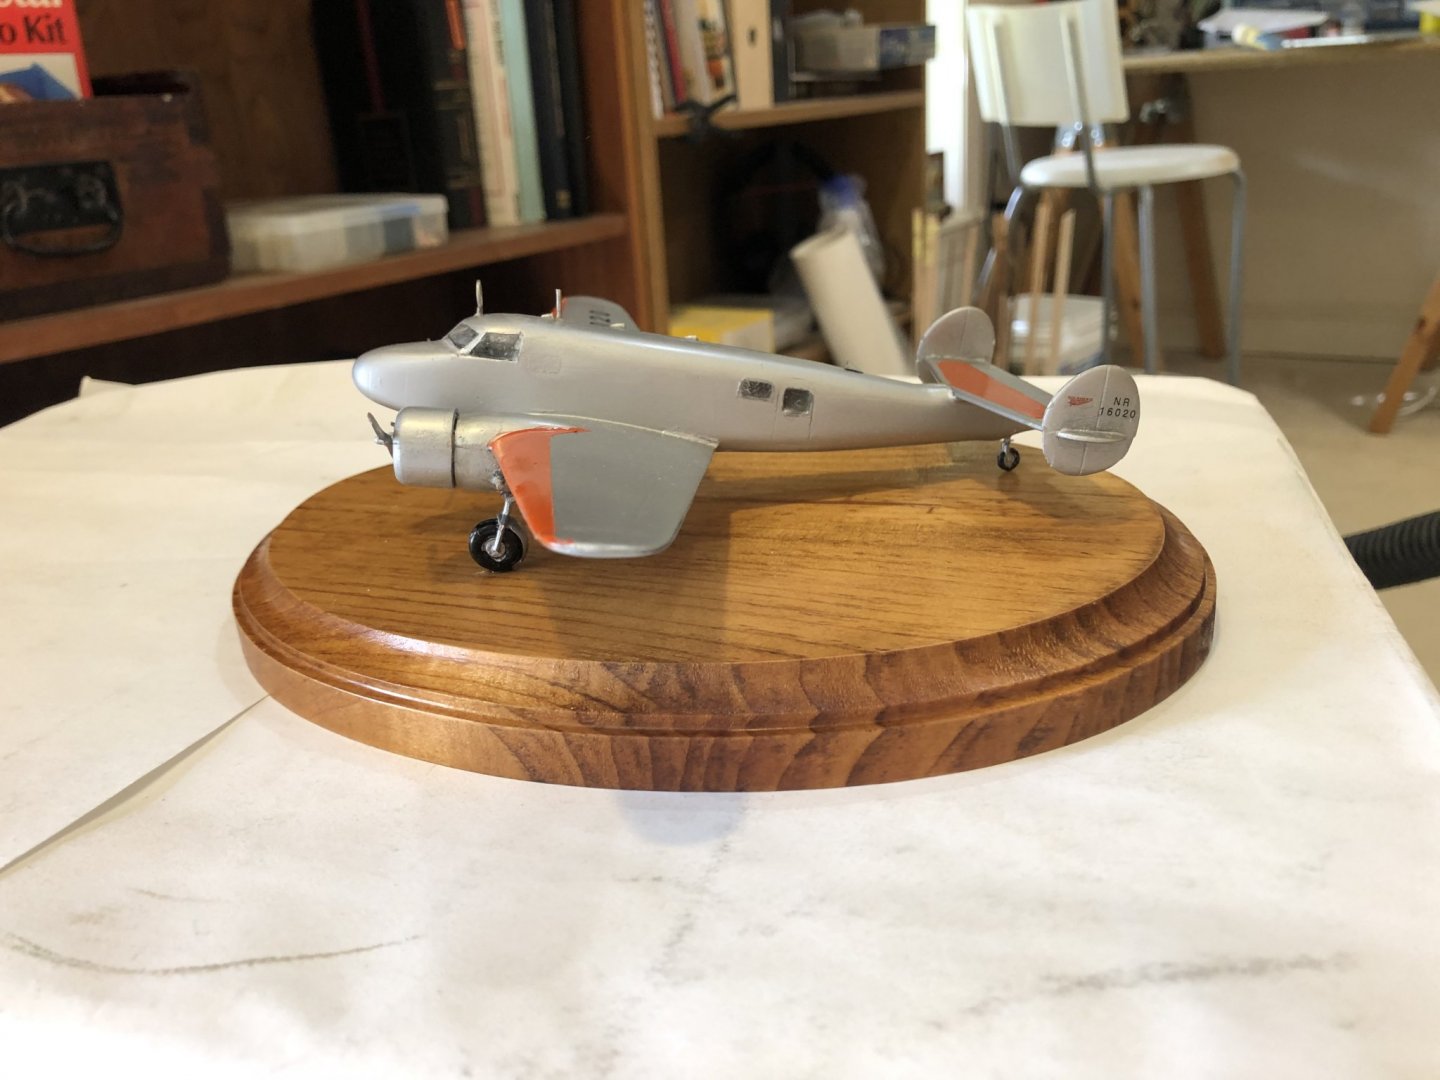
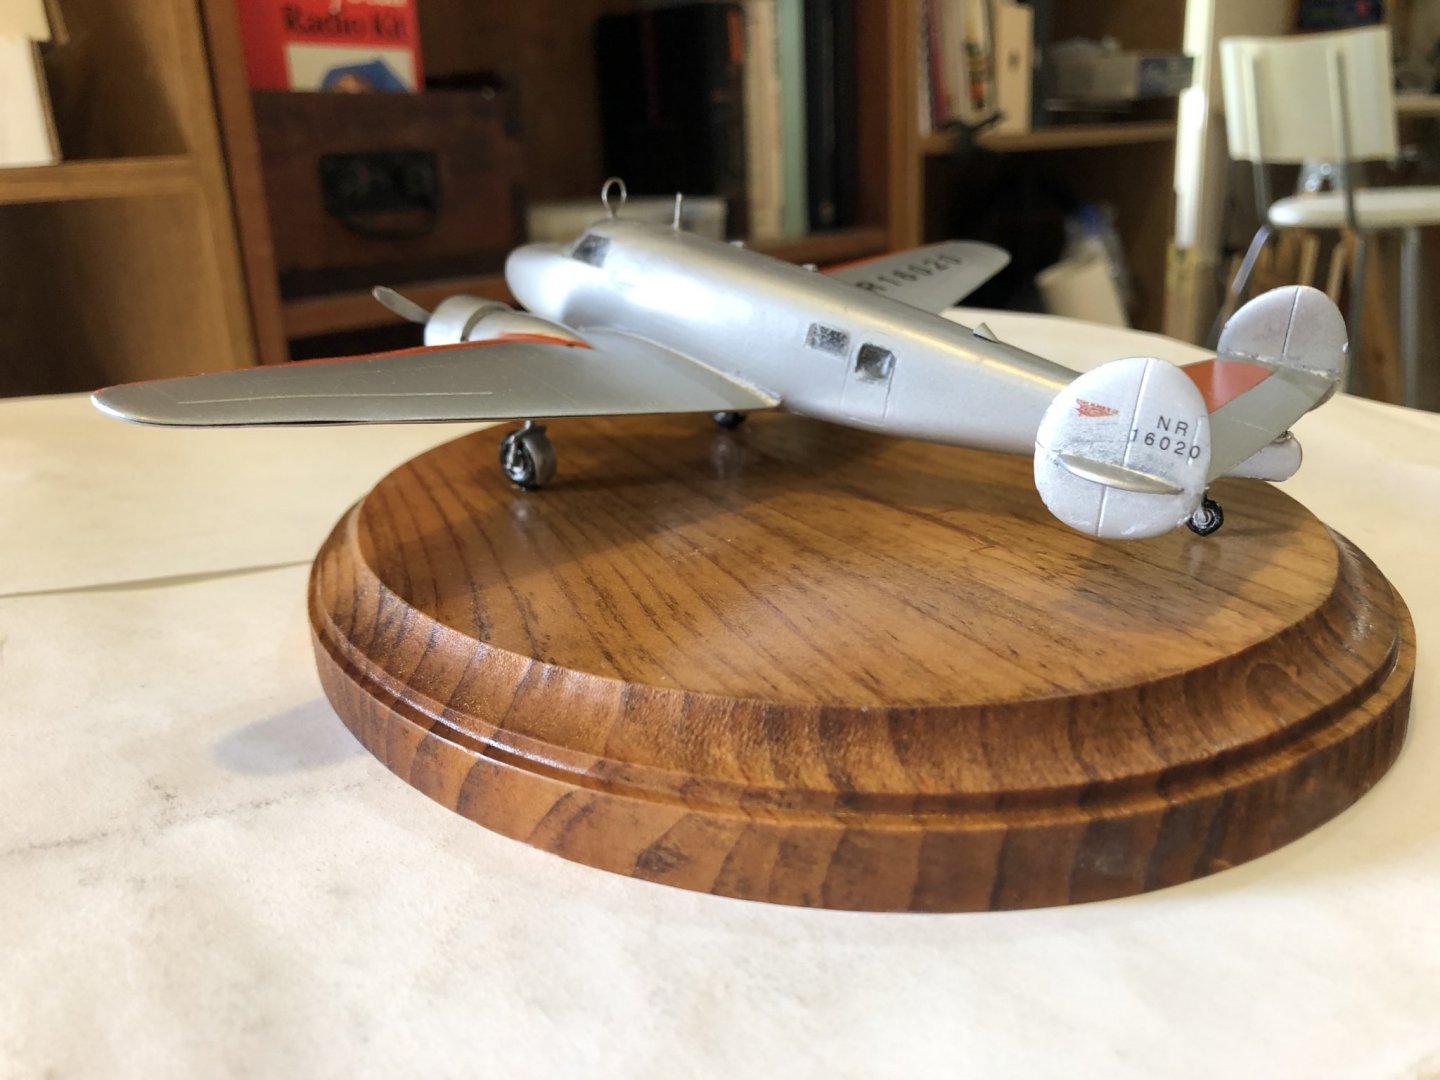
My ship model experience helped here. The DF loop above the cockpit was made from a brass hoop left over from a ship kit. I did have to re-size it a bit.
-
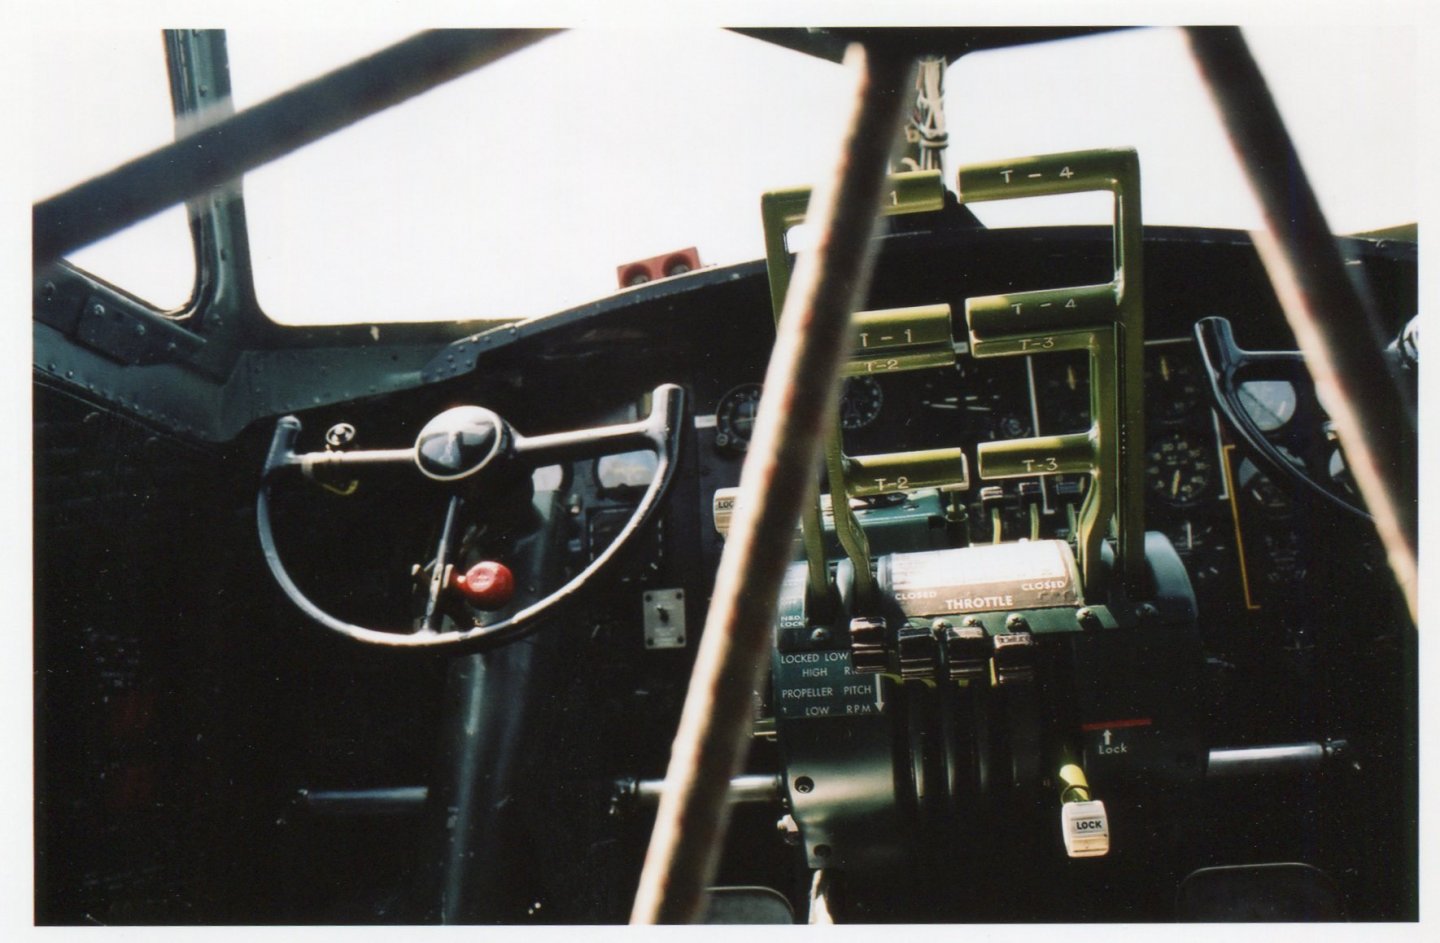
I was actually tempted to buy another copy of this kit (Special Hobby) to see if I could do it better now that I have some experience. But it seems to be unavailable. As for classic aircraft rides, I had an opportunity to get a ride in a B17 when it was at an air show in Leesburg, VA. But at close to $400 I had to pass it up.
-
Thanks for the link. Would be fun to have a ride in one of those.
-
Progress photo. Working on the pilot house. I am considering putting a wheel in there like I did on my Chaperon. I’ve also added some hinges. I drew them in SketchUp, made multiple copies and then shrunk the image until it looked about right. Then I cut them from the paper and attached with a dab of white glue.
- 26 replies
-
- 5
-
-
- city of pekin
- model shipways
- (and 1 more)
-
Ok, here’s couple more angles. Thanks for the nice comment. the photos really emphasize the flaws in the finishing!


-
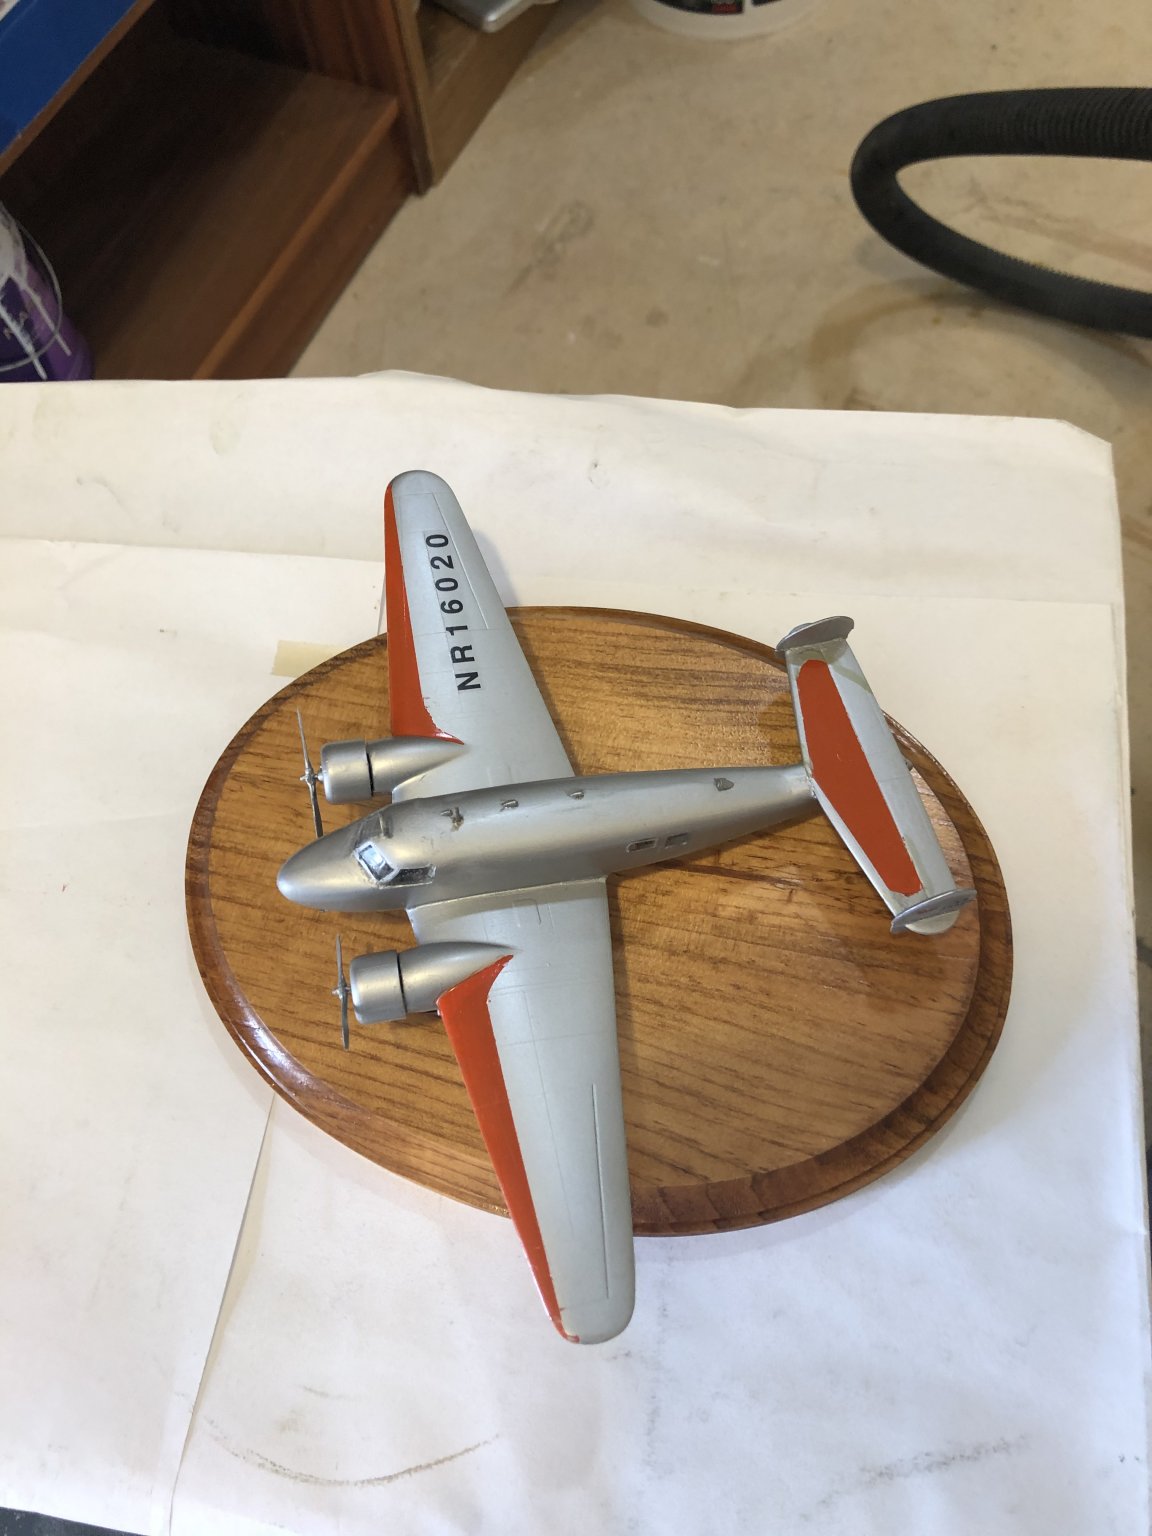
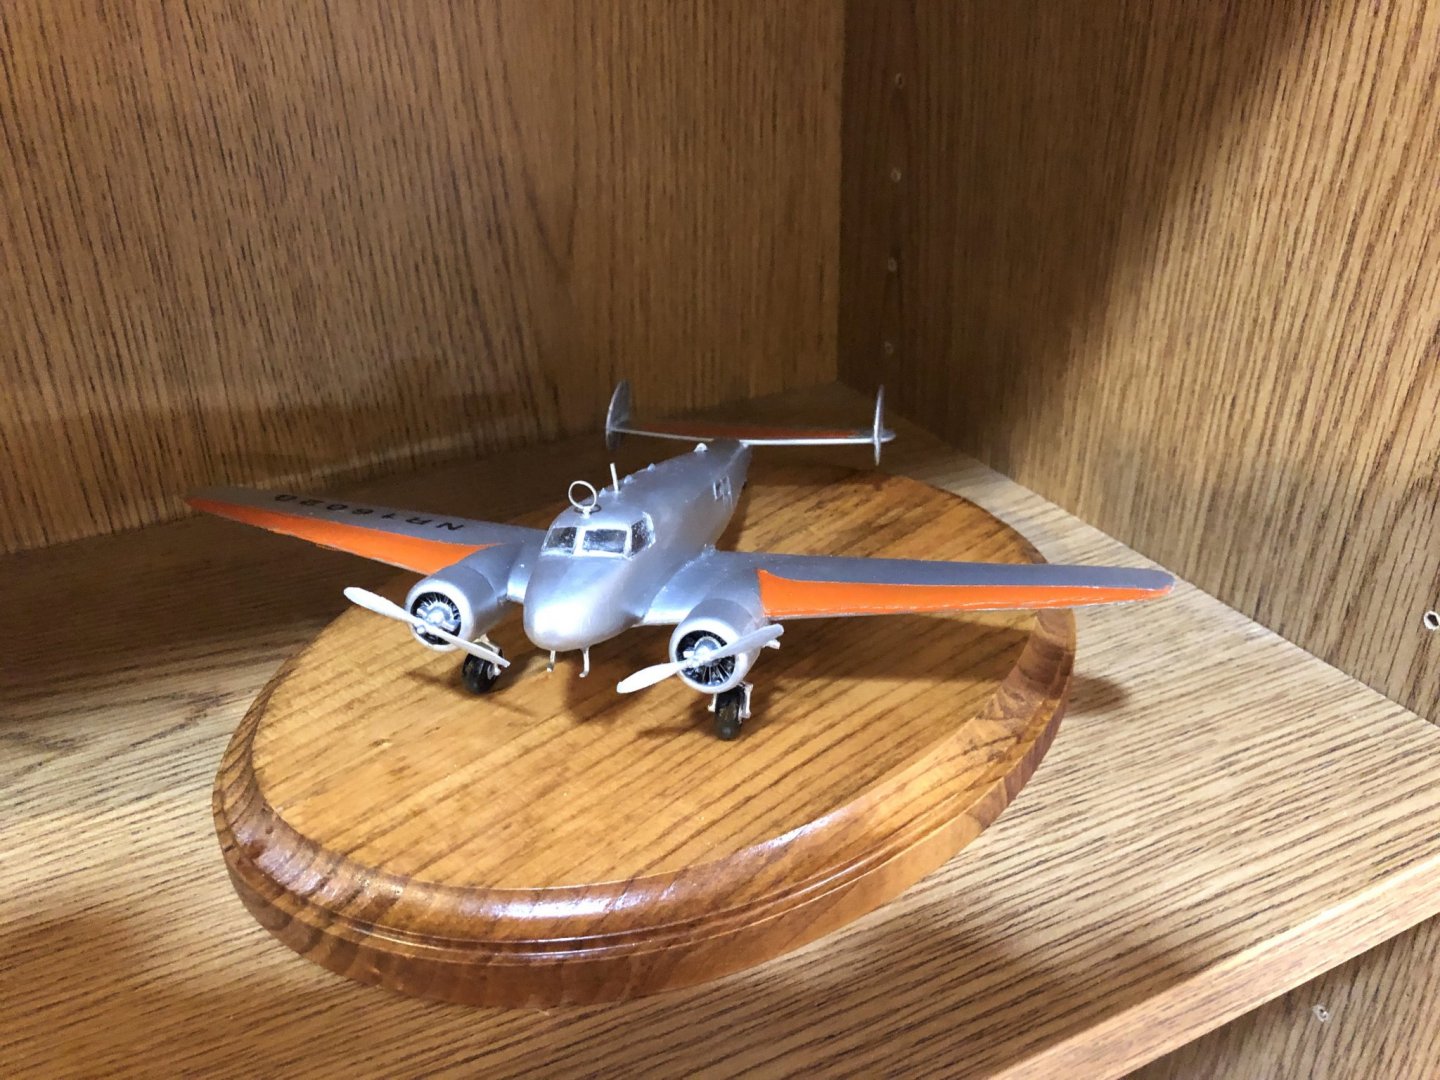
I started this kit with the intent of making the Amelia Earhart version of this iconic Lockheed aircraft. I forgot when I started it was so long ago. It is a very poorly made and poorly fitting kit. Attaching things like landing gear is pure guess work as there are no reference points or indents to show where the struts go. Ditto for many other parts. I kept putting the kit aside in frustration with filling and sanding and filling and sanding over and over. At one point I tossed it in the trash but later retrieved it. I think that’s when I lost the decals. 😣 Anyway I finally finished it with a philosophy of good enough, far from perfect. The only positive outcome was that I learned how to produce my own decals.
- 13 replies
-
- 11
-
-
I misread the drawing of the “fashion piece” in the instruction book. I was seeing it applied to the stern. I realized before getting very far that it is applied to the side of the hull along the edge where the side meets the stern. I have include a picture as I thought it shows the usefulness of the building slip more than the fashion piece.
- 294 replies
-
- 3
-
-
- charles w morgan
- model shipways
- (and 1 more)
-
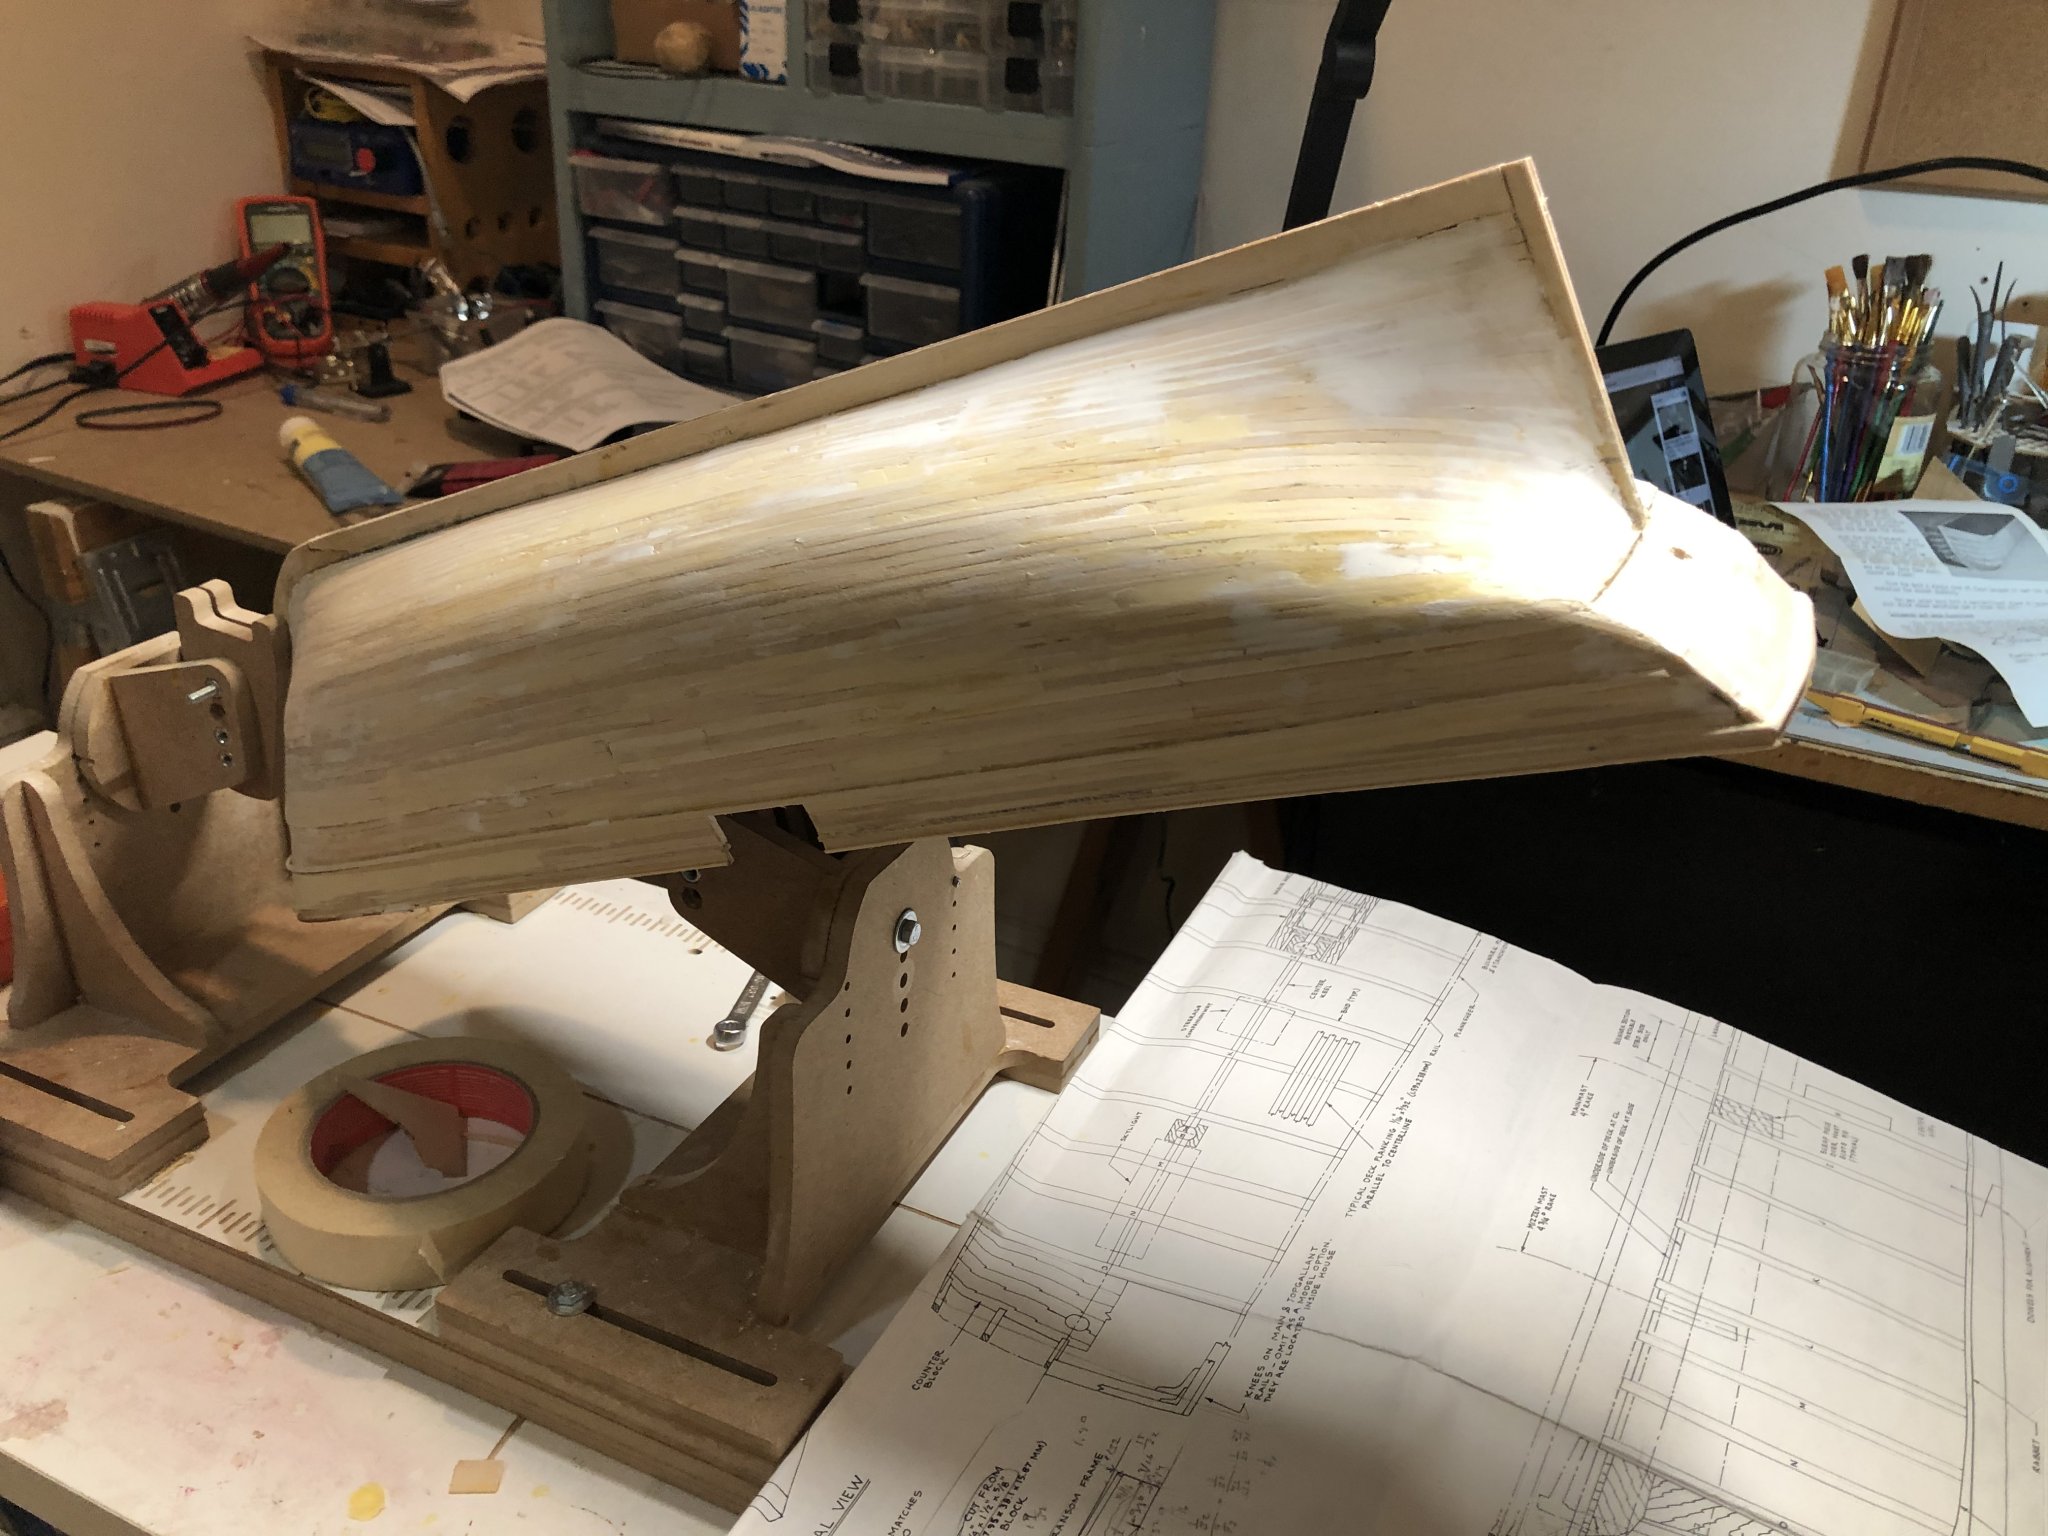
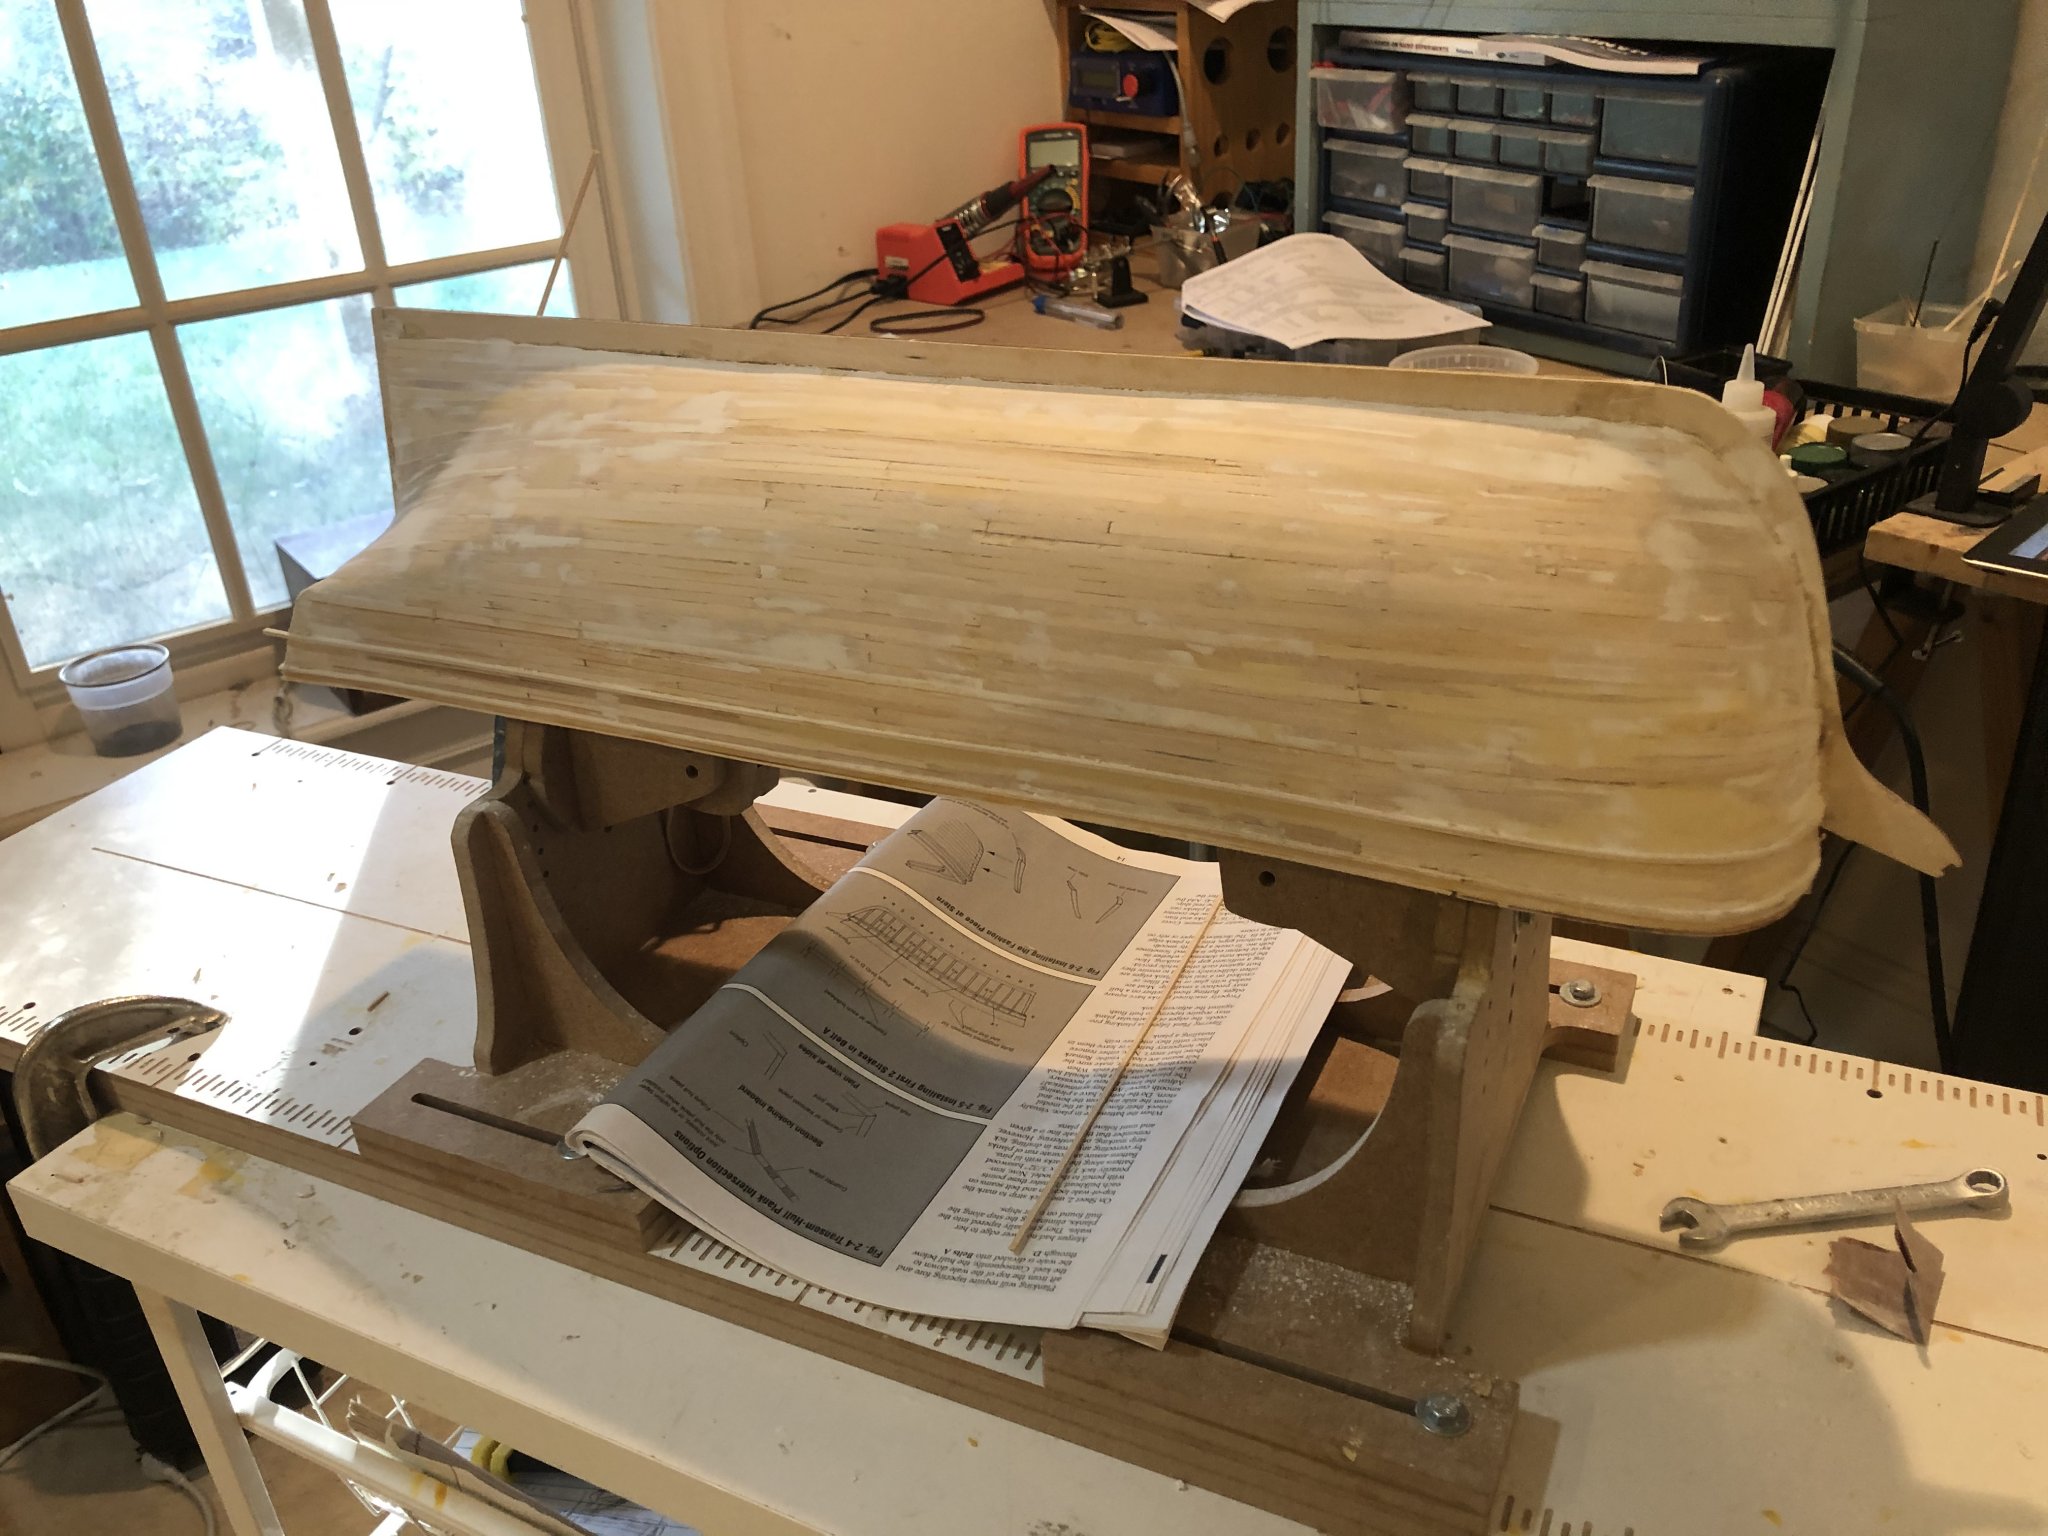
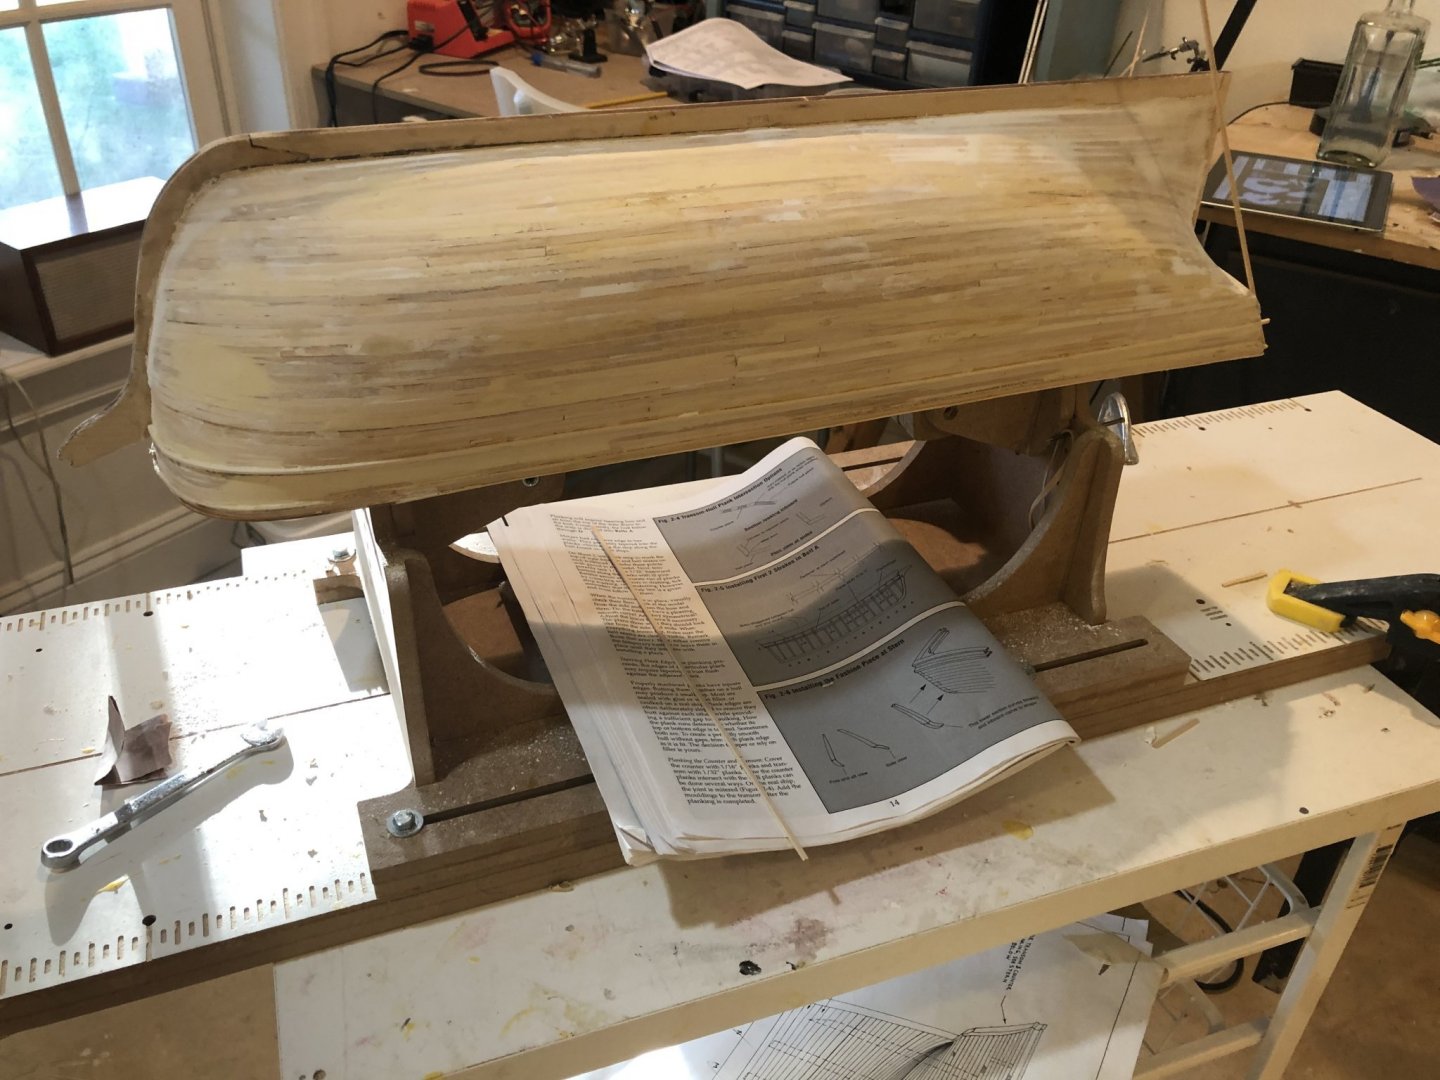
I think I have the hull smooth enough for the coppering. It may need a tad more in the painted areas. I will need to prime it to see how it looks. Started fashioning the “fashion piece” on the stern, hence the strip wood sticking up.

- 294 replies
-
- 6
-
-
- charles w morgan
- model shipways
- (and 1 more)
-
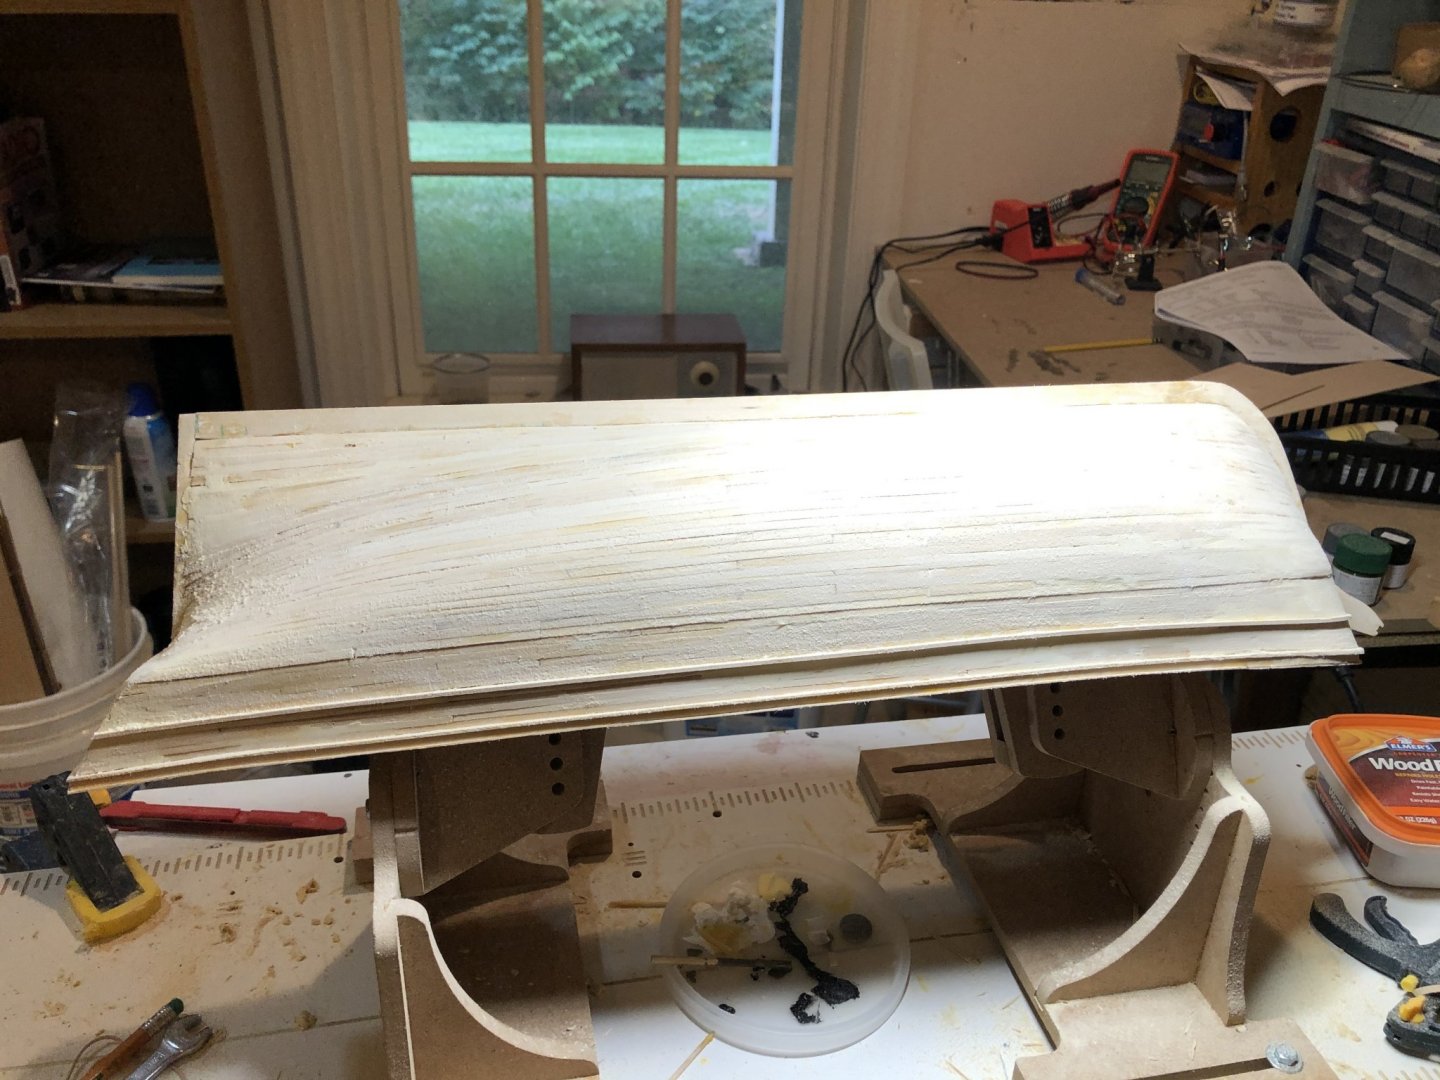
In the process of smoothing the planking and filling in hollow spots. Just under 4 months since I started the planking and I was in Colorado for a month so nothing was done in the shipyard.
- 294 replies
-
- 7
-
-
- charles w morgan
- model shipways
- (and 1 more)