
HardeeHarHar
-
Posts
615 -
Joined
-
Last visited
Content Type
Profiles
Forums
Gallery
Events
Everything posted by HardeeHarHar
-
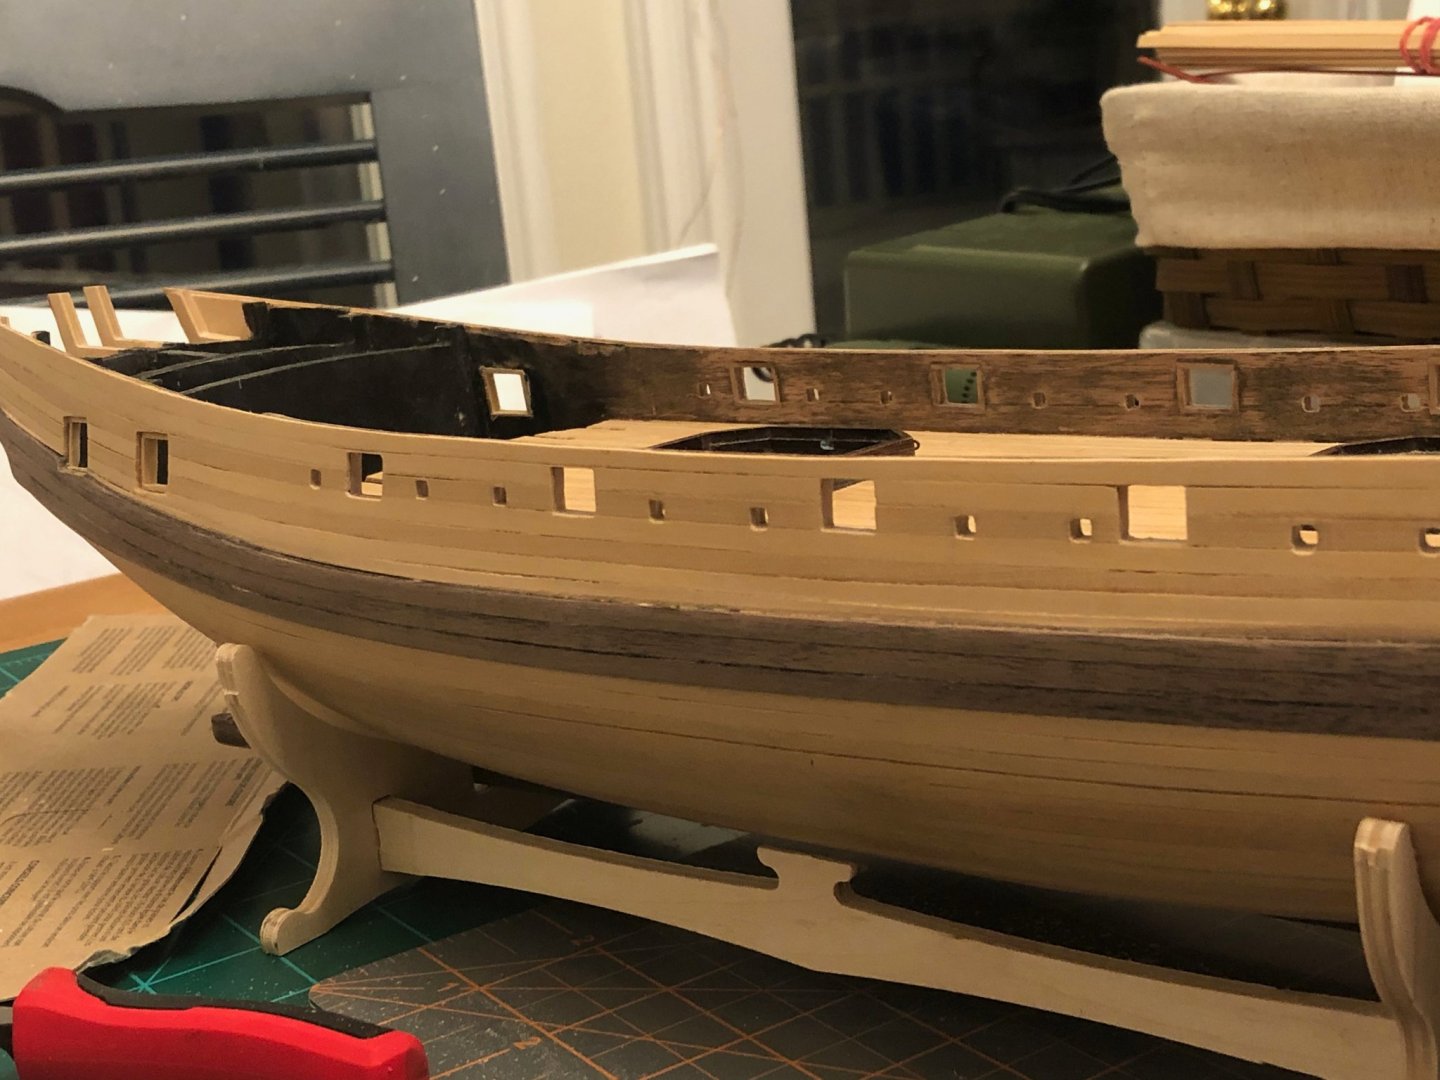
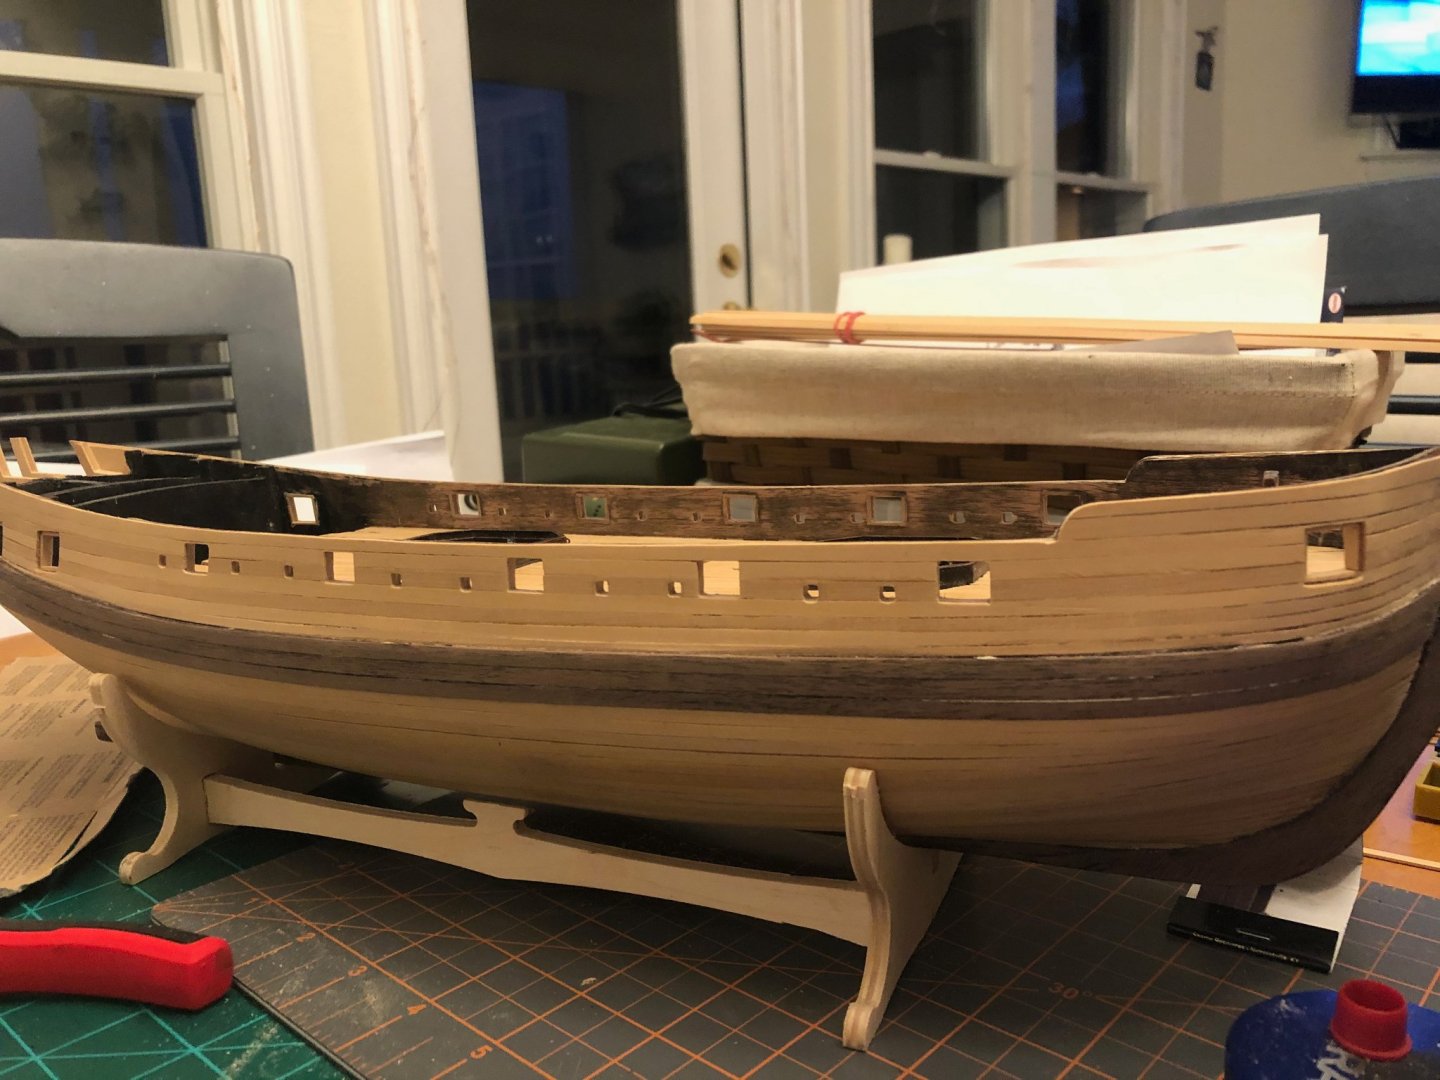
 I finally received our first John Noble for our place on Roanoke Island, NC. I should note that the picture below isn't it, because I took it to the framers before I took a picture of it. Doh. I got it as an anniversary gift for the Admiral, it is a lithograph of a man in the rigging entitled "Dying in the English Kill", with a unique perspective: My Granado is going slowly but surely, in ebbs and flows, as I attempt to try to understand all the options and approaches available and navigate appropriately. I completed lining (and even un-lining, and relining) the gunports without lids. I had inadvertently lined the chase ports and planked them as done with the gunports. Not too bad of a no-brainer, as I could just file it back (un-lining) and reline as it was supposed to be, absent of the boxwood planking this time. I also sanded the wale and false keel back down, and am preparing to cover most of the plank, wale and deck with Minwax Tung Oil or Watco Danish Oil. I am still resisting painting the wale black and am leaning towards leaving it and all the boxwood planking just oiled, not painted. You can tell the inner bulwark still needs some sanding prior to painting red ochre, which I am currently planning on doing, as I like the look of the blood red gun ports (was that the intention?). If the wale and false keel and hull below the waterline don't look great plain, then I will get the paints out and buy an Iwata Neo (which I am likely to do anyway..., because even little boats cost lots of money to build apparently!!!) I have wood conditioner I intend to use to help the Tung or Danish oil, and I may use a dark stain on the wale/and false keel before I tung oil it (as I had done earlier (see earlier photos), but a little to heavy handedly). Opinions and suggestions still being accepted and encouraged! 😉 My ship modeling colleague Tomasz suggested I might want to use some dilute glue and wood dust to pack the cracks before oiling, which I appreciated even if I also semi-dread undertaking as there are a LOT of cracks 😉 to fill and sand.
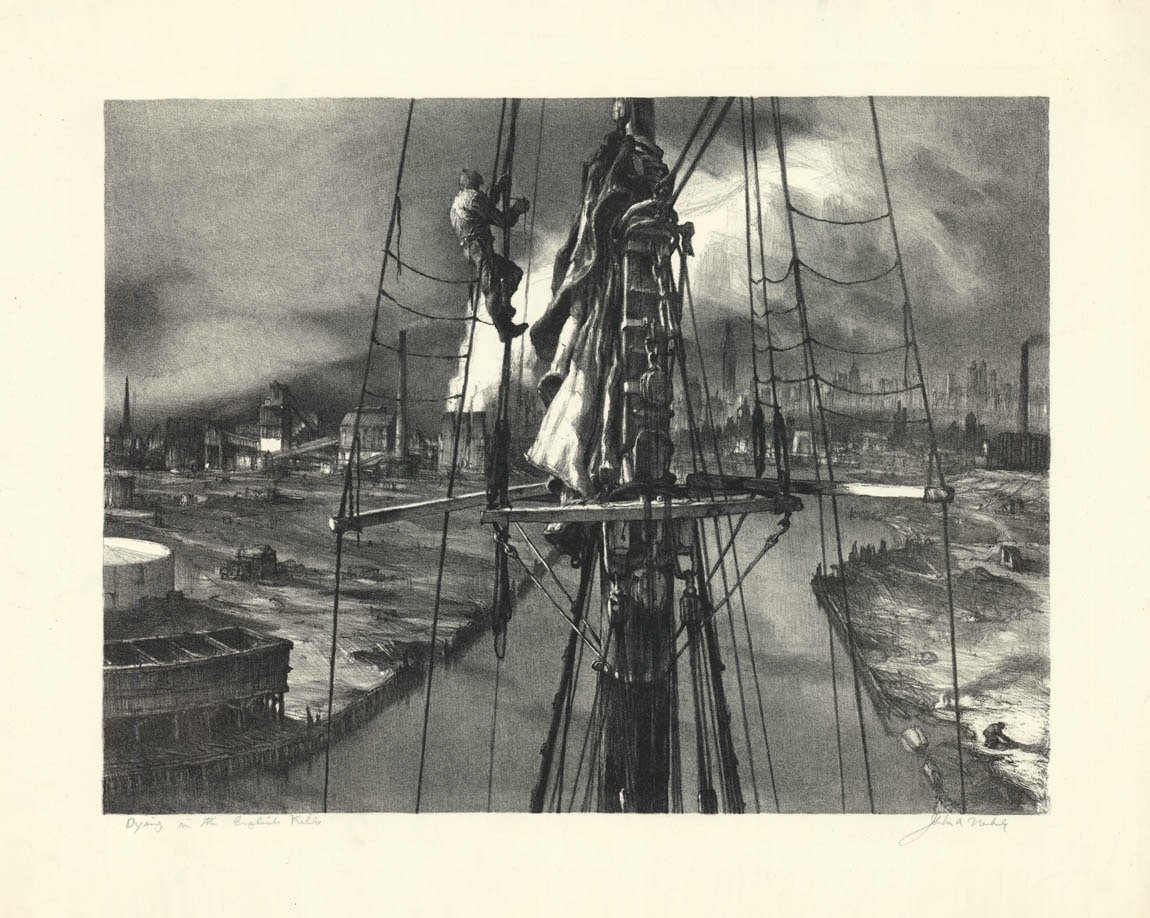
-
Hi Bob, Thanks again for sharing your knowledge as time permits!! Take care and stay safe. Brian
-
I'm stunned at what I am looking at. Building the Granado right now, and this just is an awesome visualization to be able to refer to. THANK YOU!!!
- 67 replies
-
- 2
-

-
- granado
- cross-section
- (and 1 more)
-
Hey Bob, I believe you substituted rigging ropes and fittings extensively in your Granado. It looks soooooooo good, but I also know it led to some issues and rework. I am a long way from starting the rigging on my Granado, but I was wondering if you have reached a final opinion of the value and benefit, and whether you were willing to recommend those substitutions specifically to a newbie like me? Best regards, Brian
- 421 replies
-
- 2
-
-
- caldercraft
- granado
- (and 1 more)
-
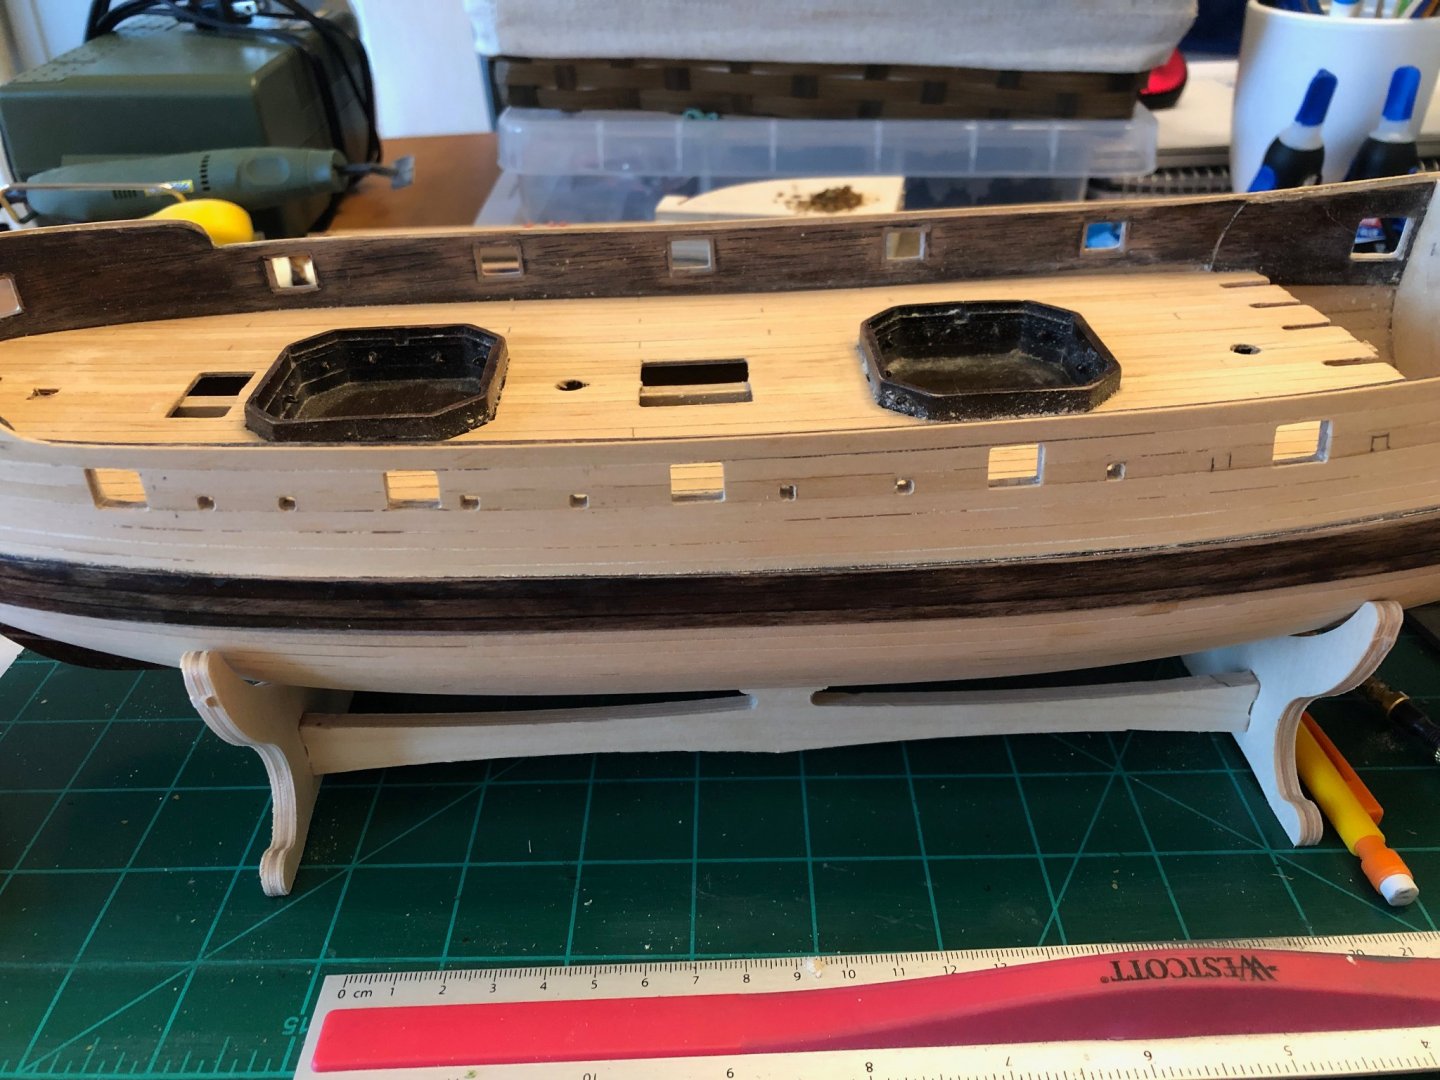
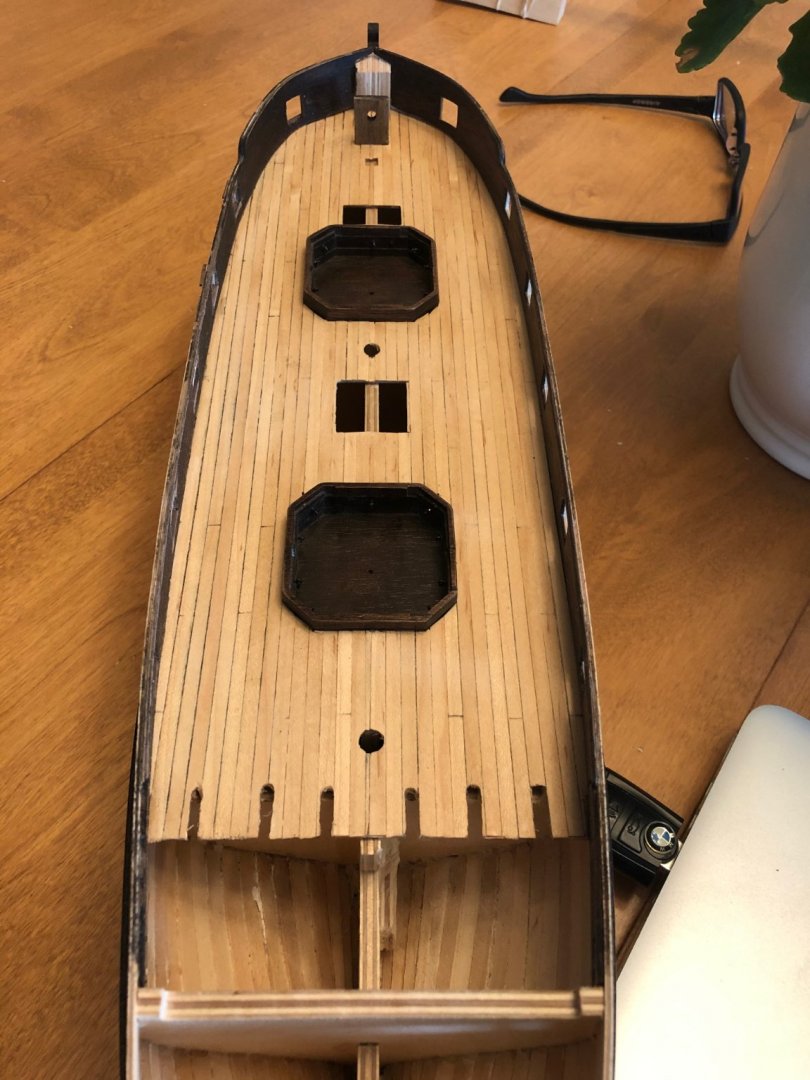
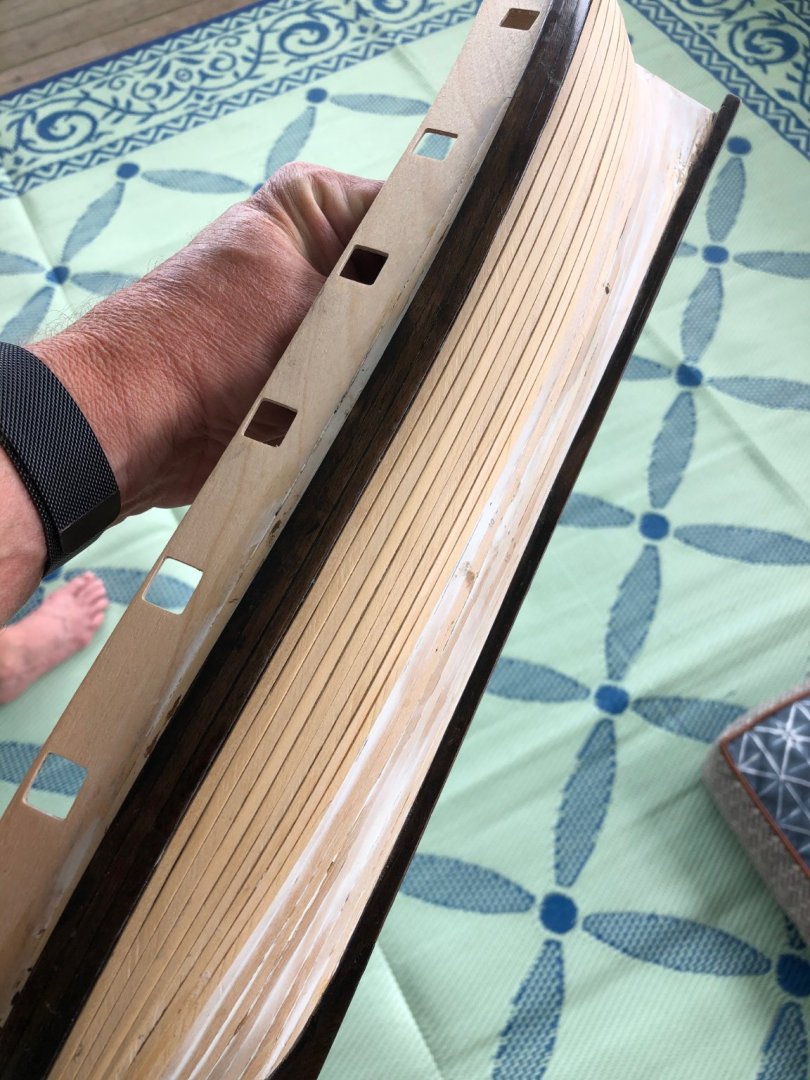
So, those sweep ports were intimidating for me to start, but I think they are looking pretty good so far. They are all pretty close to the desired dimensions from the outside; but the inside dimensions still need work due to limited access. I purchased some Tung Oil and some boiled linseed oil to test, is boiled Linseed considered "Danish Oil"?

-
Joe, your build is one of the gold standards. The quality of your work and of the others is just beautiful, and the Granado is a nice kit in my humble opinion. I found a high resolution image of Clevely's Launch of a 4th Class, that show's the Granado being pulled to Harwich for final rigging. It put's a lot of perspective on the size, as it shows people on deck. The image is captured in high resolution. And, thanks for the kind words and encouragement. I am hoping to keep a good pace to ensure completion without sacrificing quality. As I recall, you painted your beautiful boxwood hull.... While I am thinking Tung oil/Poly, I have a bottle of Admiralty white lurking as well....
-
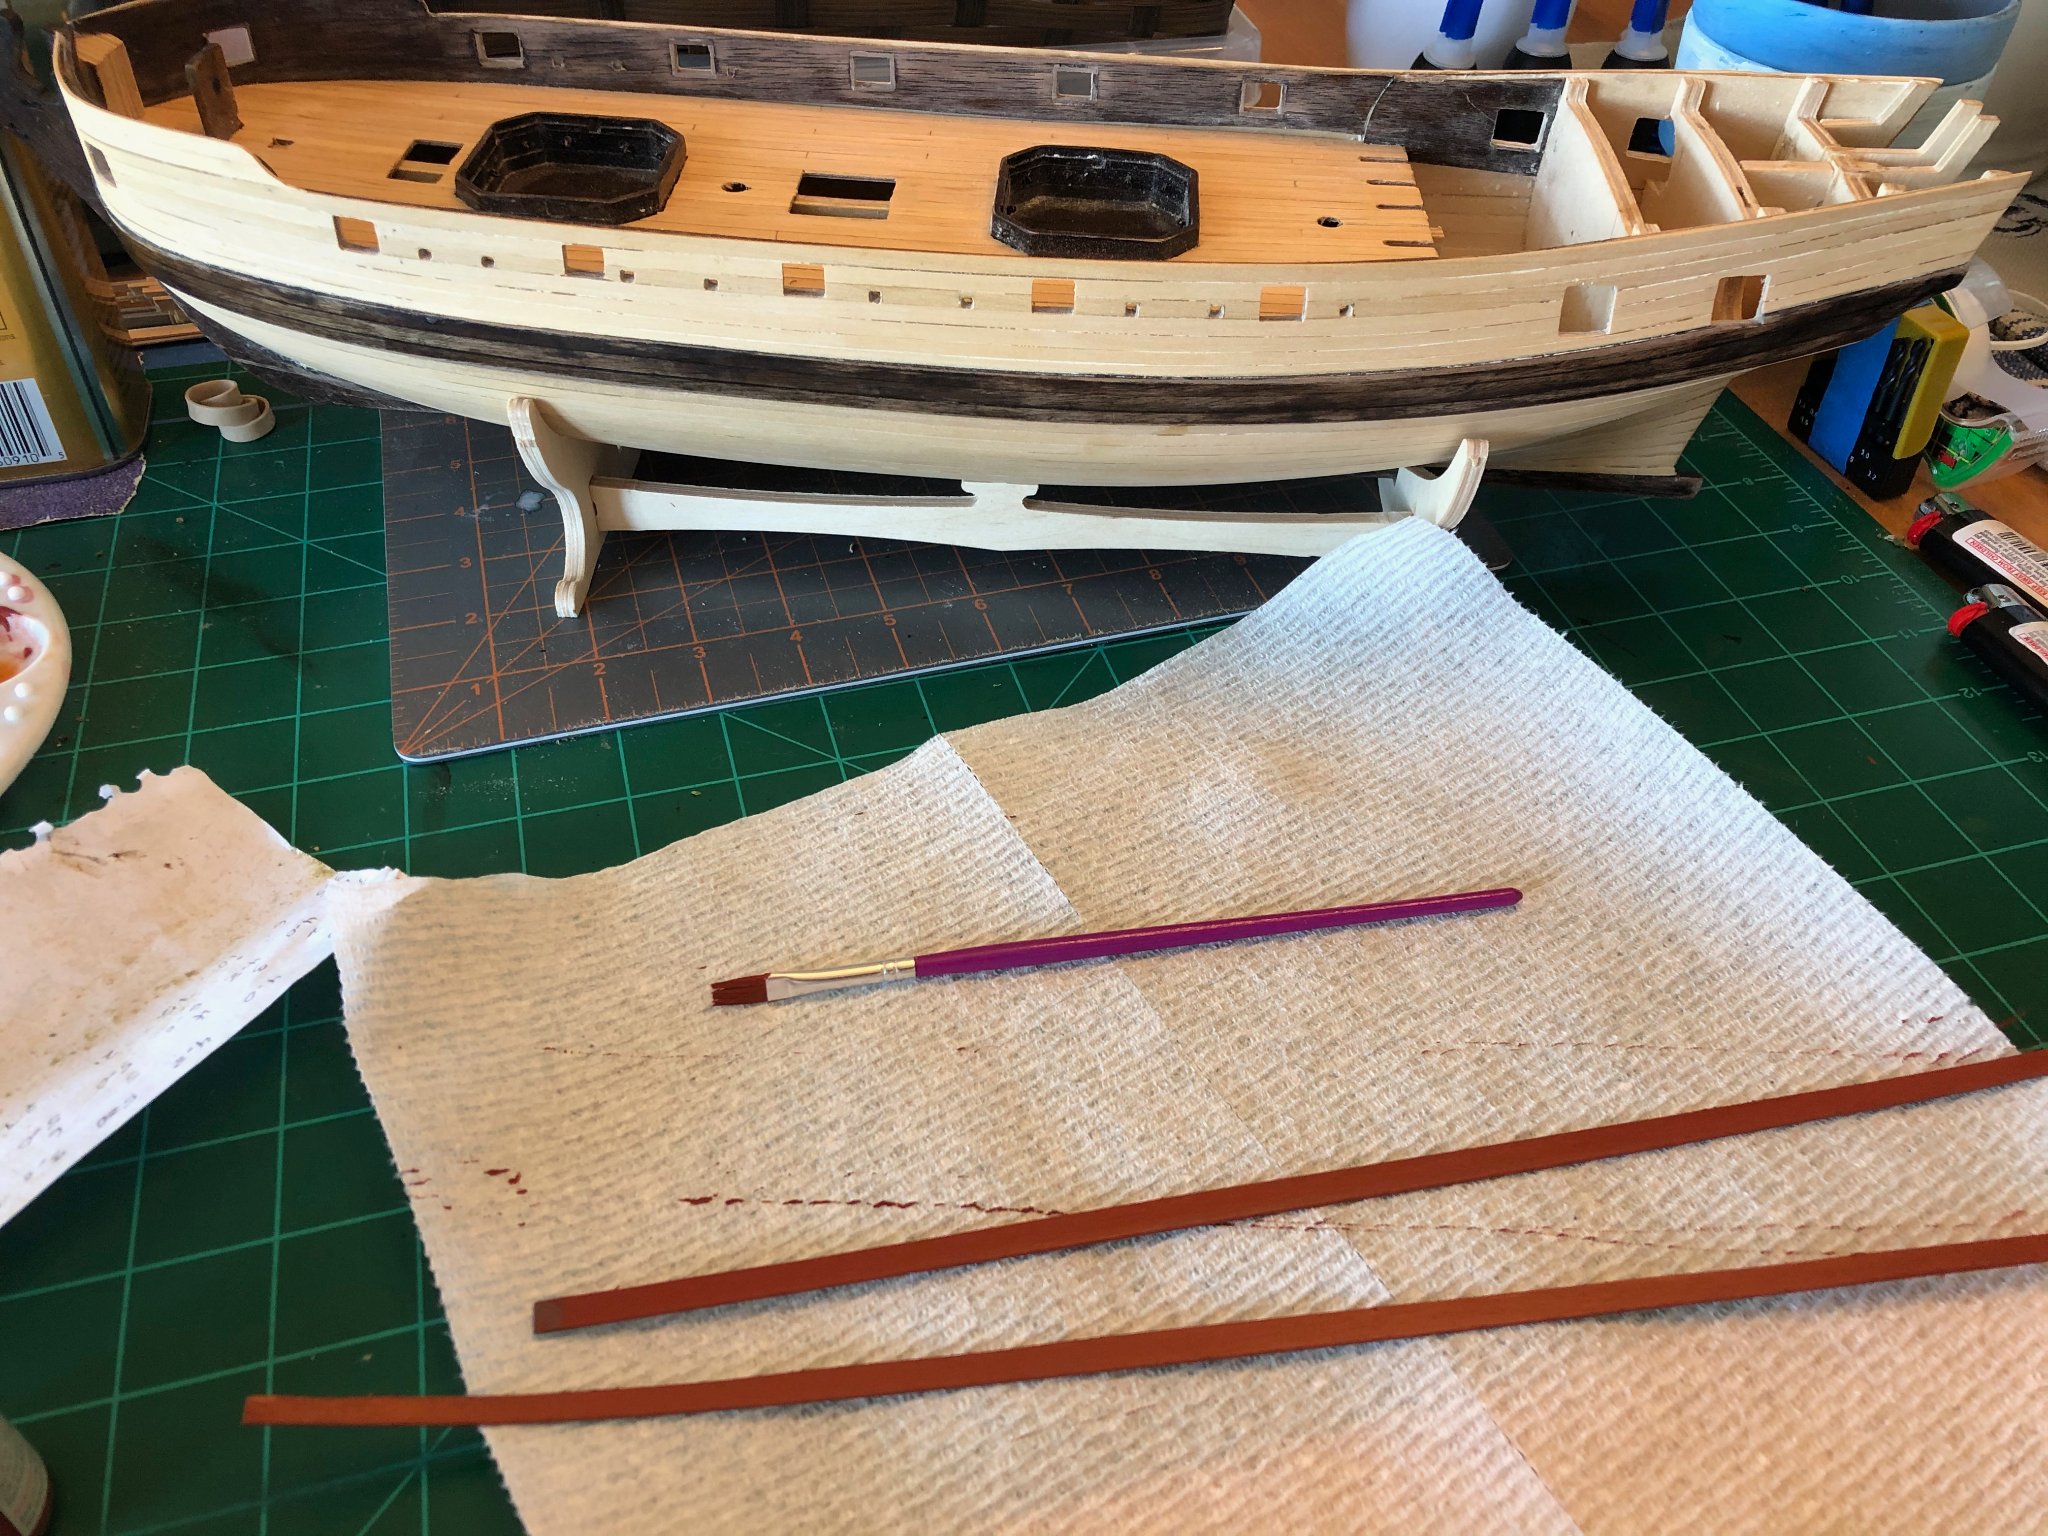
I have mentioned this before in the log, but I need to emphasize that I have no real experience with acrylic paints. For that reason, I am considering not painting the hull to show the boxwood planking (and perhaps really faint treenails). Still soliciting opinions on this decision, and have gotten some good advice on treenailing from several (thank you D.). However, I think I should use the Red Ochre Admiralty paint on the spirketting and inner bullwark as suggested. I put two coats of grey primer on the walnut spirketting strips, lightly, with a spray can. Whether I needed to do this or not, I have no idea, but I thought better safe than sorry. Then three coats of the Admiralty red. It looks like it could use a couple more coats, but should I sand in between with fine 320? Or, just make sure it has good coverage, and give it a final coat or three of poly? What do people think about the Admiralty colors in this build, and are there any alternatives that should be considered? The sweep ports are pretty rough but I can/and will try to clean them up more over time. Sill have more to do on the starboard side, but the port side is complete.

-
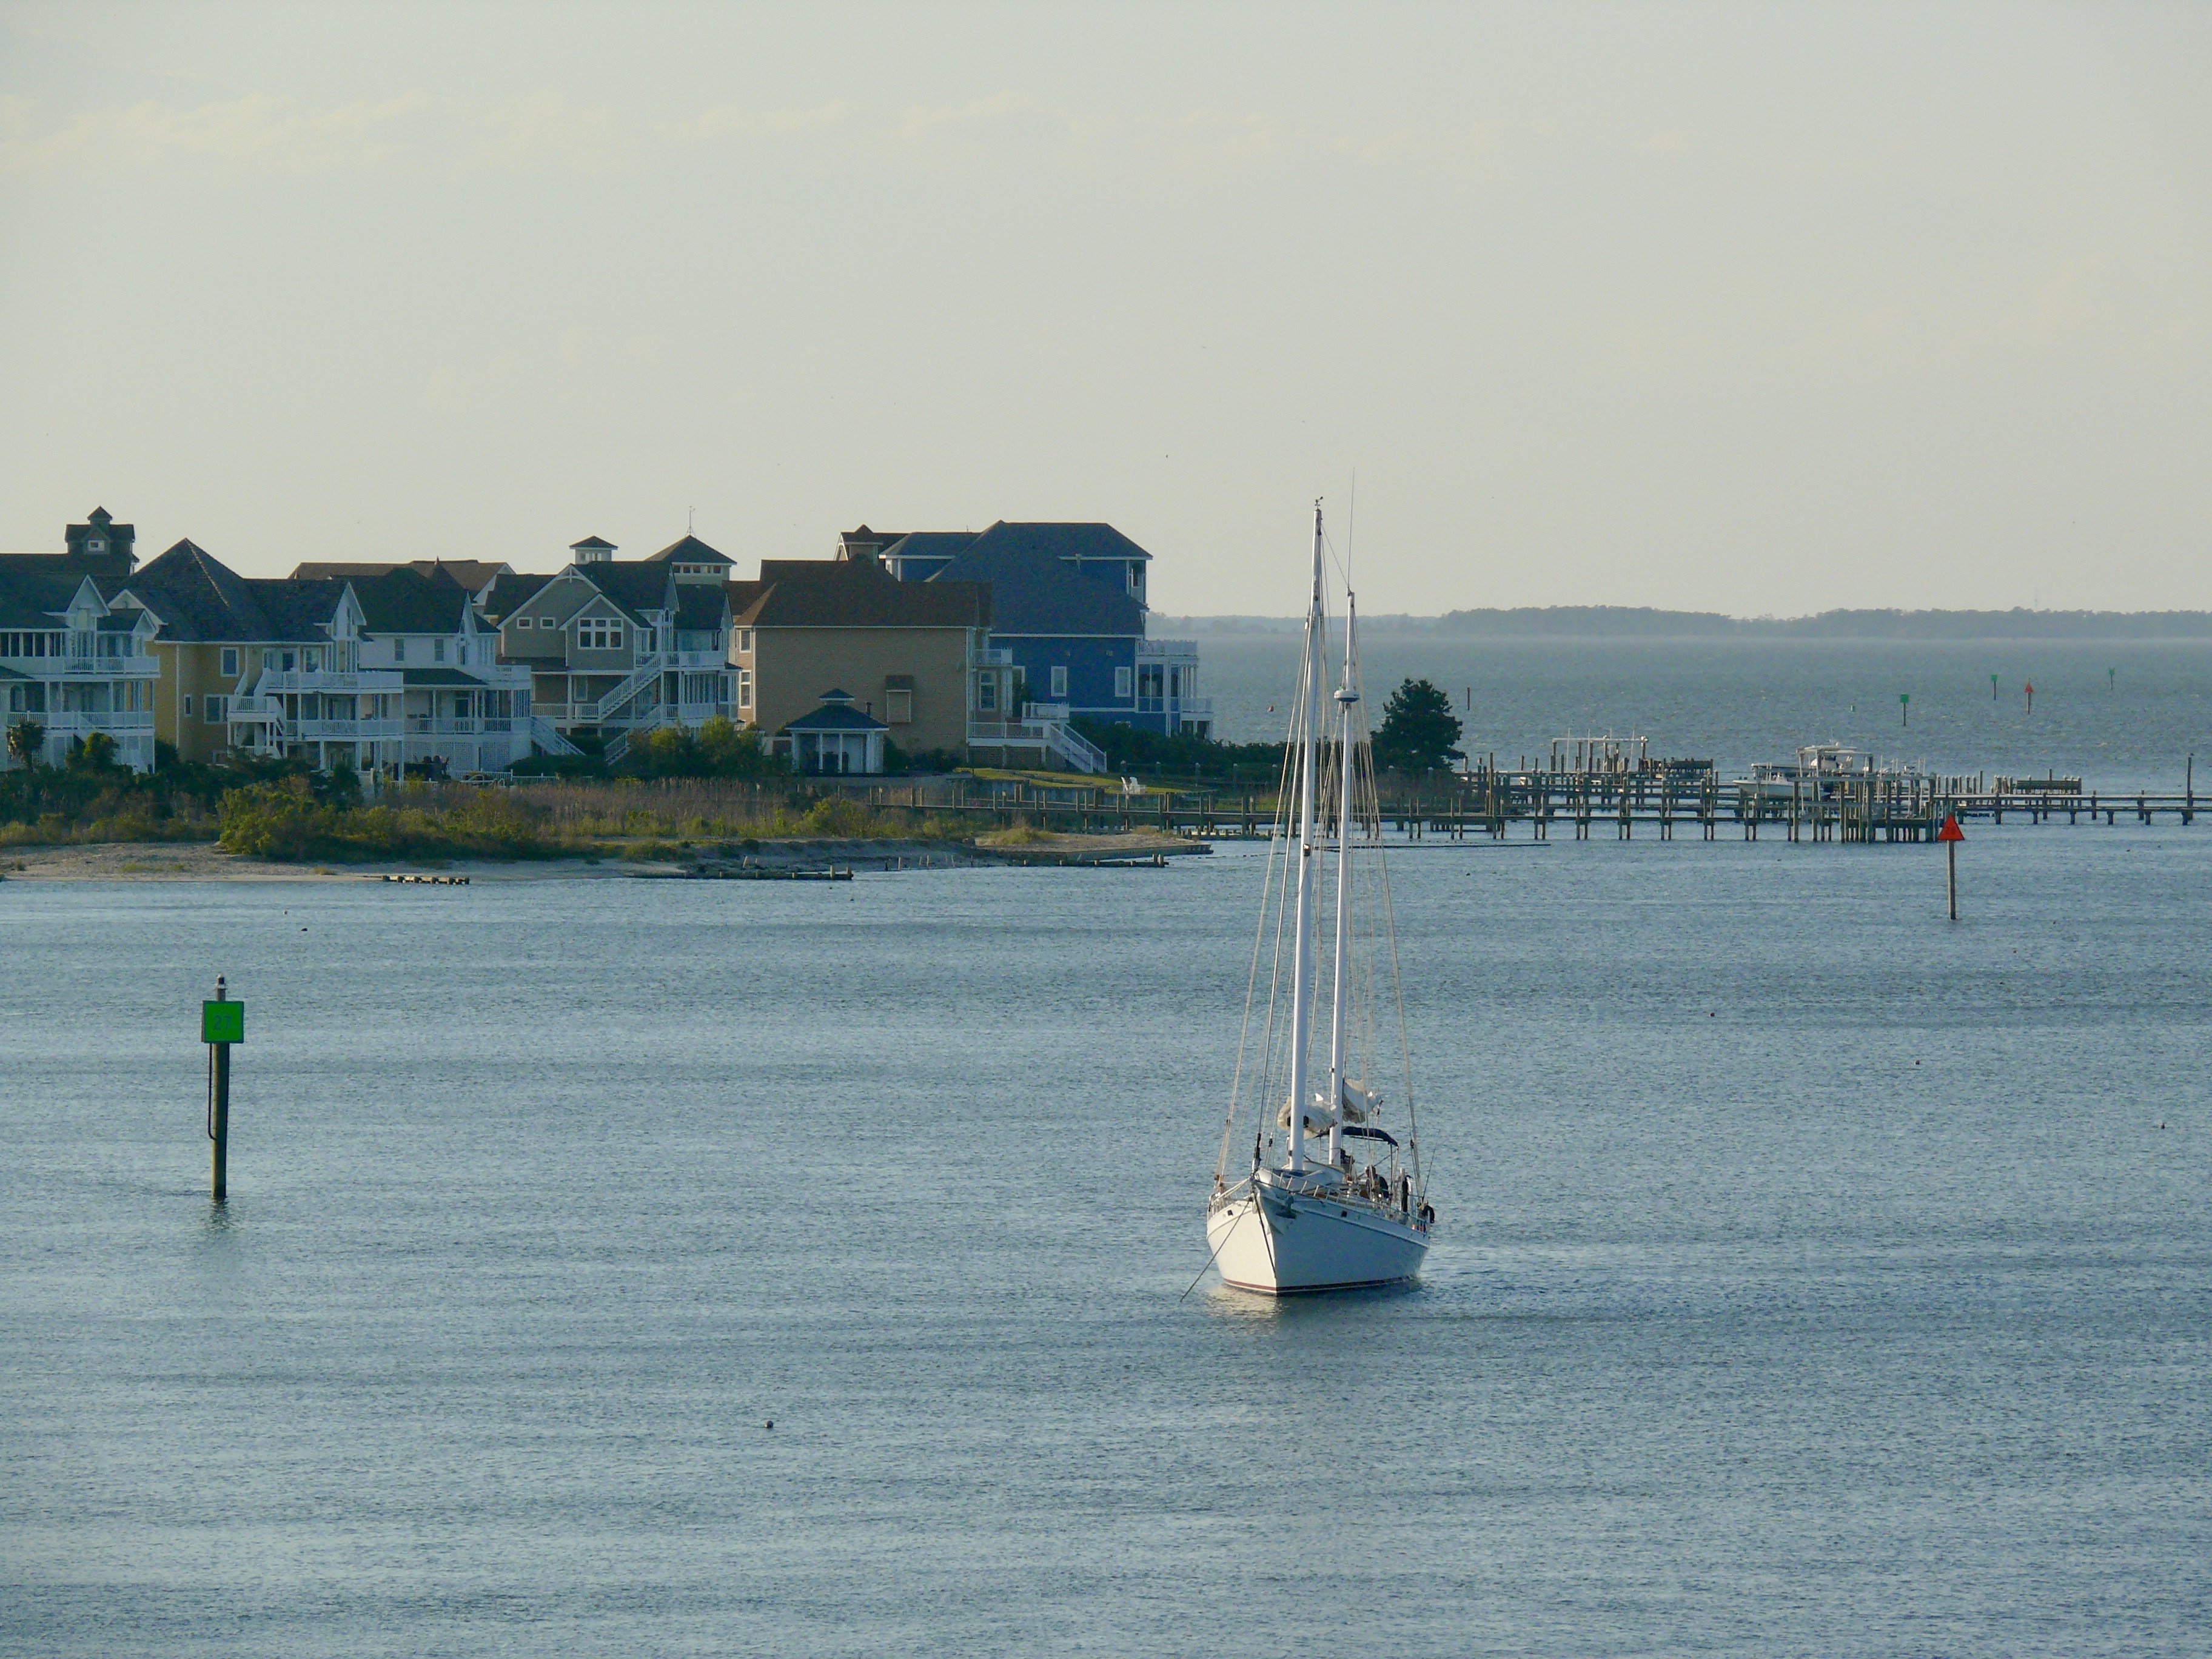
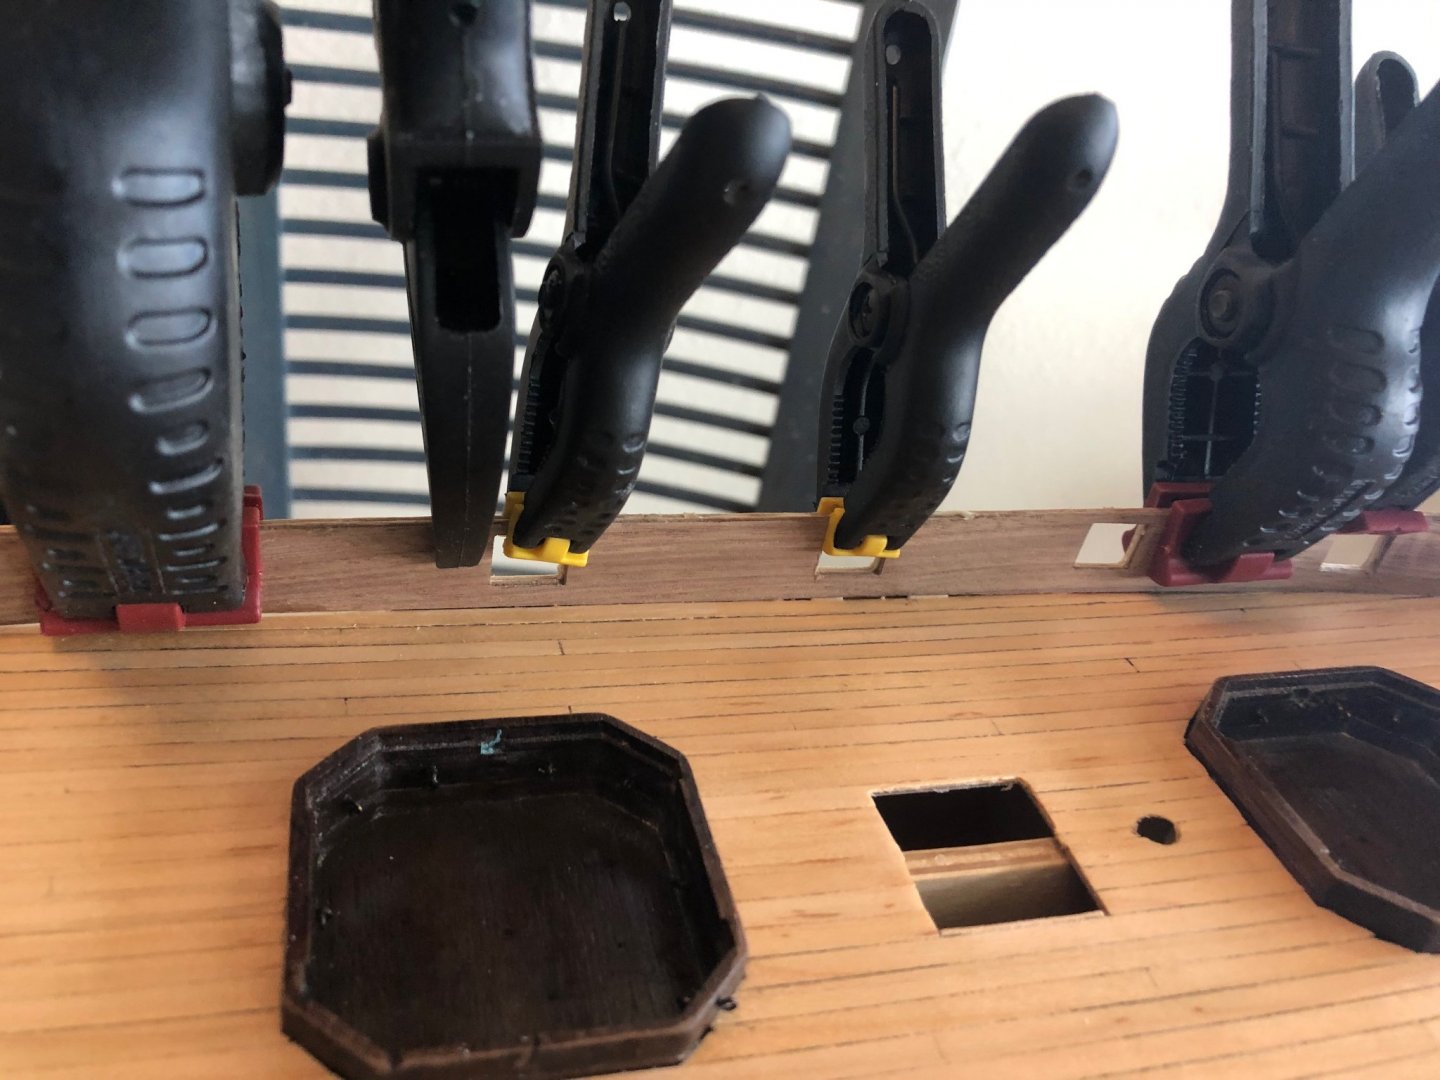
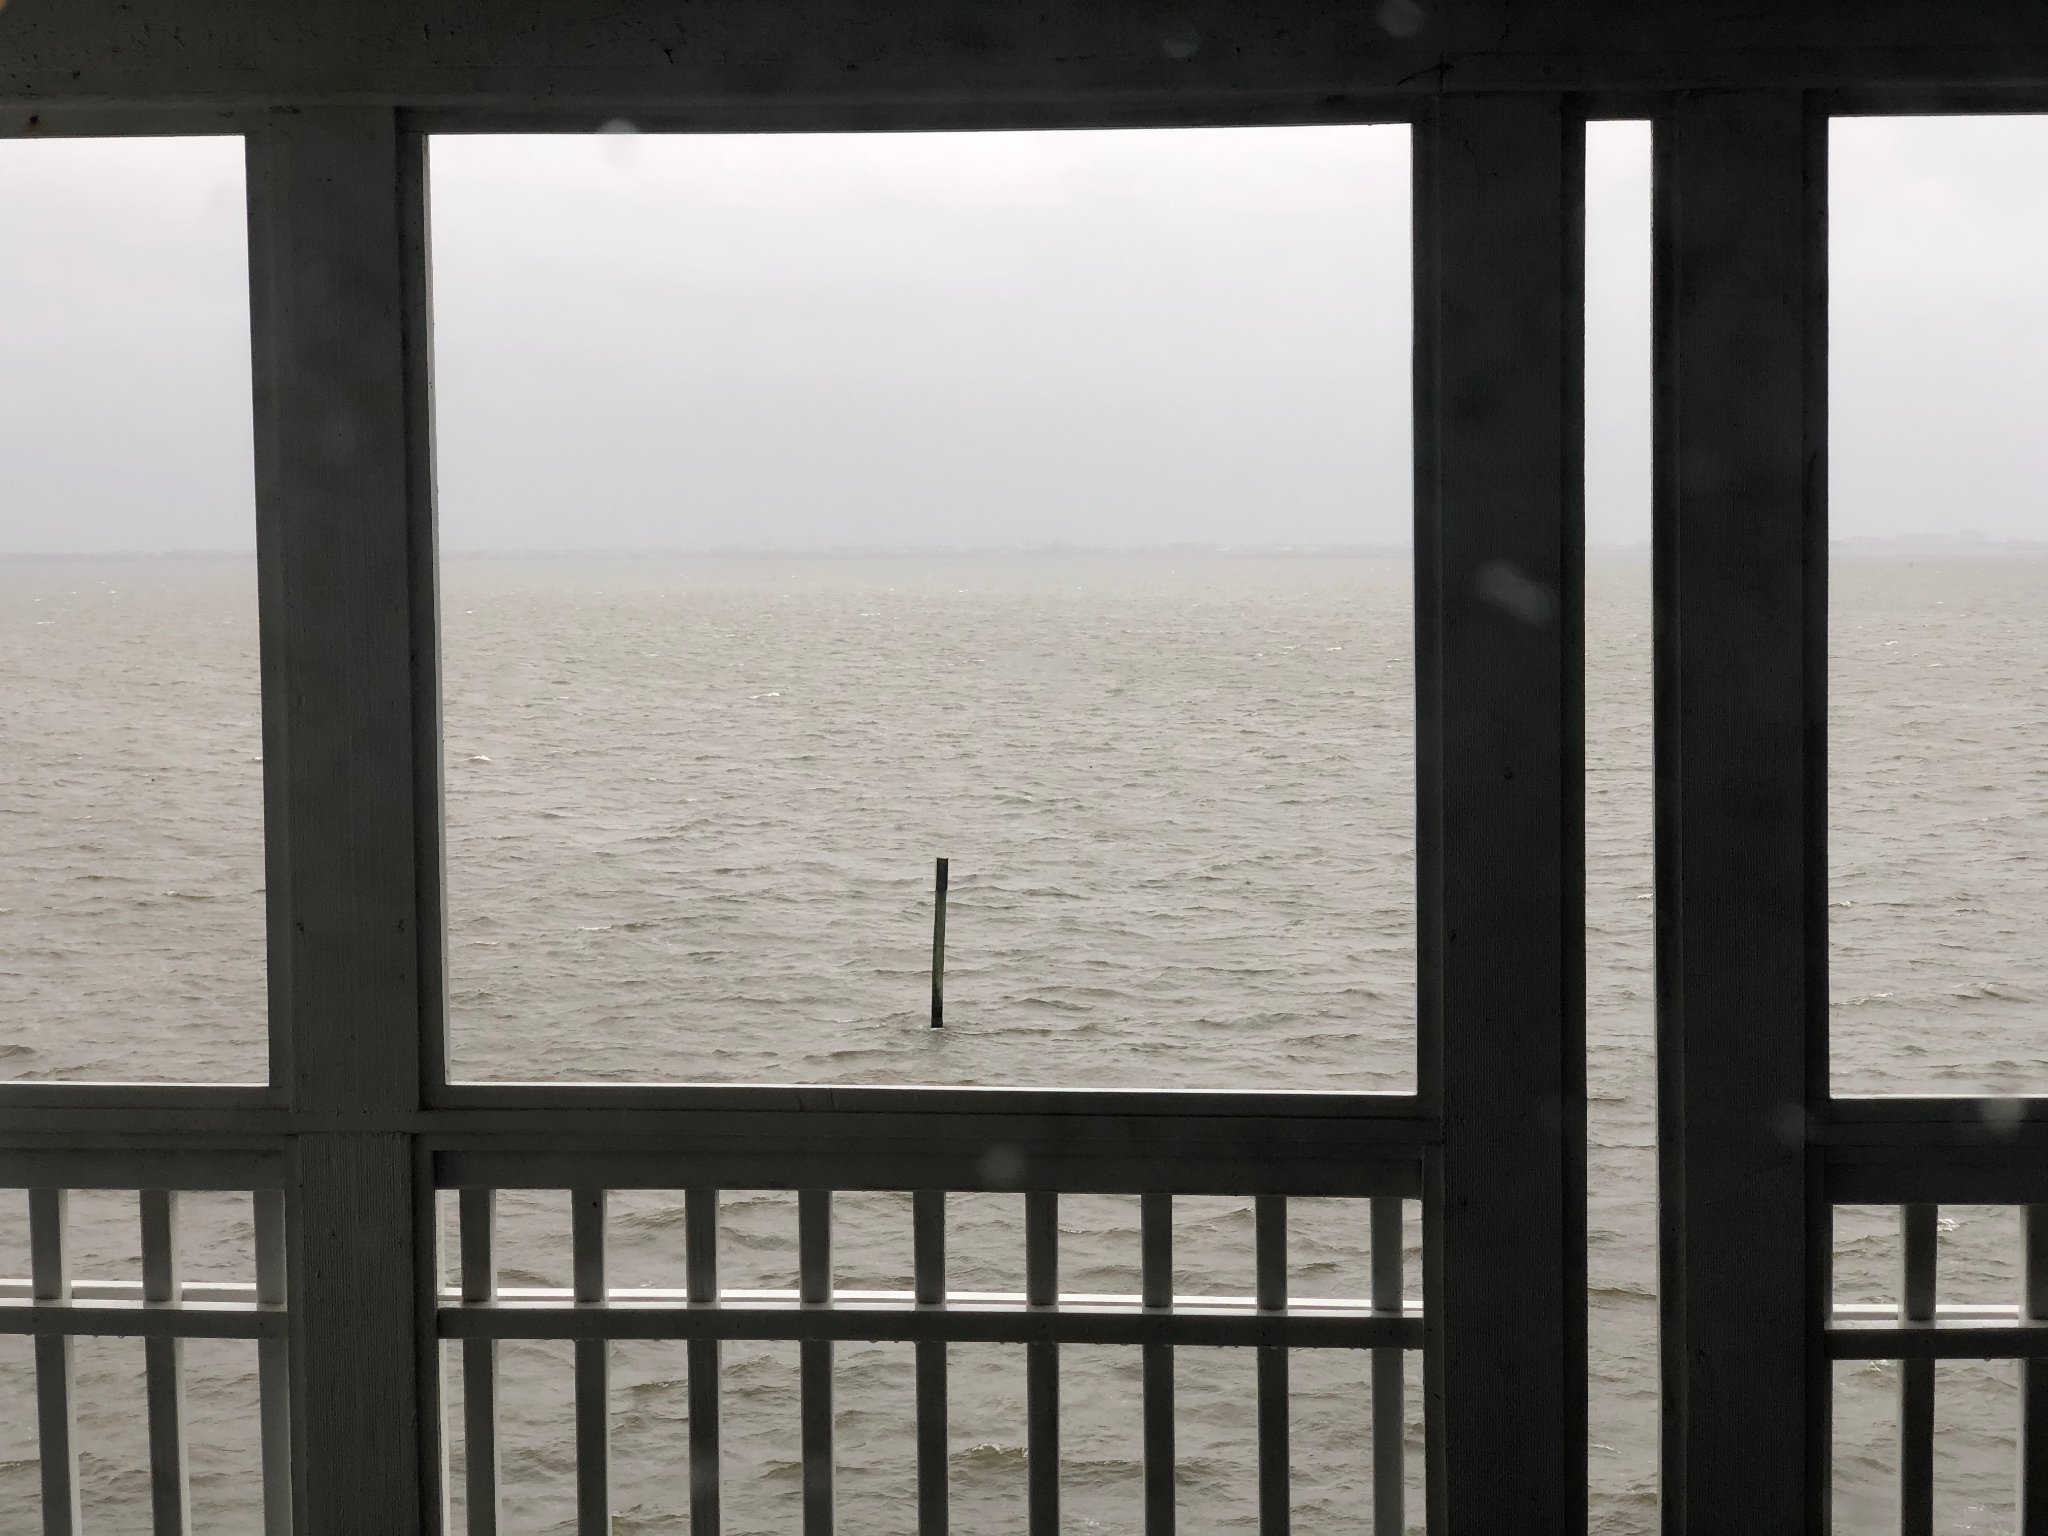
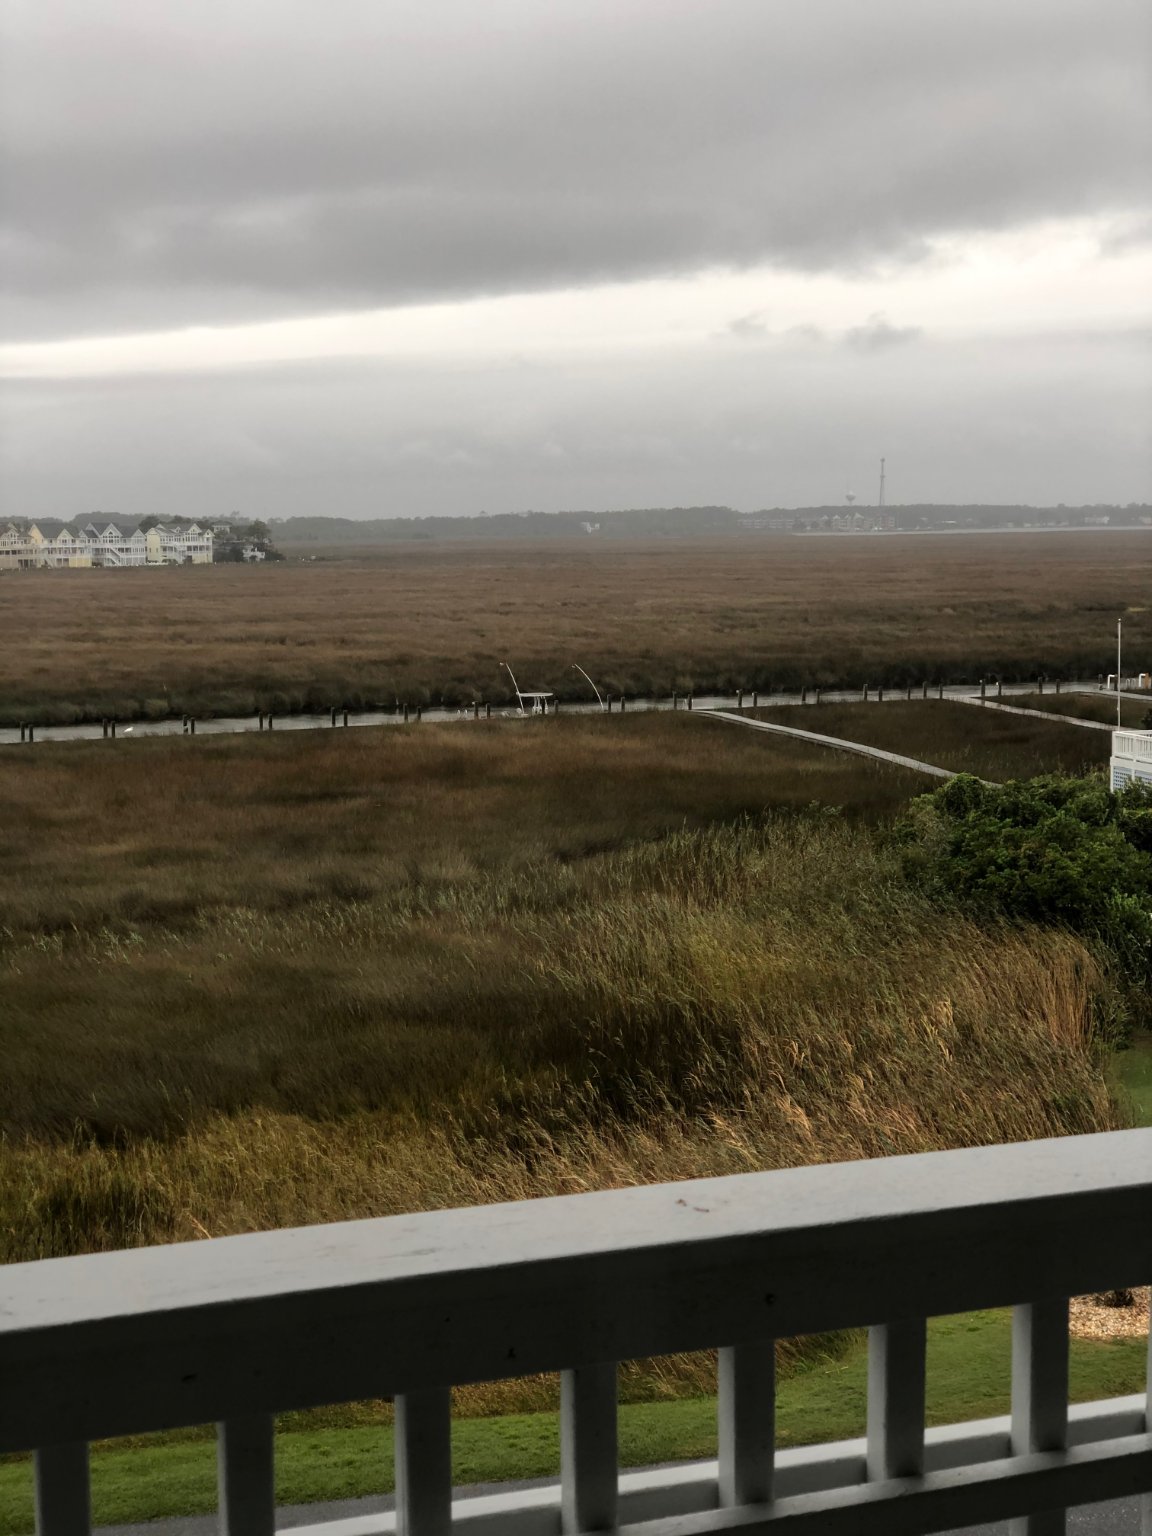
So today is the quintessential day for shipbuilding, and I had sweep ports to hack out of the boxwood that I have just CA'd in place. Stern view: View from the bow across marsh grass and bay and here are the sweep ports in the process of being cleared out. Drilled around the perimeter of the sweep port with a 0.5 mm bit until it broke. Due to torque not bend (sigh). These micro drills bits are so dang fragile. Then cleared out the non-drilled with various files and rasp. I am going to buy some auriou or valorbe rasps if I can find them, unless someone knows of a more available or appropriate substitute. I would love a bunch of fine riffler rasps and just a few course cut ones would be gravy. My fingers and hand hurts a bit. I also dry-fitted (a few tens of times), tapered appropriately, and put a final coat of grey primer on to the walnut spirketting to be painted red ocher before I will be getting around to installaltion. I will put a few very light coats on it, and see how it looks and put a few pics up. Cleveland Browns are crushing the Cowboys, 2020 really is a nightmare.


-
Holy cow, that is a great video. I love that incredible effort.
-
YAY, thanks so much for your advice and opinon. I like the needle idea to just make the ring. I will also check out those treenail makers. I really appreciate this feedback and opinion, as I am definitely a beginner and can add more details and use more skills as I build more models, but want to get the best out of the effort as well. THANKS AGAIN.
-
I have completed the 2nd planking on the HMS Granado hull with Boxwood and a dark walnut wale (please see build log pictures), and have reached a point of no return with regard to treenailing the deck and/or hull and drilling out the sweep ports (egad). Its a little further complicated by the fact that this is only my 2nd build, and I am already considering leaving the hull unpainted to show the nice boxwood/walnut contrast. Opinions and comments on this move would be most appreciated. Then, treenailing the hull would be required (I would probably try and use a 0.3 mm hand bit and a syringe needle to start the hole), and that is a considerable undertaking that if done poorly could make the model look too busy. Yes? Again, opinions and suggestions appreciated. Treenailing just the deck might be a little easier in scope? Finally, the sweep ports look awesome when done right. Given my skills and where I am in the build log, what is the general consensus on the value of cutting them, or heaven forbid, just putting the lids on hull and faking it. Ugh, so many questions, and thats why I am asking for help.... Need more context? Consider this: If I go and treenail the hell out of the hull, and it looks bad then that sucks. Or it could look great, but then as a newbie, I could screw the model up later in the rigging or doing something stupid and have it all end up in the trash.
-
Vane, did you/are you going to use any treenailing?
-
This is some beautiful work you are doing. Nice role-modeling (yuck-yuck). I'm here all night.
- 135 replies
-
- 2
-
-
- billing boats
- half moon
- (and 1 more)
-
Holy moly, this work is so well done, and Chuck's kit is frigggggging amazing.
- 607 replies
-
- 5
-
-
- winchelsea
- Syren Ship Model Company
- (and 1 more)
-
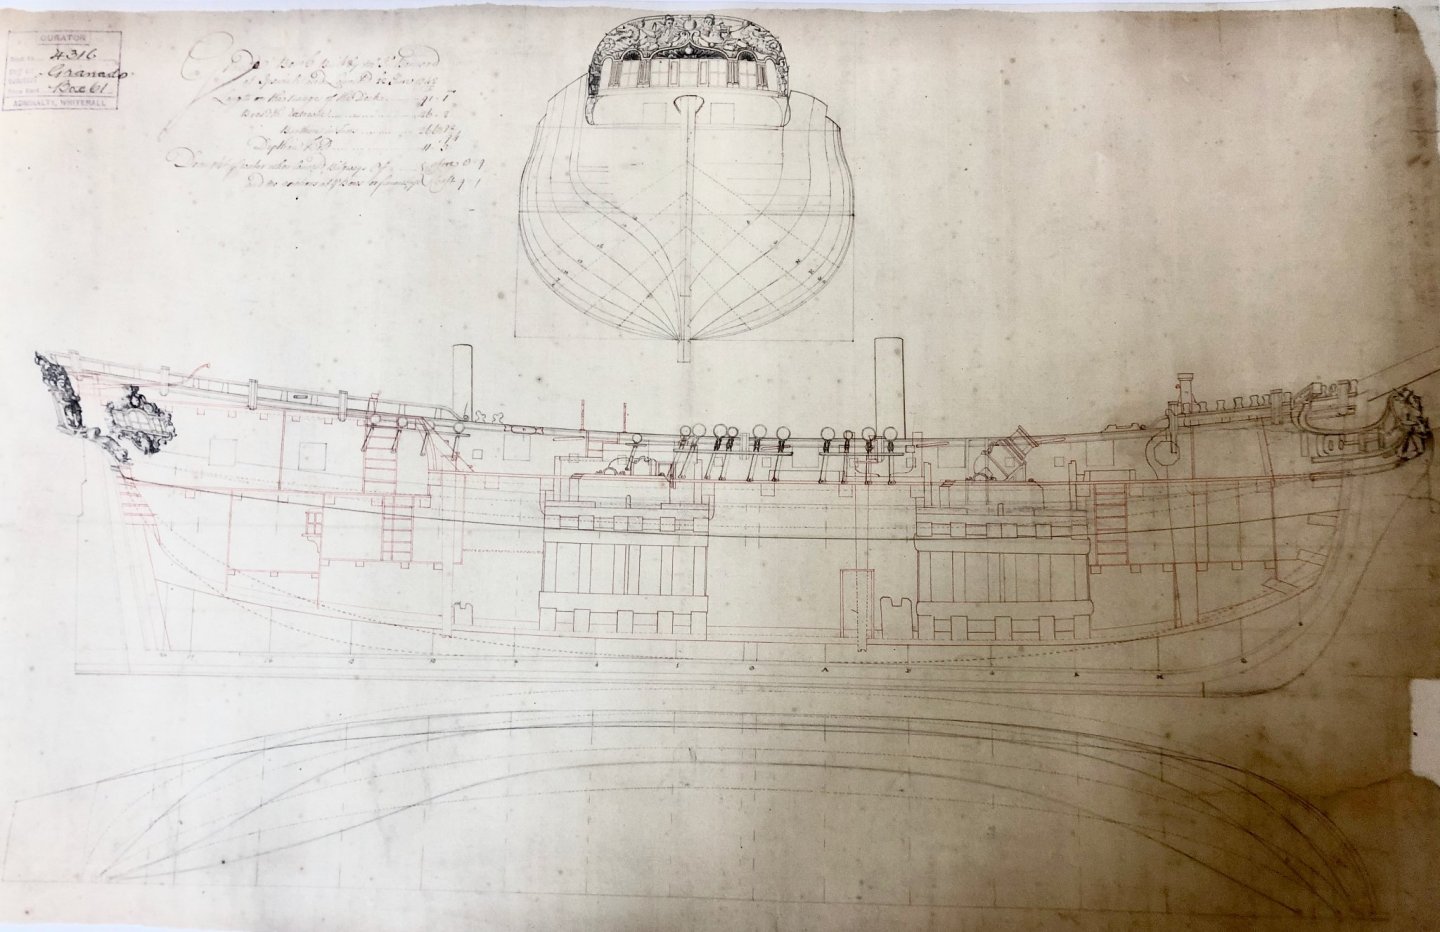
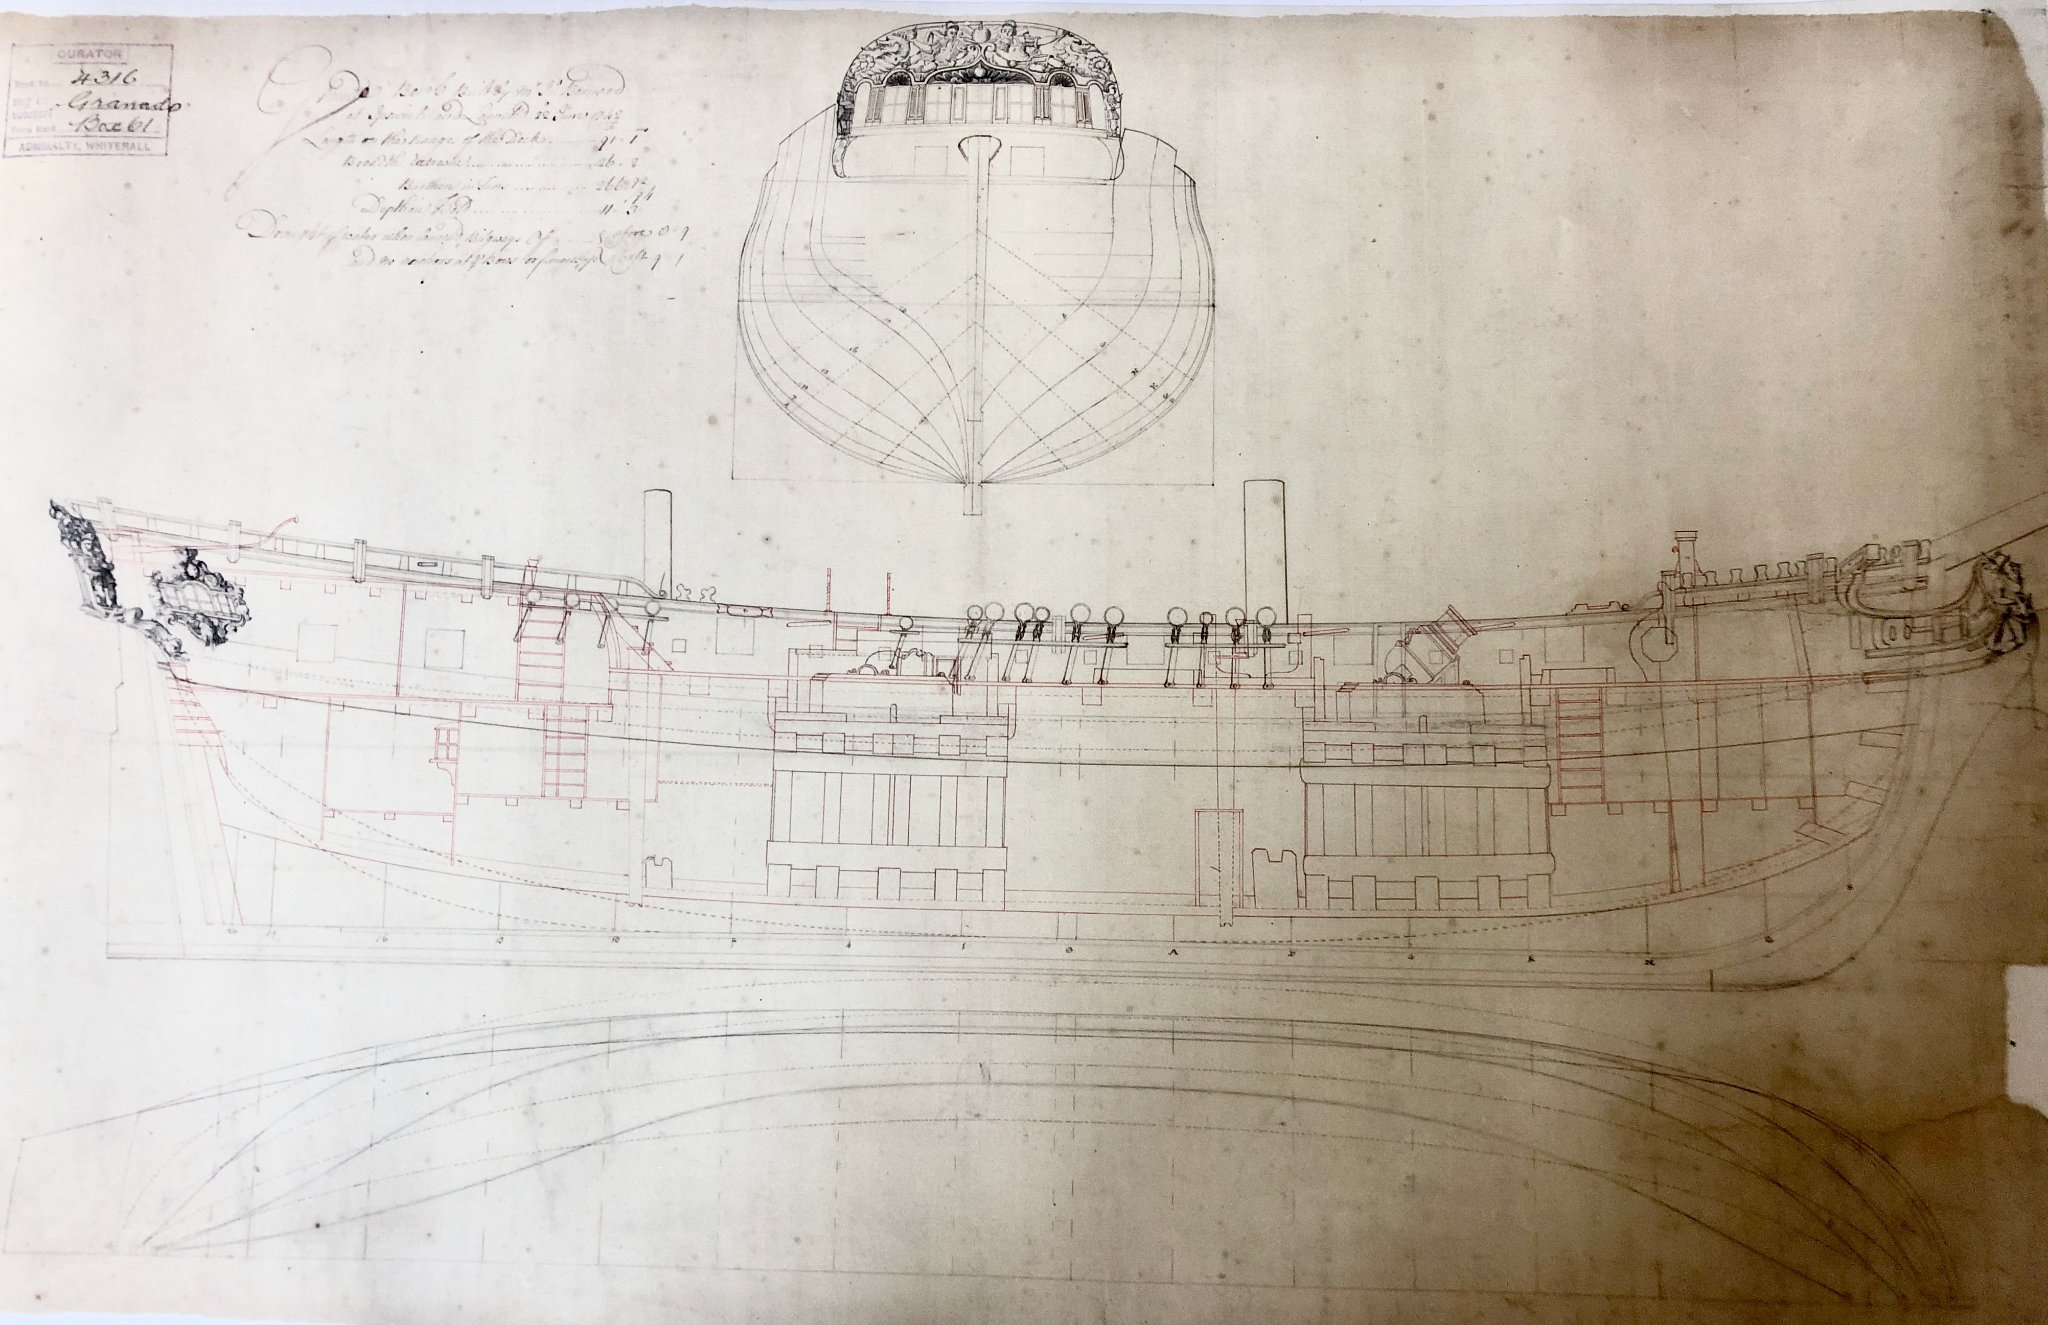
My anniversary was last month, and my lovely wife of many years and considerable tolerance bought me the book "Building Britain's Wooden Walls" as shown in the first post. She also got me the plans that are available for the Granado (which I am considering using as a base as I have seen done before by ....(insert name here):
-
Having just finished the 2nd planking, my fear level is increasing. Your rigging is stunning, as is the rest of your work.
-
Hey Ryland, Thanks for the kind words. I lived in Richmond for 10 years, so we were neighbors at one point =). The boxwood from Arkowood is very nice to work with, as it should be.
-
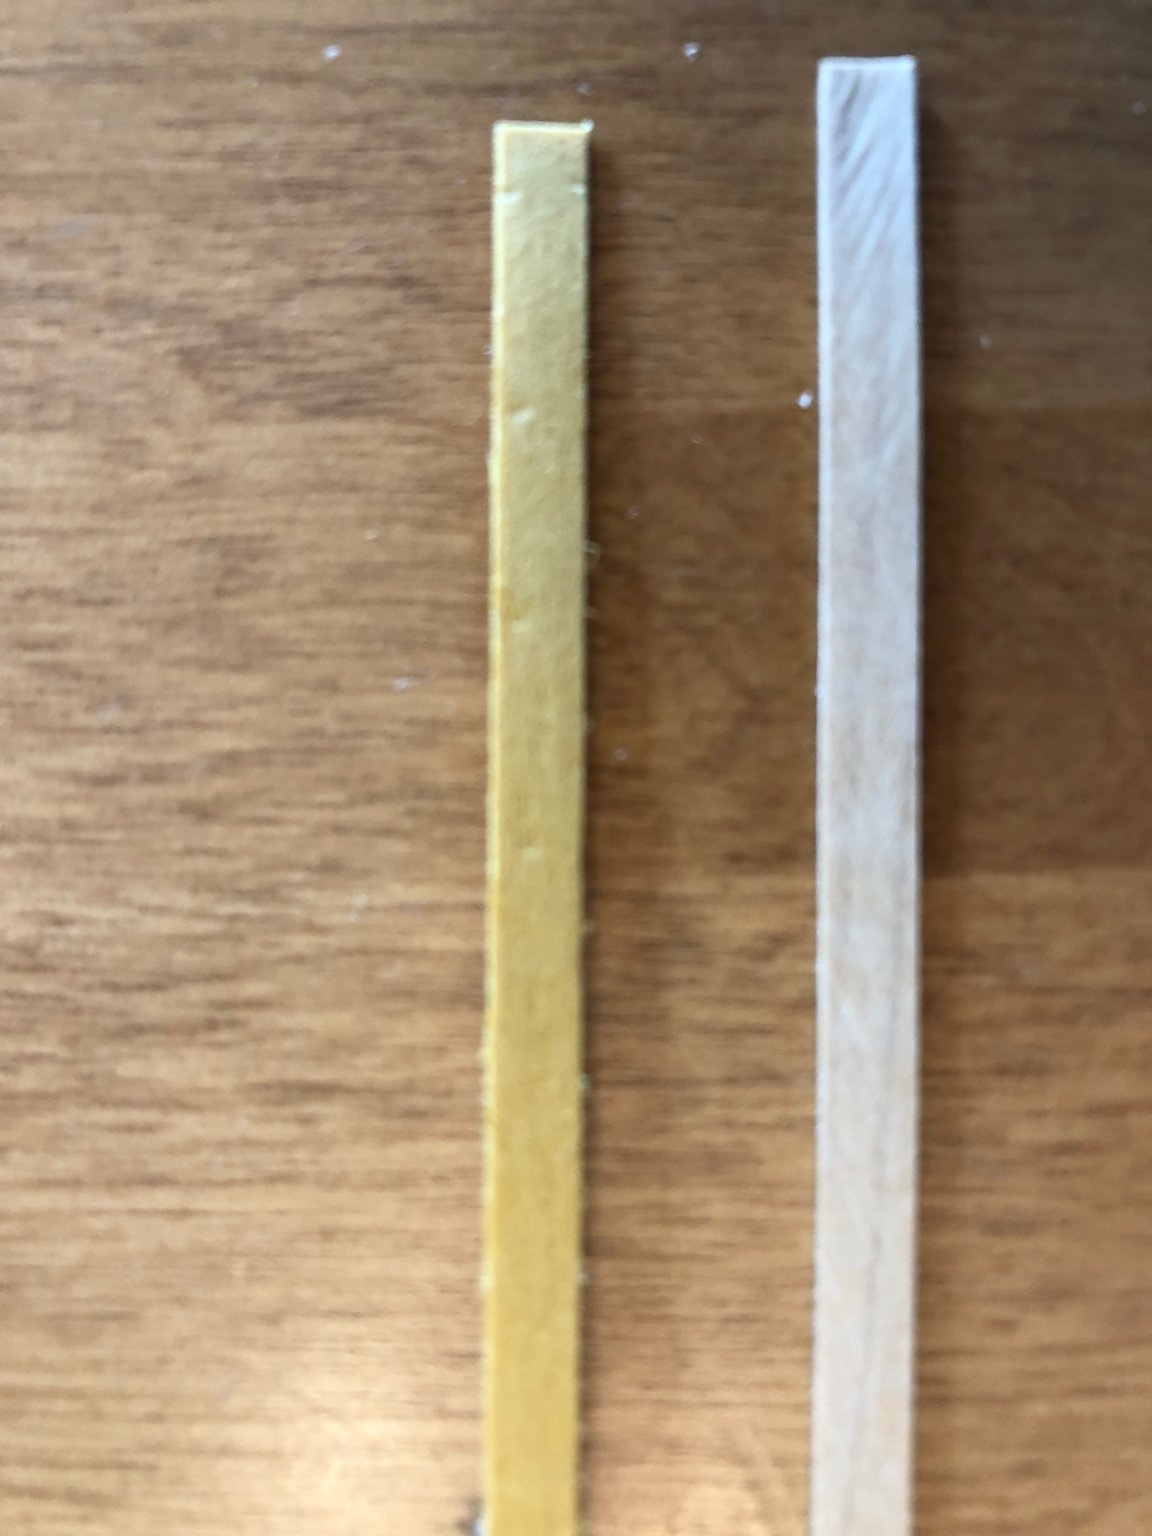
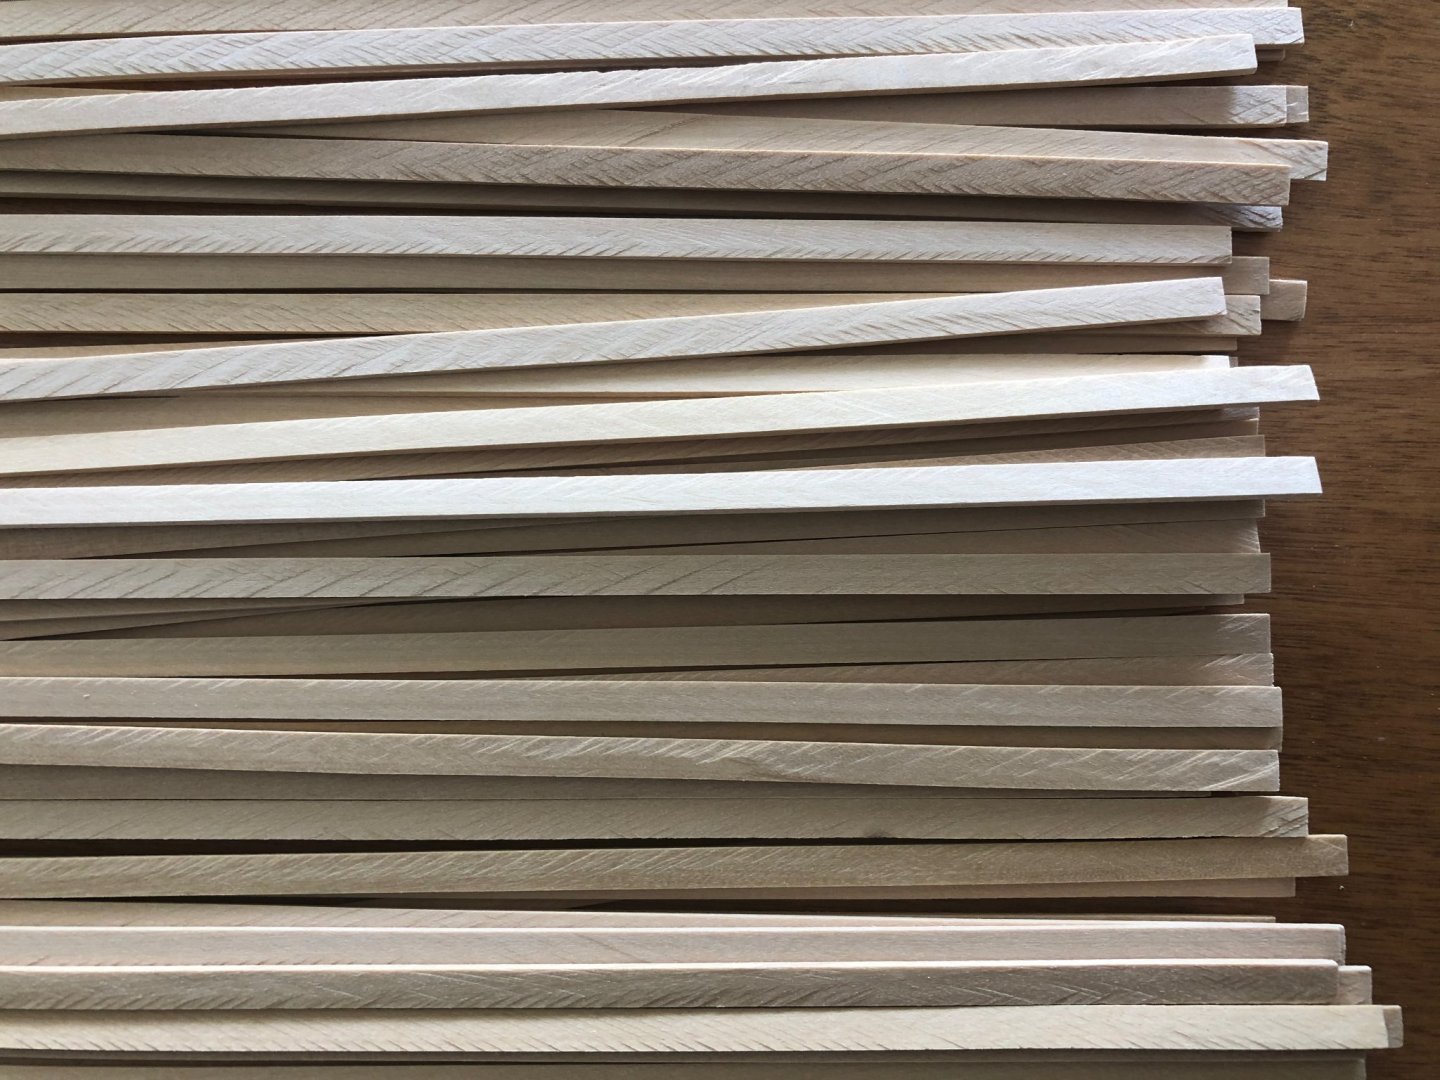
I recently ordered Boxwood from Germany (Arkowood) for my ongoing build of the Granado, and it also took forever to get here in the US. This was also due to Covid I believe, but at least it was actual Castello Boxwood when it arrived. I purchased some "boxwood" from a different supplier in the US, and it wasn't boxwood, it was putridyellowood or fuglyellowstuff, or at least I think that is its scientific name, so caveat emptor and "buyer beware" etc.....
-
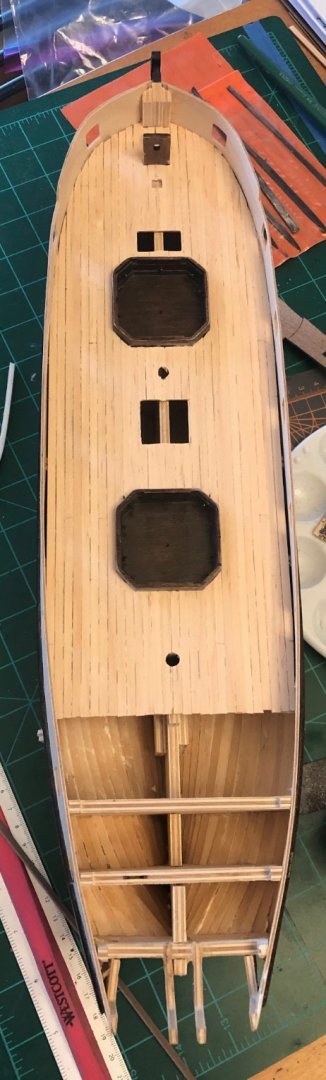
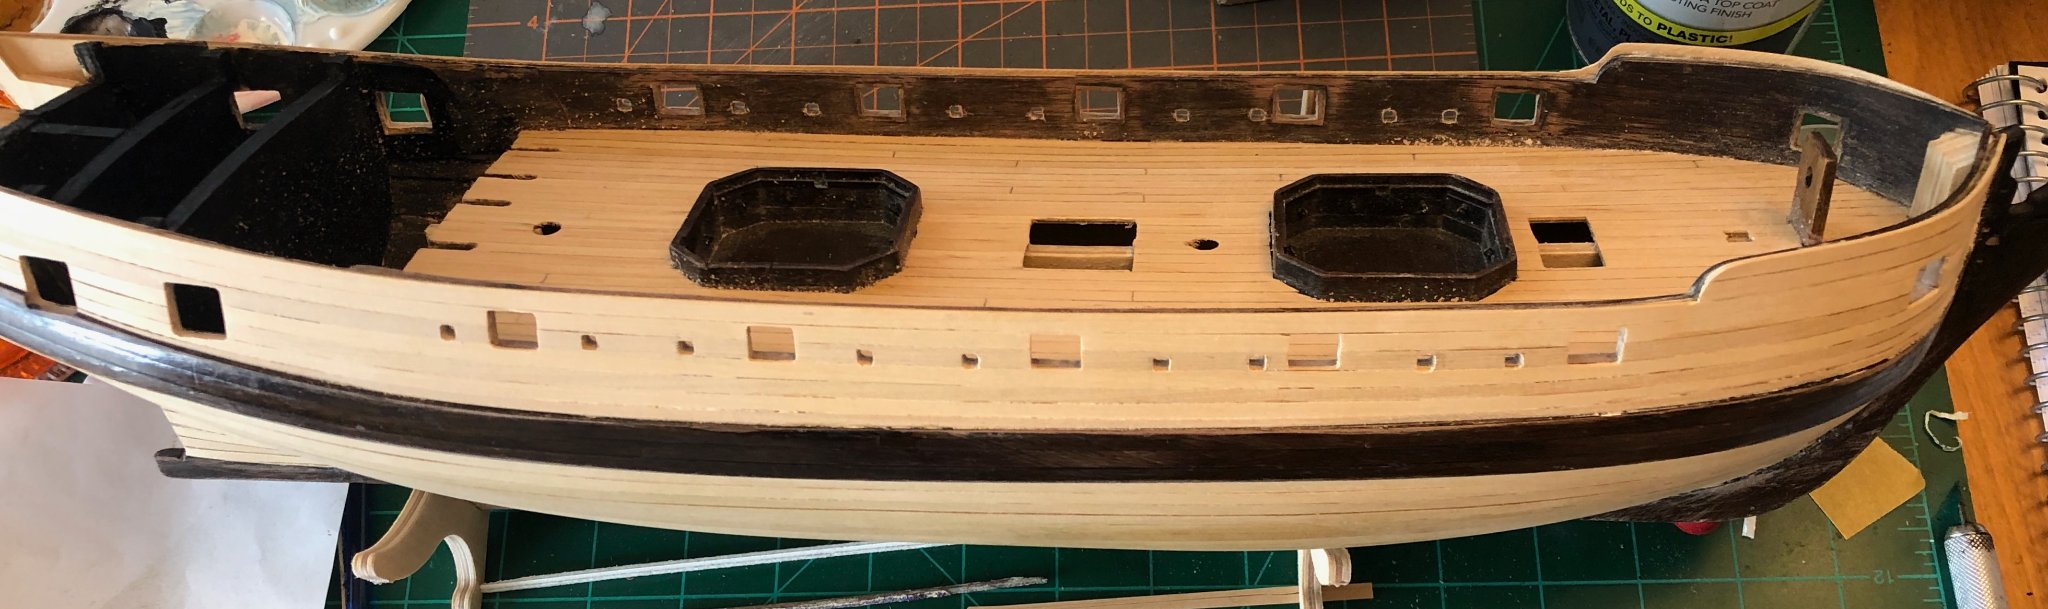
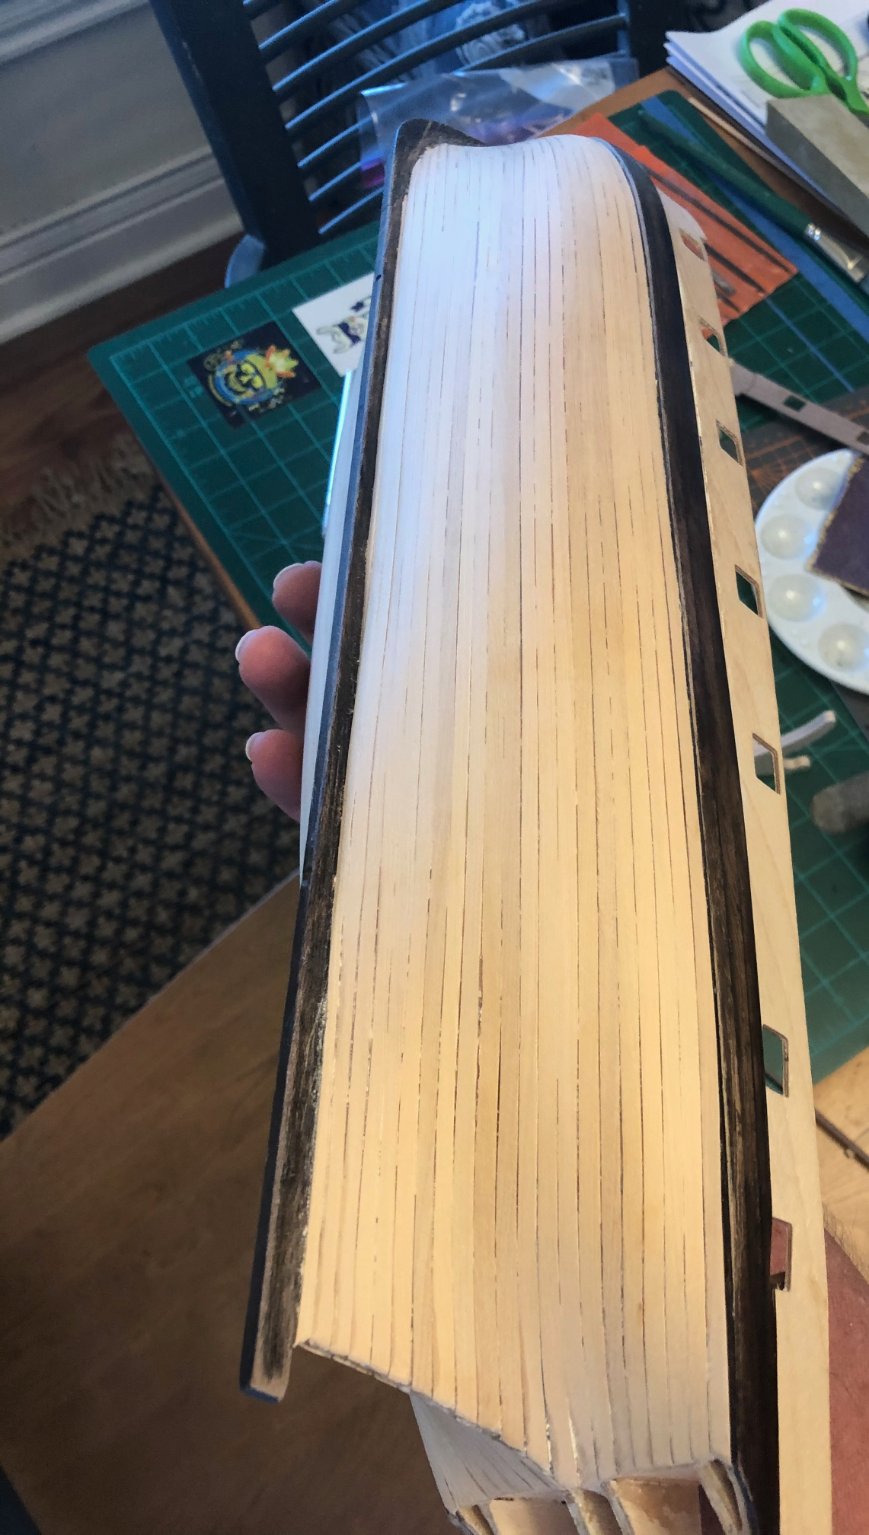
....and finally, the current state money shots, and I say money shots because the 2nd planking was costly =). Here she is with gunports lined and planked above the wale. From the side: From the top: and somewhere in the middle: It could be lots worse! I'm ecstatic (and frozen with next step questions and concerns).....as I expected. Need to get some work work done, but I plan on keeping up a good pace if at all possible. This has been about at least 3 (?!?) months of time expired I think, somewhere around there. Seems like a long way to go for sure, and I am afraid of paints, right? So this spirketting and stuff is gonna freak me out.
.thumb.jpeg.f36fd4cd65bd468f325c13086710fc87.jpeg)
.thumb.jpeg.f5bba001da08b359afdd41450f1f8625.jpeg)
.thumb.jpeg.e6c2063f029b53c123542abee1c23cfc.jpeg)
-
The inner bulwarks went in relatively smoothly. and the view from the top looks fairly acceptable so far, so good.
-
CCoyle, my South Carolina neighbor, I can feel your pain my friend. My experience is so limited, that when I did the Bounty Launch (Amati's nice little kit), I stained the walnut so dark with a dark minwax stain that it got all layered up into paint like dark. And I have tried to use less, but that stuff is hard to control 😉 So, my keel and wale are deep dark walnut, and while you can see grain, it is of relatively even tone. I was so stunned that I made a Bounty Launch that looked acceptable kept me going to finish it all. The rigging made me learn more, and then I was hooked. It came out recognizable too, which pushed me to go all Granado on myself. I can't imagine if I didn't finish it, but I also thought if I managed to mess up the Bounty, I would stop immediately. It was all a battle not to ruin a half way good model....the whole time =). I have seen a few bare walnut planked Granado's, and I think I would paint a walnut hull the white that is suggested. I am thinking I will not paint (or Treenail) the hull white and just poly the boxwood, and also not paint the wale and keel, and just leave them the dark walnut stain (which I will have to reapply at some time to hide the new scars). Opinions welcome, because I don't want to not do something that I really "should" do per authenticity or some other higher cause I am not aware of. Here is some of the deck planking I have now completed 😃 and some of the boxwood after further sanding with the Proxon sander.....which eats sandpaper.

-
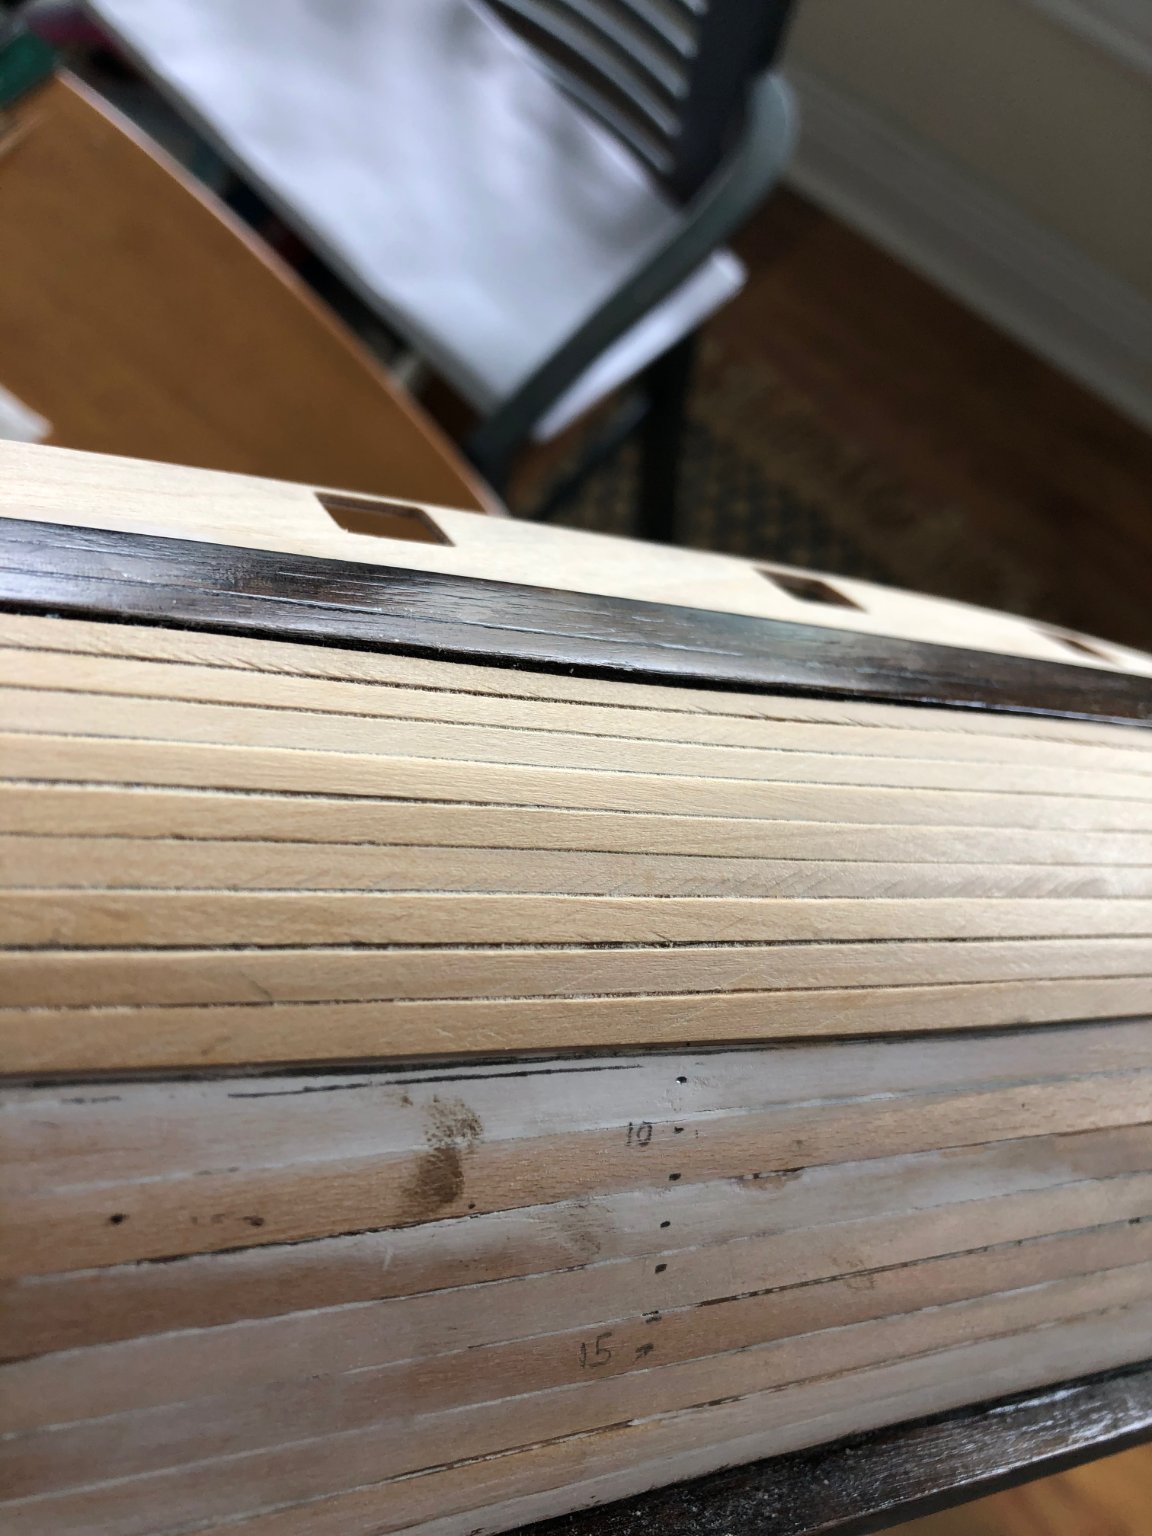
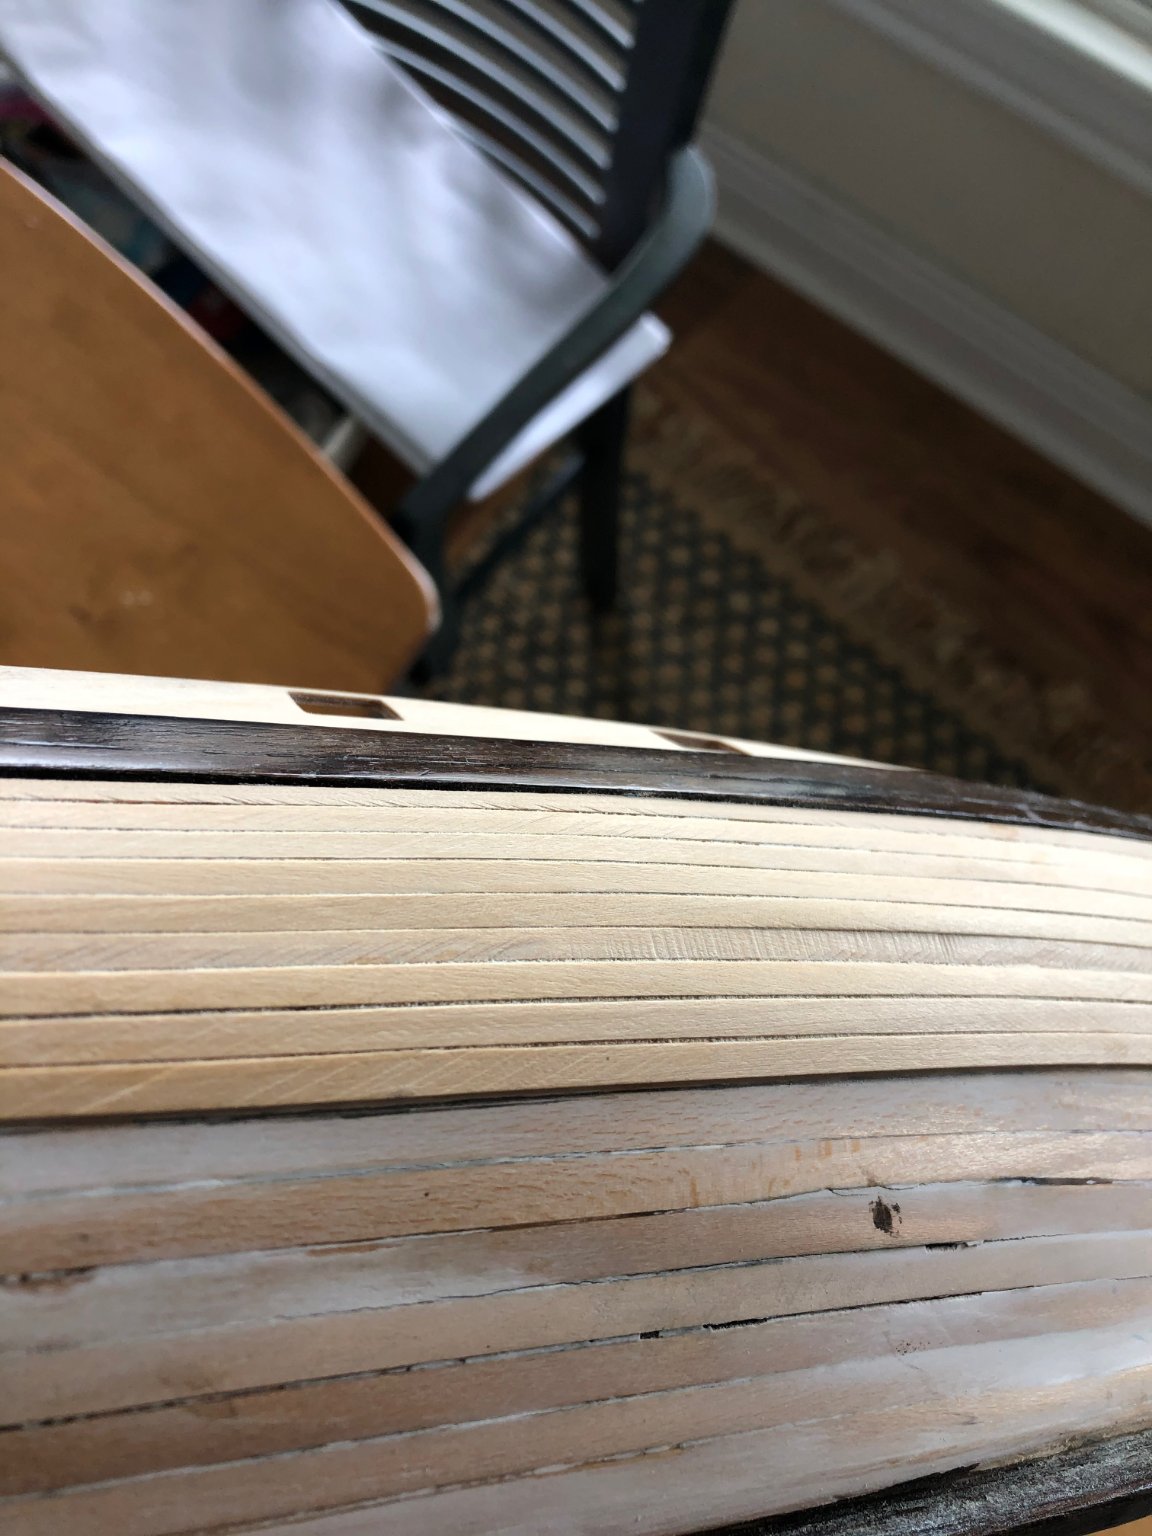
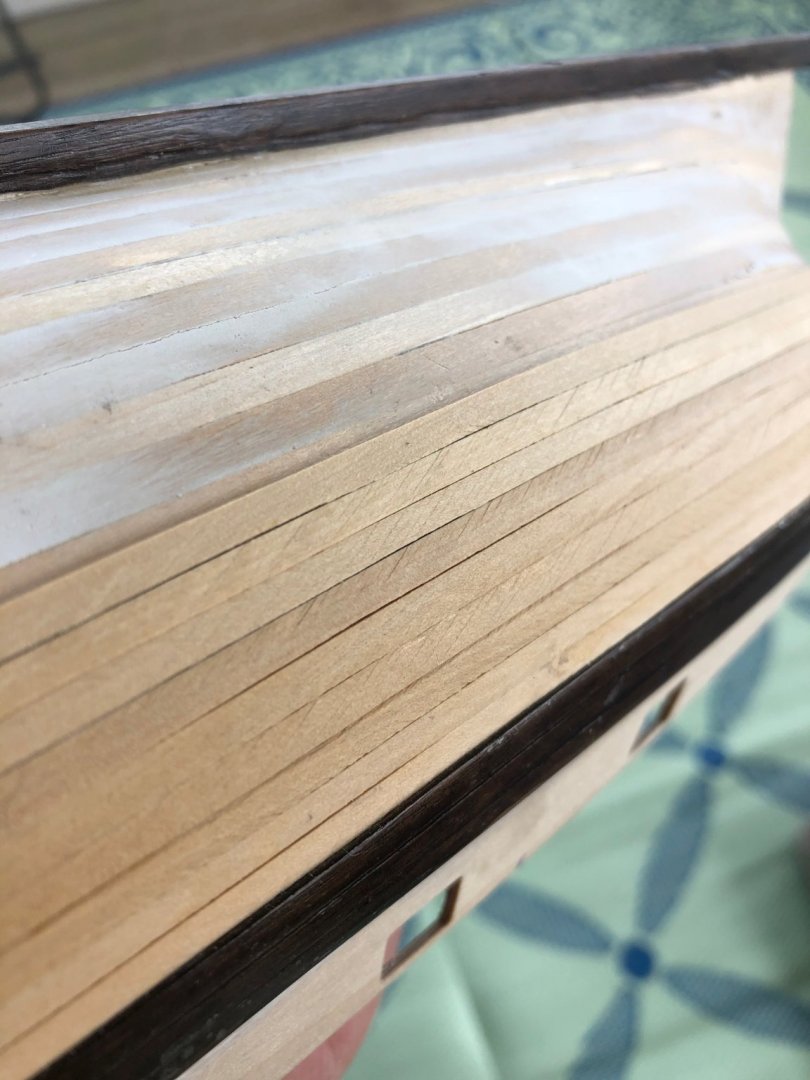
Second planking with Boxwood finished, and rough sanding underway! Looking pretty 2nd buildish isn't it, but a good 2nd buildish nonetheless (still looks like a boat). When you build with boxwood, it eliminates the ability to blame the wood. Good god these pictures make it look like gigantic fissures in the planking. I've got more sanding to do though (I ordered the Proxon sander =$) and when it gets here I'll have it sanded back down to the lime wood in no time at all. It looks pretty nice, and I am thinking I can shove boxwood dust ($) into the cracks and poly over it, sand it, poly it, sand it, poly it....and be happy for a while?
.thumb.jpeg.ba778b8f146e86d294d4b8d34e6a8ce4.jpeg)
.thumb.jpeg.5650b5402f9ad982304e2cfa676bf514.jpeg)
.thumb.jpeg.68e537083a7f800f7b773596d37aa6d4.jpeg)
-
Here is my final post for today....the tease. The wood provided in the kit was walnut and it was fine in my novice opinion, but I wanted to get the most bang for the buck if possible, and went boxwood. I think that was a good call, as long as it all works out in the end... Don't let Chuck or anybody with skill see how lame I am at planking, but I have always managed to unglue my fingers. =P I like my nasty bare foot in the above photo. No charge. The boxwood looks nice doesn't it, and it is so nice to work with. I really need to make sure I check each plank before using one side or the other. But I think it still looks pretty solid so far.


-
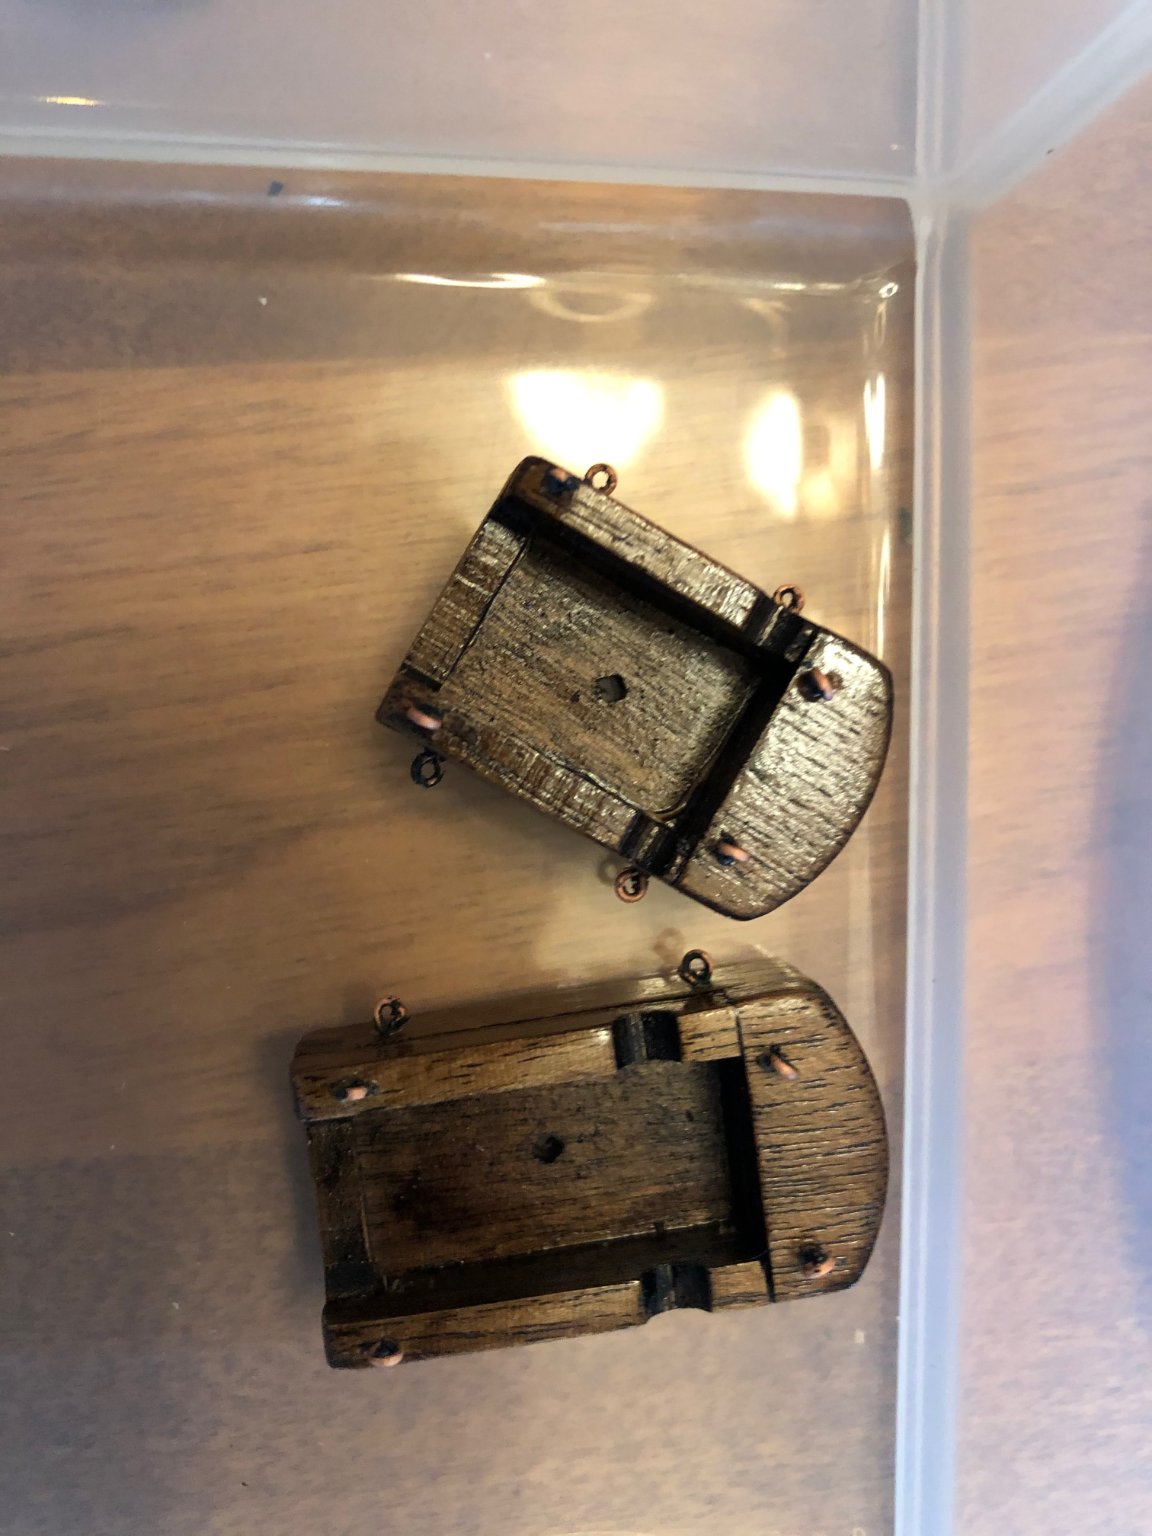
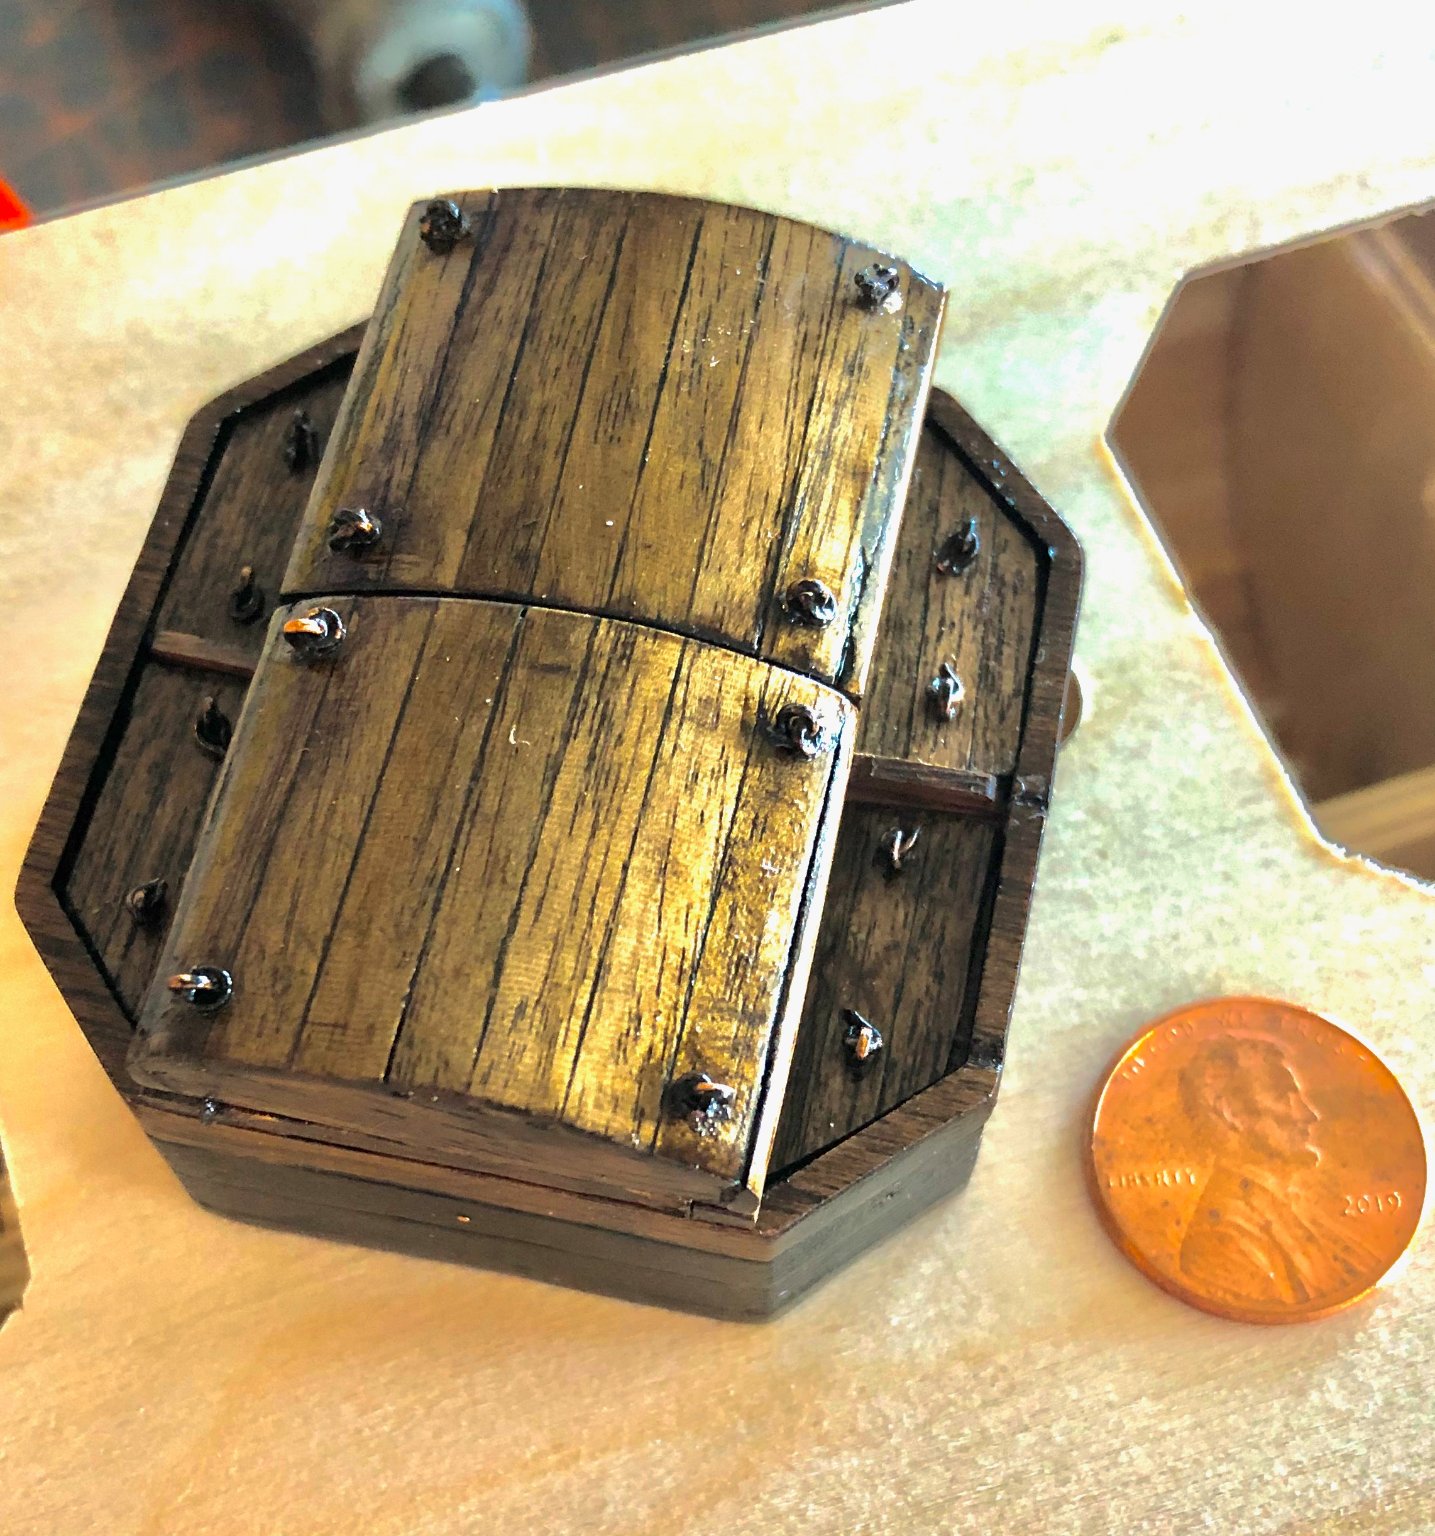
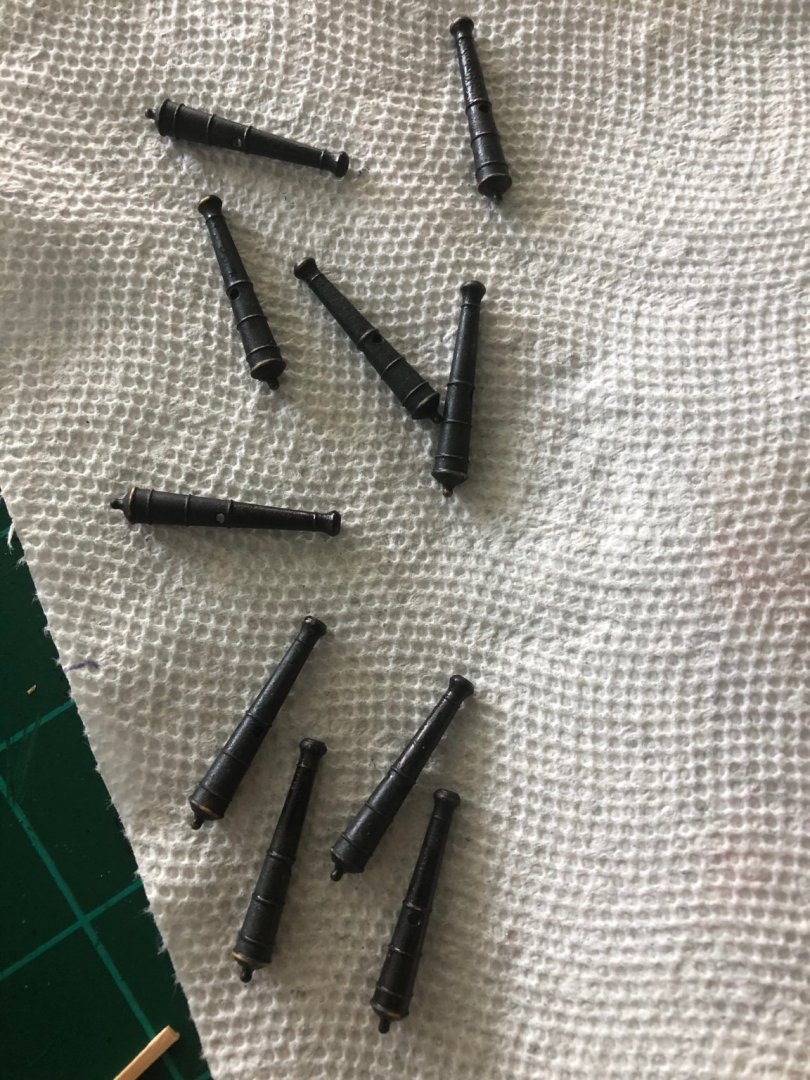
Did I mention I blackened the cannon's with a liquid blackening agent because I am "afraid" of paints due to being a newbie? Well I did that, and it turned out kinda meh. Takes a long time, toxic, takes a long time....looks good but rubs off? Wtheck is with that stuff anyway, but it does give it a certain depth and cool look, doesn't it?
-
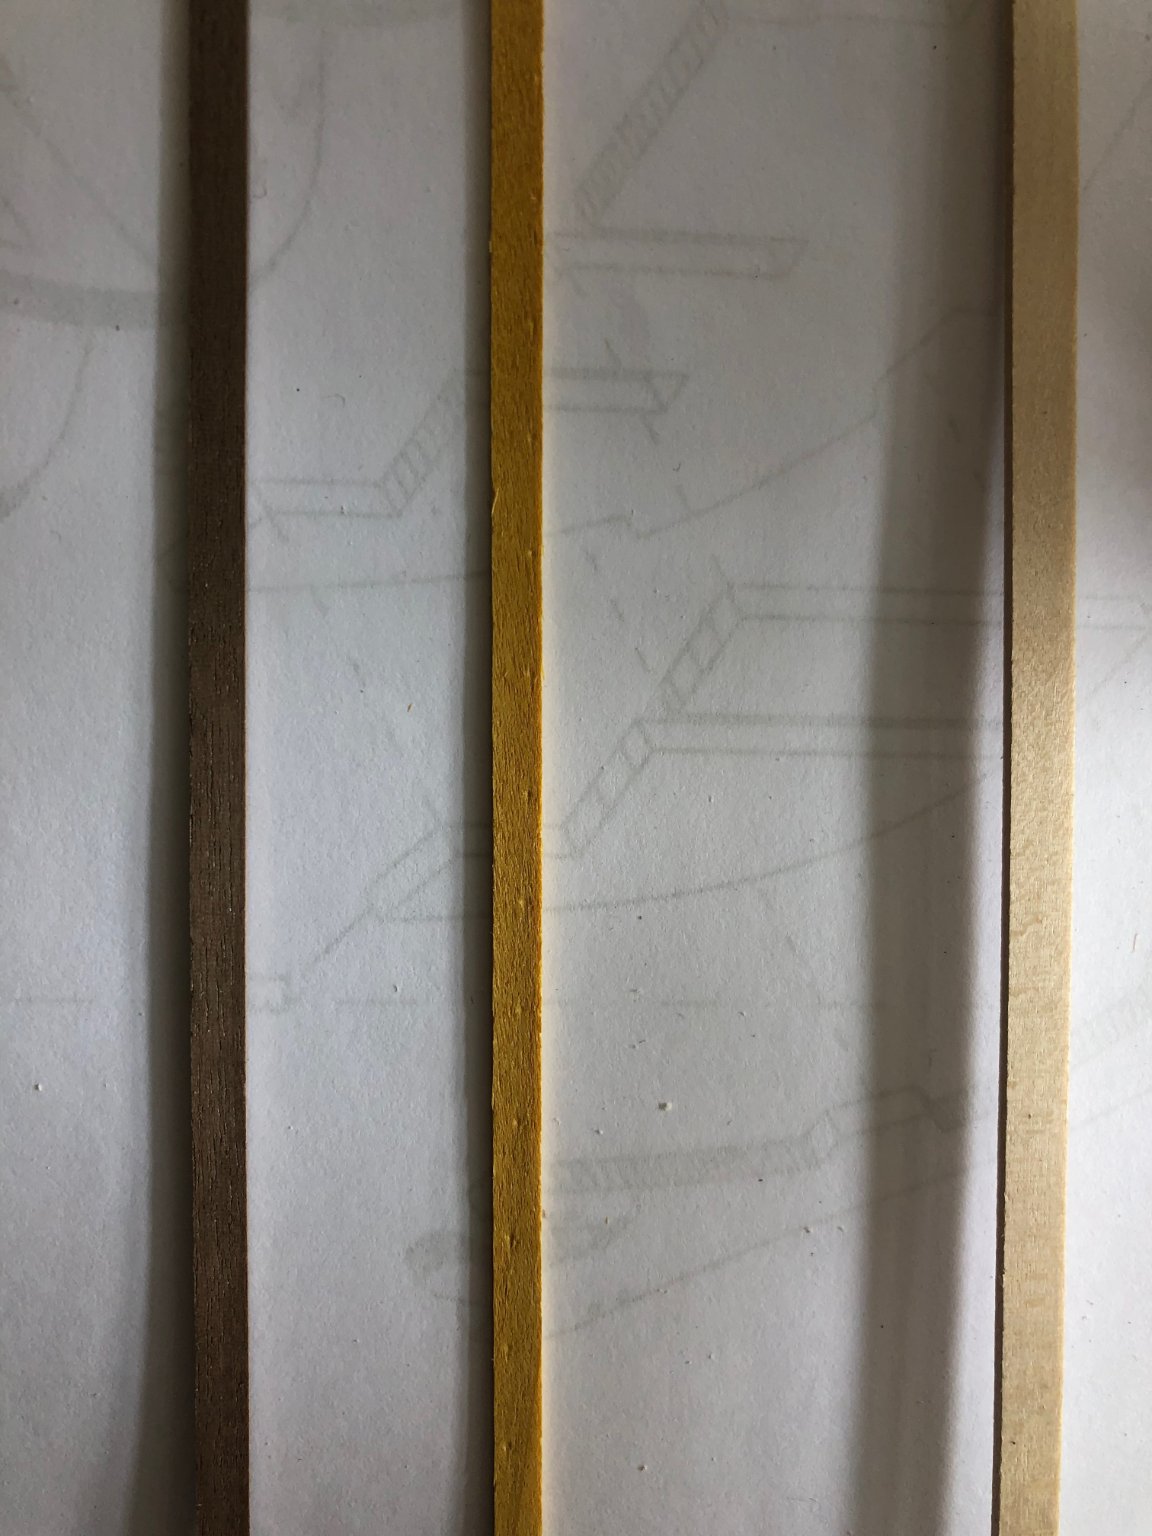
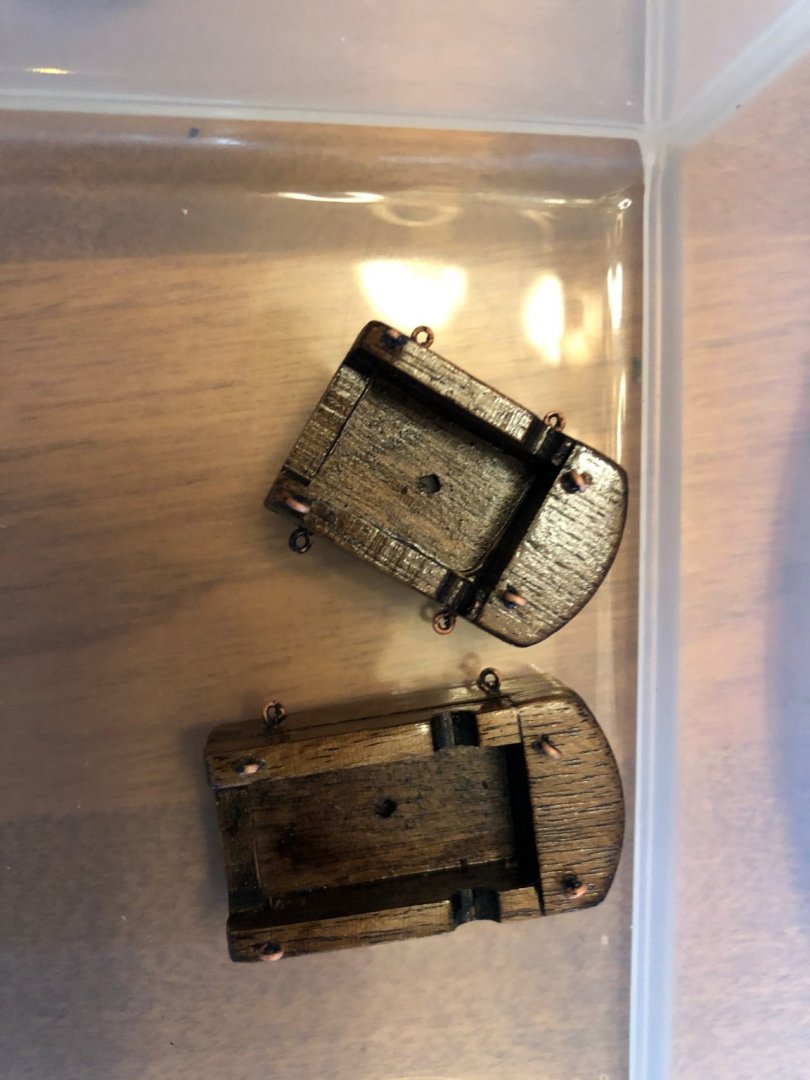
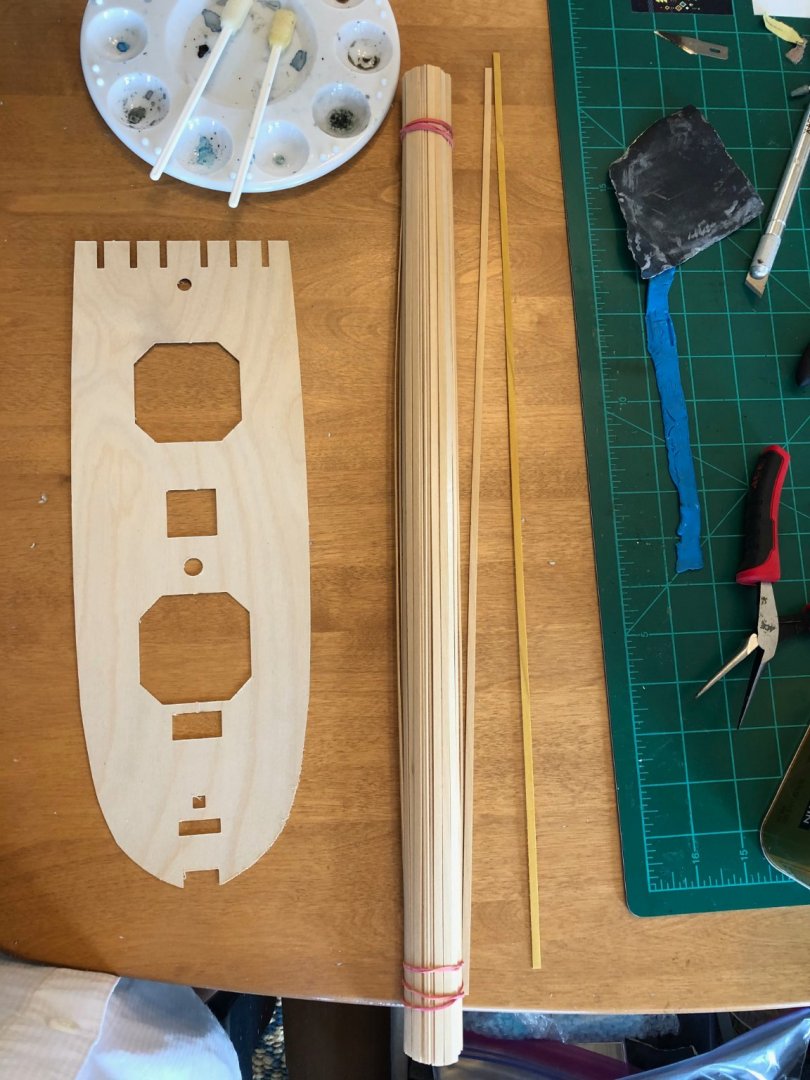
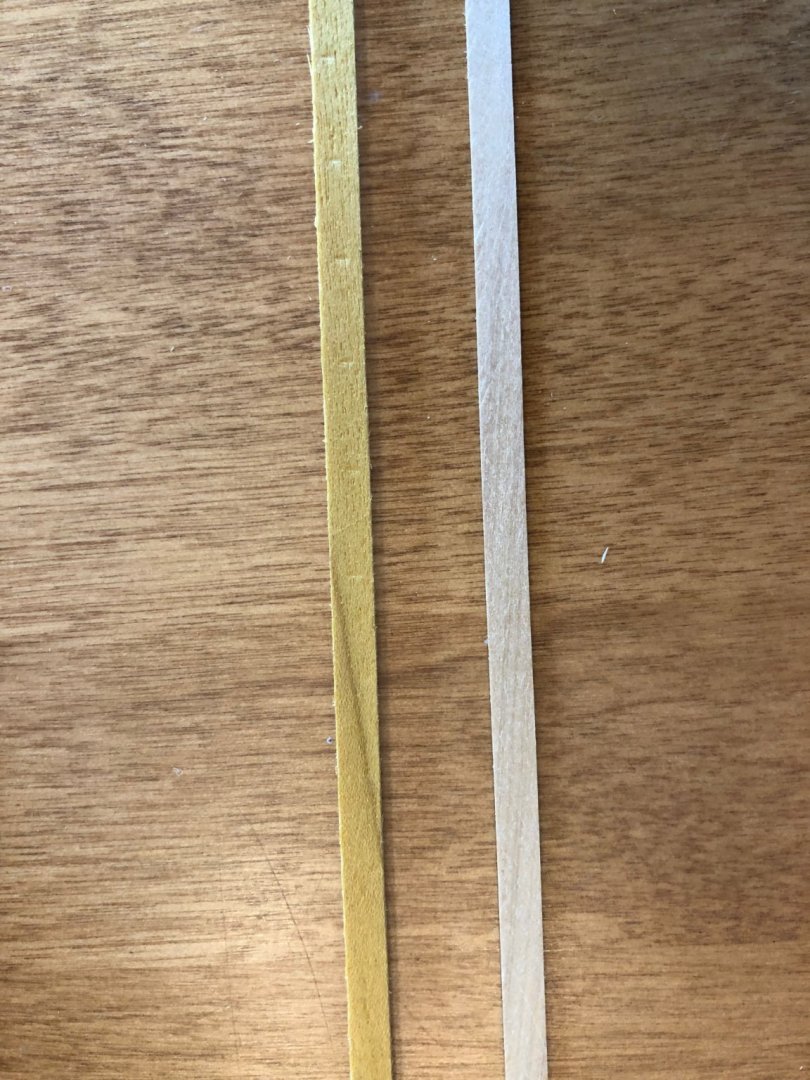
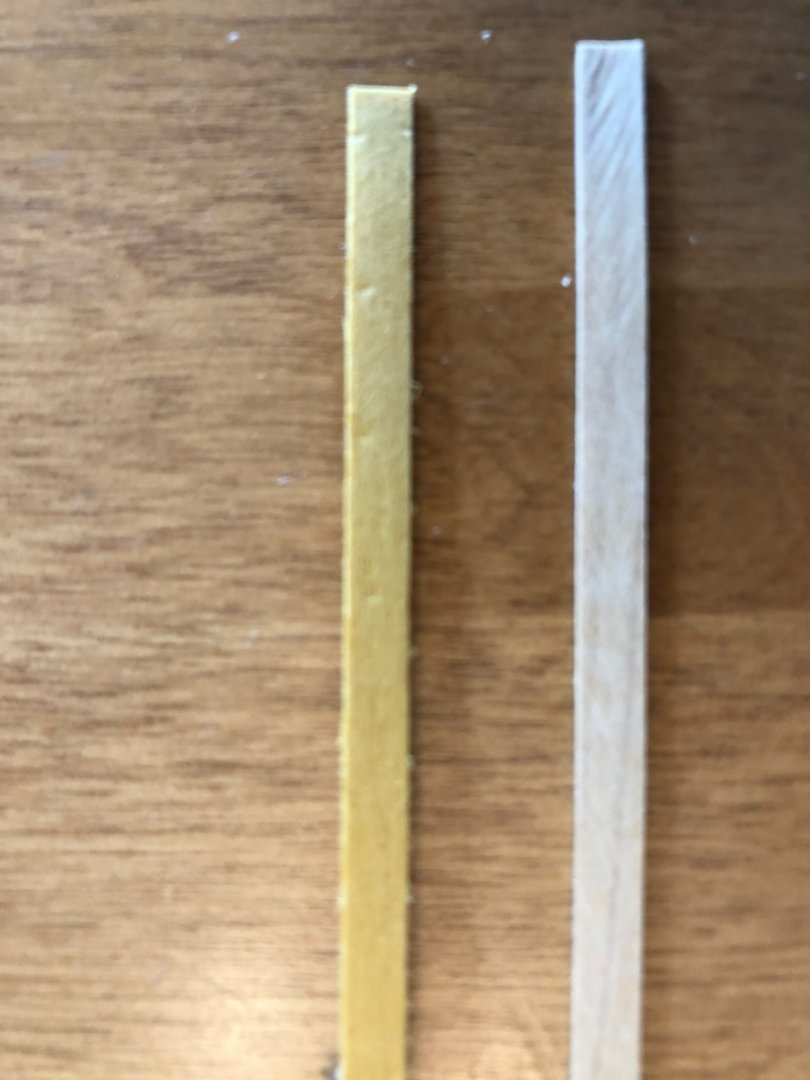
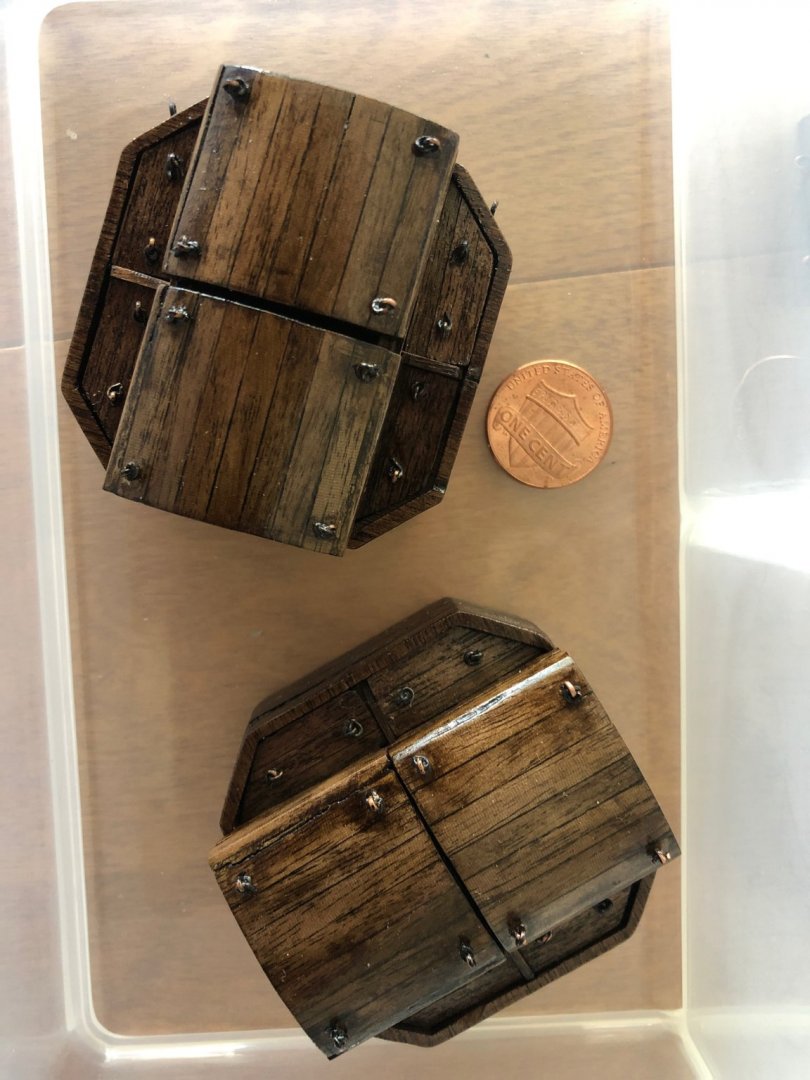
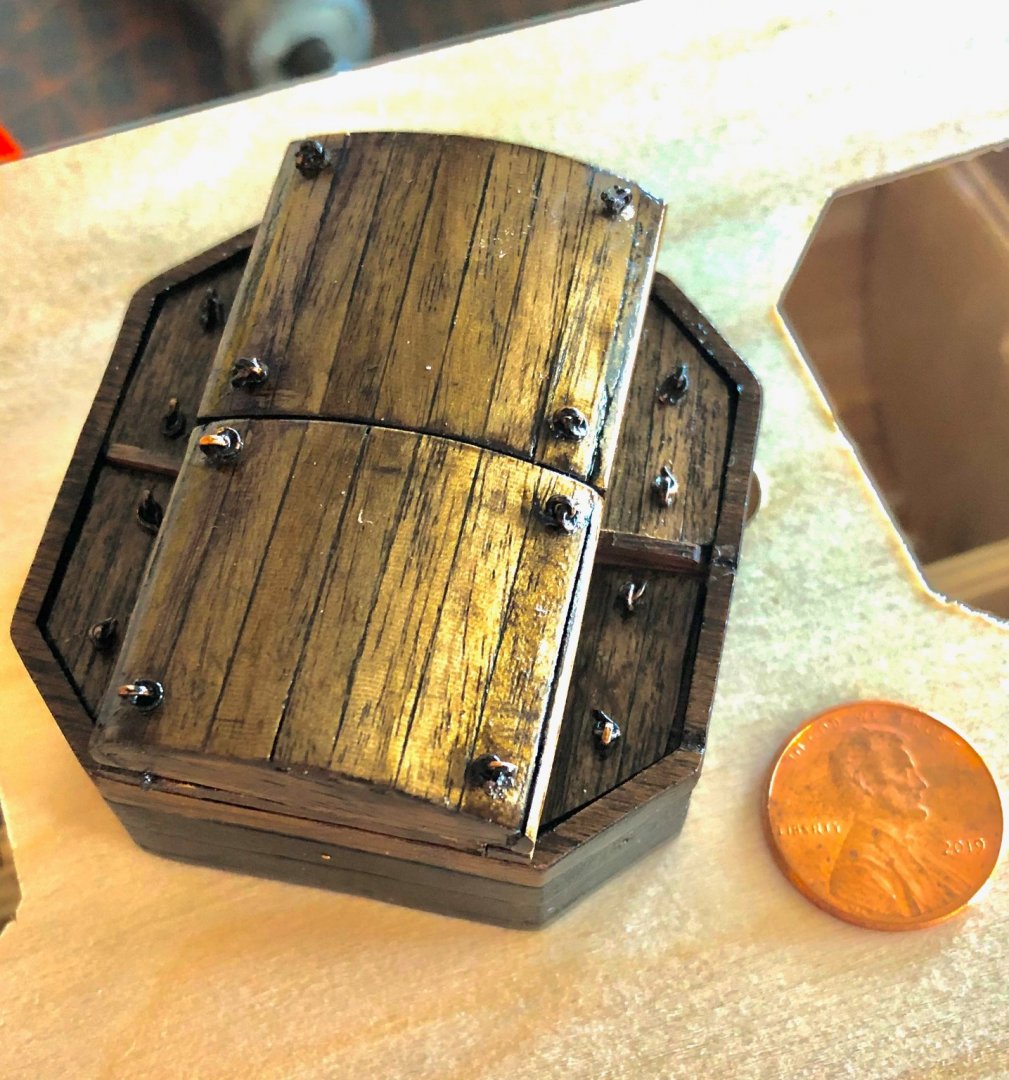
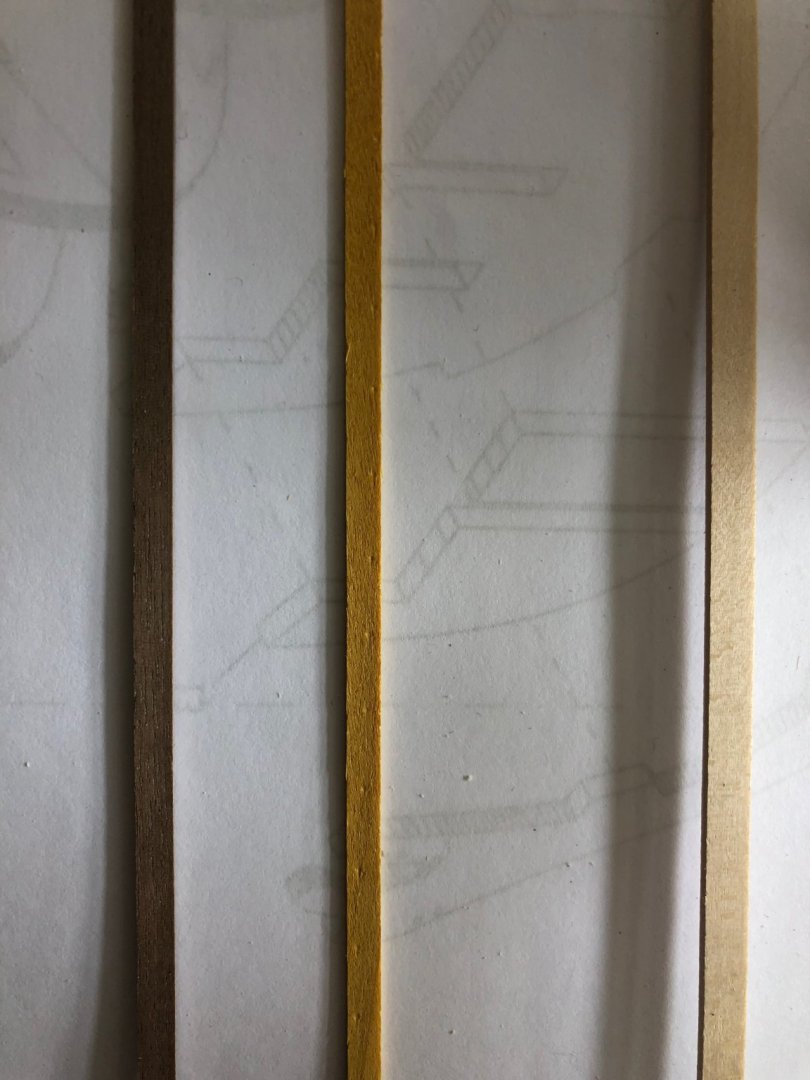
Ryland, you are encouraging me, and I thank you for that. Here is a little bit more of the build (and some wood talk): Let's start with the fake boxwood a certain somecompany sold me. I placed it between a piece of lime on the right and walnut on the right. It's pretty horrid. So while I was waiting for the boxwood from an honest supplier in Deutschland, I built the mortar housings and the cannon carriages, because that's what you do, right?!? Poorly stained and poly'd by comparison to others, but for me, an amazing feat to make something that looks somewhat functional. Here you get to see that the carriages still need sanding and finishing (as do the mortar housings), but I am glad that I am still making progress and not making too much of a mess of a good kit (thank you Caldercraft). Photo's do make my work look, uhm, like it's my second build.... But, the boxwood finally arrived!!!! Like almost 1.5 months later I am afraid to admit...but it was worth it (we will see if I make it worth it in the end..... 😉 It might not look like much, but it feels substantial, and what a joy it has turned out to work with so far..... (here is a shot with the bundle of boxwood ($) and the yellow piece of "wood" worth ($0.00000000000001). Side by side revelation that the stuff on the left is so not right.... If anyone wants some yellow "wood" strips, no wait, never mind.


.jpeg.c50eabae8060765691f660f17220cc12.jpeg)
.jpeg.b17773548a553356e5f3bd7003955290.jpeg)
.jpeg.7770d953087ebc27e5055f74a8a5ebbe.jpeg)


.jpeg.d1ca048789d65d9aeb9990f613627478.jpeg)
.jpeg.a42ecc1164f64f0c49e6c8e7565a5784.jpeg)
.jpeg.f09979e1988cdd80b6436876936979b3.jpeg)