
HardeeHarHar
-
Posts
615 -
Joined
-
Last visited
Content Type
Profiles
Forums
Gallery
Events
Everything posted by HardeeHarHar
-
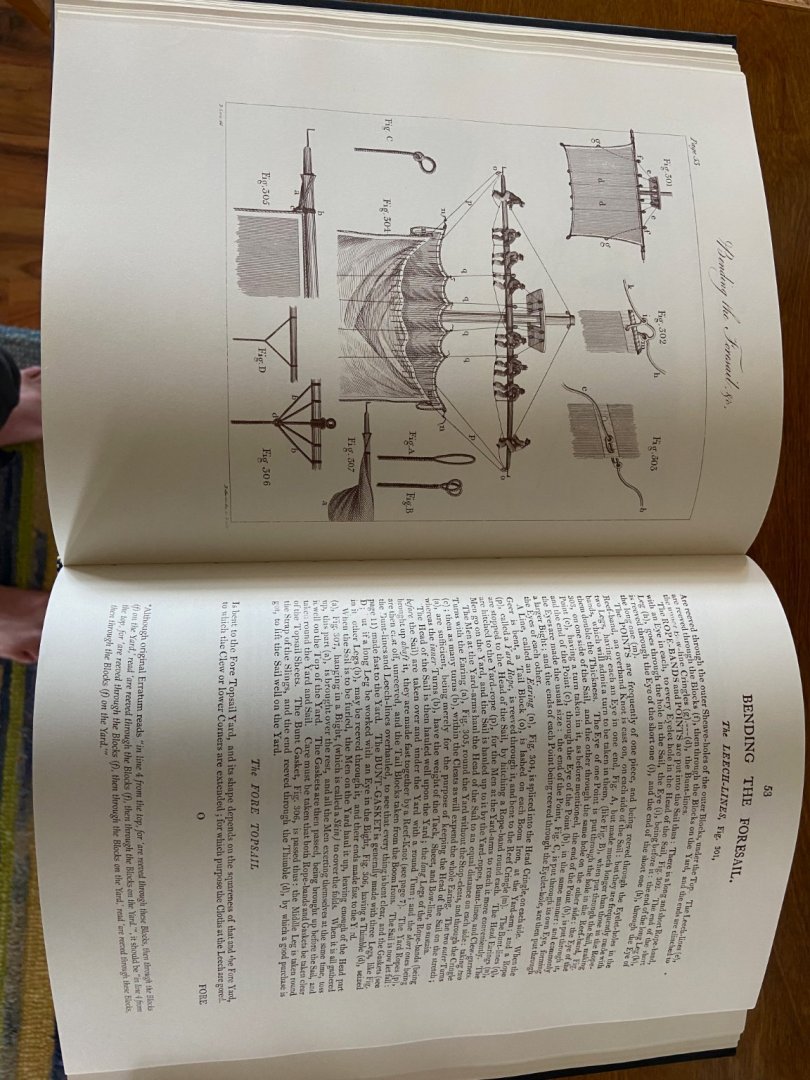
 Sample pages for your perusal 😃
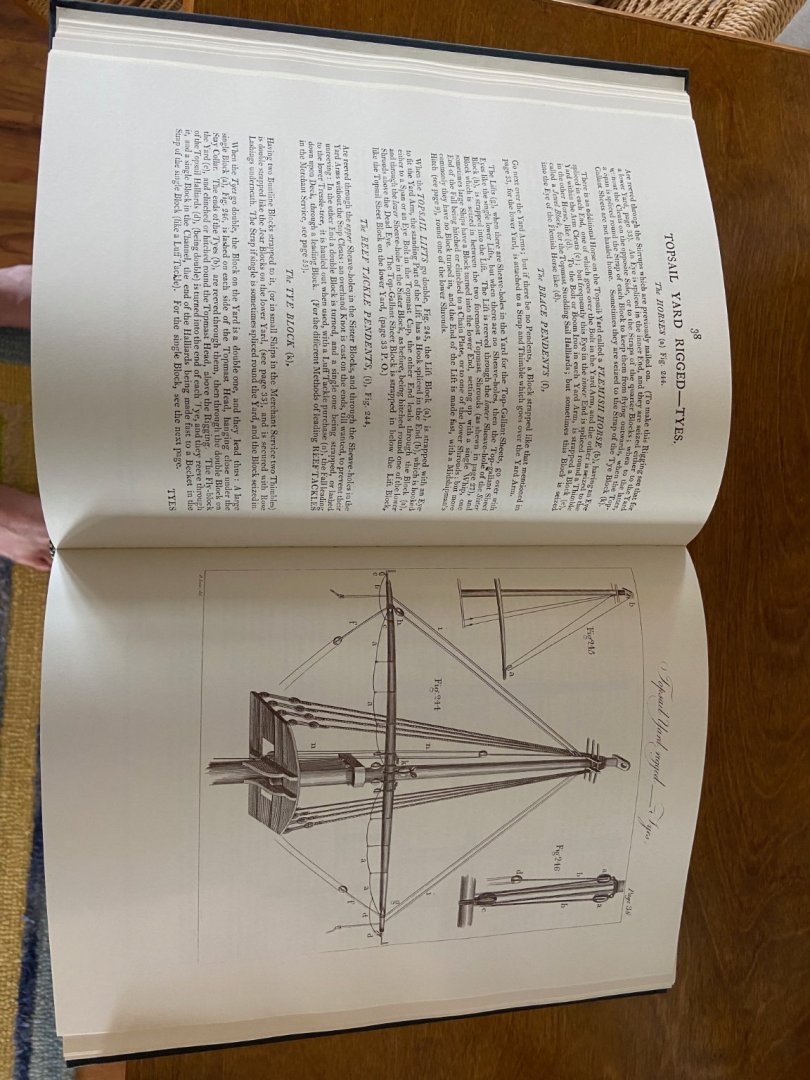

-
You know you have an illness when you freak out with joy when you receive the Granado Part 1 box from China CAFMODEL safe and sound....and....you still have a long way to go to finish the Granado by Caldercraft you are currently working on. I am thinking I should also get the CAFMODEL cross section view to round it all off. I told you it was an illness.
-
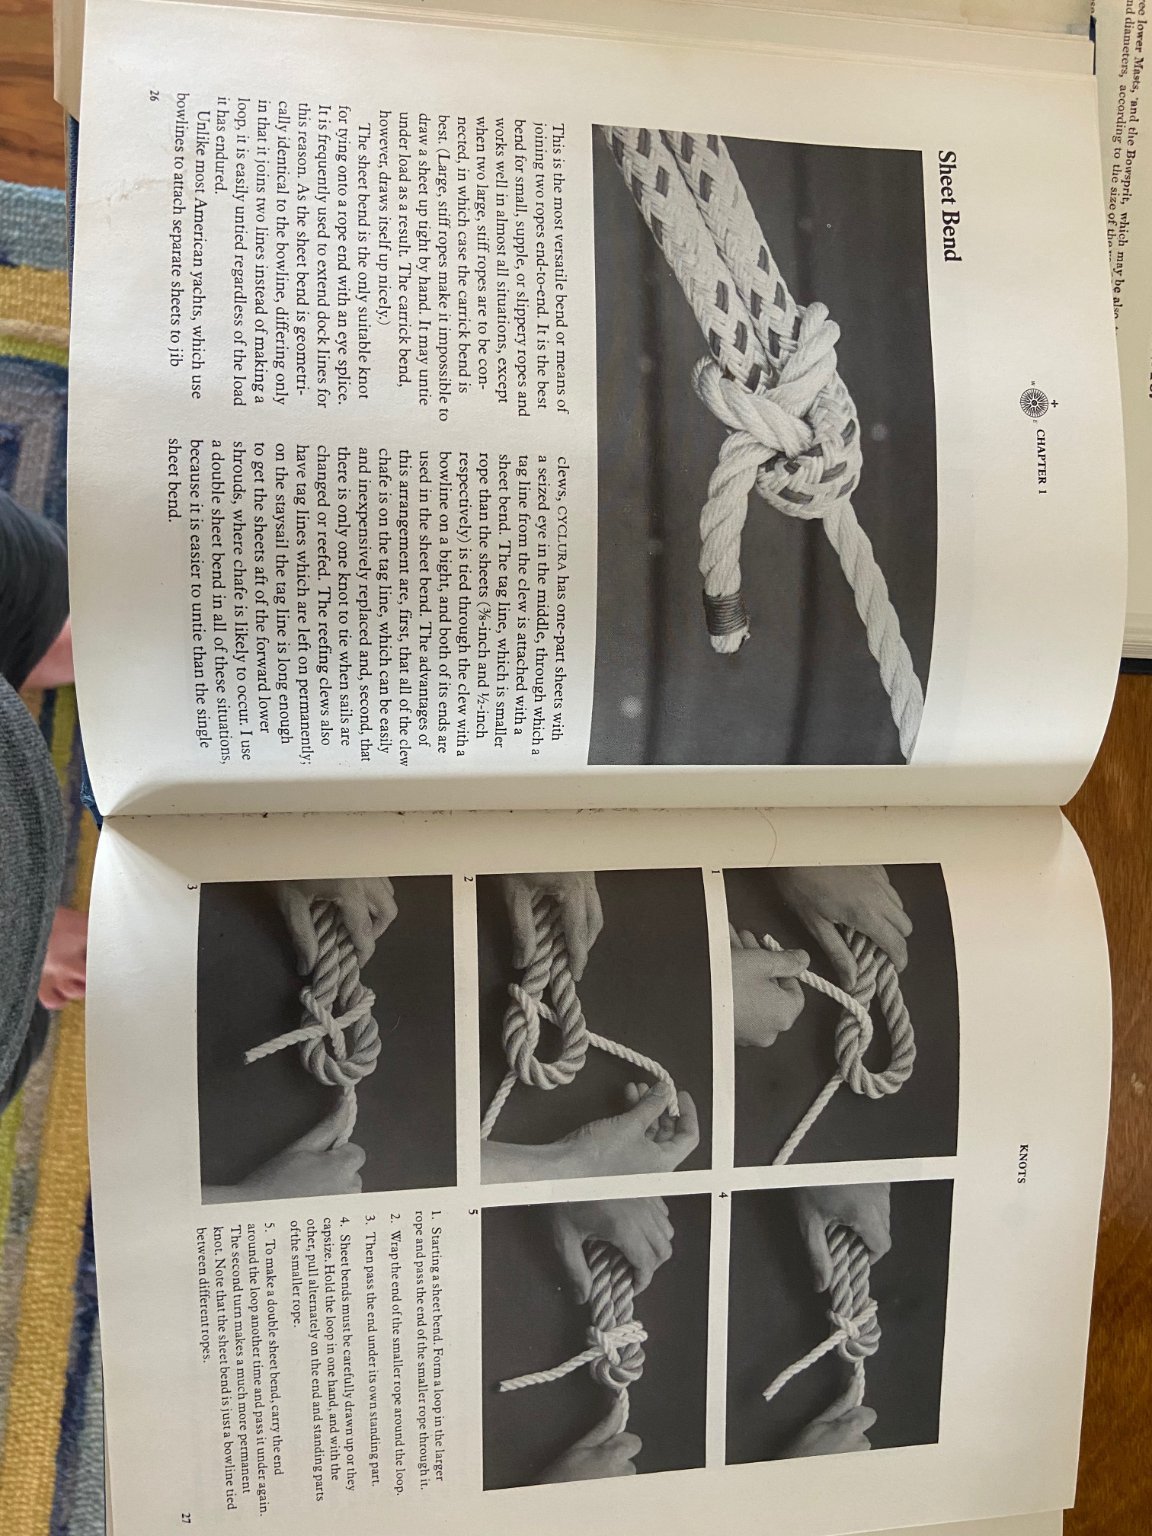
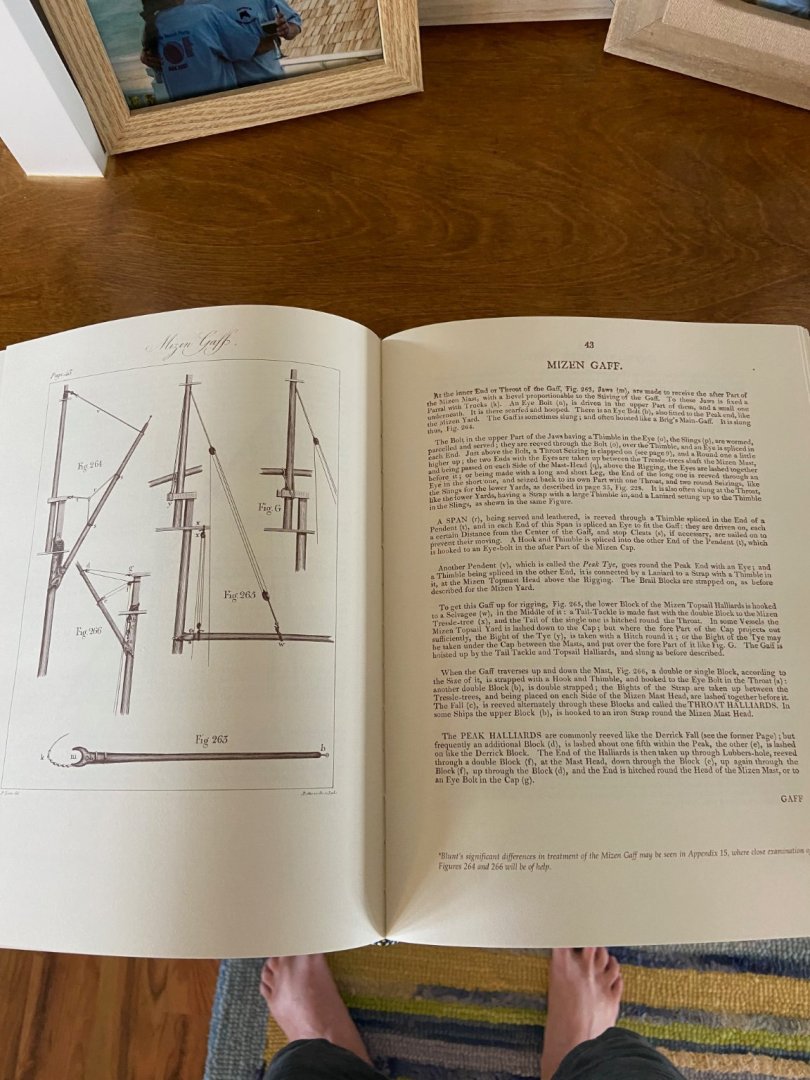
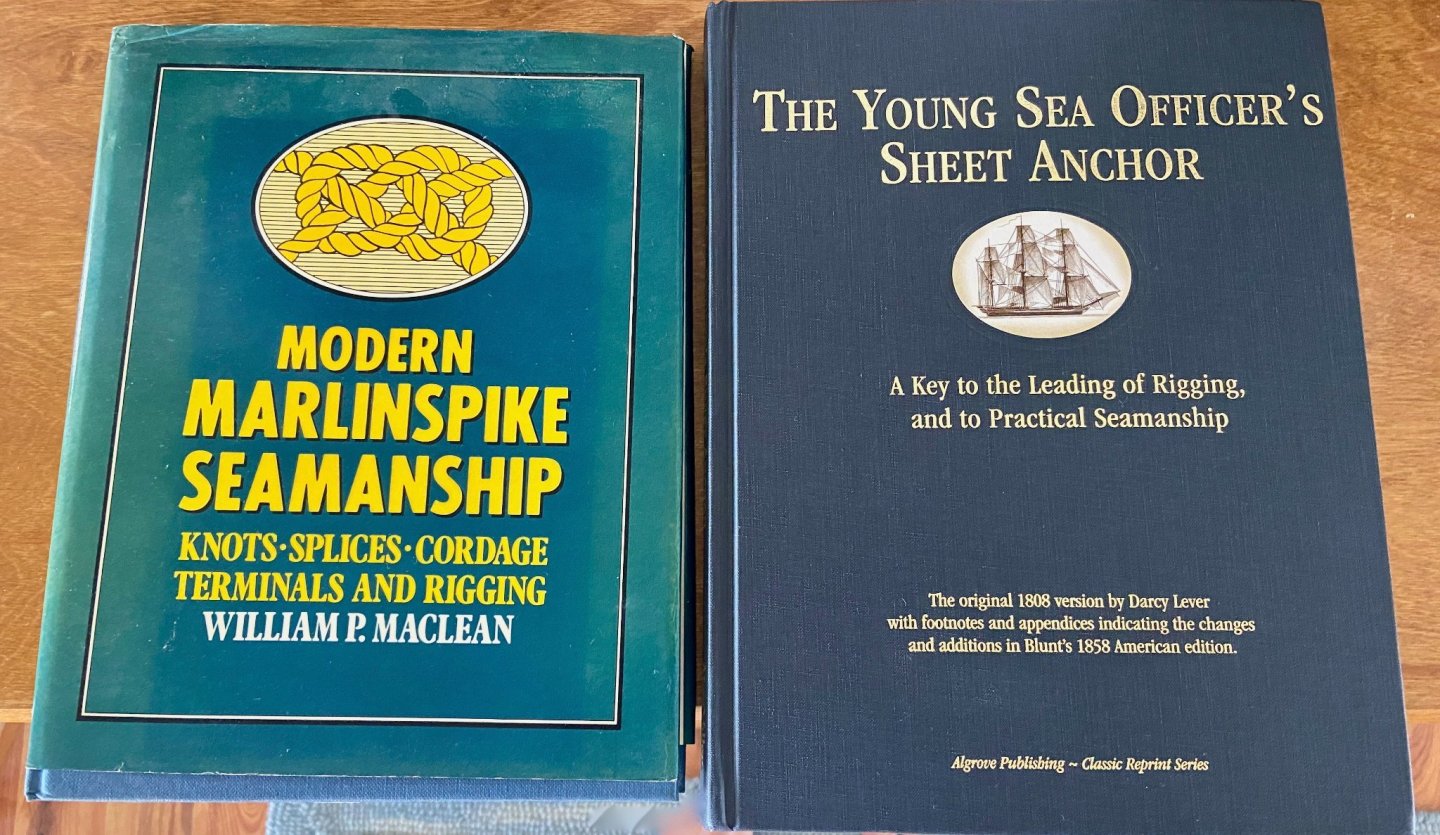
I found these references that my air-conditioning and heating repair person had recommended for nice arm chair book editions for the ship modeler. You have to try and find them at reasonable prices and grab em then if you can. I hope its not impolite to be dropping pictures in peoples build logs like this, but if it is, you or someone should tell me.


- 129 replies
-
- 2
-

-

-
- Bounty Jolly Boat
- Artesania Latina
- (and 1 more)
-
Yo Kev, It is looking very nice my good man. Looking at your work makes me remember that I didn't accommodate the oars on my launch so I didn't make the cut outs in the hull. I put the oars on display on the stand as I mentioned before. Your notes about the mast being fabricated from two parts brought that memory back out of no where! I definitely remember all too well that feeling of WTF you get when you see *that* in the instructions. I did follow right along like a lemming over a cliff and attempted to follow along as best I could. So, I stuck a piece of one of the brass nails provided in the kit (that I had cut the head off of) into a hole I drilled into the end of the big section of the mast and glued it in place. Then drilled a hole in the other (abutting) part of the mast and stuck the two together via the common "head-less" nail. Buahahaha. 😃 I need to make some progress on my own build one day! Good luck and calm seas, tight lines BT
- 129 replies
-
- 1
-
-
- Bounty Jolly Boat
- Artesania Latina
- (and 1 more)
-
So I have to add some encouragement to the build. I think you are doing a good job and have accomplished a lot of detail and craftsmanship. I am excited to see how it turns out in the end, and if you have any specific questions I can try to help (but I am just learning my self). Having recently completed the Bounty's Launch myself, I found myself doing a lot more thinking and reading than I had ever expected. I stained my build some what "uniquely", and the stain bled through just like you said, but I liked the "used" look it gave the interior. I also had to make my own thwarts, and did a few things to break pieces along the way, but persevered to a point where the final result was simply satisfaction enough. I'll never forget staring at the rigging in the instructions, and the mess of fabric, string, and metal hoops in front of me...and wondering how do you start, and when do you pull things tight, and do you glue it and figure it out later....for a week or two. It finally made sense one day and I could picture how to complete the running rigging and then pull everything up at once and into place. It sounds strange to talk about it now, but it just made sense and I could picture it happening in my head. When I finished it and it looked pretty good, I was HOOKED. After all that time and effort, and figuring it out with the help of the forum, it still looked pretty good when I was done with it, and that was a huge success above my original goal to just not total it. I made a Bounty voyage map-base like some one else had done on the forum, and I laced the oars together nicely and placed them decoratively on the base (two sets of 3 oars laced together, one for the front and one for the back of the base, that was my own touch). I'm working on the HMS Granado now, and it is really challenging my basic noobie skills, and I am again loving the steep learning curve....but very slowly....
- 129 replies
-
- 2
-
-
- Bounty Jolly Boat
- Artesania Latina
- (and 1 more)
-
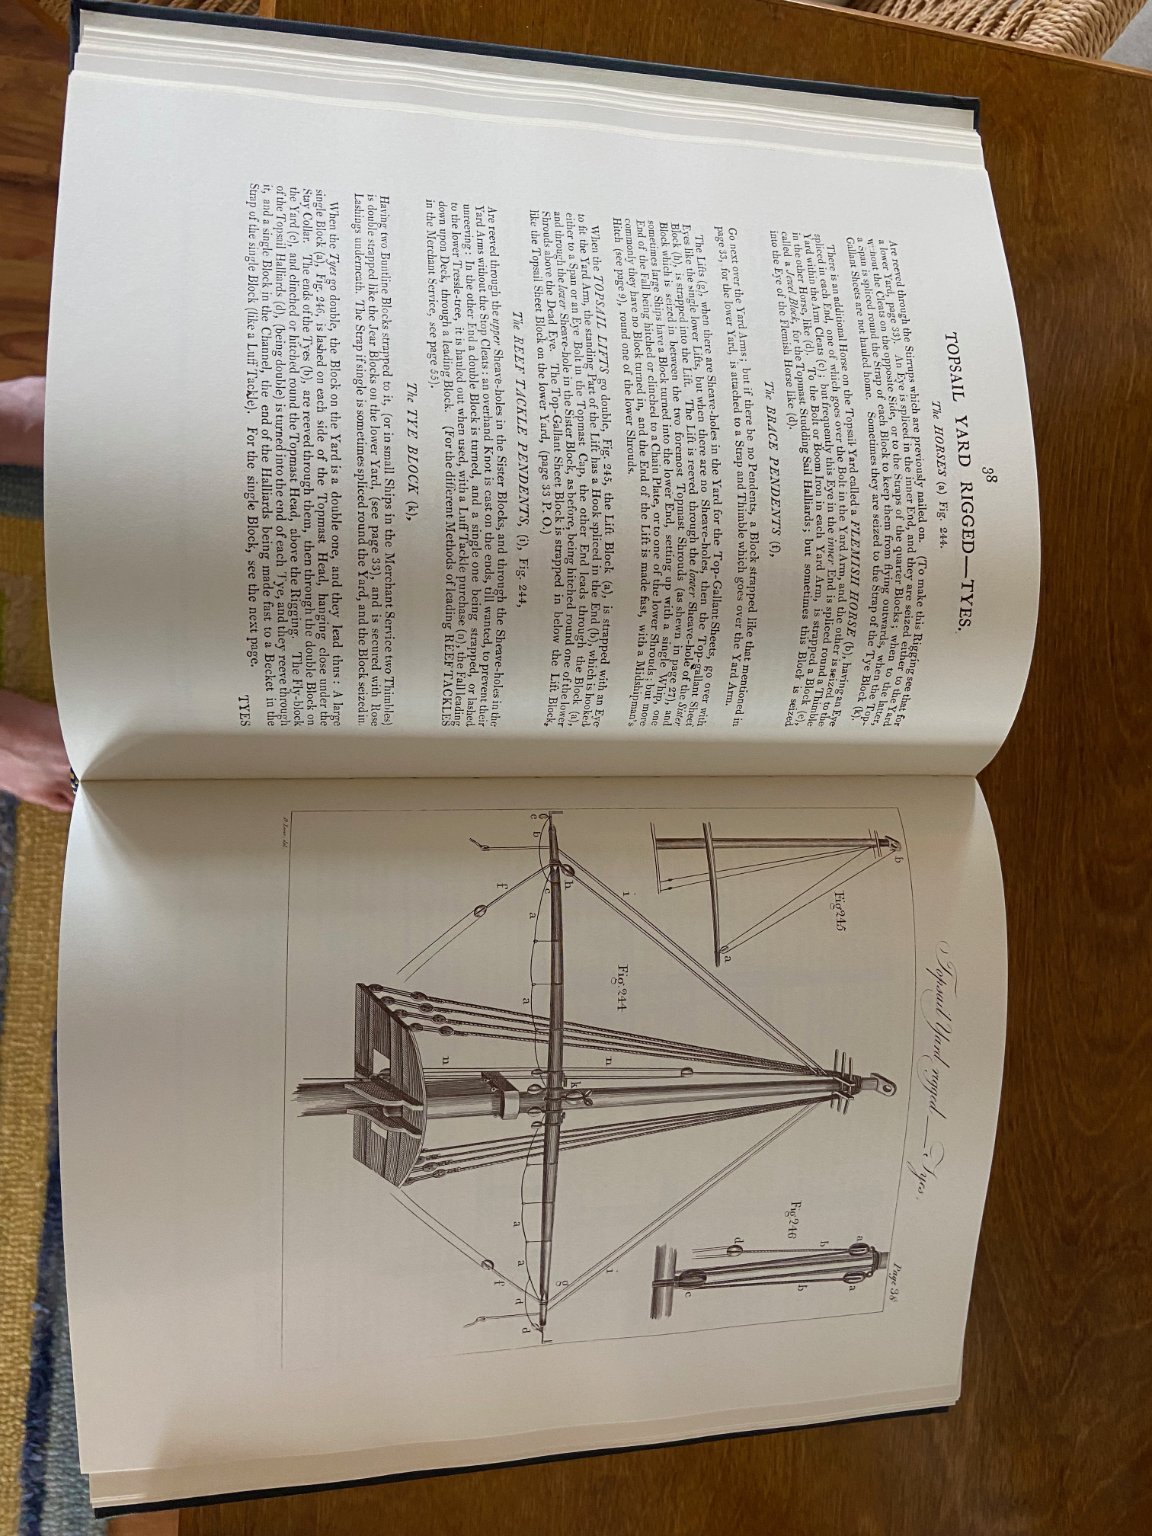
The young sea officers sheet anchor is absolutely a great book to have at hand when contemplating rigging a model ship.
- 5 replies
-
- 13
-
-
-

-
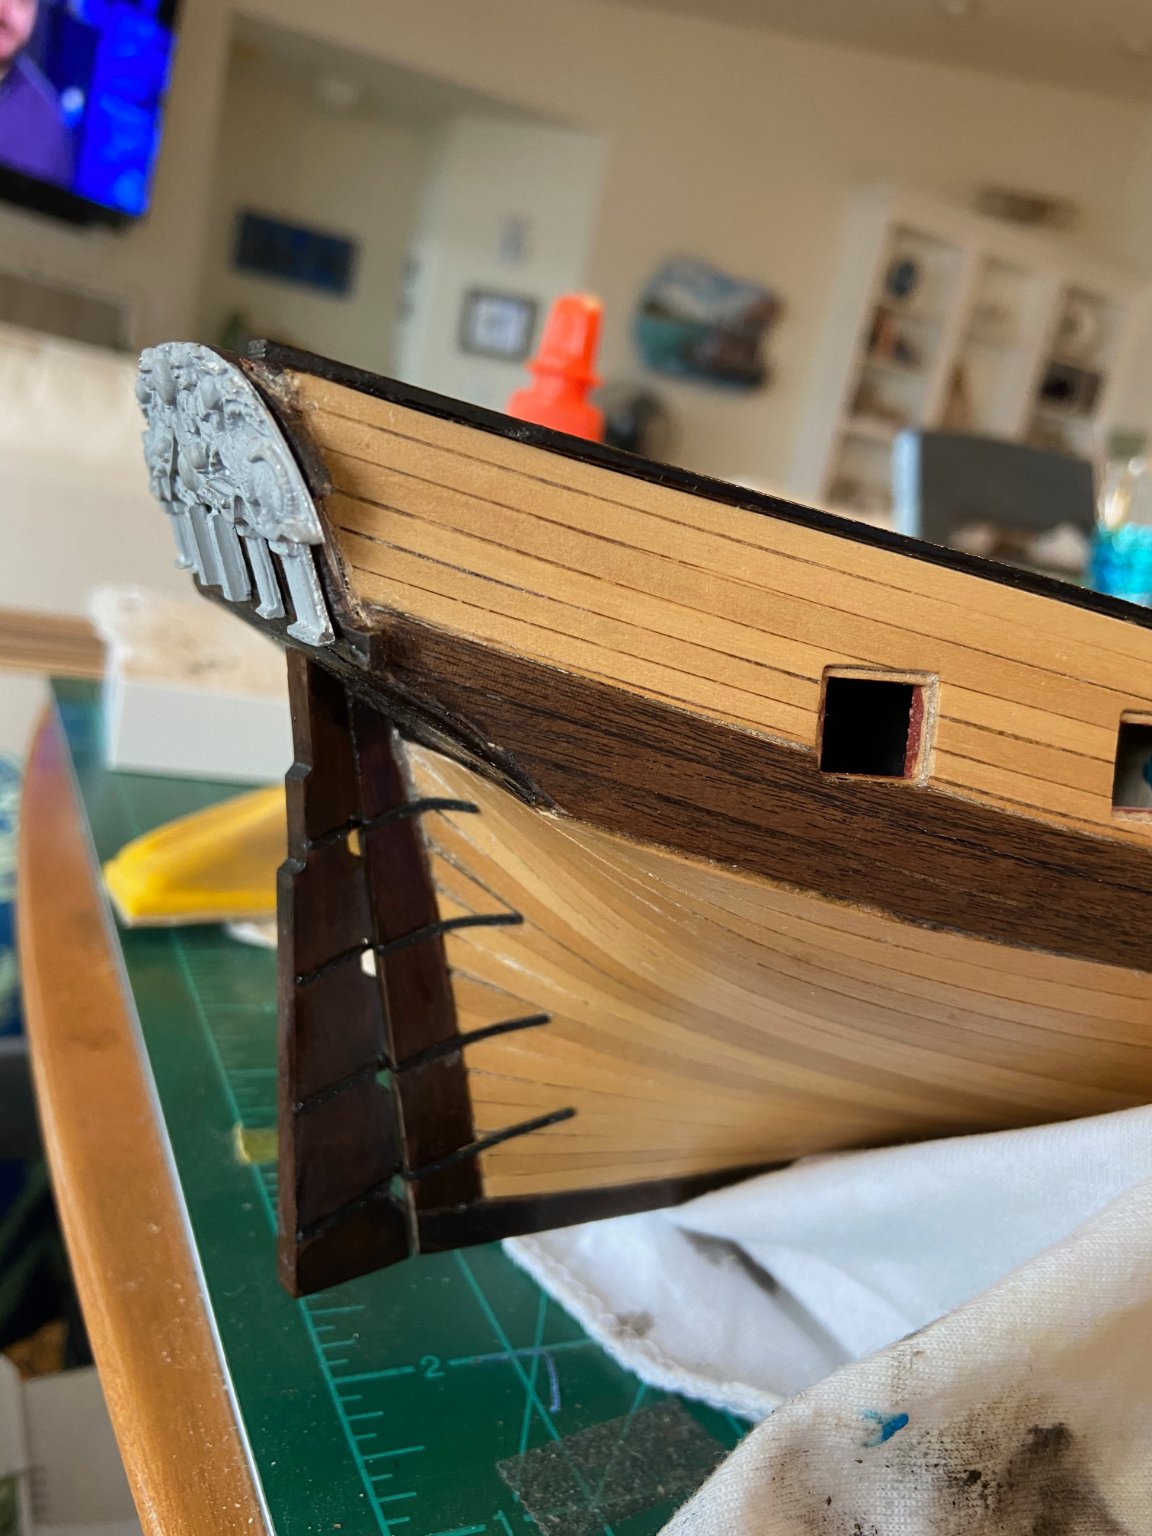
Well, small steps still count. I finished the stern vents, but they still need to be cleaned up and the lines adjusted a little. The transom relief is just tacked on with blutak, just begging me to mess it up with some paint.

-
Welcome aboard MSW. That is an extremely nice first build and I I believe it would be nice to have your pictures showing the techniques and process you applied to arrive at the final whaleboat available for others to reference. Looking forward to seeing your next build log as well. It looks like you will be right at home here!
-
HMS Granado 1742 Kit - CAF Model - 1:48 Scale
HardeeHarHar replied to cafmodel's topic in Wood ship model kits
Ordered -
@allanyed and @Mick_S - Thanks for the kind words and reinforcement of previous (difficult) decisions. I am mostly pleased with the appearance of the decking and planking, and had worried A LOT about whether to treenail or not, and even did some experimentation. However, I decided to not pursue them at this scale, particularly since I still plan on leaving the hull mostly unpainted (and thought it might look toooooo busy or drive me crazy in the process). Progress has been very slow lately: I have finished the stern vents now, and am still delaying the installation and "glueage" of the two cannons in the gunports under the forecastle deck. That seems to be a mental hurdle for me for some reason.
-
A bottle of bubbly yes, but no bananas, flat feet, or whistling (among other things).
-
Looking great Chris! You are gonna slice through the water so fast you wont even need to paddle. Just shove off, wait a while, and you will be where you were going in no time at all!
-
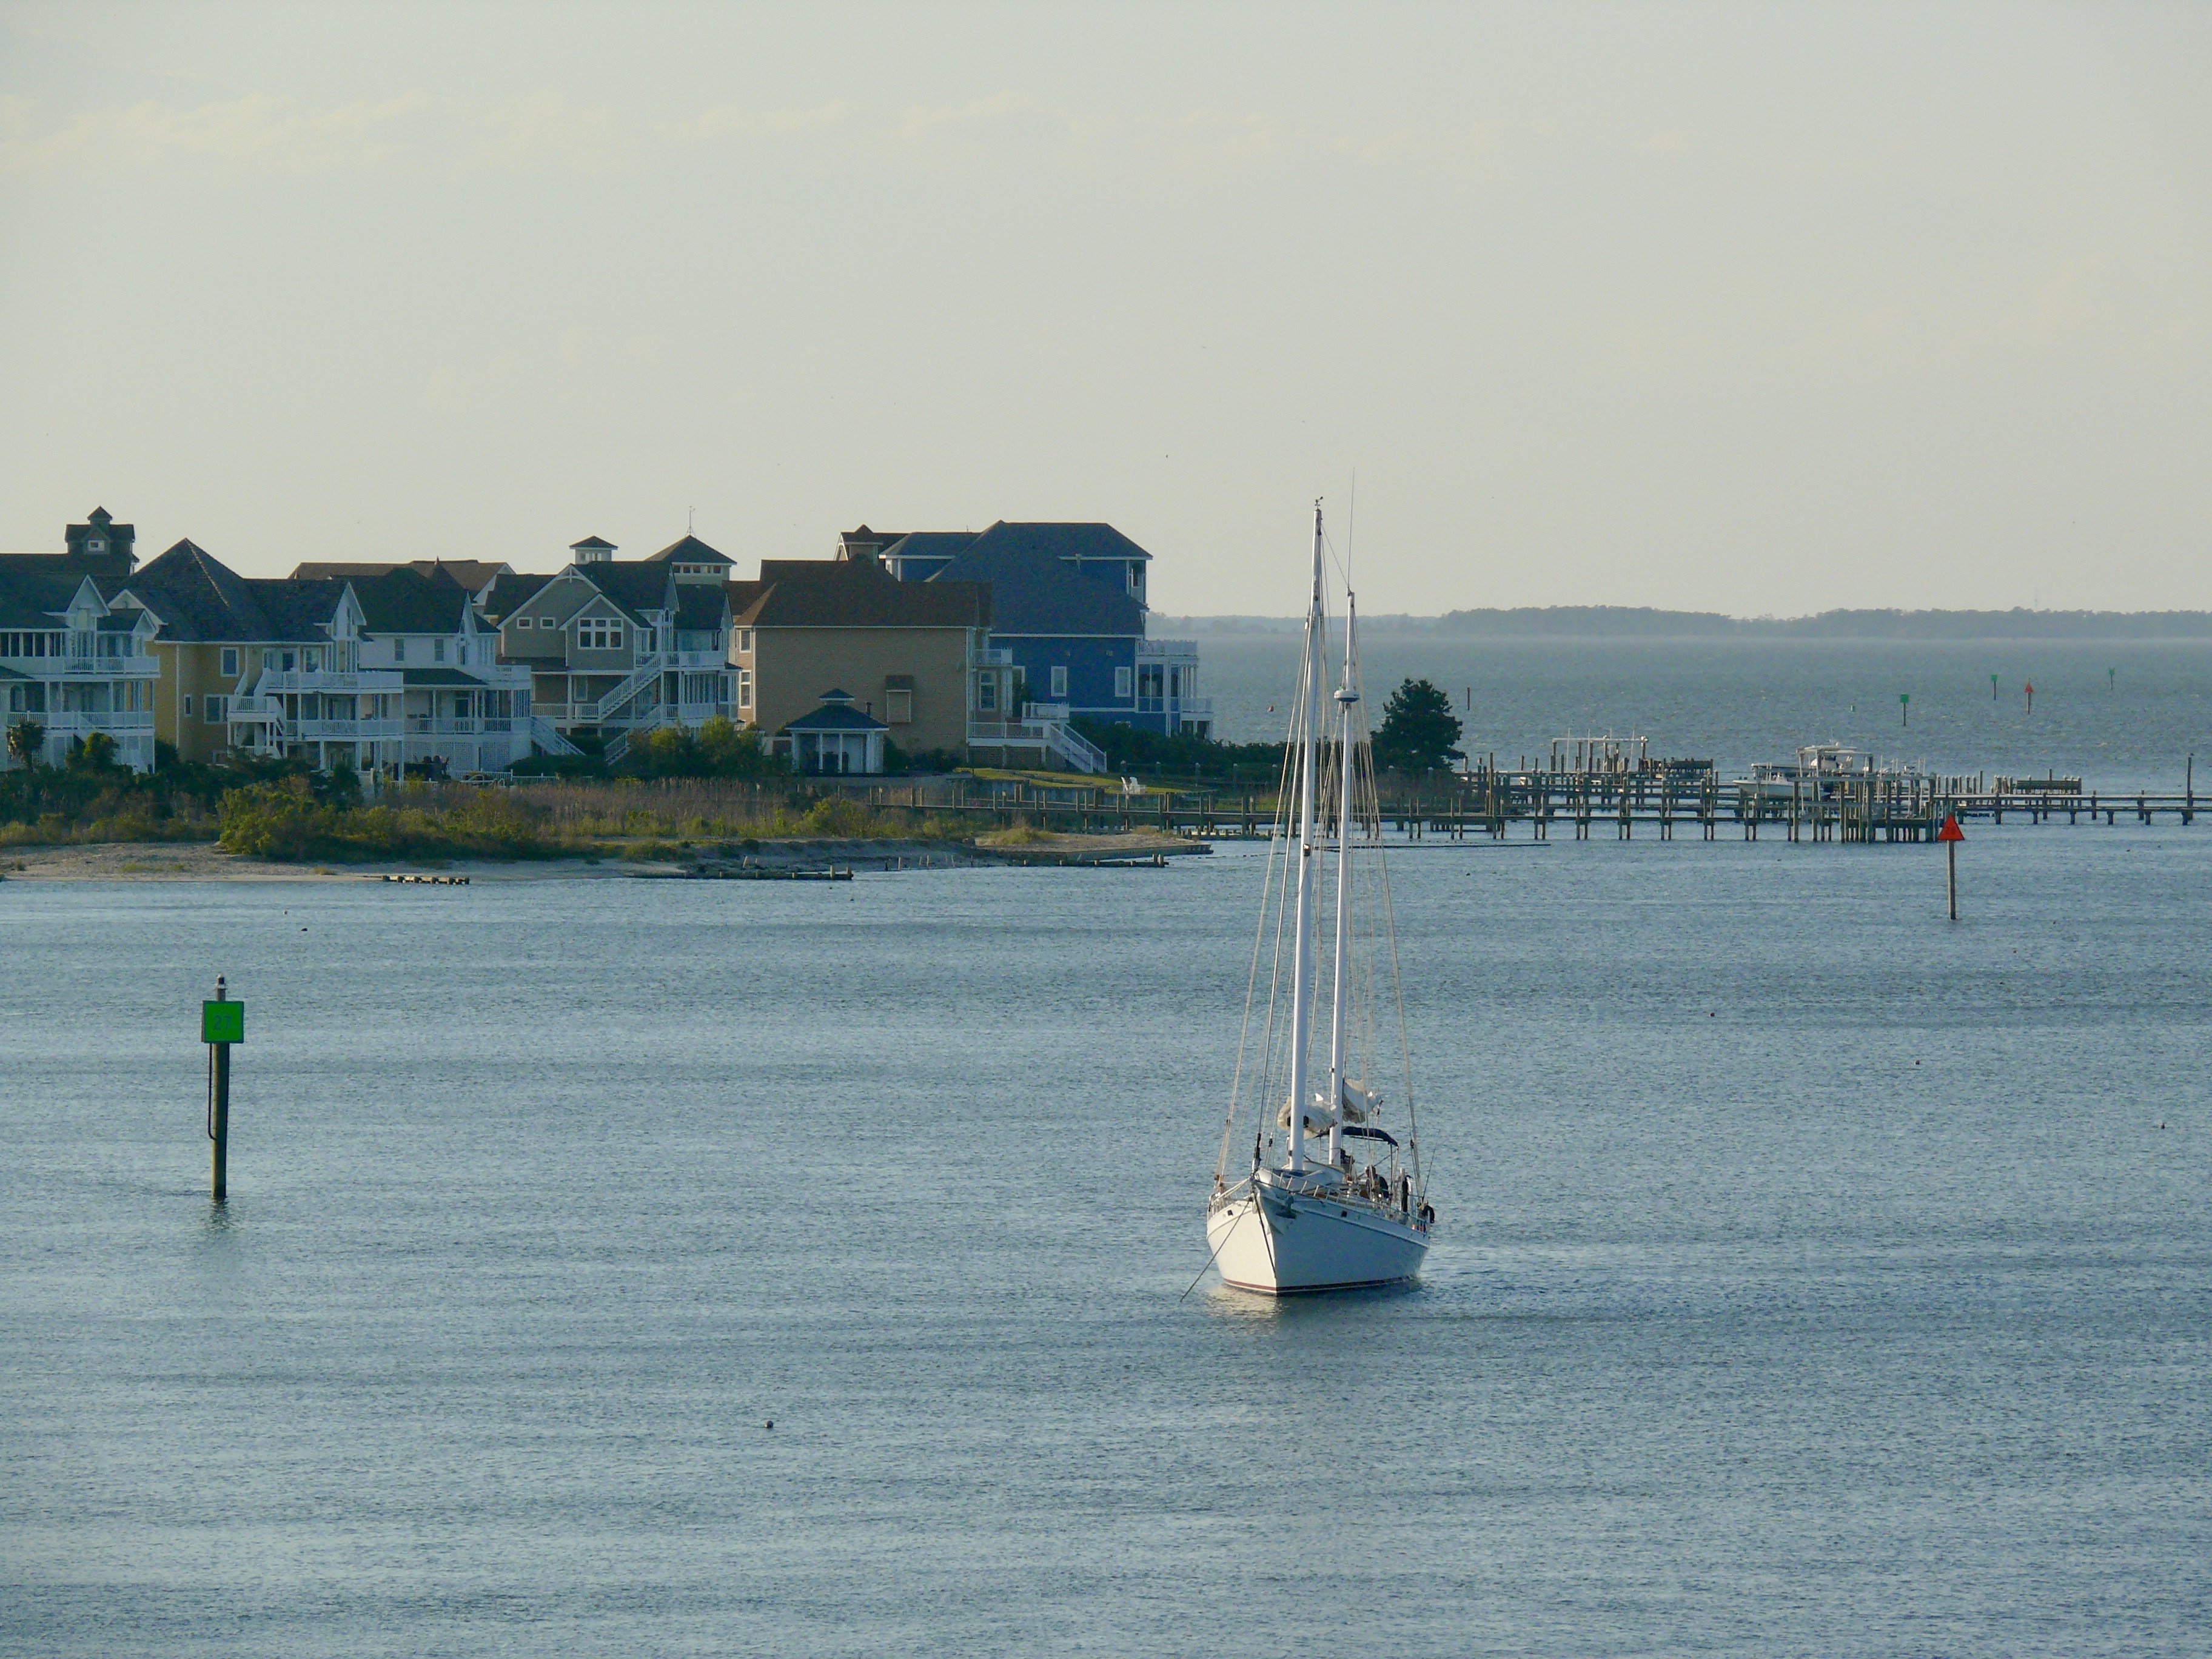
Welcome aboard, I am currently building the Caldercraft Granado after completing the simple yet fun, single masted 1/25 Bounty Longboat by Artesania Latina. I wonder if the Caldercraft Granado is the same design by Chris Watton as used by Amati?!? Regardless, I am knee deep in the Granado build, and the water is expected to rise quickly during the remainder of the build, particularly when the rigging needs to be "tackled" (ouch). The build logs and help of our fellow shipwrights helps tremendously, as they are often providing aid and keeping me from floundering and abandoning ship. You can take a look at my progression as a total newbie, I have some pictures of the longboat and a build log for the Granado if it helps get some relative idea of comparative difficulty. Best of luck, and welcome to MSW. Brian (Roanoke Island, NC)
-
I'm still curious why you sanded off the "first" coat of primer.....It looked just like the third coat does 😉
-
Ignorance WAS bliss! Damn that internet.
-
T minus 1 day. Commence countdown Major Coyle, and take your protein pill...
-
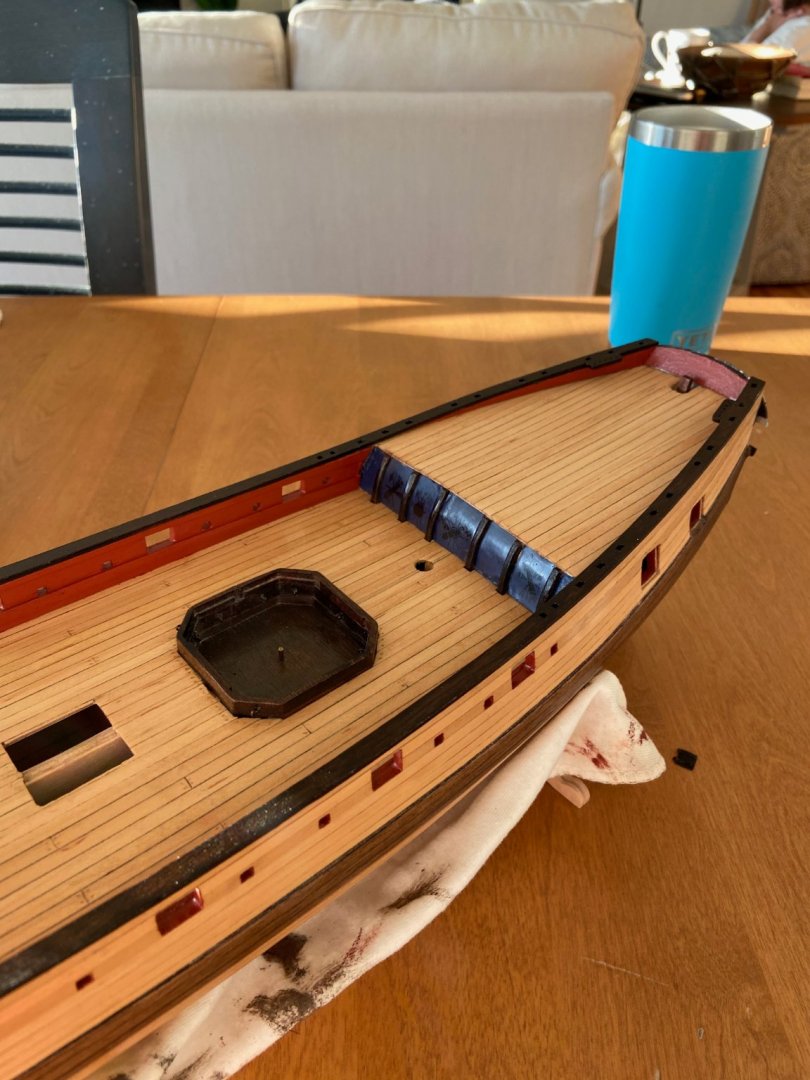
I've cleaned my work up a bit and put a coat of wipeon poly on the main deck in preparation for installation of the cannons under the forecastle deck. I have also finished most of the rigging on the 2nd cannon that goes under the forecastle. Before I put the forecastle decking on top, I thought I might even hang a few hanks of rope under there, and put a barrel or two, just to make it a little different and unique. I have completed the assembly of the hatches, and the mortar housing and mortars, but I still don't see much reason to put them in place just to get dusty or mishandled. Does any one know of any reason why I should put the mortars in early? I have finished the stern vents and will glue them in place today, hoping that they don't get mishandled over time.... A few pictures

-
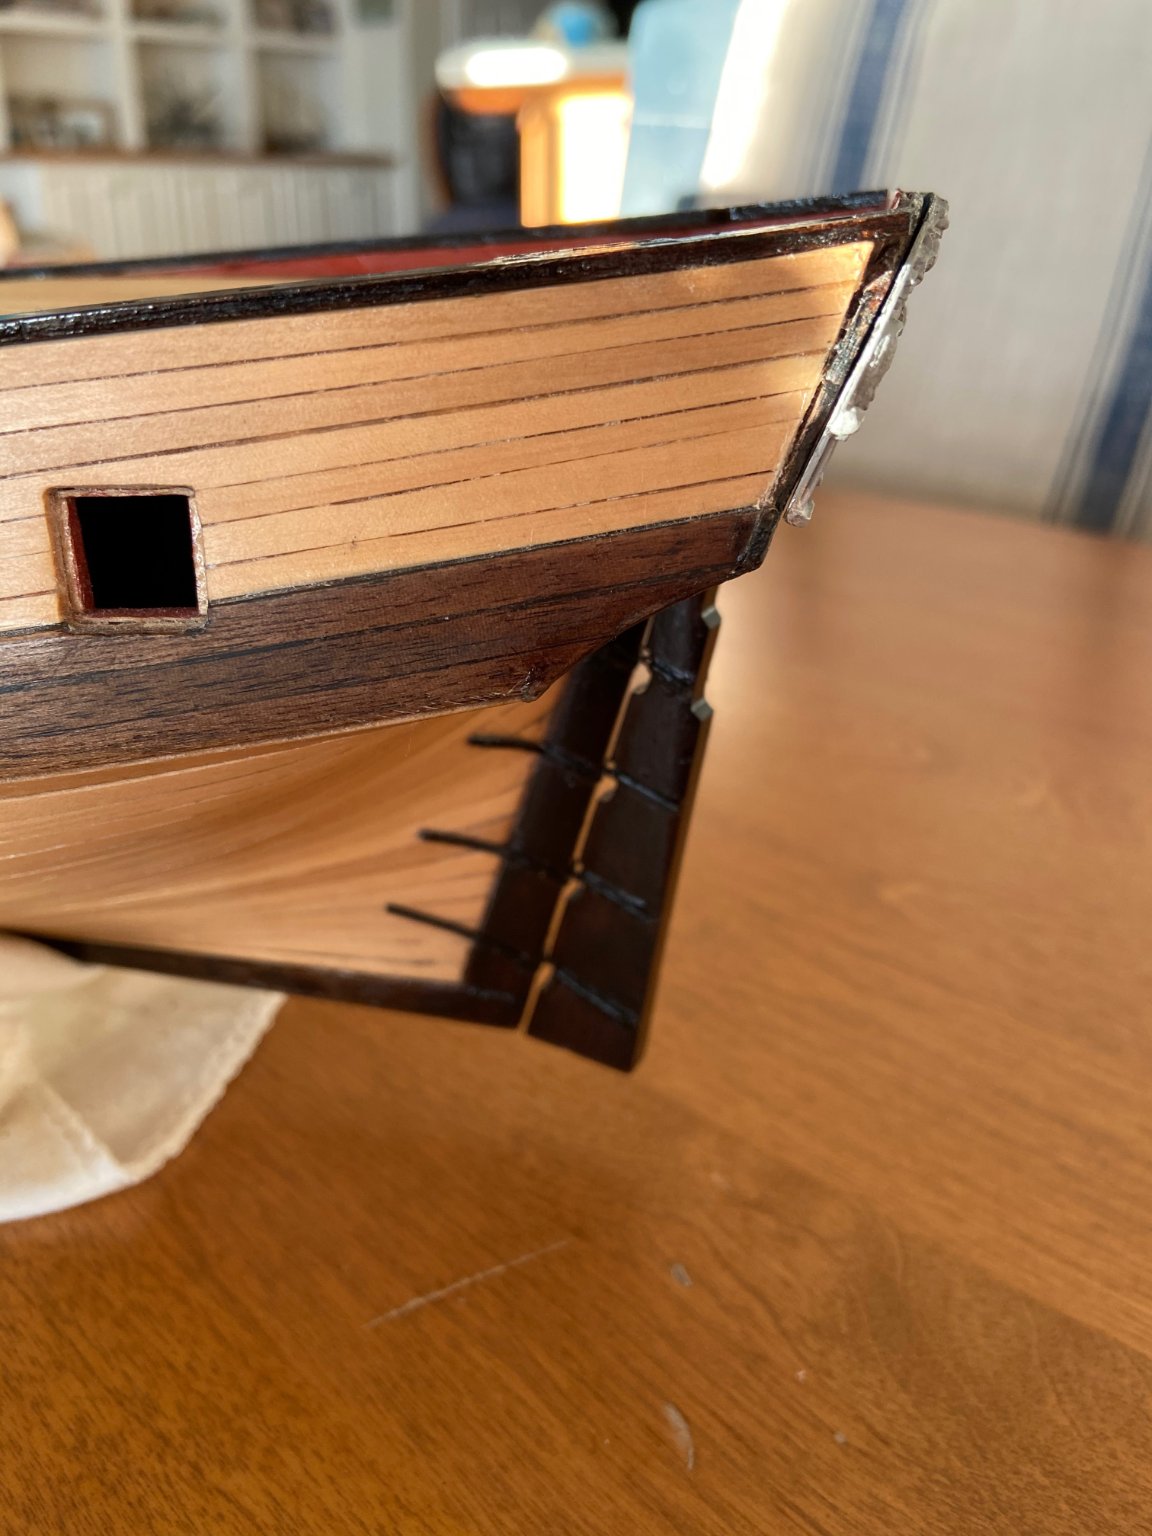
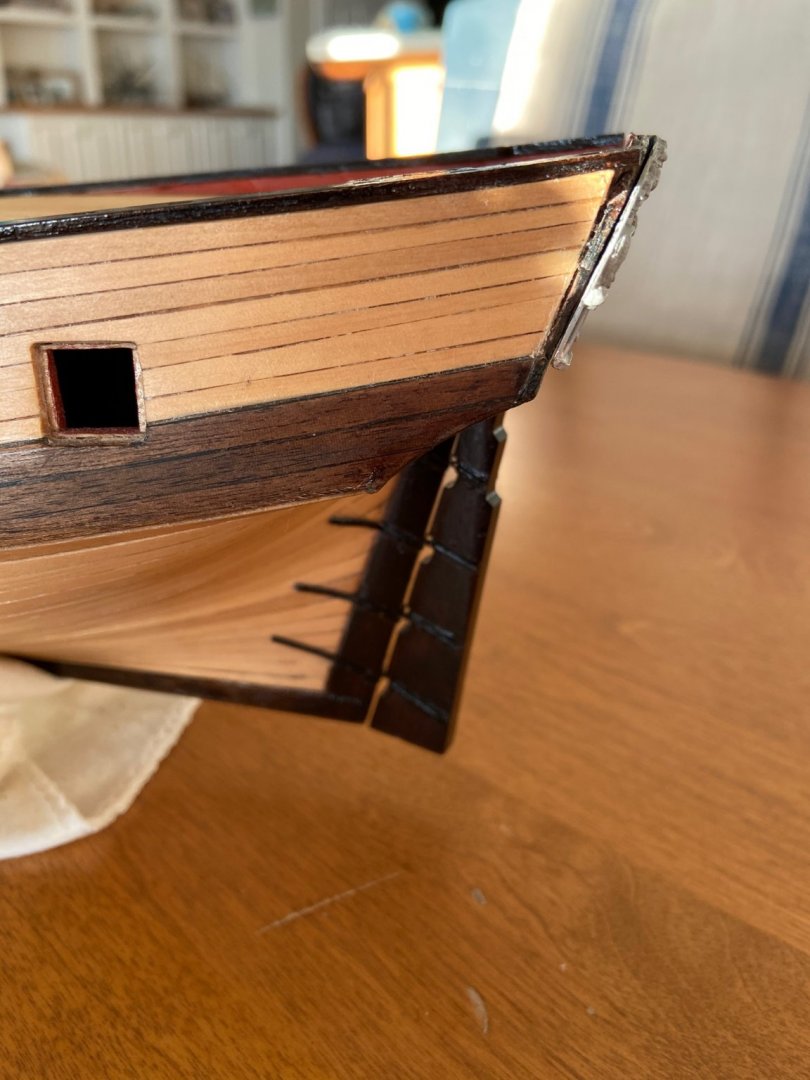
So, I did manage to finish the rudder and get it in place using guitar string as opposed to the kit supplied "nails" or using fishing line (e.g., 50lb mono painted black). Specifically, the rudder is set with nickle wound A-string and tuned accordingly ;-). It looks pretty good in person, as opposed to the quality of this photo. It amazes me how much touch-up there always is, and how much dust and debris can accumulate..... I really want to finish the stern transom and put the capping rail in place, but that will have to wait. I still have to tie down some cannons and finish the forecastle deck planking, and a million other things to do!!!!

-
Hey Wayne, Hope all is well with you. Just looking at your build for reference as I slowly plod along with my Granado. Just wondering when you put the hatches on the deck, etc., I take it you just glued them down on top of the planking. No one sets them "into" the deck planking do they?!?! Also, I also really, really like the base with the dropped anchor. You have a a good eye for visual presentation for sure, and that Granado display is just super. Cheers! Brian
- 366 replies
-
- 2
-
-
- granado
- caldercraft
- (and 1 more)
-
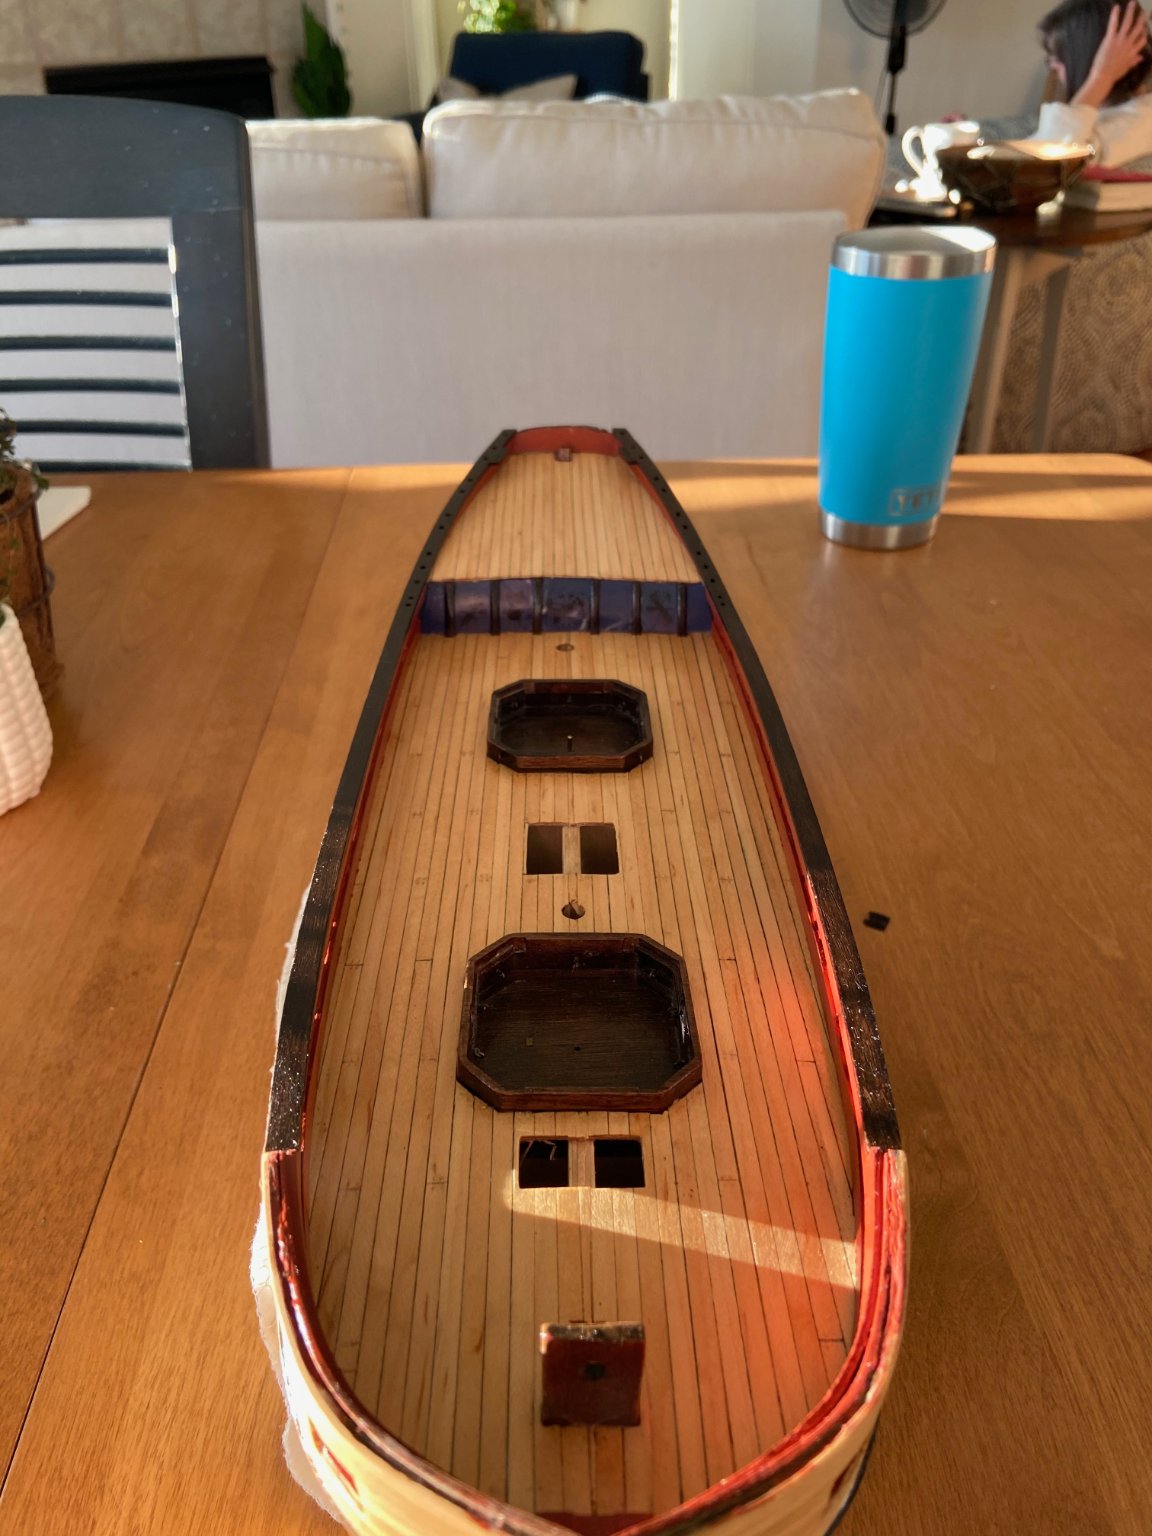
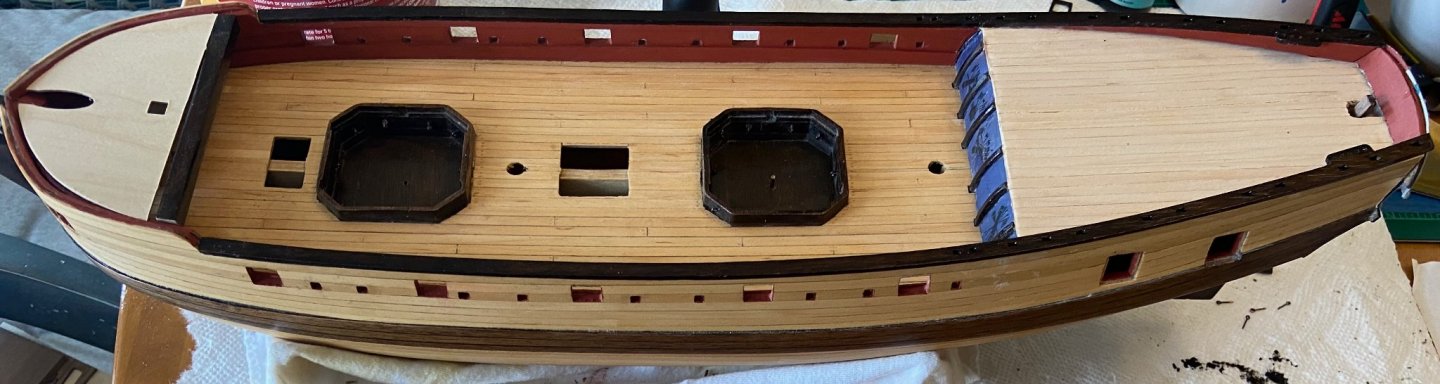
Another shot as I am plugging away, dry fitting, staining, etc. The capping rails up to the quarter deck add a nice clean look, and I blew some of the dust off of it, but not enough 😃. I am getting ready to put the rudder on, and then I will be done with most of the remaining work below the wale.
-
thanks for the thought-provoking discussion!!!
-
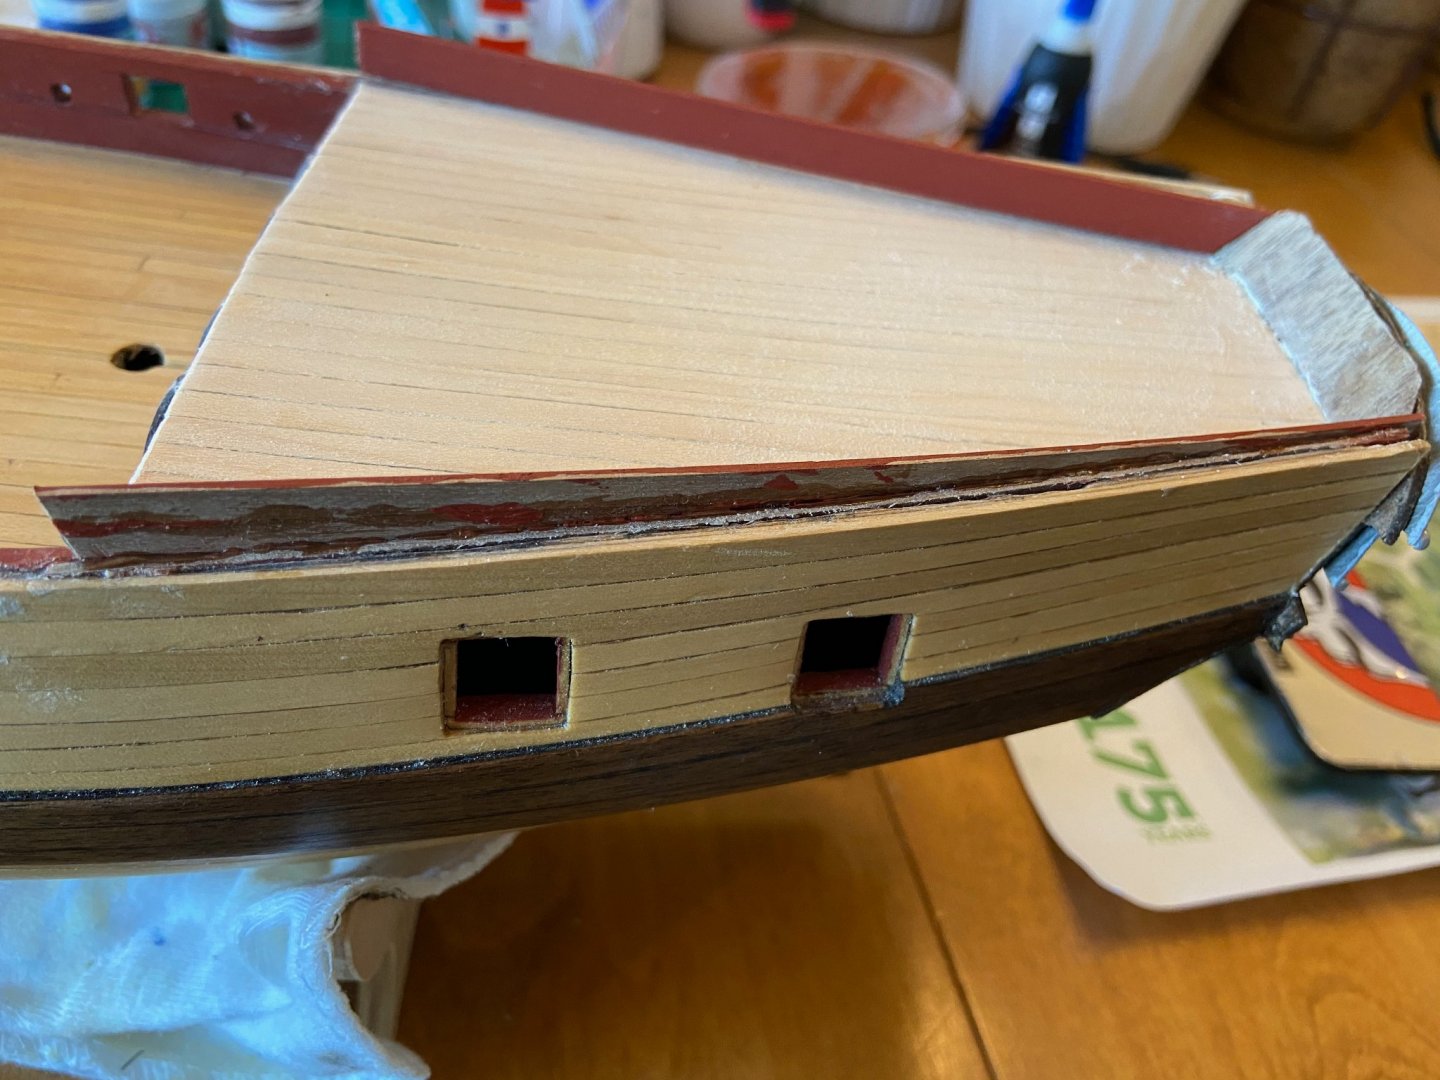
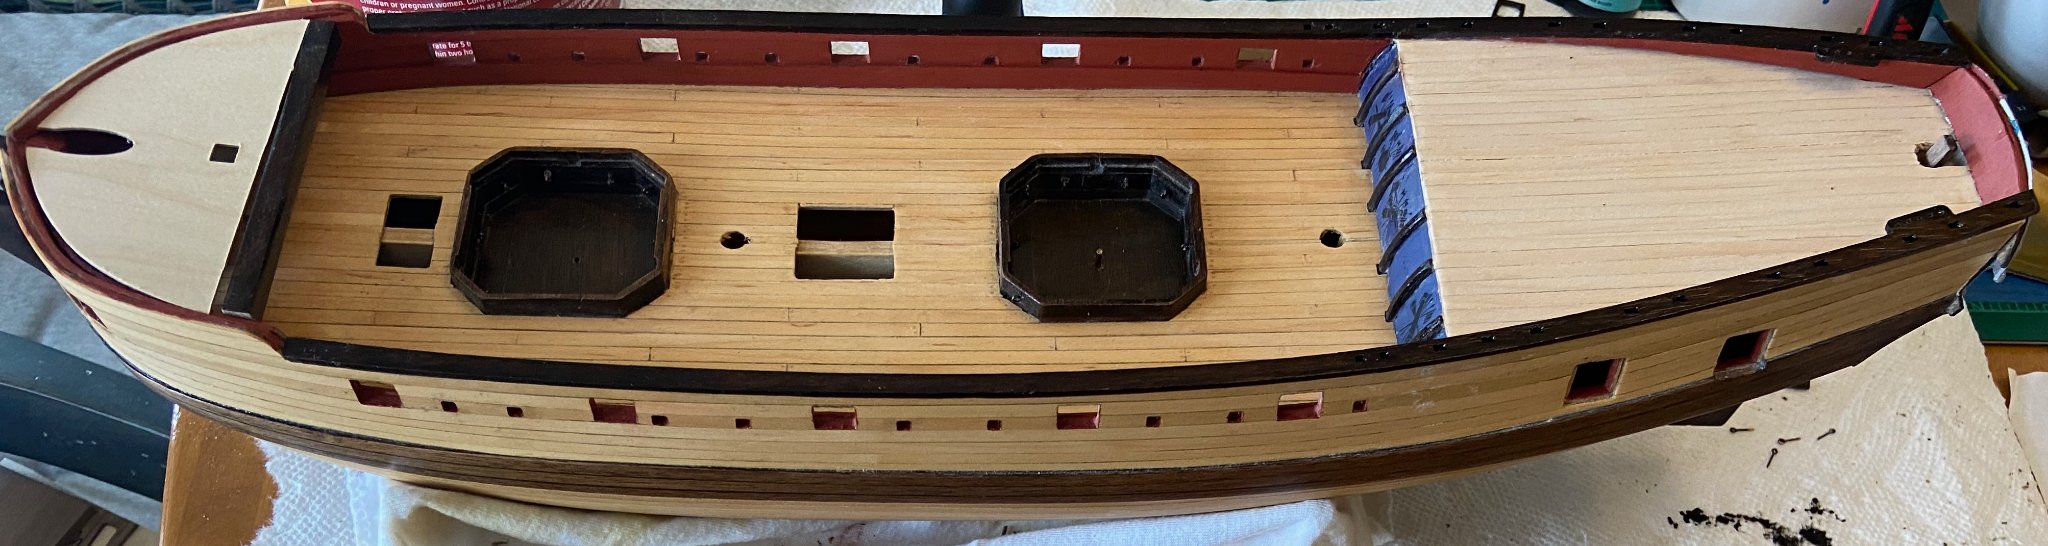
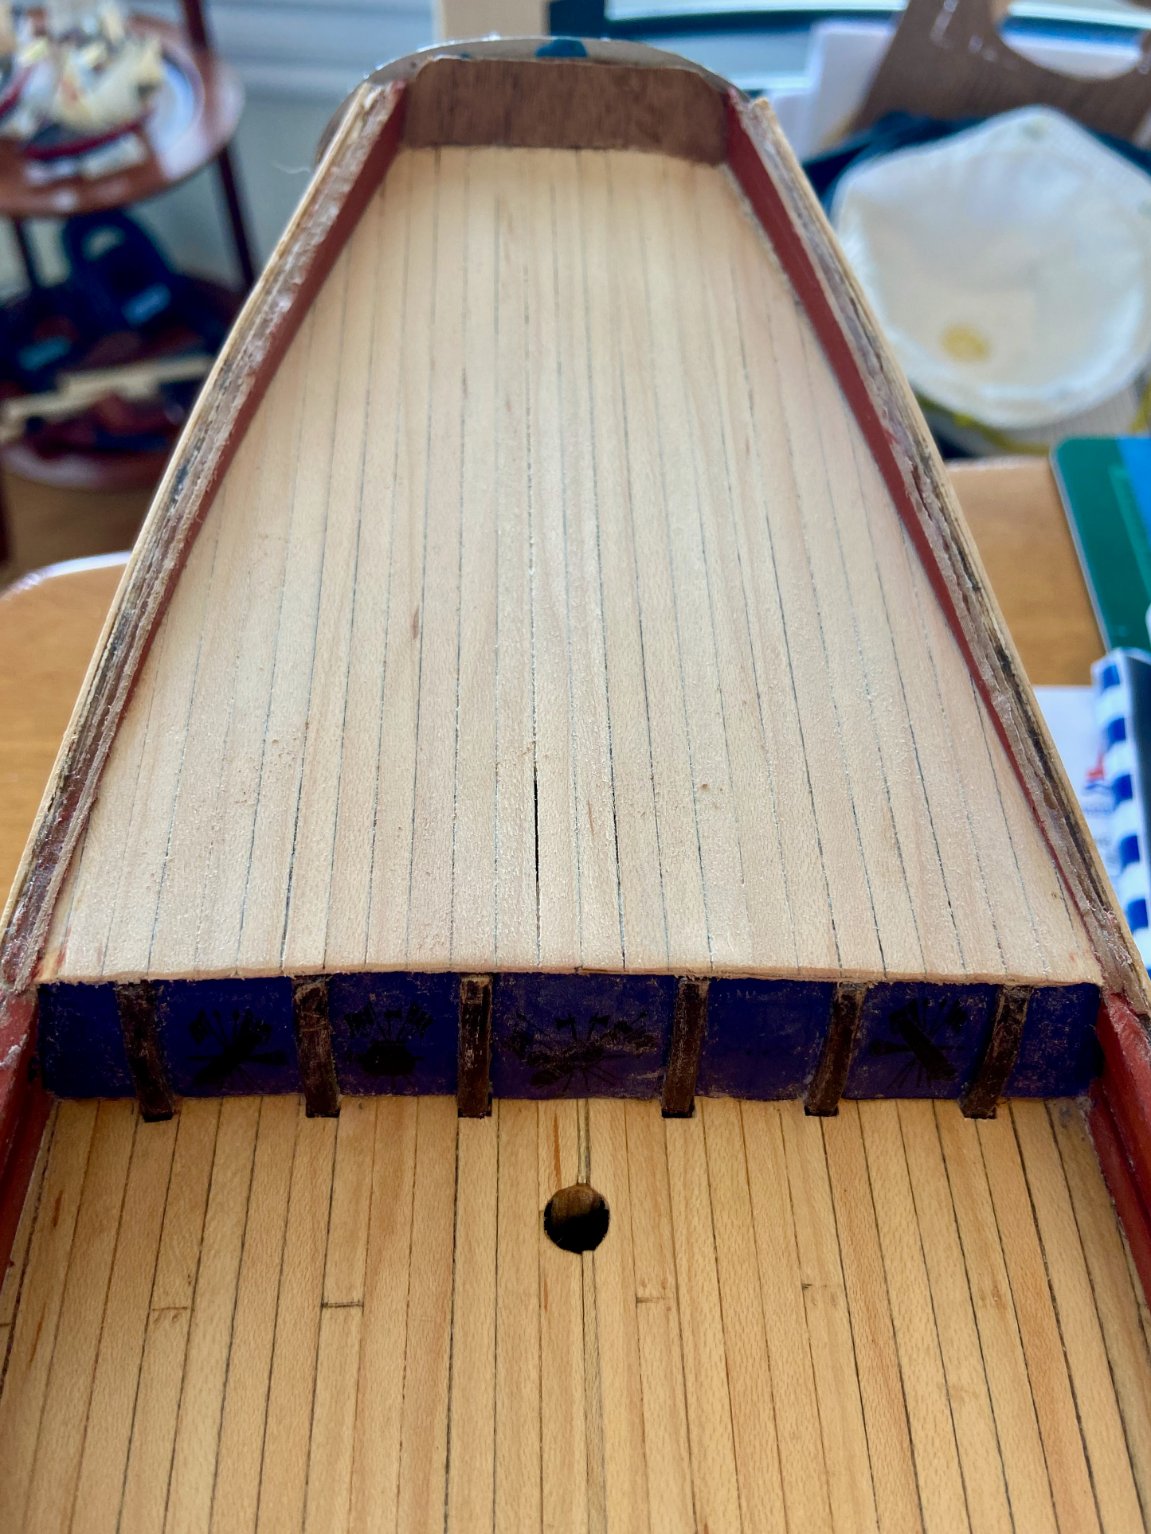
Here the quarterdeck planking on the bulwarks has been sanded flush, with the port-side filed down to a relatively even finish with the hull. The starboard bulwark planking has been roughed down, but not given a good finish with a file. I promise I will eventually clean up the horrid looking bulkhead panels and the banged up walnut dividers and get the edge of the quarterdeck planking tidied up more...but it still roughly resembles the HMS Granado I think. 😃

-
Hah! I love it! Ours are pretty salty as well, being that the water in the Albermarle Sound is pretty brackish.

- 28 replies
-
- 3
-
-
- frigate
- enterprize
- (and 2 more)
-
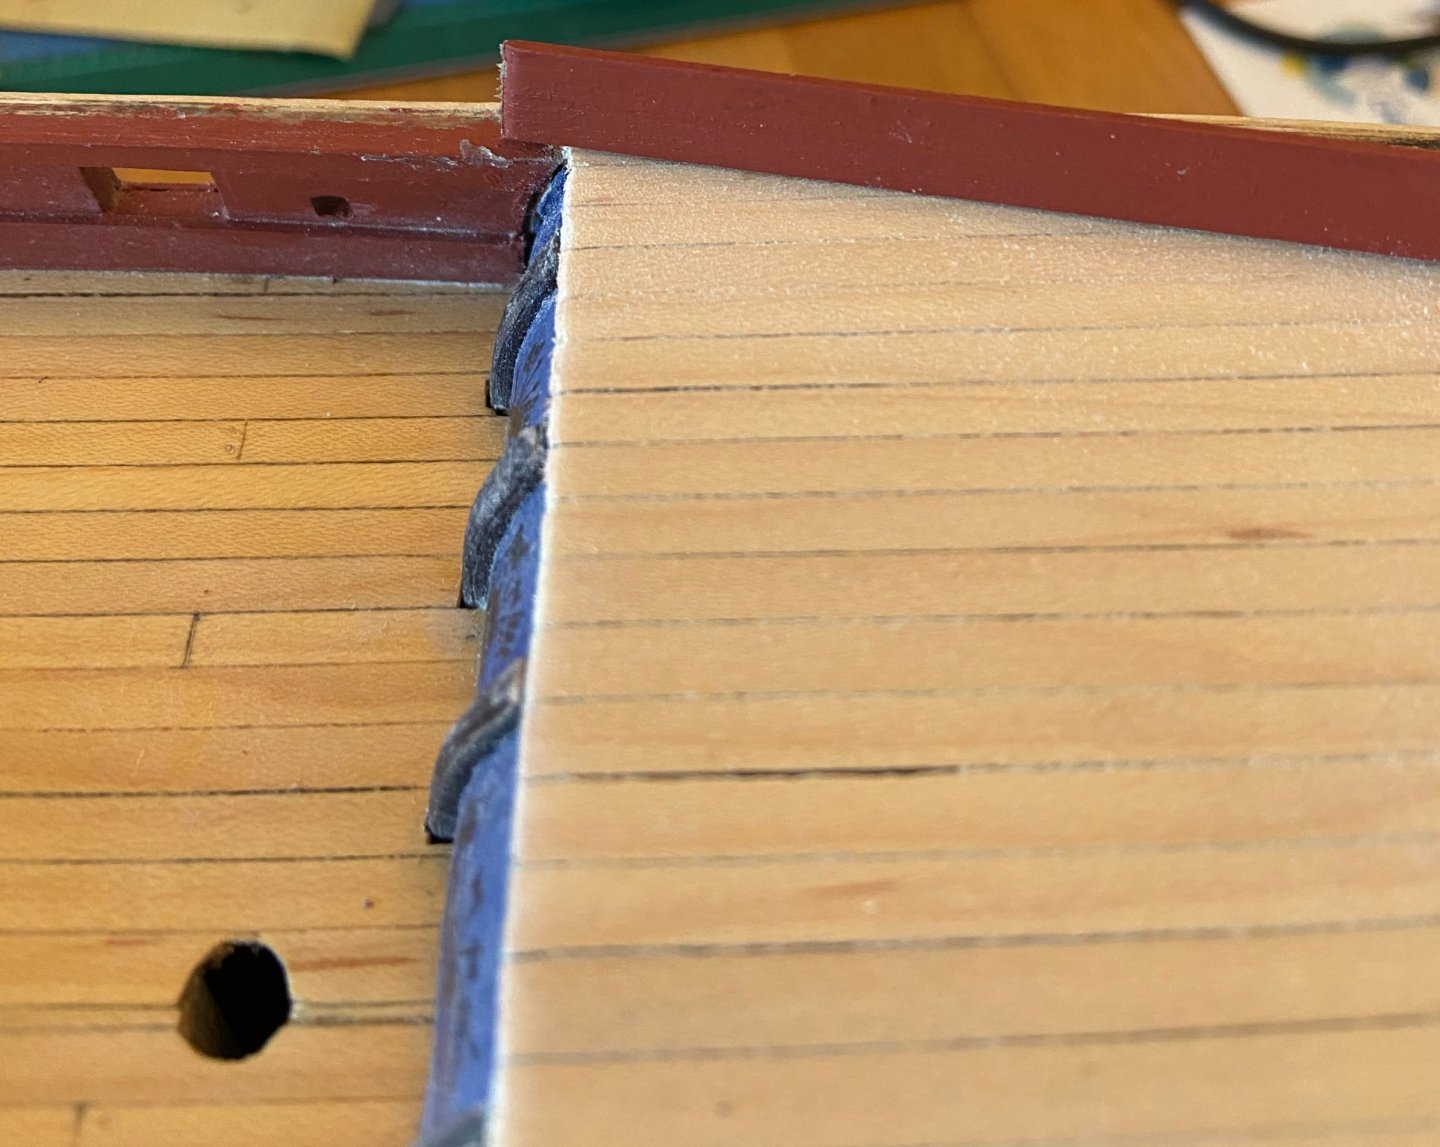
A wise man once said to me...."my suggestion would be go with what works". So, I believe I have appropriately followed that advice and arrived where the instructions intended. I took two long 1x4 walnut strips and placed them side-by-side and gave them a couple of coats of Red Orchre. They fortuitously stuck together securely enough to allow me to run a bead of medium CA down the seam to weld the two planks together more securely. Cut roughly to the appropriate length, I loaded up the CA on the bullwark sides, and slapped the twin plank segments on and held them there until they set firmly. I am not sure others would have done it the way I did, but nevertheless, the sides are done now, and present a uniform width and fairly flat surface for the capping rails (pictures to come soon). The stern is a completely different story, needing to be planked with 1x4 that is carefully shaped to fix previous heavy handed filing, and will be tackled next.