
HardeeHarHar
-
Posts
615 -
Joined
-
Last visited
Content Type
Profiles
Forums
Gallery
Events
Everything posted by HardeeHarHar
-
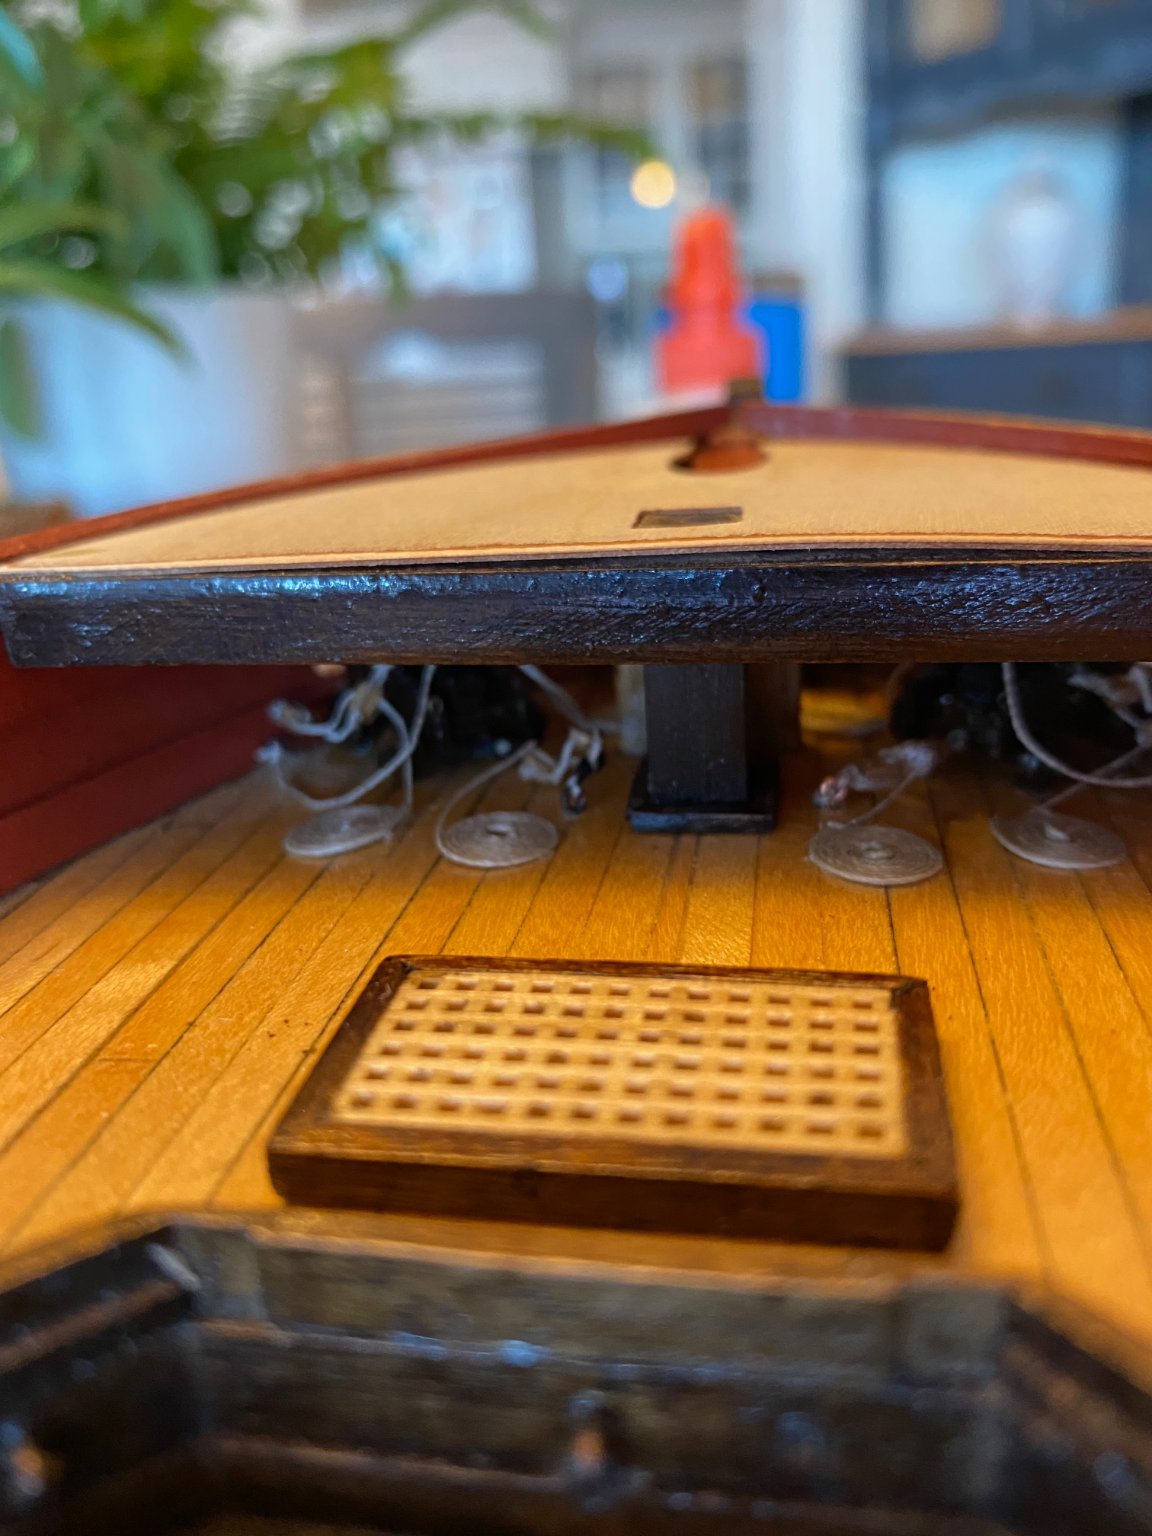
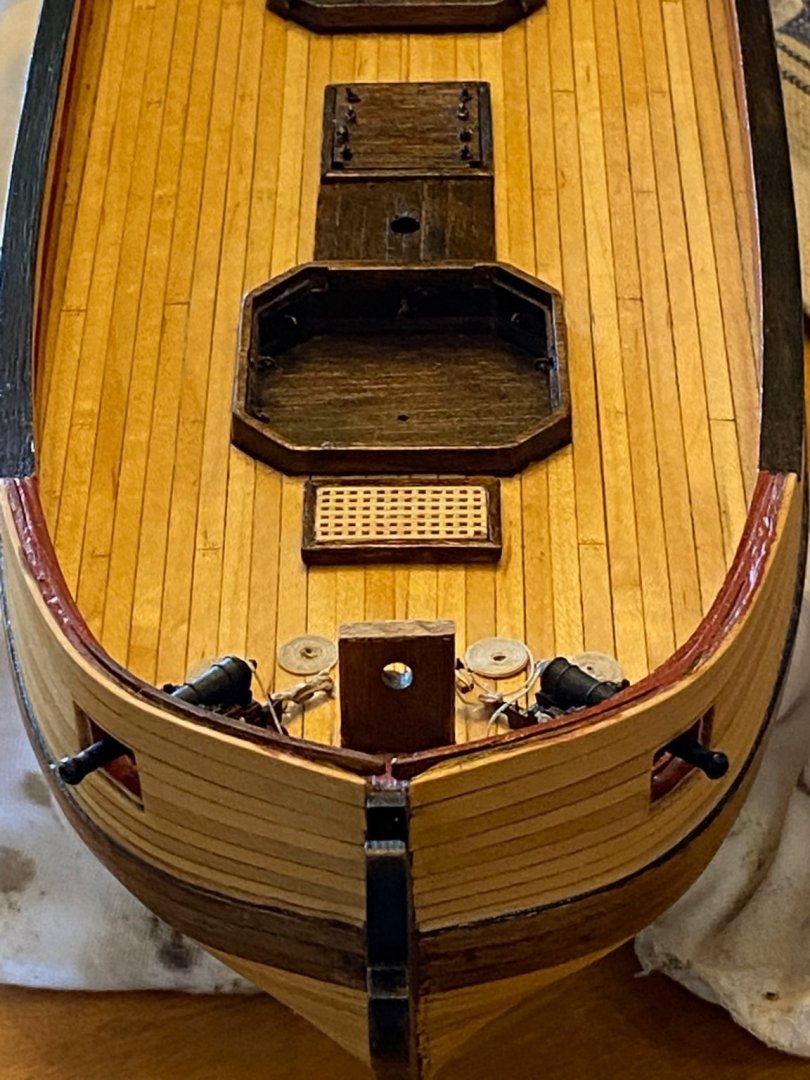
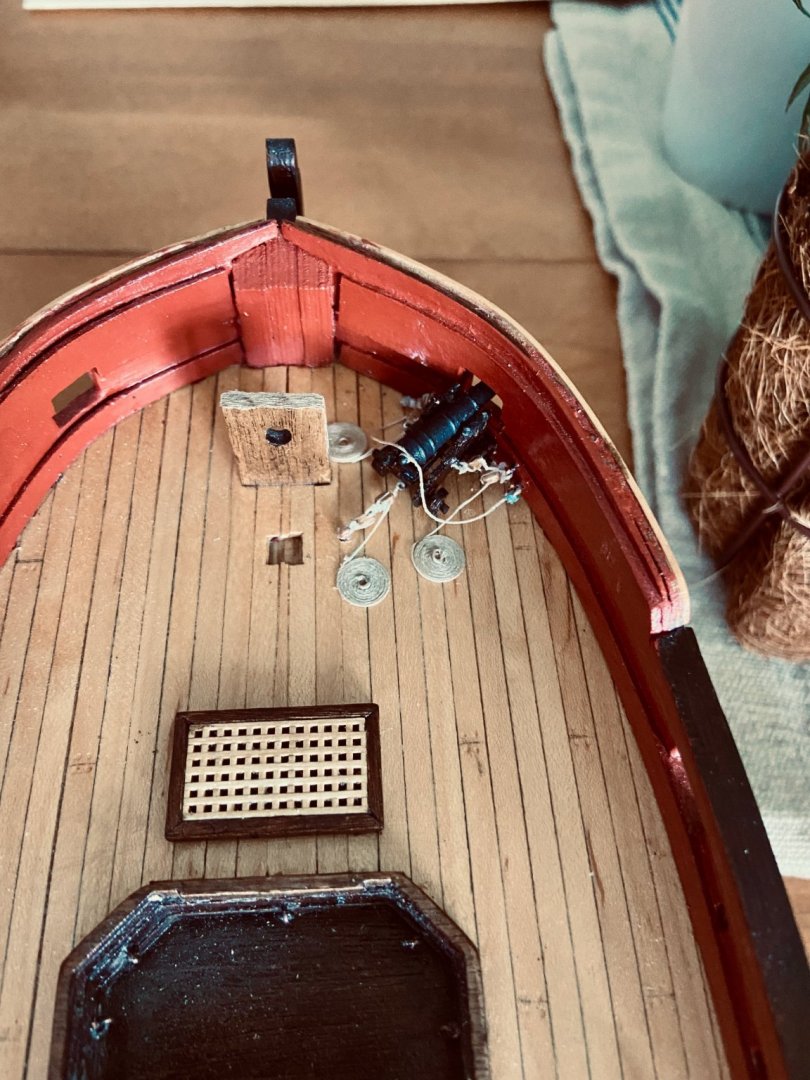
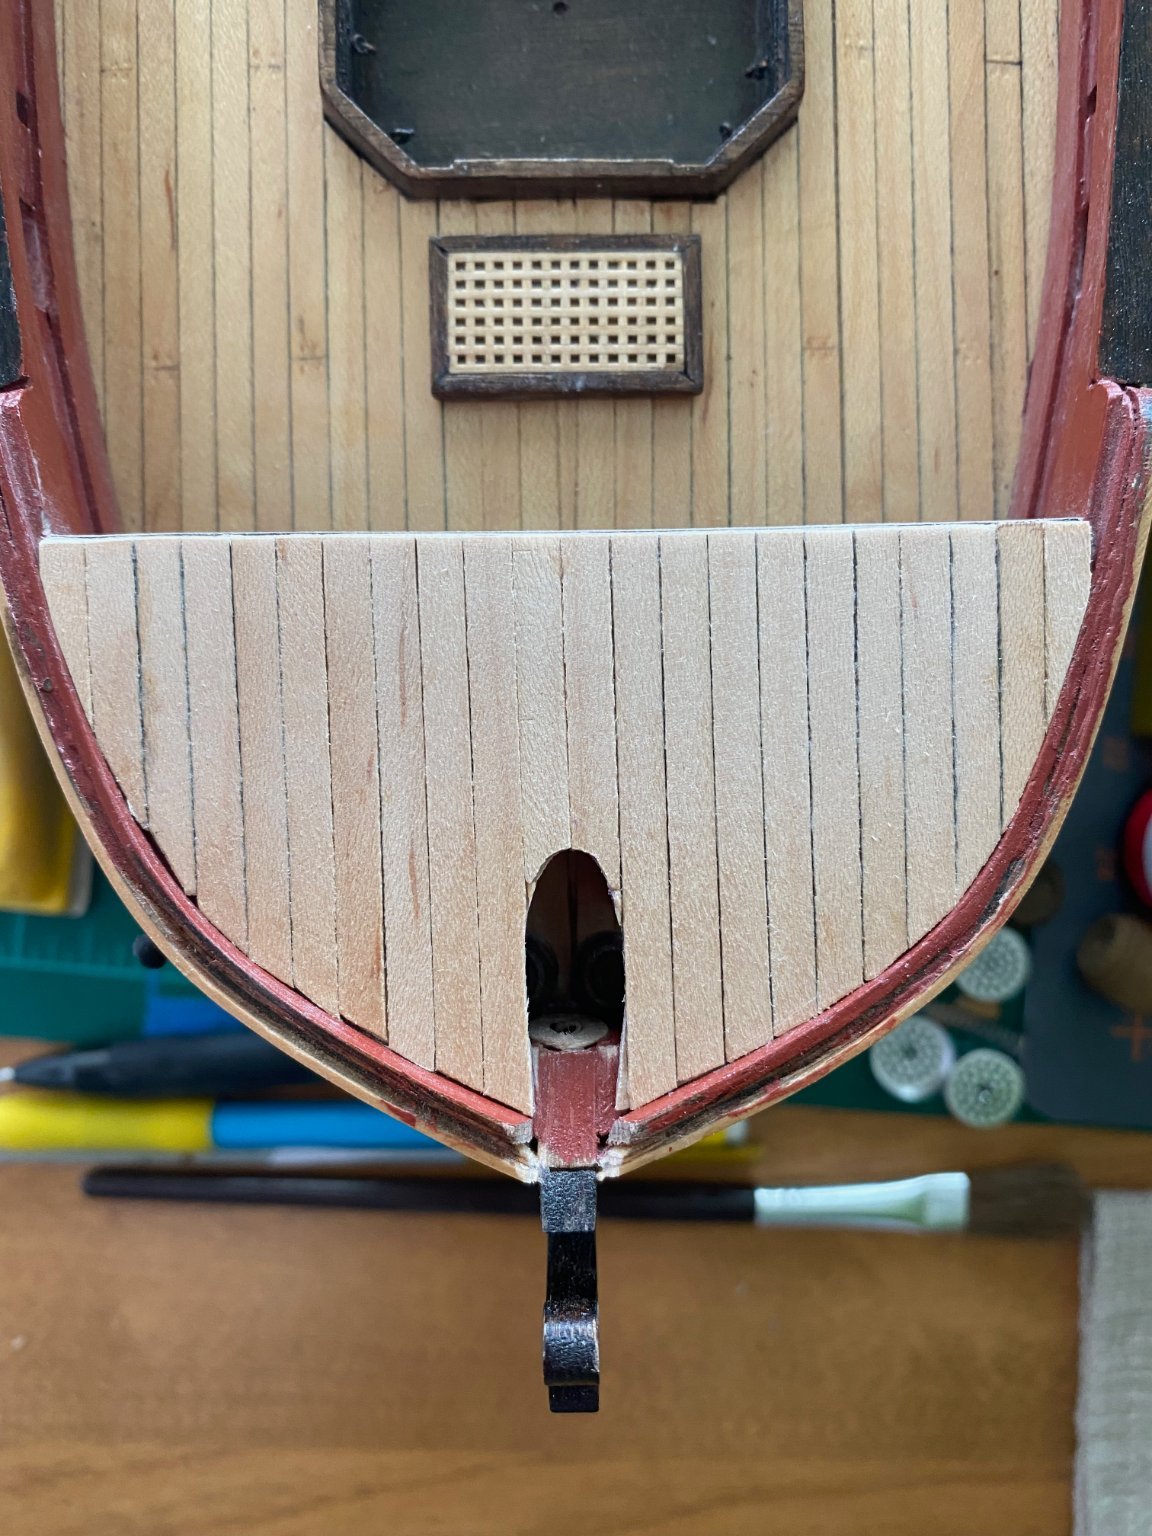
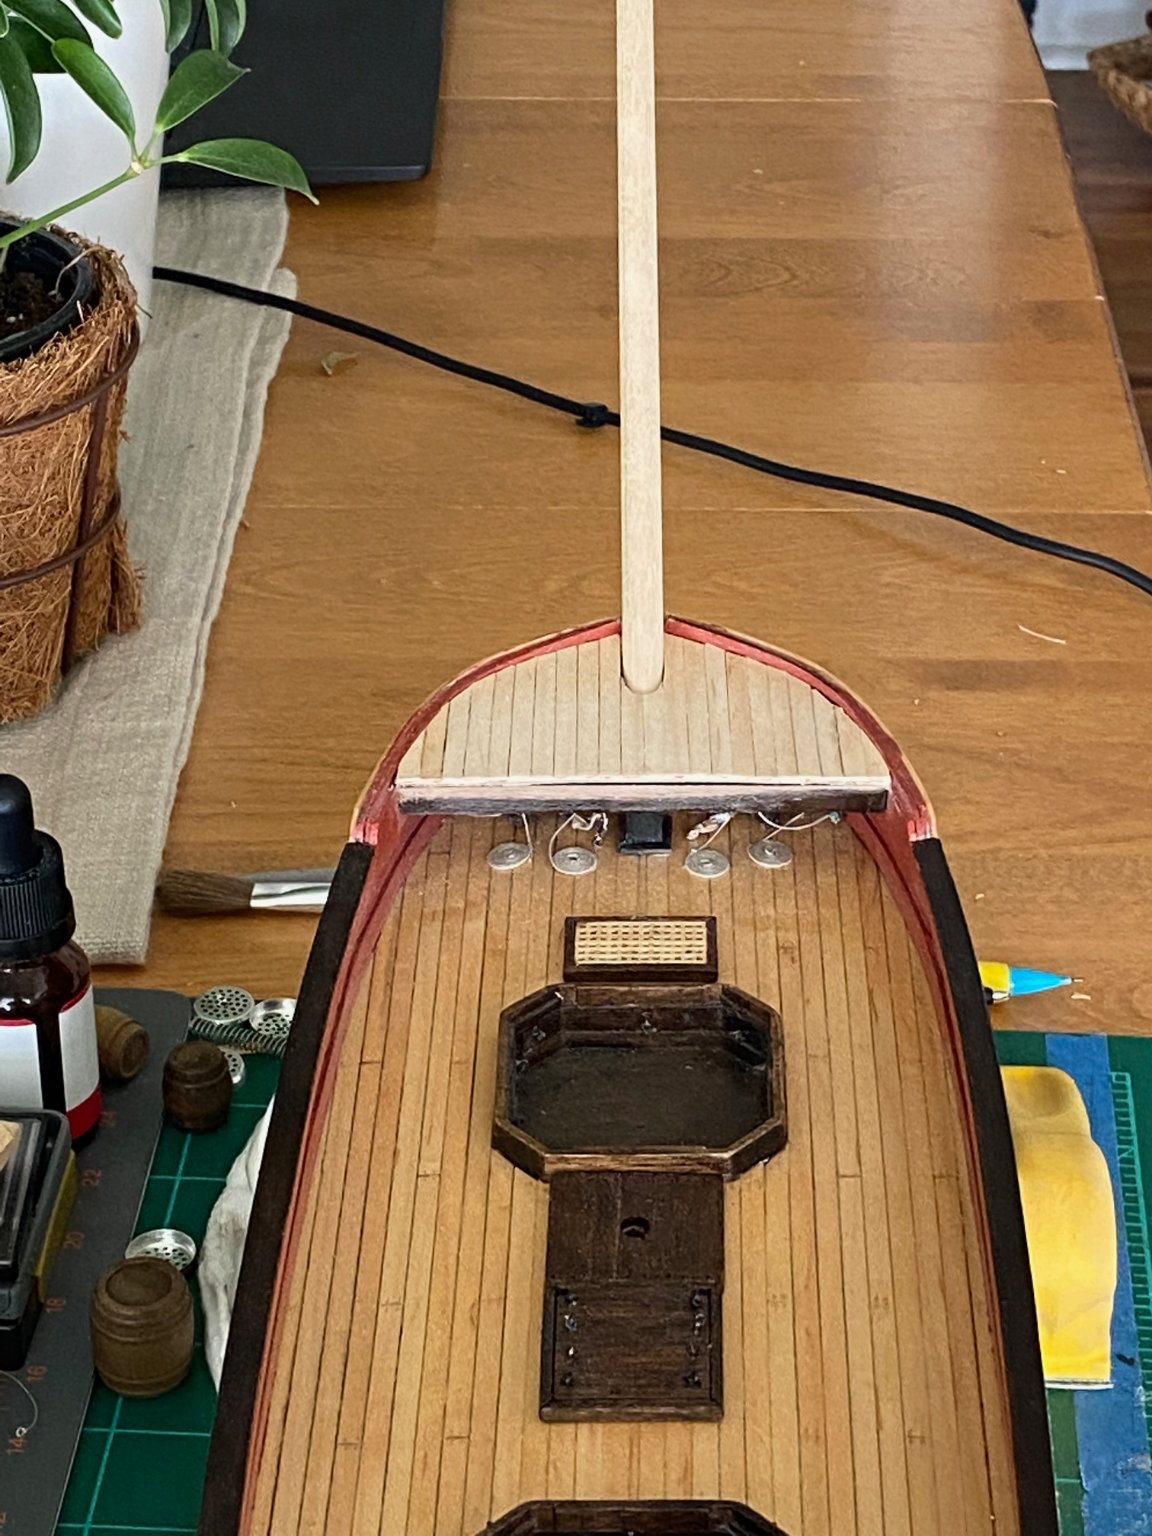
 Proceeding apace again, I was able to line the freshly planked forecastle deck with a nice red bulwark, which wasn't that easy considering how little purchase there was to be had. Once that was in place, I added the capping rails and the decorative step down rails from the forecastle capping to the main capping rails. Once that was in place, I started to repair the damage that had been done to the forecastle support beam by sanding of the forecastle planks. Hopefully that makes sense, but you can see that the beam is still not stained well, and there is lots of touch-up work to be done around the capping rails. However, I was able to sand the rails back to be relatively flush with the hull, and it looks pretty good. I'll finish some touch up and move on.
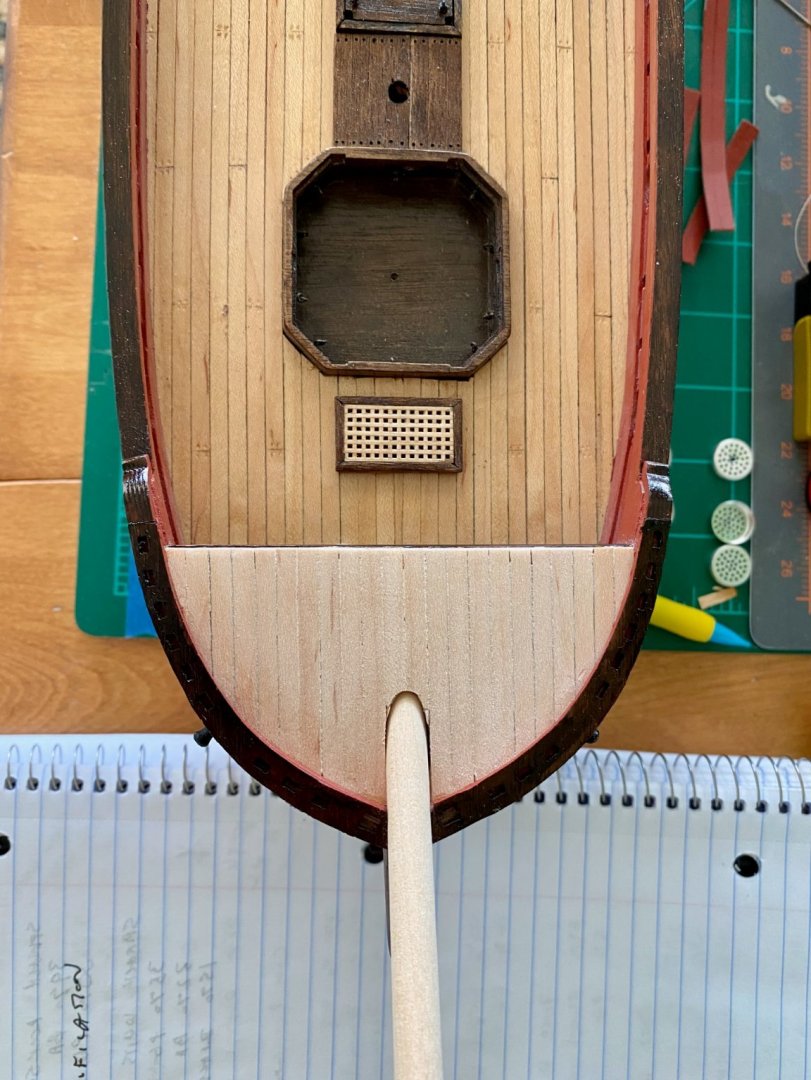

-
Onward we go, with the forecastle deck planked semi-askew (ugh), I now need to repair the damage done to the beam while trying to make sure things were aligned well at least in some aspect of the build. I will also have to consider how to fill the gap between the planking and the beam (that was created due to the camber of the deck). Nevertheless, I am happy just making forward progress that doesn't have to be completely redone, just touched up a lot!!! I have also learned some important lessons along the way, and enjoyed it to some degree 😃


-
@VTHokiEE one other question. How do you get the NRG badge etc. tp show in your comments. I recently joined and have enjoyed their one publicatin i have received! Cheers! Brian
-
Hey @VTHokiEE Thanks for the shout out and kind words. Good question about black seizing....as it does look strange side by side with one without the black. I got the concept from watching this video (see below). I ordered the finest thread i could find for use on the more visible cannon tackle. I am glad you agree I can reduce diameter at end of bowsprit and not worry that much about it. thanks very much!
-
Hey ya'll experts around here, and especially those who have completed the Granado.....i have one quick question: The bowsprit step has a hole in it to receive the bowsprit, but the hole is like half the diameter of the prescribed 8 mm diameter dowel that is to be used for the bowsprit. Since I already covered the bowsprit step with the forecastle, I am left thinking that I should just reduce the diameter of a small (4 or 5 mm) portion at the end of the dowel that will be used for the bowsprit so that it can slide into the step and be glued in place, rather than try to drill the hole in the step to a size that can accommodate an 8 mm diameter dowel. Does that make sense, the instructions don't appear to address this issue AT ALL. =( Any thoughts are extremely helpful and greatly appreciated!! Thanks, Brian
-
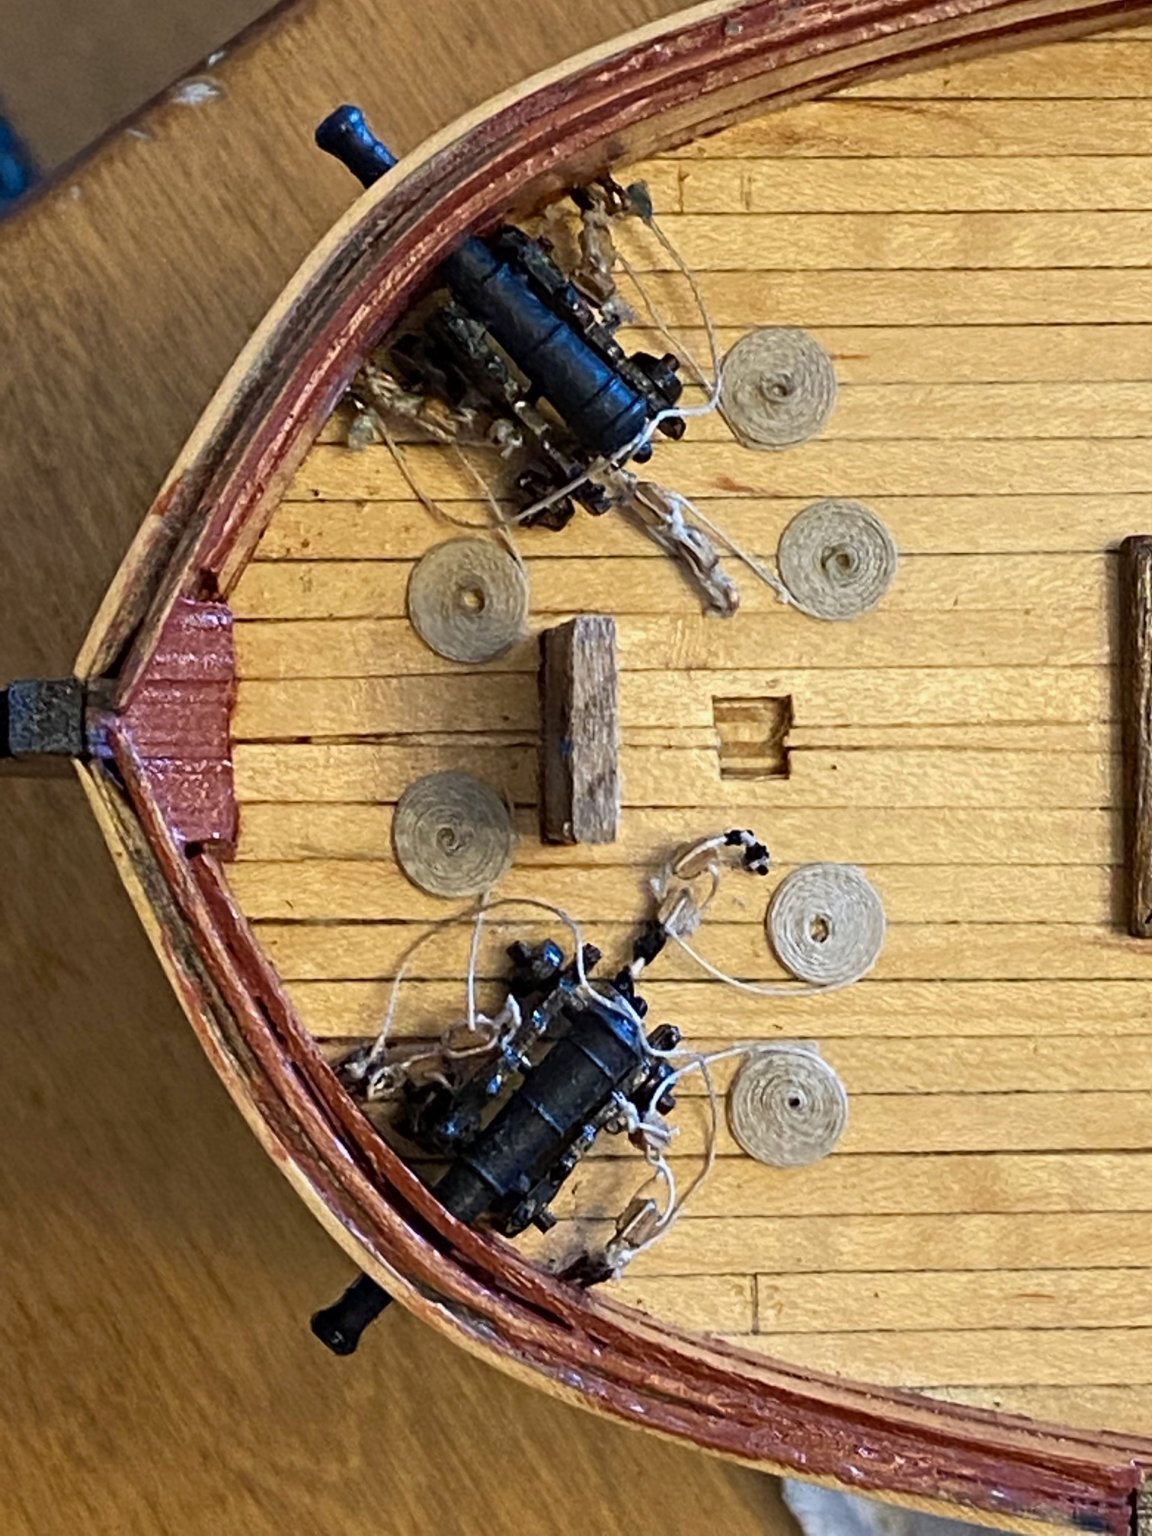
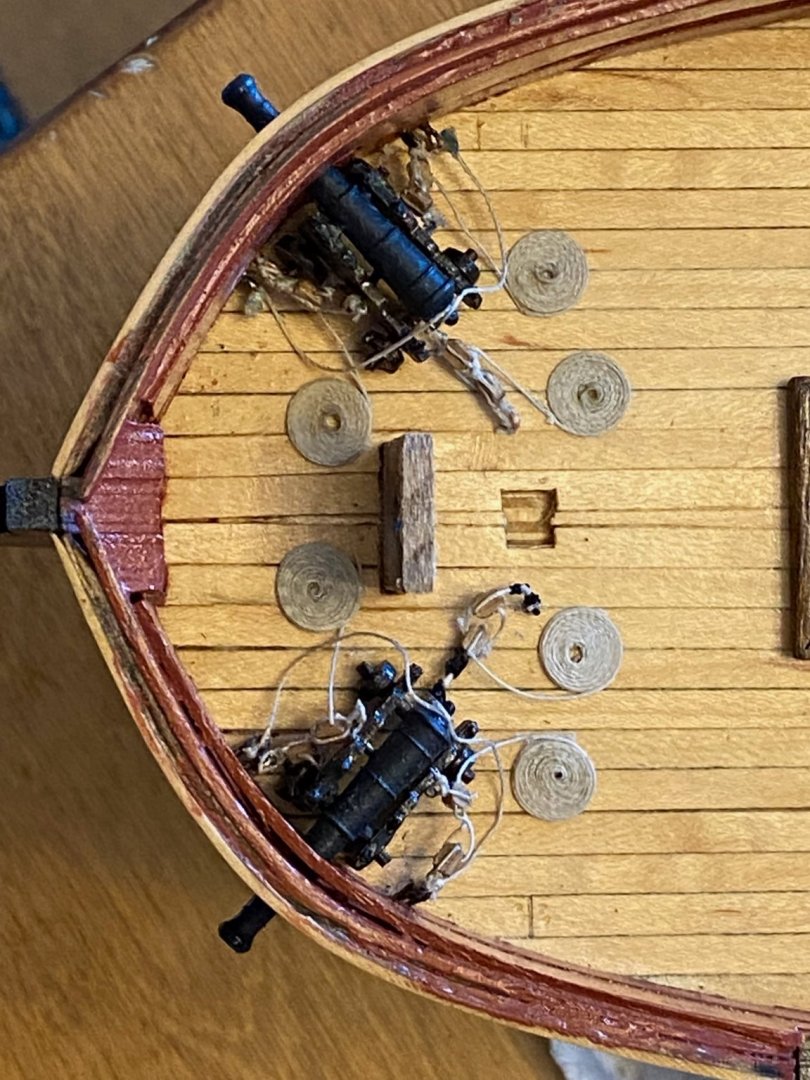
So, hurdle finally cleared, and looking downfield for the next one. I got the second bowchaser in place and locked down. Woot! It looks alright, but I see all the mistakes and warts, and there are a lot of them if you look closely. However, if your eyes are as bad as mine, it looks fine (especially when you consider they are covered and will remain unseen. You will also note that I starting seizing the tackle lines with black on the second cannon, and will adapt that approach going forward. I also added some barrels and a rope hank just for kicks, even though they will never be seen again (I hope). I am now planking the forecastle deck!!! Full speed ahead (until next hurdle)....
.thumb.jpeg.bcc07e5dc98f0a84fdd52f97a043c8be.jpeg)
-
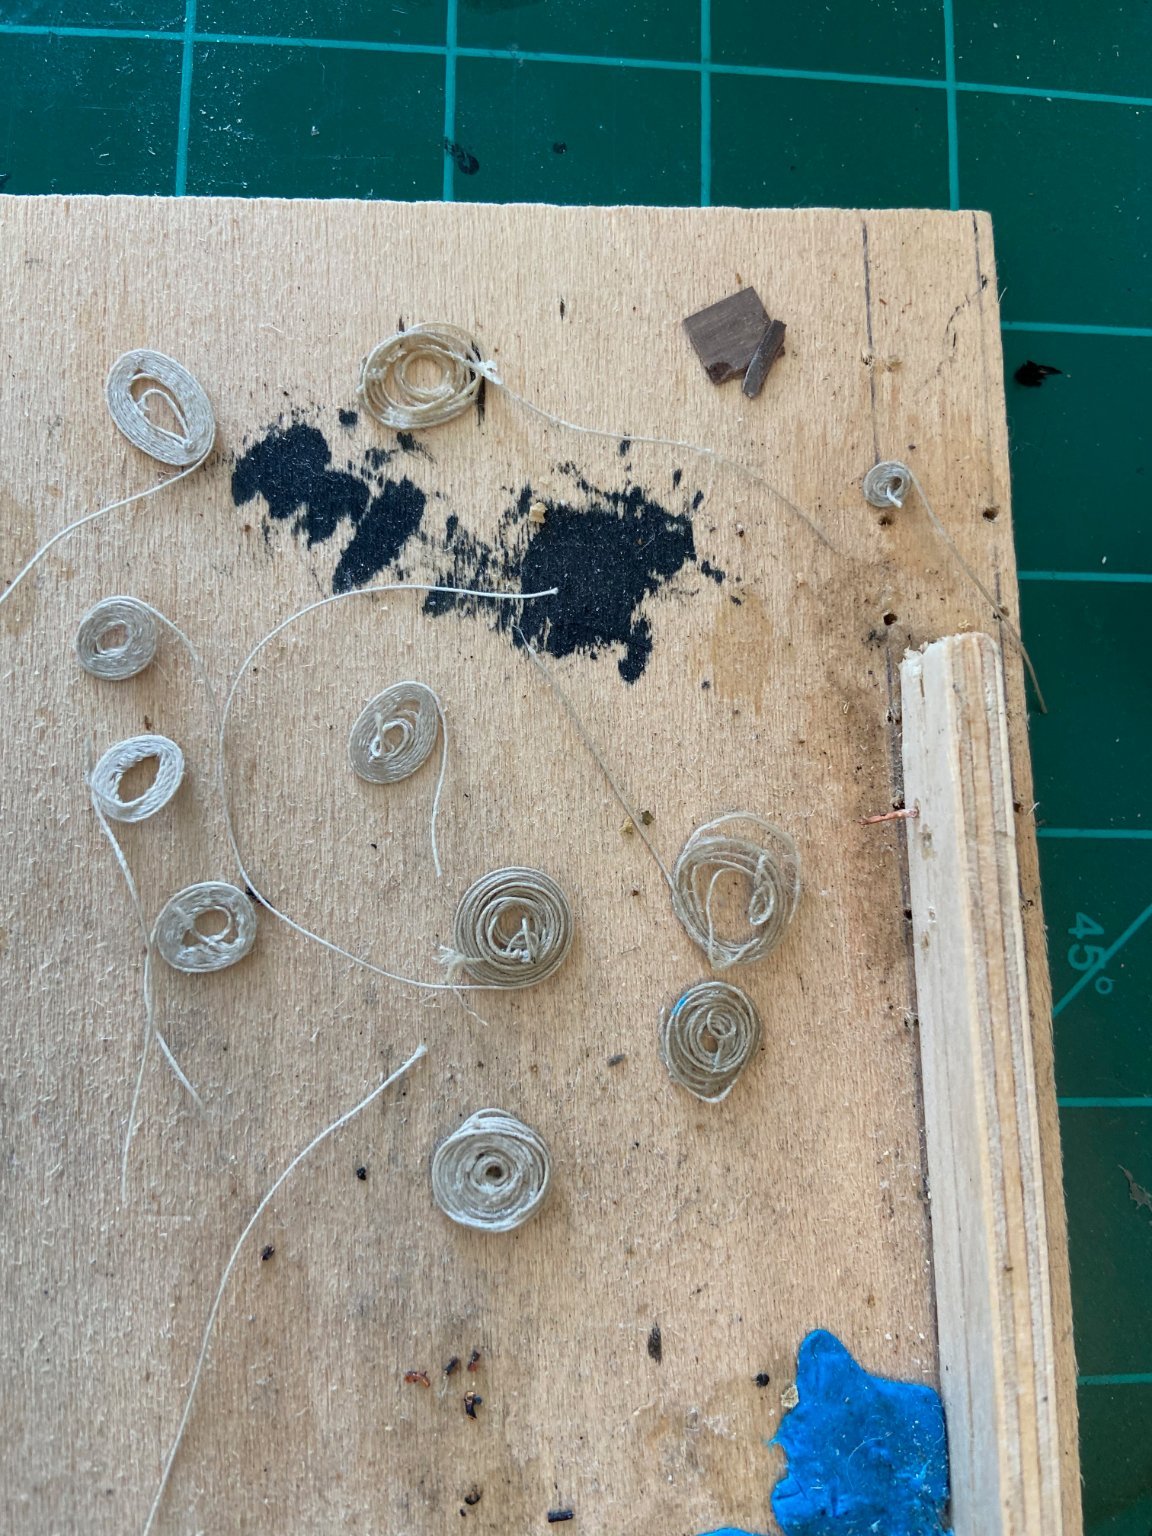
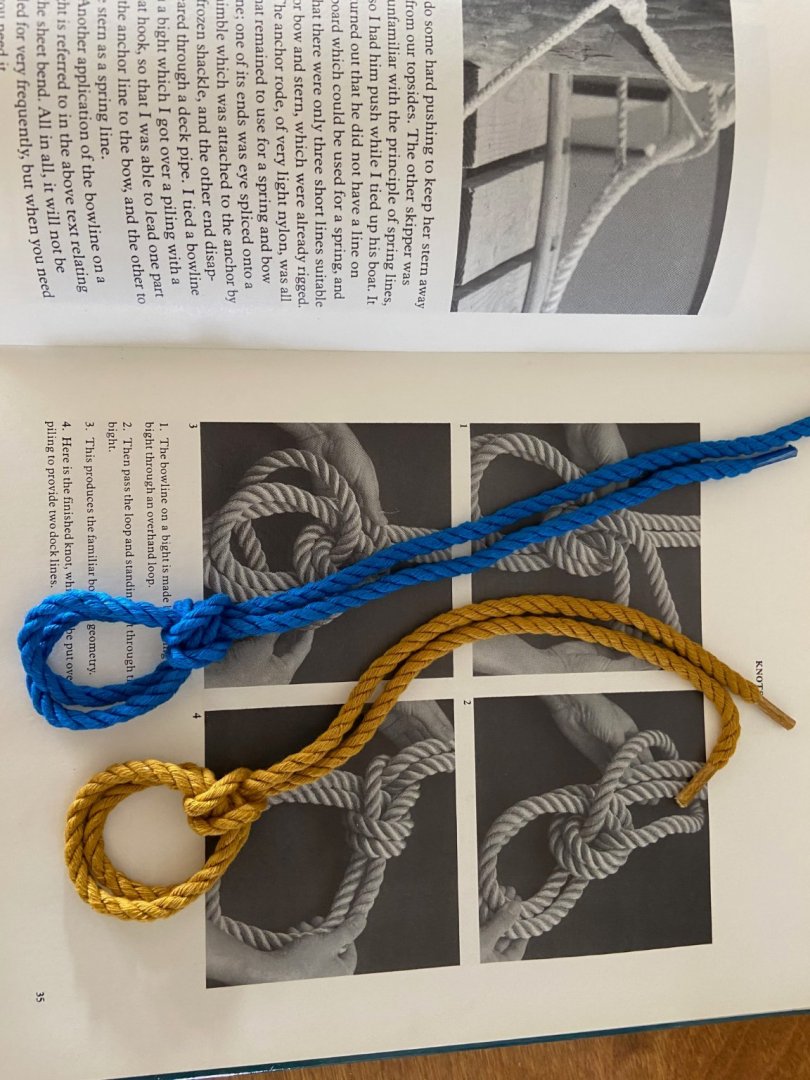
So, when I try to do the seizing as shown in the video, it has only worked once. Every other time it makes a knot before the seizing has been reduced to the size needed. I am wondering if waxing the seizing material I am using will prevent this, or if there is anyone who can tell me what I might be doing wrong! Any help or words of advice would be MOST WELCOME and GREATLY APPRECIATED! At least my knot tying is improving, just not where its needed =(, Brian
-
What a wonderful job you are doing on both the model and the log. I am glad you are enjoying yourself, because you should be really happy with your craftsmanship!!!! I love the Tanganyika and the satin finish, and the whole look of it! Can't wait to see your rigging and learn more from your efforts...
-
Hey Glen, Thanks for the input and words of encouragement. I looked at your pictures of your Granado, and I must say it is a beautiful ship model in all regards. Your work is so clean, and the rigging is beautiful. I wish it had a build log I could hack from! I am super-stoked that I have been making progress and doing a relatively good job as I go along. I am new to this art, especially painting, staining, and most other aspects of ship modeling, but eager to learn and apply new knowledge. I too agree that the cannons are a bit painful to rig and handle during installation, and note that there is no way any of my coils will be identical to another coil =), but I do have a rig made now that makes it easier to make and look fairly consistent (with just enough mess to look very real). With respect to your comment about planking the quarterdeck, I did in fact plank the quarter deck and painted it ochre red. I'm not sure what the forecastle deck and bullwark will look like when I am finished with the bowchaser cannon installation and get the forecastle deck in place. Did you do anything special up front for bullwarks on the forecastle? Any advice or commentary is GREATLY appreciated. Best regards, and I will peruse your other builds to learn more from your beautiful work! Brian
-
Spellapeaka, Your very kind words are much appreciated and further encourage me to try my best and continue to push ahead as time permits. As long as your eyesight is challenged, and you don't zoom in to far on the photos, I think my Granado build doesn't look that bad, and that makes me very happy. That feeling of "I haven't wrecked a good kit, yet" is a surprisingly compelling reason for me to continue, just as it was with my first build [the Bounty Launch (aka, Jolly Boat, by Artesania Latina). Thanks again for your kind words!
-
Wow, this is a fantastic job on a nice ship! All that hard work and bashing you have done looks great, and it seems we work at about the same pace =). All of your replacements look nice, and I am impressed with the way your single planking turned out. Every element looks very nice and consistent in its appearance, and I have to agree, your grating work is ....... excellent! I am anxious to see it continue and get fully rigged. However, there is one caveat: I am much older than you, so you may have to hurry a little 😉 . Congratulations on your degree, and nice guitars in the background. I have a few guitars lying around in various rooms in NC, just so I can always pick them up and work out the hands and the ears. I wish I had a nice big work space like yours, but in our little place here on Roanoke Island, space is limited.....at least the admiral is tolerant of my hobbies most of the time 😃 . Keep up the awesome work, you are doing a great job on a beautiful ship!
-
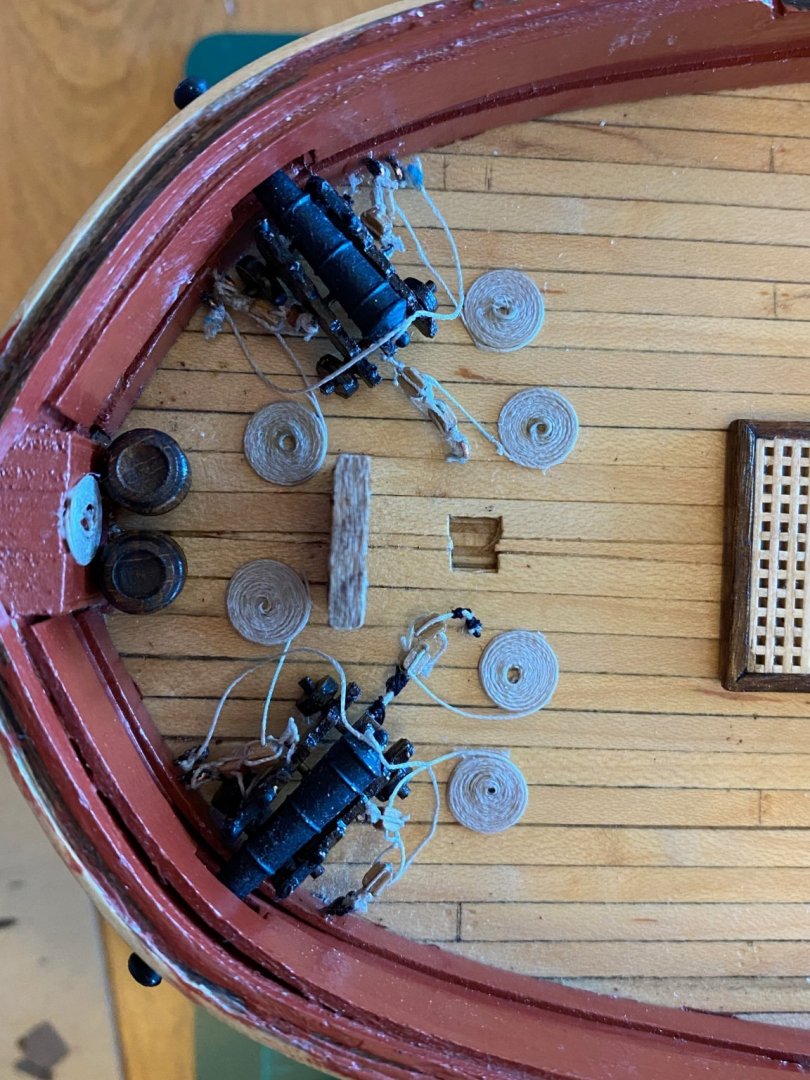
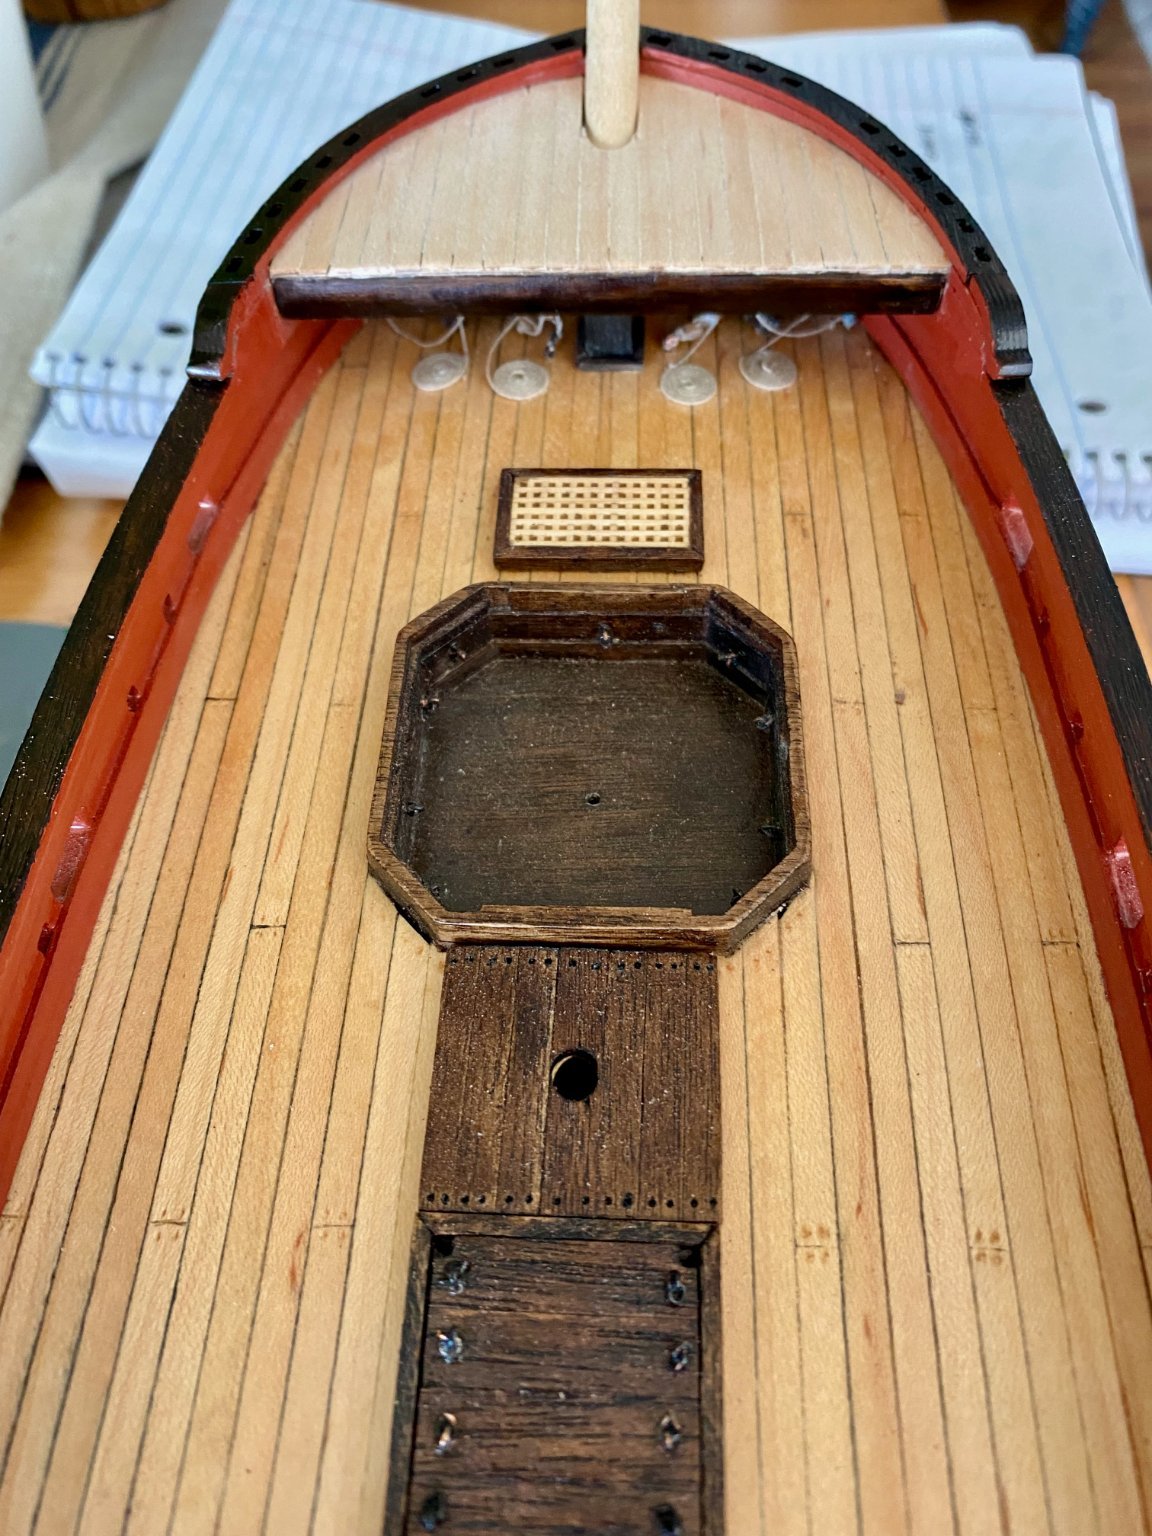
So, my biggest fear so far has been overcome, and I have managed to install one bow chaser cannon with gun tackle and flemish coils included. The picture shows every wart and wrinkle, and I still have to do some real housecleaning to remove the dust and debris, and a whole lot of touch up work to remove some residual blue tak (don't ask), touch up the bulkhead painting, etc., etc., etc. Since the bow chasers will be covered with the forecastle deck, they won't really be visible, so I used the ugly duckling cannon (even though most of mine look about the same). I have to admit, I am just glad to get one in and prove to myself that it can be done and have it still look relatively nice if you stand far enough away 😃 . I can't wait to install the second one and finish the forecastle decking, so I can move on to some other aspects of the build before I have to install ten more cannons (ugh =). Even the flemish coils are a challenge, but I really like the look of a cannons with the tackle laid out for inspection. One step forward, even if it isn't that great, is still one step forward perhaps....
-
Hey Jeff, Super stoked you are starting a build log for this kit. I have it on the shelf (mine came with instructions 😃), where it is waiting for me to finish the Caldercraft 1/64 Granado kit I am in the middle of building. I thought it would be interesting to also do the CAF Model plank on frame and include the split hull to show the details of the boat better, but the split hull approach does appear to increase the complexity of the build exponentially (and that is hard to imagine). Since I am a rank amateur builder (as is clearly apparent from my current Granado build log), I'll be watching your build log with great interest and encouragement! I'll be one of the peeps in the front row taking notes. Best regards, Brian
-
Hey Kev, Congratulations on the new job!!! I am glad there is no giving up on the ship-builder in you, but I can certainly appreciate the fact that working in the heat and humidity of the garage is not optimal. I hope you get a good rainy day where you don't have to work at your real job. To state the obvious, I am not making a lot of progress on my Granado lately either. Currently it is a few hundred miles away, but tomorrow it will be back within arm's reach. Let's hope I get some motivation and a good rain storm as well, and that my wife's patience is eternal. Best regards, and congratulations again! Brian
-
I have mixed emotions. Having just learned how to make a few nice rope coils, I was and still am anxious to rig the gun tackle and coil the ropes on my Granado. It is kind of a moot point for the bow chasers that will be covered over by the forecastle decking, but I think it looks good with all the guns rigged on the Granado (at least when done well by others). However, I also completely understand the variation and elimination of this element. There are a lot of "personal" choices encountered in building. I like the idea of the breaching rope, and I have seen some "compact" wrapped tackle lines that eliminate coils as well. One thing is for certain, whatever decision Mike makes, it always looks fantastic 😃
- 607 replies
-
- 2
-

-
- winchelsea
- Syren Ship Model Company
- (and 1 more)
-
Interesting decision. You have all those beautiful ringbolts for gun tackle on your carriages and bullwark but aren't going to put them to use?
- 607 replies
-
- 1
-
-
- winchelsea
- Syren Ship Model Company
- (and 1 more)
-
Great progress and beautiful work too!
-
Mike, Thanks for providing the information, which I will attempt to adopt to my applications. I can't stop myself from asking you if you will rig the guns before you glue them or after? I have "pre-rigged" 2 cannons for the bow chasers already, but I can drill the holes in the trucks and insert an appropriate gauge (guitar string) wire in them and install them just the same (I would hope =). Thanks again, your work is truly inspiring! Brian
- 607 replies
-
- 1
-
-
- winchelsea
- Syren Ship Model Company
- (and 1 more)
-
Thanks for any assistance you can offer Mike, I am just at the point of fixing two cannons as bow chasers under the forecastle of my HMS Granado, and as you noted, I don't won't want them to "feel free to move about the cabin". It will be a good place to "practice" too.
- 607 replies
-
- 1
-
-
- winchelsea
- Syren Ship Model Company
- (and 1 more)
-
Hey Mike, Can you provide further detail on pinning cannons to deck? Is it standard practice? Greatly appreciate your sharing your work and knowledge!!! Brian
- 607 replies
-
- 1
-
-
- winchelsea
- Syren Ship Model Company
- (and 1 more)
-
Nice work!
-
Hang in there. Positive vibes being sent your way.
- 129 replies
-
- 2
-
-
- Bounty Jolly Boat
- Artesania Latina
- (and 1 more)
-
Any progress deserves photos 😃 I do remember the issues with gluing metal, hoping nails will do their job, etc. In my experience I didn't have too much of a fit problem with the gudgeon, but getting the placement and alignment so the rudder was hung at the right level was the challenge I faced. Mine didn't come out that pretty, but the over-all look is still not that bad when all is said and done.
-
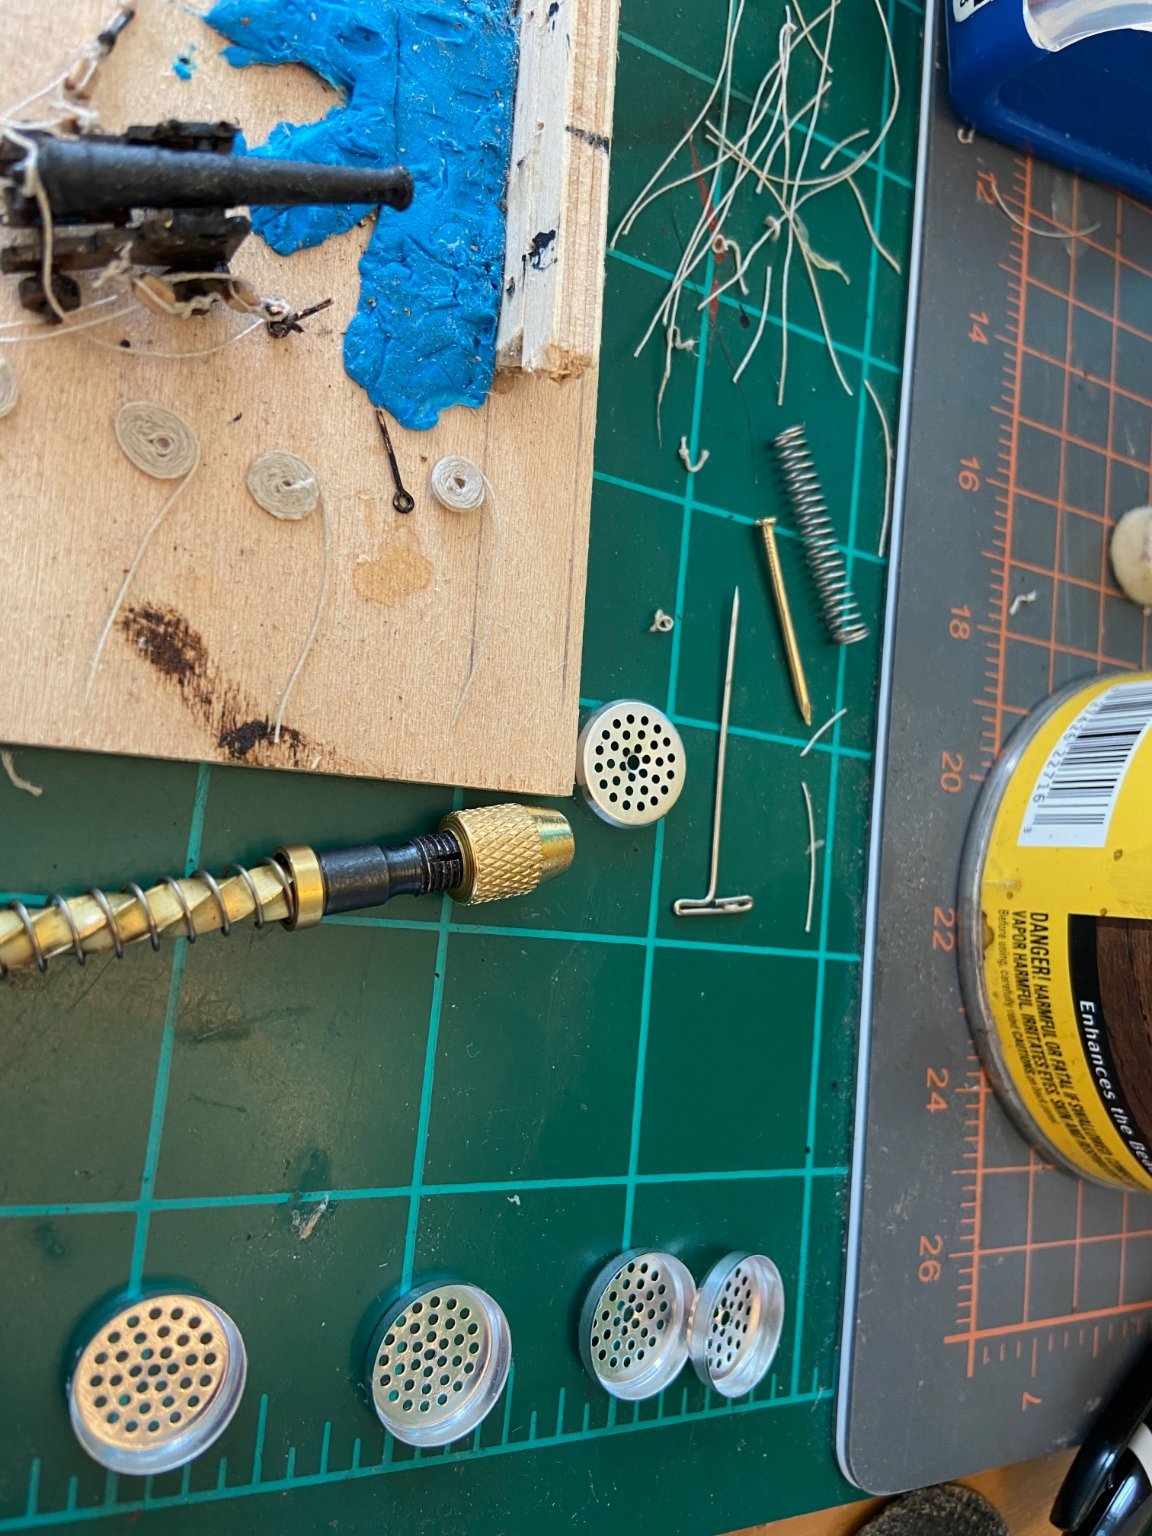
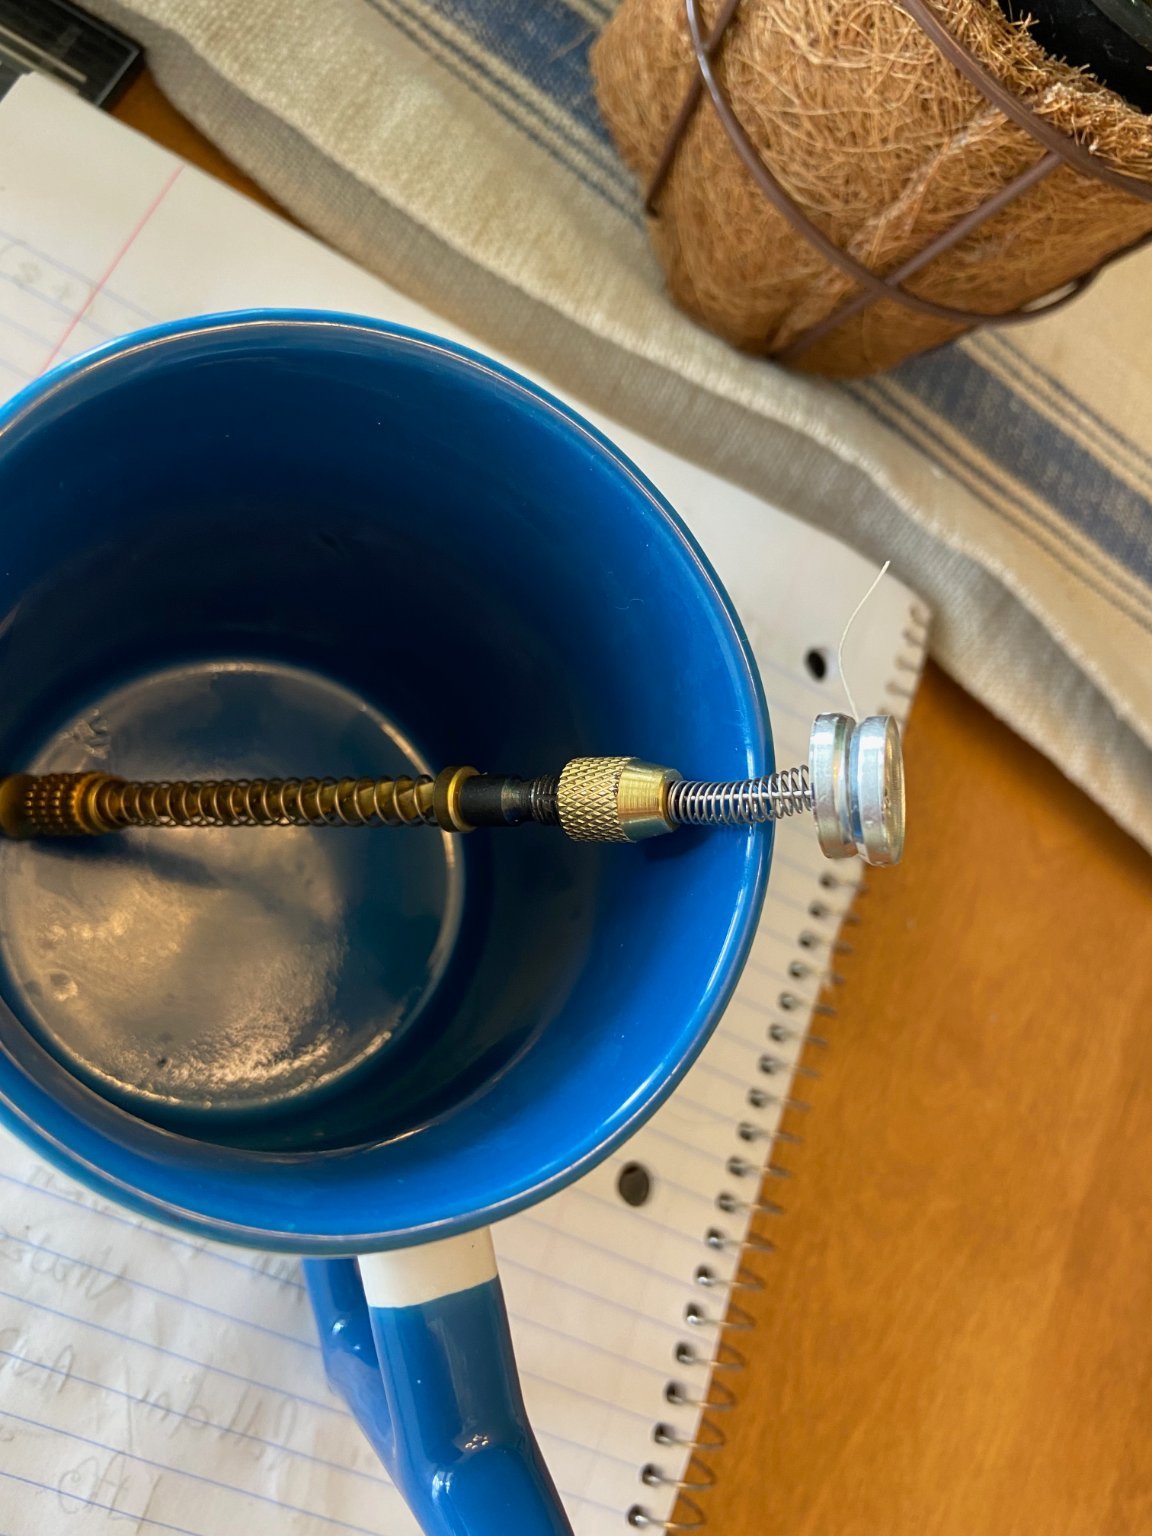
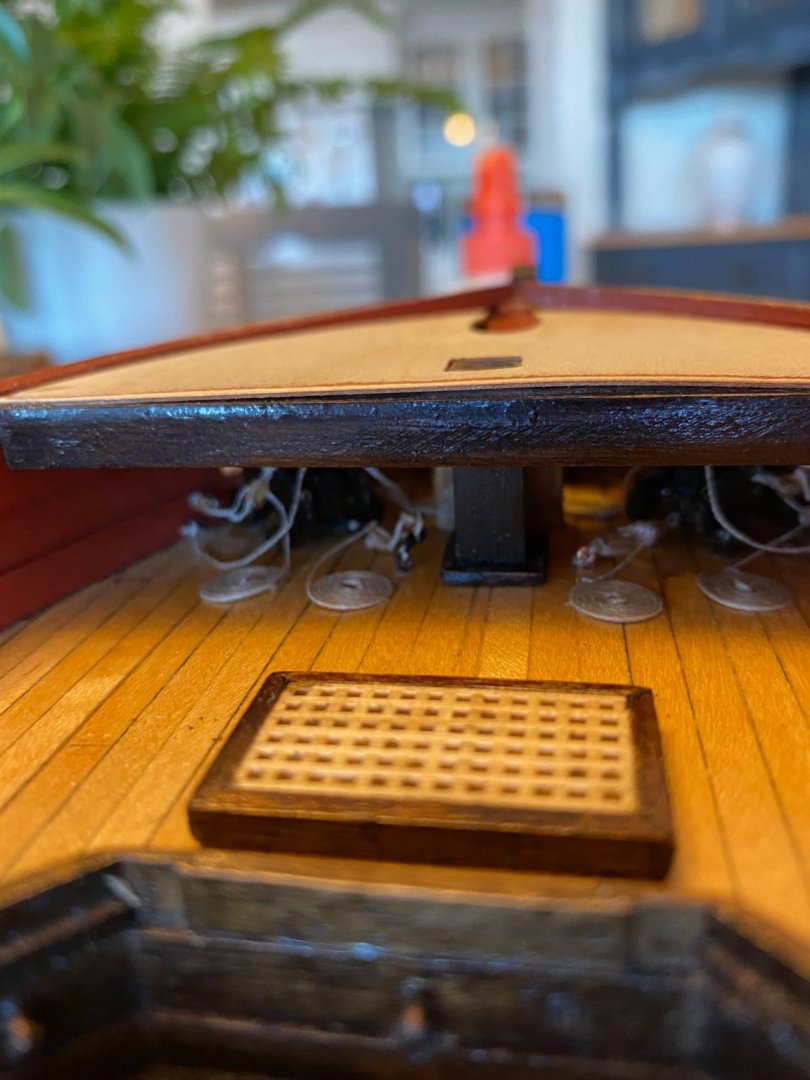
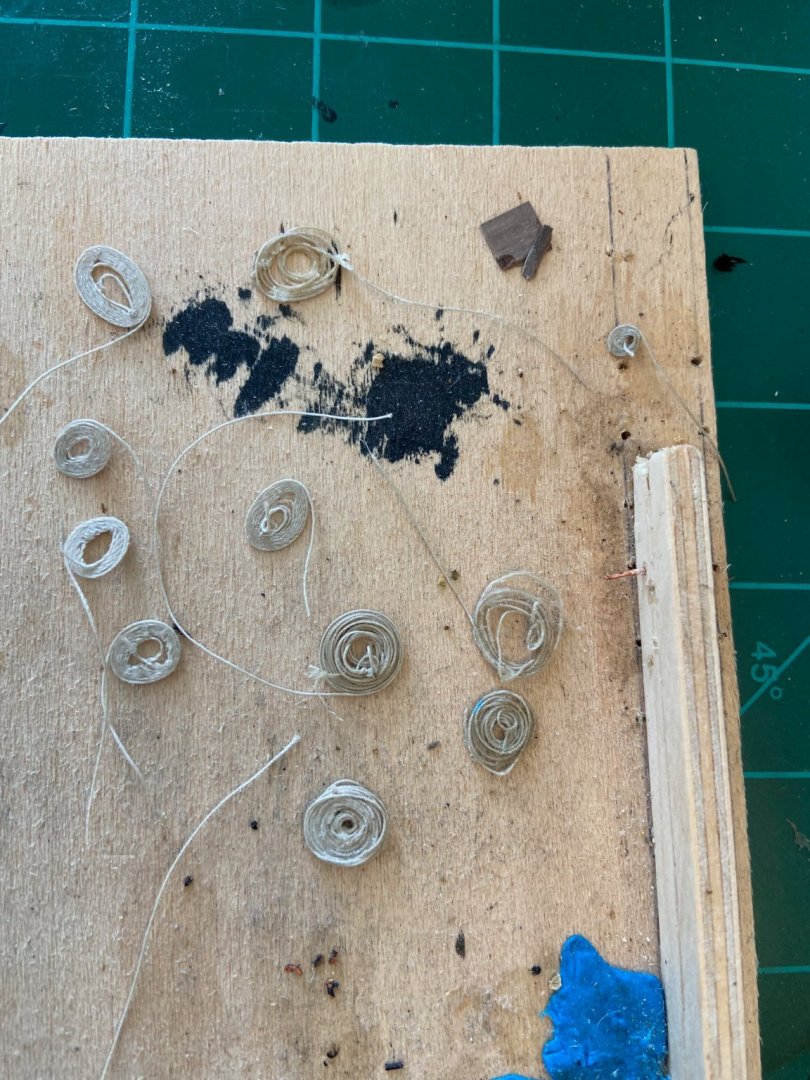
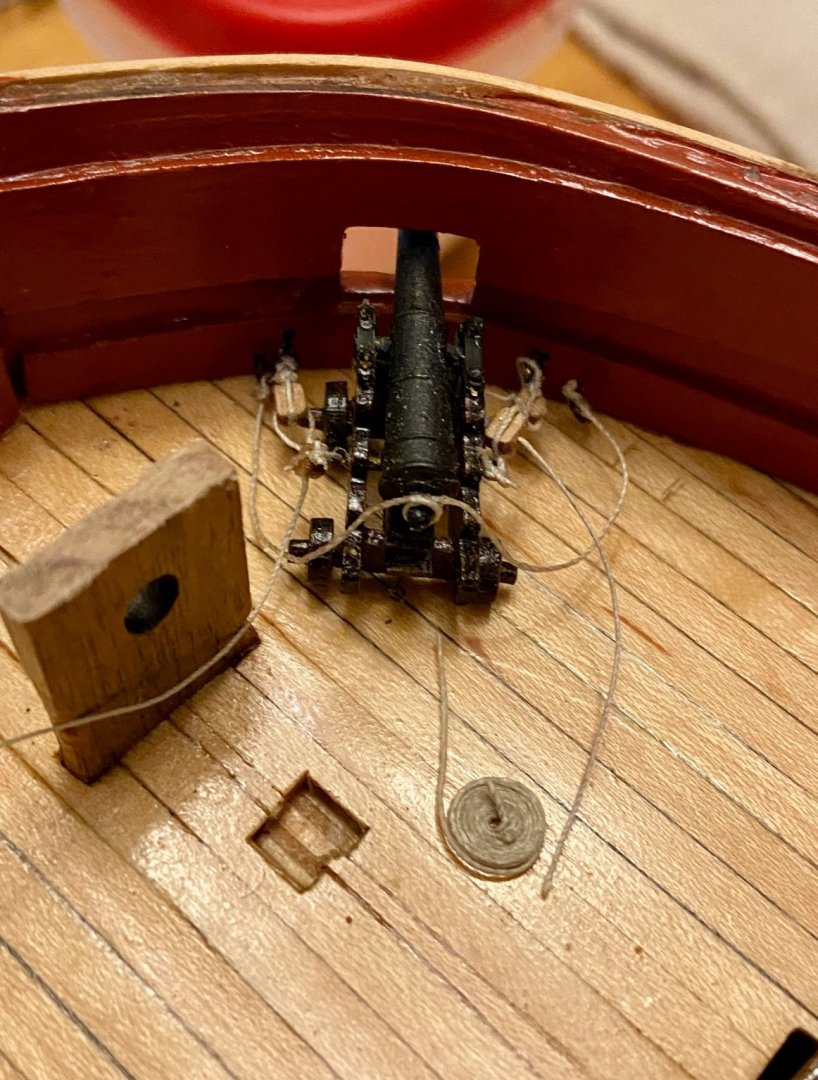
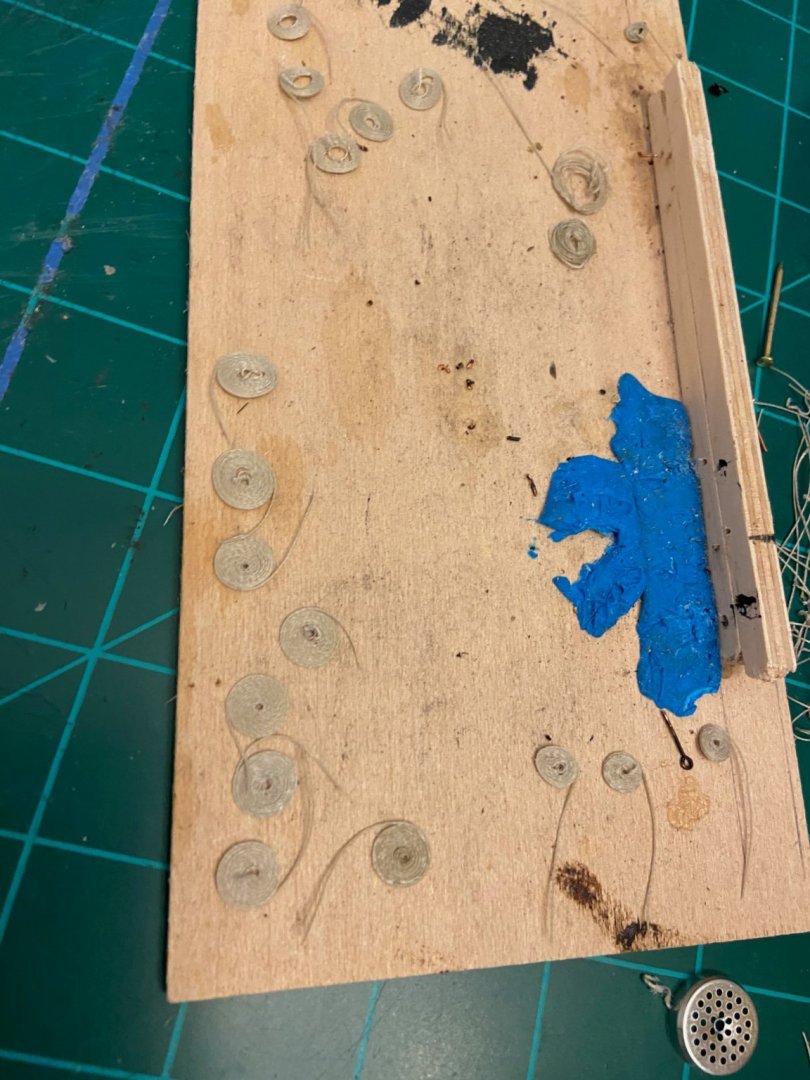
Sooooo, it turns out one of the mental blocks preventing me from moving ahead at speed with my build were the rope coils for the guns under the forecastle deck. My coils looked pretty lame. However, I finally made a jig that semi-works, and when it works it makes relatively nice coils. This has encouraged me to get moving and check the "fit" of the cannon and its rigging with it temporarily plugged into the bullwark. It looks ok with that one coil in the picture with the cannon a little small compared to the "standard" size I have been making. I think it could be a little bigger and not look bad. However, does it make sense to have different size coils? Each cannon rig will have one coil on each side and one on the back of the carriage rigged into the deck with a block.


.jpeg.f965d16c8b5a7e13e5058e76bd5e3719.jpeg)