
HardeeHarHar
-
Posts
615 -
Joined
-
Last visited
Content Type
Profiles
Forums
Gallery
Events
Everything posted by HardeeHarHar
-
 It’s fantastic!!!
 -
Thanks for the support Craig / @Craigie65, I'm not looking forward to making a lot of work, but will take a look at one or two tacked in place to see if the appearance makes it worth the extra sweat equity. I looked at your Granado build log but it ends abruptly =(, would love to see some pictures of the finished model (I can't believe you dropped it down some stairs, but I believe someone else also dropped their Granado down stairs and it survived!). Best regards to all! Brian
-
I like your attitude @OllieS! I believe I am going to build one lid with the hinge and give it further examination for ease of installation and appearance using bluetak. It's an interesting question to me because the gun ports on the Granado don't appear to have lids, but the bow chase ports have doors, and the sweep ports and cabin lights have lids. At least I think that is right, I will go look at the AotS reference book to make sure...
-
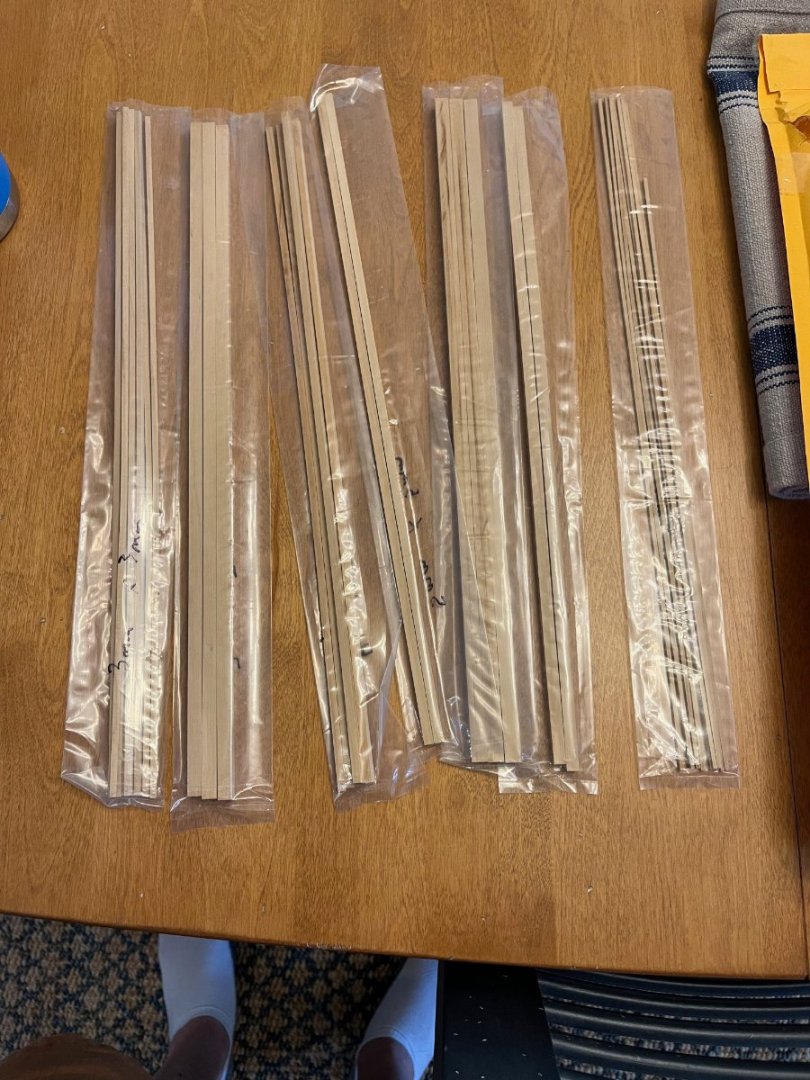
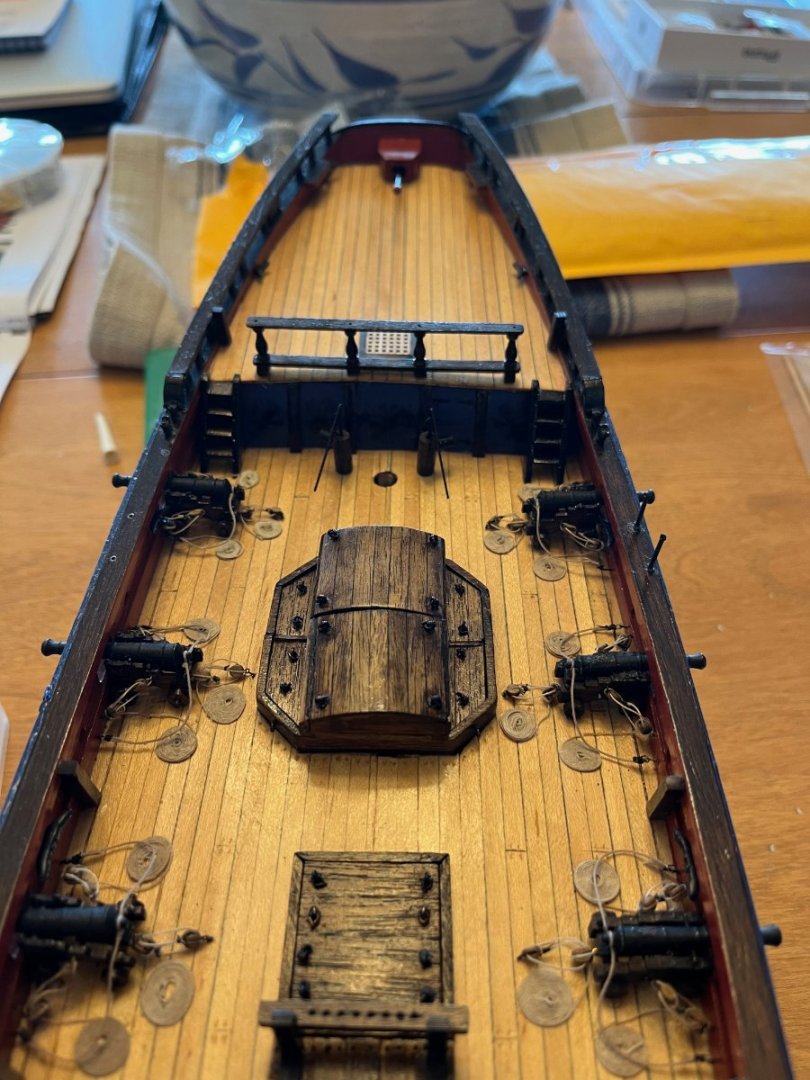
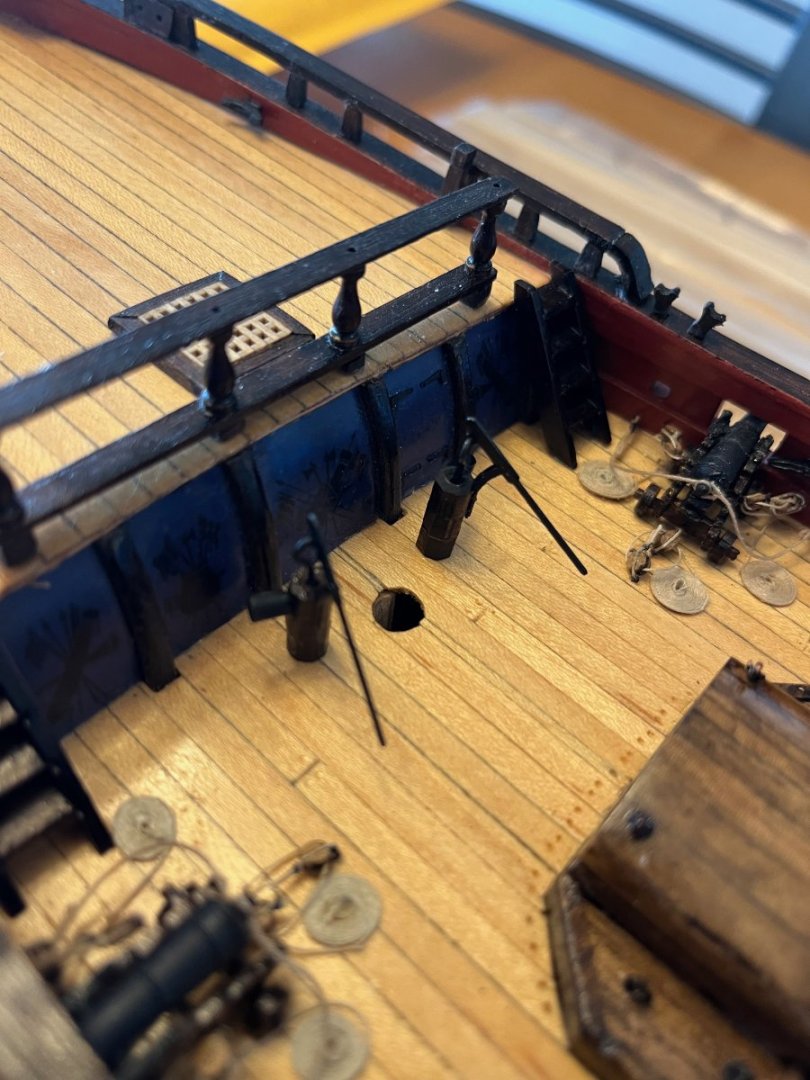
Hey Andrew, I am glad you asked. I would think they would be relatively fragile. They are supposed to be made from 0.5 mm thick, 3 mm wide, and 3.5 mm long walnut. At 0.5 mm thick, they are going to be fairly fragile, yes? Right now, I have been thinking I will use the 0.5 mm thick, 4 mm wide maple strips I have left over from the deck planking. I have used boxwood instead of walnut for the hull planking, but my boxwood strips are 1 mm thick, 4 mm wide. The instructions recommend that the inside of each lid is painted red, so I took a maple strip and painted one side red. Then I sanded the sides where the red had bled over, and (if I persist) will likely continue to reduce the width down to the 3 mm width recommended (without being overly accurate about it). You then are supposed to paint the hinges black and adhere them to the front (non-painted) side with CA (good time and place for the extra time control CA I have on hand I suspect), and drill a hole in the middle on the red side and glue a teeny tiny eye bolt on that side. You are then instructed to drill little bitty holes in the hull, and then the legs of the hinges can be inserted/CA'd into the holes in the hull to provide the glue job with a little extra reinforcement. I haven't done it yet, so I haven't really tested the relative ease or feasibility of the (w)hole operation (heh heh, see what I did there?). I think I will attach a hinge or two and see how fiddly the hinge and its legs appears before drilling any holes in the side of the Granado. It does sound like a lot of work, and drilling 36 tiny holes in the side of the hull is terrifying to Dr. Breaks Bits. Heck, I've been wondering how in the heck I am going to handle the ship when it is time to mount it on a board for display...and I suspect some "reconstruction" will be required when it is done, and can now imagine some of the sweep port lids could be involved if they are in place at the time. The one thing that makes me want to do it is because it would be more accurate with them in place, but I have to admit that the ports look pretty nice and sharp without them. Having them in the closed position just doesn't make sense to me, because I like the looks of the sweep ports so much. Ugh. I do think seeing what one looks like with a hinge, and checking how fragile it would be, is a reasonable approach. What say you my good man? I should add that even in the closed position, I believe I could knock them off with my super thumbs.
-
David, you are obviously doing a great job, and you are demonstrating how very much more I have to learn and incorporate into my developing knowledge and techniques. I want to "officially" thank you for your detailed build log, and congratulate you on your mad skillz.
- 310 replies
-
- 3
-

-
- Diana
- Caldercraft
- (and 1 more)
-
I have some work work to do today (booooo), but I have been thinking (yes, it happens) about next steps. I'm ready to install the channels and chainplates, but before I do that, I think it might be a good idea to put the lids on the sweep ports. They are little itty bitty lids with fiddly little hinges, and can be mounted in closed or open configuration. Orrrrrrr, I could just not even install them. No one would miss them, but I can't tell if I should be historically accurate, in which case I would install them in the open configuration since I went to all the trouble to make pretty little sweep ports that would only disappear if I install them in the closed configuration. There is no way I am going to just slap them in the closed position over those sweet looking sweep ports that give the hull a nice business like look. If I do decide to install them, it seems like it is now or never, before I go and install the channels and chainplates etc. Decisions, decisions! I'm soliciting opinions to see if my colleagues can help convince me one way or the other. Also, I got a box delivered today all the way from the UK, and a new build log is waiting inside!!!
-
Hey hey hey KL!!!! That rudder looks like it would work, and also looks like nice craftsmanship to my eyes. In fact, the whole kit and kaboodle is looking great!!! I like your windows and the decal definitely adds a pop of color to the stern. I wonder if you would have liked it better if you had cut out the flower(?). Have you put some dull-cote or anything on top of it, or would that ruin it? Keep up the good work, you are making awesome progress, and encouraging the rest of us!!!!
-
That looks super fantastic Andrew. Well done indeed!
- 206 replies
-
- 4
-

-
-
- Vanguard Models
- Brixham trawler
- (and 2 more)
-
Welcome to the MSW Clovehitch. It takes a while to get used to this… 😉
-
I may be the guilty party, and I regret it all. Please send me a bit of that jalapeño cheddar sausage and I’ll never do it again!!
- 68 replies
-
- 2
-

-
- Morel
- Master Korabel
- (and 1 more)
-
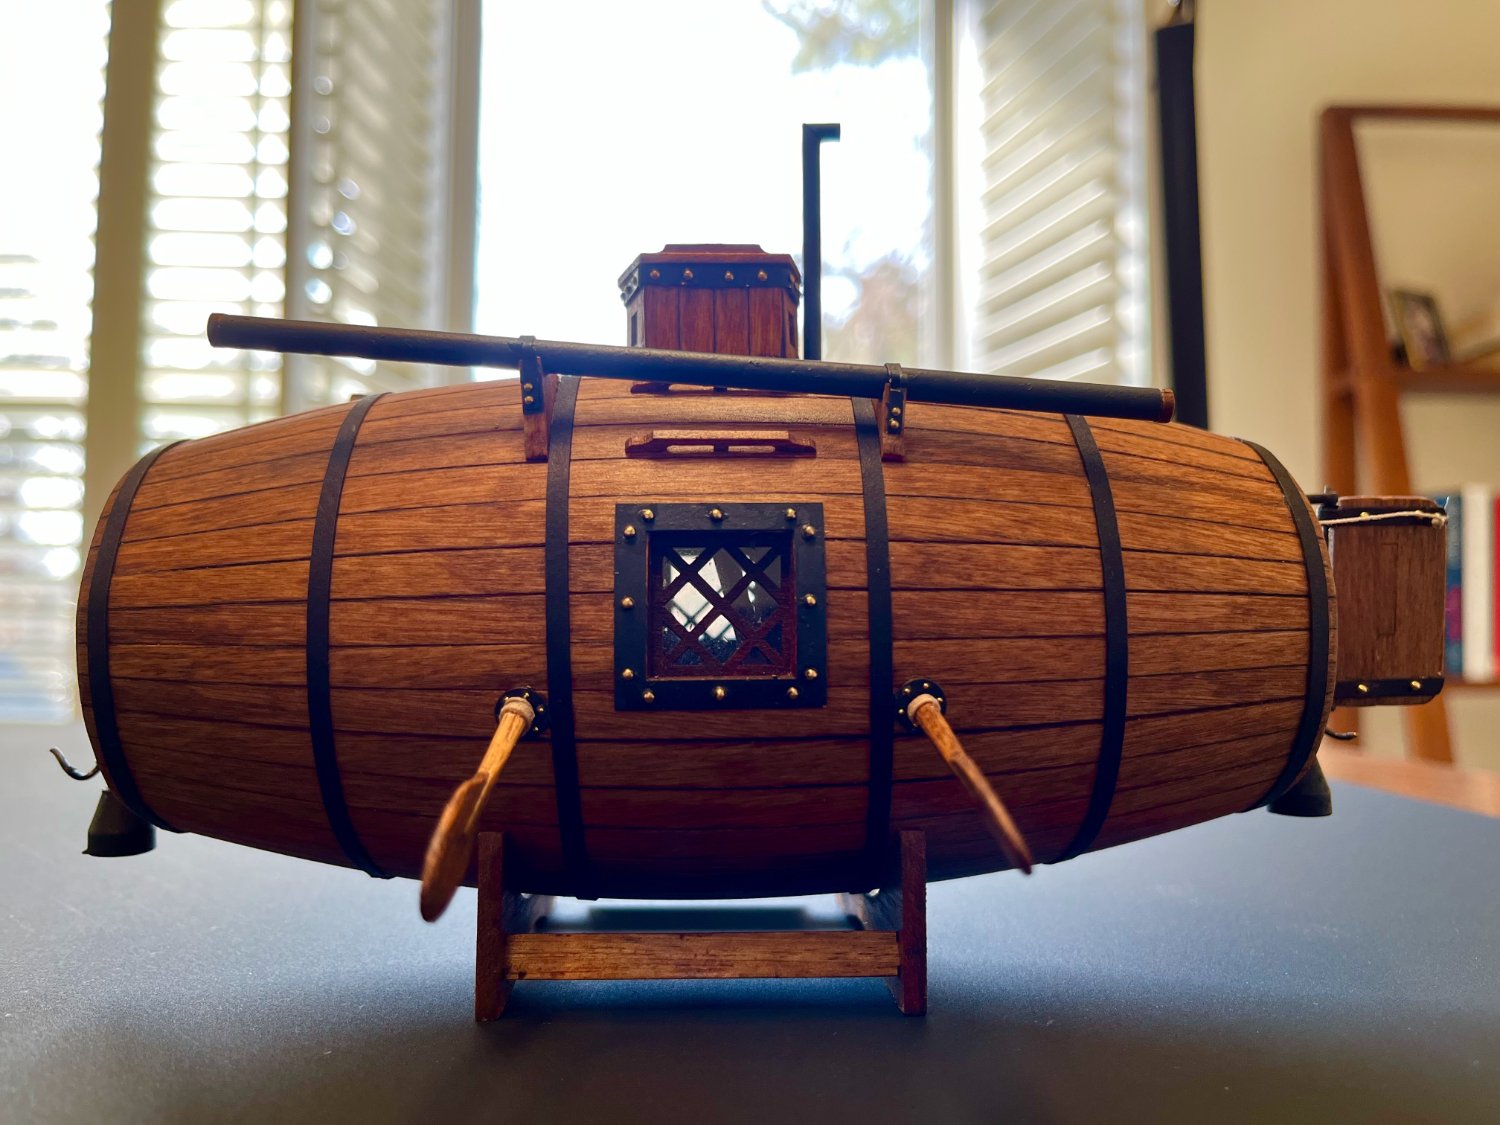
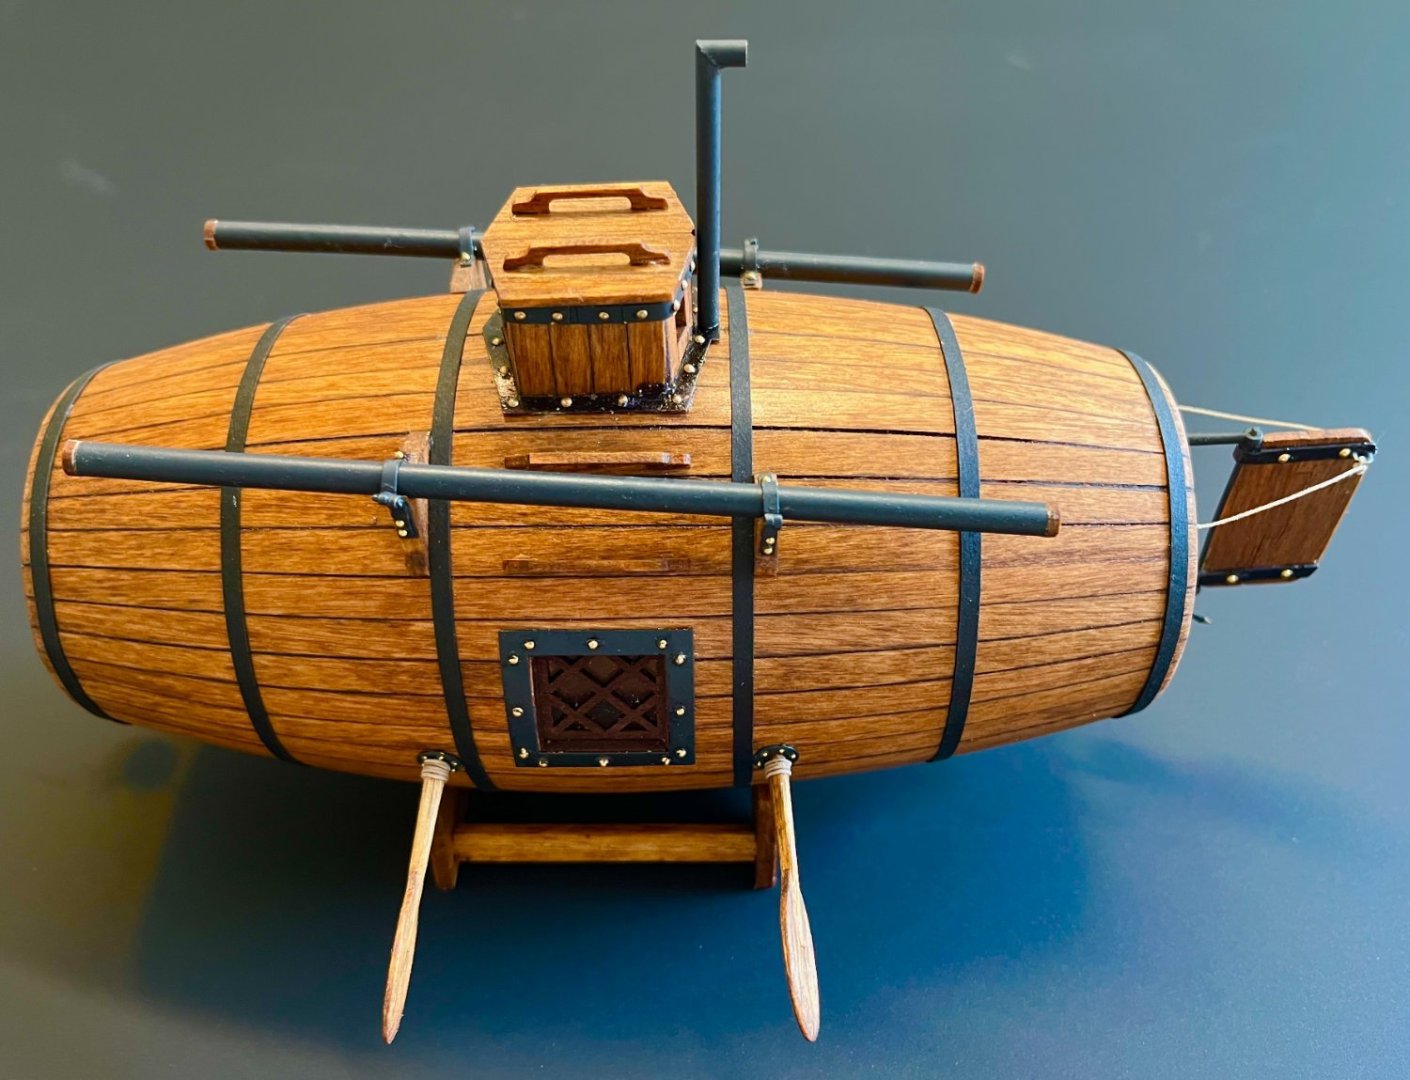
Secret Vessel made it safely to Roanoke Island, so now my attention turns back to the Granado build. Yesterday I finished up some of the work that I had been procrastinating becauseit appeared fairly fragile and I didn't want to put it in place only to smash it up with my fat fingers (i.e., elm tree pumps) I hope to get all the chainplates in place today or tomorrow, as I have placed pins in all of them to ensure a solid installation. I also brought a stock of boxwood to be used for the masts and spars of the Granado that I recently acquired from Joseph Volpe of Modeler's Sawmill. He provides a really nice source of boxwood with excellent service. I have a new Proxxon Lathe, and a finger plane, and will have to learn to use these properly to avoid turning all the beautiful boxwood into sawdust. I also purchased a new kit for the Durham Drydock which should keep me busy for several years in the future.
-
I was equally confused by the illustration provided in the manual. I beveled the top edge, and shaped the plank further when it was required (not that often). Good luck with the build (have you started a log?), and have fun with this kit. The metal work is when it really gets interesting! @Knocklouder, thanks for the shout-out homie!
-
Either here or over Knocklouderville!
-
Awww, stop it! My head is going to blow up like a Chinese Ballon
- 68 replies
-
- 1
-
-
- Morel
- Master Korabel
- (and 1 more)
-
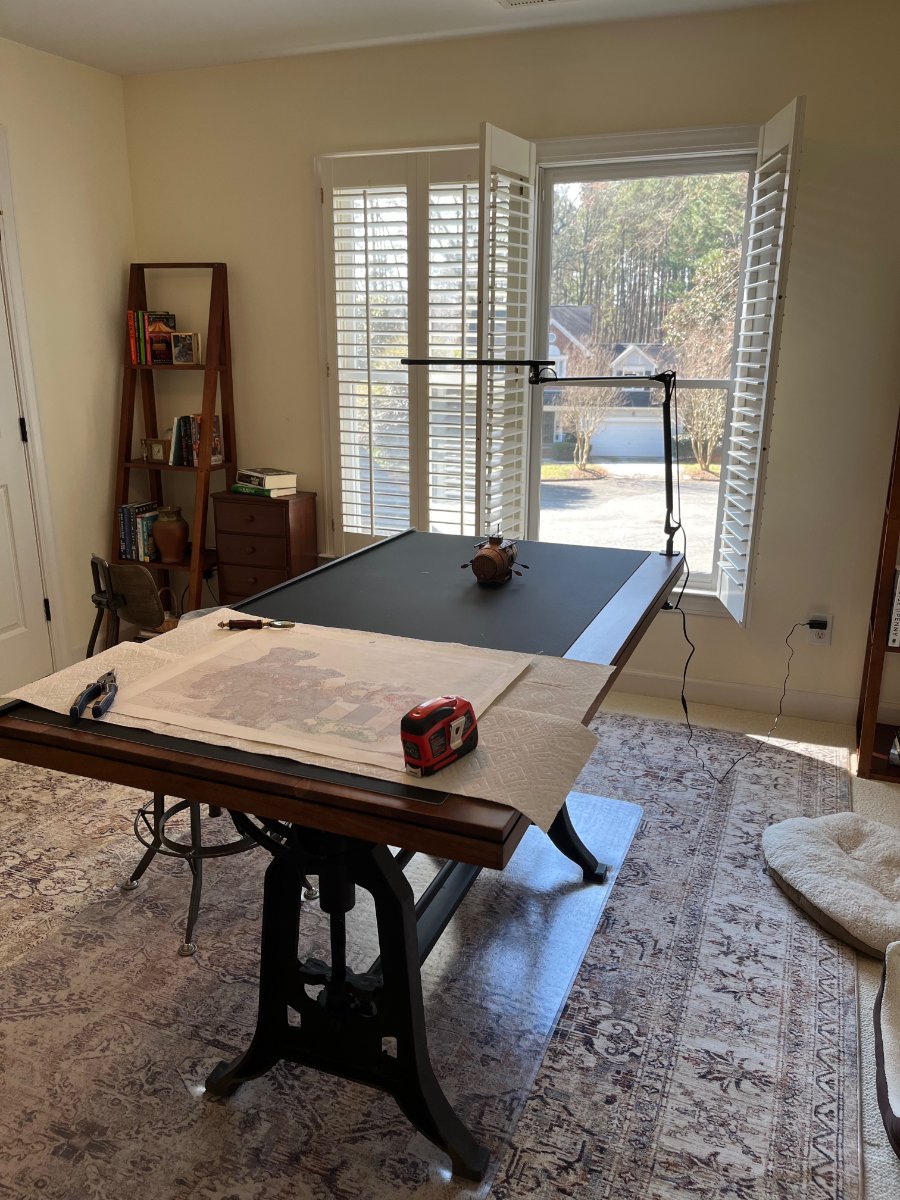
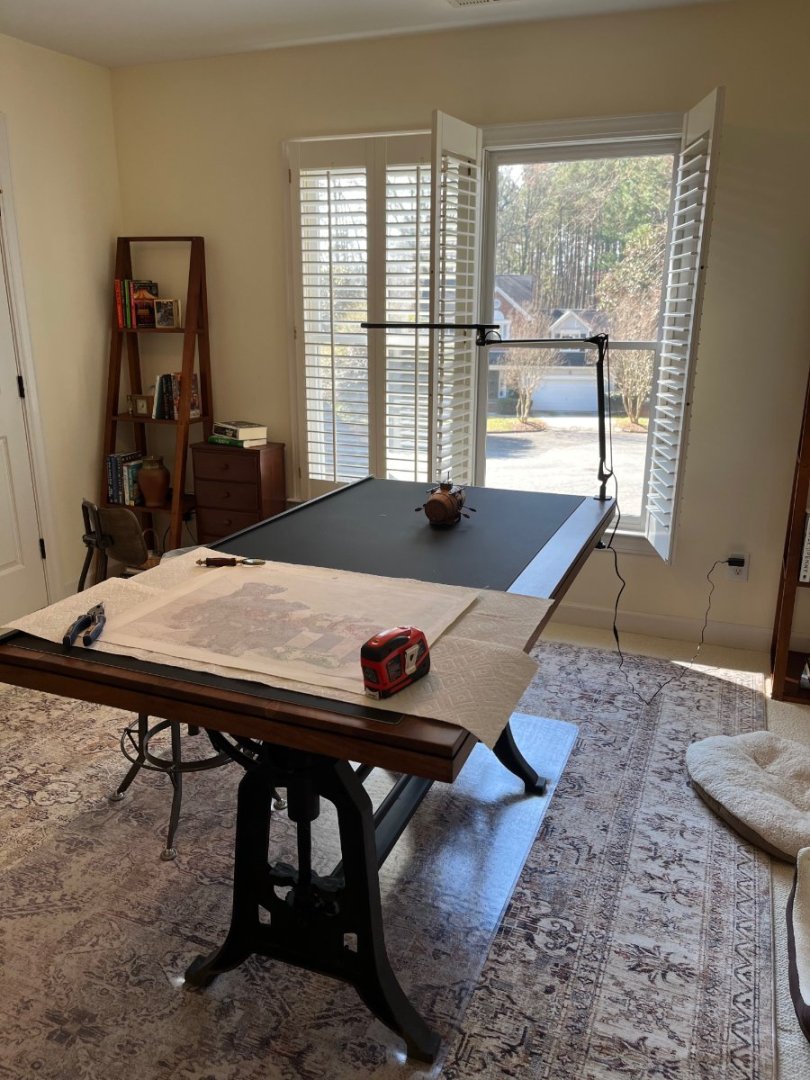
I cleaned off my new drafting table after completing the Secret Vessel, and am getting ready to pack the beer keg up and head back to the coast and the Granado Build. Before I left I thought I would take some pictures of the Secret Vessel (taken with my iPhone still), just in case she doesn't travel well.... I still need to paint the corkscrews black when I get to the beach, and I have a real camera there that I will use to take some pics for the Finished Gallery Photos. I get lots of natural light in the afternoon in my little office/shop. I have another desk coming in that will hold my iMac, and I still have to order some storage cabinets (old seed cabinets from a hardware store). Still a lot of work to do in this space, but the table worked out well so far.


- 68 replies
-
- 10
-

-
-
- Morel
- Master Korabel
- (and 1 more)
-
OMG! Your work is way over my abilities. I love the use of reference books, even if they are outside of my comprehension at the present time. So much to learn and emulate from you and the other scholars in the community!!!!
- 206 replies
-
- 2
-
-
-
- Vanguard Models
- Brixham trawler
- (and 2 more)
-
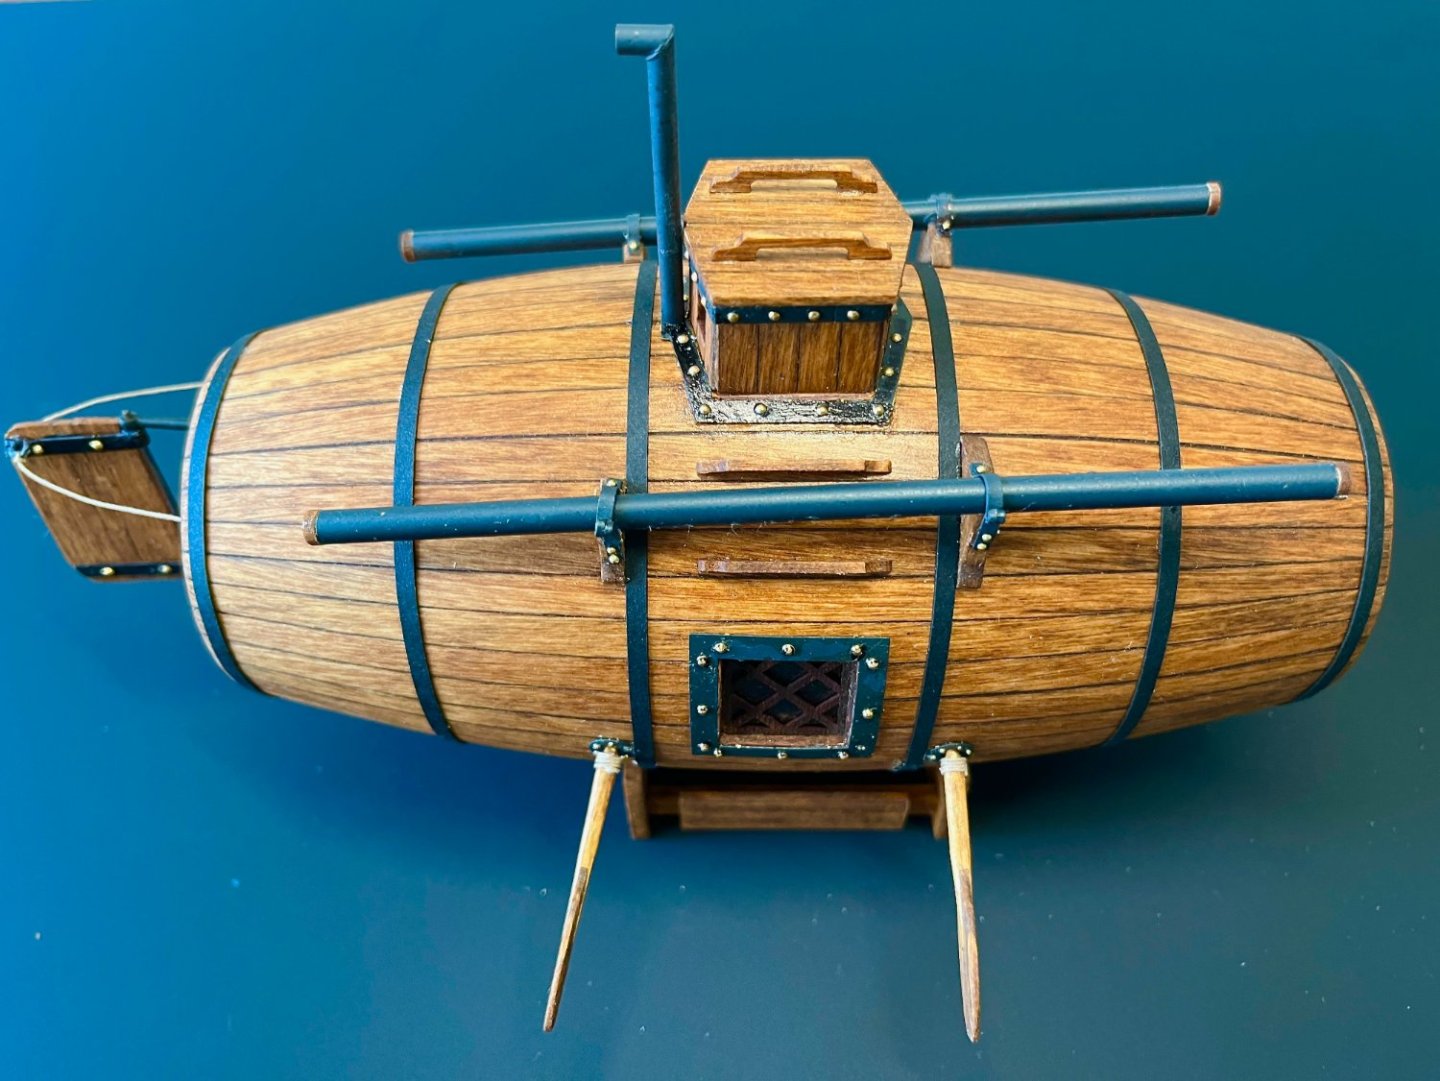
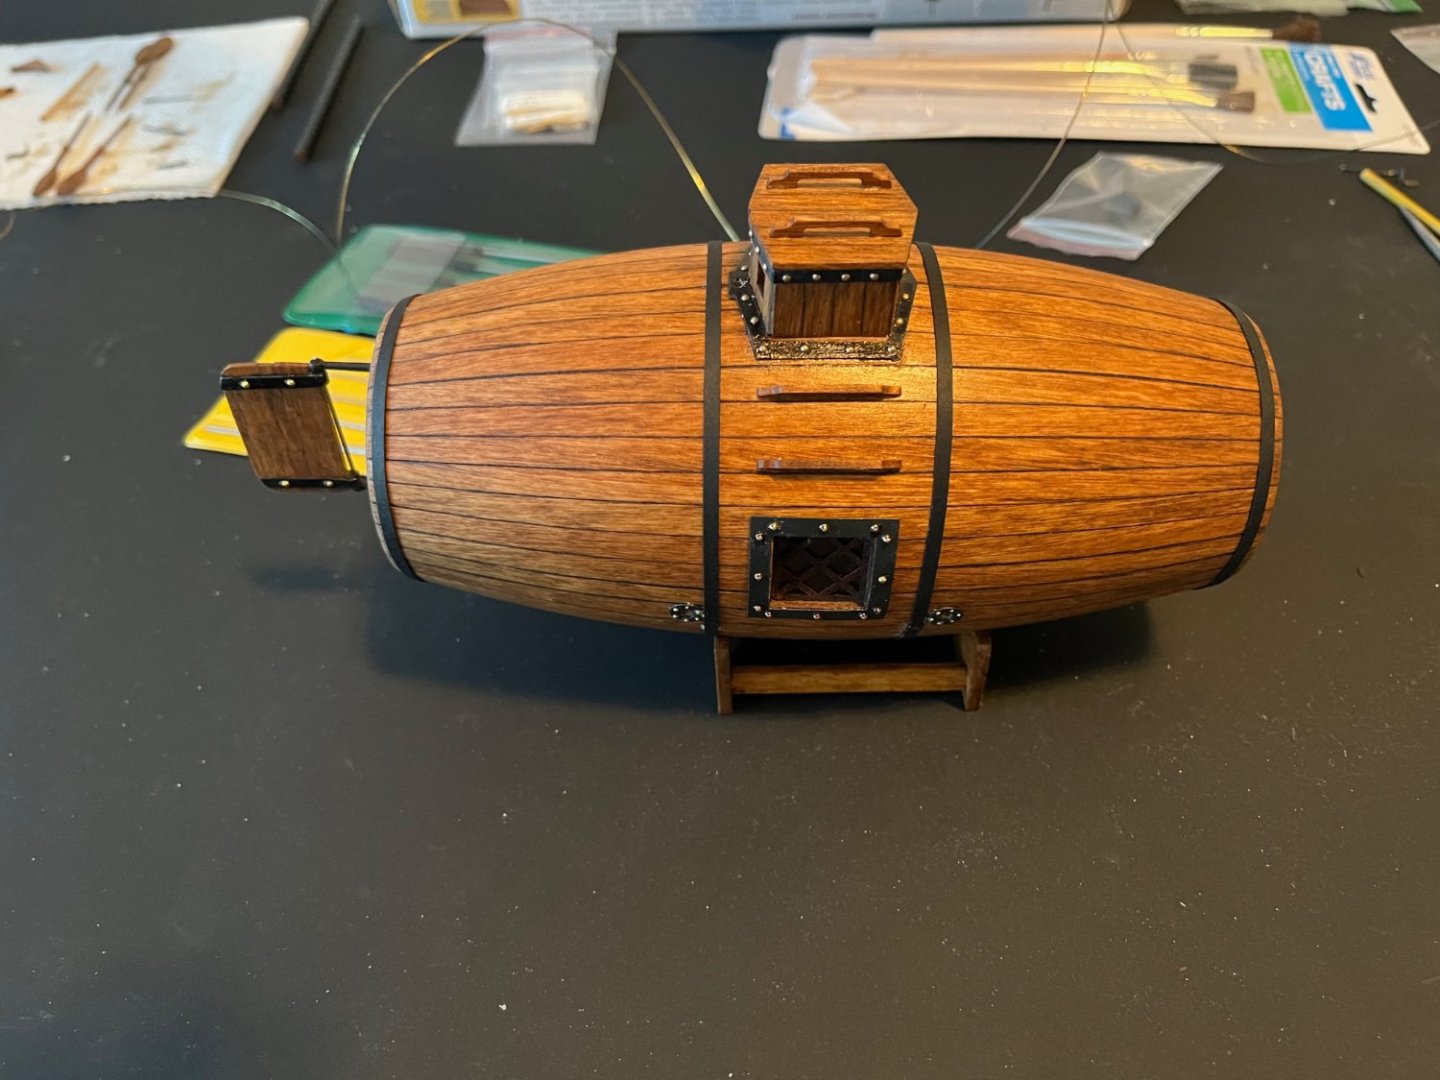
Hah! I spent some time in Russia a couple of years ago, and I enjoyed the vodka that fueled "the fiery pipes". I was thinking the Secret Vessel would make a good Port Decanter, but now that you mention it, a Vodka Keg would make more sense. That would be quite the kit bash..... The oars came out pretty nice I think. I used a few wraps of rope instead of the cloth provided. The "dangladge" is indeed ballast that is dropped by turning the corkscrew (the right way). I suspect some Russian Navy Dude would opt to have some truck balls hanging from the front and back of his Secret Vessel, but I used the ballast weights provided =). I have now removed the oars in order to finish her up, starting with the "banding". I like the look of it like it is shown below, but two more bands are supposed to be used according to the kit's instructions. Then I will attach the fiery pipes (fingers crossed), add the steering ropes to the rudder, touch everything up with black paint, and call it FINISHED. Now that I look at the picture, I think it needs those last two bands. Ron, have fun on your voyage! Kev, I hope all is well with you and your family!! Everyone else, thanks for stopping by and taking a peek at my build log. I appreciate the interest.
- 68 replies
-
- 5
-
-
- Morel
- Master Korabel
- (and 1 more)
-
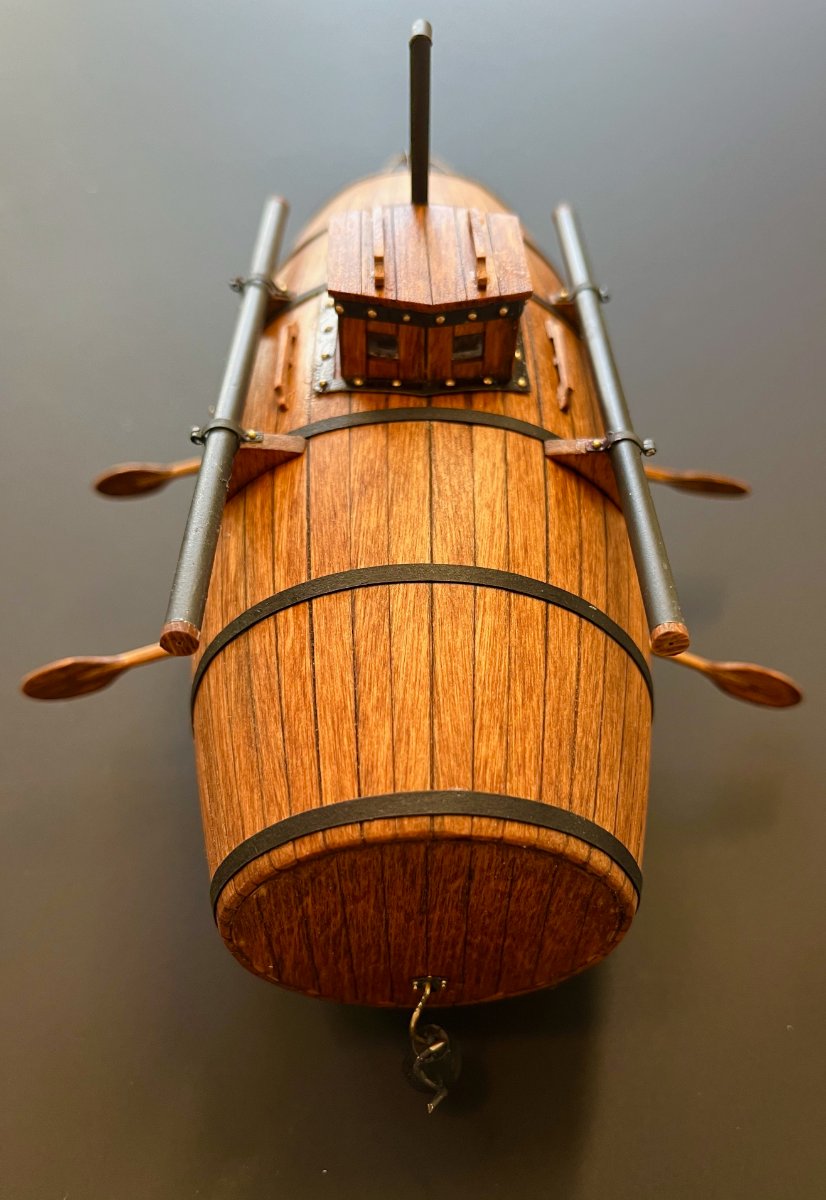
It has its rudder mounted on the back (see photo above) but I haven’t put the steering ropes in place yet!
- 68 replies
-
- 1
-
-
- Morel
- Master Korabel
- (and 1 more)
-
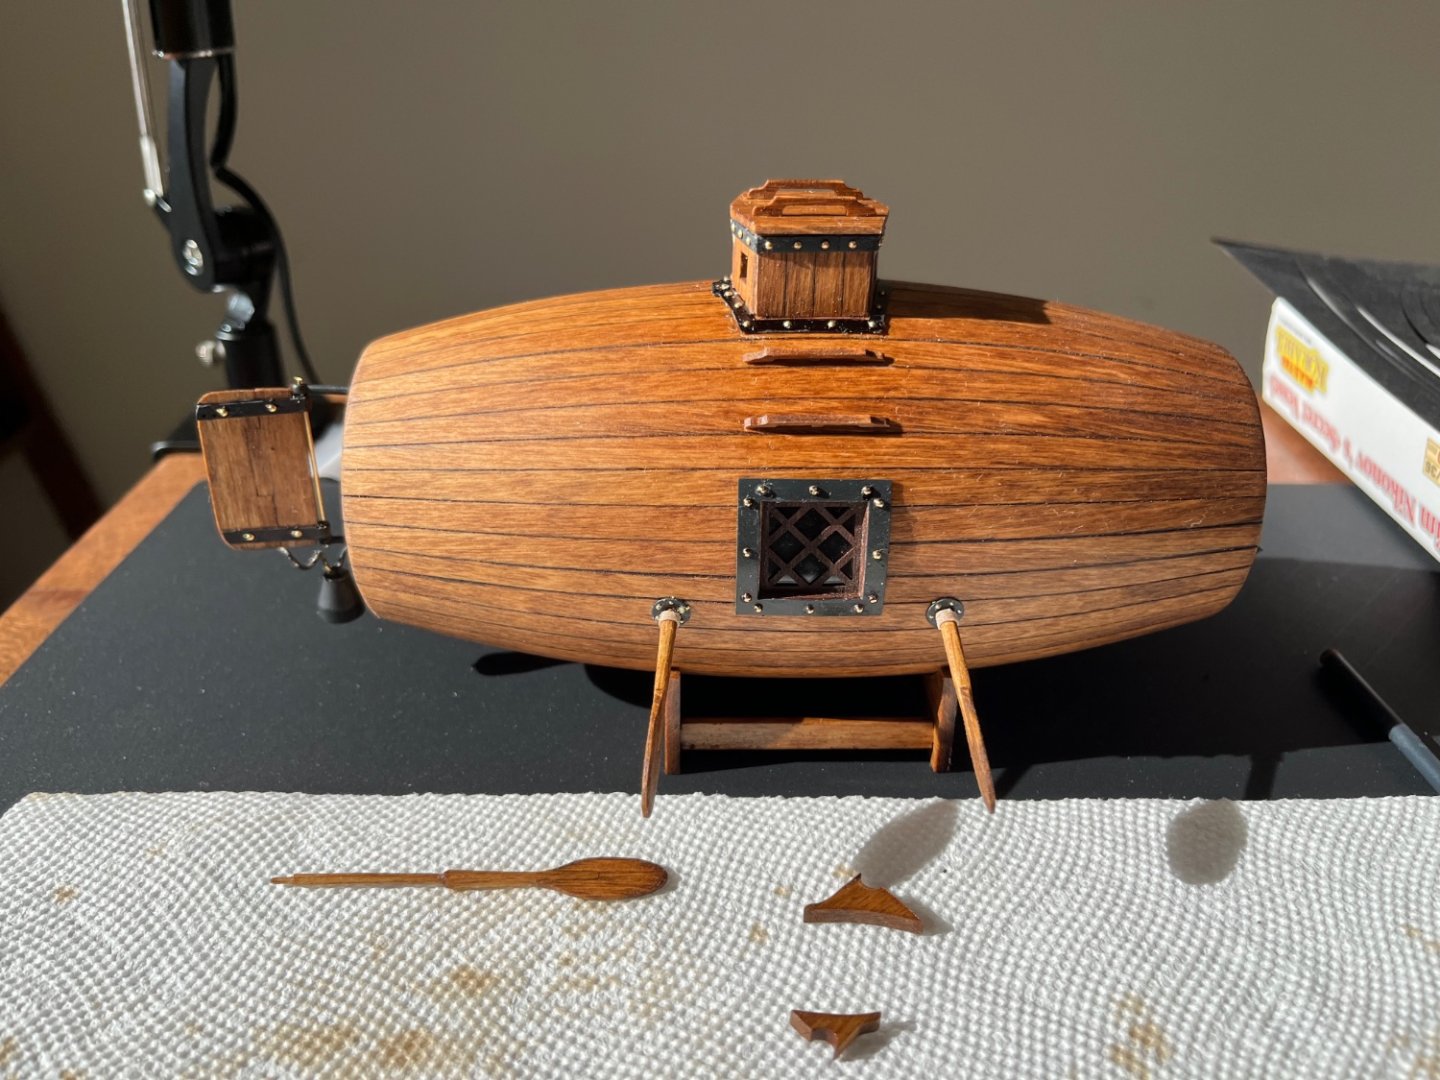
Progress is being made…one fiery pipe about ready, little hinges are not easy to deal with! Here she is at present, but a lot of black paint is still needed on the metalwork.
- 68 replies
-
- 7
-
-
- Morel
- Master Korabel
- (and 1 more)
-
Just curious, and likely a stupid question, but where do they get placed after completion…are they hung from Davit’s?
- 310 replies
-
- 1
-
-
- Diana
- Caldercraft
- (and 1 more)
-
I agree with Alan. Your Nisha is a master class in craftsmanship, and I think we all deserve a glass of something good to celebrate your topping out ceremony.
- 206 replies
-
- 2
-
-
-
- Vanguard Models
- Brixham trawler
- (and 2 more)