HOLIDAY DONATION DRIVE - SUPPORT MSW - DO YOUR PART TO KEEP THIS GREAT FORUM GOING! (Only 72 donations so far out of 49,000 members - Can we at least get 100? C'mon guys!)
×

HardeeHarHar
-
Posts
615 -
Joined
-
Last visited
Content Type
Profiles
Forums
Gallery
Events
Everything posted by HardeeHarHar
-
 What an incredible display of talent!!!! Holy Moly.
 -
Greetings from Ontario, Canada!
HardeeHarHar replied to cdnguy68's topic in New member Introductions
Greetings Mark! MSW is a great site, and hopefully you will join the Nautical Research Guild as well. Their publications and membership perks are FANTASTIC! I’m stoked to hear there is another Granado build in the pipeline. (Your wife has great taste!). Please start a build log so we can follow along with your builds and offer encouragement and admiration of your efforts. I’m currently in the middle of a Granado build (Caldercraft version) and am finding it to be a challenging and very rewarding endeavor. It would be a different story without the forum though! Have fun and enjoy, and best regards! BT -
Well Kev, I’m embarrassed to admit I have a pair of those reverse tweezers, but never thought to use them! It might have happened anyway, but without the force that occurred to turn a stair step into the ether. No dog has appeared with it yet, so the Admiral is not unhappy with me at the moment. However, it’s only a matter of time before a canine nose sniffs it out, based on previous experience. If a dog shows up with it in its beard, I’ll use my reverse tweezers!!! Hope all is well my good man 😀
-
I’m stunned! Such a beautiful boat!!!!!
-
Thanks so much for the kind words @Beef Wellington, you just made my day!!!
-
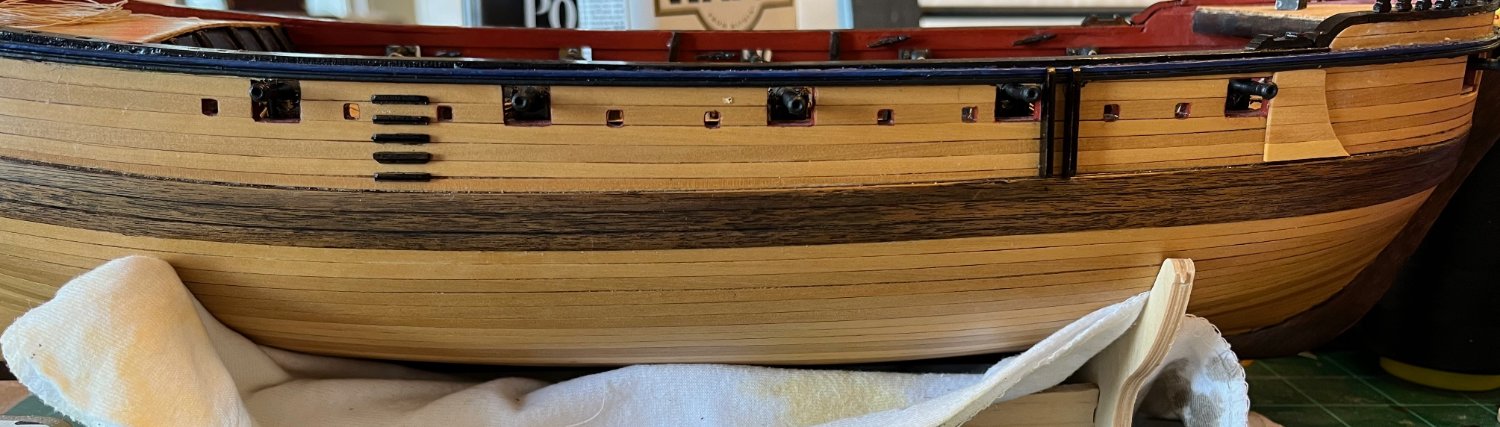
So, I listened to all suggestions in response to my question about how to align and glue the steps to the outside of the Granado, which I had already treated with Danish Oil. I decided that instead of waiting to order and receive Super Phatic Glue (it is not sold at Lowes, etc. as far as I can tell), I would follow the advice of Glen @glbarlow and build a jig and use medium CA, a glue that I have had a lot of experience and modest success using. However, instead of building a wooden jig, I made a photocopy of the plan sheet showing the steps position, alignment, and spacing. I printed it out, then used a scalpel to cut a square of the area containing the steps, and then I cut the steps out of the square, again using a sharp scalpel blade. Crazy, I know. I put just a little blue tack on the piece of paper, and then tacked it onto the side of the ship in the correct location. Now I had a template for the steps alignment and position right on the side of the ship. I then took each of my stair steps (5 per side), that I had stained and finished with Danish Oil, and holding them with fine point tweezers, I put a thin line of Loctite Medium CA along the step, and then carefully glued it in the correct position as indicated by the paper template. In most instances I surprised myself, and I didn't shake or spaz around....I just glued it right onto the side of the ship in the correct position as shown by the template. I had one step that I spazzed around with a little, and when I pulled the step back away from the ship, the unthinkable occurred. Basically, I heard the tips of the tweezers snap closed and a millisecond later the sound of the step bouncing off of something and disappearing into thin air. Some wise man once said "PUT A TOWEL IN YOUR LAP", which is almost precisely the words of wisdom frequently used by the Admiral (she also suggests a sheet under the work area). Do I listen to these suggestions. NO. I searched and searched, and now face the ugly future when one of our schnauzers goes up to the Admiral with a step stuck in her beard, and the Admiral gets to say "what is this, and why does a dog have it, don't you know it could make the dogs sick if they ate this!!!!!", and "other ugly words". So, then I had to get the part number, and then refer to the parts sheet, to see if the kit manufacturer had predicted the "oh cr*p" flight of the stair step and included an extra one. Good luck for me, they had. Before I went to retrieve the part from the sheet in the other room, I searched one more time for the missing piece, trying to avoid having to stain and finish another step. Miracles of miracles, I found THE SPARE STAIR, all unfinished and sitting there on the work table trying its best to GET LOST. At my age, you forget you had removed all 11 of them, and for some reason, you only work with the 10, and let the 11th spare start to wander around to be lost and forgotten. If I hadn't looked one last time, I would have gone to the other room, removed the parts sheet, and seen that I had removed them all....and then tried to find it. Hah, I win, I didn't have an unnecessary heart attack in this instance. So last night, I stained the spare, and will be glueing the steps to the other side. I took one of the steps that was ready for use, and glued it into the template to finish the one side, and then attempted to remove the template from around the steps without removing the steps along with the template. Guess what, it mostly worked. There were just one or two places where the paper didn't remove as cleanly as I would have hoped, but I could get it cleaned up with some tweezer work (see photo). I also got the anchor (Franken)lining and fenders in place on both sides, as you can see in the second picture. None of it is perfect work at all, but it is "not bad" by my newbie standards. Finally, it has been my strategy to build as much of the deck equipment, etc. as possible before installing it, so that the fragile pieces aren't all broken due to mishandling or finger spasms. For example, the elm tree pumps with their teeny tiny metal handles seem like parts that if installed too early in my shop would take a beating over the remainder of the build. So, I have made them, but not assembled/installed them yet. Recently, I decided I would make the tiller housing. As I am prone to do, I looked at what @Timmo and others had done in the past, and saw that he had etched some decorative figuring in the sides of his tiller housing. It occurred to me that I could do the opposite, and decided to glue decorative panels to the sides to give it a little bling (little being the operative word here). I have included a picture of the tiller housing, with my teeny tiny kit bash in evidence if you squint and look closely enough. I have come to the conclusion that the only way to make small things like the tiller housing look "good" is to include a picture of a dime or something to show the small size of these items. In the absence of an indication of scale, everything looks "bad". Live and learn. Thanks for stopping by, and a BIG THANK YOU to @glbarlow, @allanyed, @Peanut6 and everyone else for the advice, encouragement, and tips and tricks. Without everyone's help and push in the back, I would still be frozen in thought/inaction/fear. Stay safe and be happy! Brian

.thumb.jpeg.5857c64c779d8d659cb5ad45a7d24ac0.jpeg)
-
Hello and welcome to MSW!!!
-
Thanks Glen, great help that is much appreciated! Thanks Allan too, you both are extremely helpful!!!
-
Well that's certainly one way to do it. But then we wouldn't use the forum as much =(
-
Thanks Jim, I am going to follow your advice. I am pretty good with CA, but leveling and aligning 5 teeny tiny parts would be stressful and the odds of success fairly low if not zero. PVA gives one time to recover, but I am wondering if it adheres well to parts that have been treated with Danish Oil. Is there enough penetration to allow a good adhesion? Also, it seems like pins are the way to go, as for sure I want tight lines ;-), but wow, I'm not looking forward to drilling holes in the ship either. This is a difficult hobby 😃 Since I have oiled the side prematurely it appears =(, perhaps I should buy some Weldbond glue to use? Anybody have any experience doing this?!? Apparently Weldbond will adhere to just about anything....including Watco Danish Oil.
-
Heh heh Heh James, of course it would.... There is something strange going on about the type of text or something....I could post it as an image. The error I got was:

-
I am getting an error message when trying to post a new topic under *tips, trick and helpful jigs* forum
-
Beautiful work Glenn, and great photographs too!!
- 840 replies
-
- 3
-

-
- winchelsea
- Syren Ship Model Company
- (and 1 more)
-
Welcome to MSW Steve. In my opinion, this is *the* place to be if you are into ship models. Looking forward to eye-balling your build log when you get one rolling. It is always fun to look at and learn from the efforts of others!
-
Ron, I am all ears if you have some recommendations for surgeon's and dentist's tools that help you with rigging. I am dreading using my fat fingers when I get to the Granado rigging, and my set of tweezers aren't much better. I used to work in laboratories, so I know what a good pair of tweezers and forceps, etc. look like, but if you have other tools that are useful, or some tweezer or forcep recommendations/suppliers, you know I will attempt to arm myself in any way possible to make the job easier. Also, I like the mixed emotions being batted around about your open atmosphere displays. It is an interesting topic for discussion!
- 542 replies
-
- 2
-
-
- Sphinx
- Vanguard Models
- (and 3 more)
-
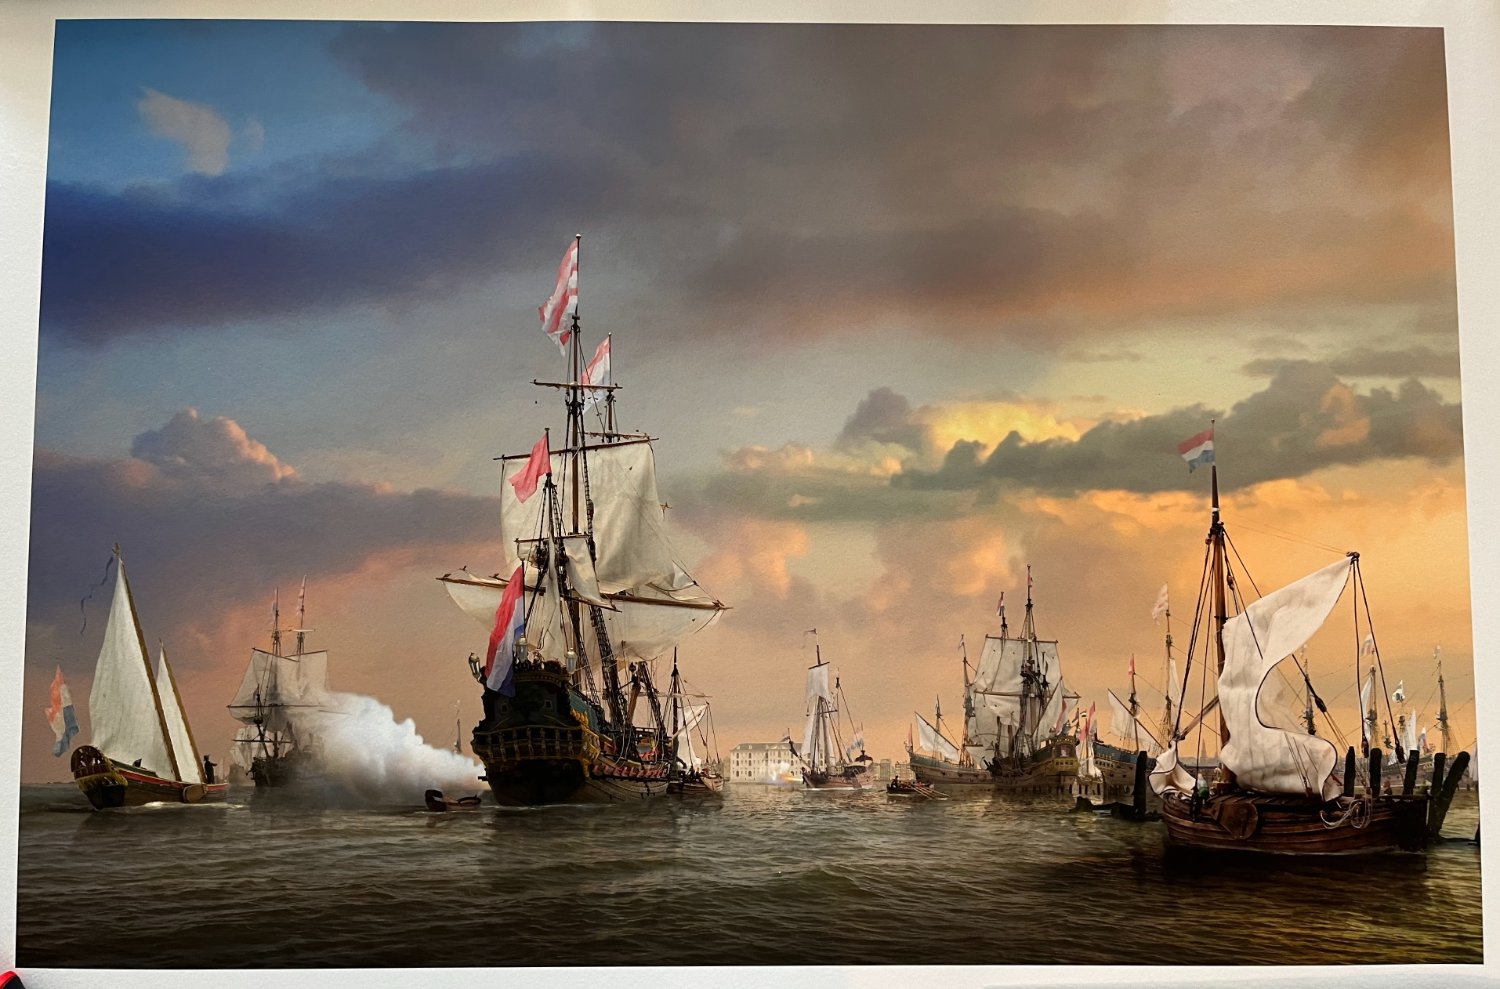
I am delighted to report that I have received my print of Emiel and @Ab Hoving's The Amsterdam Port at Nightfall from Coastal Impressions. They used an acid free canvas, and when I went to pick it up, I received several comments from the staff regarding the quality of the digital image. In particular, they noted how beautiful the composition was and just how detailed and realistically the ships, sky, and the water in the foreground had been rendered in the overall image. The print is on a piece of canvas that is approximately 24 inches tall, and it has two inch margins for framing, but they also noted (as Ab had indicated) that it could have been printed even bigger without loss of overall quality. The issue is of course wall space. Moreover, I am not above seeing if Ab would be willing to share another image file....but first I will take the print back to Durham where I will have it framed by Craven Gallery. I have used them for all of our framing, and they will do a great job, and use museum quality glass and acid free matting to ensure that there is no reflection or loss of color over time to detract from the art piece. I have attached a photo I took with my iPhone, and in posting it on the forum it will lose even more of the quality of the image. However, I think you will be able to appreciate how beautiful this print is going to be once framed inside a nice antique-style wooden frame with museum quality glass. I'll even do some research of the artists that Ab and his son used for inspiration to see what kind of frames are used for maritime masterpieces, and try to do them justice when I select the frame, etc. I'm all smiles when I look at it, and we can't wait to see it hanging on a wall in a prime viewing location here on Roanoke Island.

- 50 replies
-
- 12
-
-
I had the exact same reaction. I mean it, I think I lose sleep over Ron's open-air displays!!!! I have my little, teeny, poorly executed Jolly Boat set way back in a open shelf unit, and I am still terrified whenever dog toys are getting thrown around. Cats and ship models aren't compatible at all are they?!?!
- 542 replies
-
- 2
-
-
- Sphinx
- Vanguard Models
- (and 3 more)
-
Welcome on board!!! Your work looks very nice.
-
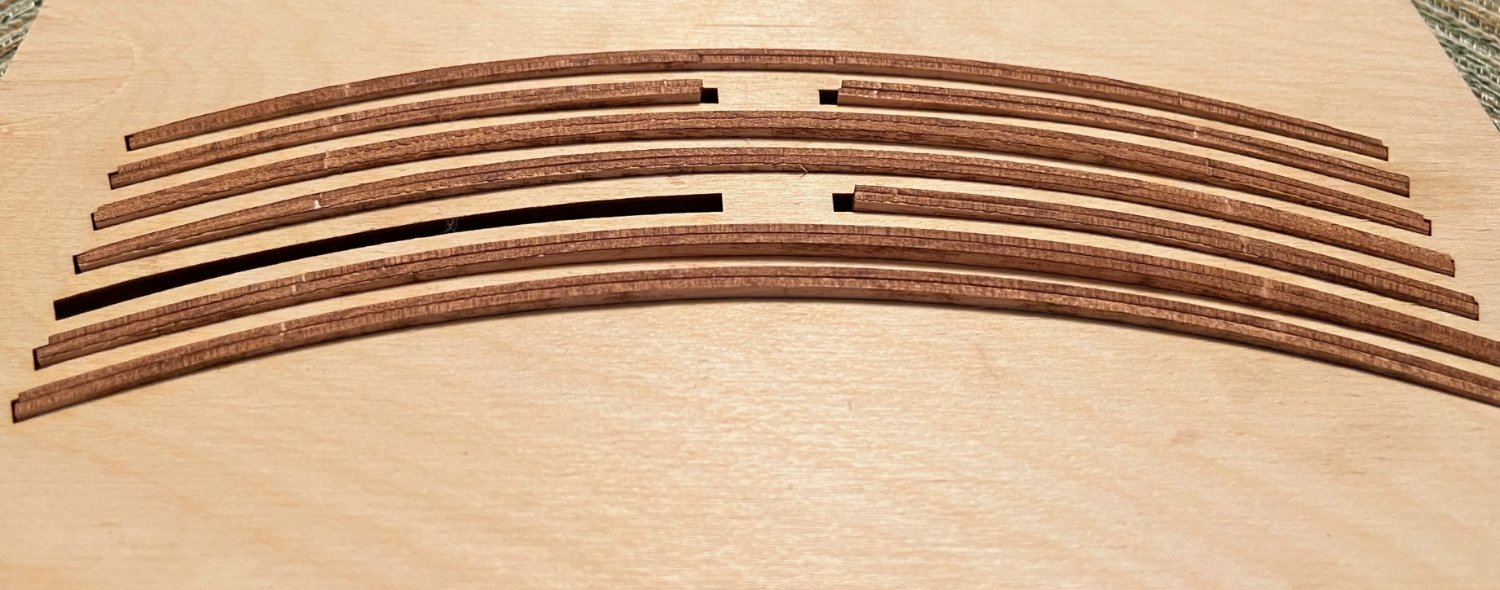
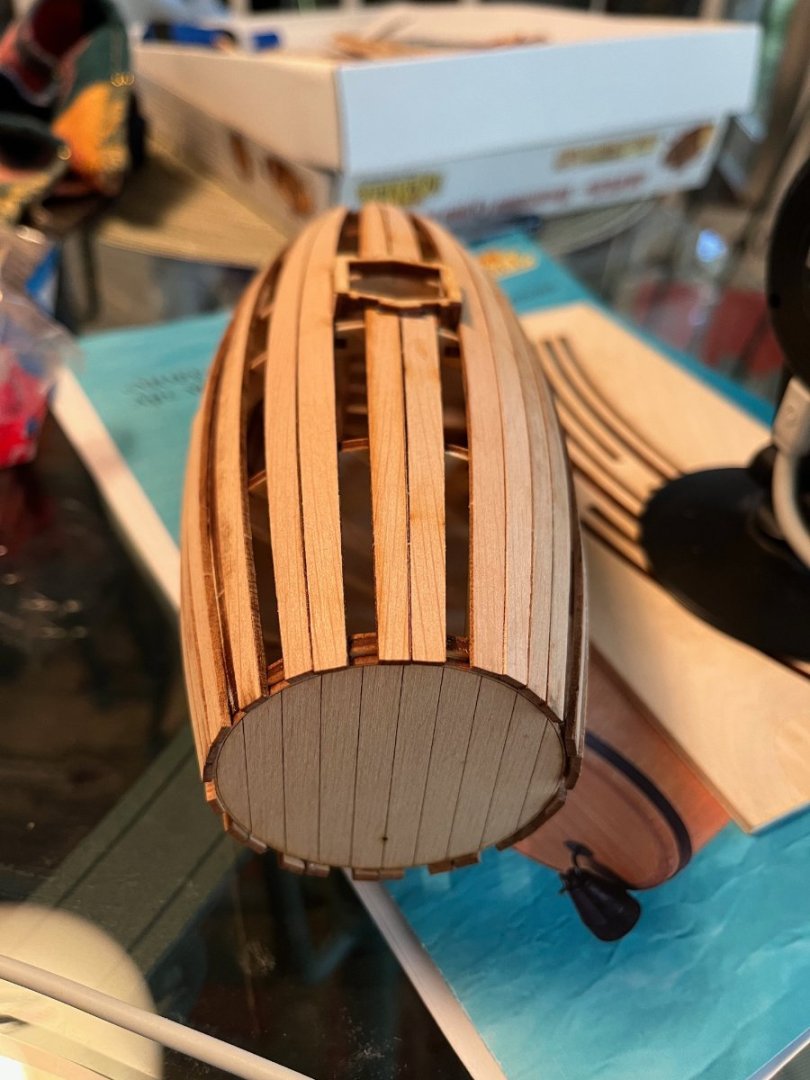
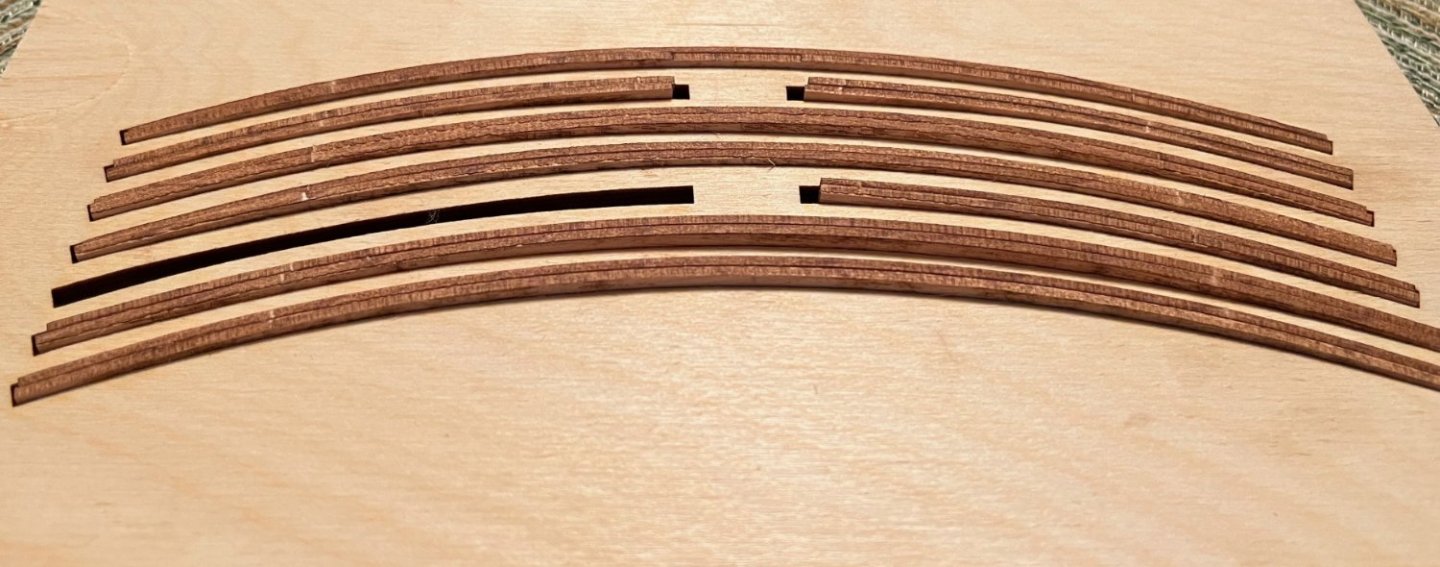
The jig provided with this kit for bending planks is very nicely done. It works particularly well if you put two planks in each slot (heh heh heh @John Gummersall, surprise! =). I followed the instructions about staggering the planking order around the circumference, and it had its positive and negatives. All that is left is to fill in the last planks that have been filed to fit exactly. Time consuming yes, but doable and required.
- 68 replies
-
- 6
-
-
- Morel
- Master Korabel
- (and 1 more)
-
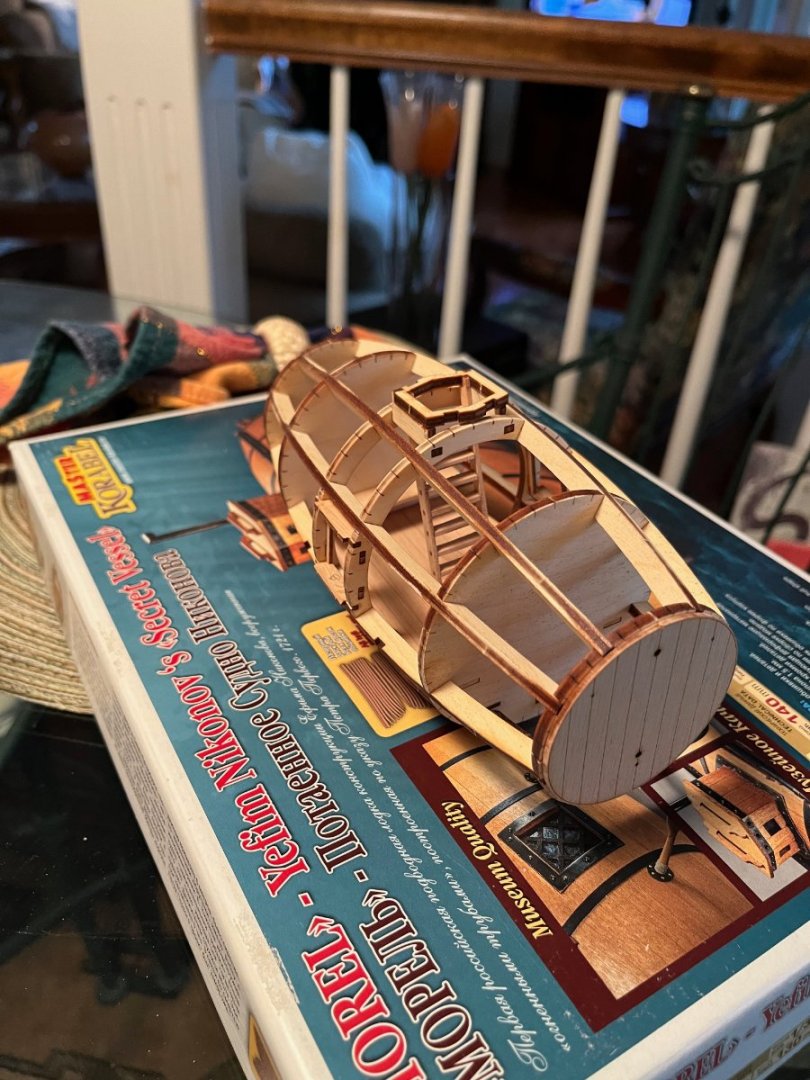
@John Gummersall Hey John, I am making some progress on the Secret Vessel I am building, and am wondering if you used the rivets from model motorworks. Here is a link: https://model-motorcars.myshopify.com/products/rivet-1-0-mm-head-diameter-brass-z050b?_pos=15&_sid=459b9b624&_ss=r. Also, I assume you just cut the head off and glue it on? Thanks for any help you can provide, in addition to the wonderful information included in your build log. I should have re-read it a few more times it turns out 😃 Best regards, Brian
-
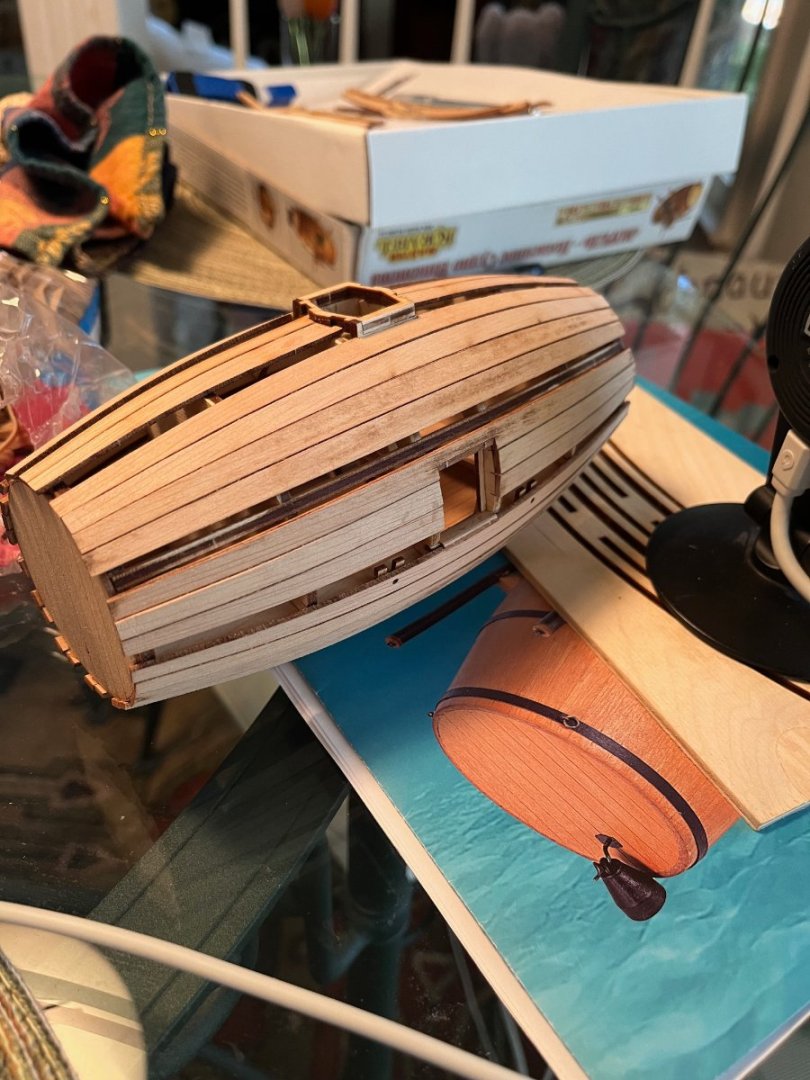
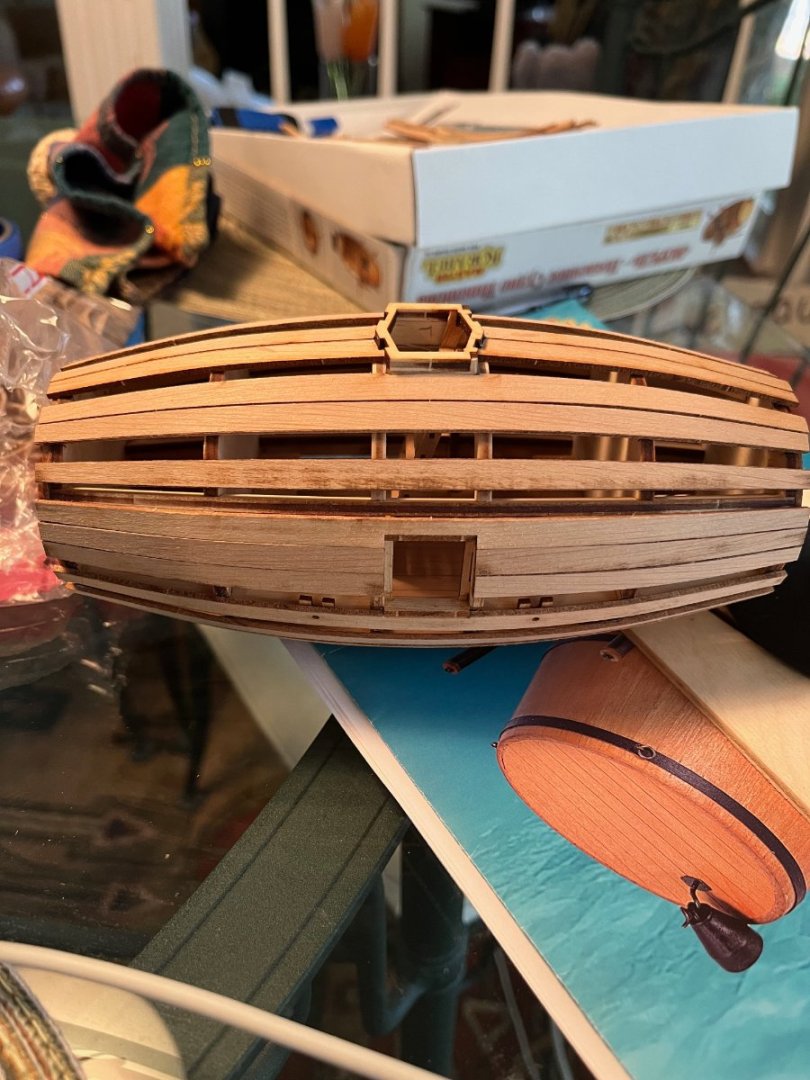
This kit really comes together quite well. The transverse ribs almost snap into place. You have to push, but they are all able to be firmly set evenly along the entire length of the little ship.
- 68 replies
-
- 7
-
-
- Morel
- Master Korabel
- (and 1 more)
-
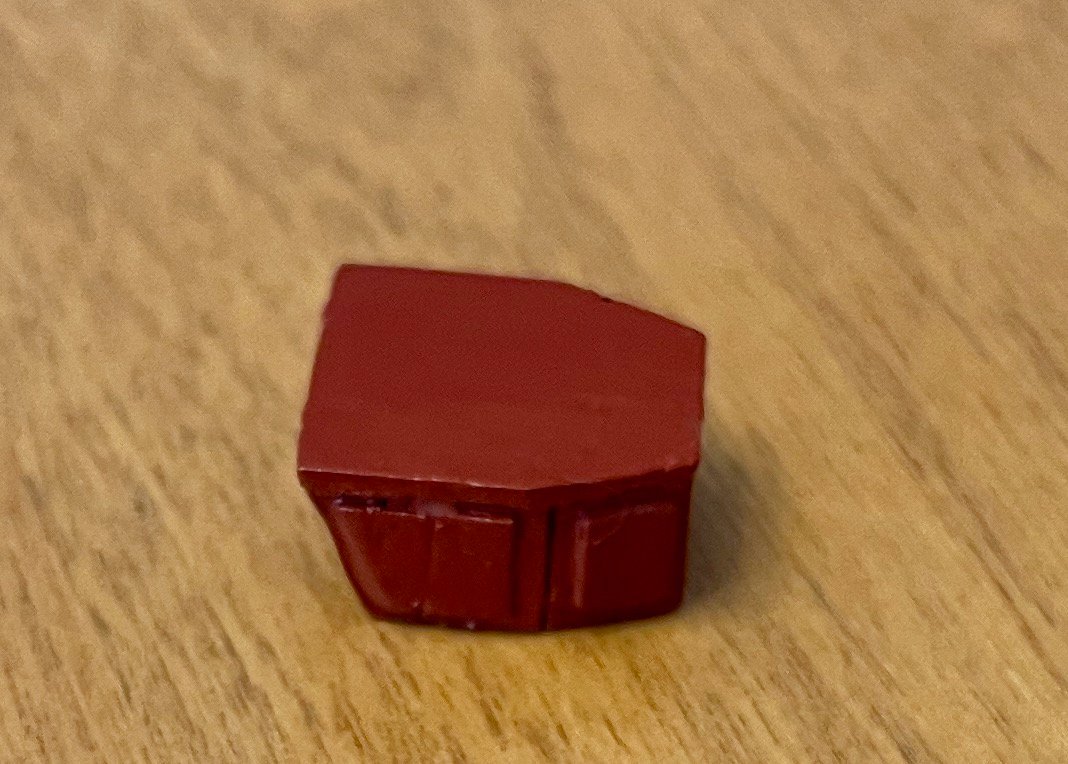
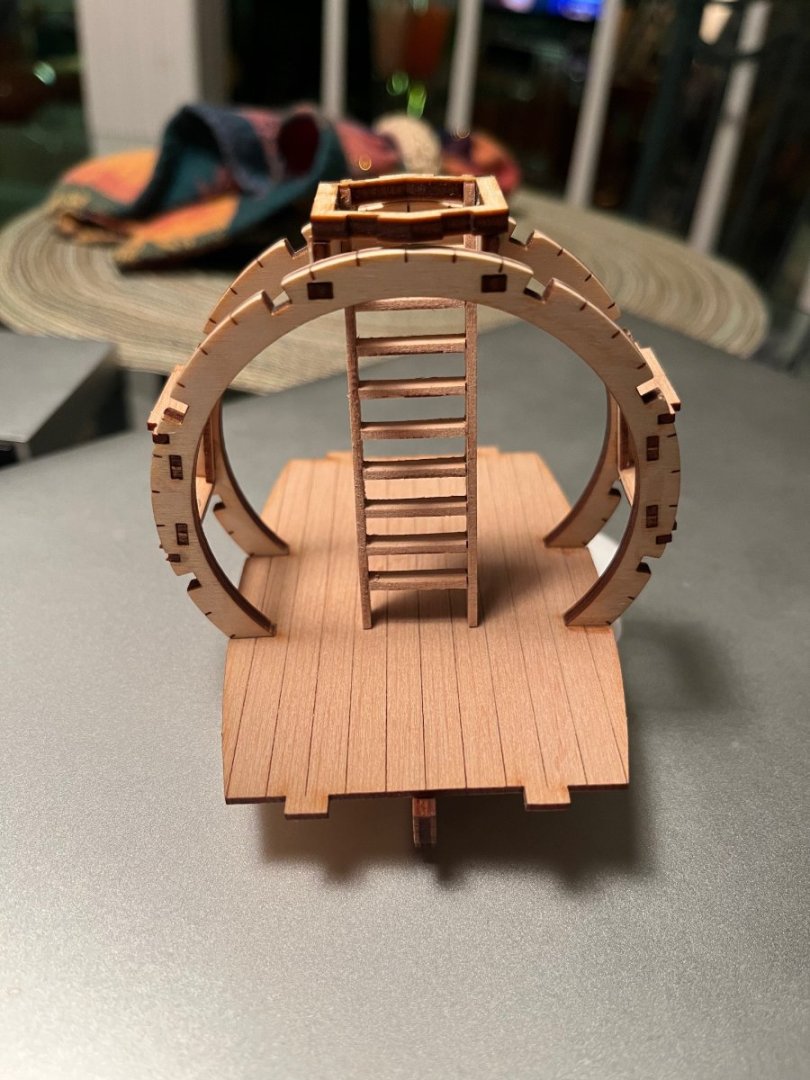
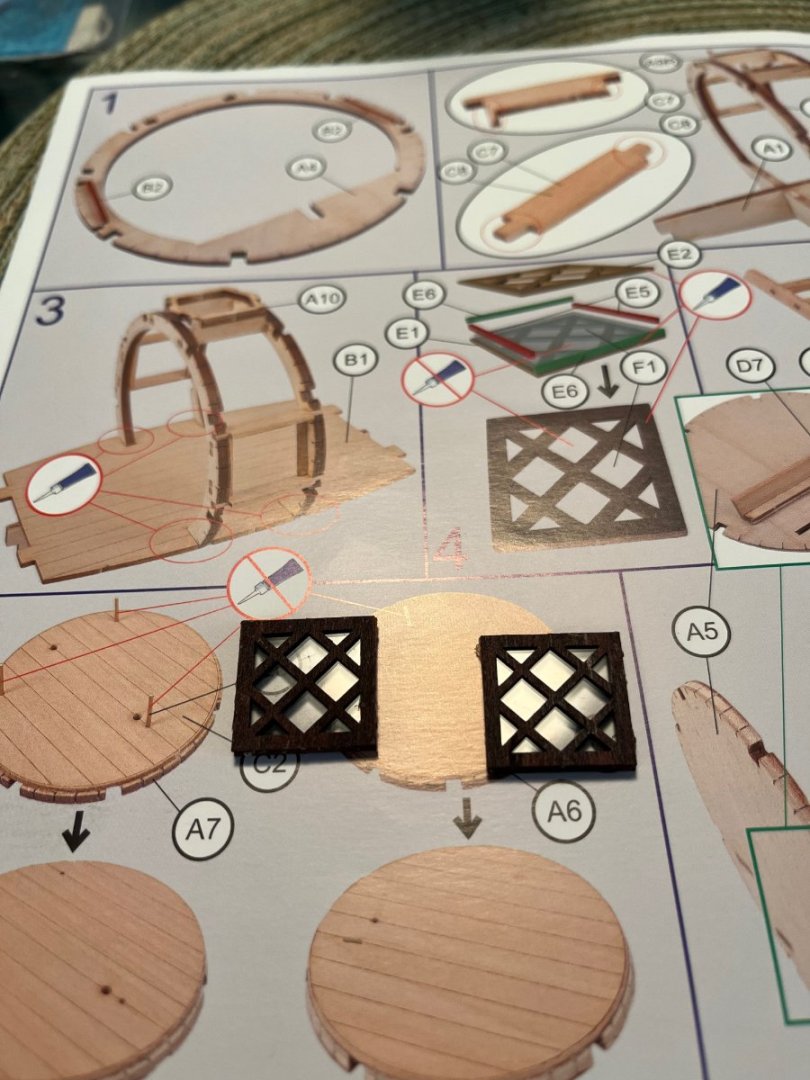
Meanwhile, back at the ranch....I have to admit that this kit is nicely done so far. I have relearned how to use PVA glue in order to enclose the windows into their window frames without causing the plastic "glass" to fog up. They came together fairly well, and the glass came through the process unscathed much to my surprise. One window was done with my contact lenses in, which means I couldn't see close up very well. The other was done with my contacts out, which means I could see close up very well. The difference was quite apparent (with my contacts out), but not so much as to require a re-do. I also assembled the ladder, which being enclosed within the secret vessel won't even be seen. That didn't stop me from sanding it down and removing the char, etc. Apparently there is some form of brain-washing being used on MSW, where you slowly become convinced you need to do everything to the best of your ability, even if it will never be seen. Thanks for stopping by peeps, best regards to everyone!
- 68 replies
-
- 8
-
-
- Morel
- Master Korabel
- (and 1 more)
-
Best wishes for a perfect surgical outcome and a speedy recovery!
-
Howdy Pardner is the official Texas greeting I believe, and welcome aboard is appropriate for MSW and your past history in the US Navy. Looking forward to seeing pictures of your work!
.jpeg.a6ca699f7a61fc213cfebf0665b66e6b.jpeg)