HOLIDAY DONATION DRIVE - SUPPORT MSW - DO YOUR PART TO KEEP THIS GREAT FORUM GOING!
×


Bill97
-
Posts
2,704 -
Joined
-
Last visited
Content Type
Profiles
Forums
Gallery
Events
Everything posted by Bill97
-
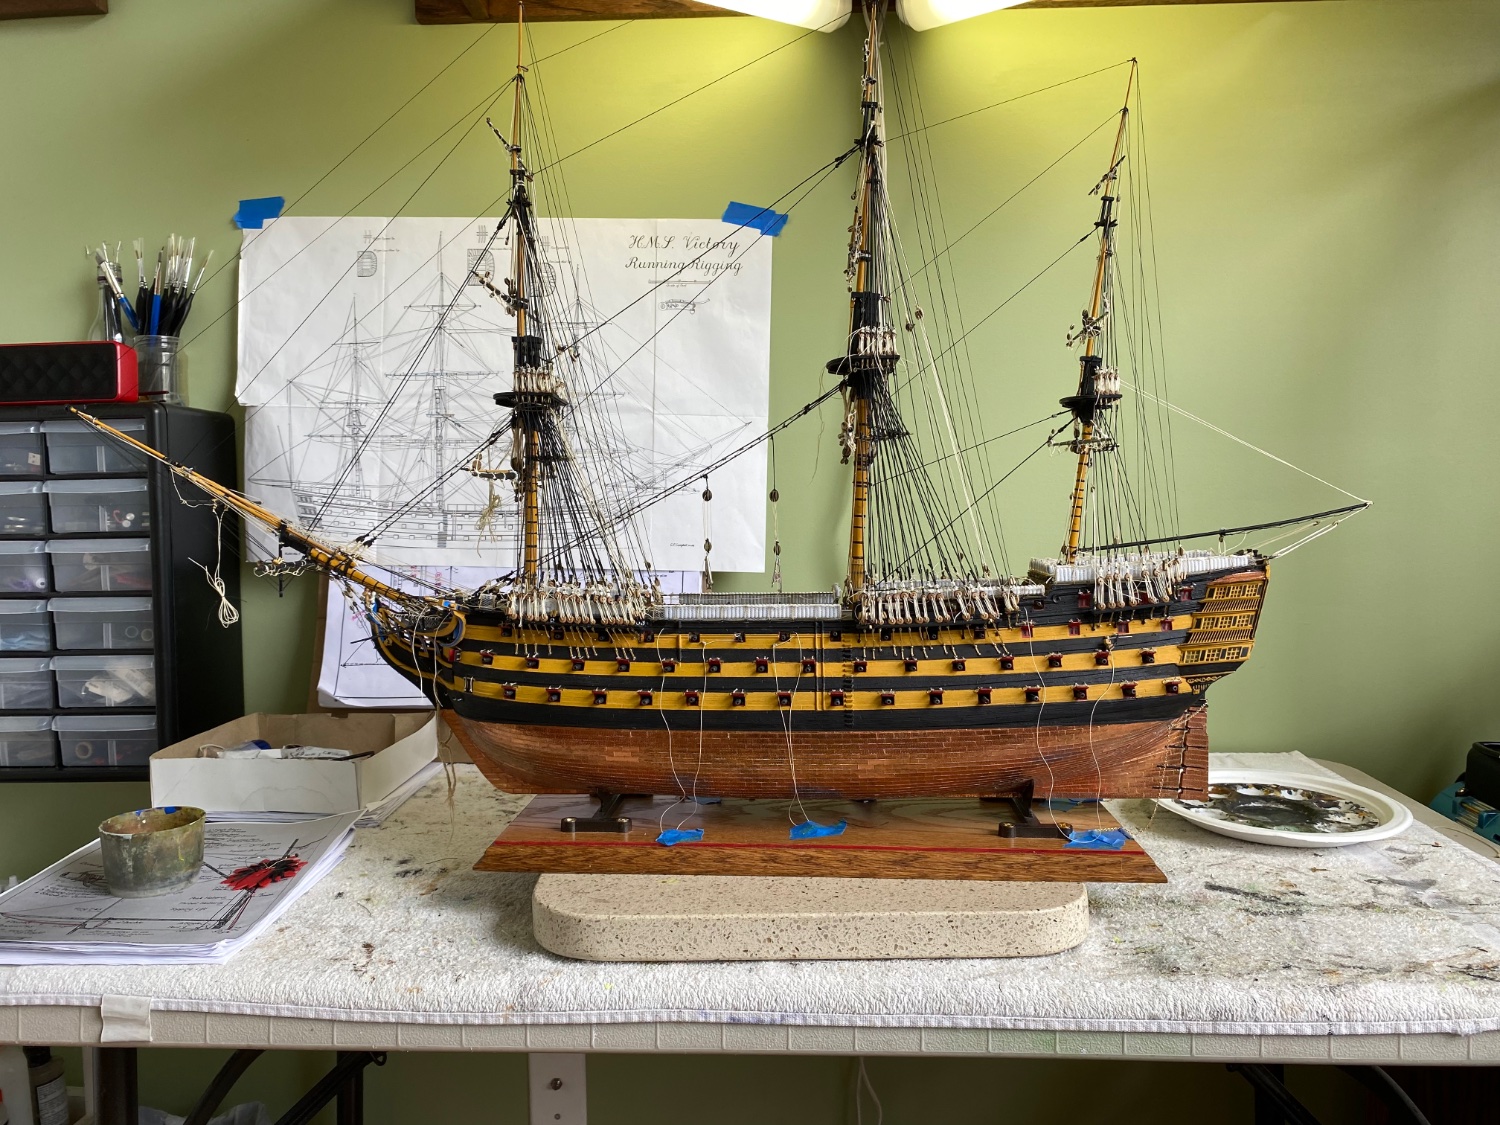
Landlubber Mike's technique for furled sails
Bill97 replied to Landlubber Mike's topic in Masting, rigging and sails
Thanks Keith. So nice of you to say. Glad you were able to find it. I have started to lean in that direction. -
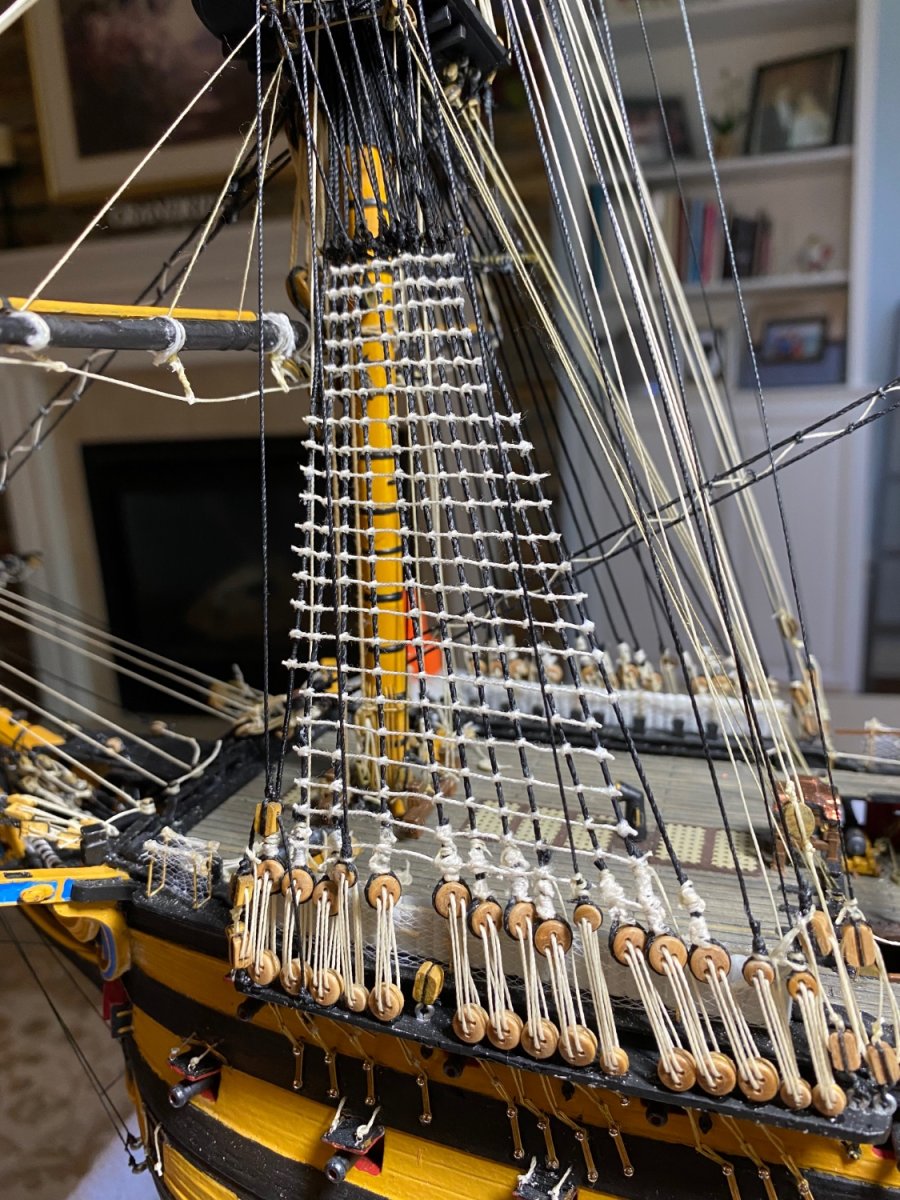
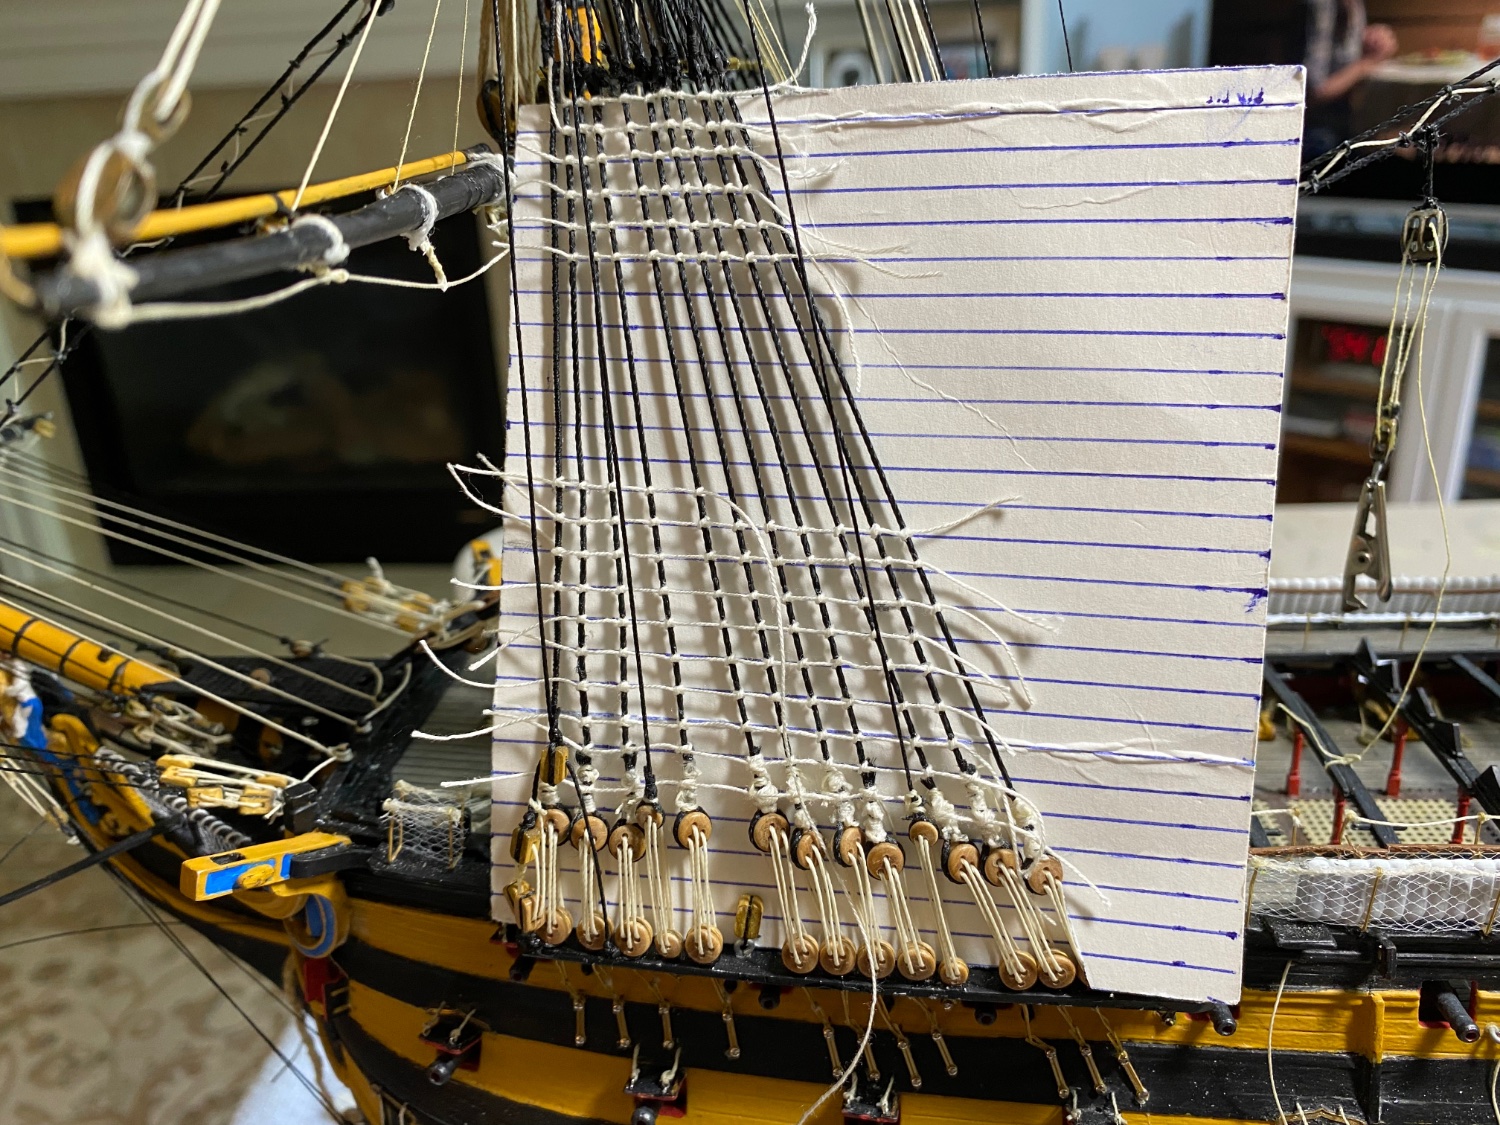
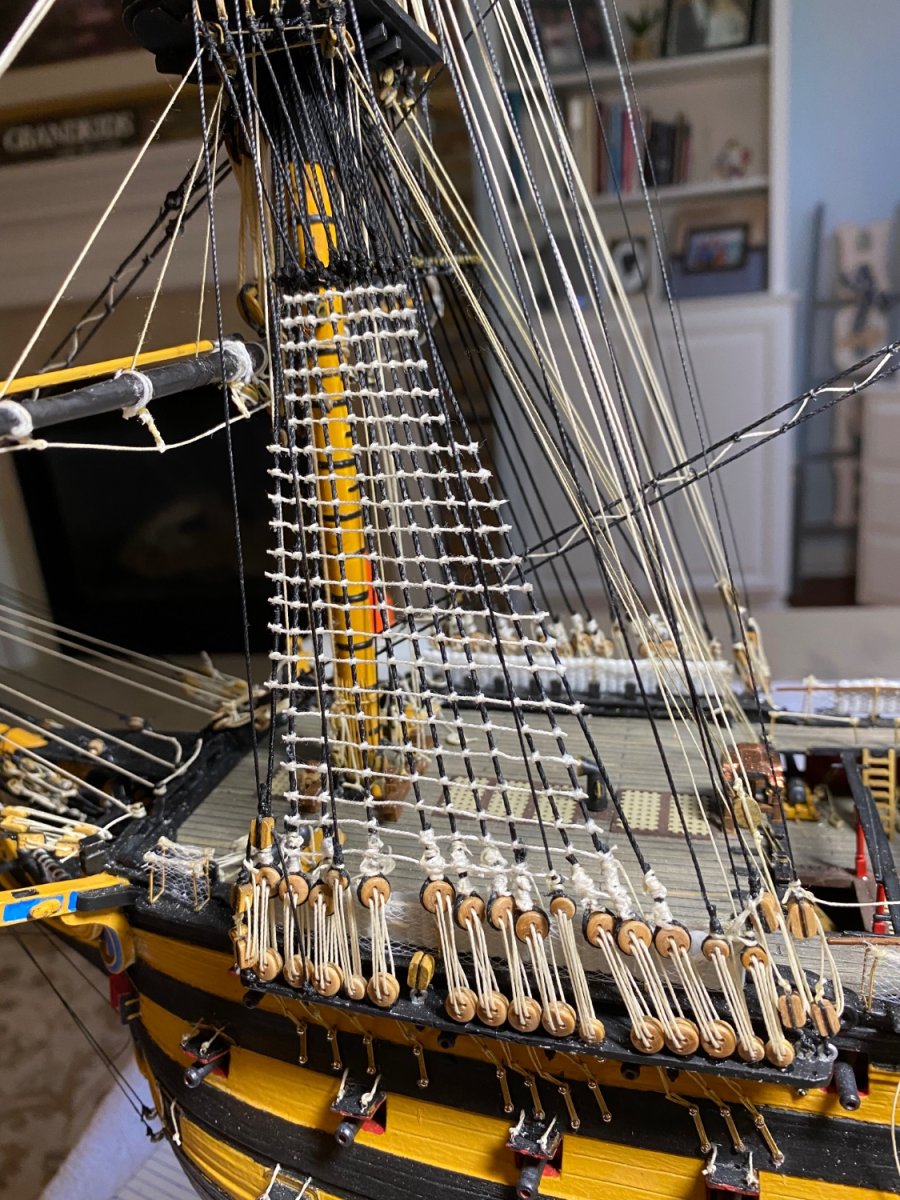
Dave it is just the piece of lined stiff card positioned behind the shrouds. Follow the line with the knots and don’t pull it to tight so I don’t distort the fall of the shrouds. And then a touch of diluted white glue once I am satisfied.
-
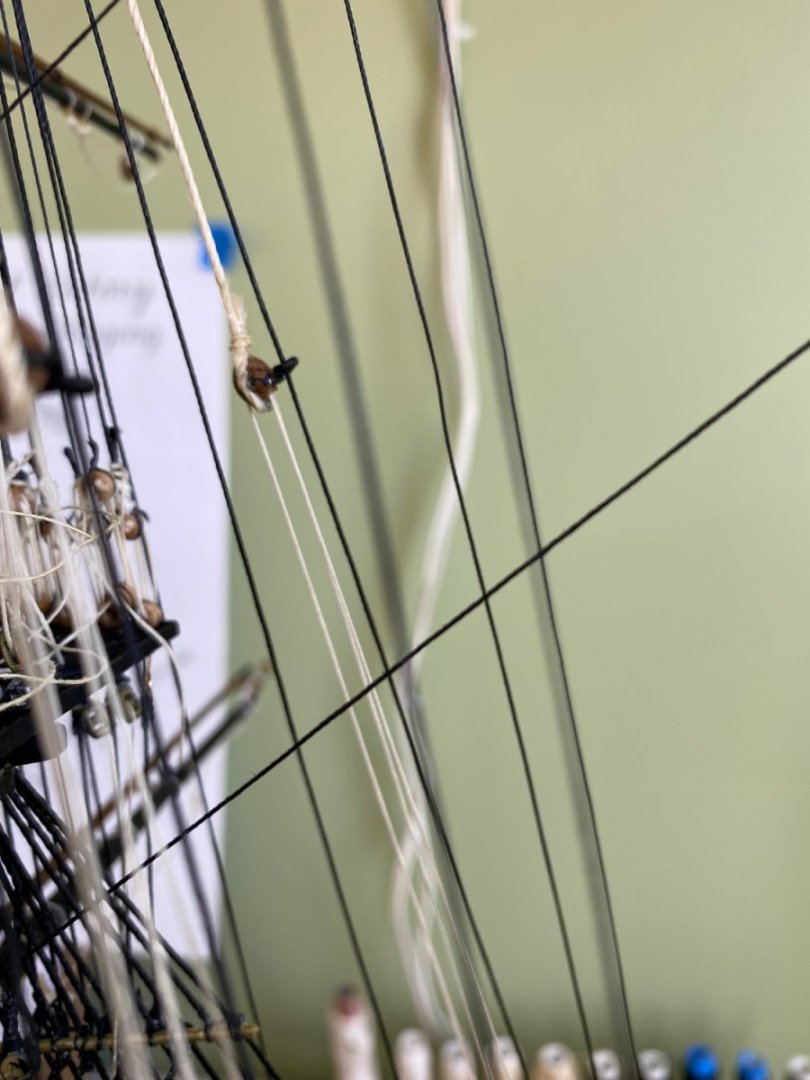
Ratlines, ratlines, ratlines! Some may think I need to be on medication, but I actually enjoy tying ratlines. There is just something about the repetition and uniformity of the knots and precise rows I find peaceful.


-
Landlubber Mike's technique for furled sails
Bill97 replied to Landlubber Mike's topic in Masting, rigging and sails
Thanks Keith. I really don’t want to put up a full ship of unfurled sails because I want to display the details of the build. I will need to either leave the sails off or come up with a doable plan for attachment of what represents furled sails. -
Landlubber Mike's technique for furled sails
Bill97 replied to Landlubber Mike's topic in Masting, rigging and sails
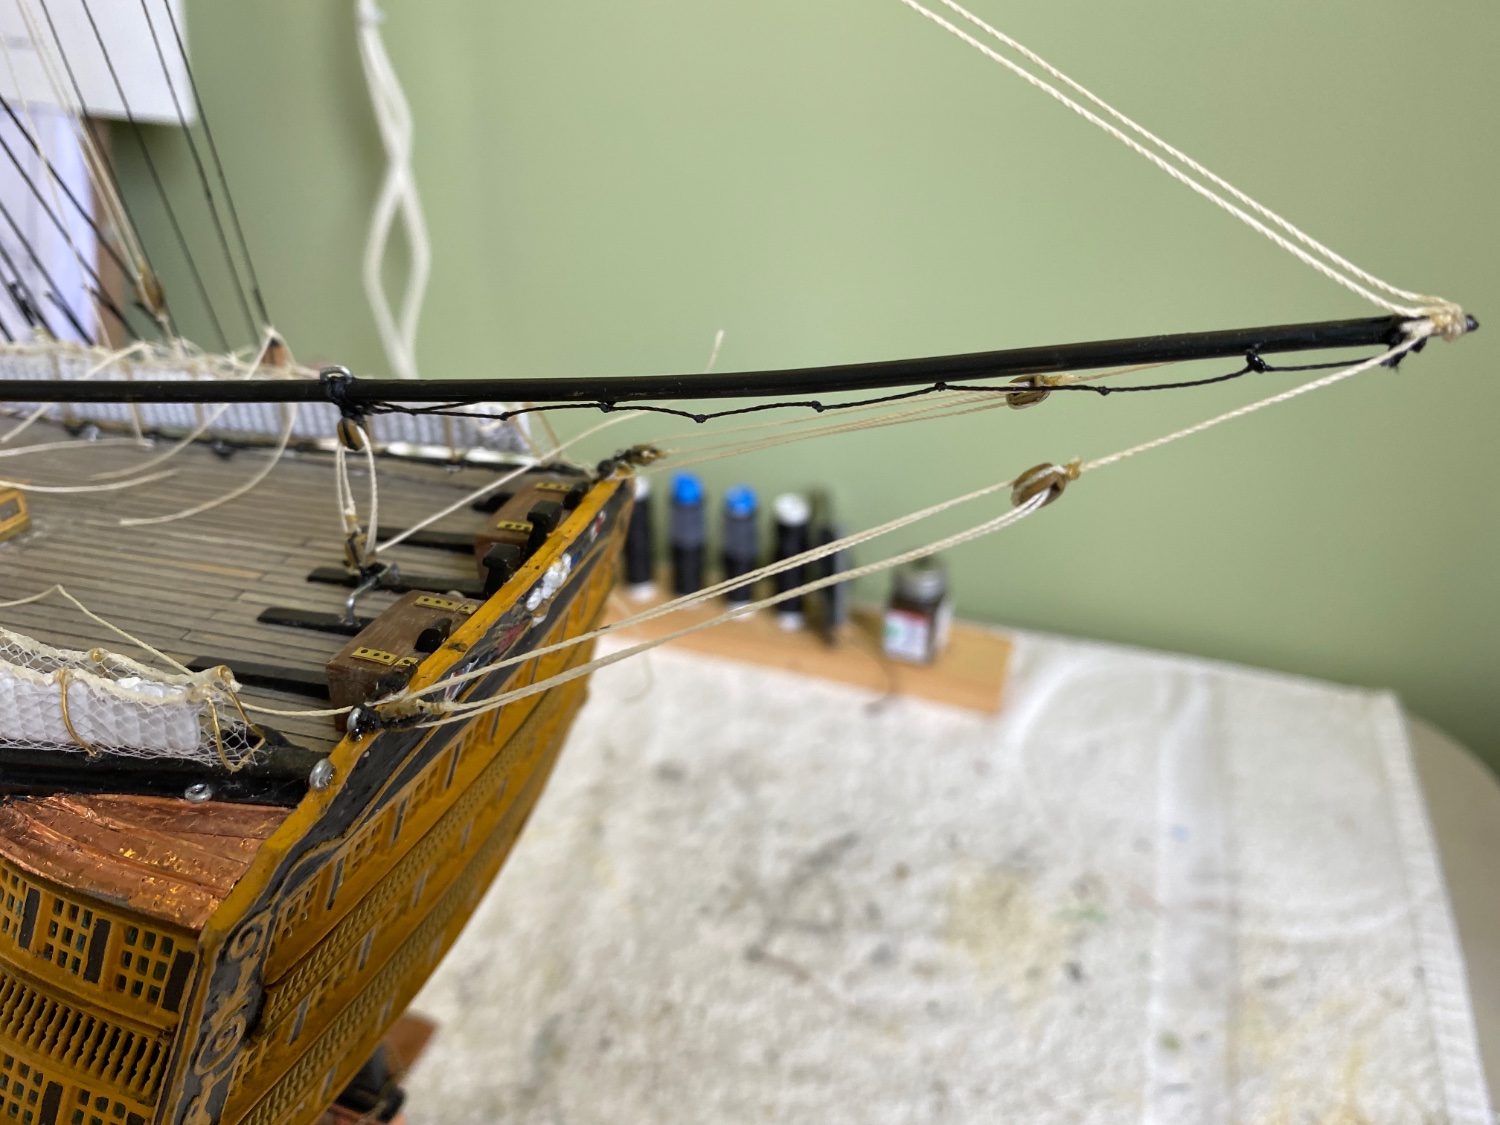
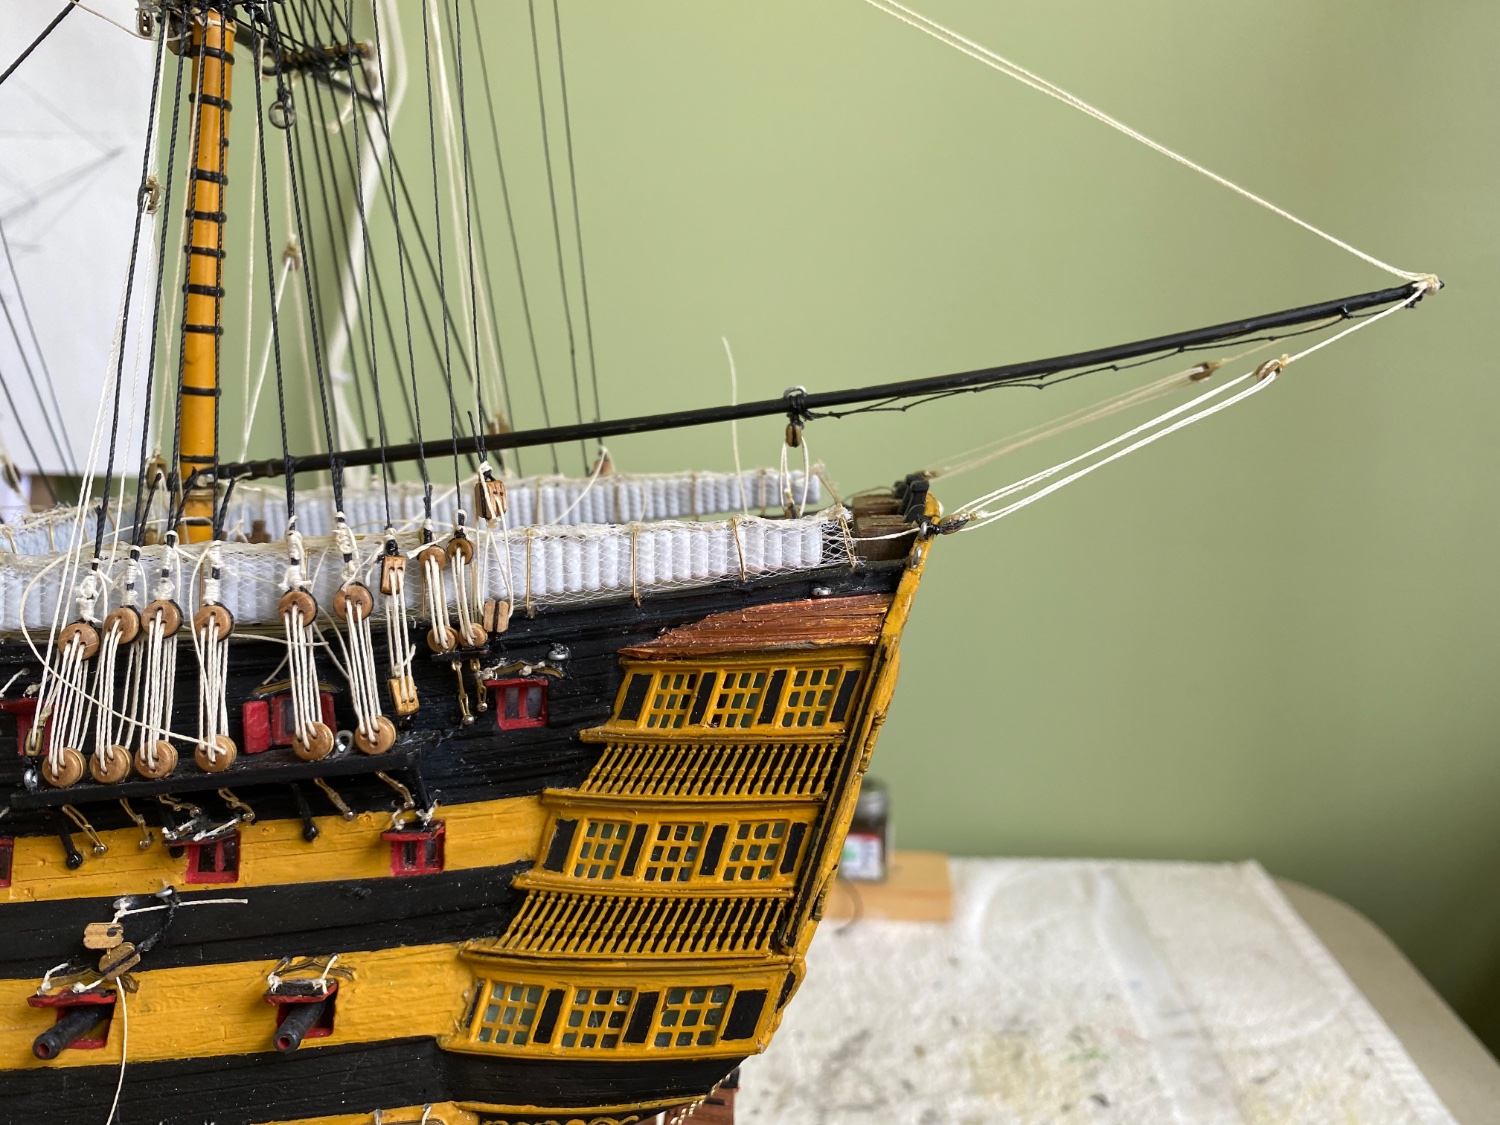
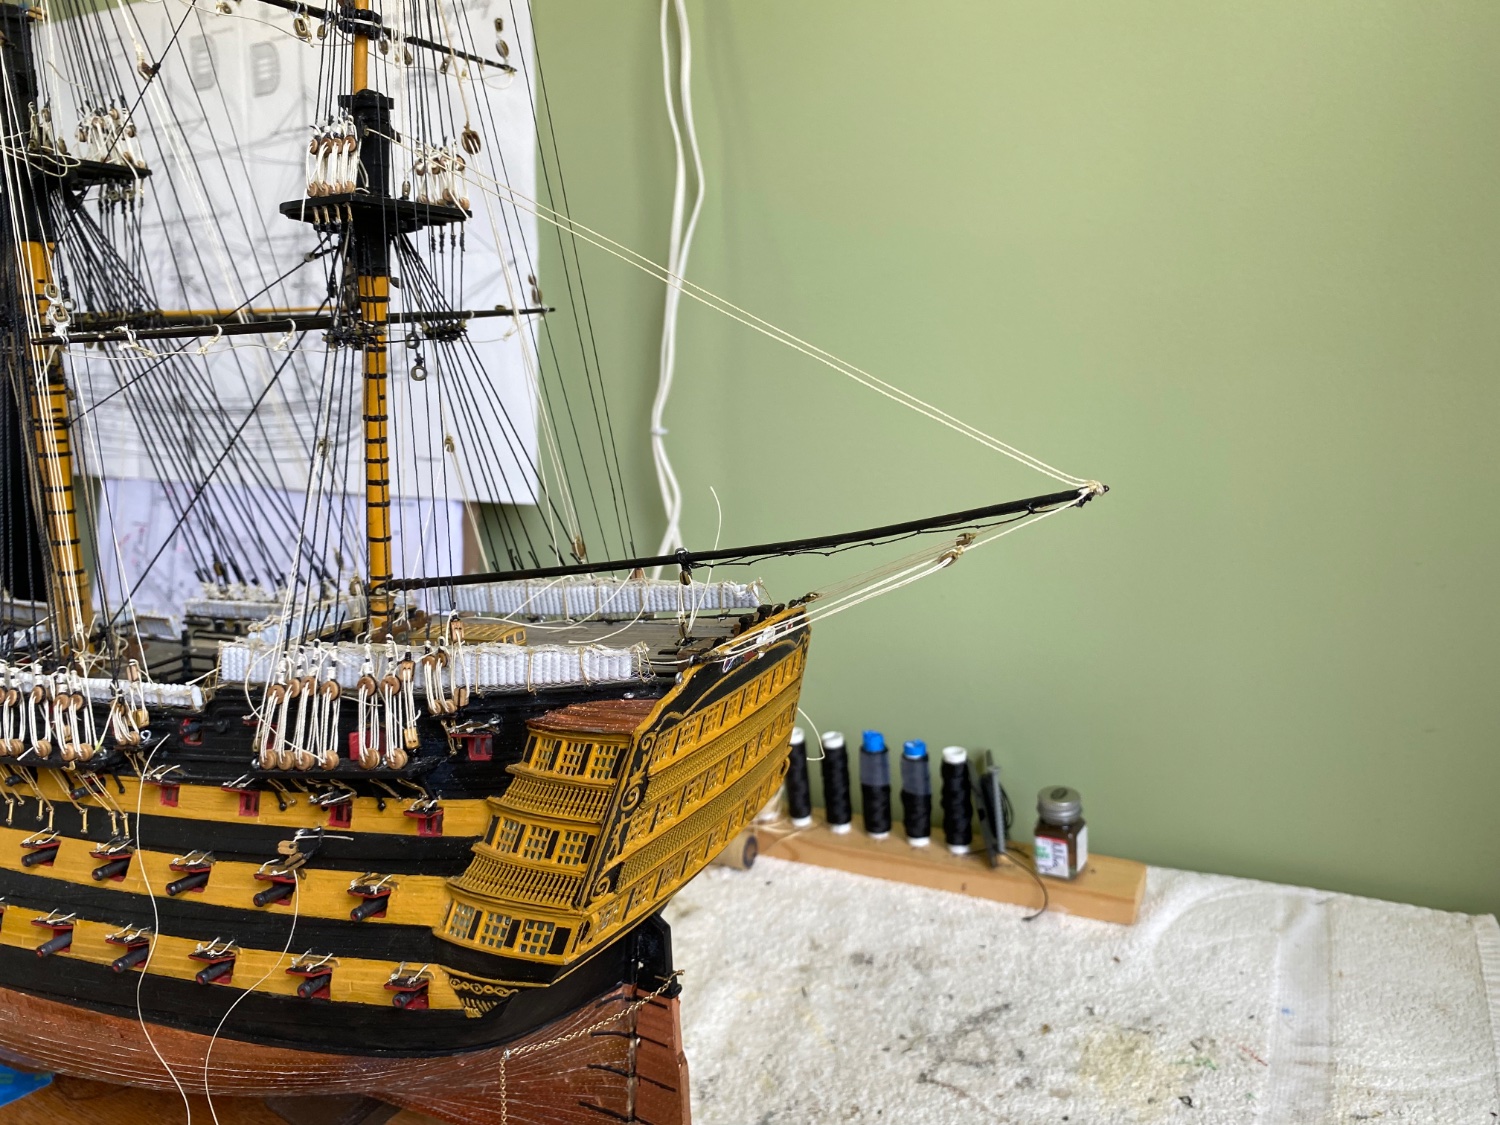
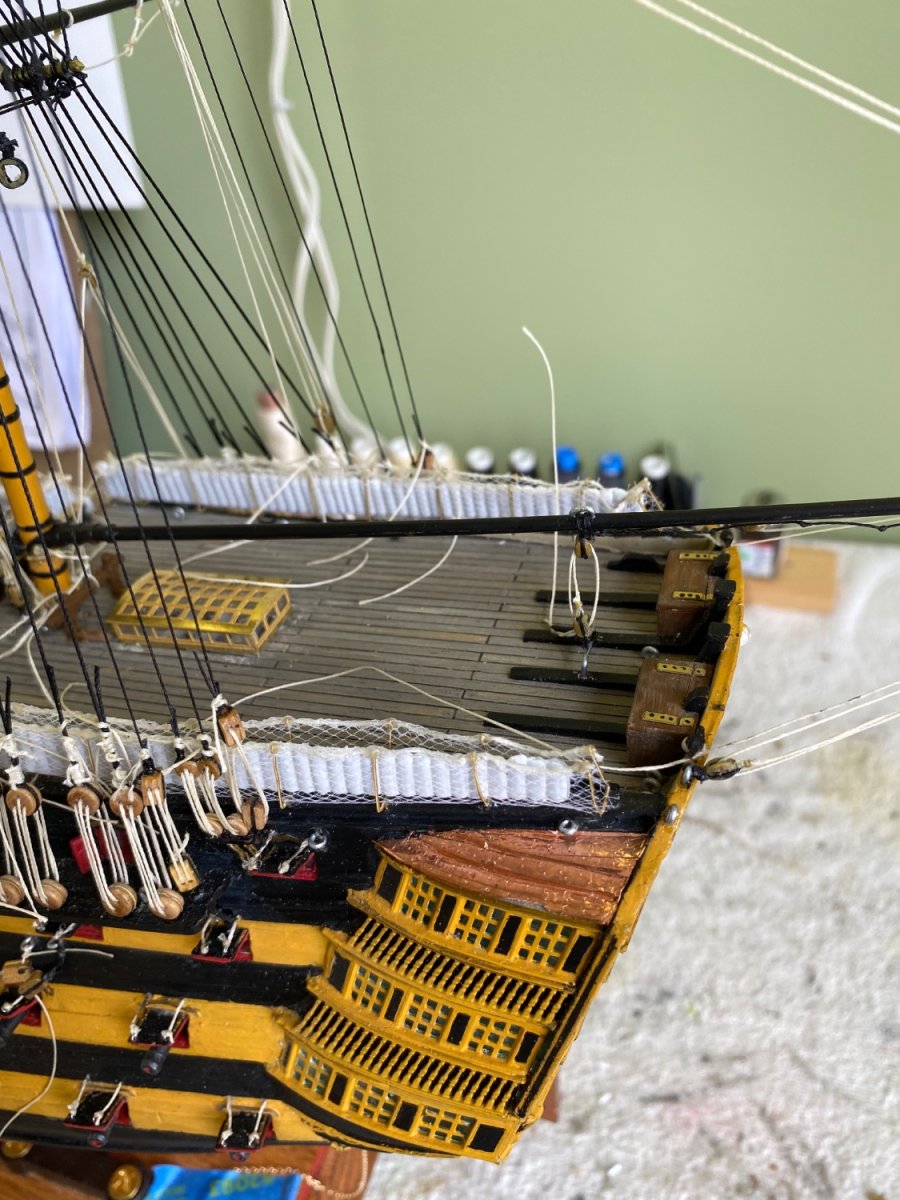
Not sure if any of you still visit this blog since it is several years old, but if so I have a question? I am building the Heller HMS Victory. I plan to furl all my sails and am reading different post on MSW about how to best make my furled sails. One thing I notice consistently is that most of the examples I find are done with the yard not on the mast yet. I have already attached all the yards and completed the initial attachment rigging of each. How difficult do you think this process would be with the yard already in place. I can already see that attachment of the completed sail will involve threading around already in place lines like the foot ropes, etc. -
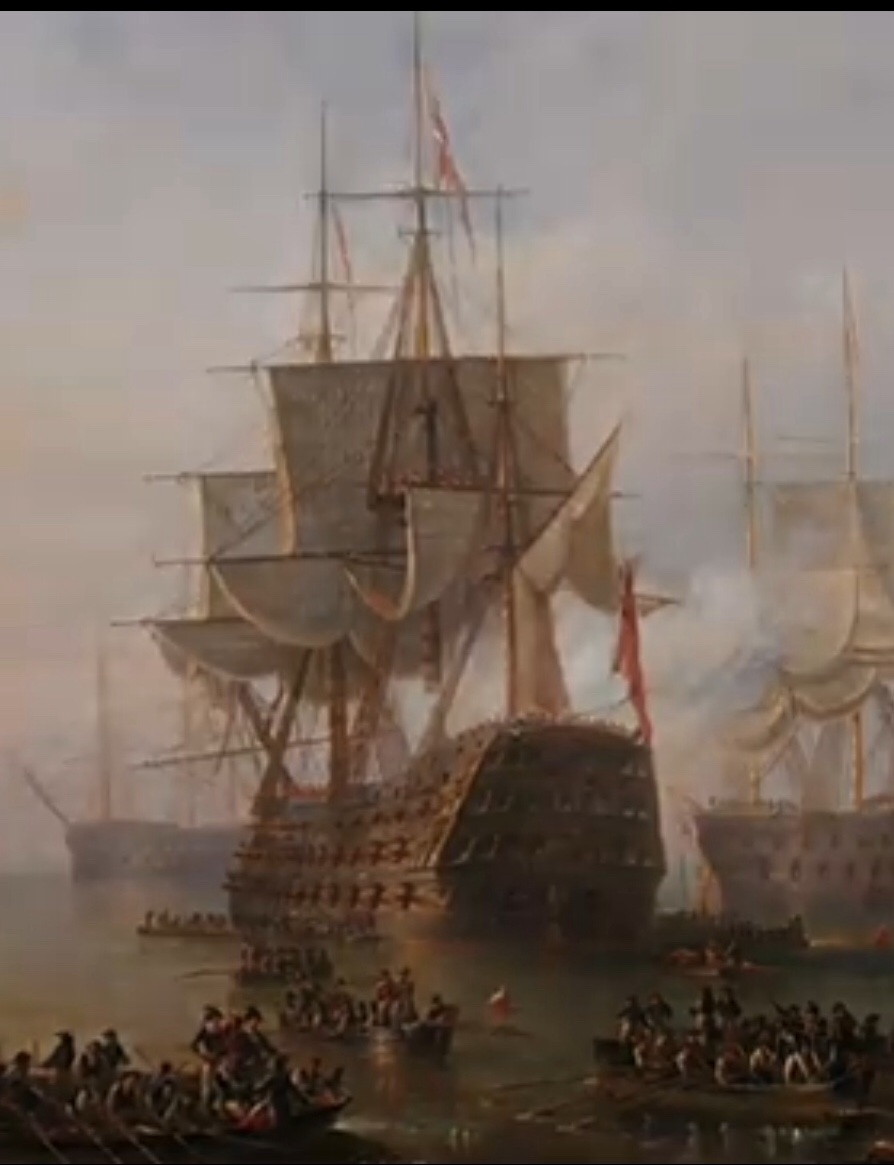
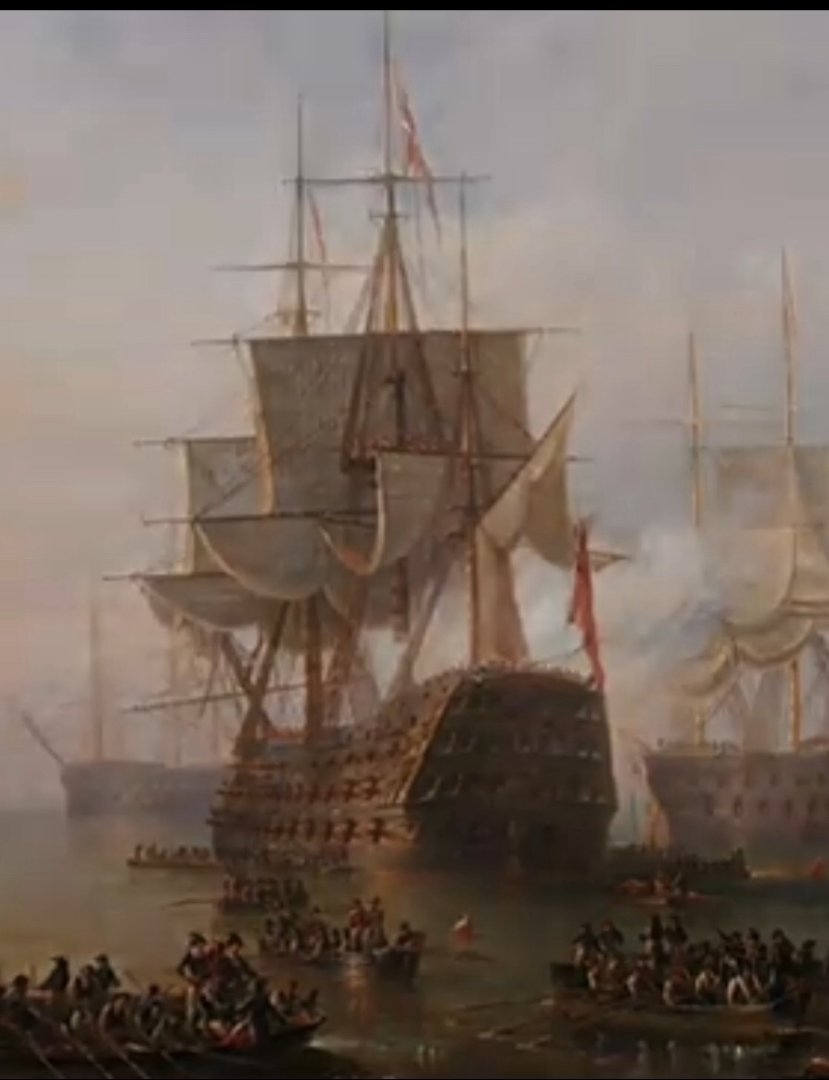
Ian there is a YouTube video titled: Fighting Top to Keelson: Saving the Mainmast of HMS Victory You May have seen it. It is a video about engineers carefully removing the main mast for restoration. The painting I am referencing is shown right at the beginning.
-
This is an interesting painting of the HMS Victory going into battle I saw on line. What I find interesting is the deployment of the sails. Would this have been the case from time to time? There are no sails on the top gallant yards. The topsails appear to be unfurled and the lower sails appear to be in a partially furled position. Can’t really figure out what is going on with the mizzenmast sails. Also appears the sail on the gaff is partially unfurled. This could be a depiction I try to capture with my sails.
-
I have absolutely no idea why my auto correct substituted “aromatherapy be near” into my comment. 😀 That is what I get for hitting submit before I proof read what I type! Can’t even remember exactly what I intended to type.
-
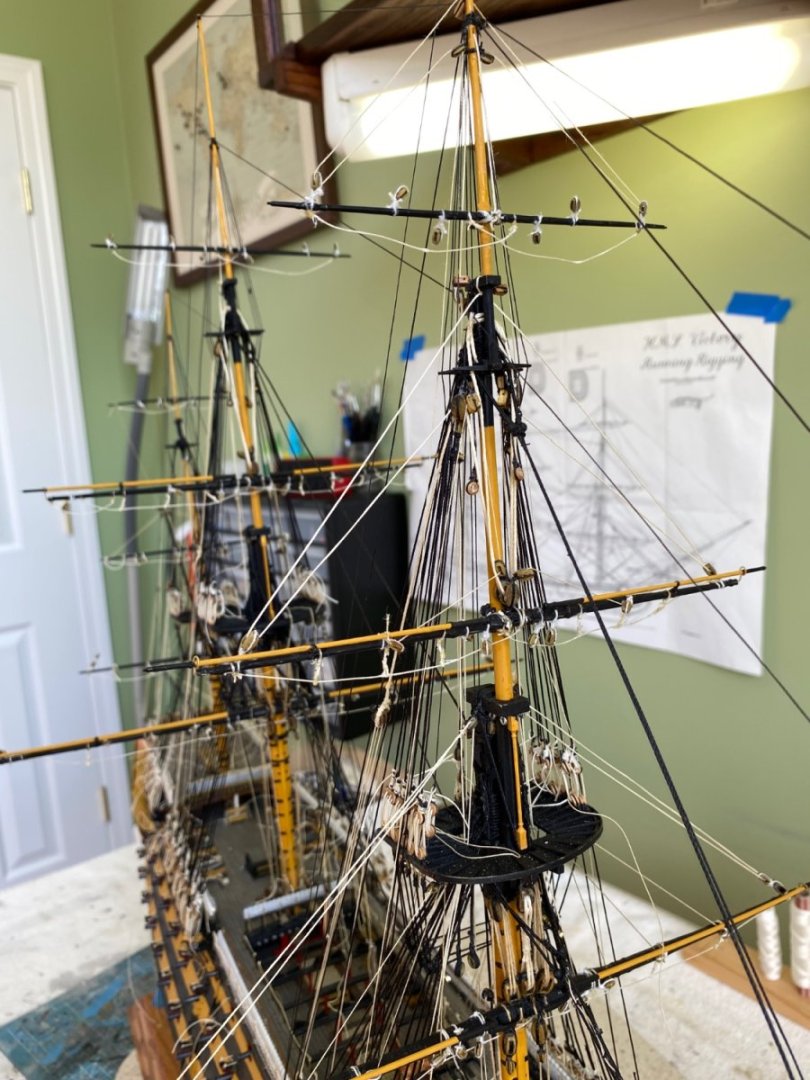
Lifts and buntlines completed for the foremast! I am thinking I need to start on the ratlines on my foremast. As I rig these different lines I am finding that I am getting them aromatherapy be and near the shrouds, especially the ones that belay to the shrouds or futtock shrouds.


-
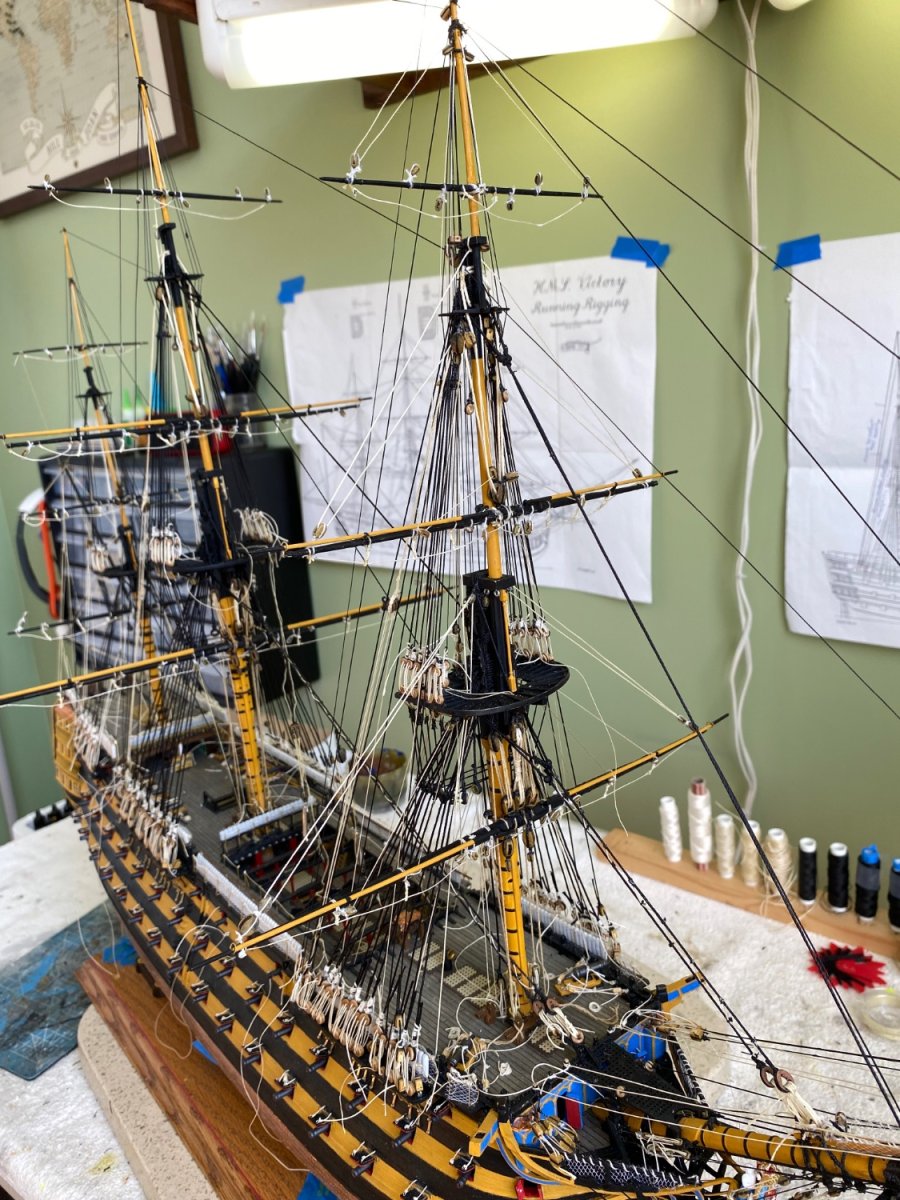
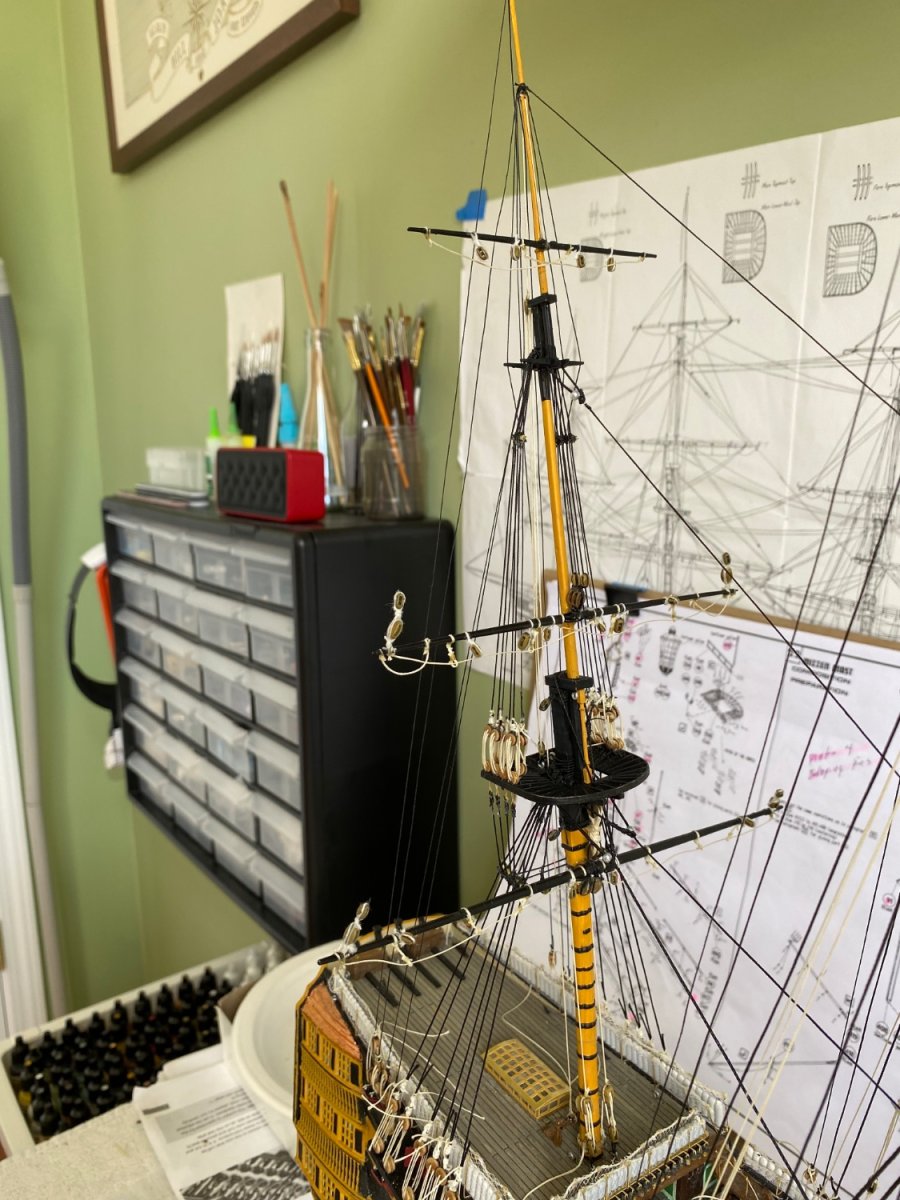
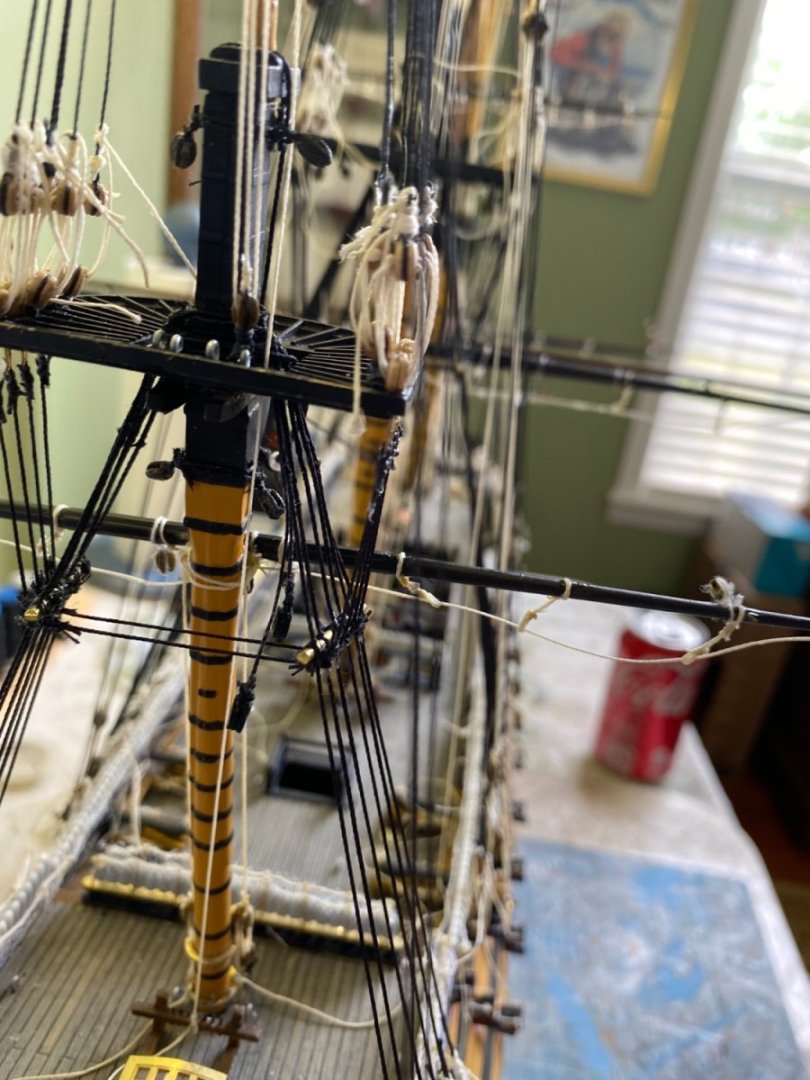
Gaff rigging completed to include Throat Haliard, Peak Haliard, mizzen topsail braces, mizzen topgallant braces, and Vangs! Heller definitely did not plan on the need for extra cleats. I am having to fabricate them from old parts. Still have ti do the ensign haliard which I don’t have a complete grasp on yet.


-
Thanks Ian
-
Ian I was looking at them just yesterday., along with Daniel’s brass parts for the supports. Trying to decide when to put them on. I know they are going to be tough to paint a susceptible to being bent once added to the ship. I looked through the Heller box to see what parts I still have left. There are not many. I have the boats and davits which I have already painted. I have the four anchors which I have already painted, I have the lanterns which are not painted, and I still need to make the rails using Daniel’s brass stanchions that go on the mast tops. Again with them I am trying to decide when it will be safe to add them. Ian I have a question I need your help with. I plan to make all my sails but have them appear stowed or furled. If I do that what do I do with the lines (I think the clewlines and buntlines?)? I assume they would still be attached to the sail for when the crew wanted to unfurl the sail. I noticed for your build you left the sails off. In that situation did you just not rig those lines? Left them off?
-
Veszett I actually thought the same thing after I took those photos. I did loosen the lifts to make it a bit more straight. Thanks
-
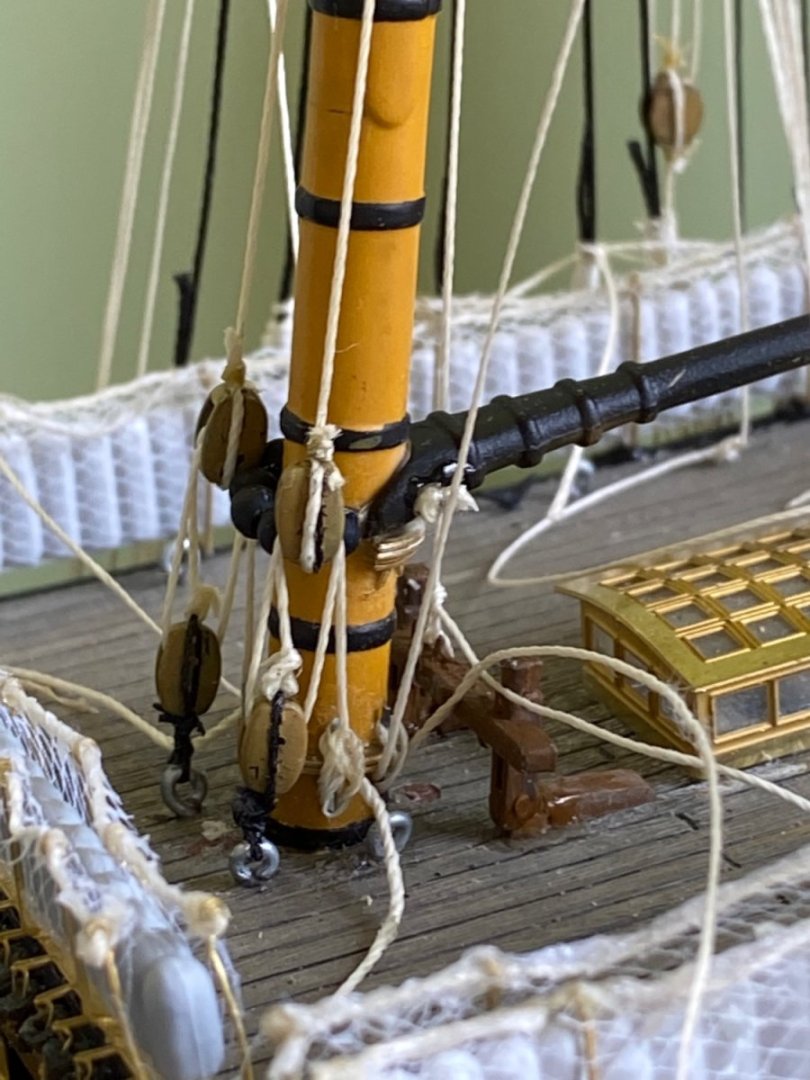
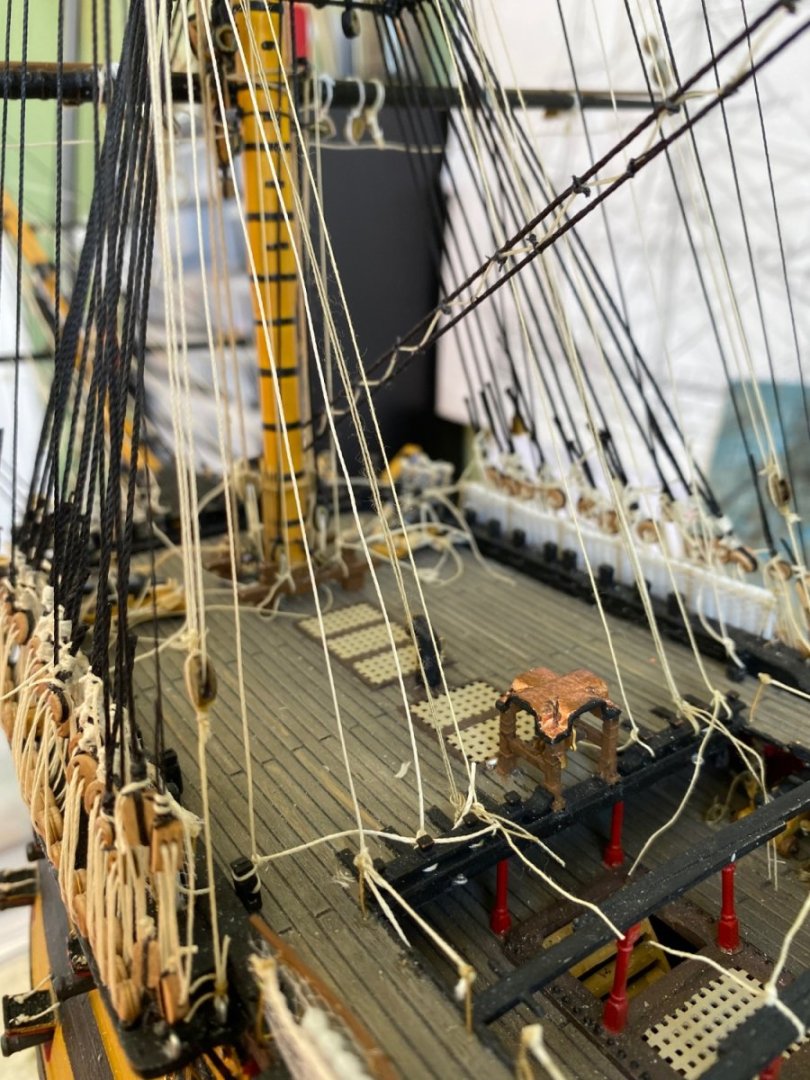
Hey Dave, leaving the eyelets I made bare metal was a decision I made early on to leave all the metal parts I added bare instead of blackening. I left all of the brass etched parts I got from Daniel bare metal as well and use brass polish to highlight them. I like the visual interest the bits of metal here and there adds to my model. I think if I had blackened all the metal parts, the extra time and effort spent, as well as the expense, would have been in time forgotten by me and ignored as being just black plastic pieces supplied in Heller’s kit.
-
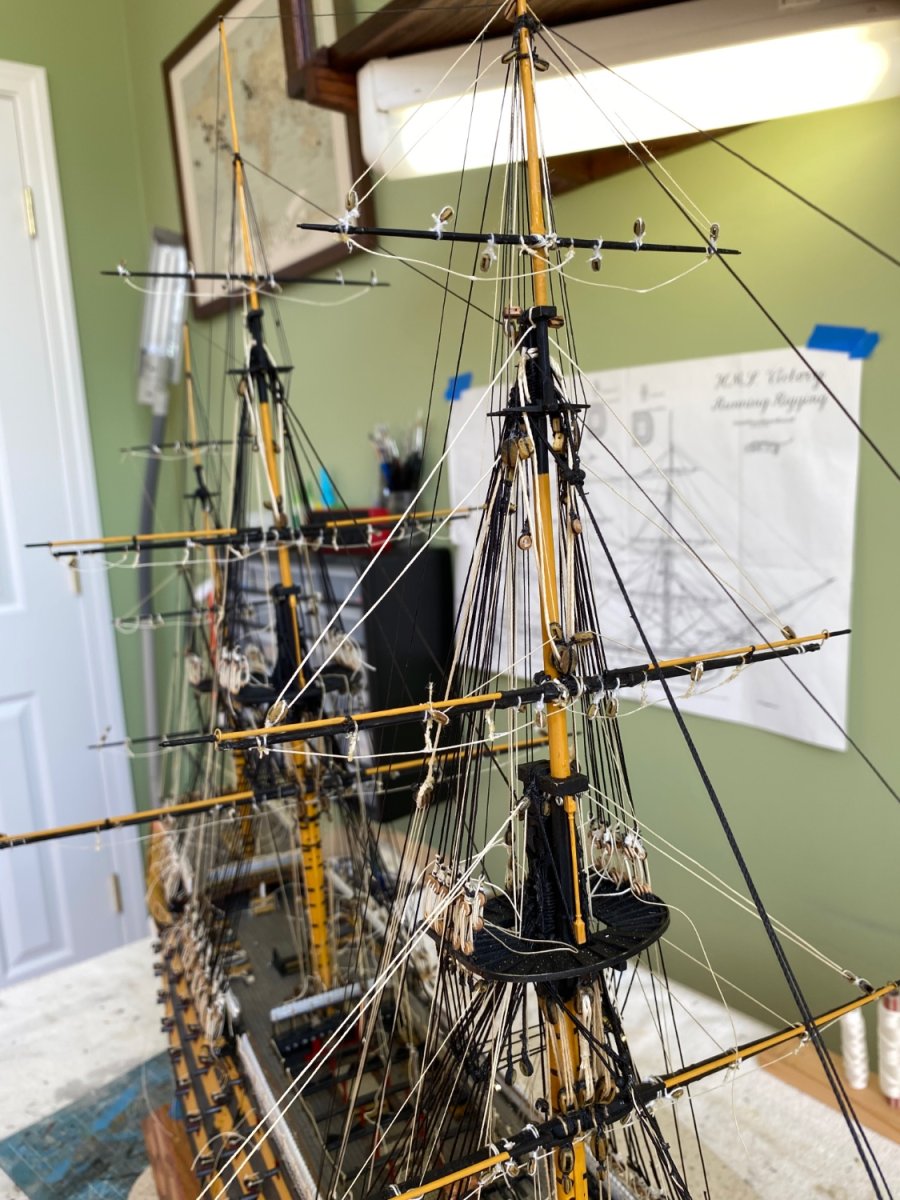
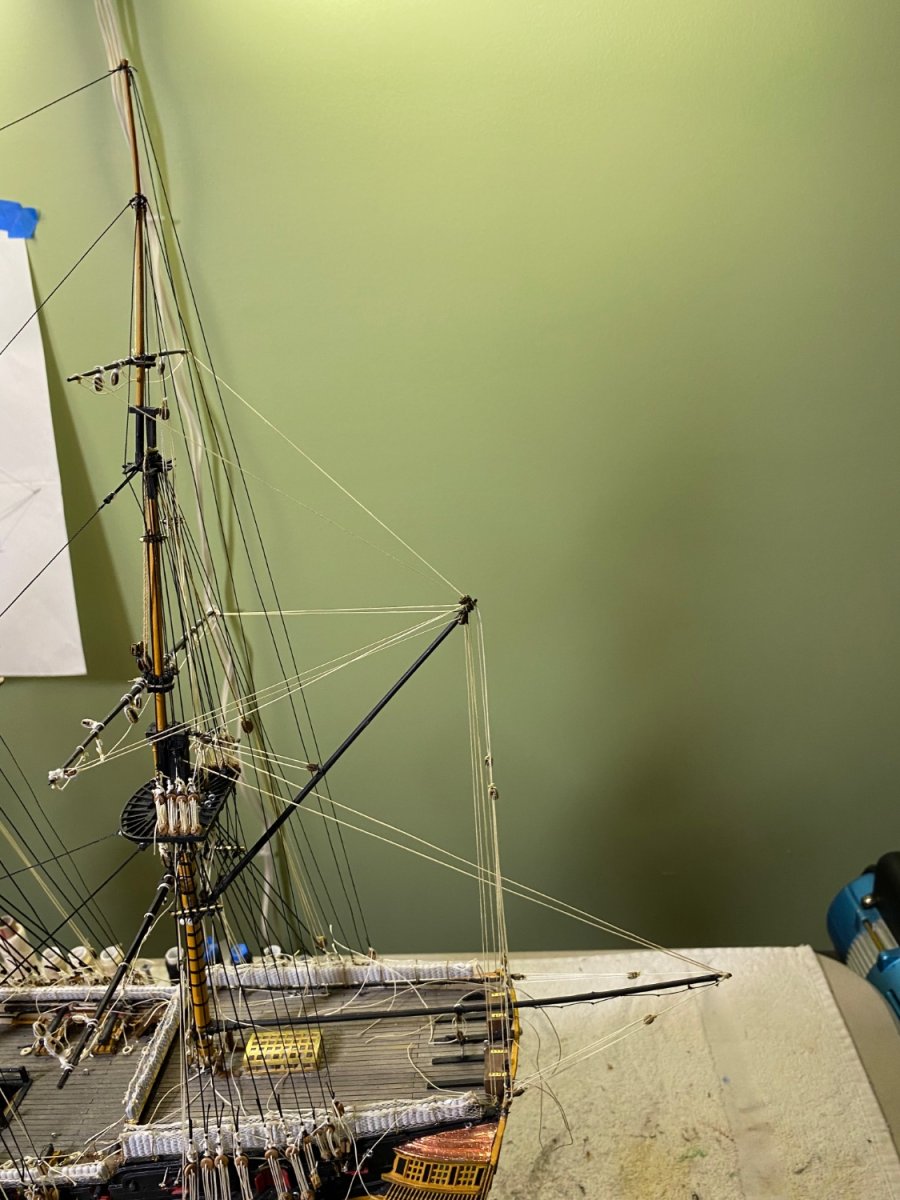
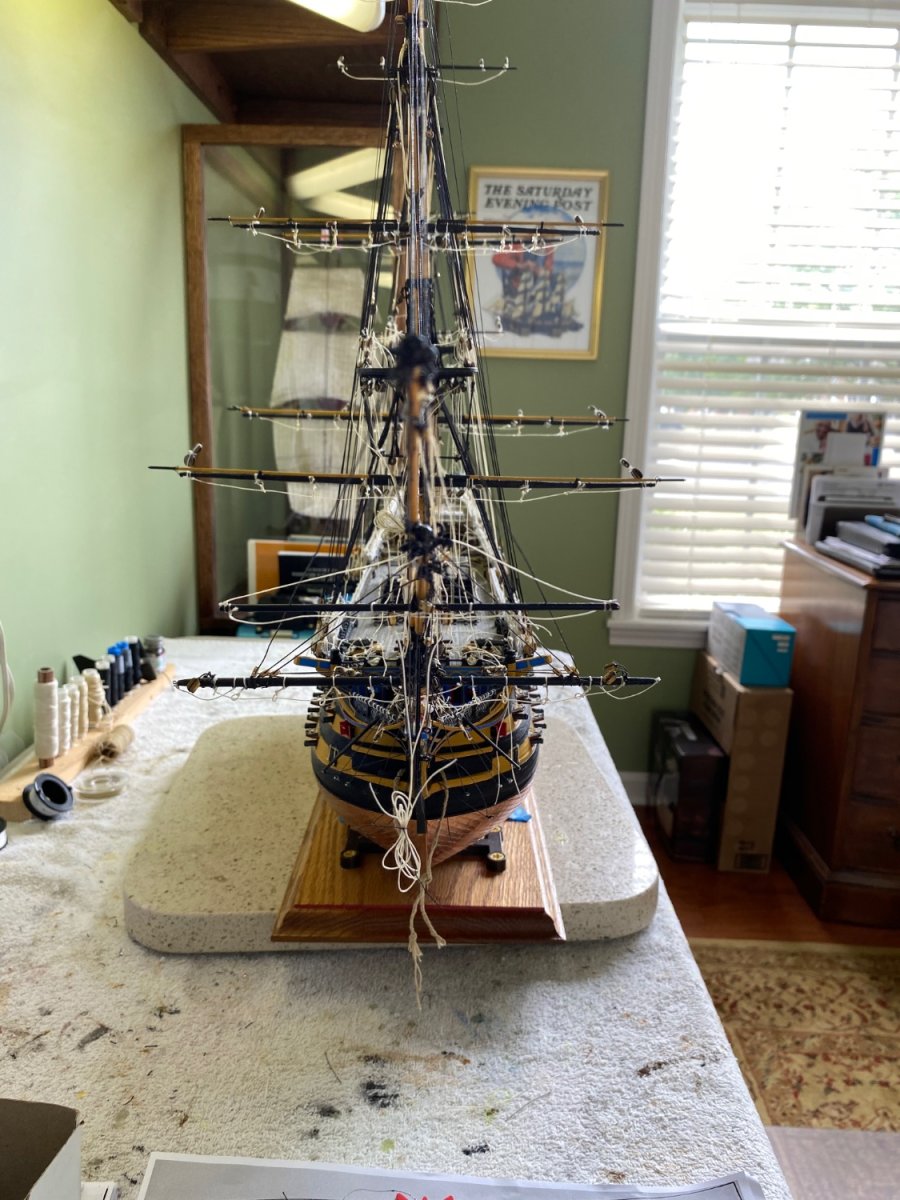
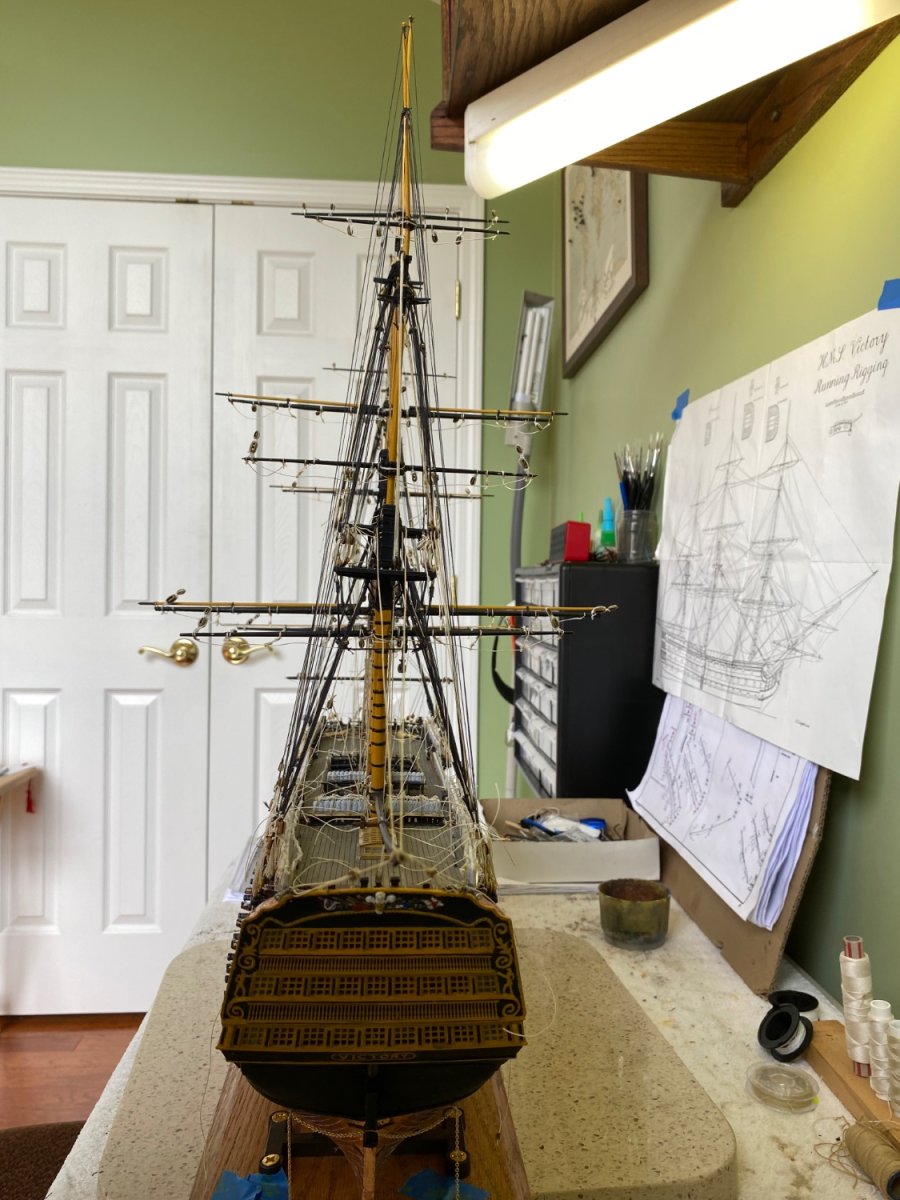
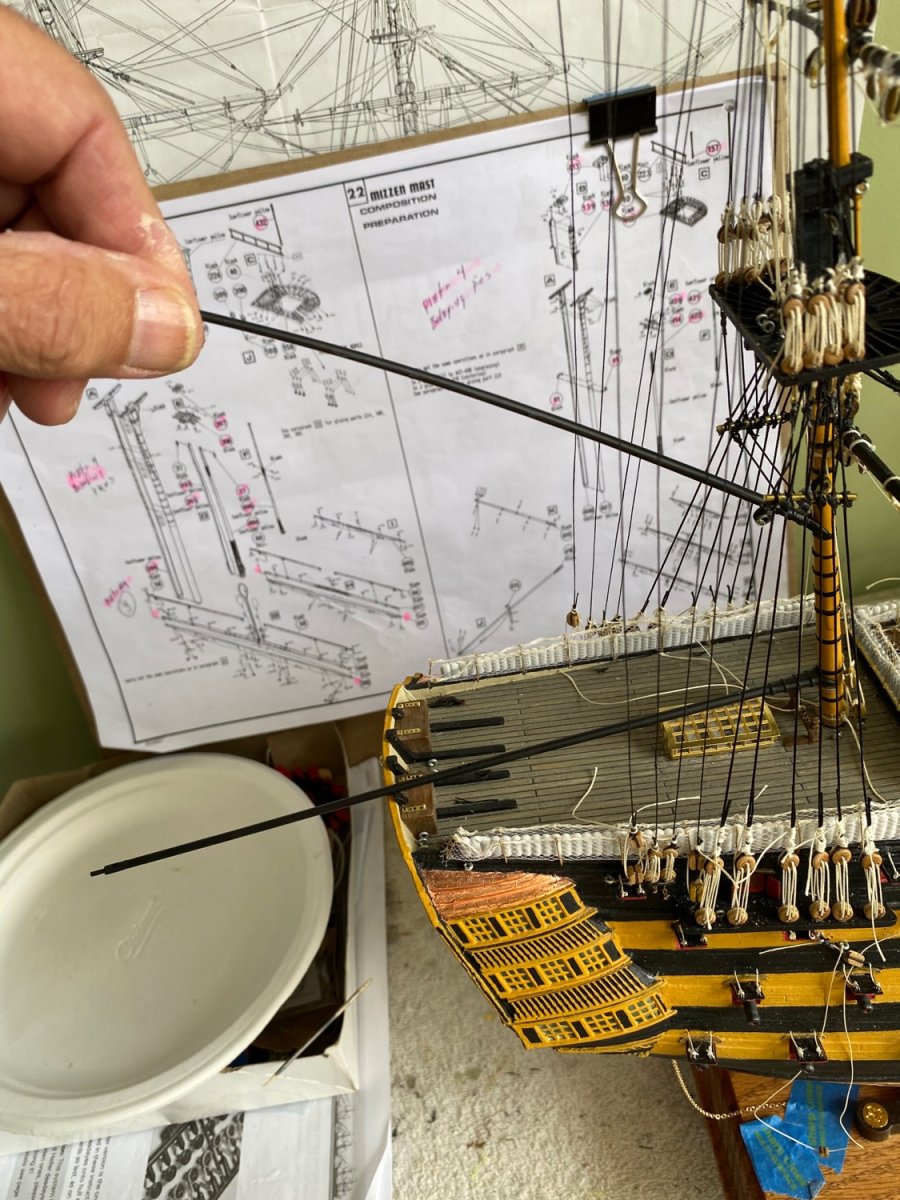
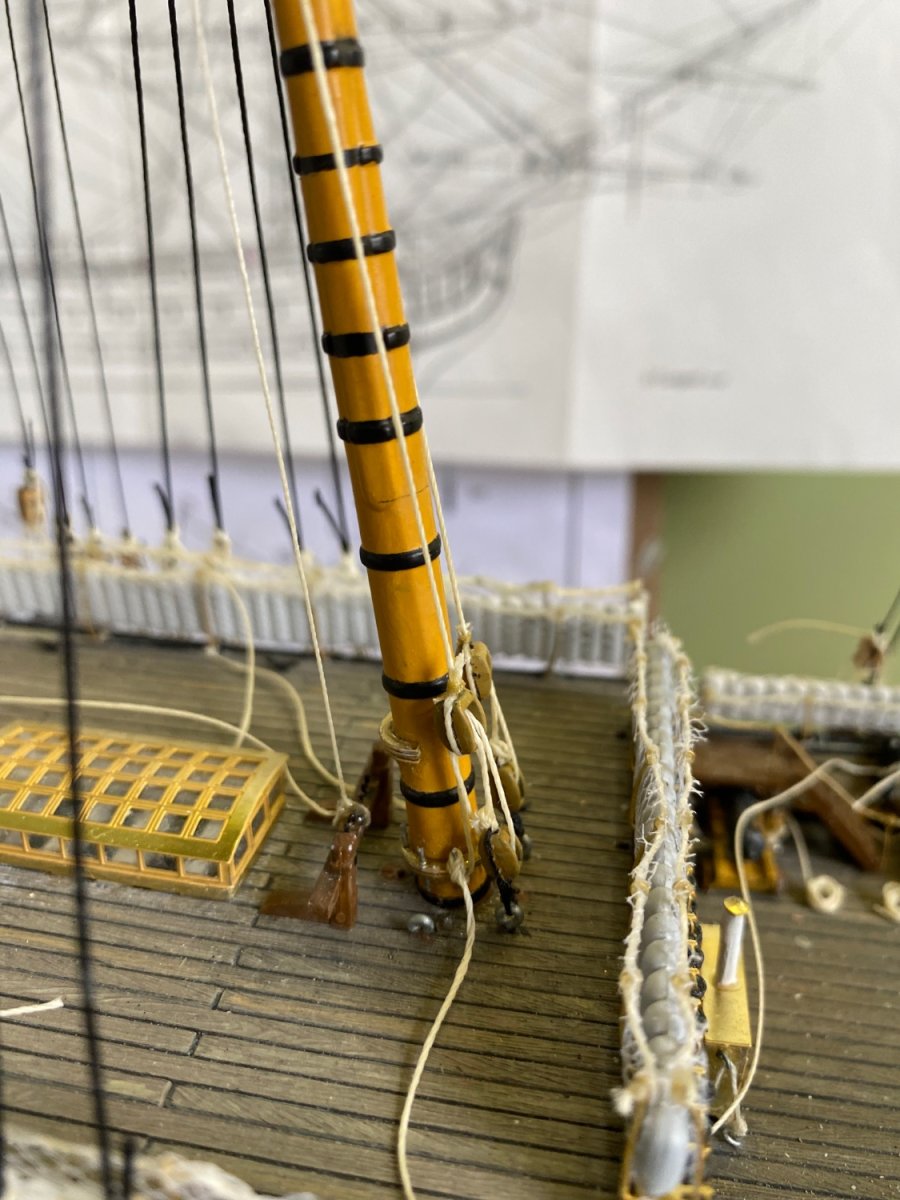
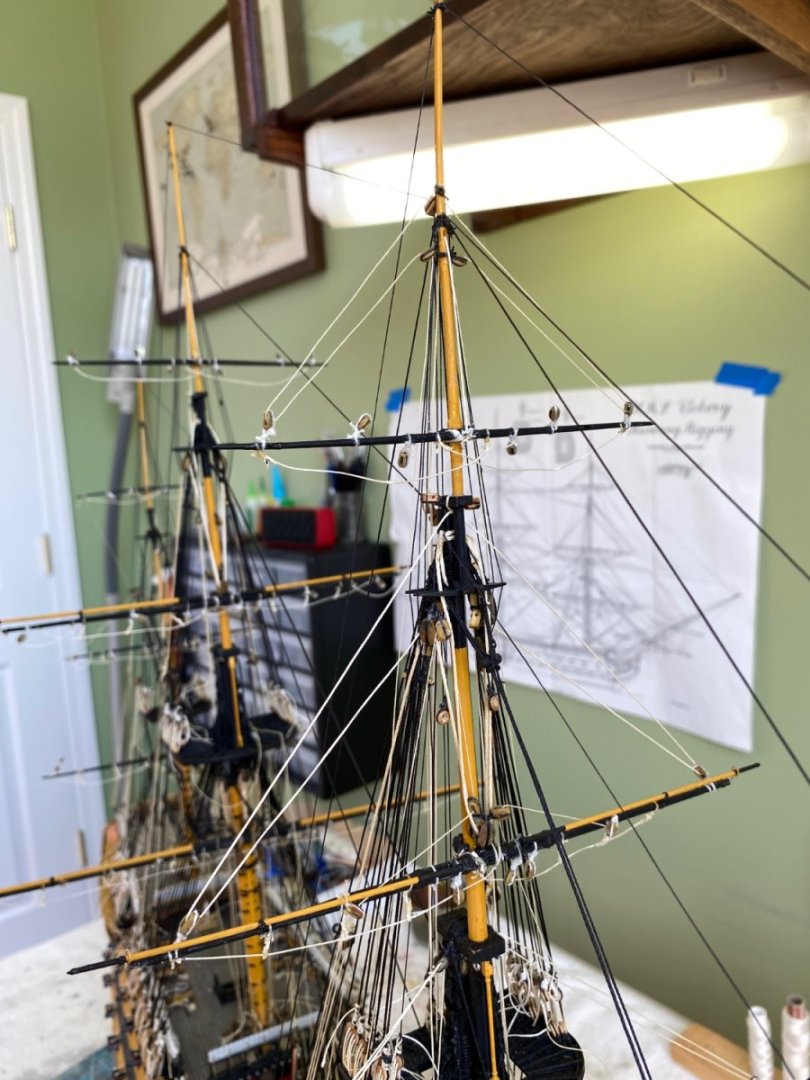
Today, July 24, 2022 I reached the total length of my HMS Victory with the installation of the Driver Boom to include the parral, horses, guy pendants, and topping lifts.


-
Ian, a visit back to your Victory blog to study the gaff and boom for attachment to the mizzenmast because I, as well, did not think I was getting the correct height on the gaff peak (I am just holding it in place). I knew the catharpins where placed correctly according to Longridge. Futtock stave same distance below the mast top as the mast cap is above the top. I felt for sure the gaff throat had to attach below the catharpins or else the fore side of the sail could not reach the mizzenmast. After scratching my head for a while I of course said, almost out loud, “what did Ian do?” 😊 I see you had the same concern. I am going to follow your lead and mount the gaff throat as high on the mizzenmast with enough angle to just miss the catharpins. I also notice in your photo you have the bottom boom at a bit of an angle instead of parallel to the deck. By the way I cut out the plastic sail Heller provided (not going to use it) to see if I could at least use it to position the new drivers, and it did not fit because of the catharpins, which Heller does not instruct you to do.
-
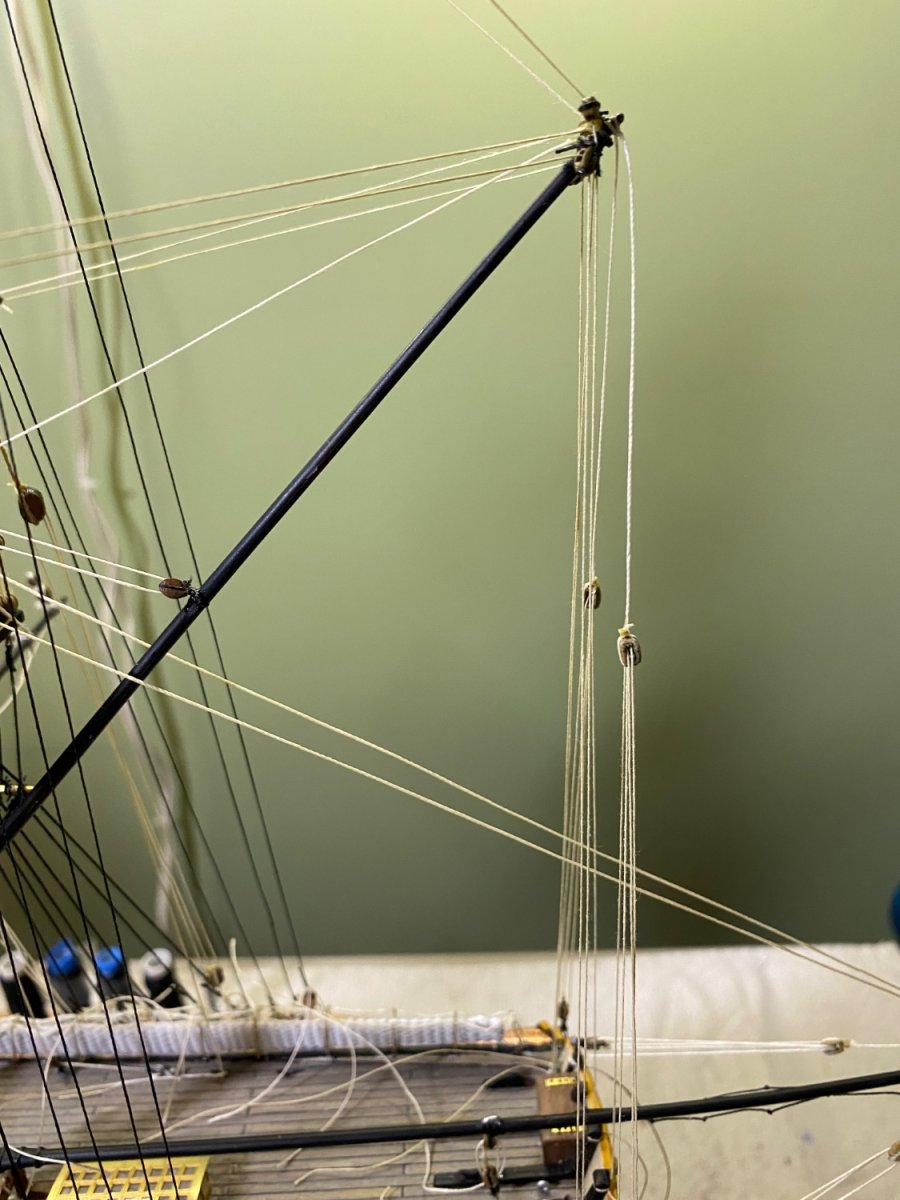
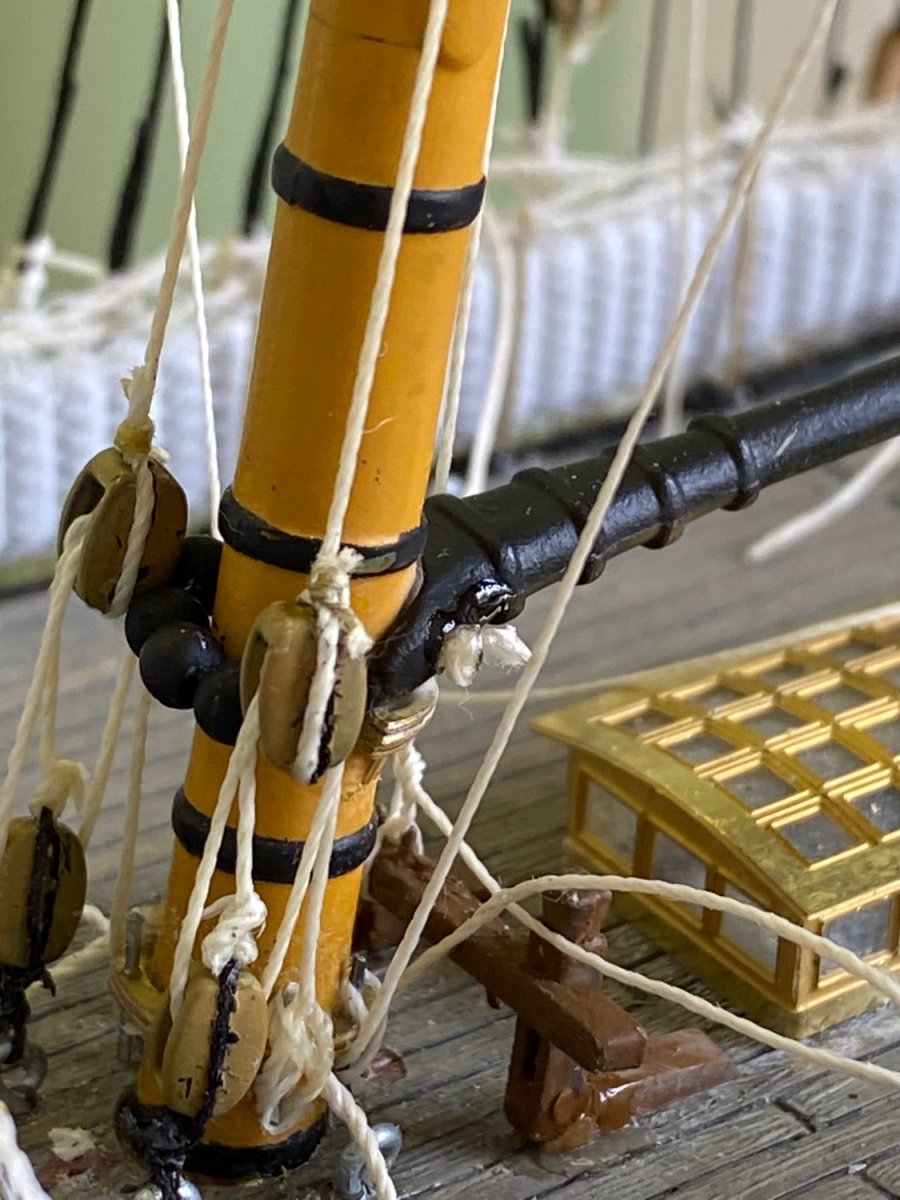
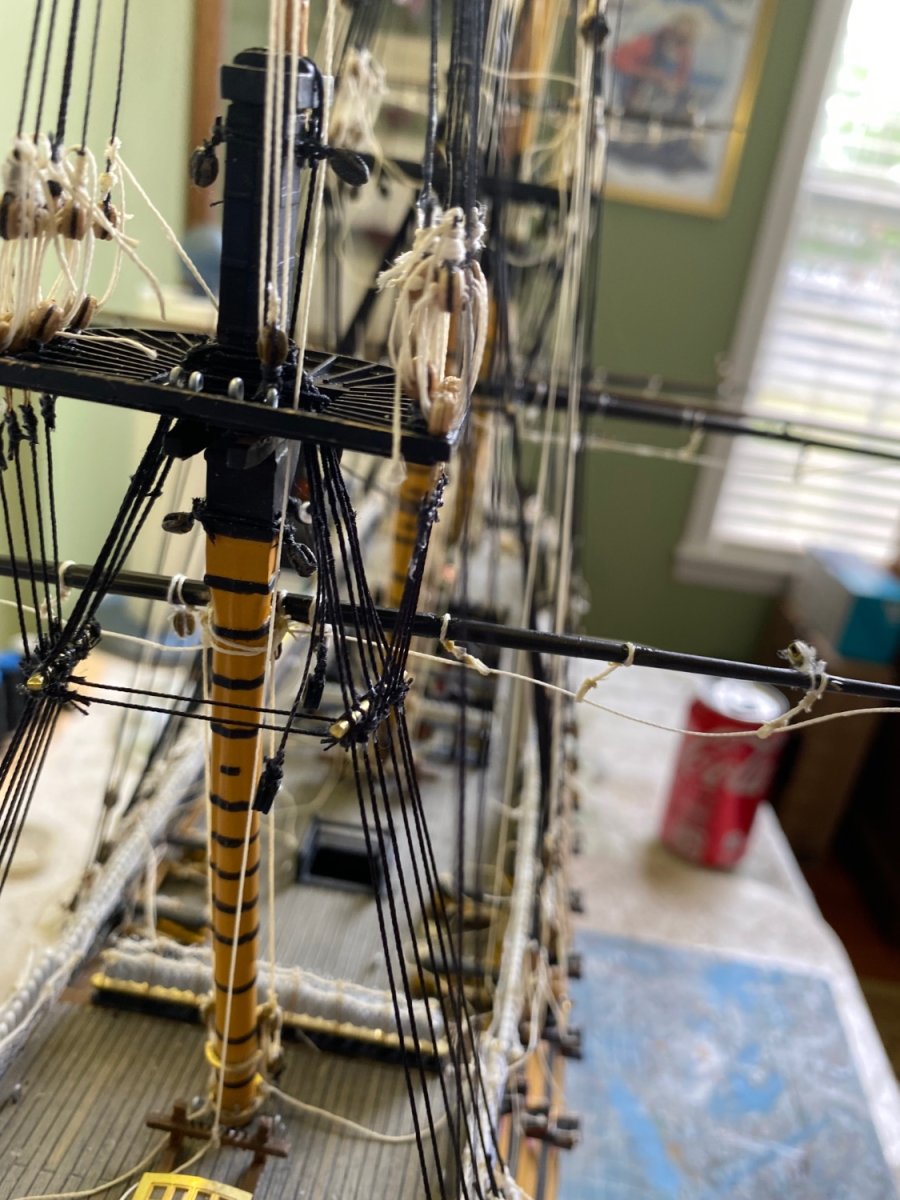
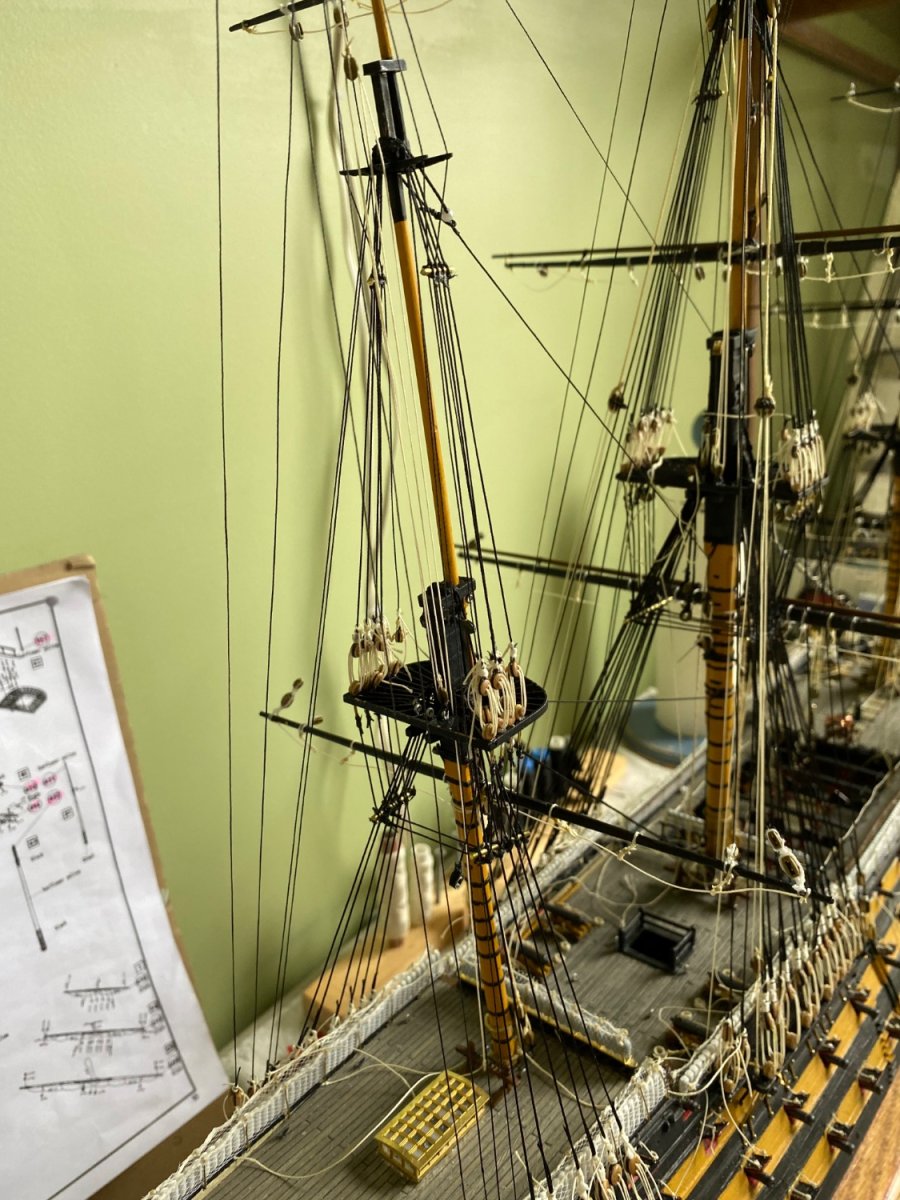
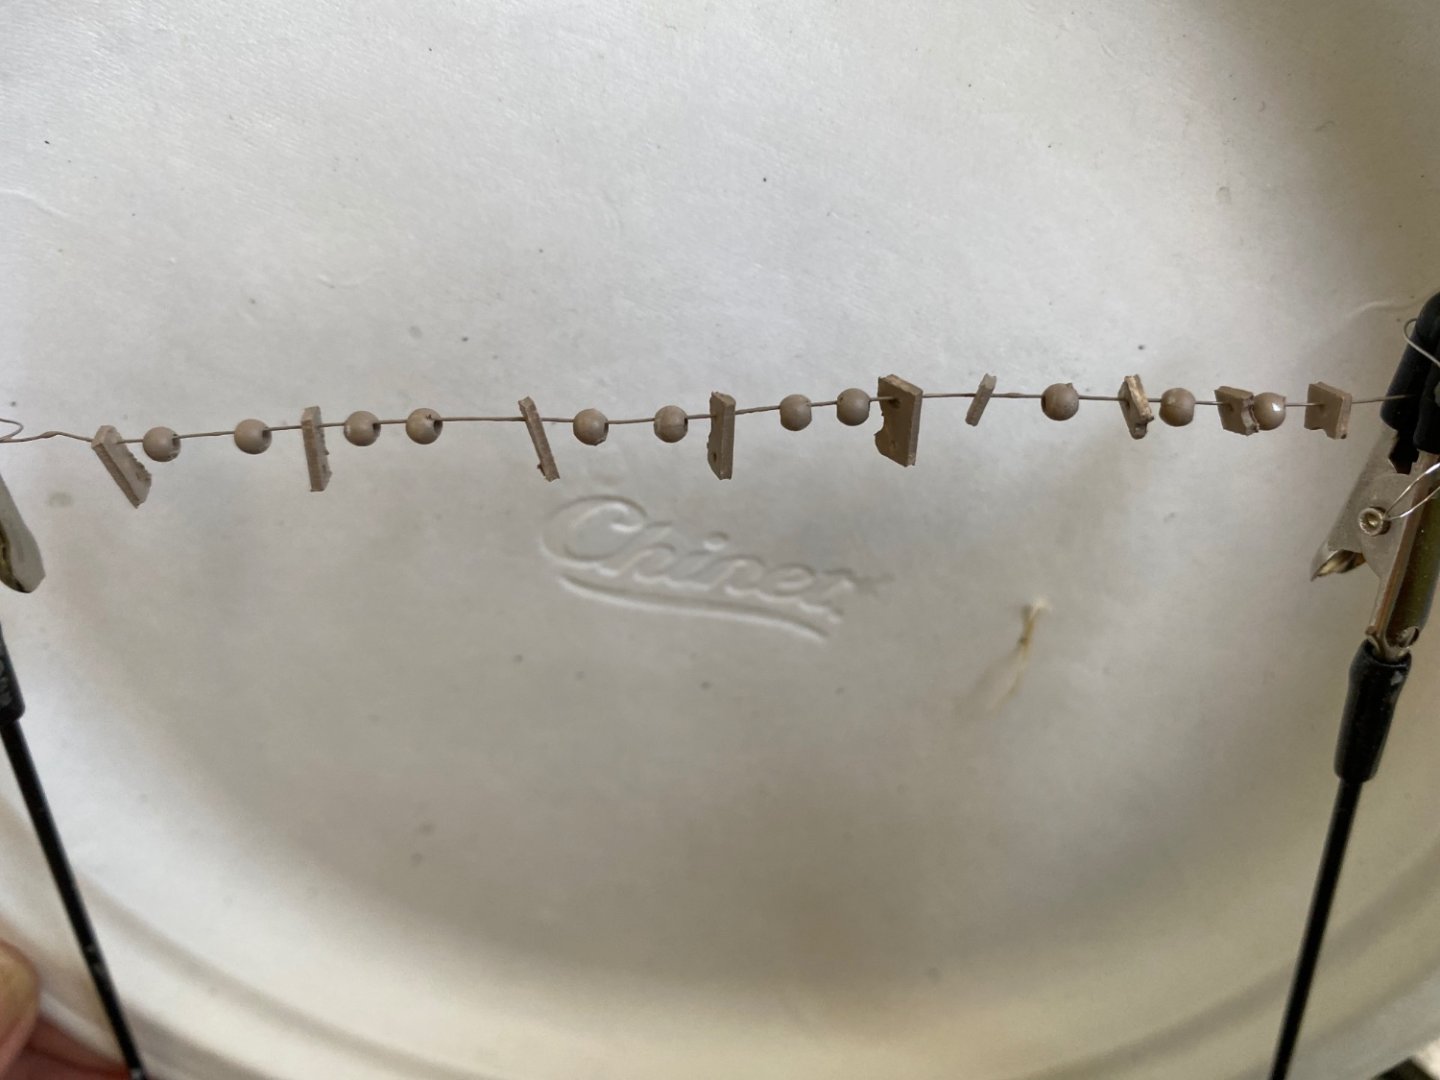
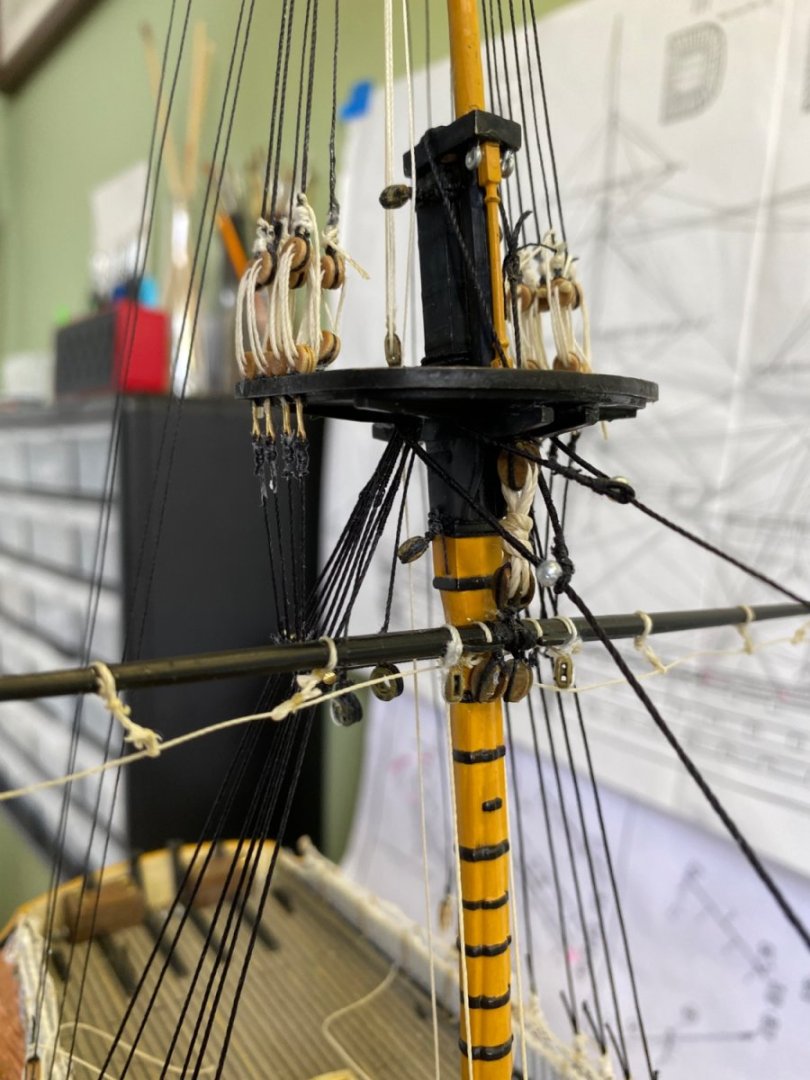
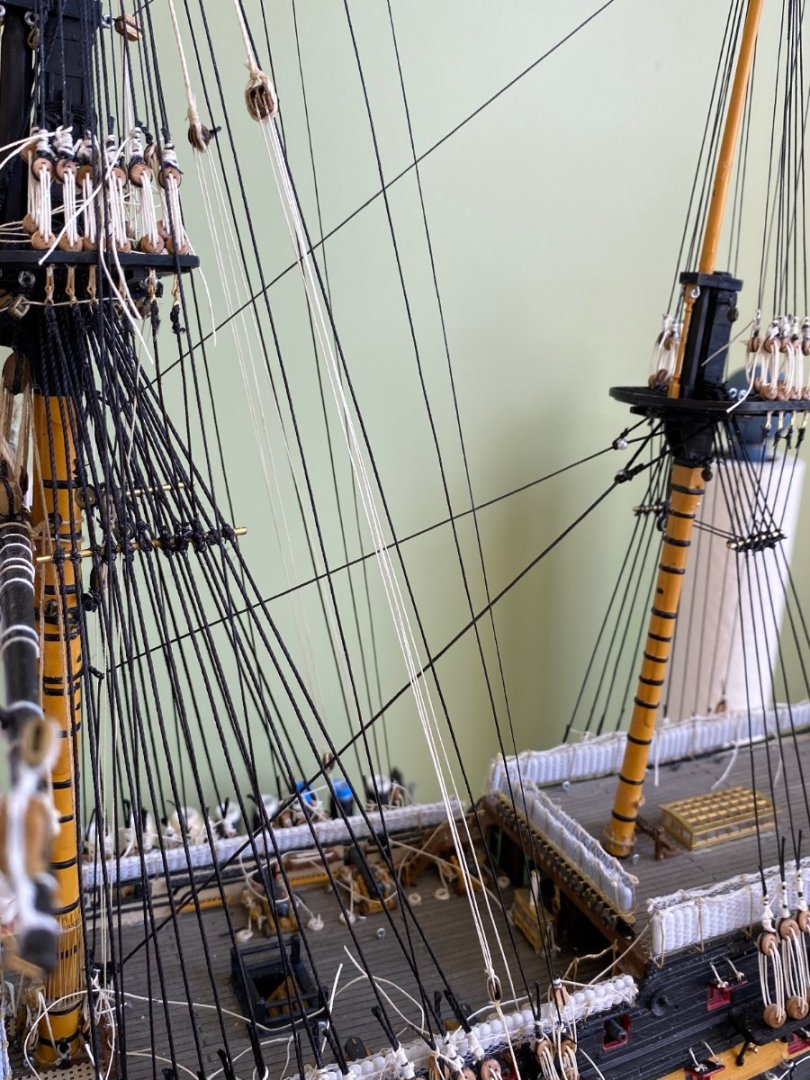
Making parrals with Evergreen and dead beads for the mizzenmast top and topgallant yards.

-
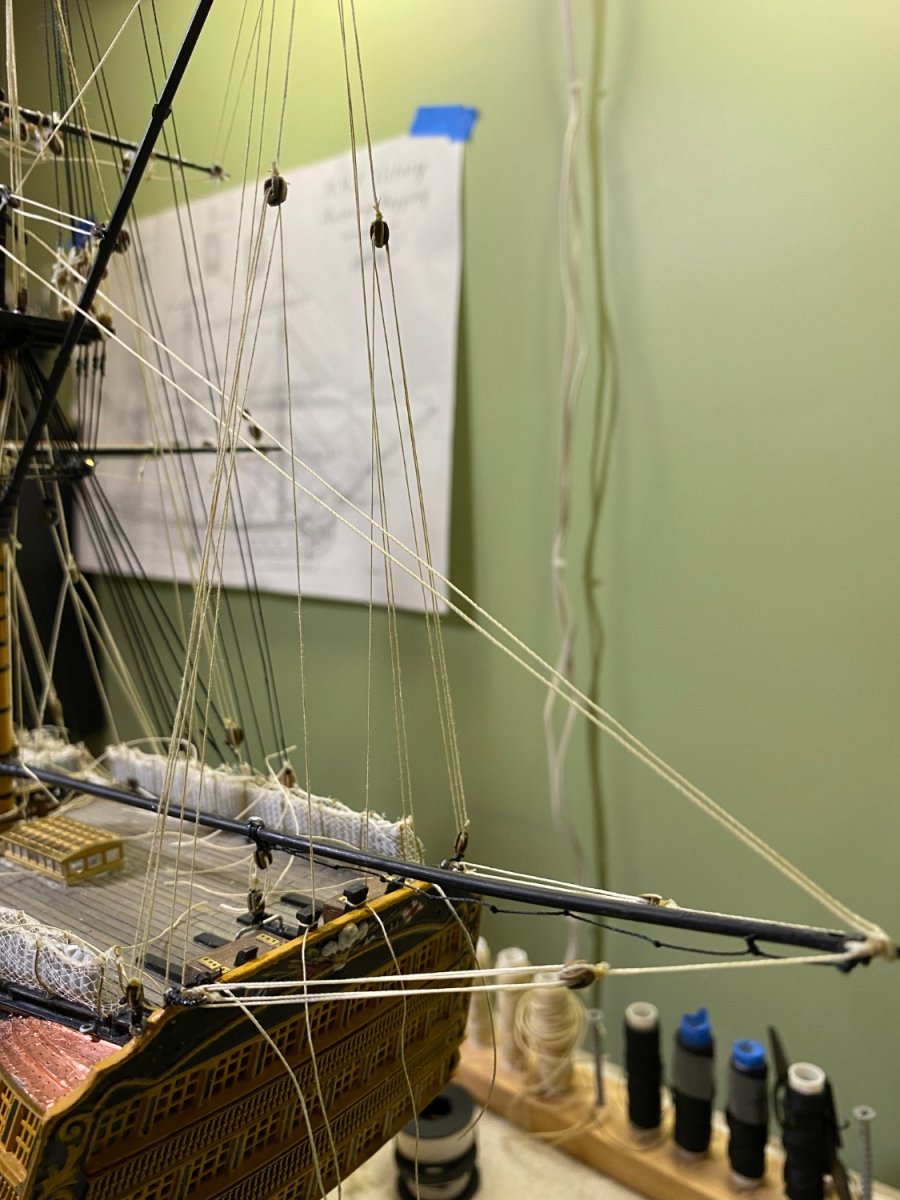
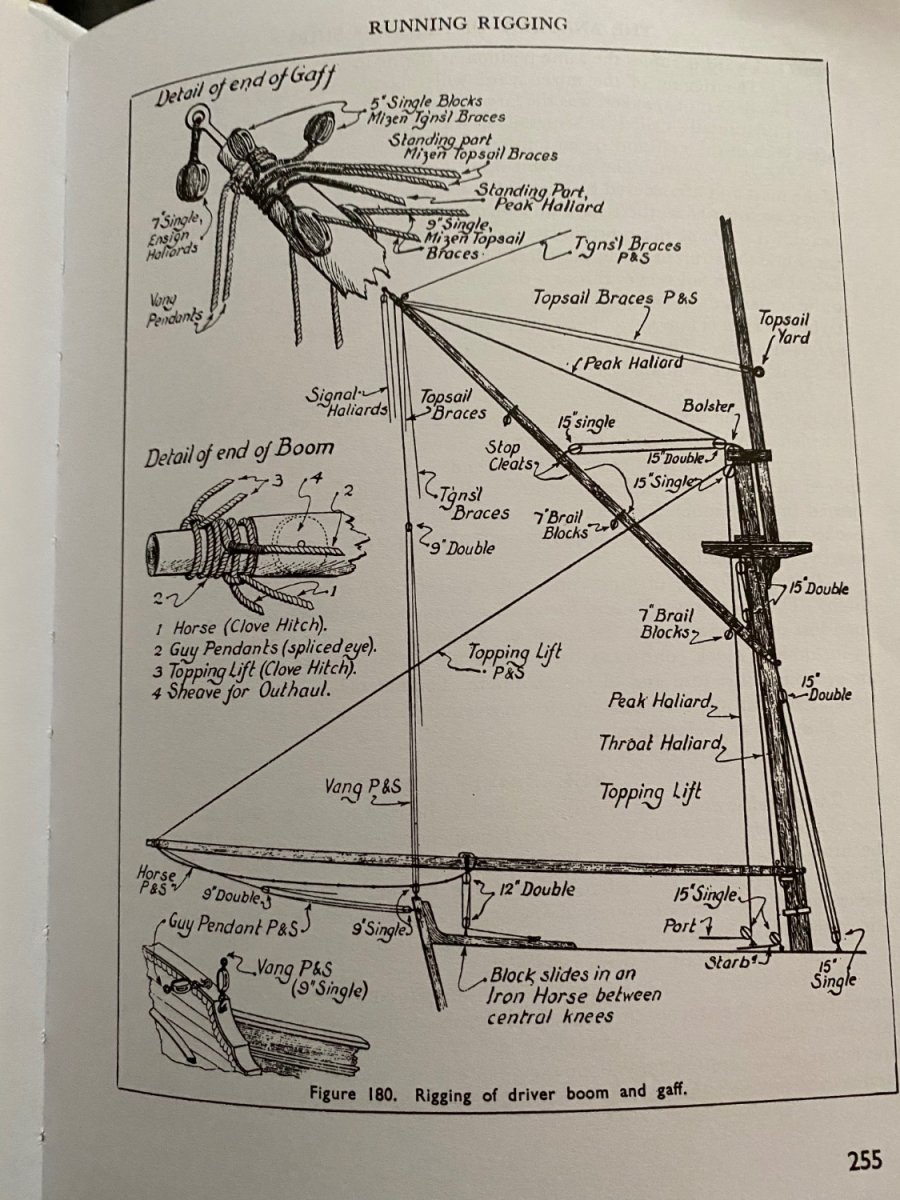
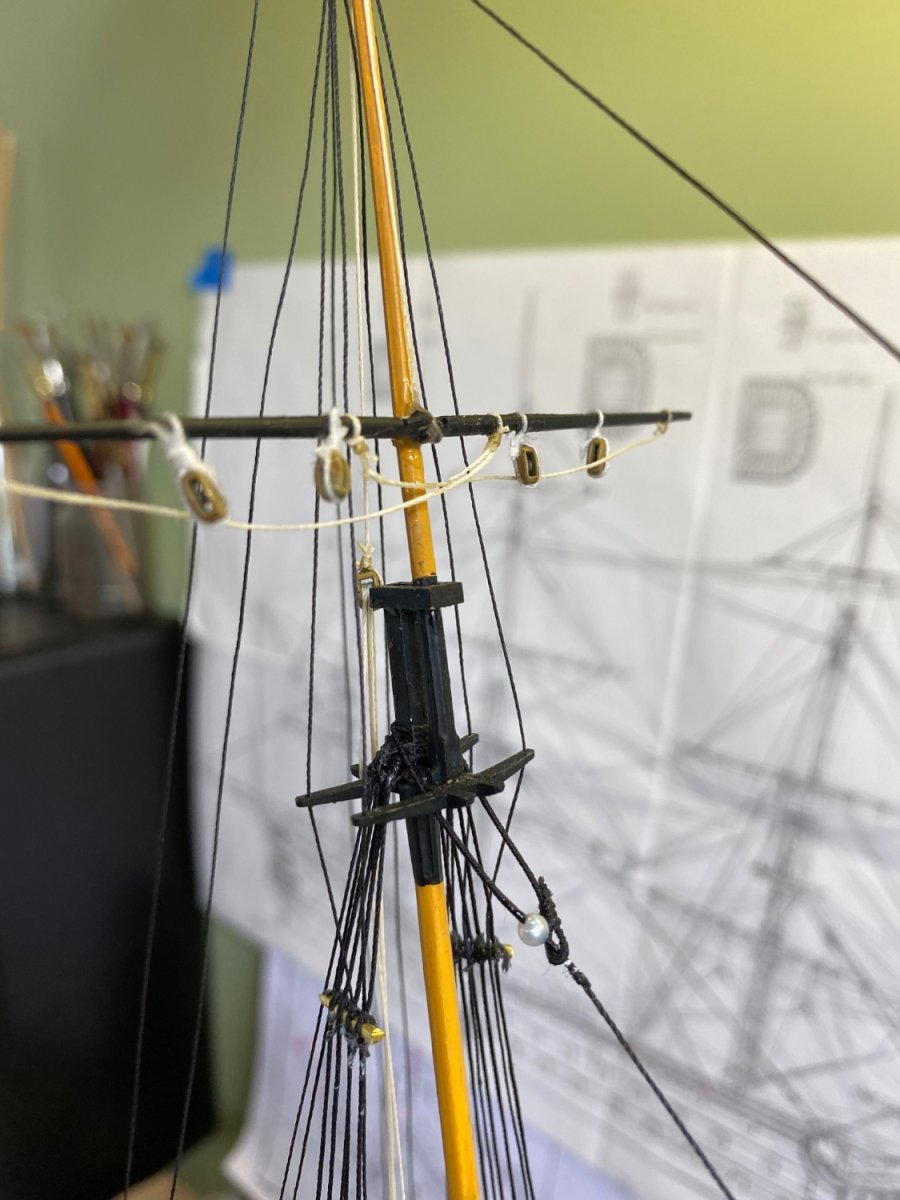
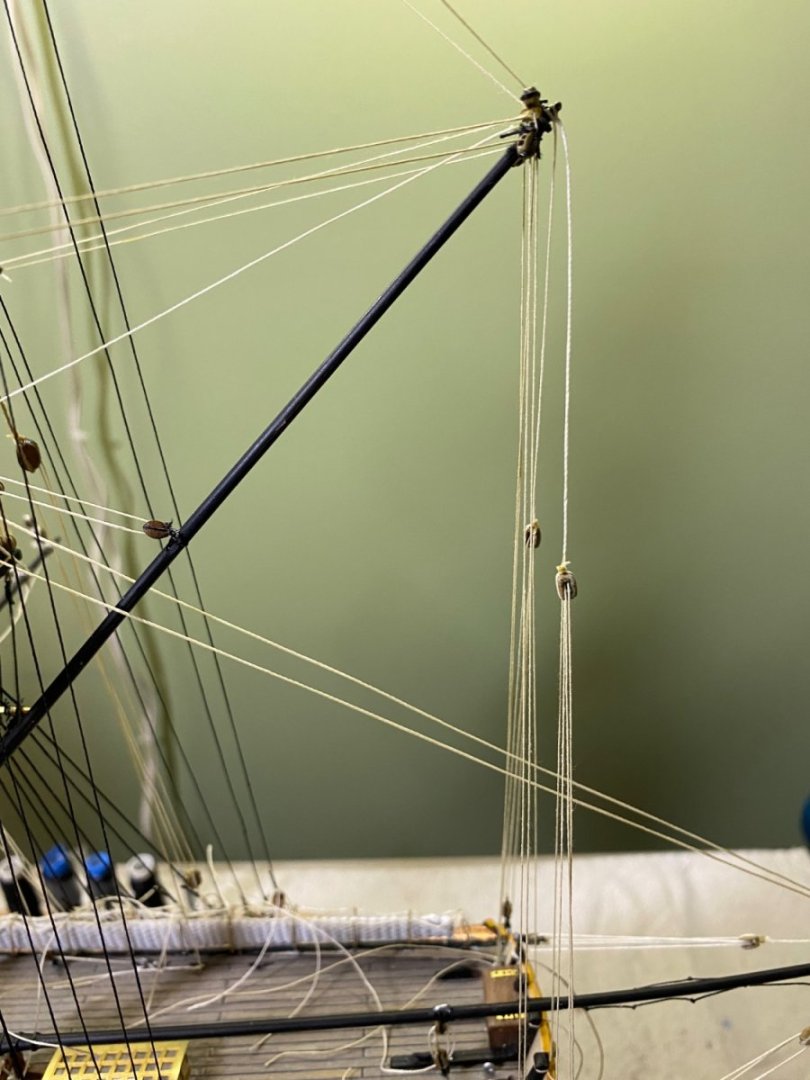
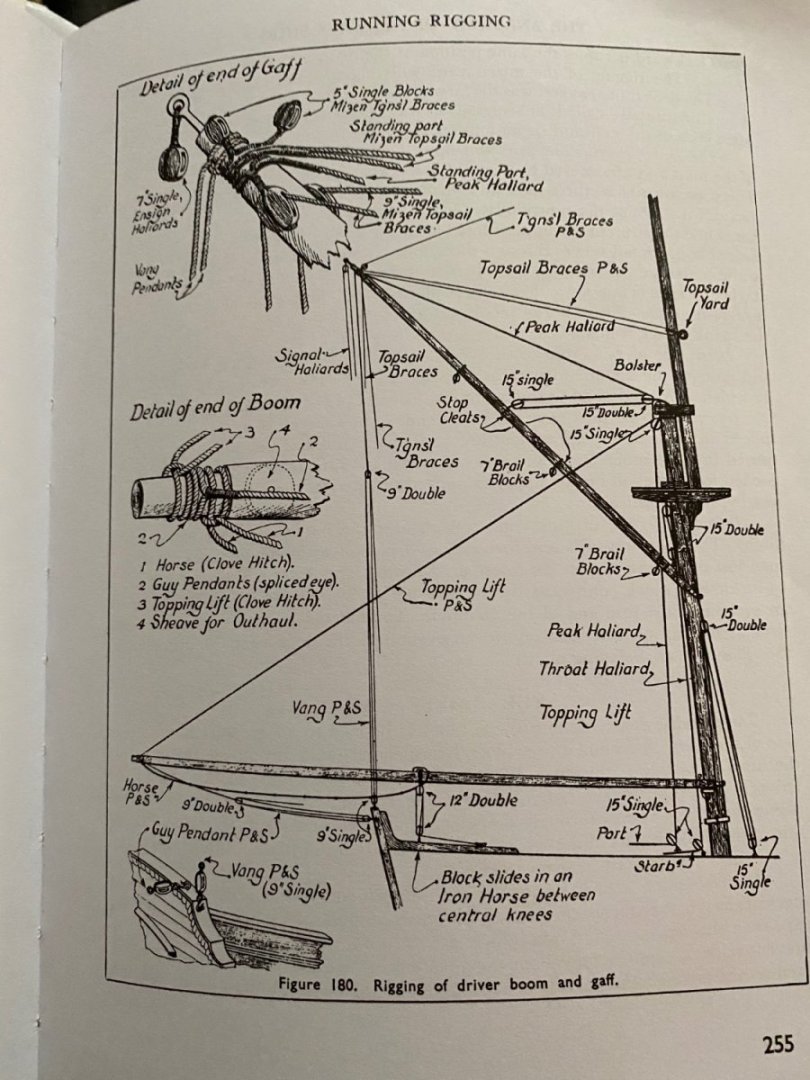
Mizzen topmast yard installed. Once glue sets up I will add parral and single tye as described by Longridge on page 258. While I wait I am reading ahead about the Driver Boom and Driver Gaff. I again have my Longridge book and studying pages 254-257 to include Fig 180. Any advice you guys can send my way before I get started as always is appreciated.


-
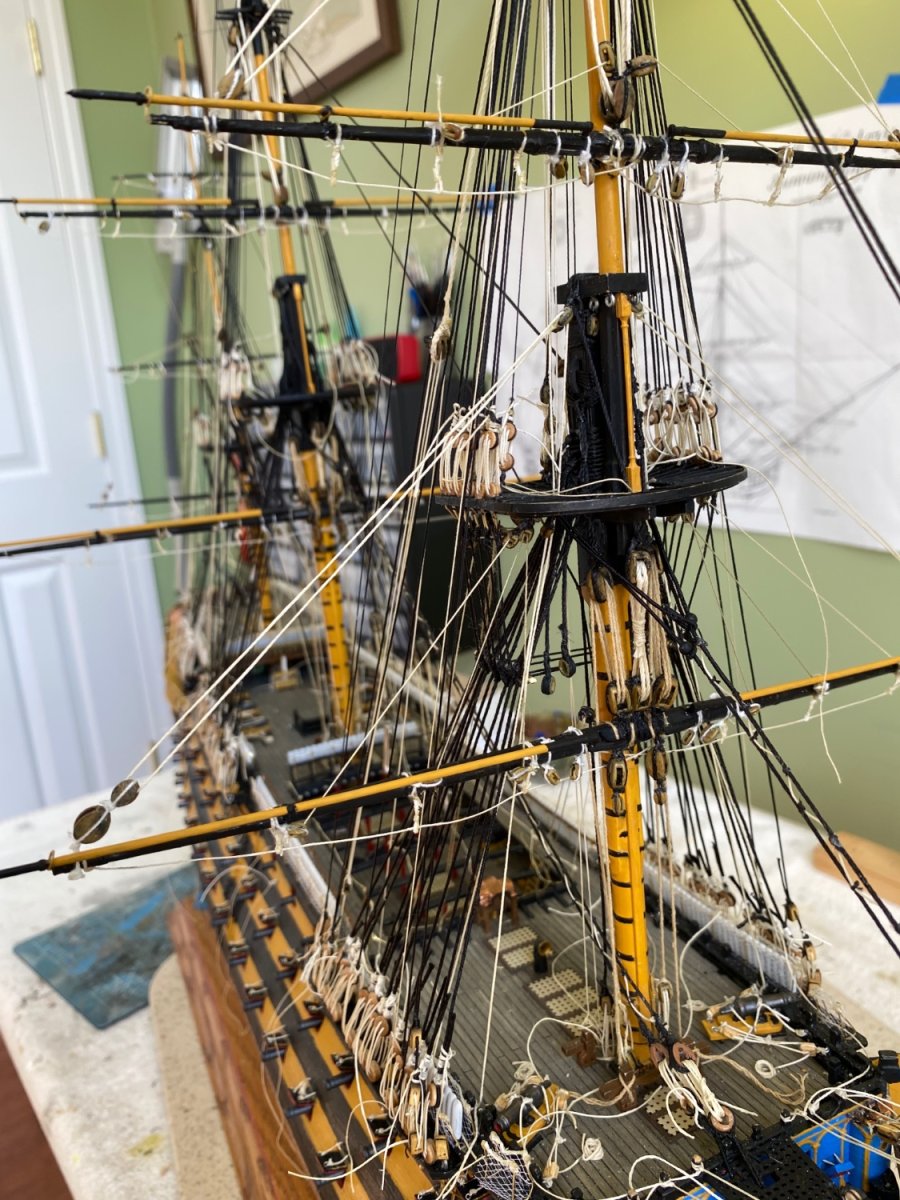
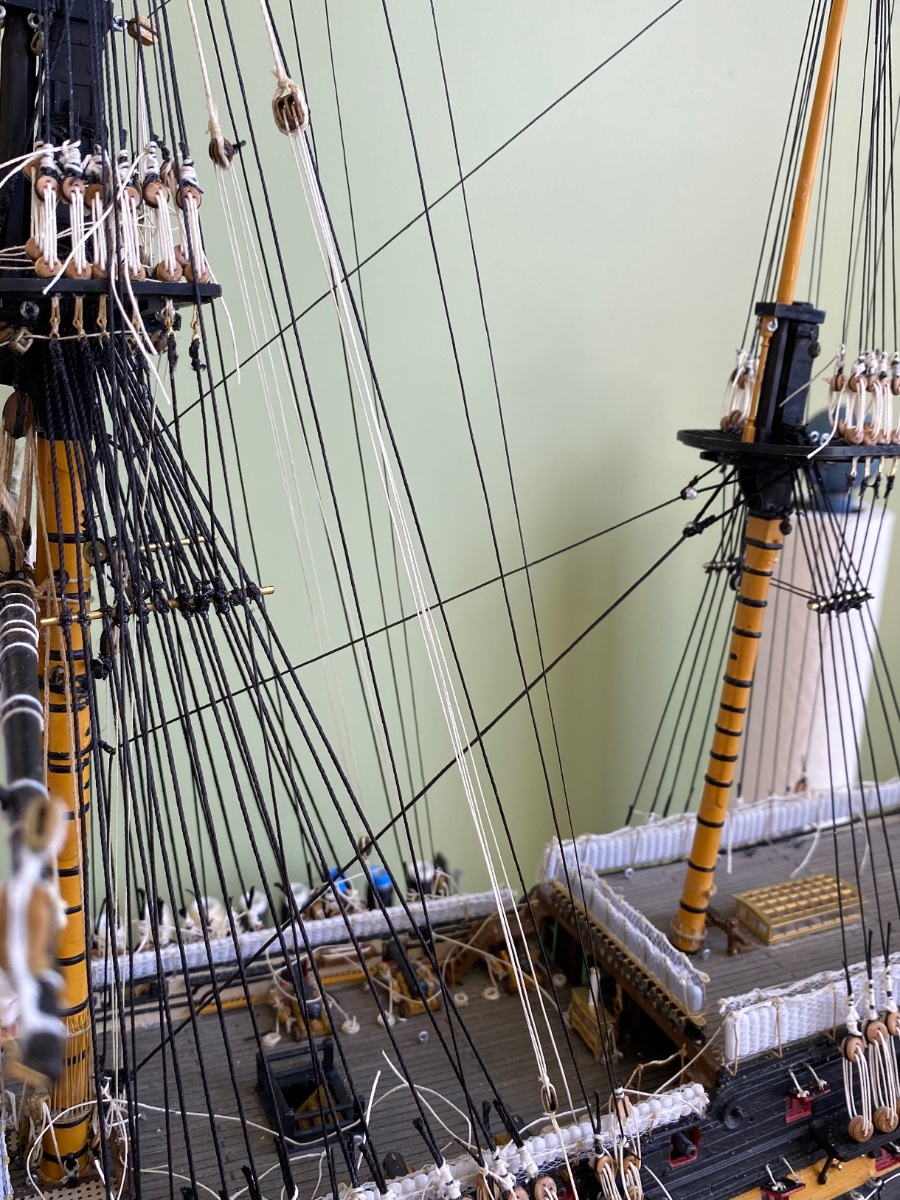
I have been back in the shipyard about a week now so I thought I would post a progress report. Completed the parrals on the fore and mainmast yards that required them. I then moved to the mizzenmast. Completed the attachment of the crossjack yard to include the sling and pendants, and the mizzen topgallant yard with it’s tye. Still need to add the parral. Working with the parrals on the fore and main mast I have discovered it is easier to attach the yard using a pin into the mast and epoxy. Once dry and hardened I add the parral. Much easier this way and still adds strength to the yard mounting. Saved the middle yard to last since I find rigging it the most complicated with its tyes rigged to a modified block attached to the backstays.


-
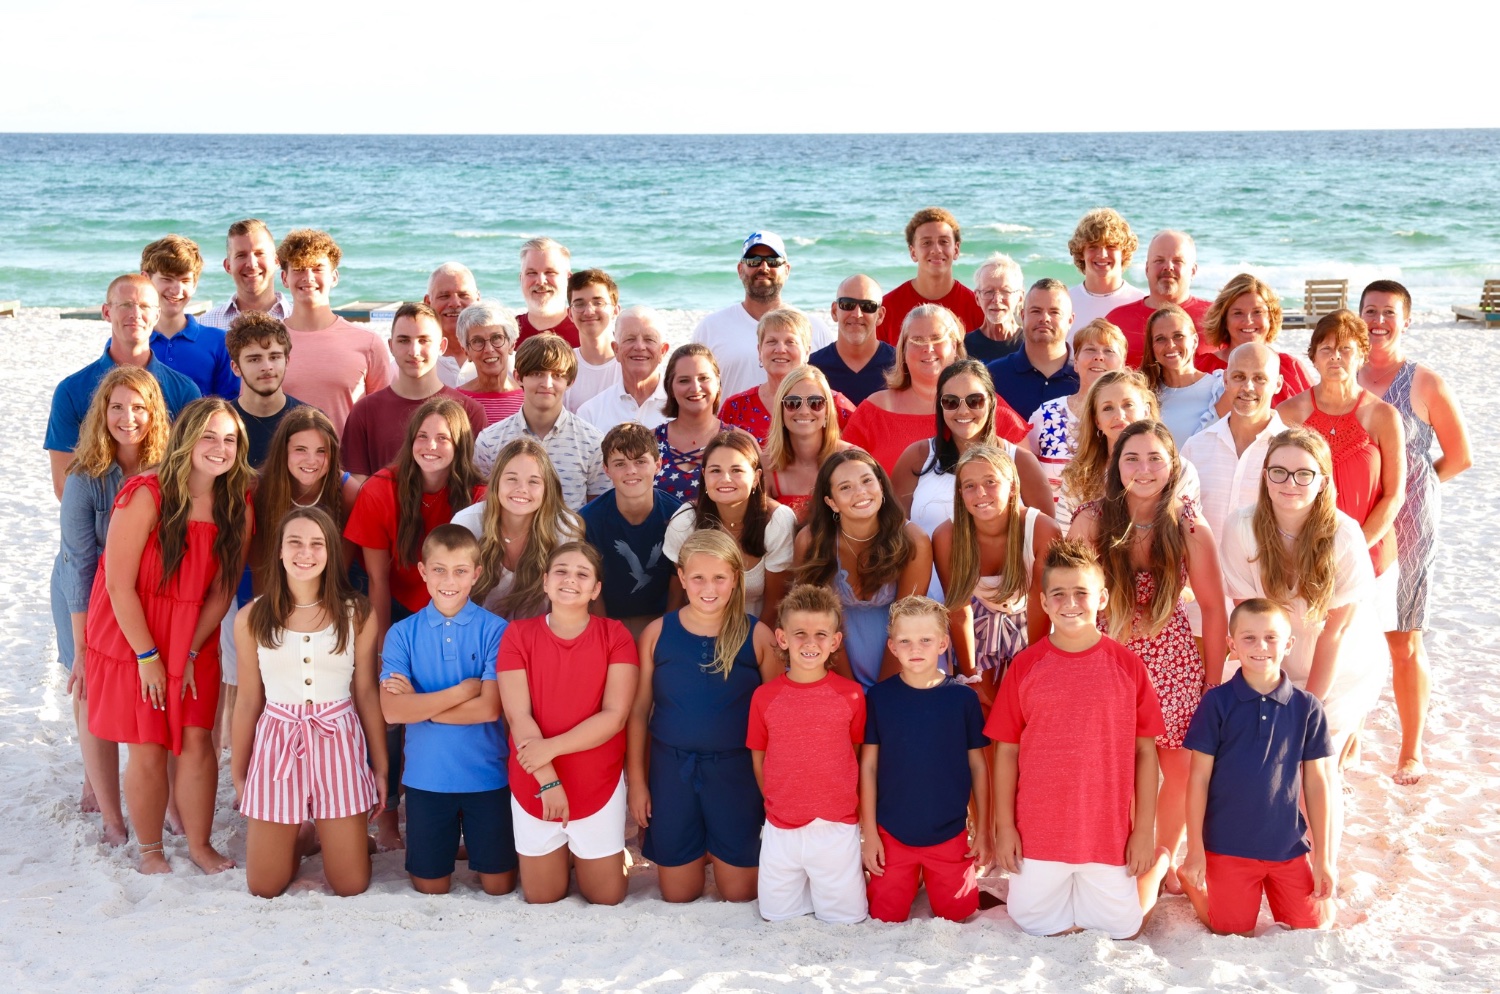
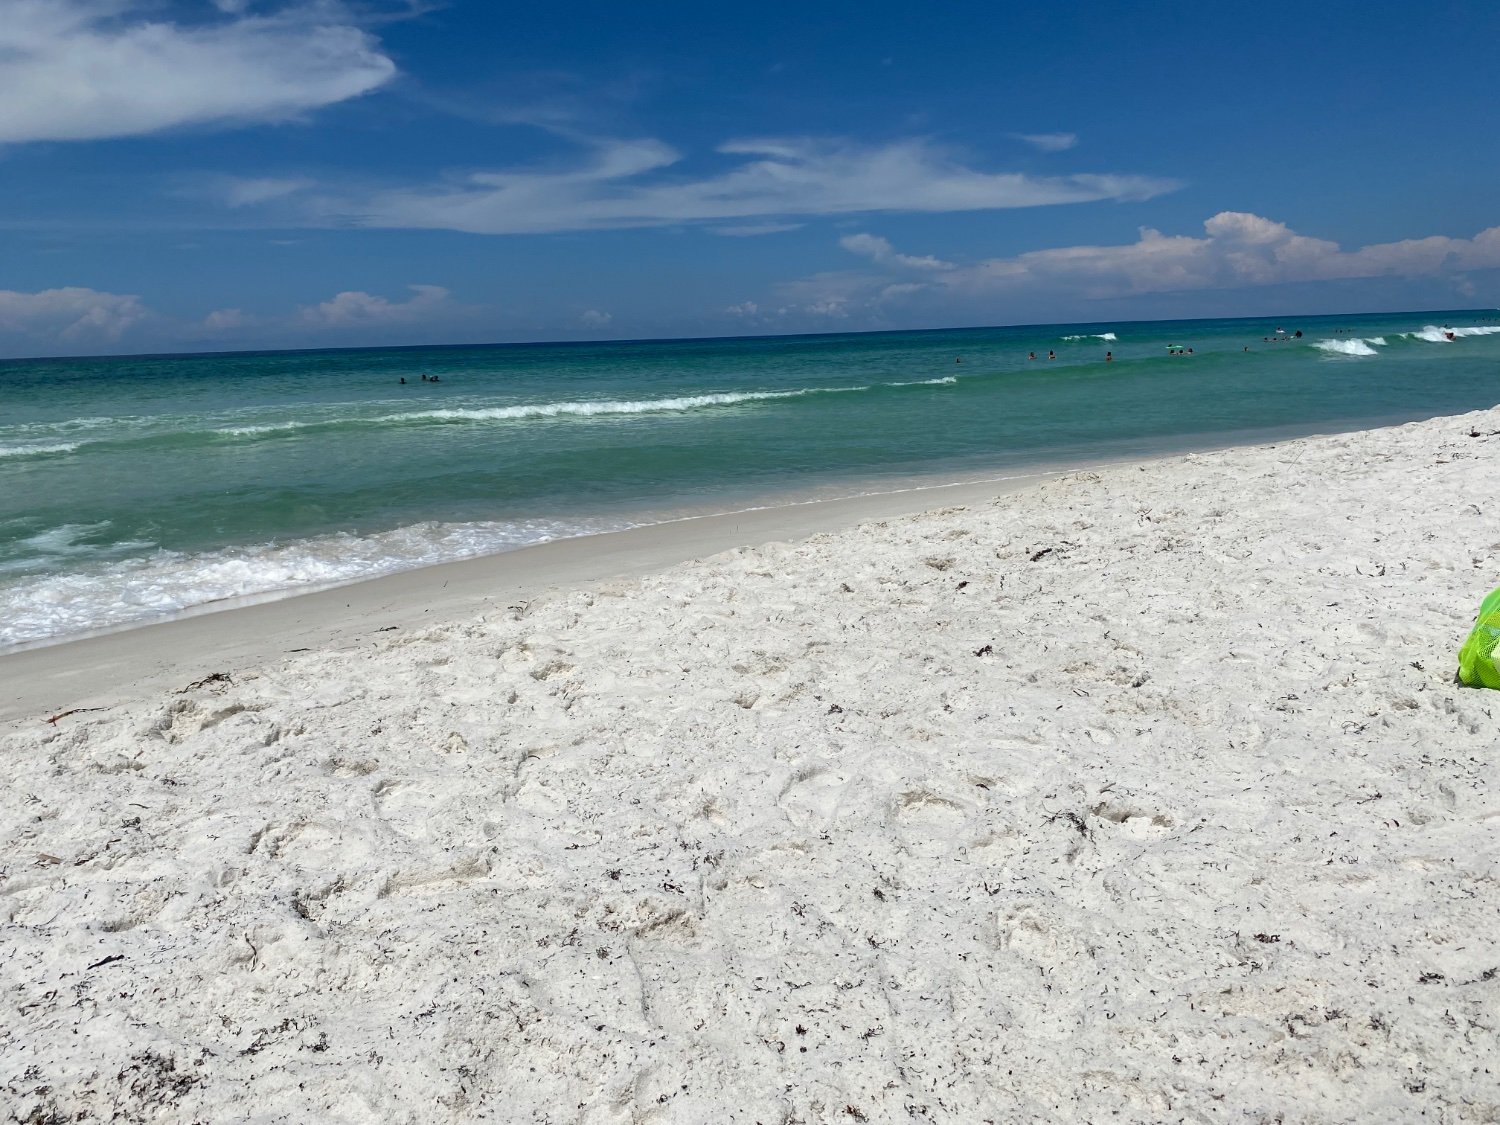
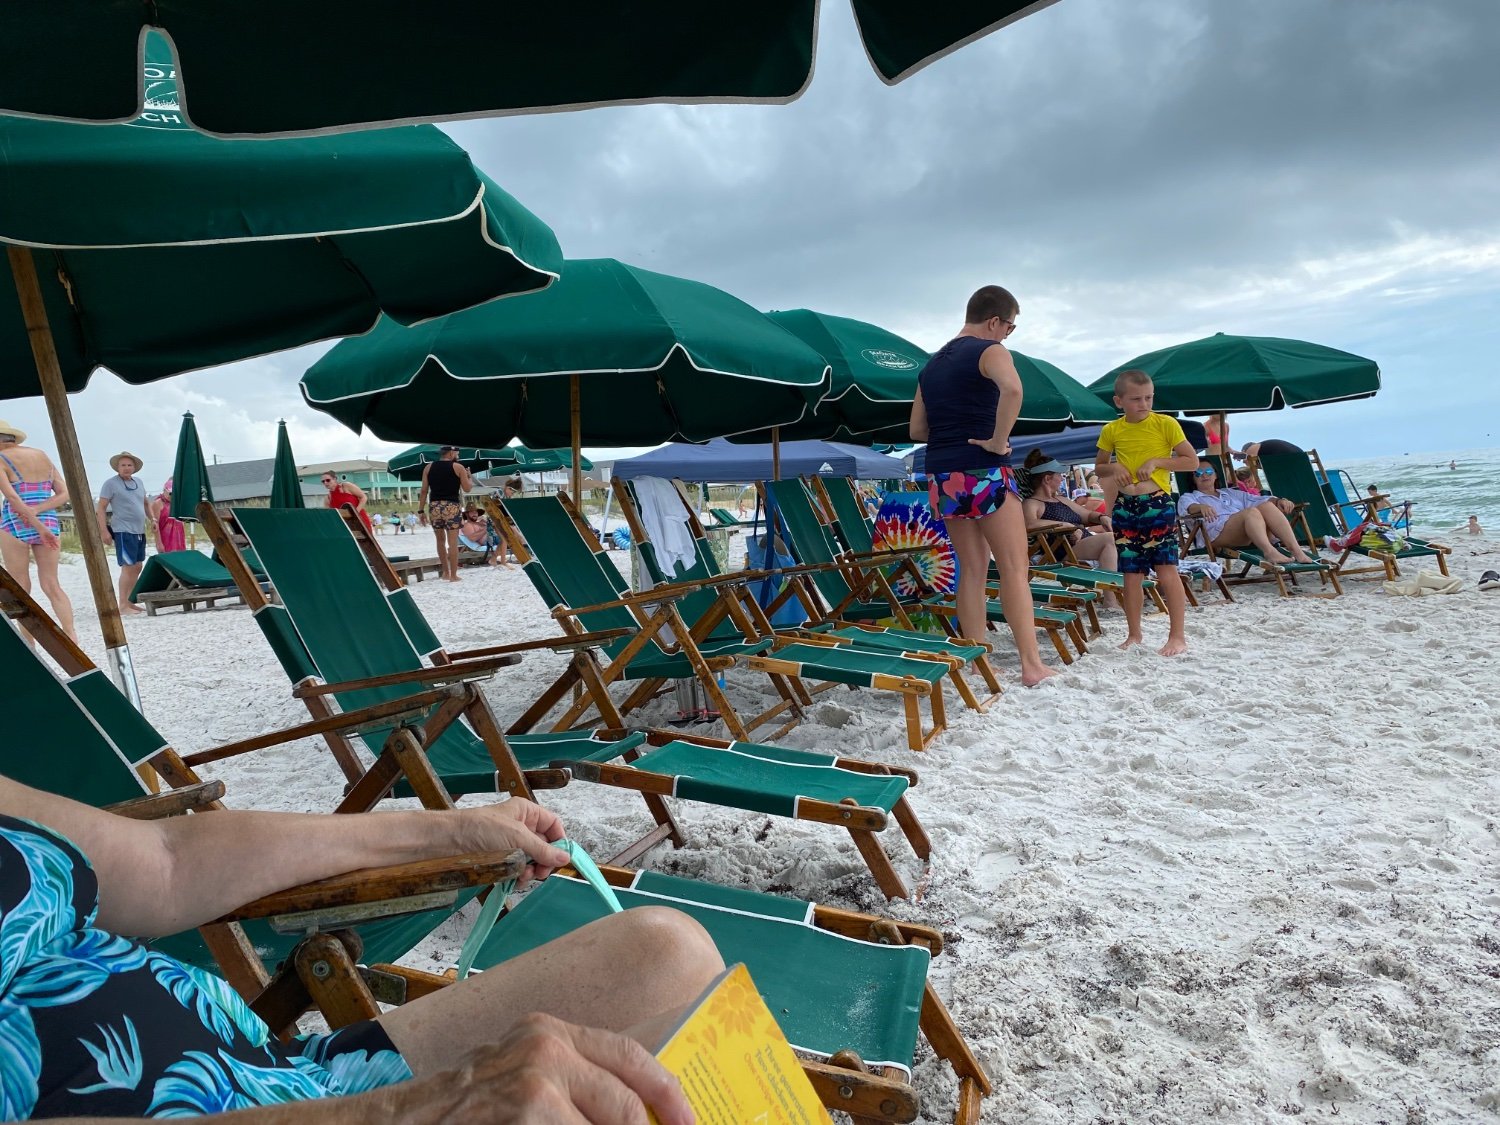
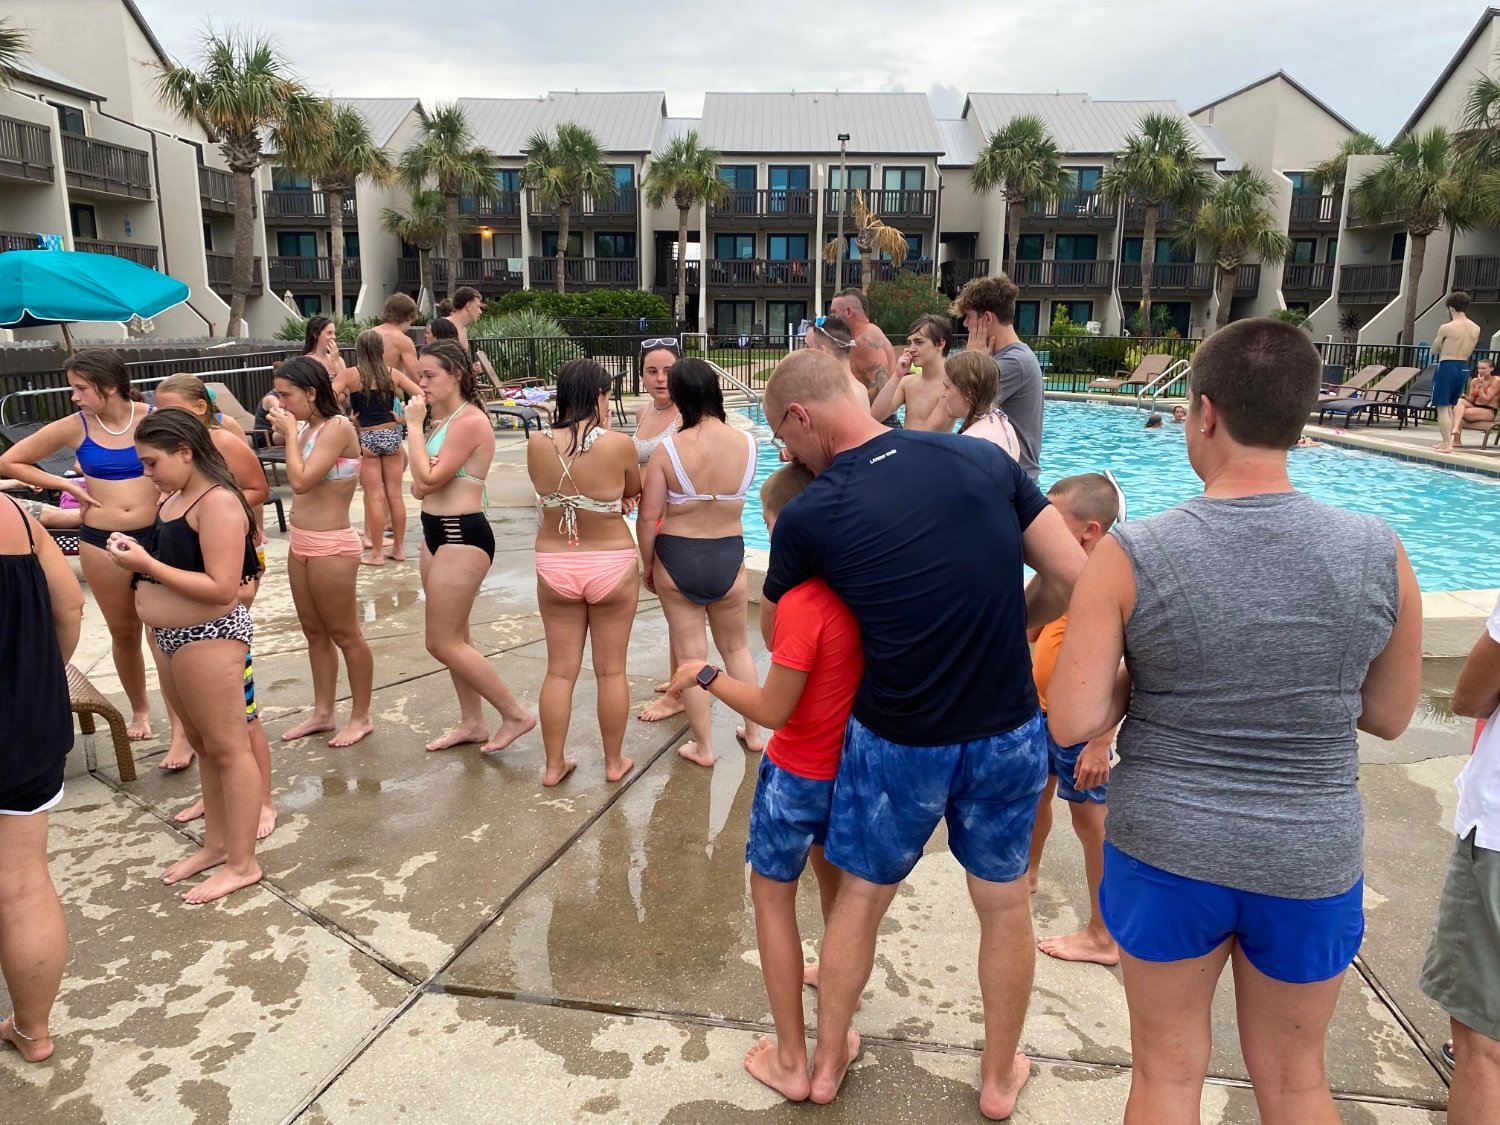
Thanks Marc. It was a great bi-annual trip with my very large family to the Gulf coast of Florida. In the picture I am on the back row, left of center, next to a guy with a grey beard (son-in-law), and behind a lady with grey hair. What a crew from Louisville to be on vacation with. Needless to say, much Kentucky bourbon was shared in the evenings with those age appropriate! 😀 Good to get back to my Victory.

-
Doing a little long range thinking. As I mentioned before I plan to furl all my hand made sails so as to reveal all the ship craftsmanship. When it comes to the rigging I know there are a number of ropes (threads) that attach to the unfurled sails. What comes of/with those lines in a furled sail situation?
-
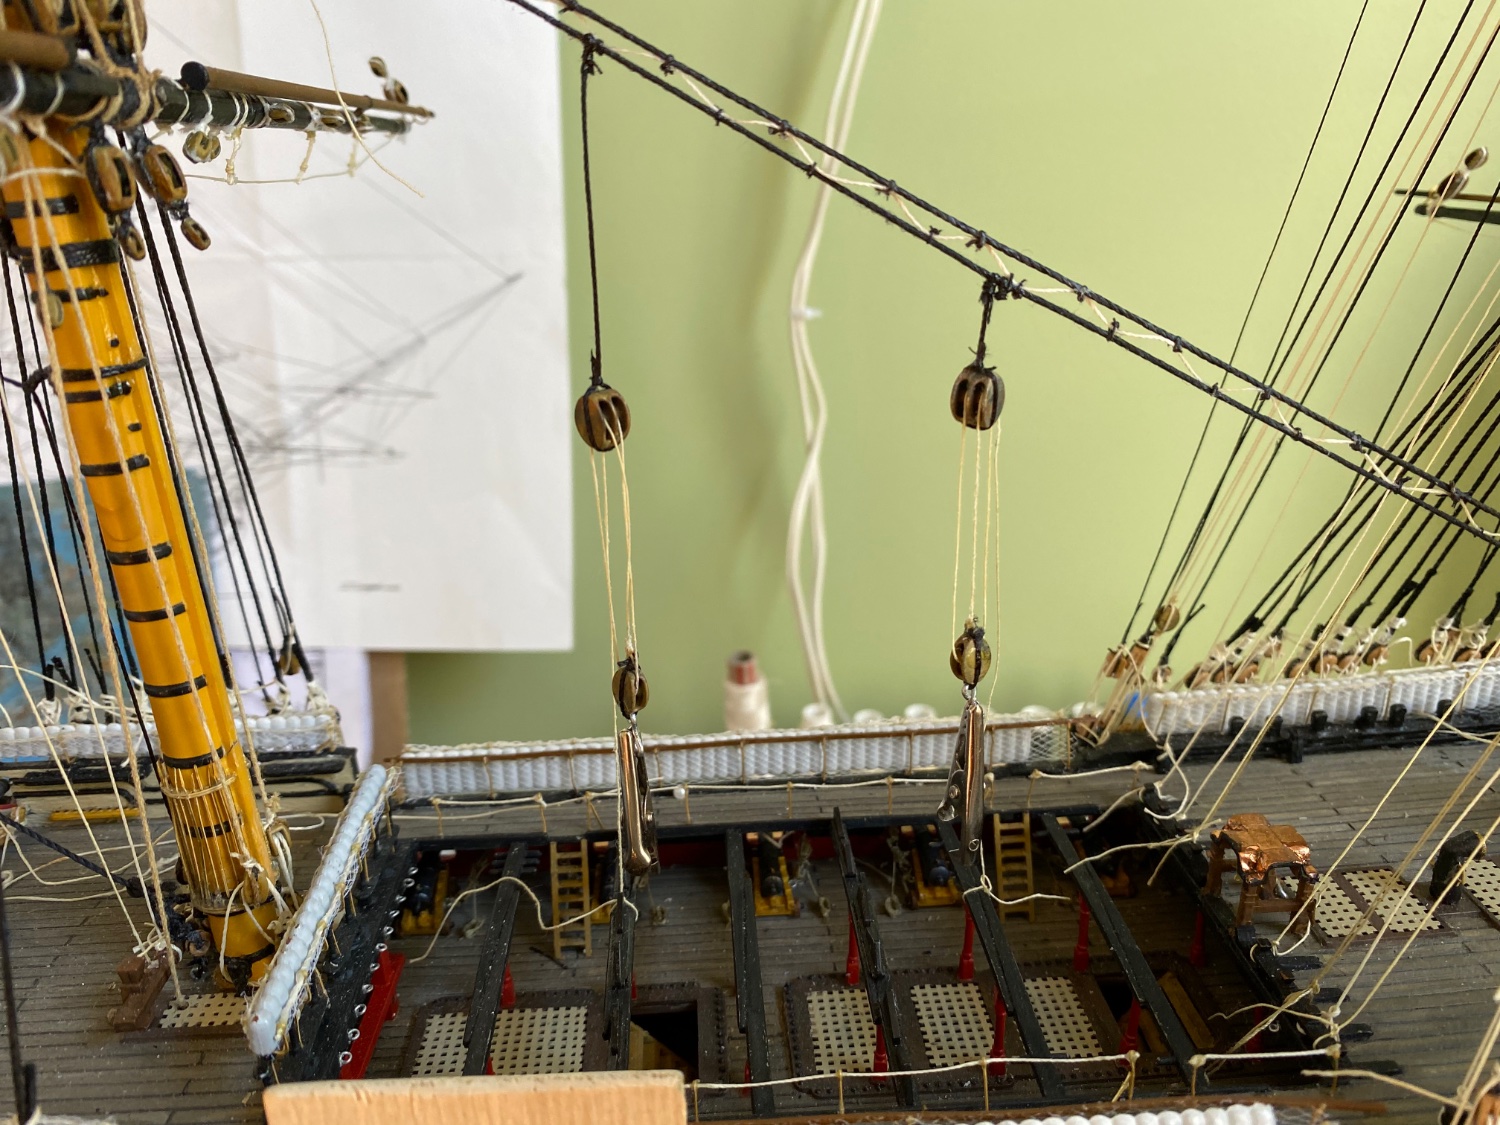
Ok, much better. I changed out the tyes to smaller thread, replaced the single and double blocks, and improved the connector for the double block to attach to the backstay. While I was at it I also replaced the single and double blocks on the pendants above the deck opening where the boats go. Kevin’s painted printed blocks look better than the wood blocks at had there before. I am now back to where I was before going to the beach. Just better now


-
Ok my MSW friends, I am back from the sea. Back in my shipyard and ready to do a bit of corrective surgery on my tye rigging. Going to replace the .75 mm thread I used for the tyes on the fore and main mast topsail yard with a .3 mm thread I have. Also debating, but not sure yet, changing the blocks I modified to attach to the backstays. Going to double check the size Longridge suggests for these blocks. I am thinking I maybe gone with a block just a bit smaller. I have to admit that never before on any ship I have built have I gone back and redone something already completed! Maybe I am maturing to a better craftsman. 😊
-
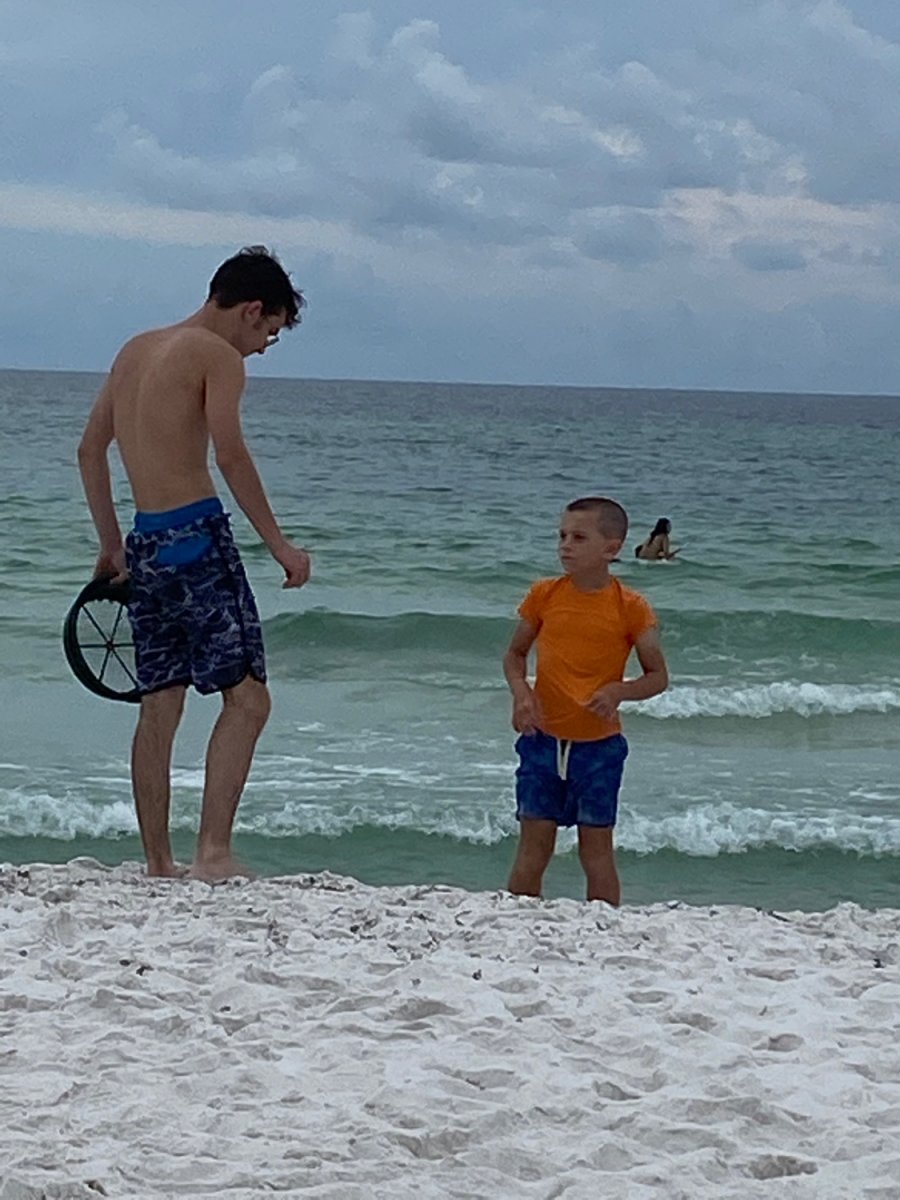
Ocean and beach colors are beautiful this morning. Got to make the best of these days before heading back to the ship yard.