HOLIDAY DONATION DRIVE - SUPPORT MSW - DO YOUR PART TO KEEP THIS GREAT FORUM GOING! (89 donations so far out of 49,000 members - C'mon guys!)
×


Brinkman
-
Posts
154 -
Joined
-
Last visited
Content Type
Profiles
Forums
Gallery
Events
Everything posted by Brinkman
-
 @Mark Pearse I've tried a couple of different ways to clench the nails, and right now I start the bend by pressing with a left over plank and then complete it and push the head into the wood using a polygrip with brass plates to protect the wood. I think this gives me more control then using a hammer but we'll see if I find a better way
 -
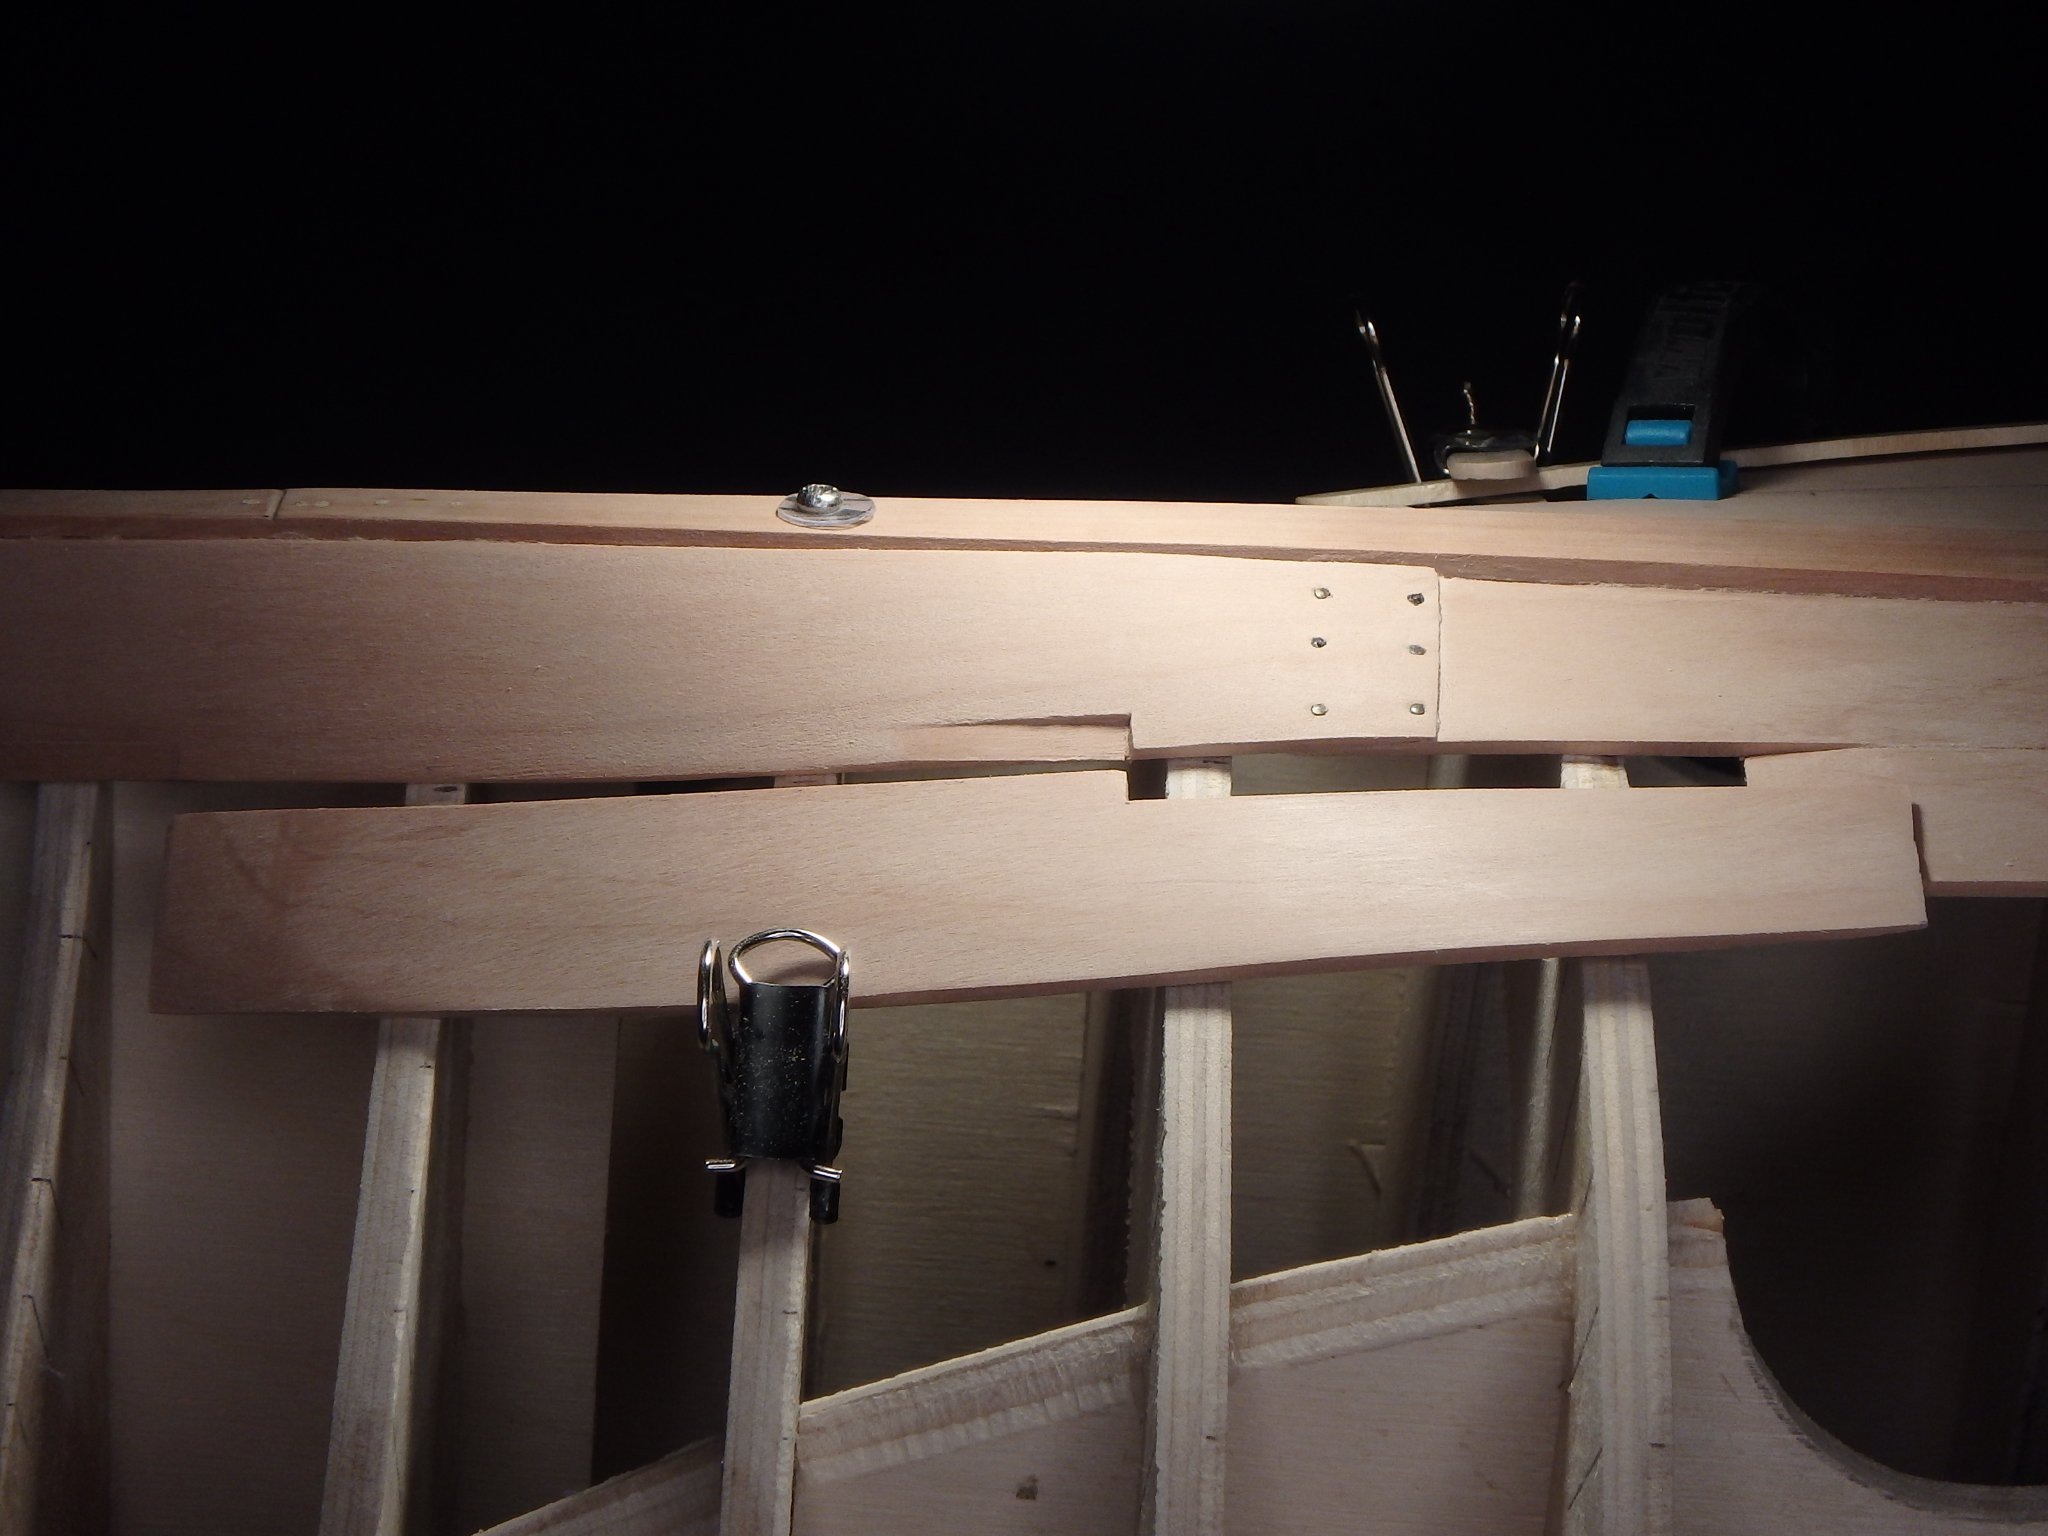
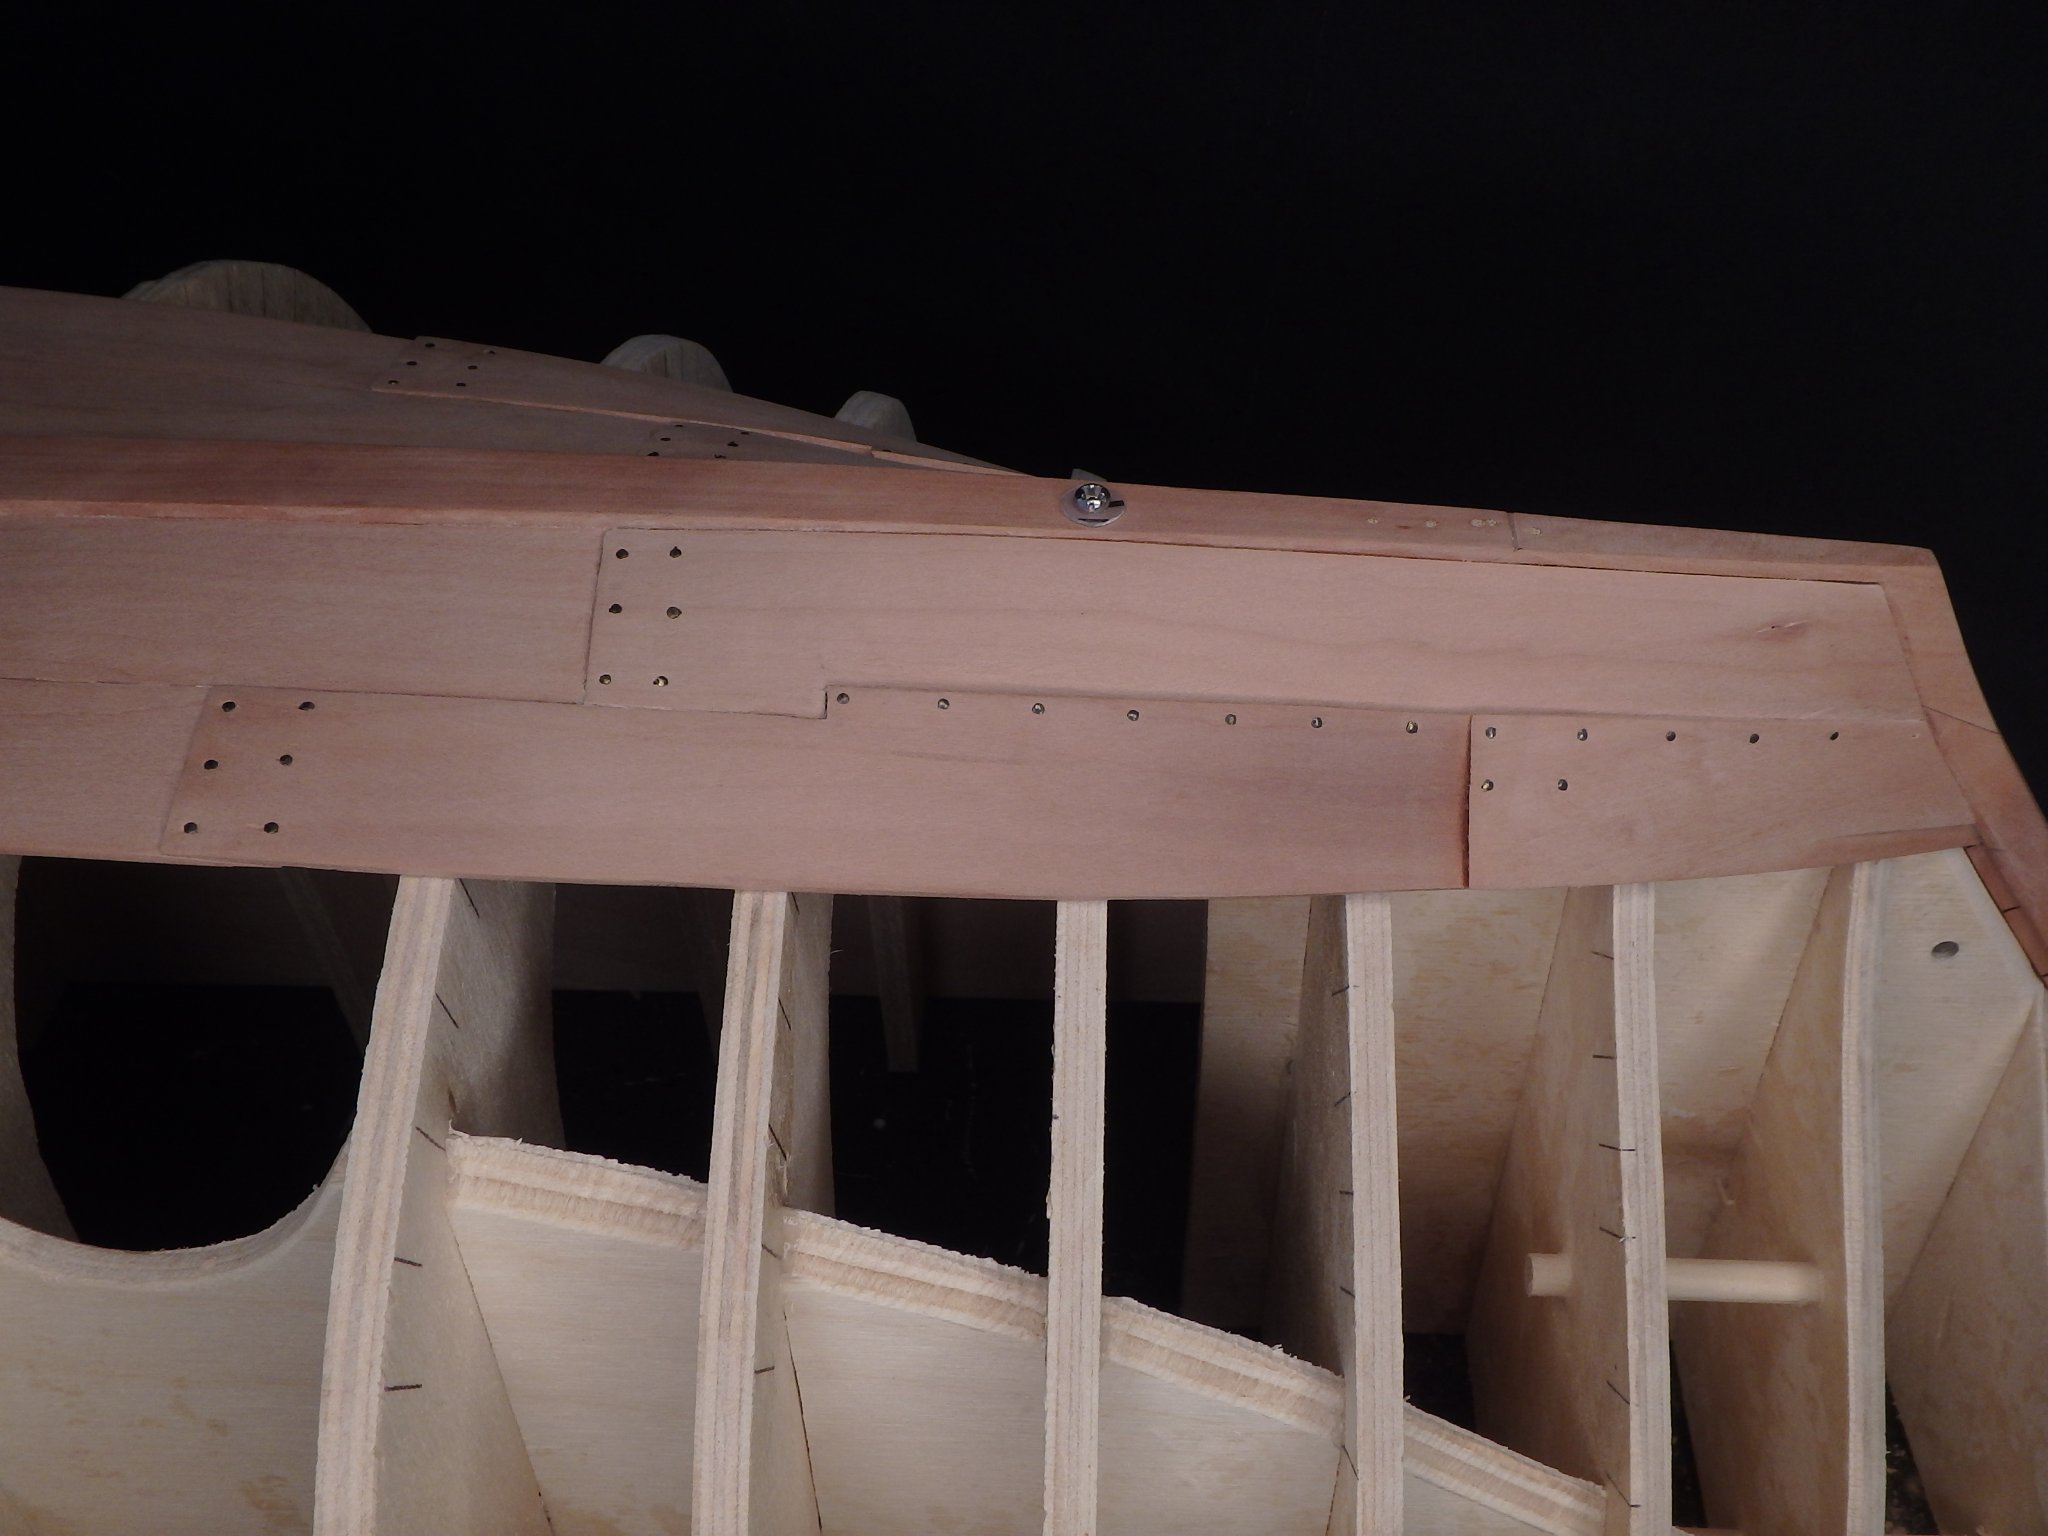
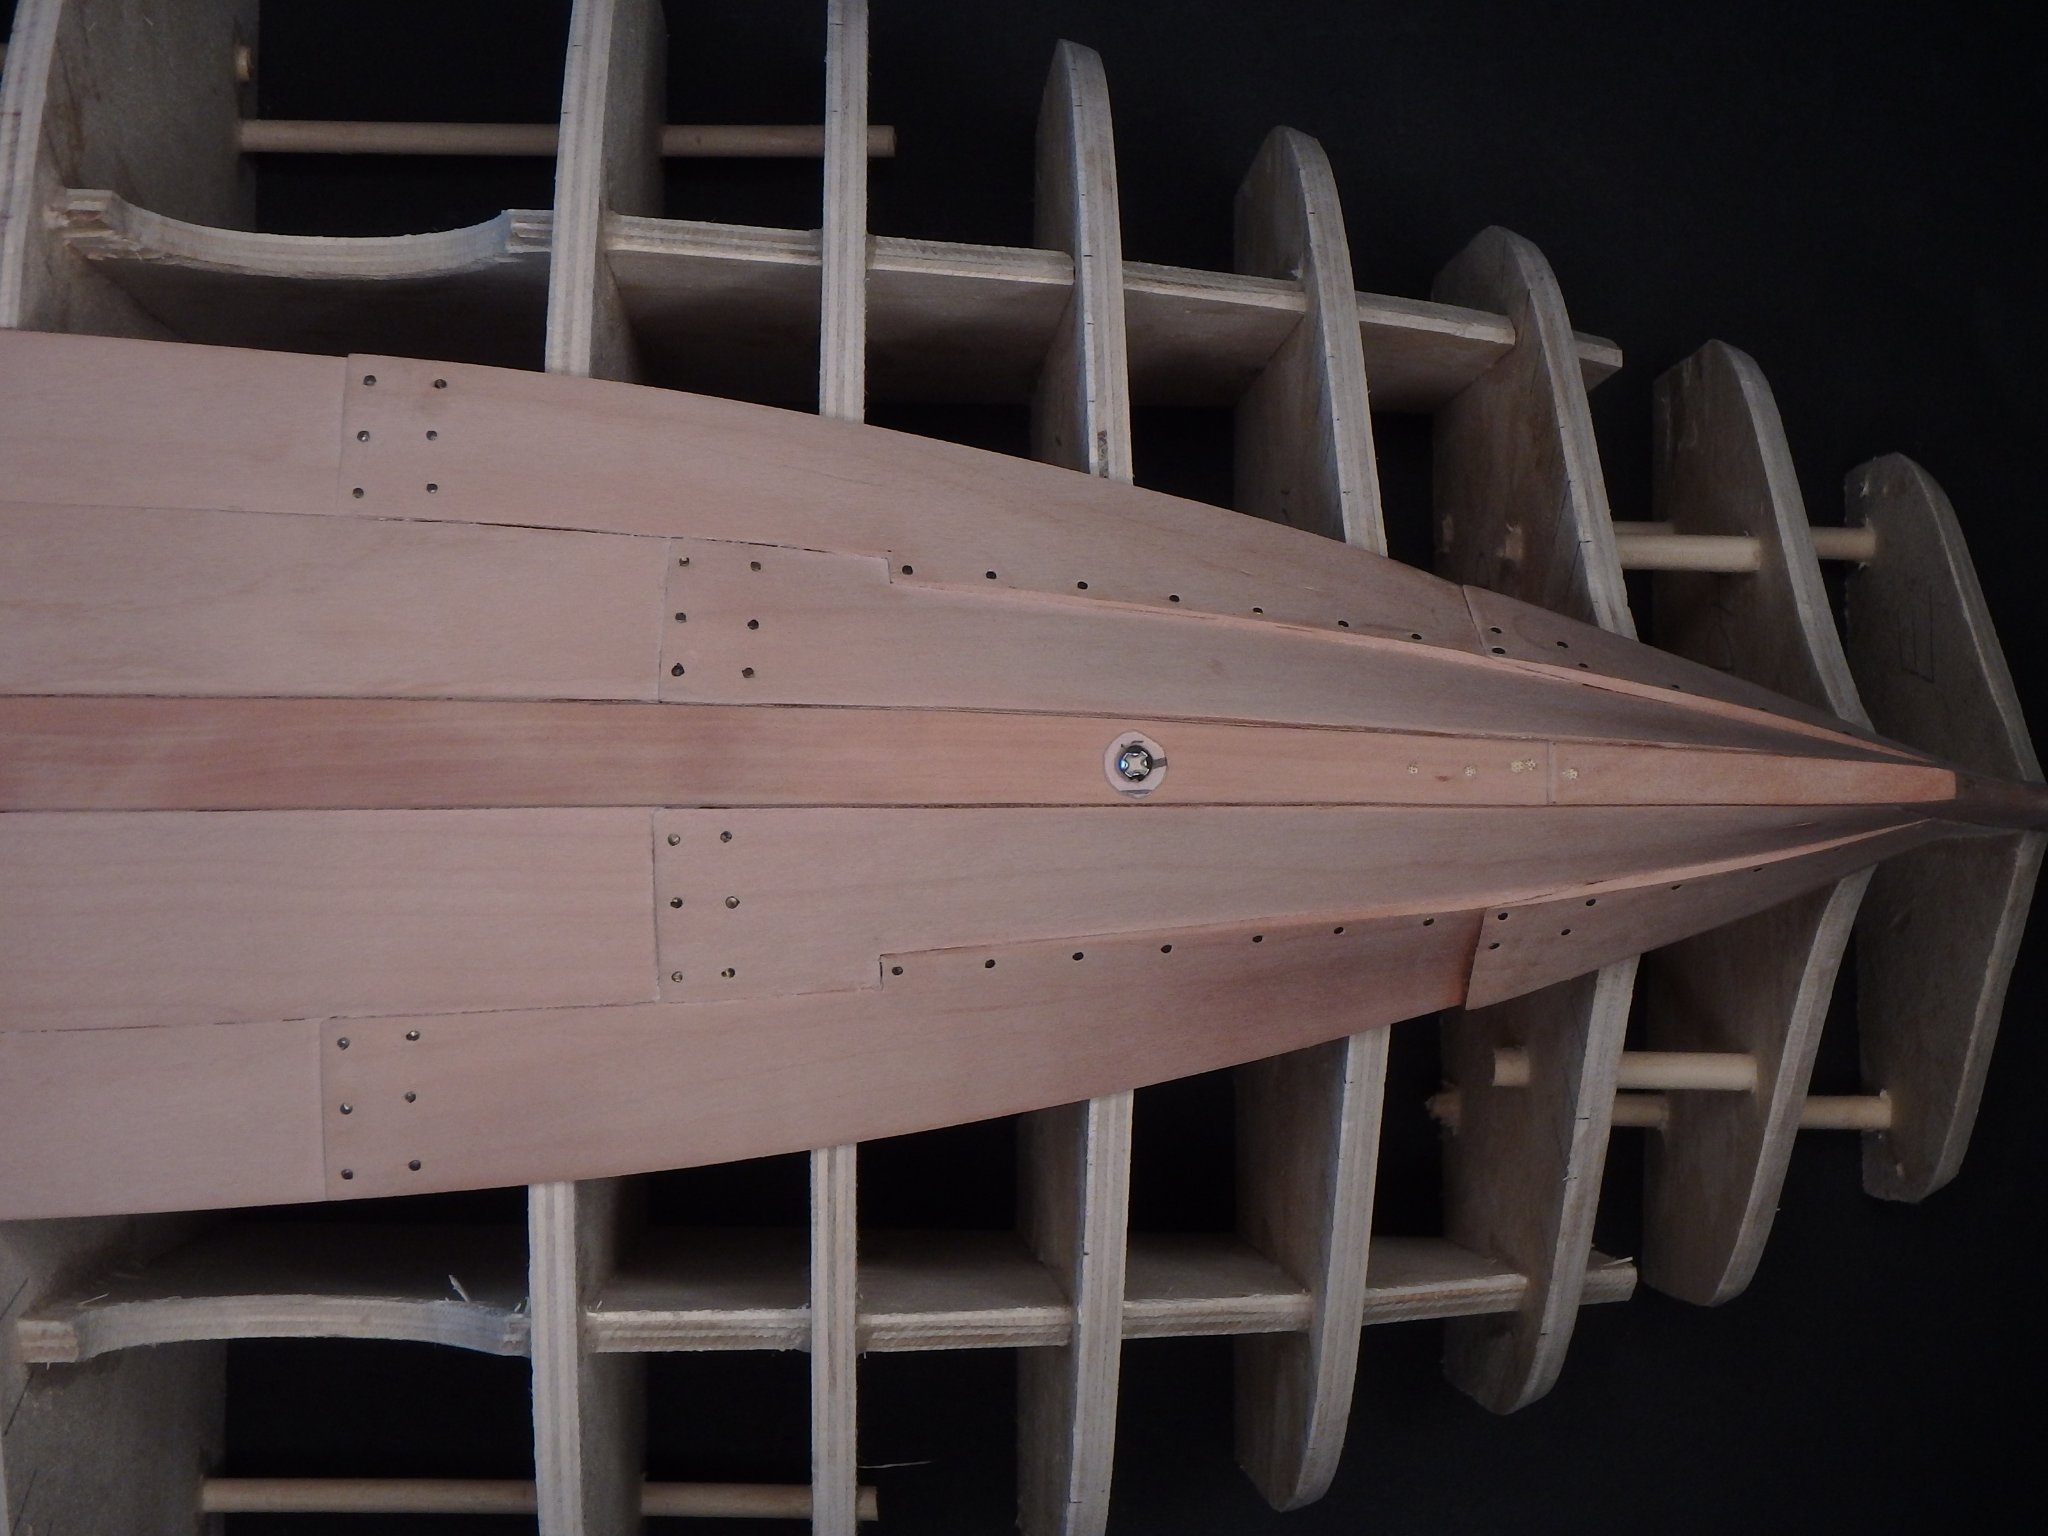
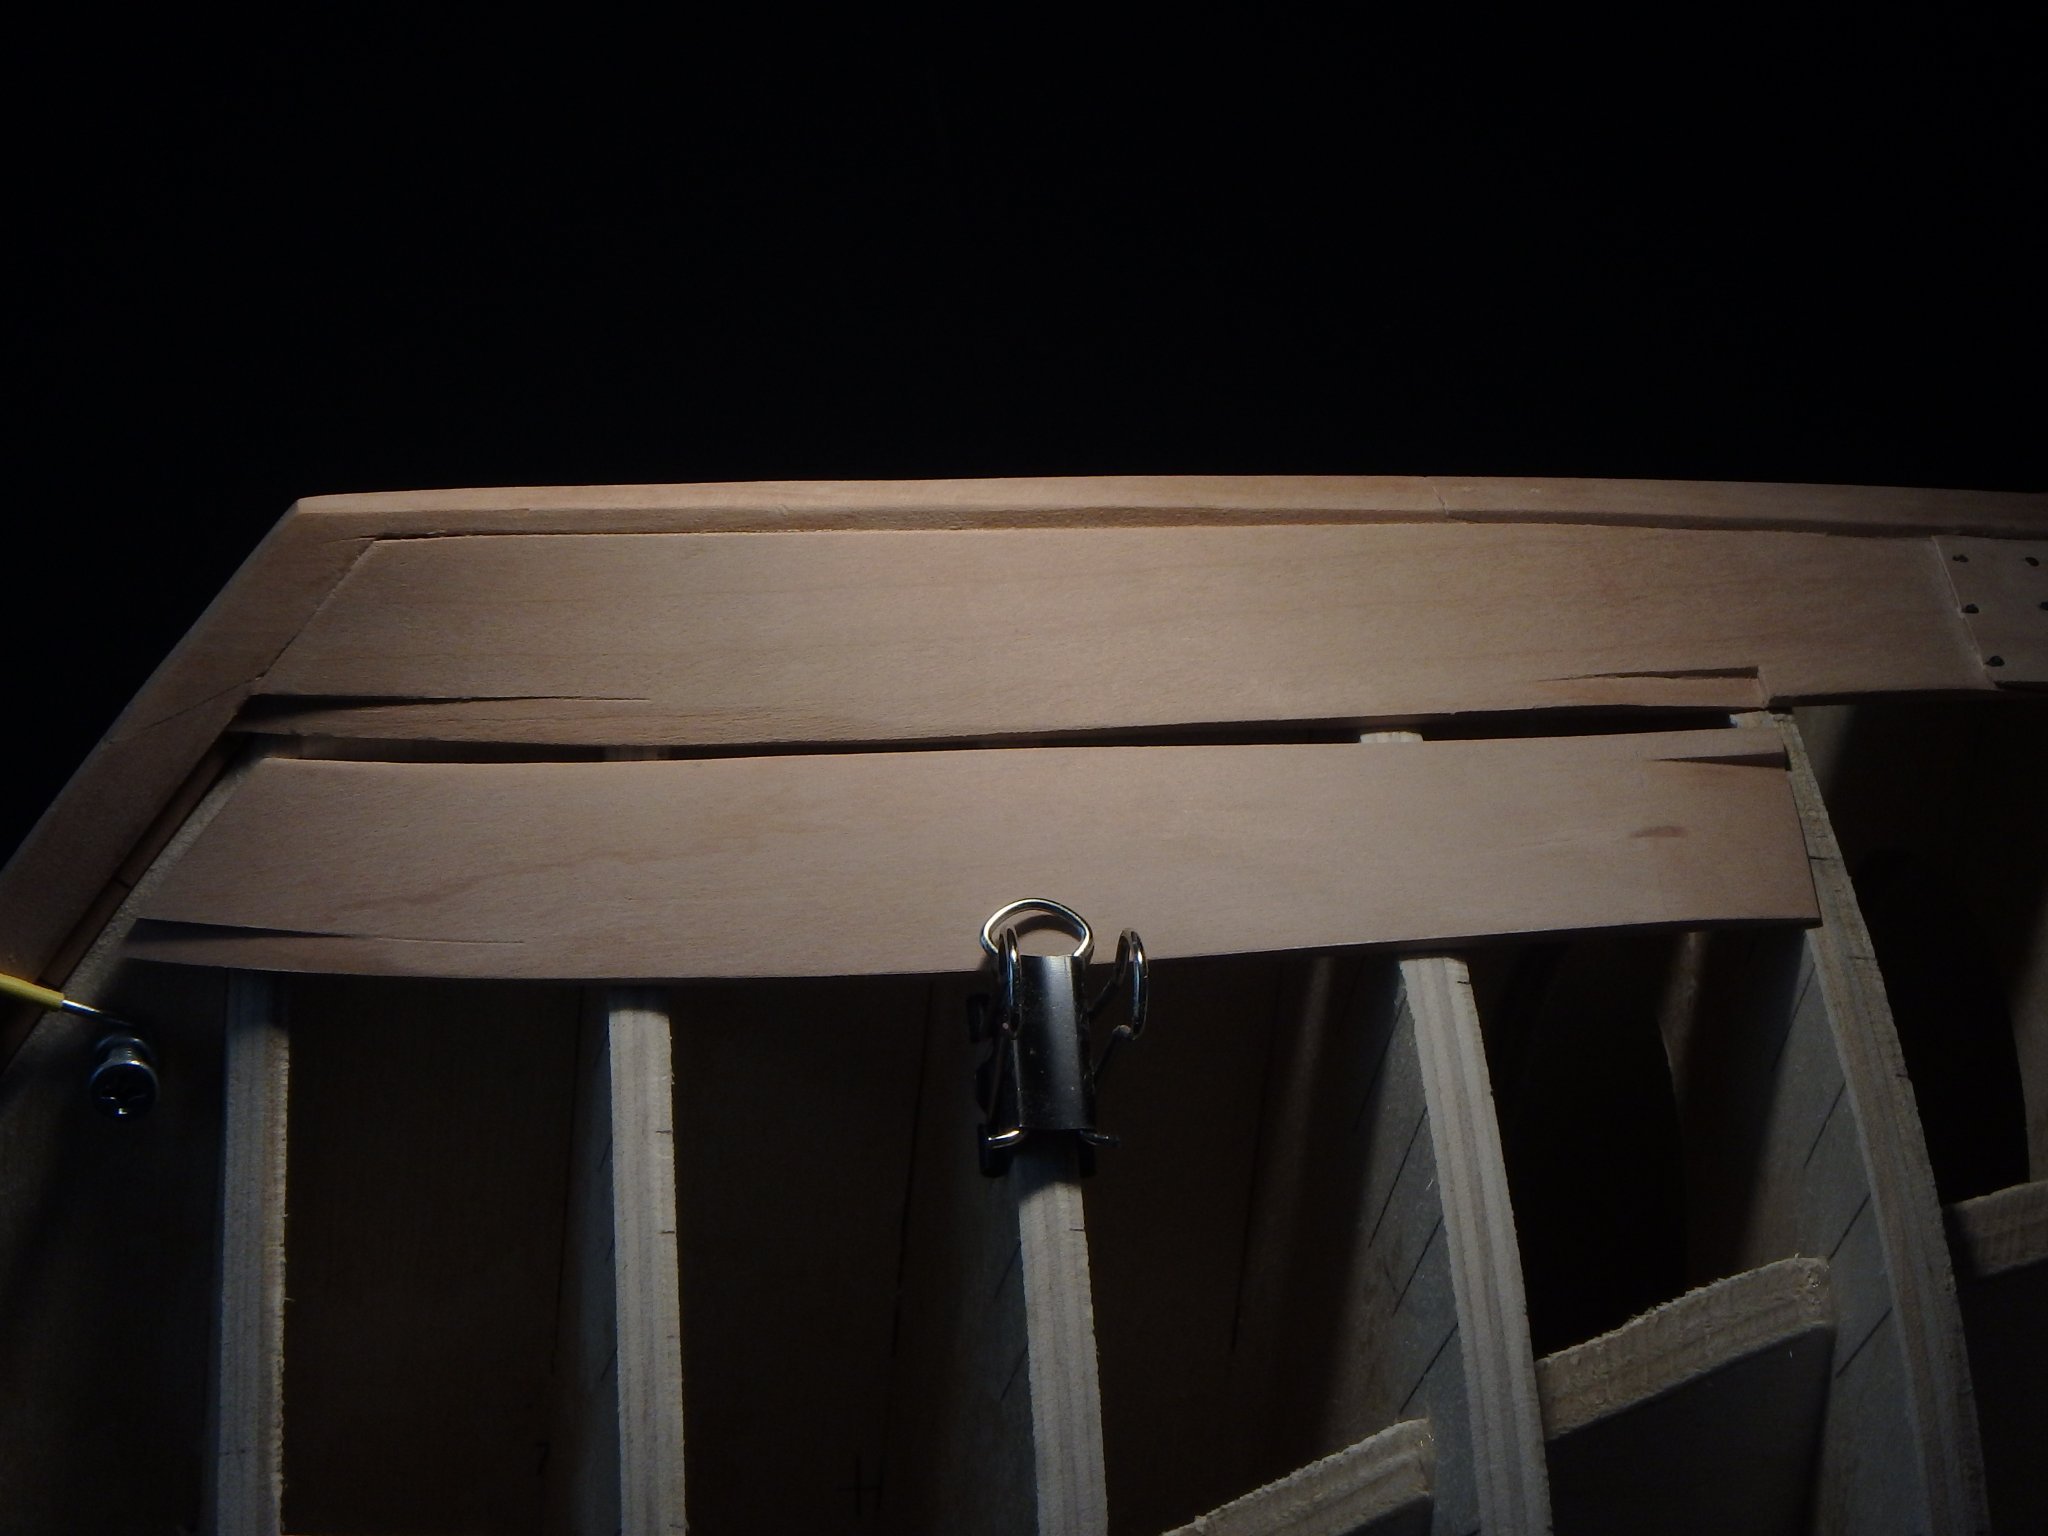
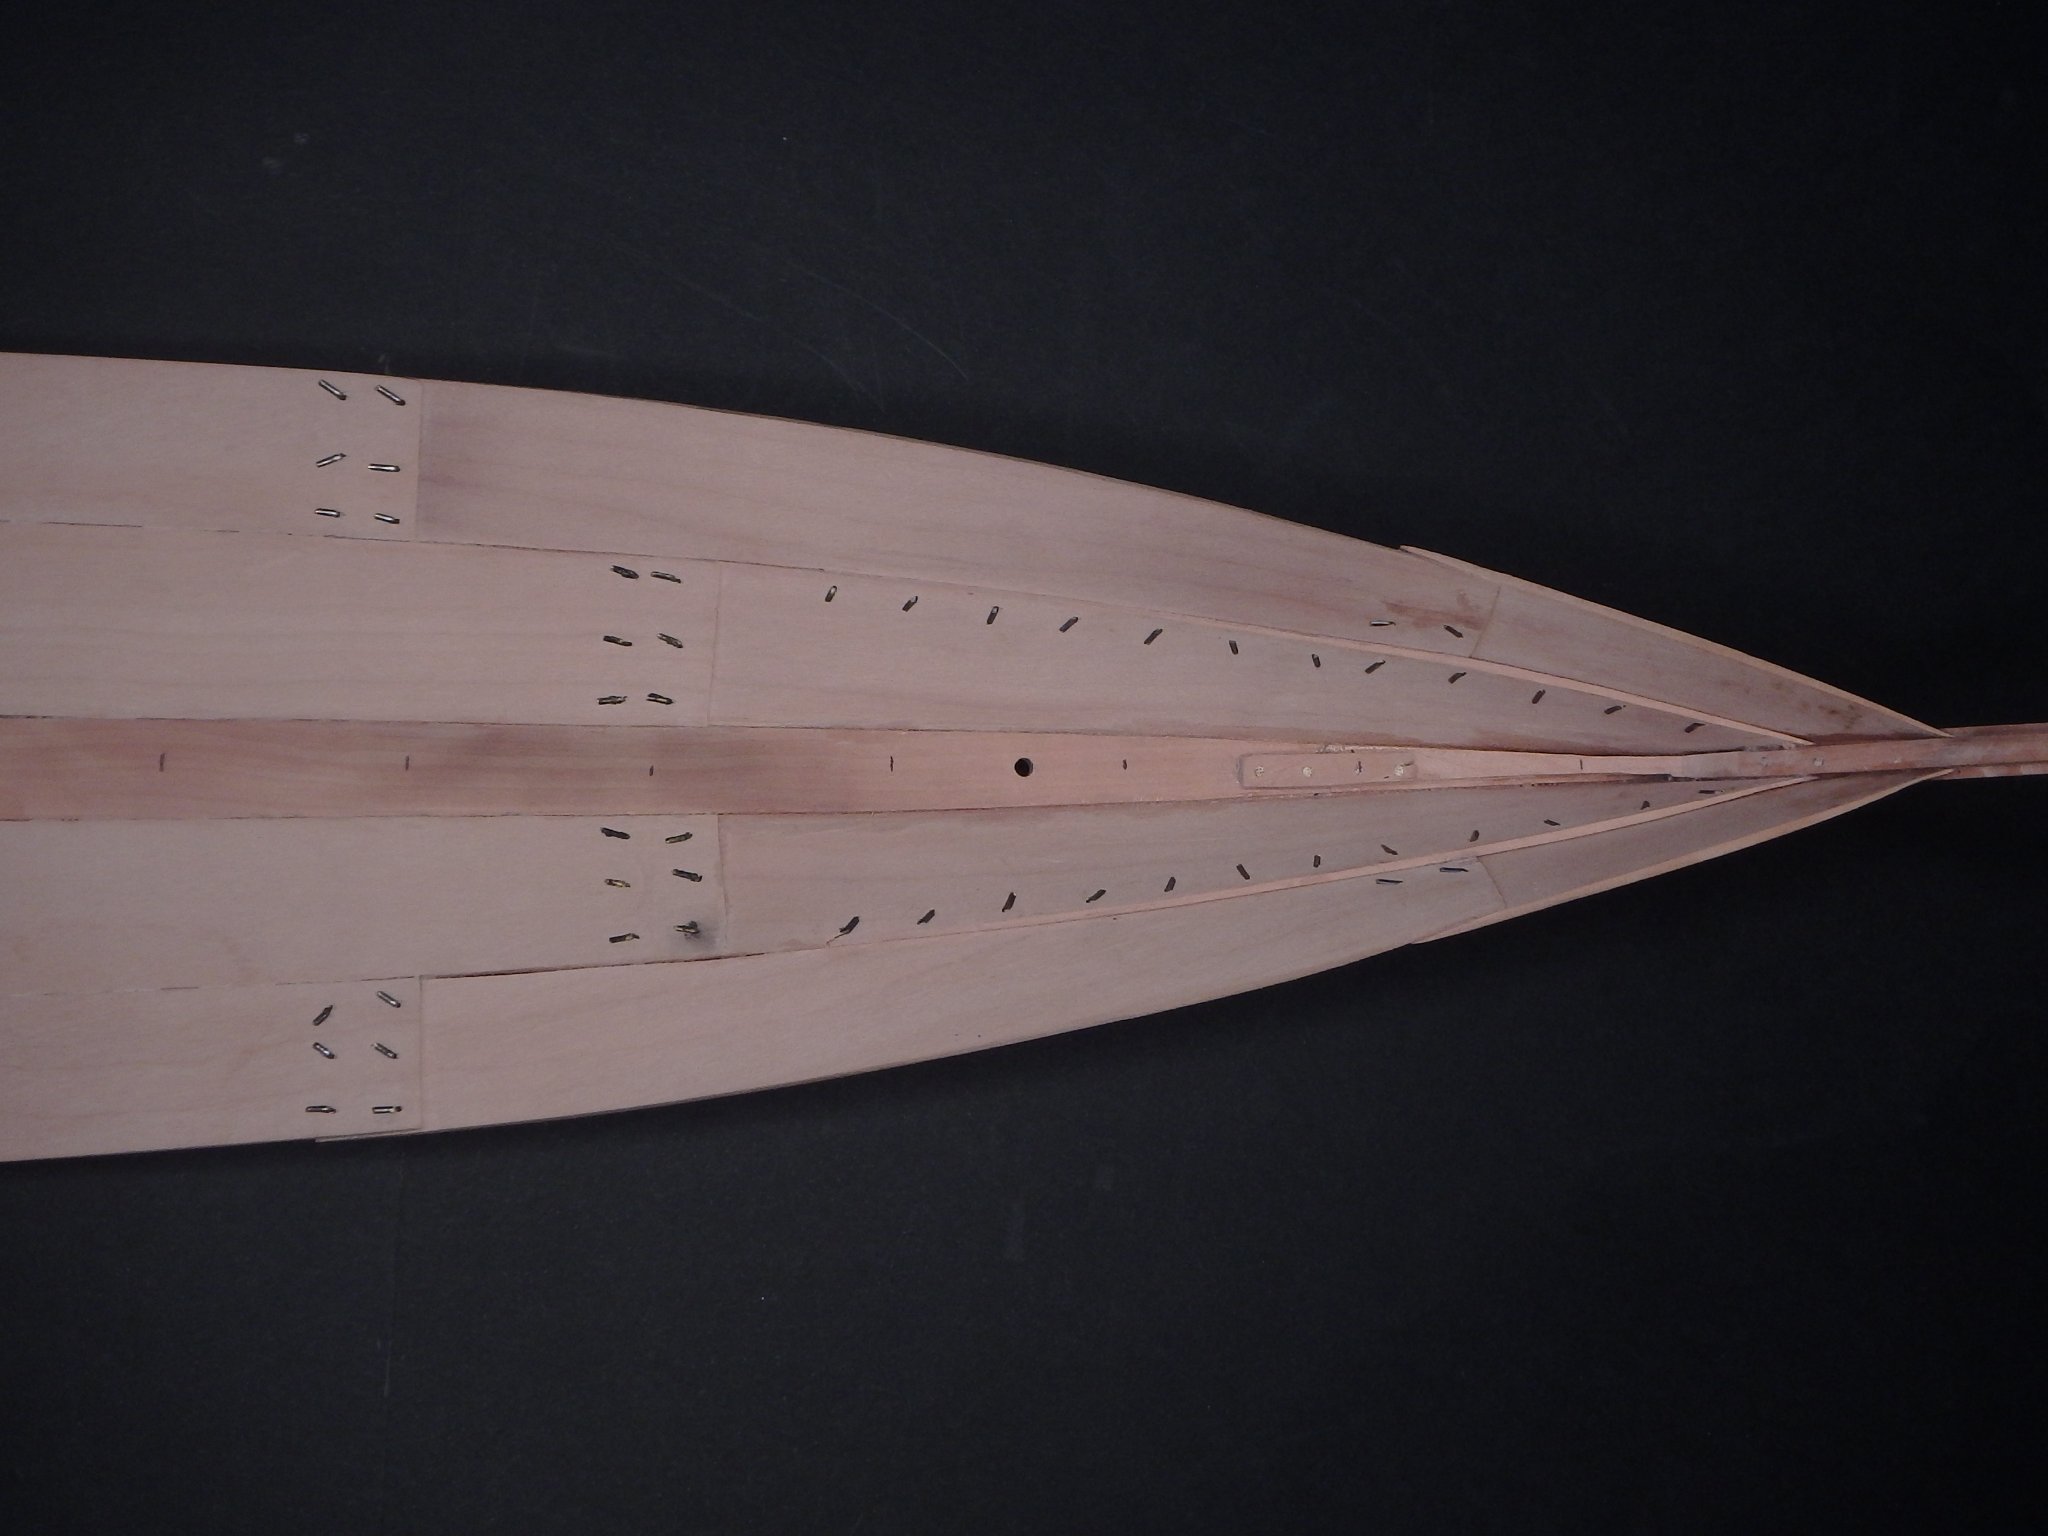
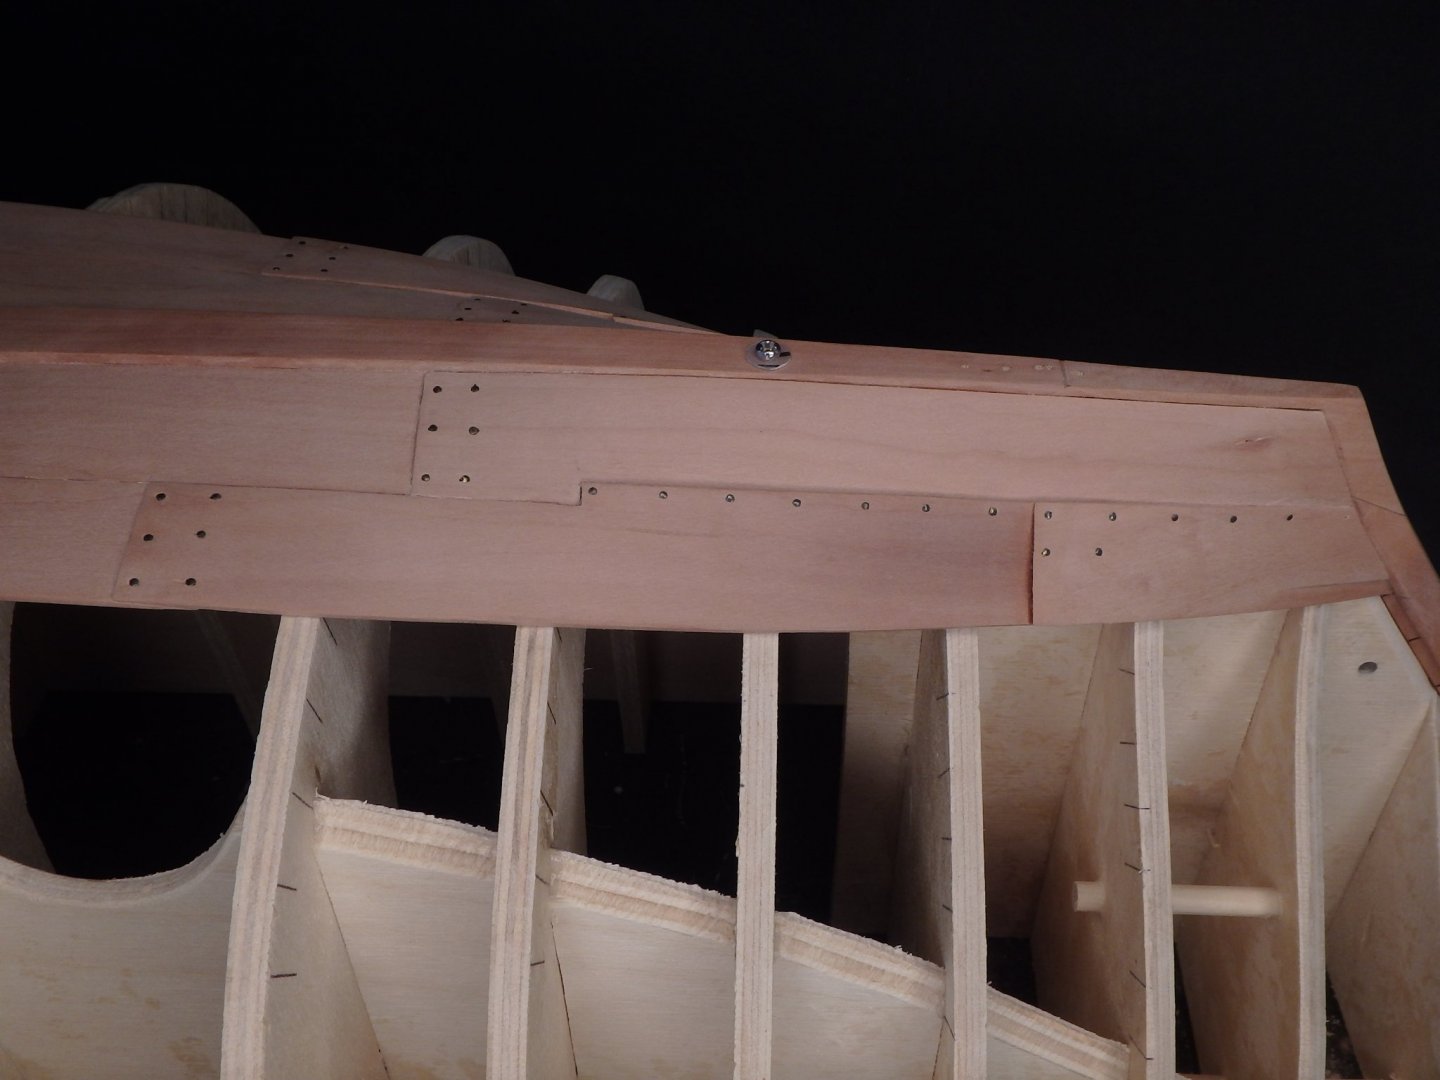
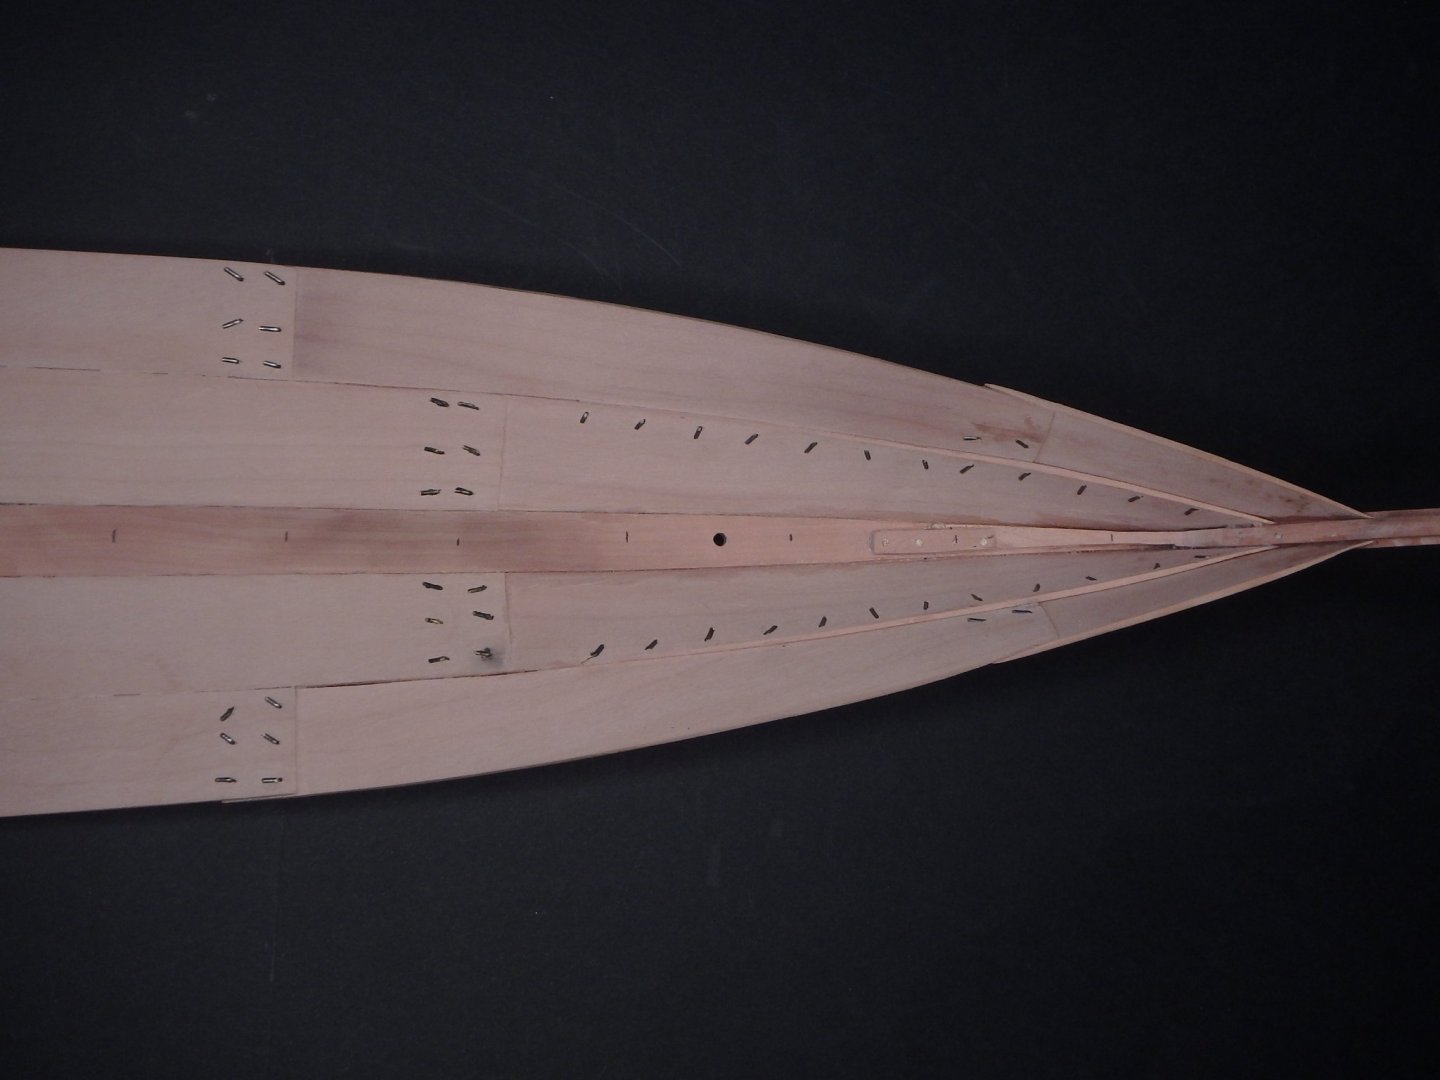
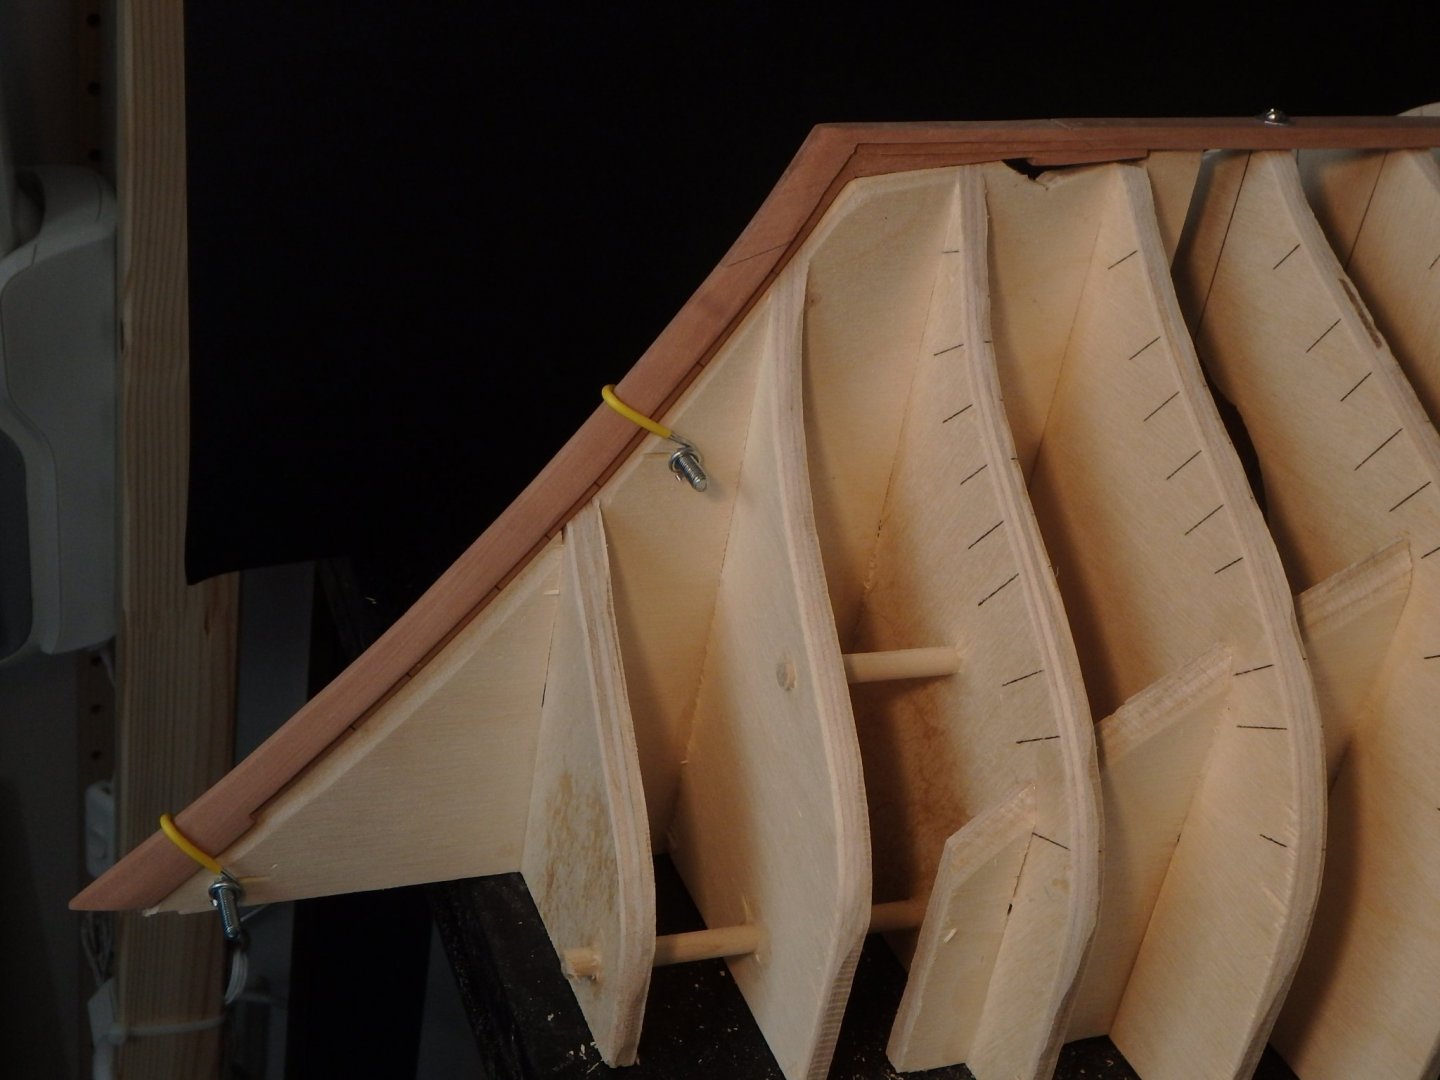
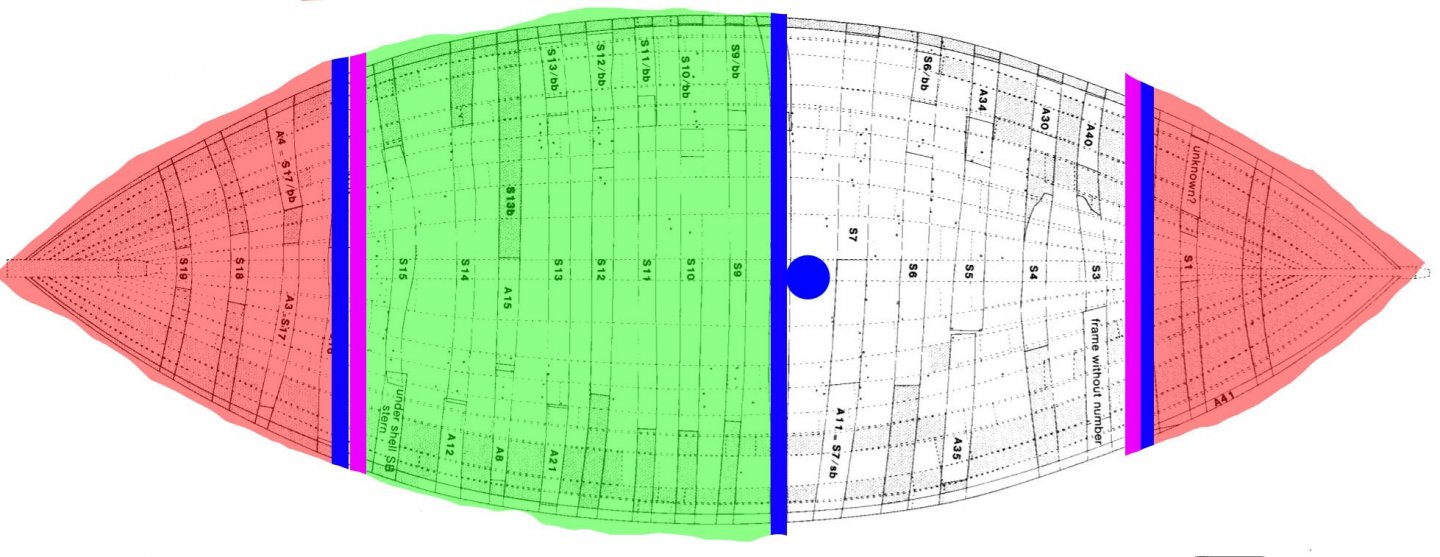
@Chuck Seiler Thank you, and yes, it bends so much easier! At first I thought something was wrong as it was so easy. @Mark Pearse Thank you for the great advice! Now I first soak the planks and then hit it with the heat gun. I feel like I get more consistent results by soaking them first, but I guess one could just use dry heat with training. The planking has started and I'm most impressed by the work they did on this ship. The largest planks are gigantic and it is so hard to imagine them heating them over an open fire before clamping it in place. The planking is quite special on some cogs as it generally is clinker built, but has a carvel built area where the hull contacts the beach at low tide. And it is also flush at the posts. This transition between carvel and clinker is sometimes mid-plank and sometimes at the scarf joints. The ship feels stable and I'm able to remove it from the mould to attach the nails. It's much easier to clench them now instead of waiting 'til the hull is finished. the clenched ends are a bit long and I'll try to make them 1mm shorter in the future.


- 87 replies
-
- 12
-

-
I missed your previous post about your injury! It looked painful and I'm glad it has healed enough for you to use the finger again. And nice work with the shroud pins.
-
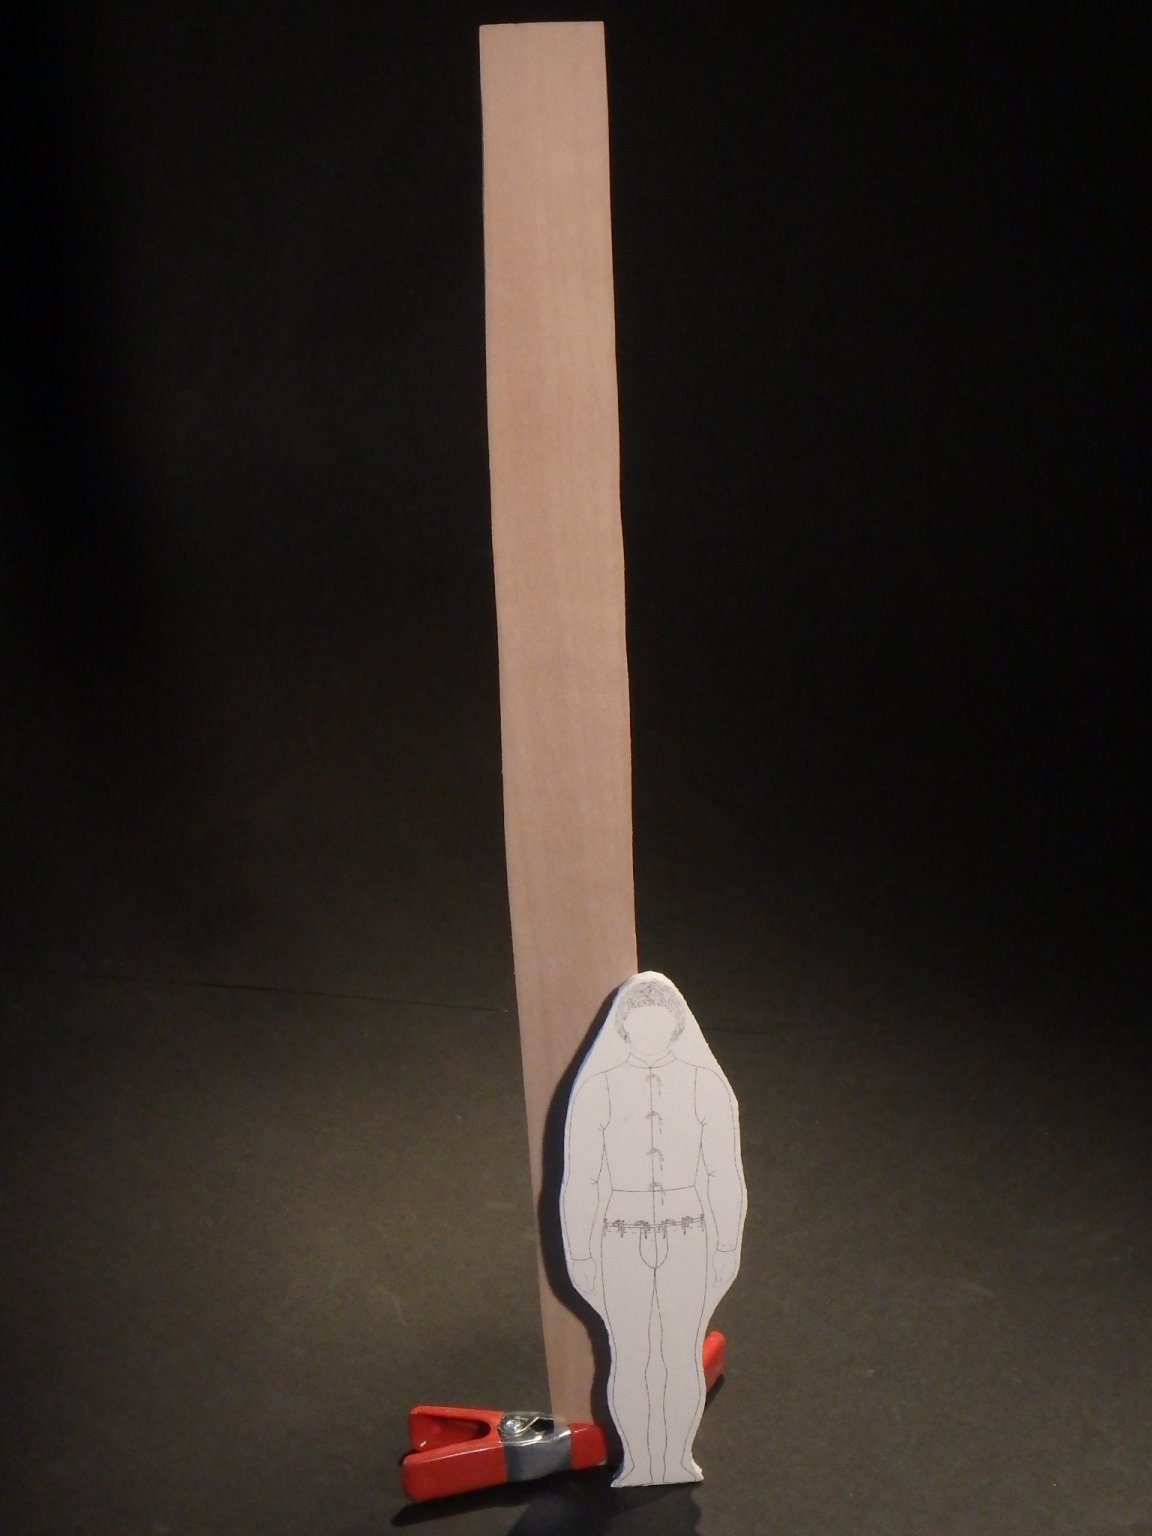
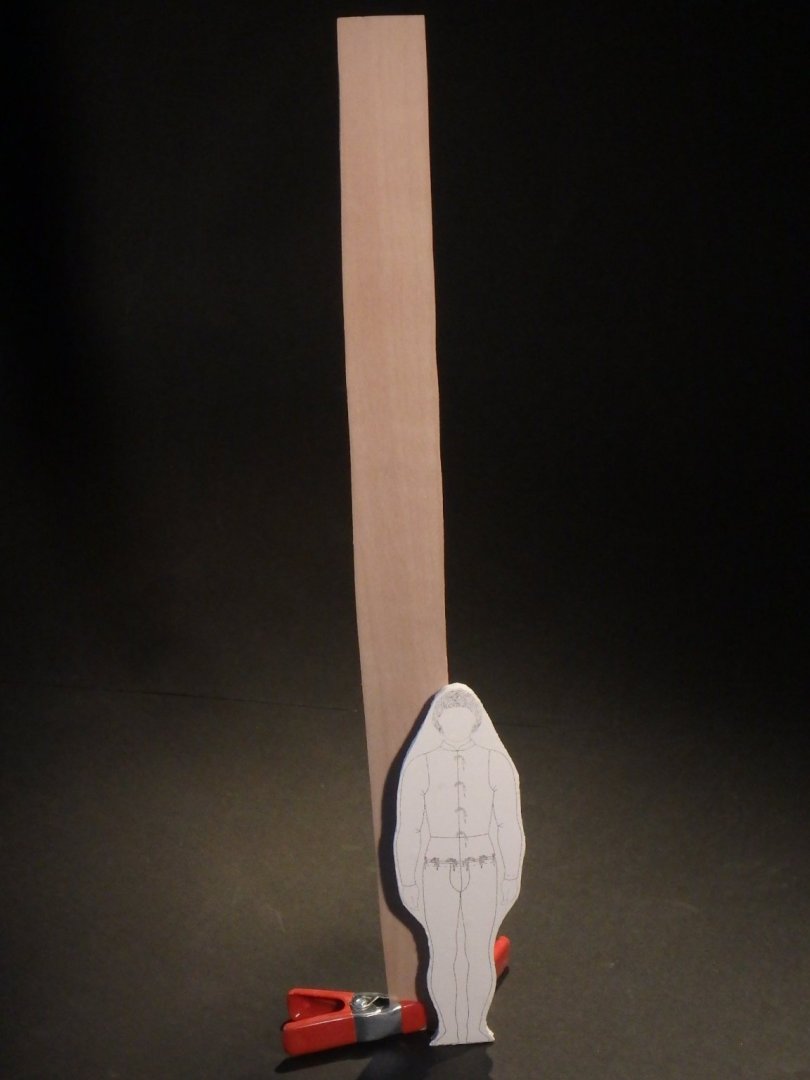
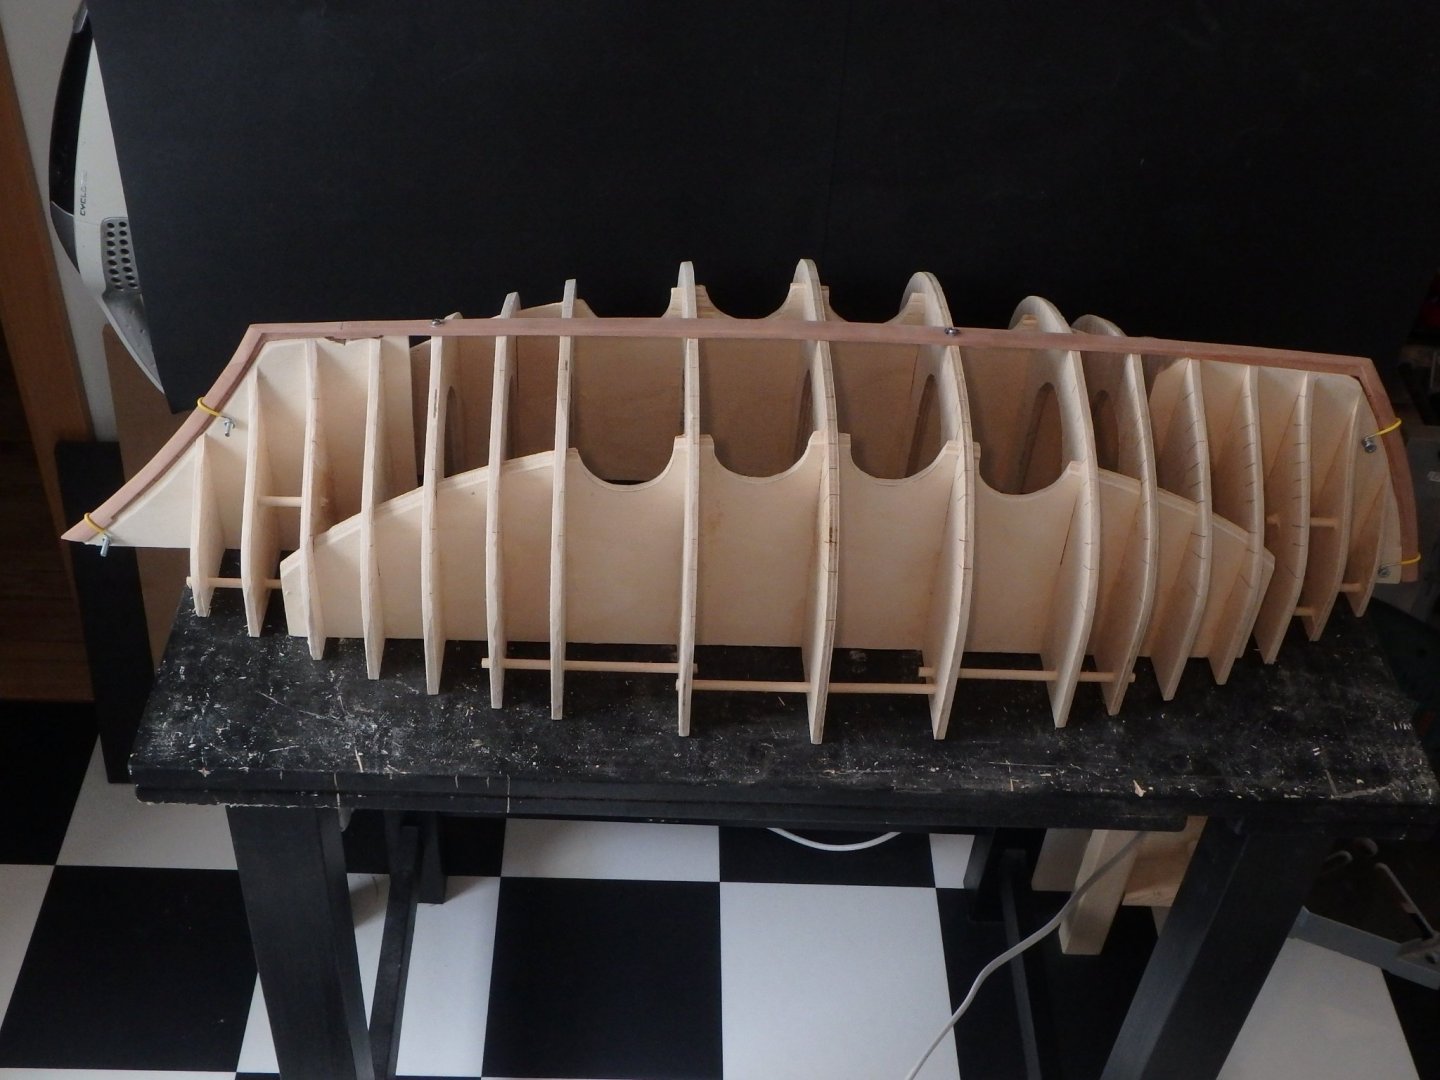
After building some furniture for the cats in the new apartment I finally have time to build more on this ship. First off I ordered some pear wood from Germany. Now I understand why people said that I shouldn't have use fir in my last build! This wood is just fantastic! Almost no grain and makes really crisp edges. I ordered 2mm sheets for the planking and 12x25mm (1/2×1") for posts etc. It saws really nice with my fine pull saws. The mould for the hull is built and the backbone of the ship - stem and sternpost, hooks and keel plank. They are held to the mould by removable wire with shrink tubing and two screws through the keel plank. I used dry heat to bend the keel plank and will try it on the planks as well.

- 87 replies
-
- 14
-
-
Congratulations for finishing it! It looks really good and the way you made the rivets is brilliant.
- 179 replies
-
- 2
-
-
- longship
- Helga Holm
- (and 1 more)
-
@bolin yeah, pretty overkill I guess, but I would like to bevel it when it is assembled and don't worry about the sturdiness. Perhaps I don't use the dowels, but it doesn't hurt to prepare for them
-
Looking good! Thank you for the explanation of the beitass - I've seen it used but now I better understand it.
-
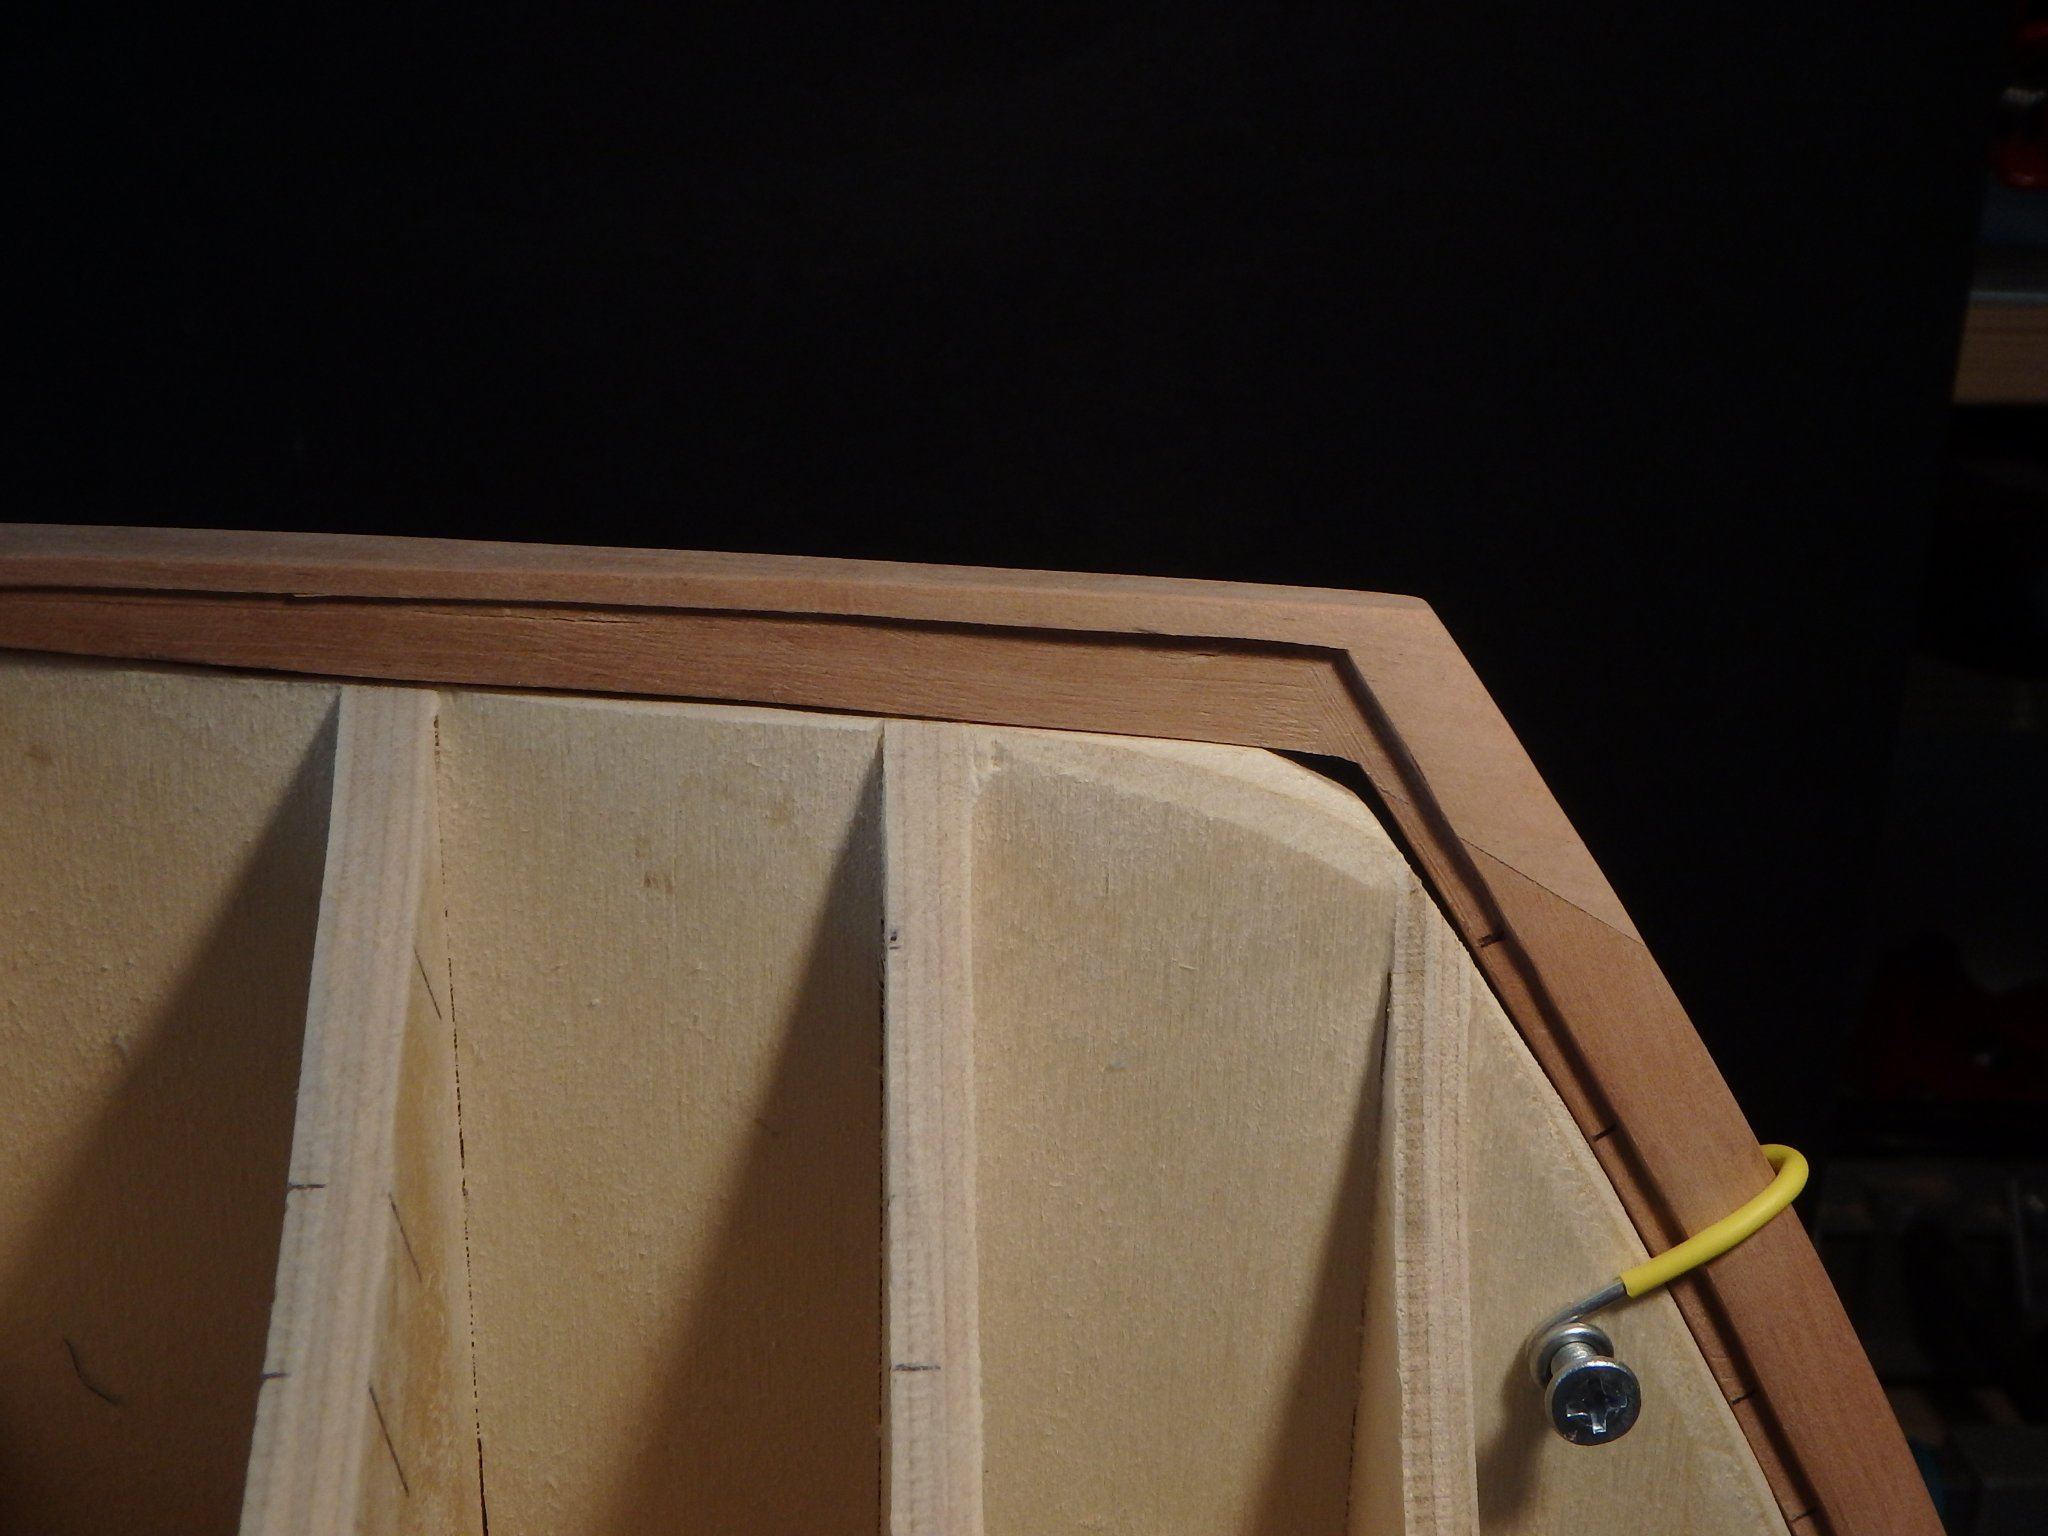
Change of strategy, it will all be built shell first. I really disliked how 'artificial' the frames in my old build was. Photographs of finds always shows much more 'organic' shapes and I see that look in builds here that are built shell first. The mold will be in 6mm birch plywood The mold will be adjusted in the ends as I build the stem, sternpost, hooks and keel plank. But I can start in the middle and see how it works out
-
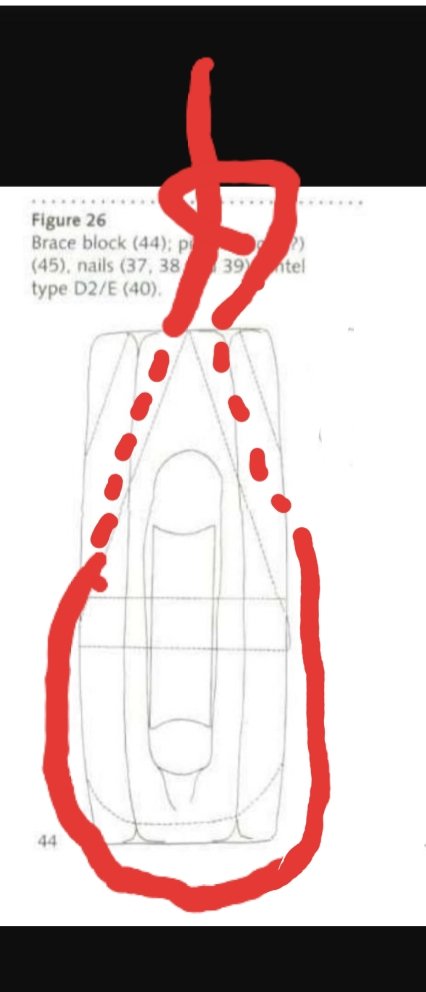
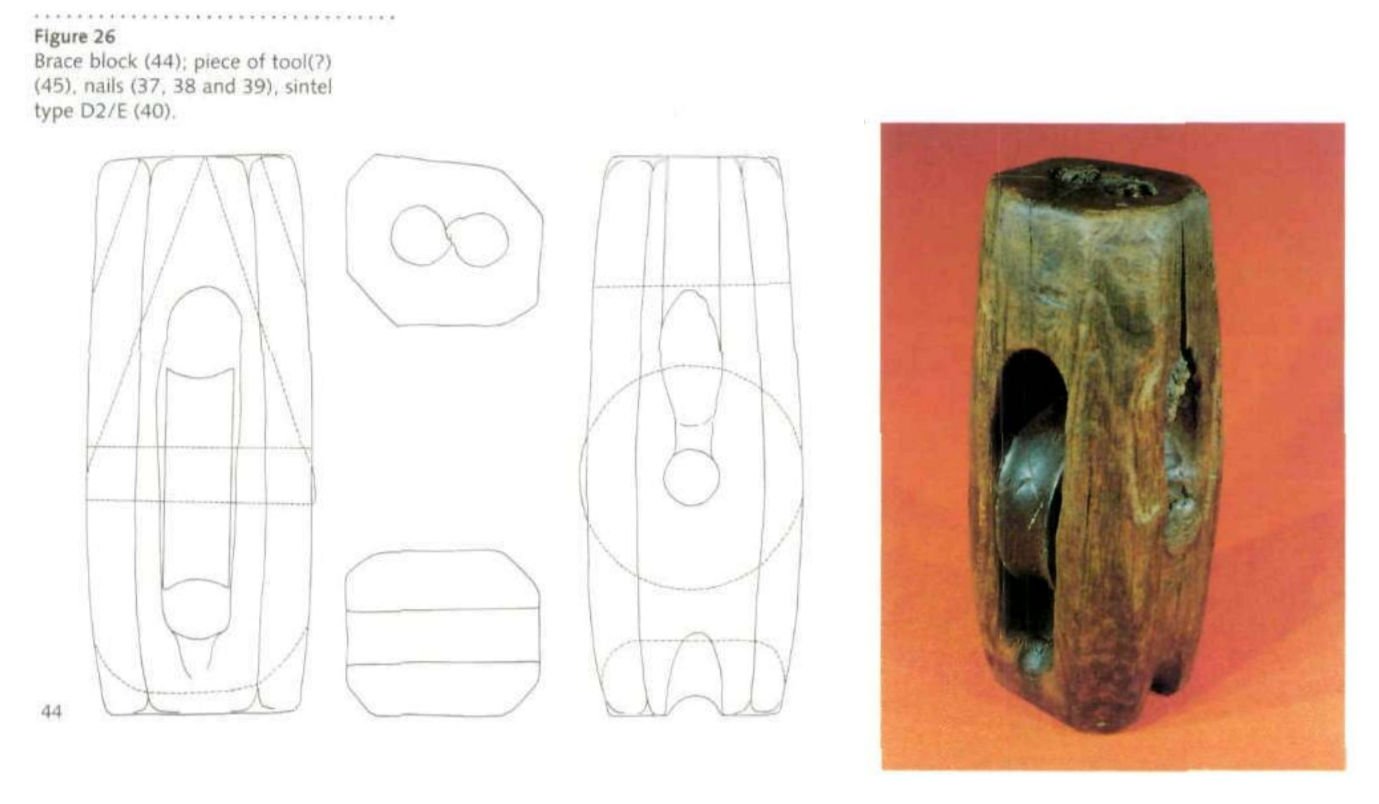
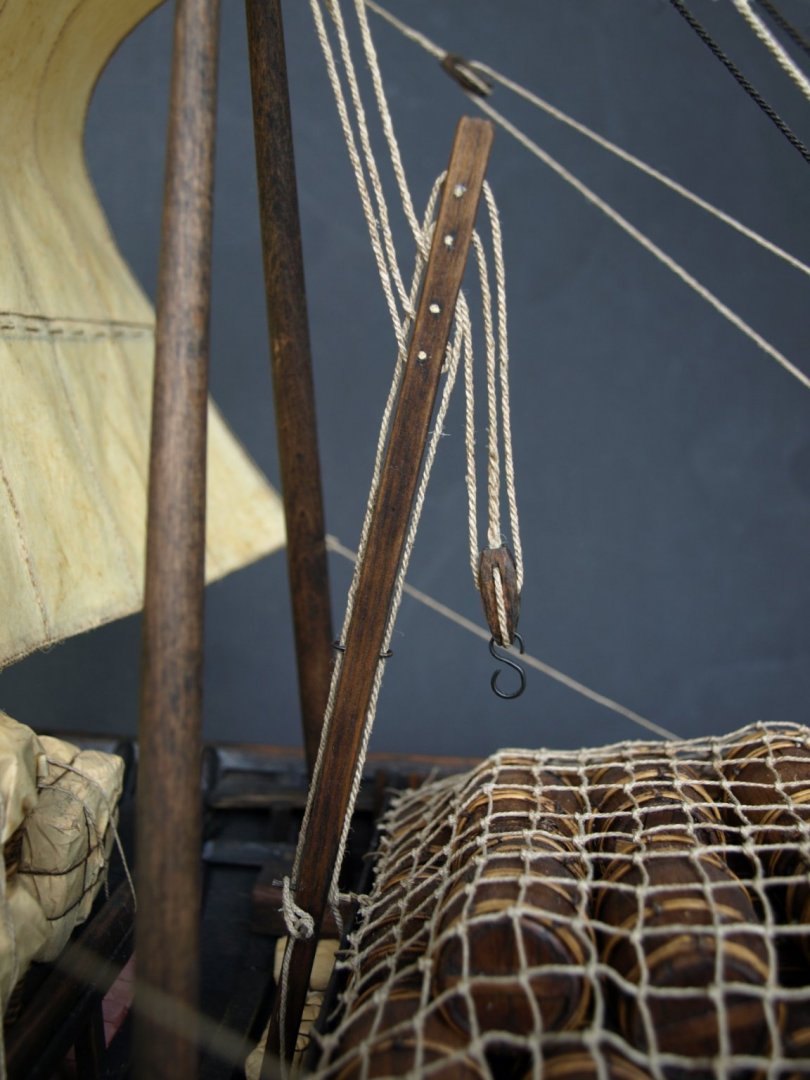
@Chuck Seiler I think it's like this - there are internal channels are at the tops and the rope loops underneath the block. Dashed lines are internal
- 130 replies
-
- 5
-
-
- wütender hund
- hanseatic
- (and 2 more)
-
Nice to see the progress! Regarding inspiration for blocks, here is a block from the Almere wijk 13 cog
- 130 replies
-
- 6
-
-
- wütender hund
- hanseatic
- (and 2 more)
-
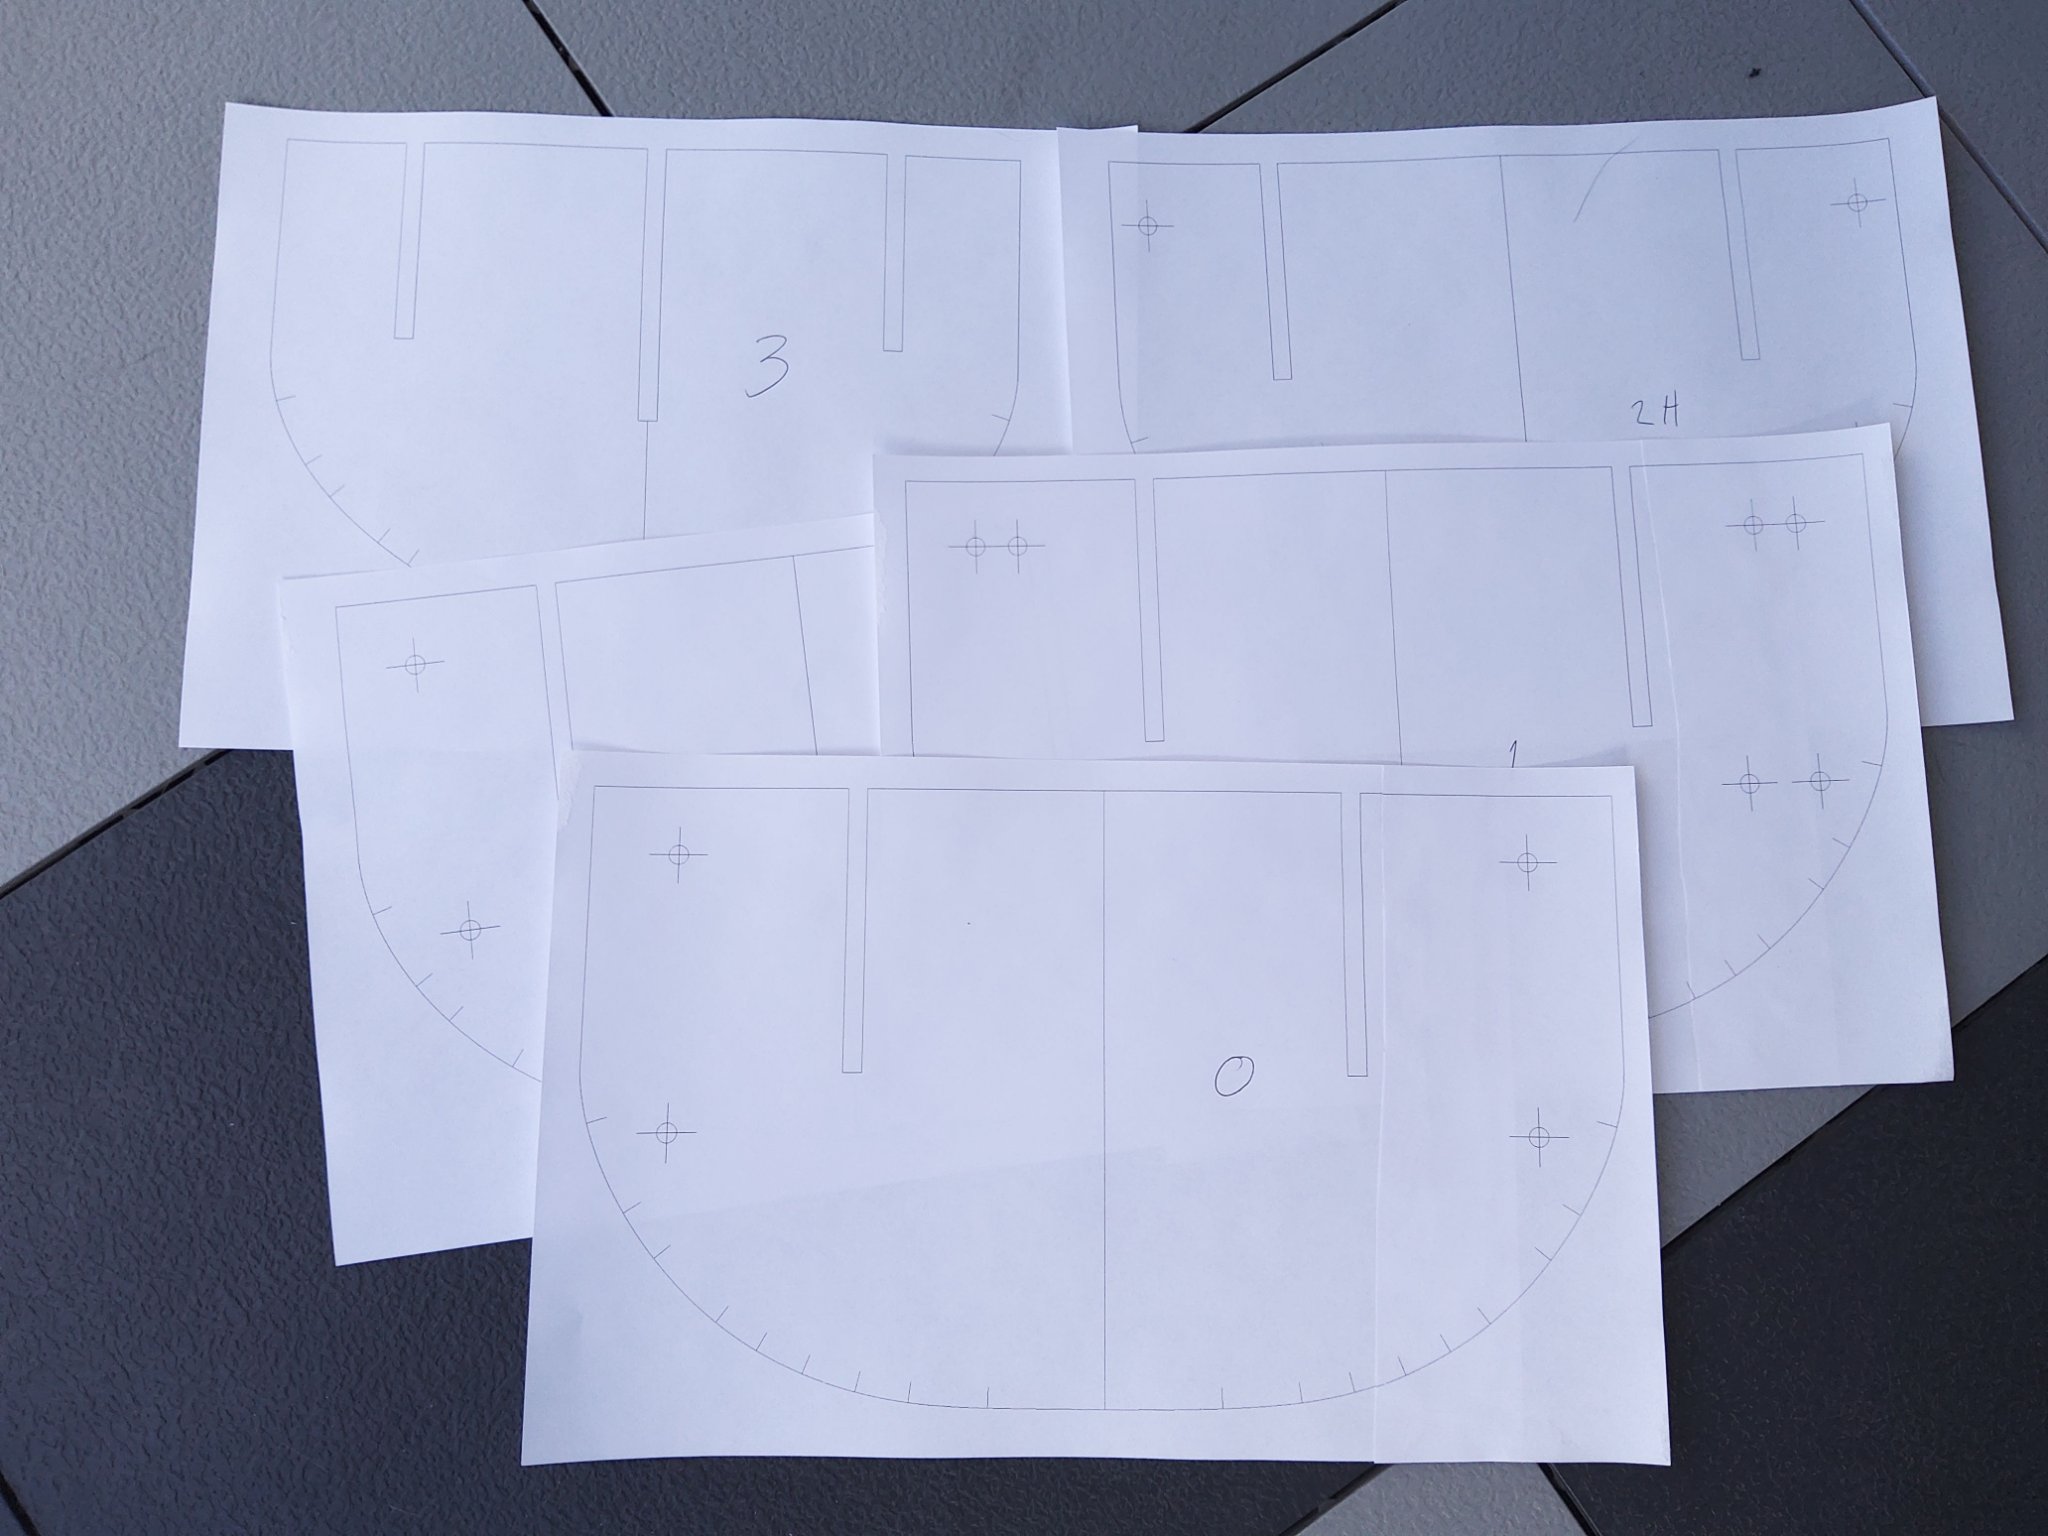
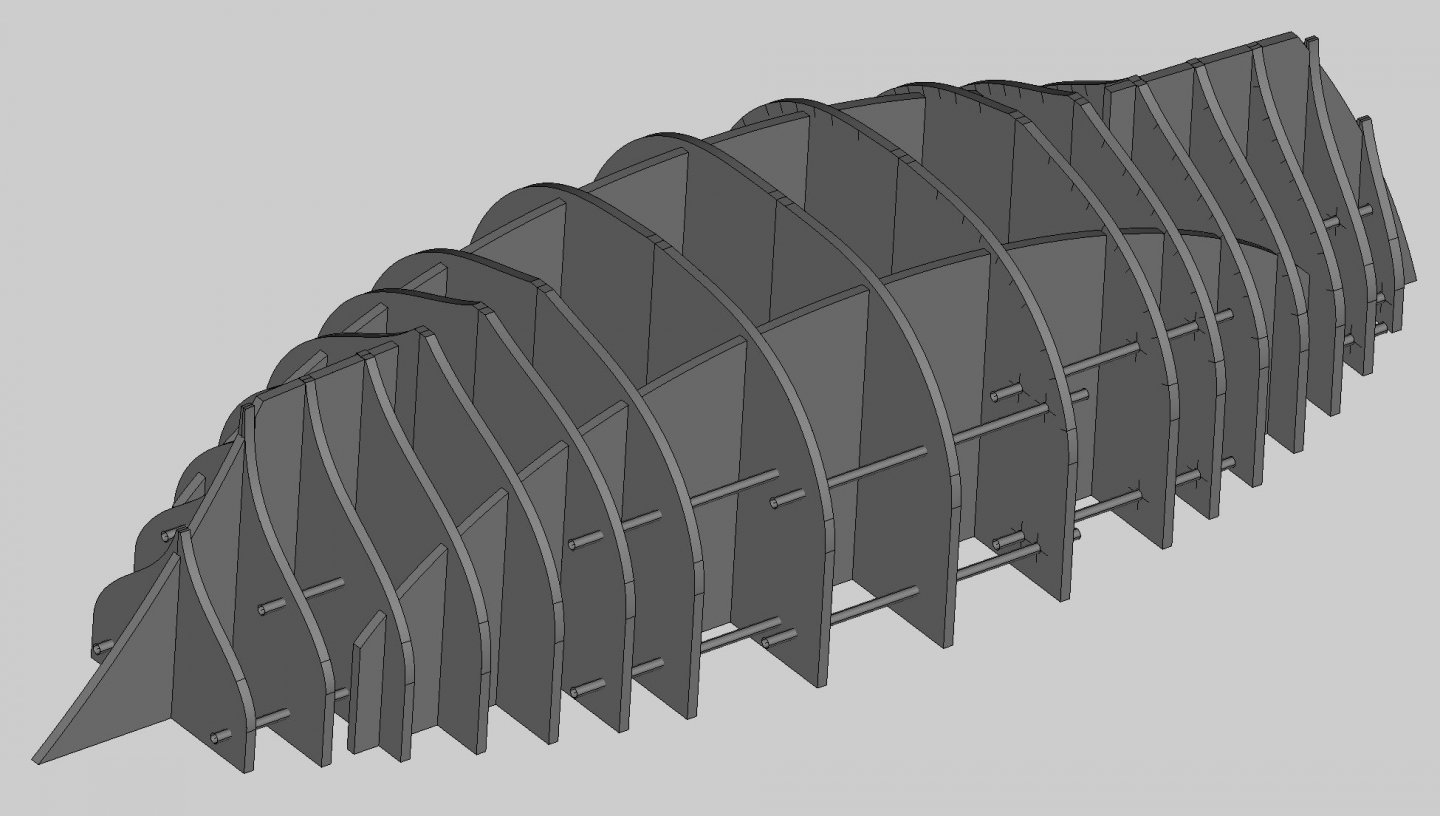
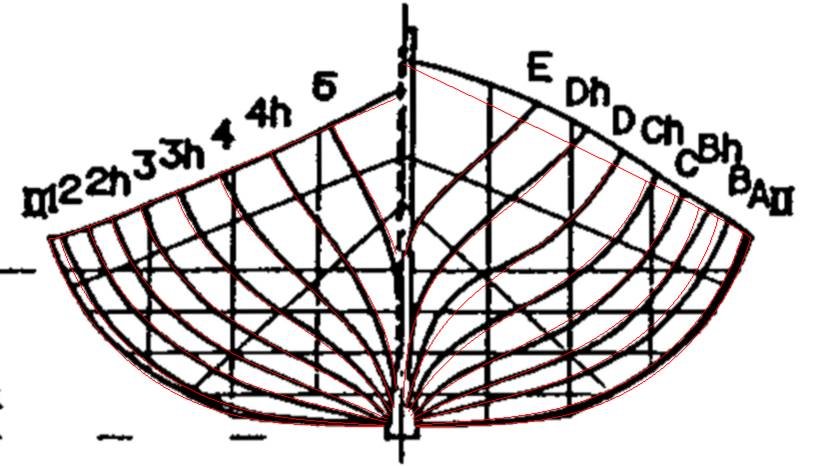
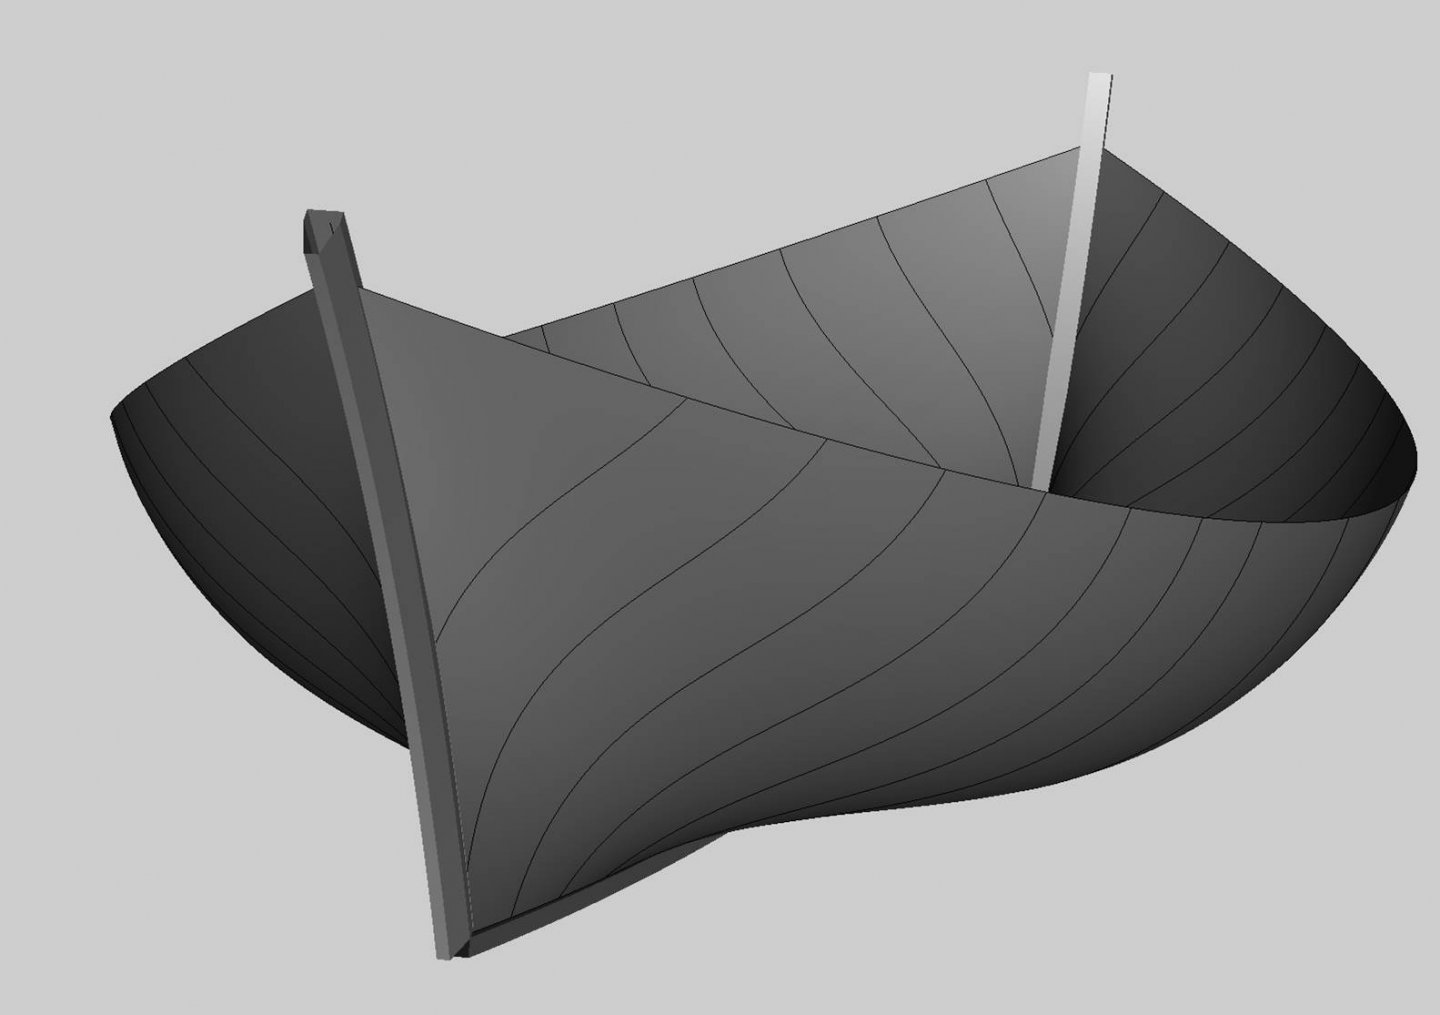
@Chuck Seiler thank you for the tips! I've learned a lot of the videos of how square sailed ships sail, most videos I've seen before was multimasted ones. Tonight I imported the ship plan into cad and made the hull. I tried to stay as close as possible, but had to stray in some areas, and that is the same areas as I strayed in my other build when I used much more lowtech ways of doing my drawings of the frames. I did a quick check to see that no strakes would be forced into strange shapes. Red curves are my new sections.
-
Thank you @Chuck Seiler for the clip! I havn't seen it before and it was interesting. Fascinating that they didn't steam the planks. And what a massive ship! I had not understood that vikings built that large. My cog is a bit special as the first strakes becomes clinker towards the ends. This was very clearly seen in the wreck.
-
I have started a new thread for a new version of this build, please give me your input of things you think I should have done differently.
-
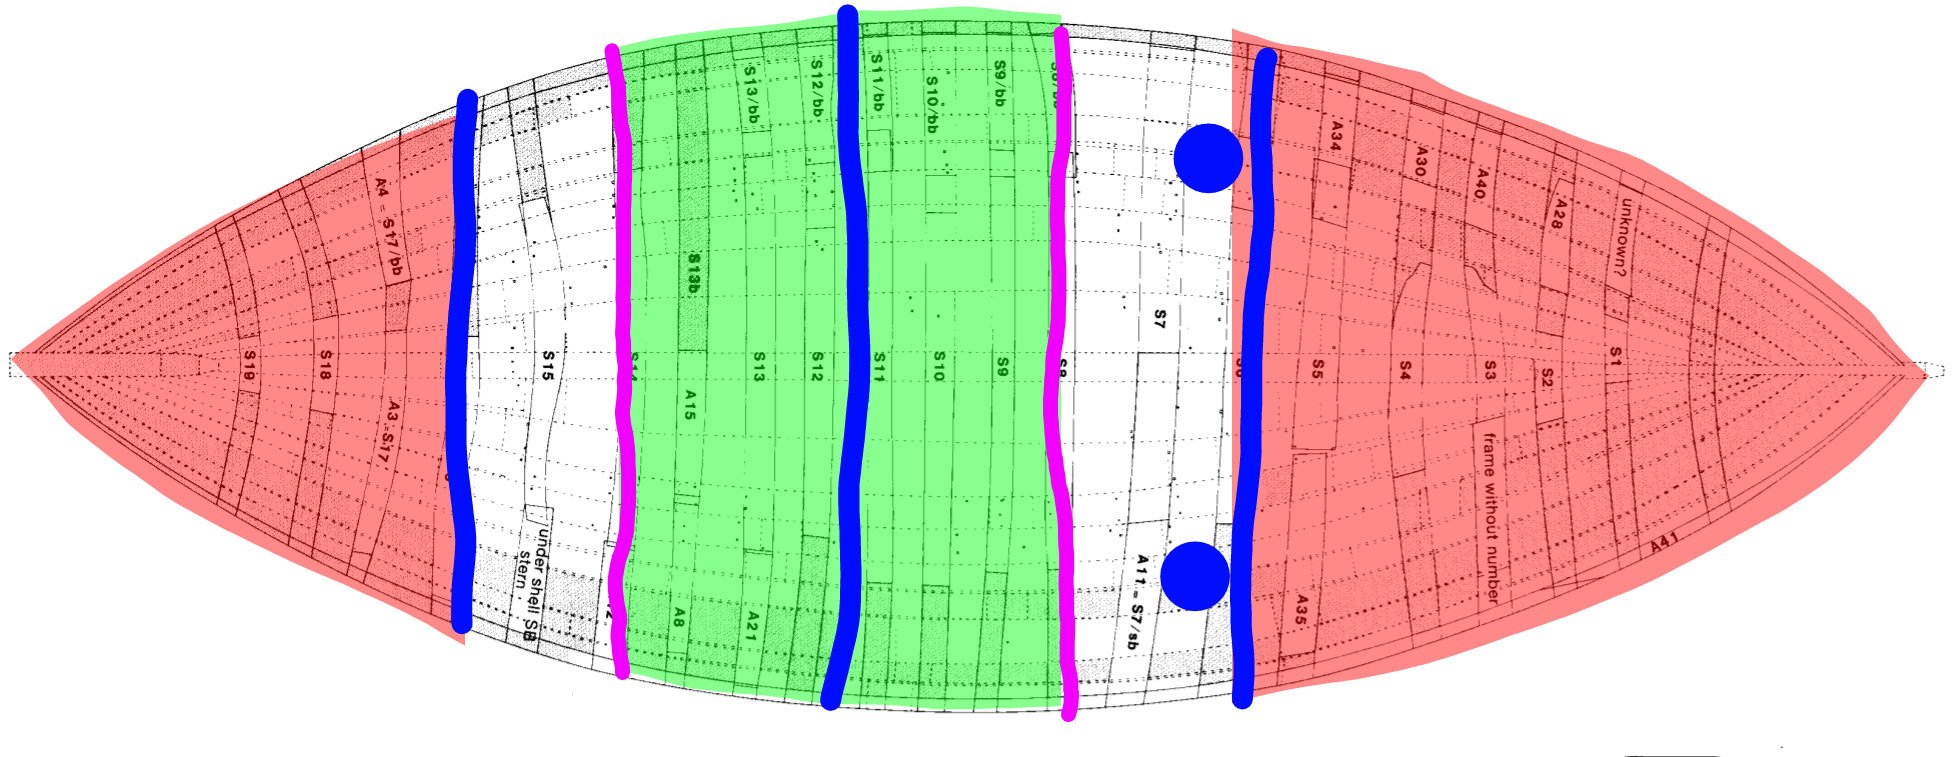
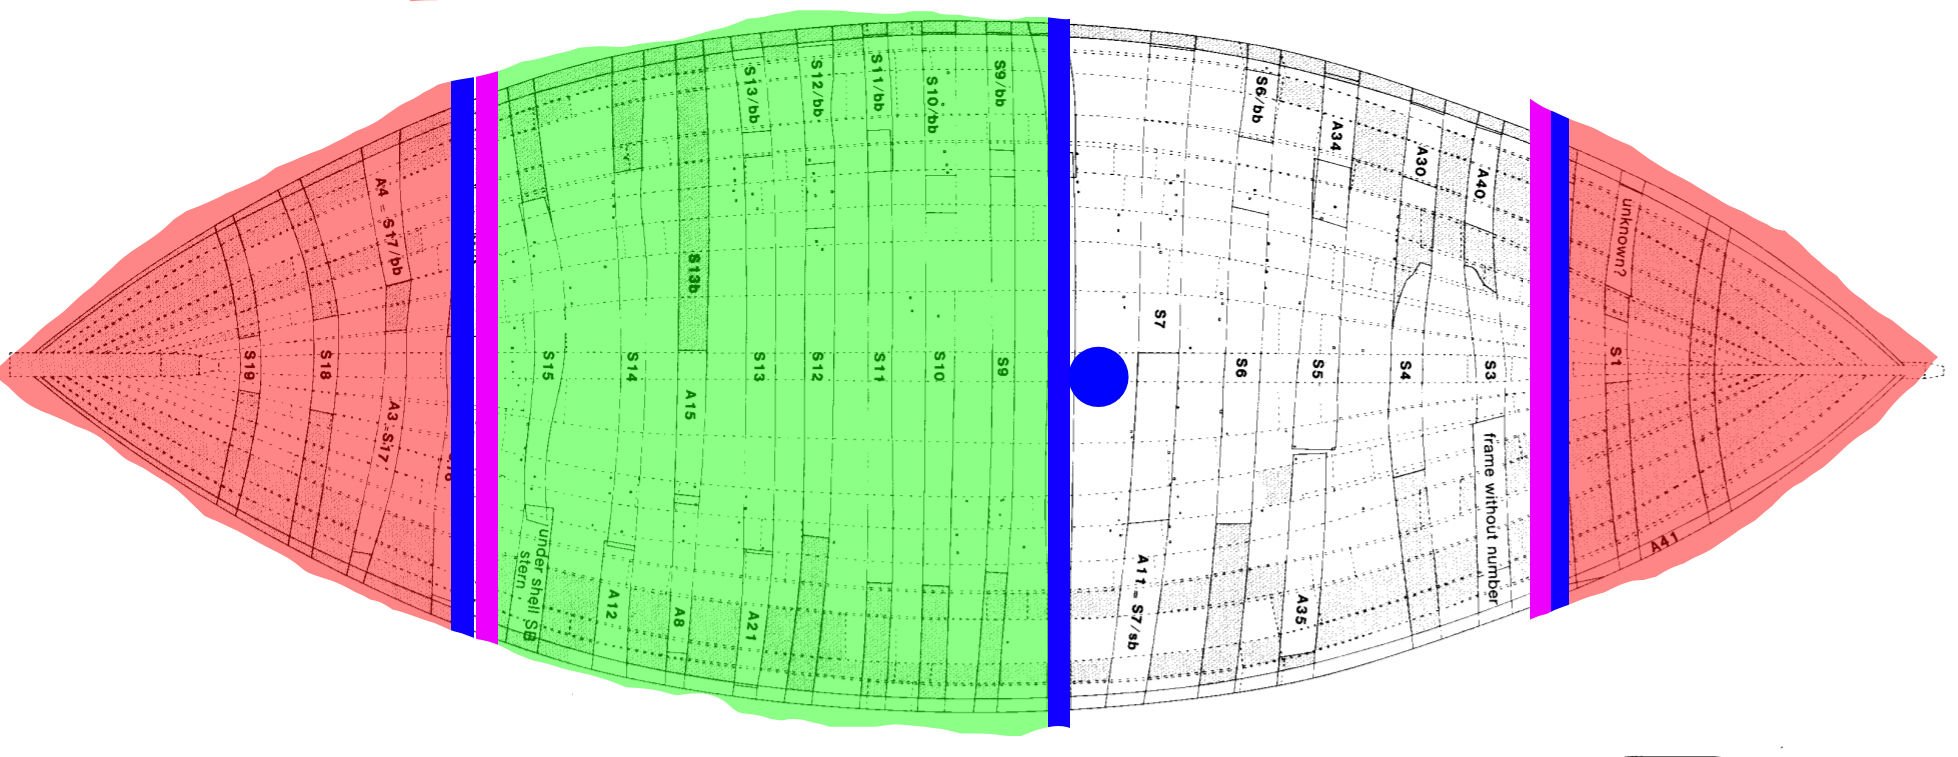
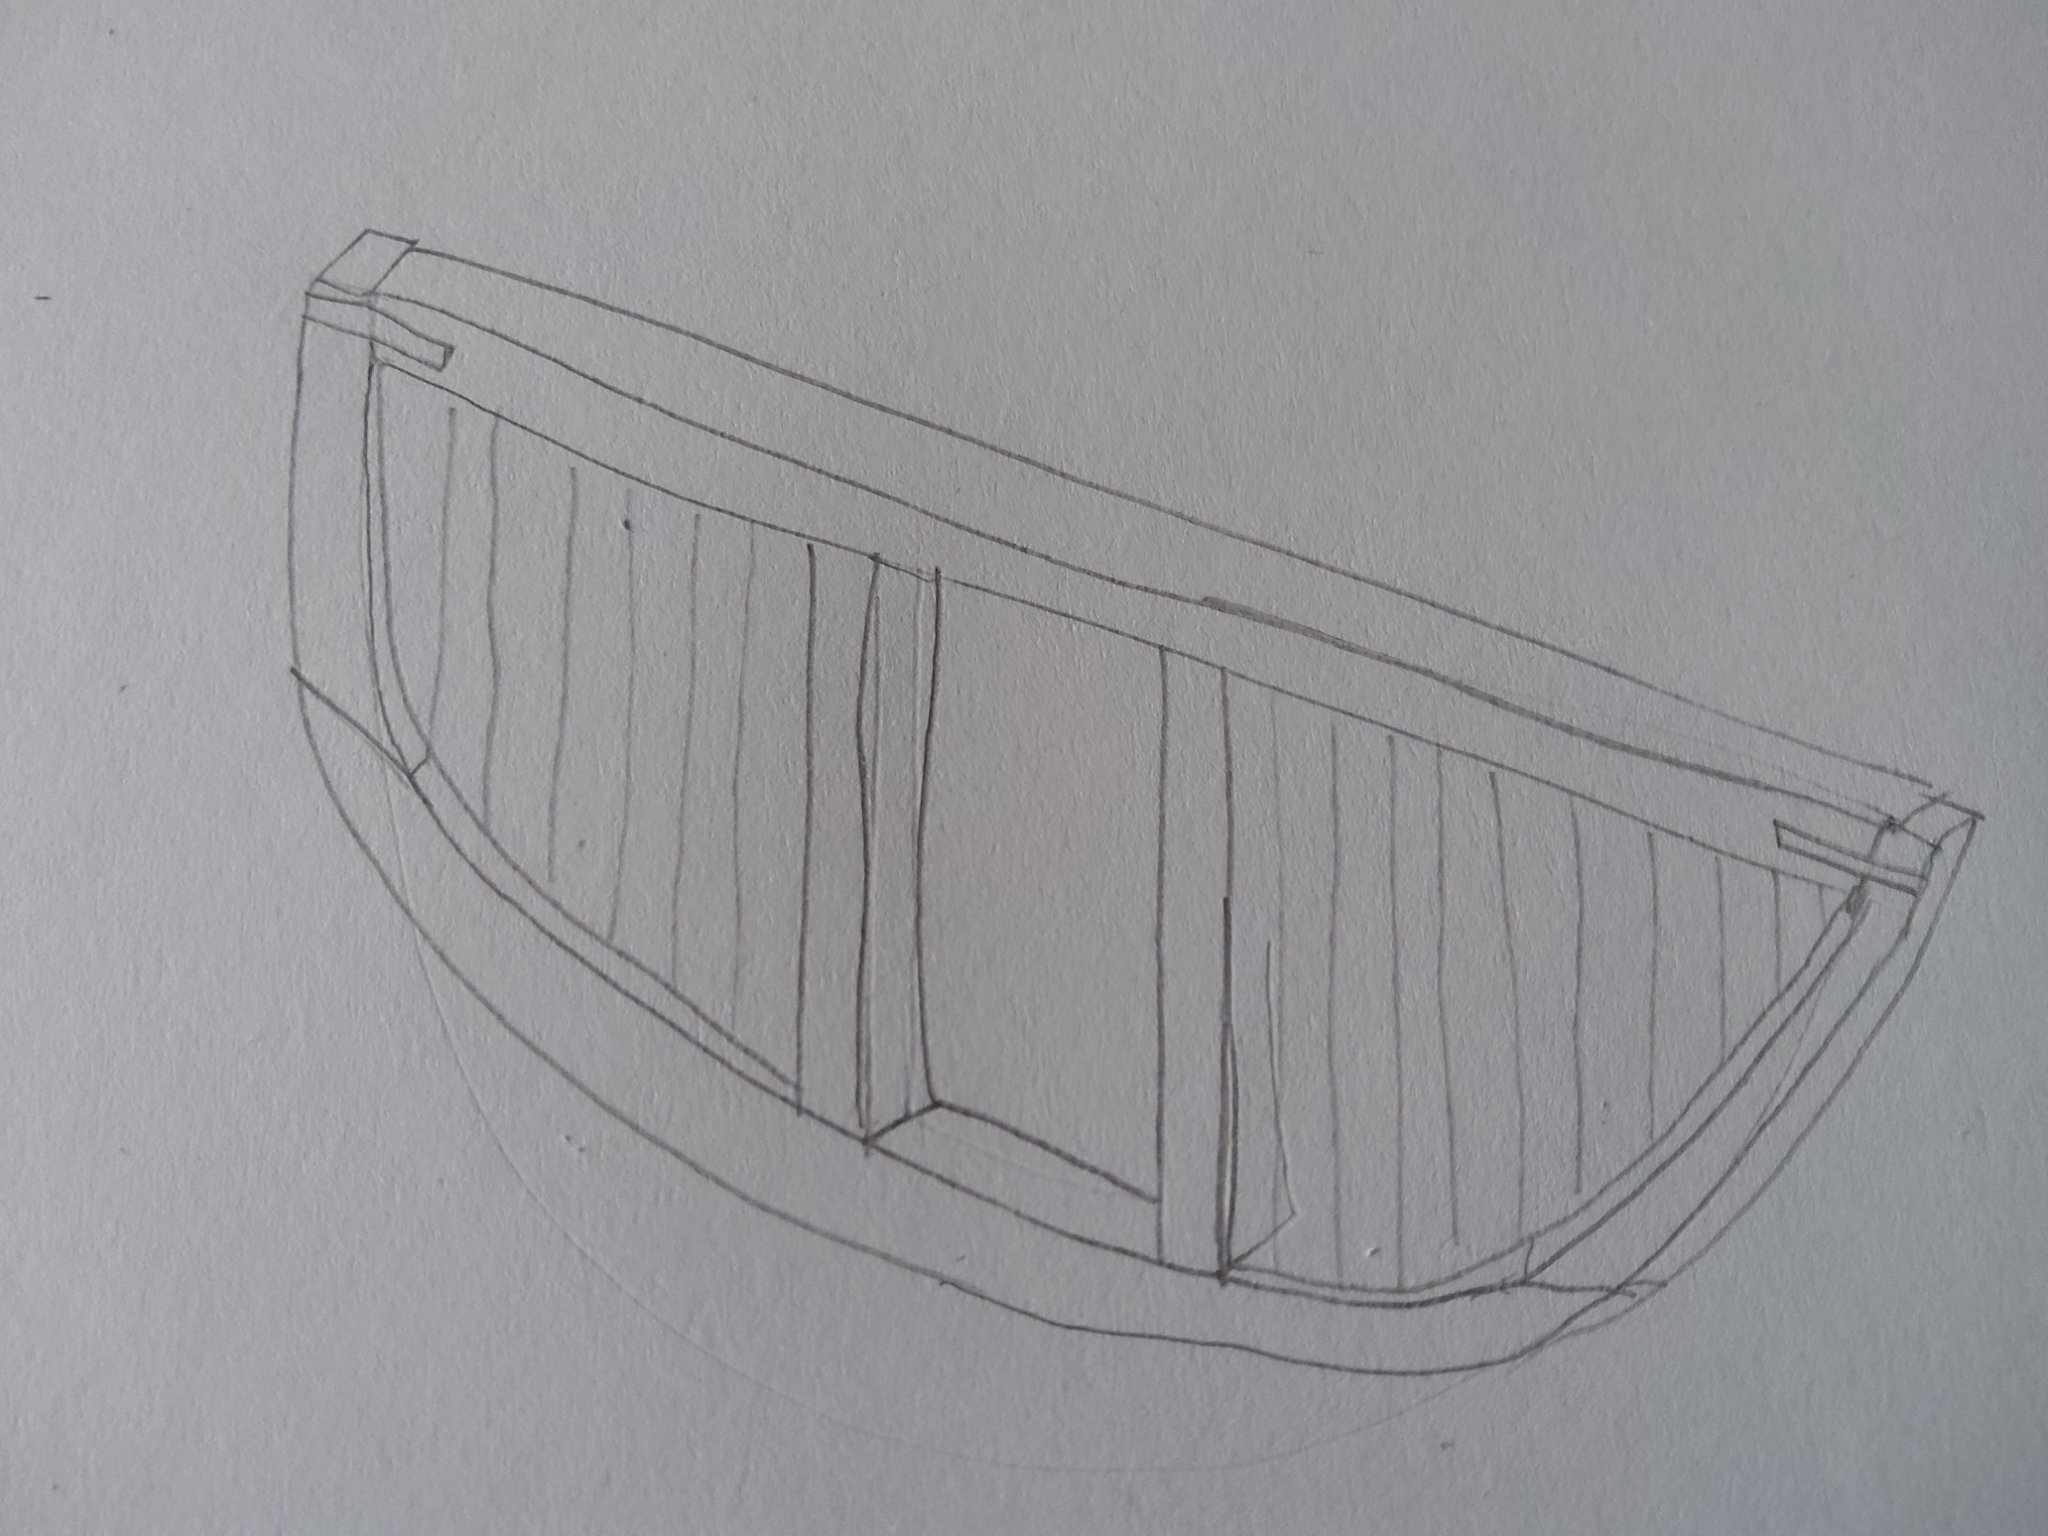
So, I have just finished my build of a small 15th century cog and while I am pleased with the result, there are some things I wish I would have done differently. The only reasonable thing to do is to start over again 😛 Old build: I guess most people would start with a new ship, but I don't feel like I'm done yet with NZ43 and would like to fix some issues, and I would like your help to find them. Here is my list of changes, and I would very much like to hear your thoughts on them. Wood The old model used fir and it it was just as bad as everyone here told me. I will look for pear, but I guess I will not find it and use birch instead. I bought the old wood in planks, but now I have space to buy a small tablesaw and saw my own wood. But before buying it I will try sawing it by hand and see if it would be feasible as I like the idea of it. I don't liked how I soaked the planks in hot water, I think I will try a steambox this time. Scale One thing I really wanted to do with the old build was to use functioning nails, but the scale proved to be just too small. I think it will be better if I now make it 50% bigger length wise. (I thought 50% bigger than 1:20 would be 1:15, but apperently it is 1:1333... Not as a neat and round number as I had hoped. Calling it scale 7.5% sounds better.) Frames I didn't much care in the last build about where the joint between futtock and floor timber was and I built it frame first. Now I will build it bottom first, ie the bottom will be frame first and the rest shell first. This way the floors will be shaped and attached to the keel plank and the futtocks will be shaped and attached afterwards. I do not know how to do it, but I'm sure I will find a way Layout The hold was way too small in the last build. The layout was like this Red - decks Green - ceiling Blue - large beams and masts Pink - bulkheads My new proposal is like this instead The fore deck was way too big and it can be cut down a lot and lots of cargo can be stored there. The bulkheads are moved to where the decks begin and will be like this with twin stanchions, vertical planking and a door. This design is from the Almere 13 wreck. Perhaps a bulkhead also under the beam aft of the mast to seal off the ceiling area? And yeah, the bipod mast was a fun build, but I will ditch it for a normal single mast with a normal mast step. And I guess the lifting boom will also have to go. The old decks were not waterproof, but the new ones will be. Cleats The old cleats were thought of in the last minute and just wrong. I think I will integrate them in the knees on the decks. Sheer height over decks I have no clue of what this is called, but I'm talking about this measurement It is so small on my build. But increasing it means smaller decks and less storage space. How much bigger must this be? The Almere 13 wreck seem to have double the height, but that ship is also a bit bigger than mine. Any thoughts of other things I should fix?


-
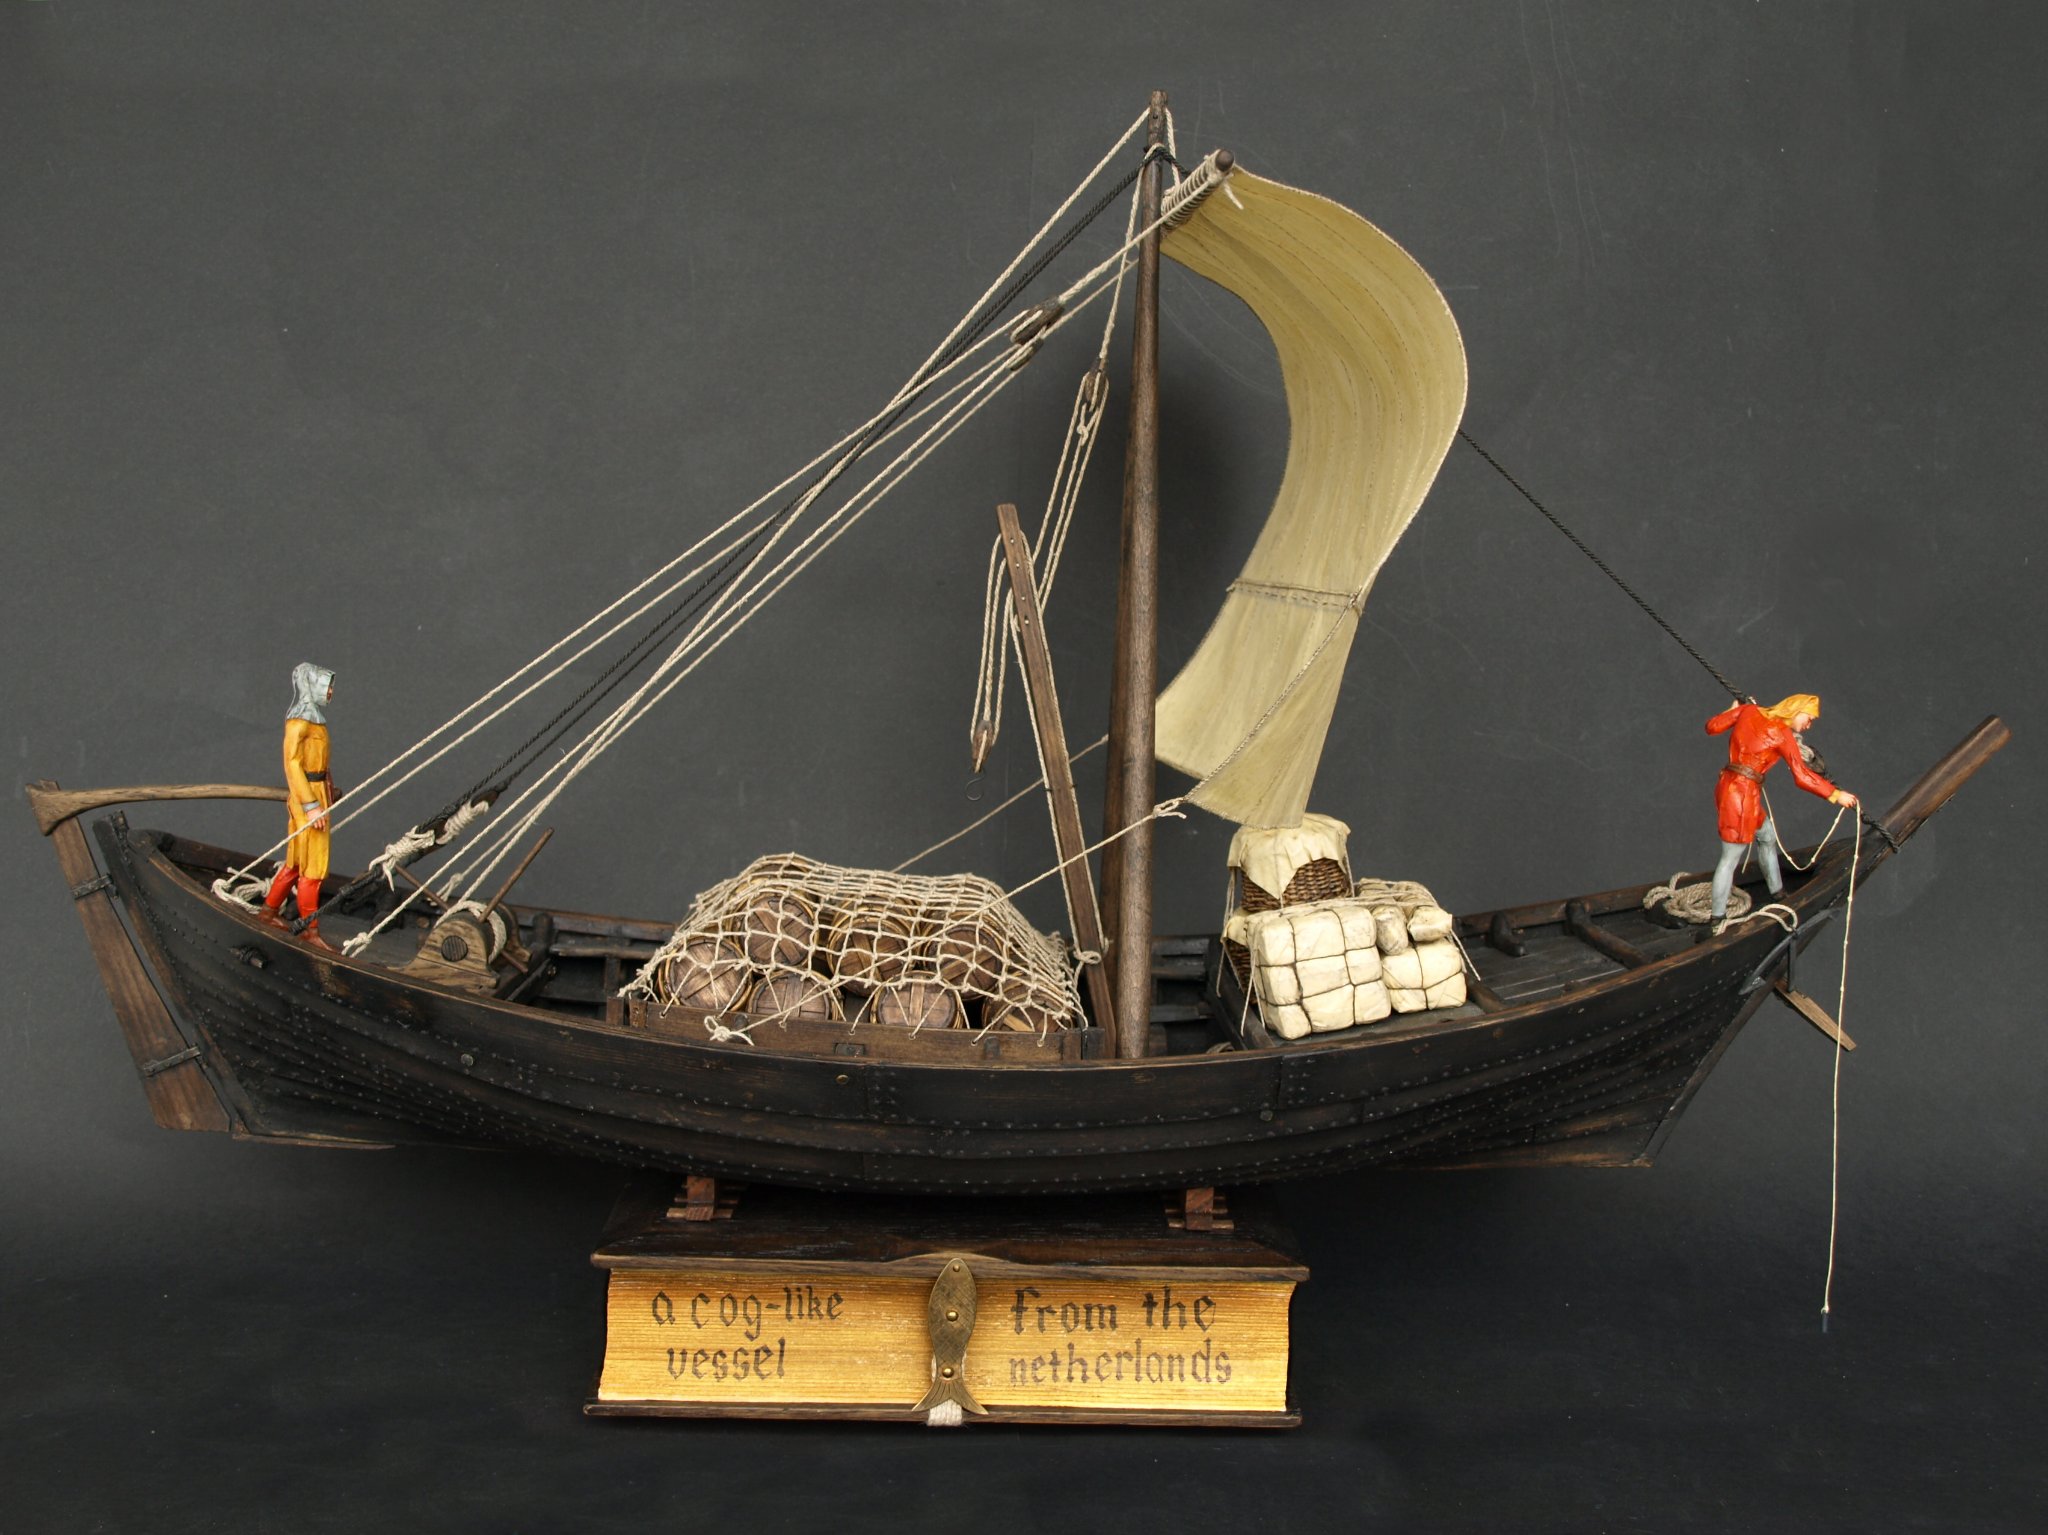
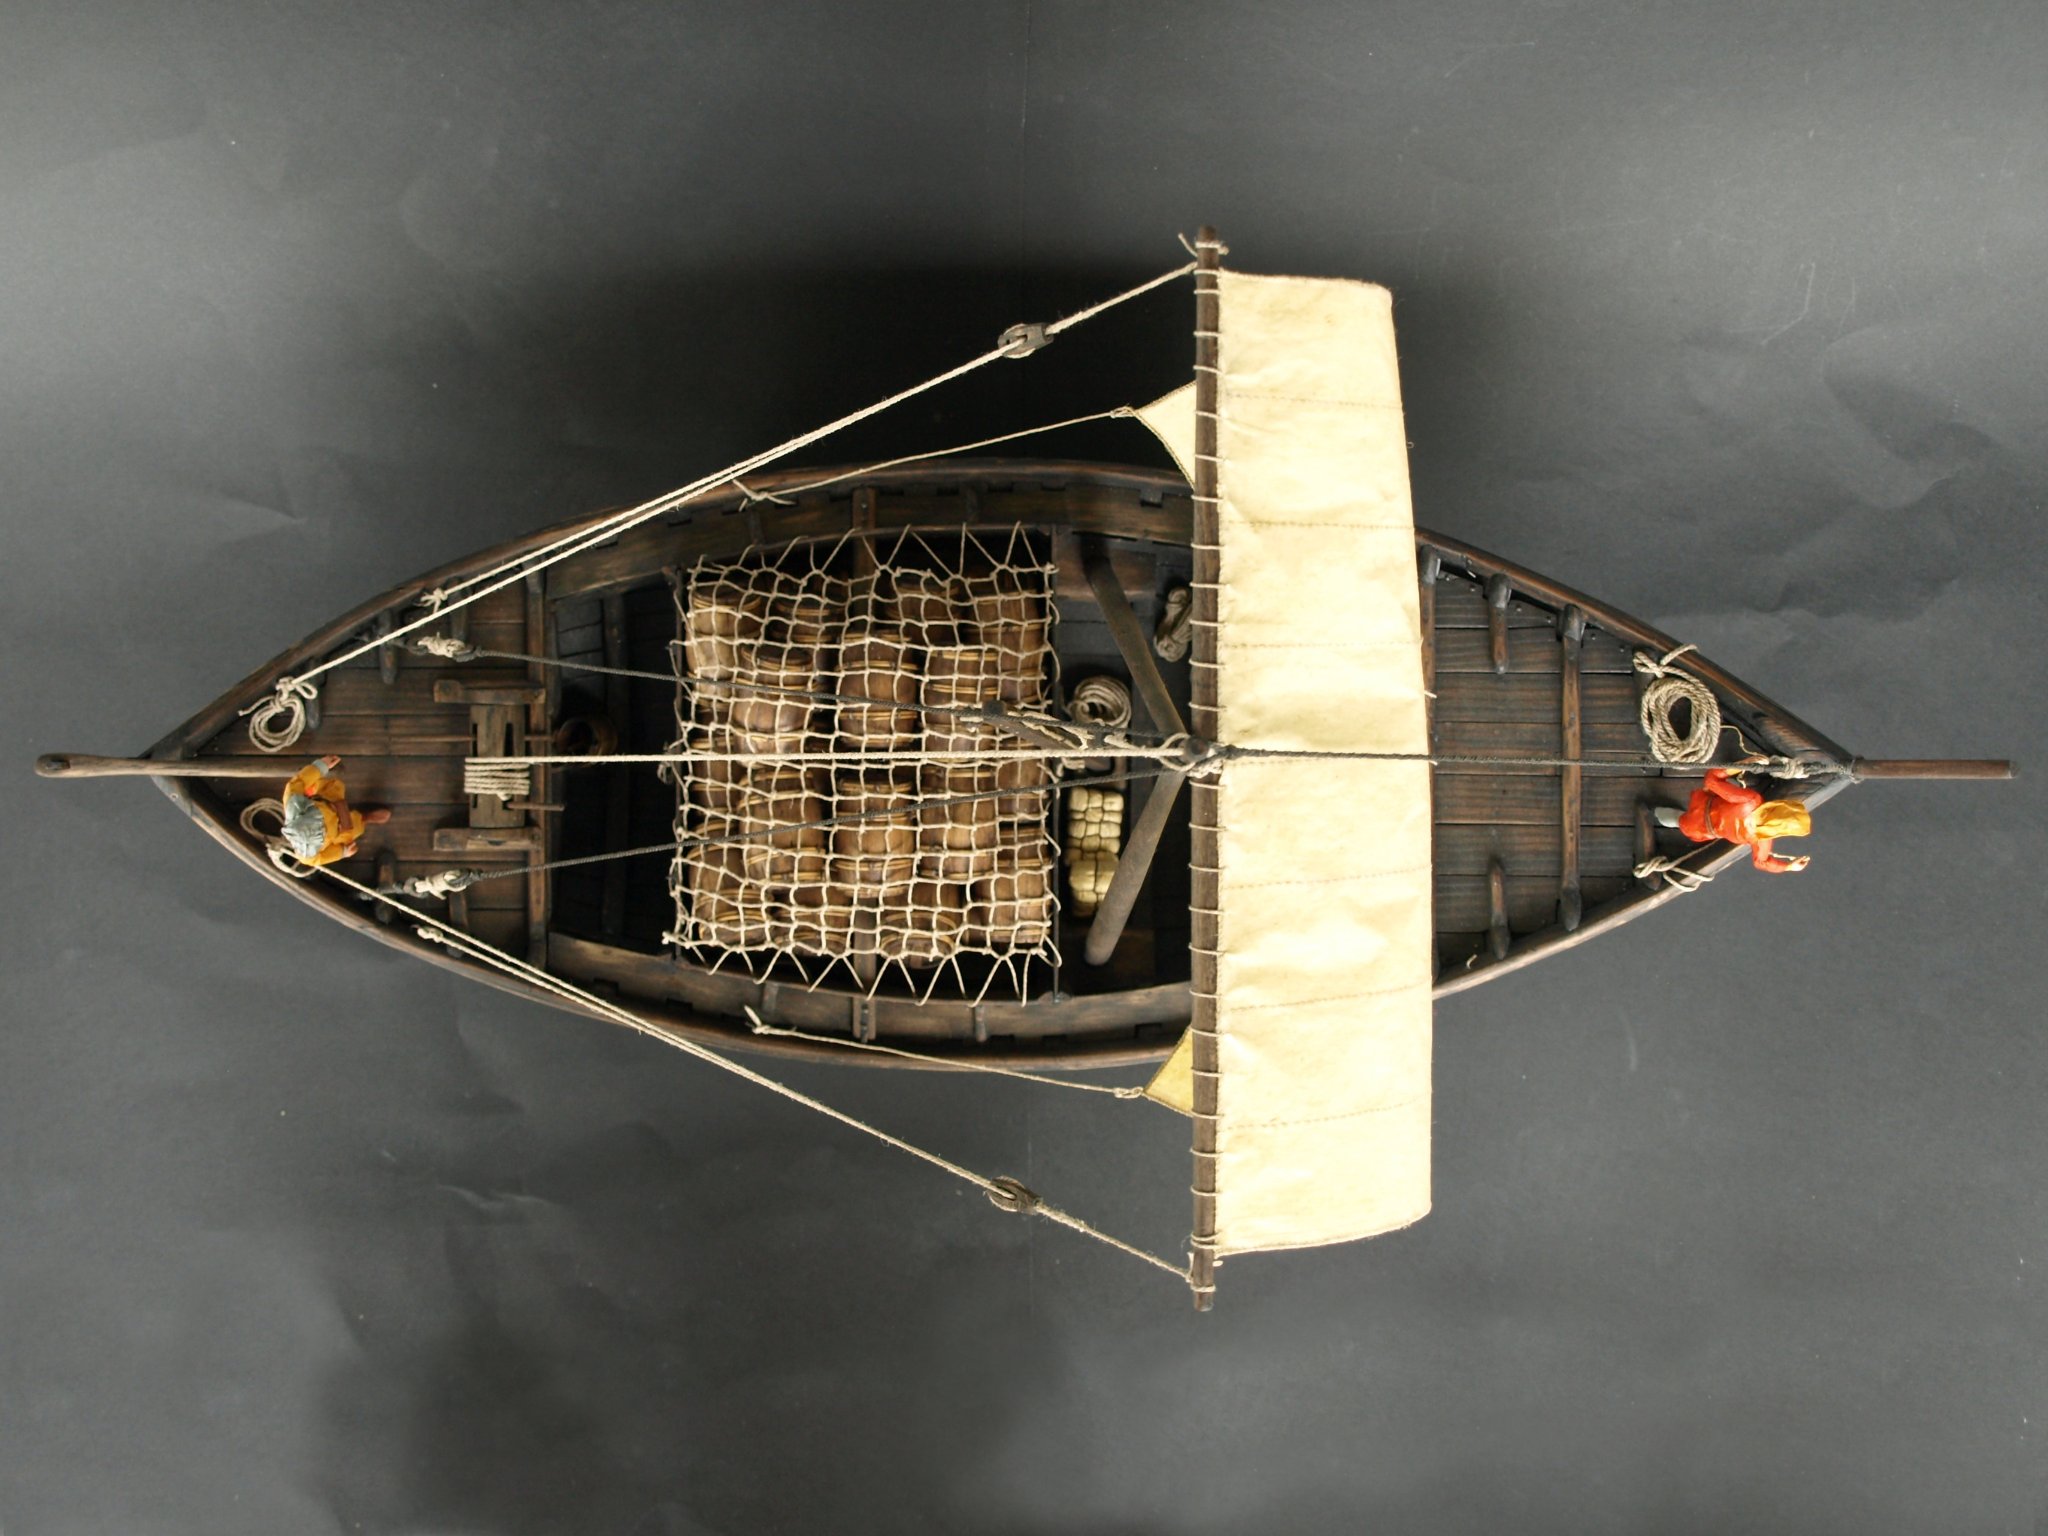
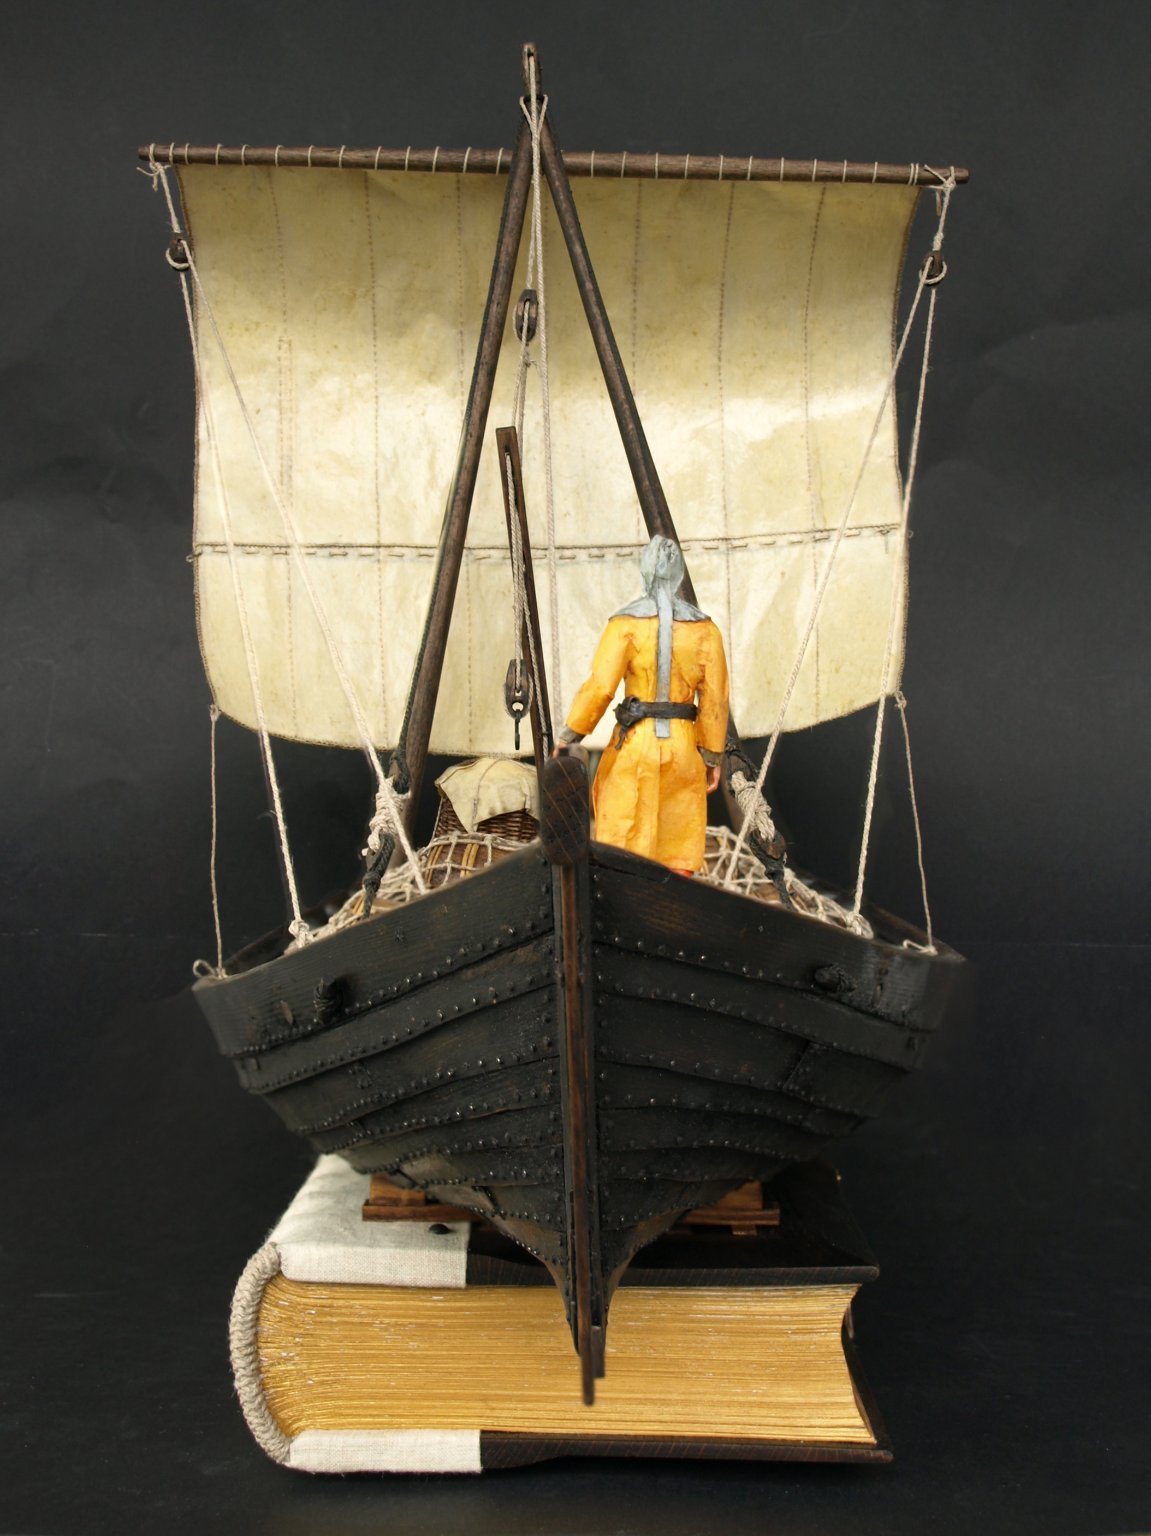
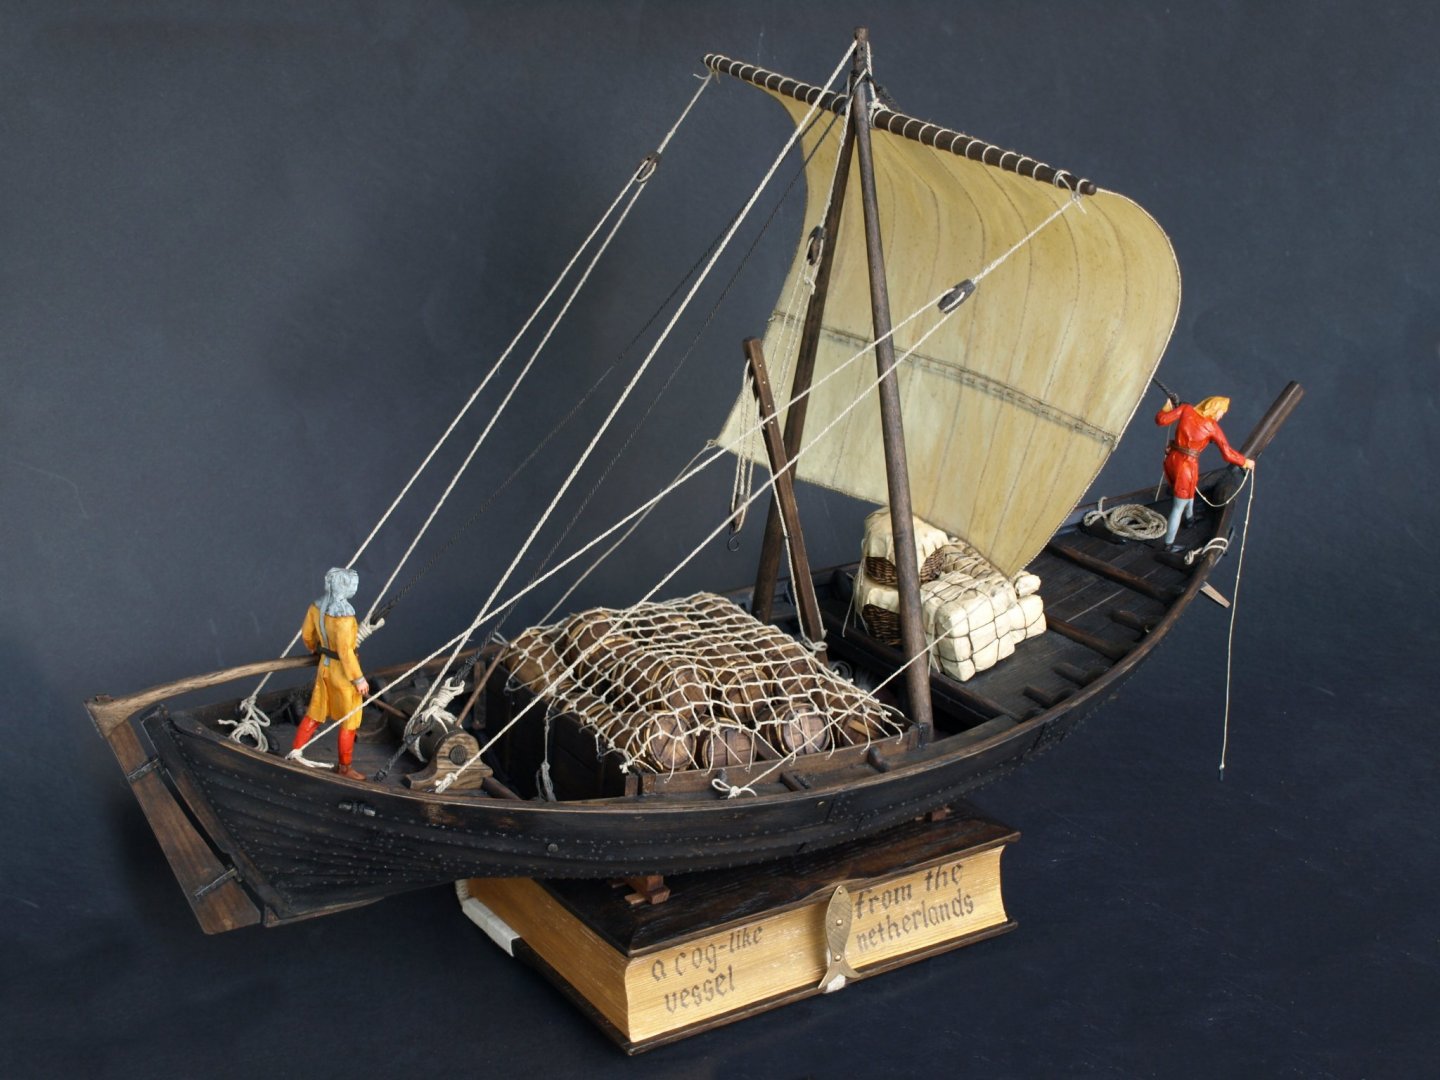
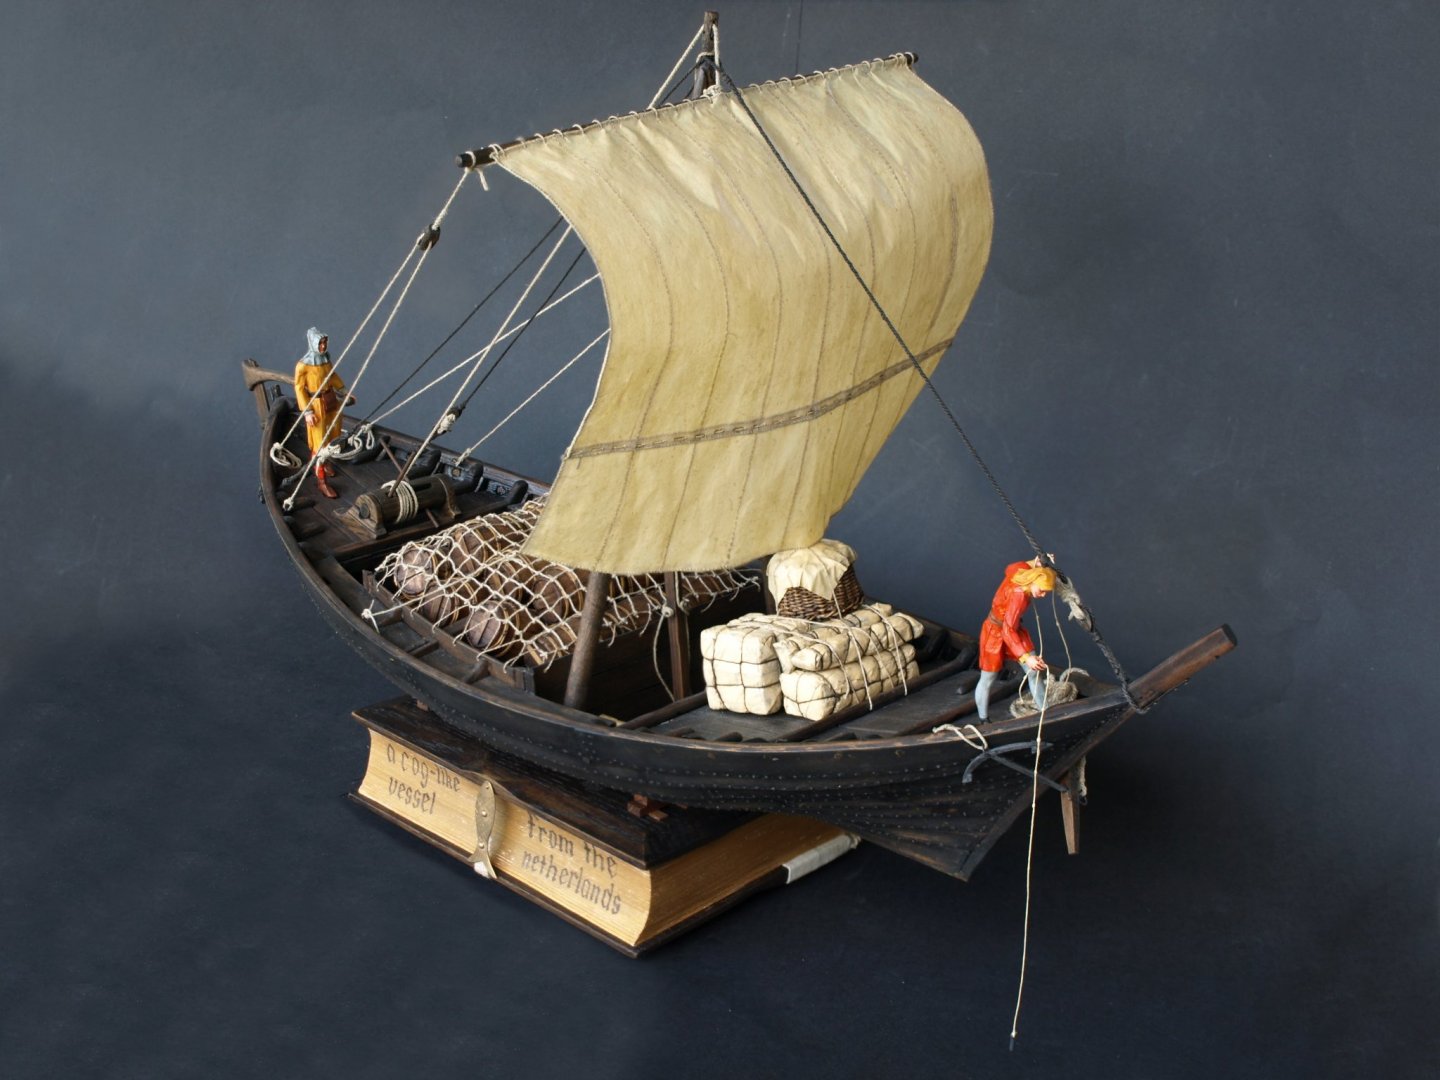
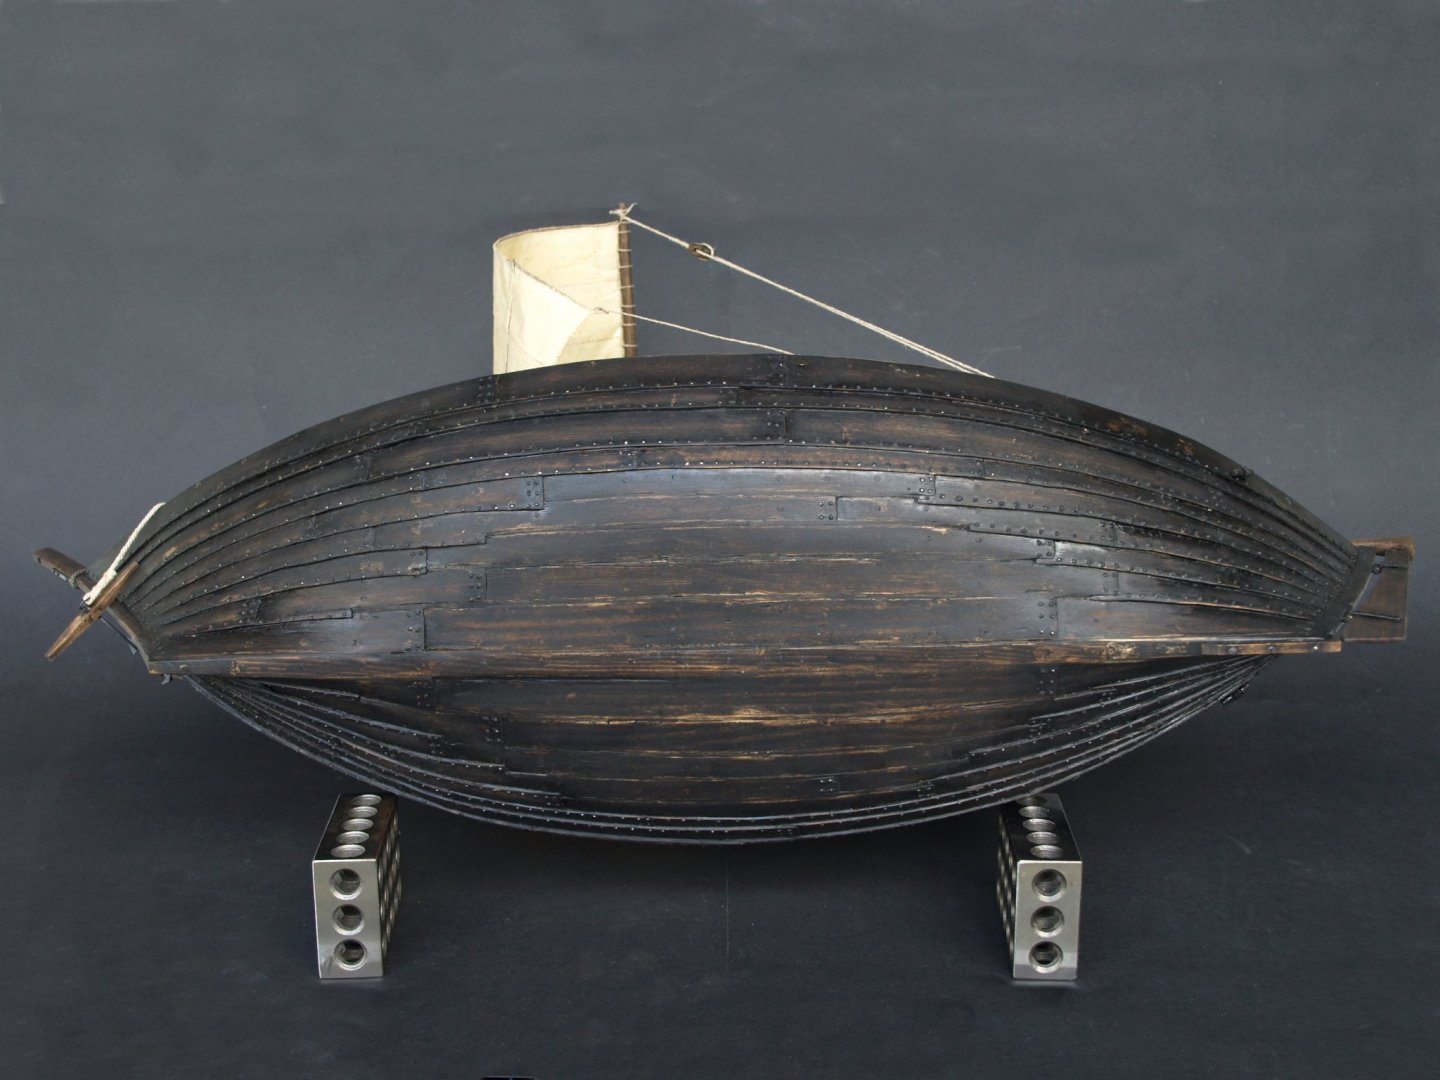
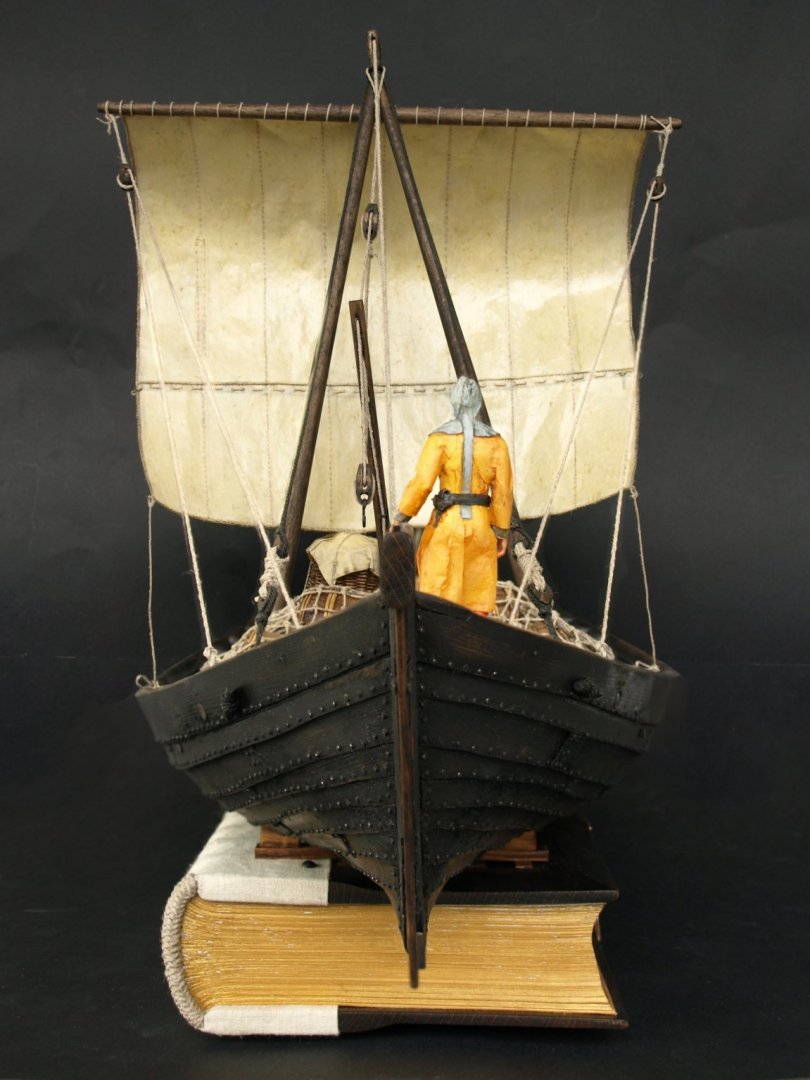
This weekend I did the last details and I guess the build is finished! Thank you all that have helped me along the way and encouraged with likes! Here are some final pictures. I read on the forum about focus stacking where you make an image sharper by combining several images with different focus points to make one sharp image and it worked out nicely.


-
Very interesting about the sails!
-
Roter Löwe 1597 by Ondras71
Brinkman replied to Ondras71's topic in - Build logs for subjects built 1501 - 1750
Great build and the colours on the sides are just amazing! -
Nice build! I'm glad I found your thread as I now what the L shaped rigging pieces look like! I read about them in the book about the Kalmar finds but just couldn't find any pictures of how they were used. Now I know, thank you.
-
@Louie da fly is that you? That's a really nice kit! What kind of armour is that? I think it's hot in the summer here in Sweden with the woolen clothing, I can't imagine how it must be in Australia! I painted miniatures when I was young and I'm glad I saved the paints for the odd occasion like this. The oldest off the paints is almost 30 years old and some still work.

-
Thank you for all the comments! @Louie da fly yeah, the hose got a bit too perfect, but I could always say that they were made to look like in the paintings rather then how they look in real life?
-
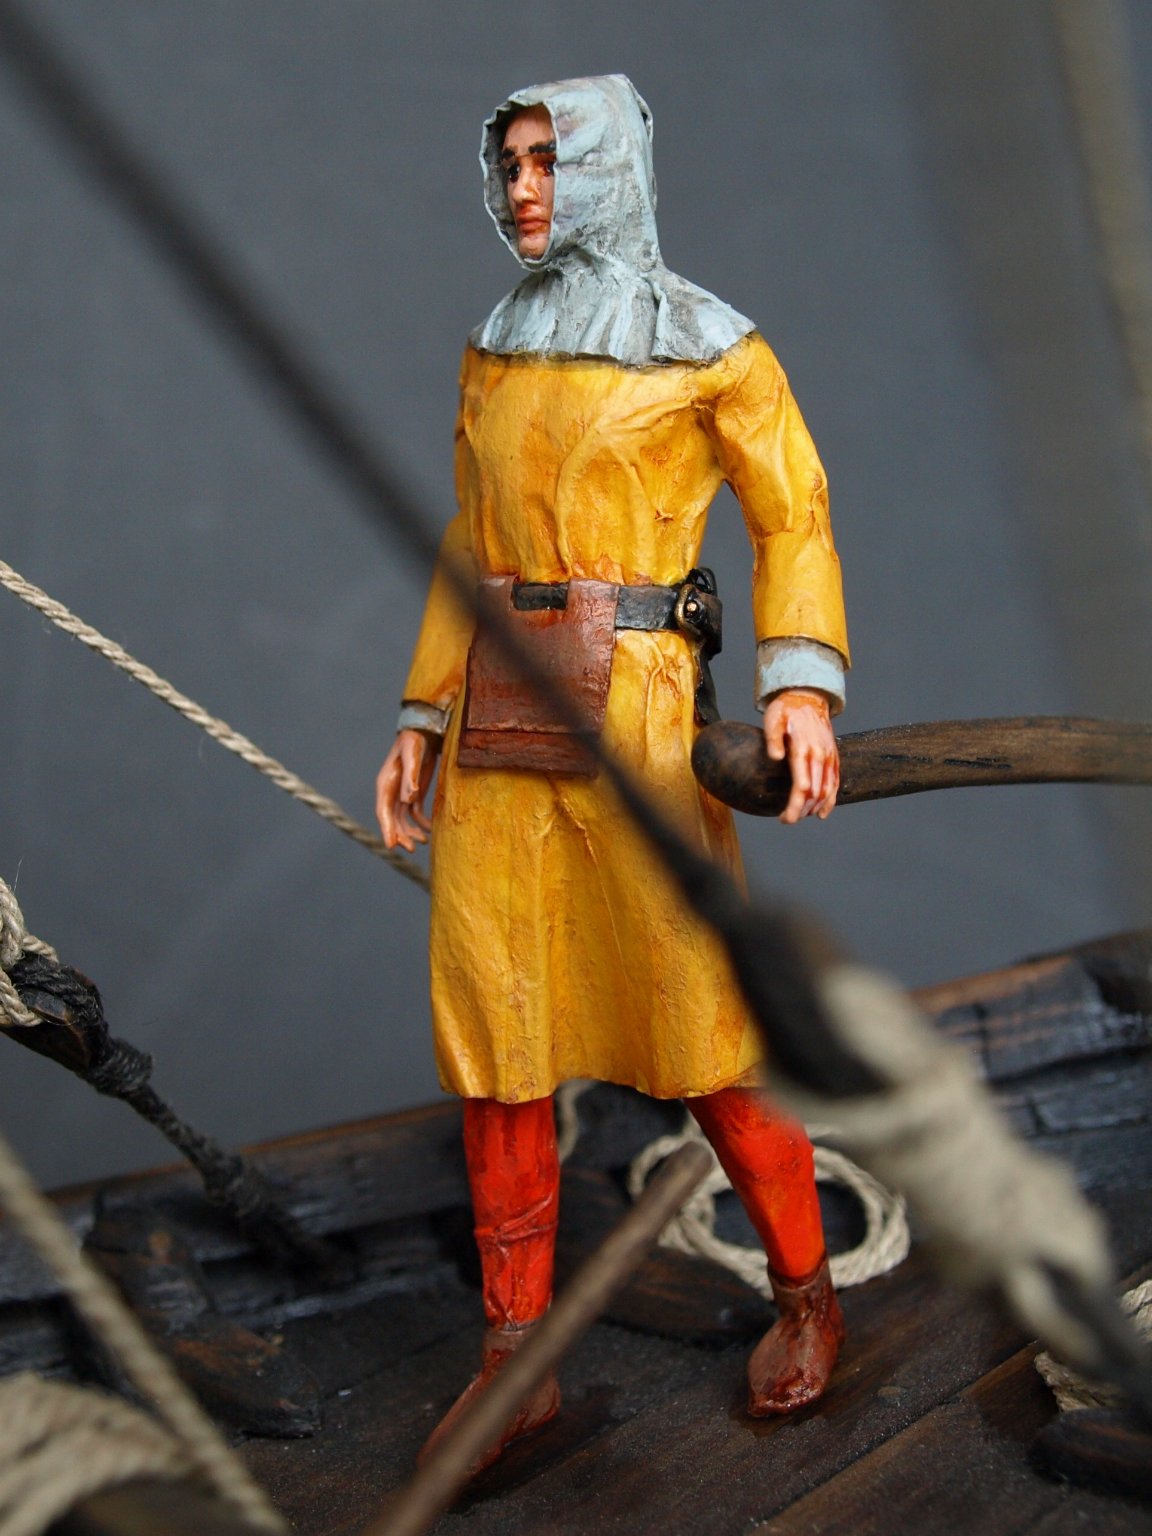
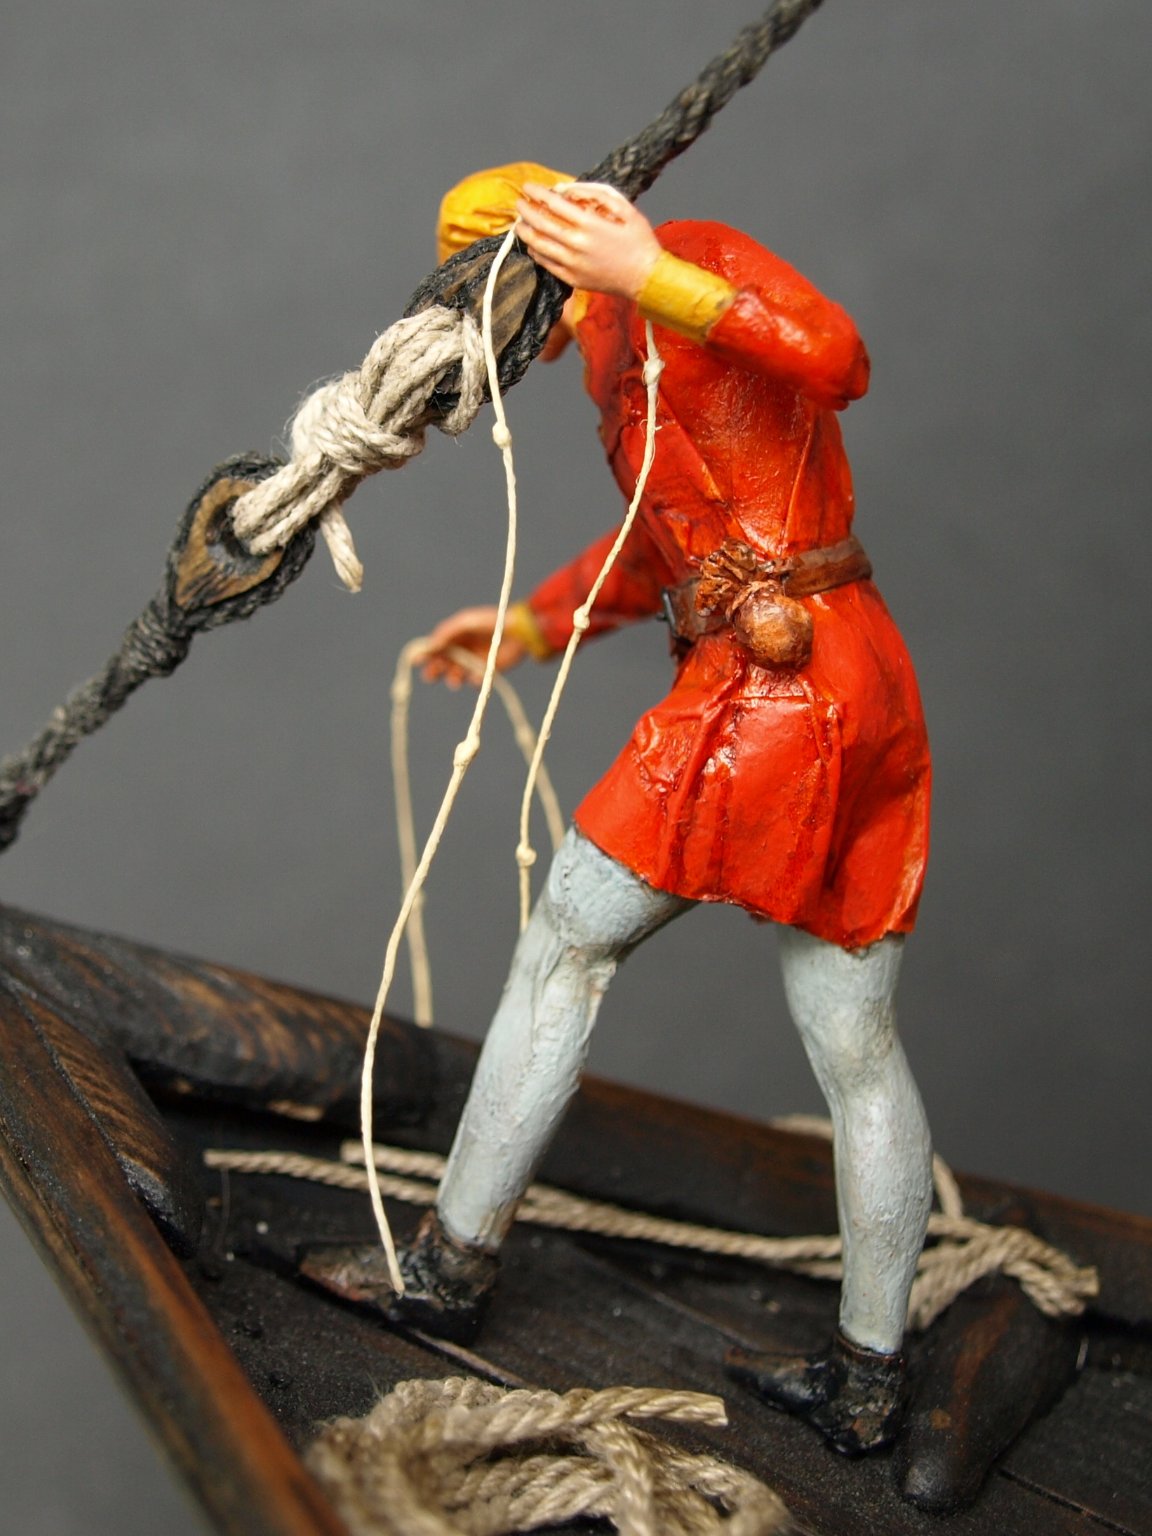
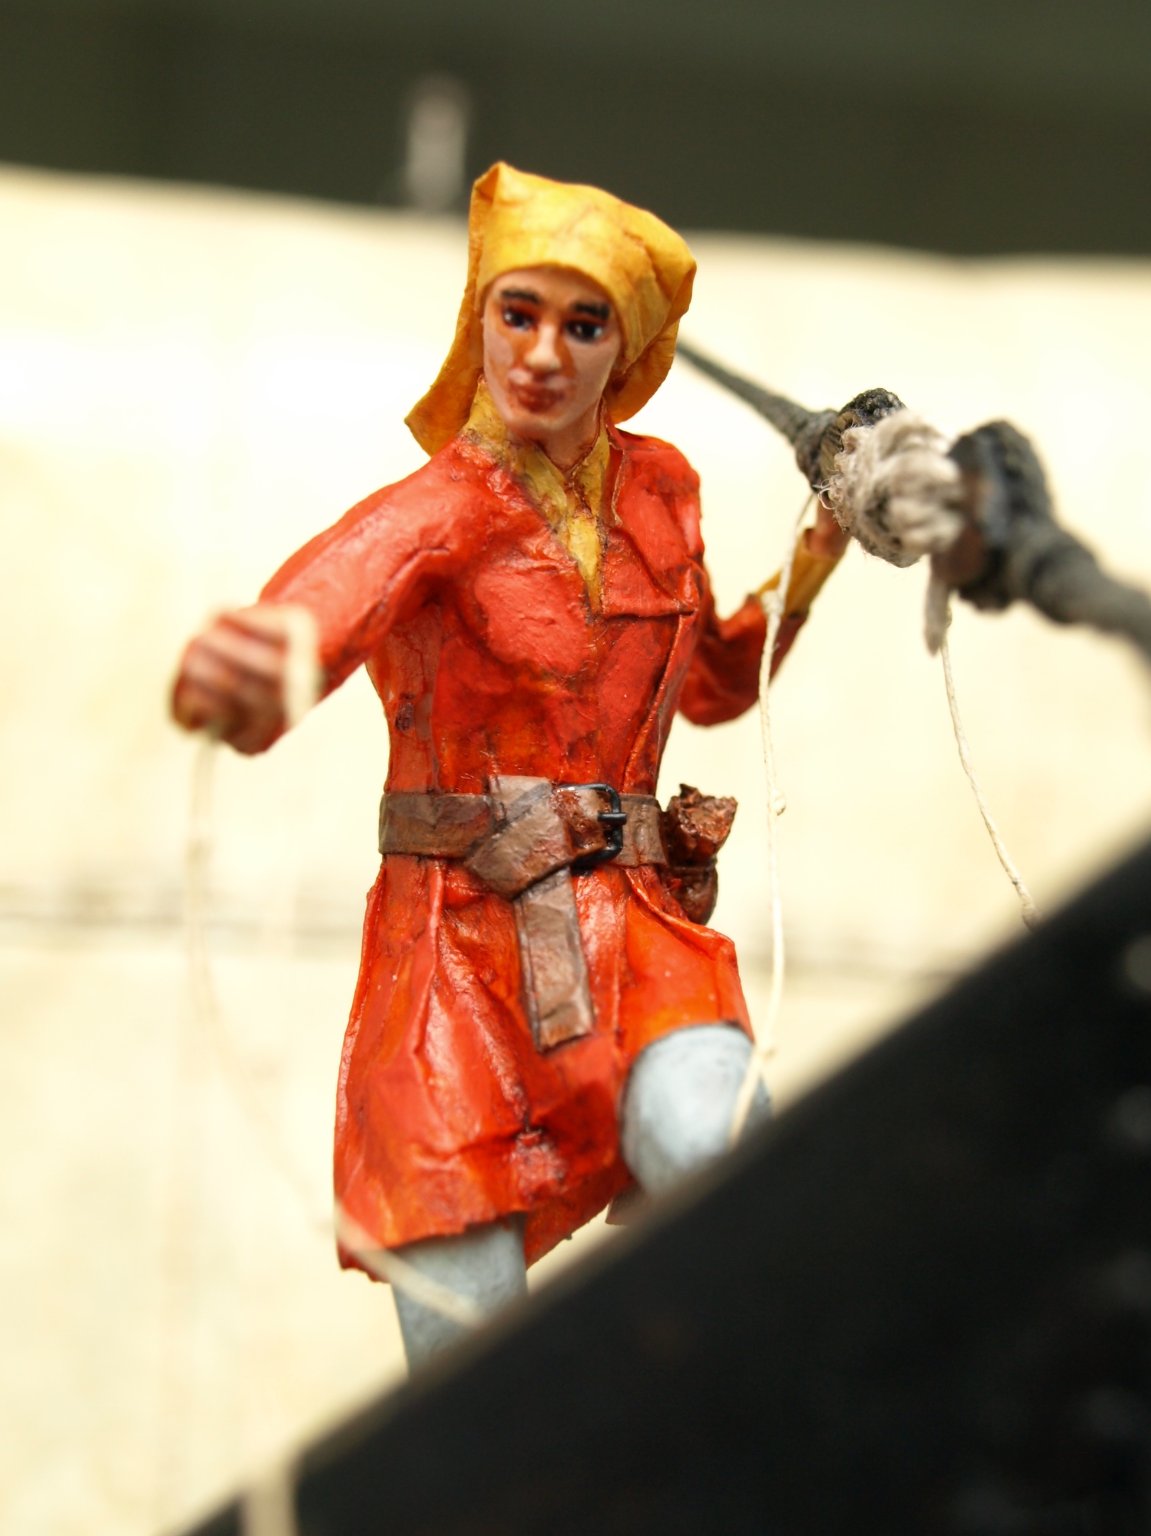
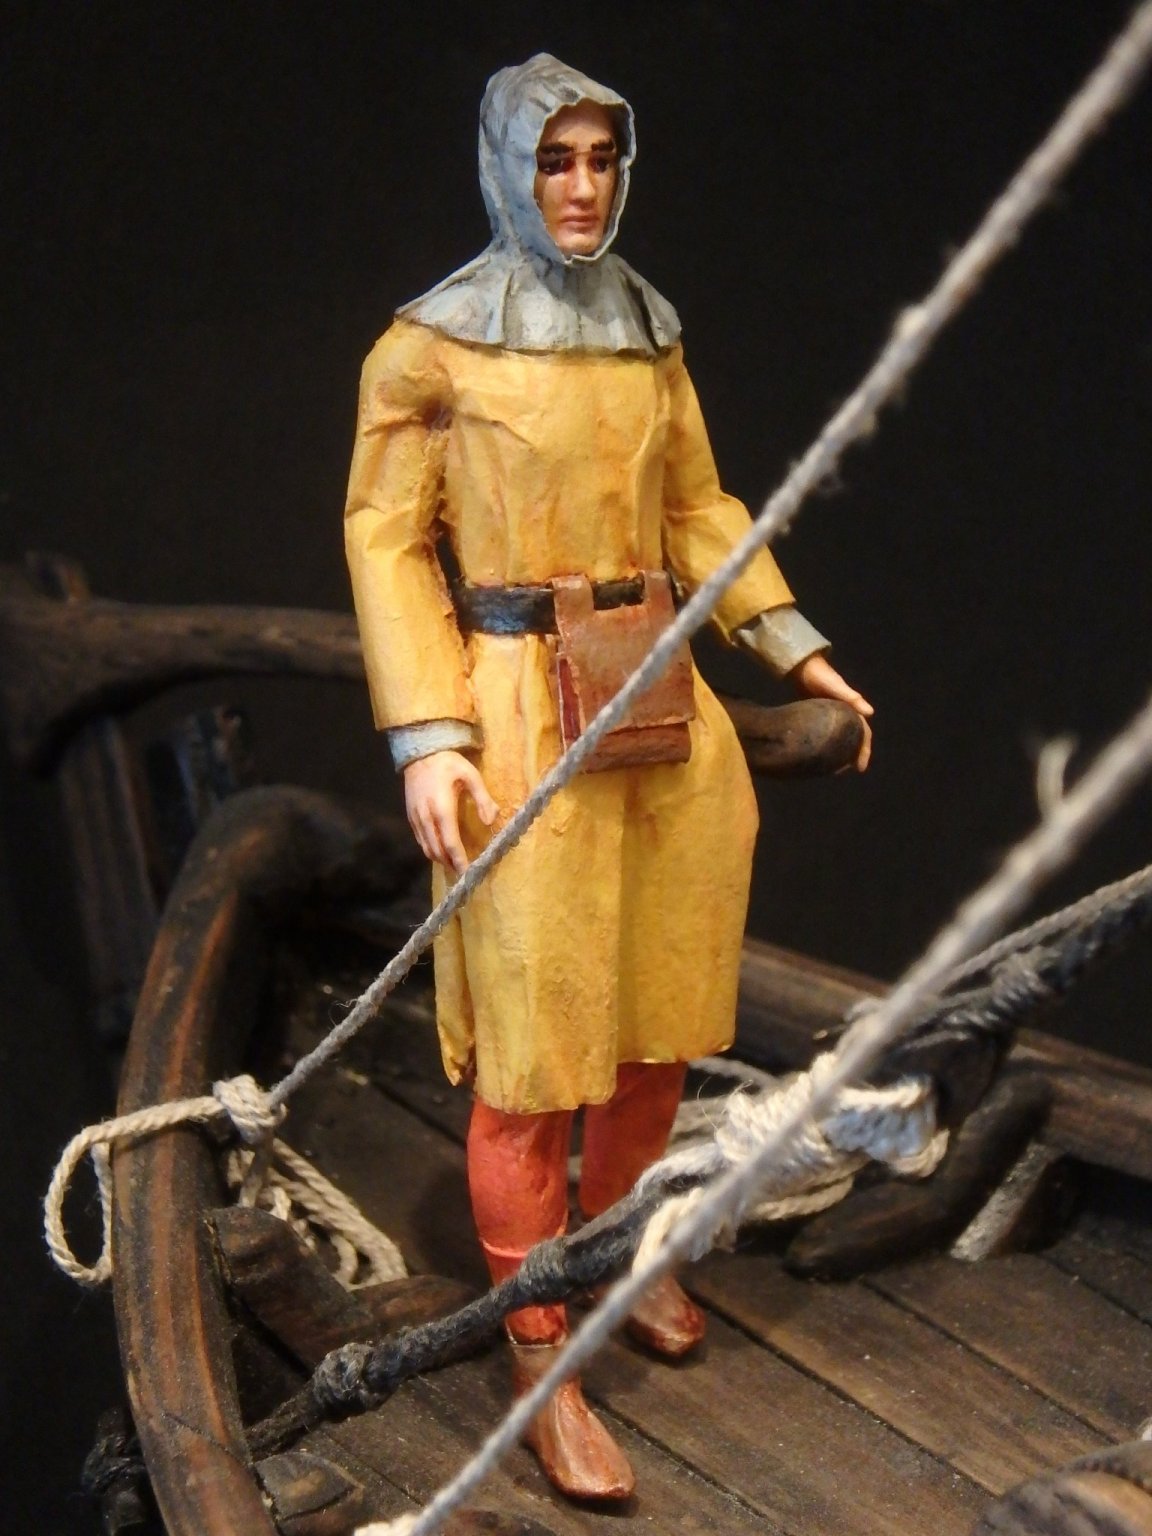
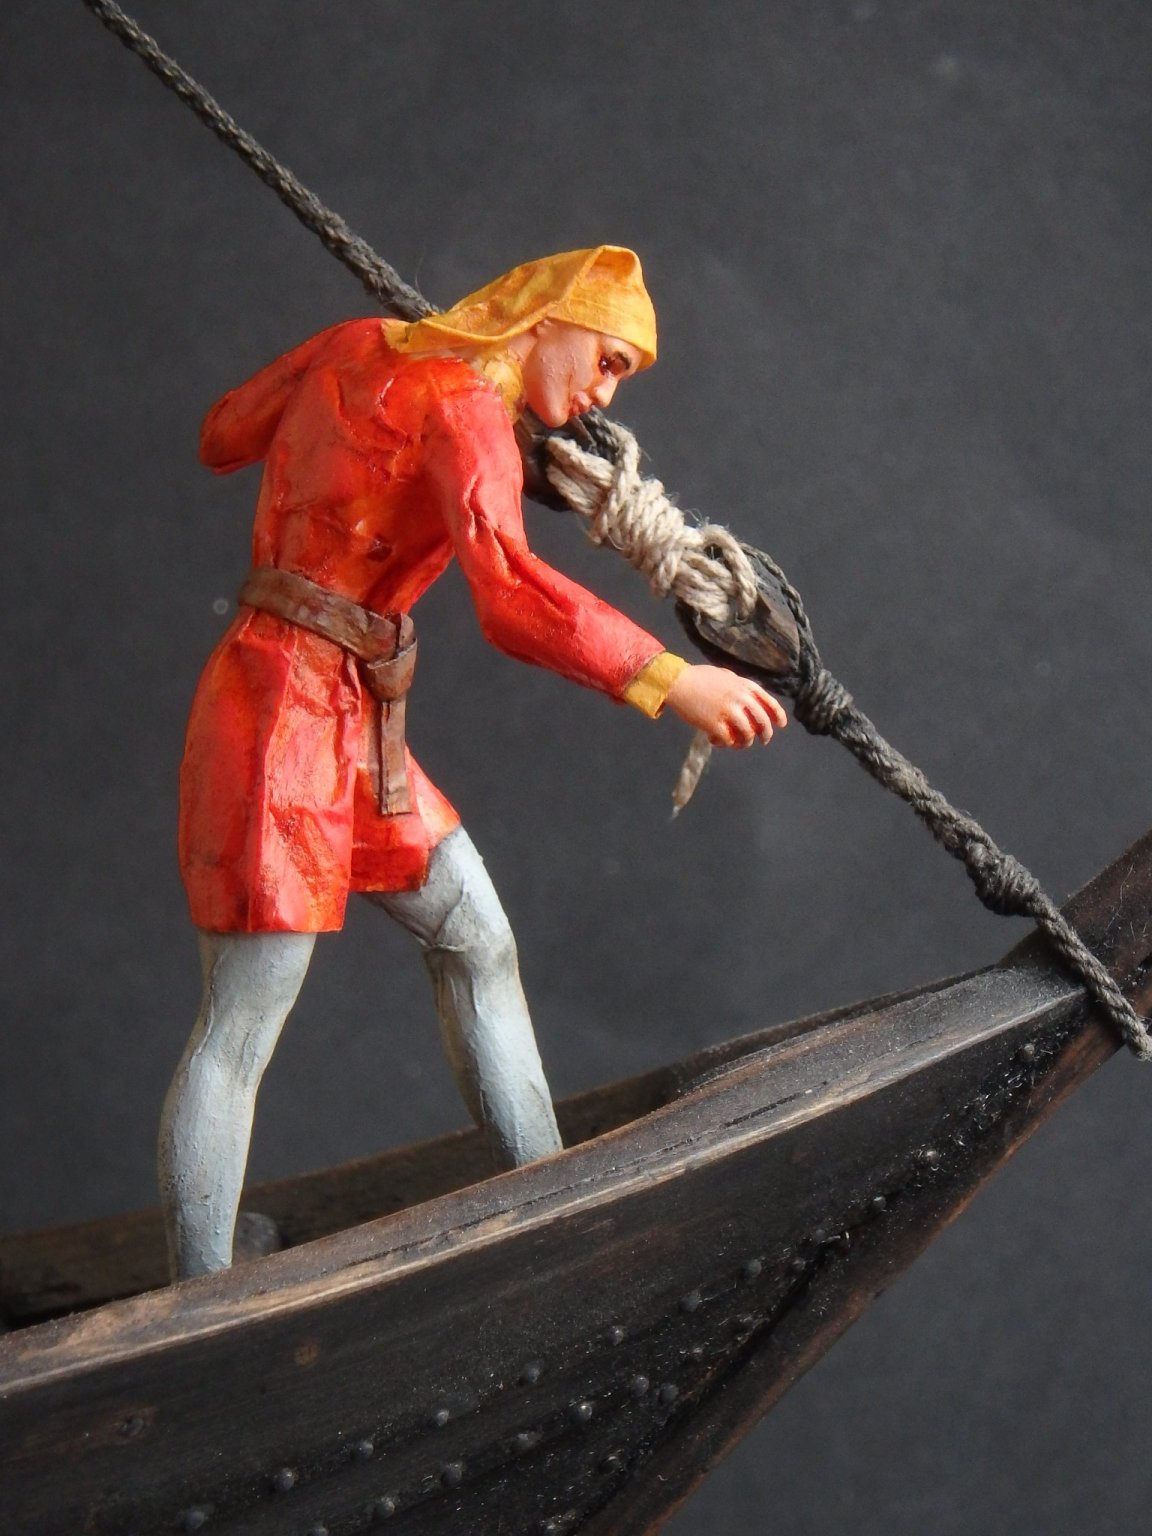
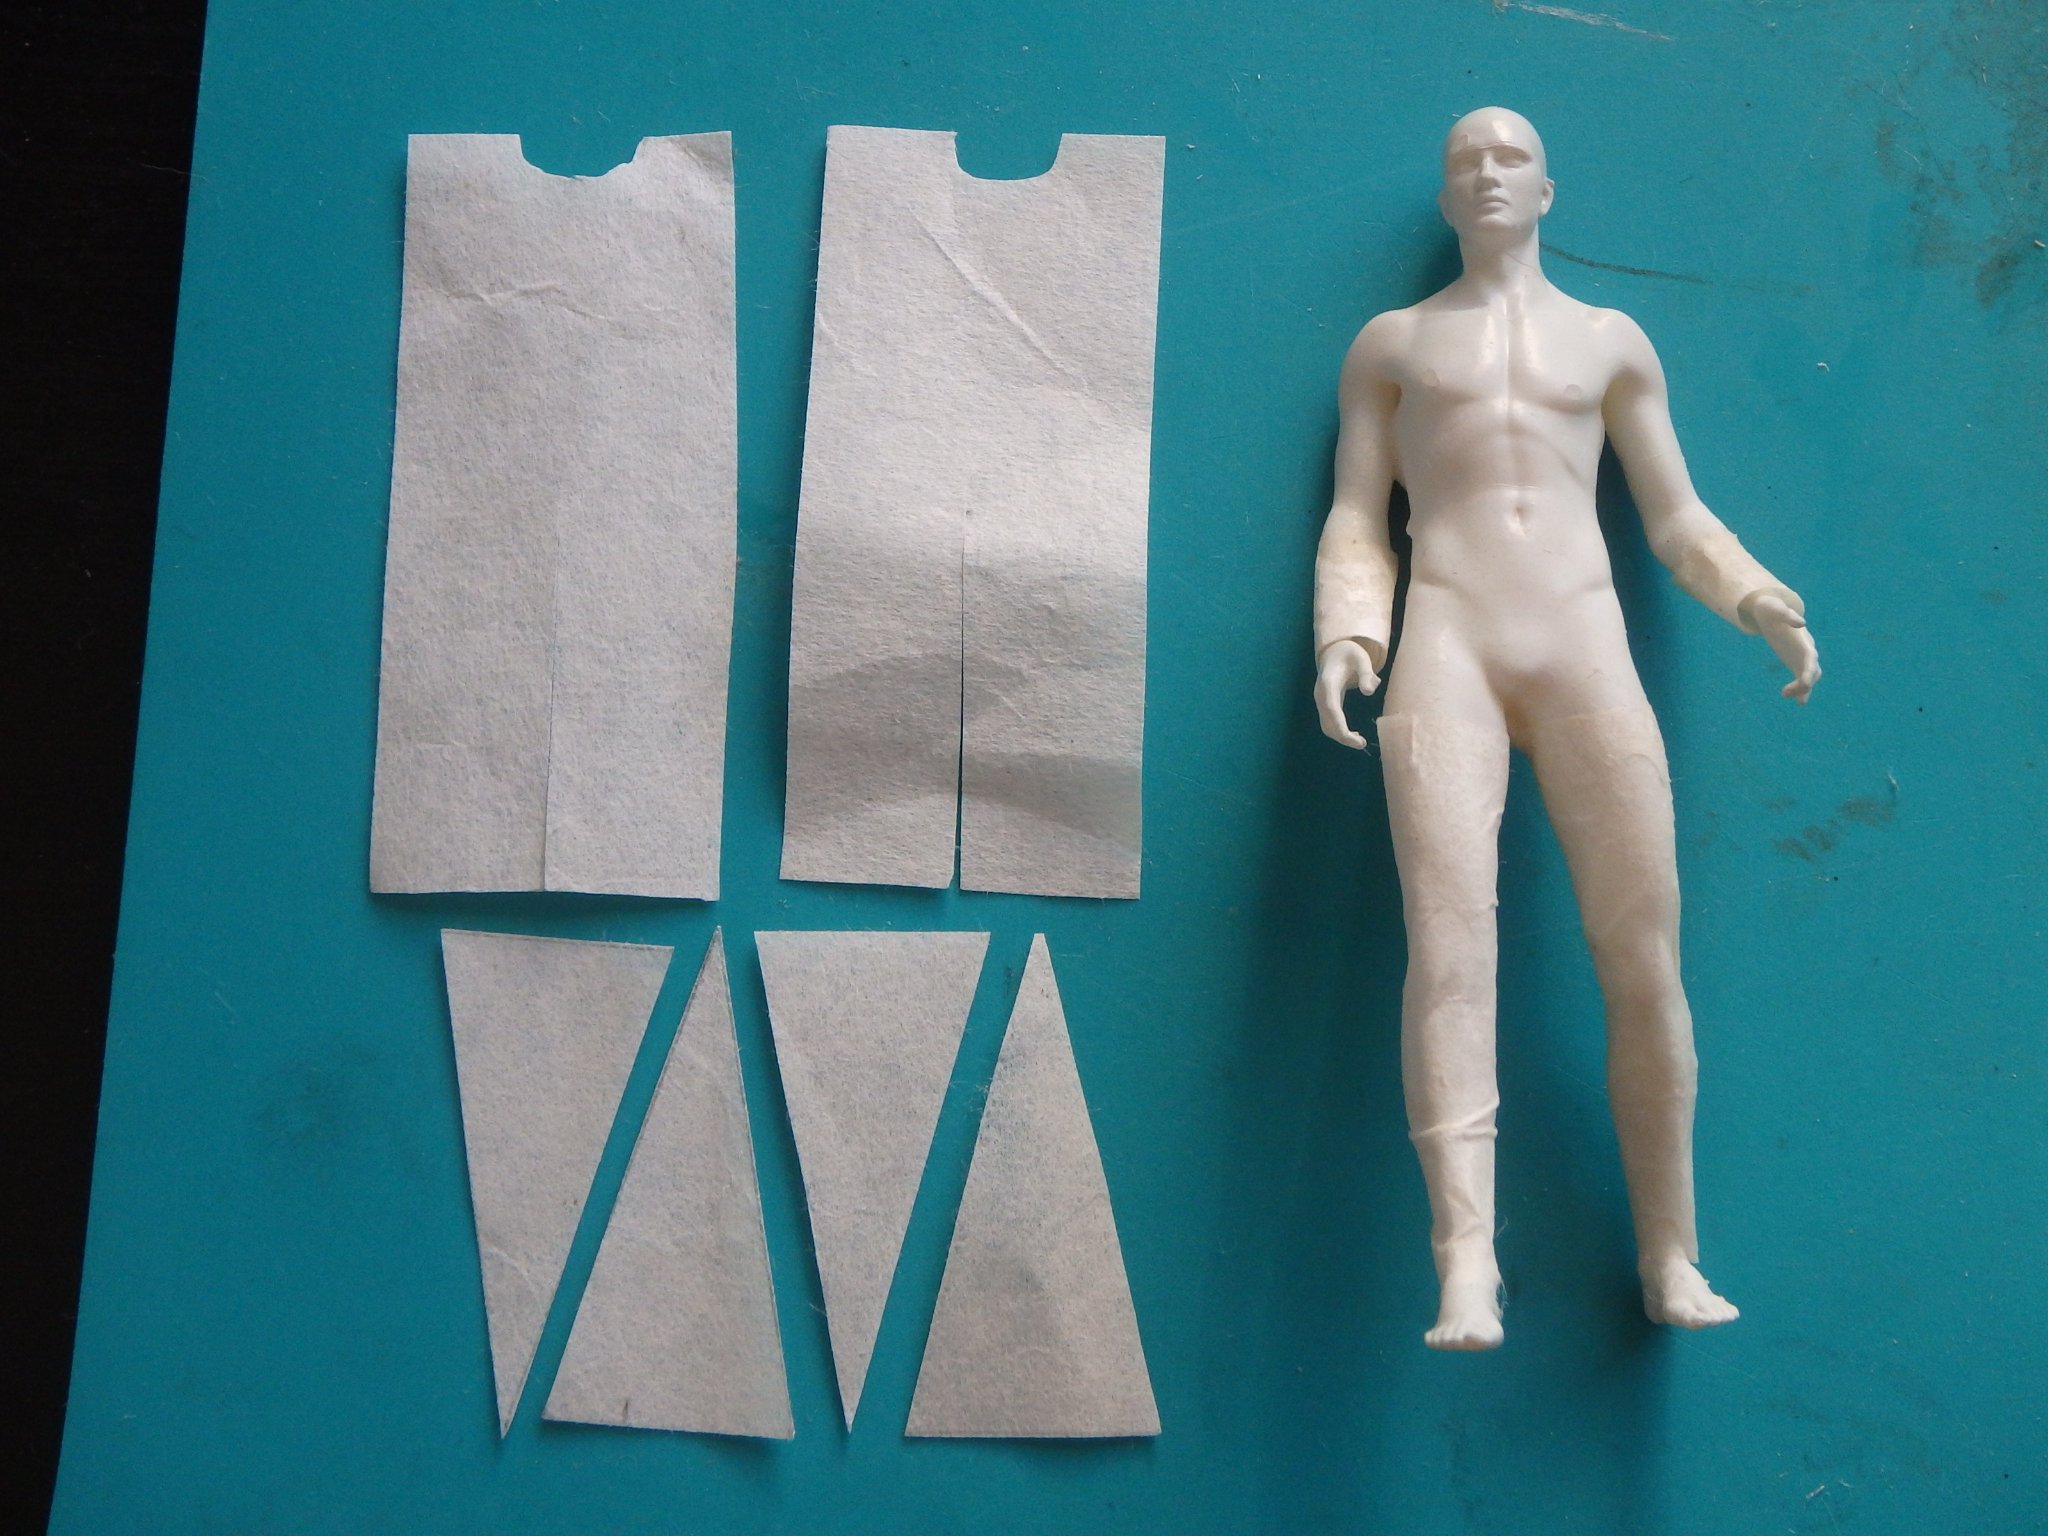
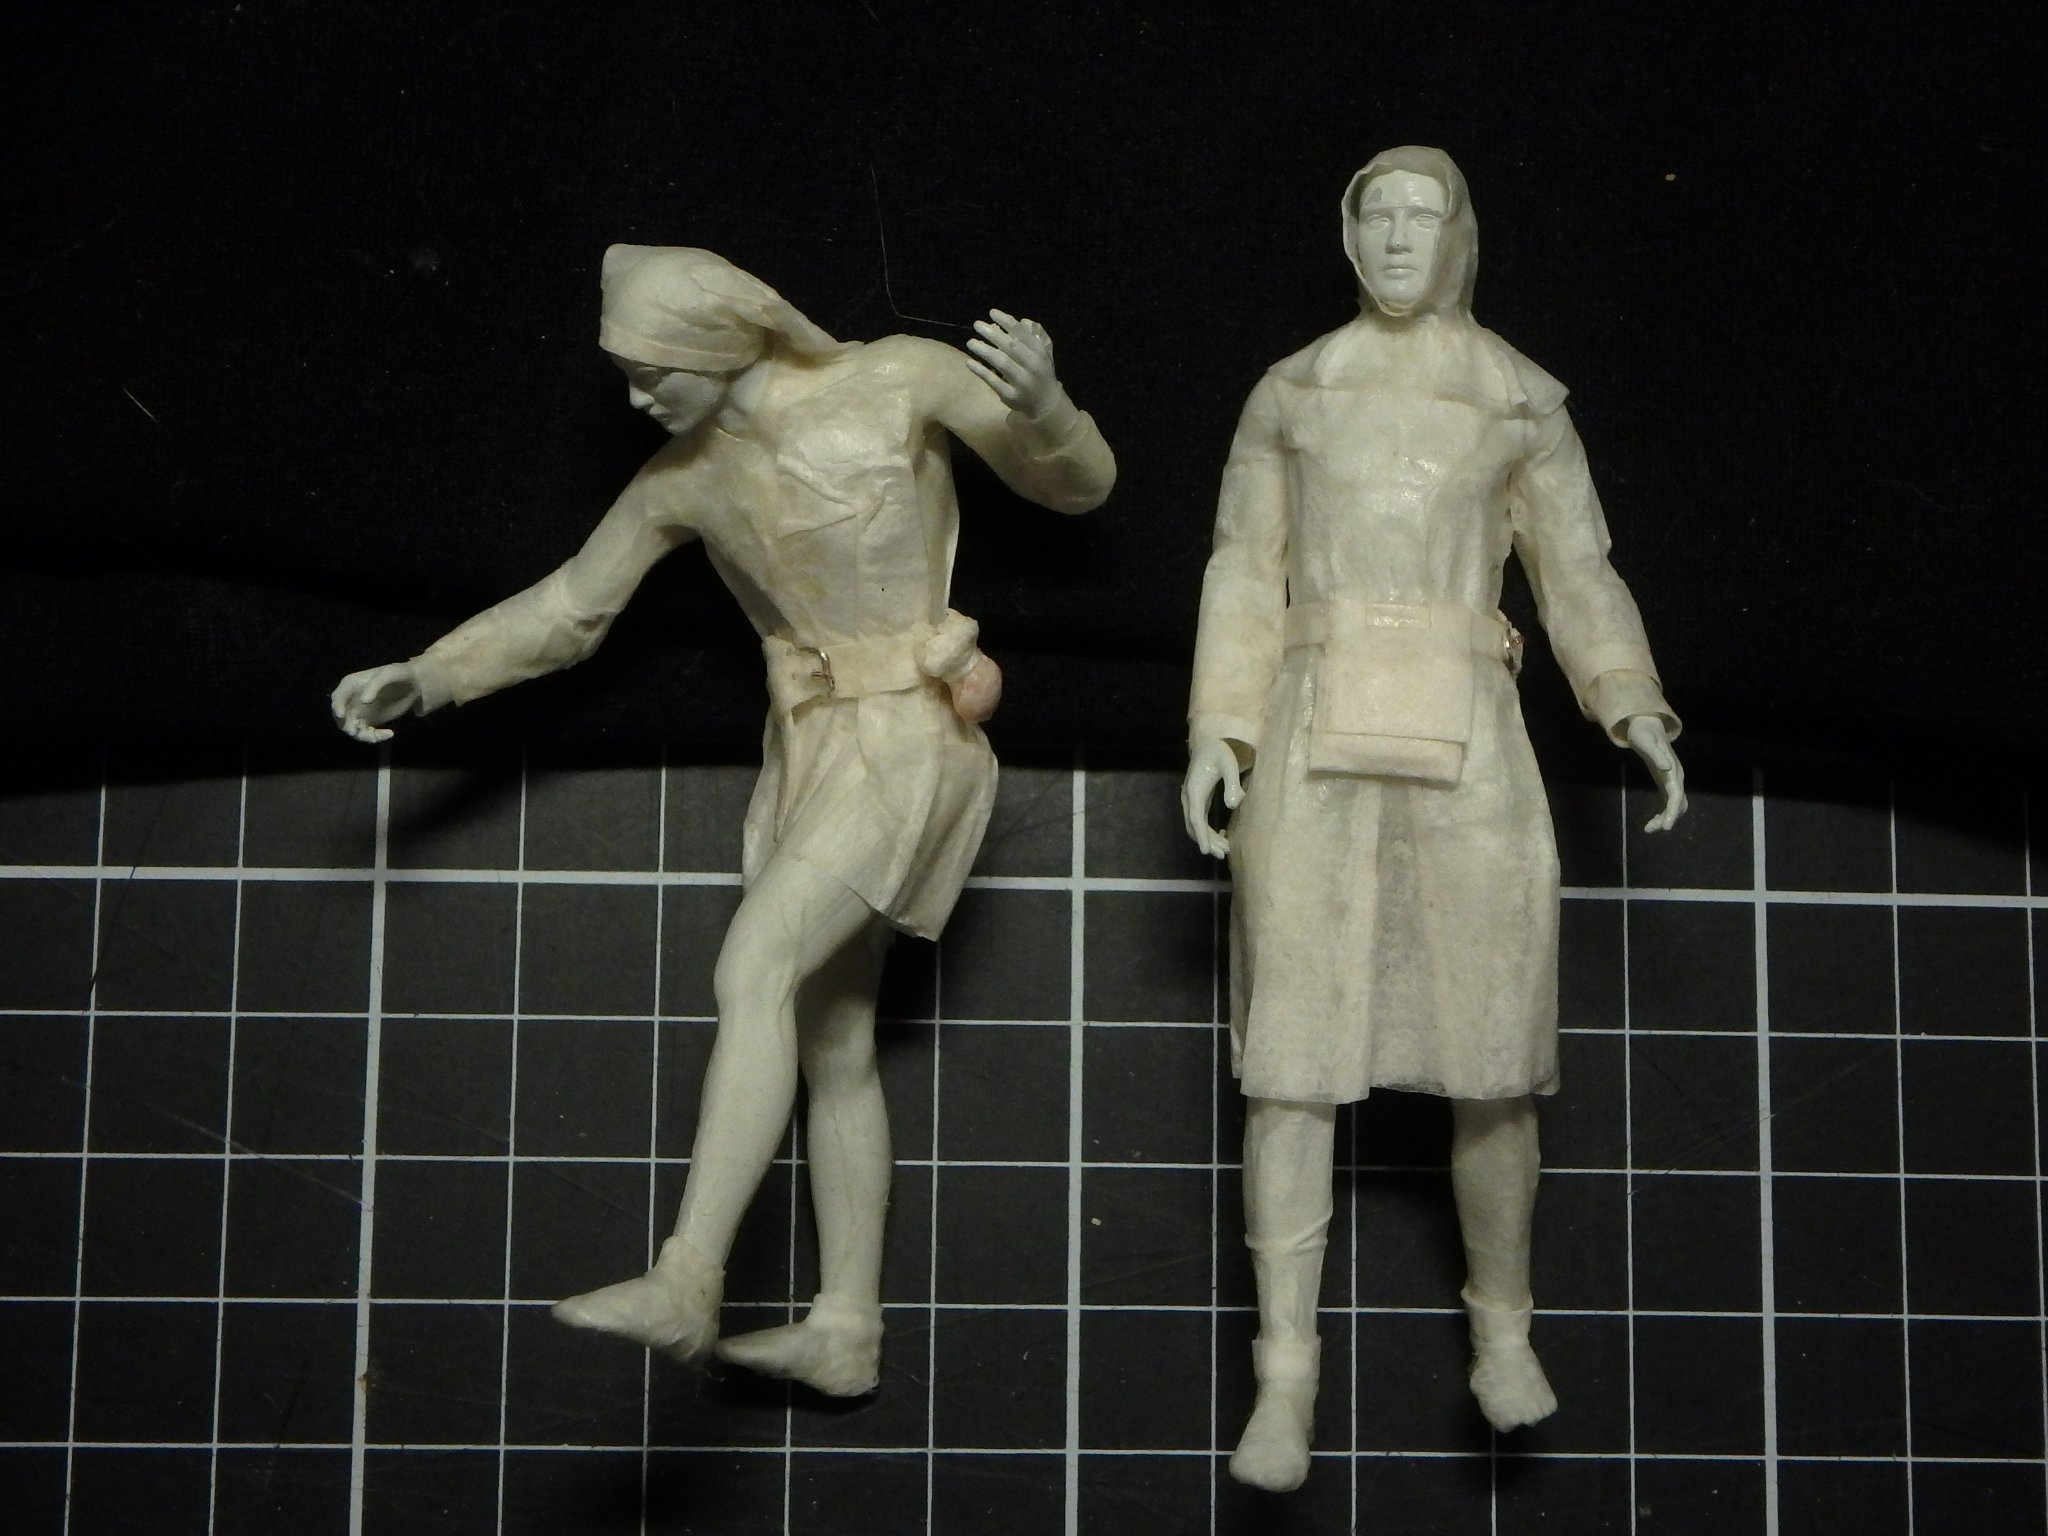
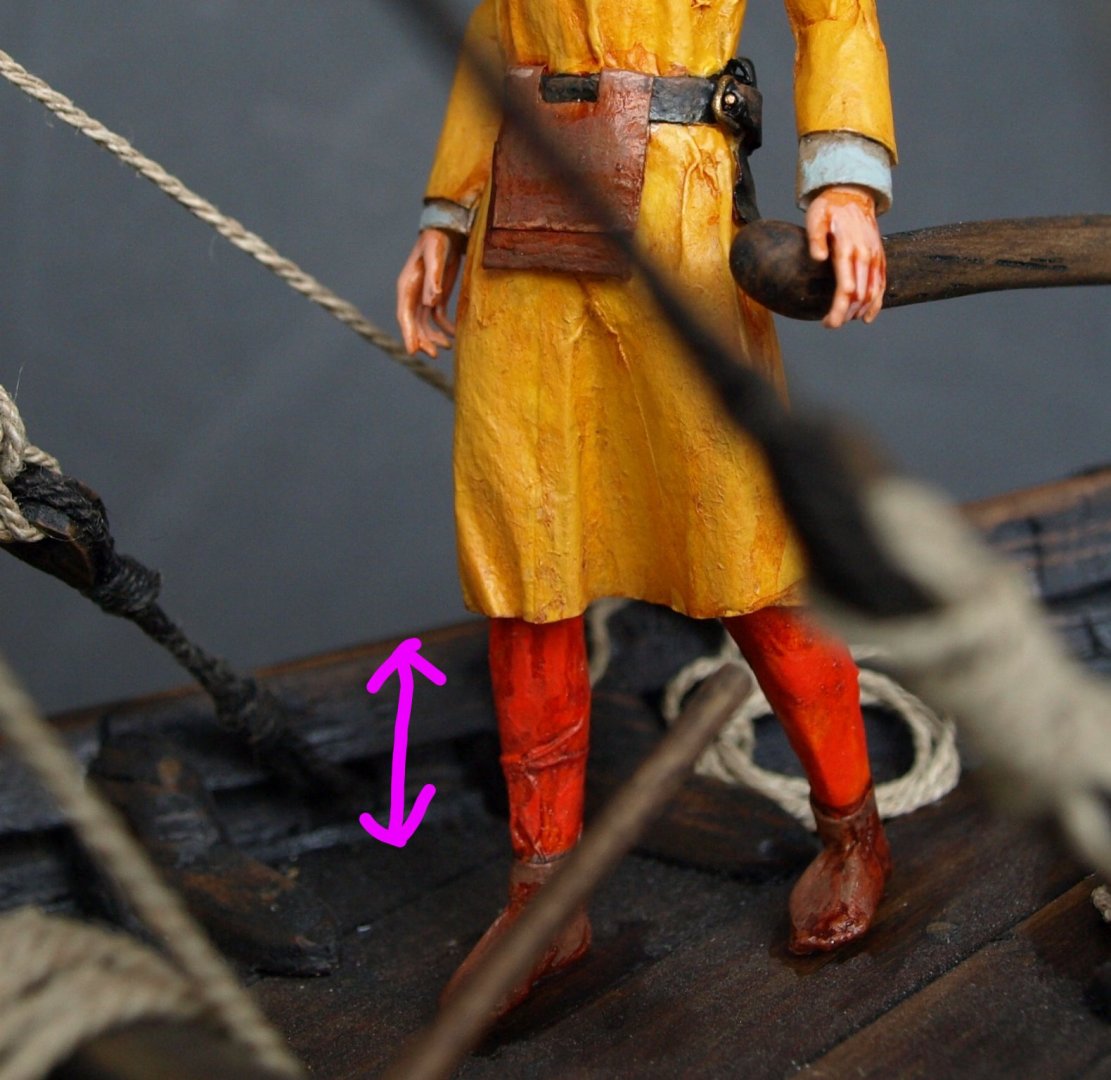
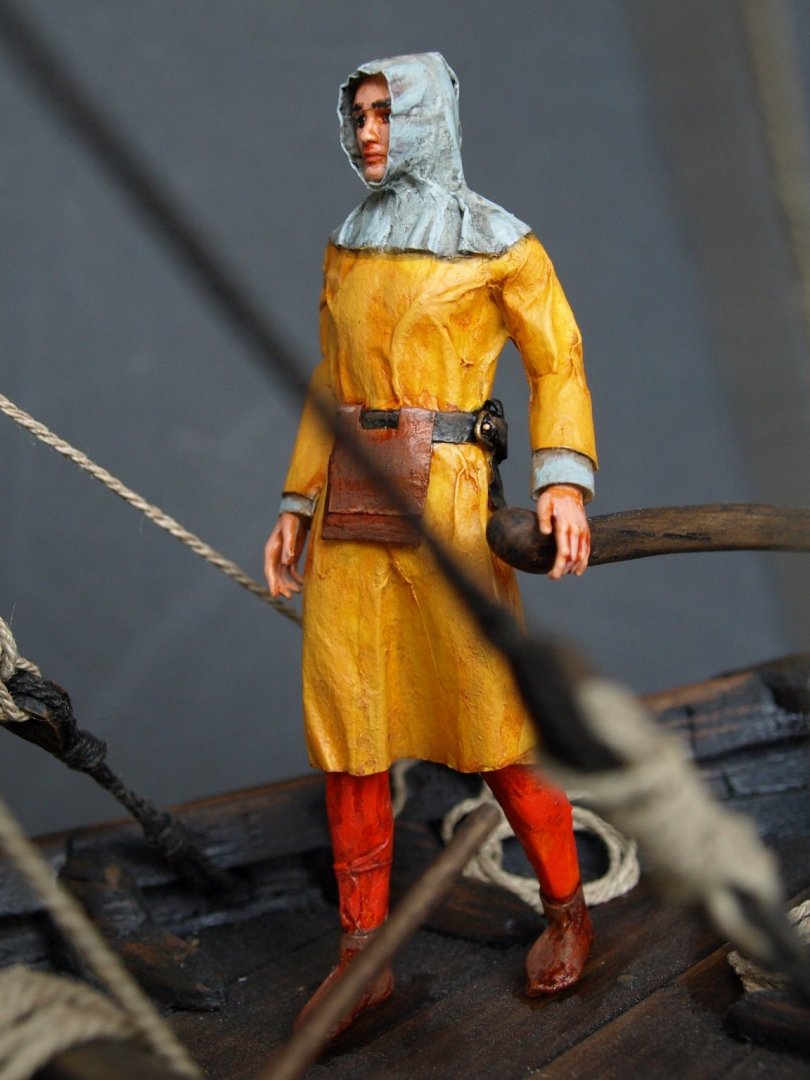
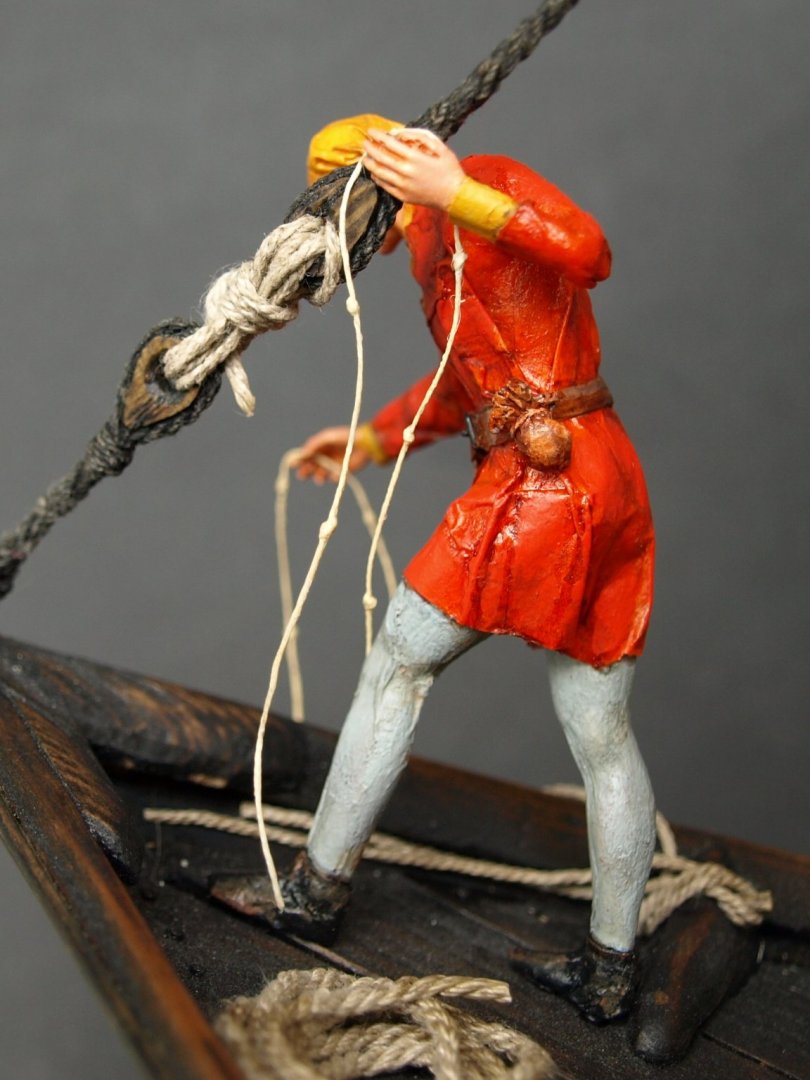
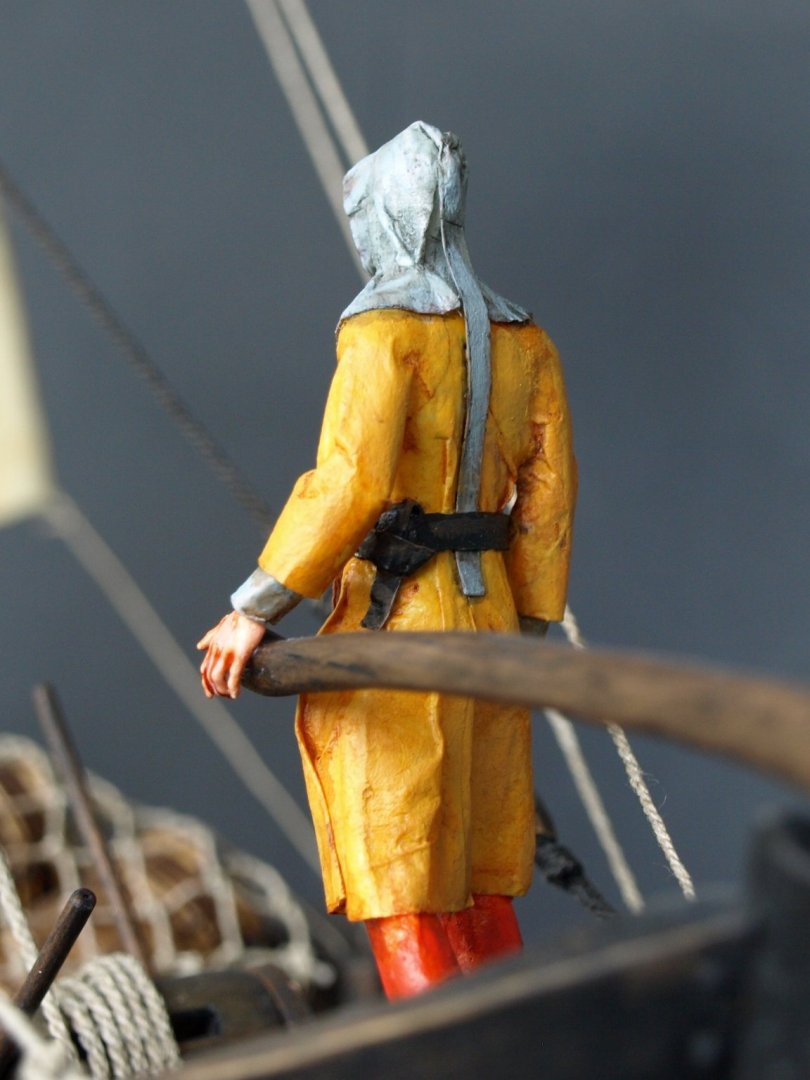
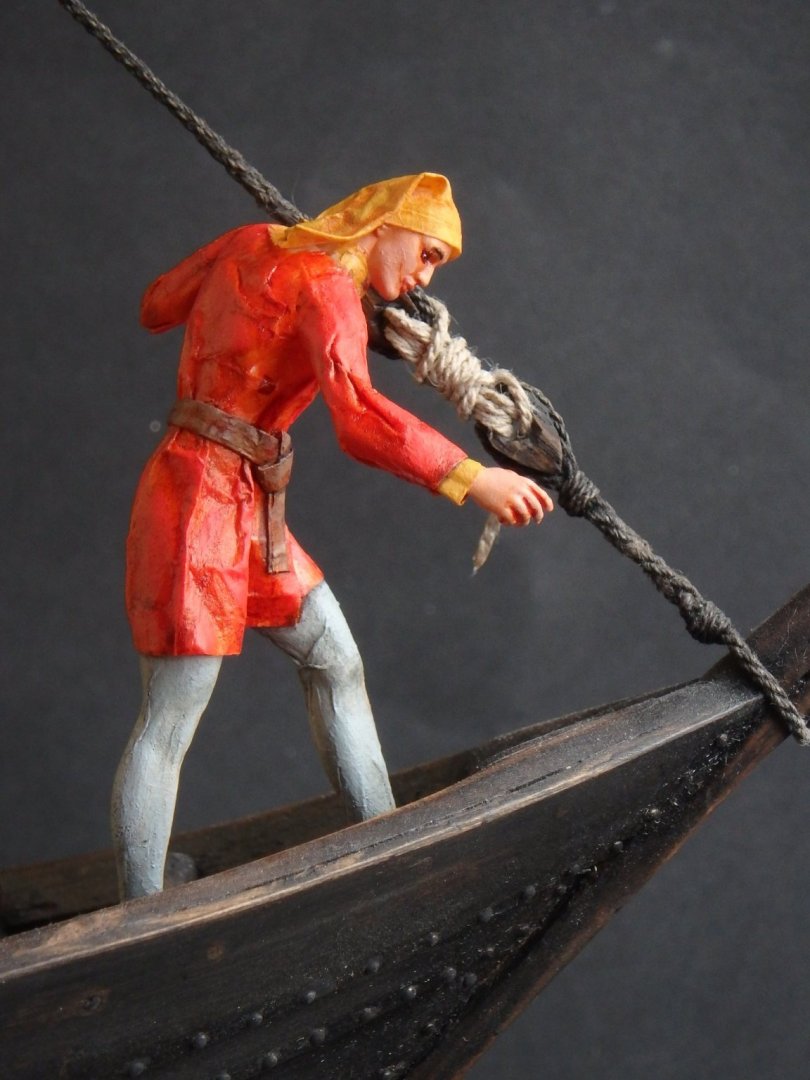
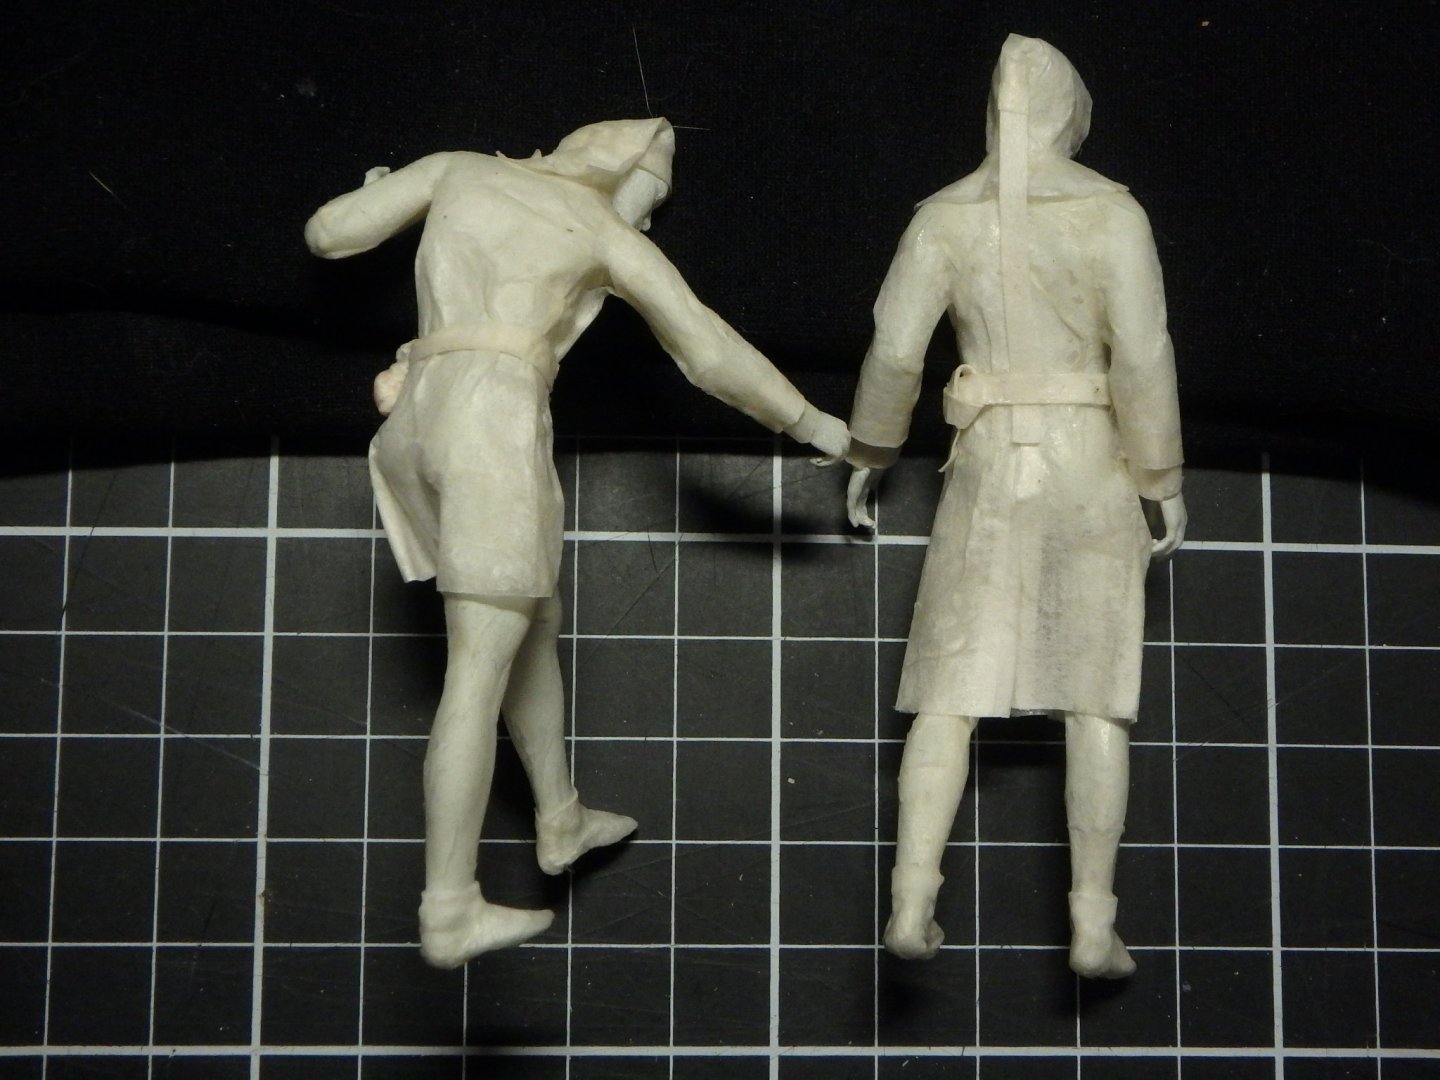
It was really fun to make the clothing! It helped a lot to have sewn before as some of the pieces were cut just like the real thing. It worked out great using the same tissue paper as the sail and it got a great consistency when covered with watered down PVA. It was an interesting experience as it was a bit similar to sculpting as one pushed around the goo to form wrinkles. The triangles are gores and make the skirt part of the surcote wider. The person on the foredeck wears an open frock and you can see the doublet underneath (I didn't get the edges as crisp as on the other figure, but I think it will show up when painted). He's got a drawstring purse in his belt and a bag hat on his head. The other person wears an older style of a longer surcote and you can see the arms of a cote underneath. On his head he's got a liripipe with the long tail tucked in the belt. He's got the bigger style of girlde purse for coins and such like. Both have hose and shoes. Now lets do some painting.


-
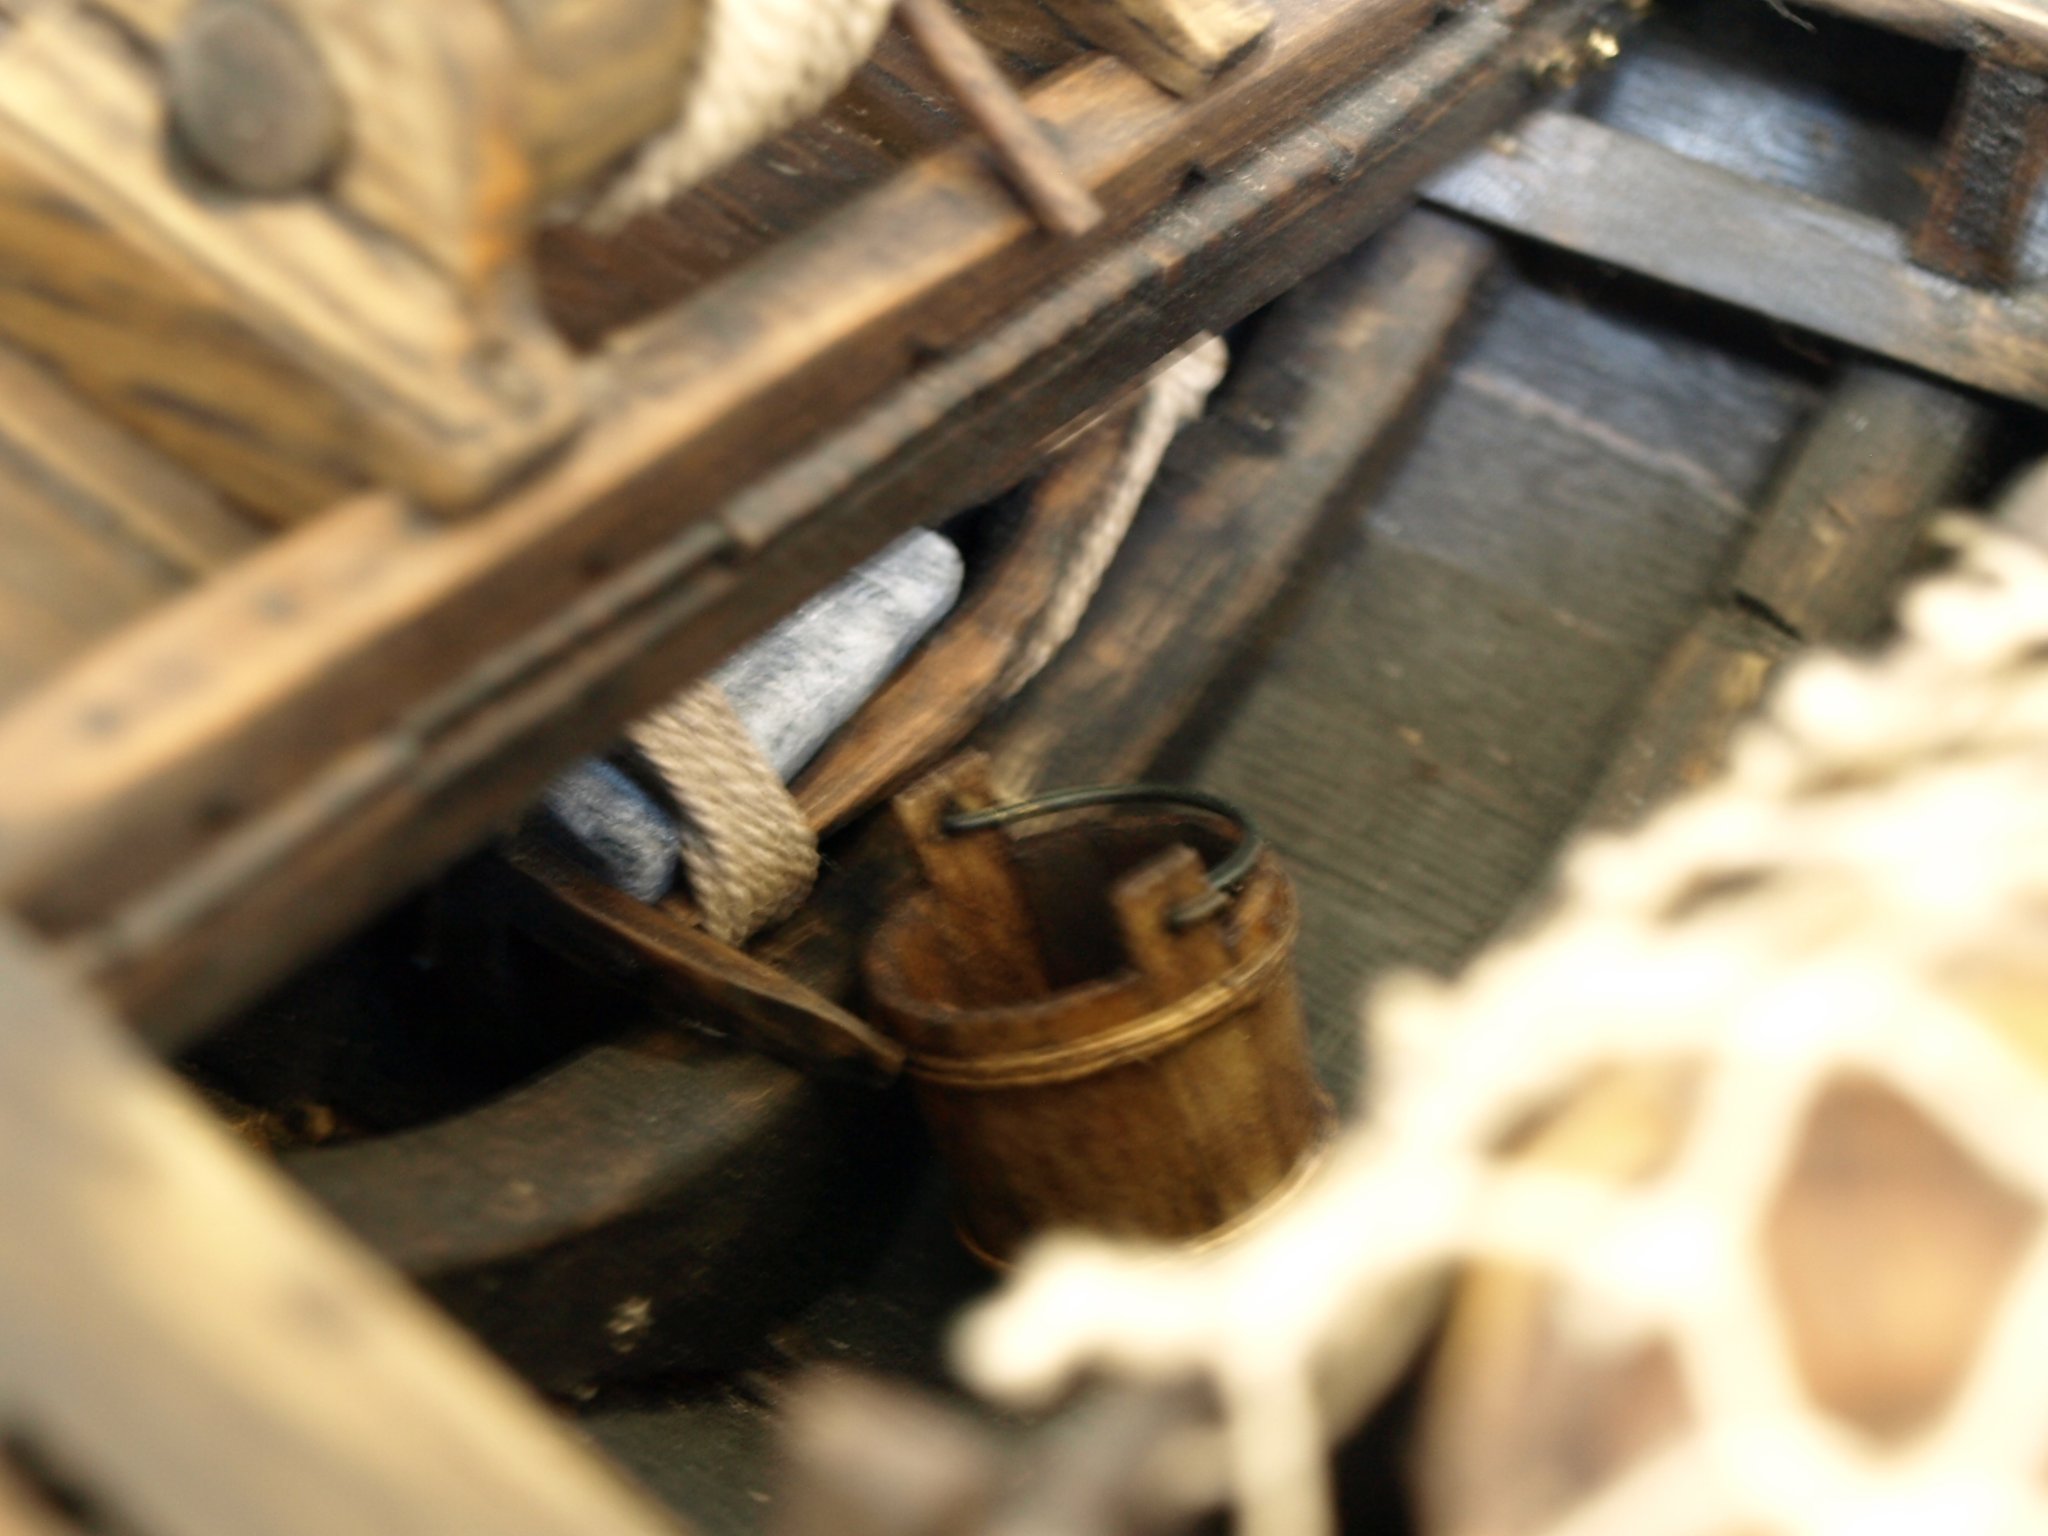
@bolin lol, now I get you! He's really not bailing right now, he's the helmsman relaxing at the tiller, I just stuck the bailer in his hand as it fit. But yeah, it looks funny now that you mention it 🙂
-
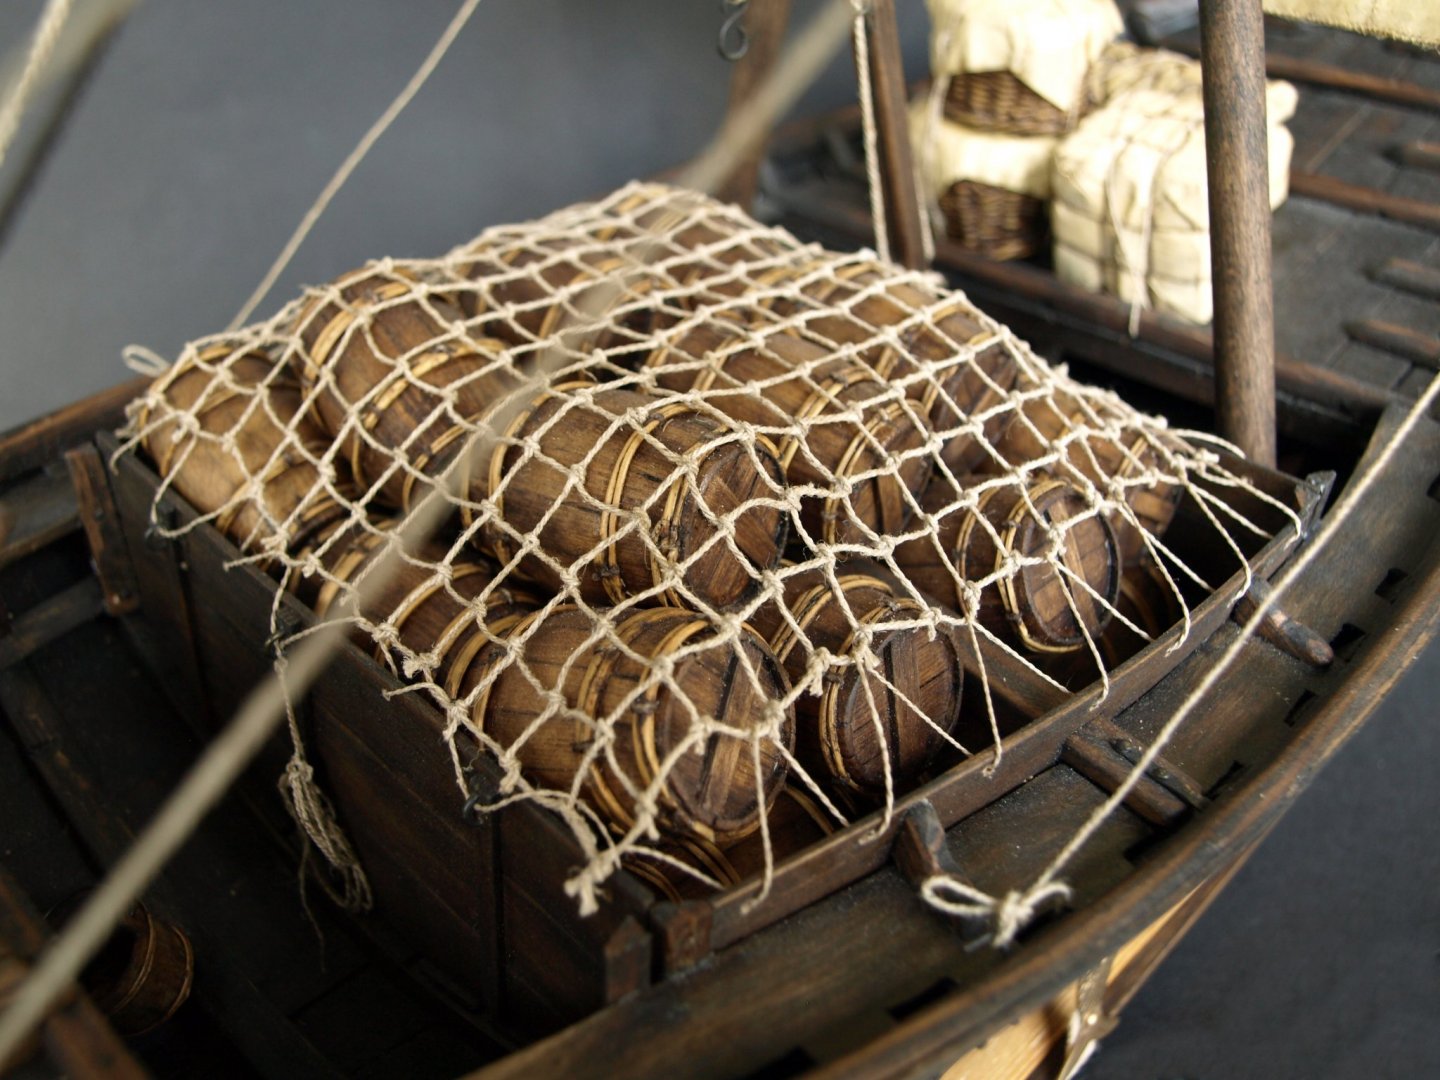
@bolin yeah, thinking about it more I guess you're right. I built it after a find, but my material thickness is out of scale. Perhaps this is good to get the very last water out? But I don't think they would be that meticulous on a ship like this...