MORE HANDBOOKS ARE ON THEIR WAY! We will let you know when they get here.
×


Keithbrad80
-
Posts
416 -
Joined
-
Last visited
Content Type
Profiles
Forums
Gallery
Events
Everything posted by Keithbrad80
-
Your bowsprit looks awesome! Very nice work, I have always thought the bowsprit really brings it all together, which yours did nicely. Bradley
- 950 replies
-
- 1
-

-
- syren
- model shipways
- (and 1 more)
-
Sand & Sealer
Keithbrad80 replied to DaveBaxt's topic in Building, Framing, Planking and plating a ships hull and deck
I have never heard of sand and sealer so thanks for that! I googled it and a quick internet search says its an oil based finish that you apply to unfinished wood, it quickly seals any pores and provides an excellent finish if sanded with fine sand paper. There must have been some confusion on my part sorry about that, it sounds like your on the right path though so nice work! Bradley -
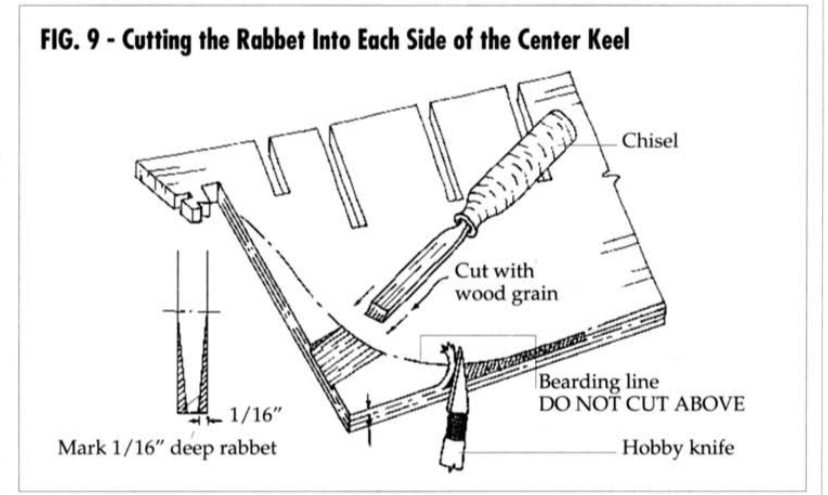
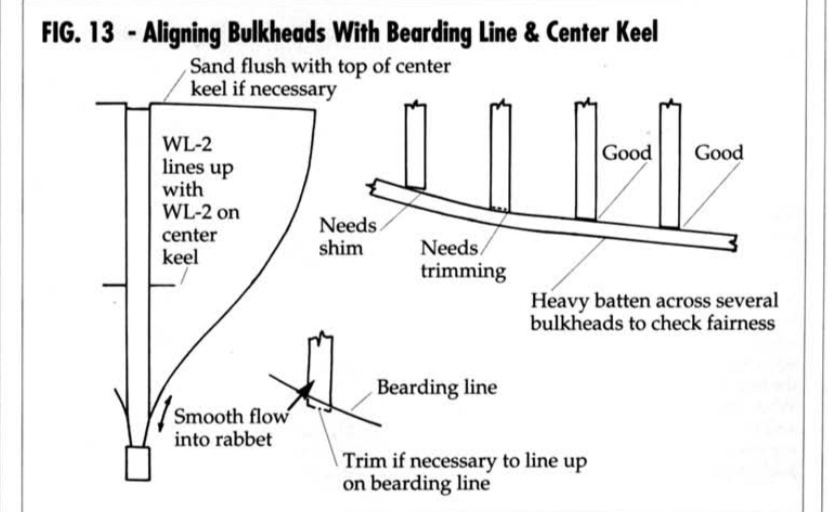
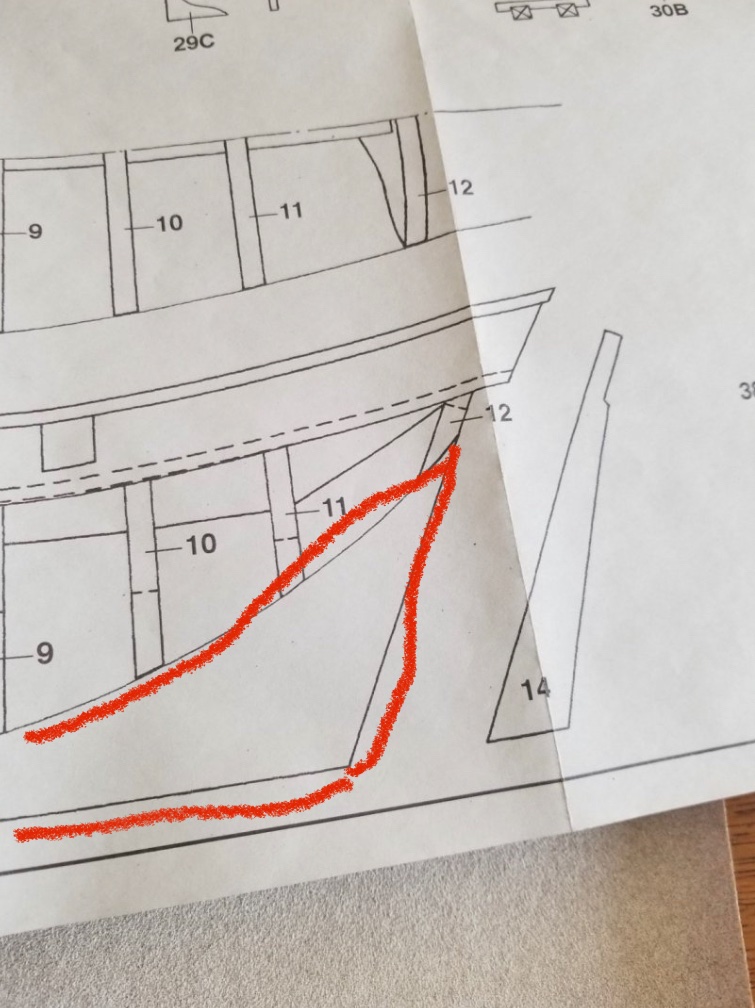
Hi Rachel, Last piece of information from me on this topic. Here are two illustrations that do a good job at showing the cut for a rabbet. @GuntherMT illustration is a really good way to imagine the bearding line of the entire hull and giving you an idea of what to cut. Hopefully this gives a clear picture of the cut.
-
Sand & Sealer
Keithbrad80 replied to DaveBaxt's topic in Building, Framing, Planking and plating a ships hull and deck
Hi Dave, because you sealed the surface before laminating the Wales to the hull there will always be the chance that comes loose before to long. In this case I would probably use CA as well but the important thing is that you sand the sealer before putting any glue on. You have to rough up the surface of that sealer first before you can glue or it won’t have any thing to hold onto. A light sanding with 220 grit paper should be fine, if it is a poly coat you will notice the surface will turn white or translucent or what ever, once it sufficiently sanded because of all the little scratches, if you go further than that you will take the sealer off completely (trust me on that one lol) hope this helps a little. Bradley -
This line here I think might be your bearding line.
-
I’m not sure how to quote a single picture but the second photo IMO shows the bearding line, not a dashed line but the line that follows the bottom of your bulk heads. Basically from the bottom of your bulkheads to the bottom of your false keel gets tapered, down to what ever the thickness of the planks your using.
-
Hi Rachel, so the rabbet isn’t a physical piece, instead a it’s a method of cutting a “grove” into the keel. This is done because your planks have width, when the planks meet the keel the best look is one where the planks sit flush against the keel instead of a lip at the bottom. the angle of the rabbet is determined by the angle in which the planks meet the keel. Basically you cut the rabbet is if you were going to plank one more strake (horizontal band of planks) at the garboard (very bottom planks). It’s an easy thing to forget to do but it really makes a huge difference. All of @GuntherMT advise is good advise! If you have a small chisel you could try to cut the rabbet with that.
-
Thank you! I just skipped the step with wood filler, a lot of people prefer that look.
-
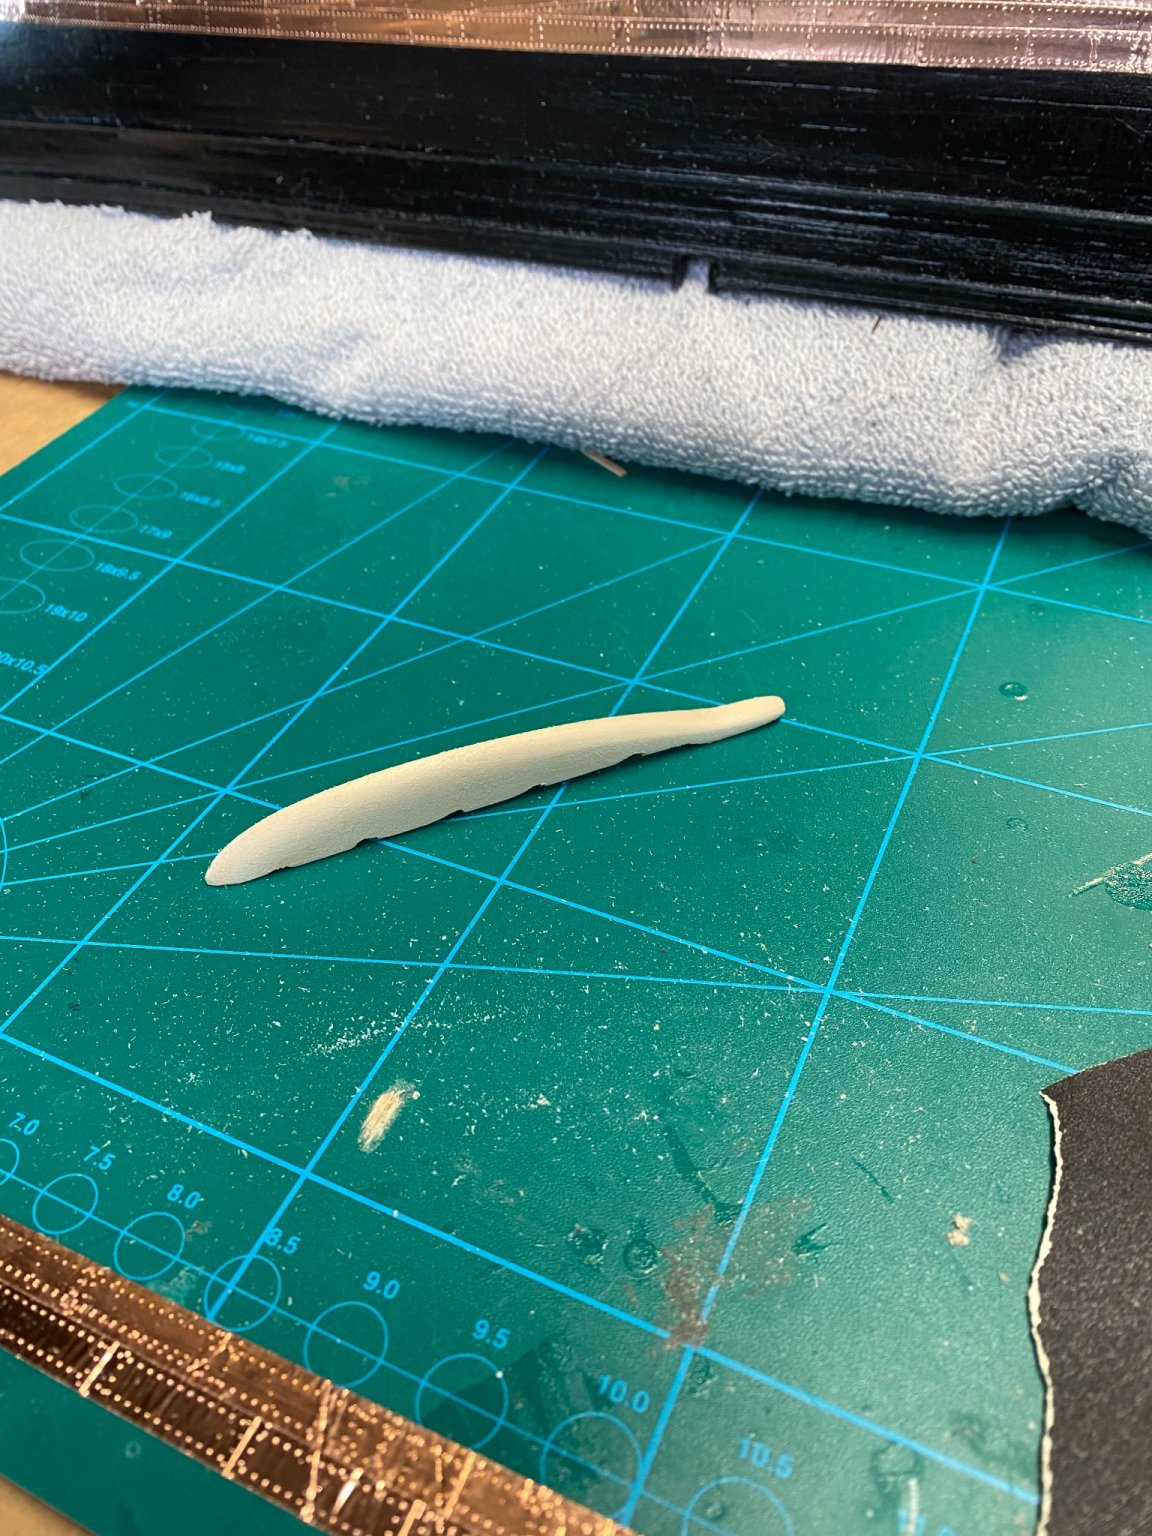
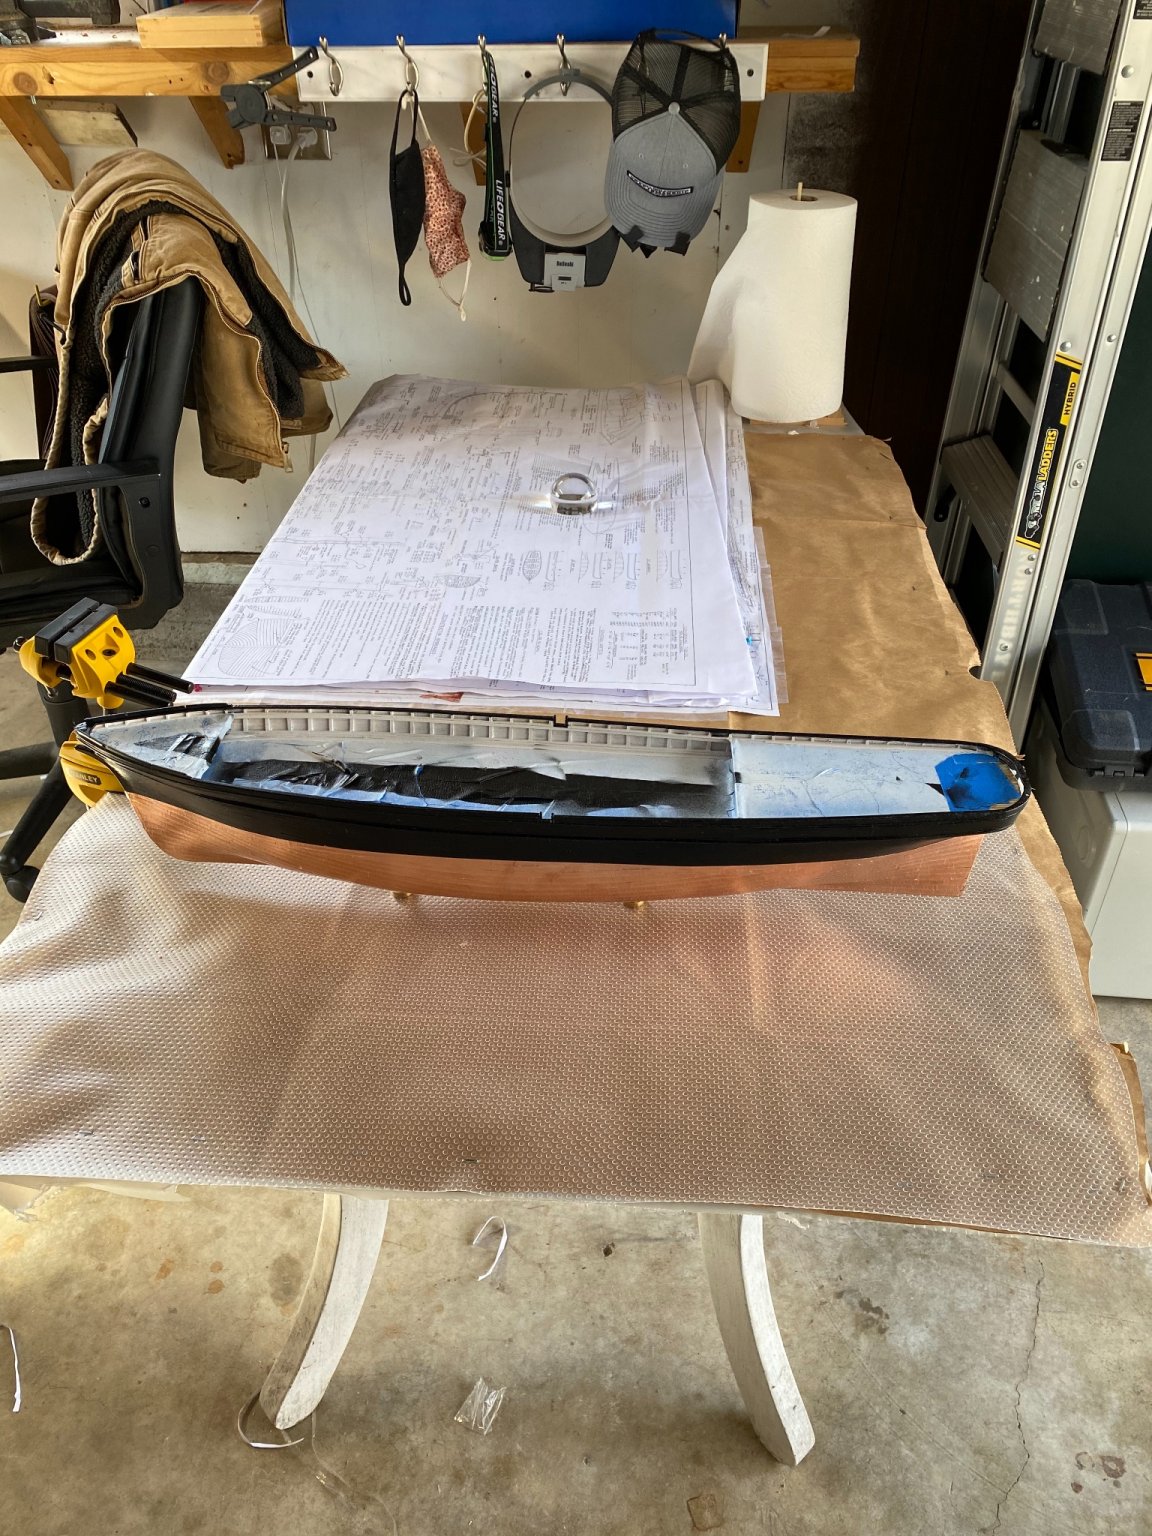
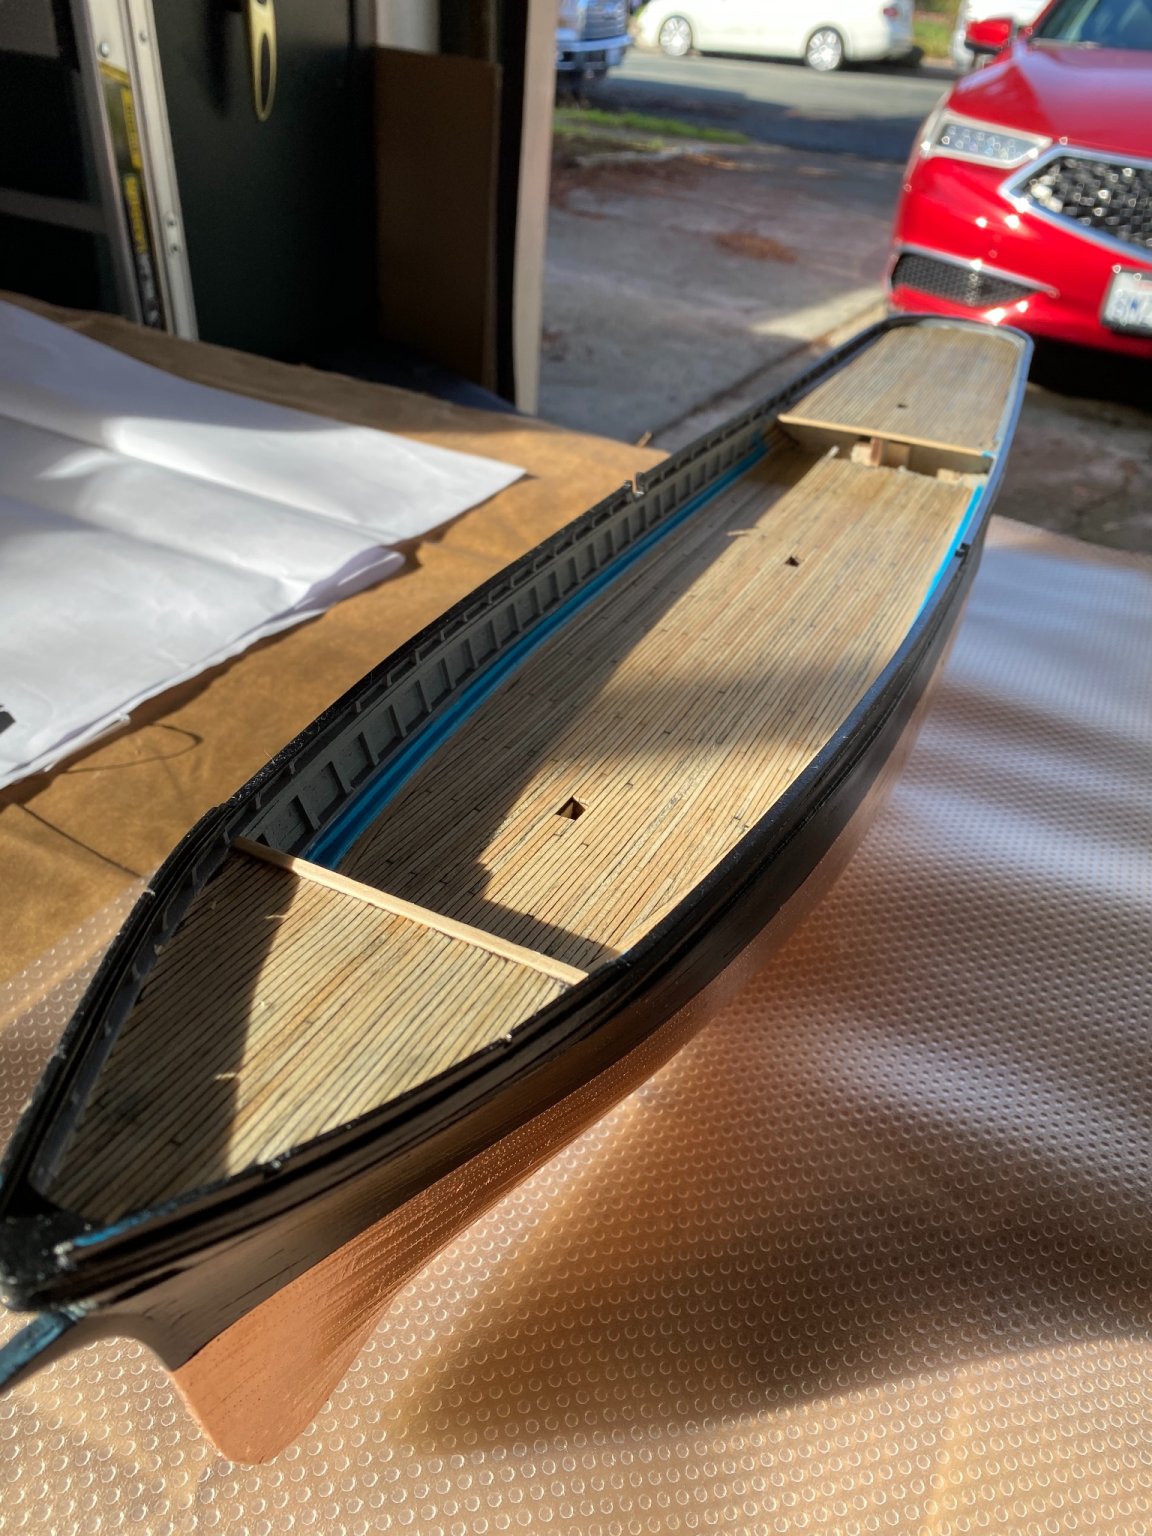
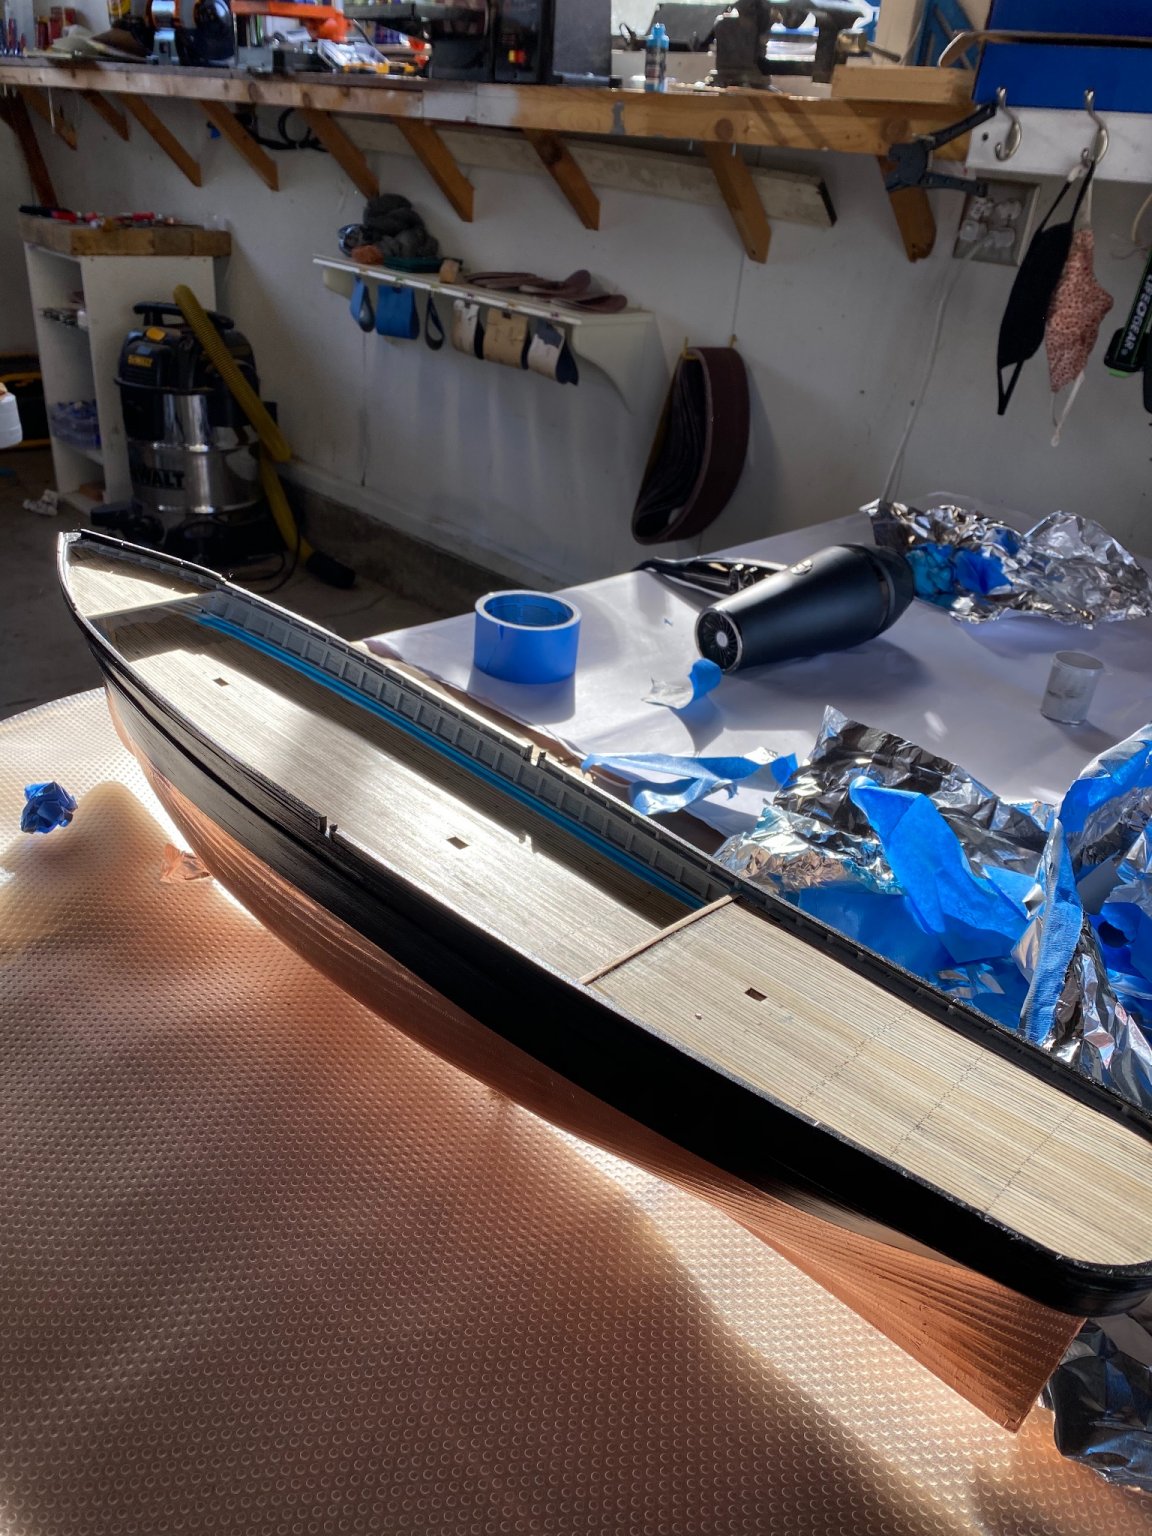
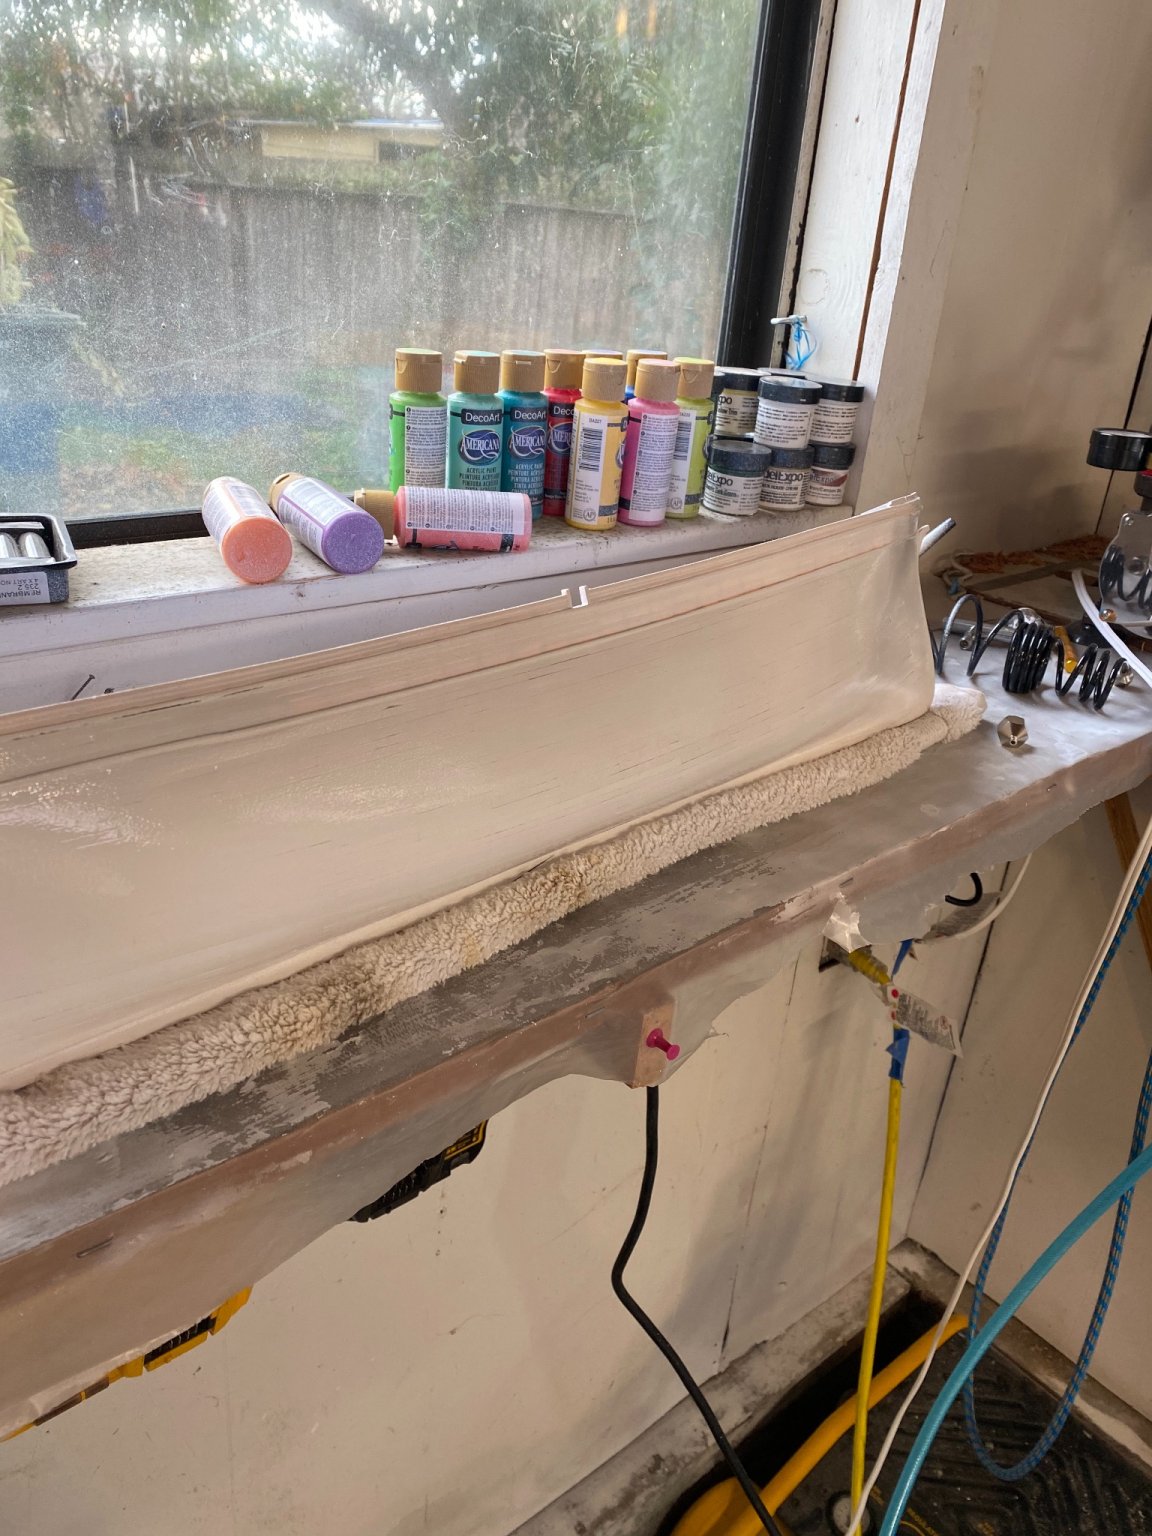
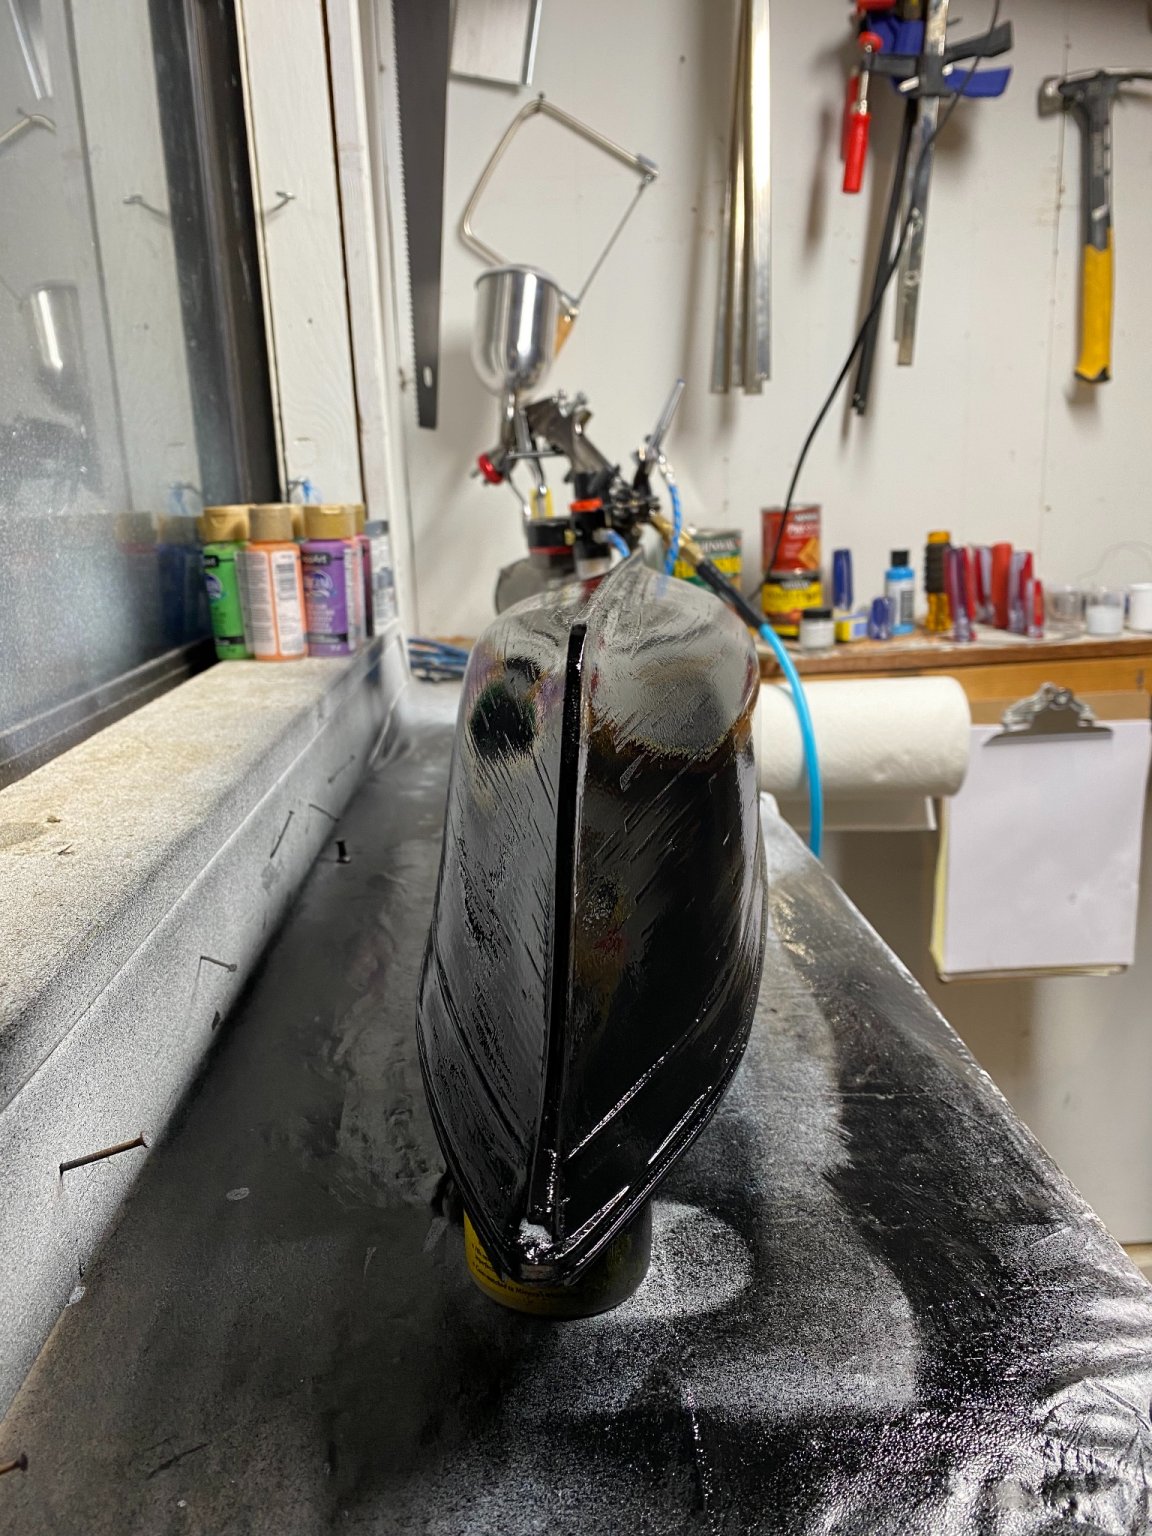
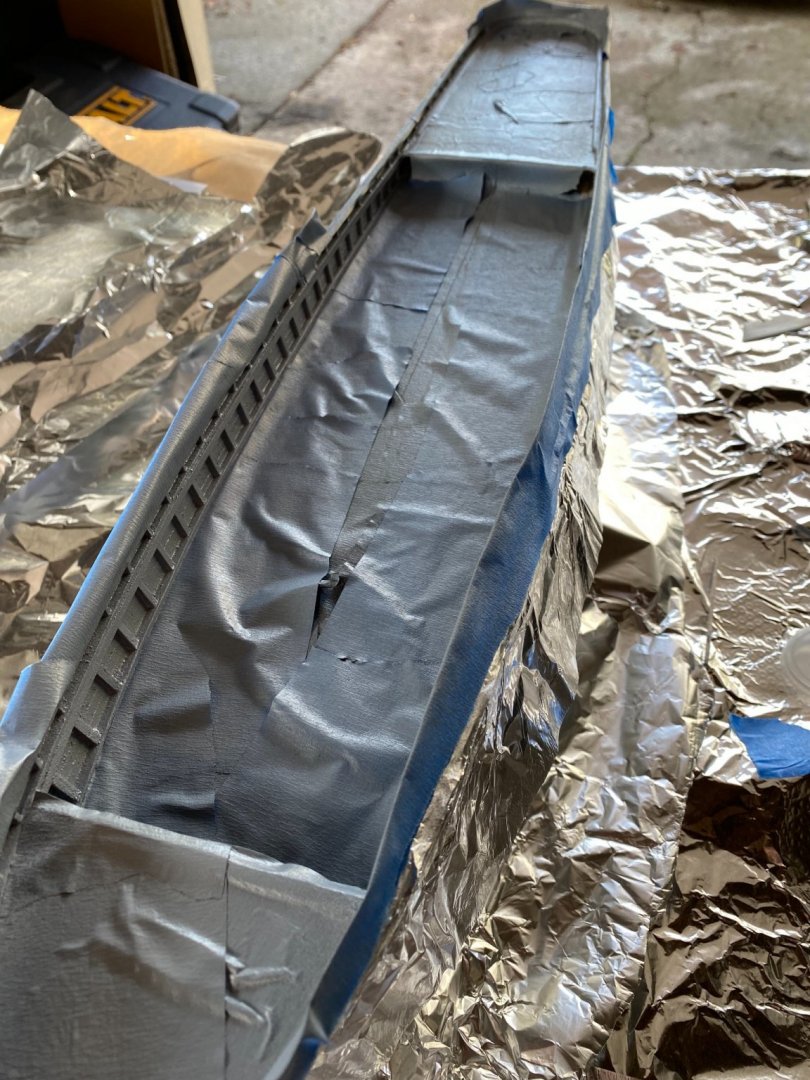
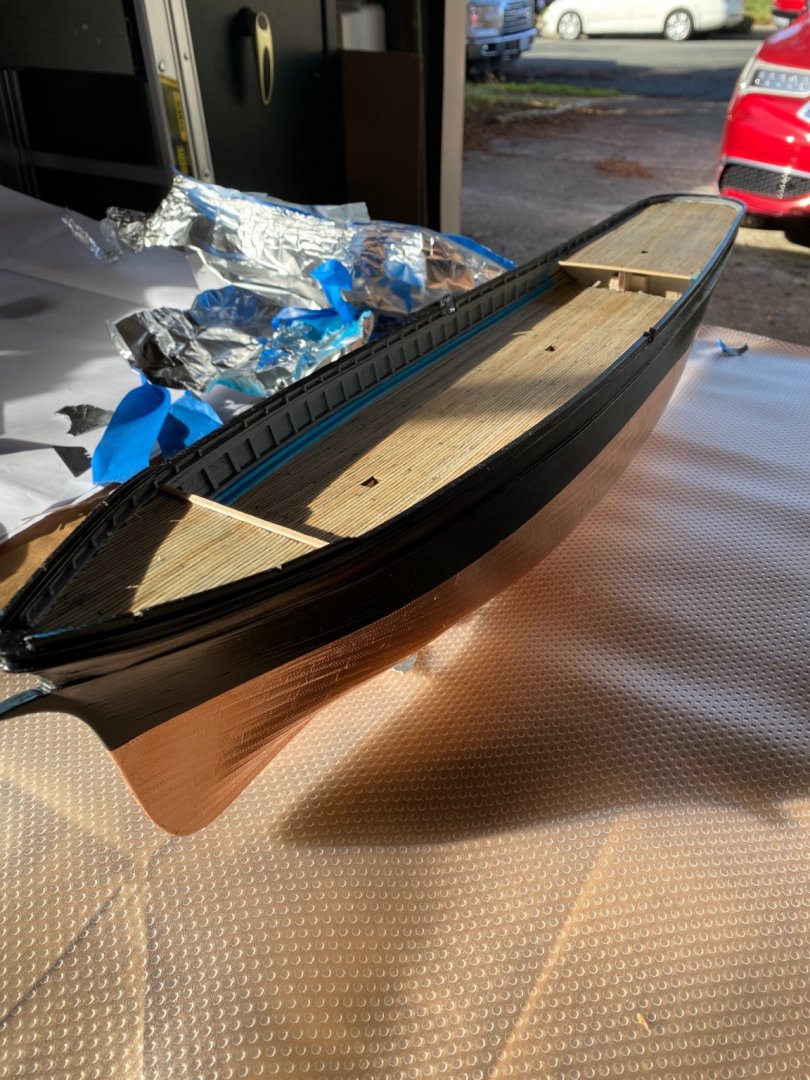
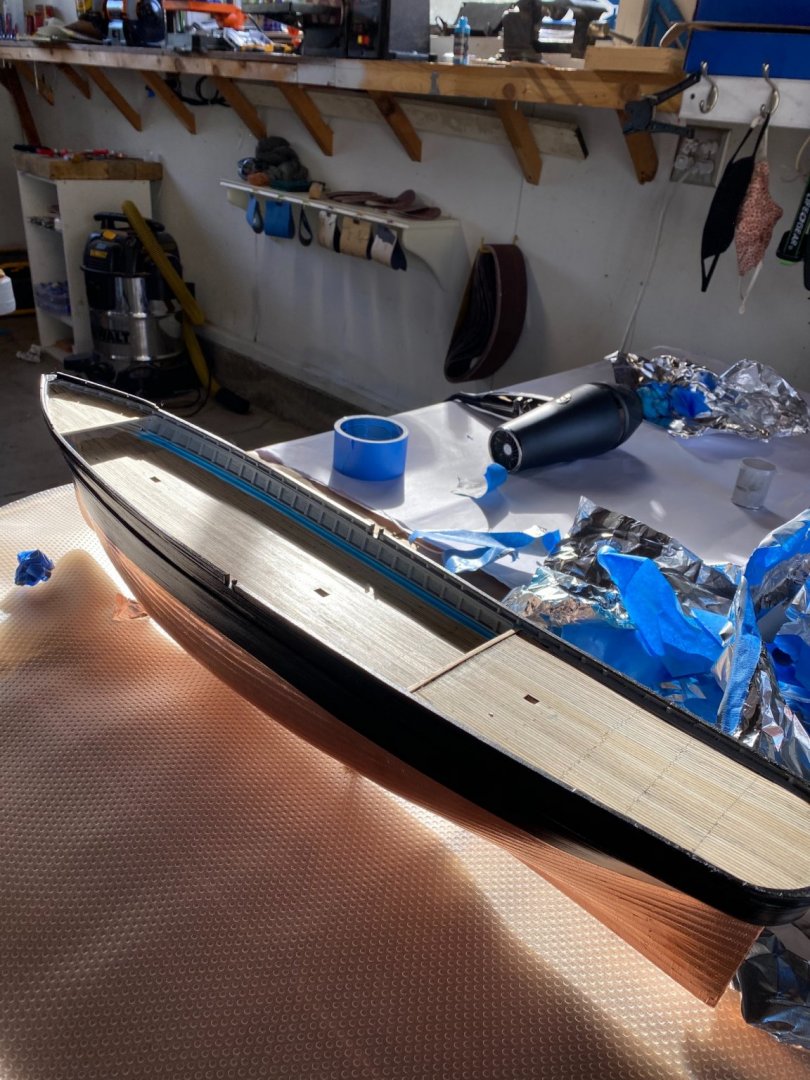
Hello everyone, I’m about 98 percent done with the structure of the hull! I only have the rudder and taff rail, the taff rail stanchions I’m going to turn on my lathe and with my airbrush so it might be awhile before we see those, I have the rudder painted and coppered. First off I decided it was time to find a semipermanent space for the flying fish while construction continues, I’m mounting the hull with brass pedestals but haven’t made a mounting board yet so I just screwed it right into may table. It works well for me, this table is my “plans” table so there is nothing but my plans and the ship on the table, with my “construction” table close by so I can build what ever I’m working on and then install it on the deck without a bunch of stuff in my way. So this first picture is just the placement of the model and where I will be working on it. I then decided it was time to finish the paint, I didn’t finish it earlier because I was waiting until the right paint color came in the mail. It would have been much easier to paint before planking the deck like most of you probably know, but I wasn’t sure if I wanted to paint it until recently, and so i waited until the hull was complete to decide. I think I chose the right choice in painting! Here it is after the grey paint on the bulwarks: After drying, I painted the water way and plank sheer with an electric blue color by Createx Colors, I dont actually know what the color is because the label is missing in only the spot with the name of the color. Big mistake. I’m honestly not sure what went wrong with this one, its premixed paint for use in an airbrush. It dried different than the others and became super thin one it hit the wood, so it bled below my tape onto the planking. Its not terrible but the fact that it is there annoys me, realistically you wont notice this in the end. I haven’t painted under the forecastle deck because I have to do that with a real brush, I also have some small spots to clean up and finish with a hand brush. Last note about the rudder. The rudder tappers in the back so I got that shaped with a little bit of 220 grit paper, I then painted it black and coppered it the same way I did the hull. I only have the pintle and gudgeon straps to make and a few more copper strips to make and install, and then I’m totally ready to move on to deck furniture! Thanks again for the support! Bradley


-
The balsa wood isn’t totally useless though! I use balsa to fill the bulkheads of some of my models, but because balsa is so easy to shape, I also use it to create molds for the ships boats. Bradley
-
Welcome to MSW Bob! Im actually building a 1:96 flying fish right now, the hull of your model does look similar to mine, although the location of some of the deck furniture seems off, . Unfortunately I don't know a lot about models from the 1870s, if thats the year this was built. There are a lot of models on the market that don't represent any actual ship, they were just built to look good and people love buying them, IMO I’m not sure this is one of those ships, due to your model having some details like a capstan and deck houses. You do have a nice model, and if it is a 1:96 Flying Fish I have a lot of available information for you! Bradley
-
This looks awesome! You killed it on this build so far, I’m looking forward to seeing it rigged! Bradley
- 222 replies
-
- 2
-
-
- First Build
- Lady Isabella
- (and 2 more)
-
Your progress to this point looks great, and that little iron will probably be super helpful! About balsa wood, as you have probably already figured out balsa is super flexible and not very strong. The reason this is an issue with this hobby is there are very difficult to work with and they leave a lot of little fibers behind when you sand them, resulting in a messy look. Even if painted this presents a problem because those little fibers that hang out will become visible in the paint and it might look weird. Your walnut planks should work great and look very nice! I would probably follow @Moltinmark advise and maybe work on some deck furniture until your planks get there! Bradley
-
This looks great! Now I need to go watch this movie... Bradley
-
I dont have much experience in any other scale besides 1: 72 and 1:96, I like clipper ships and if models came in any scale larger than that I wouldn’t have any where to put it. So for me this is a nice scale because it shows enough detail to be realistic, which works for me!
-
I’m really sorry to hear about your family, whiles its great most got better, it’s sad that this happened in the first place. Your build looks great! Your sails are coming along very nicely, I’m looking forward to seeing the finished product! Bradley
-
New To Building Ships Help and advice needed
Keithbrad80 replied to Richard O's topic in New member Introductions
Dont forget to start a build log once you get started, in the mean time I highly recommend you read up on planking techniques. There are several books available on line but there are also several free tutorials here on the website, written by some of the best ship modelers out there. You will see that planking and other aspects of the build are more challenging than they look, but I’m sure you will do fine with your experience! Im looking forward to following your build! Bradley -
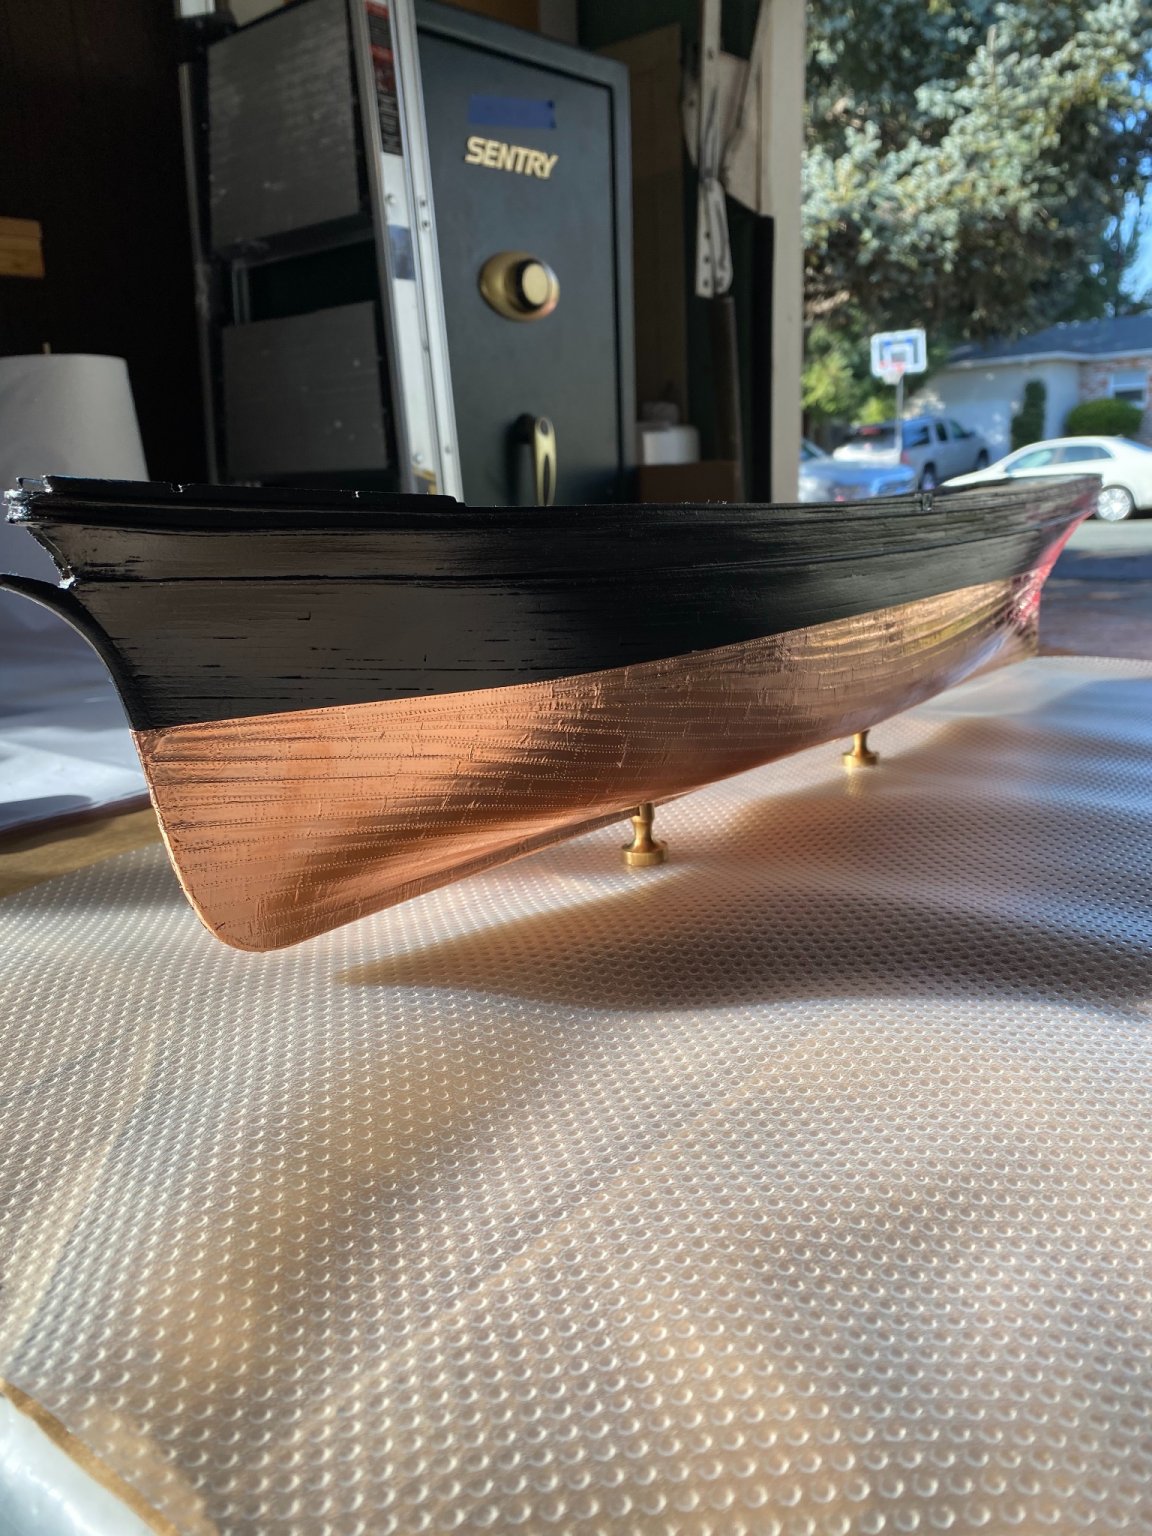
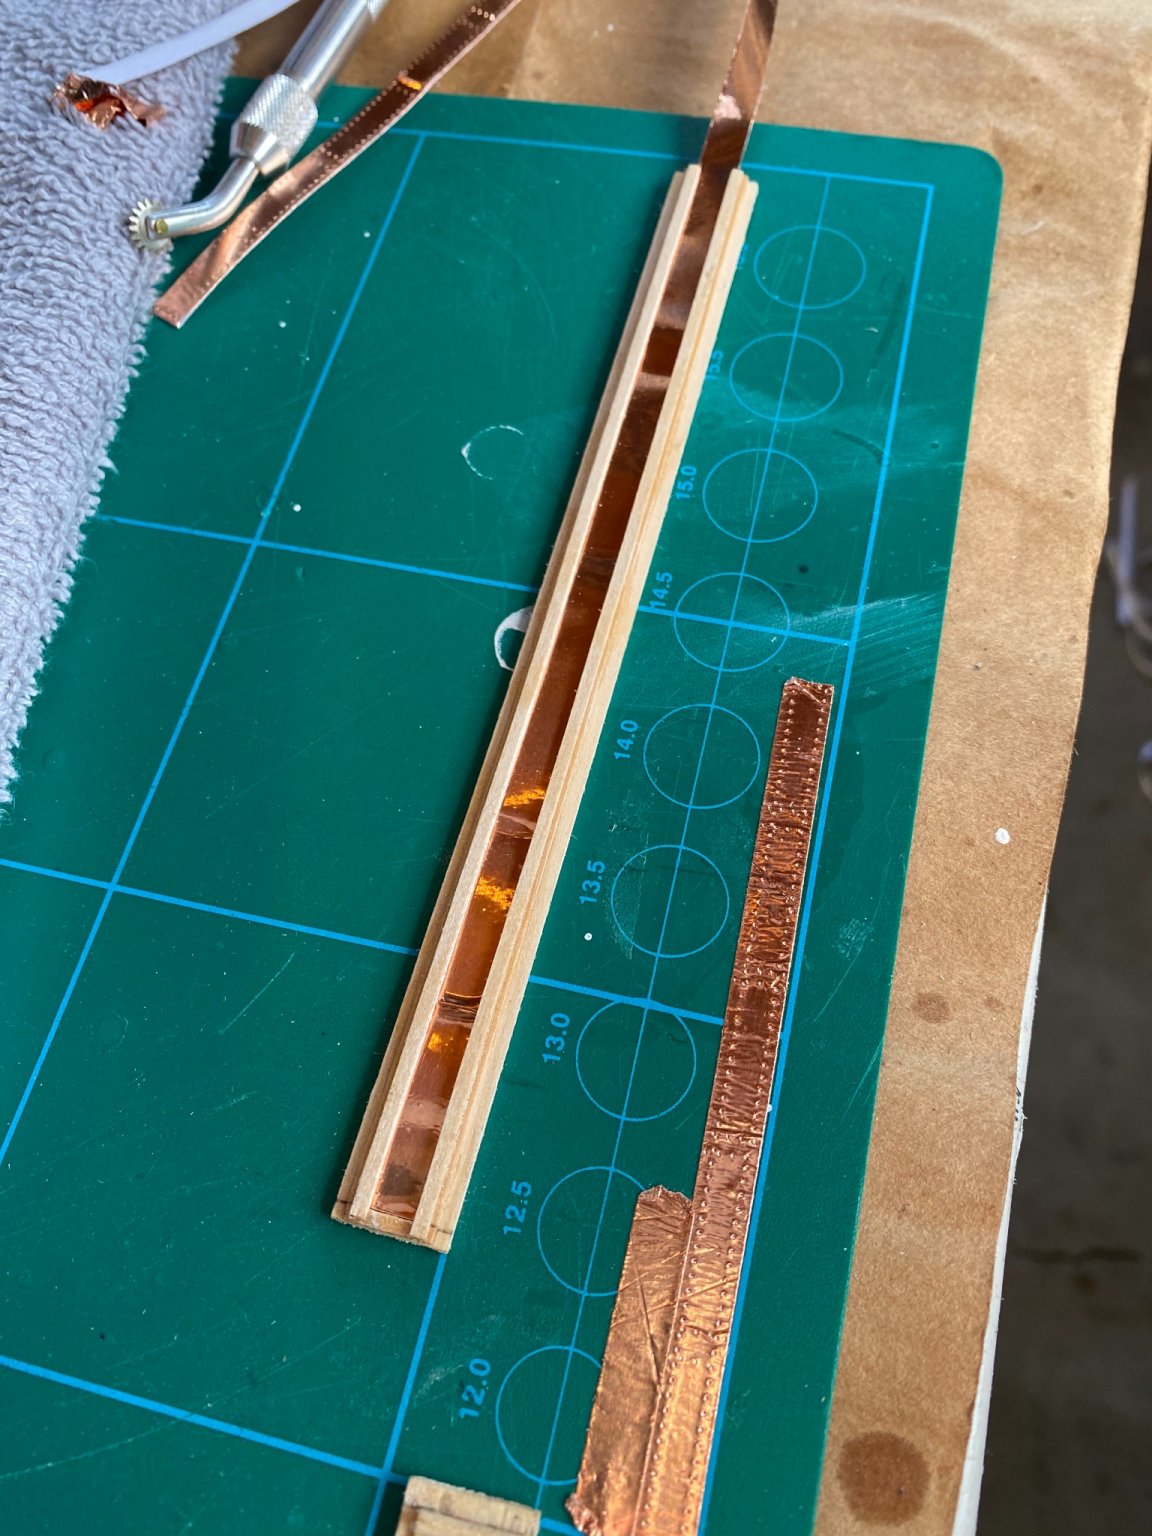
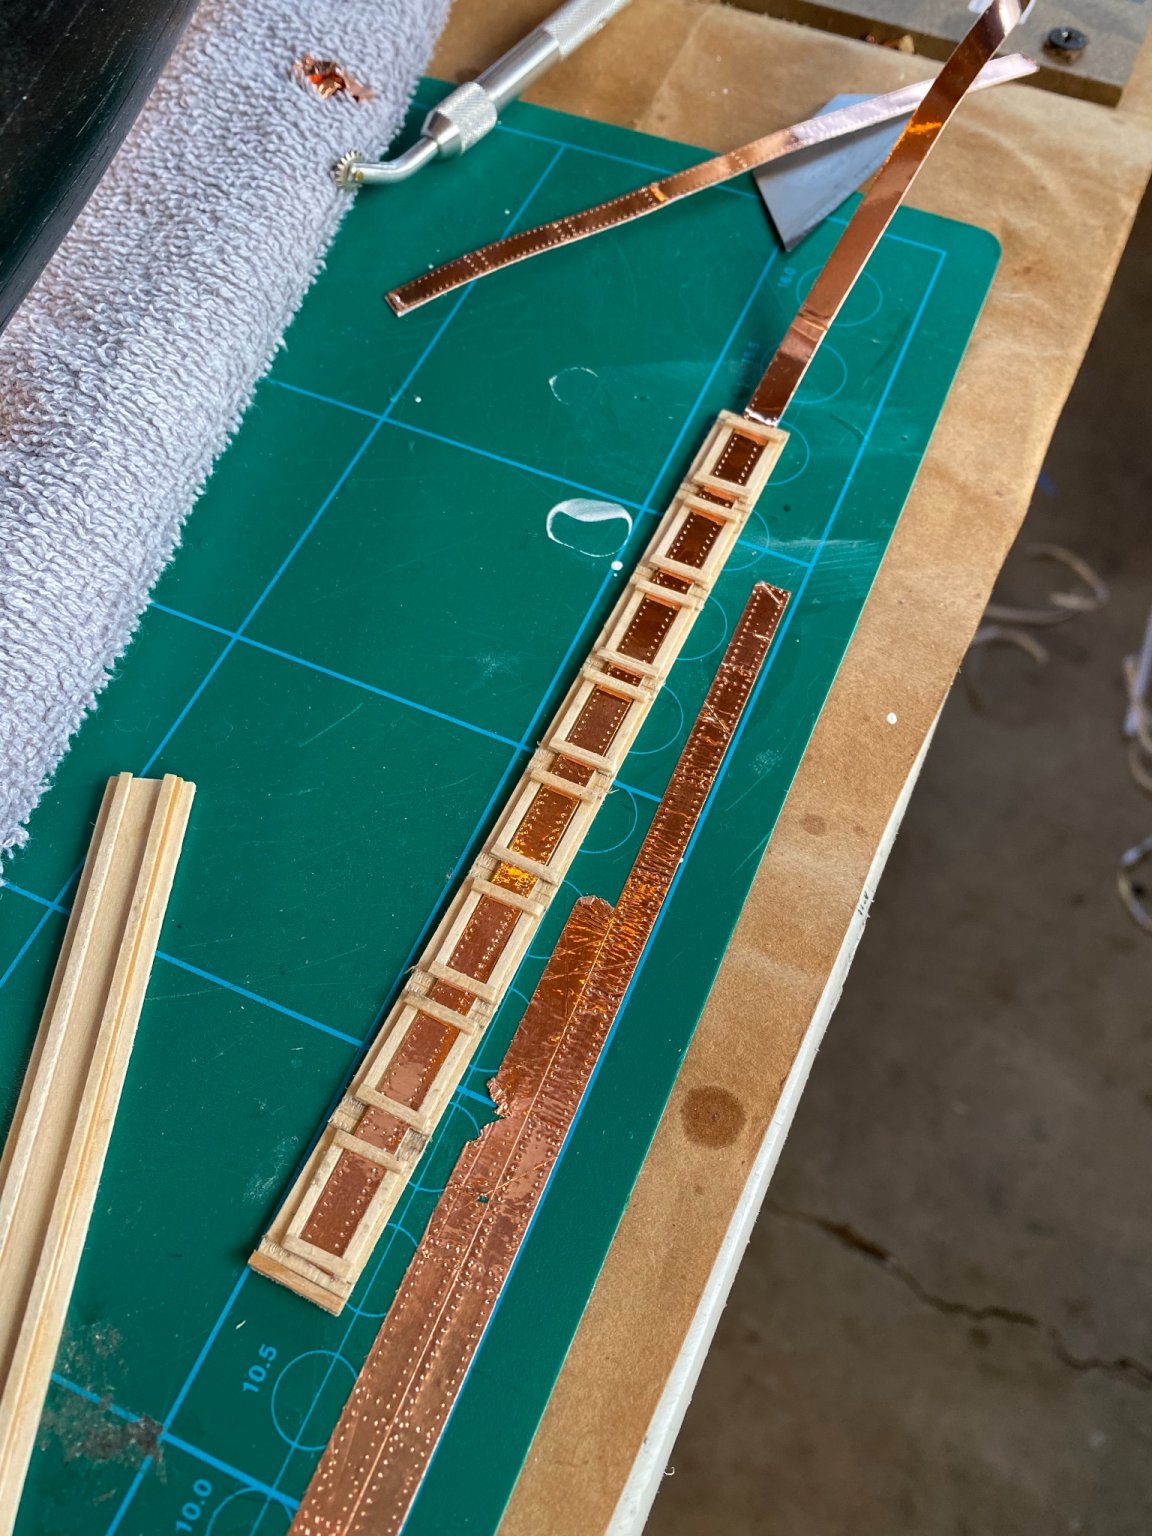
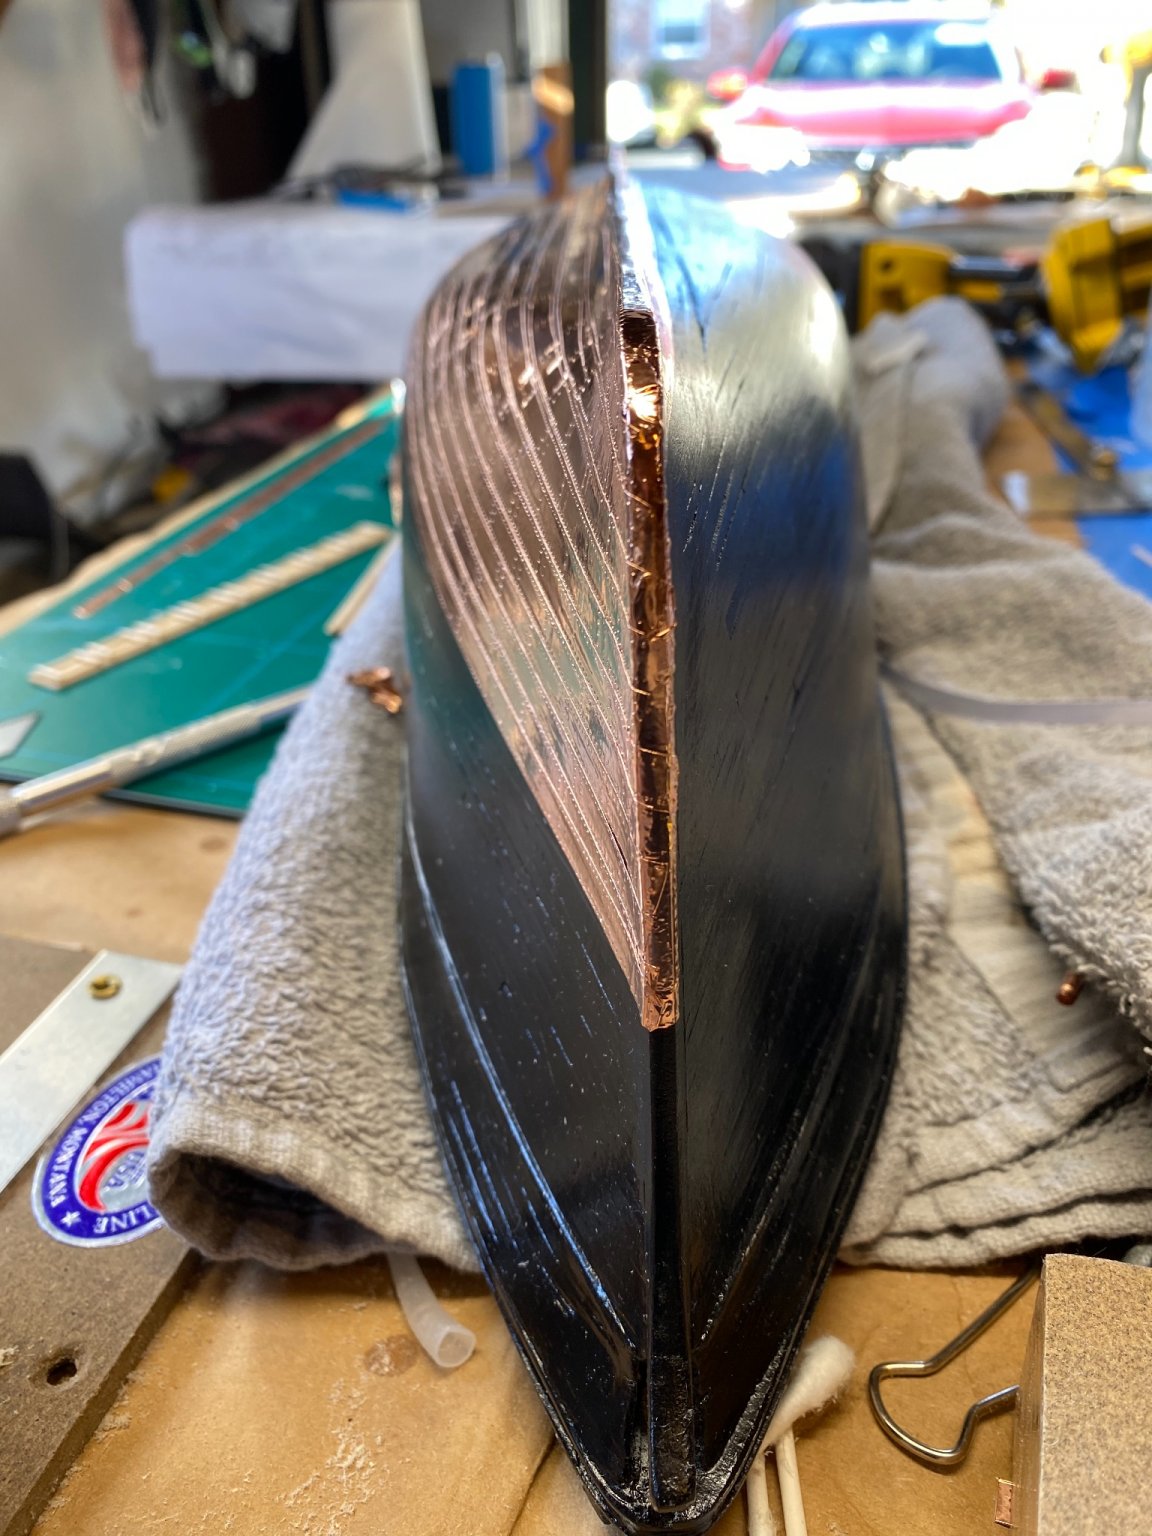
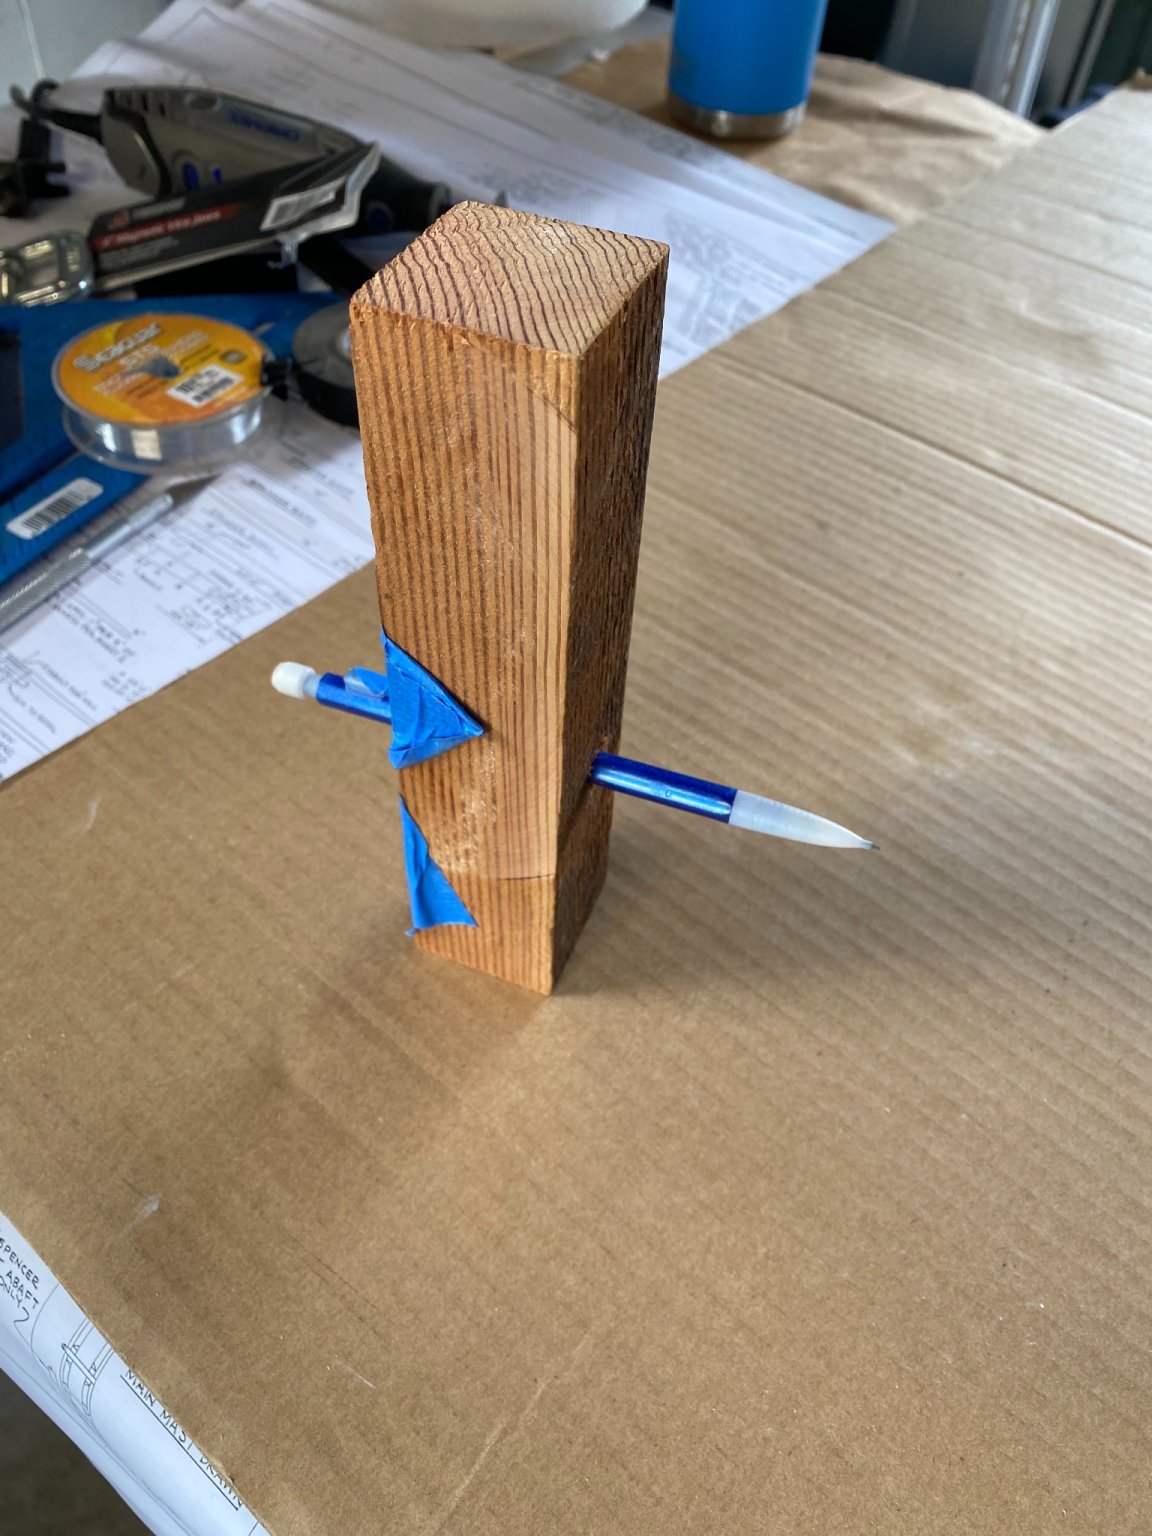
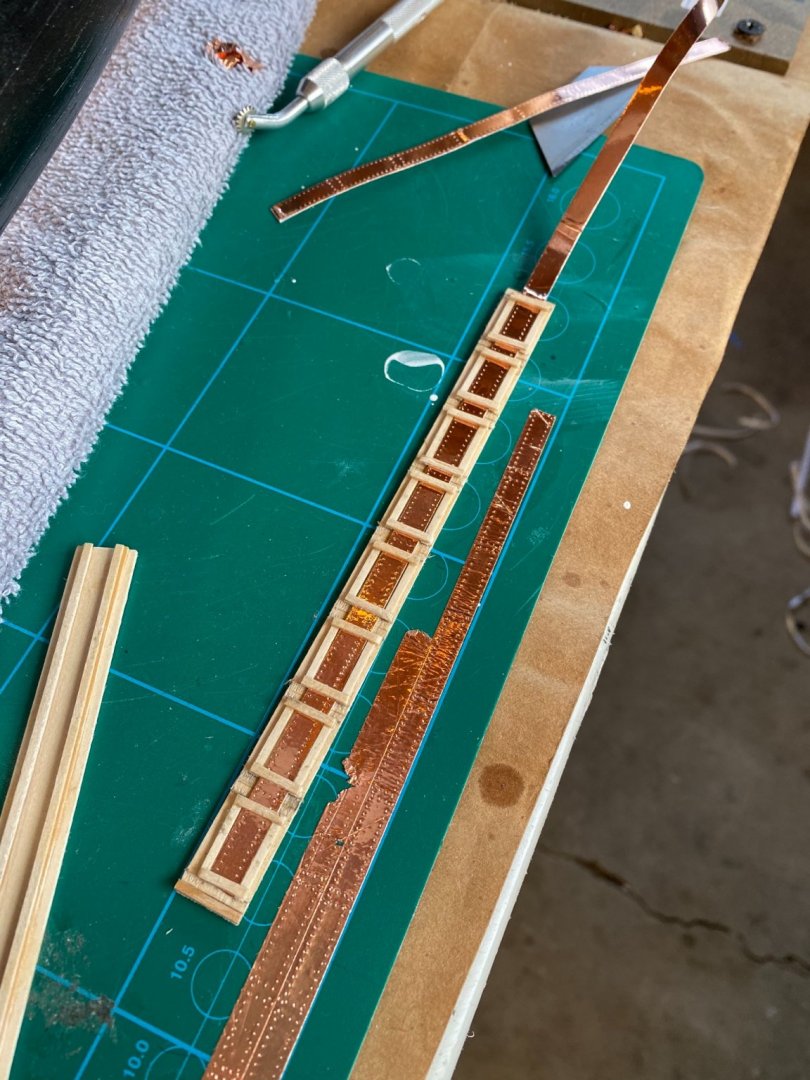
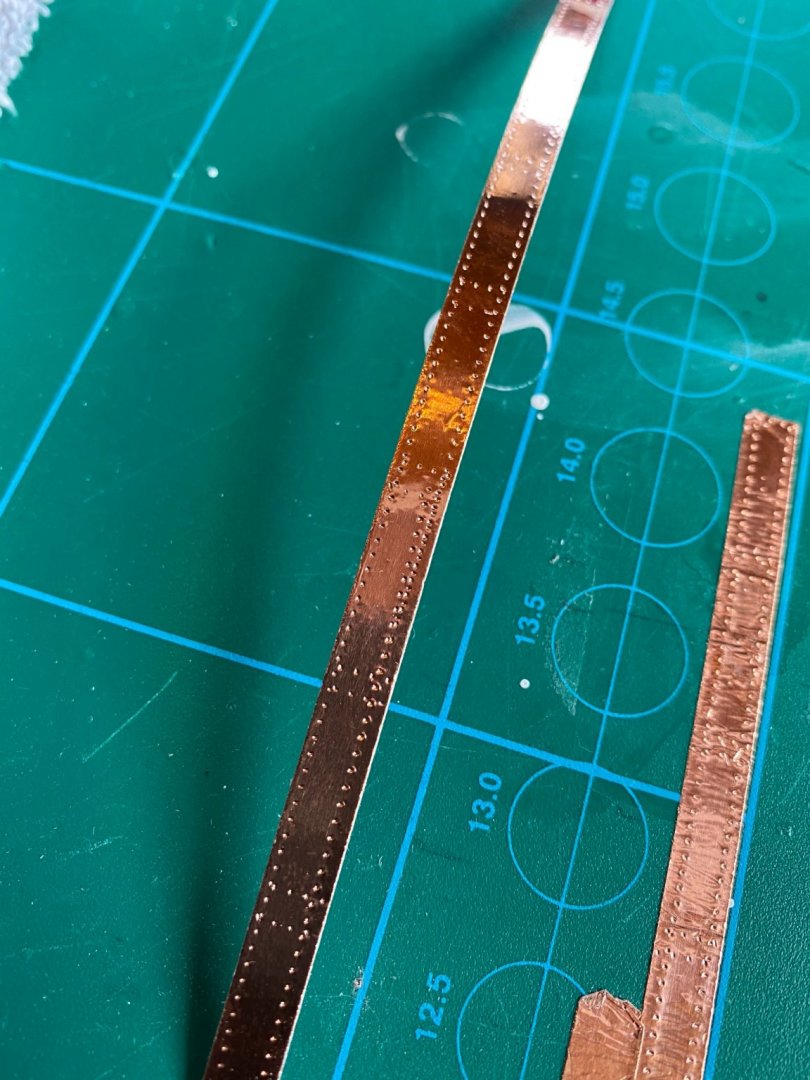
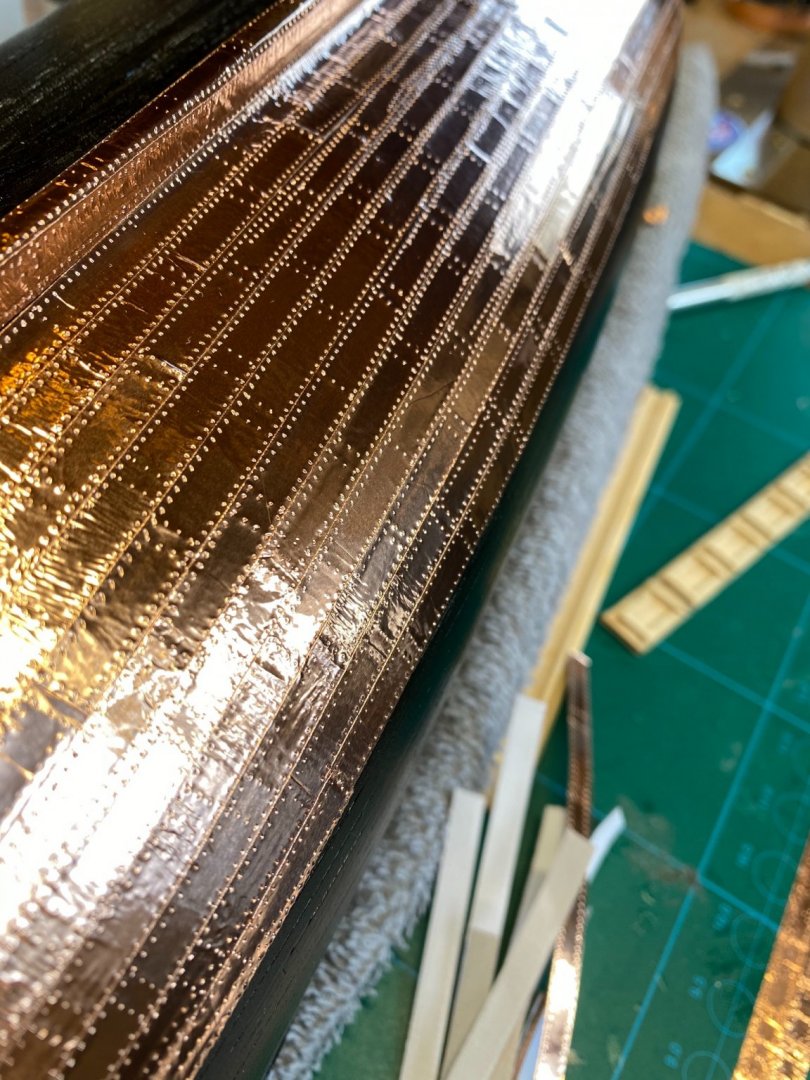
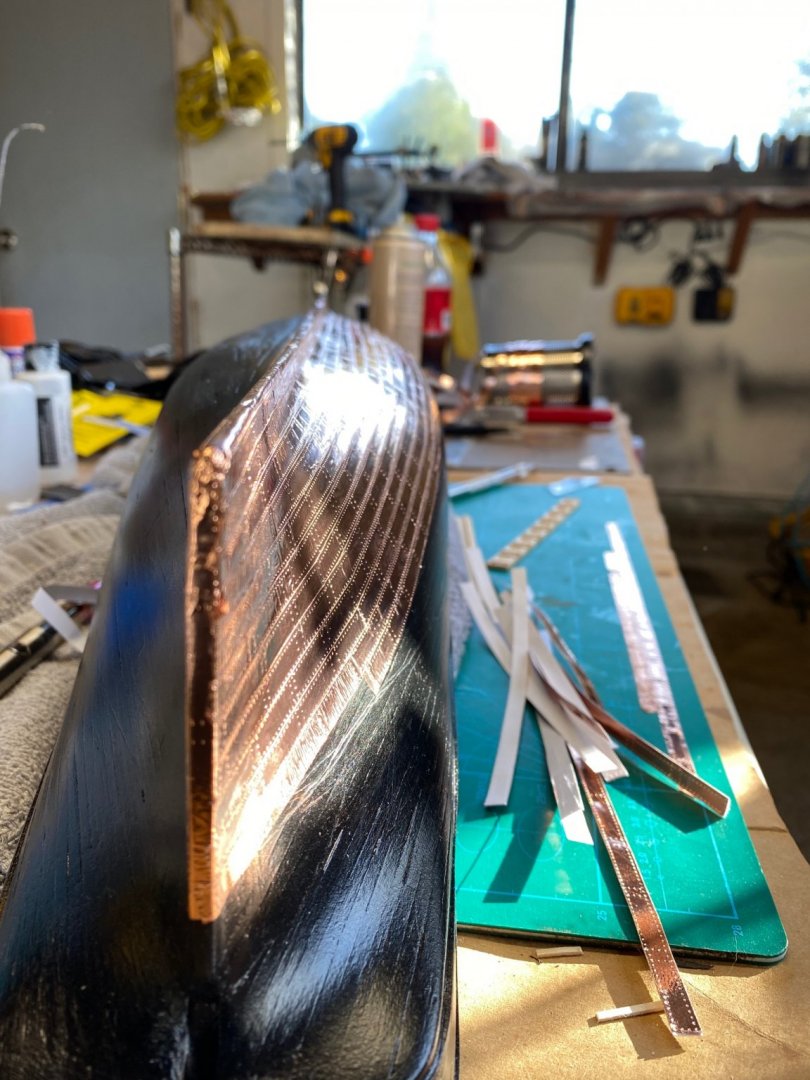
Hello everyone, So I remade my jigs, I didn’t change the design but cleaned up the corners and made it easier to get copper tape in and out. Towards the end of my supply of copper tape I was pumping one strip of tape out every 20 seconds, I got about 400 strips made in about 3 hours! Here is step 1: There is a small notch made that guides the copper tape in place and keeps it flat. Ill run my pounce wheel along the top border keeping the wheel pressed against the jig the entire time. Then ill run it along the bottom and slide the tape out, and slide it right into the second jig. Here is step 2: So i slide the tape until it sits against the end of the jig, and roll my pounce wheel along each side of the openings. As you can see the jig is beginning to fall apart, after literally hundreds of cuts the pounce wheel started to lose its tip and the wood became so thin it almost broke. These seem like easy fixes if i wanted to make a permanent jig. Anyway here is the final results, a 6 inch strip with 8 plates. The riveting pattern may not be very realistic but different ratio pounce wheels and more jigs could quickly replicate any riveting pattern. First thing this morning I ran out and gave everything another coat of wipe on poly, so by the time I was done making copper plates I could start to install them on the ship! I made a super simple waterline marker with a block of wood and a pencil, i just took the dimensions directly from the plans and set the ship on a flat surface and slide the pencil across the hull while holding the block. It looks crooked but it gave me an accurate water line marking. I got about 40 percent of the copper on, it took a few tries but once I got the hang of the paper backing the process went pretty smoothly. Here it is as of now: The copper plates have a steep learning curve that are pretty unforgiving. I figured out pretty quickly that i needed to wear gloves the whole time, there is a few spots where the metal is folded or creased. I’m thinking a soft rubber spatula could be ran over the surface to get the surface smooth, I have used that method before to smooth plastic wrap so I’m sure its similar (hopefully!). Thanks for checking in! Bradley


-
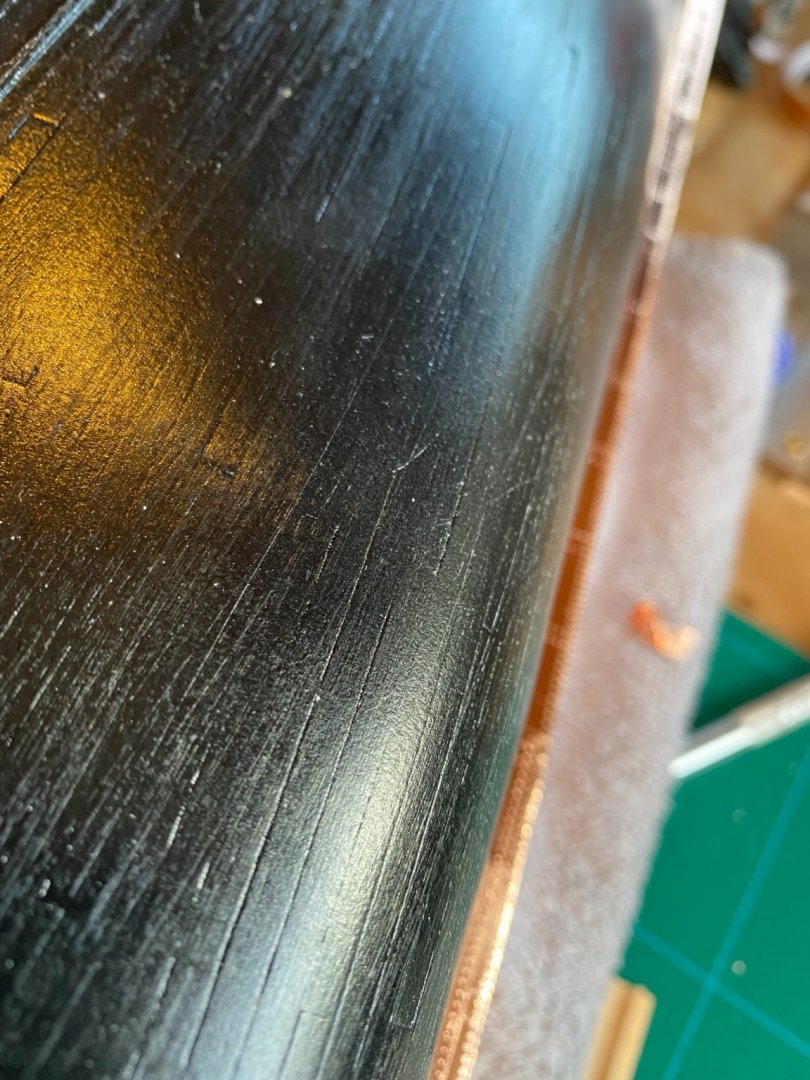
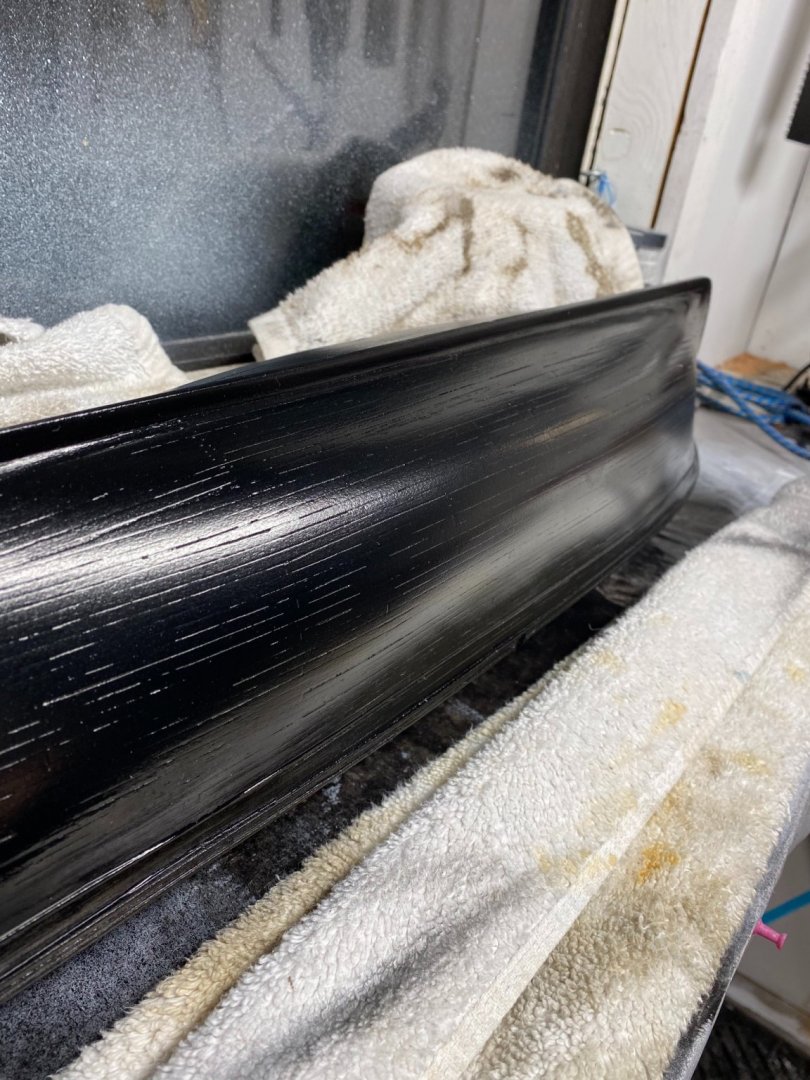
Here is a close up picture of the paint as it sits right now. That HVLP sprayer really made a huge difference! If you notice in the picture the paint is thick enough to fill most of the gaps but thin enough to leave the detail in the bulwarks. The effect is subtle, you wont notice from more than a few feet away but from up close my planking job can be shown off. Bradley
-
I thought about it, but I prefer the look of planks under the paint, so after another coat of paint and two coats of wipe on poly those cracks are pretty much filled but you can still see the individual planks, which I like. I dont have very good pictures of the hull after the paint job but ill post one soon! Bradley
-
Oscillating Spindle sander
Keithbrad80 replied to stuglo's topic in Modeling tools and Workshop Equipment
Ingenious!- 1 reply
-
- 2
-
-
Your jig is really nice! And your anchor cable is beautiful!
- 950 replies
-
- 1
-
-
- syren
- model shipways
- (and 1 more)
-
New To Building Ships Help and advice needed
Keithbrad80 replied to Richard O's topic in New member Introductions
Welcome to MSW Richard, It sounds to me like you have quite a bit of experience in working with models! I will say that building wooden ship models and working with wood is different, you will find the different techniques can take awhile to perfect and because of this I would be wary about starting with a 400 dollar kit. I would recommend checking out Vanguard Models website, they have several kits which I think would fit your needs! For instance the Royal Yacht, Duchess of Kingston (link at the bottom) is a great looking model that advertises towards people with modeling experience, I would recommend any Vanguard model for someone’s first build. For now I would say the best thing you could do is take a while to read through some logs to get a hang of the process and hopefully find a kit that fits your needs! Royal Yacht, Duchess of Kingston https://vanguardmodels.co.uk/product/duchess-of-kingston/ Bradley -
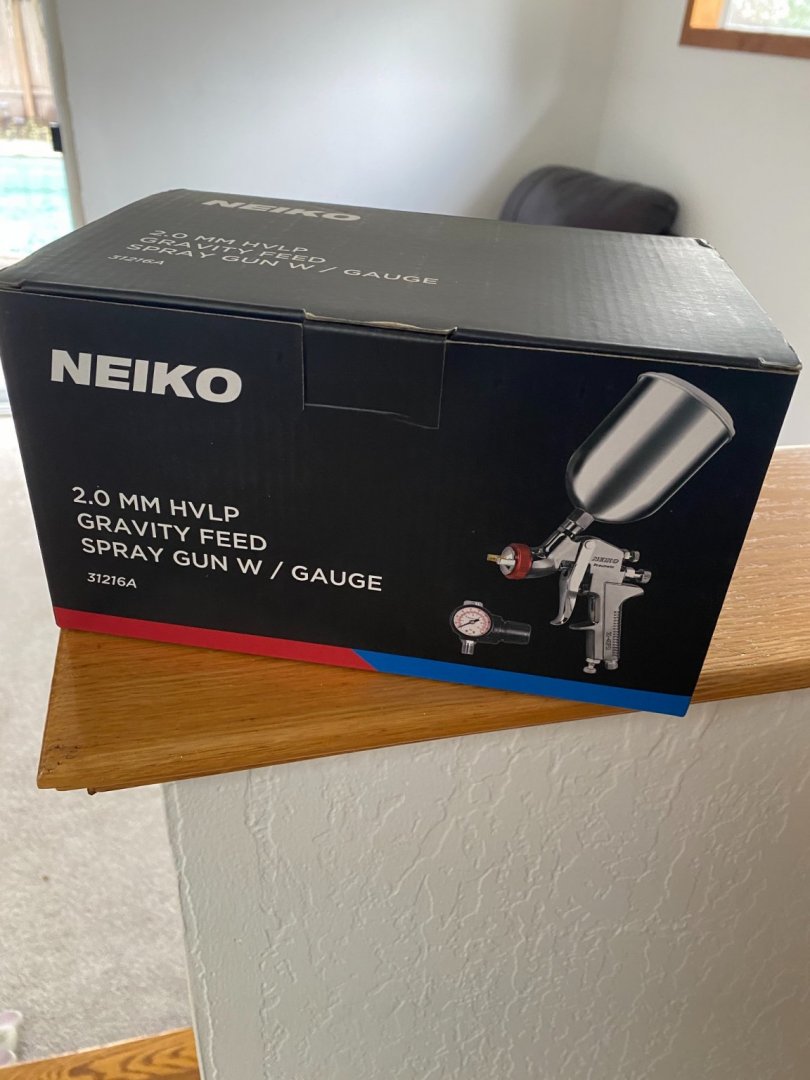
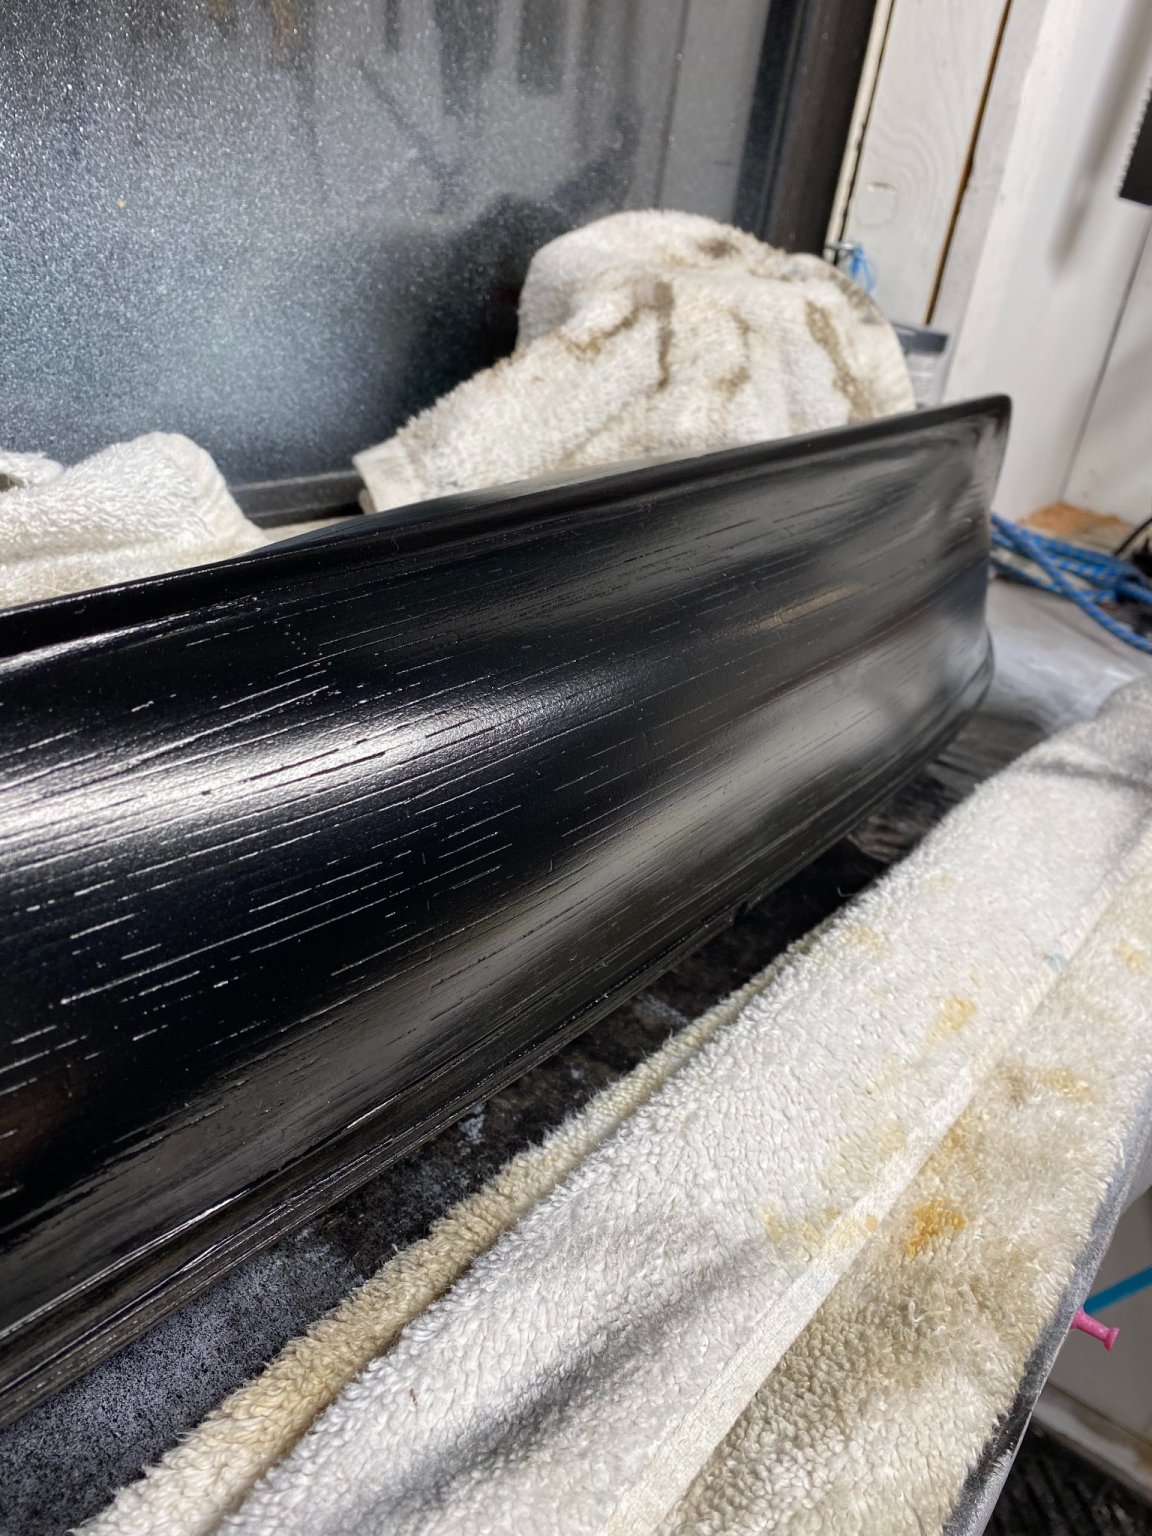
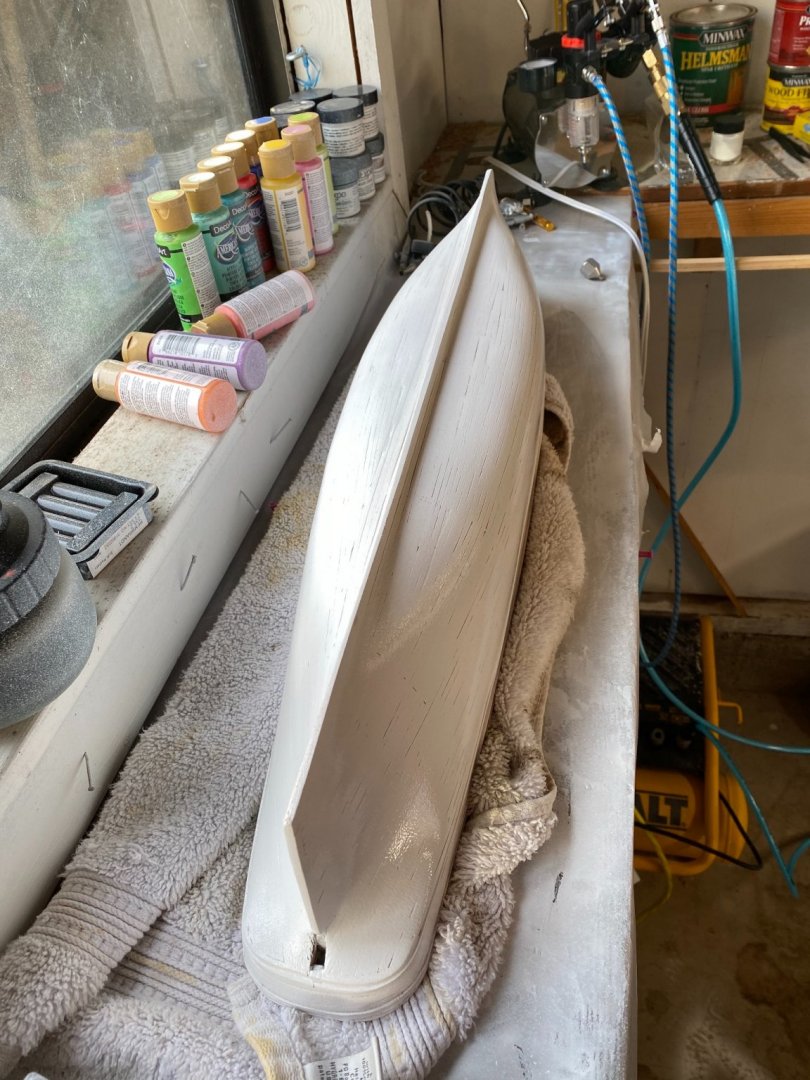
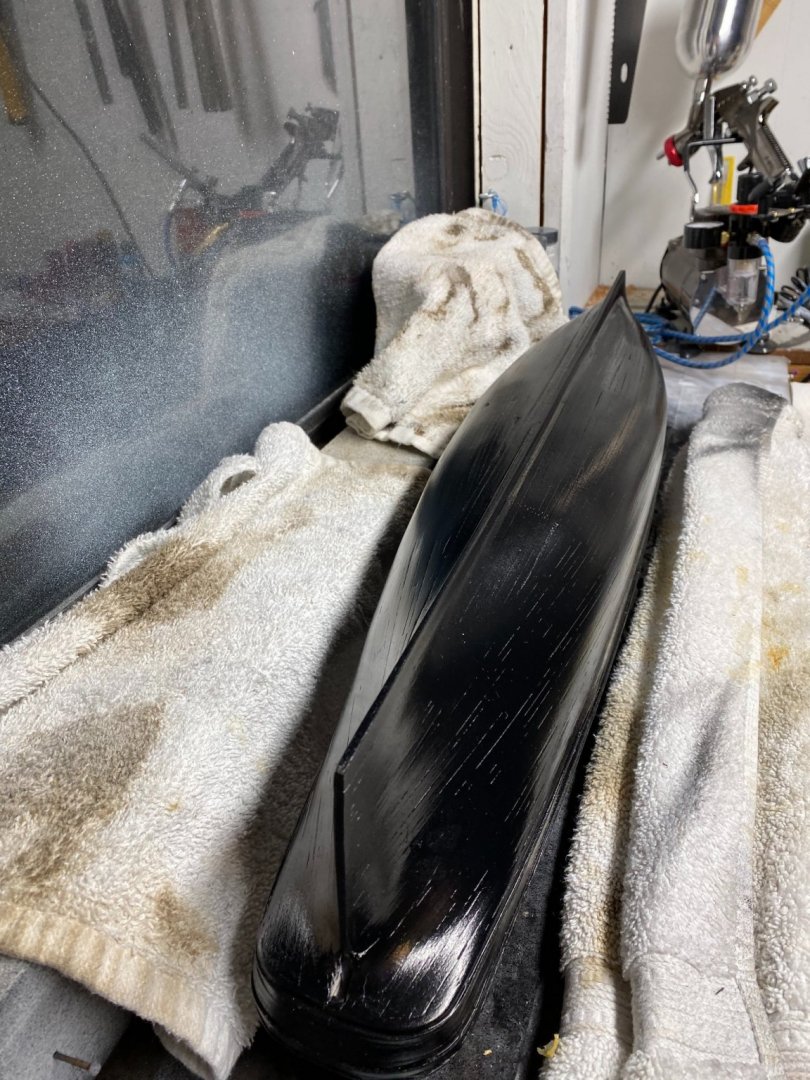
Hello again everyone, my new sprayer got the hull painting in primer in no joke 15 seconds or less. I could not be happier with the result, honestly this was the part of the build I have been dreading because I have never been great at painting. This sprayer has the delicacy of an airbrush but the volume of a can of spray paint. Here is my hull with a primer than again with the first coat of black paint. First coat of black paint, the last picture is right after being painted so it’s not that shiny I think I figured out the copper tape, I’ll post pictures of that later. Thanks again! Bradley

-
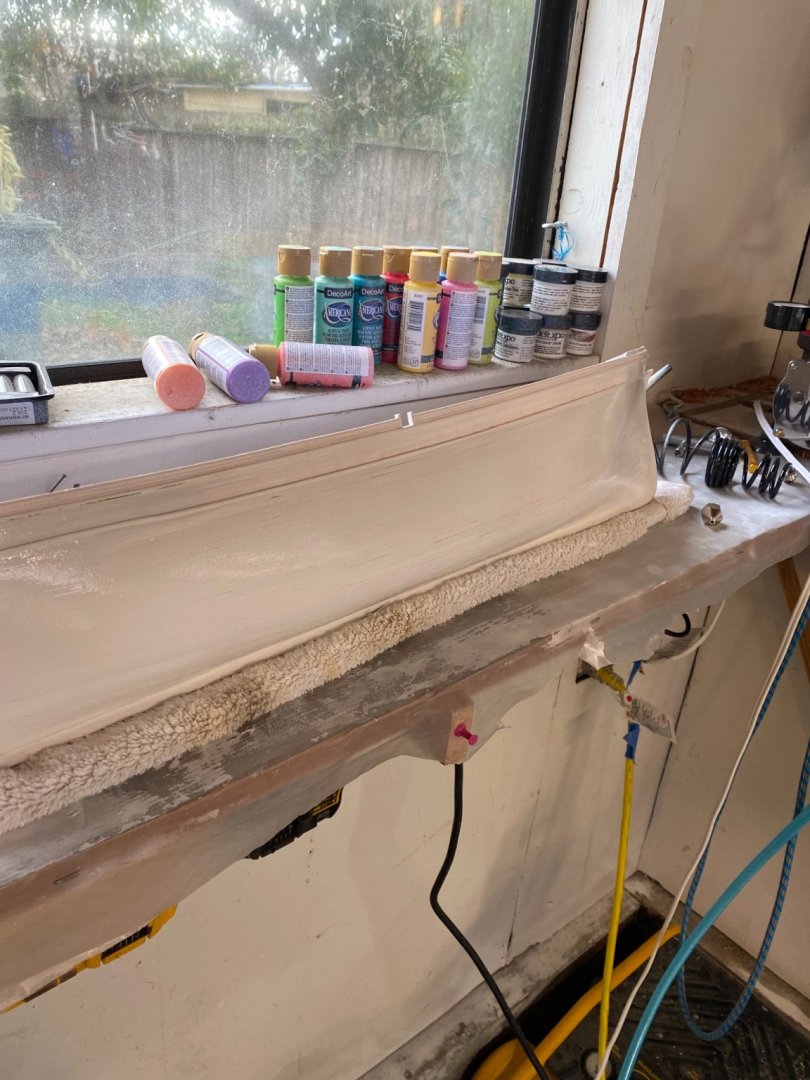
Hello everyone, Not a huge update, I got half the ship painted with a white primer before I broke the needle on my airbrush... bummer. I ordered another one but also purchased an HVLP sprayer I primarily bought it to paint the house but figured it would do a really nice job of painting the hull very quickly and evenly, so that should be nice. yesterday I spent a while thinking about how I wanted to approach the copper plates. I’m using a pounce wheel to create the riveting patterns, I tried to create a jig where I would use a stamp to create the rivets but that didn’t work. Instead I created a two part jig for the copper plates. Step 1 is the bottom jig, I slide the copper tape in and run my pounce wheel along the top and bottom to create the horizontal rivets. I then take that same strip of copper tape and put it in the second jig and run my vertical rivets, I run the pounce wheel along the right and left hand side of the jig in each spot. This leave a rectangle of rivets with about .1” over hang on each side of the plate. Afterwards I take a straight edge razor I made dull on my grinder and push it into the plate, right in between the two strips of vertical rivets. This won’t cut the plates but instead will leave an impression to make them look like individual plates, but really it’s a 6 inch strip of copper tape that when I take off the paper should be easy to install. It has a steep learning curve so when I perfect it I’ll show pictures of the final result, which is a 6 inch strip of 8 plates 3/4 inch long with rivets on each side, once overlapped these should look really nice. Hopefully that will make sense when I post pictures of the plates, I’ll also draw up some basic plans so someone else can use it if needed. Right now it takes me about 30 seconds to make a 6 inch strip of copper plates. Bradley