MORE HANDBOOKS ARE ON THEIR WAY! We will let you know when they get here.
×


Keithbrad80
-
Posts
416 -
Joined
-
Last visited
Content Type
Profiles
Forums
Gallery
Events
Everything posted by Keithbrad80
-
If you still have them and need to flatten them I would wait for summer. What I do is soak them with water so they are completely soaked through. Then cover them with something super heavy but something that puts pressure across the entire surface evenly. Bricks work well for me. Cover them with plastic wrap but leave some vents for moisture then leave them out side in the sun for a week or two. They should be flat enough to cut afterwards. Bradley
-
Wow excellent job so far, also very nice pictures. Overall top quality job! Bradley
- 950 replies
-
- 1
-

-
- syren
- model shipways
- (and 1 more)
-
If you want to make something round, nothing beats a lathe, Ive heard good things about the Proxxon mini lathes. It sounds like the perfect machine for tapering masts and spars, if you want to make the work go much faster, use a small roughing gouge to slowly remove material then 150 grit paper to smooth it all out. I do a lot of turning and would never go back to making things round by hand or by drill. Nice work so far on your build, your attention to detail is unreal! What kind of camera do you use? Sorry if that’s been asked before. Also, if your lathe came with a tail stock I highly recommend using it. I would say my tail stock is engaged 90 percent of the time or more unless I’m hollowing something out, you may find a collet useful if the three jaw chuck doesn’t properly grip the wood, if you don’t have one of those cut a tenon in the foot of the spar and use that to hold it on the lathe. I’m sure you probably know a lot of that already! Bradley
- 778 replies
-
- 1
-

-
- cheerful
- Syren Ship Model Company
- (and 1 more)
-
I haven’t read the book by Sea Watch so I don’t know very much but I always thought fireships were generally ships that were destined to be decommissioned. I guess that could explain why they were decorated, because they were not built with the intention of being fireships, they just ended up being one do to old age or damage. I could be wrong here but that could be a reason. Thinking about it, I’m not sure they would have ever intentionally built a fire ship, that seems like a huge waste of money to me. But if you get 20 years out of a vessel then it’s final stand is used to break up an enemy formation that seems pretty useful to me. Bradley
-
Also, have you ever heard of holystones? They were used to scrub the decks to clean them but also it might the decks really white, I didn’t do nearly as much research on this build as you did, I wish I did, but you could look into that and see if there is a way to replicate those results or if they even holystoned the deck of the Flying Fish. Bradley
- 602 replies
-
- 1
-
-
- Flying Fish
- Model Shipways
- (and 2 more)
-
I started at the poop with the laser cut pieces as a starting point but thankfully I didn’t have to carve the main rail. The curve from the poop to the forecastle is pretty straight and didn’t require much bending, I made several smaller pieces though at the forecastle since the curve was a little bit to much to bend. I used the same material though as the main rail for the forecastle instead of cutting from a large piece. If you wanted to do it in one piece you could start with a larger sheet of bass wood and draw the shape of rail out and cut that out. For the decks I have seen a lot of people use a pencil to highlight the caulking in between the planks, compared to what I did this should leave you with a nice clean deck that you can stain afterwards. Remember don’t use CA if you plan to stain! Your build is looking awesome, and I can’t wait to get back to my own build. Bradley
- 602 replies
-
- 1
-
-
- Flying Fish
- Model Shipways
- (and 2 more)
-
Sometimes if I have lots of small tabs to cut I’ll use a spru cutter and a heavy wood file. Here is the link the spru cutters I use, there pretty cheap and really easy to use and super sharp. After you will have bumps where the tabs used to be, I take a large wood file and drag the file over the entire assembly, as long as the file is only touching the tabs you should be left with a very flat and uniform surface. This is the file I like to use, I have a bunch of different sizes but I found this large one gets the most action. Good luck and hopefully that helps! Also razor saws work well too. Bradley
-
Hello Rach10199, Hows the build going? It’s been a few weeks so your last update, hope all is well. Bradley
-
Hello Ras Ambrosio, Your African Queen looks awesome! At the top of the screen you may notice three lines that you can click on that brings up the navigation page, in there is a link to the gallery where you can post photos of your build. Hope that helps! Bradley
-
Hi butterball, So these dory’s were clinker built (another word is lapstrake) This means that the planks above the garboard (the bottom most plank) will overlap a little bit, this is different than carvel planking where the planks are joined edge wise. I personally don’t know the benefit for one over another, clinker built seems like it would have been easier to build because you don’t have to caulk between the planks but I’m not entirely sure on that. Hopefully this illustration provides some more insight. this model is clinker built so this means that every plank except for the top one needs to be tapered to achieve a tight fit for the plank above it. Hopefully that makes some sense! Bradley

- 38 replies
-
- 2
-
-
- First Build
- Model Shipways
- (and 2 more)
-
Things are going good. I started another model that took up some time, then work got crazy and I haven’t been able to do anything... Im away from home for the next week so hopefully I can find a few days to get some stuff done when I get back. Your build is looking really great btw! Bradley
-
Hello everyone, Well I got my new planks this afternoon, but life once again stands in the way of decent progress. Thankfully I’m patient enough for a nice afternoon in my ship yard. It will probably be a solid week or two before I can sit down and get some work done, not to mention my other ship model that have been starving for attention! Thats it for now, just want to let you all know I haven’t given up, thanks again. Bradley
-
Thanks chuck!
-
Hello again everyone, it’s almost as if chuck knew something like that was going to happen because he sells an extra set of exterior planking, so I just placed an order for that. I used CA glue to hold the planks in place so I’ll use a debonder to remove the plank and hopefully I can sand away any trace of the planks on the frames. At least from now on I’ll have two tries at each plank! Hopefully I can retry in the next week or two, thanks again! Bradley
-
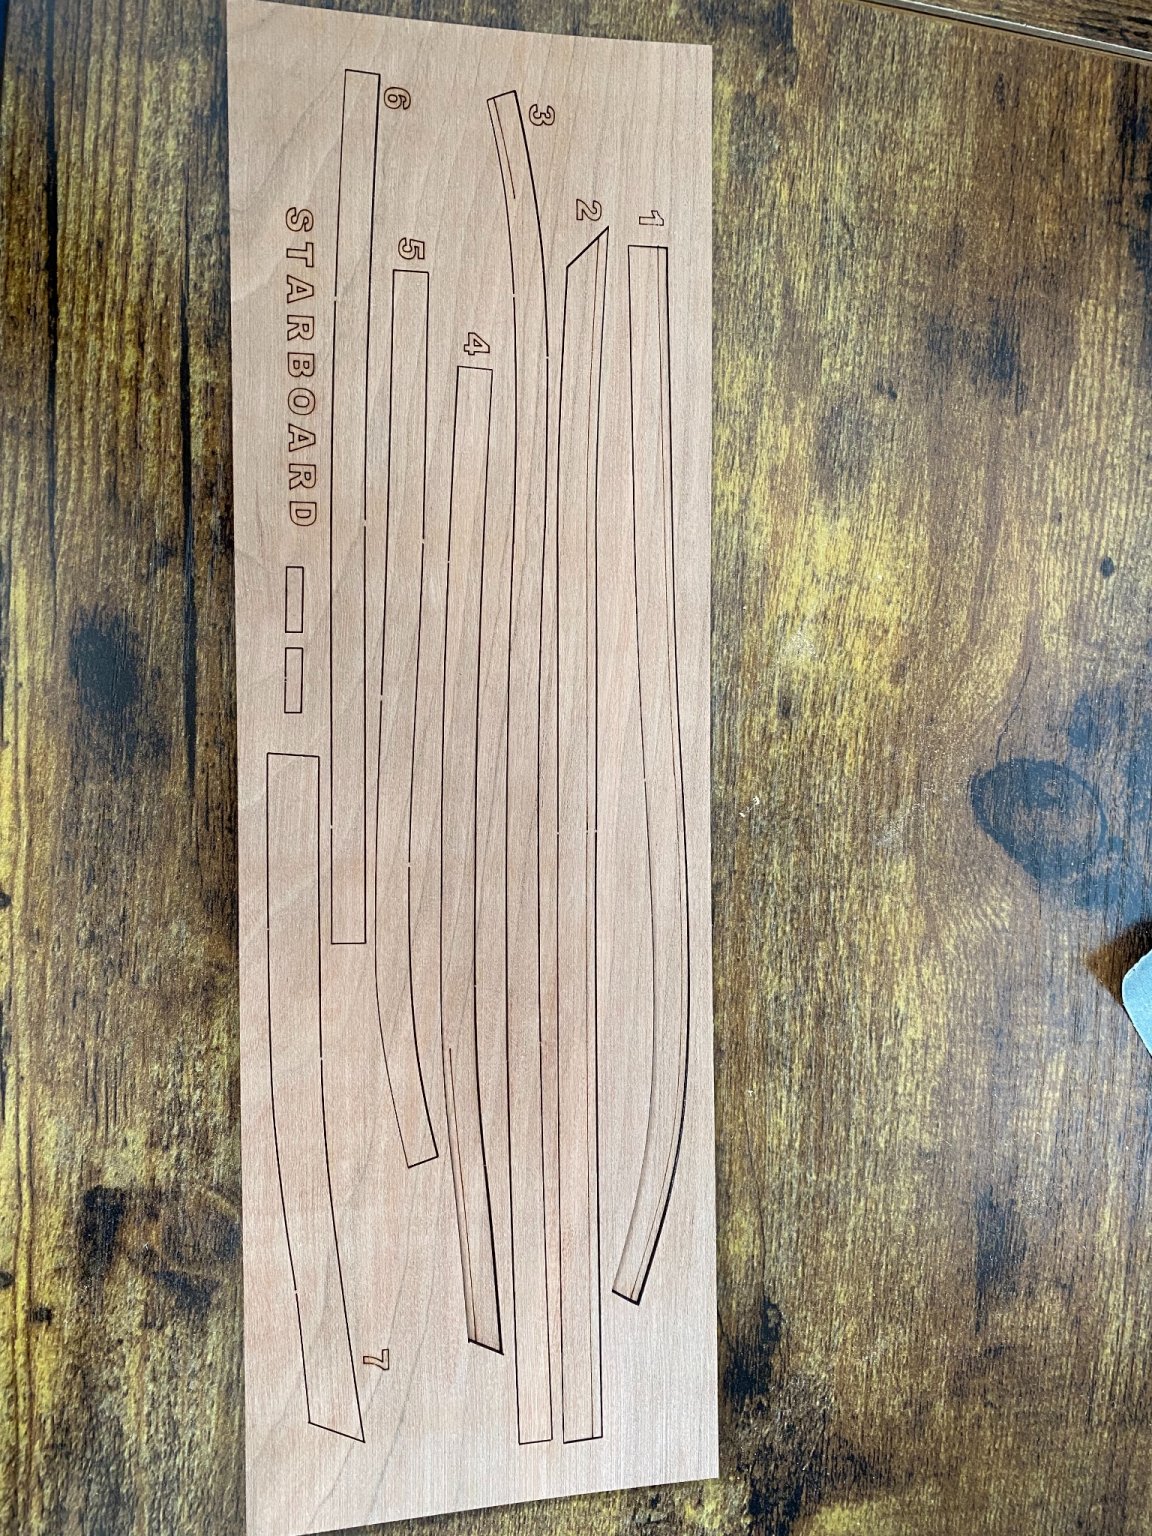
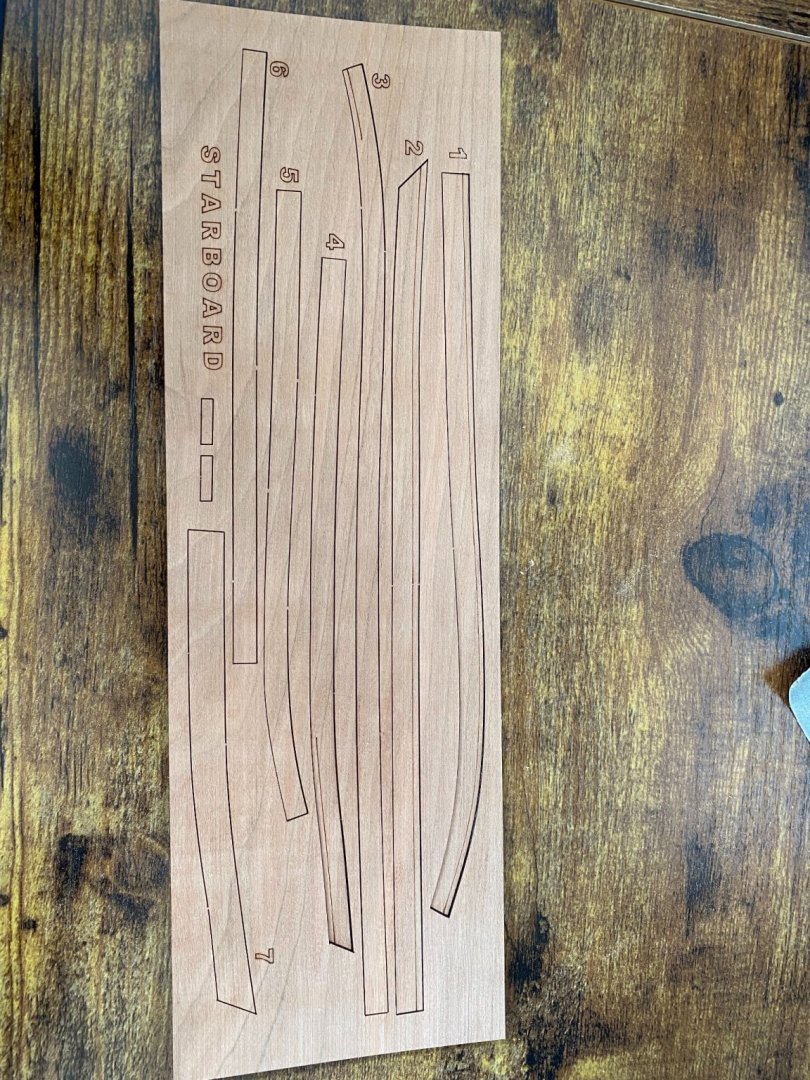
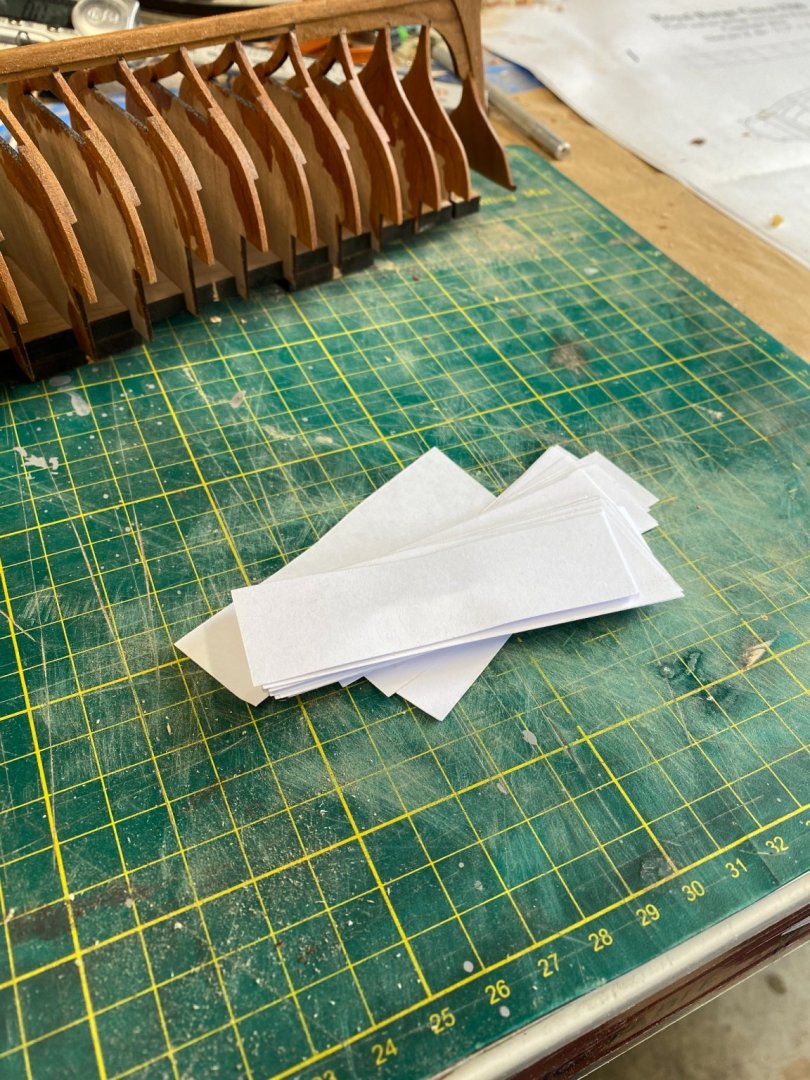
Hello everyone, So yesterday I started planking and I think overall things went ok. The first thing I needed to do before I really thought about planking was to transfer the plans to the frames using tick strips. I cut a couple dozen strips of white printer paper maybe an inch by 3 inches. These didn’t need to be precise as long as it has two straight edges at 90 degrees. I held the tick strips up the plans and copied the placement of the different strakes over to the frames one at a time. Moving on. The planks have all been pre cut and pre spiled by chuck so that is super helpful. There are 7 planks for both the the port and starboard side that have all been numbered. The bottom two planks are planked clinker styler and so the bottom strake has a reference line where you need to taper the edge. These planks are already super thin at 1/32” but I had taper them to about 1/64” so that top edge of the plank is very thin, I used a small sanding board To sand the edge square. After all the edges of the plank were sanded, I started to bend the planks. First is the bend which is not very much, just some bending at the bow. I used a little bit of water and the blower while holding the plank in position against the frames, which worked really well. Next job was twisting, this was also not bad. I clamped the planked the table added a little water and hot air and held it in place while twisting in the right direction. Final step for plank one was to cut it to length. I held the plank against the frames as I slowly worked my way back to the first 0 frame. I marked the plank at the center of the frame and cut the plank to length, I am finally ready to glue the plank! Chuck suggests CA which I was concerned about at first but I know it can be easily hidden with WOP if I make a mistake. Getting the plank glued in place at the bow stem and frame 10 was really tough, it probably took me 20 minutes per plank to get it right so now I see the need for CA. I worked my way back referring to my lines I marked earlier, after getting the plank glued at every spot I felt pretty good, everything looks great! Once the starboard side was glued, I started with the port side by holding the plank in place at the bow stem and using a small clamp with some card stock to hold it in place while I glued frame 10.... Disaster struck! I’m sure you notice the plank at frame 10, I think the clamp was to strong and I forgotten how thin I had sanded them. Oh well, no going back now, and after a small break I attempted to fix the plank. It broke in a nice configuration so hopefully I can fix it. It’s not that big deal though, recently chuck shared a photo of a build his friend is working where the planks have been painted white, I’m considering doing the same now that the plank is broken right at the front of the model. Thanks again everyone! Bradley
-
Wow the white looks awesome! Bradley
-
What plastic ship kits have you done?
Keithbrad80 replied to Broadsides's topic in Plastic model kits
These are plastic kits? You have done an outstanding job on them. Bradley -
your build looks great! I noticed with my build that the frames didn’t stay in place after a dry fit. I probably dry fit the keel to the frames 4 or 5 times before glueing and after each time I removed the keel the frames moved a little bit. I used the dry fits not so much as a method of how I’m going to place the keel but instead how I adjusted the frames once the keel was in place. Bradley
-
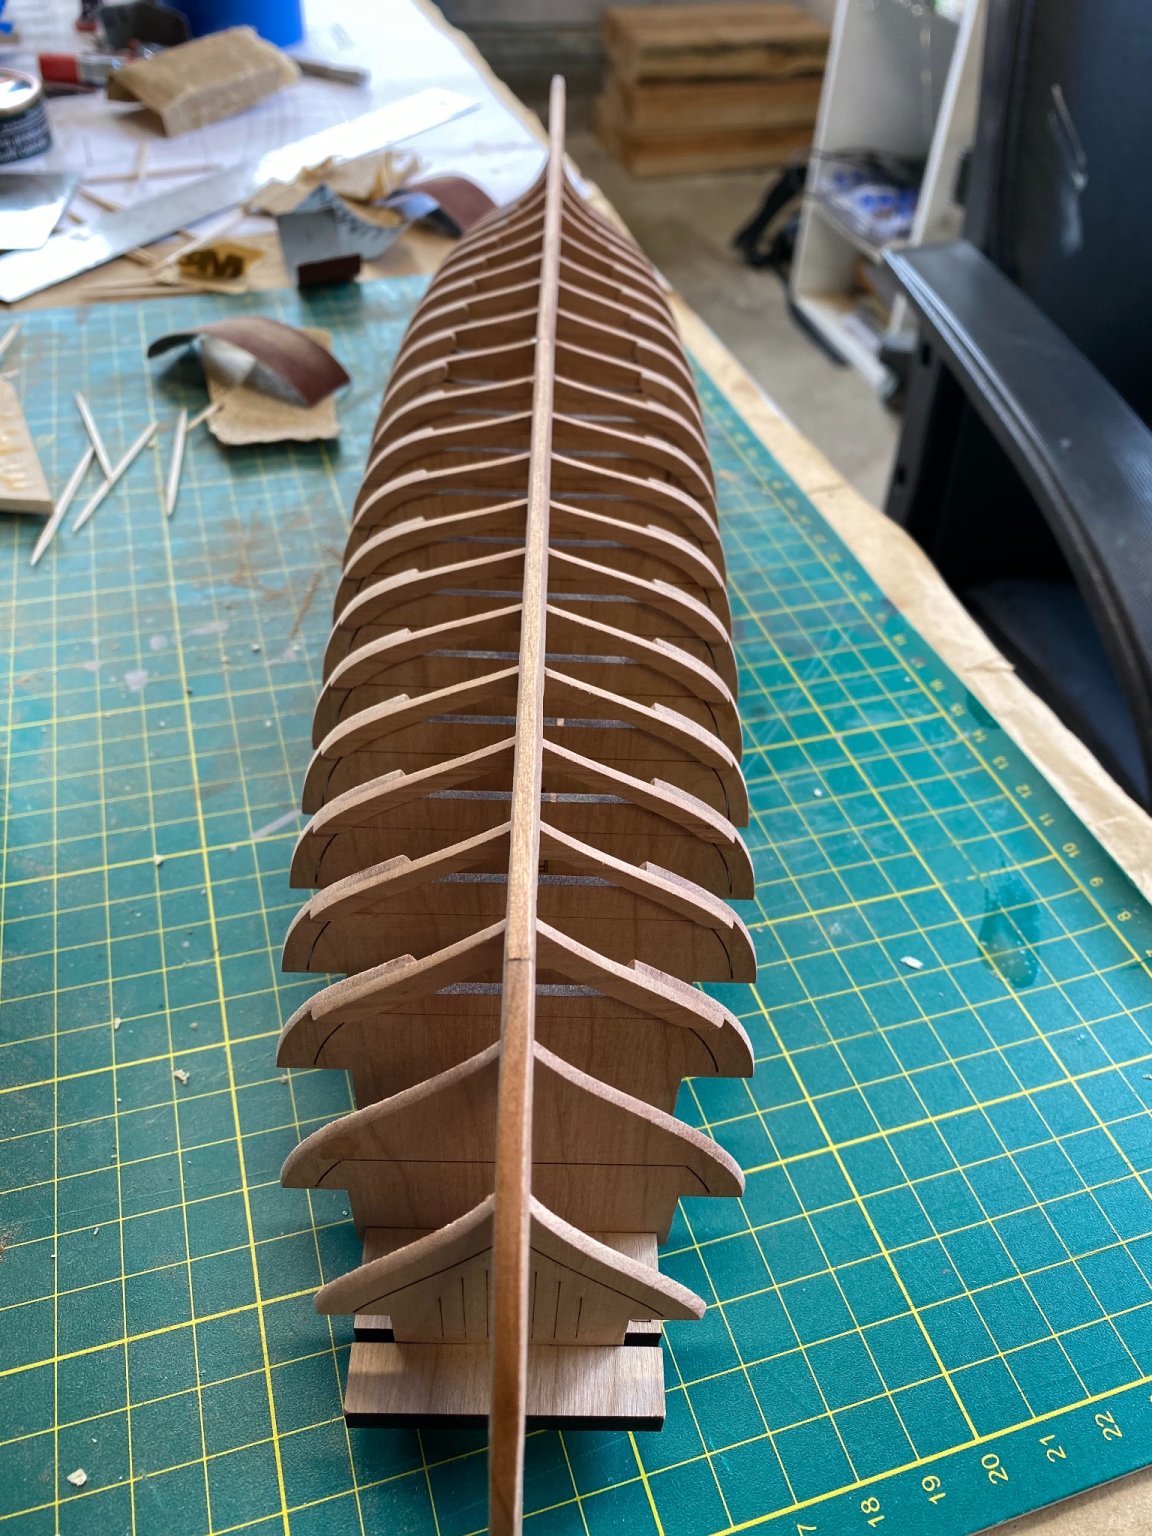
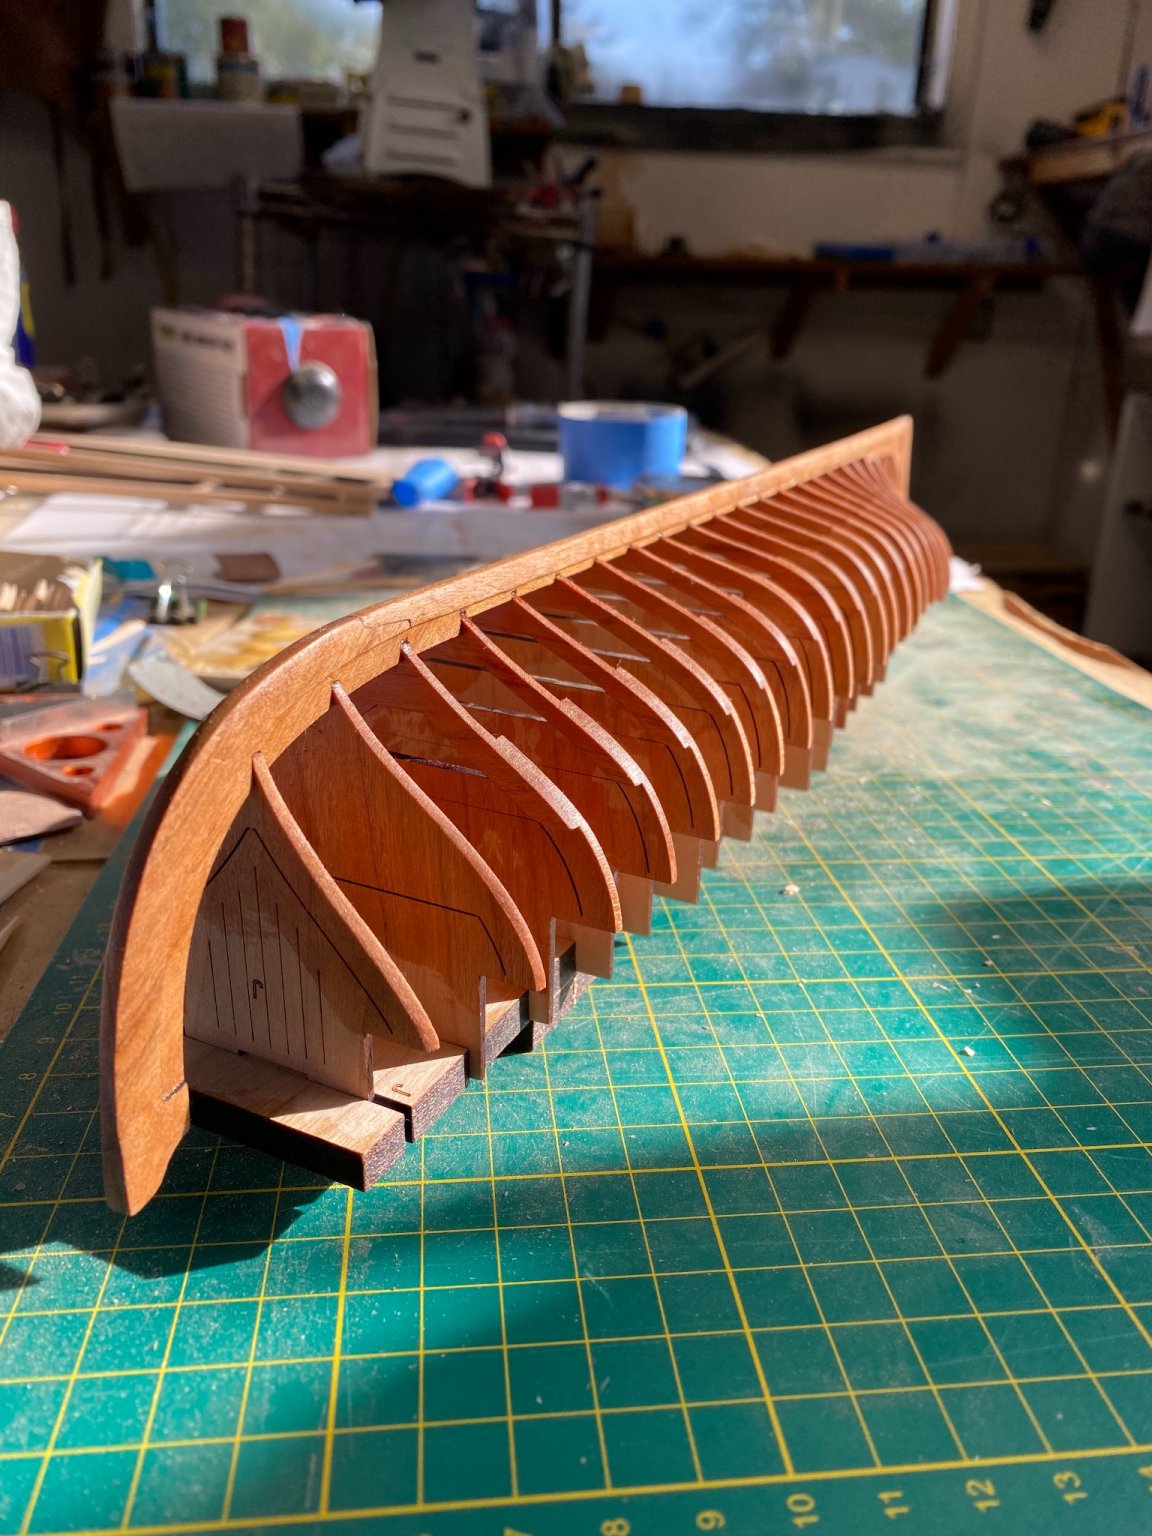
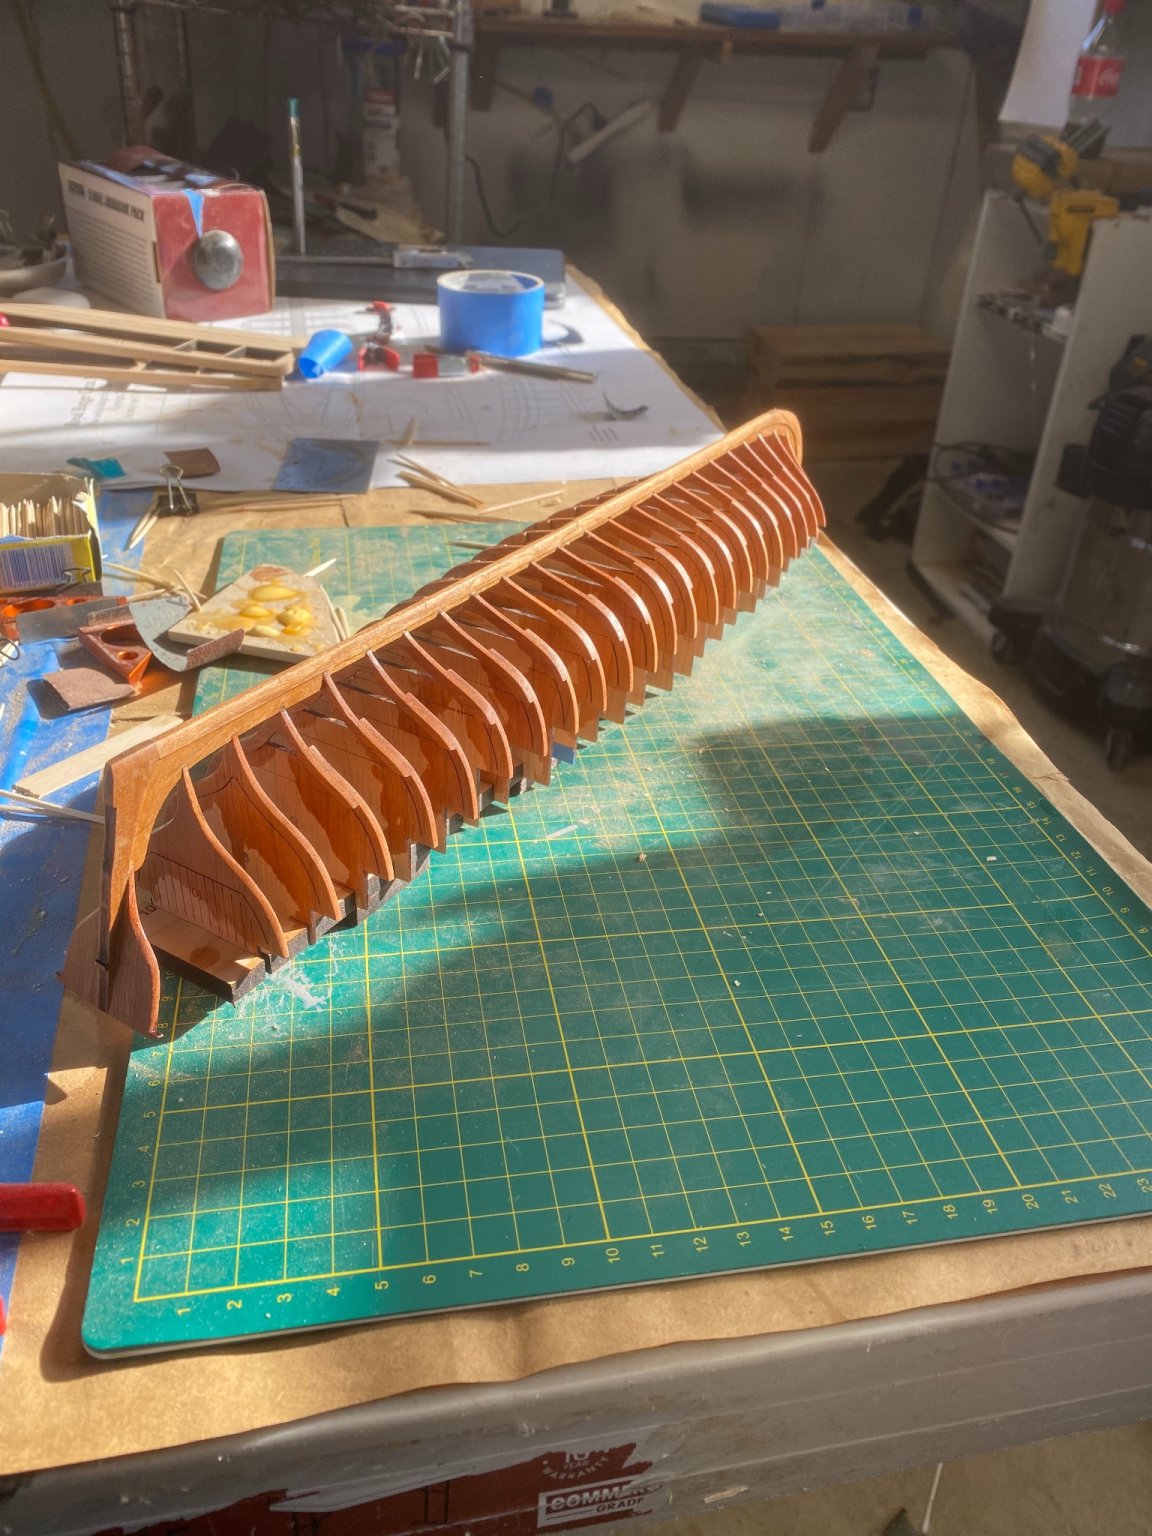
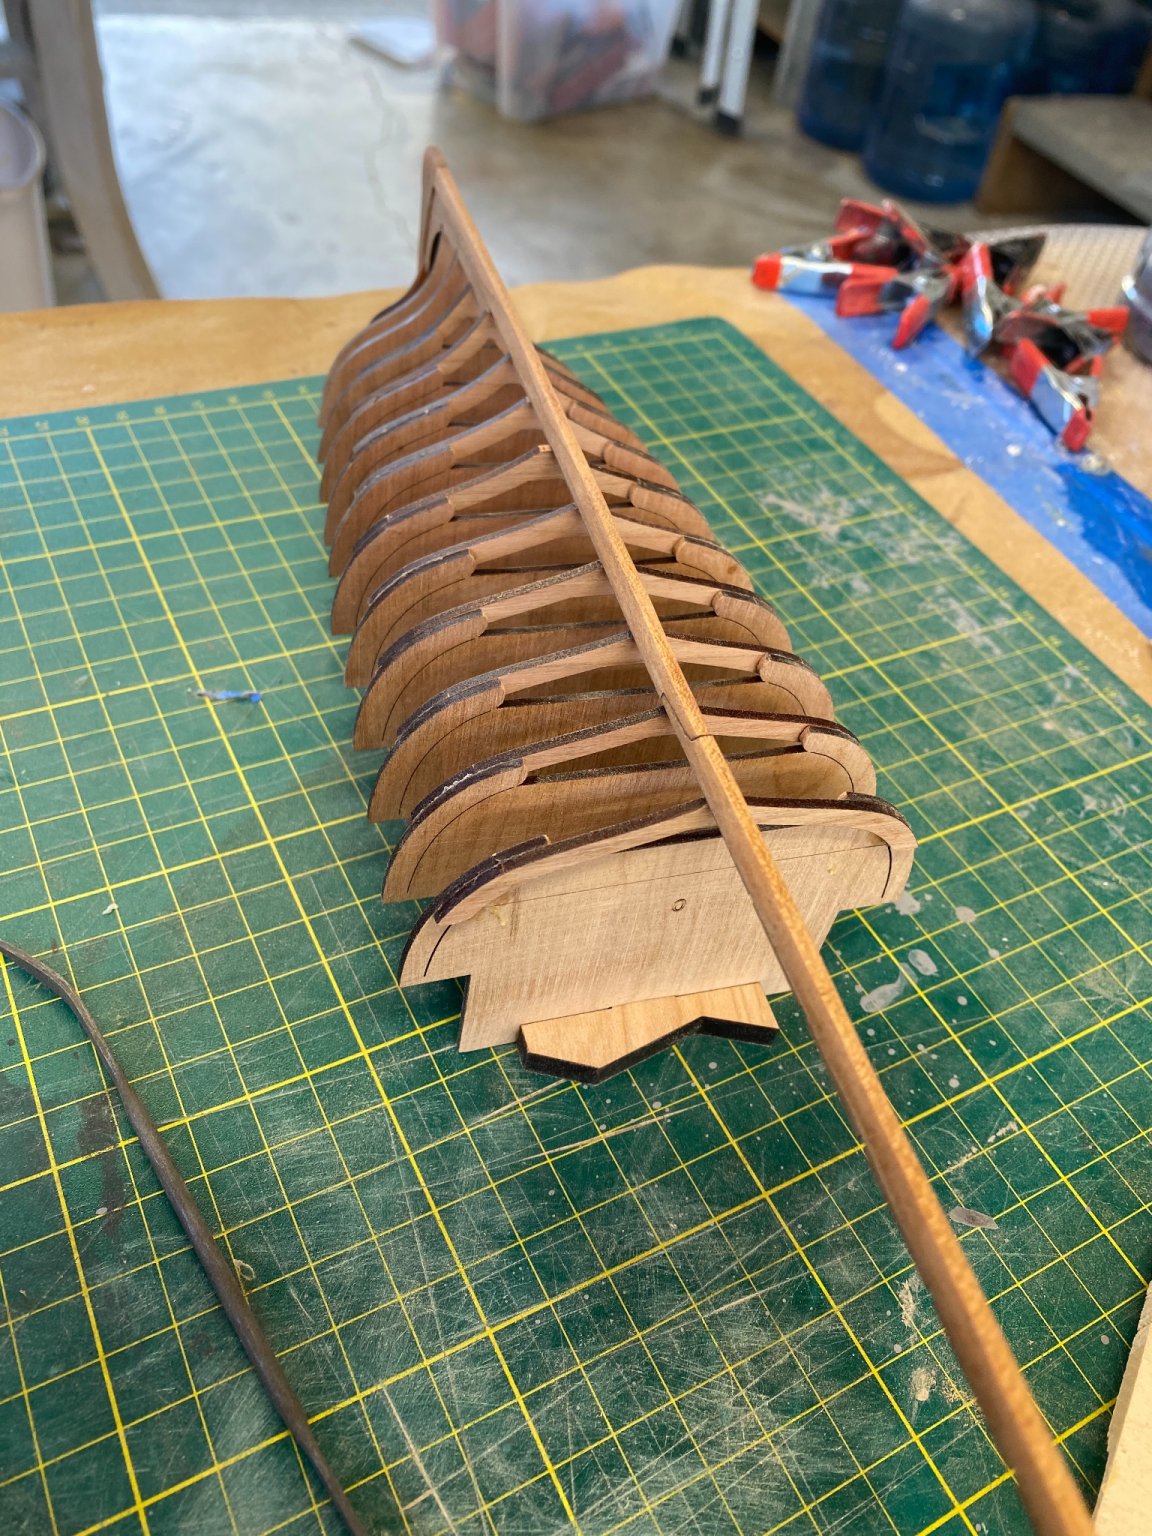
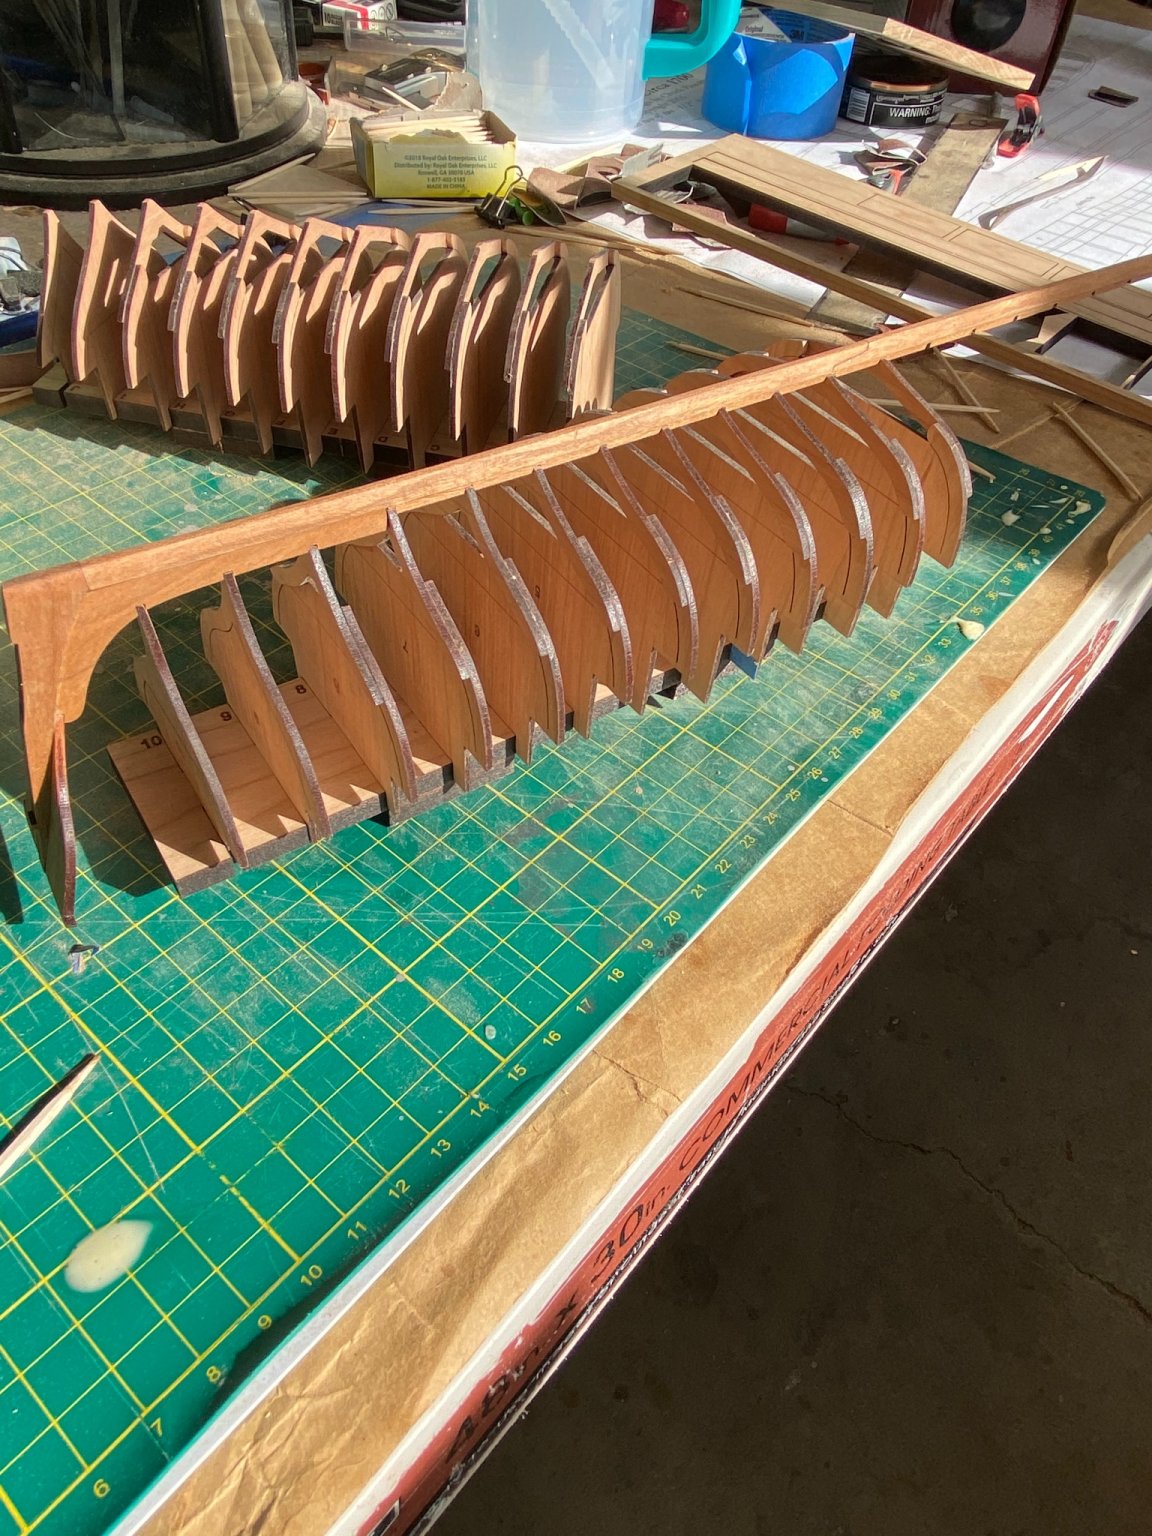
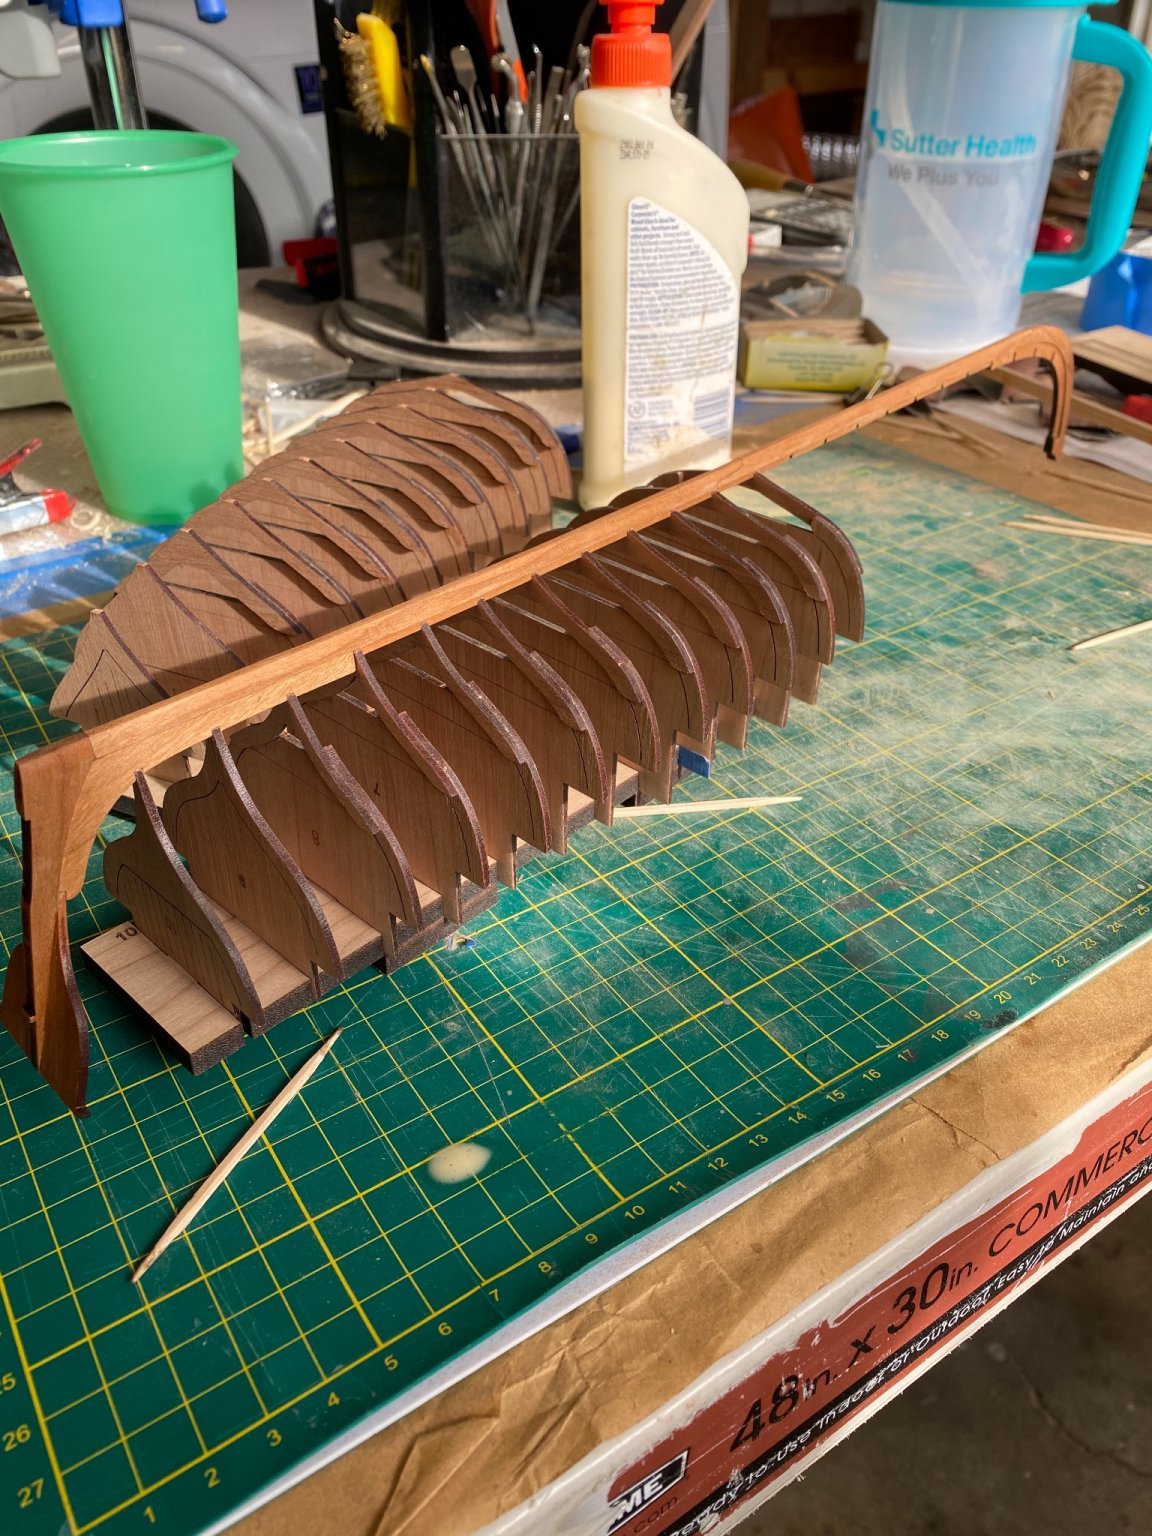
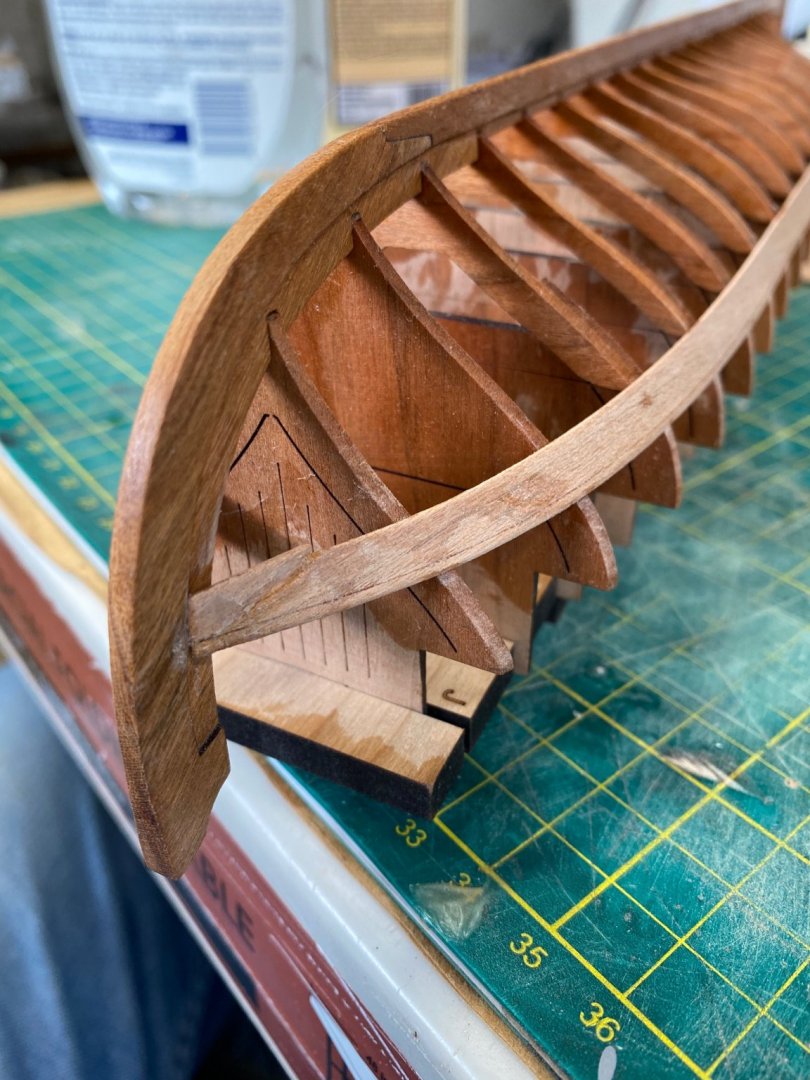
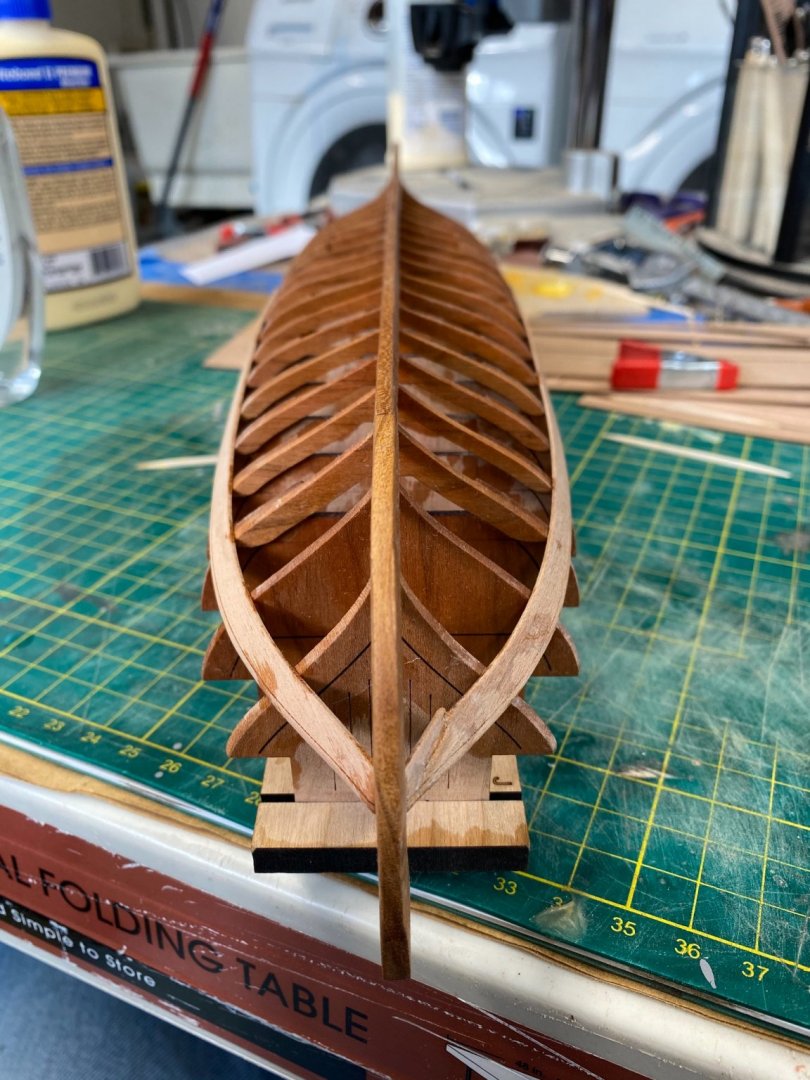
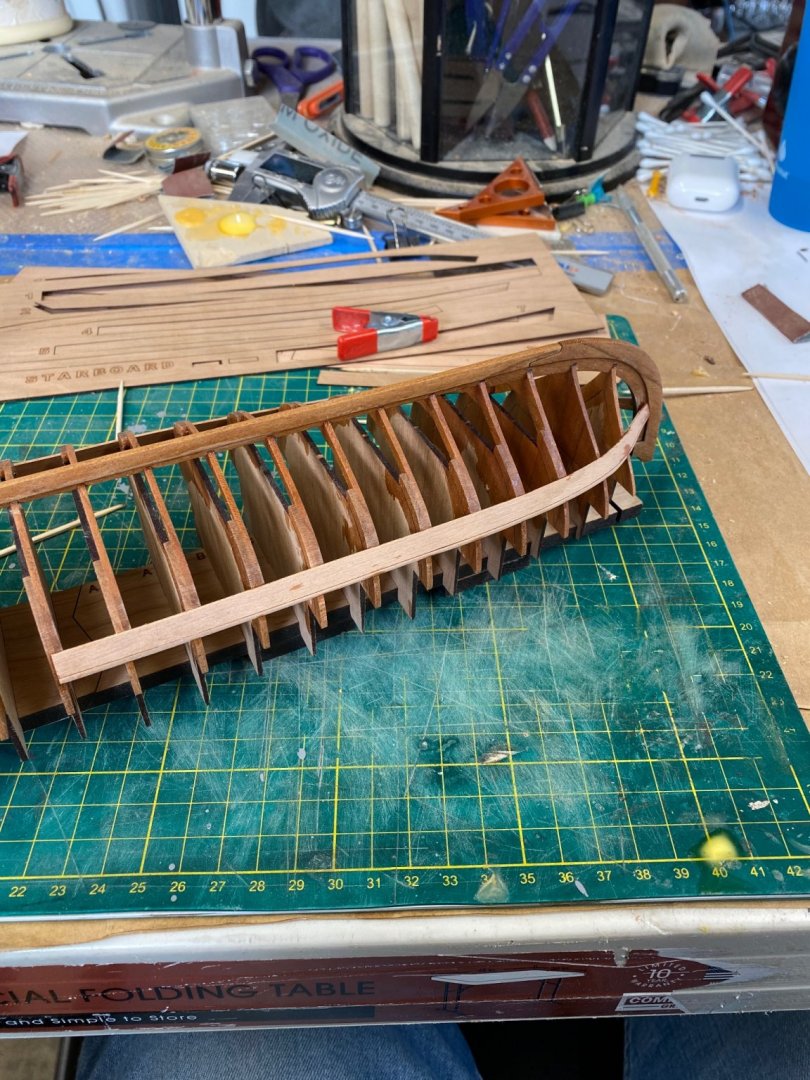
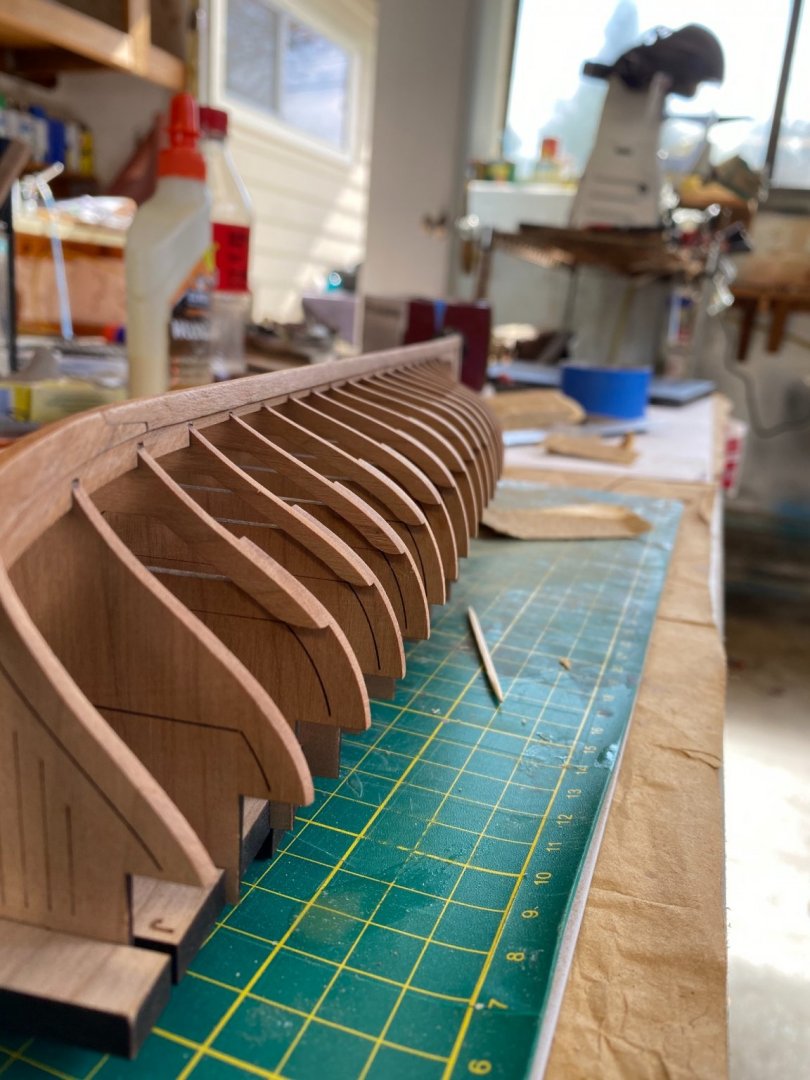
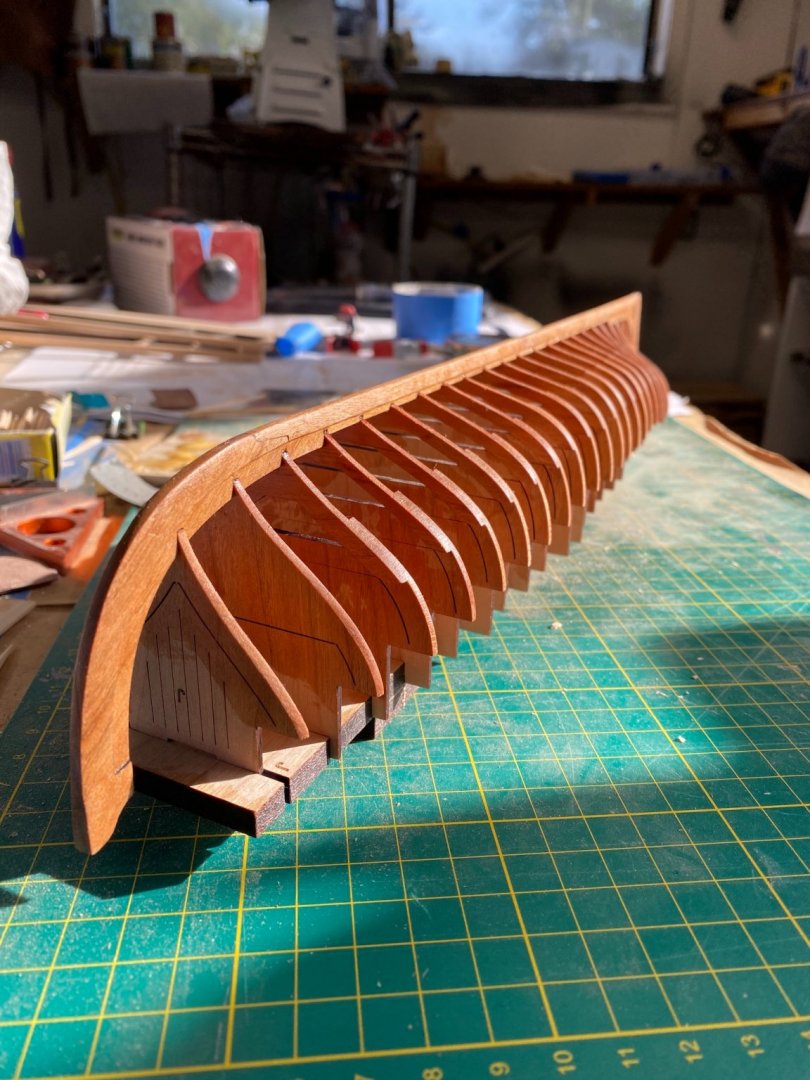
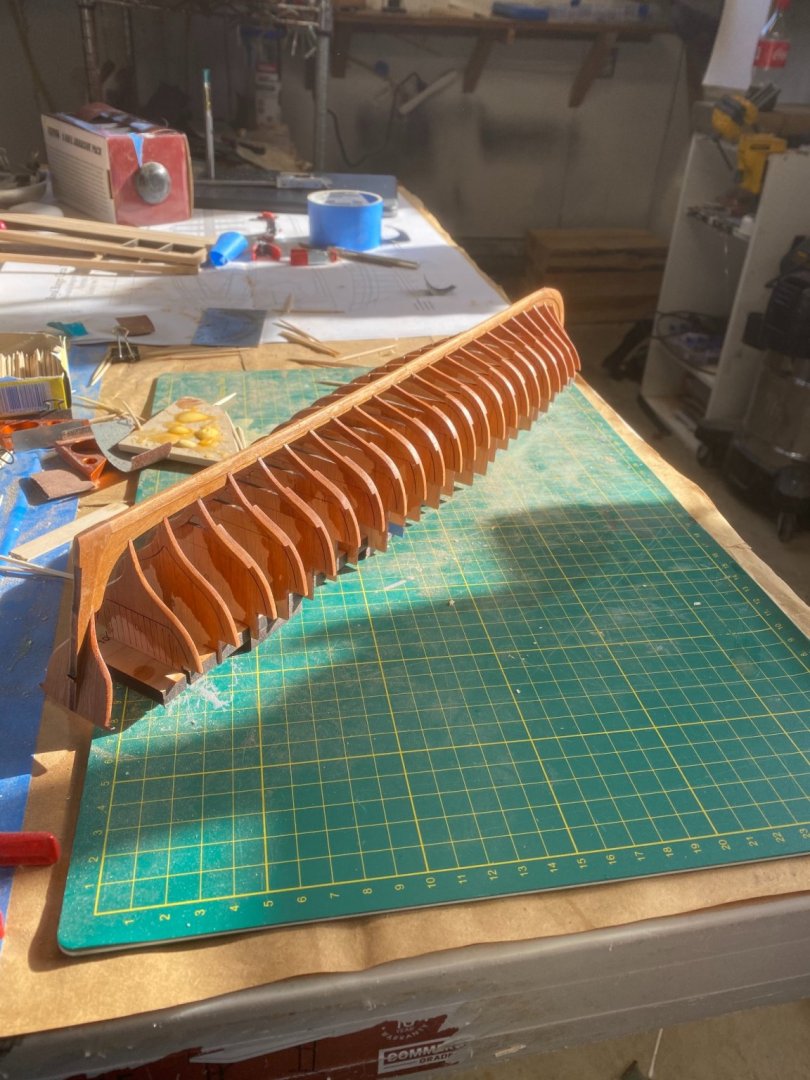
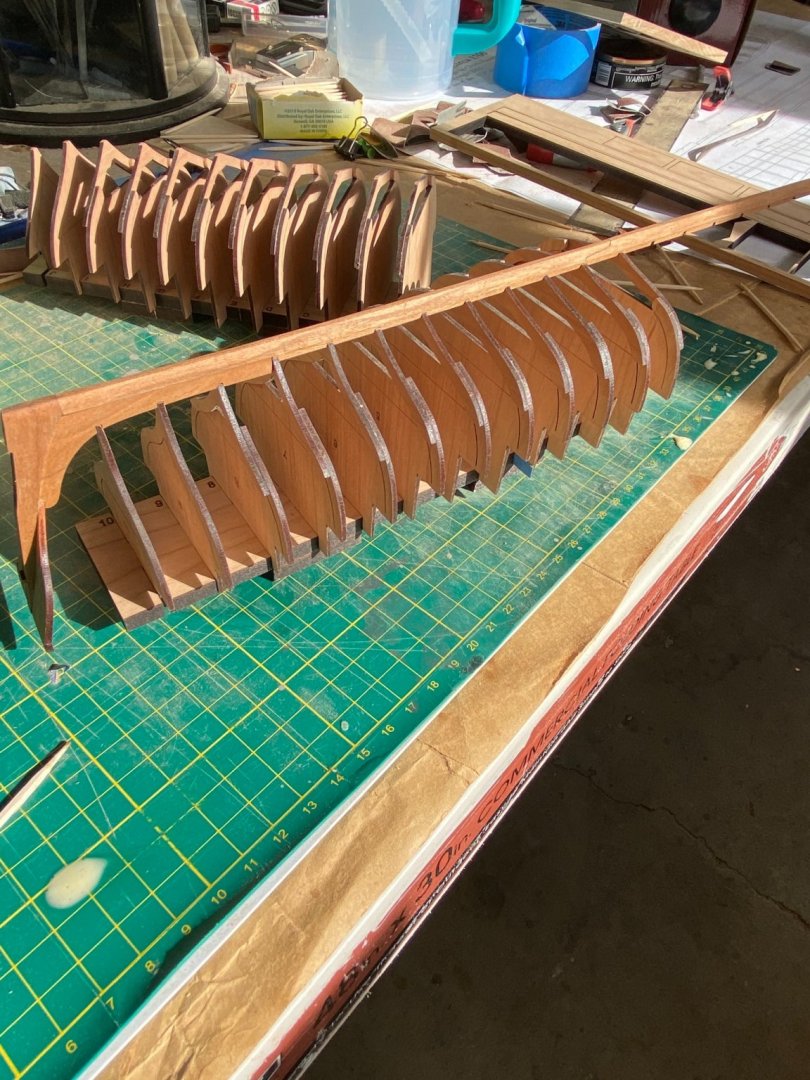
Hello everyone, So I spent several hours today fairing the hull, chucks method of using sand paper with rolled edges worked really well! First I glued the forward half to the keel, this went ok. Later there were two or three frames the moved a little bit while fairing and I had a lot of work to do afterwards. I must not have had enough glue in joint. That’s ok though, I think it looks pretty good! Here it is fully assembled: afterwards I started fairing the frames, these frames are super fragile so I made sure to take my time with this process. The cherry wood supplied with the kit is very nice, so it held a super crisp edge while fairing. This was probably my best job yet at fairing the hull of a kit, once everything was sanded I cleaned it up with a coat of WOP. that’s it for today, hopefully tomorrow or Friday I can start looking at the planking. Thanks again everyone! Bradley

-
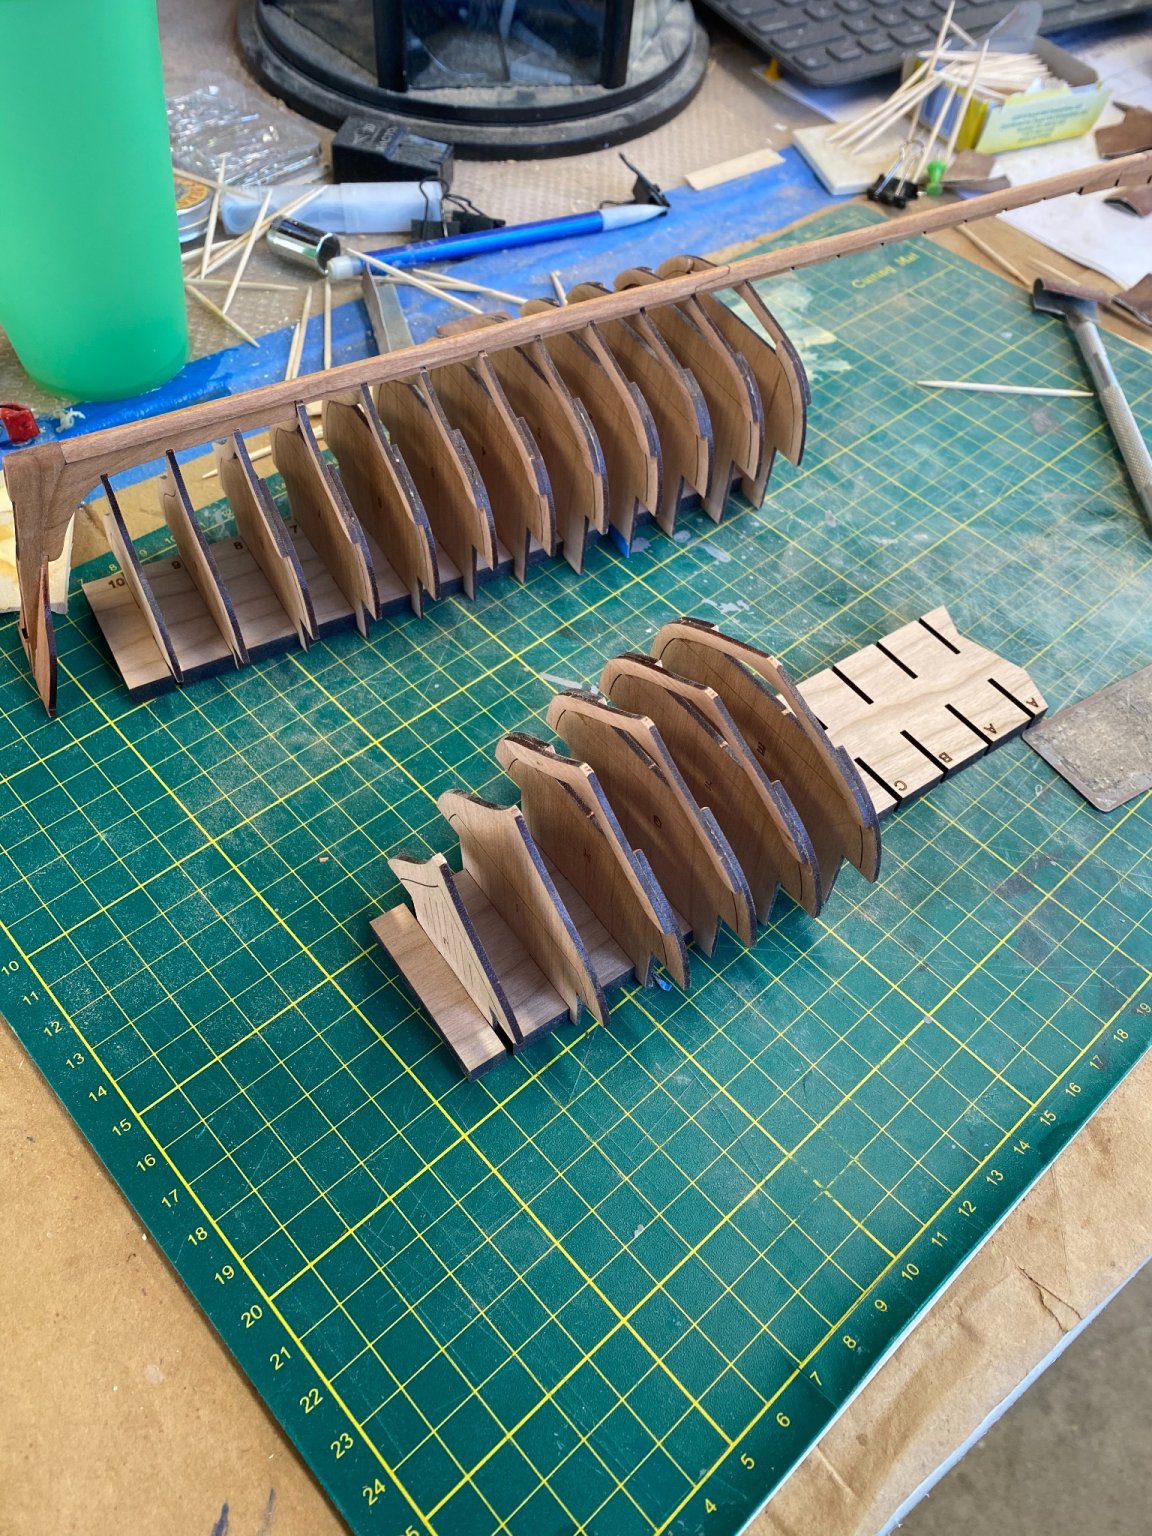
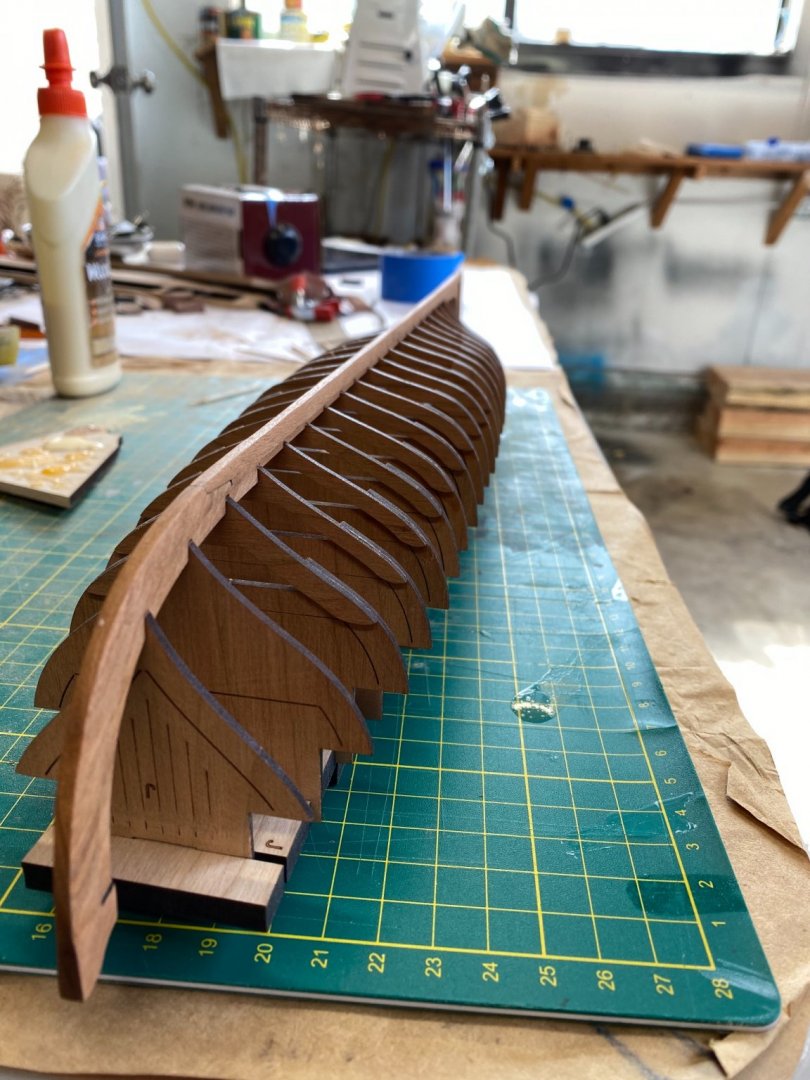
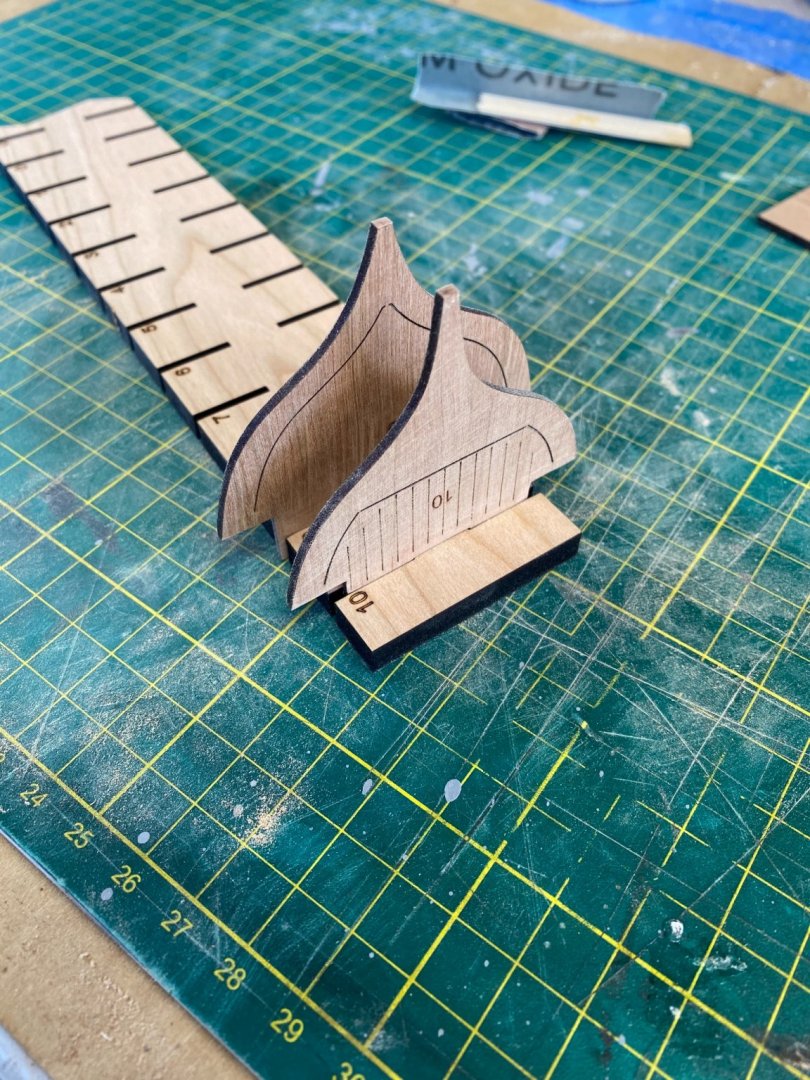
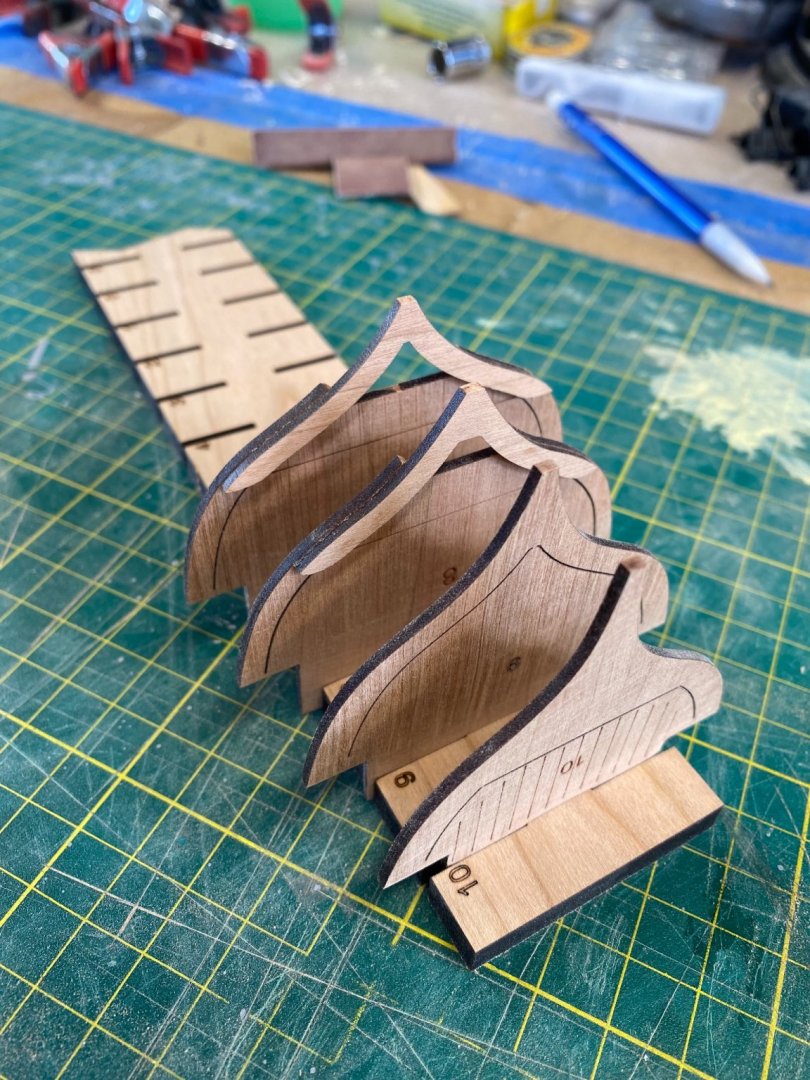
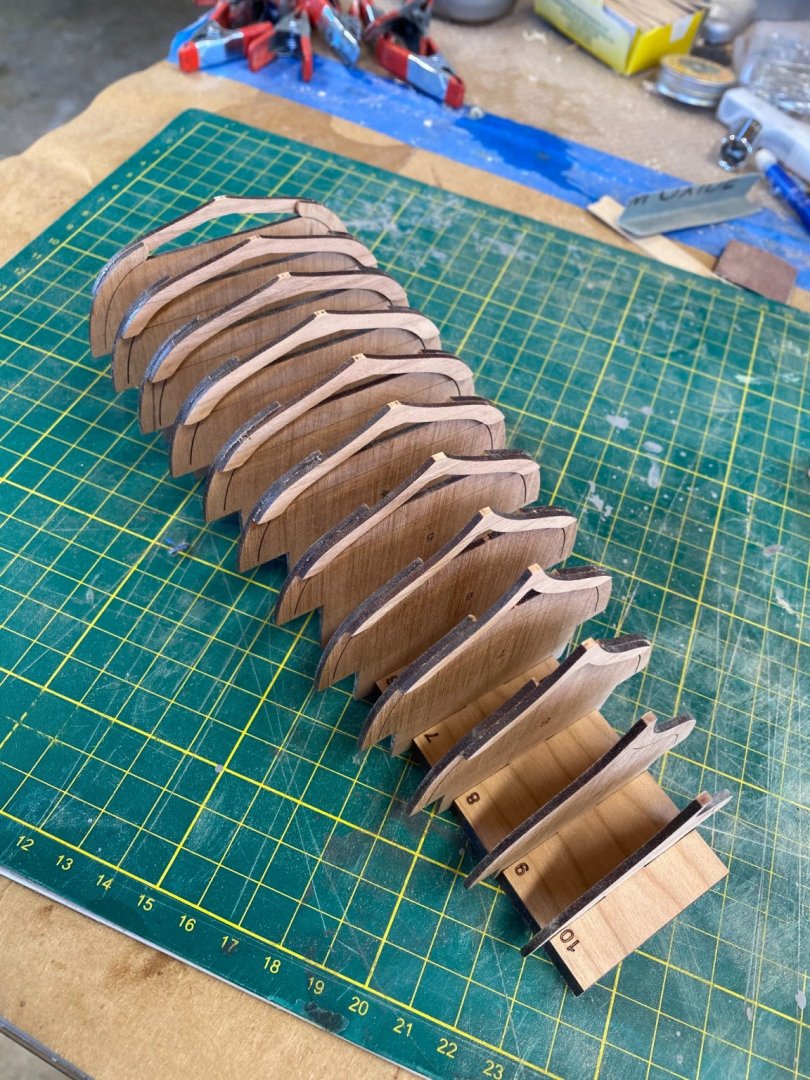
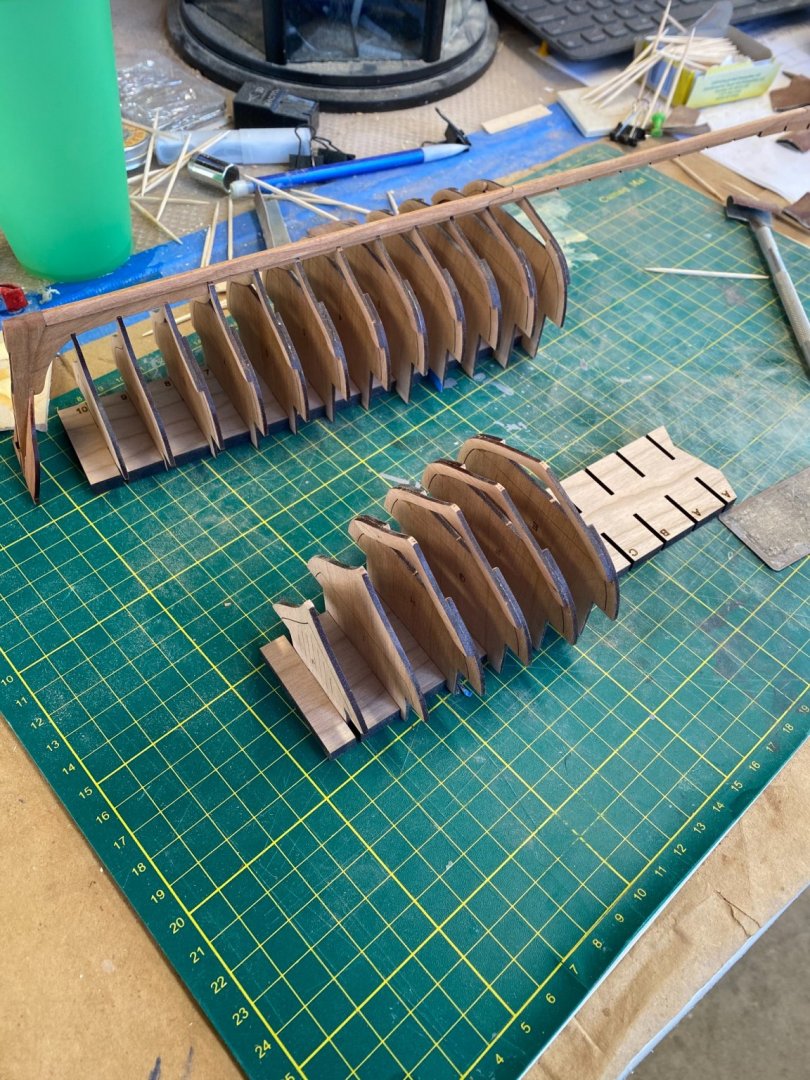
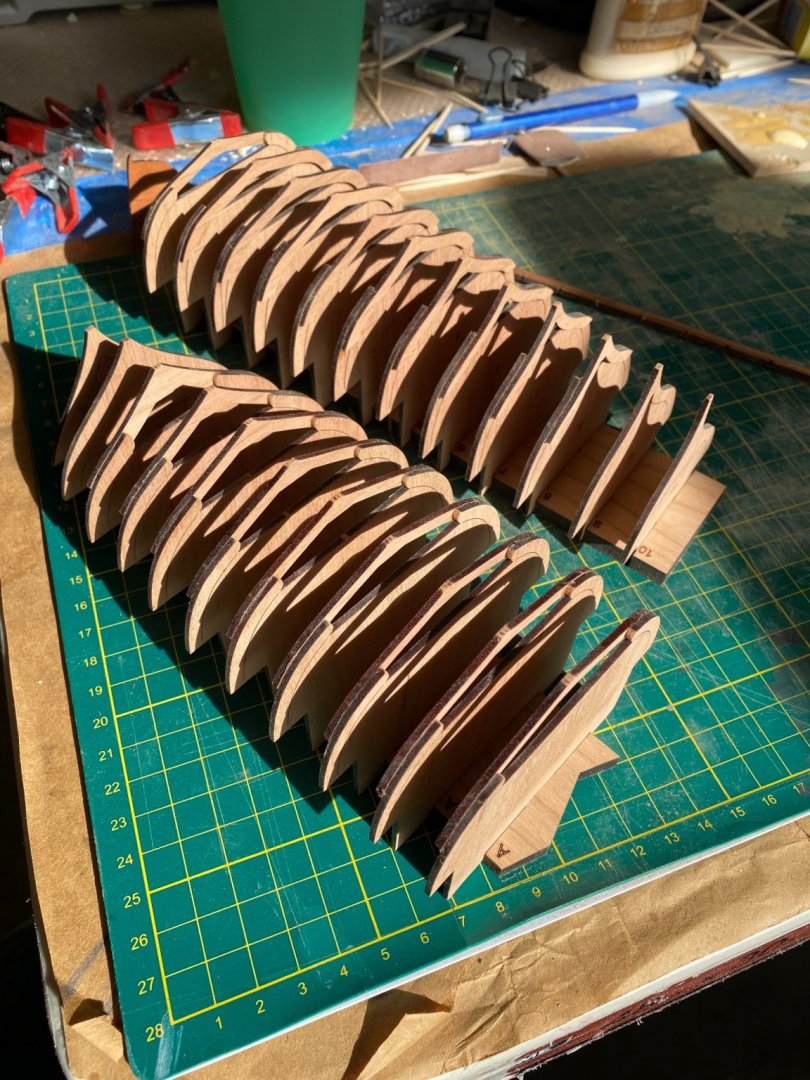
Hello everyone, I got my COVID vaccine yesterday (the first shot) and I finished my kitchen this weekend so talk about sore! I’m very happy with the progress I have made over the last two days. I have all the frames assembled and half of them glued to the keel, I thought these would take longer but once I got the hang of their construction the frames were pretty easy to get together. There are 1 piece and 2 piece frames on this model, the one piece frames are really easy to install I just cleaned up the part that will glue to the keel and the build board where the tabs sit. the two piece frames were more complicated than the 1 piece but were not very difficult to get right as long as I took my time. I started by sanding both sides of the laser cut sheets with 220 just as before, the wood tabs that held all the frame pieces were very small so I didn’t have to do a ton of sanding to remove those marks. First I sanded the build board to ensure a proper fit of the frame. Both the futtocks and floors have a rounded tip? I’m not sure how better to explain them or the name but they look very nice when all the frames are done, these rounded tips have to be sanded now as this is the only time I can do so. I got those parts sanded and once I was happy with the futtocks I cut out the floor for that frame and after sanding glued them together. These are really easy to align because chuck has provided a laser etched reference line that you align a metal straight edge with and there you go it’s pretty much aligned, from there I made sure to fine tune any alignments and make sure everything was ready to go. I did this for every frame 0-10 and again A-J. There are two 0 frames and two A frames, the frames changes direction though between the two 0 frames. I only used yellow wood glue for this btw, after the glue was applied in a thin layer I clamped them with those weak red tipped metal clamps everyone has. I used the admirals hair dryer to quickly dry the joint, and moved onto the next one. Once all the frames were put together I took them out one at a time and fit them to the keel, the spot they glue to is a little too narrow so I used a small file to clean that up. I also removed any dried wood glue I might have missed earlier, on the keel I must have missed a spot because there is a small spot in the poly coat. After the frames were done with their final adjustment I glued wood blocks to the bottom of the build board, this should give me some clearance when sanding and planking. Once all the frames were back in the build board I did a dry fit with the keel and moved the frames to their correct locations, I probably spent an hour doing this for the aft half. Once I was sure everything was aligned properly I removed the keel put a little glue on frames 0-10 and glued the keel in place. Before the glue set I made sure to go through and get everything exactly where it needs to be. dry fit #1 glued in place This is where I stopped for now, I’ll finish fitting the remaining frames before glueing them in place later, than hopefully tomorrow I can start fairing the hull. Thanks again for following along! Bradley


-
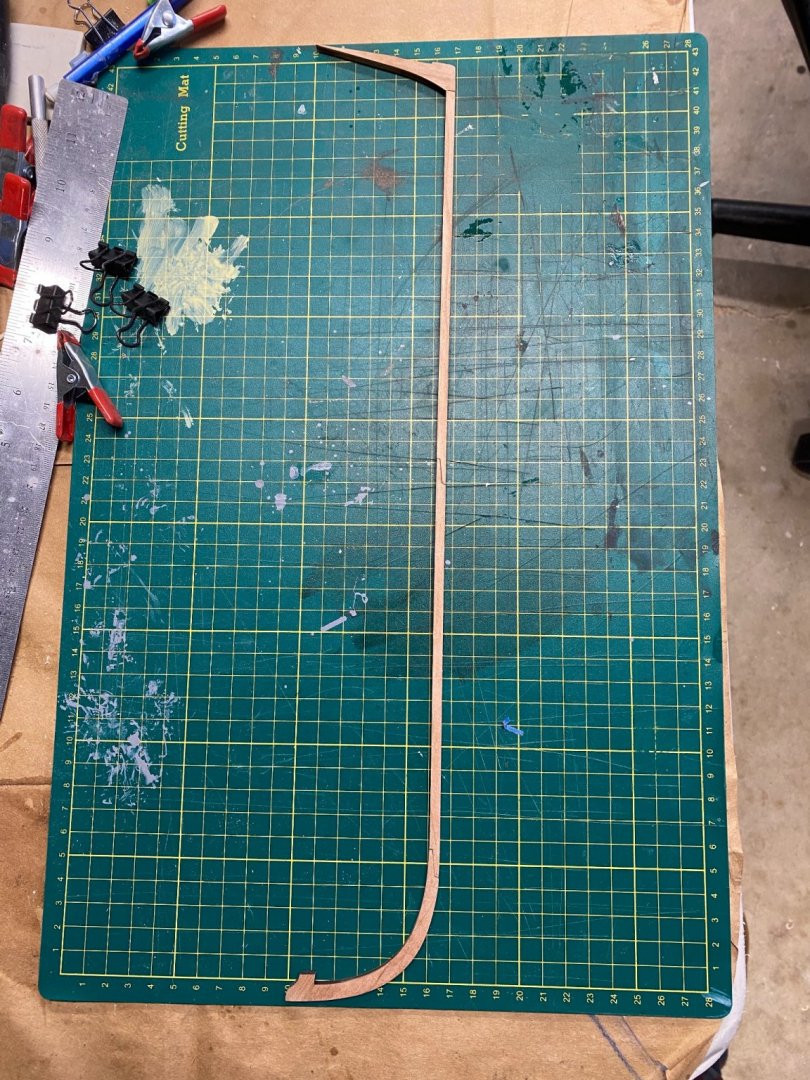
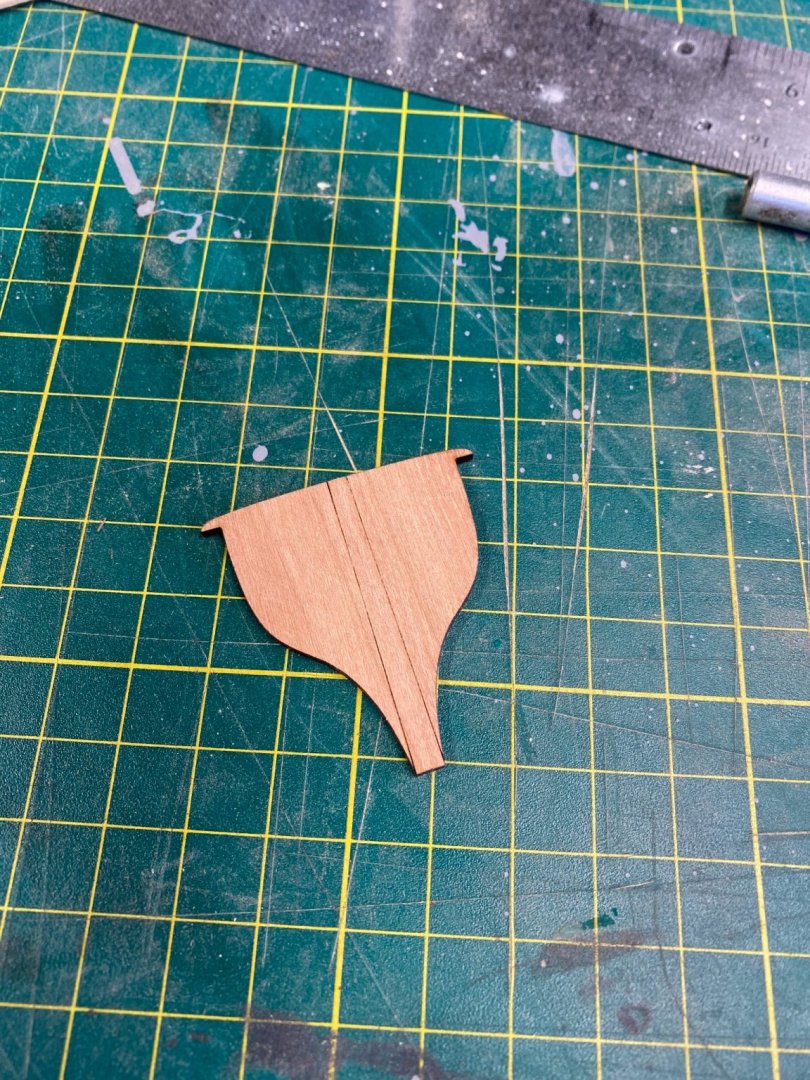
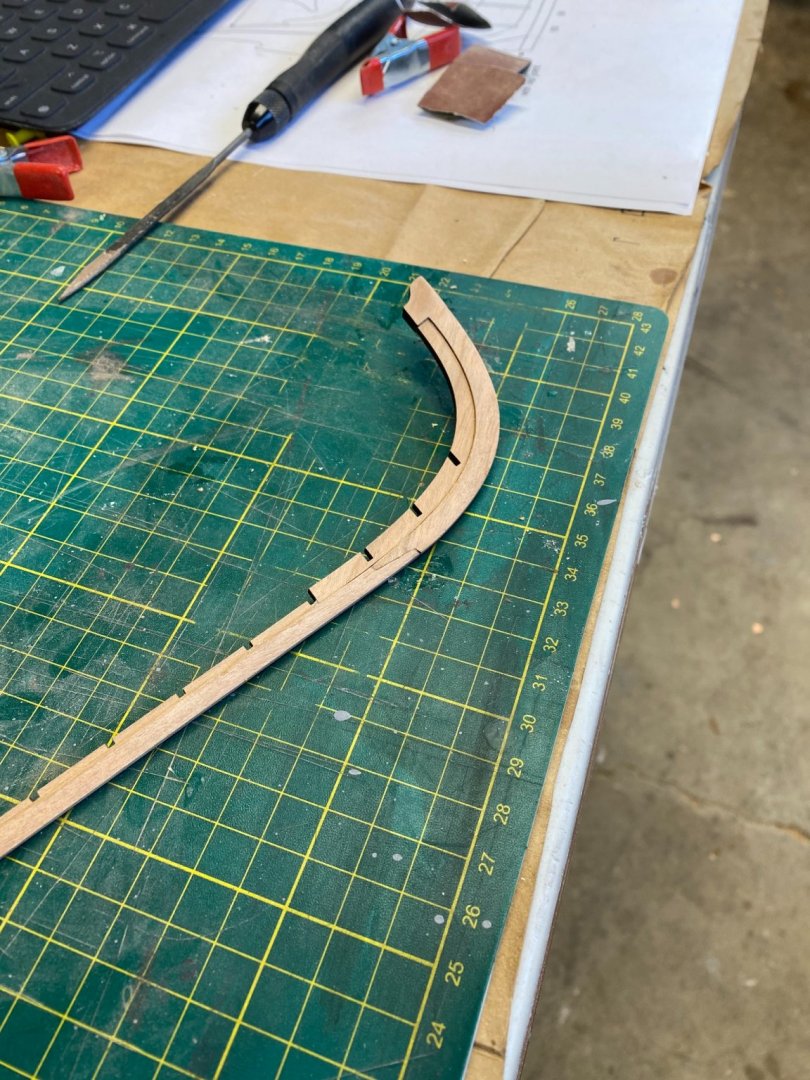
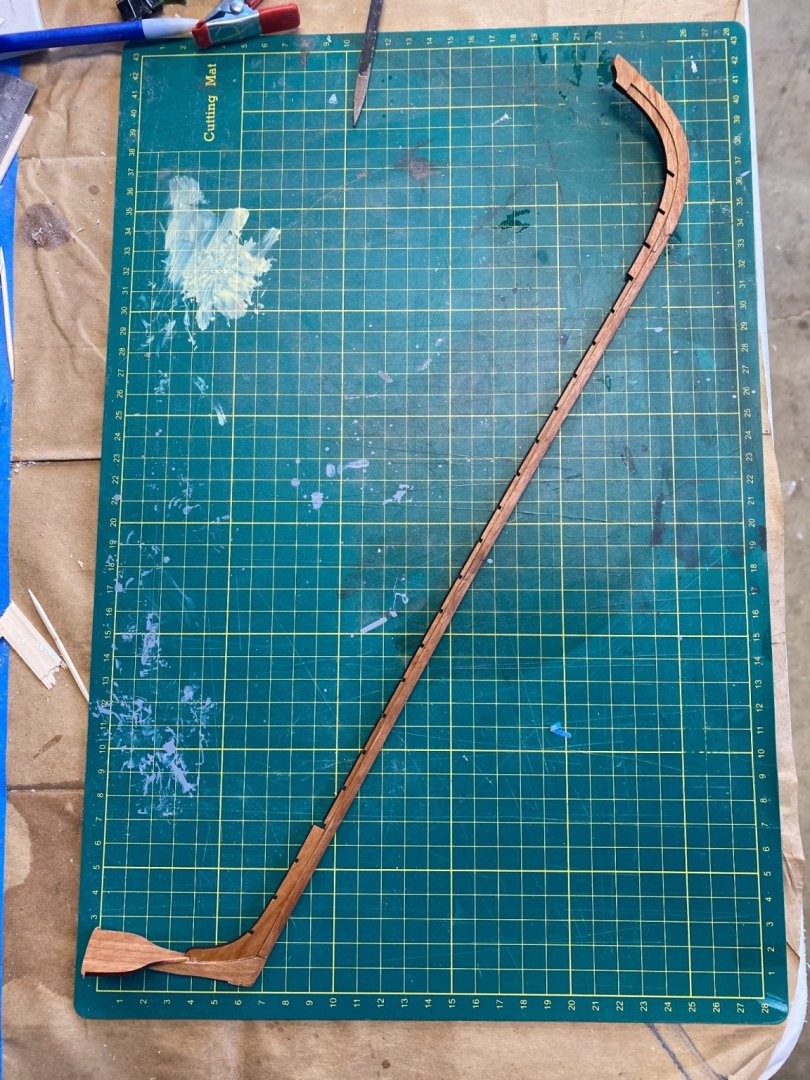
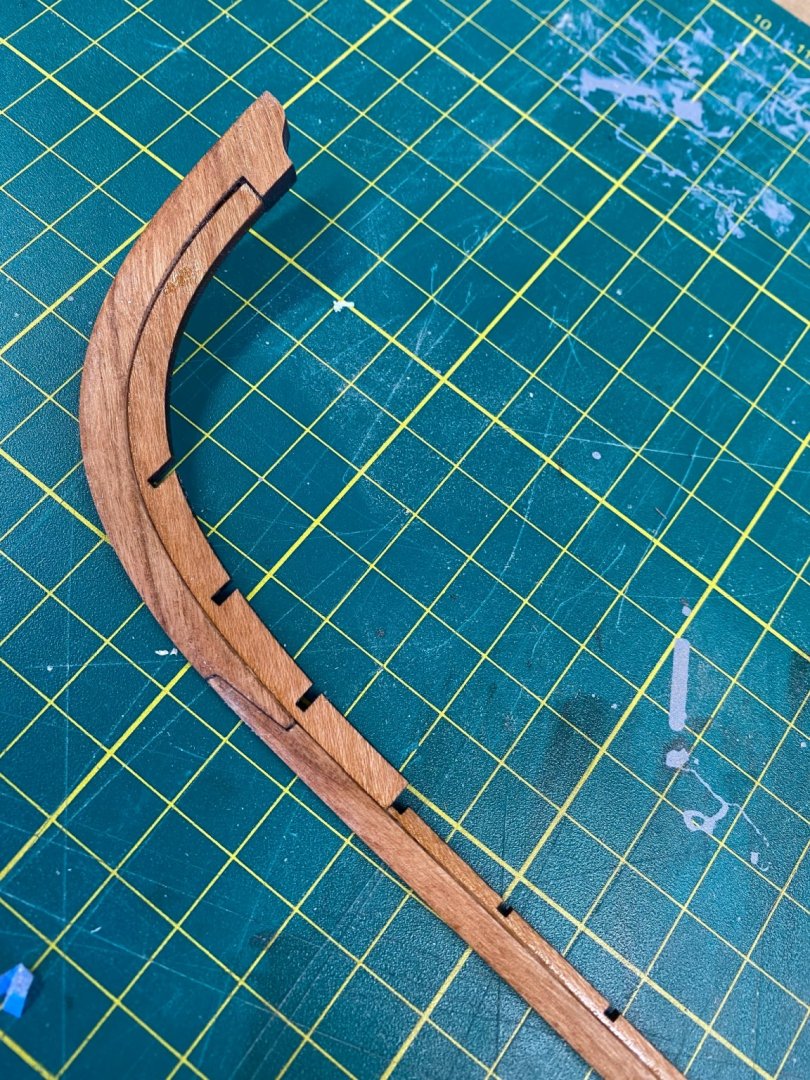
Hello everyone, So I woke up super early because I thought I had a lot more taping off to do before we started painting, turns out I didn’t and had several hours to work on this awesome kit. First off I finished tapering all the pieces of the keel. The cherry wood that comes with the kit is top notch, it holds an edge very well and doesn’t take a ton effort to sand, which made tapering and clean up really easy. After everything was tapered I started glueing stuff together using PVA wood glue. I clamped the pieces at the scarf joints and hold them against two straight edges to ensure they were straight while I hit it with some hot air from the blow dryer. Once the keel was glued together I went back through with a large metal file to straighten the edge of my keel throughout and to make sure everything was homogenous. Things were still pretty fragile at this point so I made sure not to bump any thing while working on this step. Next up was the three notched pieces that make up the support for the frames (not sure if there is a name for that), like the keel I sanded both sides of the laser cut sheets with 220 grit paper. This removed any char on the outside, but I didn’t sand anything else on these pieces to avoid breaking them, except the small wood tabs. These pieces are 3/32” thick so when centered on the top of the keel there is a 1/32” gap on each side, I used a piece a scrap wood that was 1/32” thick as a spacer. As soon as these pieces were on everything was much stronger. I cut the transom out and like the rest just sanded the wood tab down so it was flush. The bottom of the transom has to be shaped so it will fit properly so I got that done with some more sand paper. Once that was glued the keel assembly was complete. I gave it 30 minutes or so for all the glue to set some more before I cleaned up everything with some 300 grit paper. This was fine enough to remove any excess glue and clean up any minor spots that may have been missed. Finally I finished this step with a coat of WOP, I contemplated a boiled linseed oil or tung oil but decided a WOP would look best. I’ll let this sit for a few days probably before I start on the frames. Thanks again everyone for following along! Bradley

-
Hello rich, I haven’t used this product before but There are three concerns I would have with it. I’m not an expert airbrusher, but I would be curious how long the battery lasts, knowing my luck I would go to clean it or right before finishing it would die on me. The next thing is the power that tiny motor has, I’m sure it could spray acrylic but probably not very well. The last issue would be the weight and size of it, sometimes I have to hold mine at a weird angle and when painting large areas this might be difficult to use. I will say that something like this may not be a bad investment if you do a ton of air brushing. Sometimes I might want to paint something really small and to do that I would have to clean out my air brush and mix more paint. Having my normal system and then something like this for something really small might not be to bad. If you don’t own an air brush or compressor though I would consider checking out the site bob suggested, I don’t have any of their air brushes either but have heard really great things. Bradley
-
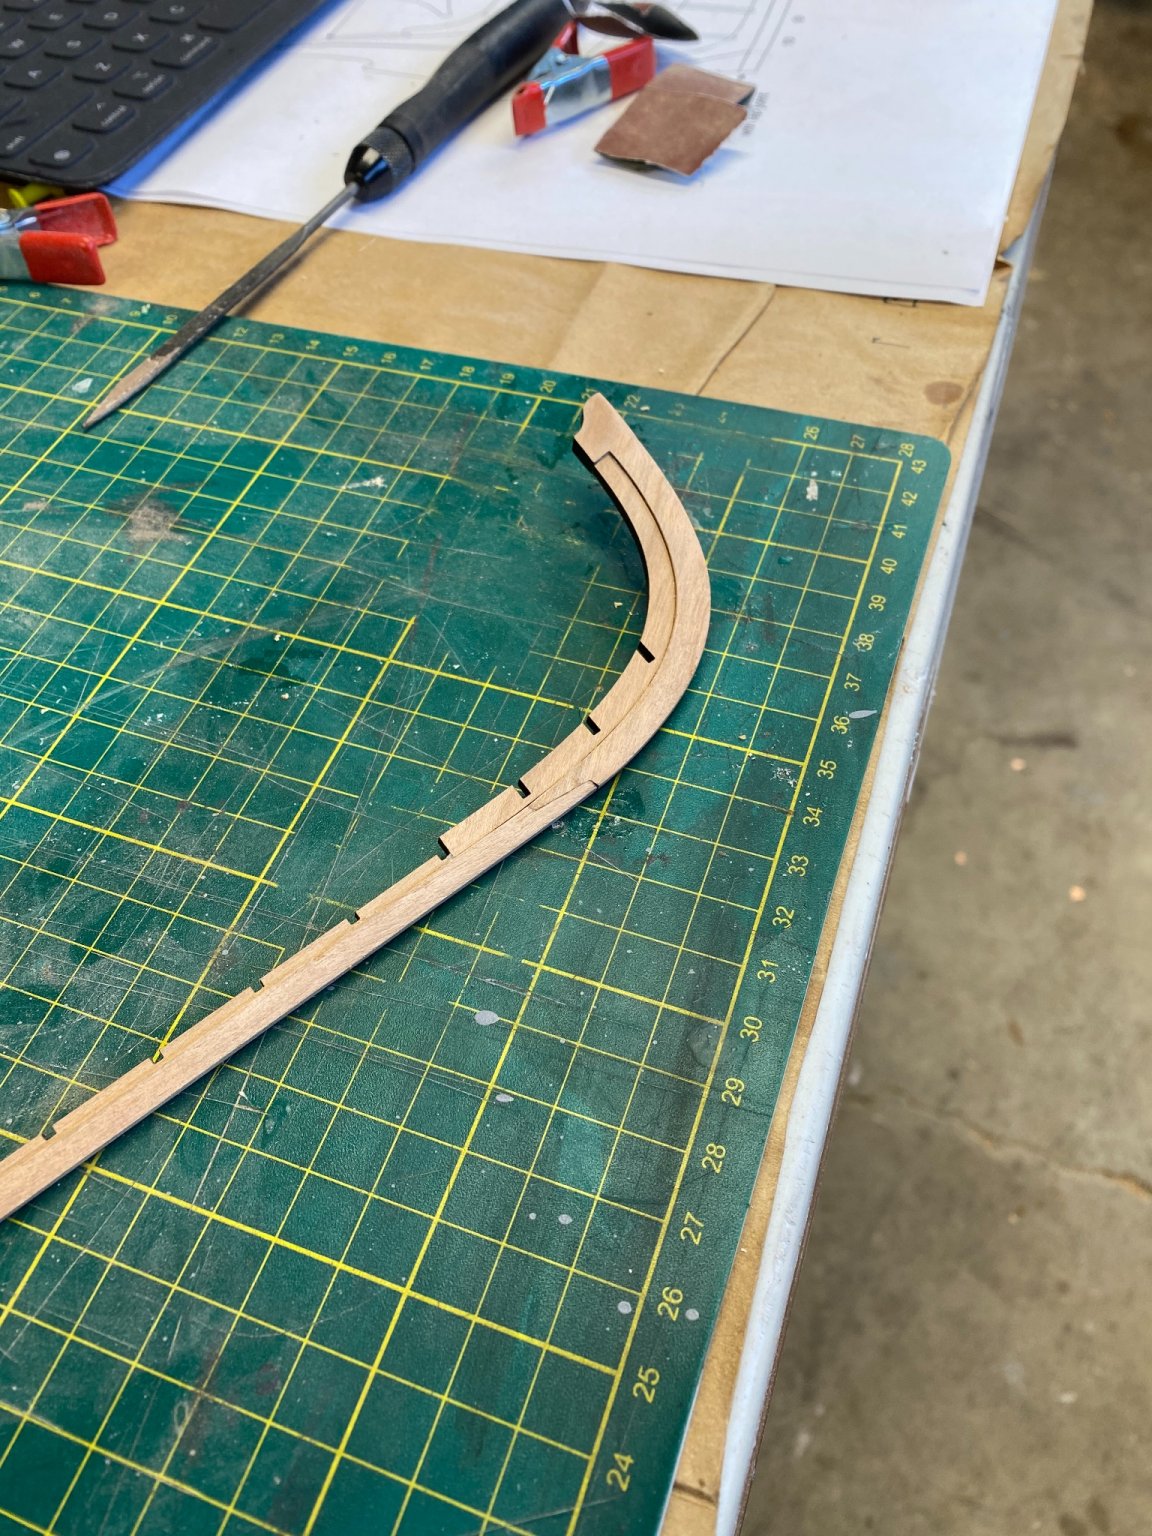
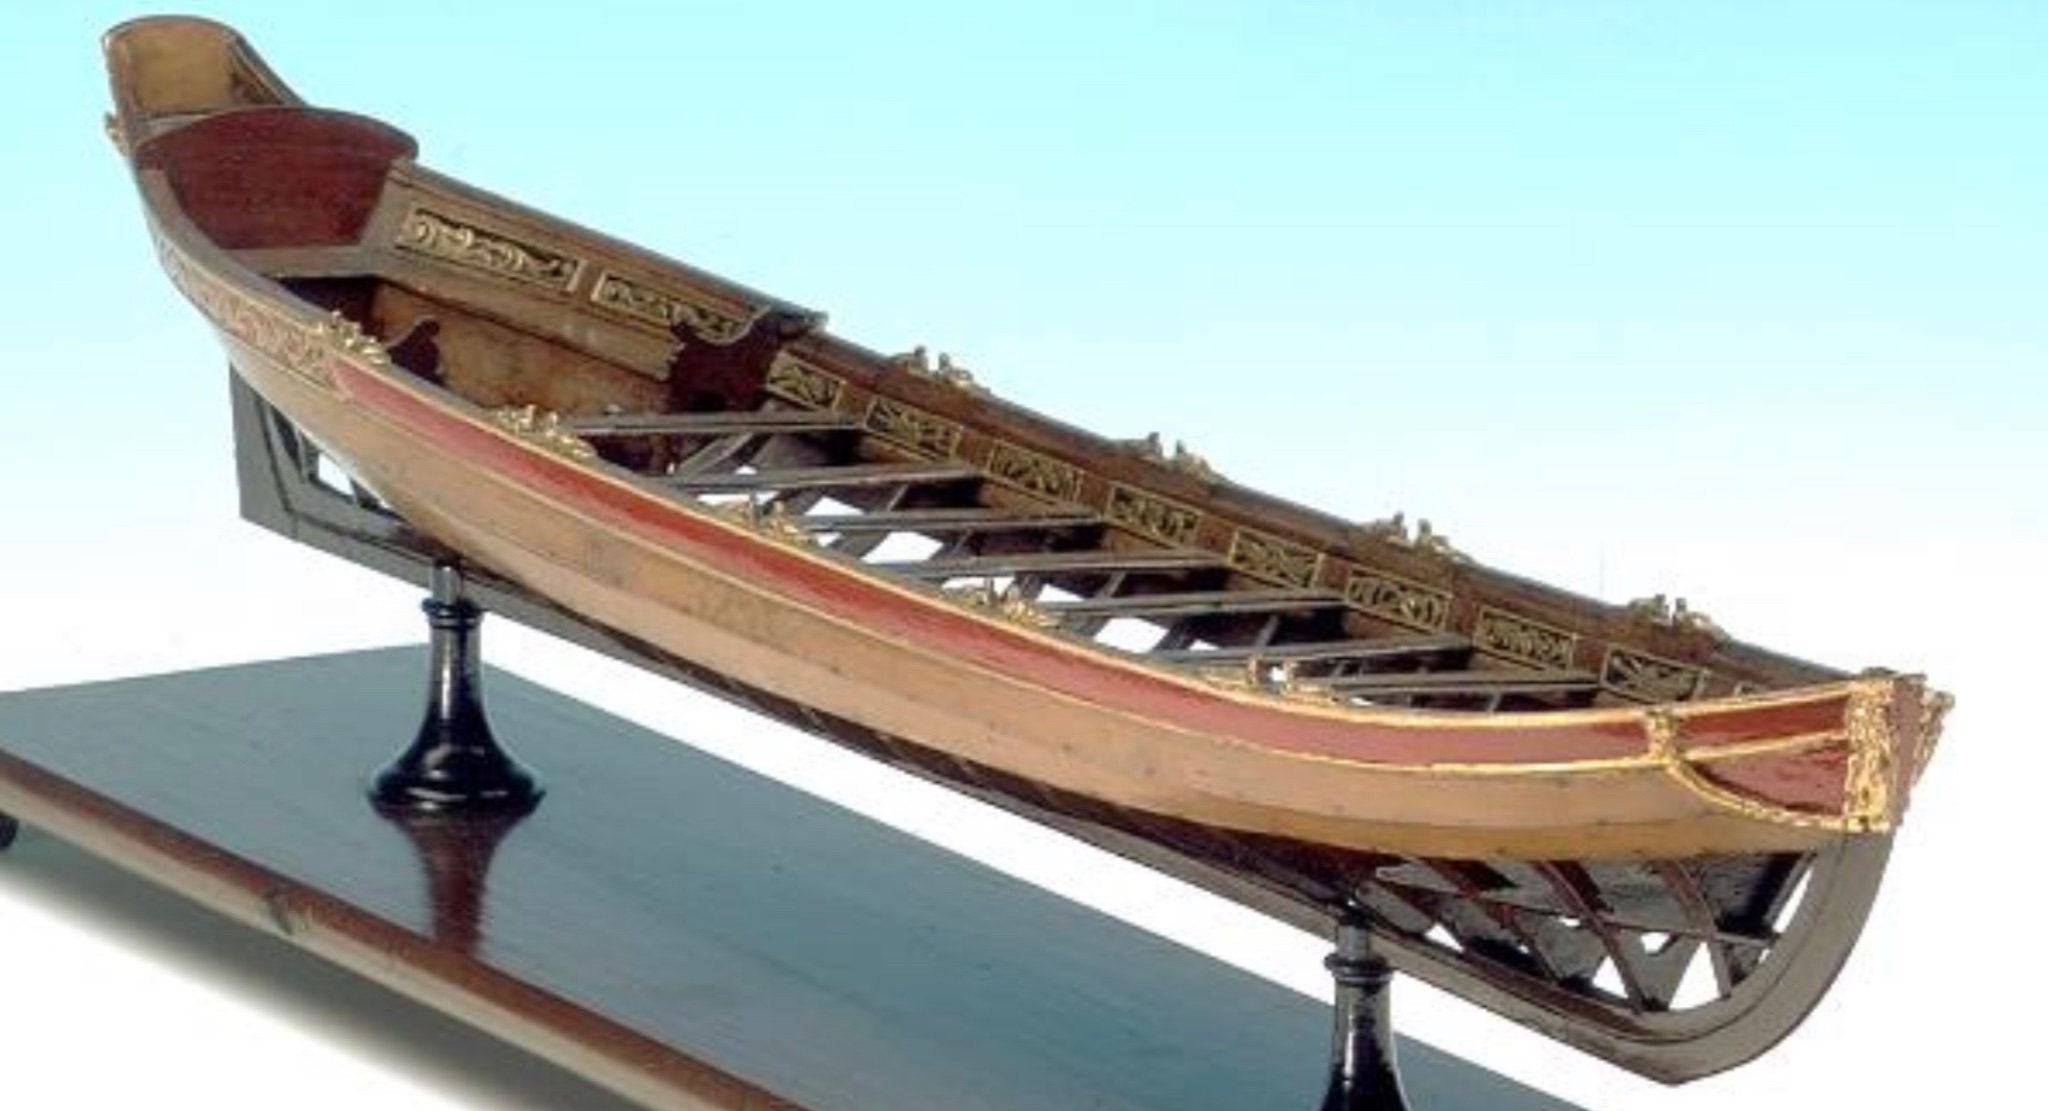
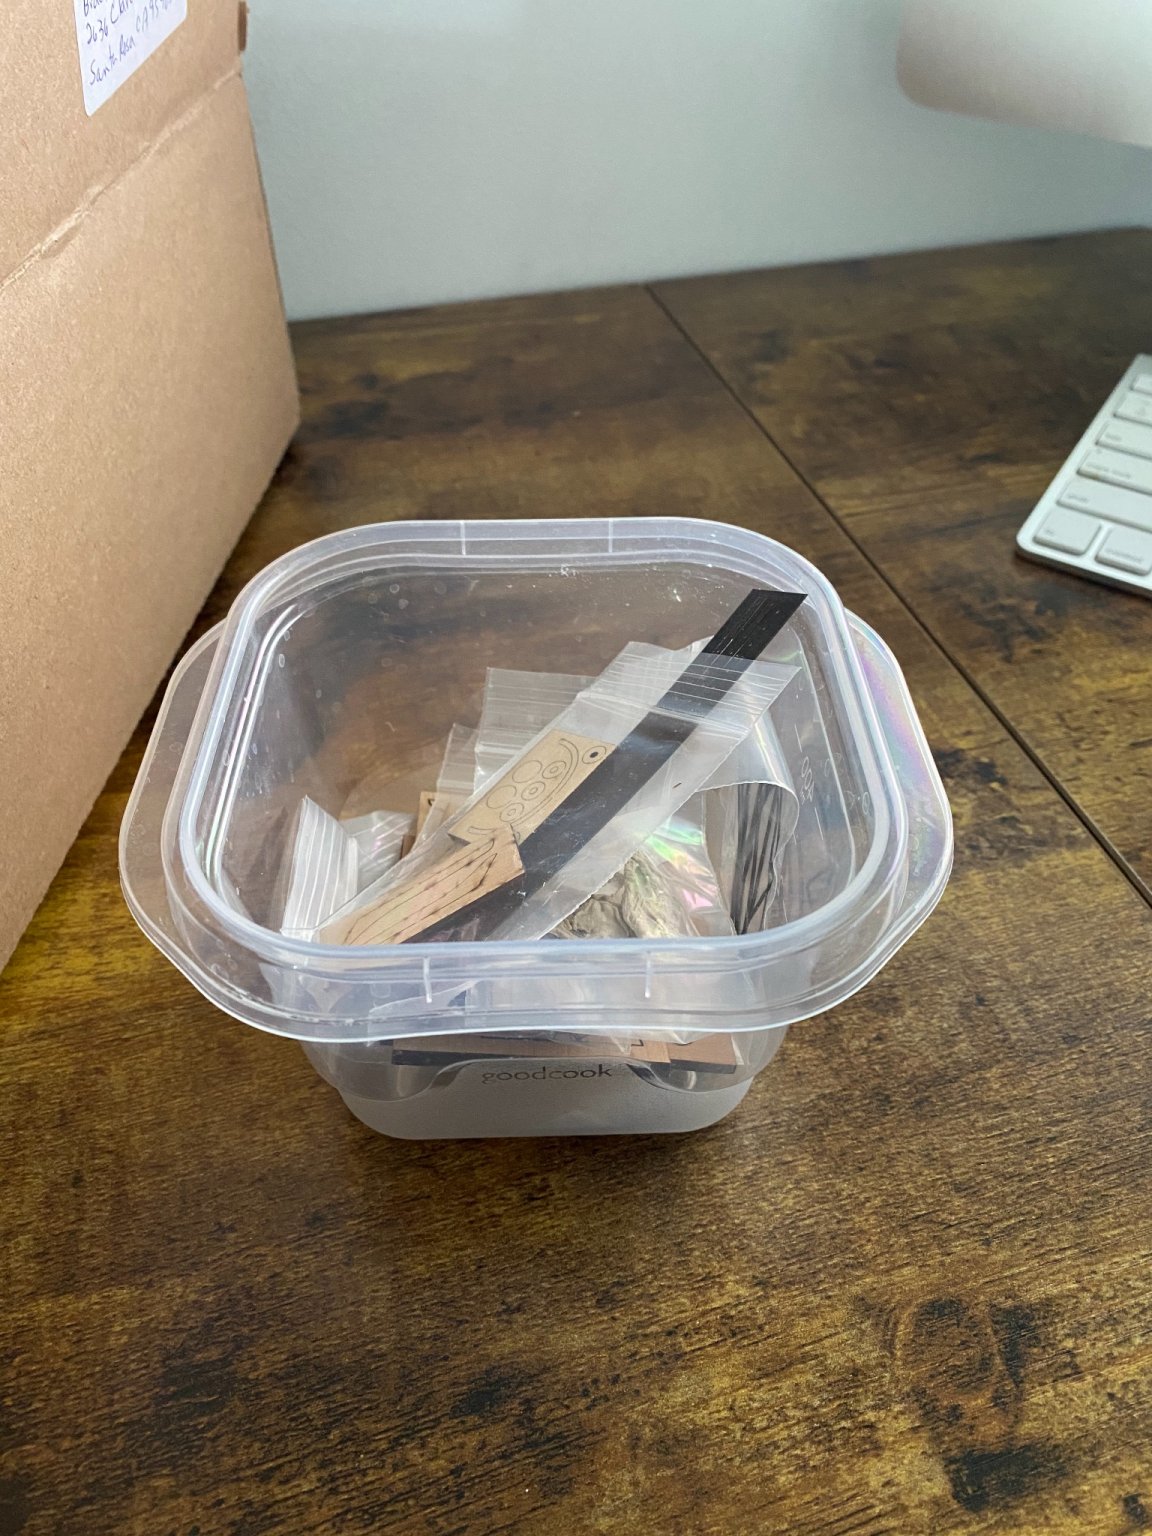
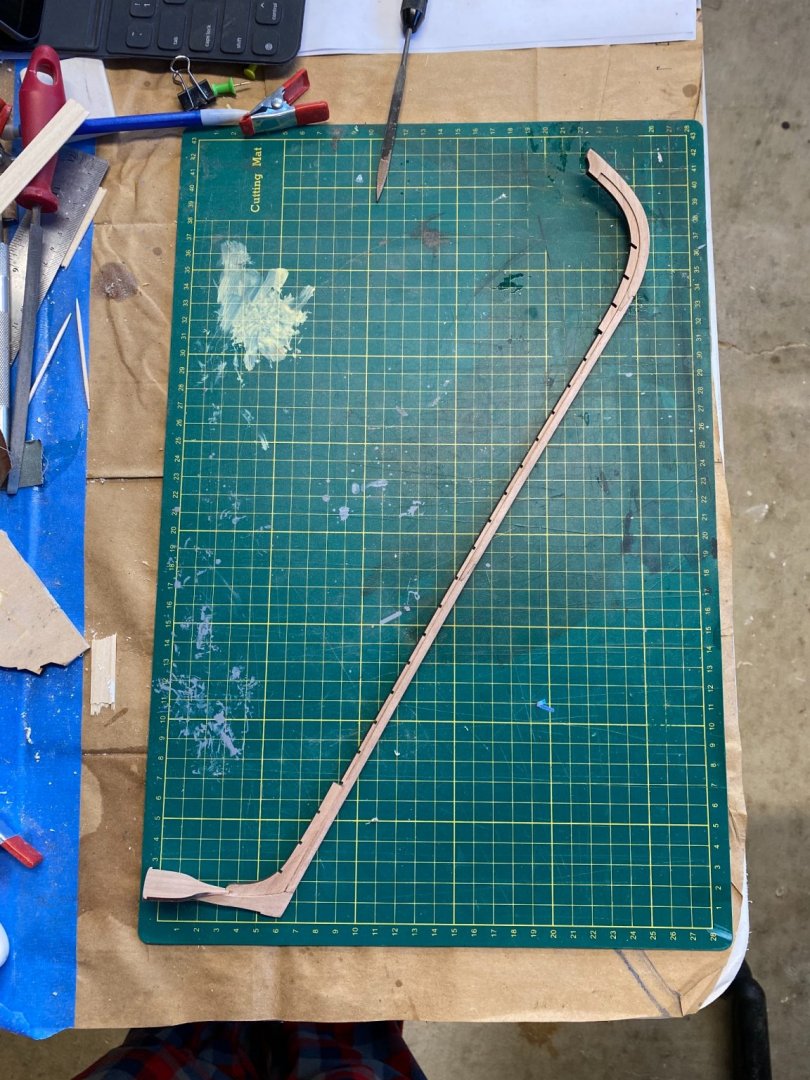
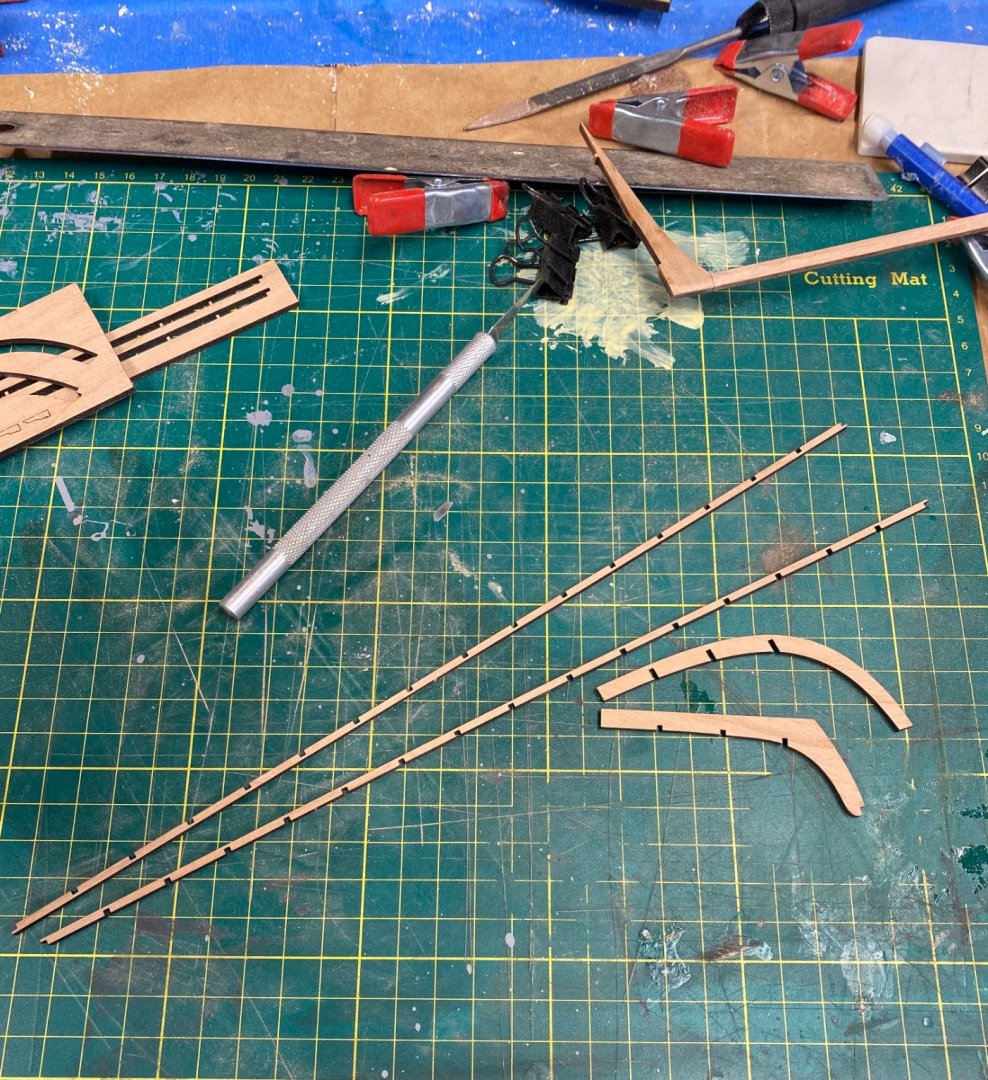
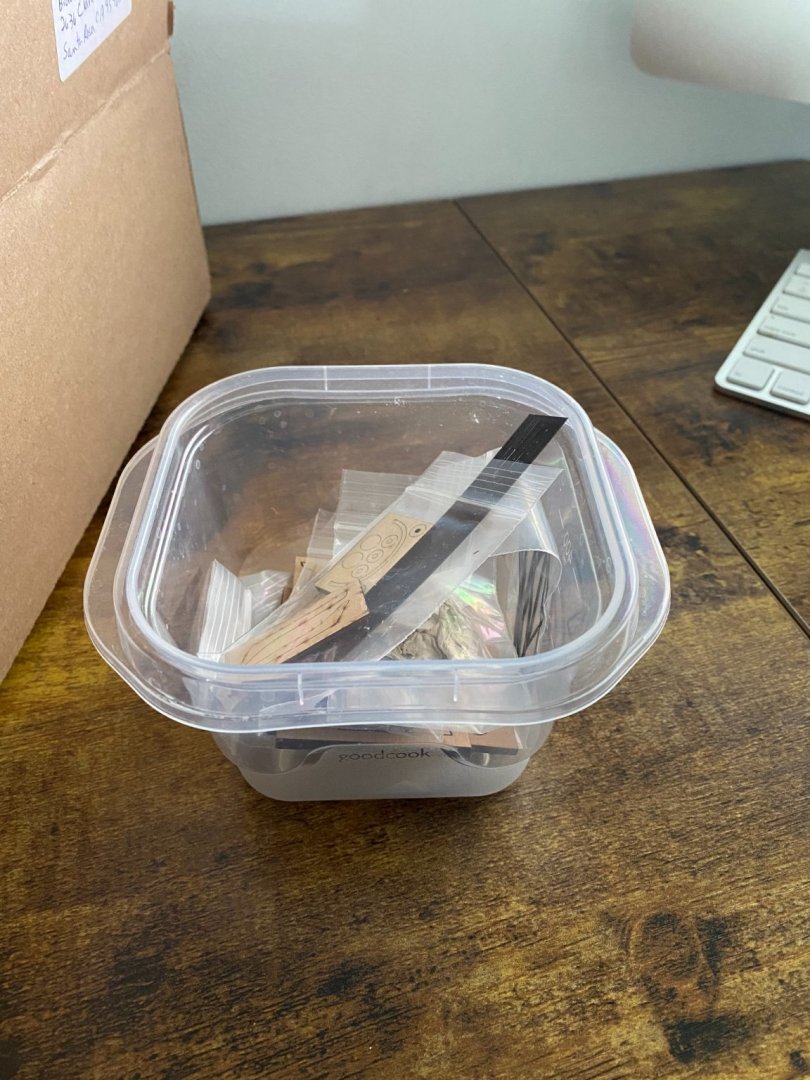
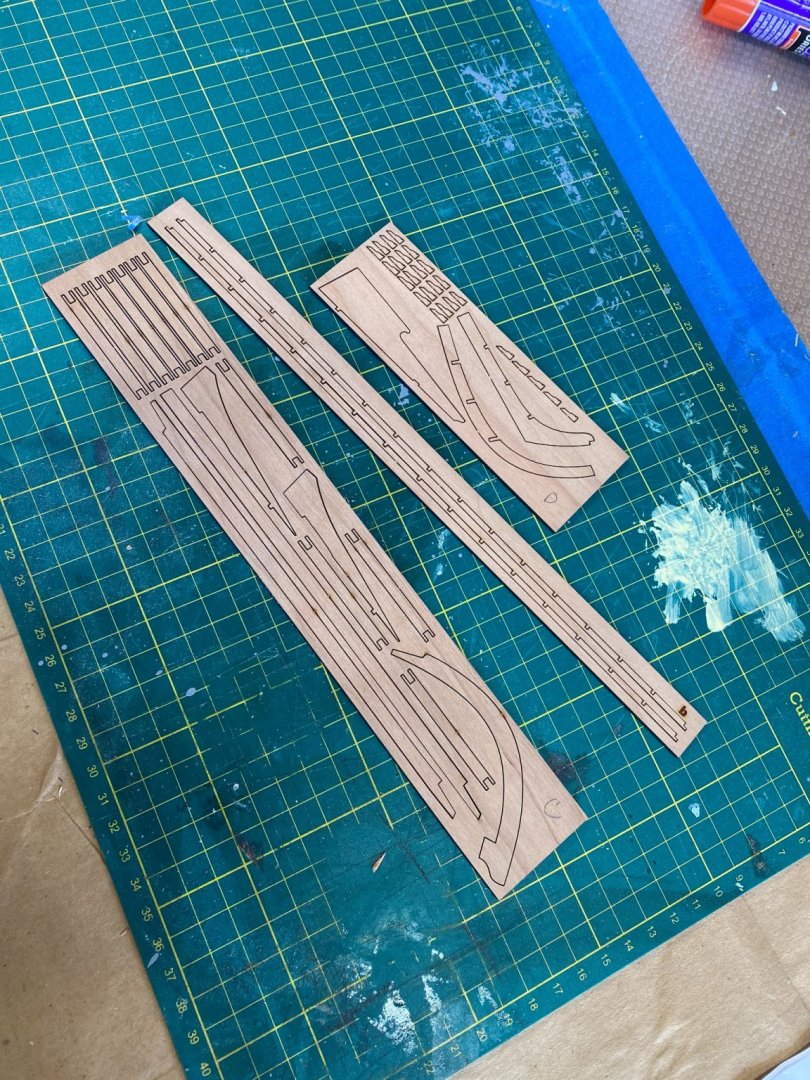
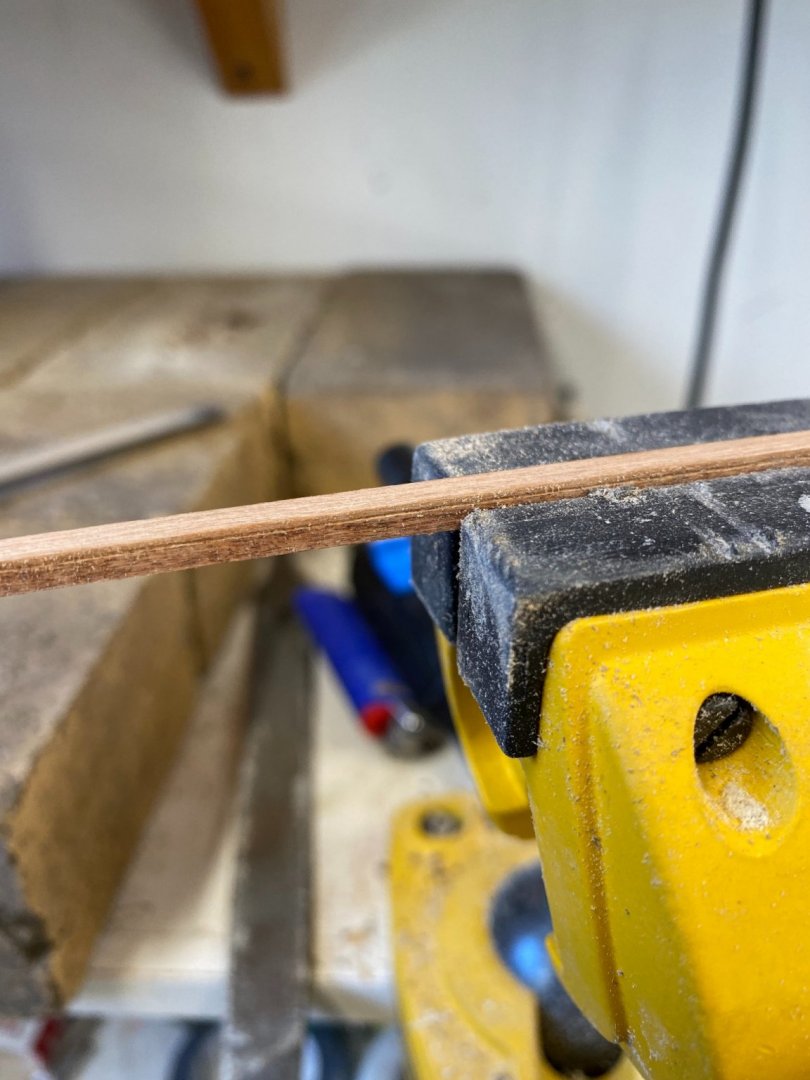
Hello everyone, I decided to start another kit, this time it will be the Queen Anne Style Royal Barge by Syren Ship Model Company. This was the first time I had ordered anything from Chuck, and have never seen customer service or products like his, I ordered this kit and some deadeyes for my Flying Fish build on Monday and got them early Wednesday. The kit itself is very nice, the laser cut cherry wood is very precise and probably the best I have ever seen. I chose this kit because I really want to build POF models, but don’t really have time to do all the research and prep work that goes into a proper scratch build. I am also working on another model as I mentioned before, but sometimes I get a little burnt out if I only have one thing to work on, and this picture specifically sold me on this kit: I had to wait until this morning to really look at the kit. While I rummaged through every thing I took some of the more delicate laser cut sheets and put them in a plastic container, I then took that container and put it on a separate shelf in my garage, that way my clumsy hands wont destroy them by accident! Really the only thing I got done today on this build is some sanding, I started with the laser cut sheet with the 4 pieces that make up the keel, I used 220 grit sand paper and lightly sanded both sides of the entire sheet to remove all the laser cut char. I then used a #11 blade and cut each of the 4 pieces out, followed by another sanding along the edges to remove any more char. I made sure not to touch the scarf joints, these are laser cut to exact dimensions so I will leave them alone for now. The next step was to taper the keel from 5/32” to 3/32”, I used my calipers to mark a line along the bottom of the keel 1/32” from the edge on both sides, which acts as a nice guide when tapering. Well thats all I got done today, the Admiral and I decided to paint the interior of our house, so I will probably have to wait a few more days before real progress can begin! Thanks for reading. Bradley

-
It was tight vertically, which is what I was hoping would happen. If you don’t rebuild the forecastle it should be at the height needed already. Bradley