
Keithbrad80
-
Posts
416 -
Joined
-
Last visited
Content Type
Profiles
Forums
Gallery
Events
Everything posted by Keithbrad80
-
Wow, I have learned a lot about CA glue. If you are following along to this point then you hopefully have a pretty good understanding of what CA glue is and how it works. In this next post I want to take the opportunity to discuss just a bit more the chemistry and then talk about the differences between CA glue types and finally bonding. Personally I have always thought the best way to fully understand a topic is to understand the theory supporting it, and so the best way to understand CA glue is to understand the individual components that make up the glue and what happens when it comes out the bottle. One thing I meant to cover in my last post that was covered earlier was shear strength, in ship model building a lot of joints experience shear stress, for instance when you glue planks to a bulkhead or frame, the glue that holds them together is experiencing shear stress. This topic of shear stress and CA glue gets complicated very quickly, but to hopefully summarize, shear stress is the force experienced when both compressional stress and friction are acting on an object. Imagine a deck of cards on a table, if you apply shear stress to the top card, it will slide forward while the card touching the table stays still. I made an attempt at learning about shear stress in glues and adhesives and I came across three methods that have been discovered to increase shear strength of CA glue. The first is the metallization of the surface the glue is being applied to by integrating chromium nanorods in a 50nm thick layer, basically microscopic rods of chromium are “painted” onto the surface of the object being glued then CA glue is applied on top. I have no idea why this works, but its sounds far to difficult and expensive to work for this hobby so that is out. Another method I stumbled across is the introduction of amines, AKA ammonium hydroxide, another very harmful substance, literally a few breaths of the stuff will kill you, so I suppose that method is out for now as well. The final method I came across is the addition of rubber. I should say now that rubber is not the additive in CA that makes it thicker, I will talk about that in a bit. The addition of rubber changes the glue all together, bringing the color from clear to black, but there is an issue with this stuff, it only works on non porous surfaces like glass, but it seems to work well for that application if you need it. Once again we are at square one, and it seems for the time being that the shear strength of CA glue cannot be improved on surfaces like wood. Maybe one day. Last note about shear strength, thick CA glue exhibits a really interesting chemical property that explains why CA glue does terrible in the presence of shear stress. Thick CA glue imparts thixotropic properties, which basically means, its is usually in a solid state, unless it experiences shear stress, where for some crazy reason that I could figure out, it turns to a liquid! Well sort of, under normal conditions as shear stress decreases the viscosity of CA glue increases (cures) but when put under shear stress the viscosity of CA glue actually decreases, which drastically decreases the bonding strength of the adhesive. So the more stress CA glue is under, the more viscous it becomes, which is a bad thing. Let’s finally talk more about ship modeling. If you were to jump on Amazon or a site like ModelExpo and search “CA glue” you will get a ton of results for all sorts of applications, how do you figure out which one works for you? Ultimately it will always come down to your personal preference and what you find works, but generally there are a few options to chose from. While any CA glue or super glue will work fine for wood adhesion, there are generally a few different thicknesses that you can chose from, all of which have different application in the modeling world. The thickener in CA glue is silicon dioxide, AKA quartz, and as you can imagine, the more SO2 that is added, the thicker the glue. There are certain brands of CA that replace the SO2 with calcium oxide, which creates a thick clear glue that when dries, closely resembles mortar, which is super strong. From what I have researched, it does not appear that the thickness of CA glue correlates with an increased shear strength. CA glue with no SO2 is called super thin or thin CA glue, this stuff is basically water, once it leaves the bottle it will spread out into a very thin layer, deeply soak into the wood and instantly cure, creating a super tight chemical bond. This type of CA is guaranteed to leave a stain behind, I have never not had a stain after using the stuff, keep this in mind when modeling. If the piece you are gluing is going to be seen I would not use super thin CA as it is nearly impossible to remove. Medium thickness CA like James mentioned does a great job for certain applications like second planking. Medium thickness CA does well because the viscosity of the glue is enough to prevent the glue from spreading to thin, as well as keeping the glue from soaking to deep in the pores of the wood. I havnt used enough medium thickness and thick CA glue to know whether or not there will be a significant glue stain, I have actually never used thick CA glue so I dont have much to say about that topic. One of my final subjects on this topic is the idea of bonding, which is what occurs during the curing process. When CA glue is applied and the chemical reaction is over, the bond that formed between your two pieces of wood closely resembles plastic. Often this plastic like bond between two pieces of wood is stronger than the wood itself, meaning in thinner or smaller pieces or weaker woods like basswood, you will probably break the wood before breaking the bond. I would guess the number one question asked about CA glue is how you remove the stain left behind after curing, and the answer is you cant get rid of it. You can debond the glue and chemically separate the two pieces, but you cannot remove the glue. Imagine a piece of wood, you fill the pores with CA glue which discolors the surface, and you want to remove it, in order to remove it you would have to clean out the pores of the wood which I’m not sure is possible. CA glue does have a life span btw, about a year from the manufacturer date, or a month or two after opening, how ever before opening if refrigerated you can extend the life span by about 6 months. If you drop the temperature below 0 F you can almost stop the chemical reaction from happening all together, increasing the life span indefinitely. CA glue can bond with other stuff as well, to create a different substance all together, mixing it with the saw dust of the species you are working with creates a very strong and light filler. Alternatively you can mix CA with baking soda to create a very light and very strong filler. After reading about CA as much as I have today I would have to disagree that CA is the Devils spittle. CA glue is every where, it holds your shoes together, a lot of furniture incorporates the glue, turns out if you add some stuff it becomes antimicrobial and can be used to seal lacerations. It’s used as a temporary bond while welding, and is the primary adhesive in most implantable medical devices. It bonds metal, wood, leather, paper, and pretty much any other porous material, its cheap, easy to acquire and dries instantly. It may not be the best adhesive for ship modeling but I think it has its place, just like every tool. My very last point, CA glue is a chemical just like any other chemical and should be handled appropriately. It should be stored in a cool dry place avoiding direct sunlight to extend the life span. My next post is a collection of tests that I am going to preform on different common wood species. I want to test different methods of removing CA wood stain, I also want to test different stains and paints on wood and how CA glue effects those paints. I’m mostly interested in ways to cover CA glue stain, and ill share my findings with all of you. Thank you for spending the time to read through my research on this glue, I hope that this collection of information proves useful for those that may be just entering this hobby or for any who may be unsure about the product. Bradley
-
Another excellent addition to the list of CA characteristics! I actually planned on posting again tomorrow about the different variations of CA and how to properly apply them without making a mess. I’ll cover more of the chemistry and why we have thicker variations in that post. Thanks again everyone for reading this topic! Bradley
-
Welcome to MSW! Any kit ideas? Maybe a scratch build? What ever you build make sure to start a build log so we can all follow along! Bradley
-
Thank you! Like you mentioned, use the glue that works best for you! Regardless of everyone’s individual thoughts on CA, I hope this thread provides some clarification on the substance. Bradley
-
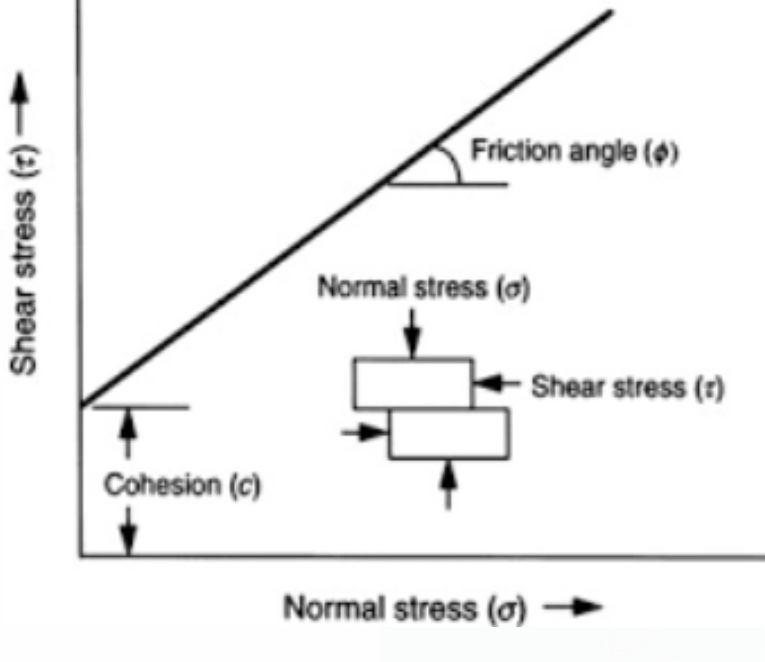
This was something I intended to mention but forgot, thanks for adding that! for any wondering what exactly shear strength is, imagine you place your hand on top of a deck of cards and push forward. The bottom card sitting on the table won’t move but the cards on top slide forward, this diagonally distortion of the deck of cards is called shear strength. It becomes very important when talking about vertical structures and their ability to support objects that are not directly on top them, so to the side. Like Chris said, one little bump and it’s coming loose. This is an excellent illustration that shows shear force a little better. Bradley
-
I was bored this morning and read another post of someone having trouble with CA glue stain and what they should do now. I figured it may be helpful to some to create a post with all the information (hopefully) that you may need on CA glue, followed by several tests of different species of wood and their reaction to CA glue and if there is anything that can be done to hide it. Thanks in advance for reading sorry about the length! Many experienced modelers will advise against the use of CA glue, also known as super glue. They often give the reason that an undesirable residue is left behind that is impossible to hide or remove, and this lesson they share with others is usually derived from personal experience. Imagine for a moment (or think back) that you recently bought your first wooden ship model, you spent weeks fairing the hull and preparing for planking, you then spend weeks or months planking the hull only to discover a pearly luster covers the sanded planks of your hull. A number of questions usually pop into the modelers head; why did this happen? Can I fix it? How do I prevent this from happening again? It seems that I see this on an almost daily basis, someone who has built a model with CA glue and ended with less than satisfying results, and hopefully this collection of information on the subject can answers any questions you may have about the adhesive substance. A quick note: I am not a chemist; I am just a modeler with some free time who decided to look closer at CA glue and its applications. All of this information is available to you online, I just complied it here and added my input. Enjoy! We should start by defining what a glue is, according to Merriam-Webster, a glue is any solution that binds something together. Within a standard glue is a cocktail of chemicals that react together with water to harden, or cure to create a strong bond. This bond is what holds your material together, I like to think of a PB&J sandwich, if you make the sandwich and pick up just the top slice of bread, the entire sandwich comes off the plate because the peanut butter and jelly hold the top slice of bread to the bottom. This is known as mechanical bonding, and while there are several types of bonding, we will only discuss mechanical and chemical bonding. Mechanical bonding is a bond made by an adhesive that does not go through a chemical change. Mechanical bonding is typically the type of bonding we are all familiar with, a good example is PVA wood glue. But mechanical bonding also refers to any method of physically bonding two things together, this means that anything from staples and nails, to glues and epoxy can be considered forms of mechanical bonding. Water is the binding agent and base within PVA wood glue, and once applied to a piece of wood allows for the glue to seep into the pores of that wood and solidify, when two pieces of wood are clamped together, the glue forms “columns” of glue within the pores of the wood. I like to think of this as a million microscopic screws holding the wood together. Because PVA wood glue is water based, it can generally be removed before curing by wiping it away with a damp paper towel, and if you waited until after it cures, it can be cut off the model or sanded away. Notice that PVA wood glue changes chemical states, not chemical composition, which is what makes mechanical bonding different than chemical bonding. Chemical bonding and mechanical bonding have some similarities, but the major difference is the change in chemical composition when applied to a surface. CA glue is the industrial name for a family of adhesives called Cyanoacrylate, these glues are not water based like PVA wood, glue but instead have an acrylic base similar to the paint. The glue we use for scale modeling is called ethyl 2-cyanoacrylate. This essentially means that when CA cures its, creates a sort of plastic bond between the two pieces, changing its chemical formula and chemical state at the same time. Earlier I mentioned both types of glues require water to cure, but we have already established that CA is not water based, so where does the water come from? When a drop of CA glue is released from the bottle it instantly starts reacting with the air around it, creating a rind of sorts on the outside of that droplet of CA glue. The water in the atmosphere reacts with the CA glue starting a reaction that creates long, super strong chemical chains that are difficult to break once cured. The chemist who developed this glue realized the cure time and the surface area of the exposed glue are directly proportional, meaning a thinner layer of glue equals a shorter dry time, duh! As a base, CA is incredibly thin stuff, at 20 degrees C, CA glue has a viscosity of 2 CPS (centipoise) compared to water at 1 CPS at the same temp and cooking oil at 84 CPS. When you apply CA to wood, it instantly penetrates those pores and at the same time reacts with the moisture of the atmosphere and the wood, instantly curing. This is the cause for the notorious CA glue “stain”. This next idea is a simple one but one that not many may realize, wood is a porous material, which means it is not a homogenous solid, and you only have so much space. Sometimes it helps me to think of this idea as a hotel, you only have so much vacancy before the building is filled to capacity and if someone is staying in a room, you can’t have someone else stay in that room at the same time. It’s a similar idea with wood, if you fill the pores with CA you can’t refill those pores with a stain or some other kind of finish. Once you put CA on a wooden surface, it becomes very difficult to remove because as you sand the surface, you just unveil more and more CA stain. CA glue is basically plastic, so when you apply it to wood you have to keep in mind that certain finishes will no longer be very effective on that surface. As a rule of thumb, if you know something won’t stick on a plastic model, I don’t use it on CA, for instance wood stains. I have seen time and time again, people post pictures of their seasick green deck asking where they went wrong after staining, and the answer is generally CA glue. This is because wood stains are usually oil based, and oil-based stains want to fill the pores that the CA has already filled, so it just sits on the surface, waiting to be wiped off. So now you see the problem with CA glue, it fills the pores and prevents stains and other finishes from attaching to the surface or filling the pores of the material. Before I talk about the positives in my mind of CA glue, we should talk about the physical hazards of CA glue. The obvious is the getting glue on your fingers, while annoying it’s not going to kill you if you get some on your fingers. When CA glue reacts with water, it produces two biproducts: heat, and a vaporized form of CA glue. Heat is released during the anionic polymerization process, and the heat is enough to vaporize small amounts of the glue, so when you use CA and see a small plume of smoke come off, that is CA that has reached such a high temp that it turns to gas. It should go without saying that you probably shouldn’t breathe these vapors in. Personally, I don’t think CA glue is that bad of a product, I used it to plank the entire hull of my 1:96 Flying Fish and had no problems because I painted the outside. I use generally use it when the piece won’t be seen or will be painted, because it is very fast drying and very thin, so I can hold my two pieces of wood together and apply to the glue to the joint, knowing that it will fill that joint. In reality the best modelers will incorporate all kinds of glue that will best fit the project, but next time you go to use CA, make sure you think of the entire project and ask if that is the best glue to use for that application. As a modeler yourself you may be asking, who cares? Why did I spend 10 minutes to read this, and what should I do now? Well, the next part of this post is a test that I am going to develop to test CA glue. Over the next few days, I am going to test several common types of wood and their reaction to CA glue and if there is a product that will do a good job of concealing CA glue stain. Thanks again everyone. Bradley
- 69 replies
-
- 13
-

-
Cutting out the windows and door was Definitely the right call. They added a lot of realism to the deck house! Bradley
-
Thanks! Glad you are enjoying the build! Bradley
-
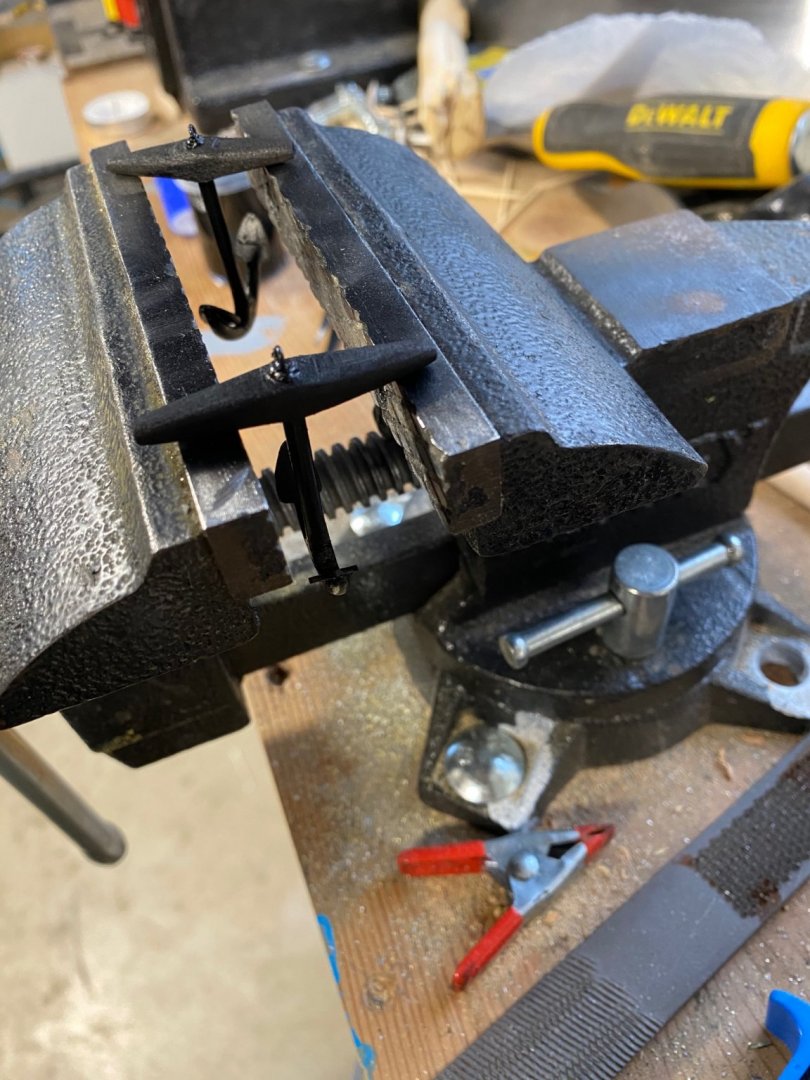
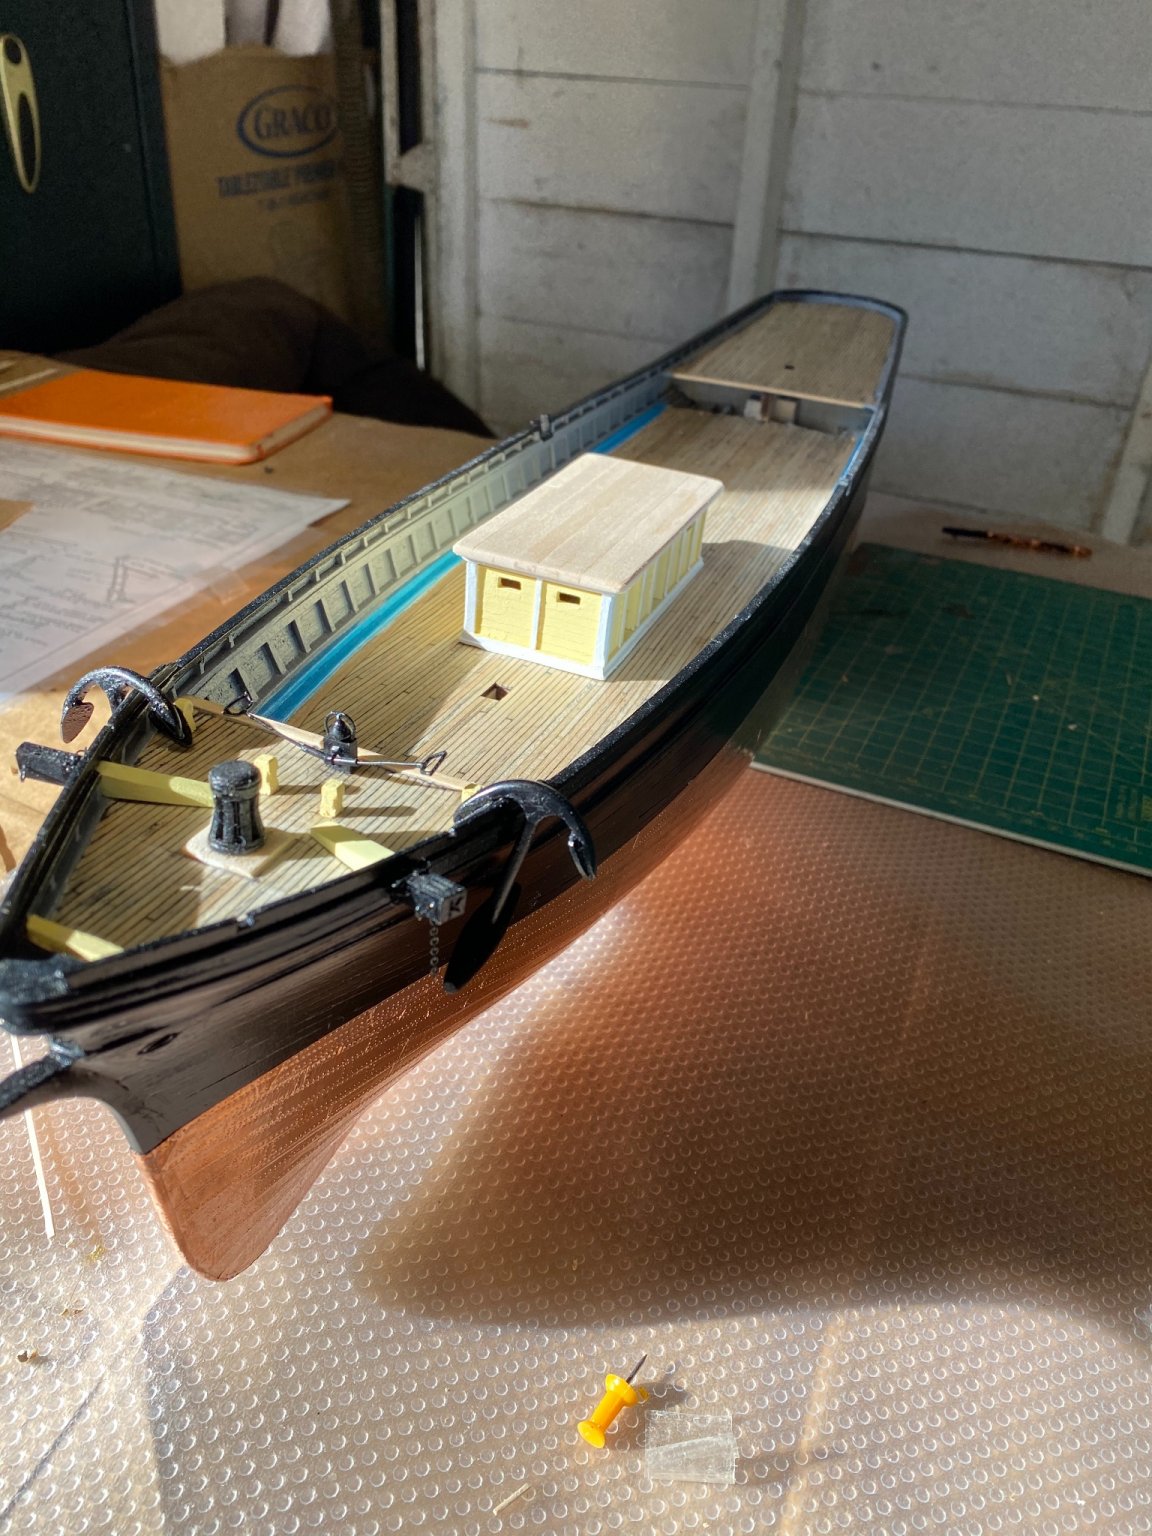
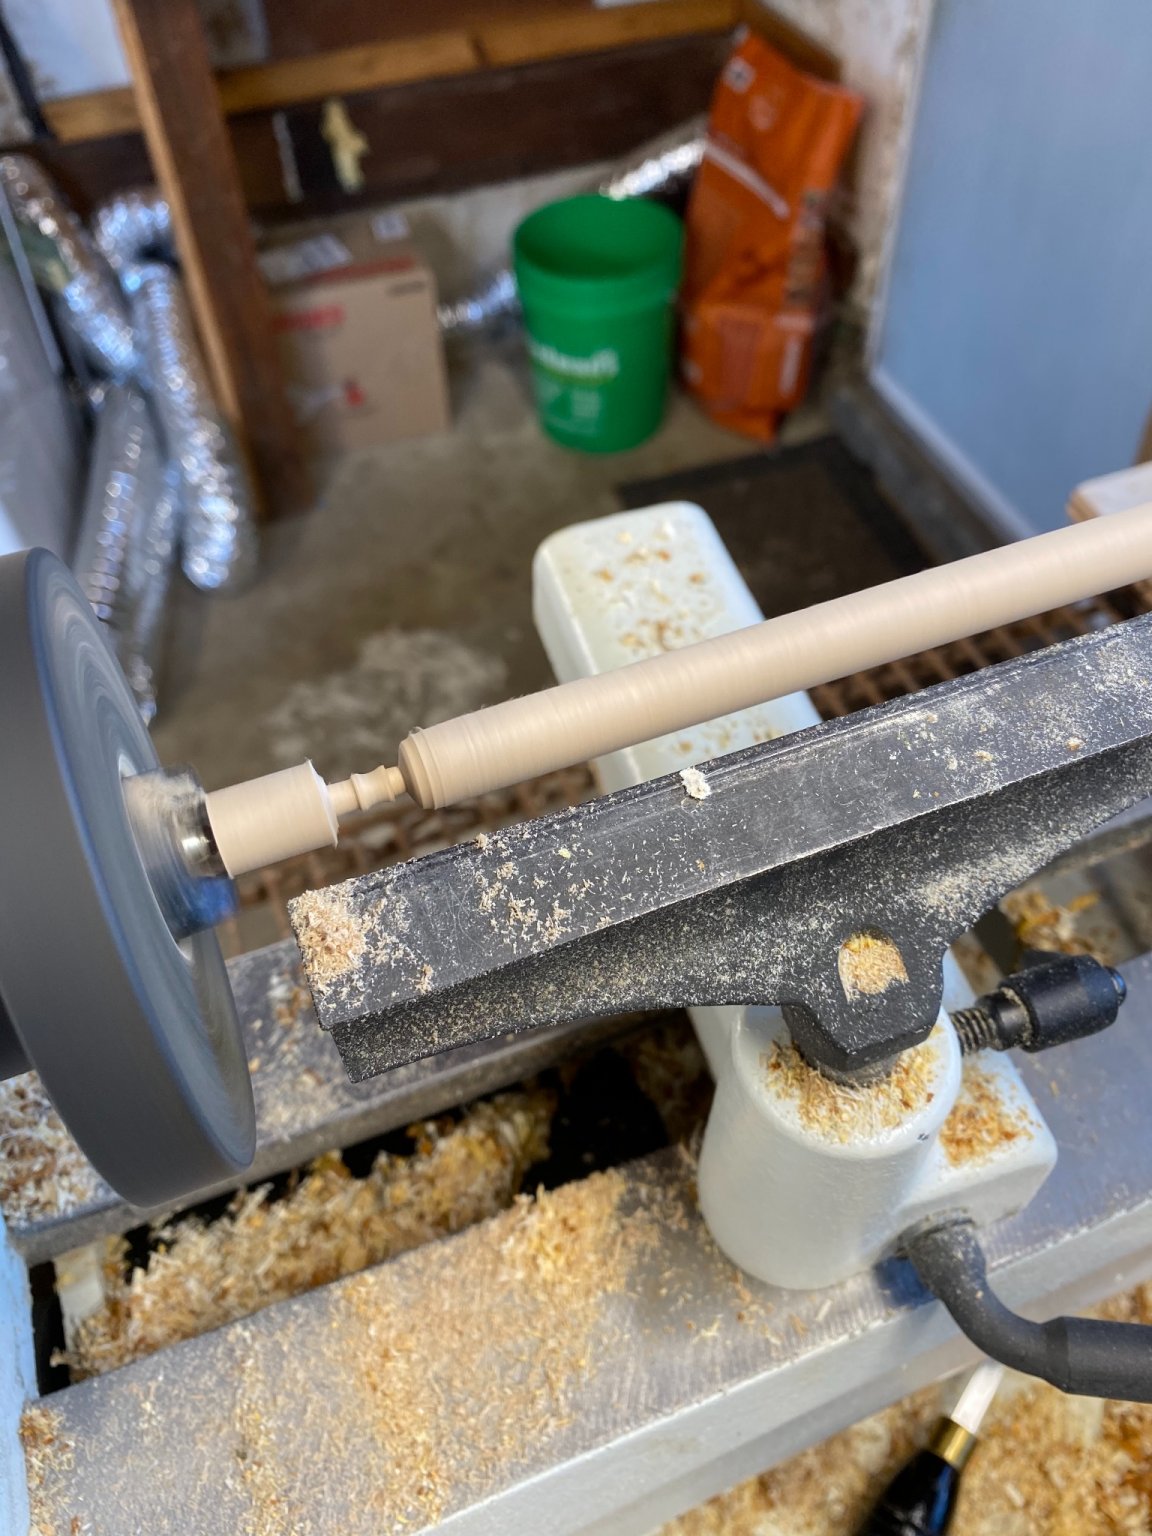
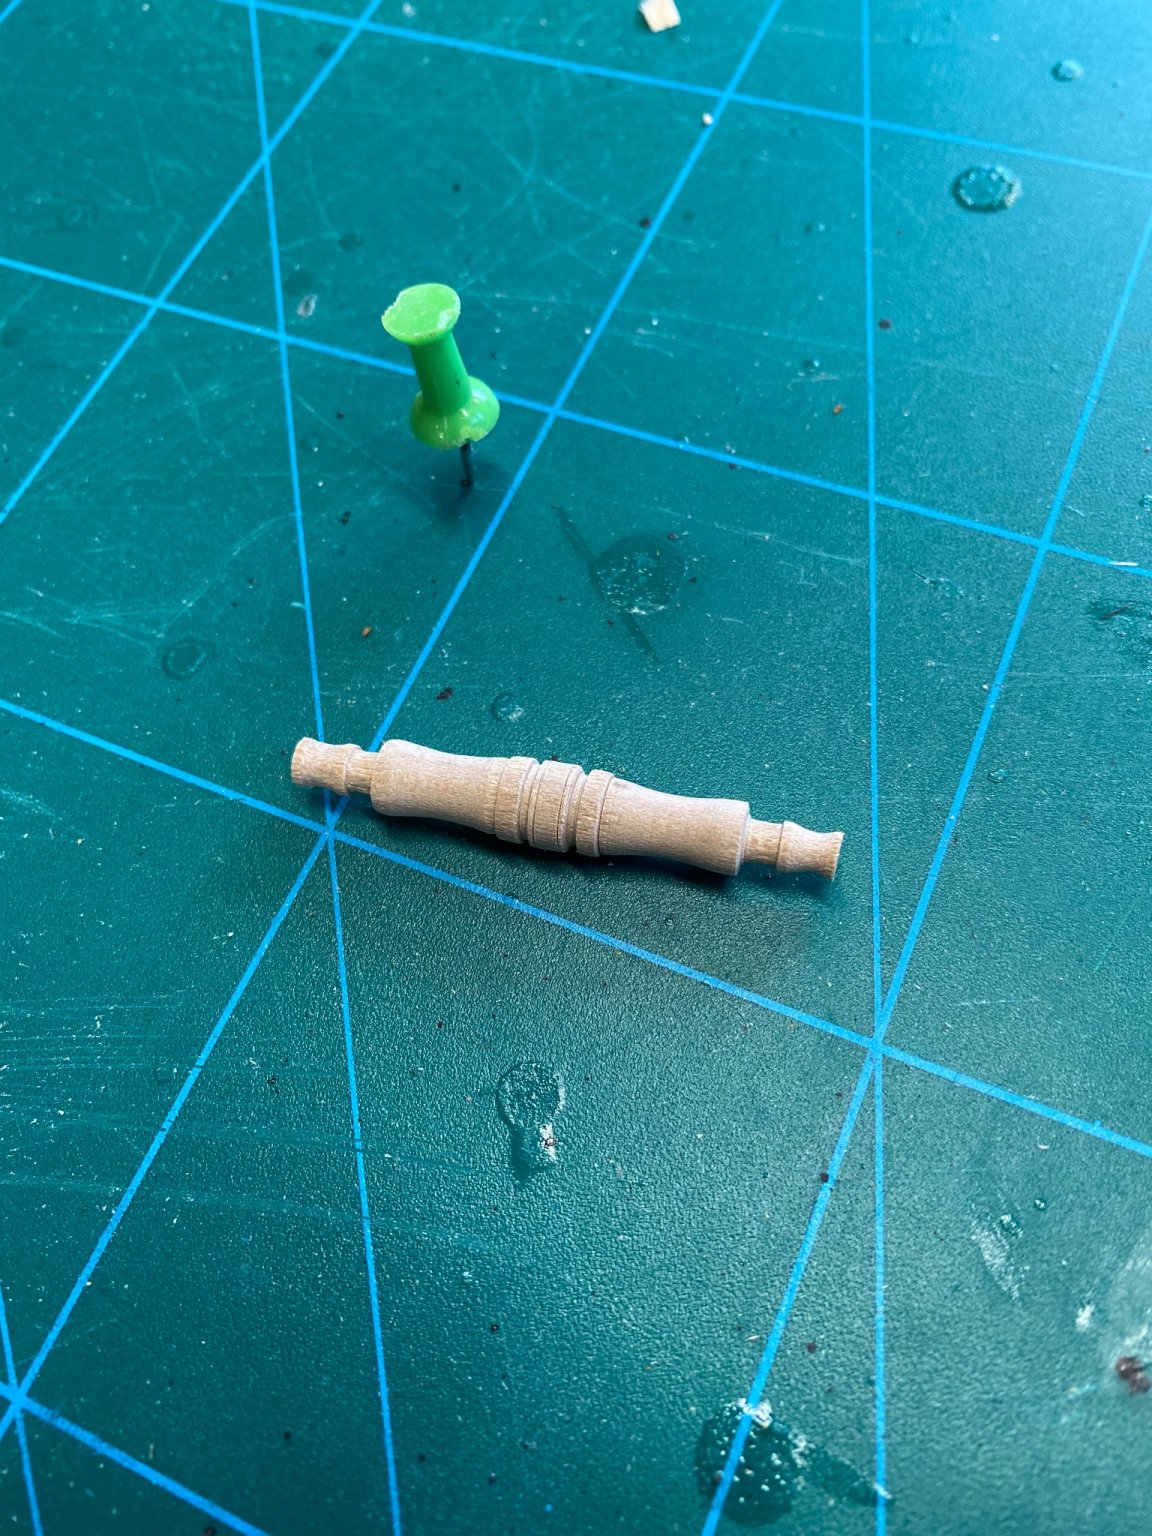
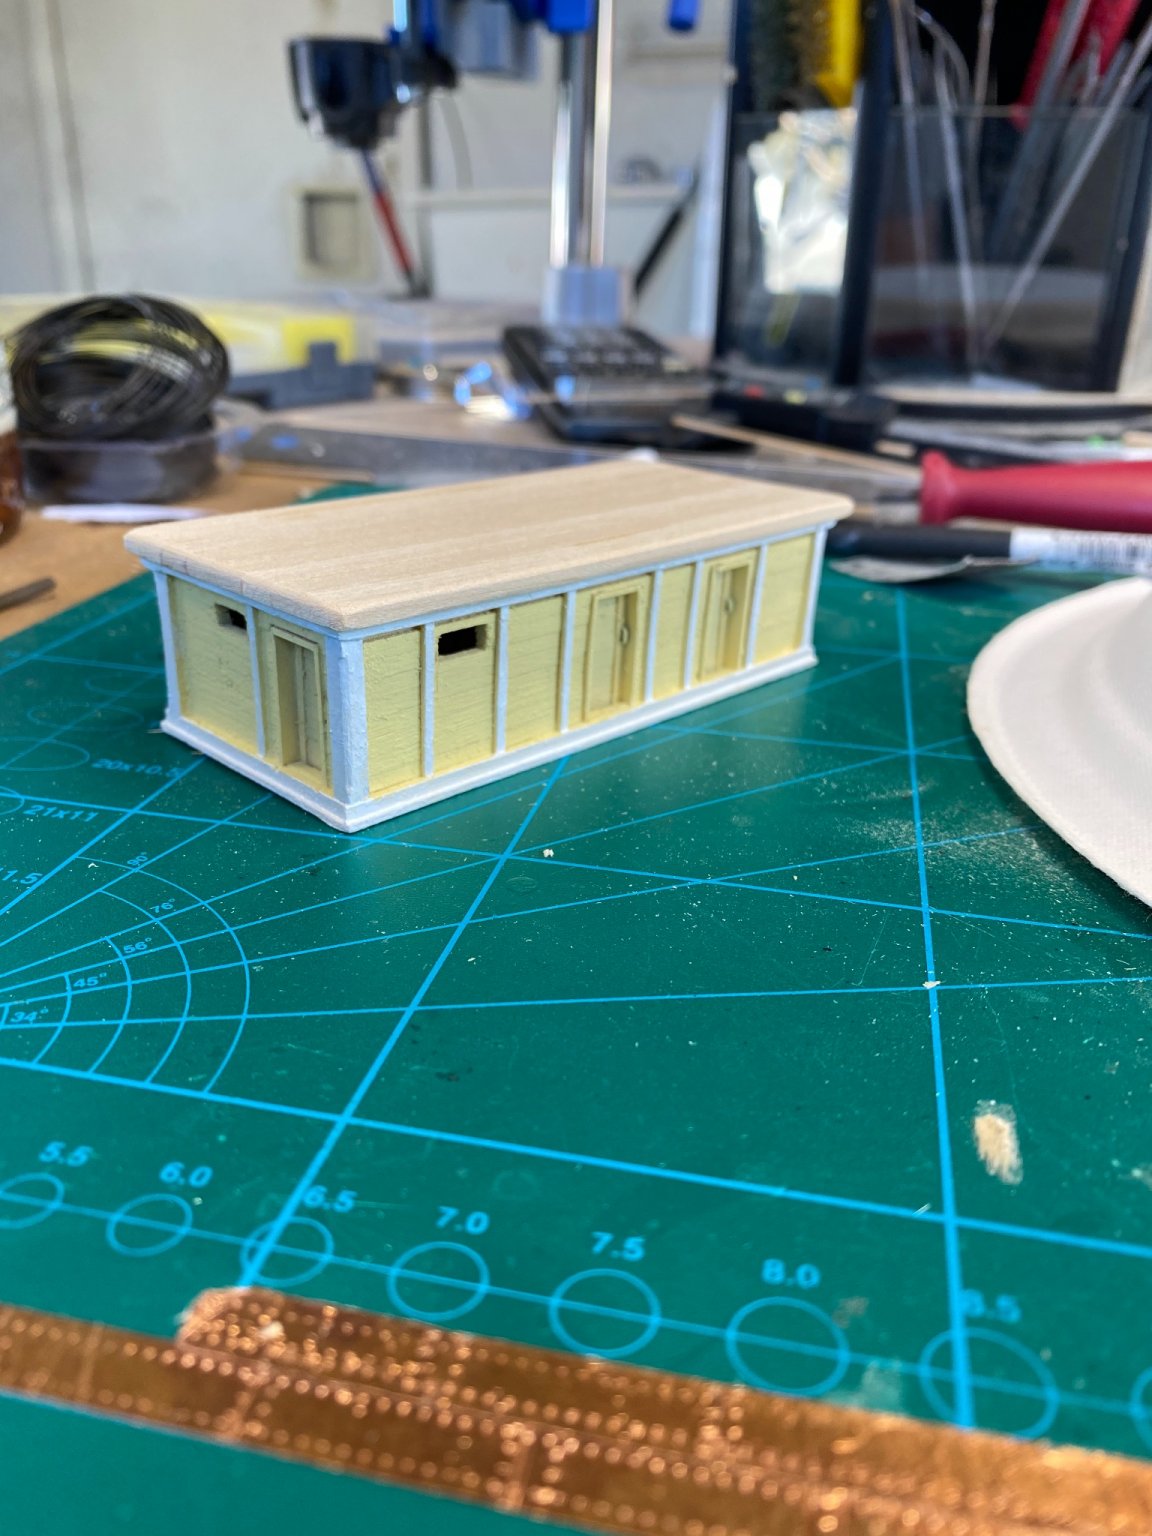
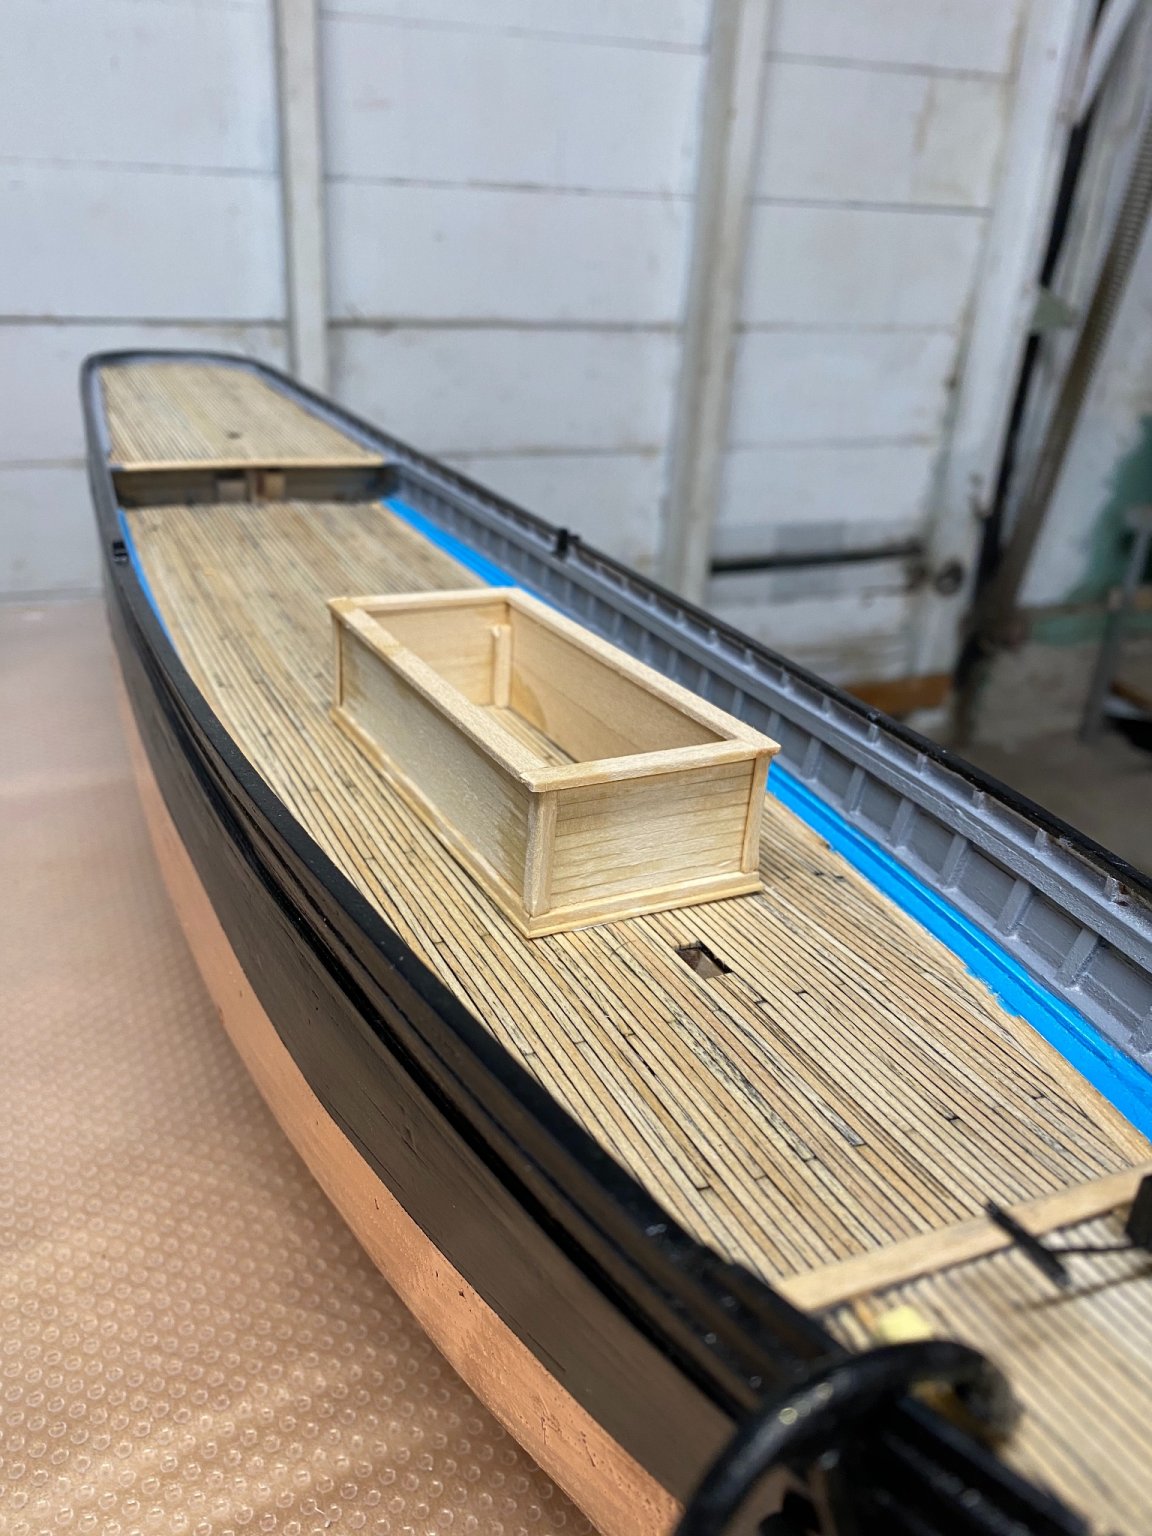
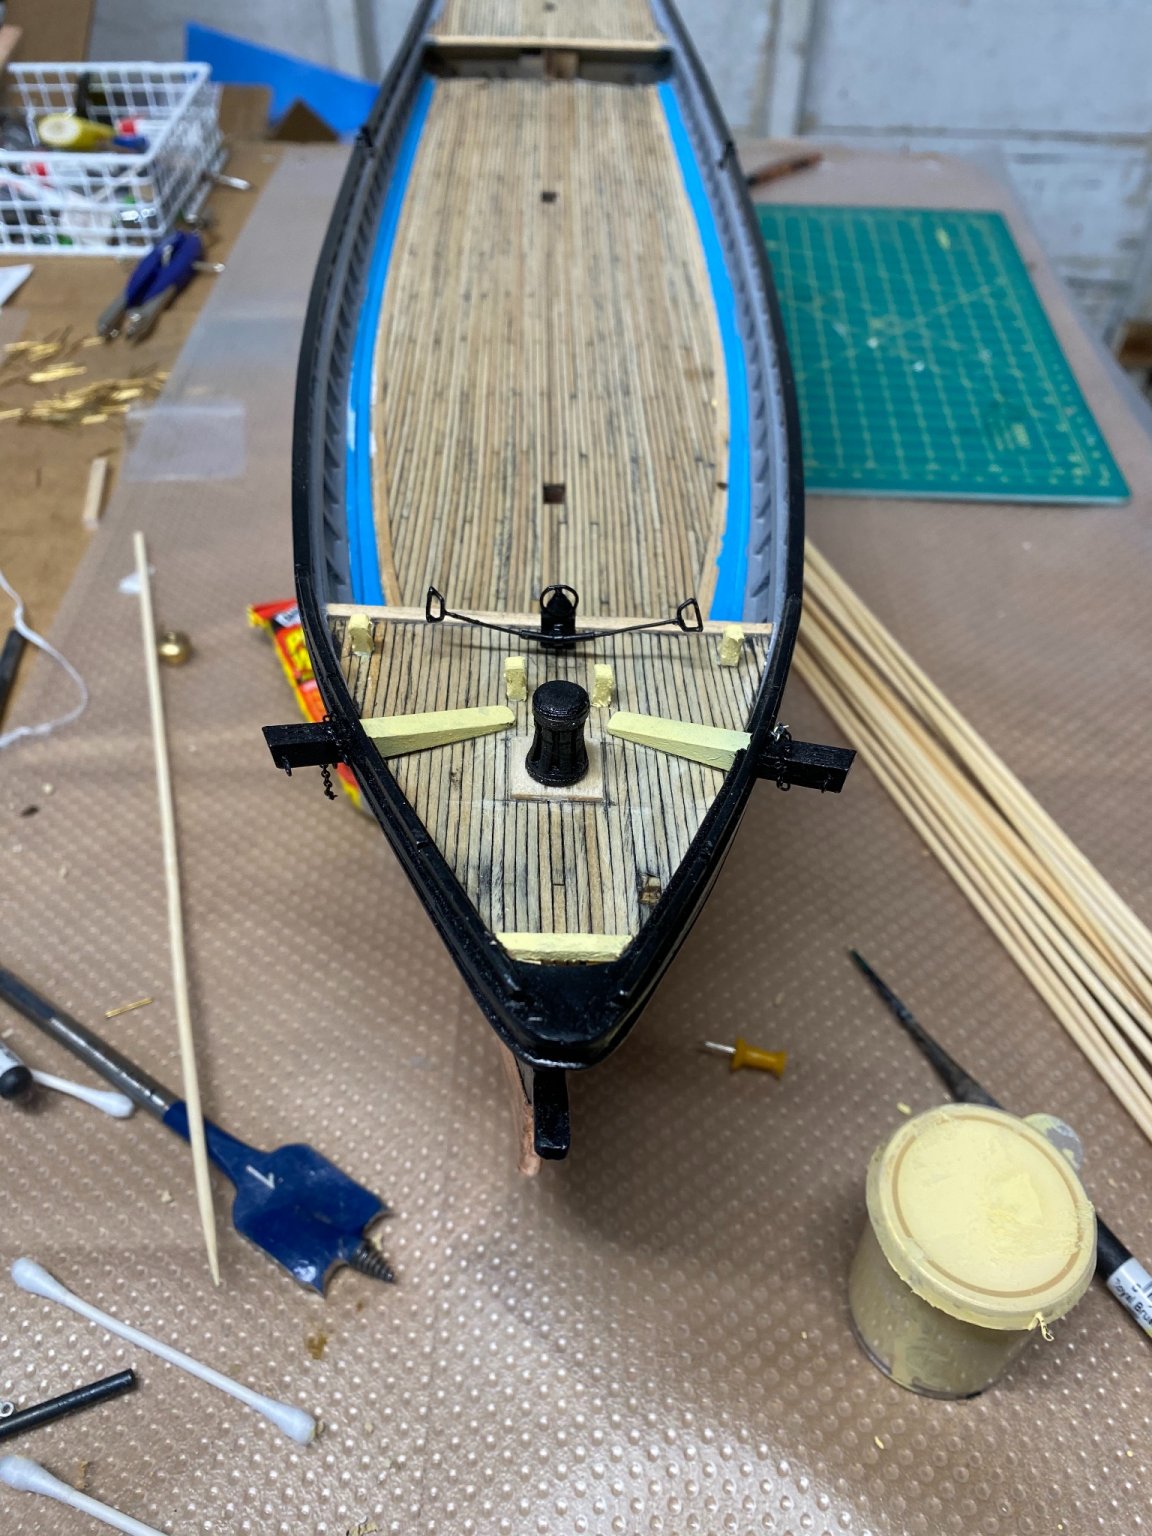
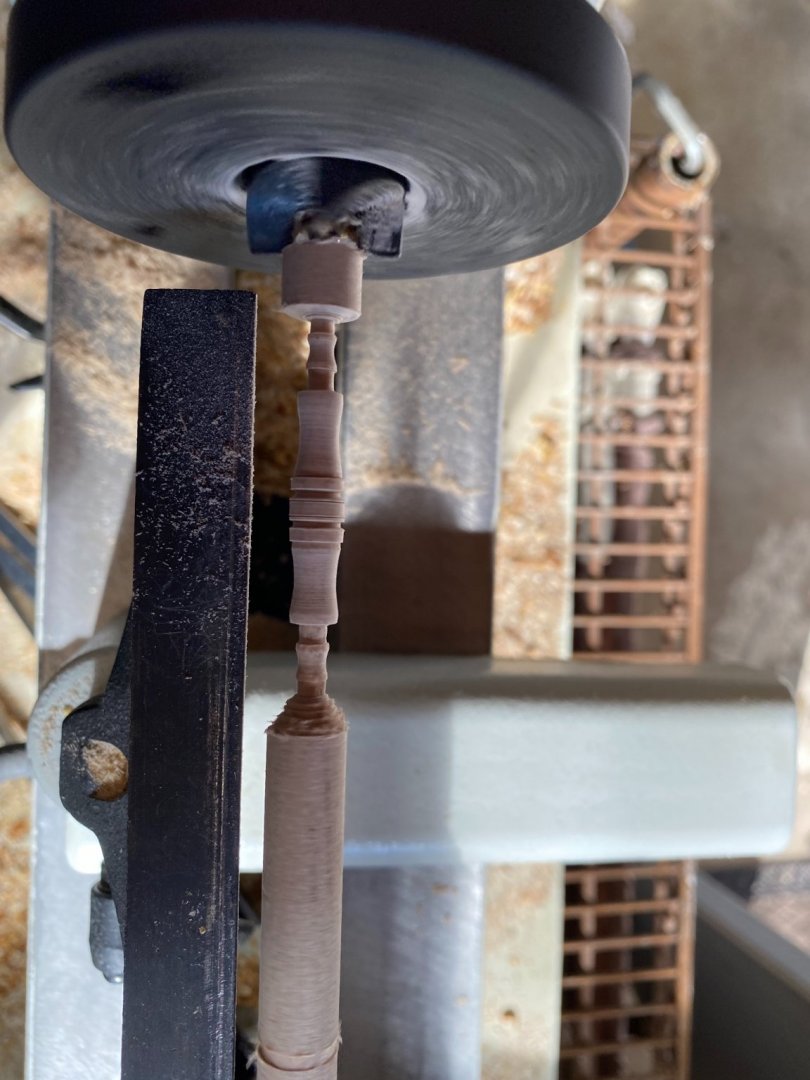
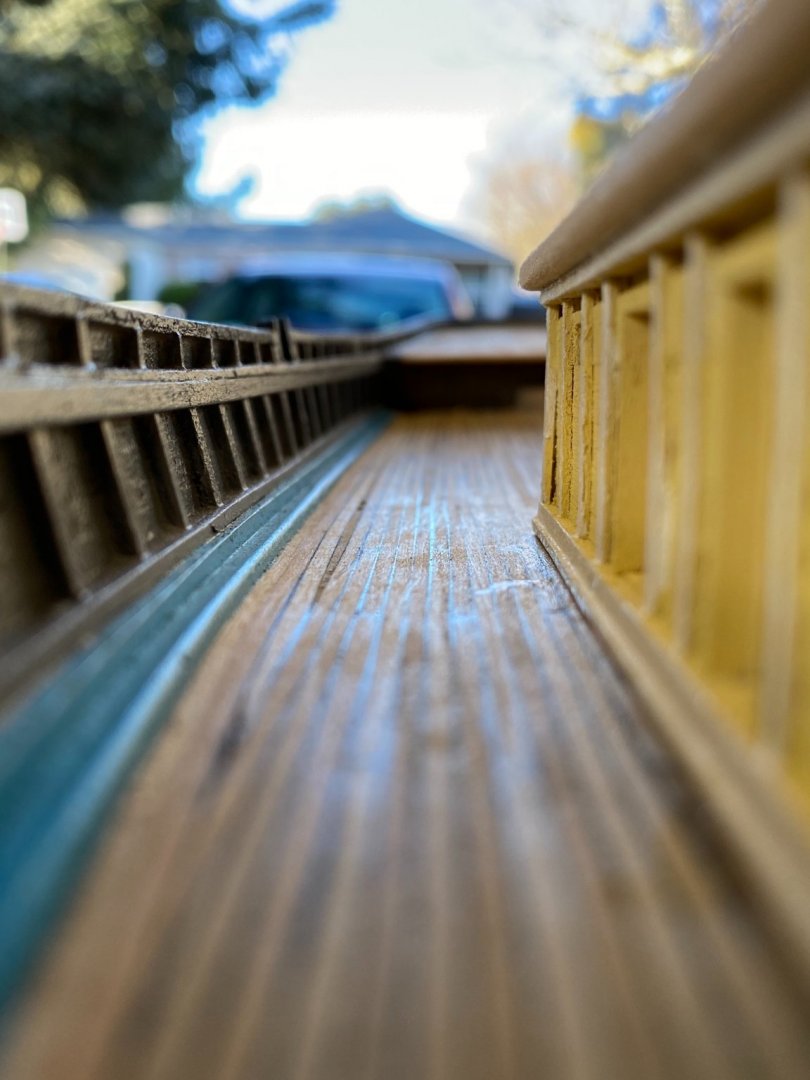
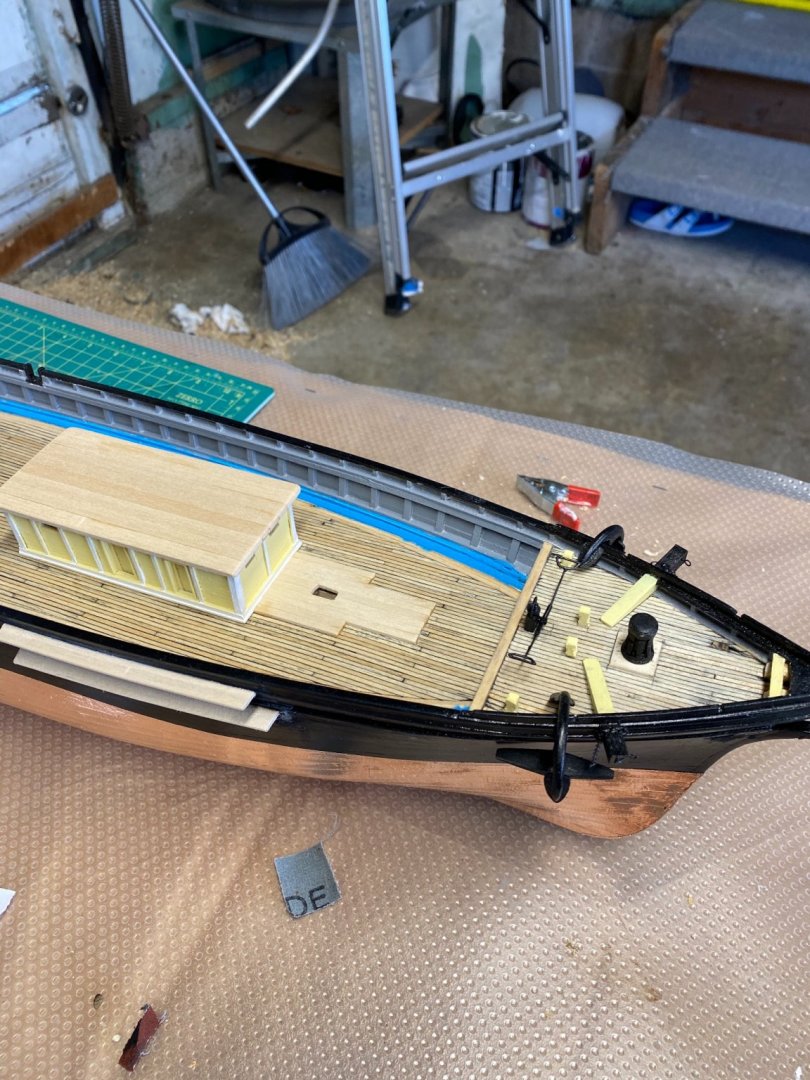
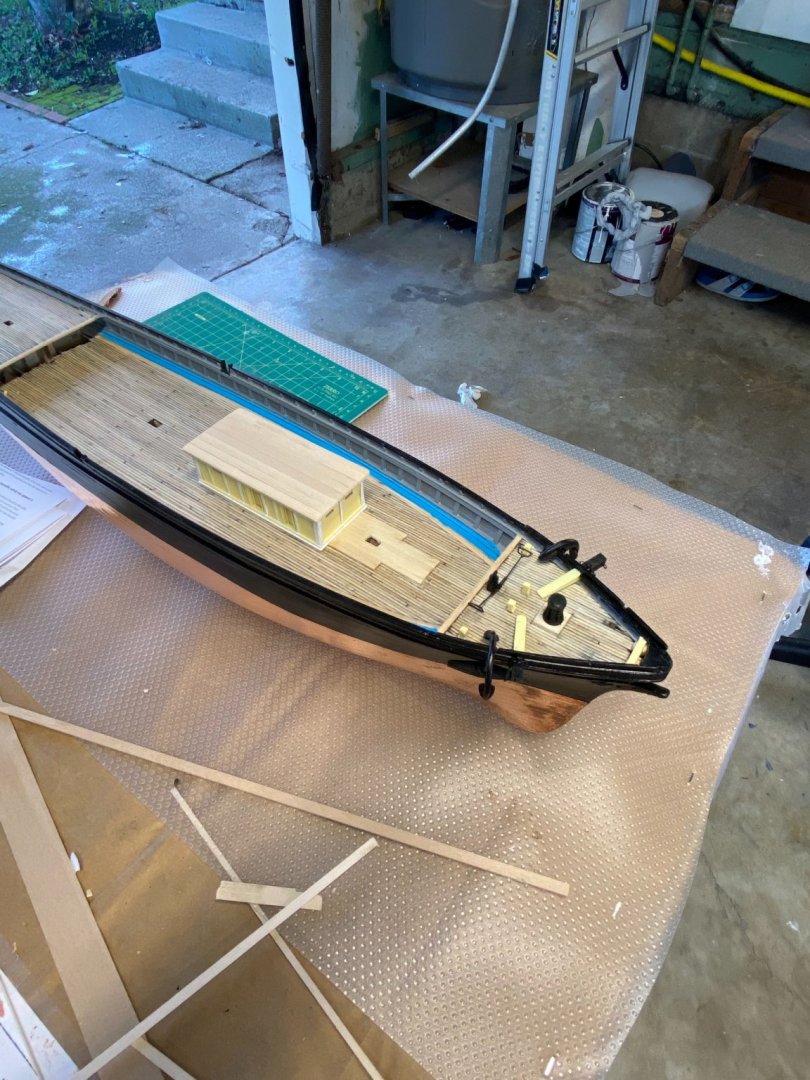
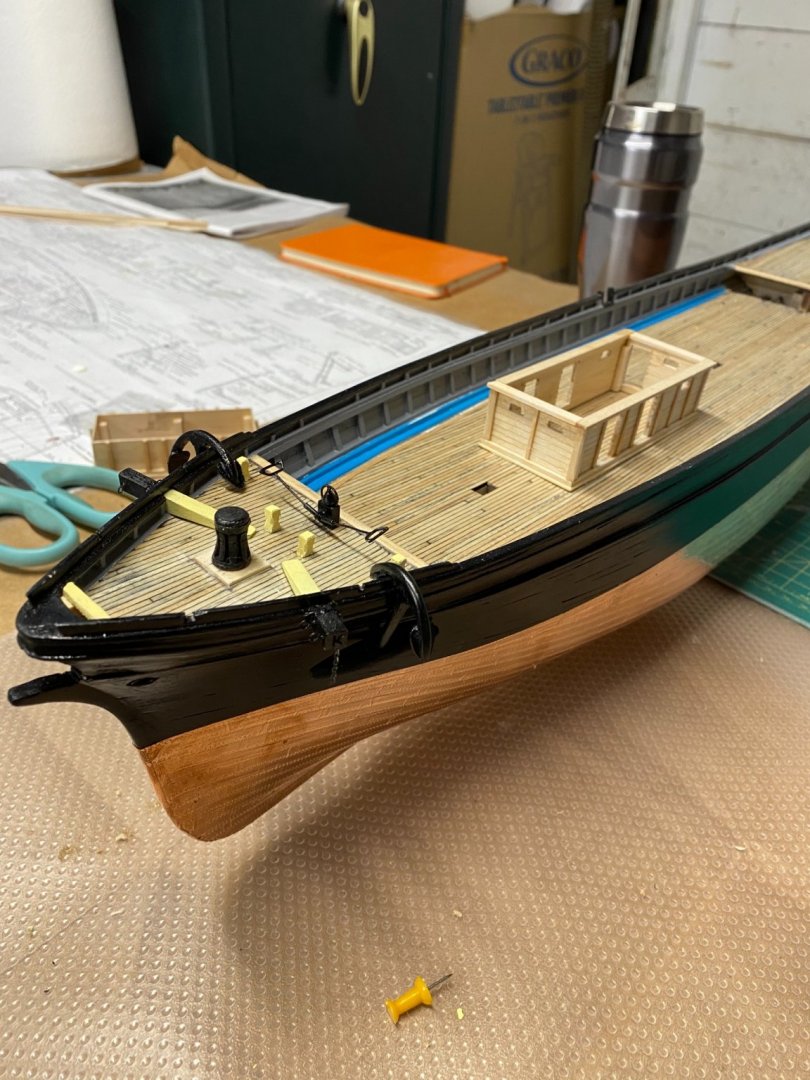
Hello everyone, I had a good feeling once that deck house was on it would make installation of other things easier, which it did! I haven’t been able to get much progress done in the last week or two but I got the deck house installed, the thick pad installed in front of the deck house, the channels for the shrouds and started working on the windlass. The deck house was a lot of fun to make and I’m looking forward to making the second and larger one. I still have some detail like the tarp, vent, and boat supports to install on the top but I’ll do that once all the furniture is built. Here are some pictures of the installed deck house: Afterwards I got the thick pad installed in front of the deck house. This was just a couple extra planks put on top of the existing planking, next time I will incorporate the thicker planks in the actual deck planking. Getting this installed only took me a half hour or so: the next thing was the channels, as of this moment I have all 12 channels built but only 4 installed, I’ll do the rest tonight or tomorrow. I found that these were kind of tough to get the right shape. They didn’t want to bend so I sanded them to shape which wasn’t to hard. They really add to look of the model IMO! I wanted to try my hand at turning the windlass on my lathe. Before this build I had never made any thing as small as the windlass or capstans so it has been fun to learn to turn something so small and fragile. so this is attempt number 1 at the windlass: Thanks again everyone! Bradley


-
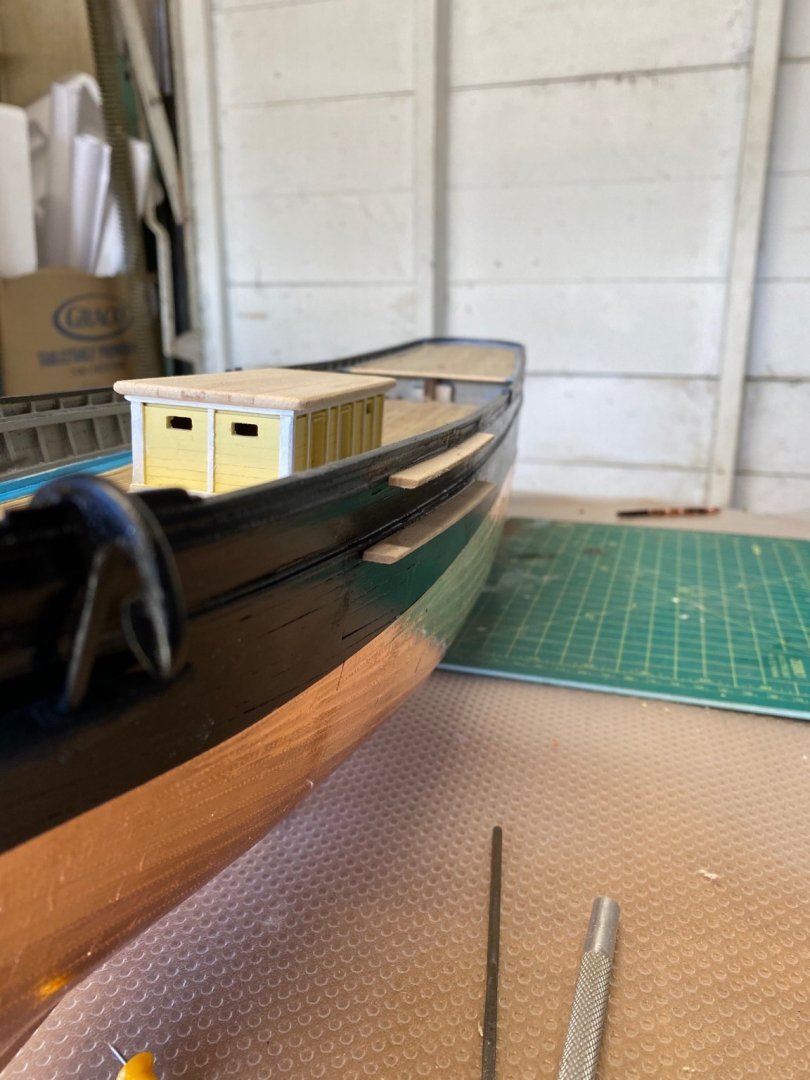
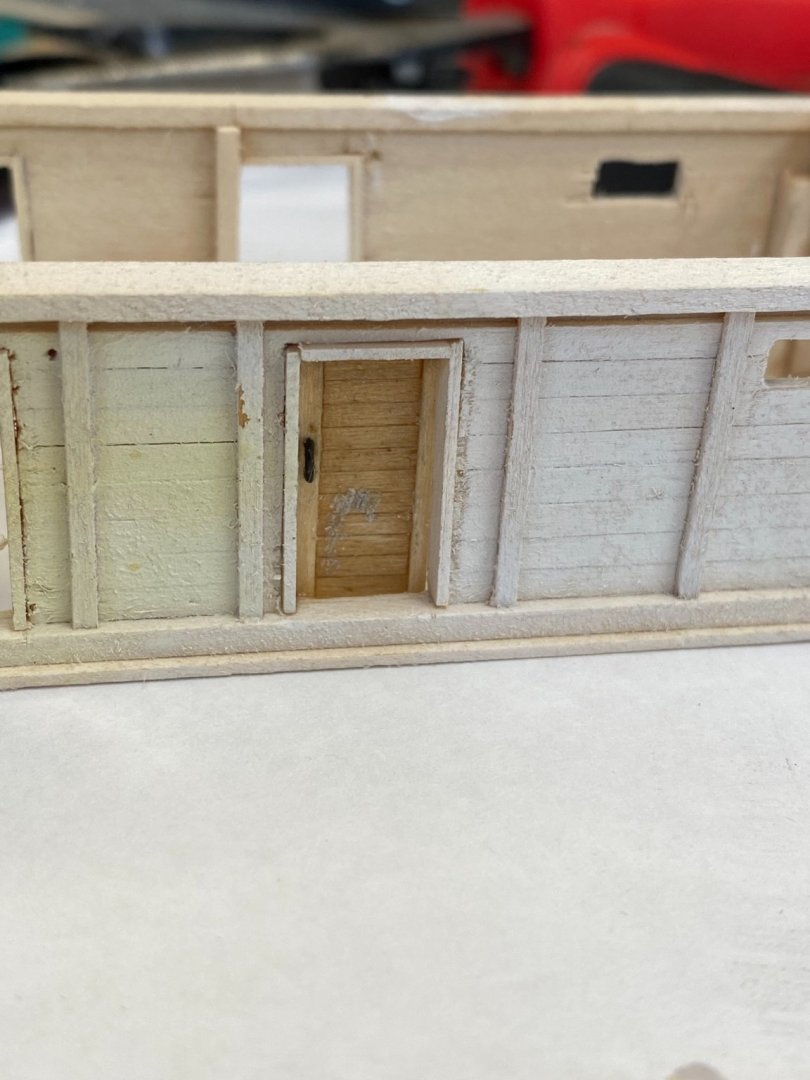
Hello everyone, So I finished the main deck house! I like the way it looks but like everything else I’m making mental notes (and some times physical) on what works and what doesn’t. The house just seems sort of flat to me, and I’m not really sure what else to add to make it look a bit better. I will be adding a canvas tarp over the top of the deck house and the boats will go on top of that. Here is a picture of the doors that I built before painting: Here is a picture of the main deck house now:


-
I have never weathered sails but personally I think the best way to simulate weathering is to speed up the earths natural processes. Here’s what I would try, I would make another sail the same way you did the rest, as a test piece. Submerge it in hot salt water for a while, then take it outside and let it sit in the direct sun light, then tumble dry in the washer with no heat, then repeat. I’m making this up as I go but I think quickly simulating what a real sail would go through on a daily basis over and over and over should give you enough weathering to not look crisp and brand new. I would be weary though, it might look weird to have a clean build like yours with weathered sails! Bradley
- 222 replies
-
- 1
-
-
- First Build
- Lady Isabella
- (and 2 more)
-
Welcome to MSW AntonK, When CA glue is used, it soaks into the wood and become almost impossible to remove, even with heavy sanding. Bradley
-
Planking can be a daunting task if going in unprepared. If you haven’t, check some of the tutorials on the site, they should prove very useful! Your plank bending jig is a cool idea, I haven’t thought of using peg board for bending planks, so nice work! Bradley
-
Hello everyone, Made some more progress yesterday on the main deck house, I only have the sliding doors and windows left to install and then I’m almost ready for paint. Here it is so far: I cut the windows and doors out instead of scribing them in because I think the trim will look more realistic than a flat box. Thanks again. Bradley

-
Is there a trick with Zap CA?
Keithbrad80 replied to Keithbrad80's topic in Modeling tools and Workshop Equipment
You couldn’t be more right about California! I noticed the color as well, it was indeed yellowish. Generally when I use CA glue i notice the smell but because I leave my garage door open all day its never bad, this stuff was intense. As soon as it came out of the bottle it started burning my eyes, so back to the store I went. I had to prove to them the glue didn’t work before they would gave me a refund, by gluing my fingers together of all things lol. Imagine the site of me gluing my fingers together in the store. Bradley -
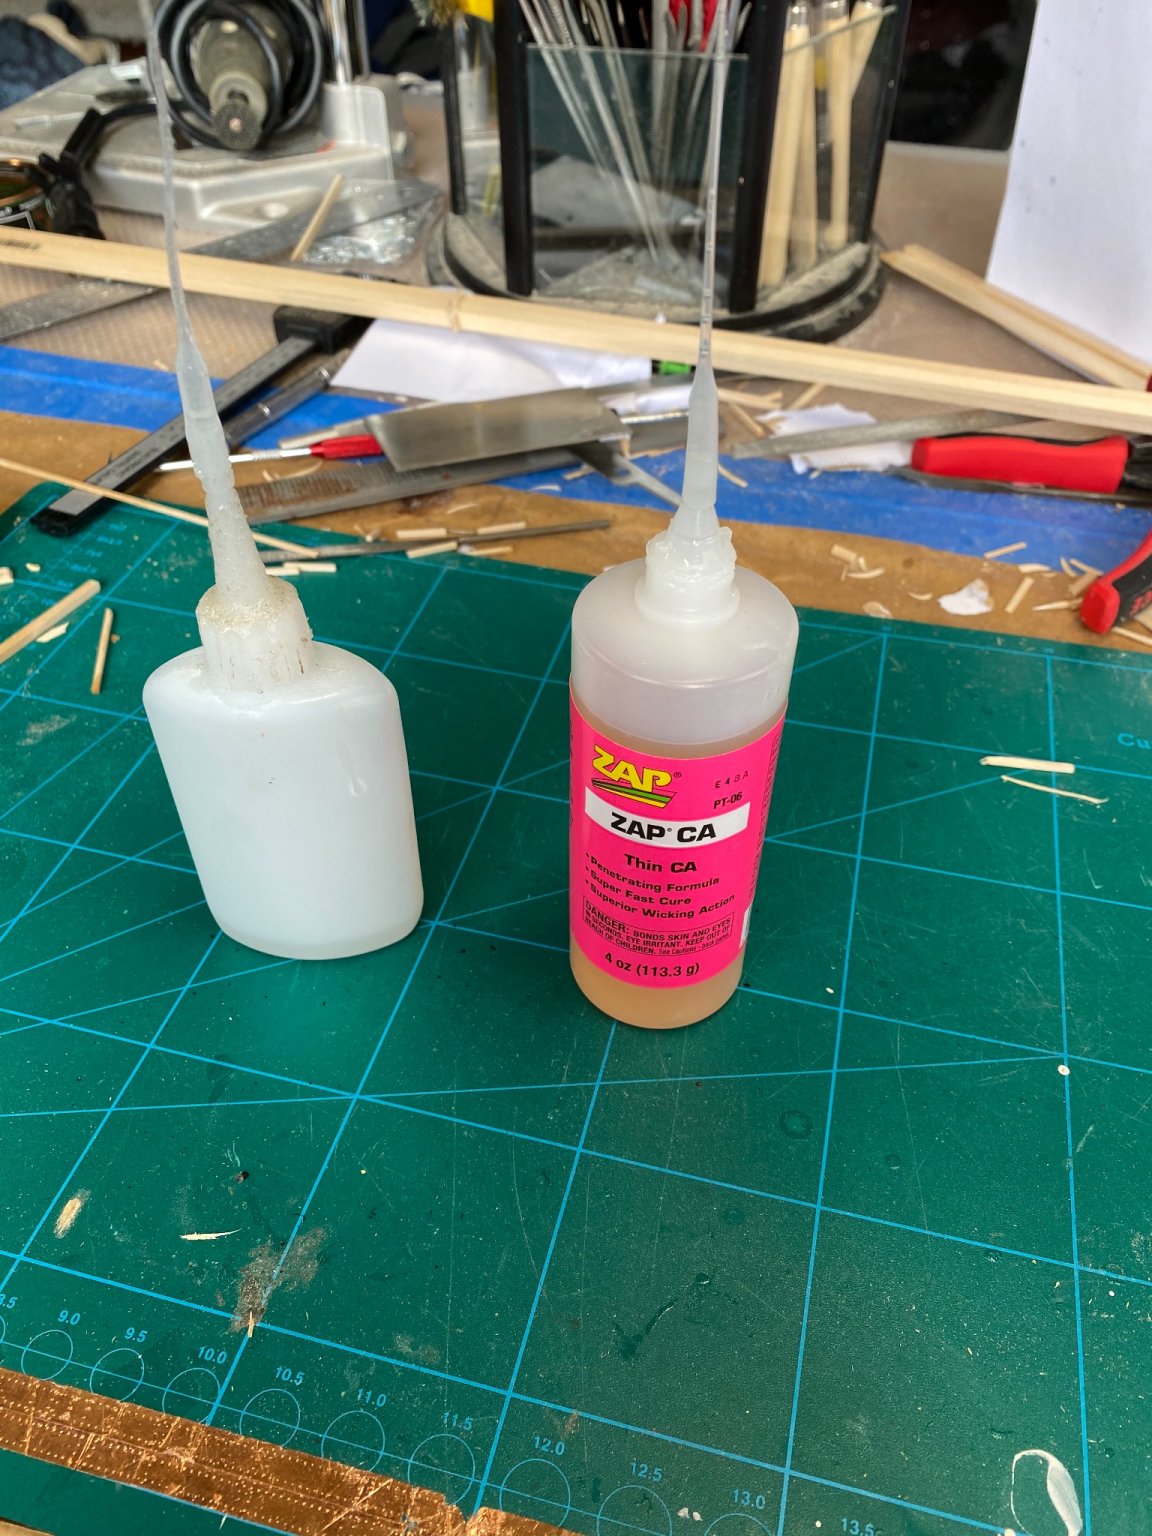
I bought a new bottle of CA glue today and I’m not sure why but it’s not sticking. If I use CA I usually only use it on parts that are to be painted and I use super thin instant CA. The bottle I bought today is a 4 oz. bottle of Zap CA (picture included) that I bought from the local art store, the bottle of CA I have been using for who knows how long is also instant super thin CA from model expo. The model expo glue dries pretty much instantly, the zap CA doesn’t dry at all. Like not even sticky, I can put some on my fingers and hold them together without them sticking. Did I just get a bad bottle that I can’t return or is there a trick with this glue? A primer of some kind? Some kind of activator I don’t have? Any help would be appreciated. The bottle on the left is the model expo glue and the Zap CA on the right. Also, I know the pros and cons of CA glue and when to use it and the effects it had on wood and my body. I’m mostly just looking for help with this specific glue. Thanks! Bradley

-
I’m looking forward to seeing your Fifi after your excellent build of the Emma C. Berry. Very nice work! Bradley
-
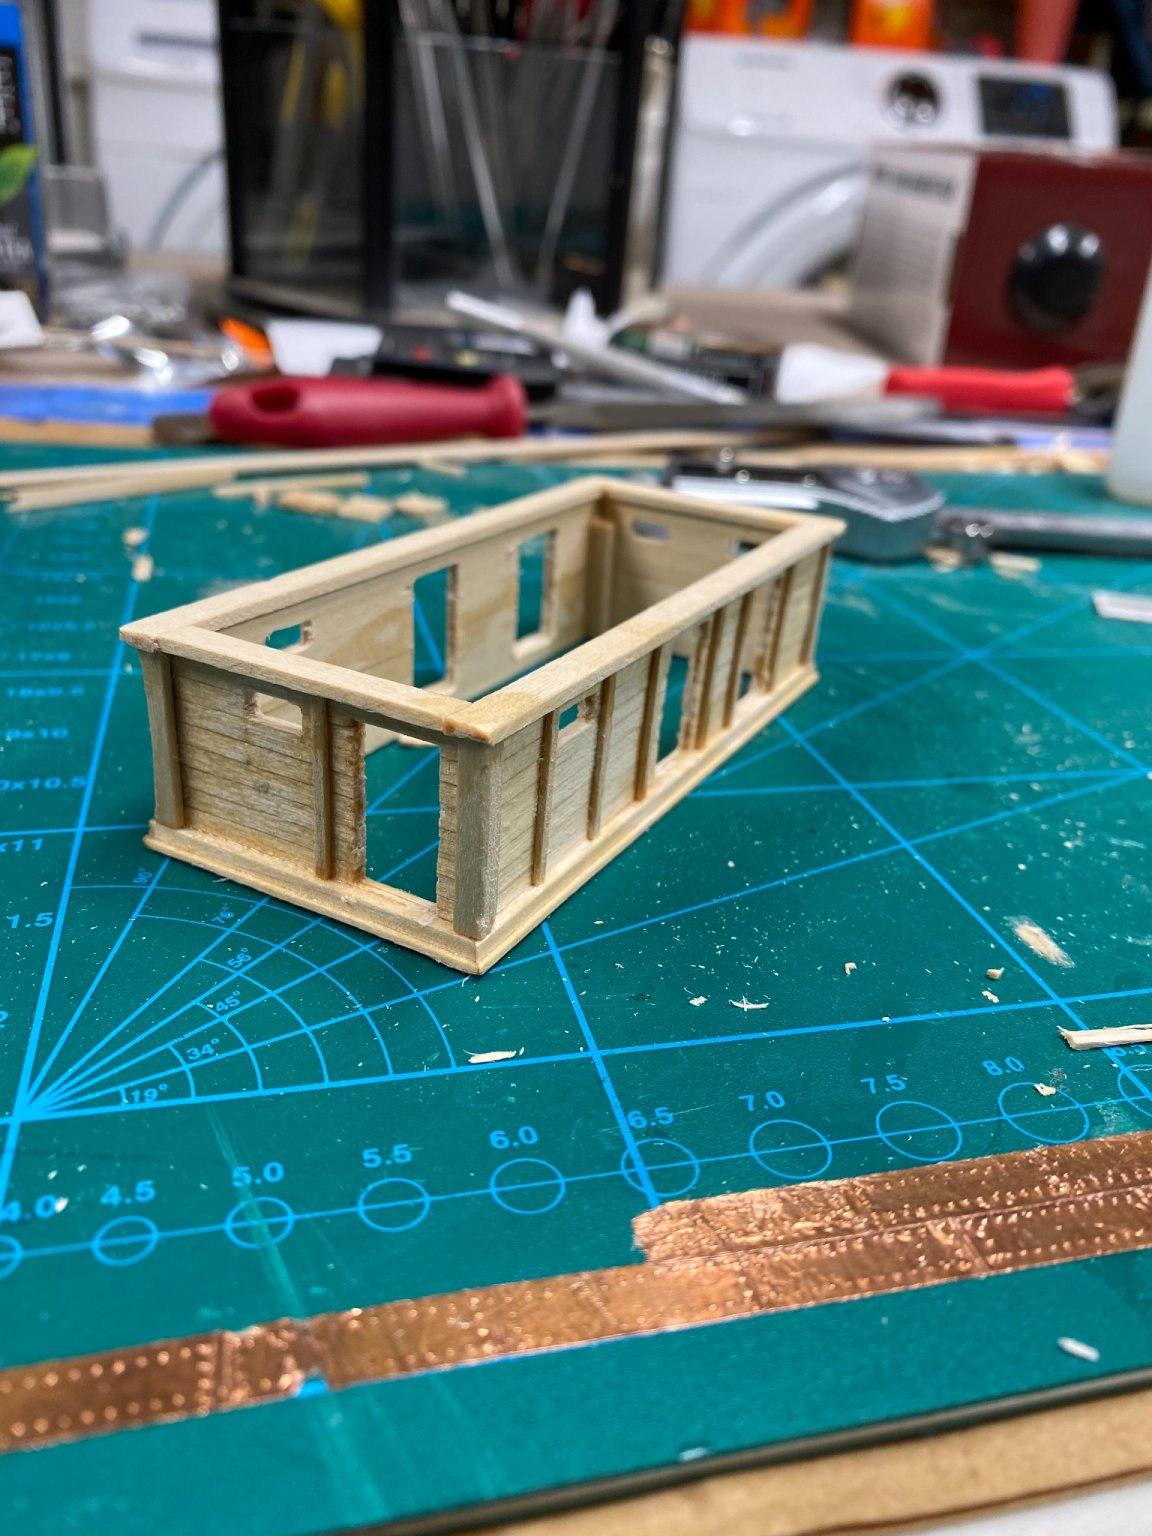
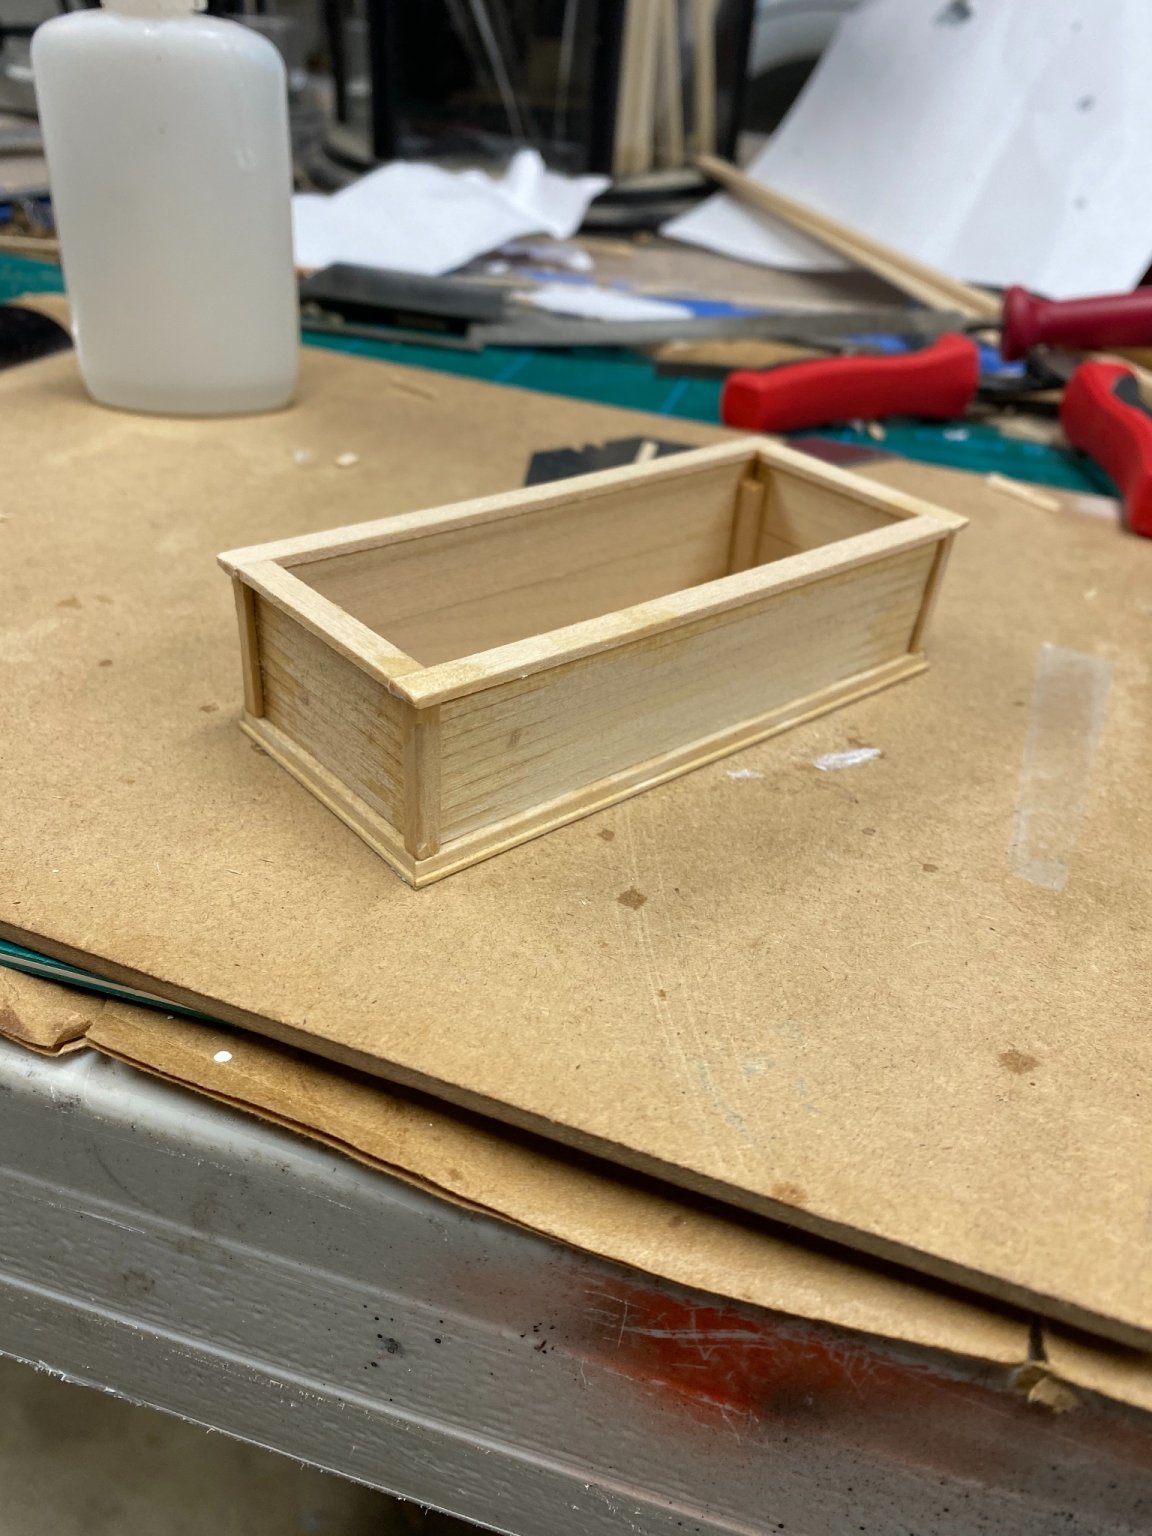
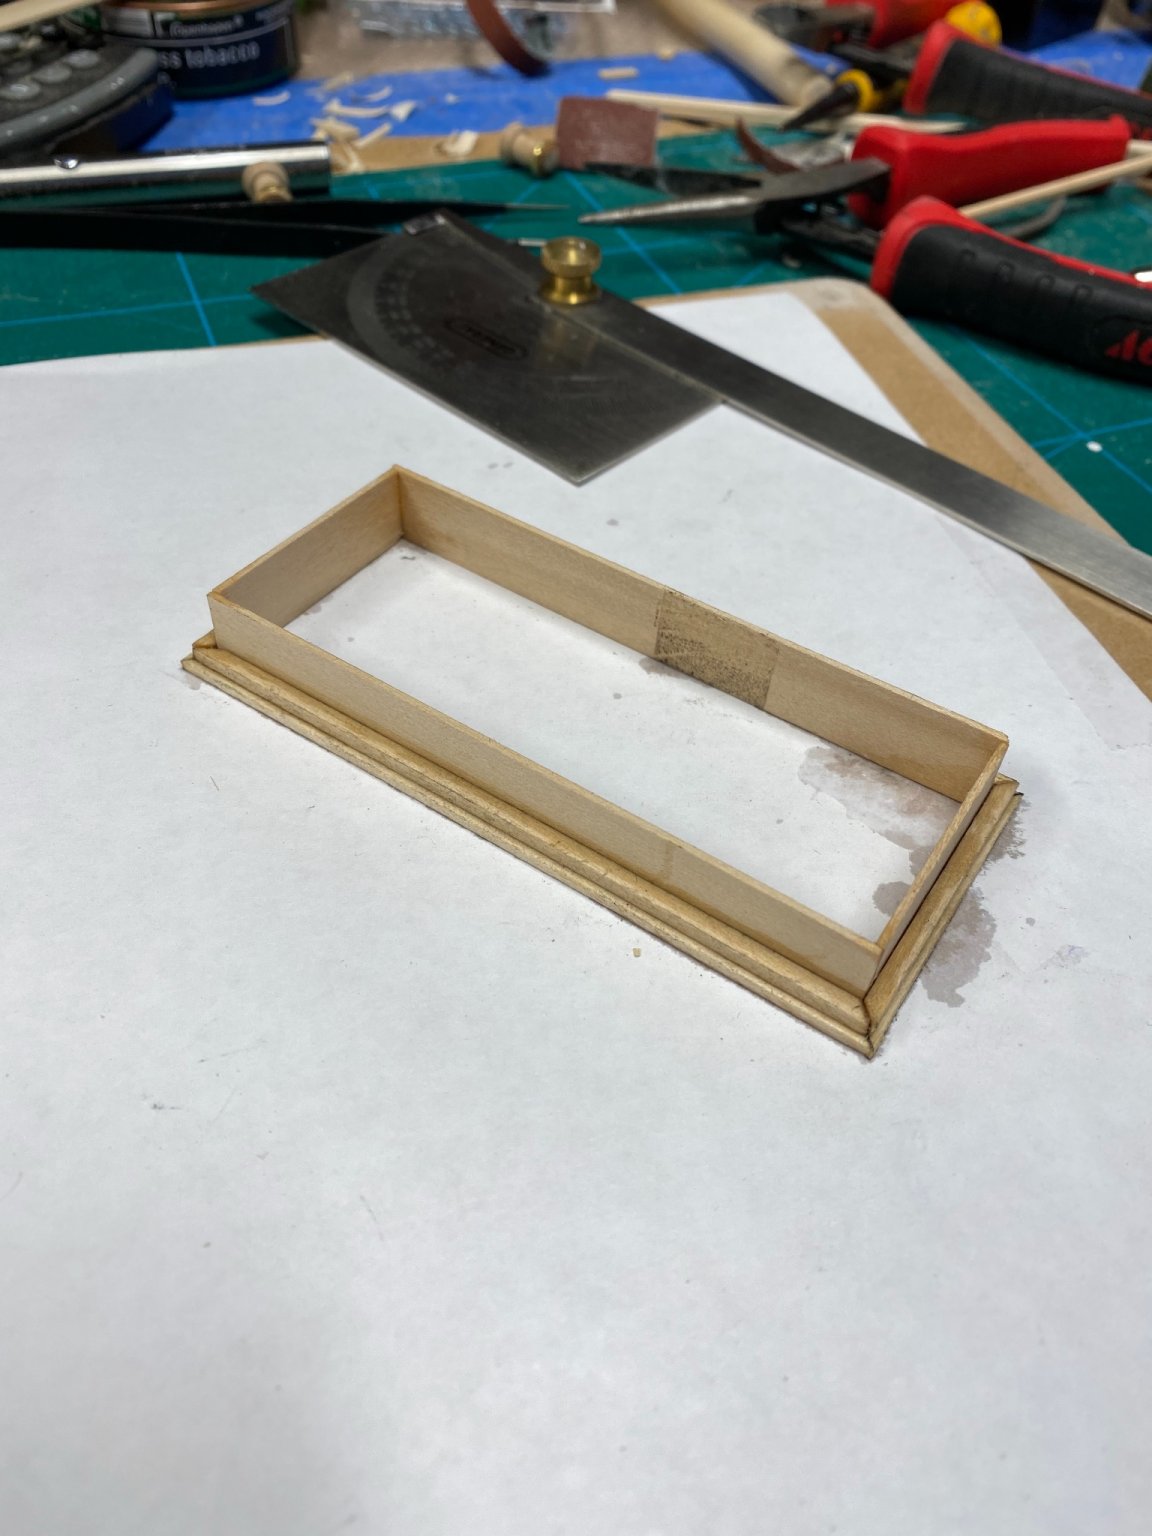
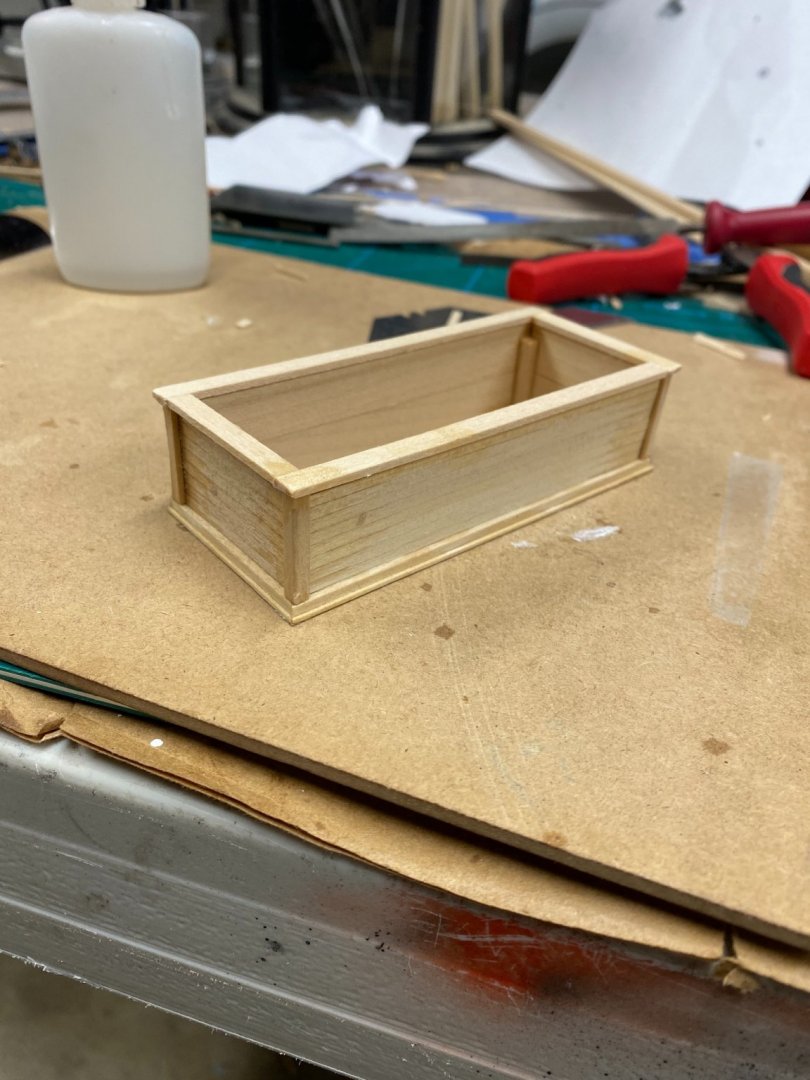
Hello everyone, I wasn’t to happy with my deck house so I started over. Starting over seems to be a theme throughout this build but that’s ok because I’m learning as I go! Deck house version 2.0 look much better. I built the house first then planked the outside then put the trim pieces on top of the planking. My original idea was to put the trim on first then plank in between, but some of the planking would have been really tough and I’m not sure it would have looked very good. On the main deck house I still have things like windows and sliding doors to build. I’ll cut out the planking and build the trim for the doors and windows, which should look pretty good. I’m not sure yet what material to use for windows, if any one has made windows before I would love to know how you did it. Thanks again! Bradley

-
Very nice work so far! For the hawse holes; I measure out my spot for the center of the hole and use a center punch to leave a small indentation where the drill bit will sit. Drilling the hole isn’t hard but measuring the angle might be, your plans should make a reference to the angle in which your hawse holes are drilled. I start with a small drill bit and drill by hand and very slowly, making my way to a size just under the final dimension of the hole. I then use a circular metal file to file the hole to the correct circumference. Hope that helps a little bit! Bradley
-
Very nice work, and congrats on finishing this model! Bradley
-
That’s exactly what I did for the same reason. I think it gave me a better result overall. Very nice work so far! Bradley
-
Just wanted to see how the build was going? Bradley
-
Welcome to MSW! I second the half hull, it’s not a first rate ship of the line, but it’s an excellent first model that will help you tremendously! It should teach you the basics of planking and hull construction which is what gets first time builders to give up or lose interest all the time. If that doesn’t interest you, Model Shipways, offers a really nice selection of first time builds that prepare you for more extreme builds! Good luck and most importantly have fun! Bradley
-
Very nicely done! This model is perfect for people without prior ship modeling experience and it looks like you are doing a nice job on this one. The addition of stain thwarts looks really great as well. Getting close to the end, any ideas for the next build? Bradley
-
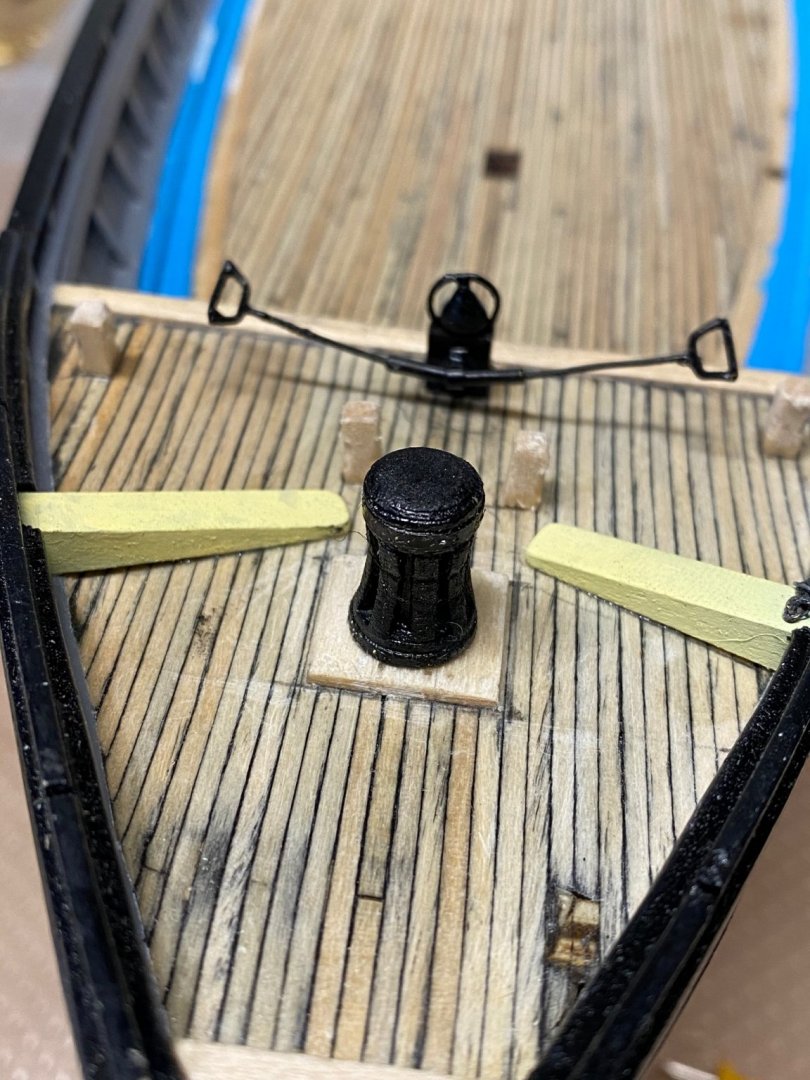
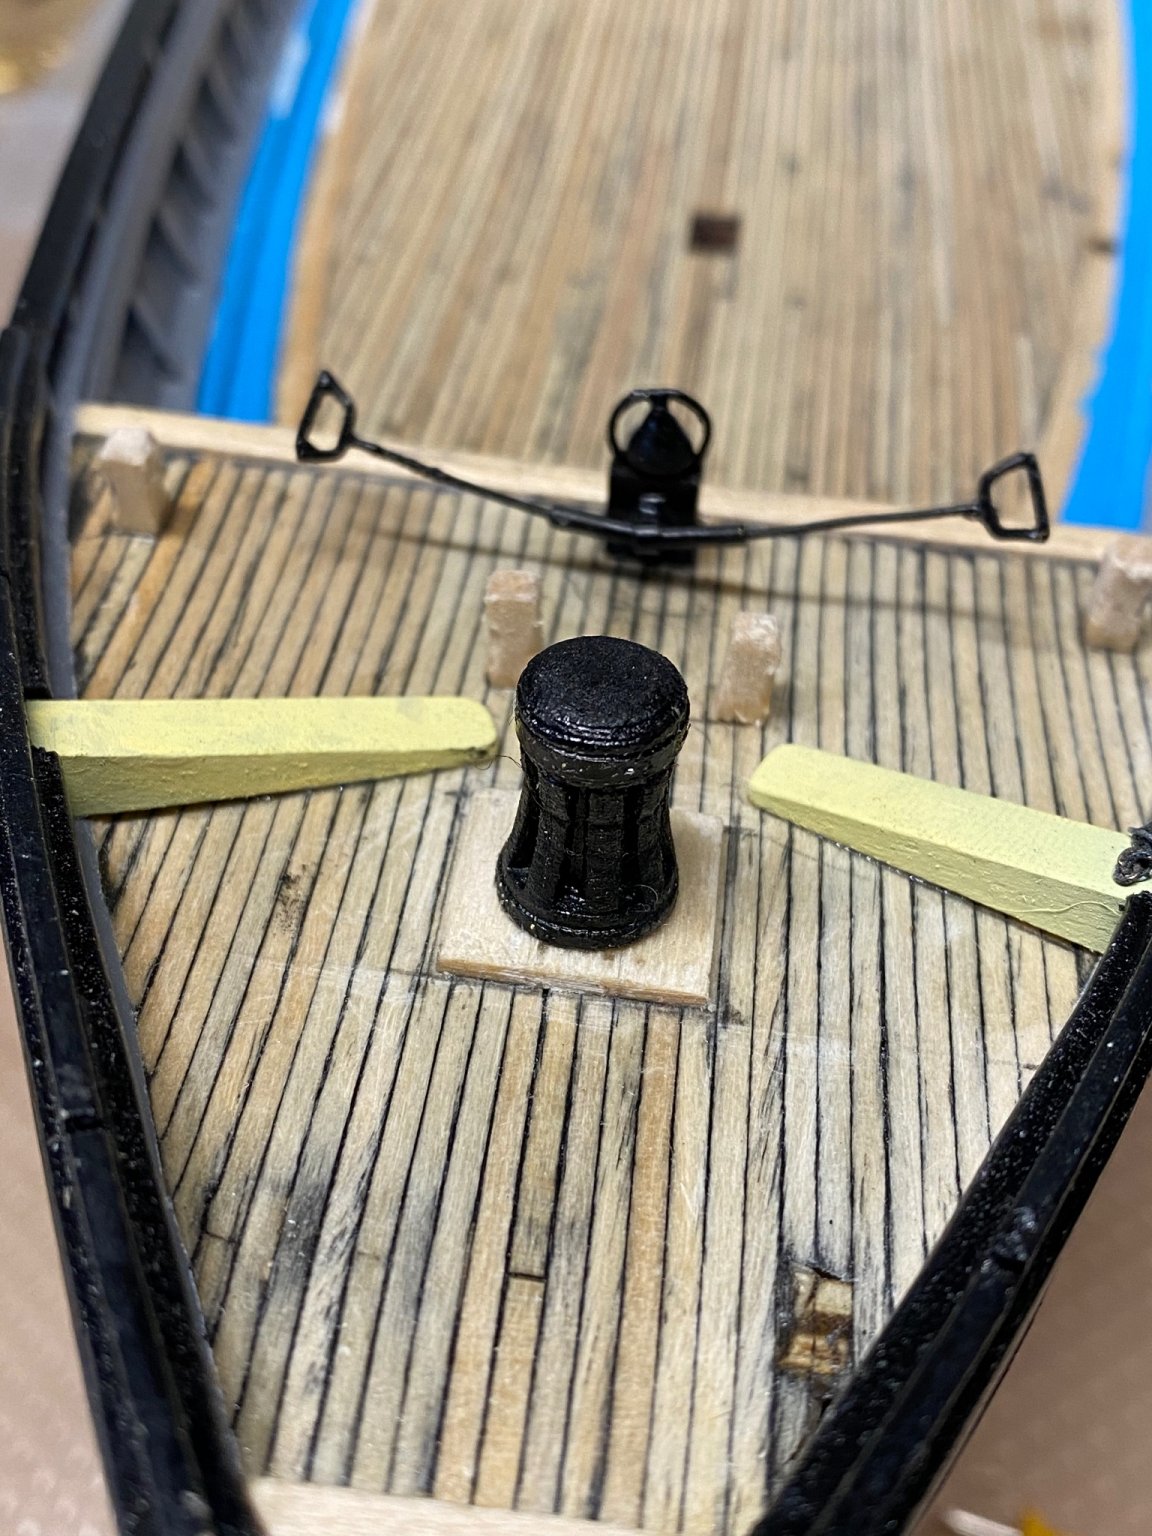
Hello everyone, I haven't had much time recently so not much progress, but some! I finished the capstan, there is a second one but I haven’t finished it yet. I decided to turn these on my lathe, basswood was way to soft for this application so I used walnut which worked great. I also got some more painting done today, I painted the anchors, the bits, the capstan, and the pin rail at the bow, as well as some more spots that needed some clean up. Here are some pictures: With the capstan done, that completes the structure of the forecastle. Ill complete the windlass soon, but first I think I’m going to complete the deck houses first. I think finishing those first will make the placement of everything else easier. Anyway, I started work on the main deck house, I’m using a thinner wood for the walls of the deck houses so I can place planks on top of that, that should look pretty good. Here is a picture of the main deck house half built: Thats all for now, thanks! Bradley