DaveBaxt
-
Posts
1,324 -
Joined
-
Last visited
Content Type
Profiles
Forums
Gallery
Events
Everything posted by DaveBaxt
-
Working out the correct height of the masts from the Deck
DaveBaxt replied to DaveBaxt's topic in Masting, rigging and sails
Thank you for that Derek and please forgive my ignorance but if those mast lengths include the section below the deck how cam we then work out the length of the main mast above the deck and then work out every thing else from that. Also when looking at James lees The Masting of Rigging of English ships of War . I thought it only covered rated ships. If the Endeavour is not rated, what is her classification. Fortunately I am the proud owner of James Lees book but I am unfortunately too ignorant to find such information as your good self. However I am a willing student. best regards Dave -
Thanks for the link Schrubbe It is always a help . I think the builder on that log seems to have more problems the fore mast being too short. However I think I am somewhere near resolving this with the help of Shipaholic and the thread I previously posted. Their seems to be quite a few discrepencies with different manufacturers of which some are maybe using AOTS Endeavour and may not be entirely accurate. I don't know but a few people are suggesting this.
-
Working out the correct height of the masts from the Deck
DaveBaxt replied to DaveBaxt's topic in Masting, rigging and sails
Thank you once again for the photo of your beautiful model of the Endeavour which confirms the width of the channels. It is also interesting to hear what you have to say regards the AOTS books. I was thinking it is I shame I have not got this book for the Endeavour and now I am not so sure due to a few people saying there are a number of inacuracies. I do however have the AOTS HMS Diana and so for one of the reasons I was considering her for my next build.. Best regards Dave -
Working out the correct height of the masts from the Deck
DaveBaxt replied to DaveBaxt's topic in Masting, rigging and sails
Thank you Shipaholic for posting this picture as this is exactly what I am after and does indeed show the mizzen cap level with the main mast top so I can now move forward with this. For the record even without the wider channel I think the shroud would still touch the upper cap rail so again I think you are correct that the channels should all be the same width. I can,t understand why Caldercraft would make it this way as yet I have not found any evidence to suggest they are all different widths. -
Fantastic work Derek. You must have some really good hand tools for that lathe.She is coming on great and look forward to watching your progress.
- 345 replies
-
- 2
-

-

-
- Duchess Of Kingston
- Vanguard Models
- (and 1 more)
-
Great work with the use of the Milling m/c on the the lower mast and something I have been considering to do myself. So thank you for taking the time to take these photos and explaining the process and how you work to such fine tolerances.Great build log by the way. Good luck and I look forward to seeing your progress. Best regards Dave
- 109 replies
-
- 1
-
-
- snake
- caldercraft
- (and 1 more)
-
Thank you Shipaholic for your confirmation that I am on the right track. I have looked at your build log many times and I think it was yours that gave me the initial idea. So thank for doing a fantastic Endeavour your workmanship is of a very high standard and an inspiration to us all.So thank you again. Best regards Dave
-
After careful thought and thanks to Bob Cleek for answering these questions on the below forum . Also I was beginning to wonder if I was the only person to experience this problem with this particular problem. I have since found out that although the majority of the blogs I have searched through have not. One or two builds have had the same issues and have both increased the height and the width of the channel. If I decide to increase the height of the mast hopefully this does not cause any problems with the rigging down the line.
-
Working out the correct height of the masts from the Deck
DaveBaxt replied to DaveBaxt's topic in Masting, rigging and sails
Thank you Bob for taking up your valuable time and finding those paintings of the Endeavour which has helped me a great deal in deciding the height of the mizzen lower mast . Although it does not quite work out as what is written the same as in RC Anderson book it is still looks to be higher than what is in the drawings supplied with the kit. However I will first work out the correct lengths of the main and fore masts including below the partners and the see where I after that. After beginning to wonder if I were the only builder to have this issue with this particular kit and searching through a number of build logs and finding that most of which did not , there was however one or two who ended up increasing both the height of the mizzen mast and/or increasing the width of the channel. Best regards Dave -
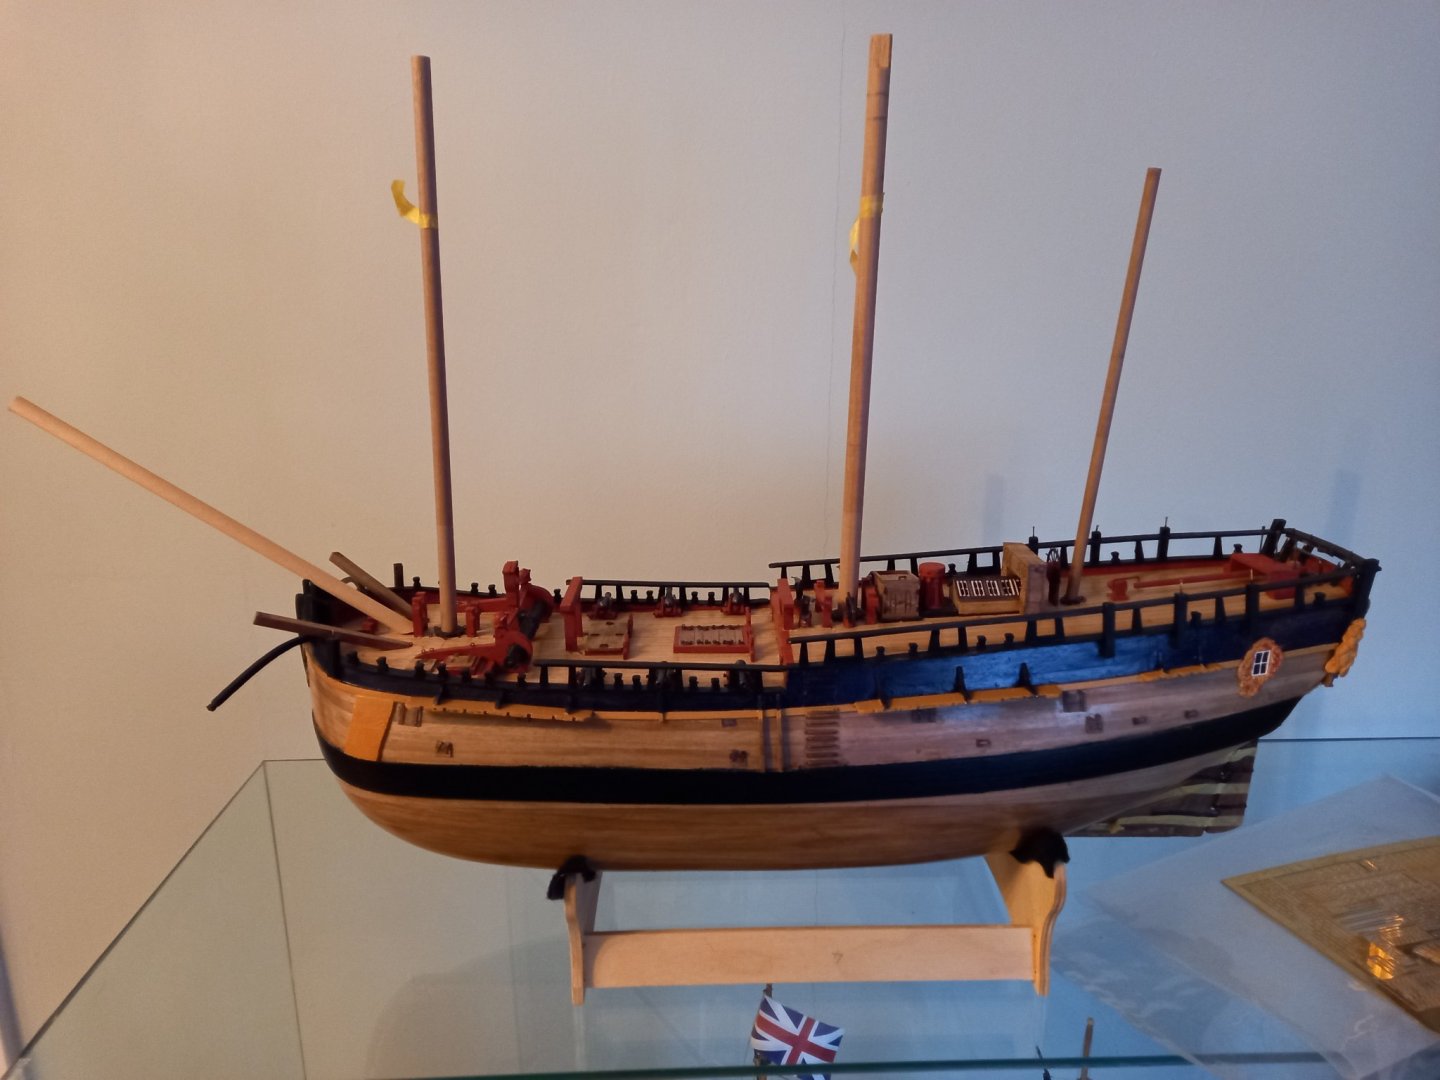
I am currently having problems working out whether or not the lower masts are the correct height from the deck. According to the book ''The rigging of ships by RC Anderson the Cap of the mizzen mast should be about half way up the mast head of the main mast and it is not . It is much lower. So something is not quite right. What made me check this is due to when checking the clearance between shrouds and the bulwark capping rail is less than zero, ie they are touching. Although the mizzen channel is only half the width of the main channel, I have checked that the channel is in the correct position, as is the wale upon which the channel is fitted. When reading from the length of masts in various books etc it is always in relation to the Beam of the vessel or length of the keel between perpendiculars.but I can,t find if the length of the mast includes the part under the deck ( below the partners) Also are the lengths given on the drawings likely to be the total lengths ie also including whats underneath the deck? I think to resolve this problem I will need to increase the width of the mizzen channel and or increase the height of the lower mast but first I would like to work out the correct heights of the lower masts above the deck I am also not sure why the channels are all different sizes as on my previous model the Bounty.I appreciate that the length would be different as would the load be less, however this where the width would need to be possibly the greatest as this is were the capping rail is the highest above the channel and the mast height is the lowest. Hope this makes sense. Best regards Dave
-
I have made a start on the lower dead eyes and their associated strops and plates and finding this slow work with the ones supplied by Caldercraft. The channels are to be drilled so that the small tabs fit into the recesses but this has been a bit hit and miss. I have also came across what I thought would be a major problem. Before fitting the smaller dead eyes to the mizzen channels I thought I would check the clearance of the upper cap rail and the shrouds unfortunately there was no clearance.l. Where have I gone wrong you might think. AS did I. I have checked the position of the upper cap rail and this would appear to be the correct height as is the position of the wale on top of which the channel fits. I have since checked the height of the mizzen mast in relation to the main and fore mast and there is something clearly wrong here. Assuming the Main mast is the correct height, then the mizzen would appear to be too short. I have since checked this with 'The Rigging of ships in the days of the sprit sail 'by RC Anderson and even with the now longer mast there is still very little clearance if any at all. I have also noticed that the mizzen channel is only about half the width of the main channel and the fore channel is somewhere in between. the two.I wonder if anyone else has had this problem in the past with this build. Perhaps I should have double checked a bit earlier but fortunately I have not fitted the dead eyes yet. It is my intention to make new channels which will be the same width as the fore channels to give me sufficient clearance between the shrouds and the upper cap rail. For the record my last build ( The Bounty ) all the channels were the same width. Also I will need to check how accurate the main and fore masts are for there length height before moving although the main shrouds are well clear of the upper cap rail. However I need to know this height of the main mast to work out the mizzen height. Hope this makes sense.
-
The headband magnifier I recently bought and mentioned on here works just fine if I shut one eye . Ha ha. No this too is pretty much useless combined with my varifocal glasses. I am really struggling with the small dead eyes 5mm and their associated brass securing ring. supplied by Caldercraft which has the tiny little tabs that are supposed to fit into a hole drilled into the recess of the channel I too have returned to the swing arm desk lamp with a light as I think the light maybe a problem I am having too as it is only fitted with an ordinary type bulb. I might need to think about an upgrade.
-
Well done and nice work on the Ships boat. What are you planning to do next?
-
Thank you Andrew. I still don,t think I up to the standard of workmanship as some people on here including your good self are achieving, however i am improving all the time as I learn new techniques . I am also trying to take more time, but sometime I forget and end up starting on another section whilst waiting for glue or paint to dry. and jI just quickly do one more thing ........I should of coarse check and double check the drawings. Hopefully one day I will be totally satisfied but I doubt it. Thanks again for keeping an eye on me . Best regards Dave
-
Thank you .It is always nice to get a positive comment.
-
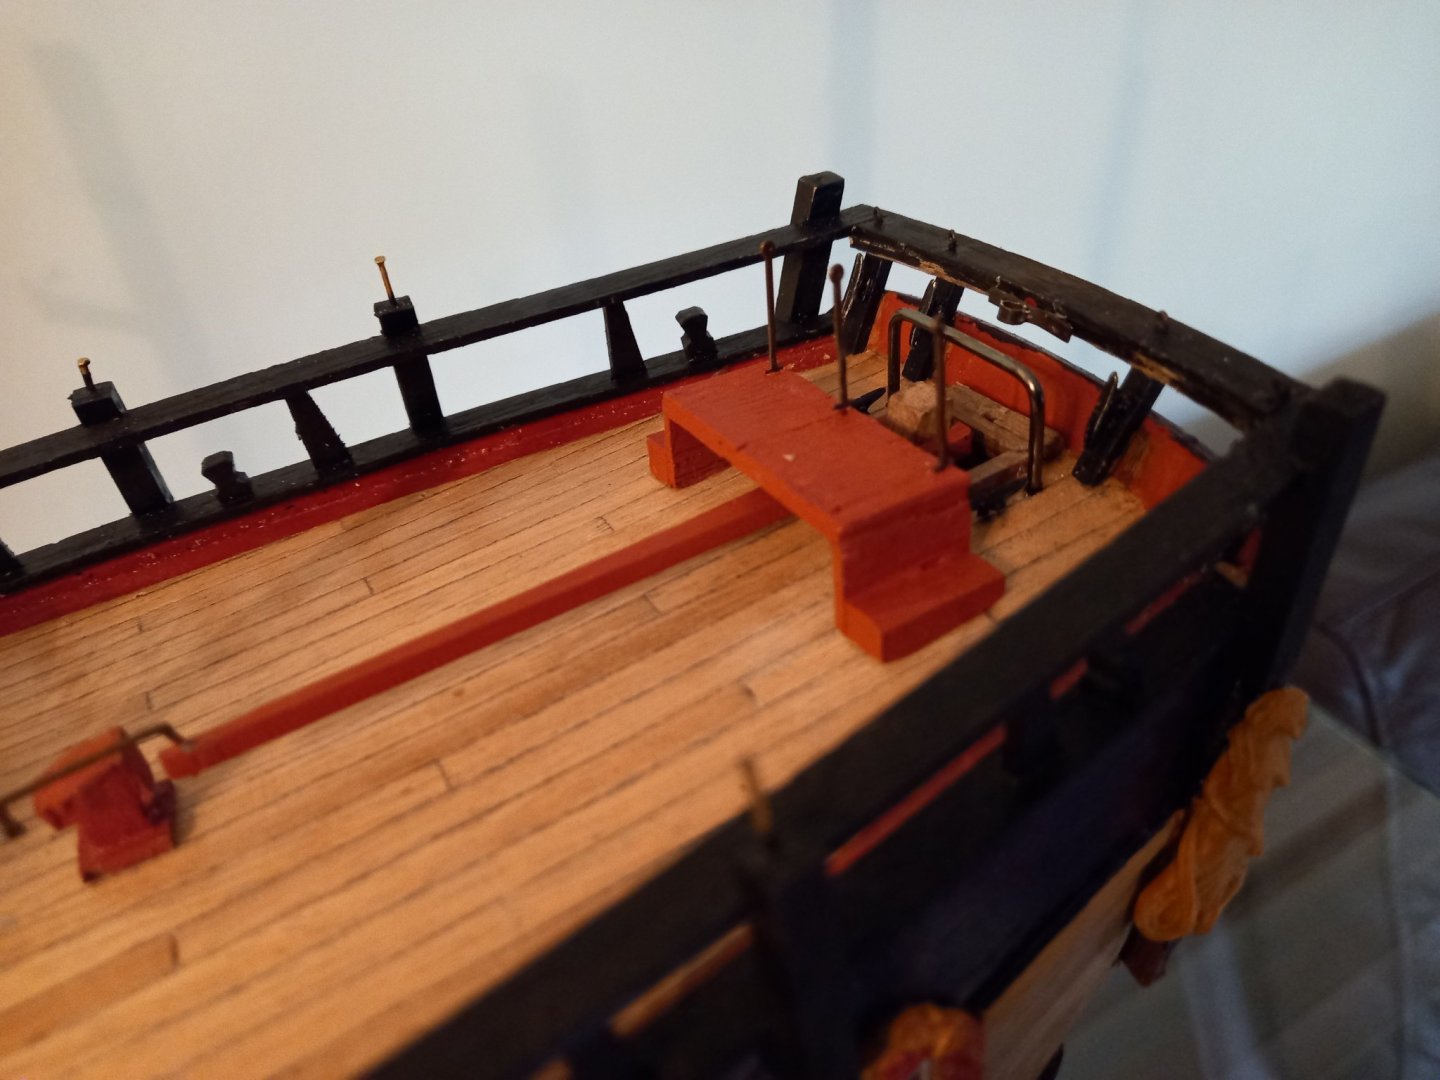
I have just notice that my heads on top of the windlass are facing the wrong way and will knead to be corrected at some stage. Also my timber heads look like broken teeth ha ha. I wish I had my table sander with compound angles to try and get this right. I think I will order some knew ones and have another go at the ones up forward. For the record I am having to do a lot of the work a few time to get it as best I can. No wonder it is taking me so long.All part of the hobby I suppose.
-
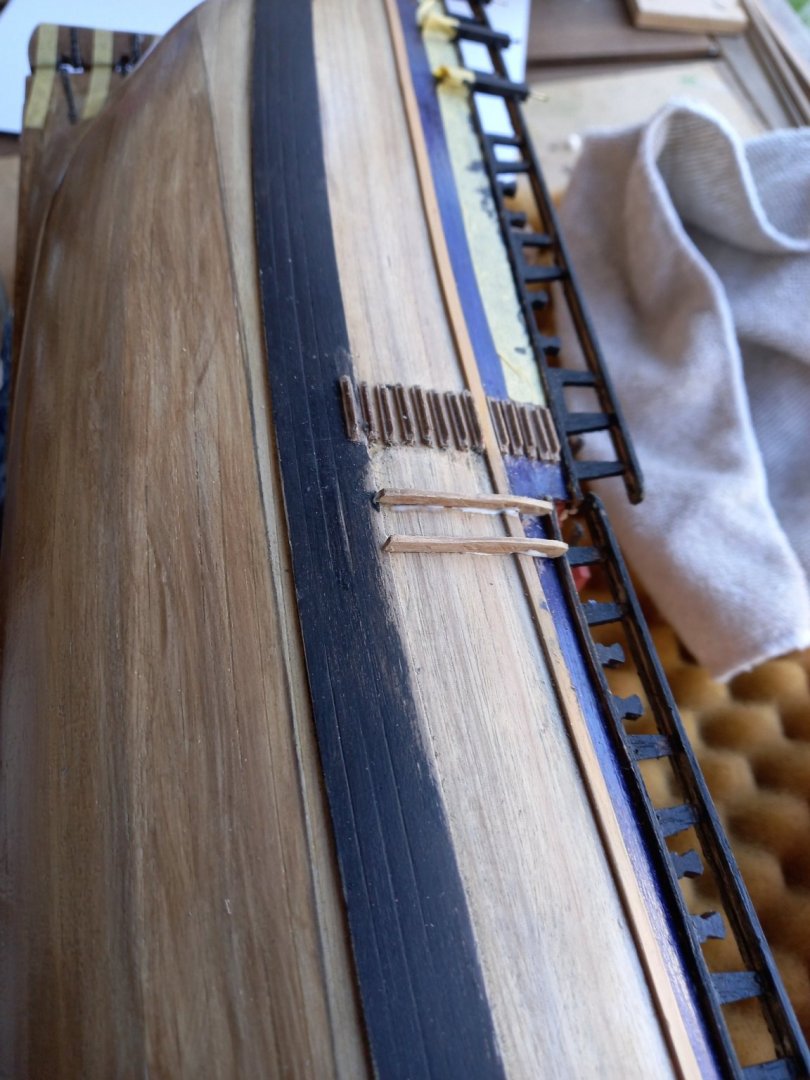
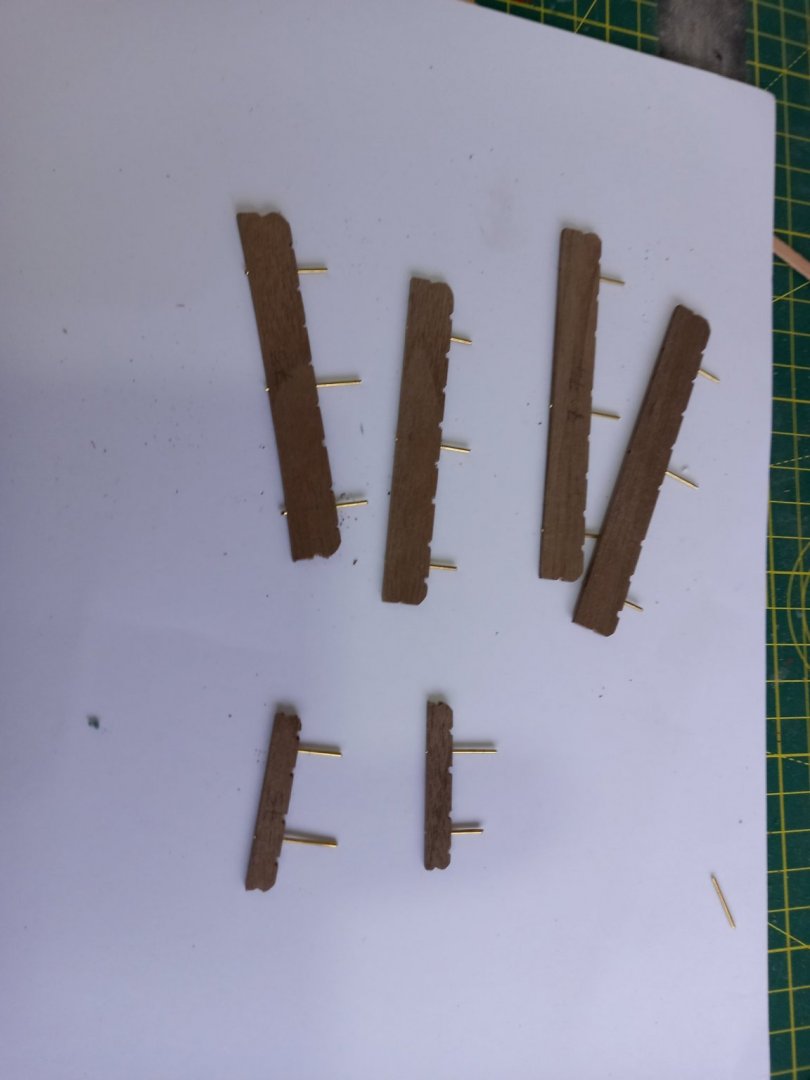
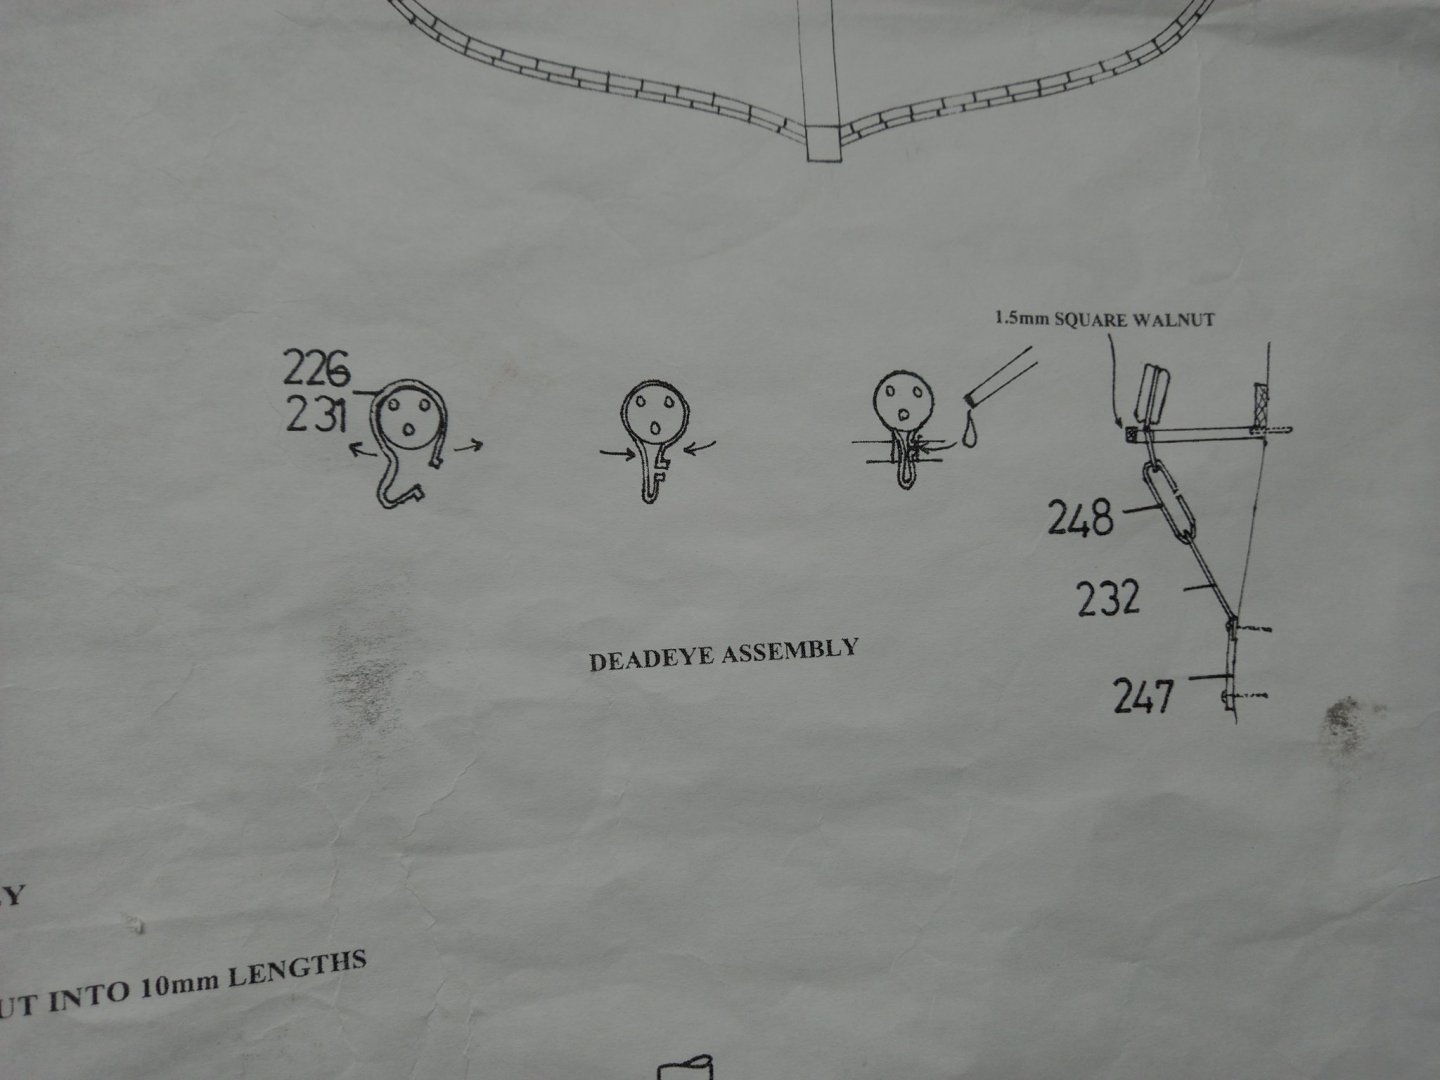
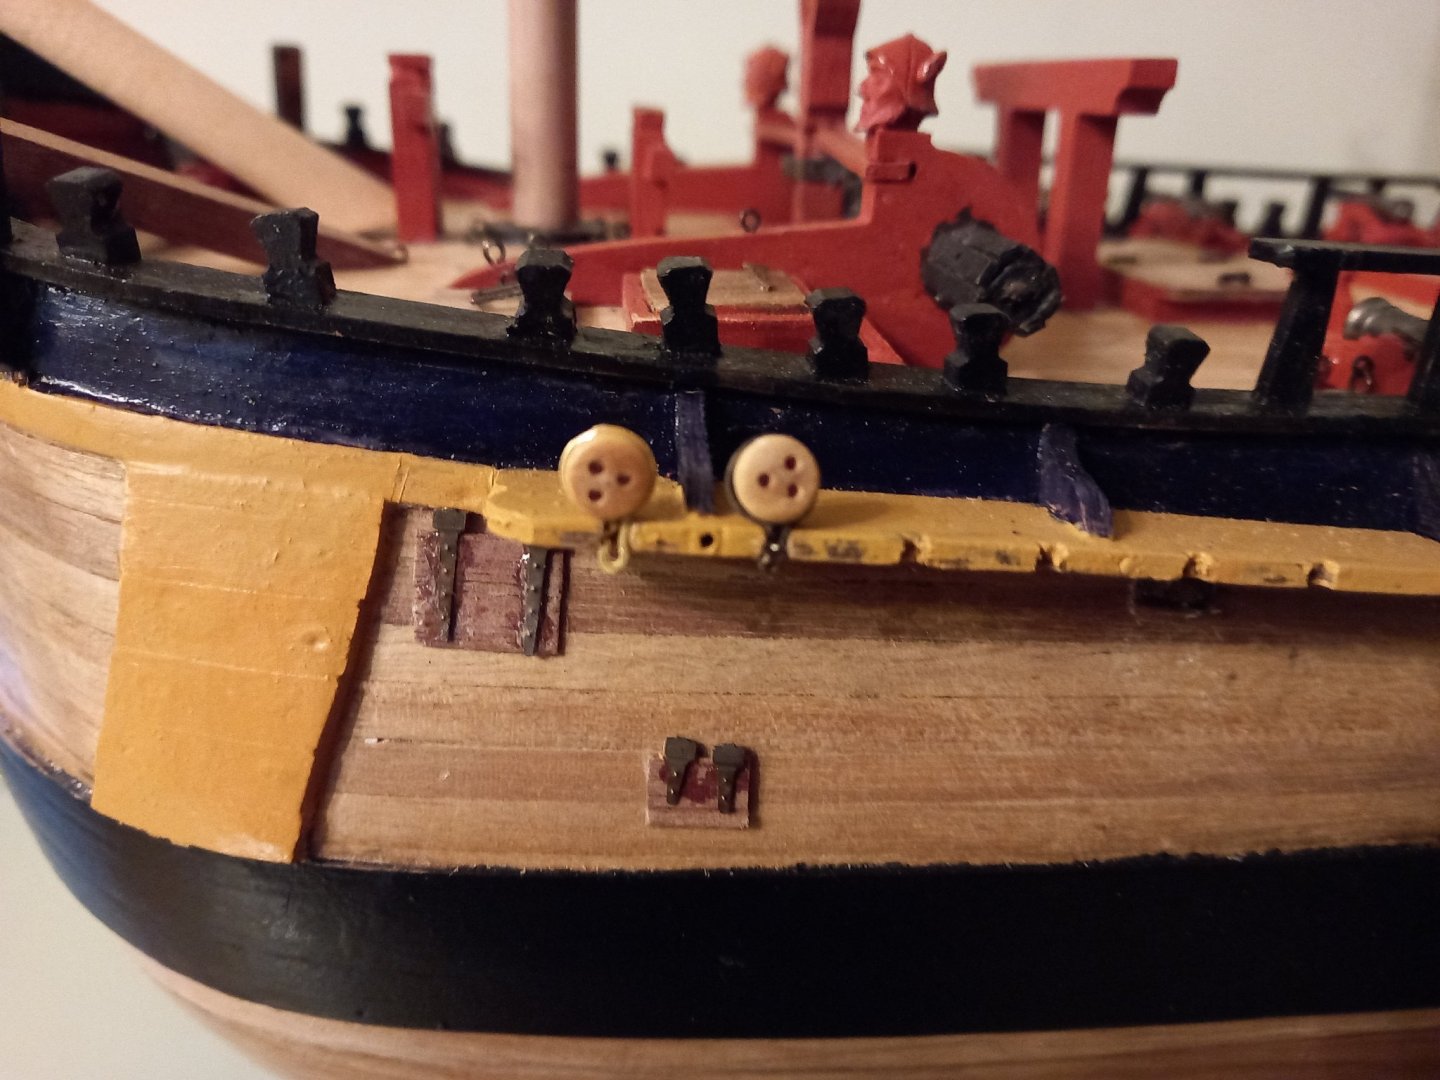
Nest moving onto the lower dead eyes and only 5 mm . I had lots of problems with these when securing them on my last build the Bounty and for some reason were larger at 7 mm. I secured them using CA glue and did not solder the links. It was therefore my intention to solder them this time using silver solder paste and my brand new Dremmel torch. Here is the drawing of the set up and part number. First off after cleaning all the brass parts in a pickling solution I soldered 248 and joined parts 248 and 232 together to see if I could manage using the solder paste and this seemed to be straight forward enough after pickling. Next up I soldered the split link which fits around the dead eye. I then found after drilling a small hole into the channel where the brass tabs are to fit ,It was naearly impossible to get those tabs to fit in and eventually my soldering came away. I did find that trying the same piece again without soldering or blackening and this seemed to work fine and was very secure without using CA glue. Here is a photo of two dead eyes in position. The left one is without soldering and the right one is after soldering ( which boke apart and is quite out of shape after fitting the dead eye after soldering. I will be quite happy with the one all my dead eyes are as secure as the one on the left and has been blackening. I also found that blackening with the dead eye in situ it does not turn freely to position the holes I do wonder if people try and get the bottom of the chain plates in line with the water level and therefore in a straight line as it would also be necessary to use different size links which are not supplied with the kit, so I am also considering making my own and how difficult this would be.
-
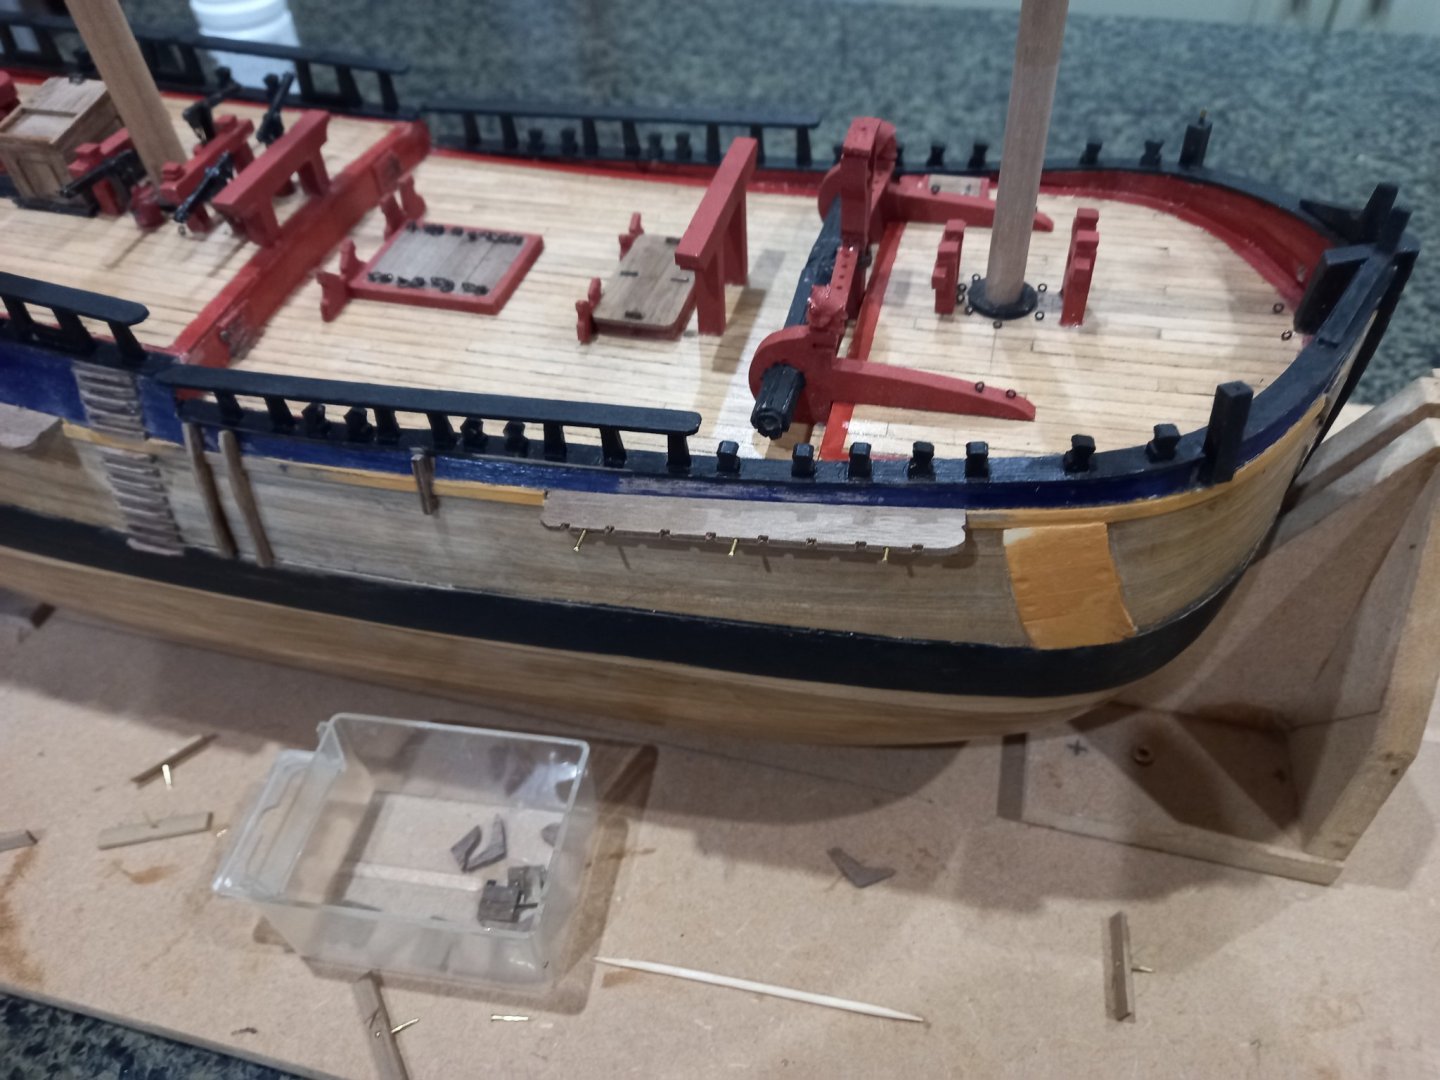
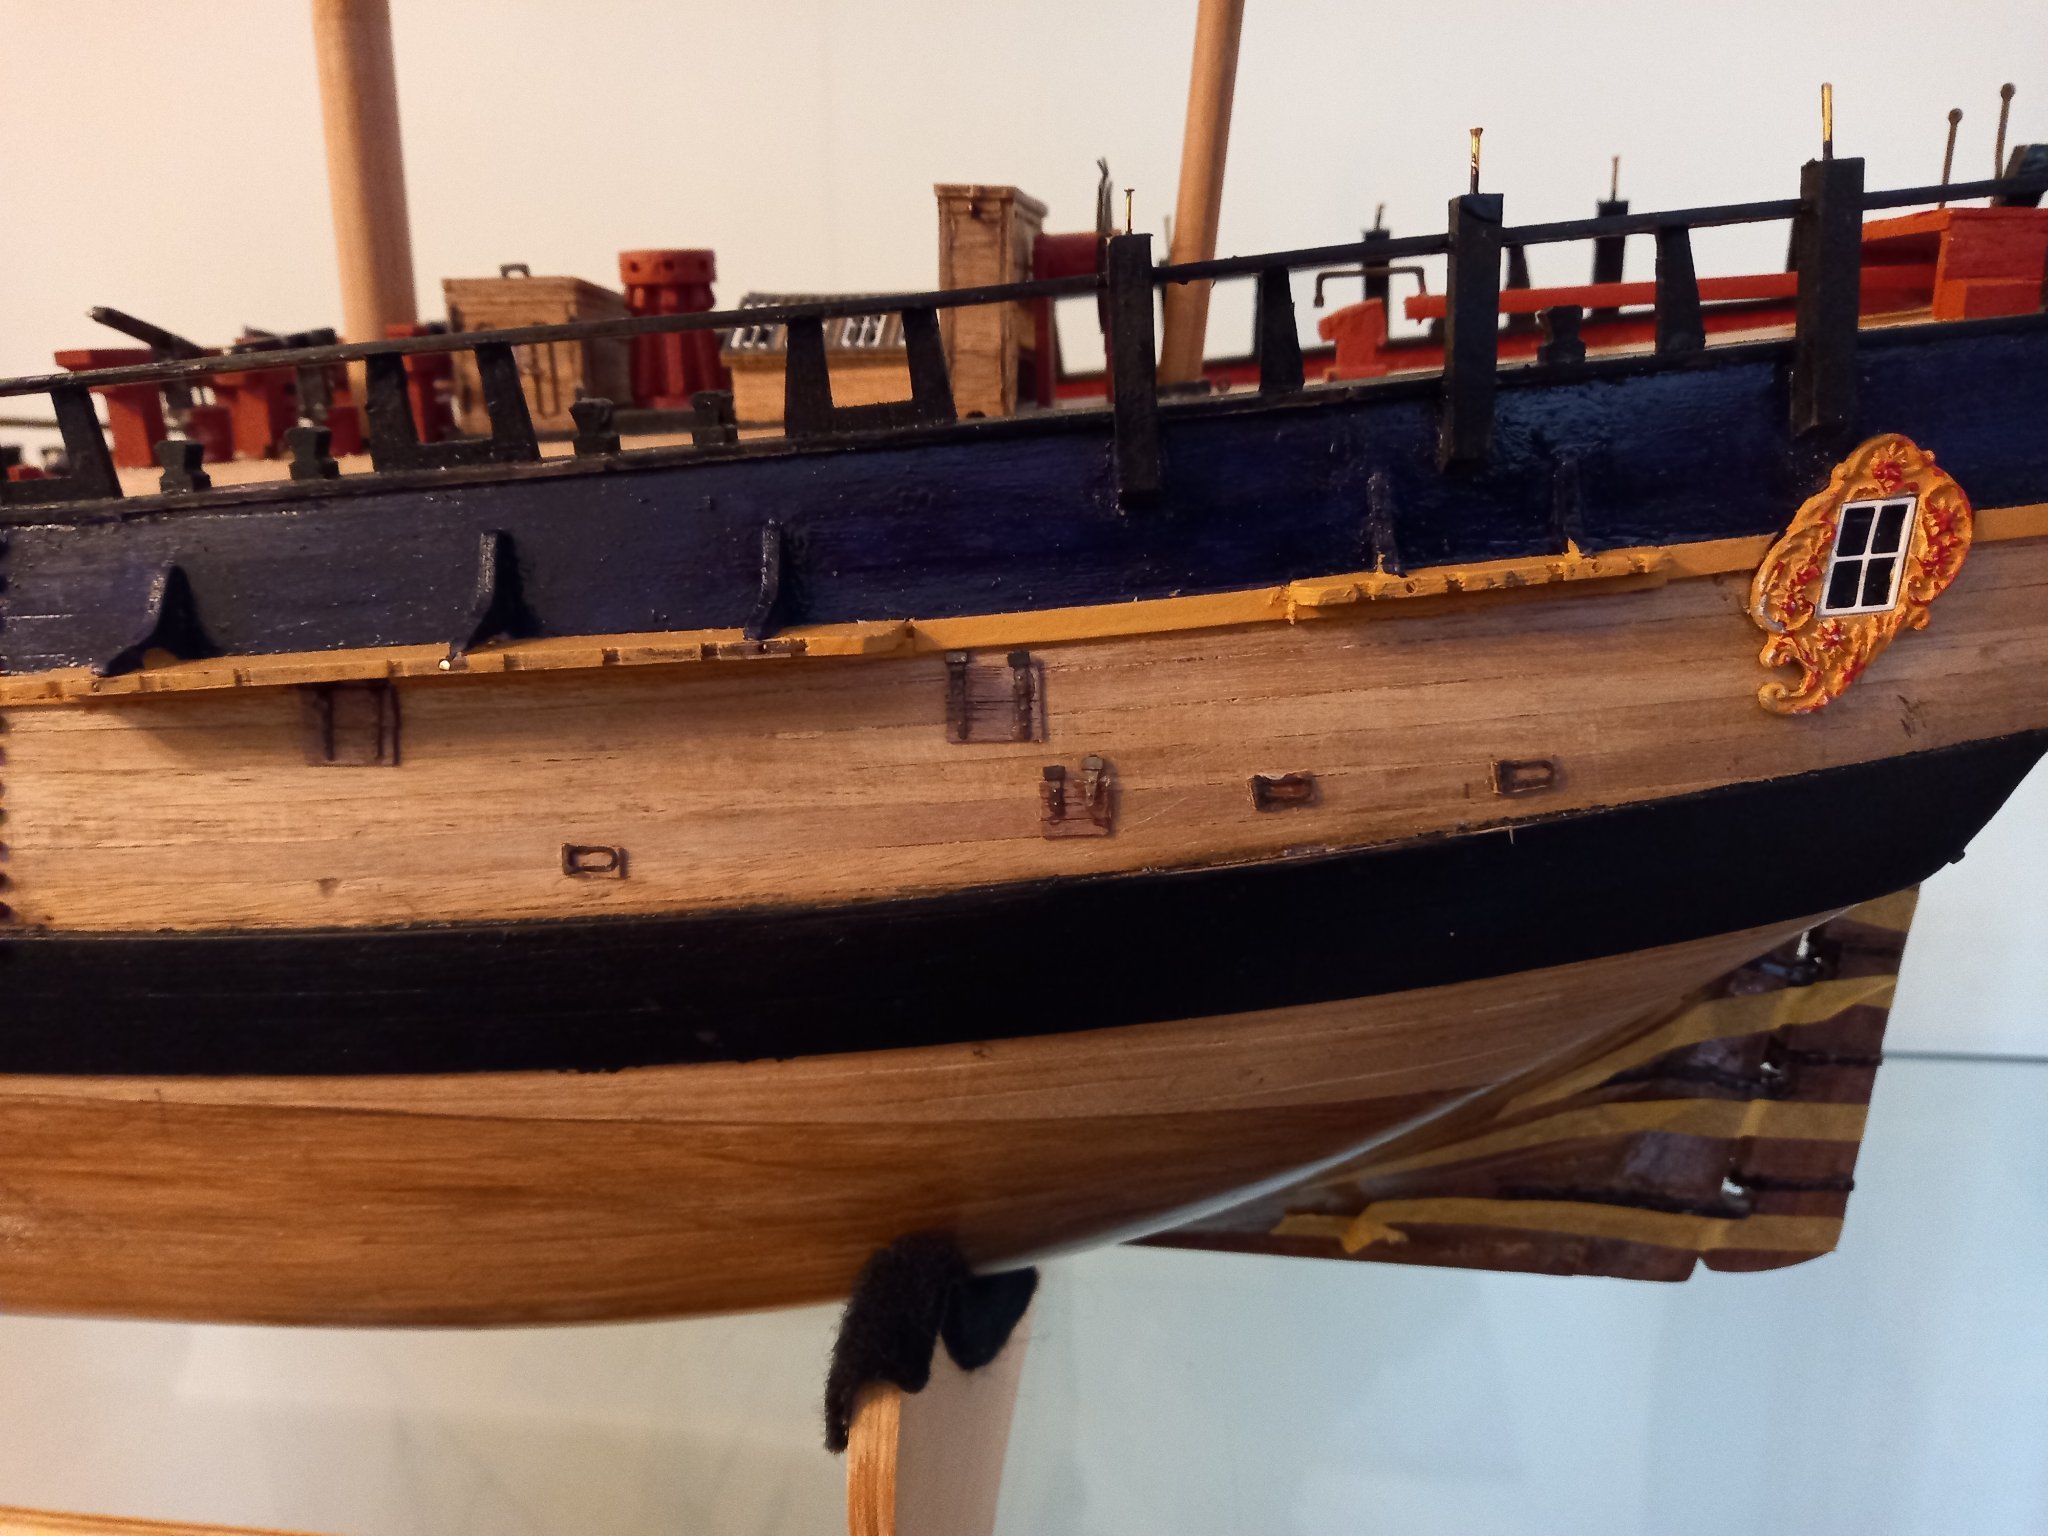
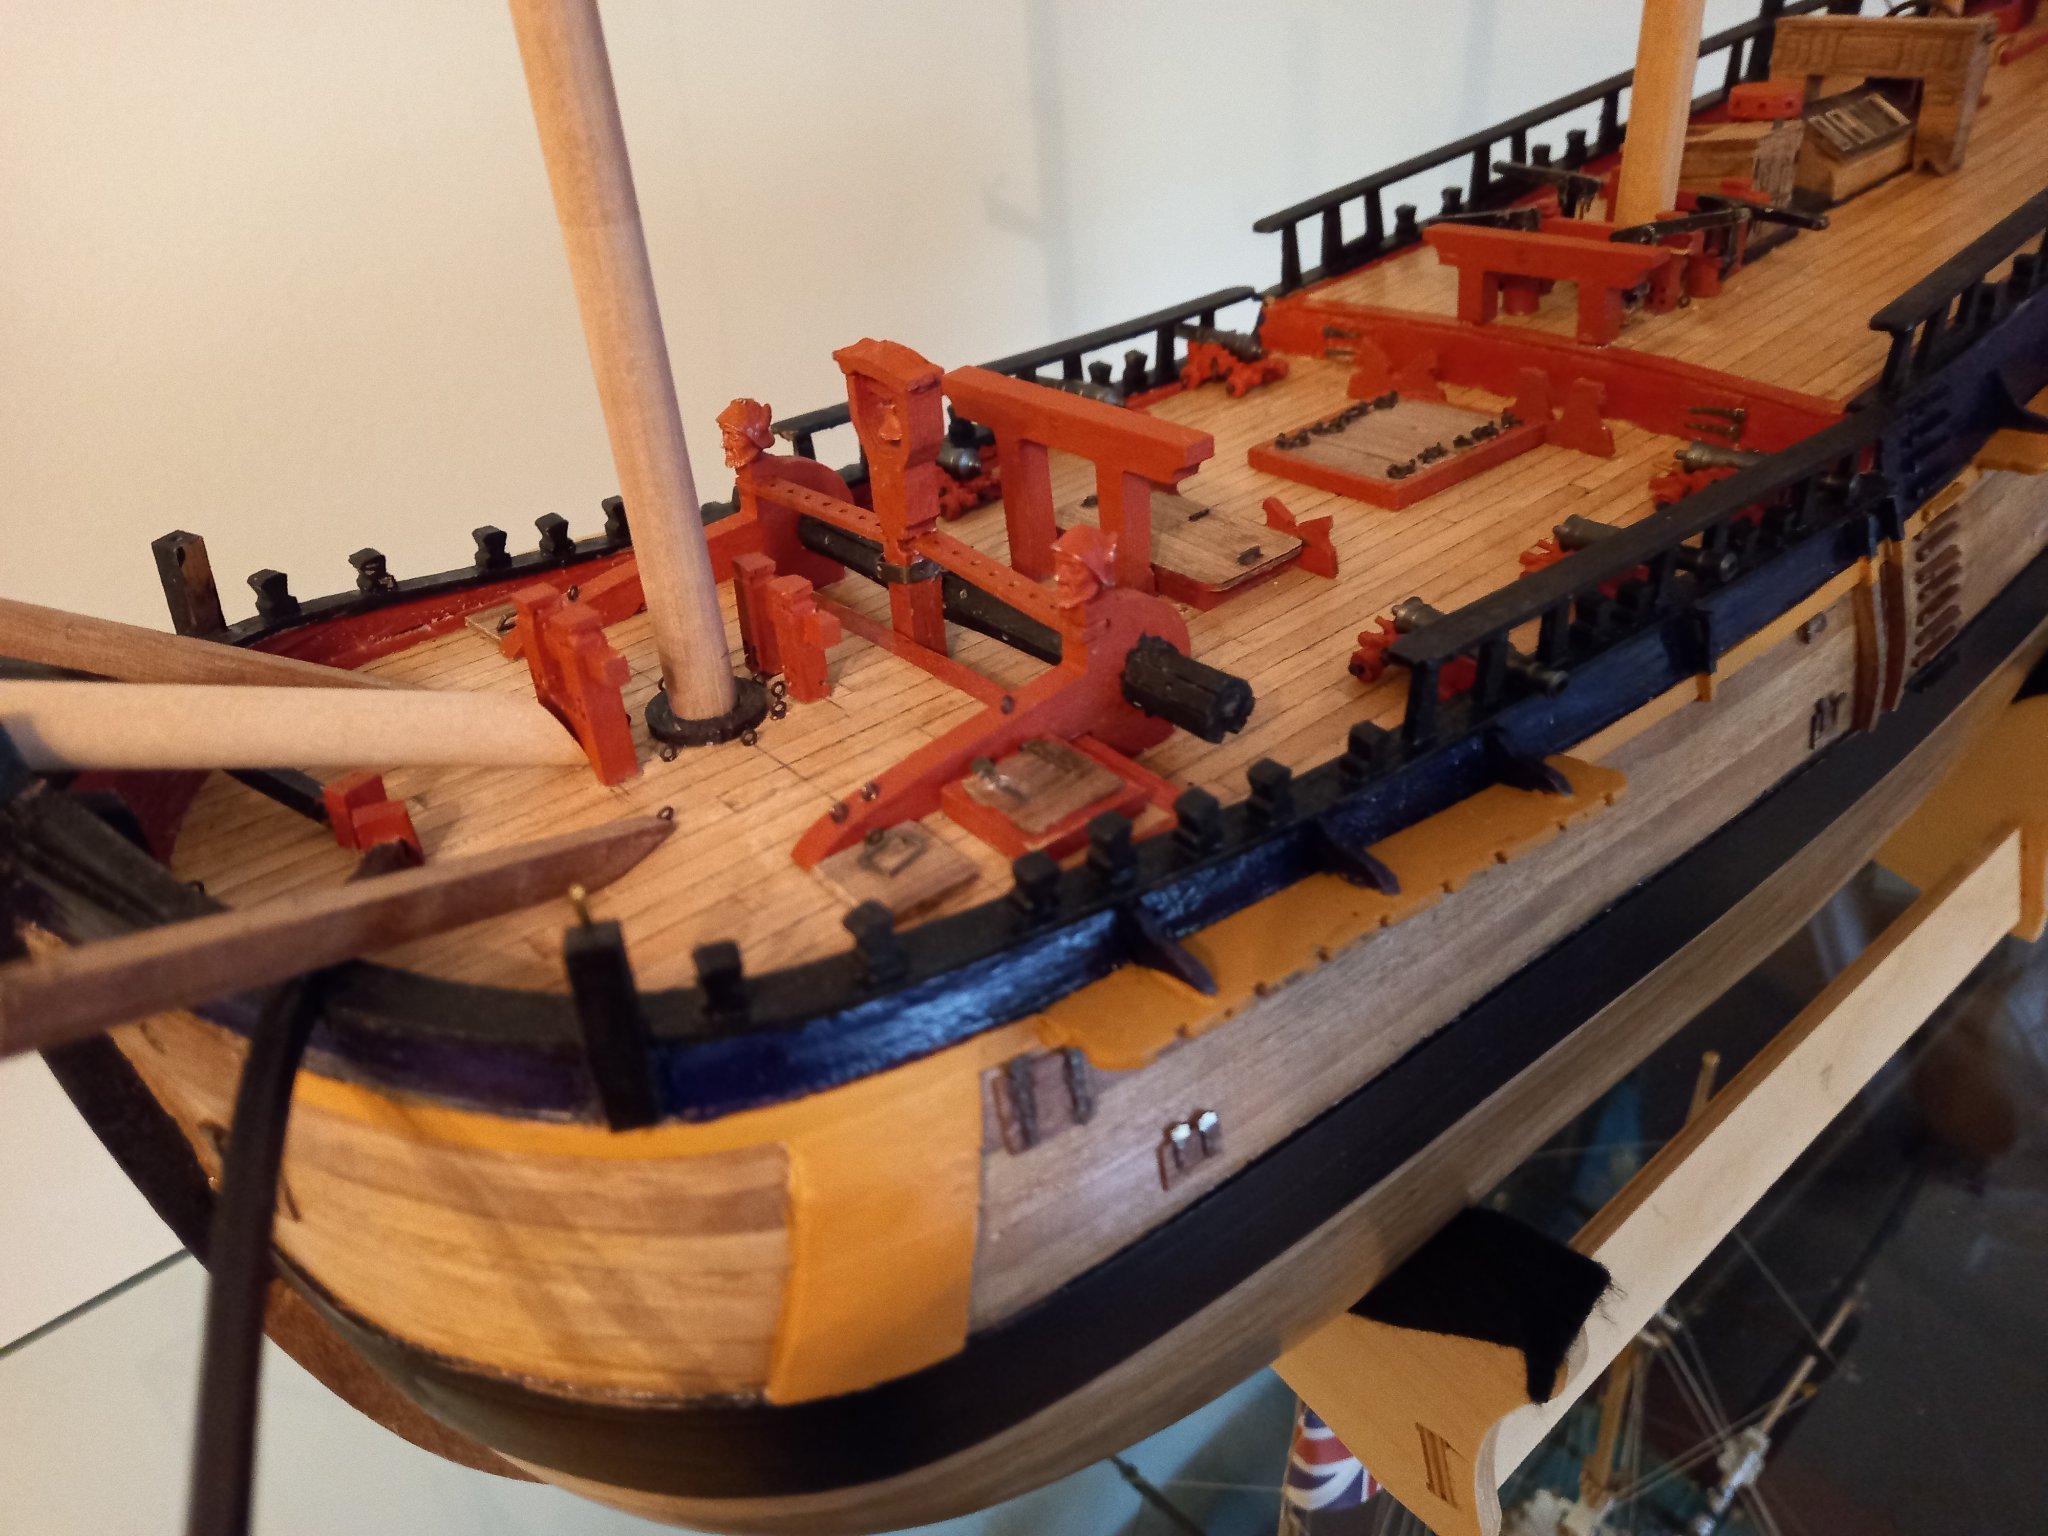
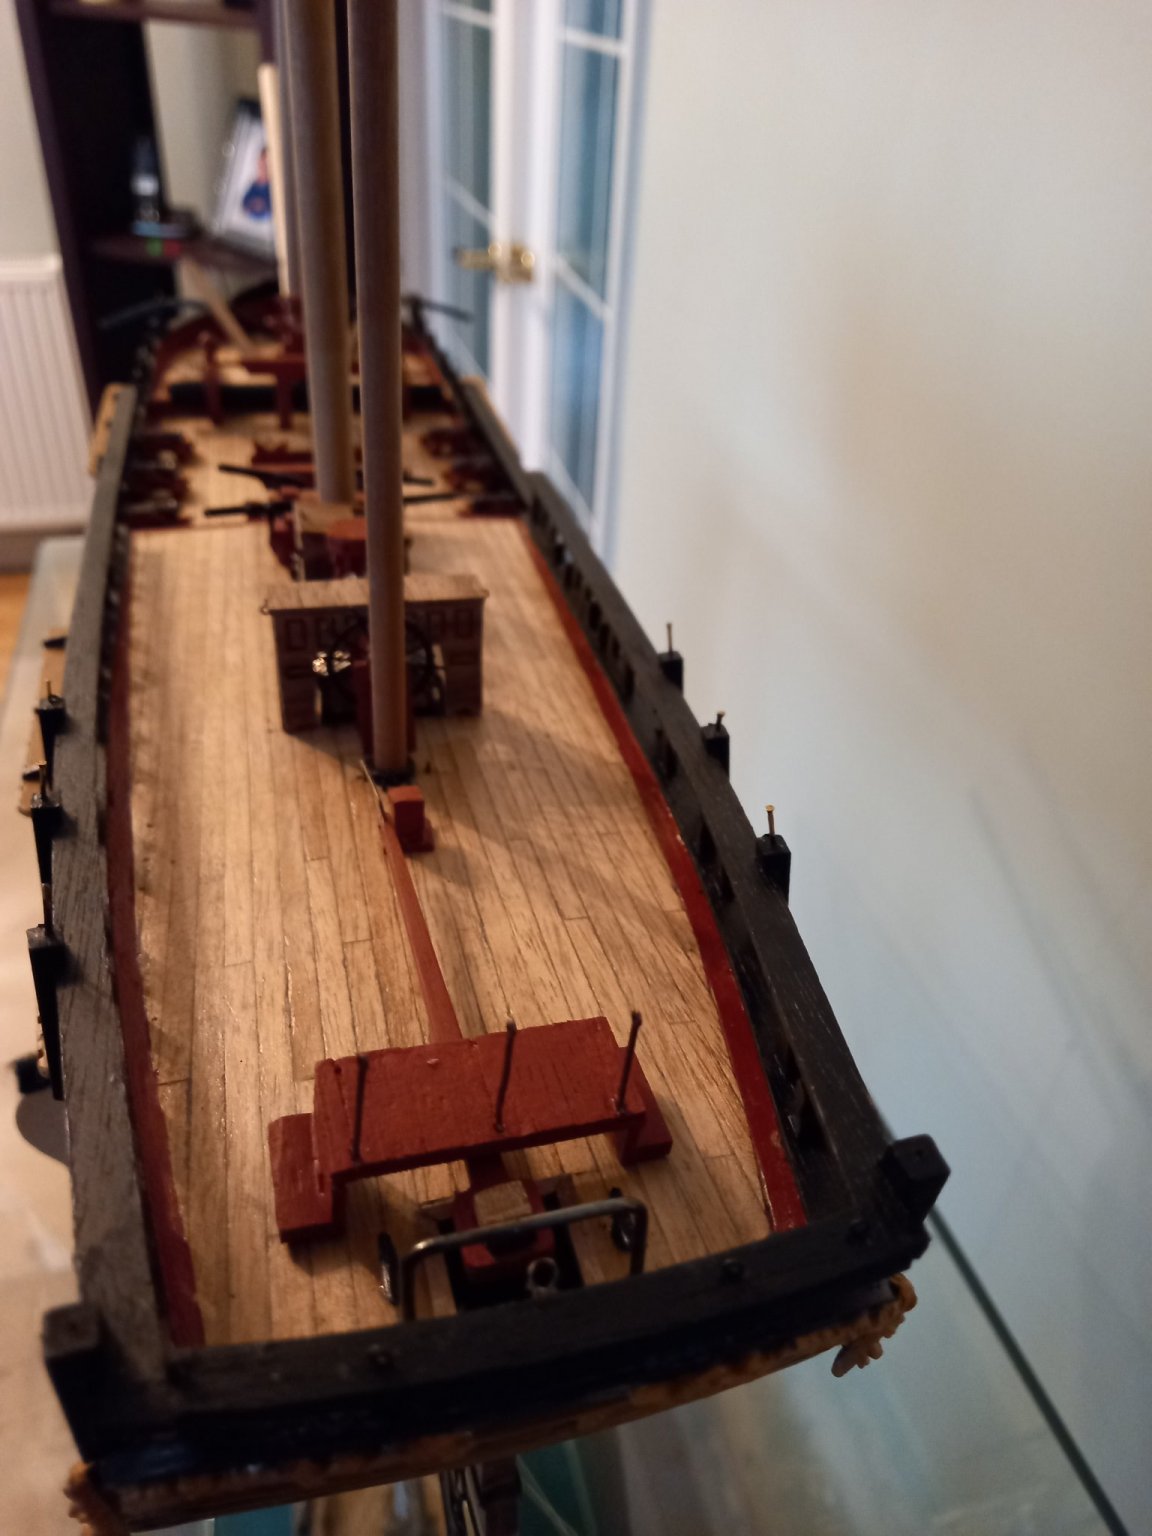
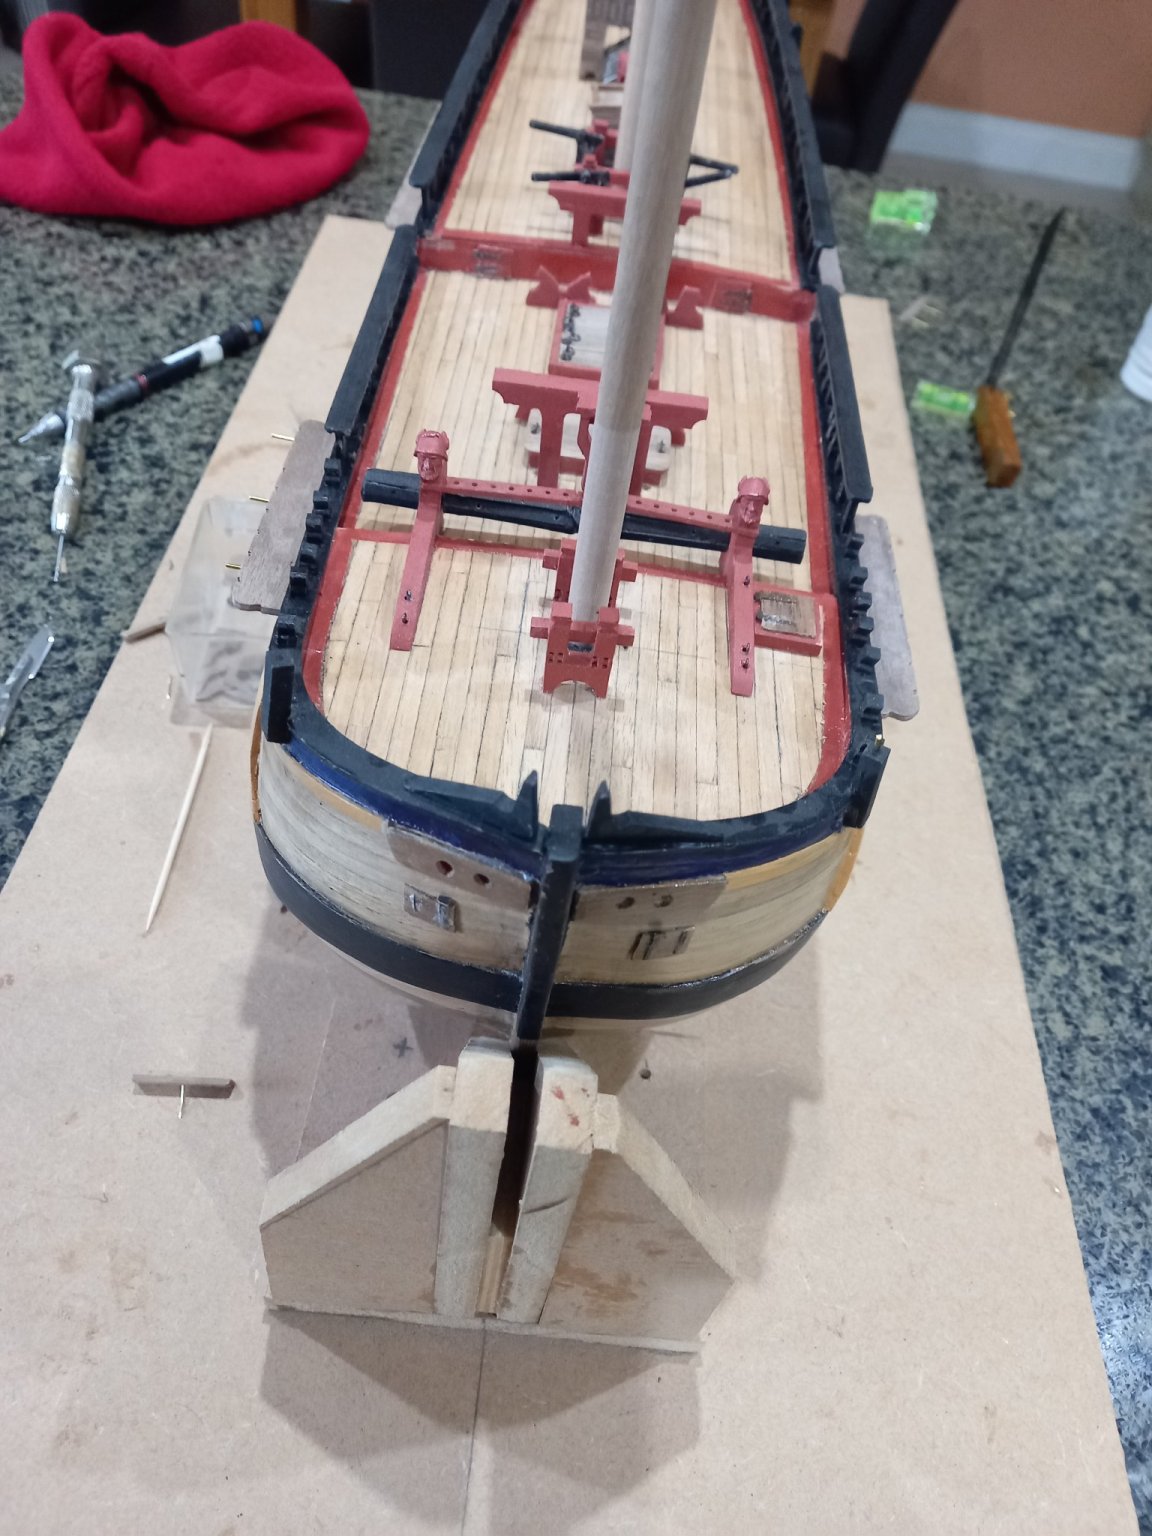
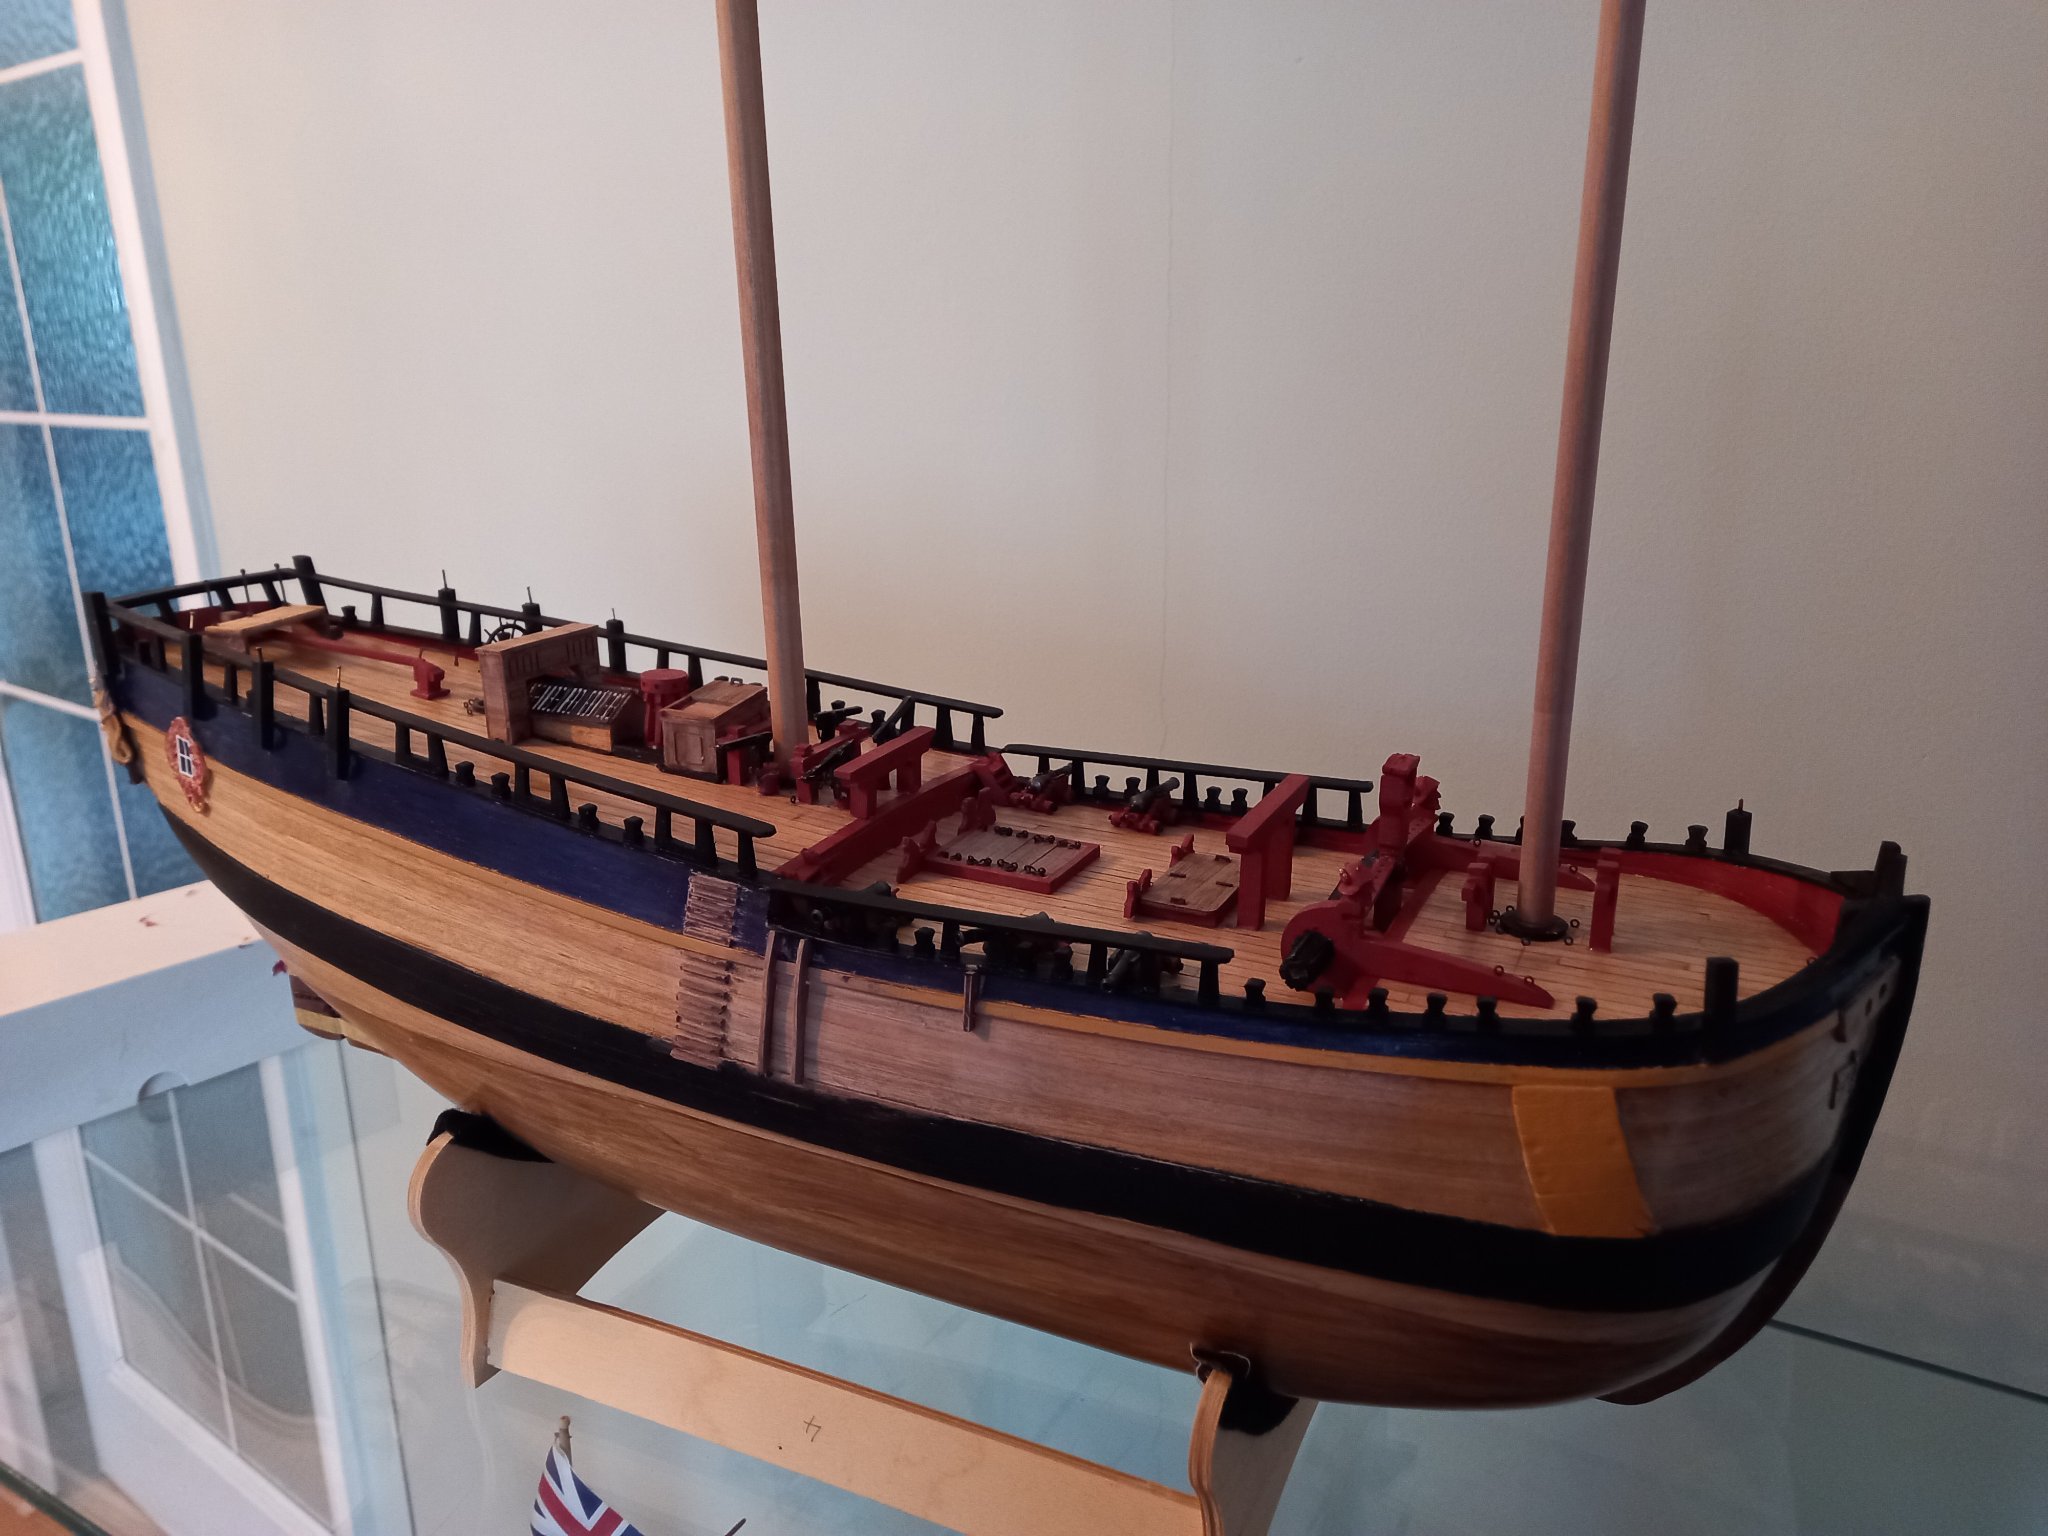
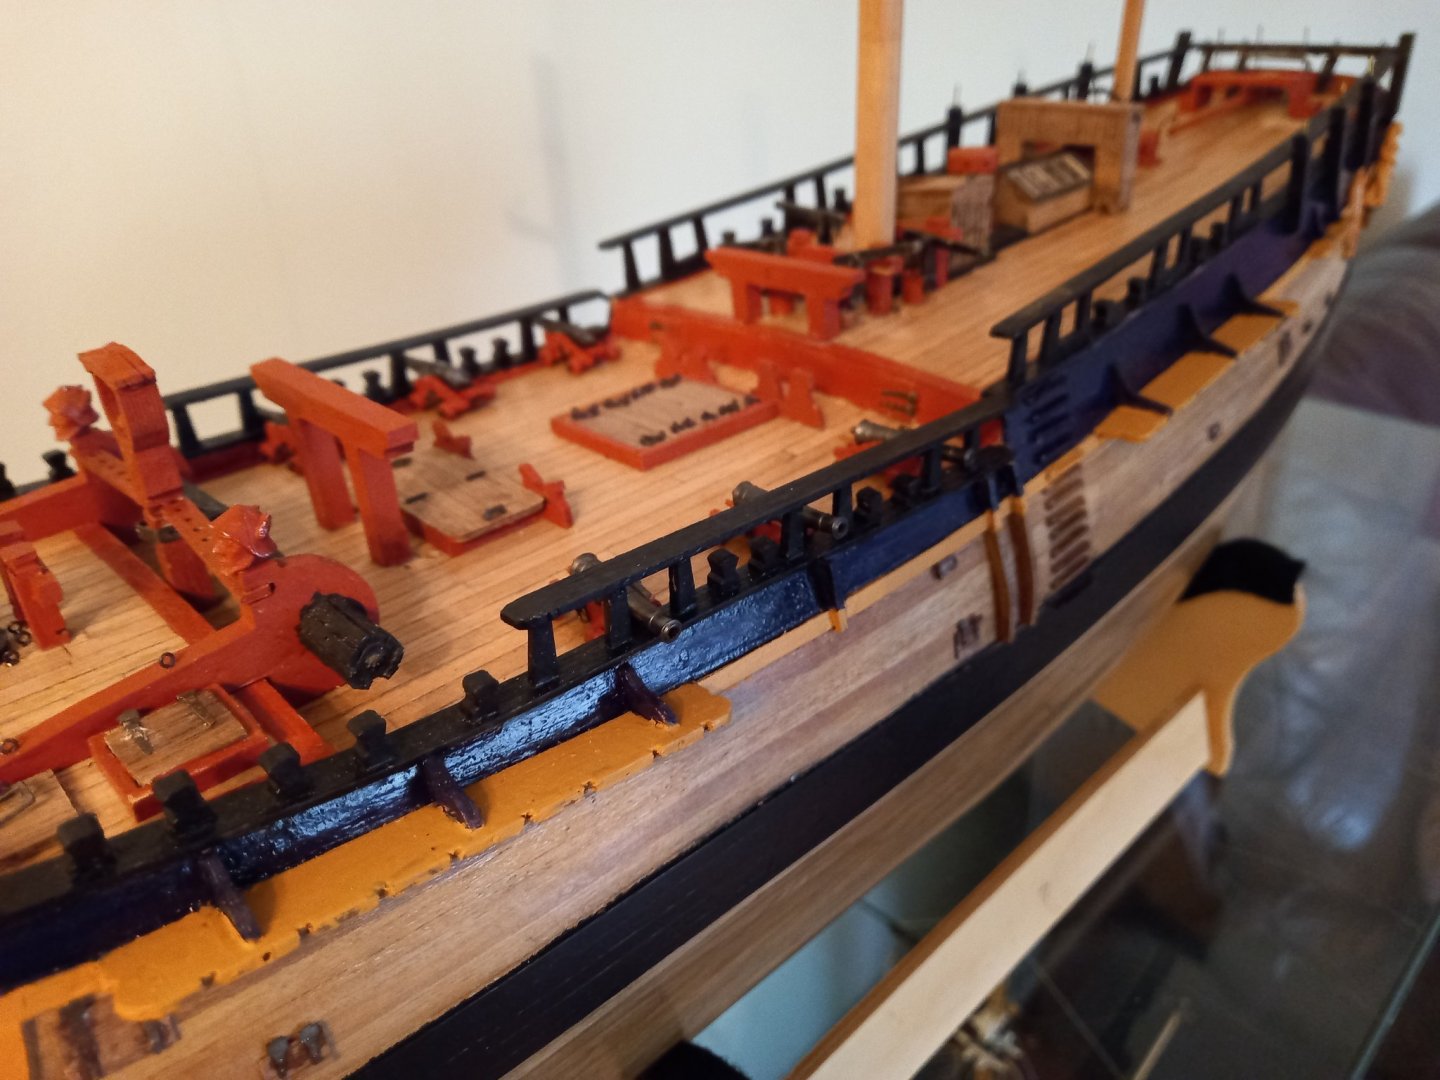
Finished of securing the channels by lining up the forward shroud with the aft of the fore and main mast and for some reason every drawing and or picture has the channels for the mizzen mast fitted further aft. Temporarily fitted bumkins, cutting out a section of the bulwark so that they lie flush with the upper cap rail. Also fitted both cat heads, and securing brackets for fish davit again temporarily. As I don,t want them damaged whilst carrying out other work. I continued on with other deck fittings including aft walkway over rudder post ,large 1.5 mm brass hand rail aft . It was also necessary to reposition the stanchions for the Taffrail so that when I fitted the cleats they lined up with the centre of the windows on the transom. I also fitted the brackets for the flagstaff to the taffrail. All in all the above went fairly smoothly and I am now thinking of making up the lower dead eyes and their links/chains/plates. together with the tackle for the steering and for securing the guns which I think will take a ggod while before moving onto the ships boats. I know I keep putting this off but I want to complete as much as possible on the ship so I can put this to one side to make a bit of room in my workshop . Here is an update of the work so far.


-
The laminated 6x2mm sounds like a great idea for the channels. What sort of wood are you using and I will be interested to know how you solve the Carronade guns and the mizzen shrouds. Looking forward to your progress and your level of detail is impressive even when you cannot see some of it.
- 310 replies
-
- 1
-
-
- Diana
- Caldercraft
- (and 1 more)
-
Sorry I got that wrong but good to here you are in good hands . Best regards Dave
- 505 replies
-
- 4
-
-
- vanguard models
- Sphinx
- (and 1 more)
-
Looking really good Mark I like the look of those planks marked and how they inter lock. Good luck with your op and I am sure you are in good hands if its the James Cook hospital which I believe is one of the best in the country. Hope its not too long before you are up and running again. Best regards Dave
- 505 replies
-
- 3
-
-
- vanguard models
- Sphinx
- (and 1 more)
-
I have just taken the plunge and bought a cheap head band type with 4 x glass lenses . I didn,t want to pay a fortune, just wanted to try this type out . Even if they just give me an idea if I can live with them or not, it will give me an idea before I decide to by something more expensive. I wonder if it would eventually be worth a visit to the opticians as every ones eyes are different.I believe even unique to an extent.
-
Yes I have Gregory and I might end up going down that route but thought I would try building the ones using the materials supplied with the kit . Someone informed me that when building the Endeavour there would be another 50% of construction than my last build the Amati Bounty and now I think I know what they are getting at. Once again thank you for your input. Best regards Dave
-
I will soon be ready to start on the gun tackle and steering tackle and although the kit suggests I use 3 mm blocks . However I believe these to be too big so will attempt to use 2mm blocks instead which is what I used on my last build the Bounty and that scale was 1:60. I must admit it was almost impossible but I persevered and eventually after destroying about 50% of my 2 mm blocks,I I eventually managed . So I am thinking of having another go and have lots and lots of spare 2mm blocks Ha ha. Also looking ahead at the ships boats and how I am going do build all 4 of them. I think I will try making them in exactly the same way as the main ships hull and split each section of the planking into bands and follow chucks method of edge bending and tapering each plank but think I will need a less bands/zones. I also wonder if I need a jig to mount the keel and bulkeads on whilst planking or is it just as easy to hold the boat in my hand. Any advice or tips on planking such small boats and double planked as well would be more than grateful. Best regards Dave
-
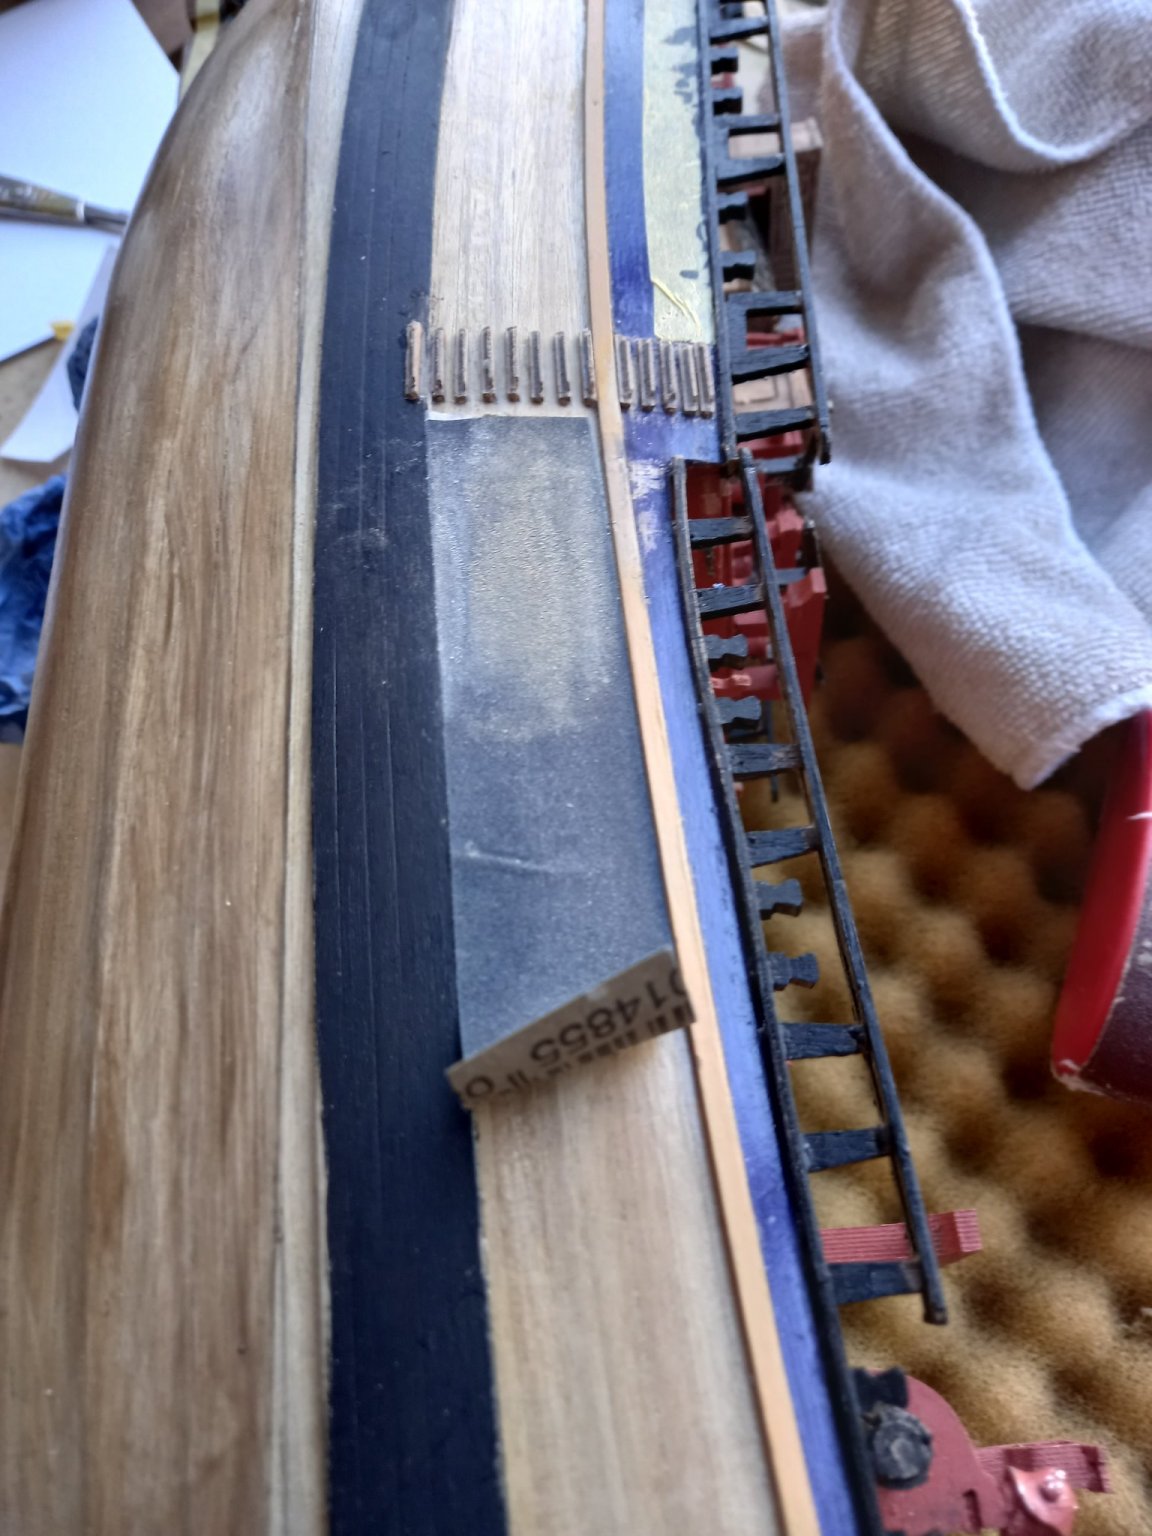
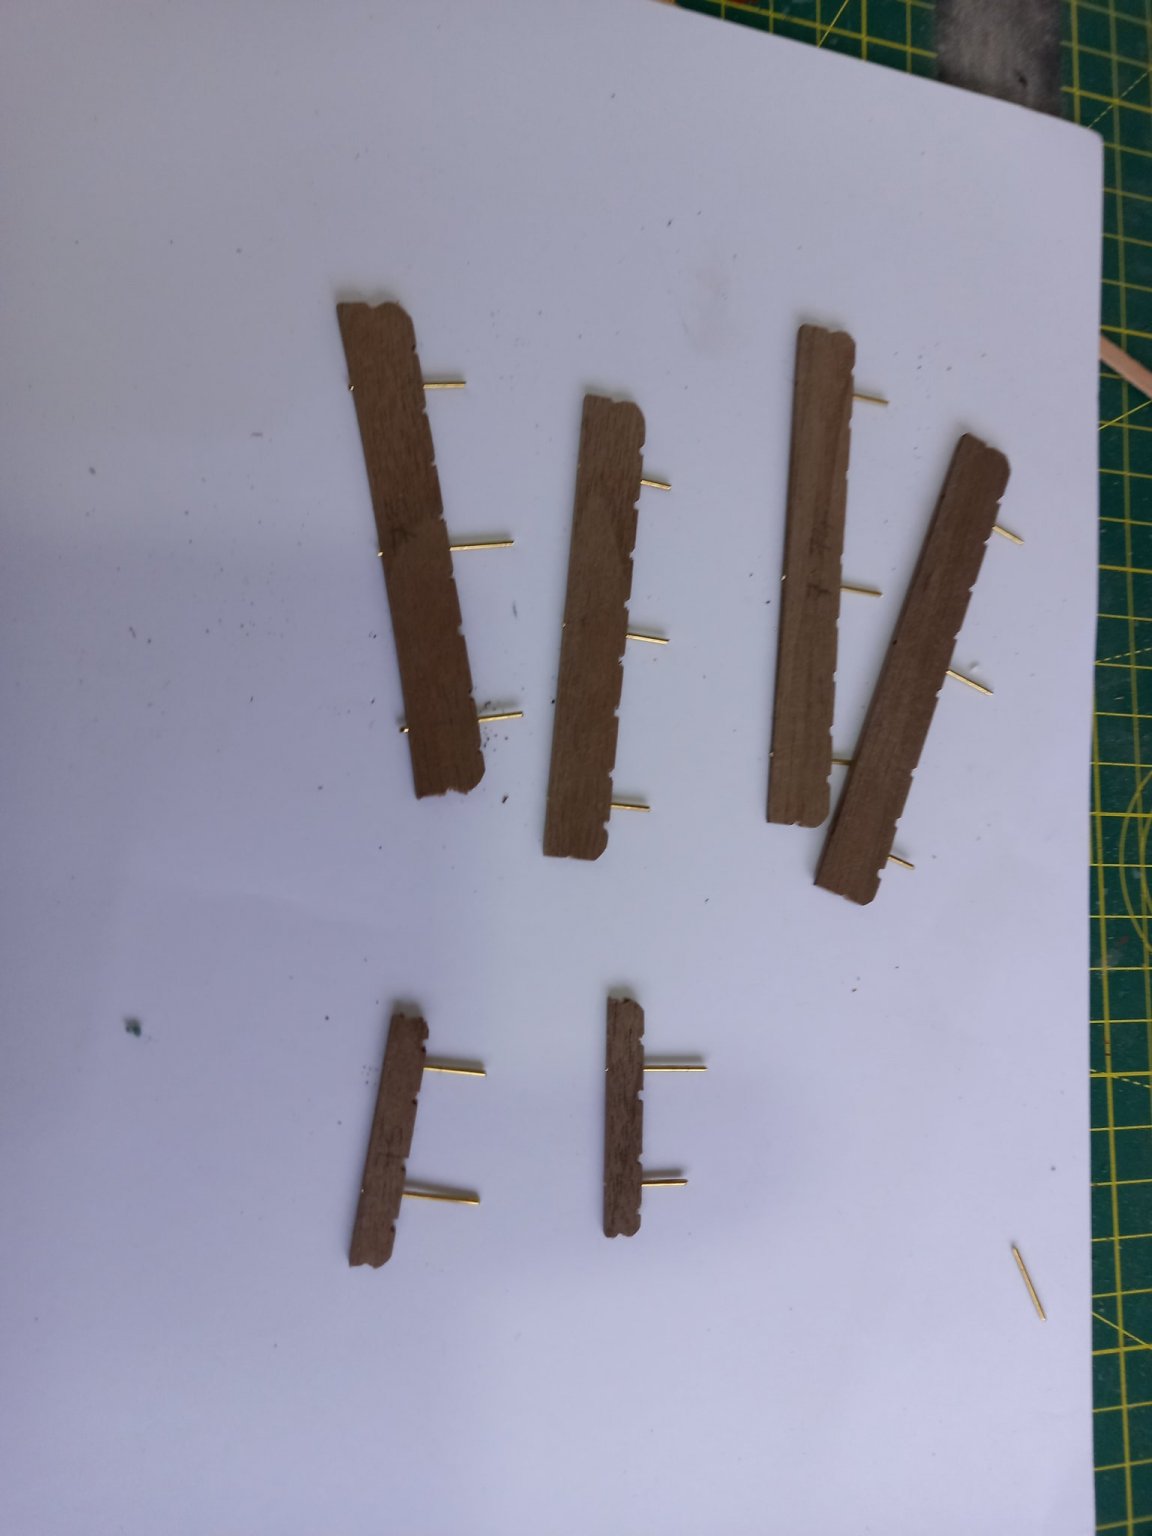
Top capping rail completed and swivel gun posts glued into position. I am beginning to wish I had left the painting until everything was glued to the hull. It was necessary to remove the paint so the glue would take better so once everything is glued into position onto the hull it will need painting again. I then moved onto the ladders and the fenders. I temporarily stuck some sand paper to the hull using two sided tape and then shaped the fenders to conform with the hull. I then moved onto the channels and used 1mm brass rod to give them added strength. I moved away from the plans and removed the wale altogether and ended up fitting 1.5mm square walnut underneath the wales. Unfortunately I did not have steel rod so hopefully brass will suffice.