DaveBaxt
-
Posts
1,324 -
Joined
-
Last visited
Content Type
Profiles
Forums
Gallery
Events
Everything posted by DaveBaxt
-
I ware vari focal lense glasses and have difficulty seeing anything up close usually better without them but still not great. I bought a pair of clip on 2.5 lenses which I clip onto my glasses but found the to be better but still not great. I have been looking at the ones previously mentioned which comes with a head torch and 3 different magnification lenses which require changing. Some sort of recomendation for what to buy would be great if anyone uses these would be great help too.Great thread by the way.
-
Thank you for clearing that up for me. I believe I have read something similar but was not sure. I just cannot remember where. Haha. Its really good of you to look up this information for me on the AotS Endeavour . Sometimes I wish I had the book but found the prices asked for this particular book absolutely rediculous. I do have lots of other books on rigging but for some reason cannot find any diagrams of this. Best regards Dave
-
Thanks for that and I think I know what you are getting at but not entirely sure. Please forgive my ignorance and hopefully someone has a drawing or photo of this so I can get a better idea of the layout and dimensions. Best regards Dave
-
The flagstaff in question is the one which sits over the Transom. On my drawings on the HMB Endeavour I have a brass bracket a basically a piece of wood, The information I have managed to obtain from other builds is that the bracket is secured to the upright stansions along the top of the transom and I am assuming the piece of wood goes would go athwartships to keep the flagstff in position. I don,t believe this to be very satisfactory and from other builds can see that the piece of wood can be replace by a shallow block with a hole in it. I cannot find anything on the ships drawing anything about this flagstaff other than the aforementioned parts in the parts list. Perhaps this is due to the flagstaff being temporary and therefore does not need to be fitted. I also do not know the size of this flagstaff in either width or height or any other information other than the lengths of other flagstaffs carried on other masts which just confuses me somewhat. Hope this makes sense. My last build did not carry a flagstaff, the flags were just carried on rigging up to the top mizzen mast. Best regards Dave.
-
Great looking Cannon and nice looking tackle for them too. Thanks for the link to the HiS web sight for what look like great looking hooks for the tackle. I think I might do the same when I build my Diana . I would be really grateful if you could let me know which hooks you picked on the HiS shop as there are lots of different ones to choose from. keep us posted on your progress as it is a really interesting blog. So thanks and beat regards Dave
-
Proxxon TSG 250/E disc sander
DaveBaxt replied to DaveBaxt's topic in Modeling tools and Workshop Equipment
All very good points and I am happy that you have added your thoughts. Hopefully if I continue to stay in the hobby long enough I will consider an upgrade at some stage if the need arises. Best regards Dave -
Proxxon TSG 250/E disc sander
DaveBaxt replied to DaveBaxt's topic in Modeling tools and Workshop Equipment
I definately will . I have already received it and gave it a go and seems to go along with what you would expect from it, however I am unable to compare it with anything else. let me know when you decide to go for something and I can update you on my findings on the following. FET saw, Miller, drilling m/c , lathe and now the sander. All made by Proxxon. Best regards Dave -
Proxxon TSG 250/E disc sander
DaveBaxt replied to DaveBaxt's topic in Modeling tools and Workshop Equipment
Good here what you think as its nice to here from someone who has had both. -
Proxxon TSG 250/E disc sander
DaveBaxt replied to DaveBaxt's topic in Modeling tools and Workshop Equipment
I think this was the main reason I did not choose the Byrnes one. I now have several tools made by Proxxon and have been happy with all of them and within my price range. I also find them very easy to source from a few companies here in the uk. -
Well done Rock from Korea. It is always a great feeiing when finishing a model. May I ask how long it has taking you and I am wondering if the sails came with the kit. I am currently building the Endeavour by Caldercraft but i have a long way to go yet. There is an awful lot of work to complete on the Endeavour even without the sails which is the case with the Caldercraft version. I am currently doing a blog too. Have you any thoughts on what you might build next or do you need a rest. Only joking Haha. Best of luck with any future builds. Sorry I didn't catch this build until later on.
-
Proxxon TSG 250/E disc sander
DaveBaxt replied to DaveBaxt's topic in Modeling tools and Workshop Equipment
Thanks Jeff I looked at the smaller verslon first and almost went for that one but just thought the bigger one would do for bigger work pieces but perhaps I could have saved myself some money. -
Latest addition to my workshop.Looks to be just what I need. I really like the size , better than the 150 and has speed control too. I also like the isa of table tilt as well as the angle rest so can sand in two different planes which might be handy.I have purchased a few different grades of discs including 80. 150 and 240 . I am not sure I will need all three but any advice would be appreciated. Anyone got one and your thoughts on this piece of equipment.
-
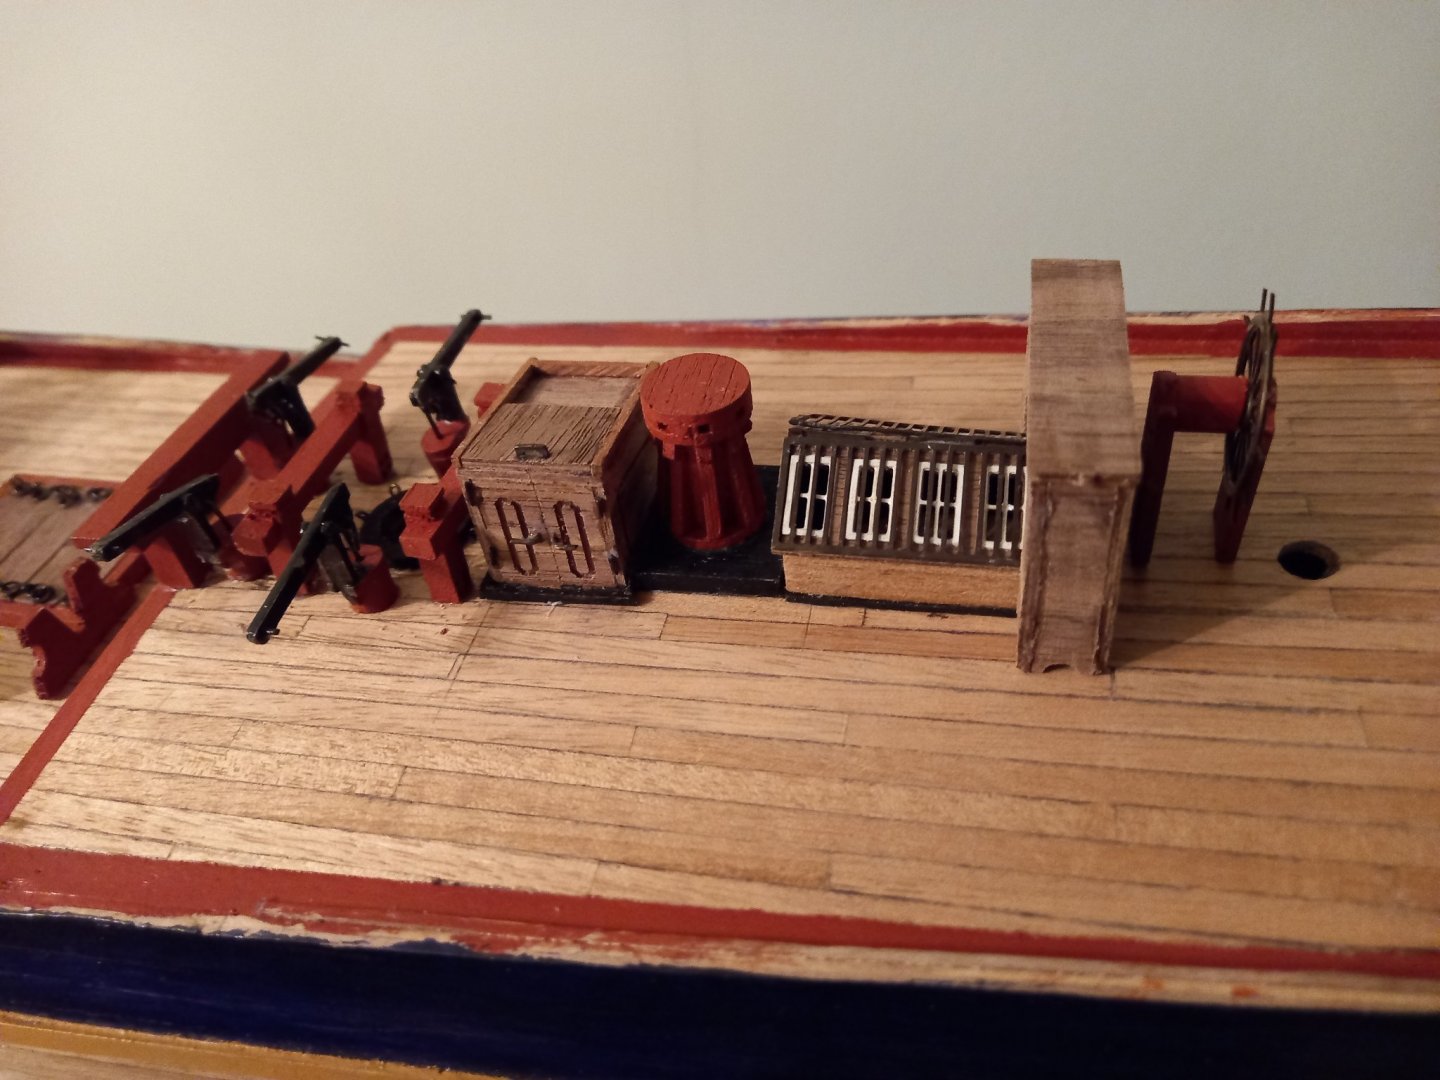
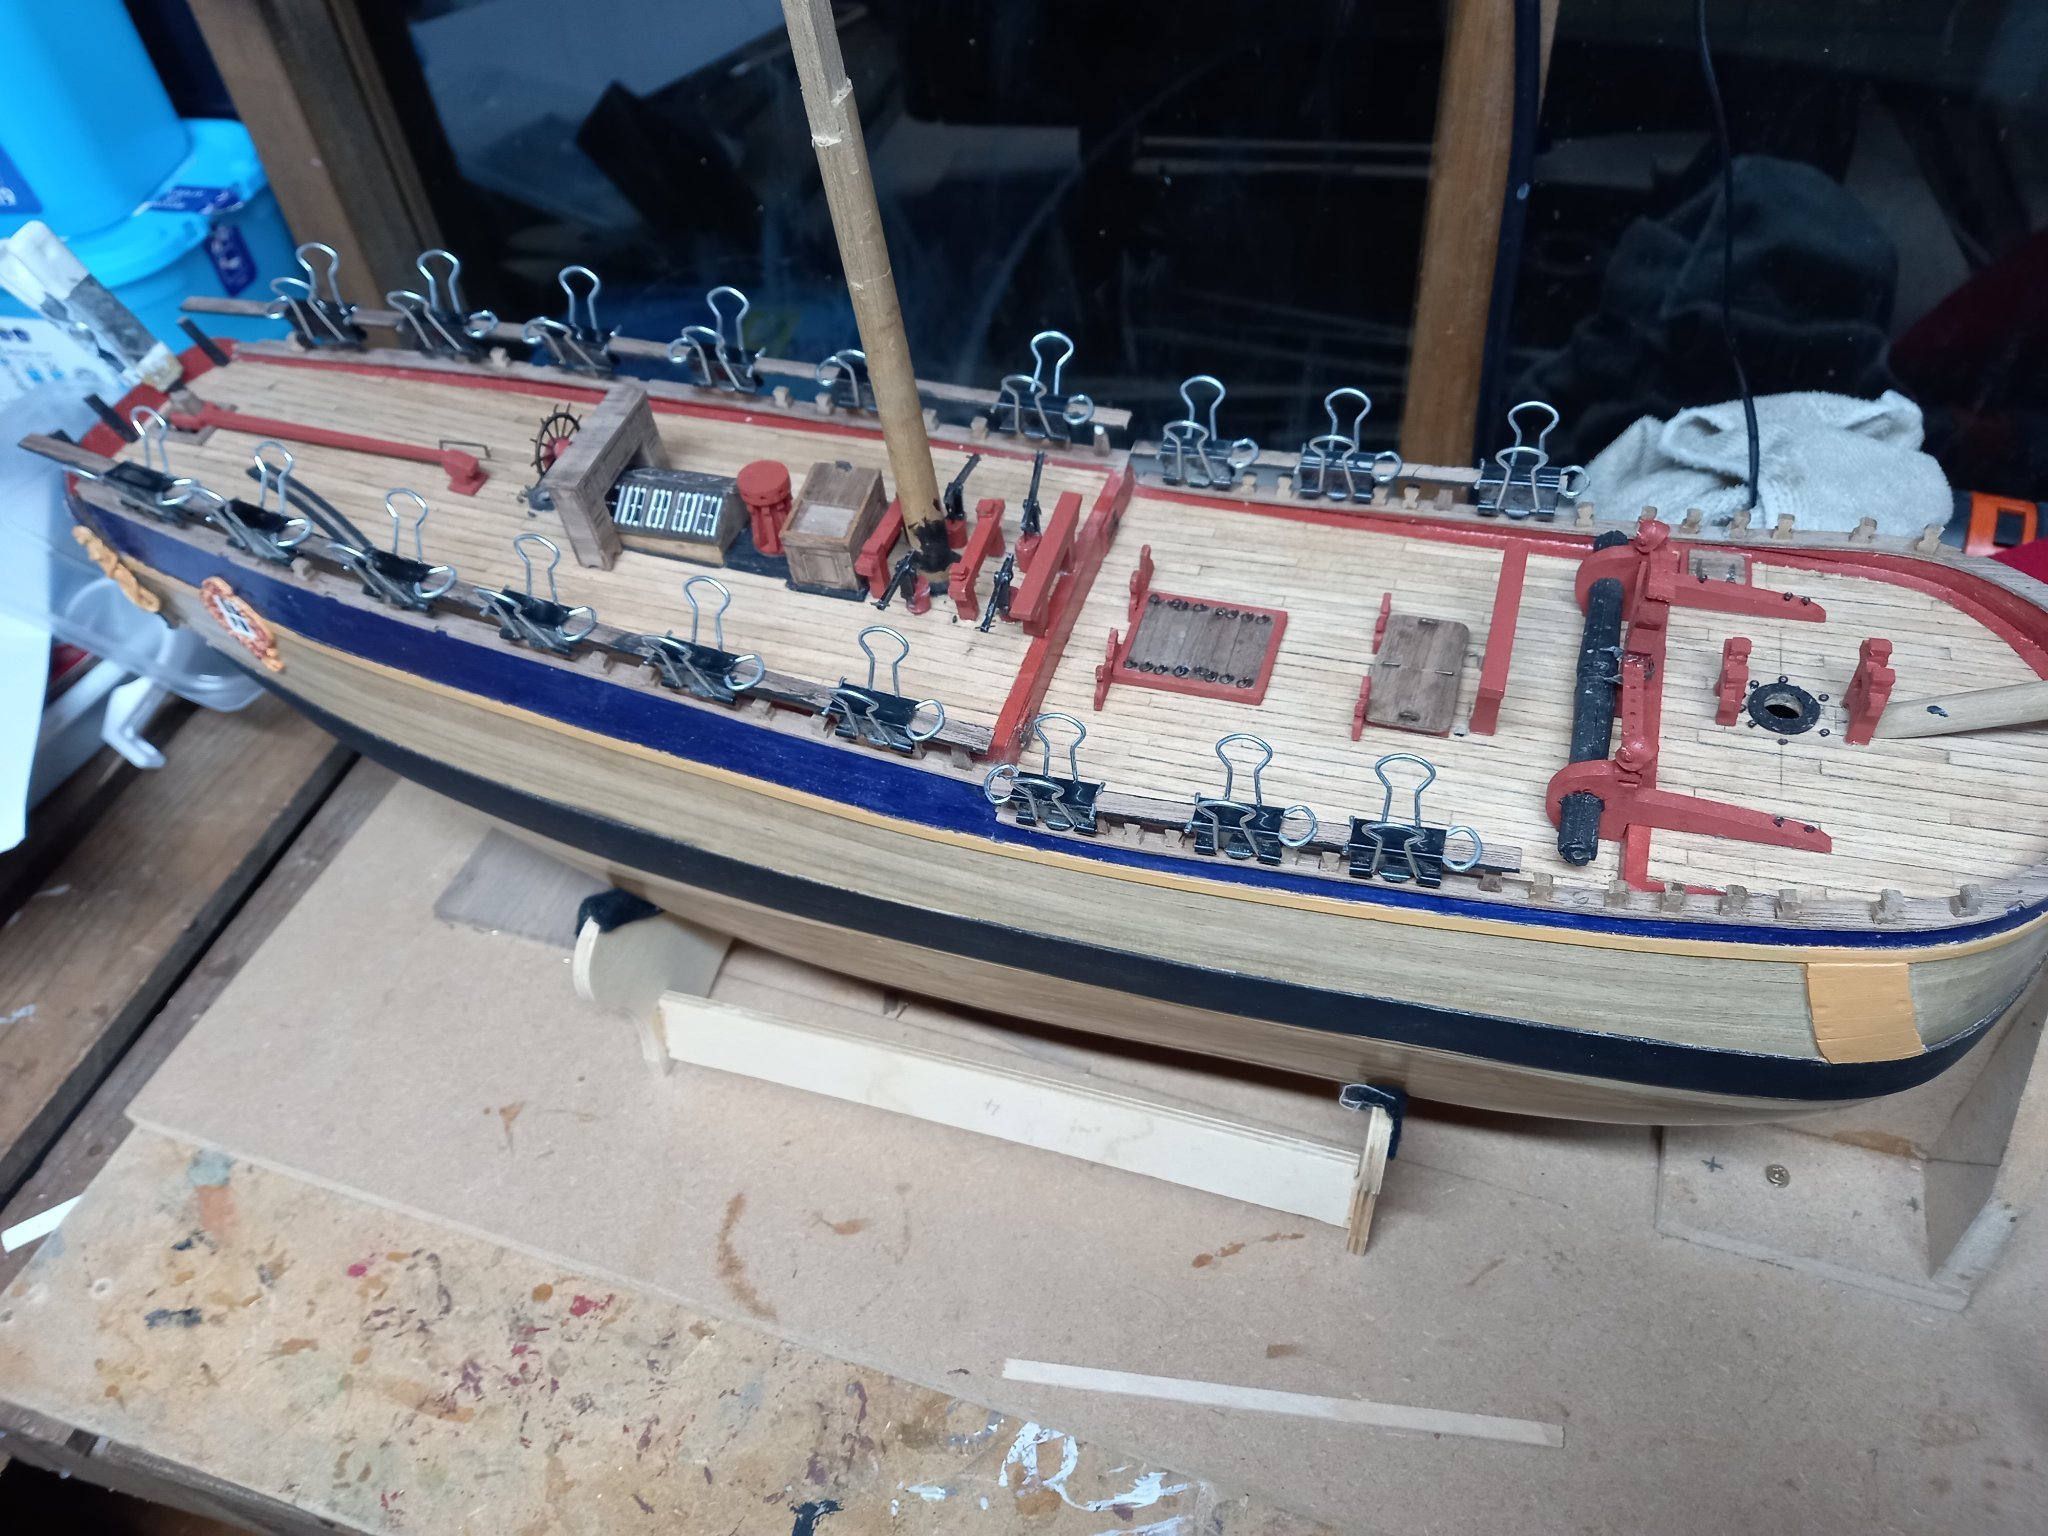
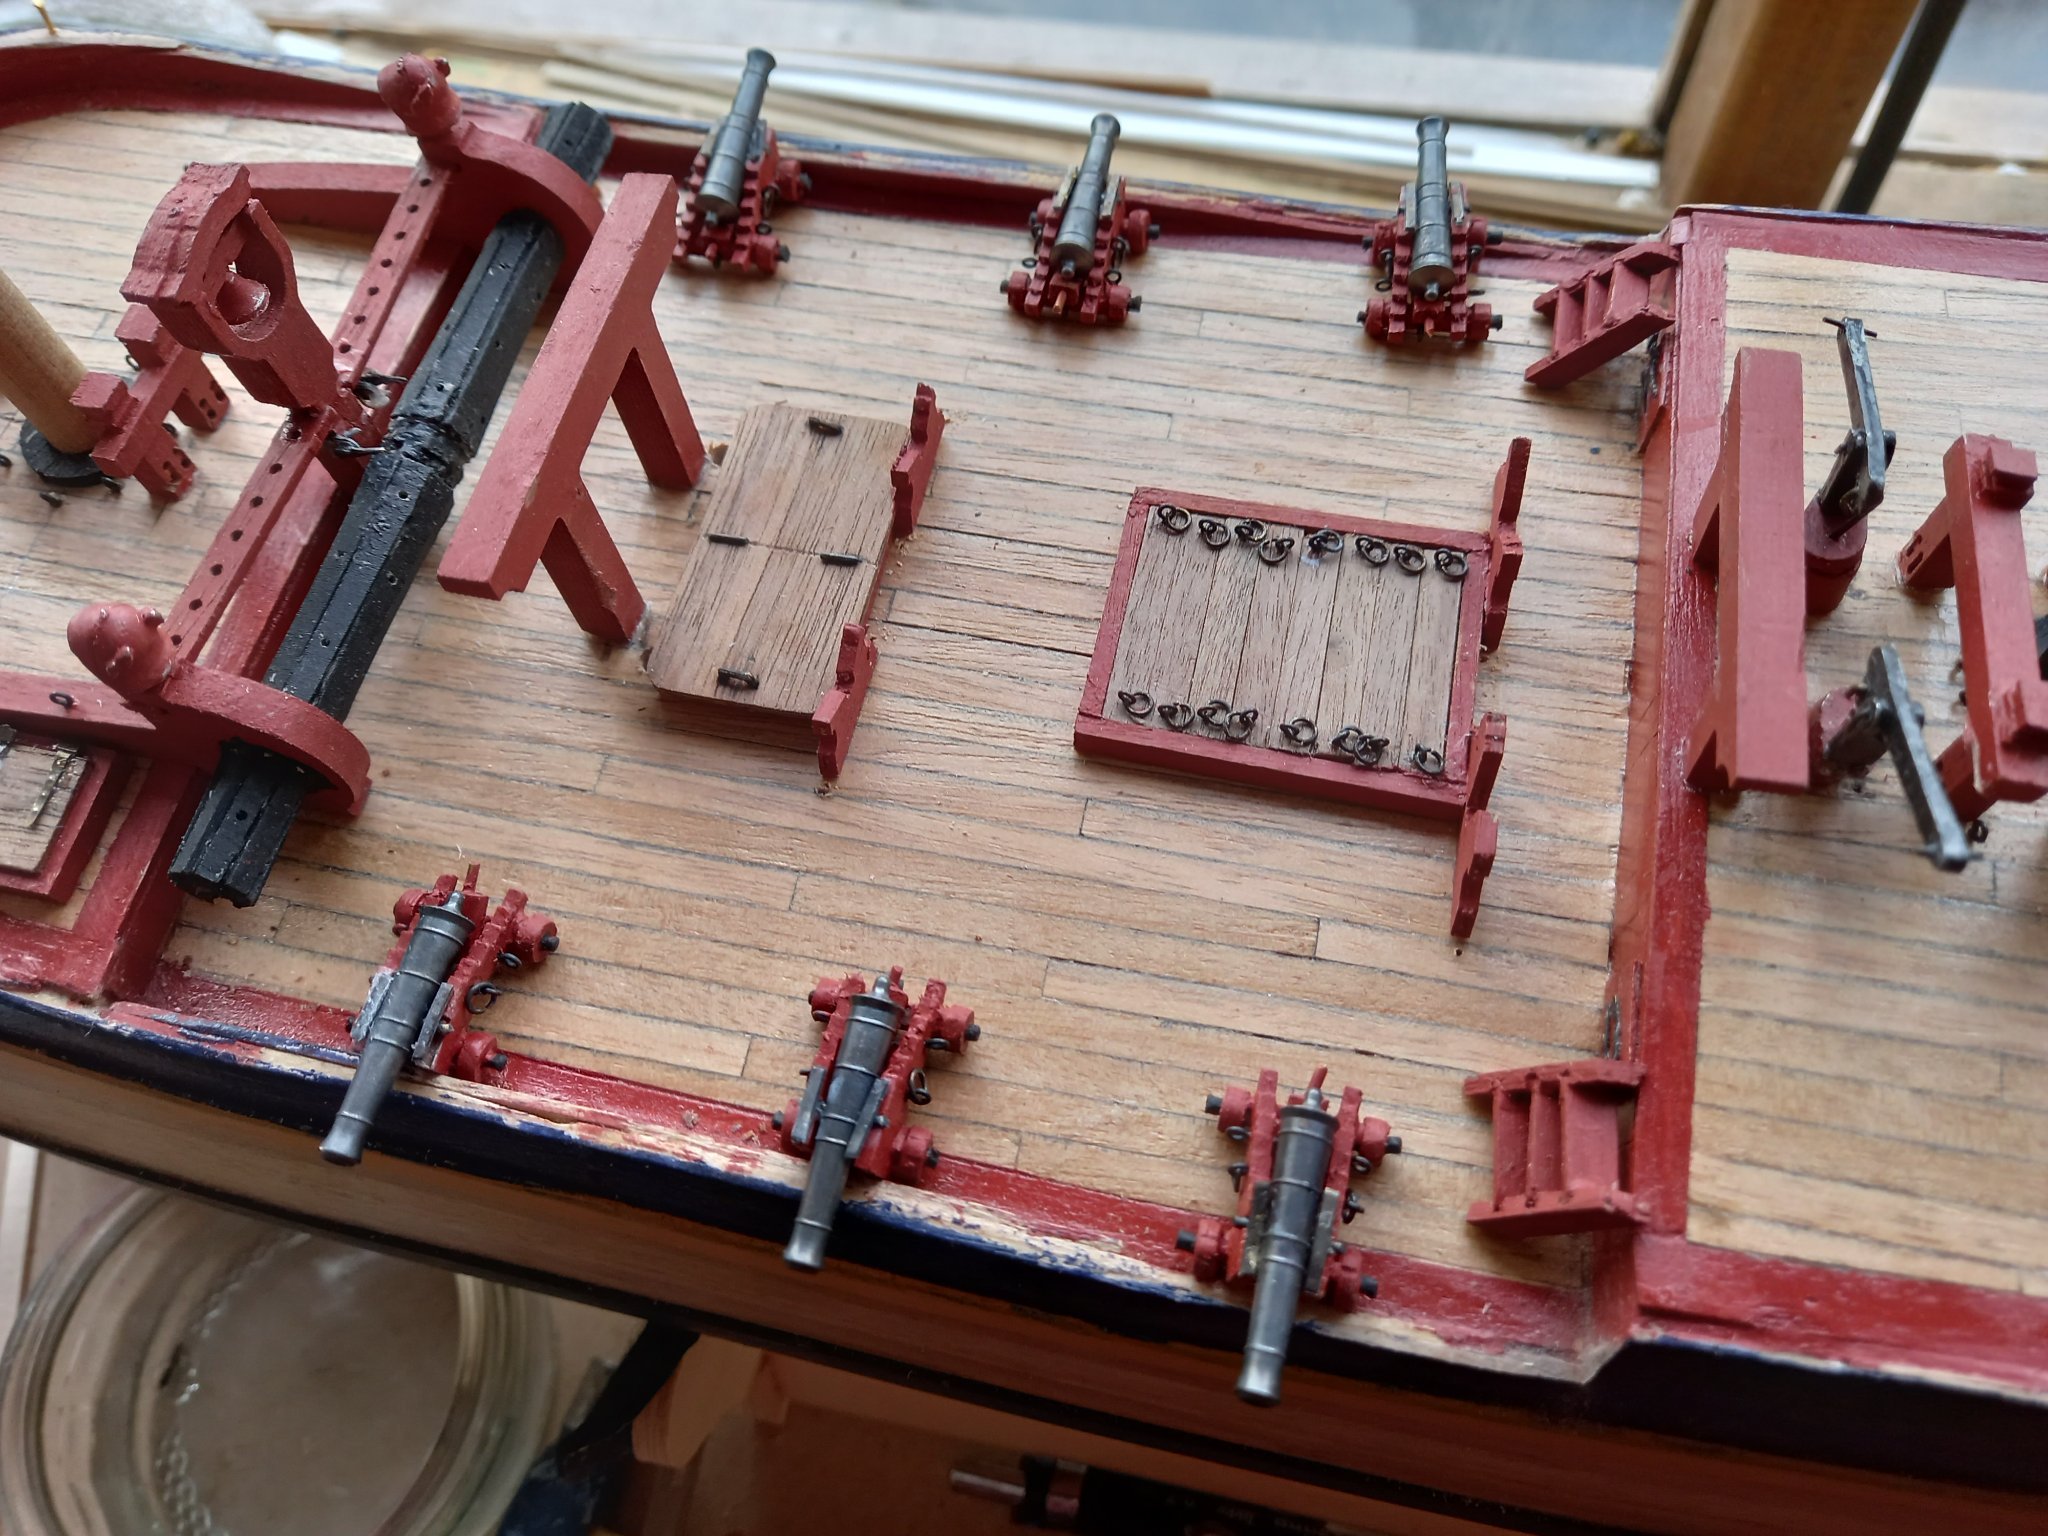
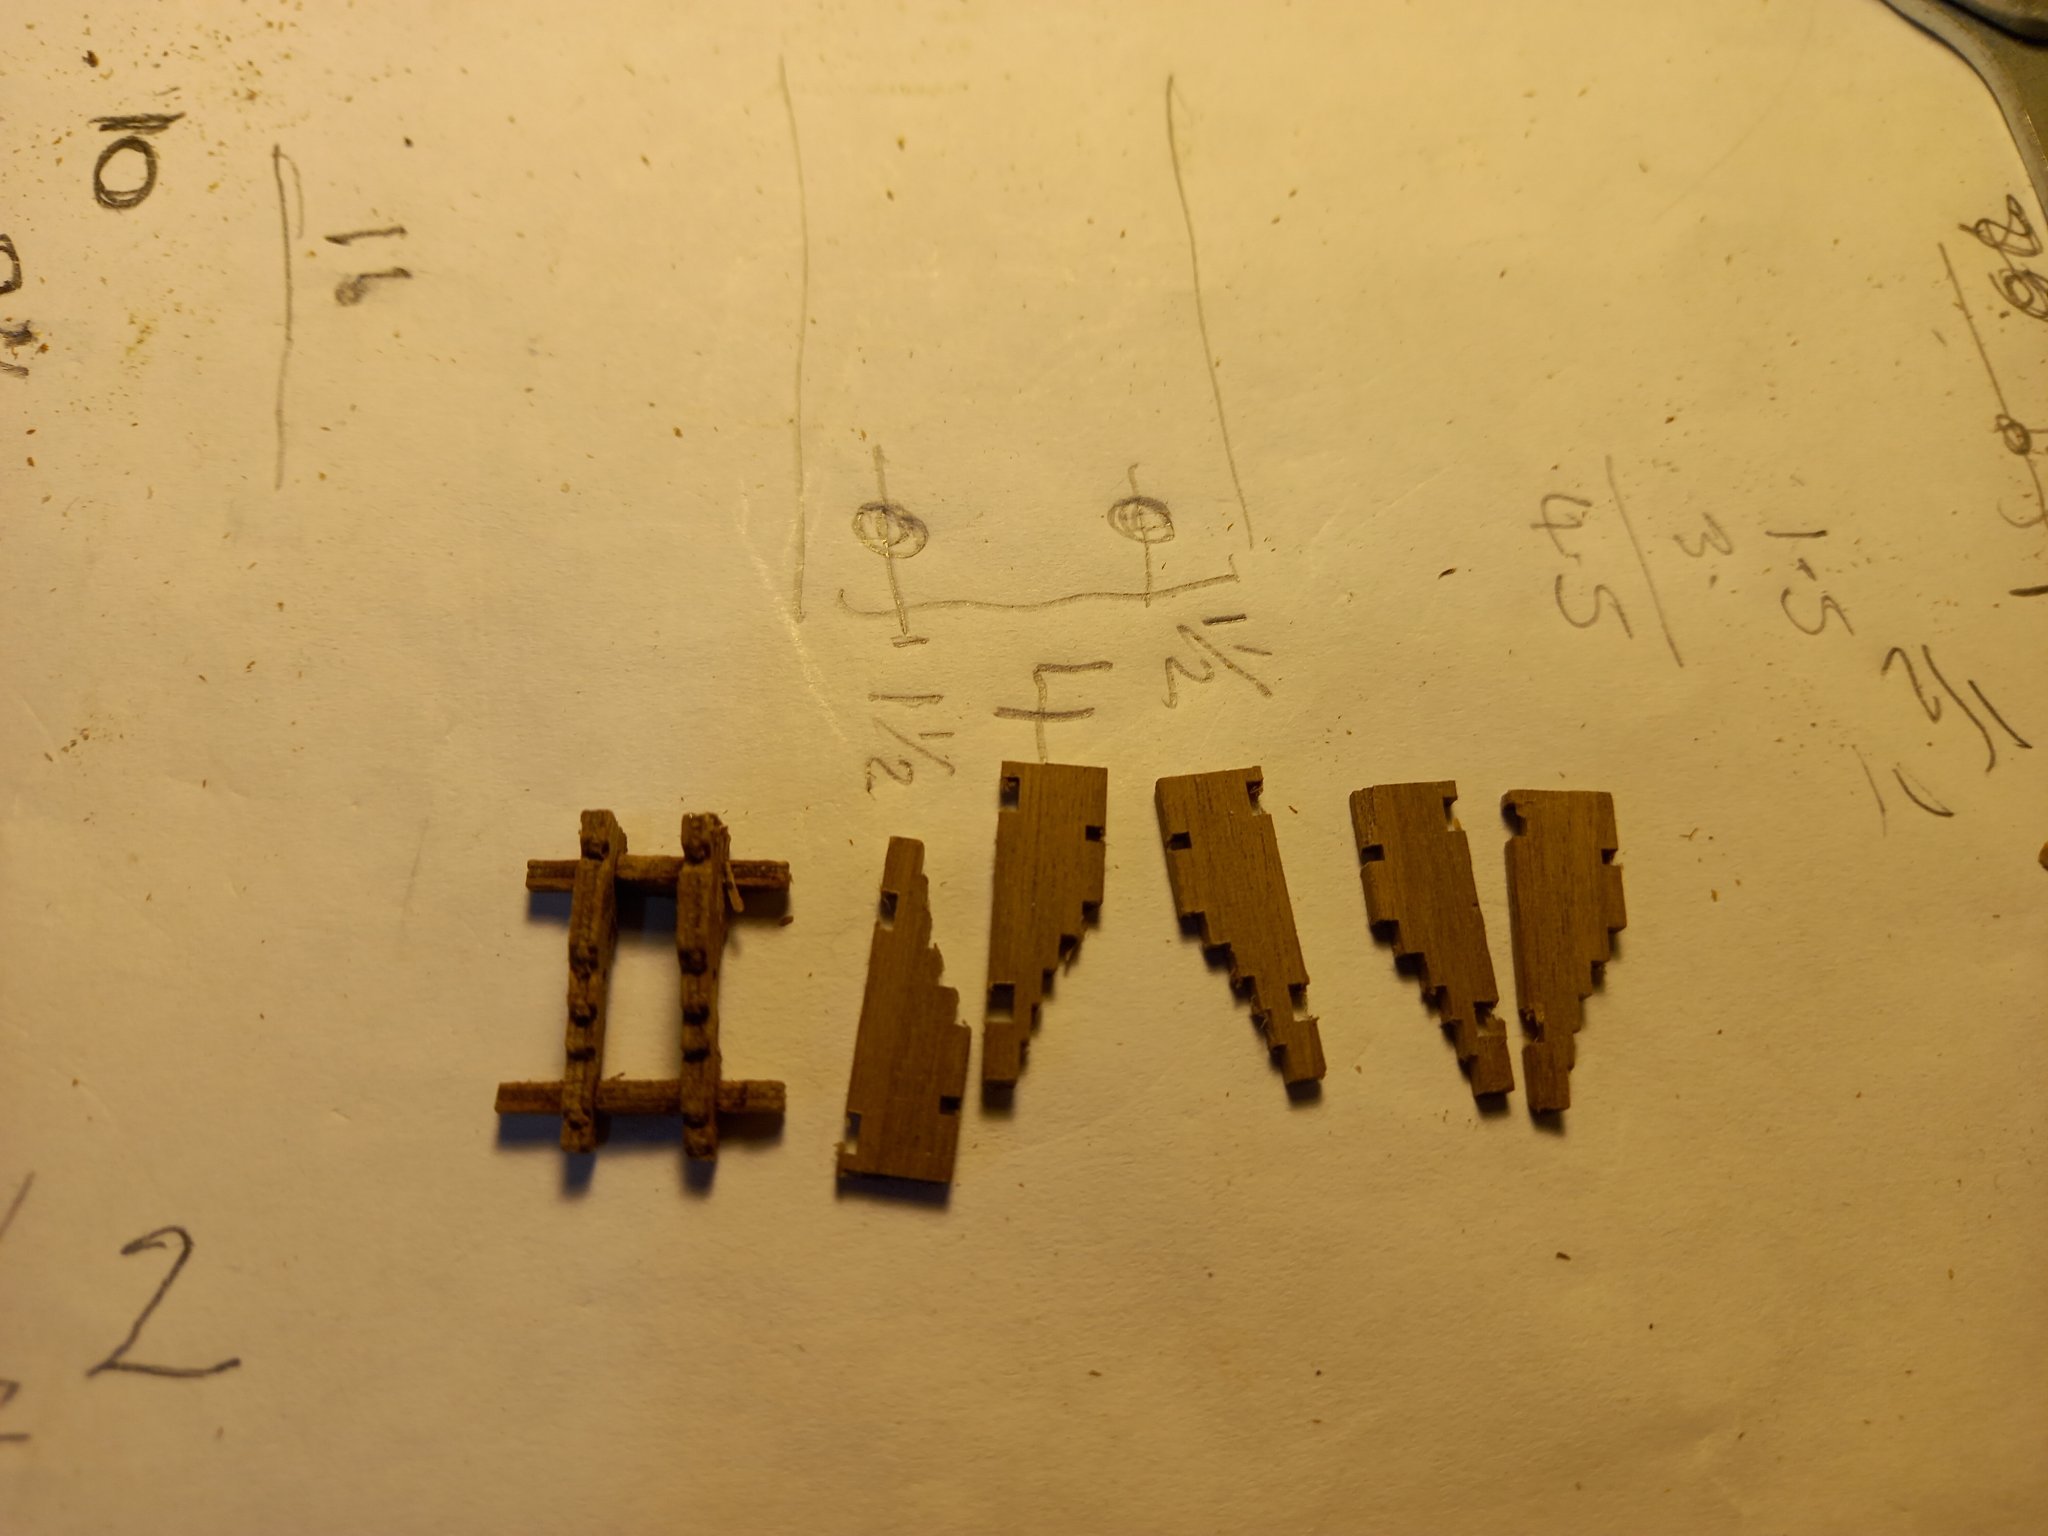
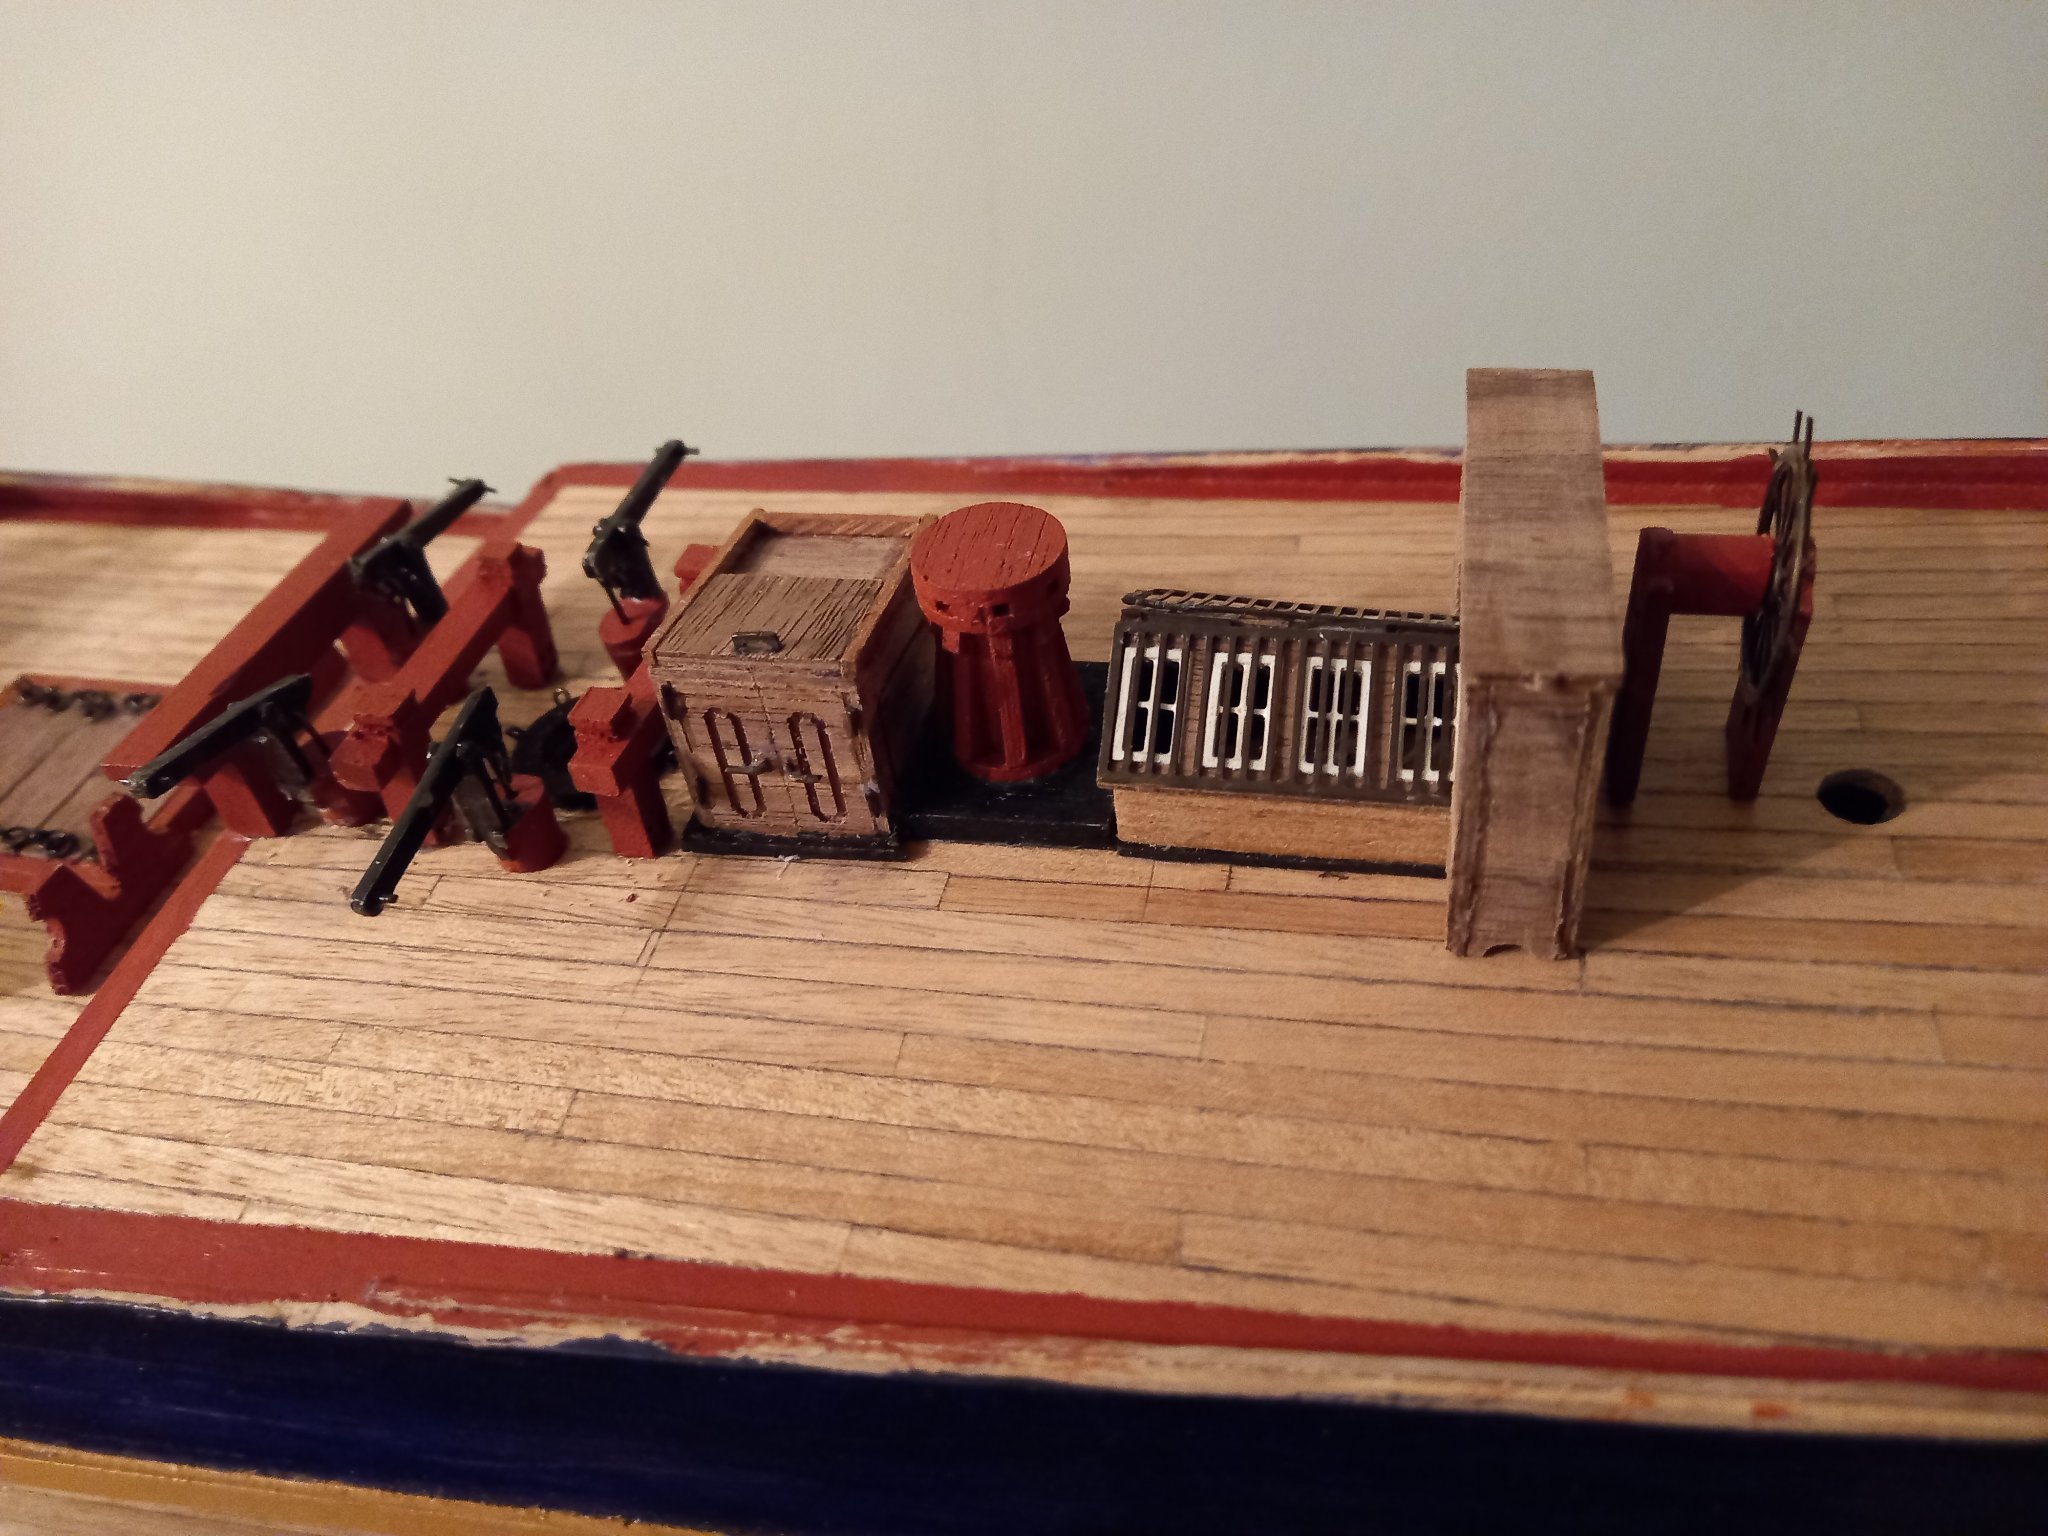
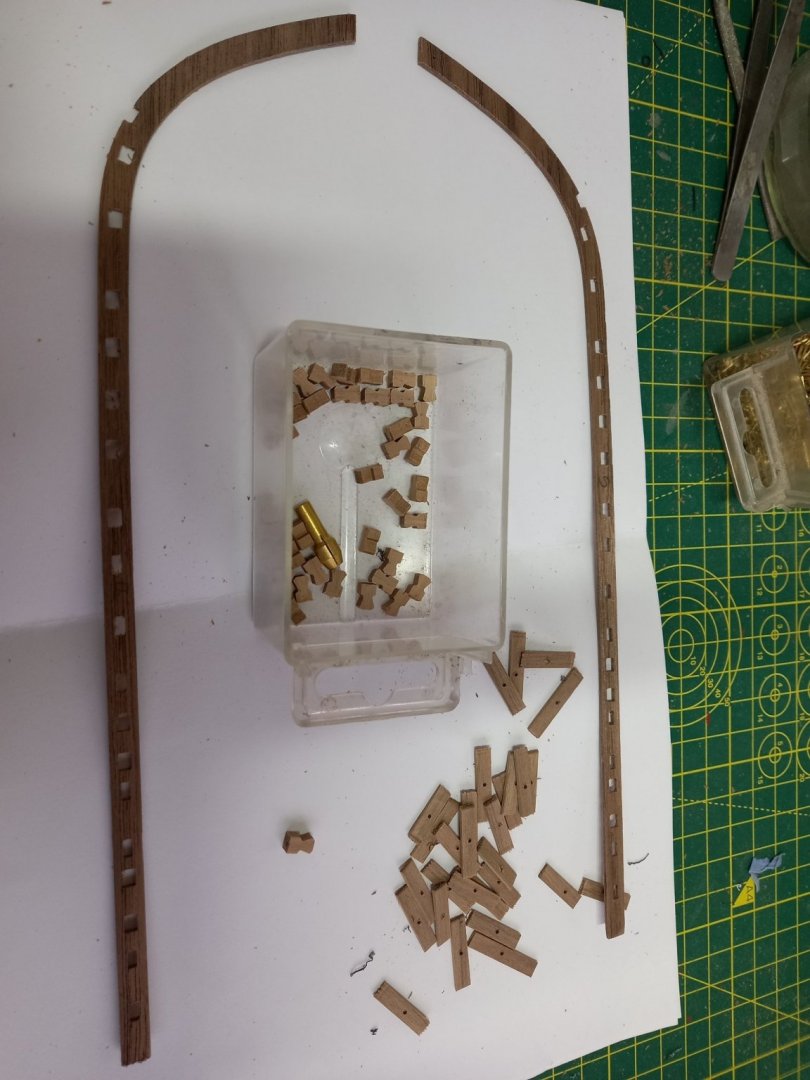
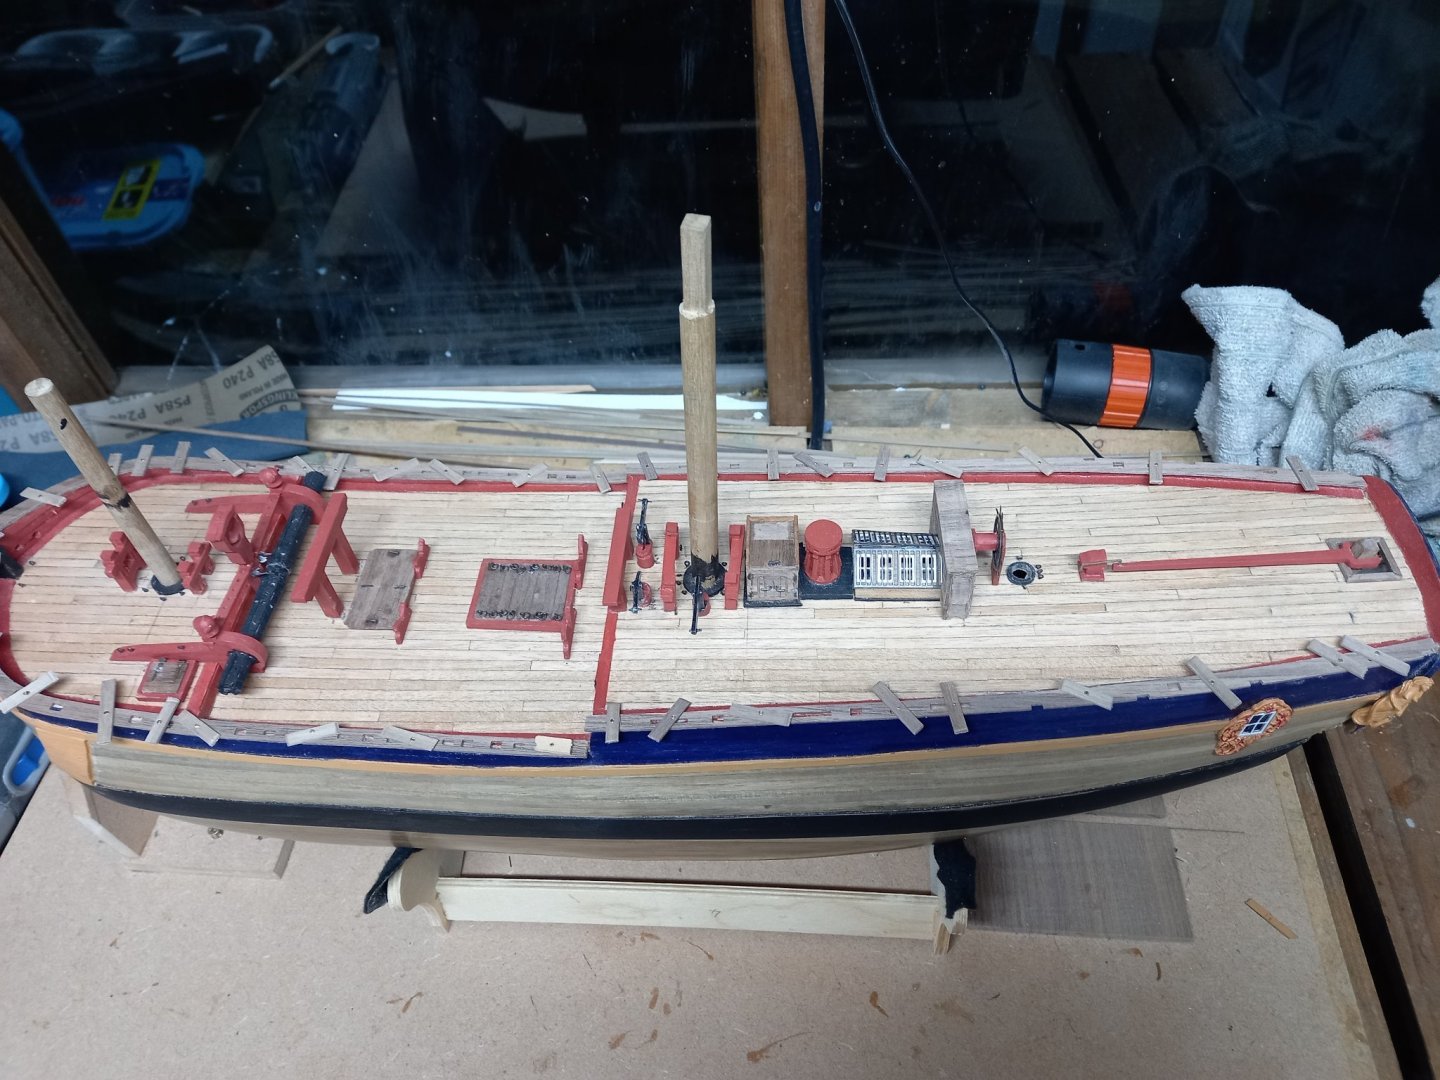
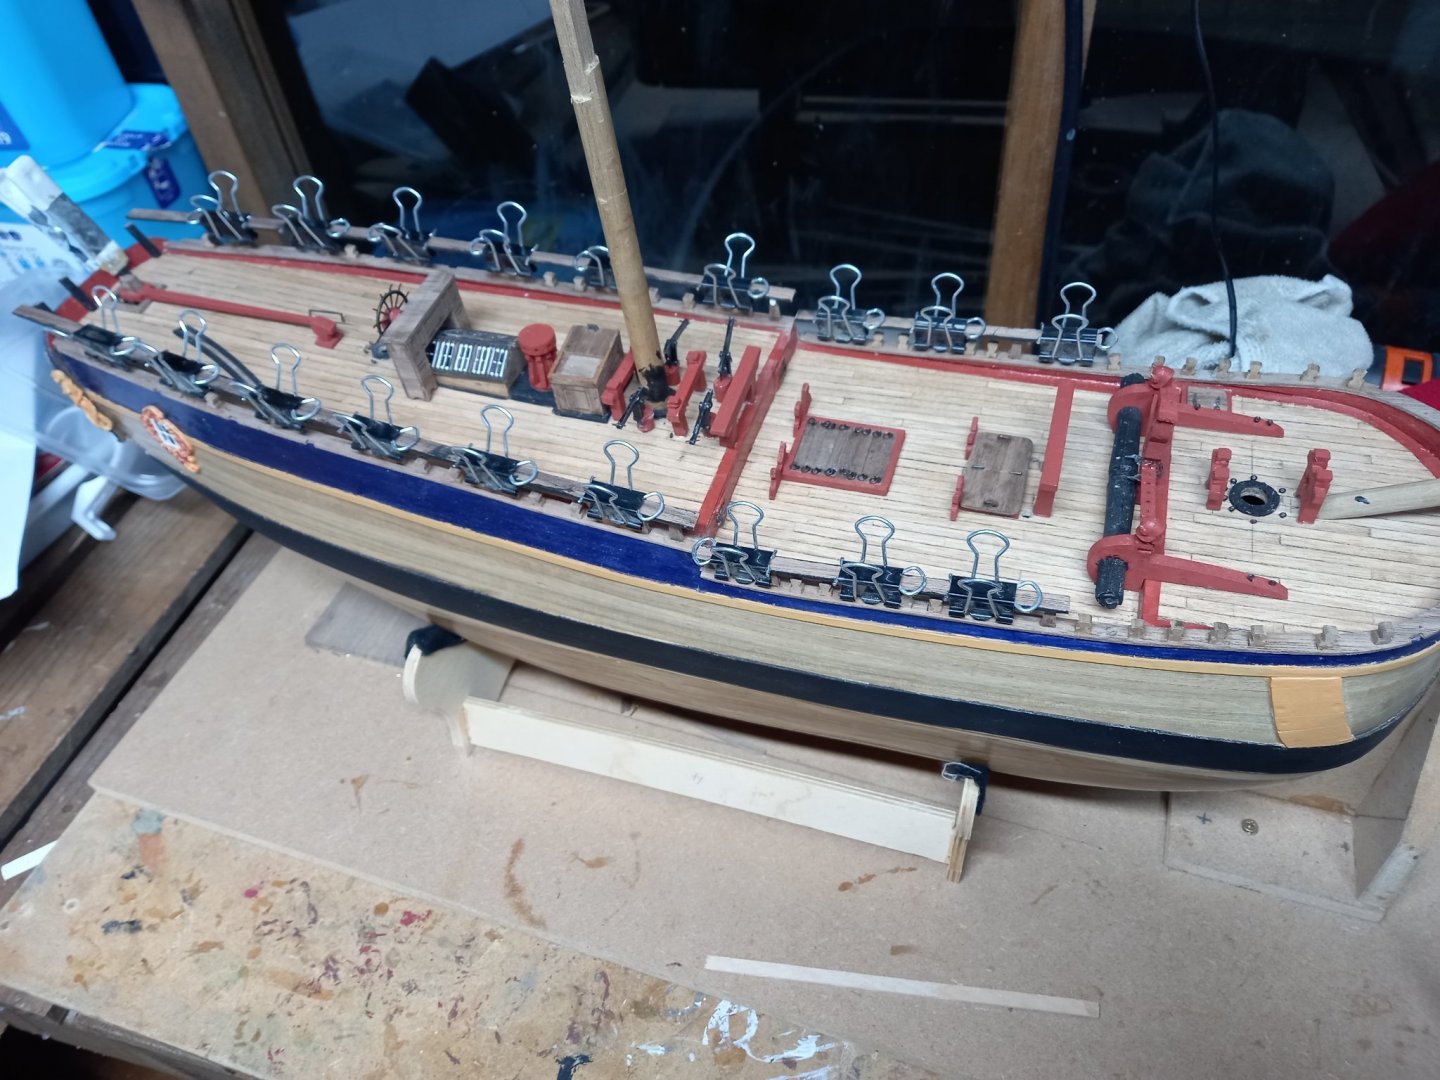
I have now glued the lower bulwark capping rails into position, fortunately the capping rails are already made from 1.5 mm sheet so no awkward edge ways bending to do, However I am now faced with something to tax my poor brain. There 40 pieces known as the timber heads which do not fit into the slots which are already cut into position on the lower cap rails. I have two solutions which would work, first one is to fit a dowl/ 1mm brass bar under each timber head but this has minimum contact area. No 2 , reduce the size of the bottom at a depth of 1.5mm to make them fit. but this will reduce the height of the timber heads from 7 mm to 5.5mm. If the main drawing is the correct size then these need to be 7 mm. A third choice would be to make new timber heads, which I am not sure if I want to go down this road if it can be helped. I finished up machining the ends of the Timberheads so they would fit into the slots. I did make them such a tight fit so decided to drill holes and fit brass dowels for added strength. I then worked my way from forward to aft gluing in the Timberheads into position and then fitting the upper capping rail using PVa glue. However before doing this I painted the underside of the upper capping rail but not the slot where the top of the stantions fitted.Here is a photo of the upper capping rail clamped into position using fold back clips. Just the aft upper rail to fit.

-
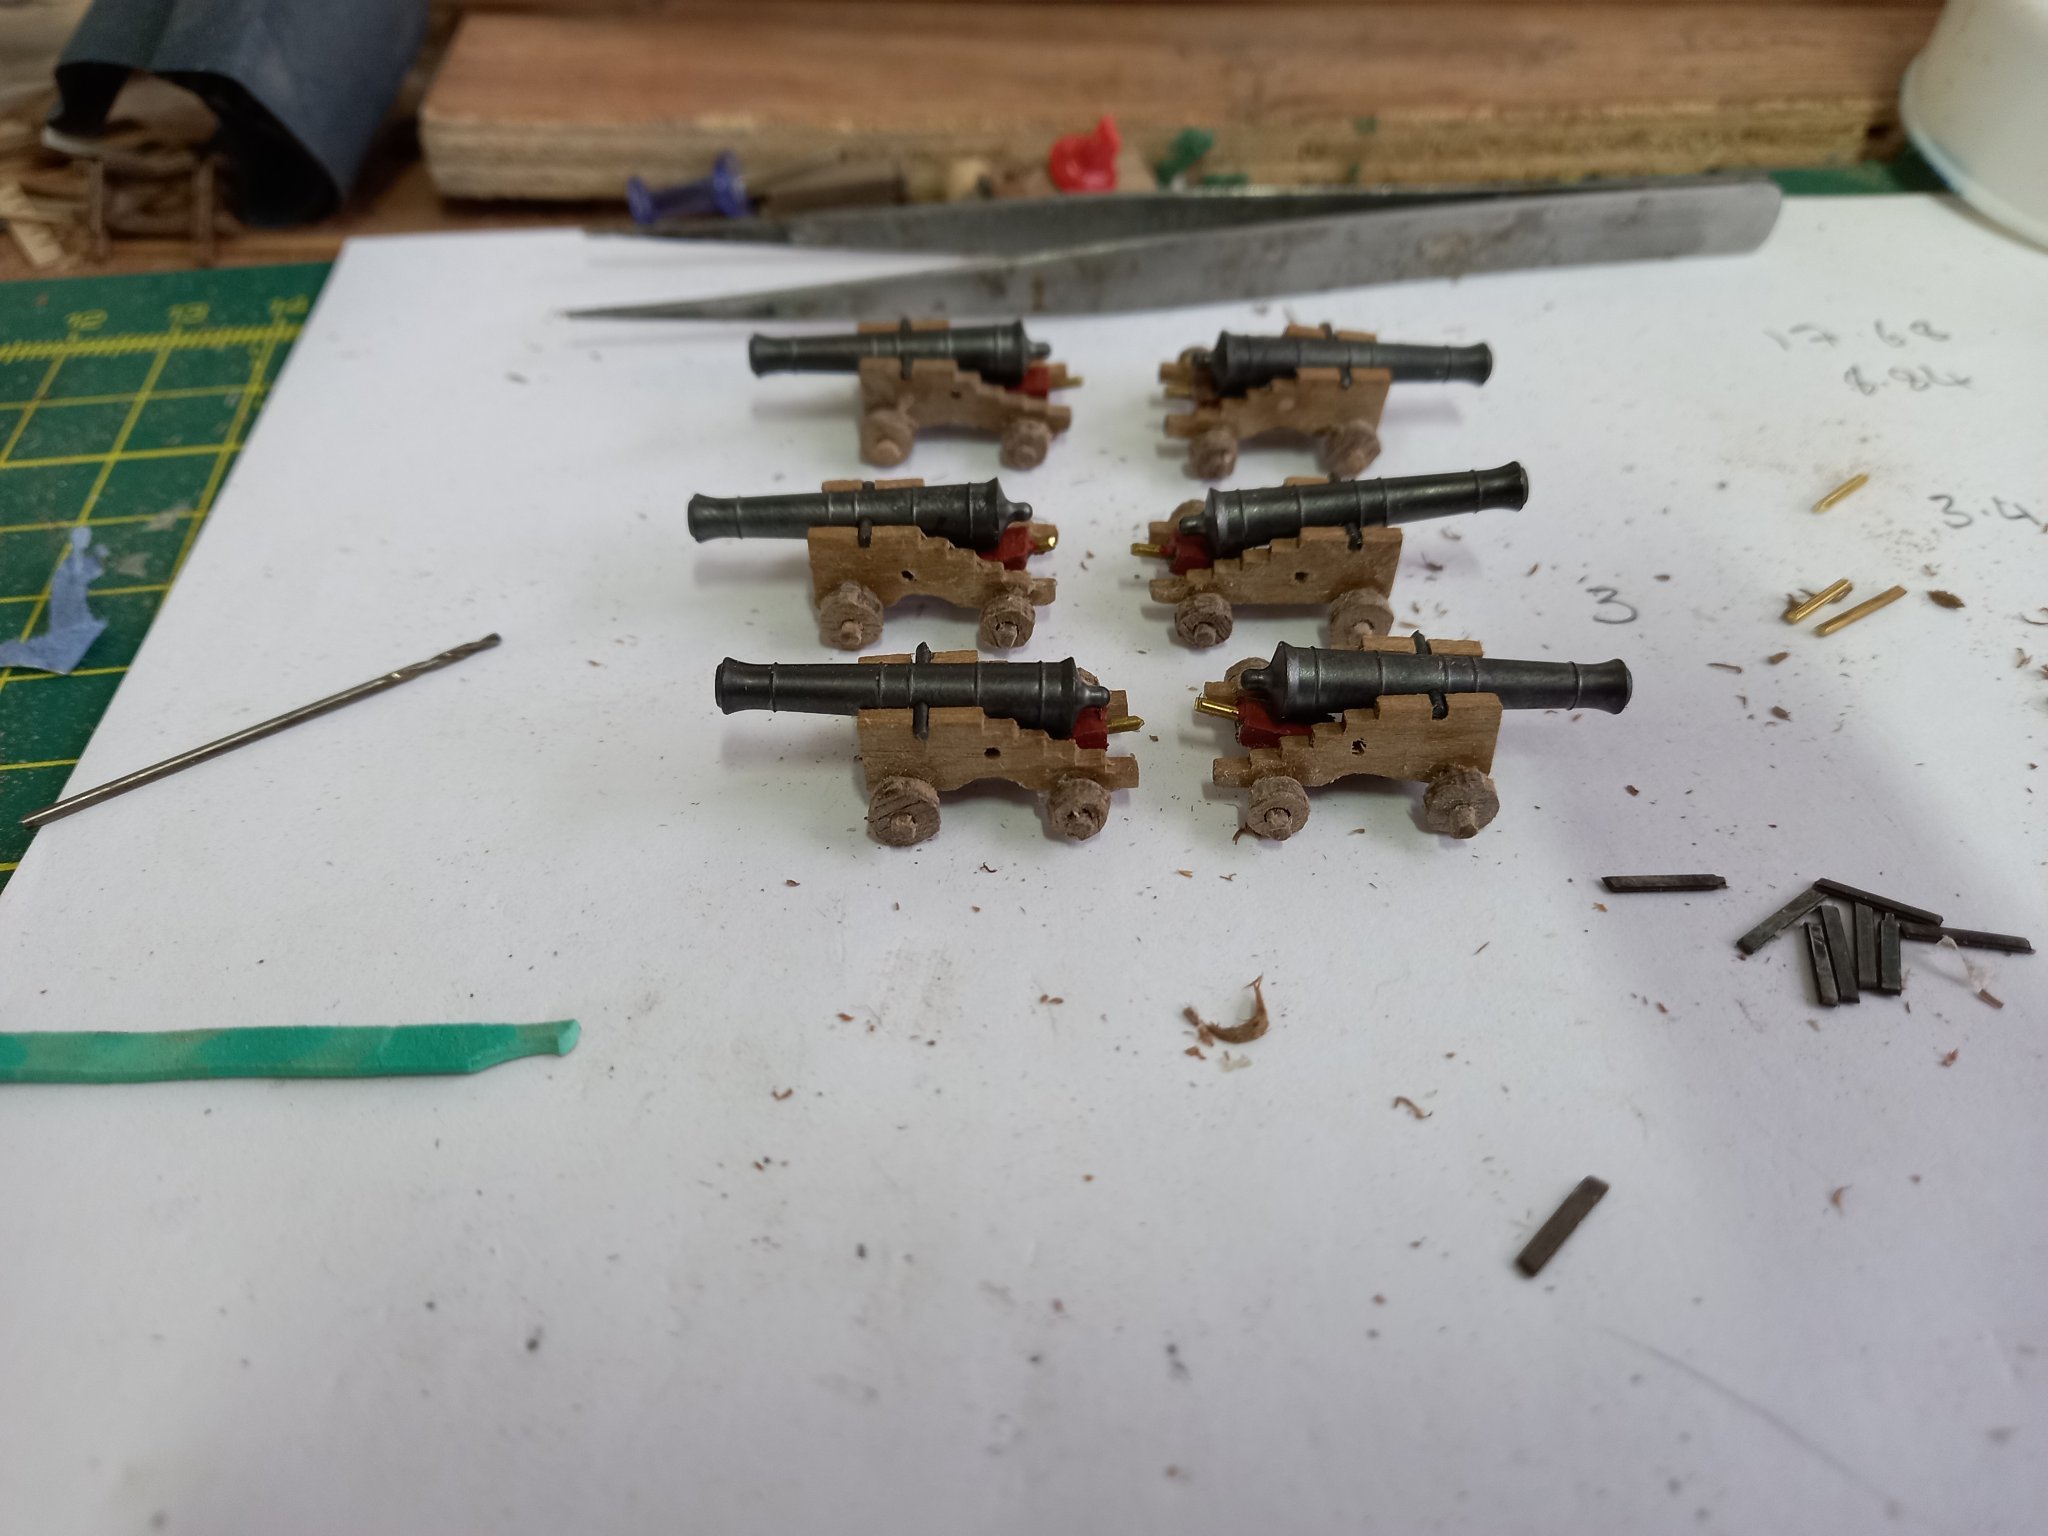
I managed to round up the square anxles using my Dremmel and a suitable collet so thank you Gregory for the Idea. I used the kits Trucks but they didn,t clean up too well and I think next time I might make my own or at least clean the ones up using my lathe .( Once I figure out how to hold them together and grip them in a 3 jaw chuck). All in all after 2 weeks work on only 6 of them I am reasonably happy with the end product for my first attempt at making my own. Here is a couple of photos of the progress


-
HMS Bounty by Gct86 - Amati
DaveBaxt replied to Gct86's topic in - Kit build logs for subjects built from 1751 - 1800
Some really nice work and you are doing the Bounty justice. I too like the weathering and something which I would like to try. Good luck with the future and look forward to your progress. -
Hi Mark. As for me by the time I finished the rigging on my last ship I had forgot how to do the planking on my current ship and had to relearn it. On my current ship I have just finished the planking and I am trying to get one step ahead and re learn the rigging whilst doing the deck fittings. So frustrating having to re learn everything before you can learn something new but I am hoping each time a little bit more sticks. I also have a number of senior moments too! Keep up the good work Mark . I love following your blog and you great way of showing how you carry out your work and the responses you get are very informative. I look forward to your progress. Best regards Dave
- 505 replies
-
- 5
-

-
- vanguard models
- Sphinx
- (and 1 more)
-
Just received my Copy of the Seamanship in the age of sail and what a great looking book. I spent last night going over the book and as yet this is not a review It looks to be just what I need and as it says should go hand in hand with one of my other books The Masting and Rigging of English ships of War, by James Lees. I haven't in past but will most certainly be keeping an eye open on this thread and also on what else is out there. Unfortunately I have not been able to get my hands on AOTS HMB Endeavour so probably just stick with the two books I now own. Thank you again. Best regards Dave
-
Excellent news I am now so glad I purchased the book. and thank you for your reply it is very much appreciated. Best regards Dave
-
Phew! That's a relief. Thank you again Derek for letting me know. Hopefully I can now get to grips with the rigging and understand how it all comes together.I am slowly building up a nice library and not forgetting power tools. Best regards Dave
-
I Couldn't resist the purchase of this book 'Seamanship in the age of sail' by John Harland. Got it second hand but states as new. I haven't heard it mentioned on here so hope I haven't bought something of no use. I am currently only building my second period ship the Endeavour and my previous ship the Bounty I did not add the sails so omitted a lot of the running rigging. I am now considering fitting of the sails and all of the running rigging and possibly furling the sails even though the sails were not supplied with the Endeavour kit by Caldercraft. I am hoping the new purchase will help me understand the need for all of the running rigging and how and why it is used. There is a mine field of books on offer and thankfully because of MSW I have chosen to purchase books by James Lees,Andersson Petersson and mondfield and have been described as some of the best out there. No doubt there will be some duplication but hopefully will give me a different perspective in my thirst for learning all I can take in. Best regards Dave
-
Thank you once again Gregory and I can now see what you mean.. I now have a few different ideas to try and hopefully I will be able to produce something that works out ok. Best regards Dave
-
Thank you again Derek. I think I get your meaning , but will have to get myself a steel drill gauge as I only have a plastic one at the moment. Good to hear from you again.
-
Thank you Gregory for your input and help. Which is much appreciated. I can see how this would work with use the collets I have for Dremel. but again how do you get around gripping square stock. Unfortunatley I do not own a sanding drum ( Next power tool on my list) so may have to try doing it free hand or somehow using my Dremmel rotary tool . I thought about drilling two carriage sides together with a piece of wood in between but think the drill required would be too large to bit either my drilling machine or my miller. If you have any more detail on using the Dremmel for turning the axle would be much appreciated. Best regards Dave
-
Gregory T Thank you Derek for your input. I have seen this method done before and have been considering doing it this way . Instead I have used some 1.5 mm planking strips which were the same height as the carrages and machined about 6 sides in one go. This has saved me cutting it on the saw, however I think your idea might be better for getting the curve on the bottom right. At there moment I am just playing around to see what comes out best and might try both ways to see how they turn out. I can,t quite make out if your photo is on a lathe or is it on the miller. Are you milling flats on the dowel or turning square stock on the lathe and if so how do you get it centered in a 3 jaw chuck? Best regards Dave
-
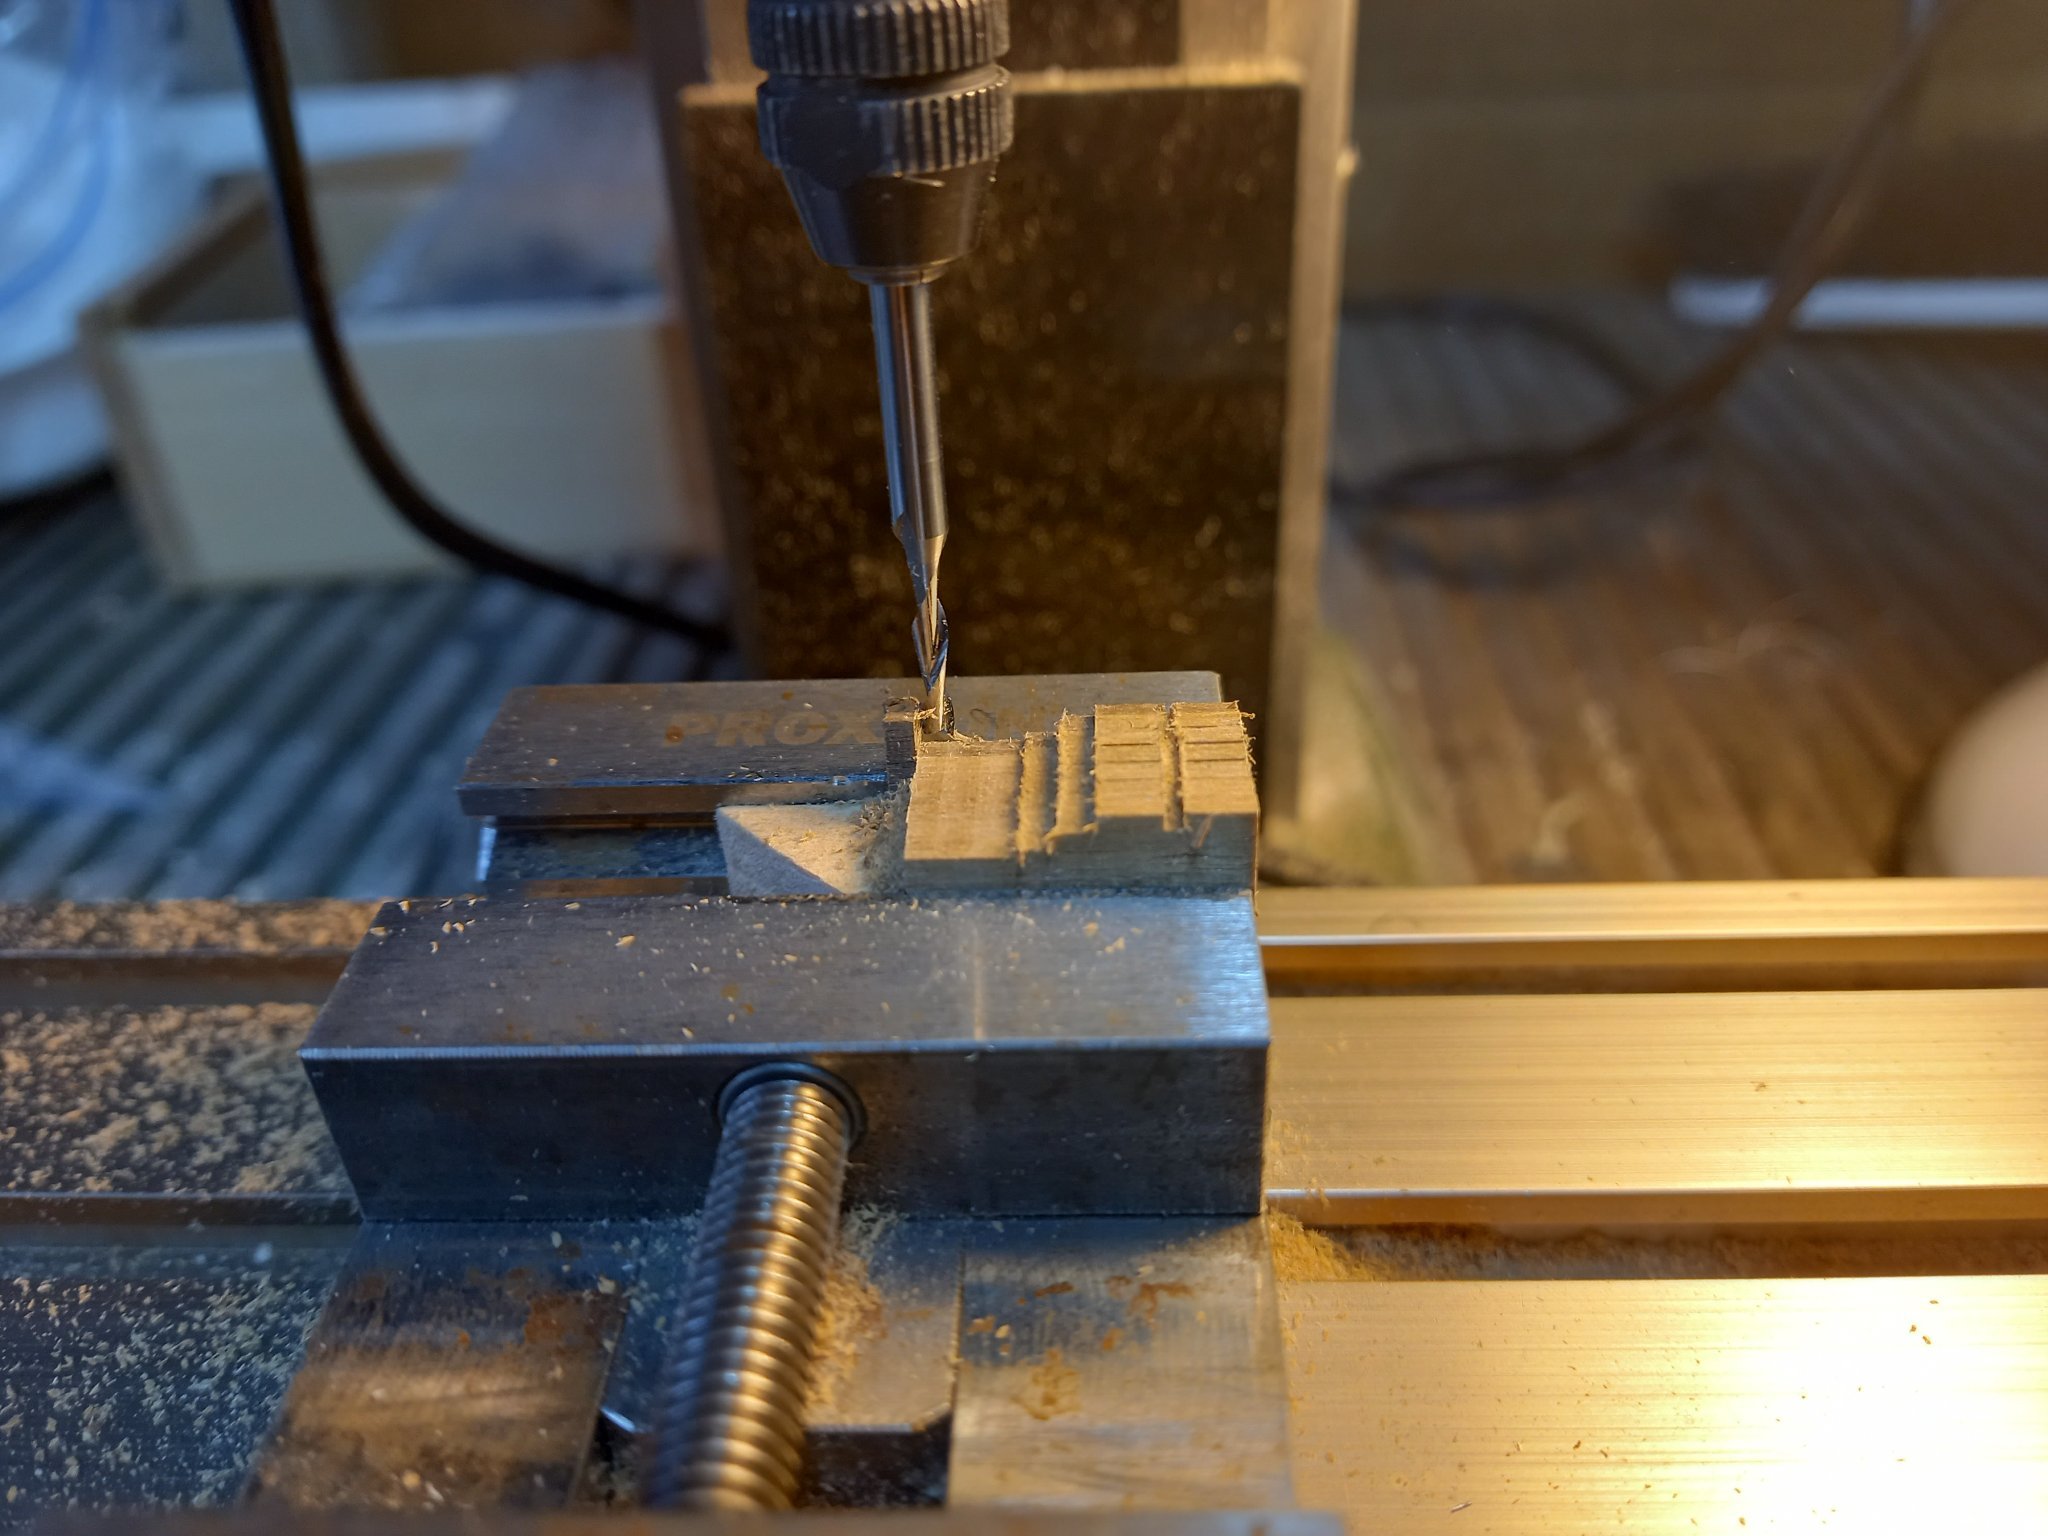
Here's an attempt at making my own cannon carriages as I did not like the look of the Caldercraft ones with the square axles . I stll need to figure out the best way to make the axles , whether or not to start with dowel and machine flats or start with square material and shape the ends which go and I think are round and not square through the trucks. Anyway I am quite pleased with the prototypes but also need to figure out how to cut the half circle on the underside of the carriage sides.