ERS Rich
-
Posts
761 -
Joined
-
Last visited
Content Type
Profiles
Forums
Gallery
Events
Everything posted by ERS Rich
-
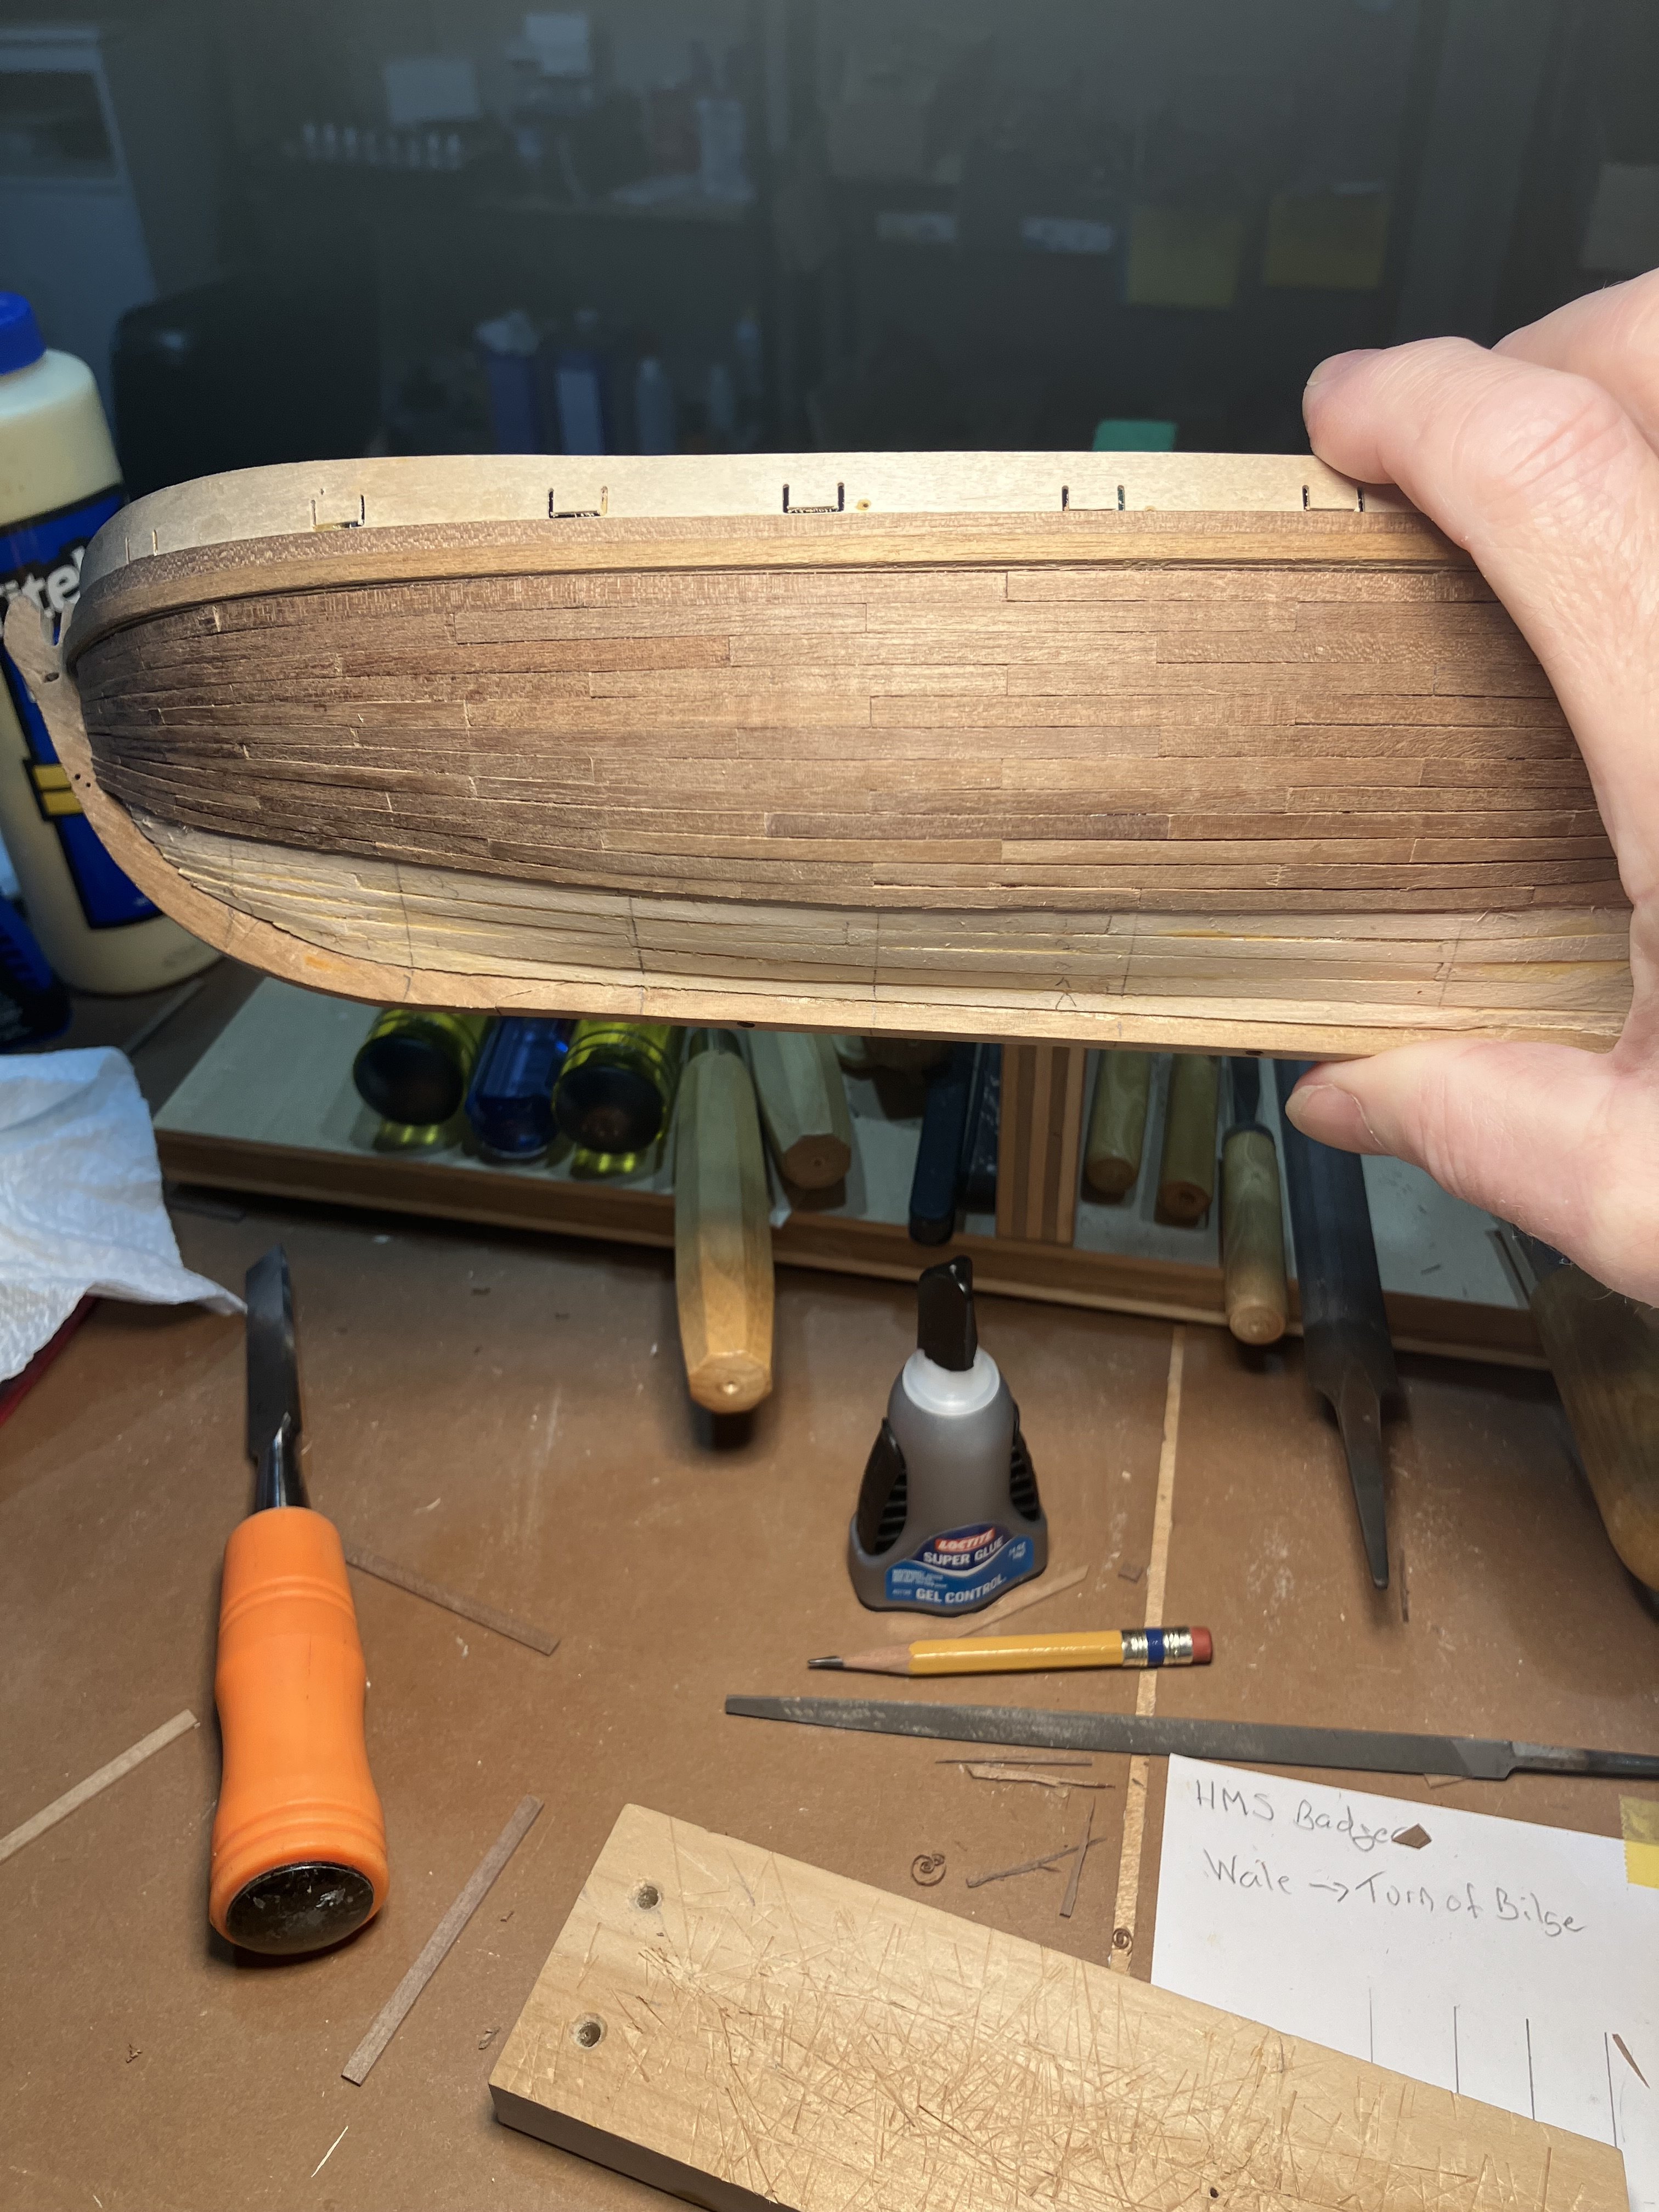
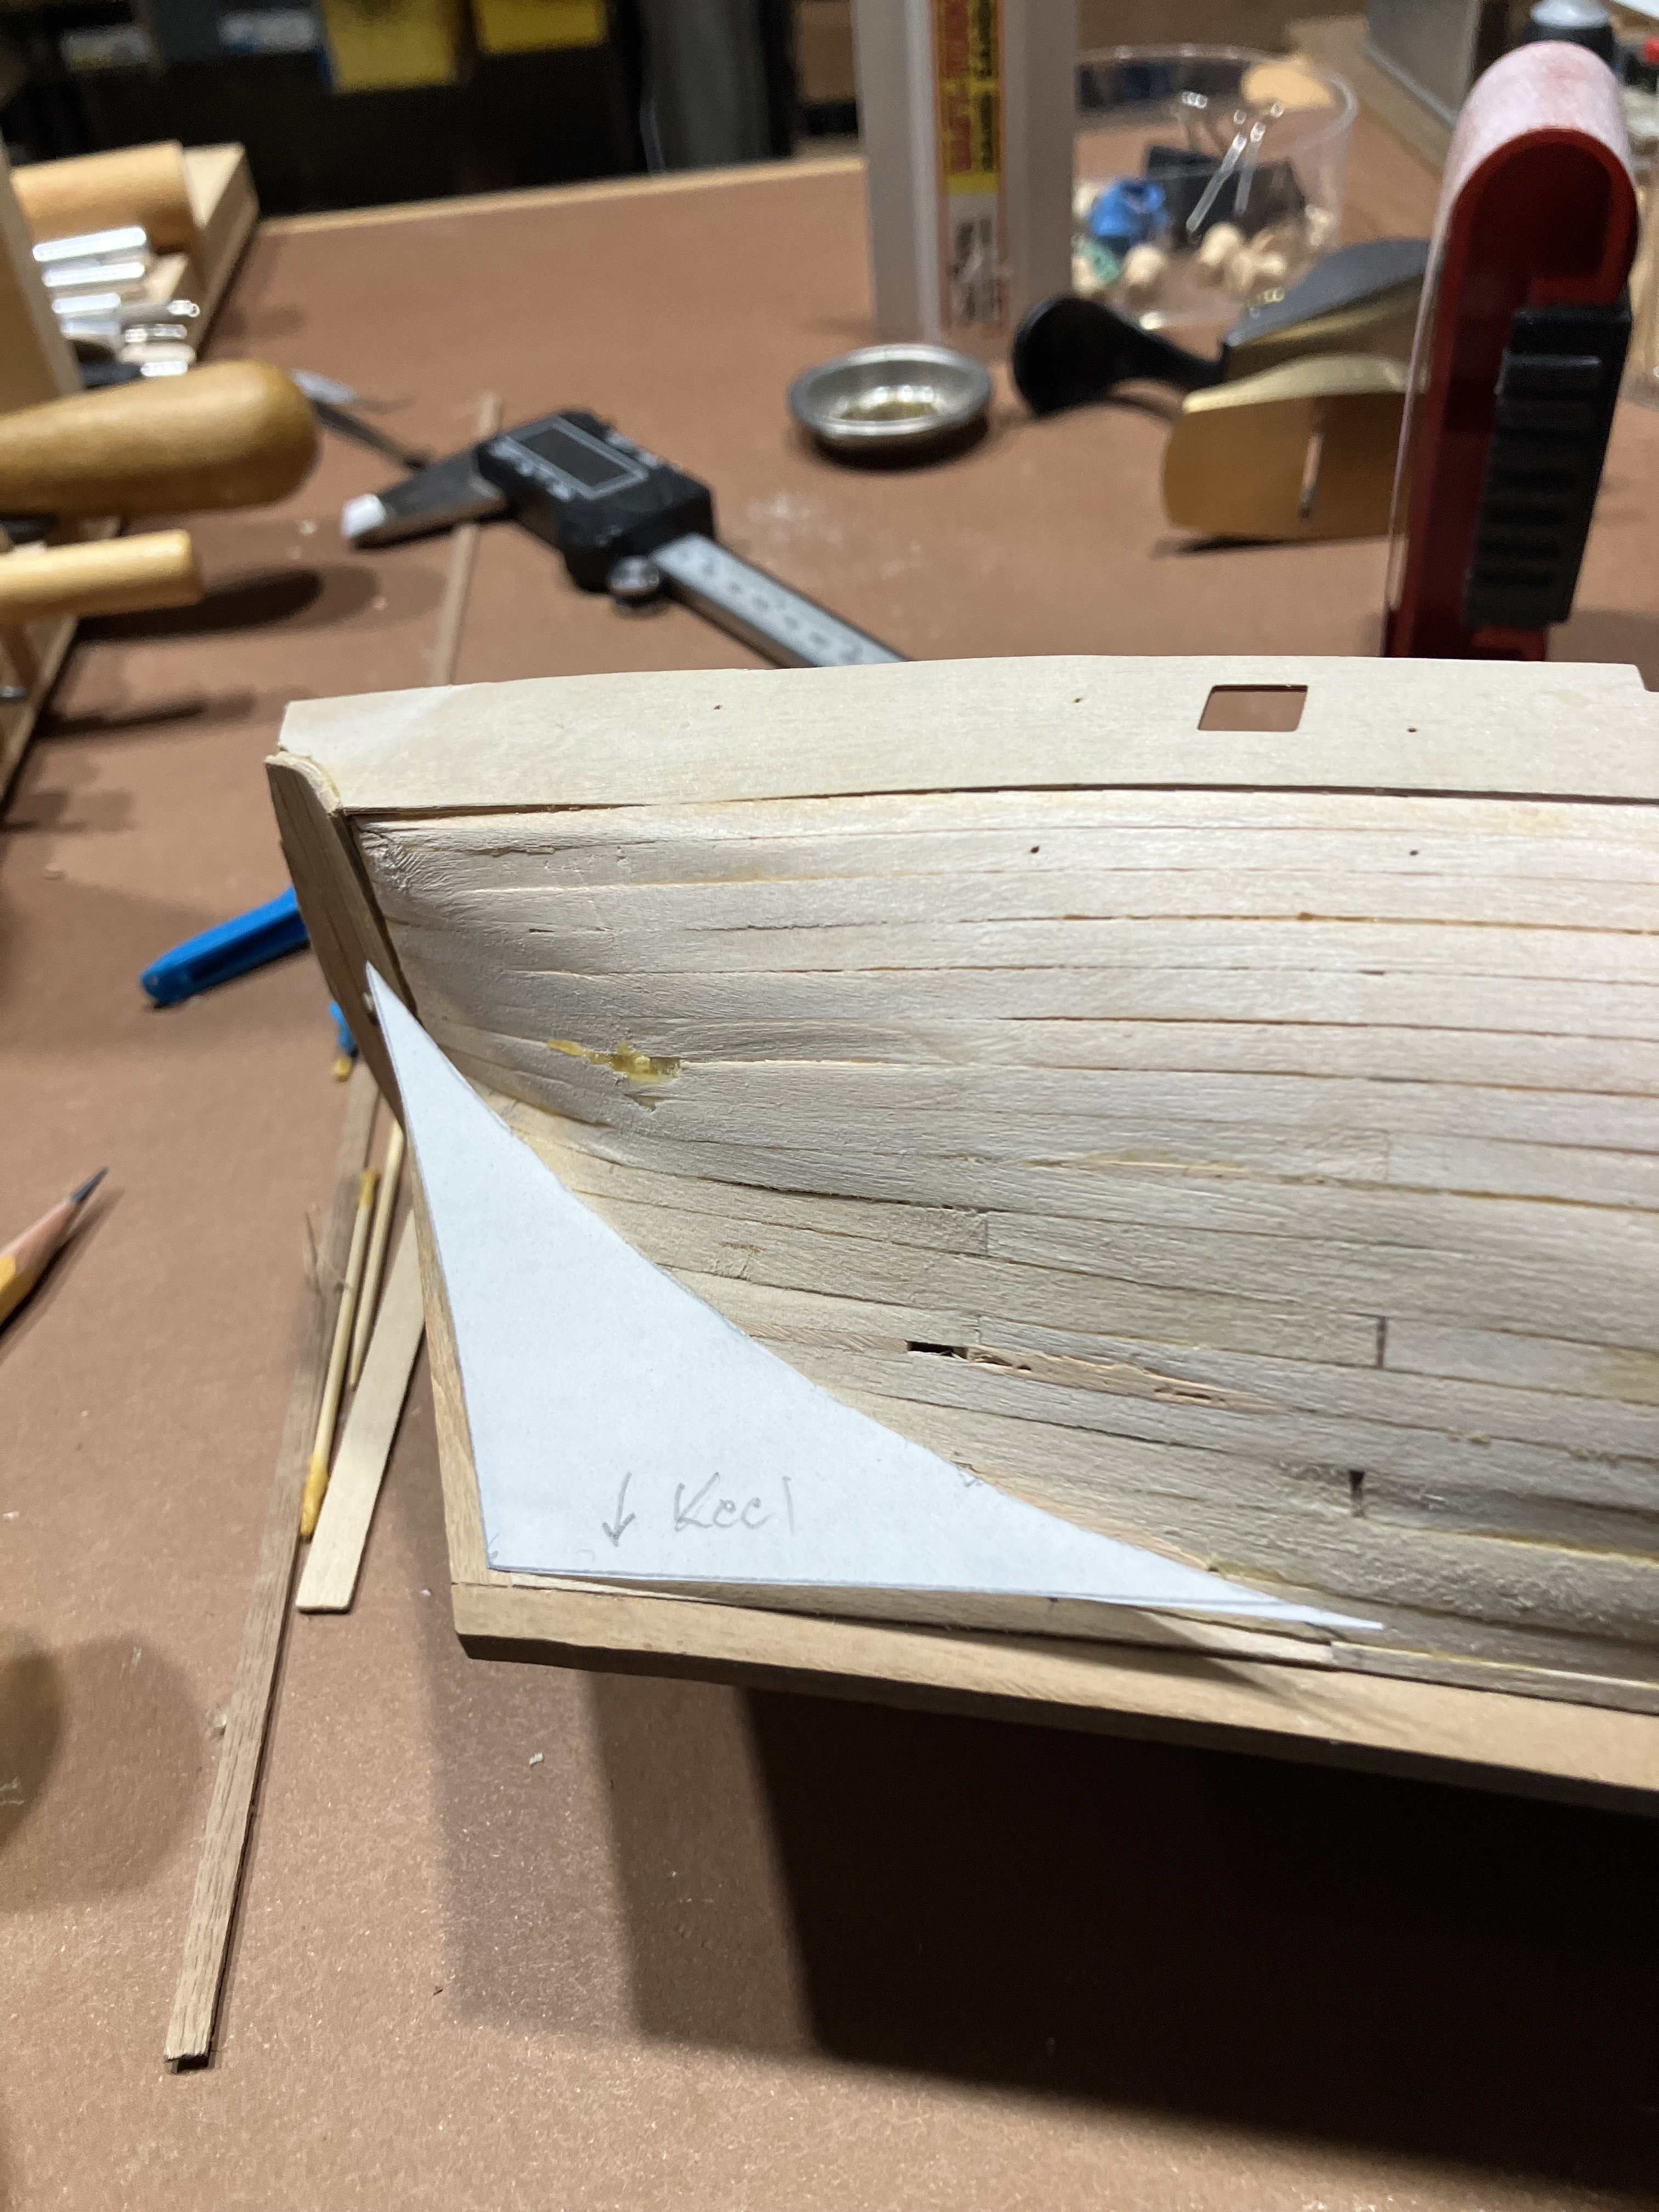
 Planking Above the Wale & Marking the Waterline Planking above the Wale was unremarkable. As before installed the planks and worked the edges with a file. Trimmed upper strake, protruding above the gunport pattern, flush with the pattern. Also worked the plank ends meeting the stem into a smooth curve. Some small openings between the edges will be filled with Minwax filler. Finally marked the Waterline. The kit has a handy piece that fits on the keel to raise the bow to the appropriate height.
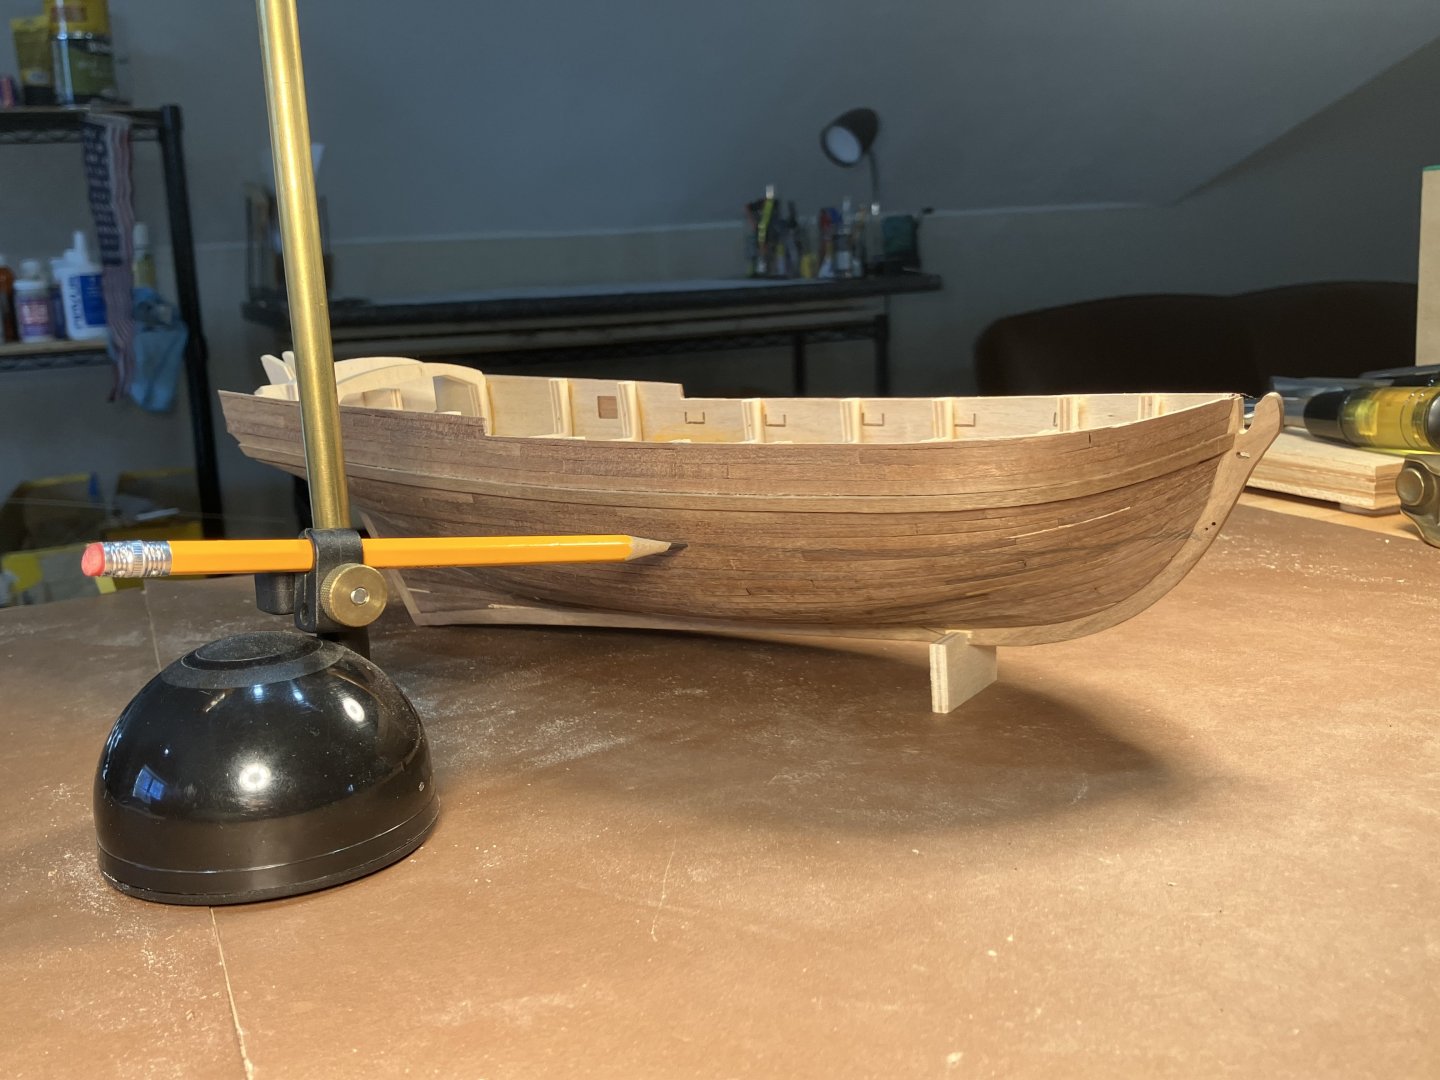

-
Ahoy! Good luck with your project! -Rich
-
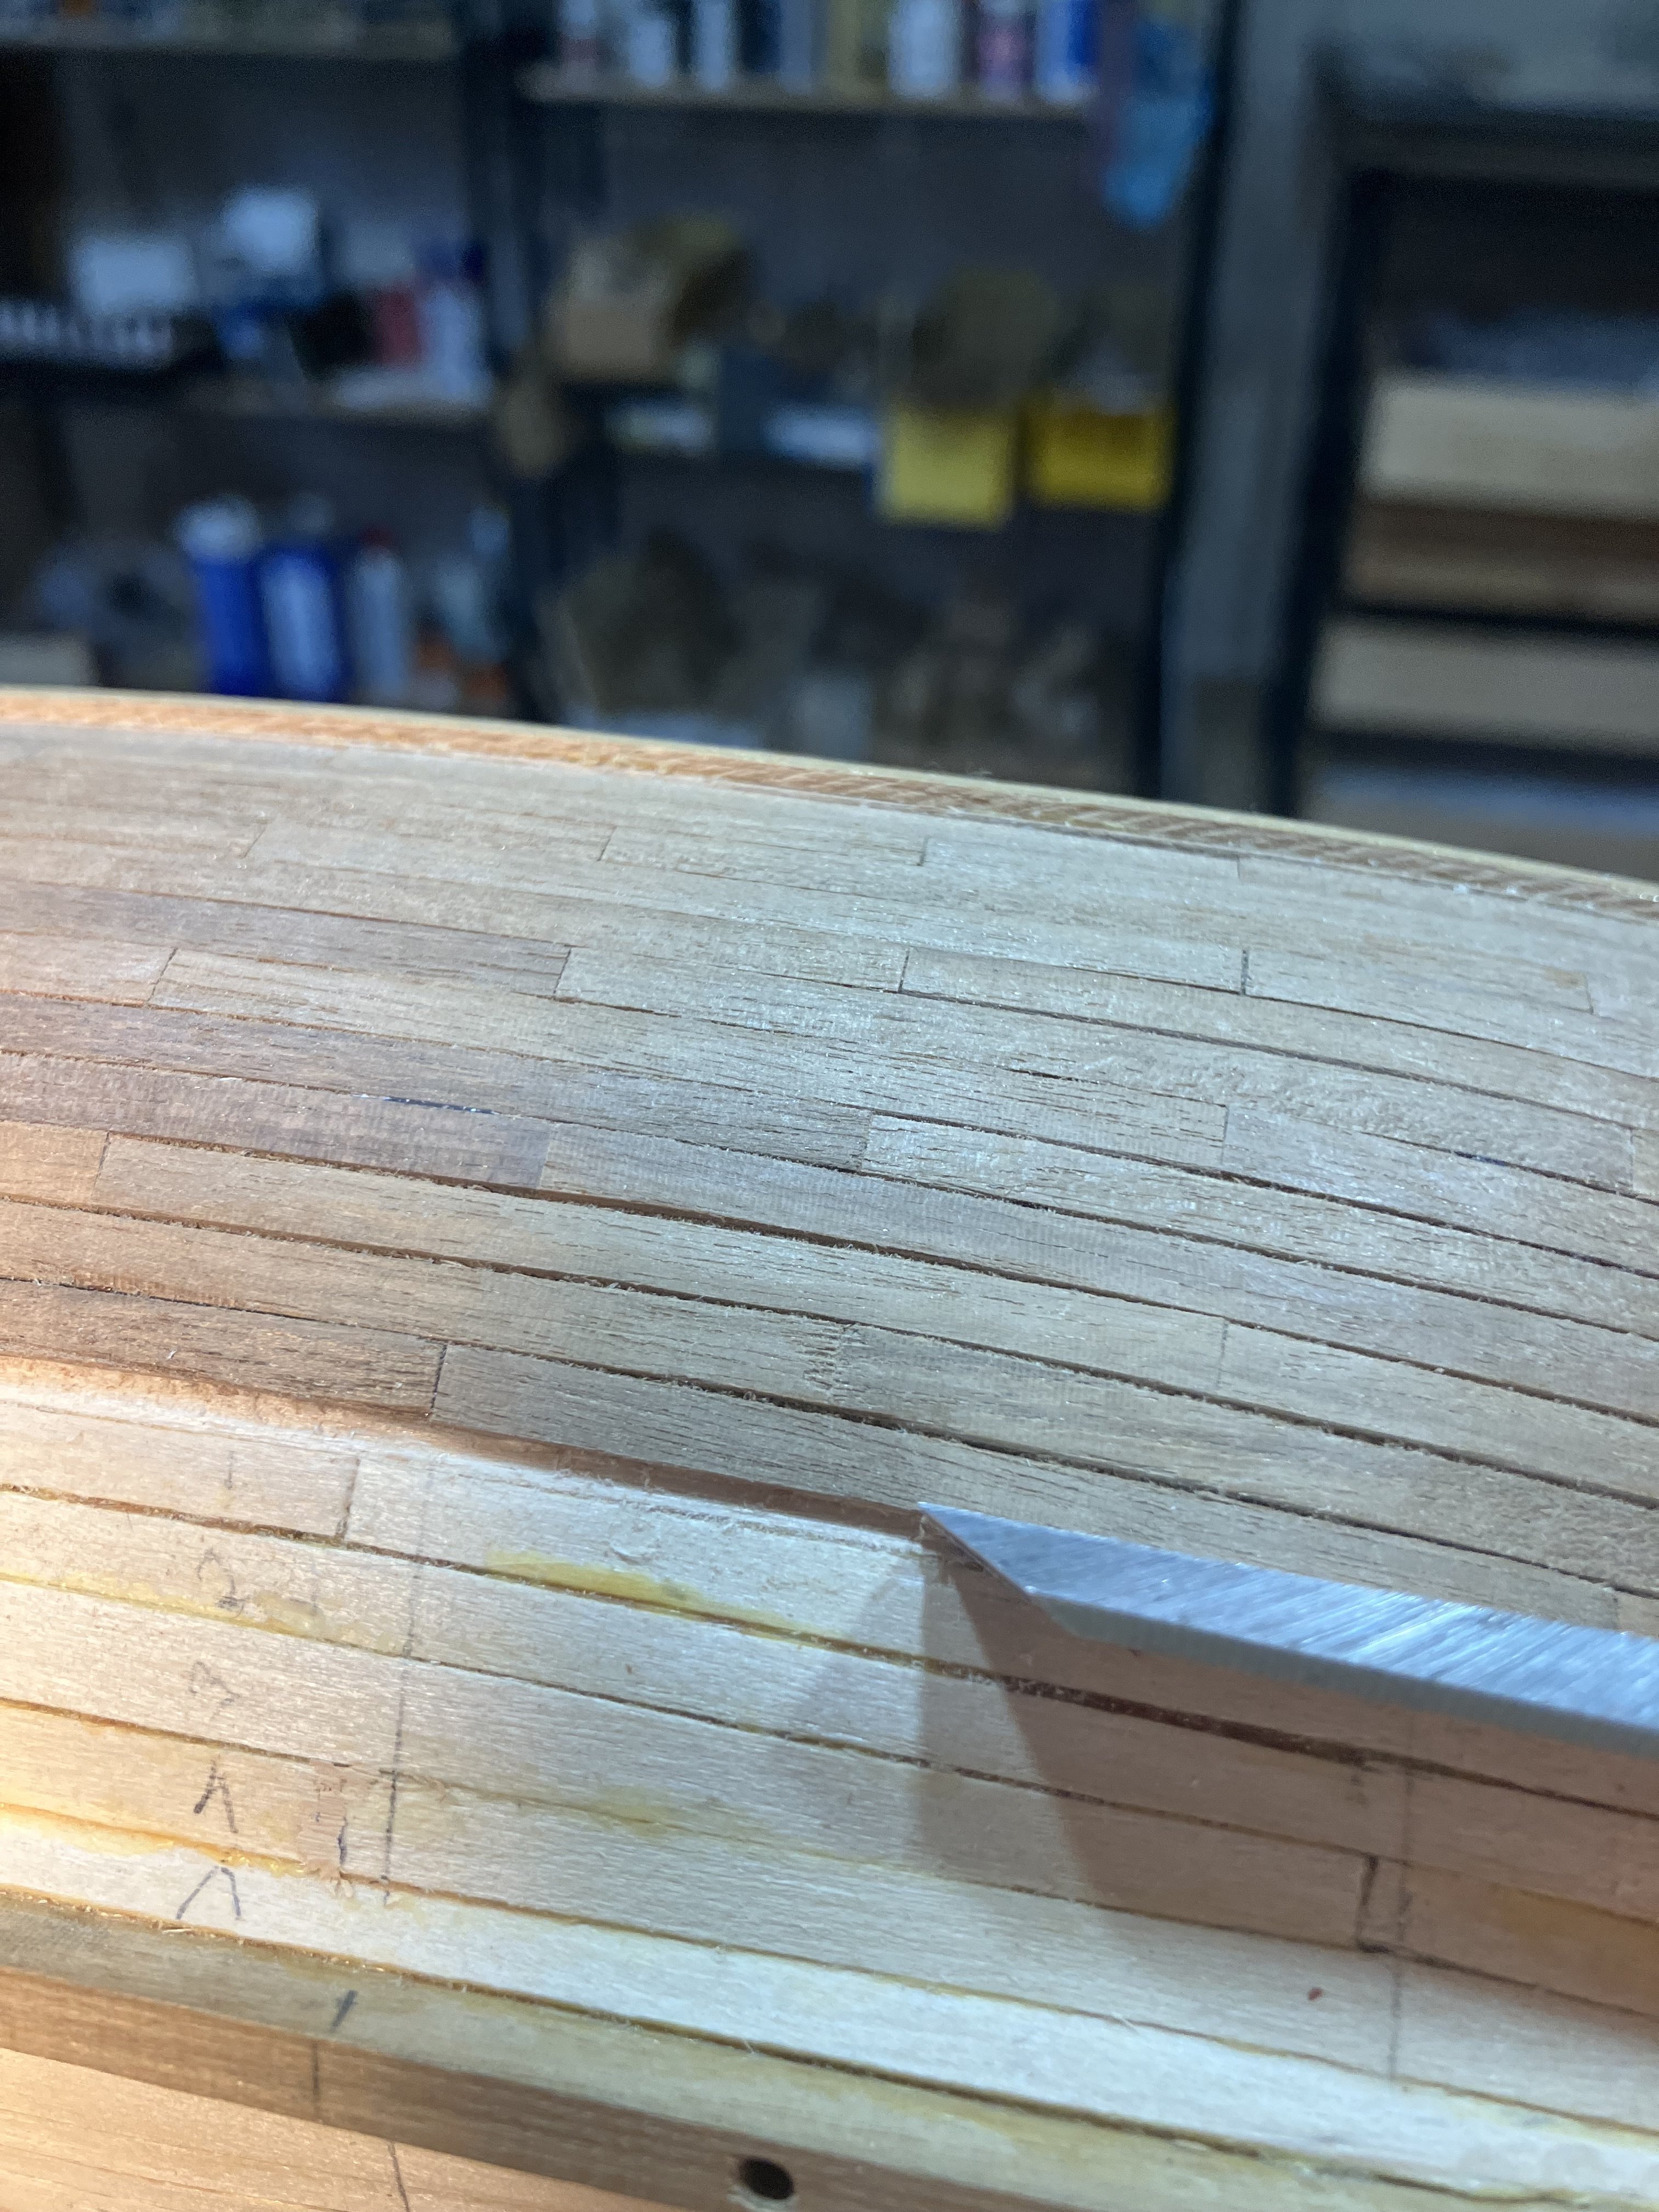
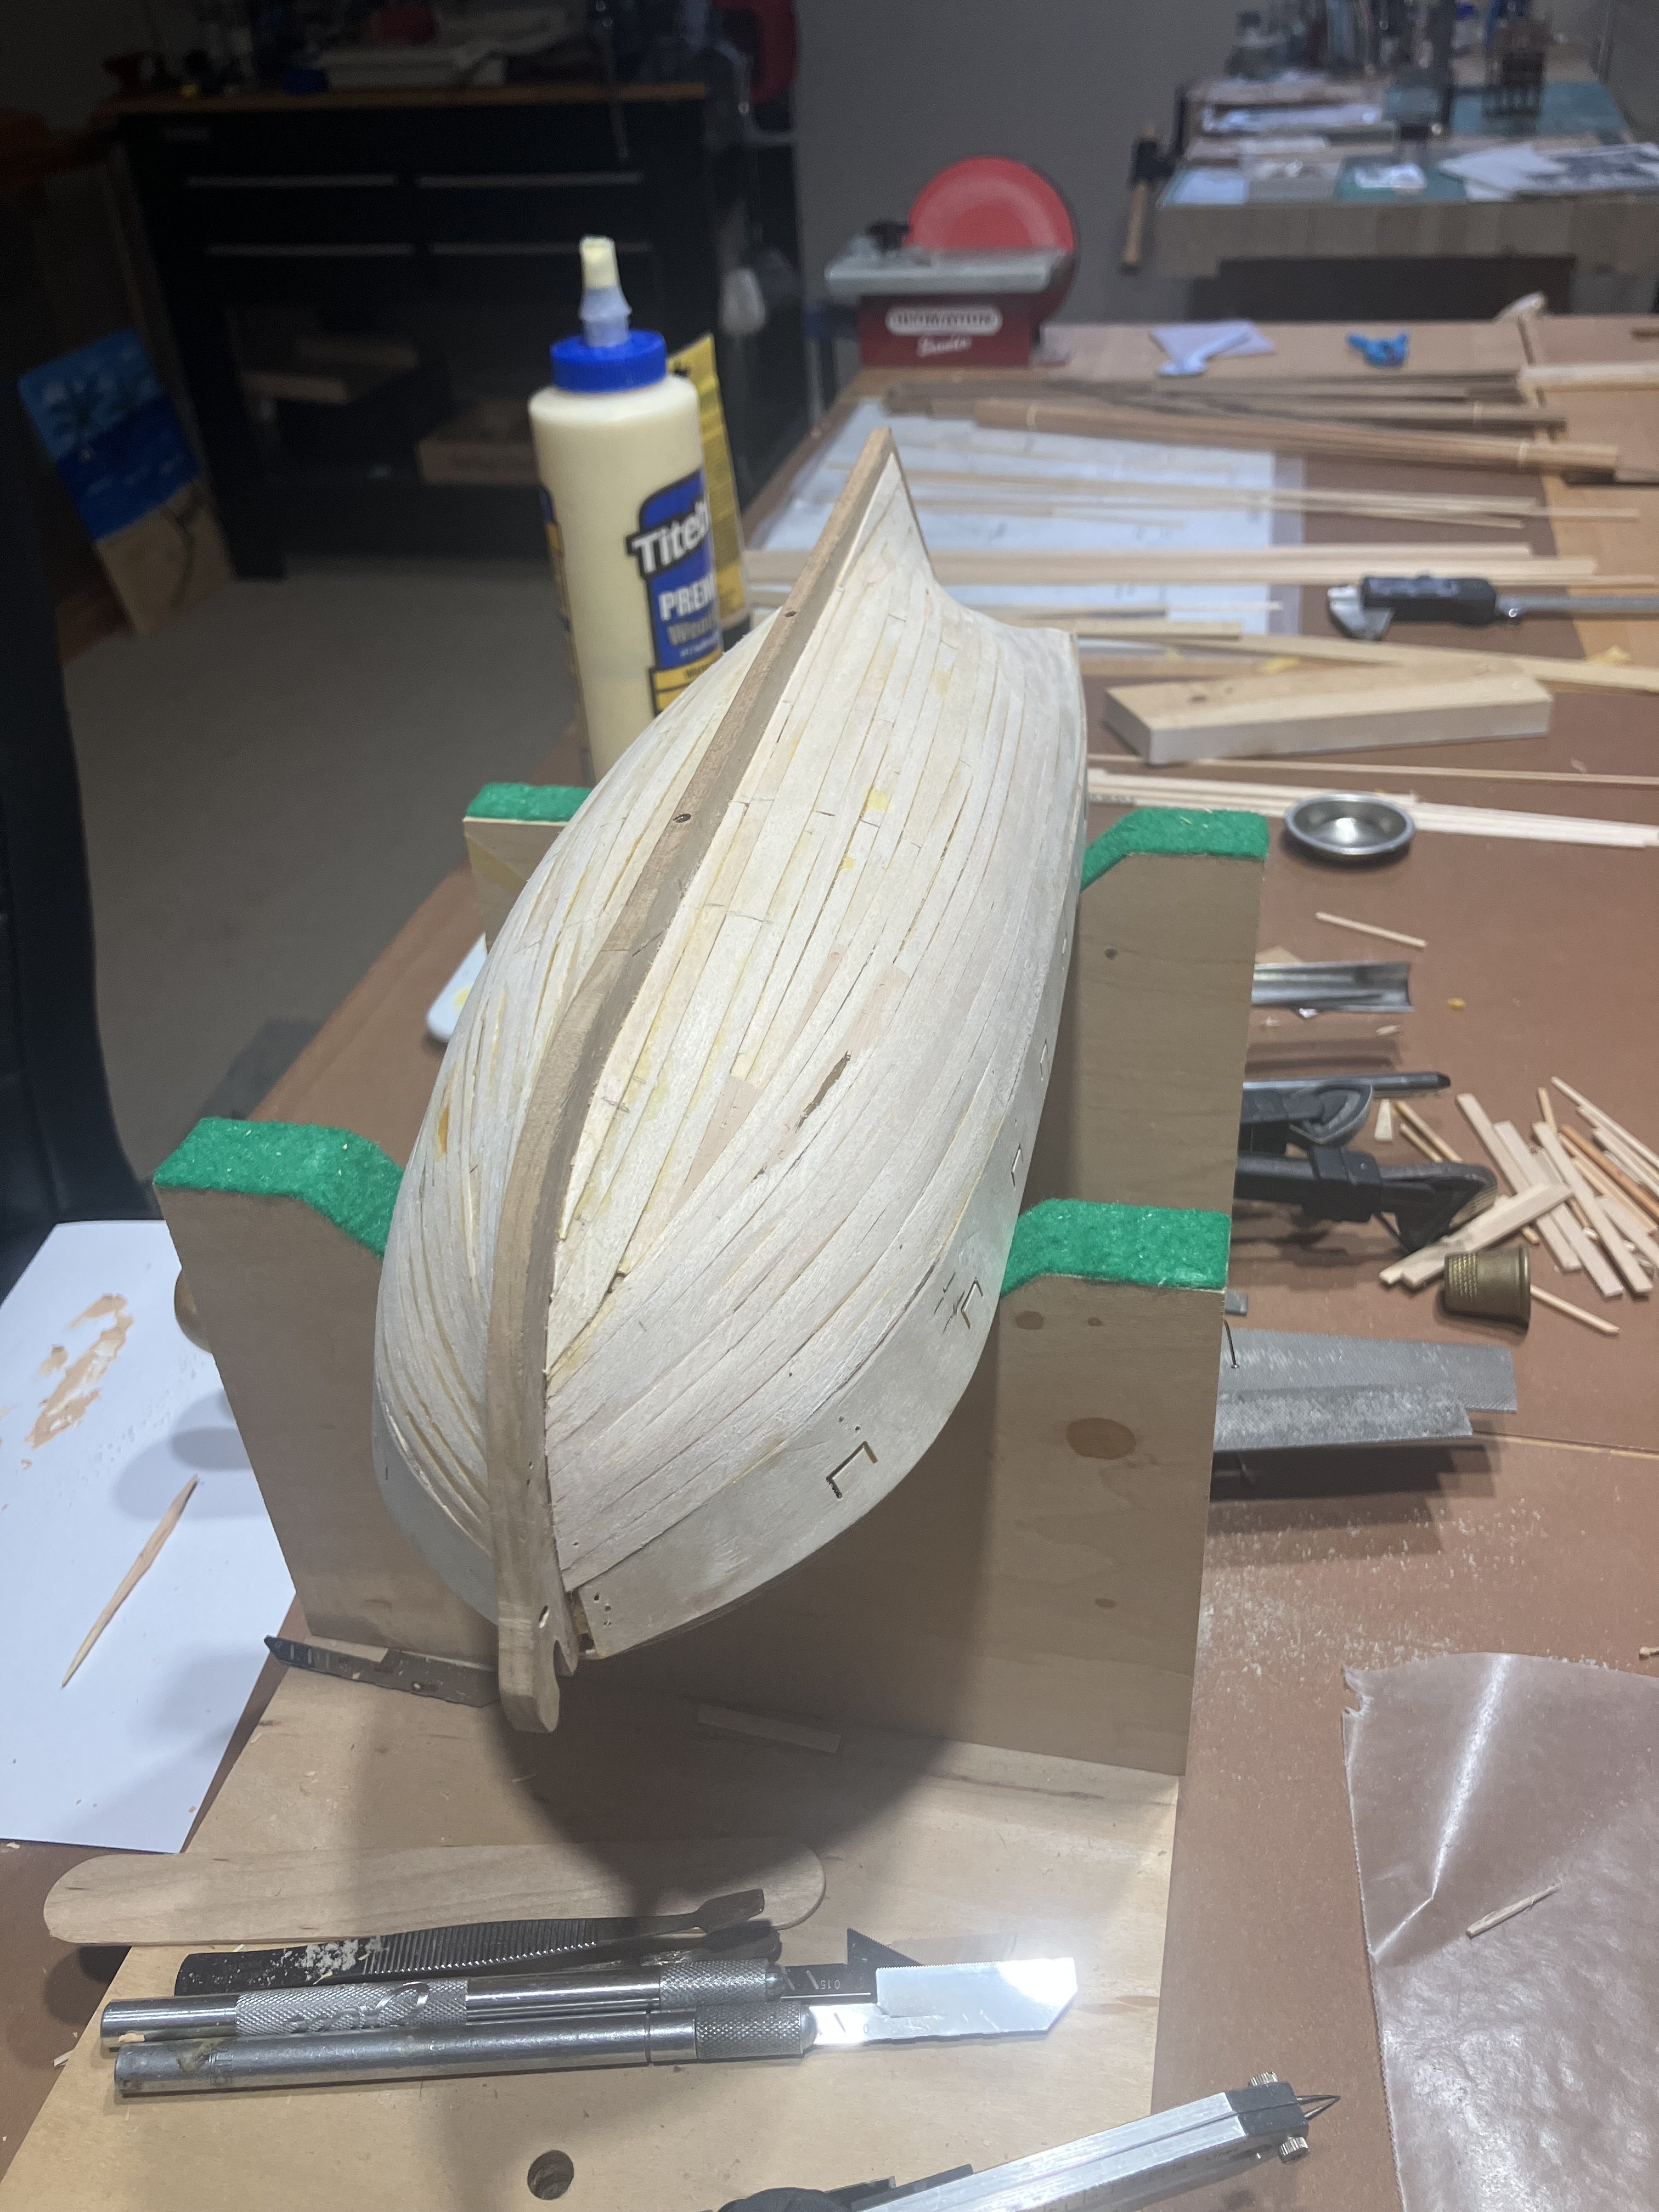
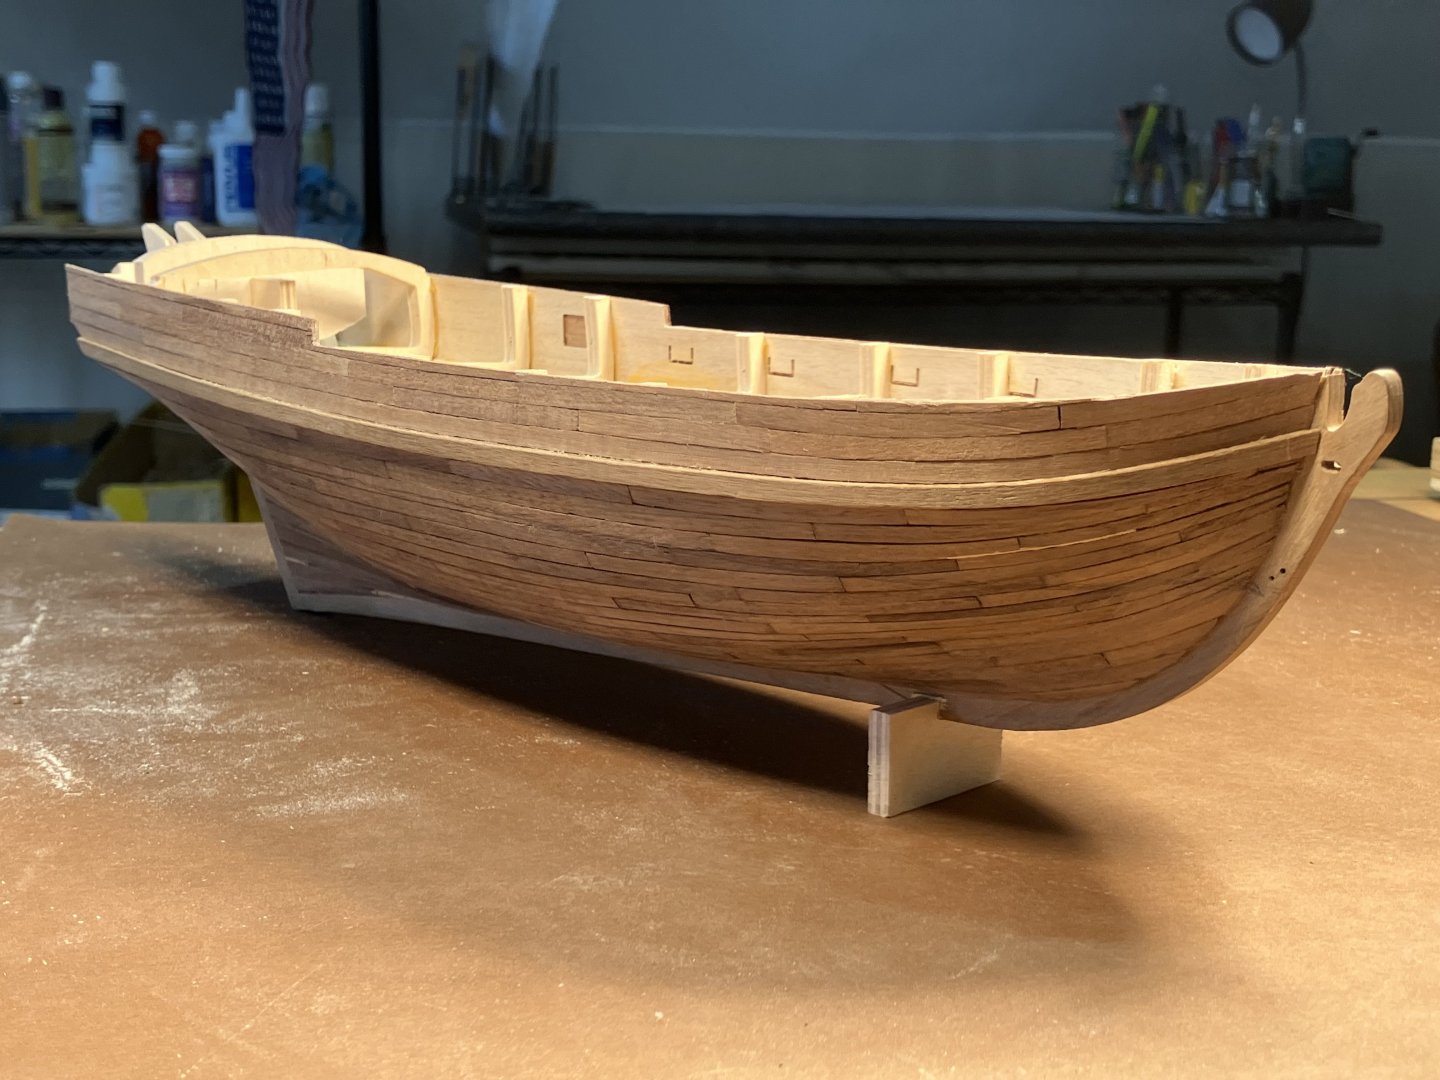
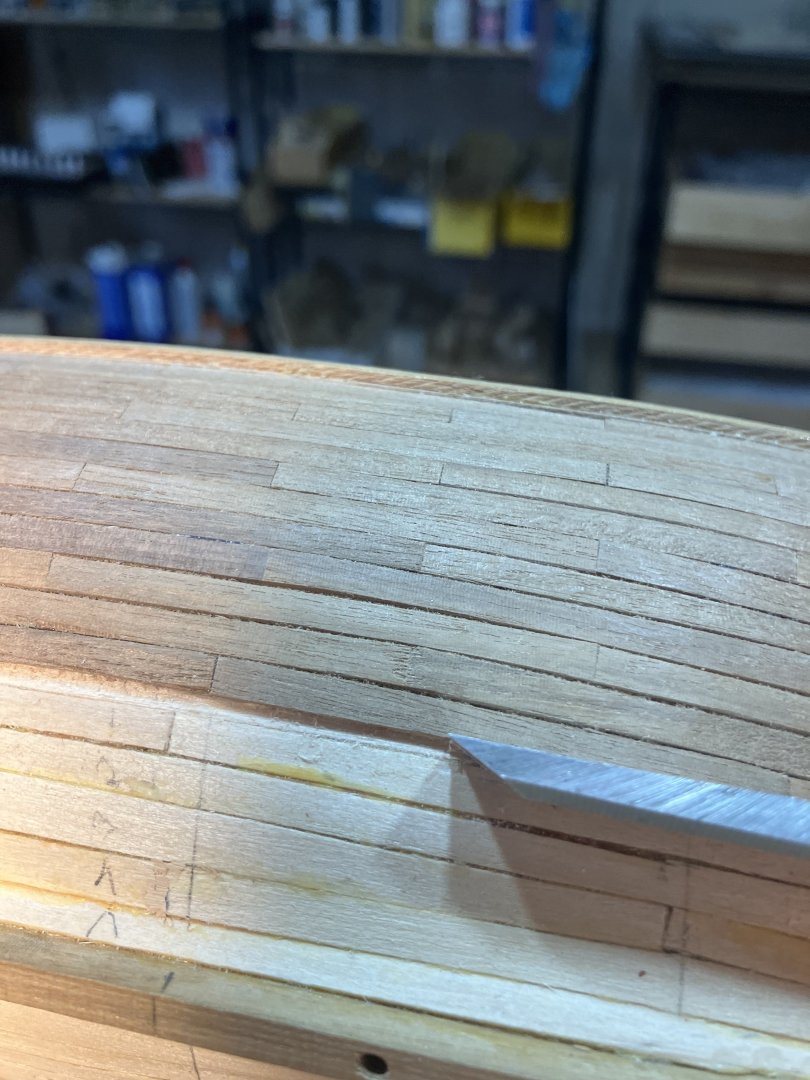
Second Planking Notes Wood strip widths and thickness vary greatly. Next time I’ll run them through the Byrnes saw to get consistent 4mm width. This is hardwood, so if there is chipping (tearout) cutting the plank edge, with the chisel in one direction, try cutting in the opposite direction.
-
Second Planking Many ways to do this. Even after many hulls I still find this a challenge. My method is place the plank, mark where it overlaps the adjacent strake, taper with hand plane. I use dots of Titebond and 3m gel CA to install the planks. First cut the strips into 2 1/4” lengths to represent 12’ boards in 3/16” scale. Taper planks with the hand plane. Going along Check that the strakes follow the necessary curve, basically from the middle sweep up fore and aft. Use stealers aft, and drop strakes forward, as necessary. Use a sharp chisel and remove high spots along the edge to form smooth curve. Work the planks with a file to smooth edges, and high and low spots

-
Getting Started: From Dollhouses to the USS Constitution
ERS Rich replied to Jasennord's topic in New member Introductions
Welcome aboard and good luck with your projects. -Rich -
Congrats for completing your ship. Best of luck to you and your family in the New Year.
-
Welcome and greetings from Boston, USA. Good luck with your projects and enjoy your journey. Always around if you have a question. -Rich
-
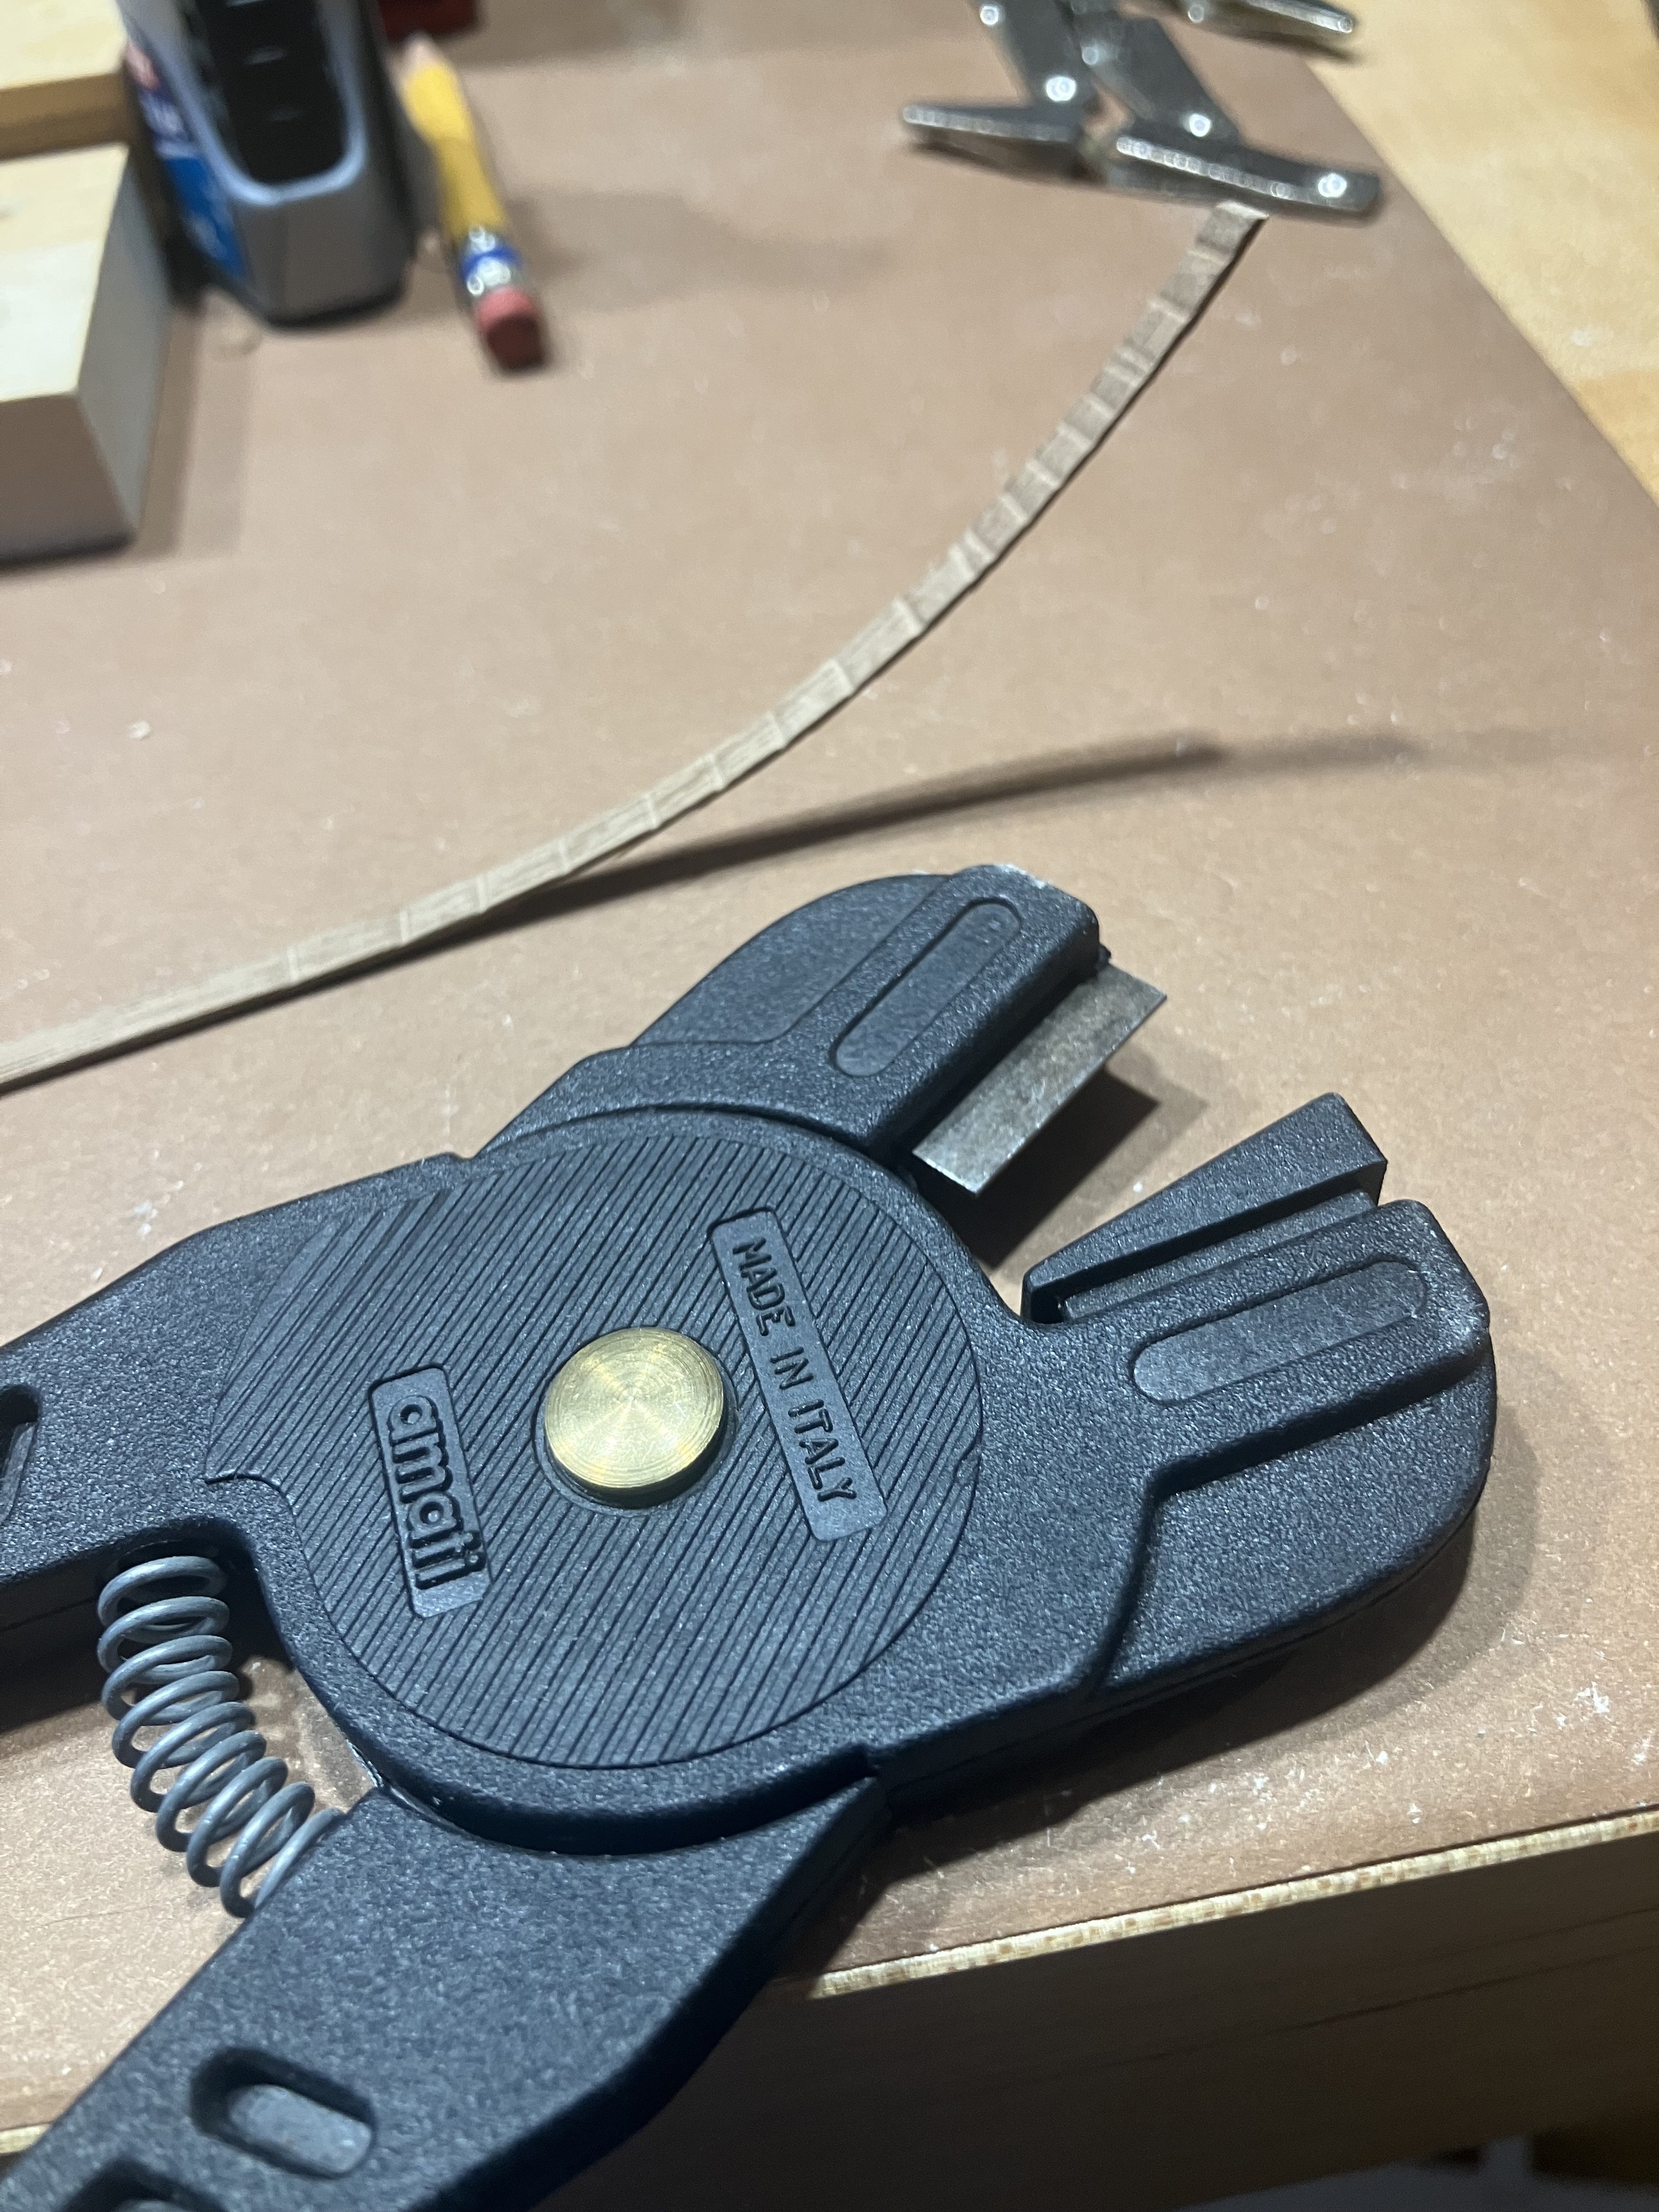
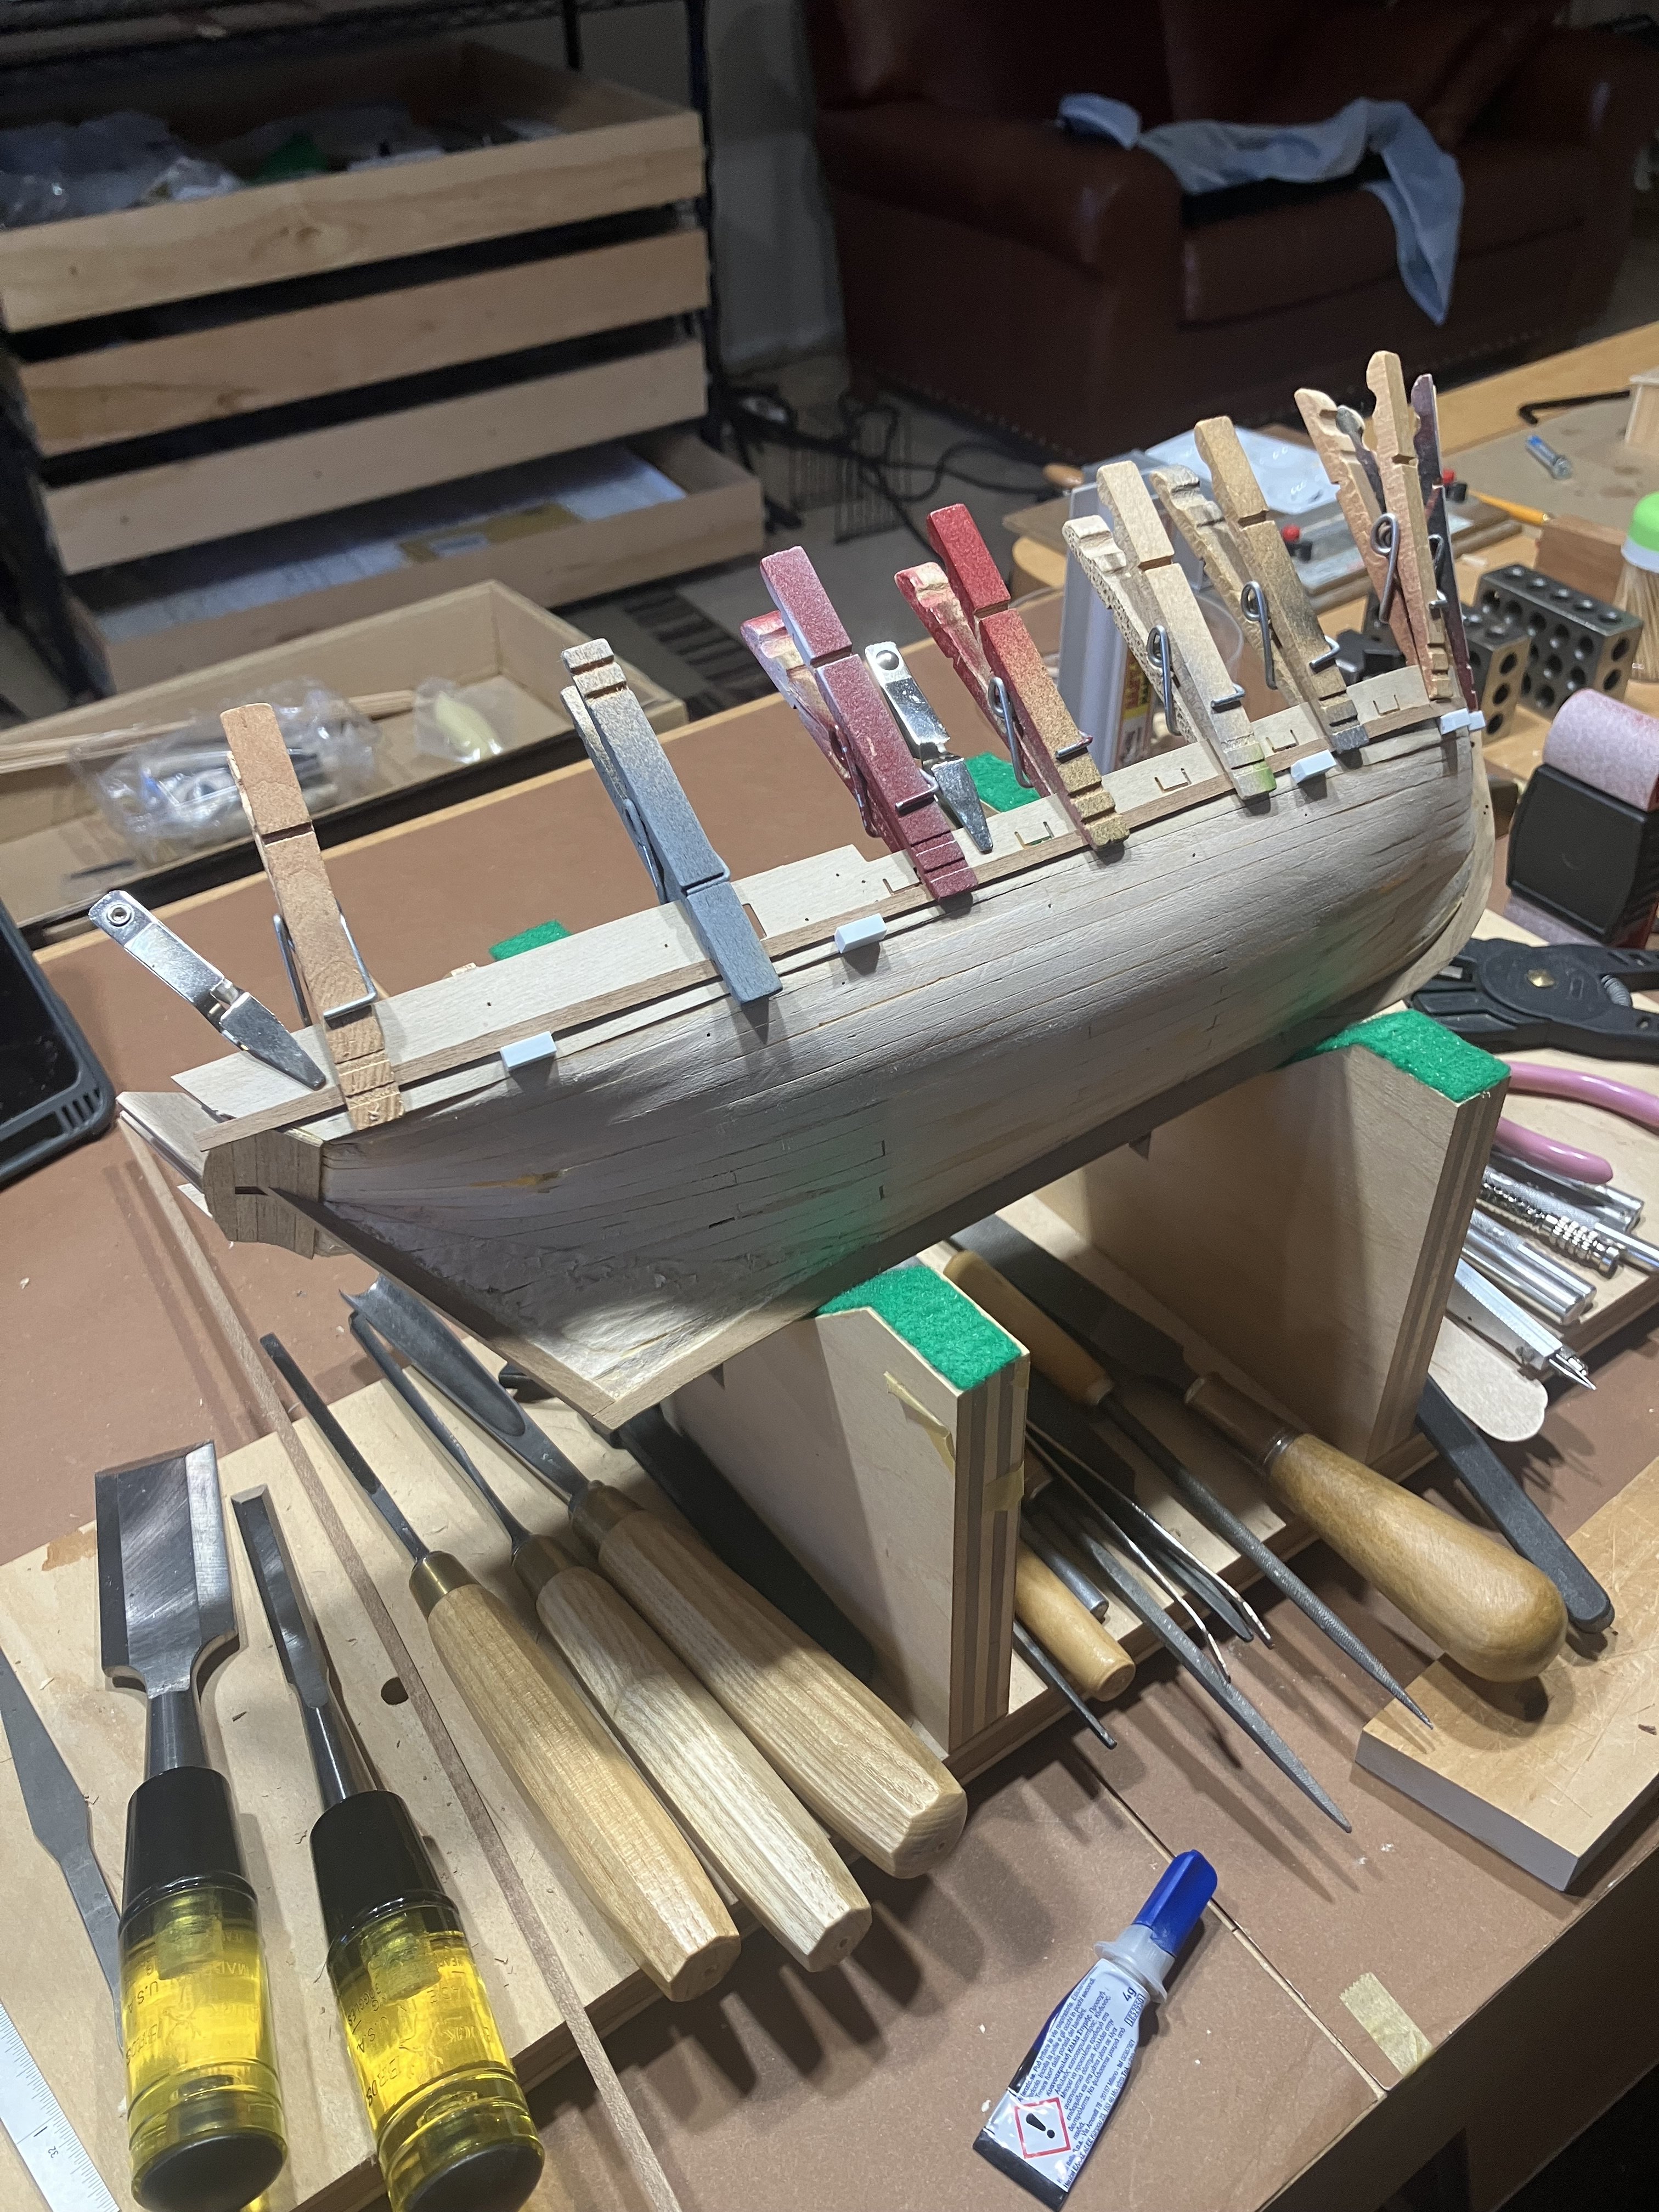
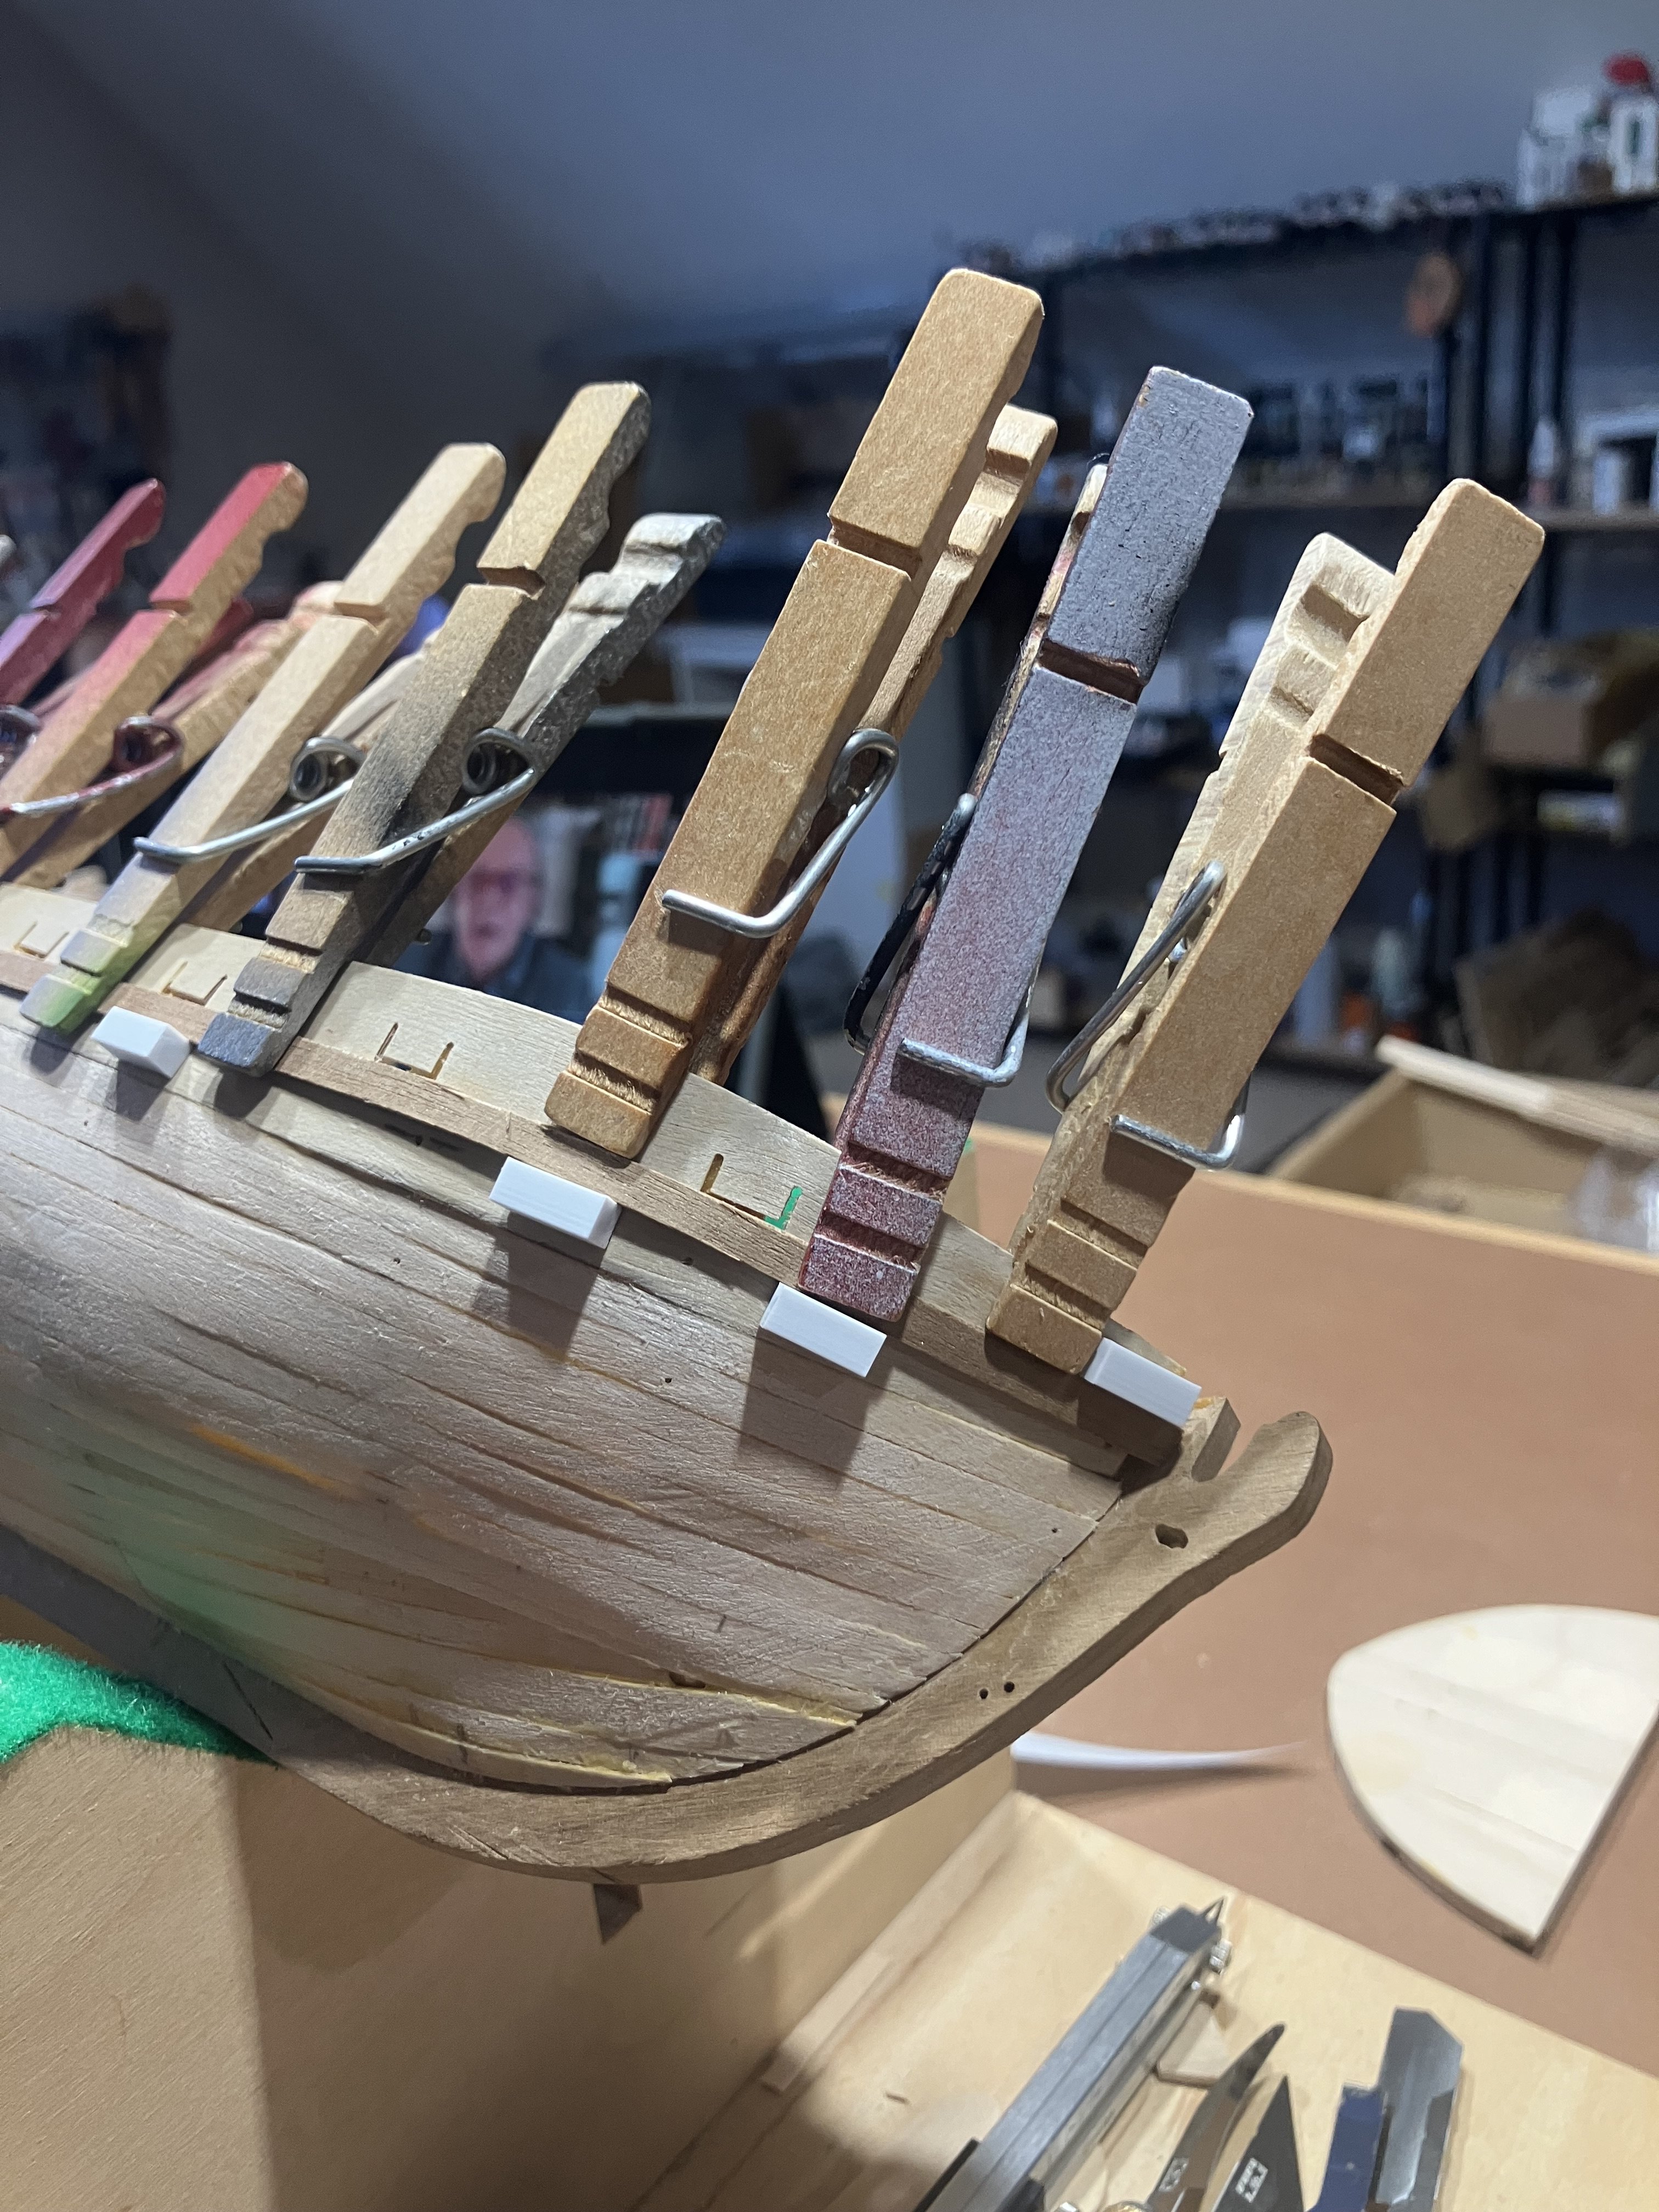
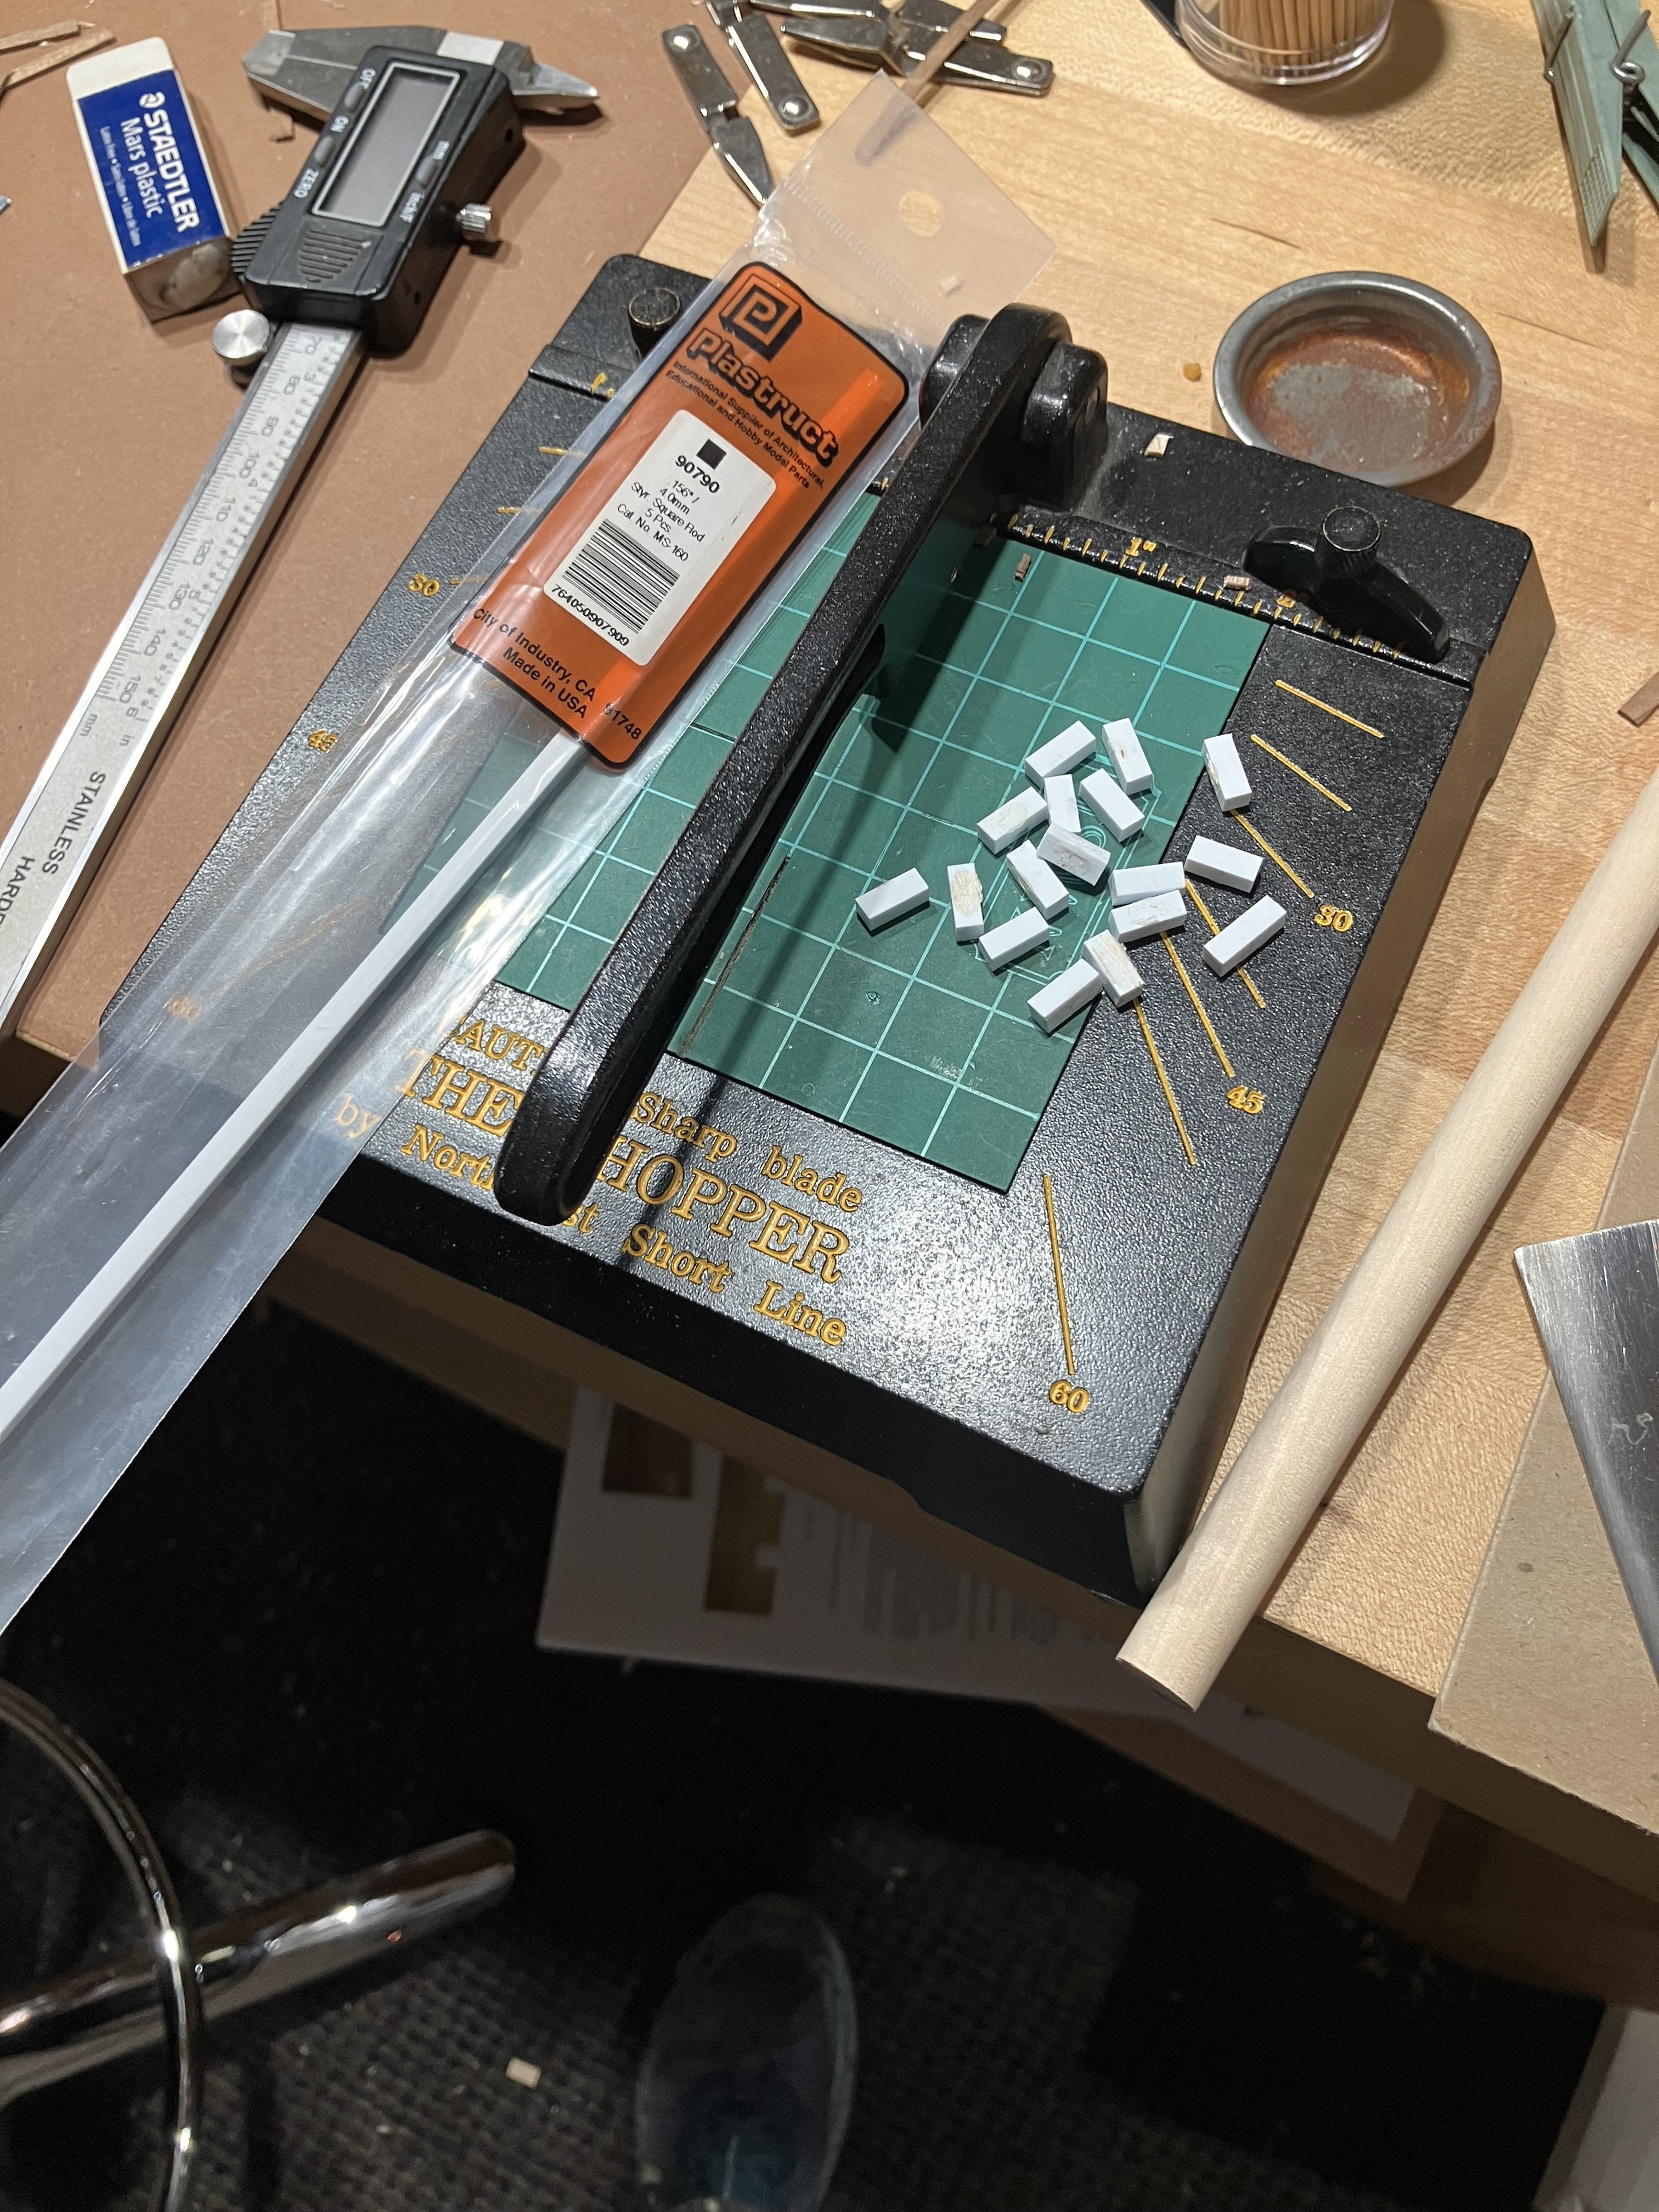
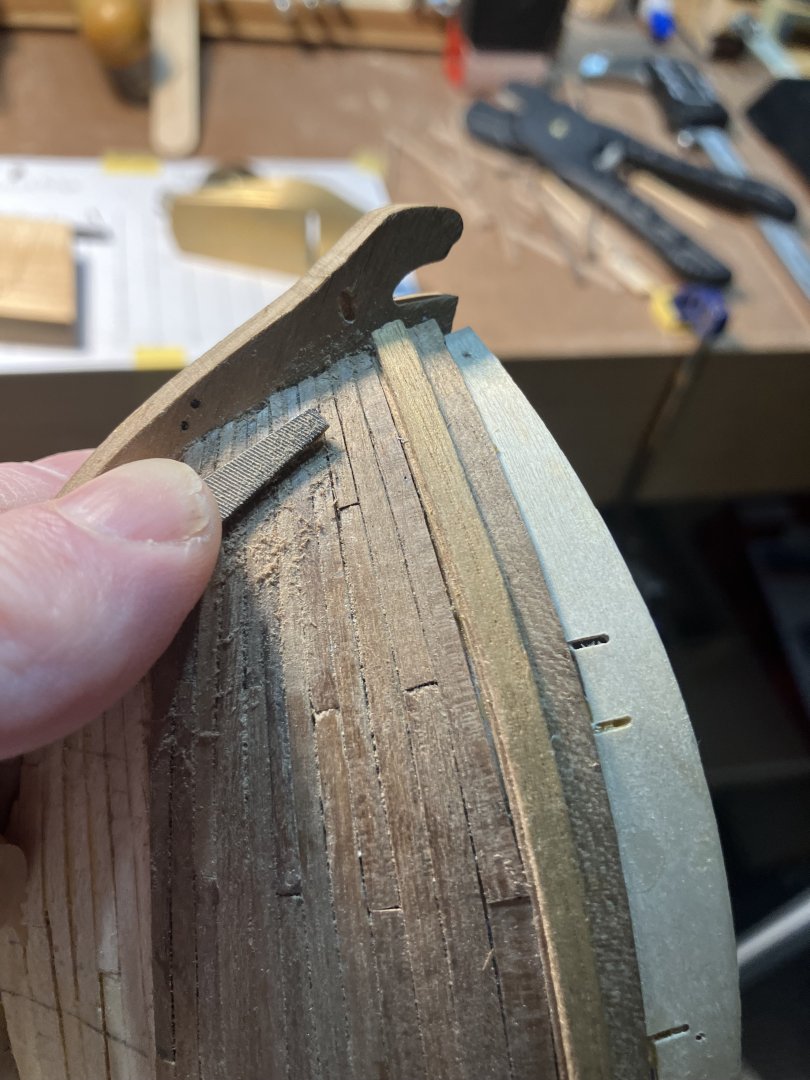
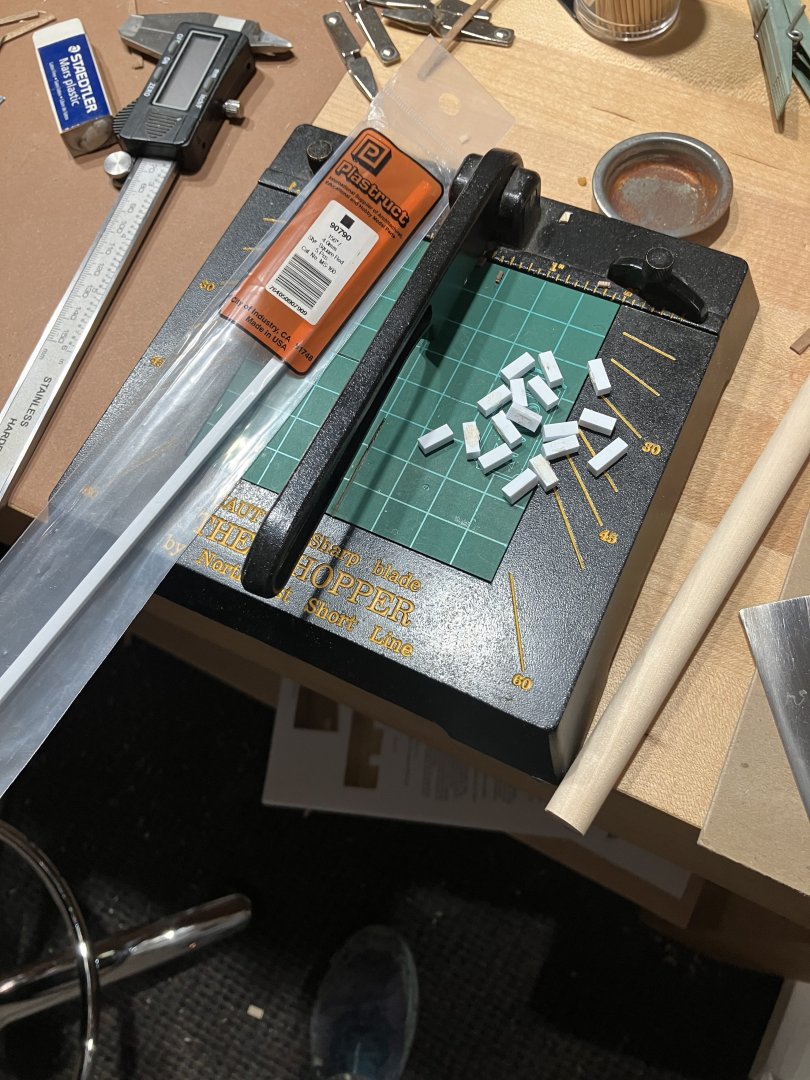
Installing the Wales Installing Wales is difficult because they need to be precisely positioned so both sides mirror each other. Here is a way to do it simply. Start with a full length plank, cut it to fit along the Stem Lost. A tool like this can be used to form the curve, it’s quicker and saves time compared to soaking. Make up a set of blocks, here I use 4 x 4 mm Plastrut. Next position the Wale in the exact location and secure with cloths pins, and take a break. Come back and make sure everything us right. Then install the blocks along the Wale edge with a dab of CA. Now the Wale can be removed, glue applied, reinstalled to the exact position, and clamped. After the glue dries, use a pair of pliers, and snap off the blocks.


-
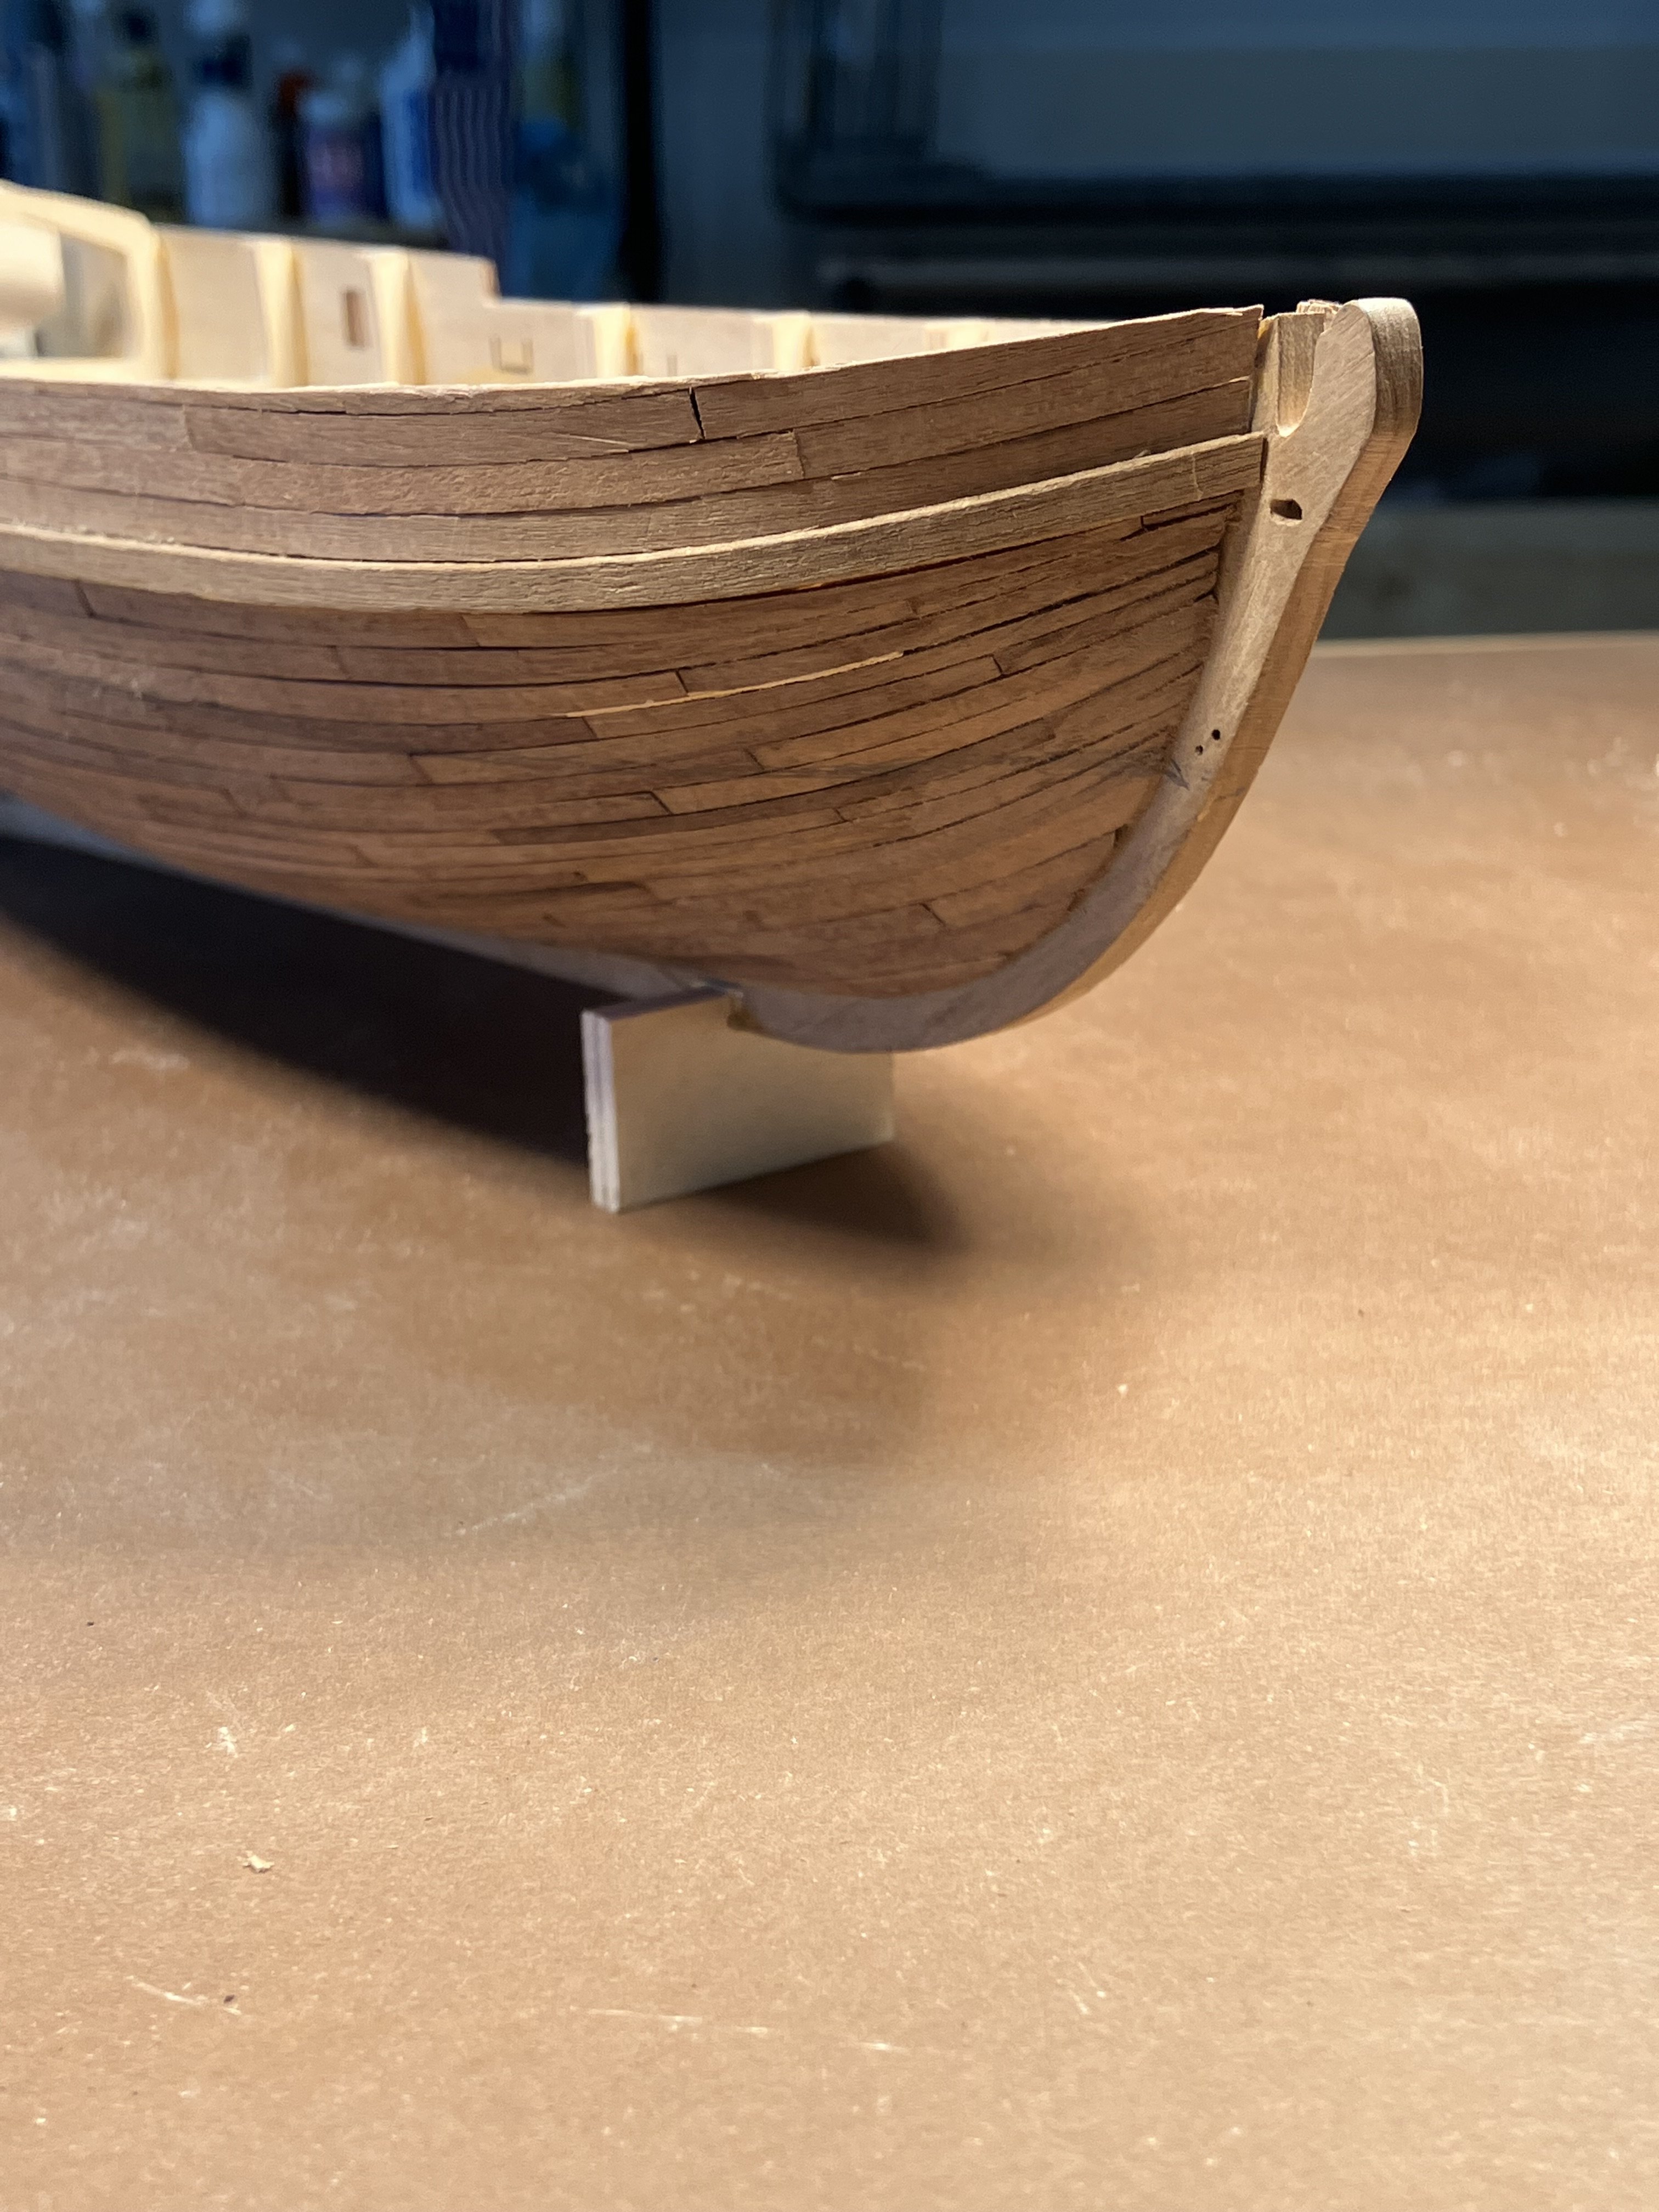
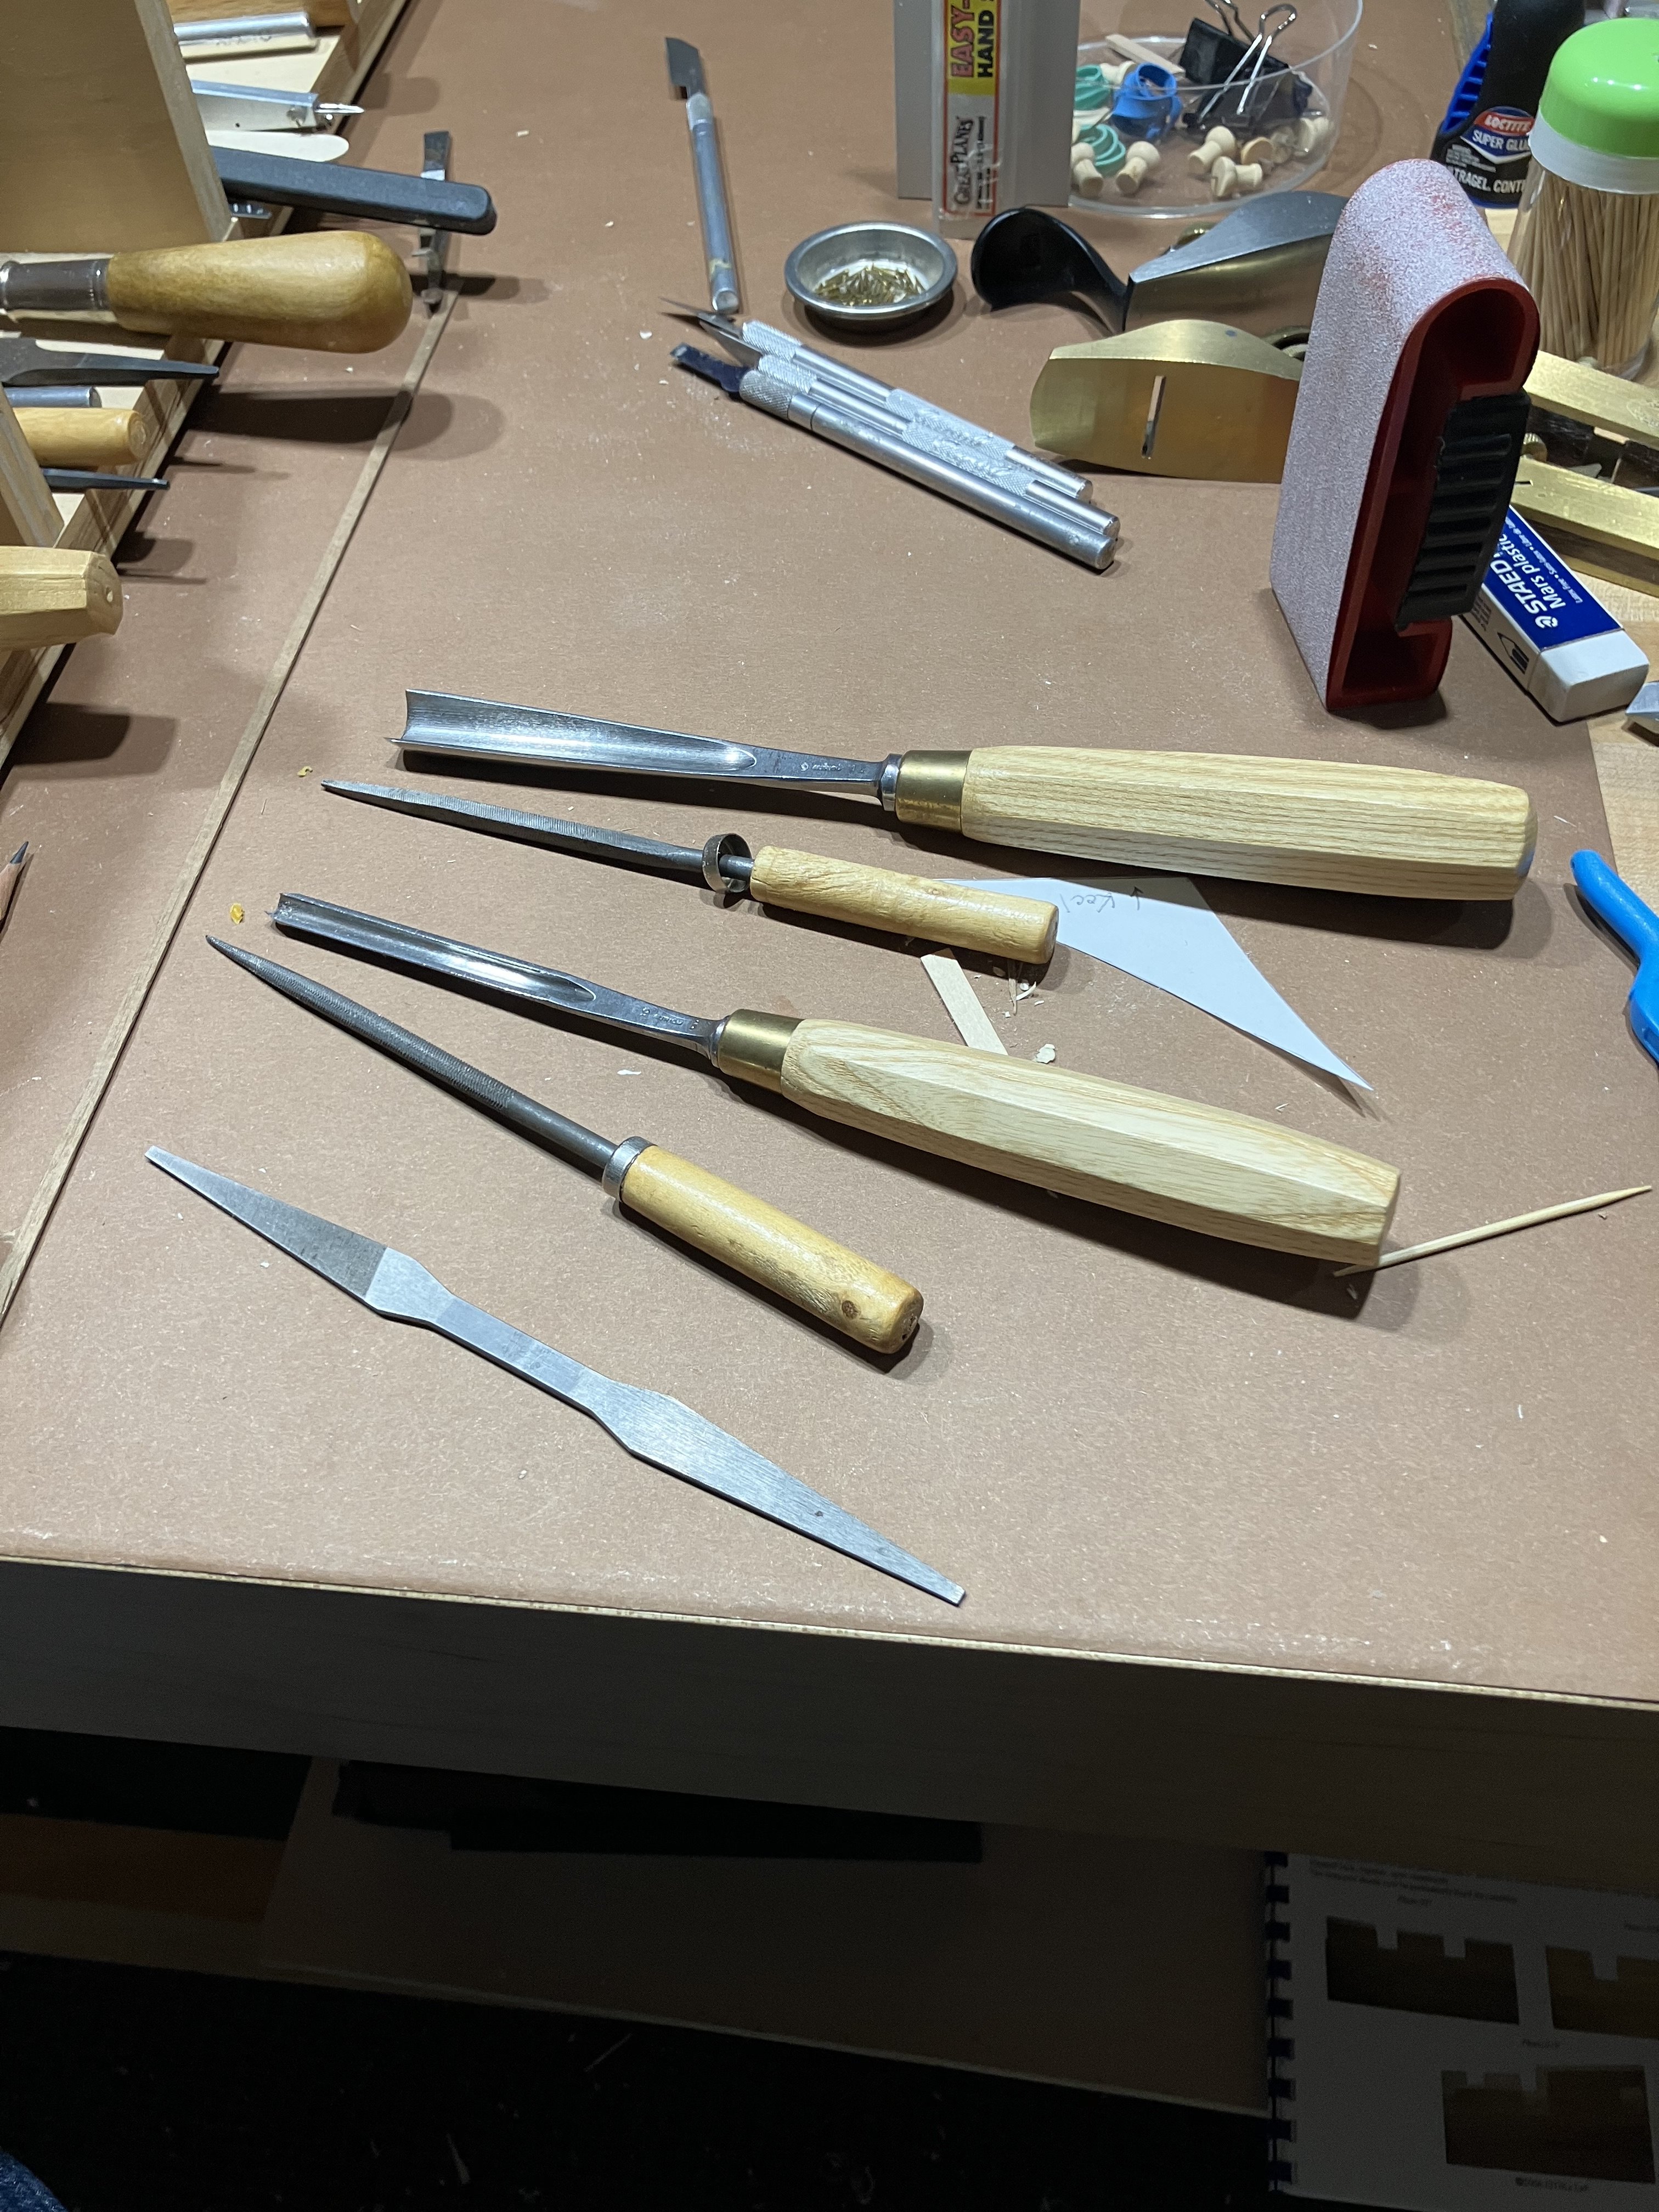
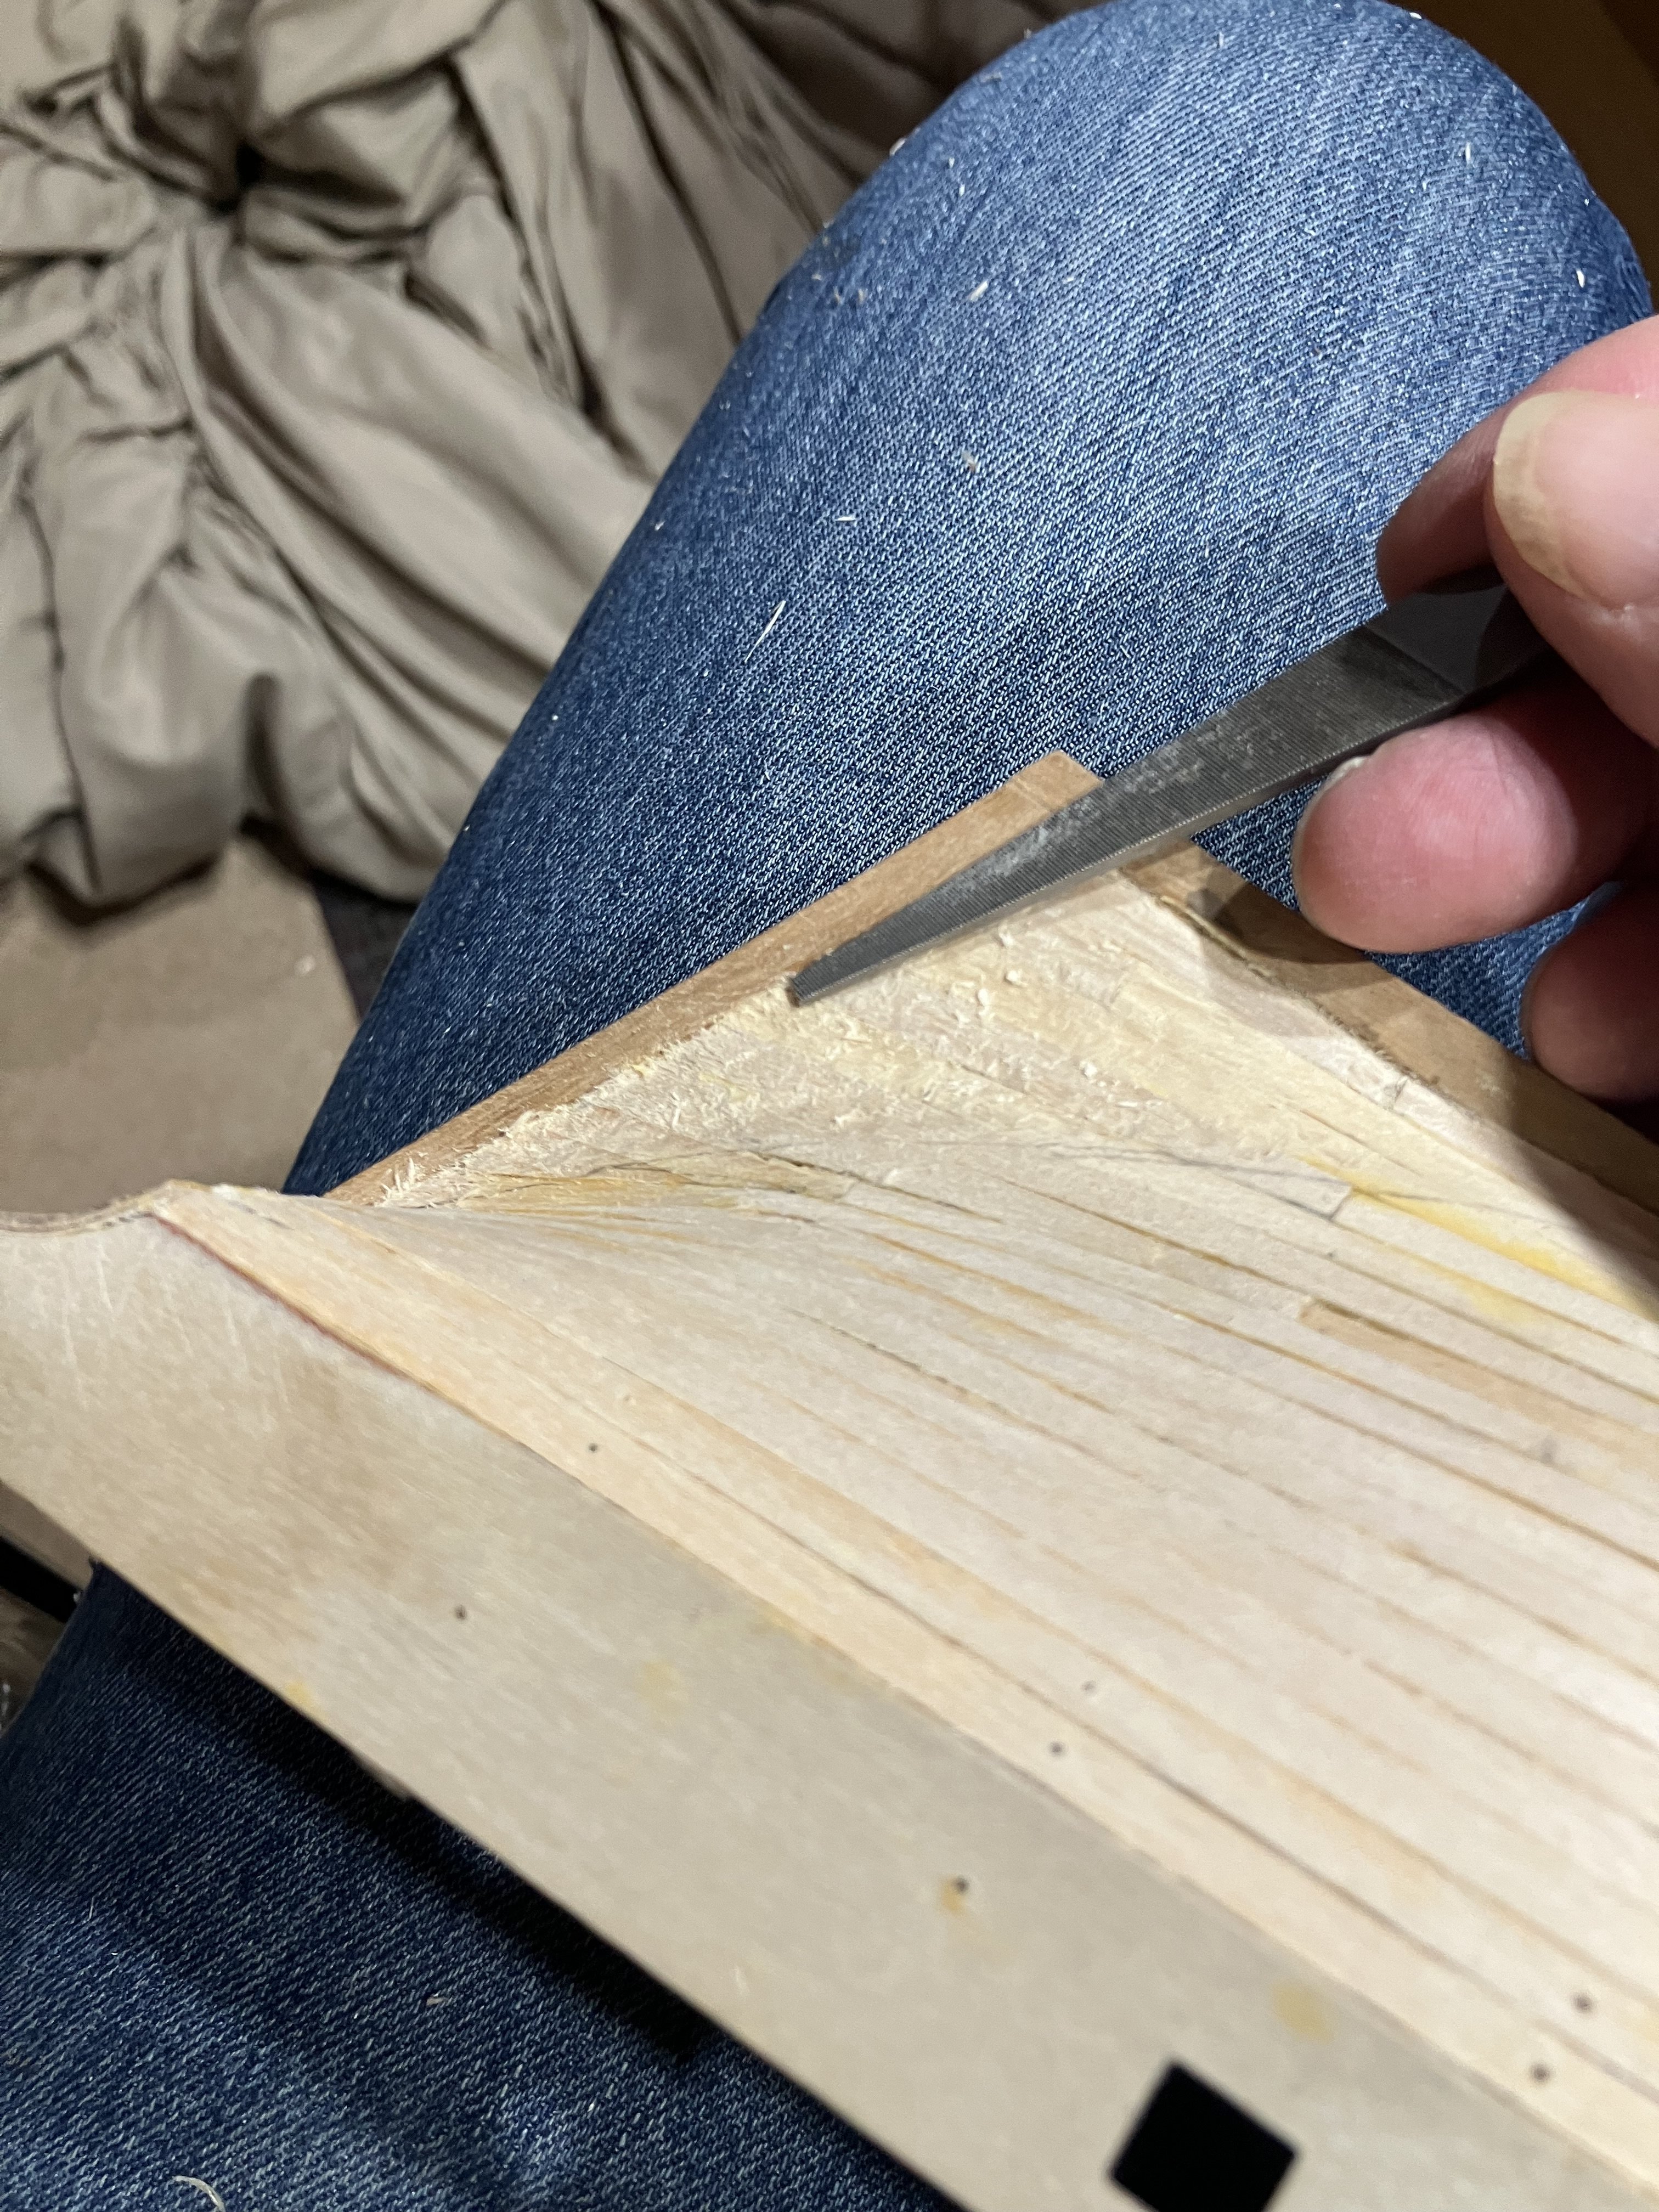
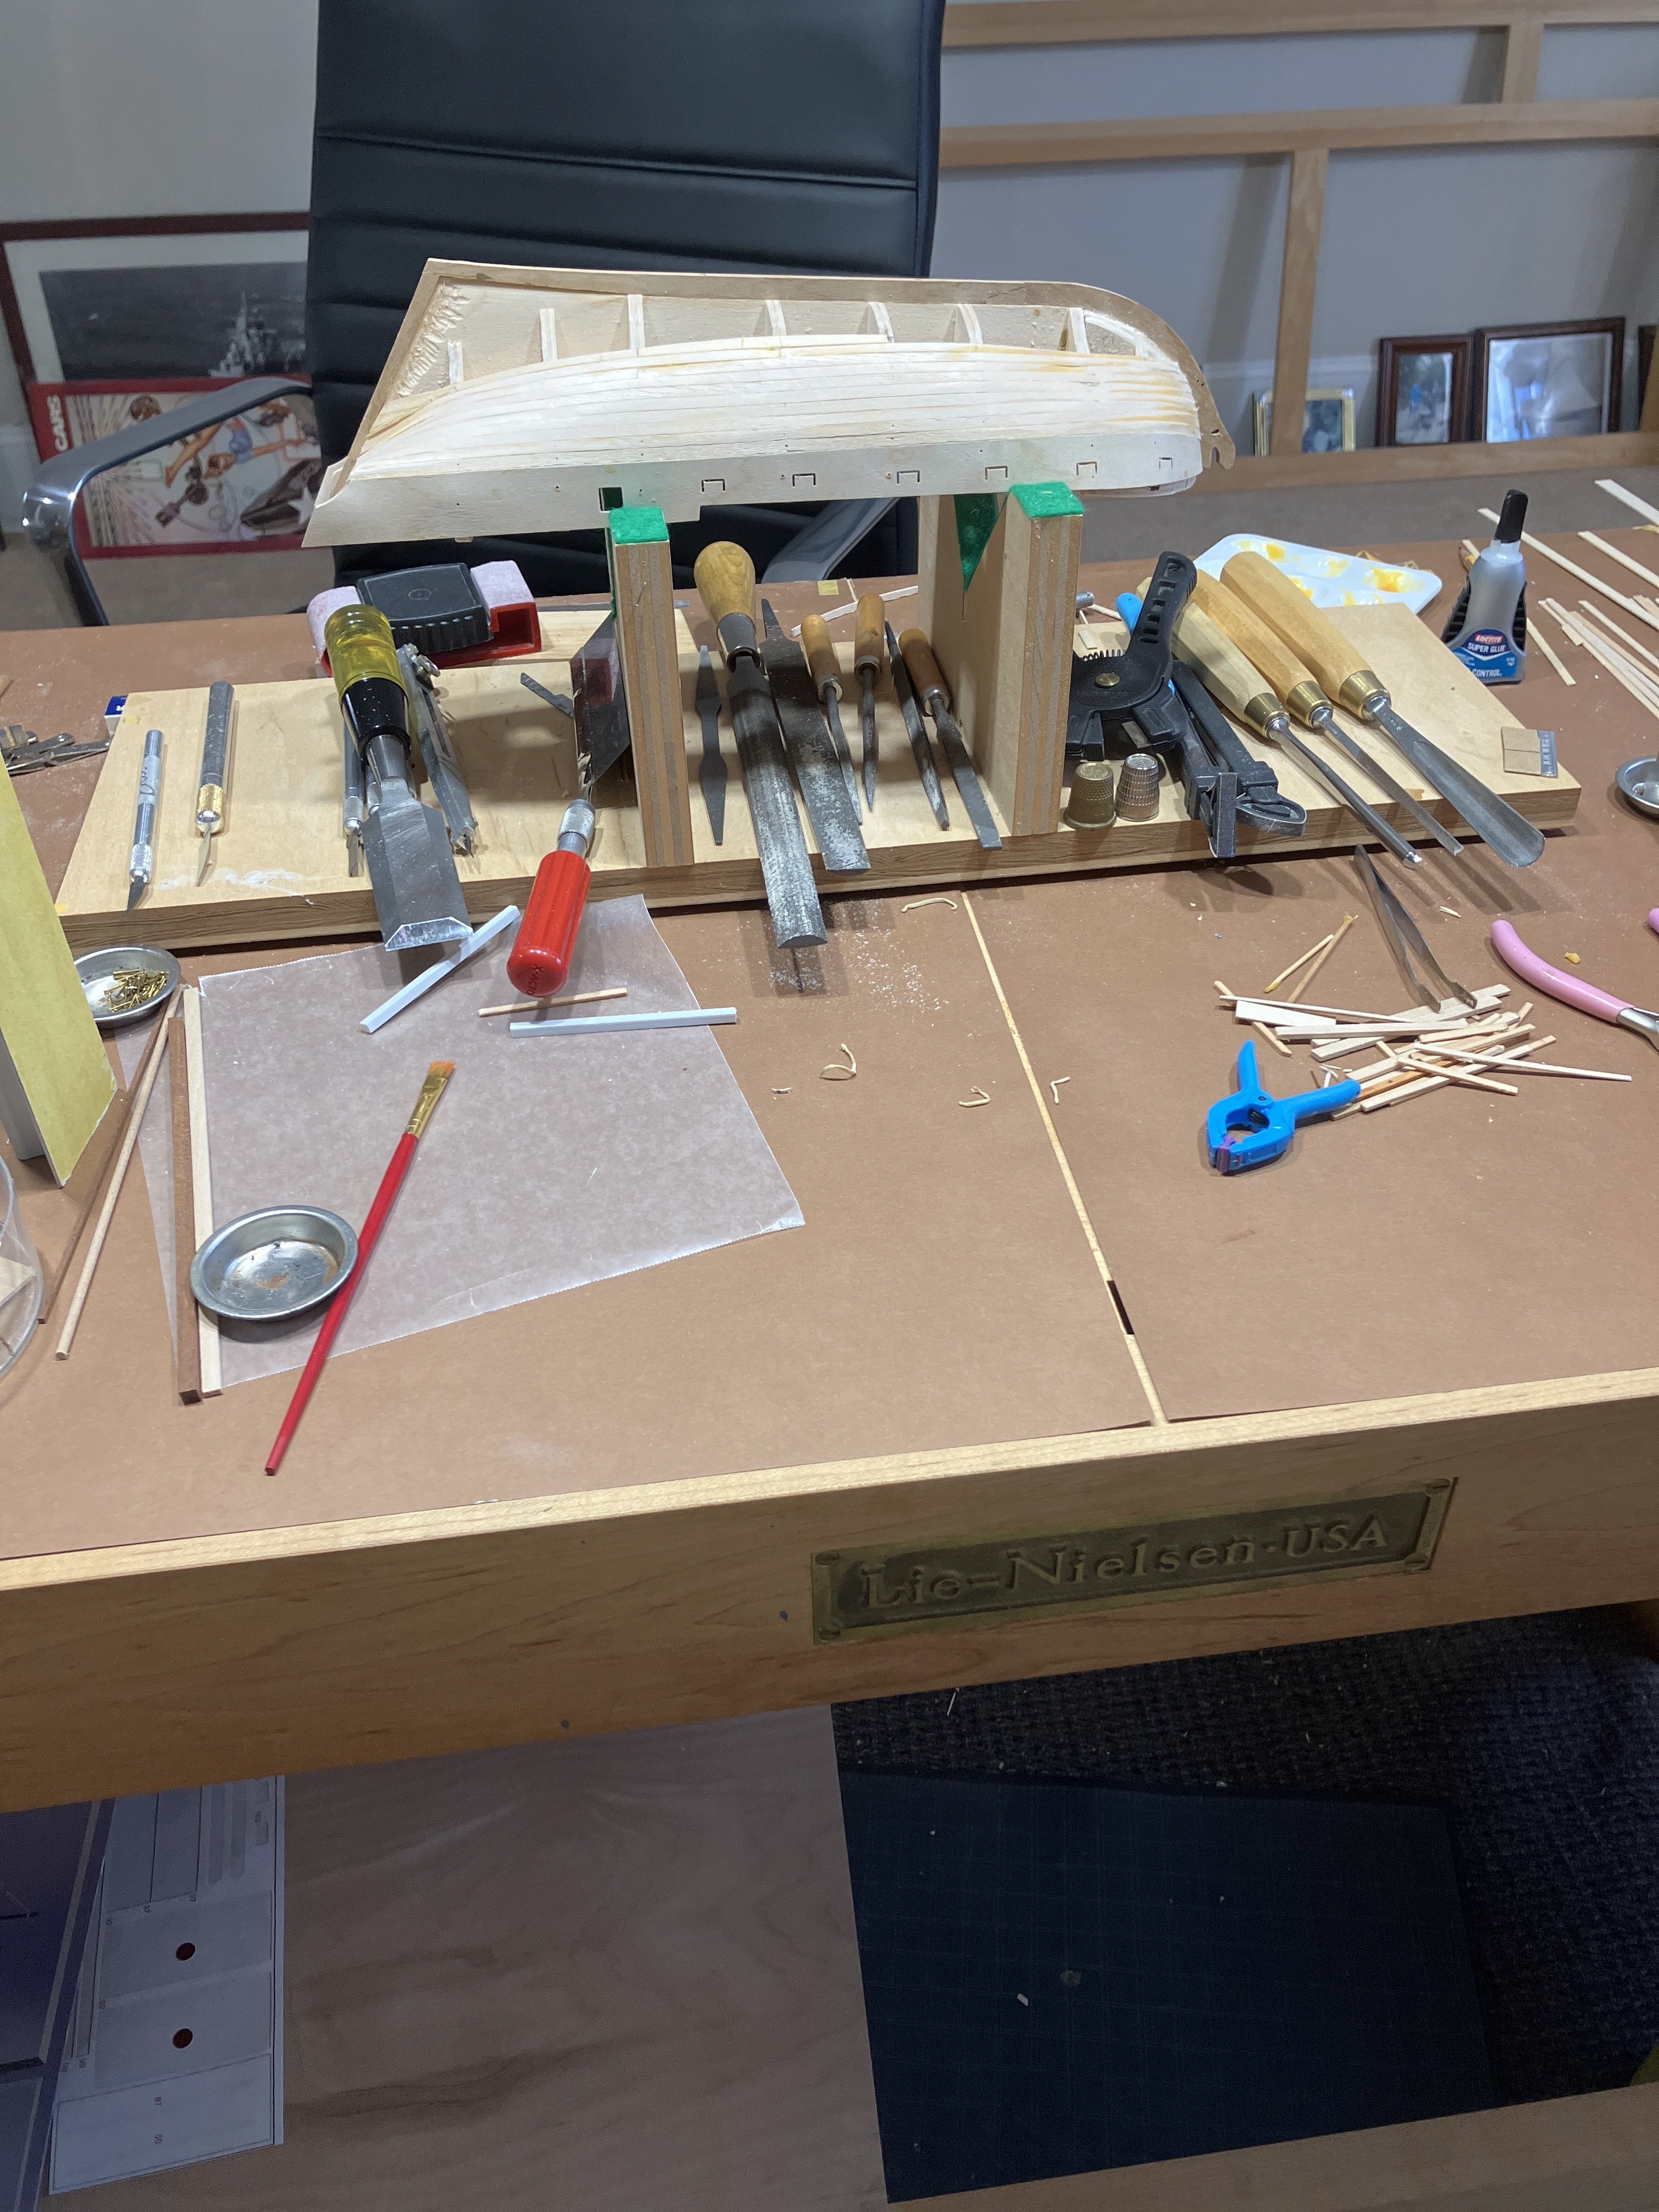
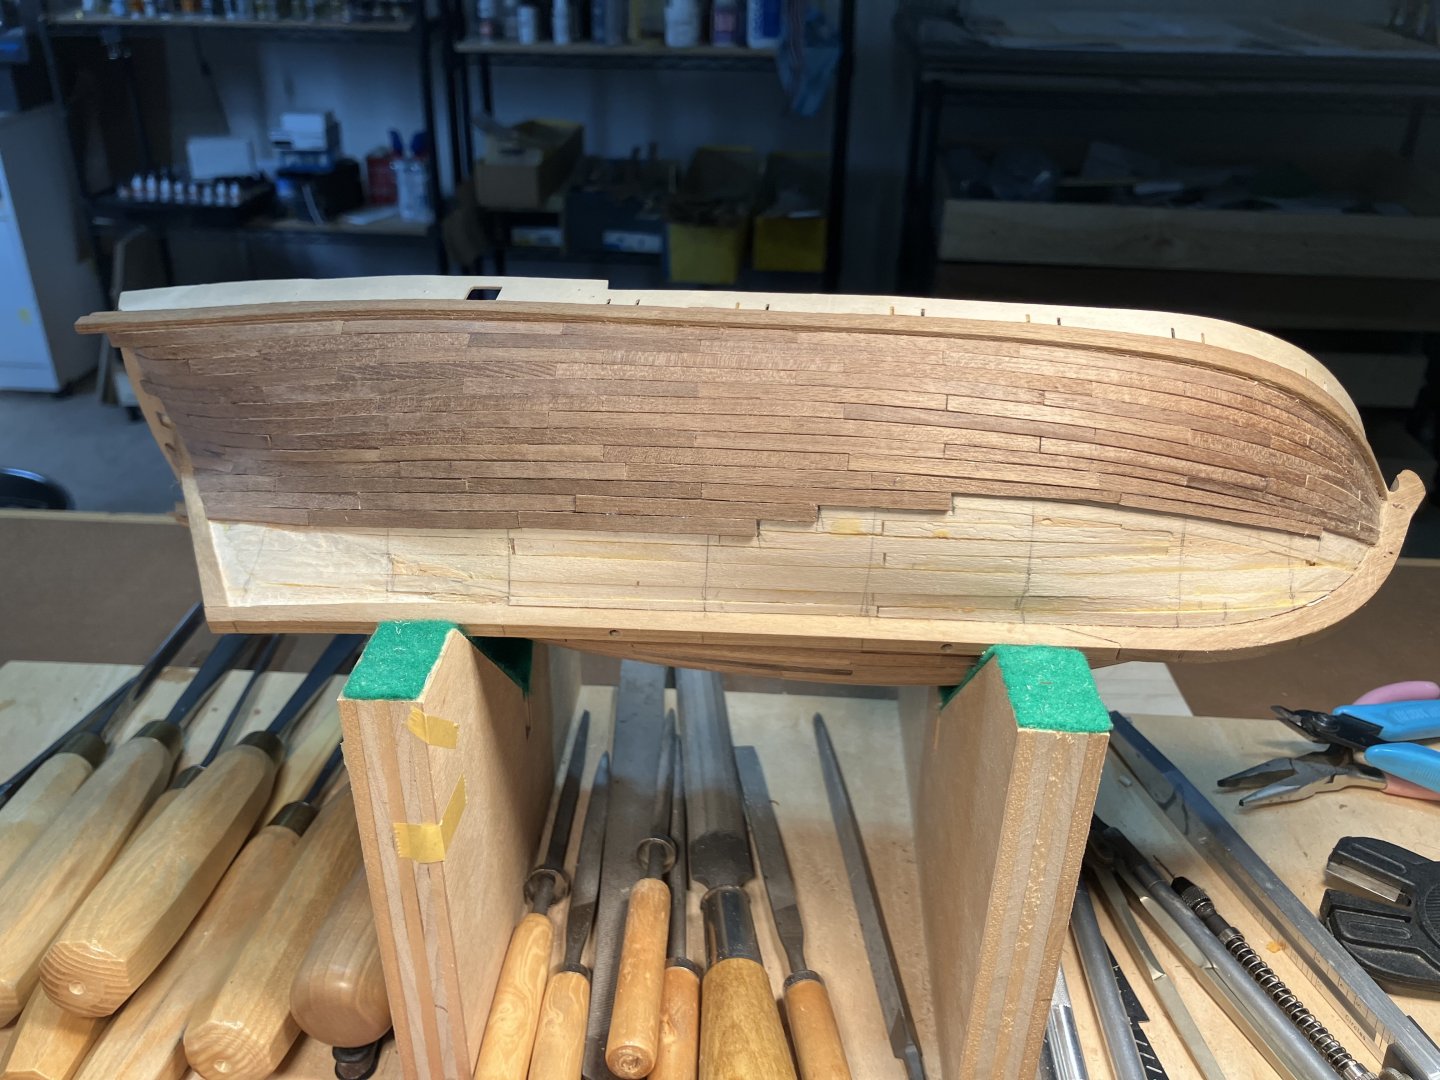
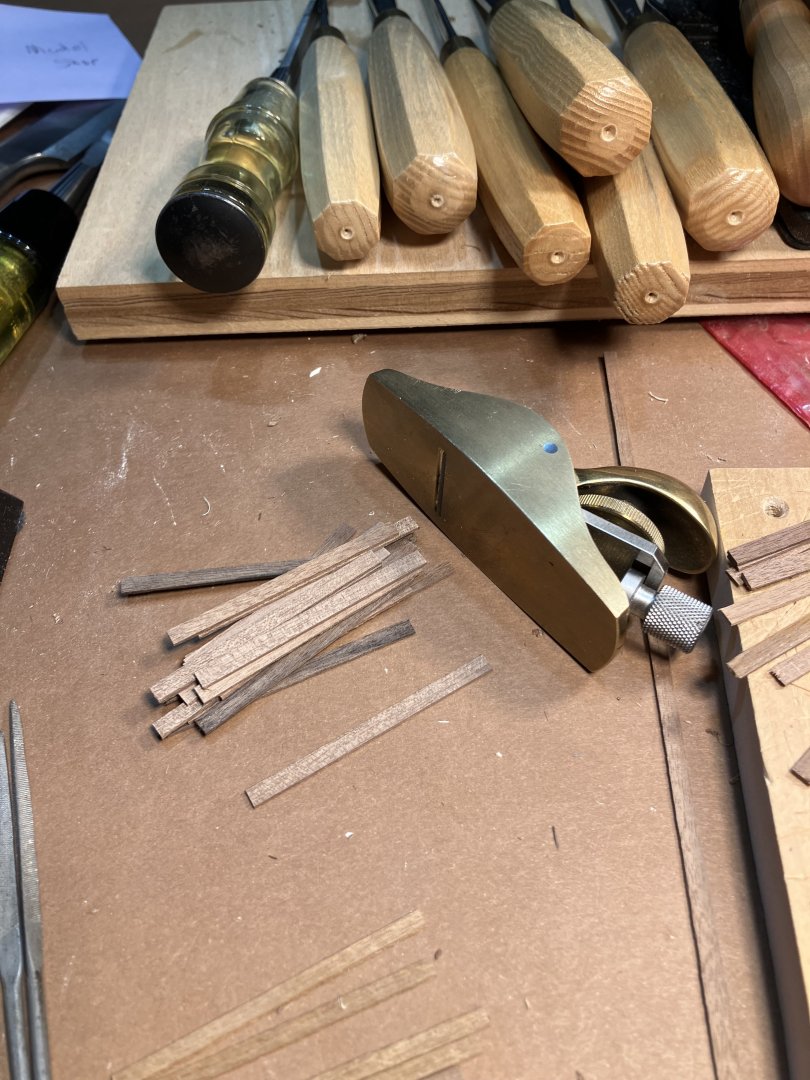
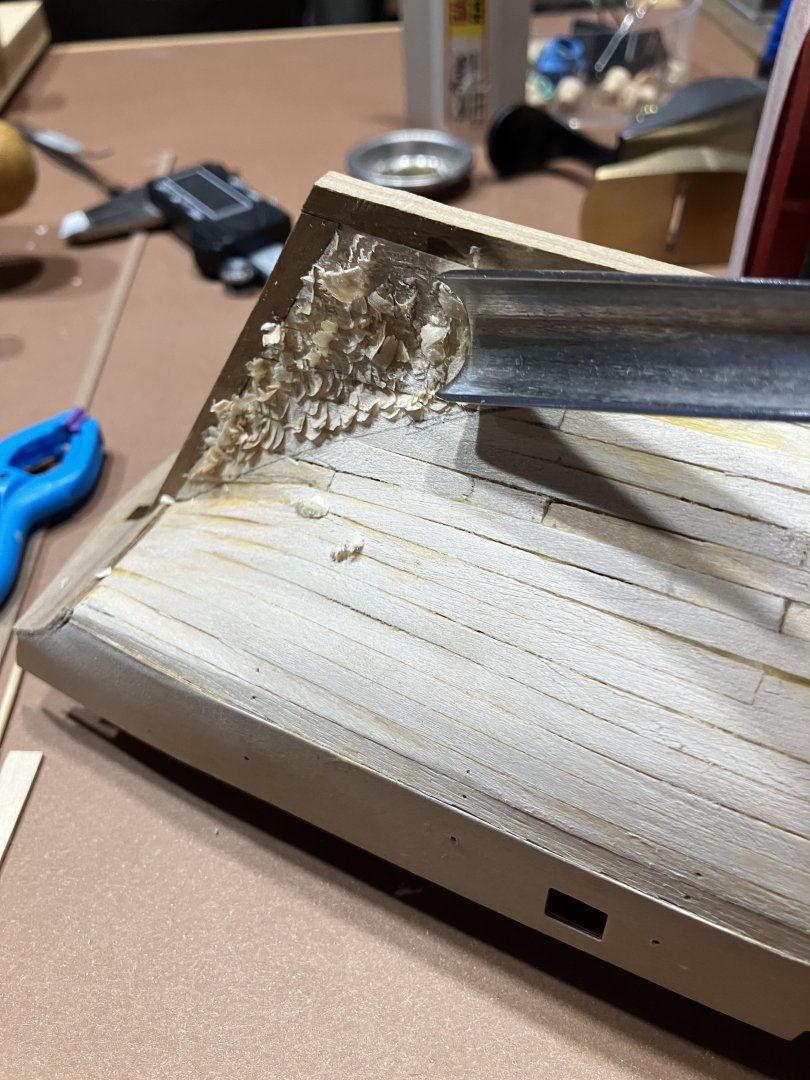
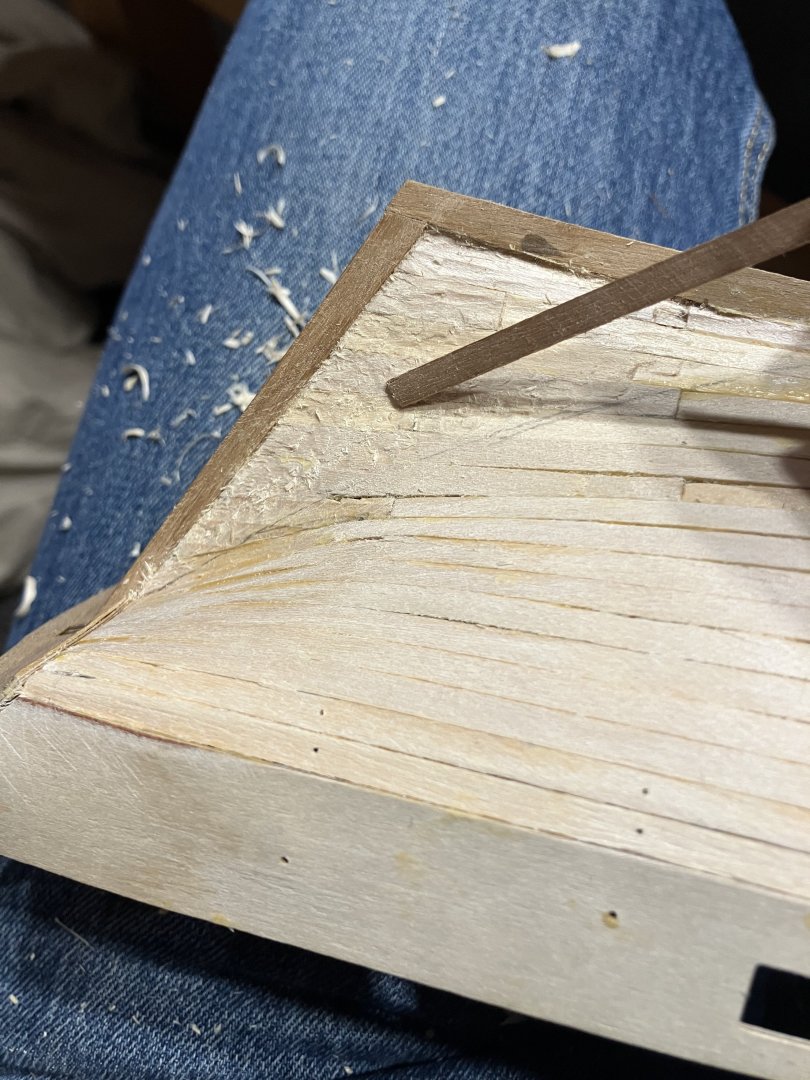
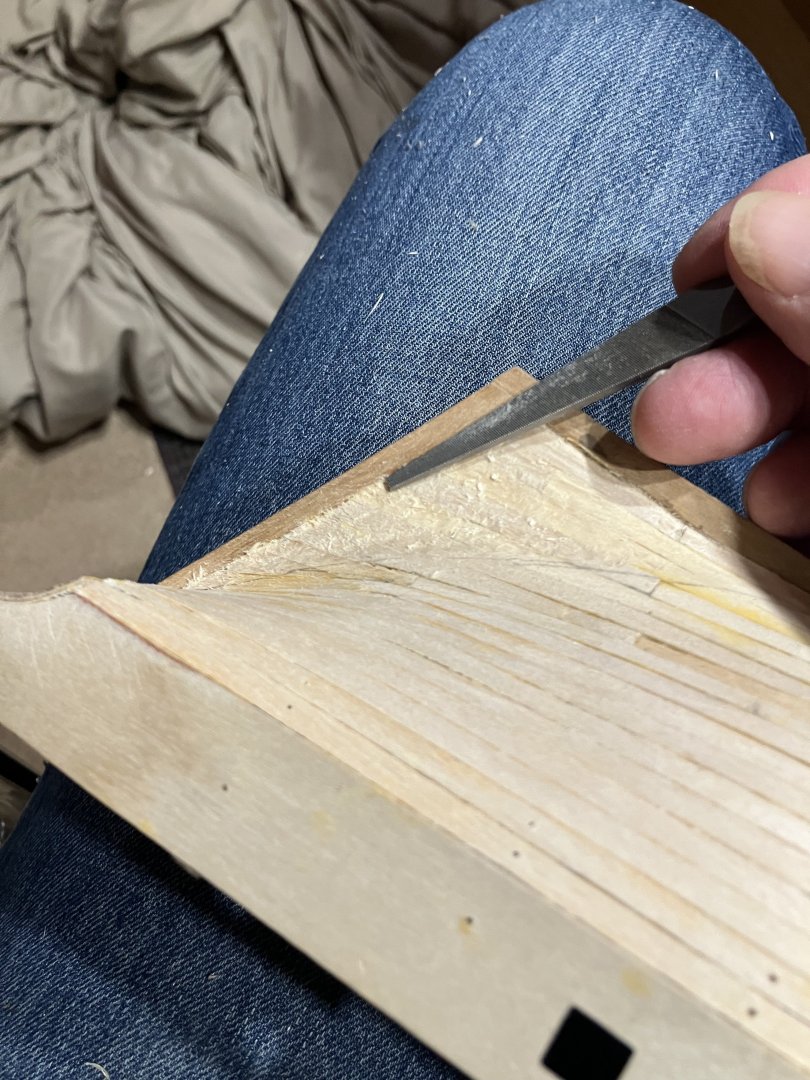
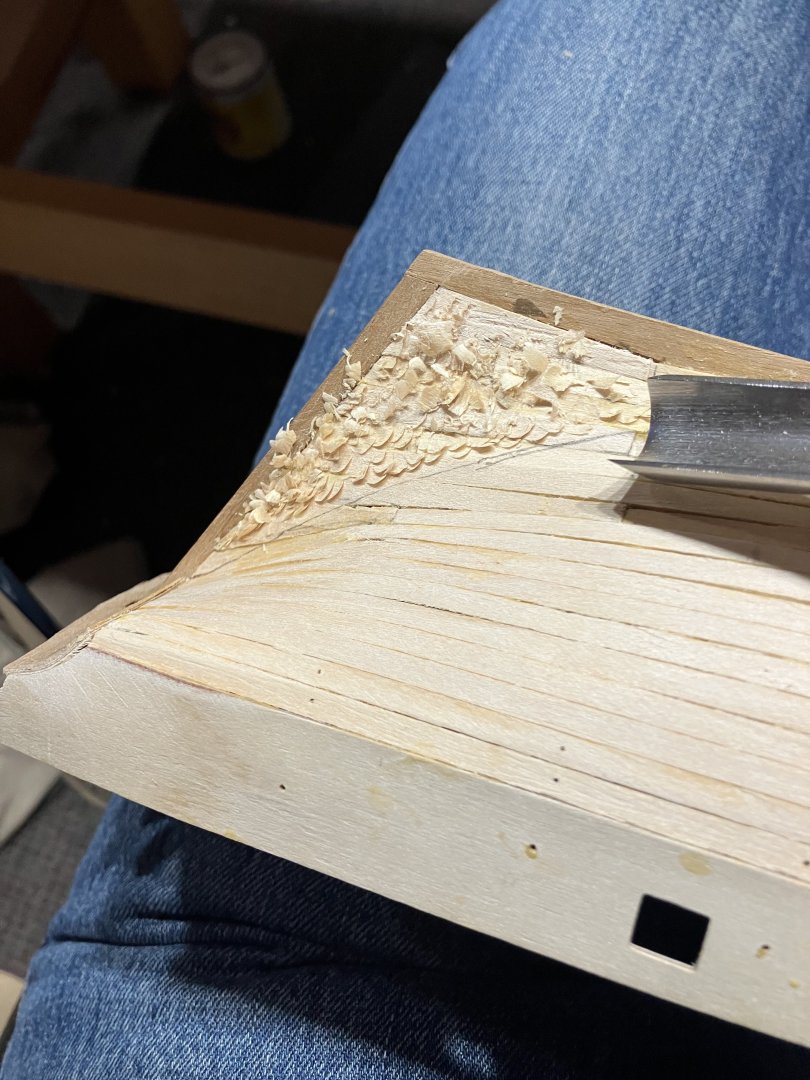
Shaping the Area Aft of Bearding Line Here the task is to taper, or thin, the First Planking from the Bearding Line aft to the Stern Post, so the top if the Second Planking is close to flush with the Stern Post and Keel. First made a template of the Bearding Line off the plan with Velum and transferred the Bearding Line to the model. The tools for doing the work: large and small gouges, triangular and round files, and a pattern file - with cutting edges and perpendicular safe edges. Making large gouge cuts. Finer cuts were made with the smaller gouge. Using a piece of Hardwood Second Planking as a Scraper to remove the chips, along with the pattern file. And working along the Keel and Stern Post.


-
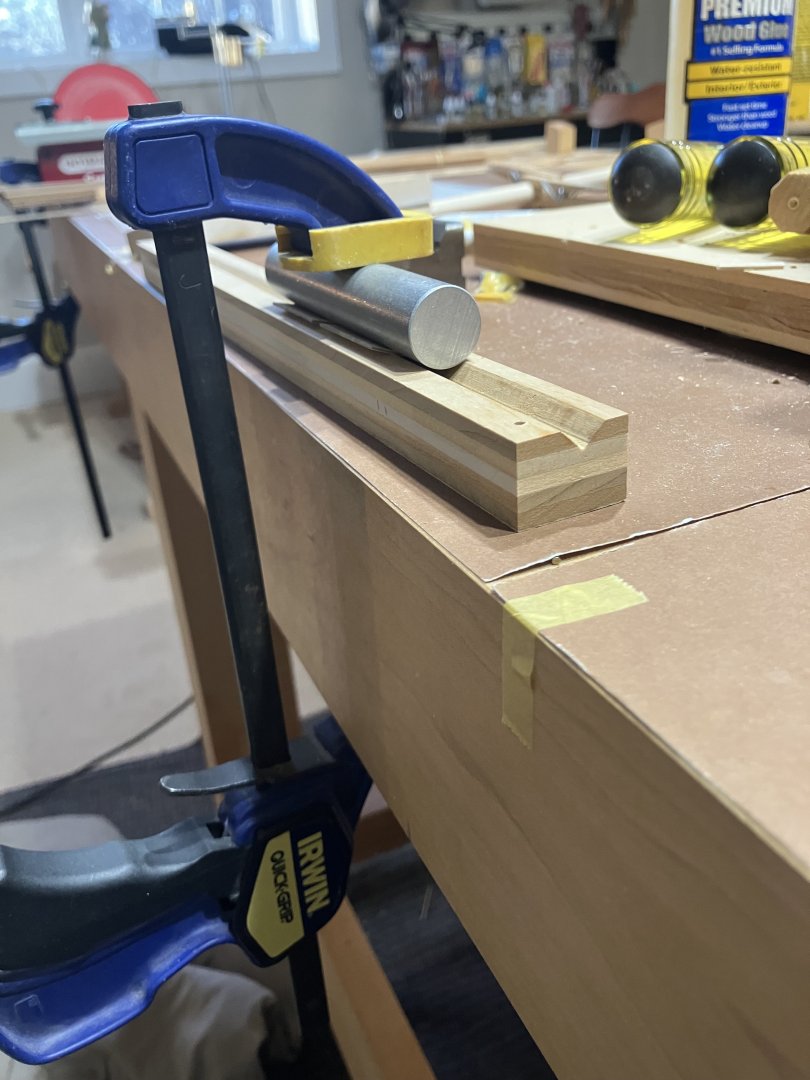
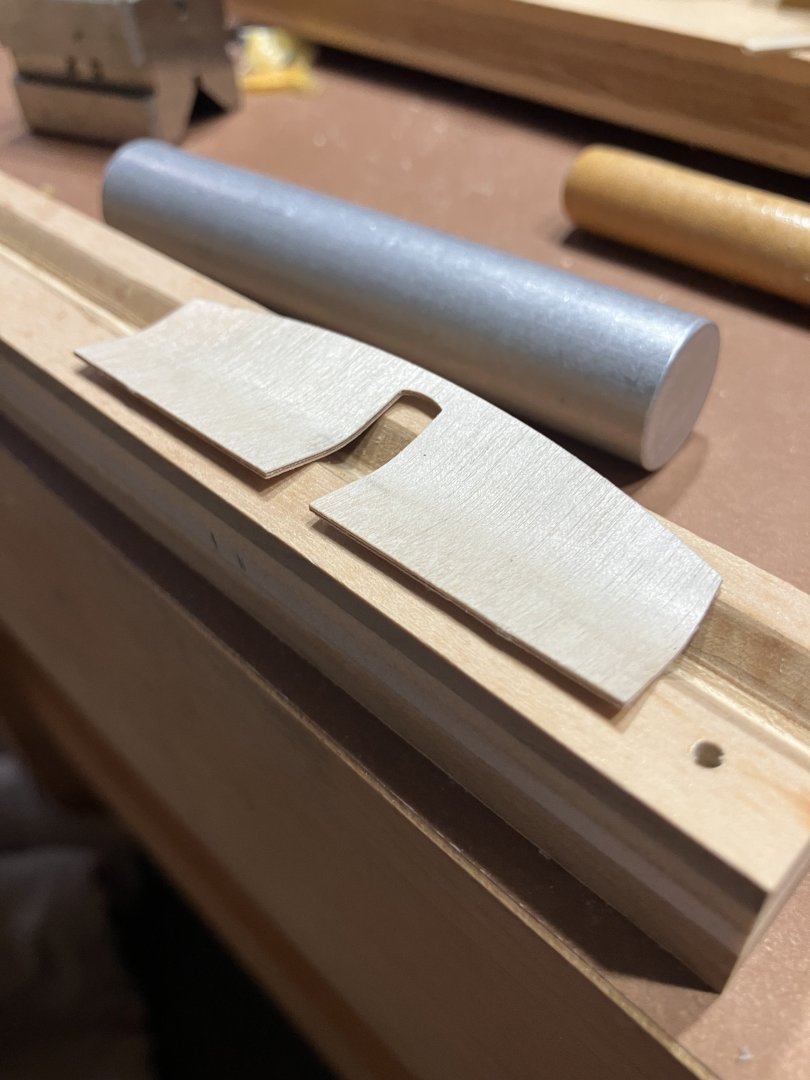
Counter Next was installing the counter. Soaked the plywood counter for a half hour, the piece was not very pliable so used a jig. Jig is plywood with a v shaped notch, bar - from a PE bending kit, and a clamp. Nice curve. Counter Installed

-
HM Badger Log begins after first planking install. Small seam gaps were filled with Titebond. A few larger triangular openings were filled with Minwax Wood Filler - Natural Color, Hull was first worked with a coarse wood file, then finer files, and finally a light sanding with 100 grit.

-
P.S. highly recommend the sliding table for the Byrnes saw.
-
Hello Y.T., Great question. A light pass with 220 sandpaper will remove any tool or saw blade marks. The thickness sander is used to make dimensional changes. For example reduce the thickness of a sheet from 3/64” to 1/32”, then cut individual planks from that sheet on the table saw. Or say you have 1/4” x 1/4” square stock, the thickness sander could be used to take off 1/16” on one face to make the stock 1/4” x 3/16” - the table saw could also do this job. I do not have a thickness sander in my shop.
-
Watch plenty of Youtube videos on how to use a table saw. Same principles apply to the Bynes saw. Bynes saw is high quality, that being said any machine may or will leave saw marks that need to be removed. Good luck.
-
Hi, Working on the Badger now. Yes, have not noticed where, if at all, the instruction say when to remove the gunport pattern former. I removed it after the first layer of planking. -Rich
-
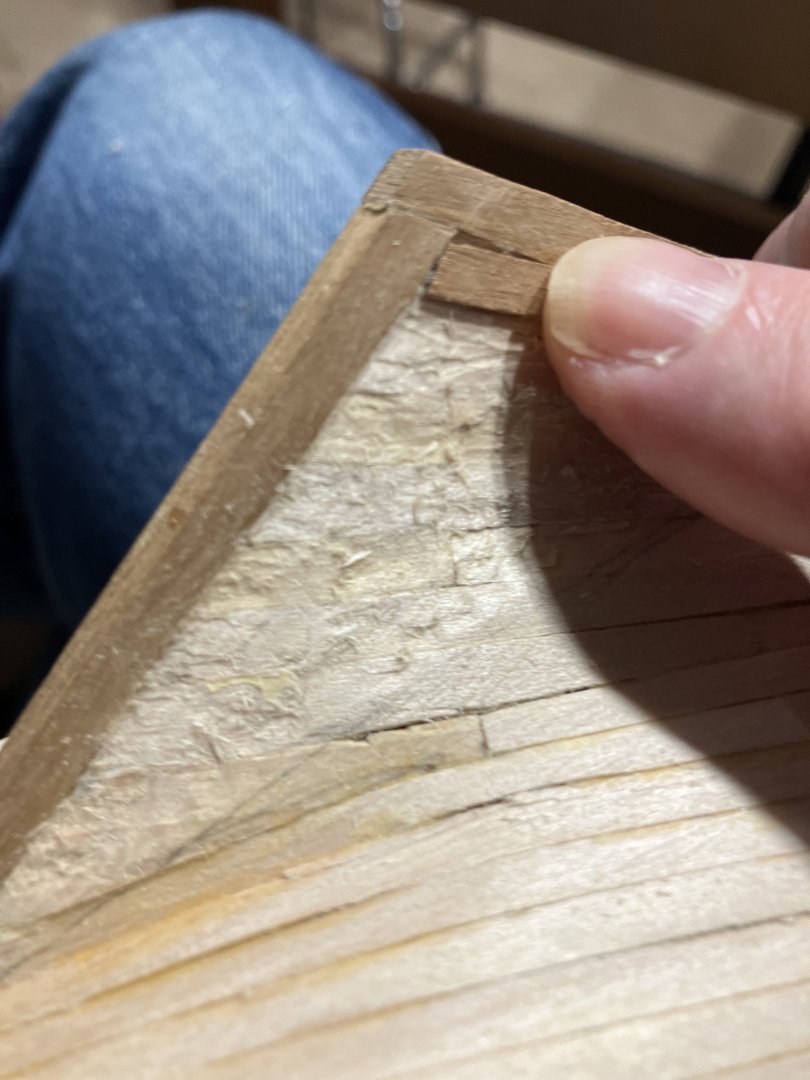
HMS Badger: Cutting Bearding Area in First Planking
First made a template from the plan with Velum.

Tools for the Work
Large and Small Gouges, Round and Square Files, Pattern File - it has cutting edges and perpendicular safe edges.

Large gouge used to make chips.

And smaller chips back towards the bearding line.
Hardwood plank makes a great scraping tool.

Pattern file to work along the keel and stern post.

The plank edge should fit flush along the keel and stern post.
-
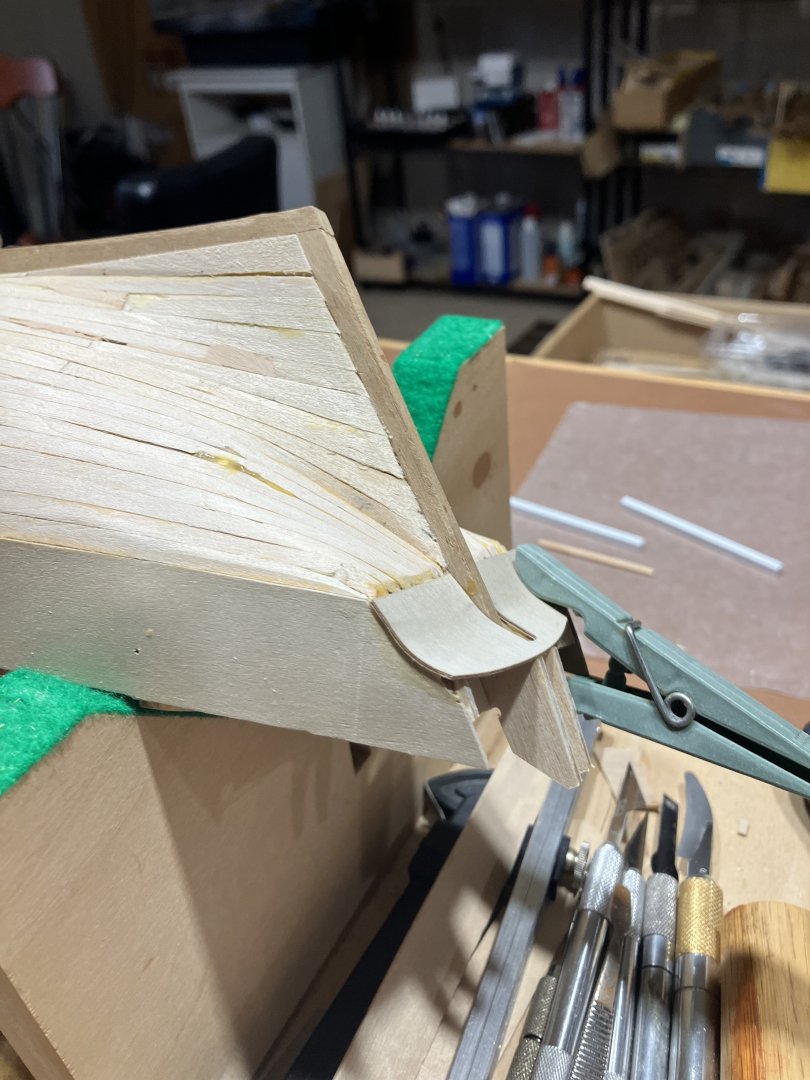
HMS Badger: Counter Forming and Installation
Usually I’d soak and form with my fingers.
This time realized I needed some help with some sort of jig. Looked around the shop and found a PE rolling bar, and a jig used to hold dowels when drilling holes.
Piece in the Jig and Clamping

Done
Installed on the Ship
-
Let’s get underway! Awesome model. Thank you for posting….
- 38 replies
-
- 2
-

-
- Pillsbury
- Clemson-class
- (and 1 more)
-
Smokin’ 😎
-
How serious do you get about dust protection
ERS Rich replied to bigcreekdad's topic in Modeling tools and Workshop Equipment
Thanks, I am doing well now, on the road to recovery and back to doing what I like to do with some limitations. Apologize for being preachy, you know how it is, you go through a tough experience, and hope others will not. Happy modeling! -Rich -
How serious do you get about dust protection
ERS Rich replied to bigcreekdad's topic in Modeling tools and Workshop Equipment
Hi, Get serious about dust. I want to help others. I was diagnosed with Interstitial Lung Disease/Pulmonary Fibrosis last March, with minor symptoms - age 63. Six months later, after a rapid decline, had a Double Lung Transplant. Fortunately I had no major complications and am recovering quickly. Foredom makes a line of desktop hoods with integrated vacs - they are expensive. They have a desktop hood that attaches to your vac for $70. That being said, use tools to remove wood, and sandpaper just for finishing. Woodworkers do not use sandpaper to remove wood they use tools, in our hobby: miniature planes, small chisels and files, drill bits. These tools produce, for the most part shavings, not dust. If you find yourself making a lot of dust with sandpaper, ask are you using the right tool. Sand outside. Using sandpaper? Wear an N95 mask, that makes a tight seal. The mask below can be found on the web, box of 10, for about $20. Rectangular “COVID” masks with gaps around the face are useless. Need motivation? Search for Interstitial Lung Disease, or Pulmonary Fibrosis on the web. Please protect yourself, you want to get old and be healthy. All the best. -Rich

-
Good luck with your project! The tools on my bench….

-
Inspirational!
-
The short answer, Yes! You are doing good work! At some point, something will be missed, and it will be a pain to add it. My view is do your best, if something isn’t “historically accurate”, no big deal, it won’t be noticed by family and friends who admire your ship. -Rich