MORE HANDBOOKS ARE ON THEIR WAY! We will let you know when they get here.
×

bobandlucy
-
Posts
511 -
Joined
-
Last visited
Content Type
Profiles
Forums
Gallery
Events
Everything posted by bobandlucy
-
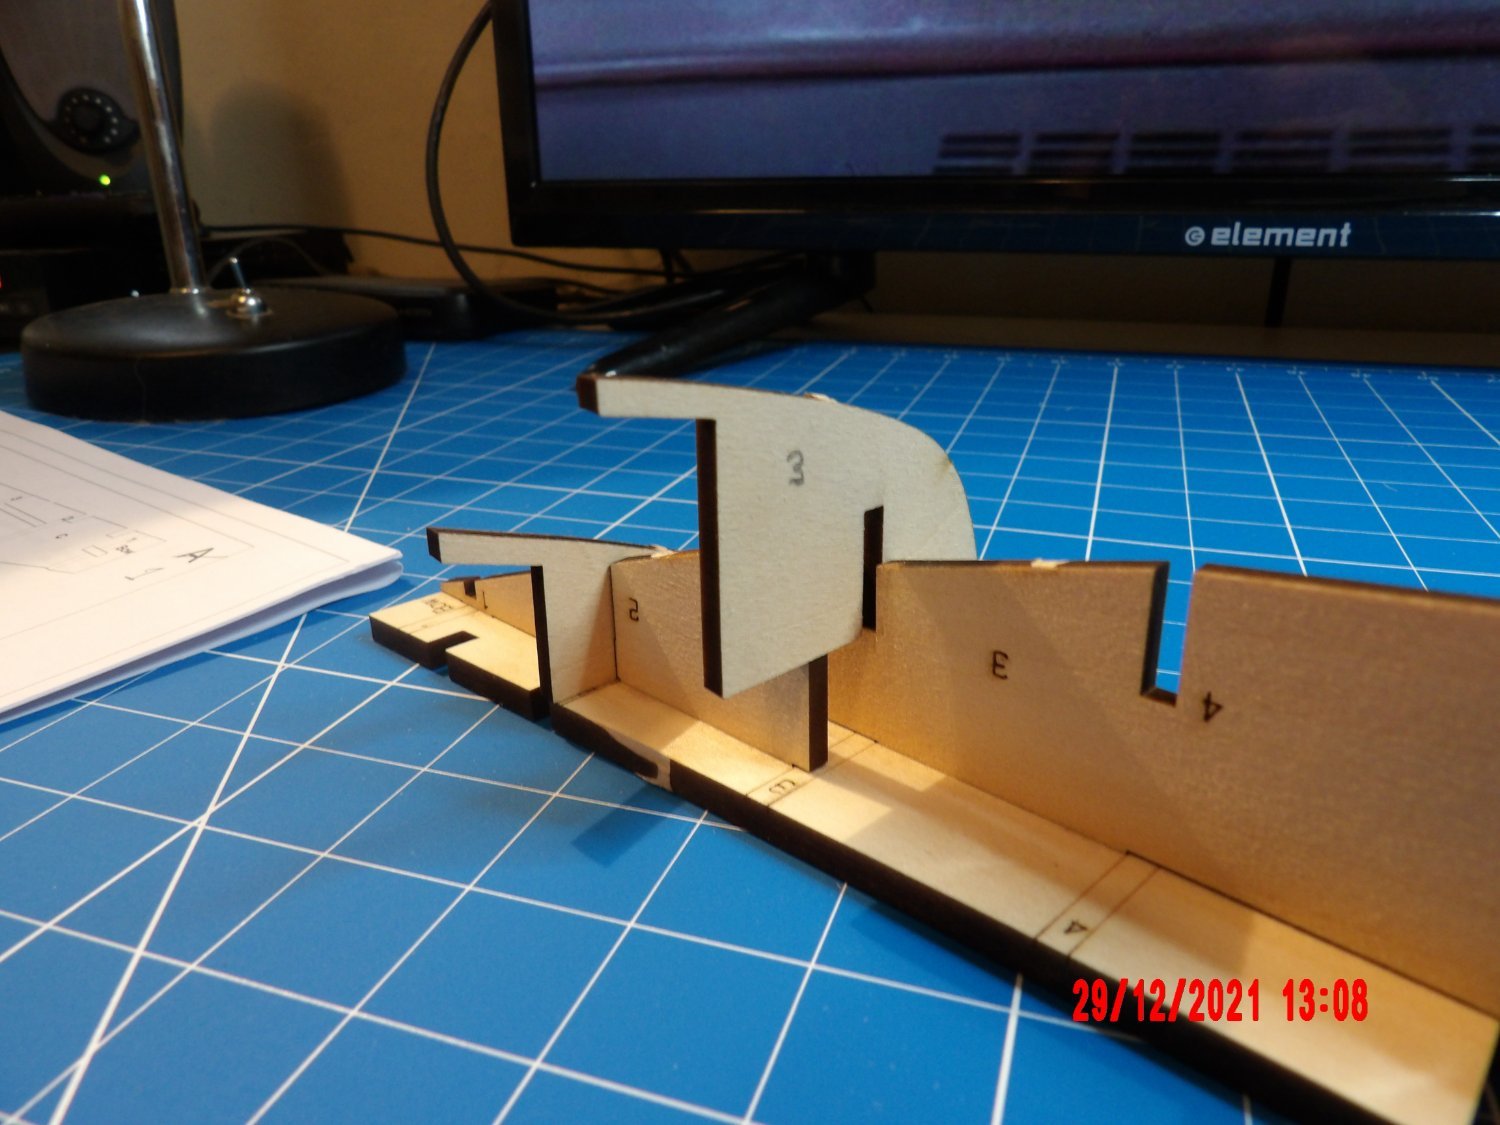
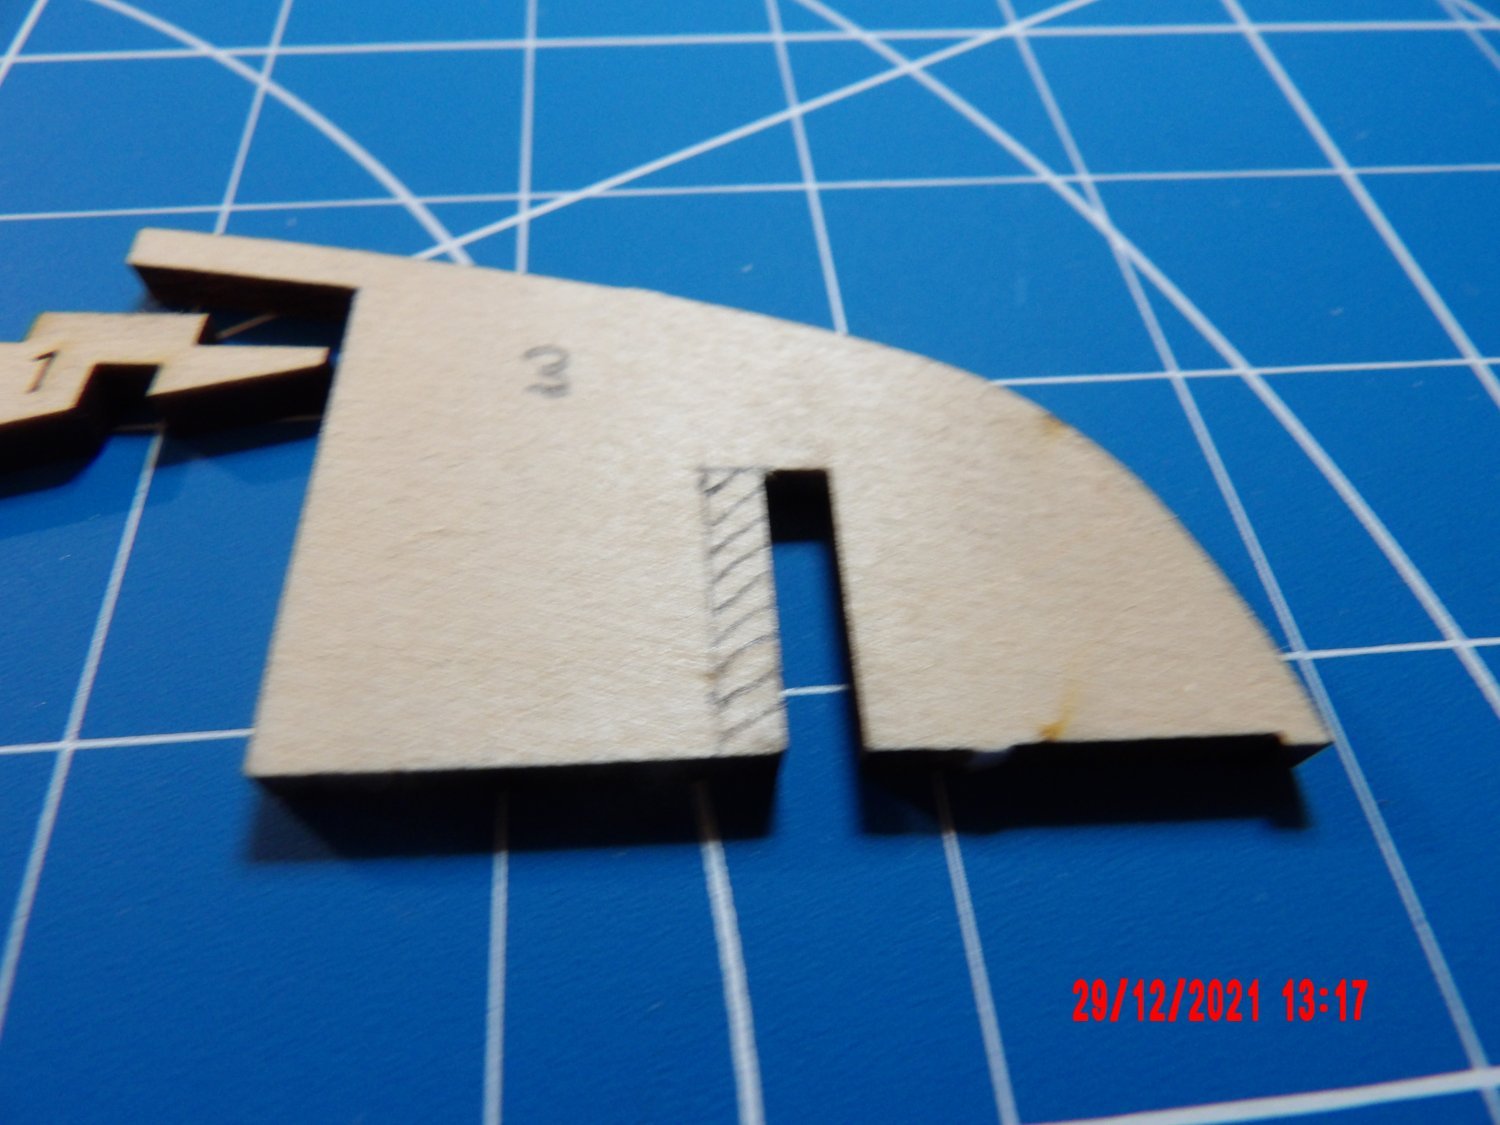
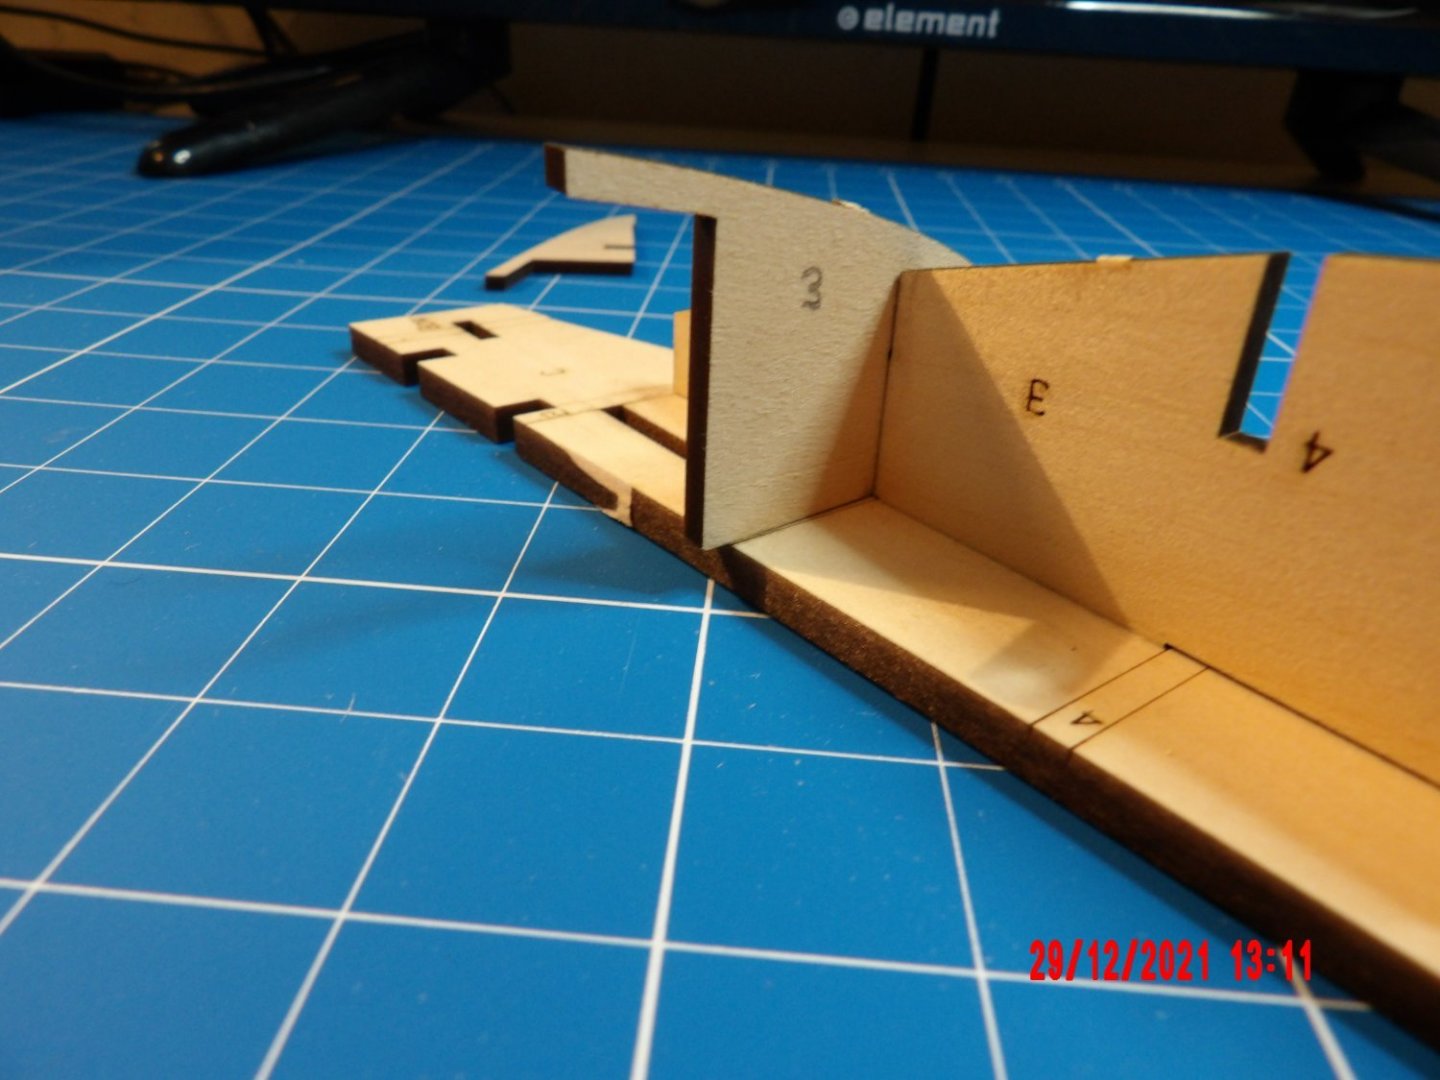
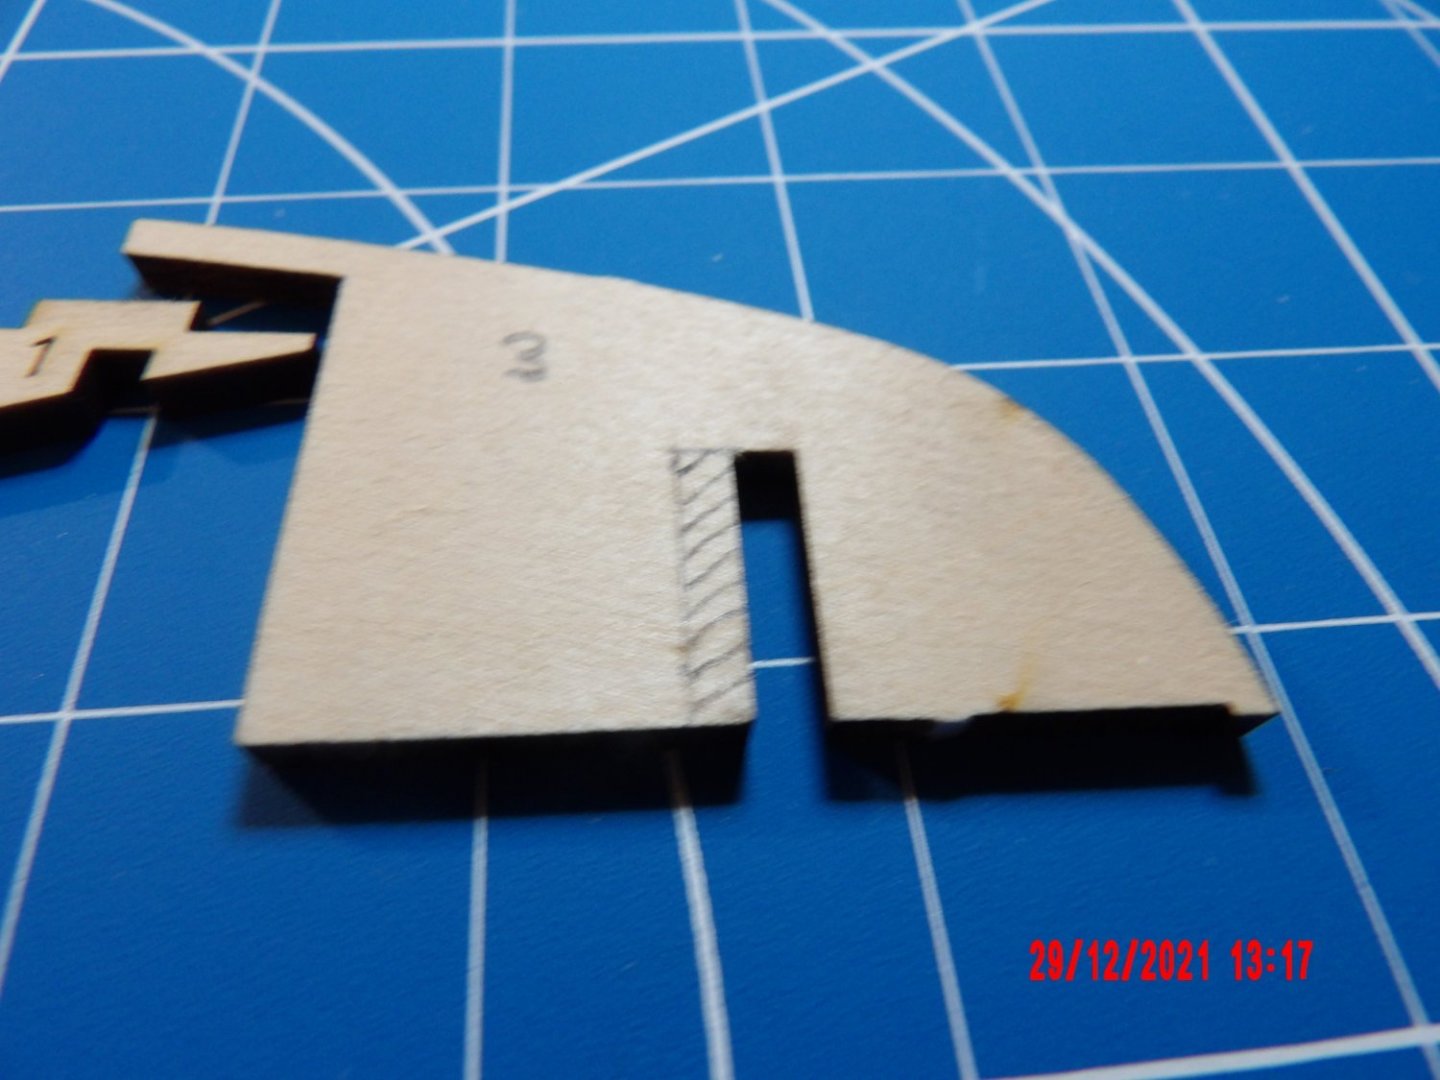
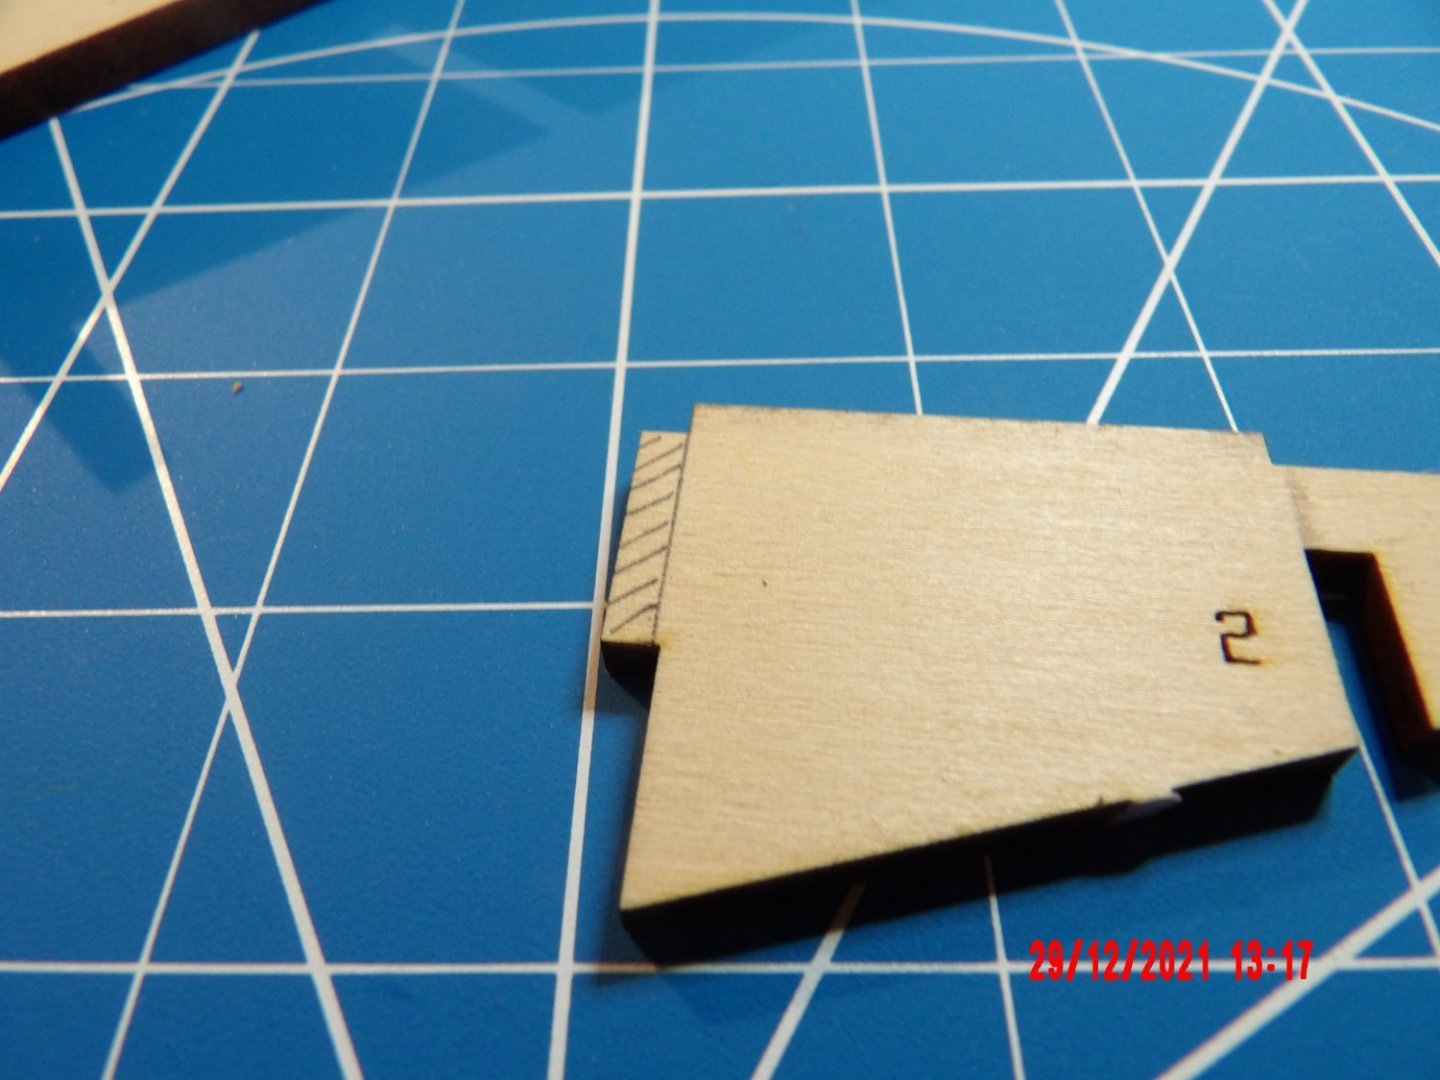
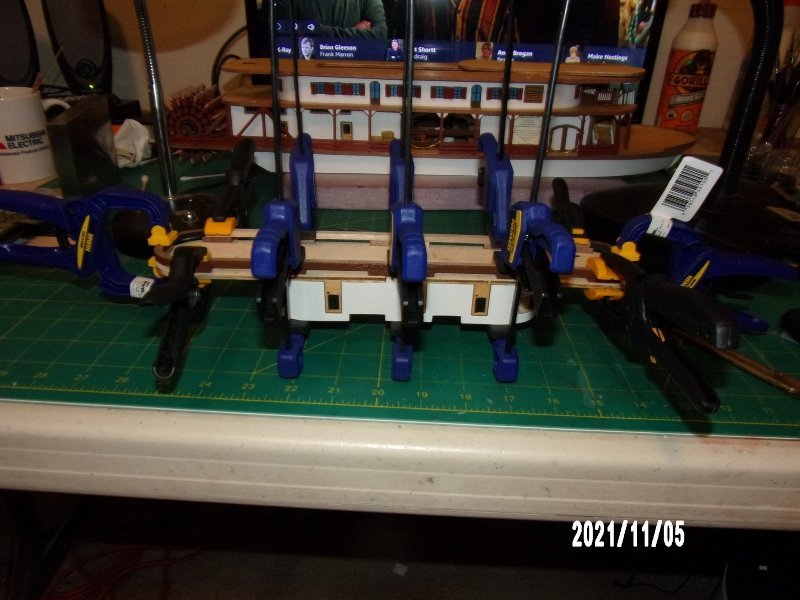
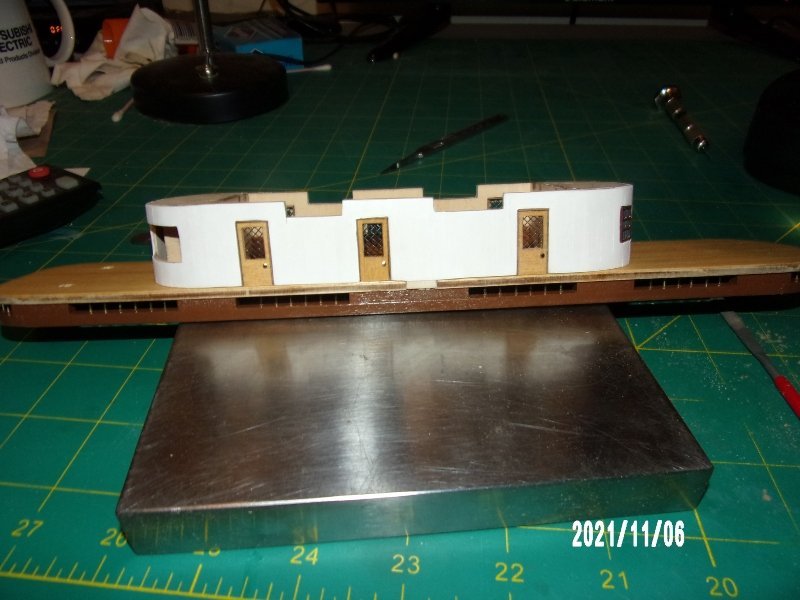
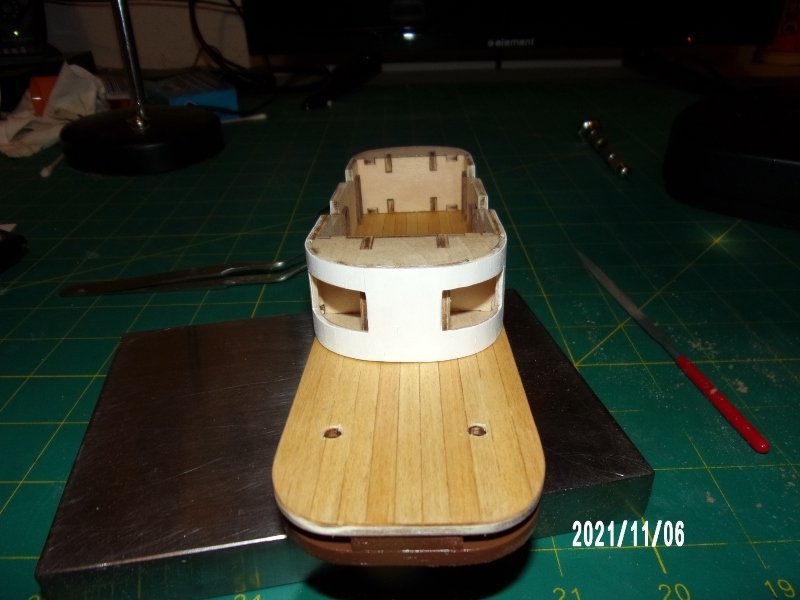
 Waiting on parts for the King of the Mississippi. When they arrive it will be a day or two to finish that project. In the meantime, I cleaned the workspace, flipped the cutting mat (over the course of 4 models I made a mess of it), and am starting Harriet Lane. I began by dry-fitting the Parts A, B & C to the central spine, using the bulkheads recommended in the manual to ensure they are square. There is a problem with Part C and bulkhead 3, shown below. The tab on Part C interferes with the bulkhead. In addition, the location of the slot on Bulkhead 3 leaves the part overhanging the top of the spine, and short at the bottom. The error looks to be just about the width of the slot. The fix will be removing material as shown below. I'll use scrap on both sides of the bulkhead to close the gap created by enlarging the slot, rather than trying to infill. This is a kit newly in production. I'm sure there will be a few more little things needing adjustment. Onward!
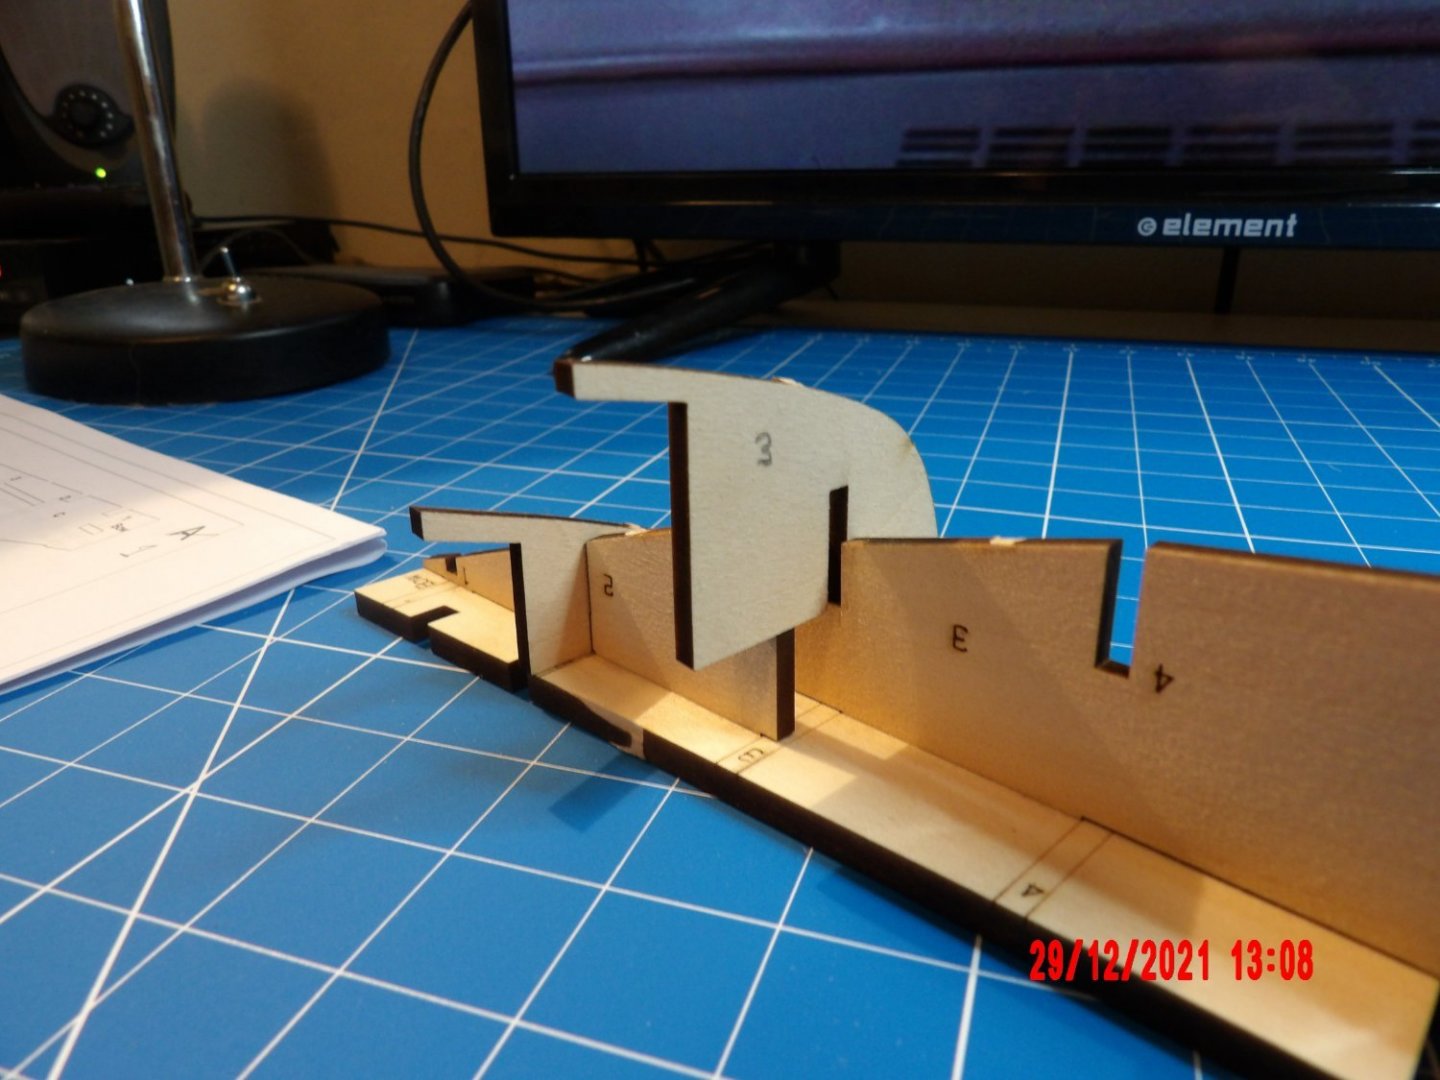
- 146 replies
-
- 4
-

-
- Harriet Lane
- Model Shipways
- (and 1 more)
-
Looks good, Dan! I think you are closer to the marks than I was. You have the right attitude and I'm sure this will turn out great. BTW, I am a believer in overnight drying of wet-bent planks. Patience pays off!
- 51 replies
-
- 3
-
-
- Model Shipways
- norwegian sailing pram
- (and 1 more)
-
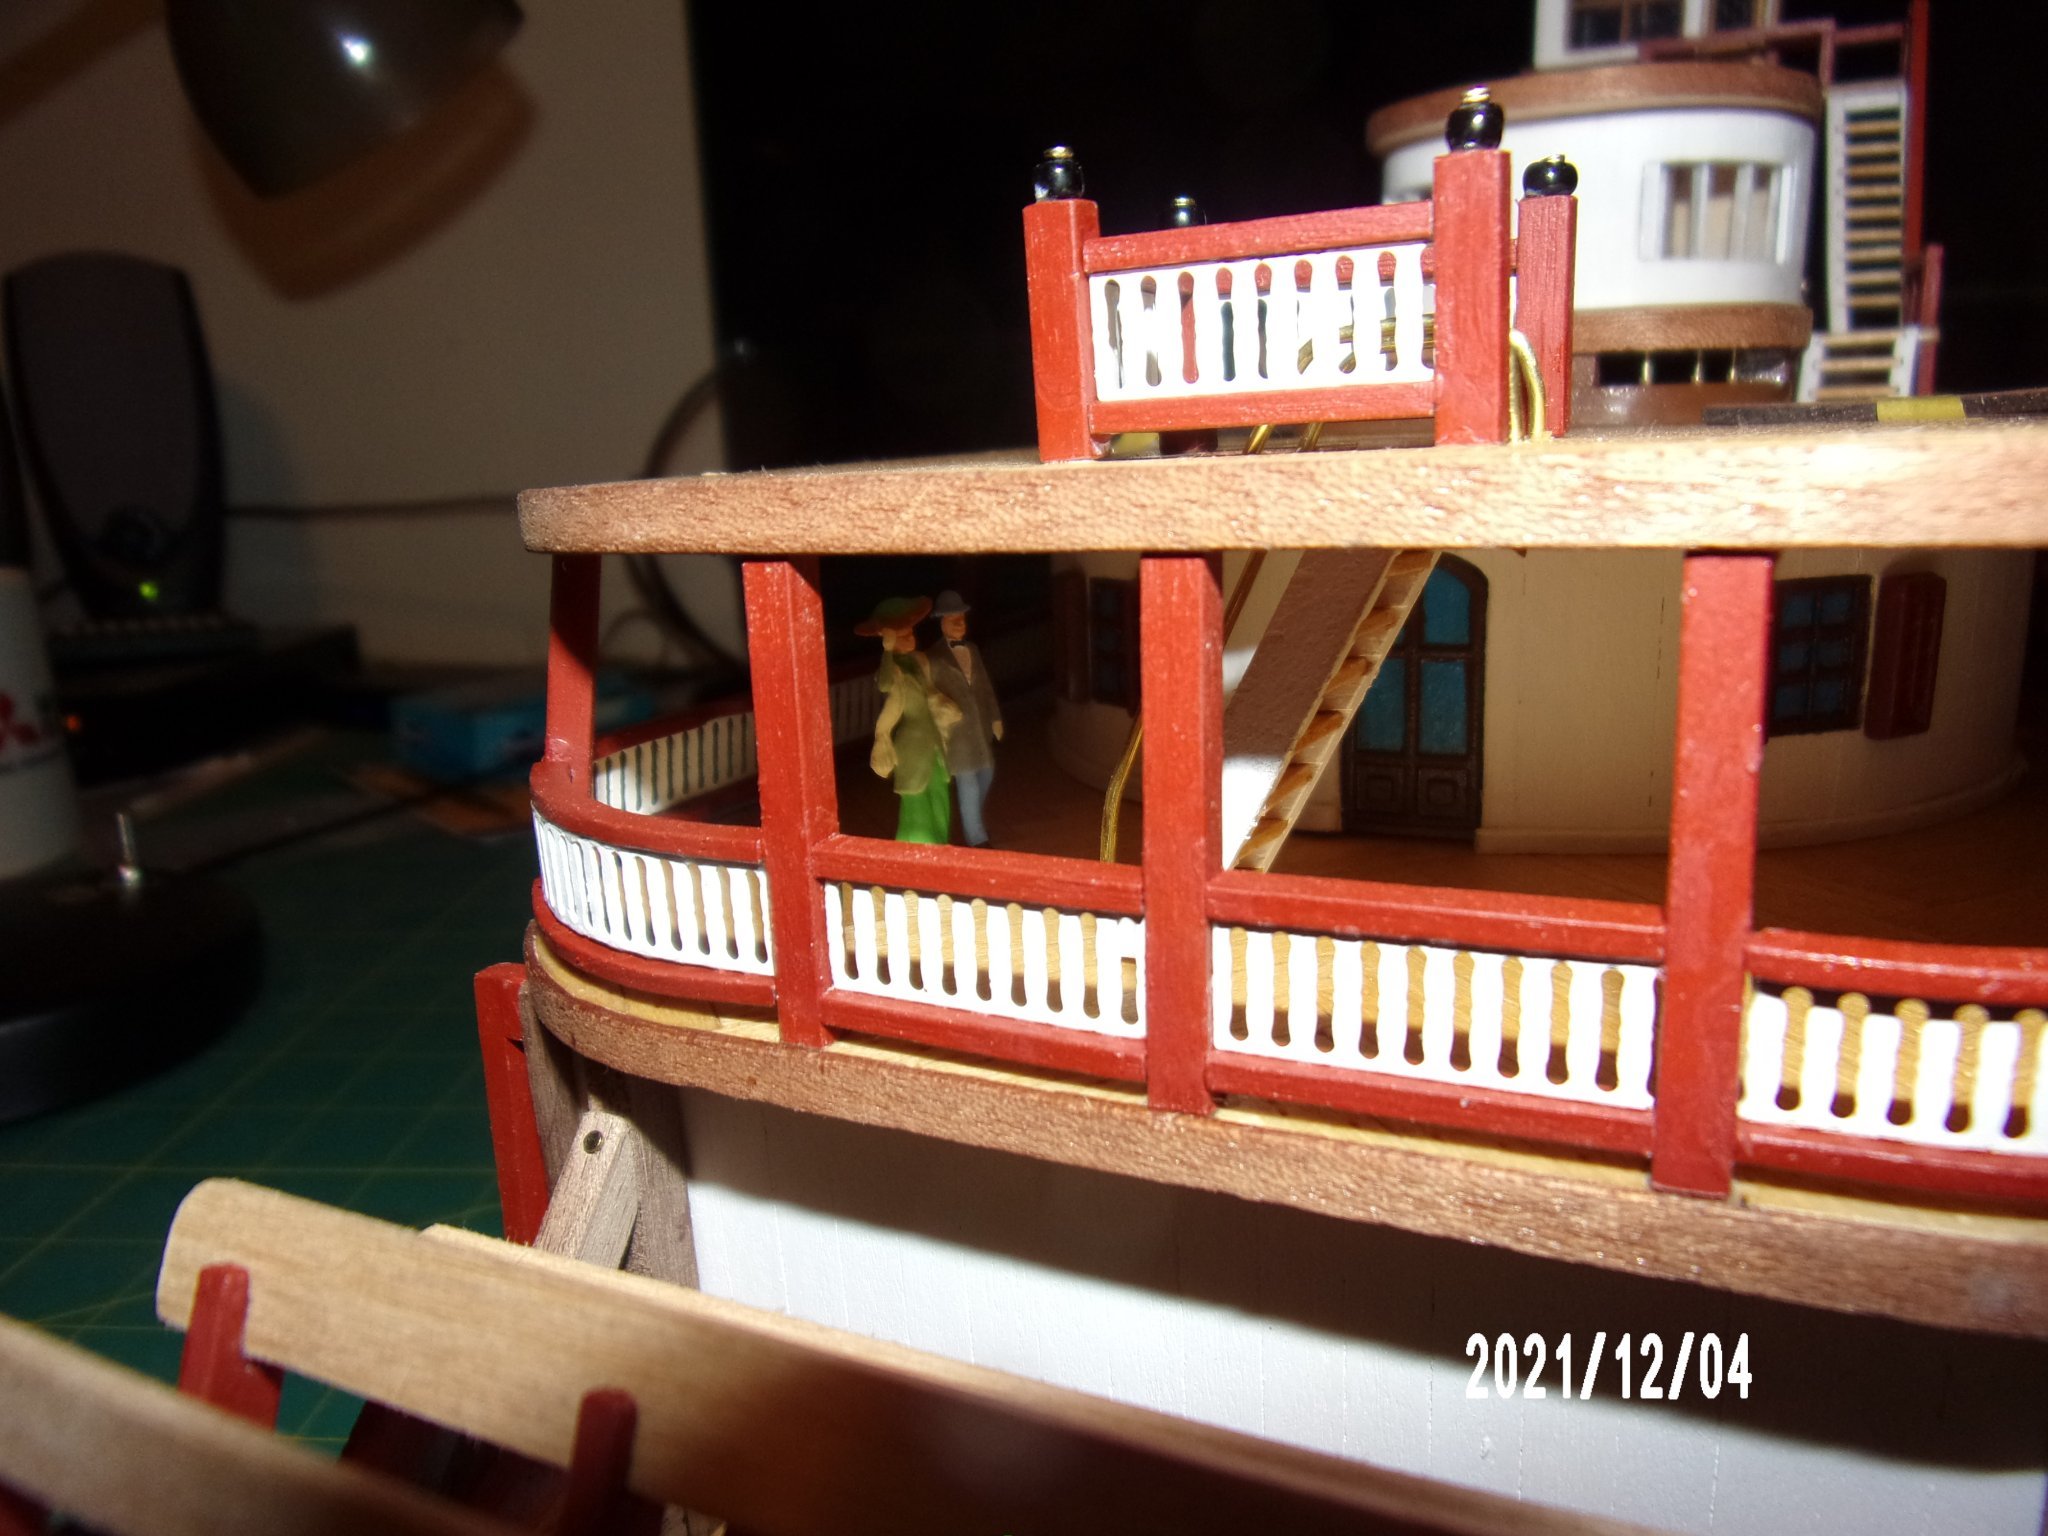
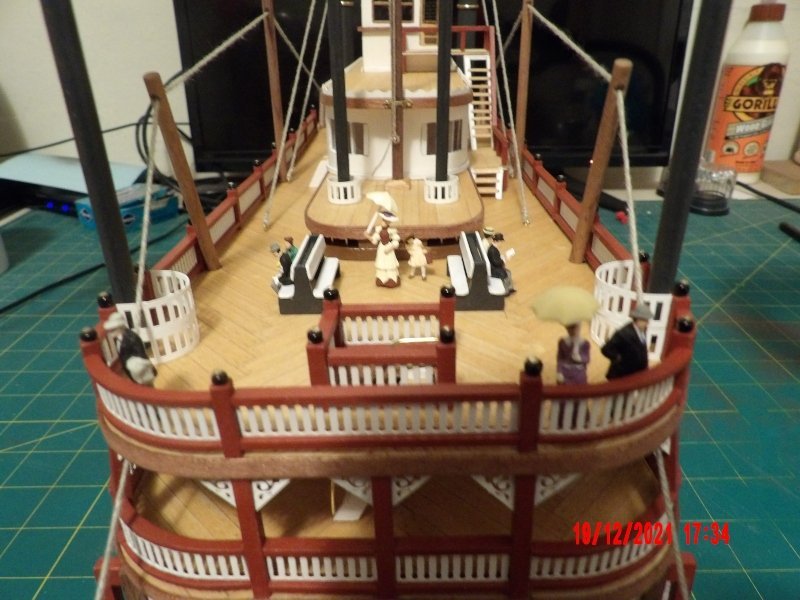
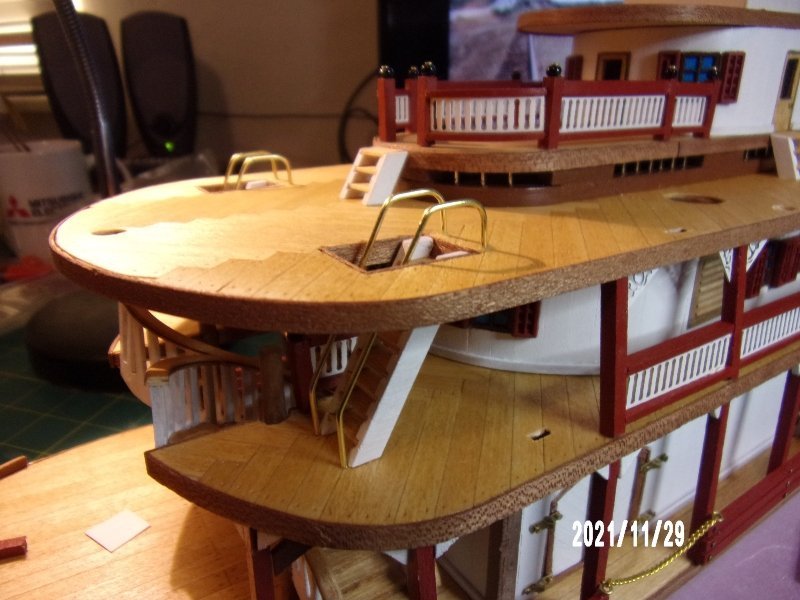
Working on the hog chains and supports. Couldn't resist adding some people to the upper stern area. Getting close to finishing now. Still have to shape the bow-end masts. . . I've been avoiding that. I've found that shaping is much easier/accurate starting with square wood as was done with Model Expo's Pram and Lobster Smack, rather than with the round dowel supplied with this kit. The pennant mast already installed is a bit wavy, not the smoothest taper. I'll see if I can do better with the remaining two. It's probably just a matter of going a bit slower and using more measuring points along the length of the mast.
- 109 replies
-
- 4
-
-
- Finished
- Artesania Latina
- (and 1 more)
-
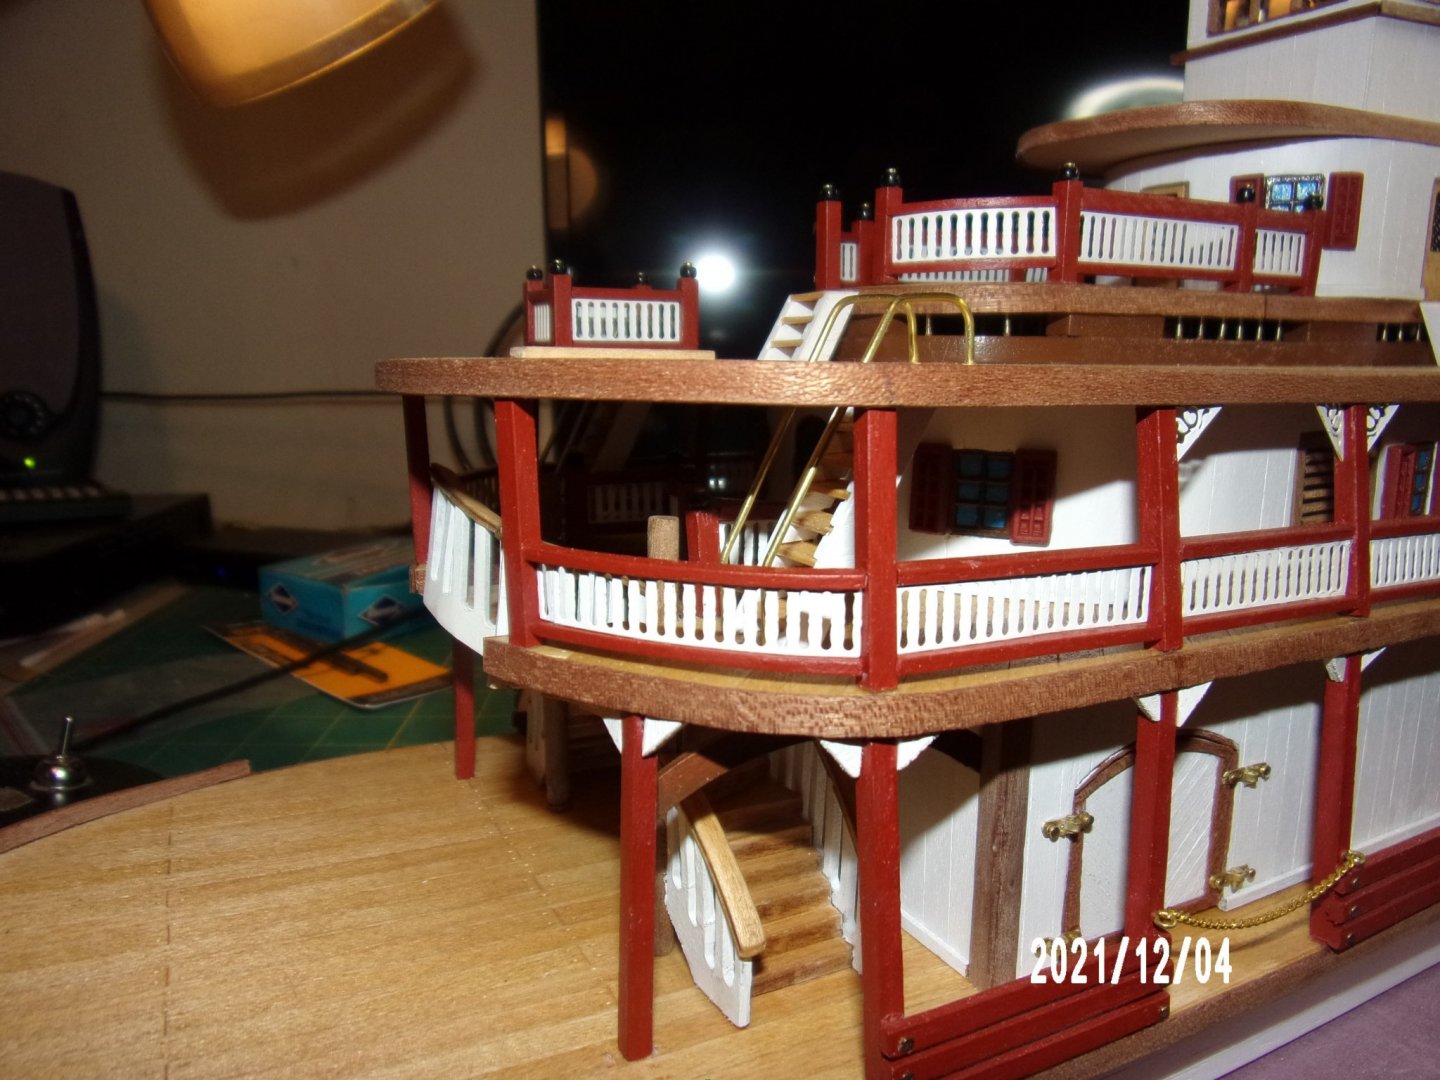
Bob, thank you. I did trim the ornamental crossbeam, as I saw the interference. The slant is in the forward direction. Today I added the surrounds for the kitchen stacks and steam stacks, and some of the third deck railing. I am really happy with this area, and I think it is where I would be hanging out if onboard, watching the shore slip by while sipping a bourbon whisky and listening to the sound of the paddlewheel slapping the water.

- 109 replies
-
- 3
-
-
- Finished
- Artesania Latina
- (and 1 more)
-
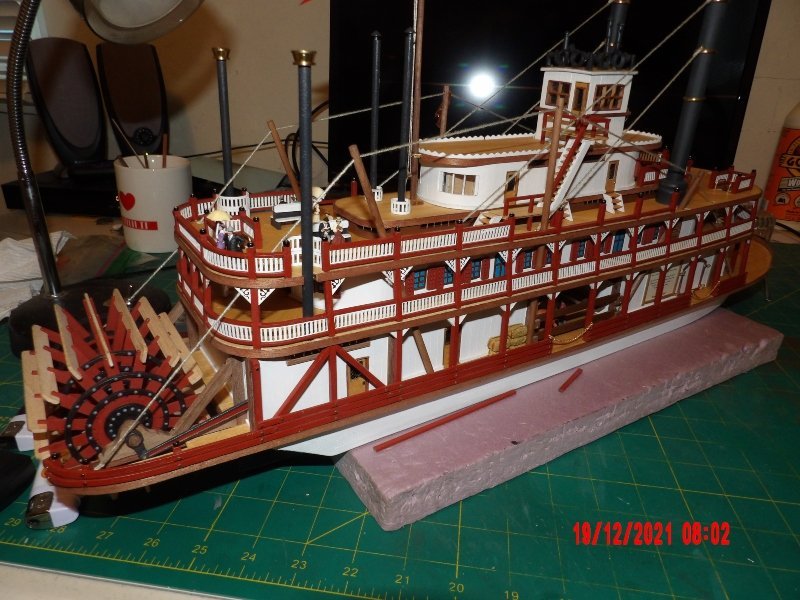
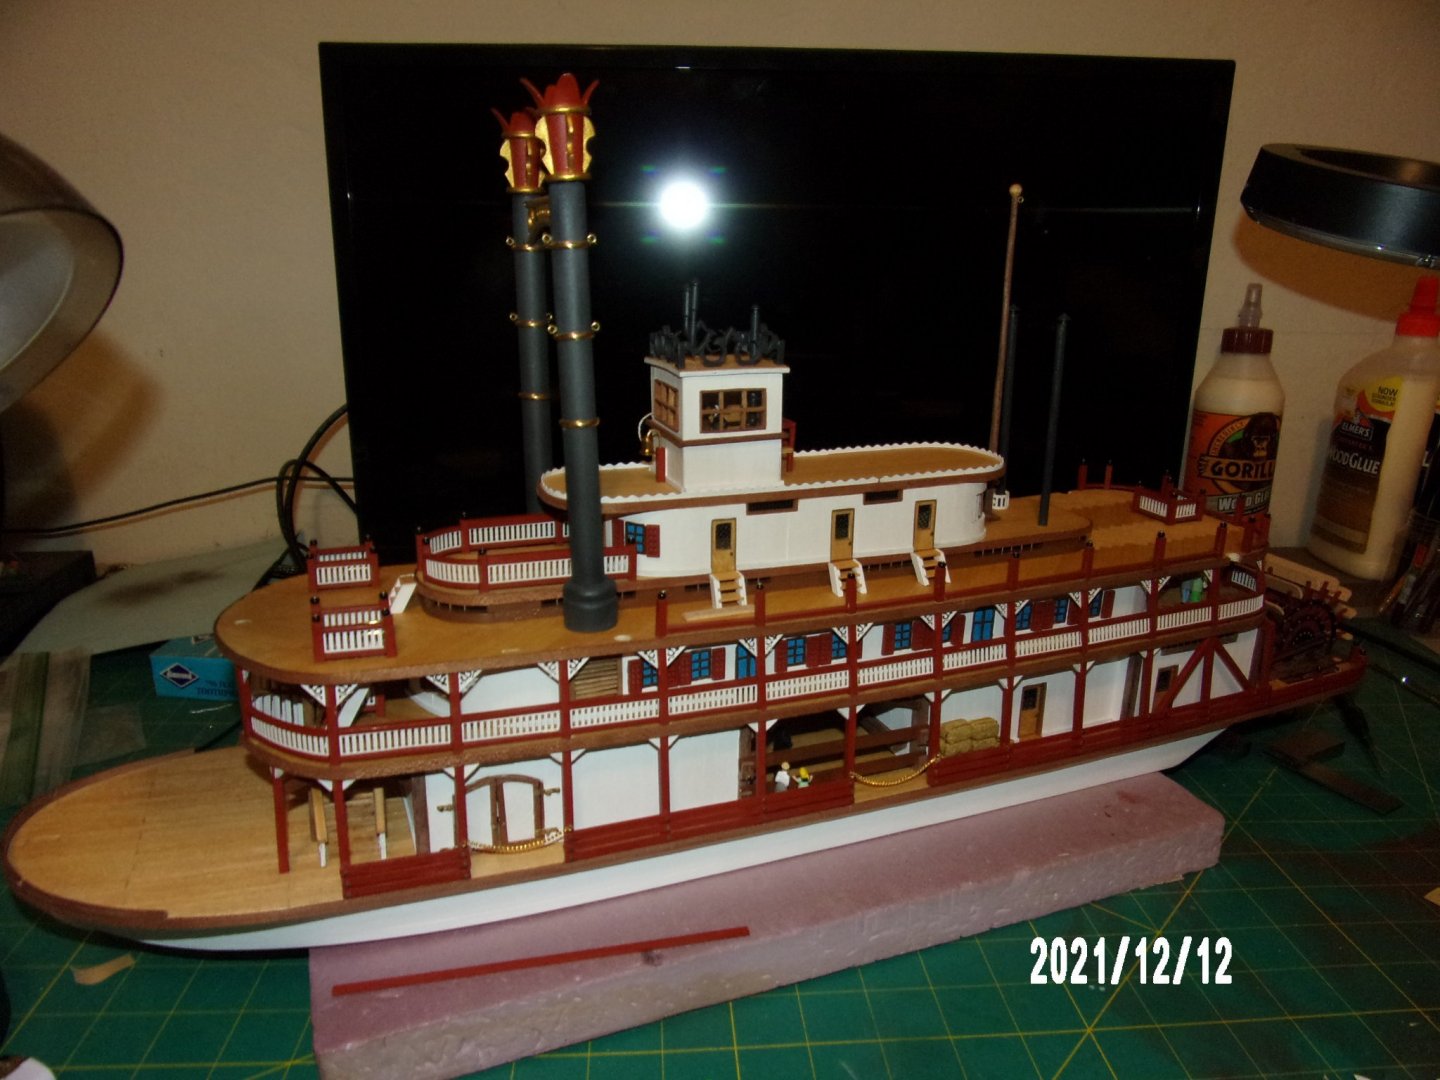
I'm feeling a little ashamed about my rant posted above. Upon reflection, and review of past logs, it seems unlikely that I would be the only one experiencing a shortage of the PE railing material. Maybe I did something strange with it. The wood shortage was definitely there, and was significant, so maybe I jumped to conclusions. One thing I have confirmed through reviewing other logs- the locating tabs for the staterooms and the pilot house deck were left incorrect for a period of years and led to more than one builder installing the staterooms backwards, and offsetting the pennant mast away from the above deck overhang or leaving the mast out entirely. Moving on, I began placing the chimneys, pennant mast, kitchen stacks, and third deck railings. Although I checked as I went along, one of the chimneys is out of plumb. I'm not sure if I'm going to correct this, as it would lead to significant rework and I'm not positive that anyone but we here would notice. Once again I've got to remind myself that I'm doing this for fun and to learn. The next will be better, I'm sure.
- 109 replies
-
- 3
-
-
- Finished
- Artesania Latina
- (and 1 more)
-
Thanks, Bob- there are too many pieces missing, but I do appreciate the offer! AL did respond promptly. They are charging me due to lack of receipt, but that's OK. The shipment originates in Hong Kong. I imagine that with our current "supply chain" problems that this may take a while. But at least I know the direction I'm heading, so can keep up the progress. Maybe AL's new owners are attempting to right their ship. Hope that effort extends to QA process as well.
- 109 replies
-
- 3
-
-
- Finished
- Artesania Latina
- (and 1 more)
-
I need to vent. Having finished the railings on the second deck, I counted the number of PE brass railings that would be required to complete the third deck. The kit is again way short, by at least 10 pieces. I sent in AL's form from their clunky website. They require a sales receipt, which I do not have (lesson for future). We'll see what happens. I'd pay if it can be shipped quickly. I have scrapped none of the supplied PE parts. Of course my brain immediately started processing the available alternates. So far they are: 1. Bow and stern with PE railings and wooden railings similar to first deck along the sides. I have the wood (which was also short), which I had ordered from another vendor. 2. Bow and stern with PE railings and wooden railings alternating with PE railings along the sides (if indeed I have enough PE). 3. Entire third deck with wooden railings. I don't resent having to deal with "problems," but material shortages of the extent present in my kit are another matter. I am happy with the model, but the kit itself has been a disappointment. I'd have a hard time opening my wallet for another Artisania Latina kit, for sure. Venting concluded.
- 109 replies
-
- 1
-
-
- Finished
- Artesania Latina
- (and 1 more)
-
Thanks, Bob and Eric. Bob, what you're seeing at the base of the stairway railings is just a piece of wood I've been using as a spacer between the decks and the bottom rails, it just happened to be laying on the deck in front of the railings.
- 109 replies
-
- 2
-
-
- Finished
- Artesania Latina
- (and 1 more)
-
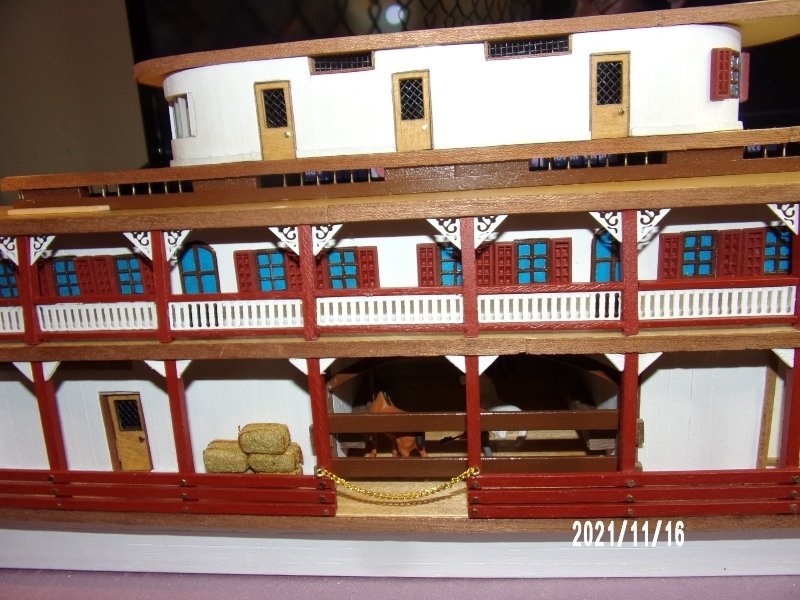
Finished off the second deck railings. More passengers showing up. Despite its flaws (some mine, some the models'), I am getting a lot of enjoyment from the building.

- 109 replies
-
- 3
-
-
- Finished
- Artesania Latina
- (and 1 more)
-
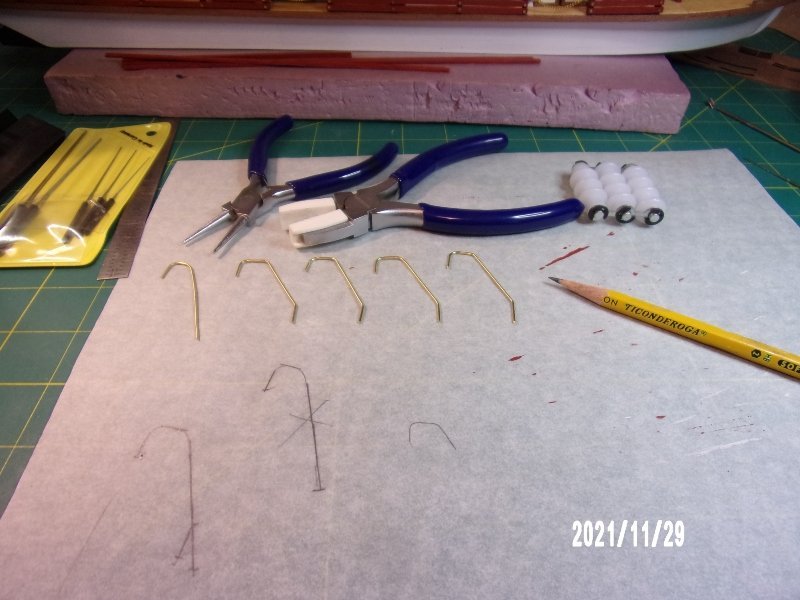
The pic in the post above shows where I ran out of wood for columns, posts, and railings. This is a significant shortage. I set out to do the brass wire railings for the staircases. The wire comes coiled and must be straightened. My first attempt at straightening by hand was a disaster. Ordered a tool which arrived today. It works, but from my reading the 1 mm wire used is at the top of its capacity. It came out better, but still with significant curvature. I read online about using a vise and nylon-tipped pliers, both of which I had, and that worked well. Pics include my first botched attempt (by hand) and four pieces which I installed. This was a good learning experience, in that I can see clearly how both uneven surface and marring can detract from the final product. I really should already know this, as I used to work in a metal shop as a parts finisher ("burr boy"), but that was a very long time ago.
- 109 replies
-
- 2
-
-
- Finished
- Artesania Latina
- (and 1 more)
-
How nice of you, Bob. I'll let you know. This may well end up lost amongst all the other details. . . This is a fun build. I will be careful around the stable, though. Horses are unpredictable!
- 109 replies
-
- 1
-
-
- Finished
- Artesania Latina
- (and 1 more)
-
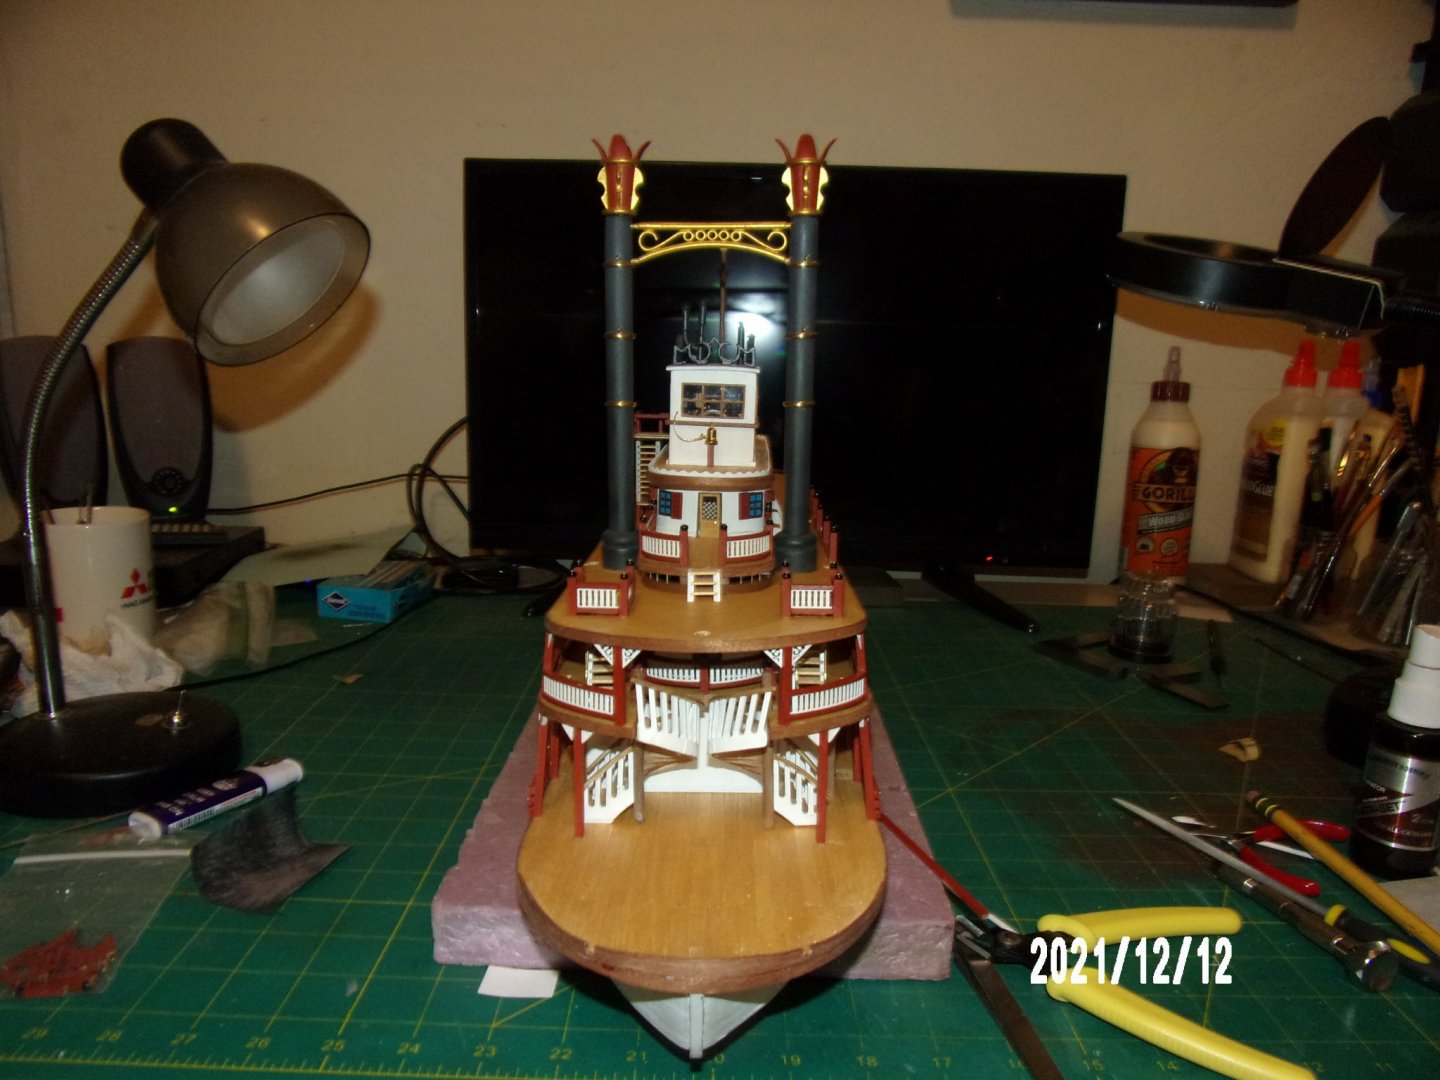
Still waiting on wood to finish the stairways (I did find enough to do the ones already built). I've also run out of wood in two other sizes, and have ordered those also. I did not scrap much wood at all, and consider this a shortcoming of the kit. Today I did the bow-end railings for the stateroom/ventilation deck. I really messed it up, in that I used 3x3 mm material for the top rail in four places. I don't know what I was thinking (I was not thinking), but at least I did the same on both sides! I then added the pre-cut 1.5x3 mm curved top rails on either side of the steps. Was thinking of re-doing all this, and then decided it did not look bad as is. I think I'll do it the same way on the aft end of the deck and it will look like it was designed this way. The other of today's mess-ups was not noticing that the photo-etch white railing next to the window (near side in photo) is not vertical. I do intend to fix this if I have a decent piece of the P.E. left after completing the rest of the railings.
- 109 replies
-
- 4
-
-
- Finished
- Artesania Latina
- (and 1 more)
-
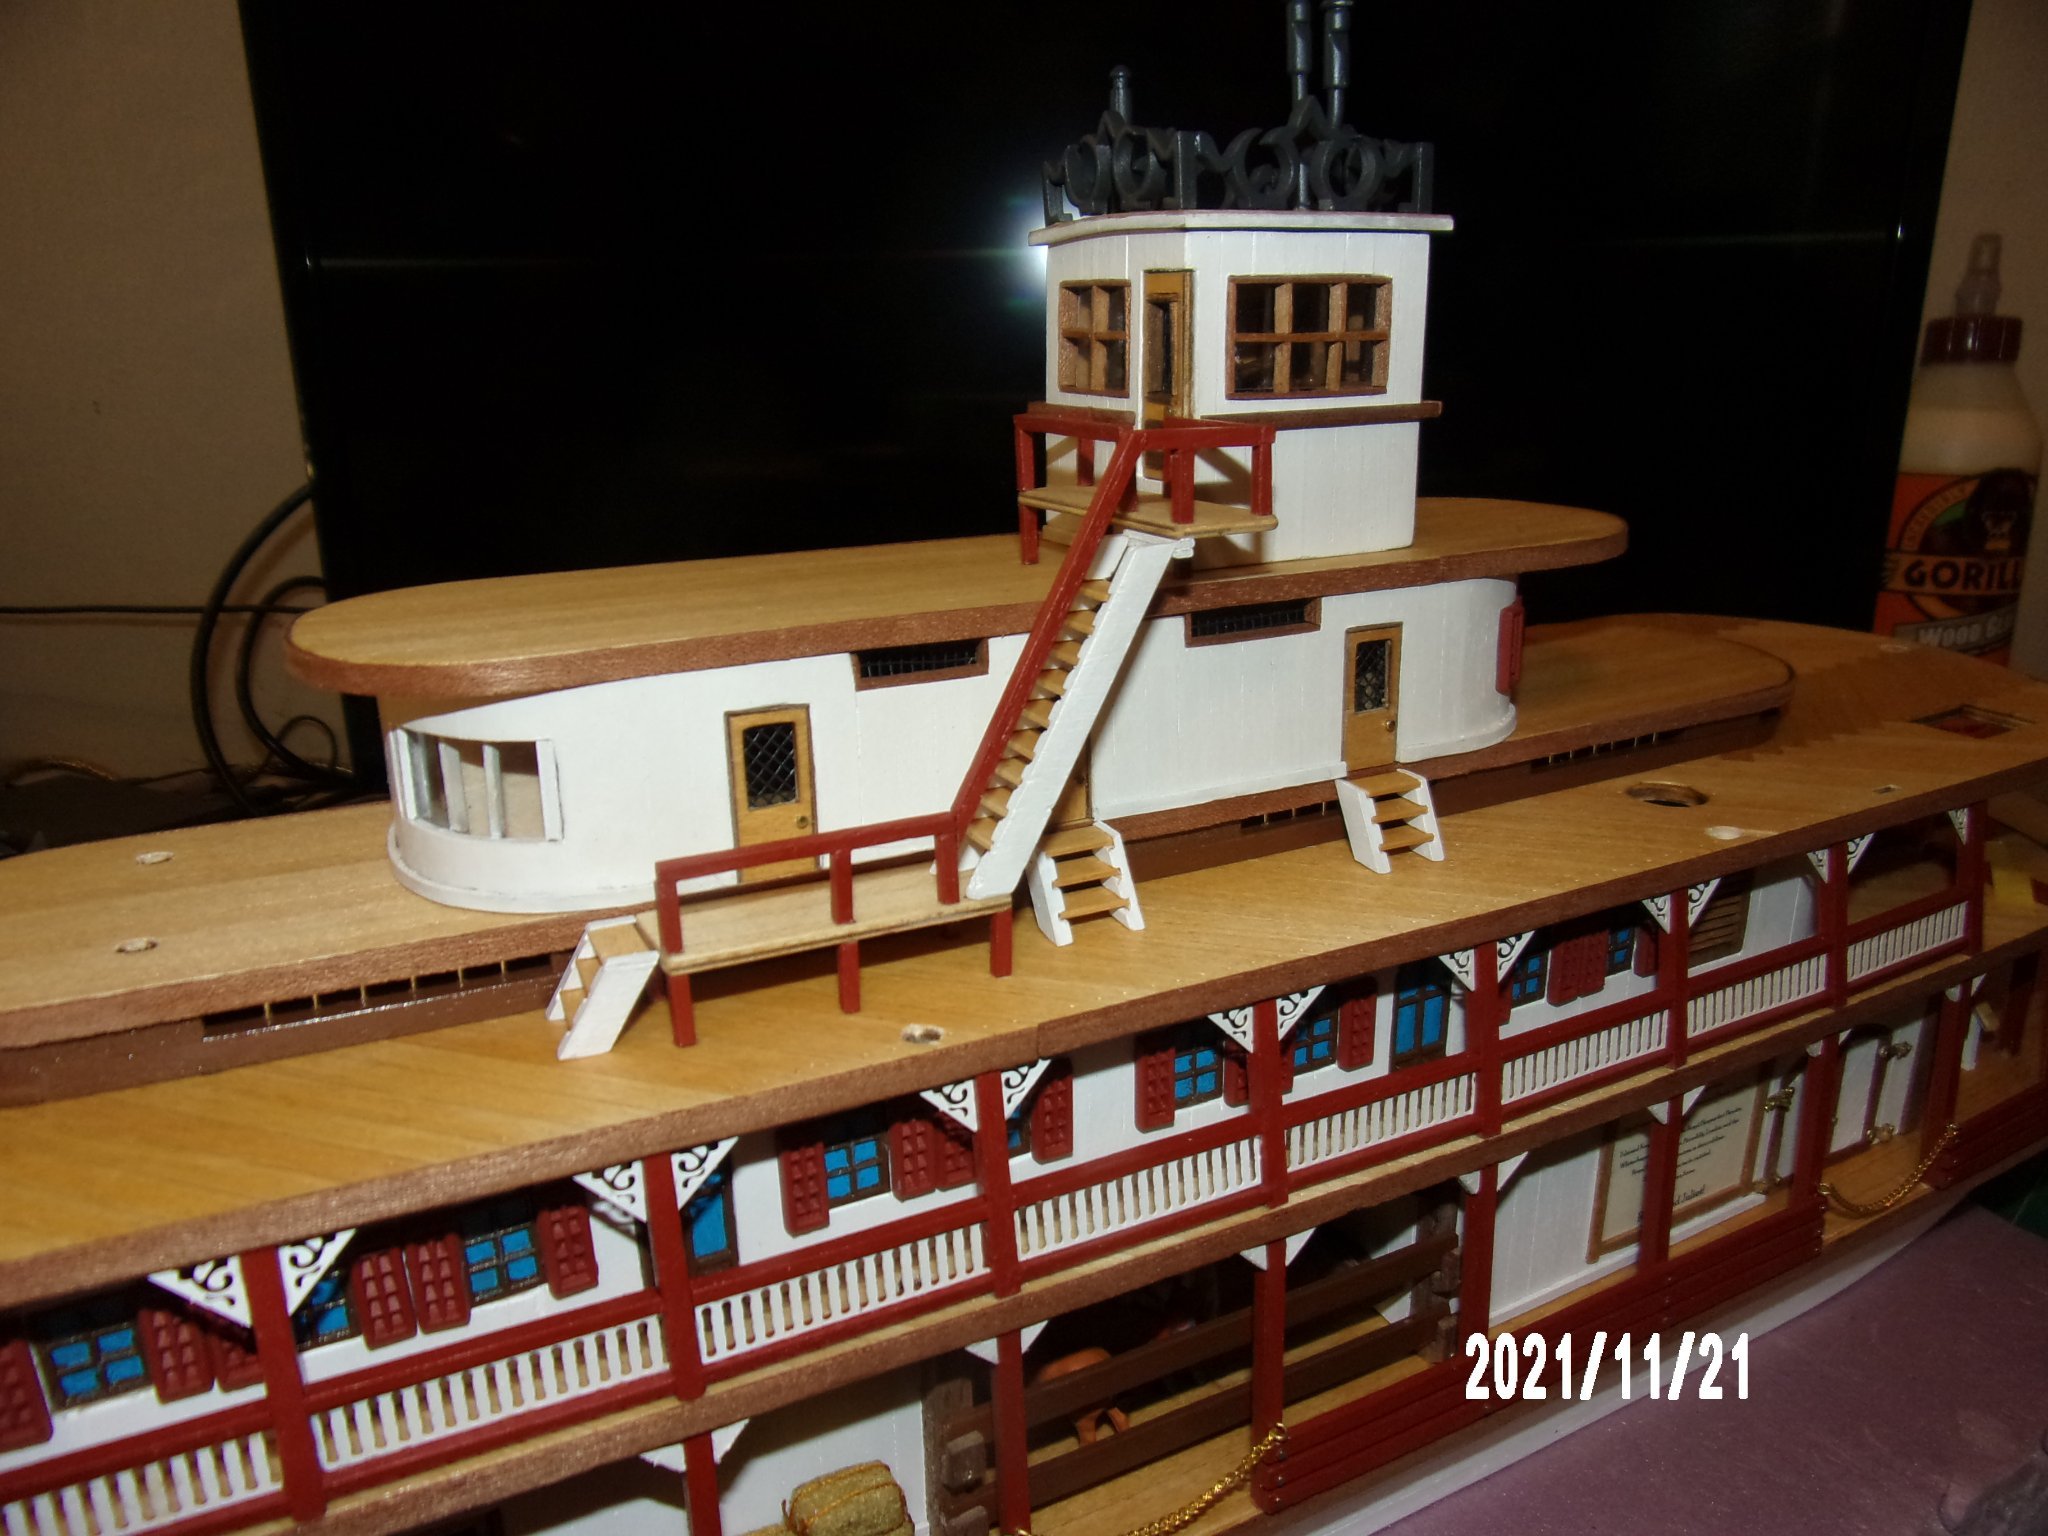
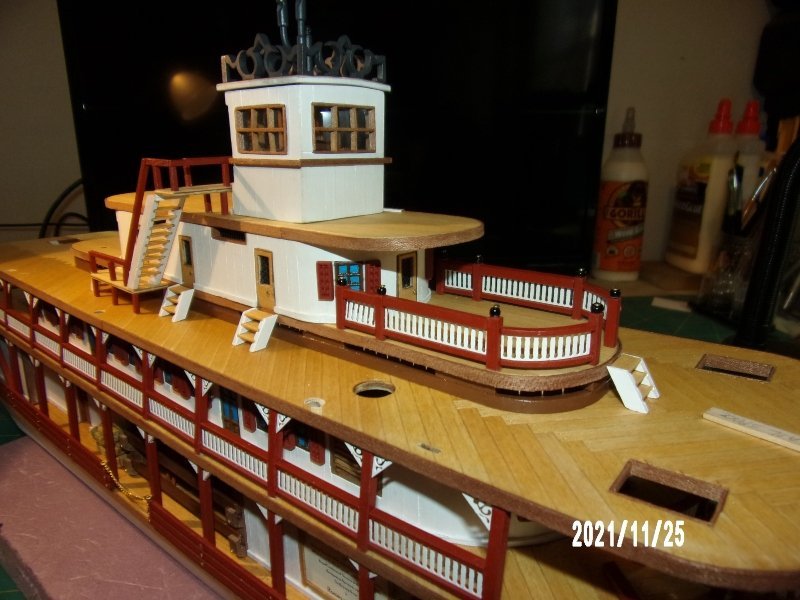
Pressing on, glued down the pilot house, Started on stairways.

- 109 replies
-
- 4
-
-
- Finished
- Artesania Latina
- (and 1 more)
-
Thanks, Bob. I'm pretty happy with things so far. I am not now doing the railings where staircases are located. The kit is also short of the 1.5x3 mm rail material, but I may have enough to do the straight run on the other side of the boat. Still, there's lots of other areas to work on. I'm using CA gel to place the column decorations. Using a round toothpick to place gel in dots along the glued edges, and using an angled tweezers for placement. It's not easy to get them perfectly square to the structure. What is helping somewhat is that there is a very small lip left on the underside of the deck above, resulting from the sapelle deck edging being slightly wider than the deck is thick, and I had made the edging flush with the top of the deck. I had thought of sanding the edging flush with the bottom of the deck, but the overhang was so slight, and I was worried about mucking up the straight line appearance. This lip was also helpful in placing the slanted columns uniformly. The horses and stable keeper are Preiser (to my mind the best). I also bought a 5 pack of Model Power figures, which includes the Pilot. The hay bales are from JTT Scenery Products. It is very hard to find period-appropriate figures online- I spent many hours and did find some 1900s era figures. A lot of them are unavailable "because." Ebay better then Amazon. My biggest haul was from a railroad hobby store (also very hard to find these days), which had an impressive stock of Preiser, and that was where I bought the hay bales as well. Unfortunately, although this store has a web site, they do not do online sales. As an aside, I have spent almost as much on the figures than the model itself cost! Bob
-
I'm at the point where I should be building the remaining stairs, but found that the wood specified for the treads is not in the kit. Ordered some lumber online. While waiting, I started the second deck railings and column decorations. This is fussy work, as the spaces are too small for fingers, so using tweezers and magnifying visor.
- 109 replies
-
- 4
-
-
- Finished
- Artesania Latina
- (and 1 more)
-
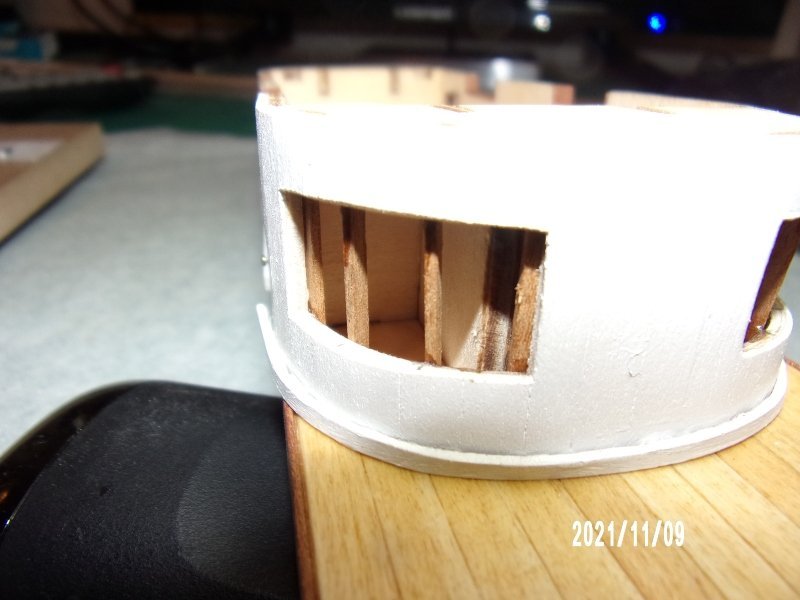
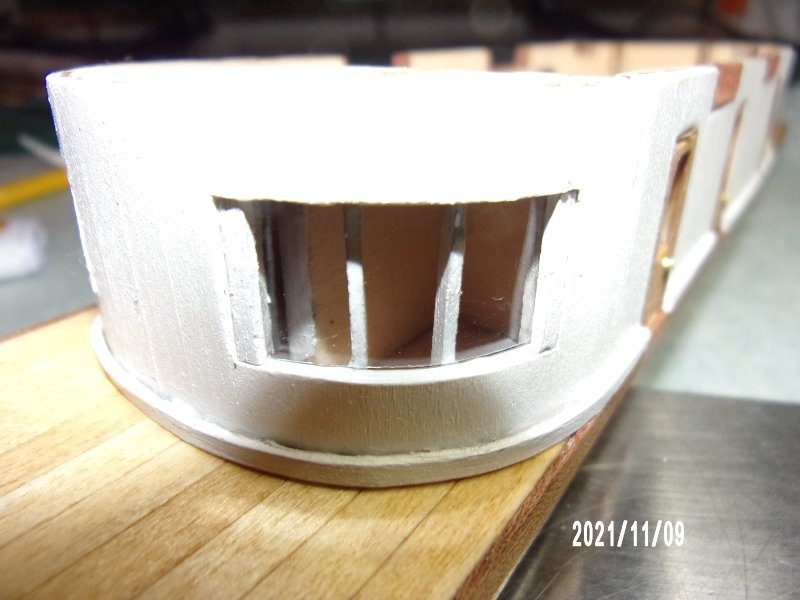
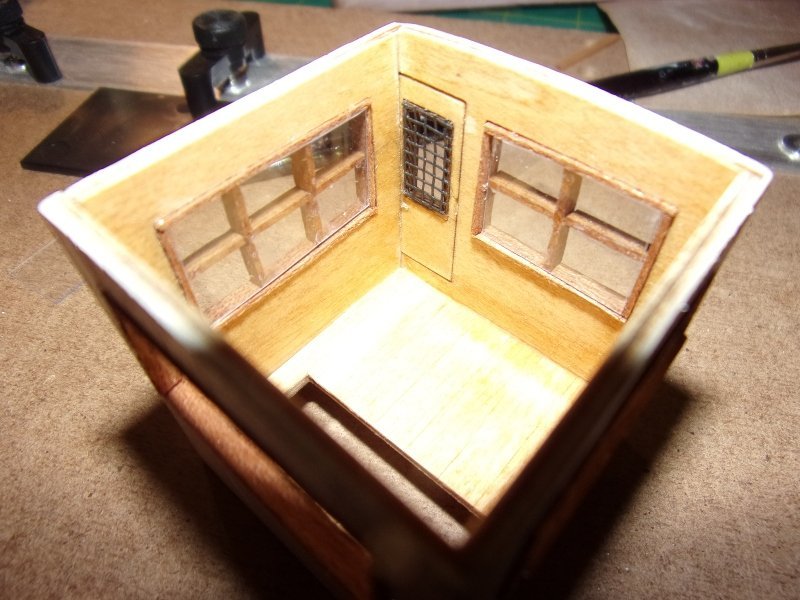
Here's what I did with the wrap-around windows:
- 109 replies
-
- 2
-
-
- Finished
- Artesania Latina
- (and 1 more)
-
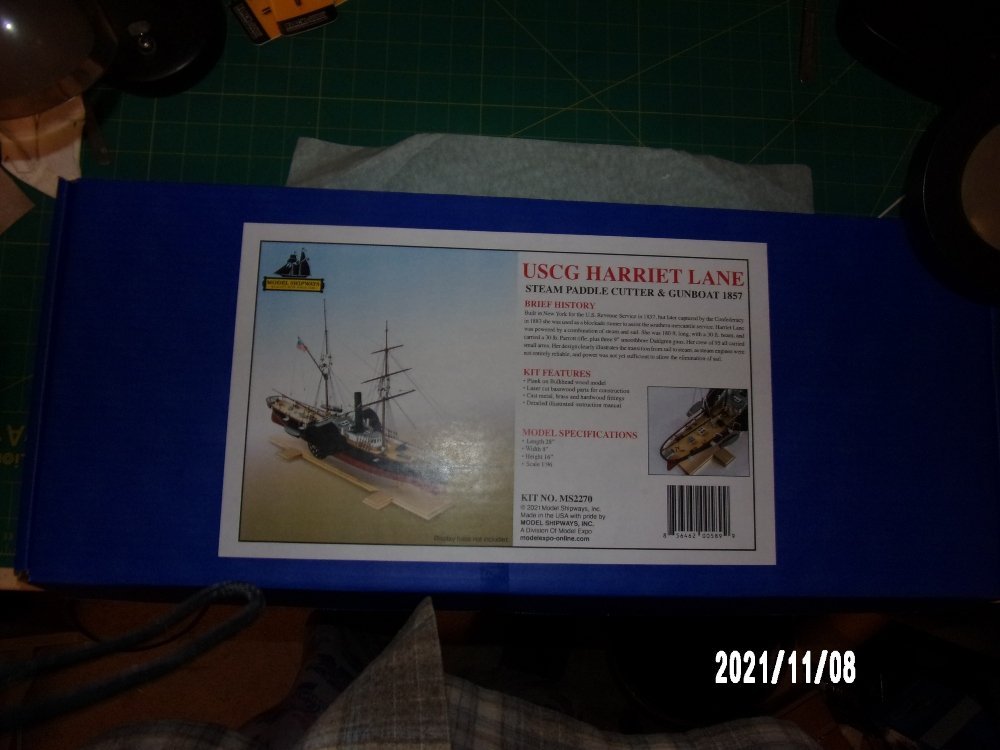
I received this model yesterday and did an inventory this morning (all is there). Designed by David Antscherl, it is the fourth in the Shipwrights series of progressive tutorial models. @Joseph F. has posted a complete unboxing "review," so I will not post more than a picture of the box here. The only thing I might differ with in Joseph's excellent assessment of the kit: "Should be an excellent kit for the intermediate ship builder, and easy enough for beginners." This kit is marketed as an "Advanced" level kit, and it certainly strikes me as such. But of course our skill levels are all different. . . Josephs review: https://modelshipworld.com/topic/30239-196-uscg-harriet-lane-paddlewheel-gunboat-by-model-shipways/#comment-862352 I am currently building AL's King of the Mississippi, so posting here will be slow for a while, but given my propensity for jumping around I can see maybe painting some of the cast metal parts or doing other small tasks for Harriet Lane here and there. Otherwise I will follow David A's advice to keep to his suggested order of operations. Certainly I will be reading and re-reading the manual before doing anything! Very exciting!
- 146 replies
-
- 4
-
-
- Harriet Lane
- Model Shipways
- (and 1 more)
-
Thanks, Bob. I did paint the railings. I had picked up a bag of pins at the hobby store, so did not have to use up the kit pins. Because I had painted the rails and the columns, and used CA glue to assemble them, I felt the pins added some structural integrity. As it turned out, I like the final appearance. Yesterday I glued the elevated portion of the third deck to the bottom of the staterooms and added the pins for the ventilation openings. I had pre-drilled the holes with a drill press, so just had to use a pin vise to extend the holes into the deck. Also, cut off the locating tabs from the top of the staterooms, as they were in the wrong place. I still have to deal with the wrap-around windows. . . really should have added the window material before gluing the rounded portion of the building together. I'm not sure how I will do this now. Soon I will be adding columns/posts to the second and third decks. Not sure if I am going to attempt to notch them to accept the top and bottom rails as shown in the manual. I don't have suitable tools to make these accurately and repeatable. Would use a mill or small table saw for this, I imagine. I will not rush finishing this model, but am awaiting delivery of the next, the new Harriet Lane from Model Expo, which is the fourth in the Shipwrights learning series by David Antscherl. Building the Dory, Pram, and Lobster Smack gave me the experience I needed to attempt this KOM model. Needless to say, the Harriet Lane is sufficiently daunting in complexity, as a Level 4 model, to have already given me that feeling of trepidation I seem to enjoy when starting a new project. Plus she fits right into the shipbuilding era to which I am most attracted!
- 109 replies
-
- 3
-
-
- Finished
- Artesania Latina
- (and 1 more)
-
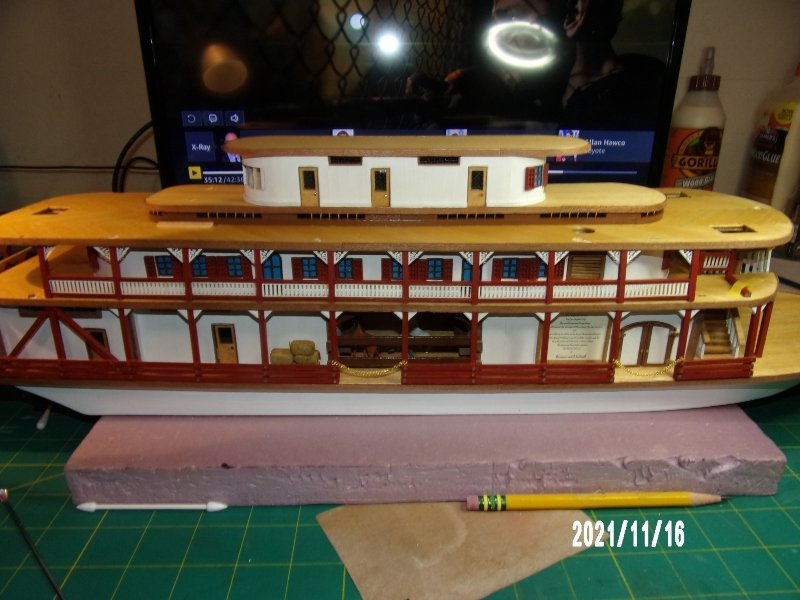
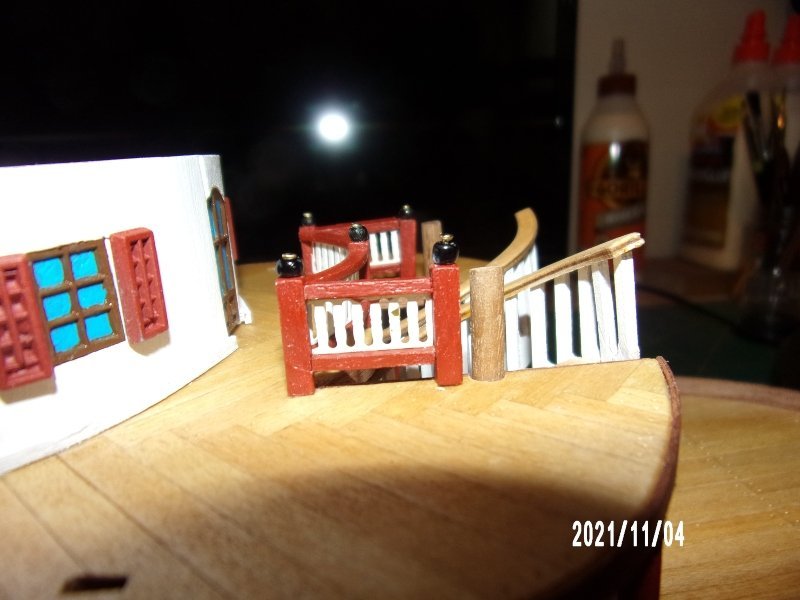
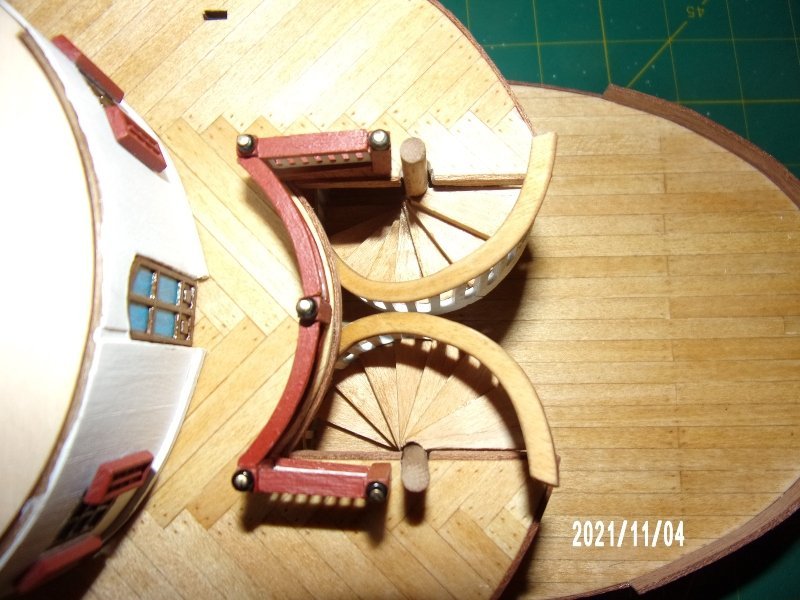
Finally installed the railings around the spiral staircase opening, and shaped the wavecatcher at the bow. Glued on the third deck. Stacked up the remaining upper components for fun. A good days progress, I think.
- 109 replies
-
- 3
-
-
- Finished
- Artesania Latina
- (and 1 more)
-
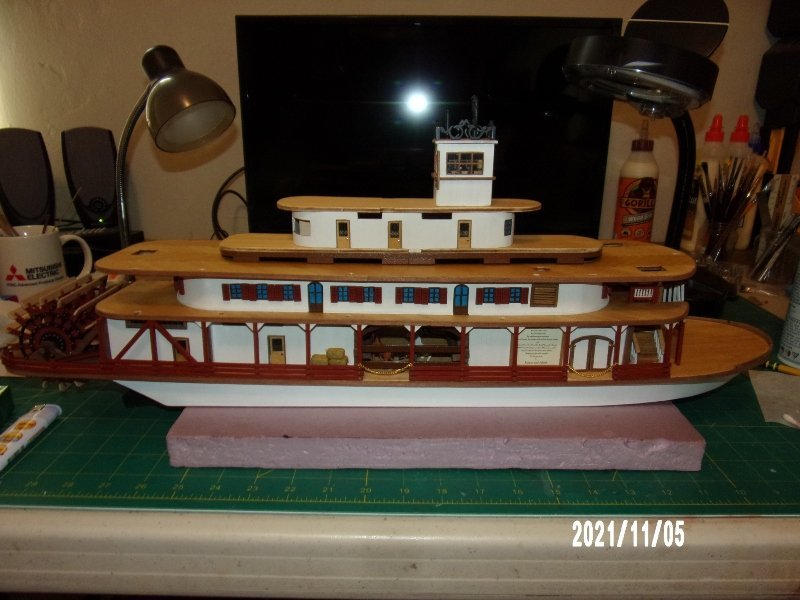
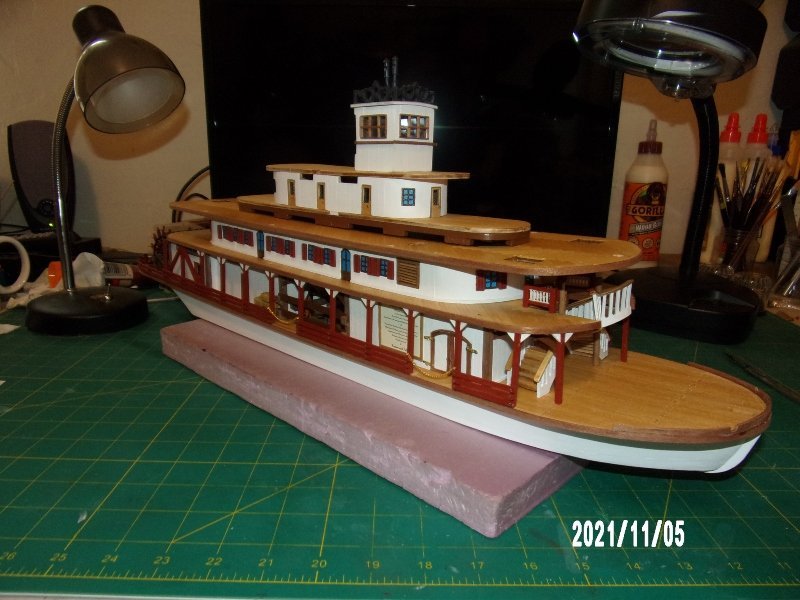
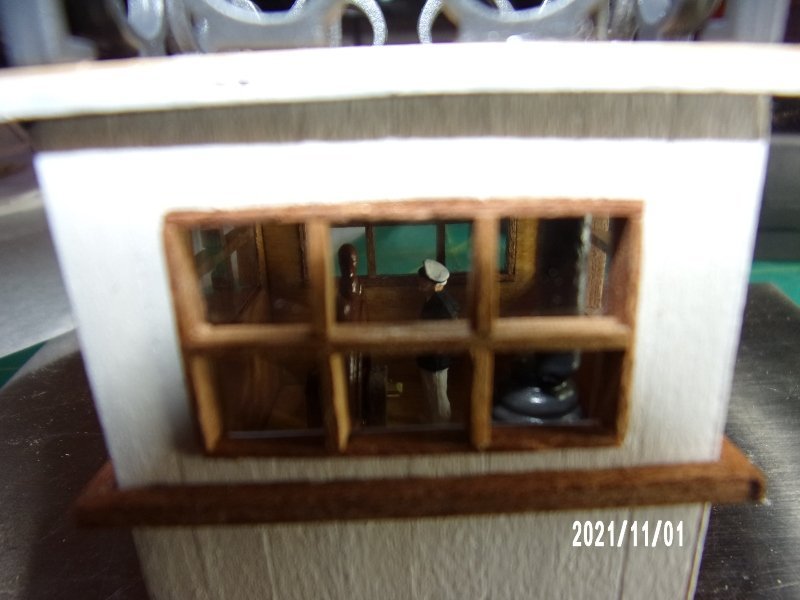
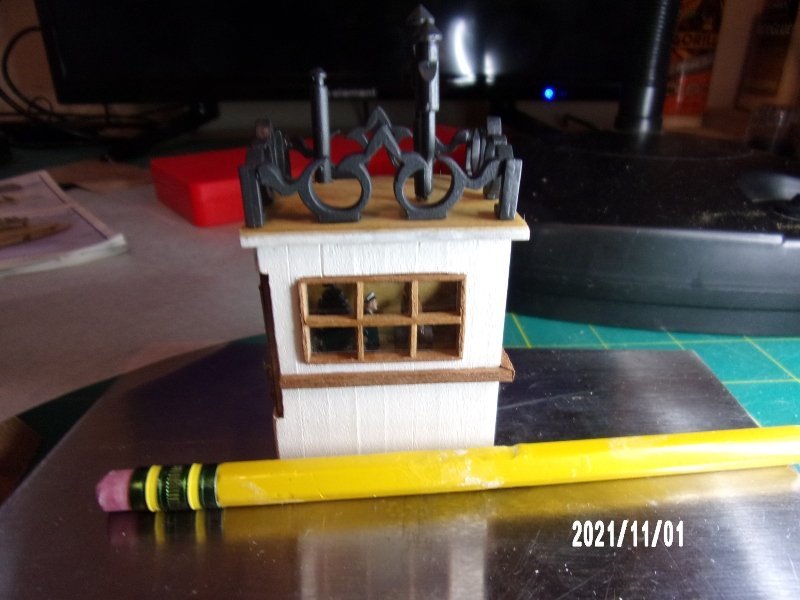
Finished the pilot house. The pilot probably doesn't yet realize that he's trapped in there forever. I hope for his sake he's got a few bottles in there. . . I am concerned that he may be overcome by smoke from the stove, as the stovepipe is not centered on the stove collar. Oh, well. . . as far as I know, plastic people do not breathe very deeply.
- 109 replies
-
- 4
-
-
- Finished
- Artesania Latina
- (and 1 more)
-
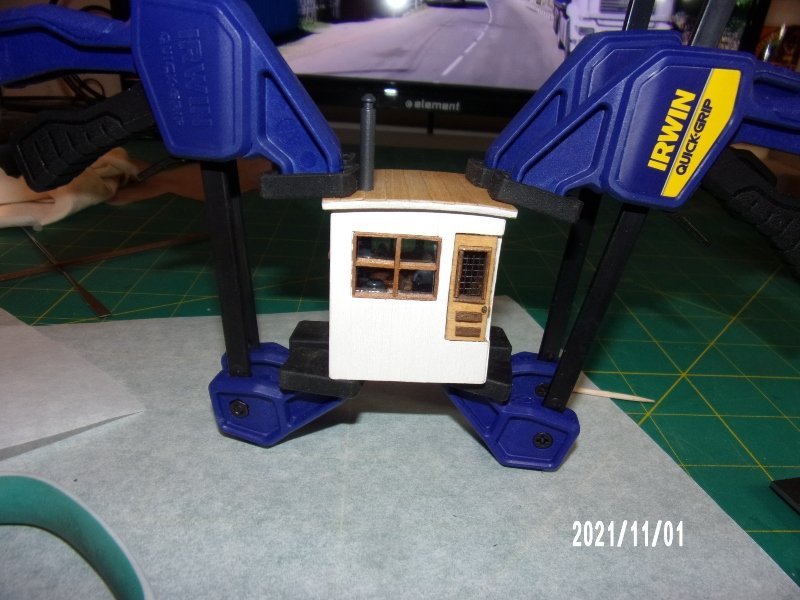
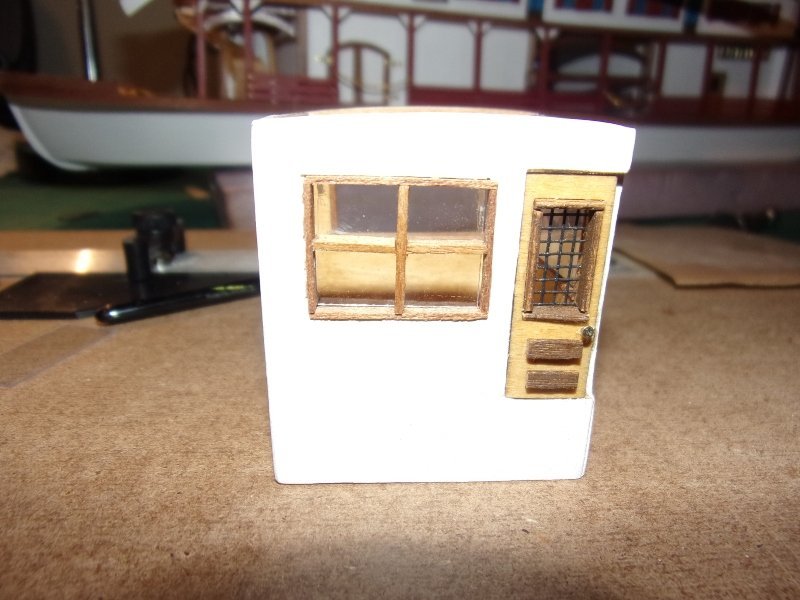
One of the things I like about building this model is the ability to do some parts out of order. I'm not in the mood to deal with upper deck placement issues right now, so I started on the pilot house. I did not like the method given to mark panes onto the acetate window material, so after framing the windows with the supplied 1x3 mm sapelle, added mullions from 1x2 mm walnut I have, aligning the mullions with the outside of the frames. This leaves a 1mm recess on the inside in which to place the "glass." I need to get better at cutting the acetate, but I still like this better than the method used by the designer. I realized too late that there was a plastic film on one side of the acetate sheet, and had to pop the two I had done out and redo, so it got a little messy. I'm sure the other two will be better.
- 109 replies
-
- 3
-
-
- Finished
- Artesania Latina
- (and 1 more)