bobandlucy
-
Posts
512 -
Joined
-
Last visited
Content Type
Profiles
Forums
Gallery
Events
Everything posted by bobandlucy
-
 I have done this also. In fact my current model ended up on the floor a couple of days ago, but luckily my floor is carpeted! Your repair looks good. Bob
- 26 replies
-
- 1
-

-
- muscongus bay lobster smack
- Model Shipways
- (and 1 more)
-
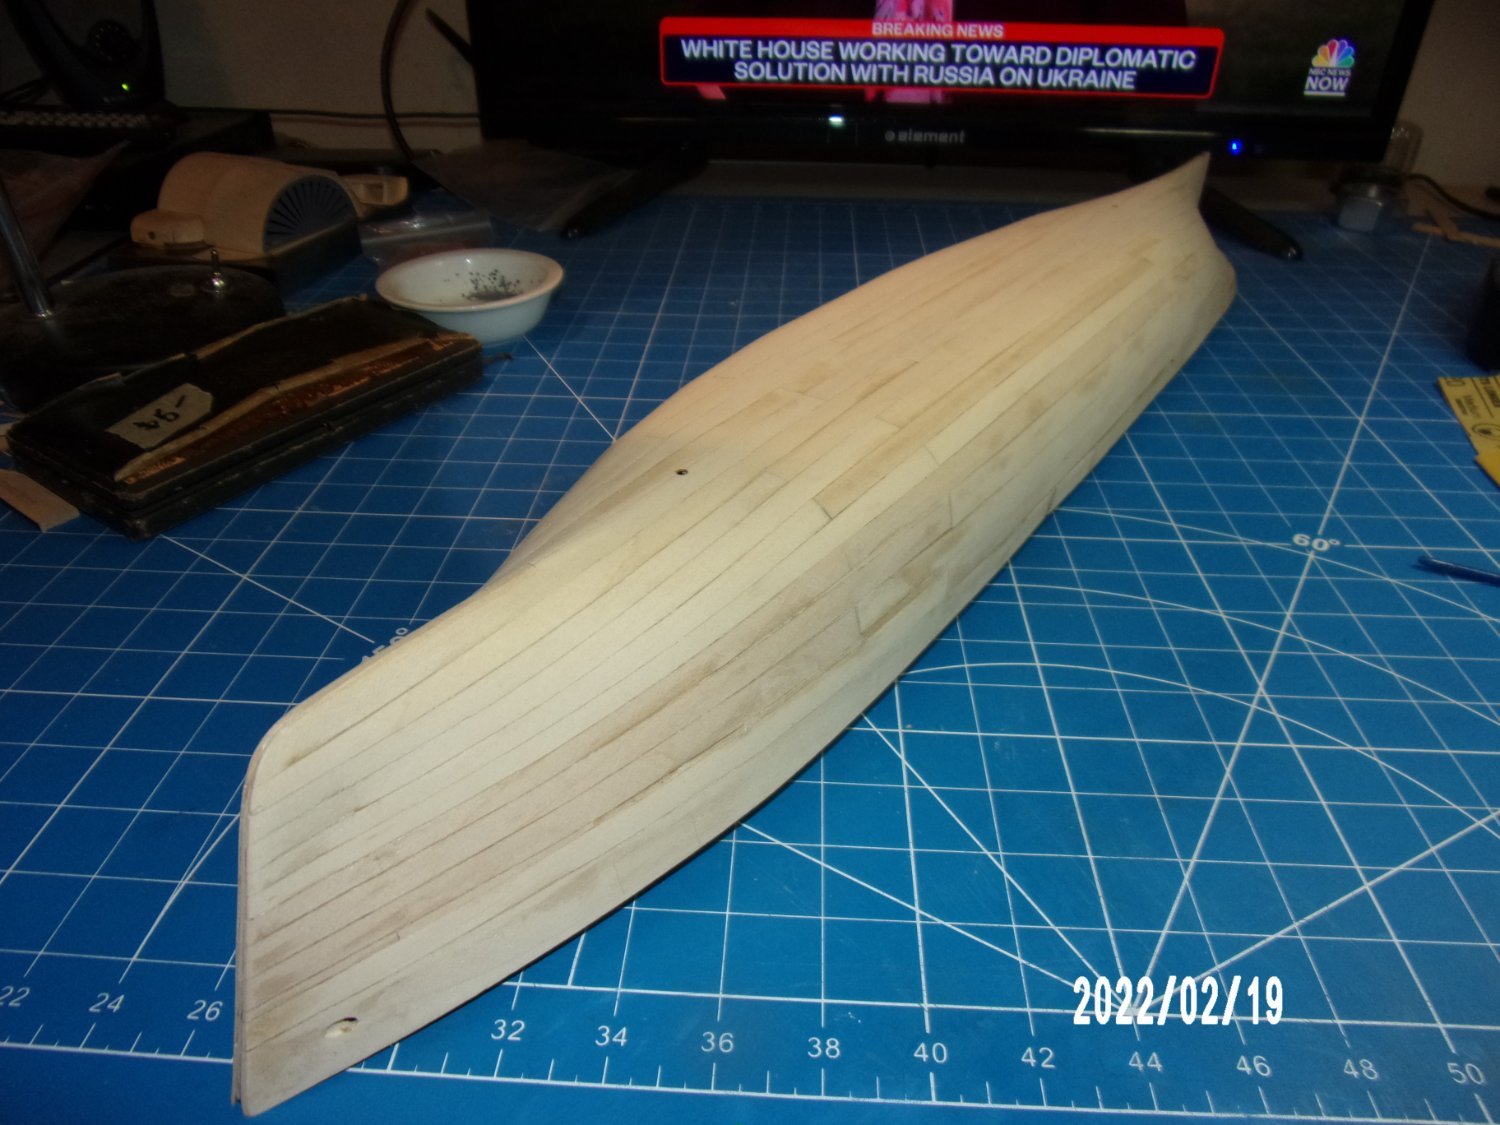
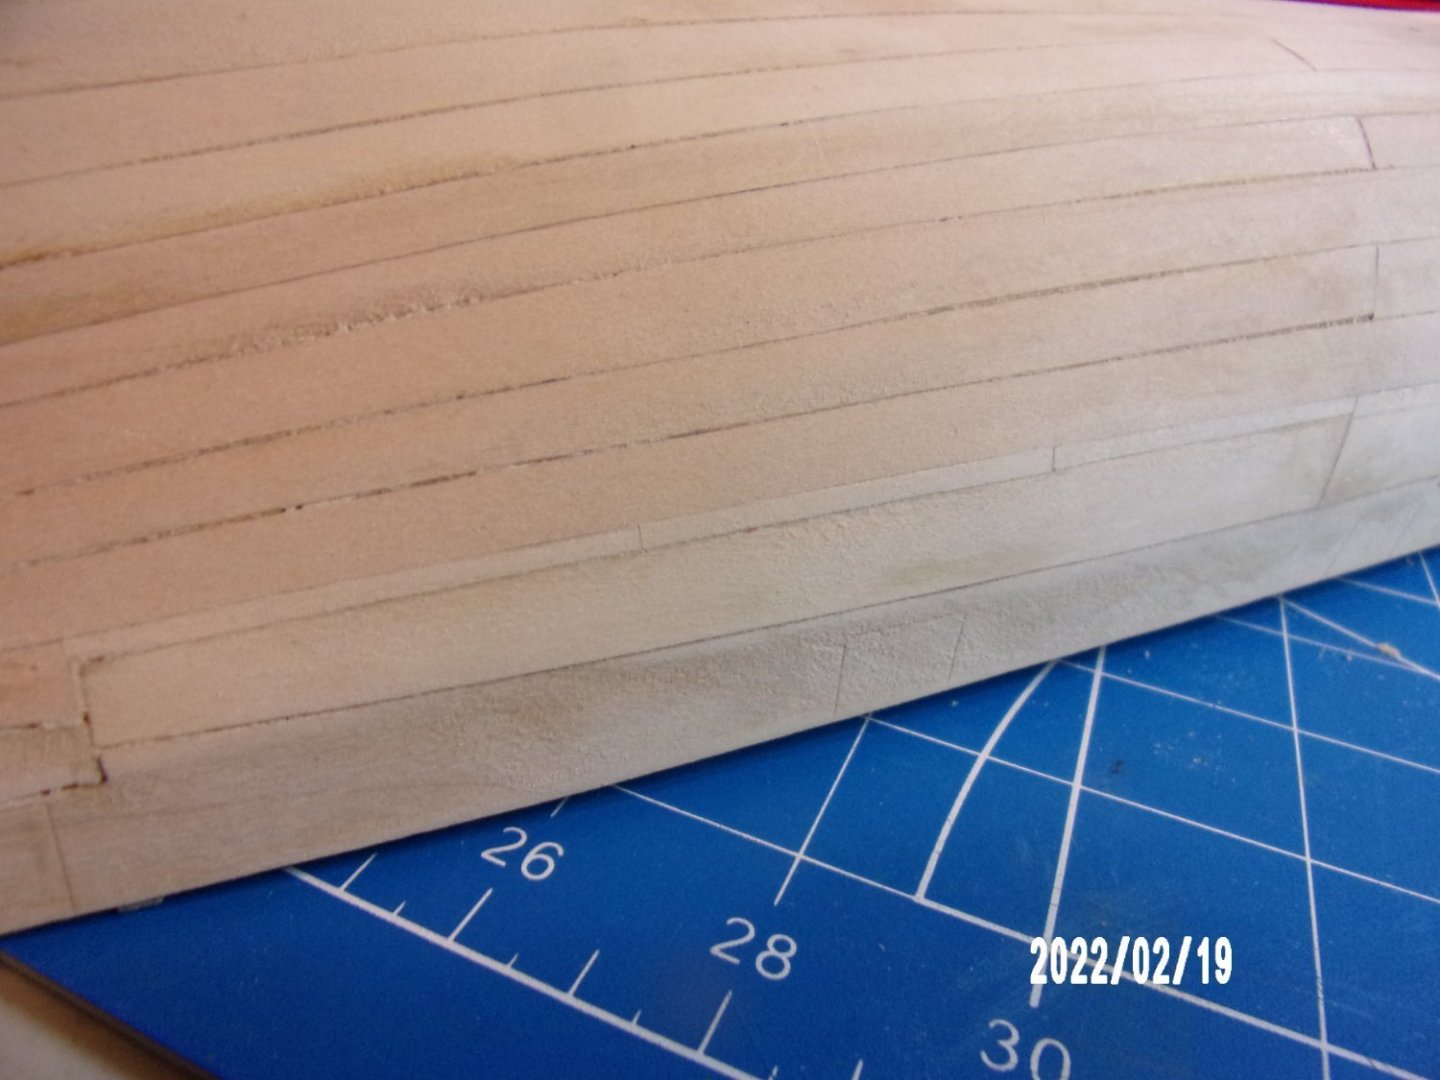
Finished the planking! Came up short on both sides and had to infill with scrap. I decided to place the last planks against the bulwark where they formed the best joint, and infill below. I filled some gaps with wood dust/glue mixture. Did quite a bit of sanding and things started to feel nice. Additional filling will be done with Elmer's.


- 146 replies
-
- 9
-
-
- Harriet Lane
- Model Shipways
- (and 1 more)
-
Thanks, Gary. BTW, I used my scalpel on myself yesterday, to remove a nasty splinter I picked up doing yardwork. Painless! bob
- 146 replies
-
- 2
-
-
- Harriet Lane
- Model Shipways
- (and 1 more)
-
Looks good Gregg, I'll follow along.
-
Thank you, David. I had a good teacher. . . and I've absolutely learned to SLOW DOWN! This is a fun model to construct. It will keep me busy for quite some time.
- 146 replies
-
- 2
-
-
- Harriet Lane
- Model Shipways
- (and 1 more)
-
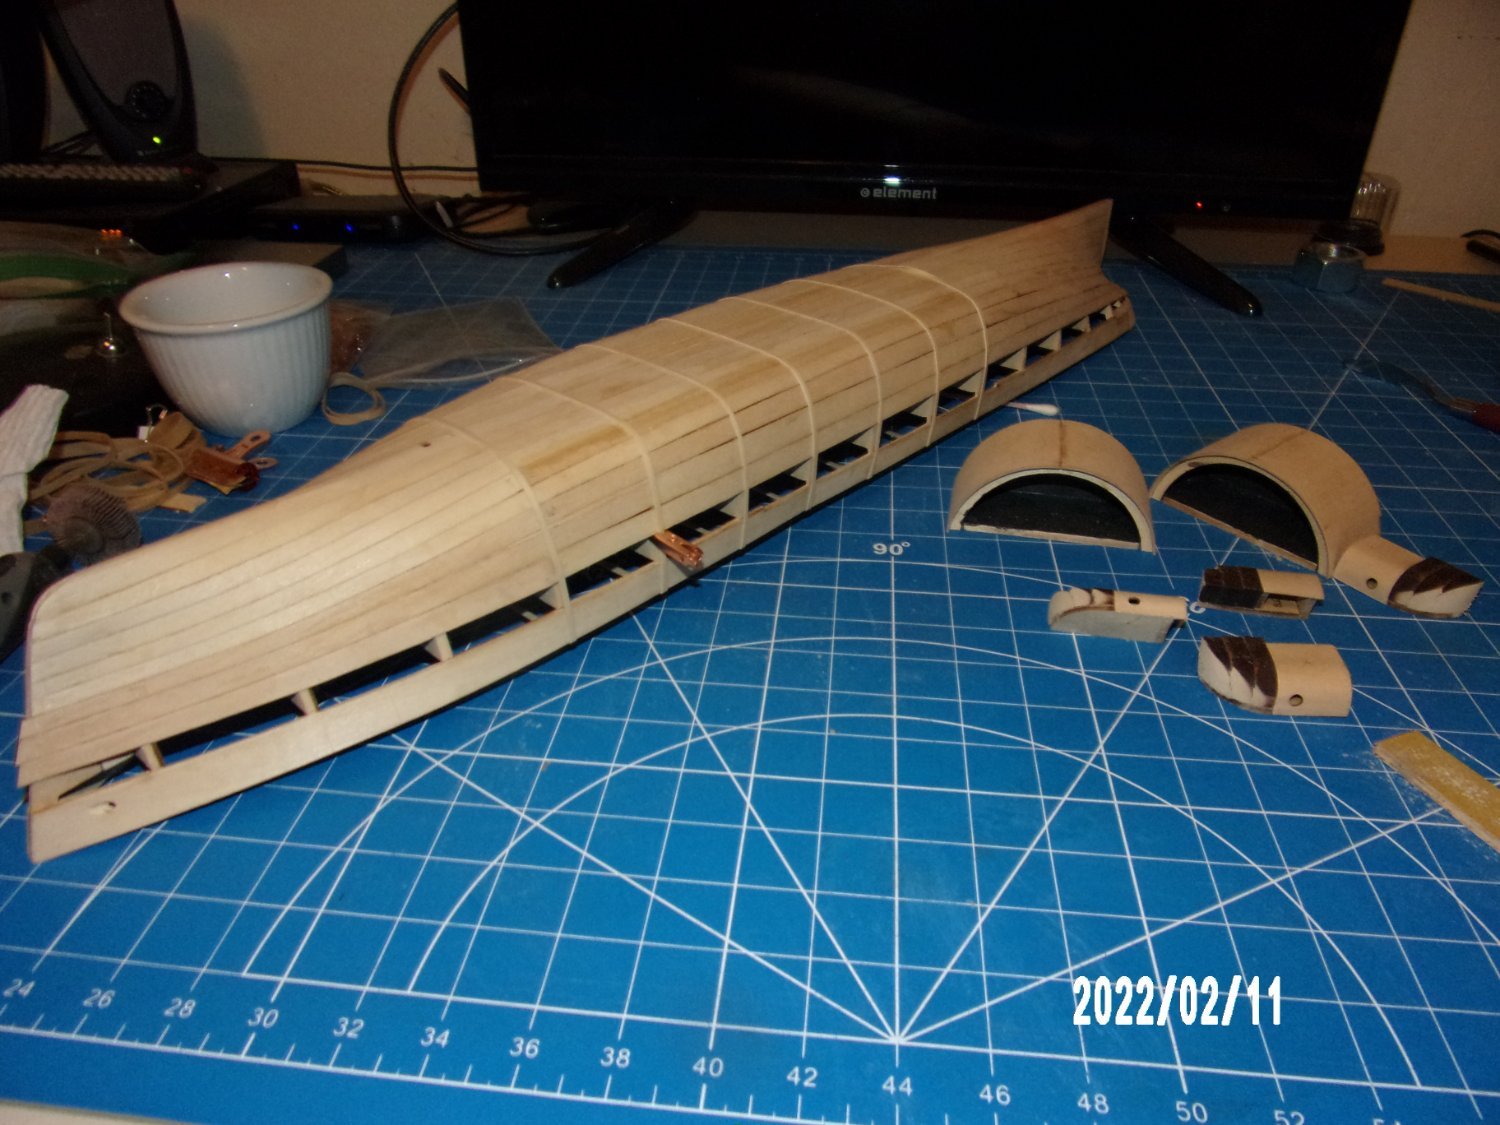
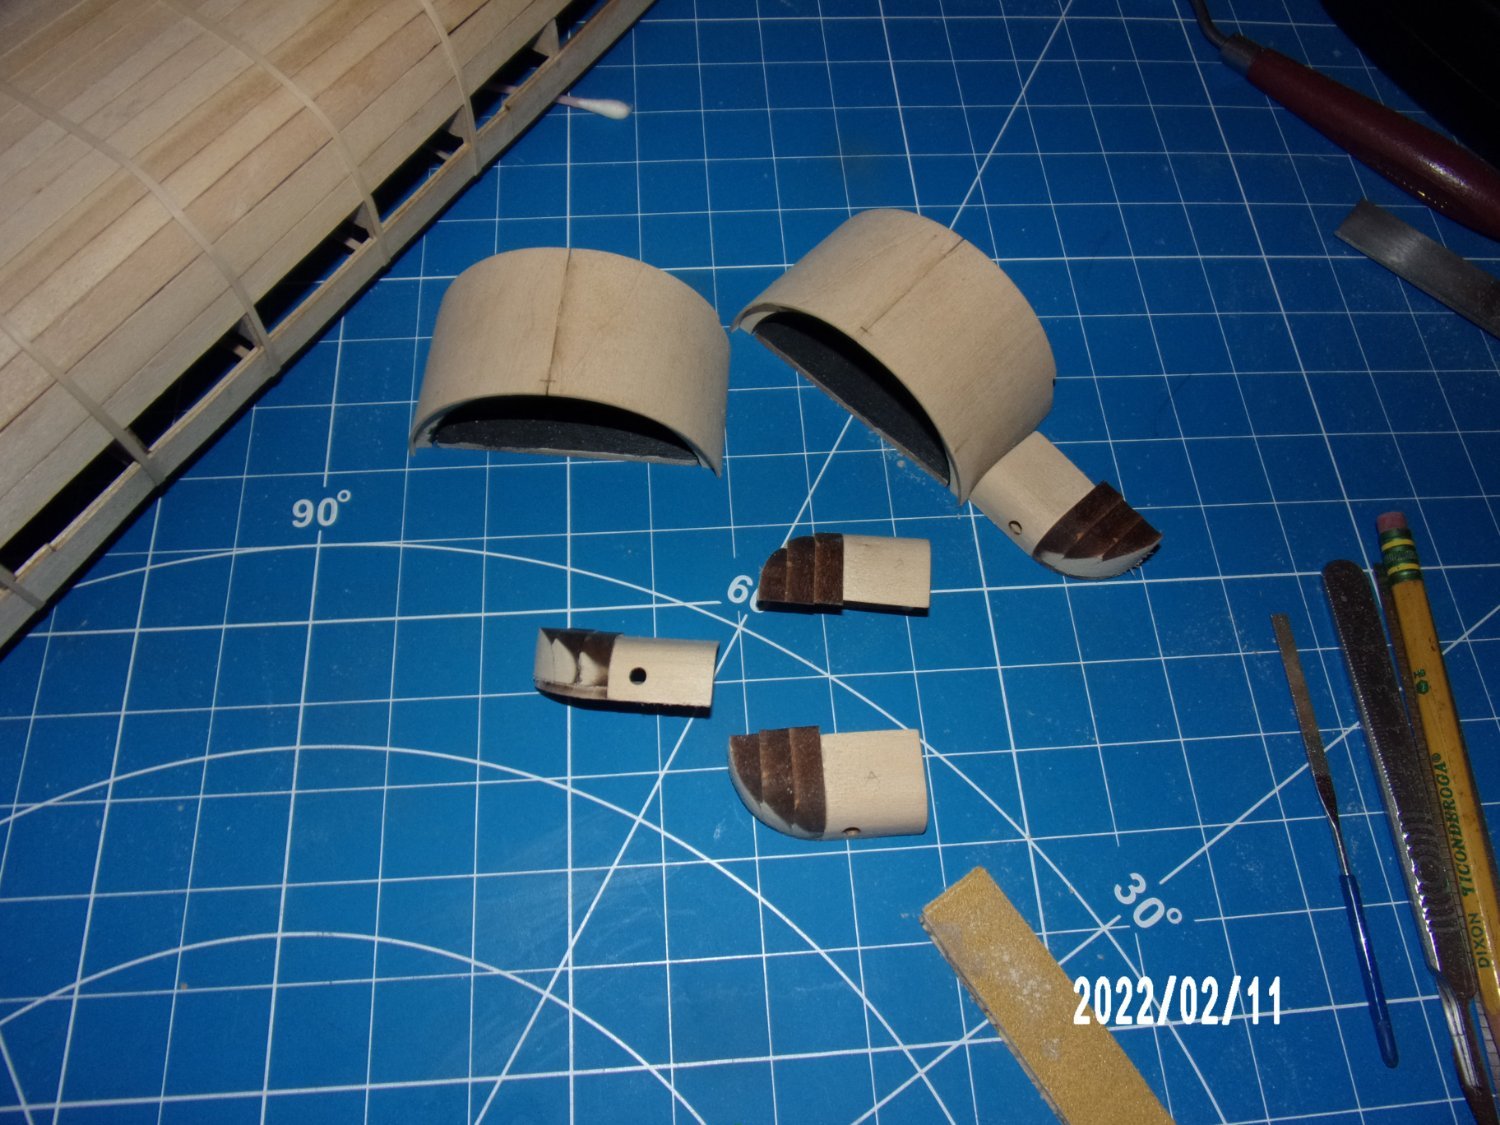
Getting close to finishing the planking. You can see I've got some minor gaps to fill, particularly amidships at the vertical planks. On the side not shown, it is better, though I beveled the planks the same on both sides. I think it is accumulated error due to some small edge-bending in planks above. Still, I am happy enough- they have a good connection to the frames and think it will turn out OK. Fitting the final strake will be its own challenge, as the manual indicates. While letting planks dry, I started on the upper wheel enclosure and water closets. The fourth piece comprising the solid section of the water closets was sanded off during the first shaping operation, so I hope I'm reading the instructions correctly.


- 146 replies
-
- 7
-
-
- Harriet Lane
- Model Shipways
- (and 1 more)
-
Gary, go ahead and get the scalpel, you won't regret it. Being able to cut with less applied pressure will free your attention and make your cuts more precise. And it does not hurt as much when you cut yourself! Bob
- 26 replies
-
- 2
-
-
- muscongus bay lobster smack
- Model Shipways
- (and 1 more)
-
Looks very nice, Gregg!
-
My buildings did not match the deck slots as well. My solution was to cut one of the tabs off. Do yourself a favor, though- consult the large plans for the correct location of the buildings to verify which tab might be the good one before doing any amputations. . .
- 132 replies
-
- 2
-
-
- King of the Mississippi
- Artesania Latina
- (and 1 more)
-
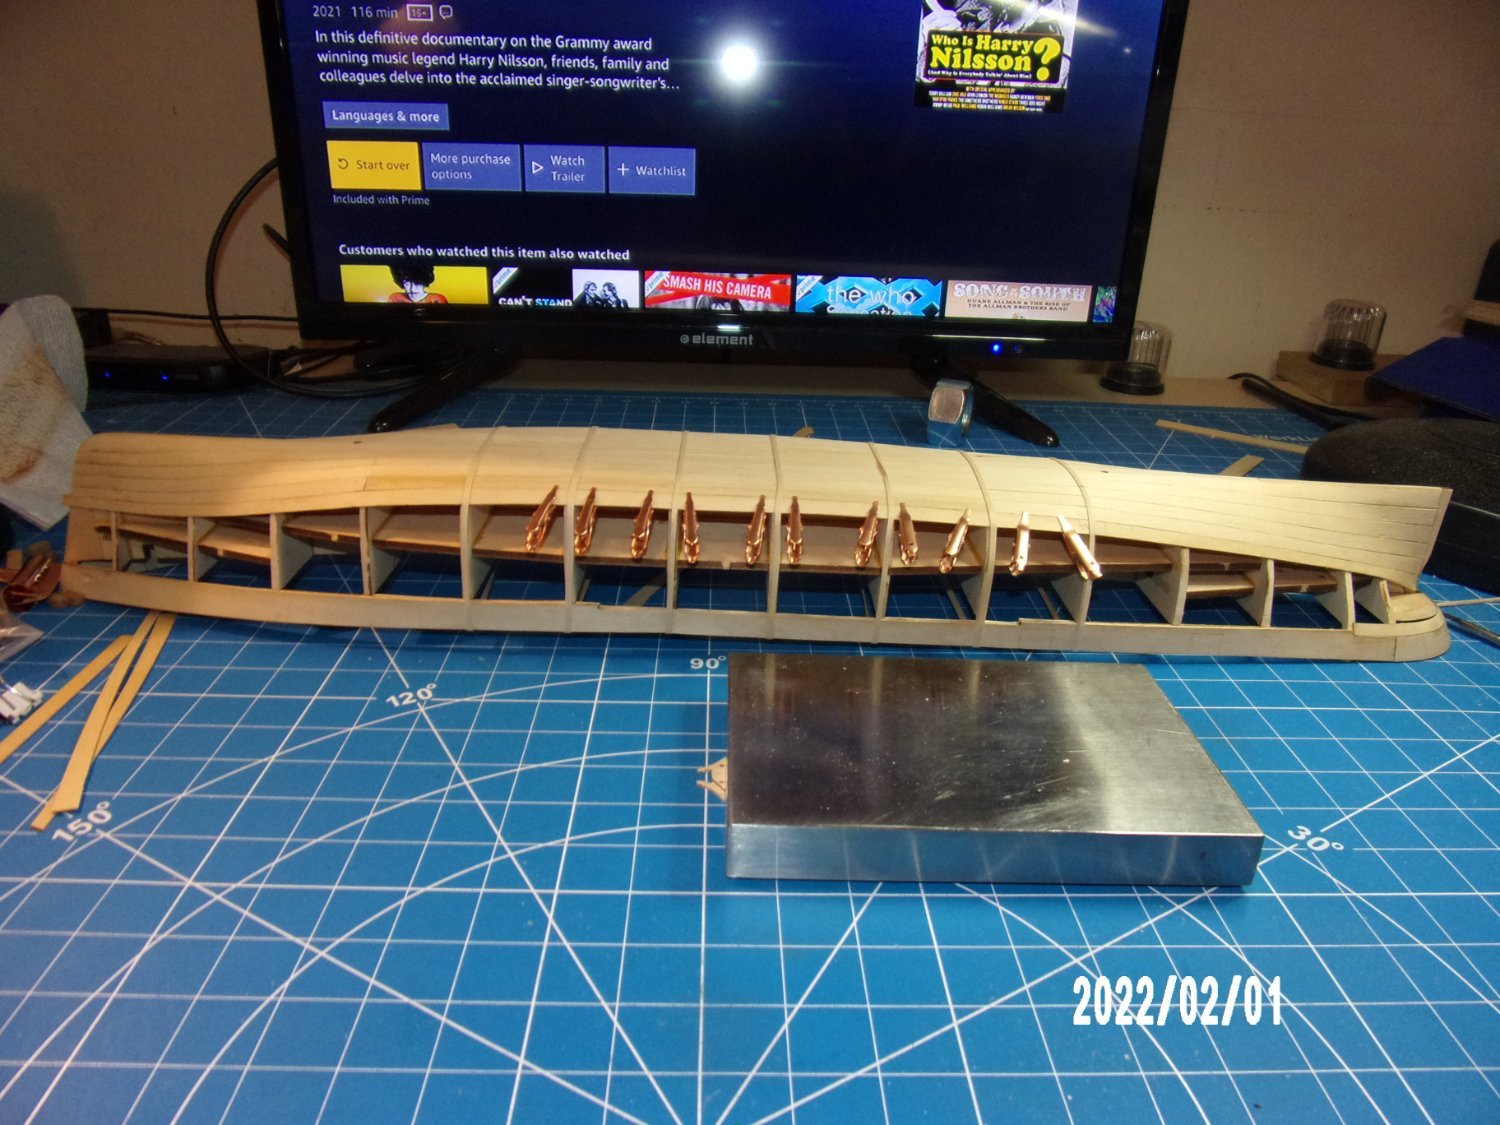
Howdy. About halfway through the planking. At least, two of the four sheets of planking are installed. Installed the outer stern post. I've definitely got some filling to do. . . but I think this one is better than my last, and that one ended up OK. It might take a couple more before I'd try a natural wood finished hull! Started on the "Sponson Deck," (trapped under the SS plate). It's part of the wheel assembly. Making some progress while planking is drying/gluing.


- 146 replies
-
- 7
-
-
- Harriet Lane
- Model Shipways
- (and 1 more)
-
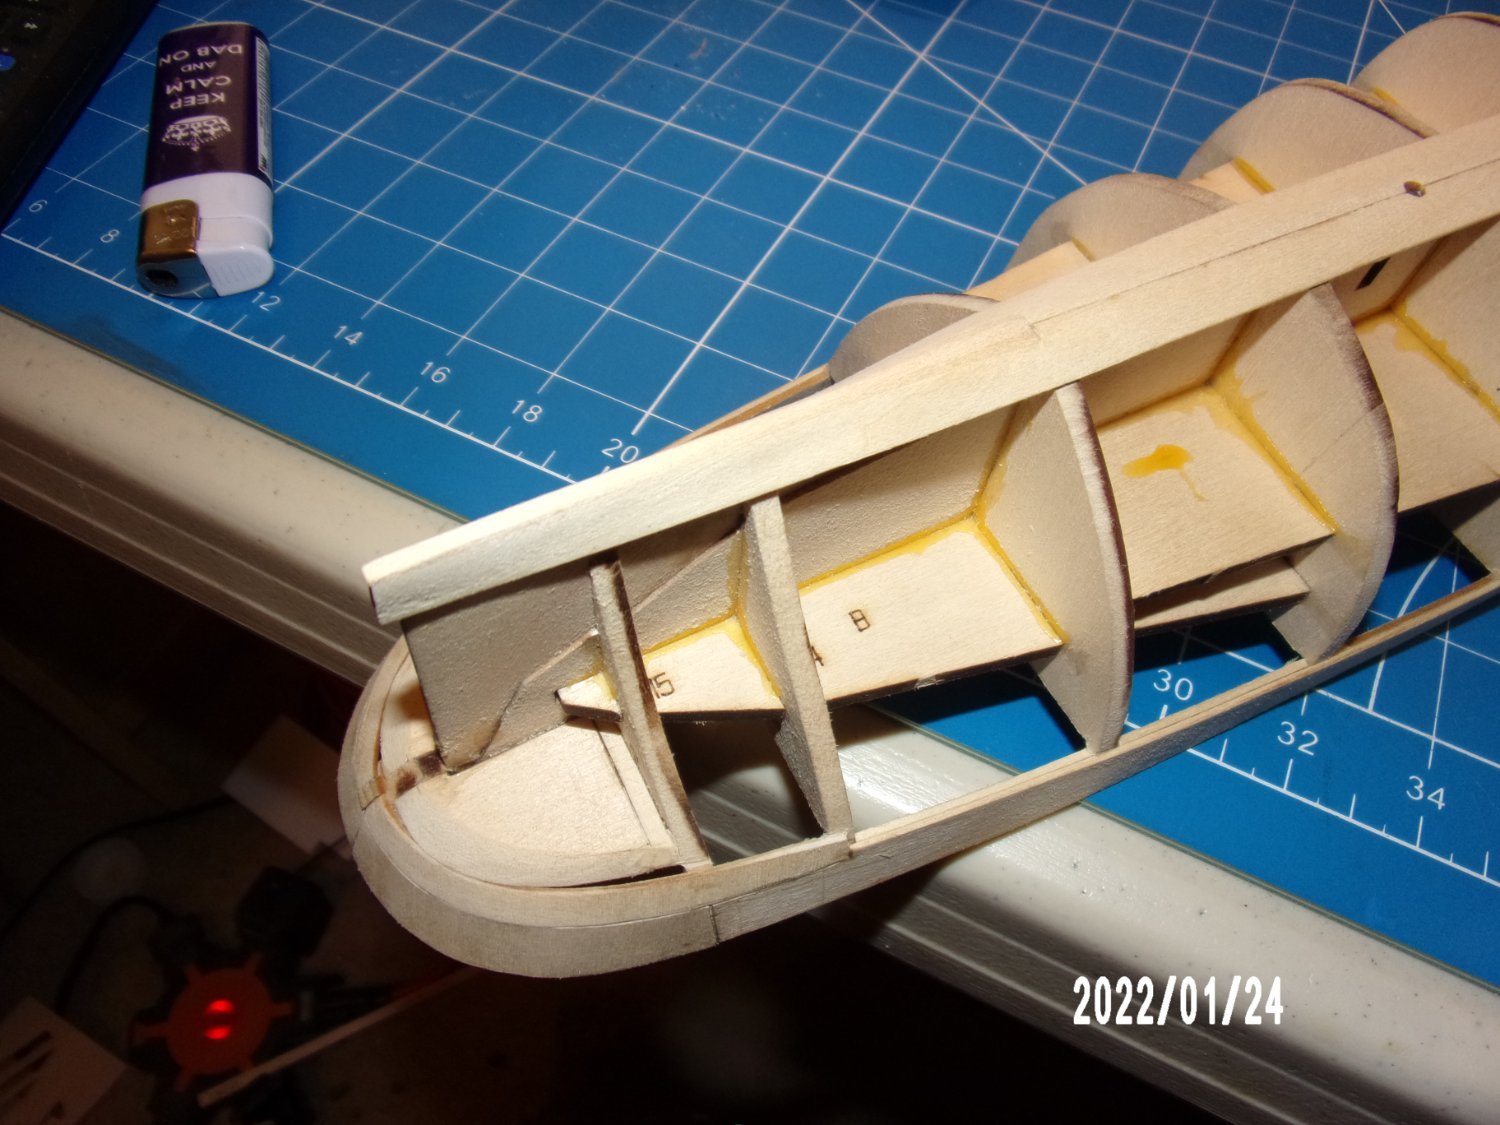
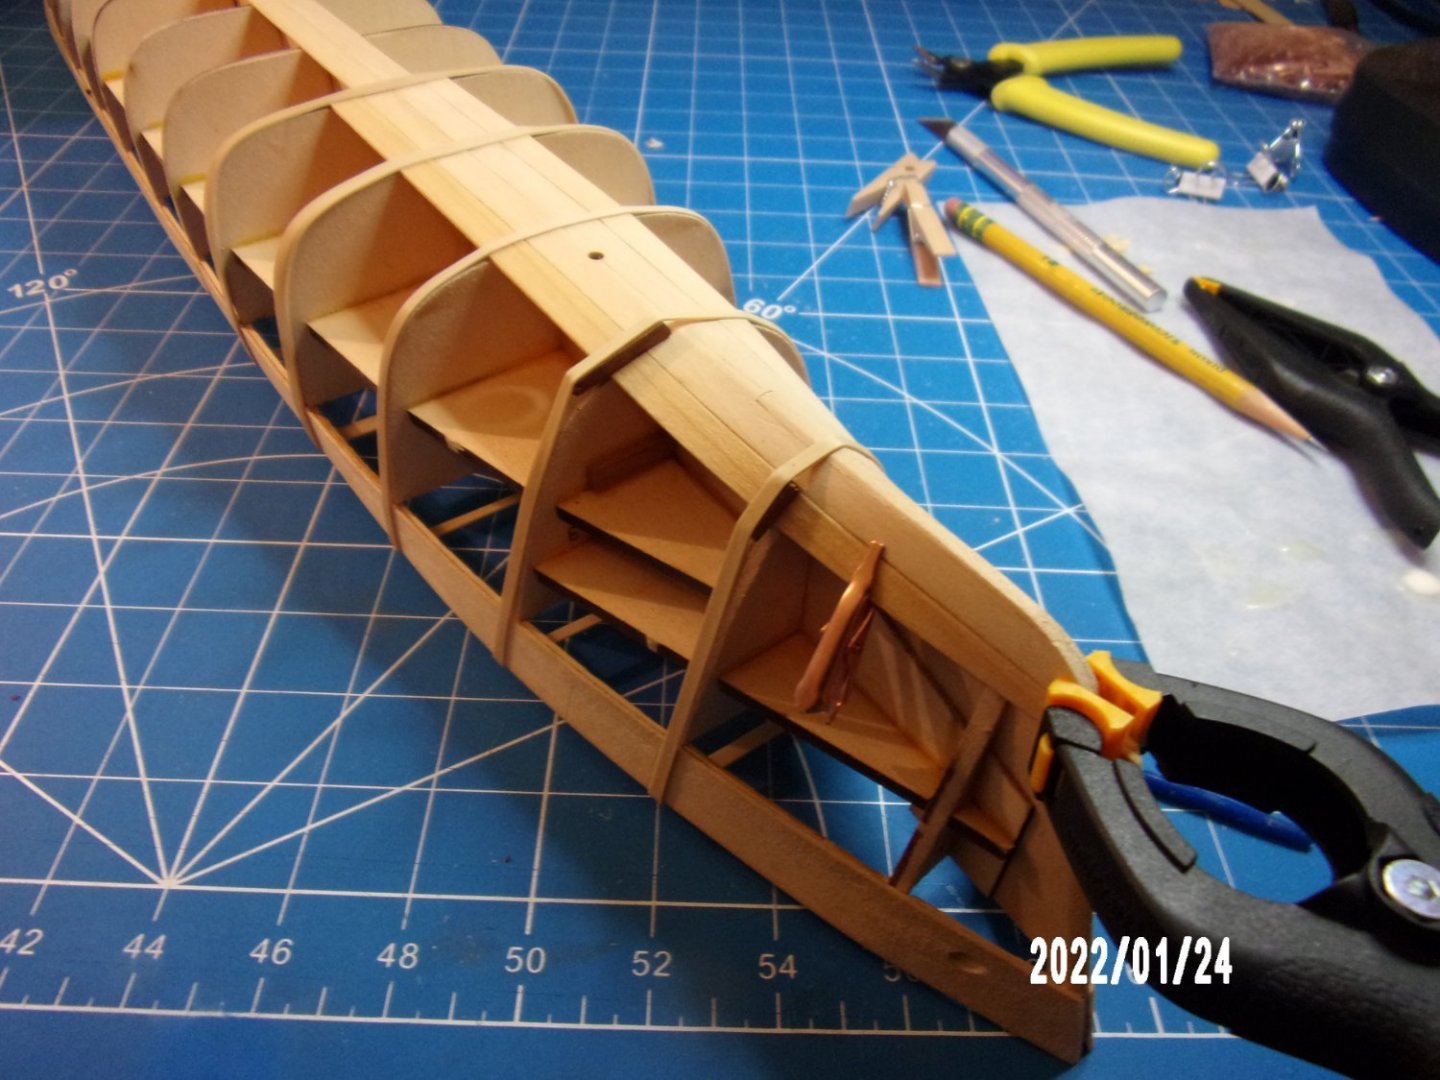
Began planking. Was a bit puzzled- there is a small step in both the inner stem and stern post which I think should roughly correspond with steps in the garboard planks, they are there to aid in the transition from horizontal to vertical planking, but they are off by about an inch in the bow and more in the stern area. This resulted in a void between the planks and the inner keel, but these are covered by the 1/32" thick closure pieces placed over the area. These strips had to be longer and wider than shown in the manual. It may make no difference, I'll have to see how it looks when placing the outer keel strips. . . Otherwise I think think it's a good start.


- 146 replies
-
- 5
-
-
- Harriet Lane
- Model Shipways
- (and 1 more)
-
Gary, have you tried gel-type CA? I find it a bit easier to control. . .
-
Very Nice! You'll enjoy the Lobster Smack. It is very elegant.
-
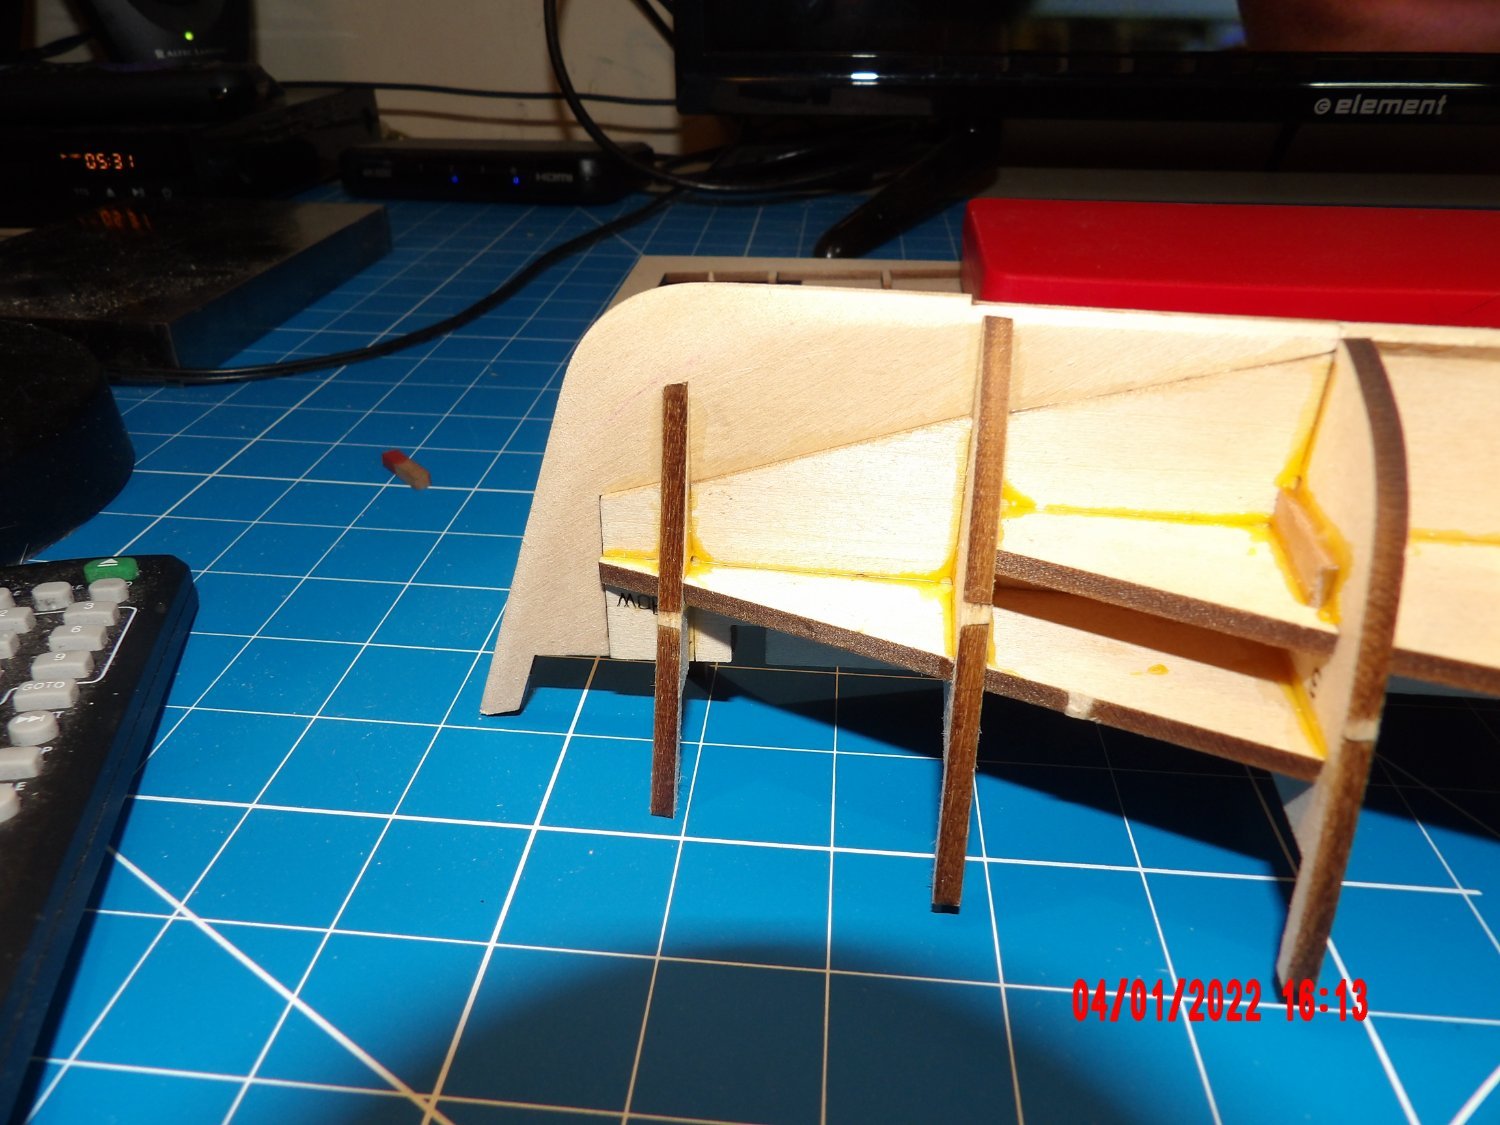
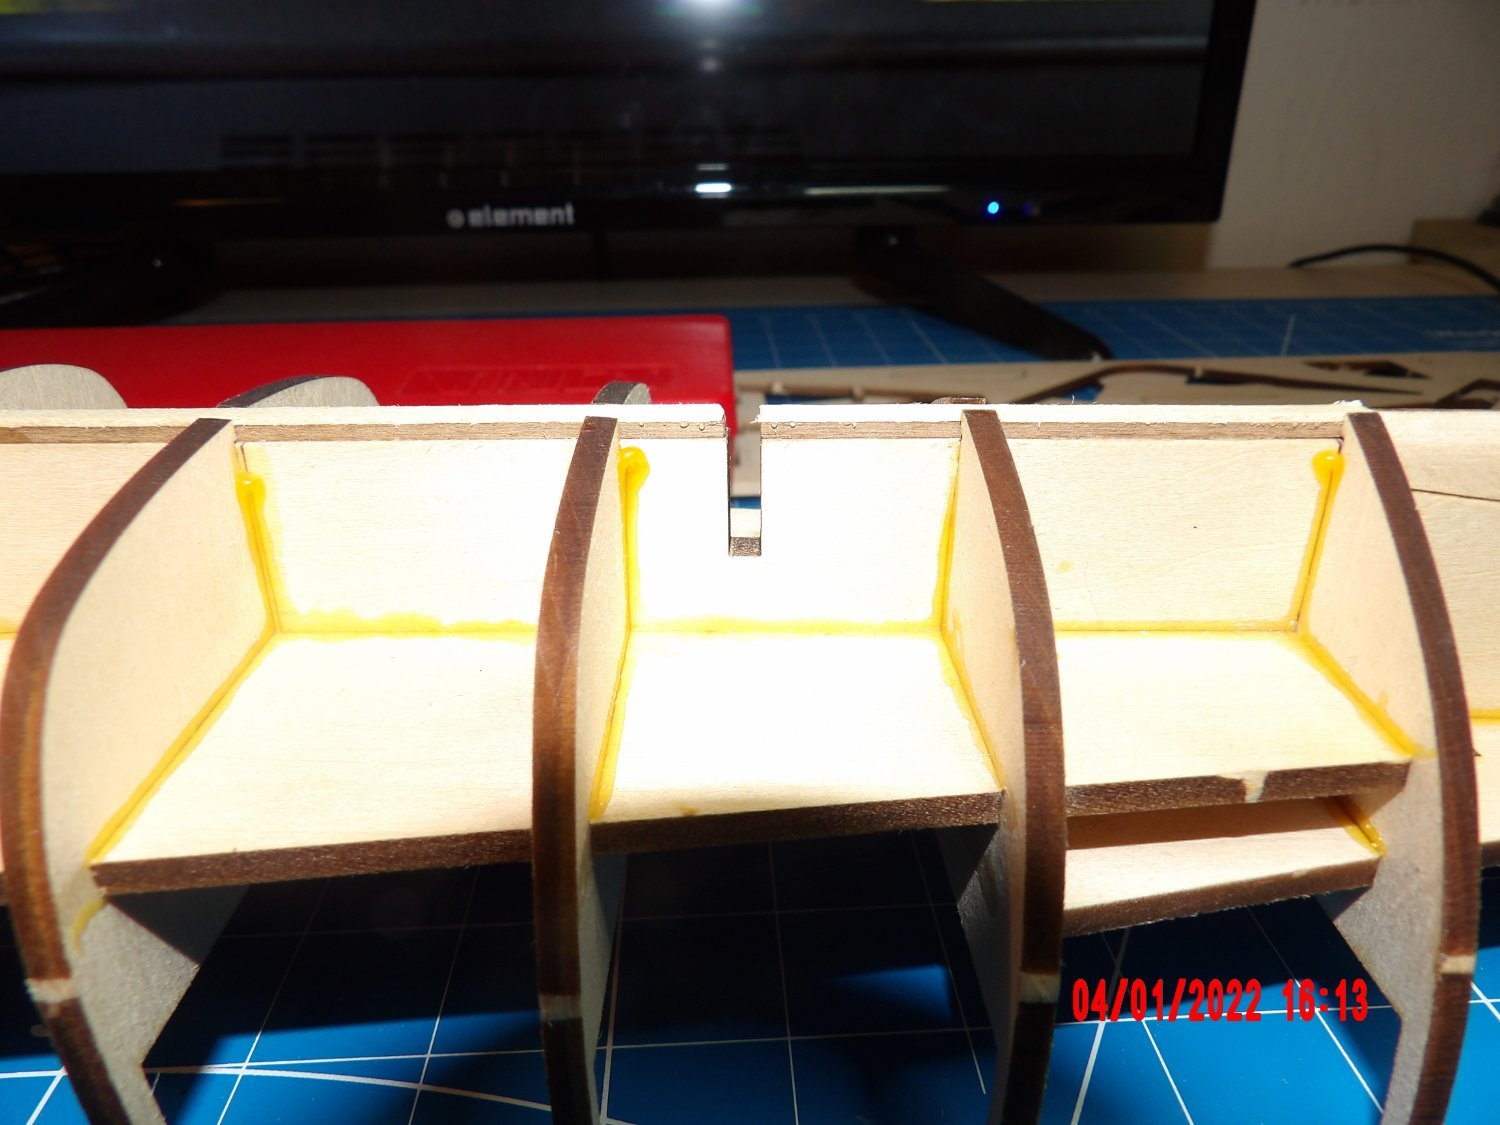
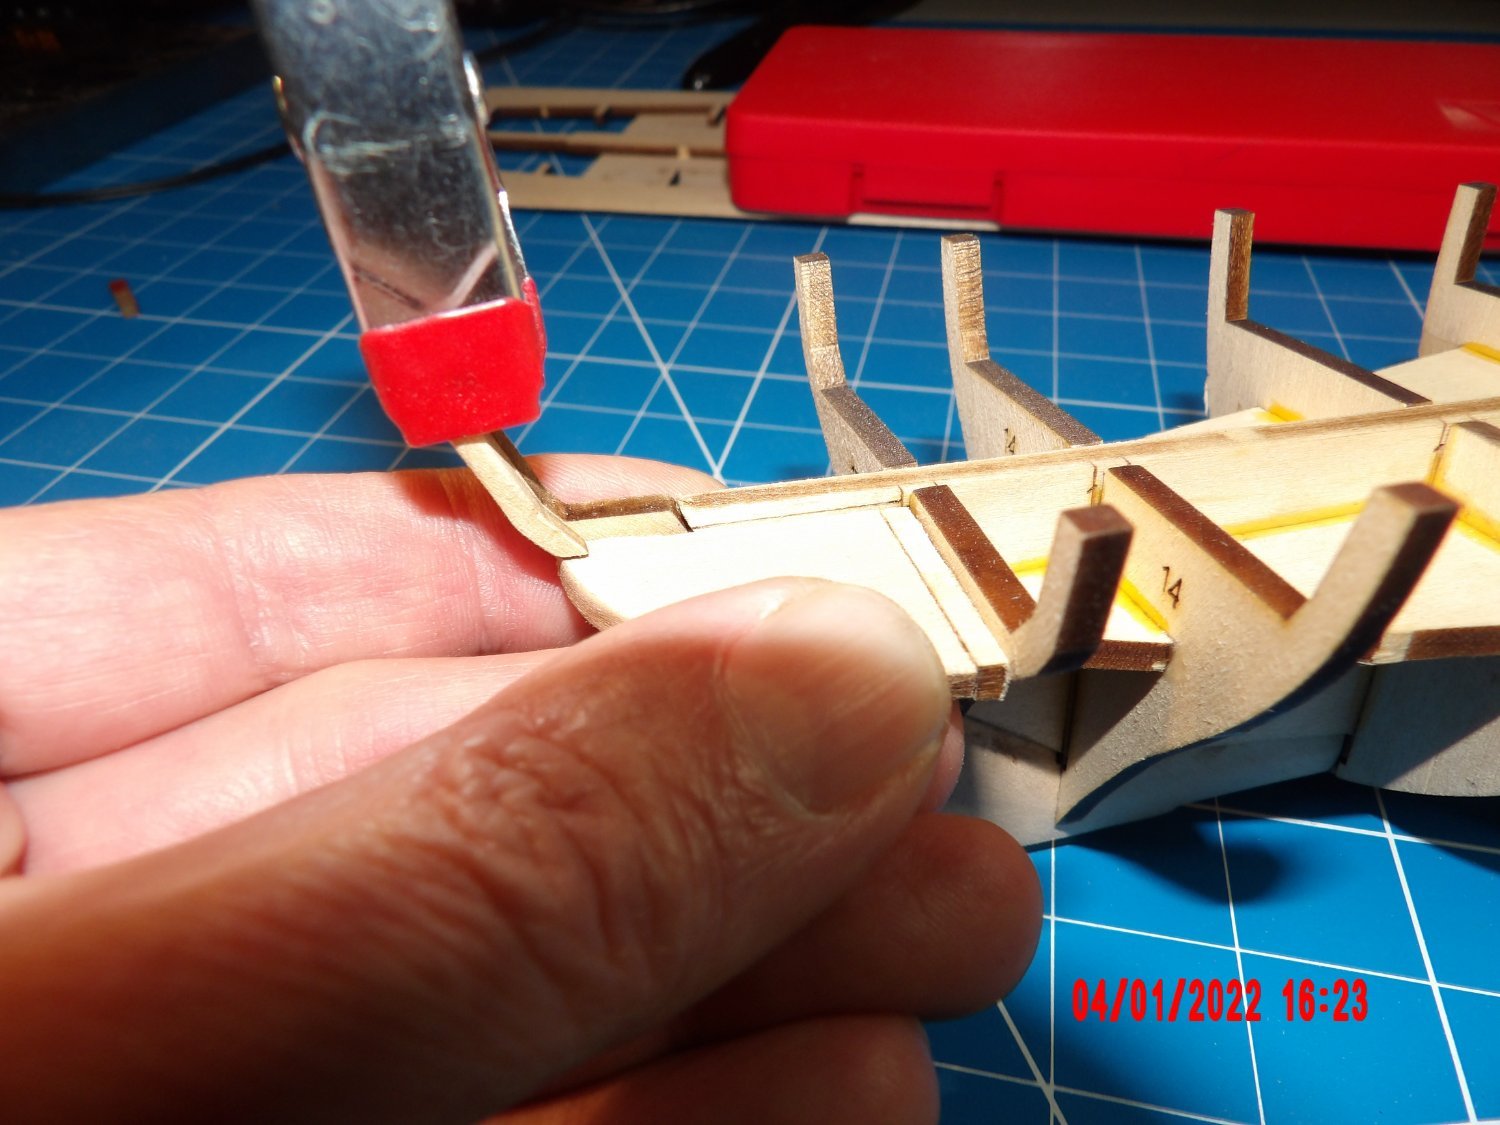
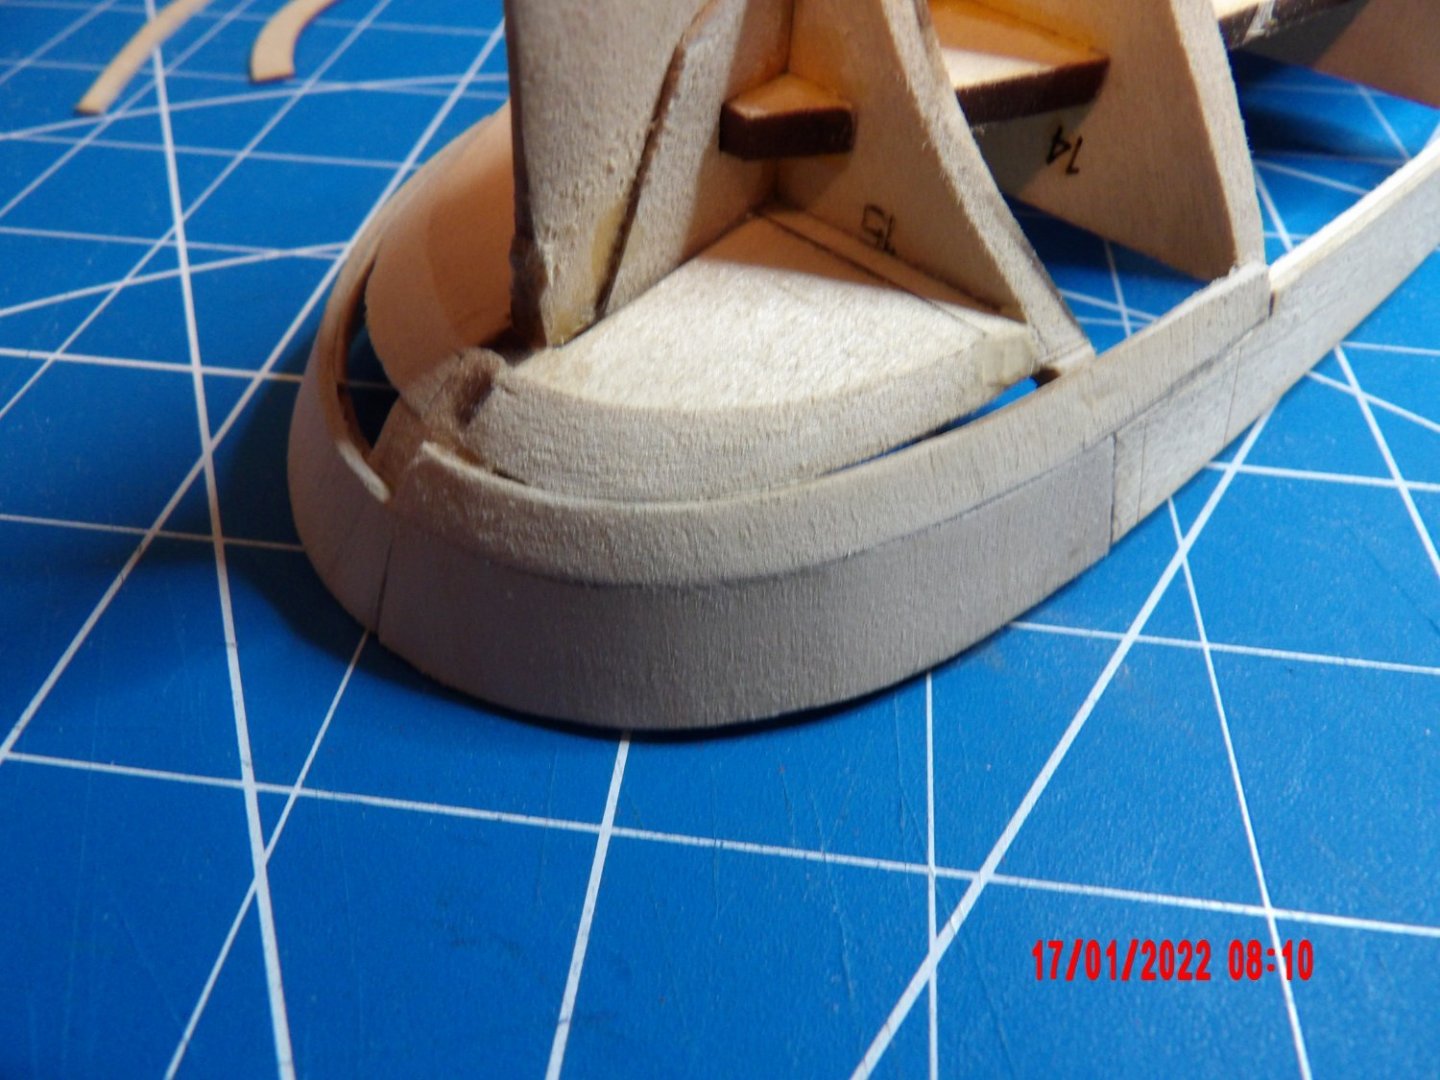
Installed one of the lower counters at the stern. I had to cut this piece from stock as the supplied pieces were not long enough (due to my extending the knuckles, probably). I think I may have made a mistake in extending the knuckles. I am not left with as much of a gap between the knuckles and the lower counter as is shown in the manual. However, by laying some planking material across bulkheads 14/15 and down to meet the lower counter, it looks like it will work without distortion of the planks. If there is a problem, it might be cured with a slight adjustment of the angle on the knuckles, and possibly a little shim towards bulkhead 15. At least, that's my hope. The intersection of the upper and lower counters finished pretty well and the subtle change in angle is pleasing. This is turning out to be a challenging model, as promised. I am settling into it and finding relaxation in a very slow pace.
- 146 replies
-
- 7
-
-
- Harriet Lane
- Model Shipways
- (and 1 more)
-
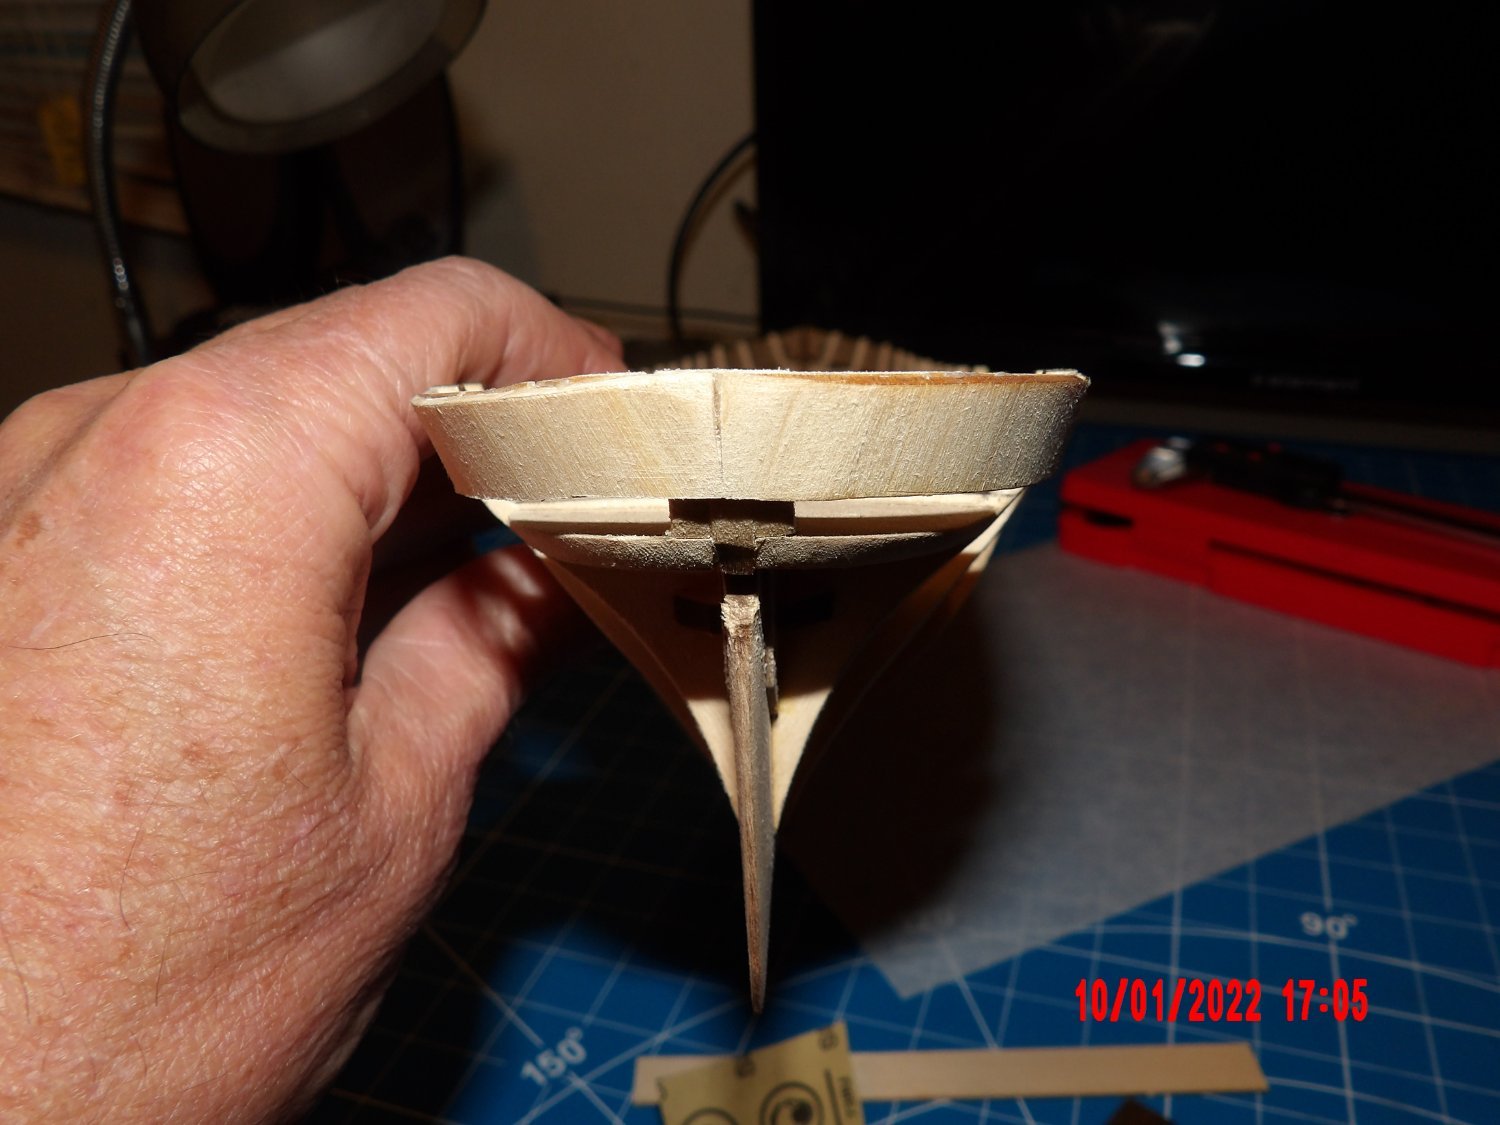
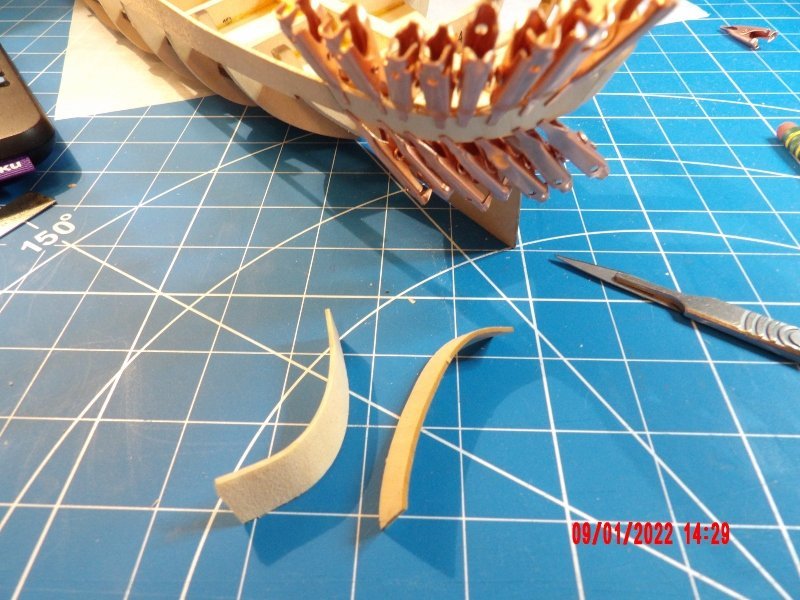
I'm finding out through experience what an "advanced" level model entails. . . Added the bulwarks. About halfway through adding the inner reinforcement pieces. The upper counter at the stern gave me problems. The first three attempts failed using the suggested hot water soaking with the inner surface painted with dilute glue. It all looked good but buckled during drying. Pics of two of the failed parts: Duplicate parts are provided, but I had to cut more before I installed them dry. That seemed to work. I then painted them on the inside surfaces with dilute glue. I used the failed upper counter pieces to make the inner reinforcing, but did not notice that the sheet containing the reinforcement pieces are thicker than the counter pieces. I'll have to correct that somehow down the road. The difference is exactly the thickness of a paper index card, so maybe gluing that on will be the fix.
- 146 replies
-
- 7
-
-
- Harriet Lane
- Model Shipways
- (and 1 more)
-
By far the best rendition of this model I have seen!
- 70 replies
-
- 3
-
-
- Lowell Grand Banks Dory
- Finished
- (and 1 more)
-
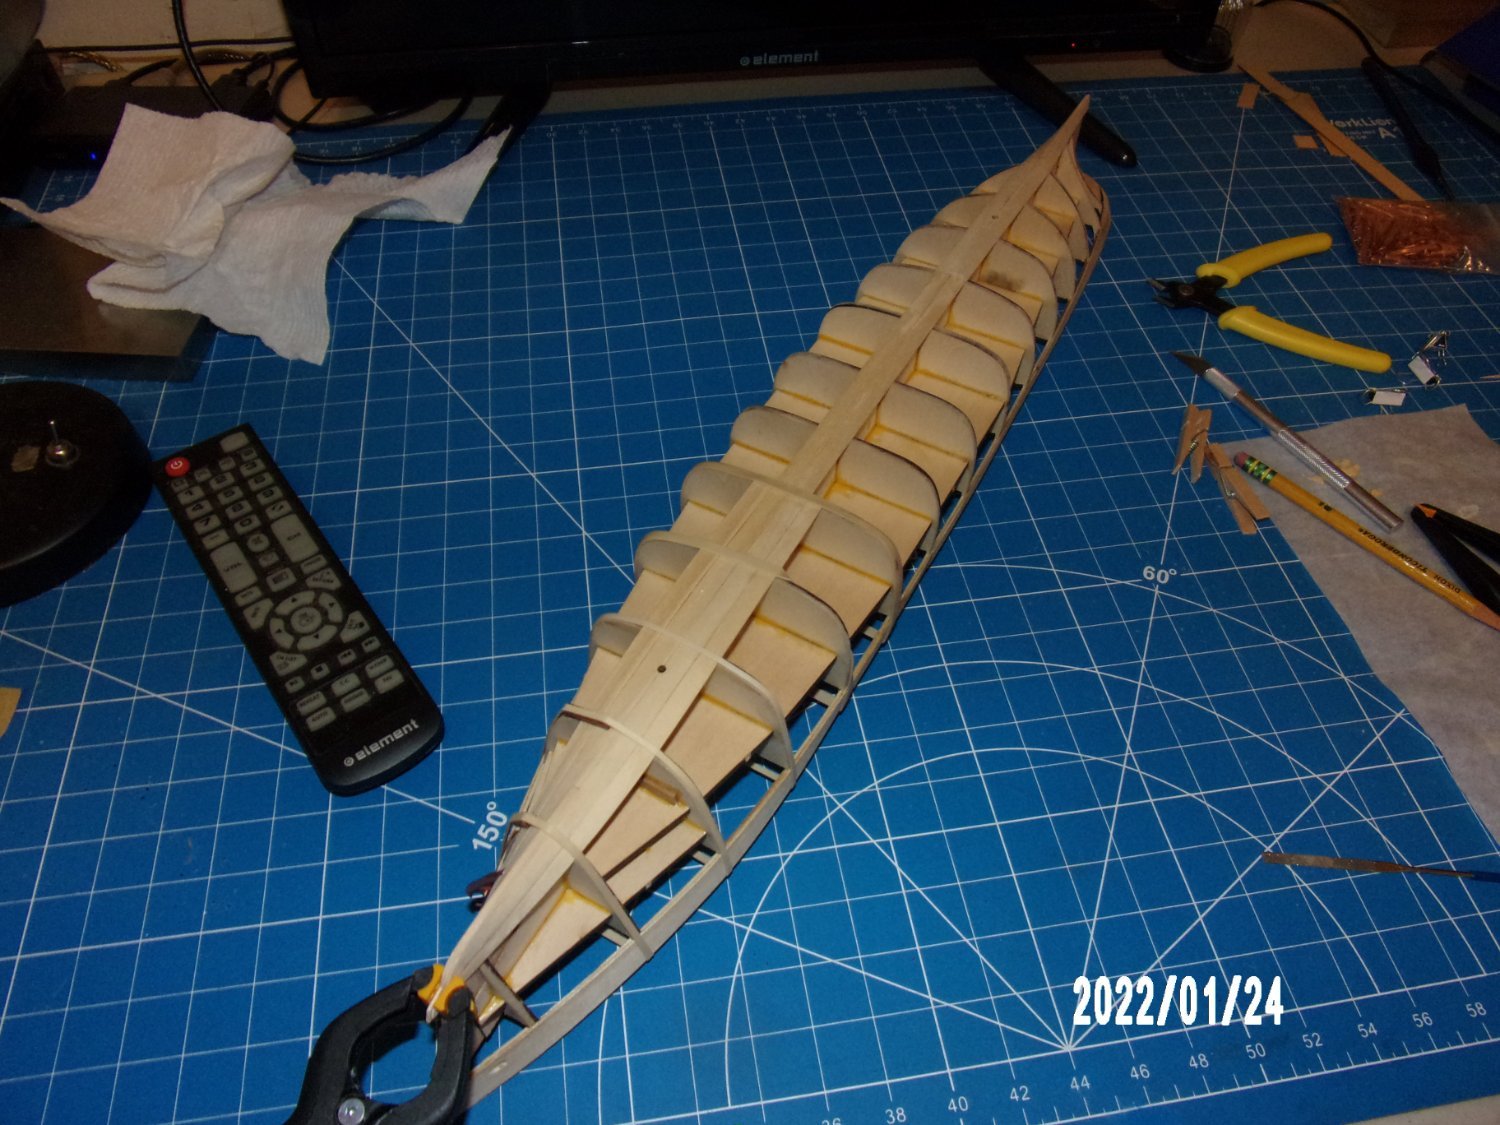
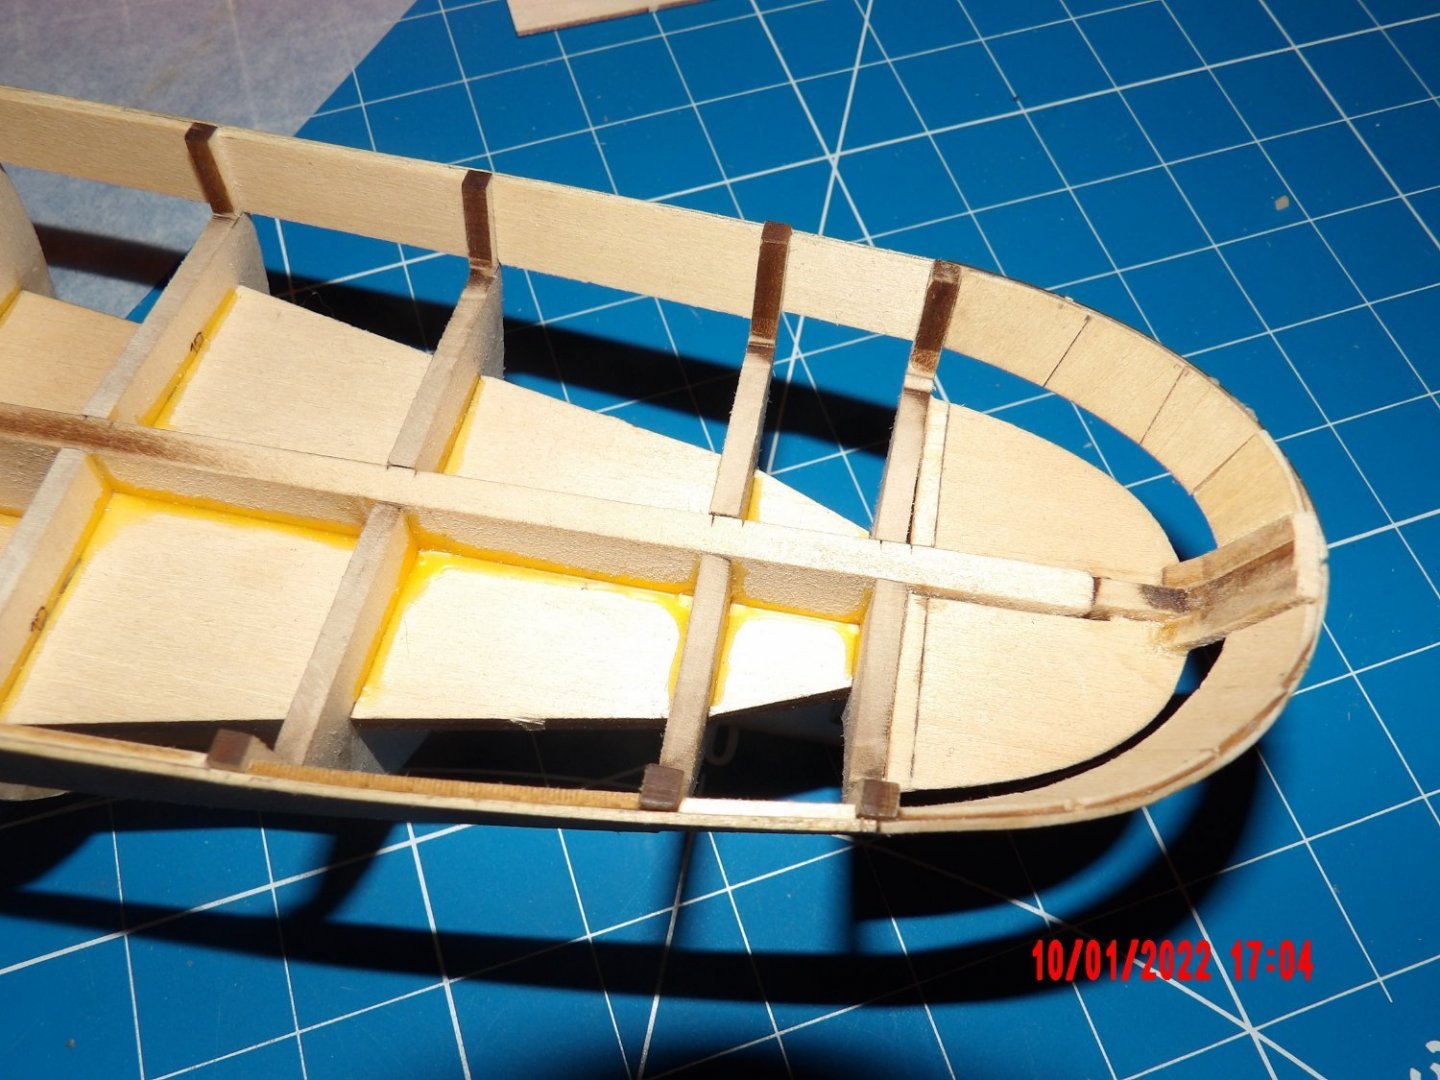
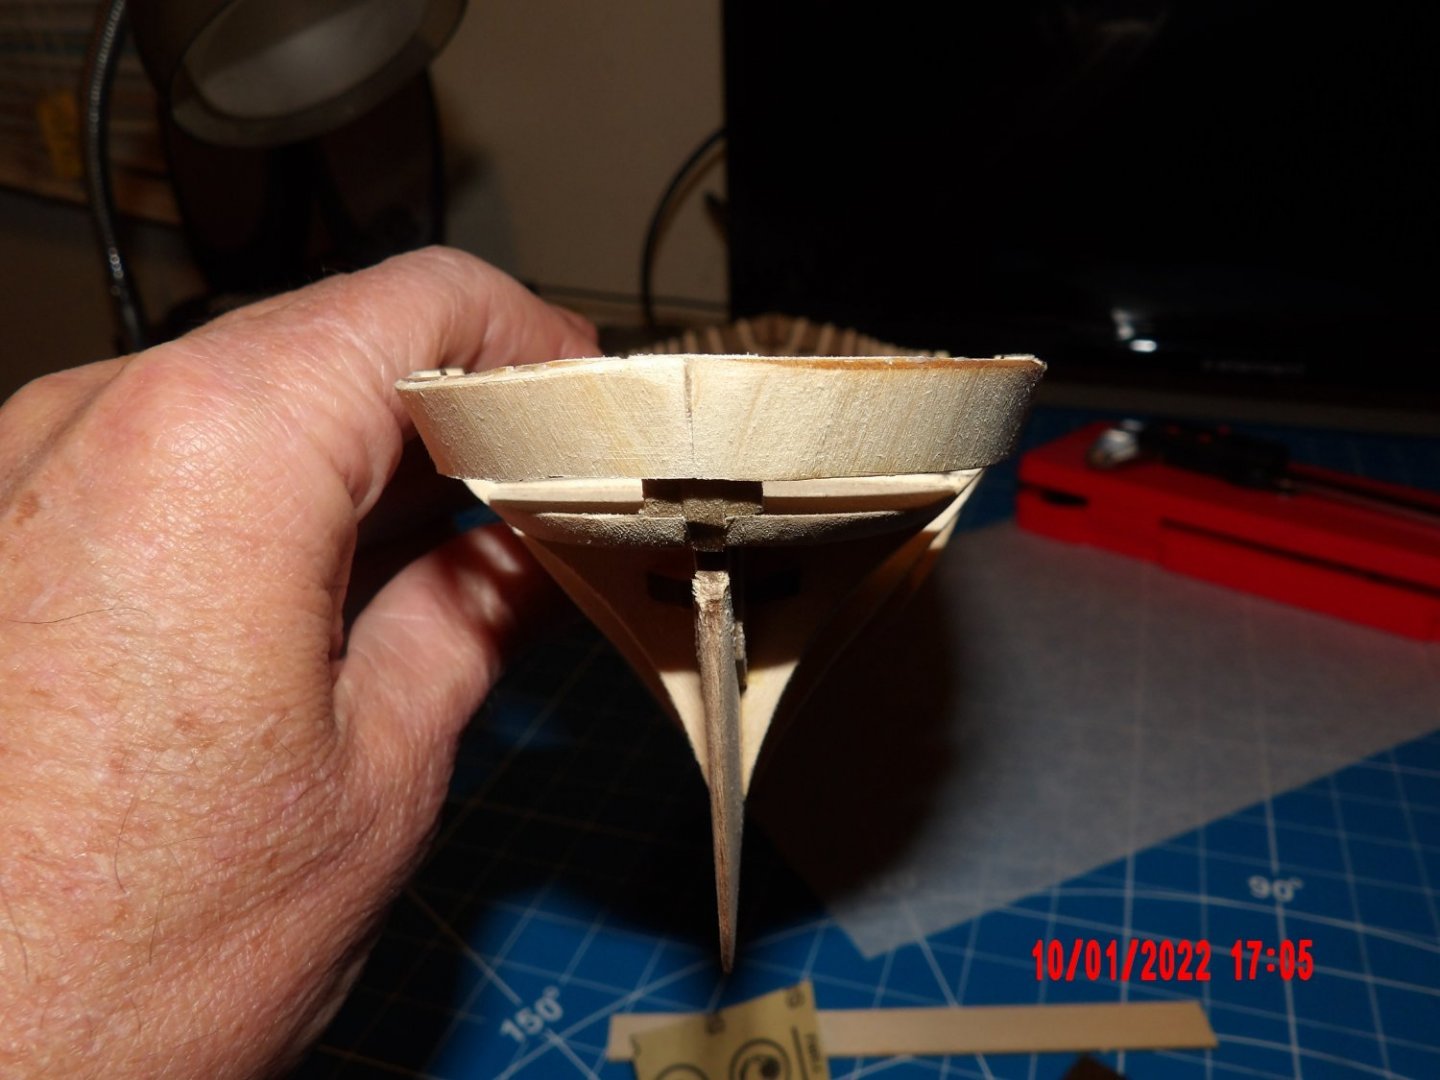
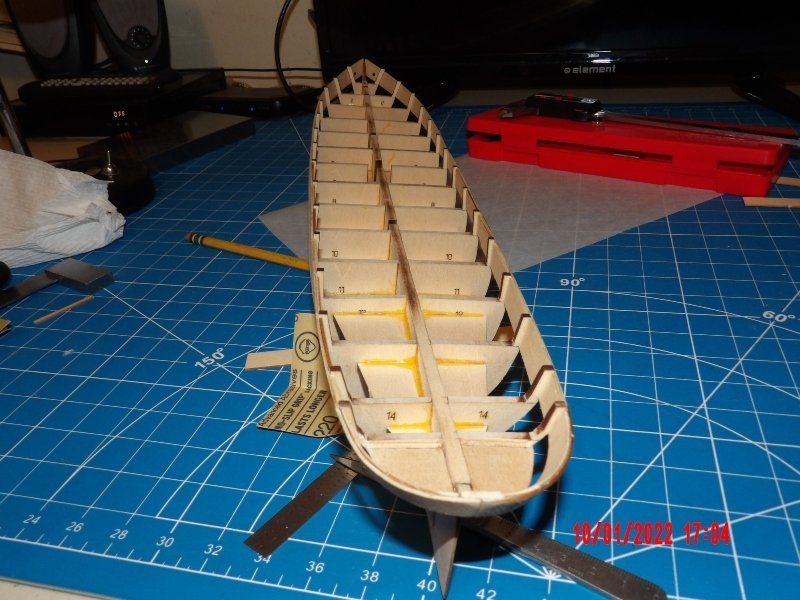
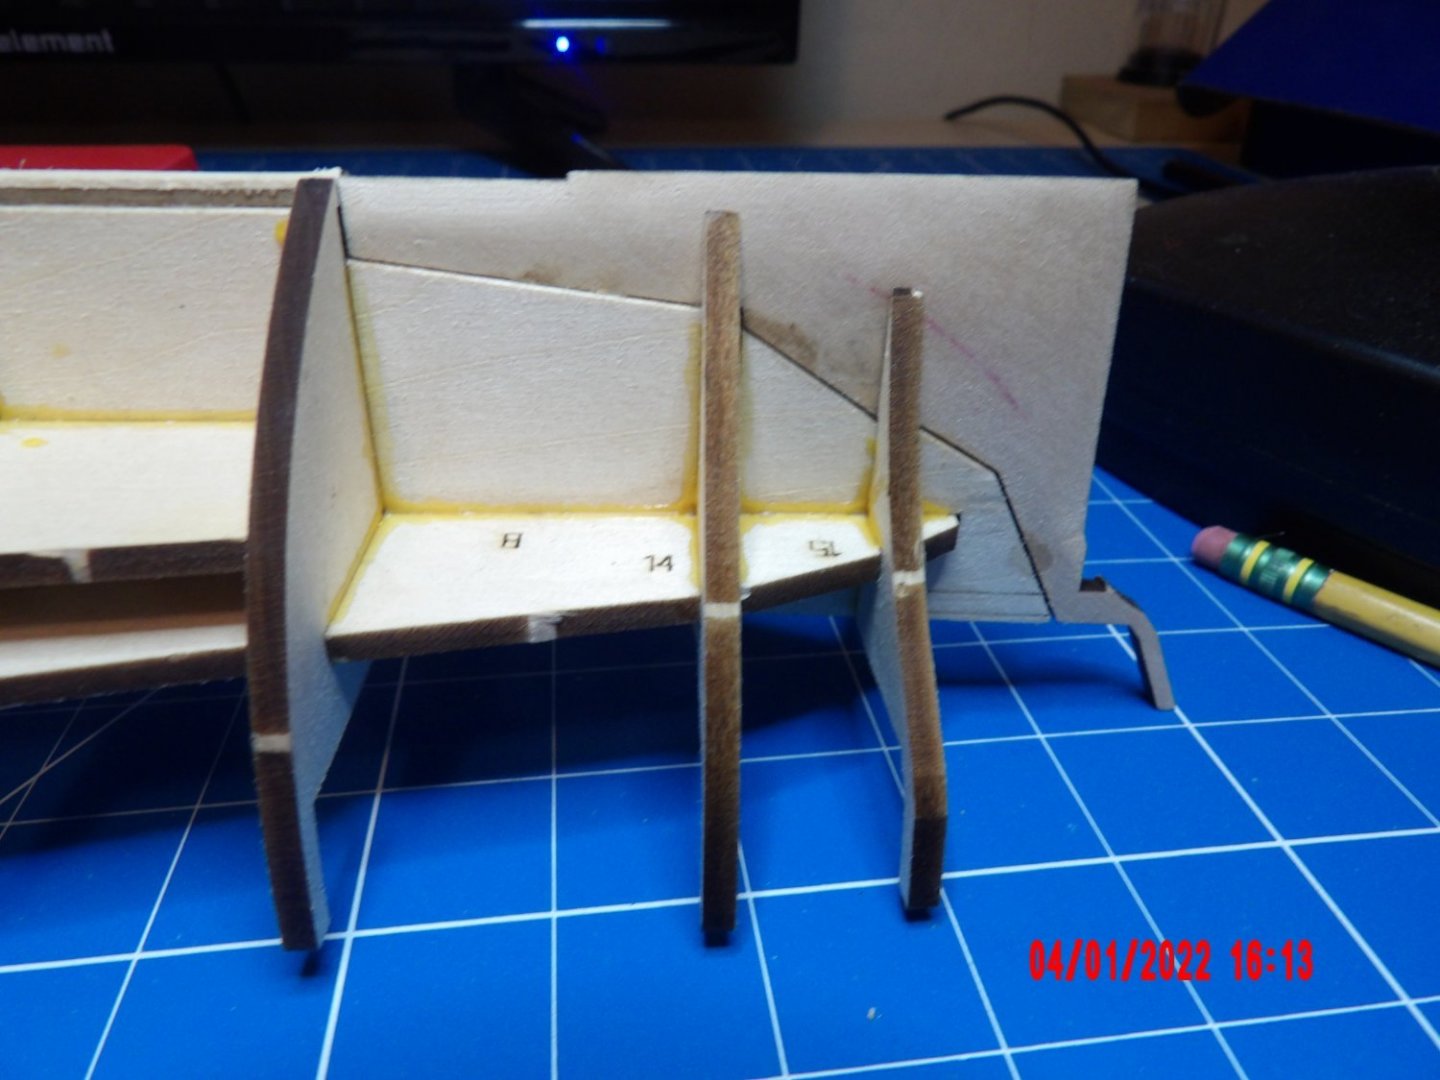
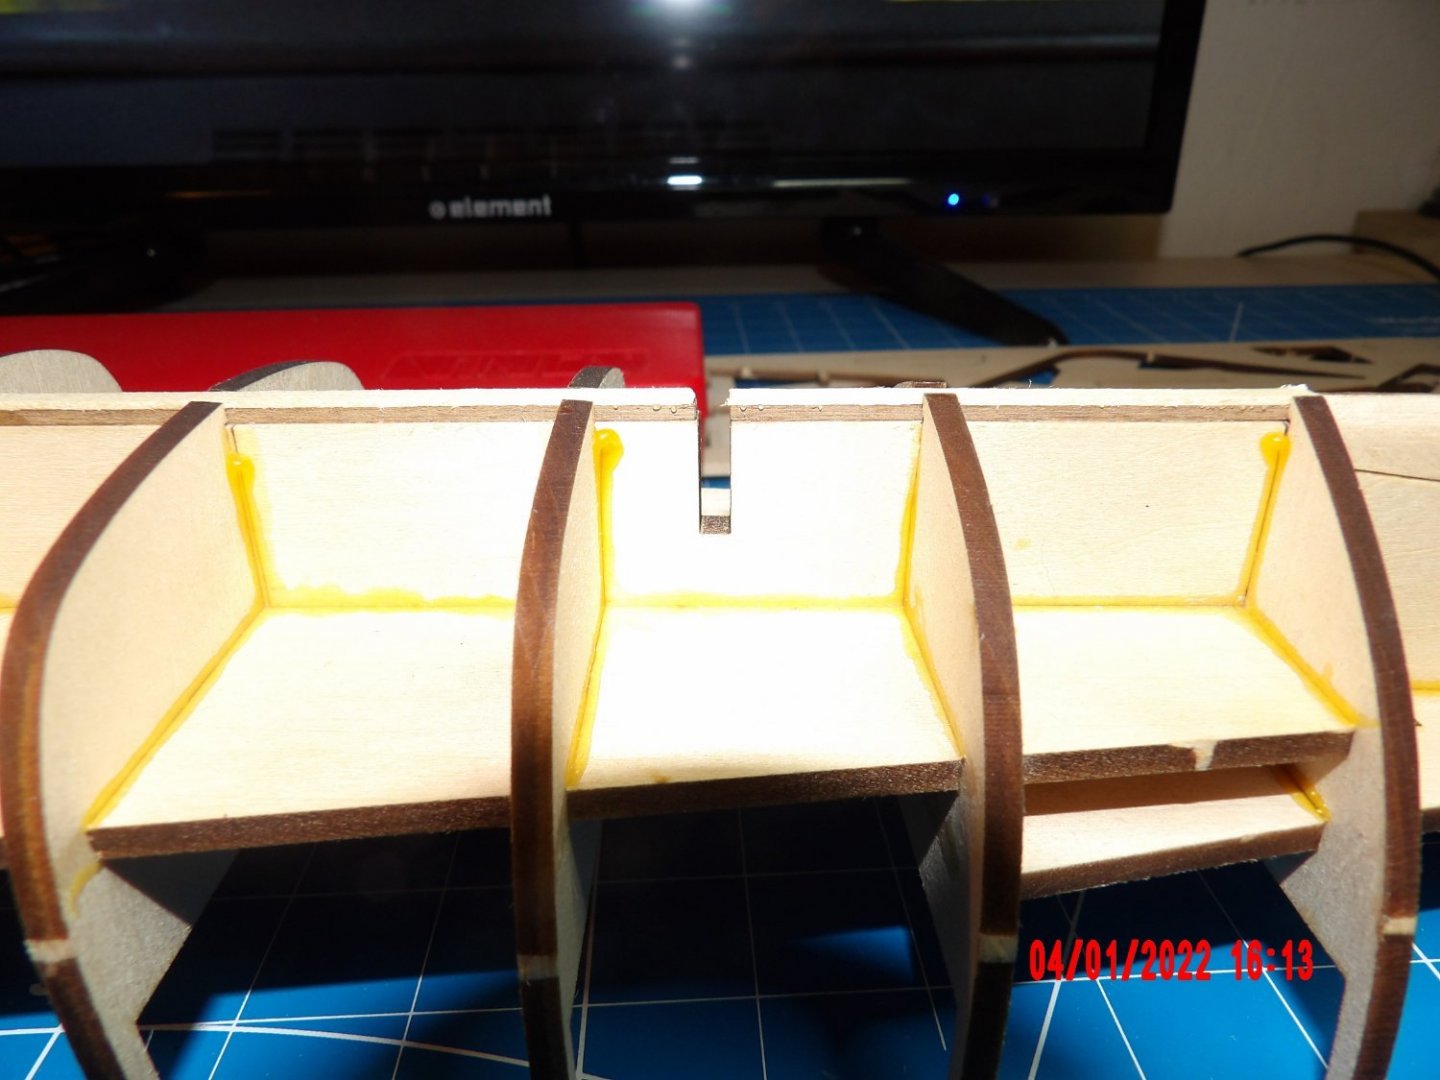
I had forgotten how soft and fragile basswood is, even when quite thick! After I heard the sound of a break, I was reminded and became more conscious of my movements and forces applied. Shaped and installed the inner stem and stern post. These pieces were missing the bevel lines. The stern post is the most challenging to shape (tapered to the outside edges), I took my time and I think it turned out well. Next, I added the inner keel pieces. These fill the gap between the bottom of the bulkheads and the spine. The material supplied was not of the correct thickness, but fortunately, I had some walnut of the correct dimensions that made up the difference. The final step before fairing is to add the stern knuckle and bulwark extension reinforcement parts. The knuckles were short in length, by approximately the thickness, so I added to them using scrap from the carrier sheet.


- 146 replies
-
- 6
-
-
- Harriet Lane
- Model Shipways
- (and 1 more)
-
Hello Cleat. I just finished this model. I planked the decks before gluing down per the instructions, but I'm not sure if you have the same version of the kit, as you mention laser-cut planks. Mine were basswood strips. Does your kit have these and walnut planks for the hull?
- 132 replies
-
- 1
-
-
- King of the Mississippi
- Artesania Latina
- (and 1 more)