bobandlucy
-
Posts
512 -
Joined
-
Last visited
Content Type
Profiles
Forums
Gallery
Events
Everything posted by bobandlucy
-
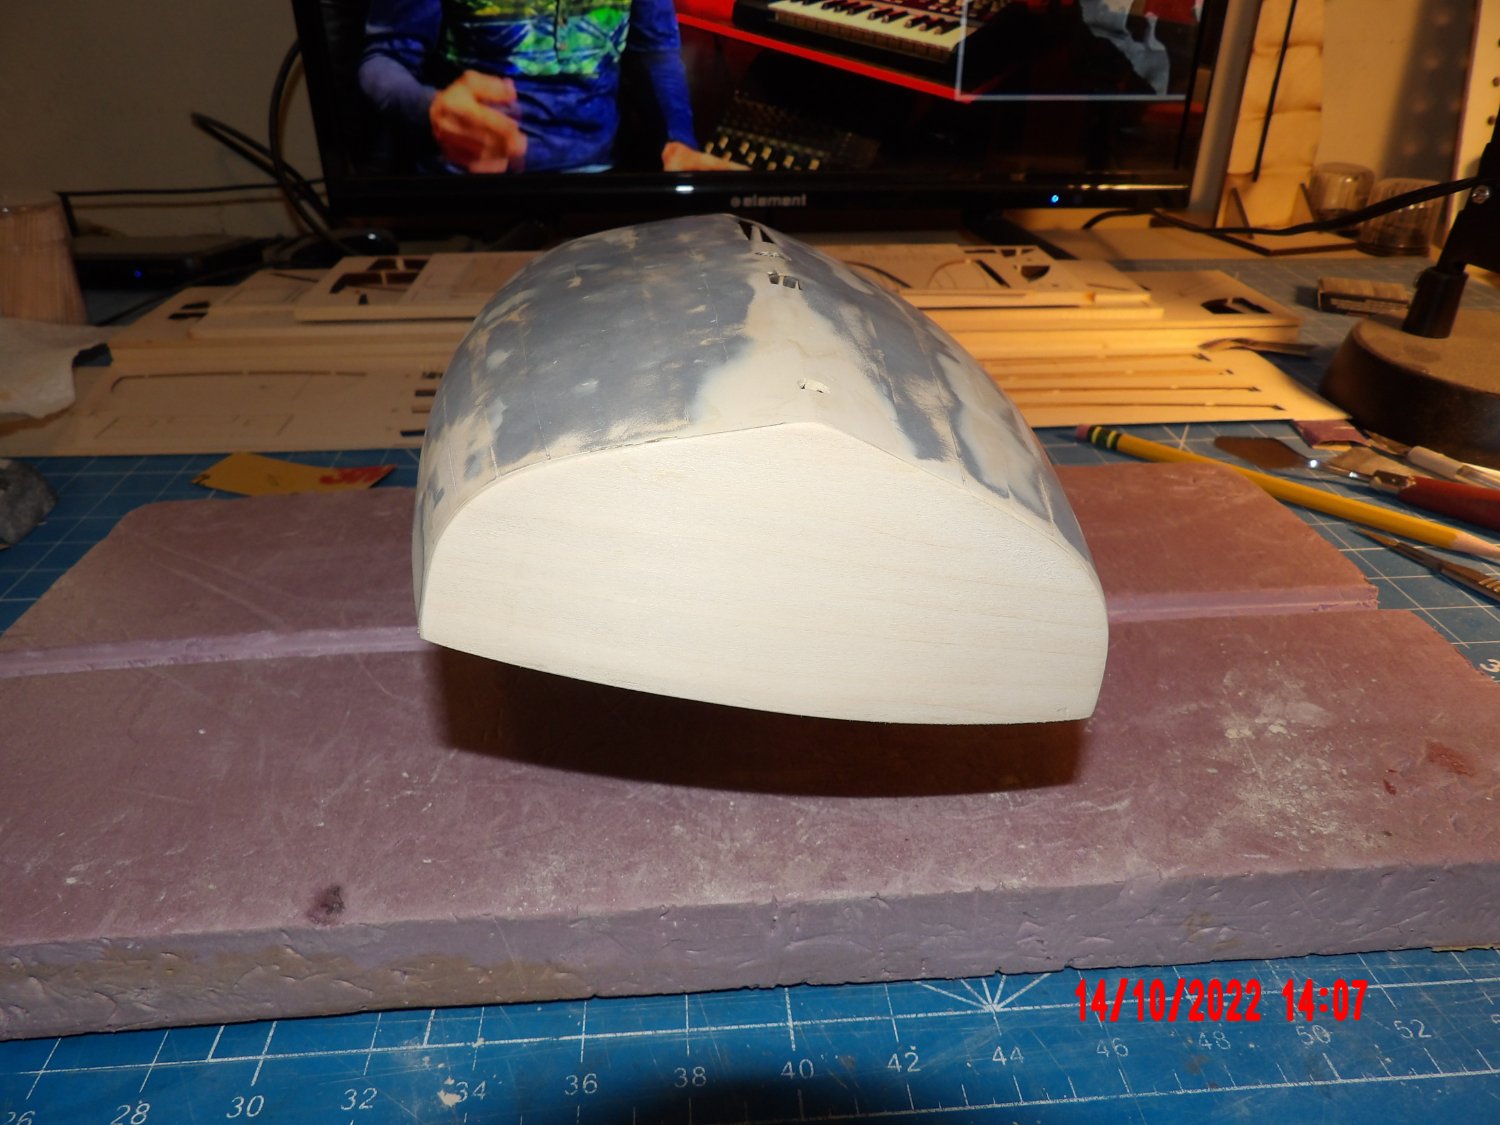
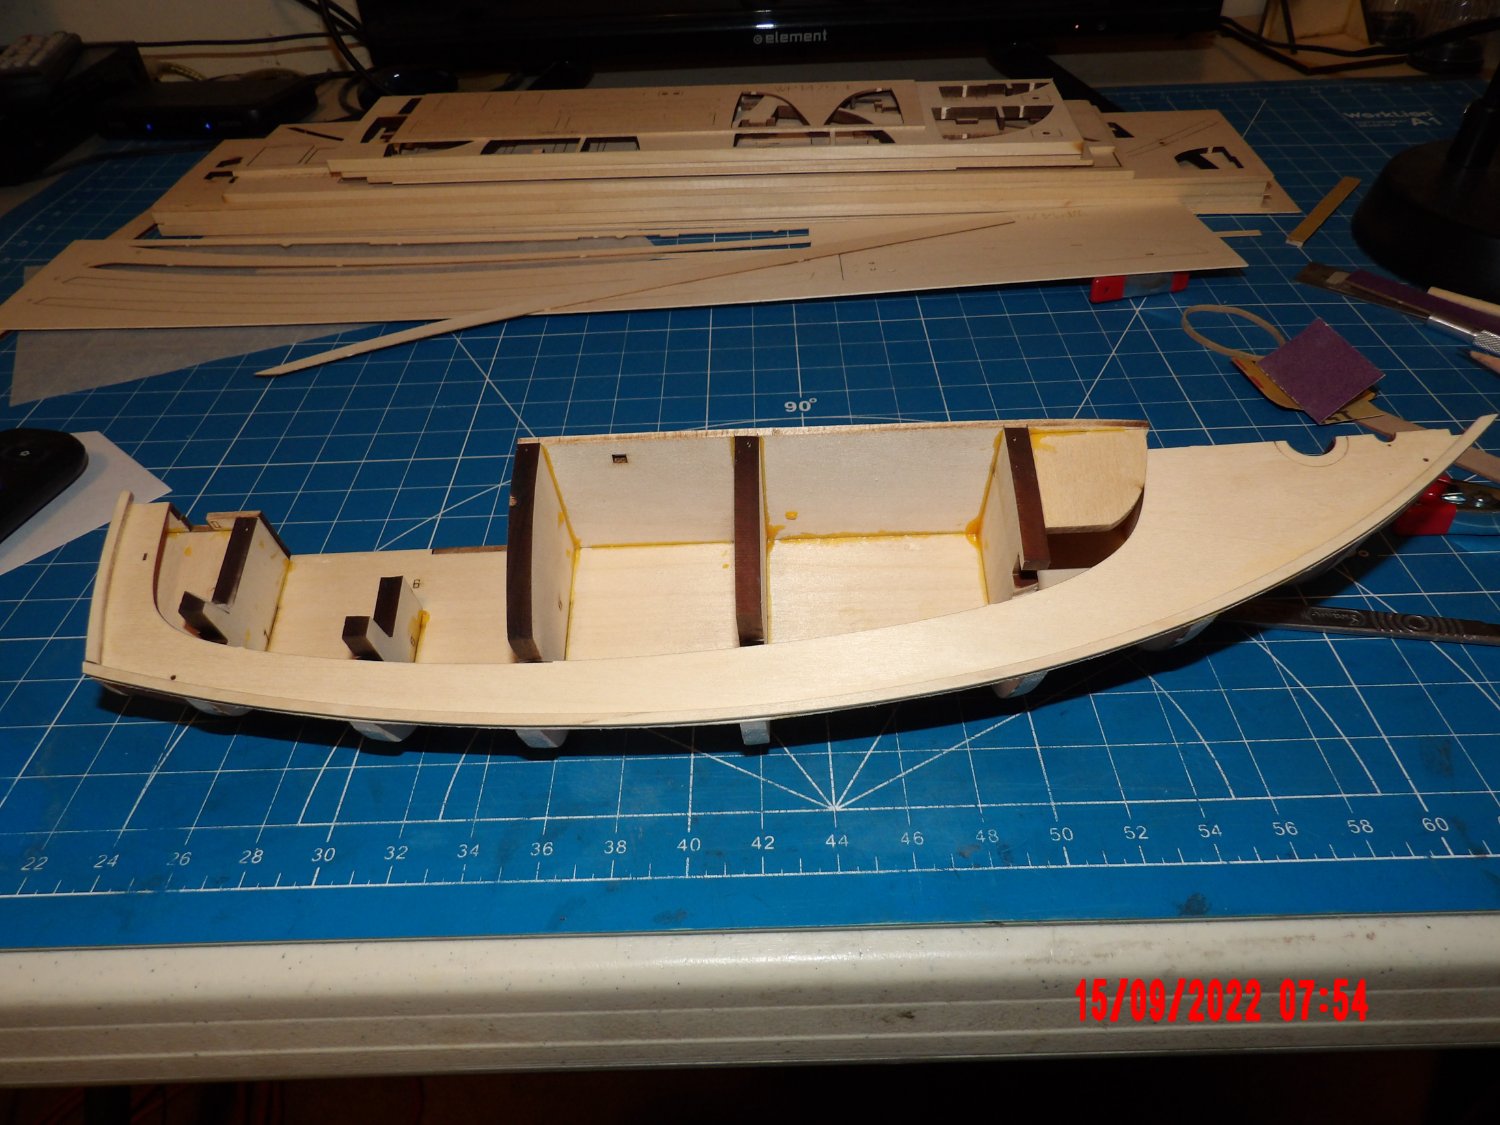
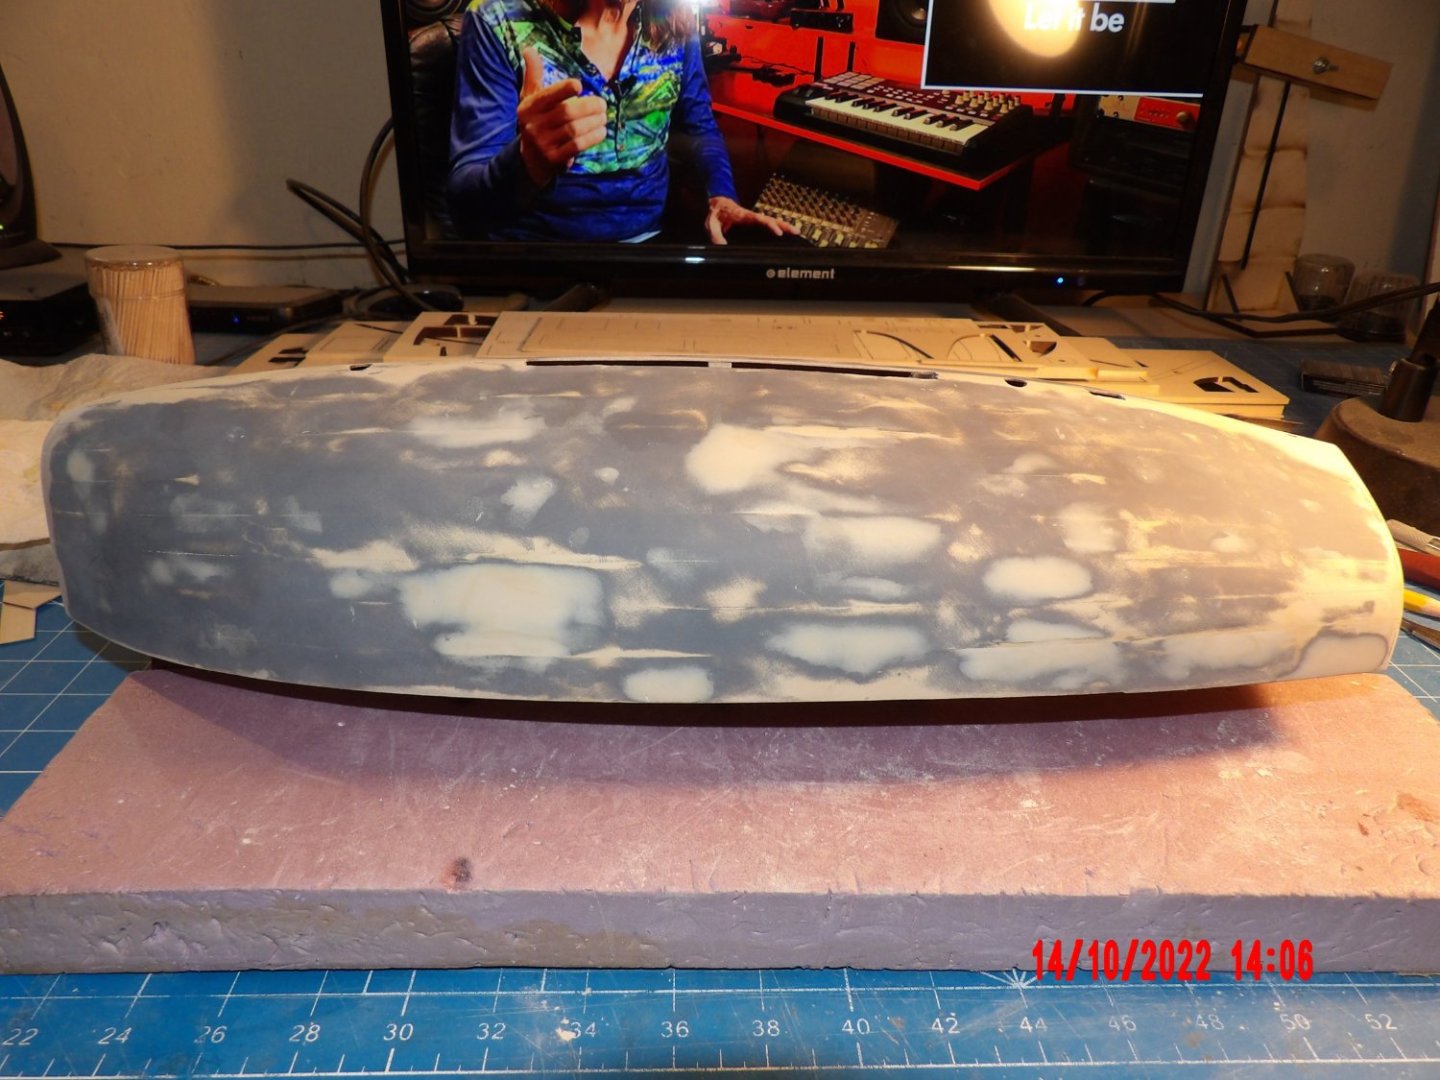
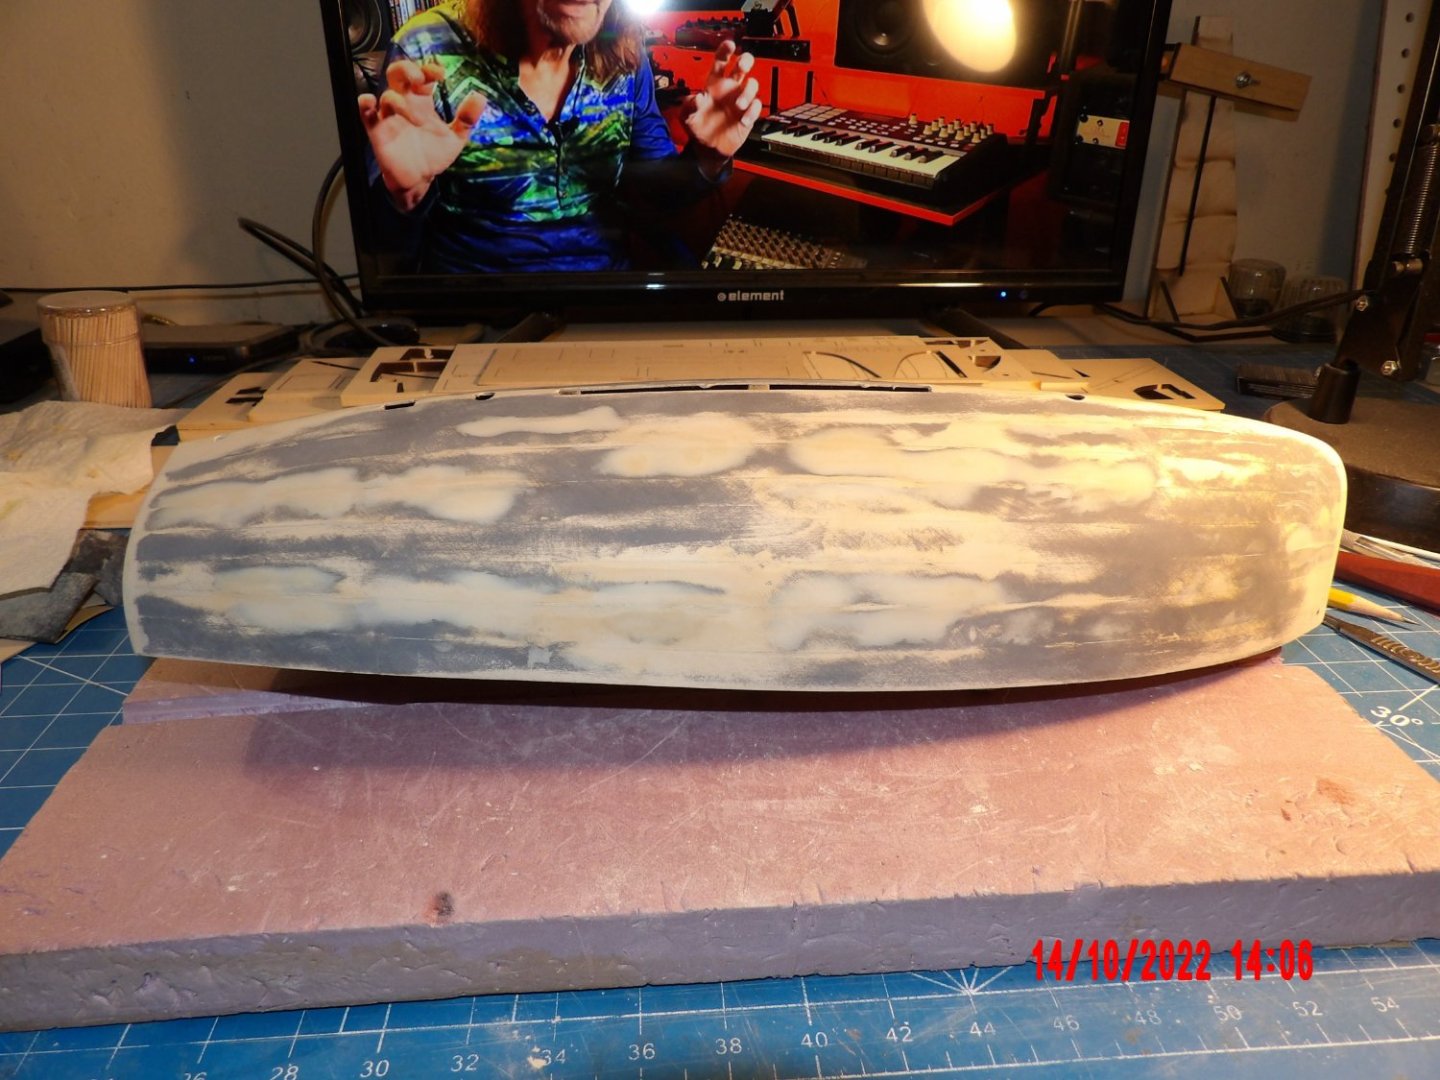
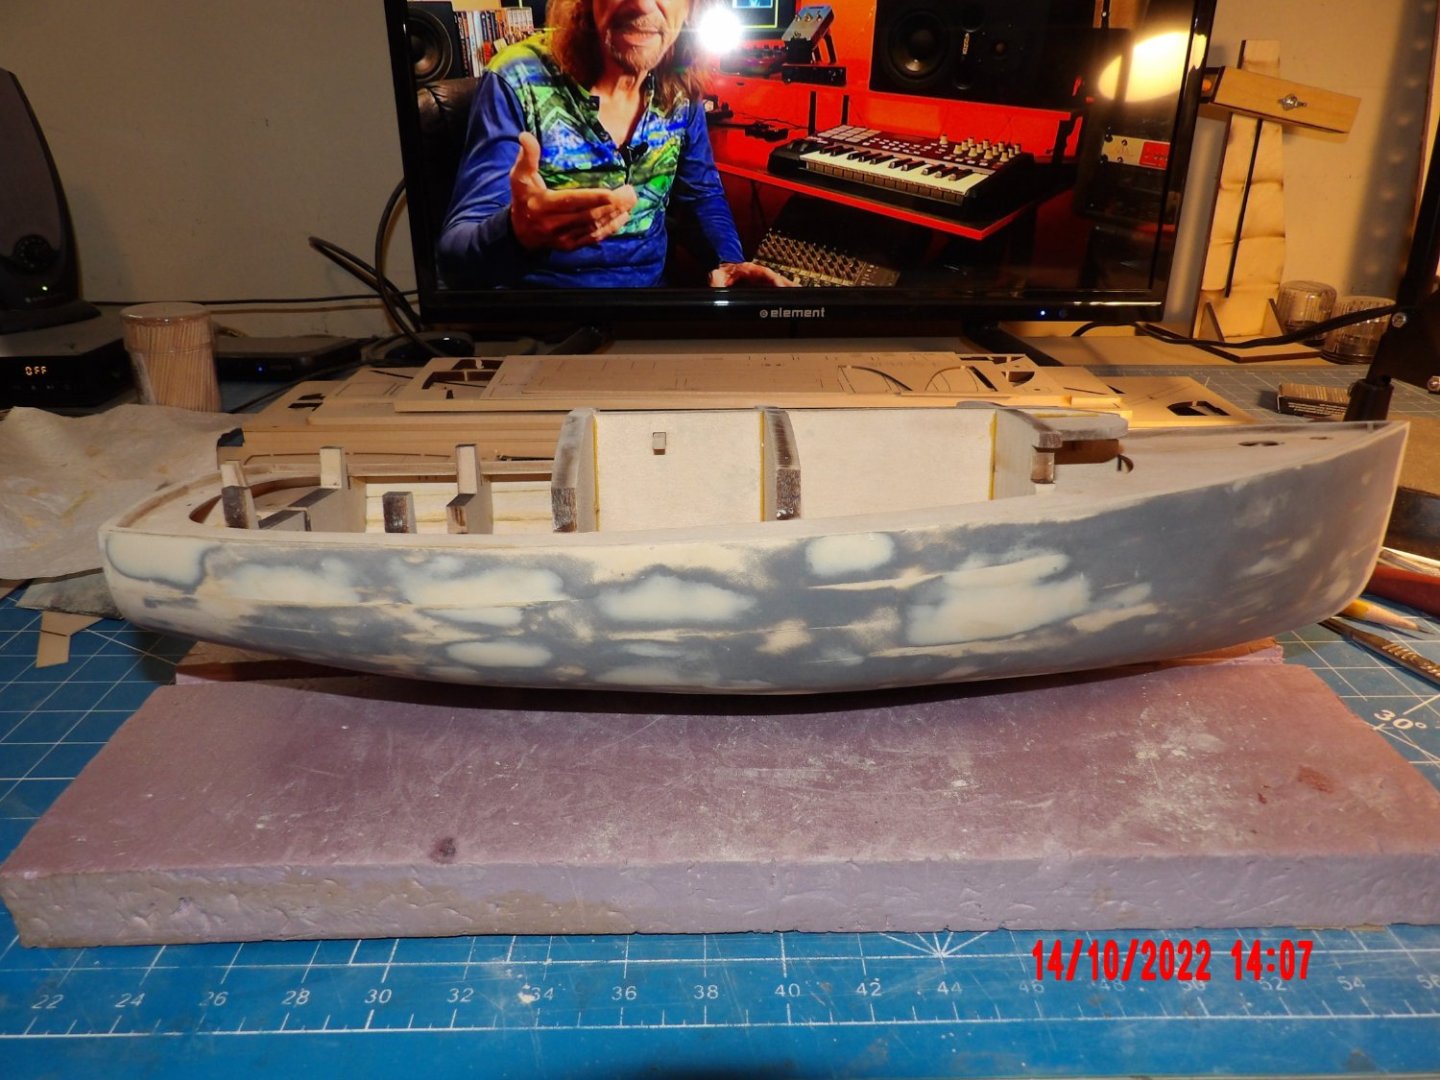
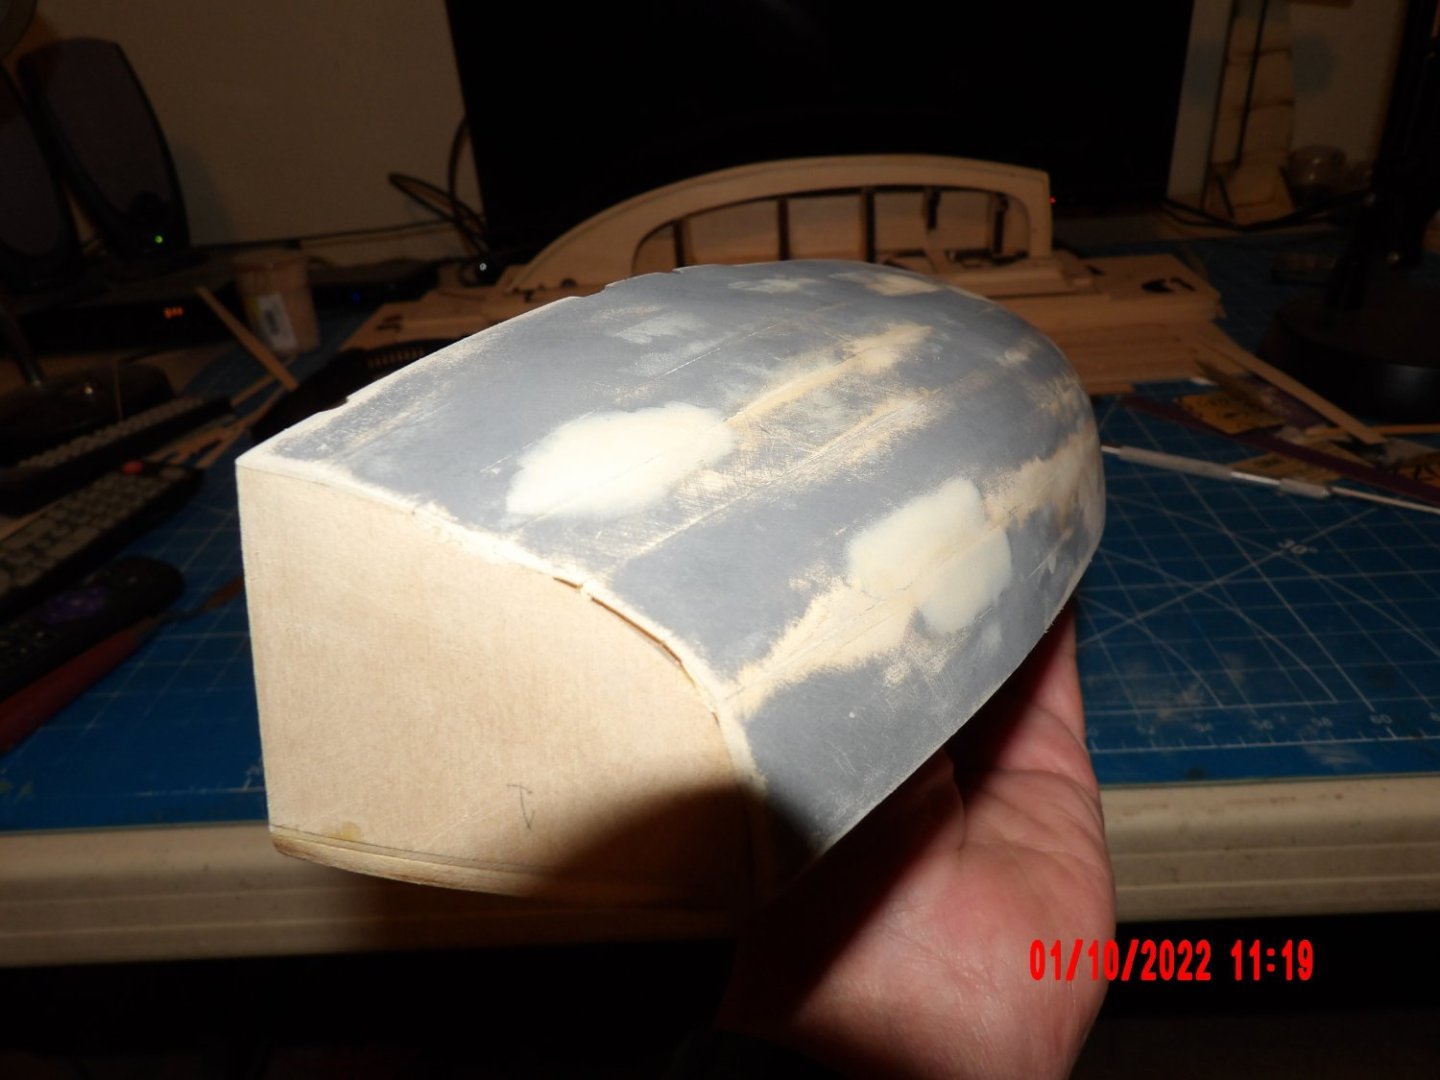
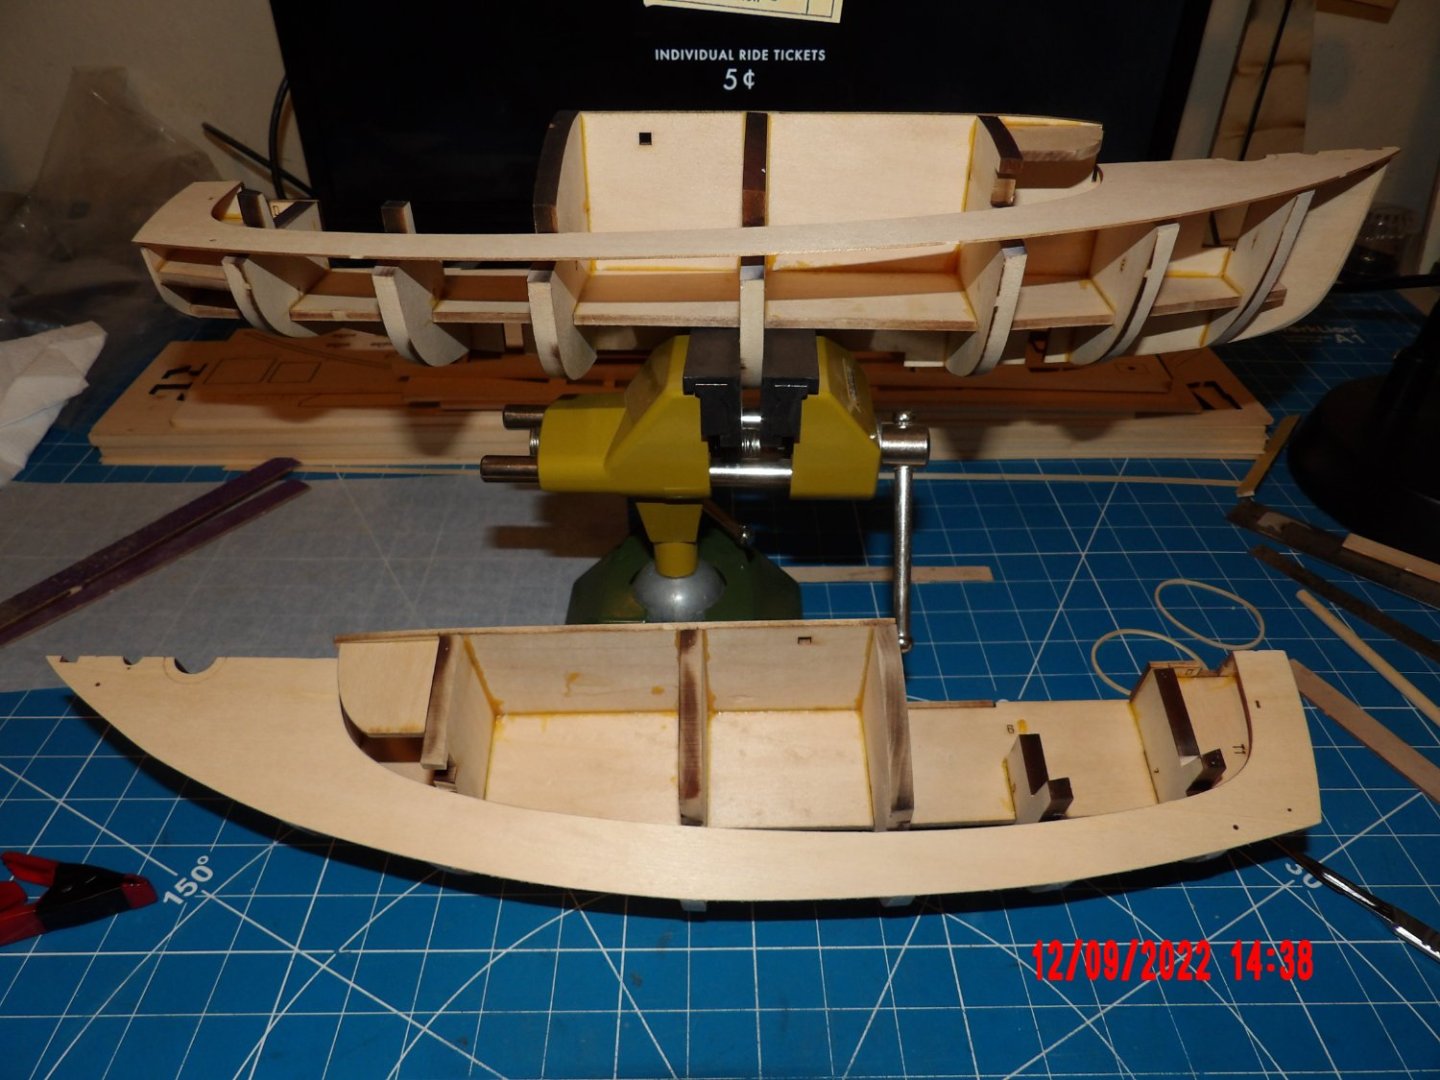
 At last the hull halves are joined and gaps filled. The second of the halves is the best. I learned much about how to approach the sanding and filling process, and the second half is much more fair, while preserving more of the plank thickness. I was much more cautious in laying the planks, correcting defects at once, and relying less on the eye and more on "feel." You can see that one half is not worked as much- it is the better. When I placed the outer transom, I found that the nice little "peak" at the center bottom did not match my more rounded hull. I added some filler to the hull and think it came out OK. Seems a little milestone in the building, and look forward to getting back to building some new features!
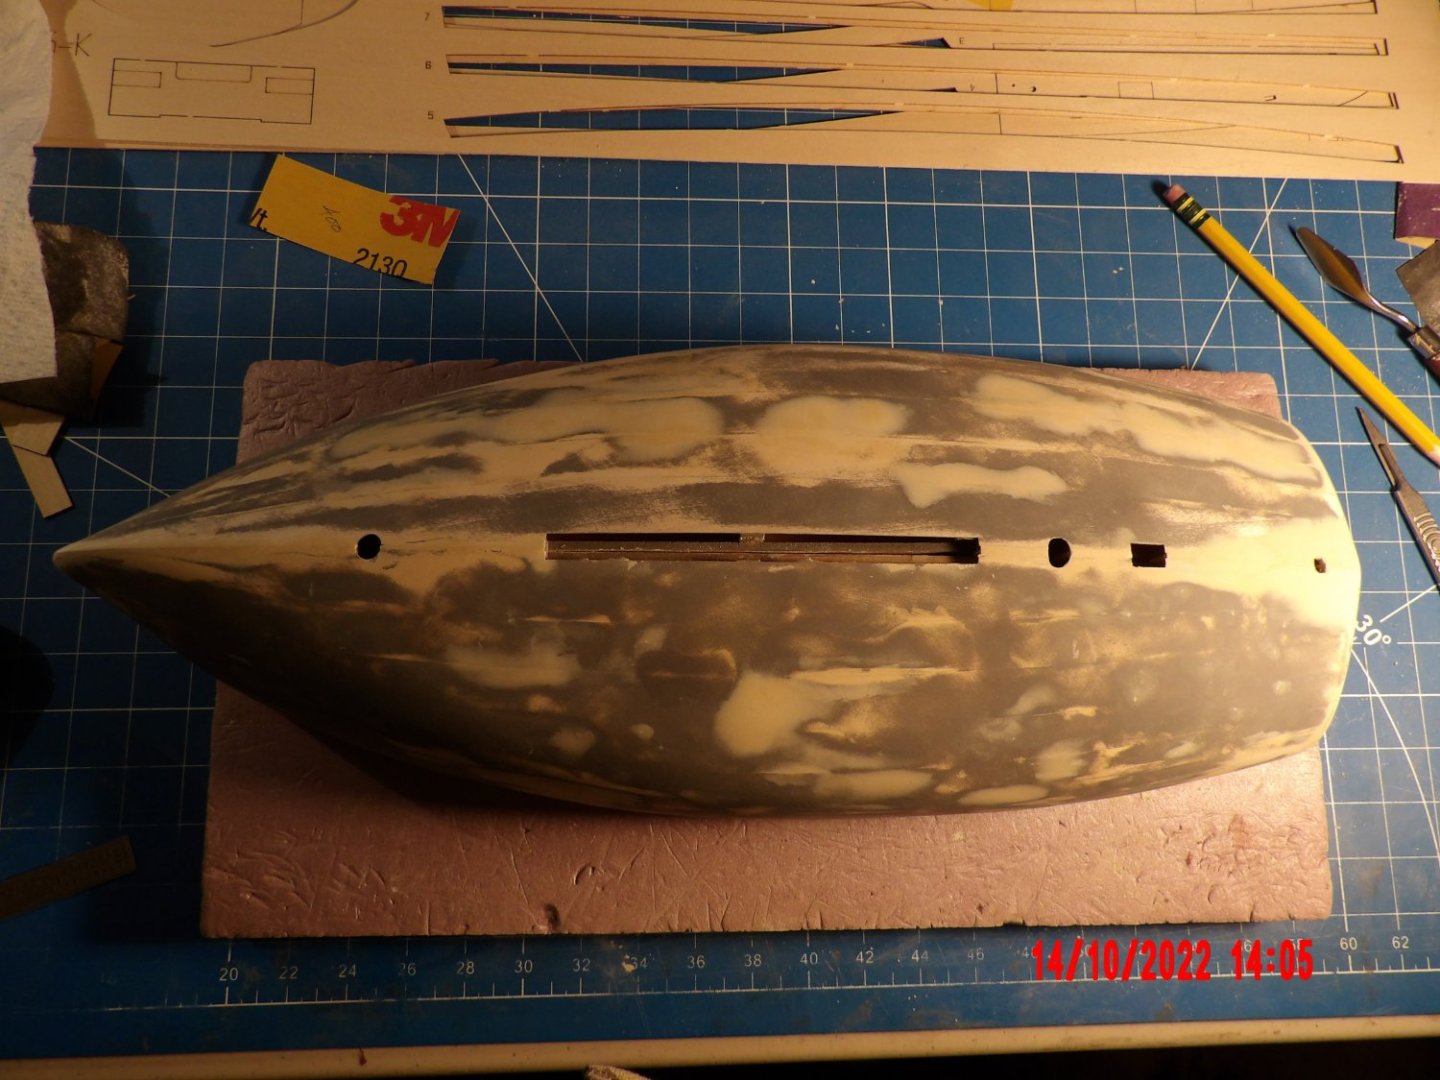

- 111 replies
-
- 7
-

-
- Nonsuch 30
- Model Shipways
- (and 1 more)
-
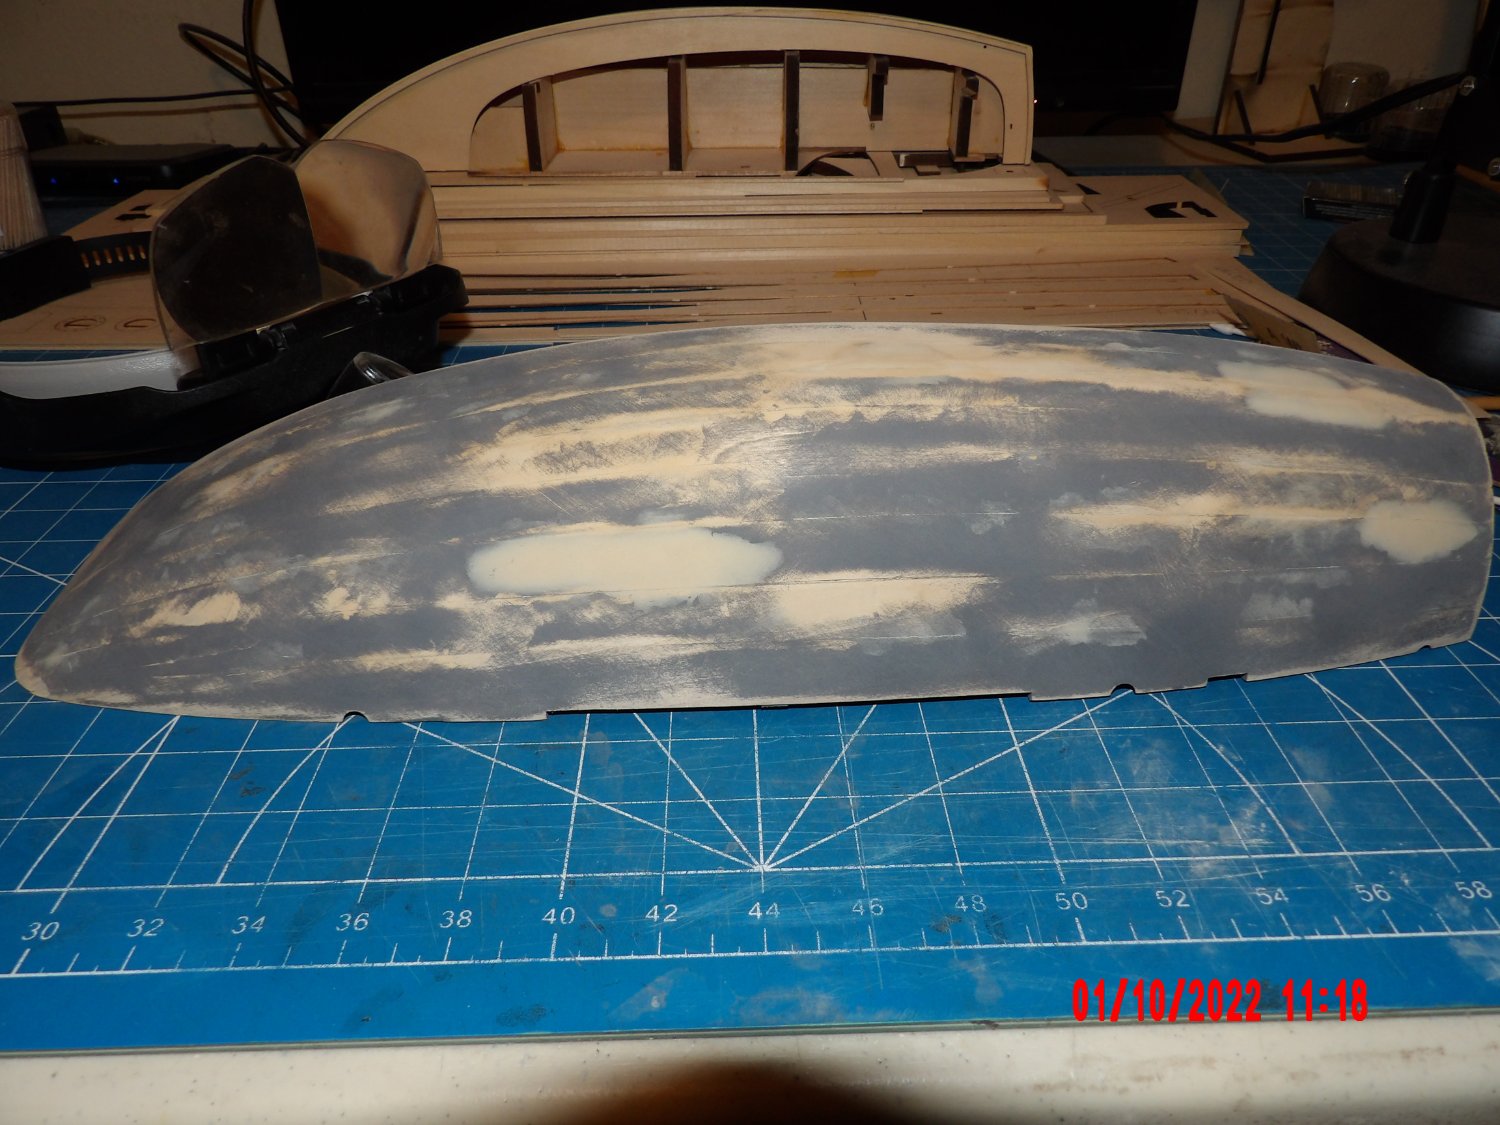
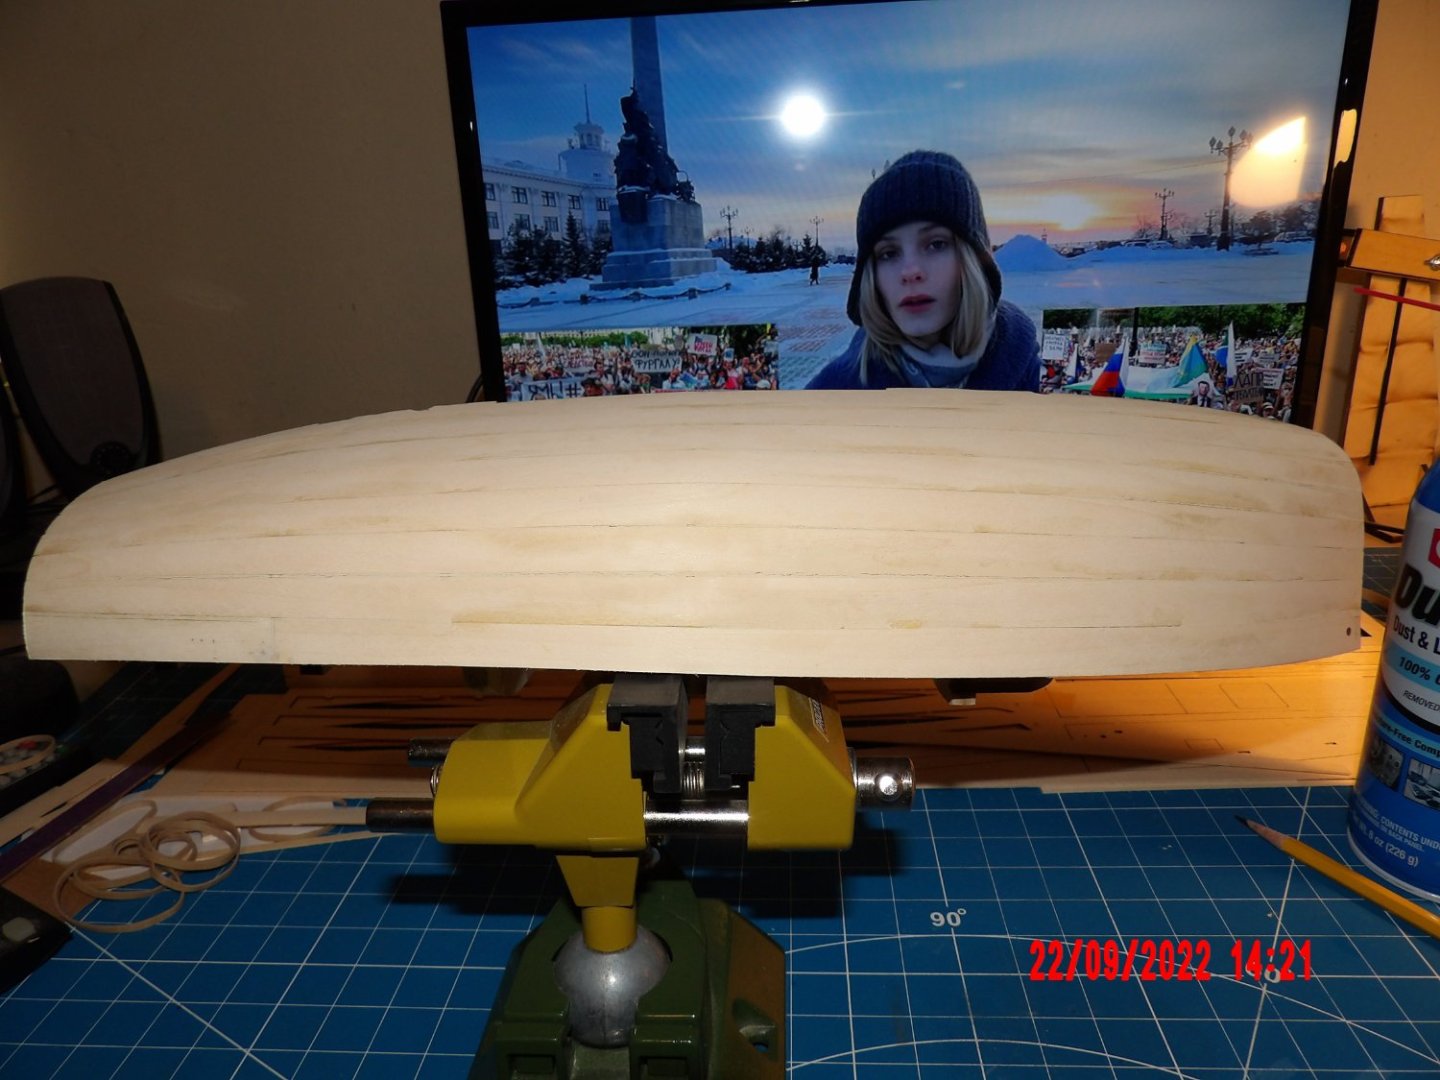
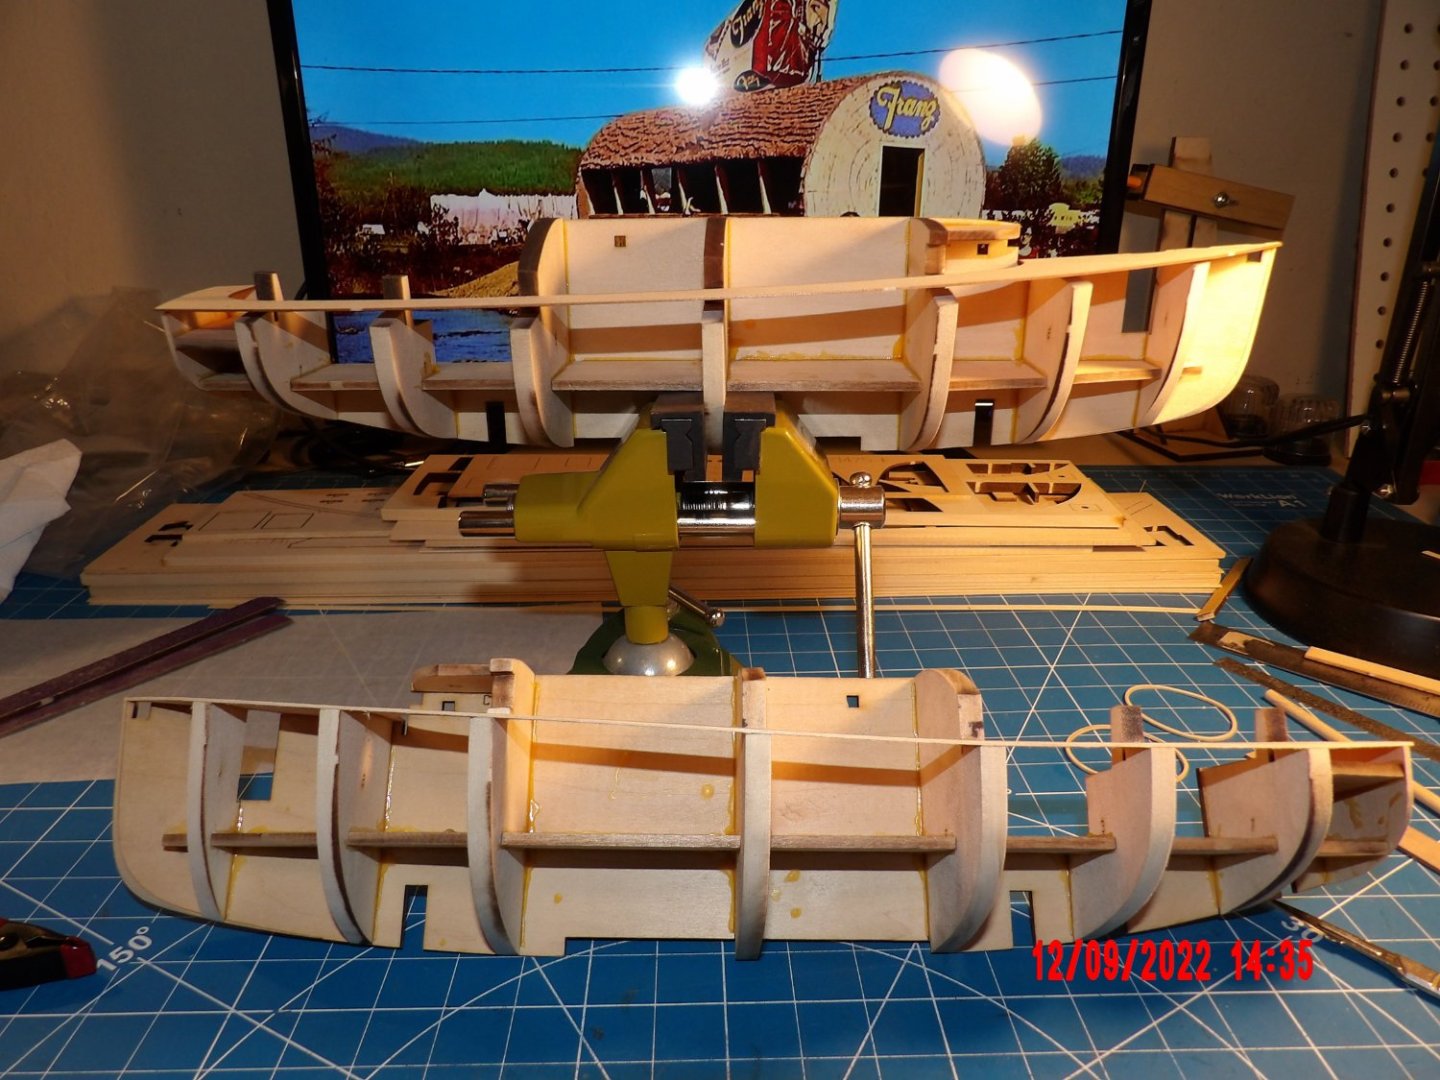
Both hull halves are planked now. Of course the second one is best. I brushed dilute glue into all the seams for rigidity. For larger gaps I glued very thin planking strips inside the hull to act as backing for filler. some areas had cupping at the seams between planks. I wet these areas, then placed strips from the kits planking carrier sheets over the offending seam, held down with elastic bands placed at the bulkheads. This generally produced a conforming seam, which I then brushed with dilute glue. Then, on the first half-hull, three or four rounds of sanding and filling, followed with a coat of gray primer, followed by additional filling and sanding. I spent a significant amount of time on all this. Now on to the next half. Hopefully, the effort will result in a very smooth and fair hull as one would expect in a fiberglass yacht. Final priming waits until more topside structure/features are added. BTW, that is not really a gap you see between the inner transom and the planks, it's just that the planks are a little shorter of the transom face in that area and some dried Titebond shows. This will be fixed when the outer tramsom is added.

- 111 replies
-
- 5
-
-
- Nonsuch 30
- Model Shipways
- (and 1 more)
-
Looks very good! And that virtual tour is just amazing. . .
-
One half-hull planked, with gap-filling and initial sanding done. A couple more rounds of filling and sanding needed. Up to plank #3 on the other half.
- 111 replies
-
- 6
-
-
- Nonsuch 30
- Model Shipways
- (and 1 more)
-
Wishes for a complete recovery, Eric. The furniture is very nice! Bob
- 113 replies
-
- 4
-
-
- Cairo
- BlueJacket Shipcrafters
- (and 1 more)
-
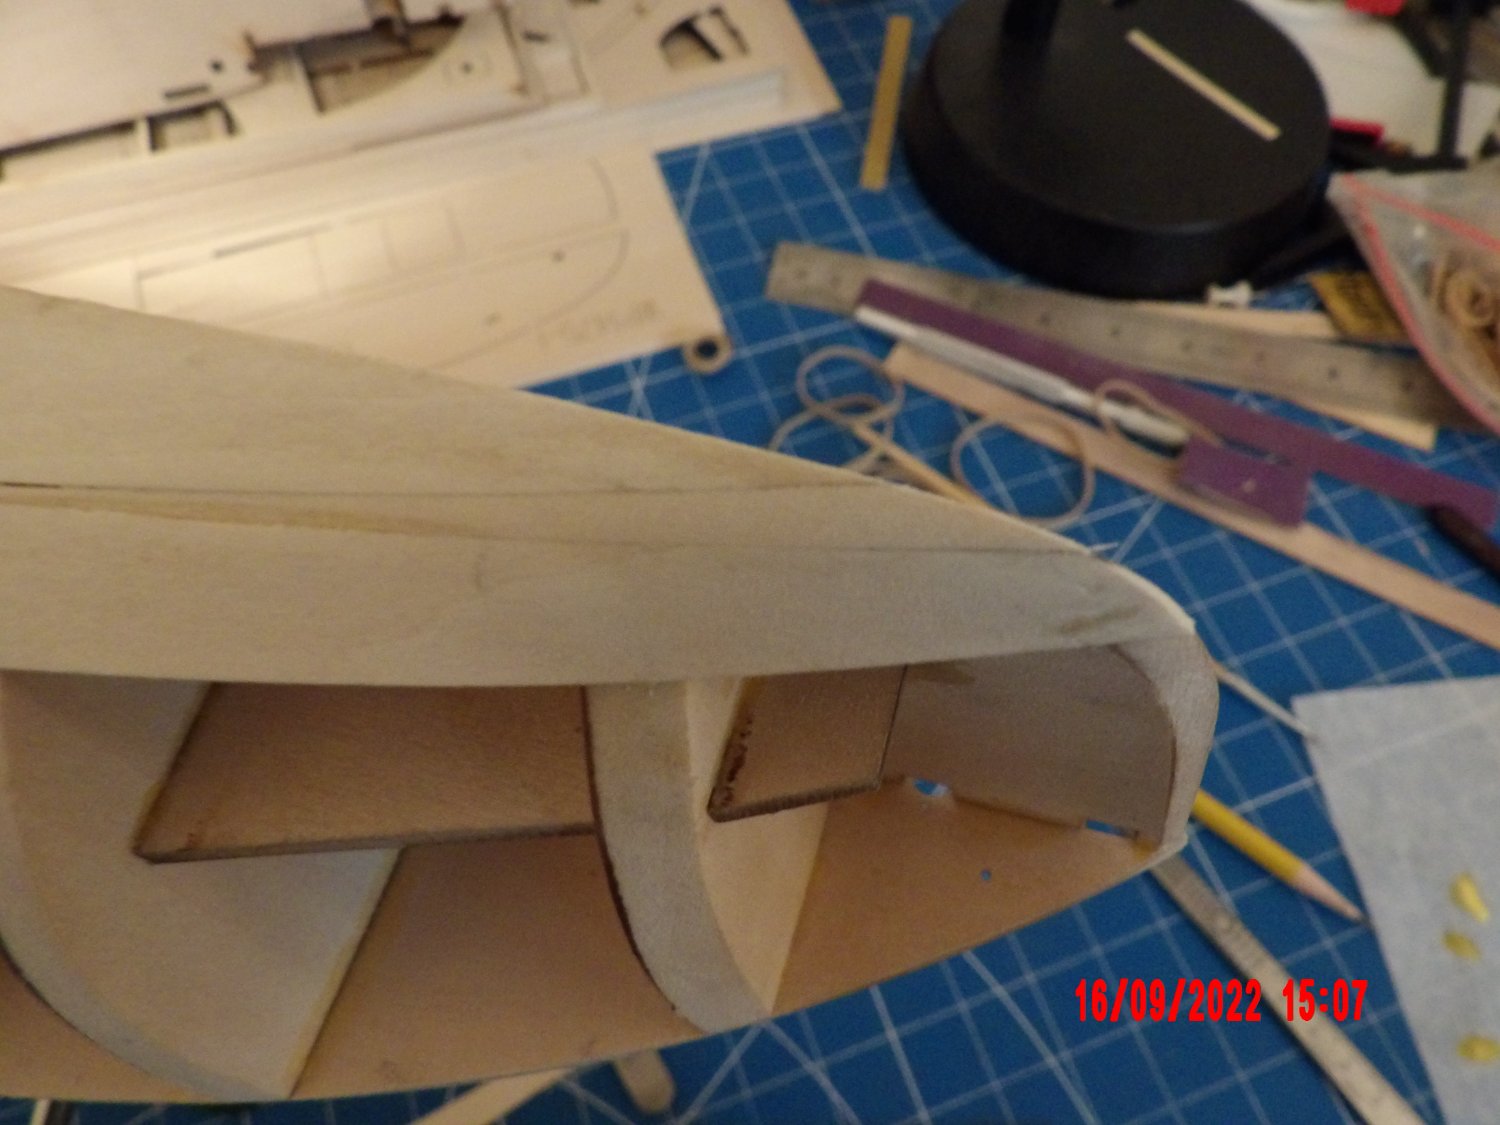
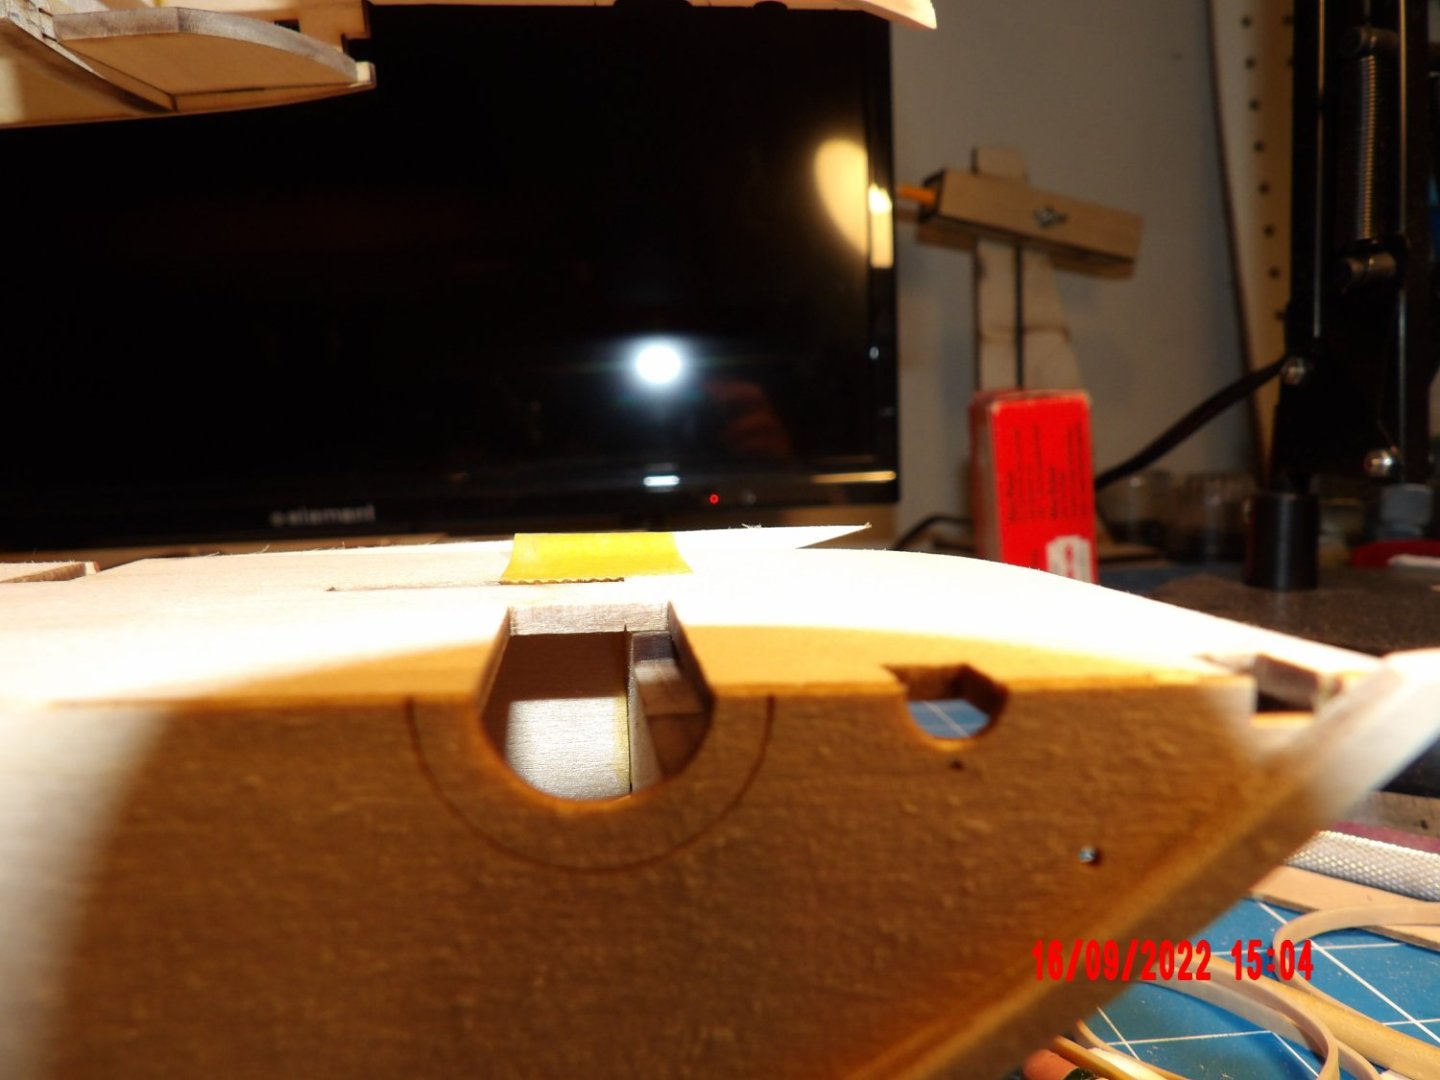
Here is a photo showing the problem I had (fore-end shown). When the garboard plank was placed as required, it overhung the half-spine fore and aft: I finally decided, after consulting with someone I respect, to accept the natural lay of the plank, and add filler plank as required. After all, I am only trying to create a surface simulating a fiberglass hull. When I added plank #2, I ended up with the gaps, fore and aft, that I was expecting. Photos shows the insert I made at the fore section, will repeat at the aft. This resulted in a good profile when viewed from the end: Good news is it looks like plank #3 will fit to #2 with only minimal gaps, hoping that this is true for the rest as well, and that I don't end up short at deck level.


- 111 replies
-
- 5
-
-
- Nonsuch 30
- Model Shipways
- (and 1 more)
-
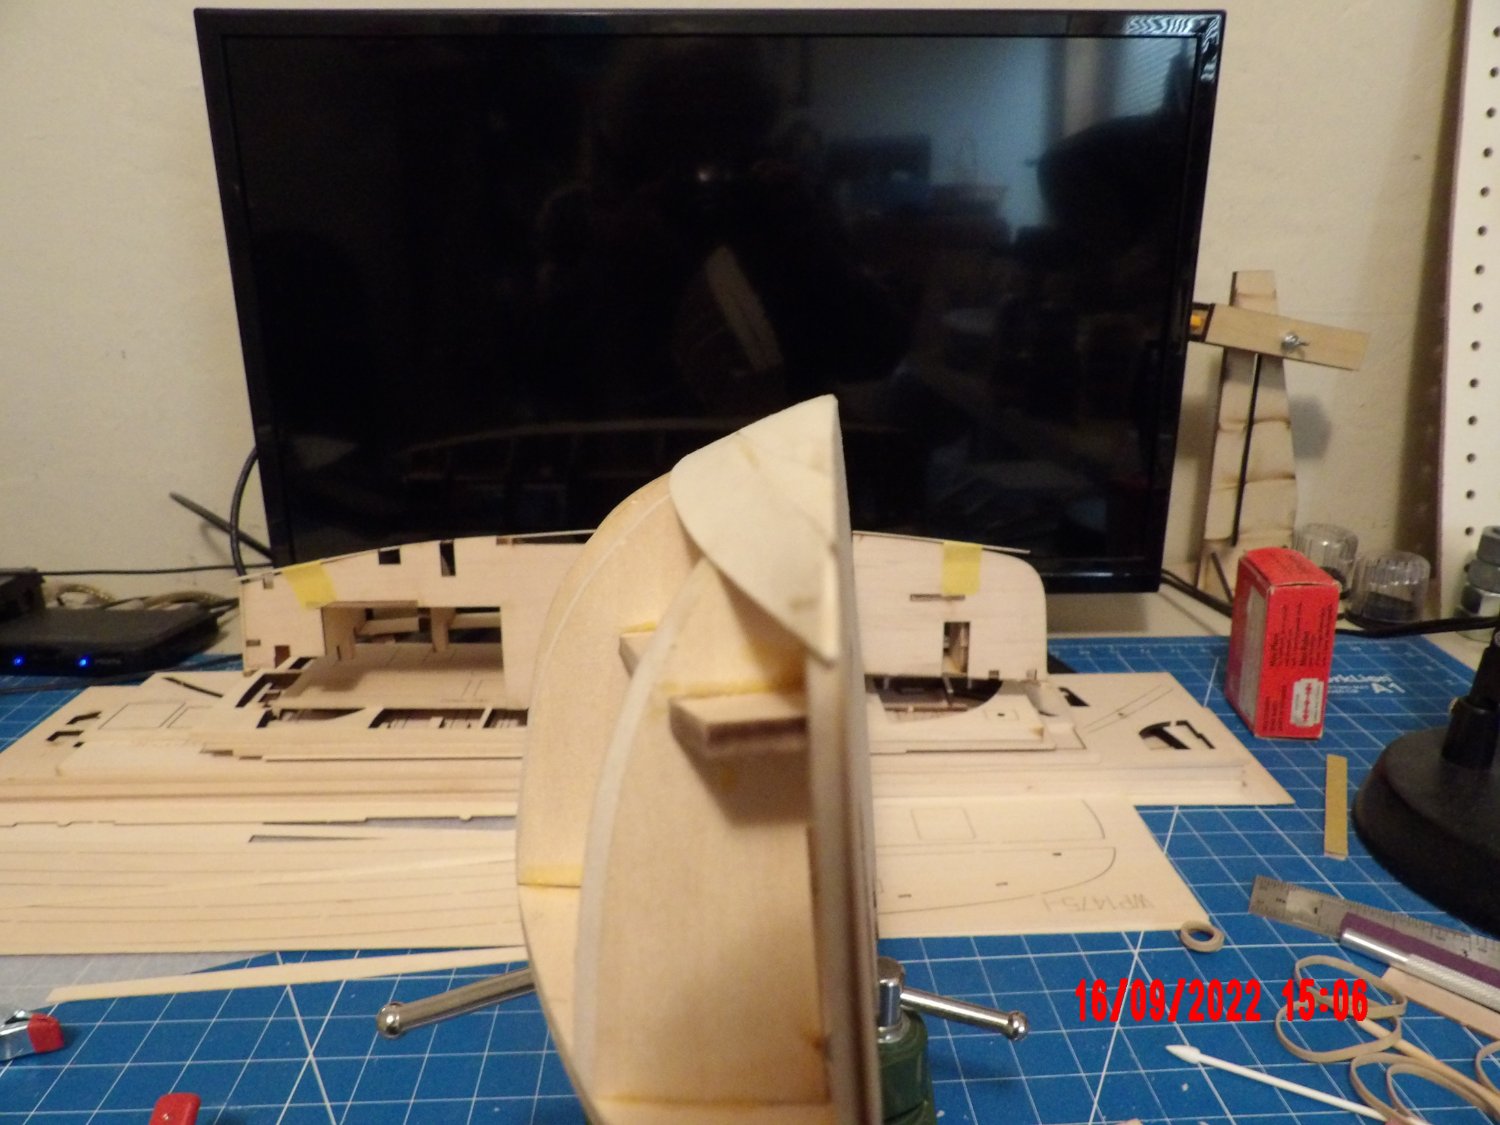
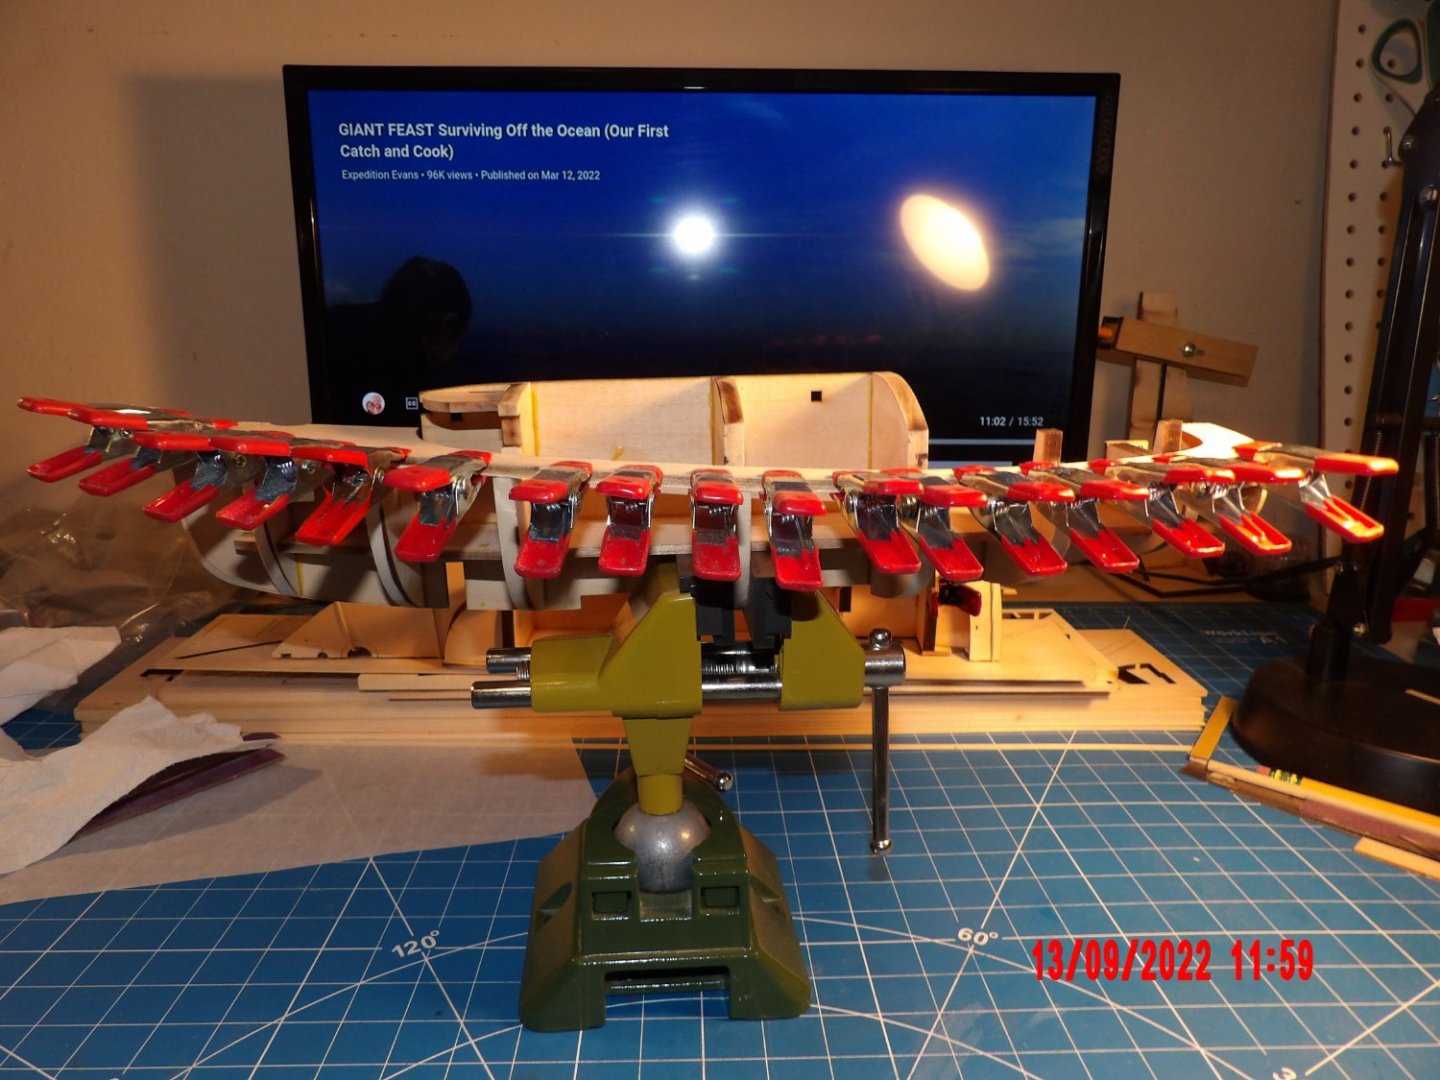
Installed the toe rails. . . Trying to fit the garboard plank. Something is seriously wrong. . . photo shows how the plank wants to lay. Similar for plank # 2. I'm kind of at a loss as to what to do. I had begun by gluing to the center three bulkheads, then had to unglue, as the plank seriously overhung the spine at both ends. Planks is too wide to attempt edge-bending (?). I'll put this aside for a bit and consider what might be done.

- 111 replies
-
- 6
-
-
- Nonsuch 30
- Model Shipways
- (and 1 more)
-
Thanks, Gregg. Yes, the bulkheads are thicker. I'm not sure why. Fairing operation was similar to what I've done in the past. Certainly, having more surface area for gluing is a plus. @thibaultron, thanks for the suggestion. The instructions are not calling for additional blocks, and I'm not sure they will be necessary. I'll see how the first planks lay. . . bob
- 111 replies
-
- 1
-
-
- Nonsuch 30
- Model Shipways
- (and 1 more)
-
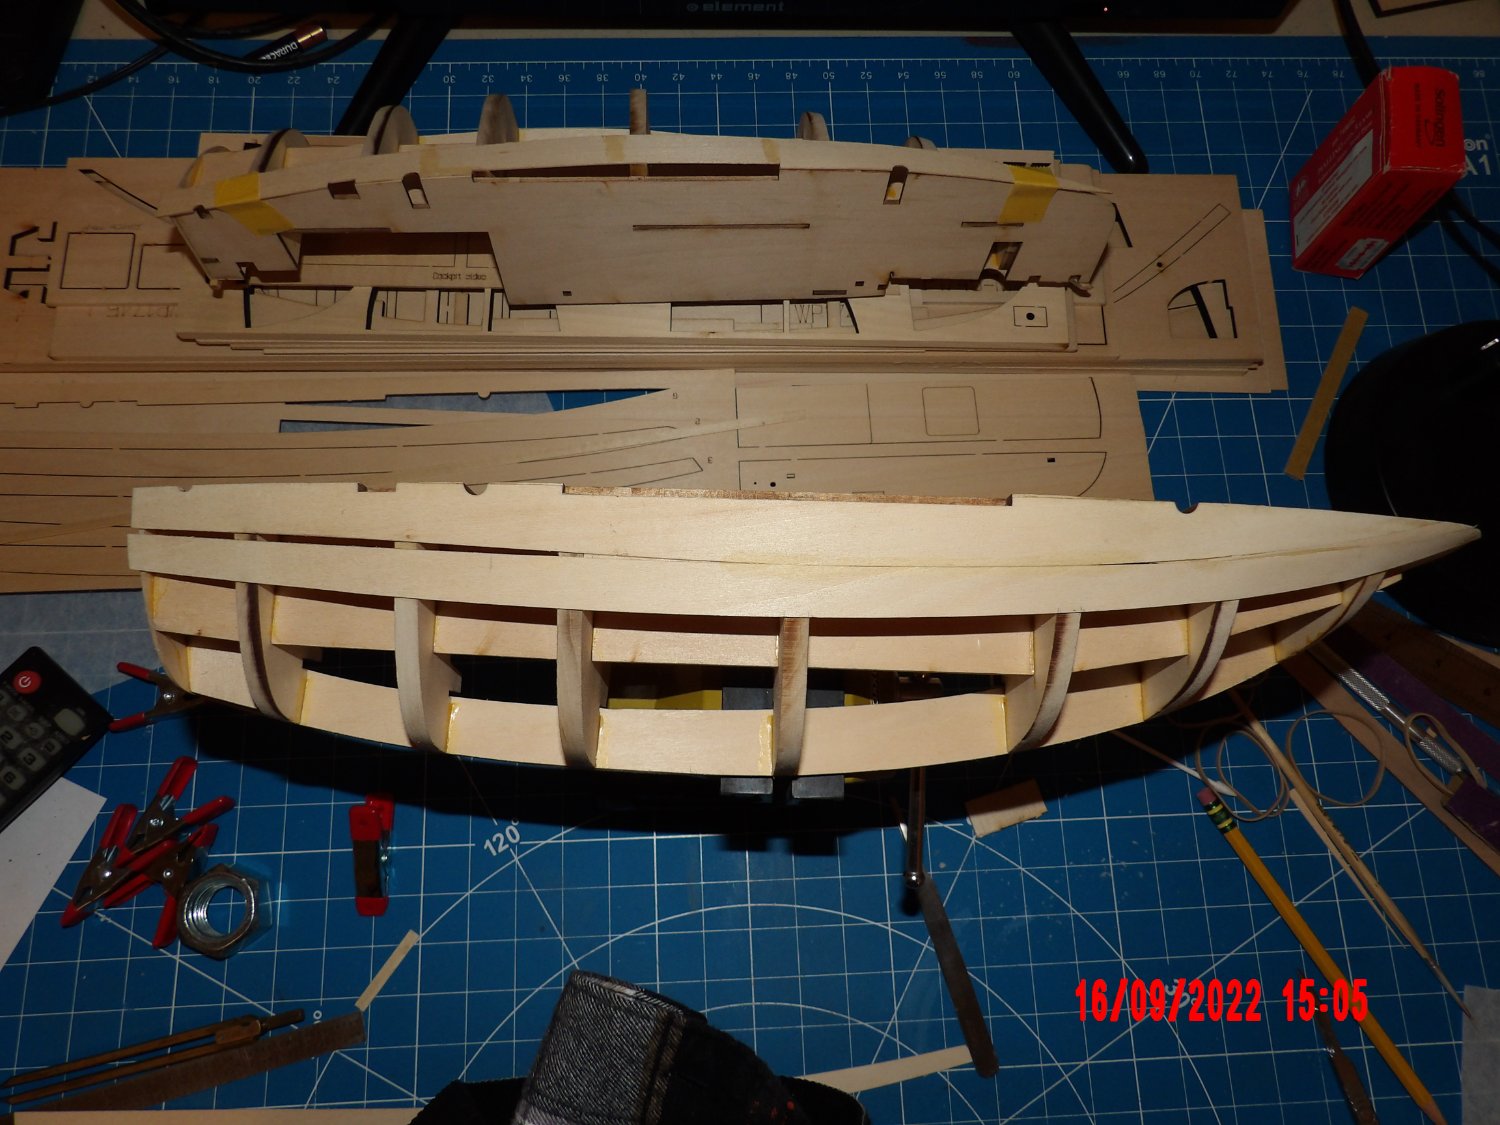
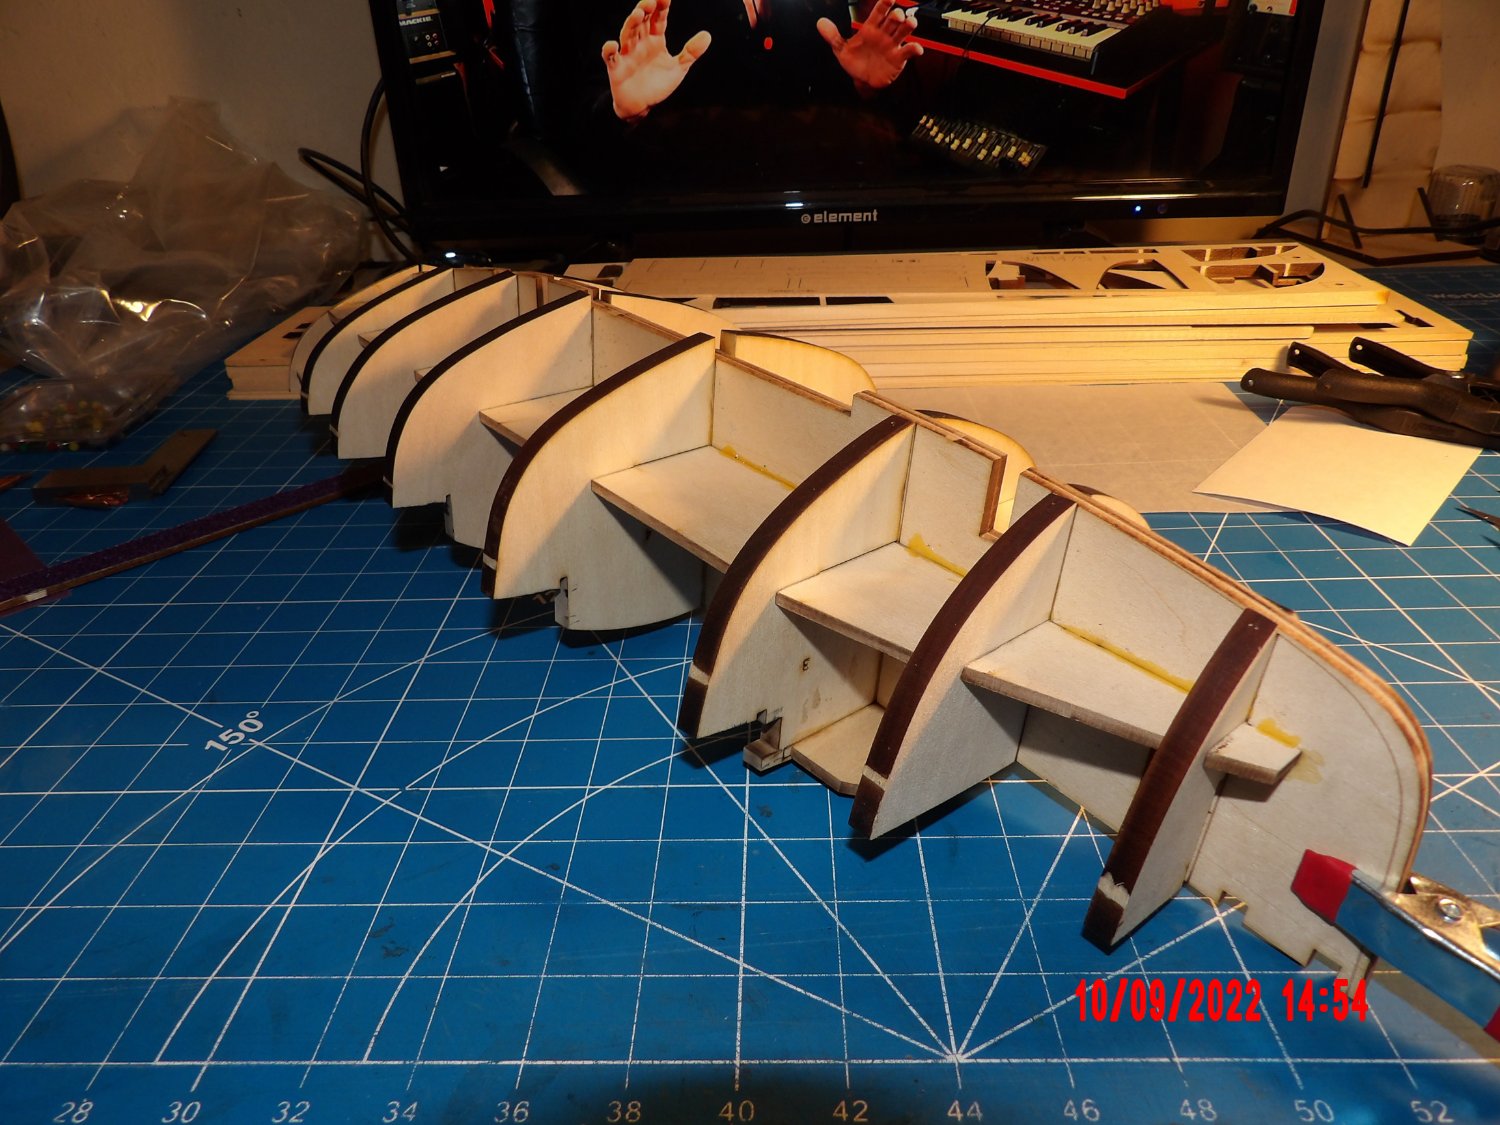
Finished (?) the fairing and am adding the deck halves. Looks good to me so far. I'm becoming better at looking ahead and making needed adjustments. Getting close to starting planking.
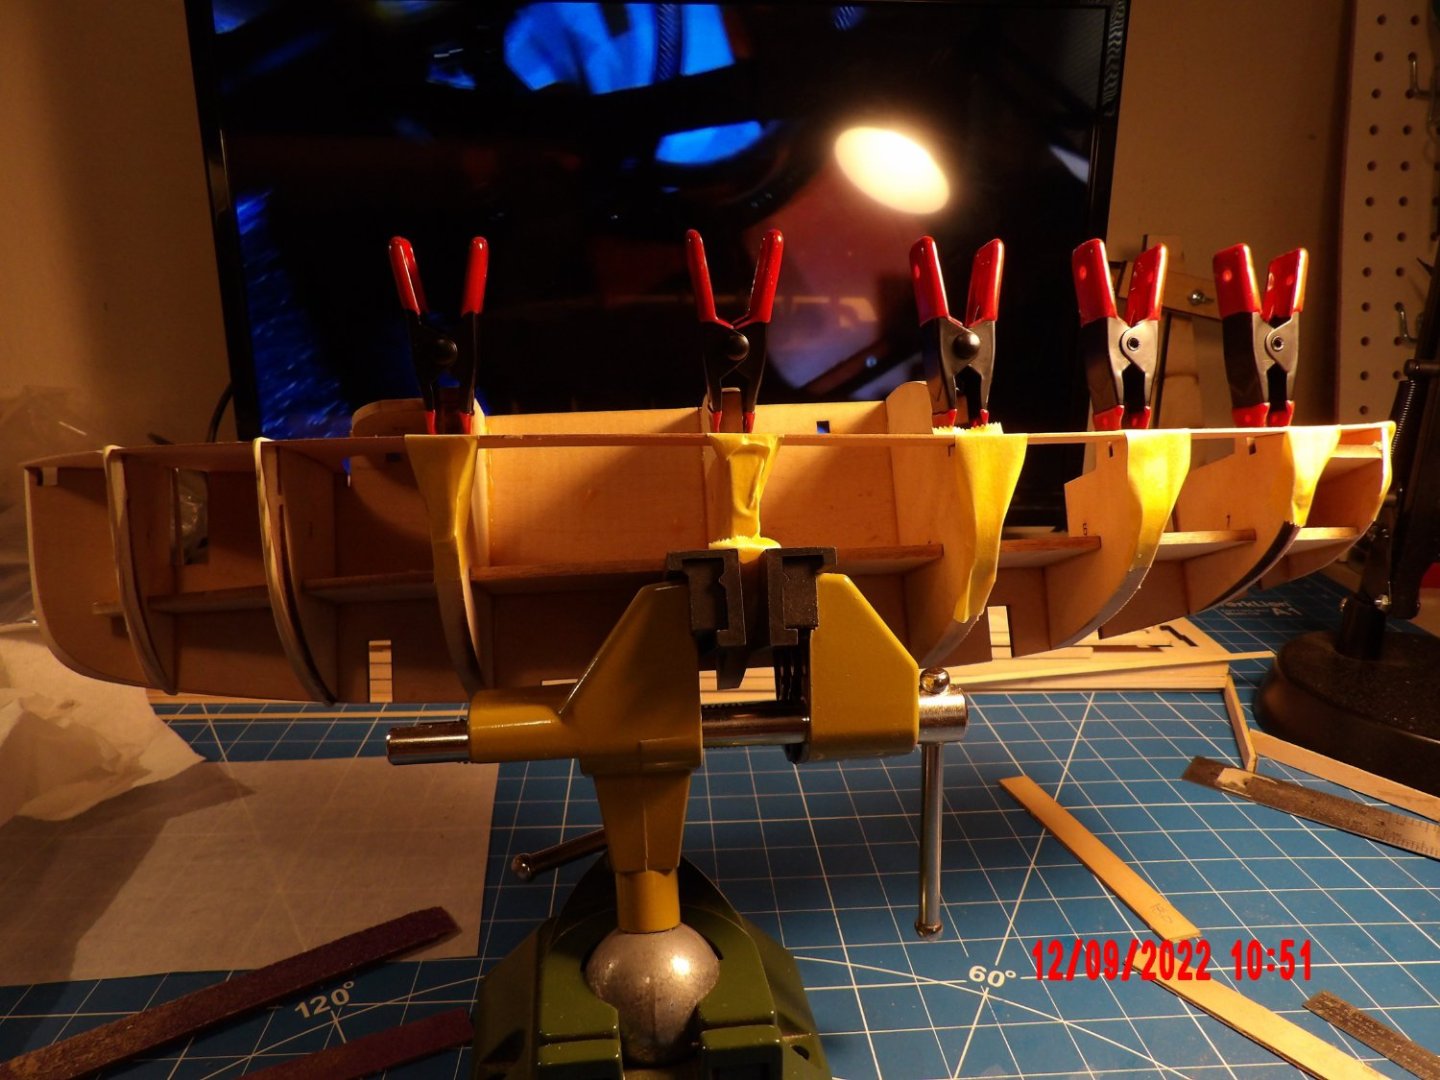
- 111 replies
-
- 8
-
-
- Nonsuch 30
- Model Shipways
- (and 1 more)
-
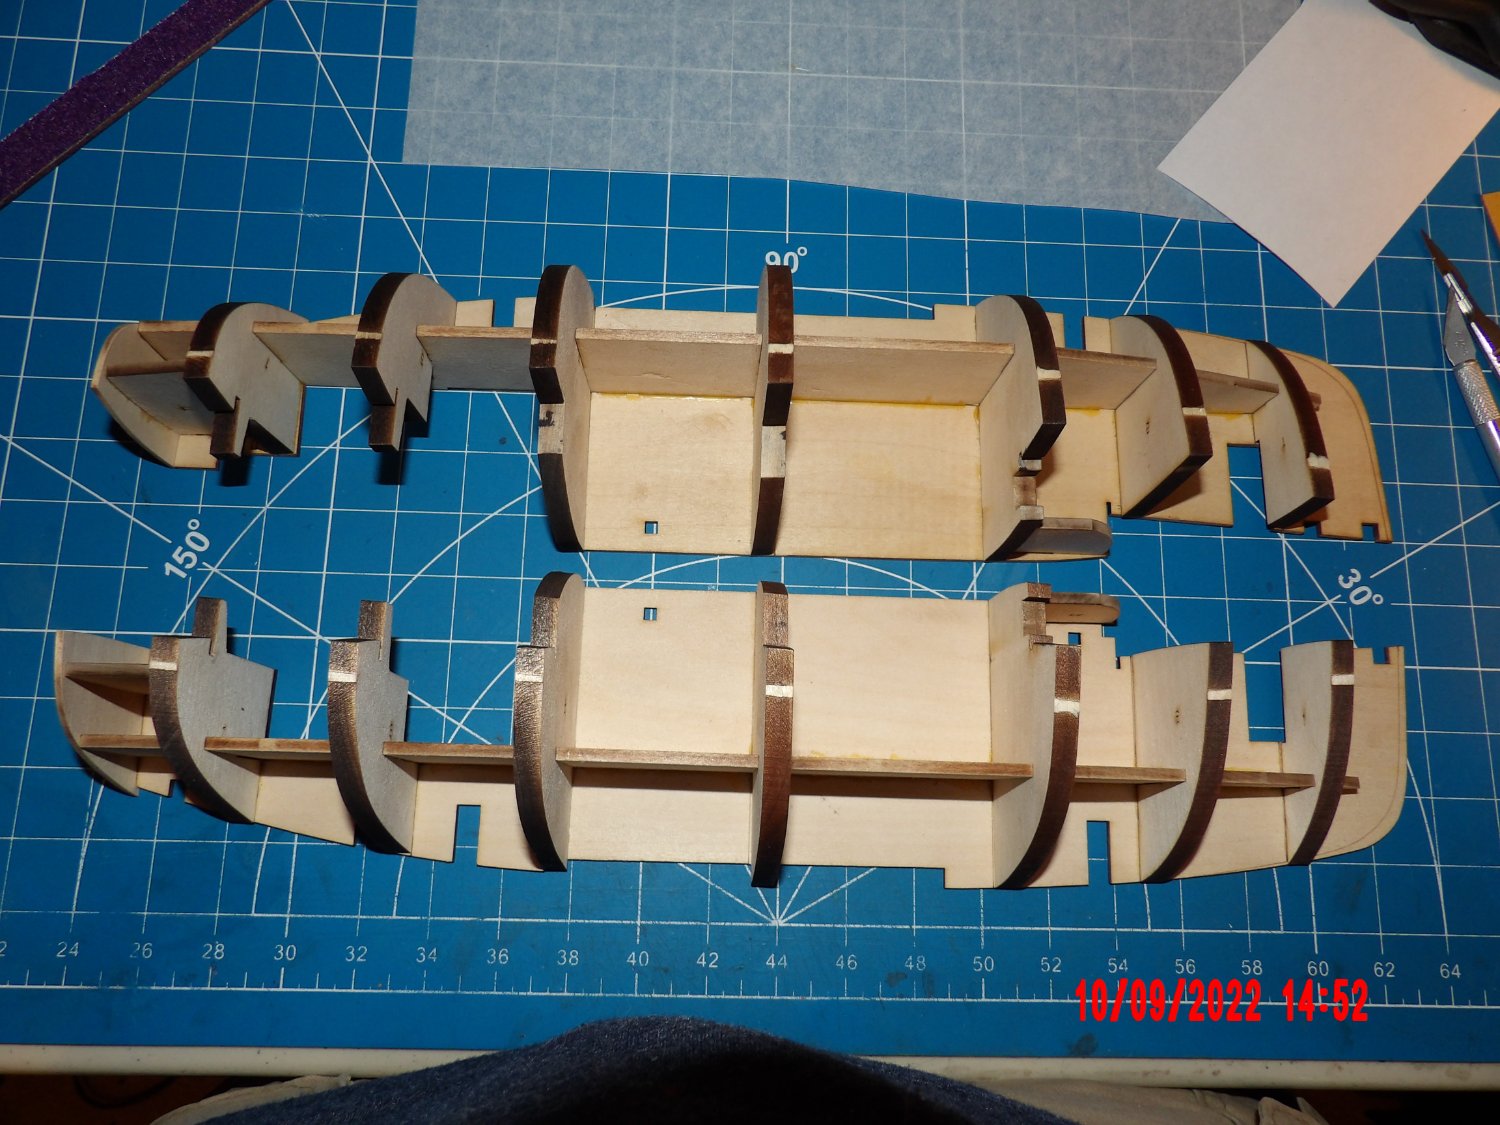
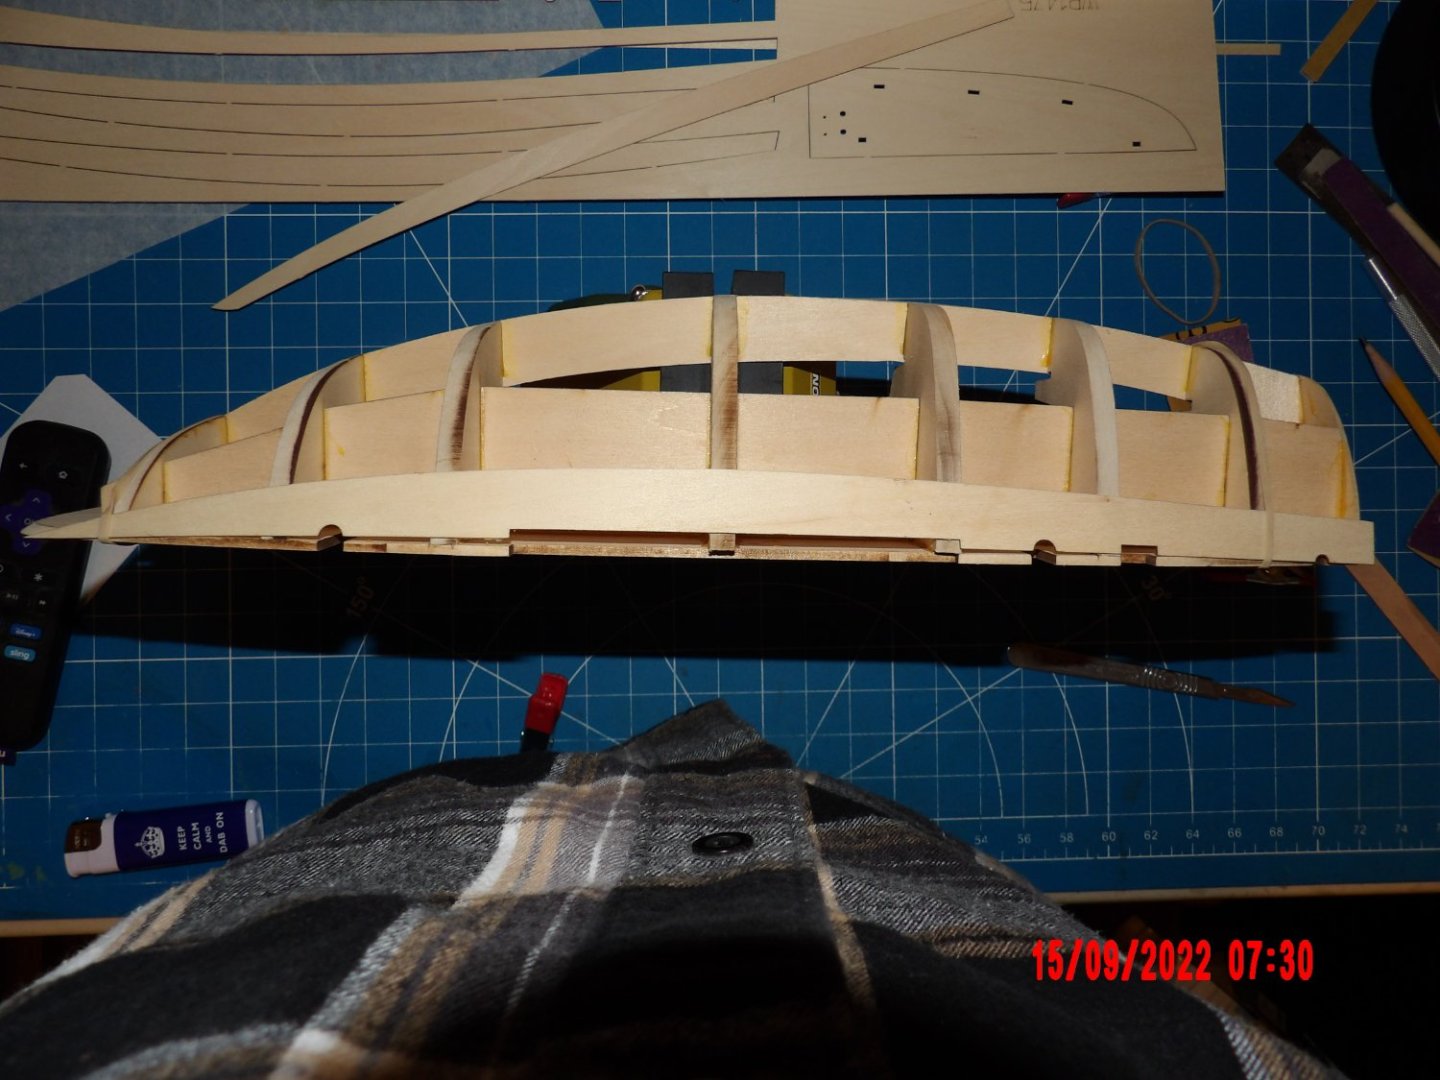
Bulkheads and inner transom assembled and ready for fairing:

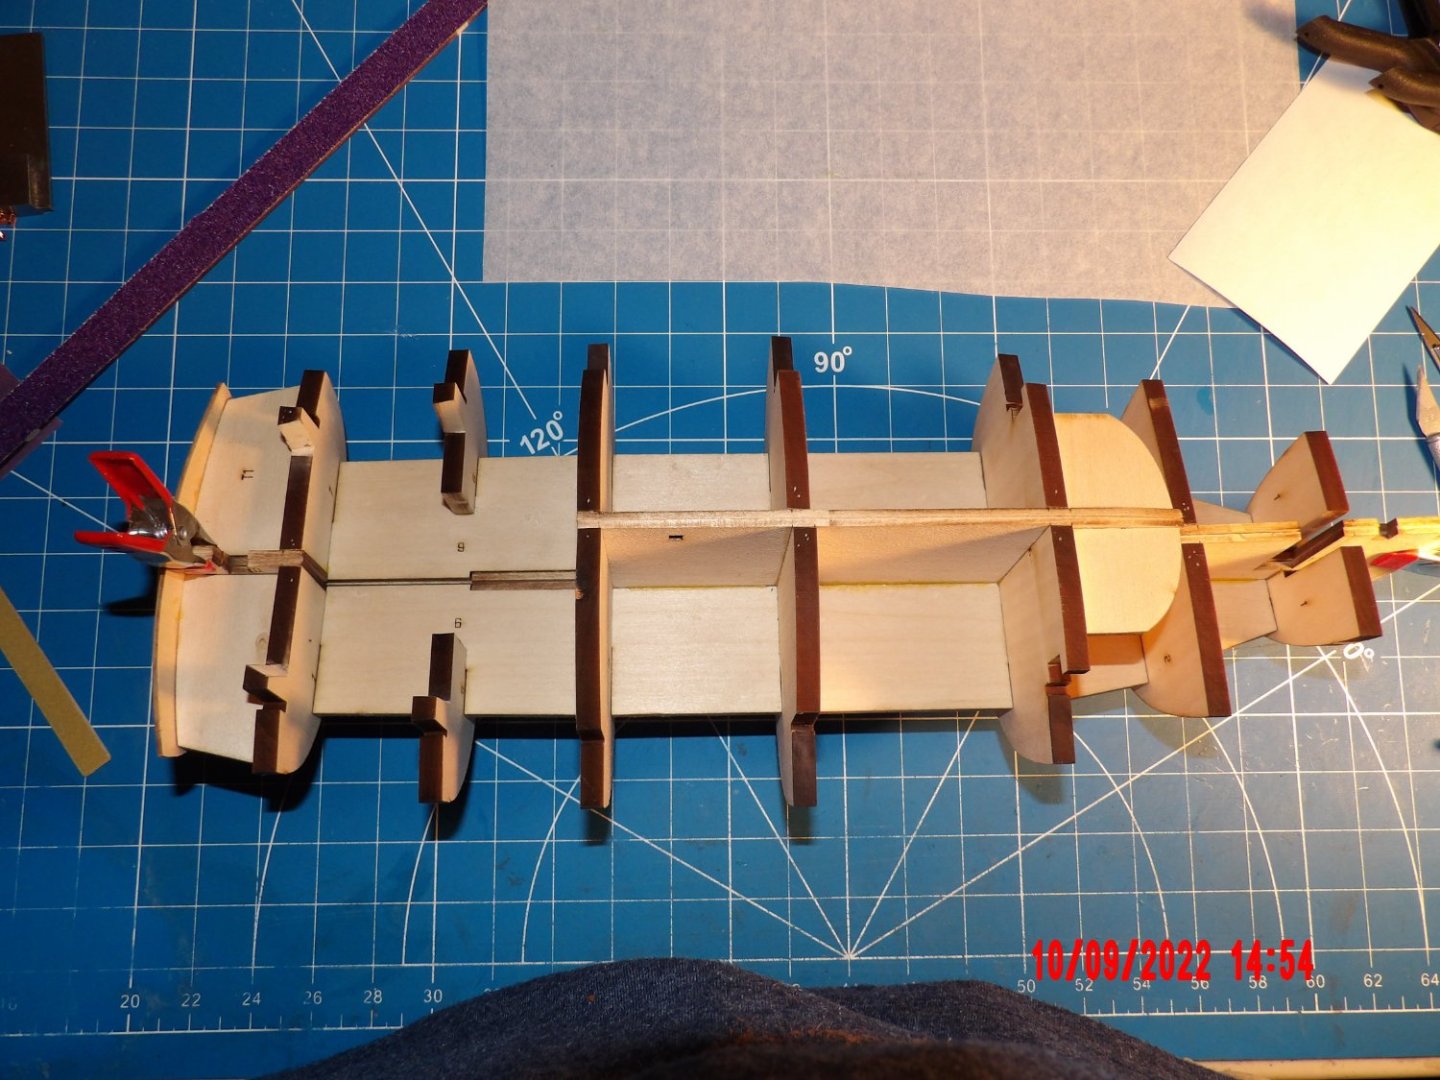

- 111 replies
-
- 8
-
-
- Nonsuch 30
- Model Shipways
- (and 1 more)
-
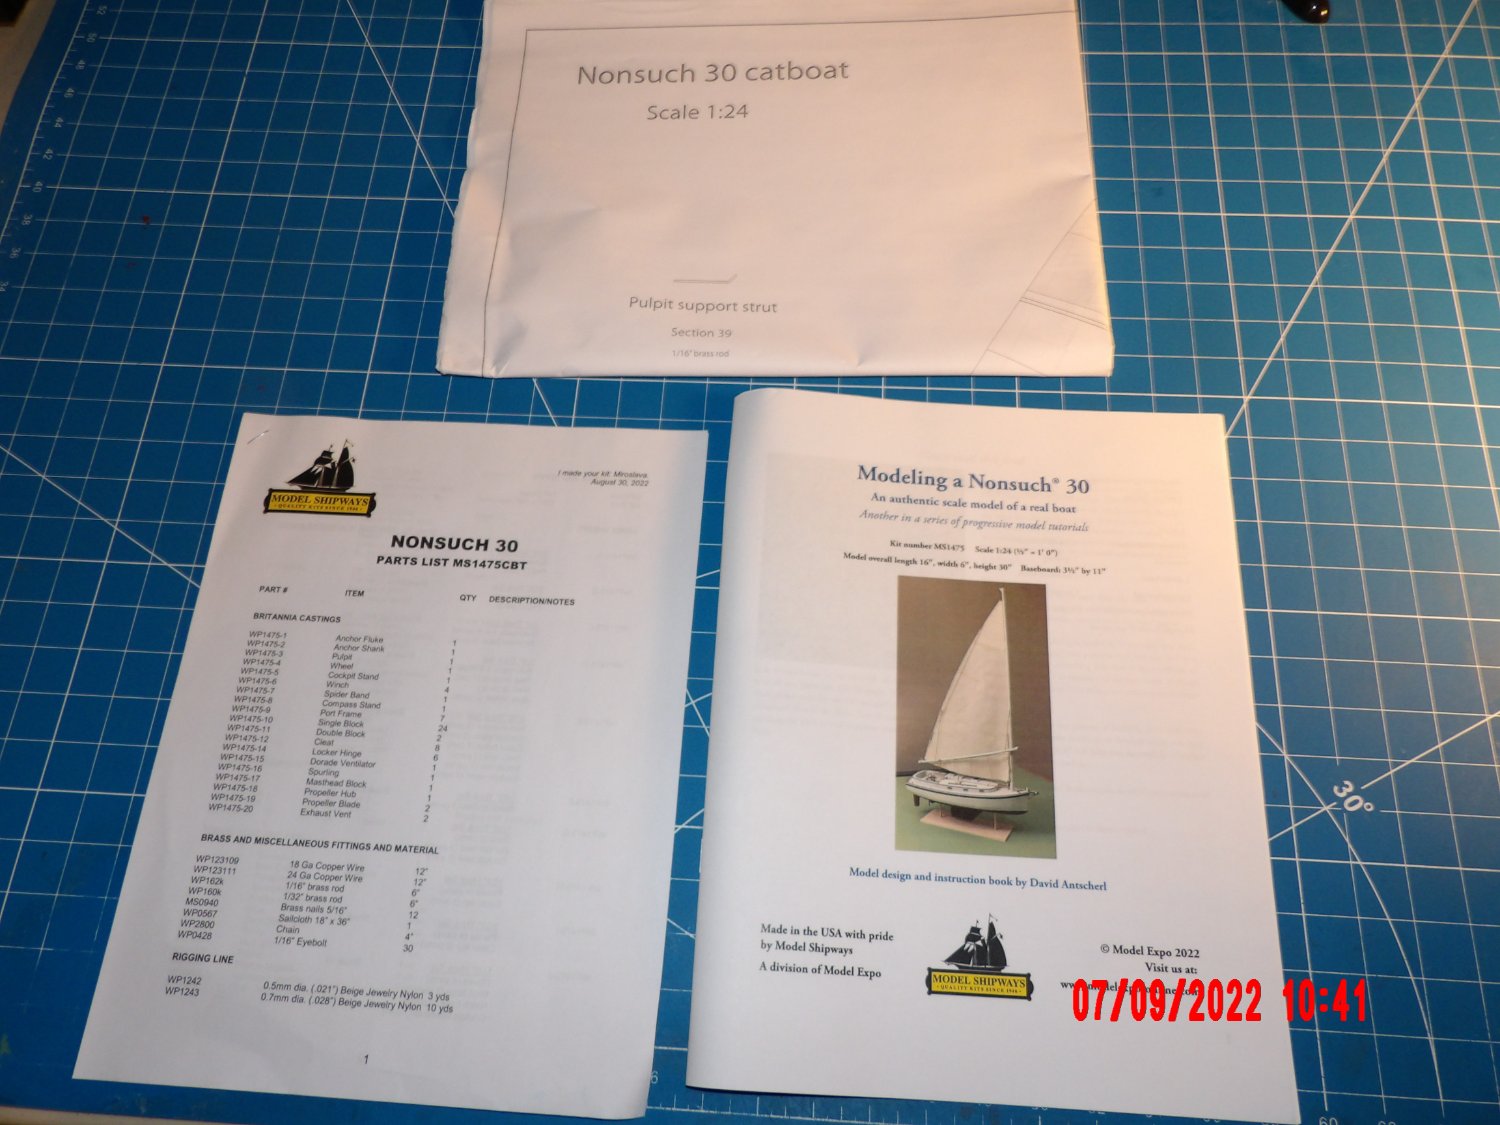
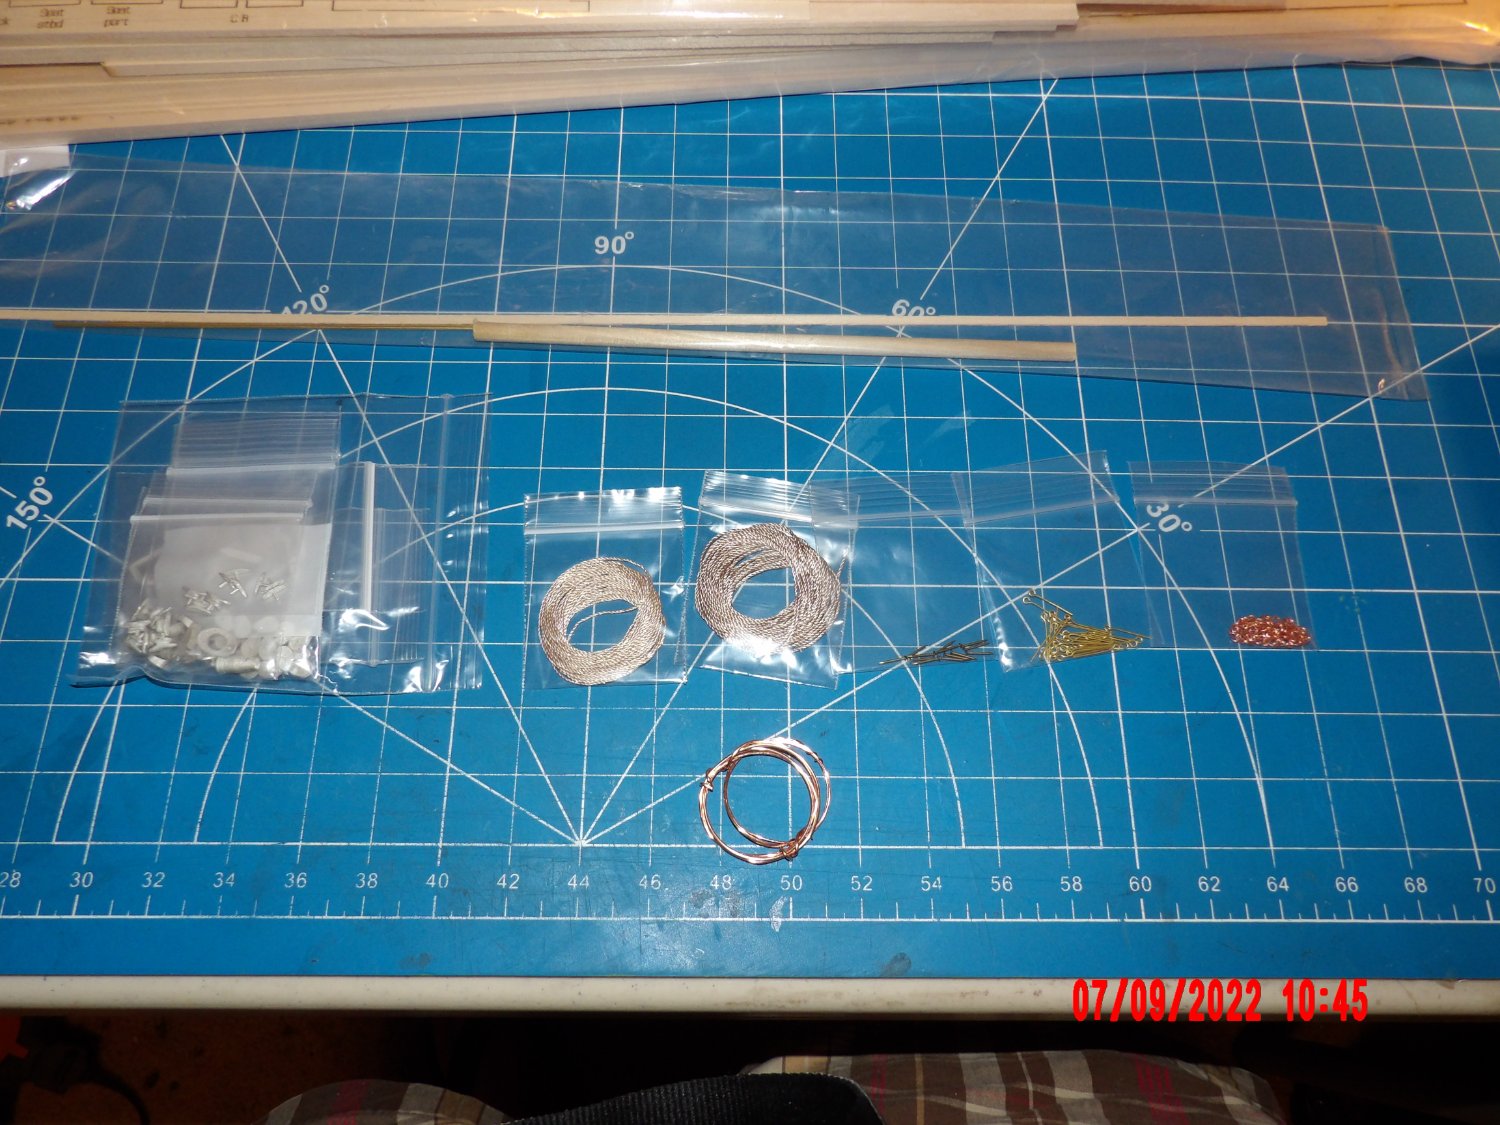
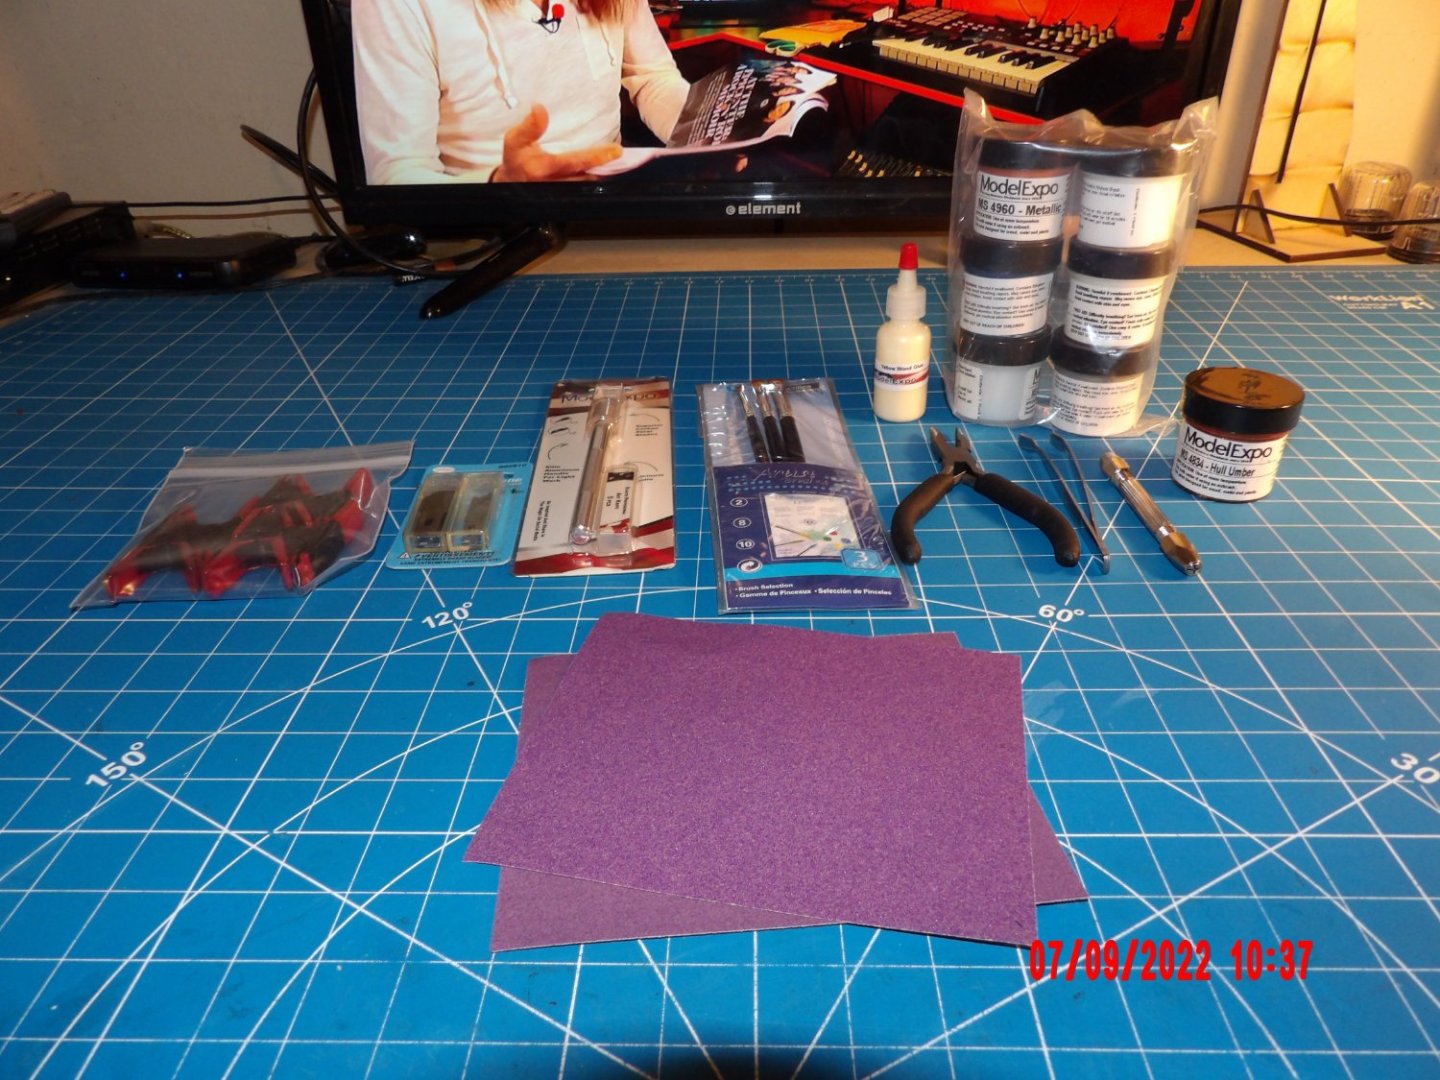
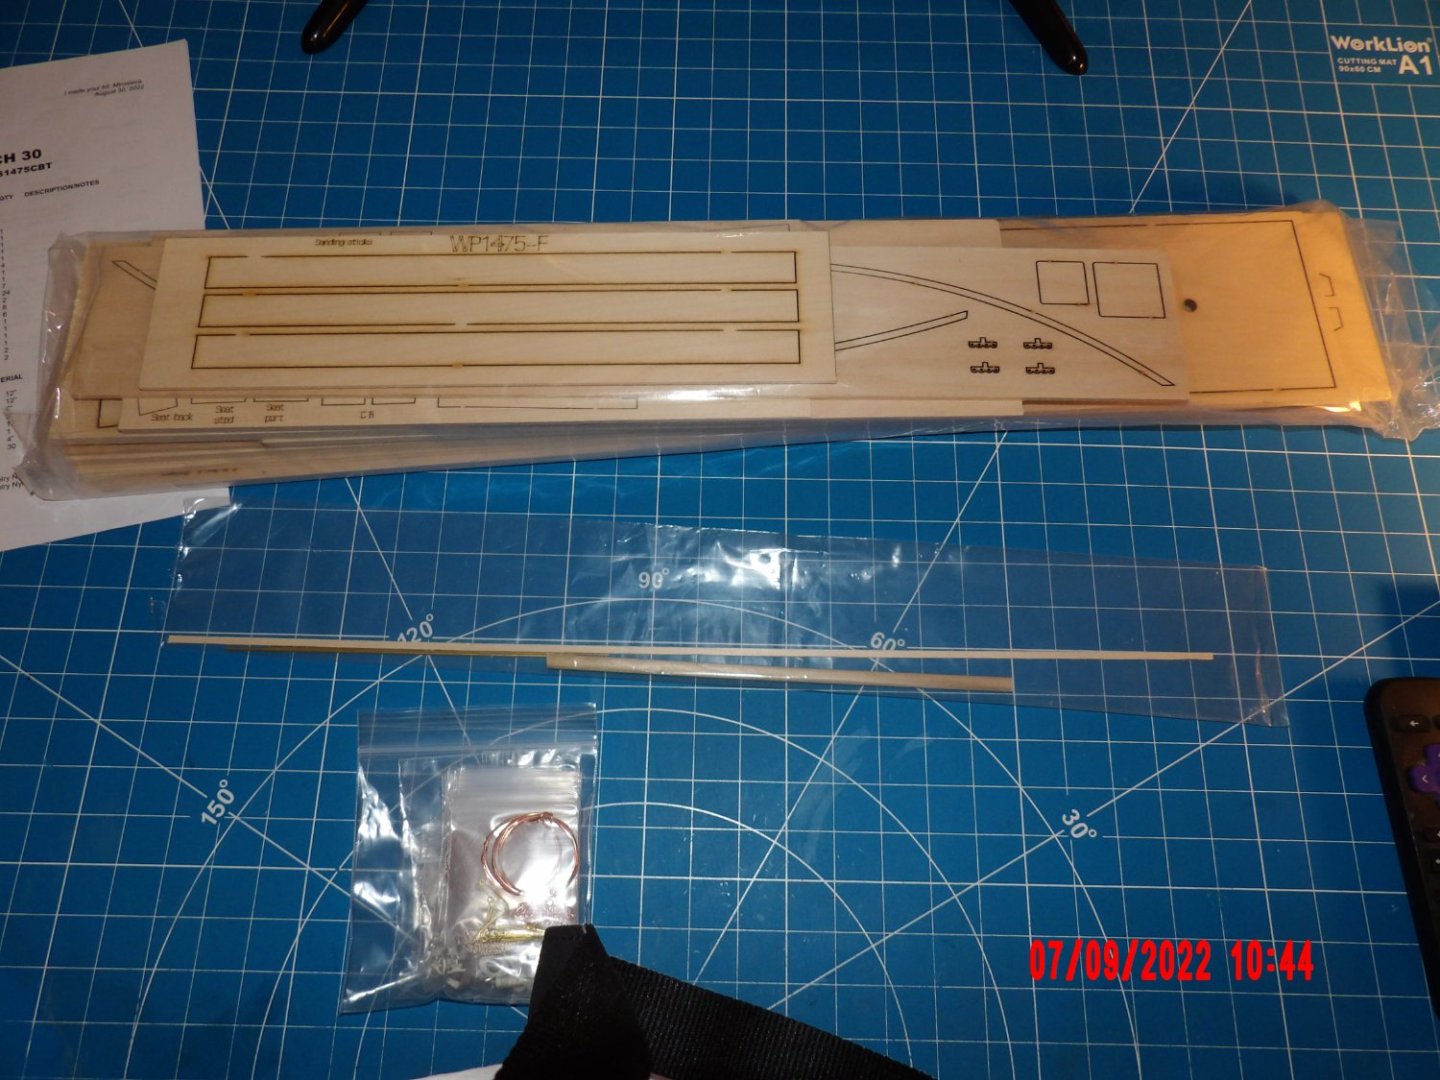
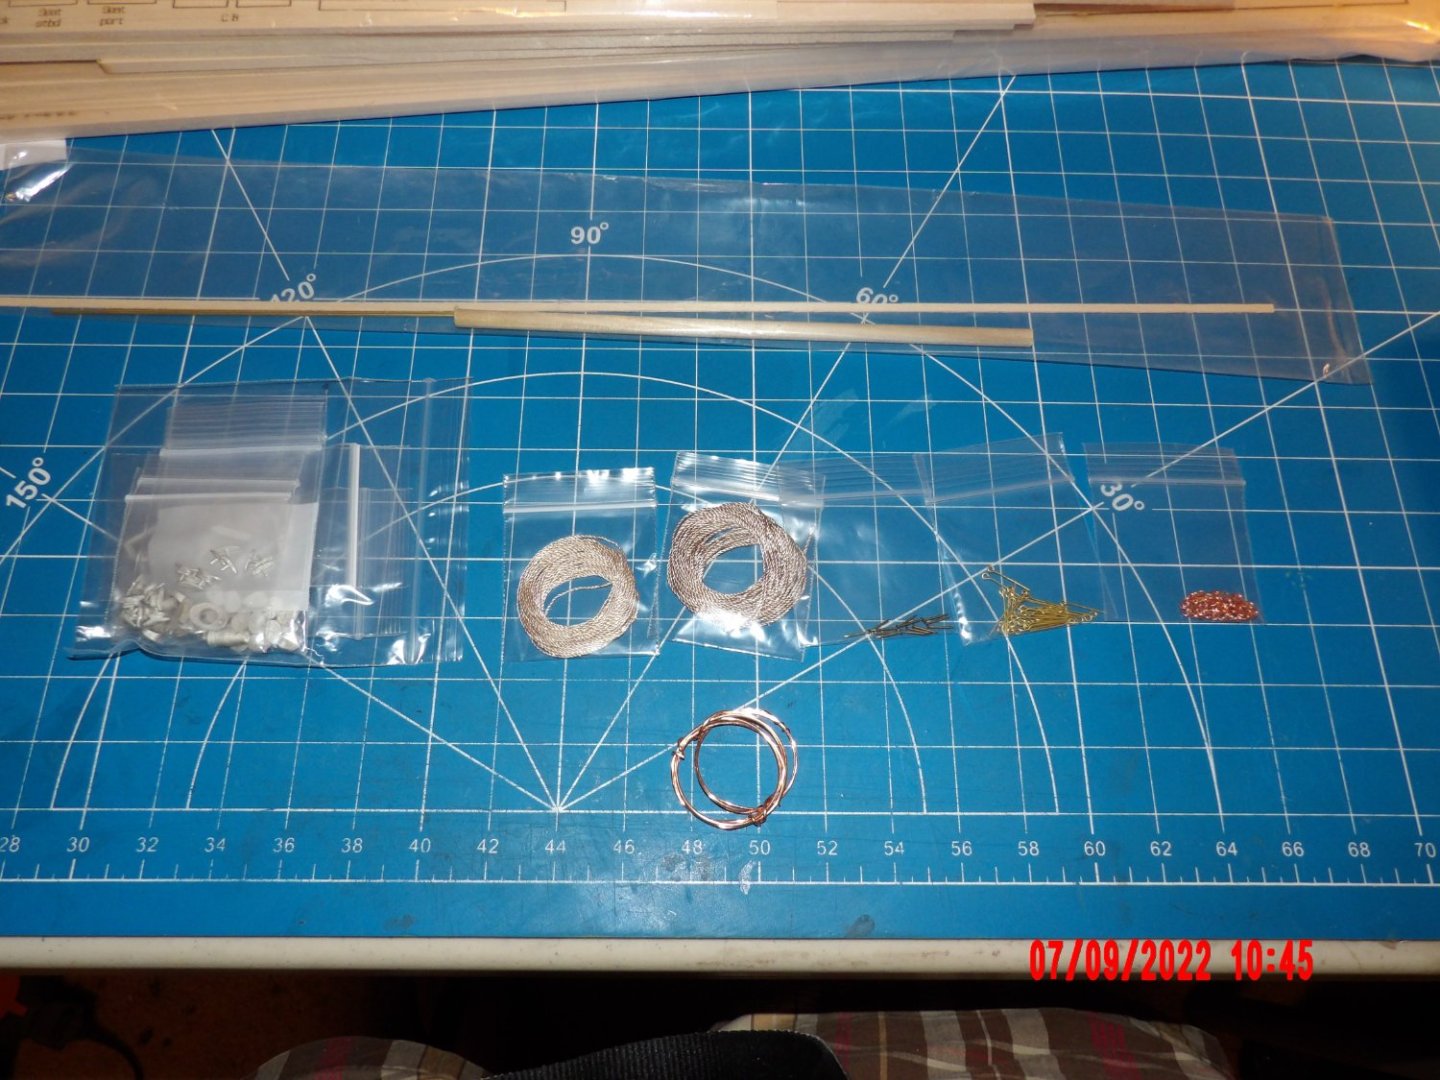
The kit arrived today! When I placed the order, it was advertised as coming with free brushes and paint, for a limited time. Next day, that was changed to two offerings- one being the kit alone, at a lesser price, the other with paint and tools. I received the version with paint and tools. Although I had most of the tools already, you can't have too many, right? And I did not have paddle-end tweezers, seen below: The kit was packed well, except for the two large plan sheets, which were crumpled more than I'd like. Almost all of the wood is in laser-cut sheets. A couple of the sheets have some marring, I'm assuming from milling the stock, but those seem to be with parts internal to the model, so not concerned. Many of the sheets are quite thick which at first was surprising, but this after all is a larger scale model of a small boat. When I saw the size of the metal blocks it started to make more sense to me. There are no key plans for the laser-cut sheets, but an improved Parts List lists the parts that should be included on each sheet. Hopefully, that, along with the pictures in the instruction manual, will be enough to figure out what each is. Some, but not all of the sheets are engraved with the part names. I did an inventory of parts against the parts list; both of the metal block sizes were short in quantity- I will place a request for those. Otherwise, all seems to check out. The manual indicates that this model is part of the progressive learning series, as did the Harriet Lane, but does not indicate its place in the lineup. I assume it's the fifth. Harriet Lane has not been added to the "Shipwrights Series," the website does not mention the series- it is only the manual that indicates that it is part of a series. HL was quite a challenge. At first glance the Nonsuch looks much simpler, but I expect some surprises. Certainly, shaping the curved mast and wishbone boom are bound to be tricky. So far, ME has not posted a downloadable PDF of the manual. I hope they do- being able to zoom in on details is very helpful for my old, overtaxed eyes. Started removing char from the main structural pieces, reading the manual, and watching videos of these boats in action.

- 111 replies
-
- 7
-
-
- Nonsuch 30
- Model Shipways
- (and 1 more)
-
Very nice lines to this ship. I admire your 10-year commitment!
-
Looking very nice!
-
Thanks, all! Just started a log for the new Model Shipways "Nonsuch 30." Harriet Lane is going onto my grandmother's china cabinet, as soon as I figure out where to put the dishes. . . Bob
- 146 replies
-
- 4
-
-
- Harriet Lane
- Model Shipways
- (and 1 more)
-
When I saw this new model designed by David Antscherl, who also designed the Model Shipways Shipwrights series which I just completed- well, I had to have it, right? It's a modern fiberglass boat (but built of wood, of course). This kit is on pre-order, available at the end of this month. Can't wait to start!
- 111 replies
-
- 7
-
-
- Nonsuch 30
- Model Shipways
- (and 1 more)
-
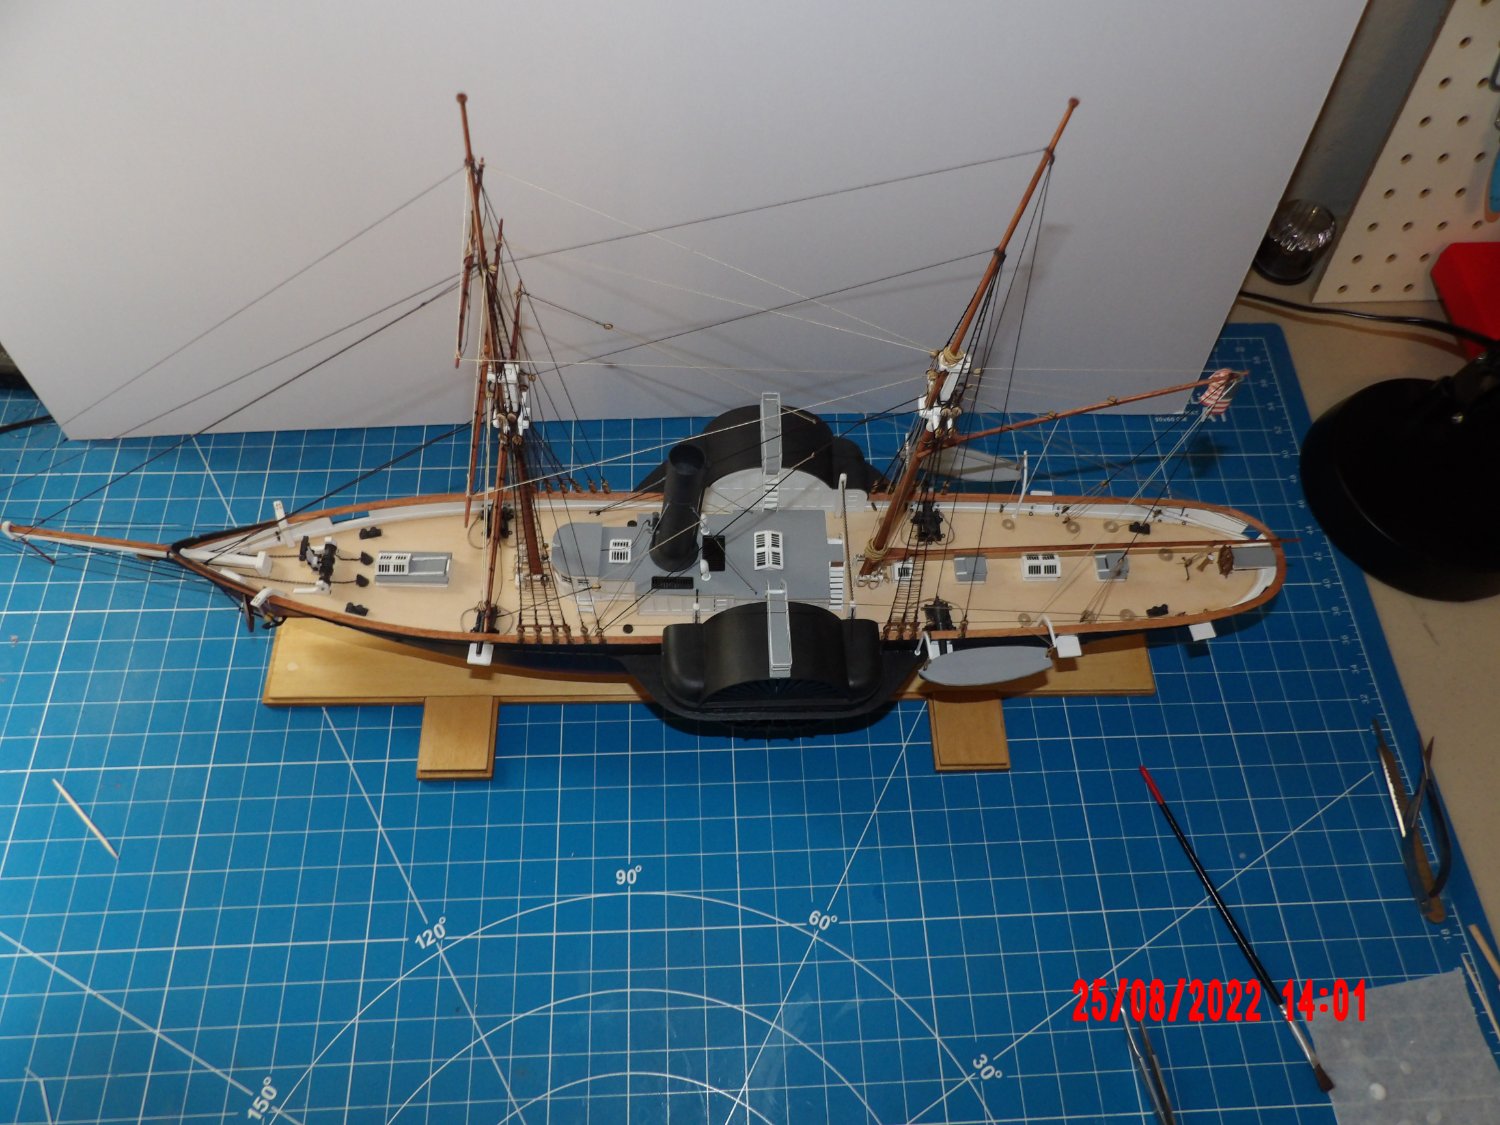
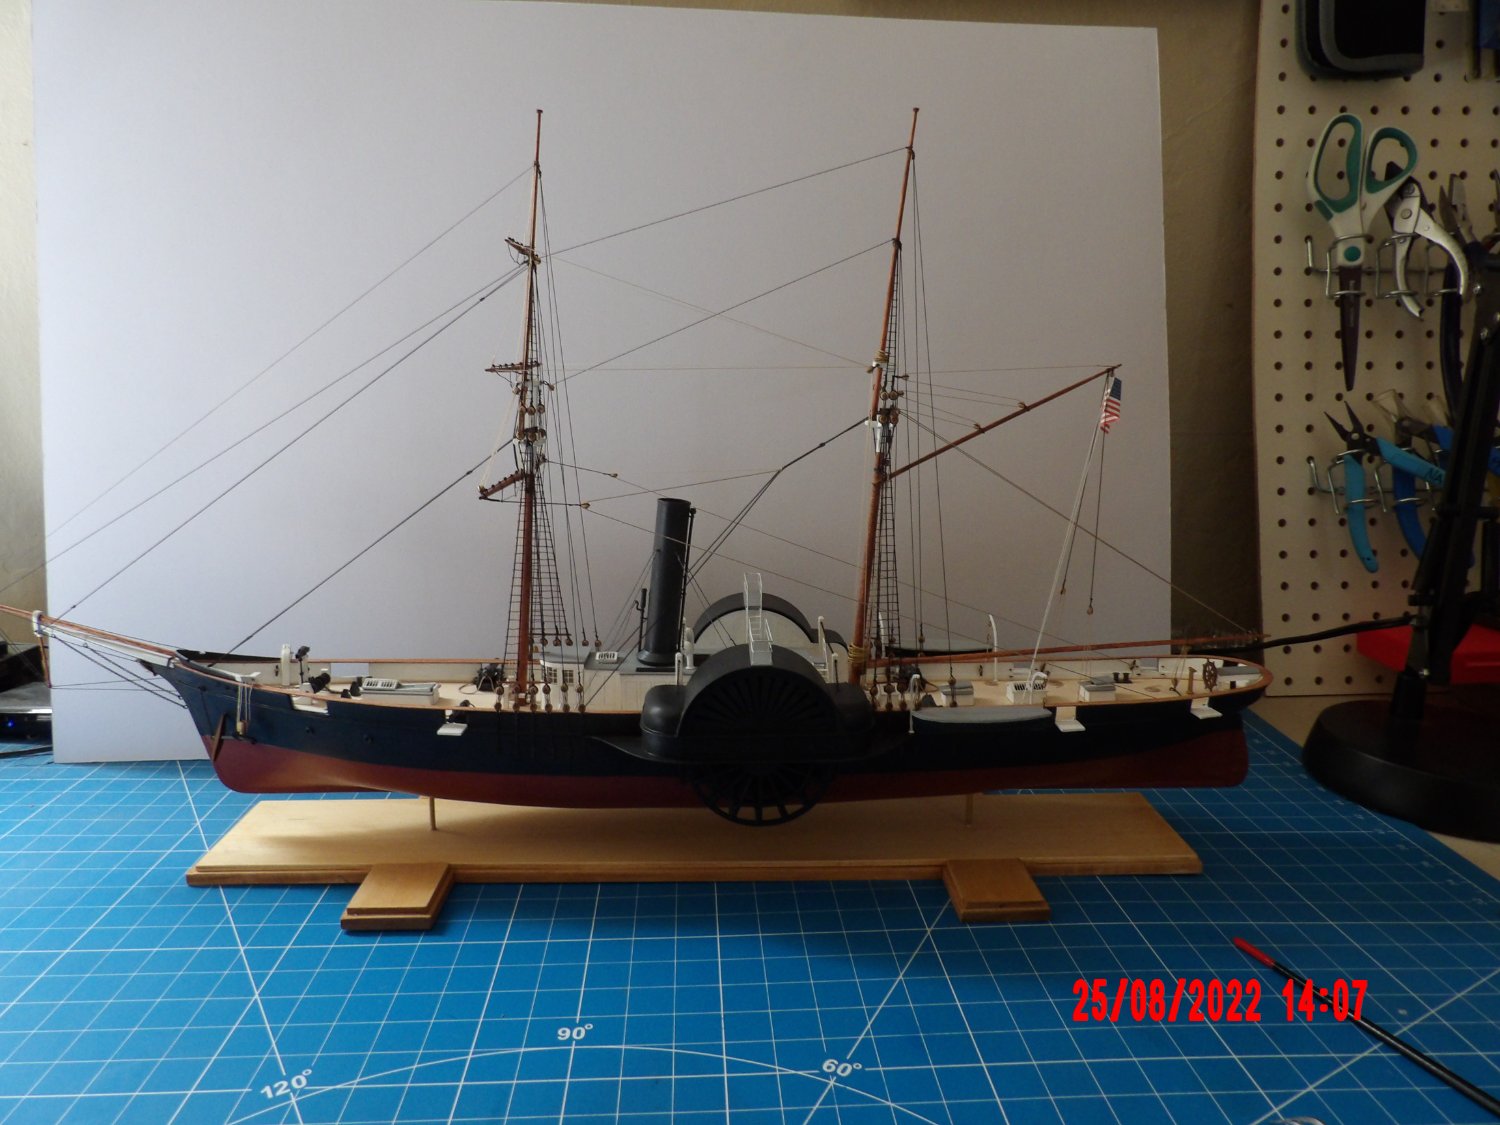
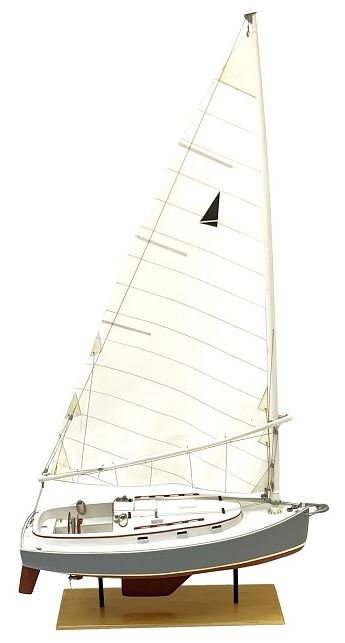
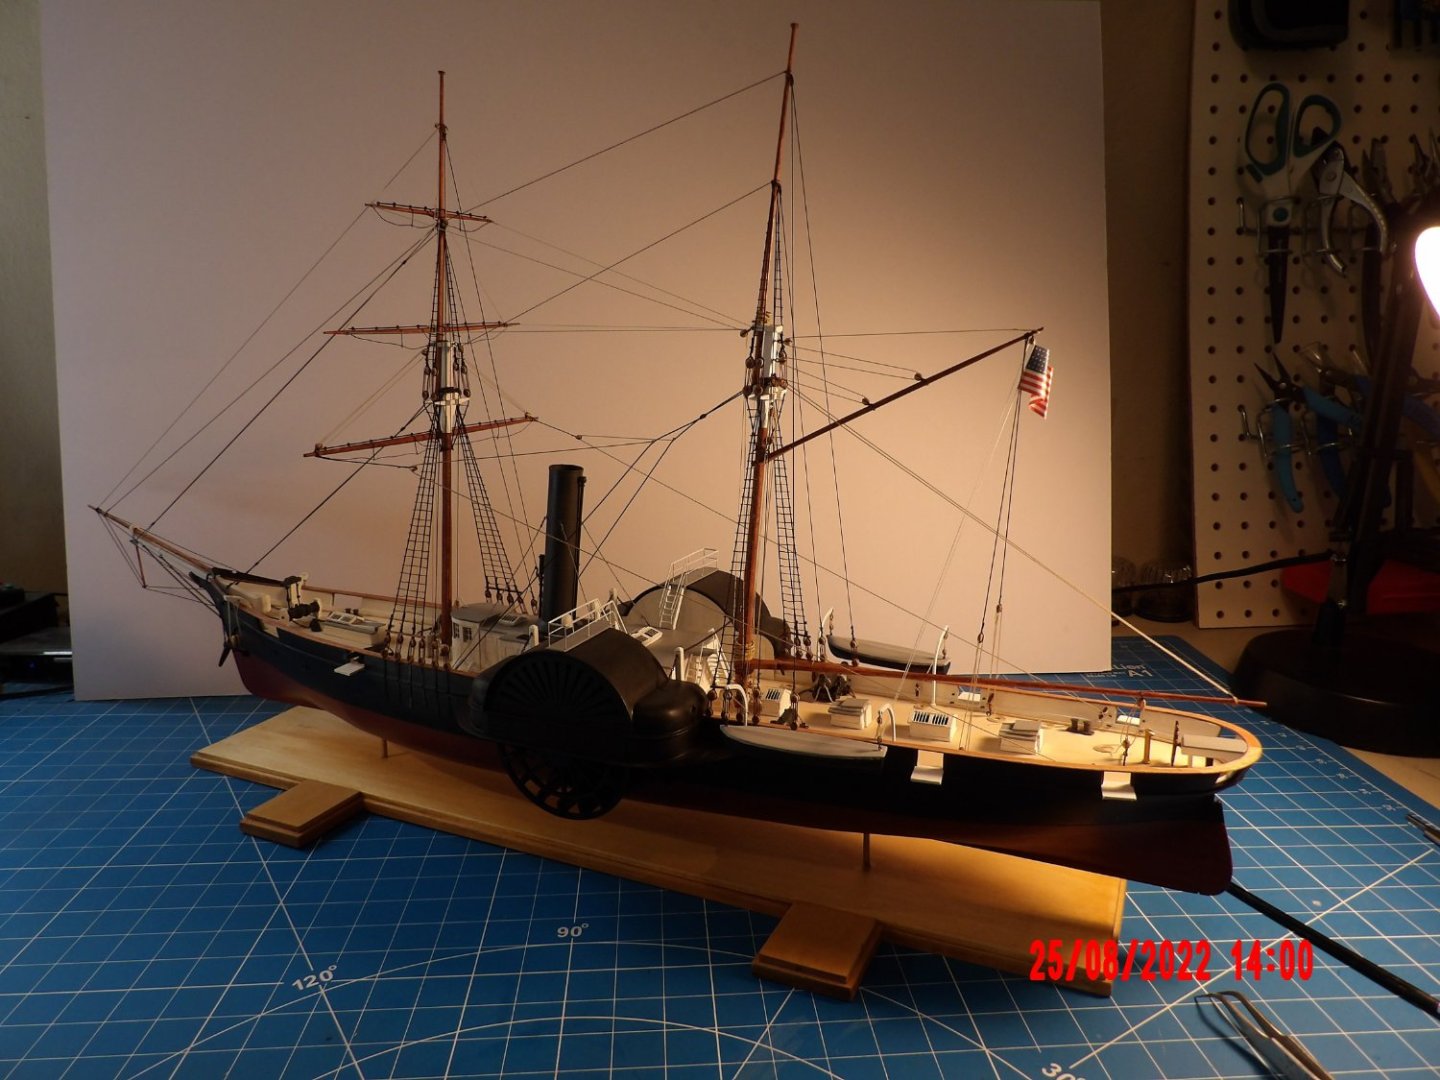
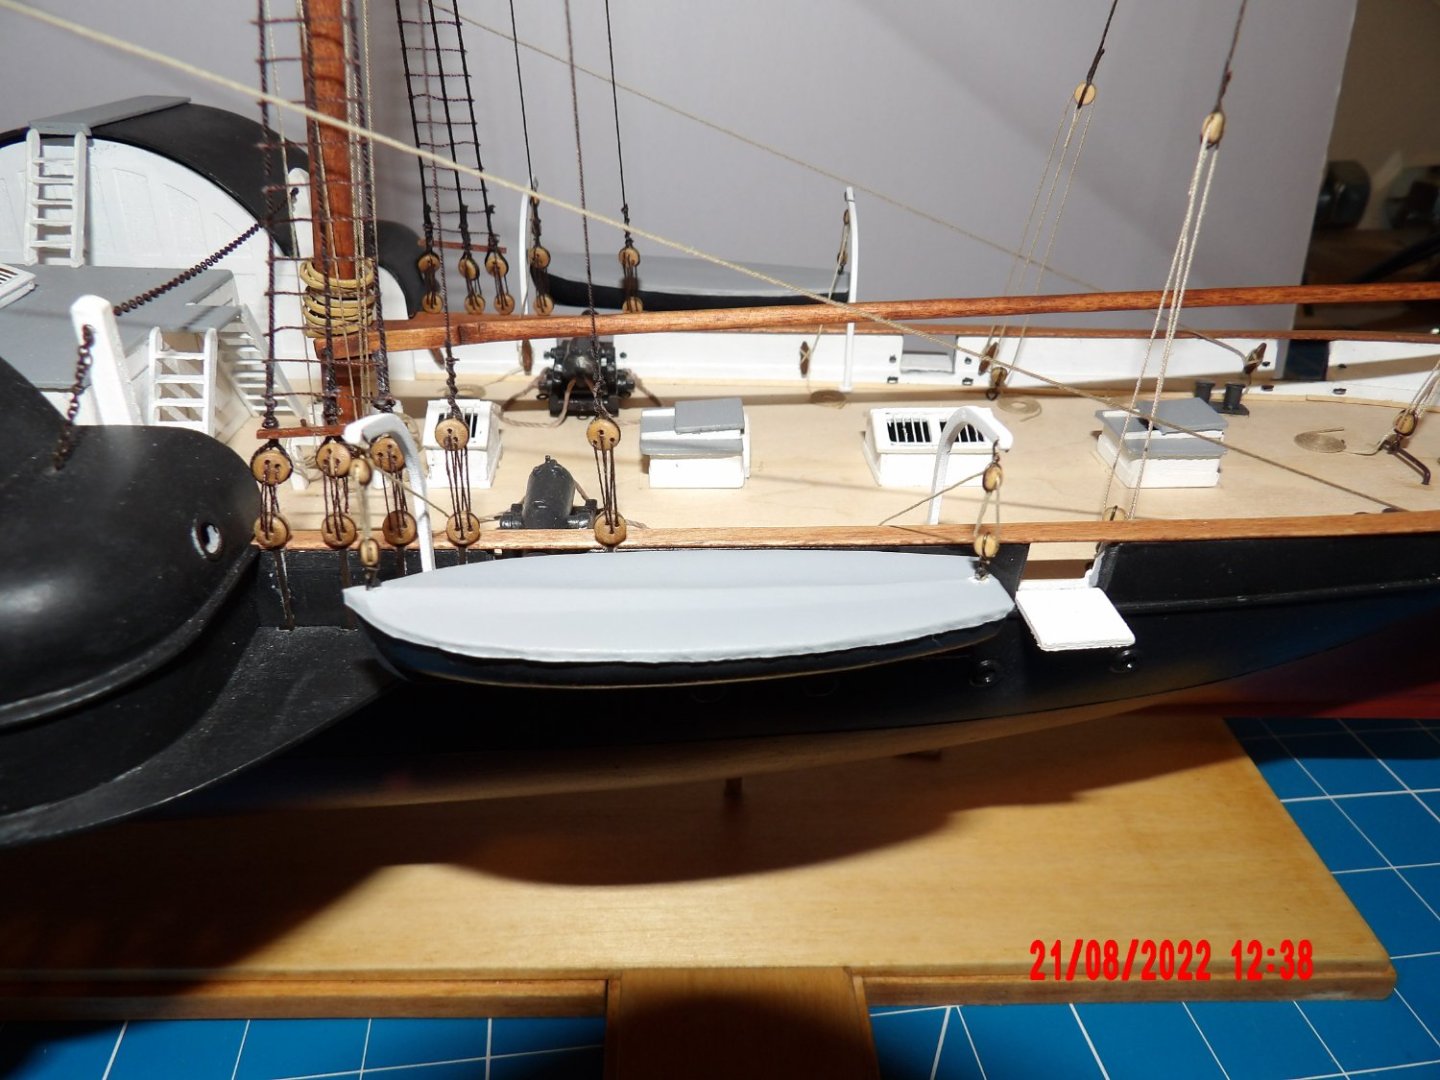
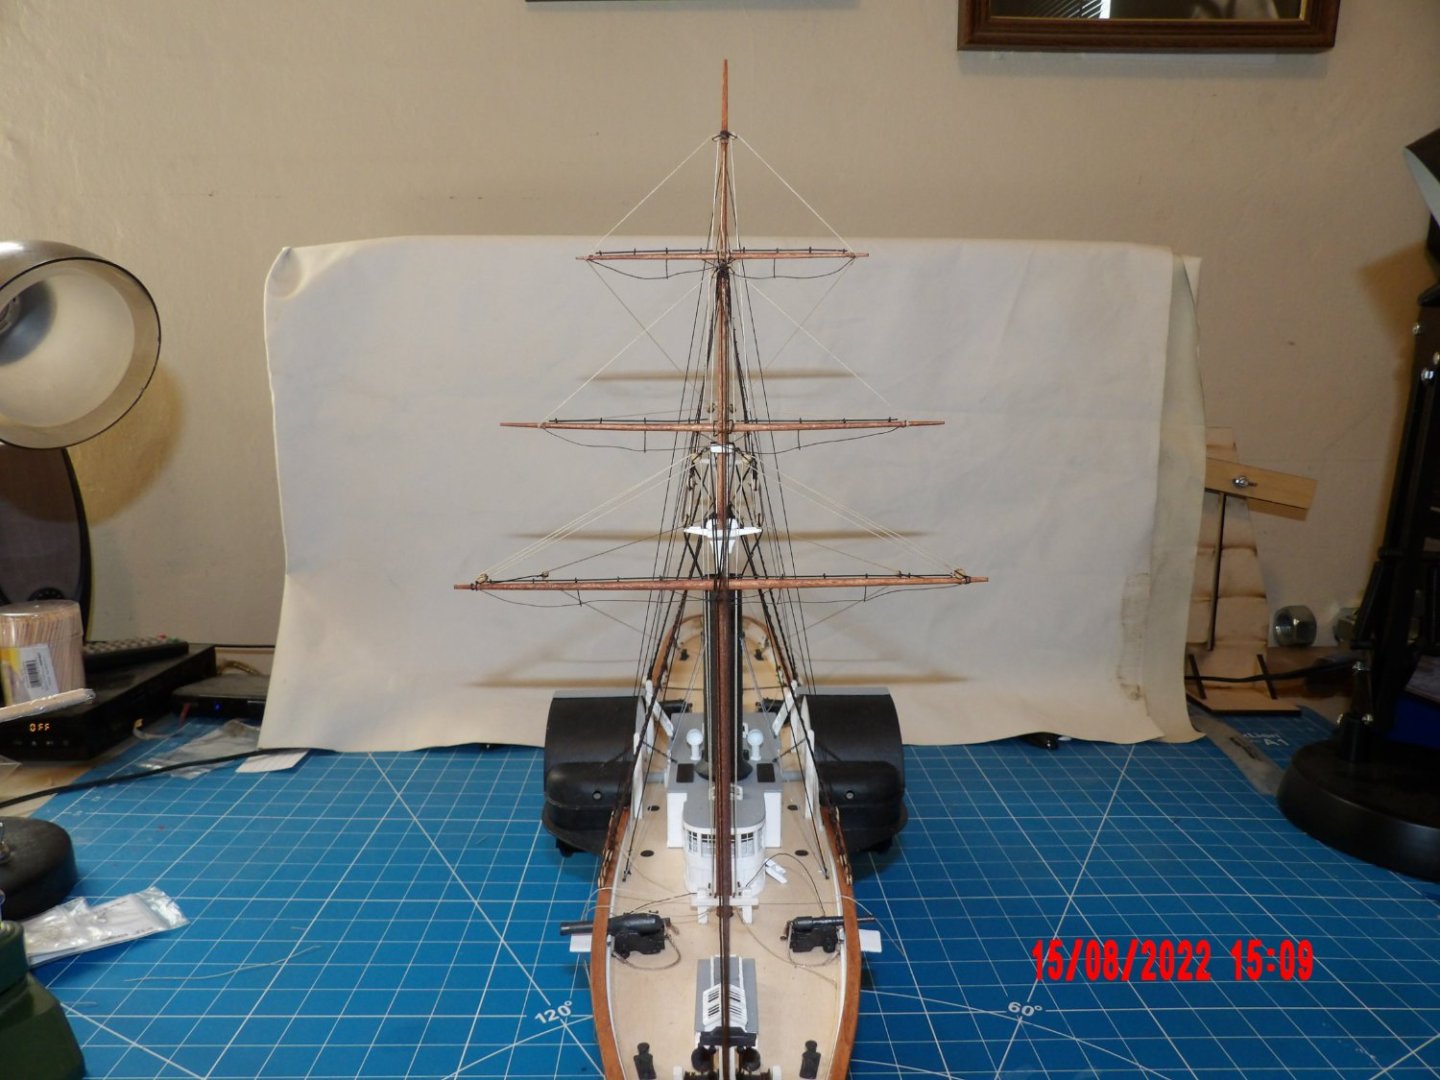
Installed the ensign and railings. Calling it done. Thanks to all commenters for participating, and for advice. Thanks to David Antscherl for the kit design, and for the excellent instruction I have received throughout the series. I have learned much through building these models. I'm a little sad now it's over. . .


- 146 replies
-
- 10
-
-

-
- Harriet Lane
- Model Shipways
- (and 1 more)
-
Thanks Ian, no apologies necessary. I did wonder a bit about this, but it is as shown in the manual. My bends may be a touch more severe, but the bends are as pictured. . . I will keep this in mind in the future as suggested. In any case, the flexibility of this arrangement kept me from disaster several times! b
- 146 replies
-
- 1
-
-
- Harriet Lane
- Model Shipways
- (and 1 more)
-
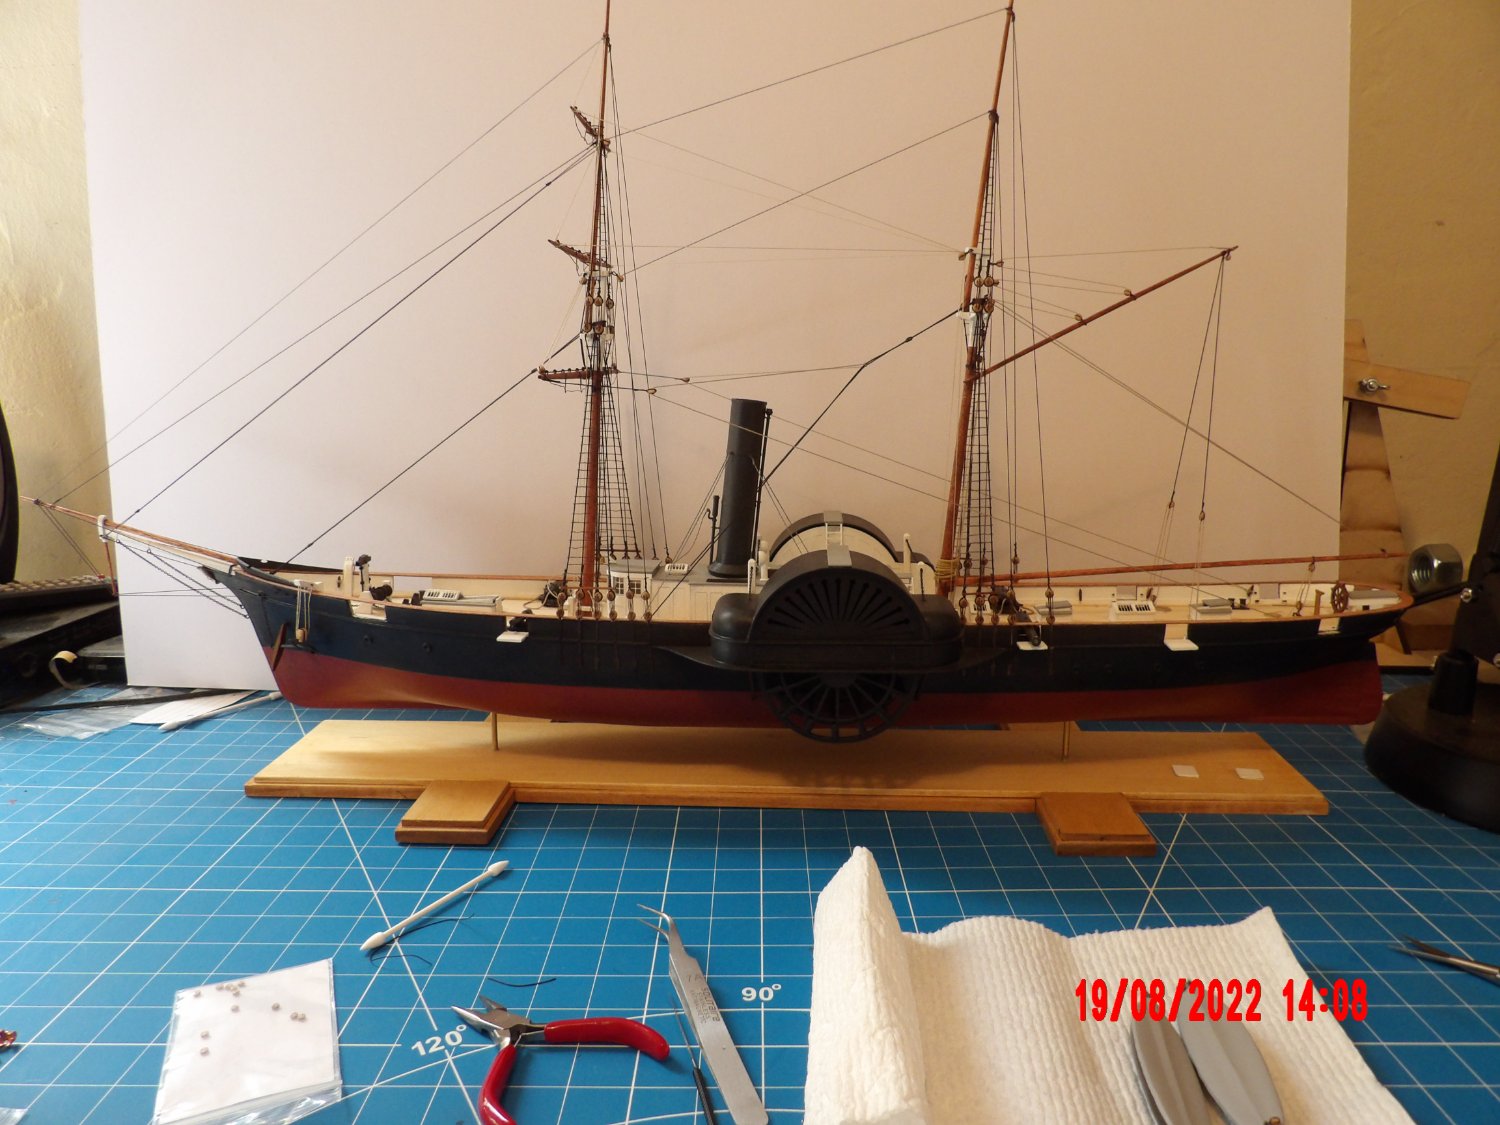
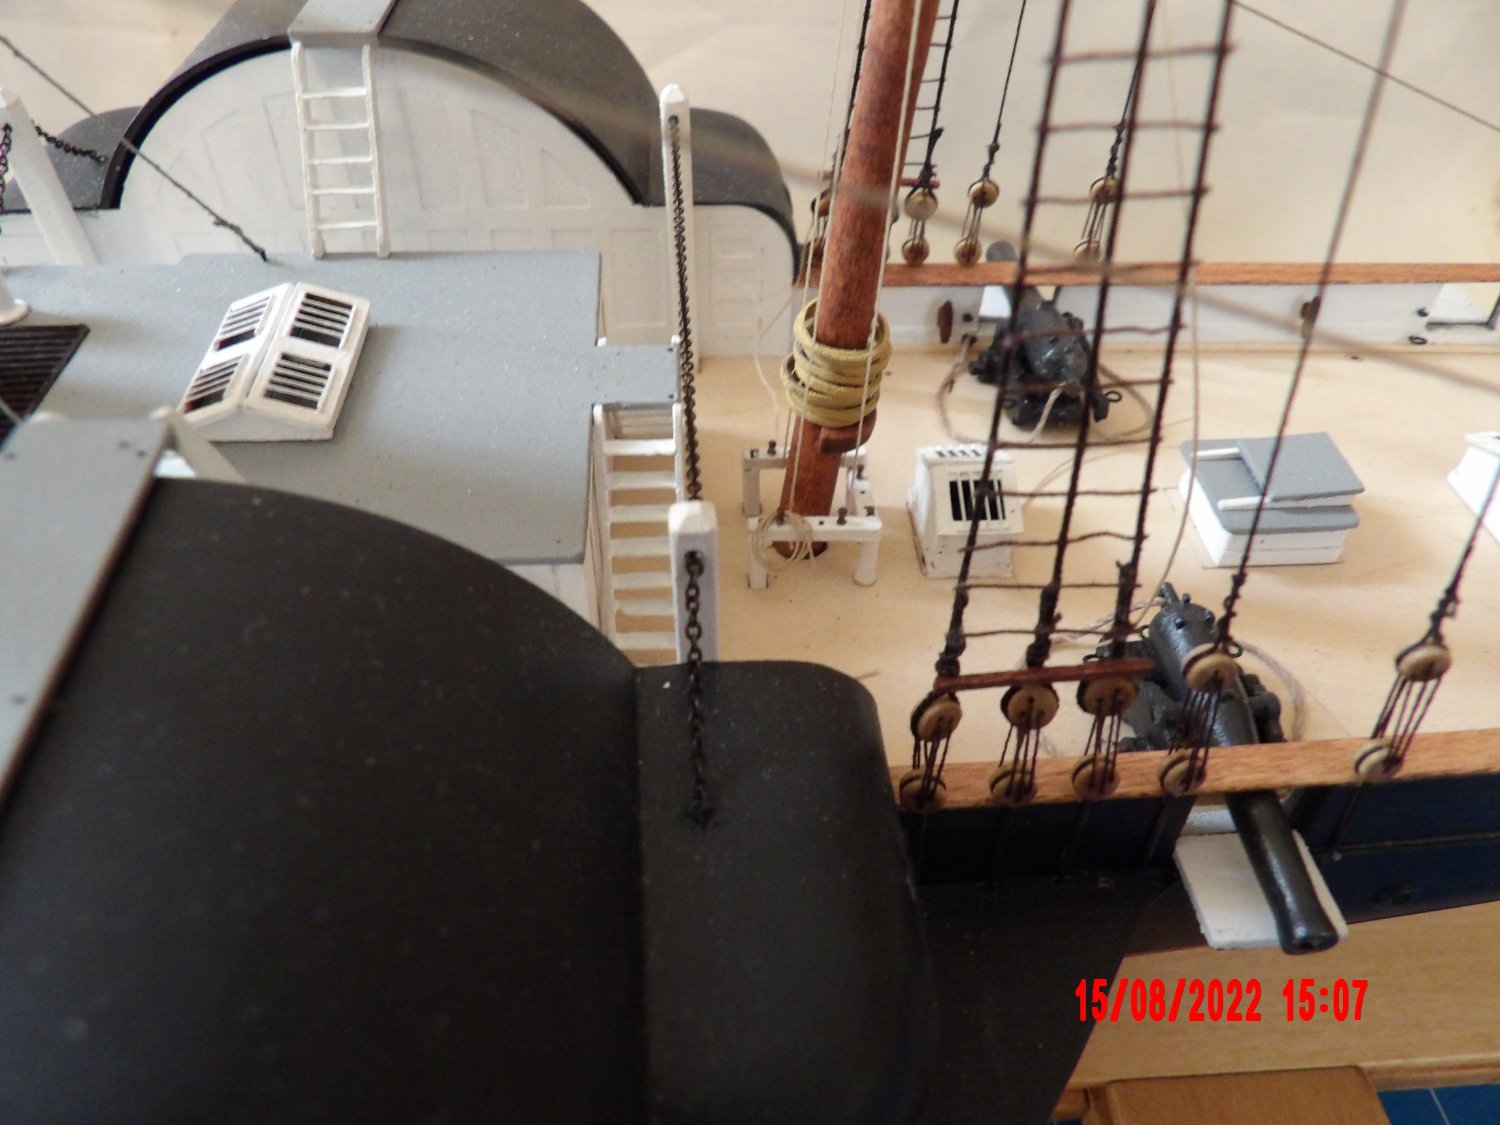
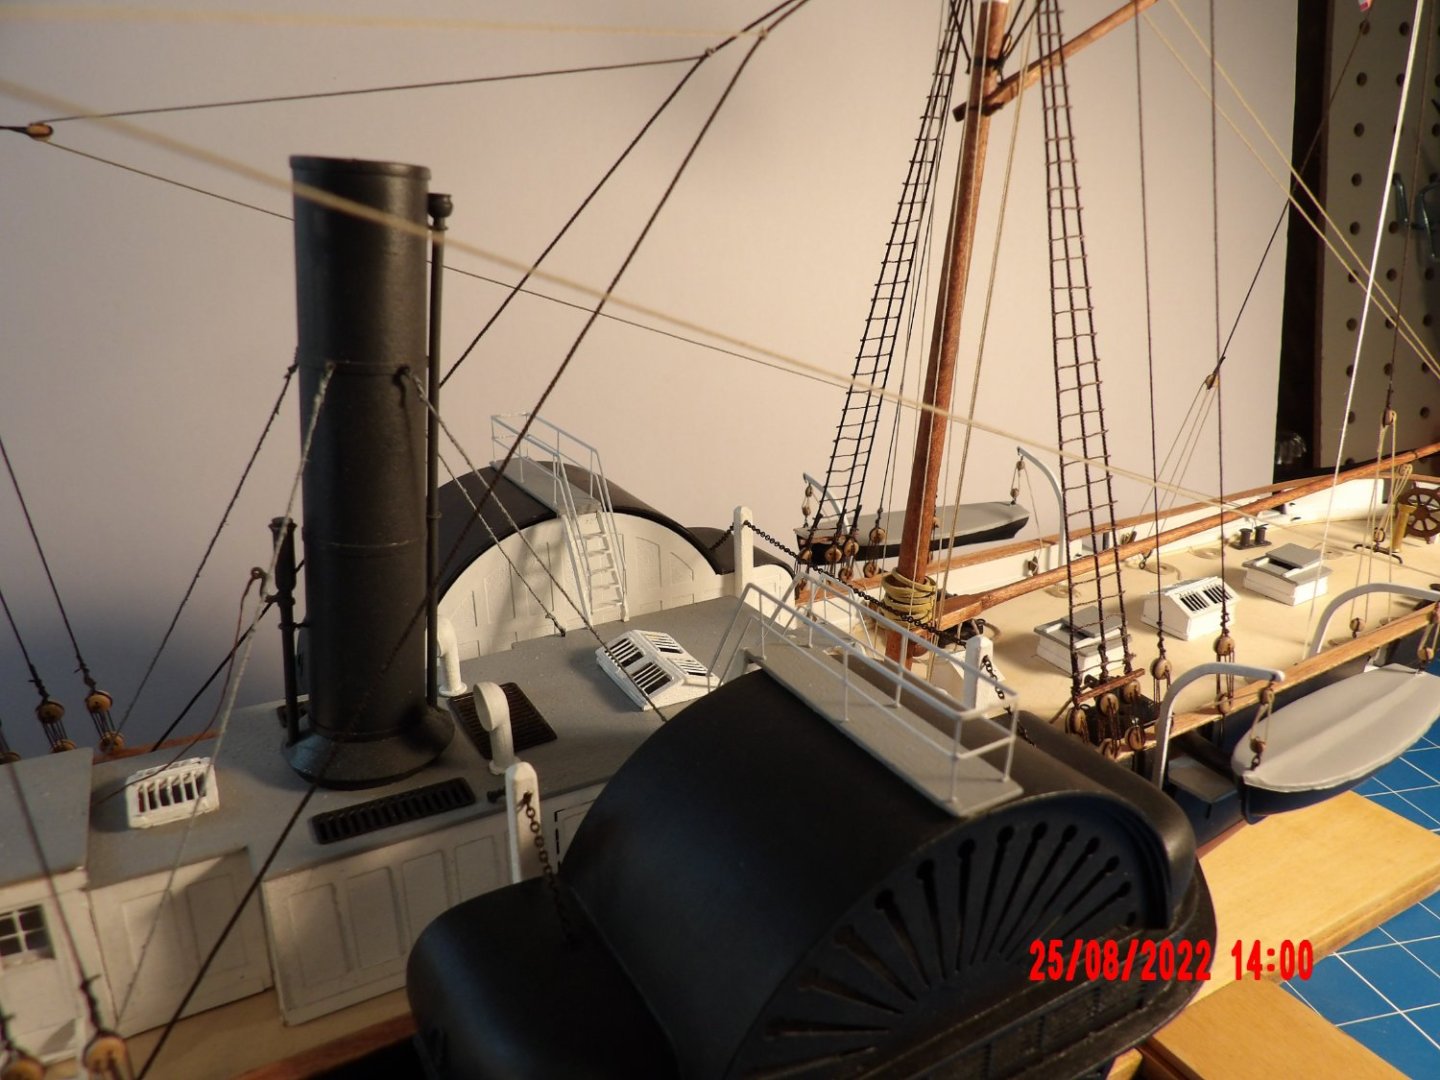
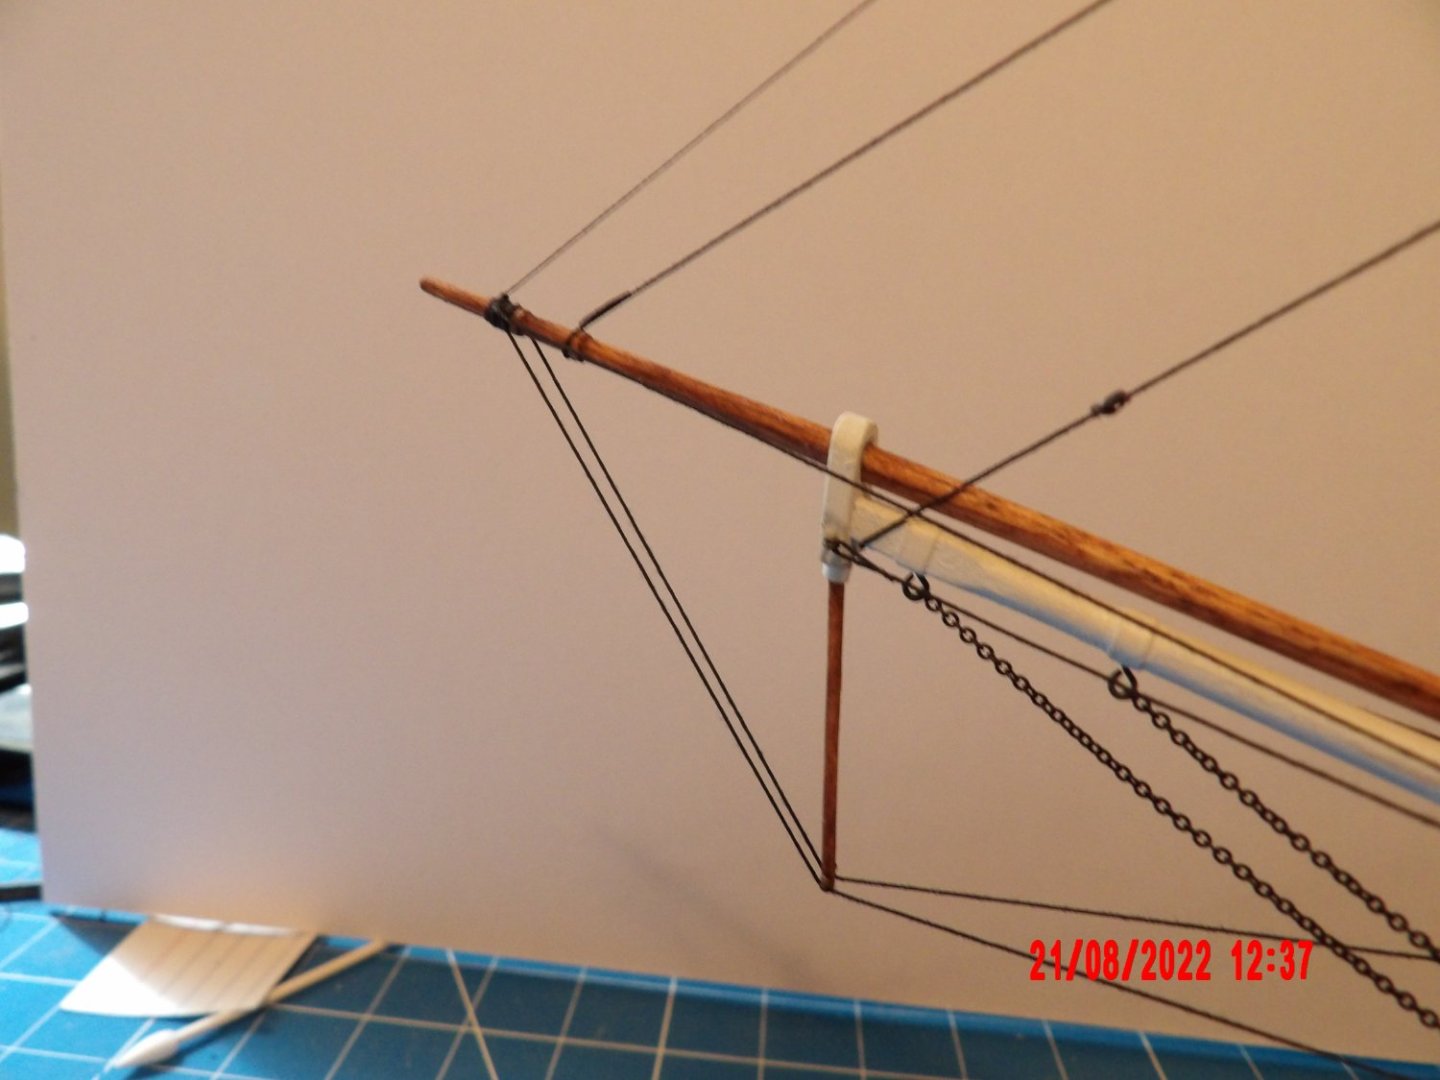
Hung and rigged the boats. I had a bear of a time belaying the lines, the forward ones especially, and the boats slipped downward a bit. The manual warns of obscuring the gun ports, but that is what I ended up with- if the guns were fired, it would blow the bottoms off the boats! Would still have happened if tightened up to the point where the blocks touched each other. . . I'm going to leave them alone. During this operation I got the magnifying headset I've been using caught in the main mast backstays- almost a disaster but I was able to get it free without breaking the lines or worse. This is not the first time that the headset has caused me problems. It's fine for working with small items on the tabletop, but not for rigging! I will be looking for an alternative to use for the next model. The martingale stays at the bowsprit should have been with one attachment at the outer stop, and for the other side, at the inner stop. But it does not look bad to me, and I will not change it. I broke the striker three times already! There is a paper band added below the cap for added strength, and it looks like I still need to paint it. Another instance where I seemed not to have absorbed the instructions- I added ratlines to the mainmast upper shrouds. The manual clearly states that they are not required. Also, I had forgot to add the mast hoops to the upper mast, so I cut them, spread them apart and inserted, then used a dot of CA and closed using tweezers. I rotated them so that the cuts would not appear all in a line. These are not shown installed in any of the pictures in the manual, including the picture of the finished model on the cover, but I cannot see that they could go in any other location. I add these True Confessions as an aid to future builders of this model. Down to a couple of items, then touchup. I still haven't selected the next project. I've looked at USS Constitution and Rattlesnake, but am not sure that my skills are up to tackling either of those models. Overall, I'm very happy with the results, and can't quite believe I have pulled this one off (crossed fingers for the railings).
- 146 replies
-
- 8
-
-
- Harriet Lane
- Model Shipways
- (and 1 more)
-
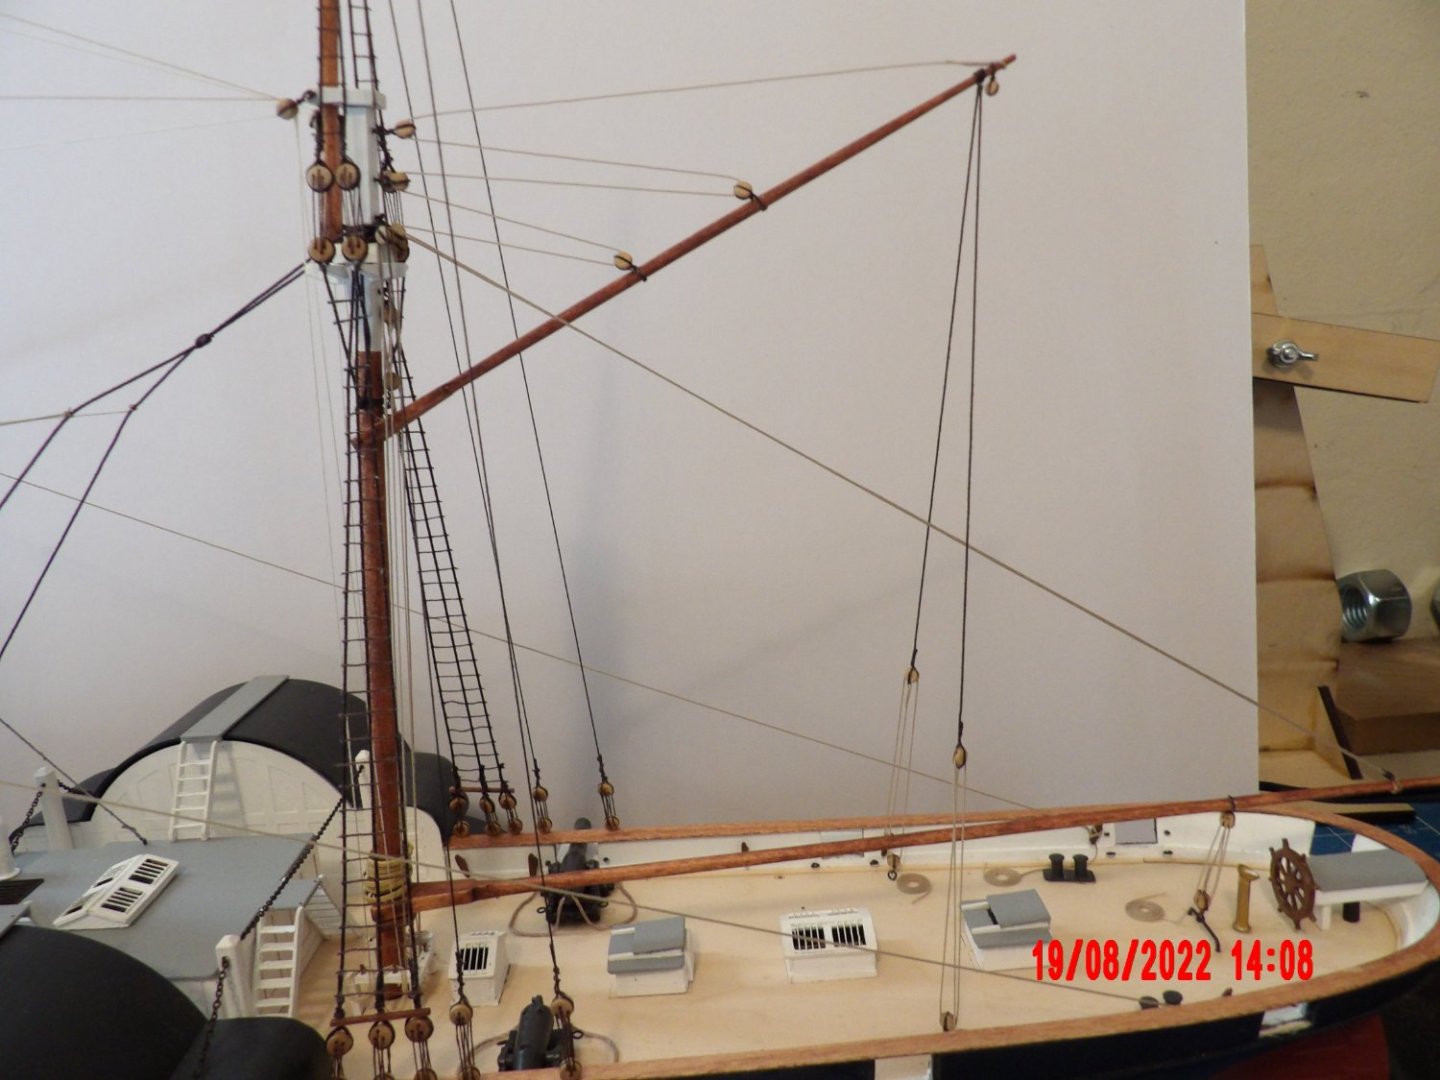
Installed the gaff. Things are getting quite tricky. . . not rushing to the finish, for once.

- 146 replies
-
- 5
-
-
- Harriet Lane
- Model Shipways
- (and 1 more)
-
Installed the boom. Trickier than I would have thought. I passed on adding the "super detail" of a block and tackle for the falls, I did most of the other such details, but am having trouble working within the confines of the lines already installed. Next time. . . Knocked off the rear gun port lids, no biggie. I'm on the last couple pages of the manual- guess I'm almost done. Looking around for a suitable, low-cost brake to use in forming the PE railings. Also thinking about my next model. If I do a kit, and for cost related reasons I may make that choice, the USS Constitution is tempting. . .

- 146 replies
-
- 5
-
-
- Harriet Lane
- Model Shipways
- (and 1 more)
-
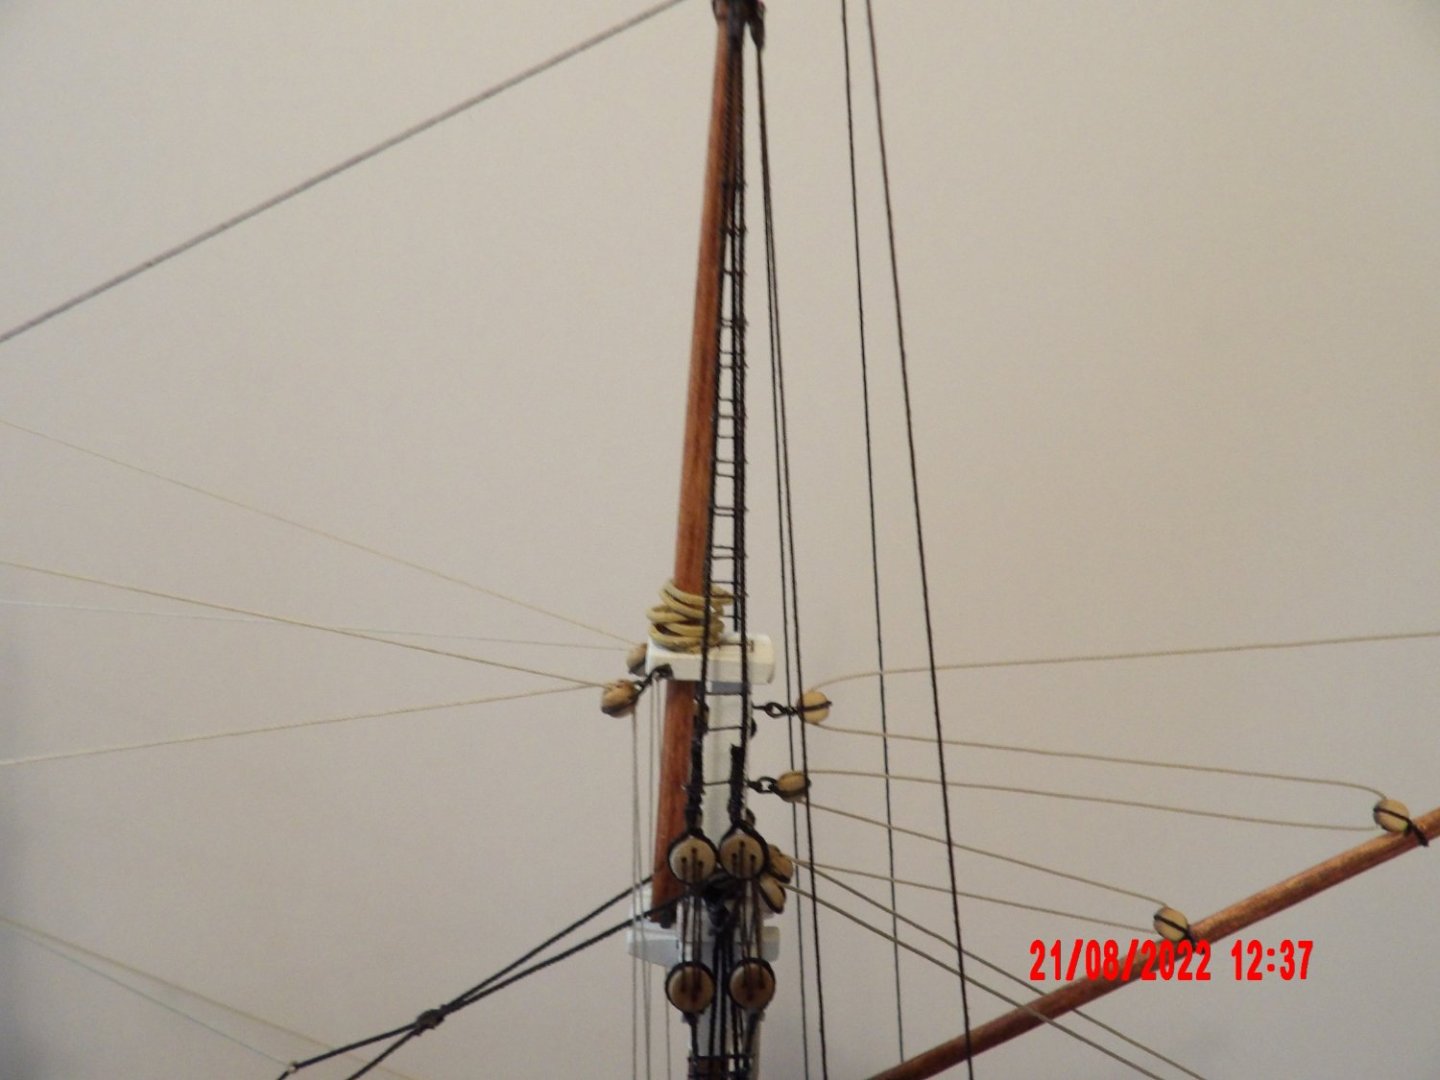
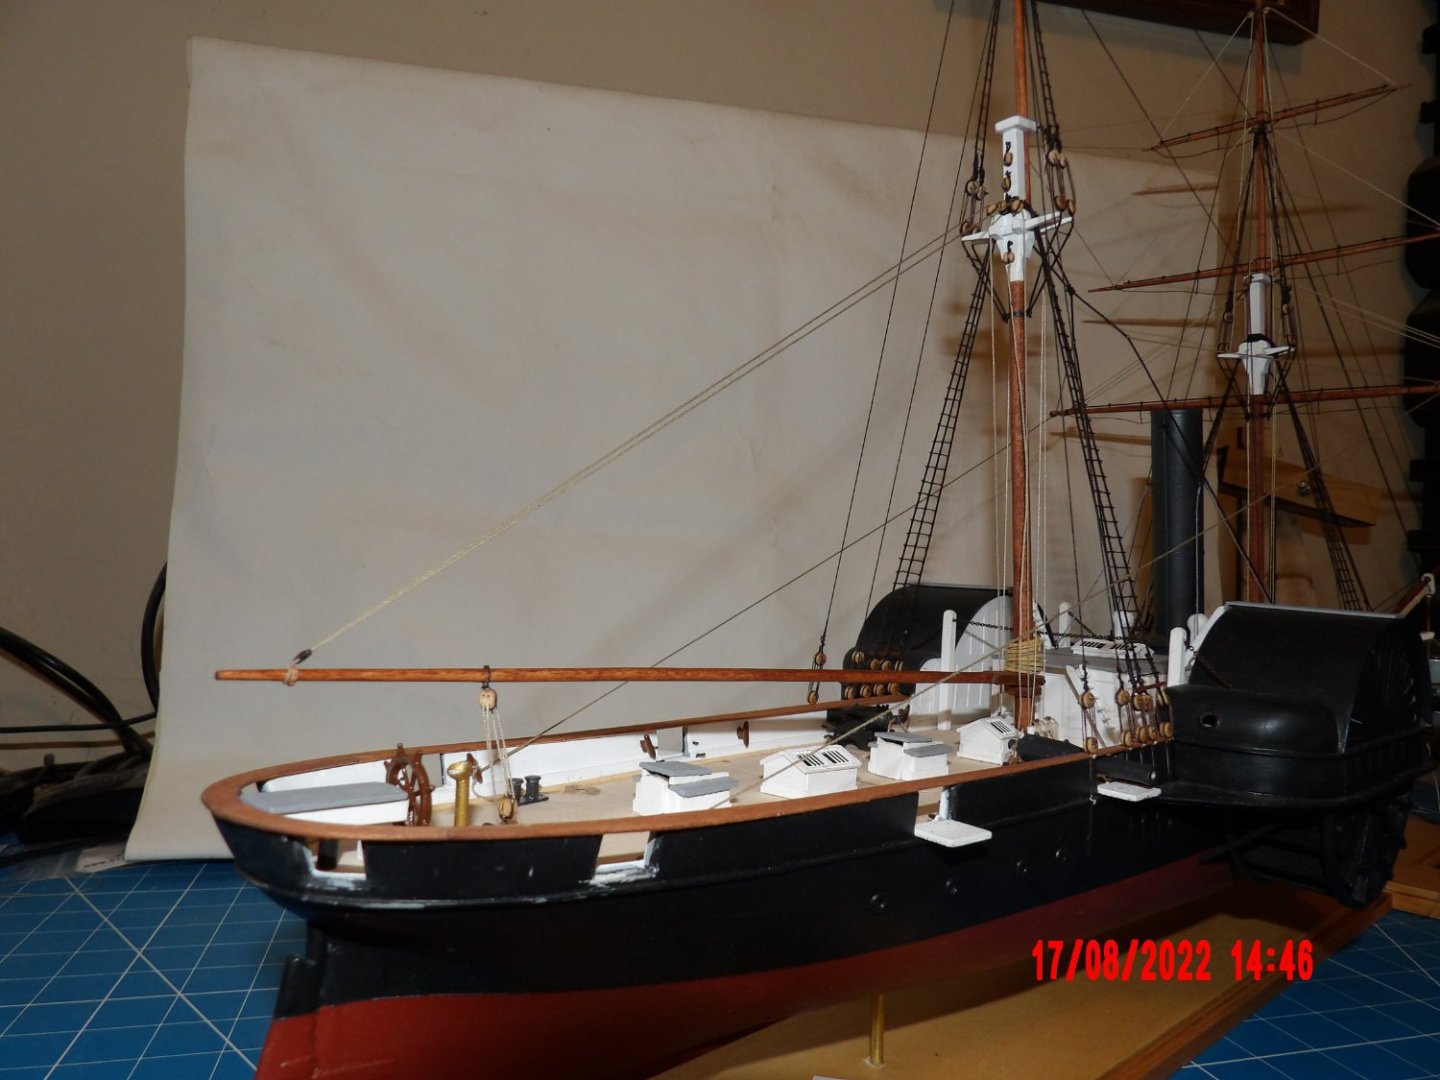
All three yards installed and trimmed. As some of you watching may have noticed, I secured the lines as each yard was added, going against the instructions, mentioned in several places. I did not do this intentionally, I can read- I suppose I was excited and wanted to see how it would look, and because the sight of them hanging ajar bothered me, and then I conveniently forgot. Doing this did cause problems, which fortunately I was able to overcome at the expense of time and a non-stop stream of expletives which I'm sure the cat was laughing at, in the next room. I also had two major unrelated accidents that required replacement of stays. However, in the end I was able to recover. My first rope coil for belaying at the bitts. This took a while, as water alone was not sufficient to relax the line sufficiently. I will be refining my methods and hopefully the rest will be better,


- 146 replies
-
- 5
-
-
- Harriet Lane
- Model Shipways
- (and 1 more)
-
Ian, yes, the main yard is held in place with a piece of wire as per the instructions. Thanks for posting the examples. Tom (Ron?), thanks for the book information, it looks very well done. I will get a copy. I have been lent a first edition (1923) copy of the "Ship Model Builders Assistant," by Davis, which also has good drawings, but rather small. Seems a good reference book, but I have not really incorporated the methods given into this model thus far. I'll be looking for a copy of that as well. Your own work is stunning. . . I have begun hanging the upper yard, it too is attached with wire, but does include a simplified parral. I have struggled to do a neat job on this rigging even though it is simplified (this kit is part of an instructional series), so I may stick to doing things as presented for the remainder of this project. But you guys, and David, have lit a new fire in me- I see the opportunities for improvement, and research is enjoyable to me (this is a lot more interesting than building codes and product research, and I enjoyed that aspect of my working life). I may do another kit before venturing into scratch building, if I do then I will certainly look to learn and incorporate more authentic methods into the work. If I scratch-build the next one, why then I'll be in the thick of it! Thank you all for your interest. I look forward to moving to the next level. Sincerely, Bob

- 146 replies
-
- 5
-
-
- Harriet Lane
- Model Shipways
- (and 1 more)
-
Thanks Ian. Truss/truss pendants not mentioned in the instructions, some of the rigging is indicated to be simplified- not sure what trusses are. . .
- 146 replies
-
- 1
-
-
- Harriet Lane
- Model Shipways
- (and 1 more)