bobandlucy
-
Posts
512 -
Joined
-
Last visited
Content Type
Profiles
Forums
Gallery
Events
Everything posted by bobandlucy
-
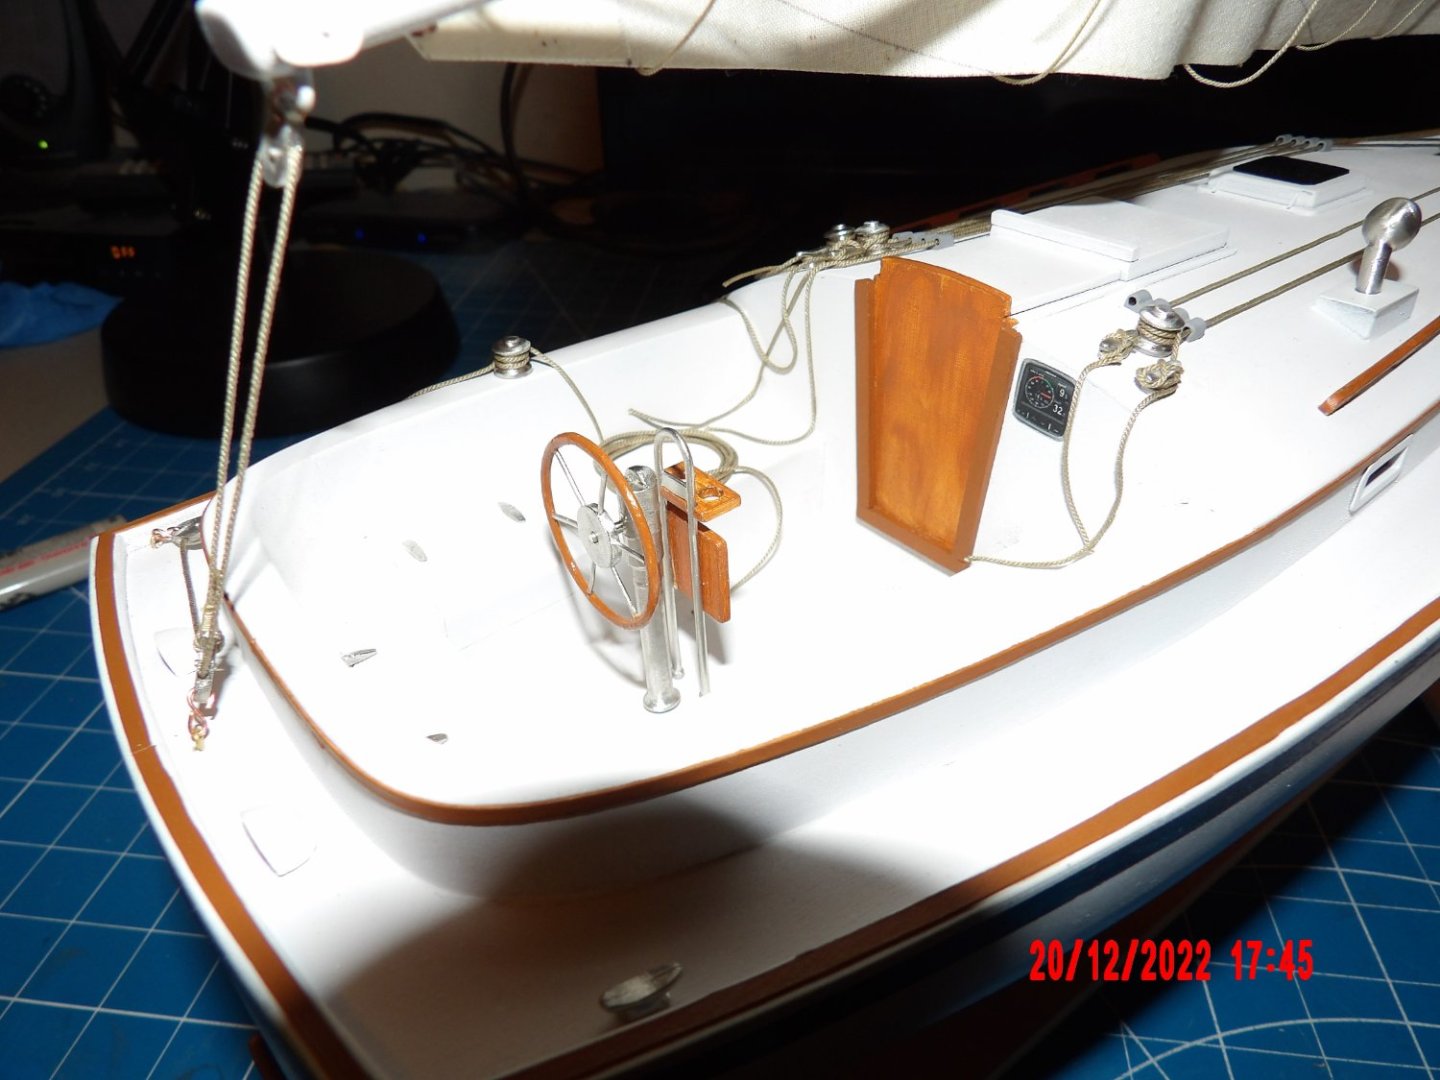
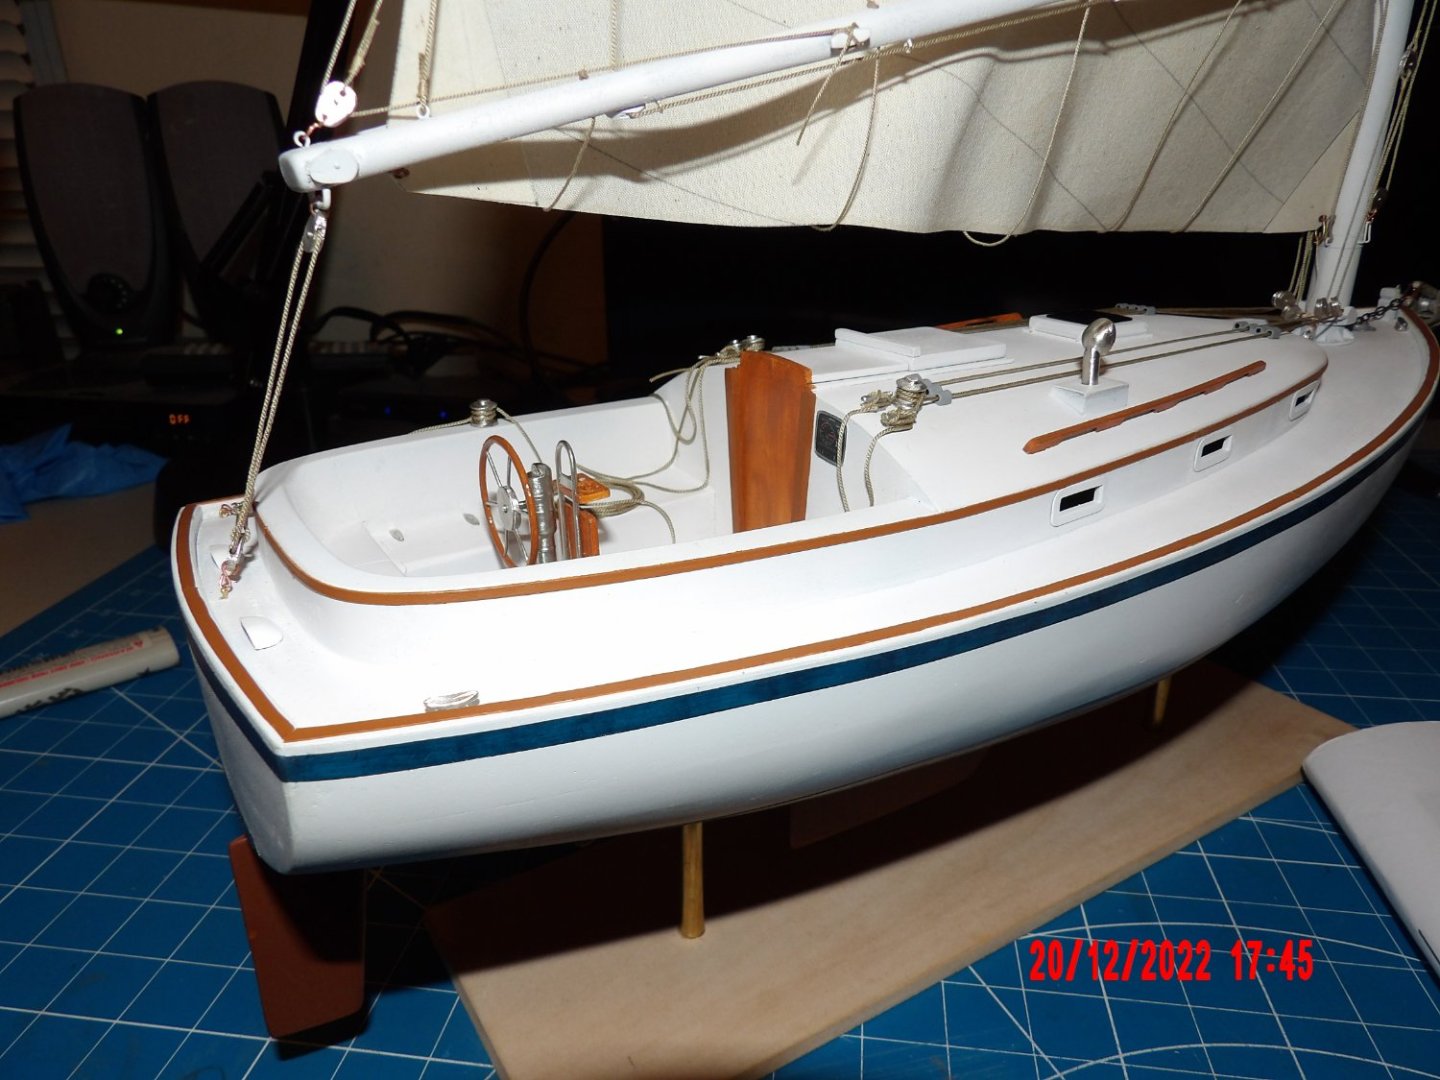
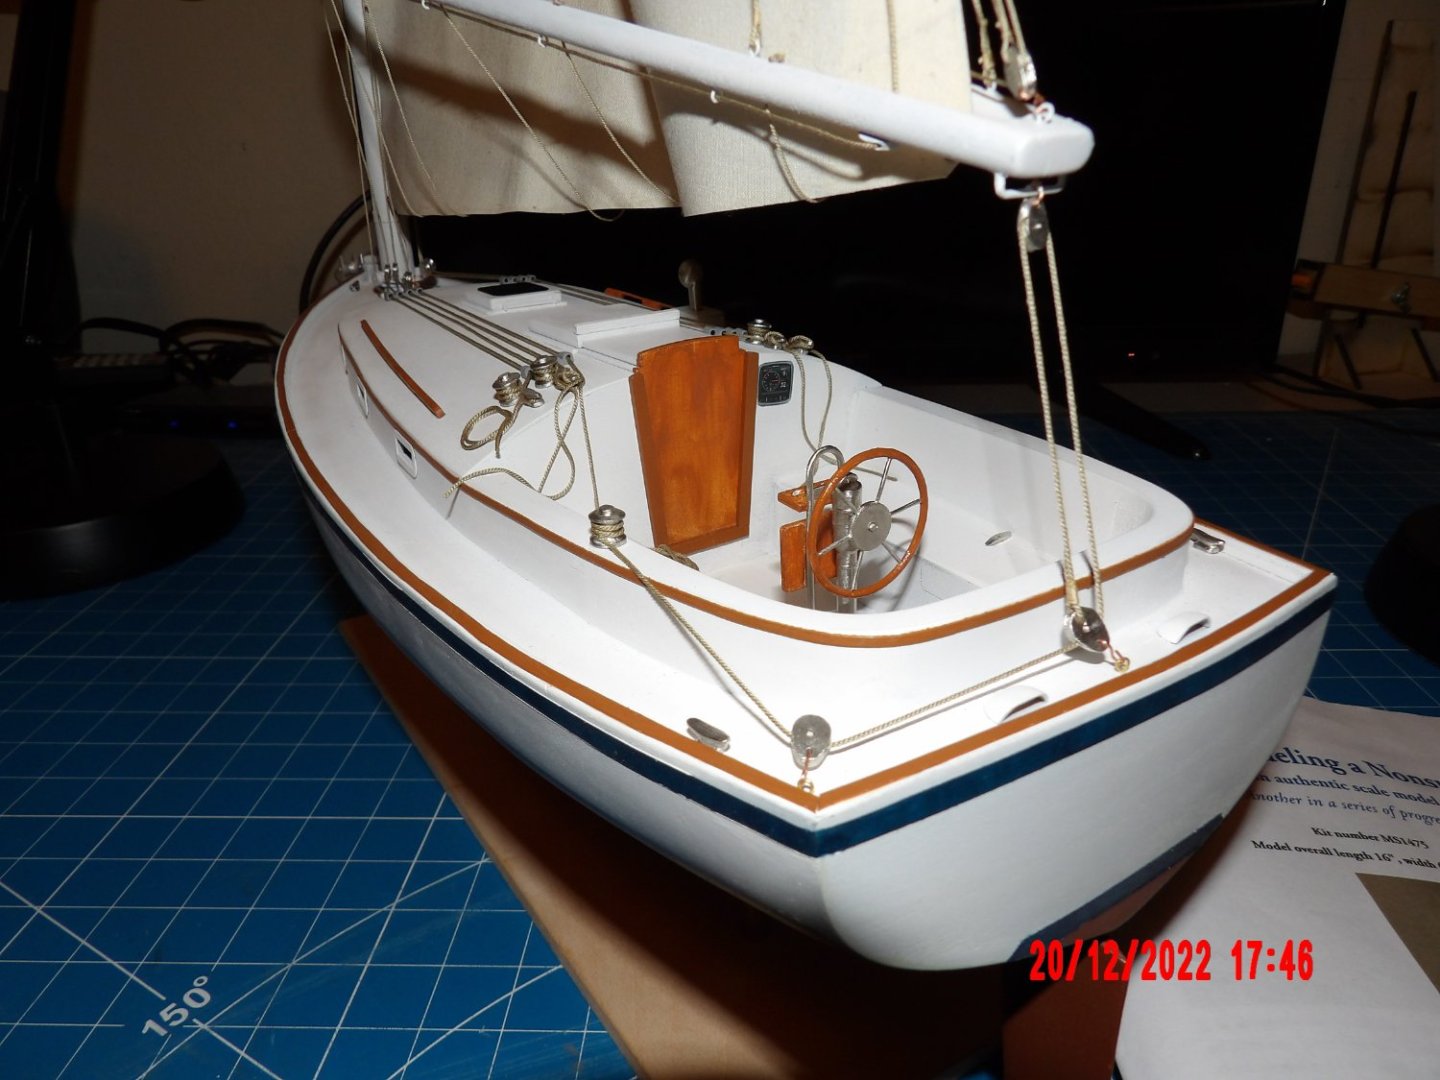
 I've decided against adding the safety railings and bimini to the model at this point in time. I may do so one day. . . I decided that the bimini would obscure the view of the cabin roof hardware, a view I really like. Also, both the bimini and the railings would have to be really well done in order to not clash with the natural lines of the model. I'll get there someday, but am not there now. I do have all the materials now and will work on learning to solder well enough to please me, and over time purchase the additional tools I think I need to build required jigs accurately. So, I'm calling it done. I'm pretty happy with this one, and it has been a great deal of fun to build. In some ways, it is my best effort thus far. The sail could be improved and the mast cap is askew (I'd re-set the cap, but had used epoxy, and am afraid I'd cause damage in doing that. But I think I did a good job on the hull, deck, cabin and cockpit. The main flaw is that the forward port on the cabin is set higher on the wall than the side ports. I recommend this model to anyone interested in these types of boats. It's fun to build a vessel that is still in use today. Bob
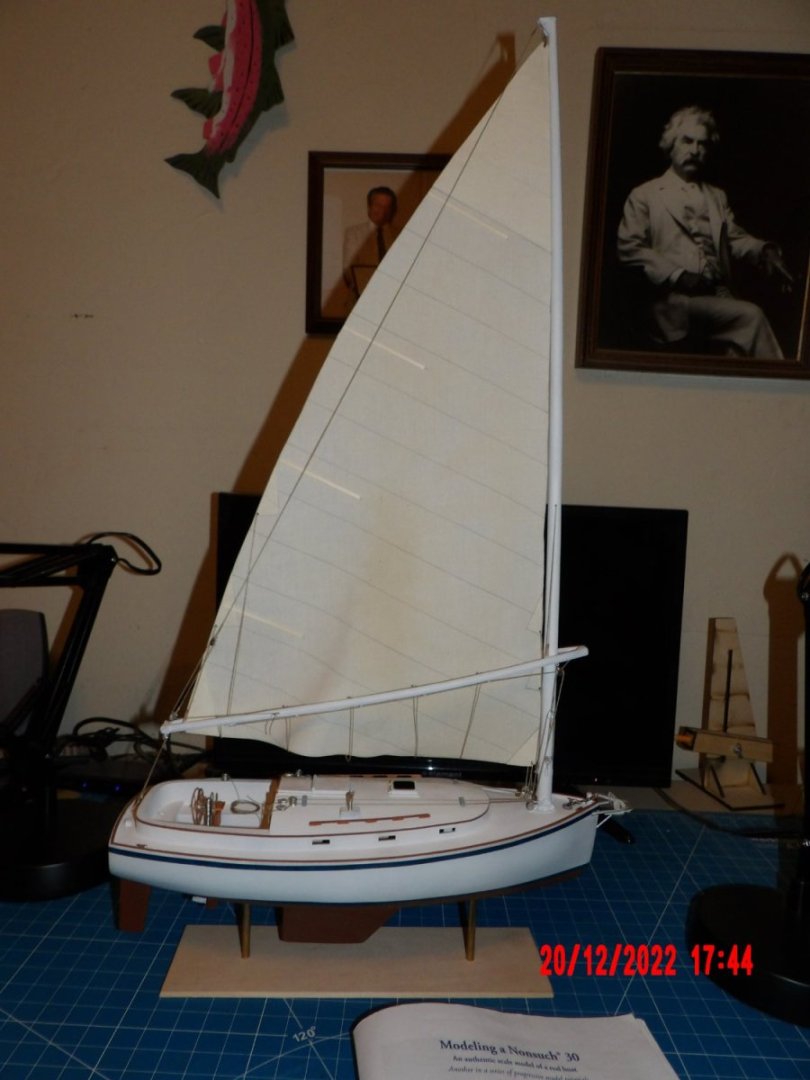

- 111 replies
-
- 16
-

-

-
- Nonsuch 30
- Model Shipways
- (and 1 more)
-
Thank you Richard. after I read this comment I looked at the model, and the rope is not wrapped around the winch yet at all, nor the cleat. It just snakes between the two and I used a clip to weigh it down. But I could have very well made the mistake you pointed out, and now hopefully never will! Bob
- 111 replies
-
- 3
-
-
- Nonsuch 30
- Model Shipways
- (and 1 more)
-
Started rigging. Very enjoyable. I replaced the rope with product from Syren. I was late in ordering, because I was going to use some Syren rope I already had, but it was slightly undersized. No problem, the new rope showed up 3 or 4 days after ordering- from across the country! I'll say it again, what outstanding service! And there is simply no comparison to be made between the ME supplied "Jewelry Thread" and the Syren rope.

- 111 replies
-
- 8
-
-
-
- Nonsuch 30
- Model Shipways
- (and 1 more)
-
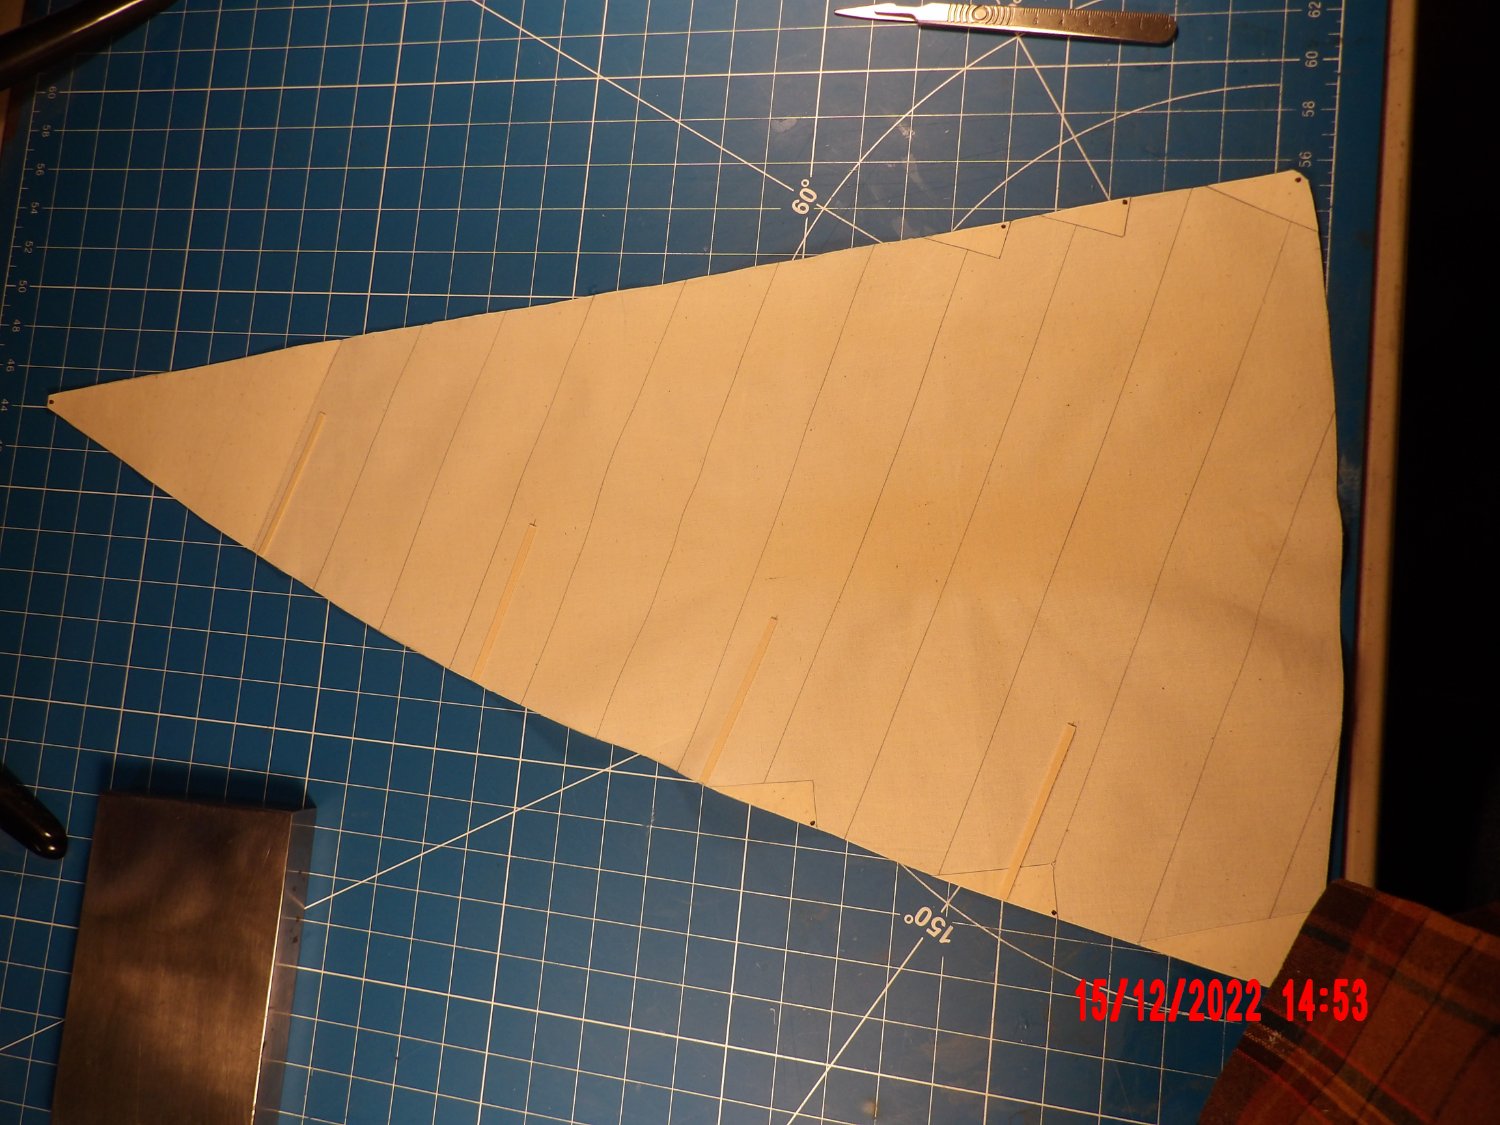
I made the sail. Luckily, the kit furnished enough material for two, because I botched the first. I ironed the material before and after cutting, but could not get it to lie flat. And it appears that I scorched it a bit the second time, at the lower center. The iron and I have never been friends; it's come out of the closet only 3 or 4 times in 25 years. Well, it will have to do:

- 111 replies
-
- 6
-
-
- Nonsuch 30
- Model Shipways
- (and 1 more)
-
David, thank you. I'm thinking of trying the plastic insulating sheeting used over residential windows to create an air gap. They are meant for heat shrinking, but I would forgo that. The downside may be shrinkage over time from ambient temperatures- it gets hot here. . . but I have not noticed that occurring when I've used the stuff in the past. Maybe it can be pre-shrunk. I think I may already have some, if I can find it! On Twain, I don't throw out the baby with the bathwater! bob
- 111 replies
-
- 2
-
-
- Nonsuch 30
- Model Shipways
- (and 1 more)
-
Thanks for the suggestion! I remember this stuff being used on model airplanes (though I never got to that stage). Adhered with "dope." How would you deal with the clear plastic windows? And yes, I'm a lifelong Twainiac! Bob
- 111 replies
-
- 1
-
-
- Nonsuch 30
- Model Shipways
- (and 1 more)
-
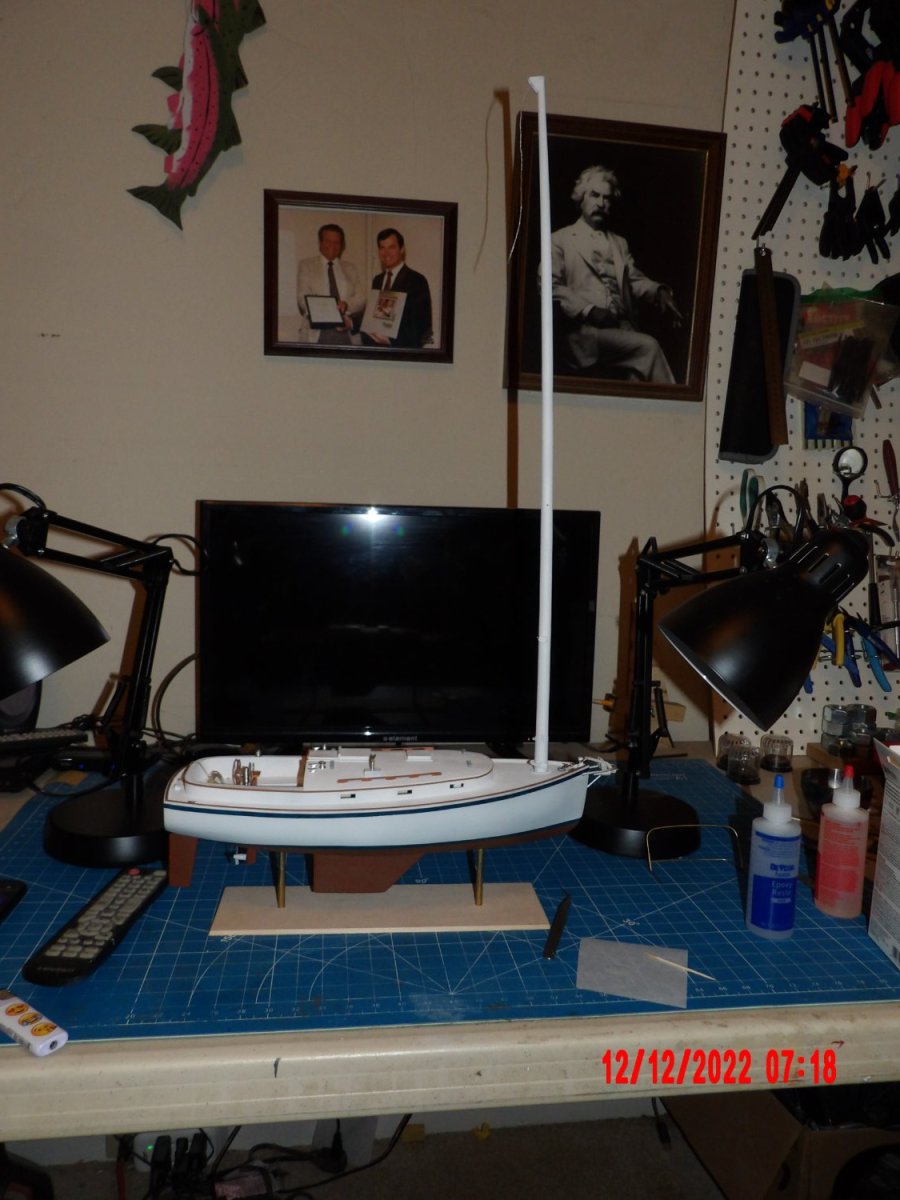
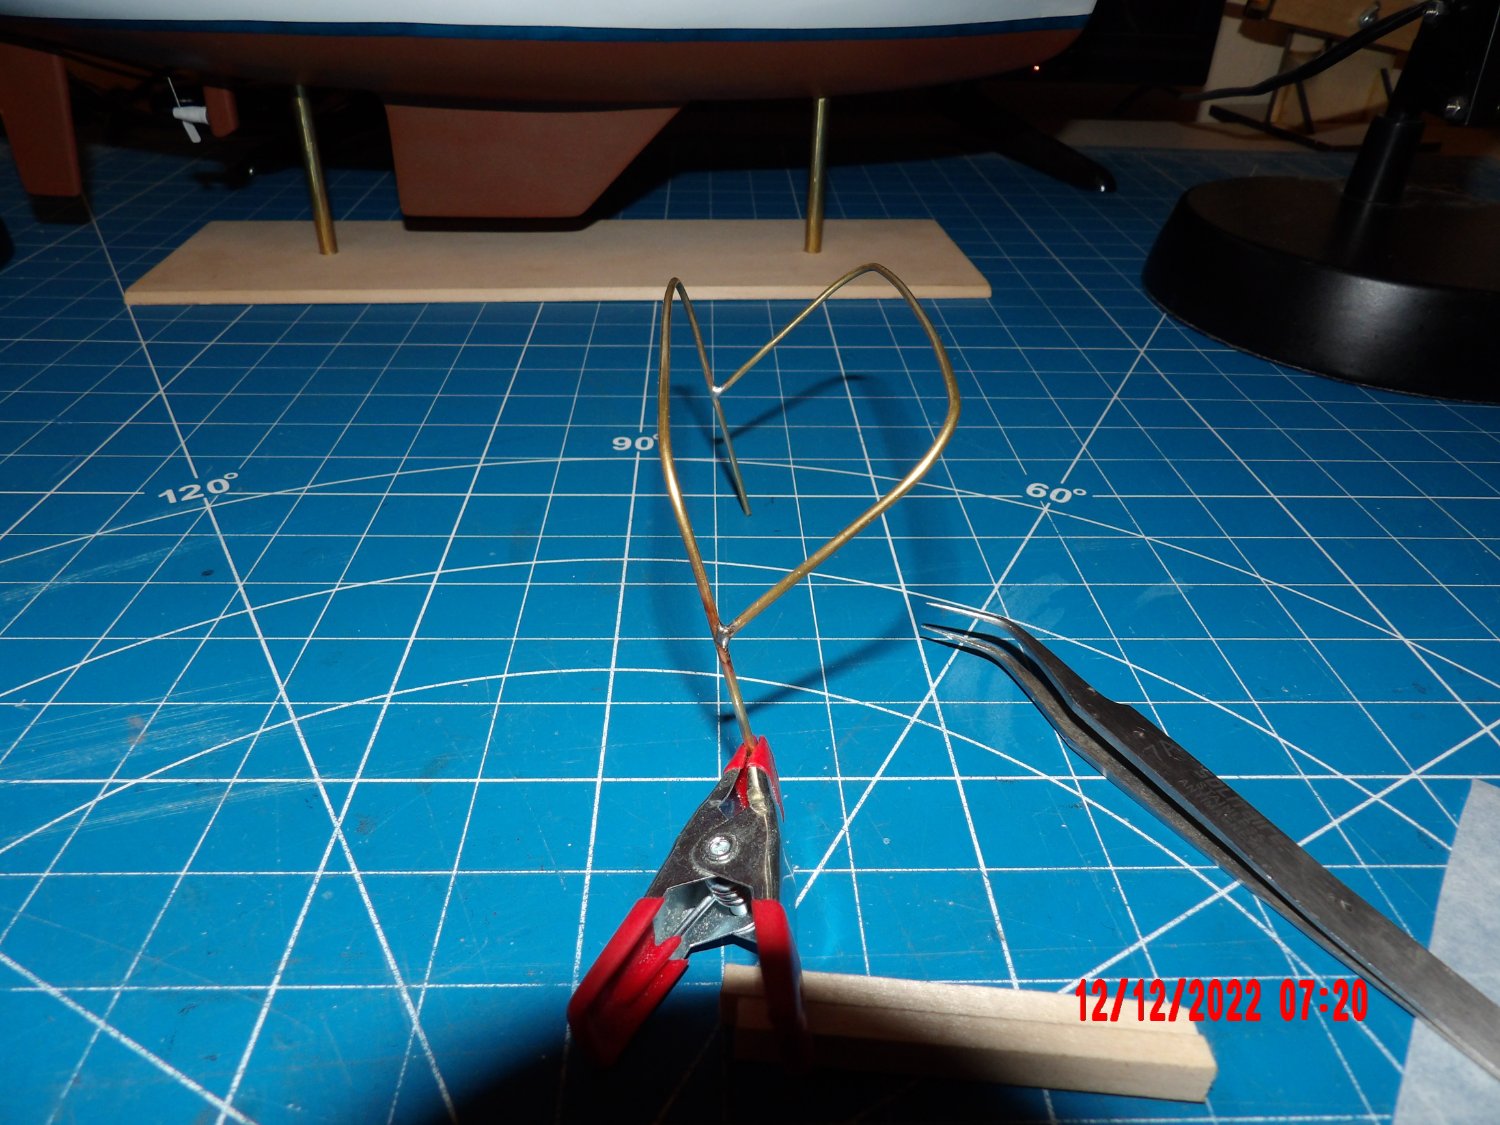
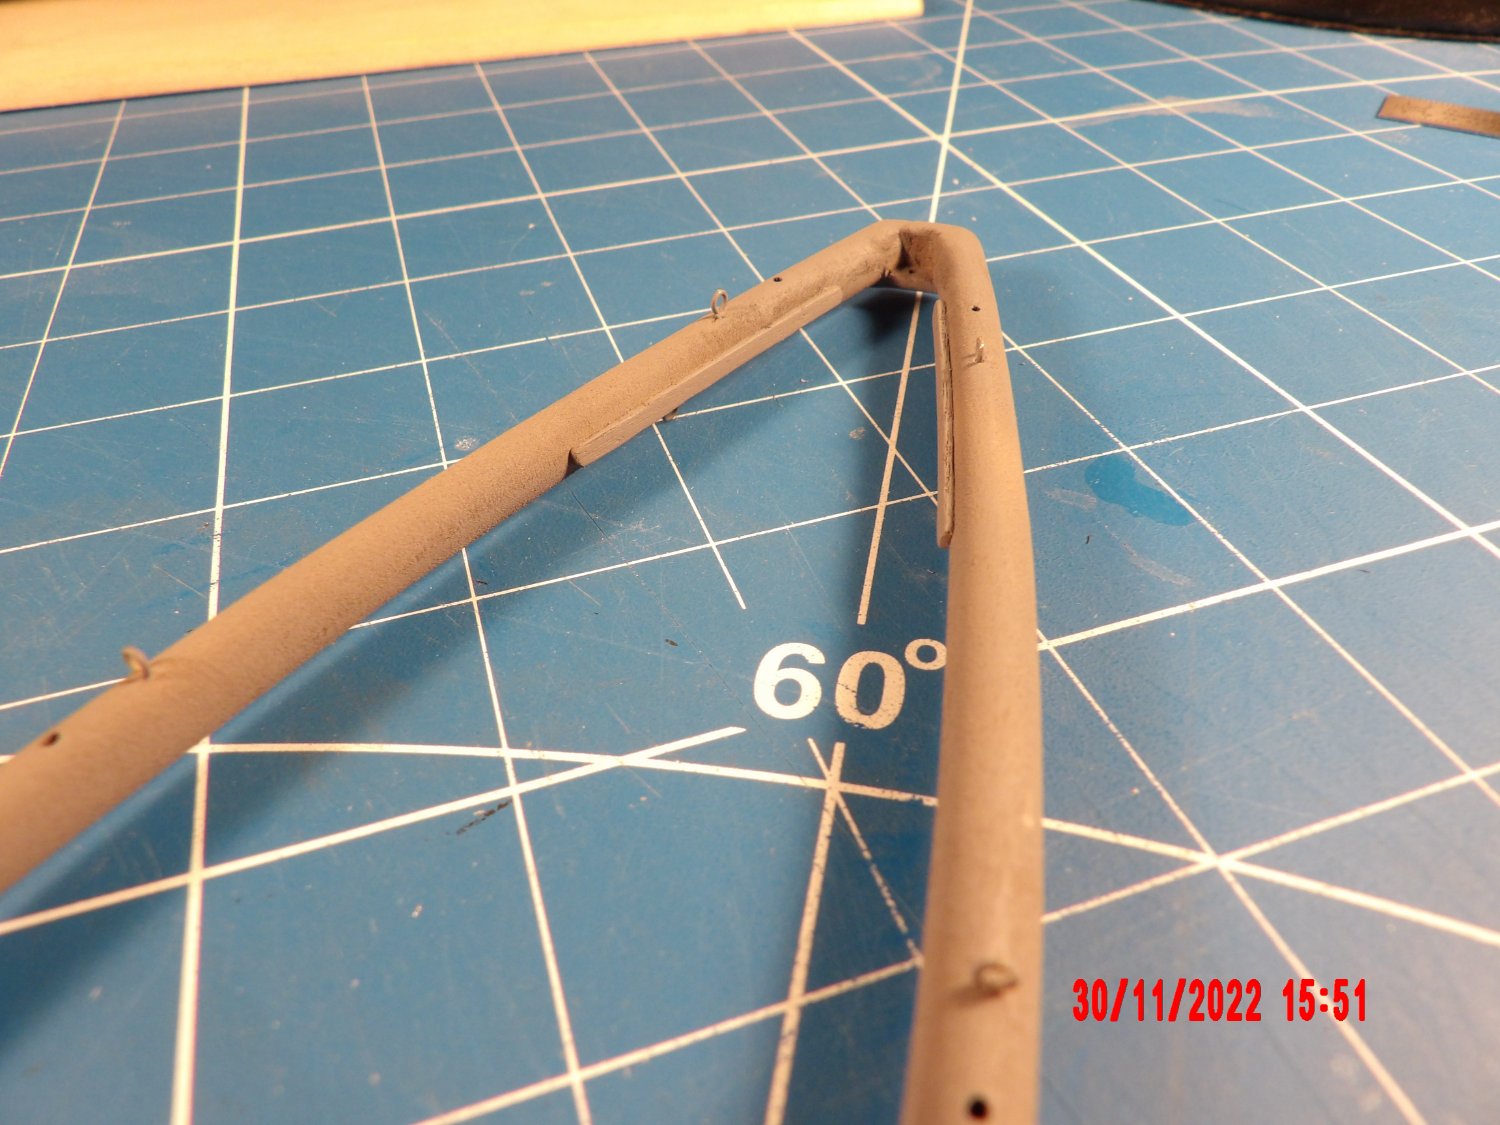
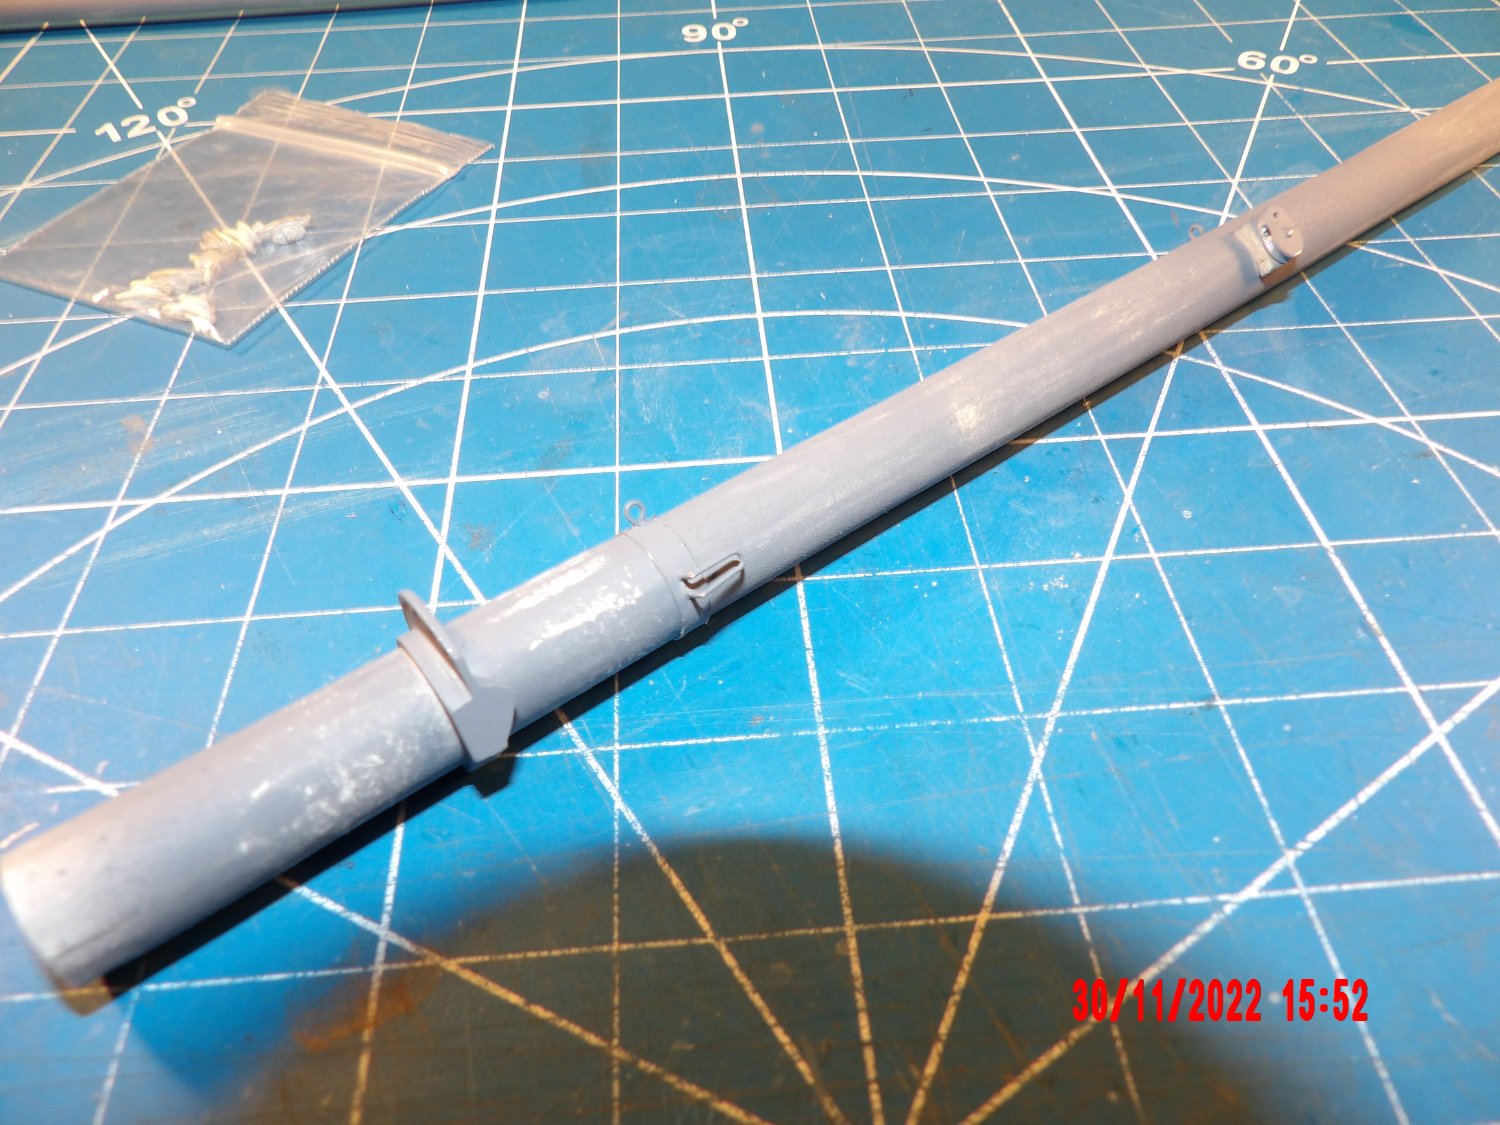
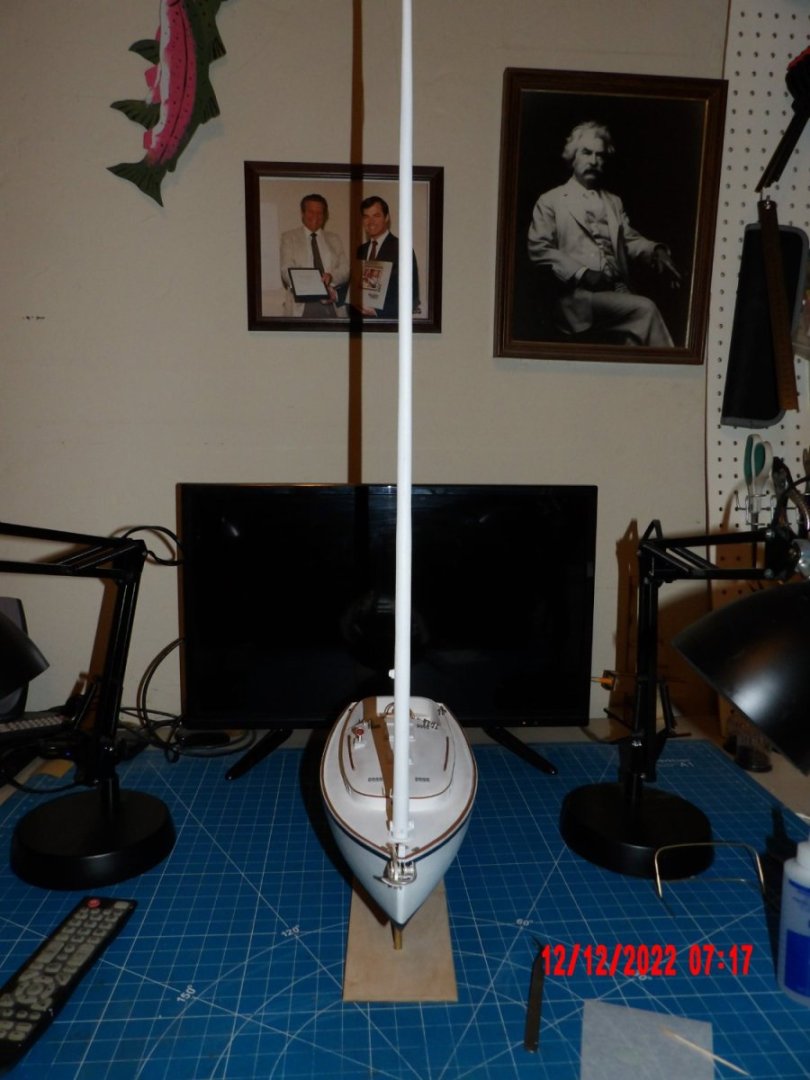
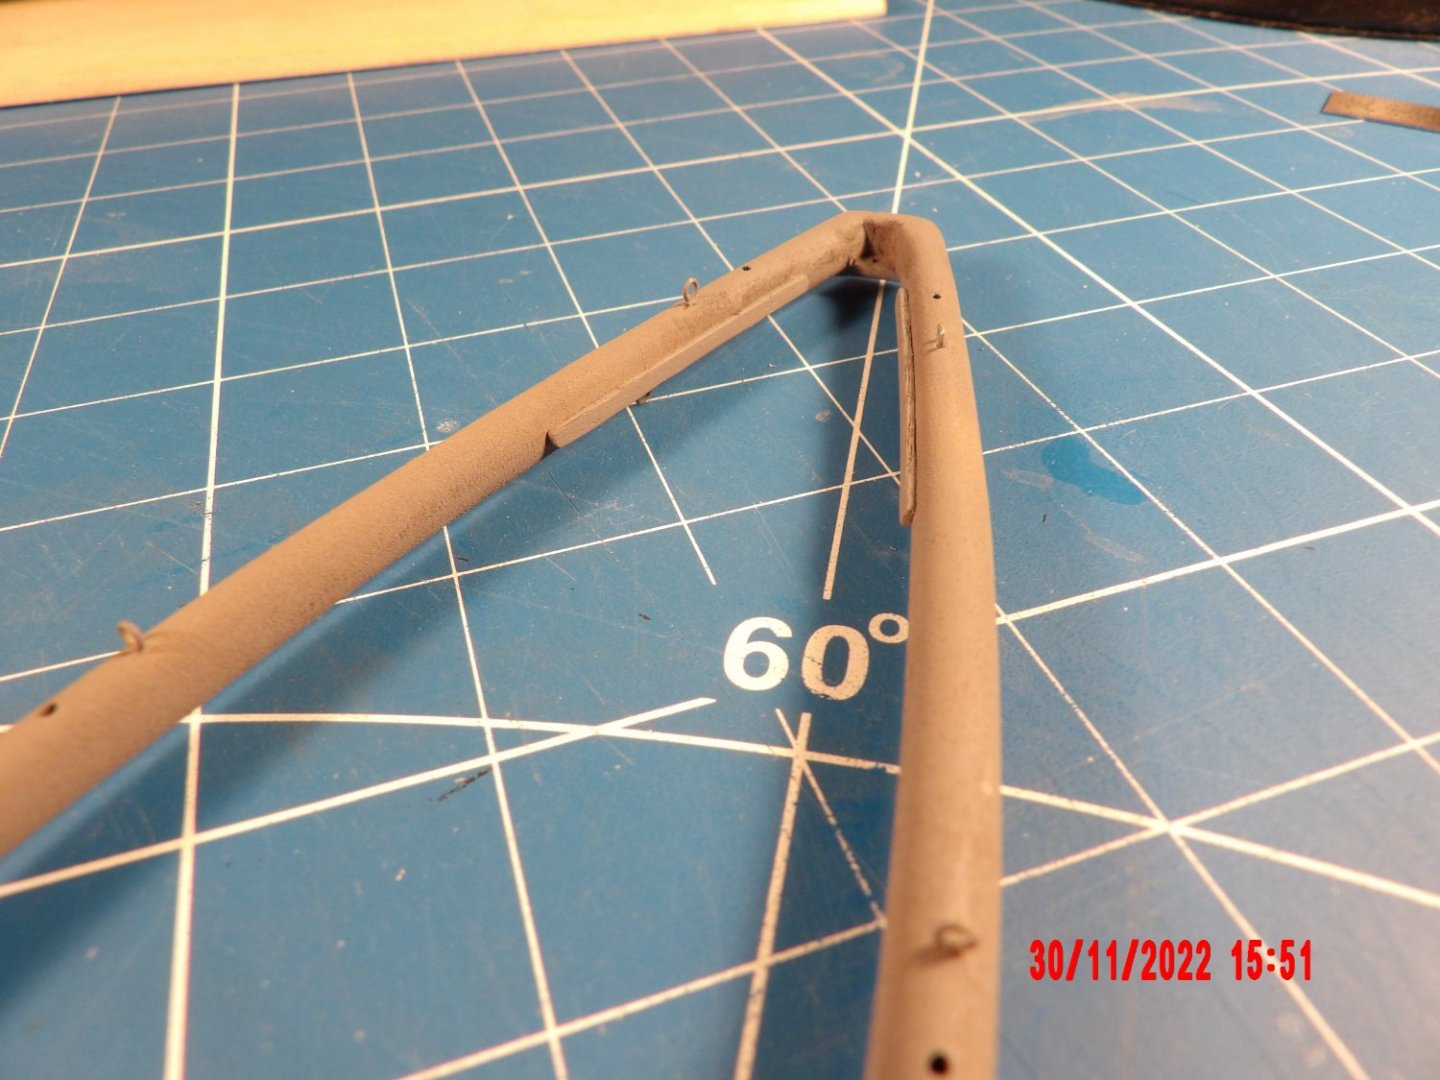
I managed to solder together a frame for a small bimini. The hardware store had silver braze, and I tried that first. I was able to make one good test joint, which is very neat and strong, but was unable to reproduce that result consistently. I switched to soft solder, which does not look as good, but I can do. . . Here is a picture of the simple bimini I am trying to reproduce: And here is my frame: Now my worry is making an acceptable fabric cover, which I am beginning to doubt I have the skill to do. I made the decision to keep working on it, as a side project, but go ahead and finish the model before attempting to add the bimini, which I will only do if it equals in quality what I have achieved so far. I am very happy with this model and don't care to mess it up! So I went ahead and added the mast:


- 111 replies
-
- 10
-
-
-
- Nonsuch 30
- Model Shipways
- (and 1 more)
-
Thank you, David and Yves. Very kind of you both.
- 111 replies
-
- 3
-
-
- Nonsuch 30
- Model Shipways
- (and 1 more)
-
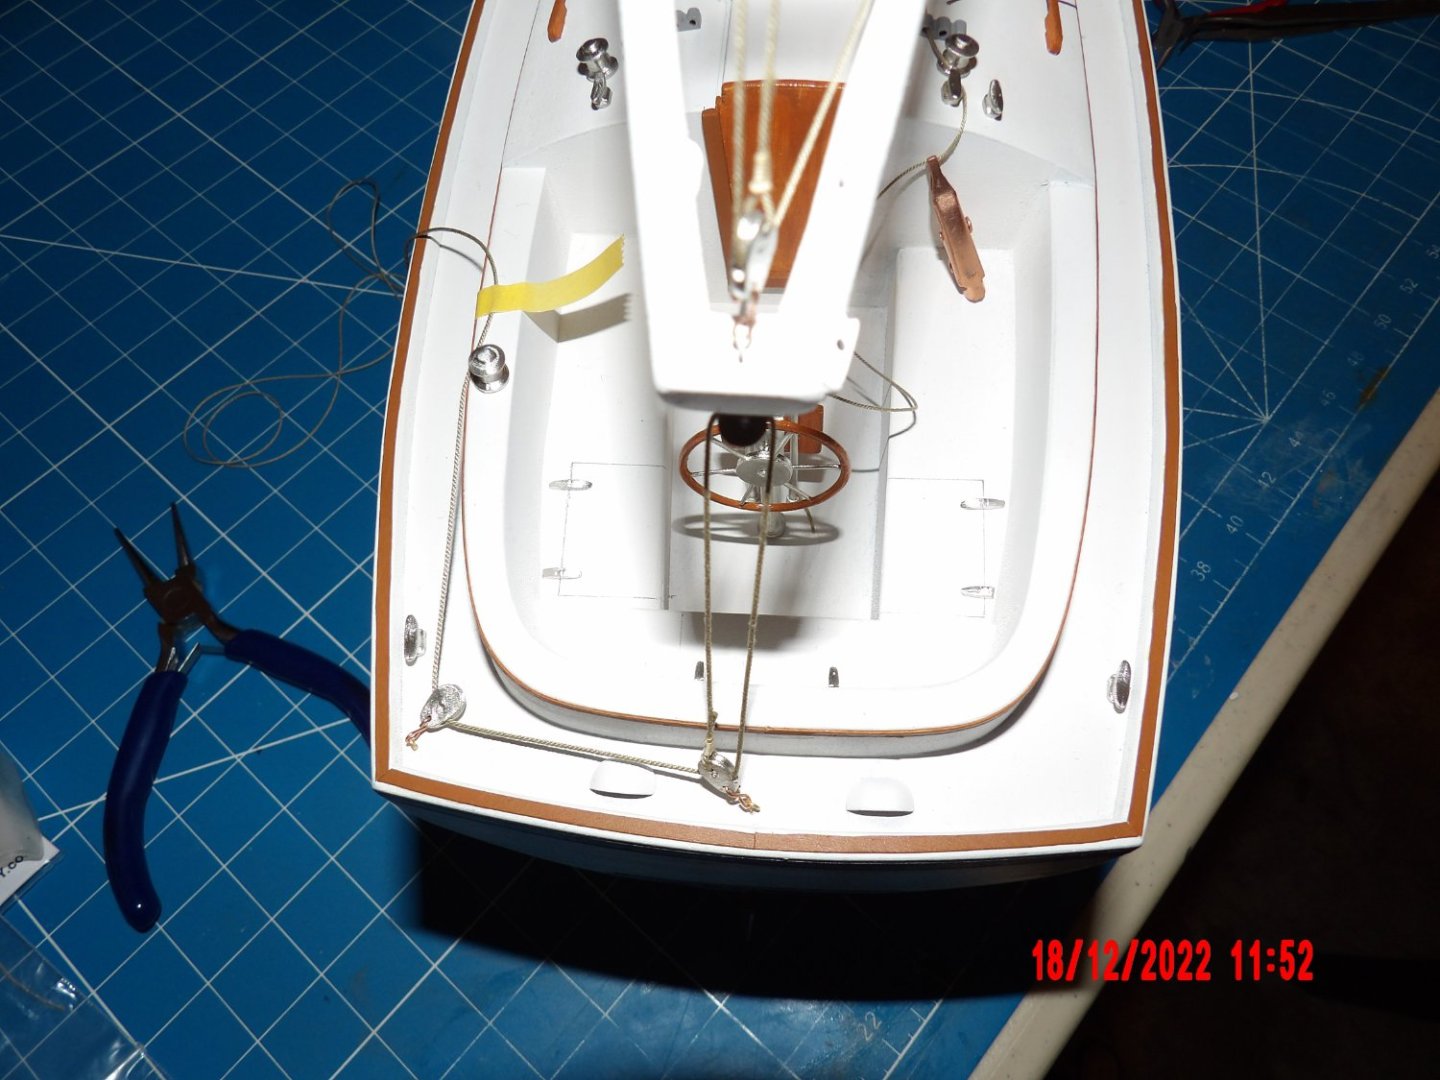
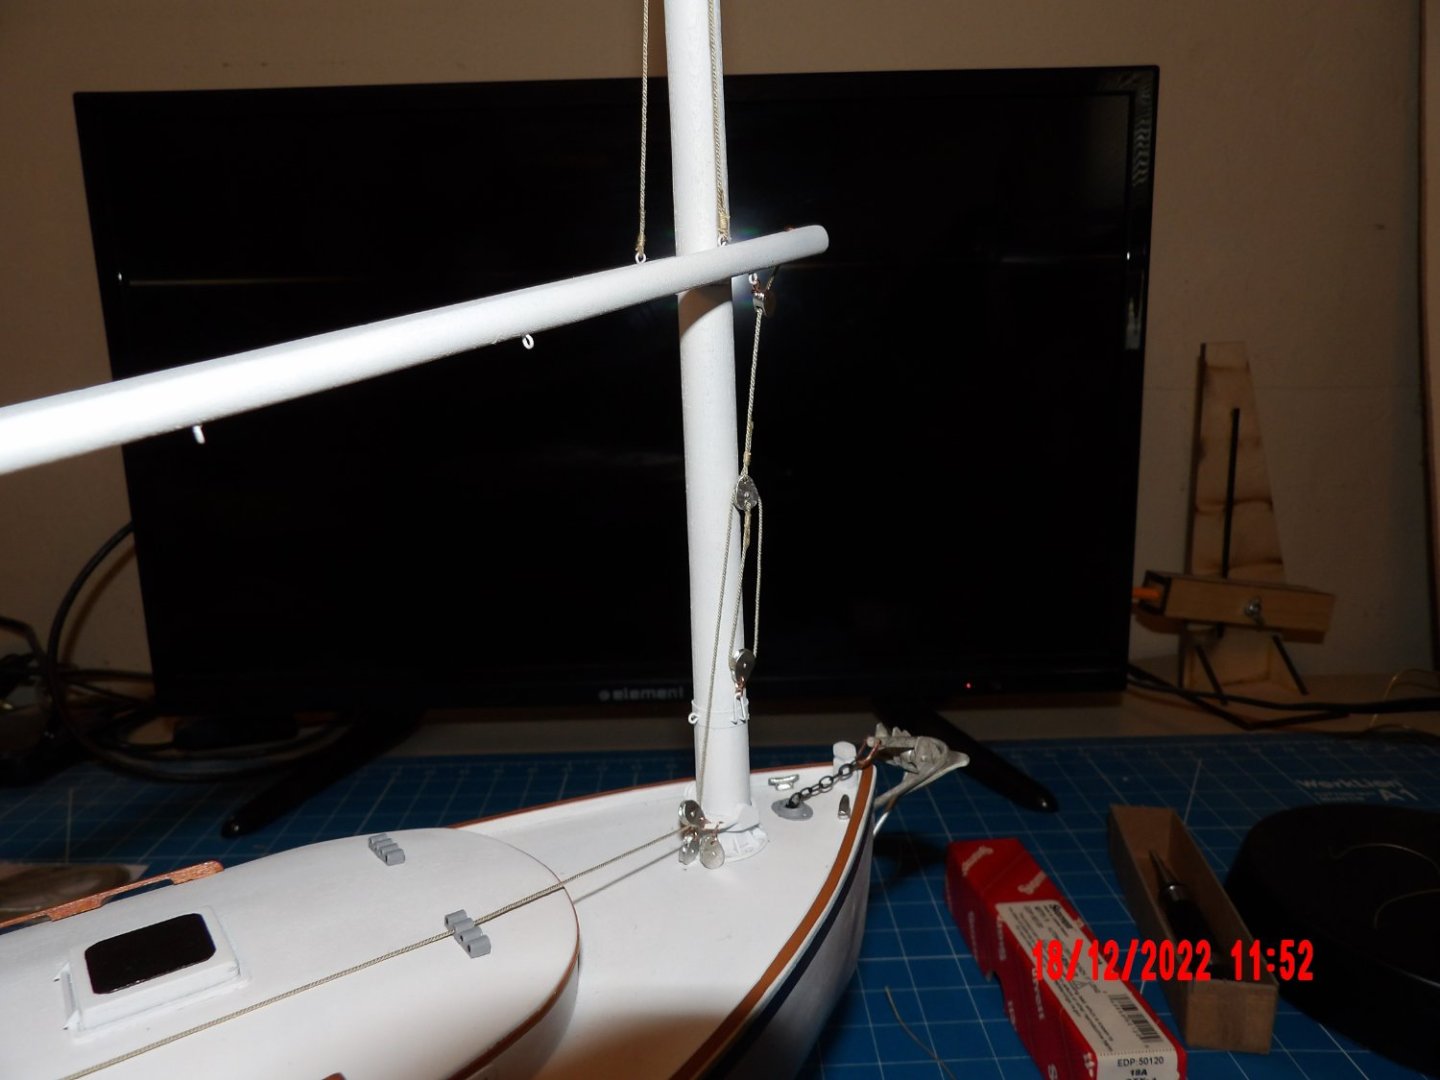
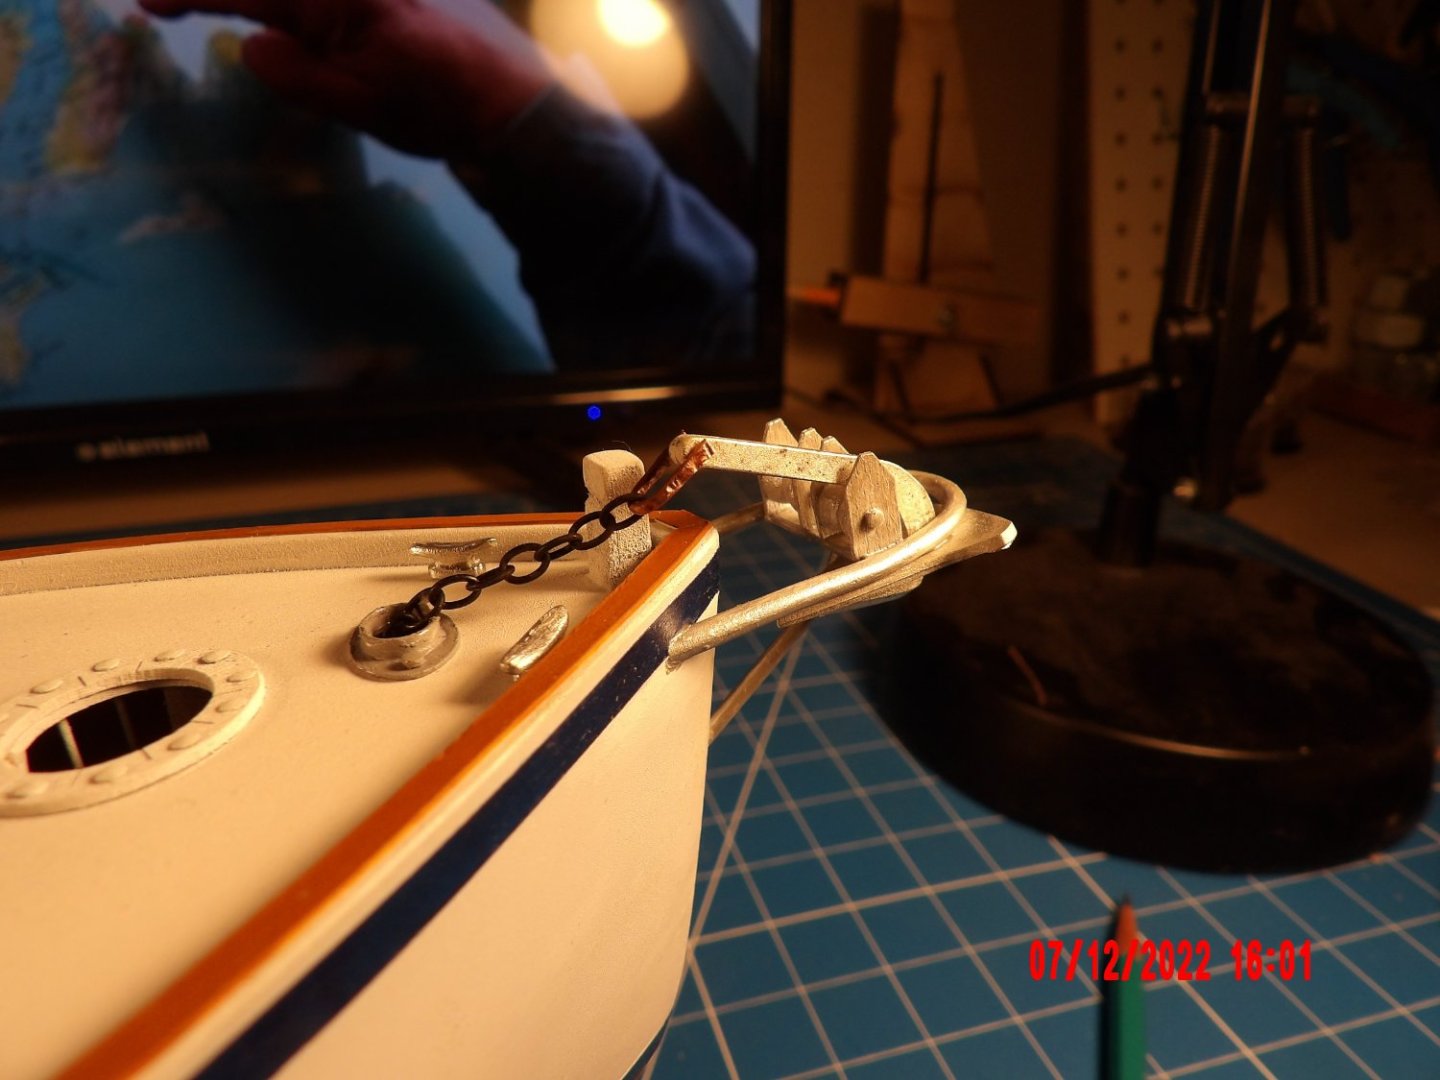
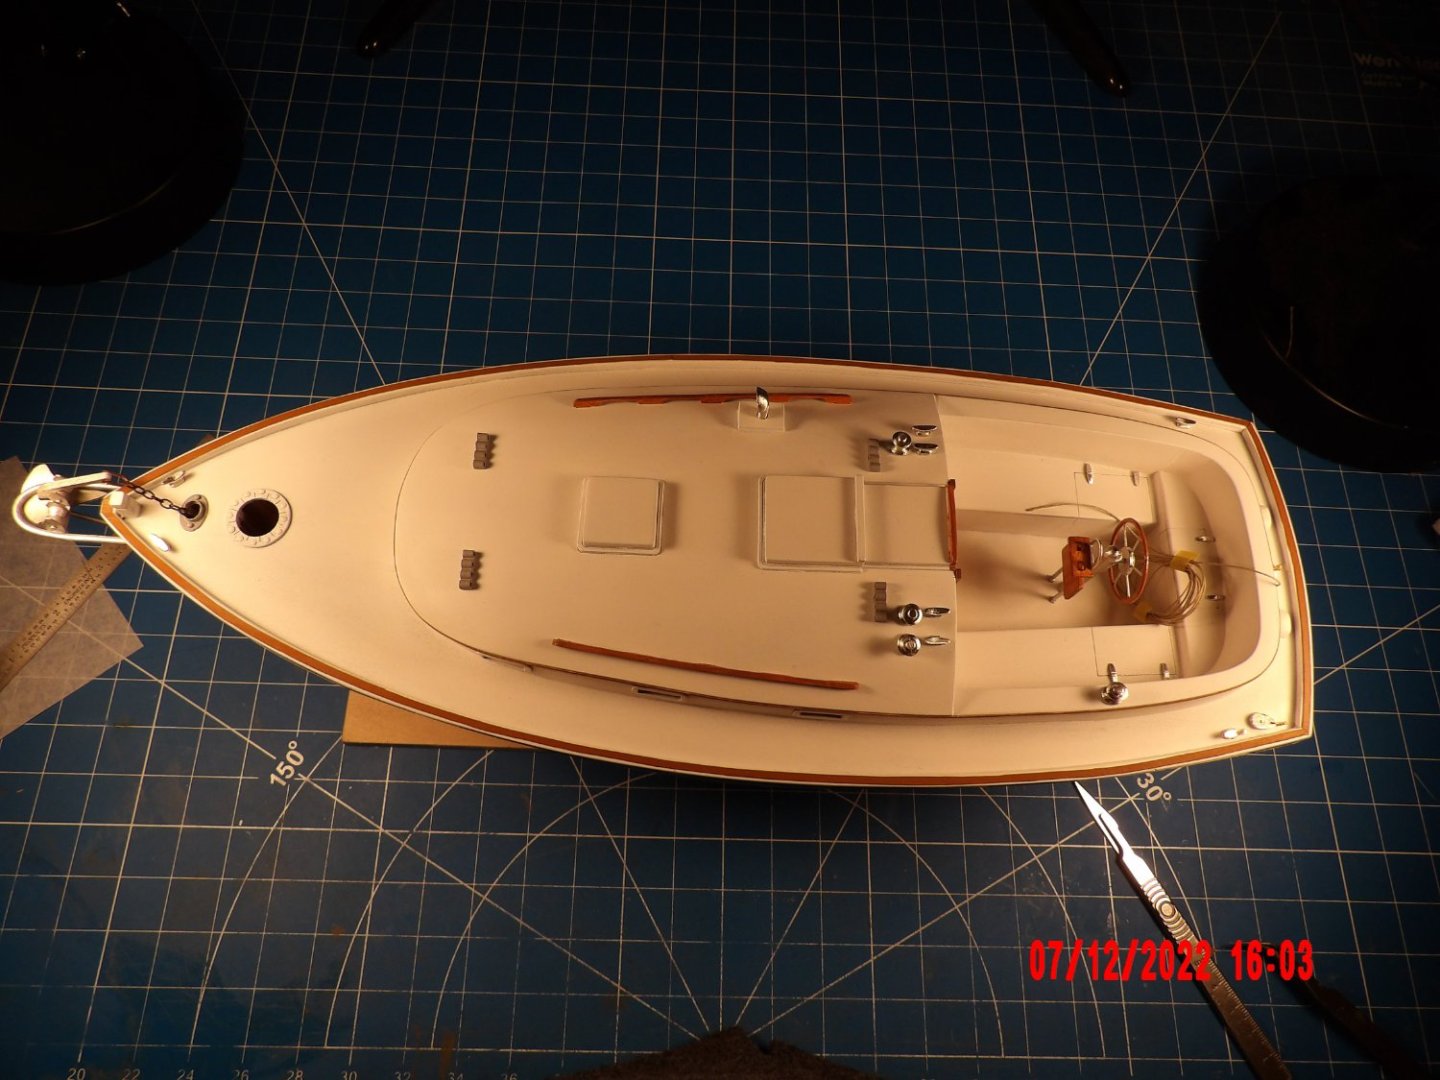
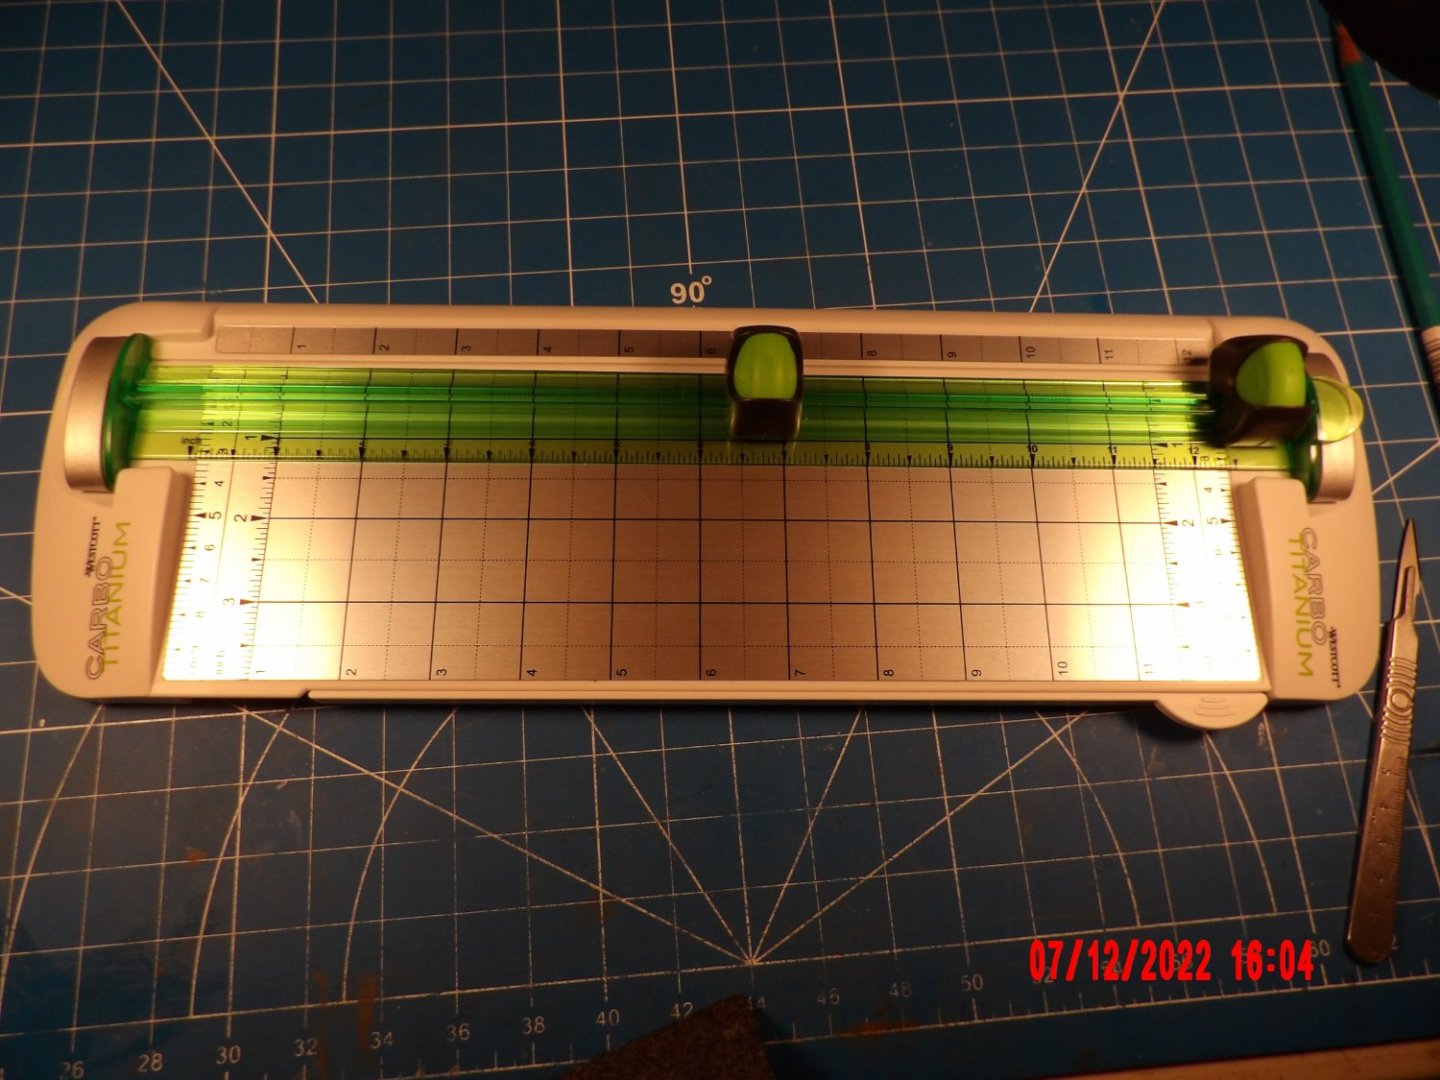
Thanks, Gregg. The wheel itself is one piece, and yes I will do what rigging I can before installing the mast. Added the anchor and chain, with my first shackle made from copper wire. I hope to get better at shackles. . . Added the optional "wood" trim at the top of the cabin walls and around the toe rail. These are of card and painted. The trim for the cabin is 1/16" wide and I found it very hard to cut such thin strips from the card stock. So I bought this paper trimmer which, with practice, made some passable, if not perfect, strips: The 3/16" wide trim for the toe rail is cut using the laser sheet that contained the deck halves as a guide. This operation was very difficult to pull off and I discarded 75% or more of my attempts. I'm thinking that if I'm going to add a Bimini I ought to get it installed before adding the mast and sail. . .
- 111 replies
-
- 11
-
-
- Nonsuch 30
- Model Shipways
- (and 1 more)
-
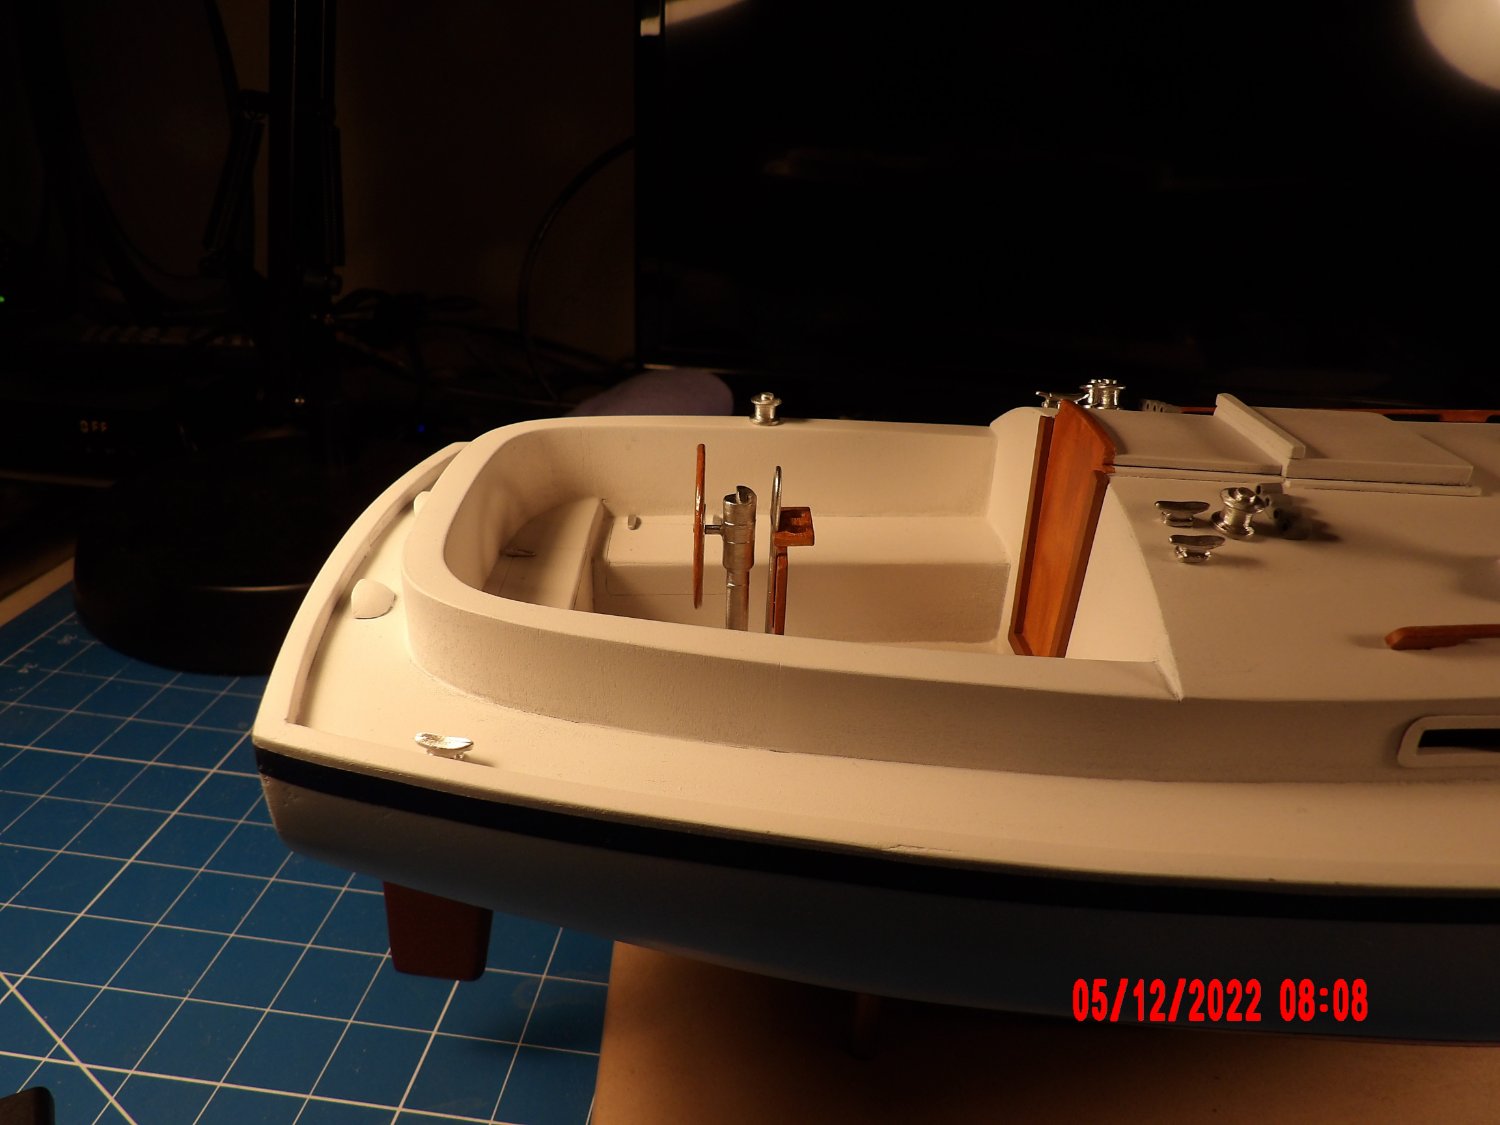
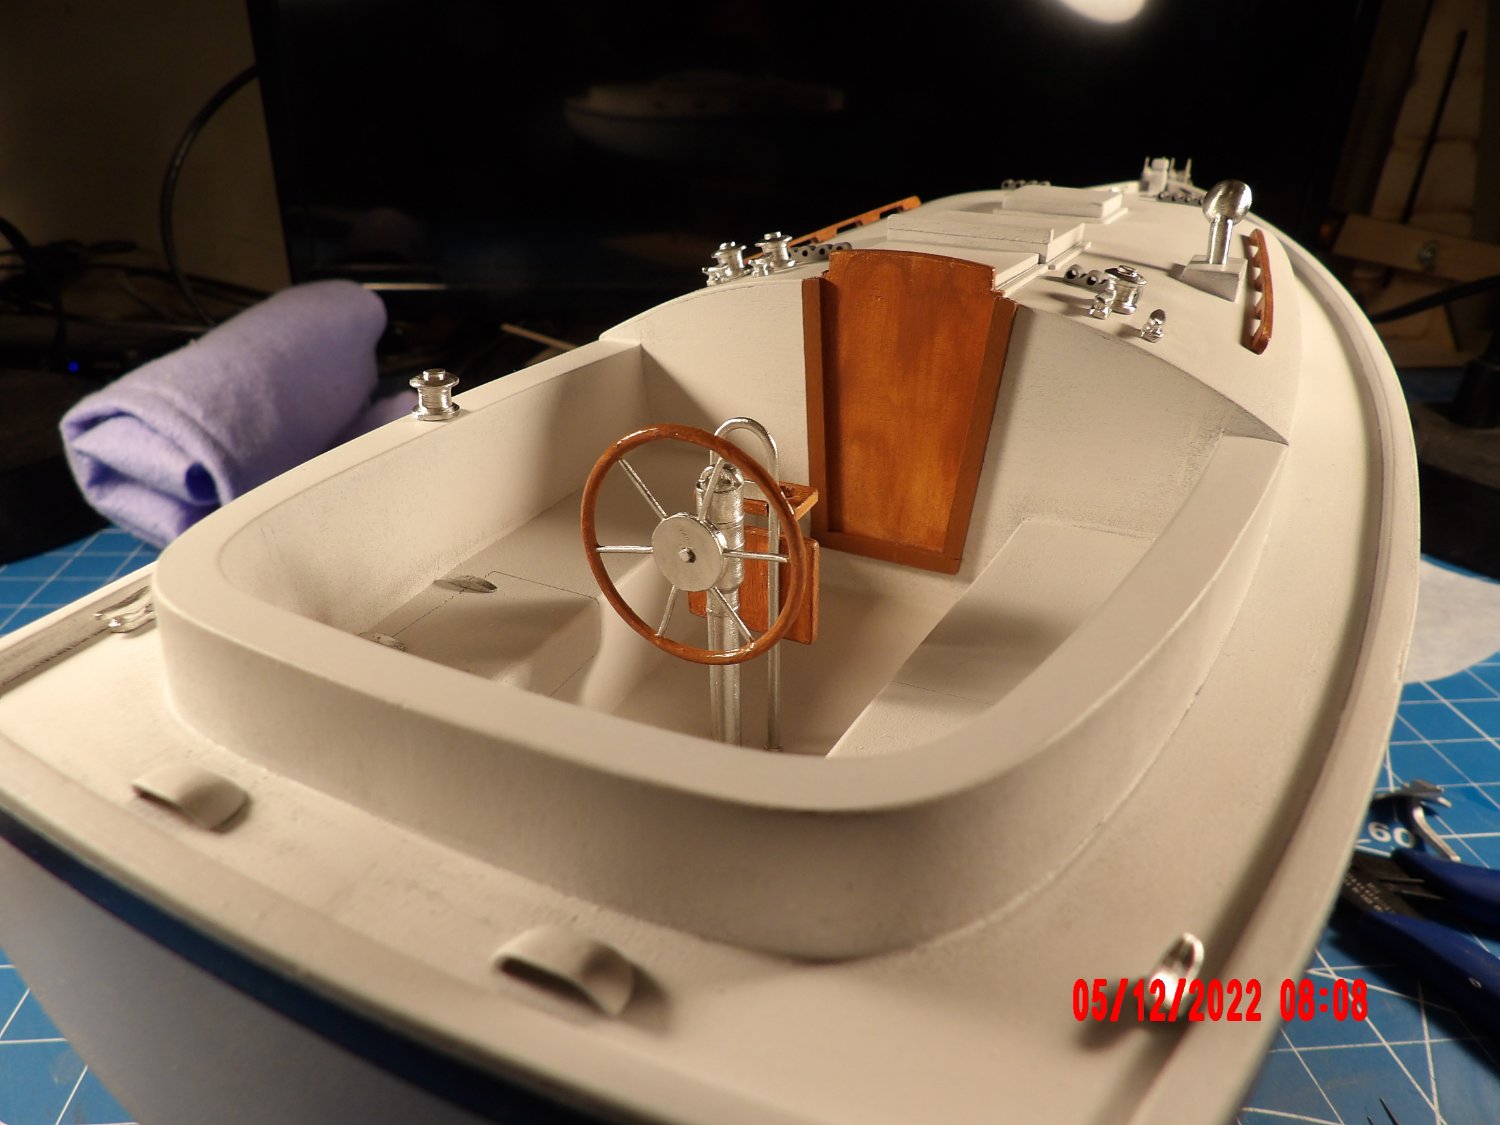
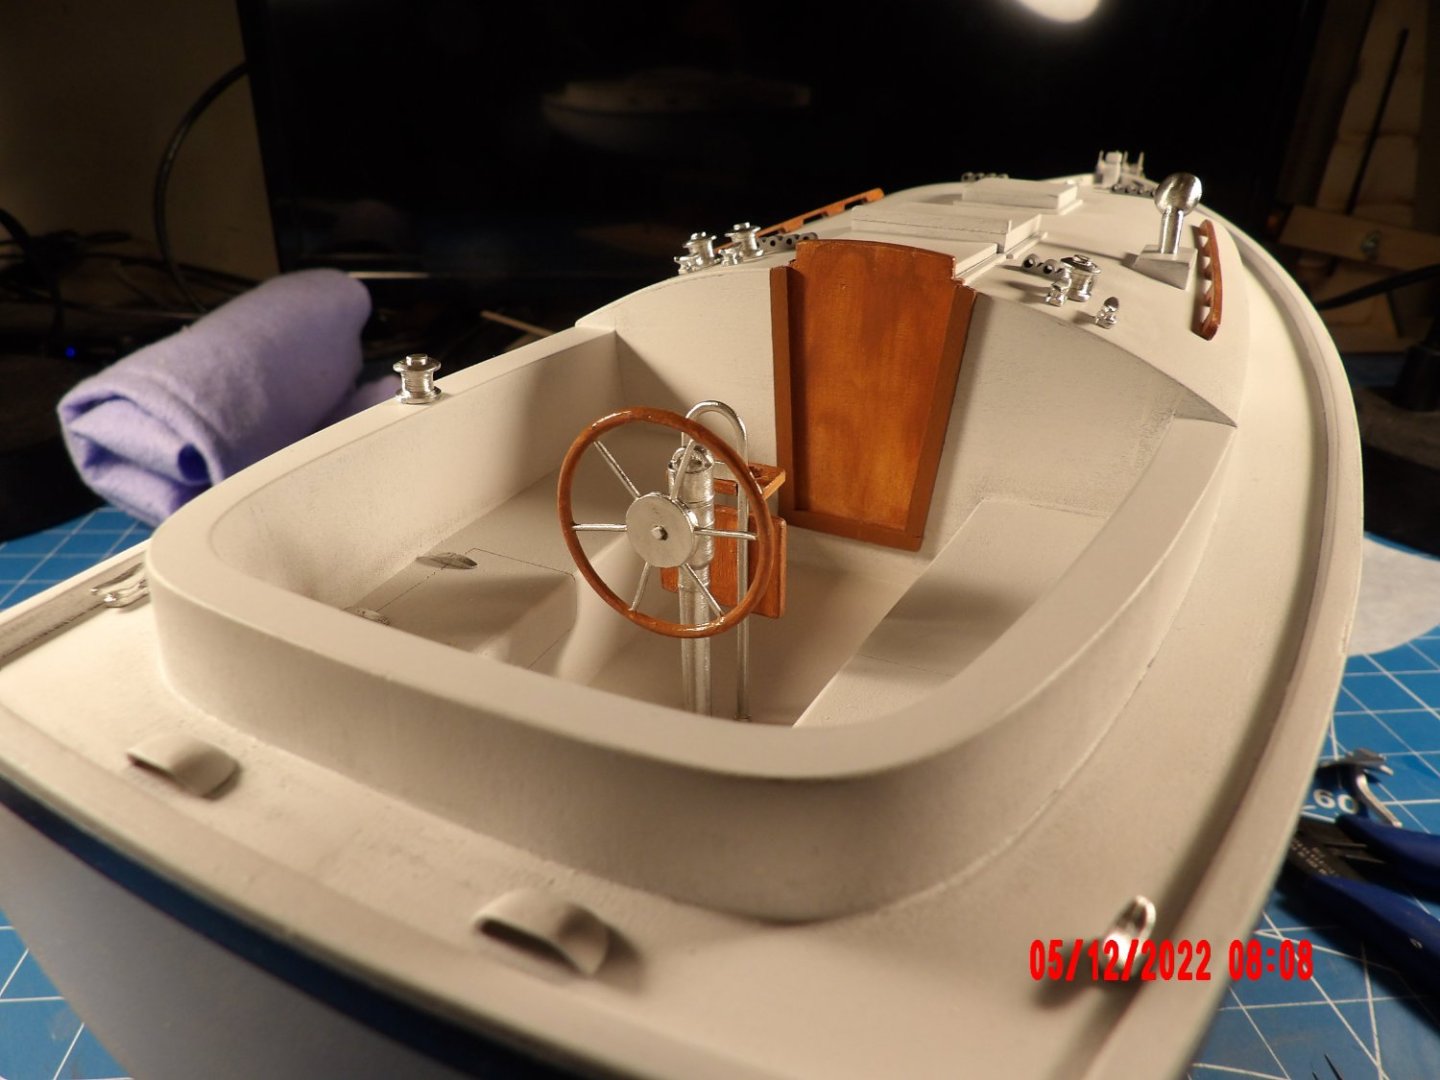
Thanks to all! This model is so much fun. Added the cockpit stand, steering column, and wheel. I'm getting very close to "stepping" the mast, and am kind of nervous about that. . .

- 111 replies
-
- 8
-
-
- Nonsuch 30
- Model Shipways
- (and 1 more)
-
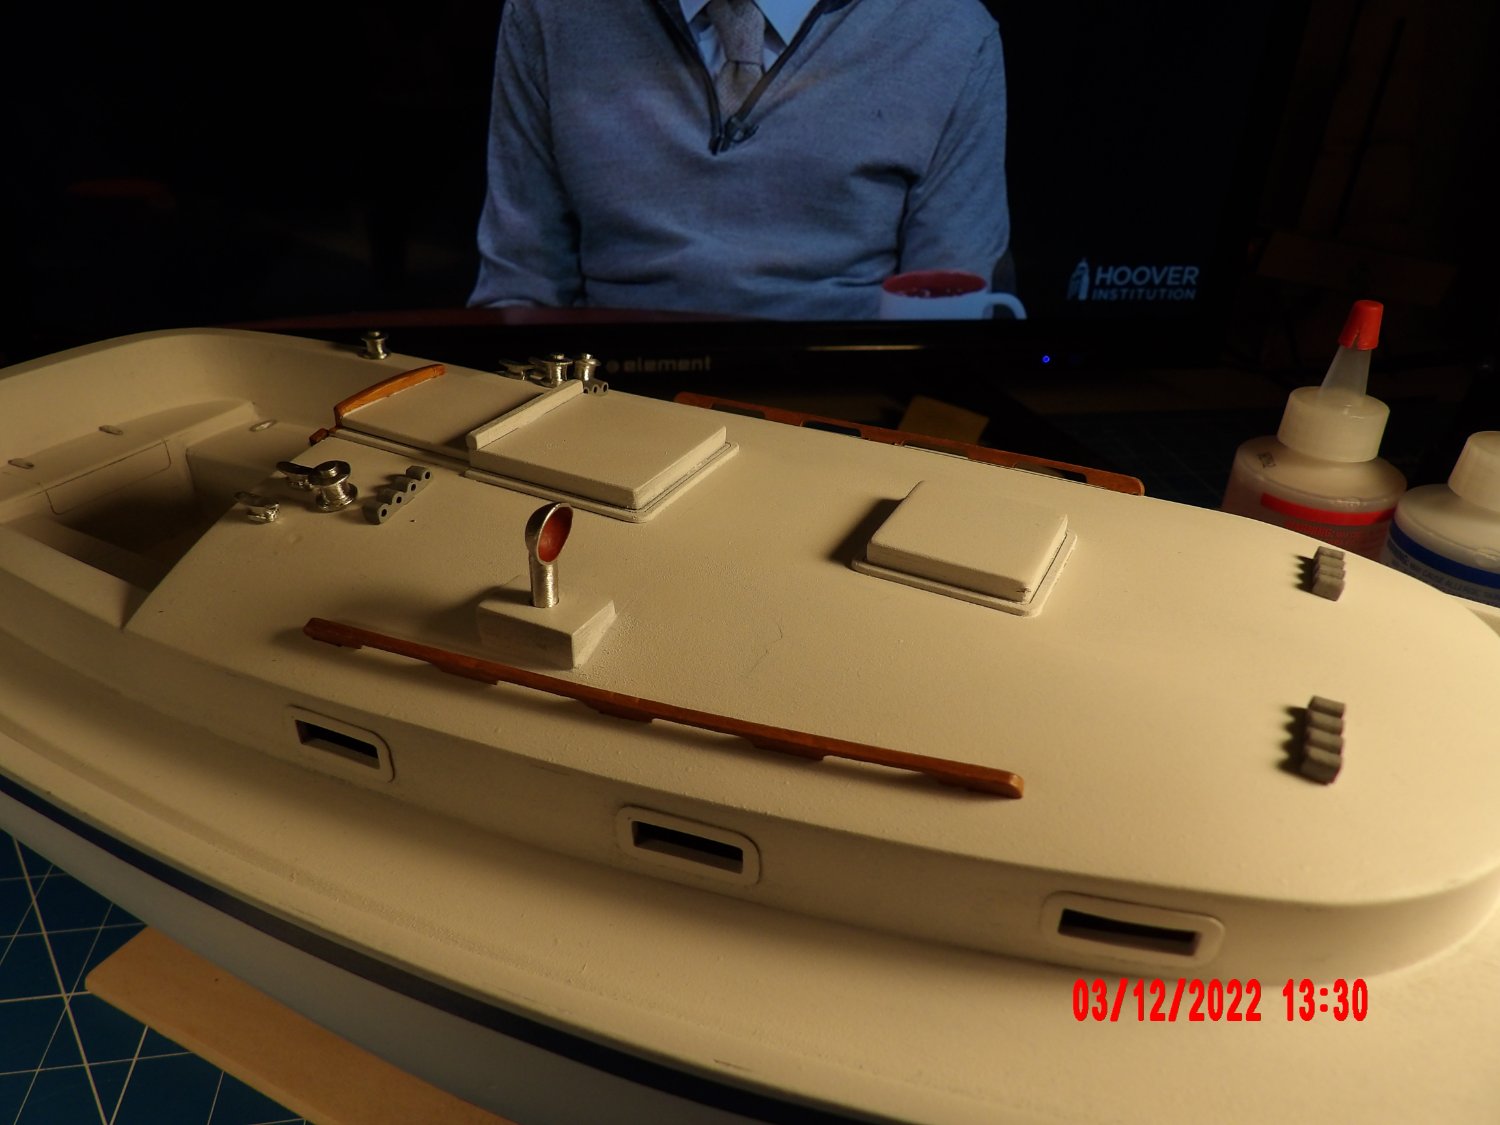
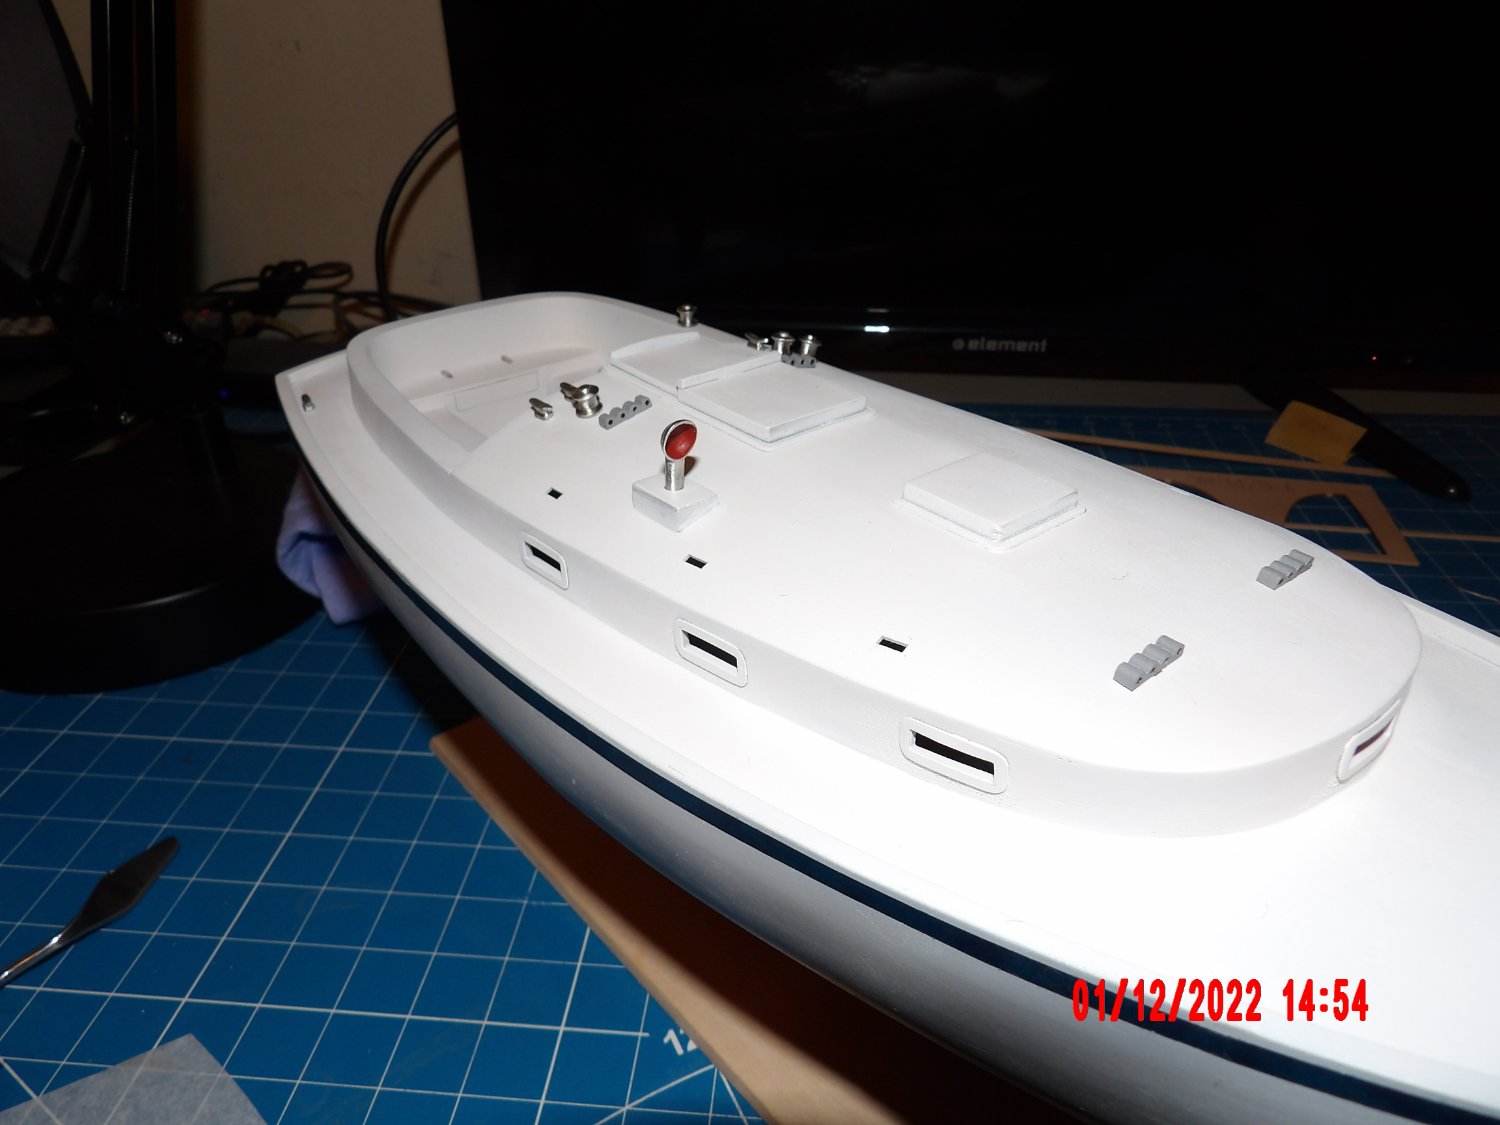
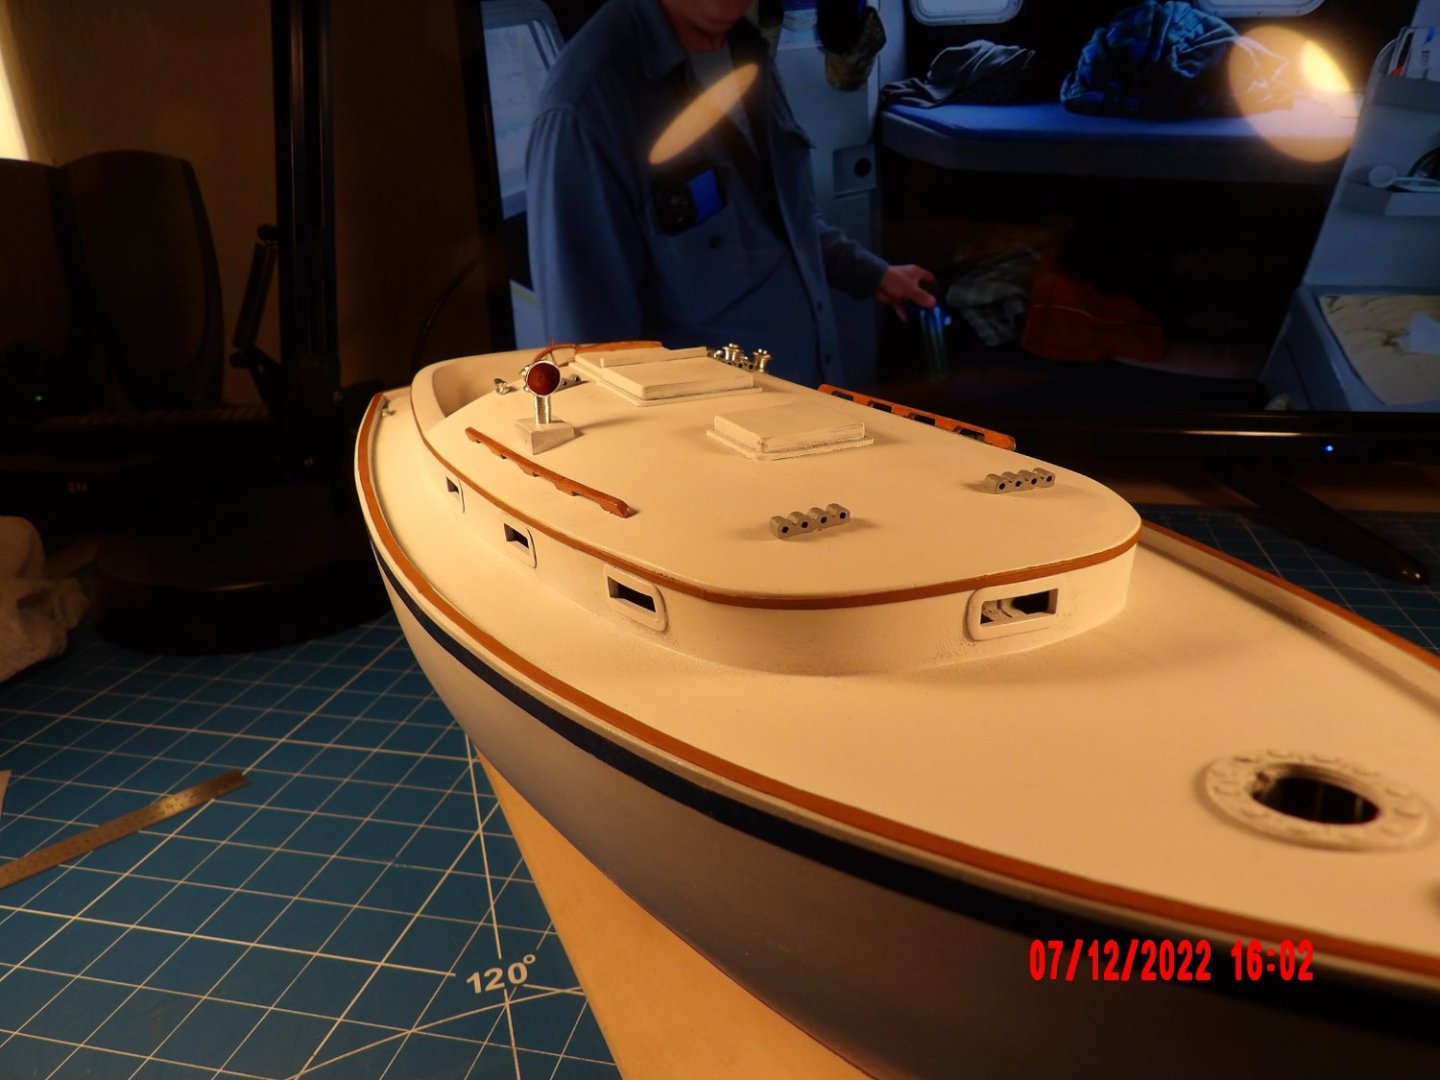
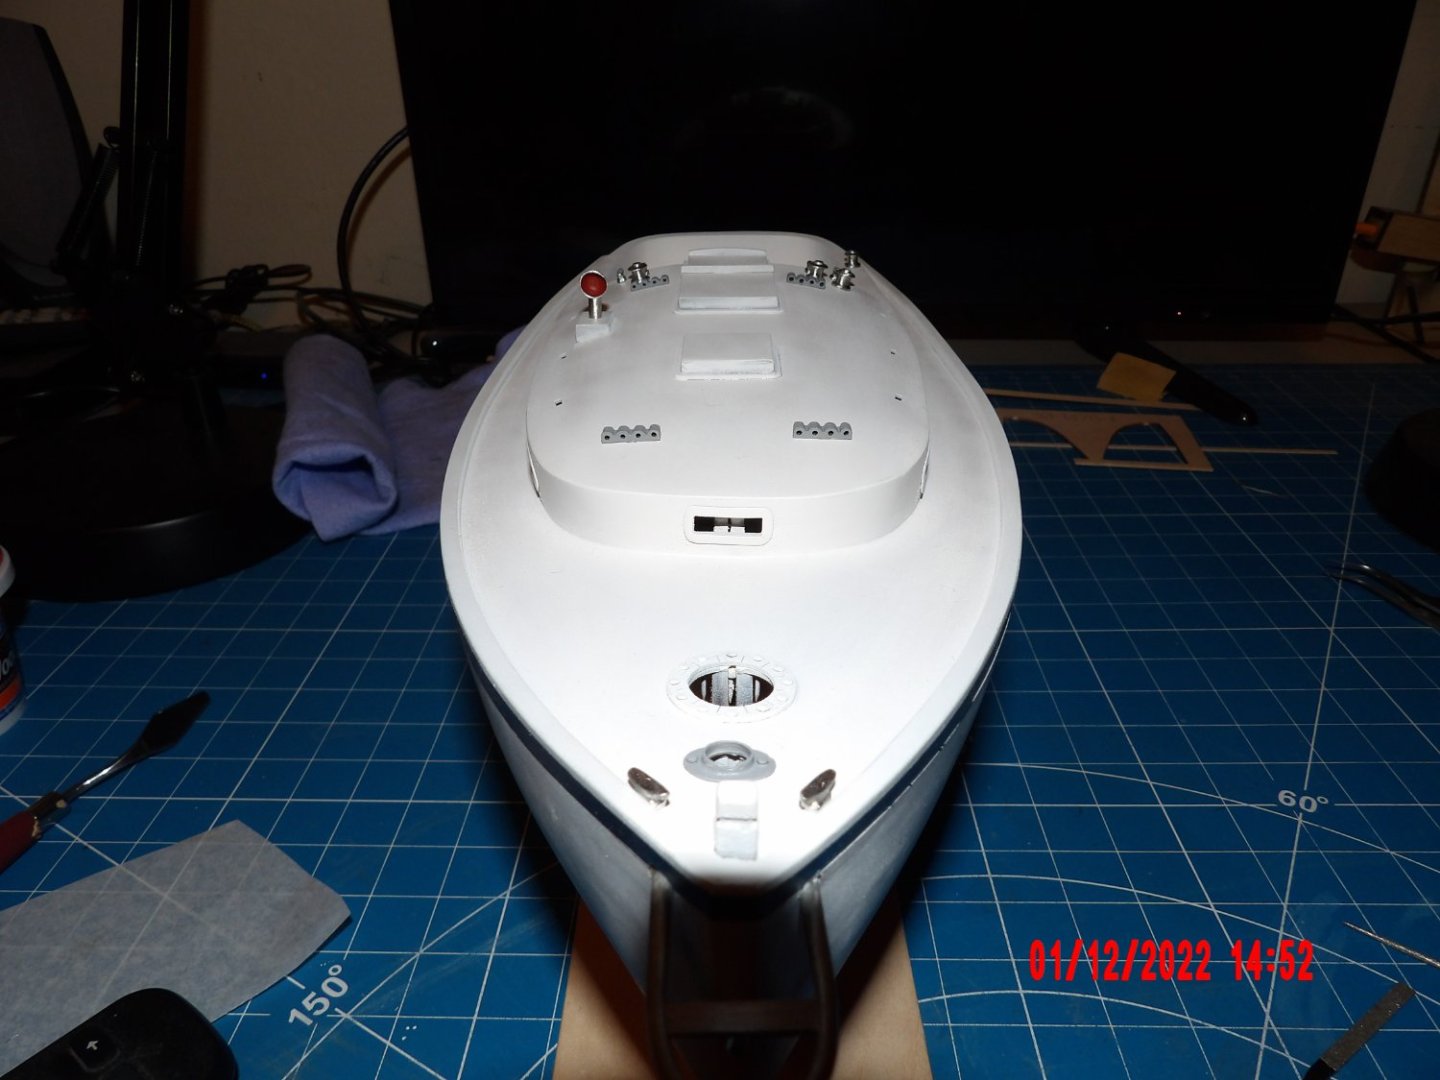
I made and added, for lack of a better term, "anchor chain rollers" to the pulpit. They are of wood and painted aluminum to match the pulpit. I saw online that most of these boats had these installed, maybe by the owners? Added the grab rails to the cabin roof: Painted the cabin companion door and added framing. I don't know that my attempt to make the door look like wood grain is all that convincing. . .

- 111 replies
-
- 8
-
-
-
- Nonsuch 30
- Model Shipways
- (and 1 more)
-
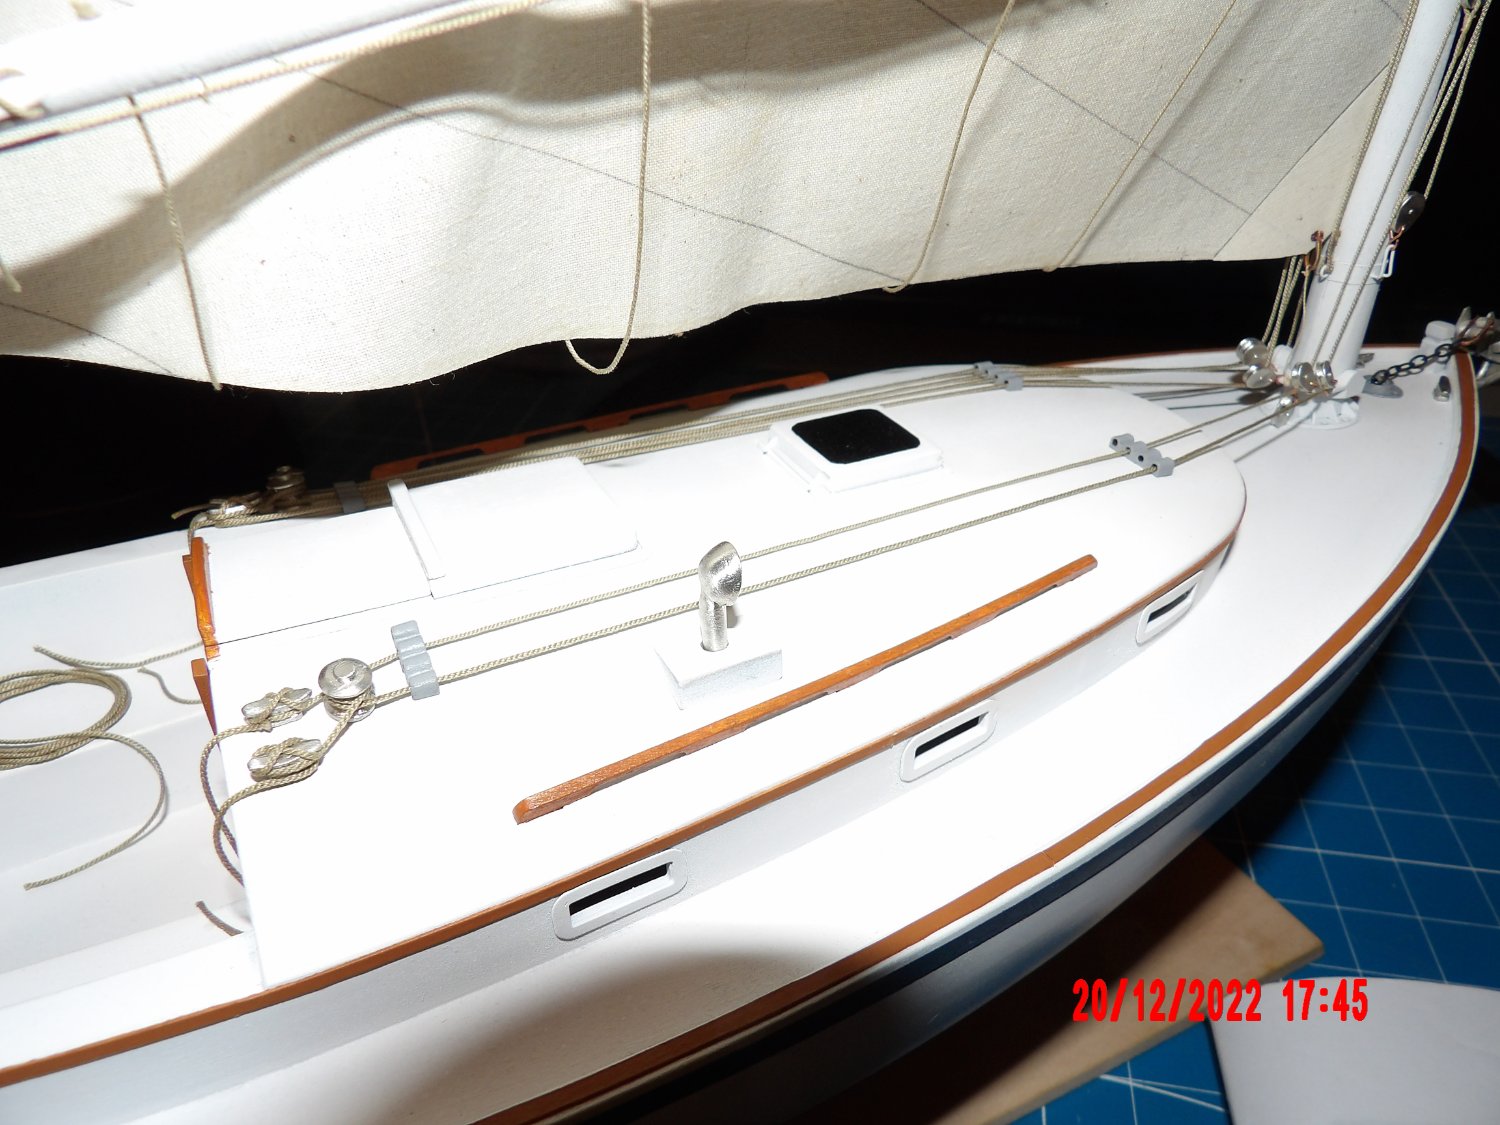
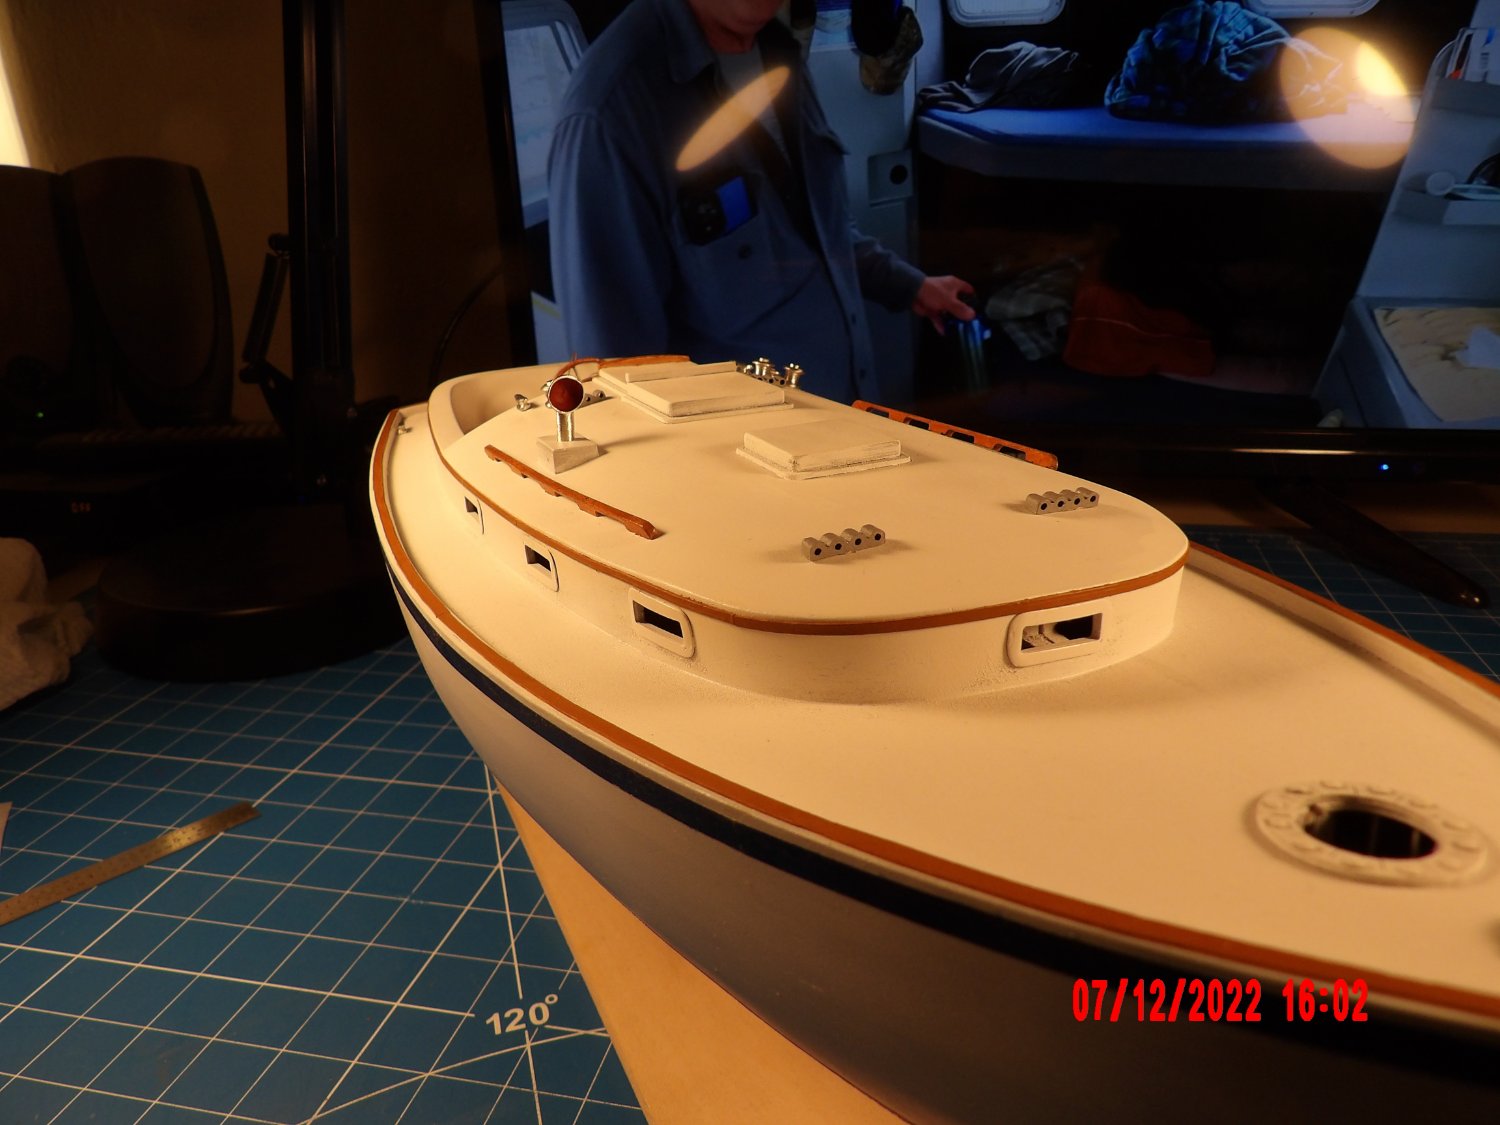
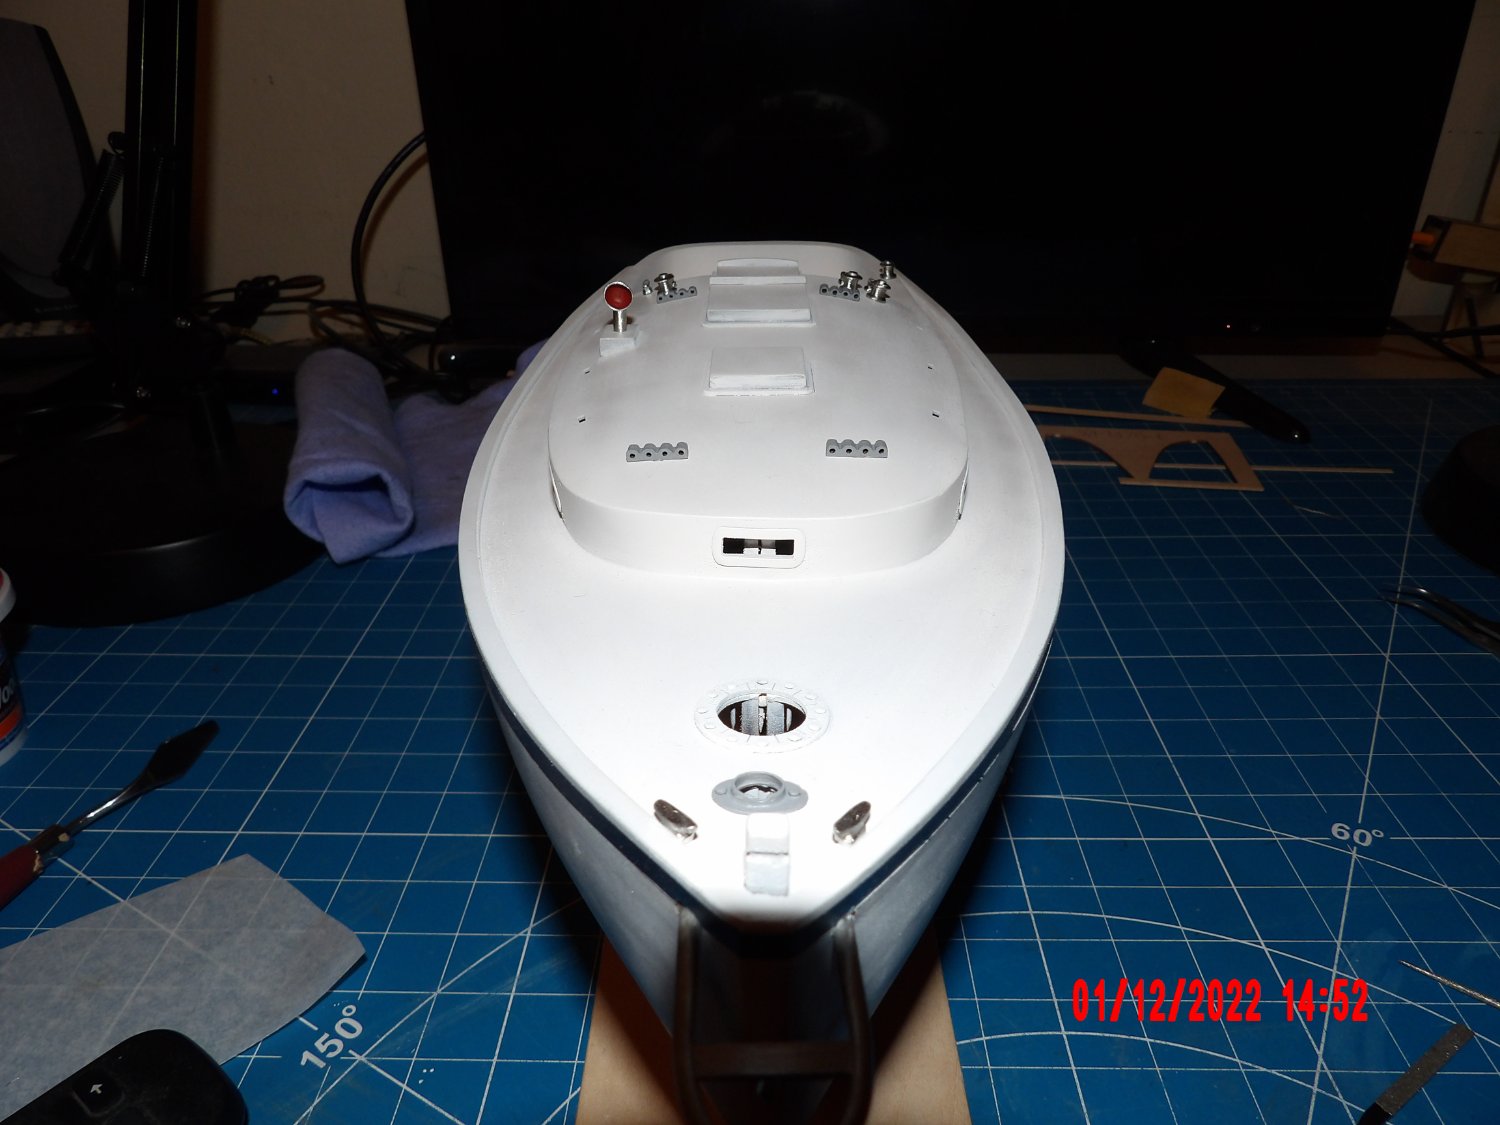
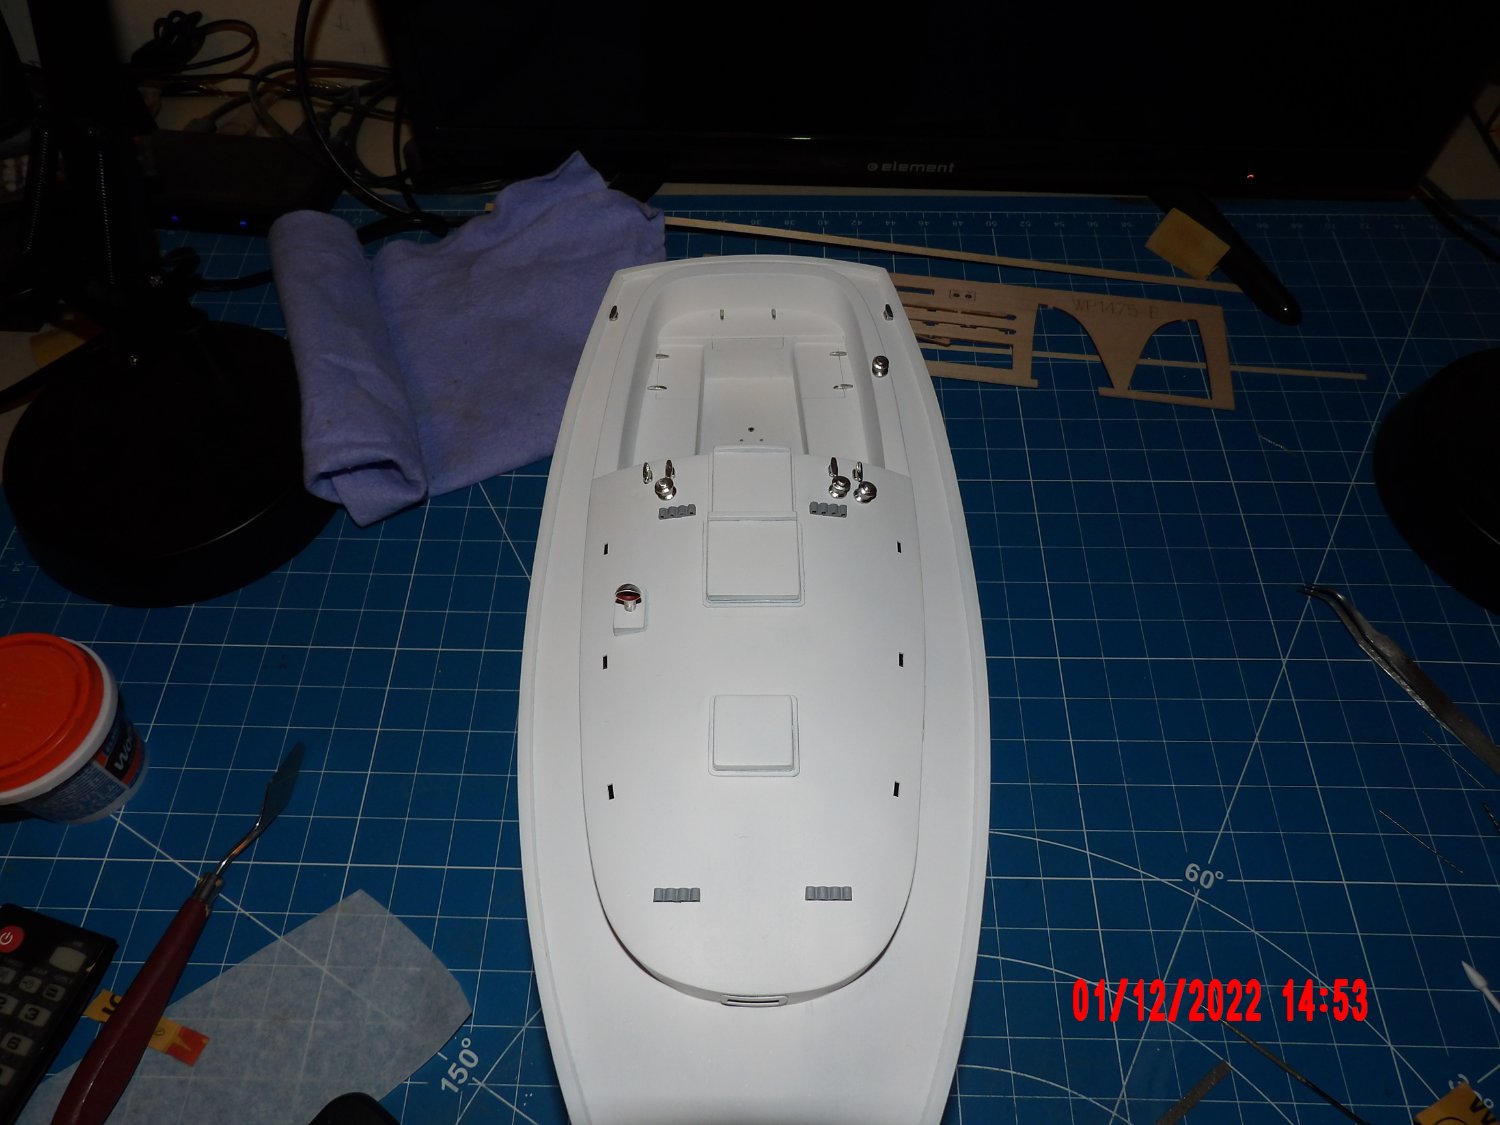
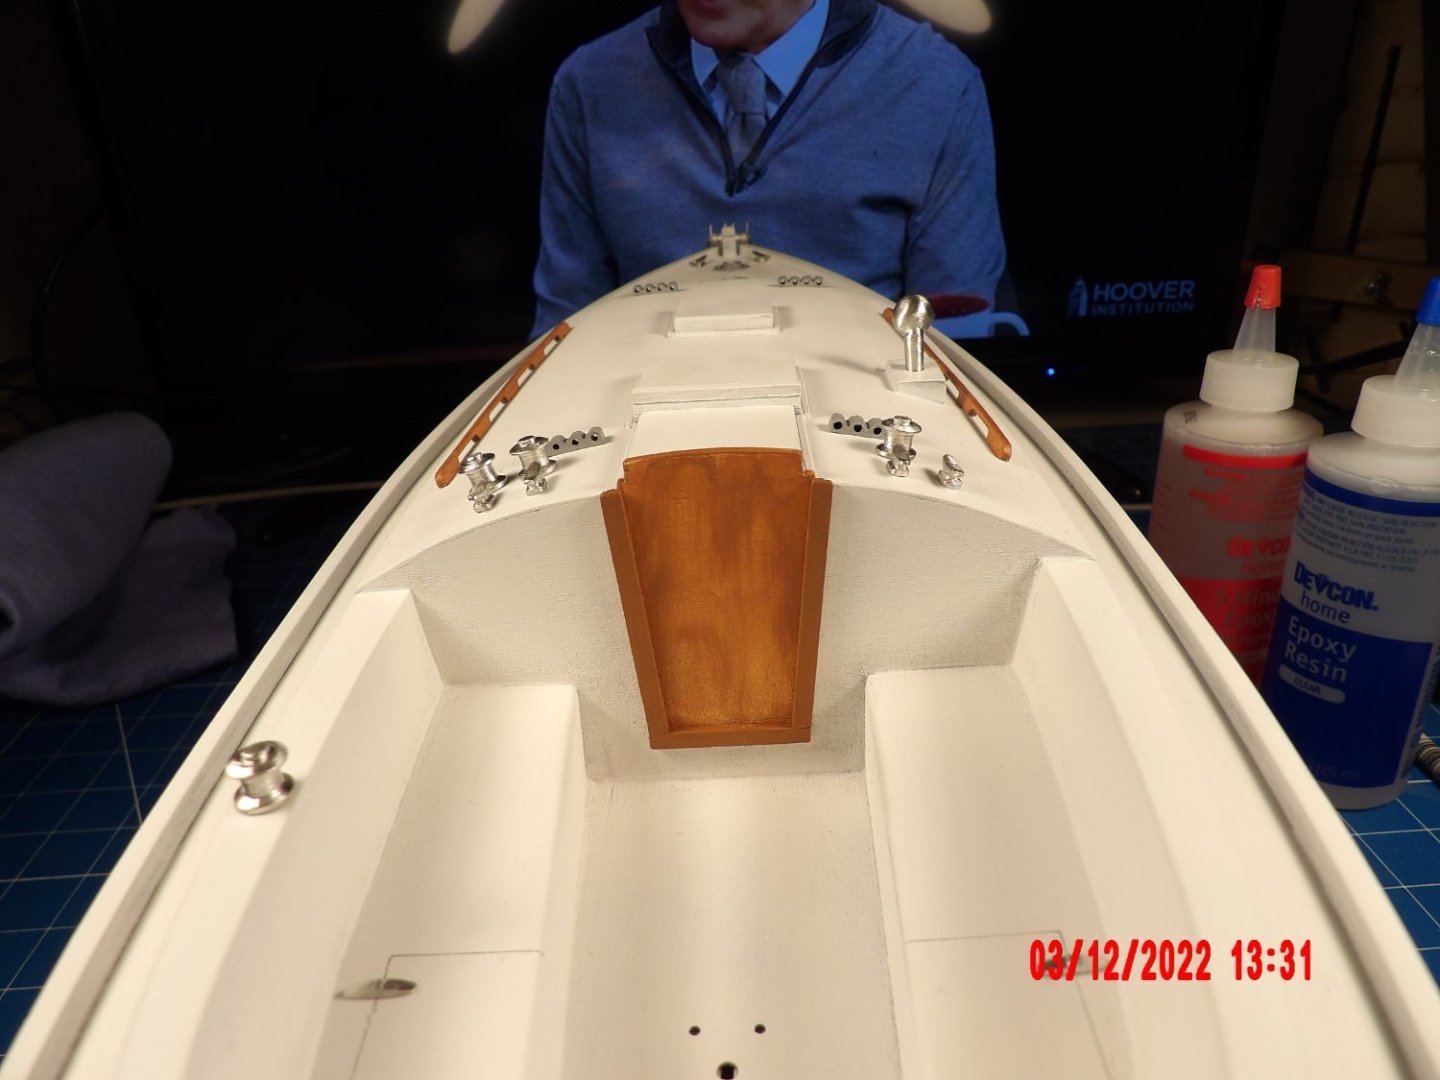
Spent a some hours cleaning up the metal parts for the deck and then installed them. I wish I'd noticed earlier- there are four holes laser-cut for winches located on the aft of the cabin roof, but there are only three winches required, two port, one starboard. I filled the extra hole and touched up the paint. No biggie, but I am finding that doing brushed paint repairs on airbrushed surfaces is difficult. The different textures reflect light differently, and are apparent. However I don't really think anyone will notice besides myself. I decided to leave the ventilator (red interior) with a polished metal finish rather than white painted. I saw online both versions, and felt that there is enough white already, although I like the clean look. . . But the "stainless" or "chromed" look is also appropriate for a modern boat. I should have addressed this earlier- the forward three port openings on the cabin wall need to have interior structural elements painted black. As always, photos reveal areas needing touch-up! In a sign of encroaching age-related mental deterioration, I found that my online perusal of history, photos, and sale advertising for these boats somehow morphed into shopping. I don't know how to sail, so this is especially ridiculous. I don't have room in my yard or driveway for even the smallest of these boats. I started thinking of purchasing a small lot. . . b


- 111 replies
-
- 9
-
-
-
- Nonsuch 30
- Model Shipways
- (and 1 more)
-
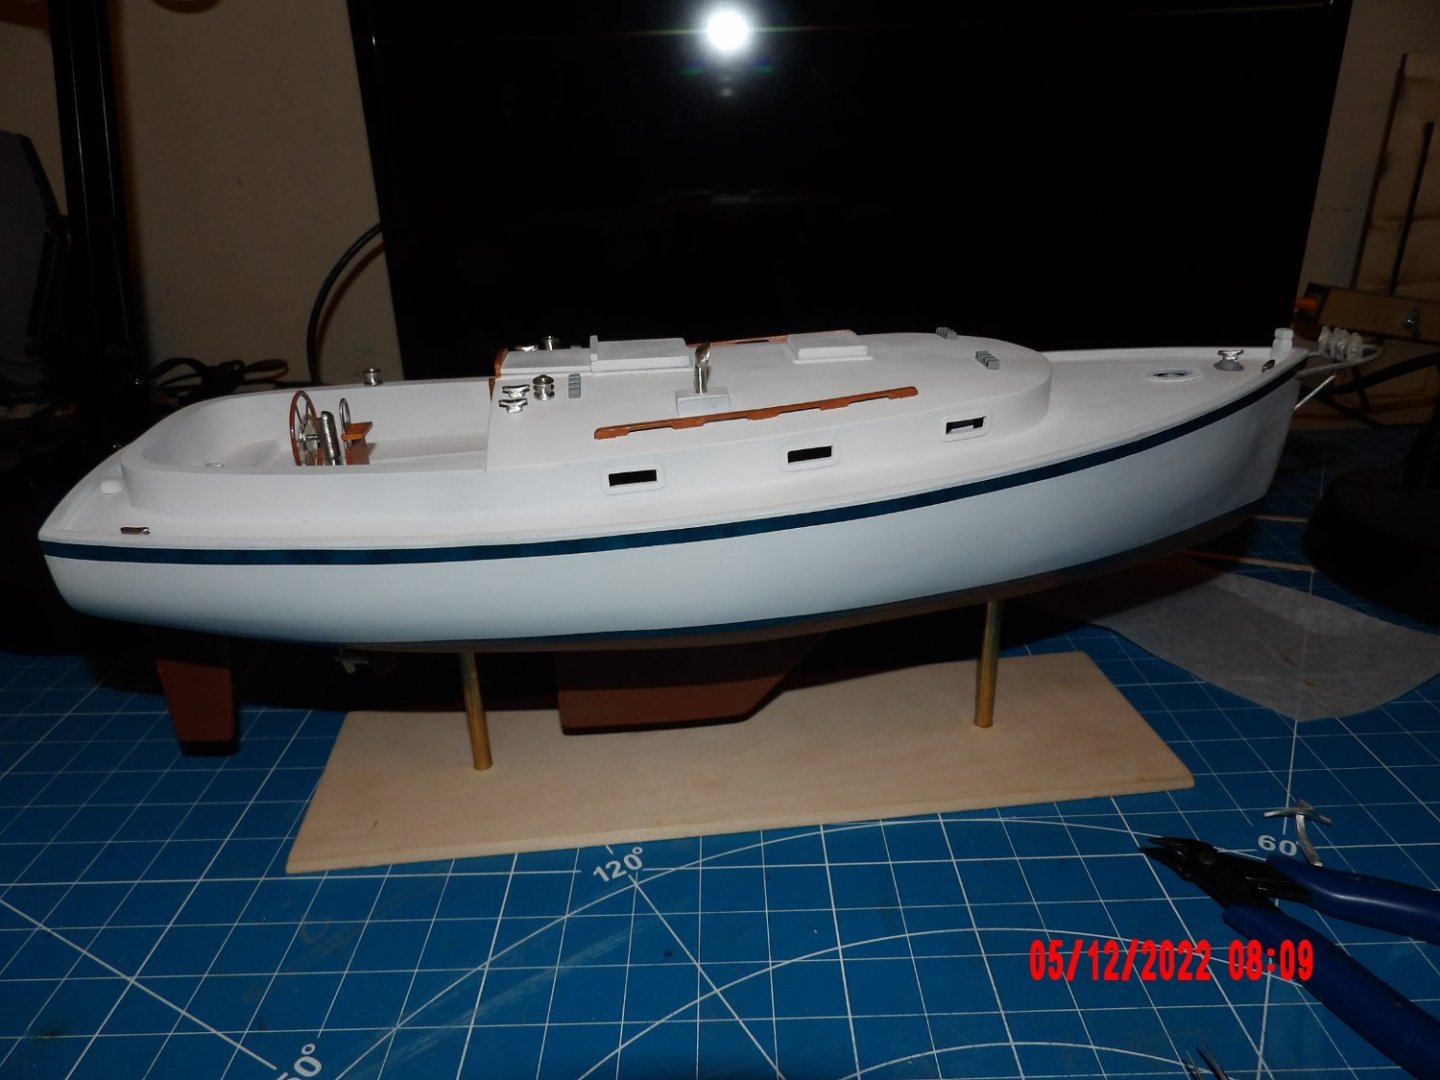
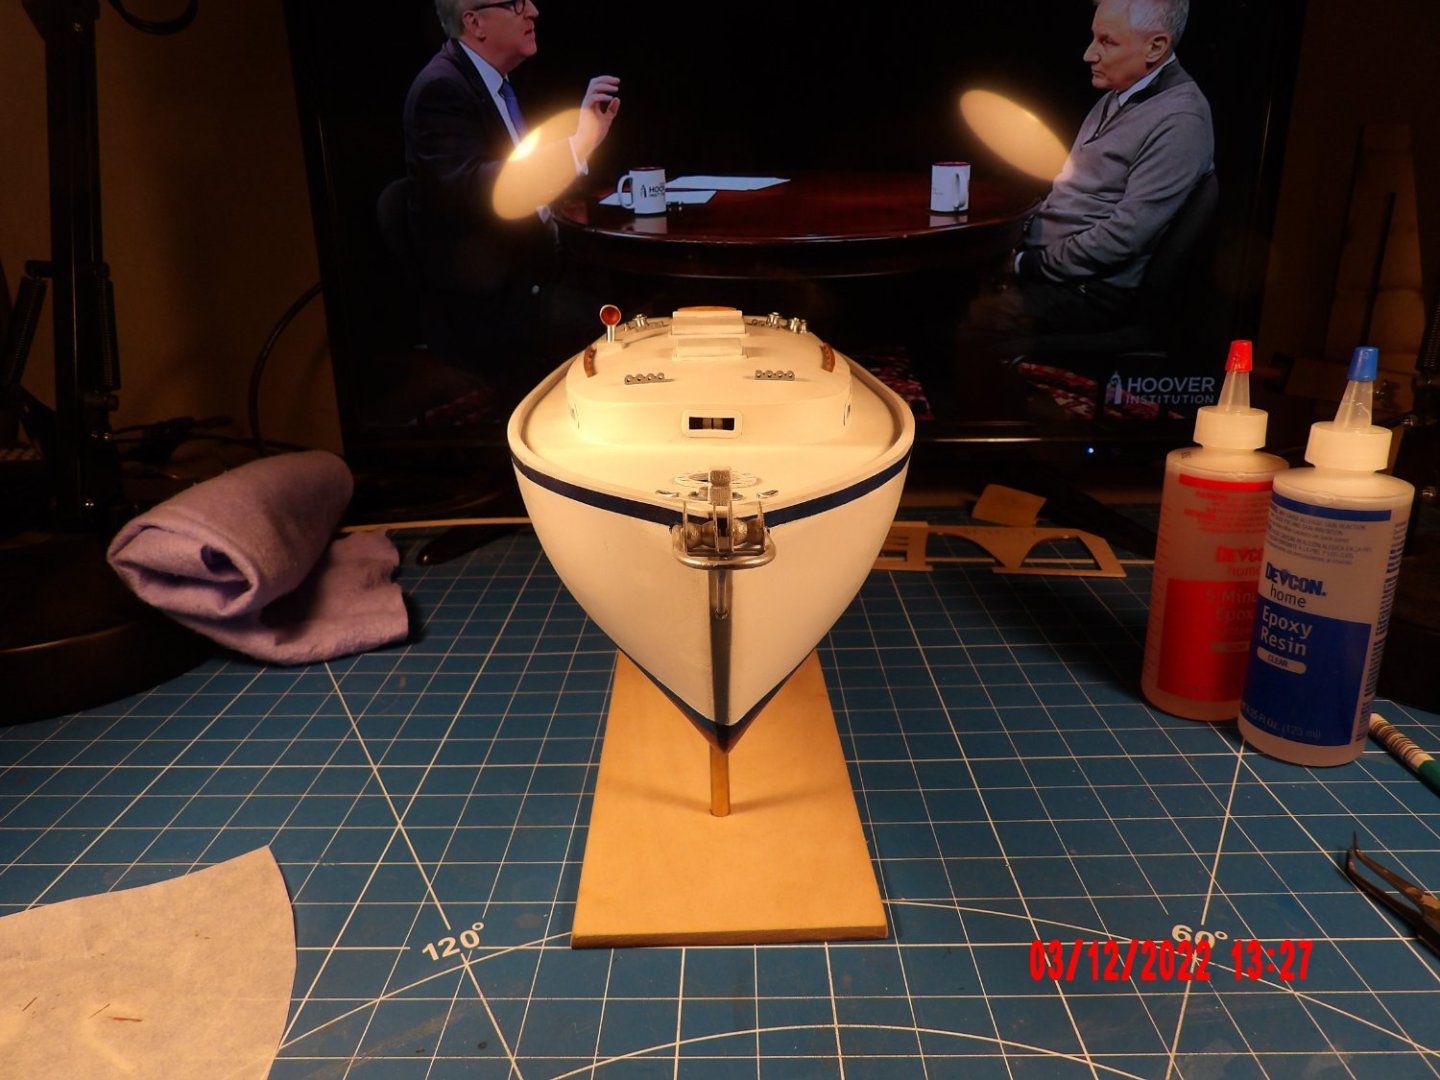
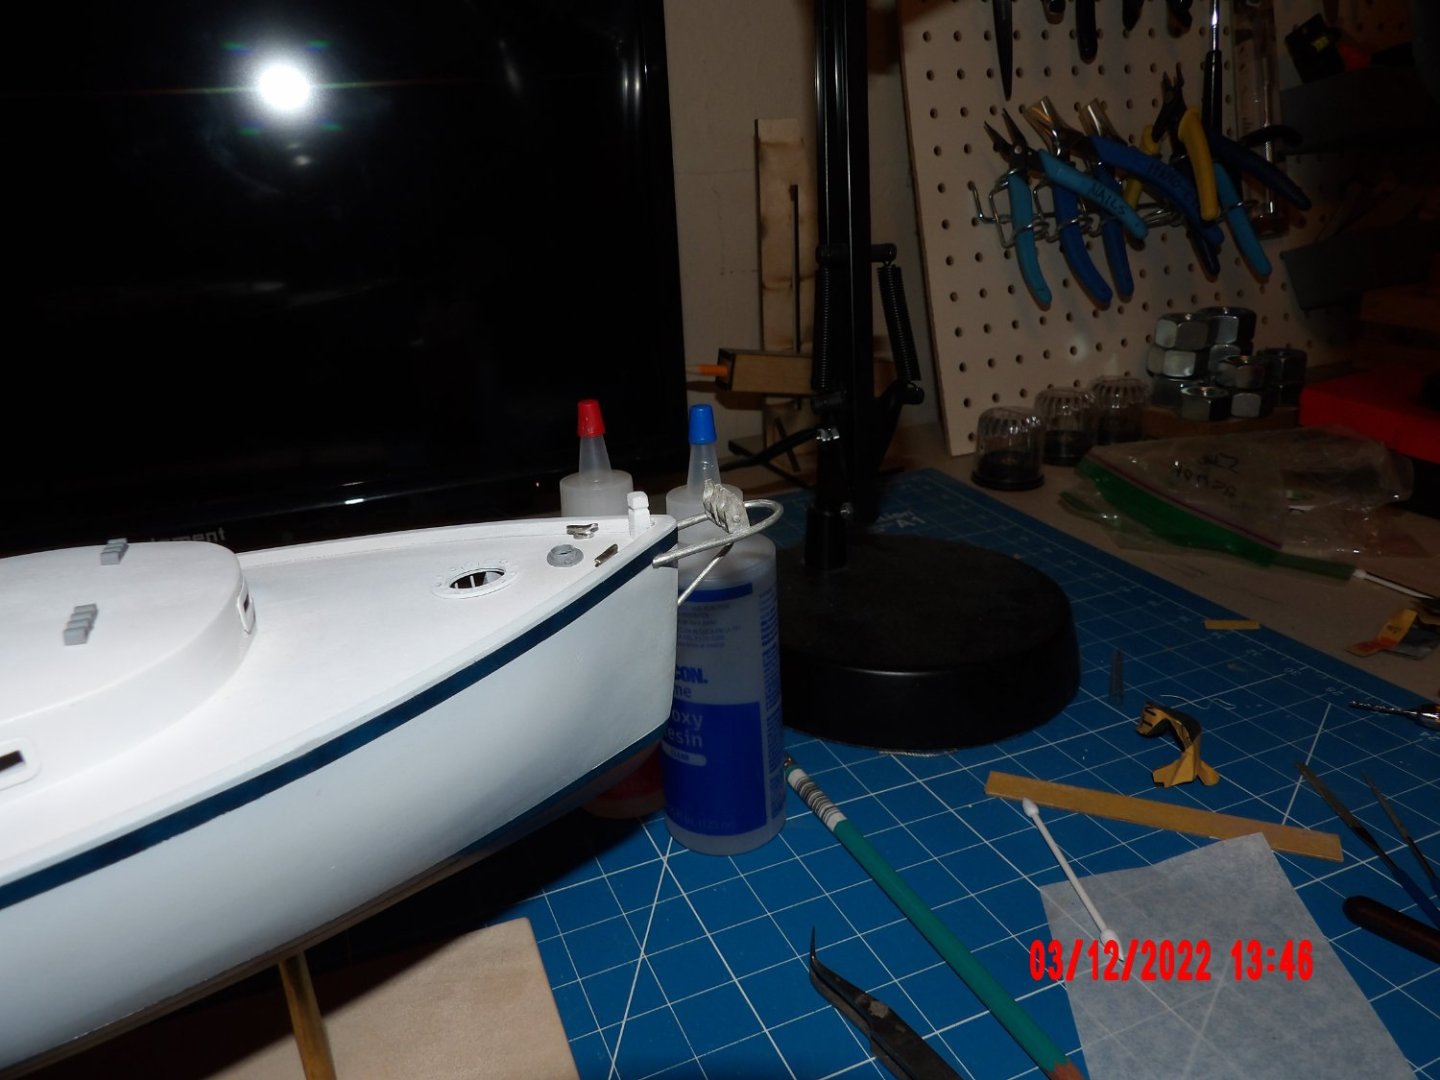
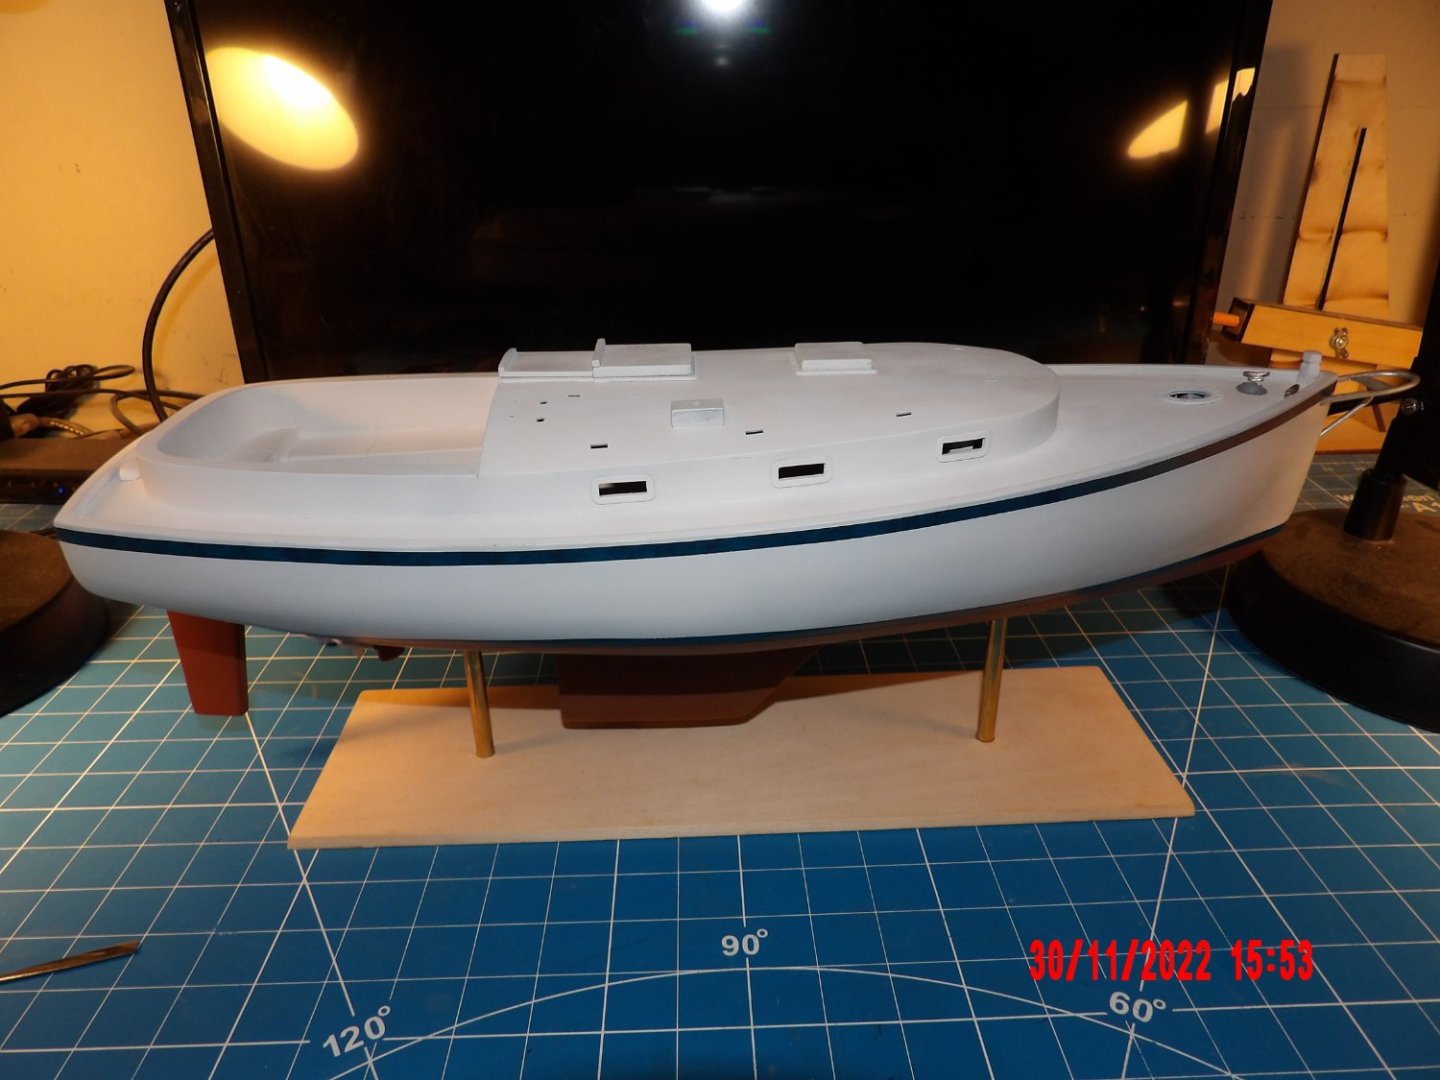
Thanks guys, for the nice comments. Outfitted the boom and mast with the required fittings. There seem to be minor discrepancies between the manuals' text and the plans, and between the plans and the rigging plan, regarding placement of fittings for the wishbone boom. After some (a lot of) studying, I made my best guesses, installed the fittings and primed the assemblies. I don't think any of the fitting locations will be functionally impactful regardless, but any chance to activate obsessiveness will be taken and I guess I enjoy that! I decided to paint the blocks that are attached to the boom and mast, and leave the others in bright metal. Through some trick of photography, all of the photos don't show the pieces as primed gray, but they are gray. . . Permanently installed the boat on its supports. Added the pulpit, spurling, and a couple of the cleats. All is looking pretty good to me (especially without magnification). I do see now that the pulpit should have been installed a with a degree or so higher incline to match the upsweep of the bow. It is not installed horizontal, but does create a visual discrepancy as it is. I am thinking of adding rollers for the anchor chain which may cover for this somewhat. It was very tricky installing these pieces (pulpit and support) on the fly. . . and I'm not going to attempt to change them now as I used epoxy.


- 111 replies
-
- 8
-
-
- Nonsuch 30
- Model Shipways
- (and 1 more)
-
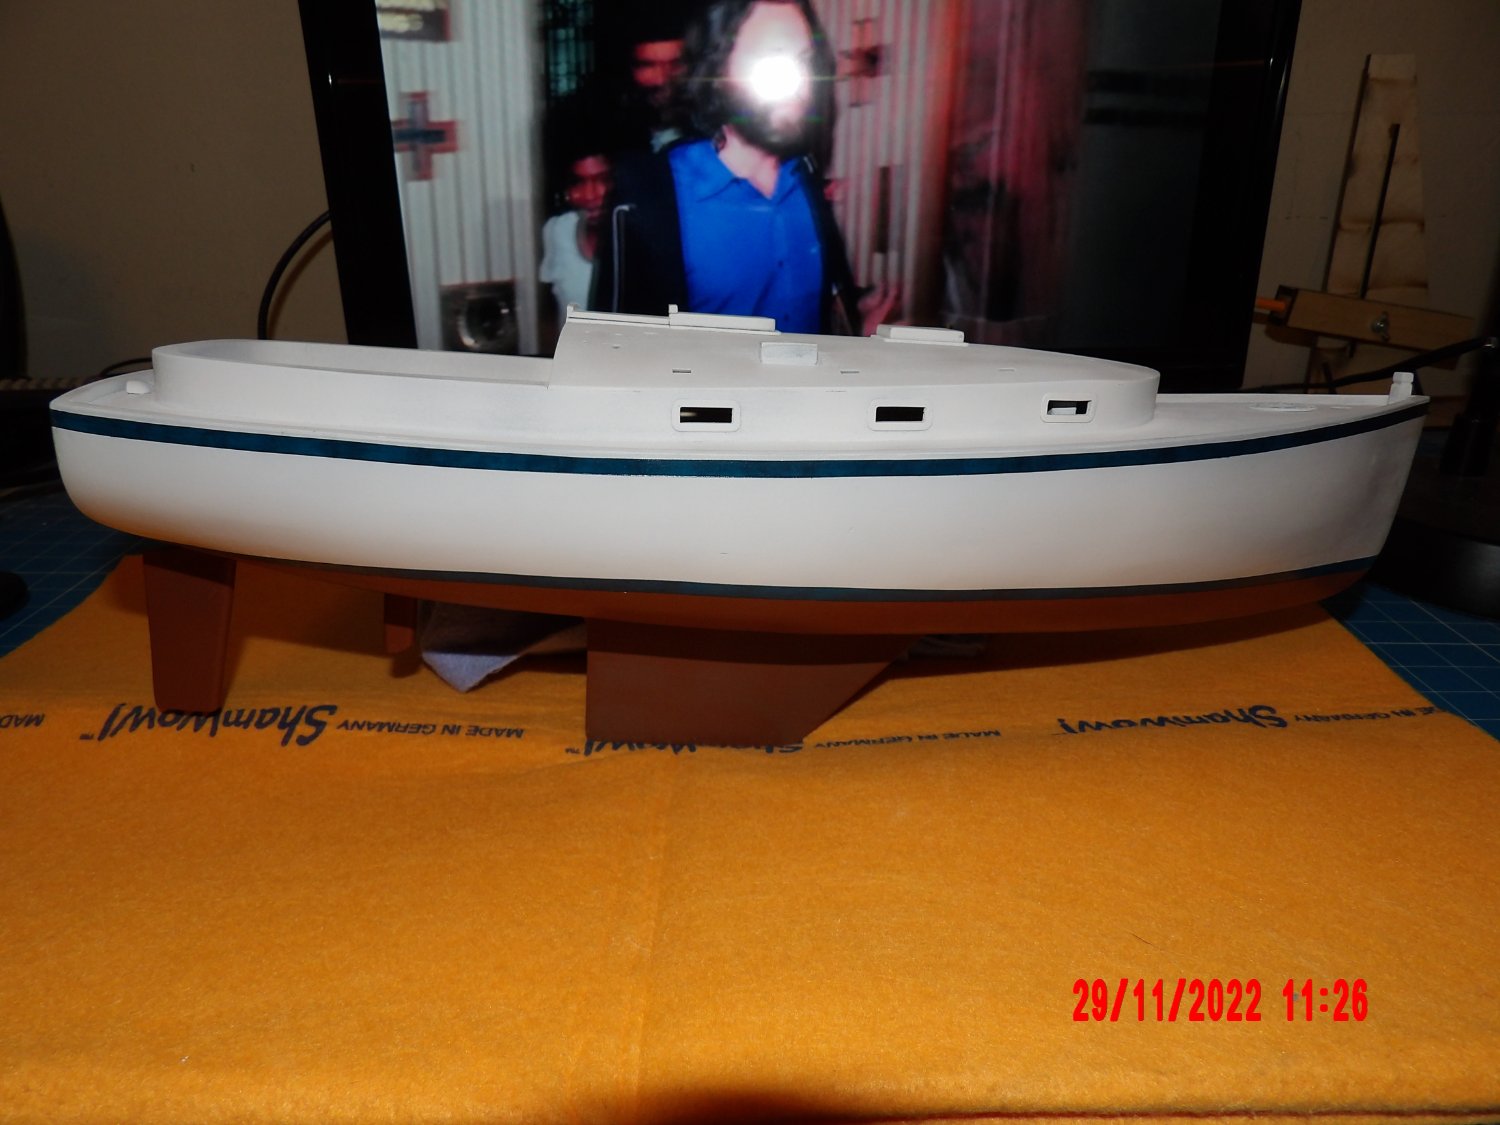
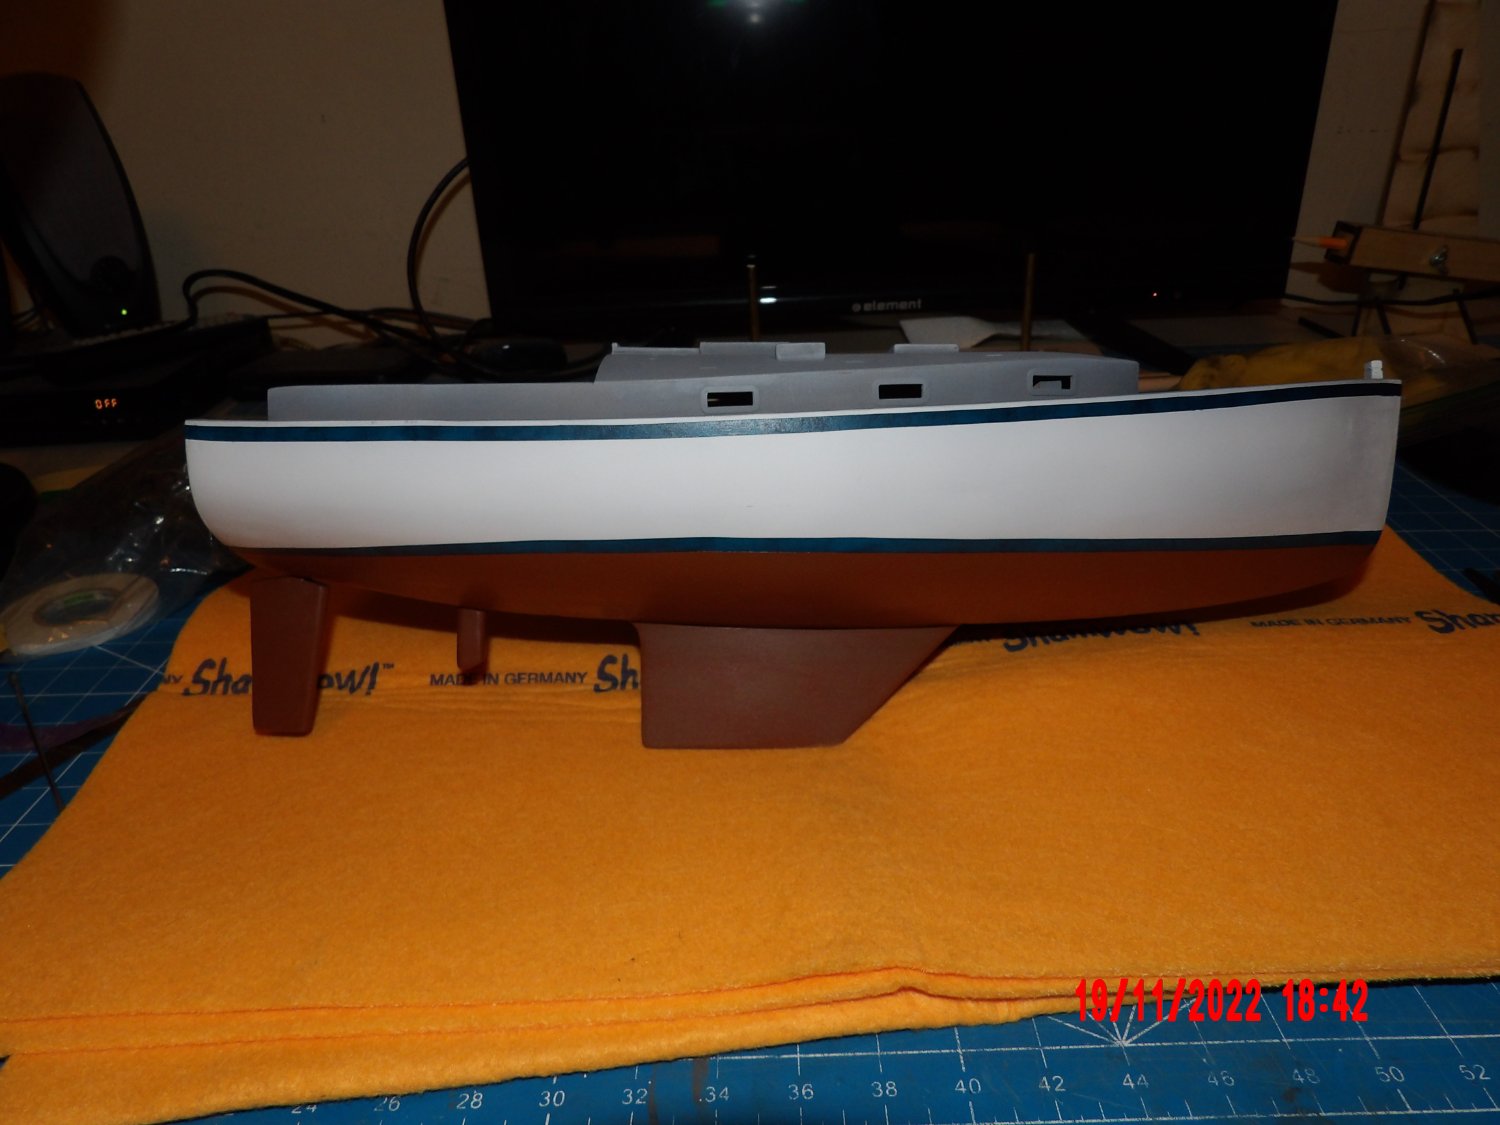
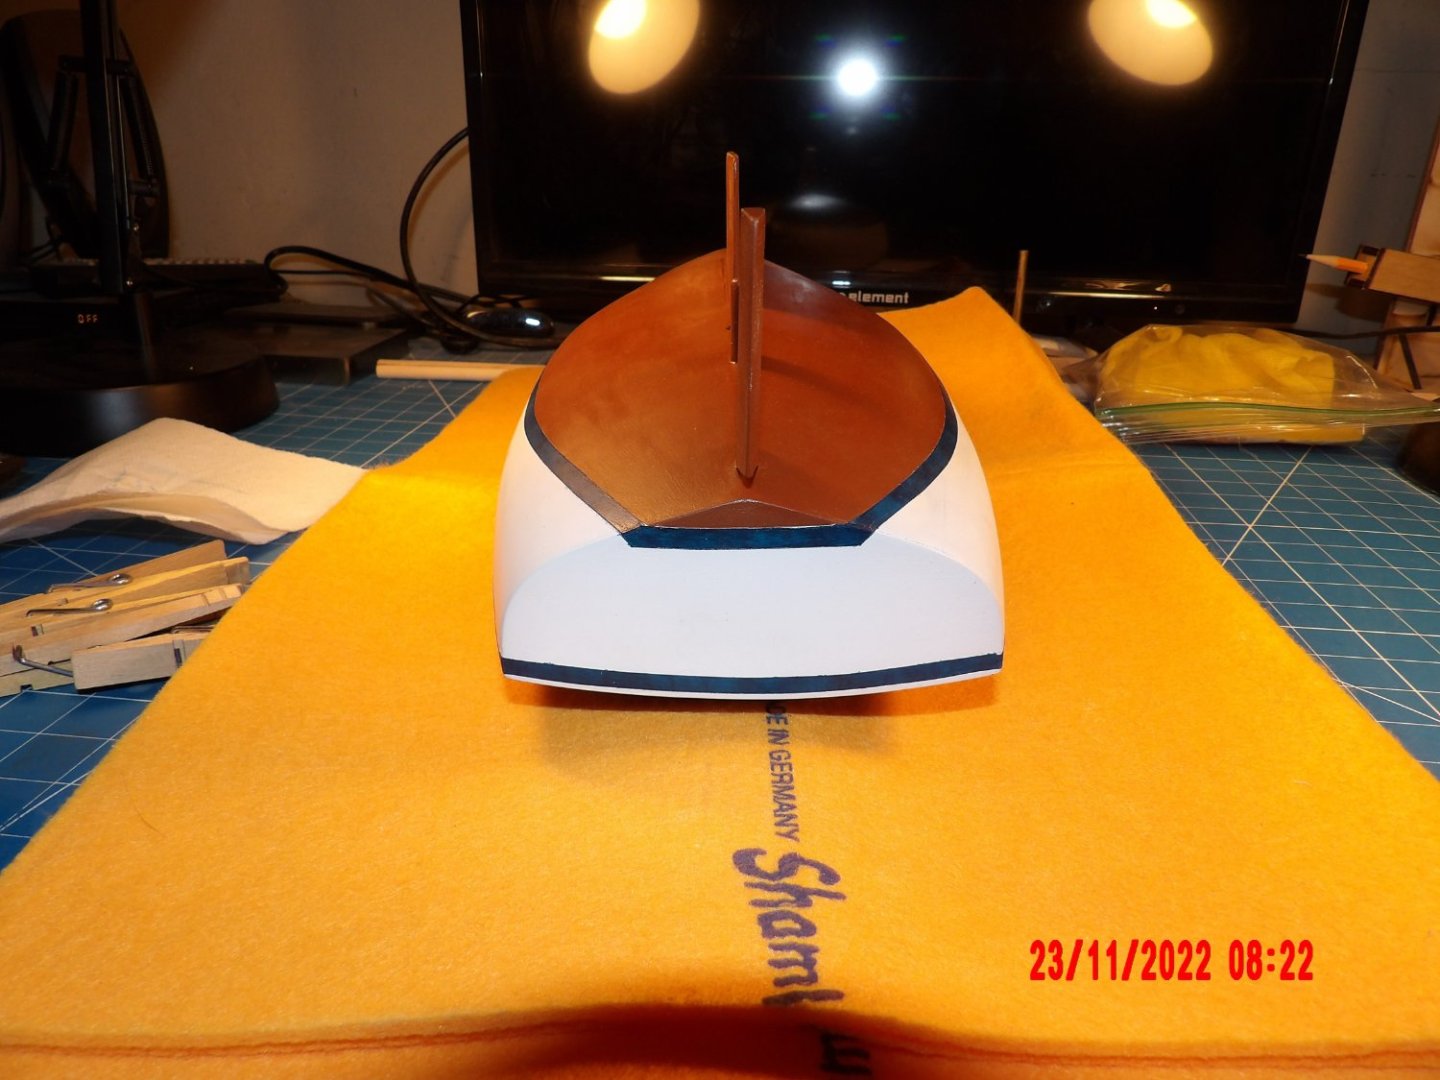
Finished the painting of the hull, except for some touchup needed at locations of masking bleed. I should have been looking at pictures online before doing the transom. I had the idea that the width of the lower stripe should be maintained. Well, it looks kind of funky! Online pictures show the lower stripe is usually discontinued at the transom. It may have looked all right if I had allowed the stripe to thin in width. . . I'm a bit leery of trying to correct this, as removing the paint and repainting may lead to an even worse outcome. I may chalk this one up as a lesson learned.
- 111 replies
-
- 7
-
-
- Nonsuch 30
- Model Shipways
- (and 1 more)
-
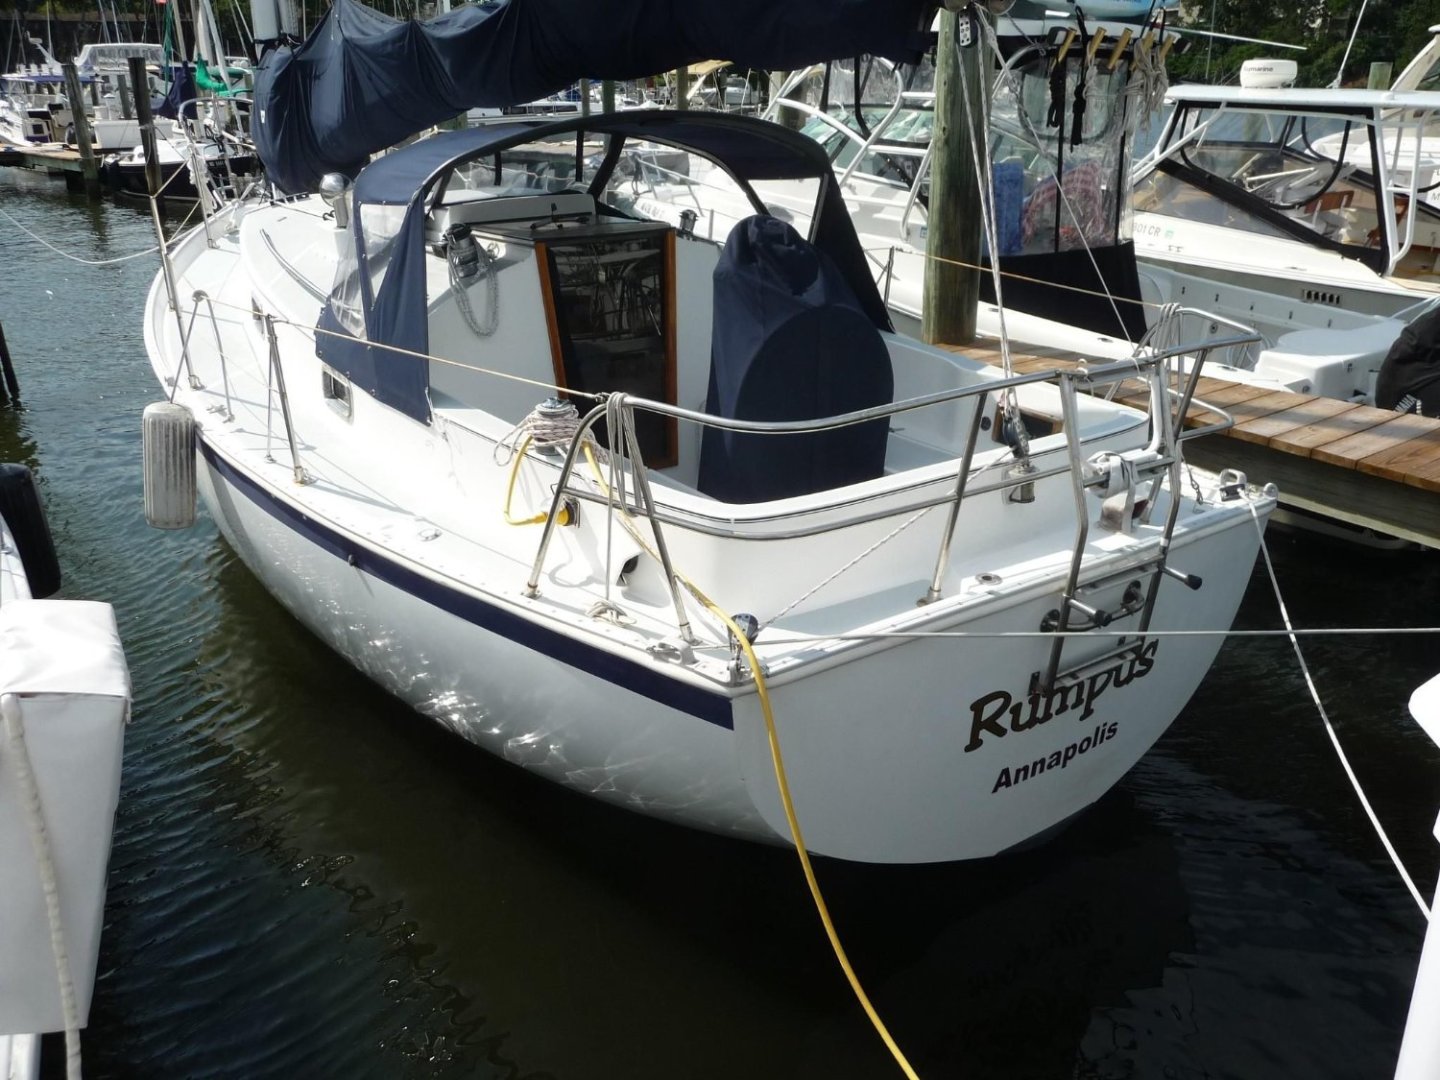
This is a fun kit to build. I particularly liked imagining life on the boat while assembling it. For me, adding period-appropriate figurines at the end of the build really enhanced the finished model. Since the kit is not supplied with walnut planking in the new version, you might consider painting the hull, as these types of boats were almost certainly always painted. Your call, though!
-
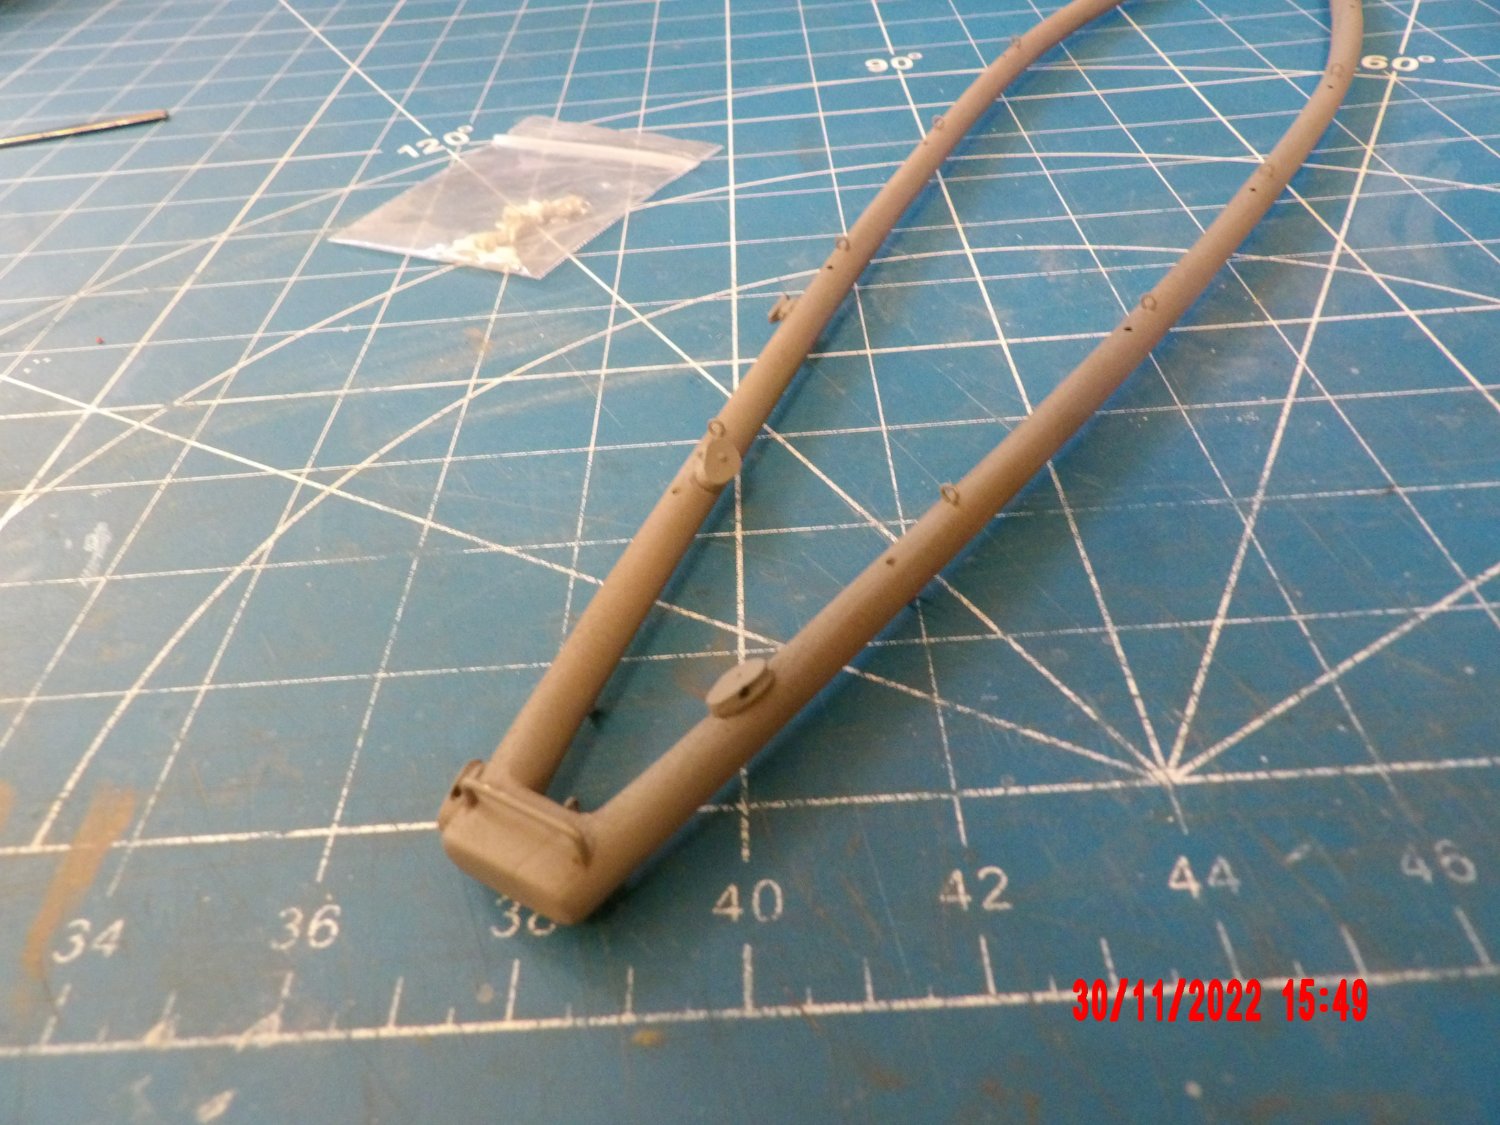
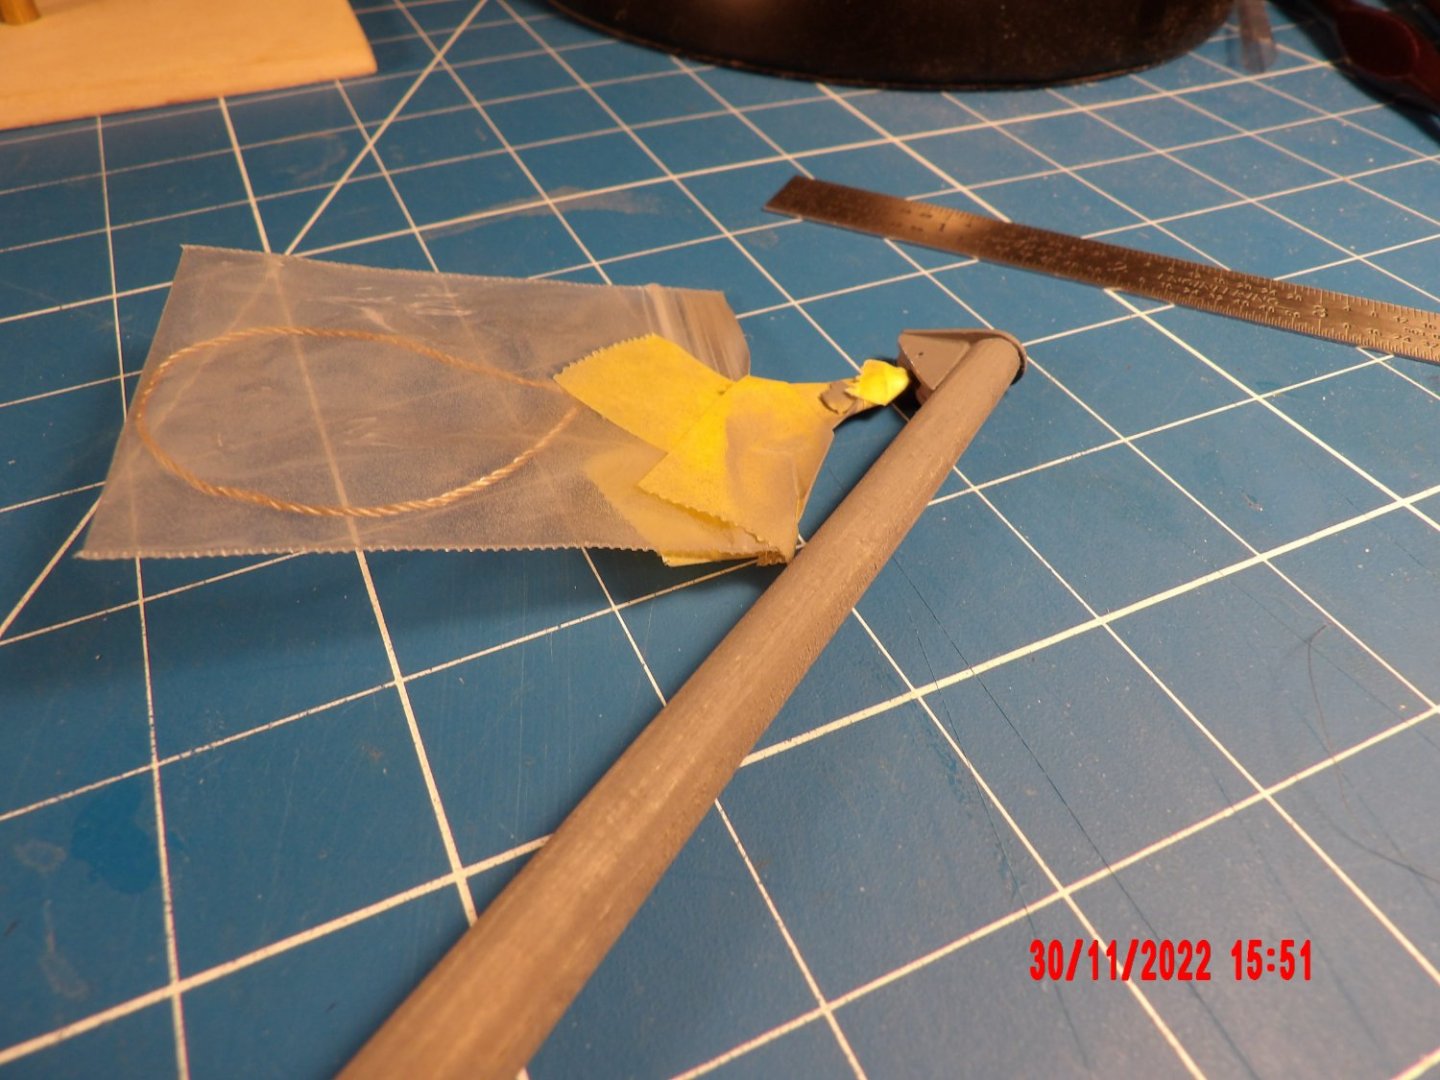
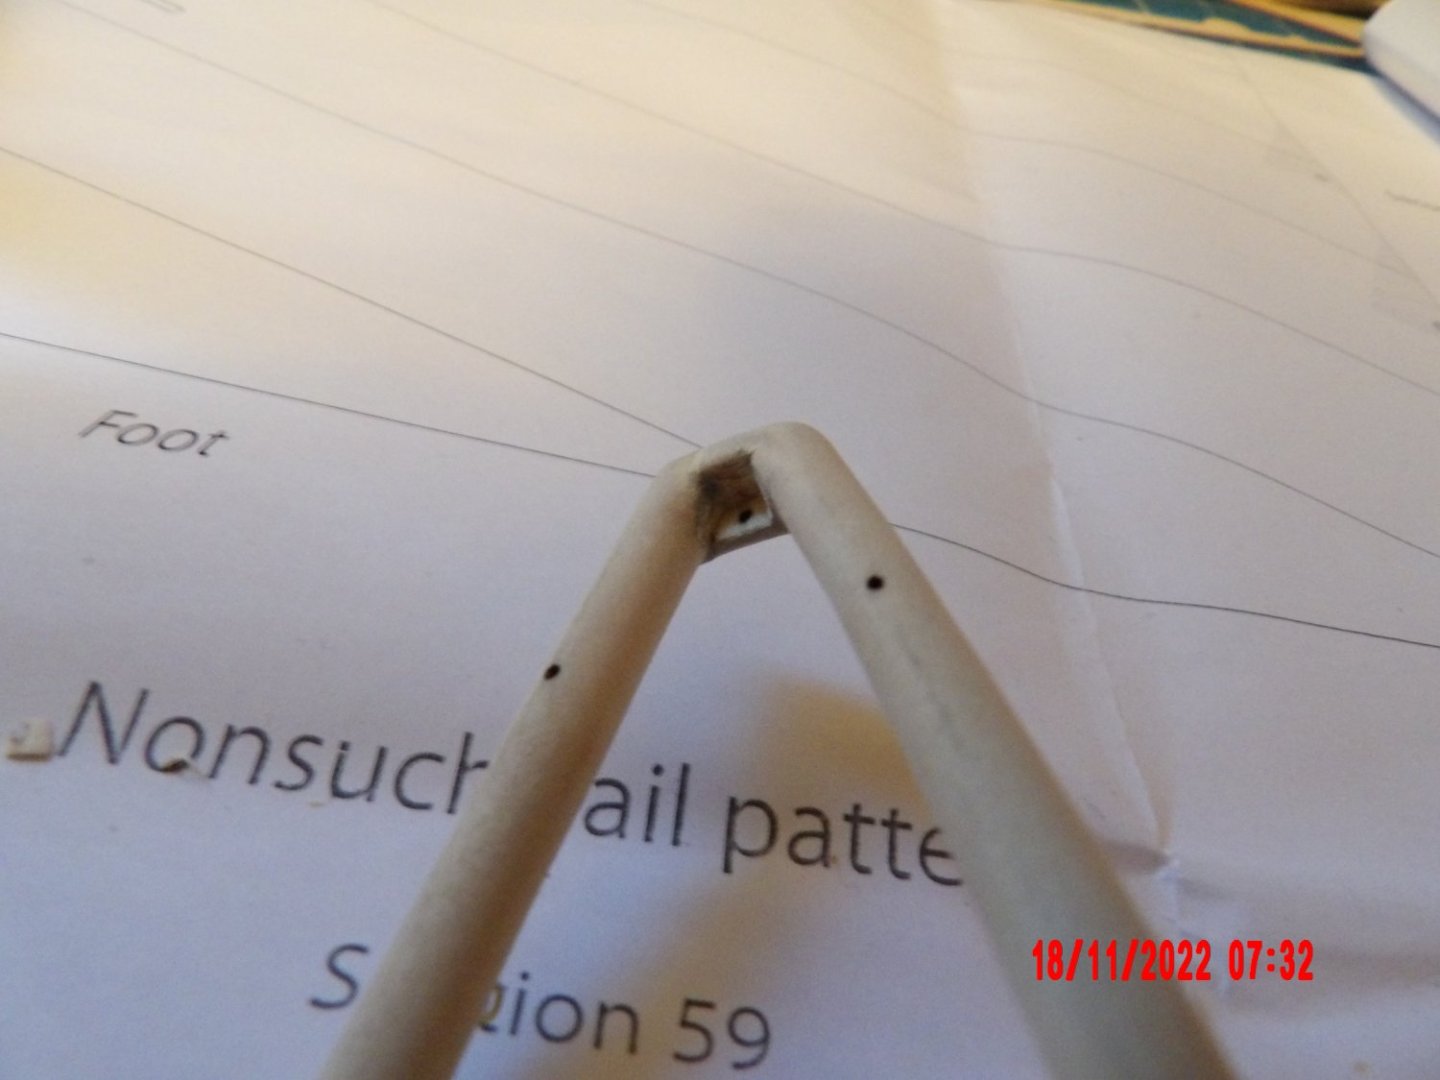
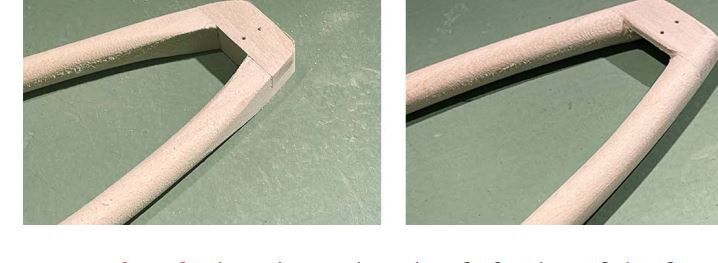
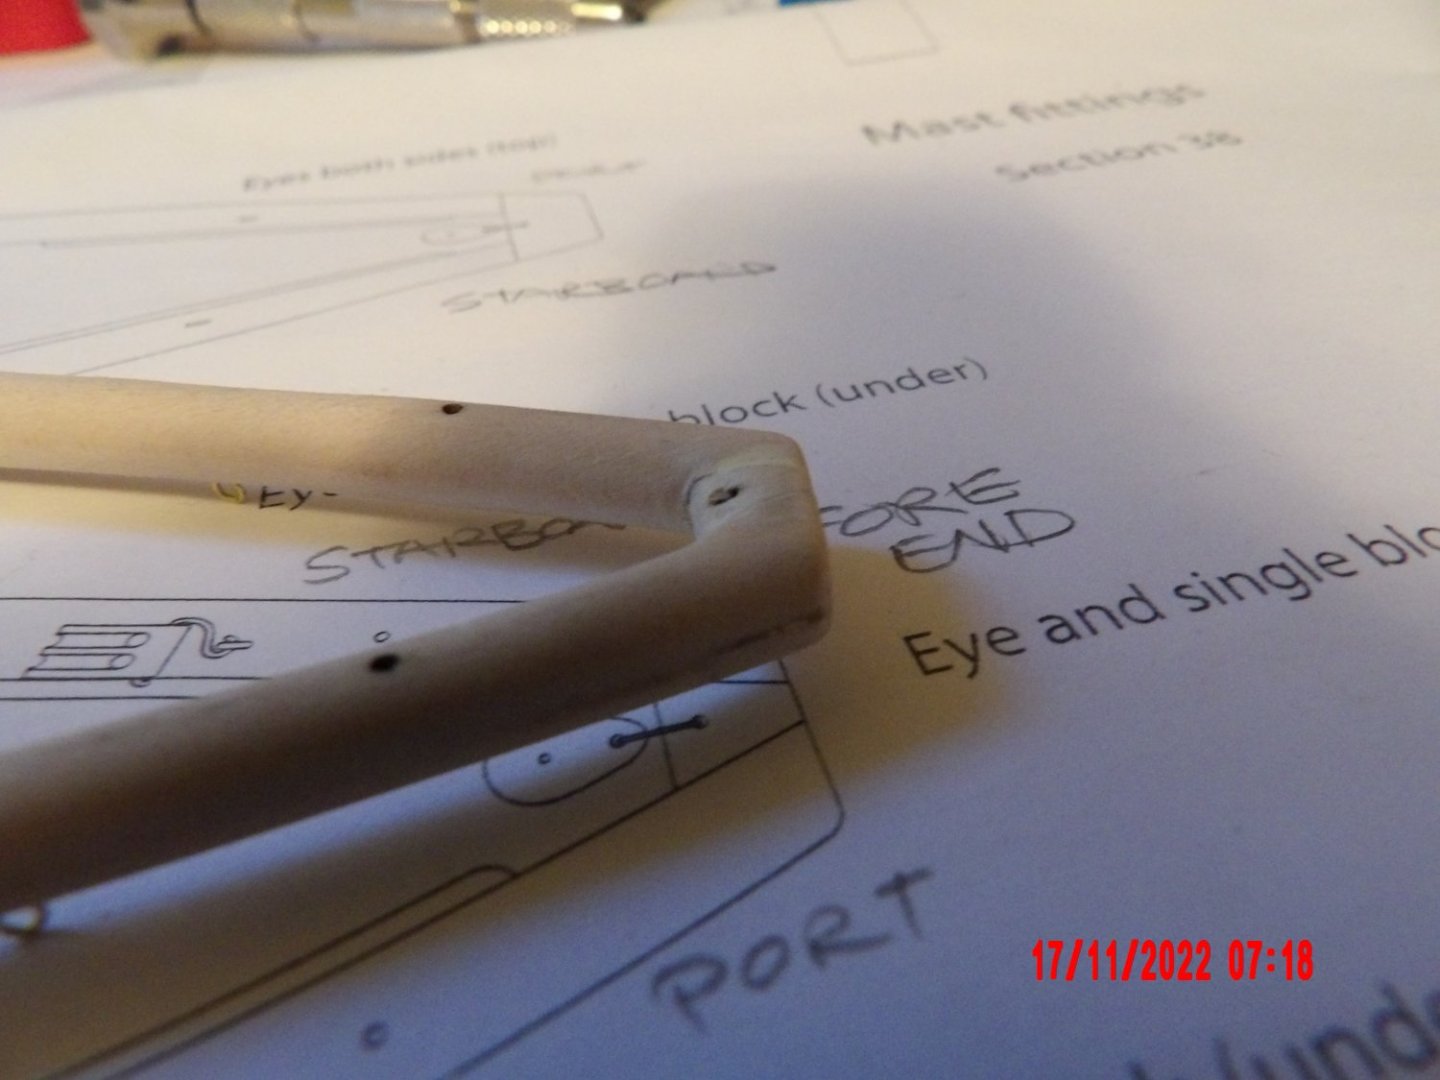
Thank you. I can't say that adding the safety rails and bimini is my idea, as they are mentioned in the kit manual as possibilities. . . I decided to try because while looking at real-life examples, every Nonsuch had safety rails added, and most had the biminis. I decided that these would be a low-risk addition, in that they could largely be built off the model. Also, a real challenge! I finally did some scalpel carving, with a new blade, to thin the fore end-cap of the wishbone, it still needs a little refinement but the gross wood removal is done:
- 111 replies
-
- 6
-
-
- Nonsuch 30
- Model Shipways
- (and 1 more)
-
I do understand the need to fly. . . It's a lot of fun. I still get out my RealFlight simulator sometimes, and I still have an unused Slowstick plane (relatively easy to fly), which I may fly in the future. The hard part is finding a place to fly. . .
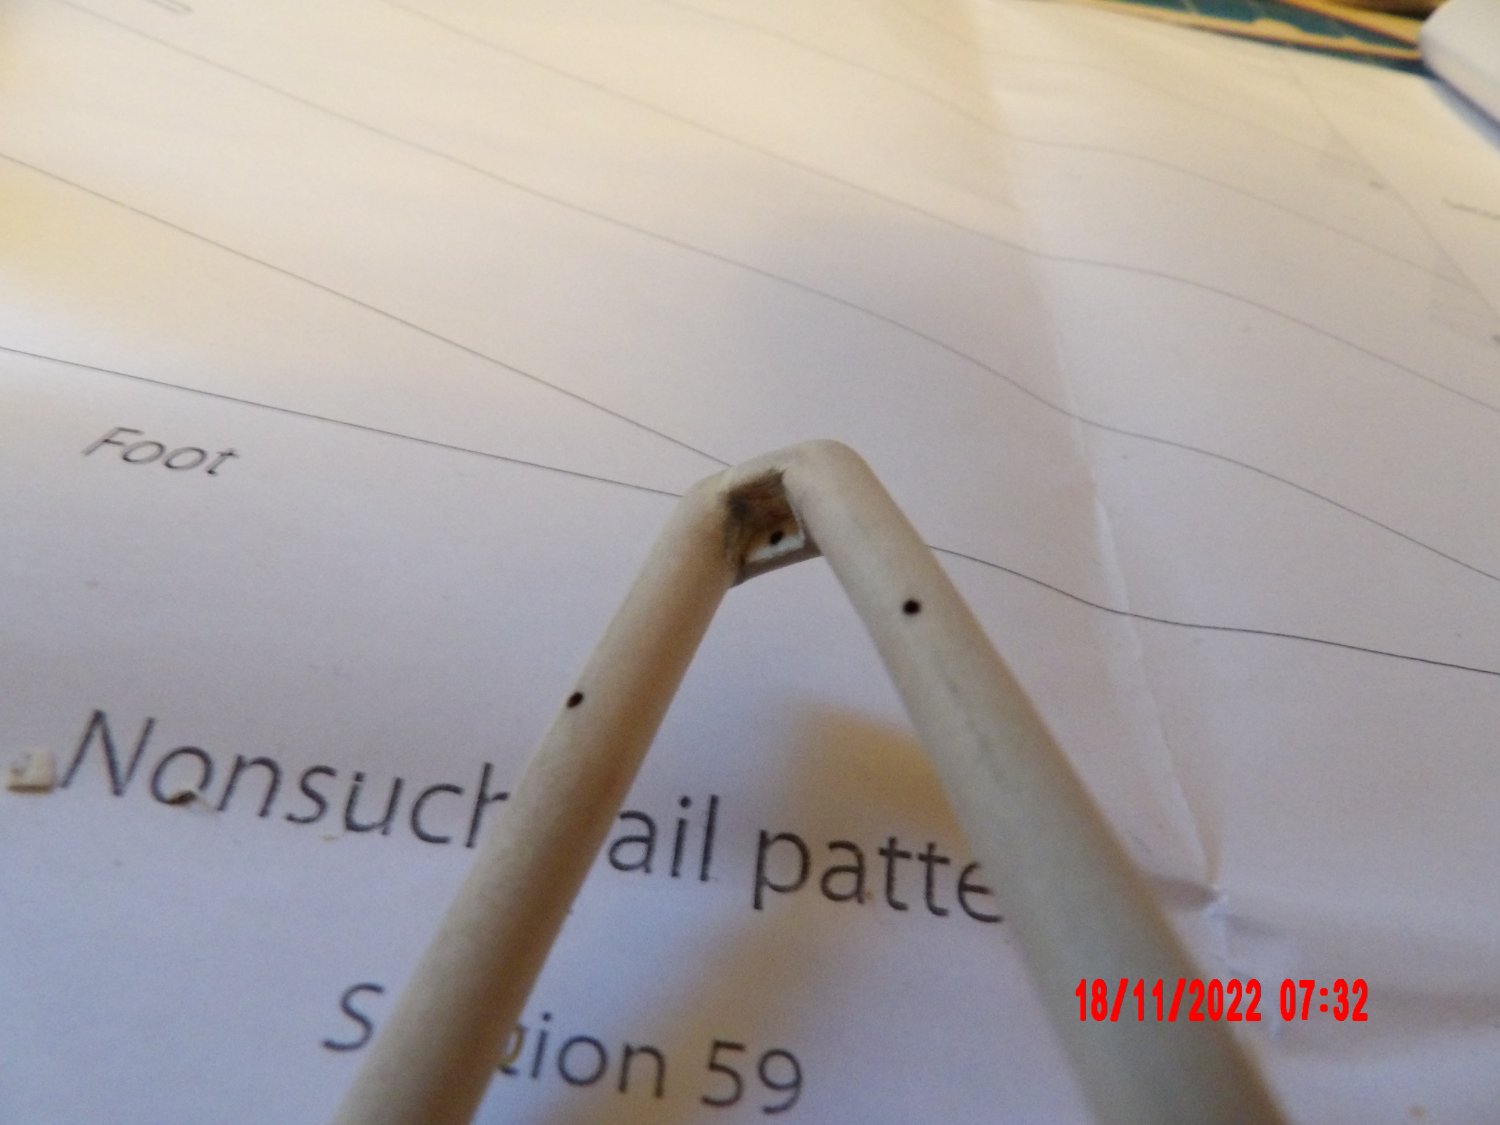
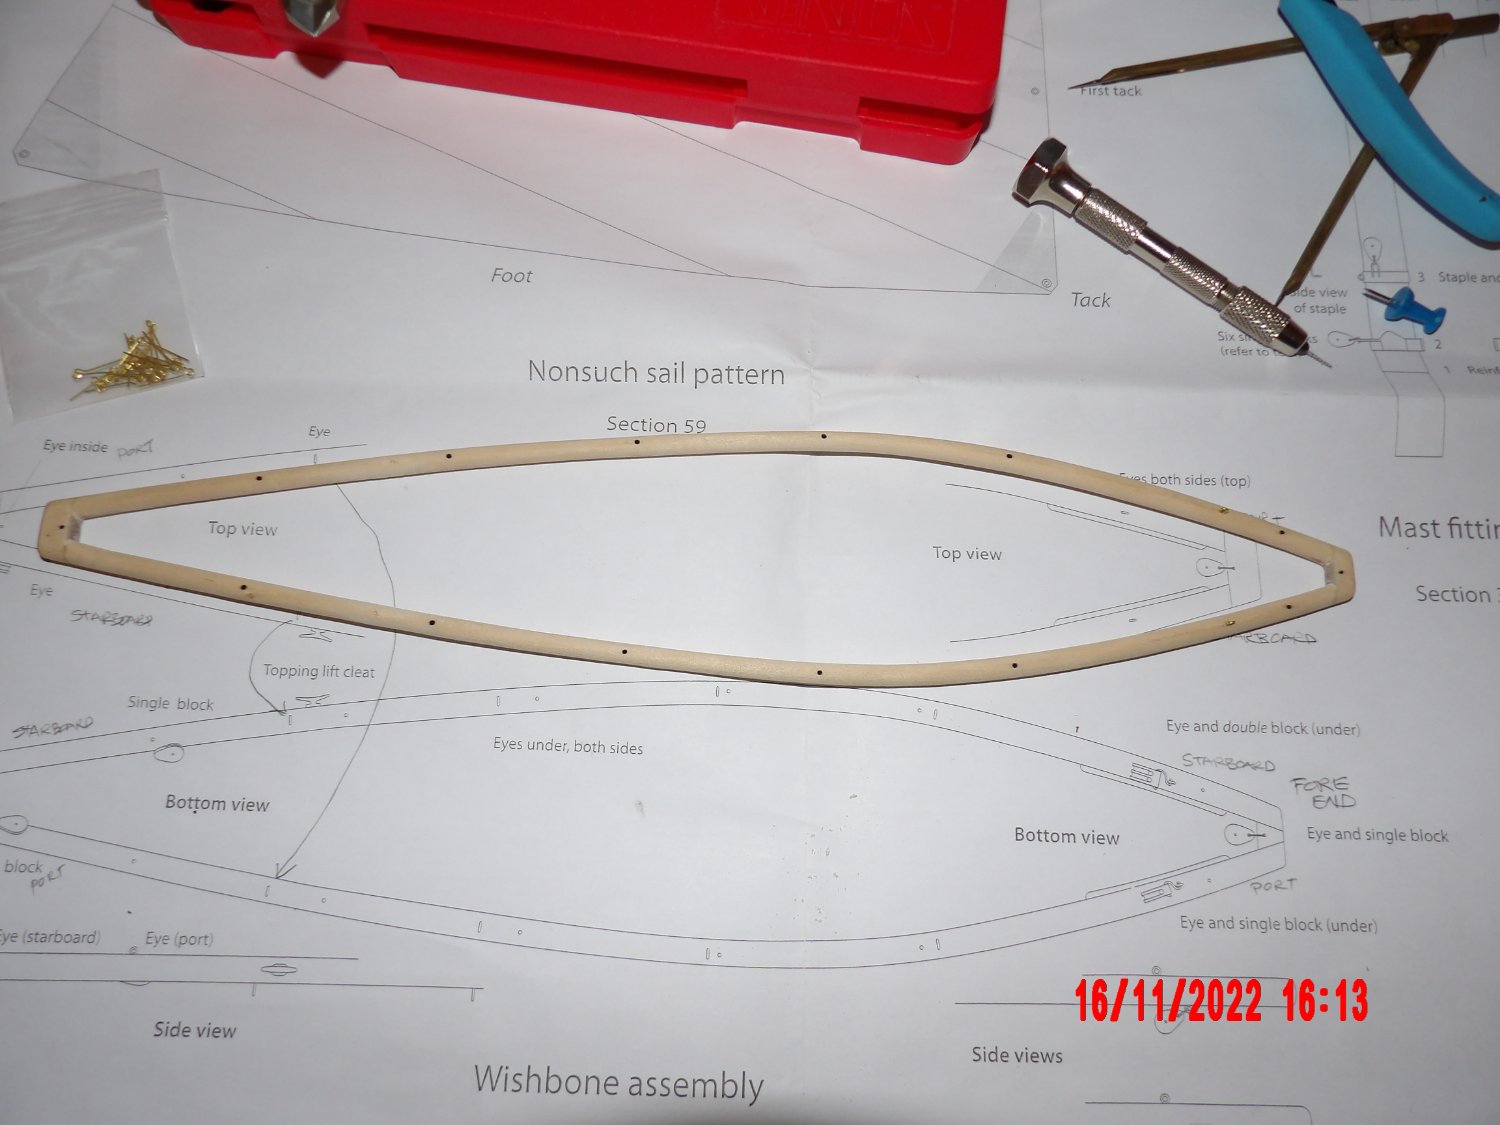
-
Show the assembled wishbone boom. I'm trying to make this part as nice as I can, as it and the very tall mast are what distinguishes this type of boat from others. I'm having a little trouble with the "super-detail" of thinning the fore end cap, so that an "S" hook for a block does not end up looking out of scale. I tried filing the bottom side of the cap at an angle and it does not seem possible to thin it enough that way. I'm thinking that this thinning should be a "step," so that a "U" shape is not created, looking at the piece end-on. From the kit manual (top view): I also tried a Dremel attachment that turned out to be not quite suitable. I might attempt to carve it out with a scalpel, or just use an eyebolt as indicated on the plans. Here's my assembly at this point: Bottom view of fore-end cap: I'm very happy with this sub-assembly thus far. On another subject, this kit does not supply safety rails for the deck. And indeed, it looks like these were installed by owners after purchasing the boats, as I see many different styles used in pictures on the internet. This seems a good opportunity to gain a new skill, soldering brass. I bought a good supply of 1/16" inch dia. hard brass rod, which should represent 1-1/2" inch dia. at this scale. I don't think I've done any soldering since junior high school metal shop. If I can do these and a bimini, it will probably double the time constructing this model, and thus double the entertainment and bang for the buck I get from this kit. . .

- 111 replies
-
- 7
-
-
- Nonsuch 30
- Model Shipways
- (and 1 more)
-
Nice project. I'd like to do an RC boat model one day. I did planes for a while, but making mistakes in the air gets rather expensive. . . Have fun! I'm following. Bob