bobandlucy
-
Posts
512 -
Joined
-
Last visited
Content Type
Profiles
Forums
Gallery
Events
Everything posted by bobandlucy
-
 Love the accessories, especially the books!
- 38 replies
-
- 4
-

-
- Norwegian Sailing Pram
- Model Shipways
- (and 2 more)
-
Steve, great build! I have used the B/C Brass Black. Works great, pieces should be very clean. I use acetone and a pickling solution. Bob
-
Yep, this kit has some serious flaws, but it's still a lot of fun! b
-
Wow, that is a great savings! Thanks, I'm sure yours will come out fine as well. This is a real fun project. Lots of these boats for sale- its fun to read the ads and dream. . .
-
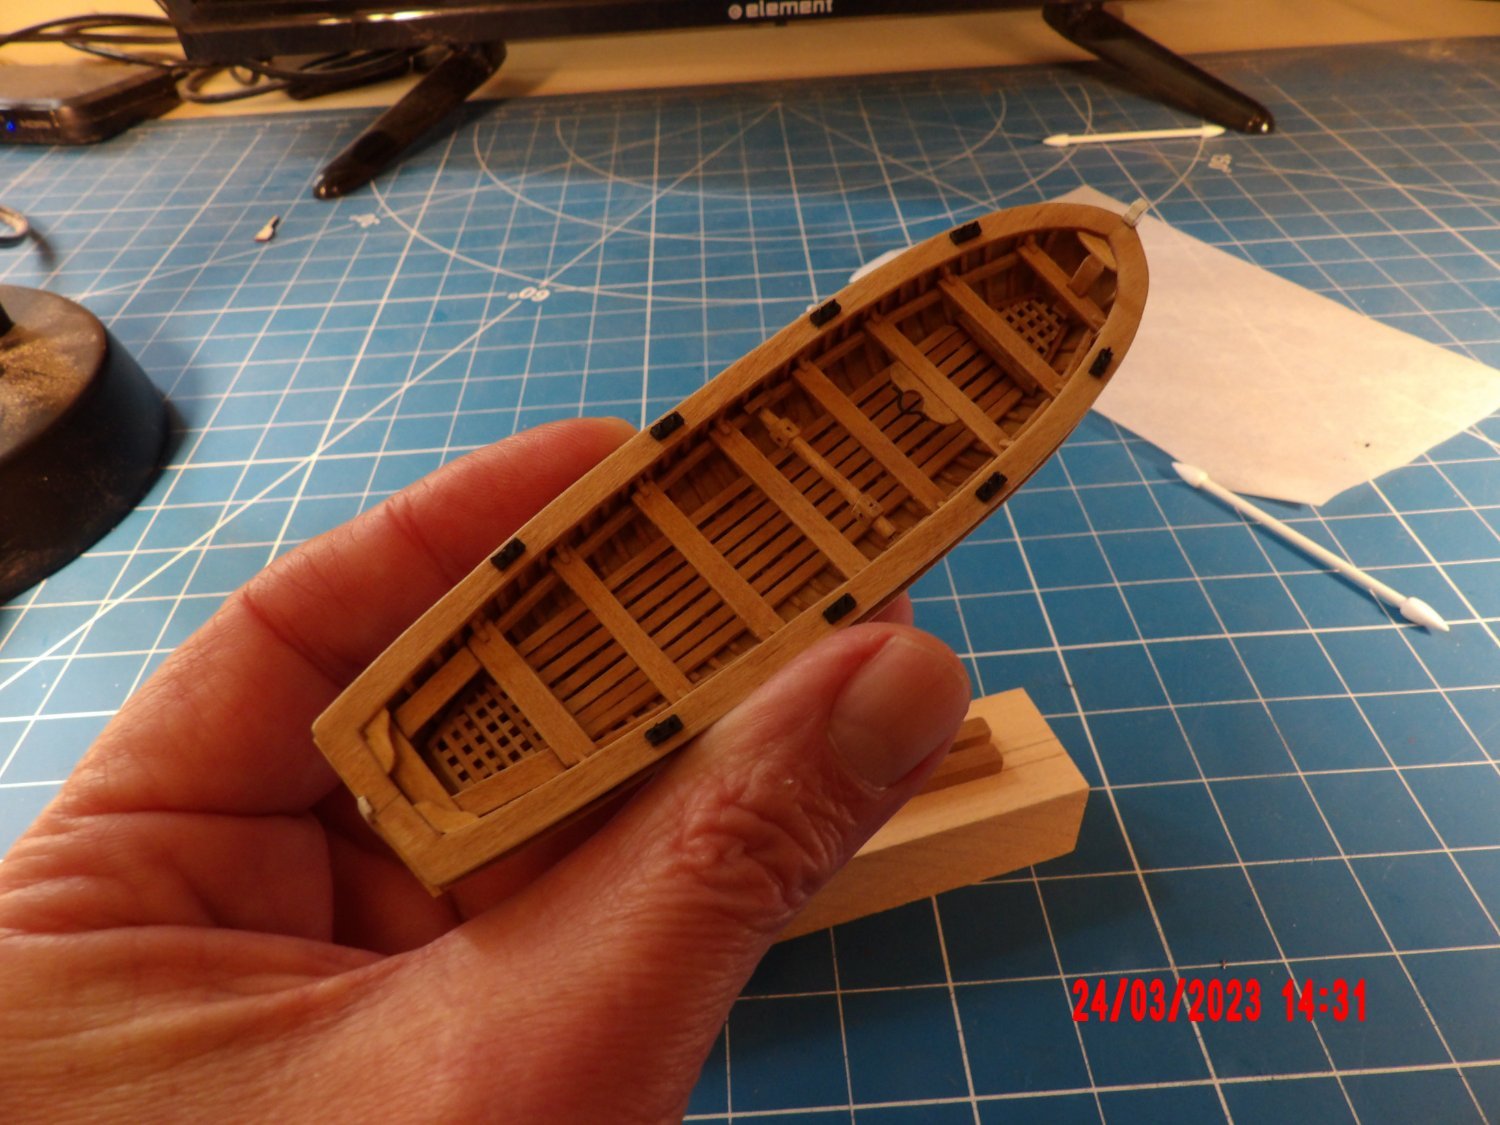
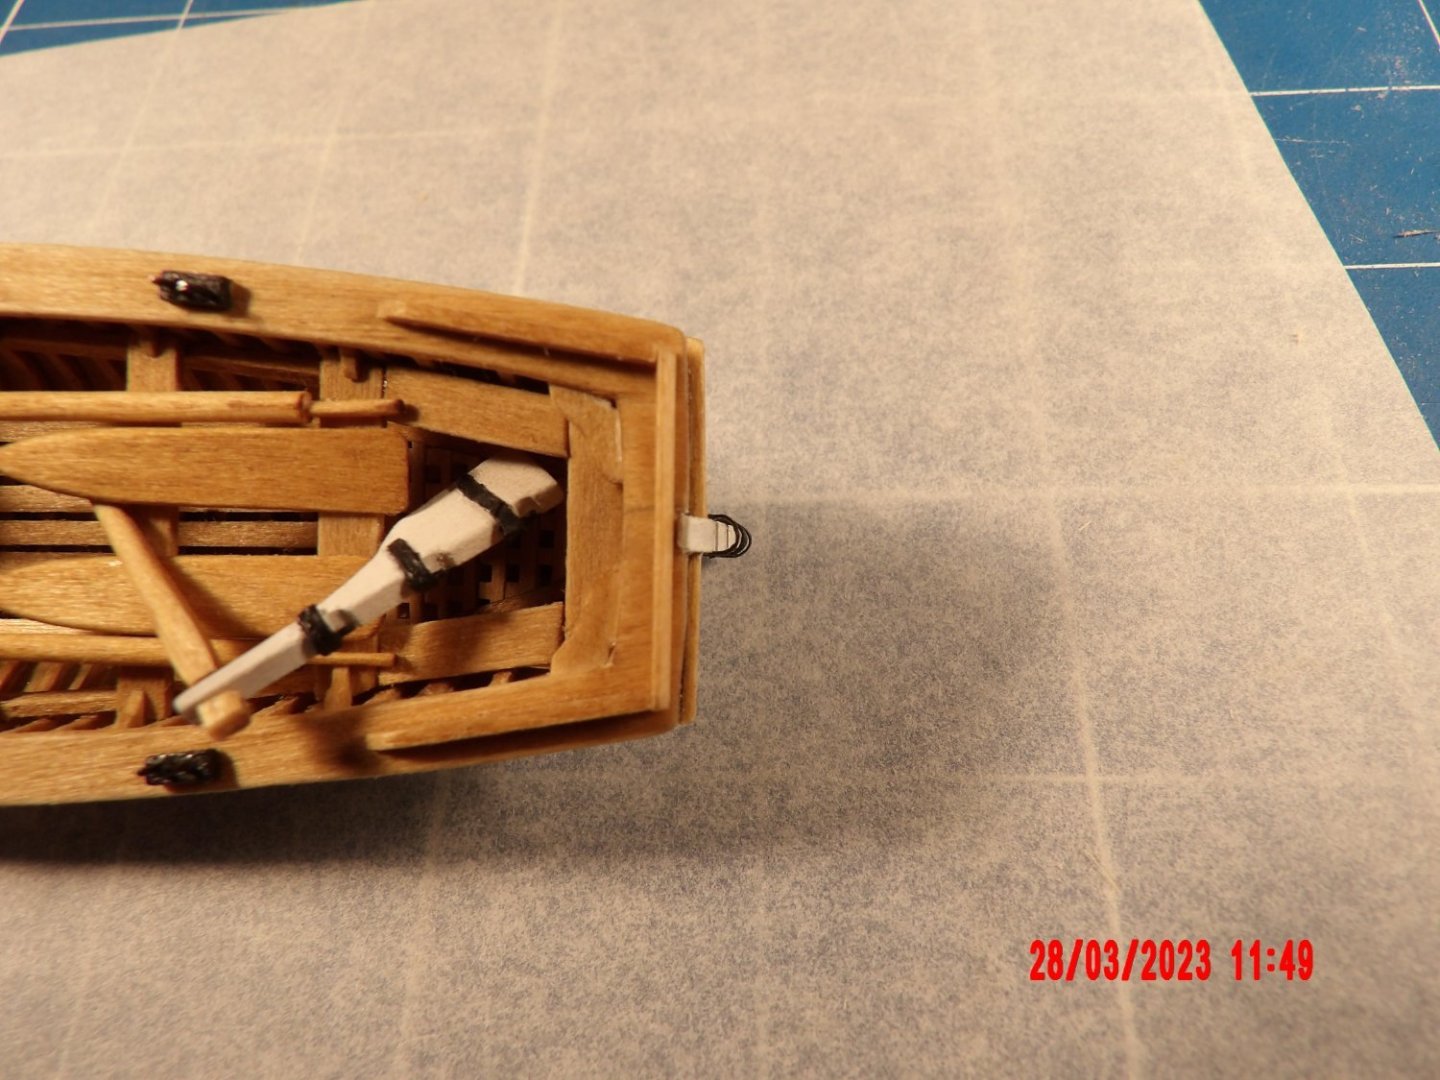
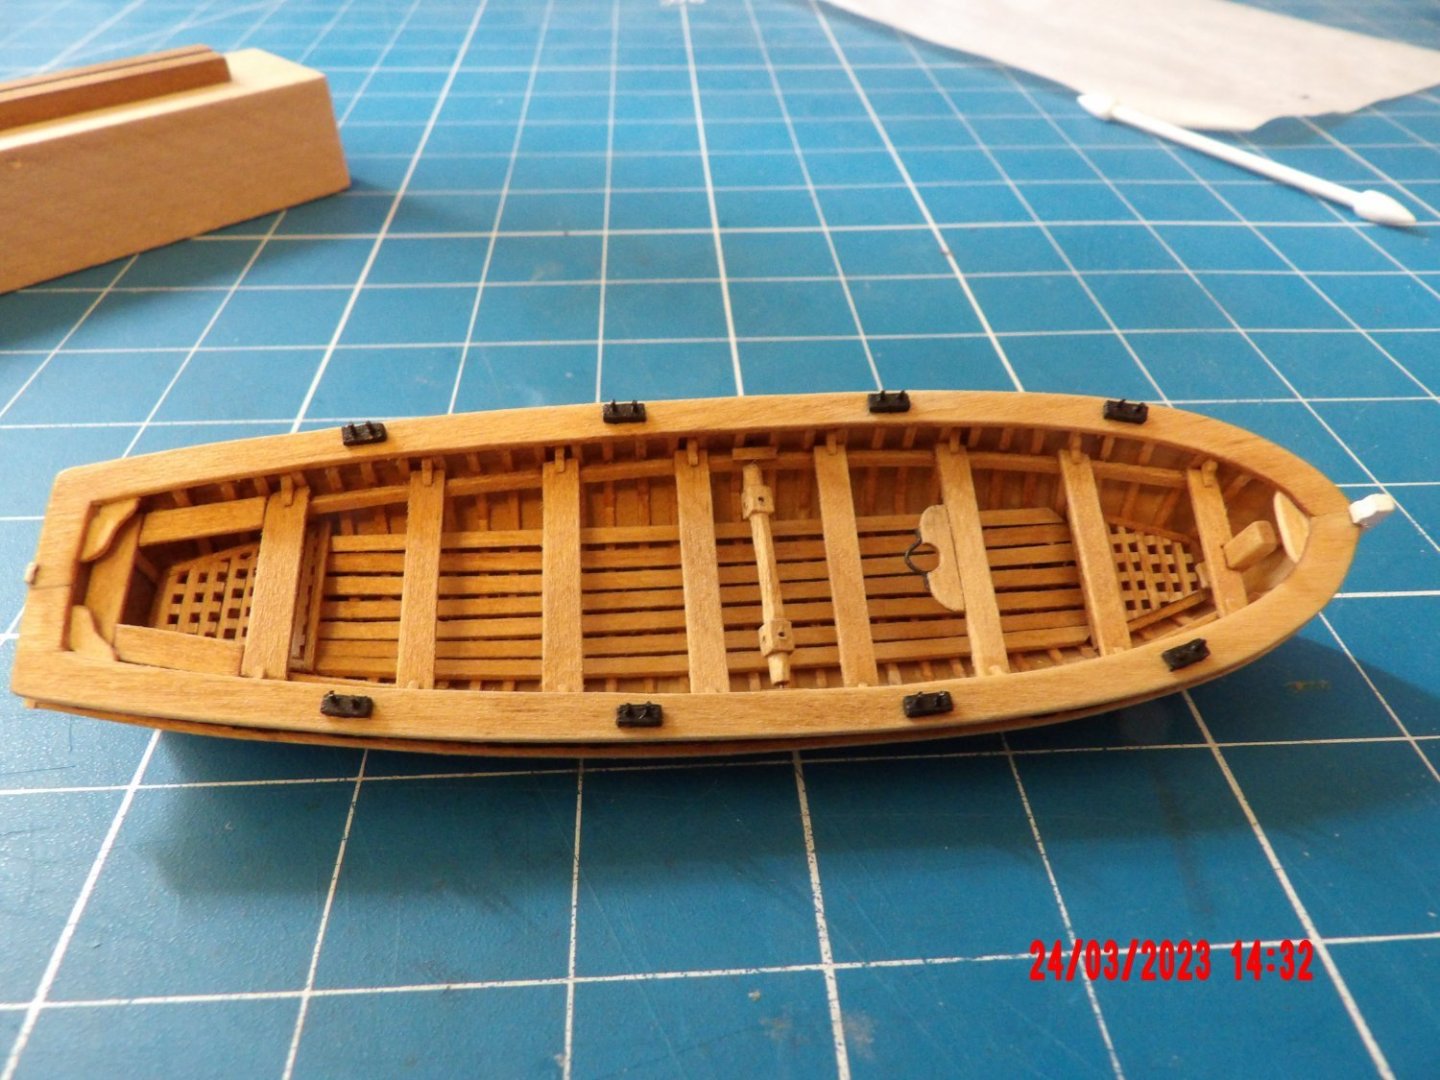
Allan, thanks for the information on single/double banked boats. This is all new to me and very interesting. The images are very helpful. I did put the oarlocks in per the instructions and have seen them similarly installed in other build logs. But I'll keep this concept in mind for future projects. Jaager, thank you as well for your ideas. Obviously, I don't have to make a decision about coppering right now. . . I have seen the mold method for making boats on this site, but it did not occur to me that it might be applicable to this project. Why not, though? Still, I had passed that decision-making point already. I may try it in the future. I had stopped thinning the hull because there were areas that were near paper thin, I had to add filler, and did not continue thinning the other areas as perhaps I should have. But I've decided to live with my results, at least for now. The longboat is now finished. I ended up using strips of aluminum from a beer can for the pintles, gudgeons and bowsprit strap. I had to try several times but was finally able to make good cuts with my scalpel. I felt that each experiment required a new can, which I had to empty, so it took a while. To my eye they look to be within scale and are certainly stronger than the copper tape would have been: Thanks for the "likes" as well! Bob


-
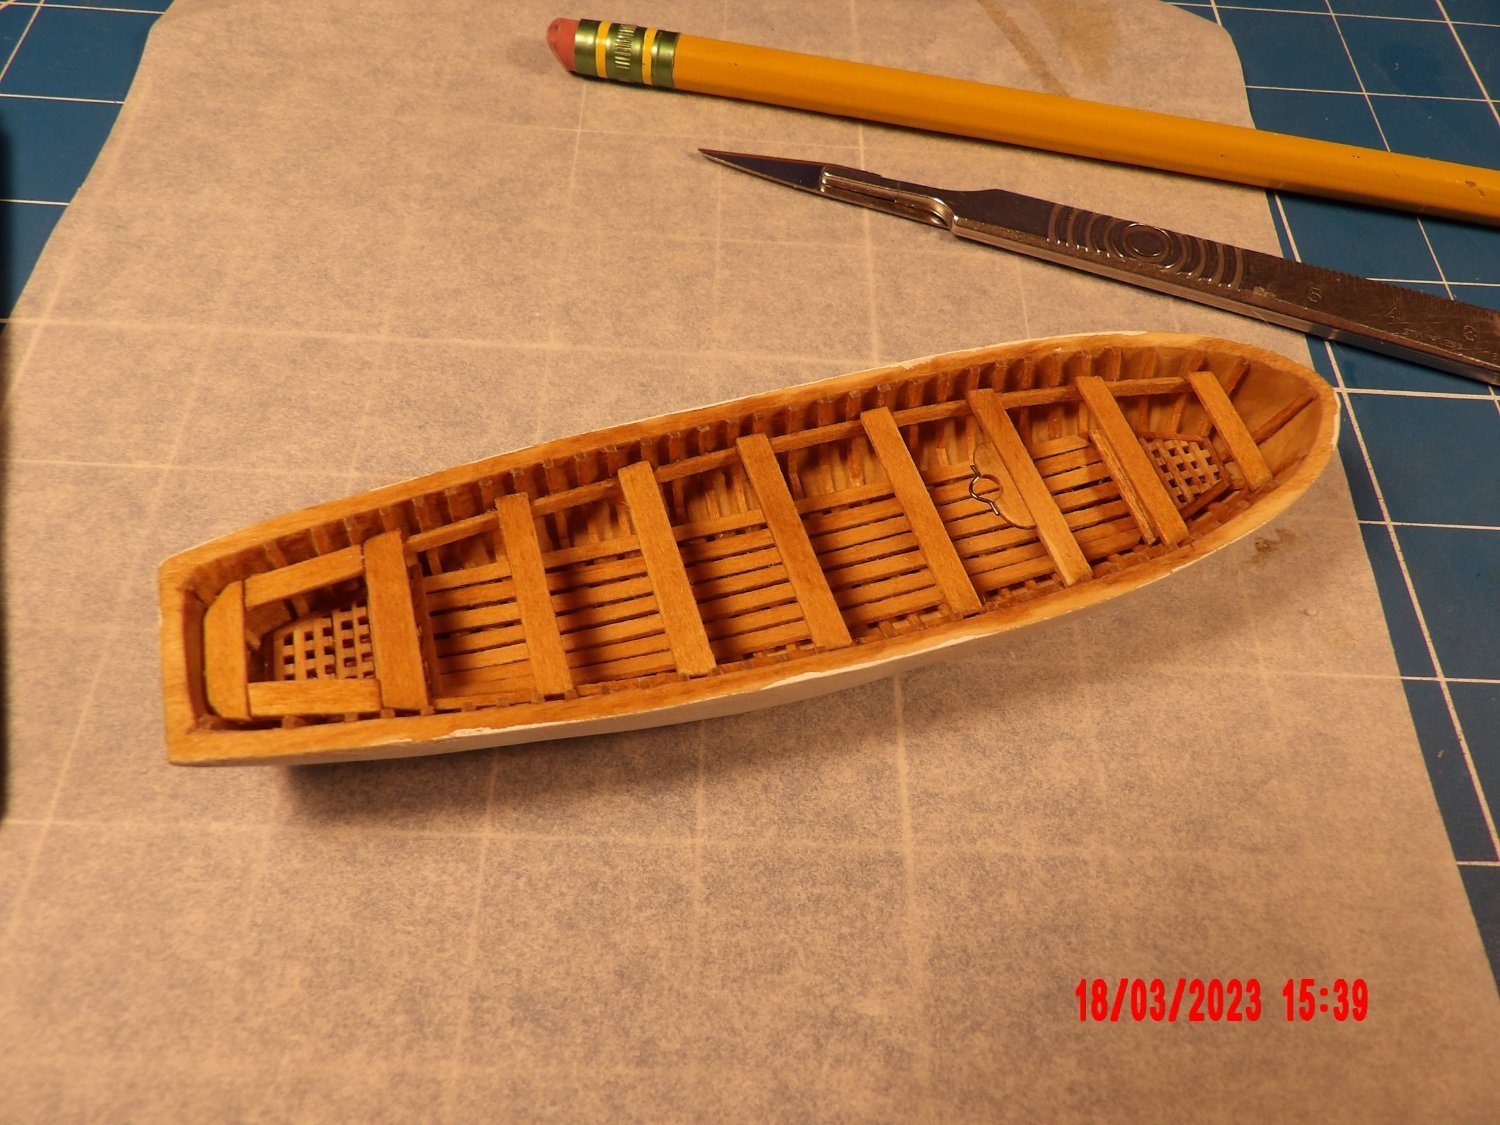
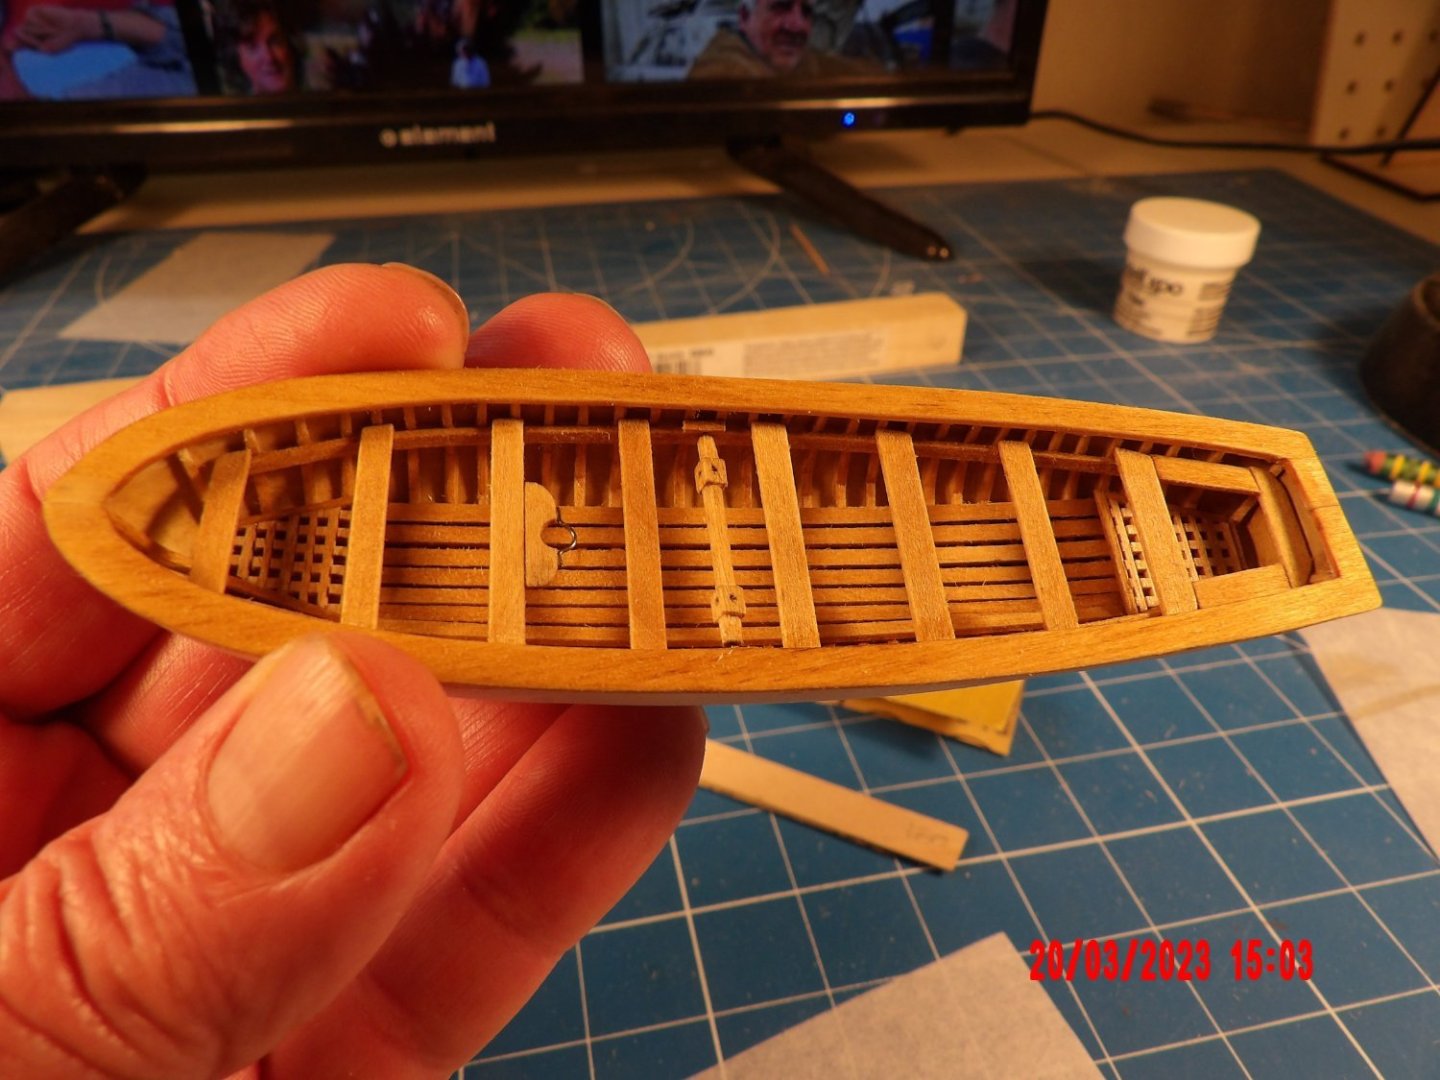
Making the knees for the thwarts. Added the knees at the thwarts, stern and bow. Added the rails at the sides of the hull and painted the area between the cap rail and lower rail black . Added the oarlocks and bowsprit step. One thing I missed: the upper stem and stern post should be stained rather than painted white at the point where they cross the lower rub rail. I kind of like the effect the way I did it, though, and will keep it as is. I'm hung up on the bowsprit strap, which is supposed to be made of the same tape used for coppering the hull. It is just too thin to manipulate. . .

-
Very charitable of you, Matt. Haha, looking at your Winchelsea you are light-years ahead of me! Some of your details are very small and very nicely done. I signed up to follow your project. Bob
-
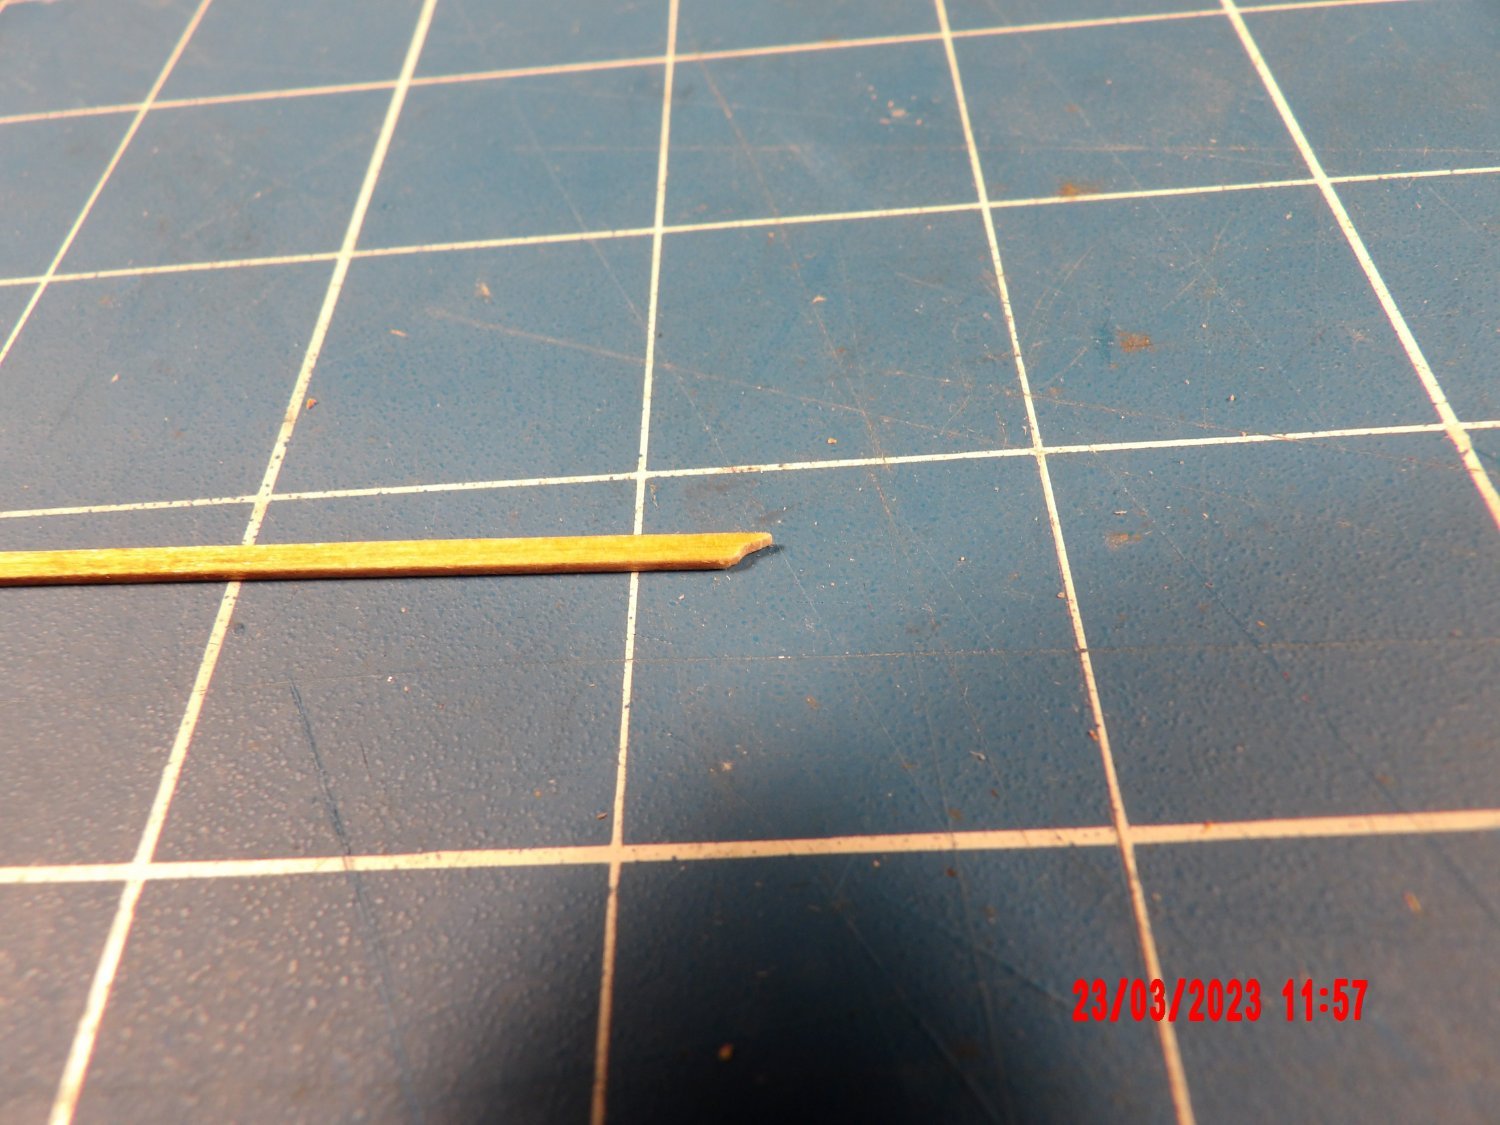
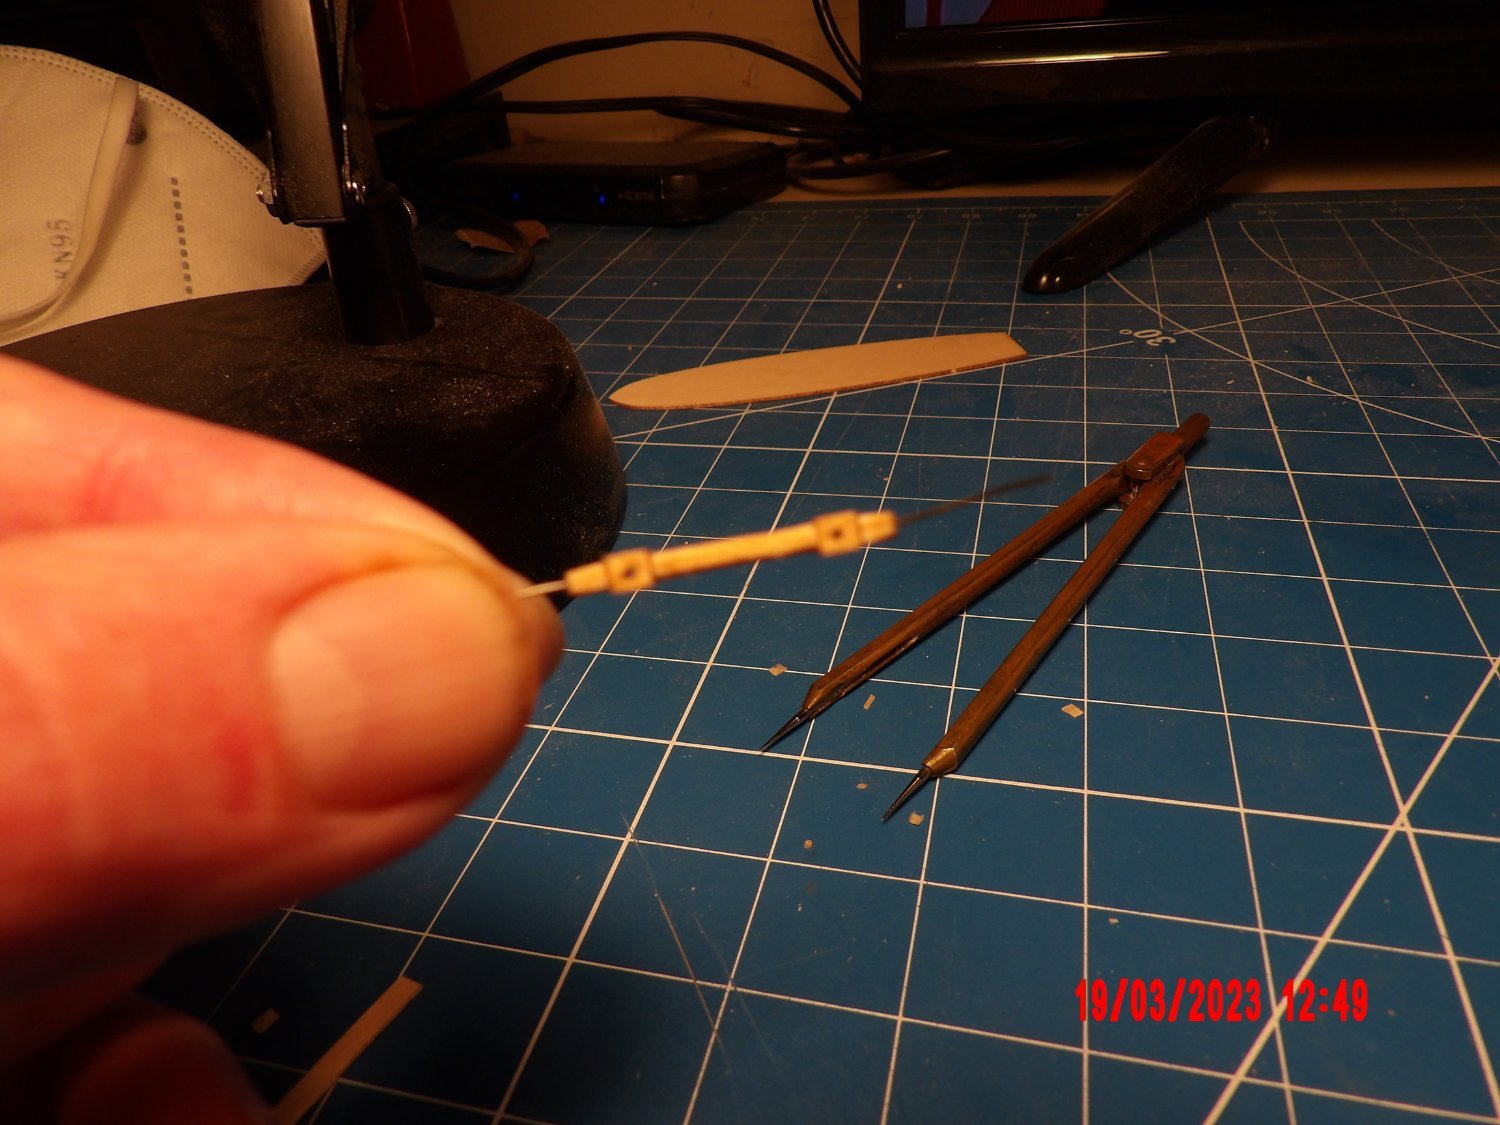
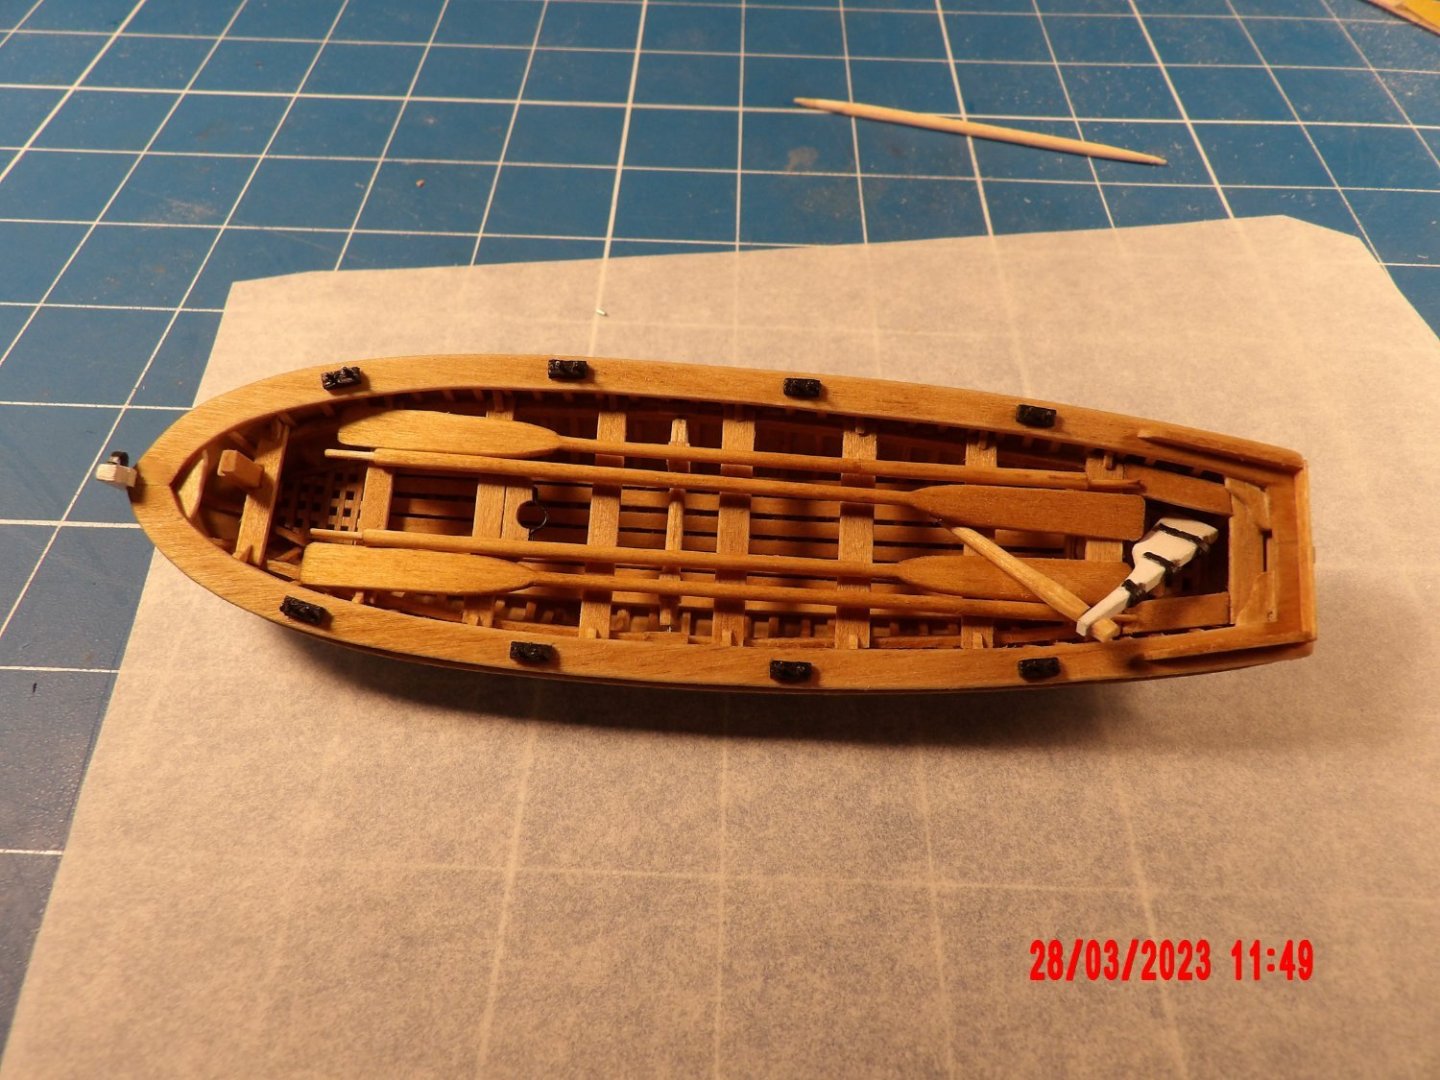
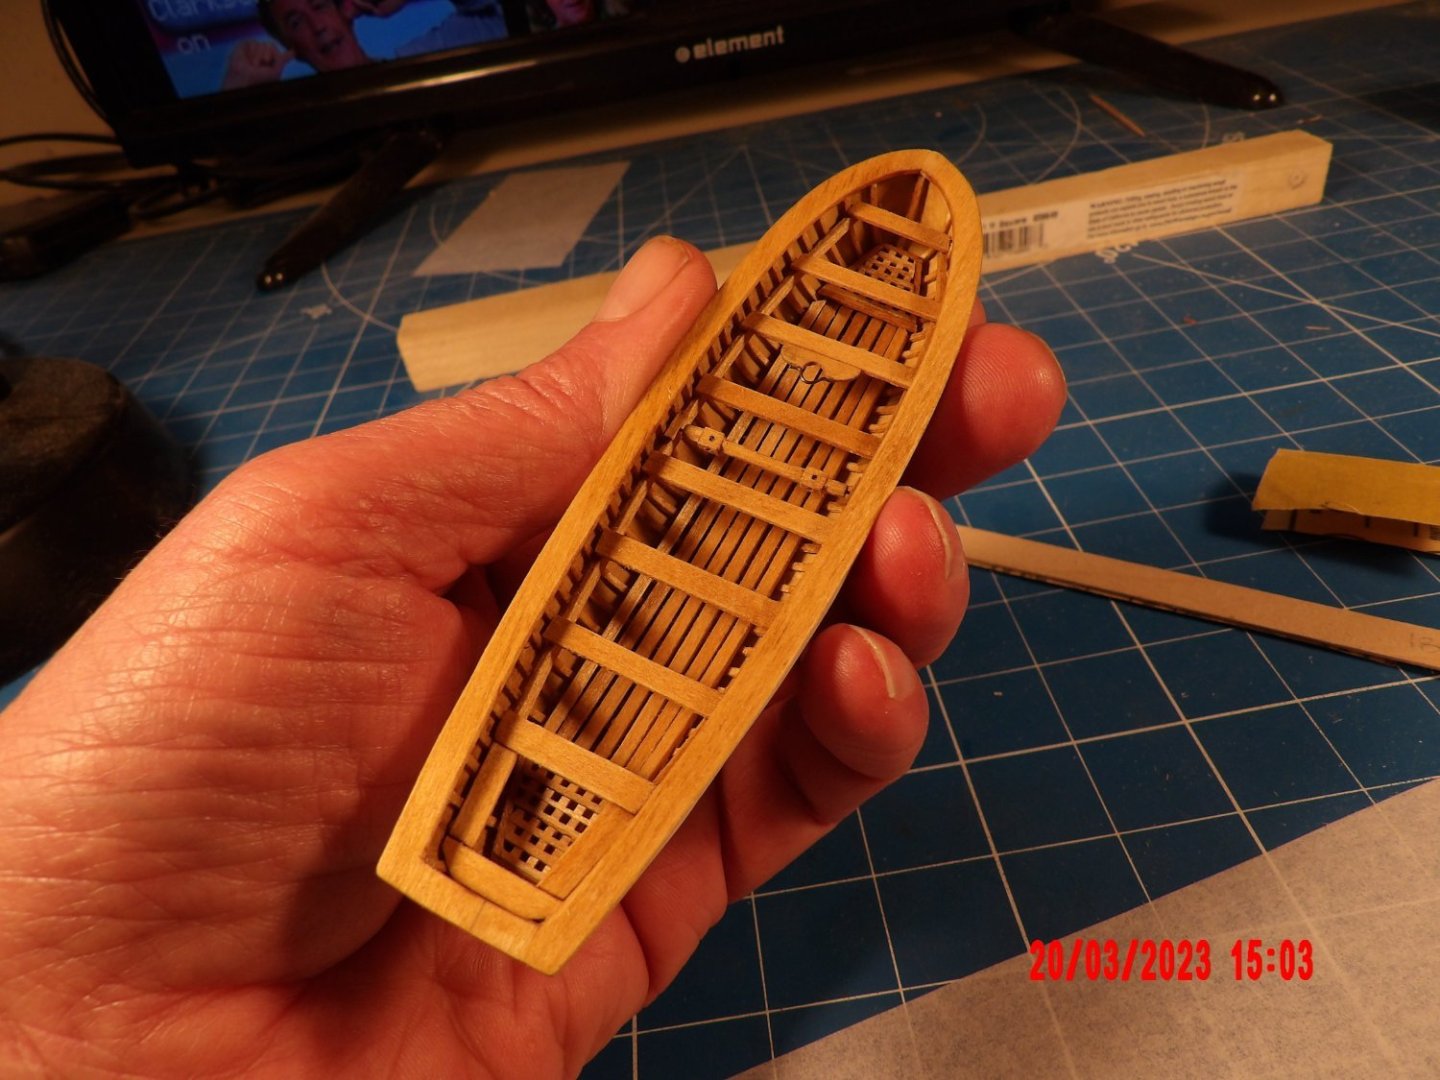
Added the ribs. Could not avoid some crimping in the bends: At this point I came to the realization that I should have thinned the hull more- it's going to require a wider cap rail than specified to cover the hull/ribs with a slight overhang all around. The kit-supplied rail was never going to fit even if the overall width of the assembly was as specified. Decided to move forward regardless. Added the grates, thwarts, and mast support: Although the 28 gauge wire supplied is supposed to be darkened out of the package, it does not look black enough to me. I may try to paint it black later. Fashioned the windlass from 3/32" square stock. The manual speaks of shaping the octagonal portions by filing and sanding, but my set of micro-files are not fine enough for this, and sanding at this size is hard even at the highest magnification I have available. I carved the piece with my surgical scalpel with a #11 blade. It is octagonal, I think, but may not be exactly uniform. I did find that I like carving. . . And finally, my obscenely wide cap rail, which I made in two halves. I was actually very happy that I was able to fashion them at all. It will be quite a while before I have to commit this longboat to the larger model. I may give it another shot, but I also may not. I remind myself that I am in this for fun, not perfection. . .


-
Congratulations, Bob! Looks great. What's number two going to be? Bob
- 86 replies
-
- 1
-
-
- king of the mississippi
- artesania latina
- (and 2 more)
-
Of course you are right, Bob, and I caught my mistake before I started gluing in the ribs! And yes, numbers have always been a problem for me- at work it was something I struggled with, and I learned to check and re-check. . . I do appreciate your checking this. . . I owe you a beer! Bob
-
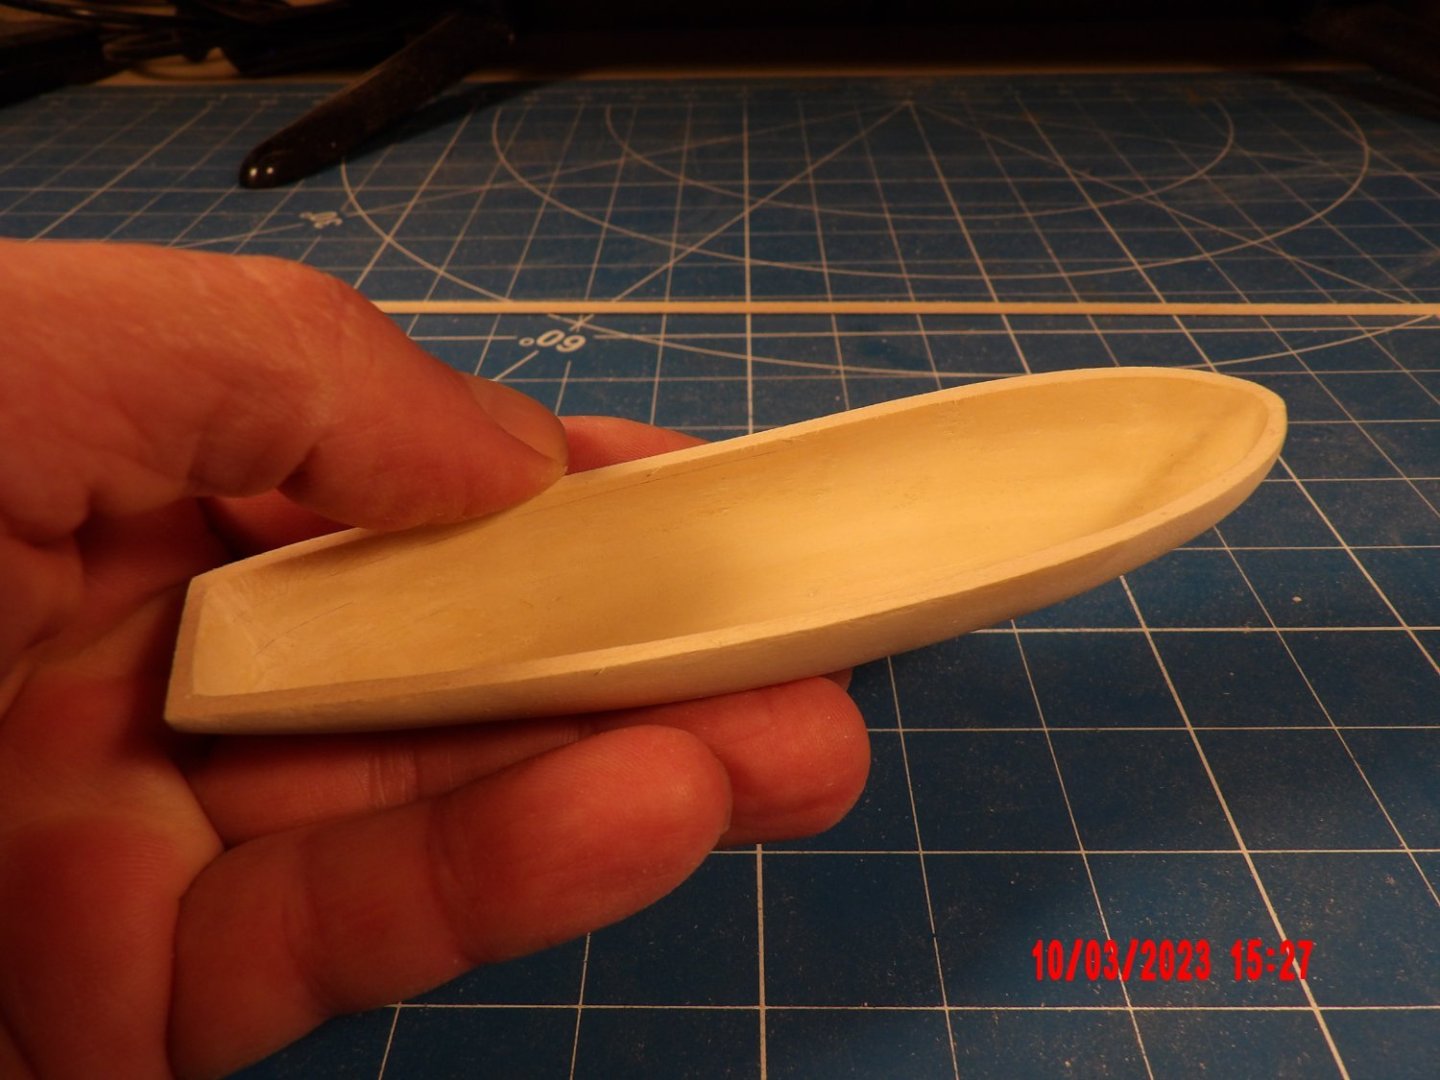
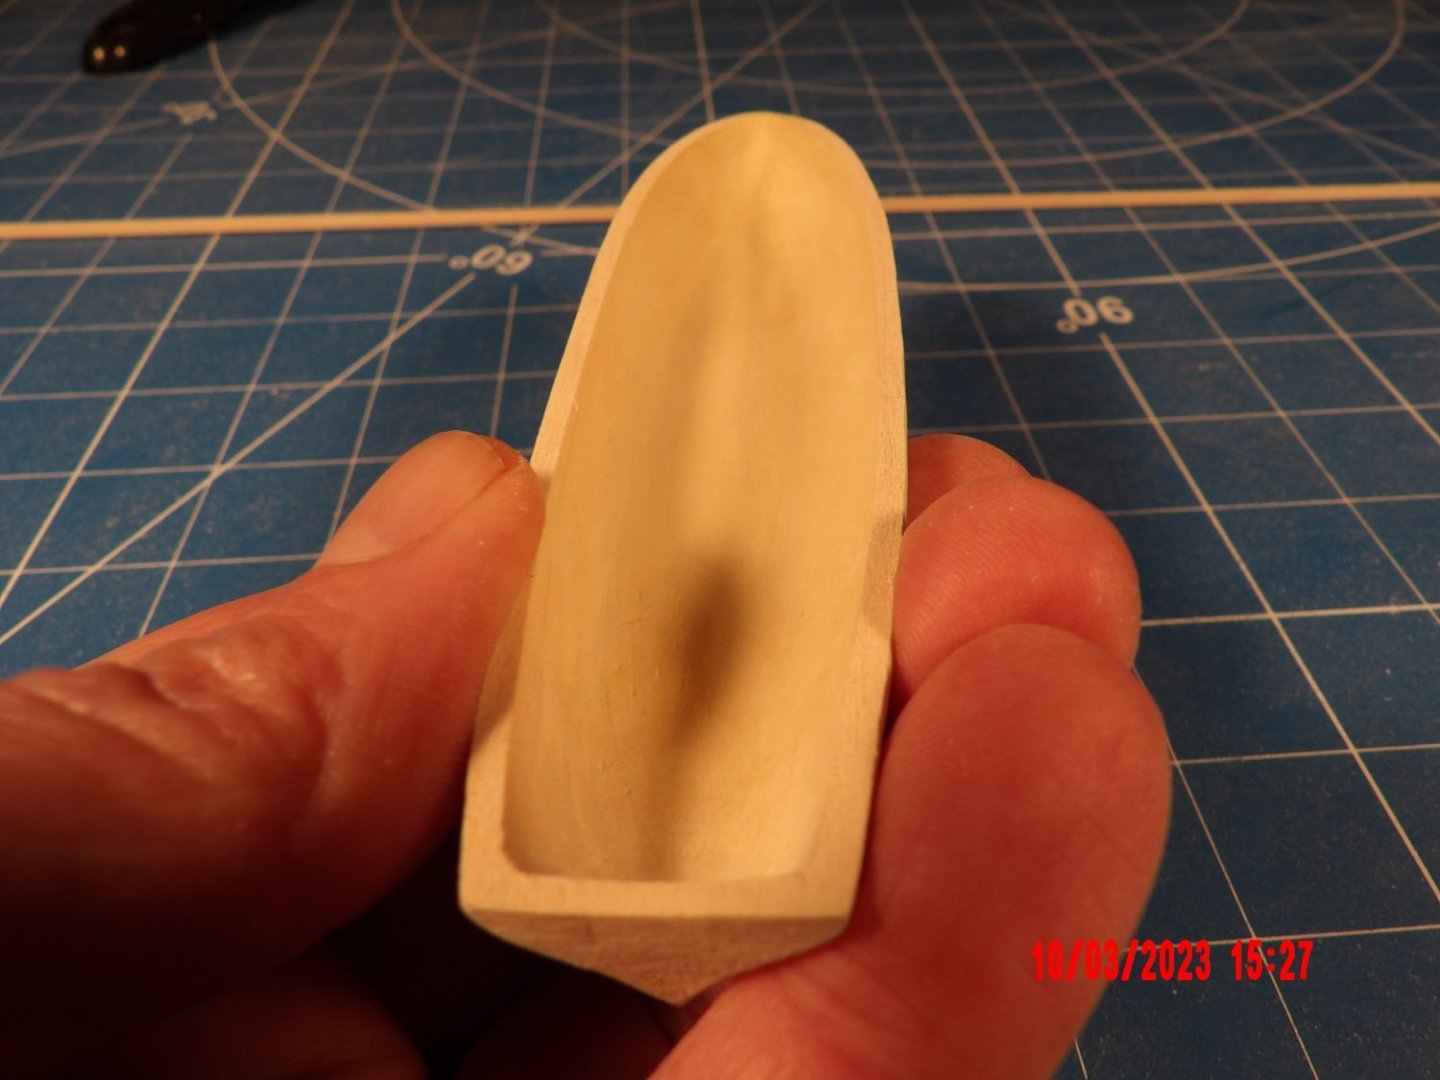
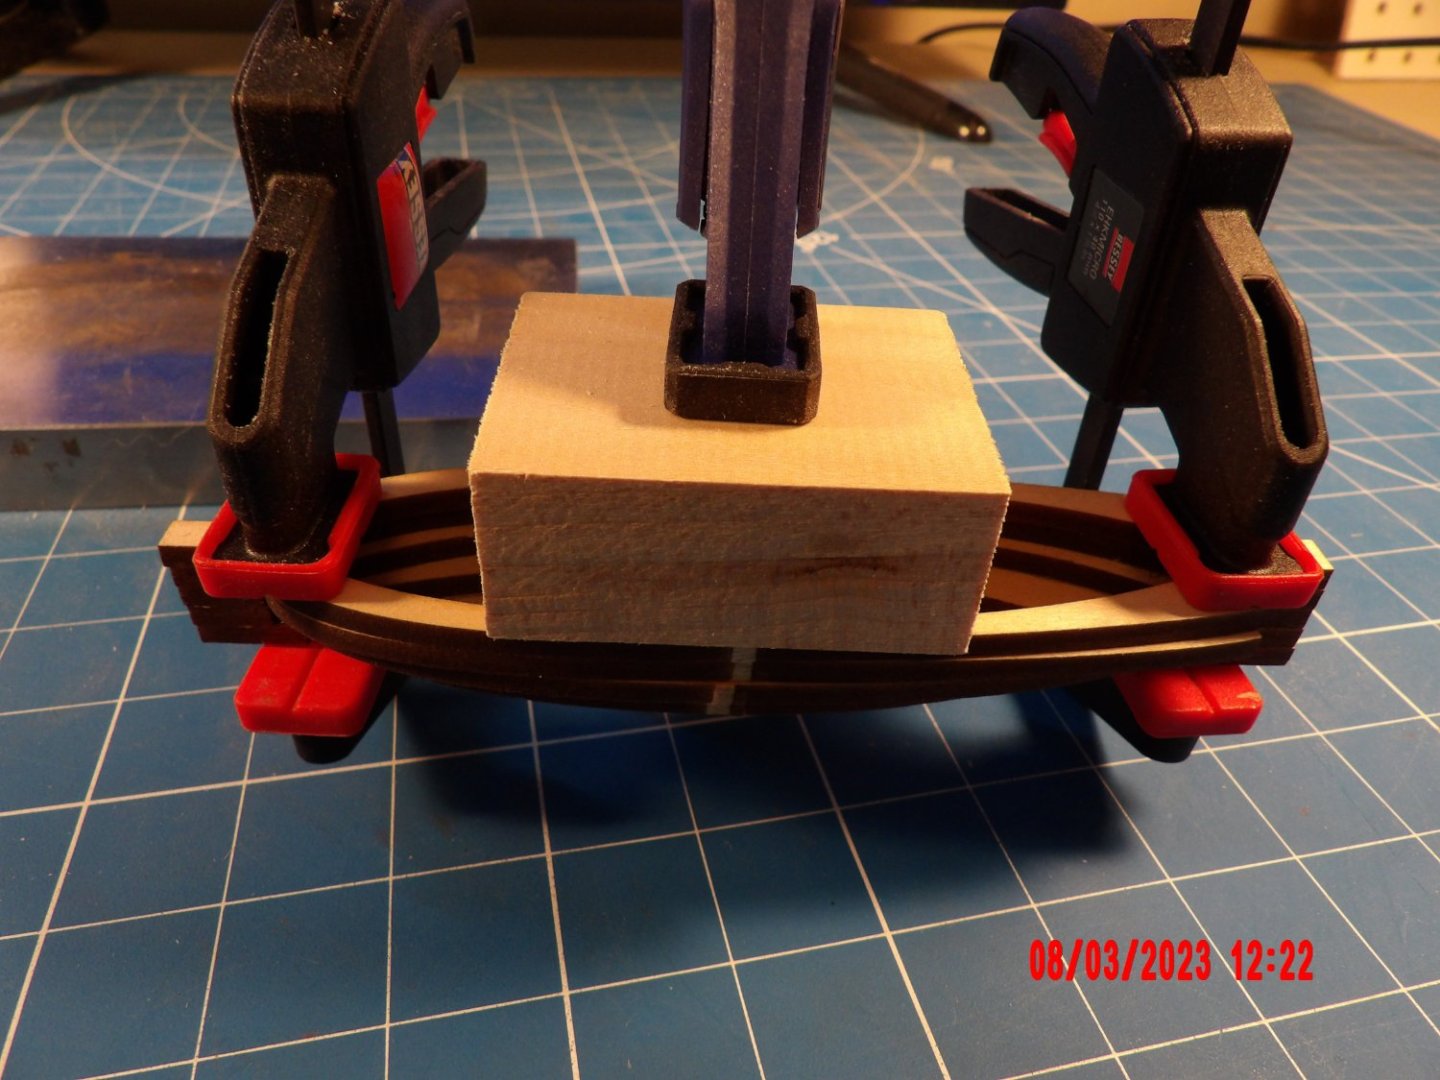
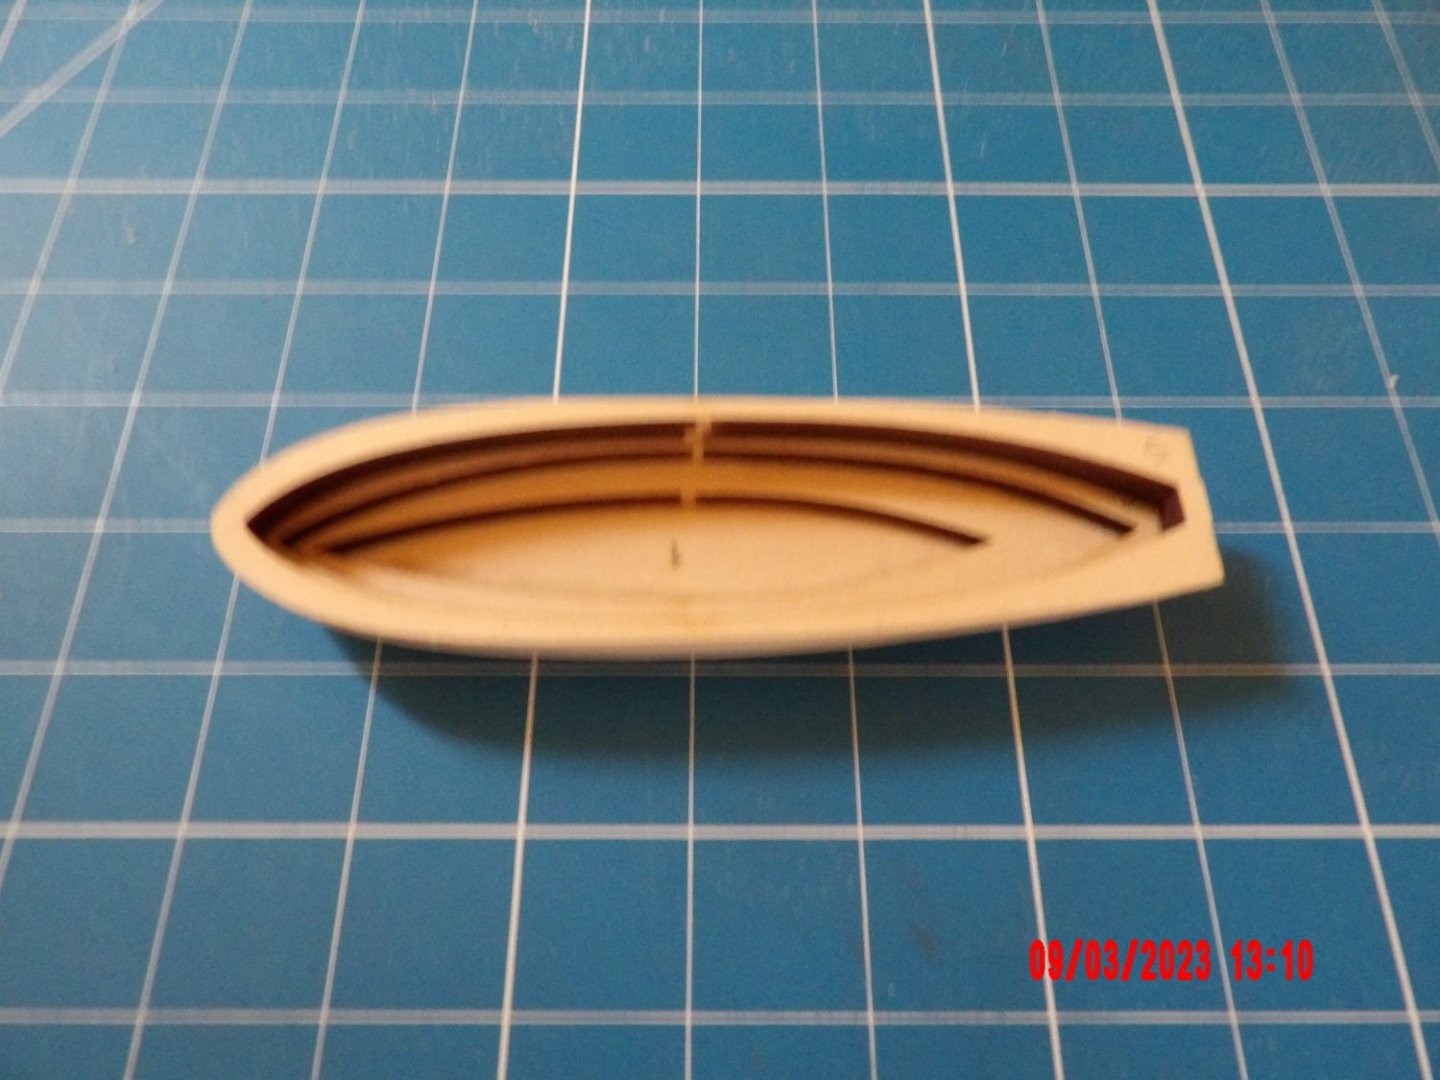
Finished carving/sanding the inside of the longboat. The instructions call for adding 1/16" square ribs by wet-bending and gluing in while wet. Makes sense as I don't see a good way to clamp and let dry without damaging the boat hull. I've never done this before. . . I assume the PVA will not be appropriate for this, and will try CA
-
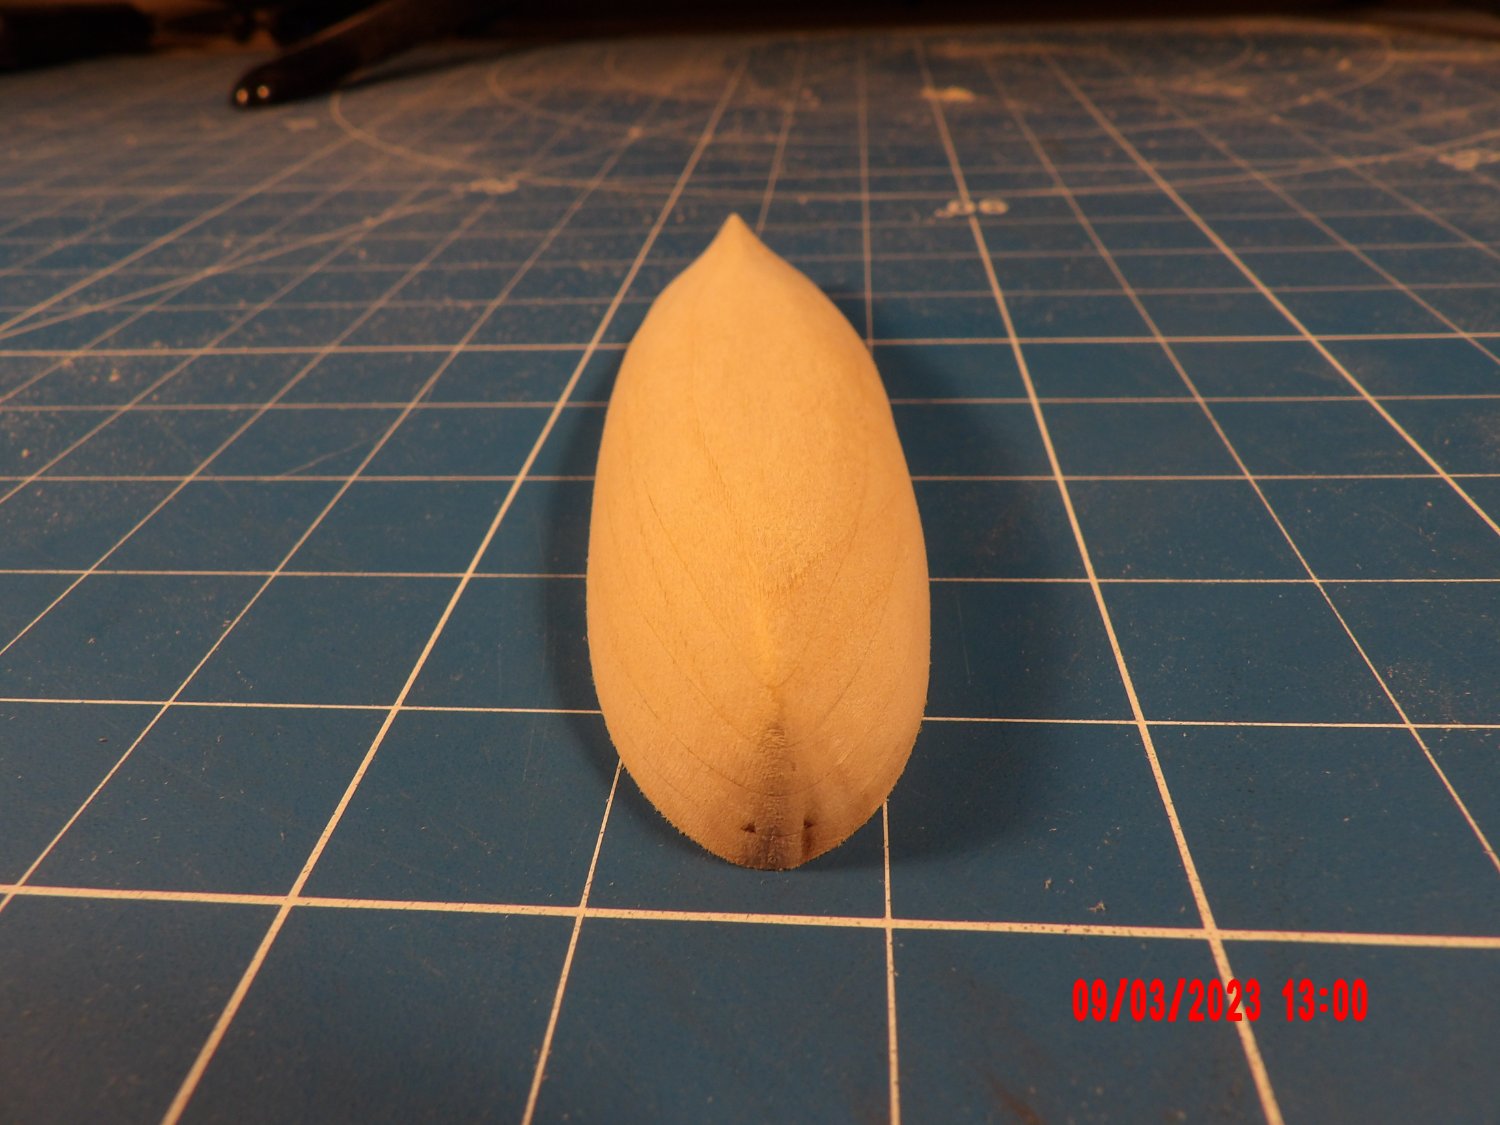
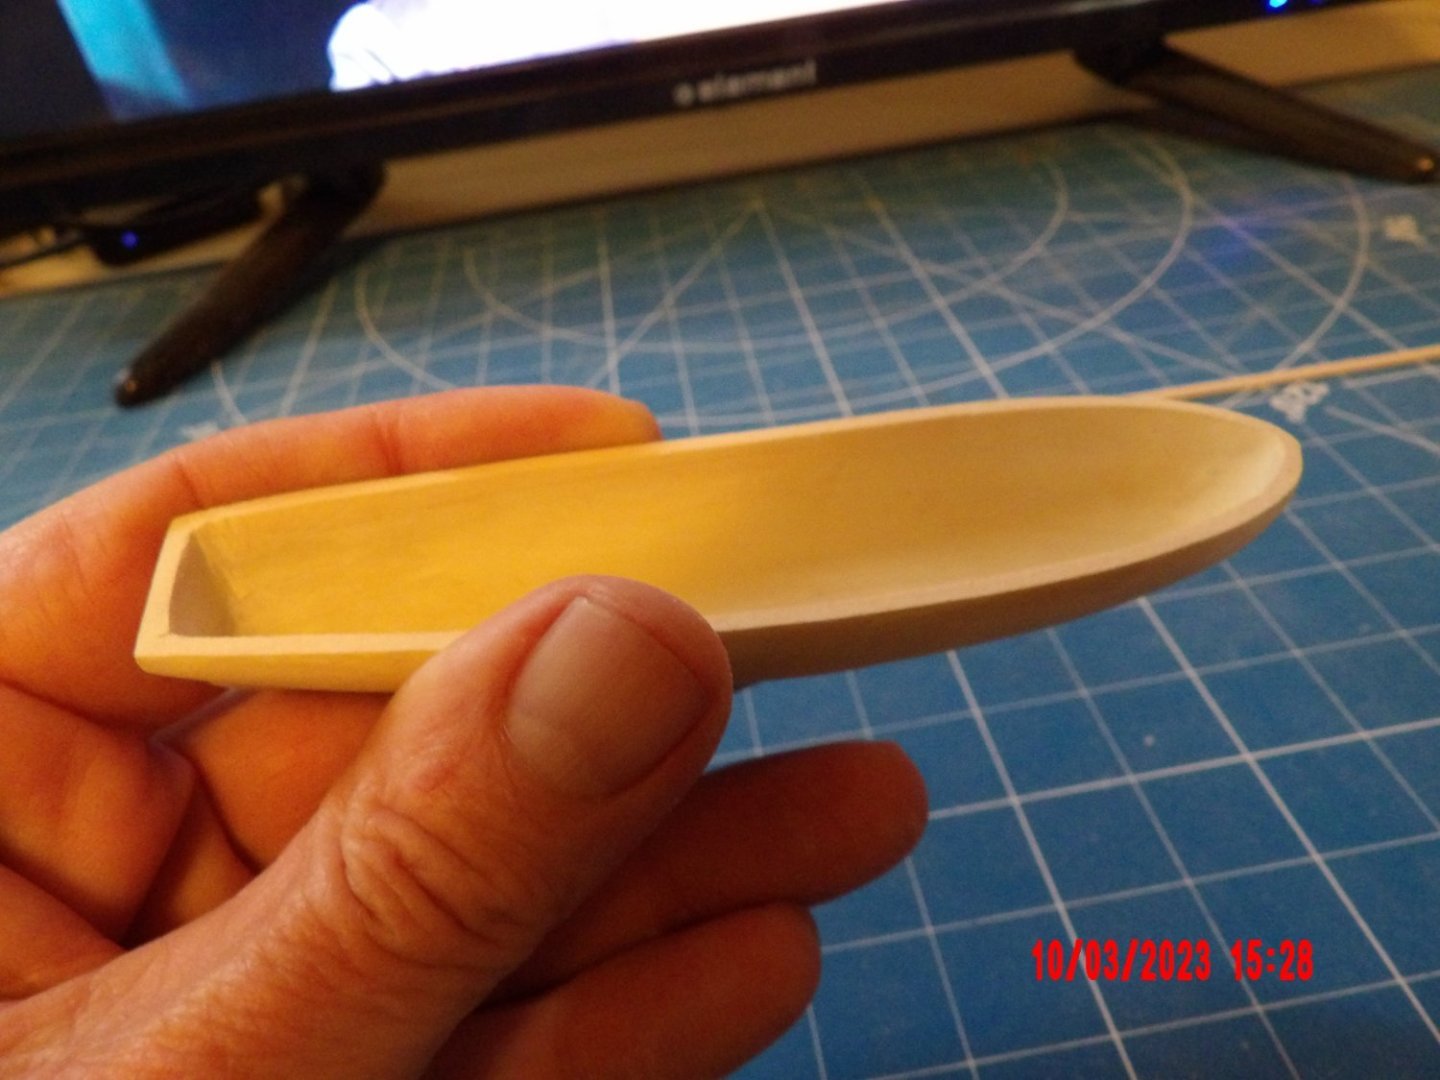
I needed a break from the work on the hull, so started the longboat. I think it's coming along OK, what a lot of sawdust, though. . . I used the Dremel with drum sanding attachment, as suggested in the manual. There is a lot of material to be removed on the inside, especially from the second lift. I'm not sure if the drum sander will be appropriate there. Enough for today.

-
What a nice build!
-
Bob, it looks really good, and I admire your willingness to experiment/improve upon this kit!
-
Regarding the glue- PVA is meant to penetrate porous material, such as wood, to establish a bond. Metal items that will be under tension, such as eyebolts for rigging, are likely to come loose when tension is applied. Similar for items that may be bumped accidentally. I do believe this is discussed and recommendations made in the kits instruction manual. But, I'm not by any means an expert, and maybe should have remained quiet. I was hoping one of the experts would highlight this issue for you. And, personally, I did not feel you were fishing for complements at all! Just exhibiting some self-doubt and humility, not a negative trait at all. . . You work does look good! Bob
- 38 replies
-
- 3
-
-
- Norwegian Sailing Pram
- Model Shipways
- (and 2 more)
-
Looks great! Save yourself some grief, though- PVA glue is not the best for metal-to-wood bonding. Consider using cyano or epoxy. . . Bob
- 38 replies
-
- 4
-
-

-
- Norwegian Sailing Pram
- Model Shipways
- (and 2 more)
-
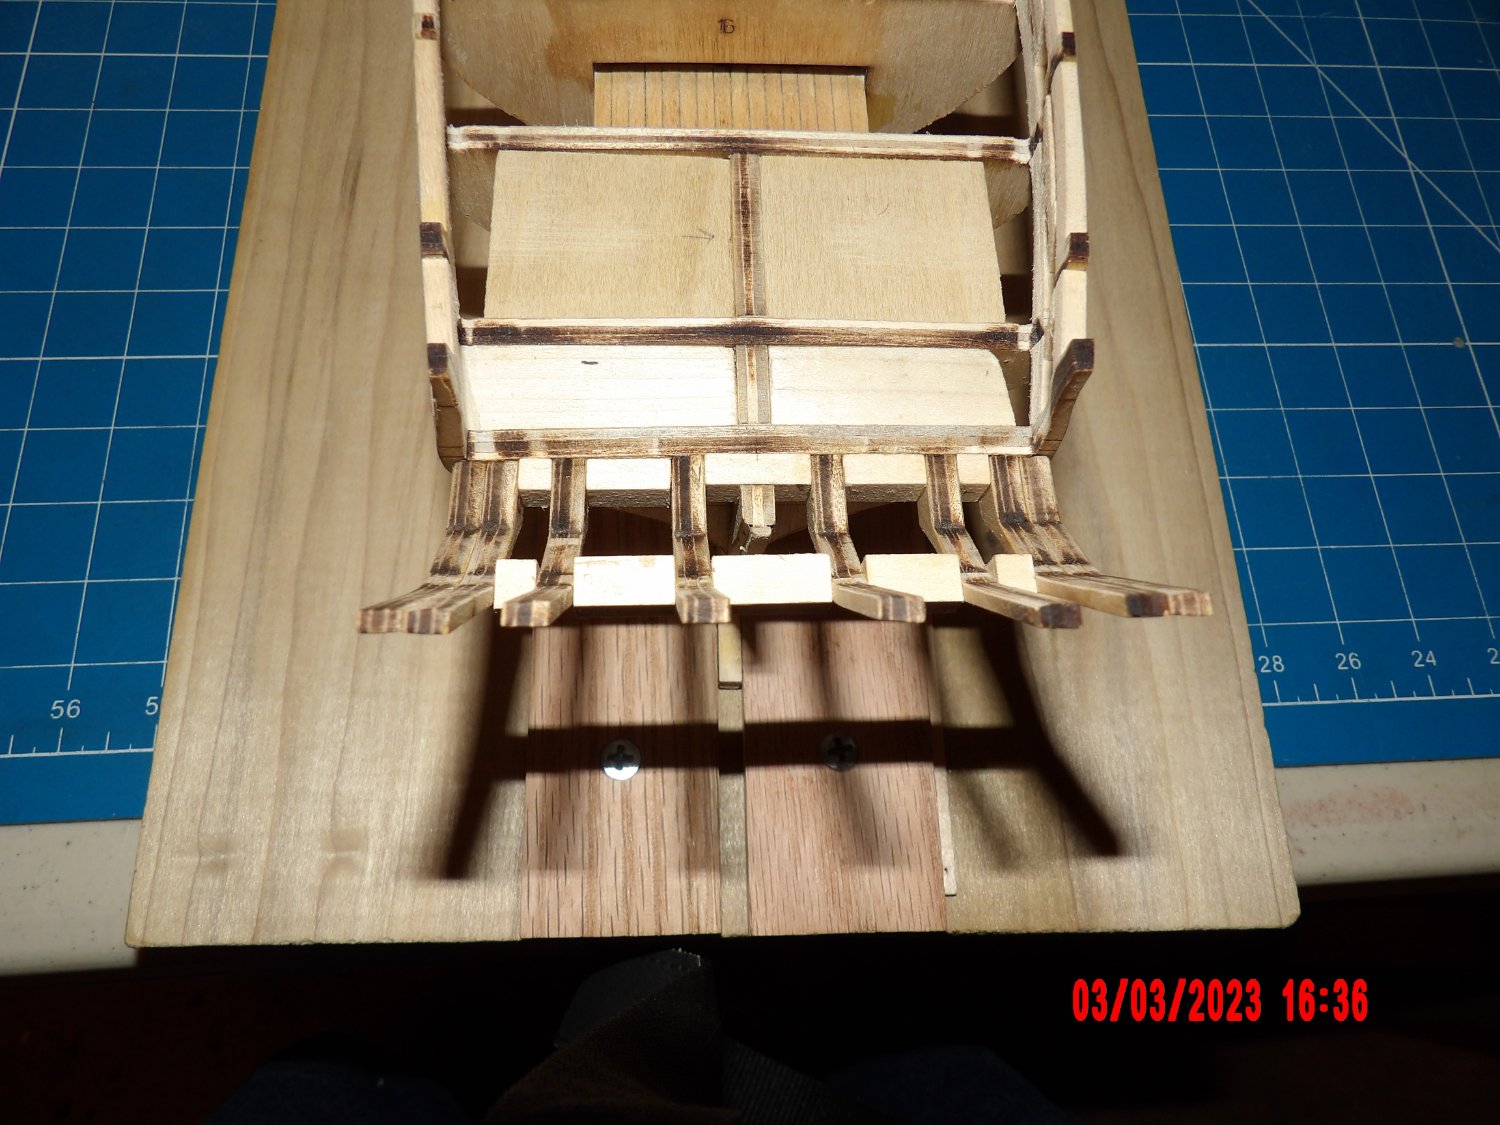
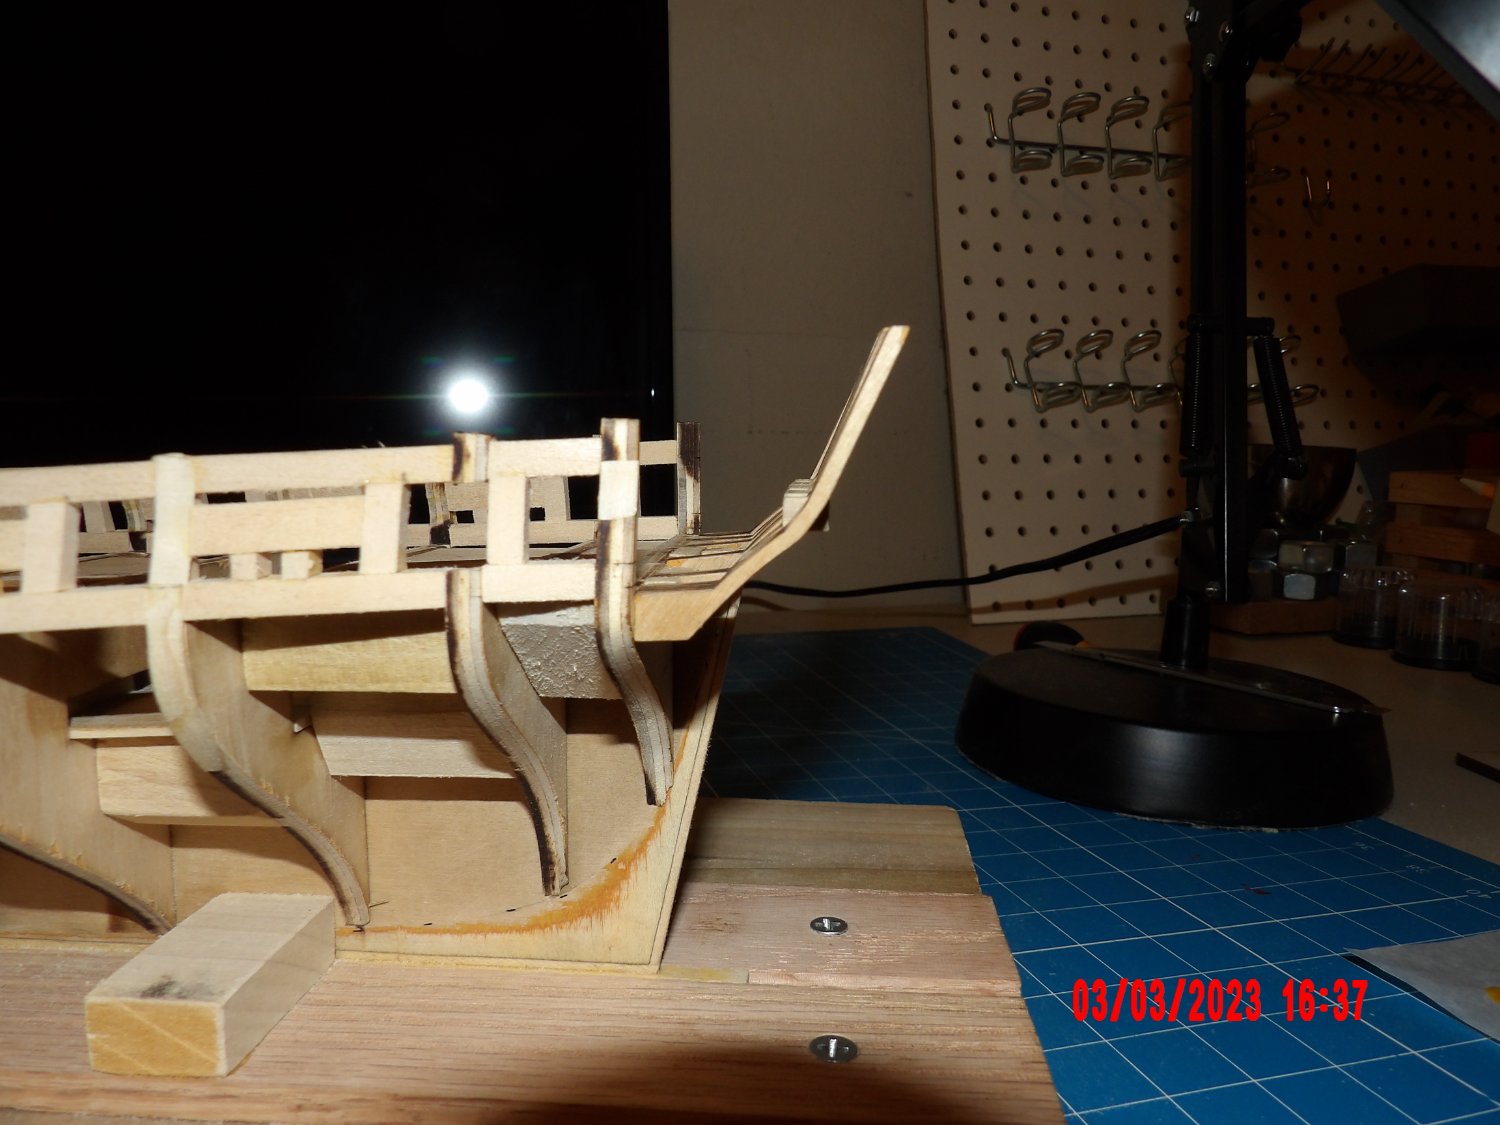
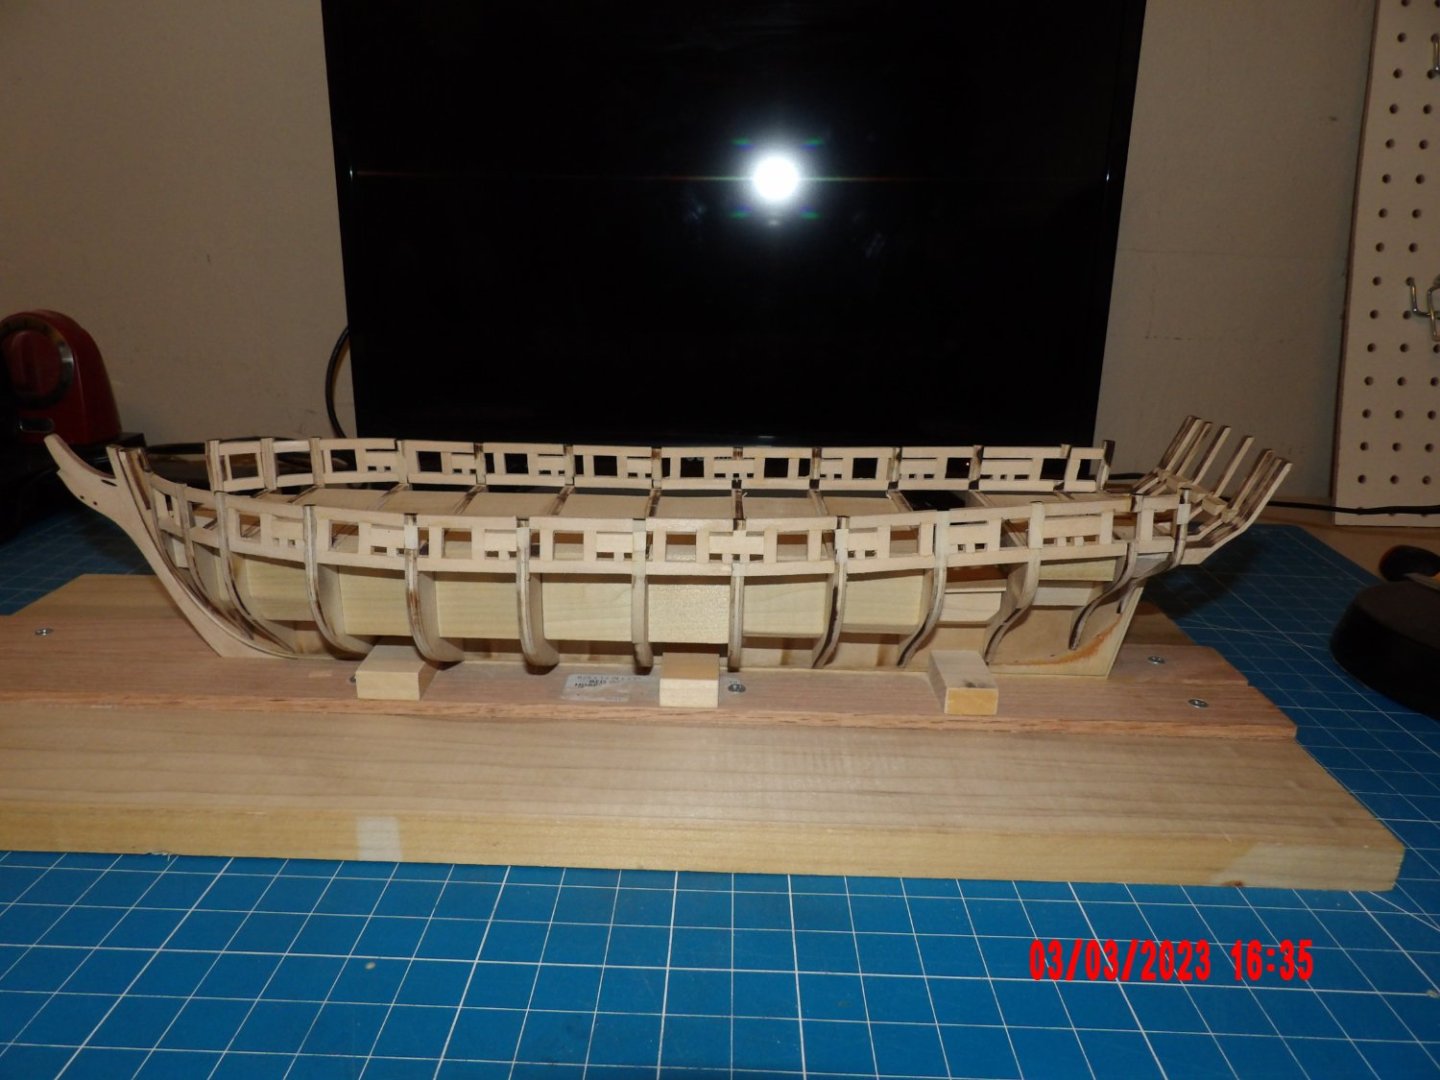
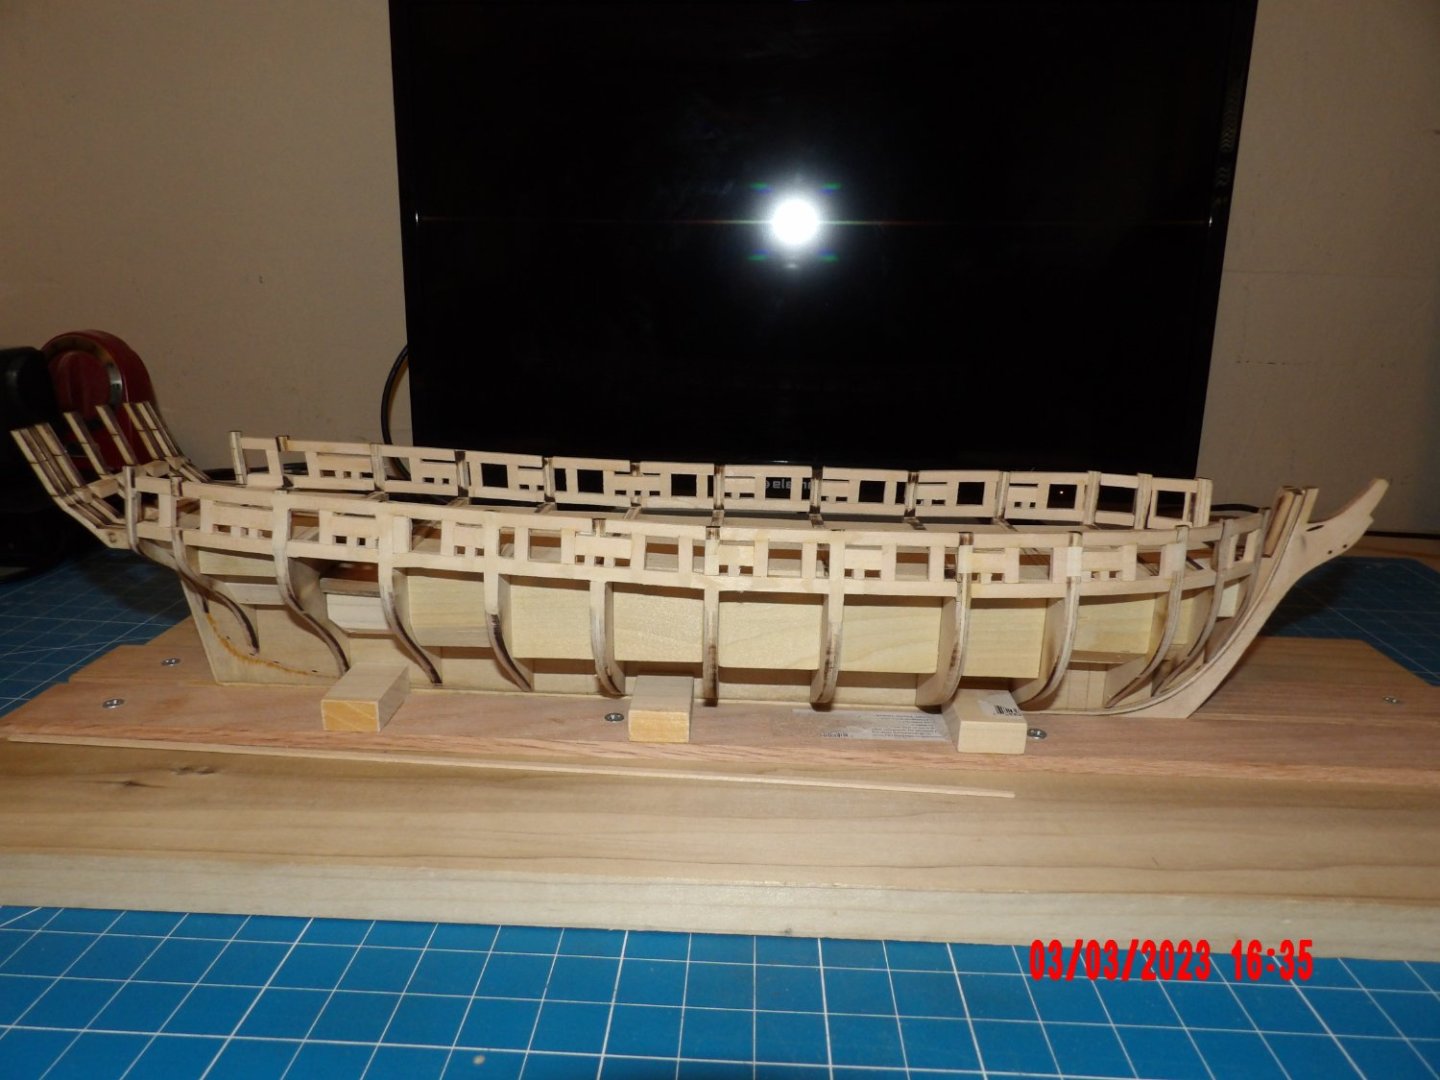
Sanding, sanding, sanding. Completed the framing for openings on the sides. I felt the hull was faired pretty well before the process of adding the framing, but in sanding all this down, I created depressions below the sills and lintels that required adding some veneer/shim. There is still a bit more of this to do. I feel that the inside fairing is not perfect, but is getting as close as I'll ever get. . . Three weeks with a cold/bronchitis, had a few down days- convinced me to rethink my aversion to masks (wonder how that arose?), and also two weeks ago to stop smoking. For me smoking goes hand-in-hand with modeling (in fact with everything), so it has been an adjustment. At least on this model I won't stick my face with a lit cig sticking out of my mouth into the rigging! And I can spend the money on tools! As you can see, I began work on the stern. I don't know why the instructions call for checking the height of the sill for the stern gun port openings after installing the sills- I did that first thing and found that the laser marks were about 1/8" too high for the gun barrels to clear the sills. Used my waterline marker to strike a new line across the bulwarks. The sills appear to be straight and flat. I'm apprehensive about the sanding that will need to be done to fair this framing to the bulwarks. So far, I haven't broken any part, did have some framing come loose during sanding the sides, but if I am to have breaks, this stern is where they will happen!


-
Nick, I have no idea what "INA" site is. . . I ordered mine from Model Expo site. FYI, there is a direct message function on MSW, just go to a persons profile and you will see it. It sends an email and is probably more appropriate for this kind of question, but no worries. Have fun. Bob
-
Nice recovery with the cockpit walls! The boat is coming together nicely. There are a couple of challenges left, but it looks like you are more than capable of dealing with them, and will end up with a model you will be proud to display. Bob
- 27 replies
-
- 1
-
-
- Nonsuch
- Model Shipways
- (and 1 more)
-
Maybe I'm the only one, but I like the smell of old books, and old furniture. . .
-
Patrick, is that a tall ship model back by the window? How in the world do you move something like that? I've been wondering what I'd do with my finished models if I ever had to move. Bob
-
Certainly a more direct answer than the one I supplied! The discrepancy I noted is very slight, but I realize it should not be there. . . I did puzzle over some of the gun ports not being square, but the plans definitely show the vertical framing as being parallel to the bulkheads. . .
-
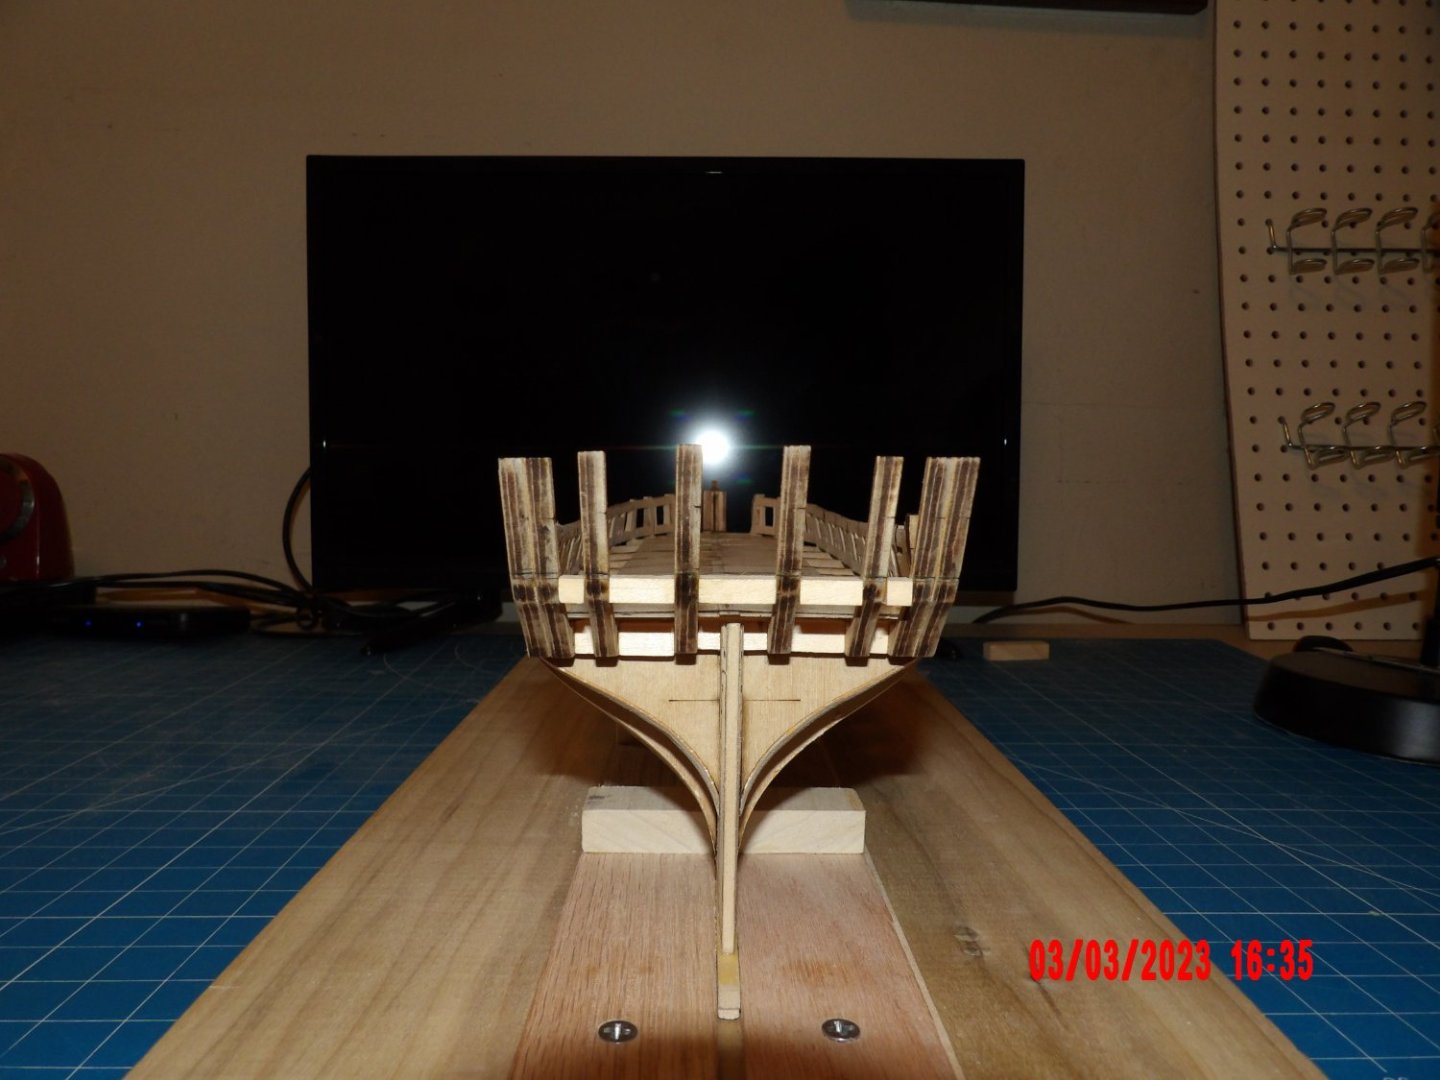
RD, Right or wrong, I started by verifying that the lower laser marks at the stern bulwarks were at the same height on each side and pinned the batten there, then worked my way to the bow, not trying to make the batten conform to any other marks, but ensuring that the batten made good contact across all bulkheads with the batten taking it's natural bend. Hit the marks on most, but not all bulwarks. But they were not very far off. I found on the first try I did not get perfect contact at all places along the run, so I pulled the batten off and did more fairing until I got good contact across the entire run. This took 3 or 4 tries. The battens wanted to rise a little towards the bow, and I let that happen, and did hit the mark on the last bulwark. As it turned out, after placing the sills, I checked that a 3/16" wide plank, when placed on the deck, met the top of the sills, which it did except it was a little low at the last couple of bulwarks at the bow. Better low than protruding above, I figure. So I will install the 3/16" plank flush with the top of the sill as it should be, and since the discrepancy is less than the thickness of the decking planks, it will be hidden by the deck. Anyway, after doing as described, it appears to my eye that both sides are symmetrical. Hope this helps. Bob
-
Somehow I missed this log. Very nice, and I love the extra details, especially the little knife!