DocBlake
-
Posts
1,811 -
Joined
-
Last visited
Content Type
Profiles
Forums
Gallery
Events
Everything posted by DocBlake
-
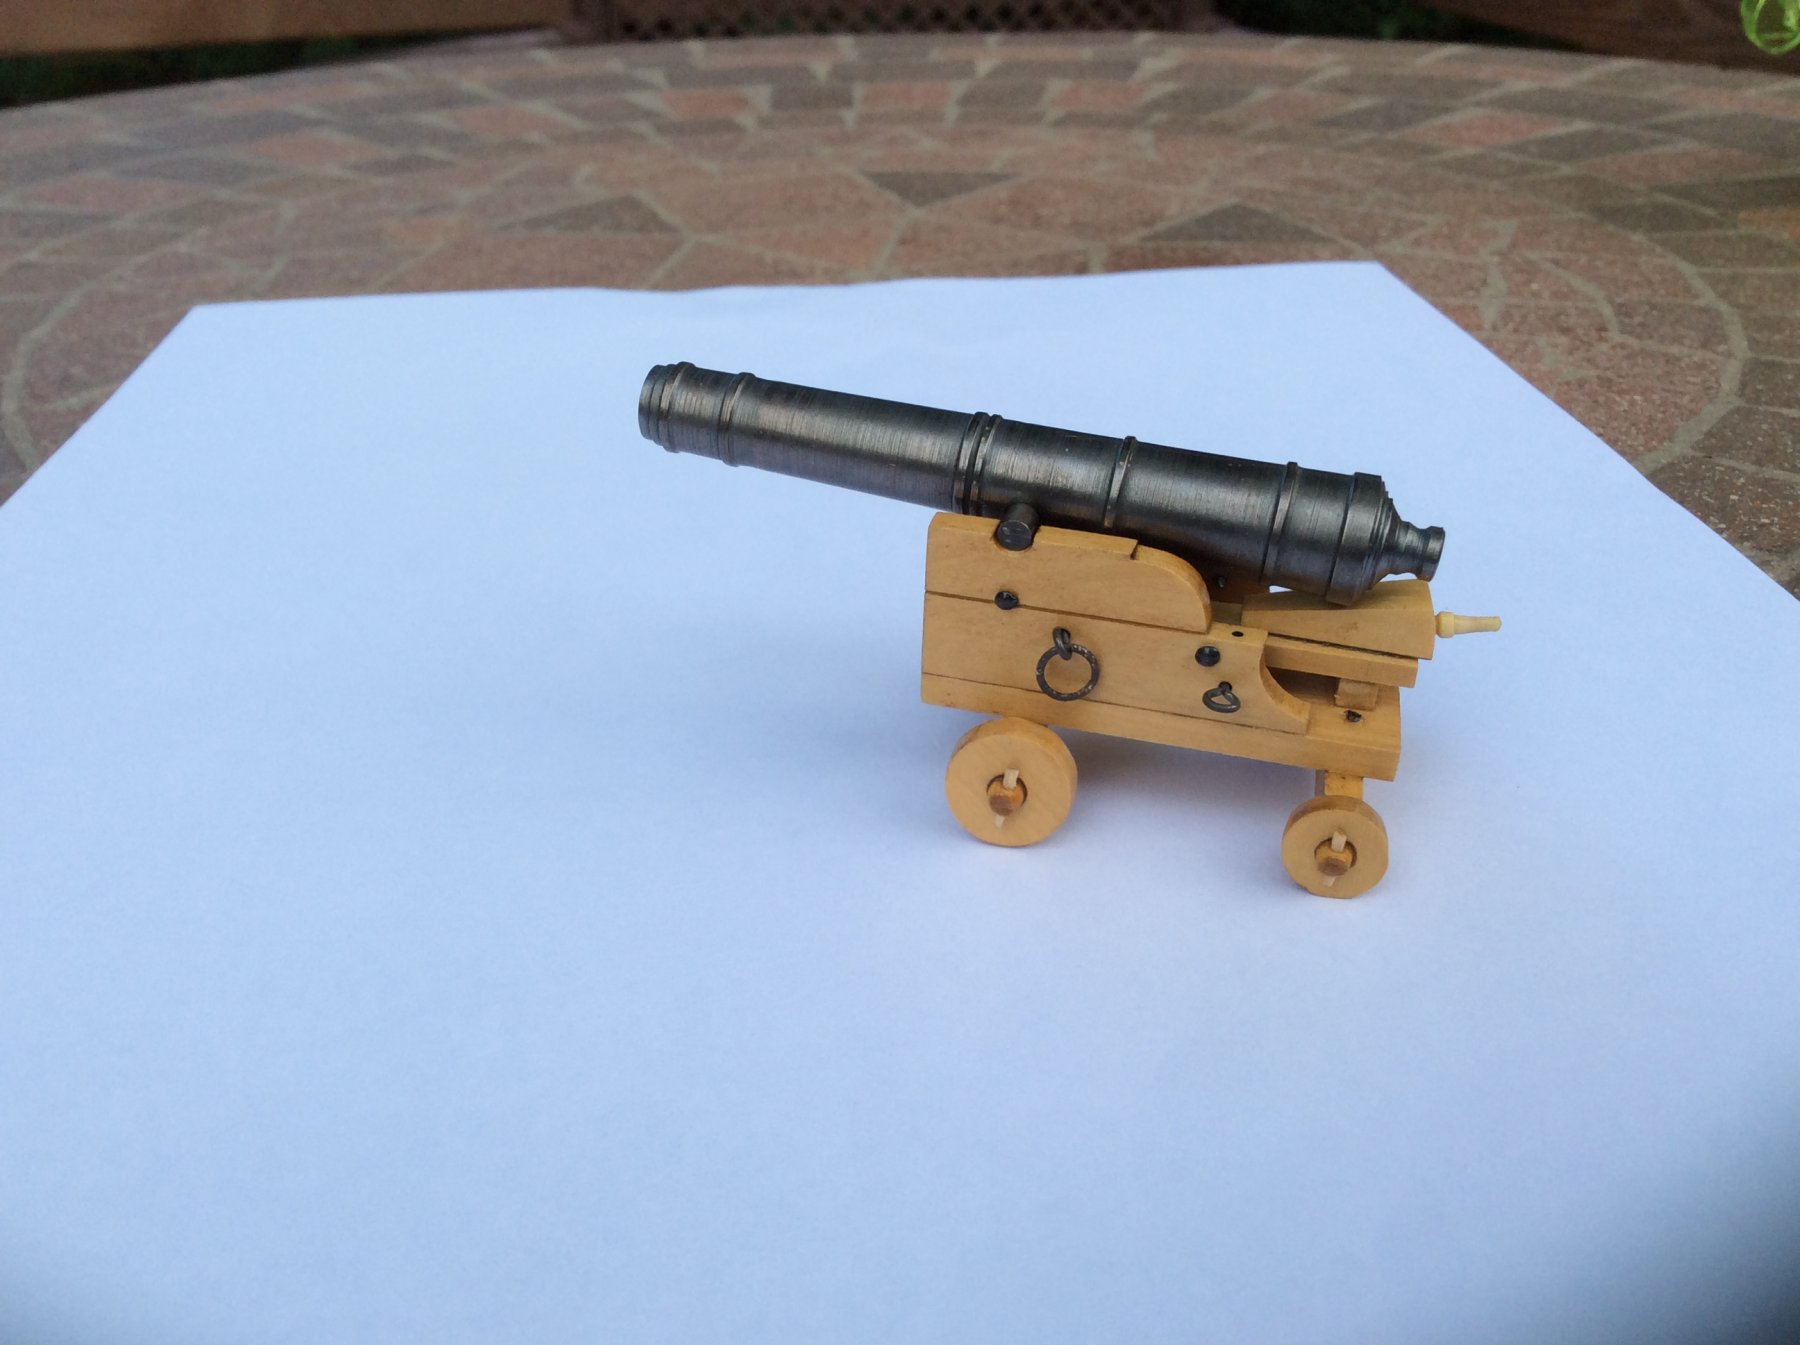
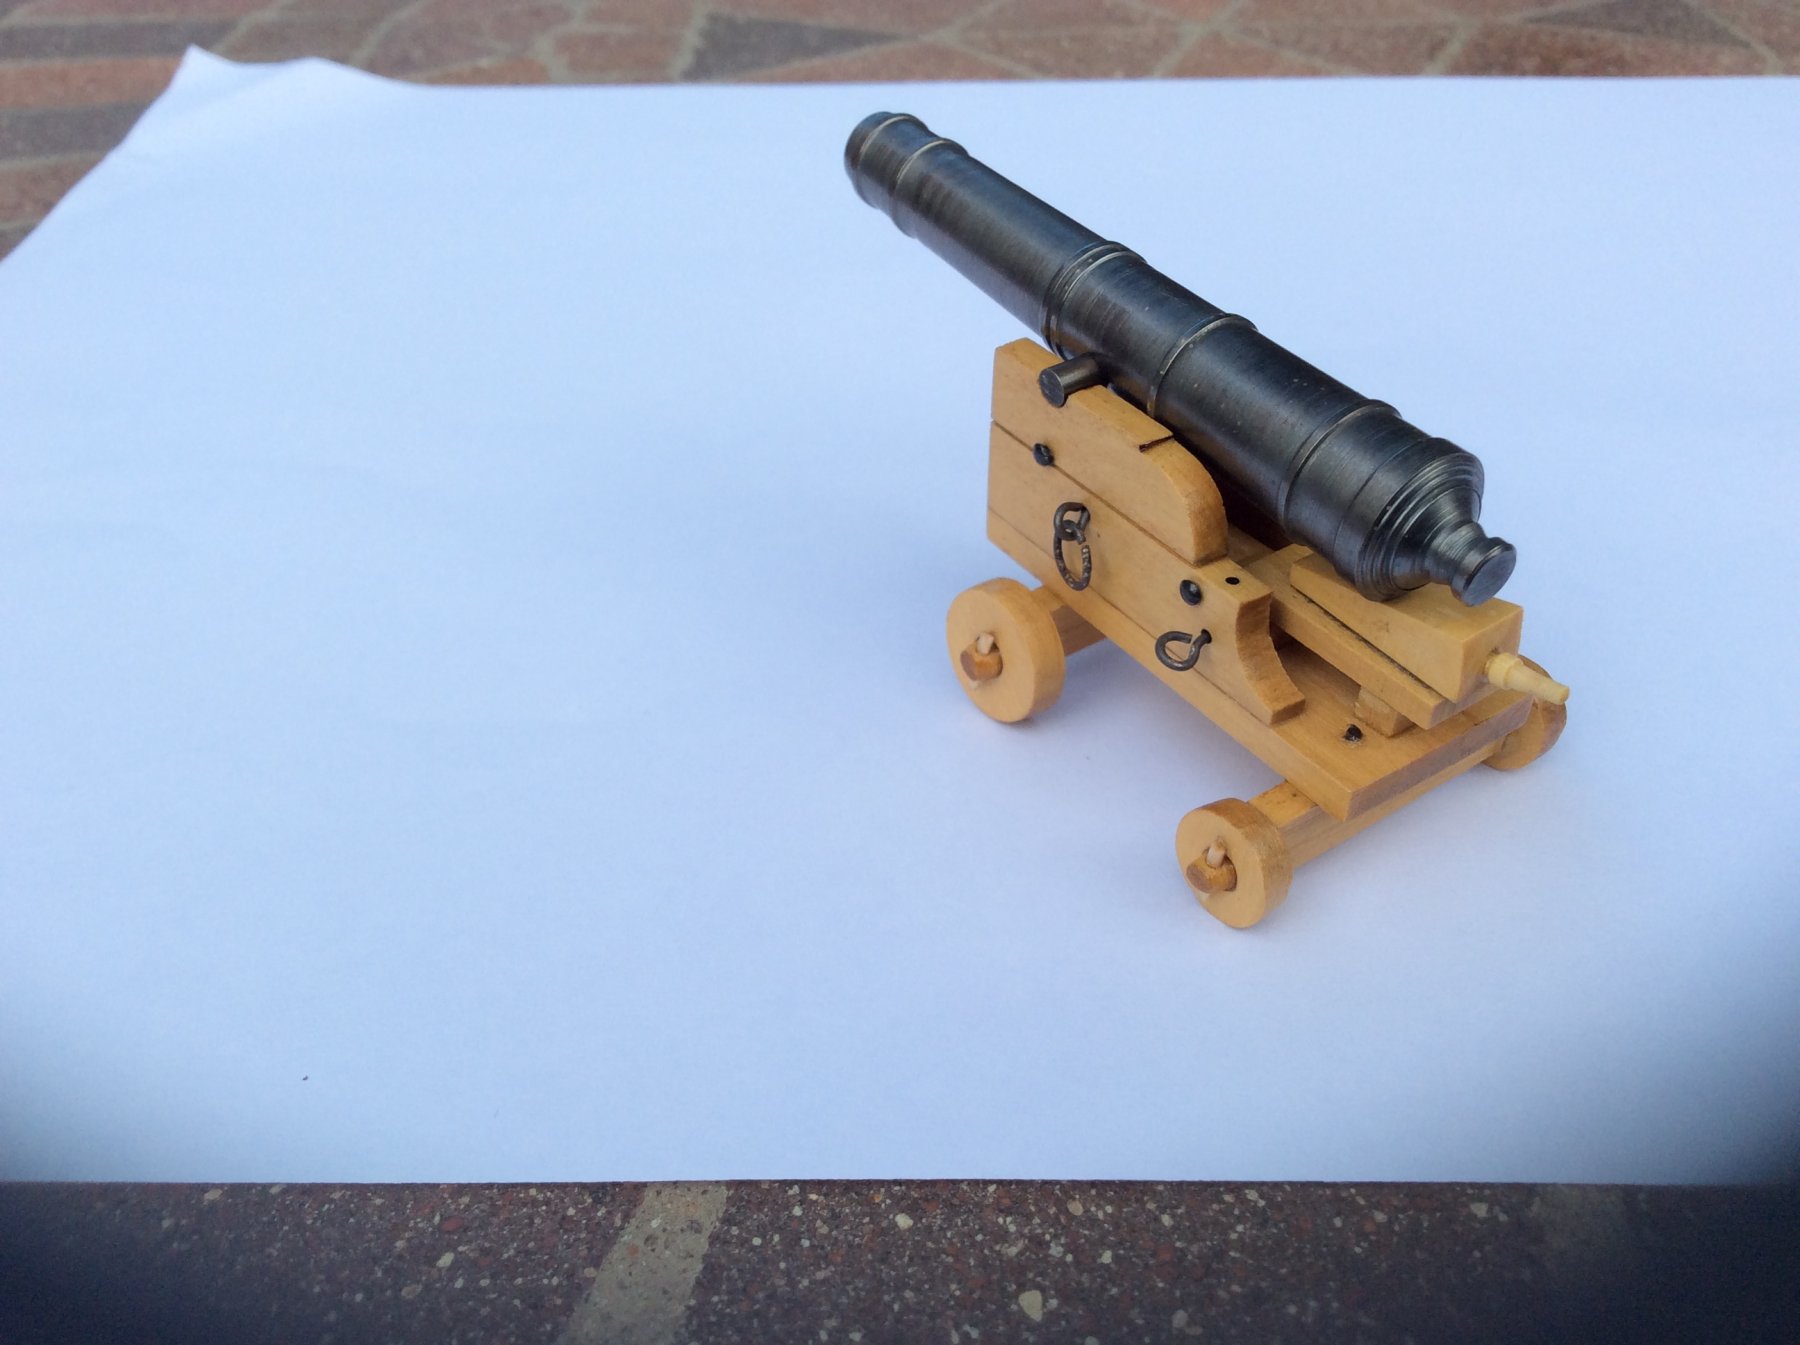
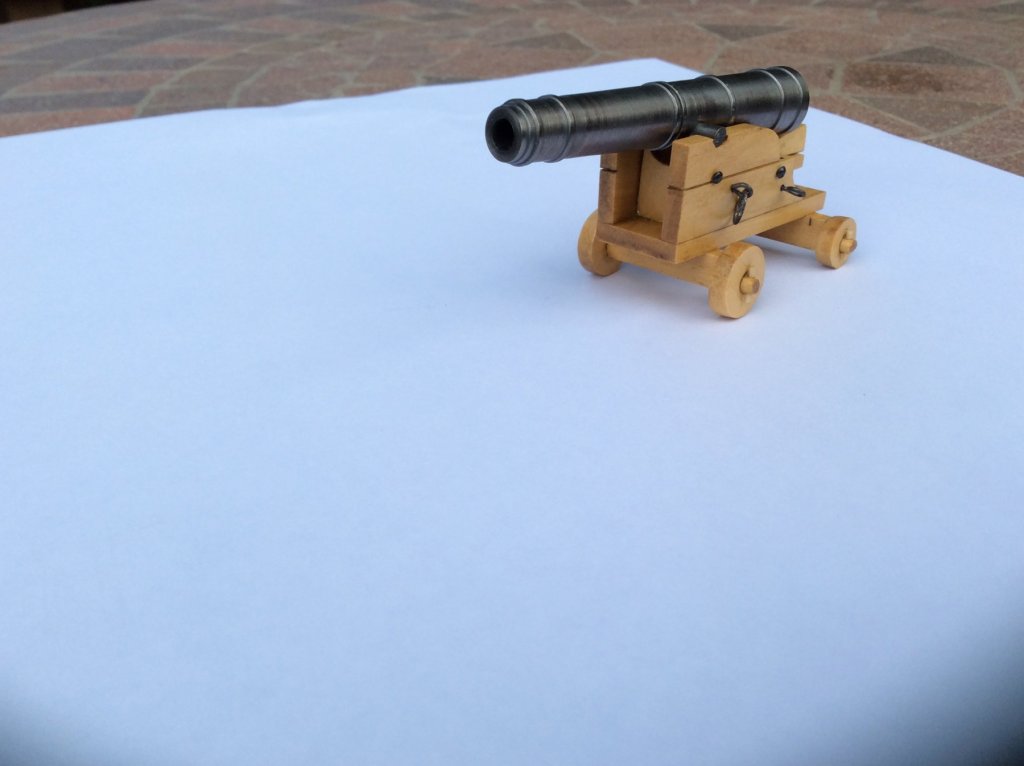
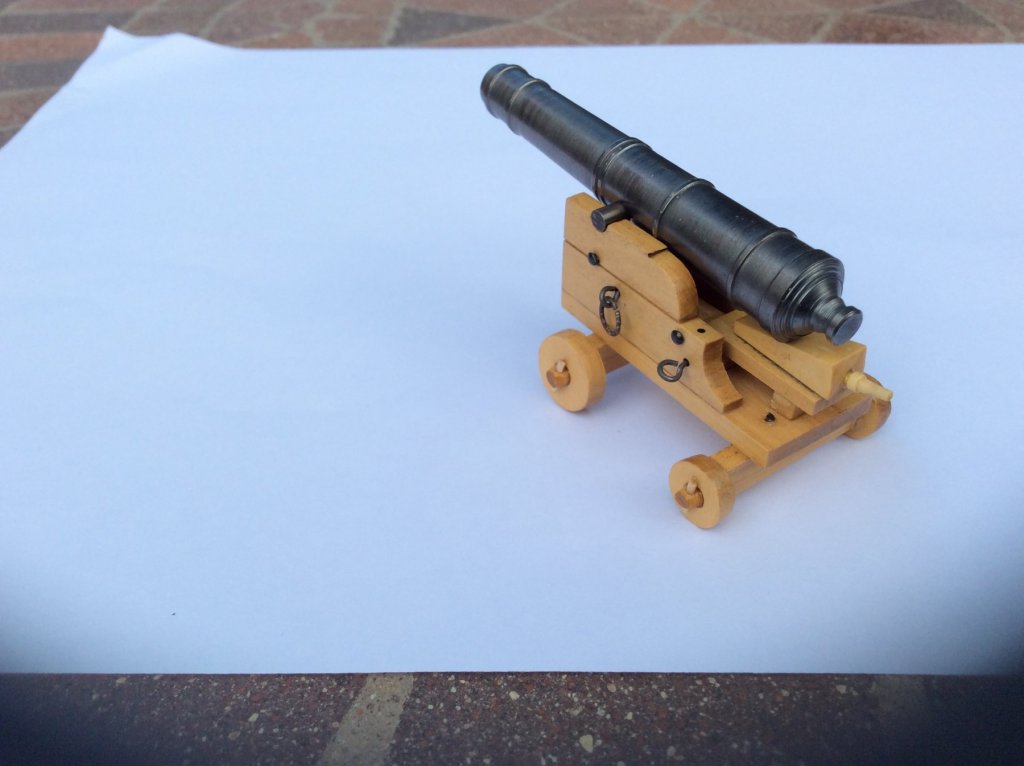
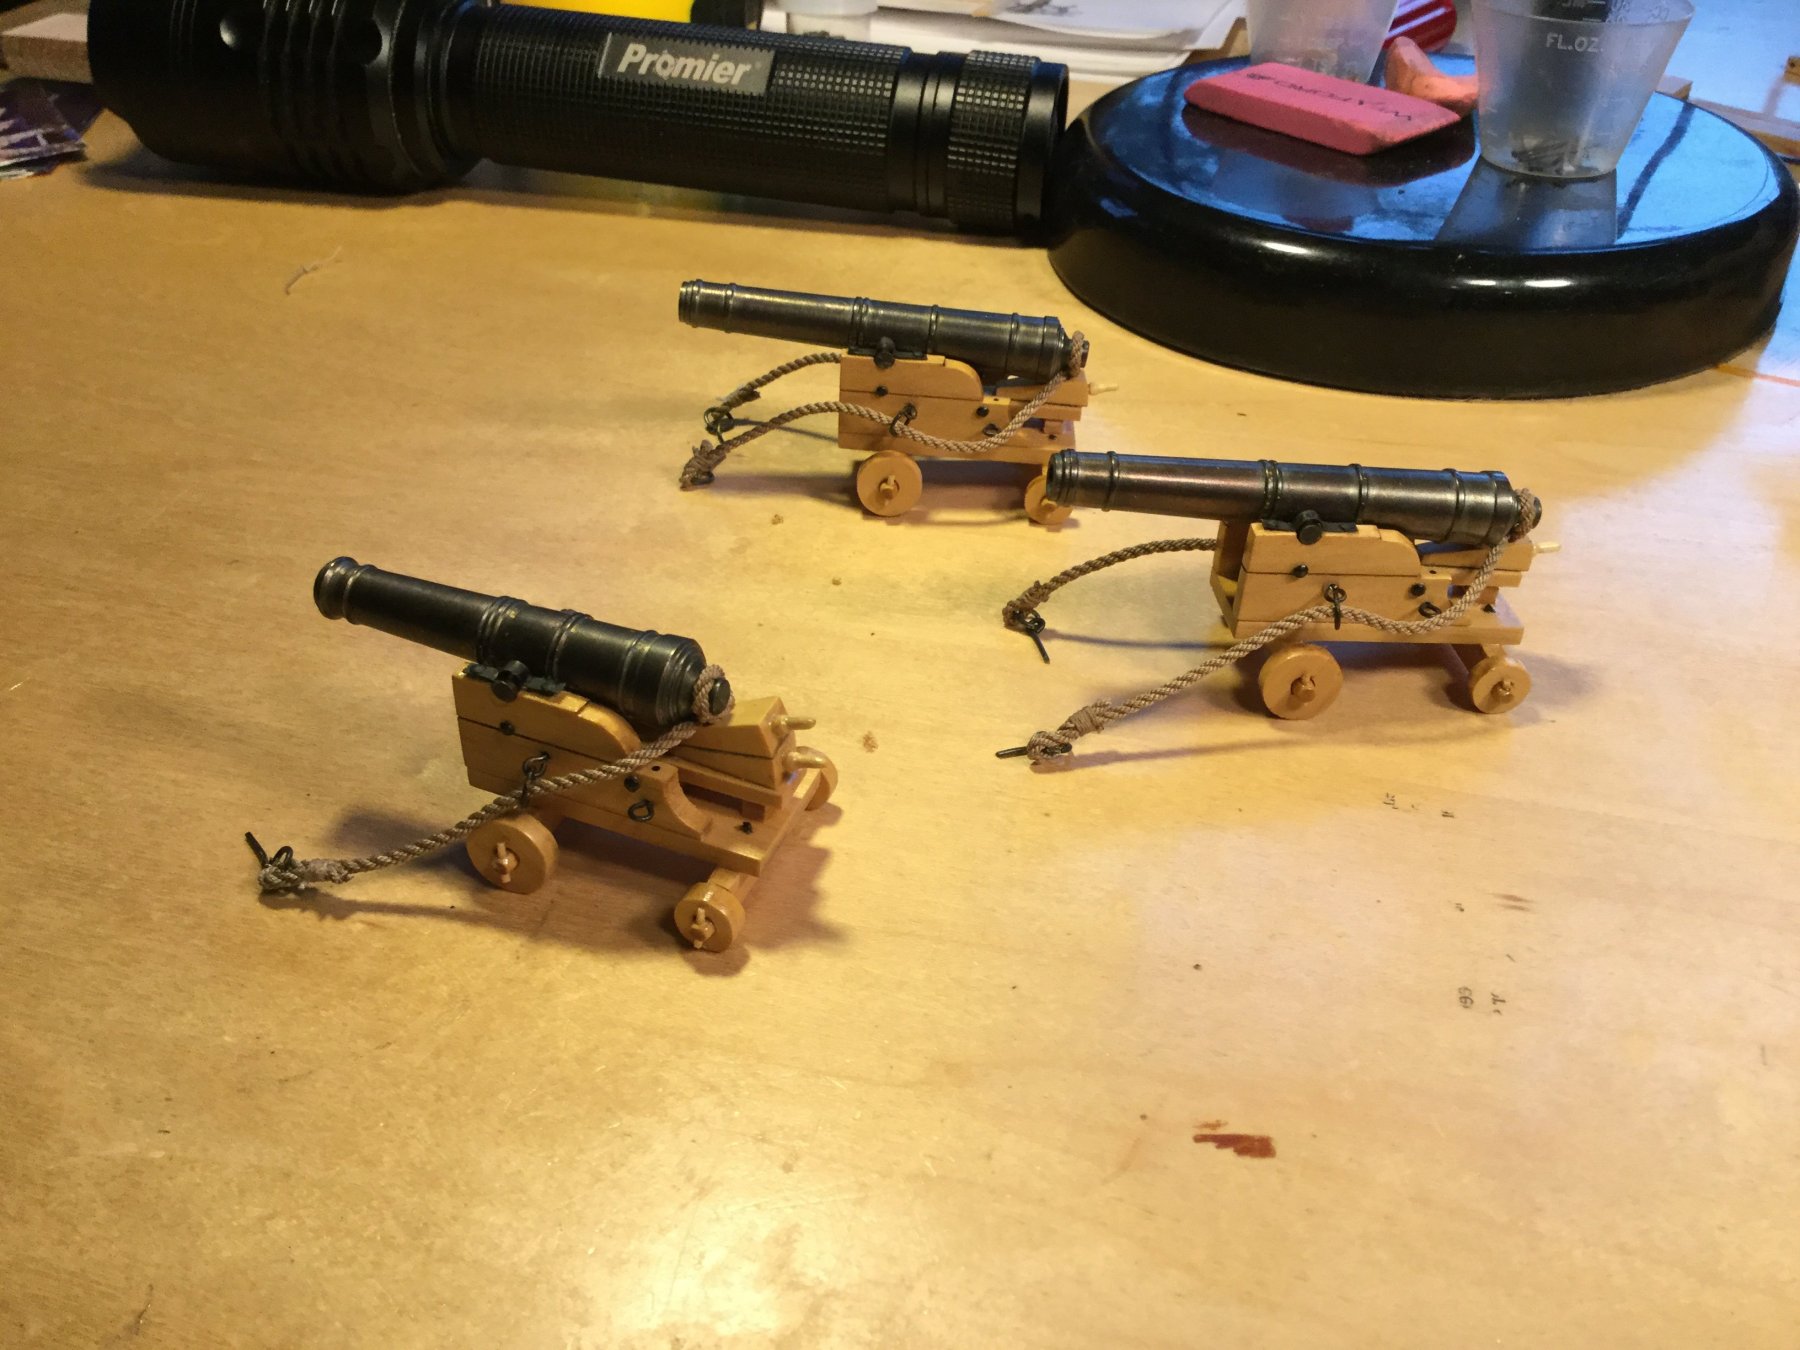
 I've been busy with a lot of things, but now we are in autumn and it's time to get back in the shipyard! Here are the cannons, with the cap squares applied and the breeching line attached. Don made the line with his ropewalk.
- 128 replies
-
- 20
-

-
- mordaunt
- battle station
- (and 1 more)
-
Very nice, Ken! I believe the anchor bumpers/guards are called “billboards”.
- 122 replies
-
- 4
-
-
- independence
- privateer
- (and 1 more)
-
Lime wood, without question. Soaked in water you can literally tie it in a knot! Very flexible, easy to bend and forgiving. The others are far too hard and/or brittle to work as a first planing in the thickness needed. I have used boxwood, holly and Swiss pear as second planking in 1/32” thickness.
-
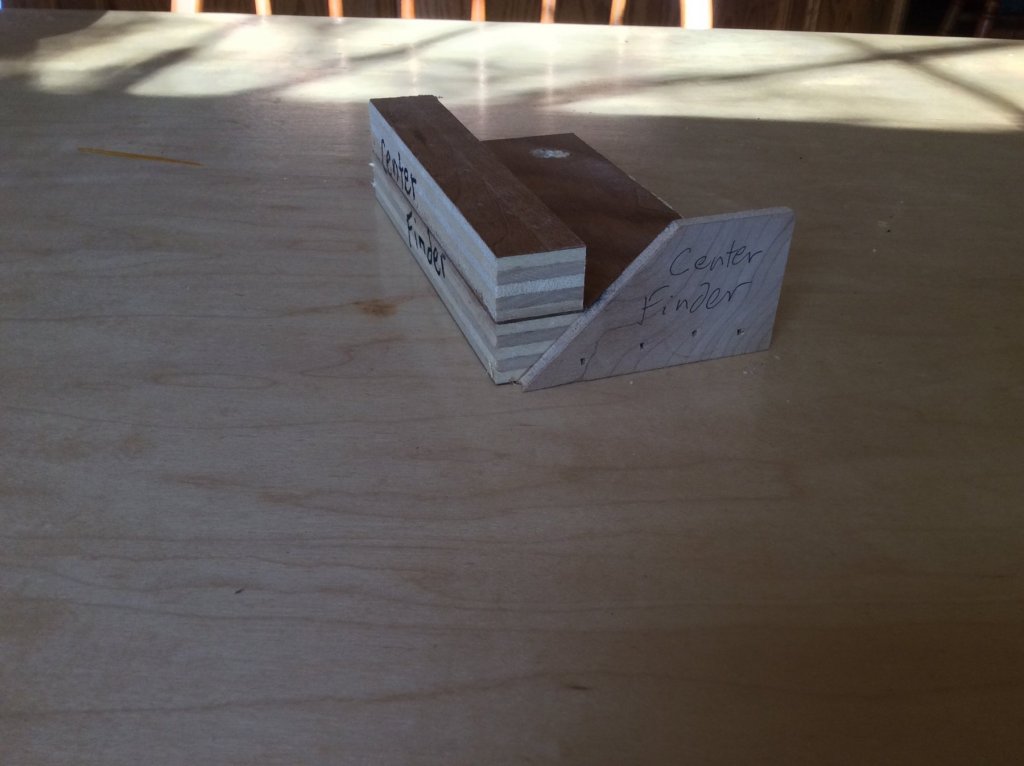
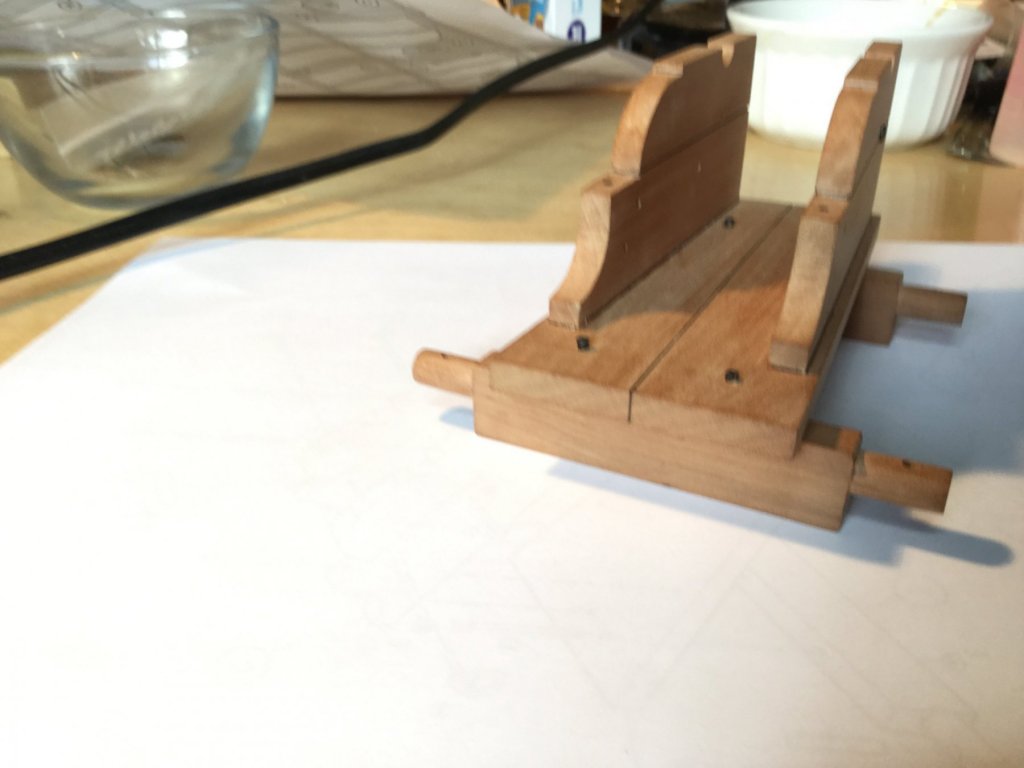
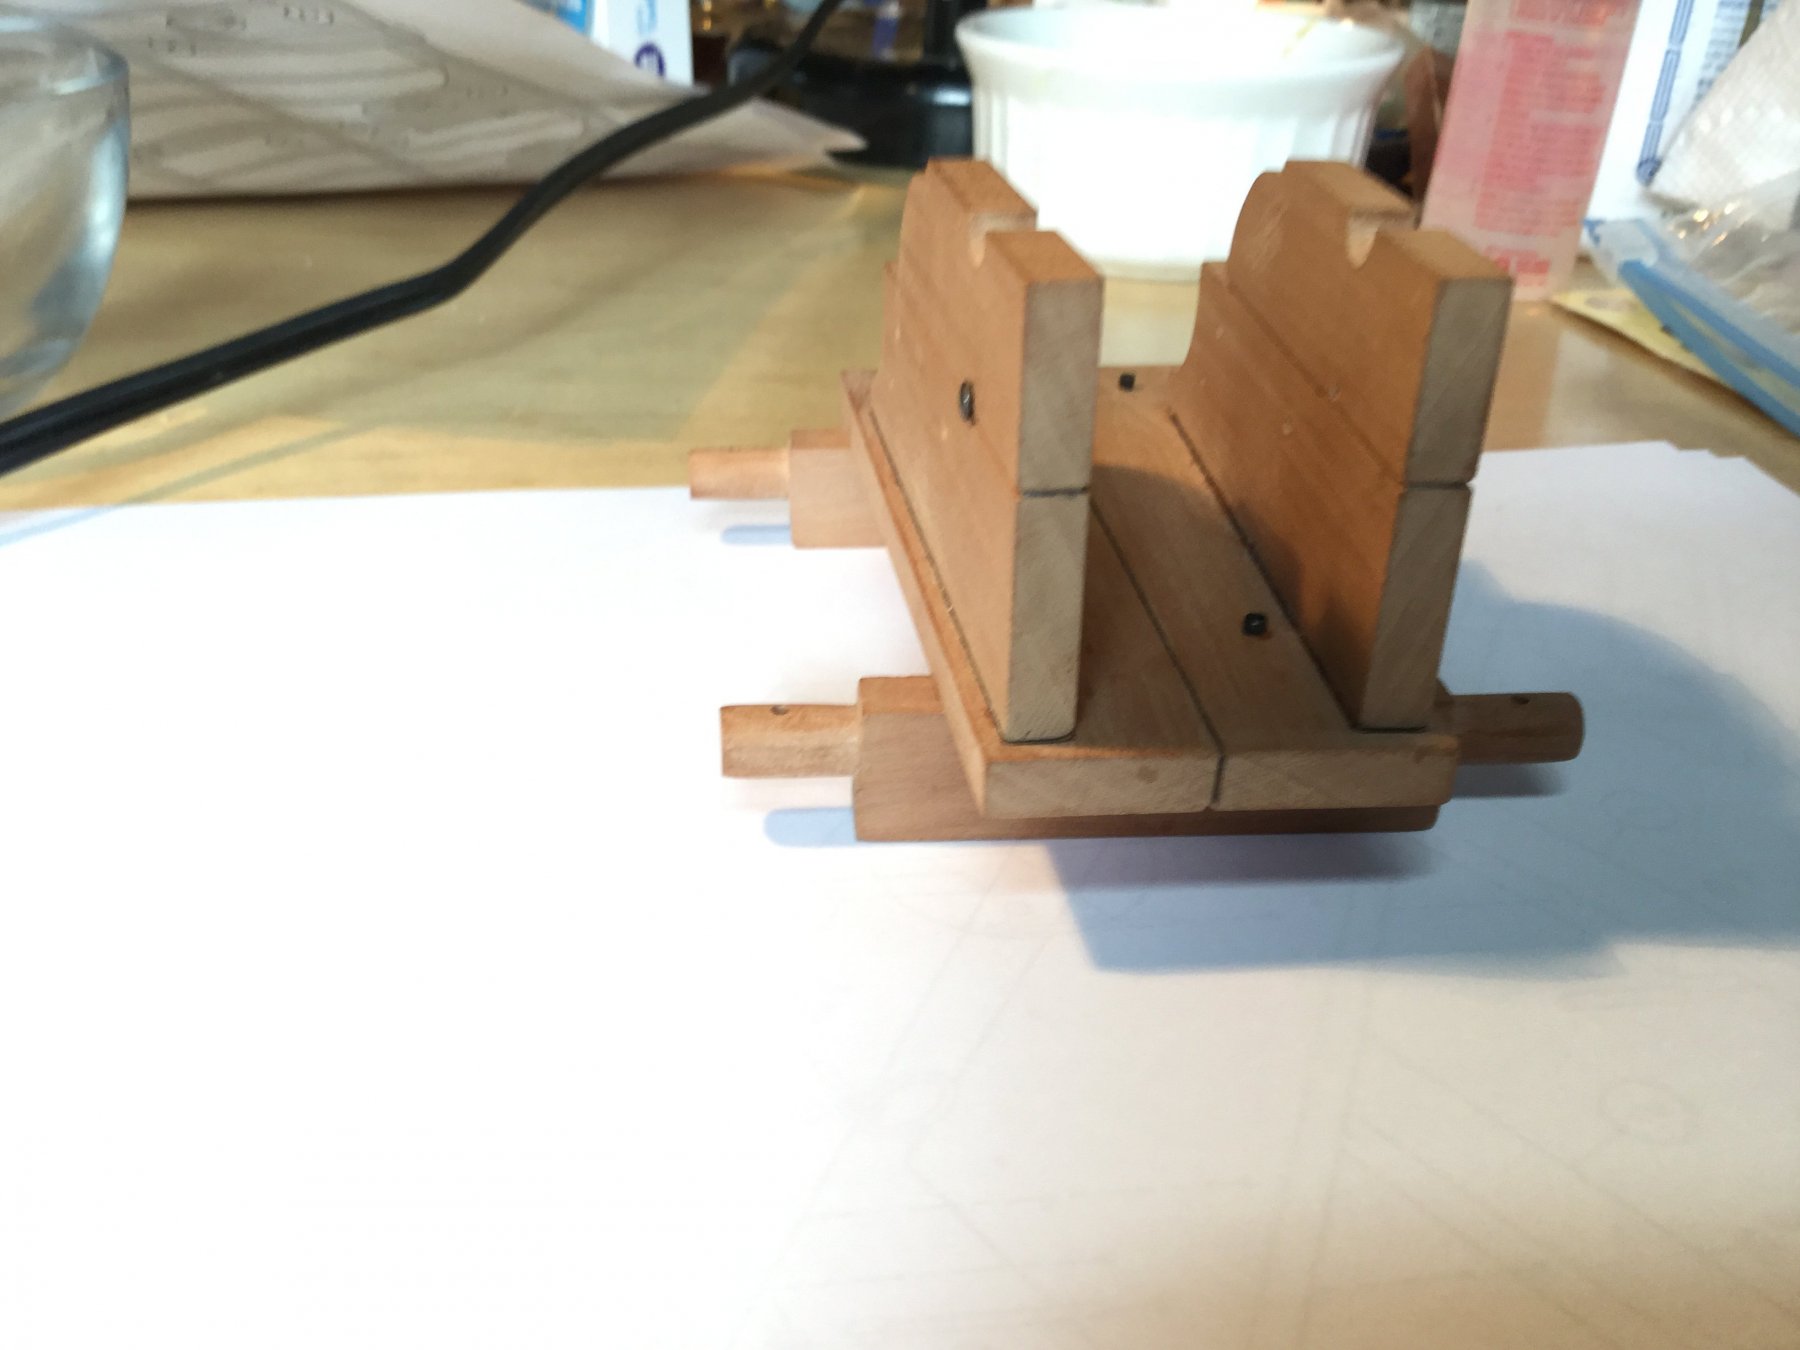
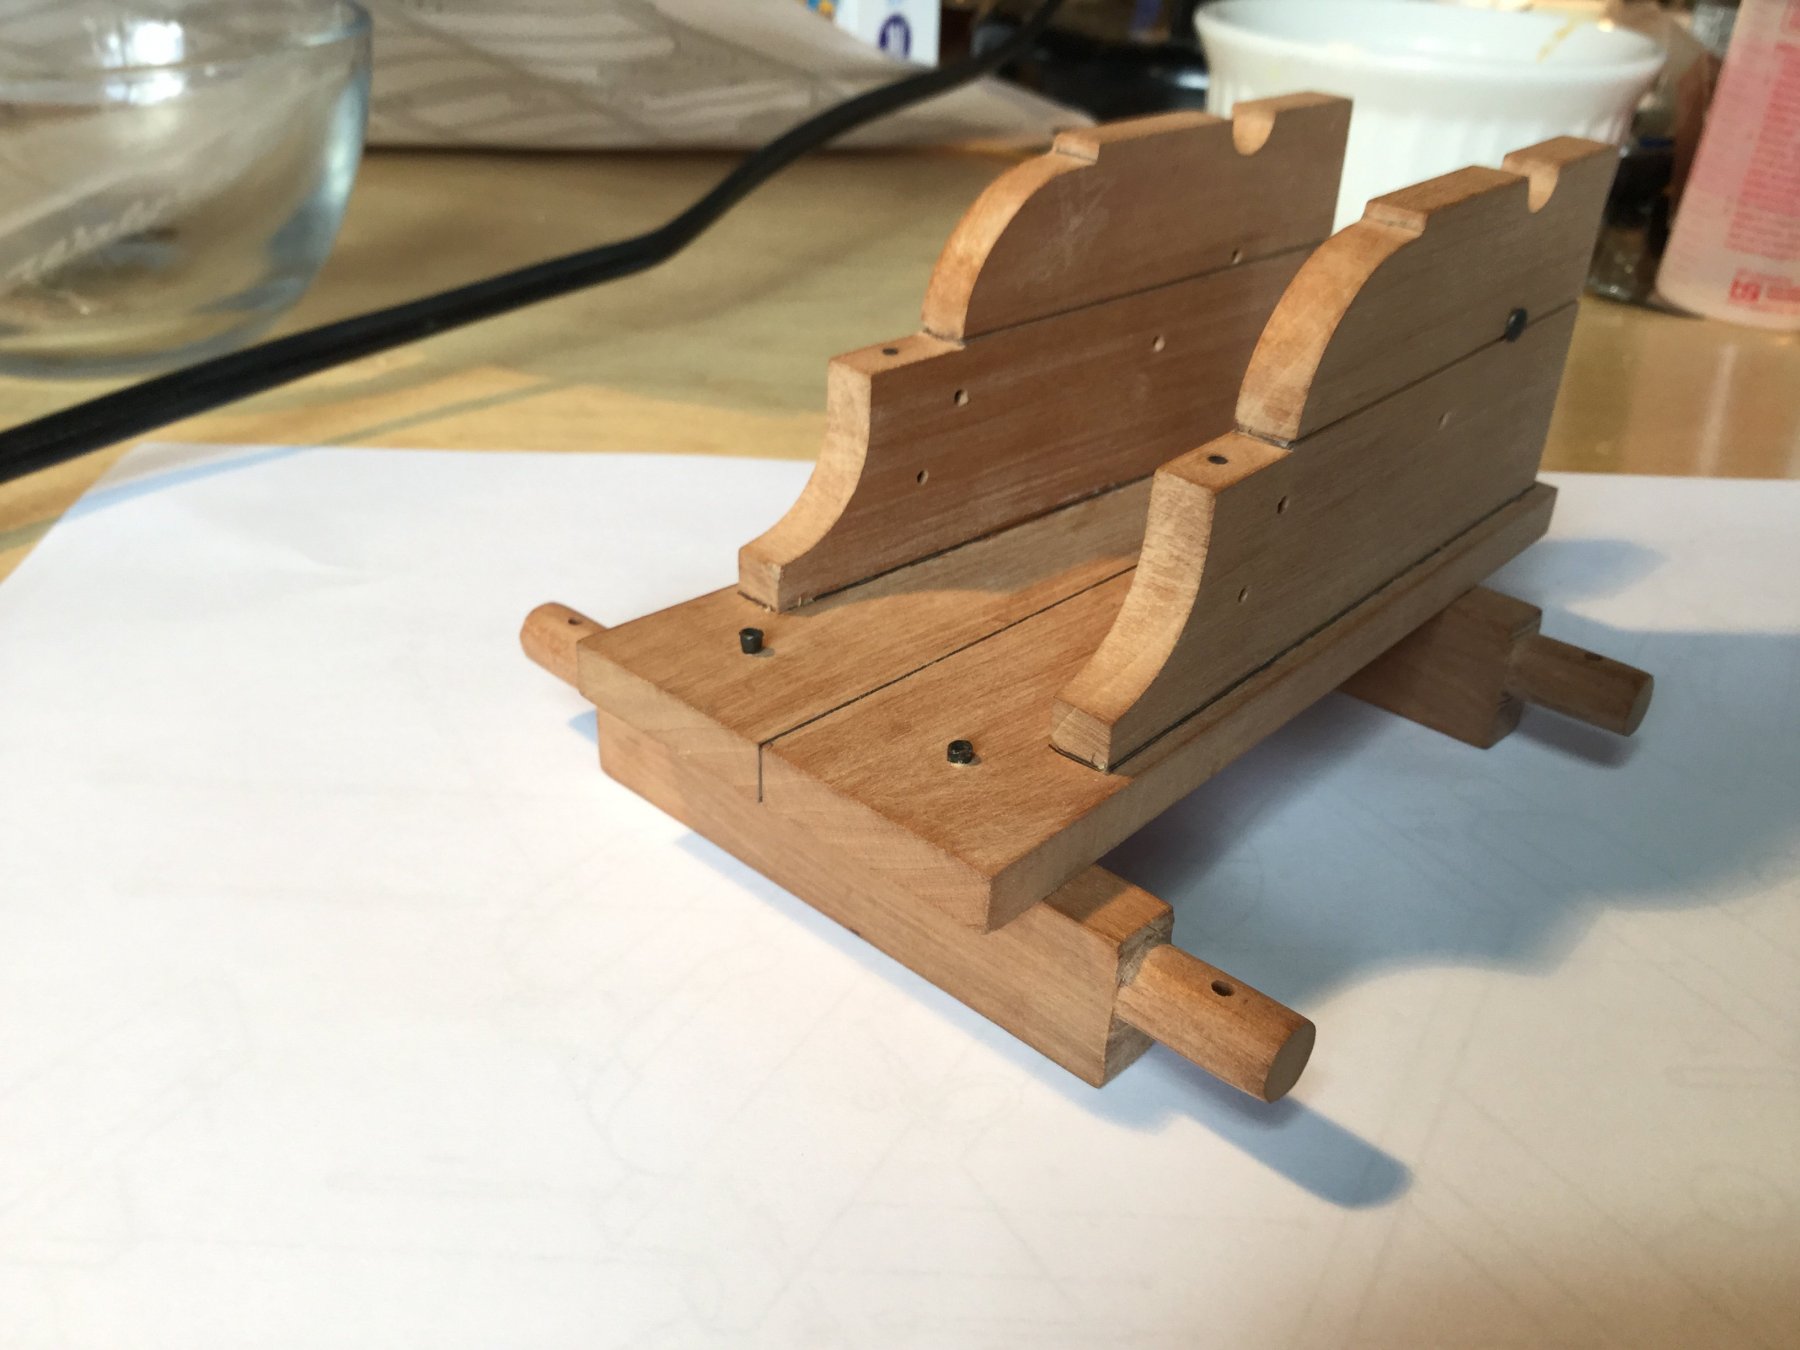
I made my own for $0. This one will accommodate dowels up to 1-1/2" diameter (or square stock). If you are working with larger diameters, add another piece of 3/4" plywood to the right angle fence for 3" diameter capacity. Just be sure the 45 degree and right angles are correct
- 17 replies
-
- 11
-
-
Thanks Michael and Kevin, and thanks to all for the “likes”!
- 128 replies
-
- 3
-
-
- mordaunt
- battle station
- (and 1 more)
-
Hi, Ken! The time in the acetone and acid is not critical. 15 minutes in each is fine. A nice water rinse between.
- 128 replies
-
- 3
-
-
- mordaunt
- battle station
- (and 1 more)
-
Hi, Ken! The time in the acetone and acid is not critical. 15 minutes in each is fine. A nice water rinse between.
- 128 replies
-
- 3
-
-
- mordaunt
- battle station
- (and 1 more)
-
Thanks, Sailor. I used a small, very sharp skew chisel to cut the transitions. The tool was "rolled" from the square part of the blank to the circular profile. i practiced on several pieces of wood before turning the spindles out of the curly maple.
-
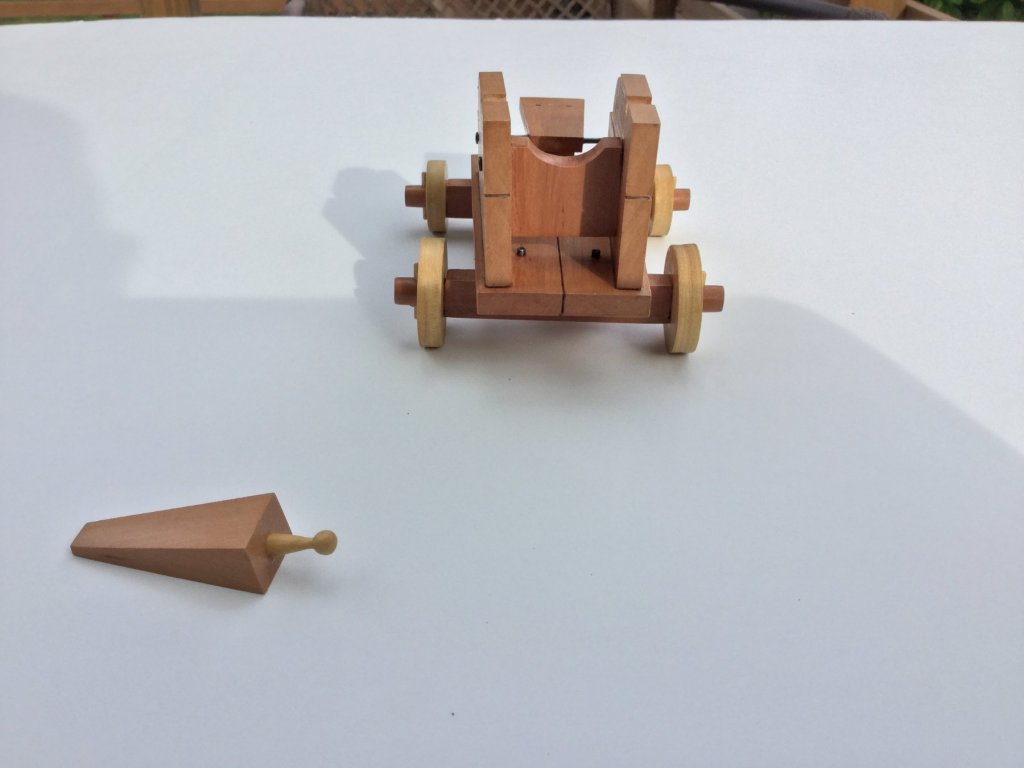
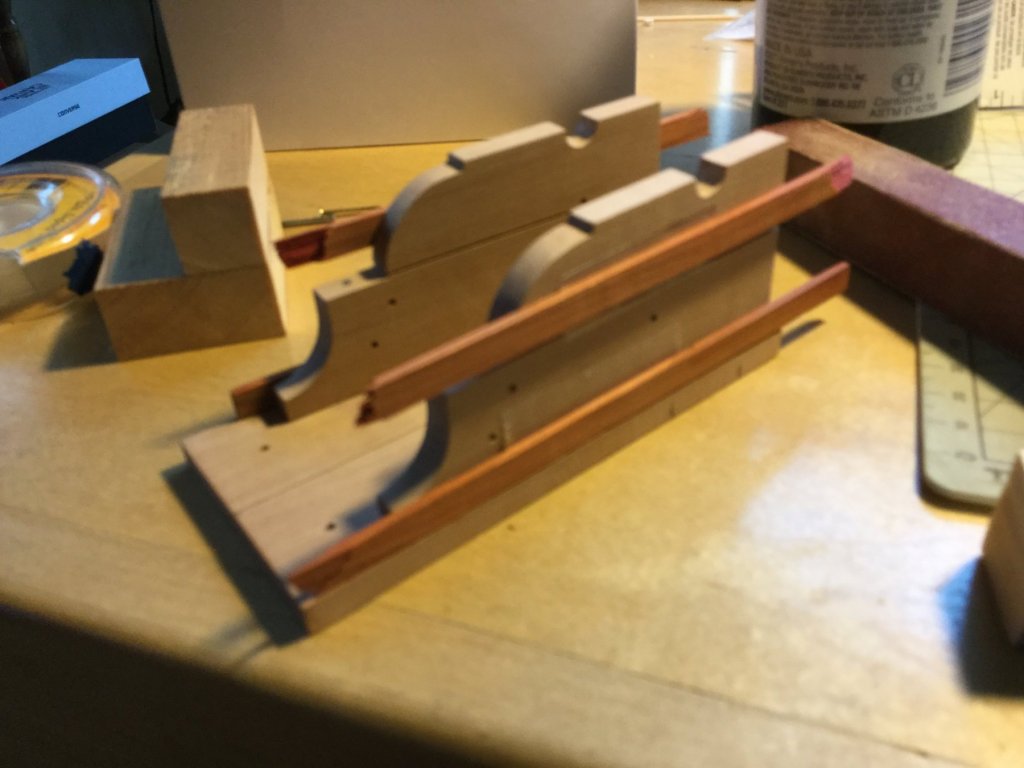
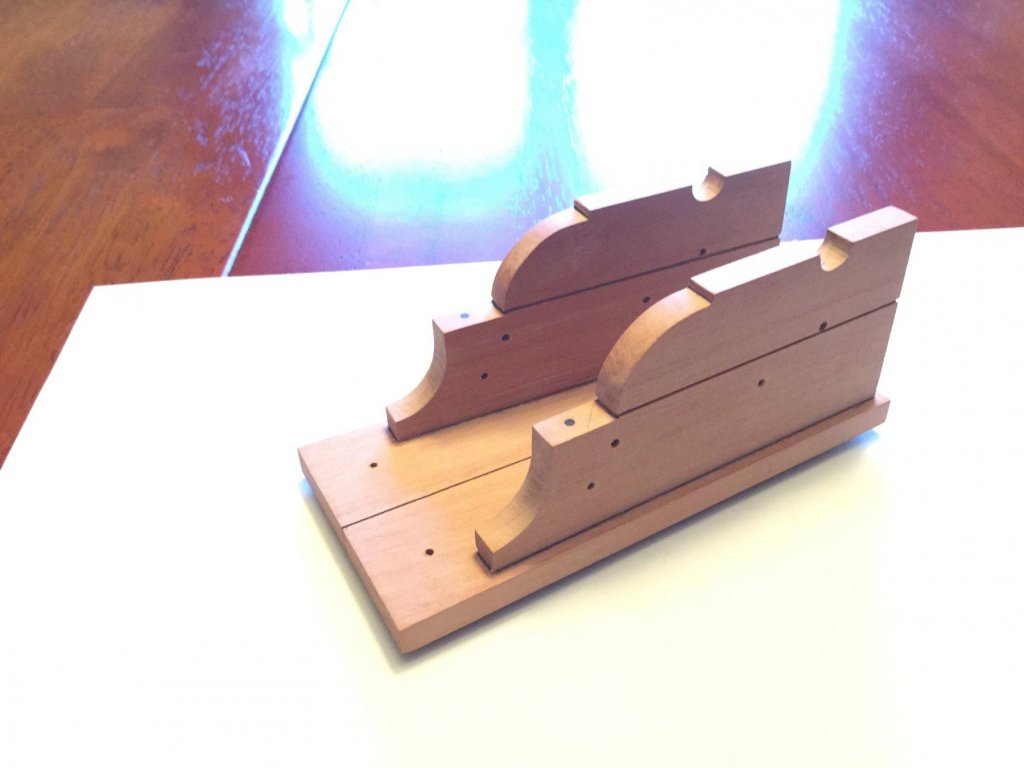
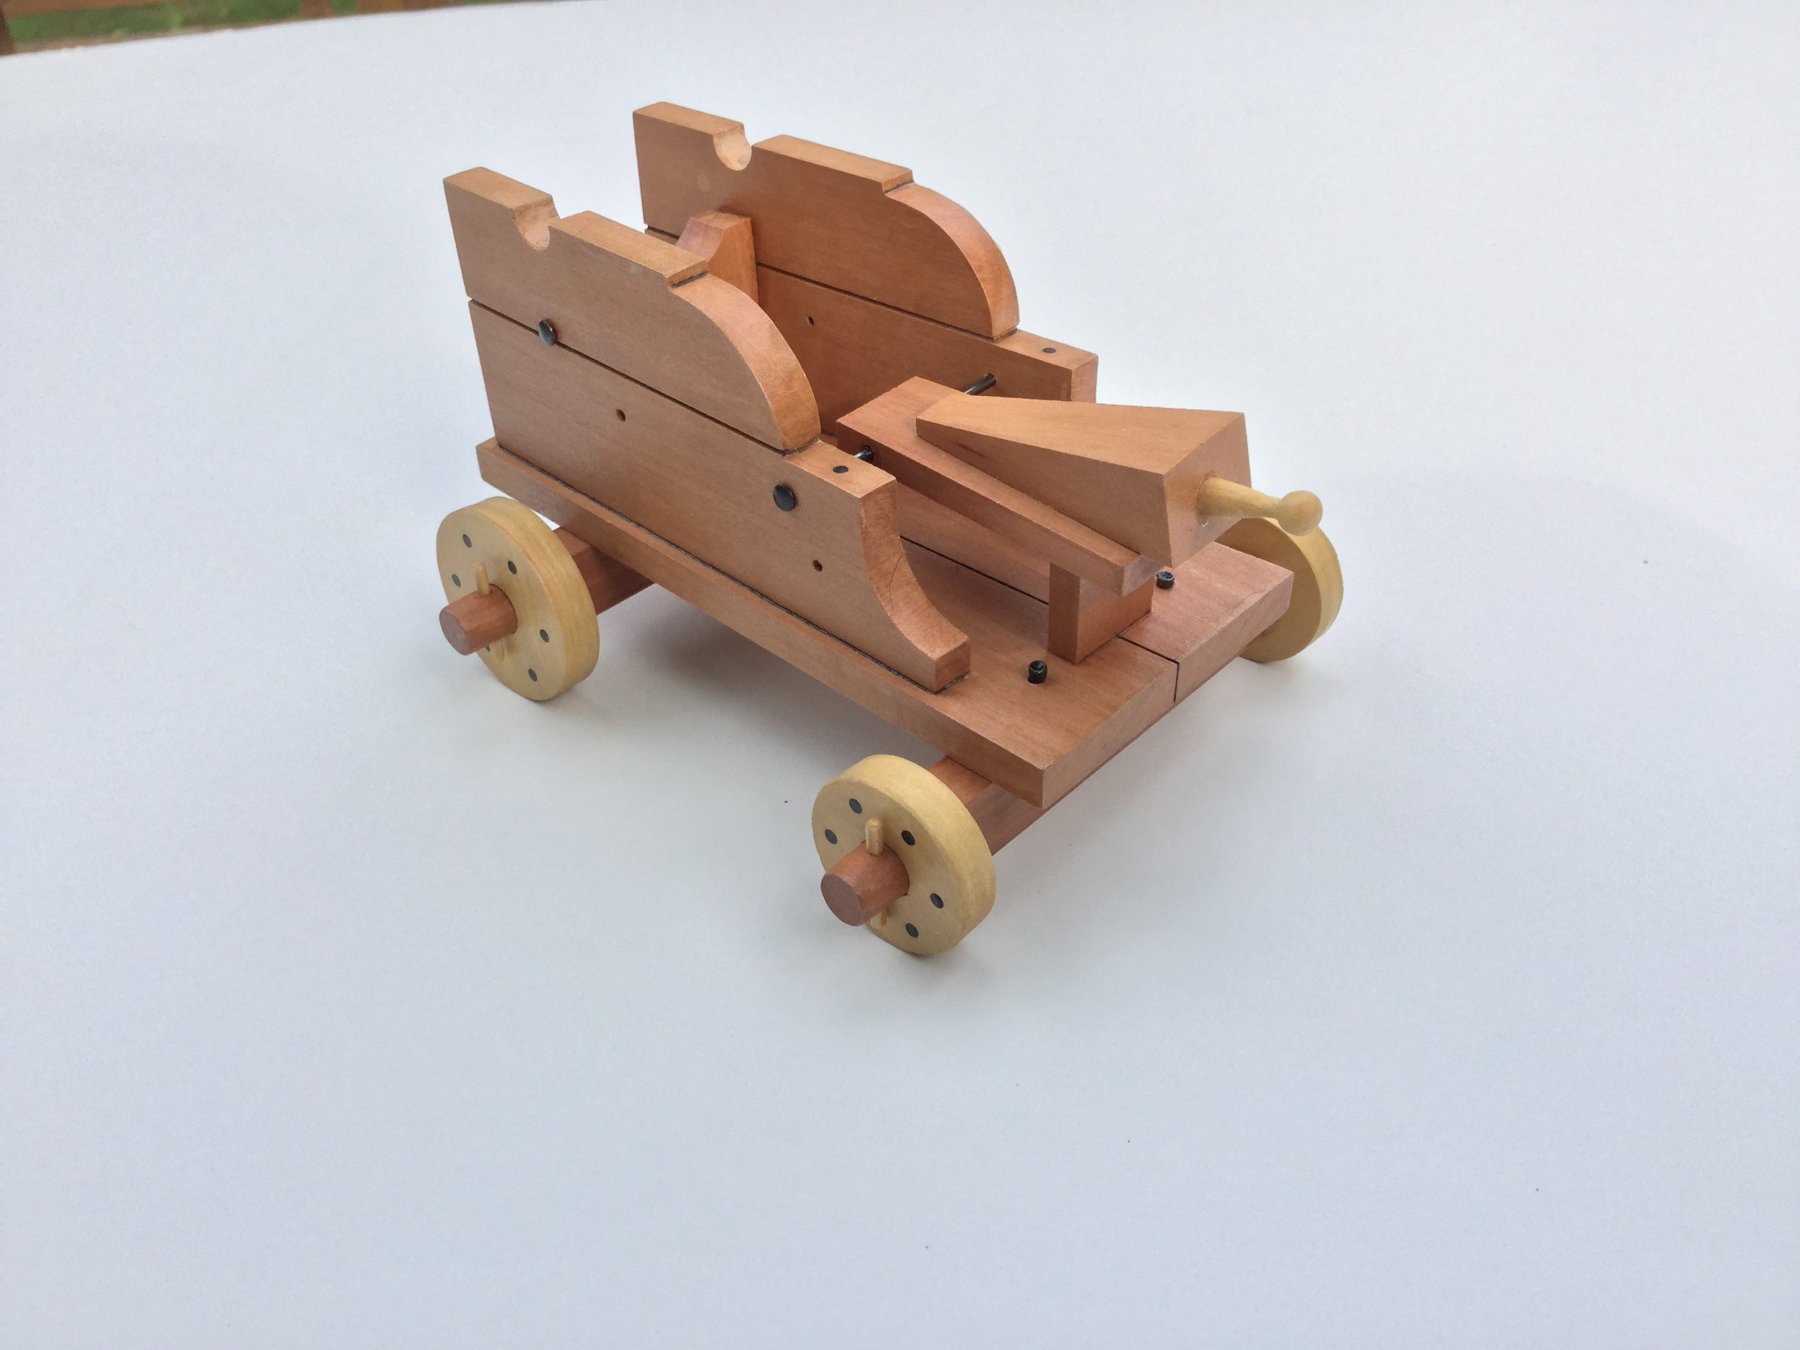
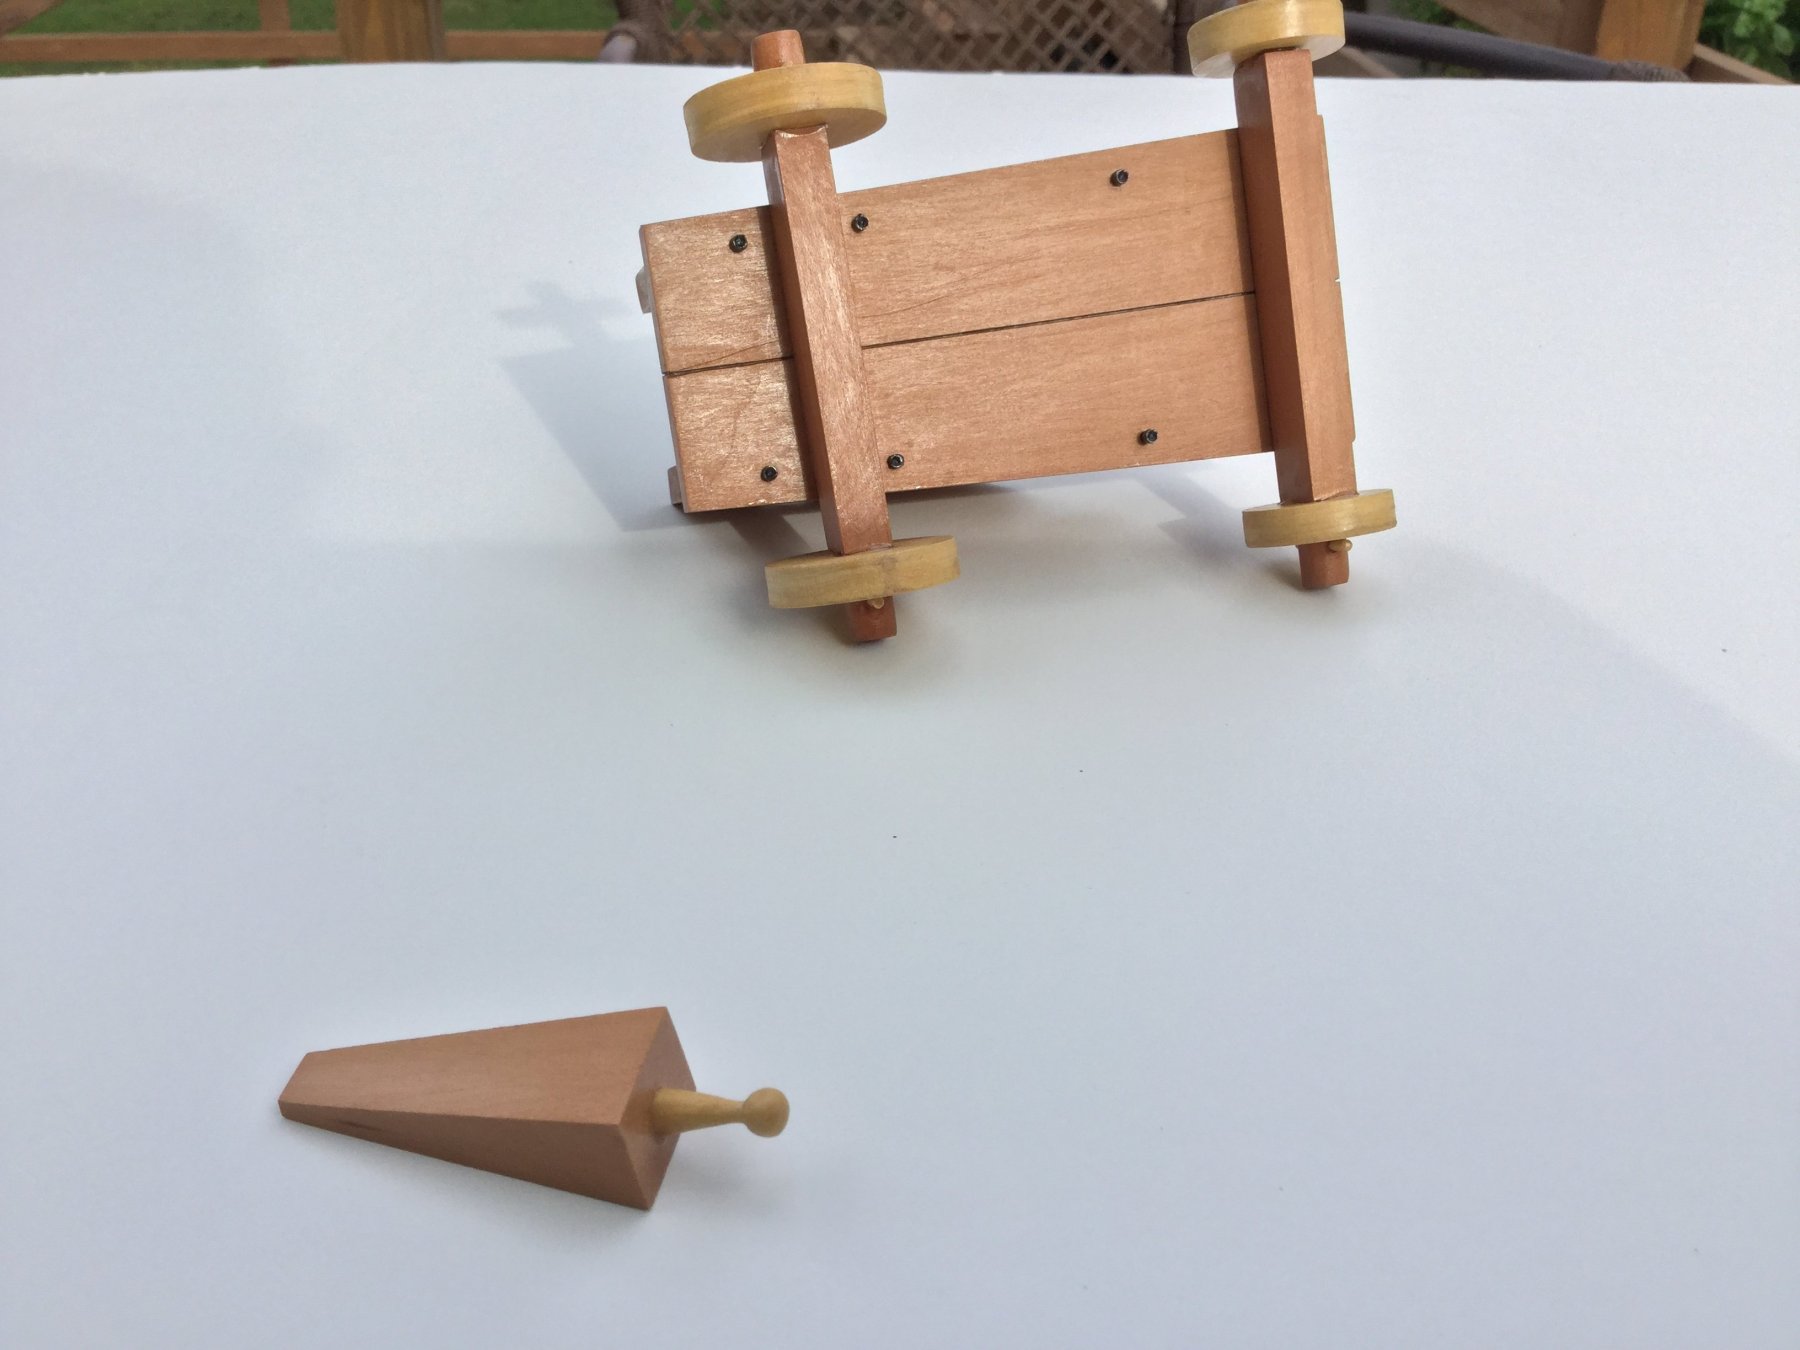
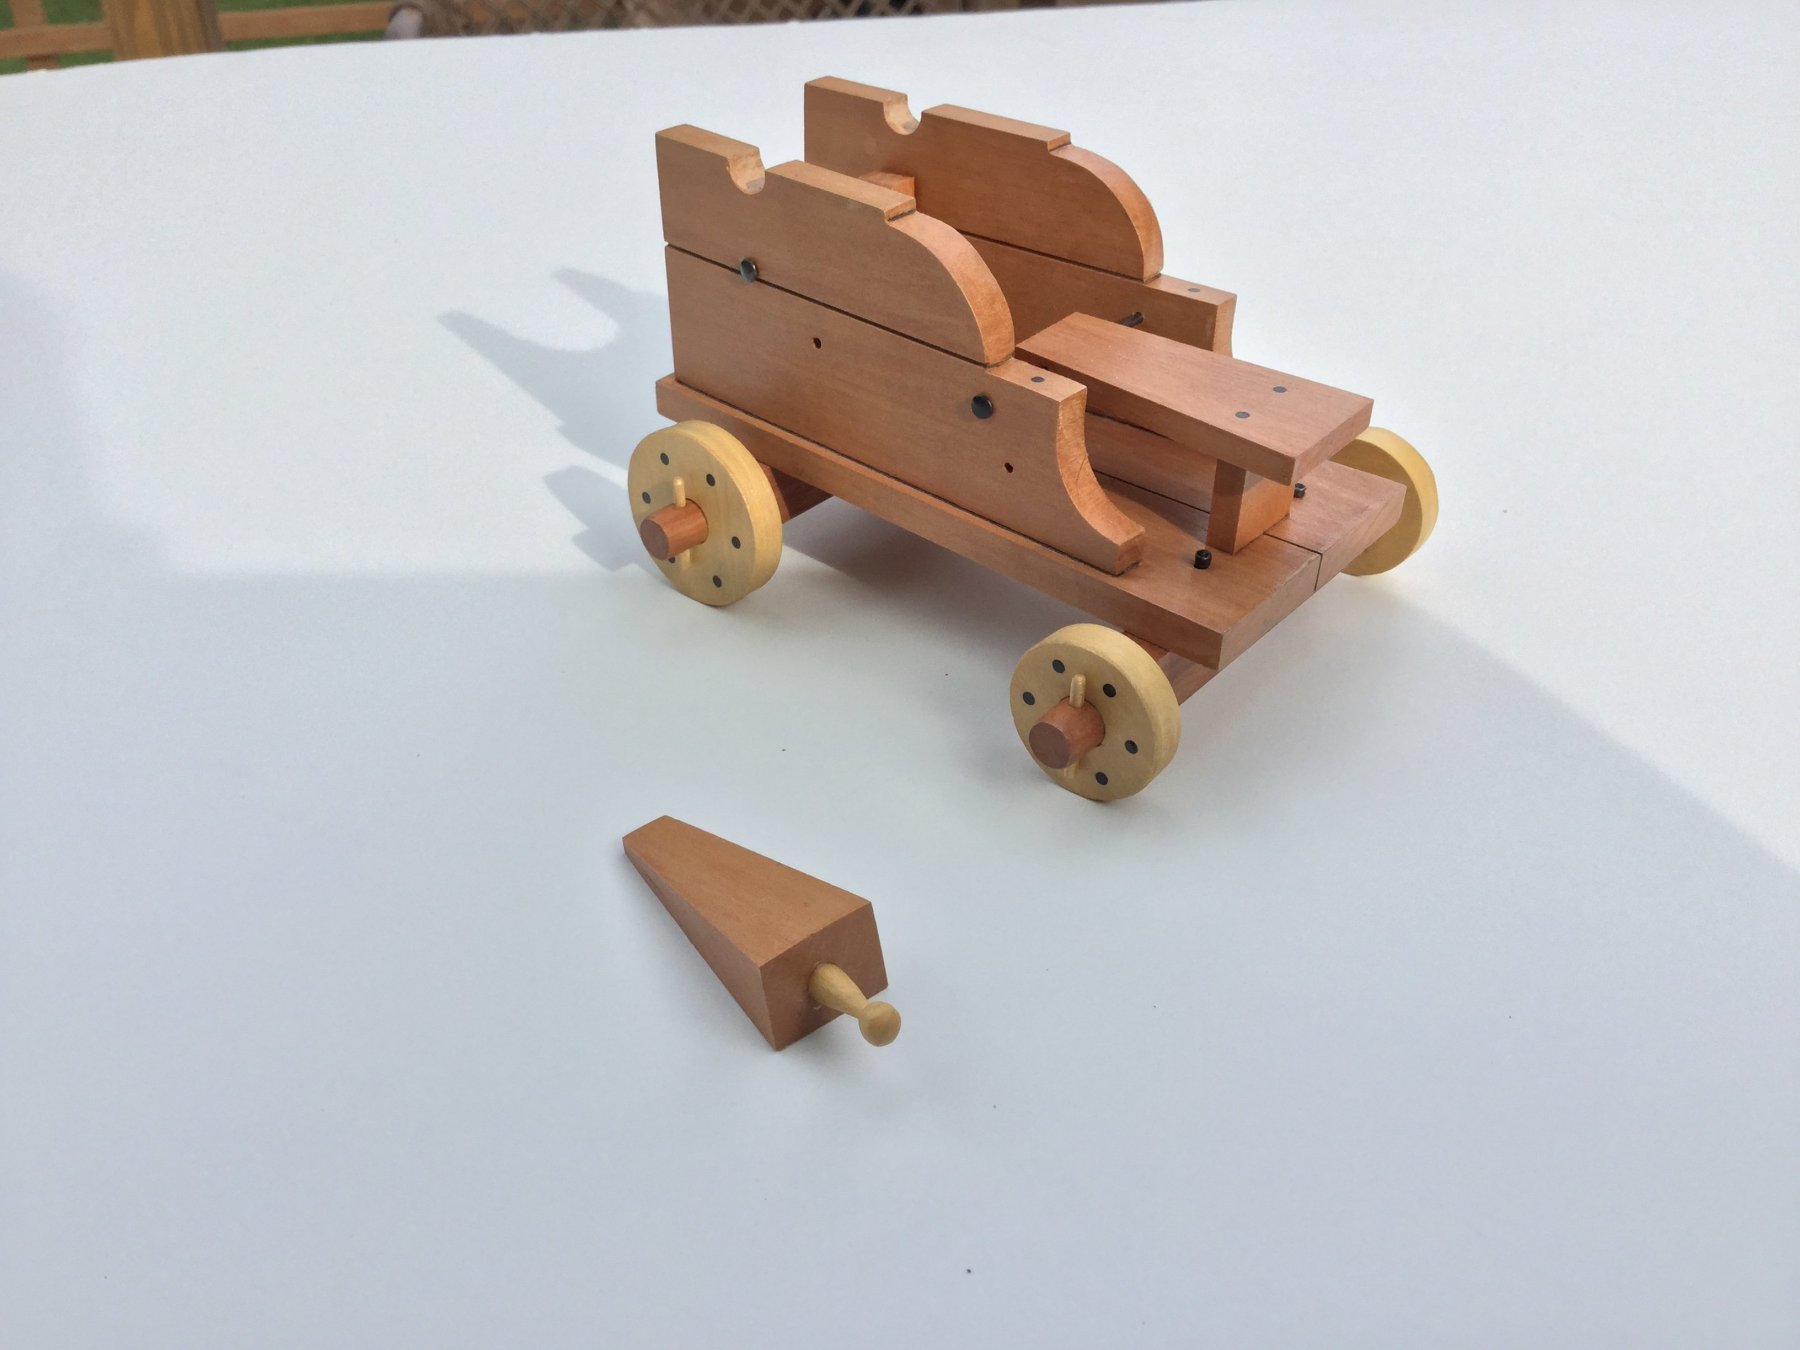
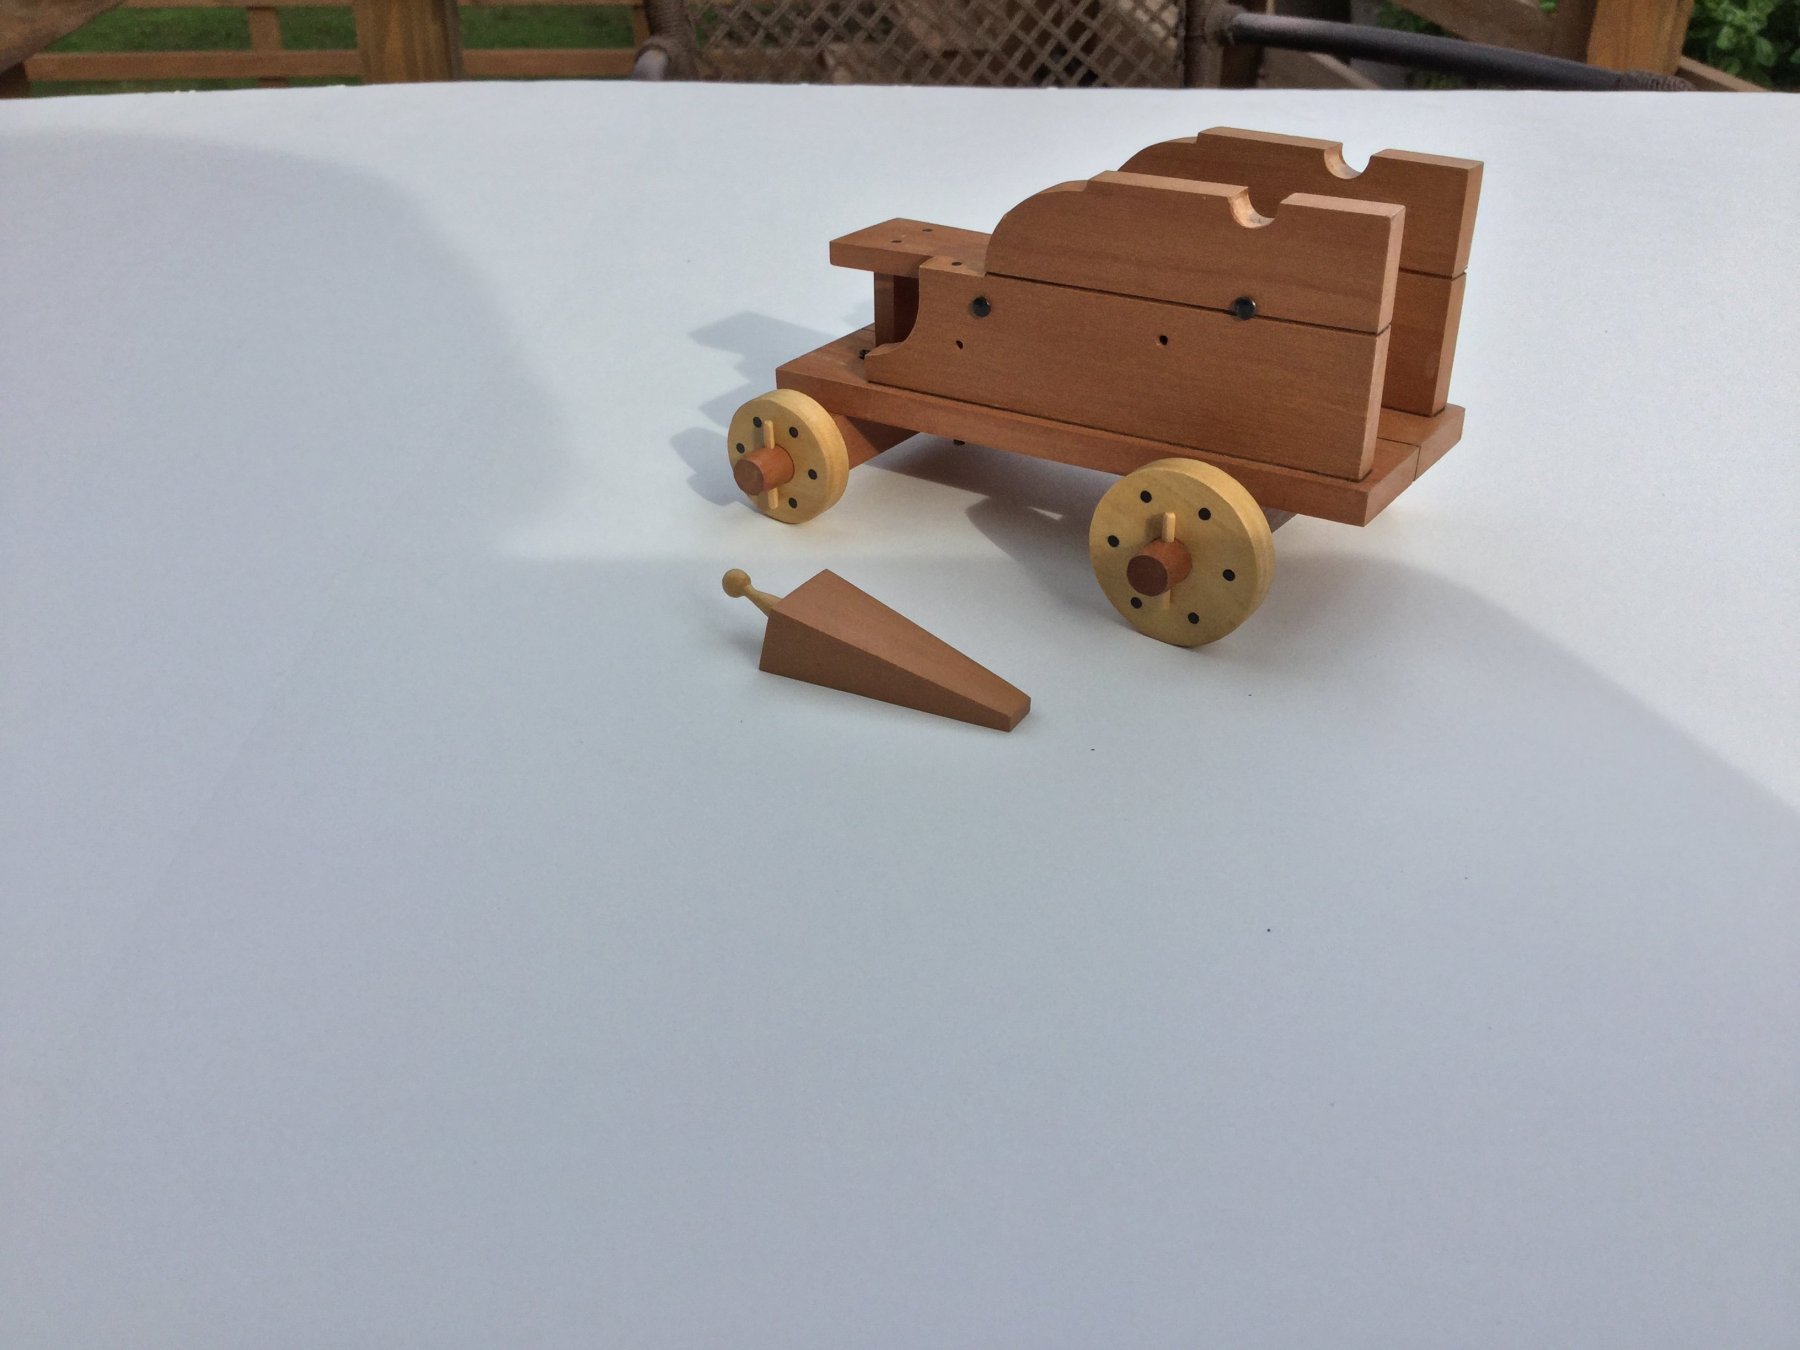
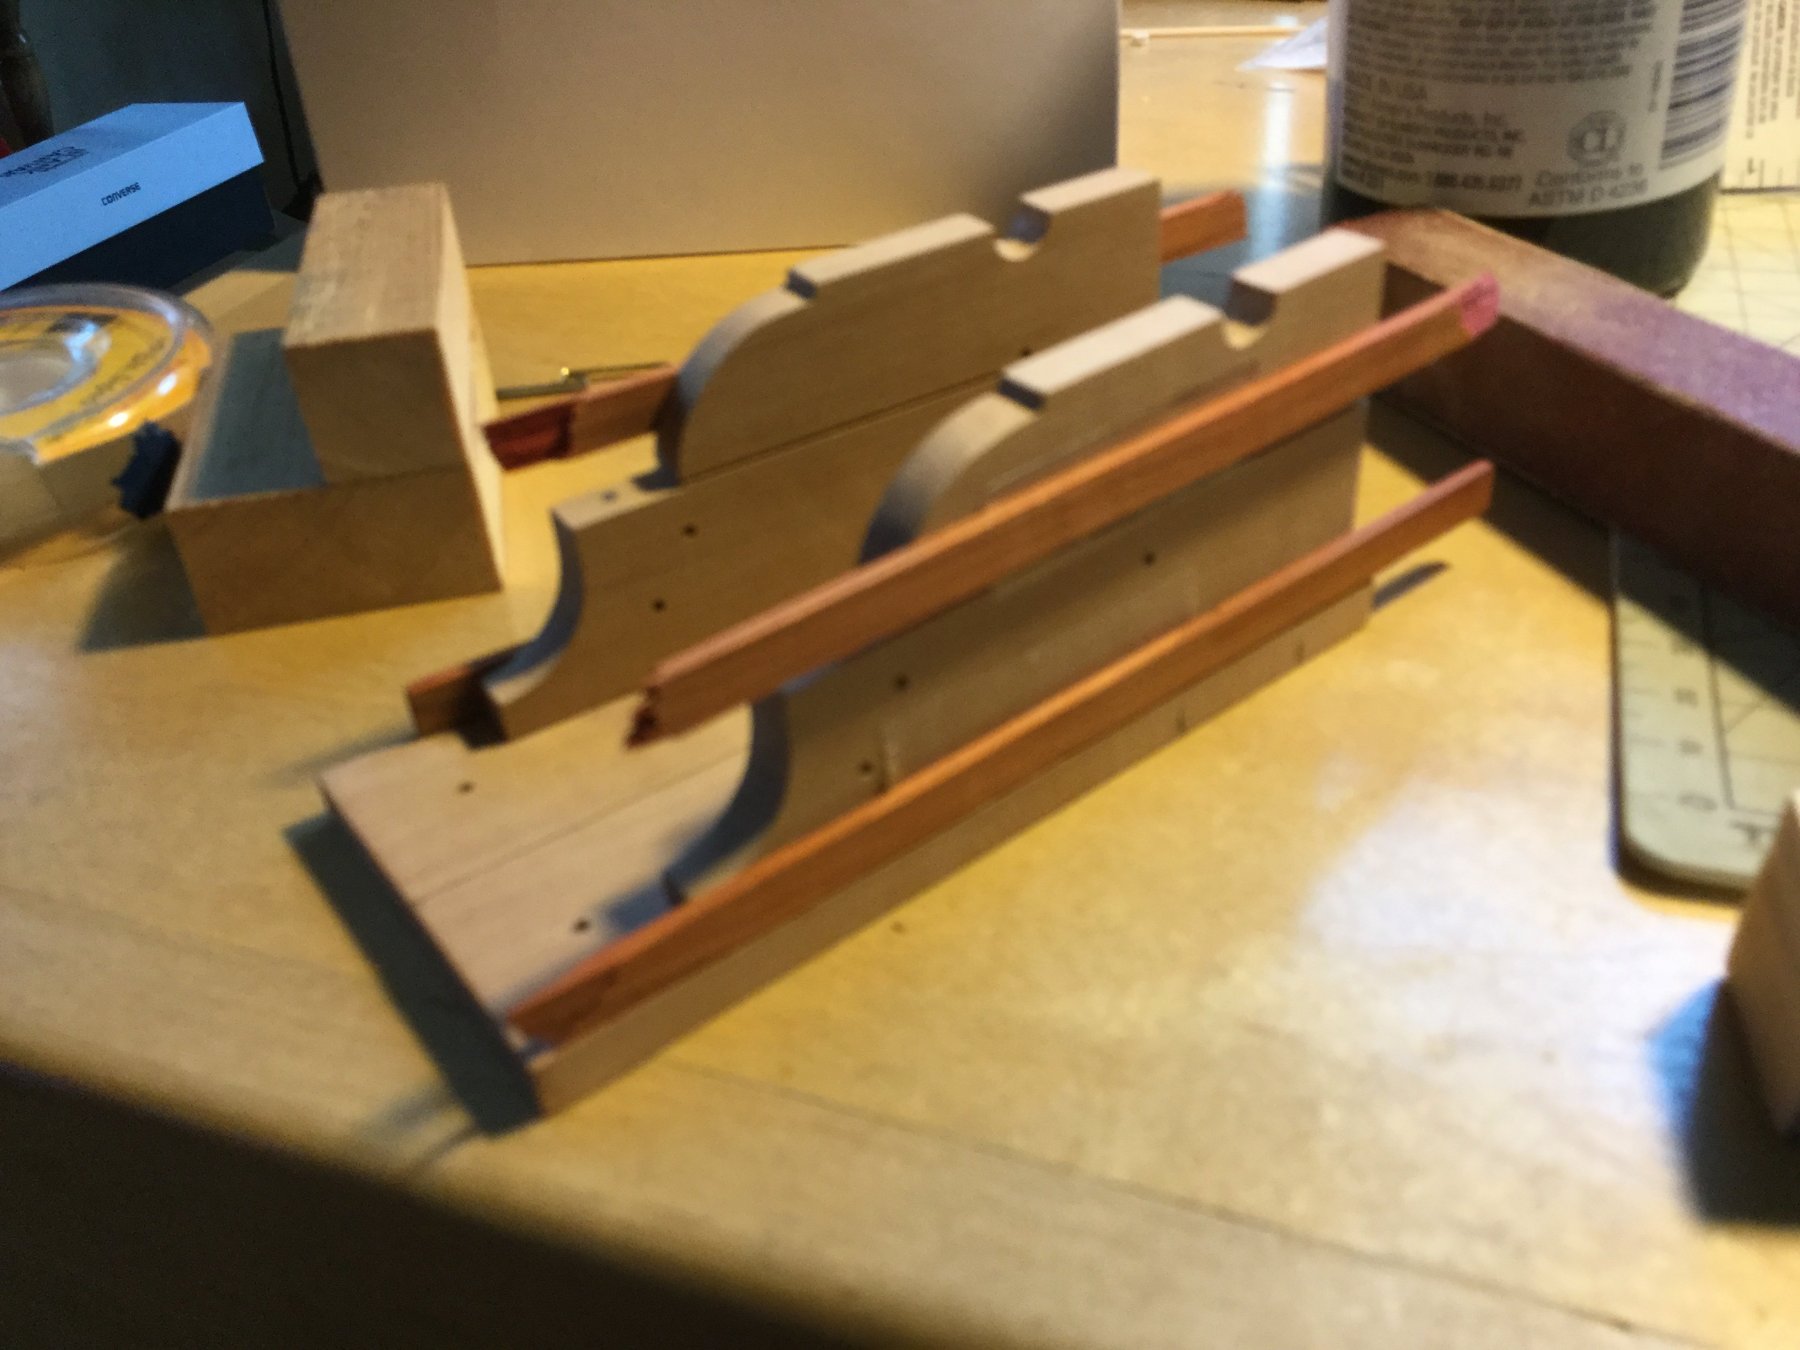
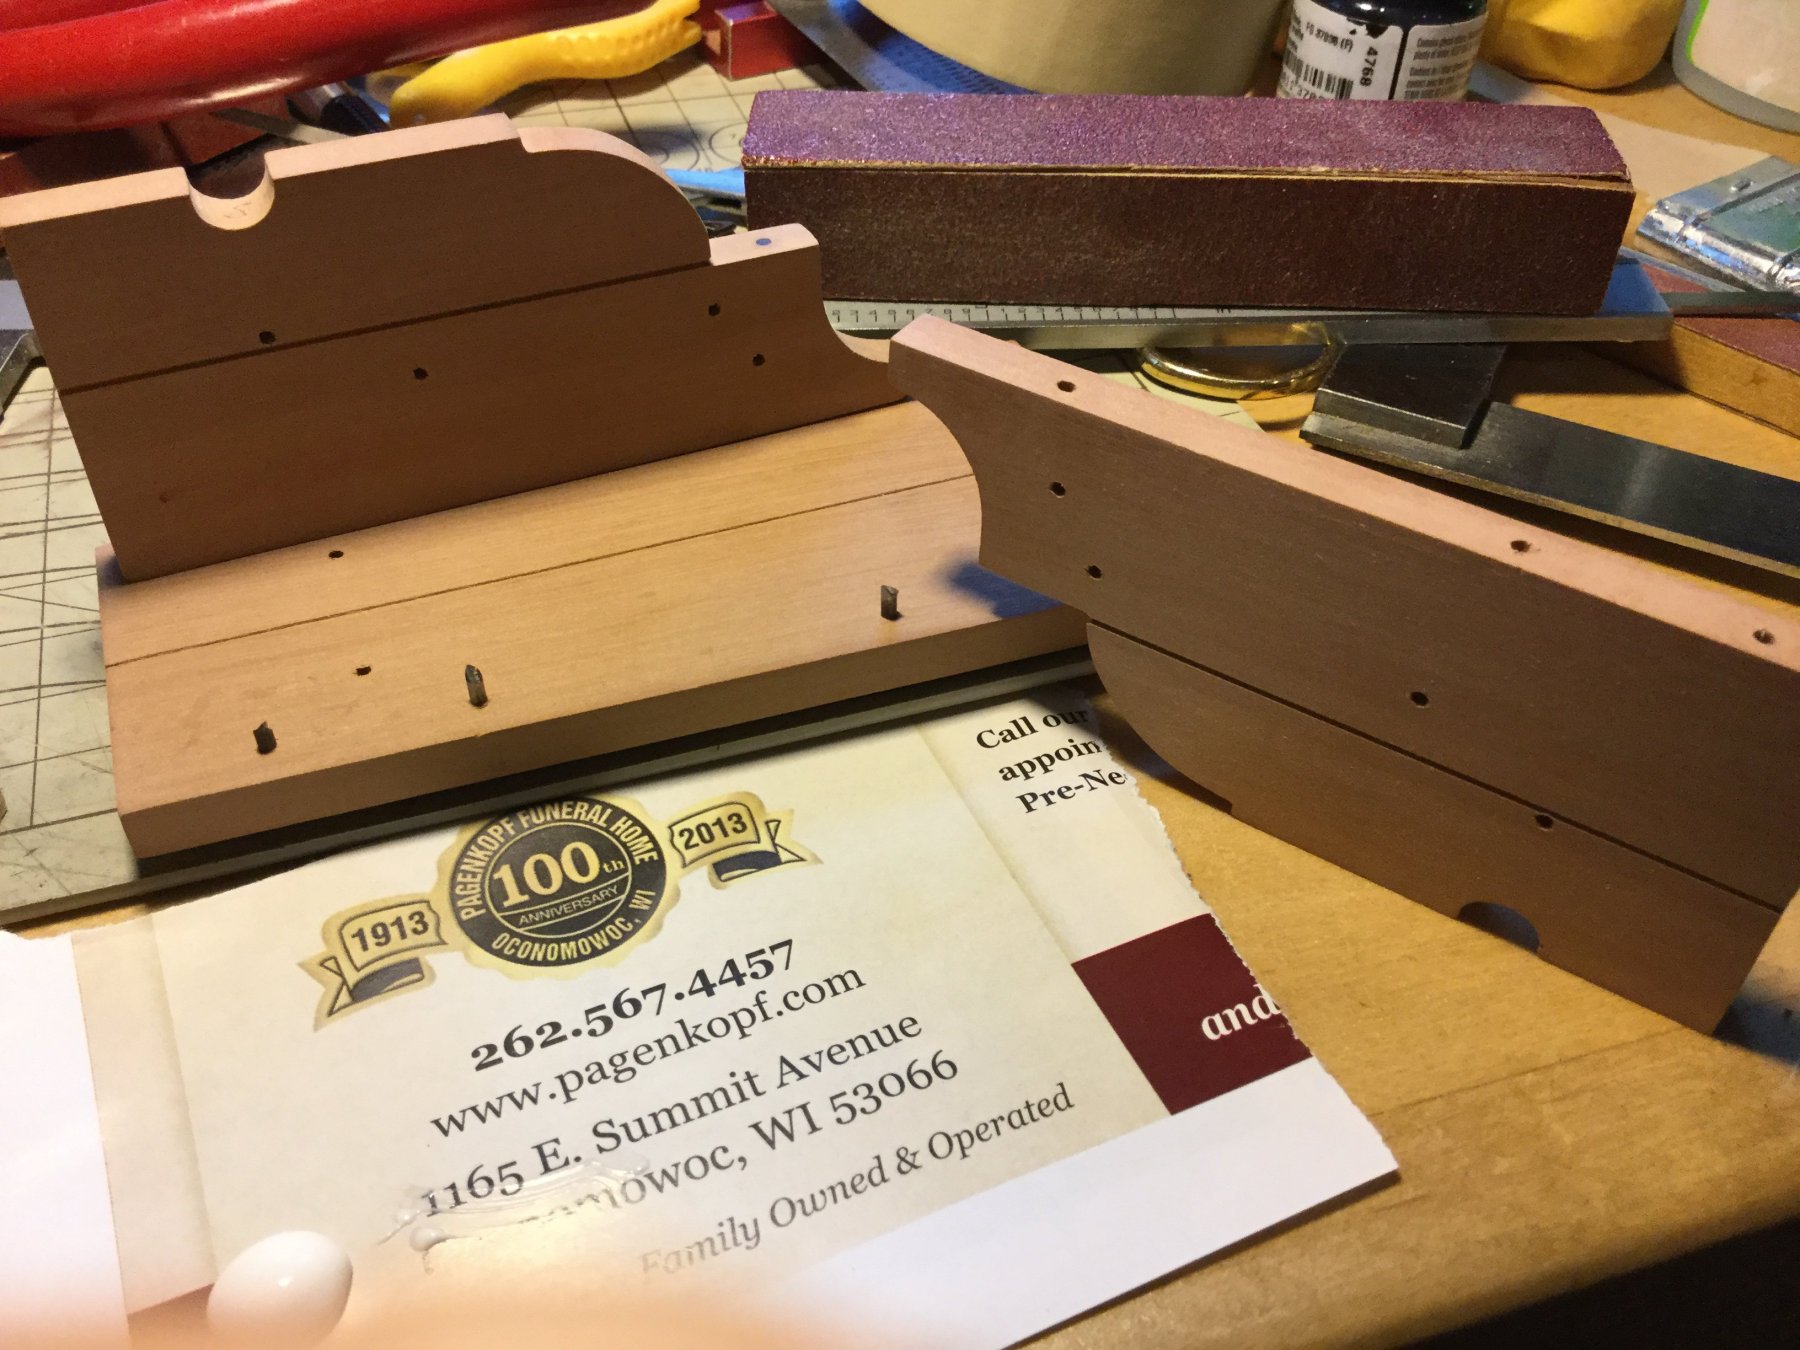
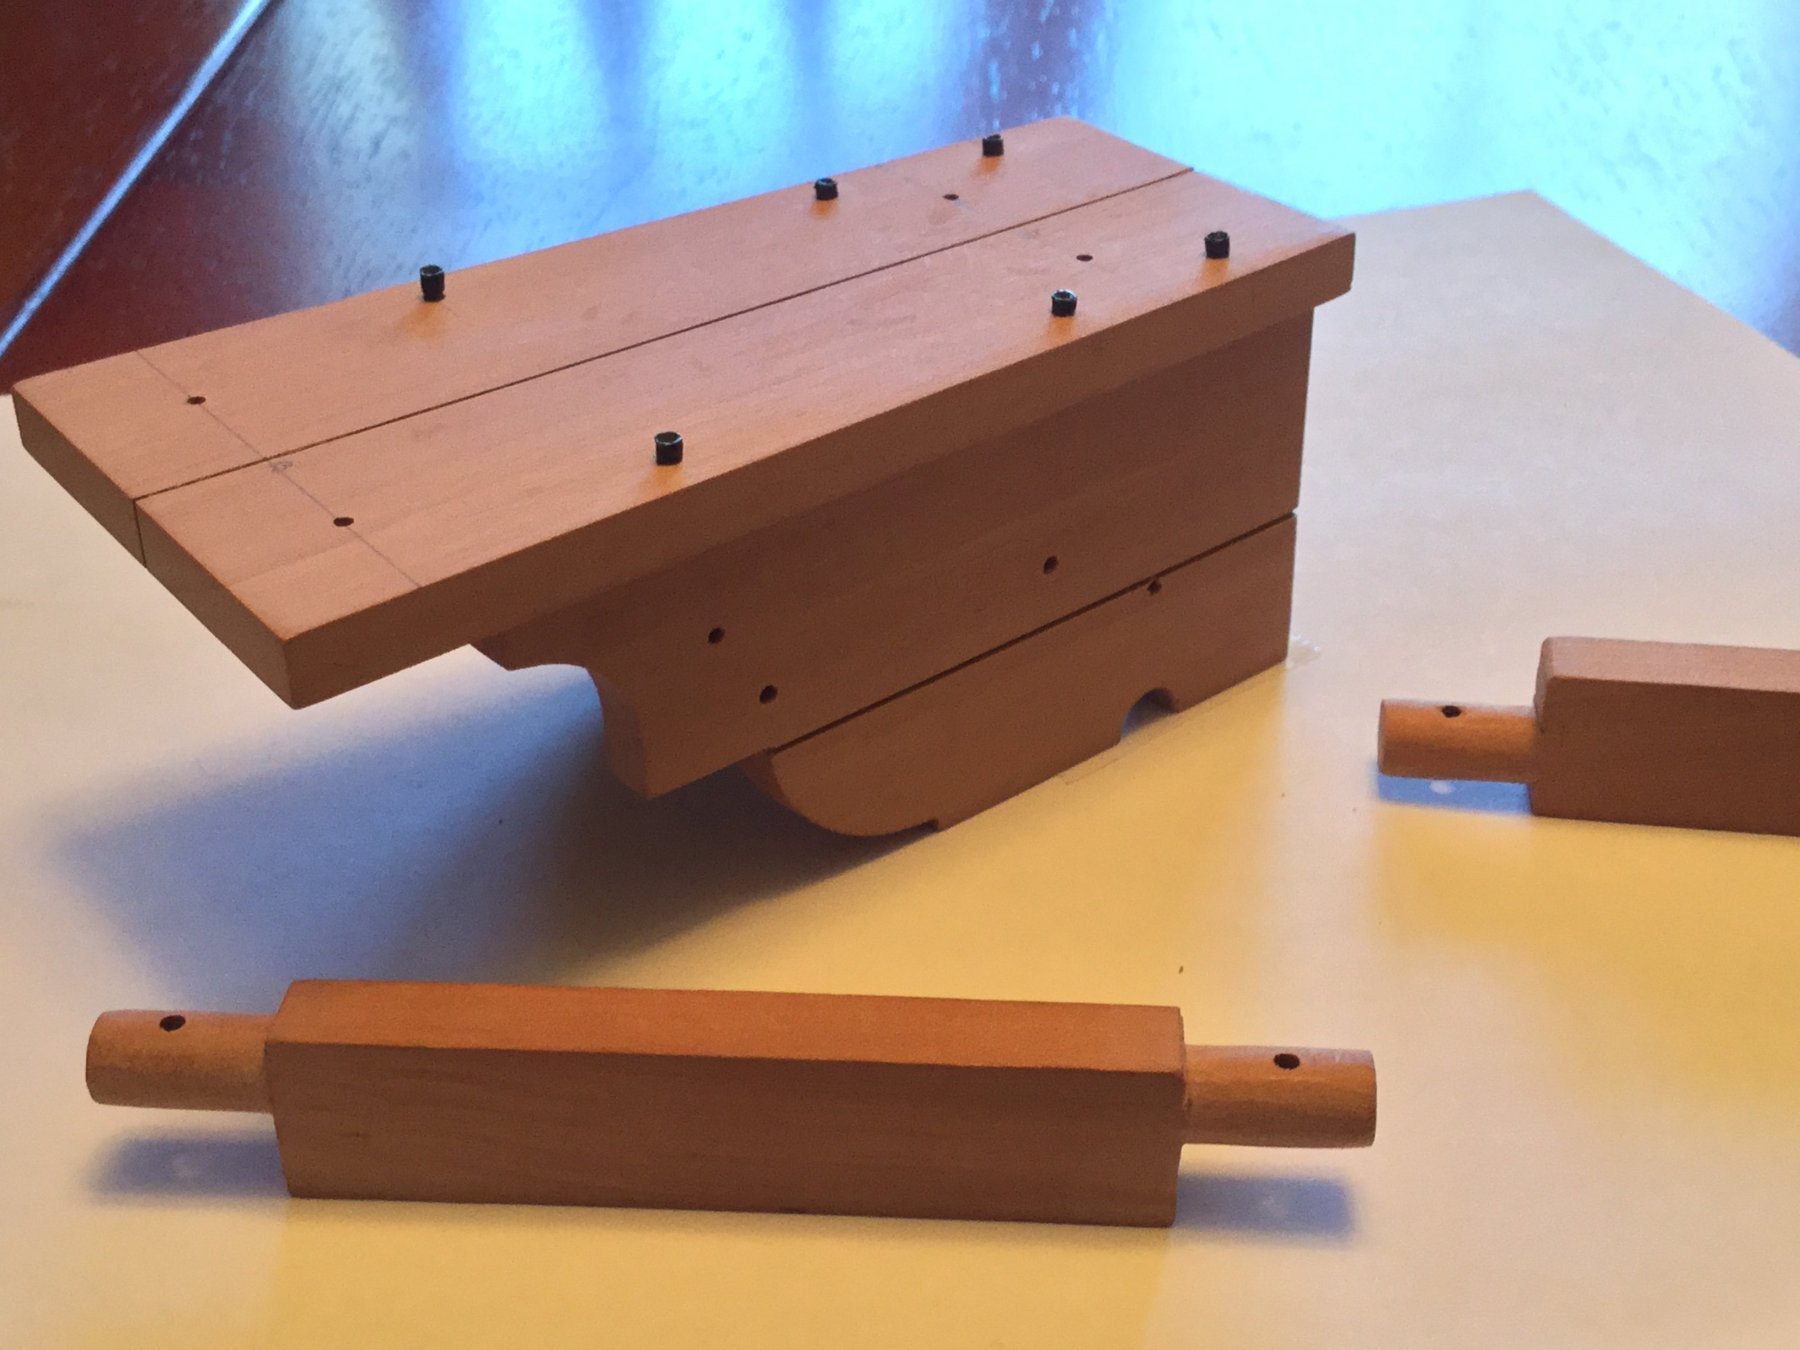
I finished assembling the gun carriage. I added the transom, and the stool bed with it's support. The forward end of the bed is drilled through for the ling horizontal bolt that supports it. The trucks and their linch pins were installed. Last, I carved the quoin's handle out of boxwood and assembled the quoin. All the rings and eyebolts are completed. I'll fashion the cap squares after the cannon is turned. That's the next job!


-
Eugene: When will Model Expo begin to sell the kit?
-
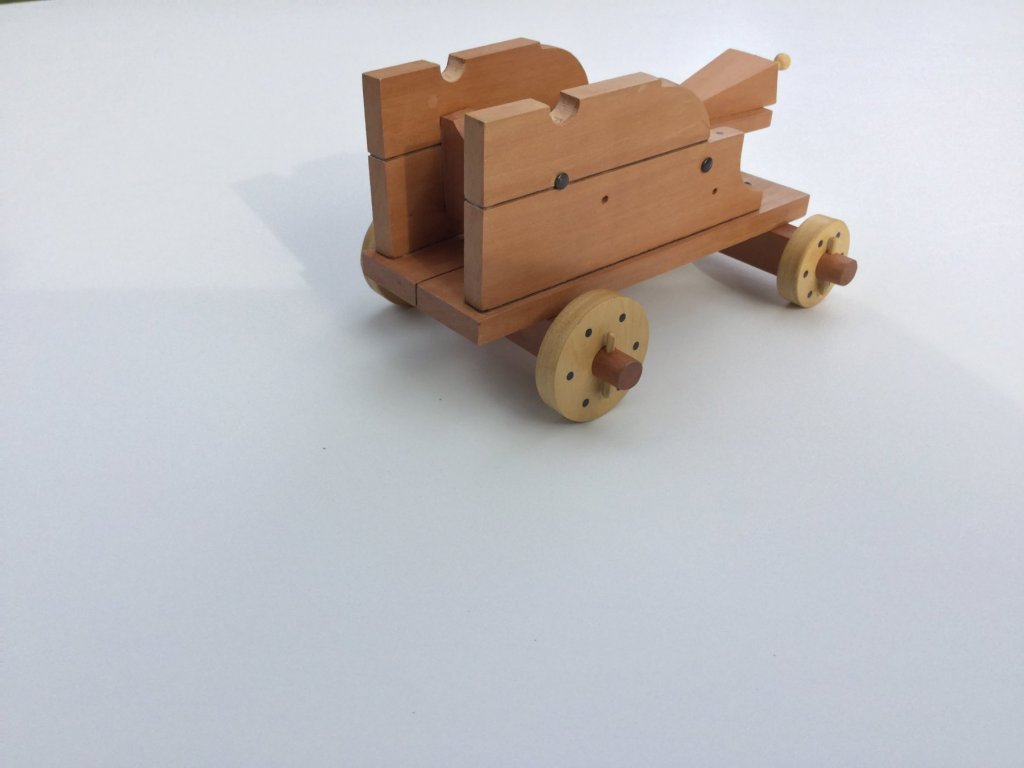
I carefully attached the axles to the carriage base with double sided tape. I then drilled through the base into the axels. Two 3d nail "bolts" hold each axle to the carriage base, but I did cut them short. The axles are glued into place. Next is the stool bed and support, the transom and mounting the trucks.


-
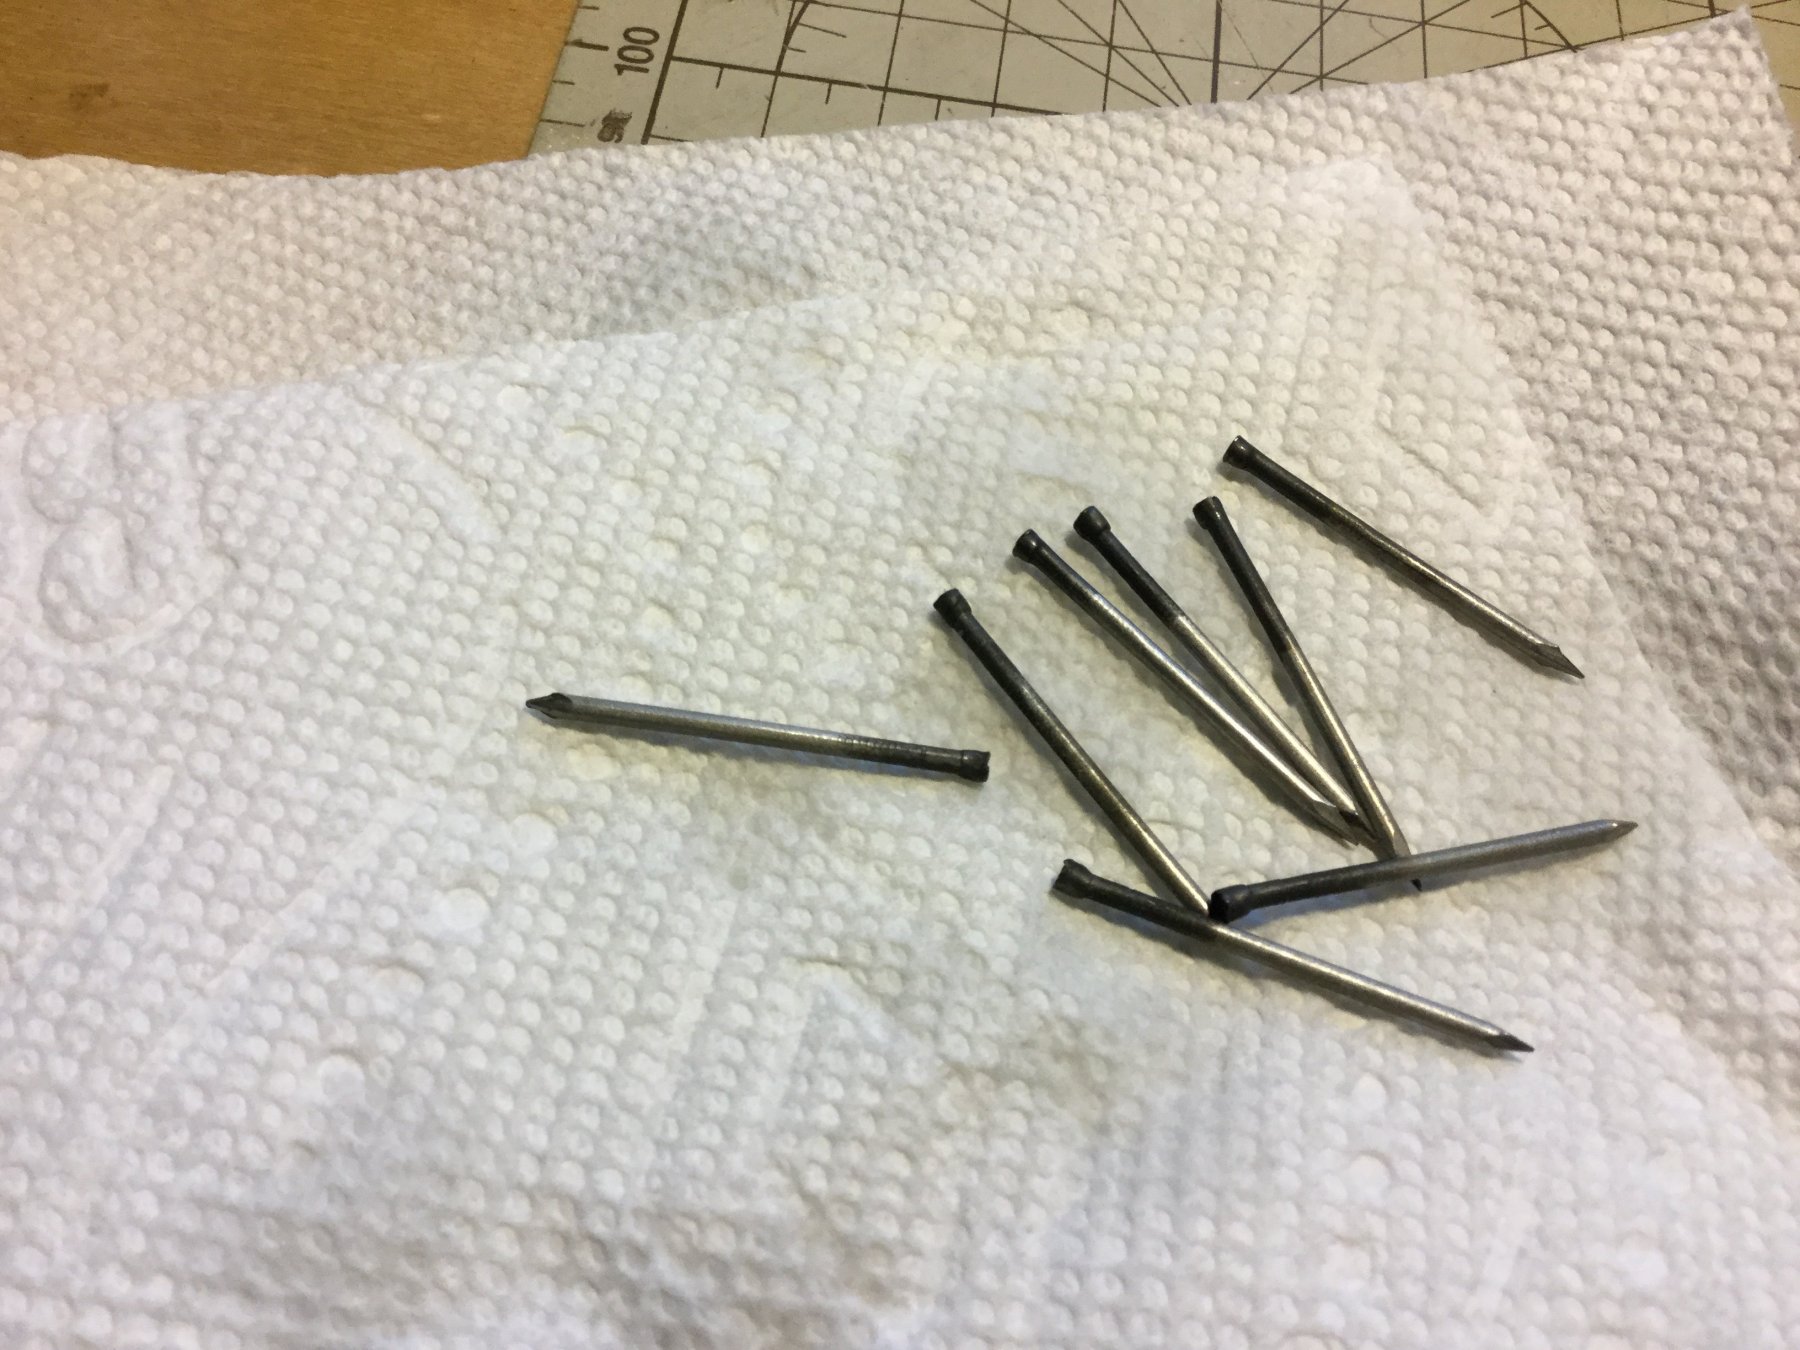
The carriage is held together with long bolts. I settled on 3d finish nails as the simulated bolts. The heads are about 3/32" in diameter - about right at this scale. I cleaned them up and blackened the heads. The brackets are inset from the edge of the base by 1/16". I used double sided tape to tape some 1/16" planking to the brackets to maintain this spacing. The brackets were double sided taped to the base Then I drilled up into each bracket through the base. The simulate bolts were cut short but still function like real bolts in holding the structure together as the glue dries.


-
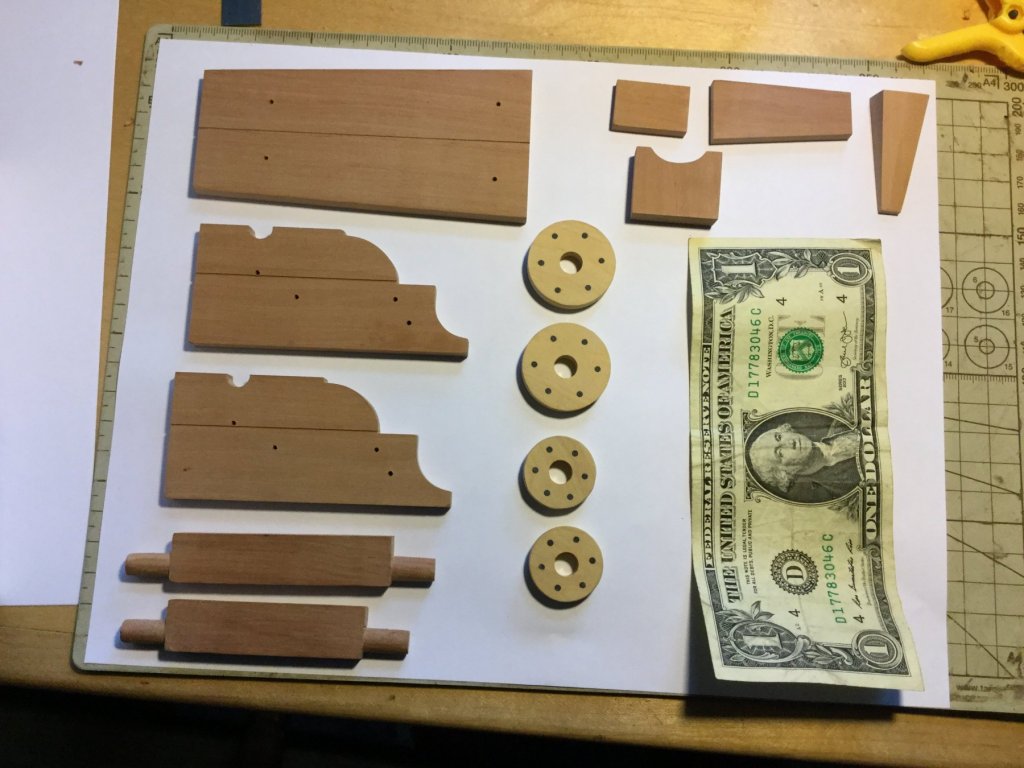
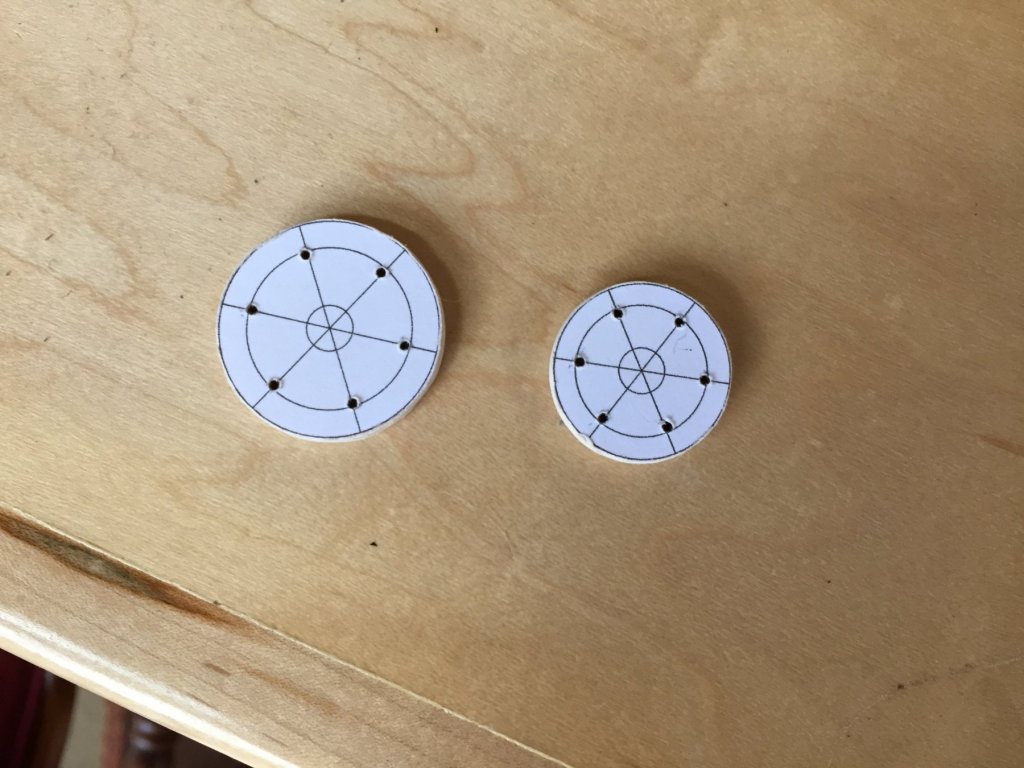
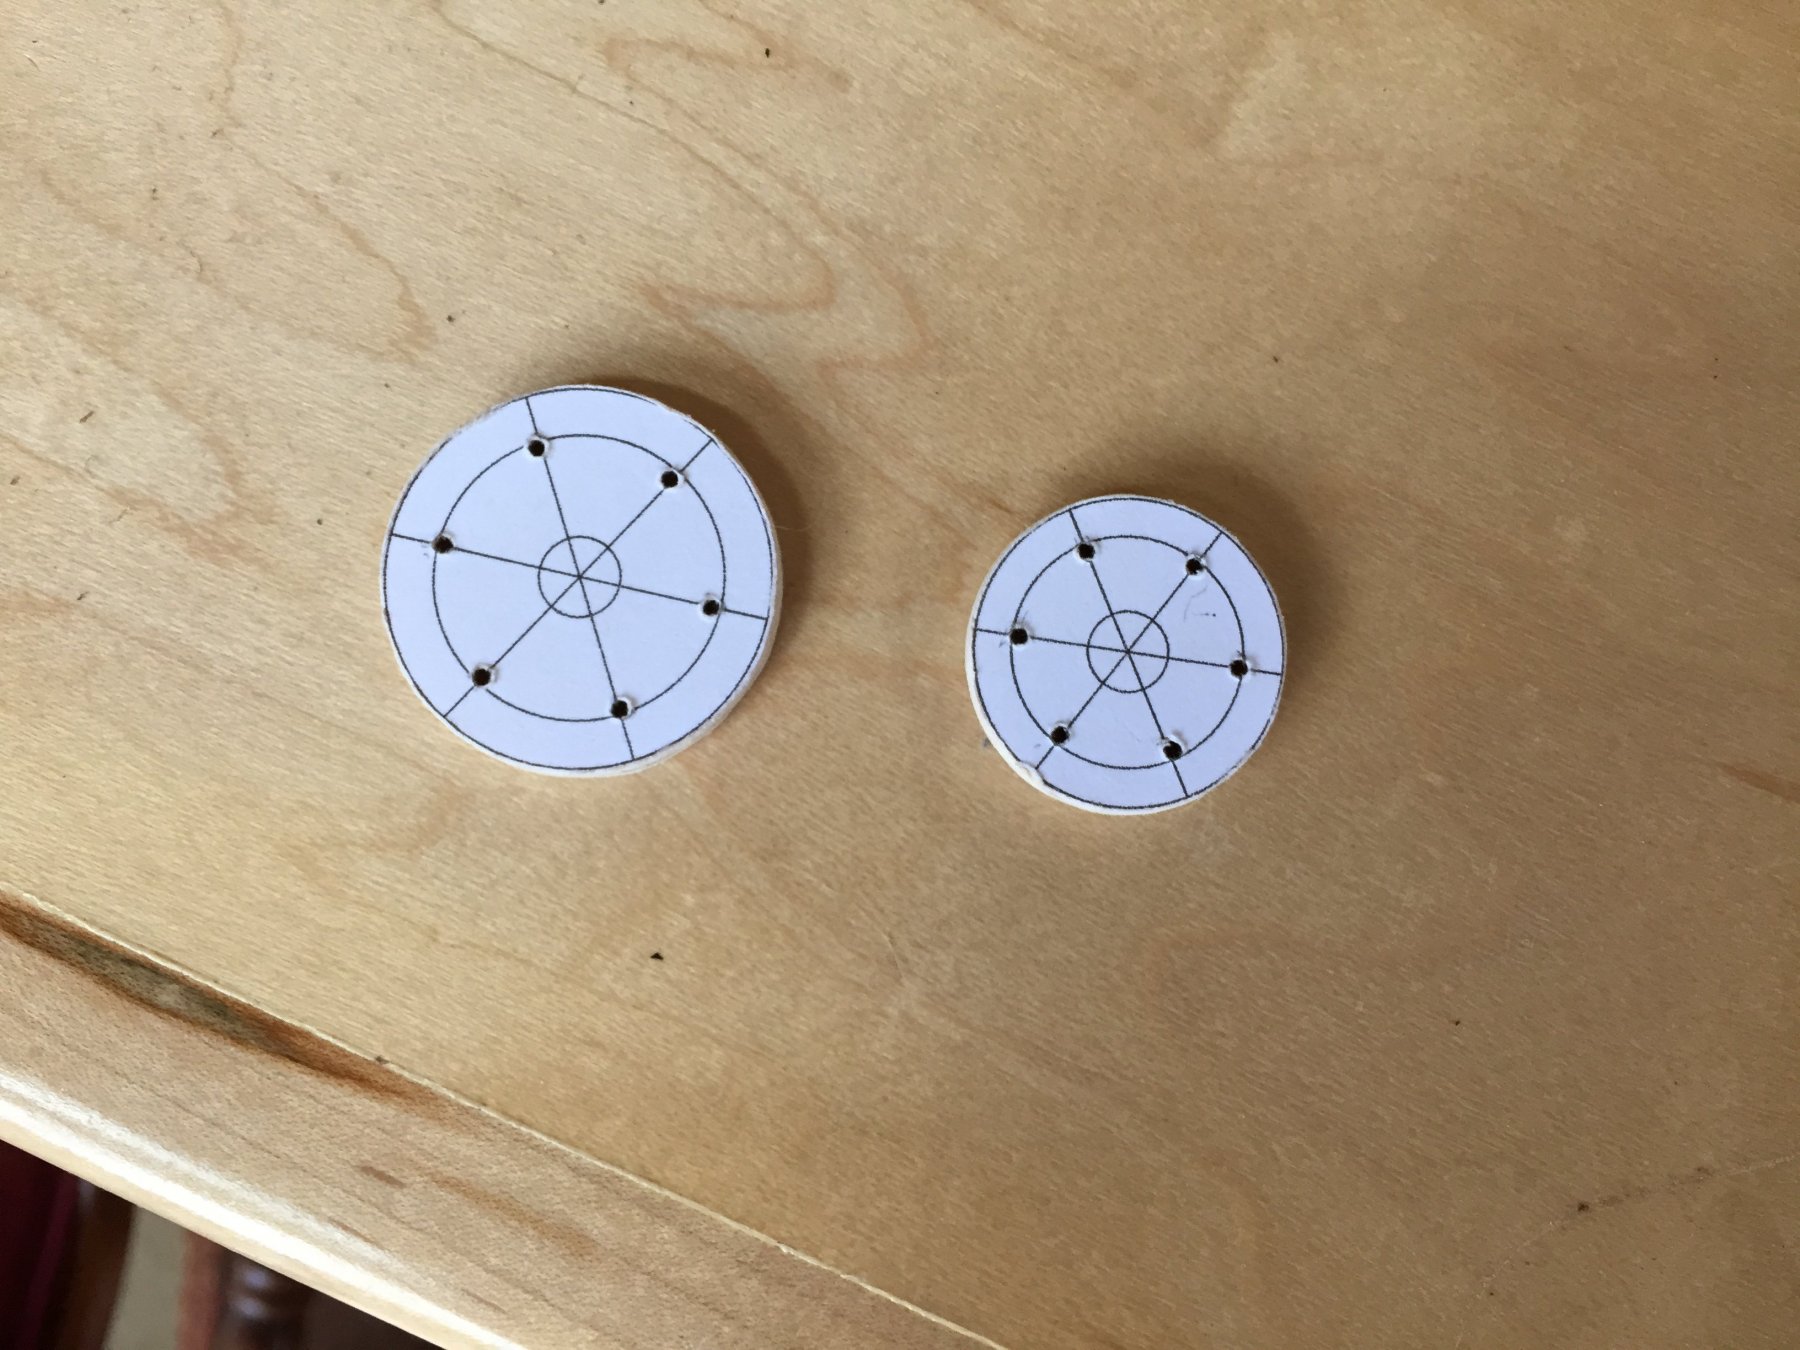
The plans for the gun and carriage print on standard 8-1/2" X 11" paper so the next step was to decide on the wood species and start cutting! I chose swiss pear for the carriage body and axles, and boxwood for the trucks. As mentioned, I'll turn the cannon out of hard maple. The parts were cut out on the table saw and scroll saw and carefully sanded. I used my Byrnes saw and a thin kerf blade to cut shallow grooves to simulate the brackets being build in 2 pieces as well as the base. I cut the trucks using a circle cutting bit on my drill press. This left a 1/4" hole in the center of each truck, which I widened to the 5/16" I need. I wanted to add the bolts the held to two halves of the trucks together, but I'd already widened the hole for the axles, so laying out the 6 bolt locations would be tricky. Since I'm trying to learn TurboCad, what I did was design the trucks in the CAD program, with the locations of the bolts noted. I printed these out and rubber cemented them to some 1/8" thick plywood. These were cut out out and sanded, and holes drilled at the appropriate points for the bolts. These 2 templates let me transfer the bolt locations to the boxwood trucks. The bolts themselves are toothpicks dyed black. The dollar bill in the photo gives a sense of scale.
-
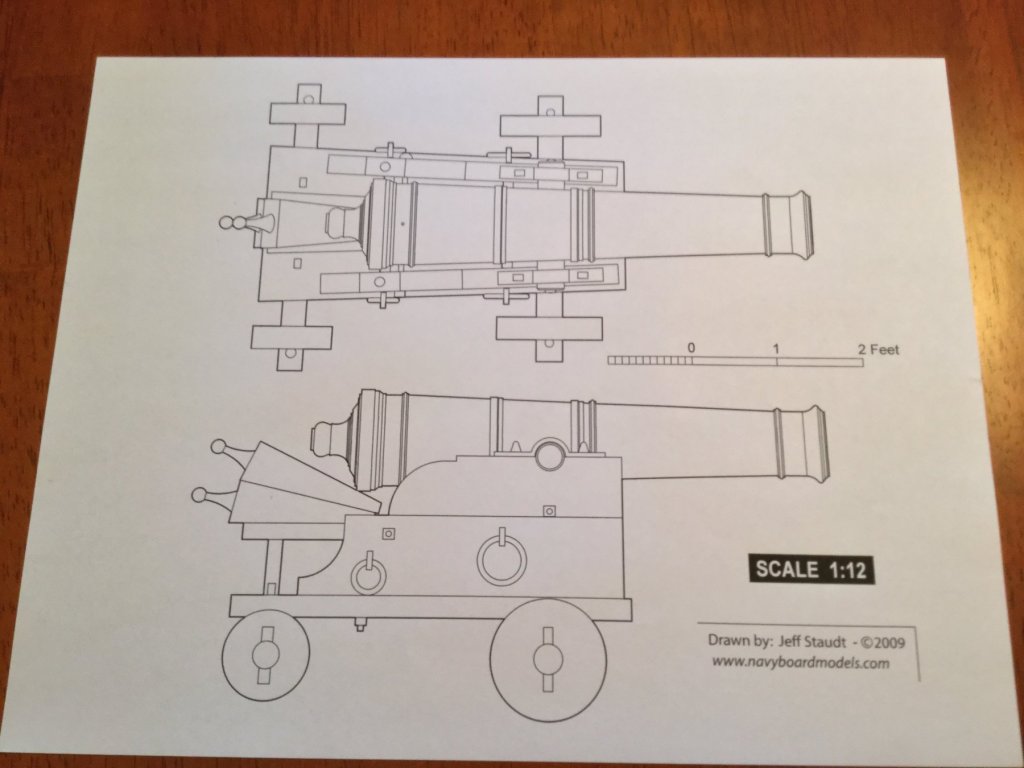
Just a little diversion from my other projects. This will be a 1:12 scale model of a 17th century naval cannon. The plans were drawn by Jeff Staudt and are available at Navy Board Models. https://www.navyboardmodels.com/sites/default/files/documents/plans/cannon-1-12.pdf This is the same gun and carriage plans we used for our 17th century battle station build. The scale is much larger, and my plan is to turn the cannon out of hard maple. I have a midi lathe and have done some turning of furniture parts, but the cannon should be a challenge. The photos show one sheet of the plans and my own turned furniture parts. The columns on the tall clock are mine turnings, not the stairway balusters!

.thumb.jpg.39541cf08a334dd2351cff956ff93240.jpg)
-
I have not yet learned how to turn brass cannon barrels. Don did a fabulous job with what we needed. You should ask him about this possibility.
- 128 replies
-
- 2
-
-
- mordaunt
- battle station
- (and 1 more)
-
Thanks Richard! Don Robinson, one of my collaborators on this project actually produced the barrels as well as the cannons and metal work. I've used the same technique as Don did to produce barrels and cannon barrels I've made out of wood. For the barrels, settle on a barrel shape and turn them on a lathe. Where the hoops are located, score shallow grooves, also on the lathe. When the barrels are separated take some black thread or rigging line of an appropriate diameter, dip it in glue and run it in the grooves on the barrel. When dry, cut off the excess. If you need wider hoops, do 2 or 3 windings, with the thread laid tightly together, side by side. Actually pretty simple.
- 128 replies
-
- 4
-
-
- mordaunt
- battle station
- (and 1 more)
-
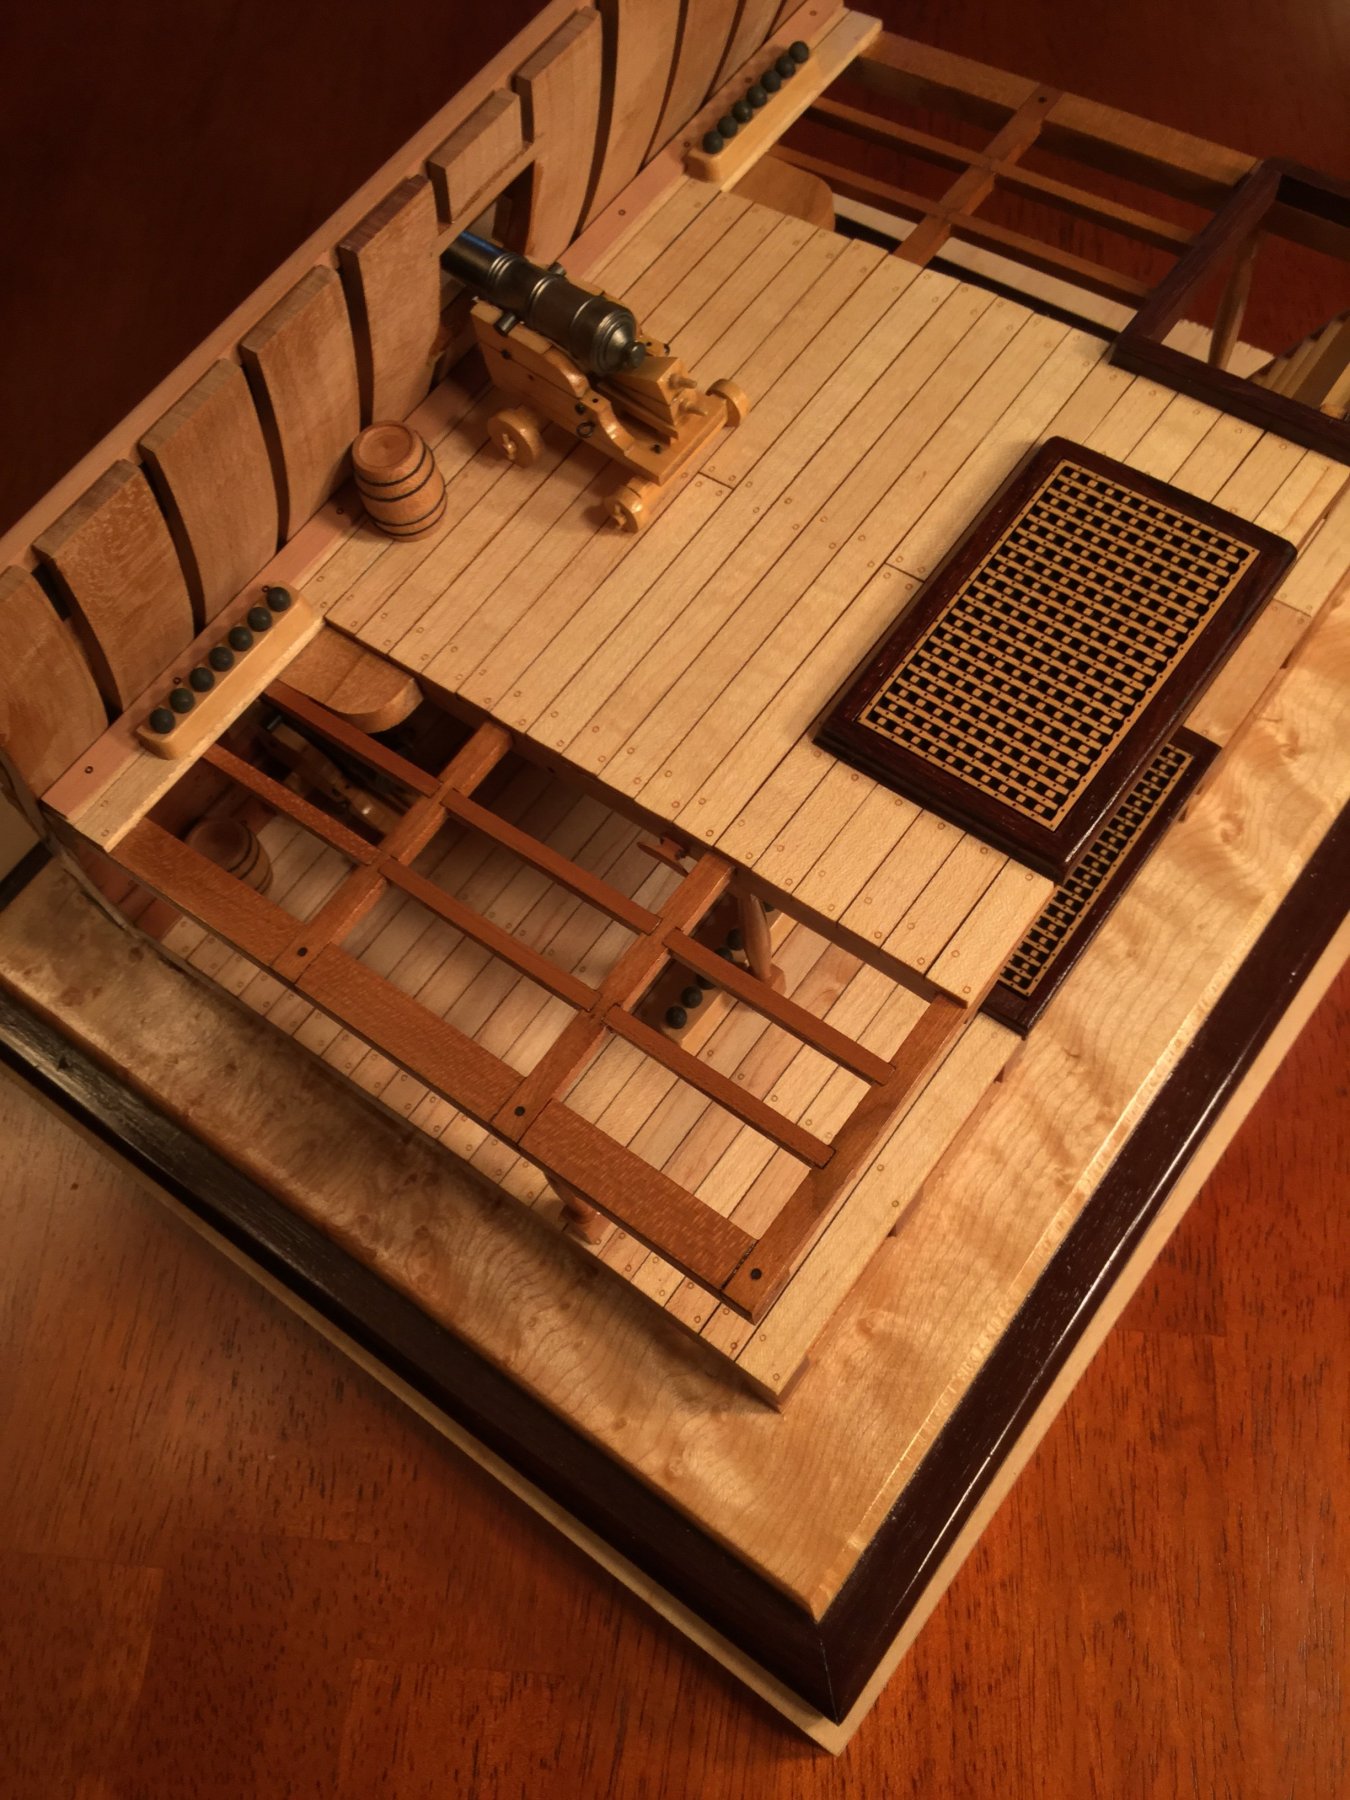
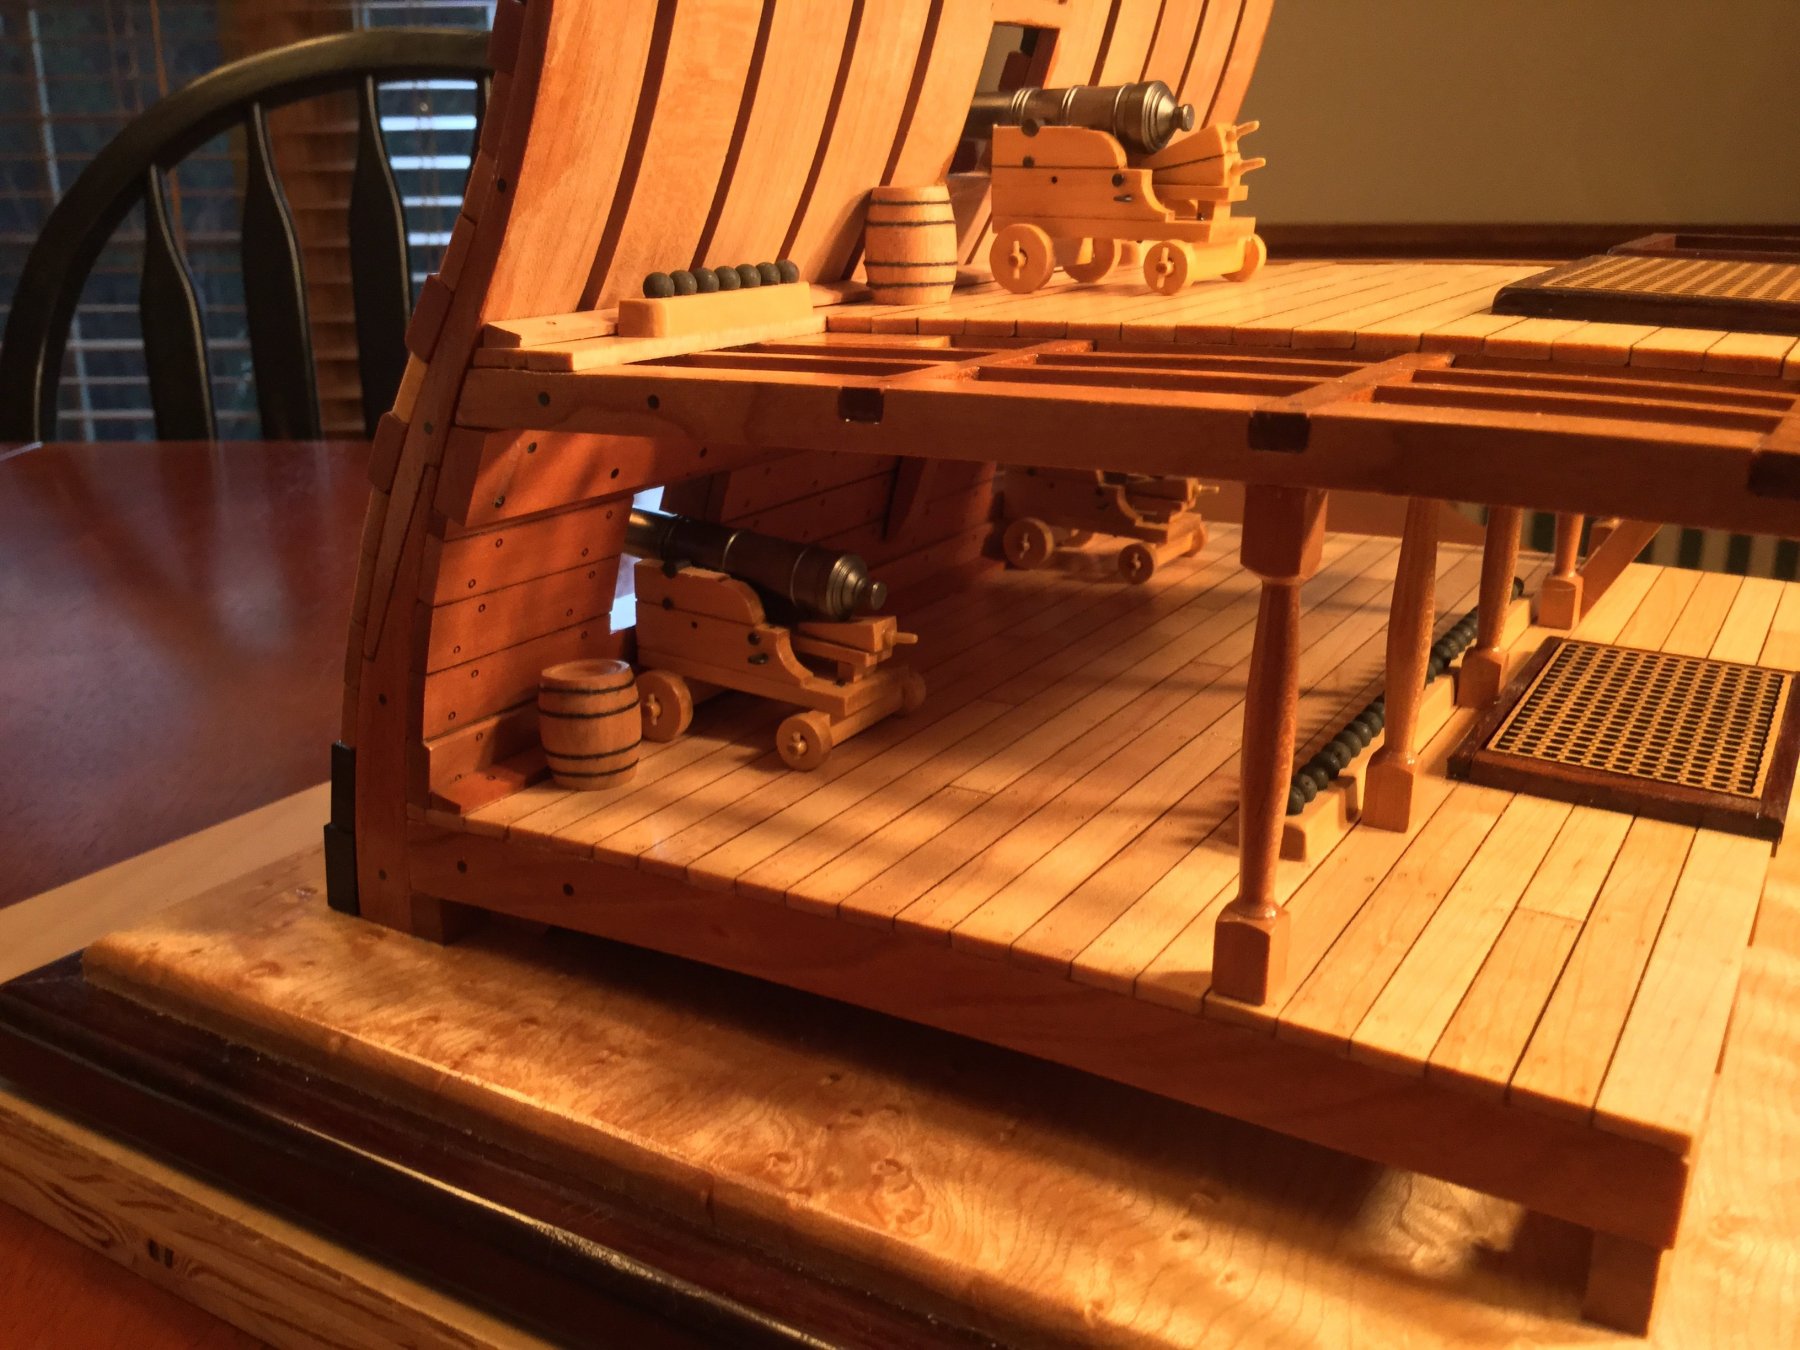
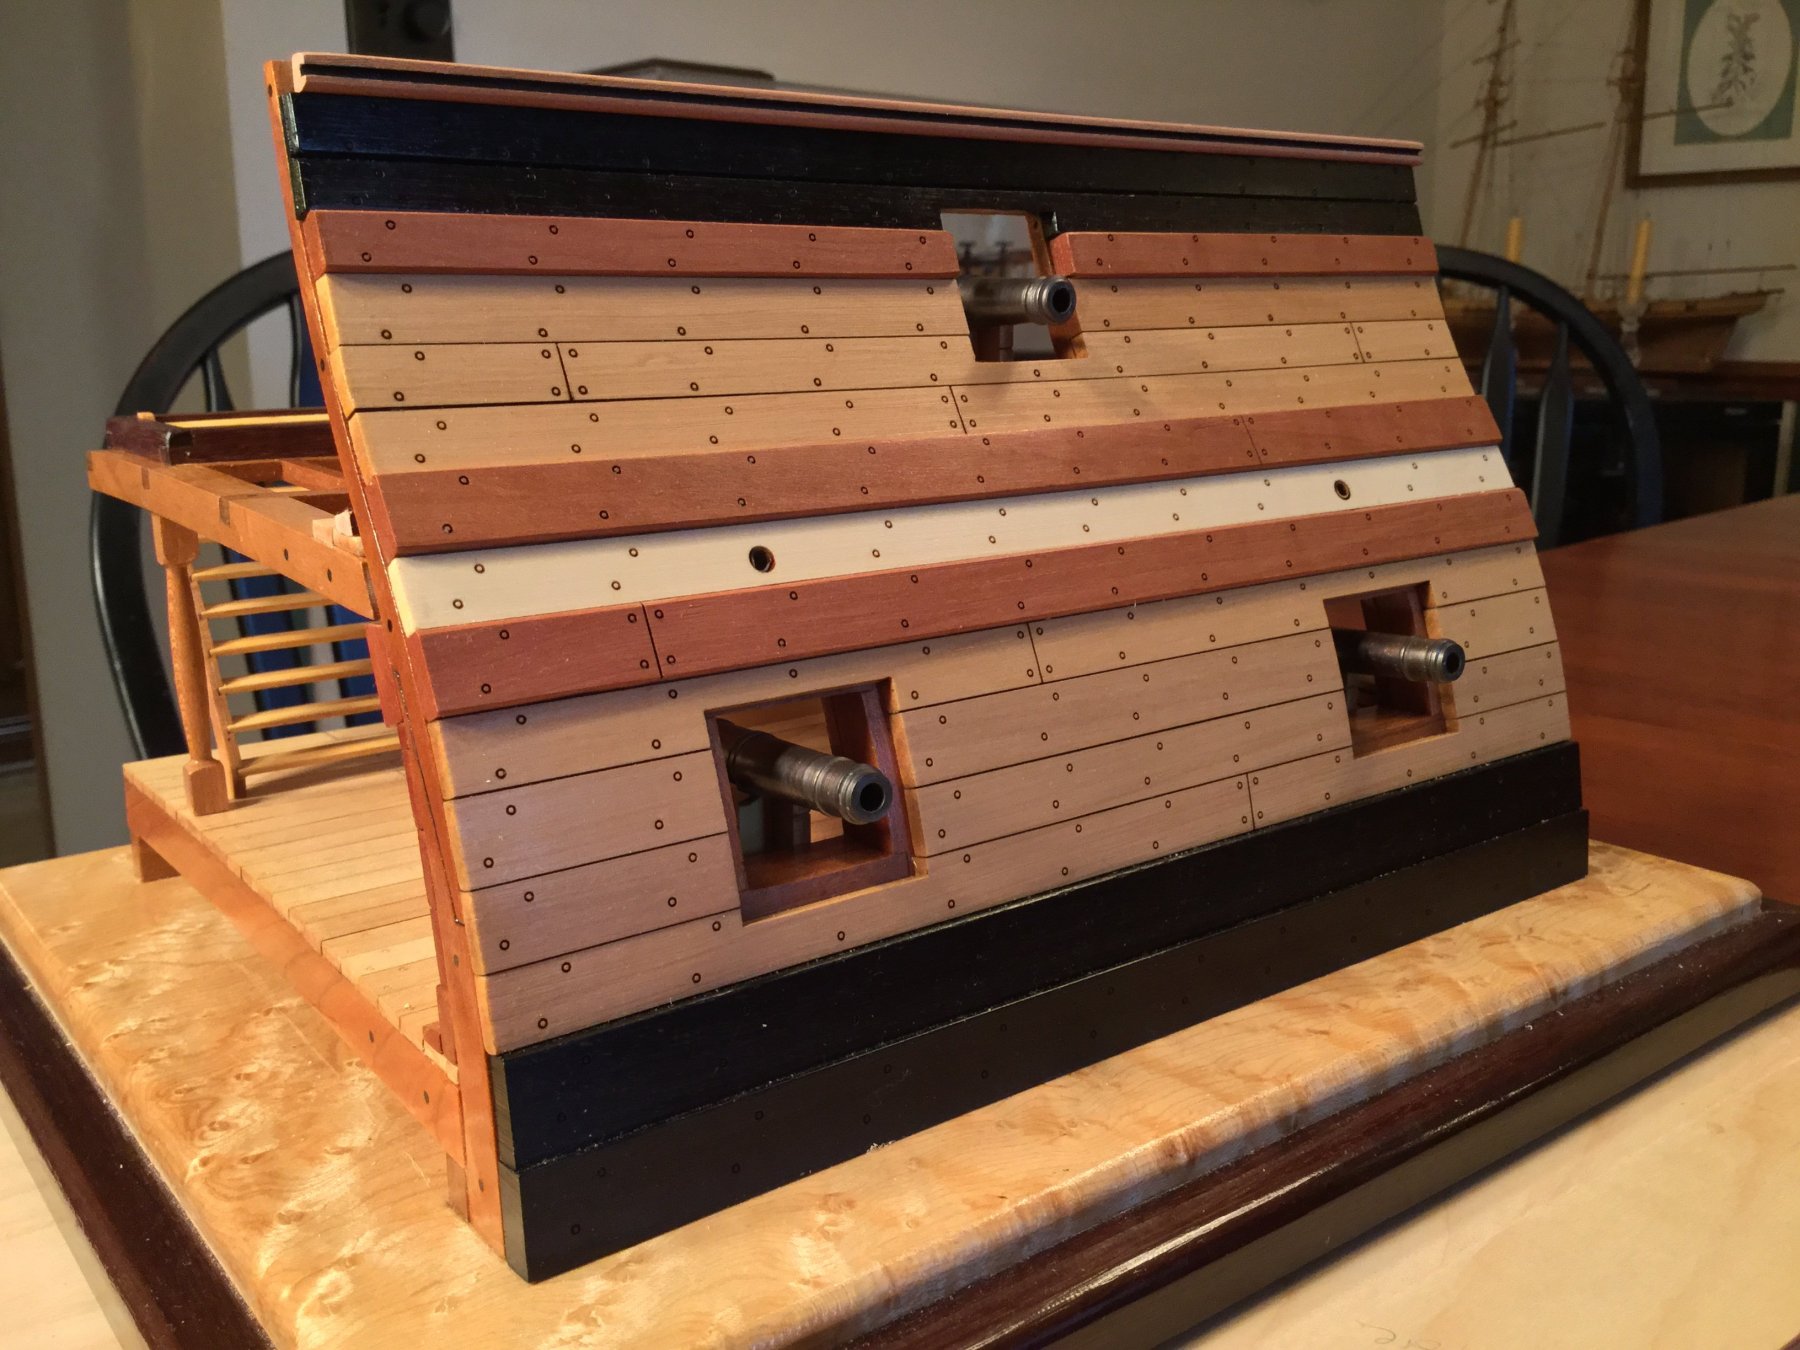
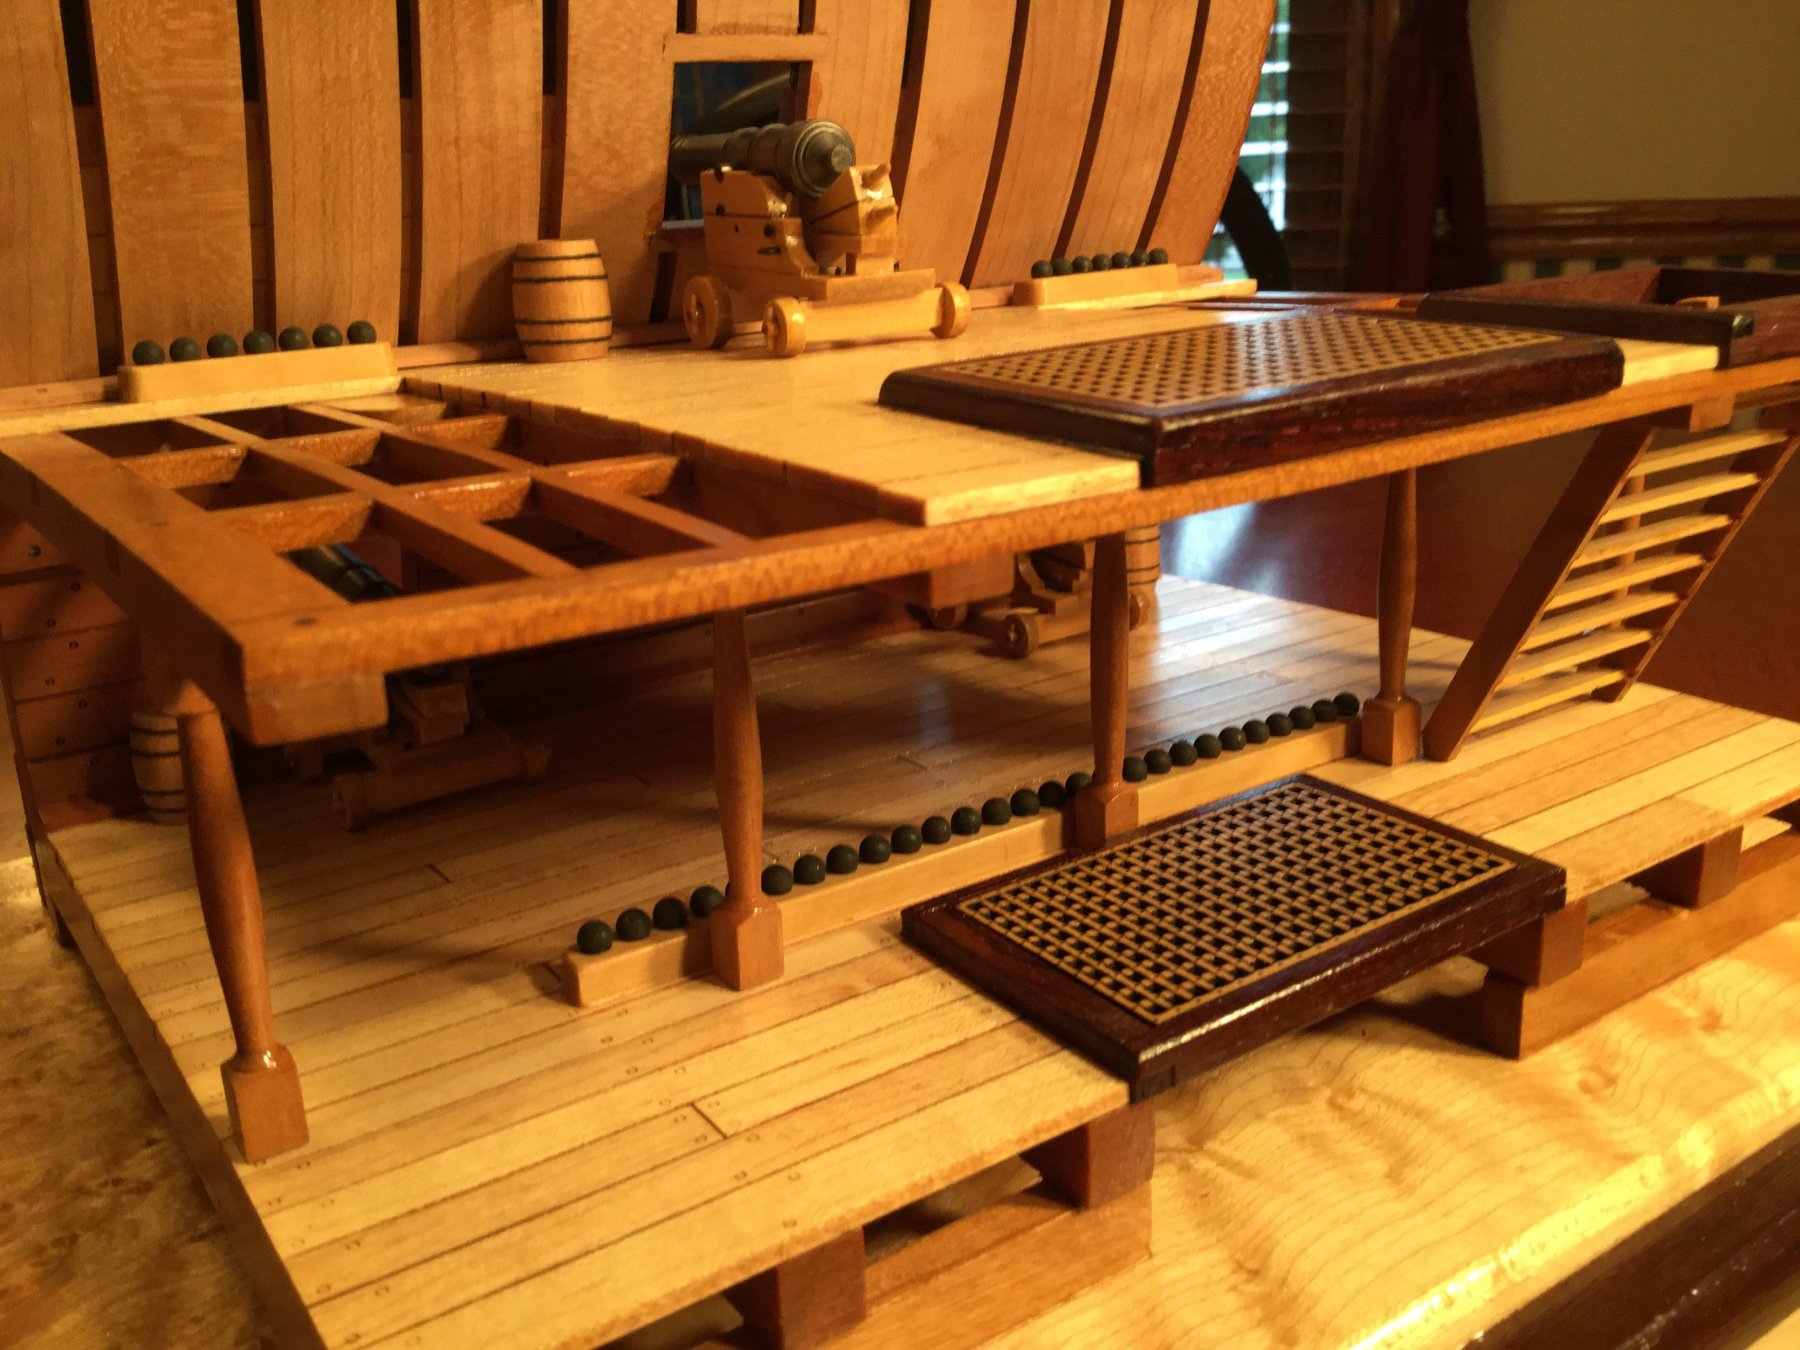
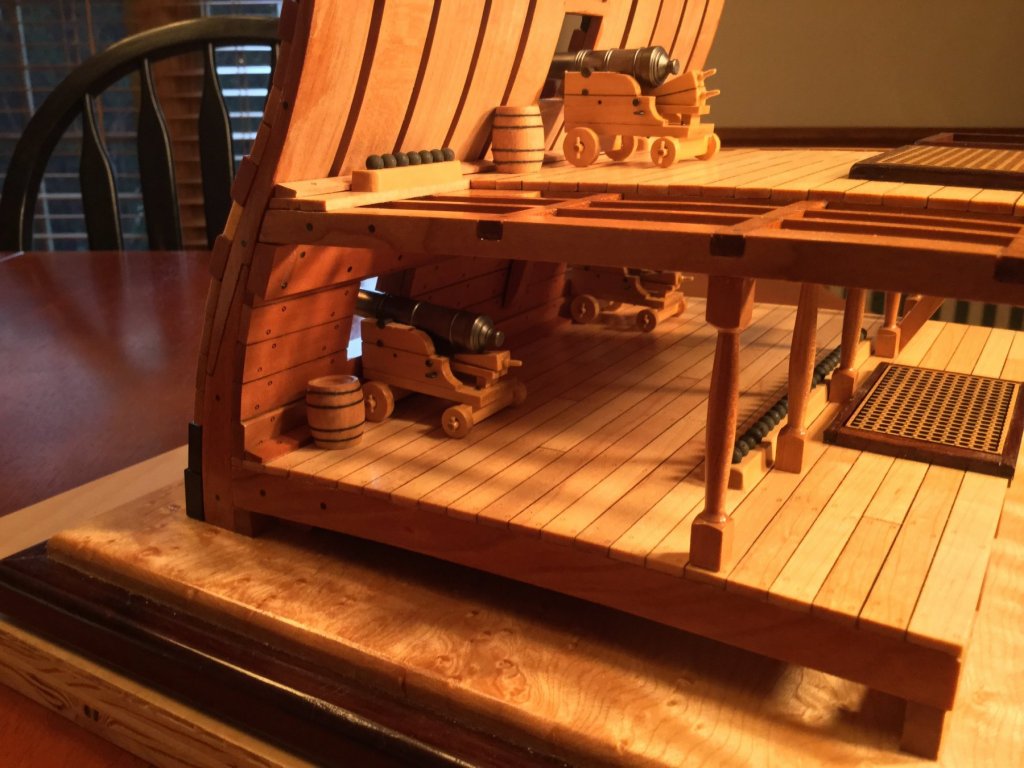
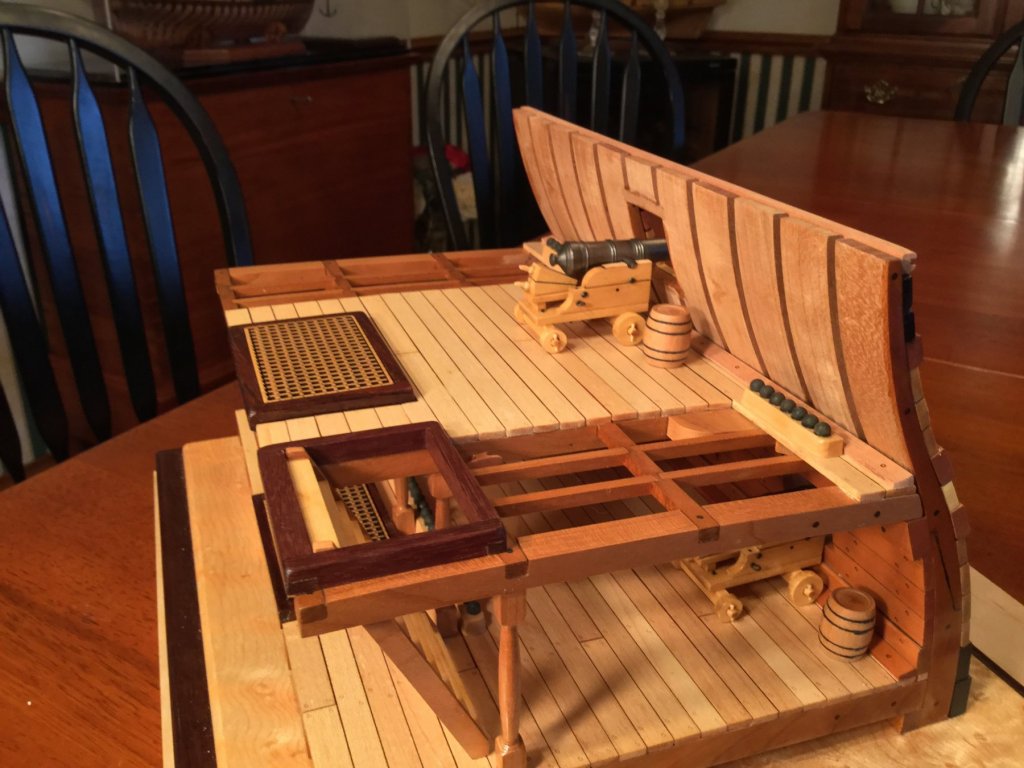
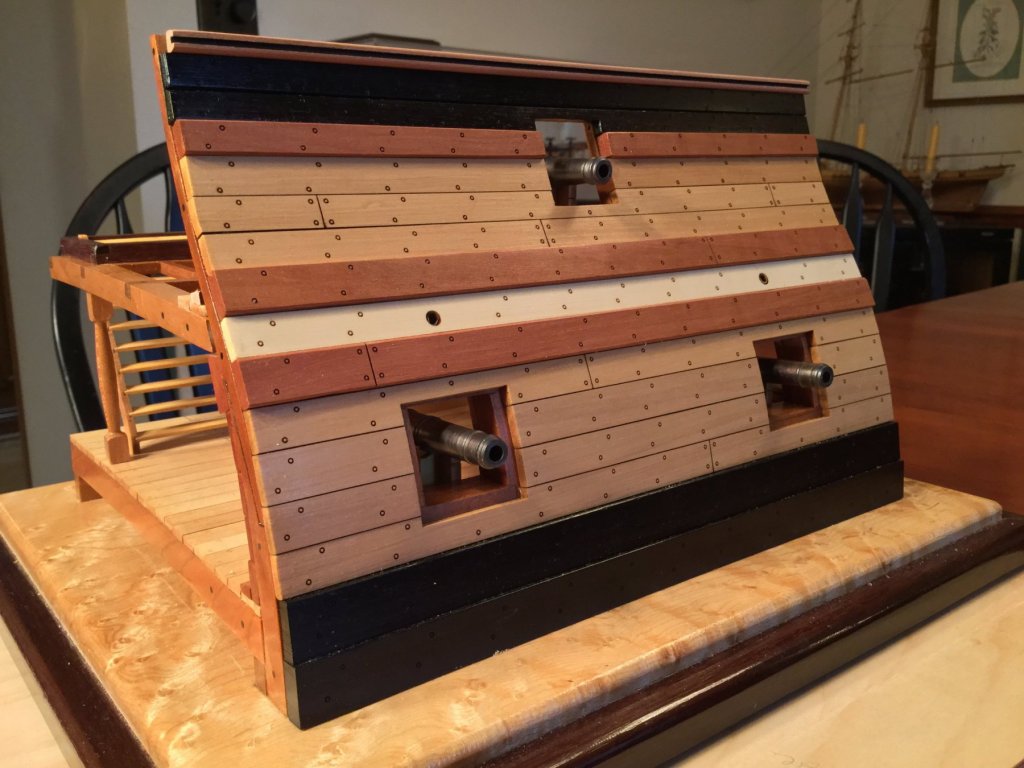
Except for the gun port lids all the parts have been fabricated. Obviously the upper bulwark planking is not yet installed. Now the model has to be assembled. The gun deck must be completed before the upper deck is installed because of the tight quarters below. Rigging the guns would be impossible. Here's a preview of the model


- 128 replies
-
- 21
-
-
- mordaunt
- battle station
- (and 1 more)
-
Hey Don! i used Jax Black for brass, copper bronze. First degrease with acetone, then etch with muriatic acid. The blackening is weird. If you leave the part in the bath too long, all the blackening rubs off. Best 1 minute at a time, and repeat 2or 3 times to get the color you want.
- 128 replies
-
- 7
-
-
- mordaunt
- battle station
- (and 1 more)
-
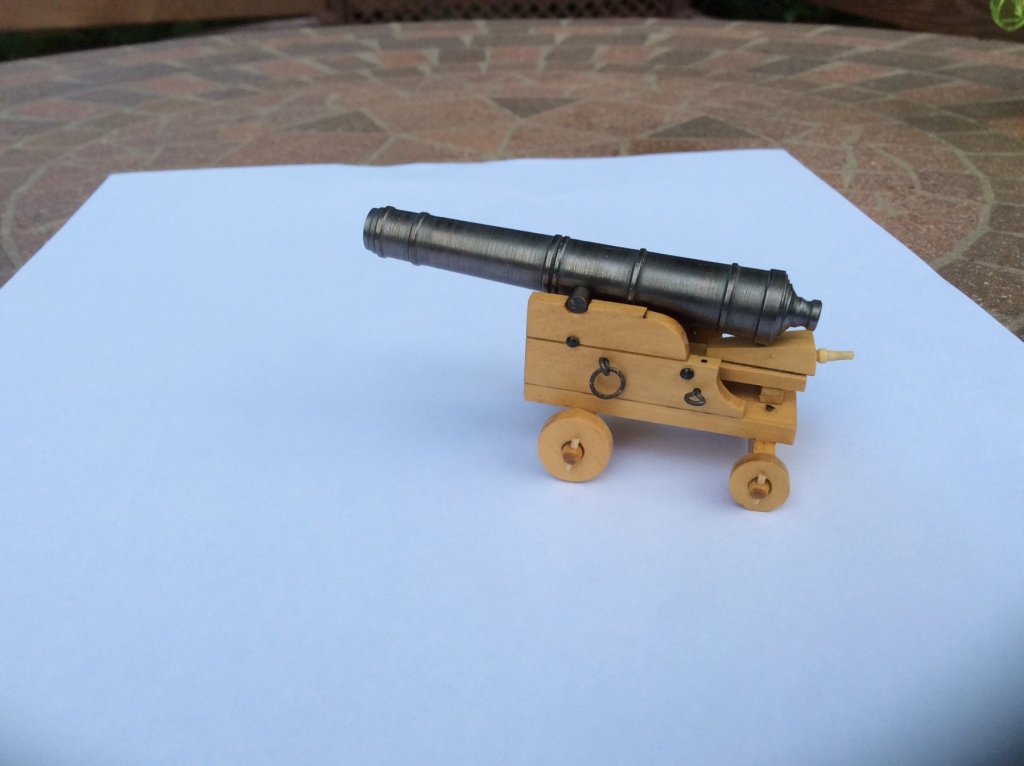
The gun barrels are awesome, Don. They look great no matter what you do to them. Mine are blackened, but they are really not “black”, rather a gunmetal dark gray color. I like it!
- 128 replies
-
- 5
-
-
- mordaunt
- battle station
- (and 1 more)
-
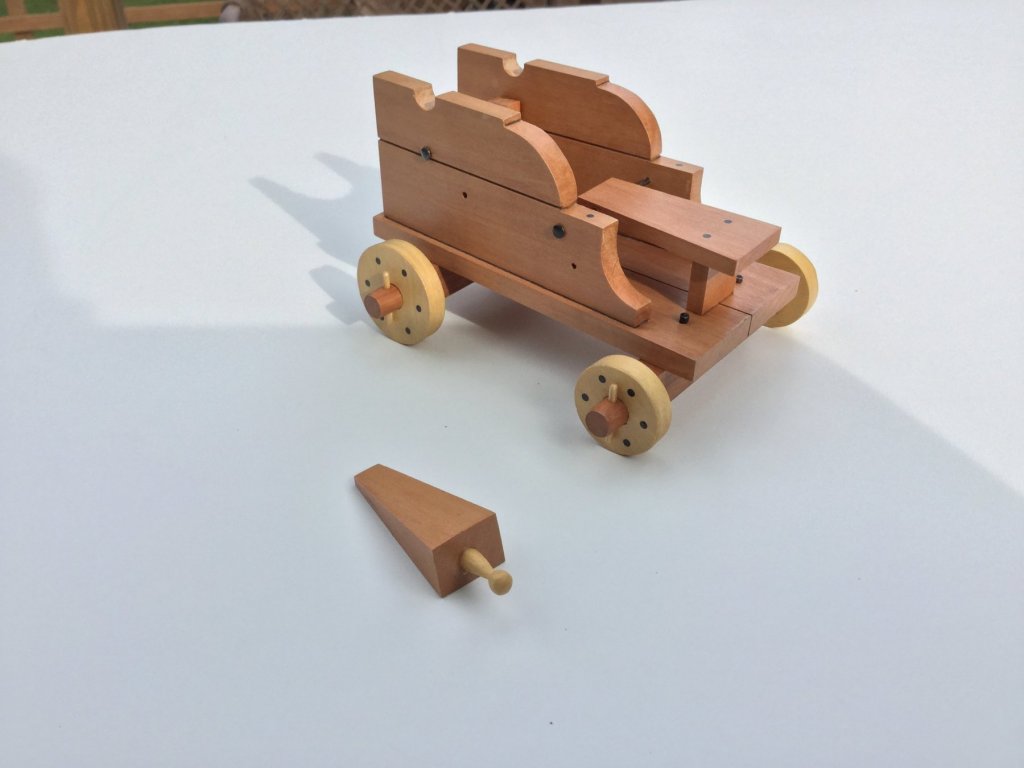
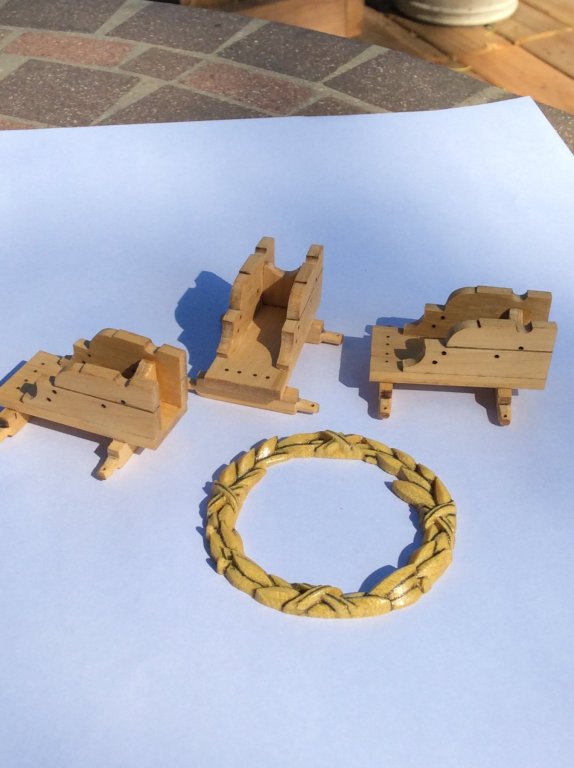
I assembled all the carriages. I did make some modifications. I lowered the stool bed and it's support so that the quoins would fit properly. I also made new transoms that extend down to the carriage base, for ease of construction. Here's some shots of one of the long cannons with one coat of poly on it. No cap squares yet!
- 128 replies
-
- 14
-
-
- mordaunt
- battle station
- (and 1 more)
-
Great work, Bob. Head rails aren’t easy!
- 359 replies
-
- 4
-
-
- prince de neufchatel
- model shipways
- (and 1 more)
-
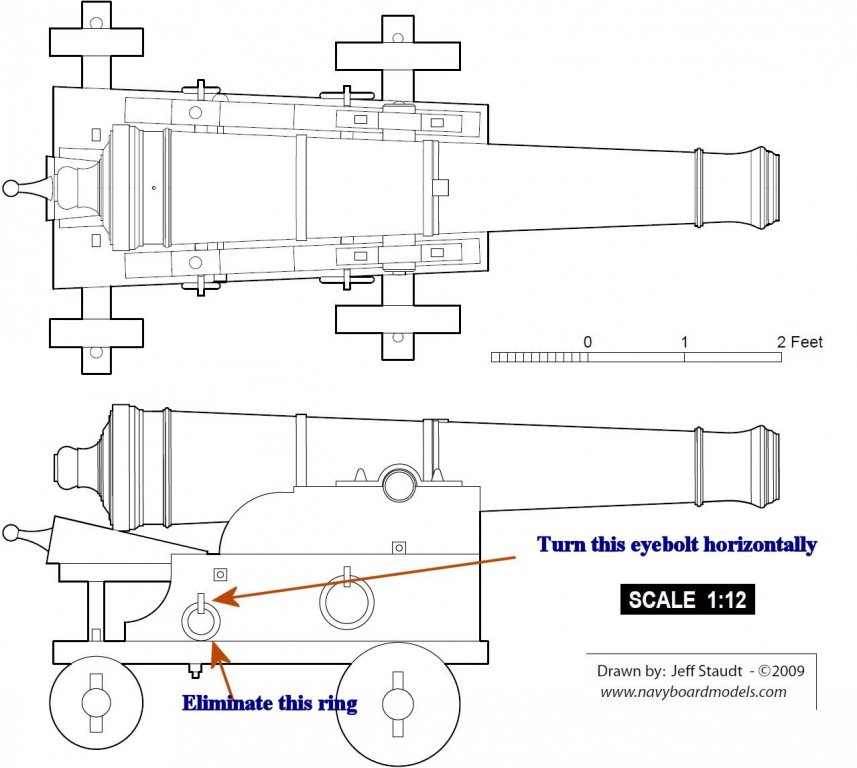
I'm working on my cannons. I've posted Jeff Staudt's plans for the carriages and you notice that there are two rings attached to the brackets. One is for the breeching line and the other is to hook on the gun carriage tackle . I can't find another example of guns being rigged like that. I think I'l just eliminate the aft-most ring, and orient the eyebolt horizontally, like it's done on virtually every other carriage I've seen.
- 128 replies
-
- 7
-
-
- mordaunt
- battle station
- (and 1 more)
-
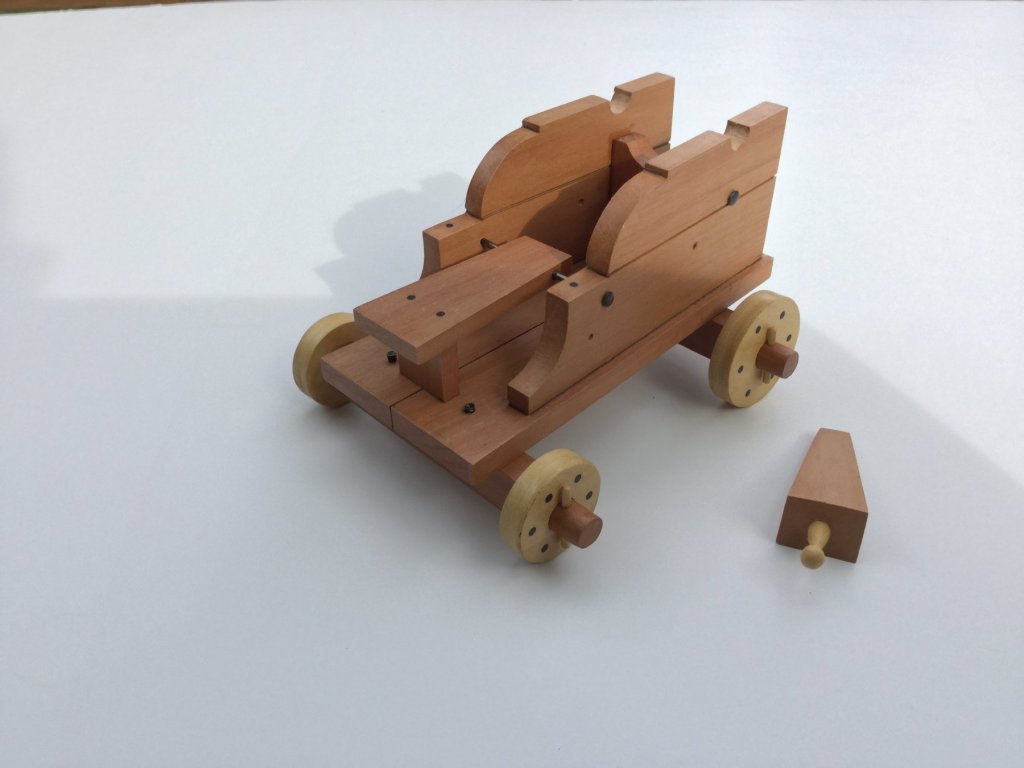
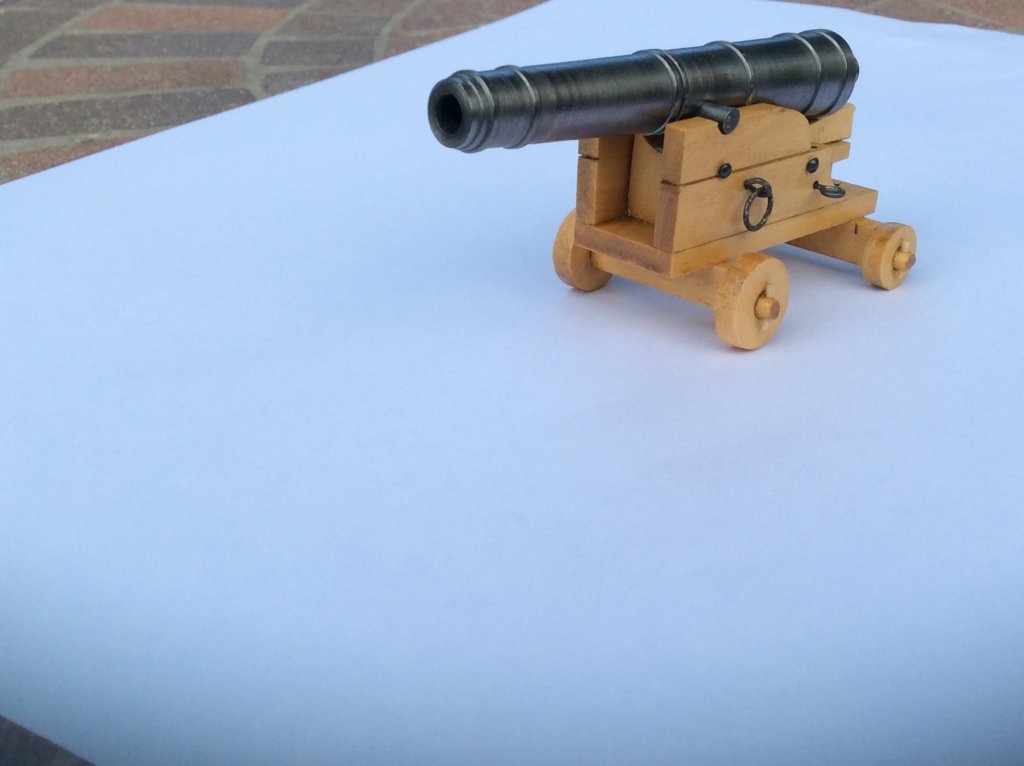
Thanks guys, and thanks for the "likes""! I spent yesterday assembling the main parts of the gun carriages. One of us noticed a problem with the fit of the quoins and getting proper elevation of the gun's barrel. I'll make a mockup of the stool bed and alter it such that the quoin fits. The carriages are boxwood and the wreath is yellowheart. I used a pencil to darken the recesses of the wreath to give more of a "3-D" effect.
- 128 replies
-
- 17
-
-
- mordaunt
- battle station
- (and 1 more)


.jpg.d7009556155cfb1da03bba6dbd027170.jpg)