DocBlake
-
Posts
1,811 -
Joined
-
Last visited
Content Type
Profiles
Forums
Gallery
Events
Everything posted by DocBlake
-
 Very nice, Ian. Great job turning the cannon. I’m anxious to see more of your work.
 -
Looks good, Mike! Thanks for the tips.
-
Hi, Ian! Jeff Staudt drew the plans as a typical 17th Century weapon, and I love the carriage design. I’ve spent hours searching the internet for an image, but haven’t found one yet. If anyone comes across one let me know! Ian: Post pictures of your cannon build!
-
Sharpie by Jim T - Scale 1:16 - SMALL
DocBlake replied to Jim T's topic in - Build logs for subjects built 1851 - 1900
Thanks, Jim! -
Sharpie by Jim T - Scale 1:16 - SMALL
DocBlake replied to Jim T's topic in - Build logs for subjects built 1851 - 1900
Jim: Very nice work! Did you have any problem fitting the chines? I may have made the notches a little too deep so I'll have to shim them, or increase the chine height slightly. -
Ken: Are you planning on rigging her? I'm considering stub masts and sprit for mine.
- 122 replies
-
- 1
-

-
- independence
- privateer
- (and 1 more)
-
Good job! These cannons in larger scale are fun!
- 125 replies
-
- 4
-
-
- 9 pound naval cannon
- 3d cannon barrel
- (and 1 more)
-
Great job! I think you've found your niche, Ken. You can do carvings for me anytime.
- 122 replies
-
- 2
-
-
- independence
- privateer
- (and 1 more)
-
Great job so far, Bob! I can't wait to see the masting and rigging!
- 359 replies
-
- 5
-
-
- prince de neufchatel
- model shipways
- (and 1 more)
-
Great job on the headworks, Ken! I struggled with the temptation to over-do the decorations on this small ship that began life as a merchantman, but in the end, opted to include the headworks, quarter badge windows and a more elaborate stern. Couldn't help myself!
- 122 replies
-
- 1
-
-
- independence
- privateer
- (and 1 more)
-
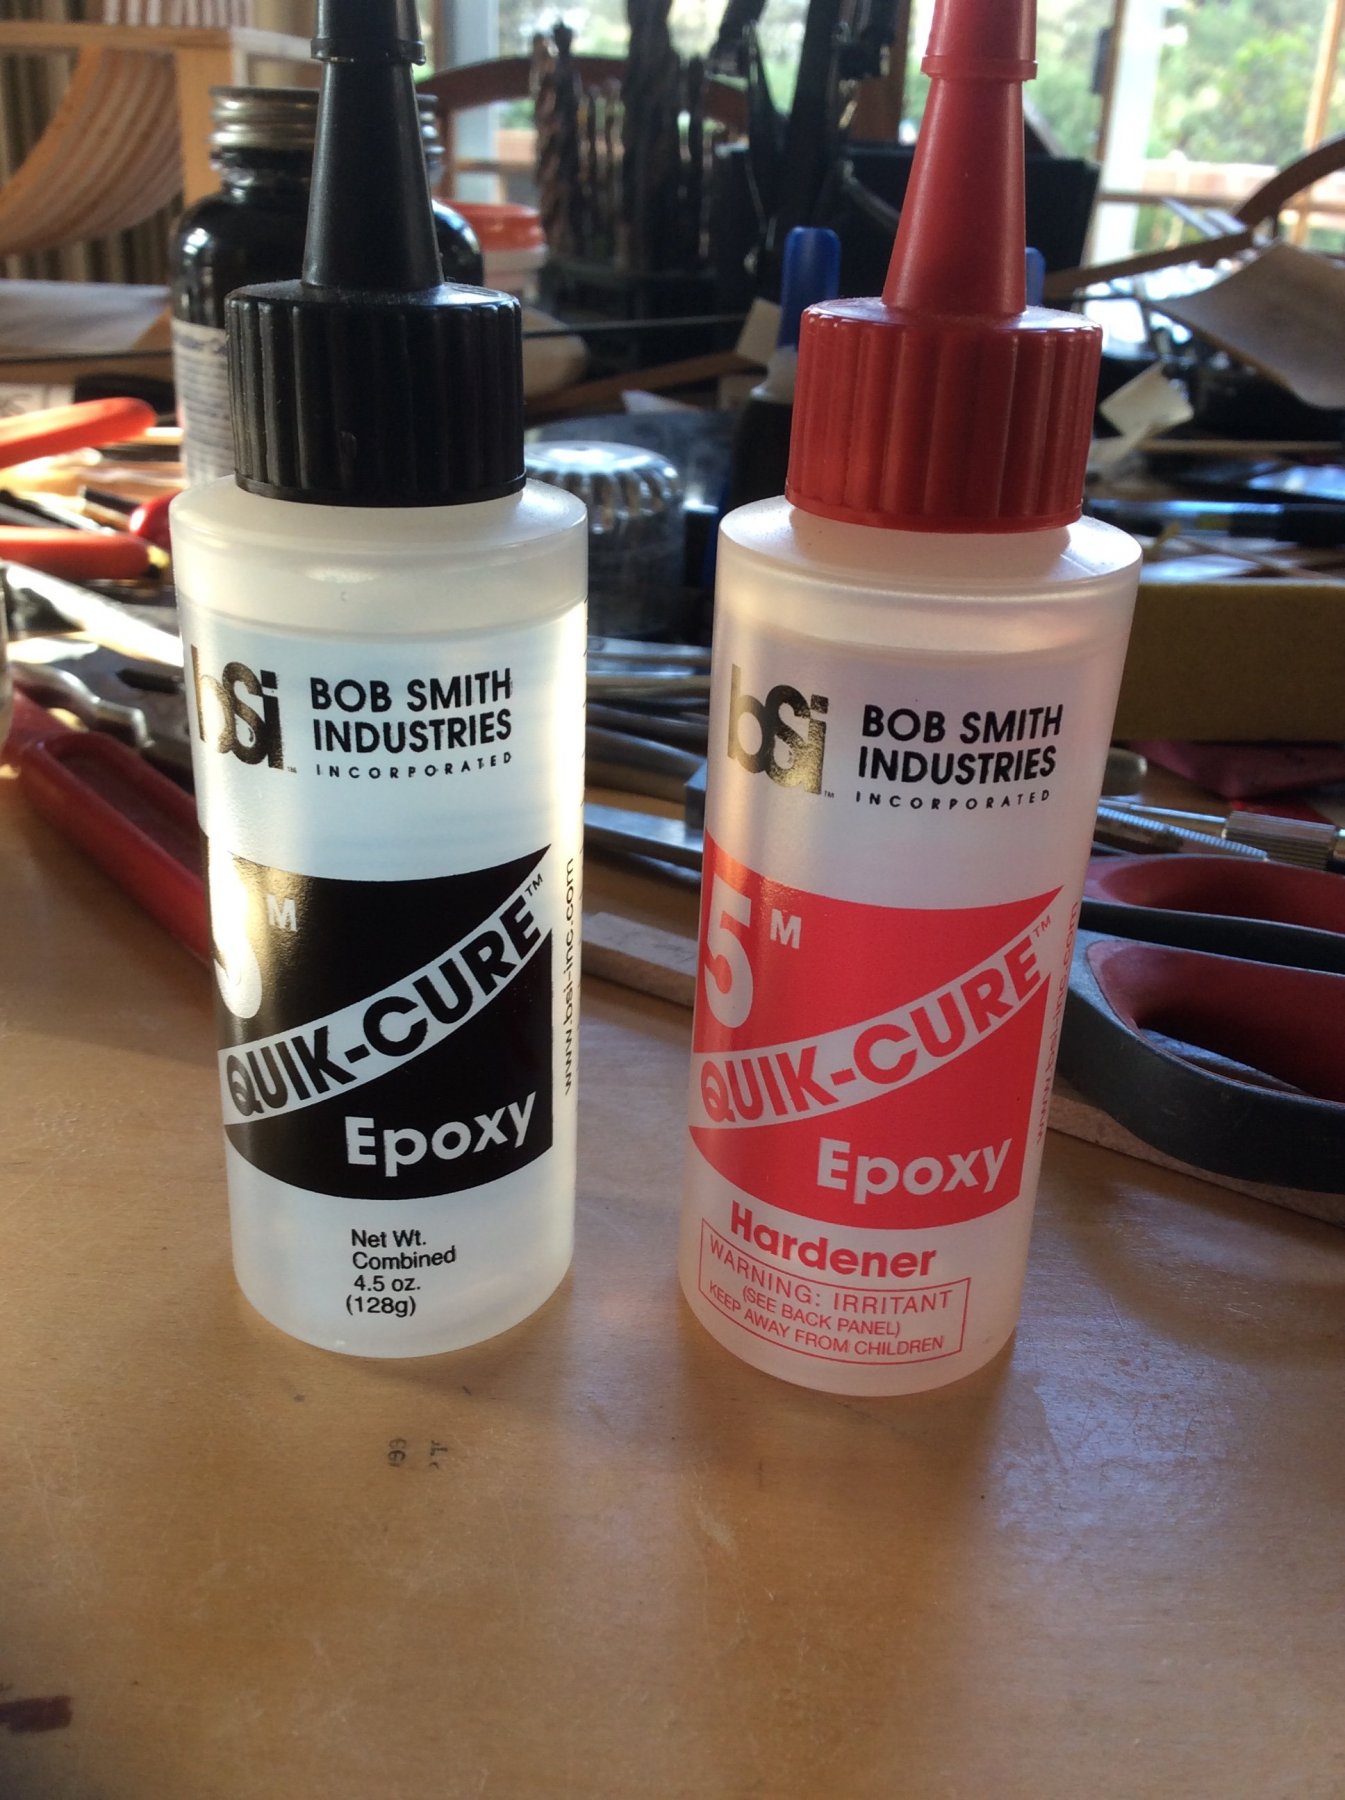
Nick: Try 5 minute epoxy! Plenty strong for modeling purposes, and sets up pretty hard in 5 minutes. You won't pull it apart in an hour, and full cure is about 24 hours. I use a lot of it! This brand is easy to use, and very economical: 4.5 total ounces for $10.00 on Amazon. Will last you years.

-
I typically use PVA with CA for planking. The CA provides instant clamping, and I can move on to the next plank in a minute or two. It is well known that PVA and CA glues are very compatible. I used WeldBond and have started using LockTite Ultra Gel Control. A little goes a long way!
-
Swan class 3D model in progress
DocBlake replied to dvm27's topic in CAD and 3D Modelling/Drafting Plans with Software
Fantastic....- 141 replies
-
- 1
-
-
- pof swan series
- swan
- (and 1 more)
-
Thanks, guys!
-
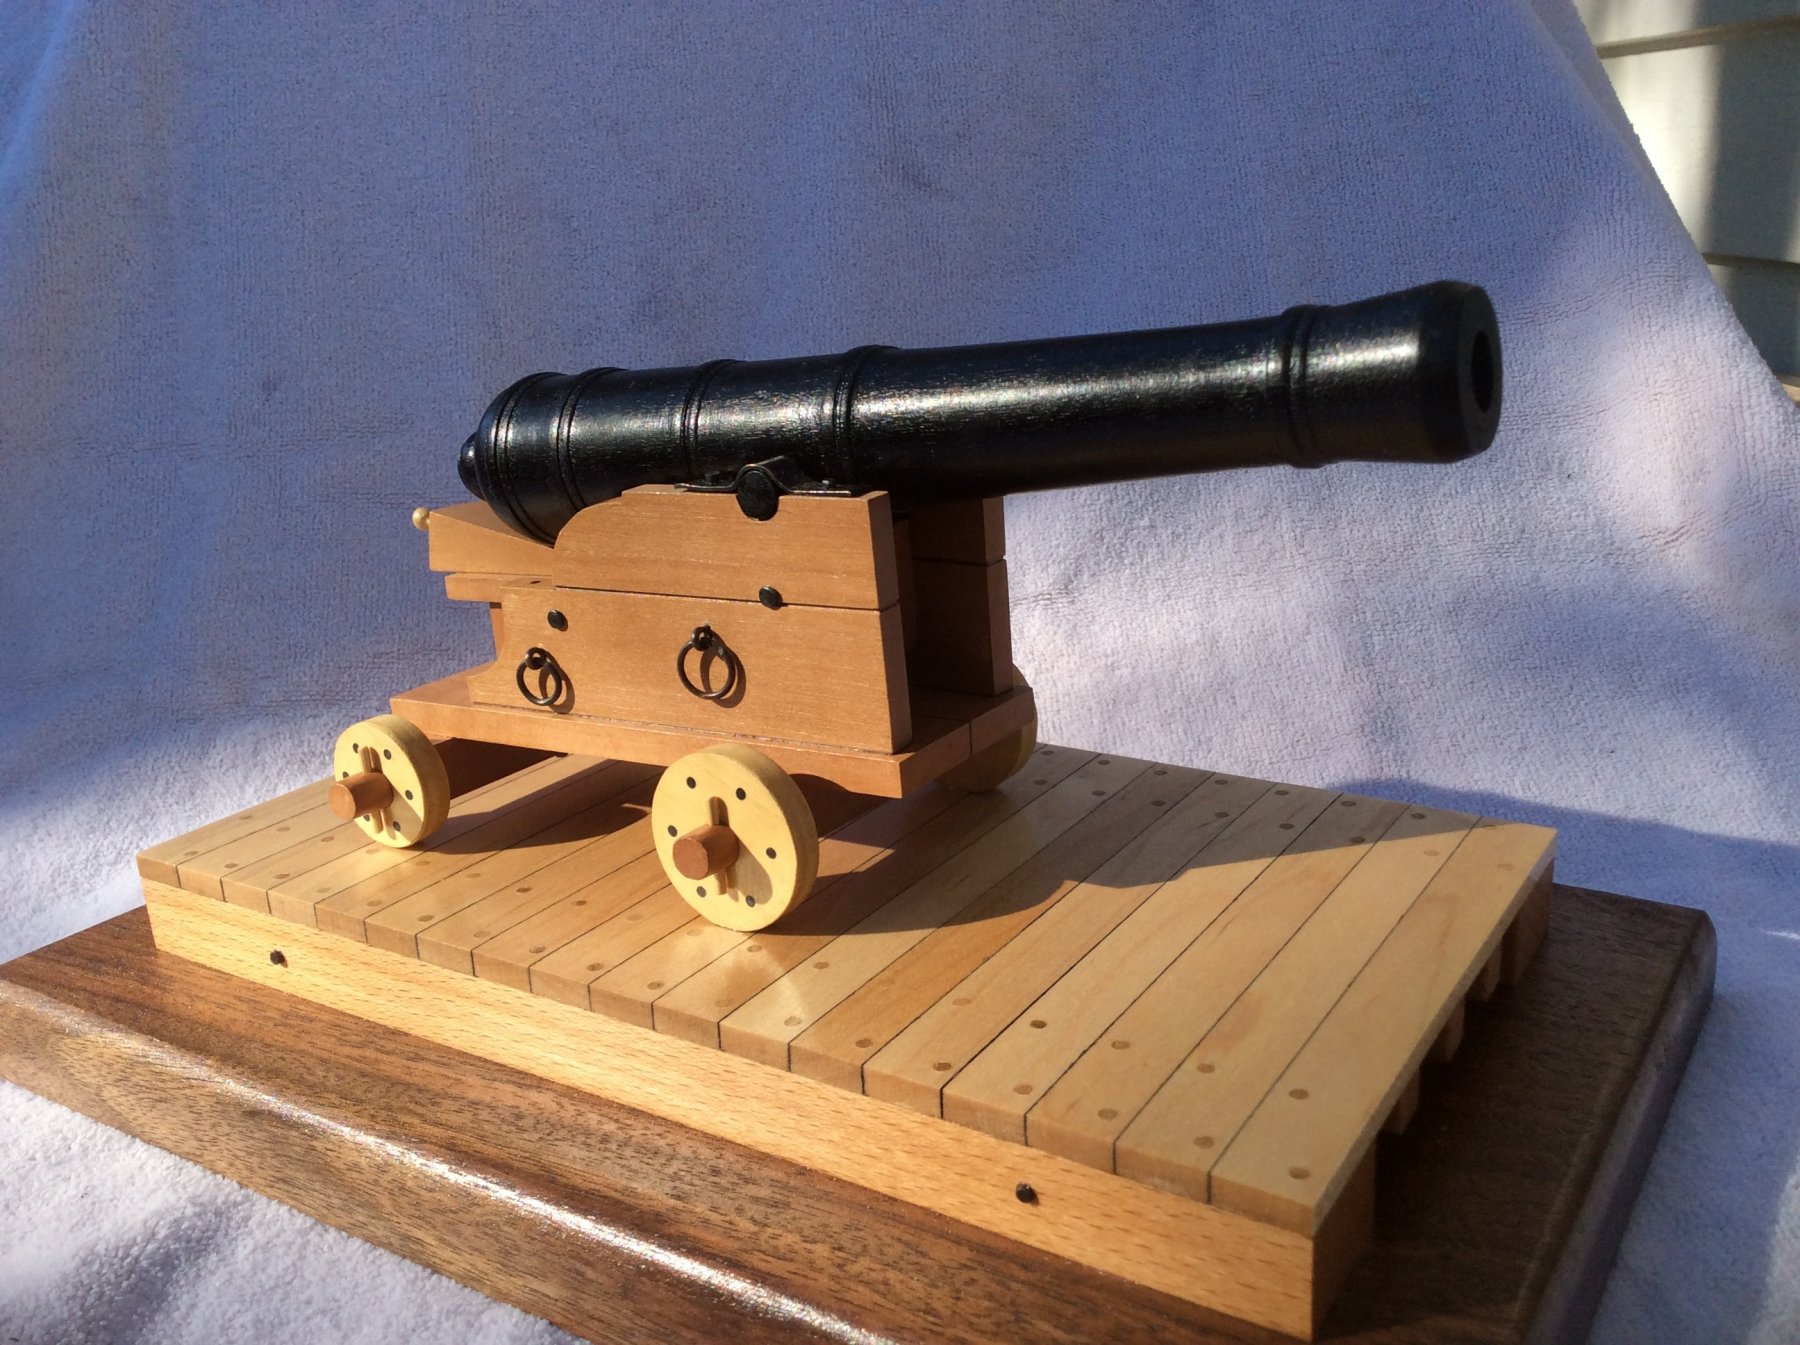
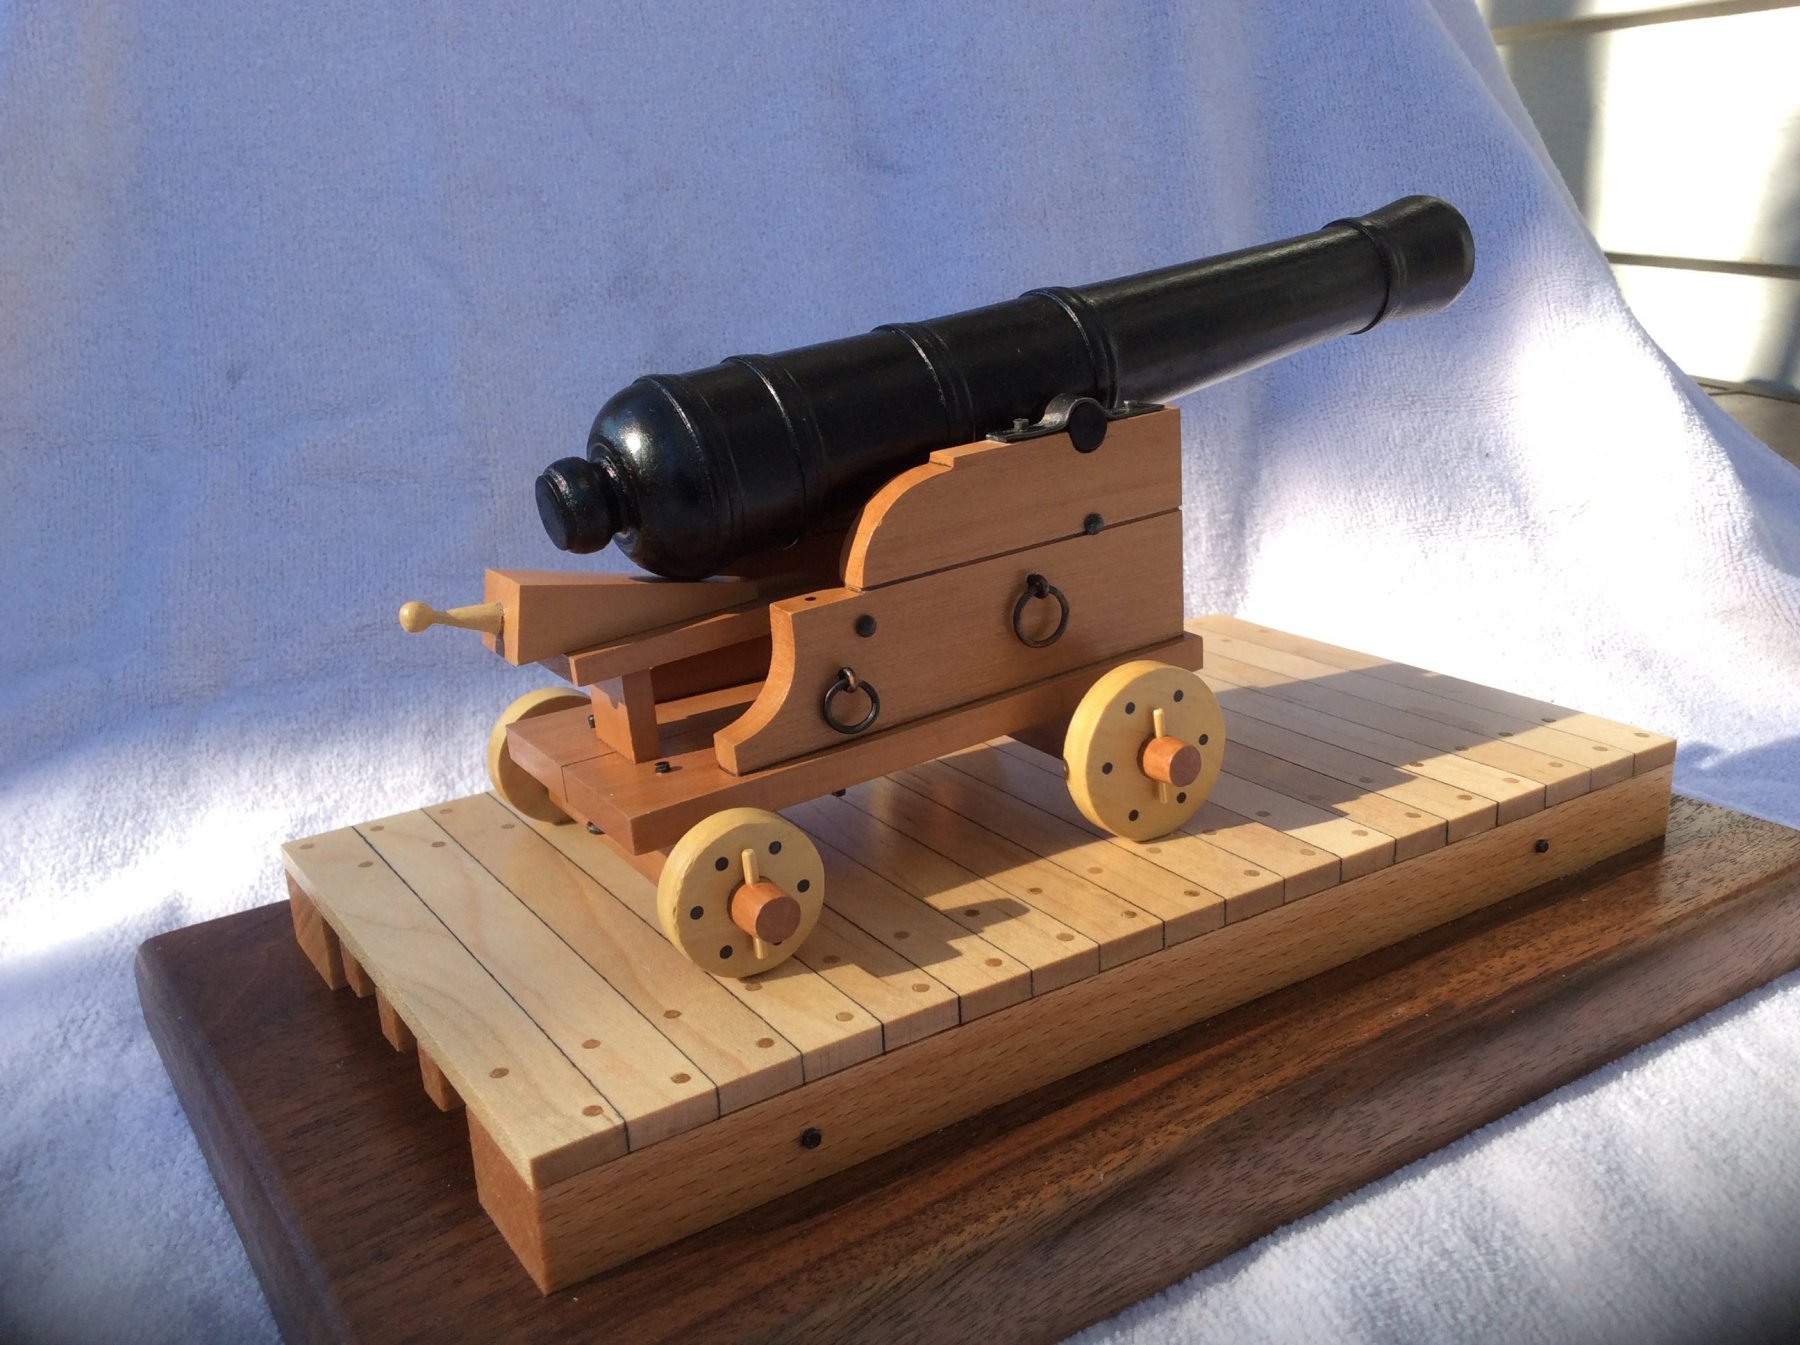
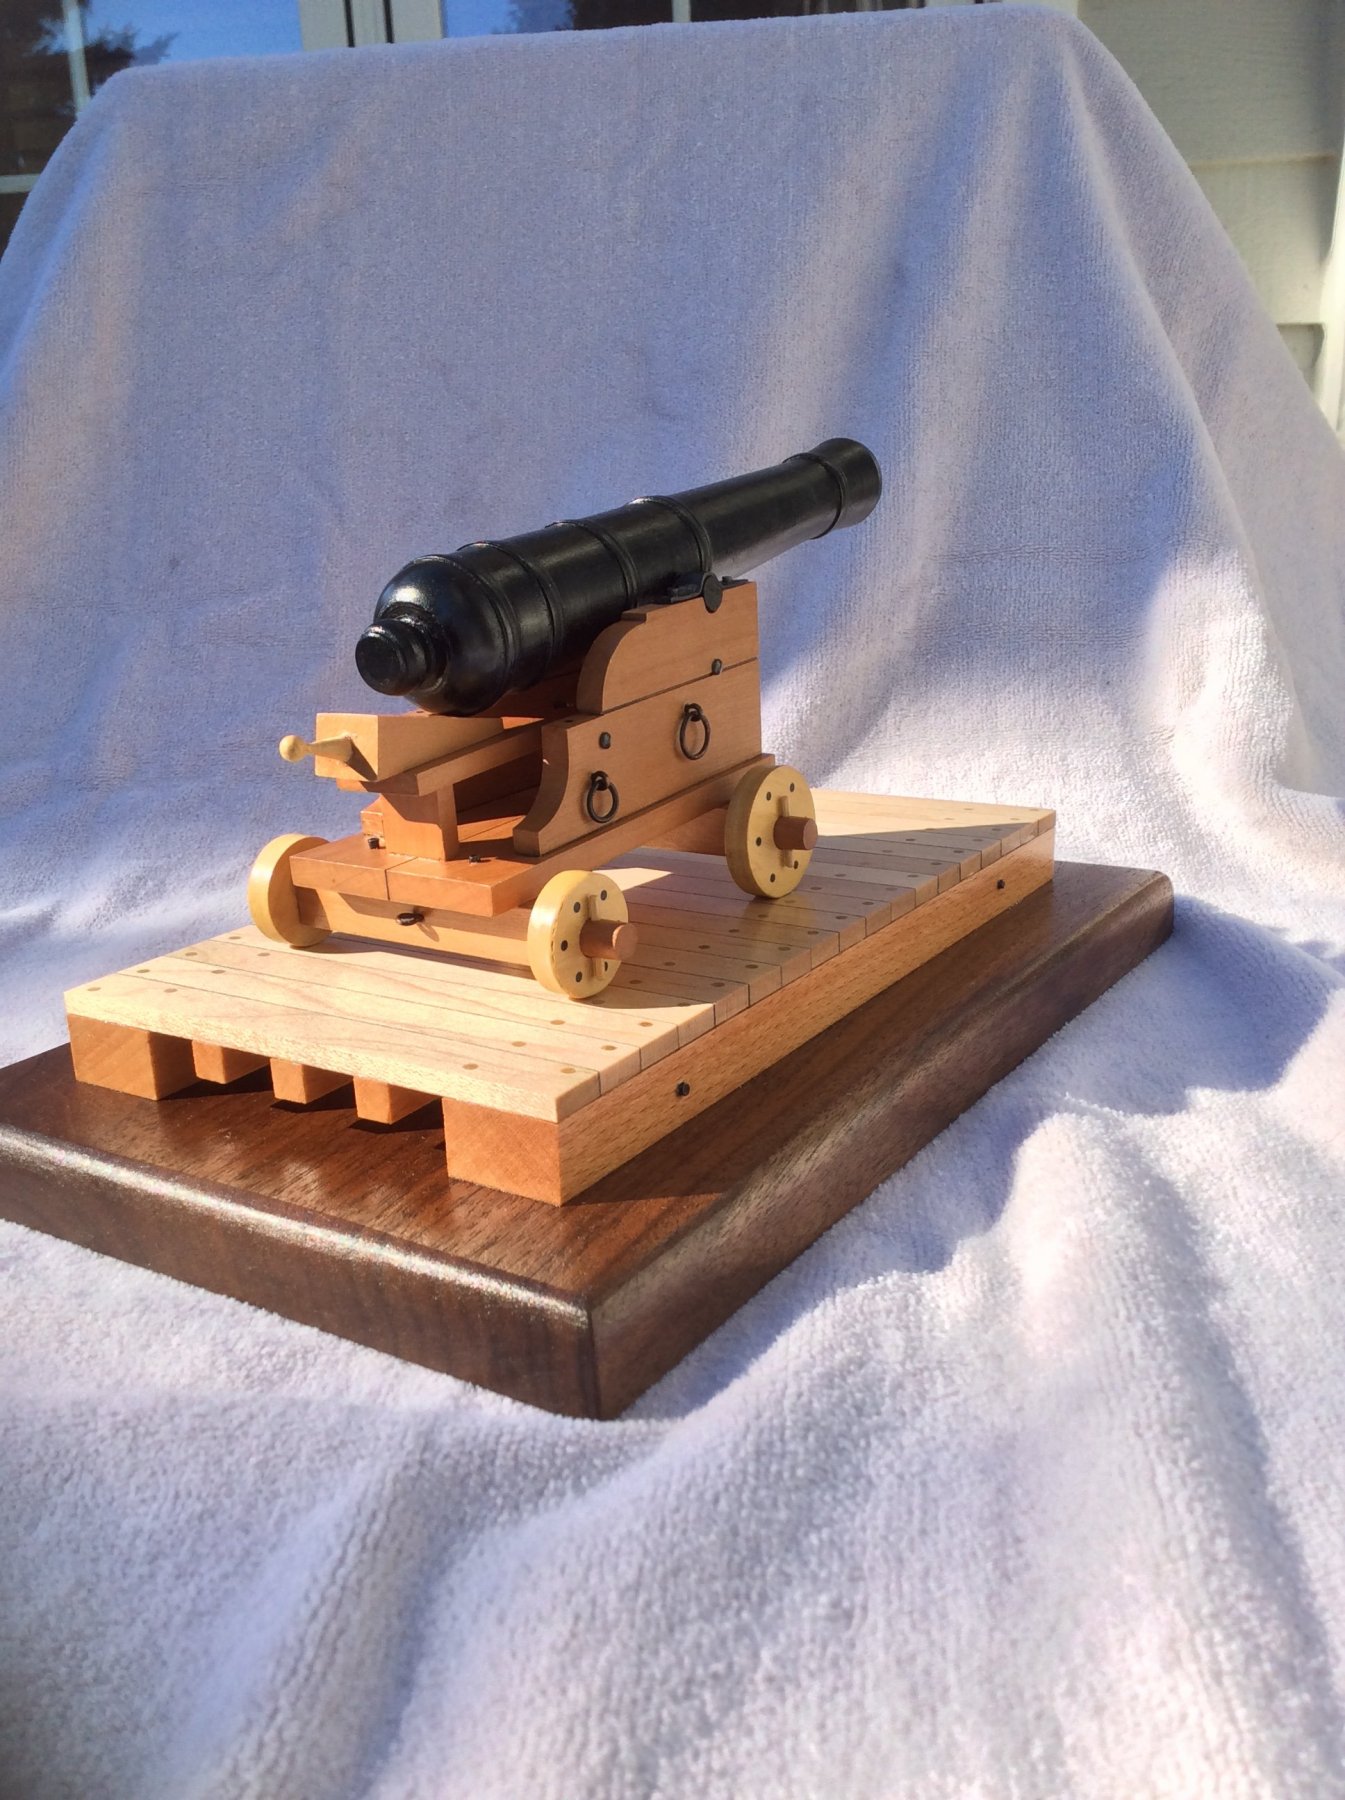
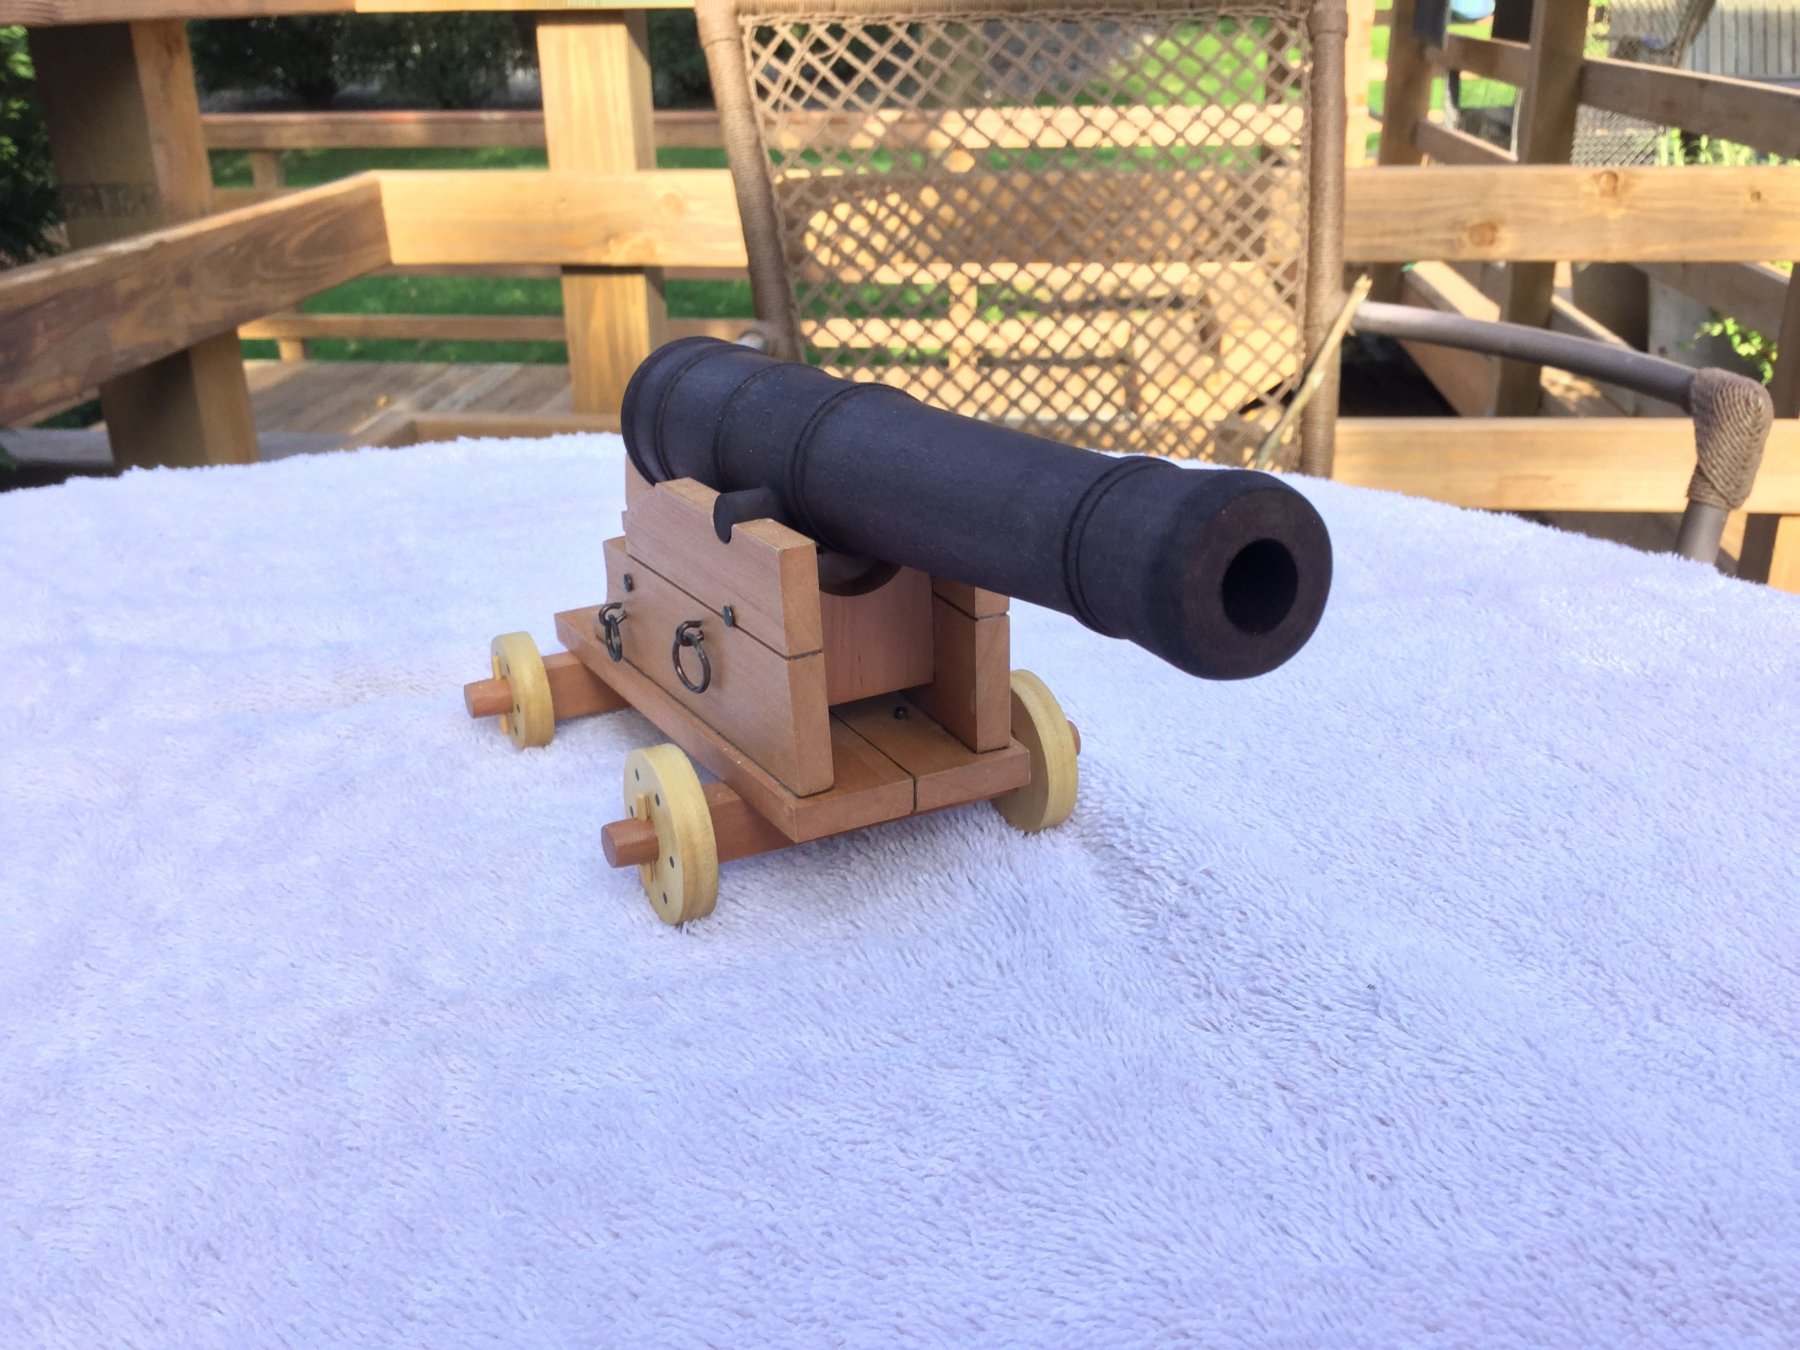
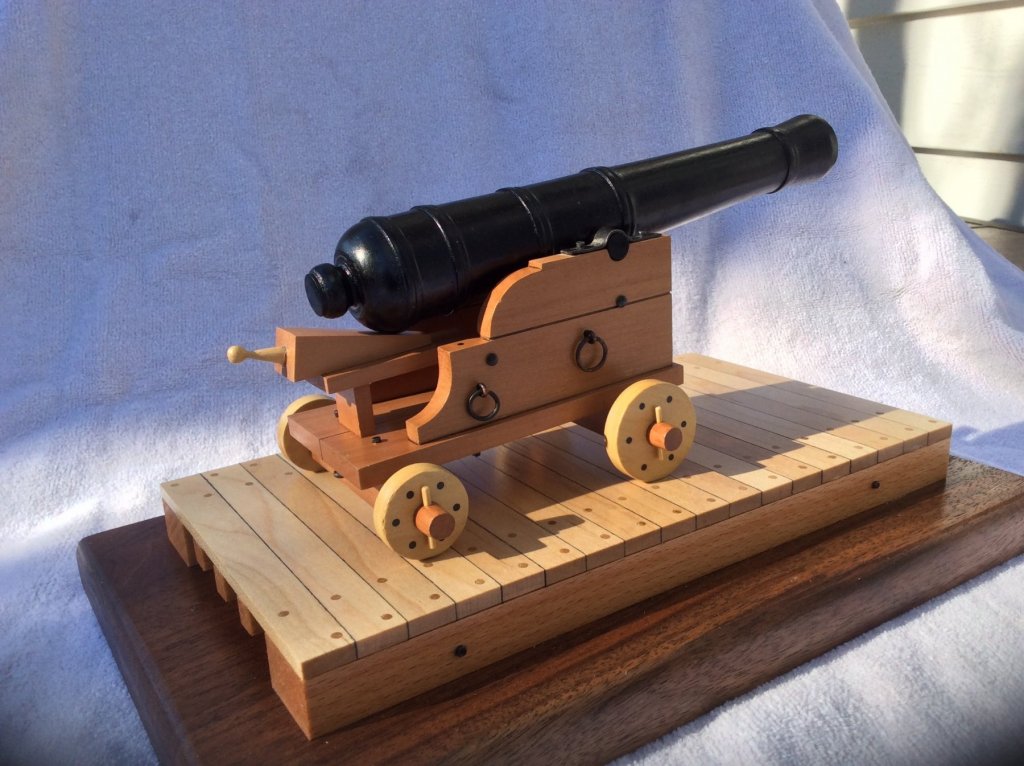
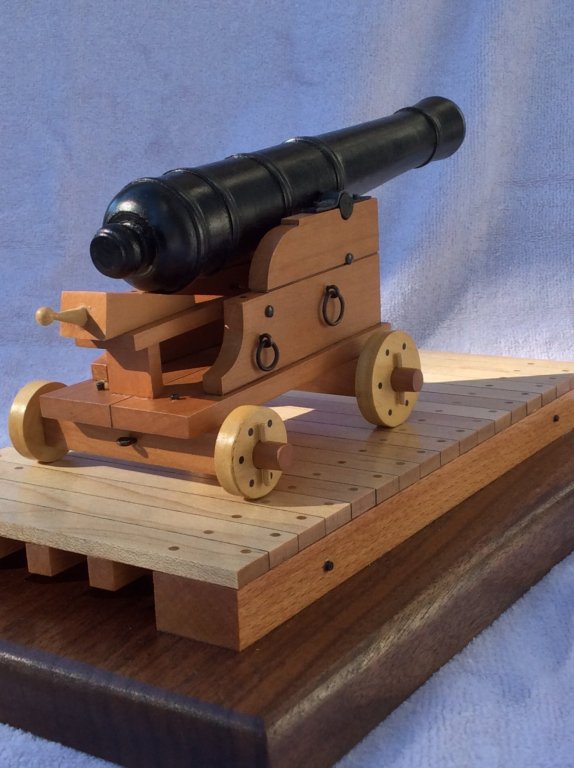
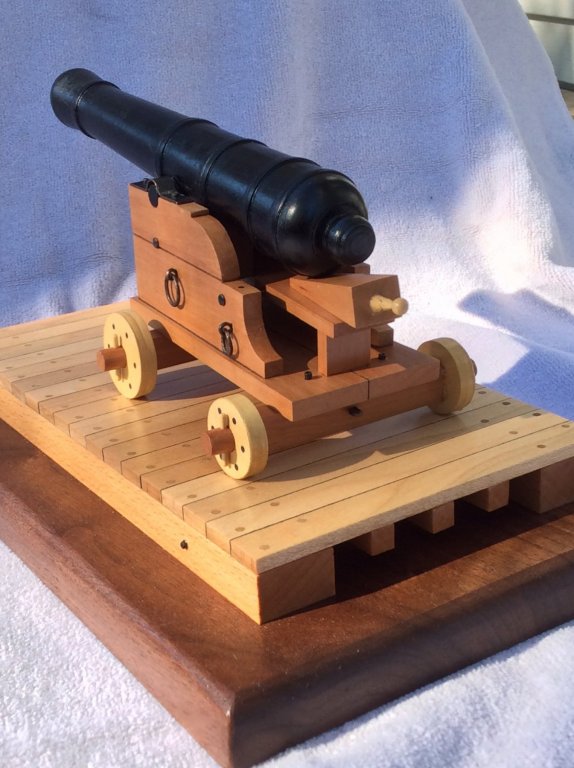
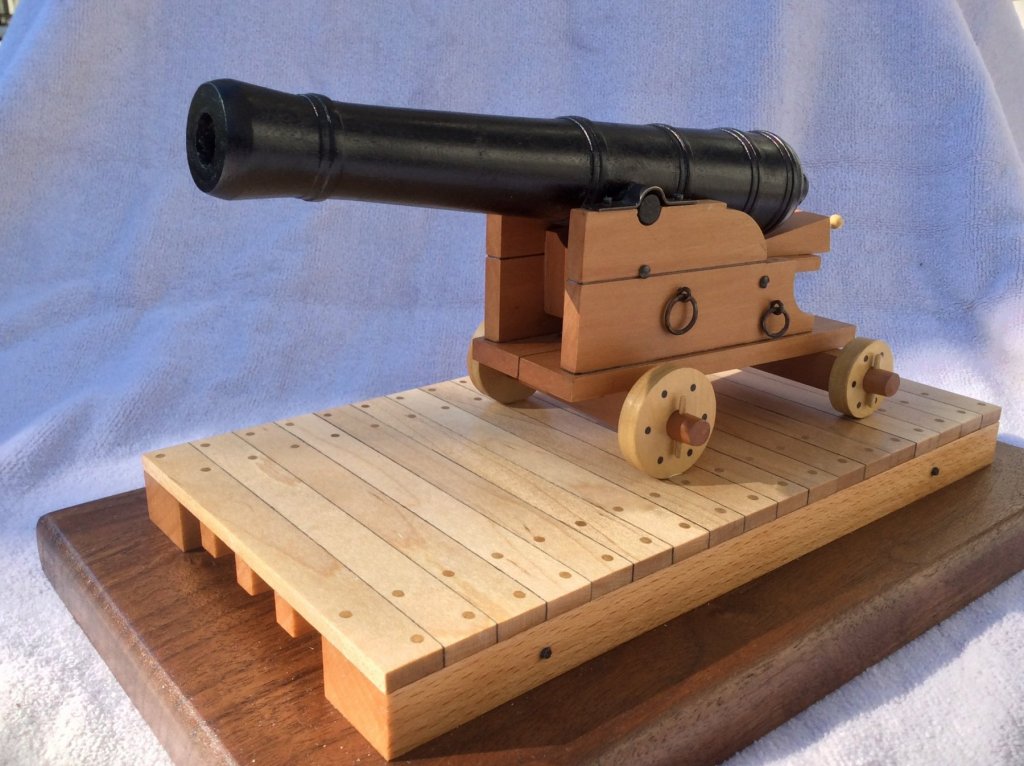
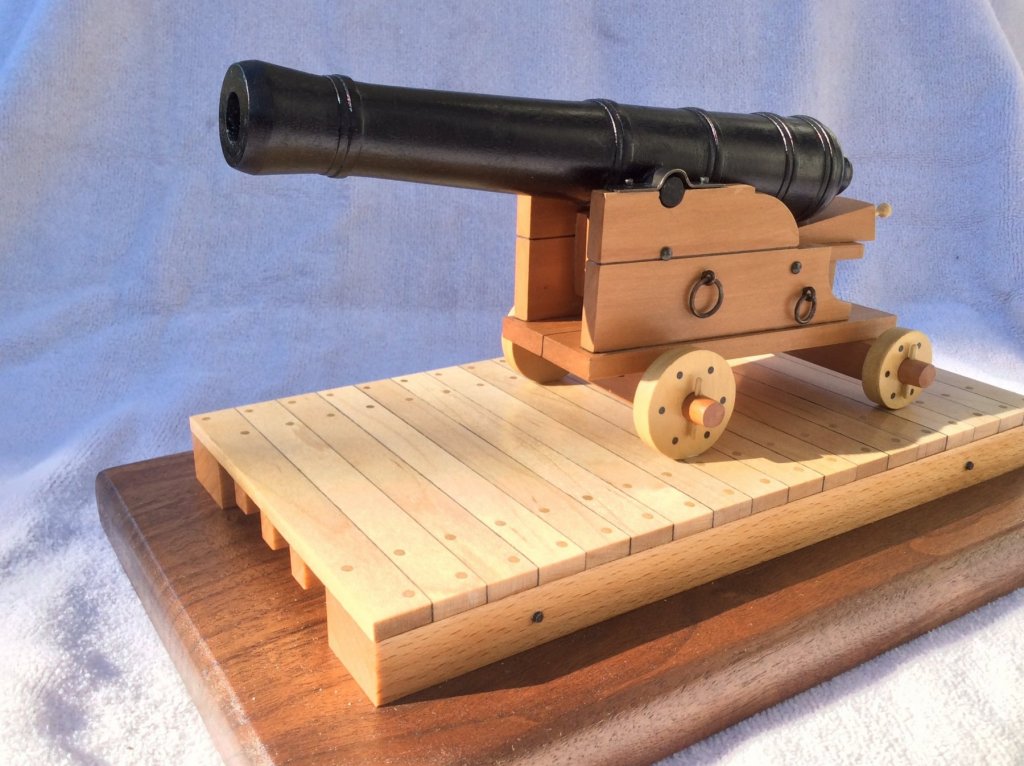
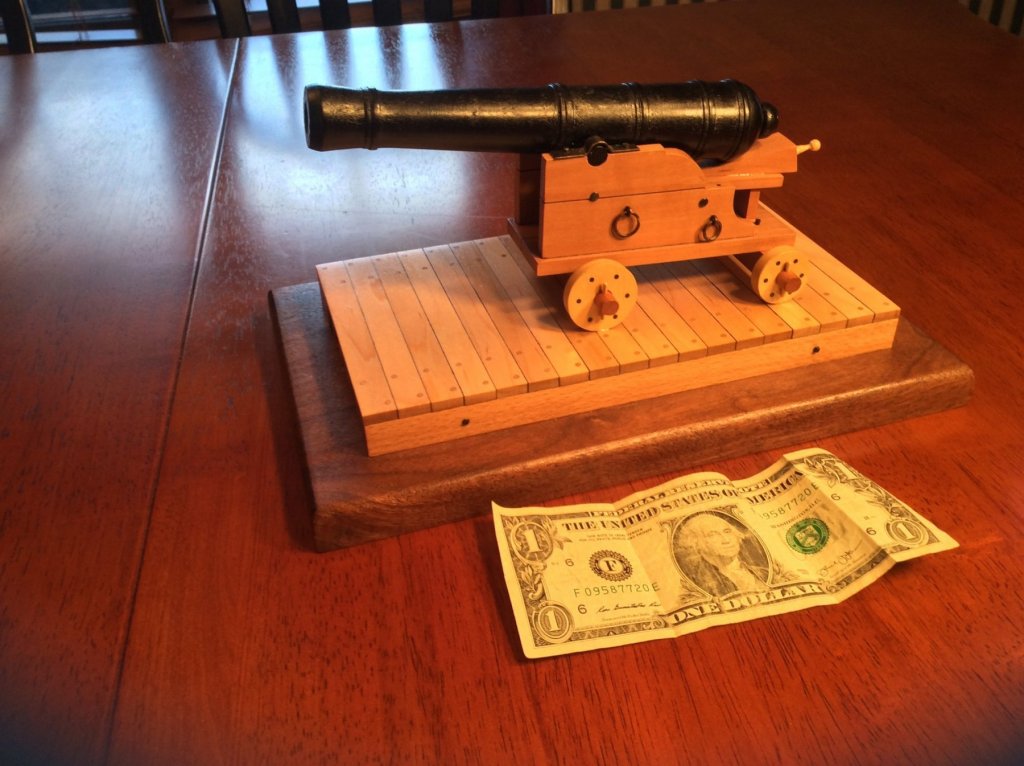
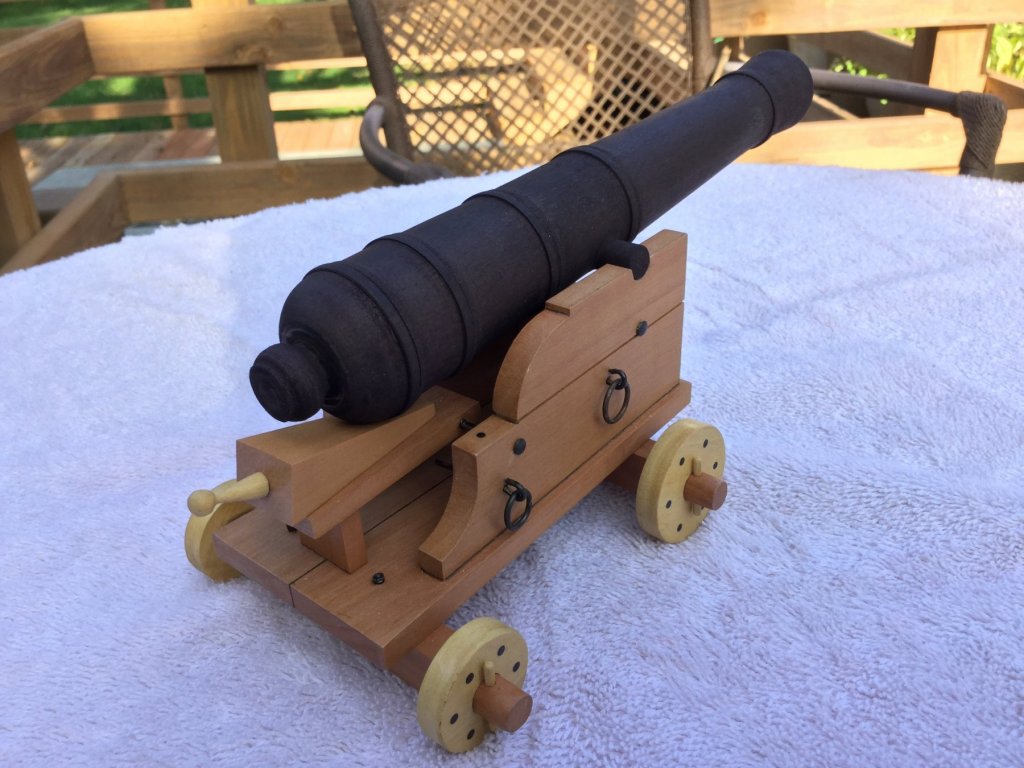
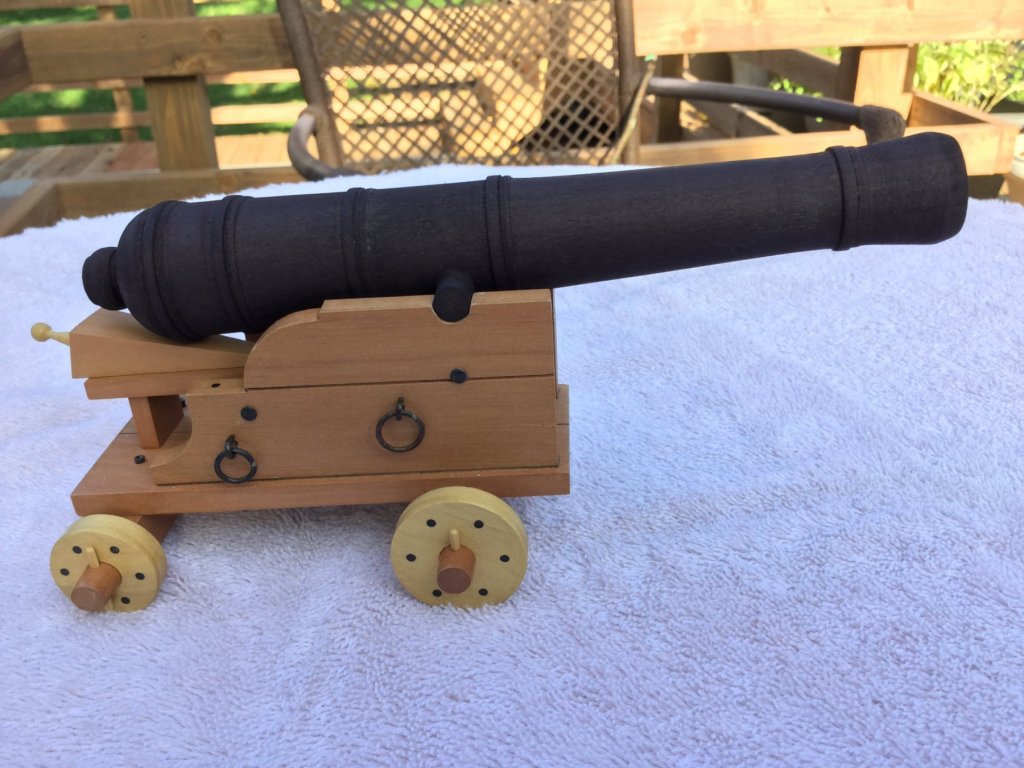
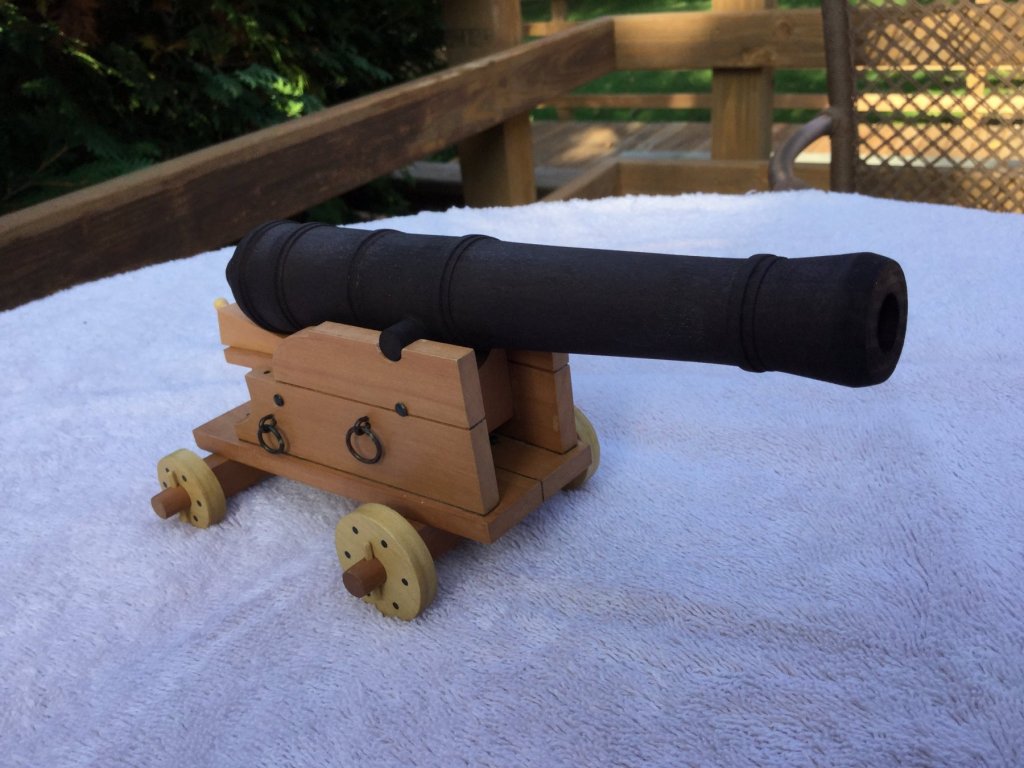
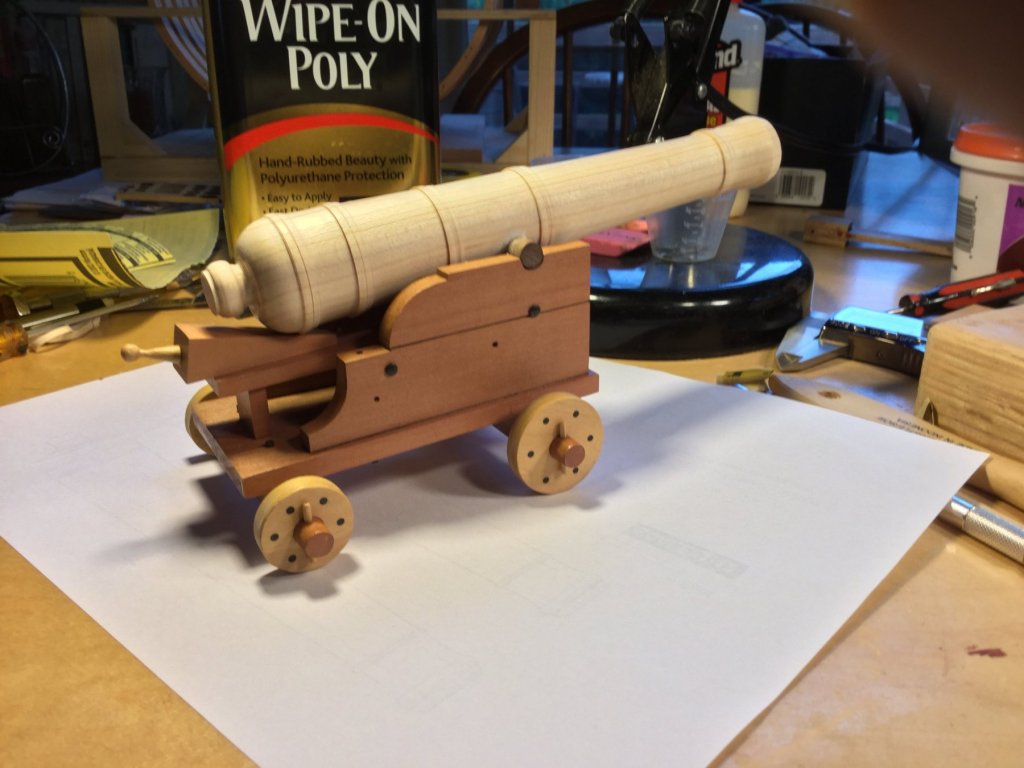
I finished the cannon and mounted it to the display board using pins in the forward trucks and epoxy. The dollar bill gives a sense of the 1:12 scale. I have an acrylic case on order for the model!


-
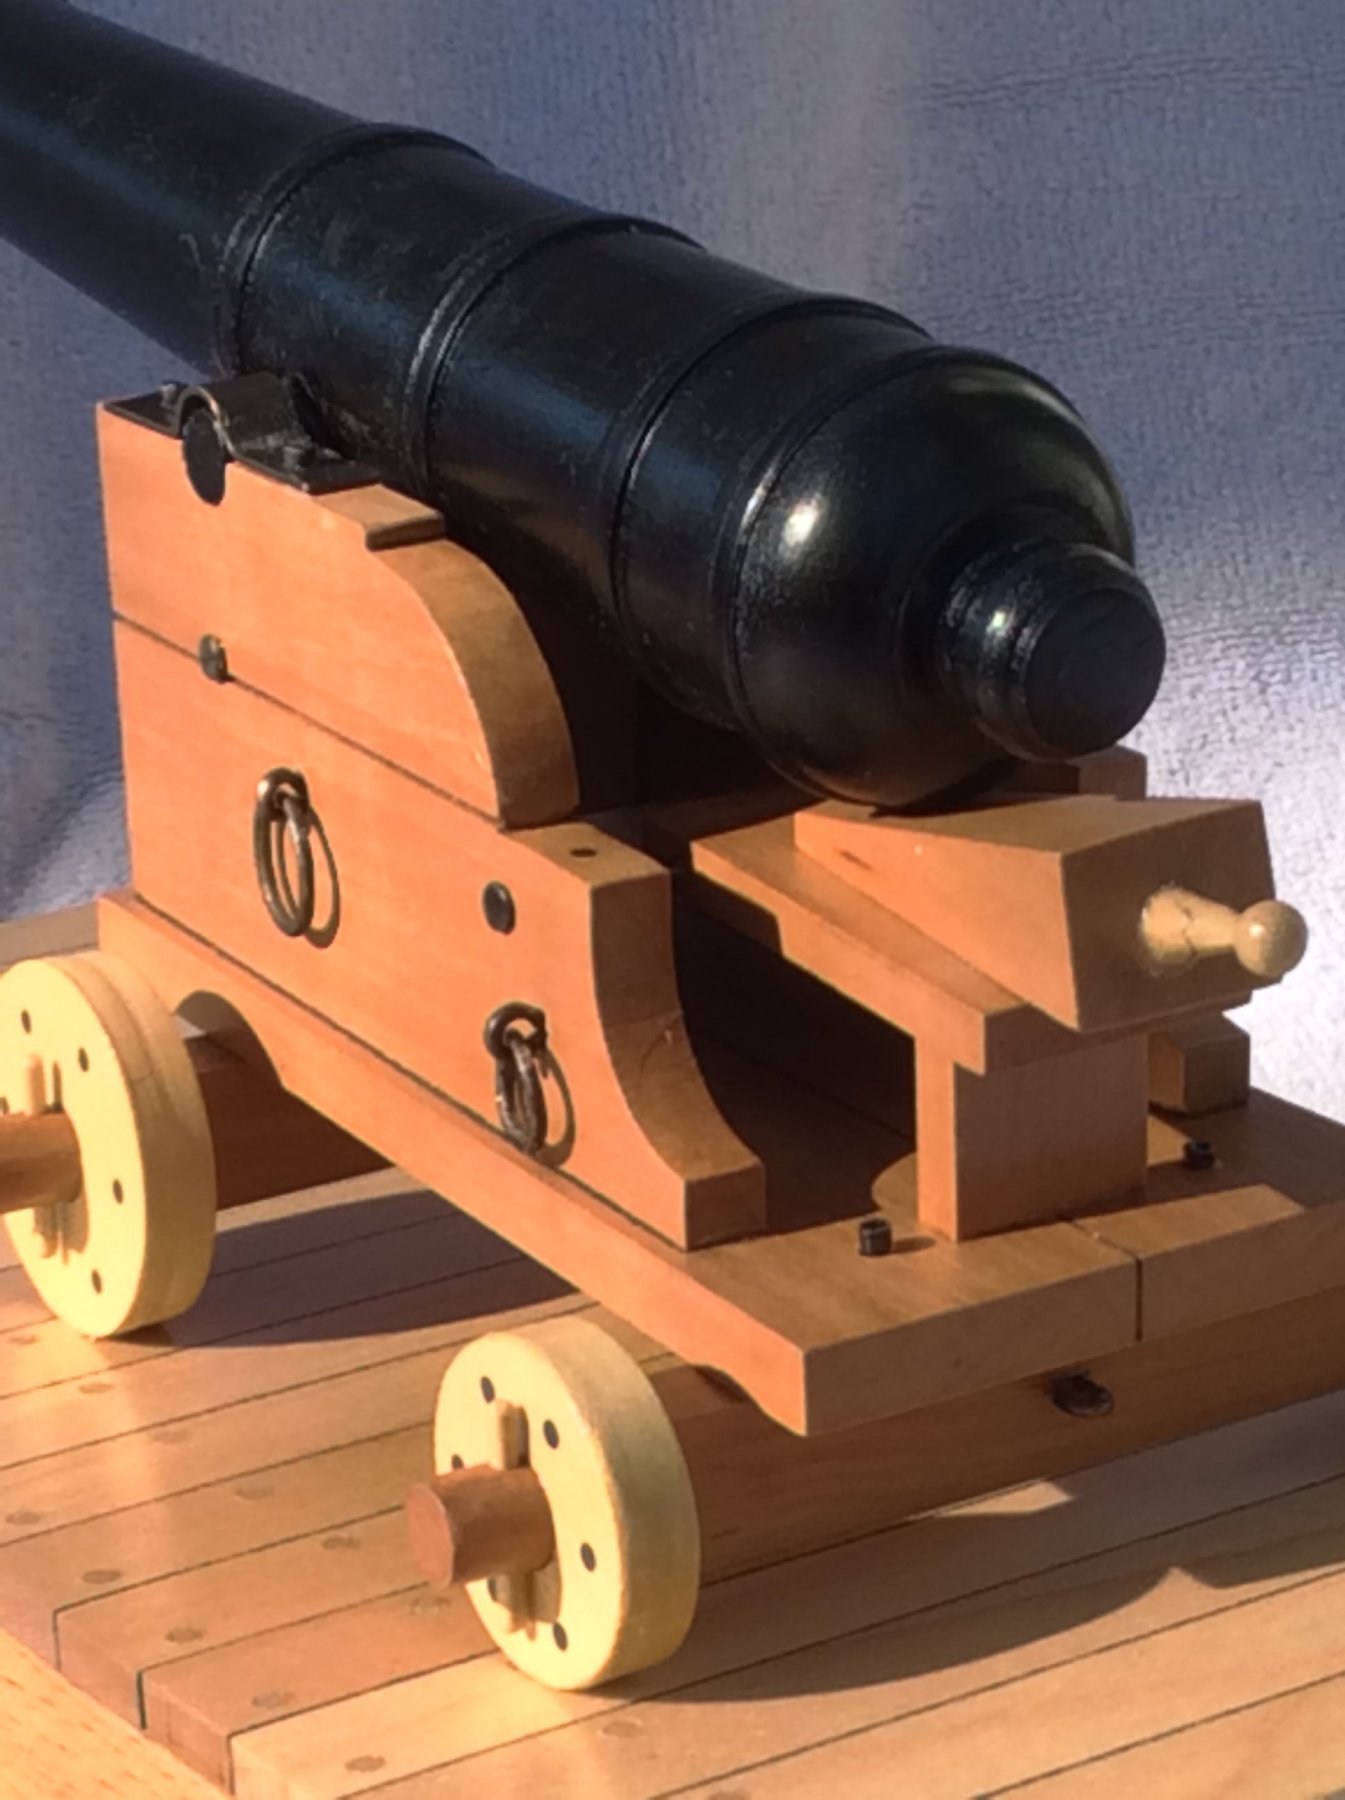
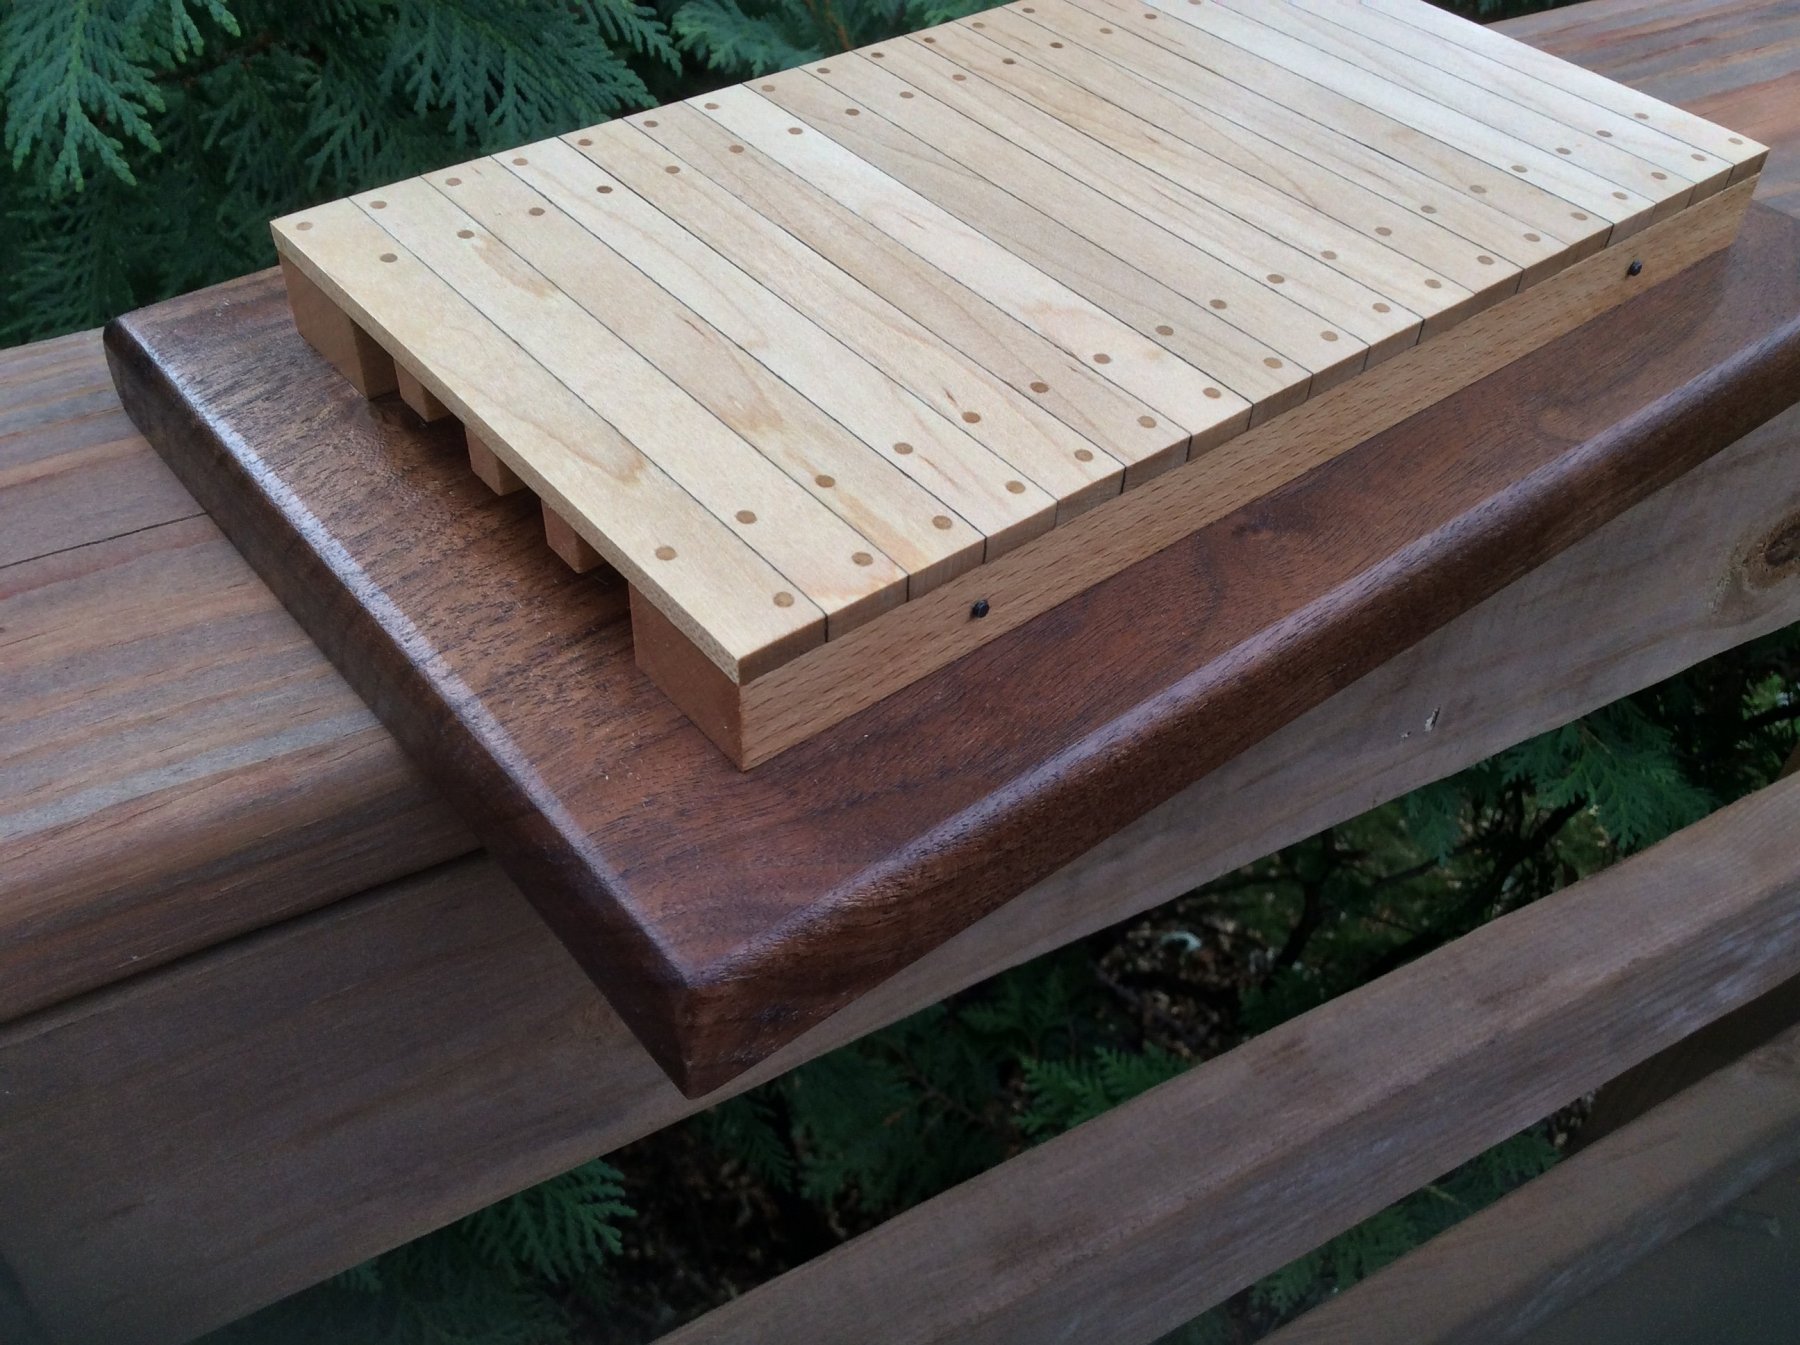
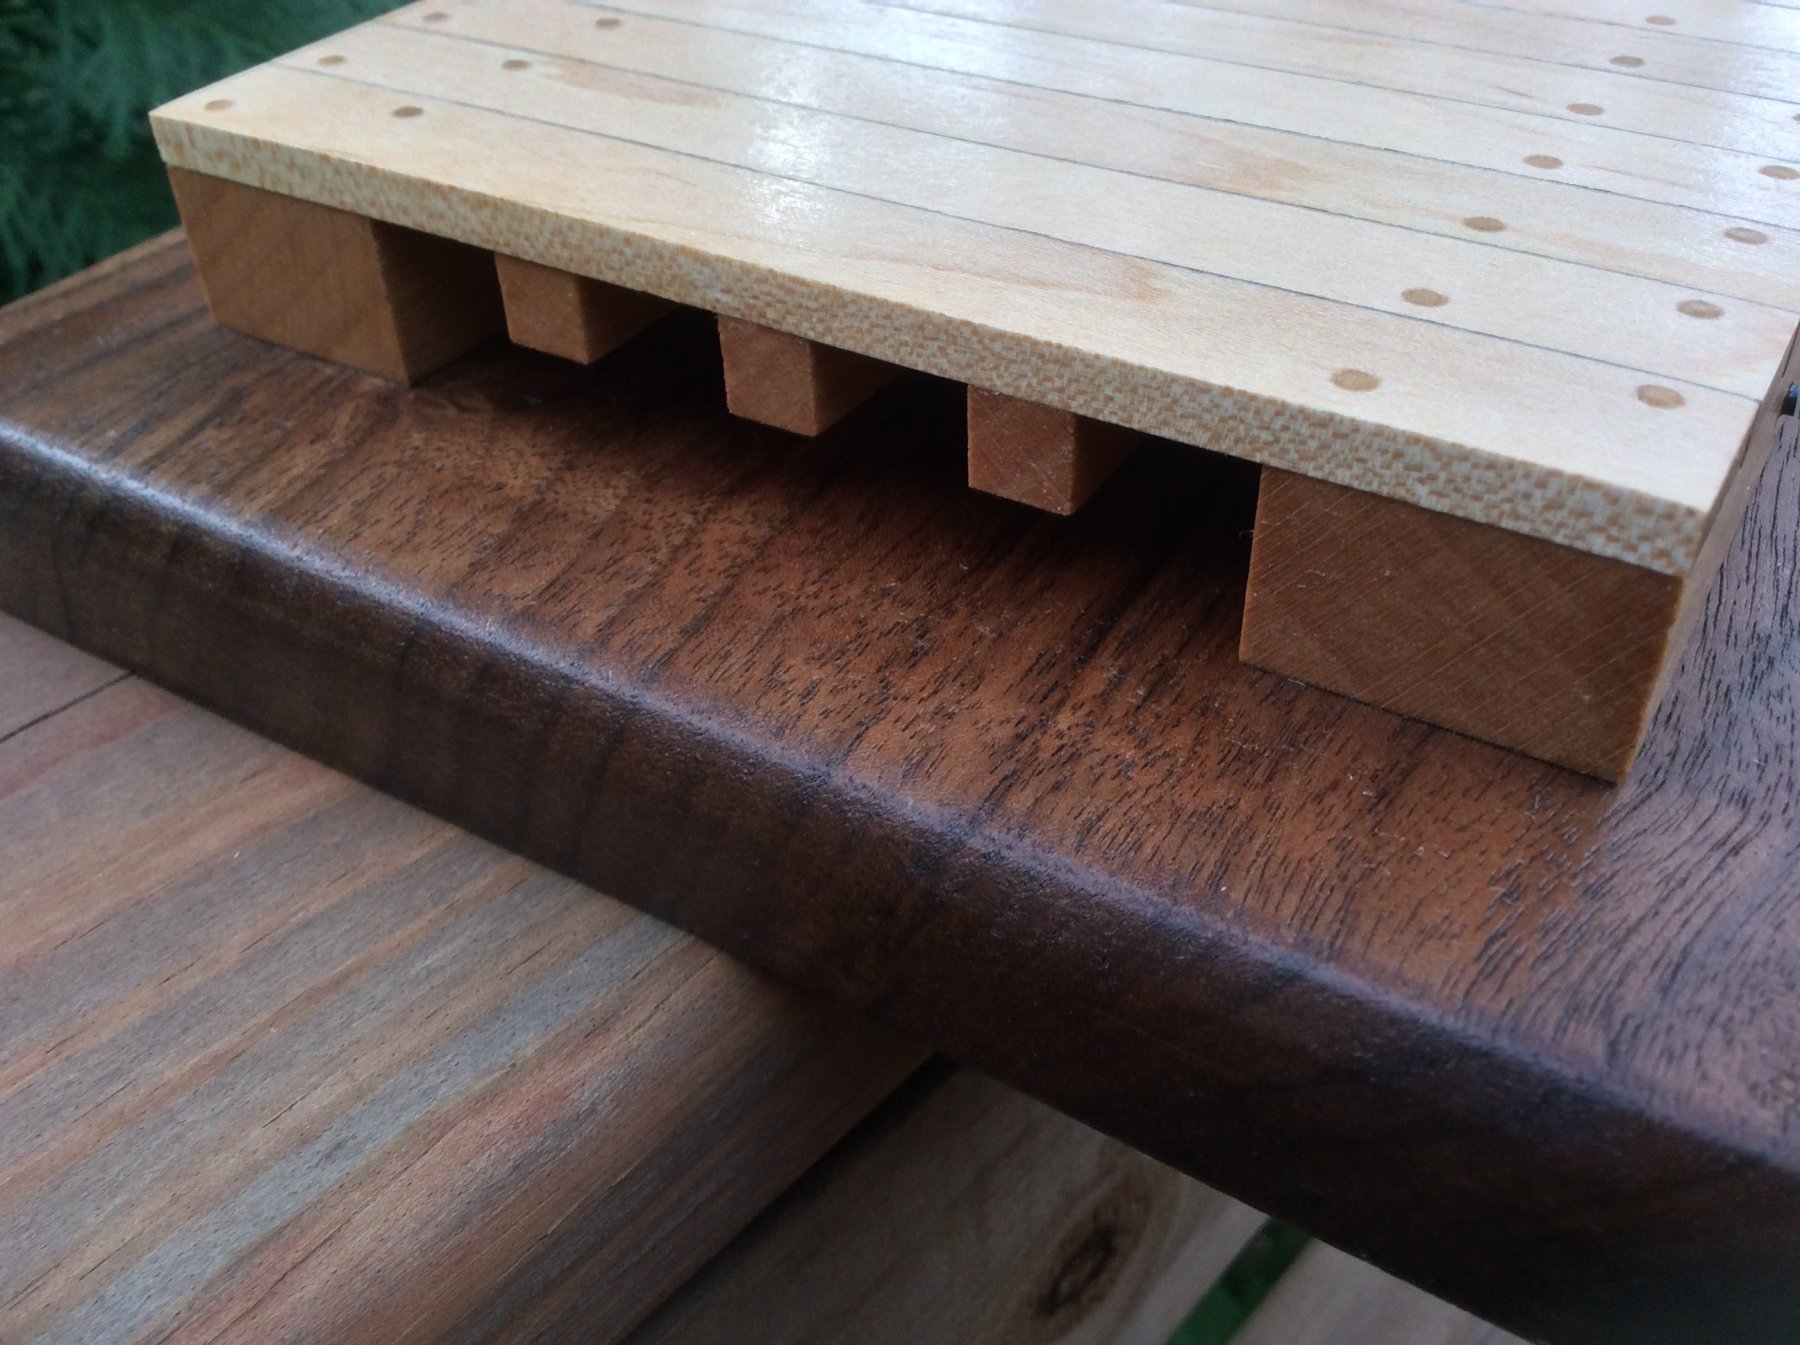
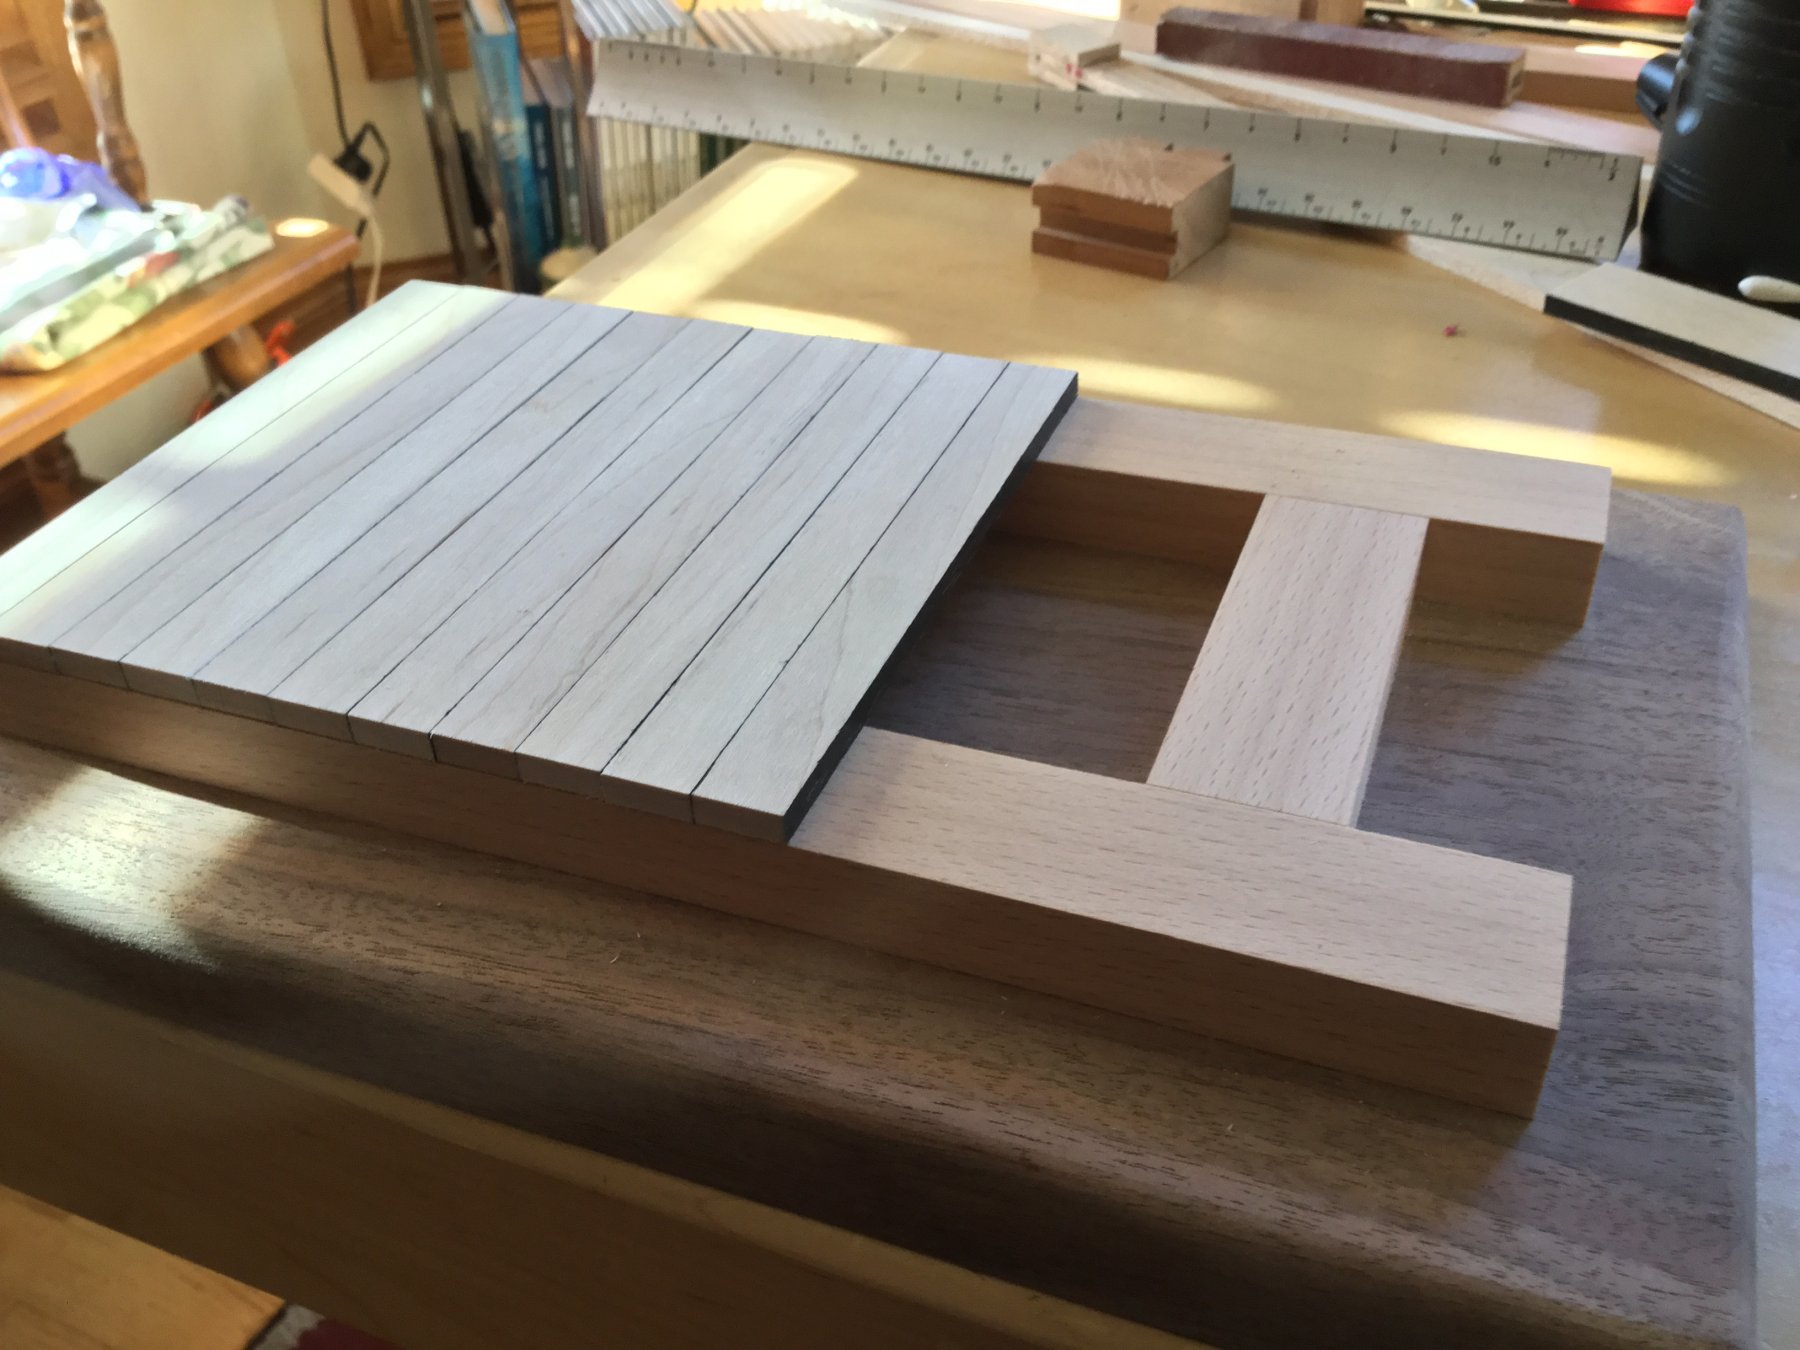
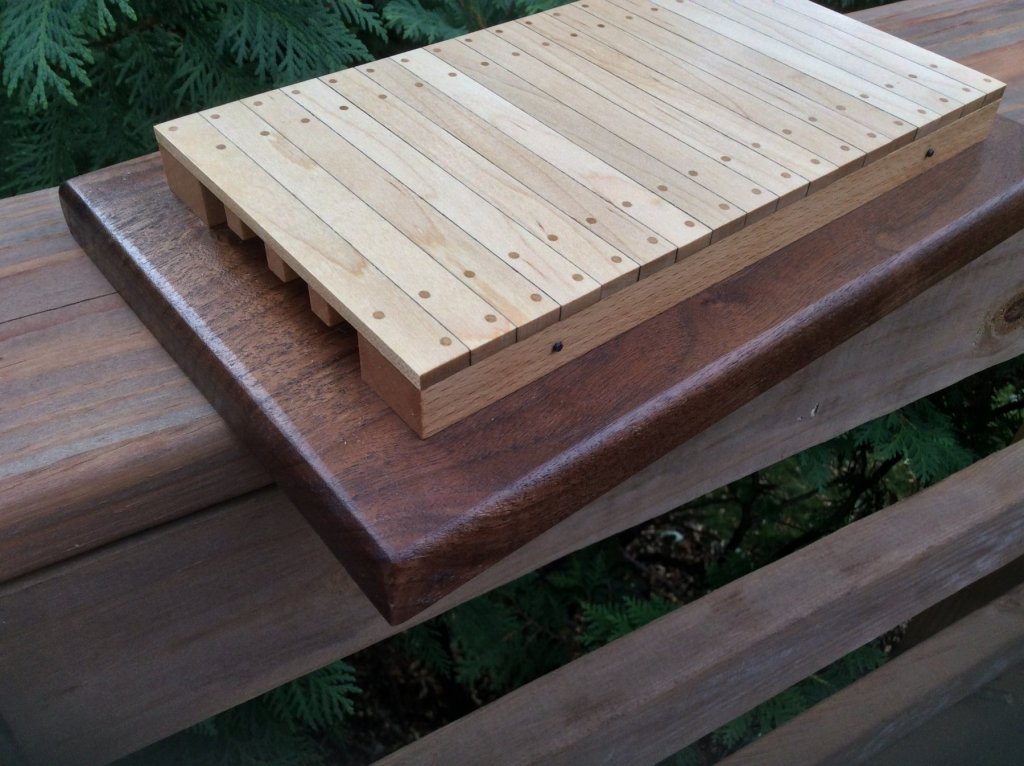
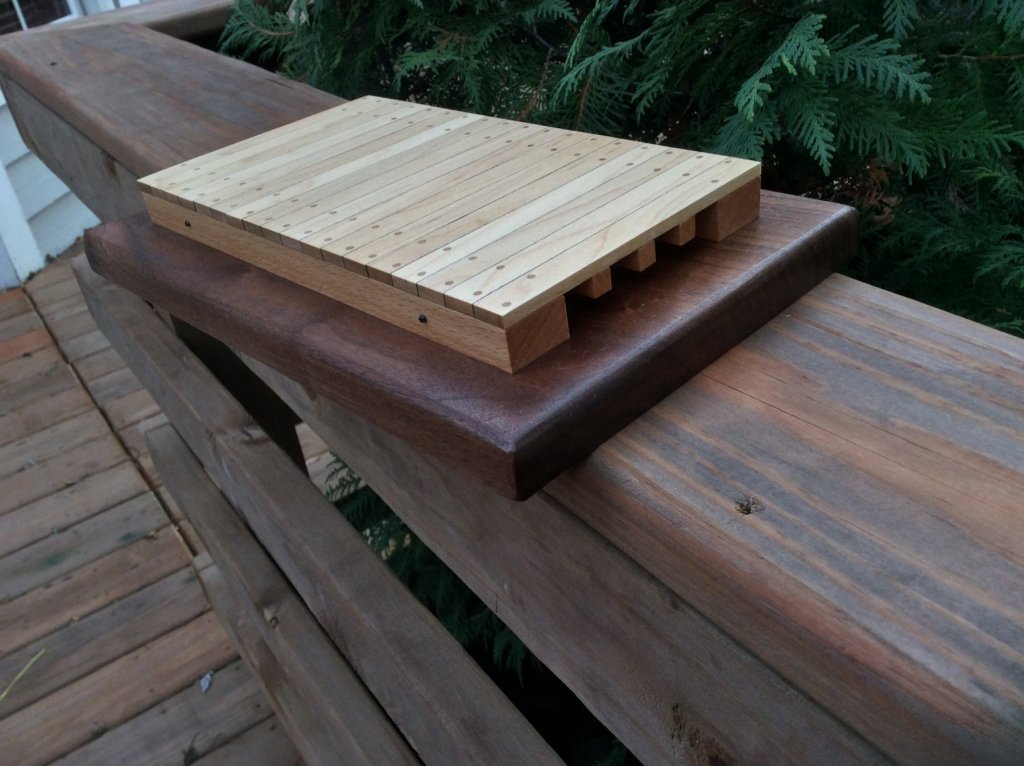
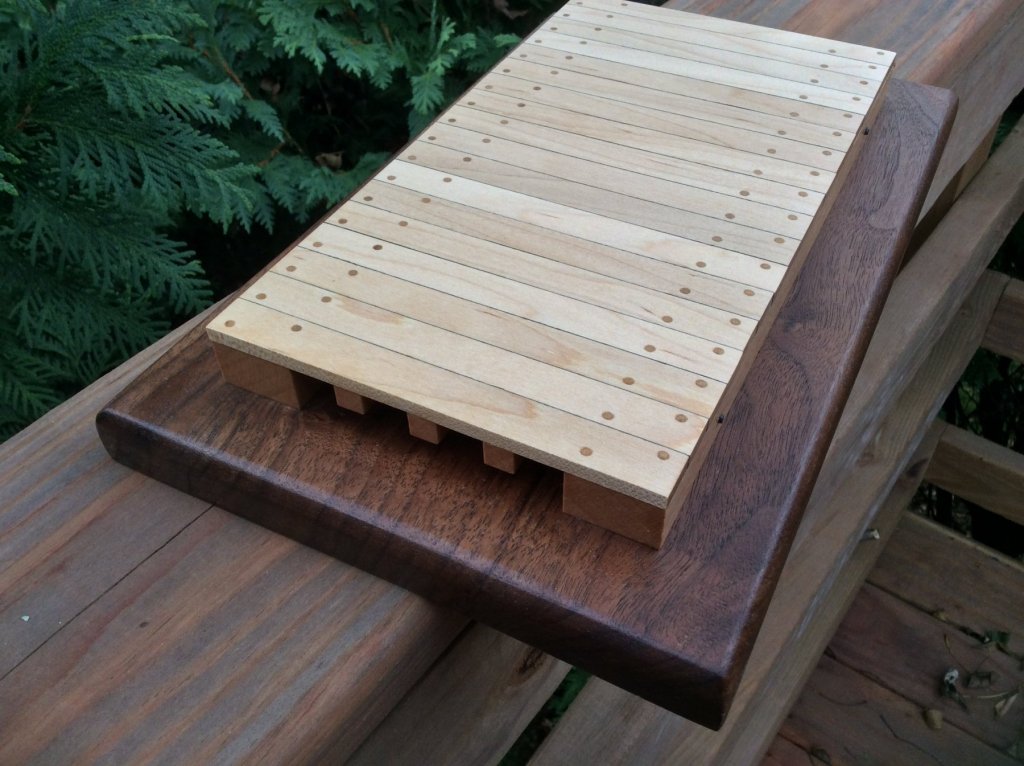
I finished the base. It is really a stylized section of decking to mount the gun on. There are black bolts in the deck beams sides that are not historically accurate - just there for visual interest. The carlings aren't visible but you can see the ends of the ledges. Once I attach the metalwork to the cannon, and mount the cannon on the deck piece I'm done!

-
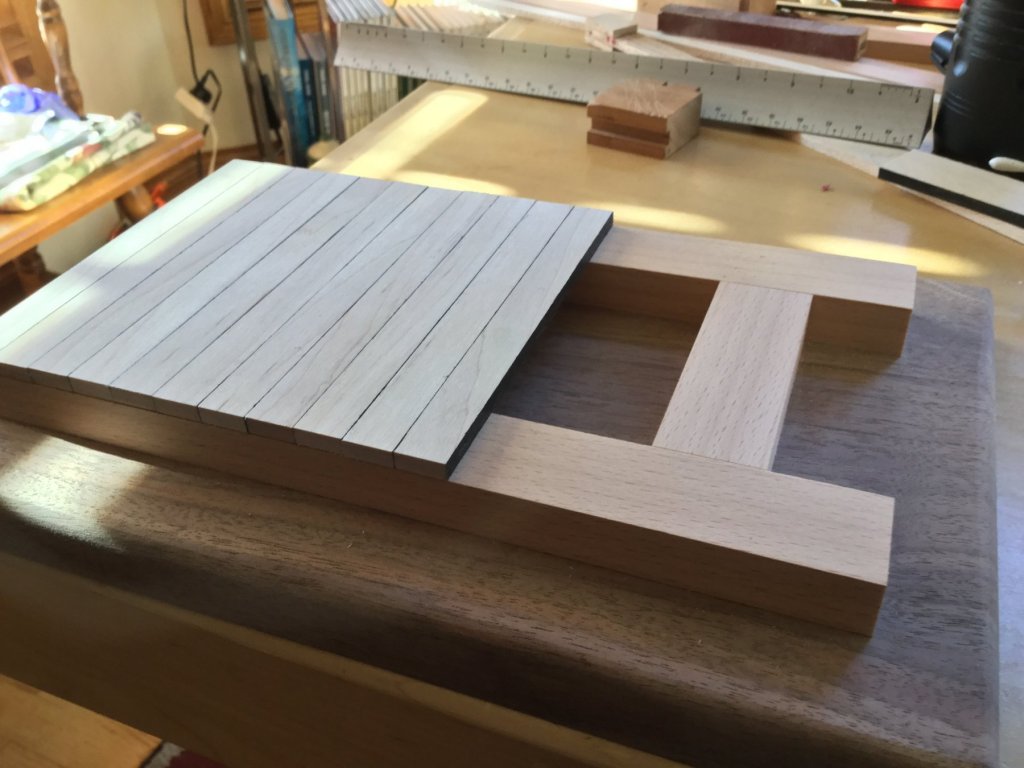
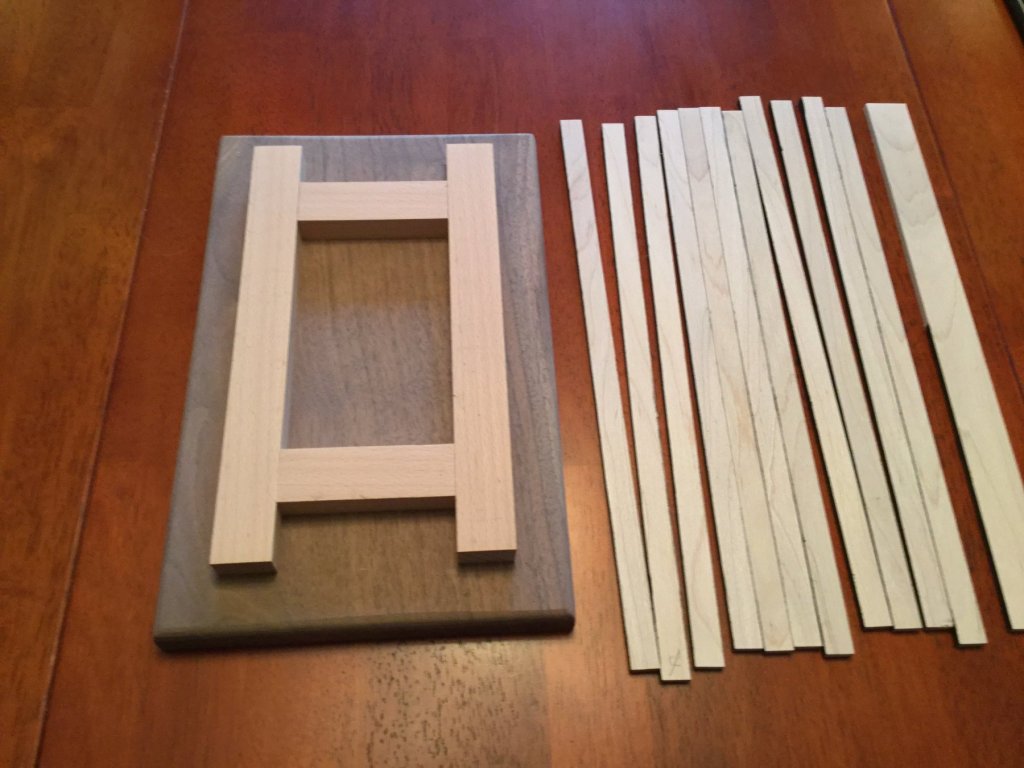
Half finished with the deck planking. Once completed, I'll lay out and drill the holes for the treenails.
-
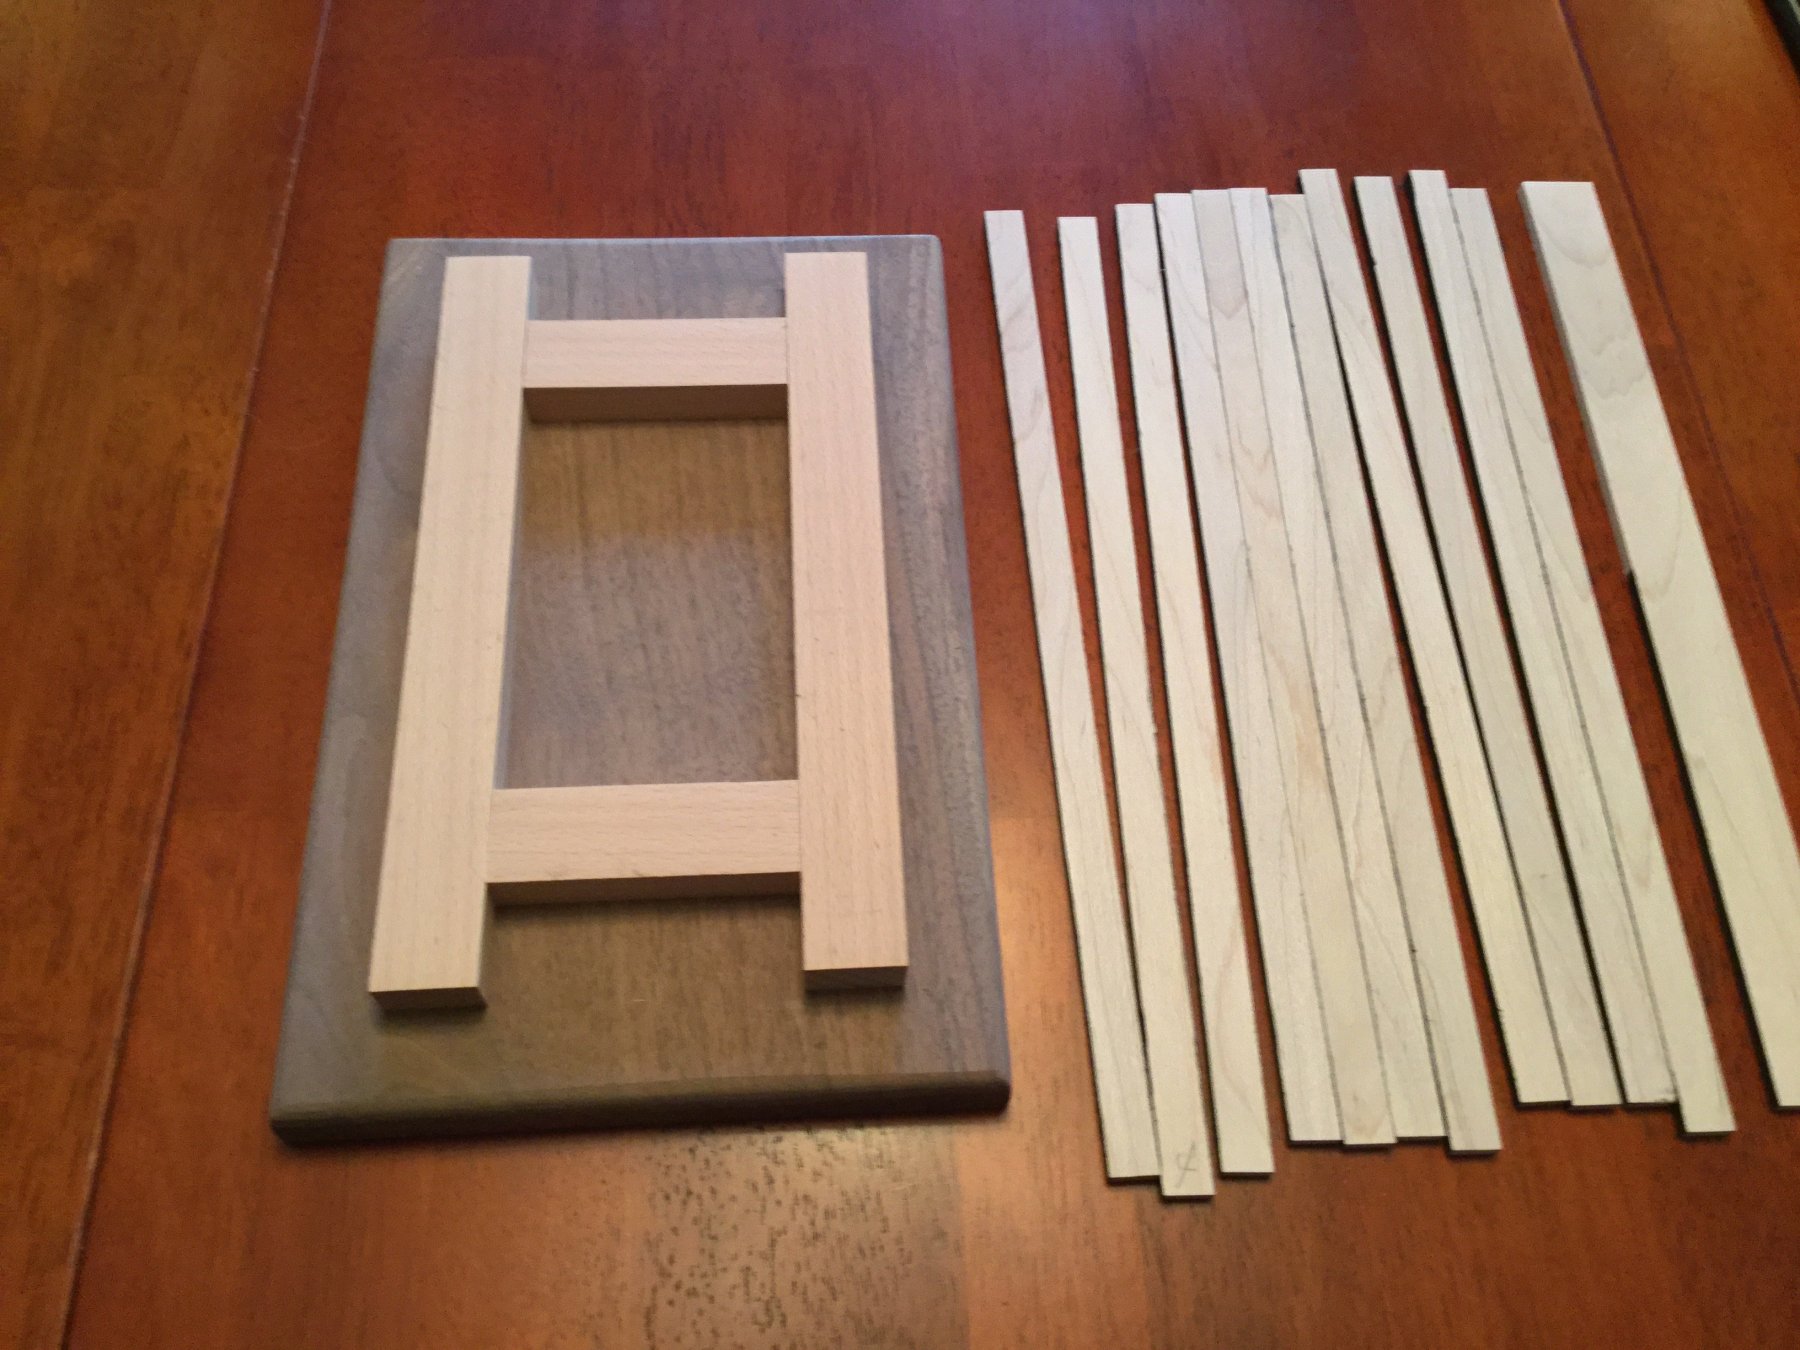
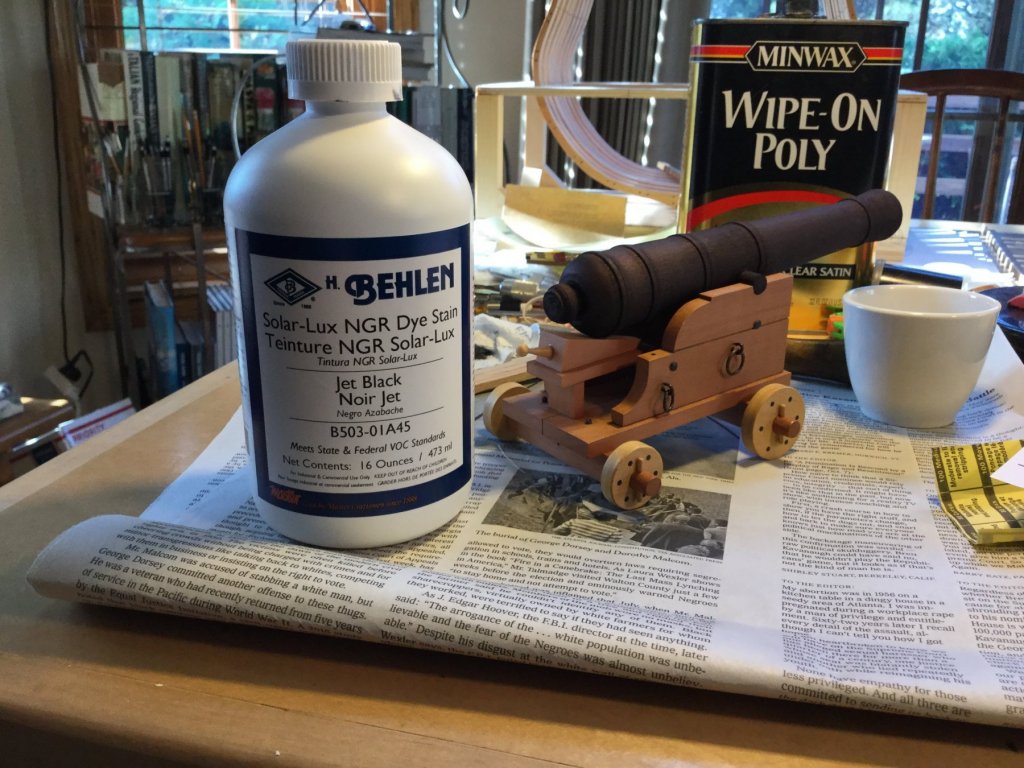
I opted to finish the cannon with satin wipe on poly. In deciding how to present the final model, I knew I wanted a little more than just a slab of wood, but I wasn't prepared to build a whole battle station section at 1/12 scale! I opted for a section of decking. I found a walnut cutoff in the shop and rounded the edges. I then glued 2 long parallel pieces of beech (1" X 5/8"0 to represent the deck beams. Then I added the two short cross pieces representing the carlings. The deck will be planked with 1/2" X 3/16" maple. Once the deck is planked, I'll add the ledges between the deck beams.
-
Nice work, Jon! You're making good progress.
-
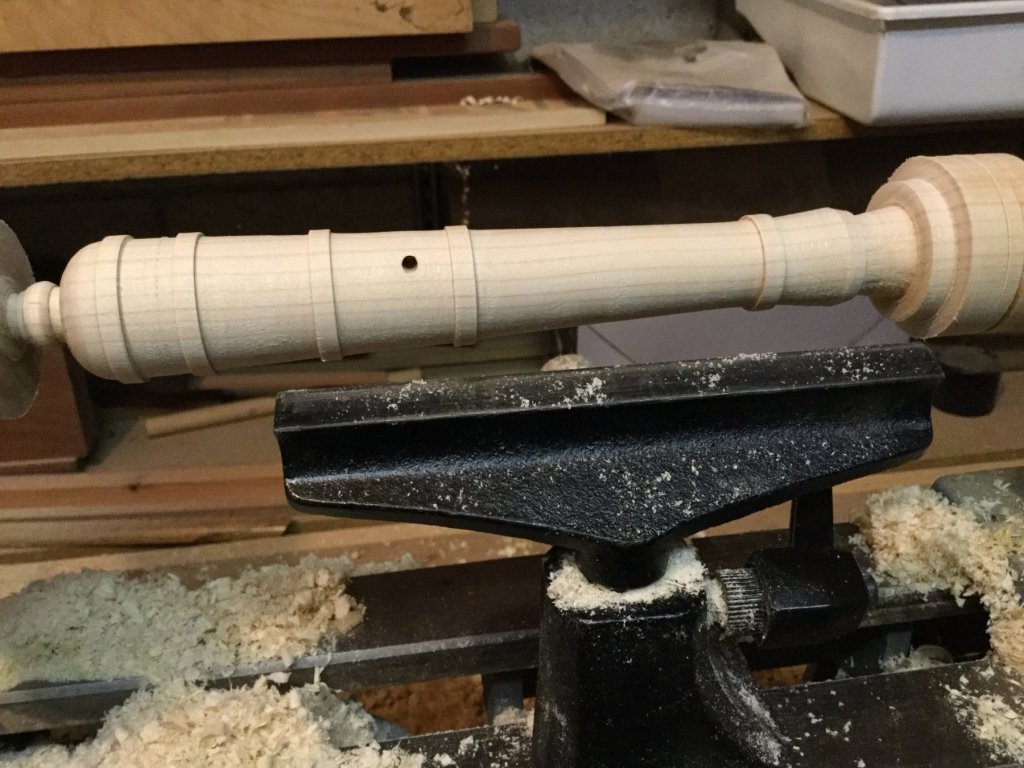
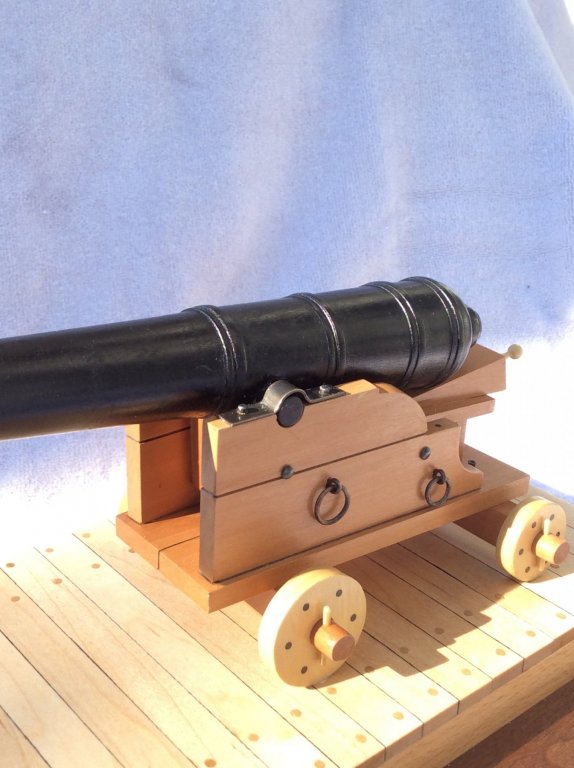
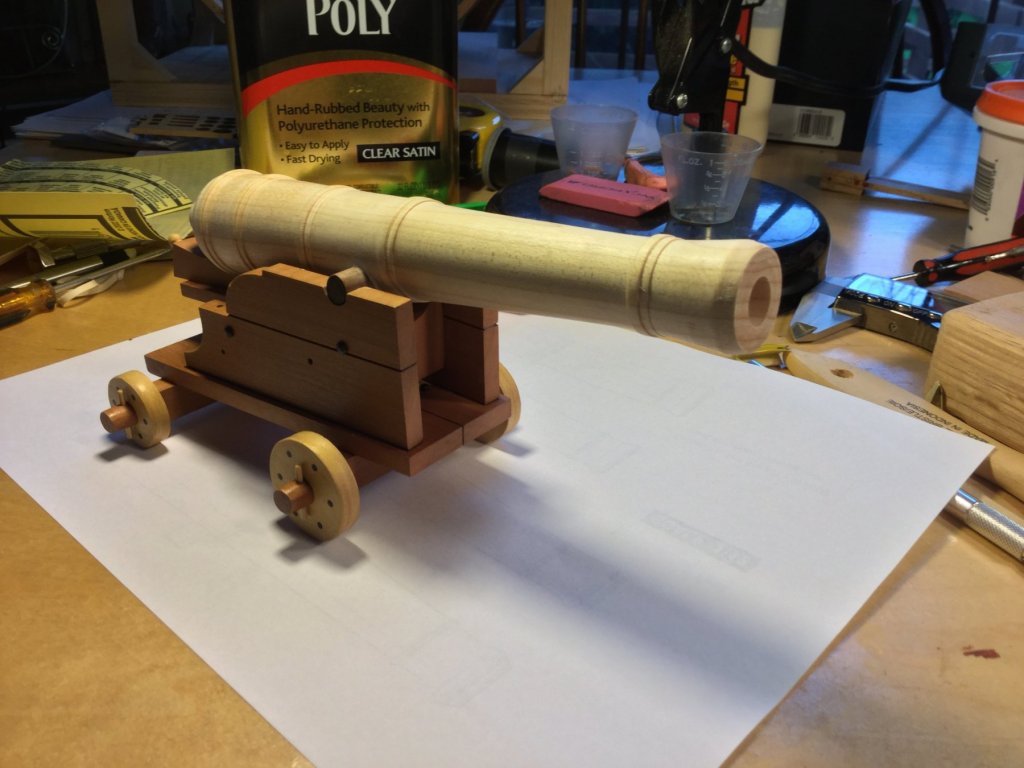
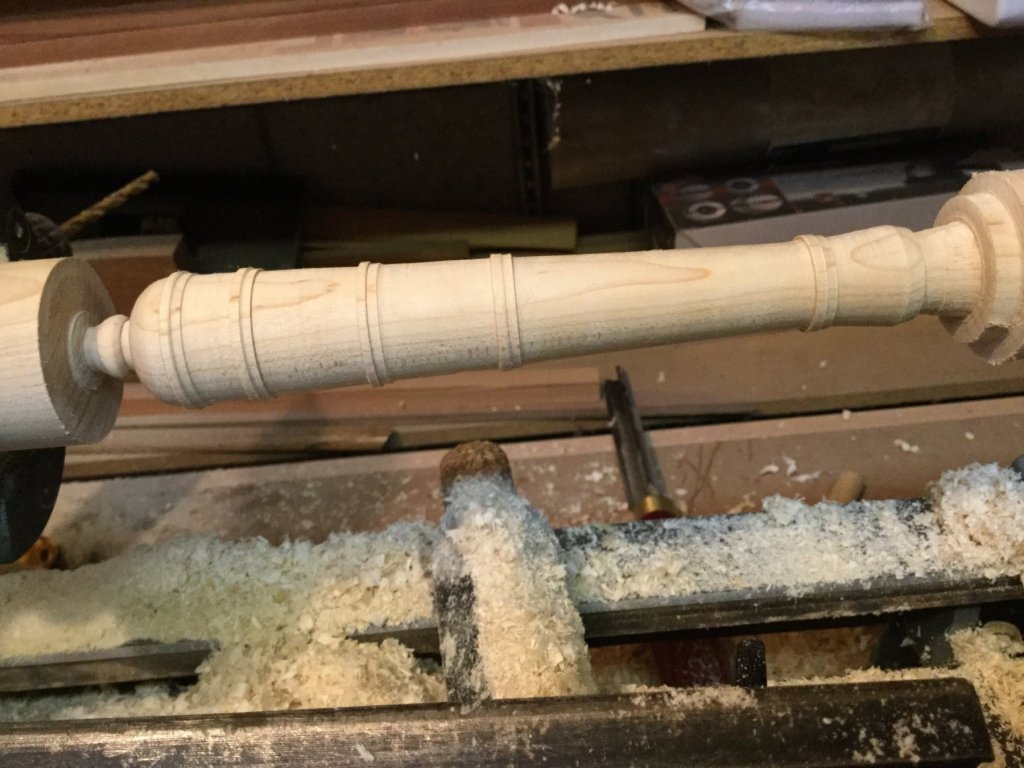
So I used the lathe and fine sandpaper to smooth the canon. The final polishing is done with handfuls of wood shavings pressed against the turning barrel to use "wood to polish wood". The technique works really well. I then had to decide how to blacken my maple cannon. Three choices: Paint, stain or dye. In the end, I chose Solar-Lux Jet Black wood dye made by Behlen. It's alcohol based, dries quickly, penetrates into the wood fibers, doesn't raise the grain and won't obscure the detail on the reinforcing rings and the cascabel. It turned out well. Obviously I'll need to protect the dyed cannon. When we blacken brass cannons chemically, the resulting gun has a bit of a sheen to it. The cannons were cast, so would have been flat black in color. The "sheen" doesn't look bad in my opinion, though. So what do you think? Flat/matte poly, or semi-gloss/satin poly for a little sheen?

-
Thanks for the likes, guys! I drilled the holes for the trunnion and bore. The trunnion hole was a little out of square so I had to use a rattail file to square up the hole and a glue a slightly larger diameter trunnion in place. I used wood filler to fill the irregularities in the trunnion hole. Dying is next
-
I added some detail to the reinforcing rings. On to final sanding and drilling the bore and trunnion hole. I plan to stain the cannon rather than paint it to preserve the detail in the reinforcing rings and cascabel.
-
Looking great, Ken! The bell was the only thing I used, also!
- 122 replies
-
- 1
-
-
- independence
- privateer
- (and 1 more)
-
I used hard maple to turn the barrel. Ebony would have cost $75! This is the rough cannon blanke. It needs additional work on the reinforcing rings, final sanding and drilling out the bore and the trunnion hole. The barrel is 7-1/2" long.