DocBlake
-
Posts
1,811 -
Joined
-
Last visited
Content Type
Profiles
Forums
Gallery
Events
Everything posted by DocBlake
-
 Awesome videos! Thanks, guys!
 -
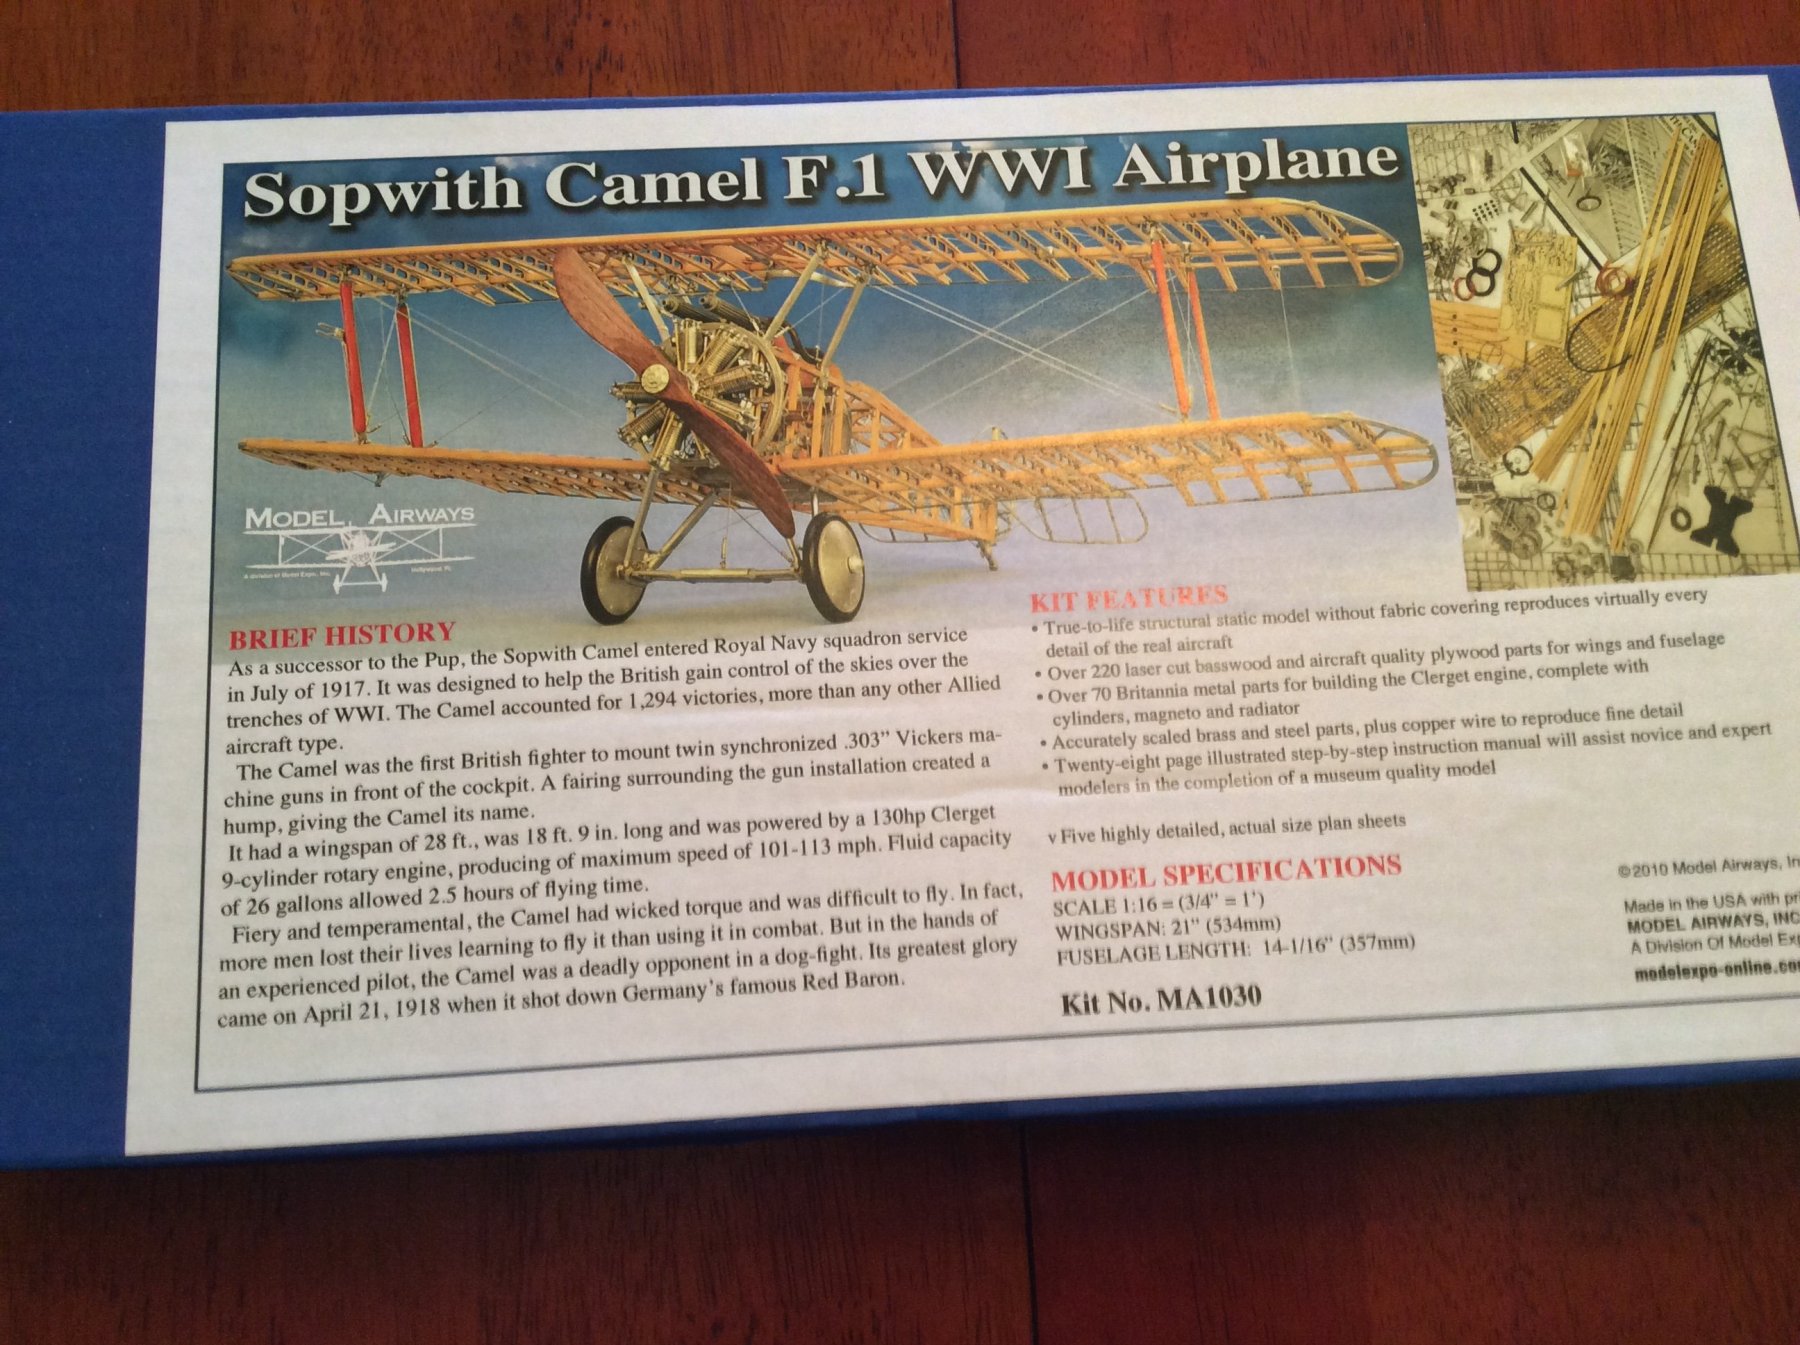
This Model Airways Sopwith Camel kit arrived today! I picked it up on sale from Model Expo and plan to build it in the background as I work on my other projects My interest in aviation goes back to my childhood. When my friends were building model cars, I was always more interested in aircraft and ships. That interest stayed with me as I grew older. In the 1990's I was introduced to MicroSoft's Flight Simulator and I was hooked. I spent hours flying simulated aircraft on my computer, and finally started designing airplanes for the platform - both the visual model as well as the flight characteristics. I specialized in WWII propeller driven aircraft, single and multi engine and designed more than 20 individual planes, some in multiple liveries. The coolest thing that happened to me was an email I received from an Army Air Corps pilot in WWII who flew B-29 bombers in the Pacific. He told me that my B-29 simulation, modeled after the "Enola Gay" flew exactly like the real thing! That made my month! In my late 40's I decided I would learn to fly, and I ended up passing my check ride 4 days before my 50th birthday! I had my Private Pilot's License! I don't fly anymore, for a variety of reasons, but I still love aviation. I have about 600 hours in my log book in Cessna 172's, and I even have 1/2 hr. logged as Pilot in Command of an Army Air Corps T-6 Texan. I did some aerobatic flying with an instructer: loops, barrel rolls etc. Great fun! So I'll start this build and keep it running in the background. It should be interesting! Thanks for looking in.

- 13 replies
-
- 11
-

-
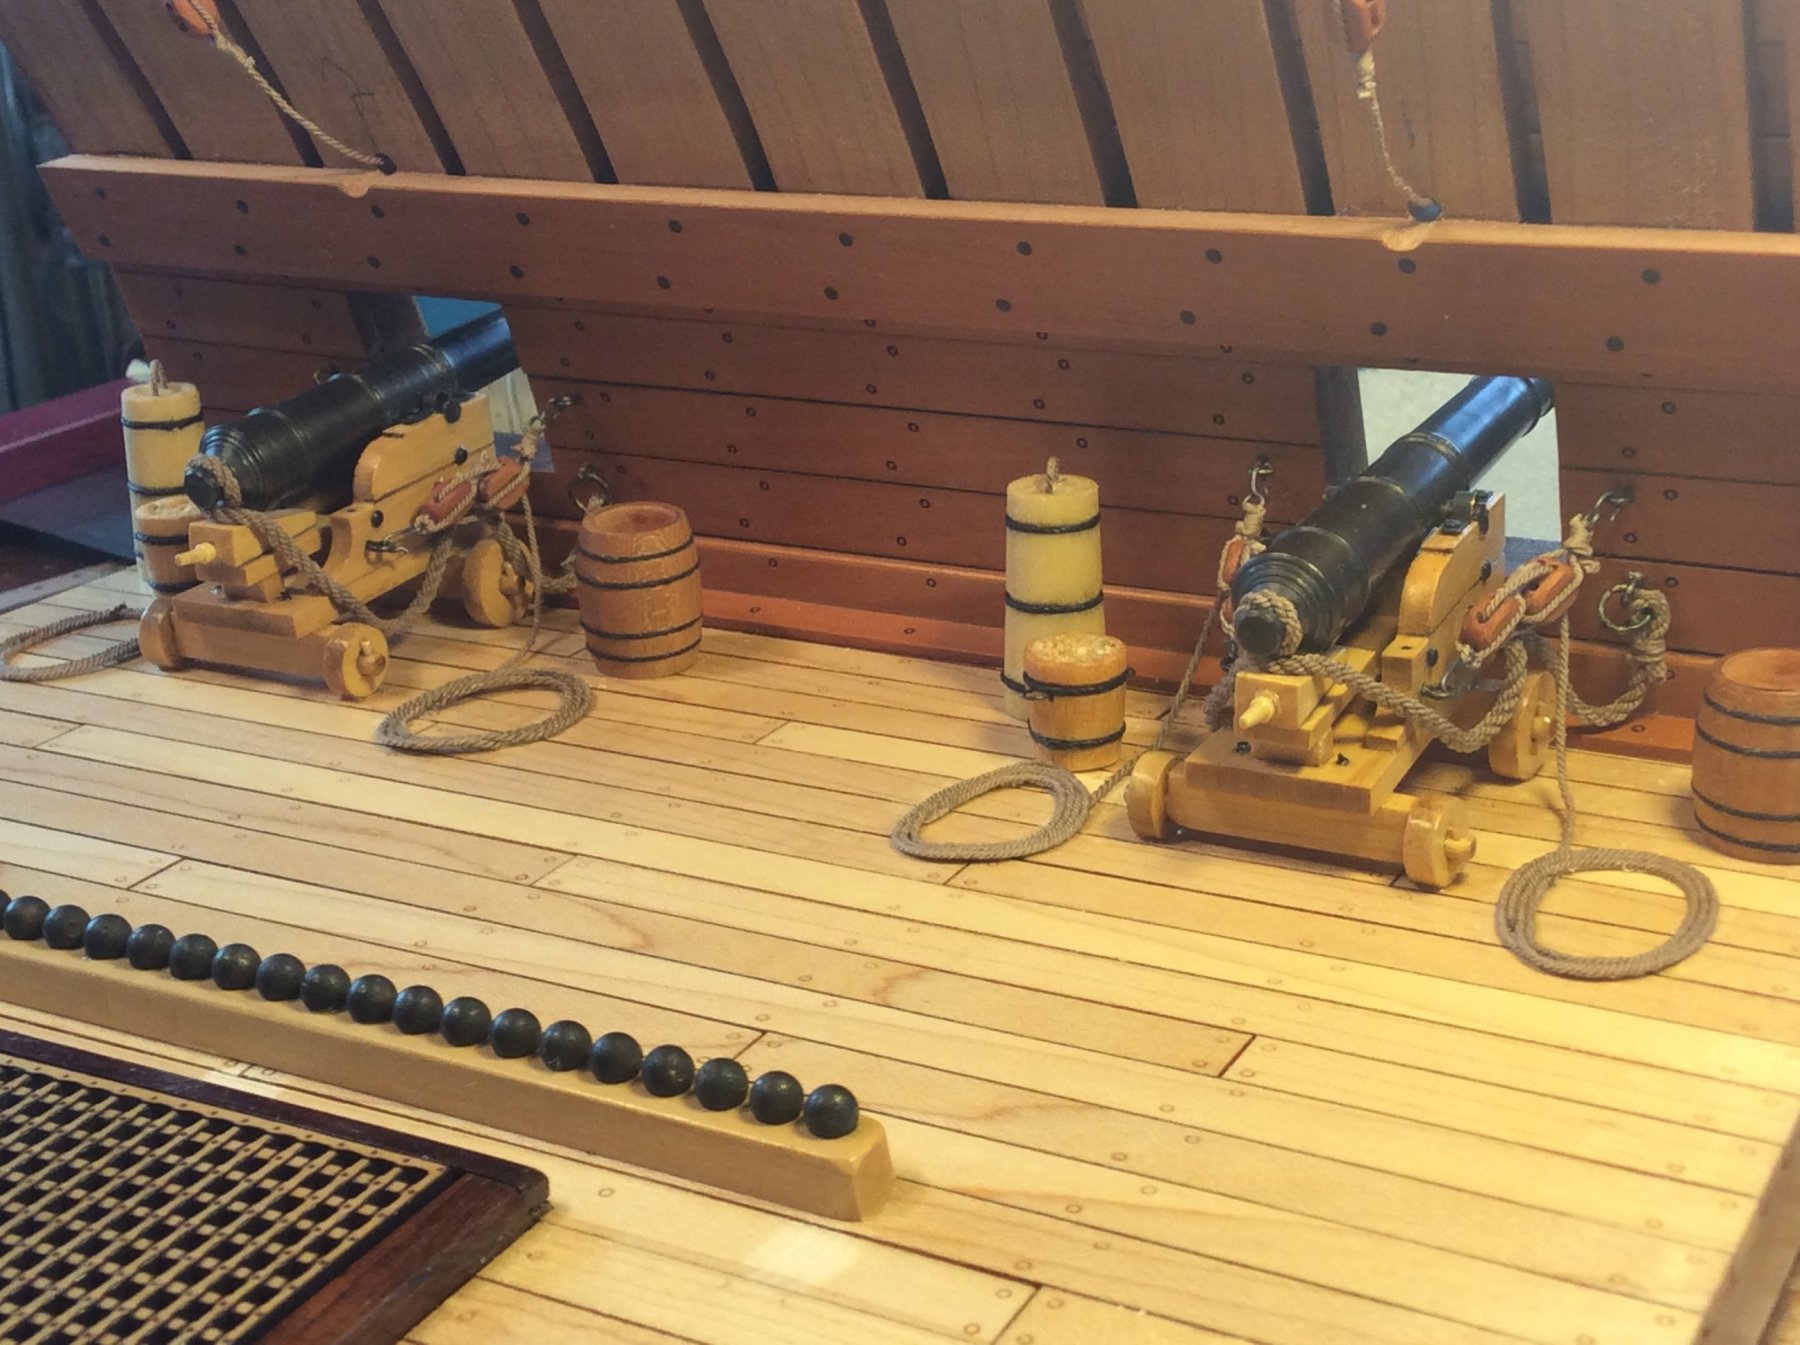
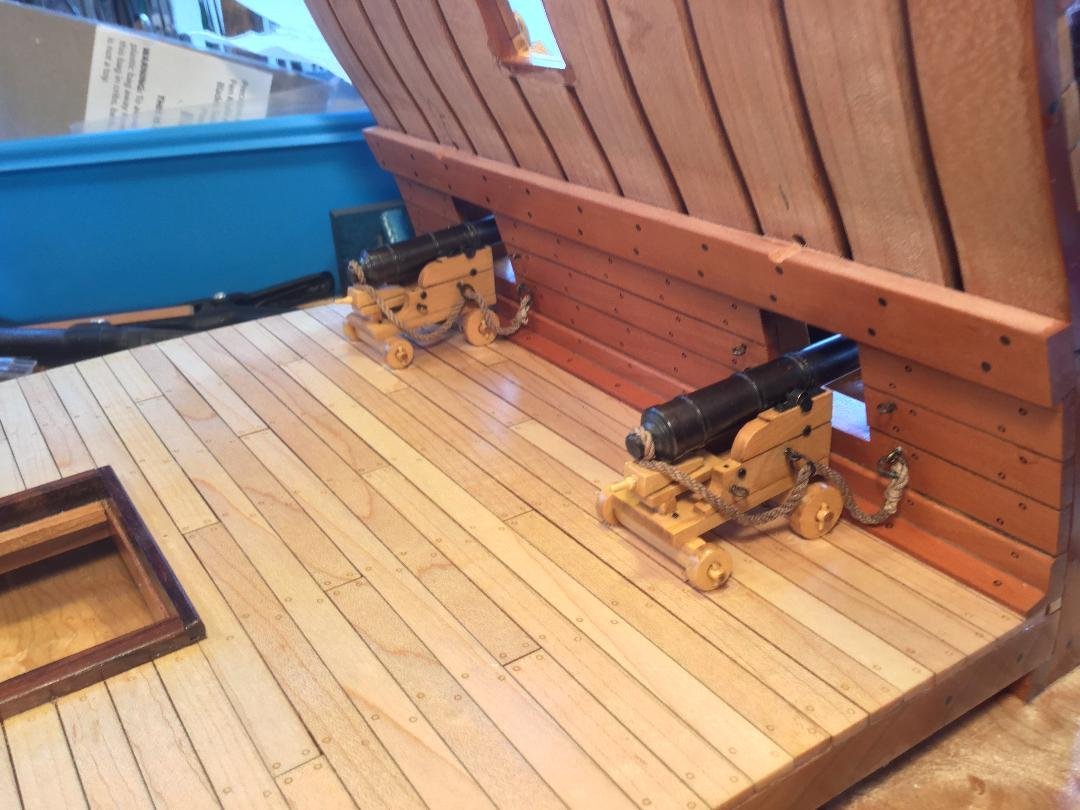
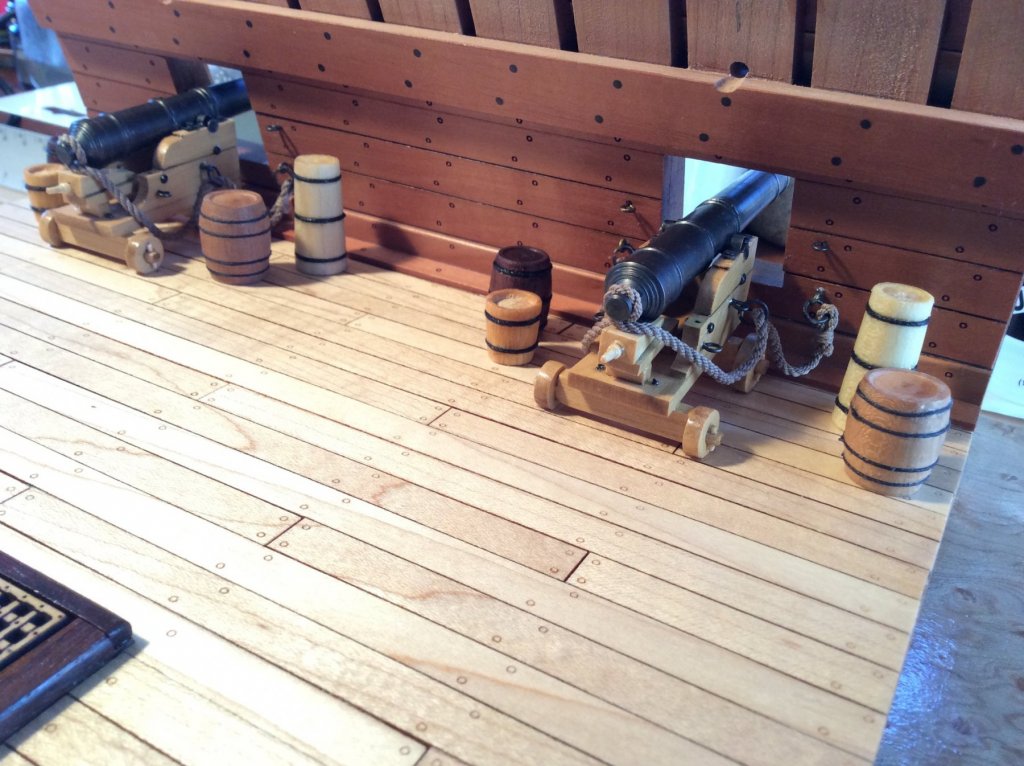
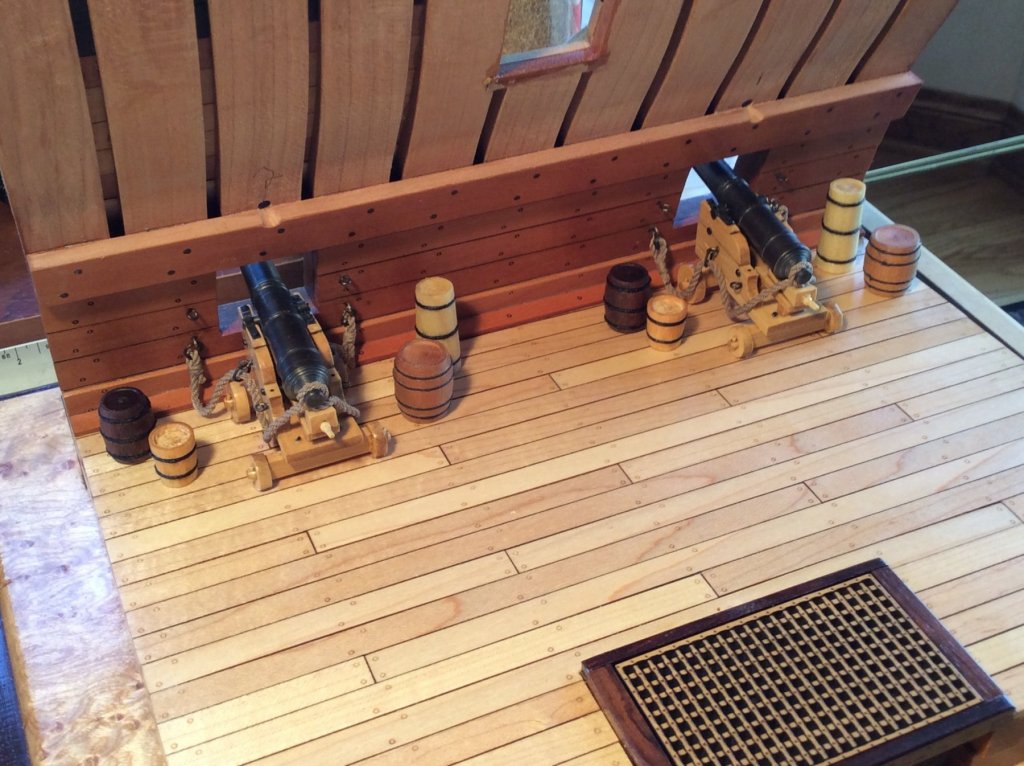
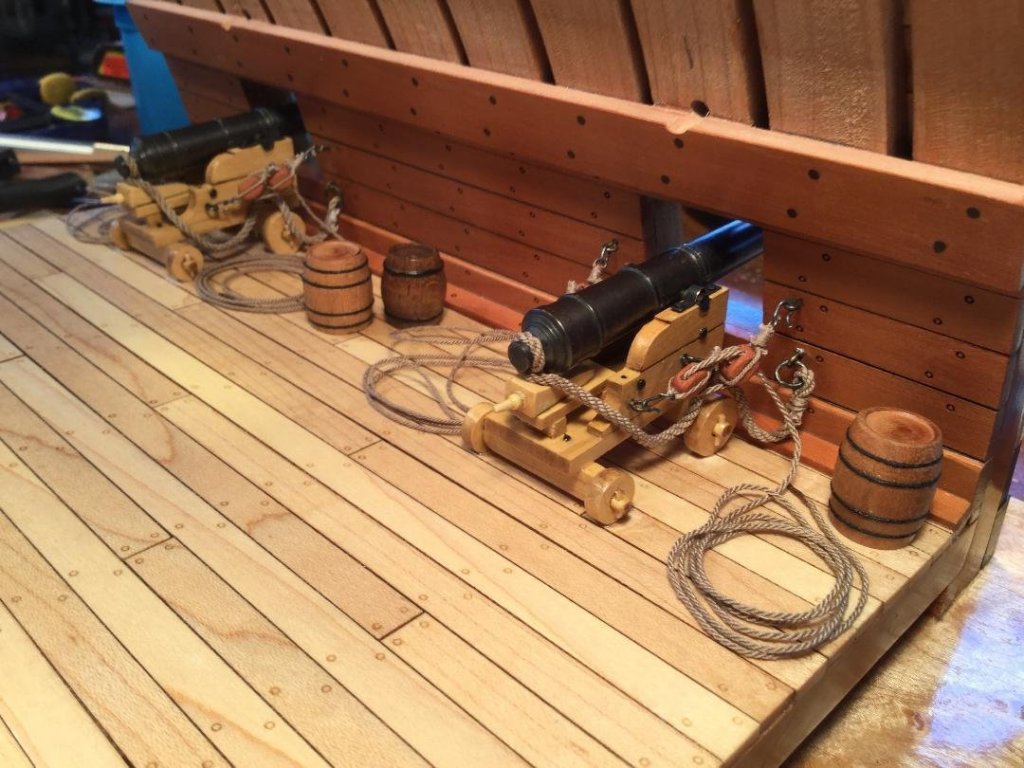
Thanks, everyone, and for the "likes". I decided to rig the guns, run out and ready to fire. Here is how the gun deck appears.


- 128 replies
-
- 17
-
-
- mordaunt
- battle station
- (and 1 more)
-
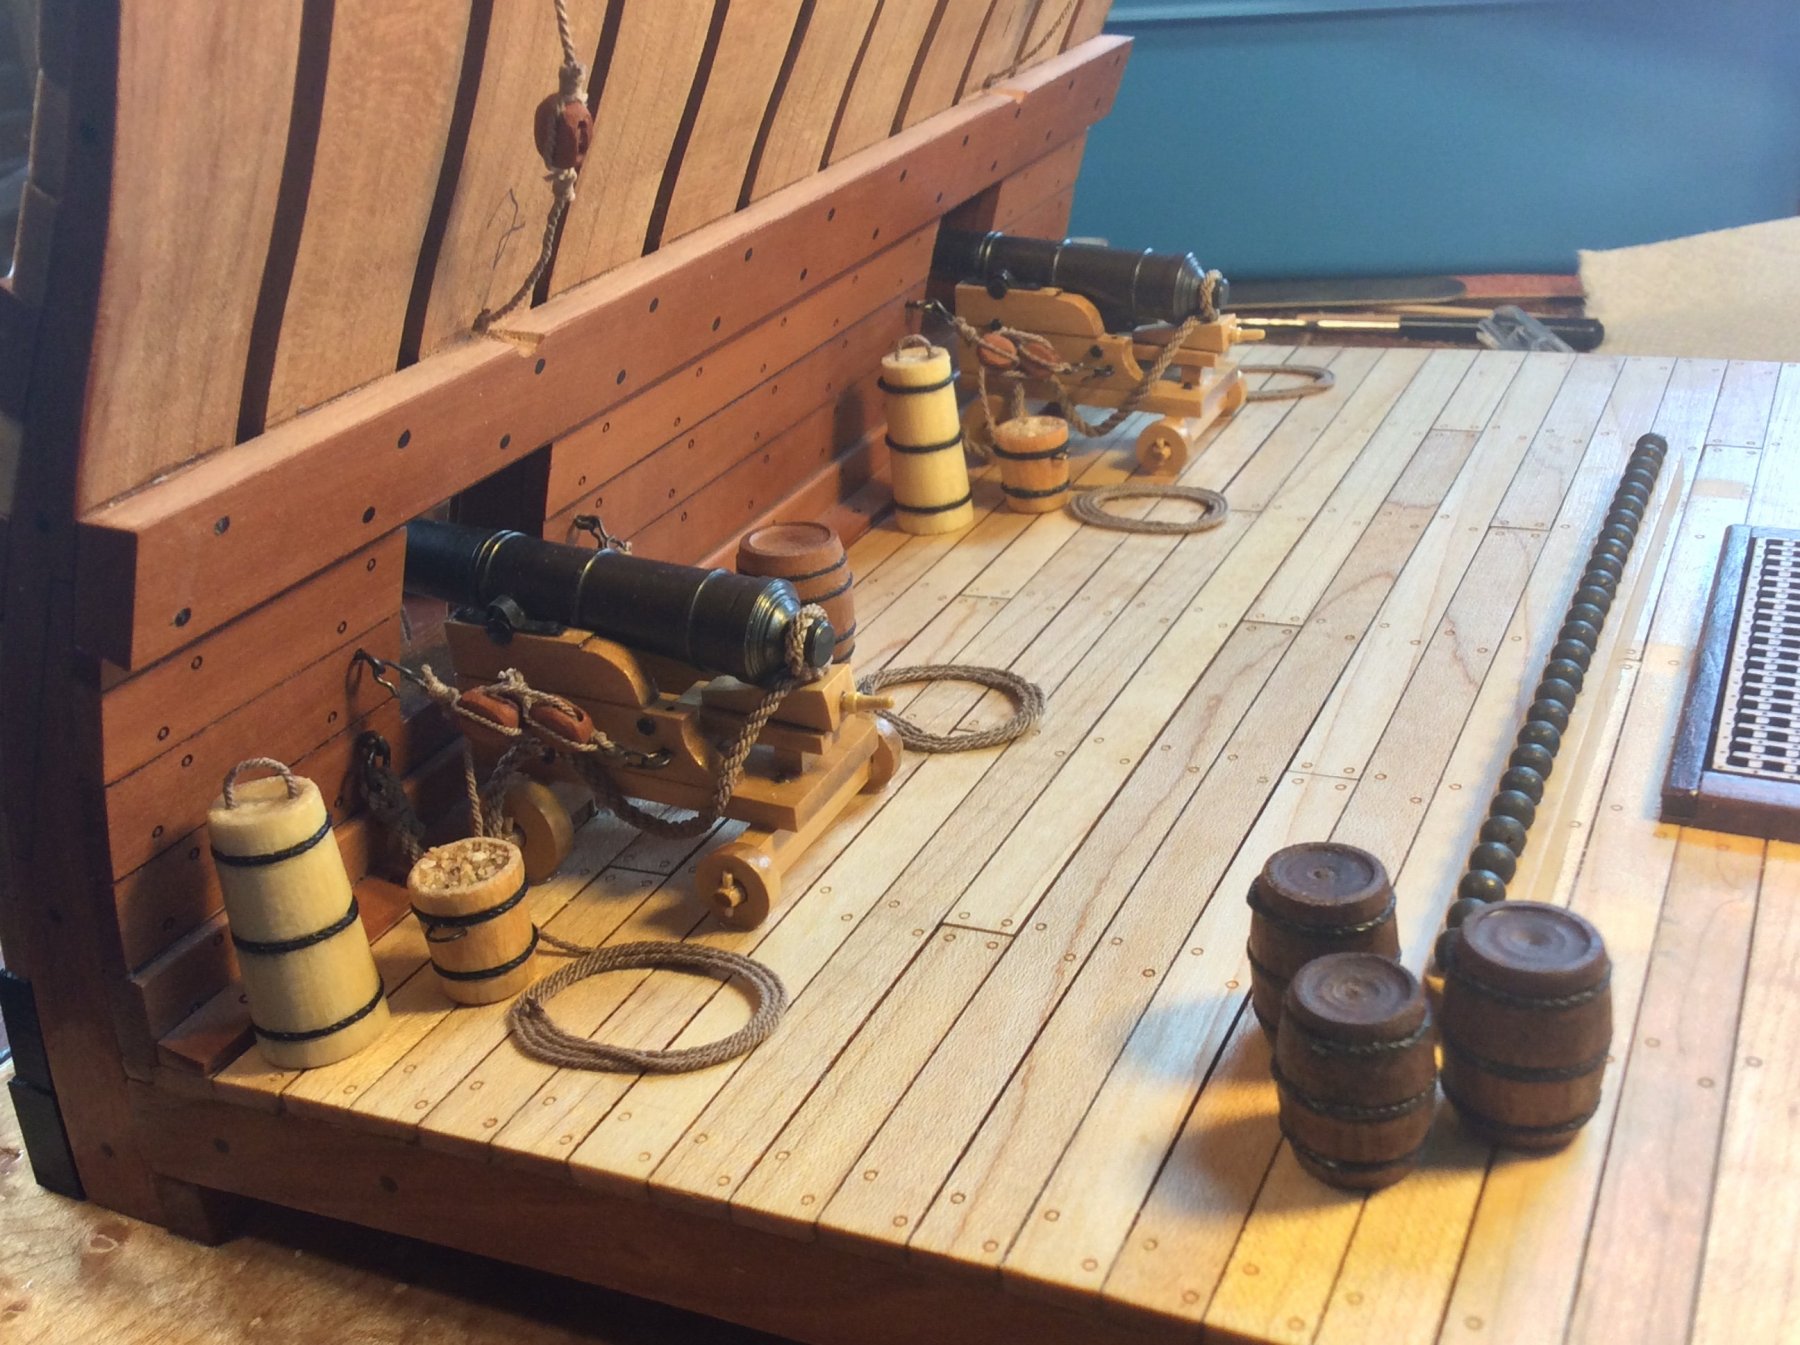
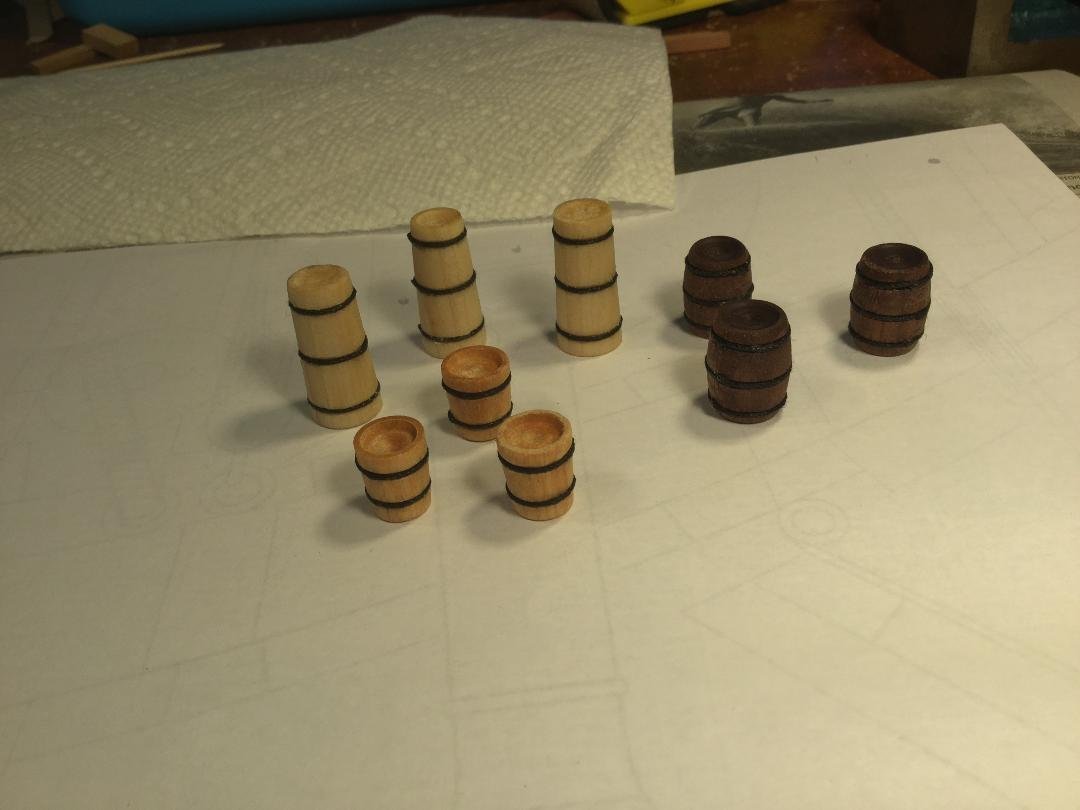
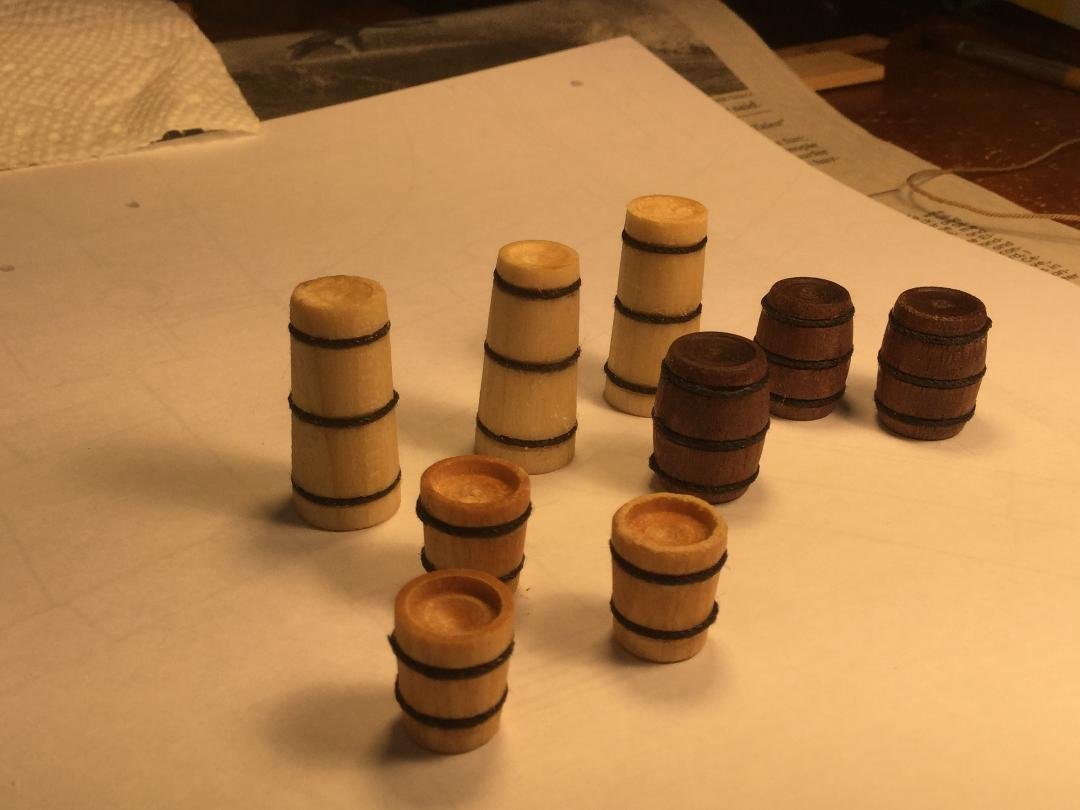
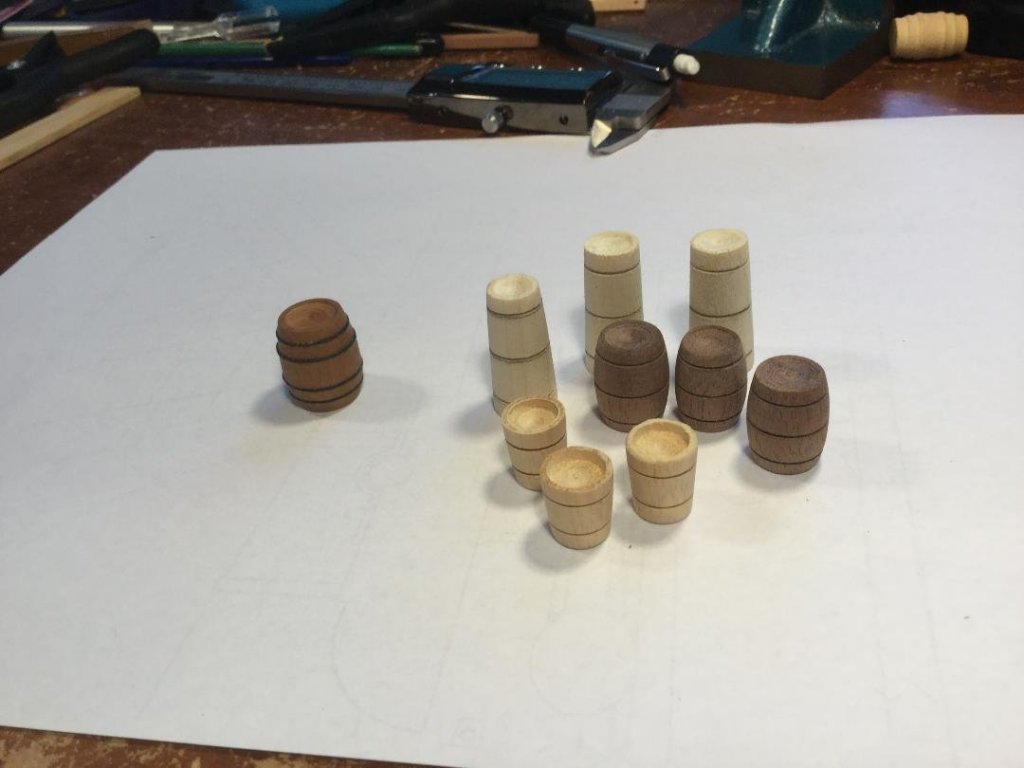
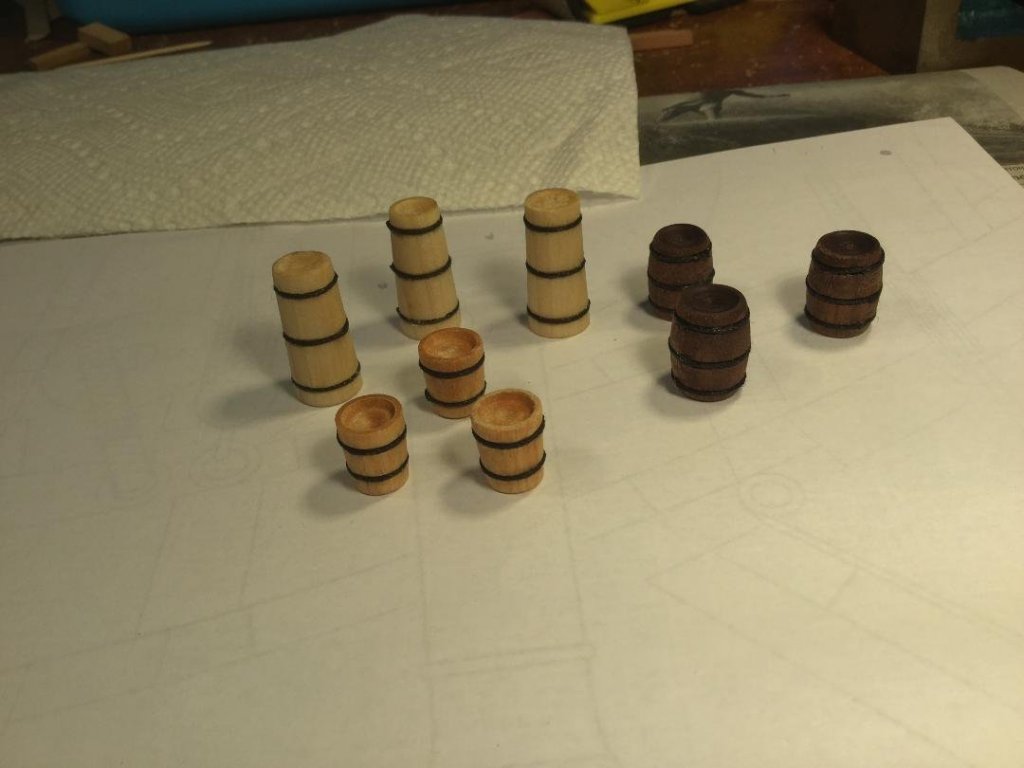
Thanks Michael. I'm leaning toward including the rigging. I spent the afternoon yesterday finishing up the detailing of the ancillary equipment for each battle station. I added rope handles to the lid of the tall storage casks and fitted metal handles to the match tubs. These were glued into #77 holes using black annealed 28 gauge wire as the handles. I then put some WeldBond glue into the recesses on the top of each match tub, packed them with sand and let them dry over night. The results are in the photo. The match tub was a safe place to rest a burning slow match when not in use. A water bucket was the typical place to extinguish it. Each battle station will have it's own worm, sponge and powder ladle also.
- 128 replies
-
- 14
-
-
- mordaunt
- battle station
- (and 1 more)
-
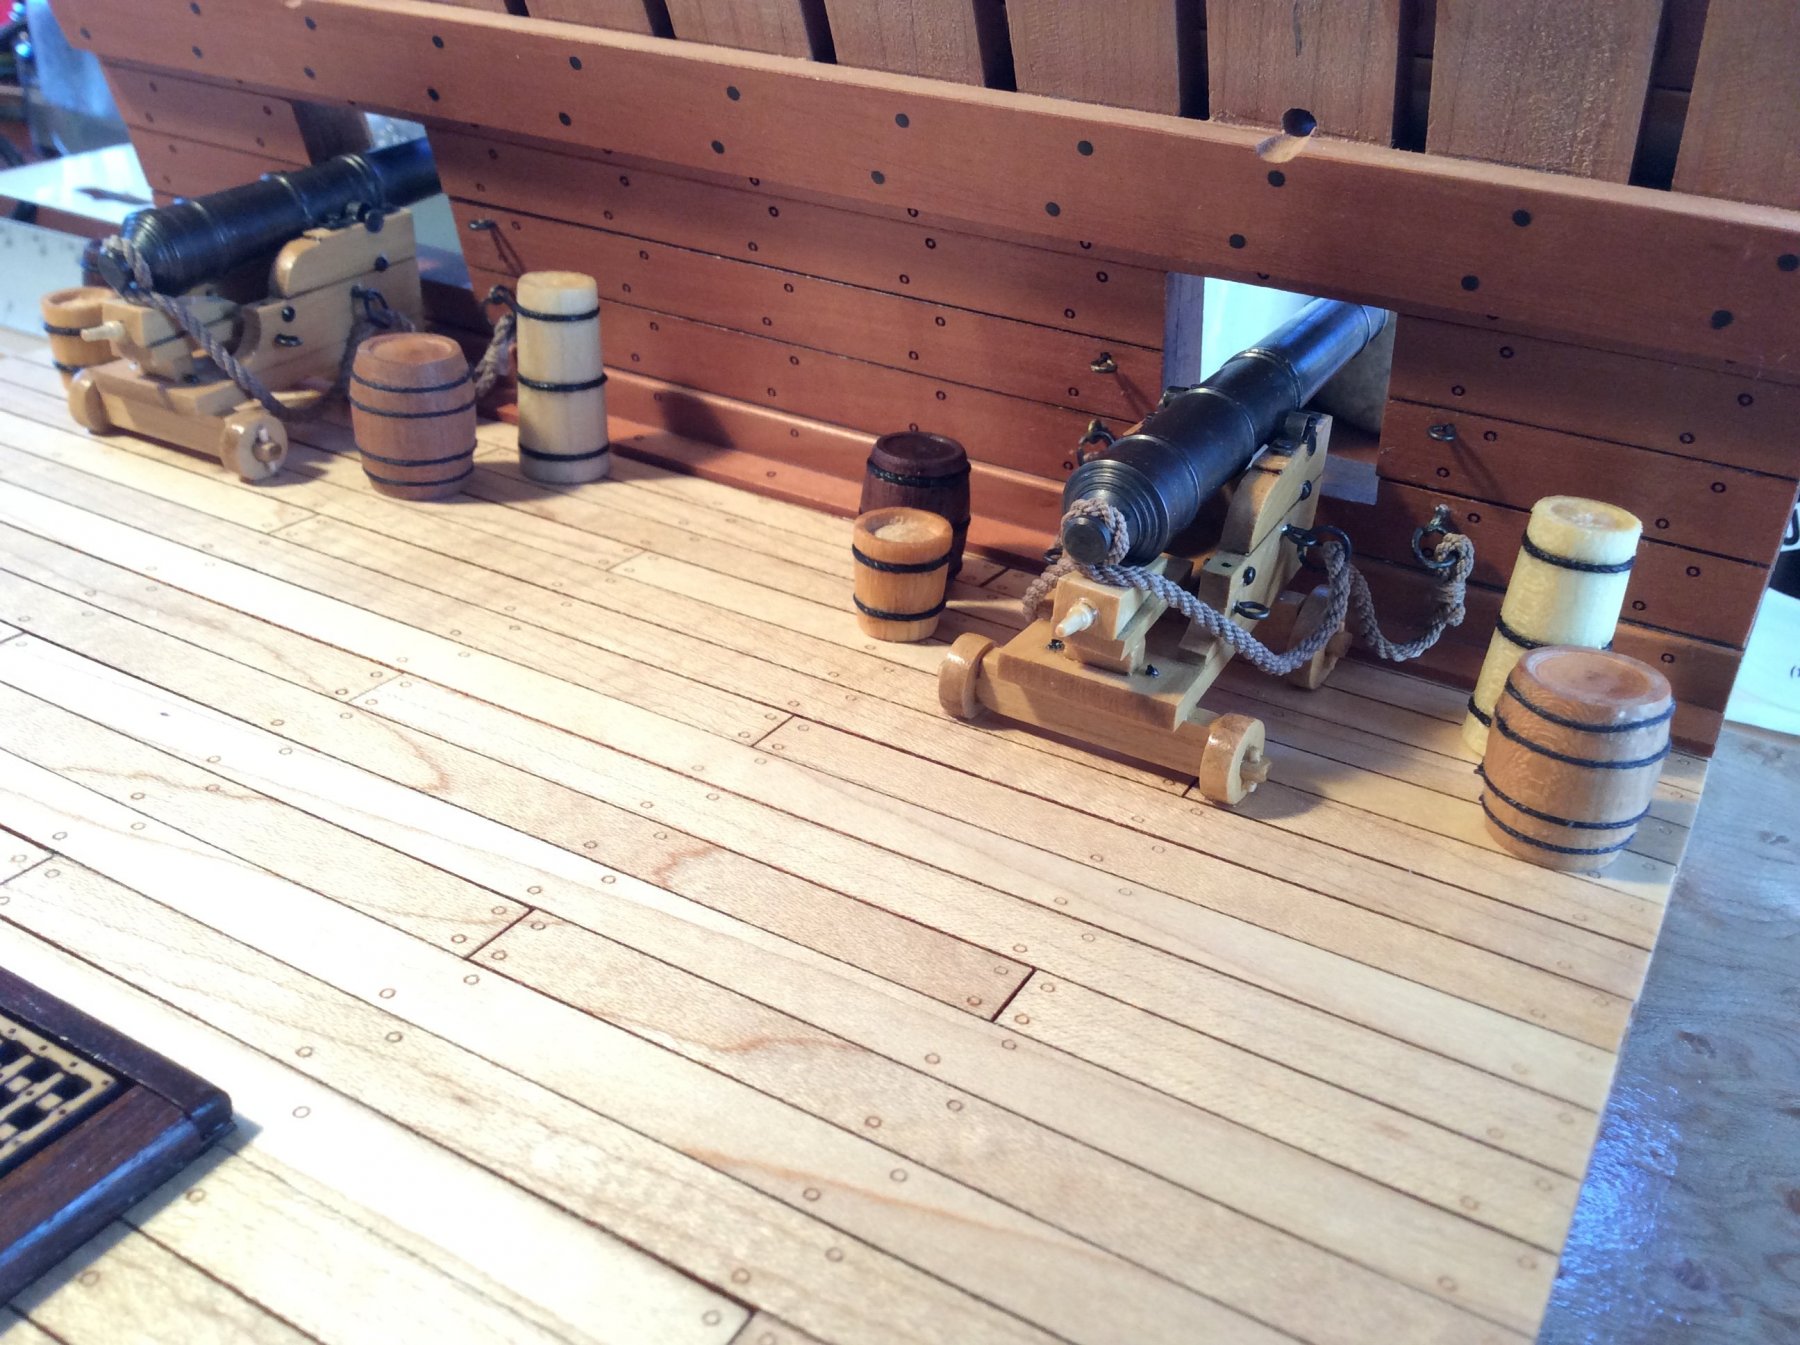
Guys: I'm thinking of leaving off the gun carriage tackle and going with just the breeching line for a cleaner look. Also, I don't want to go through the hassle of making the rope coils that lay on the deck. What do you think?
- 128 replies
-
- 15
-
-
- mordaunt
- battle station
- (and 1 more)
-
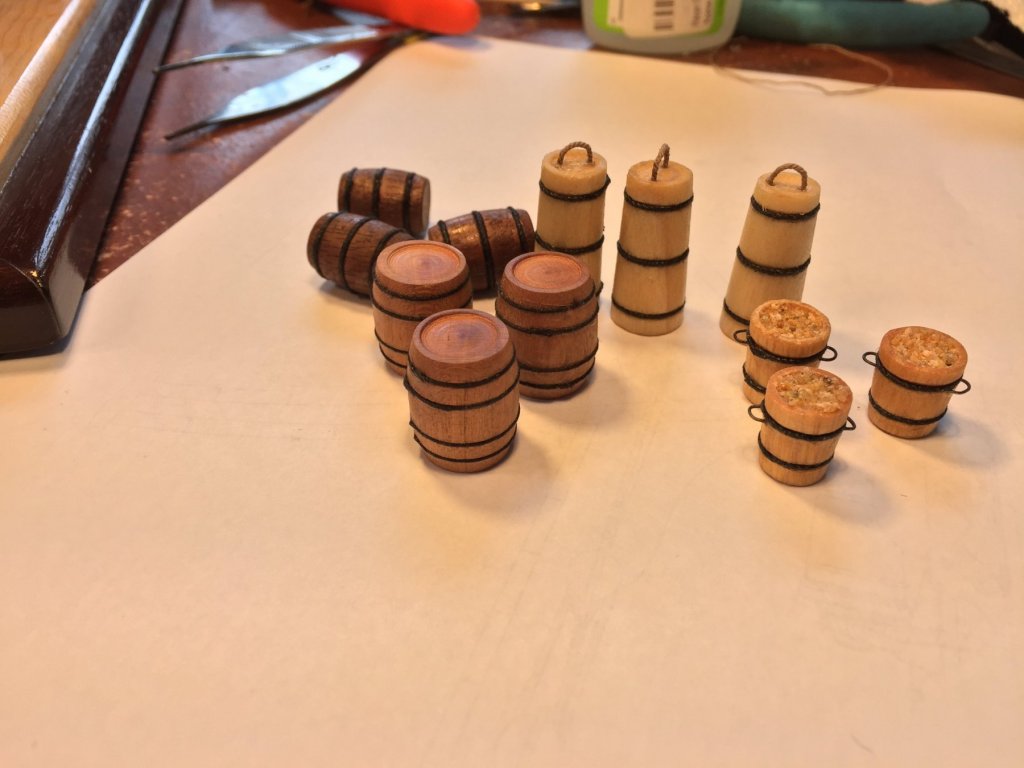
Don actually made the barrels, but only 3 for each of us. I felt I needed some additional stuff to add a little interest to the gun deck. I decided to turn a few smaller barrels, some storage casks and three match tubs. The match tubs have a little recess on top for some white glue and then sand! The parts are all turned on the lathe. The barrel bands are made by using a skew chisel to cut grooves in the parts for the bands before cutting the part from the stock. Black rigging line is glued into the grooves to complete the bands.

- 128 replies
-
- 11
-
-
- mordaunt
- battle station
- (and 1 more)
-
Because of the port lids, I had to mount the guns in their full run out position, ready for firing. That meant that the tackle had the blocks right next to each other when I rigged them If I'd have rigged them any further inboard, you wouldn't be able to see them from the outboard side of the model, The picture shows the tackle in place, but the line is just loosely coiled and not glued down.
- 128 replies
-
- 17
-
-
- mordaunt
- battle station
- (and 1 more)
-
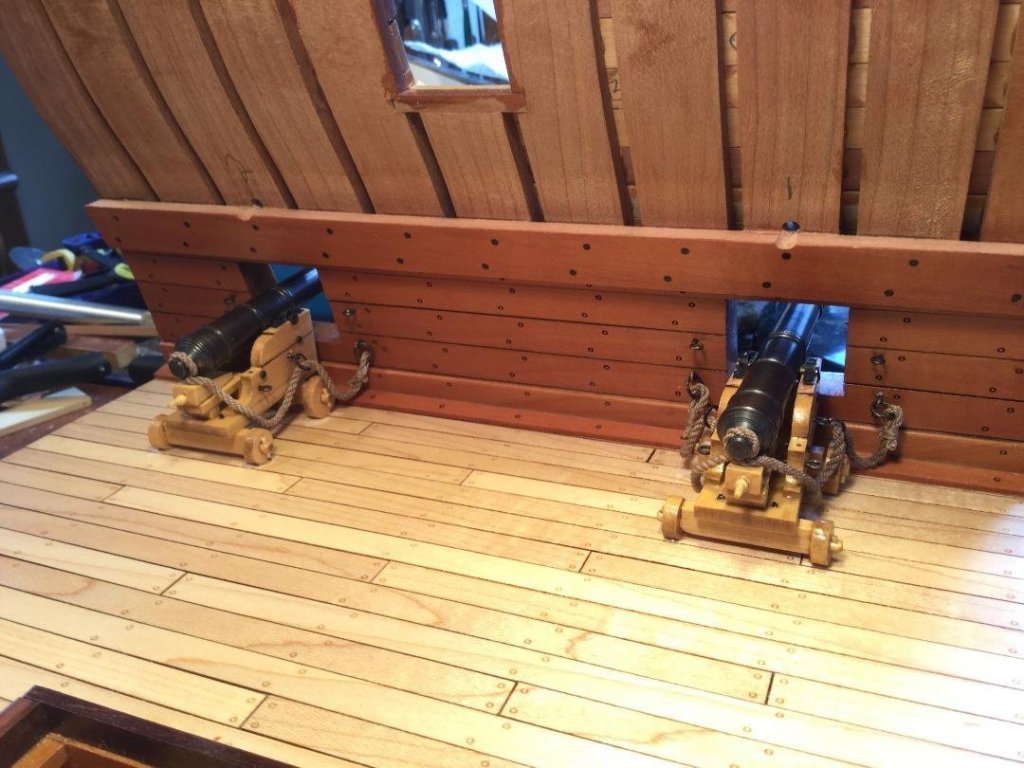
I glued and pinned the two cannons on the gun deck in place. I glued the rings and eyebolts for the breeching lines to the bulwark.

- 128 replies
-
- 16
-
-
- mordaunt
- battle station
- (and 1 more)
-
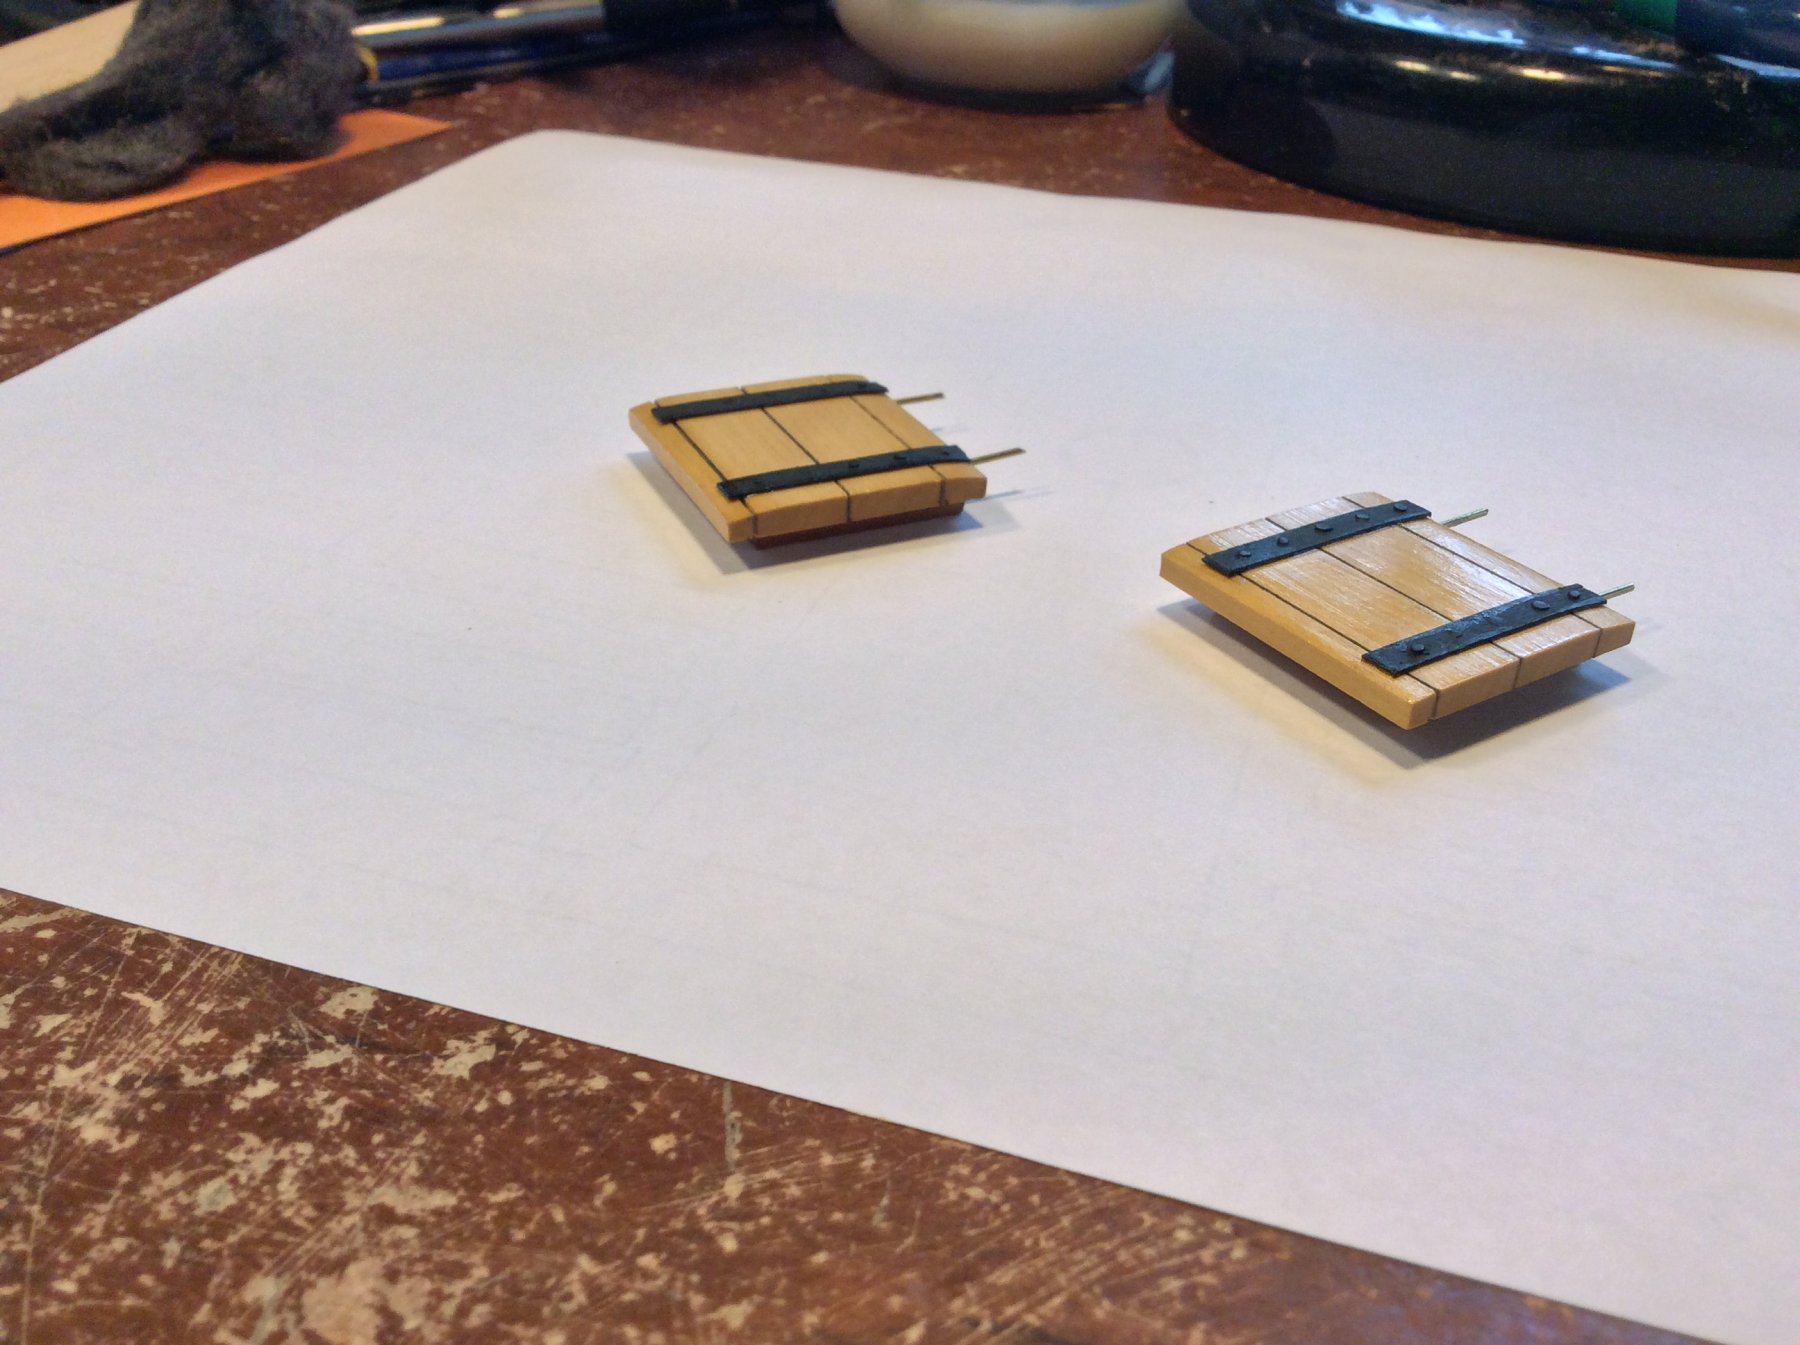
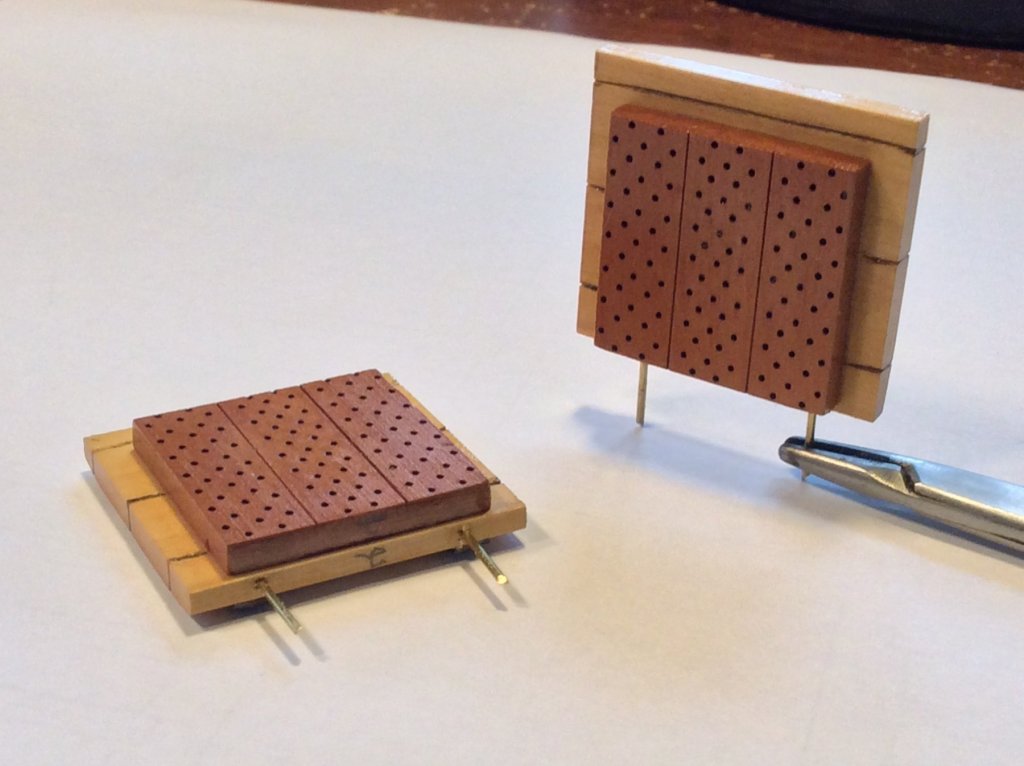
Thanks, Don! I turned my attention to the gun port lids. These are made in two parts: the outer layer duplicates the outboard bulwark planking and is boxwood. The inner layer is made of 3 vertically aligned boards and made of swiss pear. The nail holes were laser etched into the inner layer. The hull is curved, but the parts for the lids aren't, so it was necessary to sand a curve into the outer layer. The original plan was to have operating gun port lids, and Don came up with some made of brass rod and sheet brass. Unfortunately I broke two of them while prepping for blackening. Sorry, Don! The port lids will be vulnerable when glued in place, and I am obviously a klutz, so I figured I better make stronger, permanent and non-working lids. The hinge straps are cardstock with small yellow nails painted black. The "pins" holding the lids in place are .032" (21 gauge) brass rod. Solid. The hinge mechanism will be brass rod also. The eyebolts for the lid control lines has yet to be placed.


- 128 replies
-
- 18
-
-
- mordaunt
- battle station
- (and 1 more)
-
Great work, David! The color scheme is spot on, with the ochre a dead match for the current paint job at Mystic. Even the deck color is perfect! Bravo, sir! Yours may be the best Charles W. Morgan model I’ve seen

- 145 replies
-
- 2
-
-
- model shipways
- charles w. morgan
- (and 1 more)
-
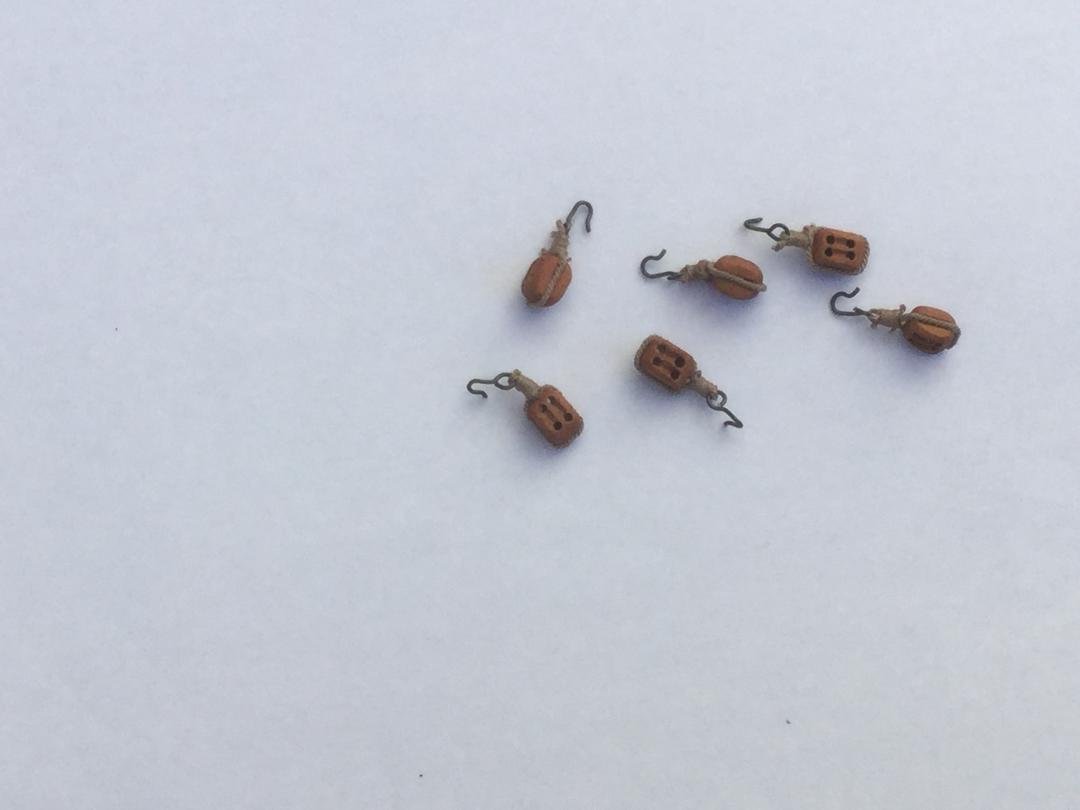
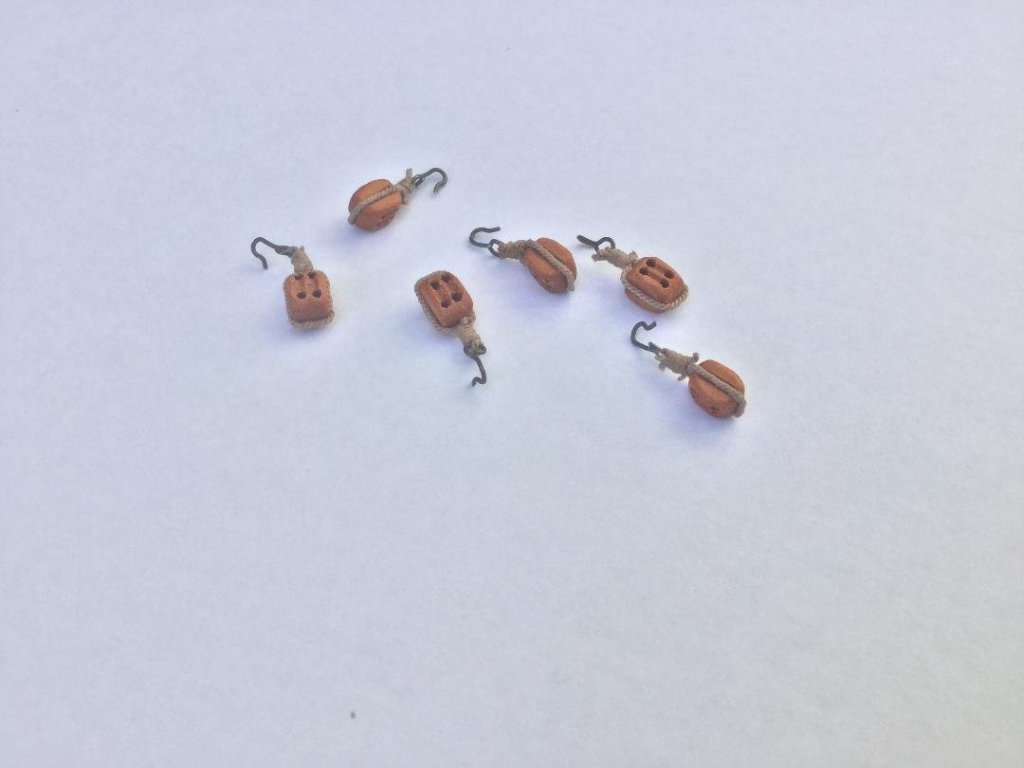
Thanks! I thought it was time to get back to this build and finish it. Next up is to mount the guns on the lower deck. I drilled holes in the gun carriages and the deck and glued brass rad into place to pin the guns to the deck. Next was rigging. I started by attaching hooks to the 6 double blocks for the carriage tackles.

- 128 replies
-
- 14
-
-
- mordaunt
- battle station
- (and 1 more)
-
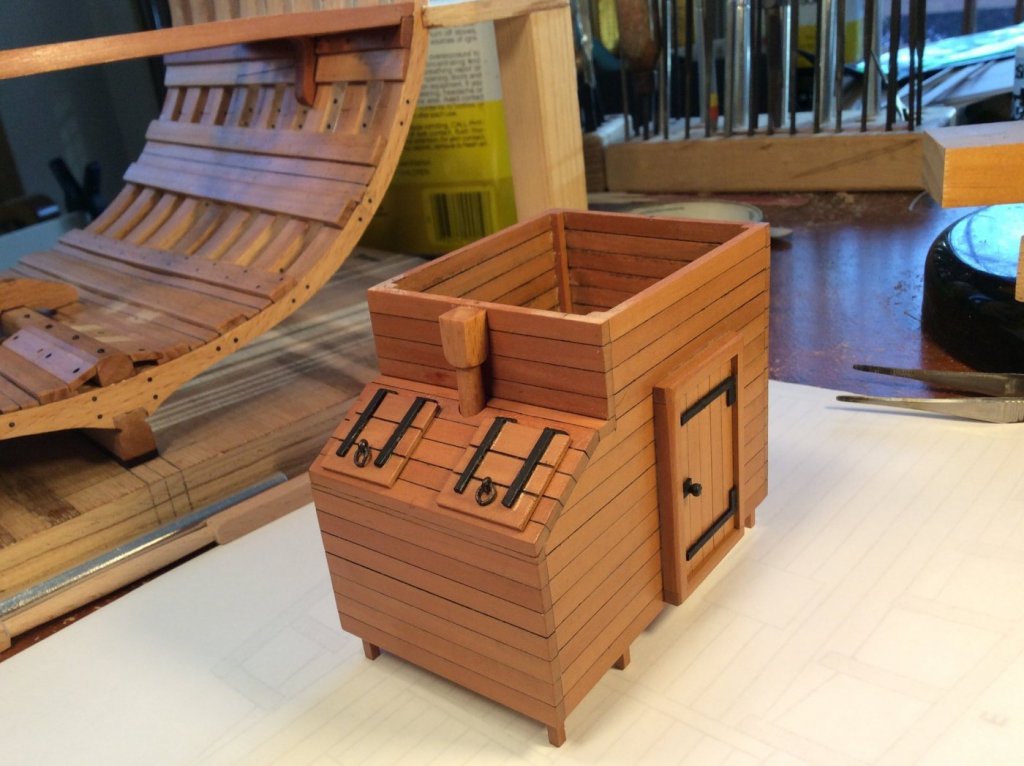
Here's how it looks sitting in place. The blank with the two other visible columns is in the foreground.
- 164 replies
-
- 20
-
-
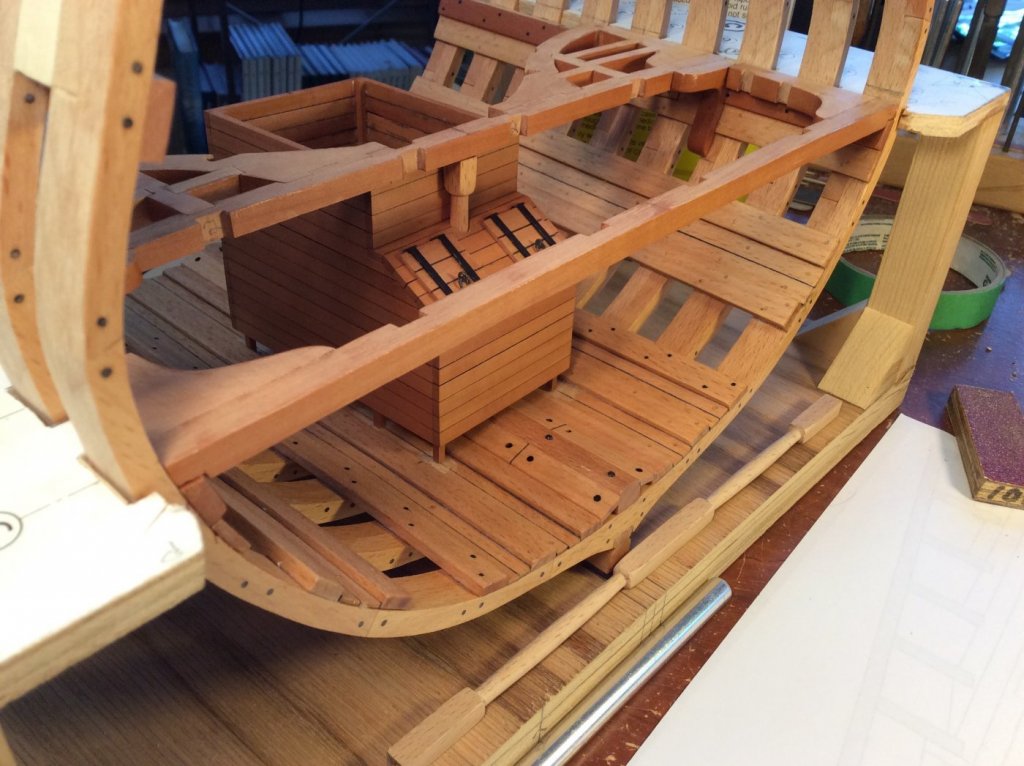
Beam 1 and 2 are glued in place. Before I can go any further, I need to glue the well and shot locker in place. The support column for beam 2 passes through the shot locker directly aft of the aft wall of the well. A weird design, for sure. Here's how I simulated it. I just turned a partial column, drilled a hole in the shot locker that fit the shaft, and glued the partial column in place.
- 164 replies
-
- 14
-
-
Beautiful job, David. Those photos really help. It's an interesting way to belay the ends of those lanyards.
-
Nice work, Ken!
-
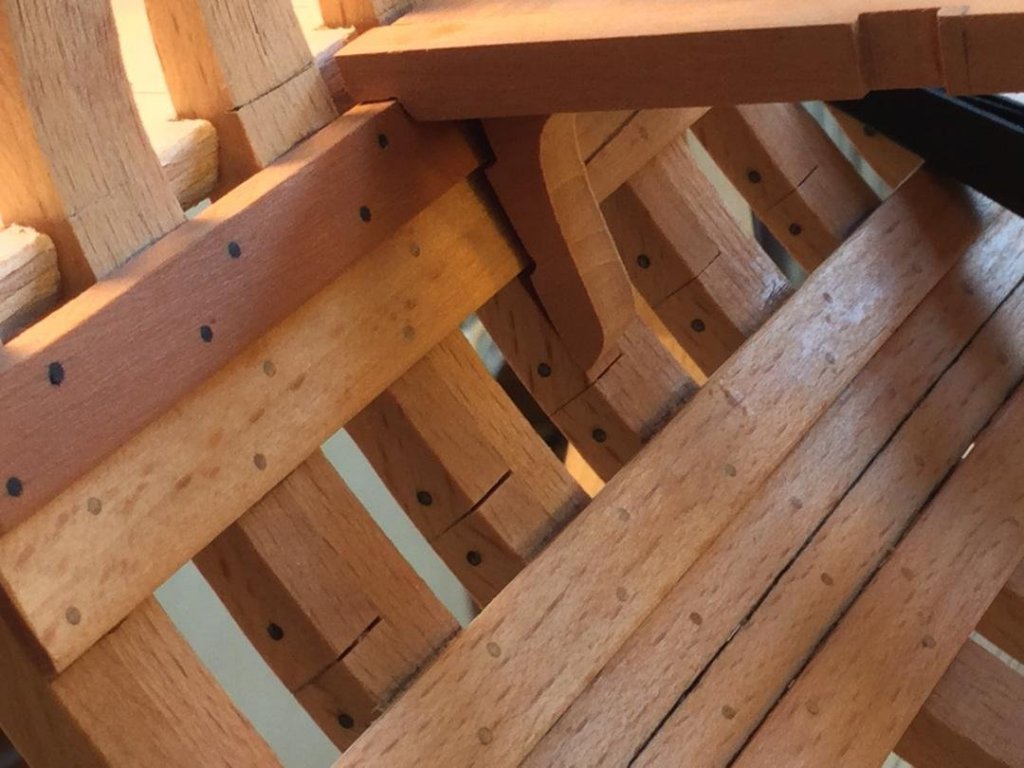
Thanks, guys! In deciding how to construct the lower deck, I decided to fit and install the beams first and then fit the carlings and ledges after. The first step was to glue the lodging knees and hanging knees in place and frame in the space between the arm beams and beam 2. I then applied poly to the under surfaces and sides of the parts. One more coat and I'll glue them in place.
- 164 replies
-
- 13
-
-
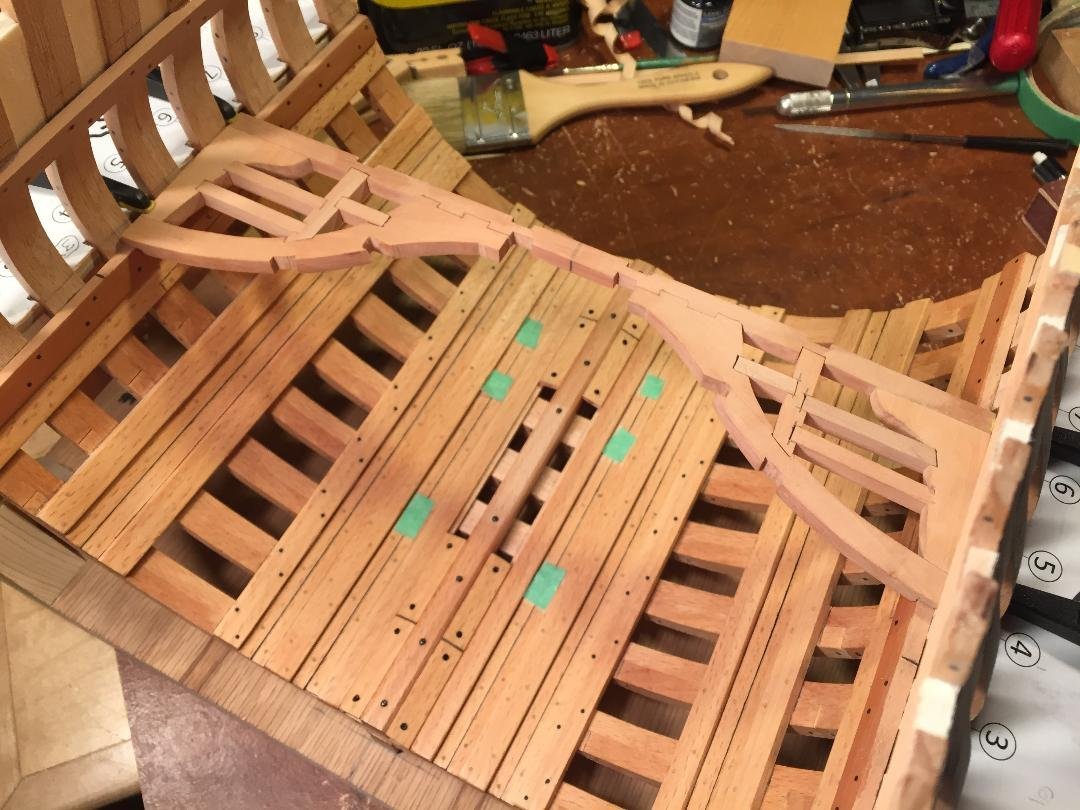
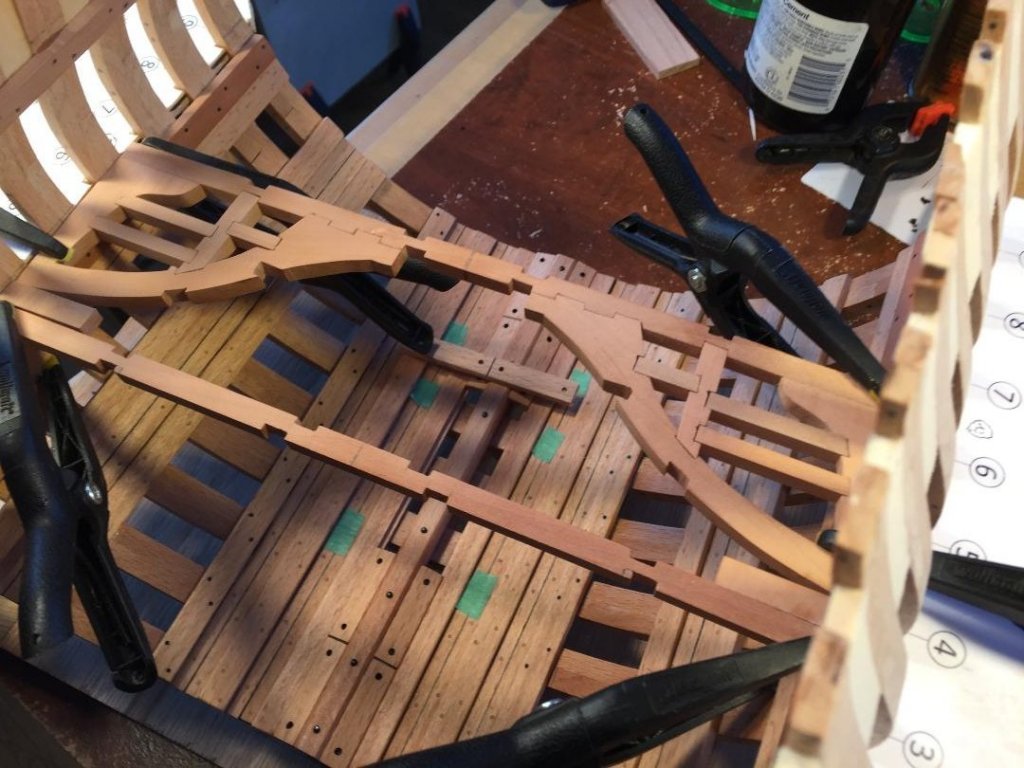
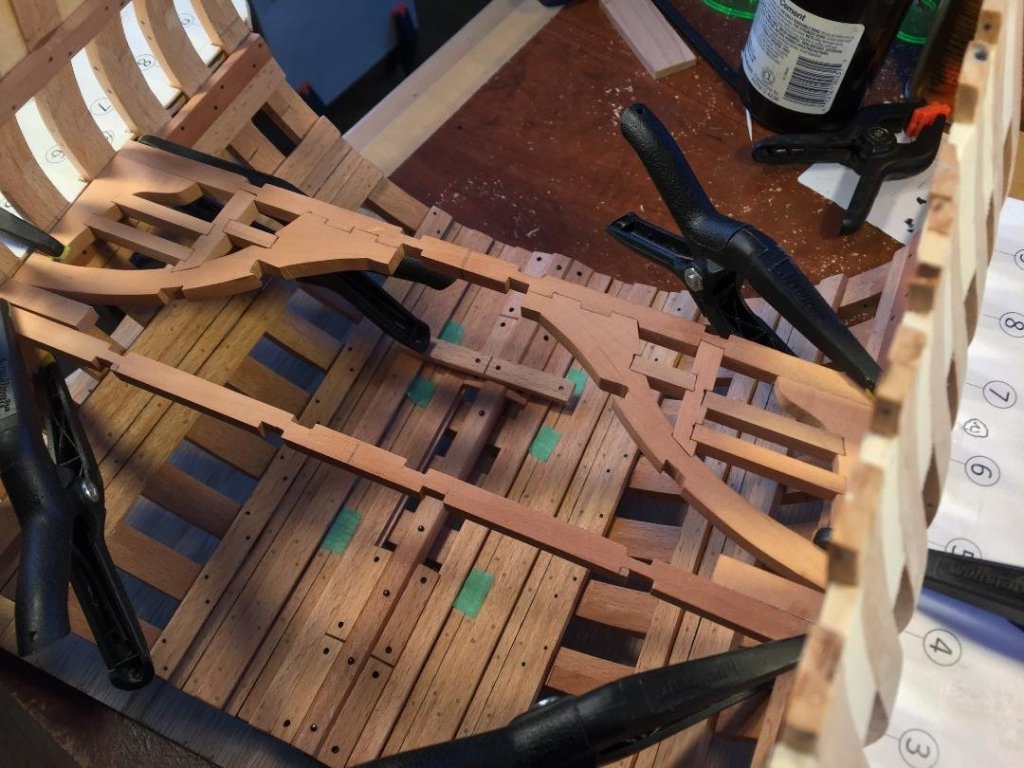
I started construction of the lower deck with beam #2. I made the arm beams a little thicker than necessary to allow for the camber of the deck. Because they are so long, stretching from the center of the beam to the clamps, they have to have some camber, and can't be flat. I'll sand that camber in when the deck is fully installed. I started adding carlings and ledges, and shaped the hanging knees for this part of the deck. For the sake of simplicity, I made the ledges just as thick as the carlings so I didn't have to cut those half-mortises in the carlings. The spots of green tape mark the location of the "legs" of the well and shot locker. Tryinmg to keep the poly off those areas so glue will stick properly.

- 164 replies
-
- 22
-
-

-
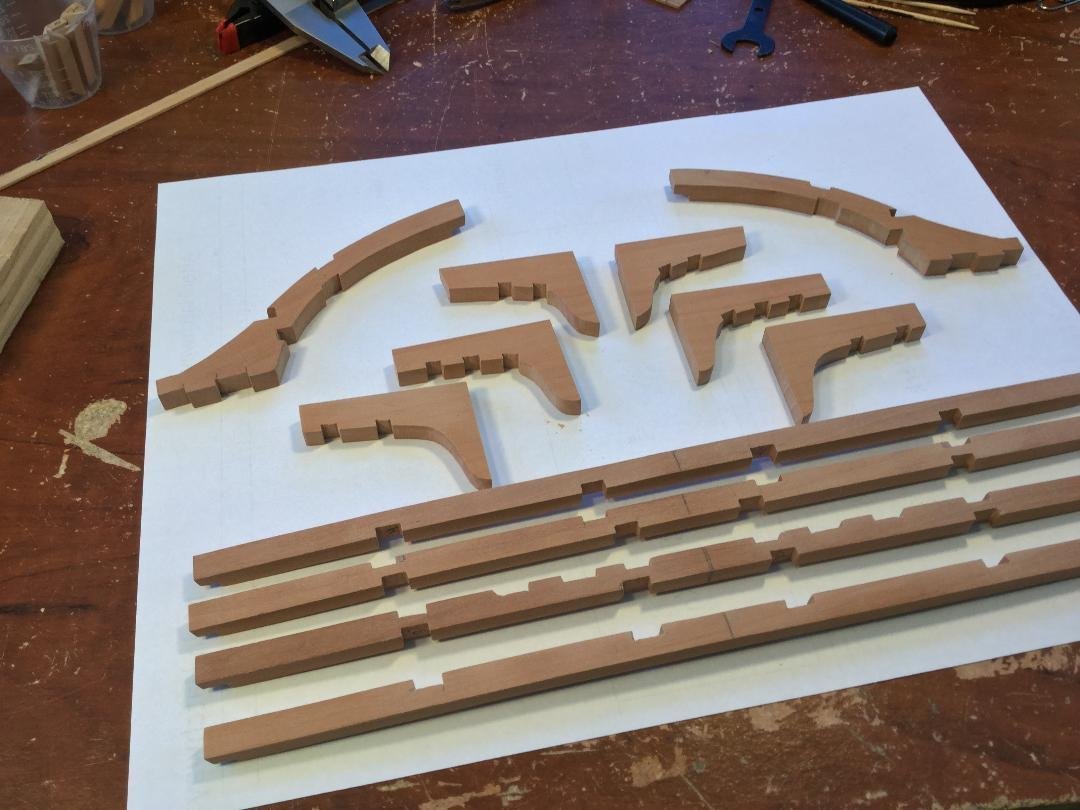
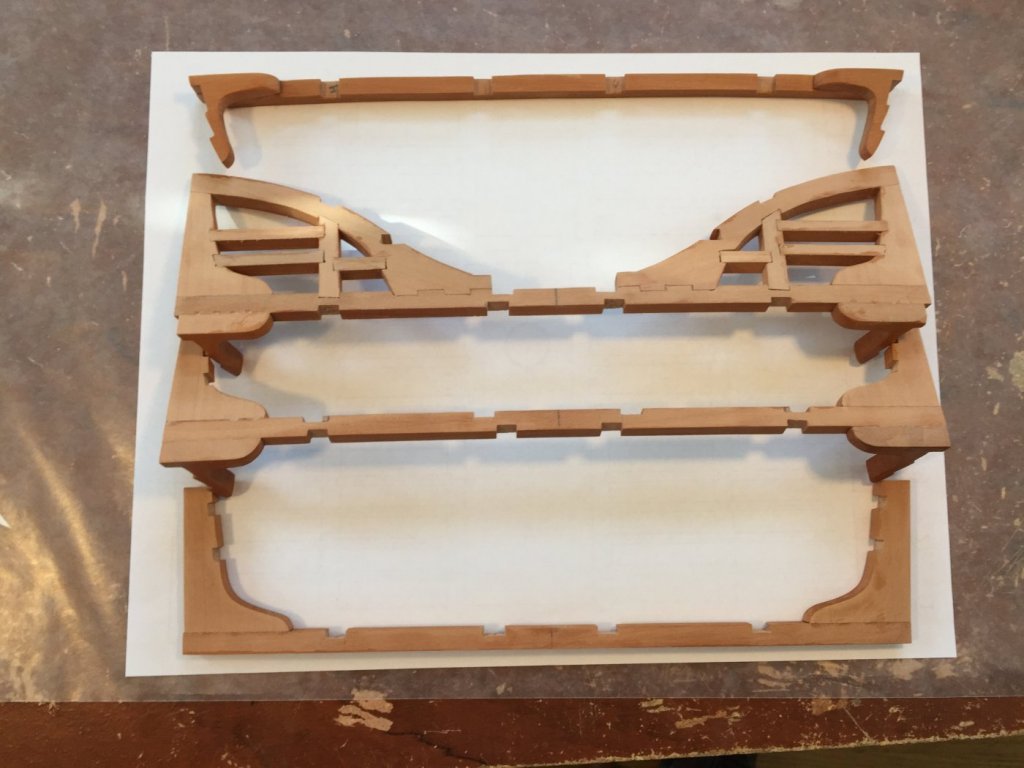
All the lower deck beams have been fitted into place and trimmed to size. I laid out and then cut out the mortises for the carlings. The lodging knees and arm beams were cut out and mortises made for the ledges. The hanging knees will be custom made as the deck is installed. The next task is to cut out the carlings. All the parts are swiss pear.

- 164 replies
-
- 14
-