DocBlake
-
Posts
1,811 -
Joined
-
Last visited
Content Type
Profiles
Forums
Gallery
Events
Everything posted by DocBlake
-
 Good progress, Bob. Hope you continue to feel better.
- 359 replies
-
- 5
-

-
- prince de neufchatel
- model shipways
- (and 1 more)
-
Byrnes table saw blade for cutting planks
DocBlake replied to genericDave's topic in Modeling tools and Workshop Equipment
Mark: The .pdf is from Jeff at Hobby Mill. You beat me to it! I keep a copy of it under my Byrnes saw in the shop! -
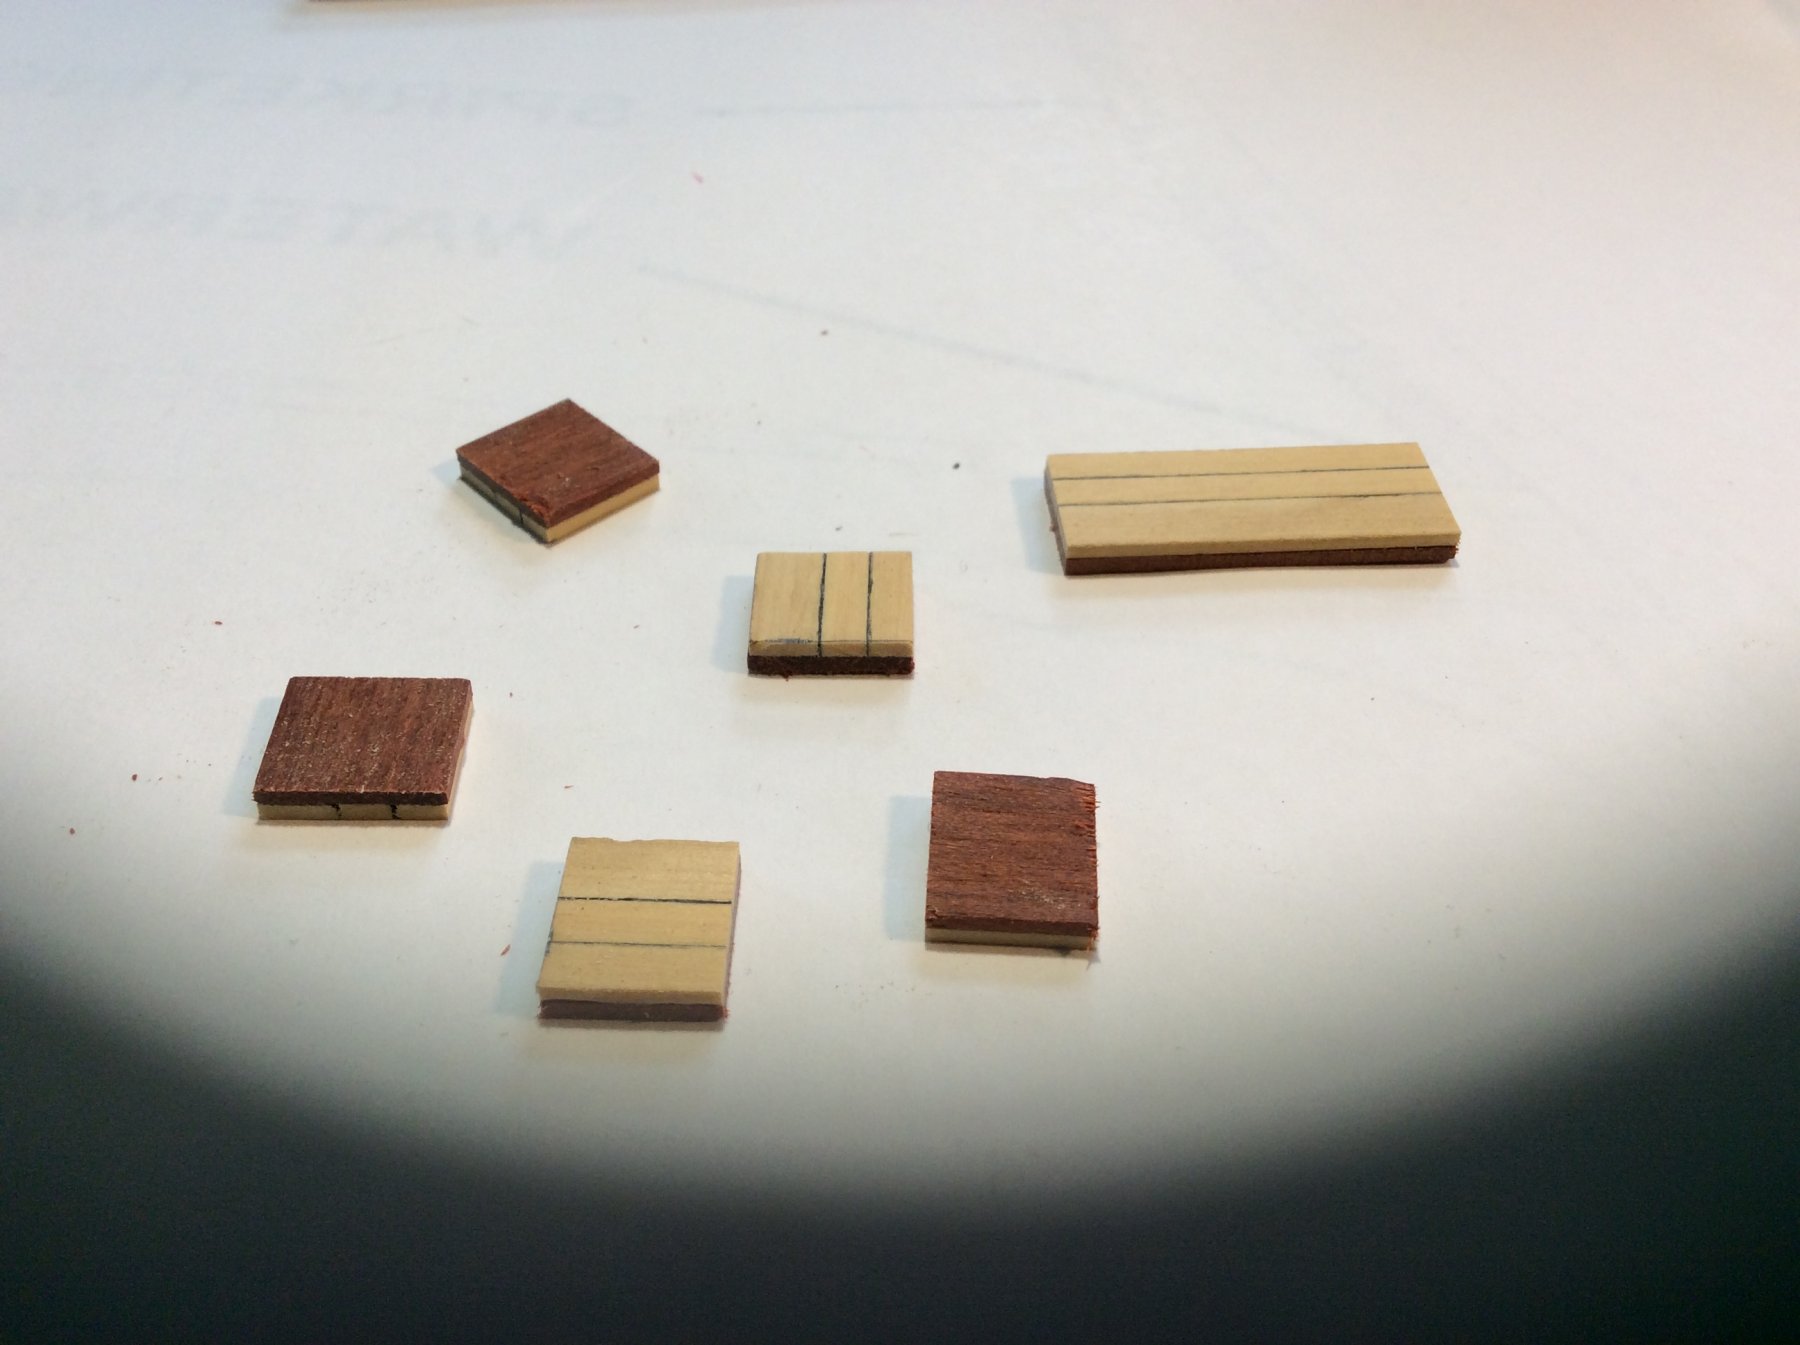
I decided to fit the gunport lids to the ports before setting the cannons into position. These will be pinned and glued into position later, just before applying poly to the exterior hull. I took 3 planks of boxwood that matched the planking width at the level of the ports and placed them tightly together side by side on some double sided tape stuck to my work surface. I glued a single piece of bloodwood to cover. when dry, I sanded the bloodwood flush with the planking and cut the individual lids from the blank. They will be pinned and glued after the hinges are applied and the rest of the model is finished..

- 75 replies
-
- 7
-
-
- constitution
- mamoli
- (and 2 more)
-
Thanks, guys for all the "likes". Michael: Glad you stopped by! I just saw your awesome cross section log myself. Great job!
- 75 replies
-
- 3
-
-
- constitution
- mamoli
- (and 2 more)
-
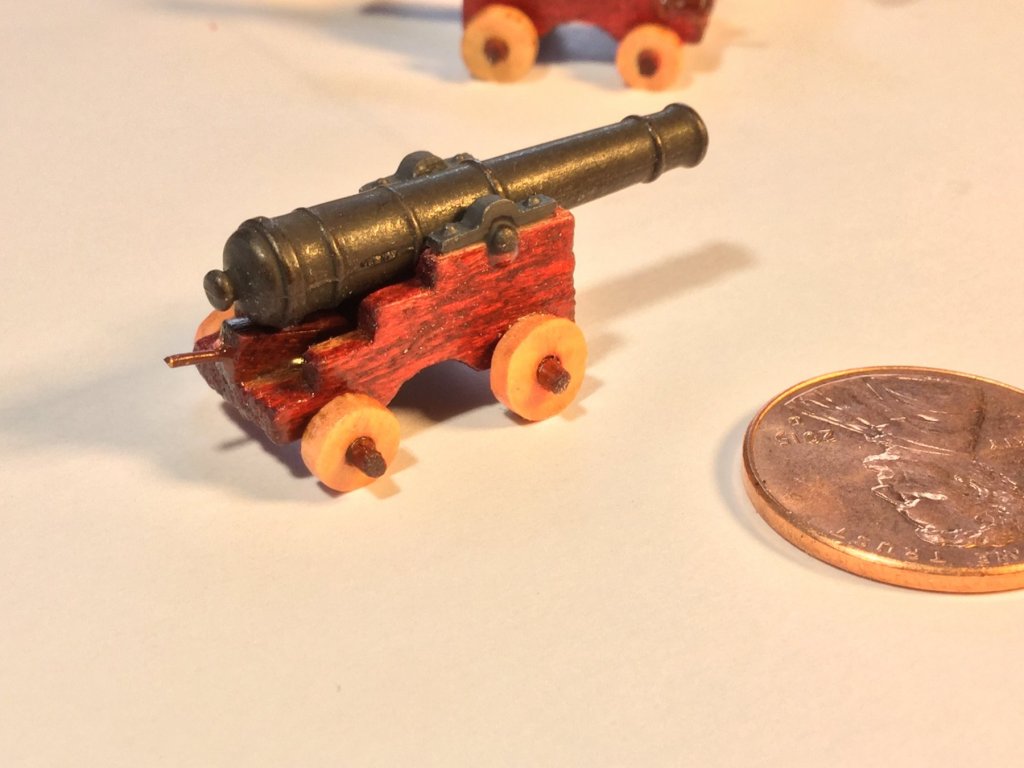
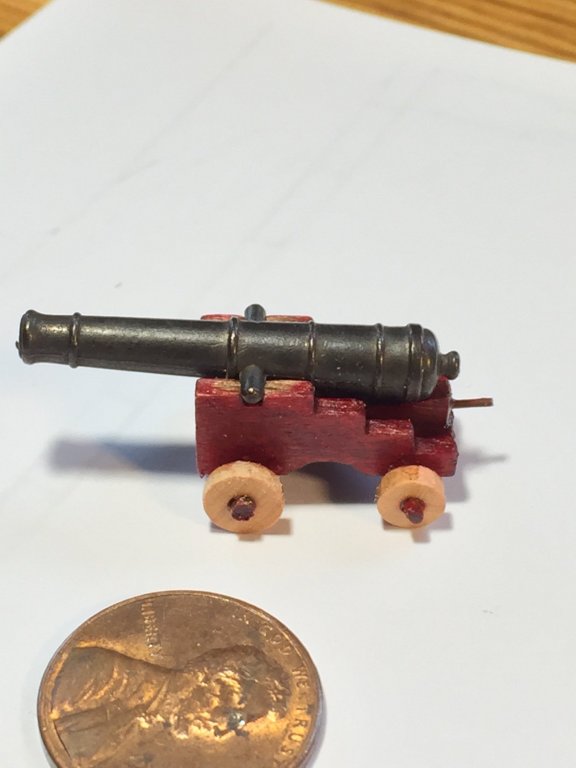
All four long guns are completed. The kit provided cap squares that actually looked pretty good so I used them. I'm not planning any further hardware or rigging for the cannon carriages. At this small scale, it will be impossible to rig blocks that aren't 18 scale inches long! In my opinion, nothing ruins the appearance of a rigged gun more than out of scale blocks. Ditto for eyebolts and rings that are out of scale.
- 75 replies
-
- 8
-
-
- constitution
- mamoli
- (and 2 more)
-
Halifax had a discontinuous lower deck with a large hold between the masts. The aft portion was a captains and officers sleeping area, and the forward lower deck held the ship’s stove. See Bob Fine’ log on handling this deck. Hannah and Halifax were VERY similar vessels.
-
Generic Sharpie by DocBlake
DocBlake replied to DocBlake's topic in - Build logs for subjects built 1851 - 1900
Thanks Ken! I just signed on to your Independence log. Somehow I missed it, but I’m there now! -
Ken: Somehow I missed this log, but I’m here now! The planking on this little schooner is challenging, but I’ve seen your work and I know you’re up to it! Watching with interest.
- 122 replies
-
- 2
-
-
- independence
- privateer
- (and 1 more)
-
Generic Sharpie by DocBlake
DocBlake replied to DocBlake's topic in - Build logs for subjects built 1851 - 1900
The 10 individual parts that make up jig2 (BJ2) are glued up, and the centerline is drawn. The curved piece sitting behind the jig is the keelson press. The keelson in made of 3 pieces of swiss pear, soaked in water and then pressed into shape to define the curve needed.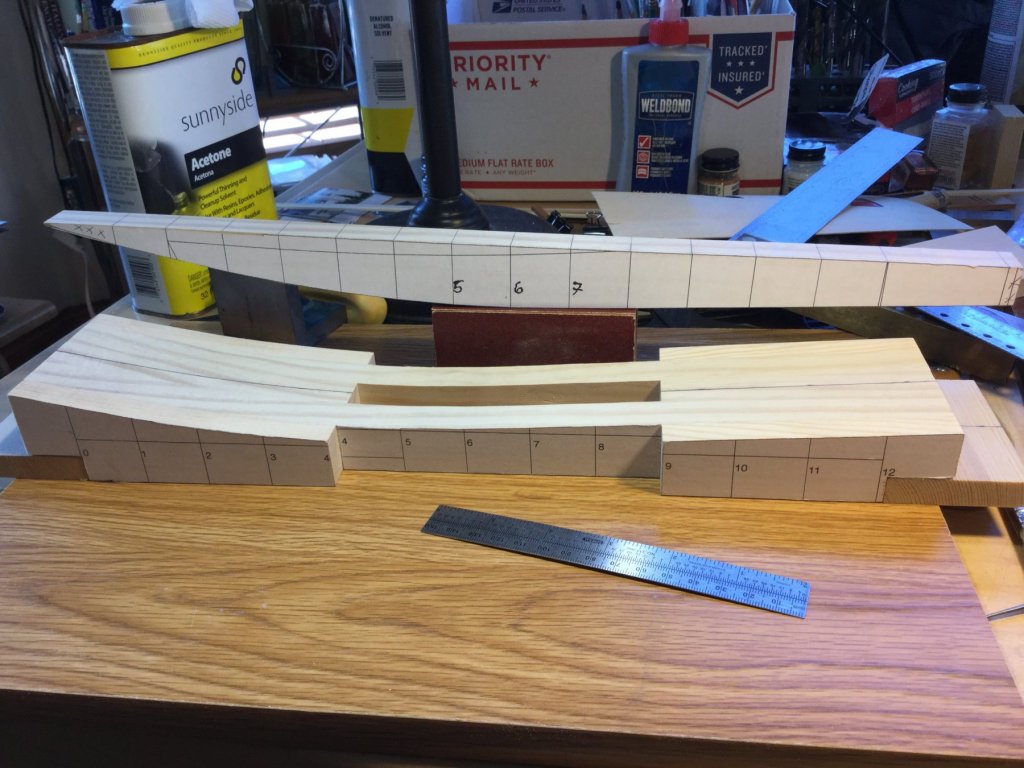
-
I'm working on the long guns on the gun deck. I used some boxwood trucks I had left over, and replaced the metal axles in the kit with walnut axles. I colored the carriage with a red Sharpie, then gave it a coat of poly. I'm not sure how much hardware and rigging I'll use at this very small scale...maybe none. I will place cap squares, though. The red Sharpie on walnut turns out pretty nice, I'd say! There is only one caveat: Sharpie ink can "bleed" a little with polyurethane. If you don't want your trucks to turn a little "pink" using the same brush to poly the red parts and then the trucks, seal all the Sharpie colored wood first, let it dry and then do the trucks . The second coat doesn't matter, since the red is sealed.
- 75 replies
-
- 8
-
-
- constitution
- mamoli
- (and 2 more)
-
Generic Sharpie by DocBlake
DocBlake replied to DocBlake's topic in - Build logs for subjects built 1851 - 1900
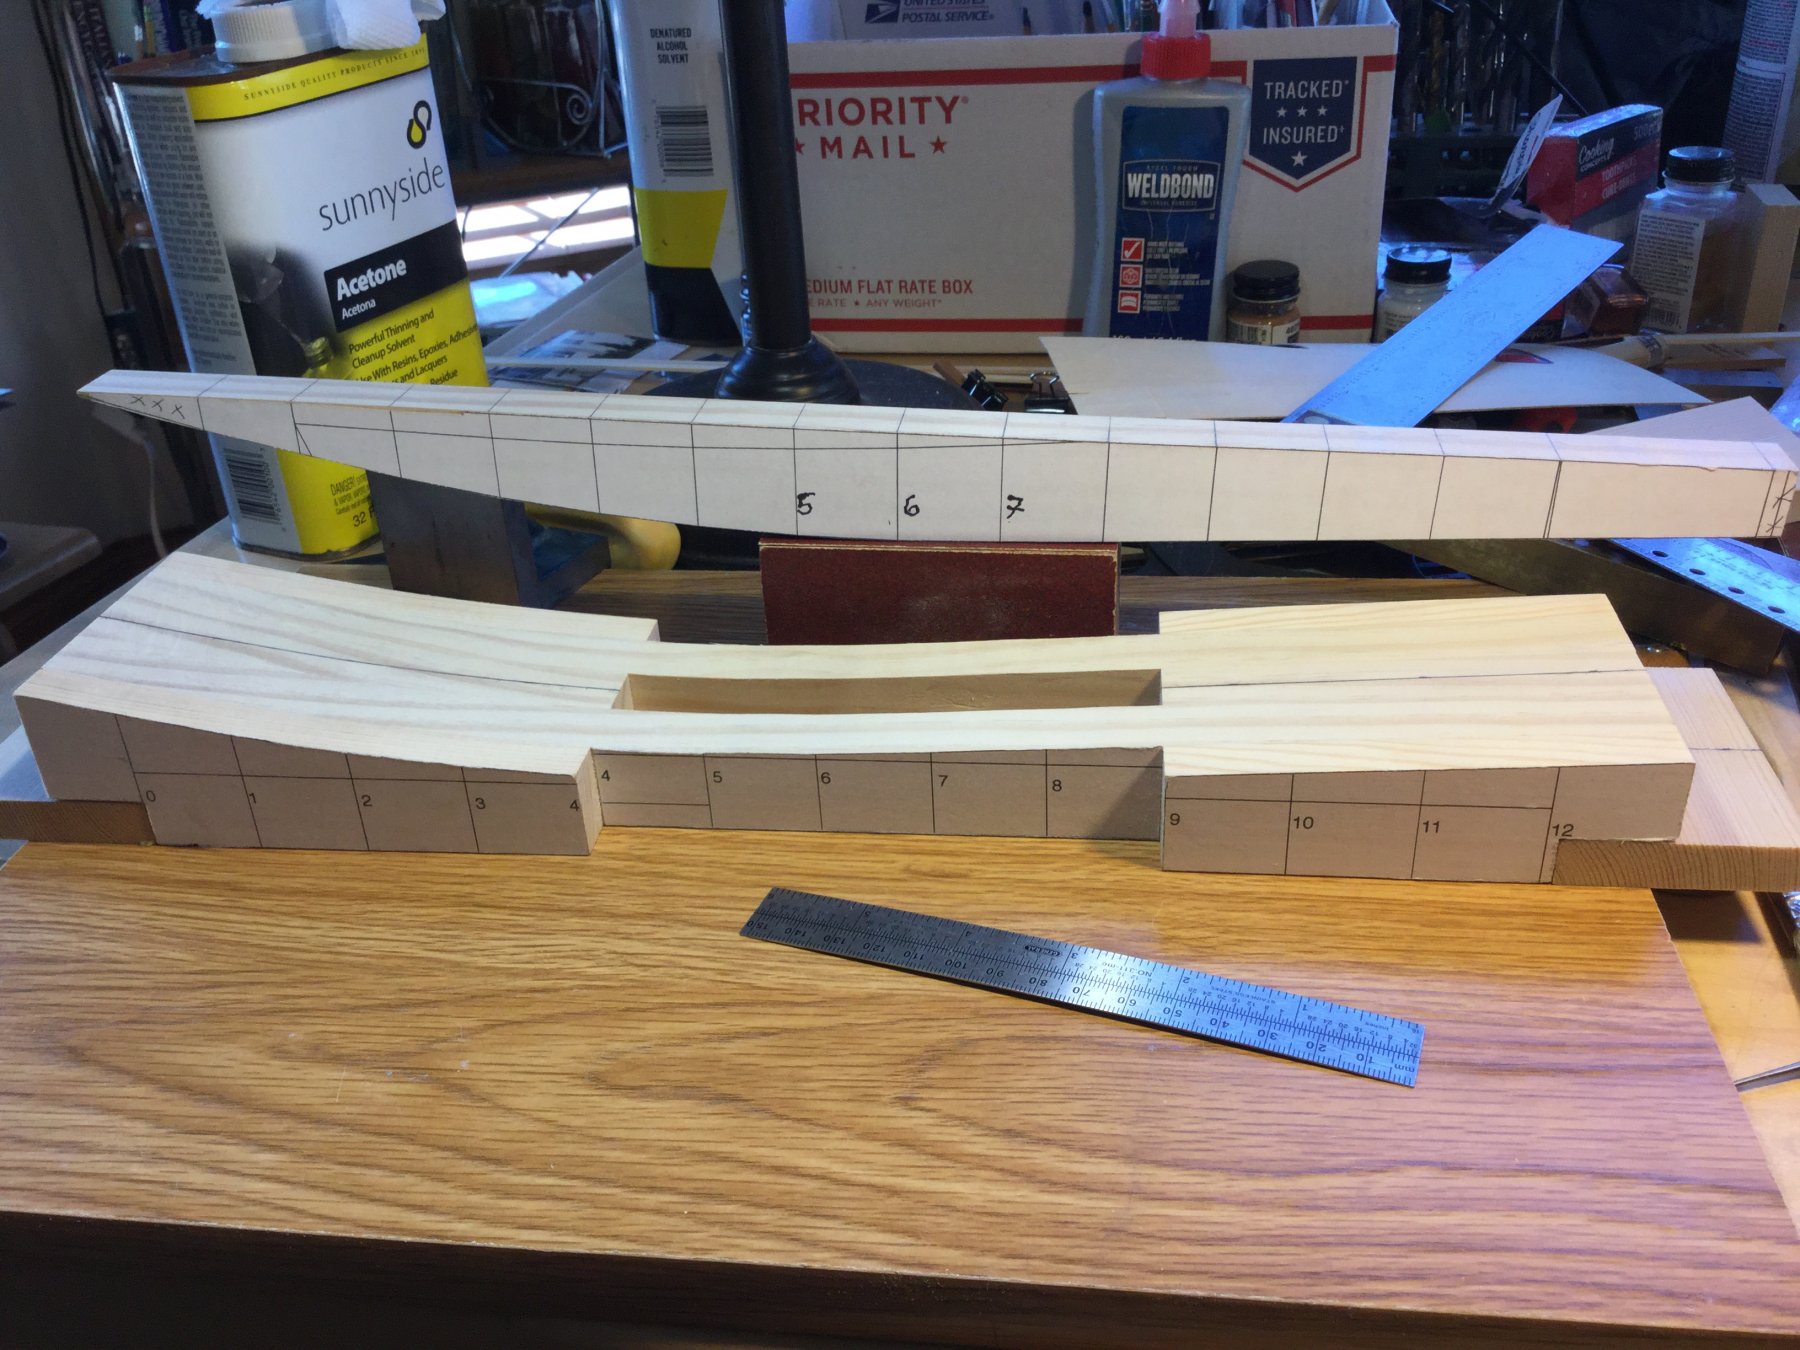
The parts for the second jig (BJ2) were trimmed to length and the notches wher the parts rest on the base plates were formed using the dado set on my table saw. The two shorter blocks are actually 3 parts ganged together using carpet tape. The long part is two separate parts joined by tape. The glue up will leave a slot for the centerboard. Next: gluing up the jig.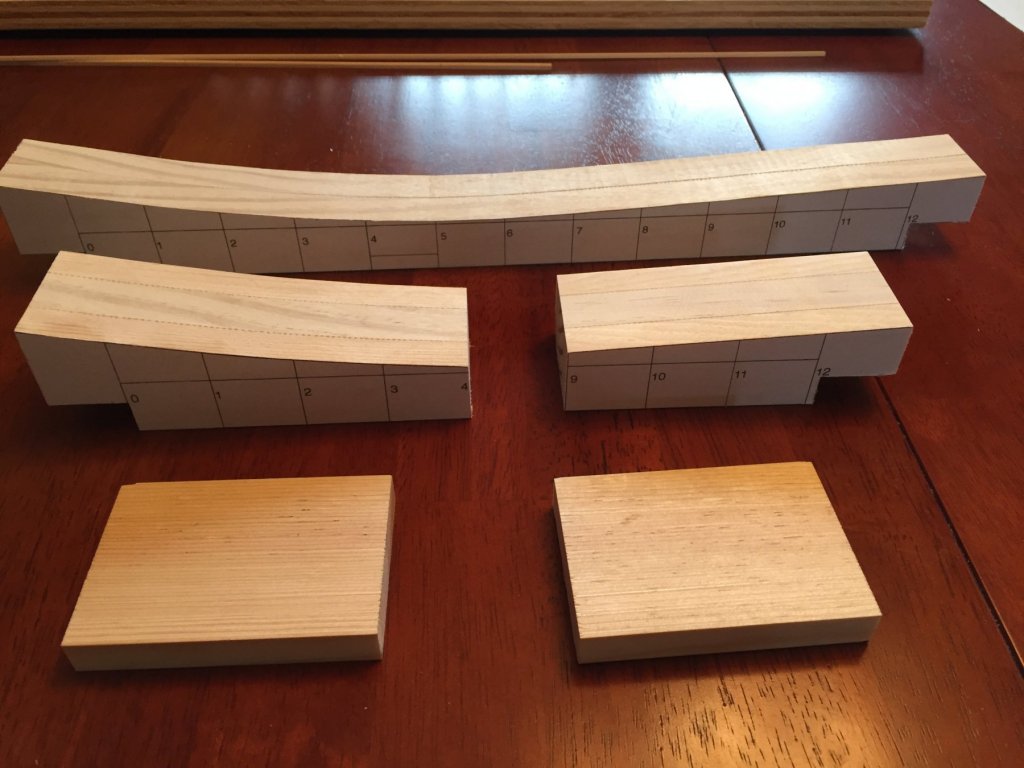
-
Will "Avos" be available to U.S. buyers in late May? I REALLY want that kit!
- 216 replies
-
- 6
-
-
- masterkorabel
- ships
- (and 3 more)
-
Nice work Jon!
-
Generic Sharpie by DocBlake
DocBlake replied to DocBlake's topic in - Build logs for subjects built 1851 - 1900
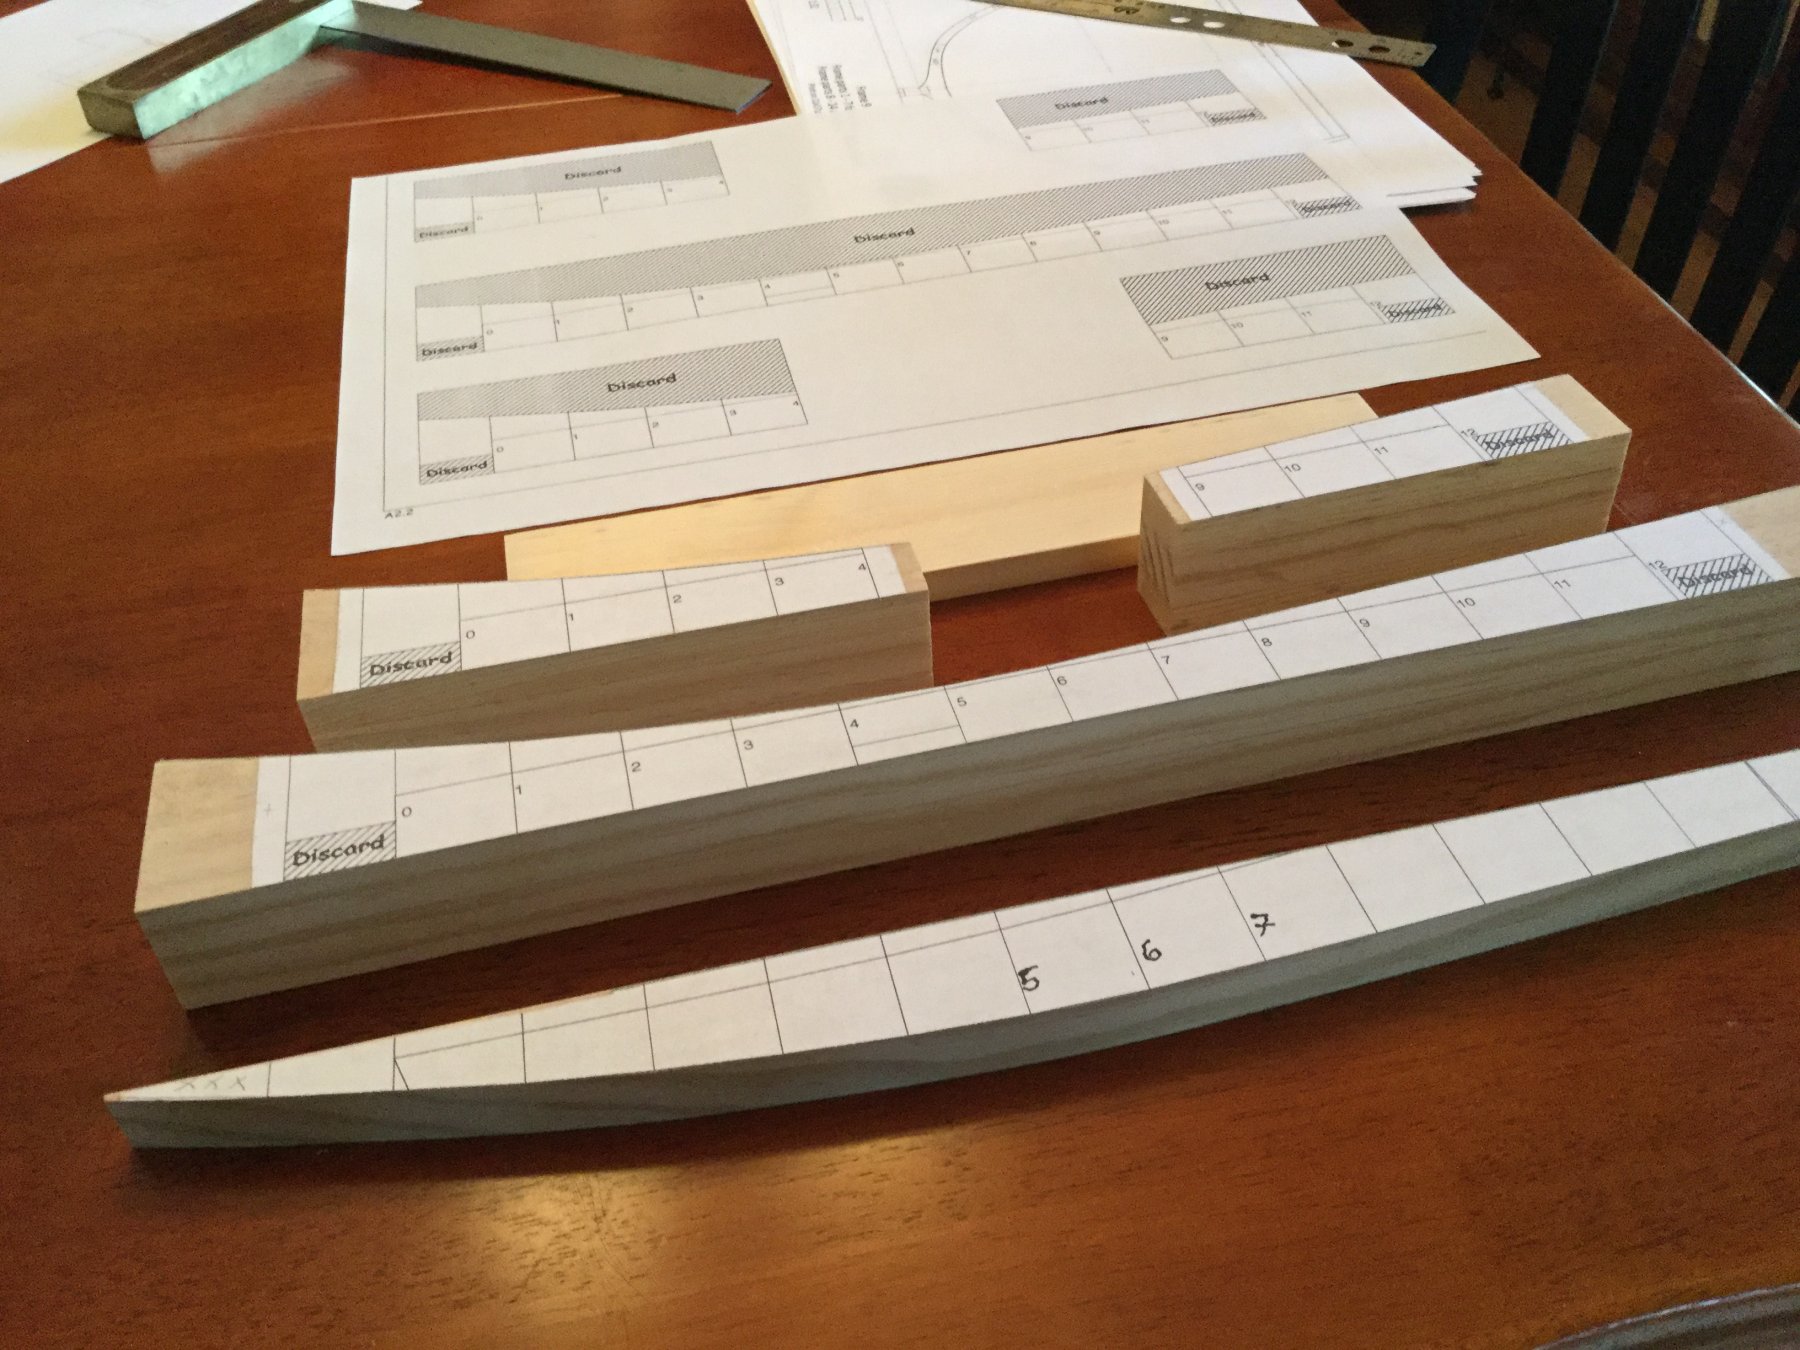
It's necessary to build the second jig (BJ2) before anything is added to the first. This jig forms a "press" to establish the curve of the keelson, which, together with the chines receive the bottom planking on the first jig. The structure is then transferred to BJ2 to complete the hull framing. The photo shows the component parts. To get congruent parts, the two and three layer pine parts are ganged together with doublesided carpet tape for cutout on the bandsaw and smoothing to the layout line on the oscillating spindle sander.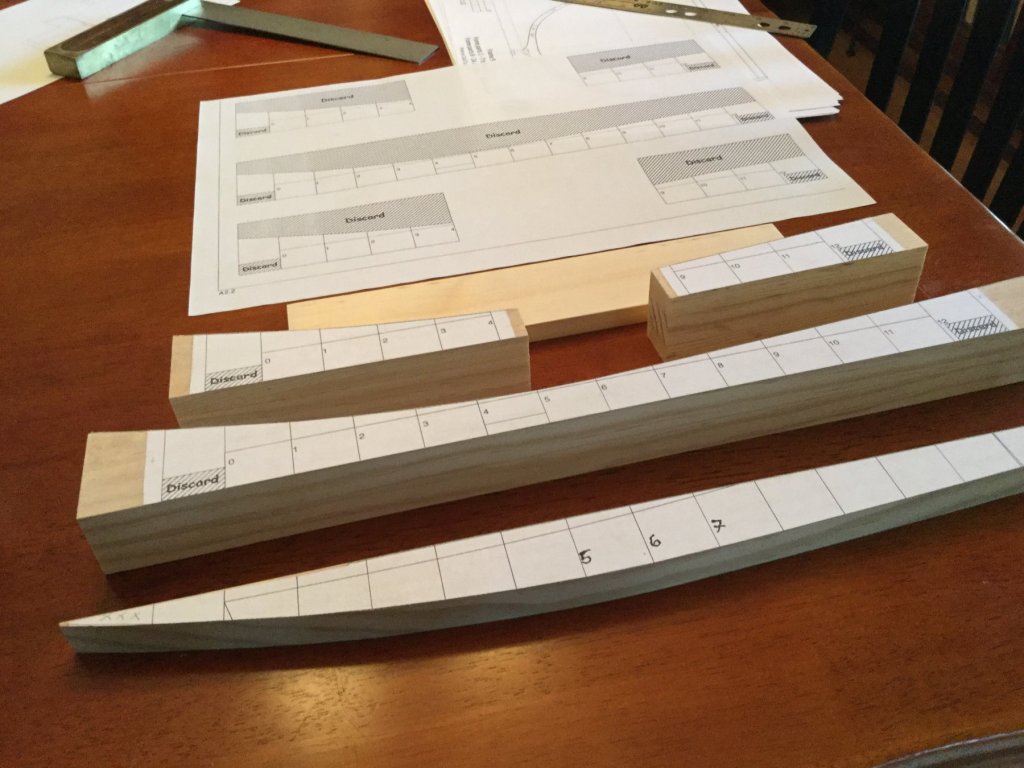
-
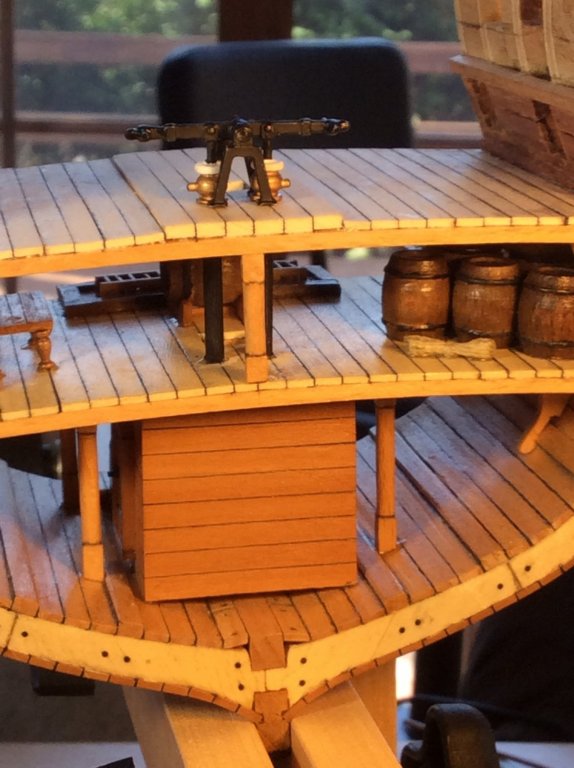
I finished planking the gun deck and planked the bulwarks using bloodwood. I also painted the cast metal pump mechanism and installed drain pipes from the pump down to the well. Next up are the cannons. The carriages are walnut and are going to require some work. I did discover that coloring walnut with a red Sharpie produces a color that is a dead match for bloodwood! That's my plan! The carriages for the carronades are cast metal. They will have to be remade.

- 75 replies
-
- 9
-
-
- constitution
- mamoli
- (and 2 more)
-
Generic Sharpie by DocBlake
DocBlake replied to DocBlake's topic in - Build logs for subjects built 1851 - 1900
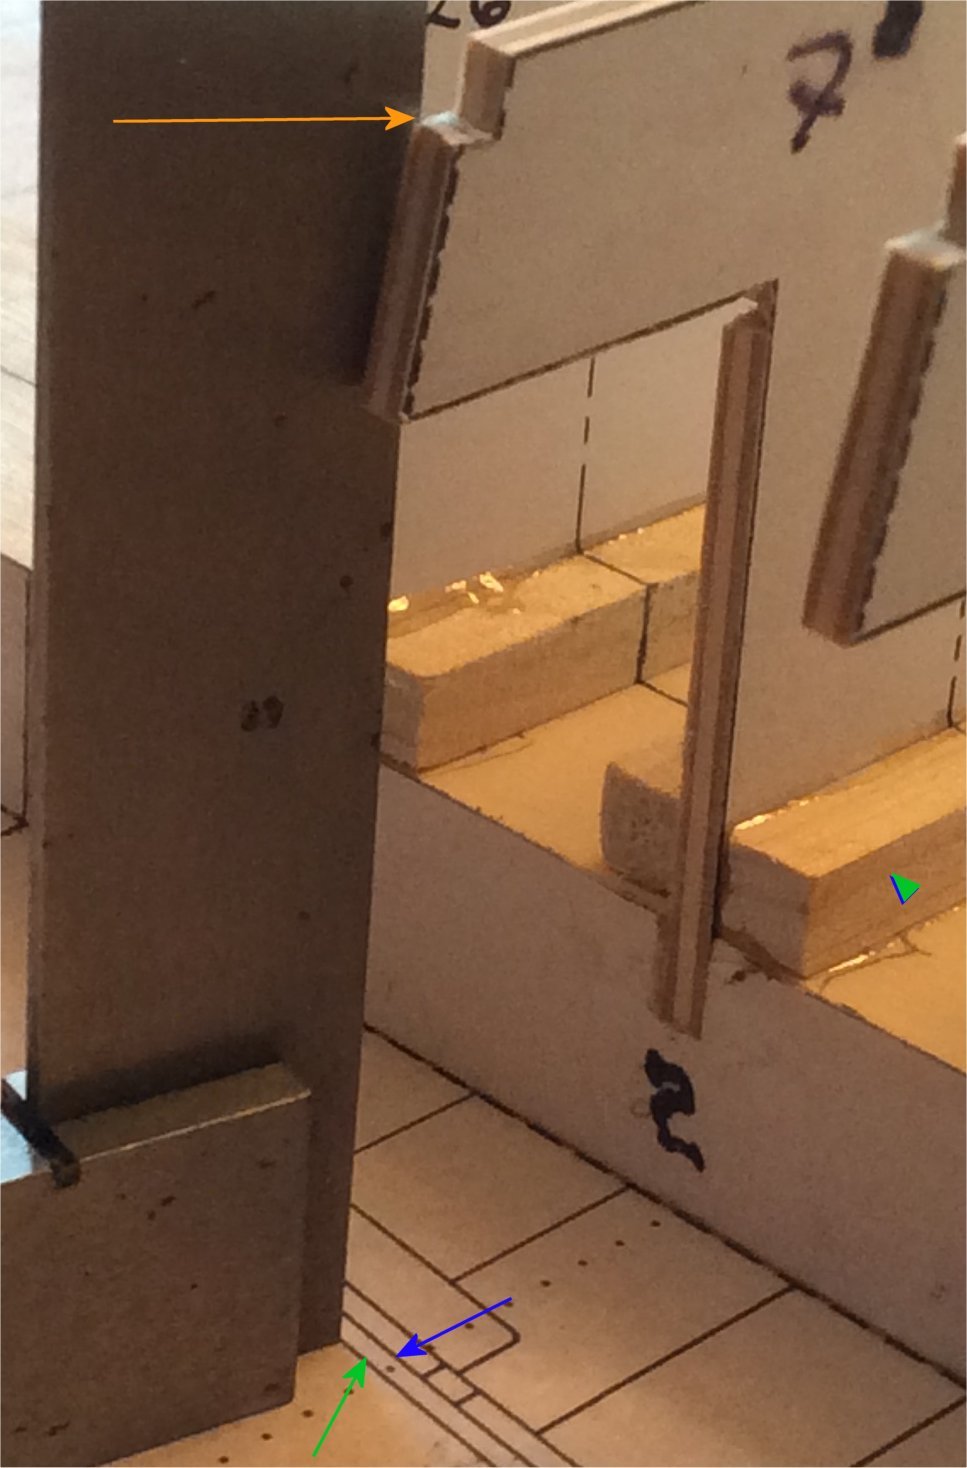
Are Bill and/or Al available for questions on this build? I finished the first jig, but when comparing the chine locations from the centerline, based on the plans glued to the build board, I'm off on several. This despite the fact the each station template in bottomed in it's slot and centered perfectly. The keelson run appears right on the money! Hopefully I'll be able to tweak the notches when fitting the chines. The orange arrow points to the square lined up with the outside edge of the chine. The bottom of the square should be at the blue arrow. It's actually at the green arrow. As you can see, it's off a bit!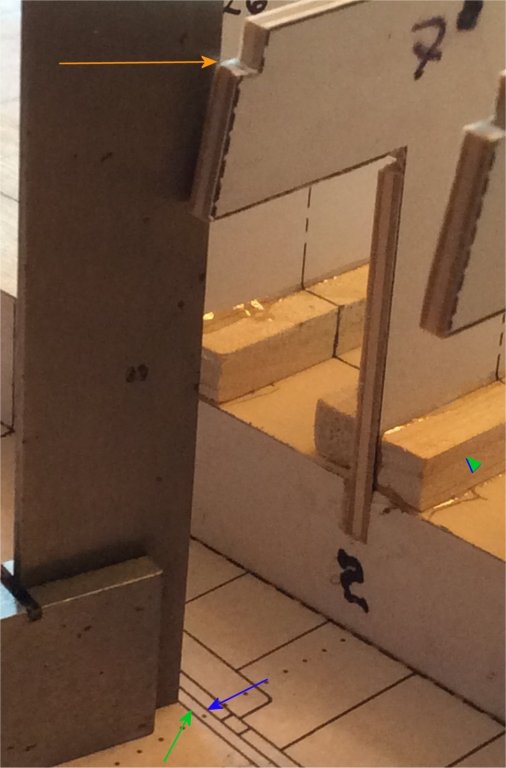
-
Looking good, David! I think your head rails look great!
- 59 replies
-
- 2
-
-
- prince de neufchatel
- model shipways
- (and 1 more)
-
Generic Sharpie by DocBlake
DocBlake replied to DocBlake's topic in - Build logs for subjects built 1851 - 1900
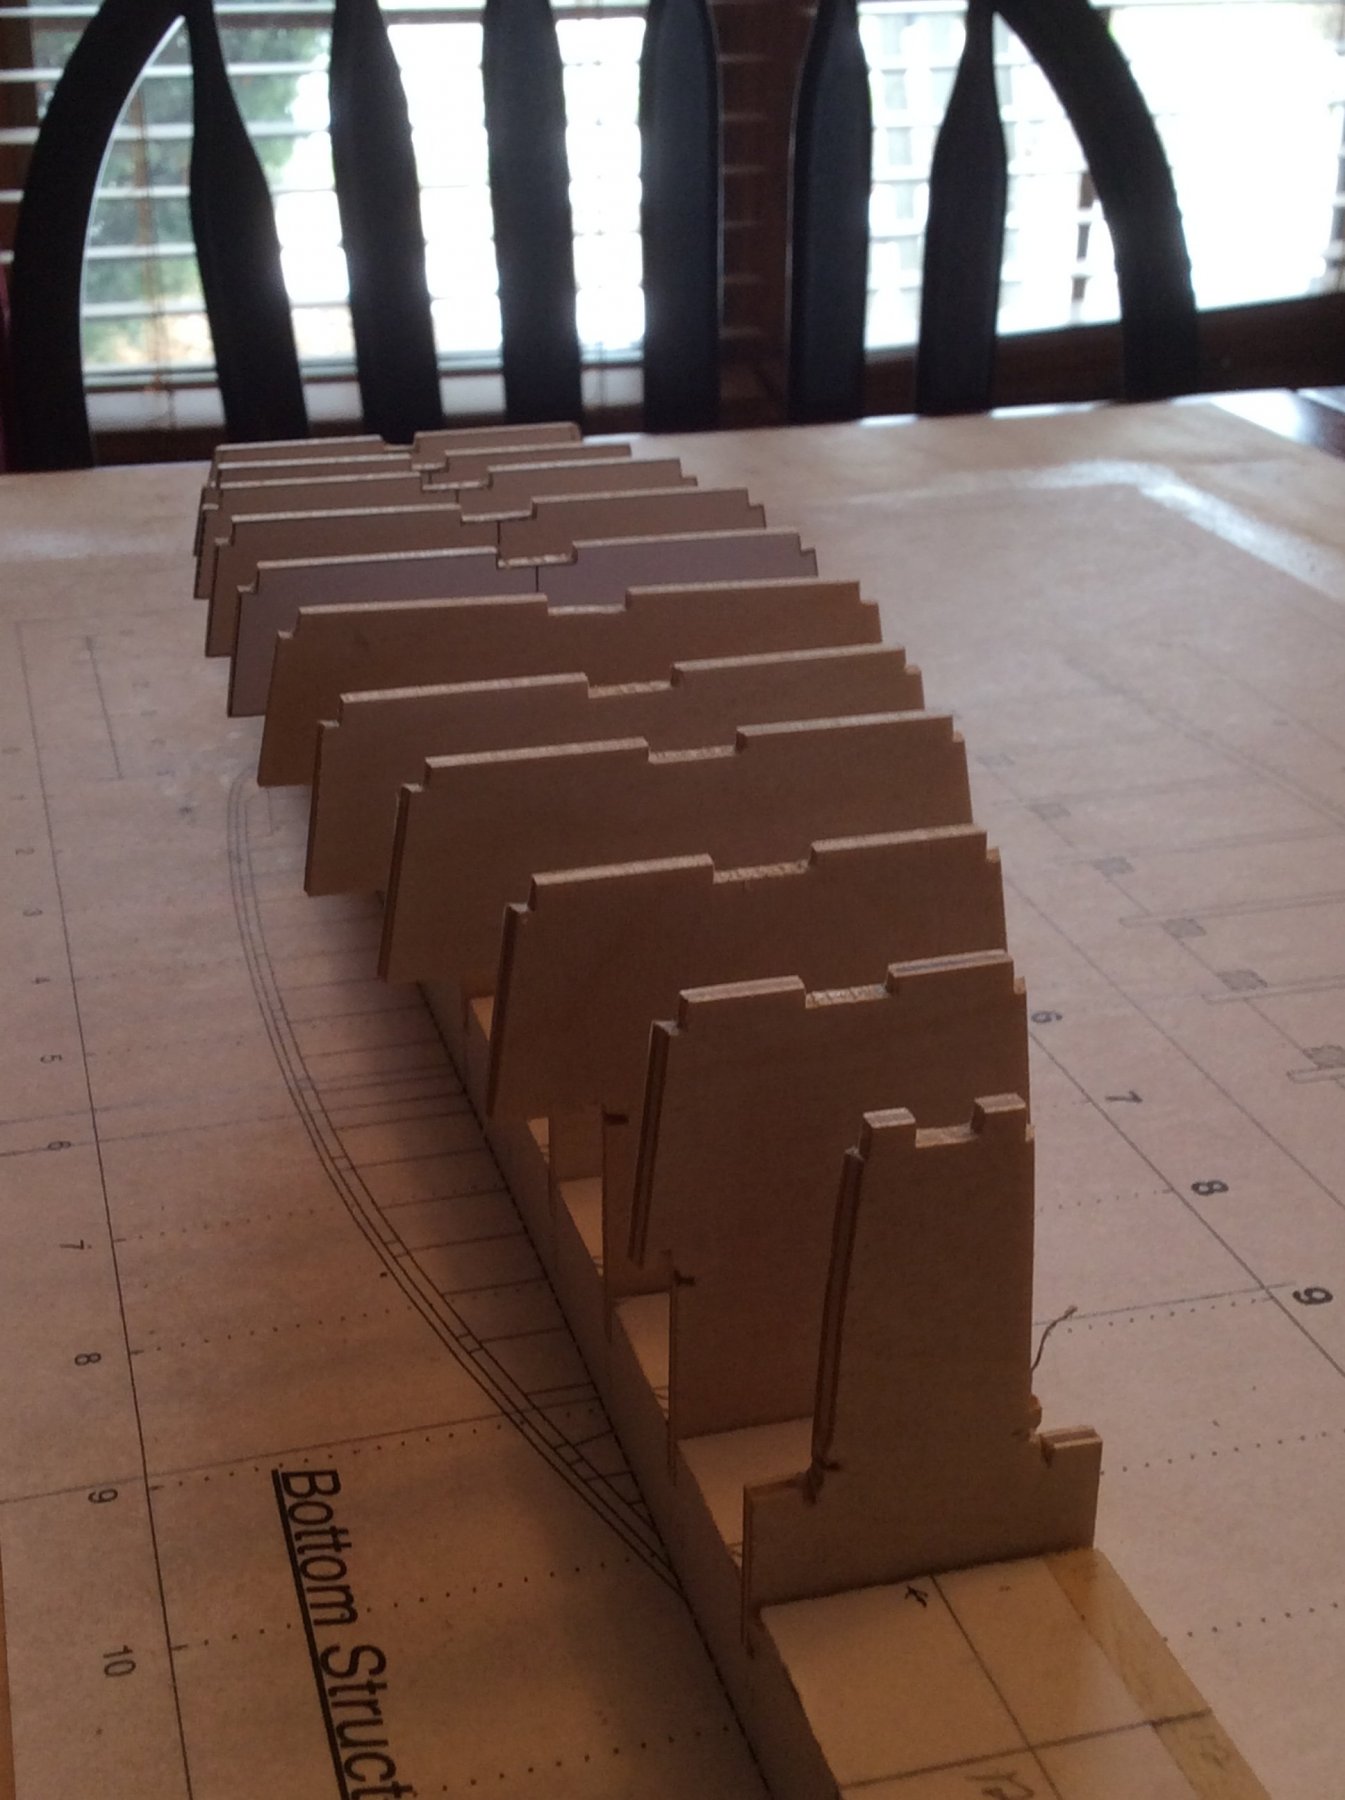
Preliminary testing to make sure everything lines up before fixing the station templates to the jig permanently. Here I'm checking the fairness of the keelson notches. Only one template needed a little shimming to bring it to fair.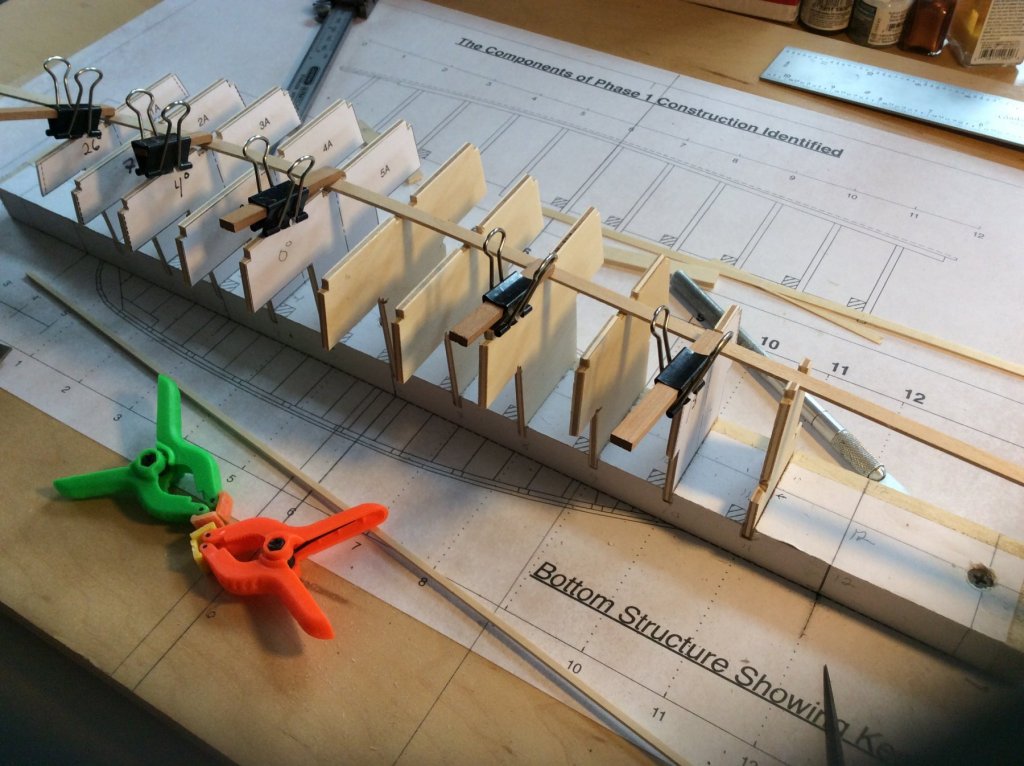
-
Generic Sharpie by DocBlake
DocBlake replied to DocBlake's topic in - Build logs for subjects built 1851 - 1900
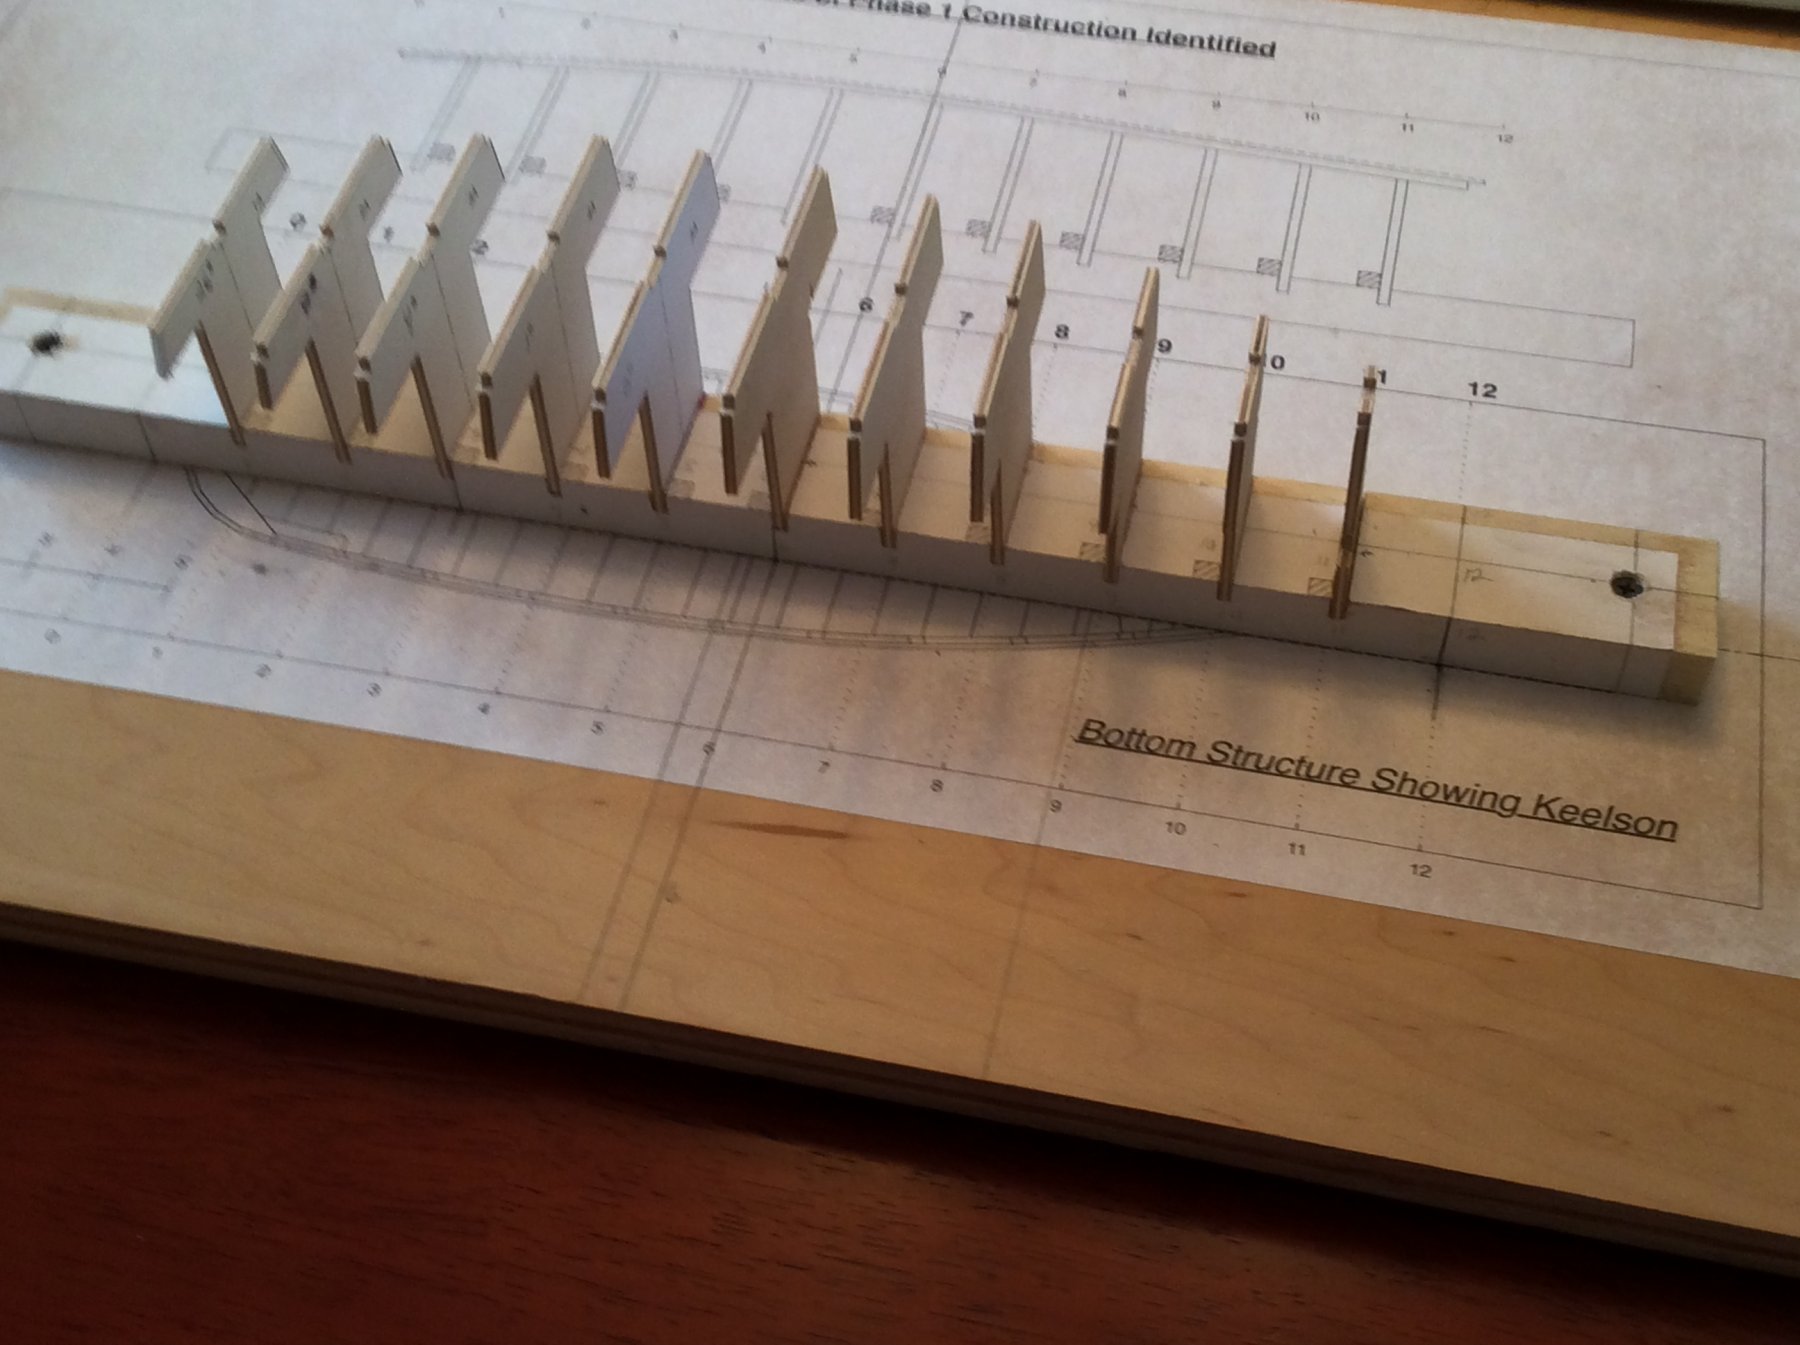
All the station templates were cut out, and the lines trued up with the Byrnes sander. The chine notches and sides of the templates were beveled according to the plans. The practicum explain how to bevel off the drawings themselves, but the plans list with bevel angles of each station template calculated by CAD. I went with the CAD bevels!. The next step is to temporarily set the templates in the jig and fine tune the notches so the side planking, chines and keelson fit properly.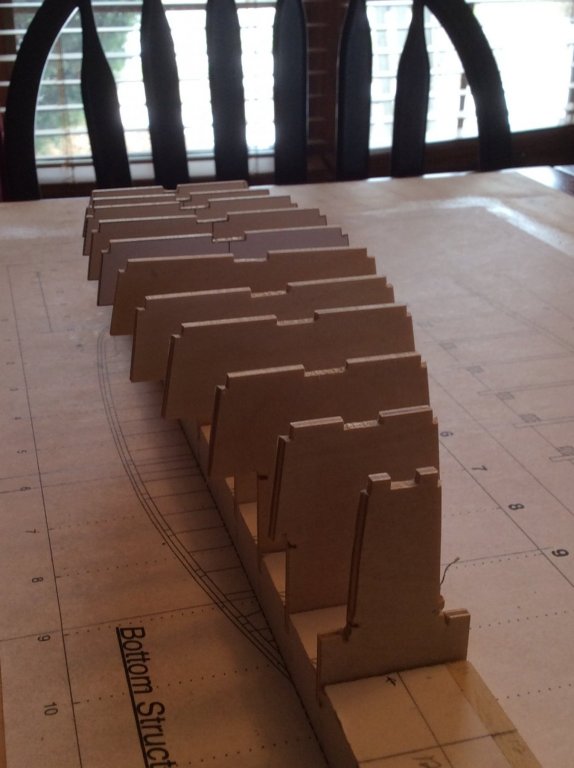

-
Generic Sharpie by DocBlake
DocBlake replied to DocBlake's topic in - Build logs for subjects built 1851 - 1900
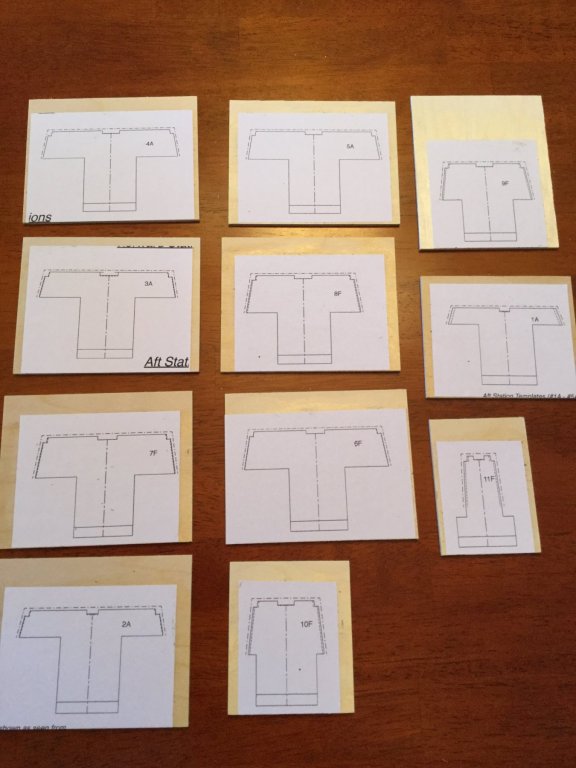
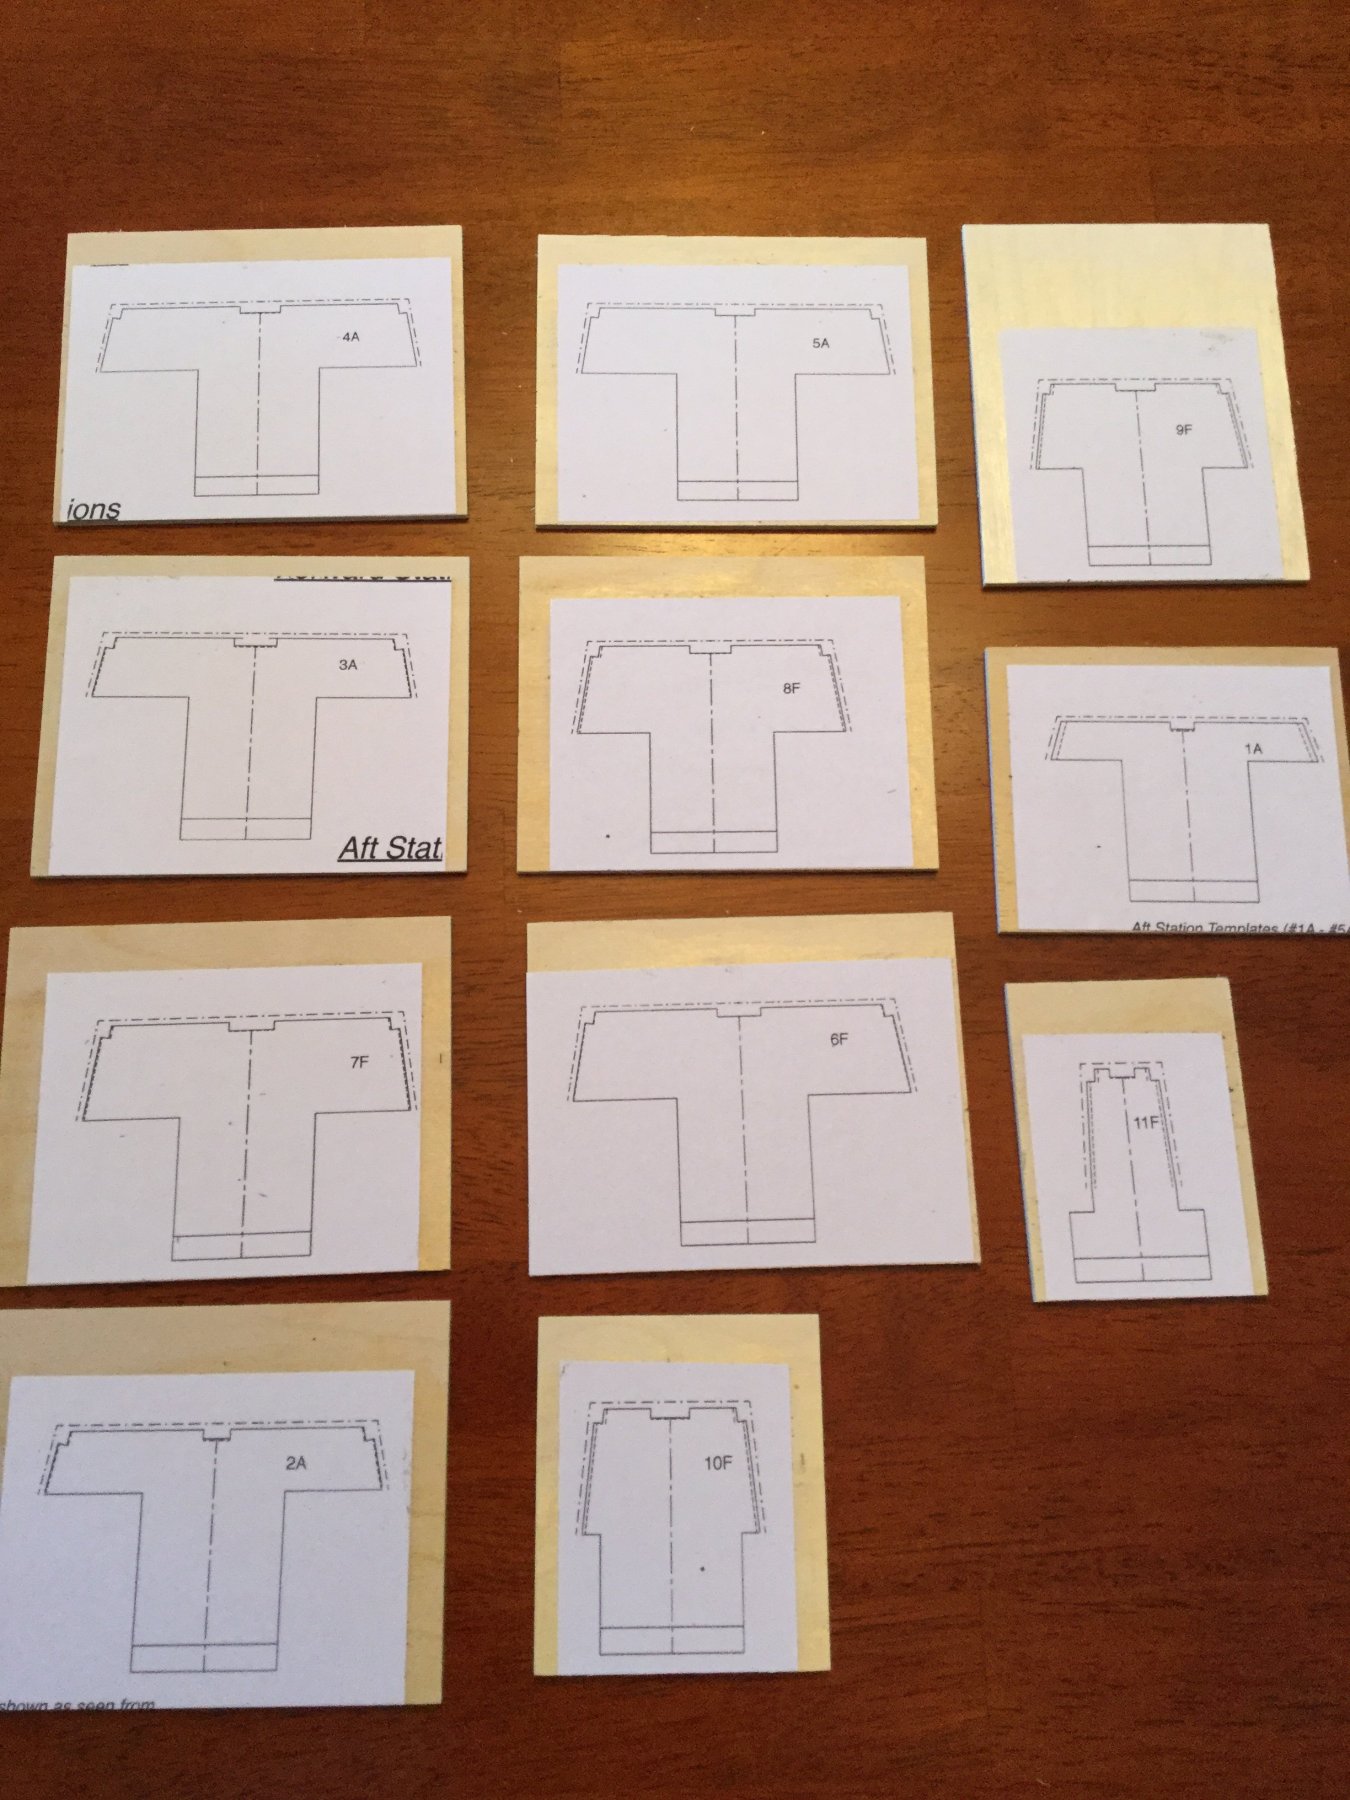
The eleven station templates were rubber cemented to 1/8" plywood blanks. They'll be cut out and beveled according to the plans using the Byrnes saw, the scroll saw and the Byrnes sander. This is the most critical part of the build, so I plan to take my time!