Supplies of the Ship Modeler's Handbook are running out. Get your copy NOW before they are gone! Click on photo to order.
×


DocBlake
-
Posts
1,811 -
Joined
-
Last visited
Content Type
Profiles
Forums
Gallery
Events
Everything posted by DocBlake
-
 Thanks, Don!
 -
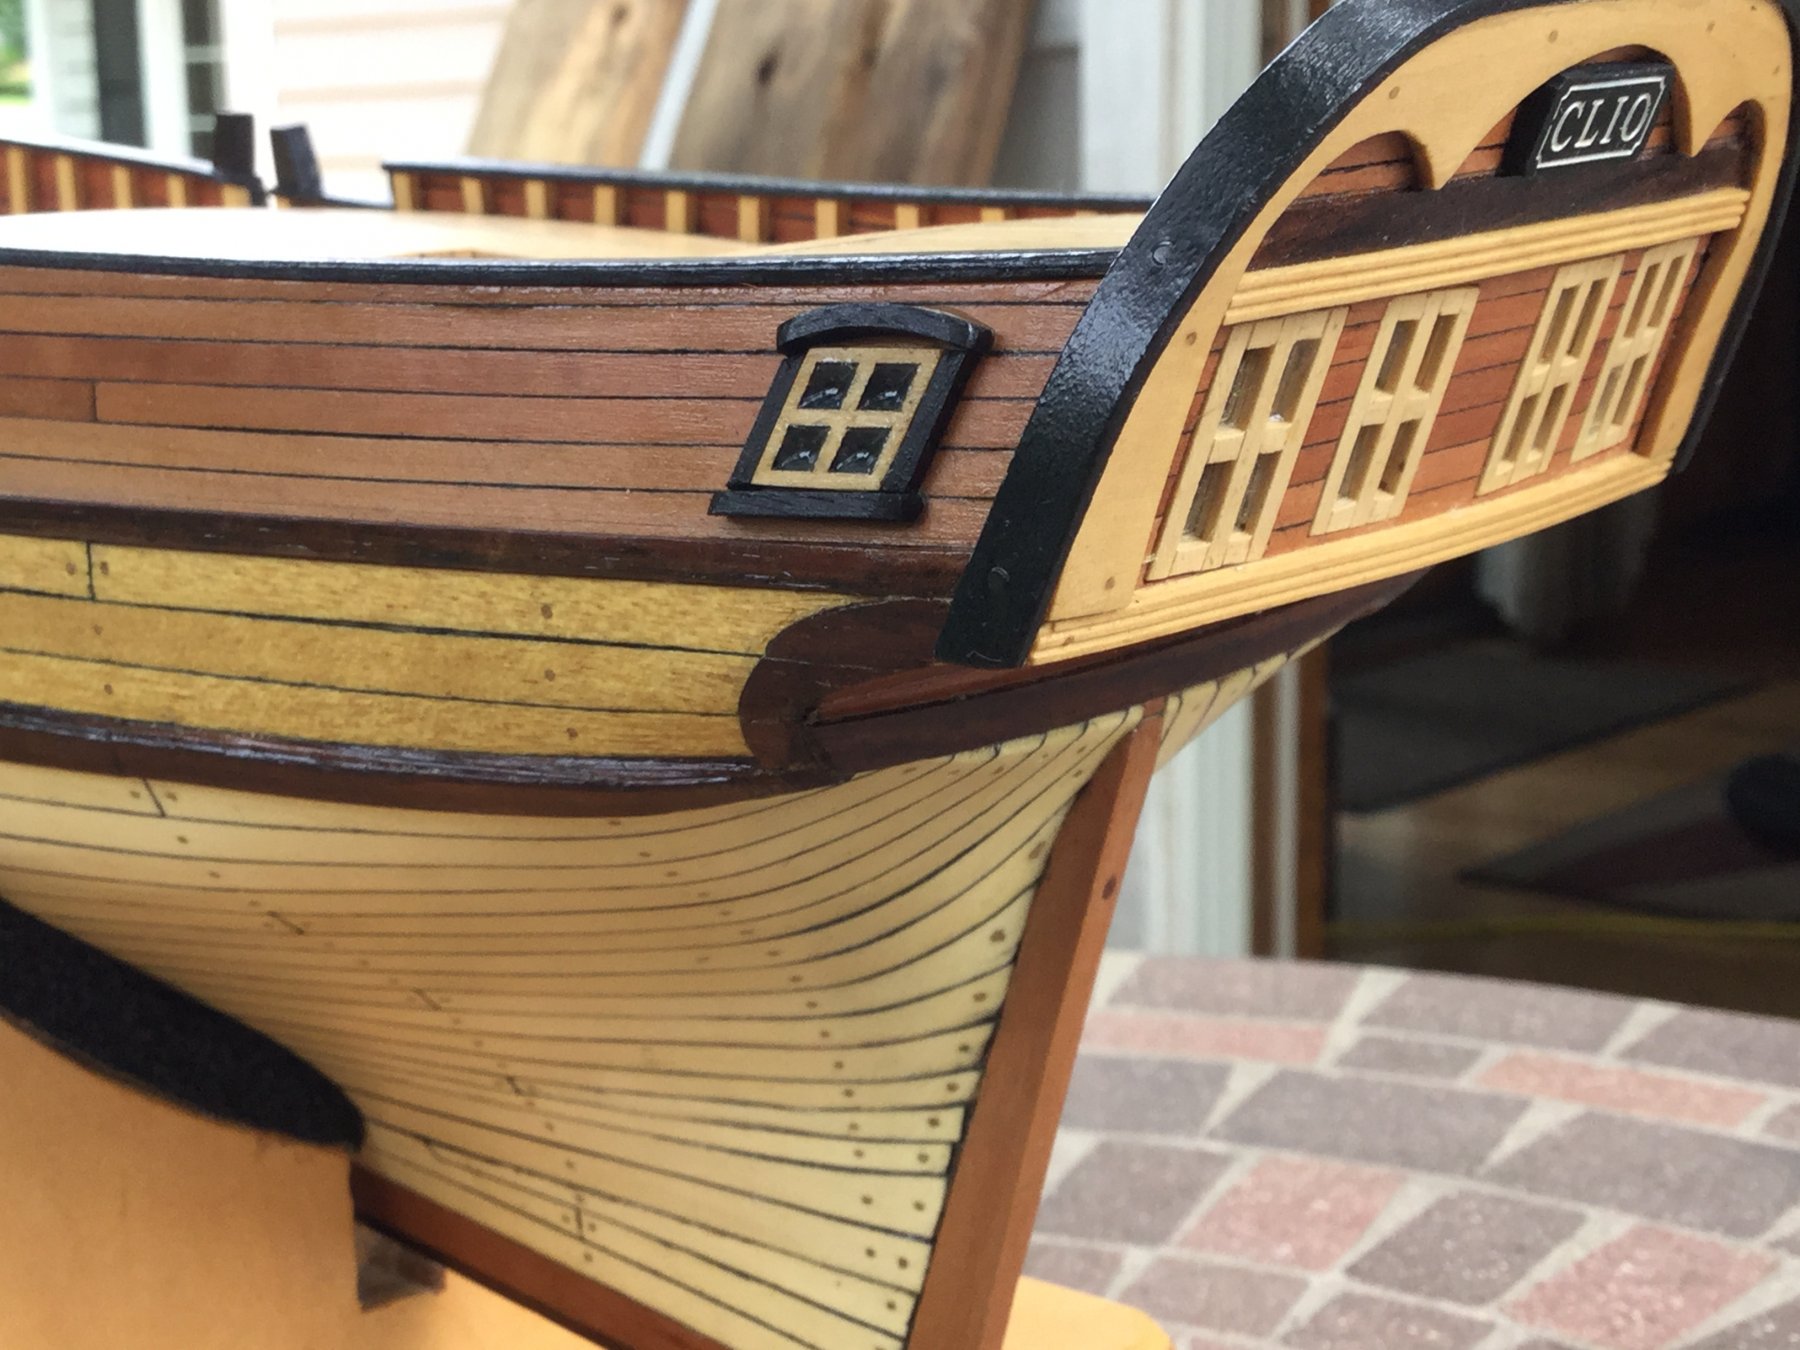
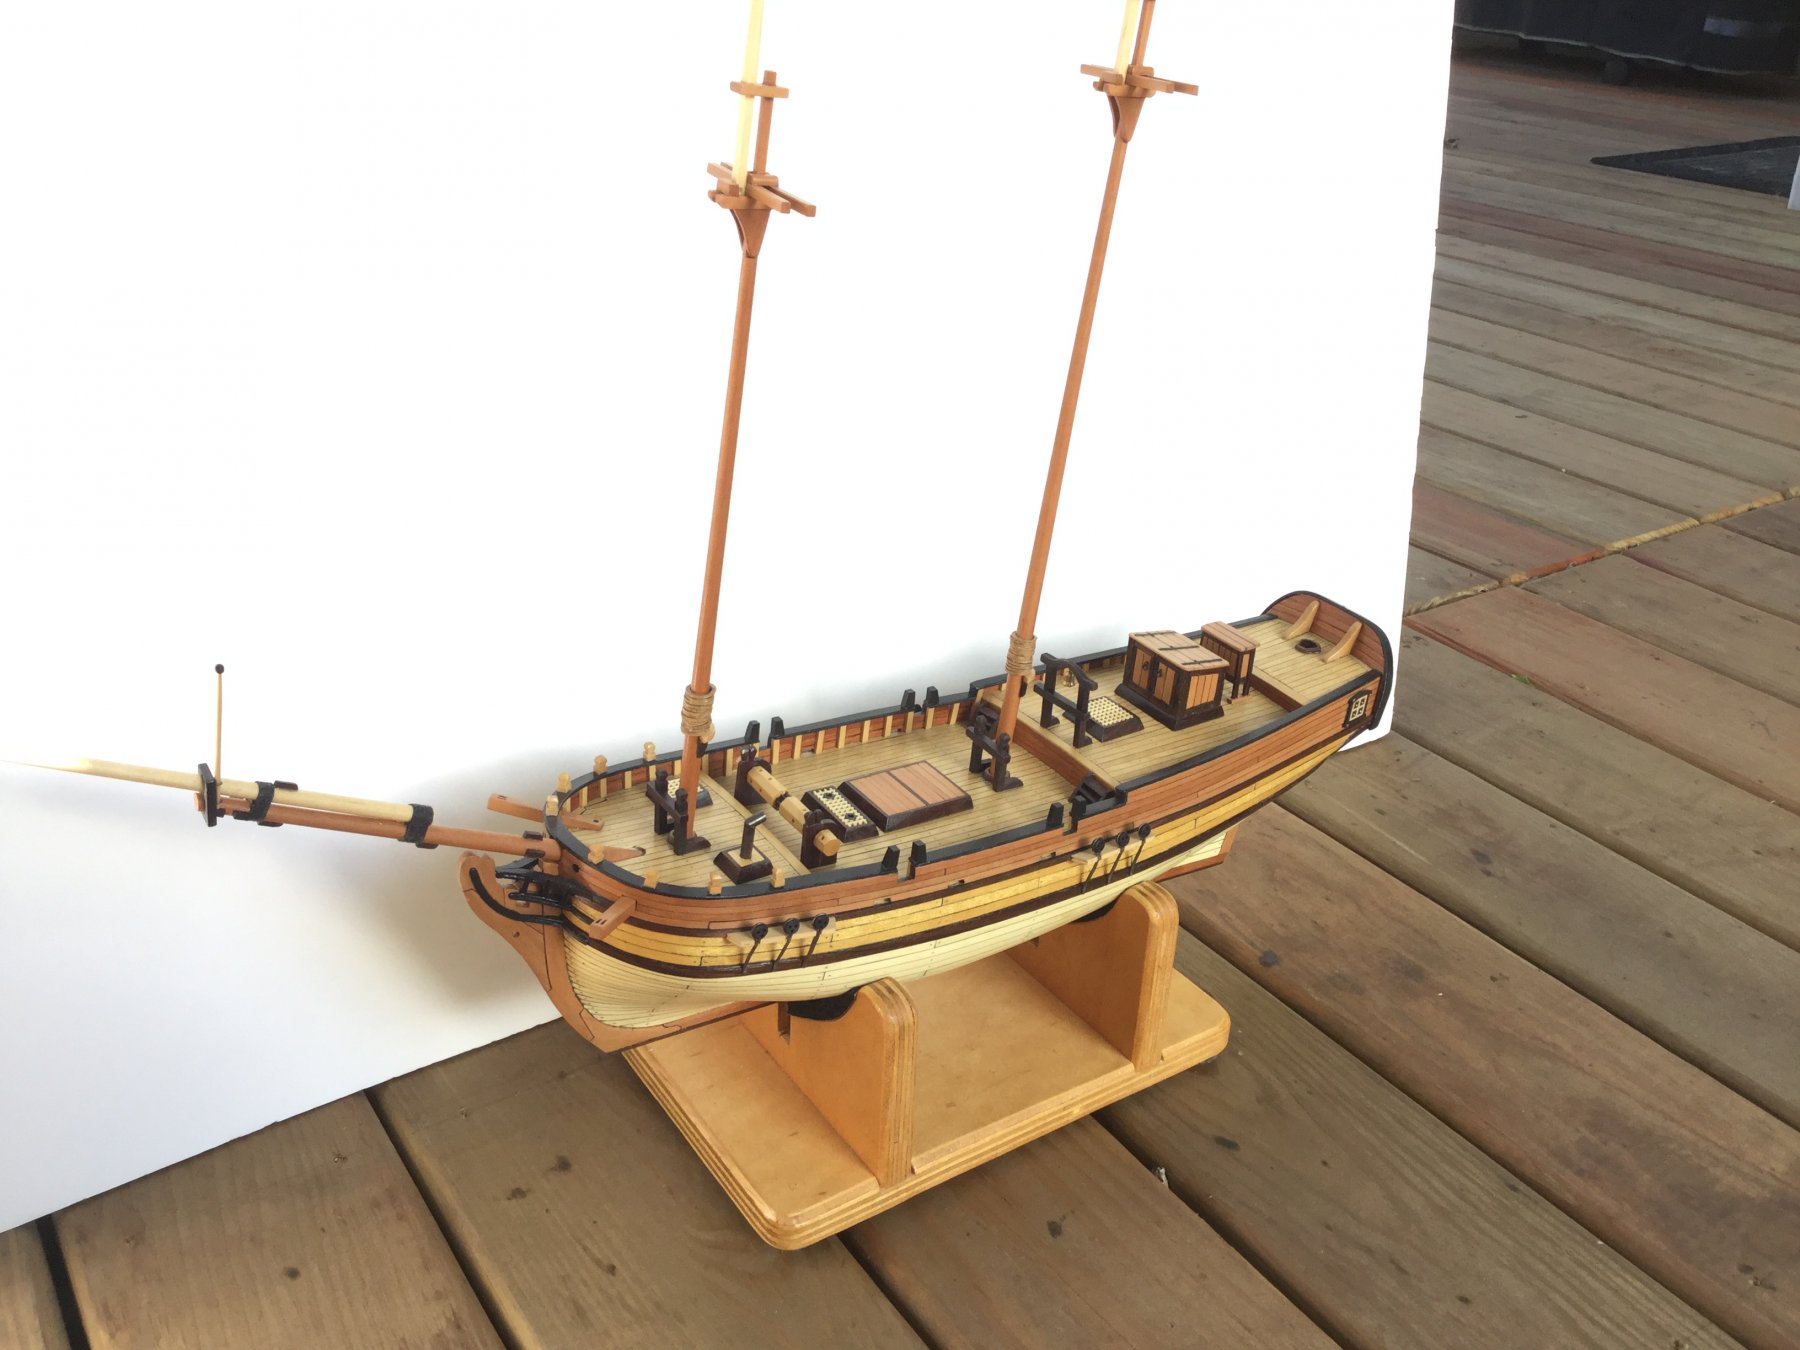
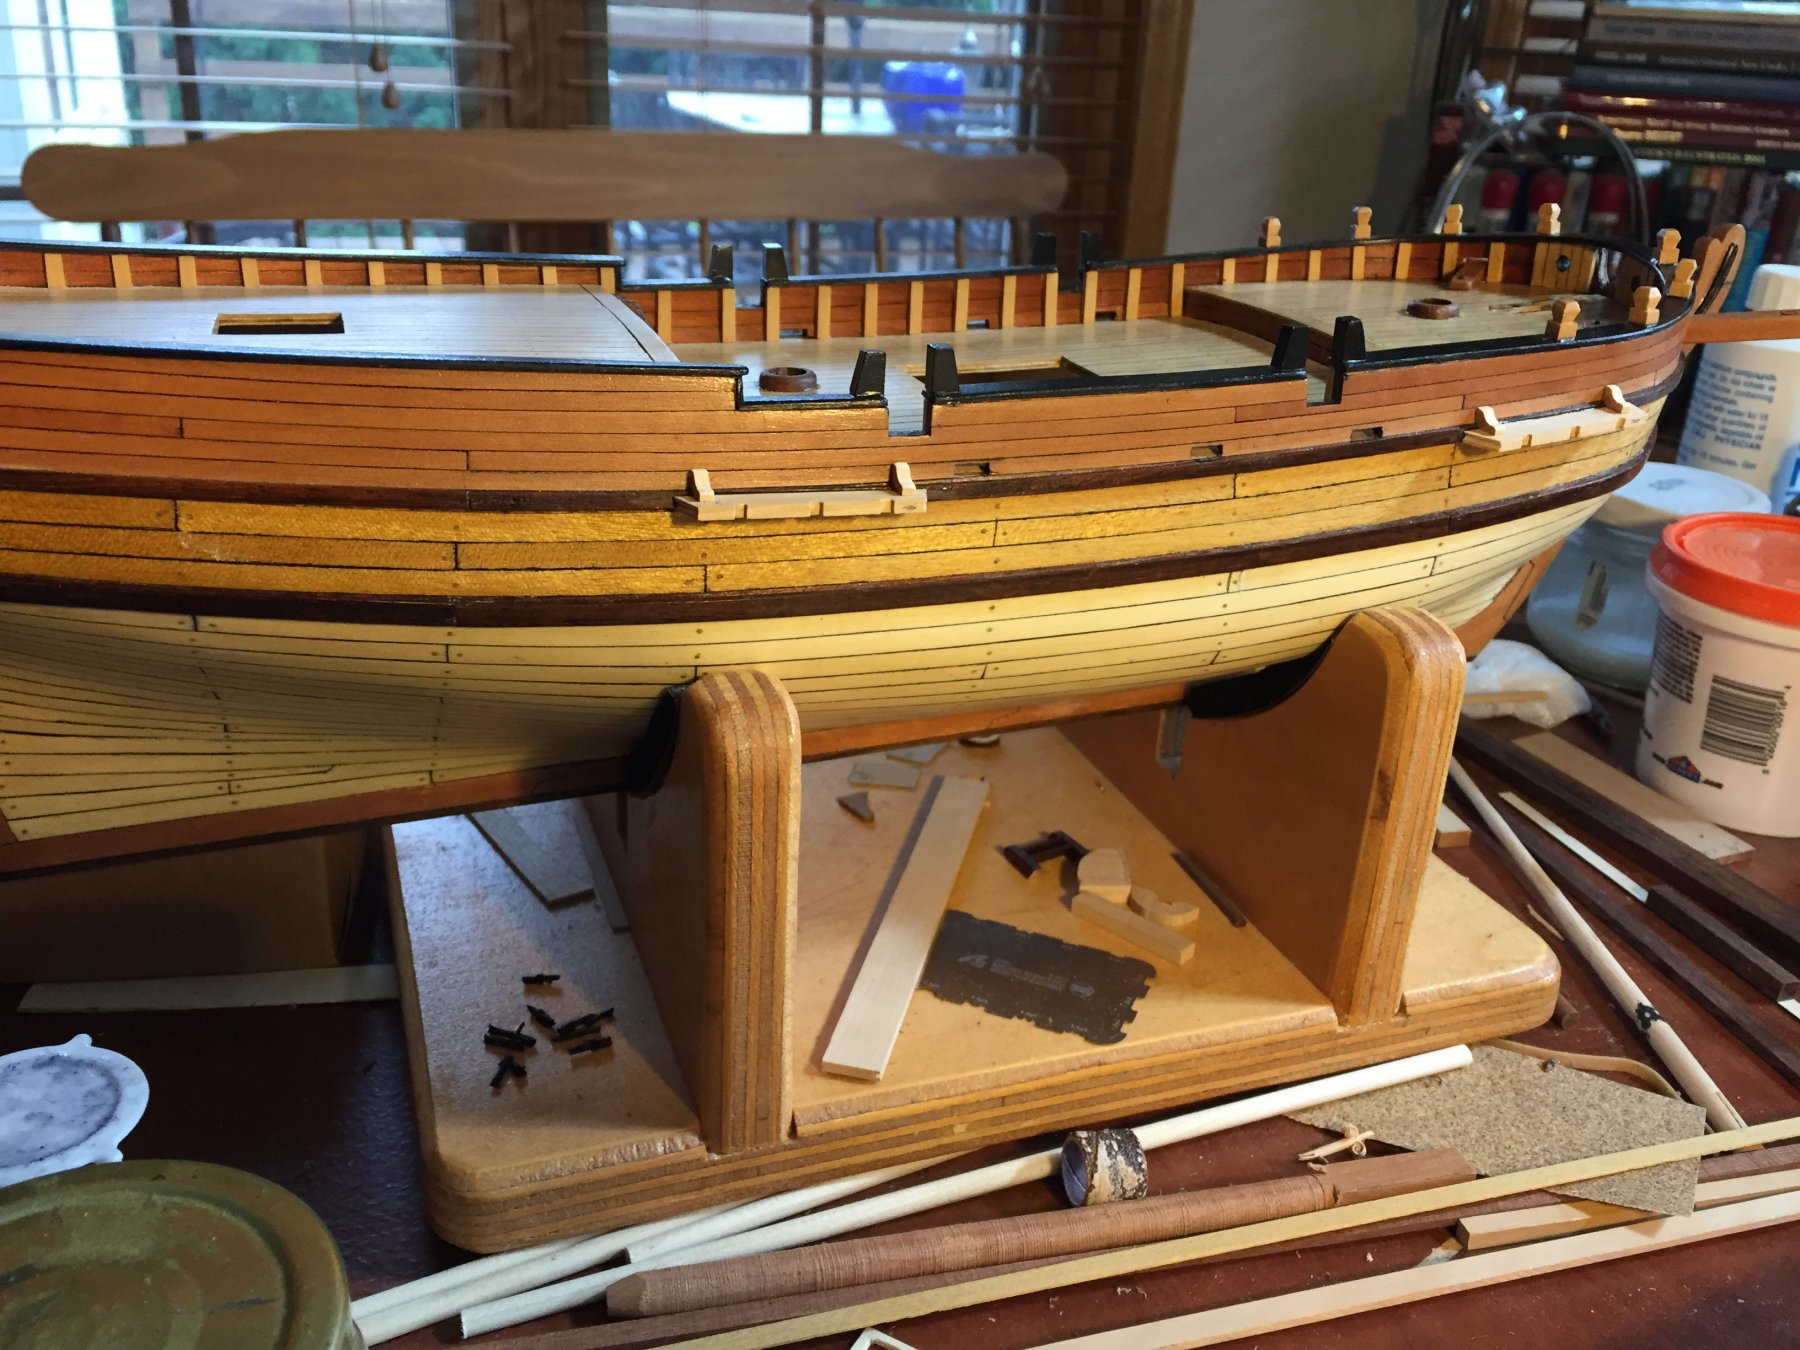
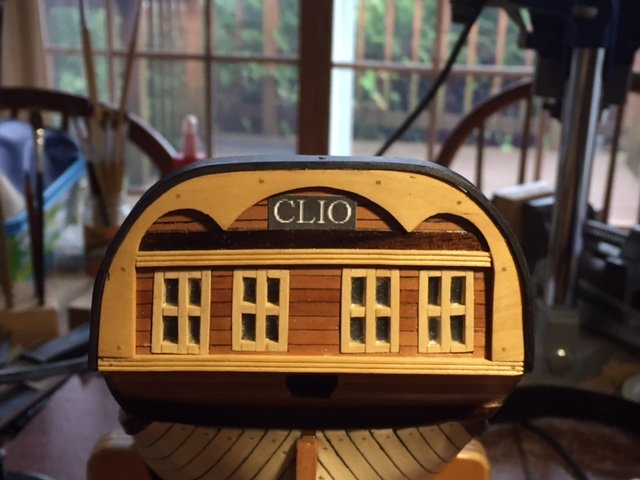
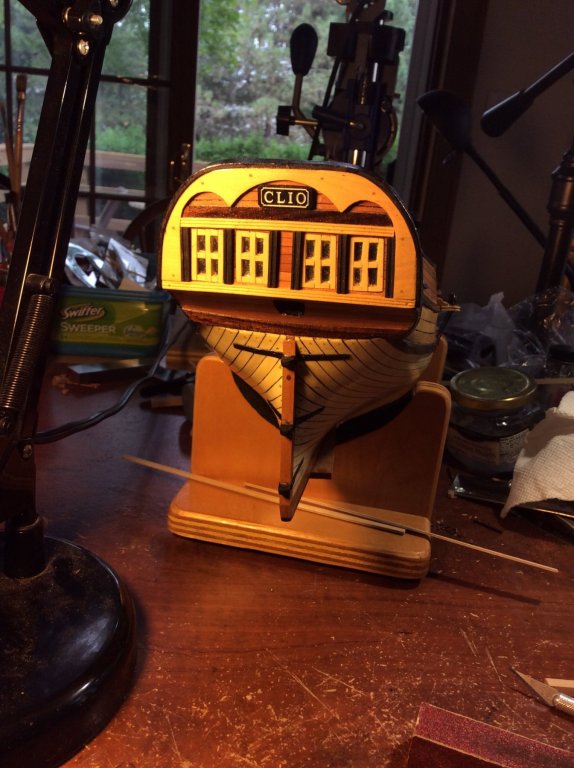
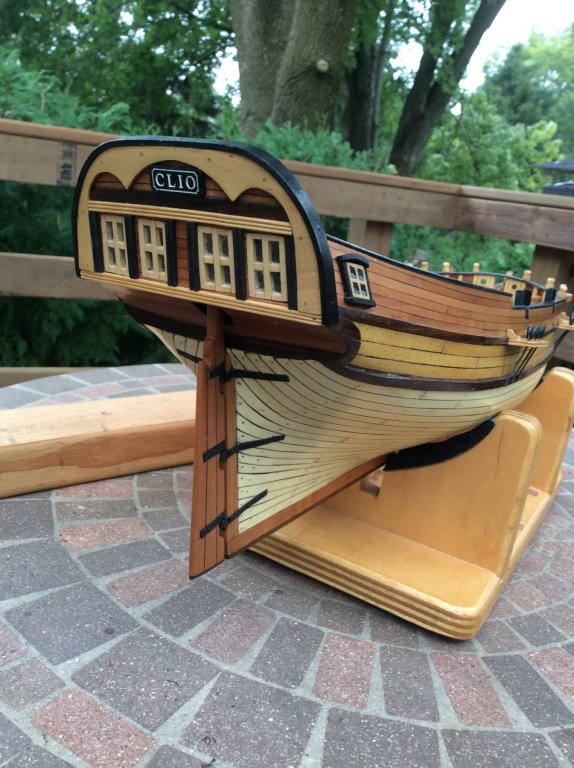
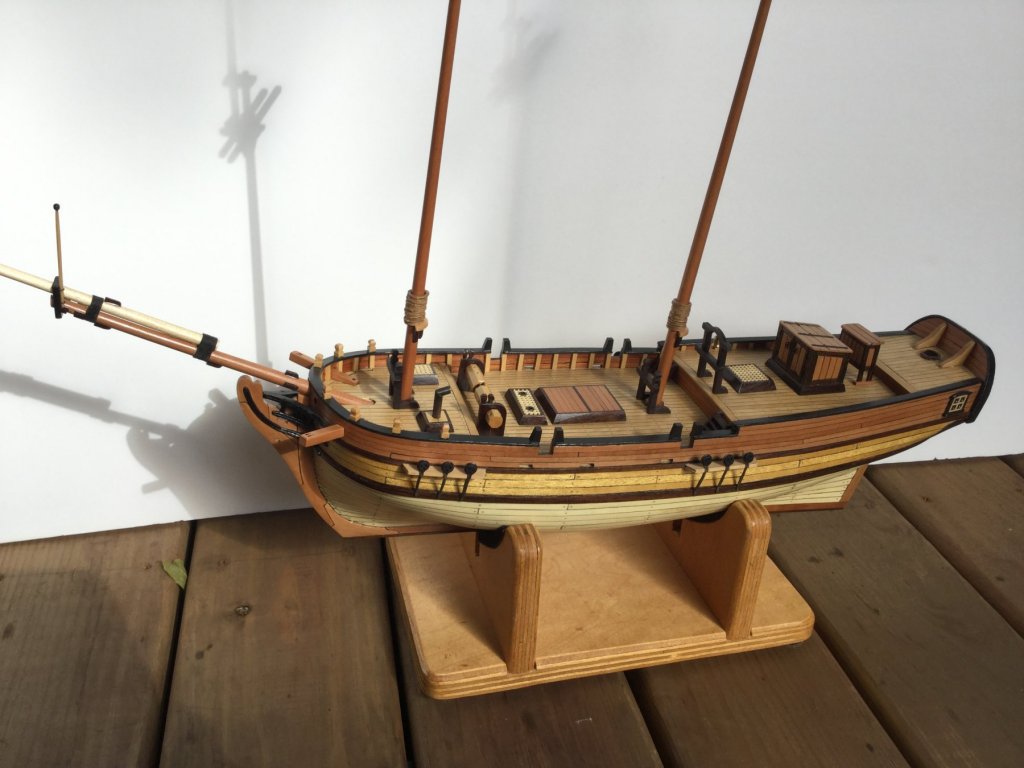
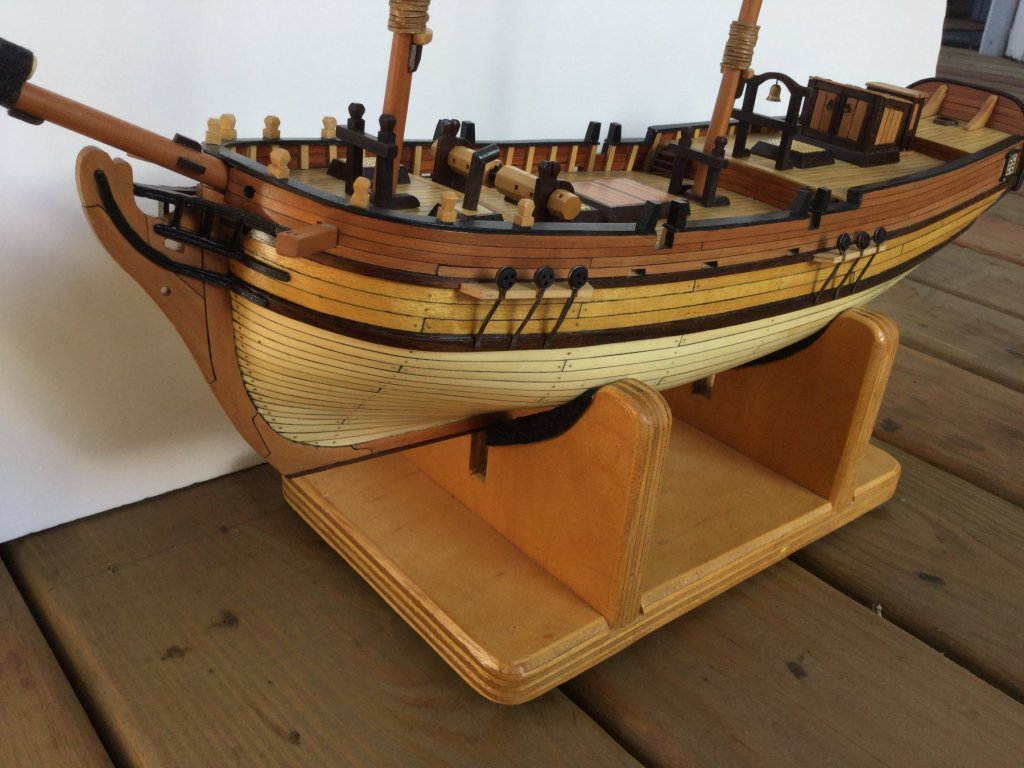
I decided I needed to punch up the stern on "Clio" (Independence). It looked kind of pale and vanilla. I added vertical beaded molding made of rosewood between the lights. I think it highlights the windows and ties them in with the quarter badges. The photos show the comparison. I added the gudgeons and pintles and mounted (temporarily) the rudder. I finished the channels. I'm ready to start the quarter deck/poop deck railings and swivel gun mounts. Then it's glue all the deck furniture in place and start rigging!

-
You are right, Gaetan. Ebony glues as well as any wood. I like to wipe it with an acetone soaked paper towel before glueup because of the high oil content. The acetone dissolves and removes the surface oil assuring a good bond. I do the same with rosewood and have never had a glue failure with either.
-
She is looking really great, Bob. Keep up the fabulous work.
- 682 replies
-
- 1
-

-
- halifax
- lumberyard
- (and 1 more)
-
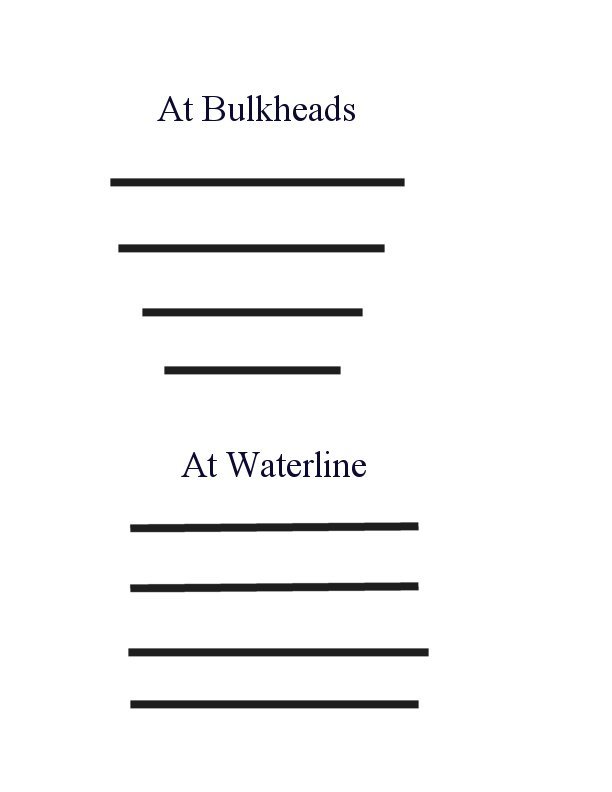
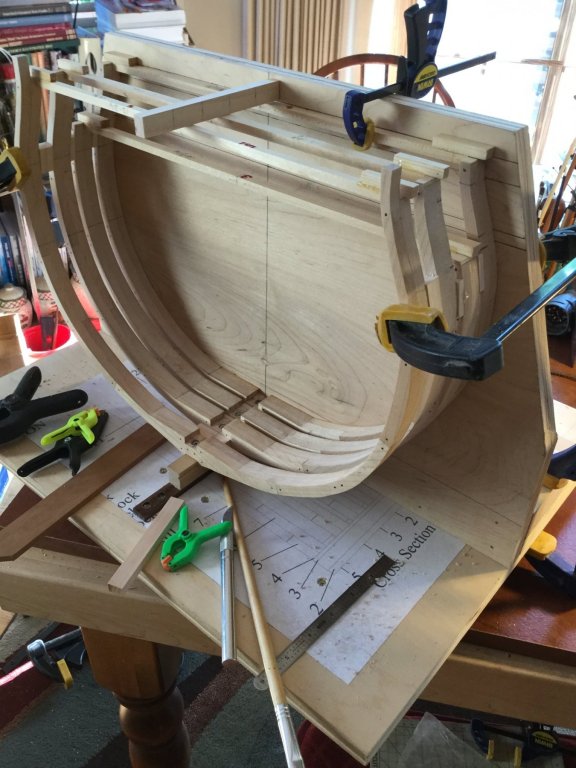
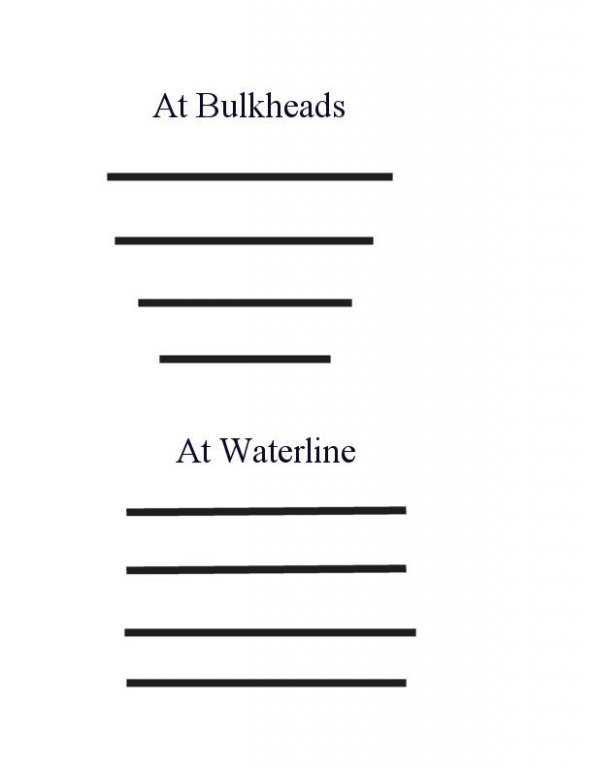
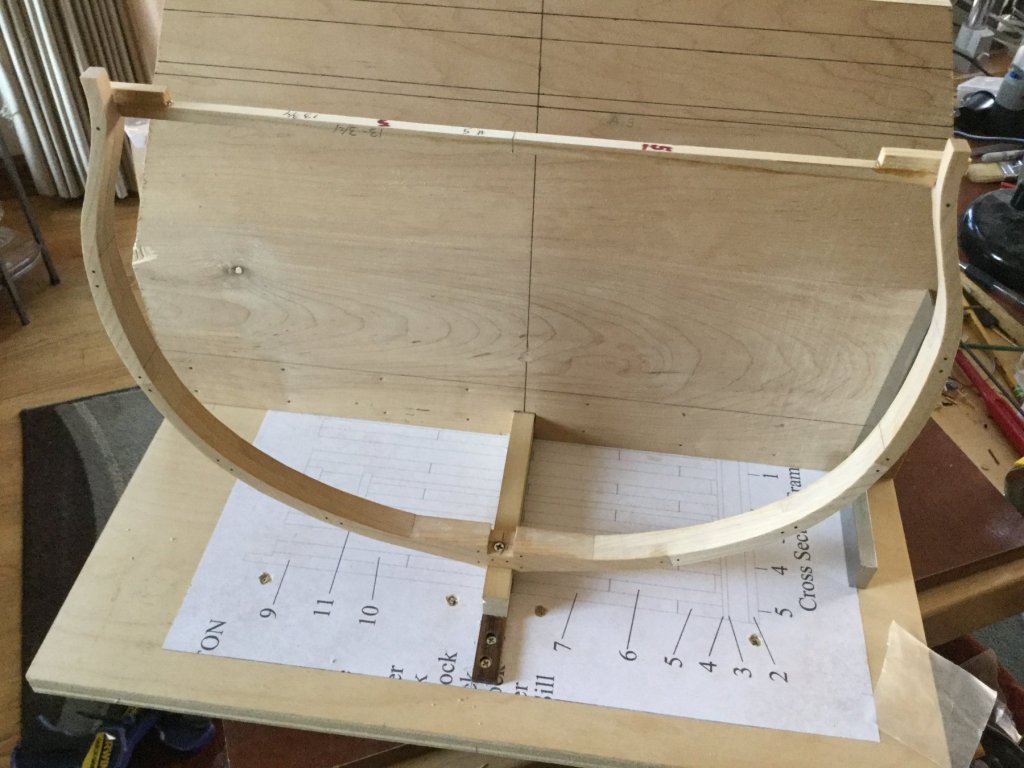
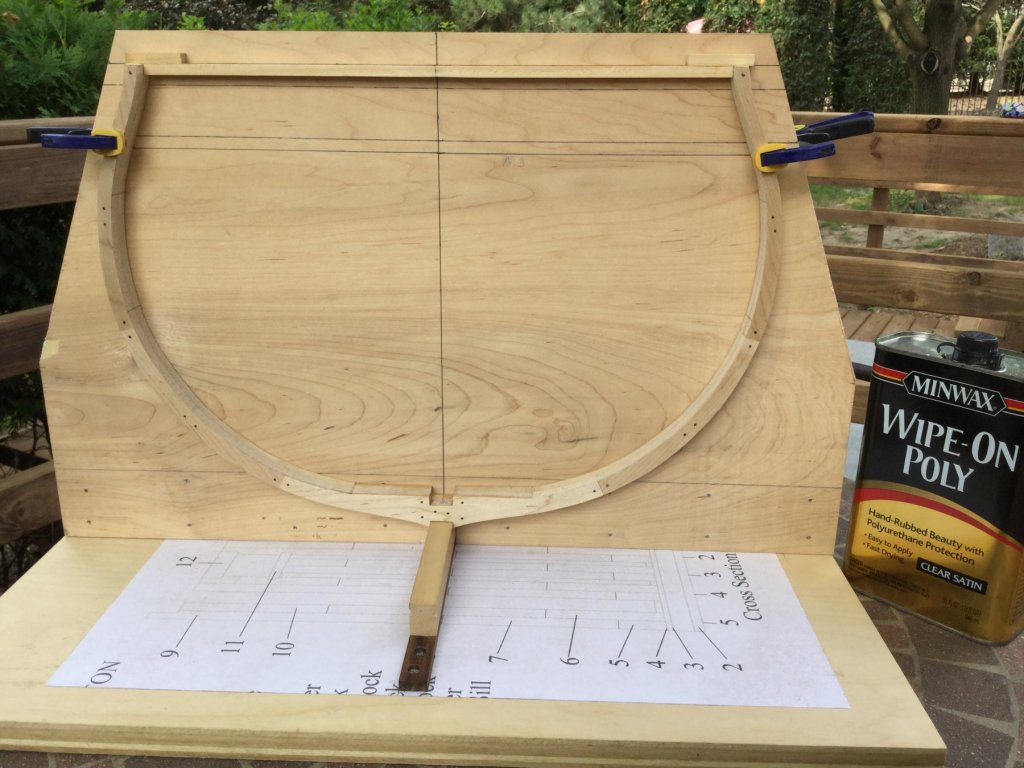
I temporarily screwed frames 4, 3 and two to the keel, adding spacers with a dab of hot glue. I then marked the mortises for the gun port sills and lintels. I will cut those off the model. At this stage, the most aft of the section, you can see that the frames define a compound curve: Tapering slightly inboard at the bulwarks as you proceed aft from frame #2, but remaining straight below the waterline to the keel. The diagram (exaggerated) shows the pattern of the frames curving inboard at the bulwarks, moving aft, while they are still straight at the waterline and below. Very well designed plans!
-
Thanks Brian! The mortise in the frame in which the keel fits is really tight - there is absolutely no play in the frame to allow misalignment. I also clamped the frame to the vertical brace and used 5 minute epoxy as glue. The frame stayed dead on.
-
Greg: I agree, now that I look at the problem again. That's what I'll do. Frame #5 has no mortises so I glued (epoxy) and screwed (1-1/4" #6 wood screw) it onto the keel. I let it dry in clamps overnight. A milestone! Next I will temporarily mount frames 4,3 and 2 to mark the mortises for the sills and lintels, then cut them off the model.
-
Hi Svein. Thanks for dropping in! I think I'll cut the rabbets later. Thanks for the input, guys!
-
I need some advice from previous builders! I'm getting ready to mount the frames, and although I've marked the locations for cutting rabbets for the gun port sills and lintels, I'm not sure if I should cut them out now, or wait until the frames are placed and some additional bracing, like deck clamps and wales are installed. There is bound to be tolerance creep, and I'd hate to have to try to repair gun ports that are not square, having been pre-cut. Cutting the rabbets into mounted frames can assure the gun ports are placed right and of the right shape, but is obviously more difficult that cutting them into the frames off the model. Any thoughts?
-
Very nice work on this pretty little boat. The wood finish is excellent. One caution: when building "Swift", another AL kit, I noticed that the channels were narrow, and when the deadeyes were rigged, the lanyards rubbed against the rail! A big No-No! I had to widen the channels, so the deadeyes were moved further outboard, and when rigged to the shrouds, the lanyards between the deadeyes no longer rubbed on the rail. This is a design flaw in "Swift", but might be present in other AL "small" ships that have little or no tumblehome at the bulkheads.
- 91 replies
-
- 1
-
-
- artesania latina
- Virginia
- (and 1 more)
-
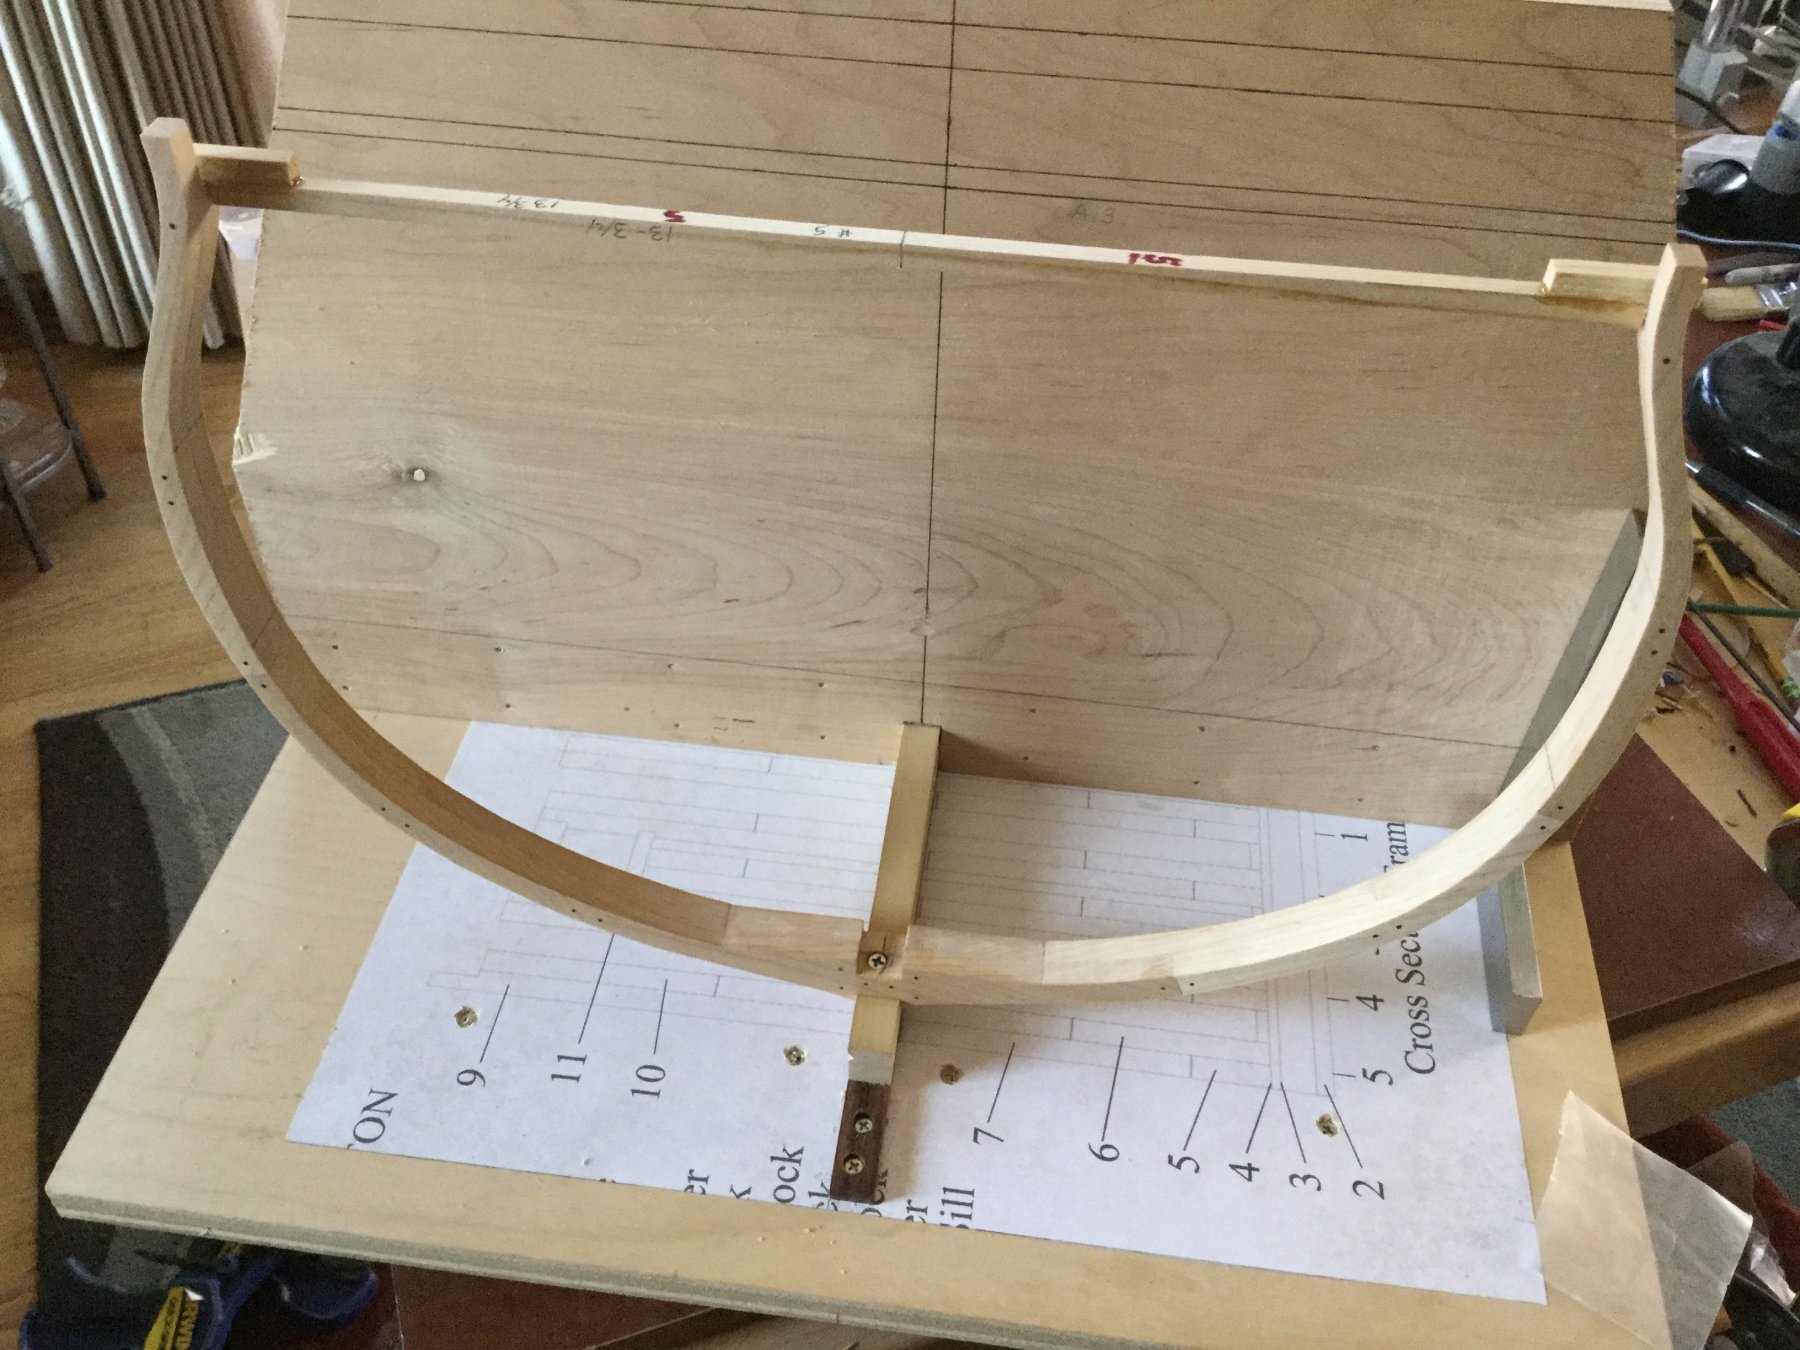
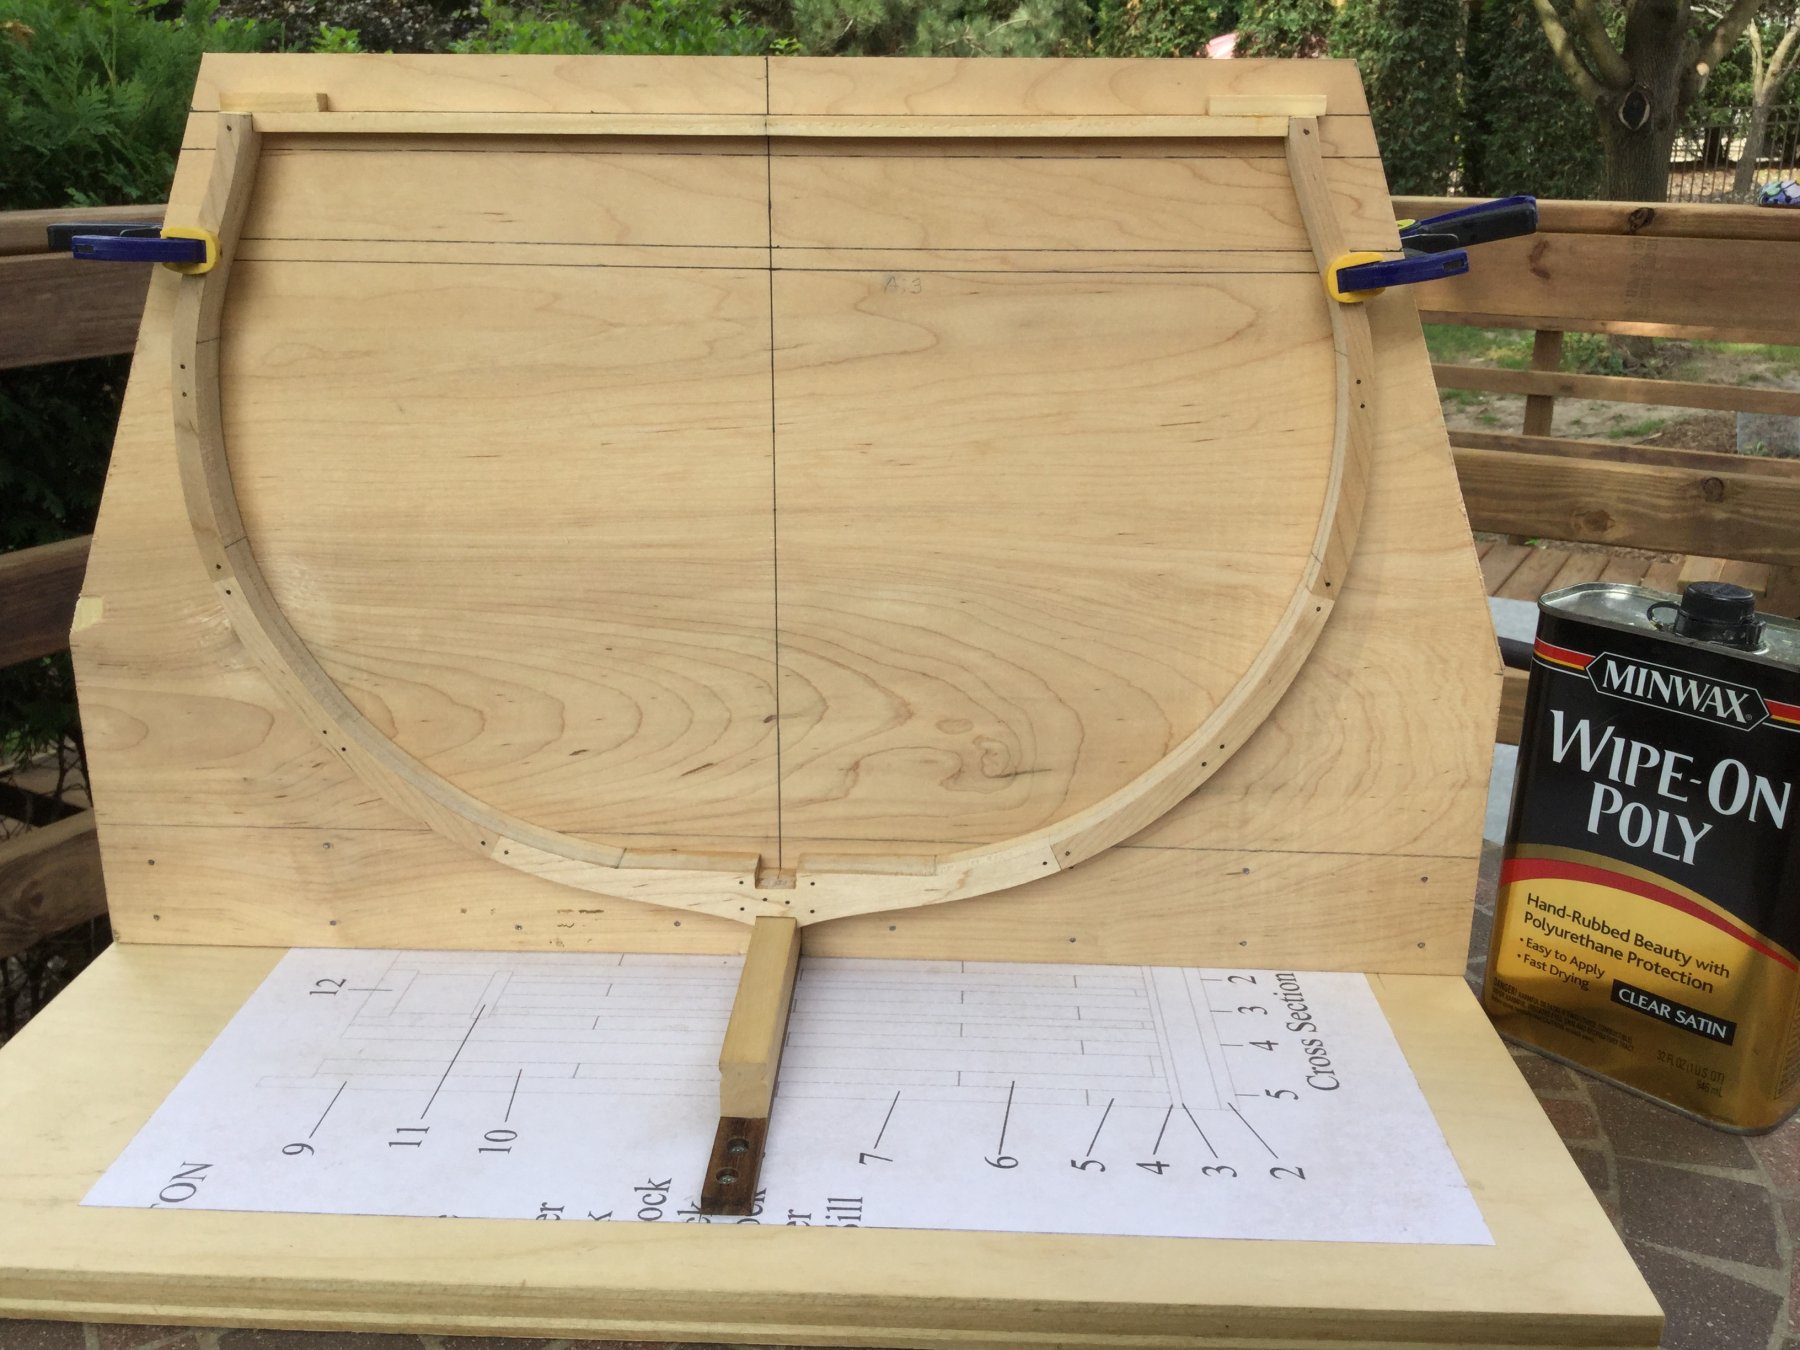
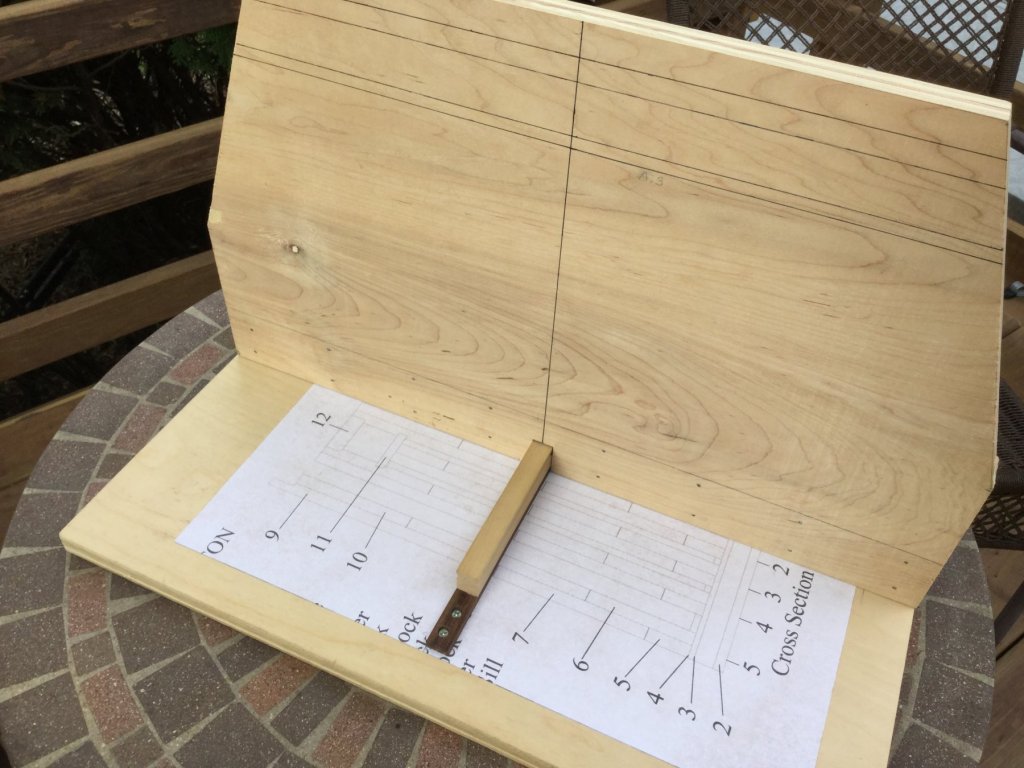
I'm finishing up a number of small tasks before starting to mount the frames on the keel. I'm marking out the rabbets for the gun port sills and lintels, and adding some temporary bracing across the top timbers of the frames to stiffen them. They are attached with Weldbond, so I can dissolve the bond with alcohol. The first photo shows my build board with the keel and false keel screwed to it. The keel assembly is long on both ends so it can be trimmed flush after the hull is removed from the board. The second photo is my brace for ensuring all the frames are plumb. The lines represent the top of the frames and the lines for the rabbets to receive the sills and lintels of the ports. The third photo shows a frame in place with a temporary brace across the top.
-
The grain is tolerable at this large scale, Brian. But blood wood becomes really dark with age. Red heart is a pretty scarlet when freshly sawn. but ages to a muddier reddish brown over time. All in all I think boxwood is the best choice. Chuck's Syren carriages are boxwood, and what I used in building my AVS "Patrick Henry"

-
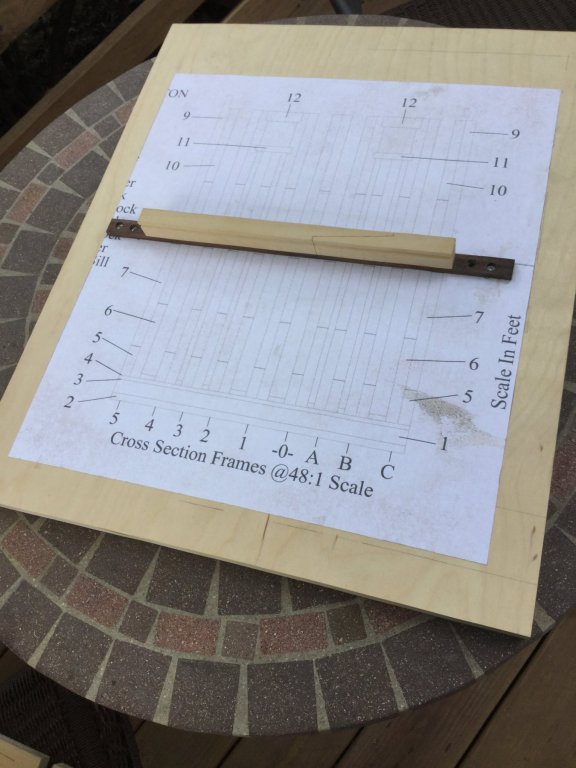
I'll be watching this one too! Cross sections are so interesting to me. JP: What is the quality of the wood in the older kit?
-
Nice progress. The rigging really makes the ship come alive!
-
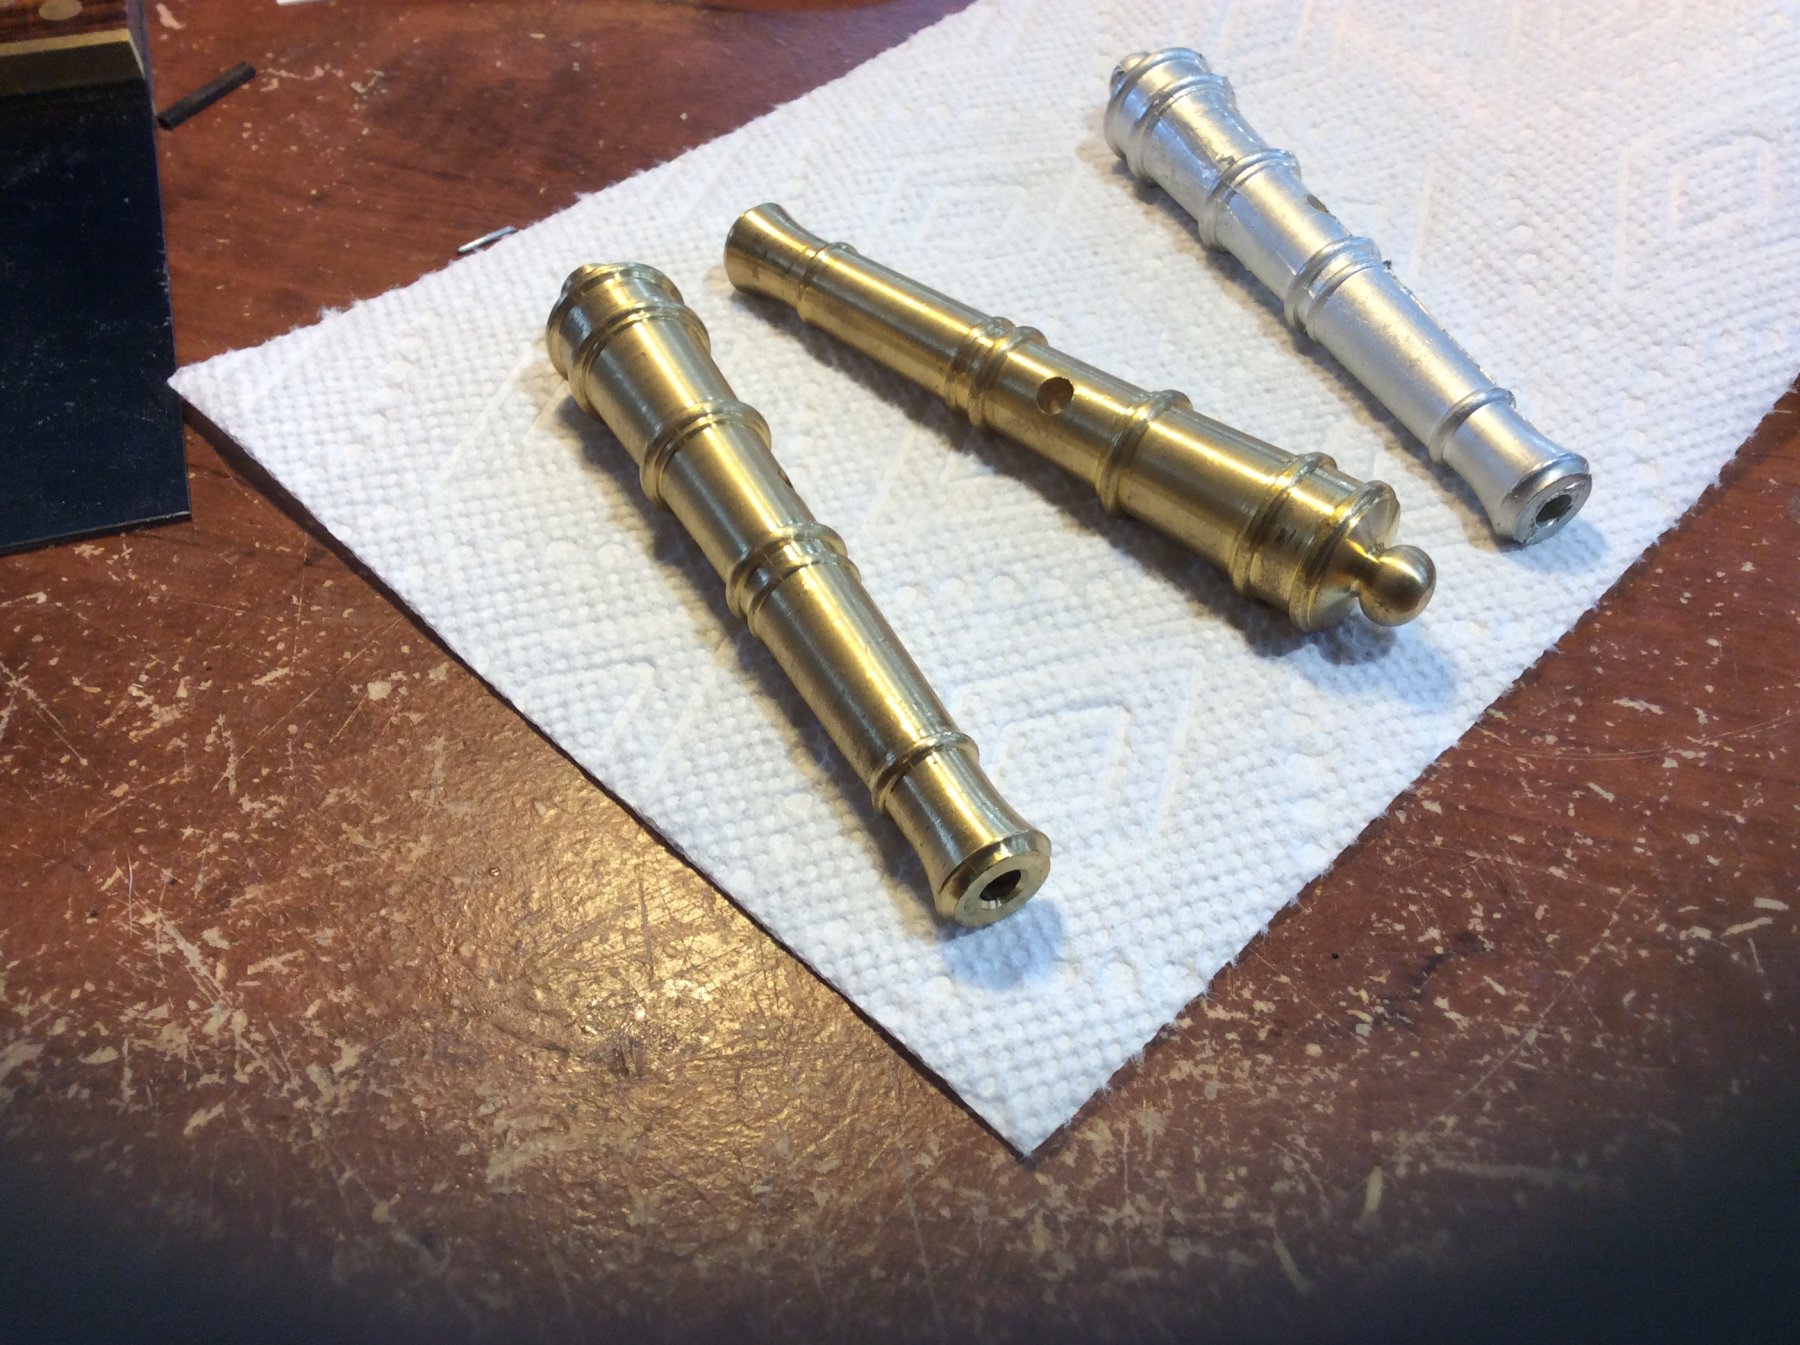
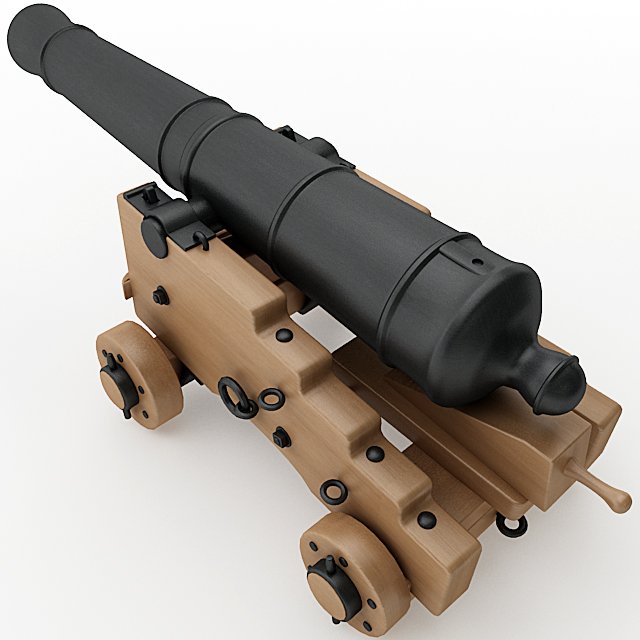
Model shipways did sell me two cannons without the rest of the kit. The cost was $15 each plus shipping. Given their size, I thought that was probably fair. When I opened the package I was pleased to find that the cannons were turned brass, and not Britannia metal (as they were in the kit I had purchased awhile back). Here is a comparison photo. I thought maybe the cascabel was too large, but the other photo shows an 18th century naval gun, and the cascabel is fairly large on it also. In addition the hole for the trunnion is not offset...well, you can't have everything! The next question is to make the carriage our off boxwood, or use bloodwood like I plan to use to plank the inboard bulwarks. the boxwood allows the detail on the carriage to really stand out. Any thoughts?

-
I use that same technique, Jon. For the initial placement I use a very short pin (1mm protruding) in the part to be placed so it can more accurately be situated. After the hole is drilled l substitute a longer permanent pin for final attachment. It works well.
- 67 replies
-
- 2
-
-
- rattlesnake
- mamoli
- (and 1 more)
-
Great solution, David! The rails look great. I'm ready to add the railings to Independence, and I've decided to build them on the model. They have an added problem in that they are tapered. Each baluster must match the others. I'll take my time and hopefully it will turn out. Keep up the great work! BTW: The headrails look great. also. A million times better that the metal junk the kit provides.
- 67 replies
-
- 2
-
-
- rattlesnake
- mamoli
- (and 1 more)
-
Thanks, guys!
-
The chainplates were blackened and the deadeyes stropped. They were then mounted on the channels, with the chainplates nailed to the wales. The coverstrips, which cover the chainplates and "lock" them in place have not yet been added.

-
You are right, Mark. I think I'll go ahead with the 12 pouinders. Don: This is a warm up for the real project Mike and I are planning: a 1/24 scale full model of "Hannah". The only question is will it be rigged or admiralty style!
-
I don't want to cast or turn the cannons for this model. Model Expo has a battle station kit for a smooth bore 18th century naval cannon. I thought it was a 9 pounder, but it turns out the measurements are most compatible with a 12 pounder, according to Hahn's tables for cannon dimensions. The differences are pretty small. For example a 9 pounder cannon is 93" long, while a 12 pounder is 97.97" long. It's the same for the carriages. Model expo is willing to sell me two cannons, without the rest of the kit. Can I swap out the 9 pounders for 12 pounders and still show my face around here?
-
I glued the channels in place. I've read in a couple of sources that the stress on the channels by the shrouds is upward and inward. Knees were sometimes used to counter the forces, but were planed atop the channels rather than underneath. Here is a photo of Robert Bruckshaw's HMS Brittania with the knees on top. I cut out some boxwood knees and set them in place in the second photo. It IS a different look, but there is historical precedent, I guess. Anyone have comments?


-
Amazing work! I wonder if you could have fit this saw in that space? I purchased it from a company in Japan (took 2 weeks to arrive) and it is a dream to use! Here's a link to Clare Hess' blog about the saw and how to buy it: https://shipmodeler.wordpress.com/2015/05/19/a-super-fine-cut-japanese-hobby-saw-hishika-industries/

- 648 replies
-
- 4
-
-
- niagara
- model shipways
- (and 1 more)