DocBlake
-
Posts
1,811 -
Joined
-
Last visited
Content Type
Profiles
Forums
Gallery
Events
Everything posted by DocBlake
-

Generic Sharpie by DocBlake
DocBlake replied to DocBlake's topic in - Build logs for subjects built 1851 - 1900
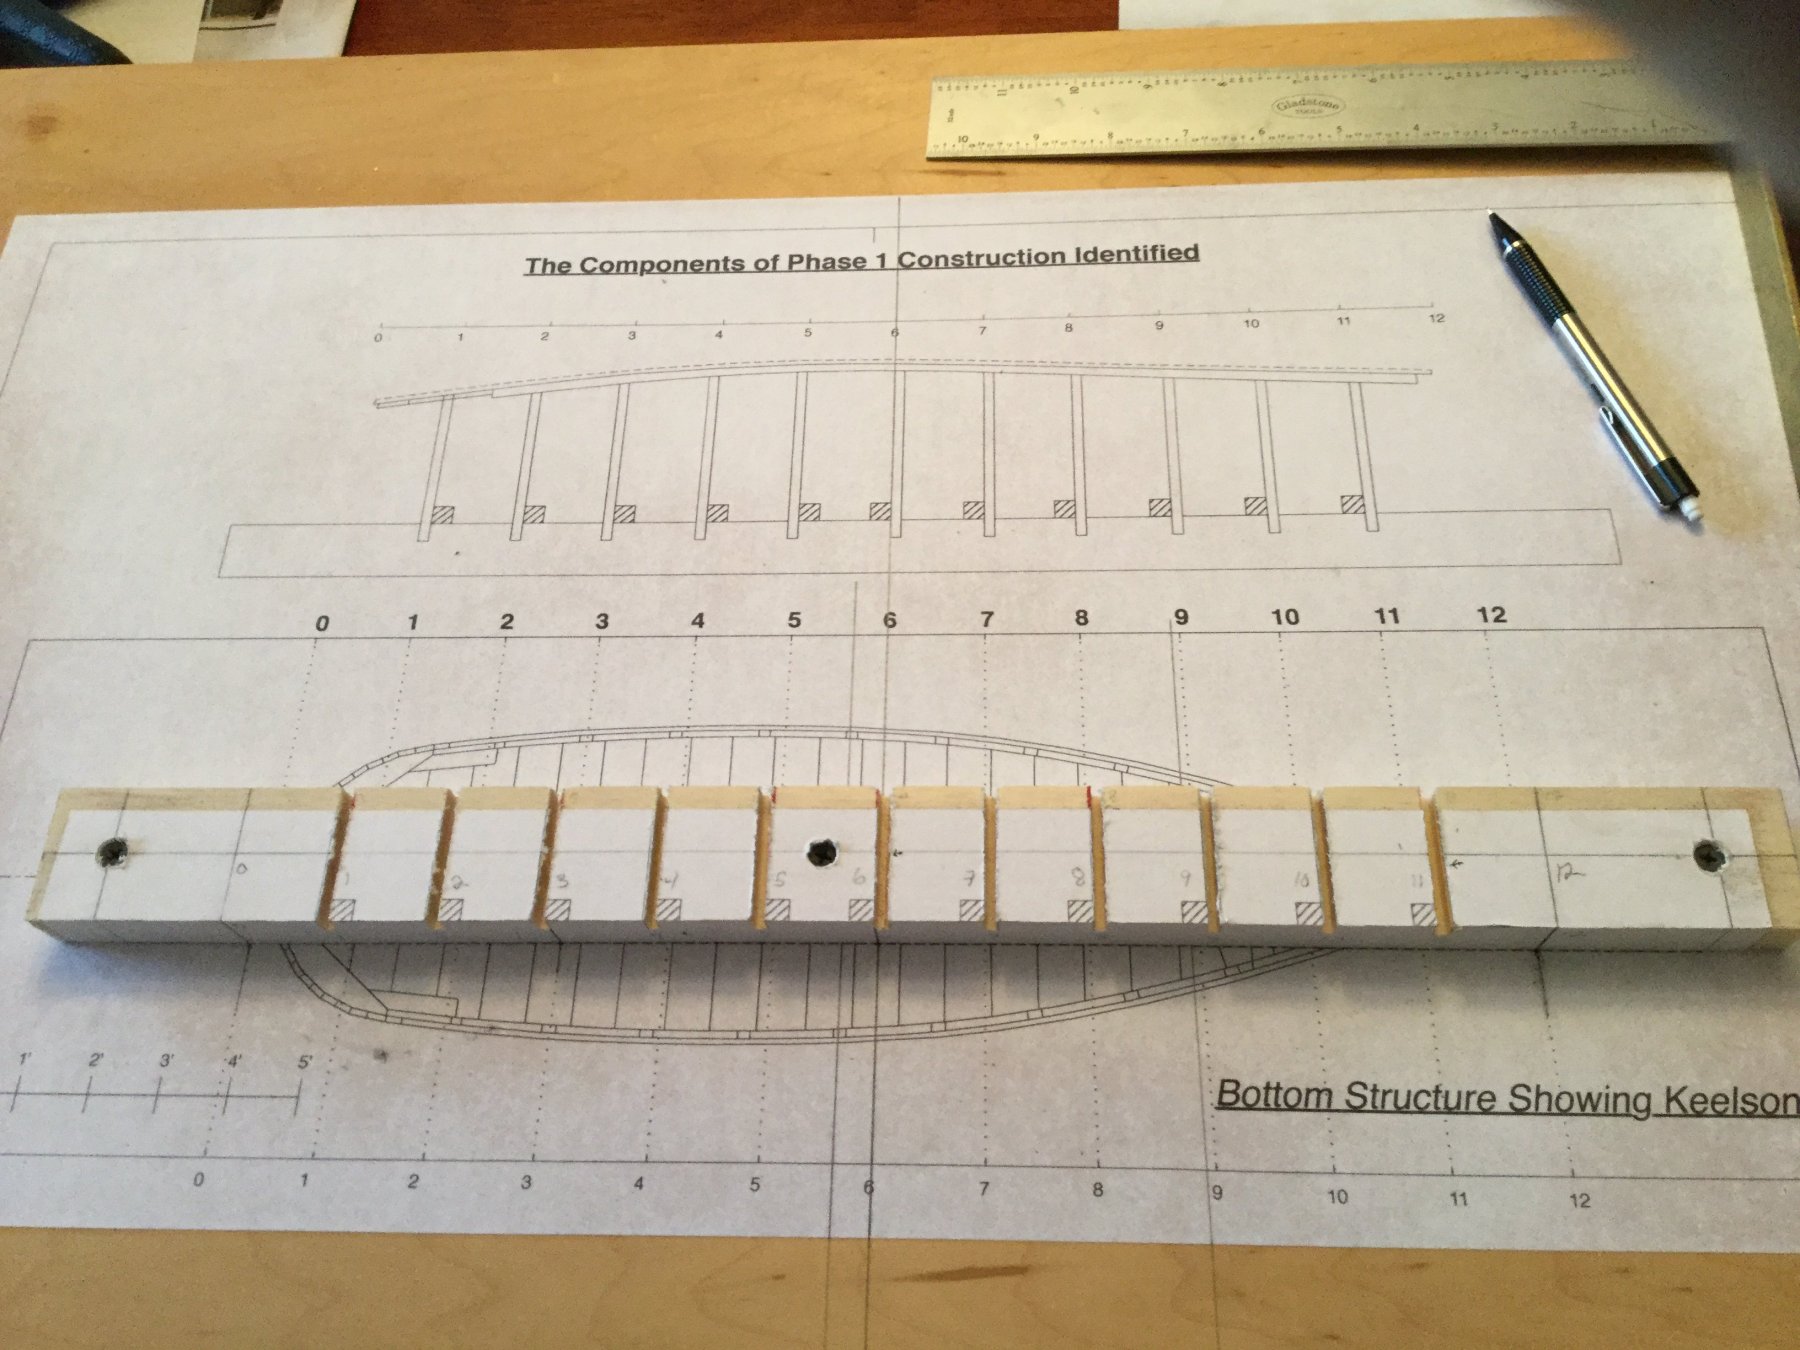
After removing the rip fence from my Byrnes saw, I set the carbide ripping blade to 1/4". I then cut 11 notches wide enough to fit a thickness of 1/8" aircraft plywood. Using the template on the plans, I carefully screwed Building Jig 1 to the main build board. Next comes shaping the station templates. These are 1/8" plywood bulkheads that fit in the grooves on the jig and have cutouts for the chines and keelson. The bottom of the boat is then planked in this " up side down" position.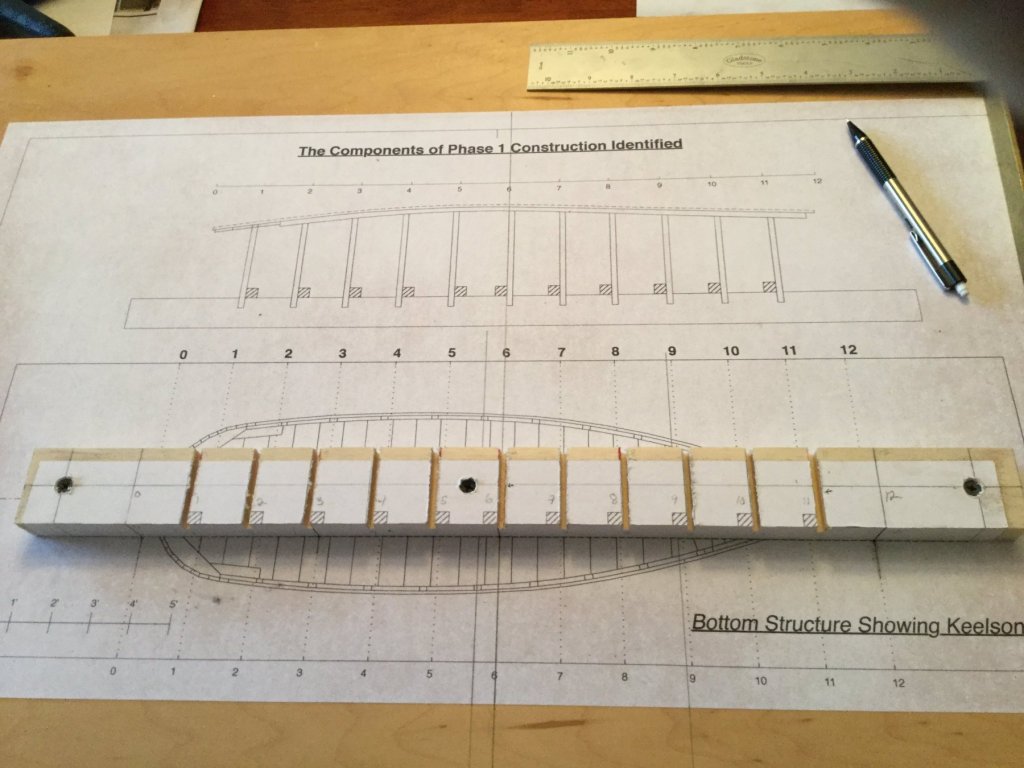
-
Generic Sharpie by DocBlake
DocBlake replied to DocBlake's topic in - Build logs for subjects built 1851 - 1900
Maybe not! I am going to show my POF Armed Virgina Sloop though. -
Yup. It's a combination of tapering and edge bending. I use a clothes iron to bend my planks. I've tried Chuck Passaro's method with a hair dryer, but it just doesn't work for me. Maybe I'm too impatient! If I remember planking my Independence, I started tapering the planks at the bow after I had 2 or 3 strakes in place.
- 126 replies
-
- 2
-

-
- fly
- victory models
- (and 1 more)
-
Looks good. Remember, the bow is appreciably narrower than the hull amidships. You need to start tapering the planks a bit at the bow.
- 126 replies
-
- 4
-
-
- fly
- victory models
- (and 1 more)
-
That looks great. A good base for the second planking!
- 126 replies
-
- 3
-
-
- fly
- victory models
- (and 1 more)
-
I'm sure there would be a lot of interest in "Rattlesnake".
-
It's always hard to rip something out and redo it, but you did a great job. The second planking should float into place!
- 126 replies
-
- 3
-
-
- fly
- victory models
- (and 1 more)
-
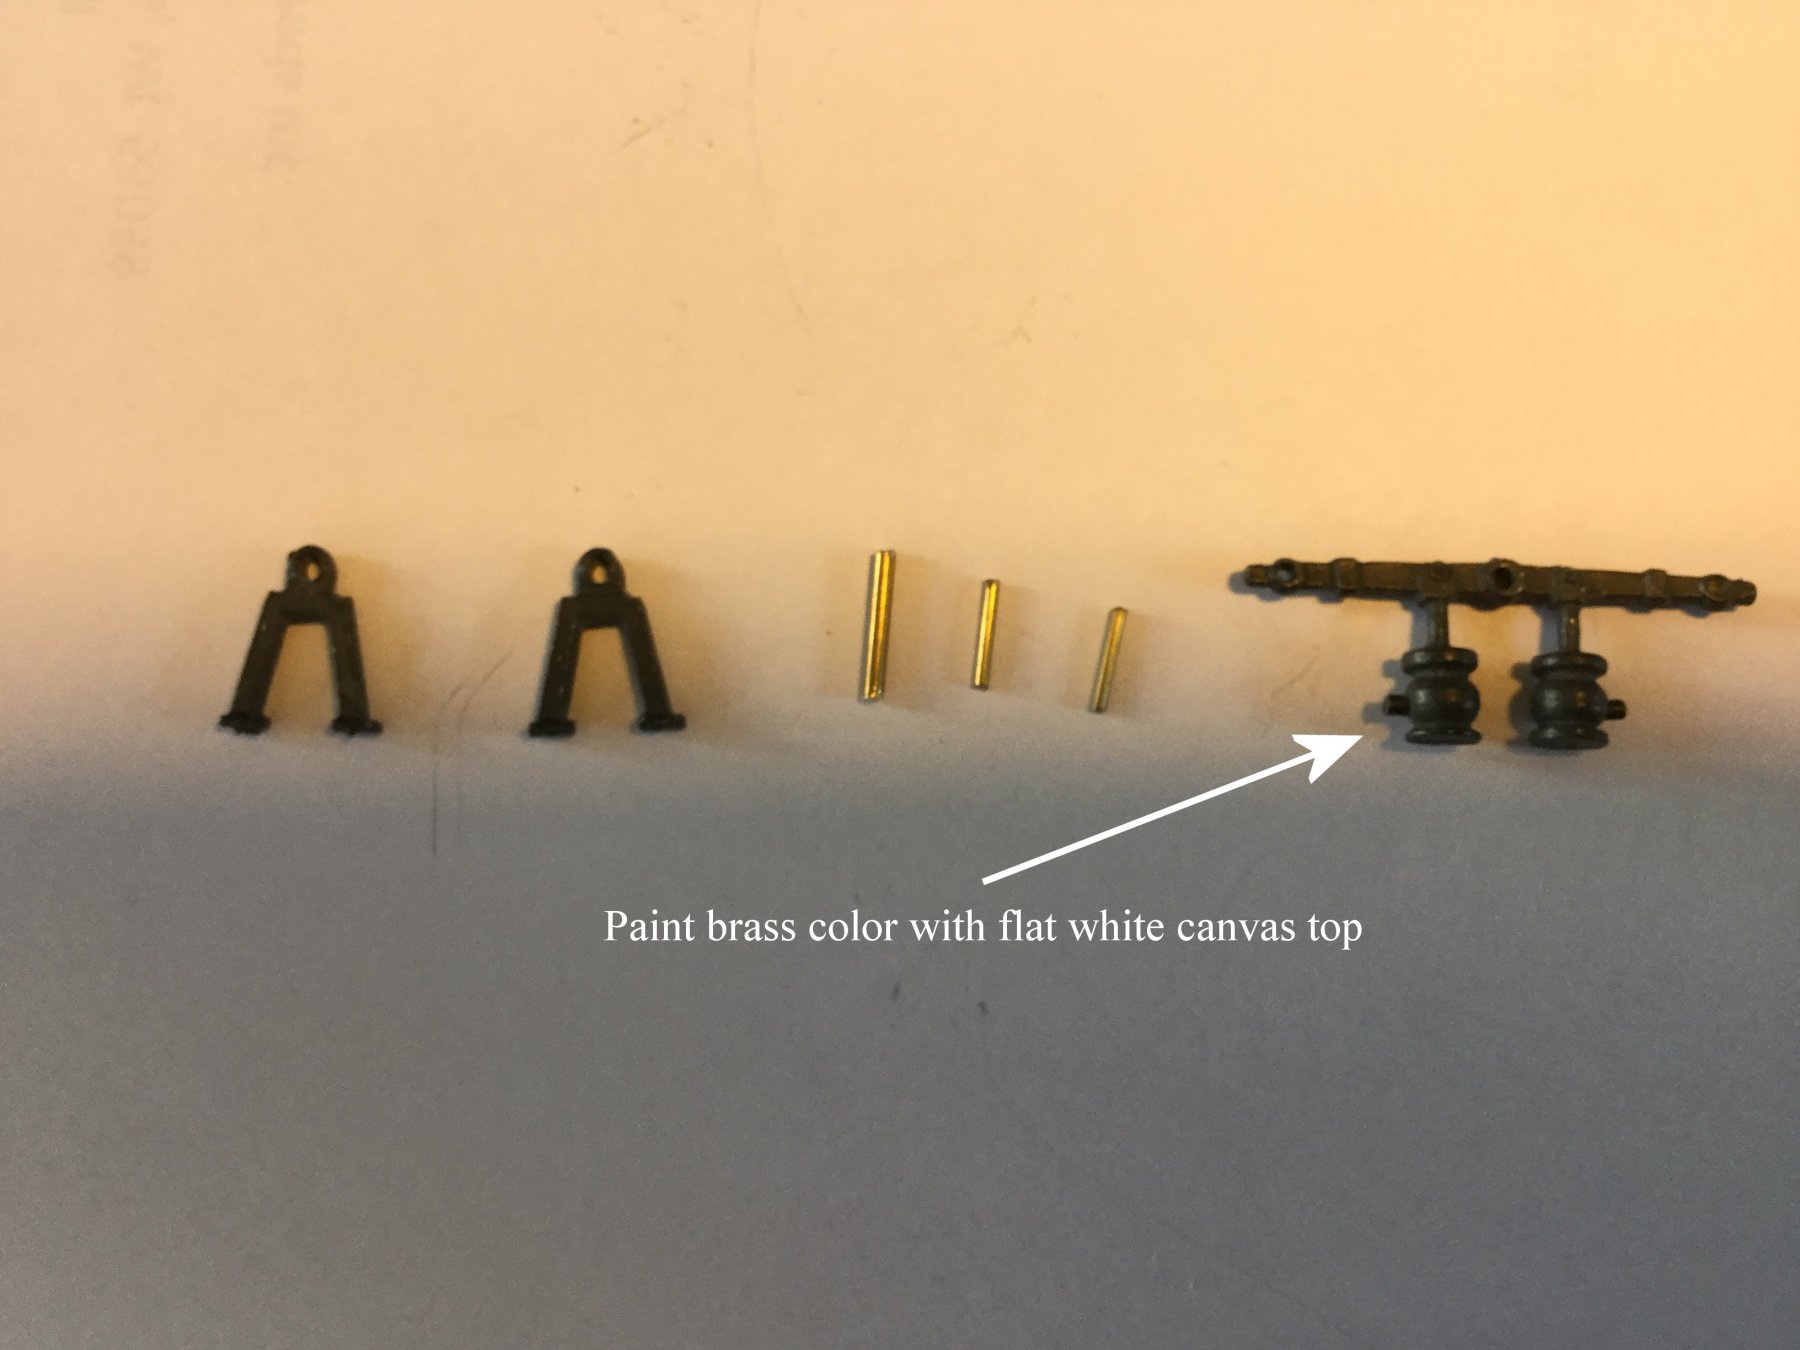
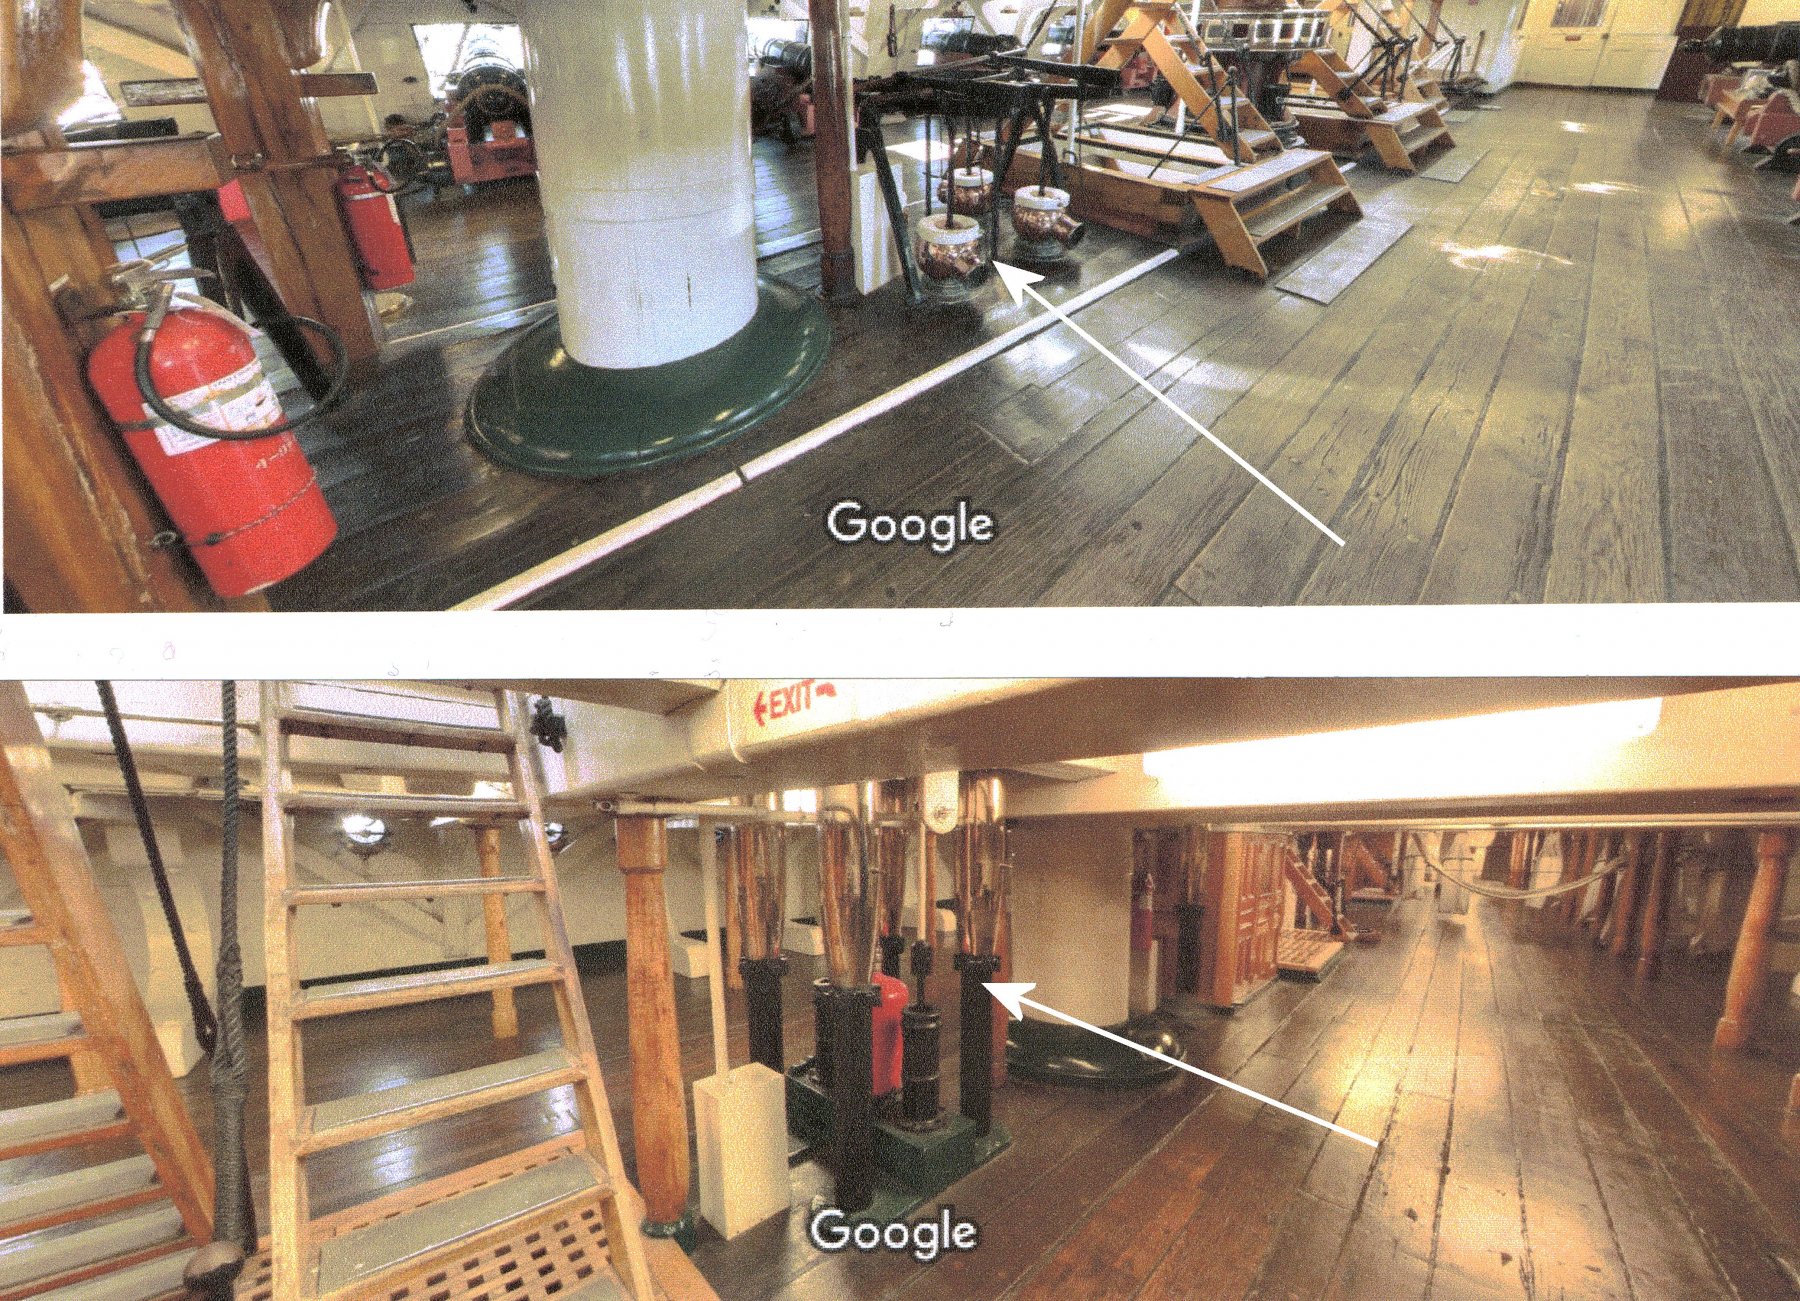
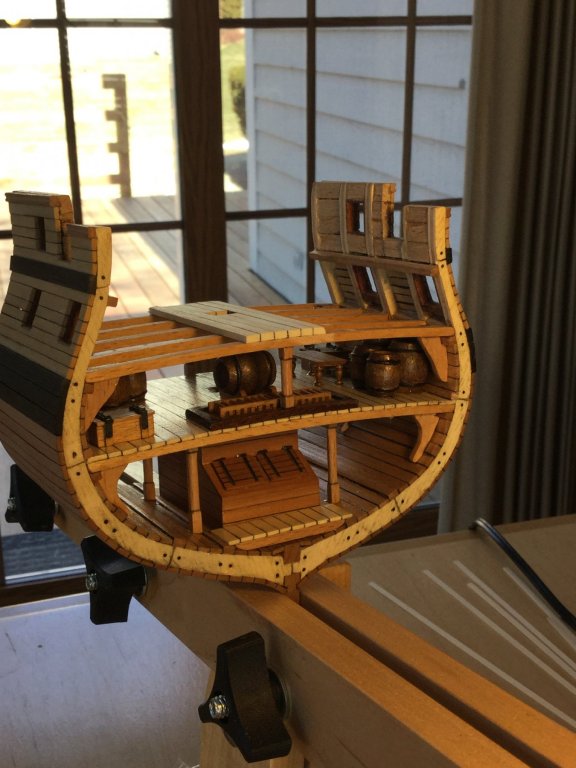
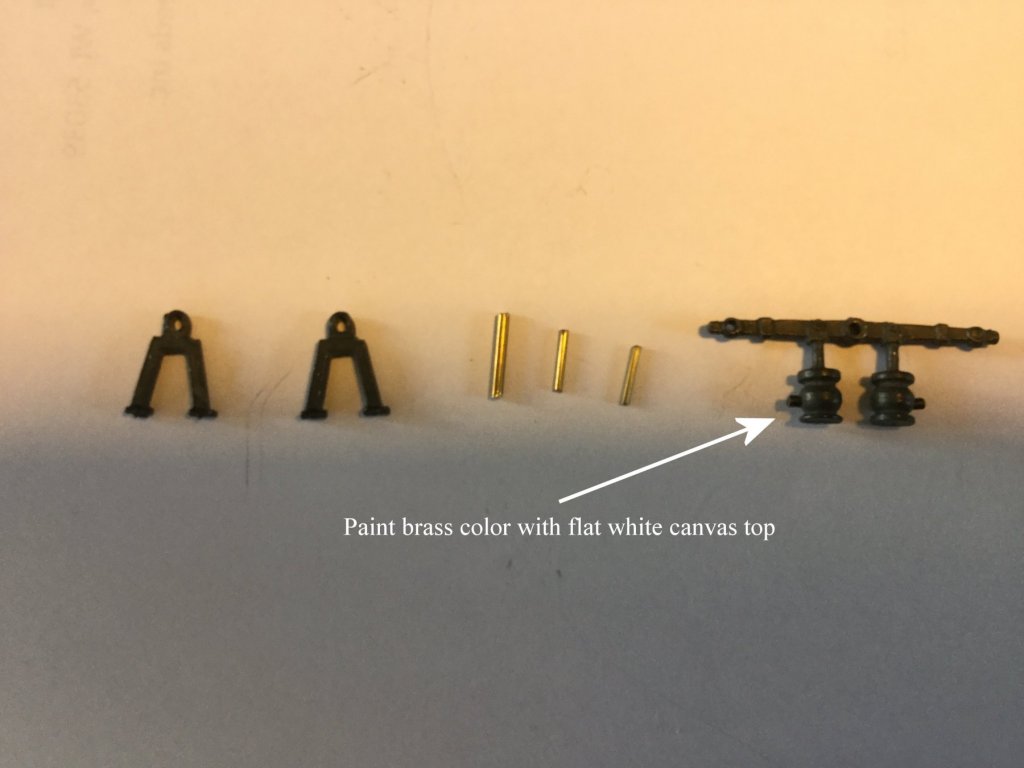
I installed the beams for the gun deck and finished the central planking. I need to install the bilge pumps before I complete the decking. The pump handles and discharge ports are pretty simple. The parts are metal, and I'll prime them with flat black auto primer and paint the discharge area a brass color with flat white tops to simulate white canvas. The pipes leading down through the orlop deck into the well are a little different. The enclosed photo of the Constitution shows they were black pipe, fitted with a brass or bronze cap as they neared the pump mechanism. I think I'l just use flat black stained dowels to simulate them. Any thoughts?


- 75 replies
-
- 12
-
-
- constitution
- mamoli
- (and 2 more)
-
I think dimensioning parts is often a compromise between historic accuracy and what pleases the eye...with emphasis on the latter. No one is going to measure the handle length with a ruler. So the “eyeball” test maybe more important. Nice work overall, Charlie. Looks great!
- 362 replies
-
- 3
-
-
- active
- revenue cutter
- (and 1 more)
-
Generic Sharpie by DocBlake
DocBlake replied to DocBlake's topic in - Build logs for subjects built 1851 - 1900
Thanks, Kurt. I saw the Sharpie exhibit at the St. Petersburg NRG meeting and was instantly interested. I think it will be fun. -
Generic Sharpie by DocBlake
DocBlake replied to DocBlake's topic in - Build logs for subjects built 1851 - 1900
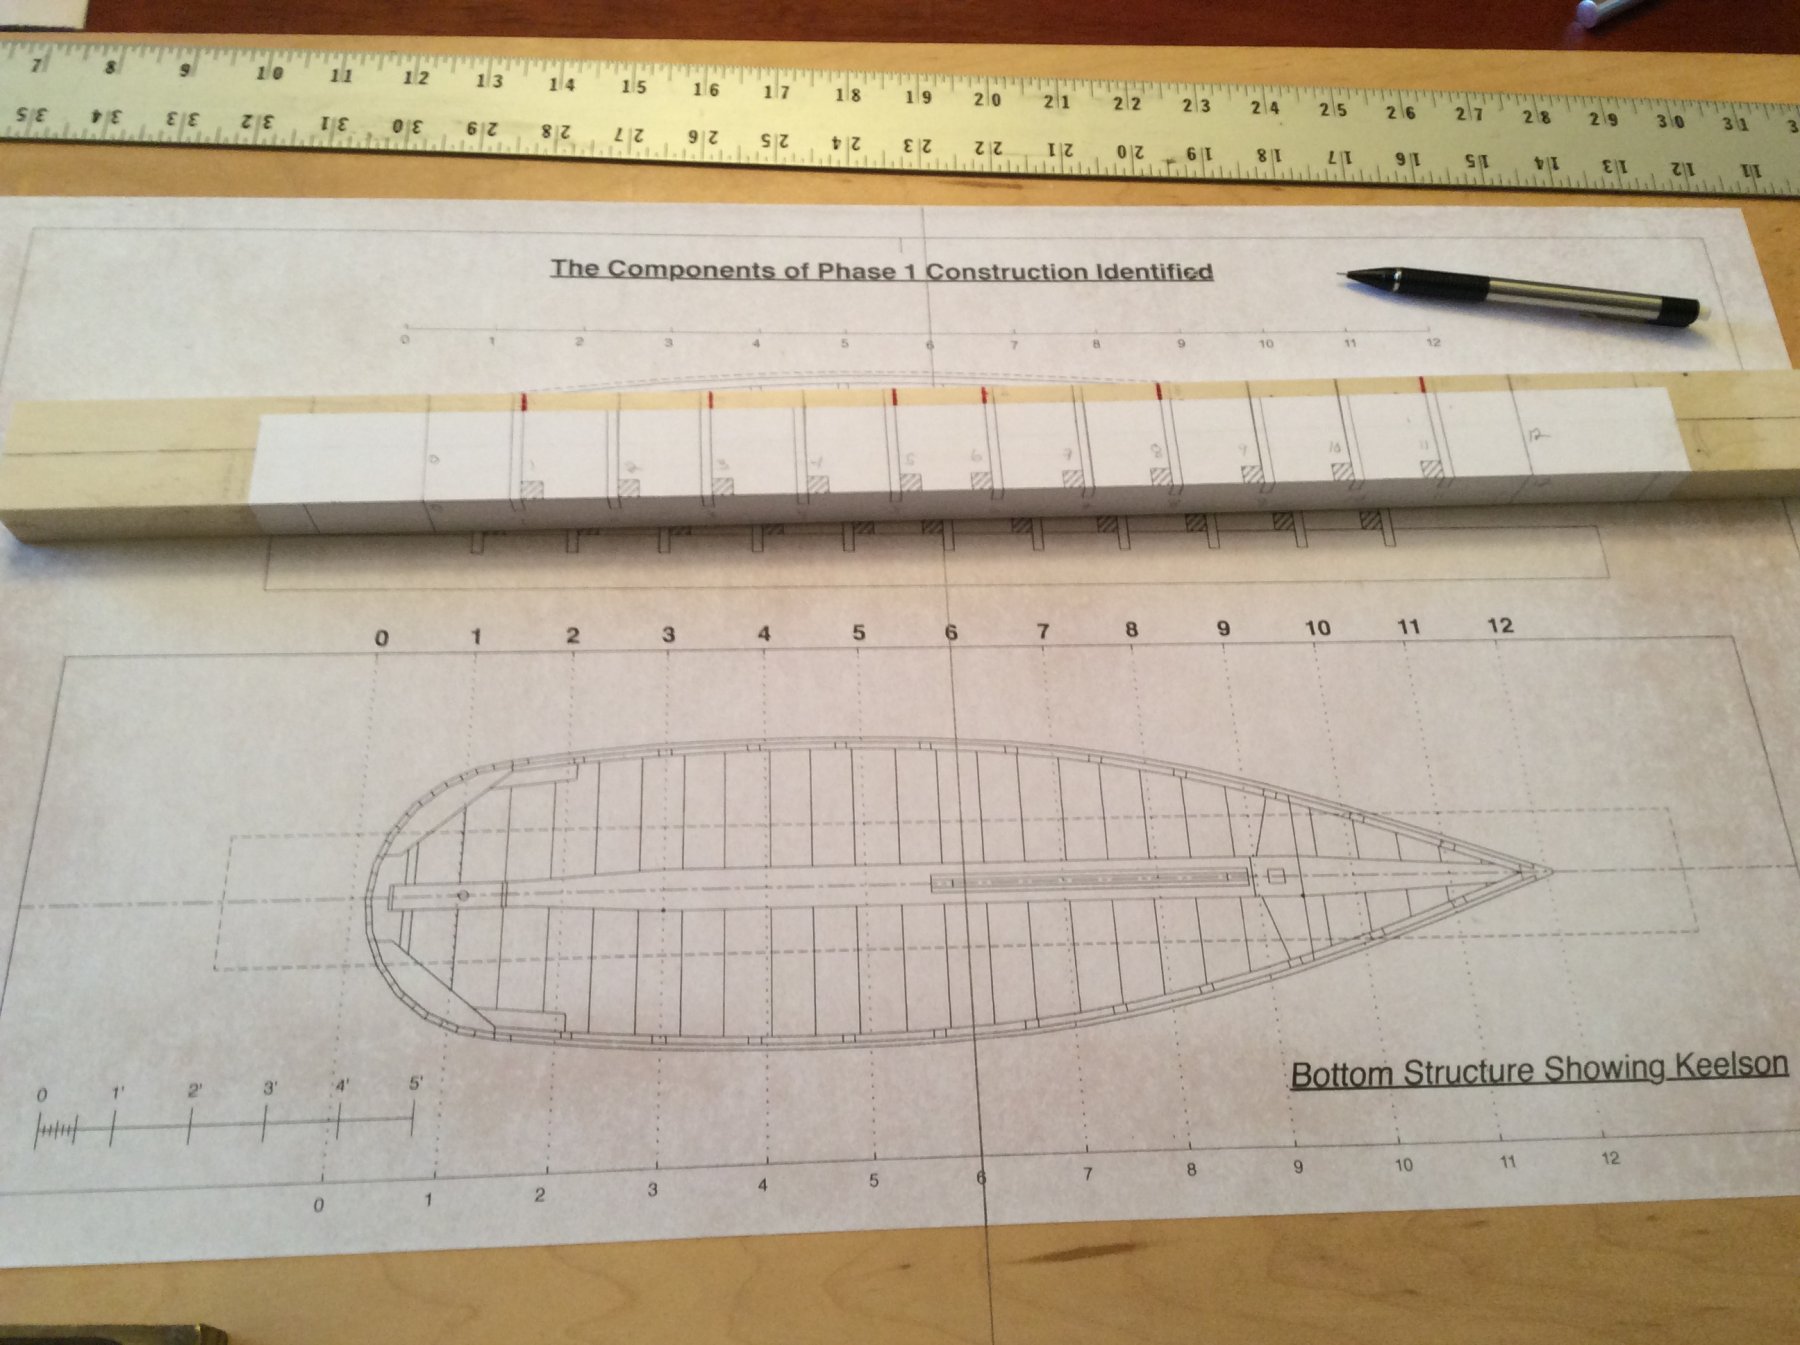
The plan template is glued to the build board. Building jig #1 had templates glued to the top and side after being ripped to width. The next step is to cut out the slots where the 1/8" thick plywood station templates sit. They will be used to define the chines and the keelson. Once cut out, the jig will be trimmed to length and carefully screwed to the build board.
-
Generic Sharpie by DocBlake
DocBlake replied to DocBlake's topic in - Build logs for subjects built 1851 - 1900
Thanks, Gary! The Rattler is on hold for now, but I will get back to it. Thanks for stopping by! -
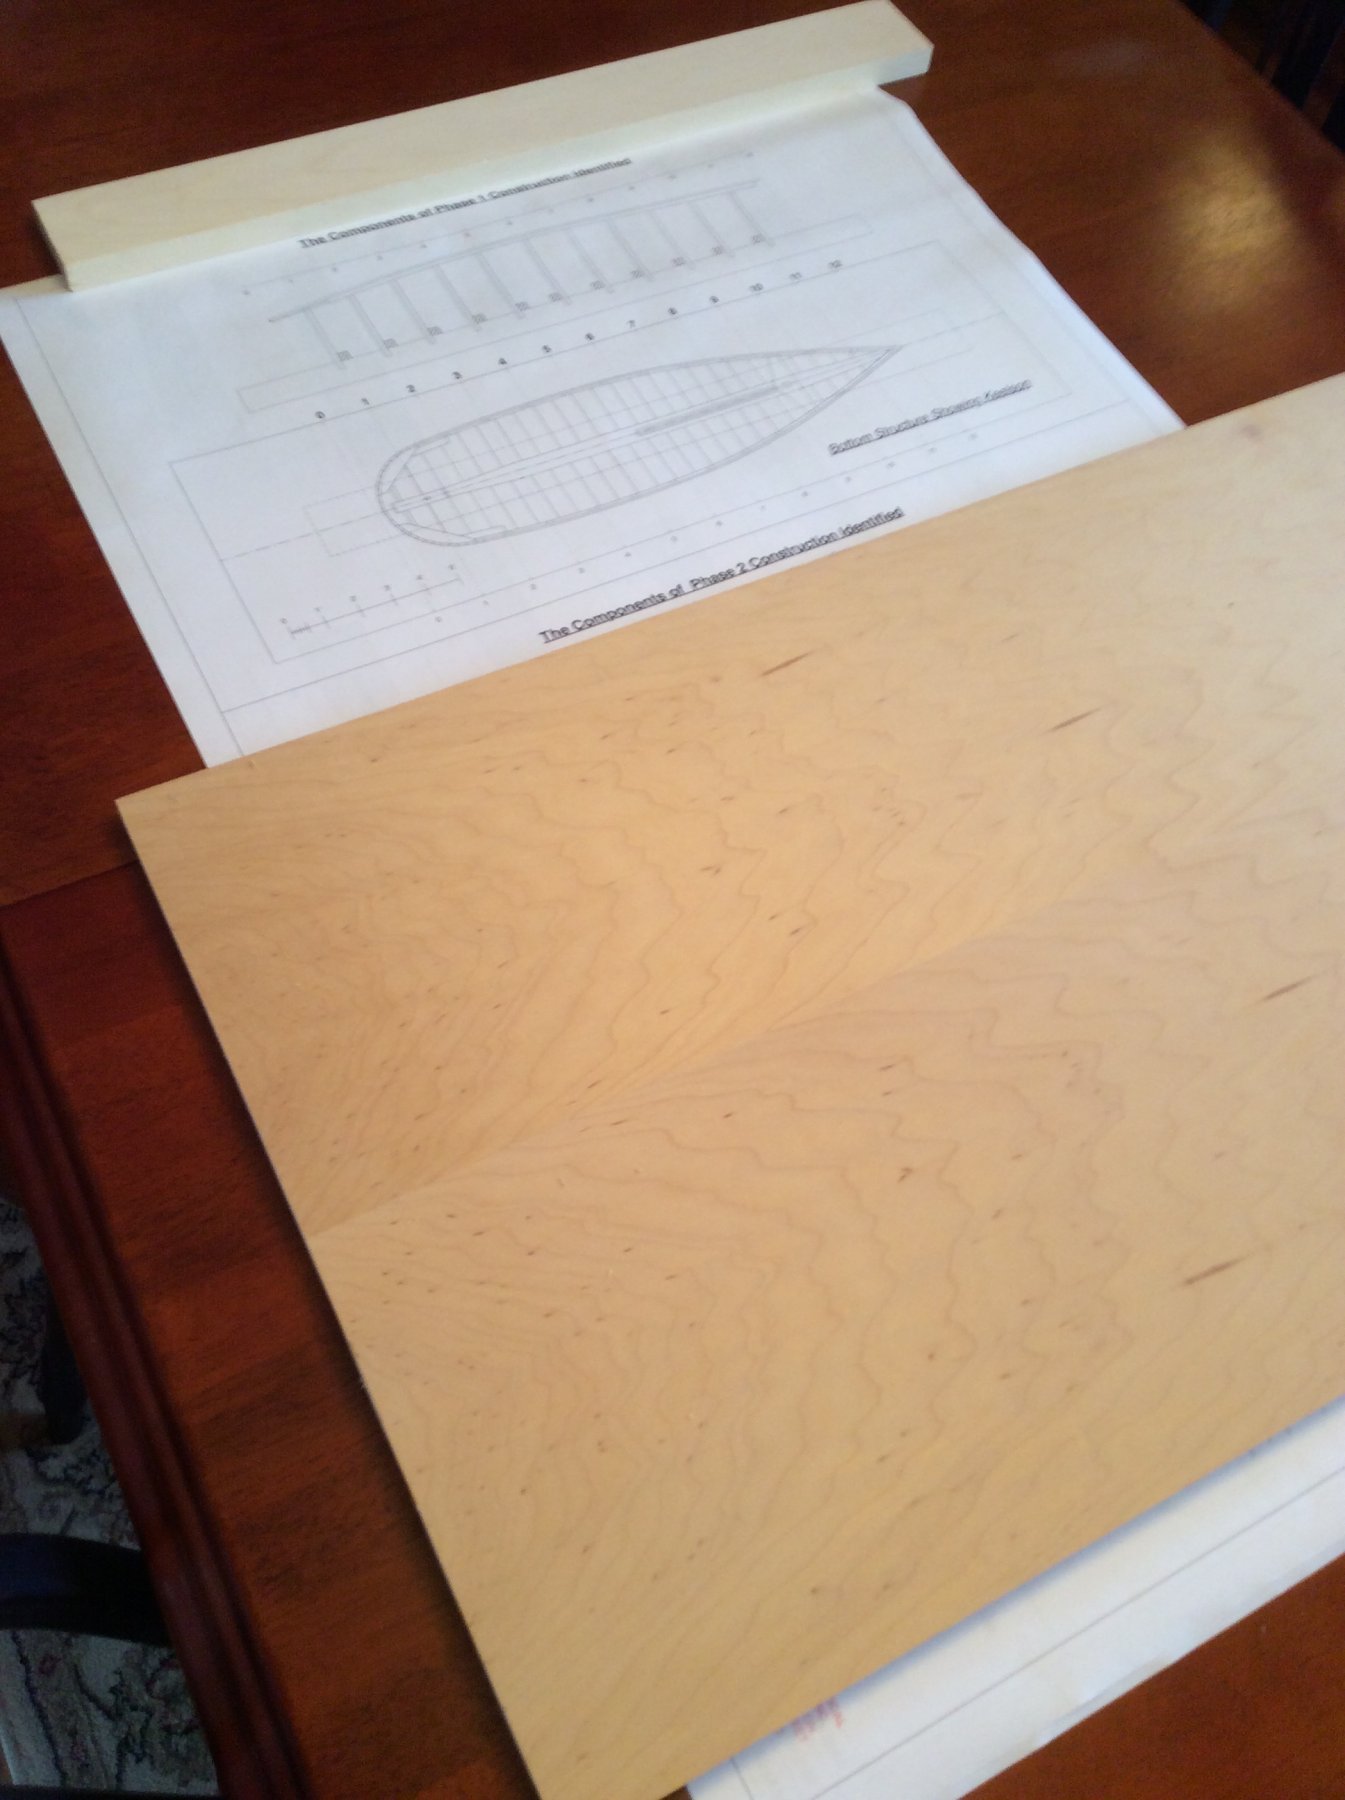
This will begin my log on the construction of the generic sharpie, based on the NRG plans by Bill Strachan and Al Saubermann. The scale is 3/4" = 1". I purchased the plans, and cut out the building board base out of 3/4" maple plywood. It is purposely oversized. Picture in the photo is construction template A1 which will be glued to the plywood base. There is a blank for building jig 1 (BJ1) which will be ripped to 1-1/2" wide. I've not decided as to whether i'll mill my own boxwood for the project or ask Crown to do it. I've got a lot of things going on, so hiring it out may be best. Here we go!

-
Good start! Here’s a link to a blog that might be helpful, also: http://hmsfly.com
- 126 replies
-
- 2
-
-
- fly
- victory models
- (and 1 more)
-
Nice work, Don! The hull blocks are fabulous. I noticed the Norton detail sander in the picture above. Aren't those great? I have three so I have a range of grits ready to go at any time!
-
Good solution, David, the cheeks look great!
-
Tried to download the updated monograph. There is a problem with the link.
-
Thanks, Kurt! I'm looking forward to the plans. We do plan to attend the Manitowoc show in May. I'm not sure if I'll show a model, though.
-
Is a bill of materials (wood list) included with the plans? It would make milling the material much easier than approaching parts piece by piece.
-
Bob: $80 plus $4 shipping at Amazon: https://www.amazon.com/Period-Ship-Modelmaking-Illustrated-Masterclass/dp/1844156966
- 359 replies
-
- 2
-
-
- prince de neufchatel
- model shipways
- (and 1 more)
-
Hi David! Odd design, placing grating there. No need for a “floor” under seats of ease since there are none! And there is no opening in the deck to the fo’c’s’le below that needs ventilation. Why the grate?
- 59 replies
-
- 1
-
-
- prince de neufchatel
- model shipways
- (and 1 more)