HOLIDAY DONATION DRIVE - SUPPORT MSW - DO YOUR PART TO KEEP THIS GREAT FORUM GOING!
×


DocBlake
-
Posts
1,811 -
Joined
-
Last visited
Content Type
Profiles
Forums
Gallery
Events
Everything posted by DocBlake
-
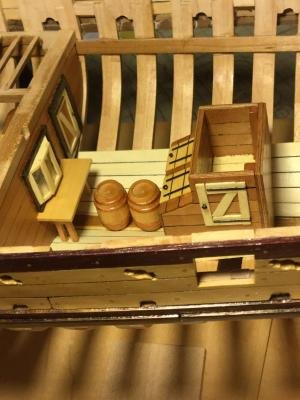
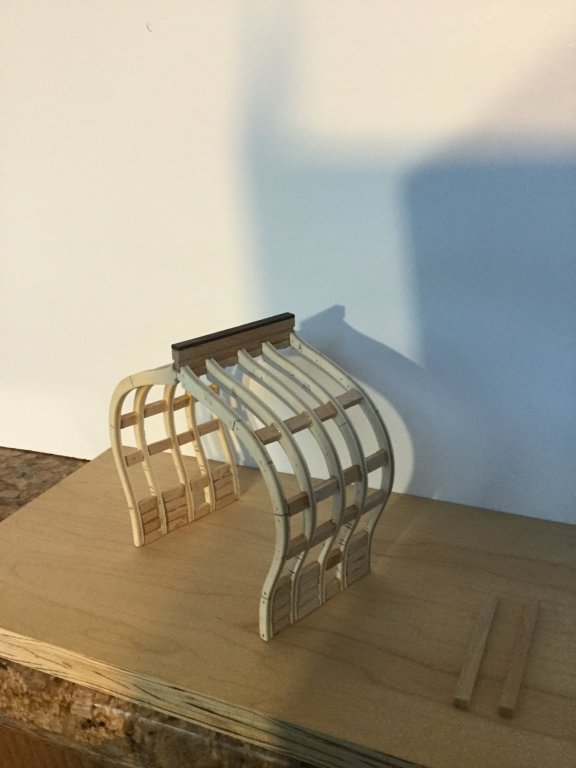
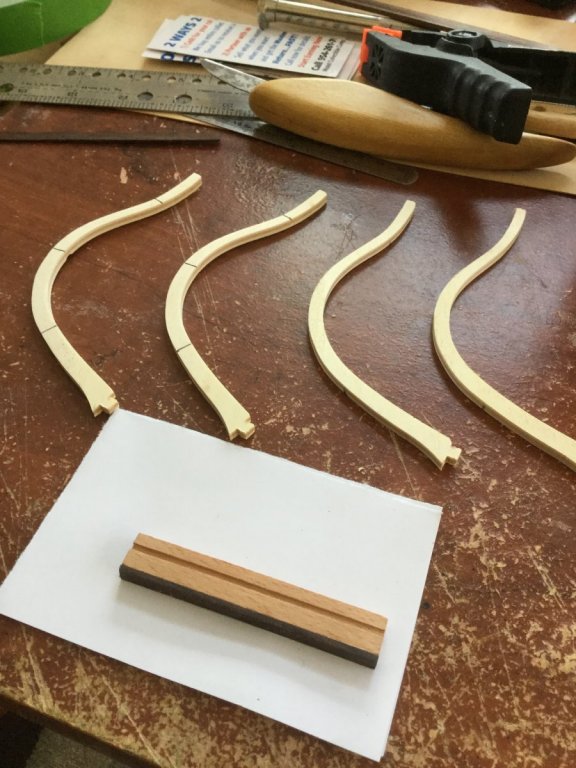
 In getting prepared to lay the deck beams, I realized that bending the relatively thick stock was going to be a problem. The kit says to "build up" the beams from 2 layers of stock held in shape by nails or pins. When the glue dries the deck beams should be good with the proper camber. How much can go wrong there? So I asked a friend if he could cut out the 15 deck beams I needed out of beech with his laser. Each beam is 4 mm wide and 3 mm thick. They turned out great! A little trimming and sanding and they fit perfectly. I'm going to start laying the beams and finishing up the hold. You can see the limber boards in the photo. I'm also planning a small section of decking in front of the shot locker where the two transverse mini-beams are in the photo. There are also 4 support pillars in the hold under the orlop deck. There is no finish on the model except for the well/shot locker.
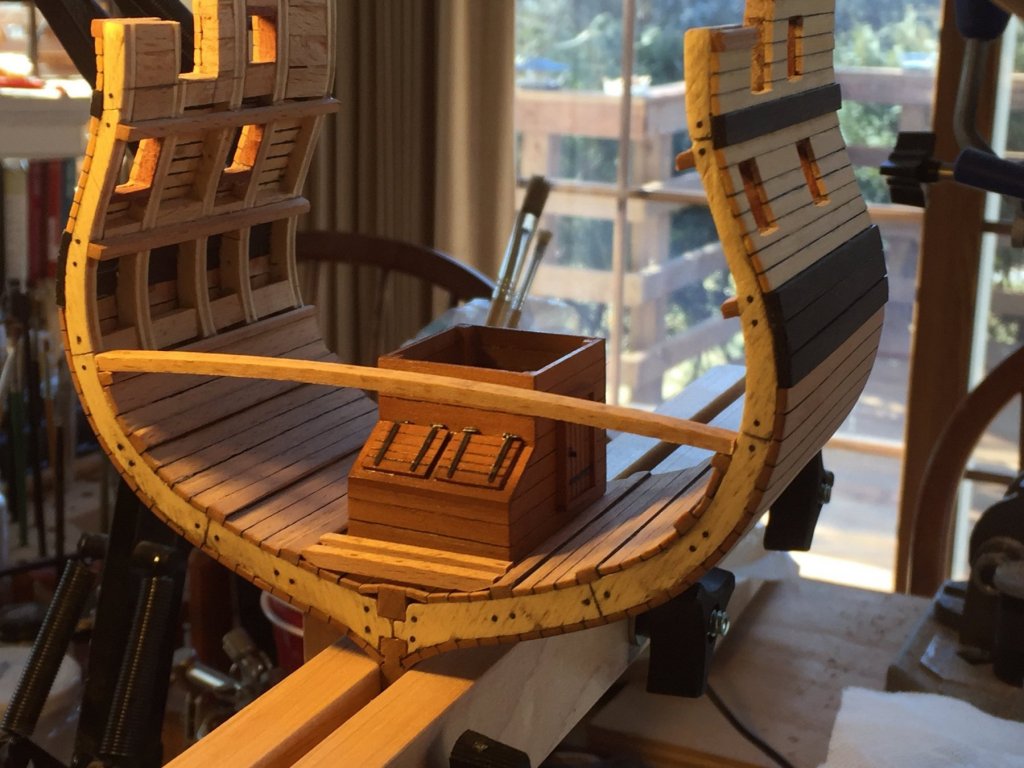
- 75 replies
-
- 11
-

-
- constitution
- mamoli
- (and 2 more)
-
I think the stain works well...very realistic, Elijah. Nice job!
- 228 replies
-
- 3
-
-
- gunboat
- model shipways
- (and 1 more)
-
Chuck: On the videos it looks like you've dyed your thread before laying up the rope. What's your procedure for dying and what brand and color dye do you use for your tan rope?
- 22 replies
-
- 2
-
-
- ropewalk
- rope rocket
- (and 1 more)
-
Swan class 3D model in progress
DocBlake replied to dvm27's topic in CAD and 3D Modelling/Drafting Plans with Software
Wow! Just awesome.- 141 replies
-
- 4
-
-
- pof swan series
- swan
- (and 1 more)
-
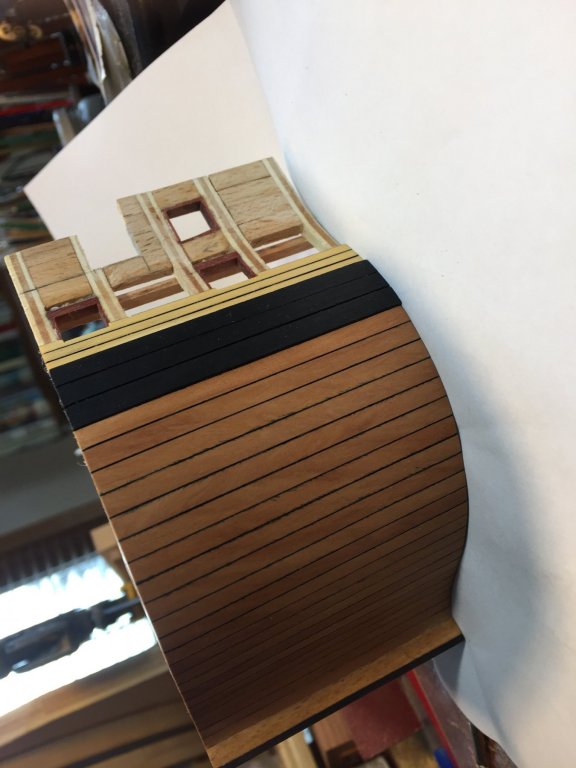
Thanks guys! I finished planking the outside of the hull. I added decorative molding that I made from swiss pear as the sheer strakes. The boarding ladder, channels and deadeyes will come later. I'll fit the cap rail after the inboard bulwarks are planked.
- 75 replies
-
- 7
-
-
- constitution
- mamoli
- (and 2 more)
-
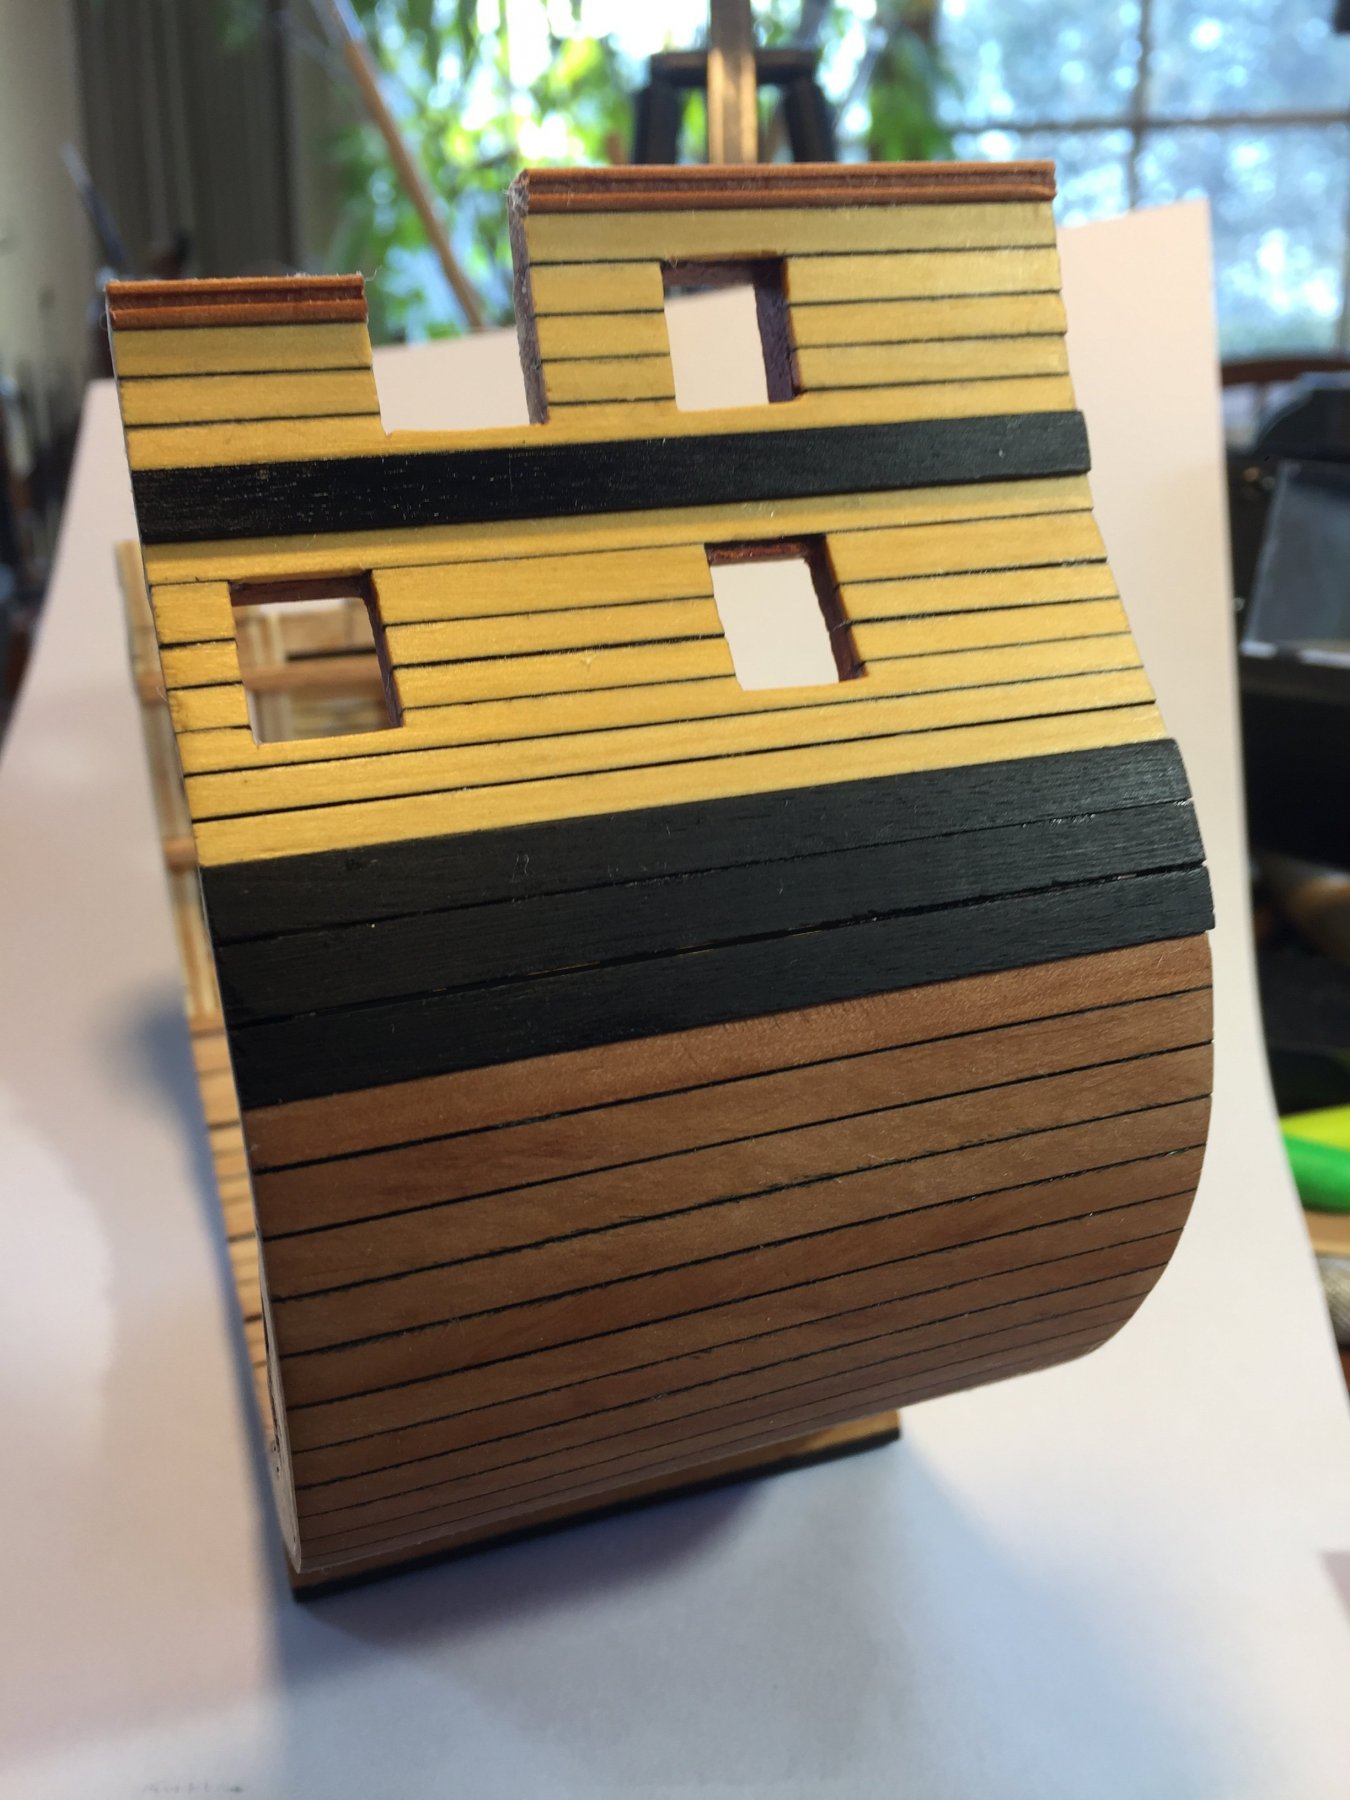
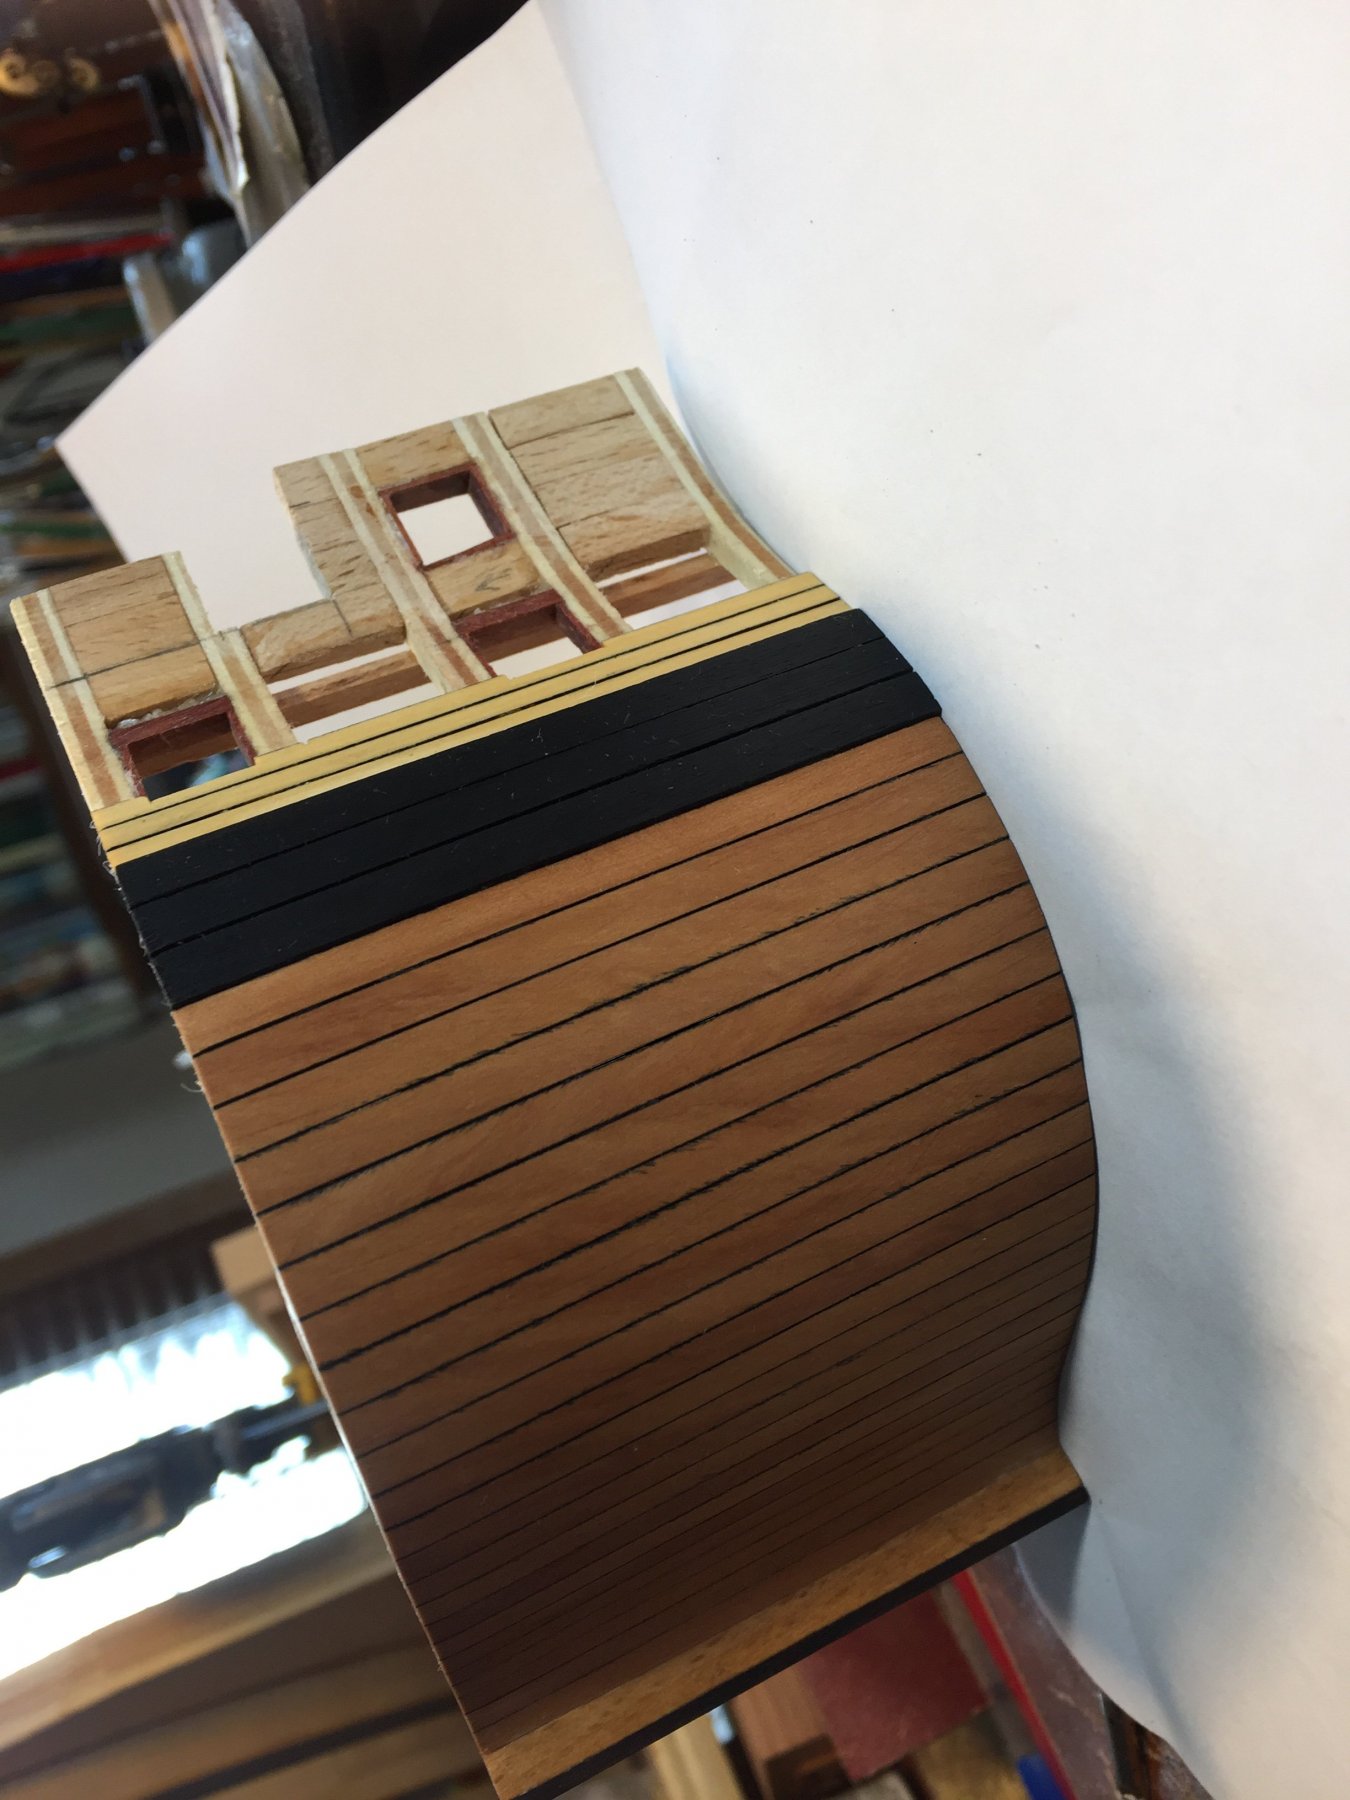
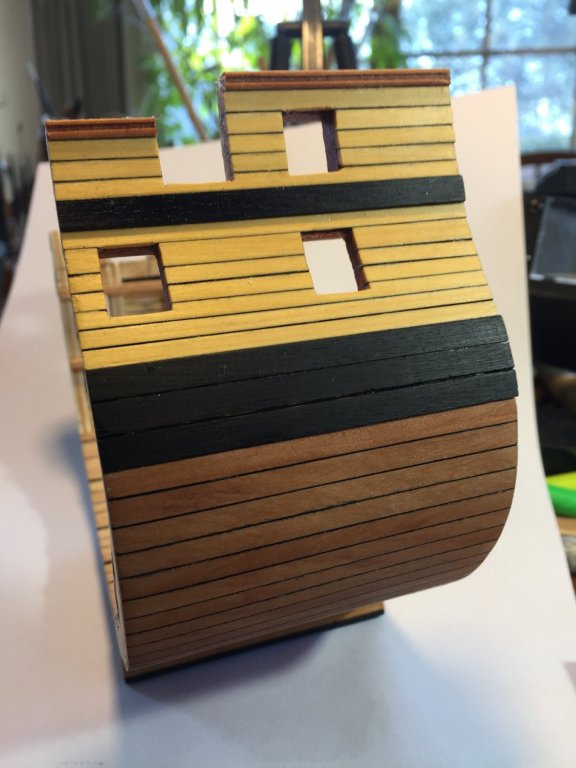
I framed out the gun port openings in blood wood then planked the hull up to the gun deck ports. The hull below the wales is swiss pear, the wales are ebony and the planking above the wales is castello box wood. I spent way more time on the shot locker and well than I planned, but it's finally done. In the end, I opted for making the access door and shot locker lids of swiss pear, just like the framework of the well itself.

- 75 replies
-
- 12
-
-
- constitution
- mamoli
- (and 2 more)
-
David: I somehow missed this thread, but I’ve pulled up my chair this morning! This should be very interesting. Great work on the reconstruction so far. Keep the pictures coming.
-
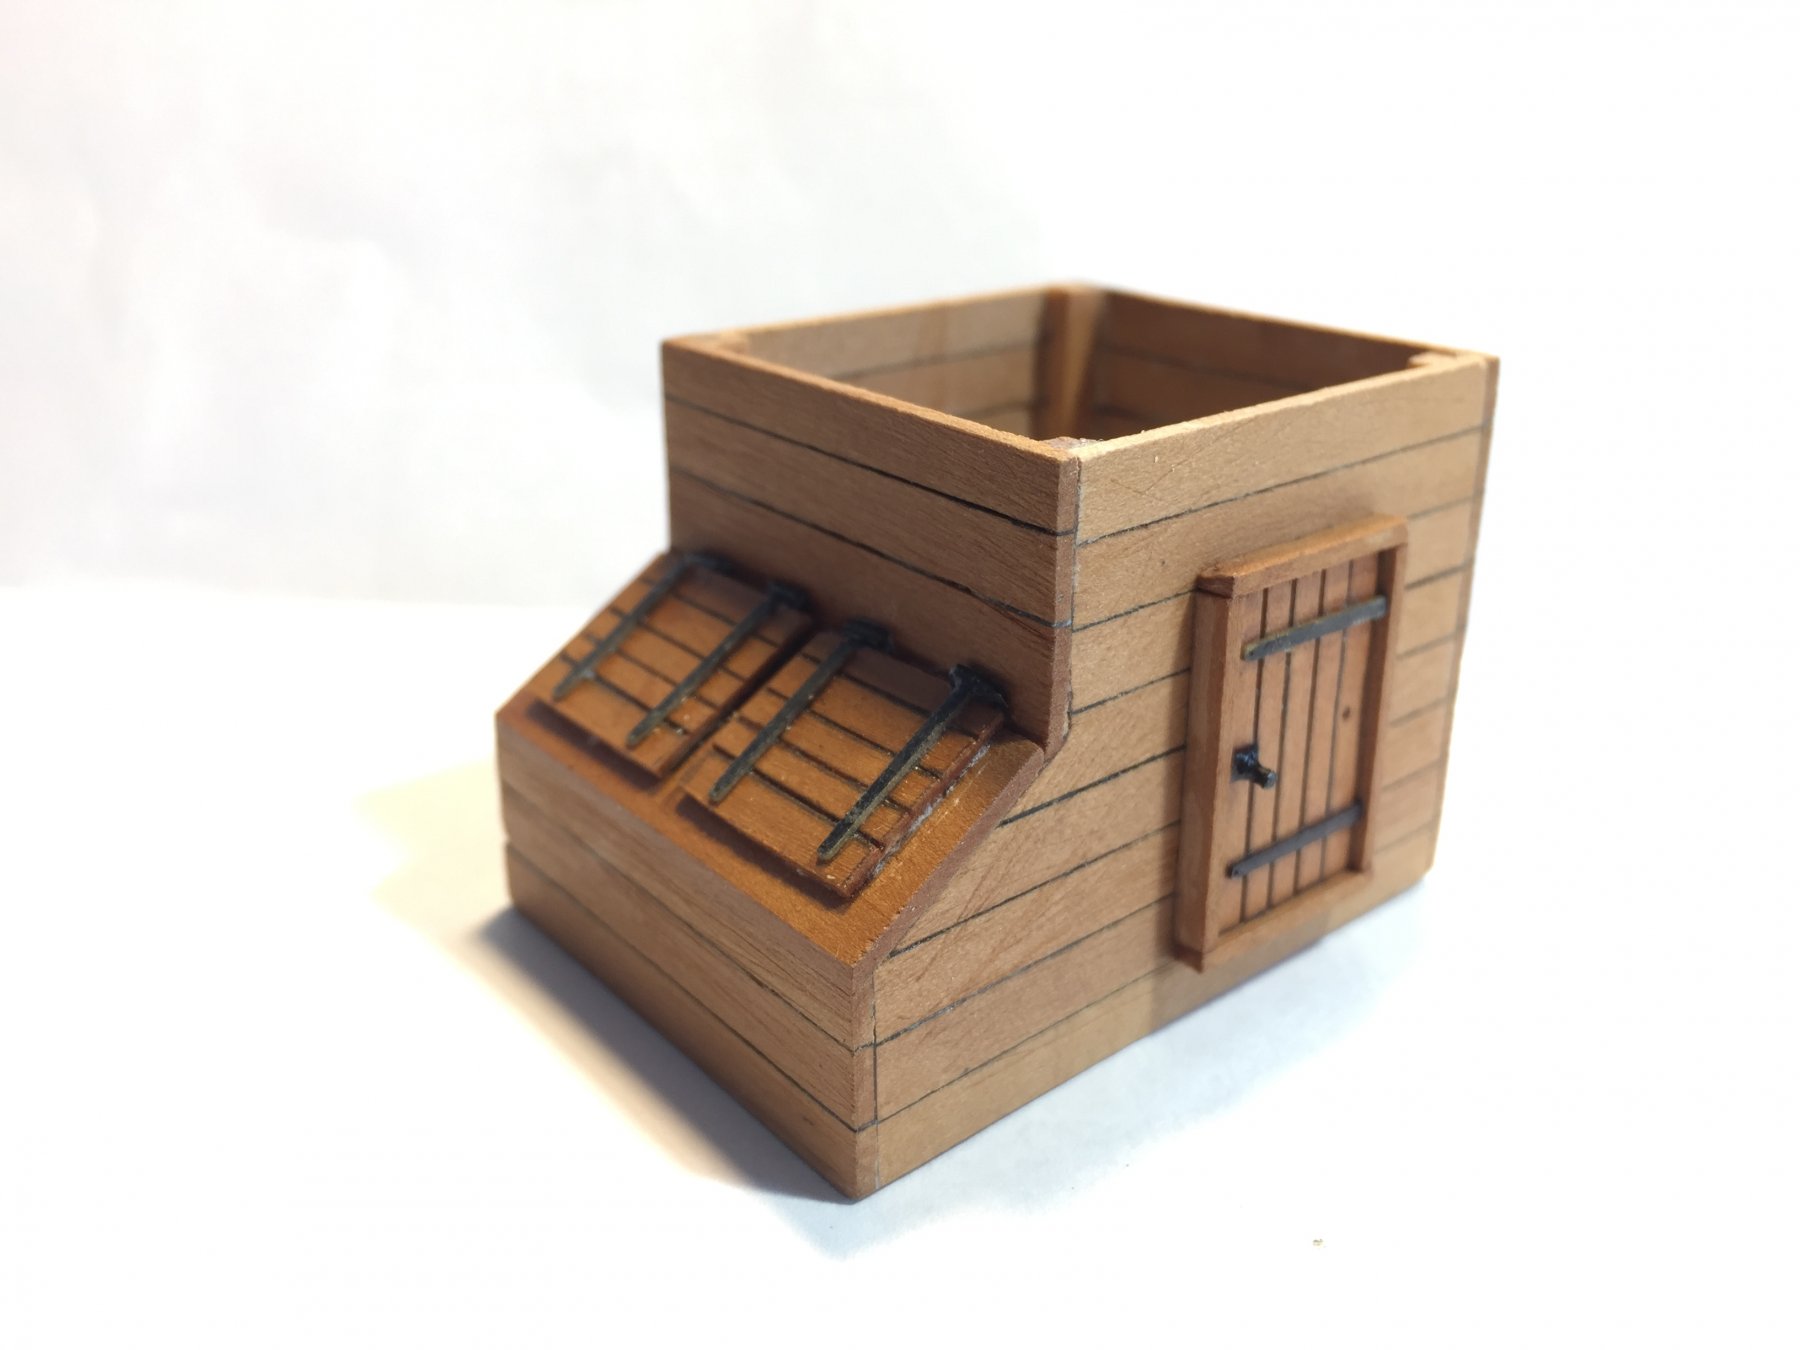
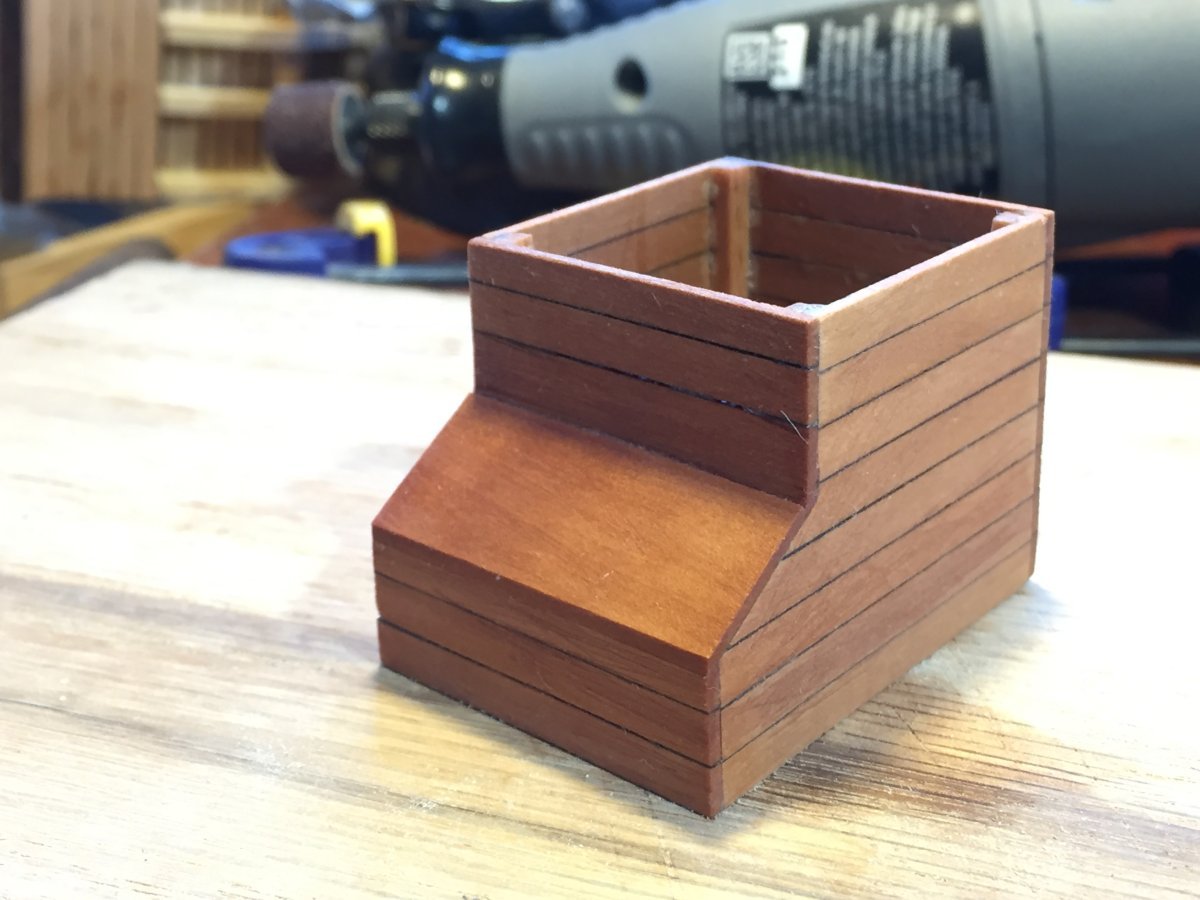
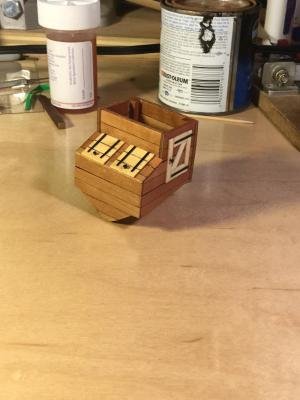
Here is the glued up well and shot locker. I need to add the hinged lids for the shot locker as well as the access door to the well. This part is the first in which I had to address the issue of scale. I came to an interesting conclusion. The kit is listed at 1:93 scale, or just slightly larger than 1/8" = 1 foot. At that scale, the hold would be 10 scale feet deep and the space between the decks would be about 7 scale feet! Very doubtful any ship existed in the 18th century with that kind of head room. I suspect the scale is much closer to 3/16" or 1:64, giving the space between decks at slightly less than 5 feet. I'm going to build to that scale going forward. Regarding the lids and access door: I'm planning to use boxwood for the contrast with the pear. Anyone disagree and vote for pear for those parts? The other two photos show this wood combination for the well in my AVS build.

- 75 replies
-
- 16
-
-
- constitution
- mamoli
- (and 2 more)
-
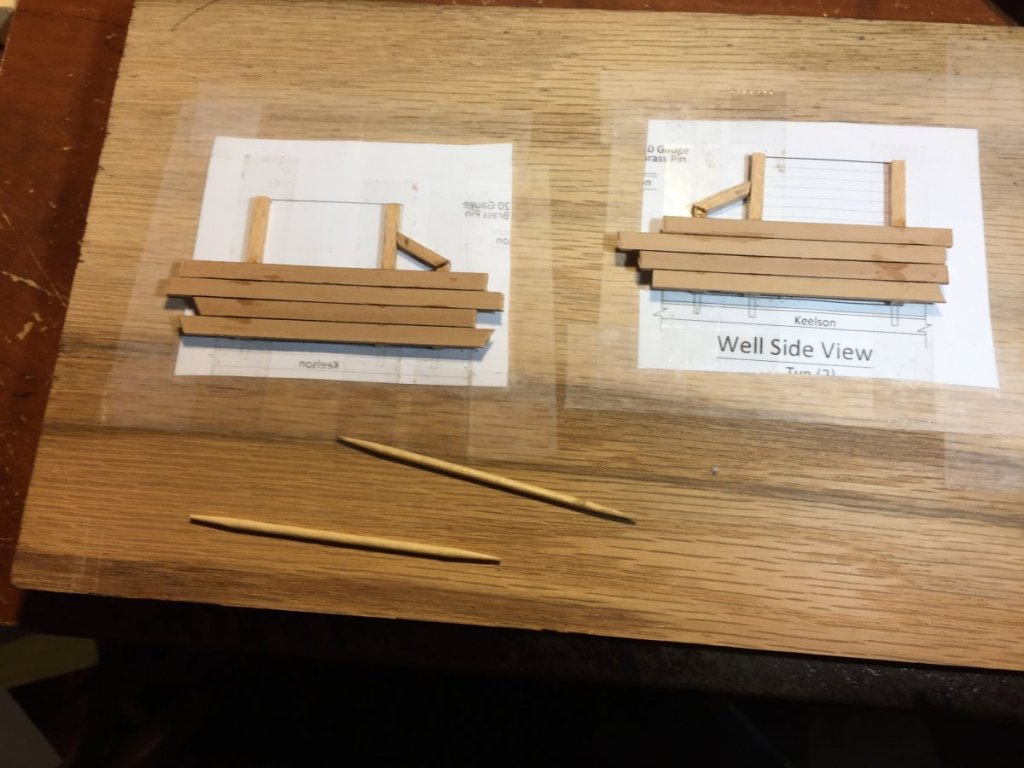
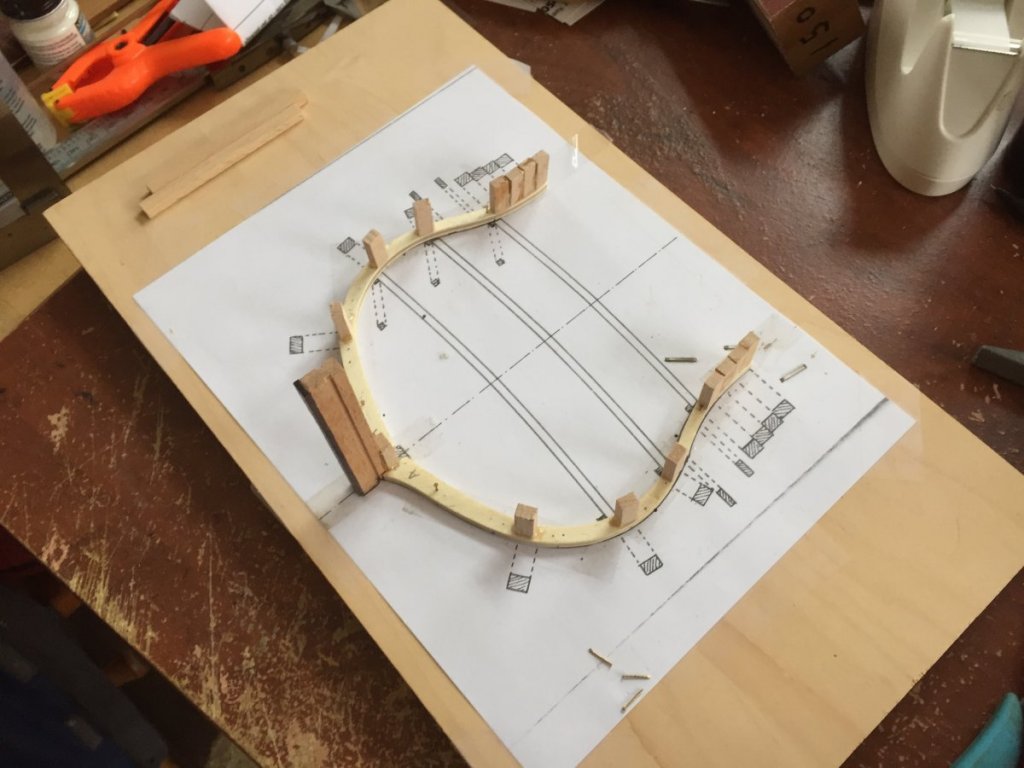
I started building a well and shot locker, since none was included with the kit. The structure will be swiss pear with the access door and the lids to the shot lockers made of boxwood. I "borrowed" some plans for the well and scaled then to the right size. I used double sided tape to hold the vertical studs in place while I planked horizontally across them. I'll trim them up when the glue dries and add the front, back,lids and door.
- 75 replies
-
- 8
-
-
- constitution
- mamoli
- (and 2 more)
-
Thanks, Bob! I planked the hold up to the deck clamps for the orlop deck. I added thick stuff at the approximate locations of the futtock joints. I alsp started planking the outer hull. The inner planking is European beech, the outer hull planking is swiss pear. The limber boards are fitted but not yet installed.

- 75 replies
-
- 10
-
-
- constitution
- mamoli
- (and 2 more)
-
Got a little more done today. I milled my own keelson and deck clamps out of European beech and installed them. Next is planking the hold. I'll use beech and include thick stuff as well as footwaling. I also plan limber boards and a well and shot locker. This may be a bit challenging at what is essential 1/8" scale.


- 75 replies
-
- 13
-
-
- constitution
- mamoli
- (and 2 more)
-
Gun deck bulwark color
DocBlake replied to DocBlake's topic in Building, Framing, Planking and plating a ships hull and deck
Thanks, guys. I'll go with red bulwarks on the gun deck too! -
The bulwarks on the upper (spar) deck of a 18th century warship were painted red, along with other deck furniture. What about the bulwarks on the second deck or gun deck? Were they also typically painted red? Perhaps white, to brighten the dark space a bit.
-
Very nice work as always, Mike! I’m also considering buying a mill. What brand and model did you choose. How steep is the learning curve? Are you happy with your choice?
-
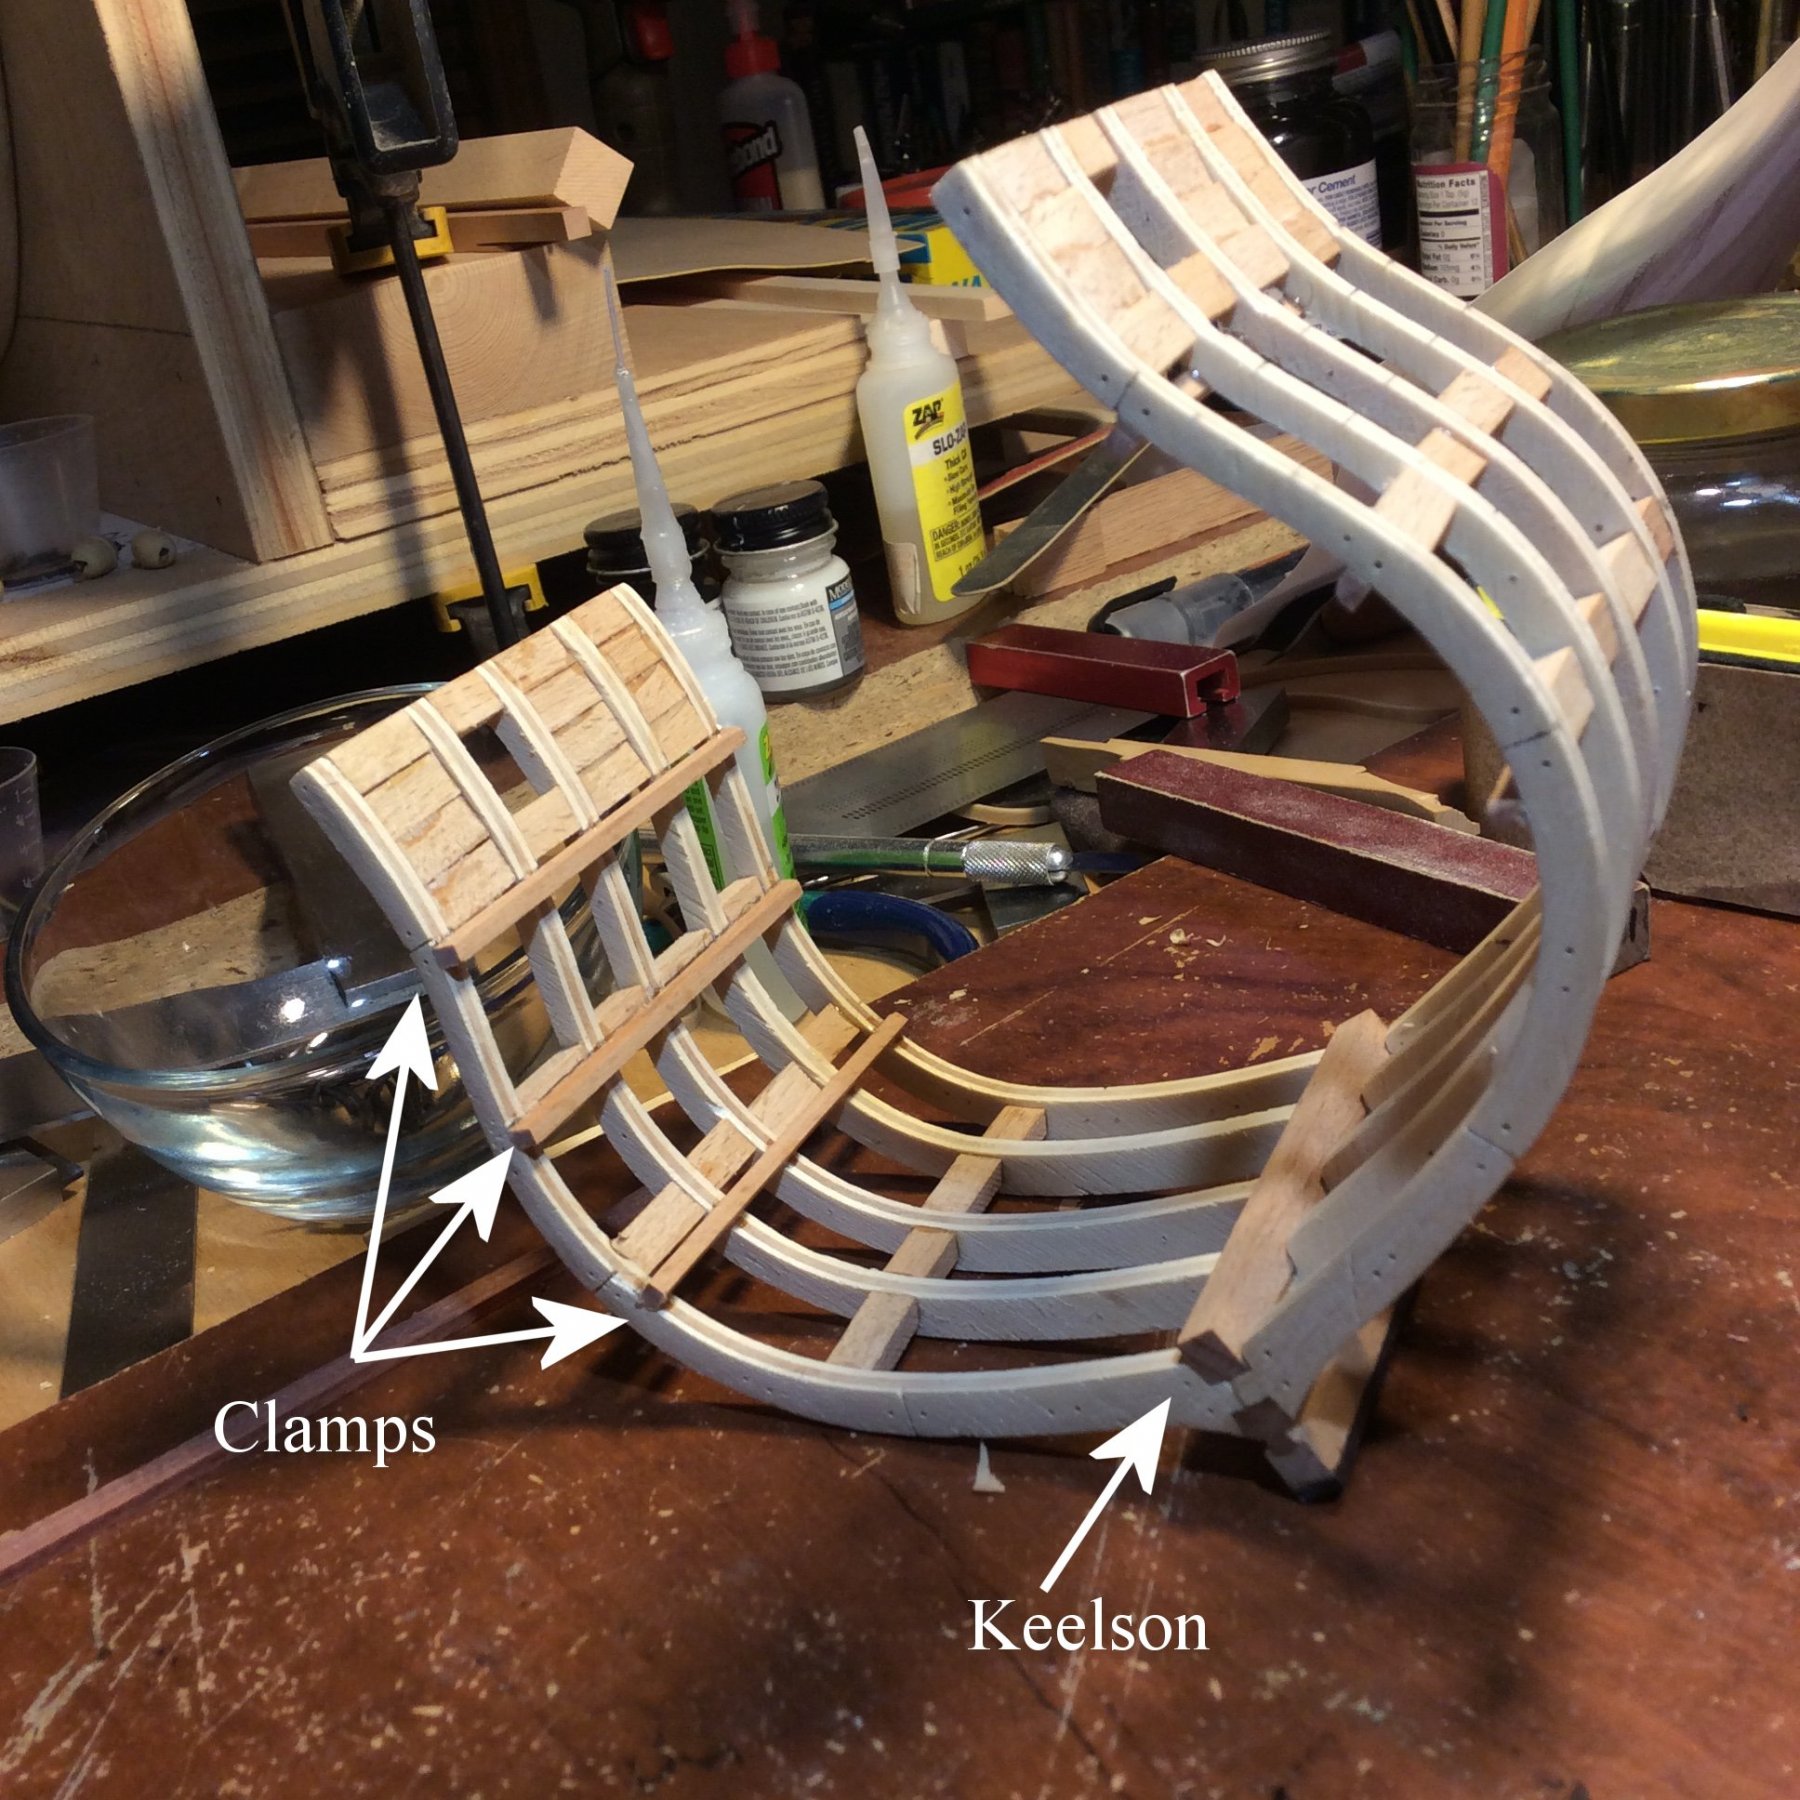
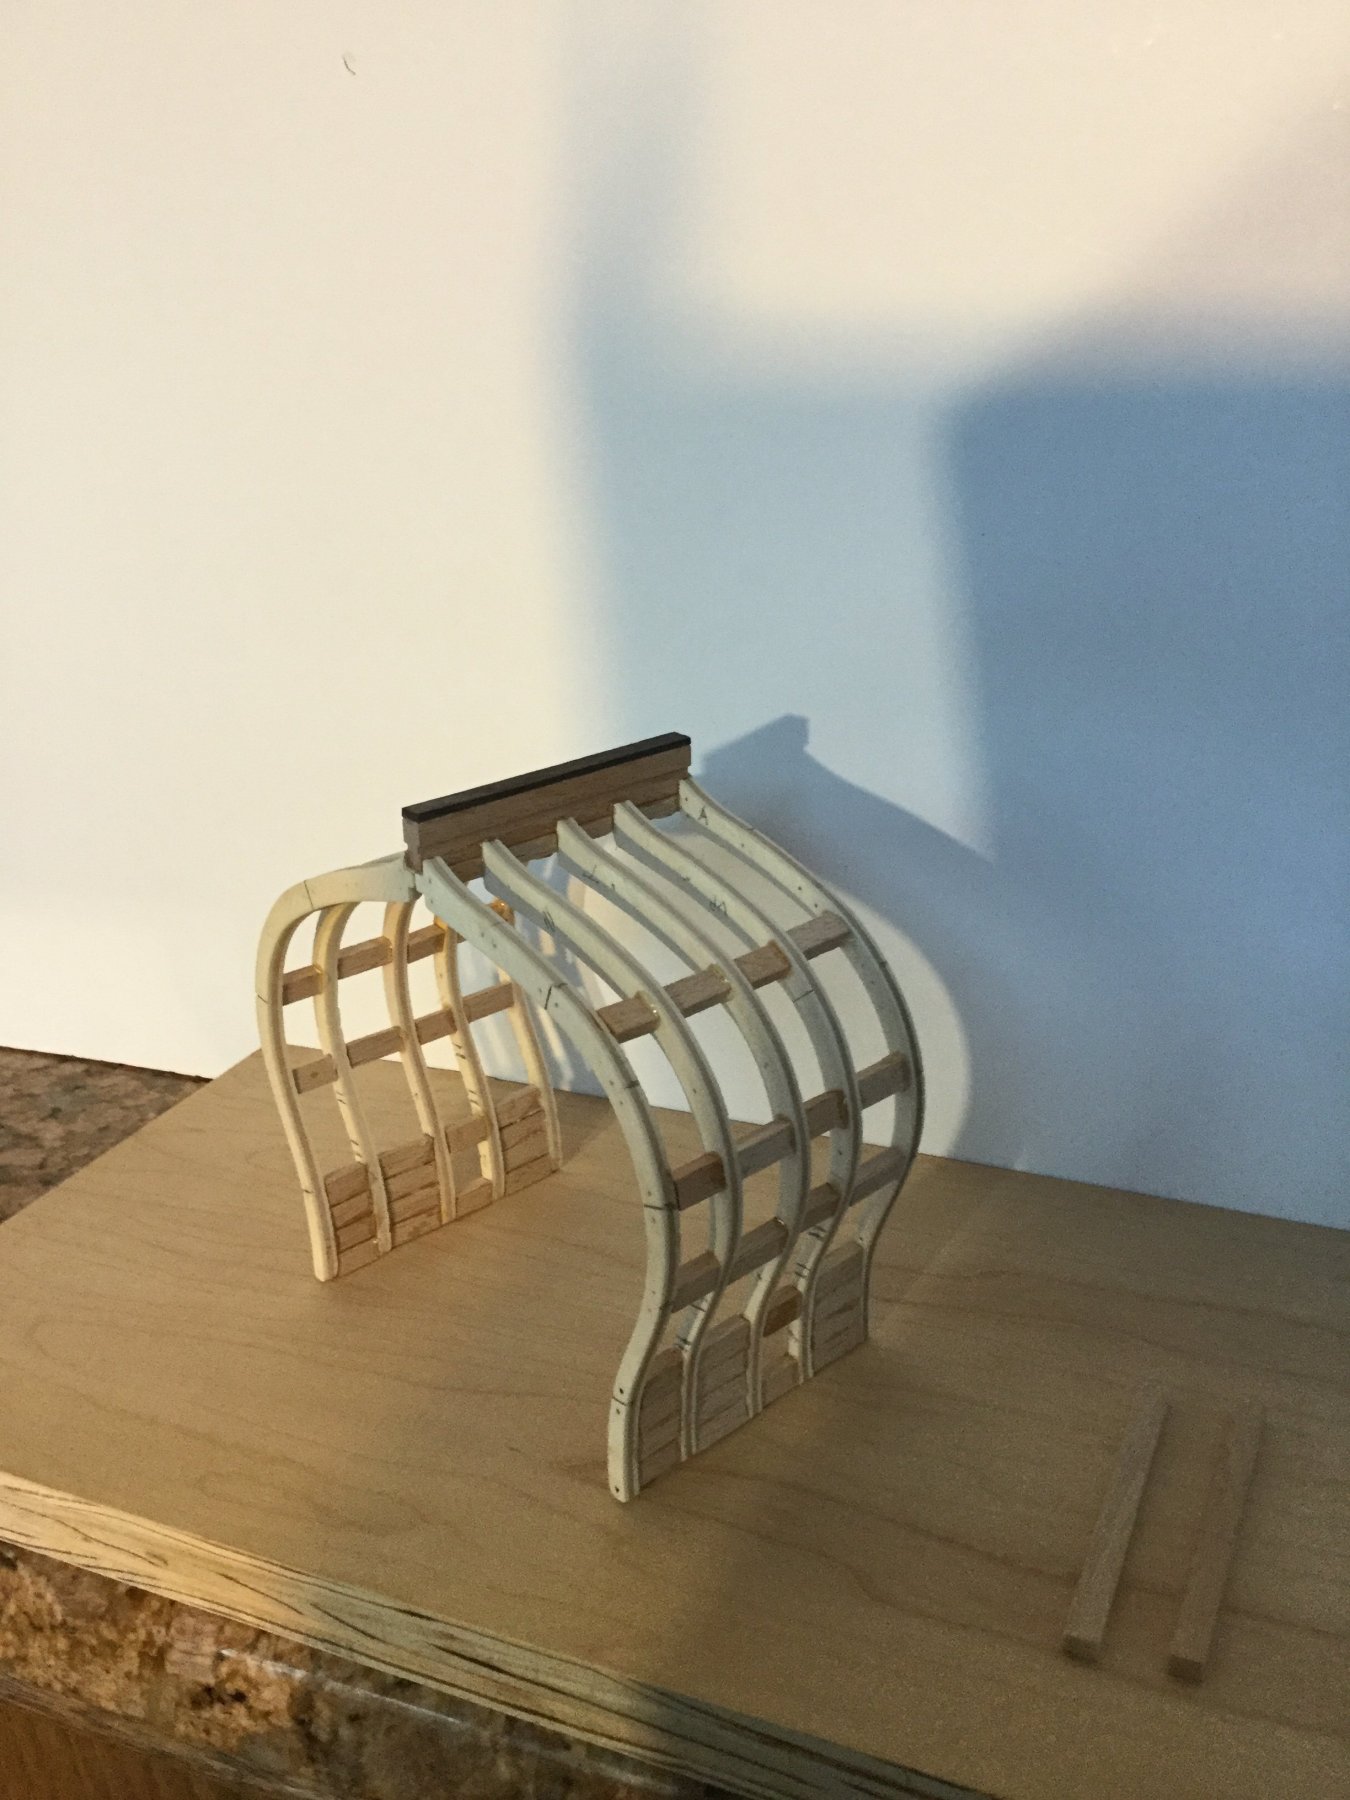
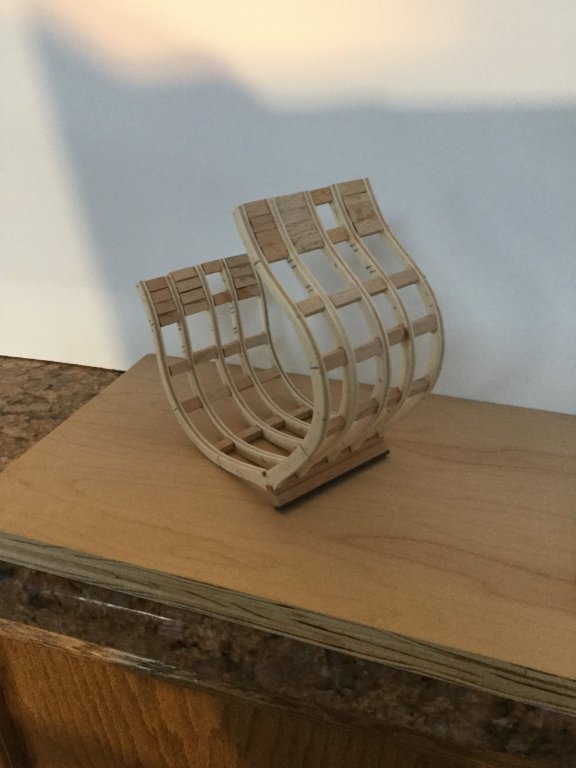
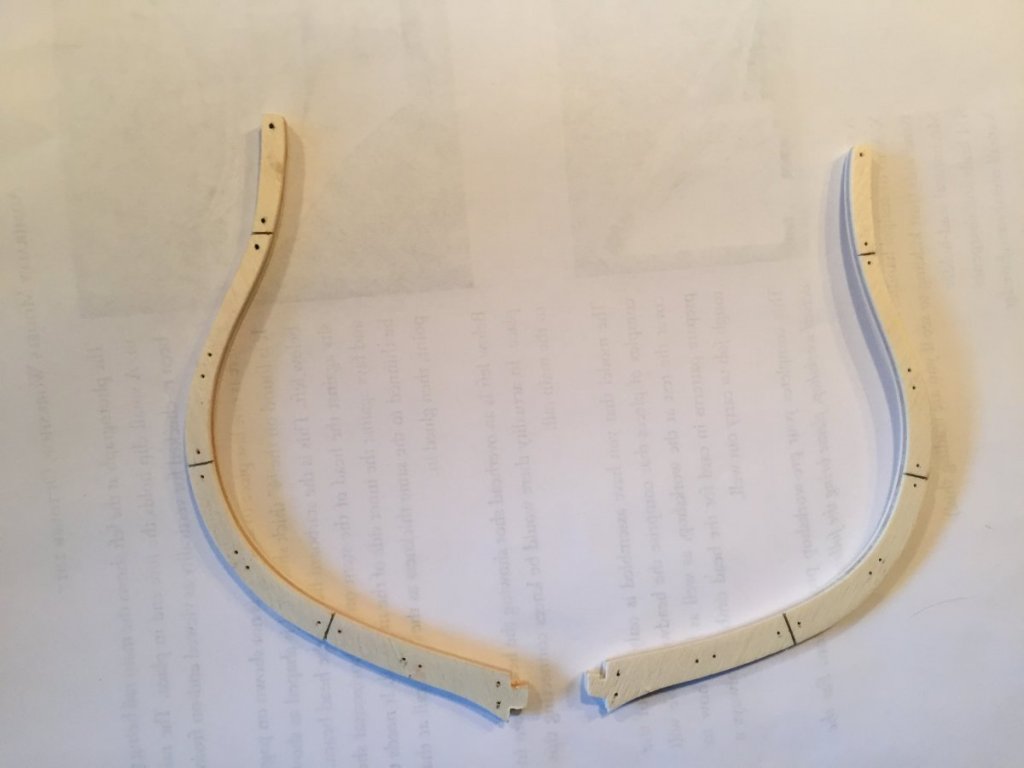
I finished gluing up all 5 pair of half frames. There are spacers between each one, and because of all the end grain butt joints, I elected to use 5 minute epoxy to glue the frame assembly together. I used 6 small machinist's squares to keep the glue up straight and perpendicular. There will be minimal fairing, because most of the spacers fit inside the profile of the frames. I will have to fit the keelson and that will require a little trimming of the notches, but nothing major. The outboard surface will need almost no fairing, since the frames are identical. Bellona was built in 1760 but didn't get her bottom coppered until 1780. I think I'll use a stylized color scheme: Swiss pear below the wales, rosewood for the wales and rails, boxwood for the outboard planking above the wales (usually painted ochre) and bloodwood for the inner bulwark planking. Deck framing will be European beech wood and the decks, holly/
- 75 replies
-
- 11
-
-
- constitution
- mamoli
- (and 2 more)
-
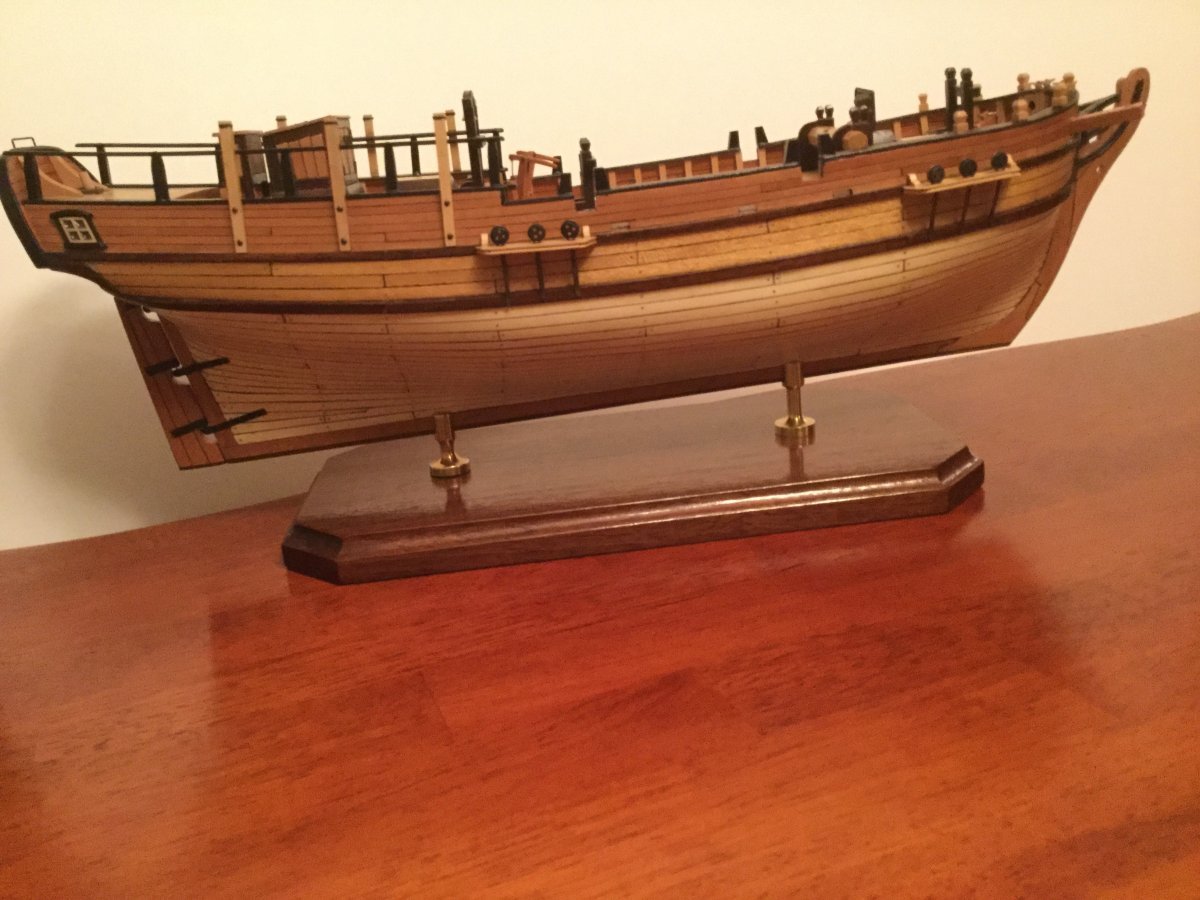
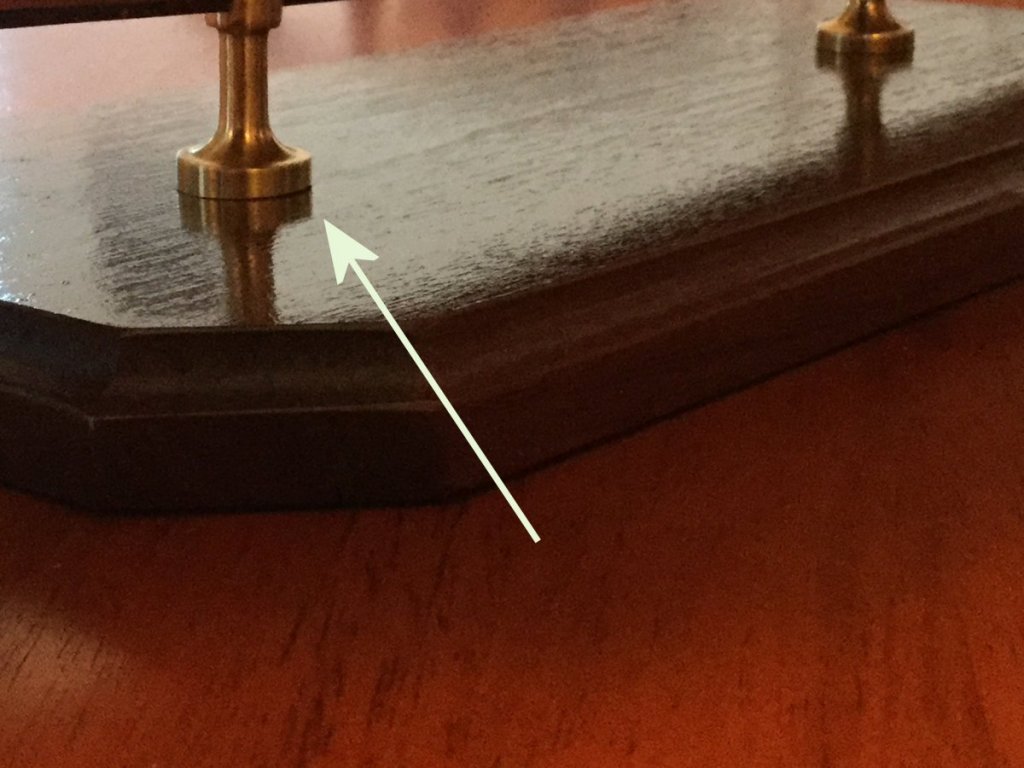
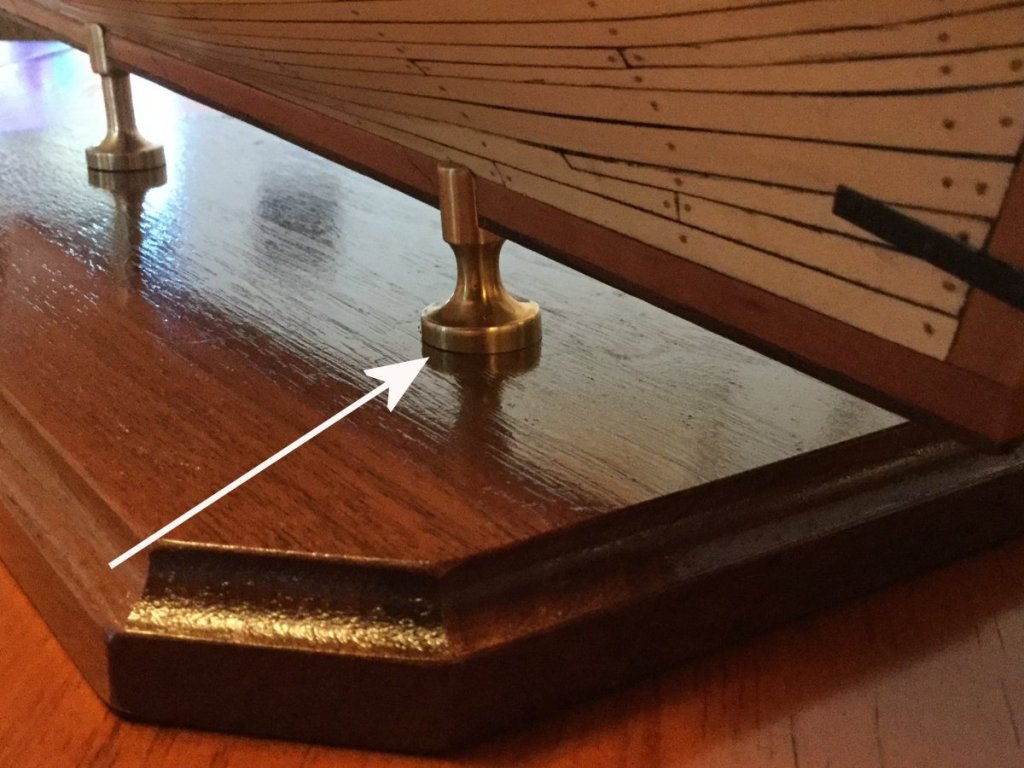
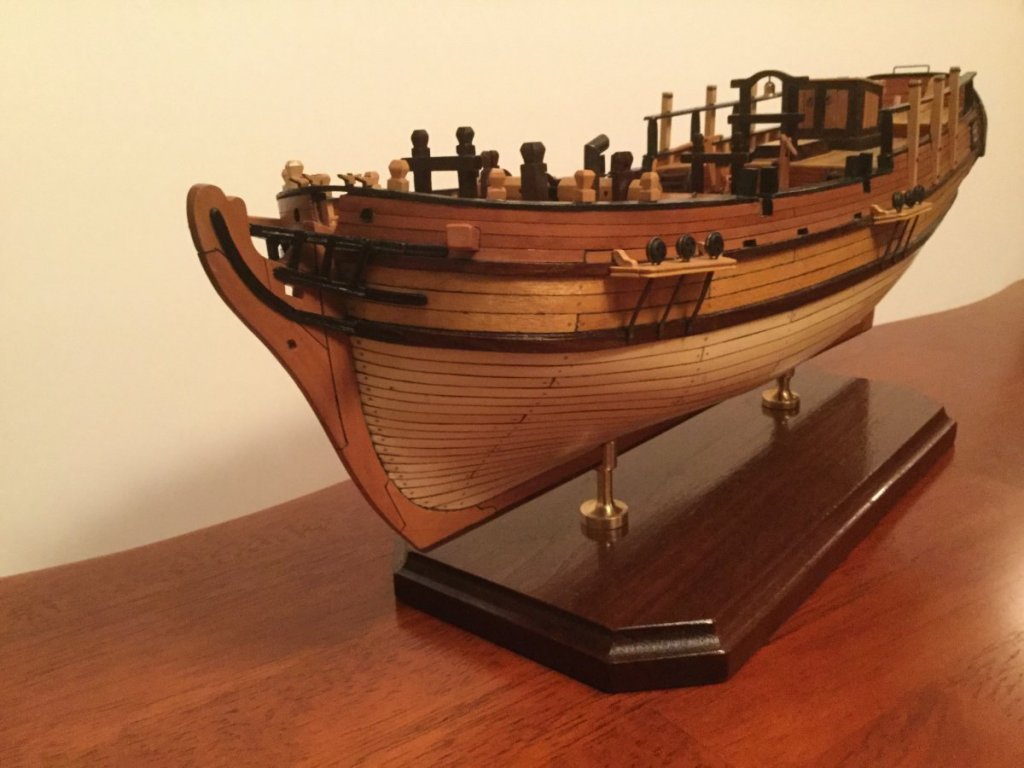
Thanks, guys! Dave: If you look REALLY closely you can see that the base of the pedestal has a definite taper to it. It's "thinner" on the port side. The photos show the difference. I don't think the casual observer would notice unless I pointed it out.
-
Outstanding job on the rigging, Bob. Are you using Syren rope? Do you wax the line or use it as-is?
- 682 replies
-
- 5
-
-
- halifax
- lumberyard
- (and 1 more)
-
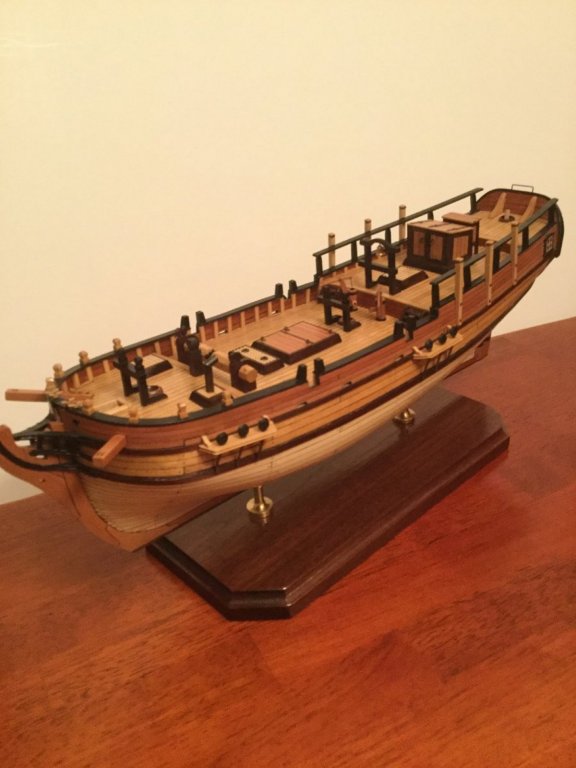
Thanks guys! After a lot of hand wringing I decided to go with traditional brass pedestals mounted on a walnut board for my display stand. I ran into a little problem in that my keel is a little off of dead vertical and when I mounted the model there was a definite, noticeable dip to starboard. I took the pedestals off and beveled their bases a bit until the model sat straight. Now I can begin rigging!

-
I'm embarrassed to say I forgot all about this build! I just reviewed it: Fantastic job, Nils, on a very interesting vessel!
- 692 replies
-
- 6
-
-
- eagle of algier
- chebec
- (and 2 more)
-
The kit has 5 pair of half frames, all identical and cut from plywood. The surface of the plywood is light colored and closed grain so it can be left as is for finishing. Only the fore-most and aft-most are visible in the completed model. I decided to score futtock lines and drill holes for bolts on 2 pair of half frames. I'm not even adding treenails, because the holes are so small, all that's needed is a little graphite from a 0.5 mm mechanical pencil lead and a couple of coats of poly to simulate bolts holding the frame together. There is no build jig per se. The model is constructed "sandwich" style with spaces glued between each frame to establish proper location and fix the gun ports. I made about 10 copies of the layout plan for the frames and spaces. The keel is European beech, as is the keelson, and has rabbets already milled. The was no false keel so I added one made of rosewood. The keel was then glued to the first frame and check carefully for square. I'll build the second frame on a separate board and transfer it here to the main board for assembly. I want to make sure my placement of spacers is accurate, especially where they define the gun ports.
- 75 replies
-
- 12
-
-
- constitution
- mamoli
- (and 2 more)
-
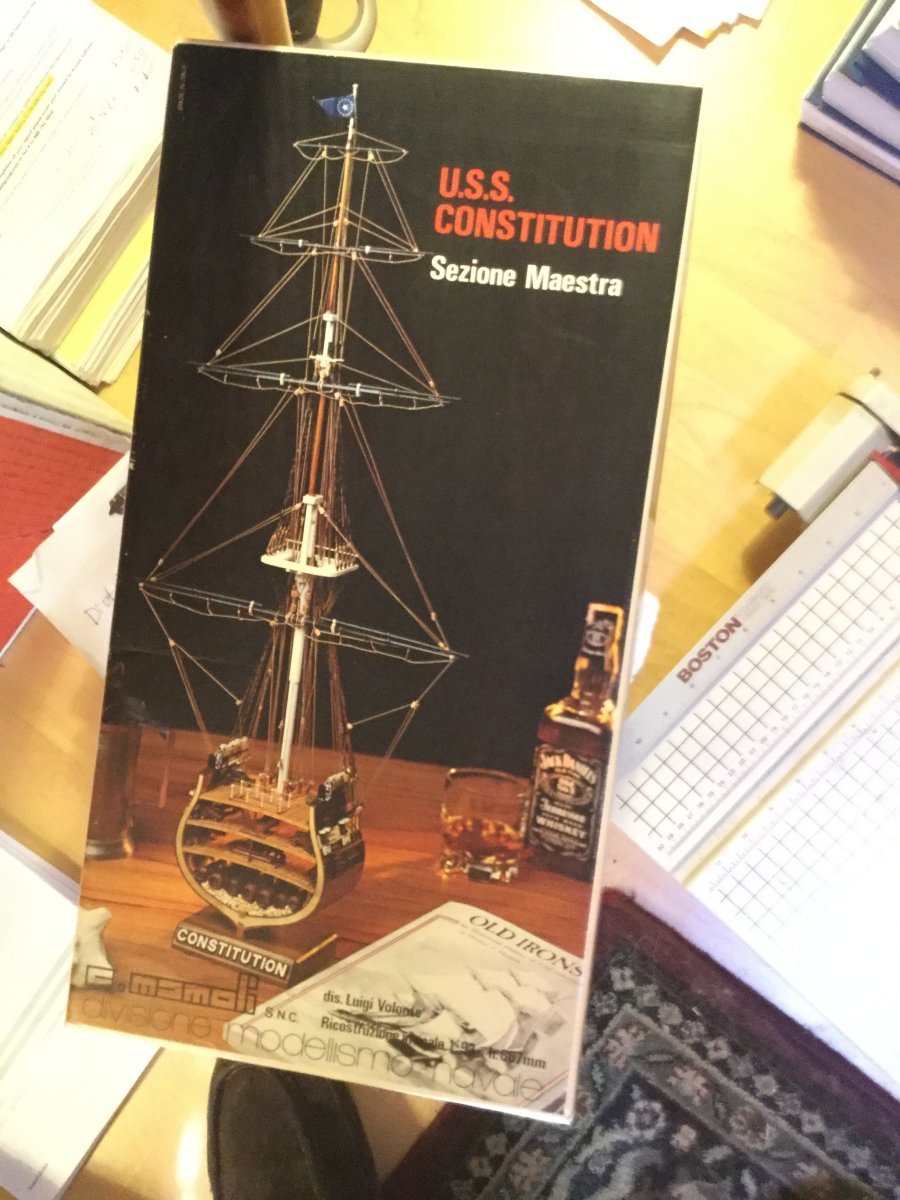
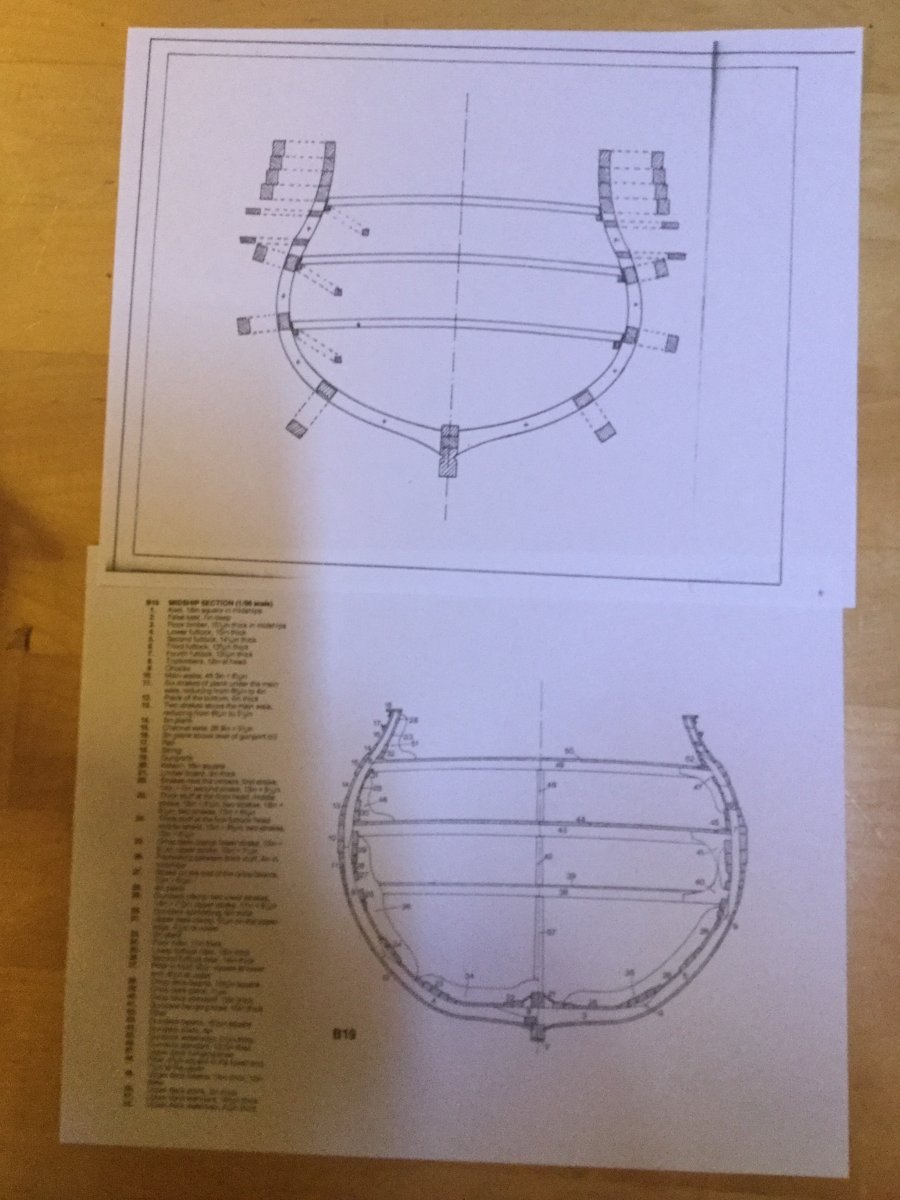
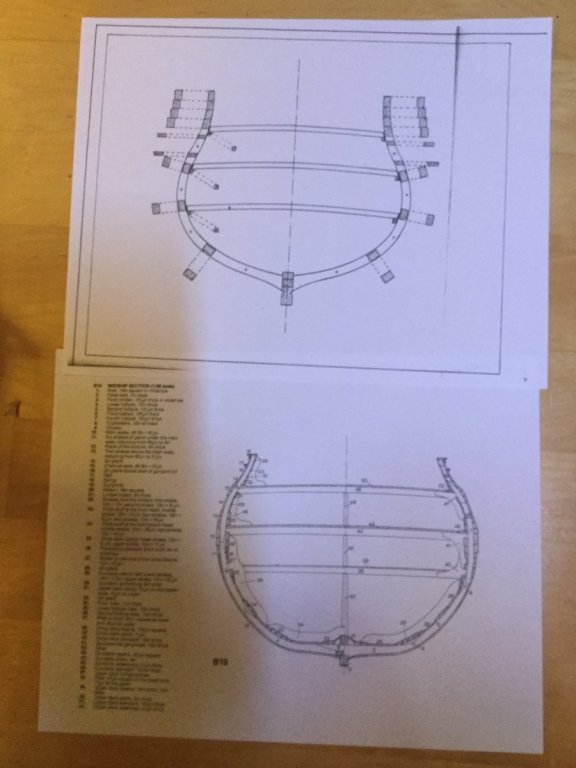
I found the Mamoli Constitution cross section on EBay for a song (plus shipping!) so I bought it, thinking I'd start yet another project. Looking at the box cover, I noticed the bottle of Jim Beam and the half full glass next to it. It turns out that these are not there by accident. In reviewing the kit contents and plans, I came to the conclusion that the designer of this cross section must have been drunk when he drew up the plans! There are so many errors! First, this is supposed to represent the constitution at the level of the main mast. The frames in this kit are all identical, meaning the section will be dead straight with no bevel to the frames, and no narrowing of the hull moving aft. This is great for fairing and planking, but not accurate at all: the AOTS book clearly shows the hull narrowing moving aft at this point. Also the chain pumps don't connect with anything below the gun deck! There is no well or shot lockers, and most egregious of all, the cross section has only 3 decks! "Old Ironsides" has 4. What to do? I decided that I couldn't build the cross section as the Constitution. In studying several plans in my AOTS library, I discovered that the three deck layout, and shape of the hull amidships was similar to the HMS Bellona, a Royal Navy Ship of the Line. I decided I would build the cross section as typical of British naval vessels of the 18th century. This should be interesting. I'll be switching out a lot of the woods, and plan to avoid using any paint. I'll also add details missing from the kit like shot lockers and the well. The photos show the box cover and the cross section layout for this kit and Bellona. They are very similar, including having only 3 decks!

- 75 replies
-
- 11
-
-
- constitution
- mamoli
- (and 2 more)
-
Bob: Check out Chuck's practicum for building and rigging "Sultana" over at the Model Expo site. Sultana was smaller than Halifax, but rigged similarly. mIt's under "instructions & Parts List". http://modelexpo-online.com/model-shipways-sultana-solid-hull-1-64-scale
- 682 replies
-
- 6
-
-
- halifax
- lumberyard
- (and 1 more)