


Glen McGuire
-
Posts
1,272 -
Joined
-
Last visited
Content Type
Profiles
Forums
Gallery
Events
Posts posted by Glen McGuire
-
-
Just found your build log, Bryan, and went thru the whole thing. Your ship is coming along very nicely.
-
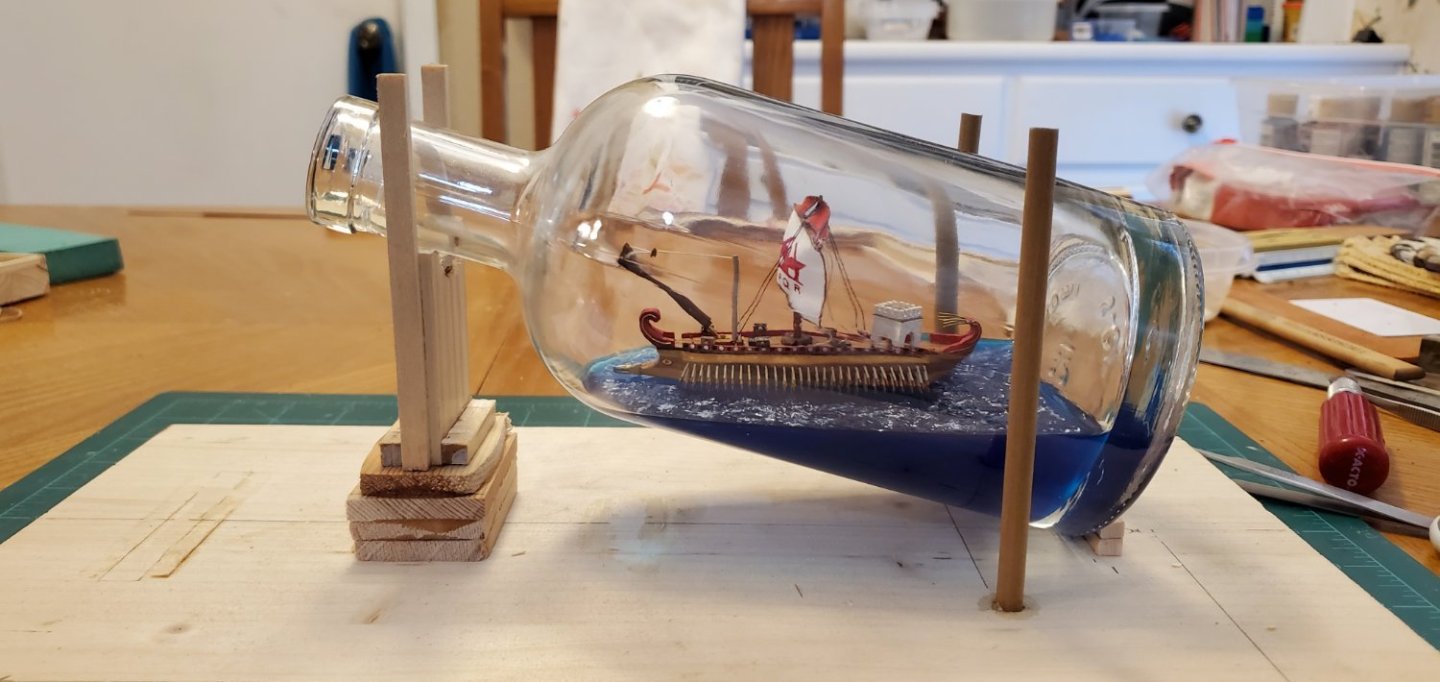
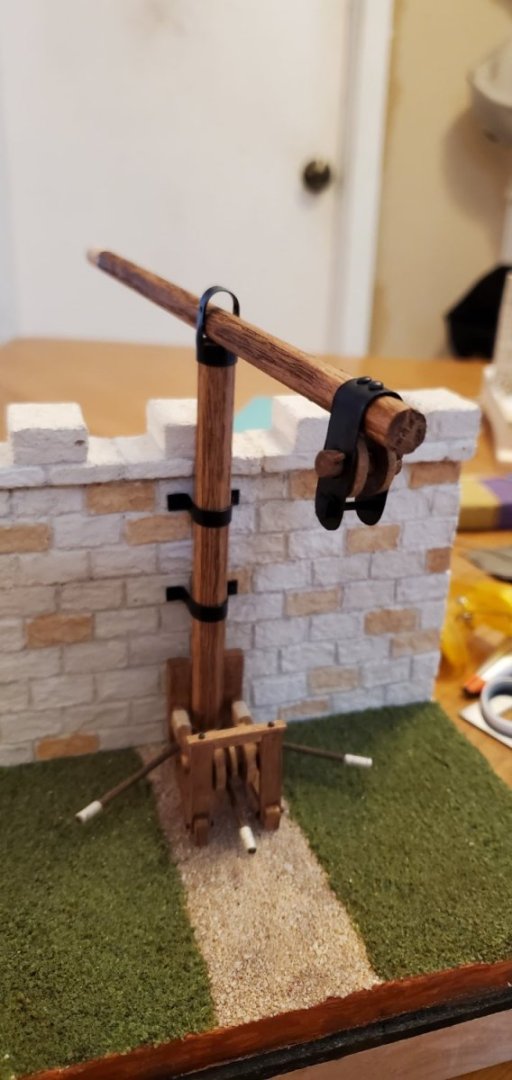
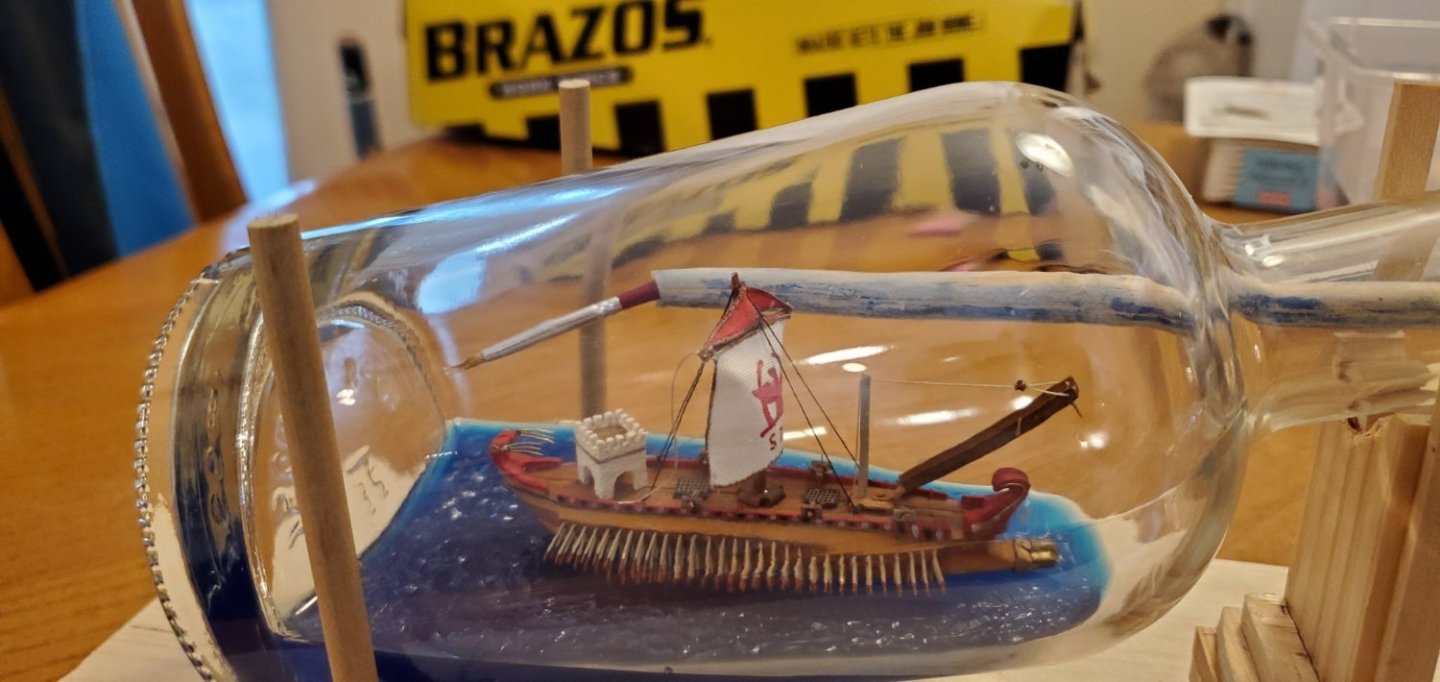
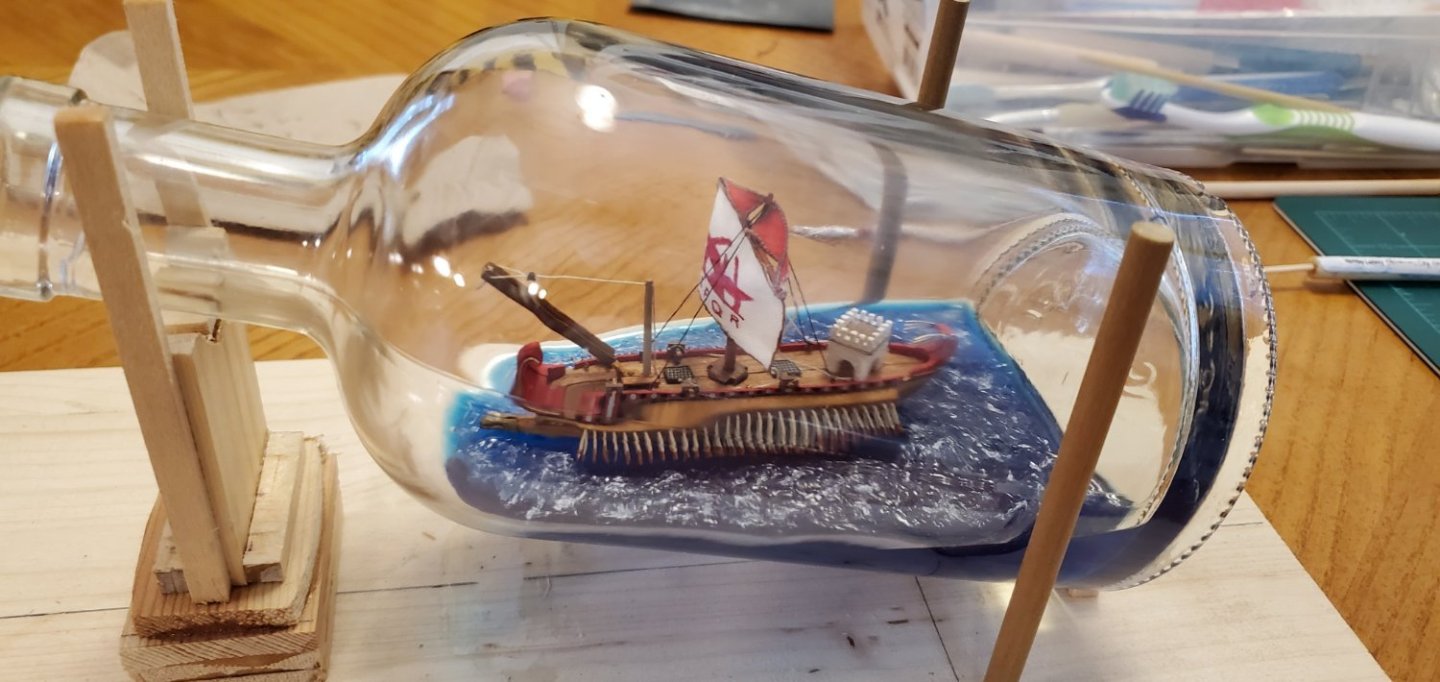
Time to confront one challenge I knew would be waiting for me late in the game - how to secure the bottle to the base at an upward angle when only a small portion of the bottle's rear would actually be in contact with the base. My practice stand below has the bottle at the angle I want and shows how much of the bottle is raised above the base (water) by the claw's hook. However, I don't want to use the claw to actually support the bottle. The bottle weighs too much for my comfort and then there's the lateral stability to worry about.
So my solution is to carve out a small cradle in the base and have the bottle's end epoxied to it. Then create a small wave just to the left of where the bottle extends out of the cradle for additional support. I believe this will work. Because of the bottle's angle, a lot of the weight (helped by the water inside the bottle) is in the rear and will be in the cradle. So my wave should not have to be too high or too far forward to give me comfortable support. That's the theory anyway!
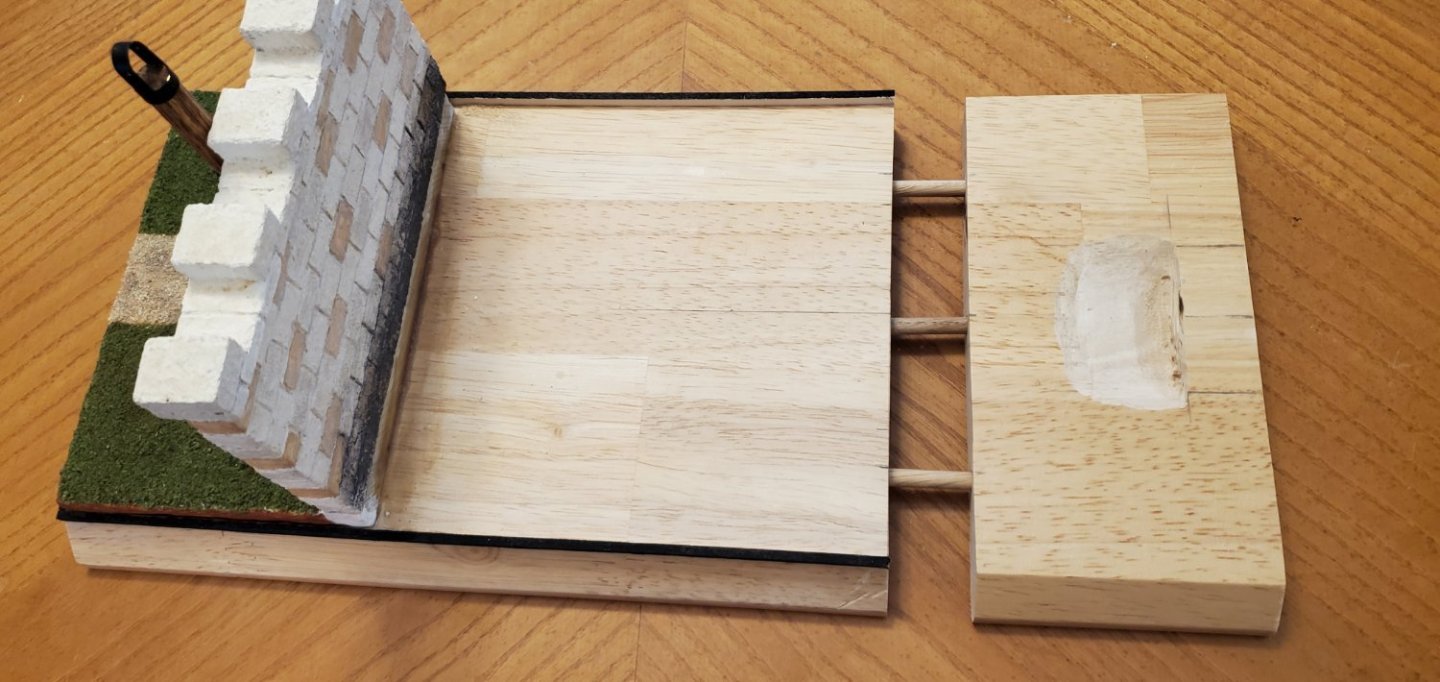
Alas. Ugh. Sigh. After I carved out my cradle in the base and rested the bottle in it for a test, I found I'd made a major blunder. My base was not wide enough. The bottle's opening was almost hitting my seawall. Somehow, (or maybe as usual), I'd measured wrong. The base was about 1 1/2" short. And unfortunately, I'd already glued the wall and land securely to the base. But fortunately, we are talking about wood here, so there's usually a fix. So I decided I'd just extend the base.
I cut off the base at the edge of the cradle I'd carved. The base was made from an old bookshelf I'd repurposed for modeling so I had plenty of extra material to make the extension. I carved a new cradle, cut the extension to the proper size, added some dowels for security, glued it up, and added the border railing.

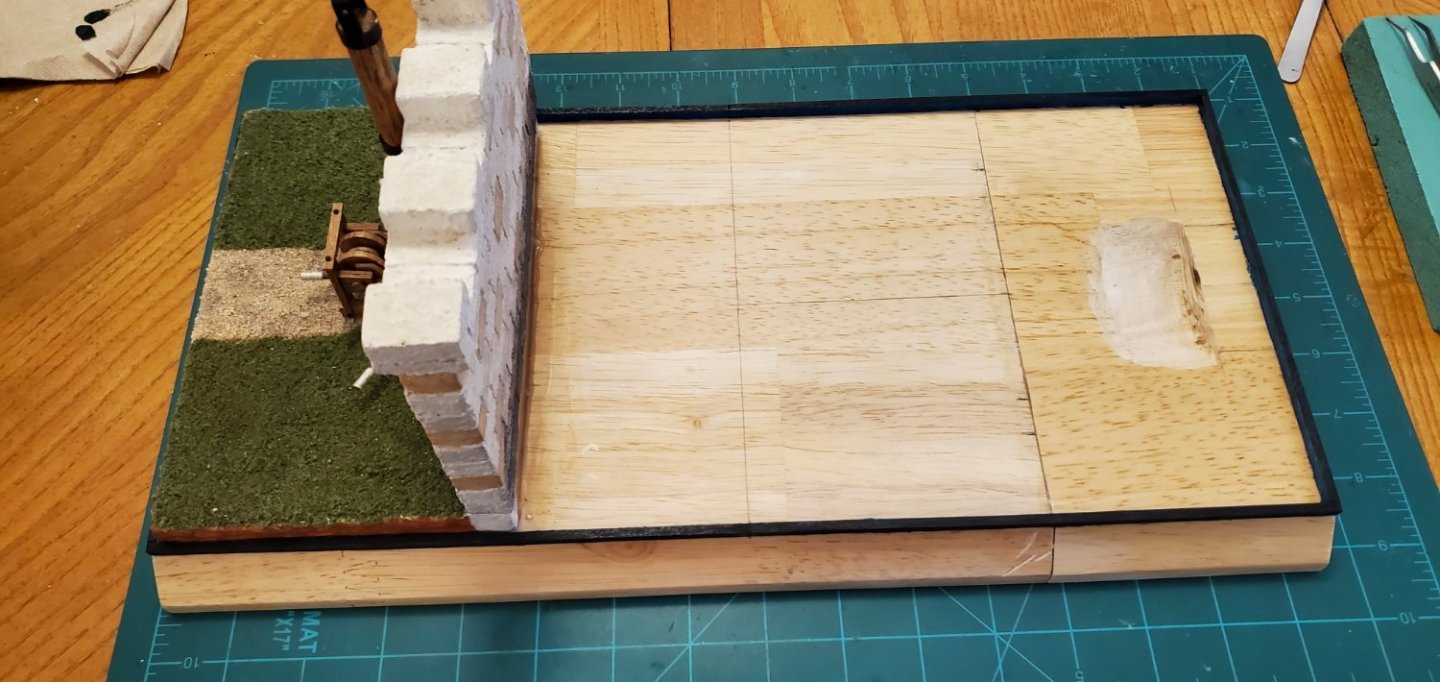
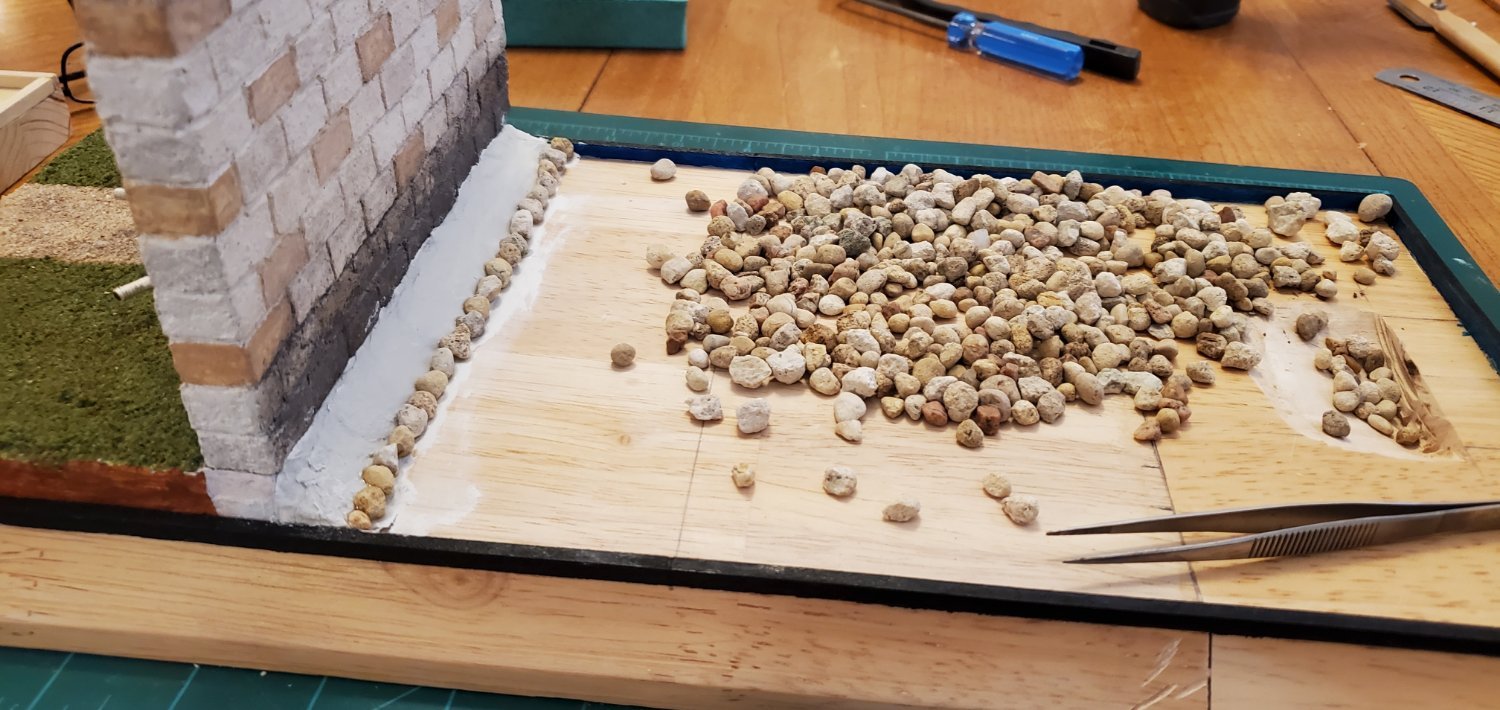
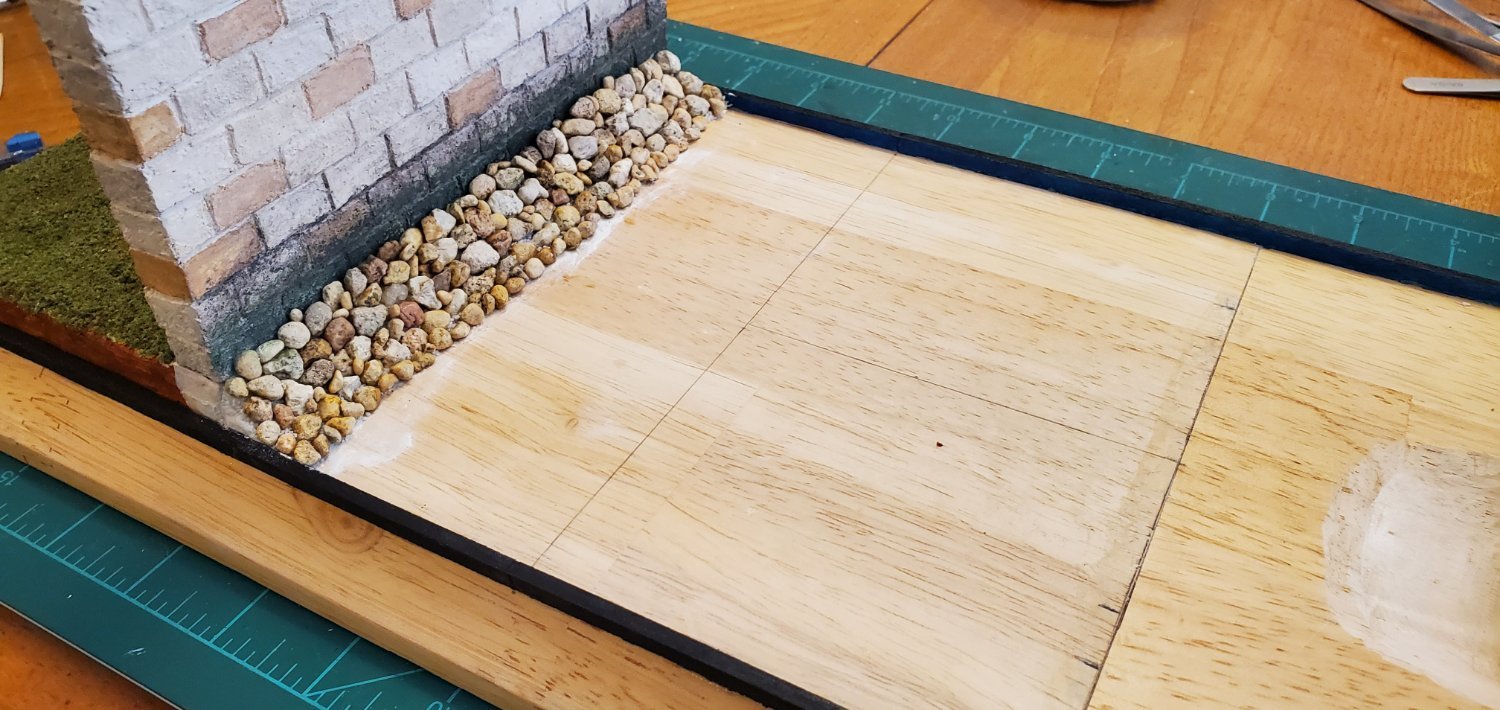
With the self-inflicted detour out of the way, I added the rocks at the base of the seawall. I added a wedge of modeling clay, spread a thin layer of glue, sprinkled some sand on top, then added pea gravel I'd carefully selected from a pathway in my backyard. Putting the rocks in place was kind of like doing a weird puzzle.


As you can see, I also added a layer of sea scum to the base of the wall above the rocks as Pat (aka @BANYAN) suggested in an earlier post. It looks black in the pic above but it reality, it's got a dark greenish tint. I may add a small bit of color to the top layer or 2 of the rocks. But I don't want to go overboard.
-
2 hours ago, Knocklouder said:
the race to the finish, so we can start another lol.
Ain't that the truth! Such an addiction or is it a sickness, take your pick!

- Ian_Grant, Knocklouder, BANYAN and 4 others
-
 7
7
-
6 minutes ago, Ferrus Manus said:
Can someone explain to me how a steering oar actually steers a vessel, and how it is operated??
I can't speak to the mosaic ships that Steven is modeling, but when I was doing research for my Oseberg build, I came across this webpage describing the steering oar for Viking ships. Perhaps the concept is the same or similar.
- mtaylor and Ferrus Manus
-
1
-
 1
1
-
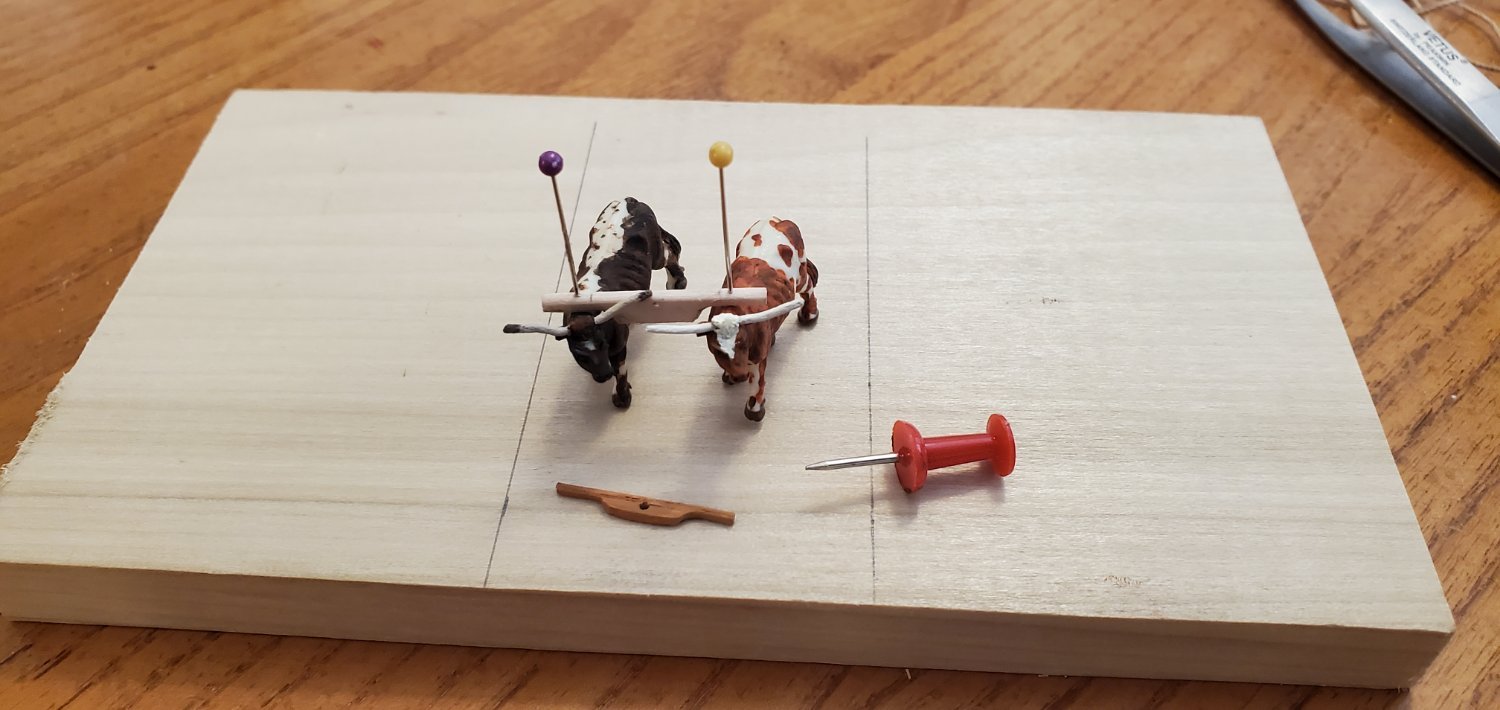
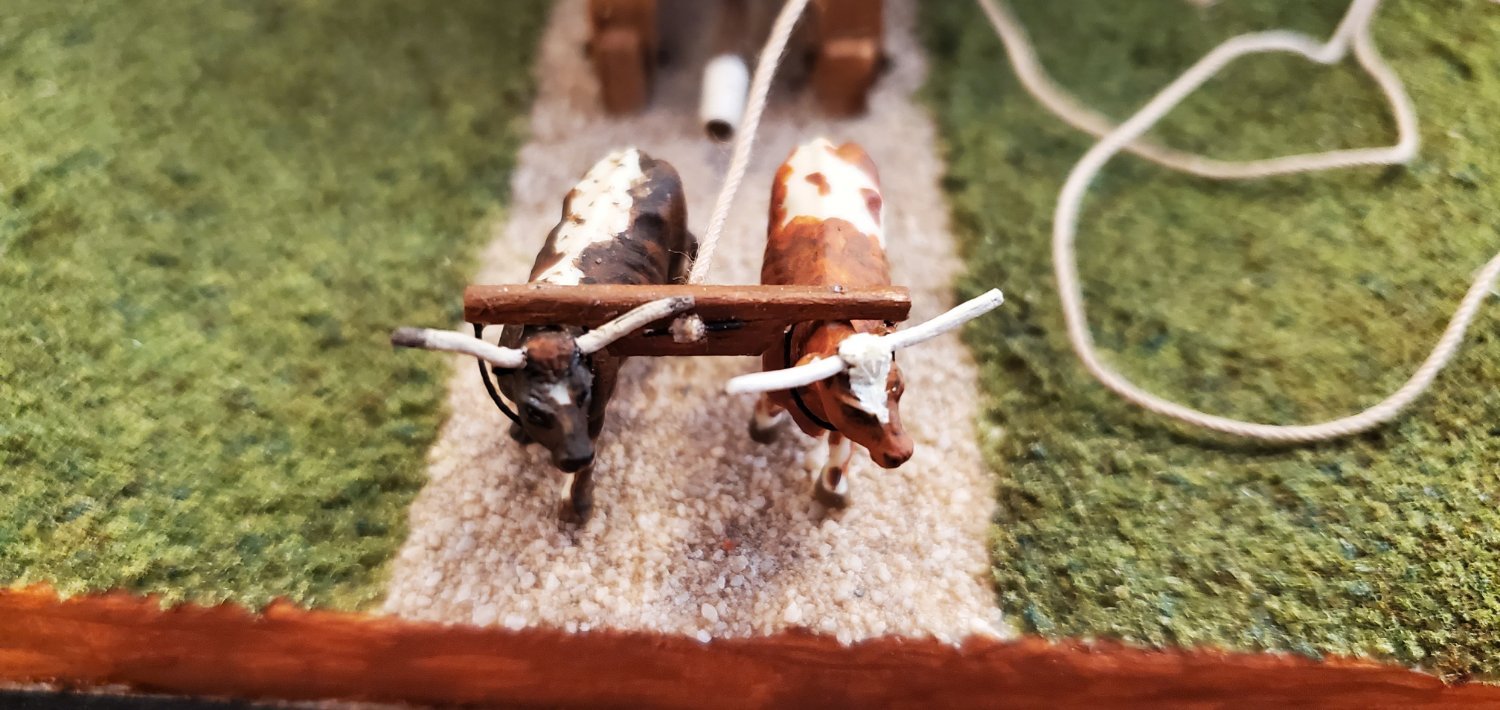
Small update here (ok, all SIB updates are small ones aren't they 🙄). When Ken (a.k.a. @Canute), mentioned oxen in an earlier post, it made me realize that I needed a yoke for my longhorns. I never seem to think of details like that when I come up with a project idea. Then I stumble into them along the way and they add hours and hours to the build.
I ended up making several yokes before I found a size and shape I was happy with. You can see one of my early attempts below that was way too small.


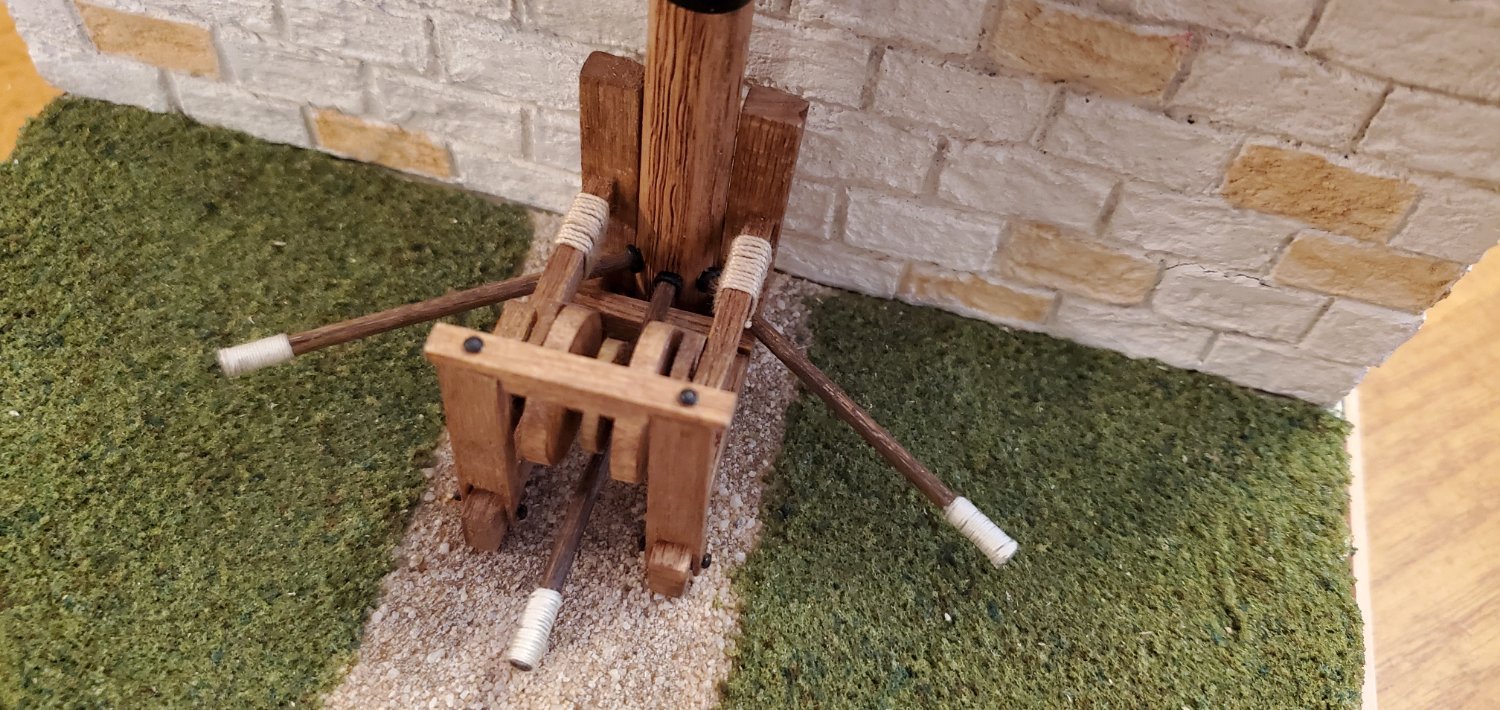
Next, I affixed the claw's base to the main pole and added the swivel rods. Then I made the pulley for the claw's horizontal arm.
Other than permanently affixing the longhorns and adding their pull rope (which will probably be the very last step of this project), I believe I'm done with the land side of the wall. Now it's time to bring the bottle back into the picture and figure out what I'm going to do with the ocean side.
- GrandpaPhil, Bryan Woods, mtaylor and 4 others
-
7
-
The shipyard can be a very dangerous place, what with falling timbers and other hazards. I hope Marvin is ok. Otherwise, very fine work, Bob!
- Bryan Woods, Javelin, Keith Black and 13 others
-
5
-
 11
11
-
That is absolutely amazing work, Ian! Congrats on a successful test run.
In the first video when you said, "Something's gone wrong" all I could think of was "Houston, we have a problem." But you get her fixed and cruising across the water. Awesome!!
- mtaylor, Ian_Grant and Knocklouder
-
2
-
1
-
8 minutes ago, Canute said:
nice juicy burger. 😁
That's another B word we don't say around my herd, Ken! 🤐
- mtaylor, Canute, Keith Black and 1 other
-
4
-
1 hour ago, Keith Black said:
It's a family show.
I thought we stopped being a family show when @mtaylor made the reference to Monty Python and canoes during my Oseberg build log! 😃
- Keith Black, Knocklouder, Canute and 2 others
-
2
-
3
-
-
On 8/25/2023 at 8:59 PM, Louie da fly said:
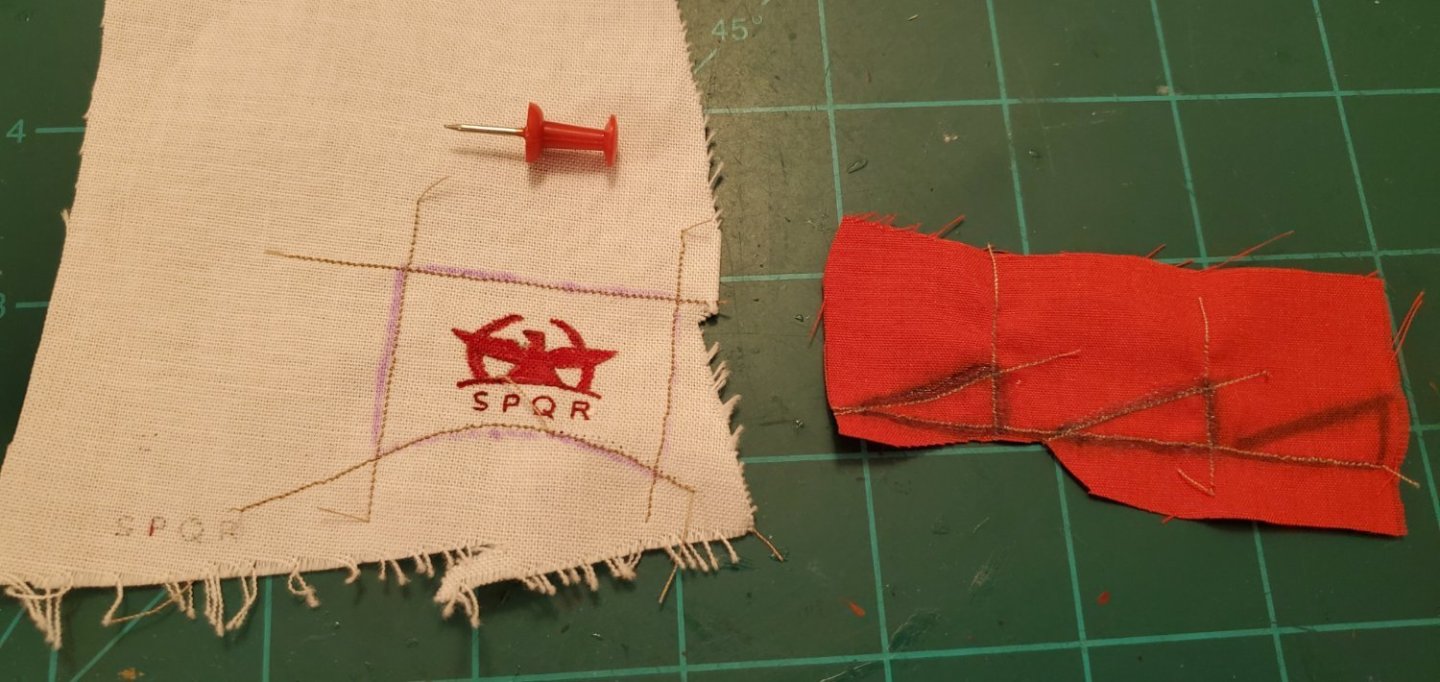
Depending on how steady your hand is, you could hand-paint it. I used acrylic paint on a piece of (I think) cotton fabric,
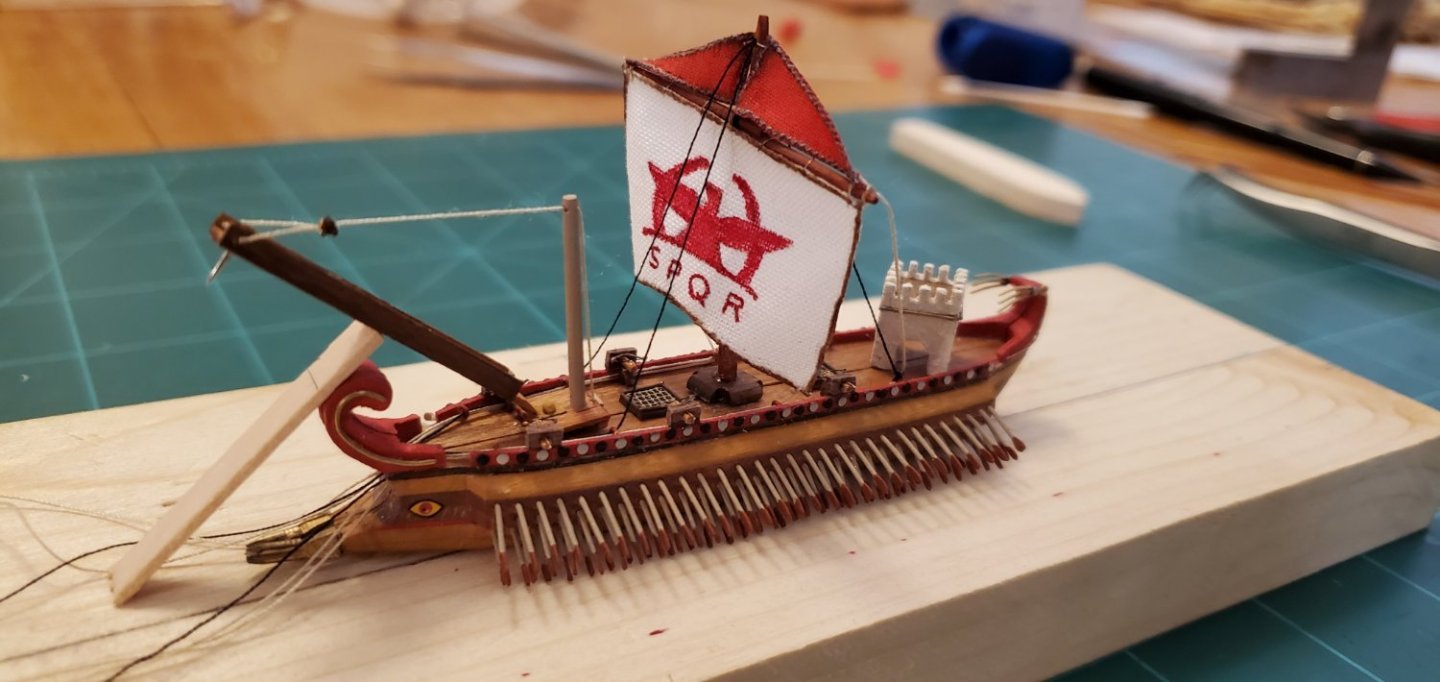
I'm with Steven on this. I am no great artist and would likely find a new hobby before attempting something as intricate as what he did with his incredible restoration project, but I did manage to hand paint a reasonable design with small lettering on my tiny Roman quinquereme sail (muslin fabric).
- thibaultron, Louie da fly and mtaylor
-
3
-
Glad you could make it back, Mr. Pirate!!
- Keith Black and mtaylor
-
2
-
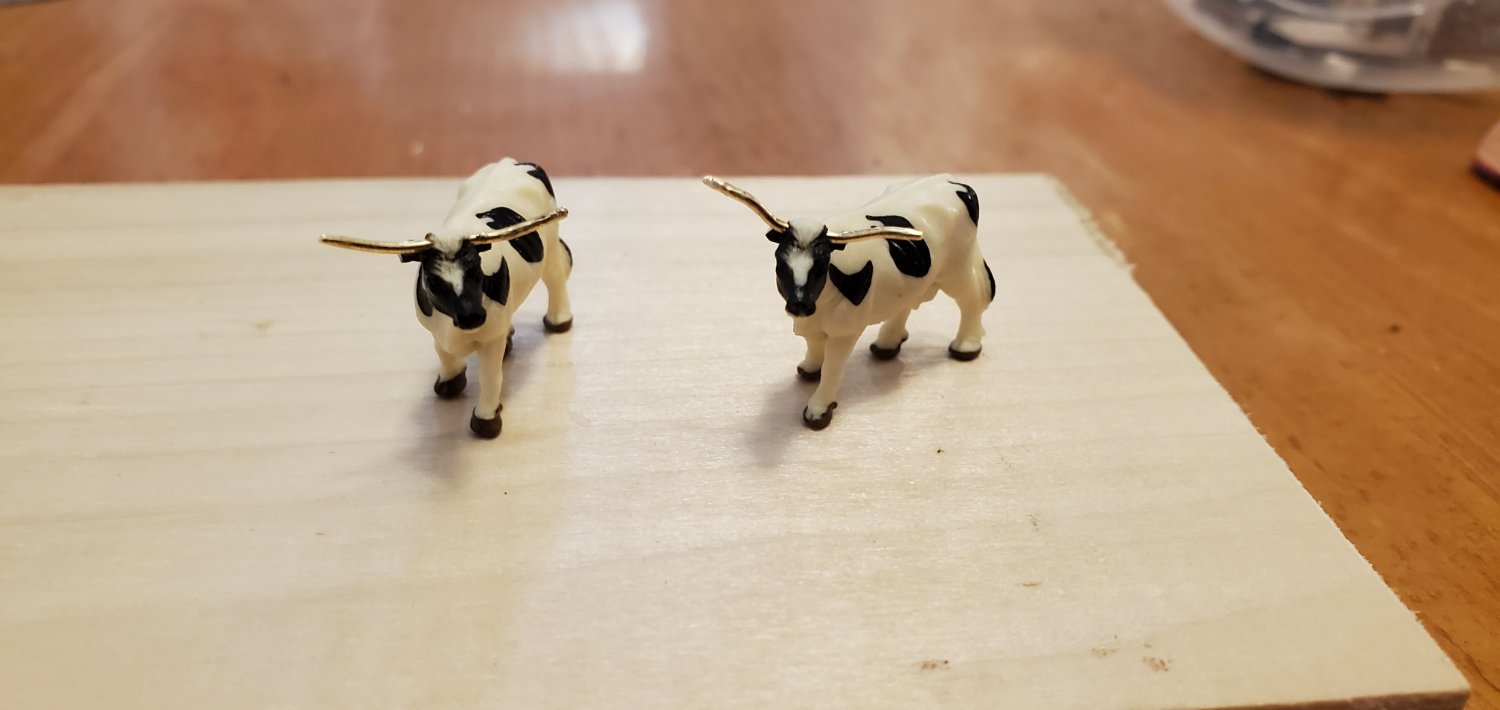
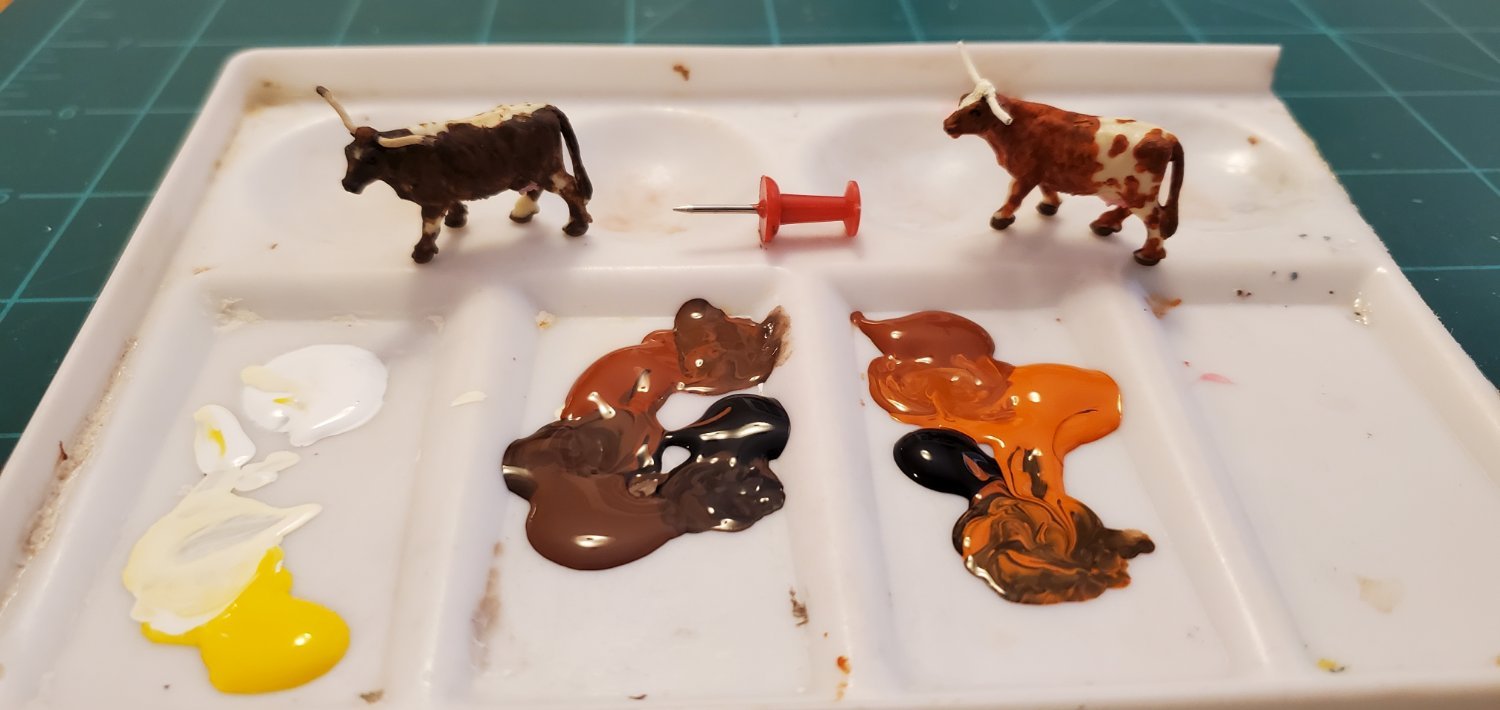
My little cows sprouted horns very quickly. Then I did some paint mixing and swirling trying to get coloring that resembled their real life inspirations above.


Now, back to the base. For the grounds inside the wall, I wanted green grass bisected by a gravel path for the cows. This was my first try at landscaping in a model, so there was definitely some trial and error.
For the grass, I went to the model railroad aisle at Hobby Lobby and got a small package of coarse ground green grass. Mistake. I should have gotten the fine ground as the coarse was too large for my scale. So I ended up sifting the grass thru a screen to capture the smaller particles. That worked ok. For the gravel path, I used leftover sand (actually aquatic substrate for aquariums) from my Adventure Galley build. I mixed in a little leftover reddish-brown dust from the sea wall construction for a bit of color variation.
The application process I settled on was: 1) spread a thin layer of white glue on the clay surface, 2) sprinkle the grass/sand liberally on top of the glue, 3) gently pat everything down with fingers, 4) blow off excess, 5) using a small syringe, drop a thin layer of diluted white glue over the top of everything and let it soak in.
After drying, everything was nice and tight, no flaking or particles coming off. I think it came out looking ok.
.thumb.jpg.b294c92532f34083fe06e6938434d928.jpg)
Next, I secured the "land" portion onto the main base and added the sea wall.
-
14 hours ago, Boccherini said:
looks like Sweet Eileen dyes her hair, or possibly sports a wig/hair piece.
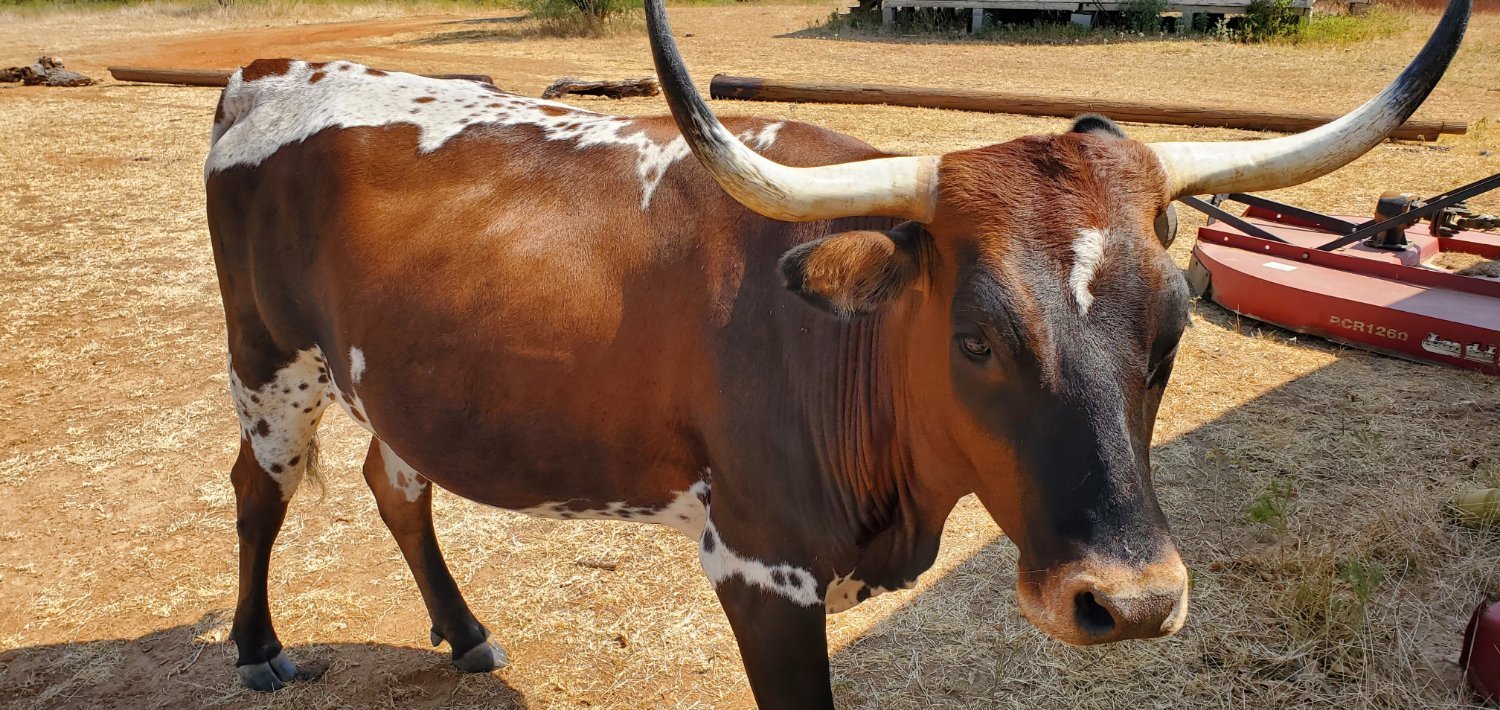
That is funny, Grant! Here's a better picture that shows her true colors. Her hide is kind of like a metallic paint job on a car. Get her out in the bright sun and the colors really come to life. She's a bit unique as you don't see too many Texas longhorns with her color scheme.

- Canute, Keith Black, mtaylor and 2 others
-
5
-
11 hours ago, Knocklouder said:
Great work my friend. Are you fixin to use black and white longhorns, no reson just wondering lol.
Thanks, Bob! As far as the color of the longhorns, I'll try to make one burnt orange and white like Dimples in the first pic below. I may try to make the other longhorn black and white like Sweet Eileen in the second pic below. Actually, she's a really dark brown when you get up close, but most people look at her and think she's black.
I'm working on the horns first though. Then I'll work on the paint job.
.jpg.84175de35a6424e6727b415fe18e7592.jpg)
.jpg.a2727b170bce08260d8c02df79b1b89a.jpg)
- Knocklouder, Canute, GrandpaPhil and 2 others
-
5
-
23 minutes ago, Canute said:
Better get ox #1, up on the parapet wall, in the game or the Sicilians/Syracusans are going to be roasting beef for dinner. 😁
He's trying to convince me he's a better lookout than beast of burden. You have a good point though, so I will pass your warning on to him and see if he changes his mind!
21 minutes ago, gjdale said:Love the cows - from their colouring, it looks like they may be distant cousins of your penguin colony…….
OMG!! That never crossed my mind but I think you are right!! So to ensure there is no confusion, the cows will be undergoing a breed-change procedure soon to transition from holstein to longhorn.
- Keith Black, GrandpaPhil, mtaylor and 4 others
-
1
-
6
-
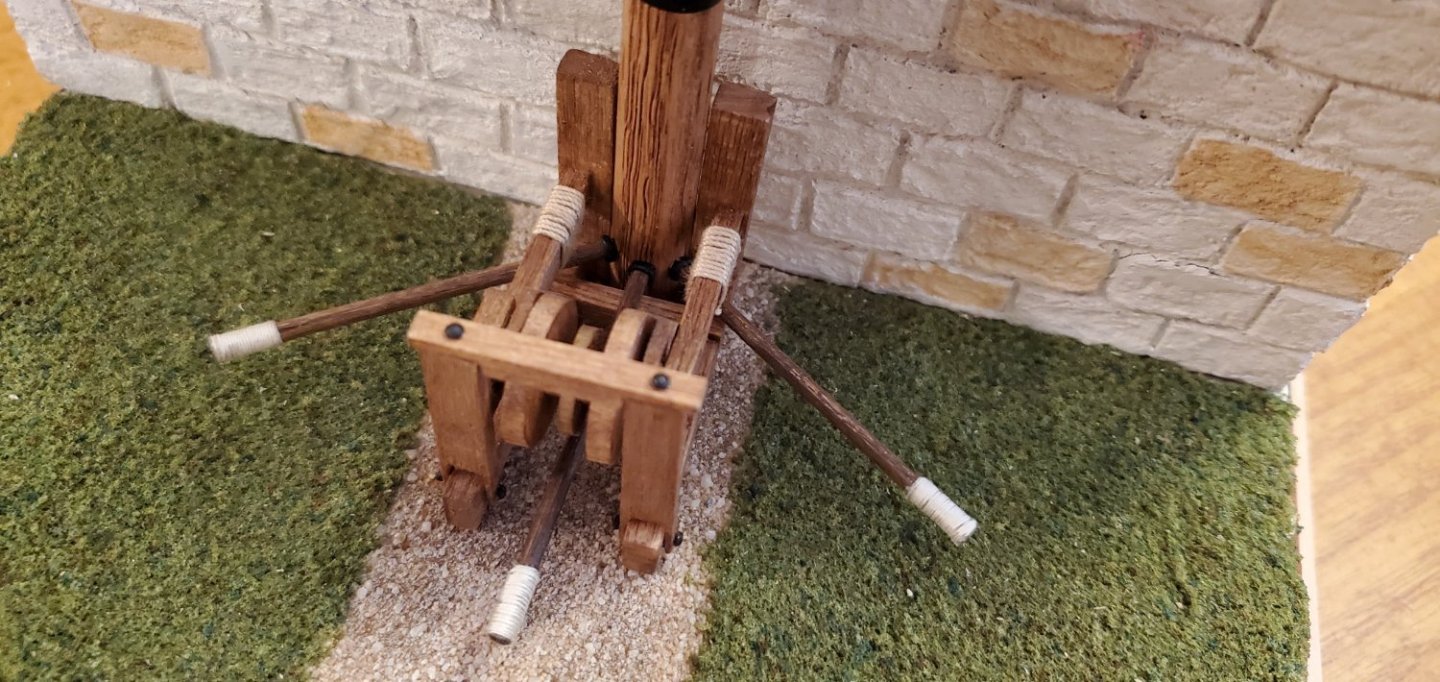
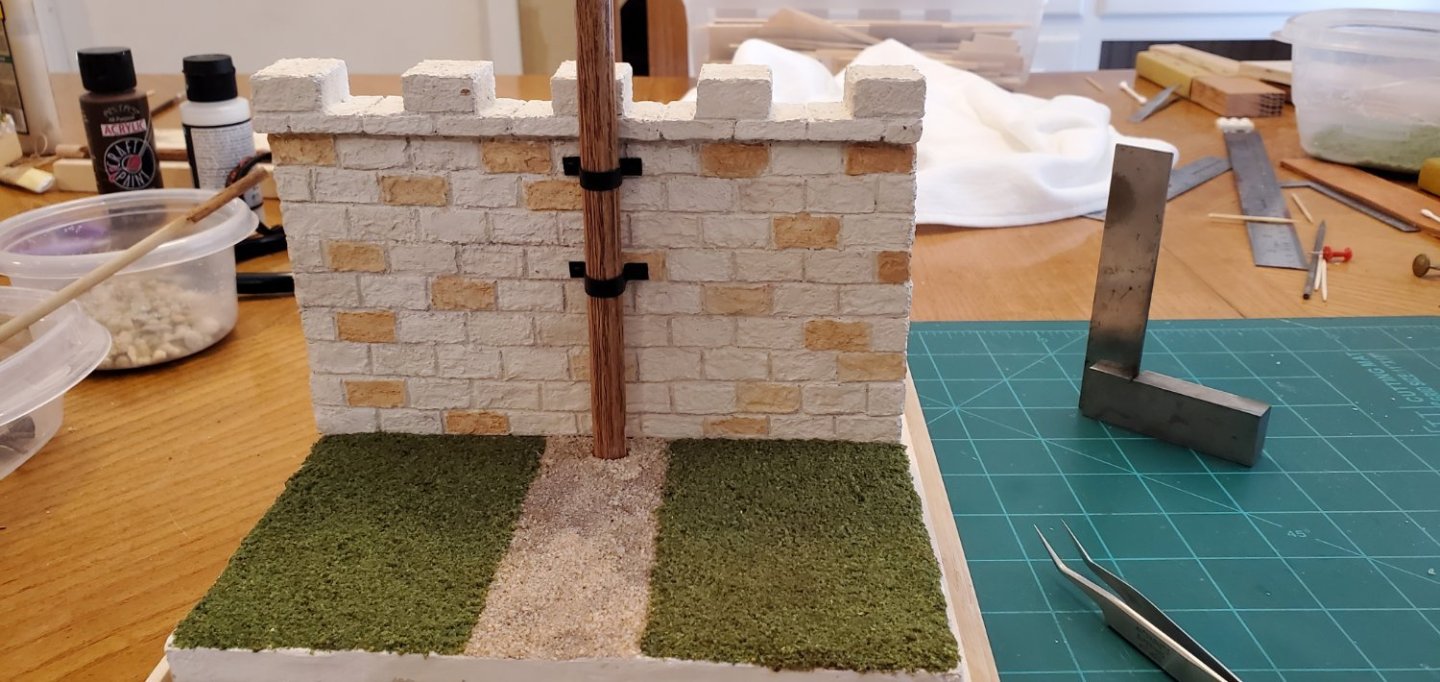
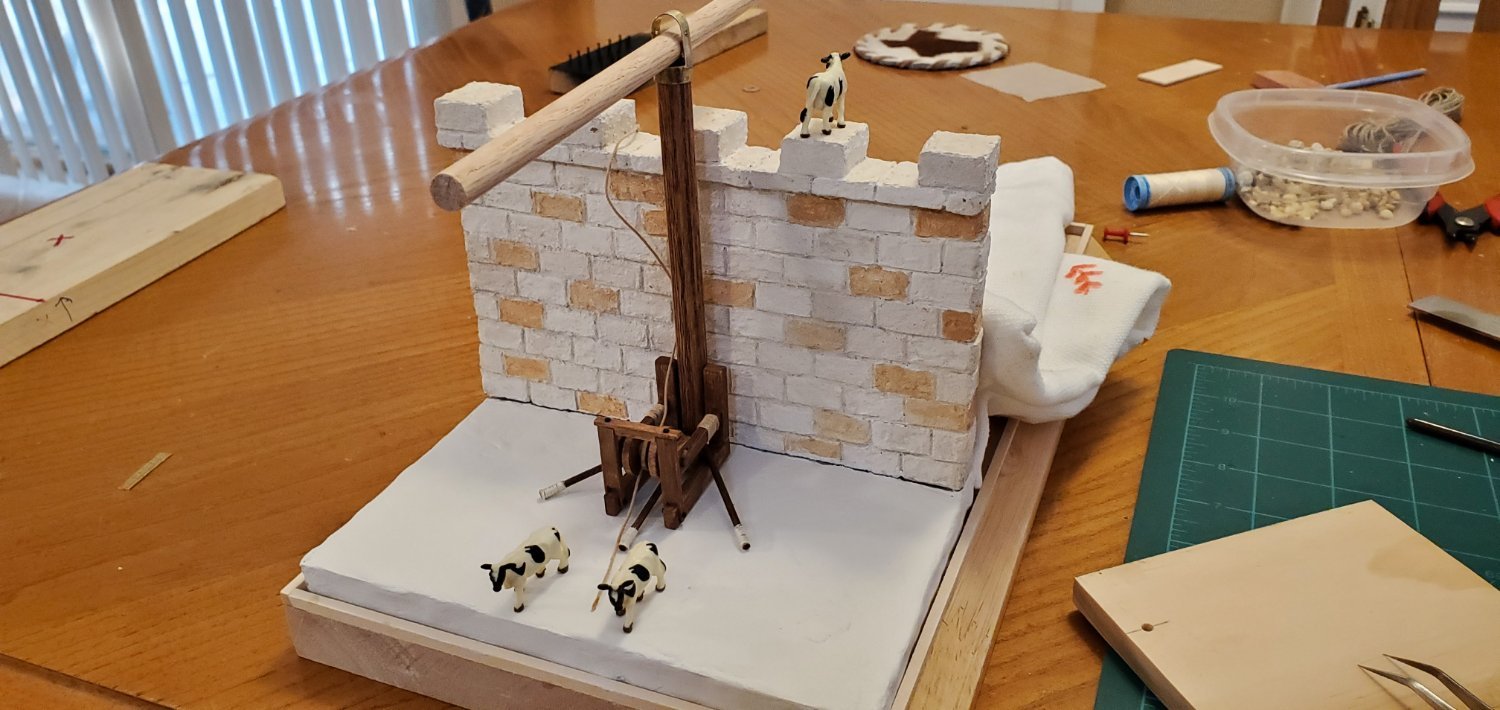
Here’s where the whole base is at right now. I added a thin layer of modeling clay to the land behind the wall and will add some grass and a gravel cow path on top of it.
The 3 small rods are a design change I made to the claw (with apologies to Archimedes). I decided the claw needed the ability to swivel right and left to some degree. Otherwise, you are just counting on the Roman quinqueremes to run straight into the claw’s hook. With a stationary claw, it seems like the Romans would be able to steer away from the hook pretty easily. So my claw uses a capstan concept to add lateral range to the claw. The 3 small rods fit into the main pole and are used rotate the pole and swing the claw’s hook back and forth as necessary to snag the incoming quinquereme.

.thumb.jpg.cac2146aeb5c8f61d0dfa8f39b80f357.jpg)
- mtaylor, John Fox III, Keith Black and 7 others
-
7
-
 3
3
-
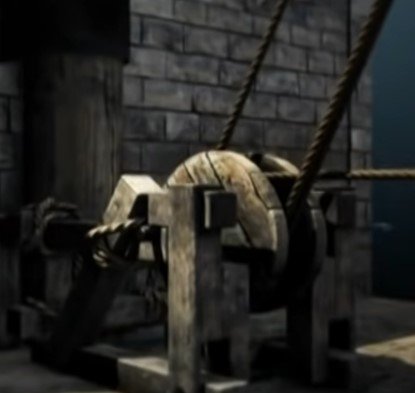
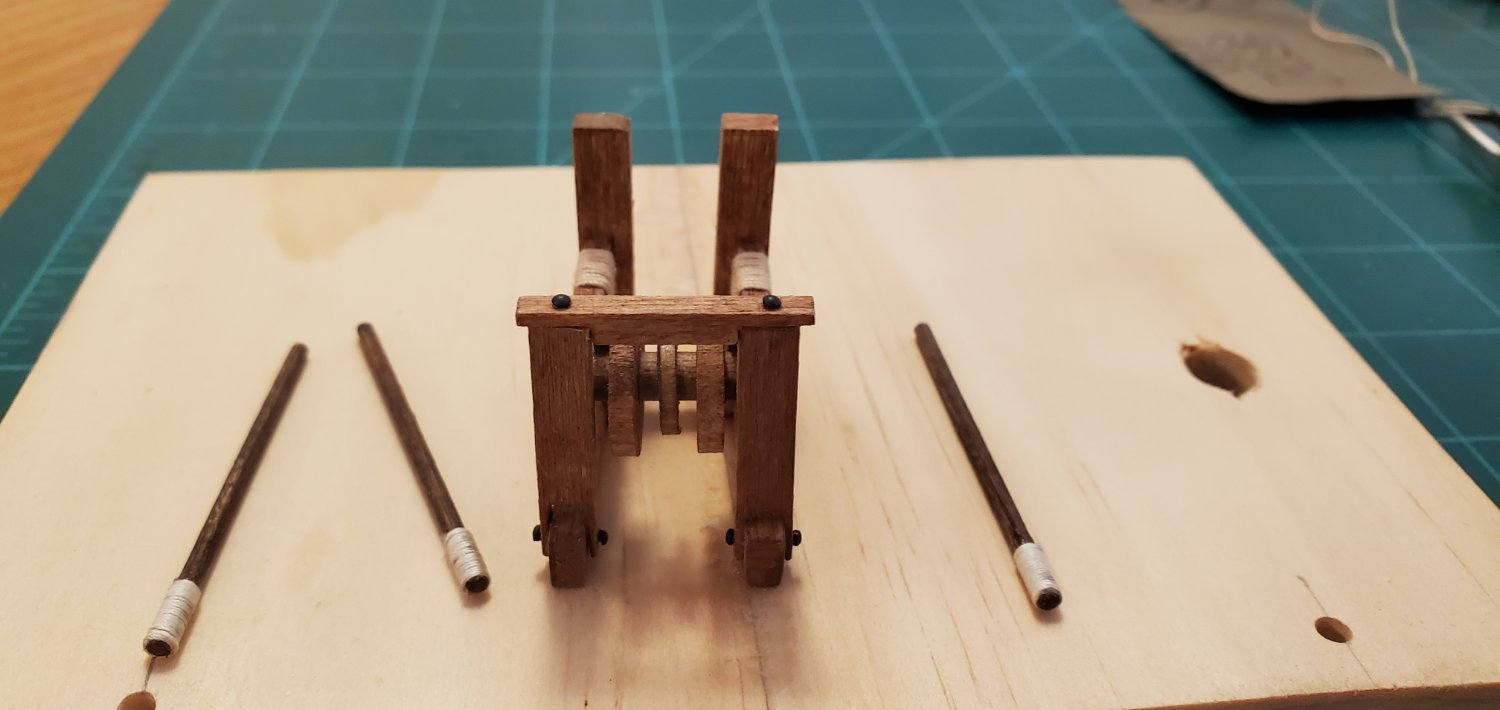
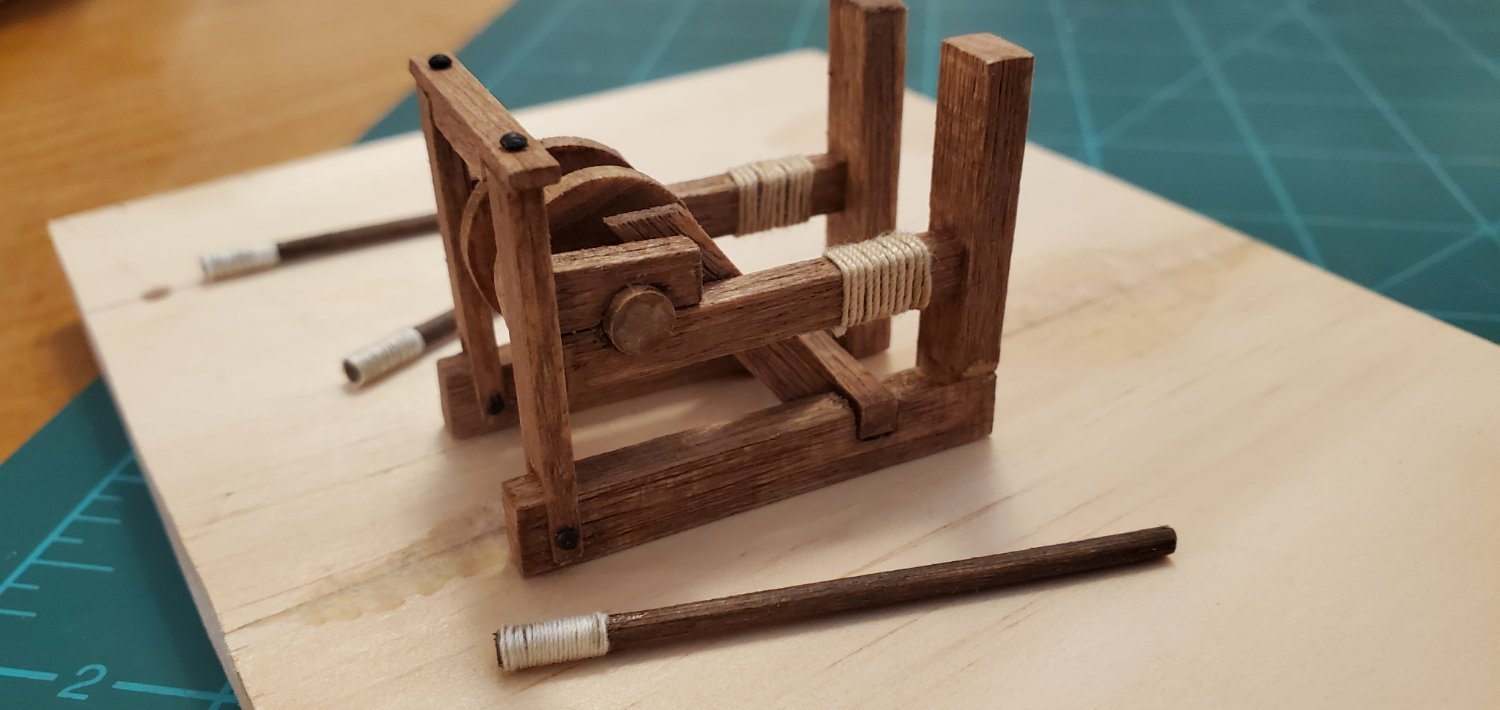
The craw or claw is coming to life. The first pic below is a still shot from the video mentioned earlier and is basically what I tried to recreate for the claw's base. My version is not an exact replica but fairly close.
Here are the piece parts made from basswood scraps. I scored the wood to age it a bit similar to what @gjdale did with his Shipyard at Foss' Landing project. The workforce also showed up looking for some green grass since there's none left anywhere around central Texas.
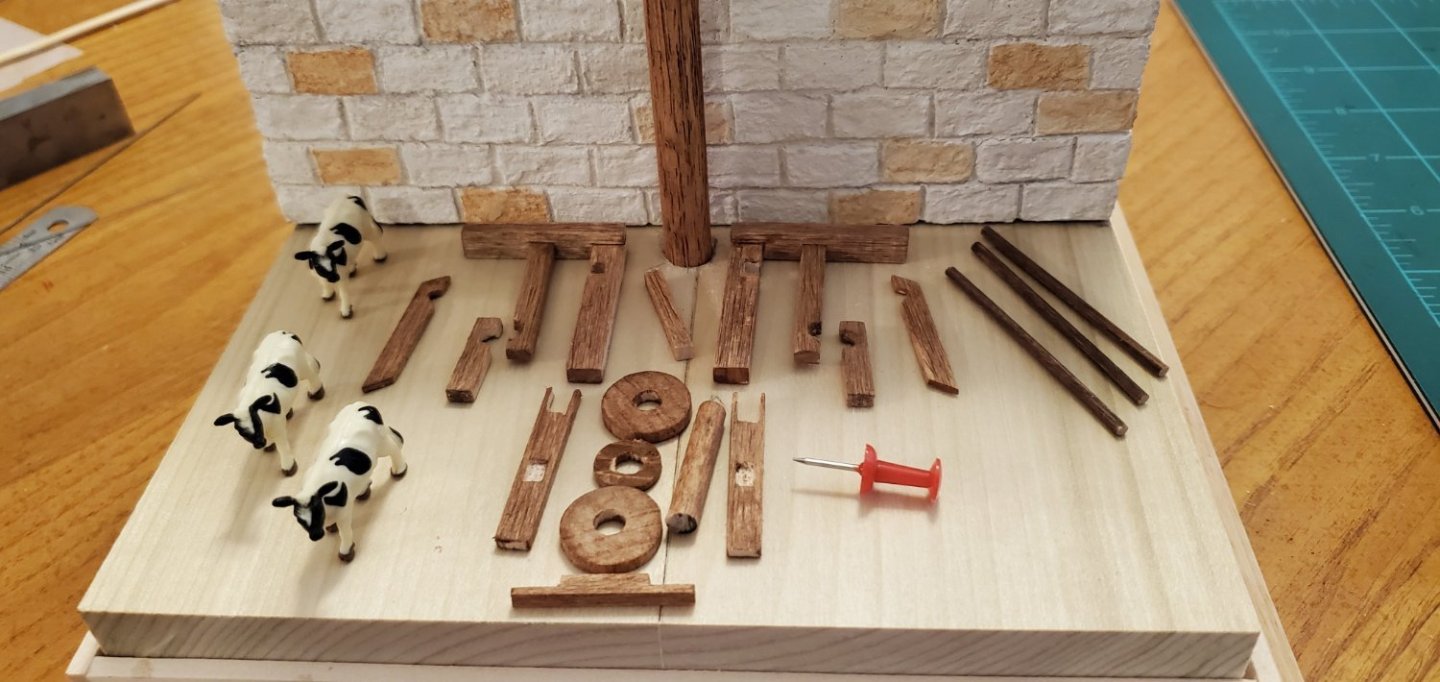
Here's the assembled base.


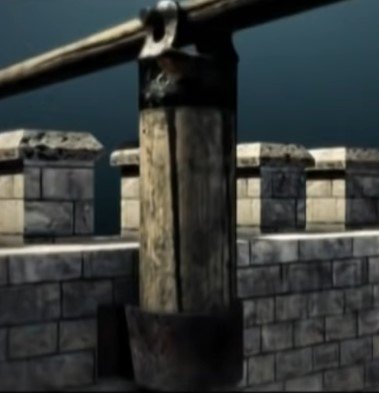
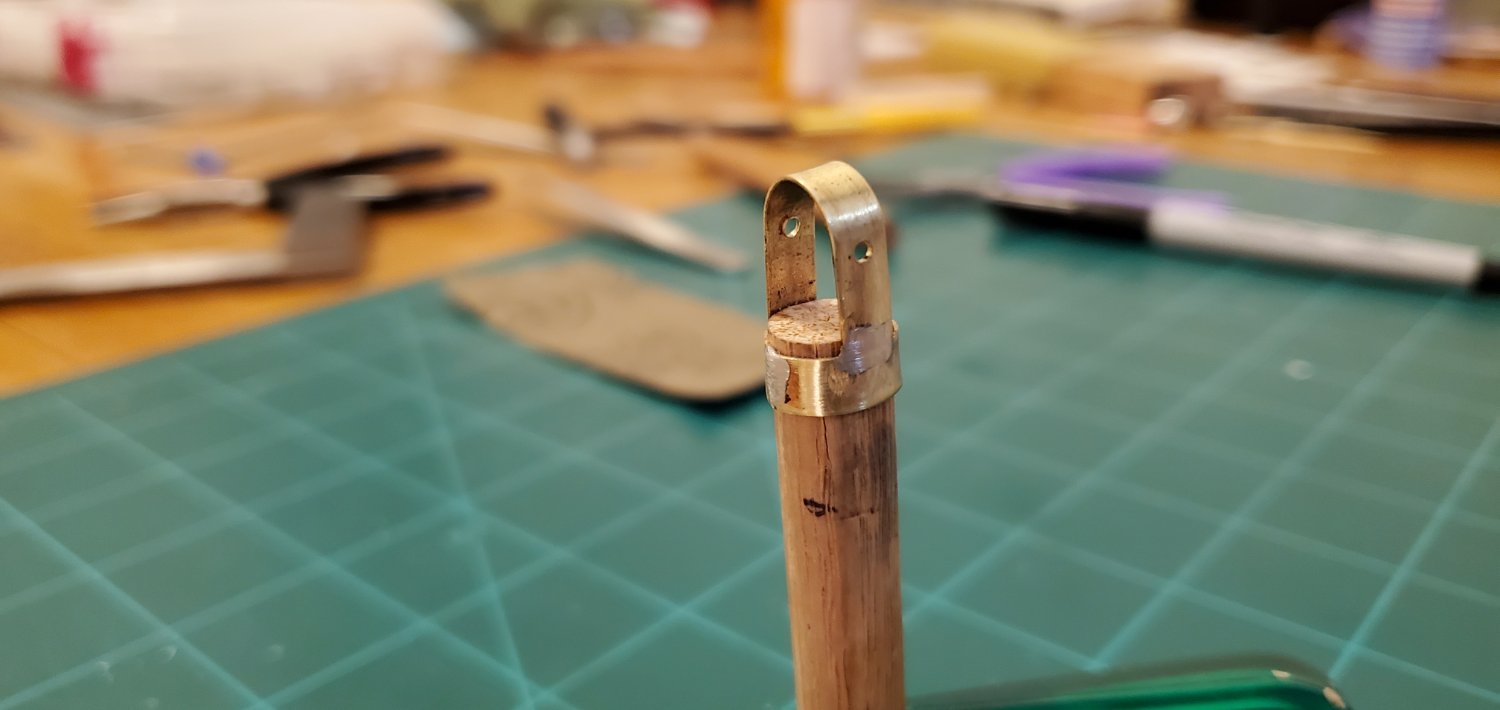
Next was making a cap/fulcrum for the top of the main pole. The first pic, once again, shows the goal. To replicate, I cut and shaped a couple of brass brads and then silver-soldered them together.

- Keith Black, GrandpaPhil, mtaylor and 4 others
-
5
-
2
-
9 hours ago, BANYAN said:
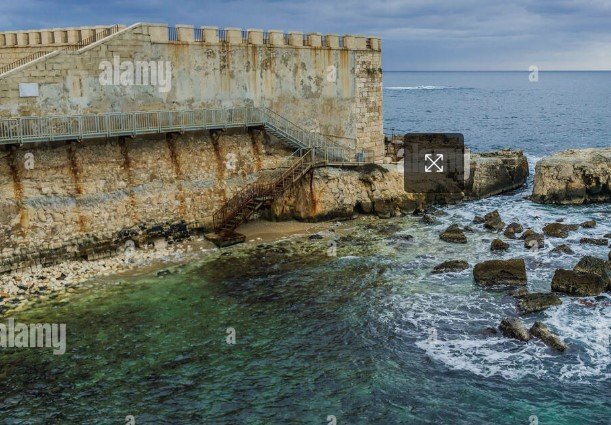
Seriously though, that wall is coming along really nicely, are you going to do any weather and/or scum line etc?
Thanks, Pat. And yes, I plan on some a scum line or something at the base of the wall similar to the one on the left side of this pic. Although I haven't figured out the right color yet. The scum looks like a really dark green to me in this pic but in others look more of a charcoal gray or even black.
-
Can't believe how fast you got that first layer of planking done! Warp speed and it looks great!!
- Keith Black, mtaylor, Dave_E and 1 other
-
4
-
On 8/18/2023 at 5:32 PM, mtaylor said:
"Not the craw. The craw!"
OK, Mark. I do remember Get Smart (mainly the closing scene every show where the automatic doors would close on his nose), but not that line so I had to look it up. That whole exchange was hilarious from the start: "I suppose you can guess what they call me."....."Lefty?" 😄
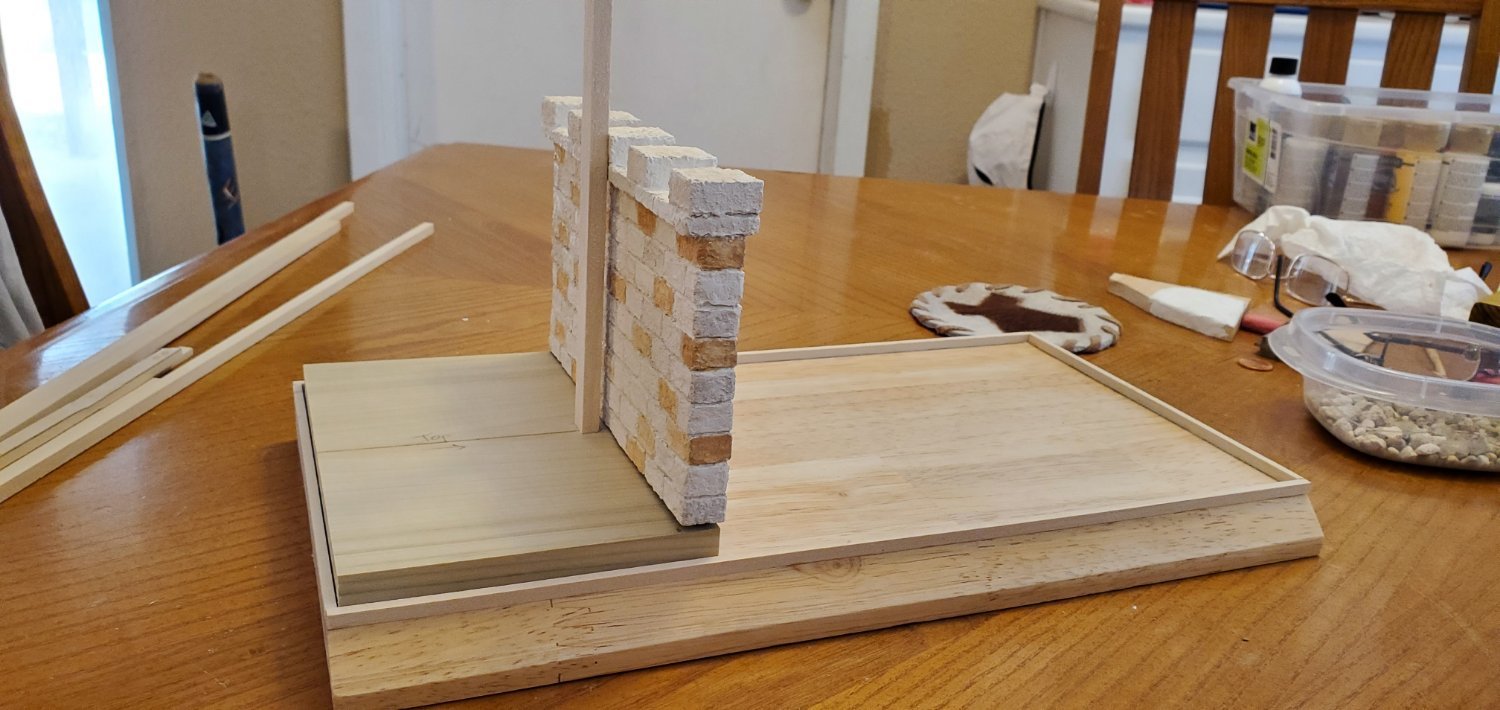
Back to the build. I've been chasing my tail for the last few days trying to figure out what to do next - the claw, the landscaping, the seawall rocks, the water,
the penguins, etc. I finally decided I needed to get the main elements of the base configured and then start on the claw. So I did a little mockup to figure out the components and get a visual of whether or not I was on the right track.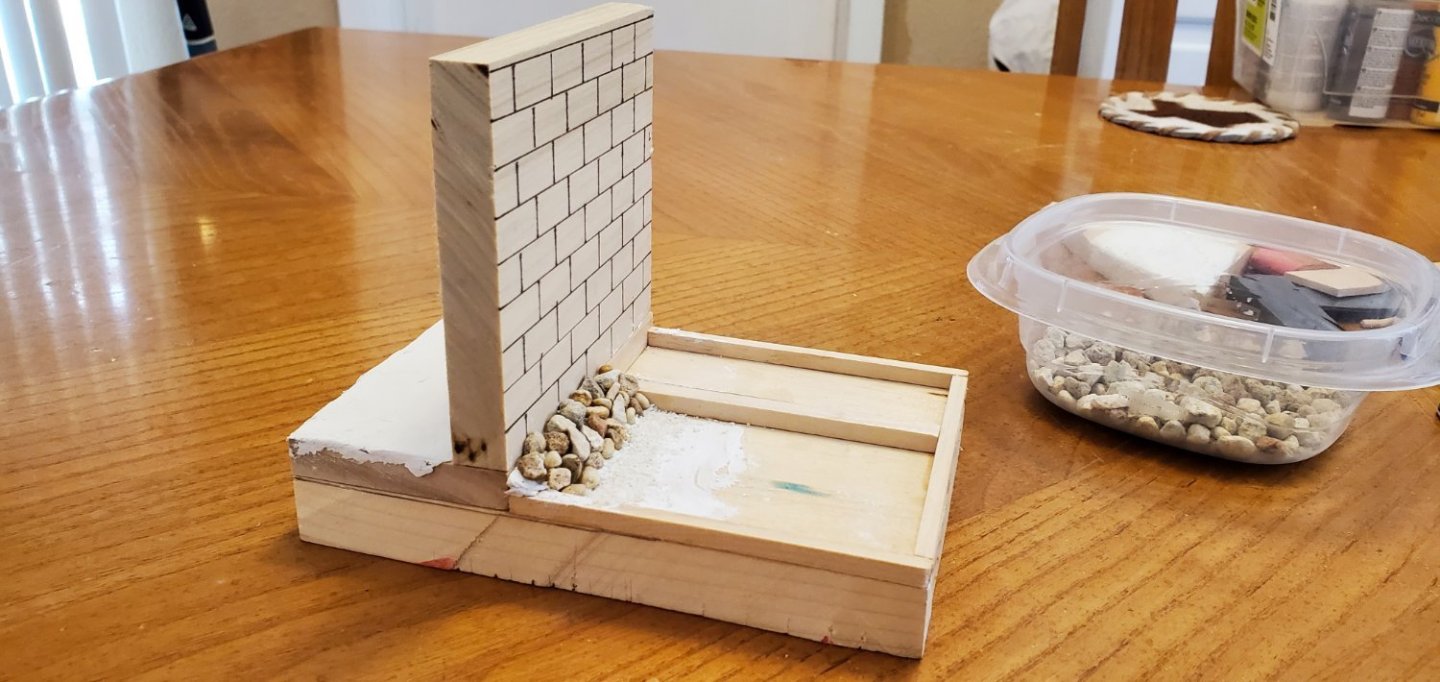
I thought it looked ok, so I began work on the real thing. I made a small wooden base for the sea wall to rest on and give it some elevation above the water level. Then I drilled alignment holes in the bottom of the wall, small base, and larger base and inserted dowels into the bottom of the wall. The dowels should give the wall additional stability. I also carved out a hole in the small base for the main vertical post of the claw.

Here's the initial assembly.

Next, I'll continue with the claw's construction. There are a lot of simplified illustrations out there of what the claw might have looked like. I found a video animation of a working claw that is more detailed so I'm going to try and mirror it to a large degree (although mine will definitely not have the release mechanism). Here's the video if you want to take a quick look.
https://www.youtube.com/watch?v=E1YrueoGlbE
-
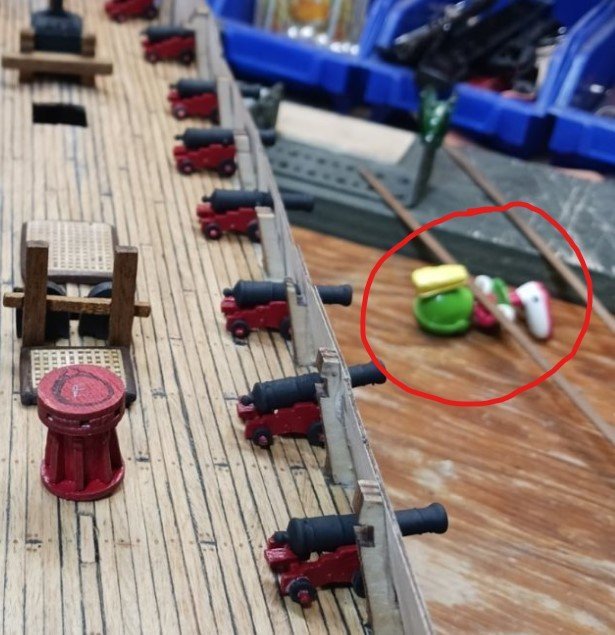
Small waves and assorted whitecaps added to the epoxy resin. For the waves I use acrylic medium gloss gel. It has the perfect consistency to swirl around and make random waves and ripples. It's white when applied but quickly dries clear. To apply it around the ship, I dab a blob using a long prong made from a coat hanger (circled below). It works well except when I get careless and swipe it against the glass (see arrow below).
Also, during application, it looks like I've made the sea a frothing, white-capped, overdone mess. But in the last 2 pics, you can see how the winds calm as the gel dries and the effect is much better.
.thumb.jpg.6f311248e827587b6d407f4704b62fa8.jpg)
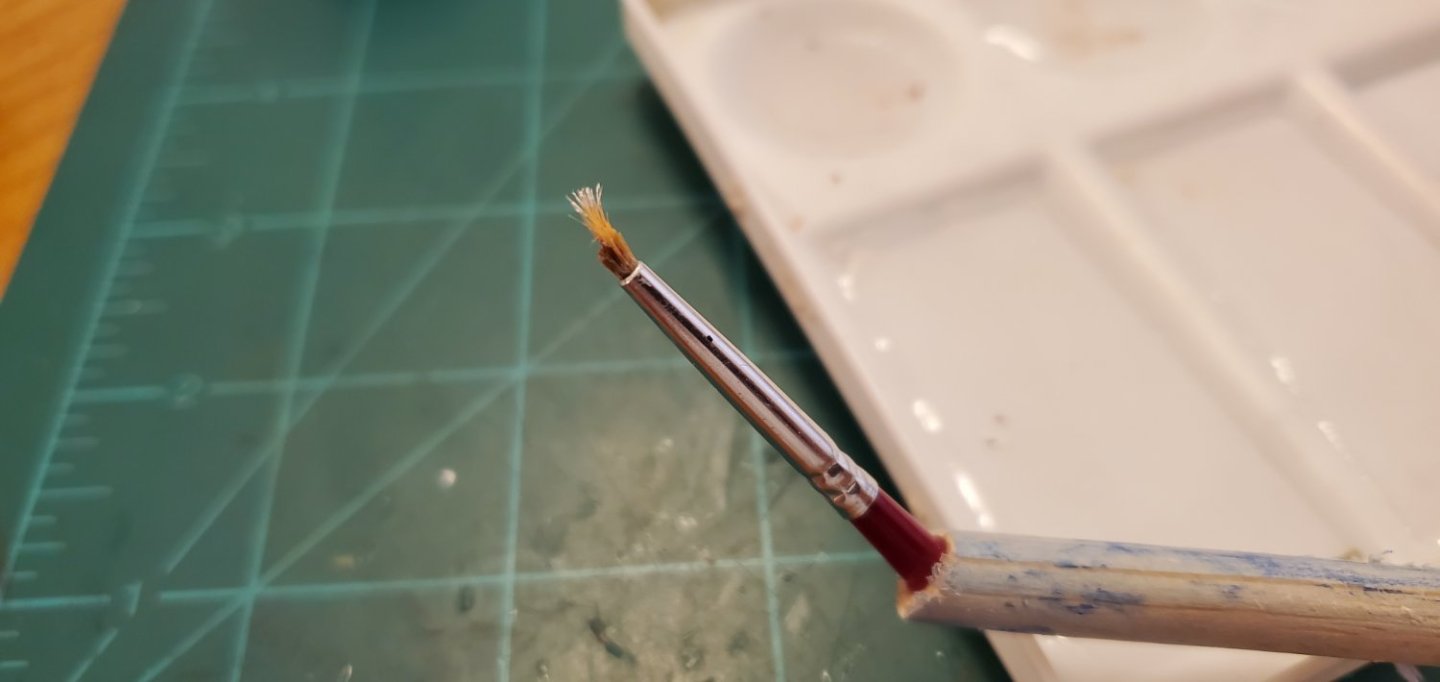
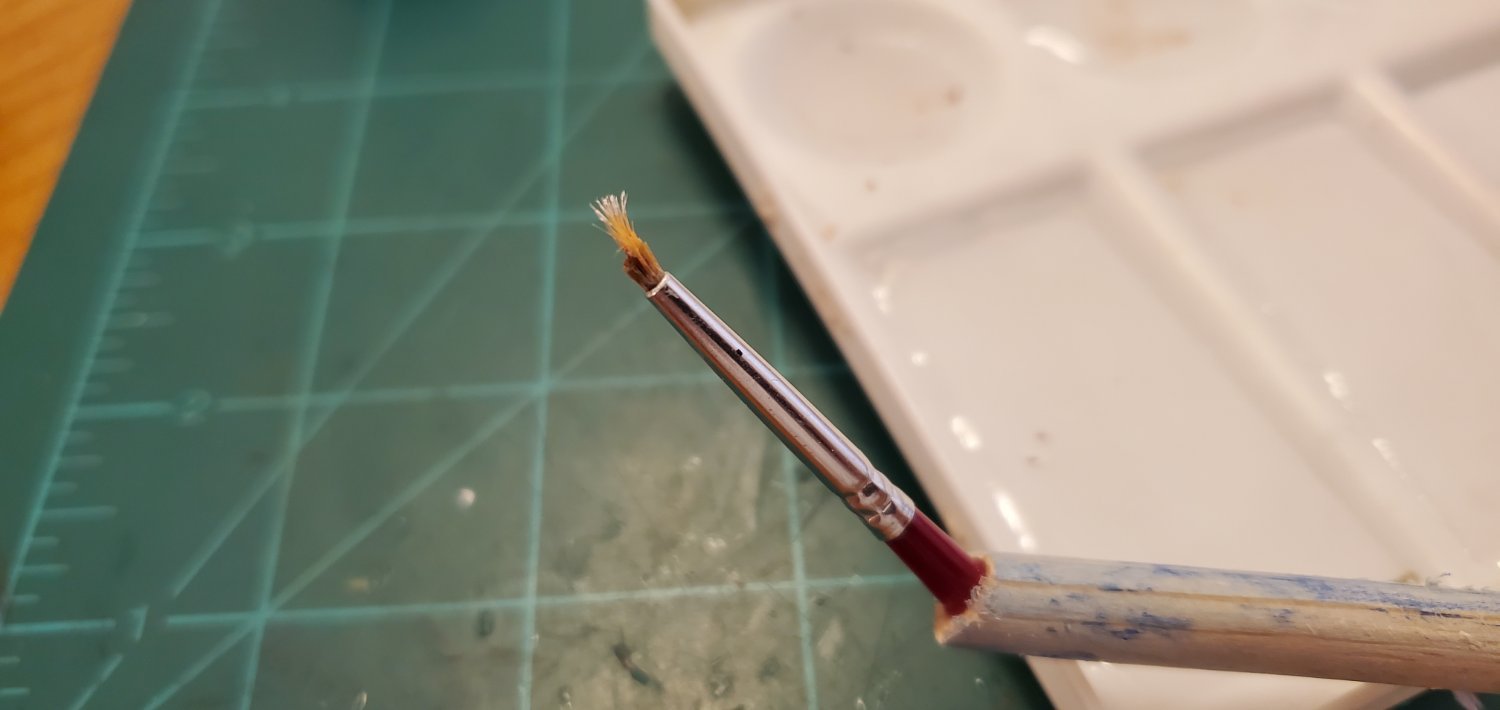
To apply whitecaps, I use a shredded brush affixed to a dowel at a sharp angle. It takes just a few tiny dots of acrylic paint at a time.
Completed water effects below. The thing I really like about the gloss gel is how the light shines off the edges of it (in the picture above, you can see a bit of the glint). In the picture below, it's hard to tell the whitecaps from the natural shining of the light, but it's distinct when looking at in person and a reasonable look.
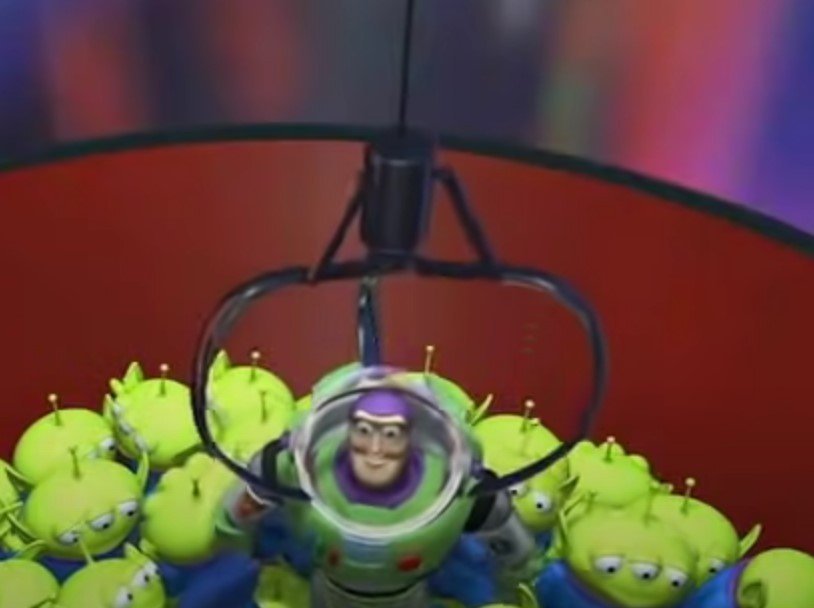
And with that, the SIB portion of this build is complete and it's time for the claw! Every time I think of the claw, instead of Archimedes, I keep thinking of the movie Toy Story where Buzz Lightyear is trapped in the arcade game with all the little aliens who think the claw is a deity. They whisper "the Claw" in such reverenced tones. And then when one gets snatched, he says, "I have been chosen...farewell my friends...I go to a better place". 😄
- JacquesCousteau, Canute, Keith Black and 9 others
-
7
-
5
-
Looks like you are off to a great start on this one, Bob! What did you use to darken the lines between each deck board?
- Keith Black, Knocklouder and Dave_E
-
2
-
1
-
2 hours ago, BANYAN said:
Glen, don't forget you still have the penguins to do also
")
")
Whoa, wait just a minute now. @Keith Black already awarded me the highly coveted penguin seal of approval, so I think I'm done with them for this build!


.jpg.33c3b1a240c83a29b1c81b4fcd74d700.jpg)

.jpg.020343632d05f52f37728e9d3a7df1a6.jpg)


.jpg.f4d75007a8ea57fc00e7c856a0705aee.jpg)


Roman Quinquereme and Claw by Glen McGuire - FINISHED - 1/500 - BOTTLE
in - Subjects built Up to and including 1500 AD
Posted
The more I look at it the more I agree with you!