


Glen McGuire
-
Posts
1,840 -
Joined
-
Last visited
Content Type
Profiles
Forums
Gallery
Events
Posts posted by Glen McGuire
-
-
38 minutes ago, Keith Black said:
You recovered better than TCU.
LOL! Maybe that's part of the problem. I'm usually working on the ship with one eye and watching a football game with the other!
10 minutes ago, Dave_E said:Sweet! 👍😀
Thank you, Dave!
- mtaylor, Dave_E, Keith Black and 1 other
-
 4
4
-
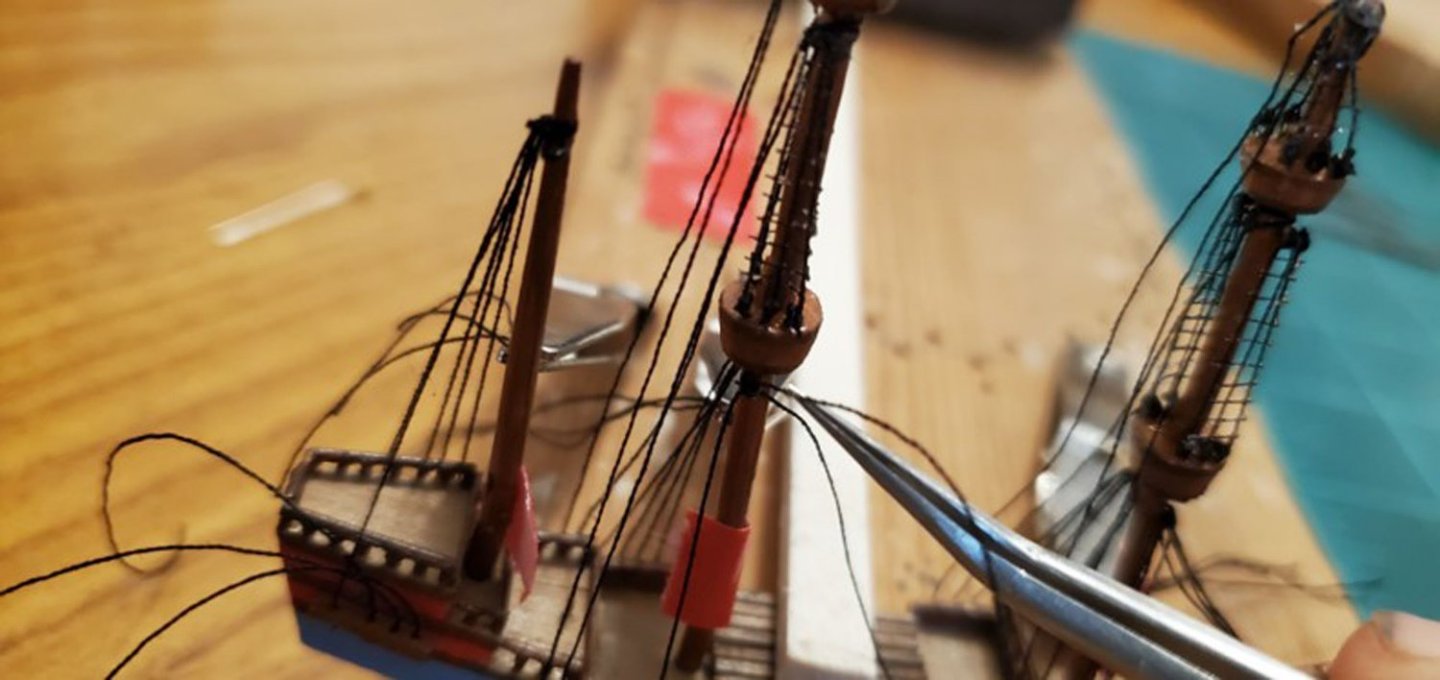
I was hoping I was done wearing the dunce cap, but no, it stayed firmly on my head as I attached the backstays. While attaching one of the starboard backstays on the foremast, I pulled it snug and promptly pulled off the channel on the port side. Note to self - glue the channels to the hull BEFORE painting the hull. Duh.
I recovered from that blunder and moved to the main mast where I pulled the dunce cap on even tighter. I grabbed a backstay with tweezers and secured it to the mast. I leaned back to admire my magnificent work and realized that I had attached a shroud instead of a backstay. With the channel ends of the shrouds already tied and glued firmly in the channels, this was yet another dodo move.
After much cursing and gnashing of teeth, I actually got lucky. After clipping the shroud away from the mast, there was just enough length left to tie it off to its eye bolt. Whew!
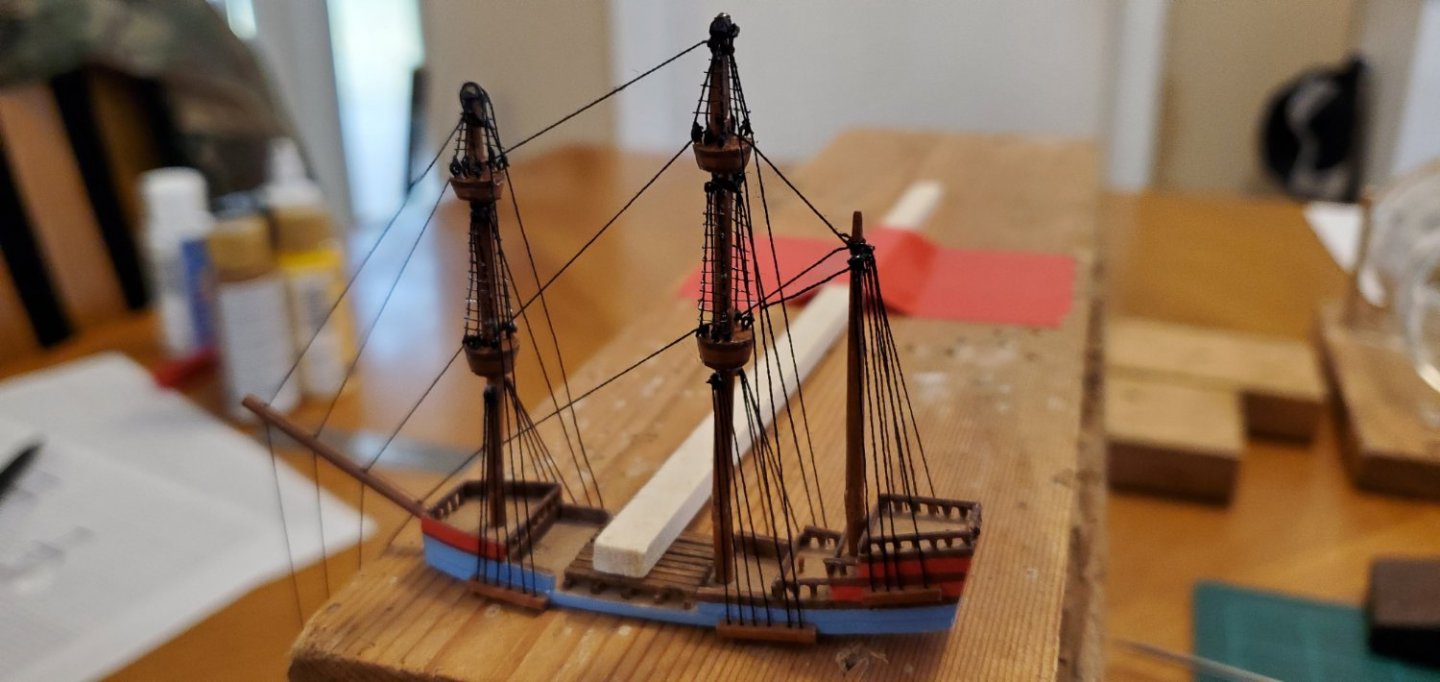
After that, things settled down and I got all the backstays and shrouds in place as well as the pull threads. Everything tightened up nicely with the masts at a reasonable upright angle and no sagging lines.


- GrandpaPhil, Landlubber Mike, BANYAN and 8 others
-
9
-
 2
2
-
On 11/26/2022 at 9:45 PM, RobTBay said:
What's the forum etiquette, or typically people's opinions, on starting a build log on a half-finished model?
Hey Rob, I discovered MSW right as I was finishing my first ship model (see link below for CSS Alabama). I had taken a bunch of pictures along the way so I decided to post a build log even though I had just finished the model. I was hoping I would get some constructive comments from some of the master builders out here. And let me tell you, I was not disappointed!! I learned sooooo much from all the comments.
So even though you are halfway done, I would highly recommend starting a build log ASAP.
- Keith Black, Knocklouder and mtaylor
-
3
-
-
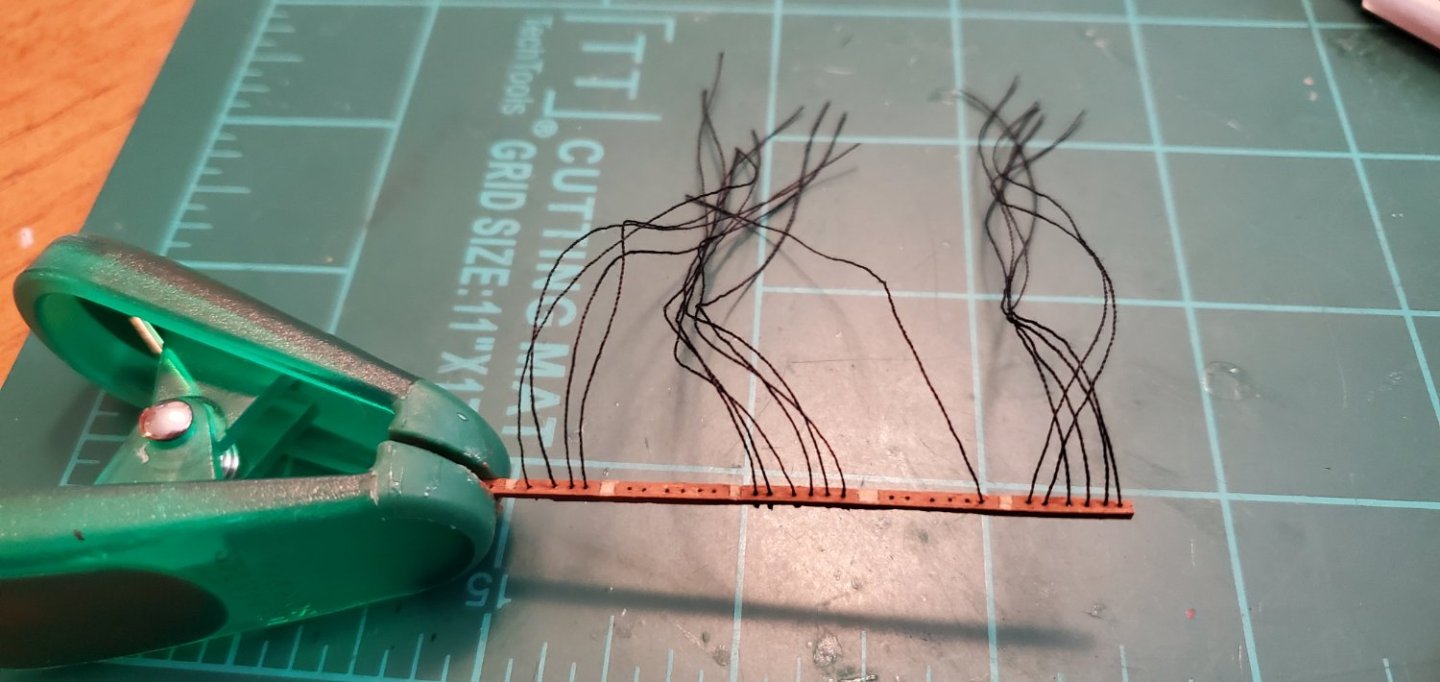
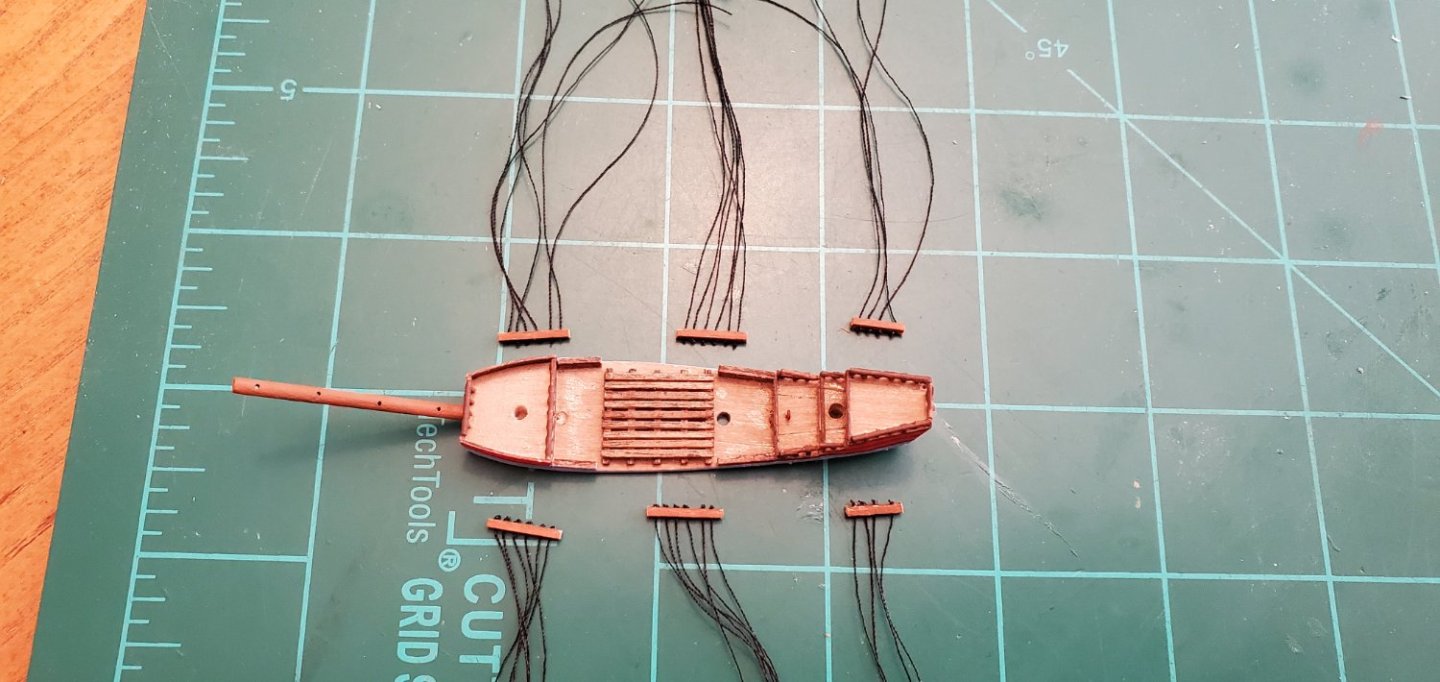
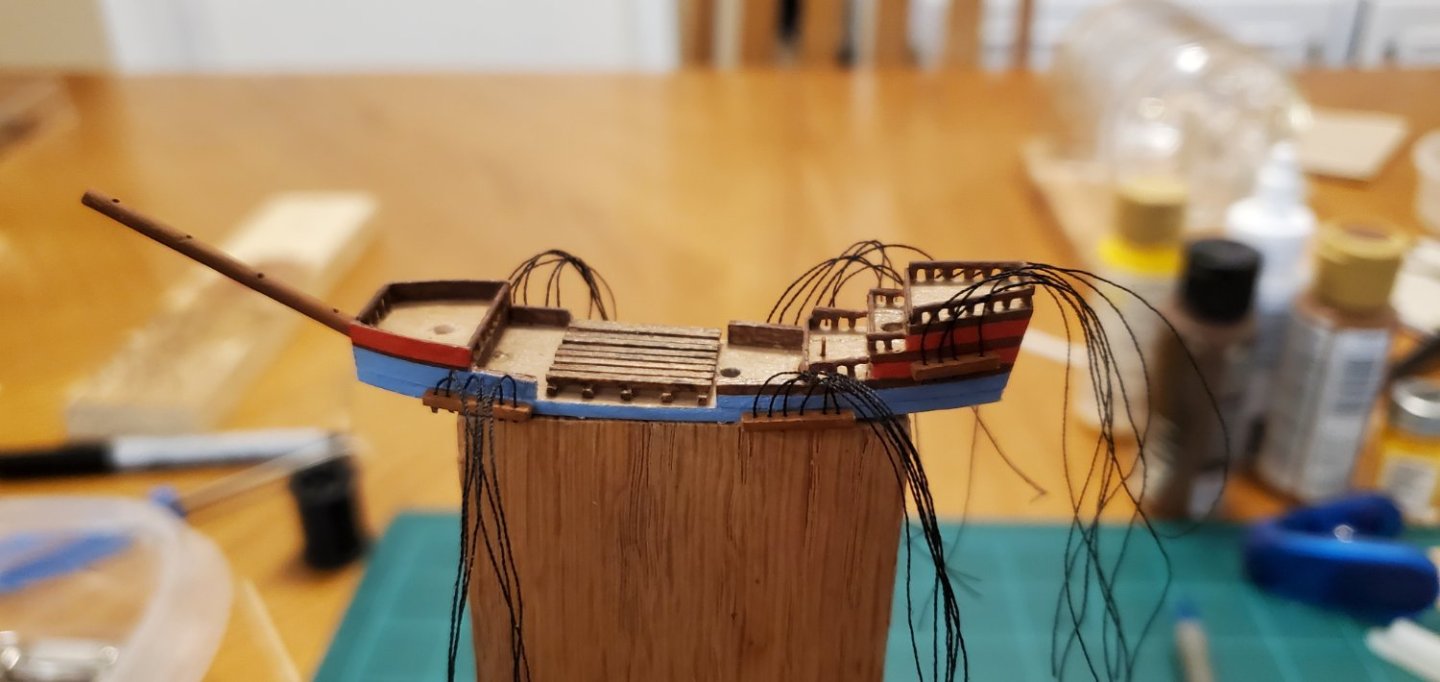
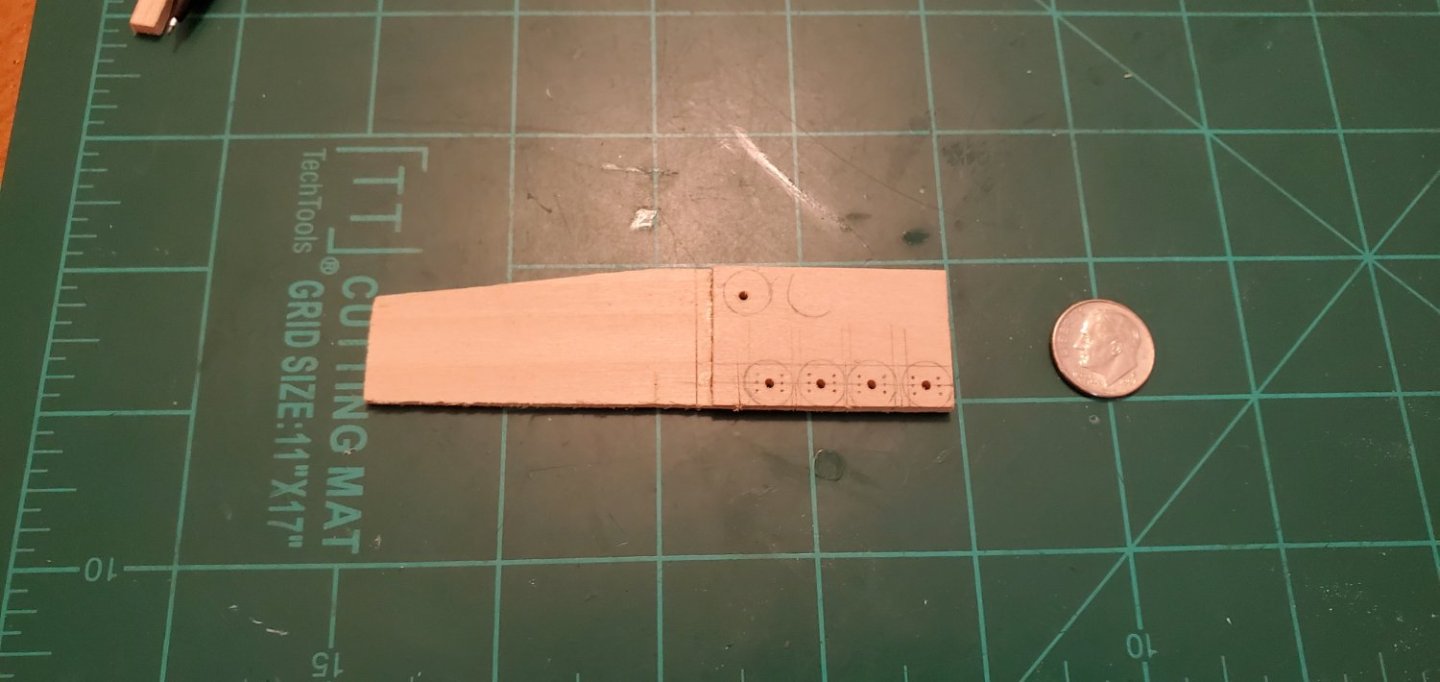
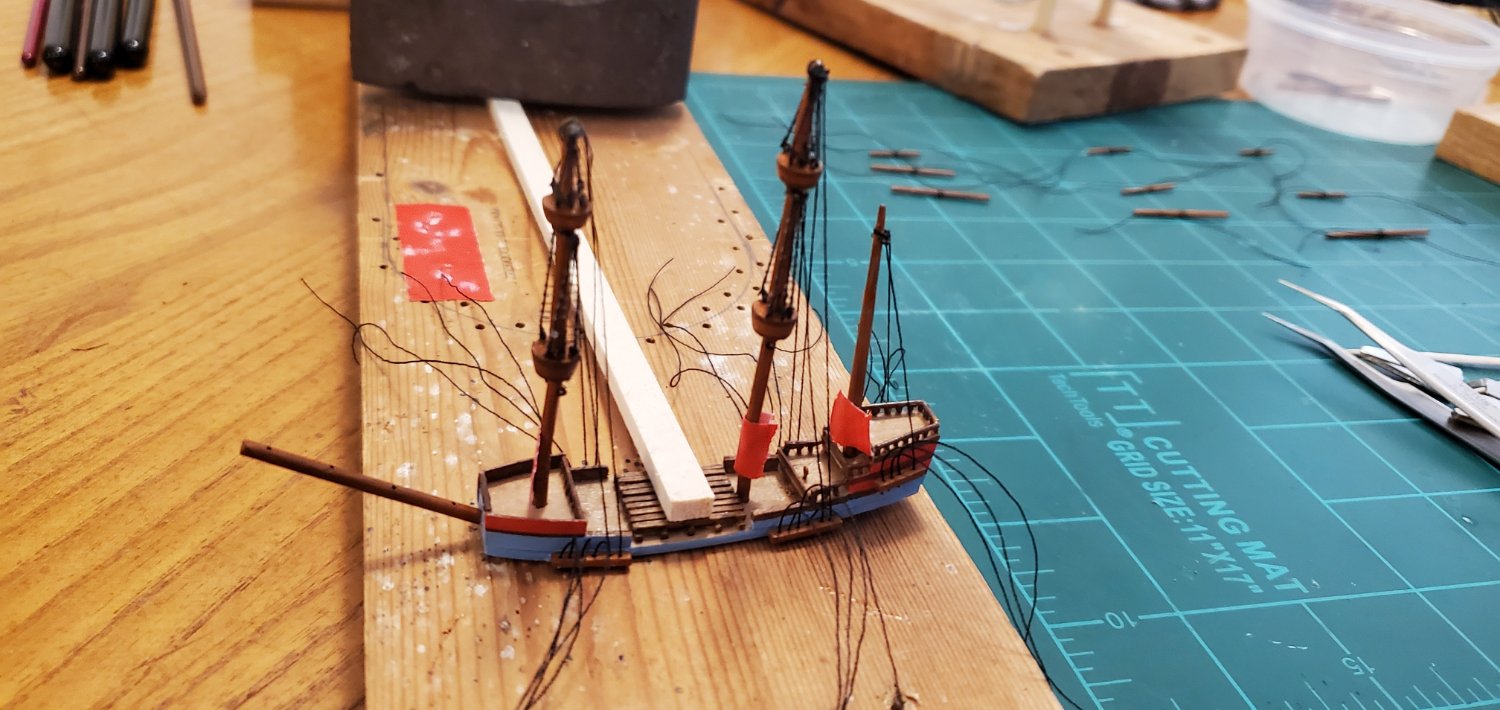
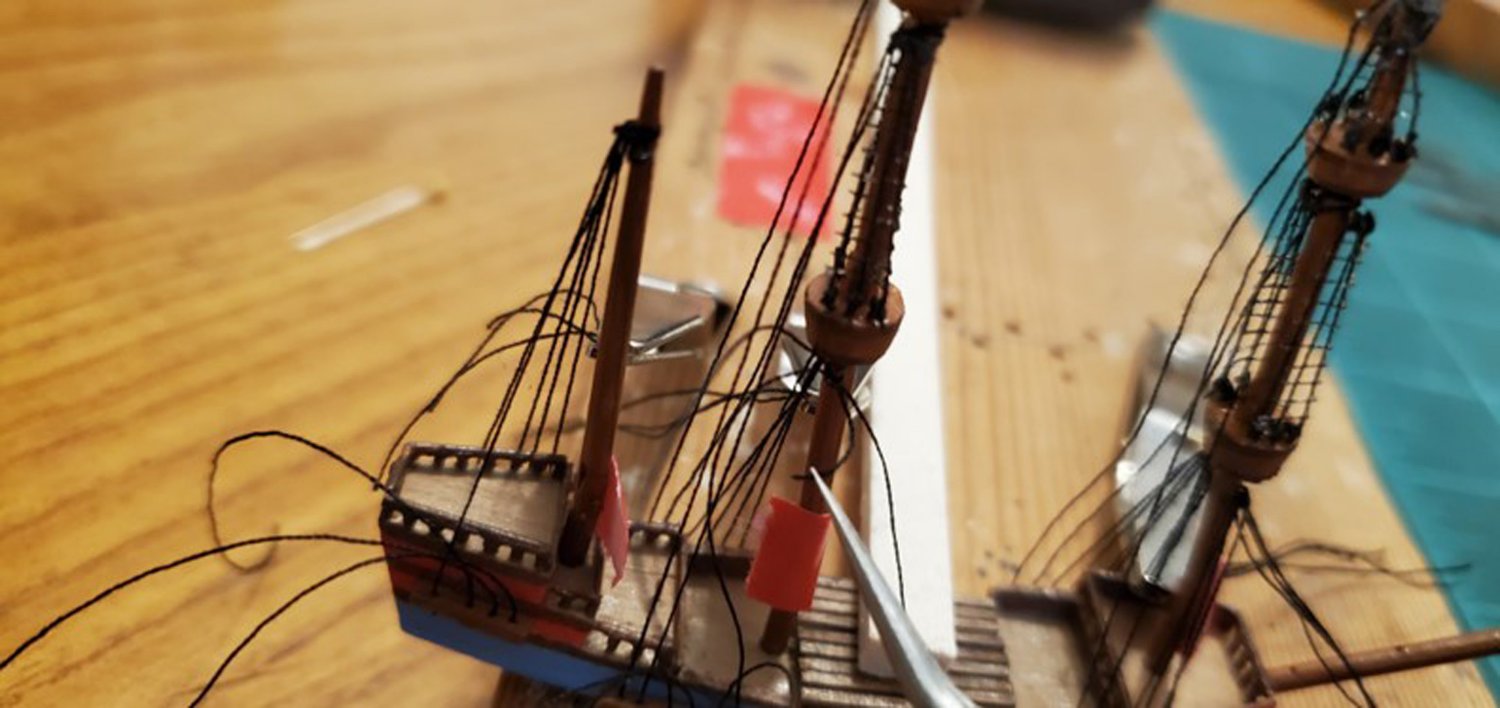
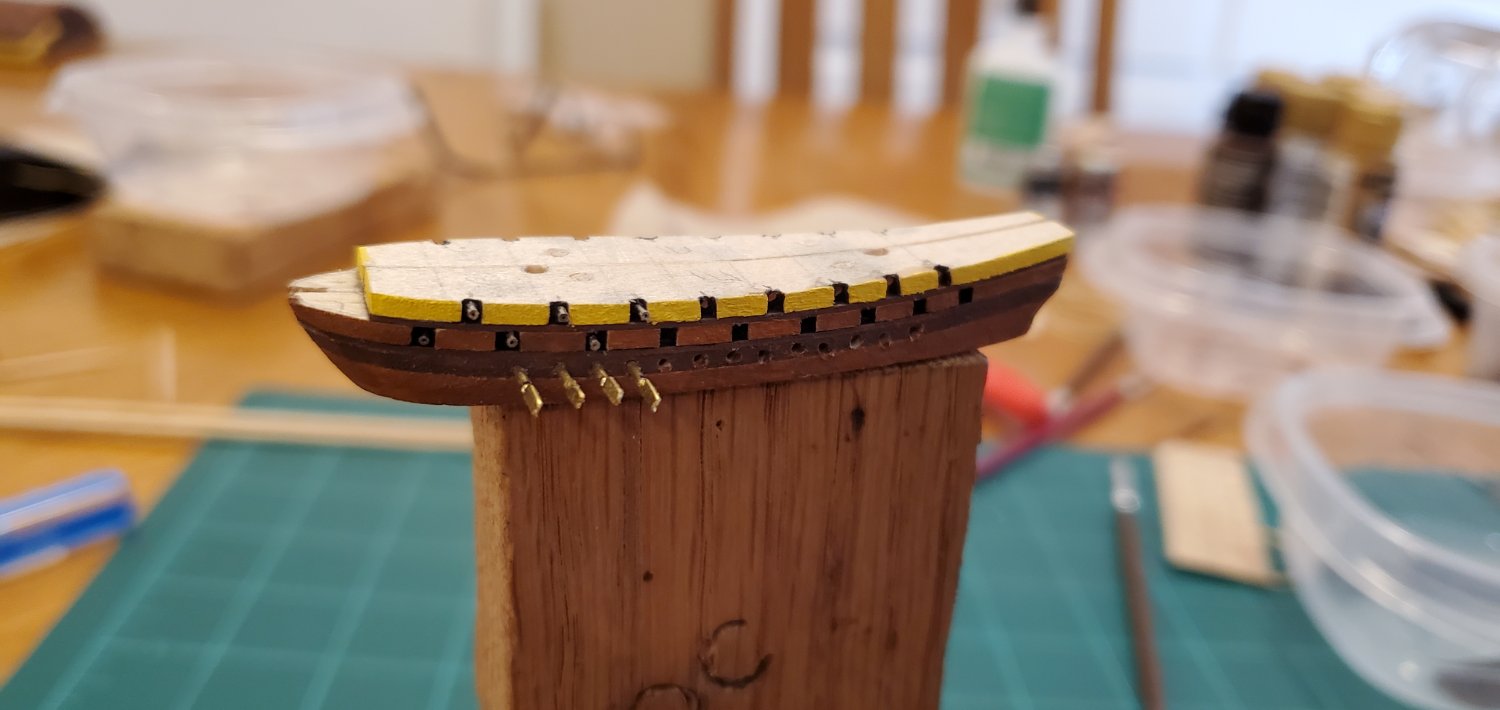
I decided to try an assembly line type process for the channels/shrouds/backstays and do them off-ship before attachment. I started out with a single strip of wood for all the channels, drilled the necessary holes, threaded the shrouds/backstays, and tied them off. Then I separated the channels and attached to the ship. At the end it looks like a scraggly, bad hair day, but the process worked pretty well.

- Benjamin S, Dave_E, Knocklouder and 7 others
-
7
-
3
-
8 hours ago, Keith Black said:
Glen, have you considered rice paper? I'm considering using it for the sails for Amelia.
Never heard of rice paper before. I will look into that. Thanks, Keith.
-
Well done under that extra pressure!!!
- John Ruy, bobandlucy and mbp521
-
2
-
 1
1
-
1 hour ago, GrandpaPhil said:
However, let me see how it works for making my set of sails for Solferino.
OK. I'll stay tuned. Thanks!
- GrandpaPhil and Keith Black
-
2
-
45 minutes ago, GrandpaPhil said:
I also bought everything for a complete set of silk span sails.
Where do you get your silk span, Phil?
- Edwardkenway and GrandpaPhil
-
2
-
I hope everyone had a wonderful Thanksgiving and got to spend lots of time with family and friends.
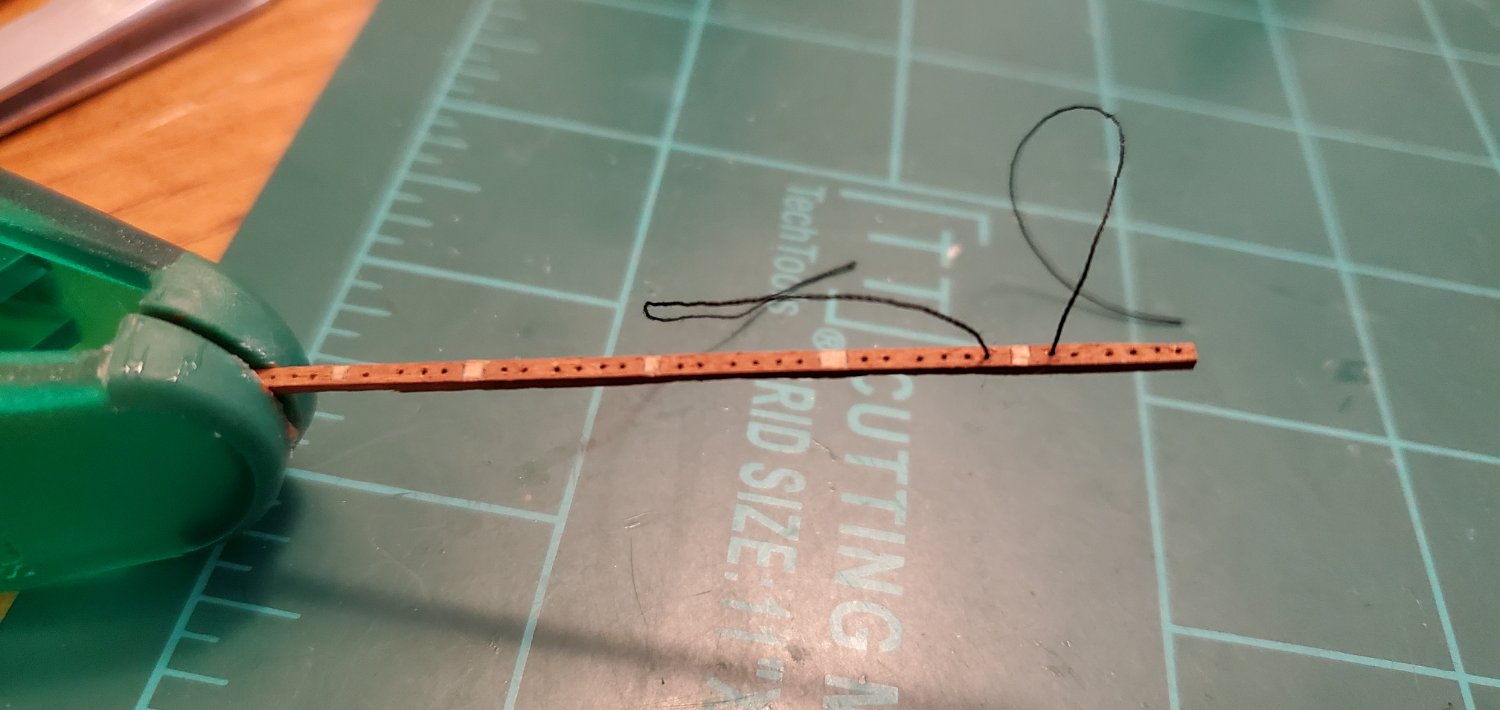
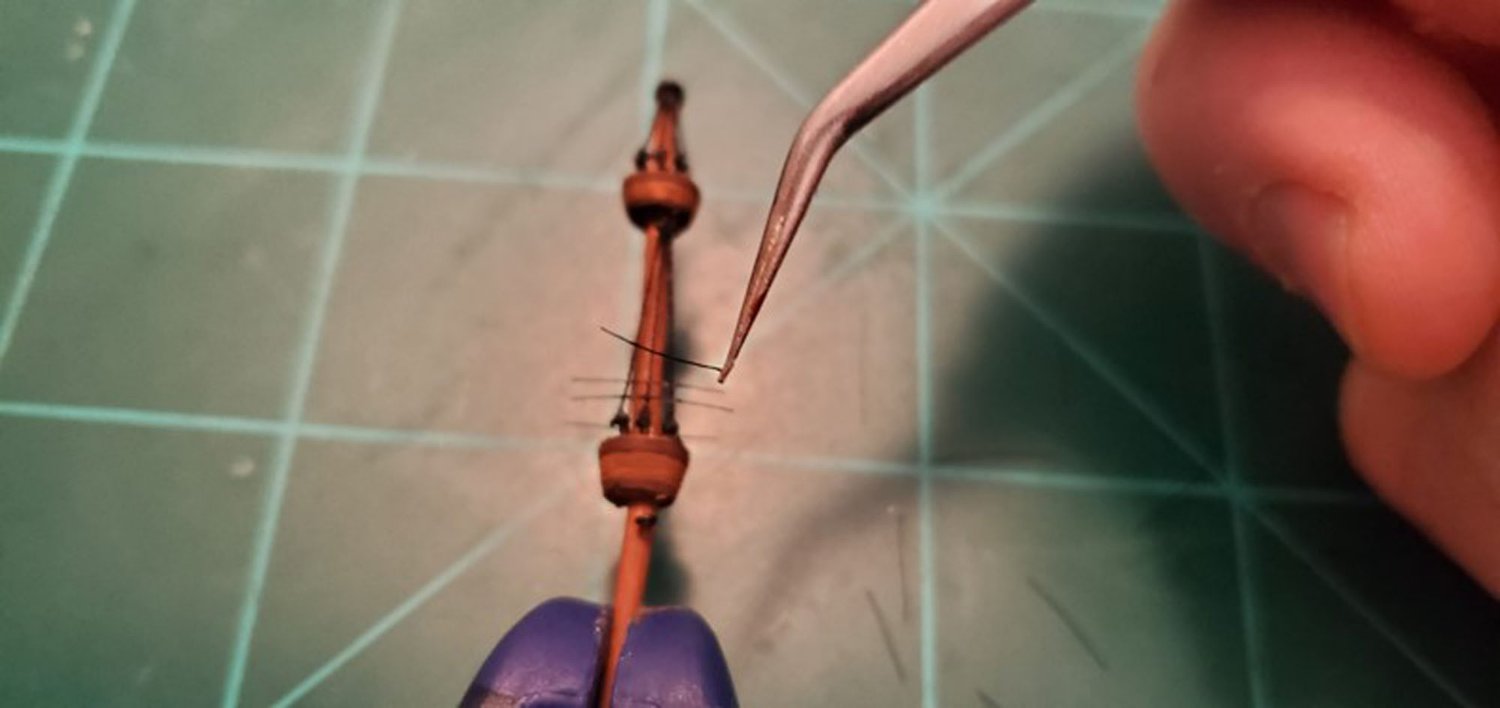
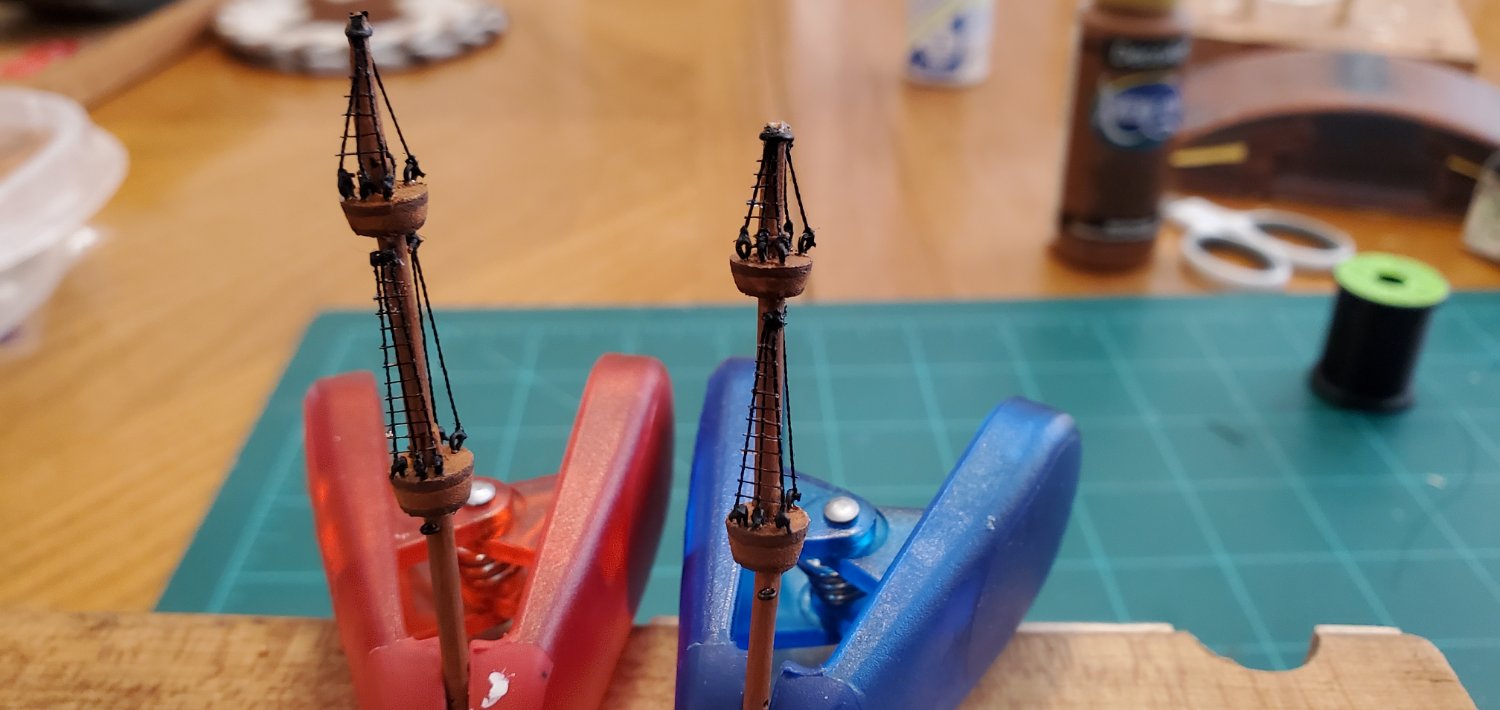
Work continues on the masts with installation of the upper shrouds and ratlines (I'll do the lower shrouds after I step the masts into the deck). The first step was drilling tiny holes and fitting .75mm x 6mm eye bolts to the crow's nests. Those are the smallest ones I can find on Model Expo's website and I find them very useful. Here, I tie the lower the lower ends of the shrouds to them. I also put one thru the mast just below the crow's nest to tie off all the upper ends of the shrouds (see first pic).
Once the upper shrouds are in place, the ratlines are next. I snip thin fly fishing line into small pieces about 10mm in length. Then I drag them thru Aleene's fabric glue and lay them across the shrouds.

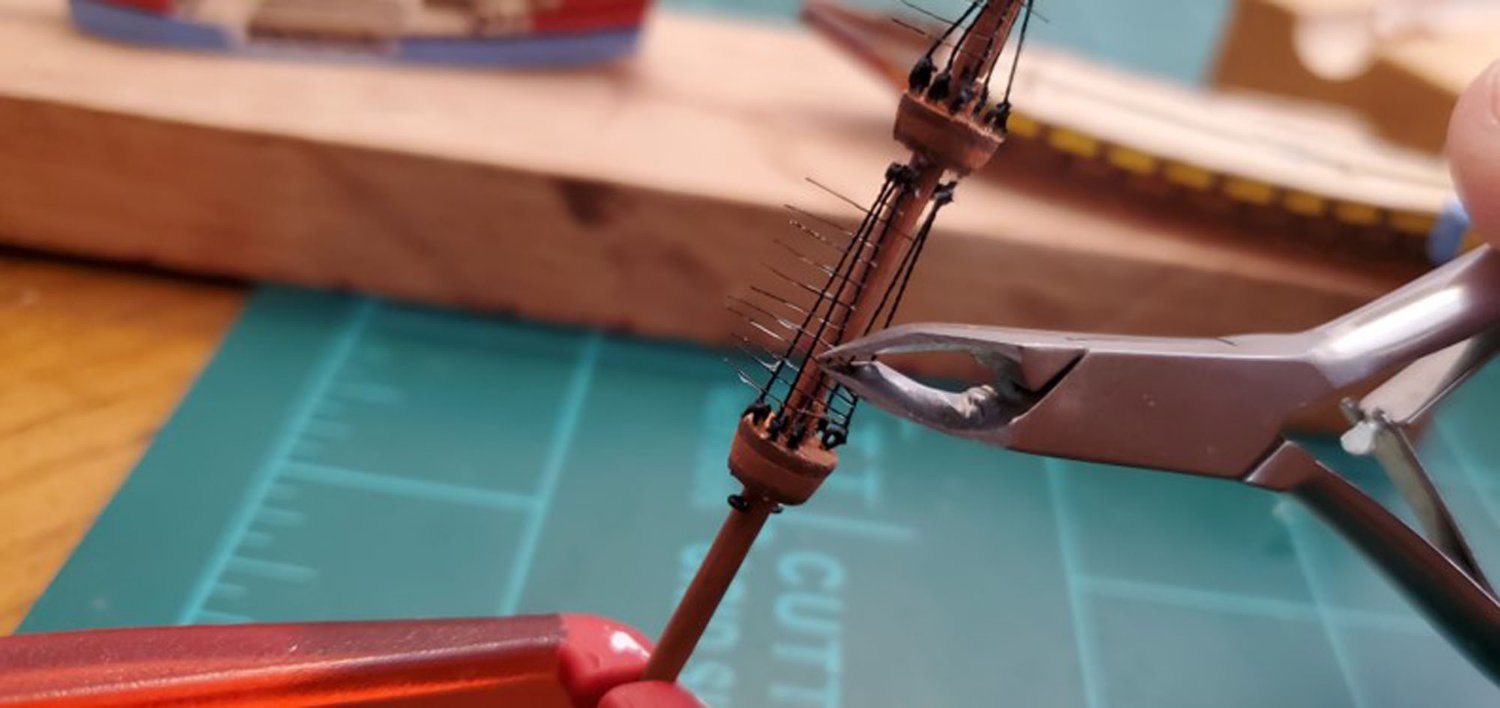
The last step is to trim the edges with cuticle trimmers and try real hard not to cut the shrouds which causes immediate loud cursing and thrown tools.
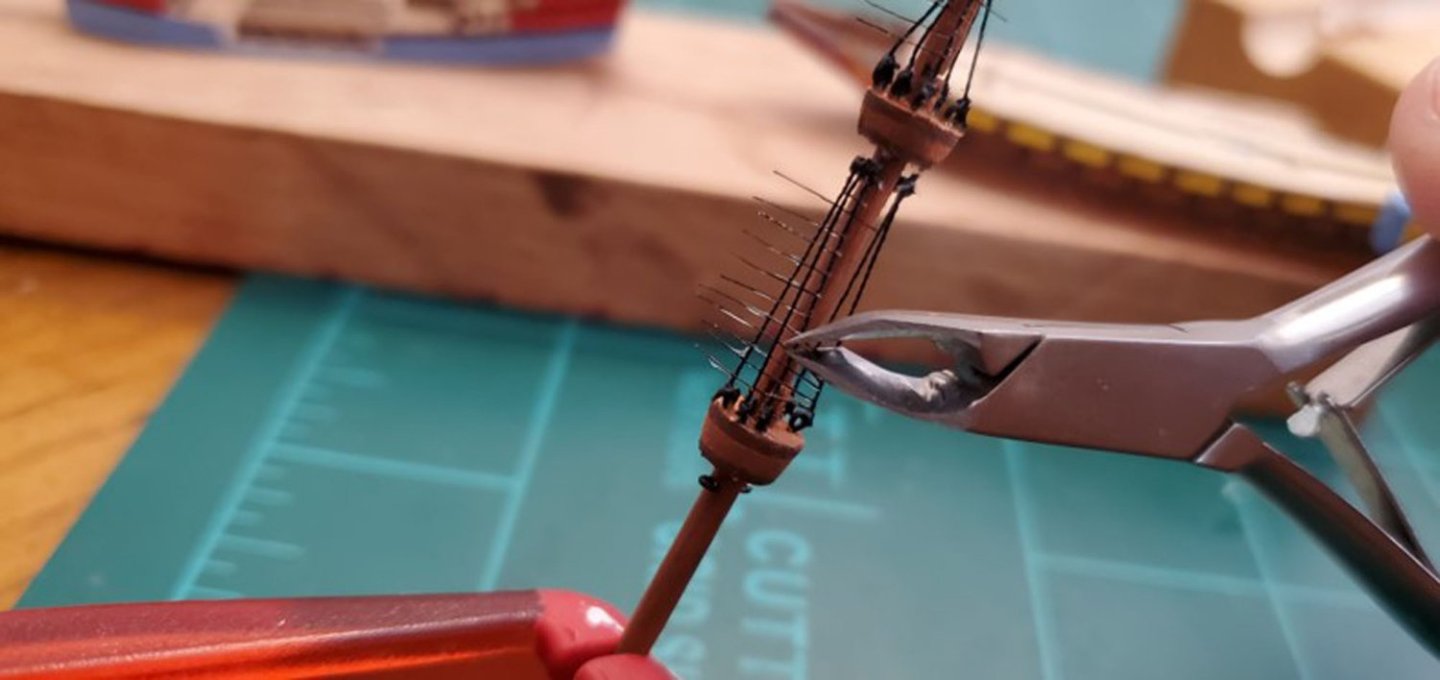
And the port side is done (with no loud cursing yet).

- GrandpaPhil, mtaylor, Knocklouder and 6 others
-
5
-
4
-
-
Thanks for the positive comments and the likes.
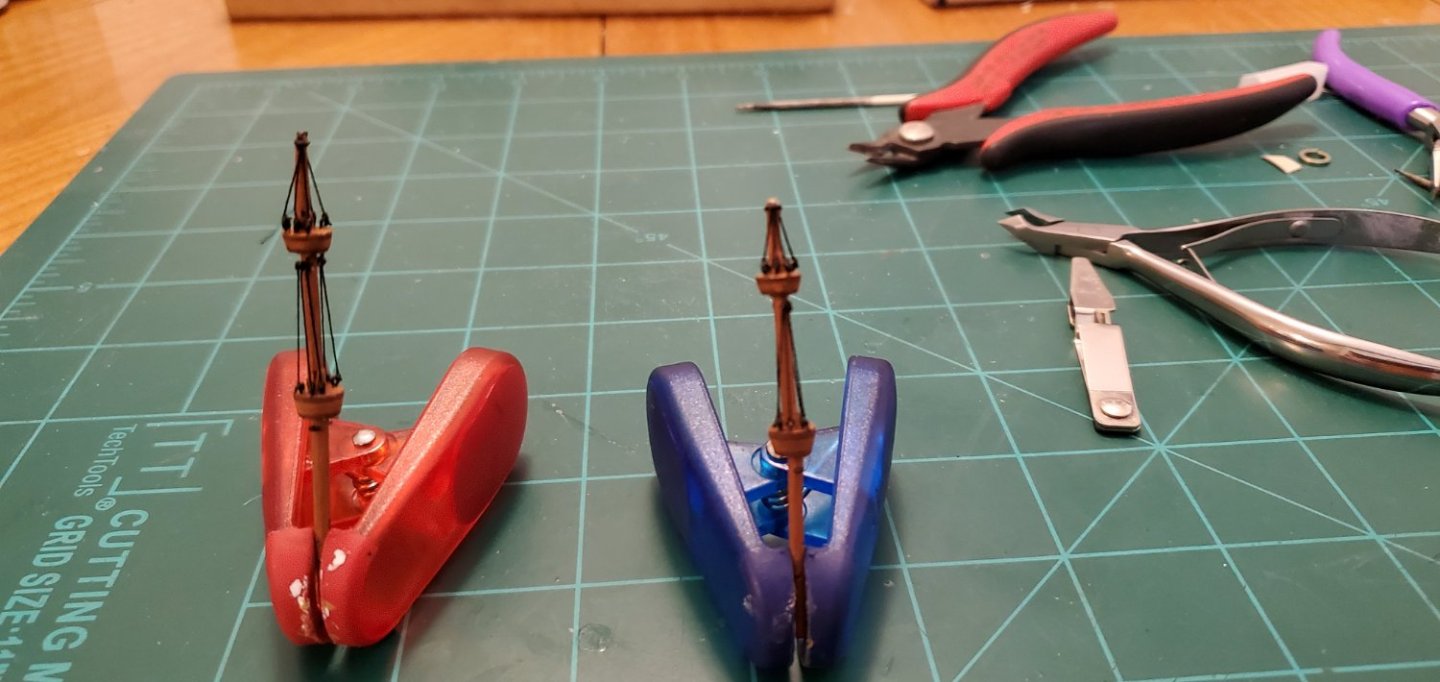
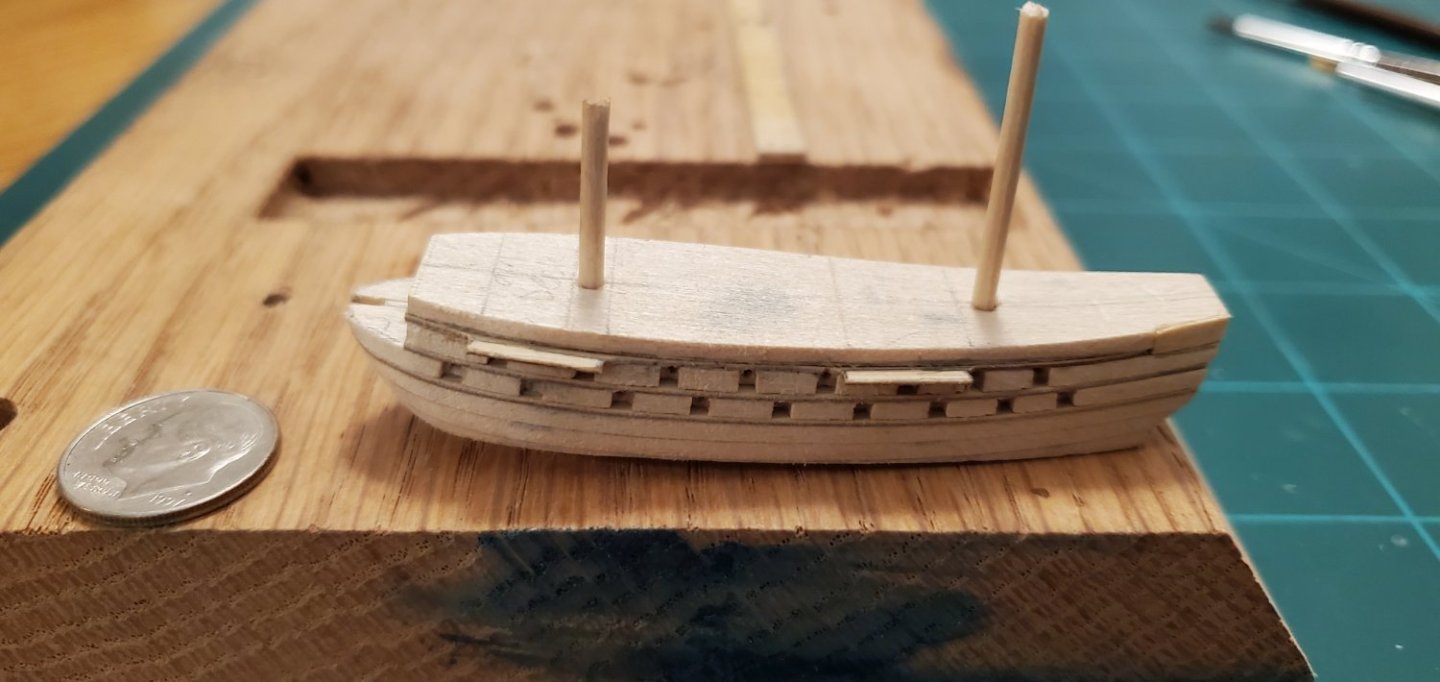
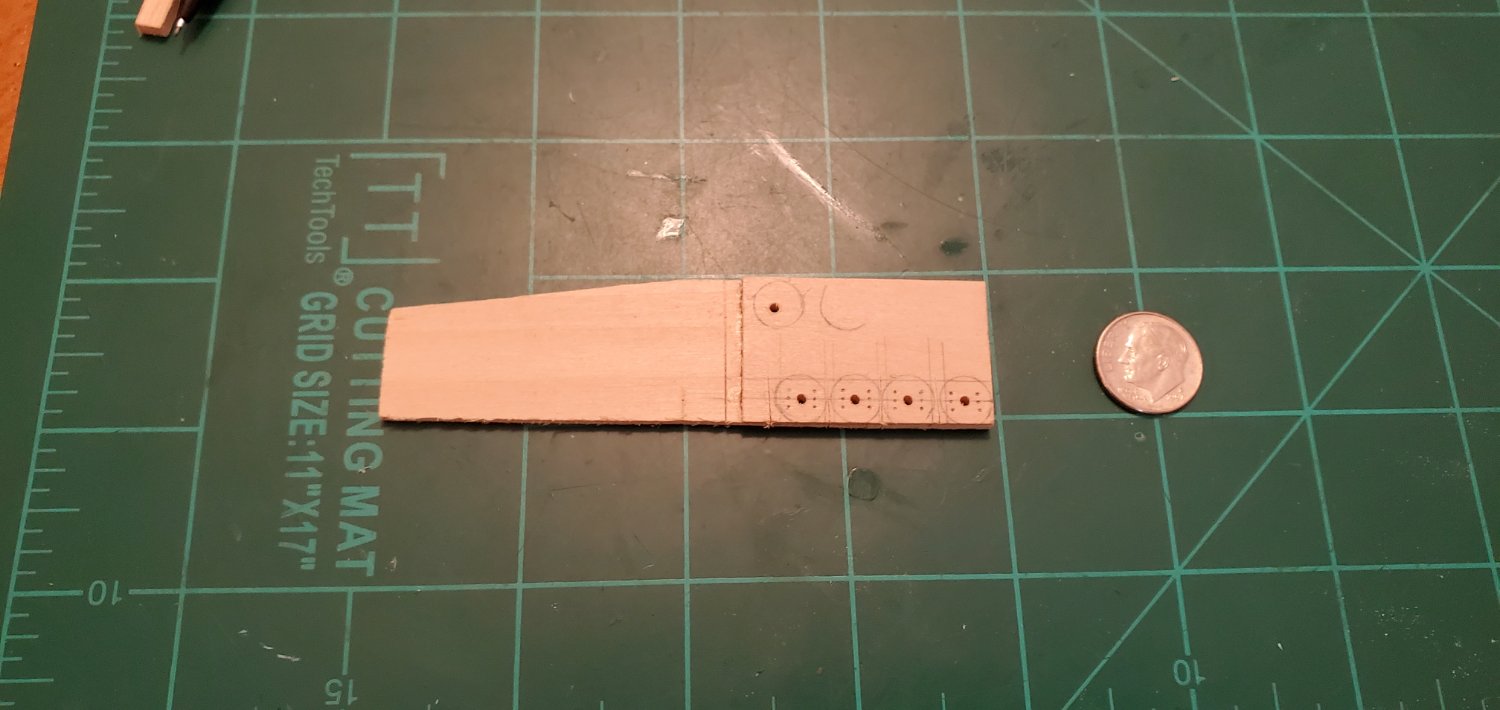
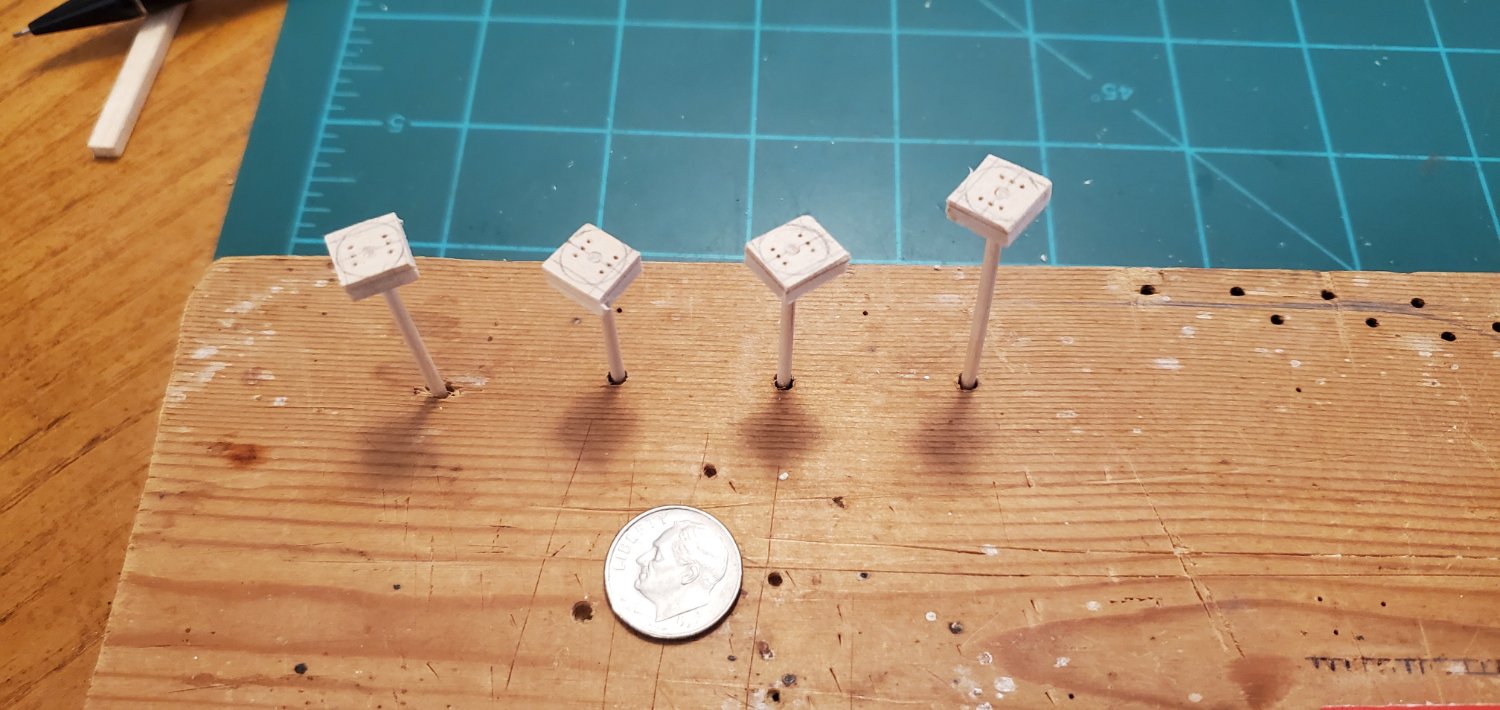
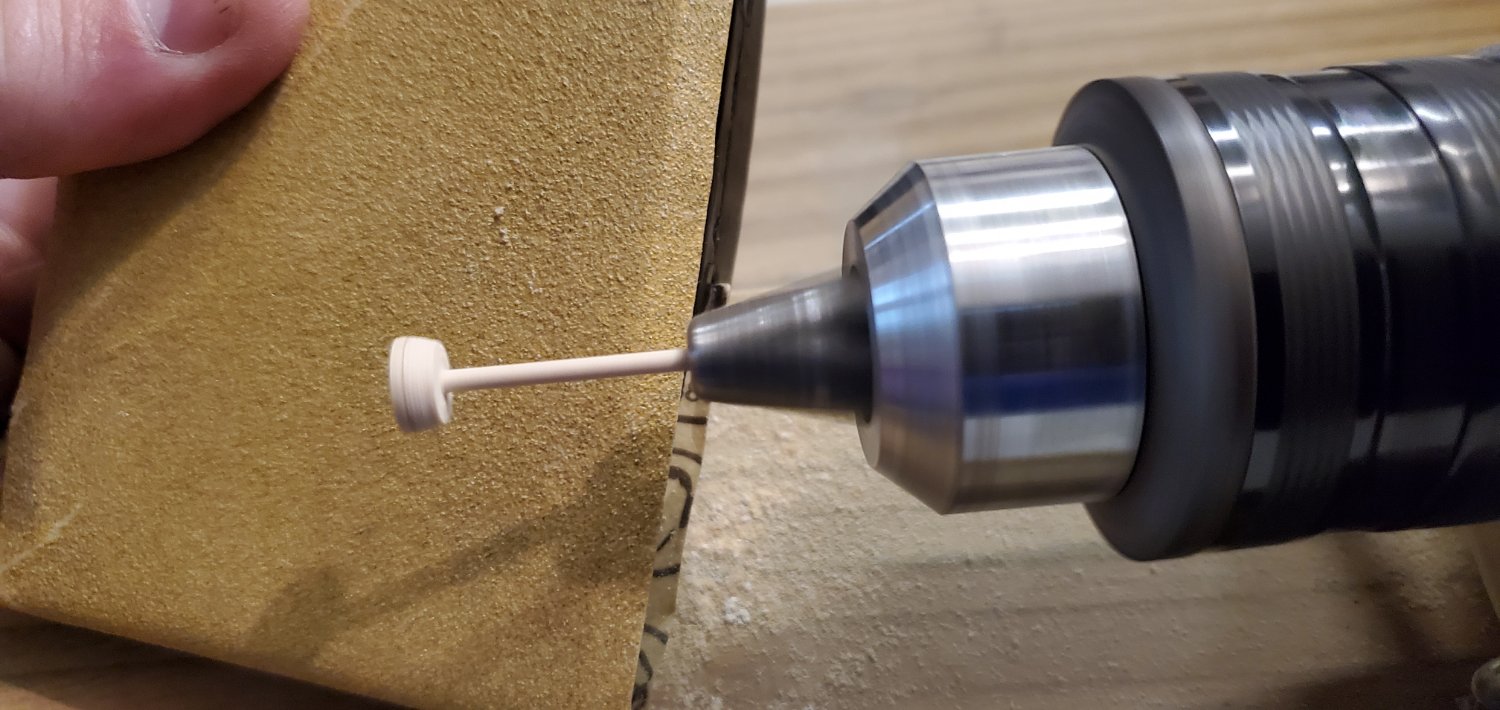
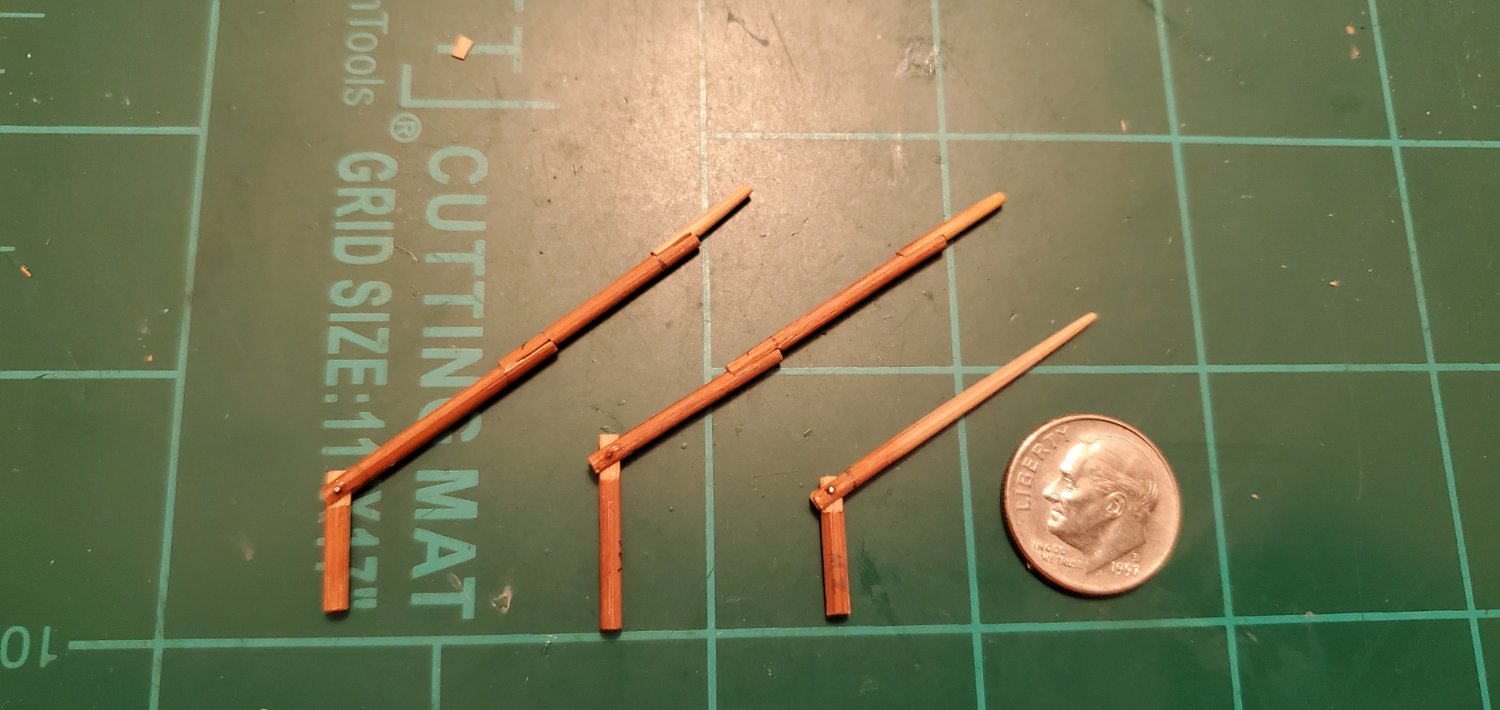
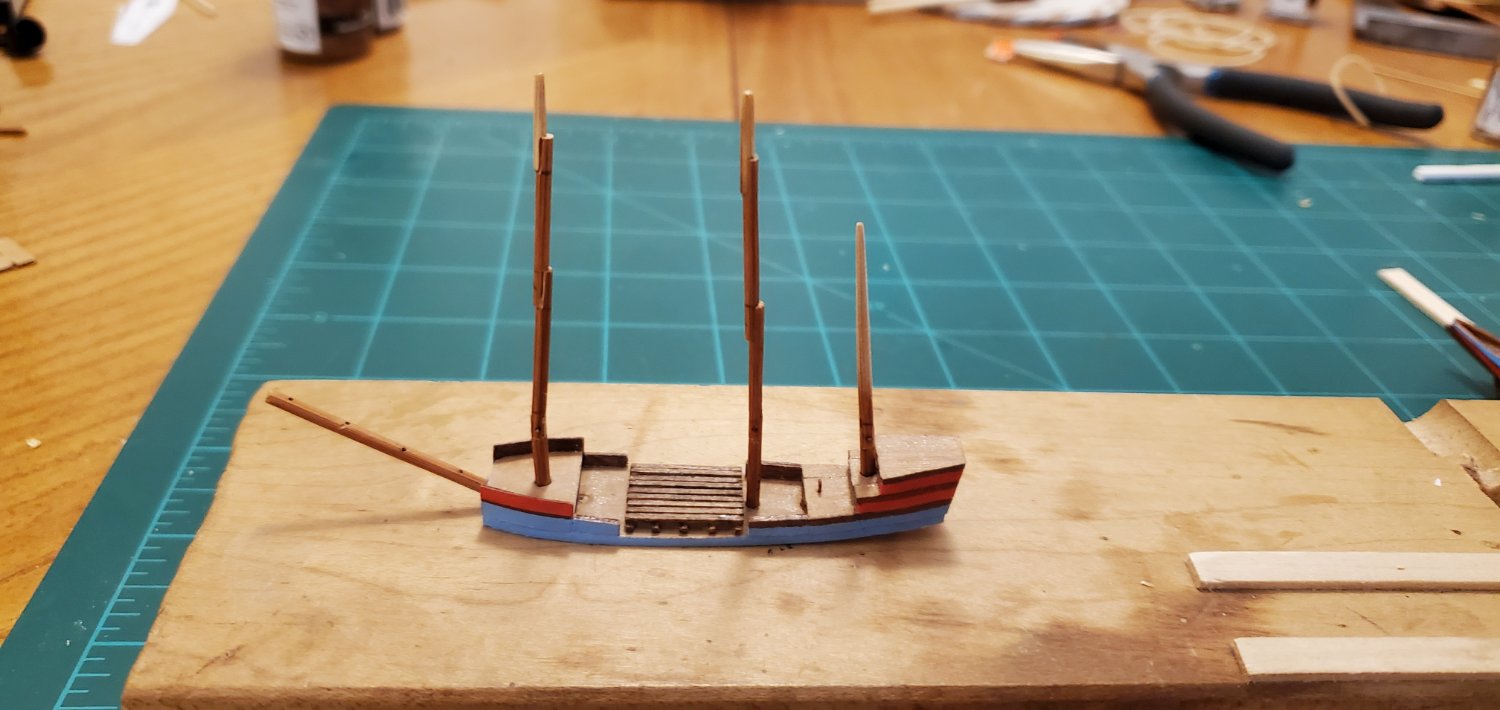
More cold and rainy weather here yesterday and today, so the cows get neglected but the ship gets lots of attention. Continuing with the theme for this project, I had to totally rebuild the main mast. The hinge was too high and would not fit thru the bottle opening. Then I started making mast tops which is the usual next step. I got about halfway thru and it suddenly dawned on me that this ship has crow's nests instead of the flat mast tops I'd built for every other ship.
So once again it's 2 steps forward and 1 back. But I thought this would be cool because I've never tried to make crow's nests before. The pics below show the steps from drawing them out to placing them in position on the fore and main masts. The mizzen mast has a large lateen sail which will be another new thing for me to deal with later.
The last pic shows a test fit. Lots of room to spare for yards and sails. Or so it seems right now!
 !
!

-
-
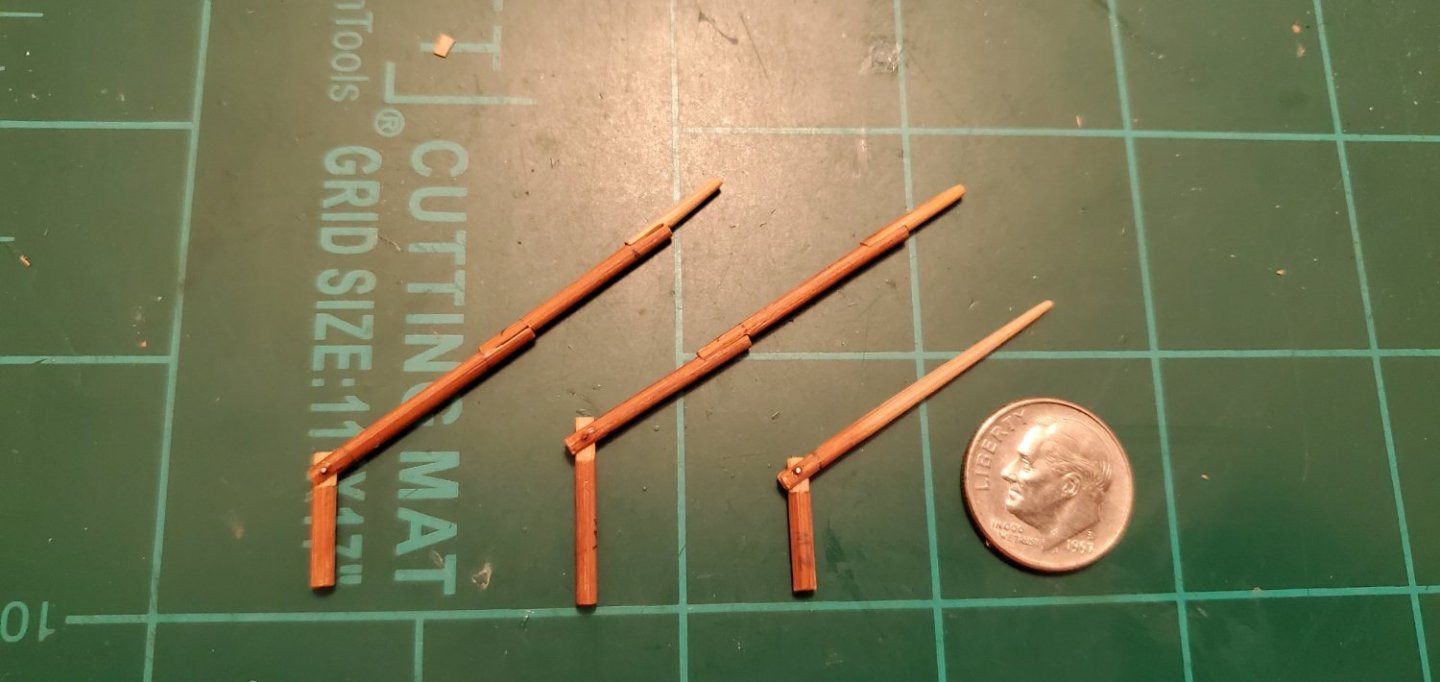
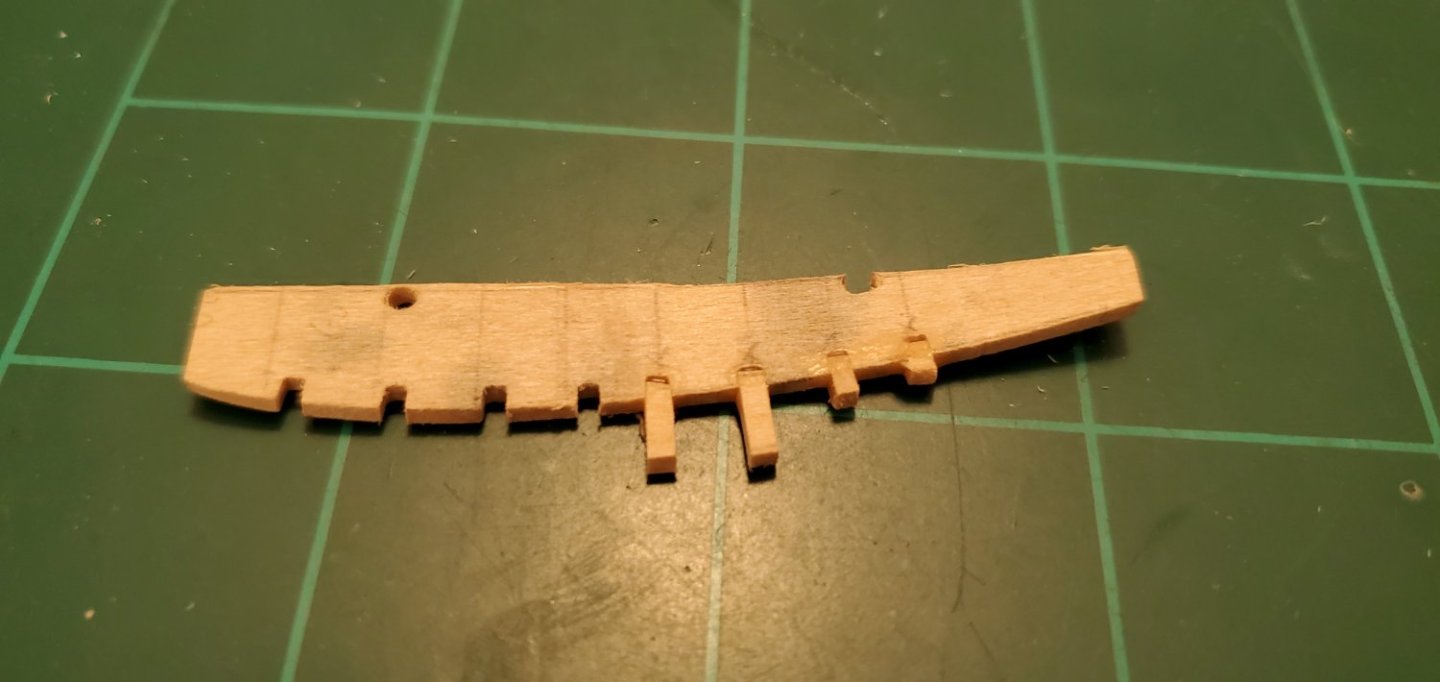
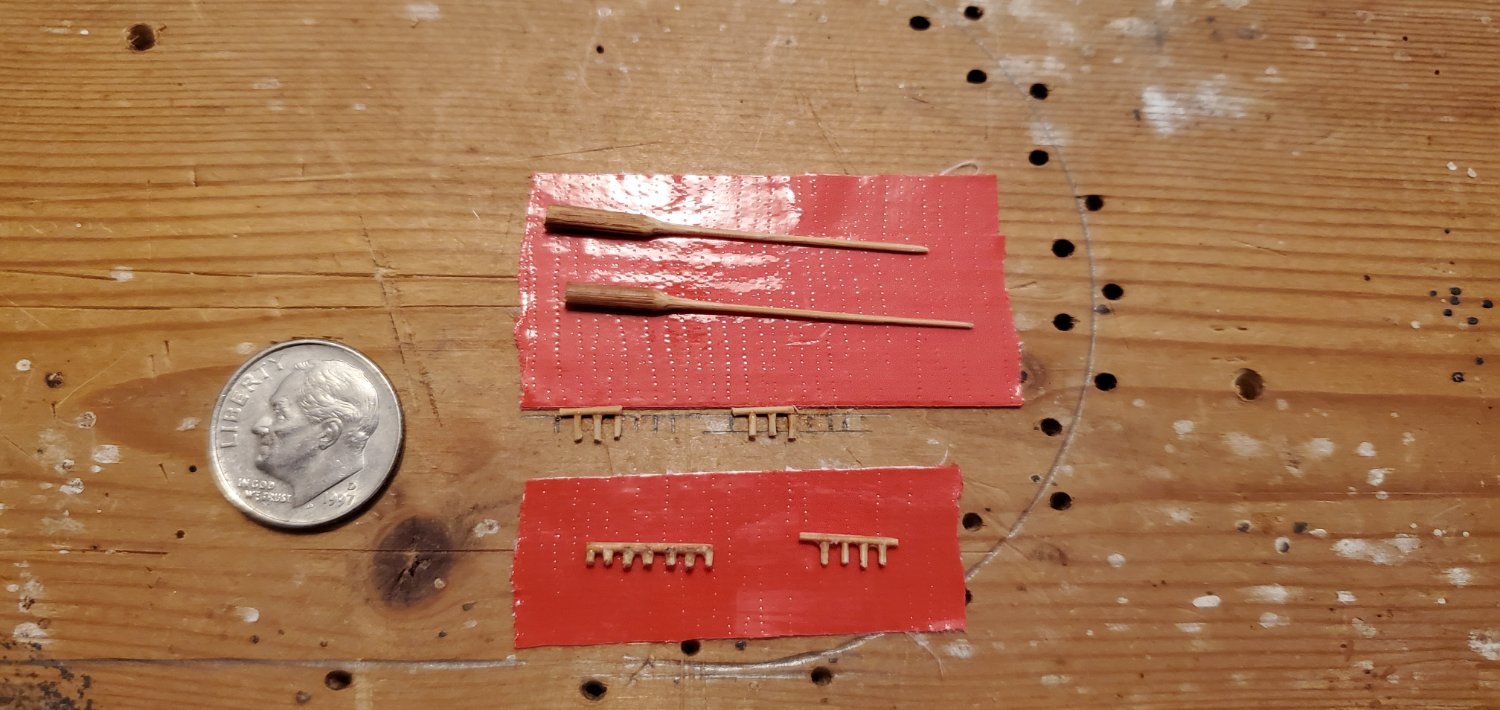
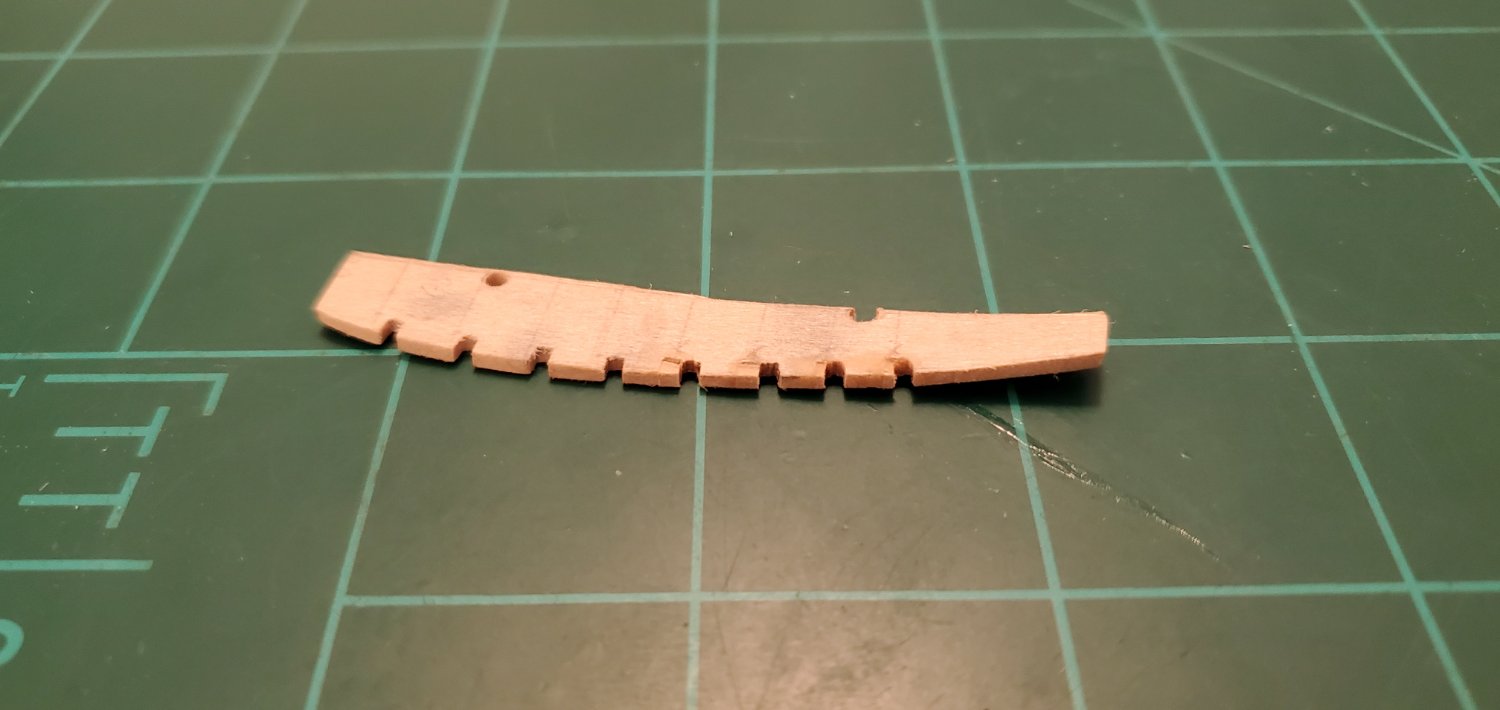
It was cold and rainy all day yesterday in Austin, which made for a good day to watch football with one eye and work on the ship with the other. And I needed all day to tackle the rails. In an earlier post, I showed the little bamboo sticks I'd sanded down to < 1/32" in preparation. Time to see if I could turn them into decent looking rails. The first pic shows the evolution from bamboo stick to rail ready for attachment to the ship.
The results were not perfect, but I think they came out ok. As usual, the farther away you get, the better they look.


- Knocklouder, mtaylor, Prowler901 and 9 others
-
9
-
3
-
I'm still trying to figure out what horse pucky is, but in the meantime, it's time to move to the mast construction.

- mtaylor, Keith Black, BANYAN and 9 others
-
12
-
1 hour ago, Keith Black said:
Glen, the hull passes through the opening without issue?
Yes! Each half of the hull fits thru easily. They will be joined together once inside the bottle. Then the main deck (with masts, yards, and sails attached) will be inserted into the bottle and glued to the hull. The main deck will be a more challenging fit since the main and mizzen masts have to fold over and lay on top of that tall poop deck. According to the plans I've drawn it should fit ok, which means in reality it probably won't be anywhere close.
-
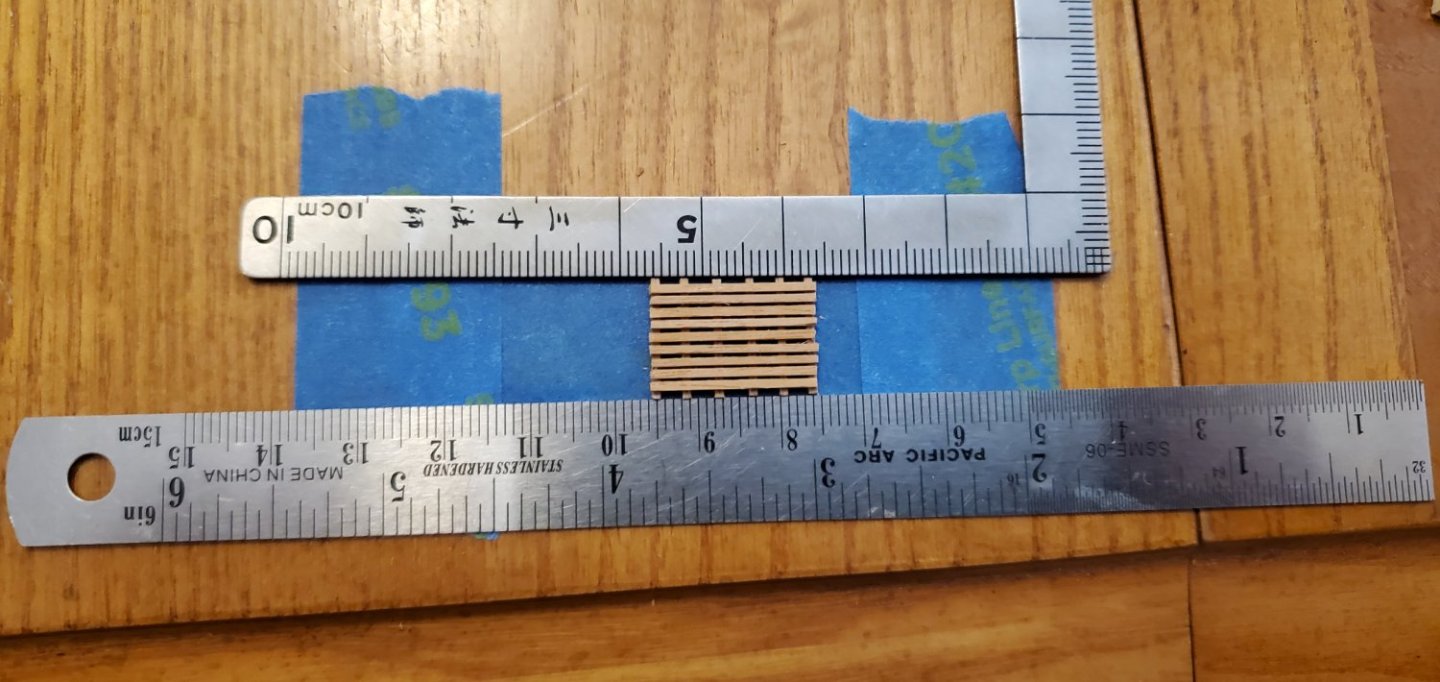
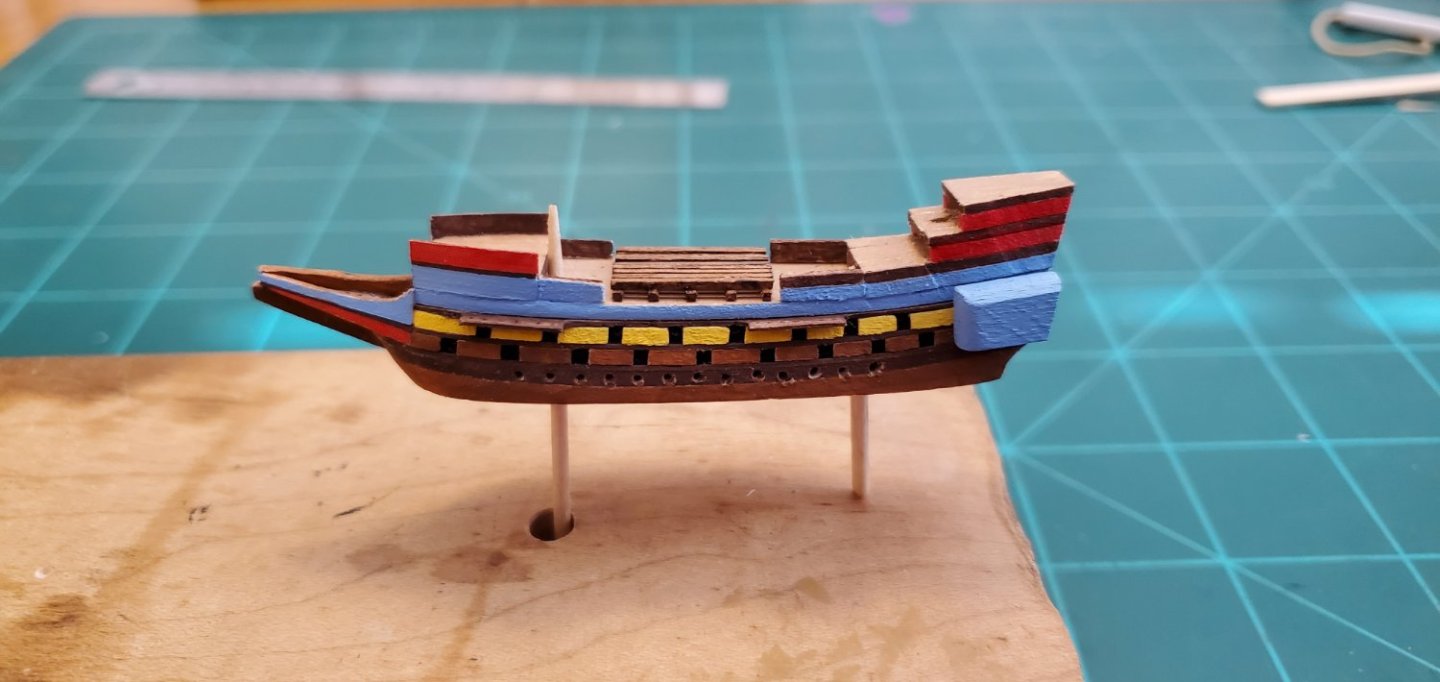
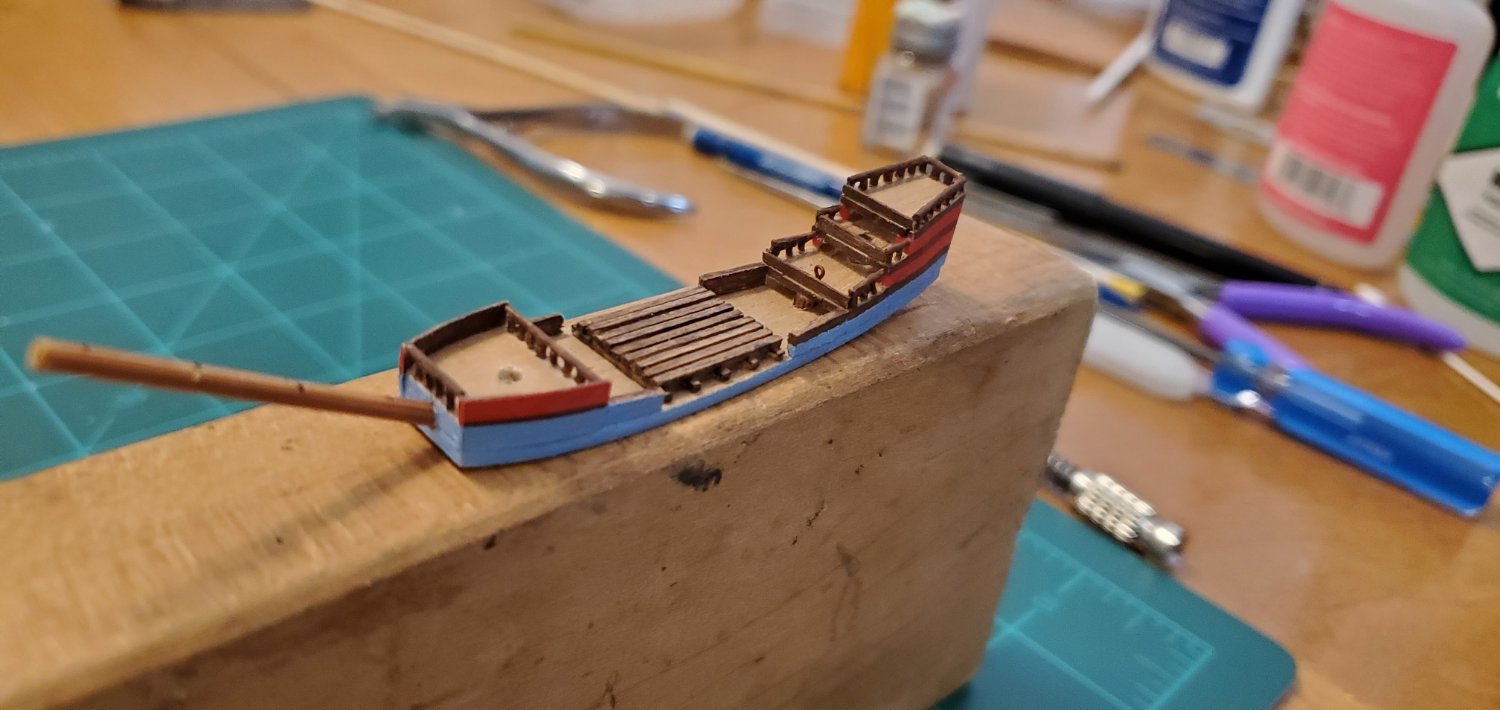
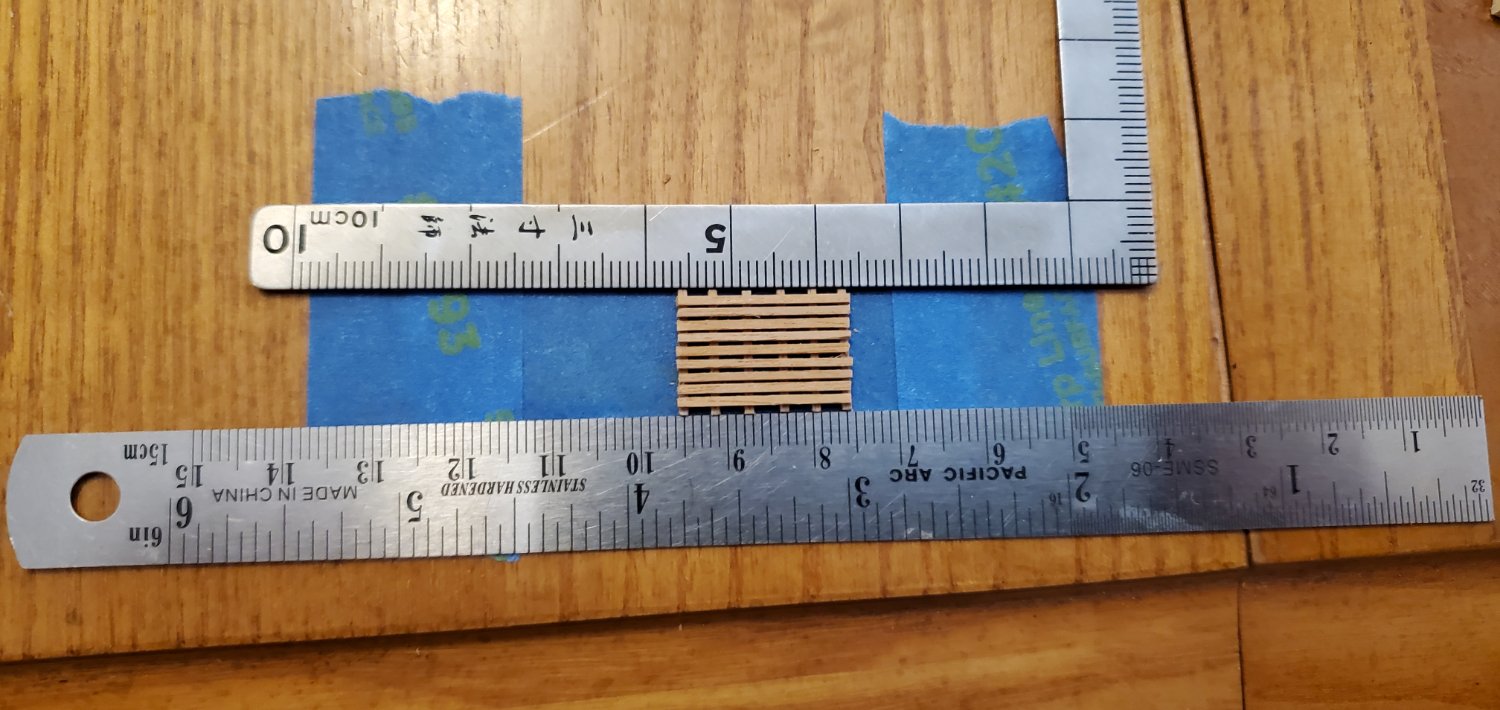
Returning to the main deck assembly, I made a crutch for the ship’s boats. I was struggling with keeping all the lower slats aligned while laying the top slats in place. So I eventually tried sticking the lower ones on painter’s tape to keep them still. It worked well.
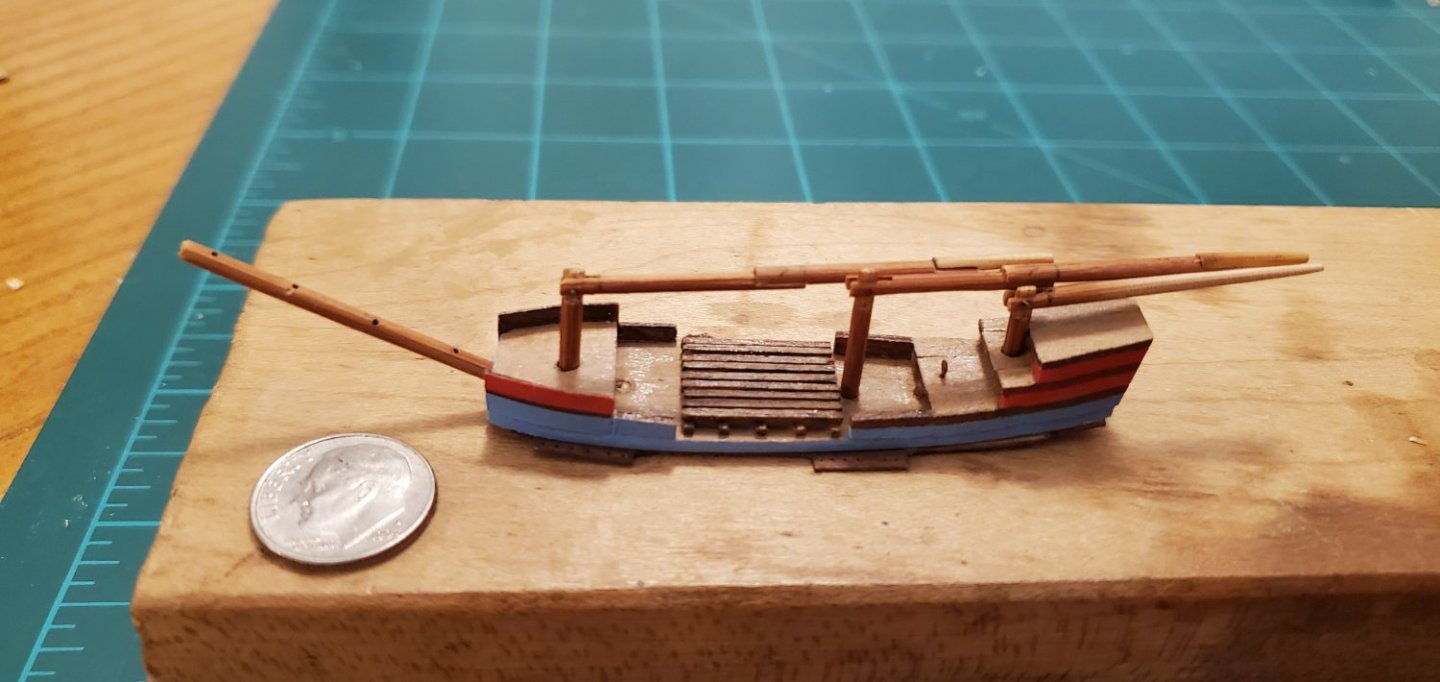
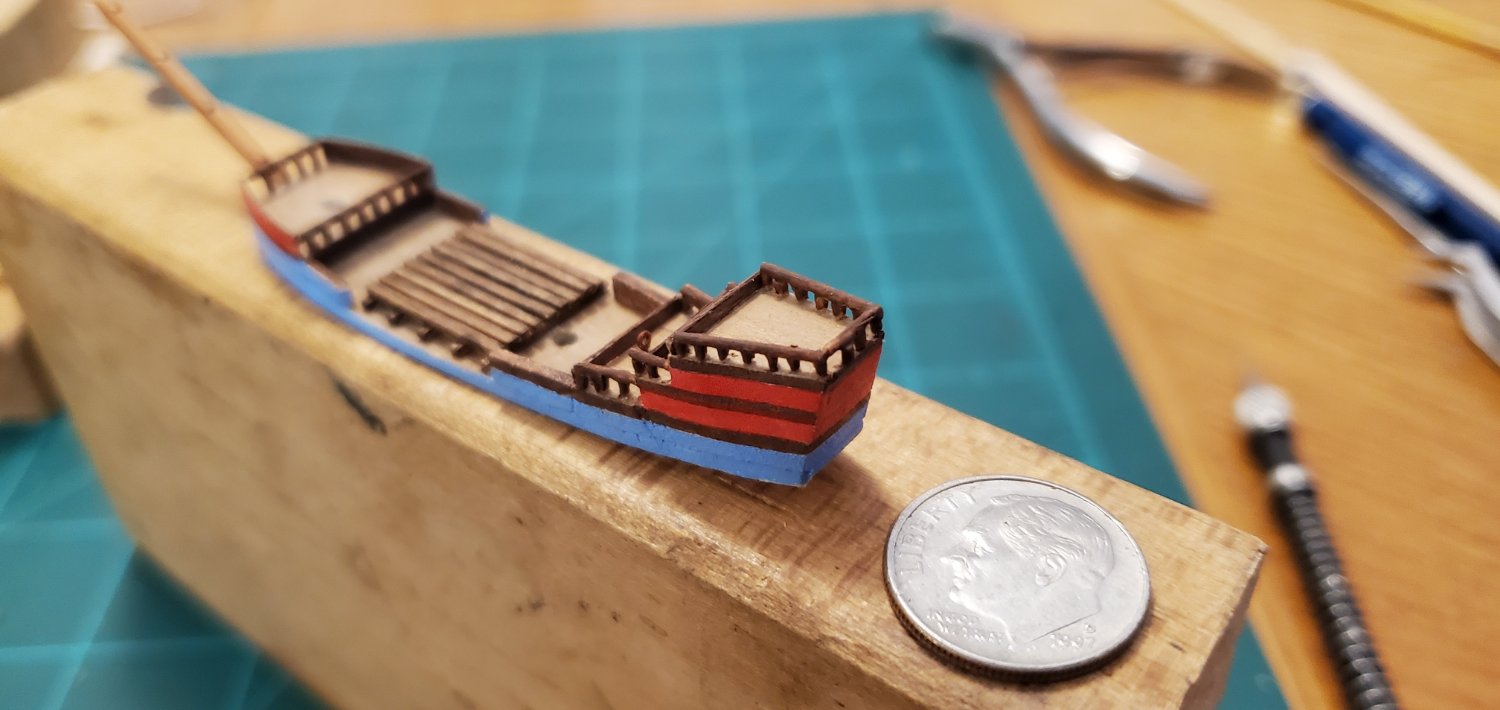
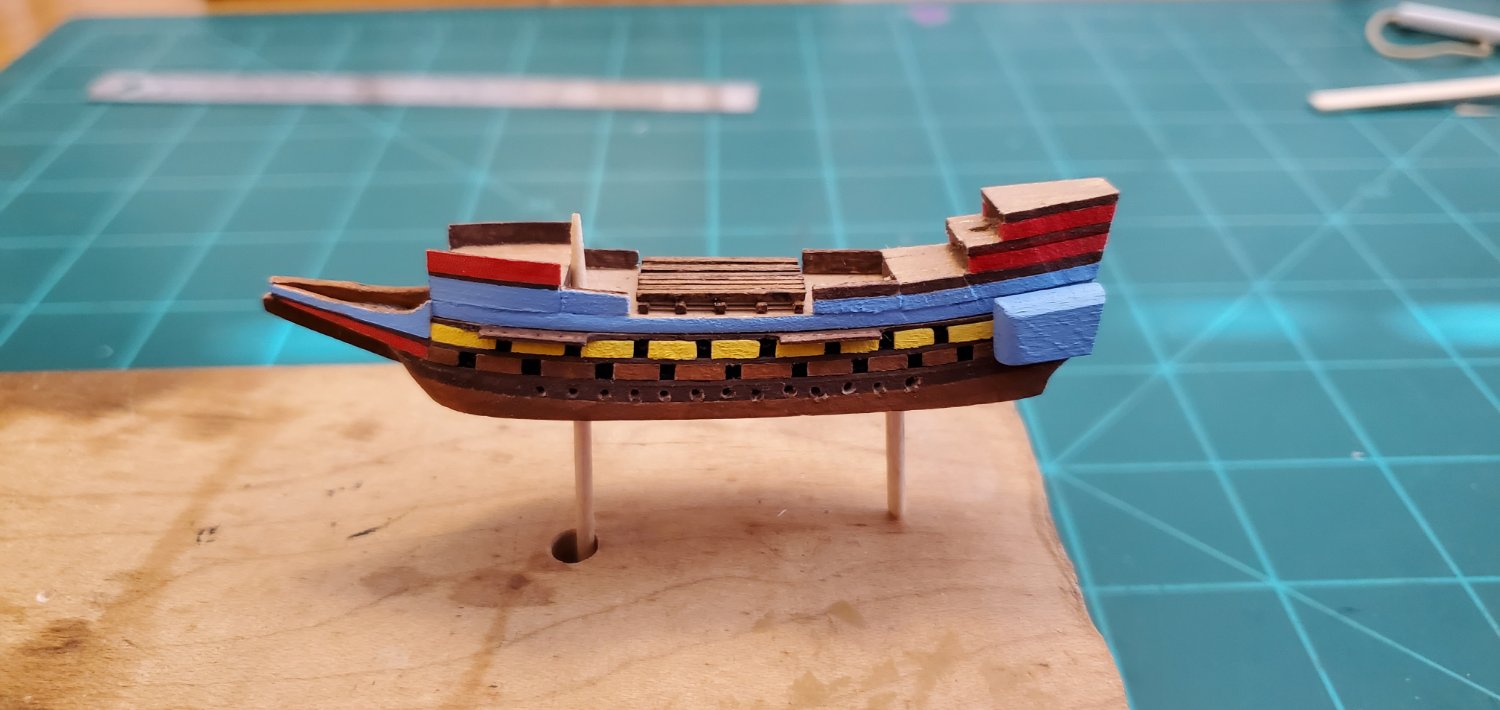
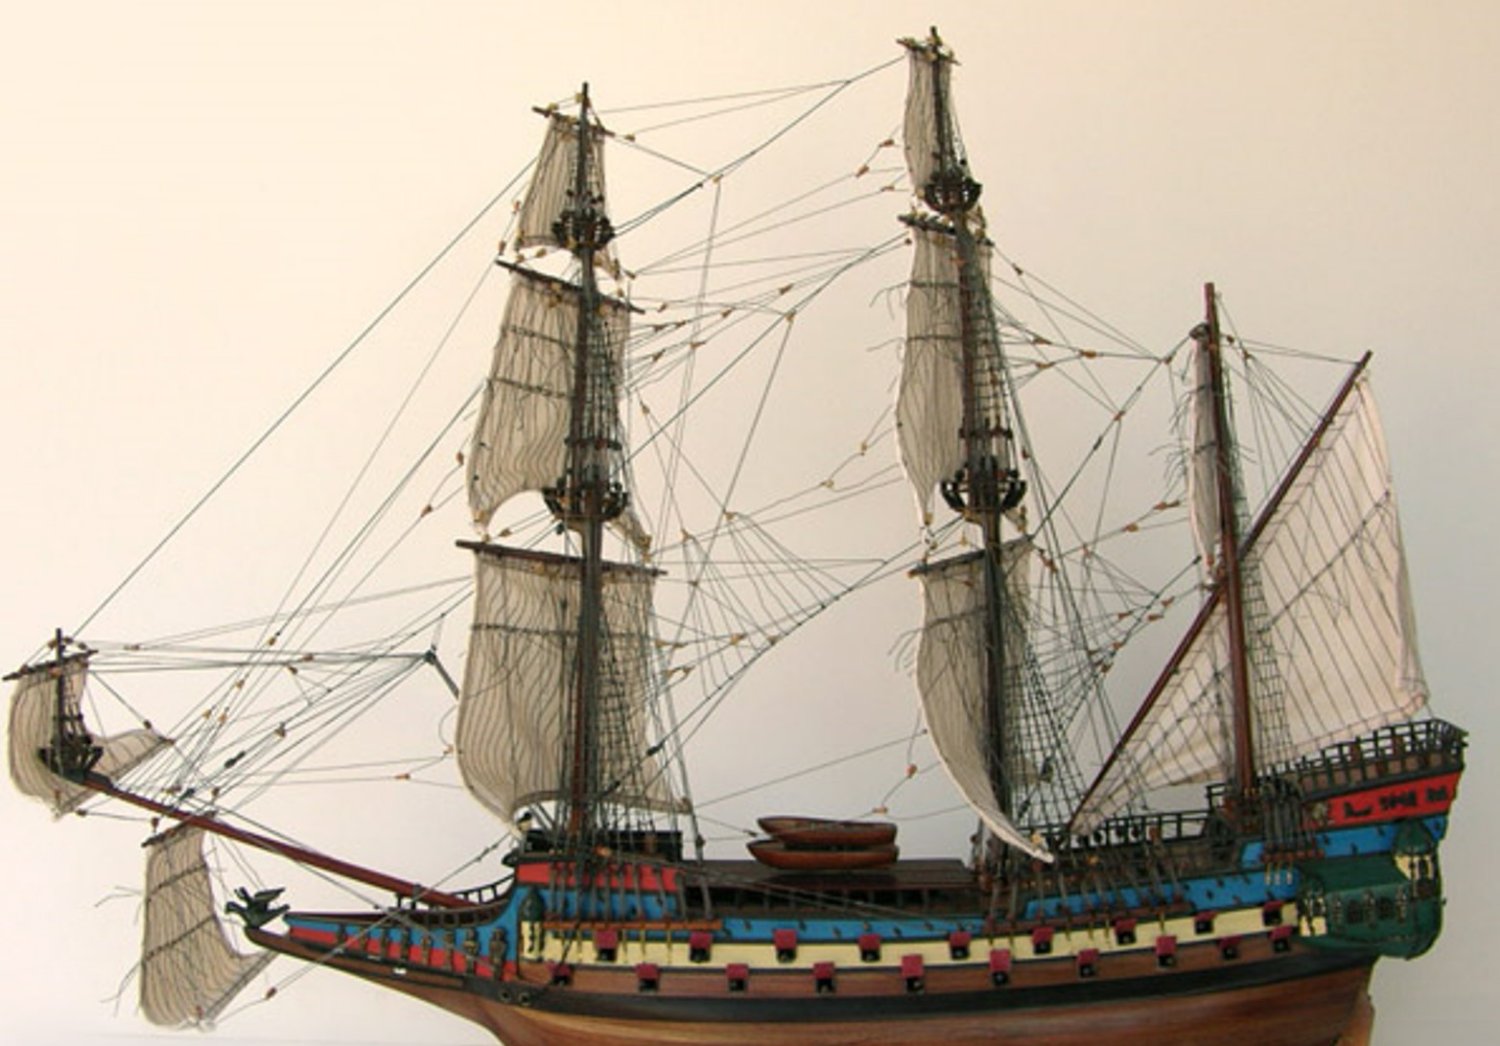
I finished painting the main deck assembly, added the crutch and some bulwarks, then dry-fitted it on top of the lower deck assembly for a look. The last pic is the what I am loosely basing my ship on, although I do not plan on adding the spritsail or sprit-topsail.


- Landlubber Mike, Dave_E, Prowler901 and 8 others
-
7
-
4
-
I added the knee and head on the bow along with an attempt at the associated grating. The grating was a particular challenge. I eventually cut a small piece of veneer into the tiny triangular shapes and drilled a bunch of little holes. I think it gives a reasonable impression. But like so many other details, it will likely be invisible once the ship is inside the bottle. As you can see, I decided not to split the knee in half. The halves of the hull join easier with the knee fully intact on the port side.


- Keith Black, Ian_Grant, mtaylor and 3 others
-
6
-
49 minutes ago, Ian_Grant said:
that's called "tumblehome". Kept higher-up weight nearer the centreline, for stability.
That's an interesting term. I had not heard it before. Thanks for the education, Ian!
- mtaylor and Keith Black
-
2
-
The comedy of errors continues. I finished up the split pieces of the hull as well as the main deck and a veneer spacer. I did a width check on the main deck to see how it would fit thru the bottle opening. It was pretty close but looked manageable. But it also looked like something was missing. Hmmmm. Then it hit me. I somehow forgot about the channels. UGH. No way would it fit thru the opening with channels added to the width.
So not only did I need to add channels, I also needed to narrow the width of the main deck as well as the entire lower deck assembly. And when I sanded the gun decks down to size, it erased most of the gun ports I had carefully cut and drilled holes for. Long story, short - Lots of rework on the entire hull and main deck.
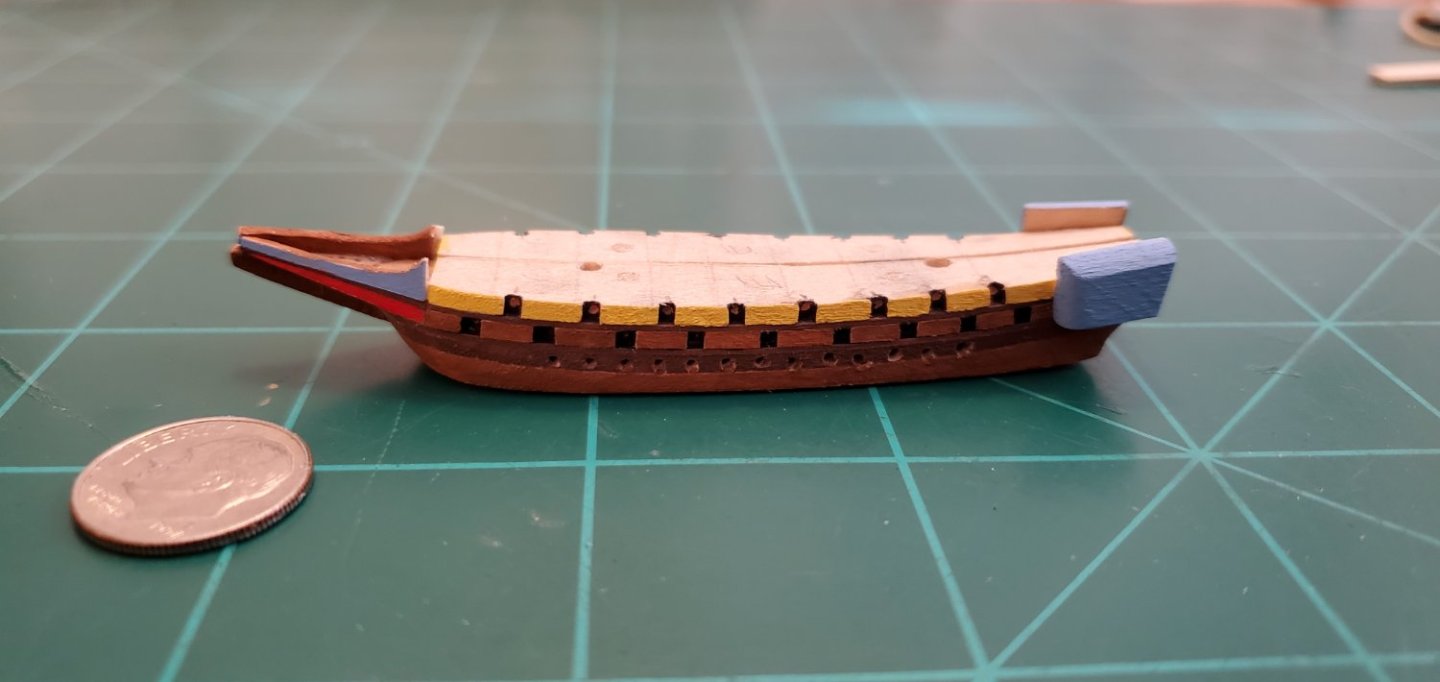
However, there was a silver lining. I had not noticed before how much the profile of a galleon tapers from the waterline to the deck. It's sort of like wide hips and a narrow waist. So all the rework gave me a chance to give the hull its proper narrowing from waterline to deck.
Anyway, here's some work-in-progress pics. The first pic shows yet another screwup courtesy of a slip while sanding. In the upper right and corner of the stern, you can see another patch job. Fortunately, this will be covered up by the quarter gallery. The last pic shows the lower hull assembly after rework. I stuck in a few cannon barrels and oars to get an early idea of what it's going to look like fully equipped. I really like the cannons with open ends vs the solid wire I used on previous models, even though it's so tiny I'm not sure the effect will be visible once it's inside the bottle.


- John Fox III, BANYAN, Keith Black and 7 others
-
9
-
1
-
14 hours ago, BANYAN said:
Love the bread-and-butter building technique
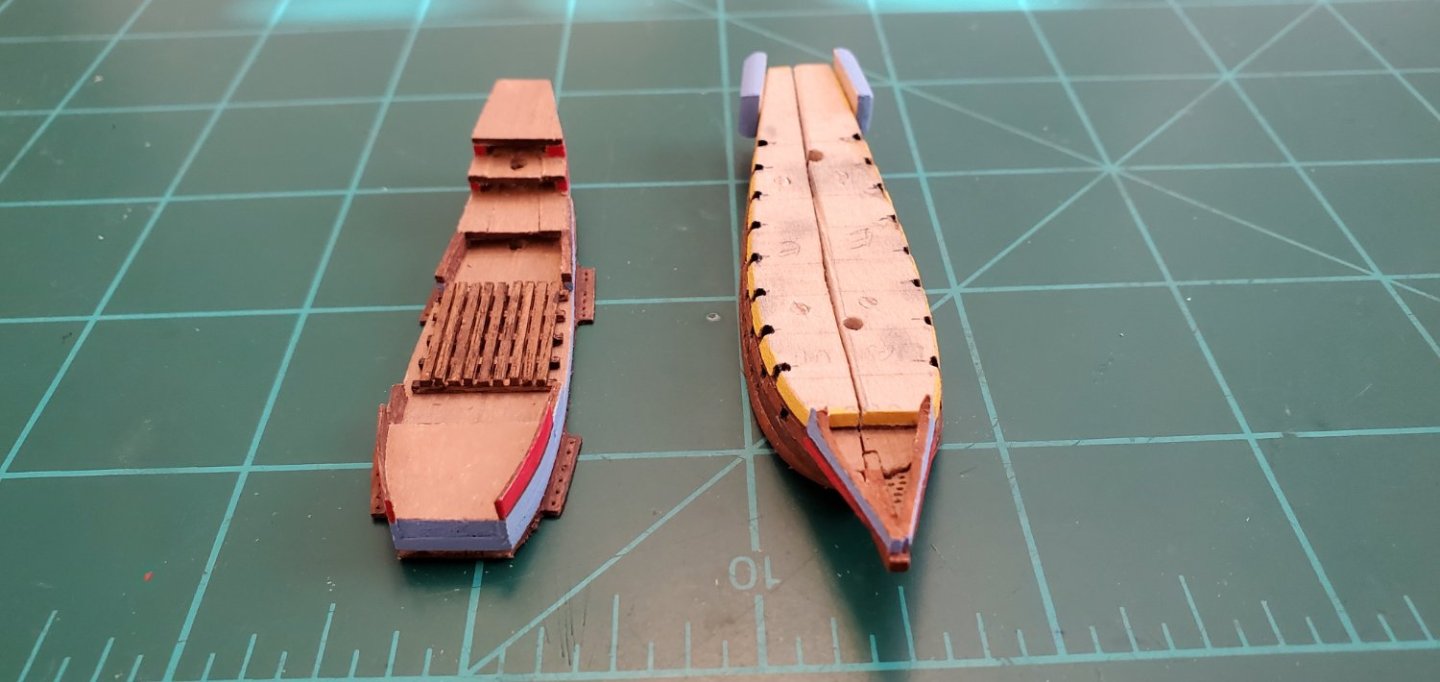
Thanks, Pat. It works particularly well with this ship as you will see later when I get it painted. The oar deck and gun decks are different colors so having them as separate, individual layers sure makes the painting easier!
- mtaylor, Keith Black and BANYAN
-
3
-
50 minutes ago, gjdale said:
Nice recovery Glen!
Thanks, Grant. I wish that was the last one. Unfortunately I know there are many more to come! This hull plan is proving to be a struggle. But the mule is out and we are gonna git r done!
- mtaylor, gjdale and Keith Black
-
3
-
Thanks, Benjamin! Long ways to go on this one!
- Keith Black and Knocklouder
-
2
-
8 hours ago, Keith Black said:
Oh yeah, and exactly when is that gonna happen?
")
It's a very long and complicated process. I'm still in the concept phase!
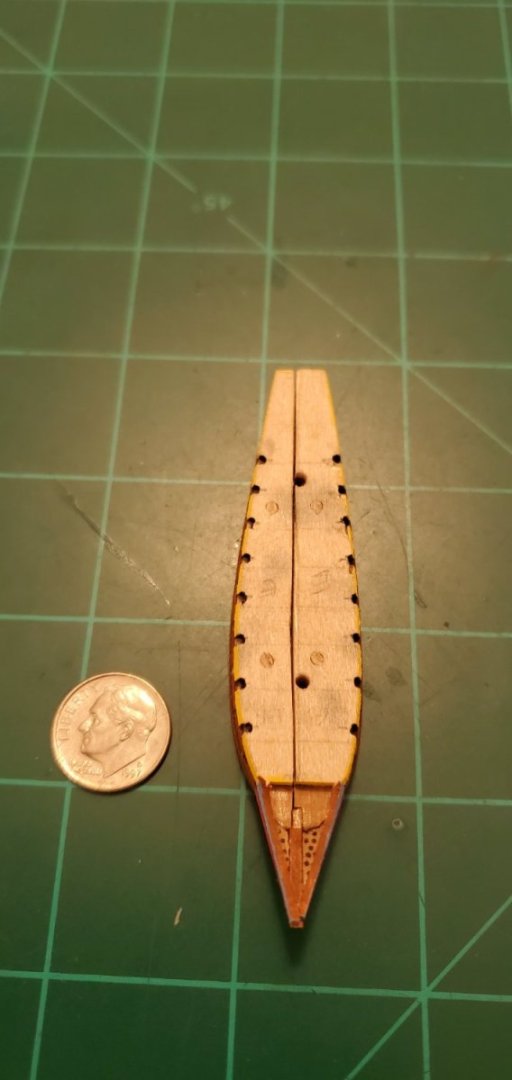
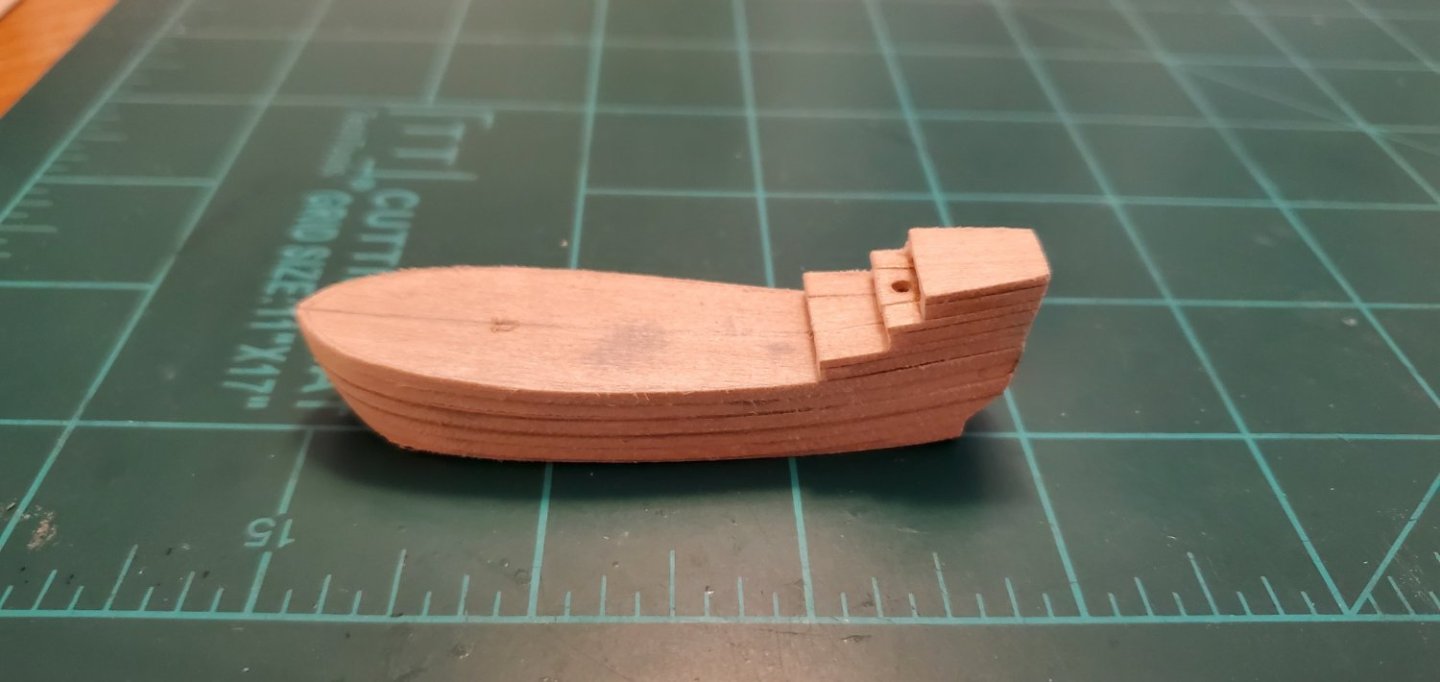
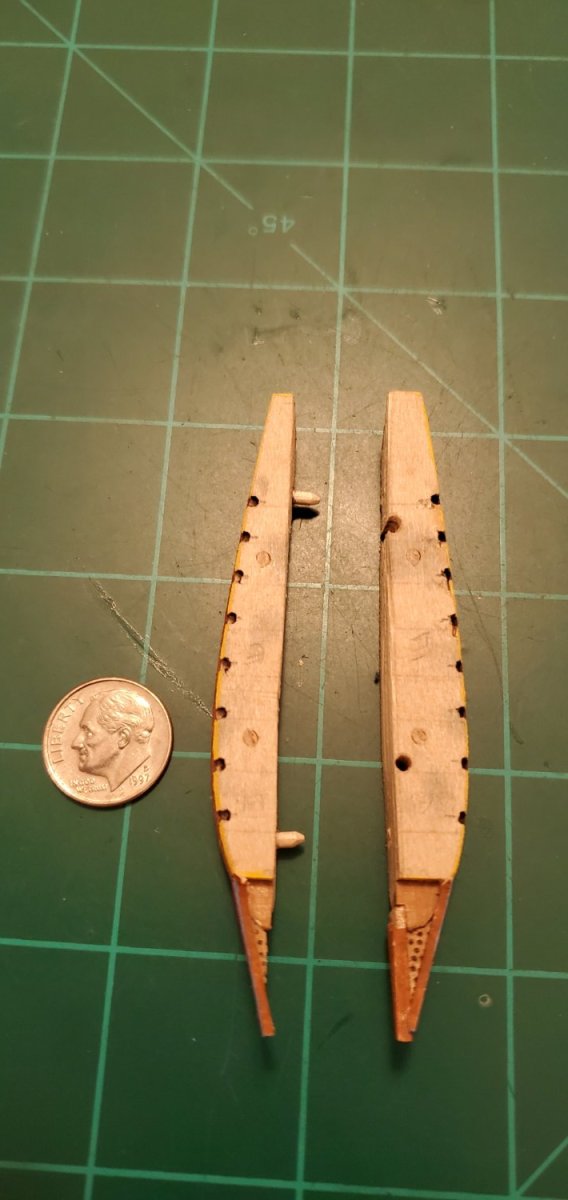
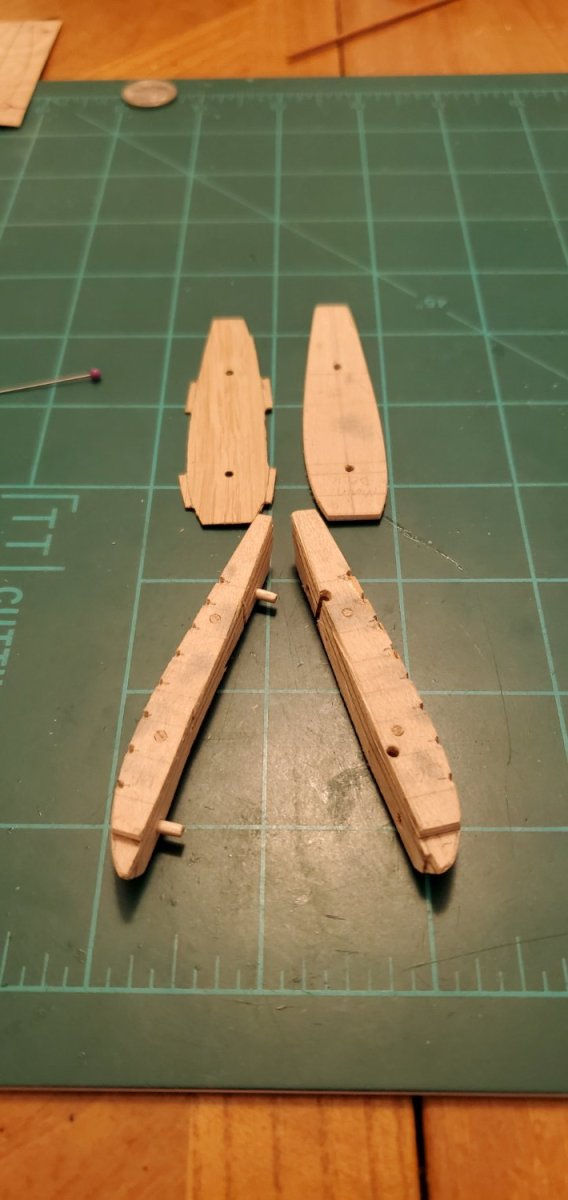
Back to the adventure of the Adventure Galley. The hull is taking shape, although as usual, it's 2 steps forward and 1 back. I've got 8 layers - bottom layer, oar deck, veneer spacer, lower gun deck, spacer, upper gun deck, spacer, main deck. The first pic shows all the layers stacked and sanded into the basic outline of the hull. The 2nd pic shows the hull with the bottom sanded flat at the water line, the bow and stern shaped, and the quarter/poop deck assembly resting in place (unglued). Afterwards, I sliced the whole thing right down the middle.
And then a screw up. If I ever drew something correct the first time it would probably start snowing in Laredo. I got the gun ports cut for the port side lower gun deck. The 1st pic shows the technique using a thin diamond cutting wheel on my Dremel. Then I started on the port side upper gun deck. After 4 cuts I checked my alignment with the lower gun deck and the stagger was way off. The upper gun ports were not squarely between the lower ones. Ugh.
One of the most helpful comments I've ever read was on someone's build log when I first discovered MSW. I wish I could remember who made the comment. The builder was distraught because they'd made a wrong cut, but the commenter said something to the effect of, "Relax, it's wood. You can fix it." Such great advice. So rather than me cutting and bending and drying and shaping another gun deck layer, which would have taken forever, I plugged the holes, sanded them down, and cut new holes. Thank you again to whoever made that comment! In the last pic, you can see the gun ports of both decks properly aligned.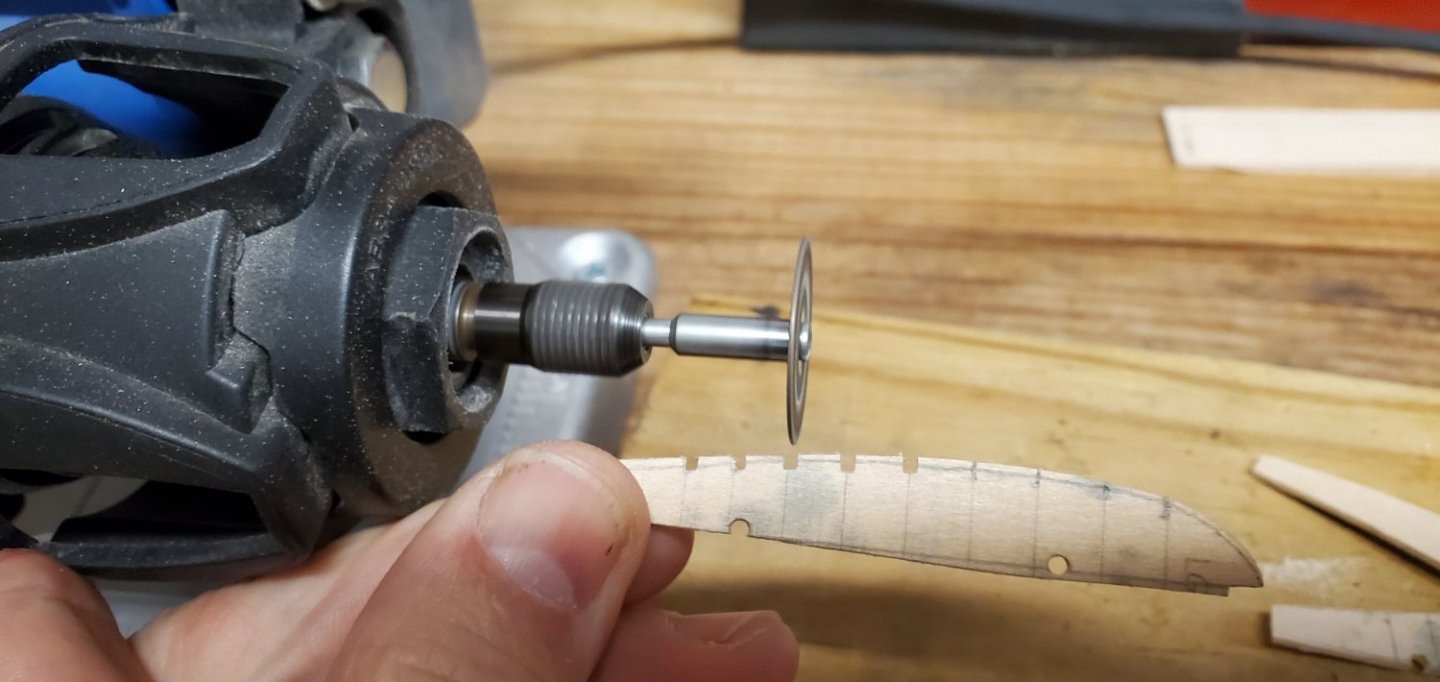


Adventure Galley by Glen McGuire – FINISHED – 1/400 - BOTTLE
in - Build logs for subjects built 1501 - 1750
Posted
Thanks, Pat. I really appreciate that!