Glen McGuire
-
Posts
1,979 -
Joined
-
Last visited
Content Type
Profiles
Forums
Gallery
Events
Everything posted by Glen McGuire
-
Welcome aboard, Nick! I hope that you will create a build log for this epic adventure so we can follow along.
-
 Your work with the pastels is very convincing, Keith. And yes, a little goes a looong way as I have learned!
 -
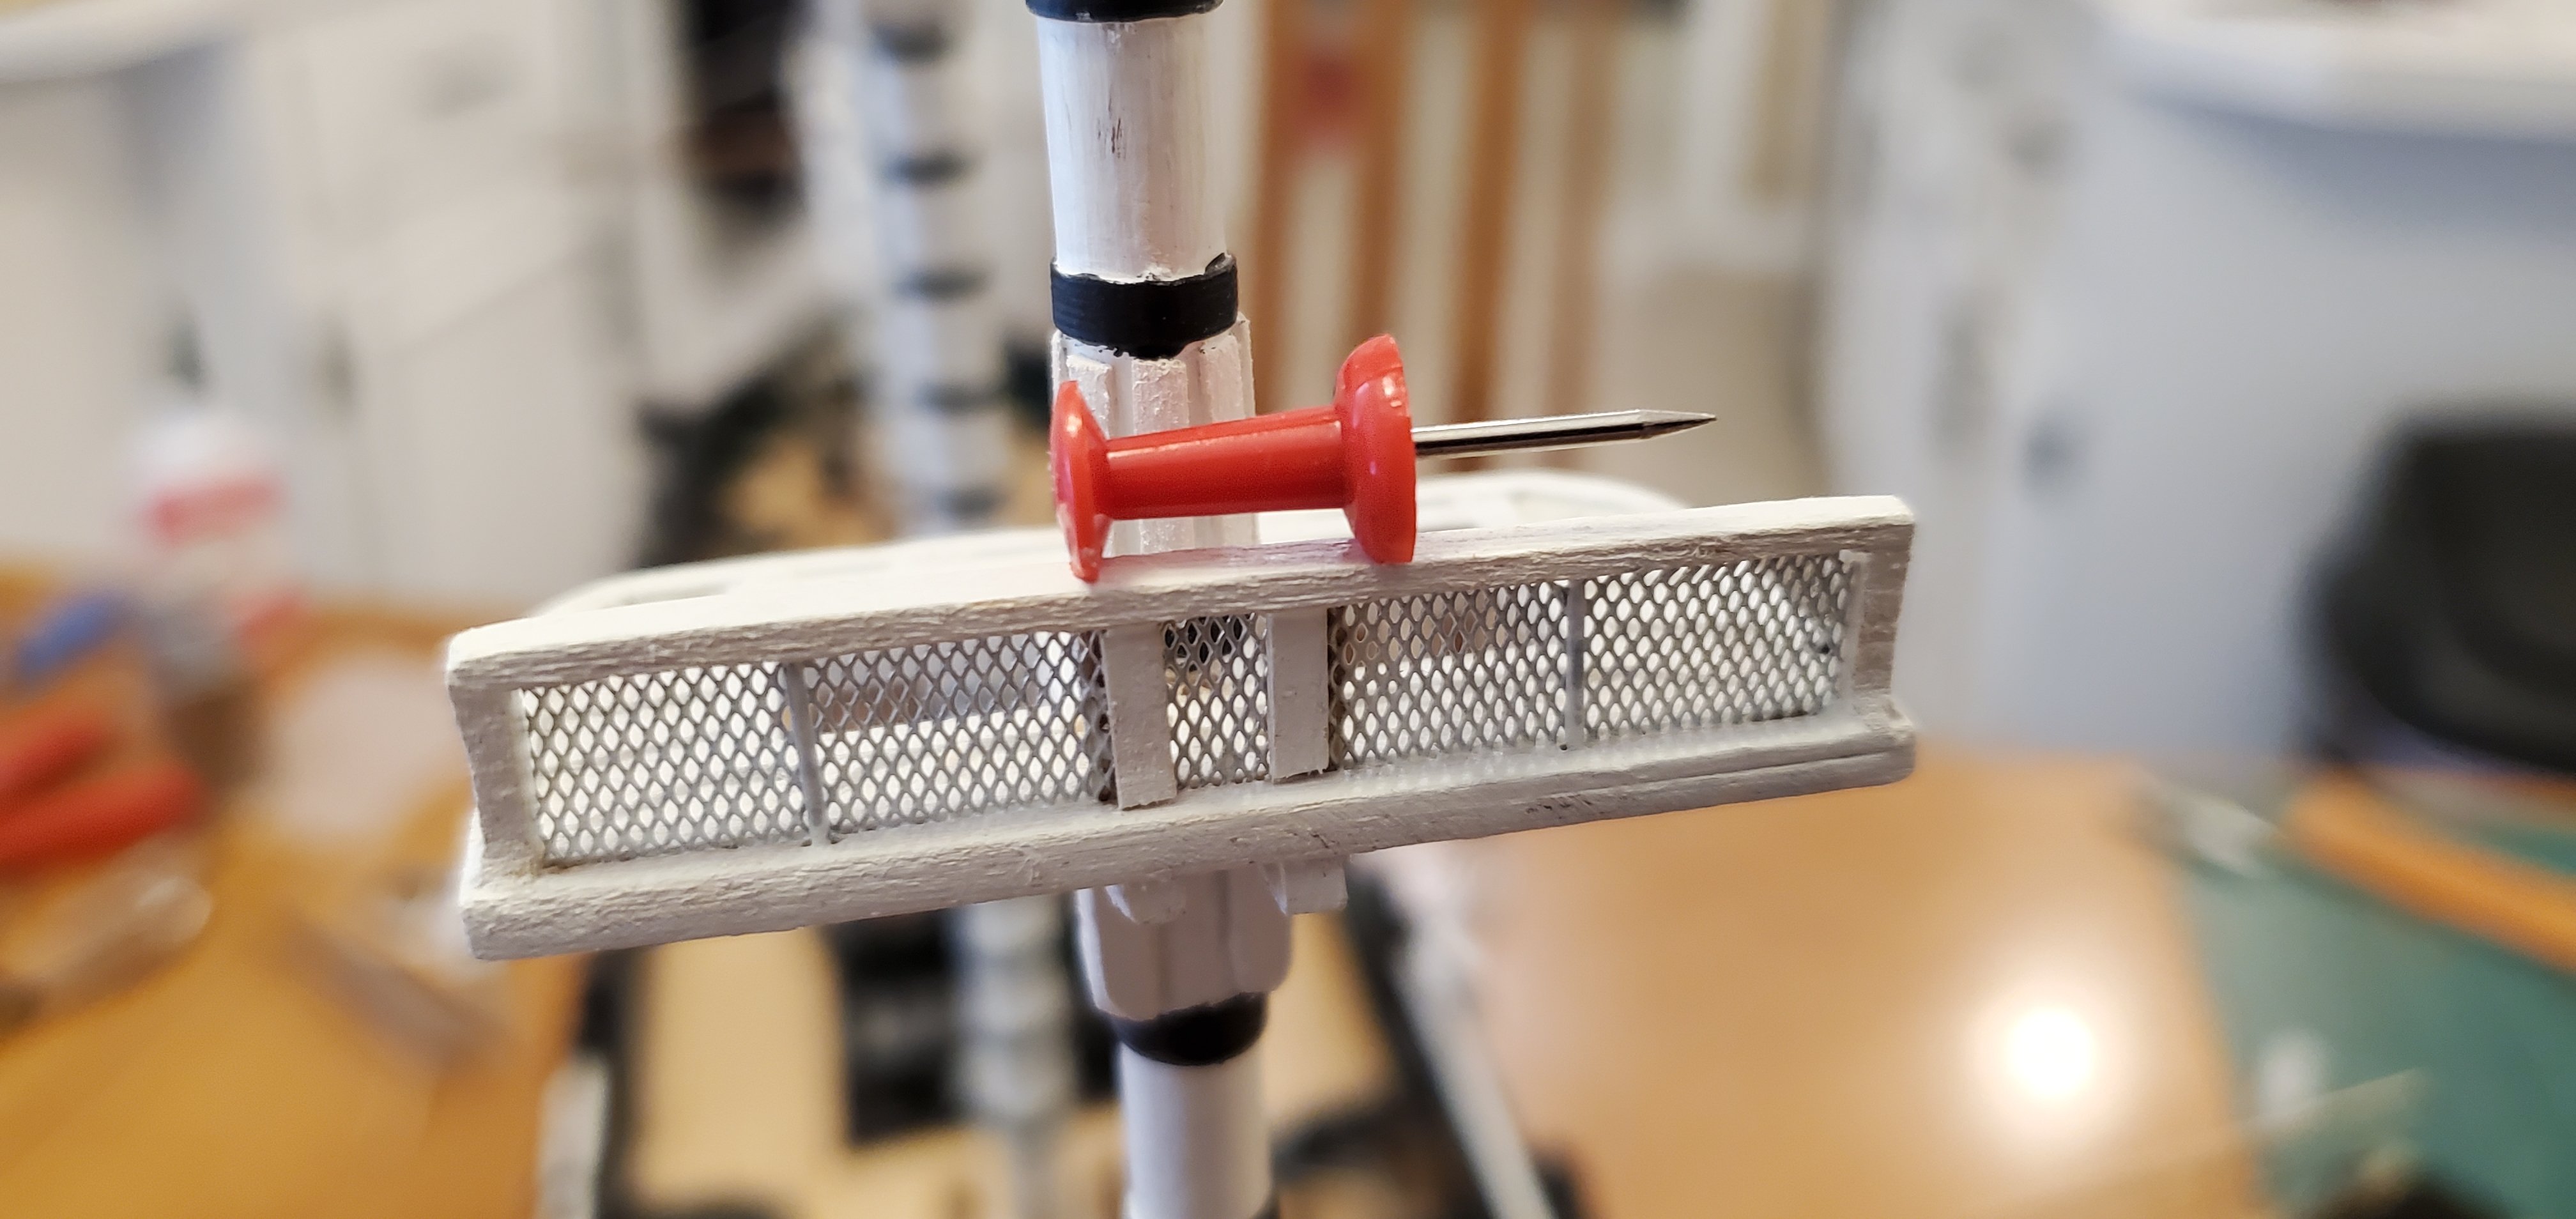
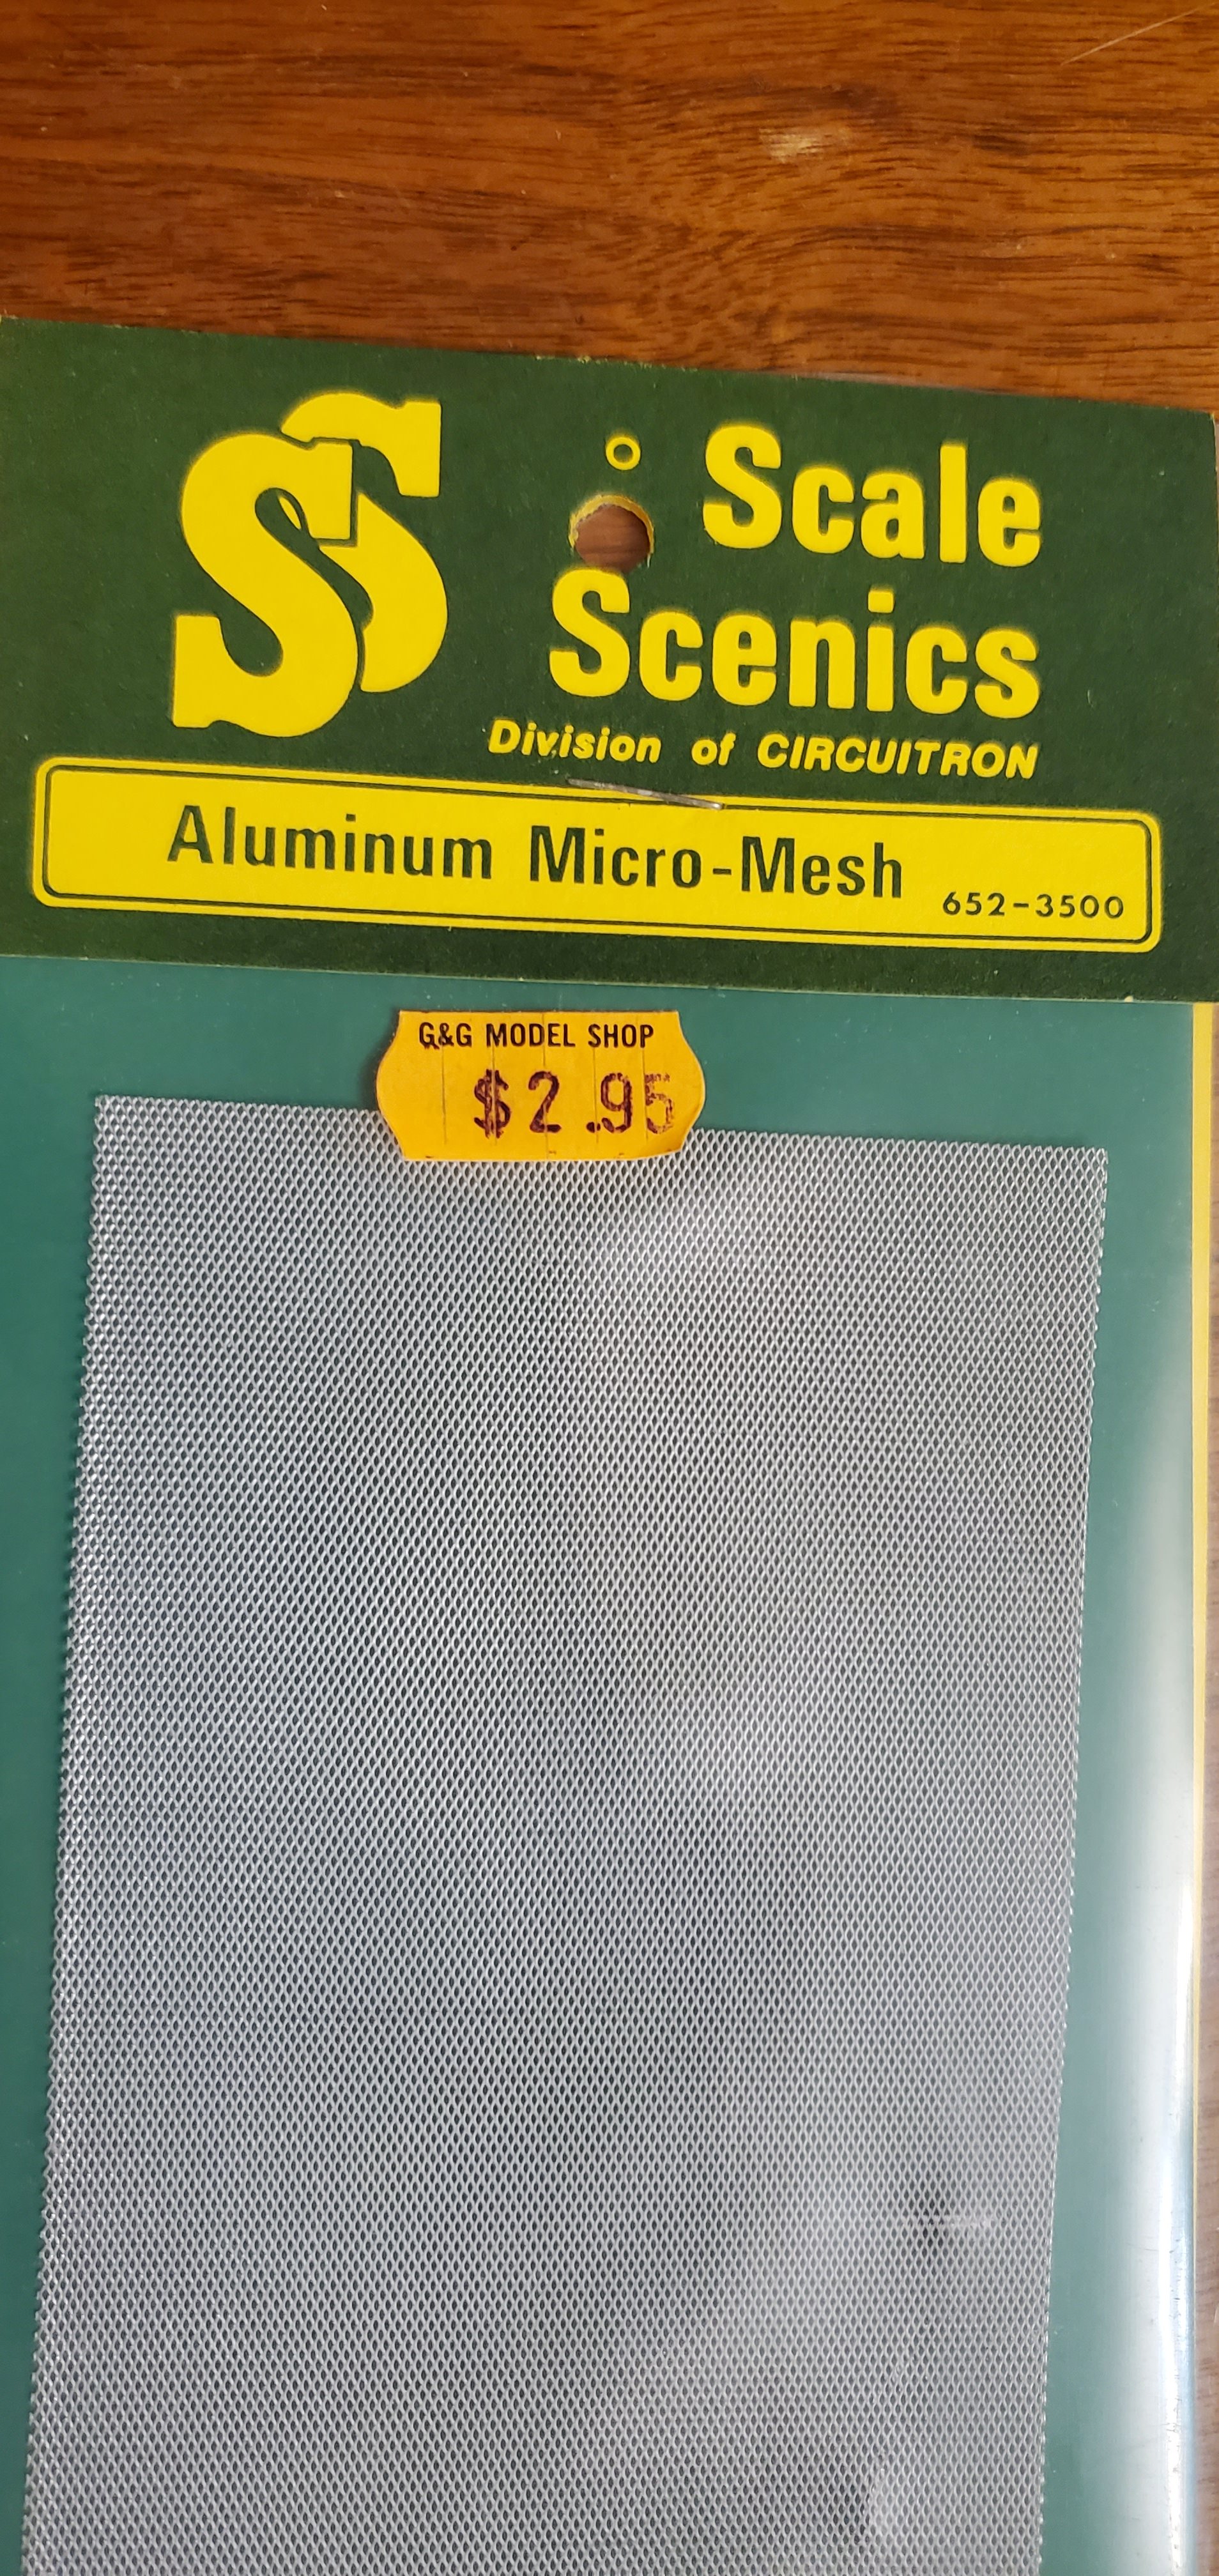
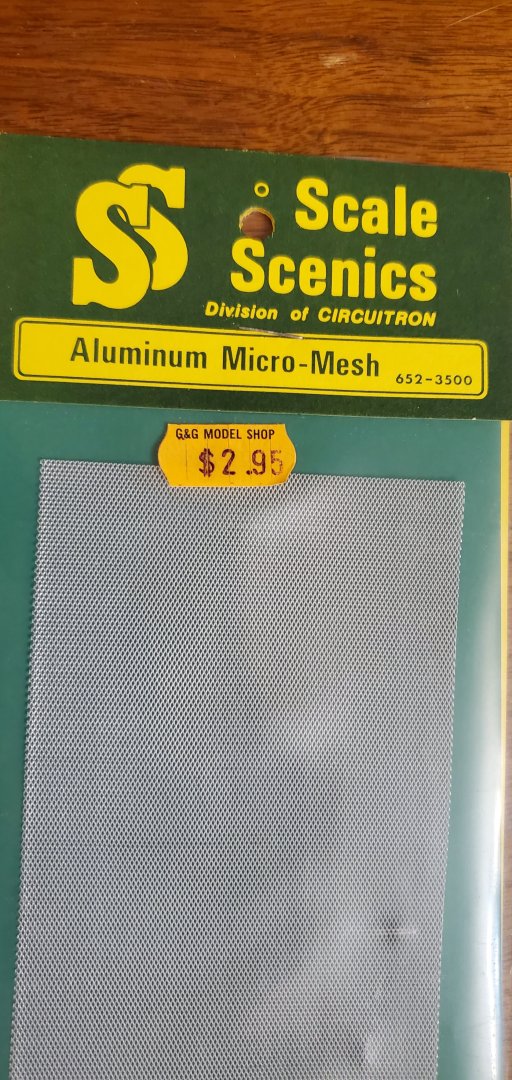
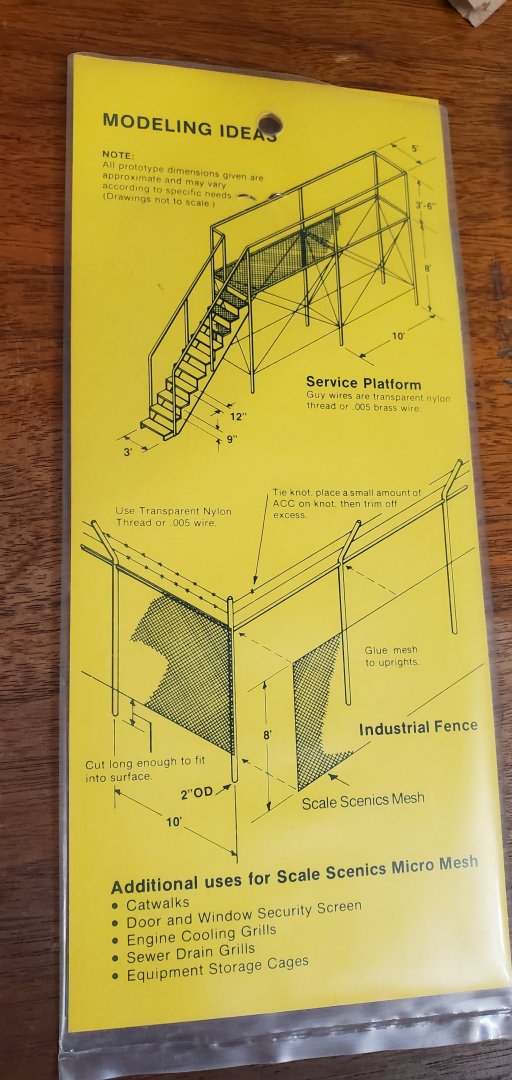
Thanks, Tim. The netting on the aft railing of the fighting tops was already completed by Carson's father. I didn't really look at it too closely until your note. It's a lot finer mesh than the netting that he used under the bowsprit and, interestingly enough, it is metallic and not woven like a window screen. I did some rummaging around inside another box of goodies that Carson had given me and found the source of this netting - Scale Scenics - which makes things for model railroads. I had not seen this product before but I'm thinking it might be of use for some of my SIB work. However, I bet I can't get it for anywhere near $2.95 now! Now, back to the bobstay issue. Keith, I do think your idea was brilliant, but I did not have the right paint or maybe the right painting skills (I'm definitely no "Paintin' Manning" like in the new commercial!). I tried your idea out on a test piece of thread but I kept getting blobs. So back to the double rope plan. Which, in looking at some other Connie build logs, seems to be a popular method of rigging the bobstays. I was able to add a line, as hoped, without too much difficulty. Then I seized it up and down with knots as others have done. I like how it looks now. So thank you, @Ian_Grant! You made me do some extra work, but I believe it was well worth it!


- 301 replies
-
- 14
-

-
- Constitution
- Bluejacket Shipcrafters
- (and 1 more)
-
We made it through all that incredible piping layout/installation and now you are worried about boring us with details? 😃 You should know by now that we crave endless details! Such a fascinating project. Keep up the brilliant work, Roel!
-
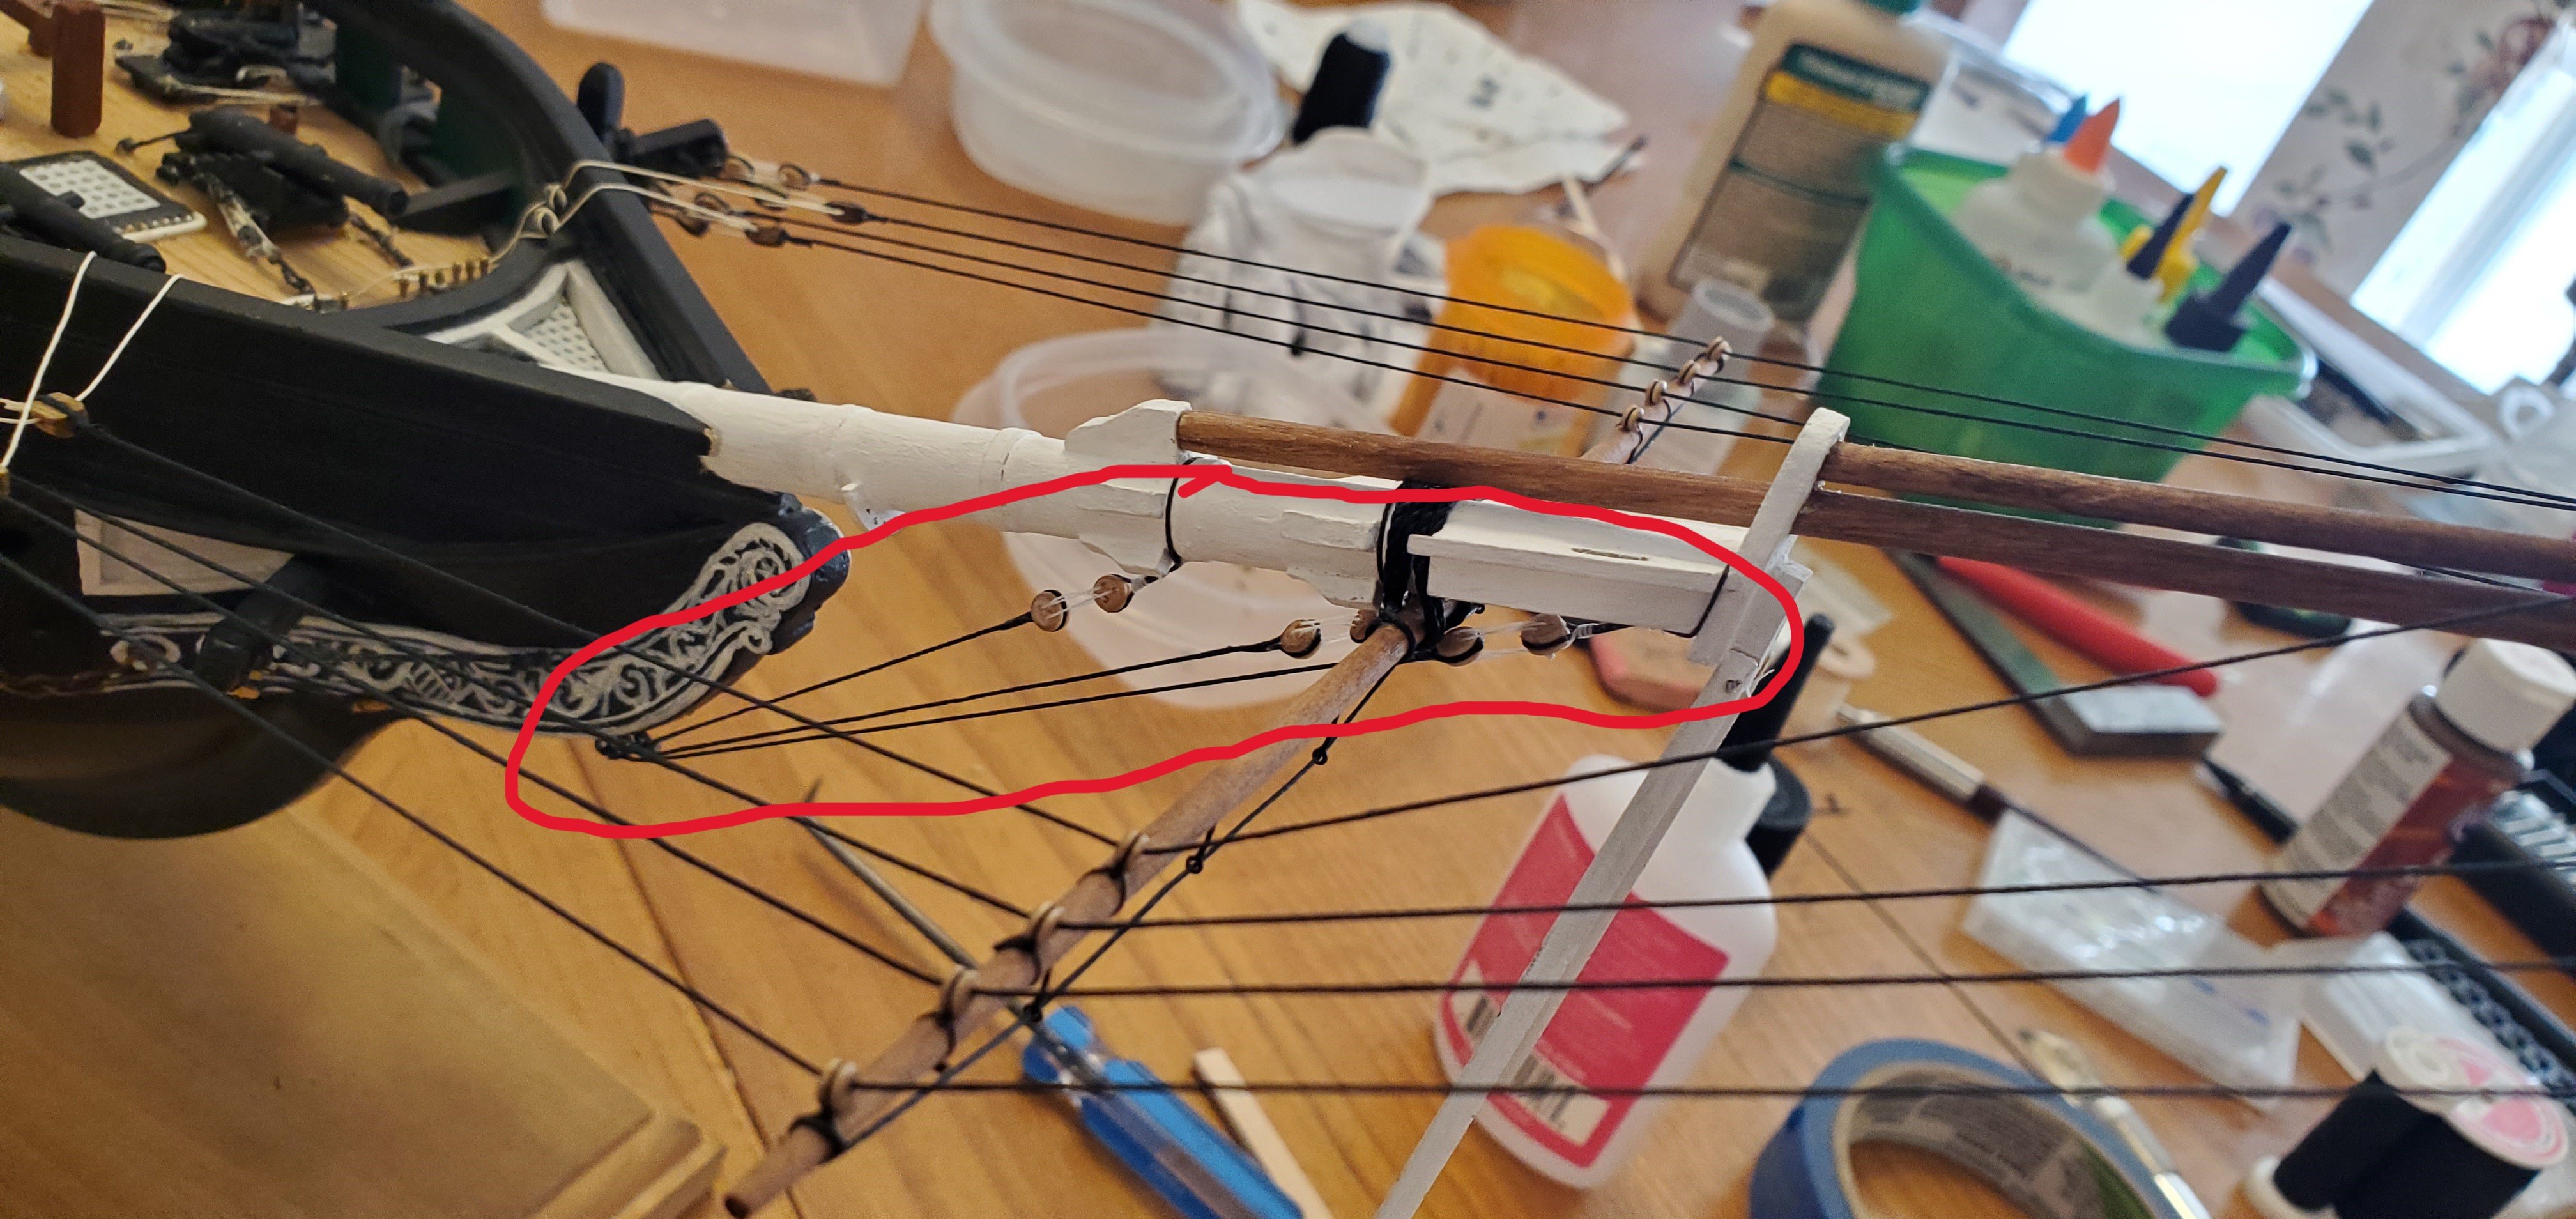
OK, who invited this guy to the build log?? 😠 Just kidding! It's interesting that you pointed out the bobstay lines, Ian. I could not figure out exactly what the instructions were telling me with those. They say, "Bobstays - 3"-8" ". The number is supposed to indicate the actual rope diameter and they provide a table to convert it to thread diameter at scale. I thought they were giving me a choice of using 3" rope or 8" rope. My box of kit goodies has a lot more 3" rope than it does 8" so I chose the 3". And, yes, the 3" is the same as the martingale rope. Looking again at other build logs now, I can see clearly that you are right. All the bobstay ropes I see are thicker than the martingale rope. I still don't know why the instructions are written the way they are, but the question is what to do about it. Of course, the easiest fix is just deleting your comment and blocking you from the log 😃. But I don't know how to do that. So on to plan B where I think I found a good solution. In reviewing @usedtosail's excellent build log for his Constitution, he doubled the lines for the bobstays. I'm pretty sure I can do that and leave my current bobstays in place without too much difficulty. All joking aside, I really do appreciate your eagle eye on catching something like that. I hope that you and others will not hesitate to give advice and point out things I've missed. That's one of the great benefits of doing a build log here on MSW!
- 301 replies
-
- 8
-
-

-
- Constitution
- Bluejacket Shipcrafters
- (and 1 more)
-
Thanks for joining the party, Ian! I am not familiar with Bill97's Victory. I will have to look that one up!
- 301 replies
-
- 3
-
-
- Constitution
- Bluejacket Shipcrafters
- (and 1 more)
-
Glad to have you along for the ride, Ian! Yes, those pieces of RR tracks come in handy more times than you would believe! You'll see another piece on the latest post of my Connie log!
- 185 replies
-
- 6
-
-
- Flying Dutchman
- Black pearl
- (and 2 more)
-
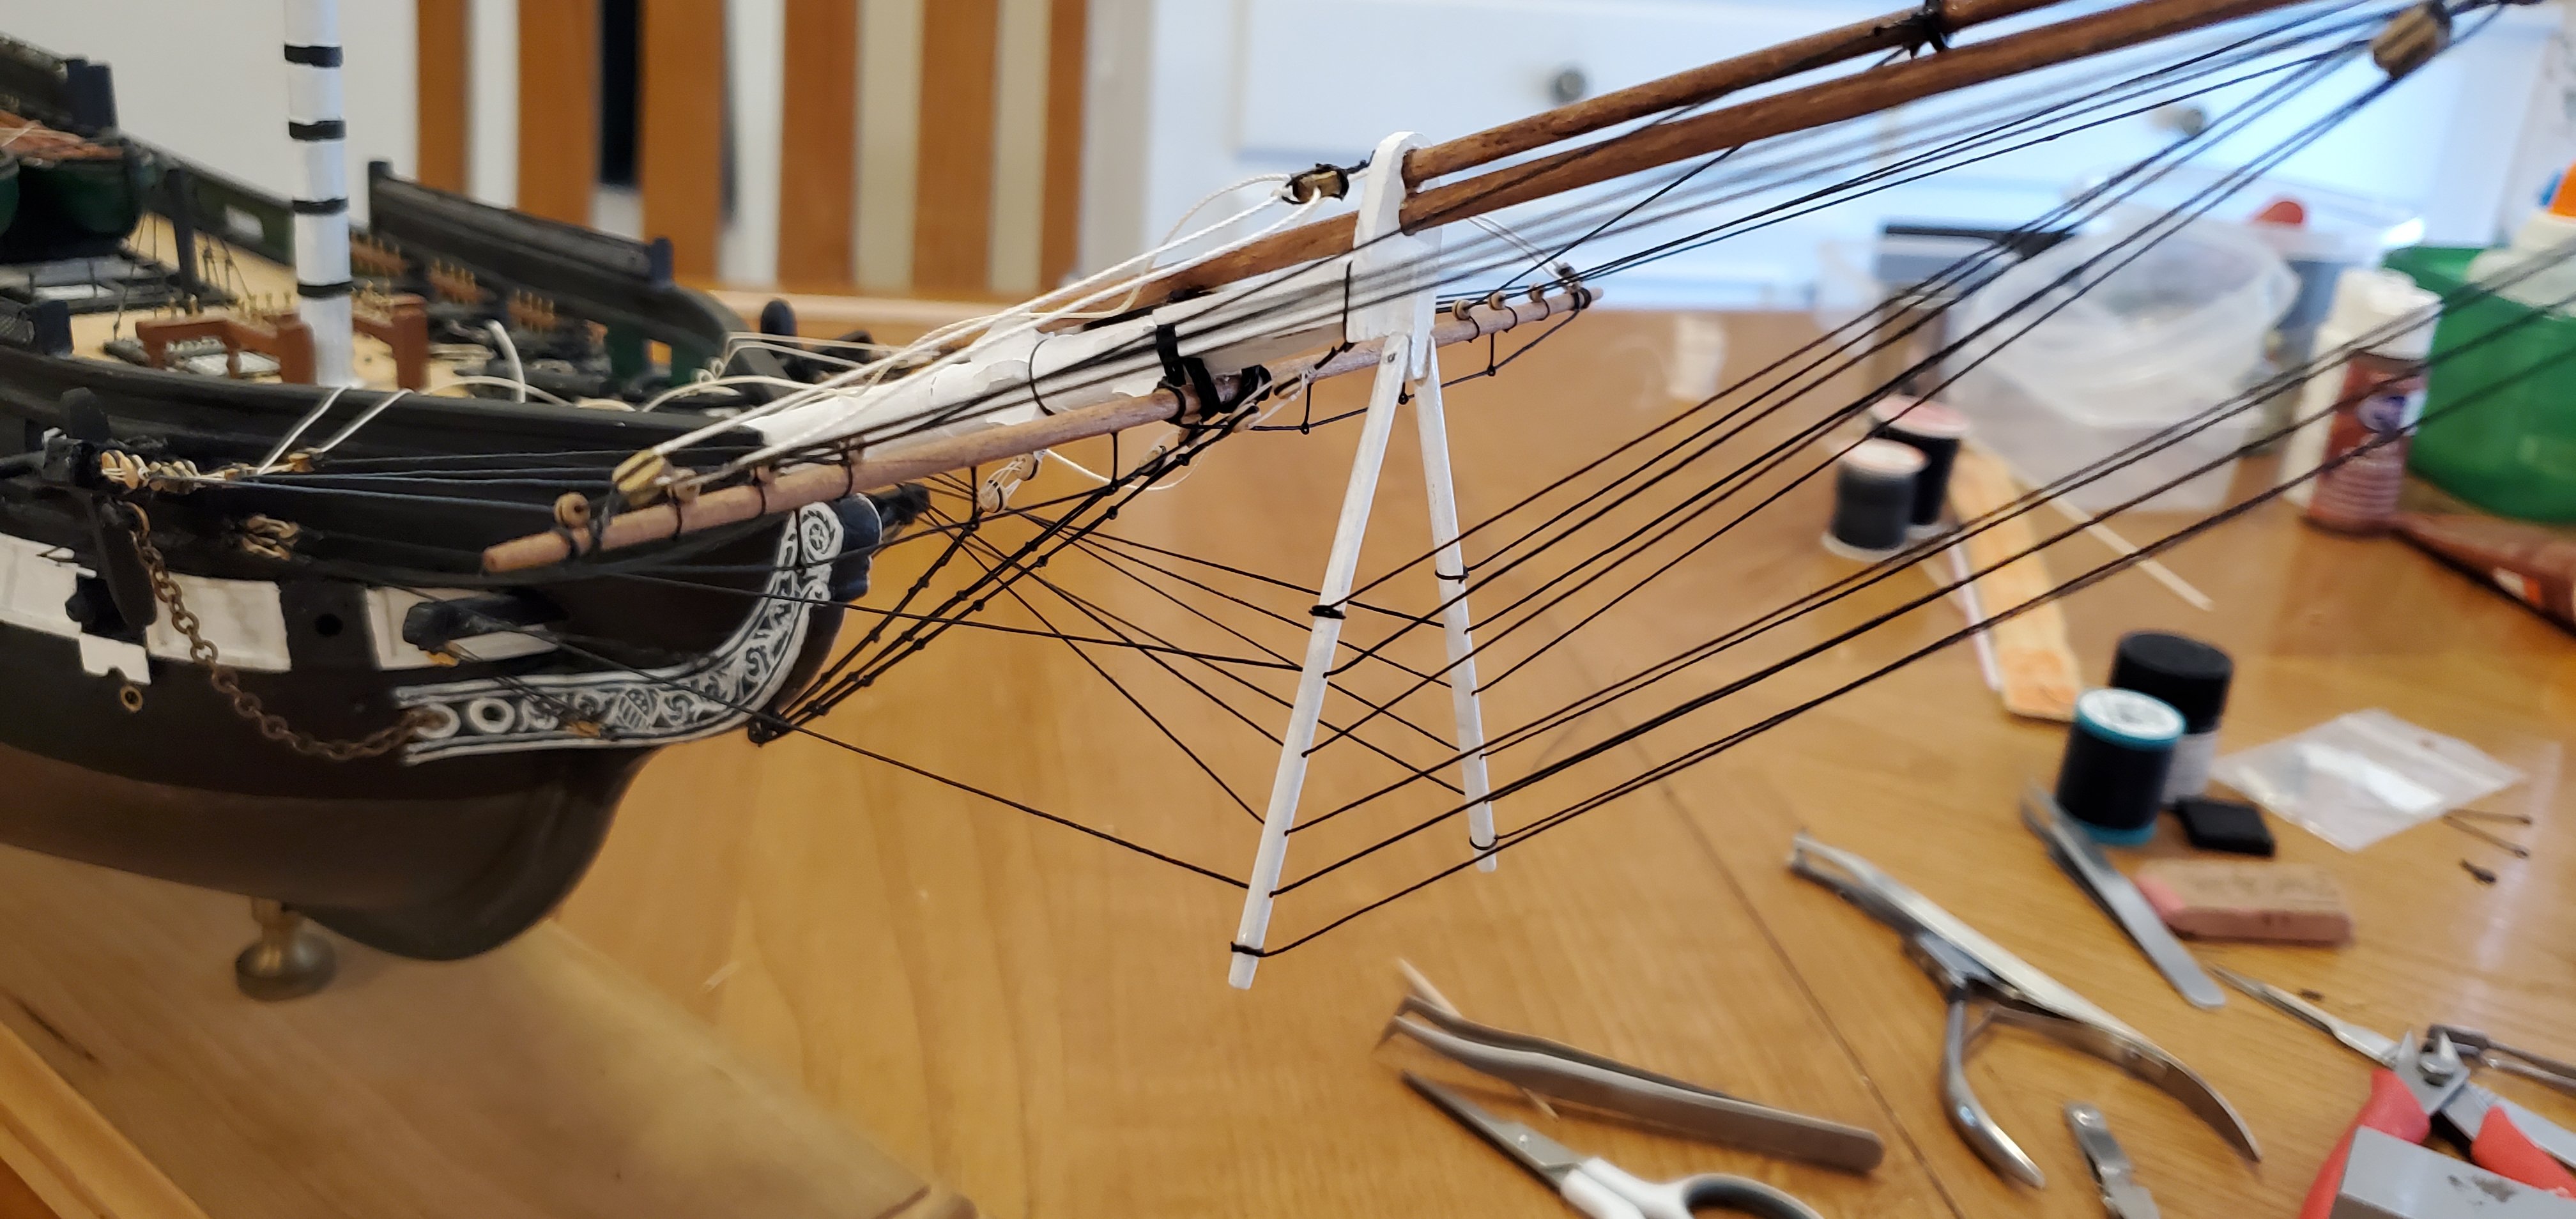
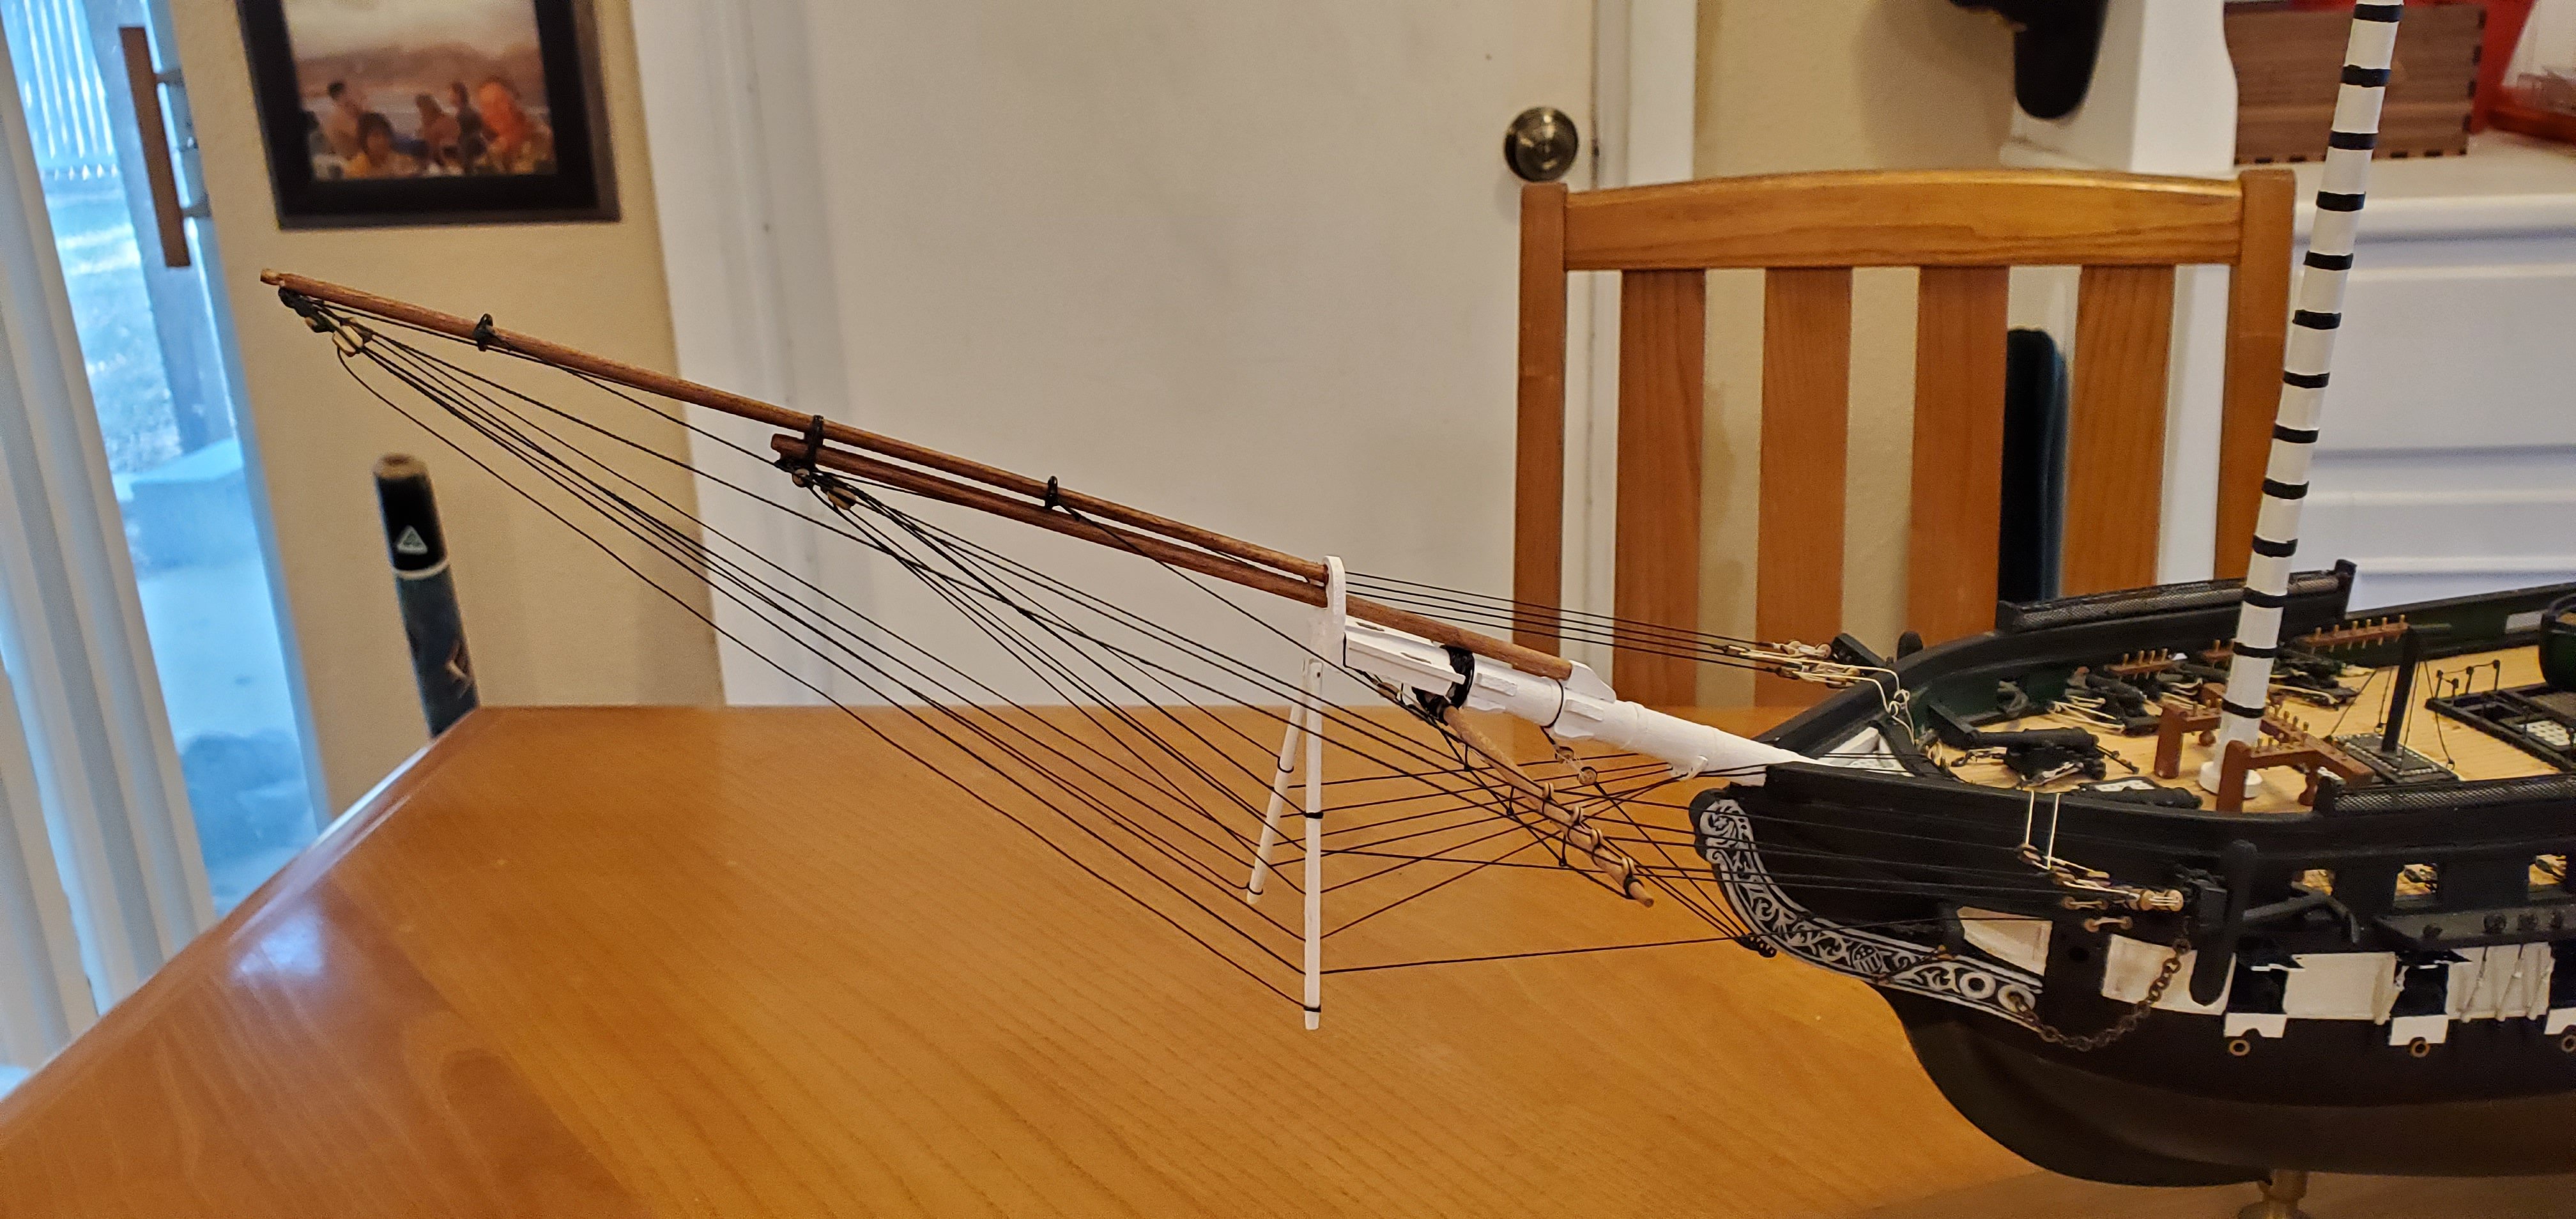
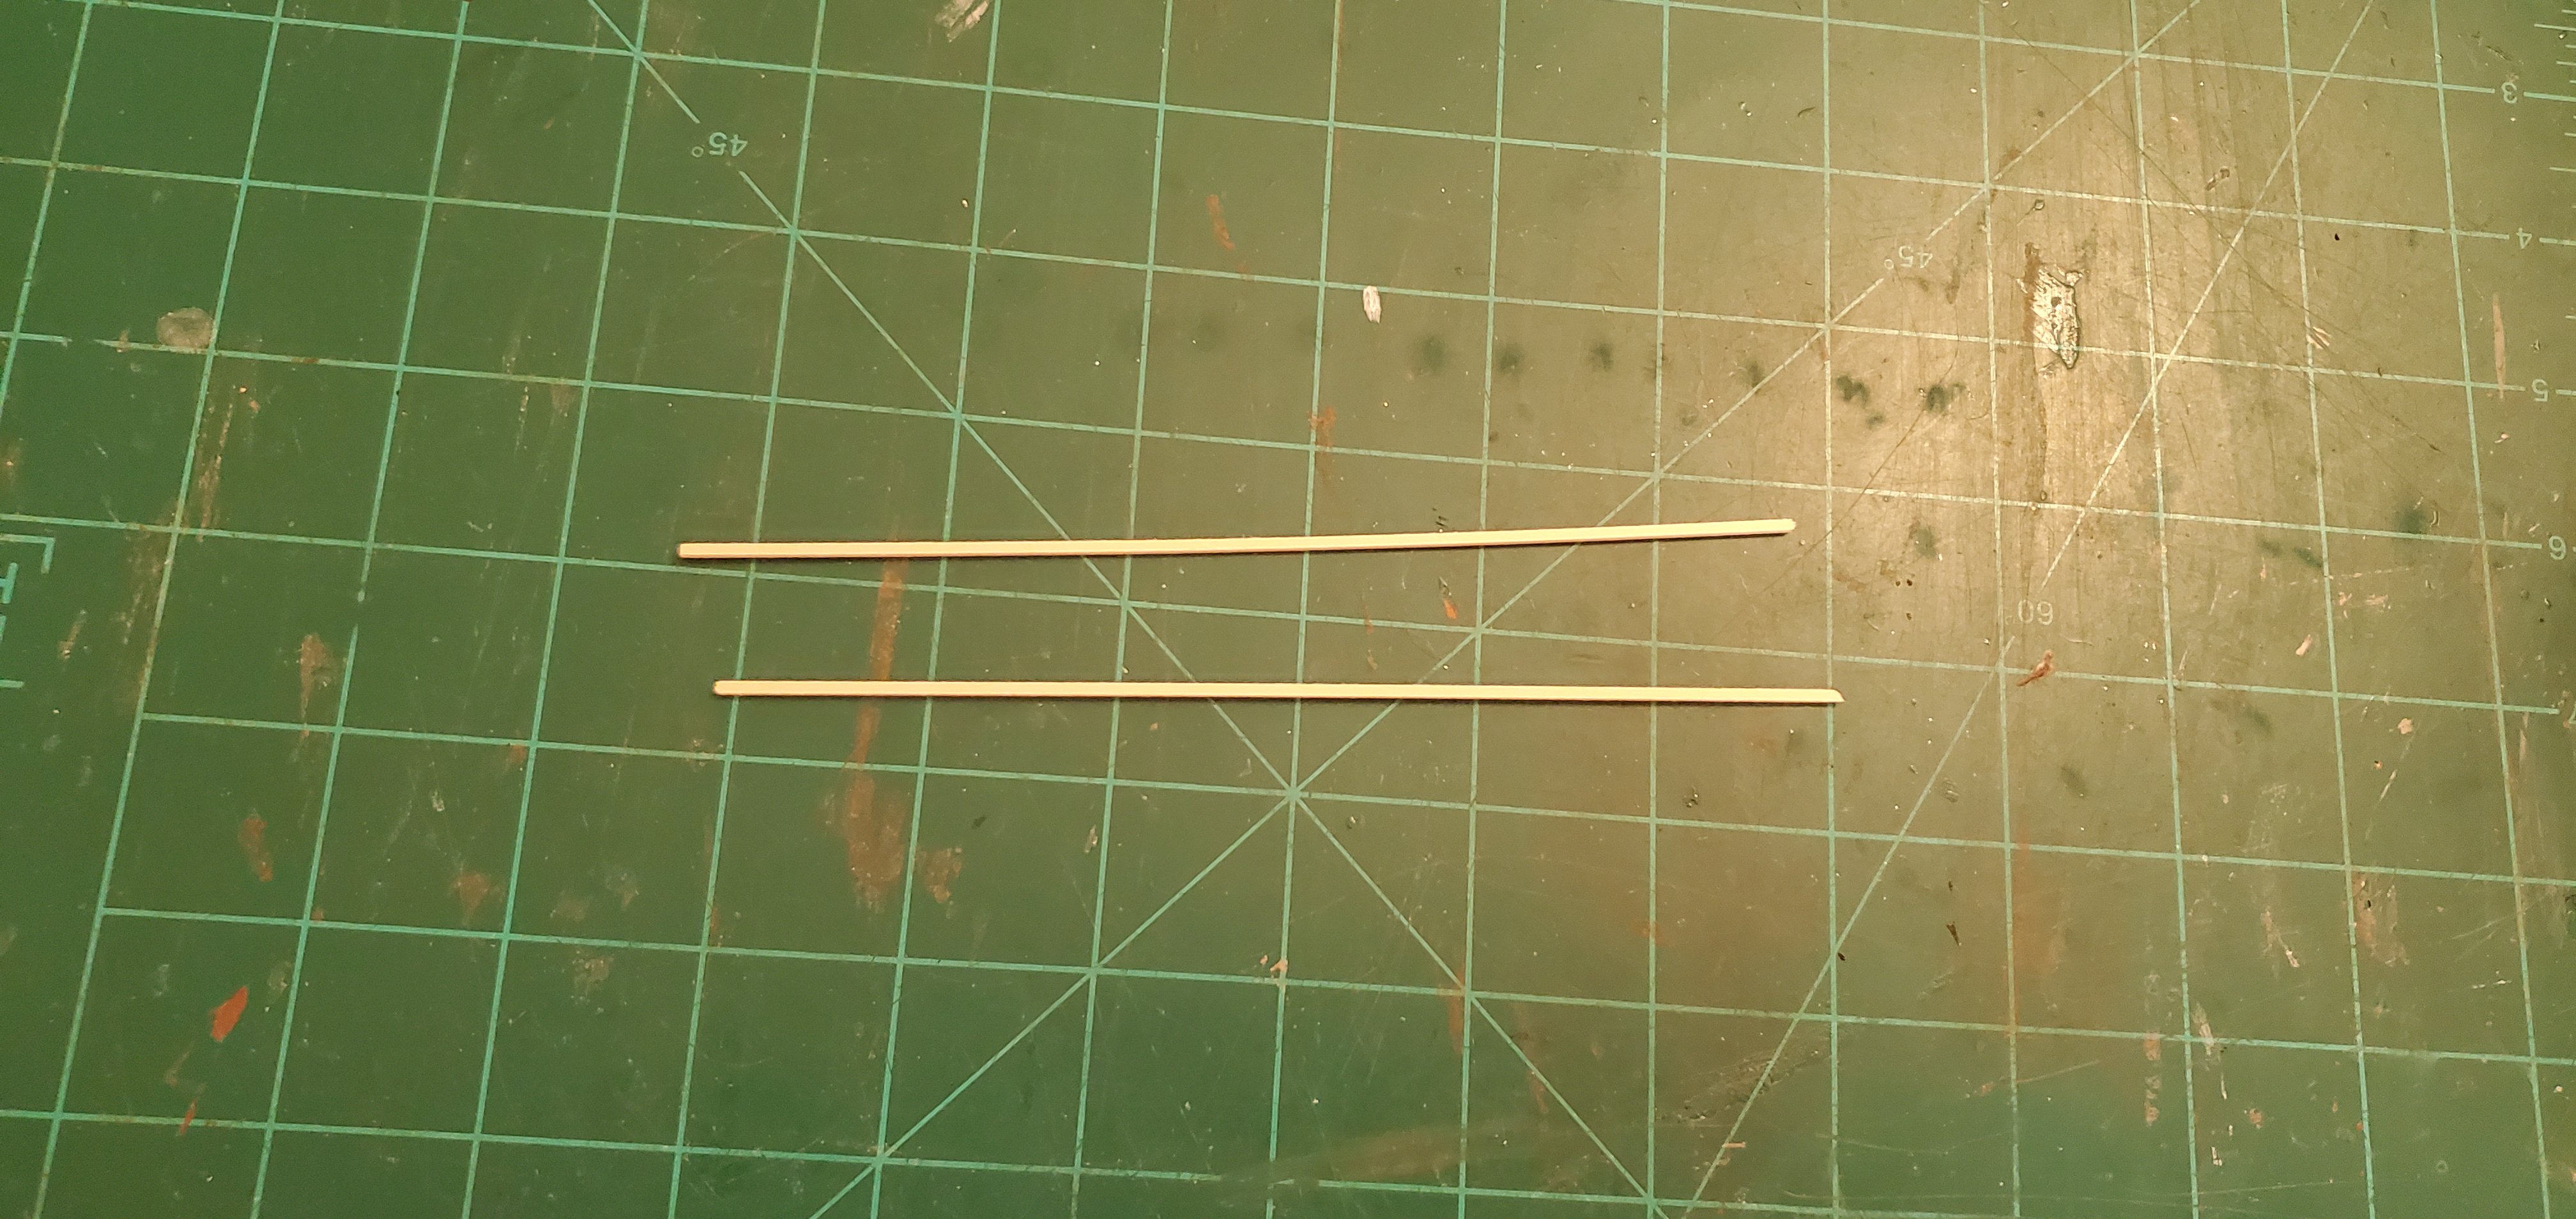
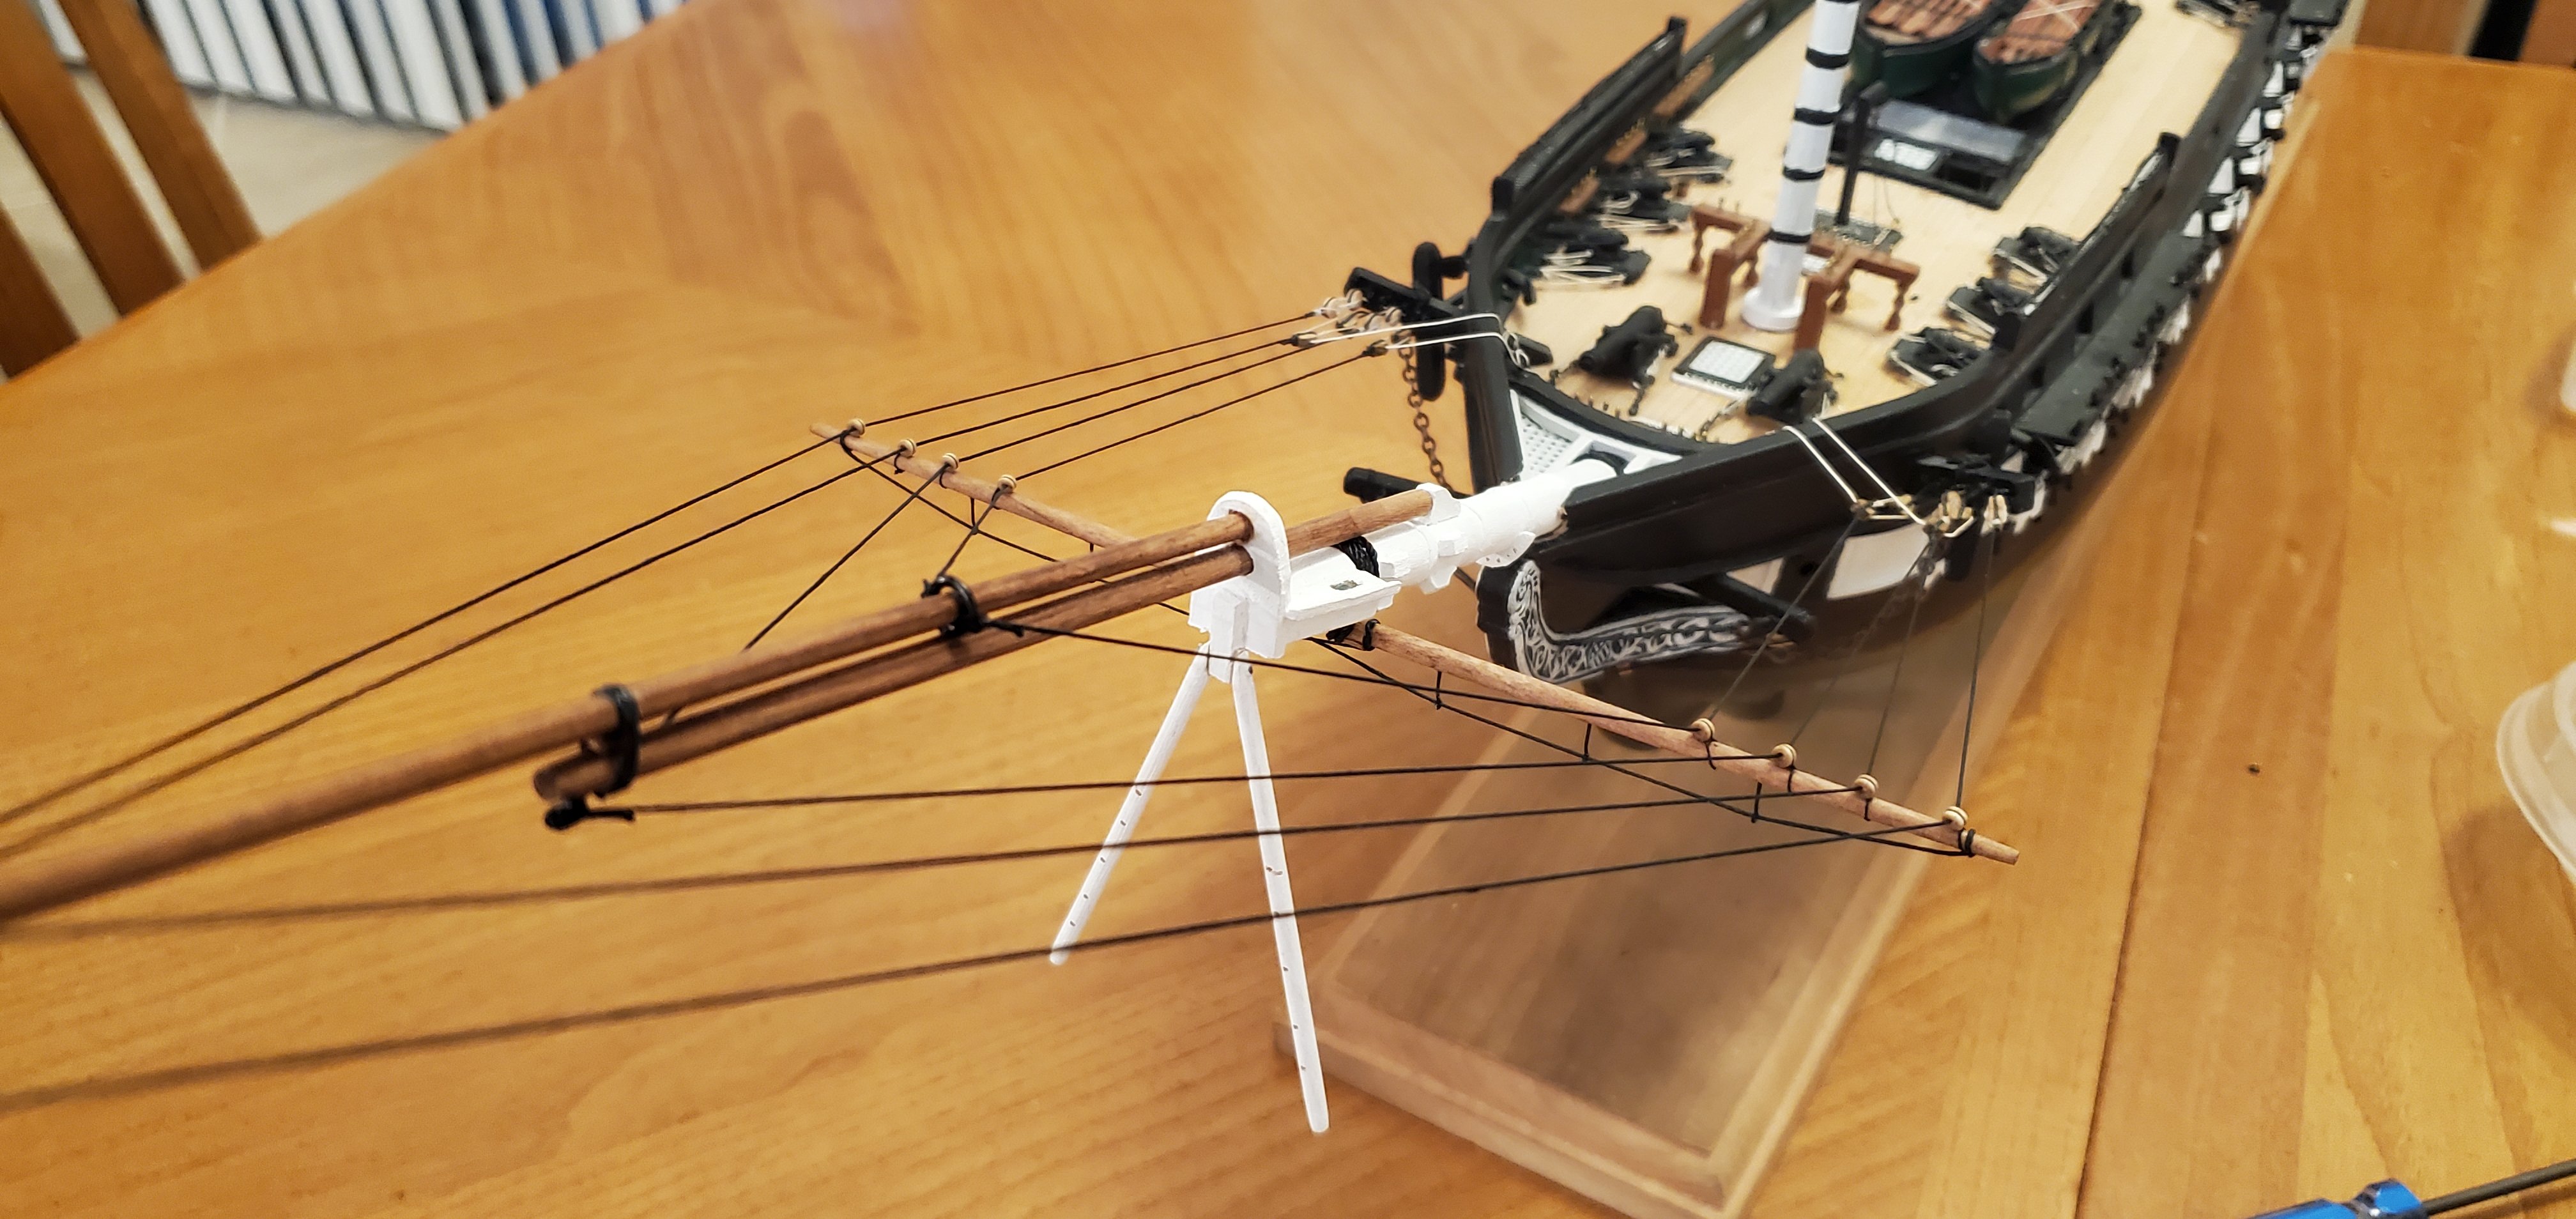
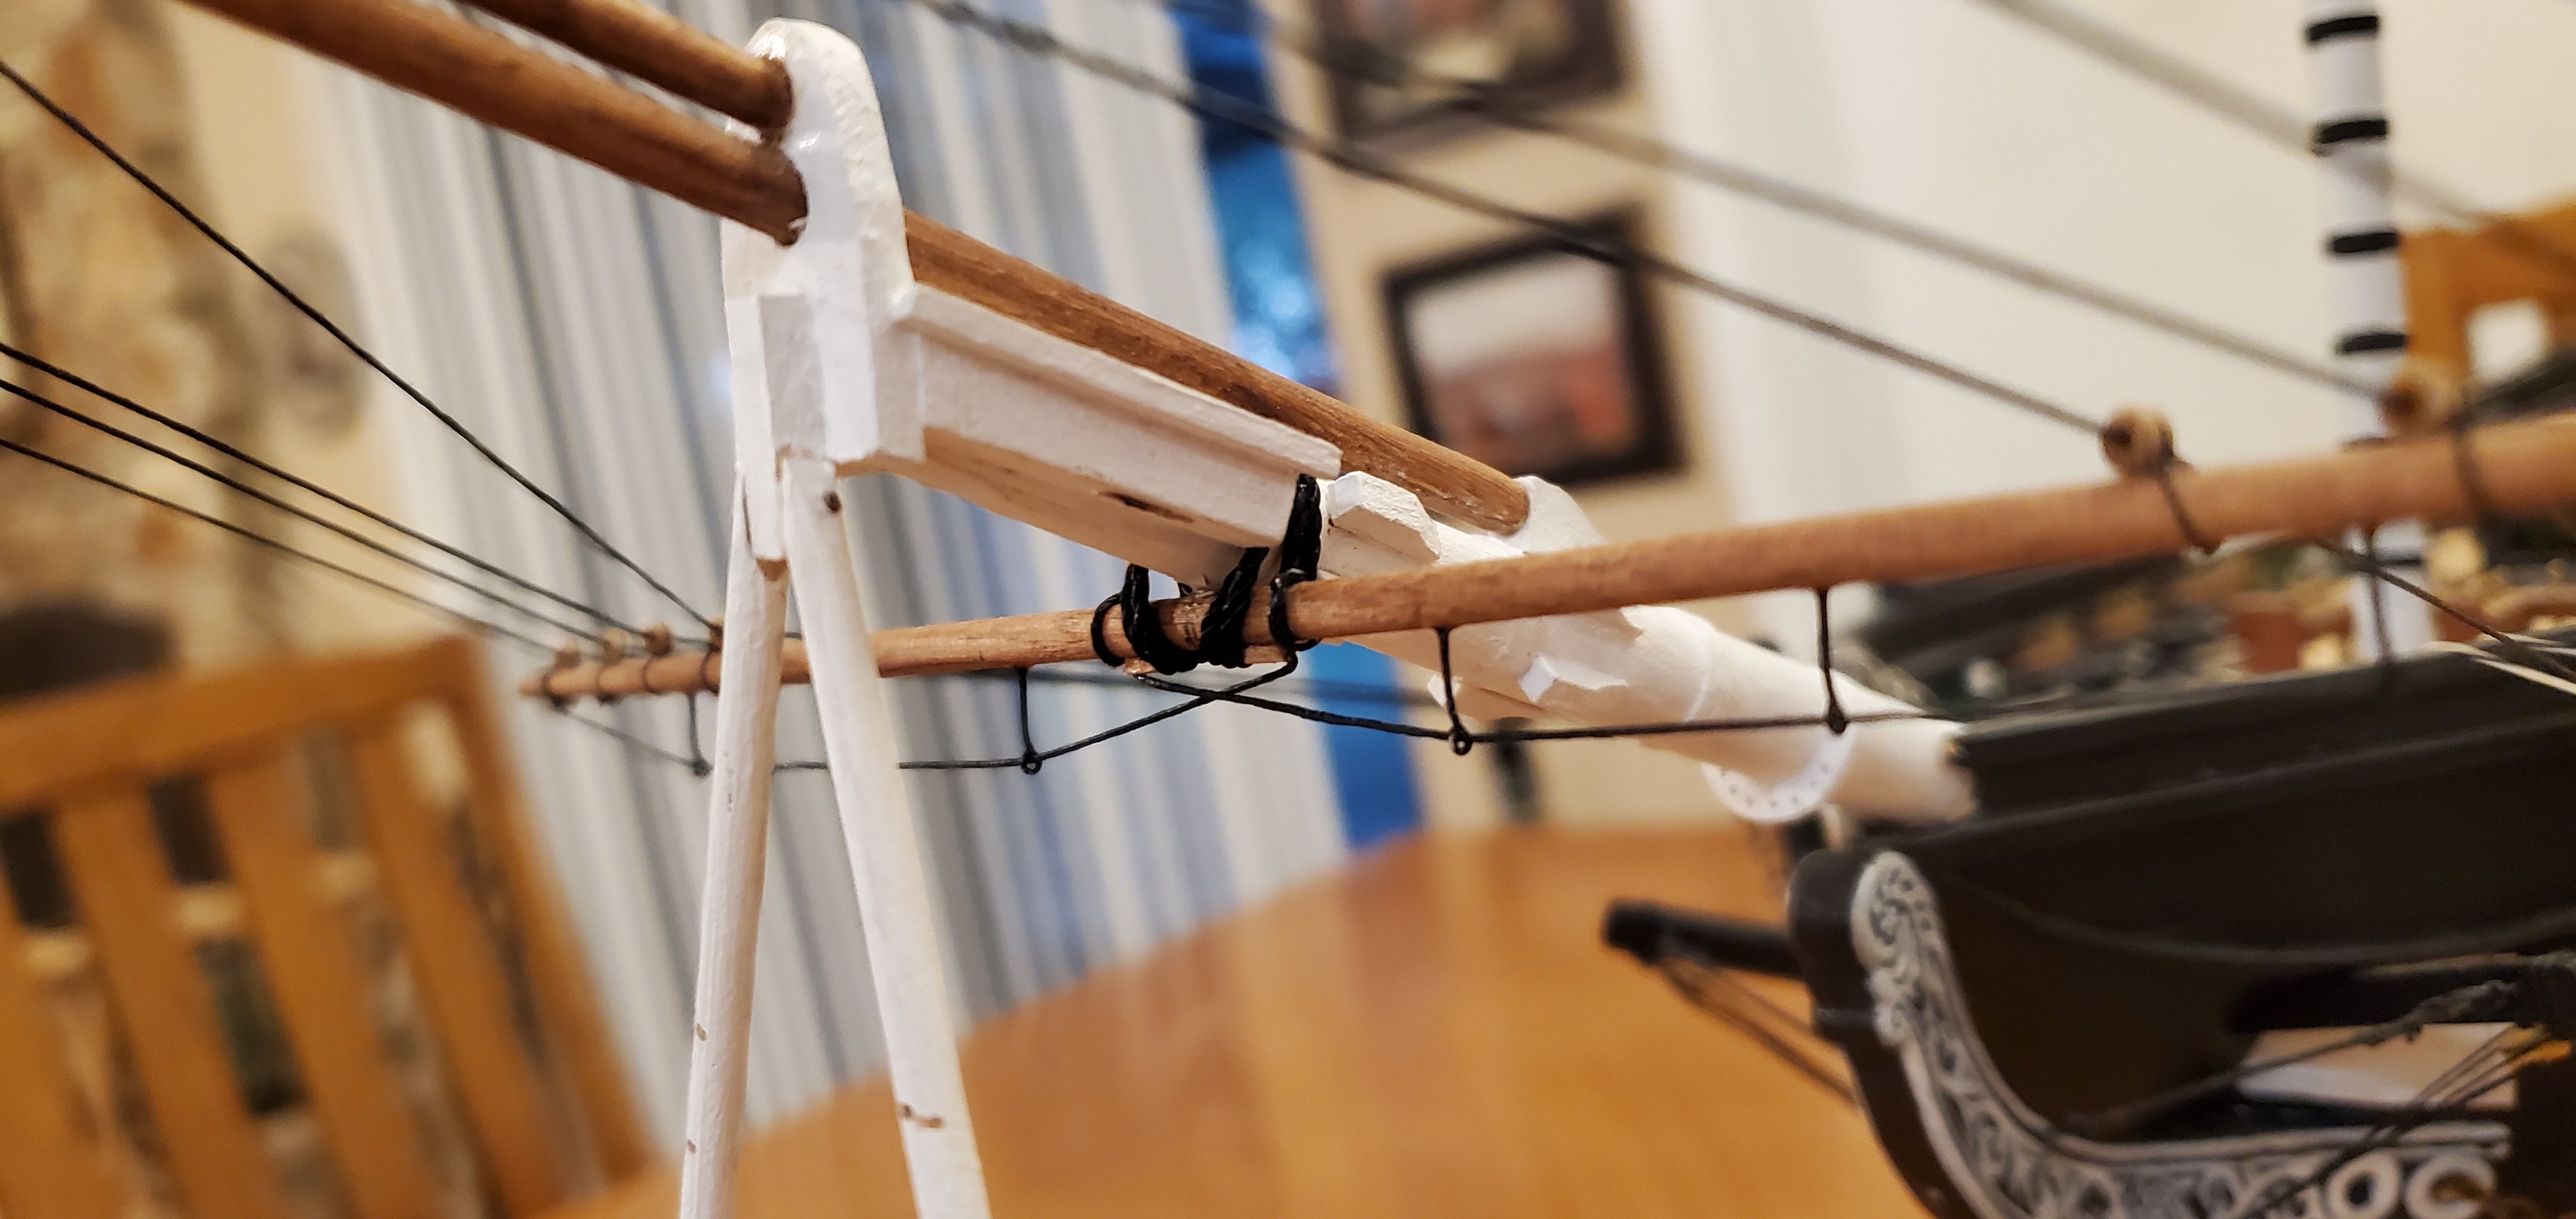
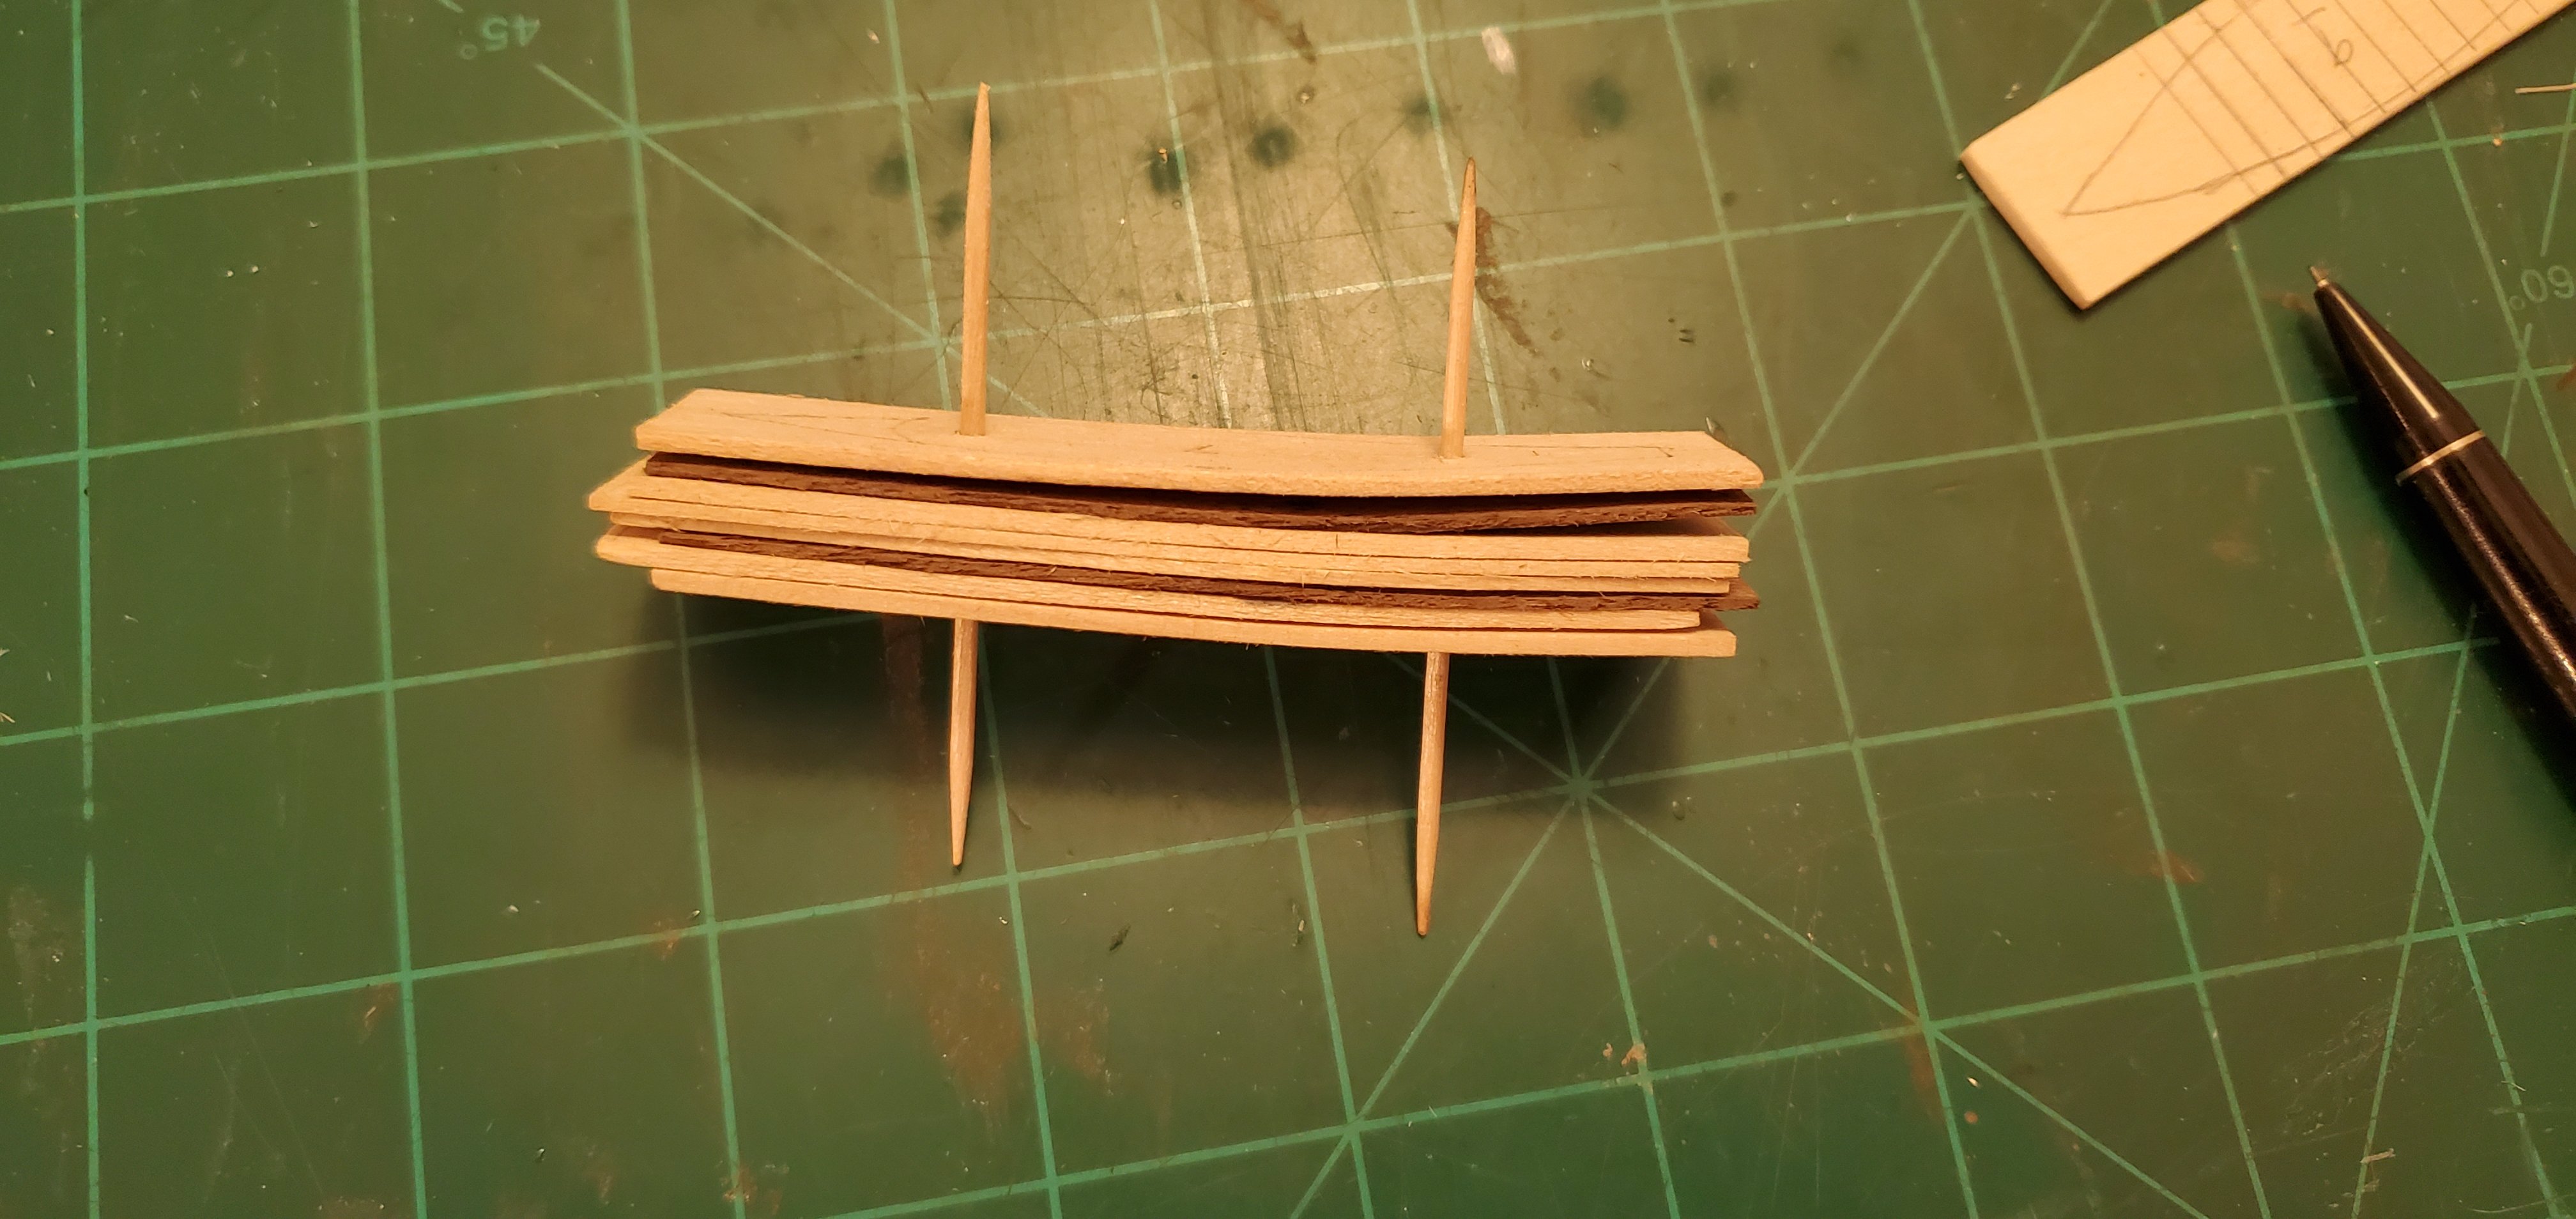
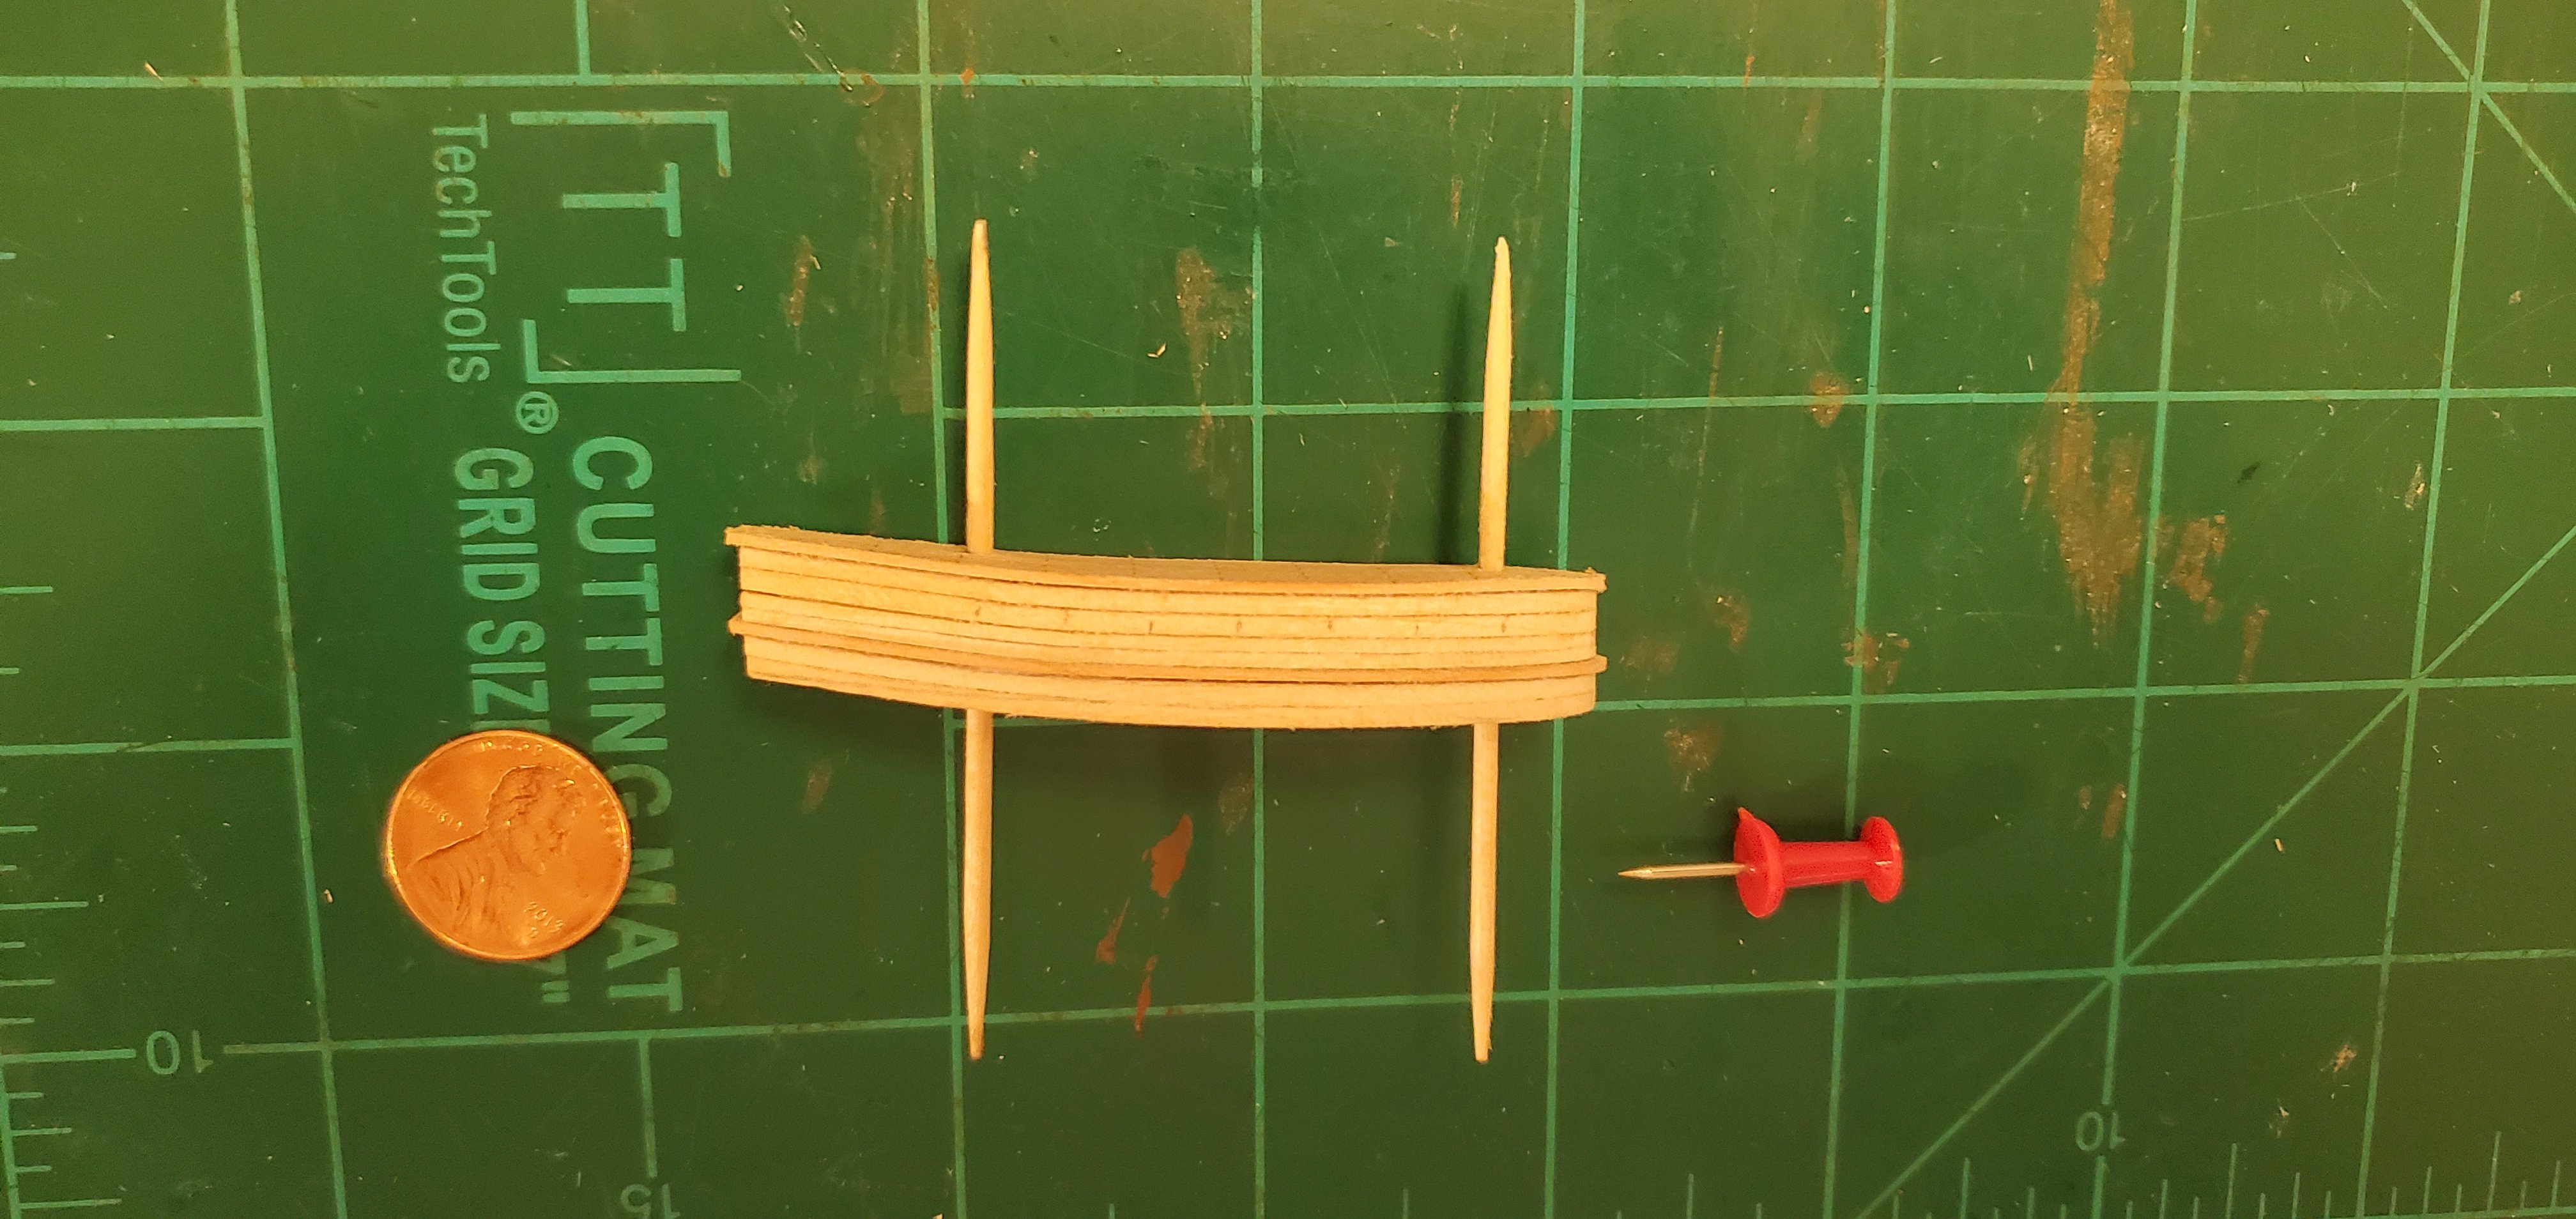
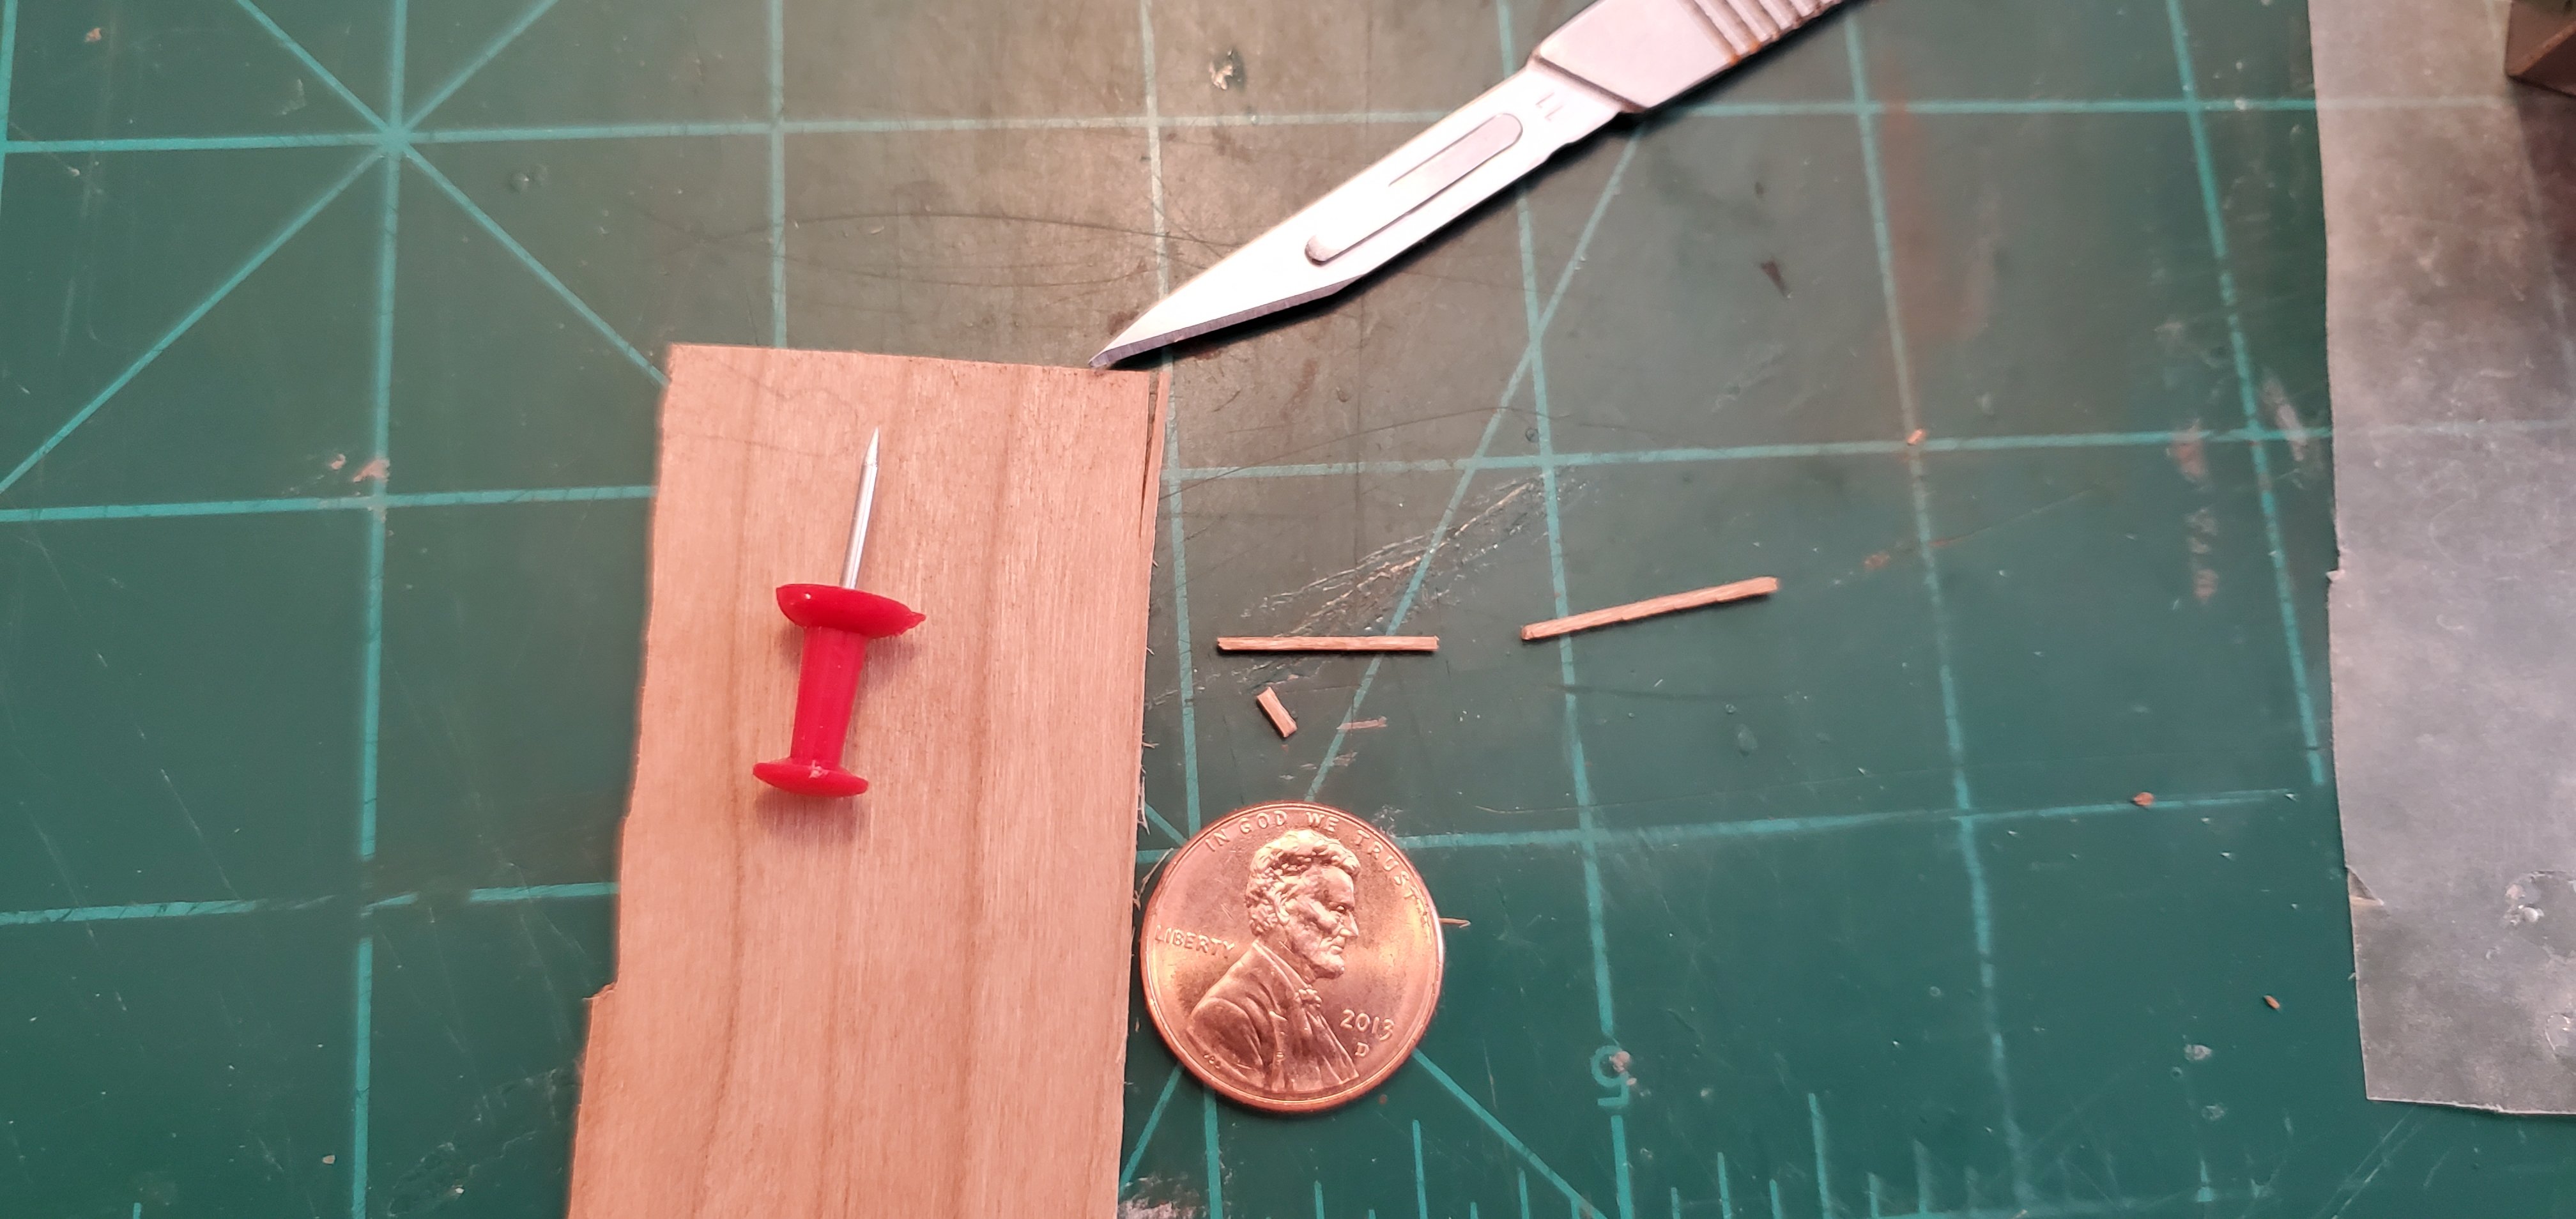
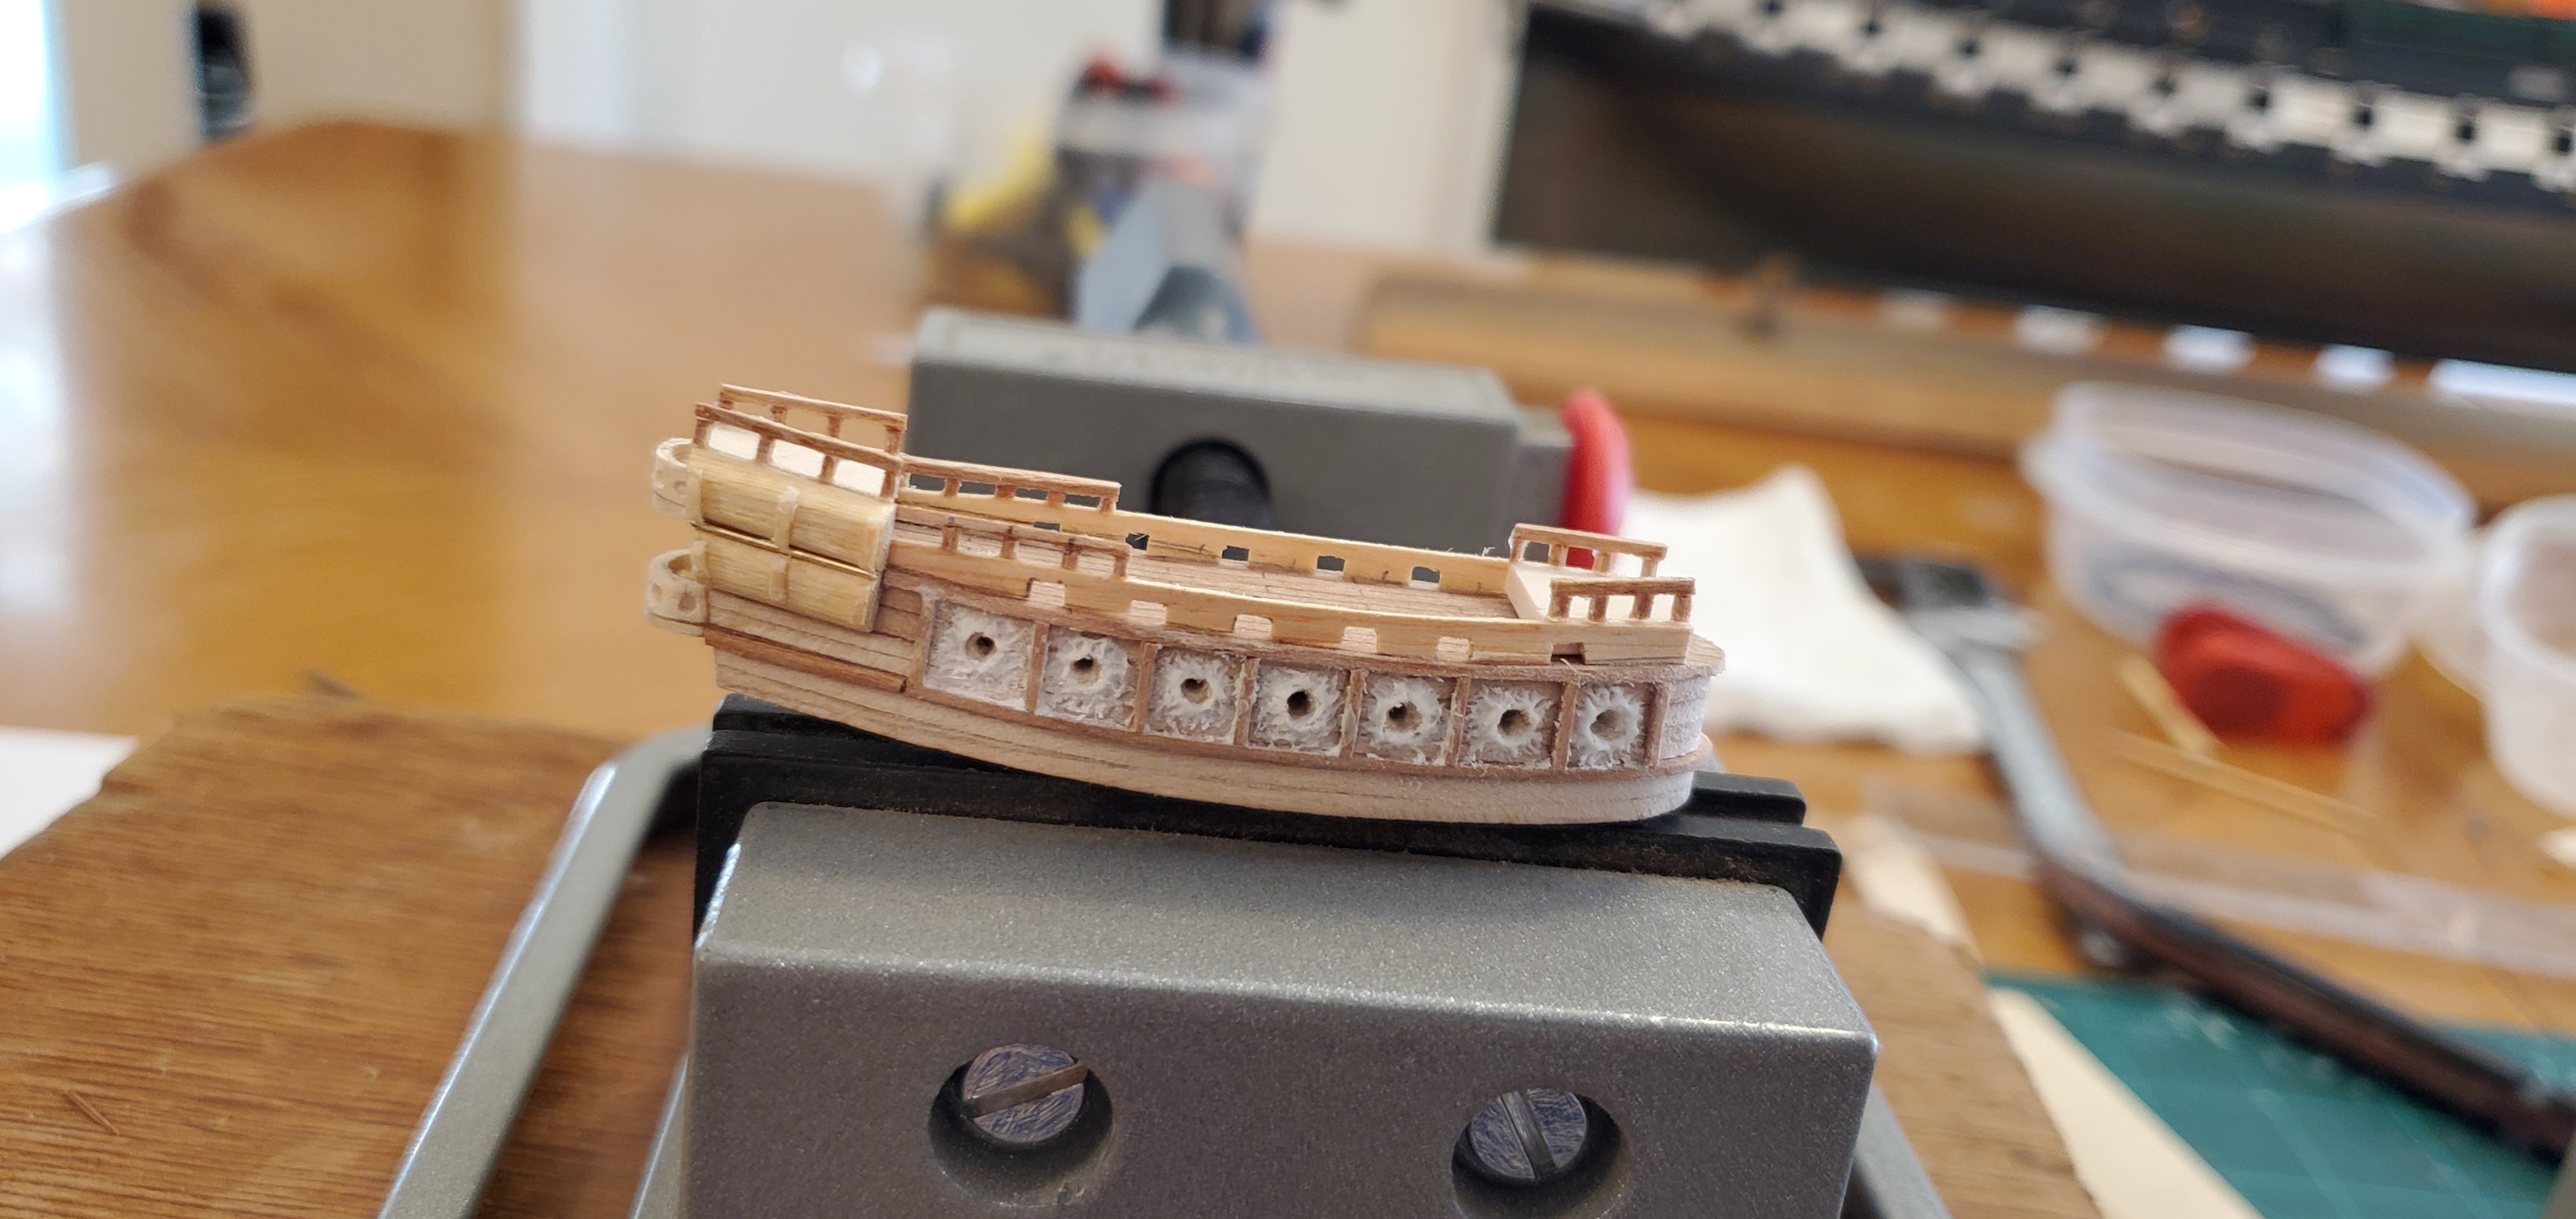
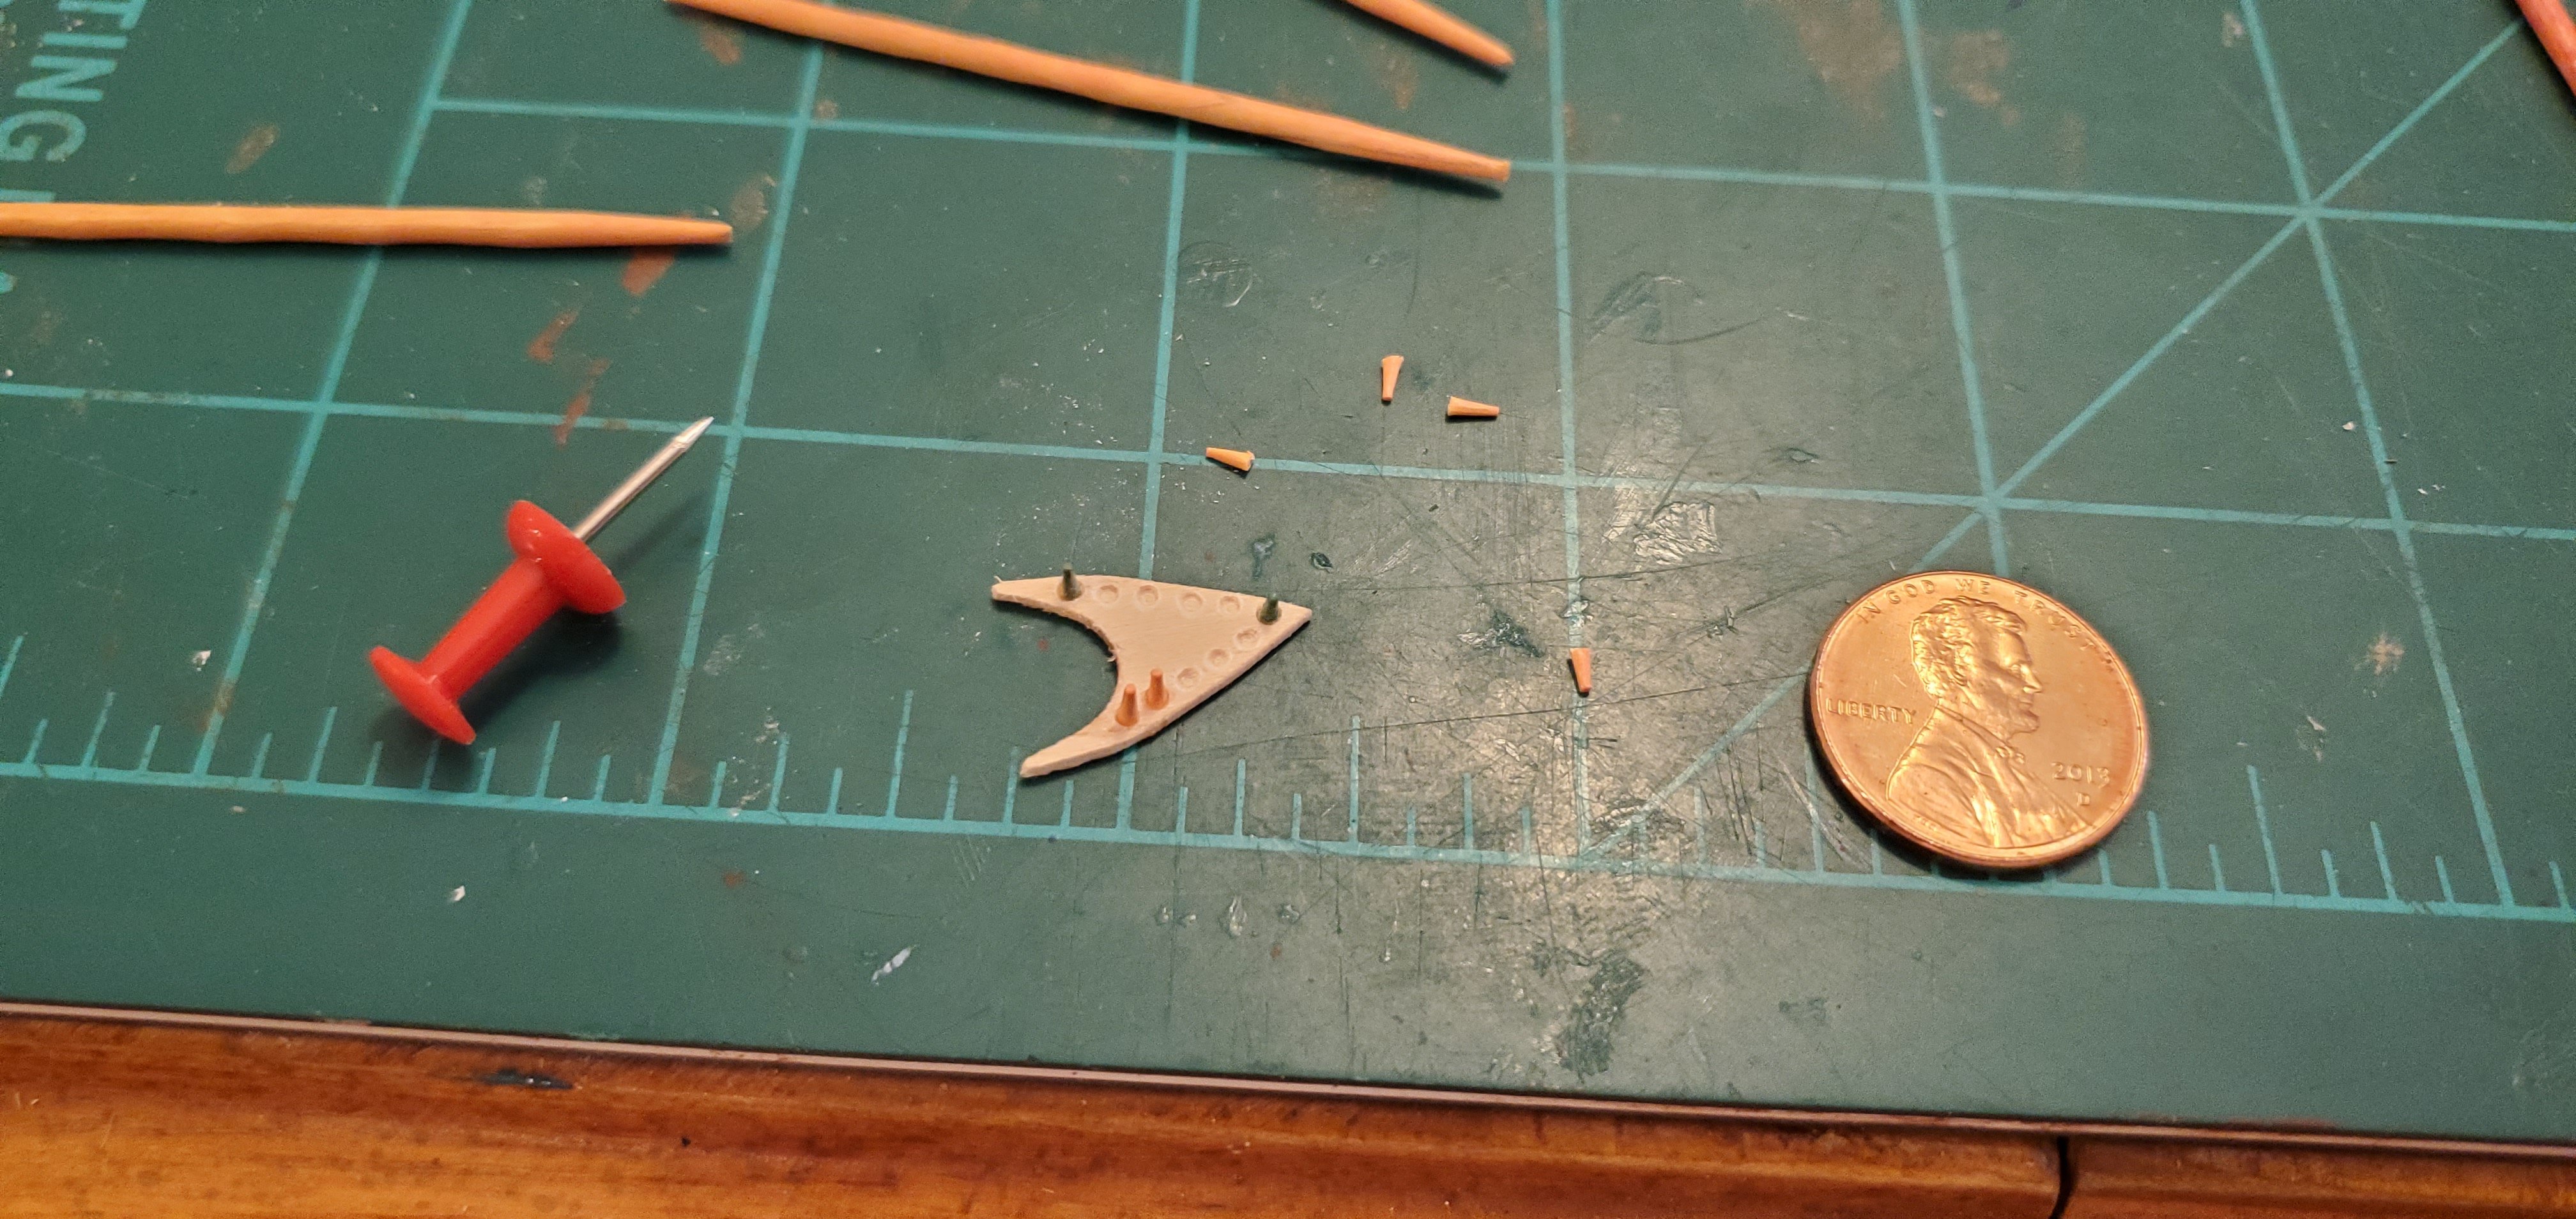
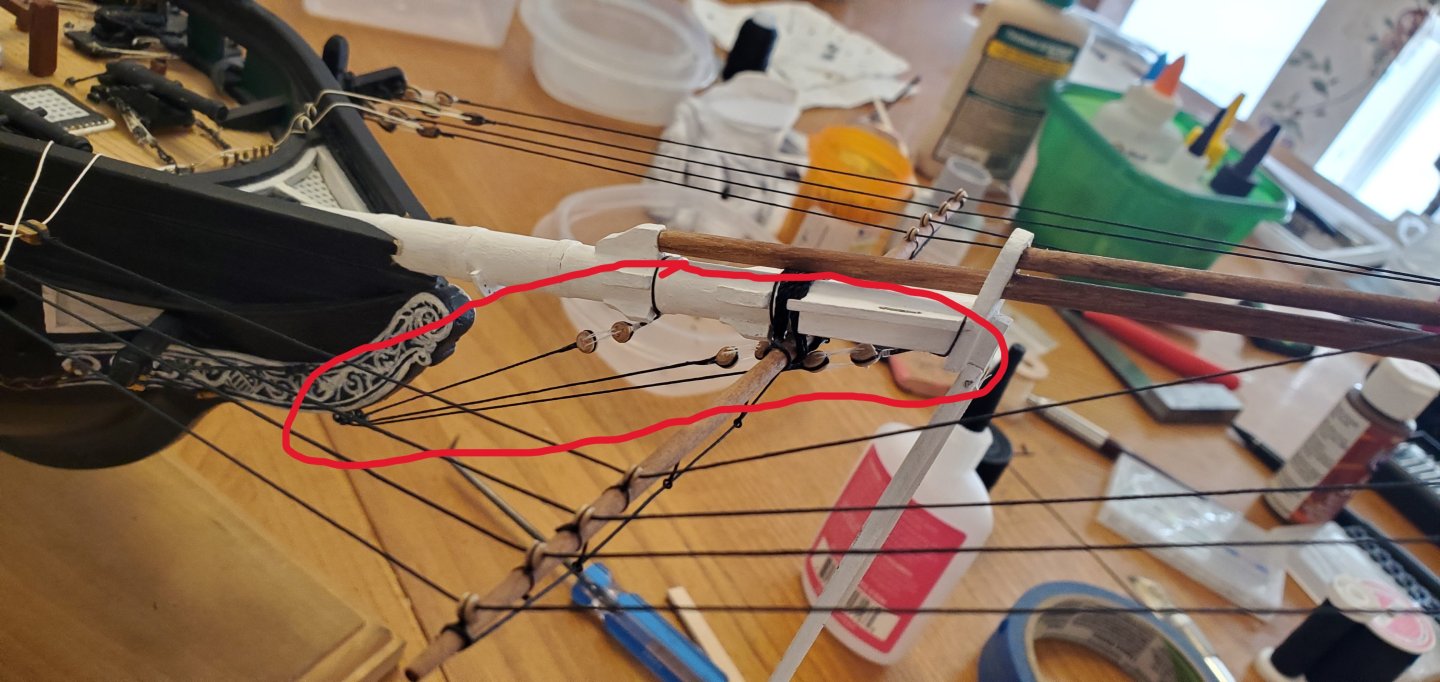
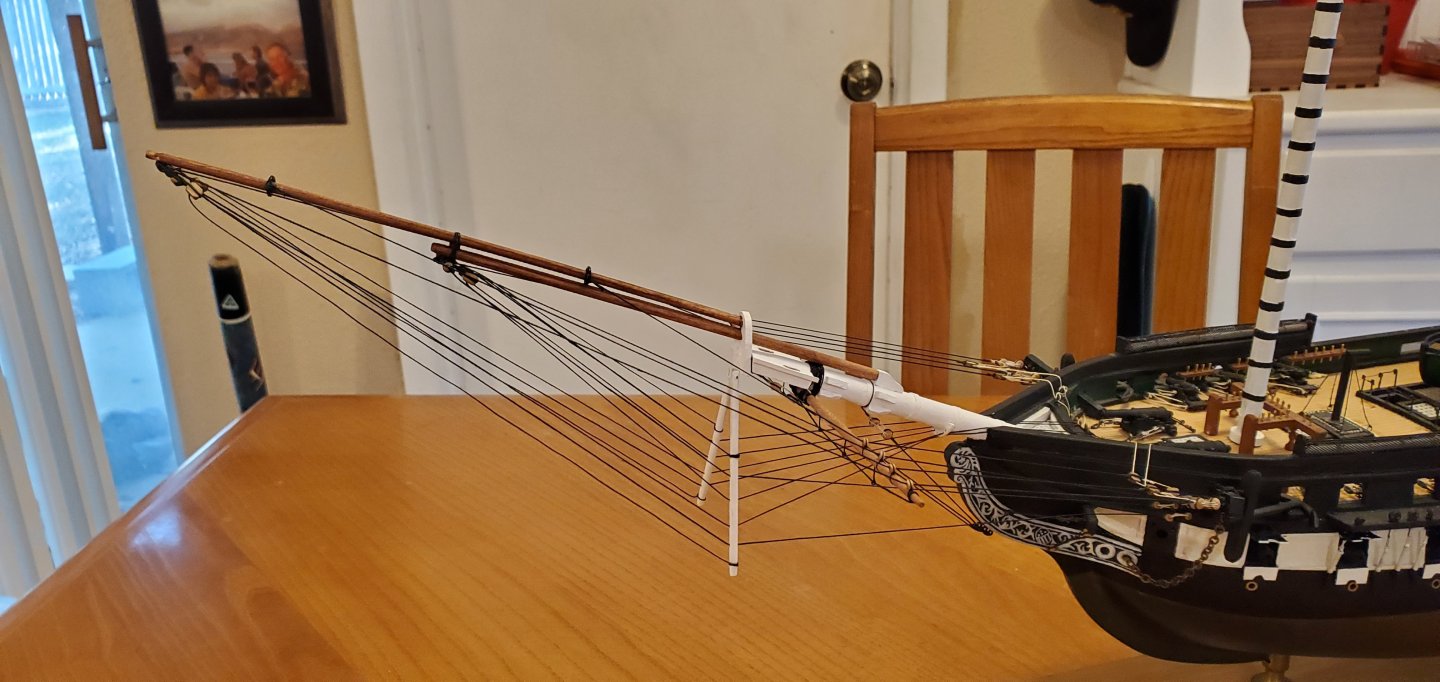
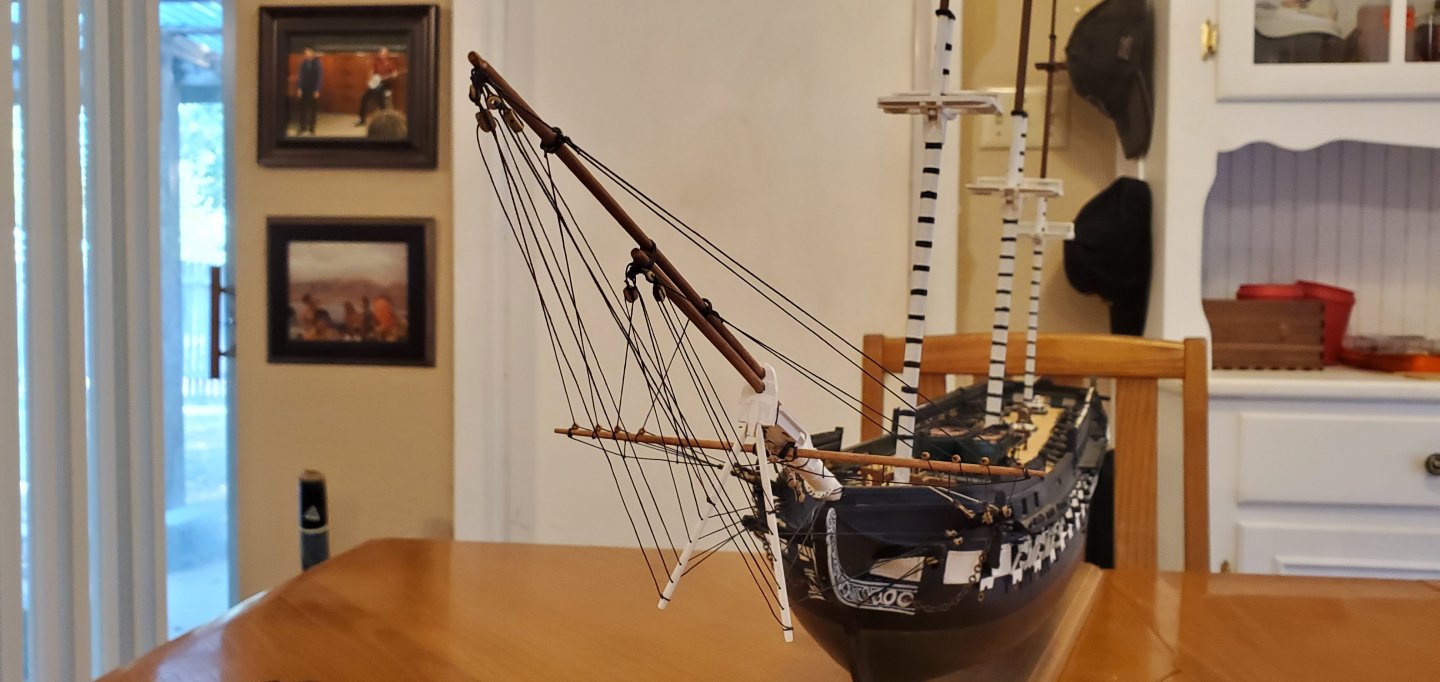
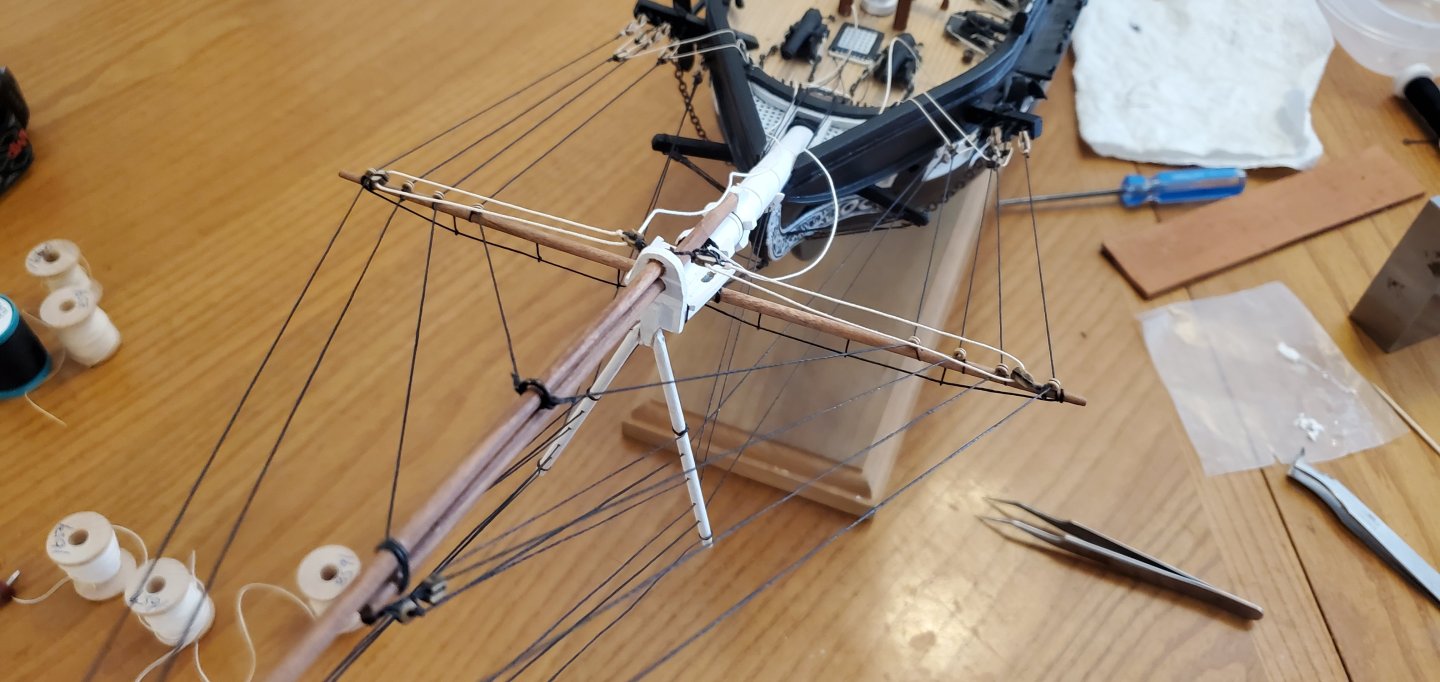
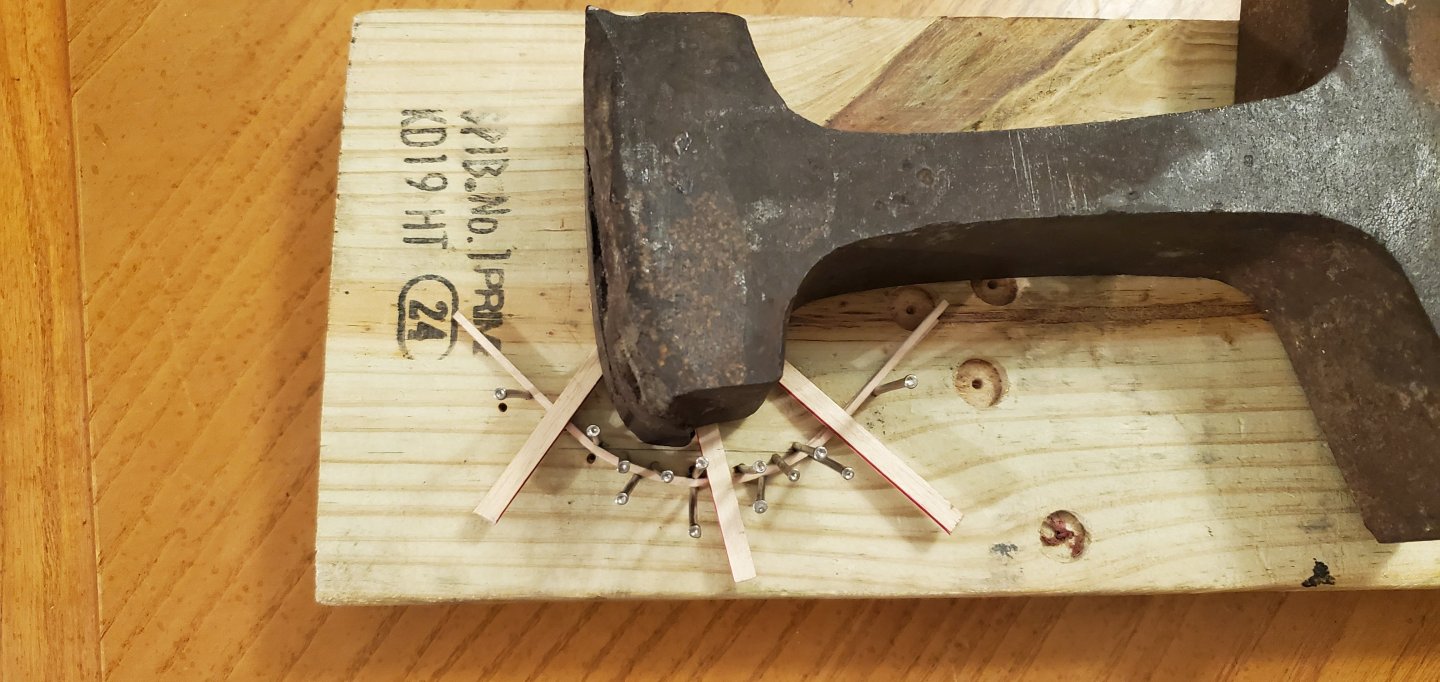
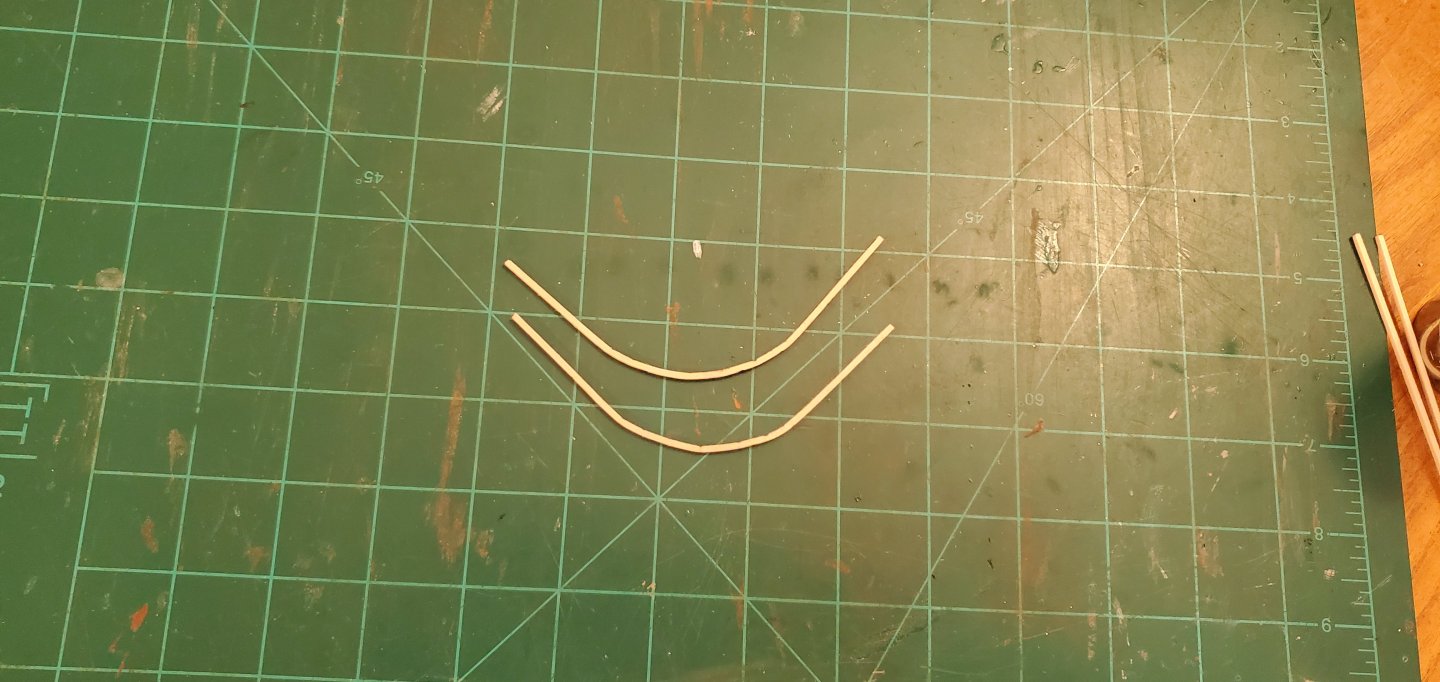
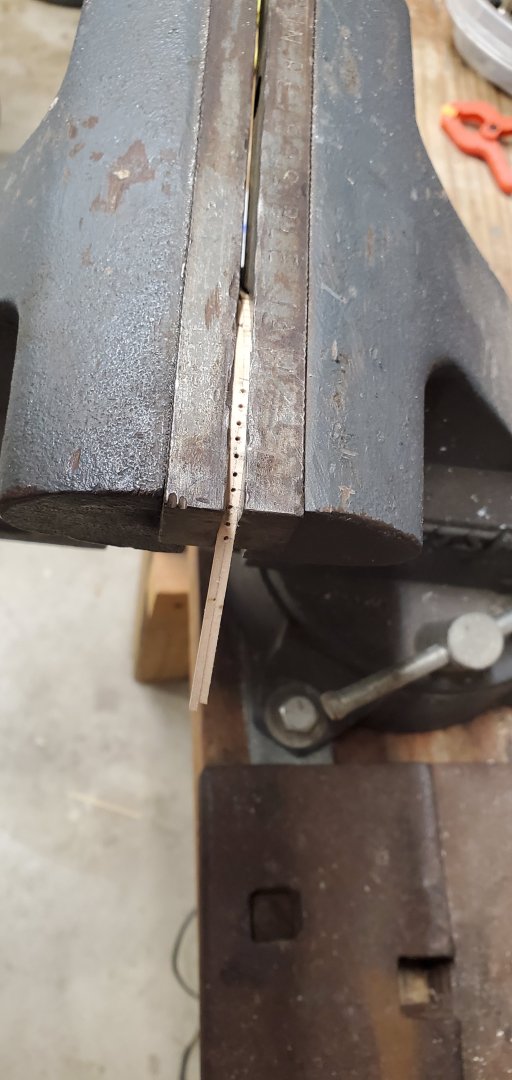
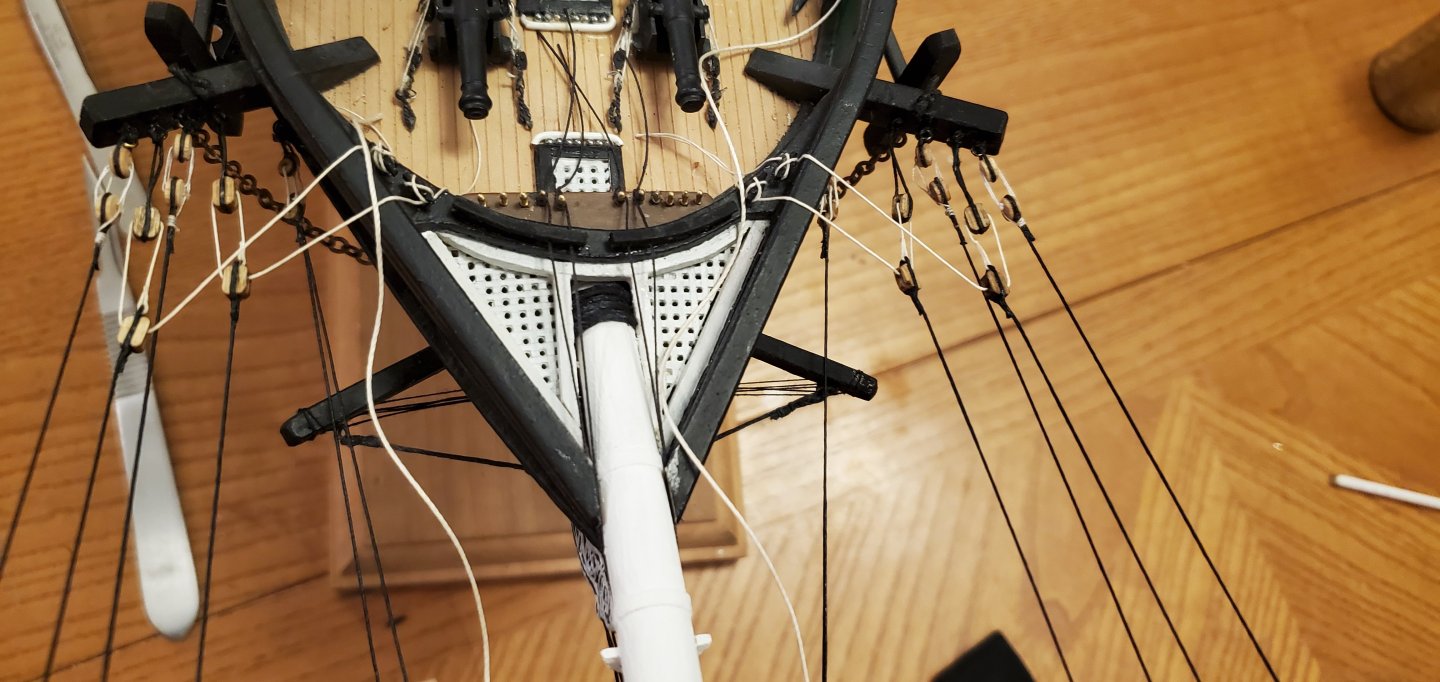
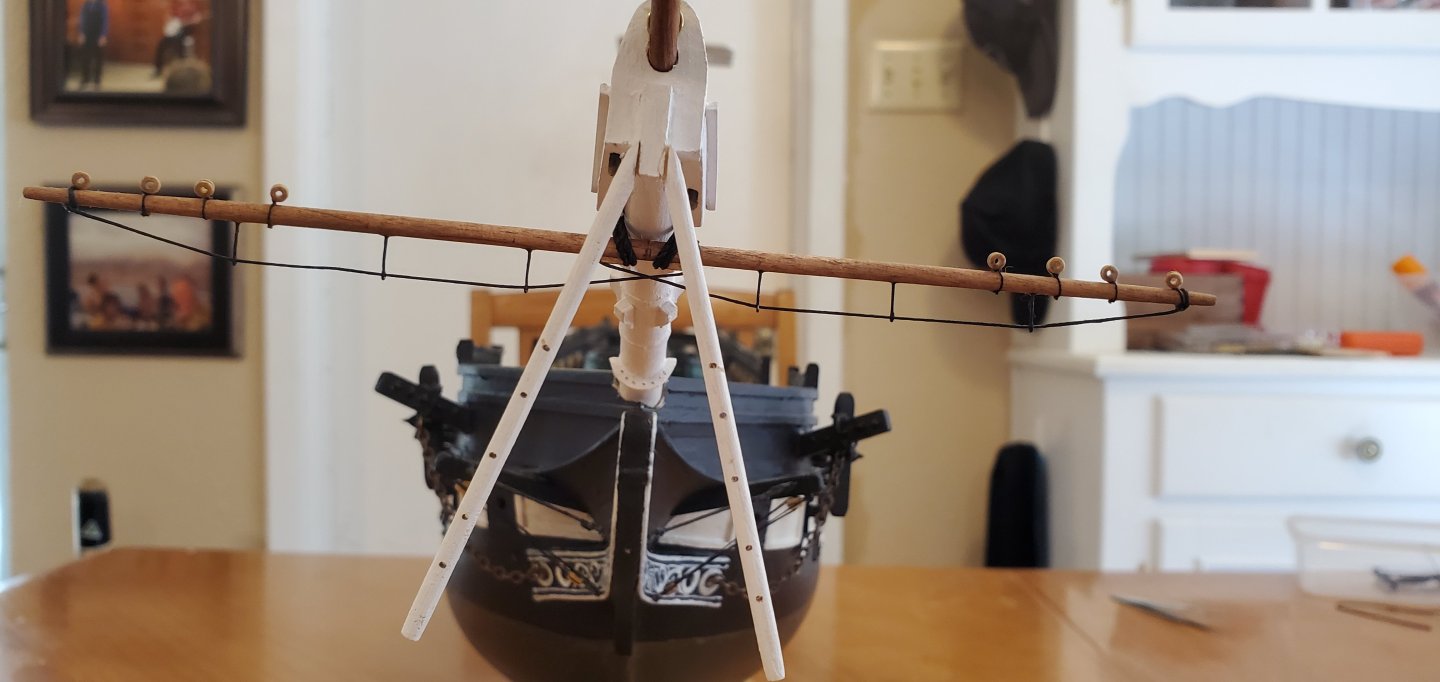
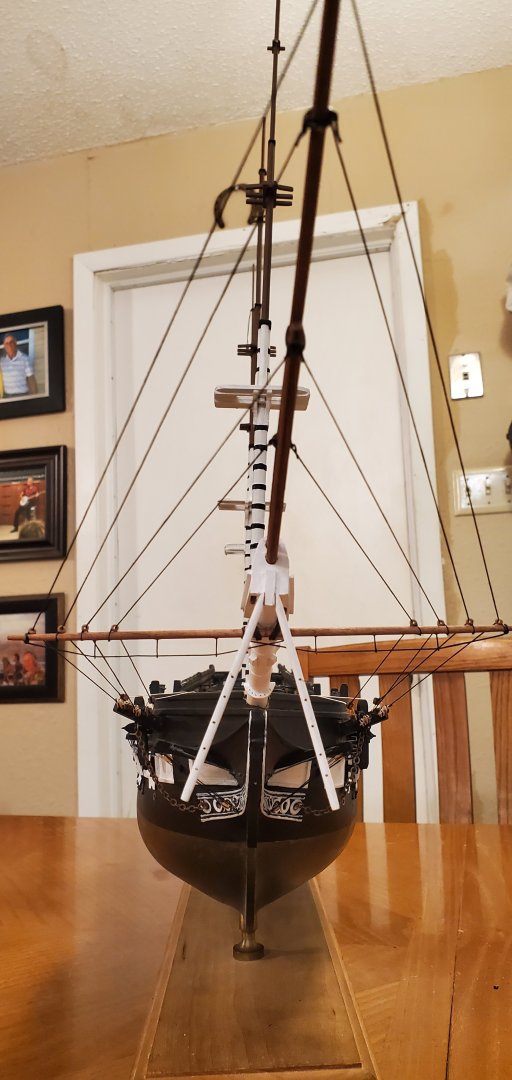
OK, Pat. If you can say everything on this ship is tiddly after I'm done, then I will be very happy! The next thing I decided to do was install the bobstays. I figured it would be easier to do them now rather than try and get to them after rigging the martingale. Three bobstays run from eyebolts on the knee to the underside of the bowsprit via lanyards. Next step - the rigging of the martingale, which the instructions describe as an "intricate process". At first glance, my thought was, "how in the world can anyone figure out this jumble of lines?" But if you take it one line at a time (and can decode the instructions), it's actually pretty simple. Tedious, but simple. It's really just 4 lines on each side - a backstay and guy for both the jib and flying jib. The only wrinkle is the guy which, according to the instructions, hitches at at the martingale, runs out to a single block at the end of the jib/flying jib, back through the martingale, through the bowsprit fairlead, and on to the bow pin rail. This makes it look like there are 12 lines running from the martingale to the ends of the jib/flying jib. The first pic shows the martingale fully rigged. In the second, you can see the guys running their courses as described above. They start at the obvious hitch around the martingale. Another look at the fully rigged martingale. Next, I added the lifts to the spritsail yard. After adding the lifts, I suddenly got the feeling that something was not quite right. Sort of, anyway. I remembered a detail from several build logs that I was missing - a fairlead on the bow bulwark that the martingale guys would pass through on their way to the bow pin rail. The instructions did not call for a fairlead on the bow bulwark, but I thought it was a nice touch. And I figured a curved fairlead to fit the curve of the bow would not be too difficult to make. Unfortunately, I had already secured (glued) the guys to the pin rails. Which meant I needed to make each fairlead in 2 pieces, a top and bottom, so I could slip the bottom underneath the guys that were already in place and then add the top. If that doesn't make any sense, hopefully pics of the process will. I took 1 strips of 1mm x 1mm basswood and boiled them for 10 minutes before putting them in piece of high tech bending equipment. After drying, I stacked the 2 pieces in a vice and drilled holes. The I slipped the bottom half for each fairlead under the guy lines on top of the bow bulwark and finished by gluing the top halves in place.


- 301 replies
-
- 14
-
-

-
- Constitution
- Bluejacket Shipcrafters
- (and 1 more)
-
I'm on board as well! Although I'll be a bit disappointed if, as part of the restoration, you don't add 3 banks of working oars to the battleship! 😃
-
Agree with Pat. She is beautiful!
-
Thanks Tim and Keith. I had completely overlooked that netting on those broken pieces. Interesting. I went through all the pictures of the Constitution I could find in the Gallery and didn't see a single model with that netting. So I may leave it off. But I reserve the right to change my mind!
- 301 replies
-
- 4
-
-
- Constitution
- Bluejacket Shipcrafters
- (and 1 more)
-
There you go again, Pat. I hope tiddly is something good! Netting? I don't see any netting referred to in the plans. Are you trying to confuse me like Pat?
- 301 replies
-
- 4
-
-
- Constitution
- Bluejacket Shipcrafters
- (and 1 more)
-
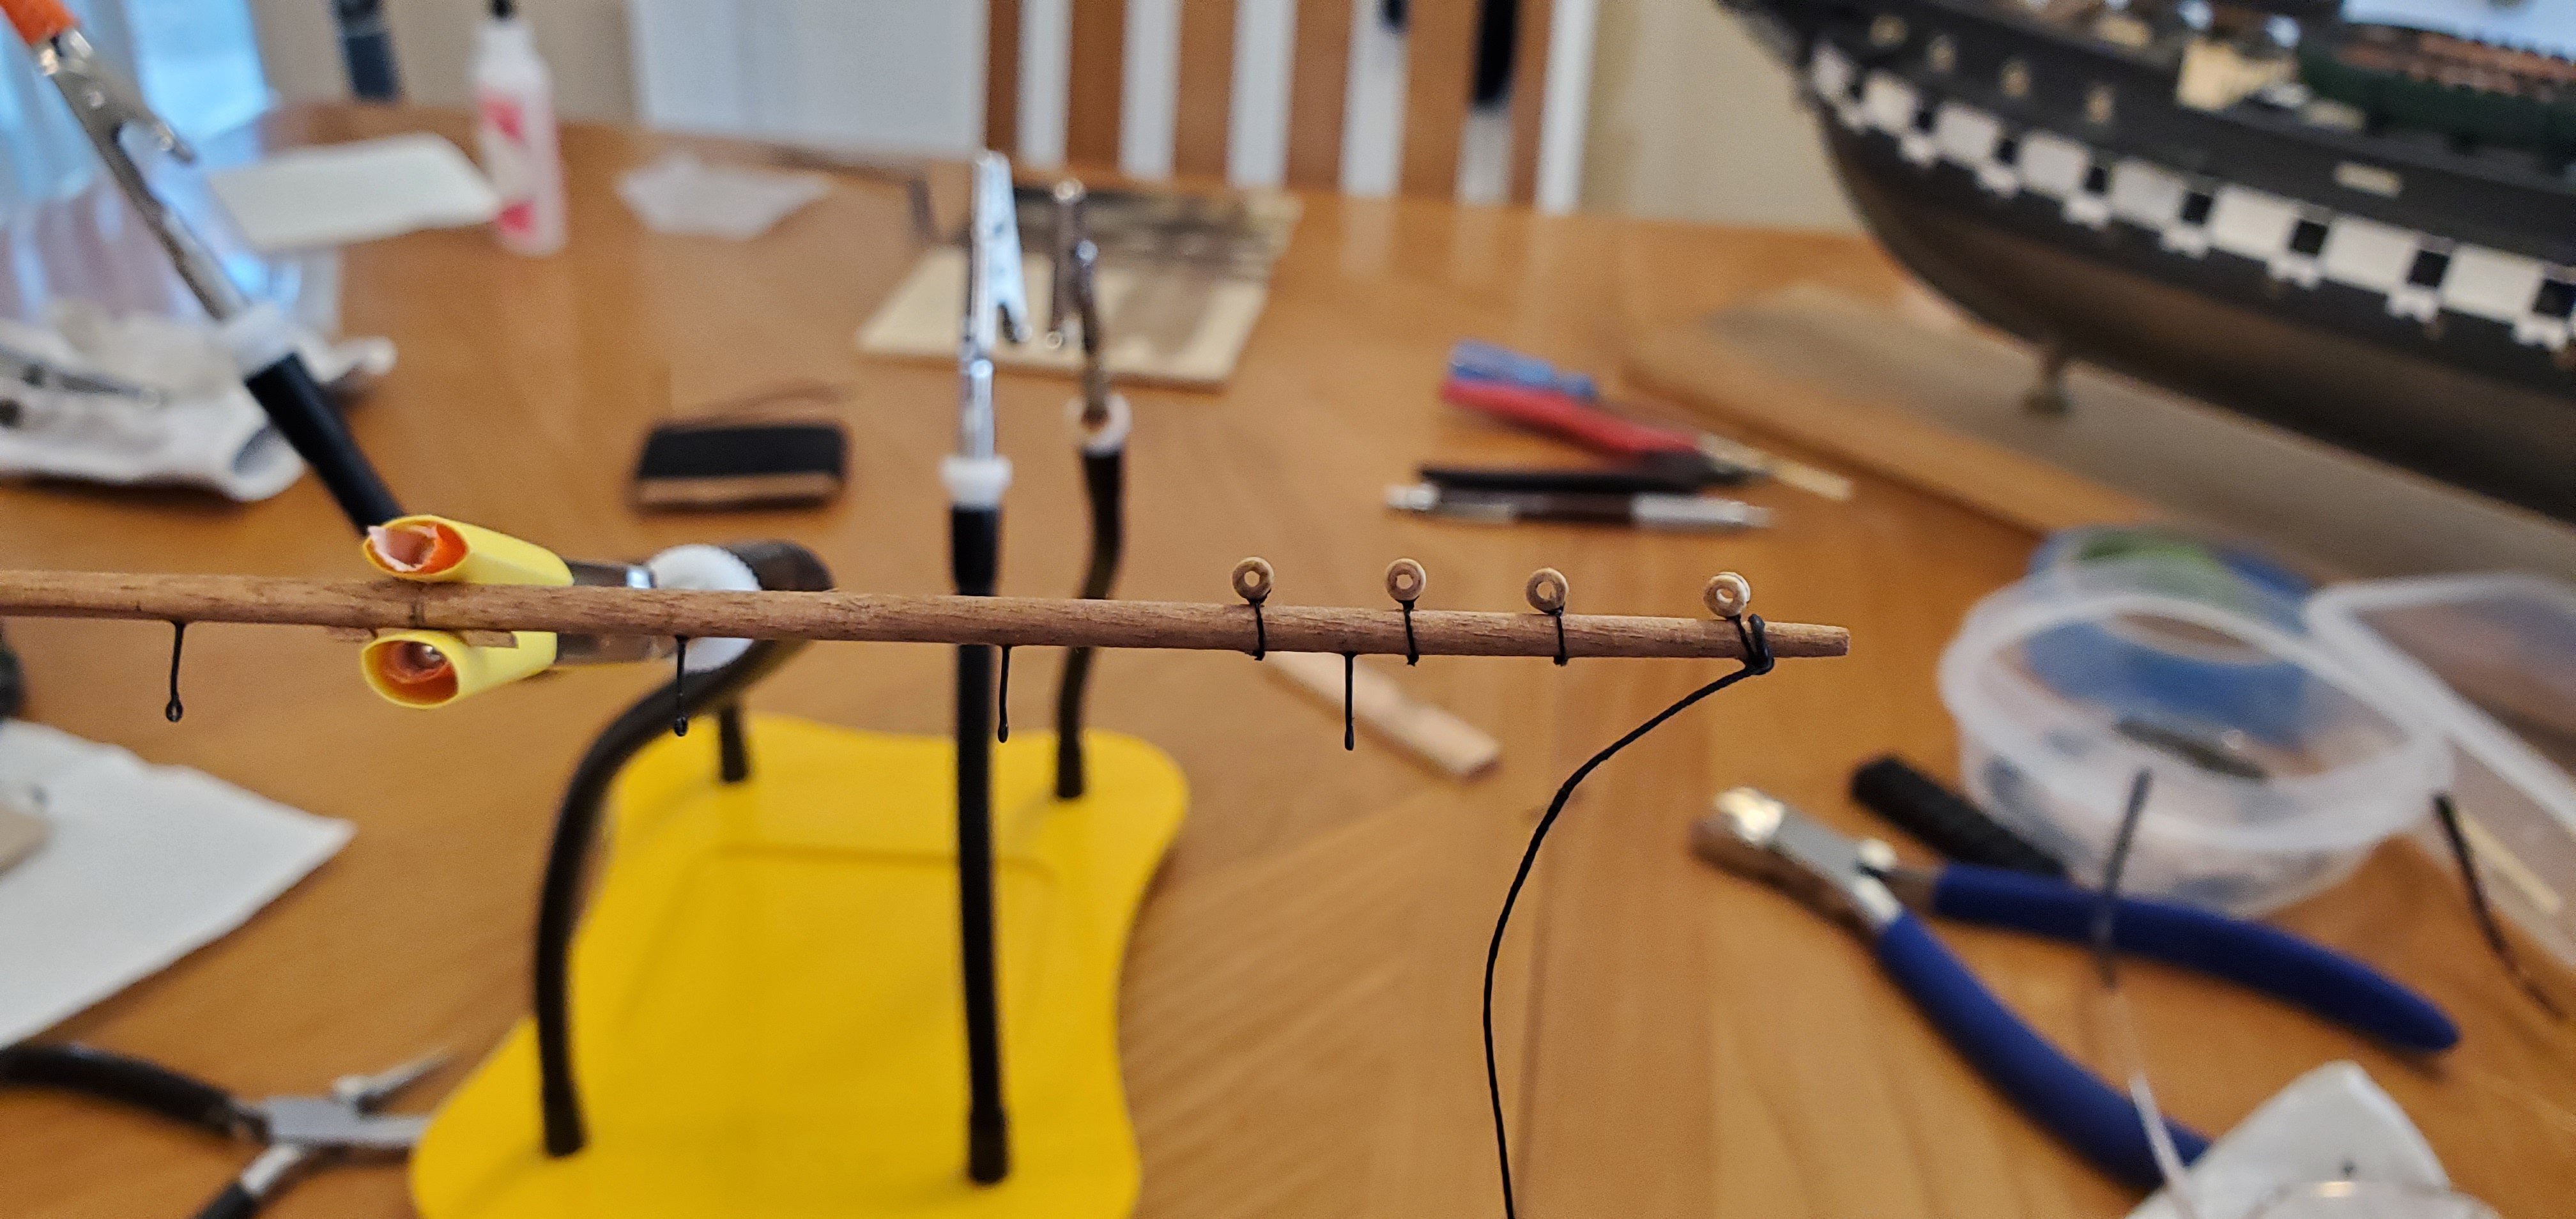
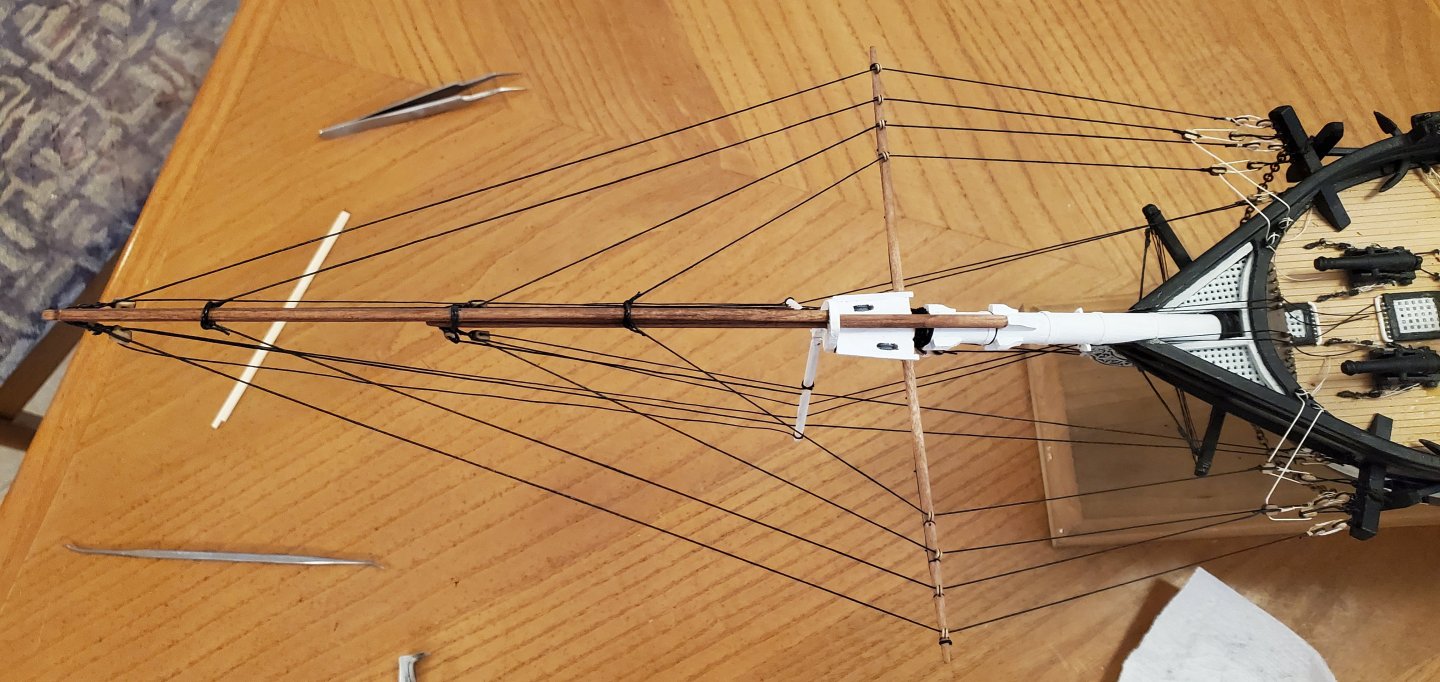
I got my parts finally delivered (bullseyes and blocks), which meant it was time to put down the bottle and get back to work on the Connie. The next step was trying to figure out what the next step was. According to the kit instructions, it was the lower shrouds. However, Carson’s dad had begun rigging the bowsprit first. I reviewed a bunch of build logs and found that some builders do the shrouds first and others do the bowsprit and spritsail yard. So with no real consensus, I chose the bowsprit. Here’s the other thing I learned from all the Connie build logs – they were all rigged differently, even among the same kits. So I decided I would just follow the Blue Jacket instructions as close as possible. This led to the second learning experience – the instructions are written in some kind of language that even Google Translator can’t help with. It's even harder to figure out than "Let Stalk Strine" like @gjdale, @PvG Aussie, and @BANYAN introduced me to on the Banshee SIB! Example: B - 2”flying jibboom traveling guy: seized to flying jibboom traveling guy. Through thimble on yard. Set up to S on cathead with gun tackle. Belay to small cleats on bow bulwark. Or this one: Jibstay (jib outhauler) – 3 ½”: long eye splice seated on foretopmast head. Through roller (if fitted) on jib traveler ring through sheave at outer end of jibboom to 3/32” DB in end. Set up fiddle block on bowsprit cap with tackle. Fall is led through port bowsprit fairlead to bow pinrail. It took waaaaay longer than I care to admit to crack the code and figure out what the instructions were telling me to do. But the light bulb finally flickered on and I was able to move forward. Actually, the first part of this exercise did have instructions – setting up the spritsail yard. It was a just matter of making the yard, then adding the bullseyes and foot ropes. My goal for the foot ropes was to make them as nice as the ones @Keith Black did on his Tennessee. Next, it was following the instructions and setting up the guy lines that attach to 4 different points along the jib and flying jib. The guys that tie off firmly to the jib/flying jib are anchored to the cathead with deadeye lanyards. The guys that tie off to traveling guys attach to the cathead via gun tackle with the end of the rope belayed to cleats on the bowhead bulwark. Going forward, I hope to get faster at decoding the instructions. 😃


- 301 replies
-
- 14
-
-
-

-
- Constitution
- Bluejacket Shipcrafters
- (and 1 more)
-
Wonderful job, Stephen! It was very interesting to tag along and watch you create such a realistic representation from such a wide variety of mosaics. Well done!
-
Definitely send me some pics. I'd like to see what Michigan longhorns look like!
- 185 replies
-
- 7
-
-
- Flying Dutchman
- Black pearl
- (and 2 more)
-
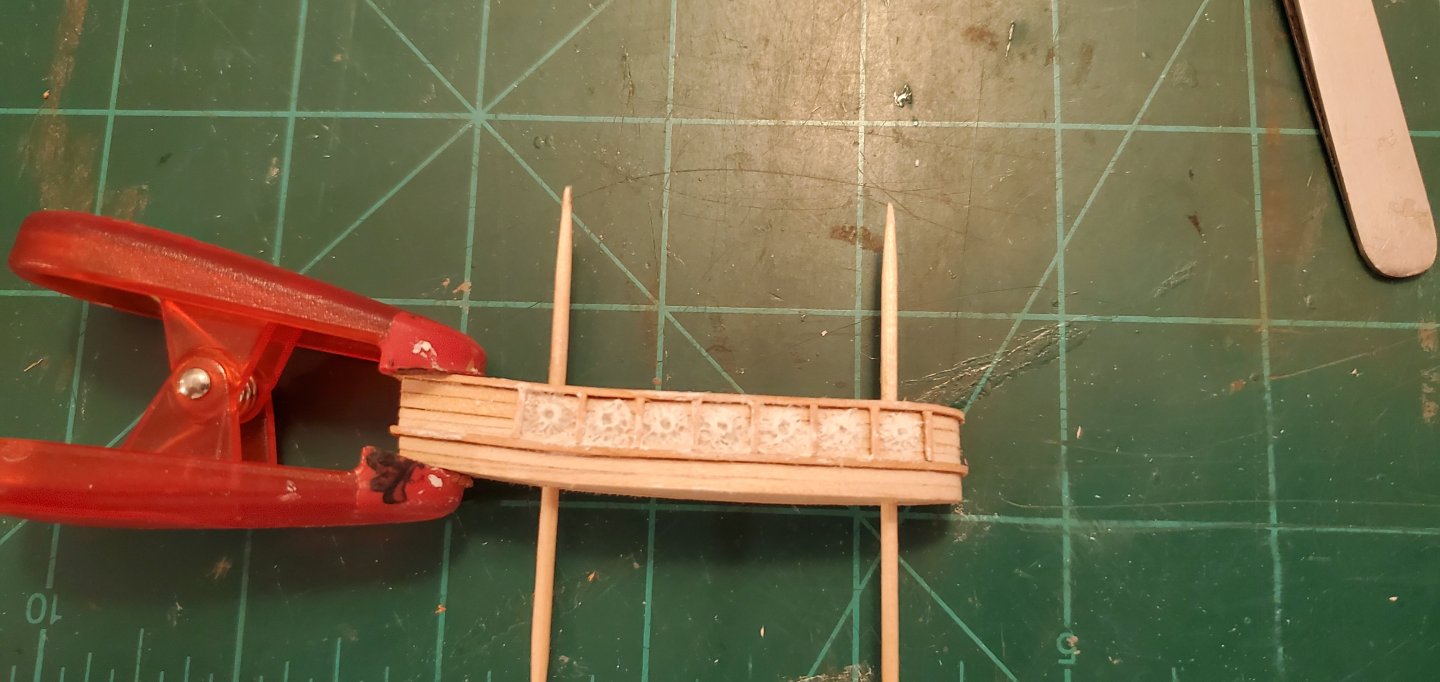
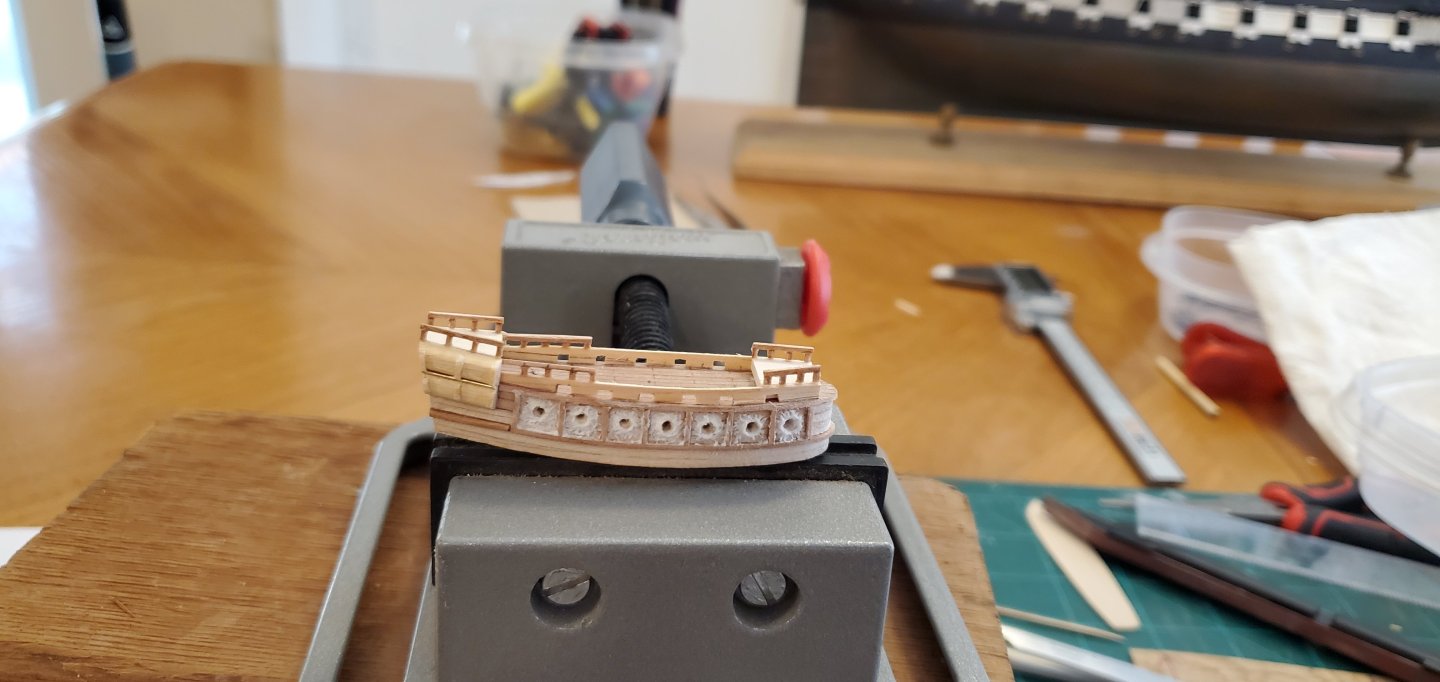
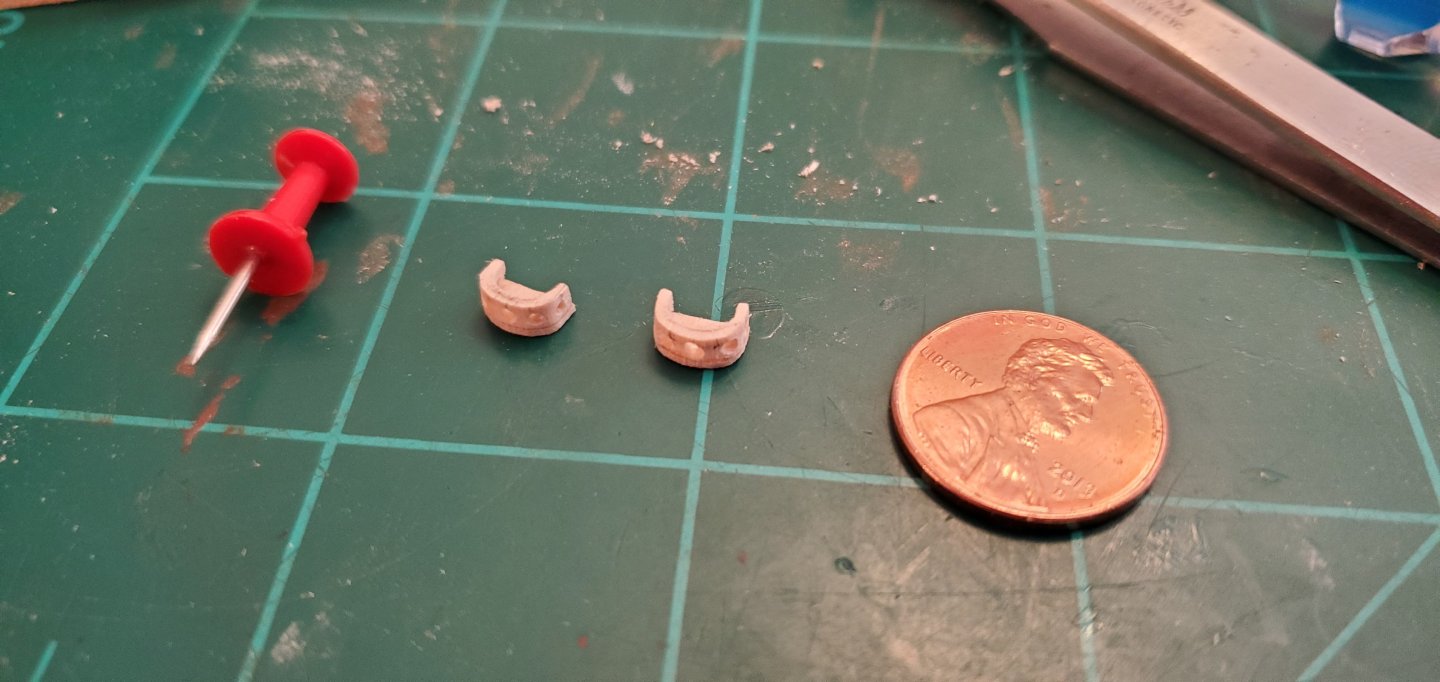
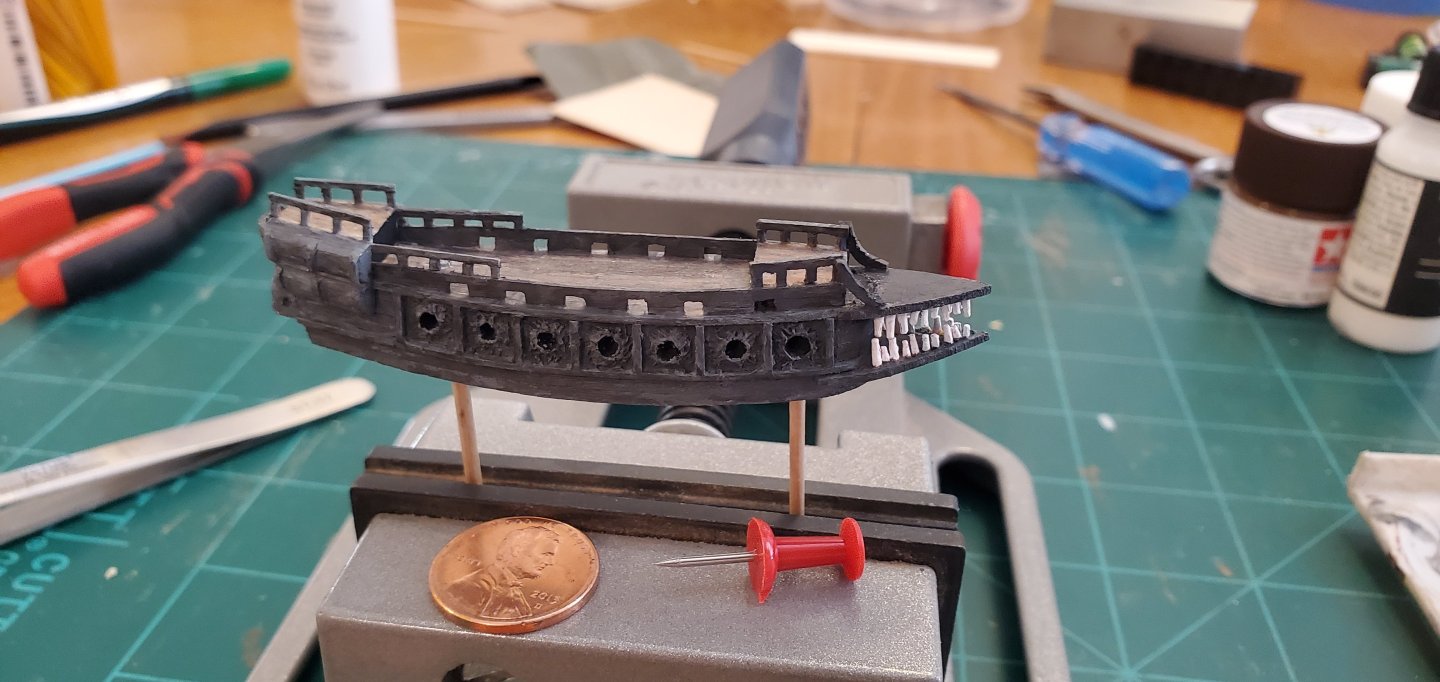
Where does Keith find these thing?? SMH! My goal was to get the Flying Dutchman hull finished up before jumping ship (ha ha 🙄) back to the Constitution. I measured the inside of the brandy bottle and figured a ship length of 3.0" - 3.25" would work. I did a crude test to see how things might look by pouring some Gatorade in the bottle and floating a couple of 3" dummy hulls inside, spacing them apart as they will be on opposing sides of the whirlpool. I thought it looked reasonable. For the ship, I like to highlight (or even exaggerate) the things that catch my eye and make the ship recognizable. For the Flying Dutchman, I think these are the dragon's jaw and teeth on the bow, the prominent vertical and horizontal ribs on the side, the weird screeching faces surrounding the gun ports, and of course the color. So hopefully when done, those features will stand out making the ship easily identifiable. I started with a 7-layer laminated hull. I cut the layers in rectangles, boiled them for about 10 minutes, then put them on very high tech a press to get the proper curvature from bow to stern. The hull is made with 5 layers of basswood and 2 of darker cherry. The cherry layers will be the horizontal ribs and will protrude from the other layers. For ribs like that, I find it easier to sand them down to fit vs adding small strips as separate pieces. Next, I added the vertical ribs and the weird screeching gun port faces. The ribs are just slivers of cherry wood the I cut. The faces are made from caulk. Next was adding the rails and quarter galleries. Like the vertical ribs, the rails are slivers of cherry. Next, I carved little balconies out of basswood for the stern. And then it was time for some fun - figuring out how to do the dragon's mouth bow head. I tried several different ideas that turned out horribly (like using photo-etch sprues) but ended up going back to the simplicity of wood. The upper and lower jaw were carved from basswood and the teeth are the snipped-off ends of toothpicks. And finally, it was time to paint this thing. I played around with some swirls of gray and black to give it an uneven and weathered look. The picture of the Dutchman in the first post has some brown splotches scattered about. I may go back later and add a little of that, but for now I'm ok with how it looks. I went with a lighter shade on the deck to give it comes contrast. Now I gotta flip my magnifying glasses around and get back to work on the Connie!


- 185 replies
-
- 18
-
-
-
- Flying Dutchman
- Black pearl
- (and 2 more)
-
I don't know about Jack Sparrow, Pat. How about Jack Penguin? 😃
- 185 replies
-
- 9
-
-
- Flying Dutchman
- Black pearl
- (and 2 more)
-
Thank you, Kauz! I already found some for the Flying Dutchman but not the Black Pearl. So that will definitely help!
- 185 replies
-
- 5
-
-
- Flying Dutchman
- Black pearl
- (and 2 more)
-
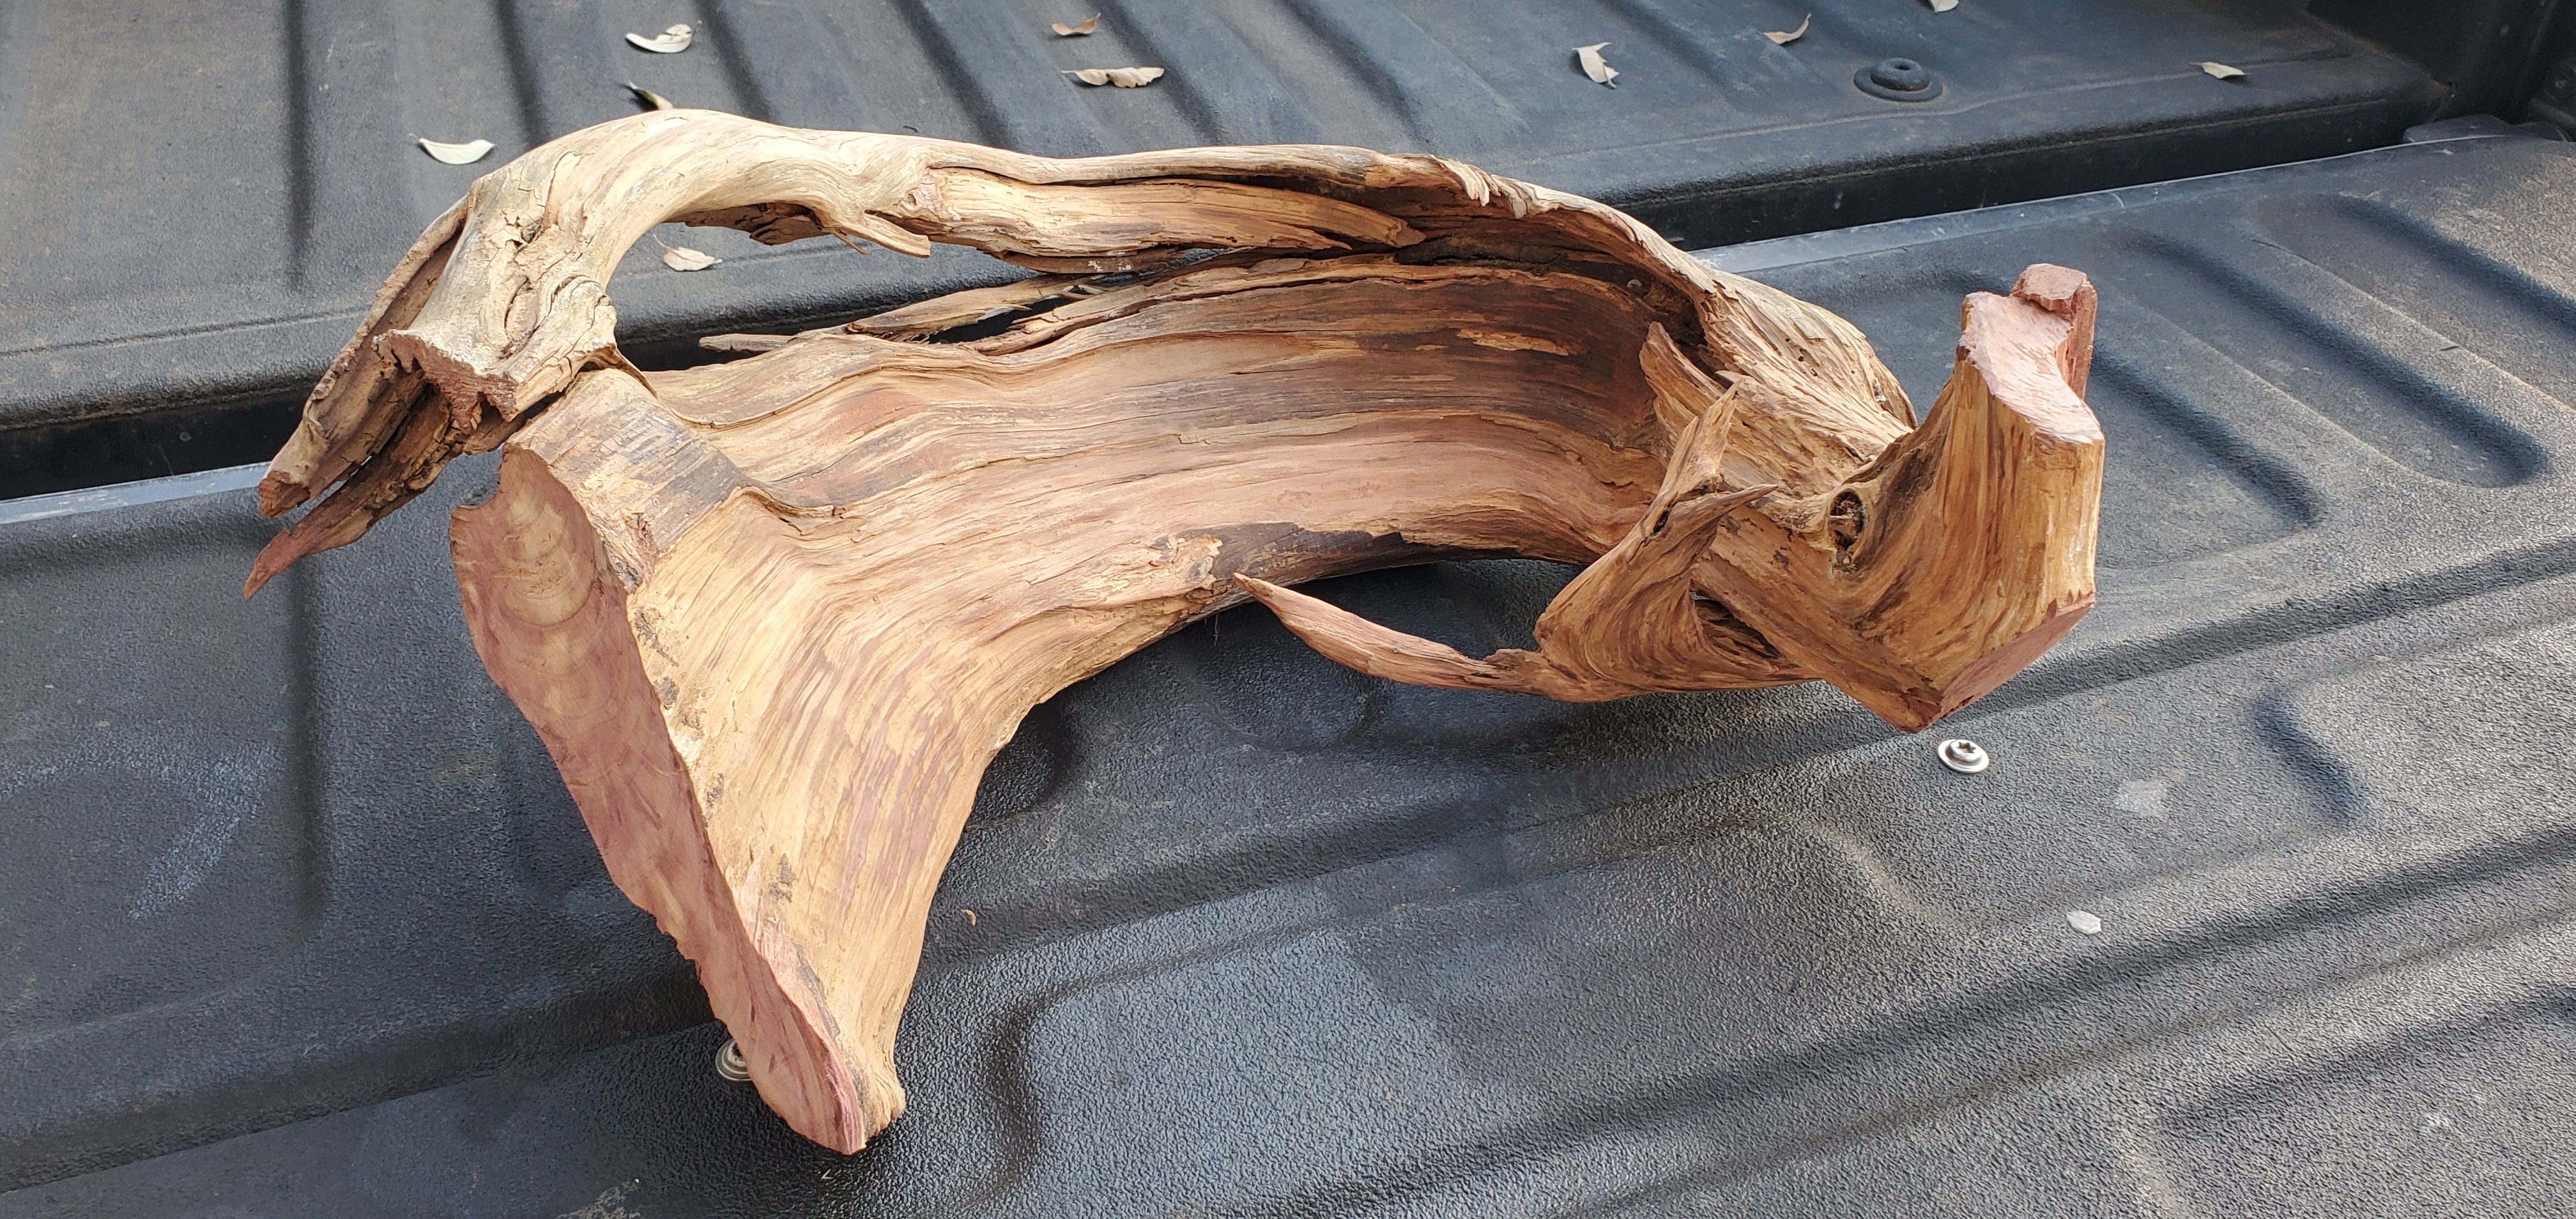
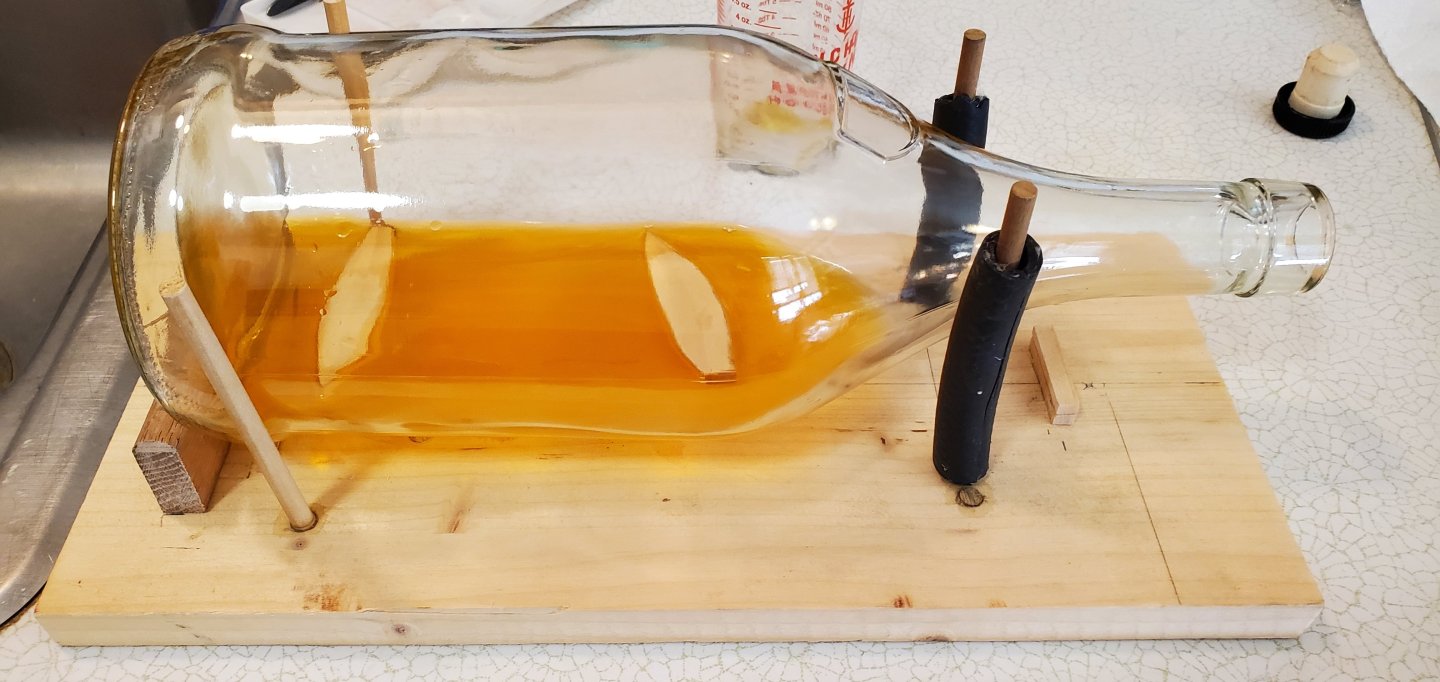
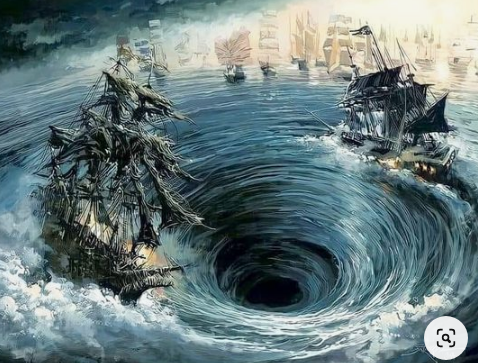
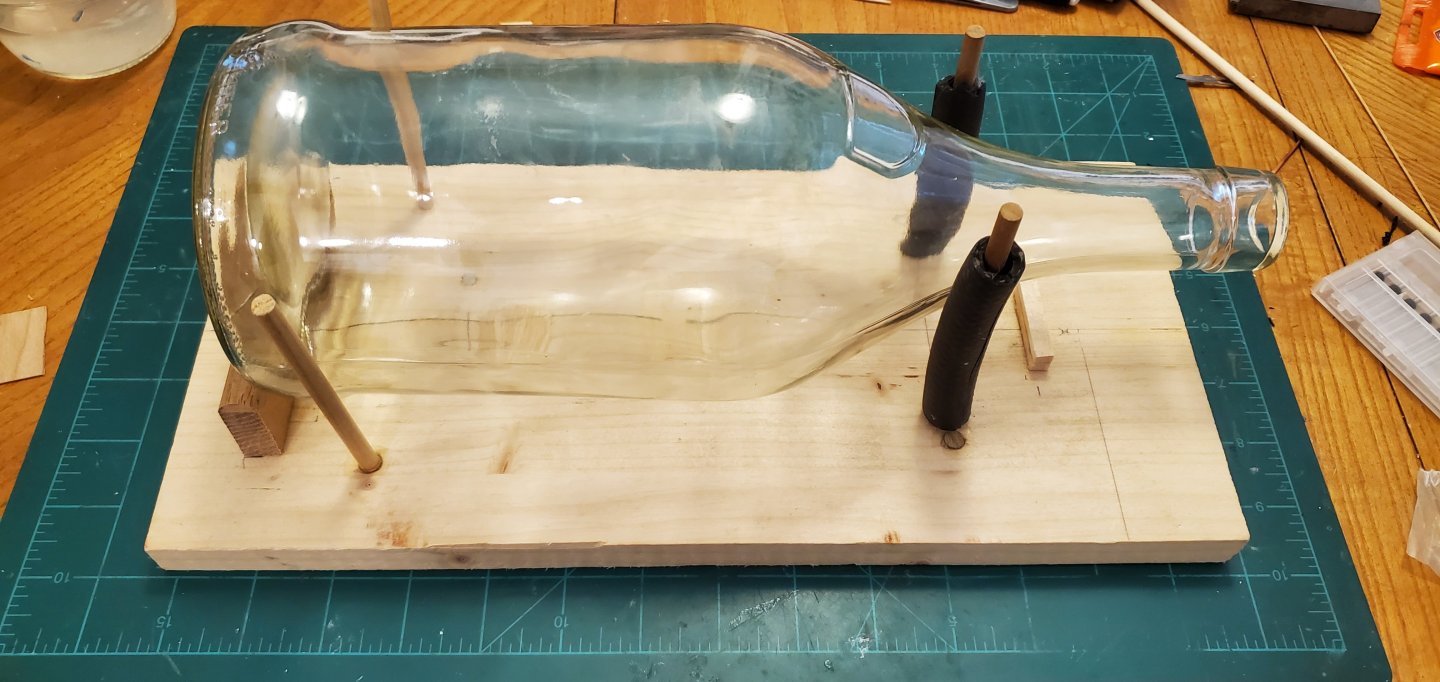
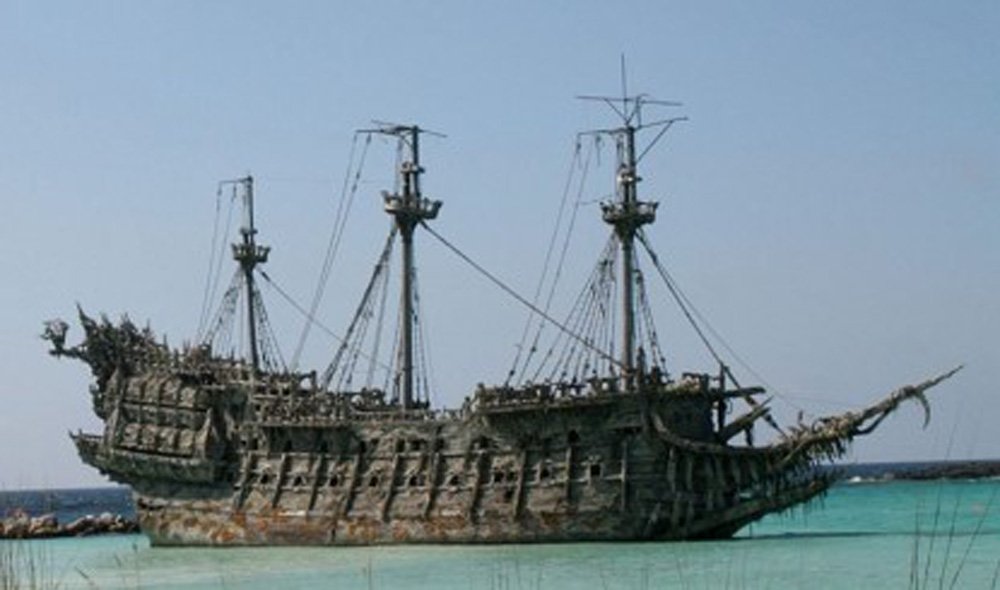
If you have been following my Constitution build log, thank you for taking a detour over to this one. If you are just tuning in to this one, thank you for being a part of it. My short attention span and ever-dwindling brain cells do not usually allow for simultaneous projects. But I had to put Connie on a brief hold while I wait for delivery of some parts that I ordered. So I figured I’d get started on another bottle project I’ve been mulling over for the past couple of months. When I was working on my Kraken SIB, @O.B.one made a reference to one of the Pirates of the Caribbean movies. So I did some digging on the movie series and came a cross an image that caught my eye and has been sitting in the back of my mind ever since. It’s a scene from the third installment of the franchise, At World’s End. Calypso summons a maelstrom and the Black Pearl and Flying Dutchman do battle on opposites sides of the whirlpool. Here’s the pic: Last month, I was wandering through the woods of my ranch, trying to find an ornery steer, and I spotted an interesting branch sticking out of the base of a cedar tree. The branch had a sharp curve and grain that swirled around. It reminded me of a whirlpool. Then the lightbulb flickered in my head and I thought the branch might make the perfect backdrop for a project – recreate the scene from At World’s End with the Black Pearl, Flying Dutchman, and a whirlpool inside the bottle. Here’s the piece of wood. It was dead but had weirdly grown upward from the base, made a u-turn, and dove back into the ground. Never seen anything quite like it. To have room for all the action going on inside the bottle, I needed a bottle that was more wide than long. A Paul Masson bottle of brandy had the perfect shape and it fit almost naturally into the piece of wood. The last bit of planning was finding good images of each ship to fashion my build after. I decided to take on the Flying Dutchman first and use this pic as a basic guide. I certainly won’t be able to match all the wonderful imagery and eerie ornamentation at my scale, but will do my best to give a good impression of it. The biggest challenge I think will be figuring out how to make a realistic looking whirlpool inside the bottle. Not sure how I'm gonna do that, but I'll build the ships first and give myself time to figure that out. I will likely be bouncing back and forth between this project and the Constitution. Hopefully I don’t get confused and try to put some of those humongous Connie parts inside the bottle here!

- 185 replies
-
- 20
-
-
- Flying Dutchman
- Black pearl
- (and 2 more)
-
Glad to have you join us, Vytautas!
-
The surface of those roofs look pretty smooth to me. I'd be inclined to do your first idea - paint the wood with a black/gray mixture.
-
There are probably several different things you can do with that roof. Do you have a picture of what you want it to look like?