MORE HANDBOOKS ARE ON THEIR WAY! We will let you know when they get here.
×


Glen McGuire
-
Posts
1,912 -
Joined
-
Last visited
Content Type
Profiles
Forums
Gallery
Events
Everything posted by Glen McGuire
-
 Such a cool subject and so well done. Congratulations, Keith, on completing a remarkable build!
- 732 replies
-
- 4
-

-

-
- Lula
- sternwheeler
- (and 1 more)
-
I's pretty solid so it must be the Bundaberg! They are forbidden to get near my Bundaberg. I am very stingy with it!
- 106 replies
-
- 4
-

-
- Kentoshi-Sen
- bottle
- (and 1 more)
-
I did some poking around and did not find anything either, Steve. Interesting idea though.
- 106 replies
-
- 2
-
-
- Kentoshi-Sen
- bottle
- (and 1 more)
-
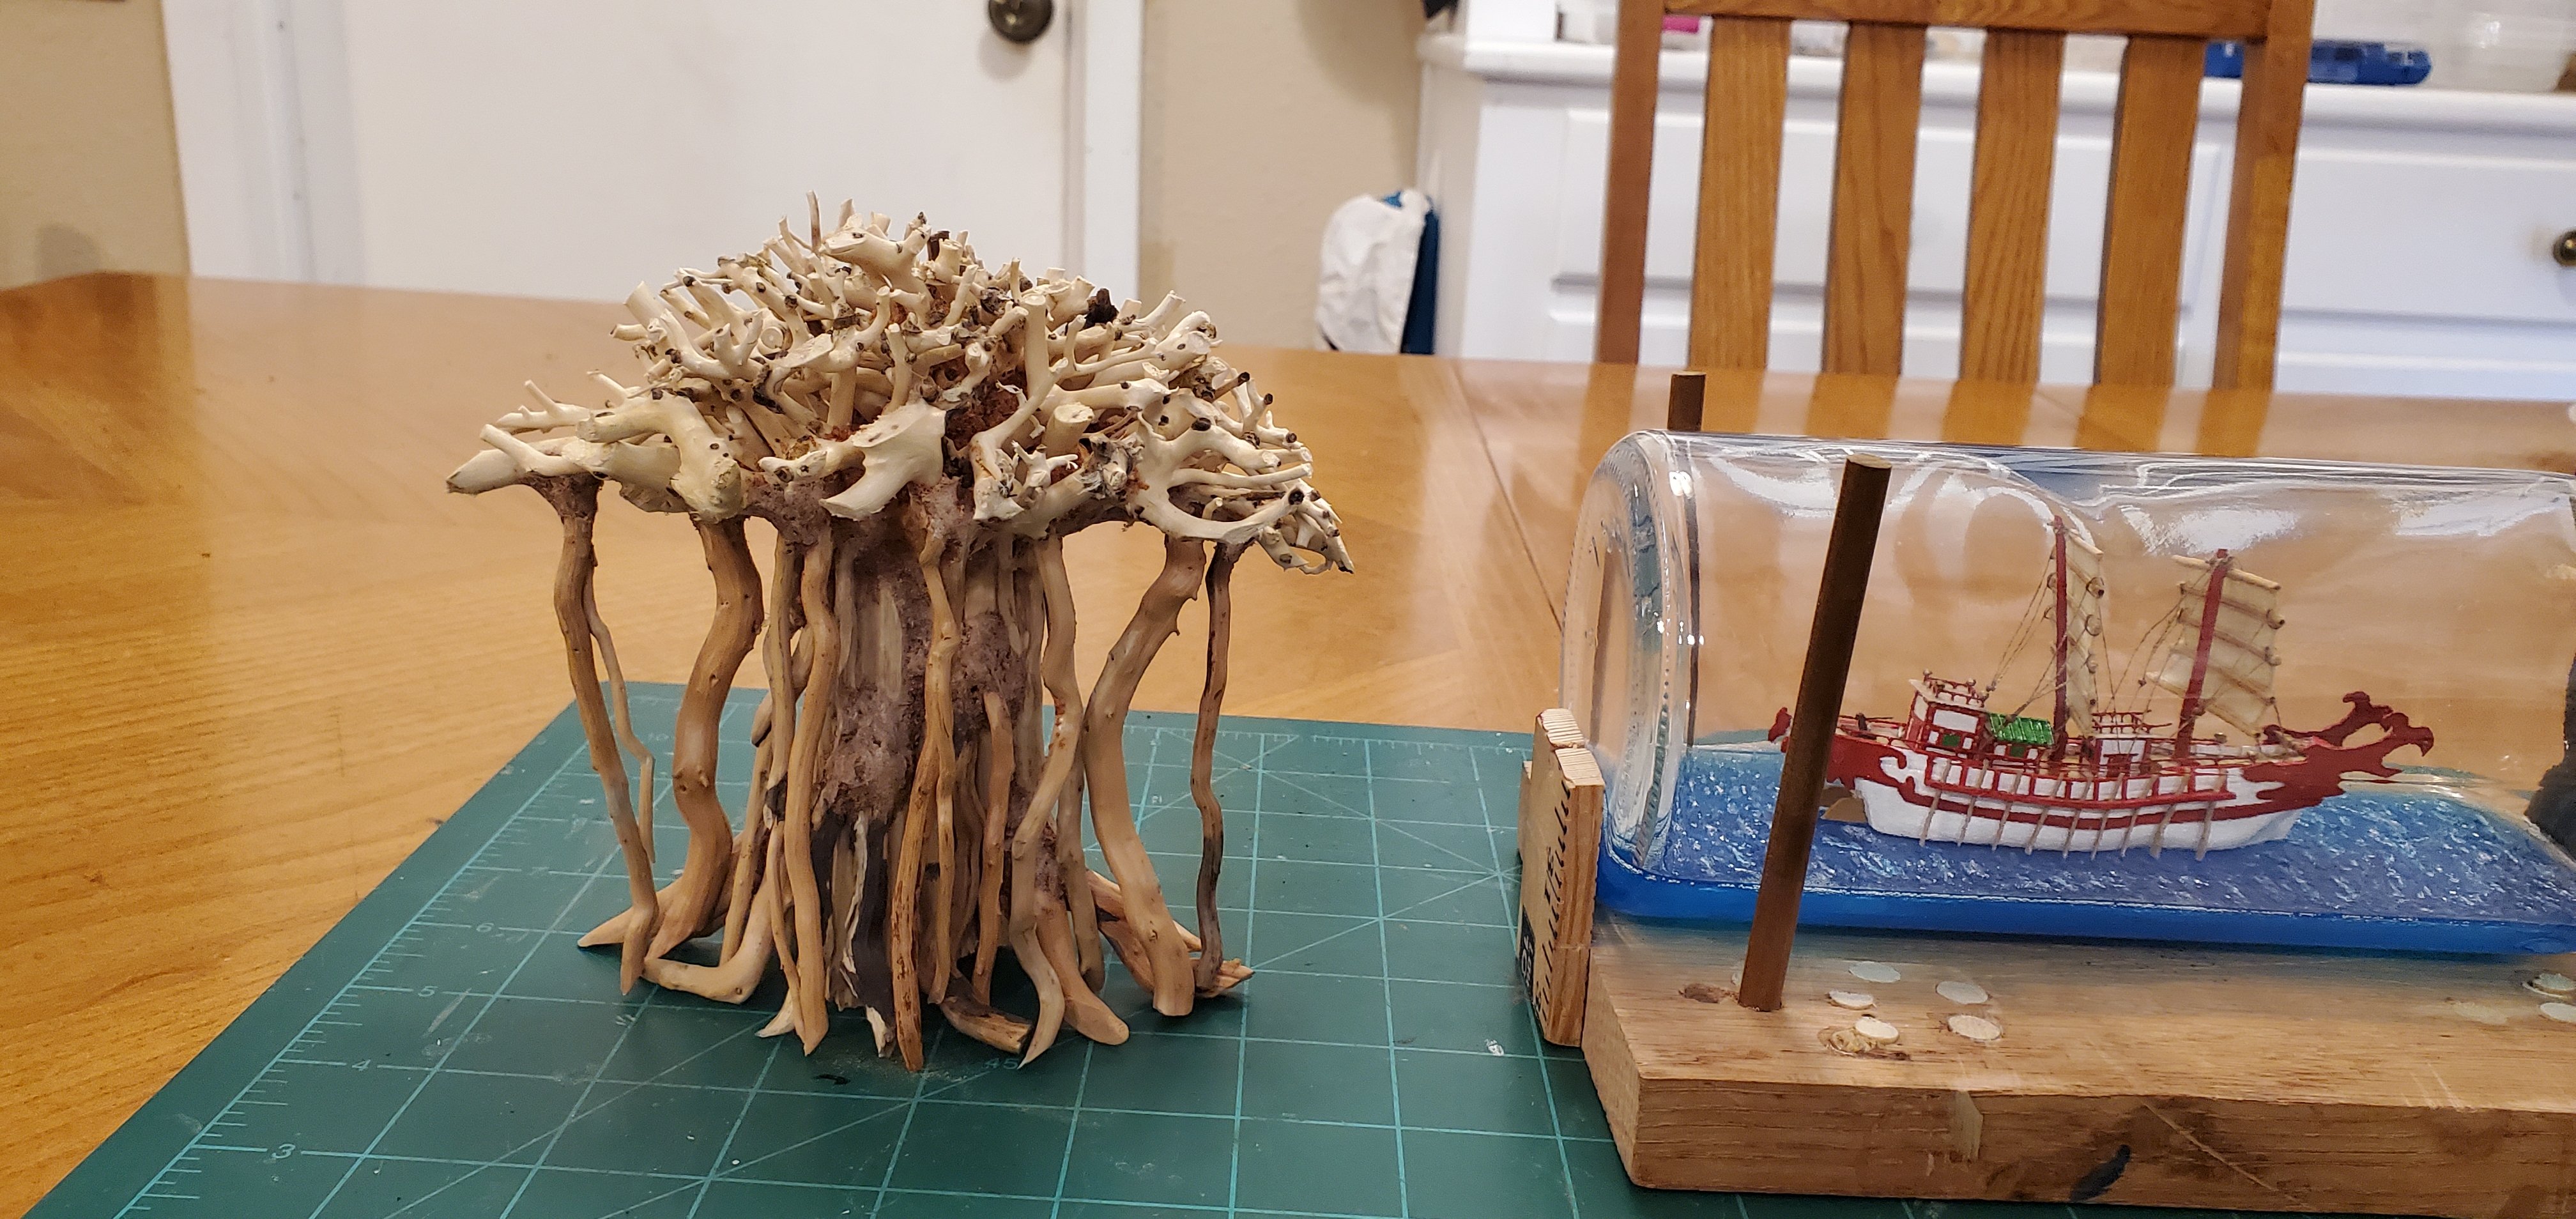
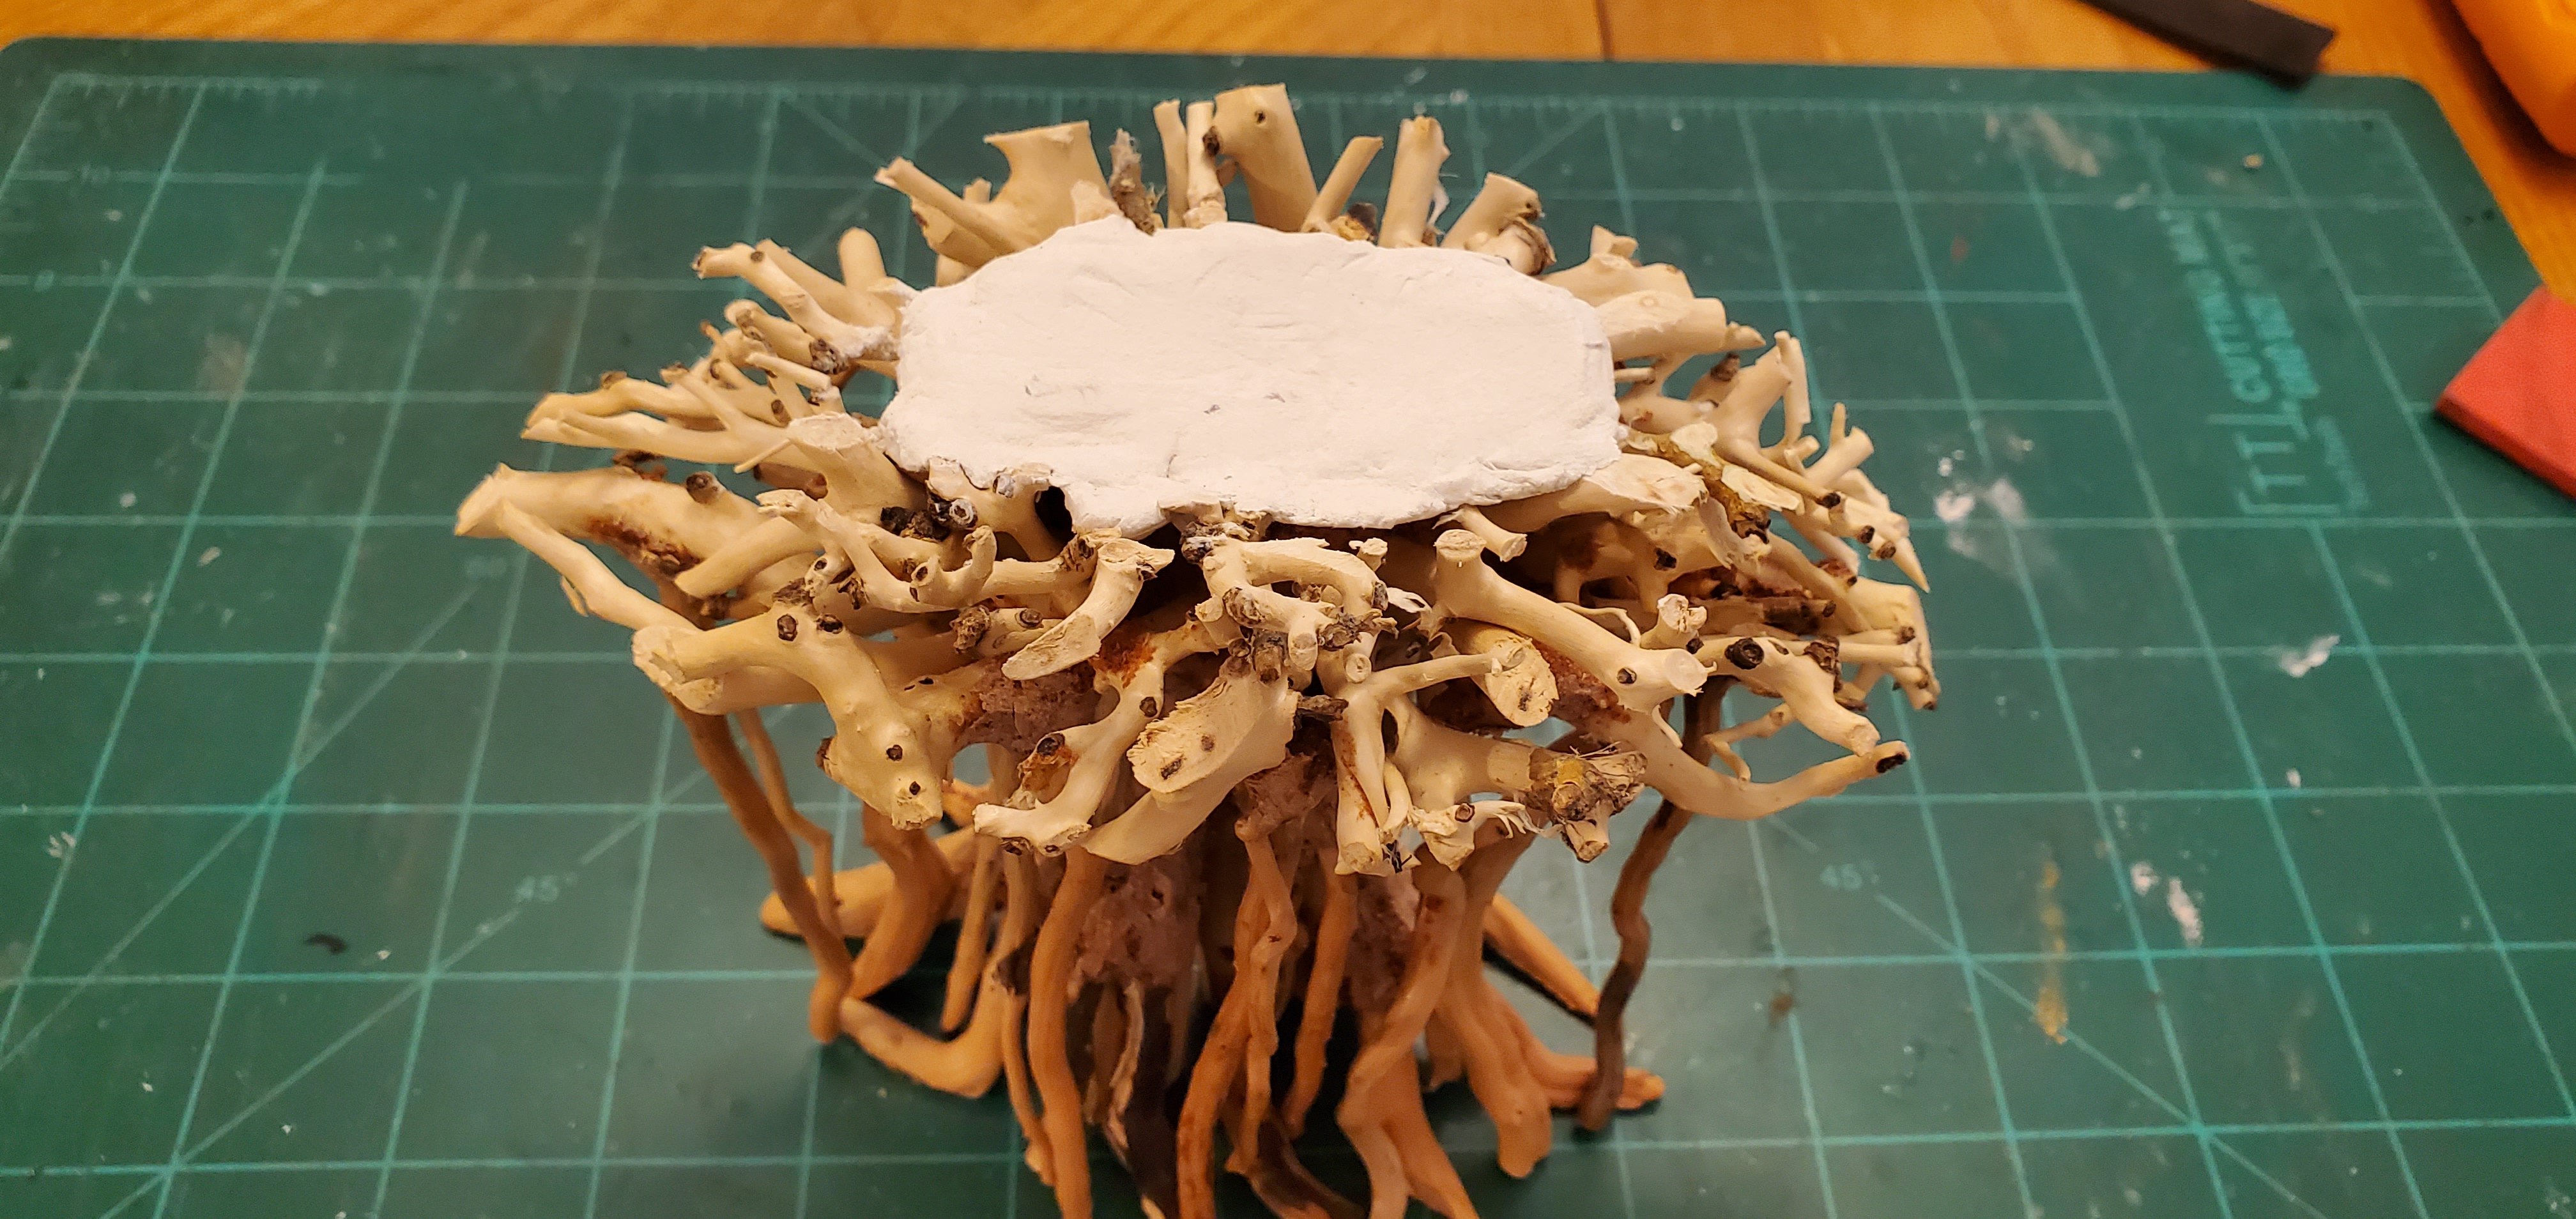
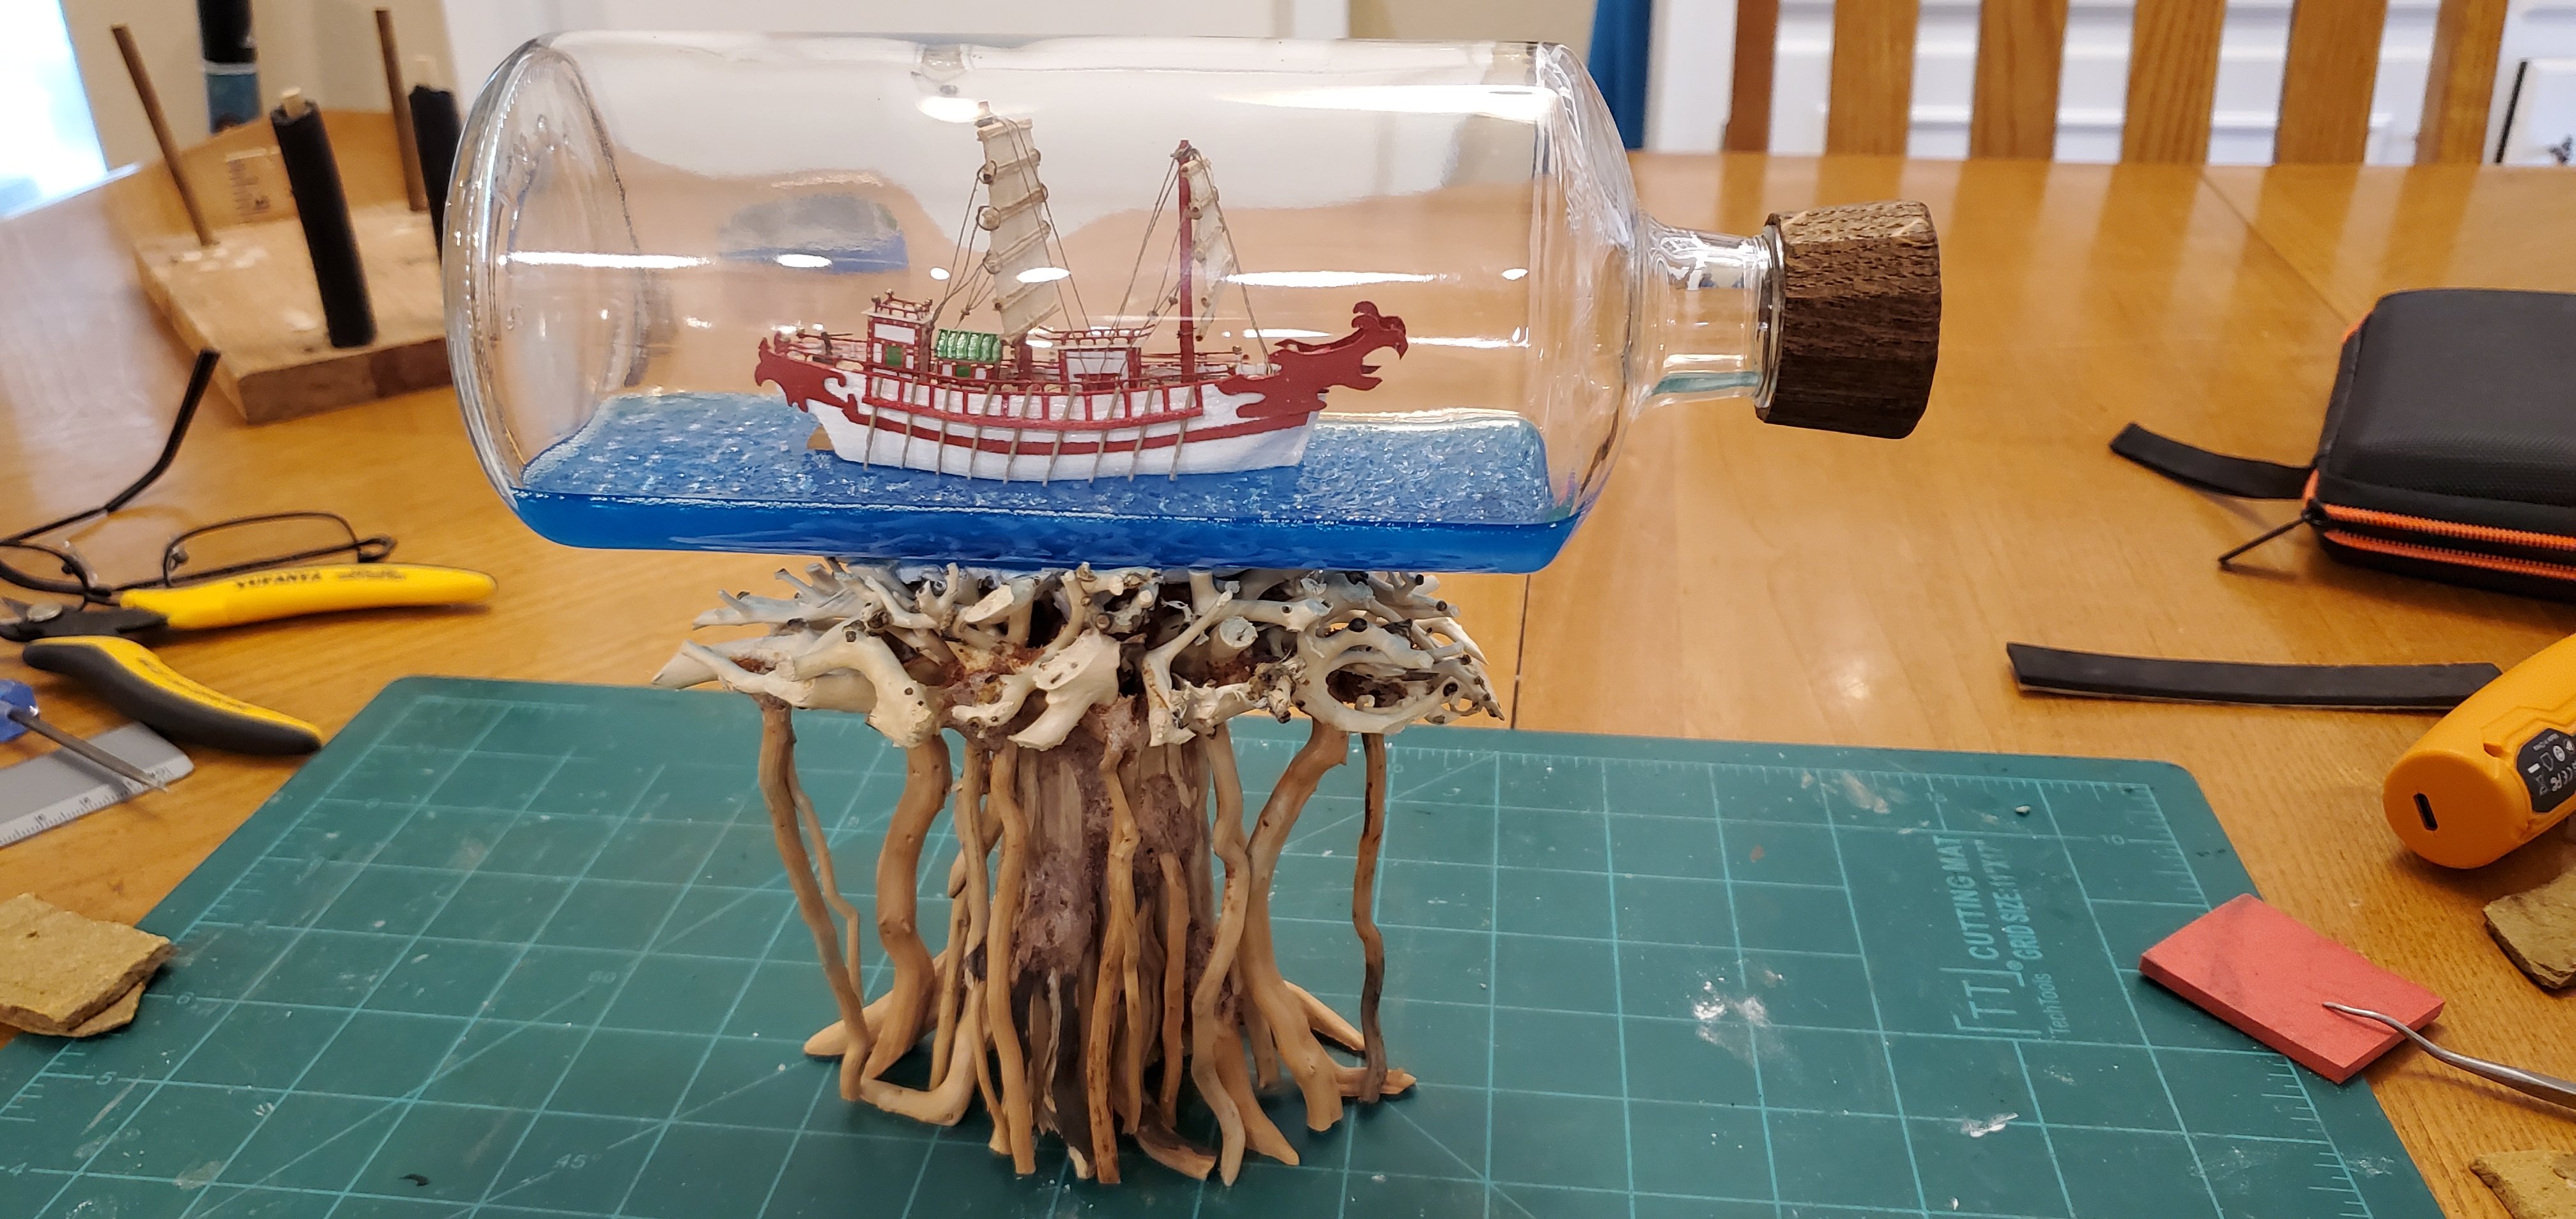
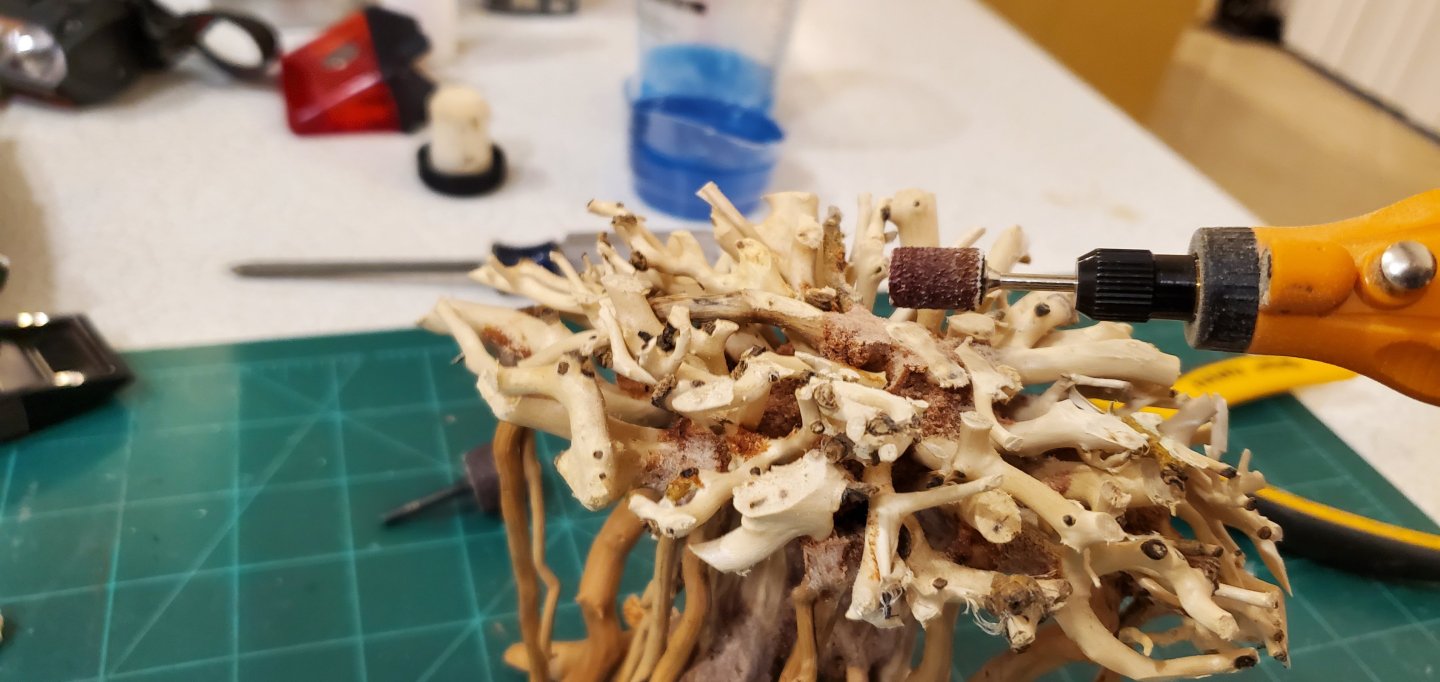
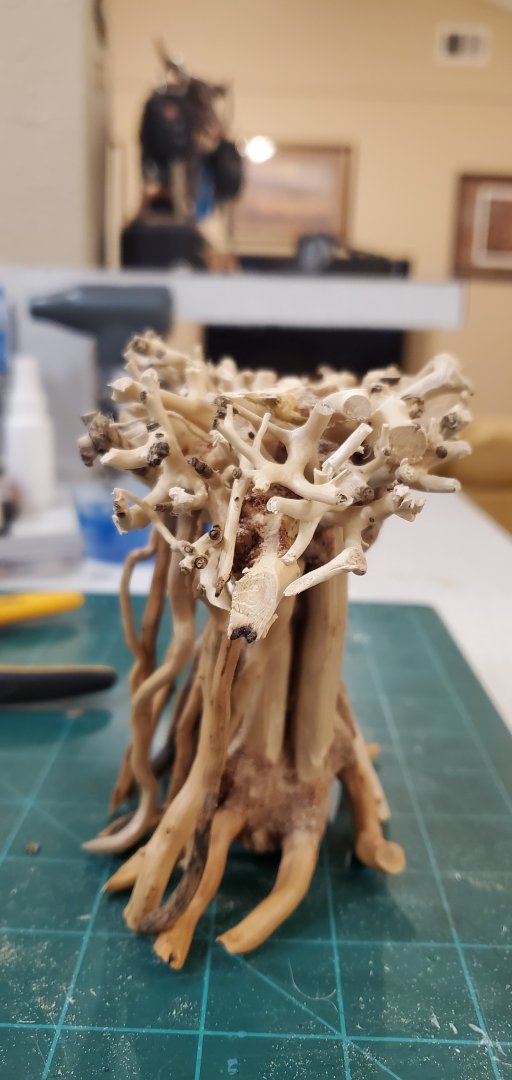
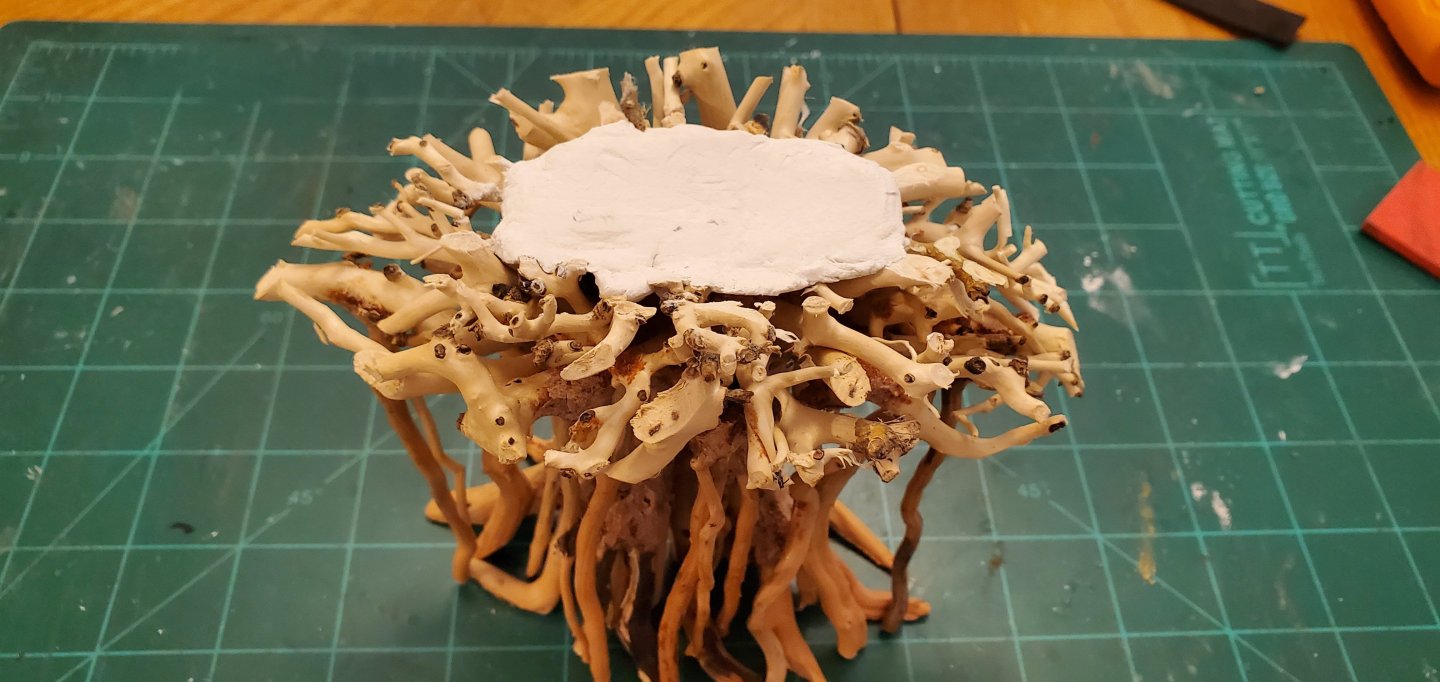
Working on the display base now. In keeping with the Japanese theme, I wanted to have elements of Japanese culture in the display base. I had this idea of mounting the bottle on a live bonsai tree, but @landlubber gave me a quick education on bonsai trees and let me know that they should be kept primarily outdoors rather than inside sitting on a shelf. Obviously, that would not work. I tried to come up with some other ideas, but I could not get rid of the bonsai idea. So I started googling around and found that bonsai driftwood is used somewhat commonly as a decoration in aquariums and terrariums. I went on eBay and found this amazing piece that looked like it might be able to hold my bottle. It reminded me of the banyan trees you see in Maui. I bought the piece and it arrived a couple of days ago. For the bottle to rest on top, I needed to carve out a cradle. I used some flush-cutter snips and my battery Dremel-like tool to do the trick. The wood was surprisingly hard. When I first got the piece, I was almost afraid to handle it because it looked so fragile. But it is quite durable. Here's a side view of the cradle afterwards. Even with the cradle, the bottle would still be resting on the ends of small shoots or little branches or whatever you want to call them. I wasn't sure if that was enough to safely hold the bottle in place. To secure the bottle on top, I wanted to have as much surface contact of the bottle as possible. So I filled in the middle portion of the cradle with air-drying modeling clay. Here's how it looks with the bottle in place (but not glued down yet). The last piece of the puzzle is the actual base - what the bonsai piece will rest on. TBD.


- 106 replies
-
- 20
-

-
-
- Kentoshi-Sen
- bottle
- (and 1 more)
-
Sounds like we need to start a large penguin colony here in Texas to help with our drought!
-
That's exactly what I was thinking, Eric! I think Keith made it the perfect width.

- 732 replies
-
- 9
-
-
-
-
- Lula
- sternwheeler
- (and 1 more)
-
Thank you, @JacquesCousteau, @Keith Black, @Knocklouder, @FriedClams, @GrandpaPhil, @gjdale, @BANYAN, @lraymo, @Coyote_6 for the kind words and for following along. I've got some ideas for the base that I'm messing around with, so I've still got a little ways to go on this thing. But at least the hard part is done and my blood pressure is back down to normal. Now there's an idea, Pat! I'd like to know what a tipsy longhorn would look like. Or maybe I don't! The funny thing is, Lynn, that I'm actually a very impatient person. That's probably a big reason why I do these ship in bottle projects - because I can usually get them done in 3 months or so. My mind just cannot fathom spending 3, 4, 5 plus years working on a single project like so many of the builders out here that do real ship models. Their patience astounds me!
- 106 replies
-
- 8
-
-
- Kentoshi-Sen
- bottle
- (and 1 more)
-
A very interesting subject and kit, Ferrus. I've done one SIB with Chinese junk ships and have another SIB currently in work with a Japanese ship as the subject. I find the ancient Chinese and Japanese ships fun (and challenging) to build because of their unique hull shapes, deck structures, and sails. Really nice start with the weathering process of the hull. This should be a great tutorial for your friend. Looking forward to see your work here.
-
Agree with Keith B and Wefalck. appreciate the update and look forward to you resuming work when possible.
-
Oh duh! Wipe on poly. I should have figured that out since I use it frequently. 🙄 Thanks for the explanation!
-
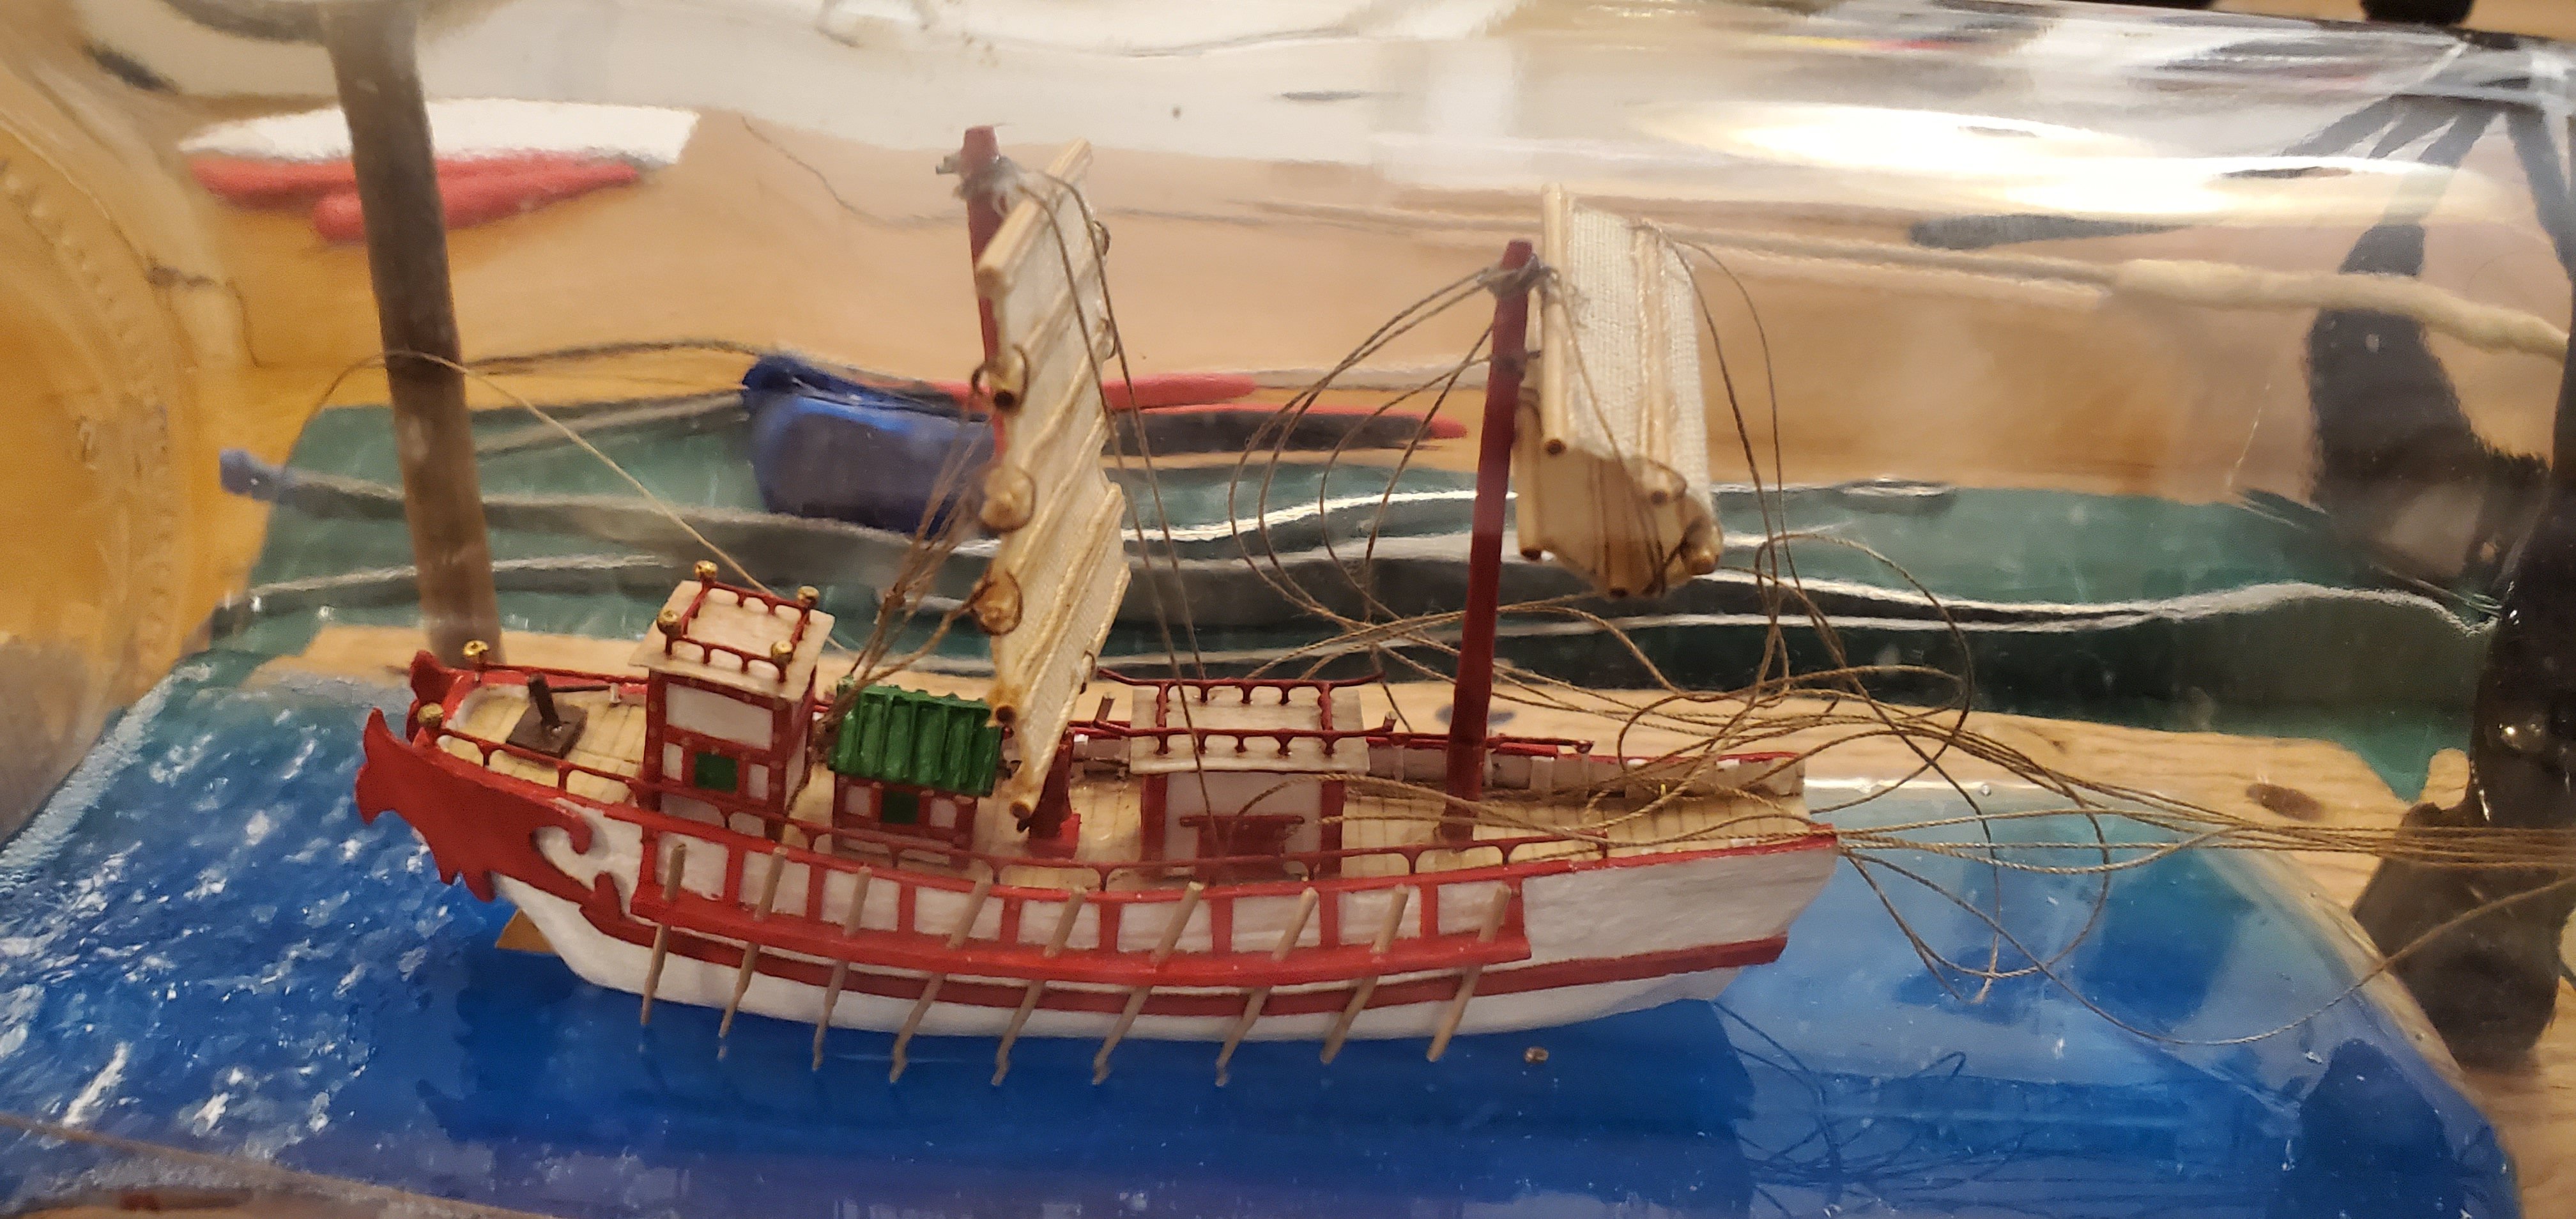
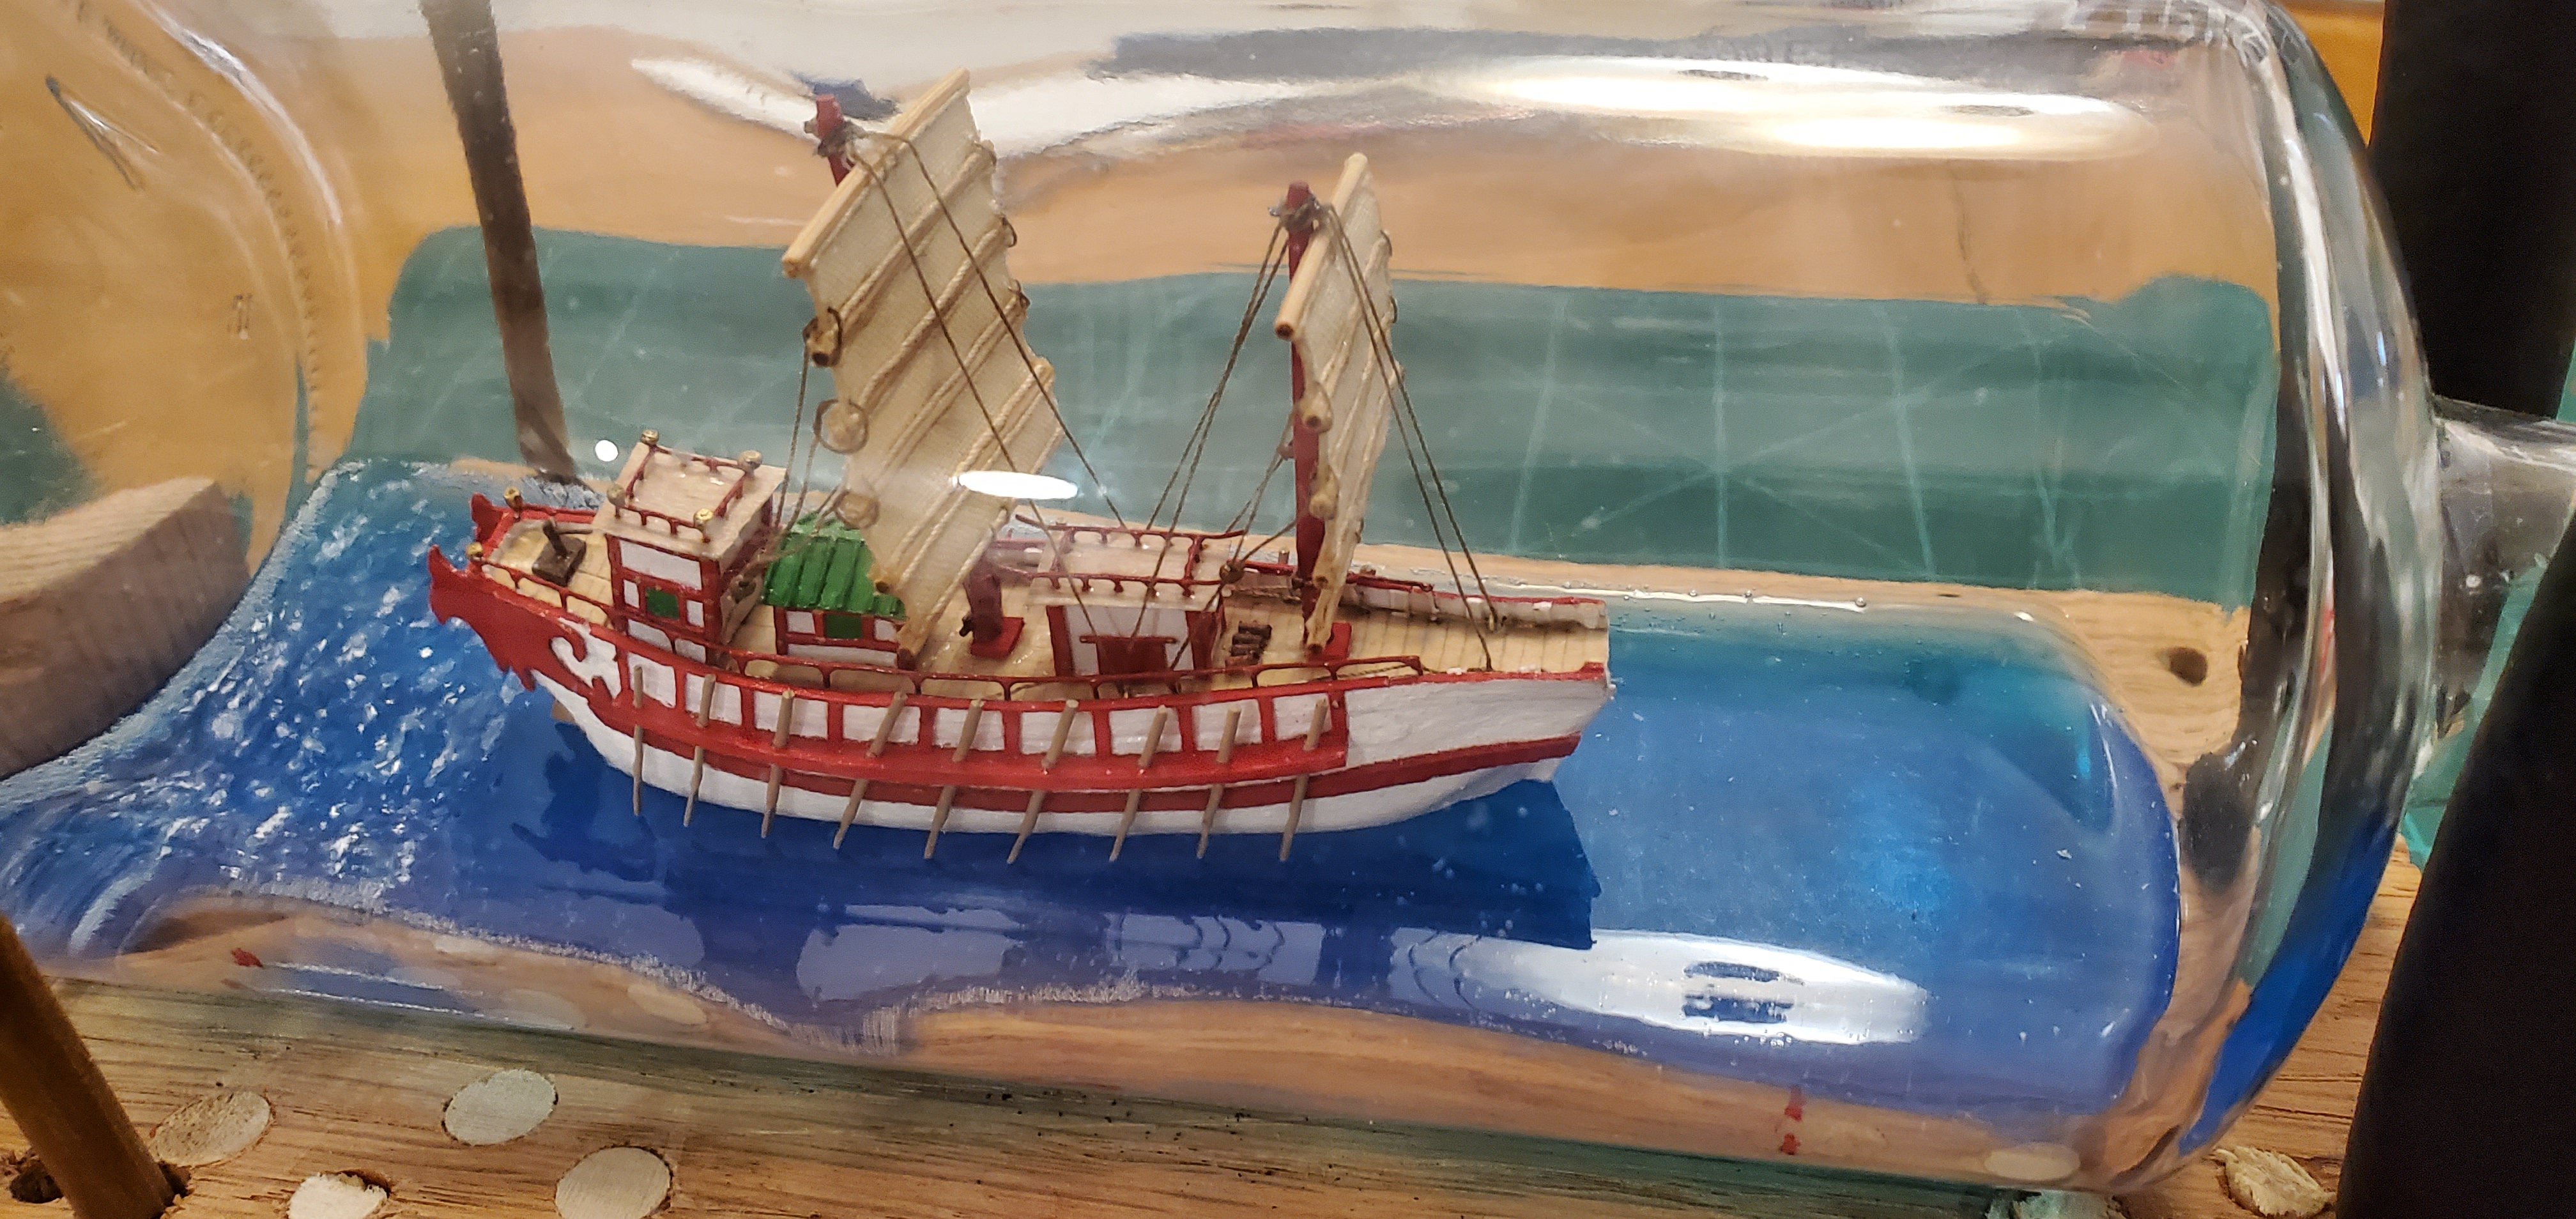
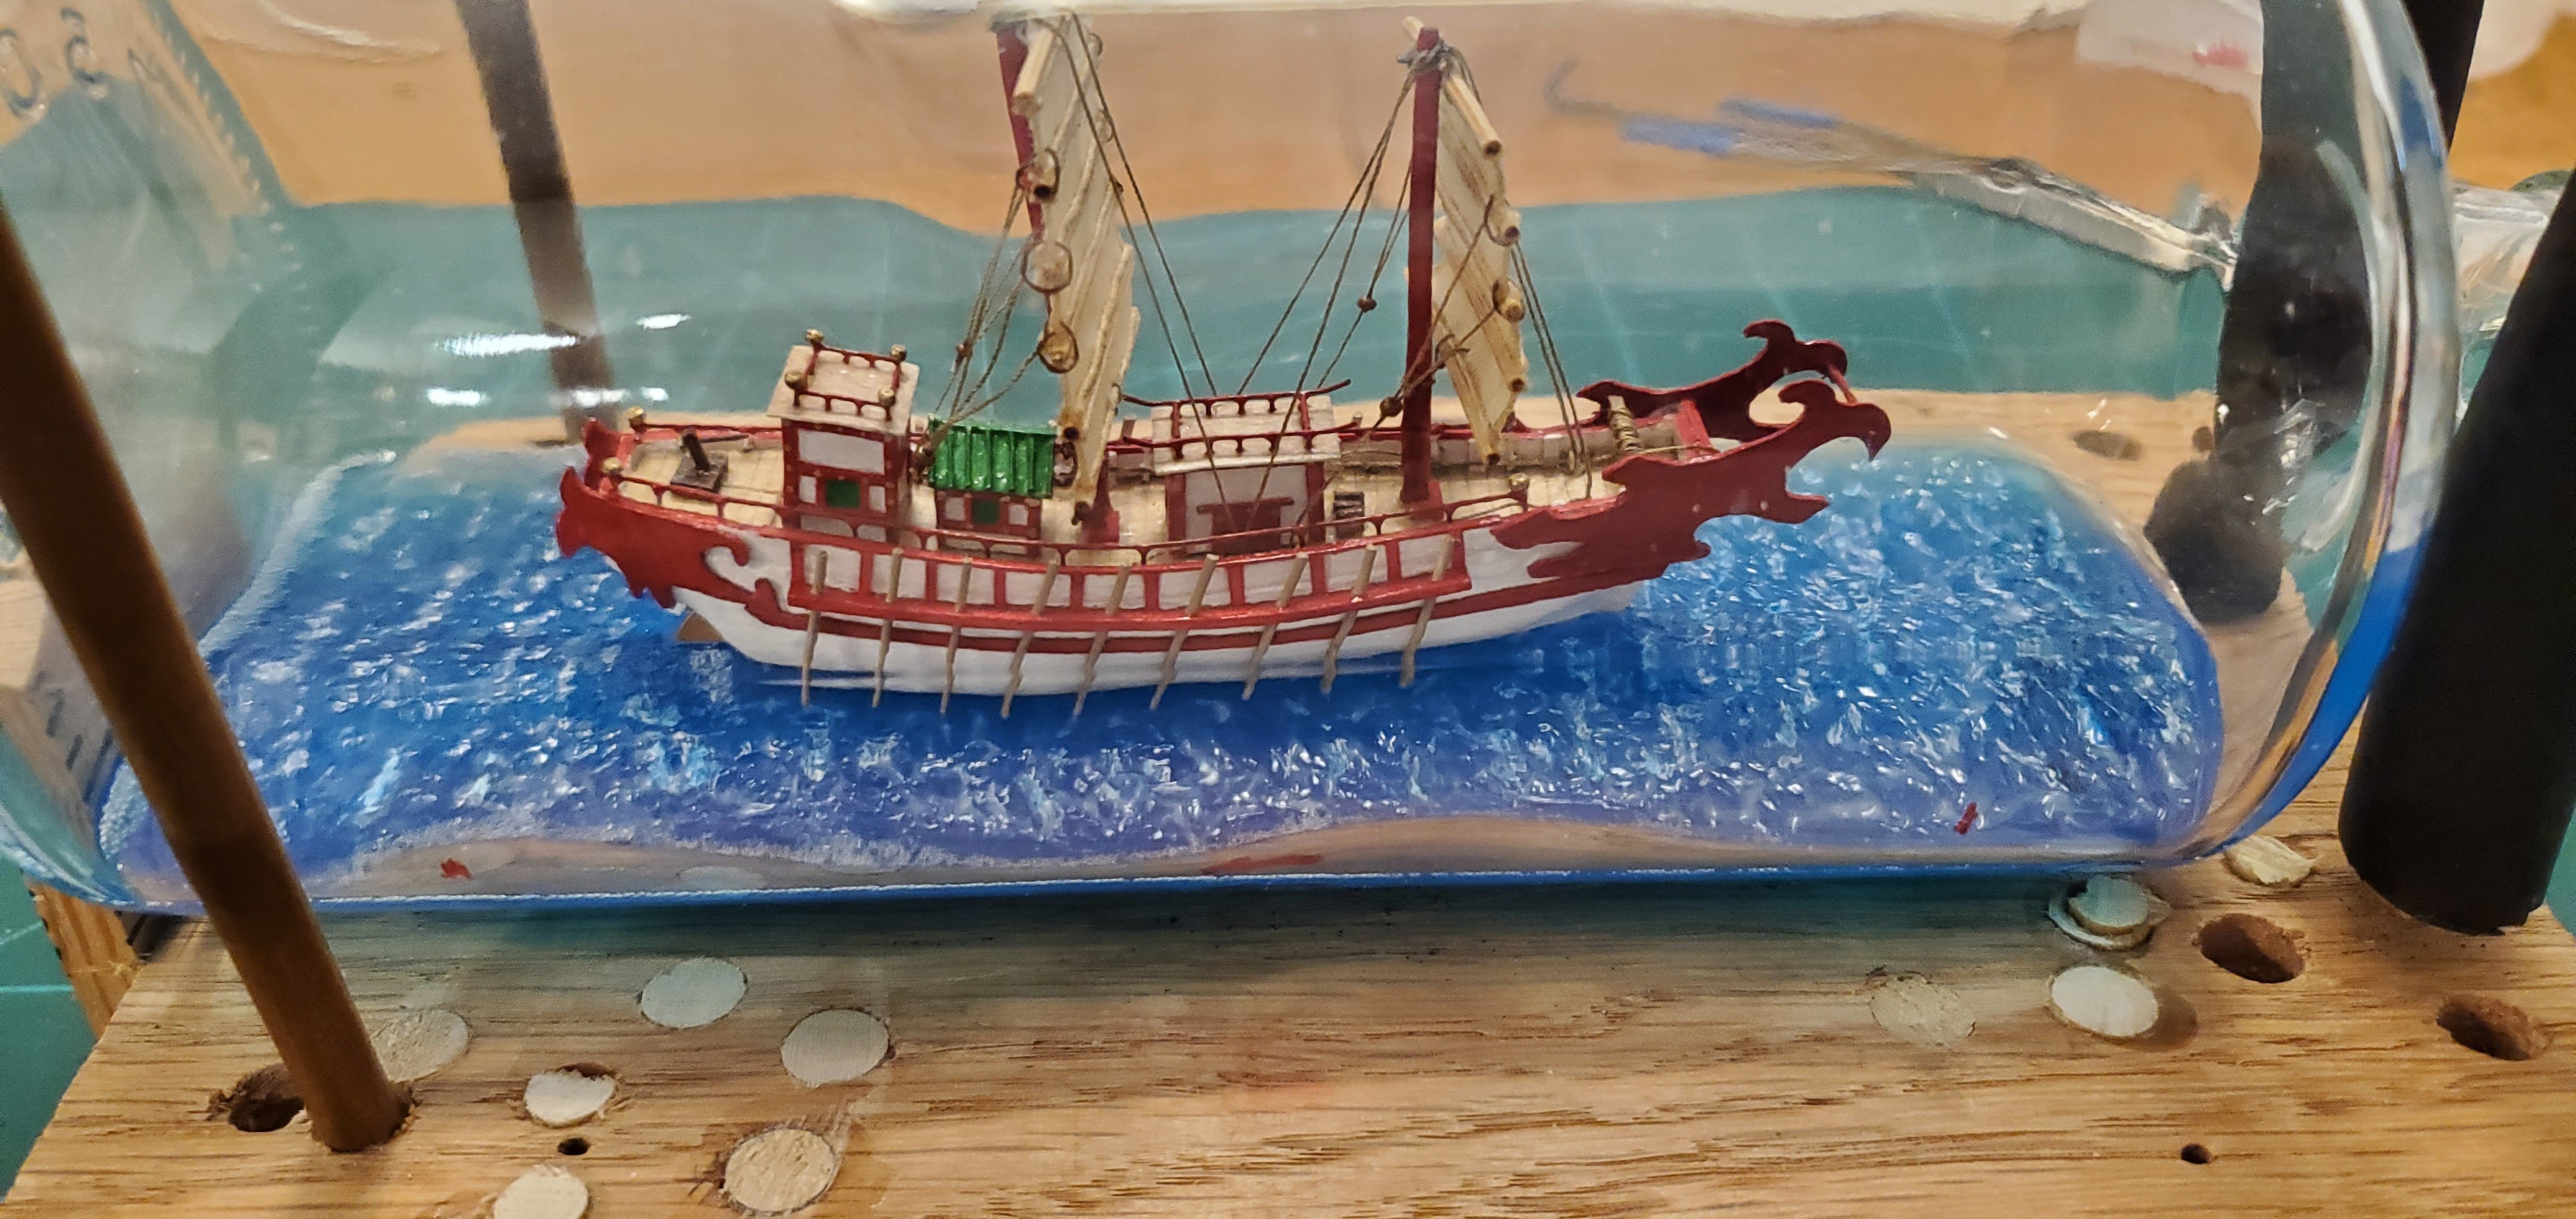
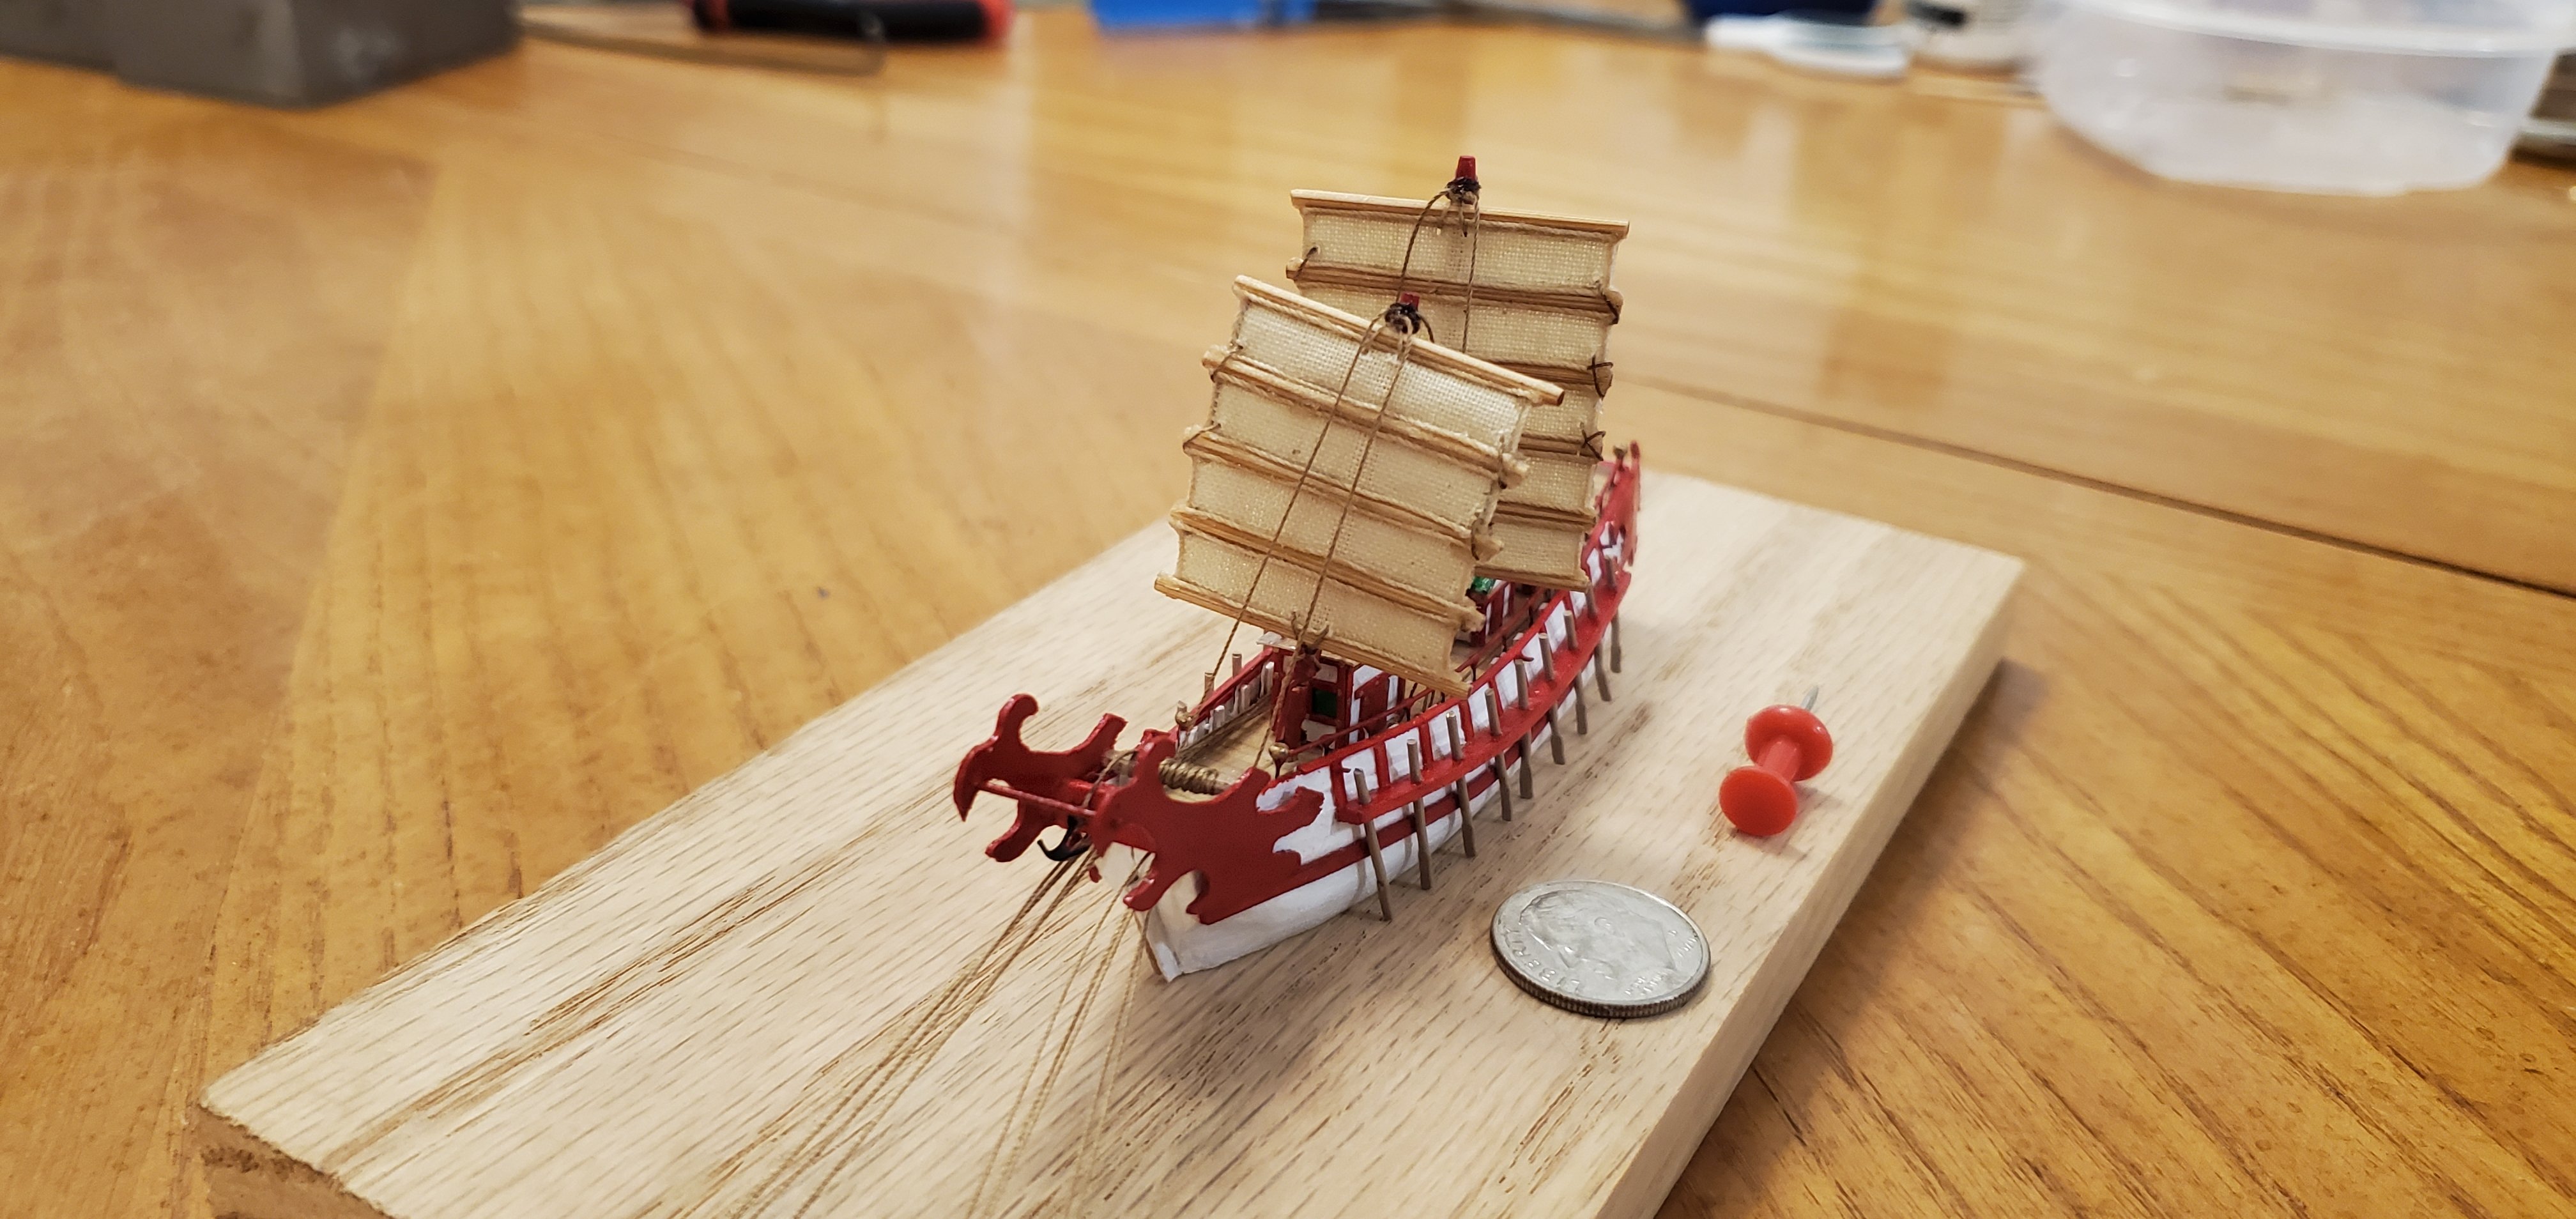
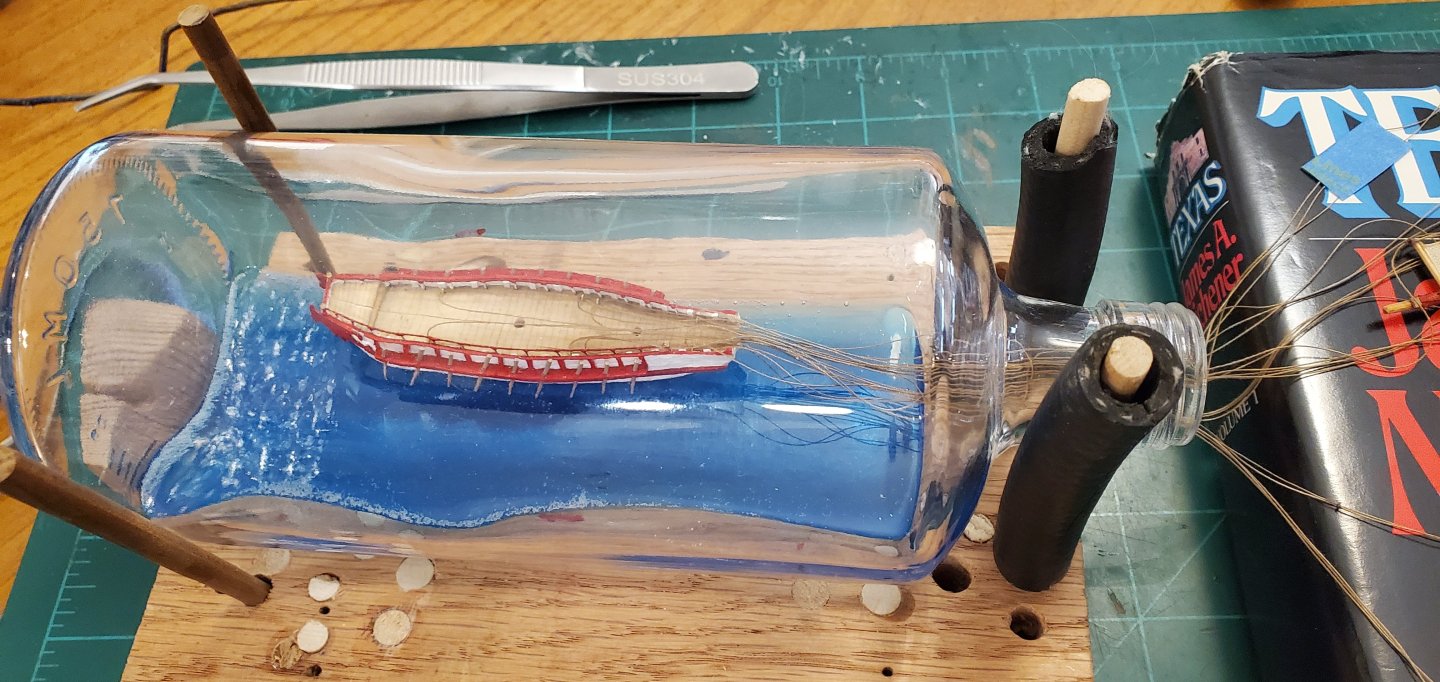
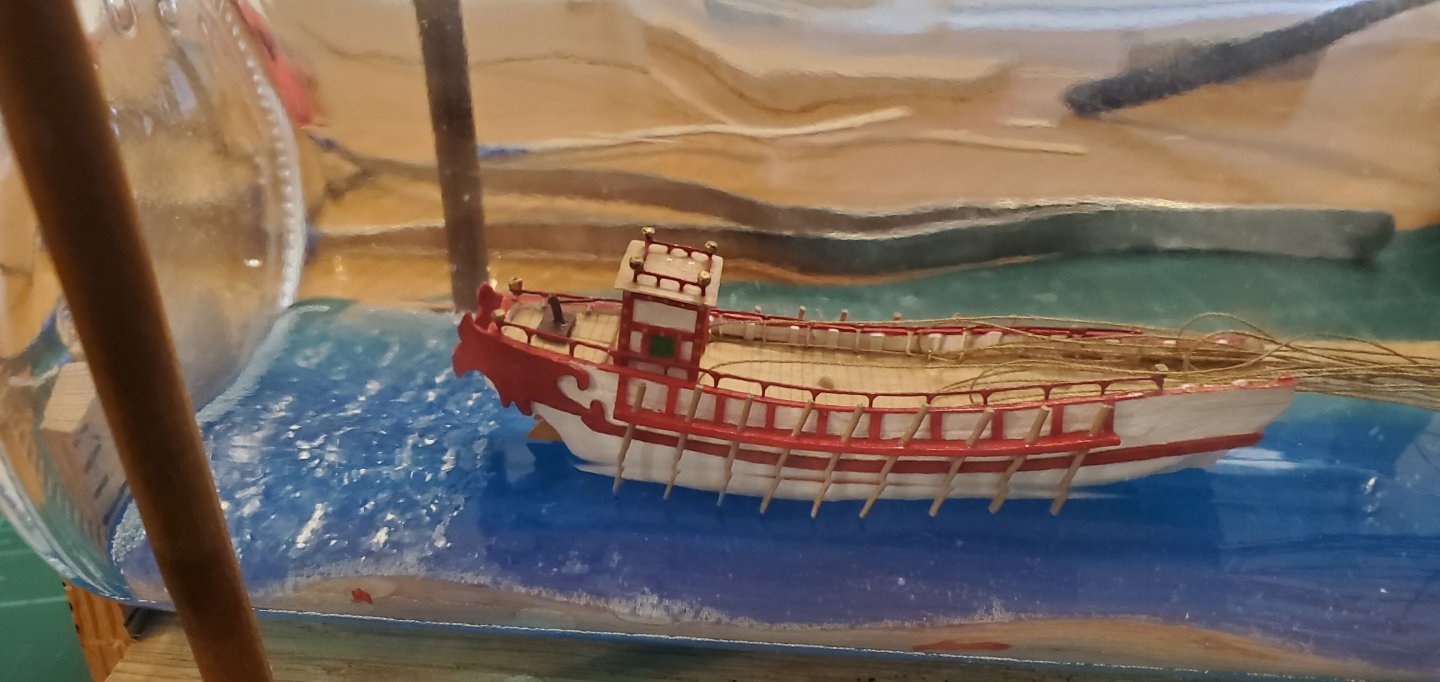
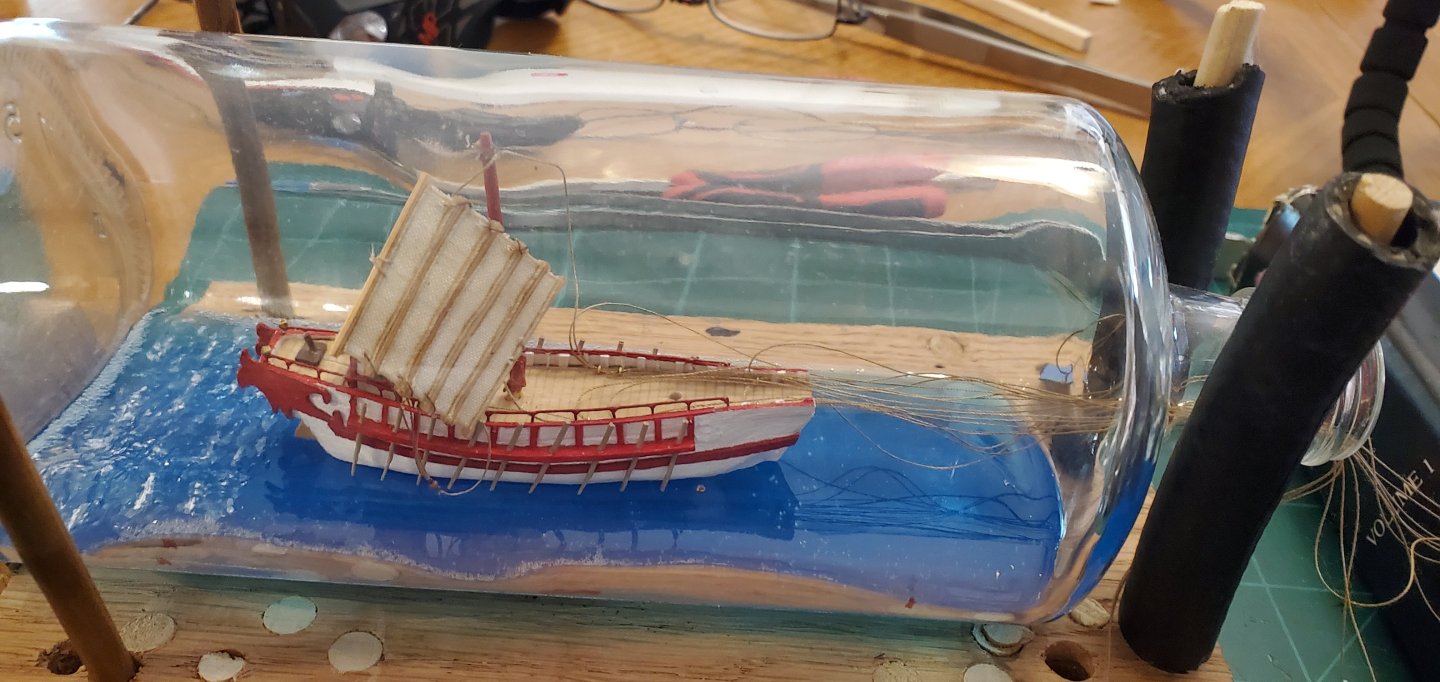
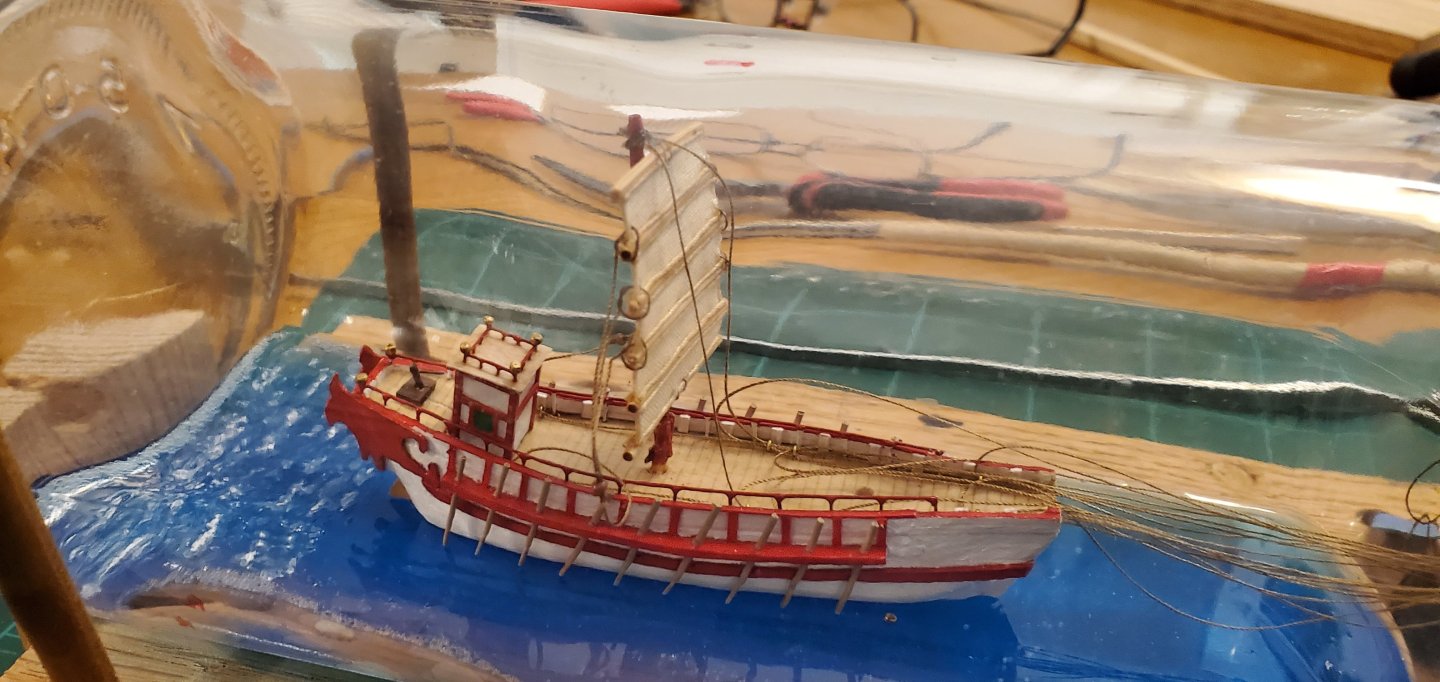
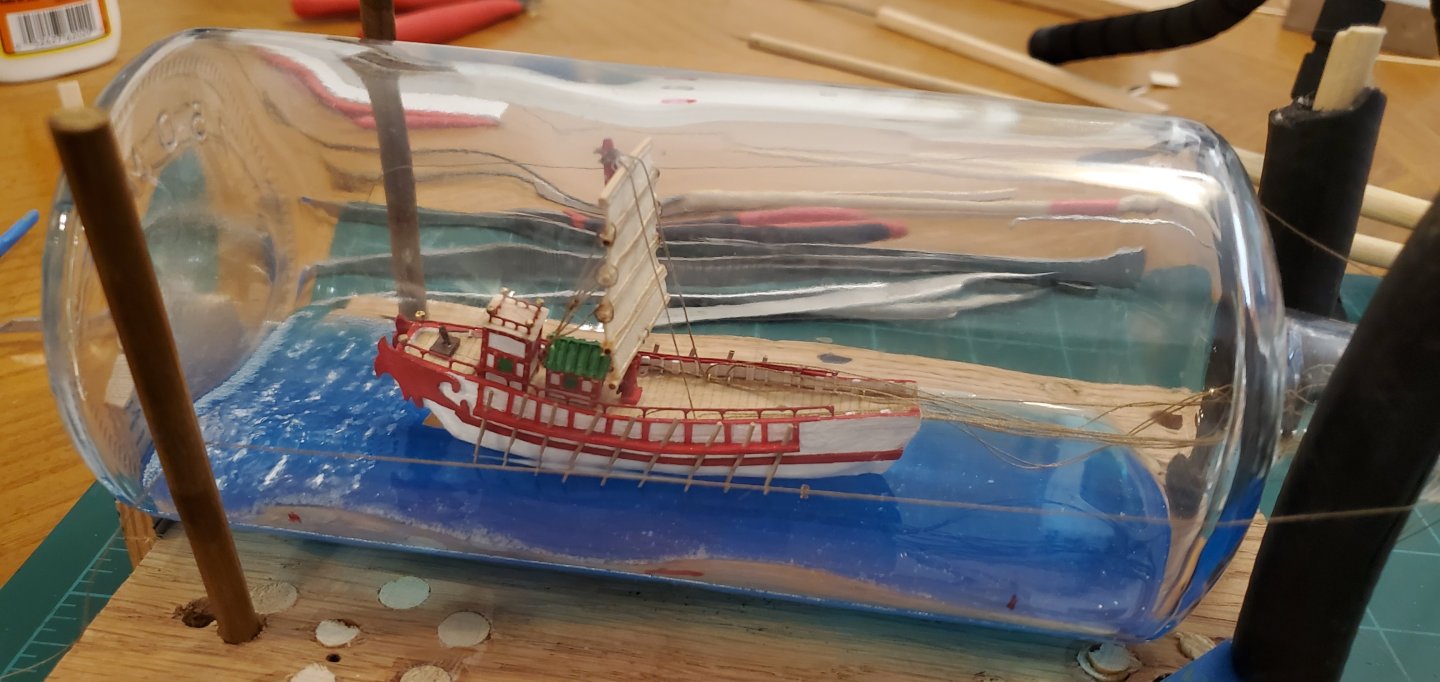
Thank you @Thukydides! The insertion process was a doozy. It took me 8 or 9 hours to get the ship assembled inside the bottle and another 3 or 4 to get the water effects finished up (not counting drying time). There were quite a few self-inflicted wounds that caused the process to take so long. But it the end, we got er done! I took some videos of much of the ordeal. So if anyone wants to see how the sausage was made, here's the 12 hour process condensed down to three 8 - 9 minute videos. Part 1 - https://www.youtube.com/watch?v=2NnI9r-tPeQ Part 2 - https://www.youtube.com/watch?v=6_T9eUPj0f0 Part 3 - https://www.youtube.com/watch?v=UXudxchH3-Y Here's the picture version of the process, starting with the 2 halves of the hull ready for insertion. You can see the rigging lines as described in the post above - attached to the sails/masts, running thru the eye pins on the hull halves, then back out of the bow where the ends will remain outside the bottle after hull insertion. Here's the 2 halves of the hull joined up inside the bottle. Rigging lines are nice and tidy. You may notice that I actually textured the water behind the ship BEFORE insertion. Wow! What a concept! It only took me 3 years of doing this stuff to figure that out. Tiller and first deck house installed. Now the real first test - installing the main mast and tensioning the rigging. Lines still nice and tidy. I got the main mast installed ok, and without tangling the rigging lines, but managed to detach the top of the sail from the top of the mast. Ugh. However, using a new tool in the tool box (a barbecue skewer), I was able to push the sail into place and glue it to the top of the mast. It's not tied on, but I globbed enough CA glue on it to keep it secure. Then I realized I'd made another unforced error. I was so anxious to try and get that first mast/sail assembly in place that I forgot to install the little Monopoly house that goes in front of the larger house (Monopoly hotel?) already in place. So I had to thread the needle and fit the little house between the rigging lines and into place. Quite a bit of difficulty doing that (as you can see in the video), but I eventually got there. I got the 2nd Monopoly hotel into place with no difficulty. Then the horror show began. It took me 2 long tries to get the fore mast into place. At one point, I ended up pulling it back out of the bottle, untangling the lines, and re-inserting. On the second try, I finally managed to get the mast in the deck hole, but made a gawd-awful mess of the rigging lines. It took 3 or 4 hours to get the rigging lines for the fore mast/sail untangled, tensioned, and tied off. Ugh. But in the end, the mule finally won out. That ended day 1 of the process. Moving to day 2 of the process and smooth sailing the rest of the way! Day 2 was spent completing the water effects and adding the ornamental carving on the bow. I had textured the water behind the boat before insertion. Now it was just a matter of adding the texture around the sides and in the front. I wanted to texture the water first so I wouldn't have to mess with reaching underneath the ornamental carving and risk knocking it off or damaging it. For texturing, I dabbed on some clear acrylic medium gloss gel to make gentle waves. After it dried, I added some touches of white paint to many of the wave tops for whitecaps. After that dried, I went back over many of the whitecaps with Tamiya clear blue paint. It has a transparent quality and is a shade lighter than my epoxy resin base. It had the dual effect of softening the whitecaps and adding a lighter blue color to the tops of the waves giving a layered effect of blue coloring, much like real waves (although kind of hard to see thru the camera lens). And with that, the insertion process was complete! Only one thing left to do - celebrate with a tipple of Bundaberg courtesy of Pat (a.k.a @BANYAN). Mini-Dimples heard me busting out the Bundaberg and decided to make an appearance. She rates the ship and the rum 2 horns up!


- 106 replies
-
- 21
-
-
-
- Kentoshi-Sen
- bottle
- (and 1 more)
-
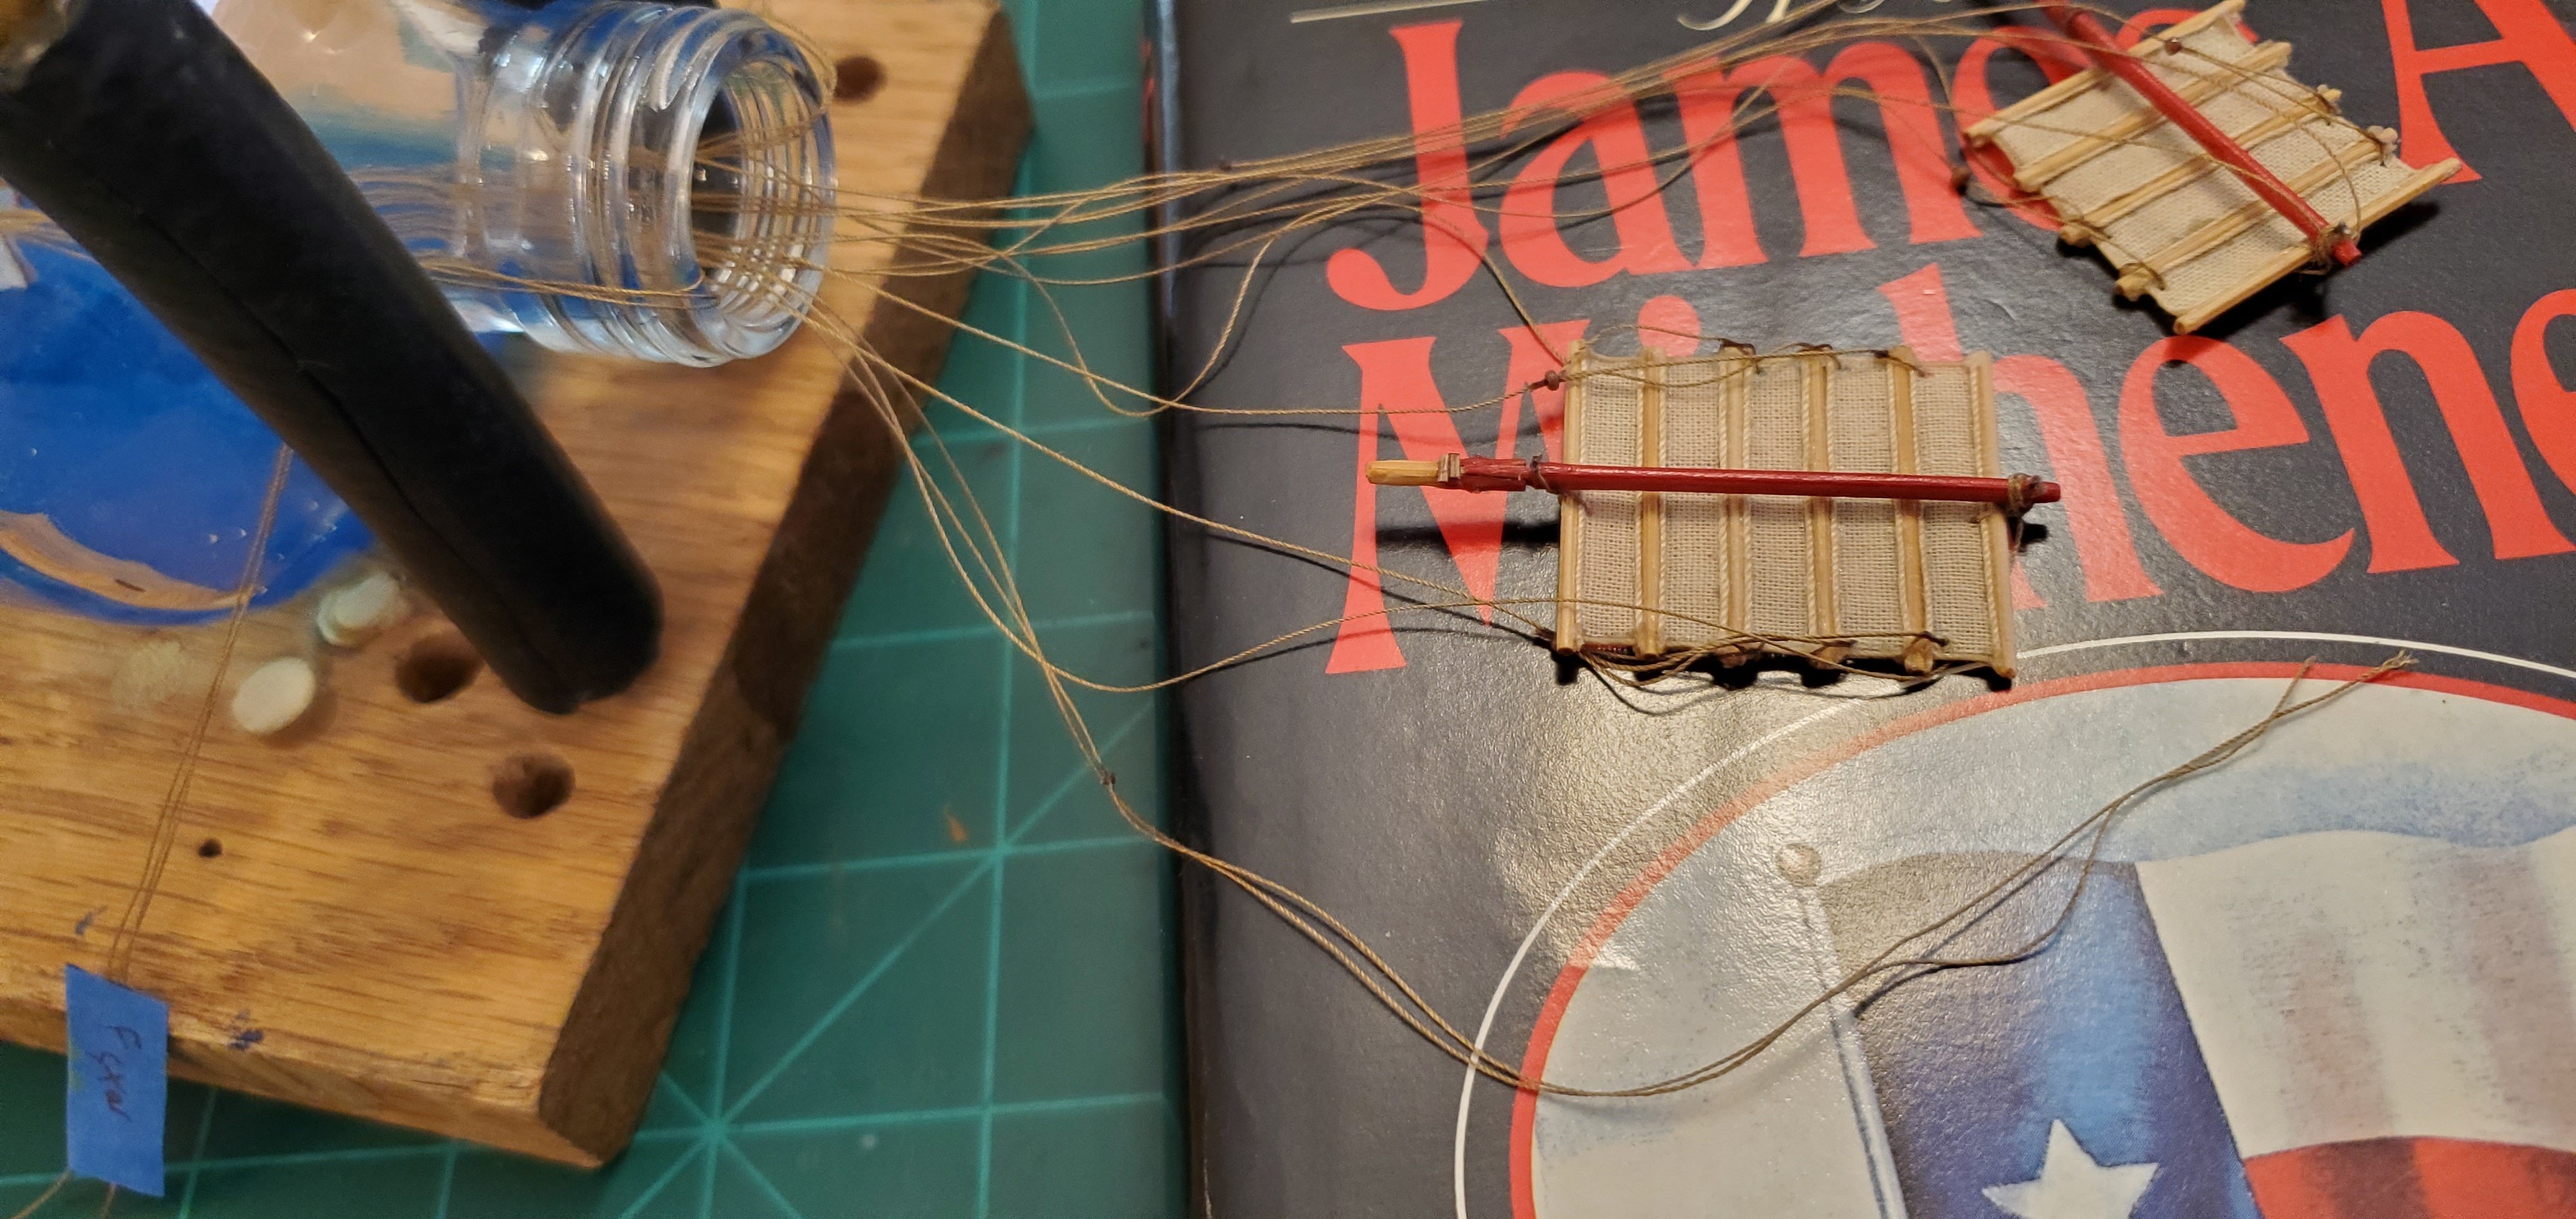
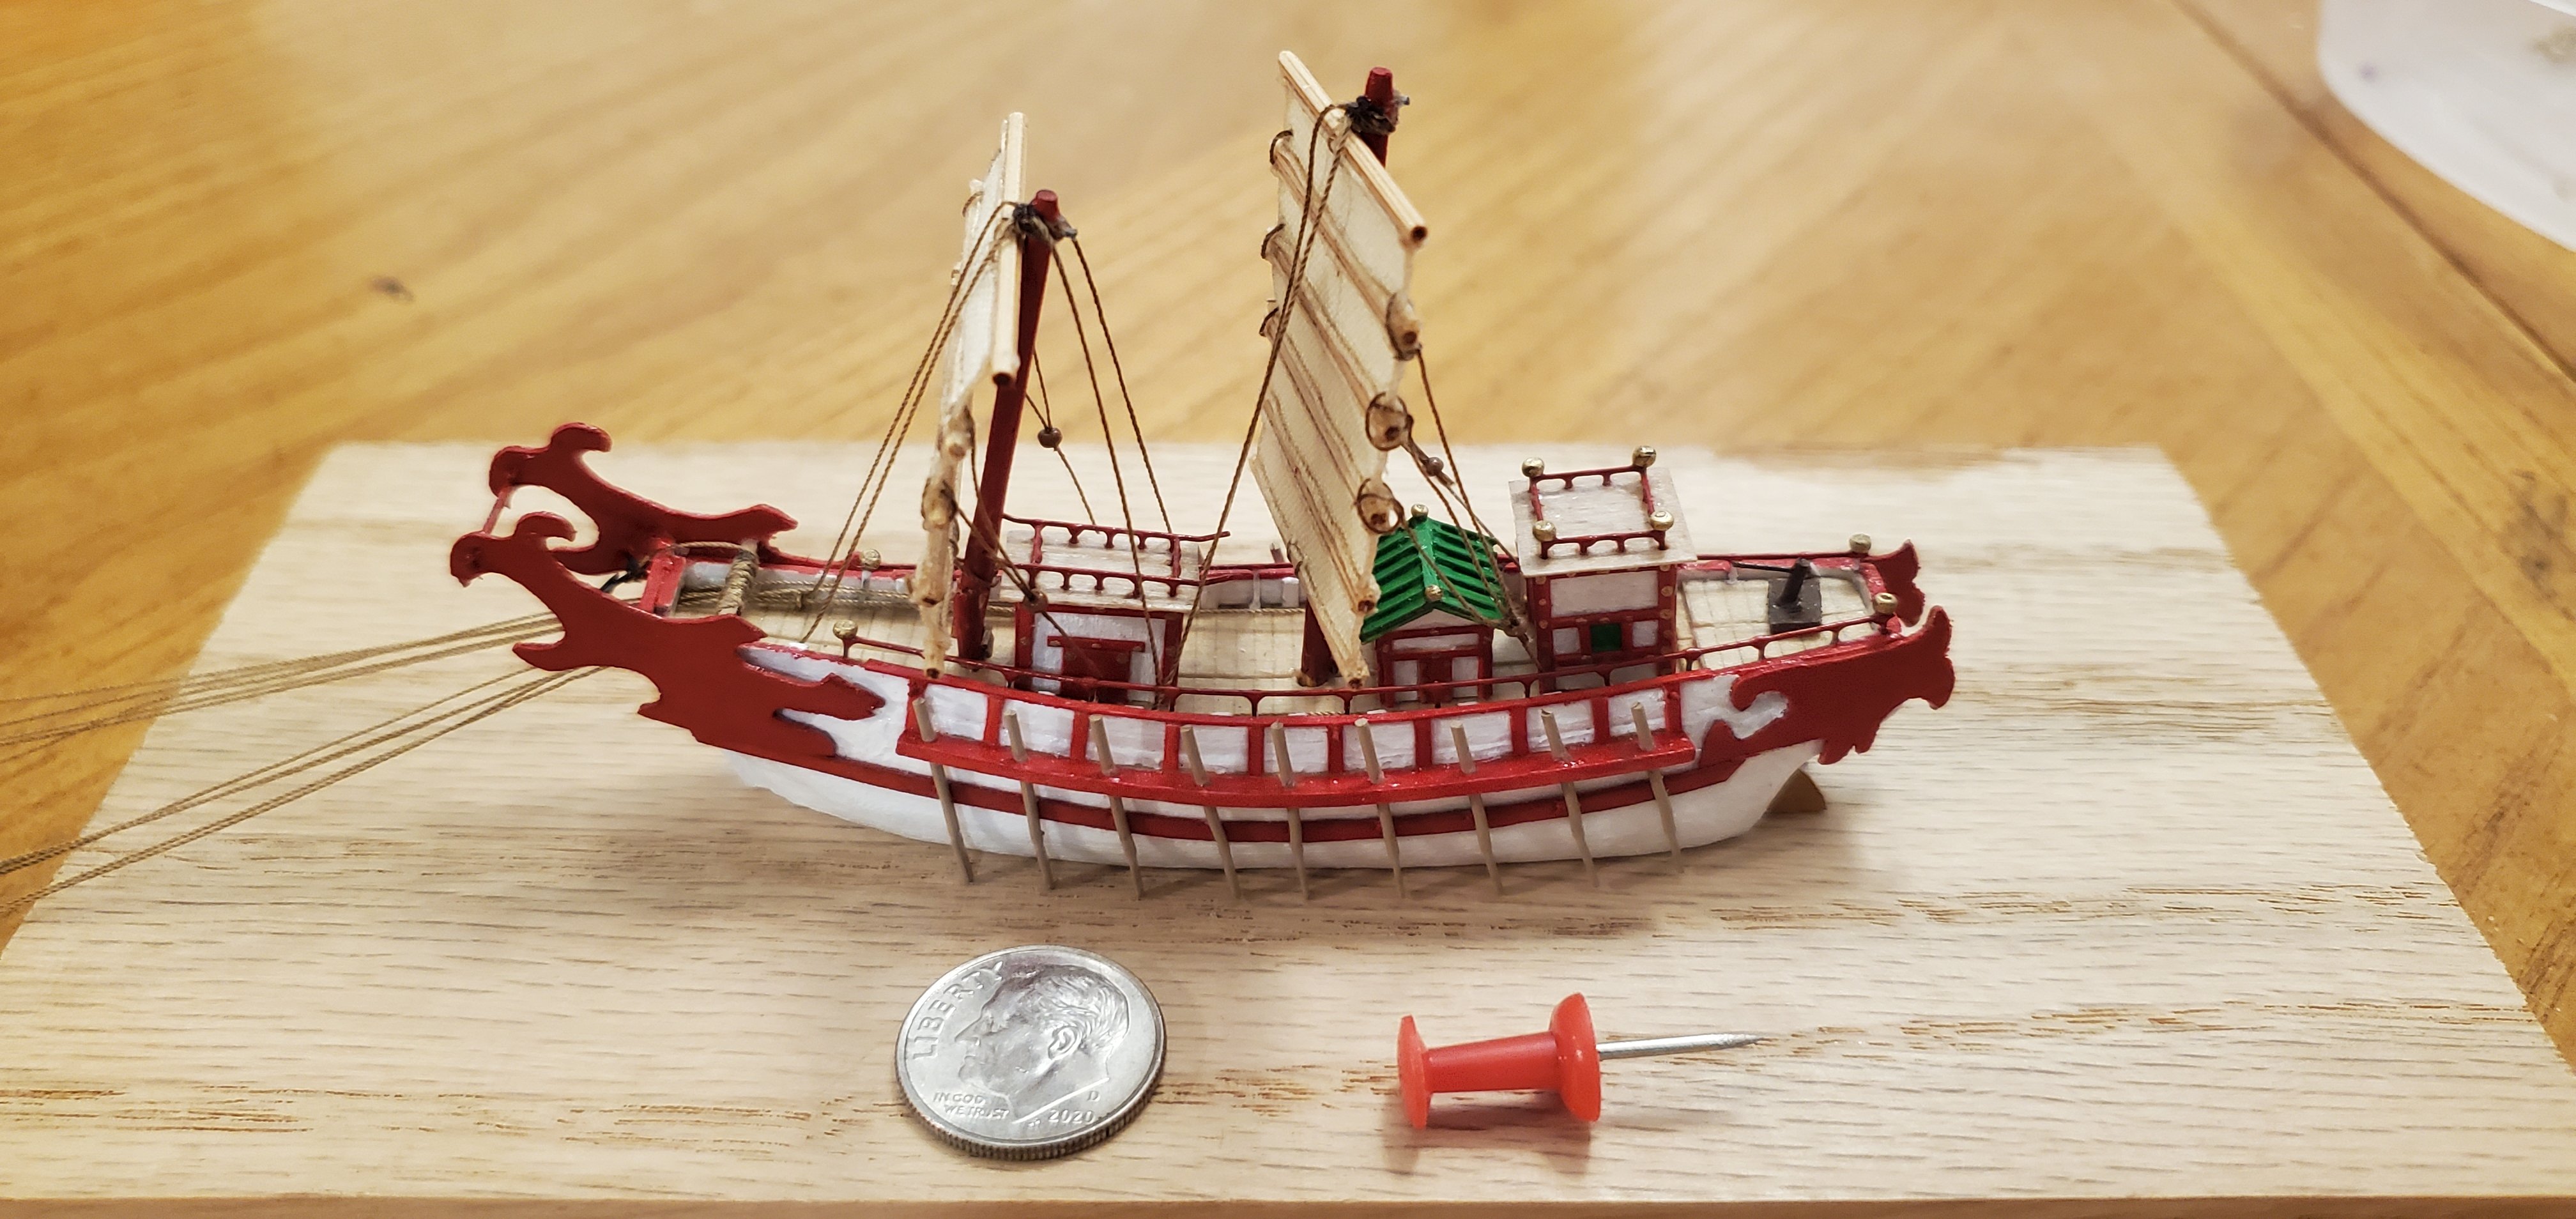
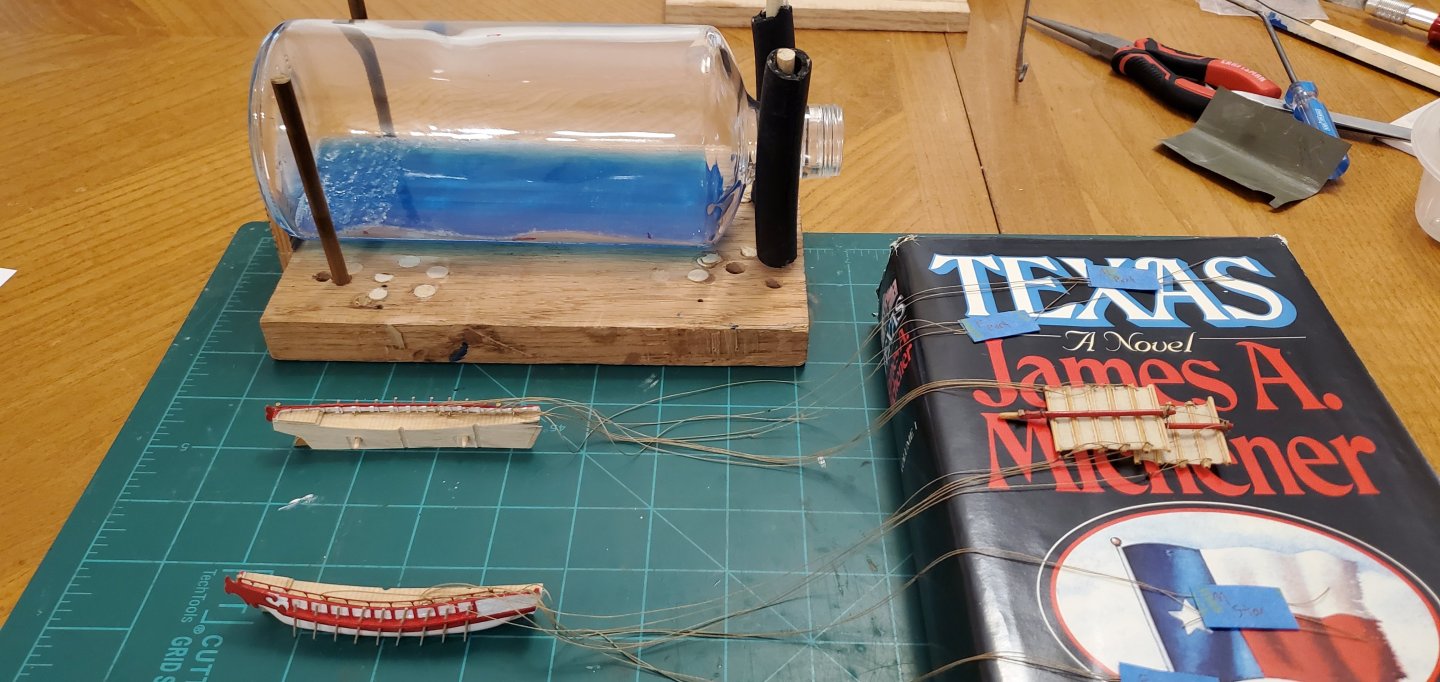
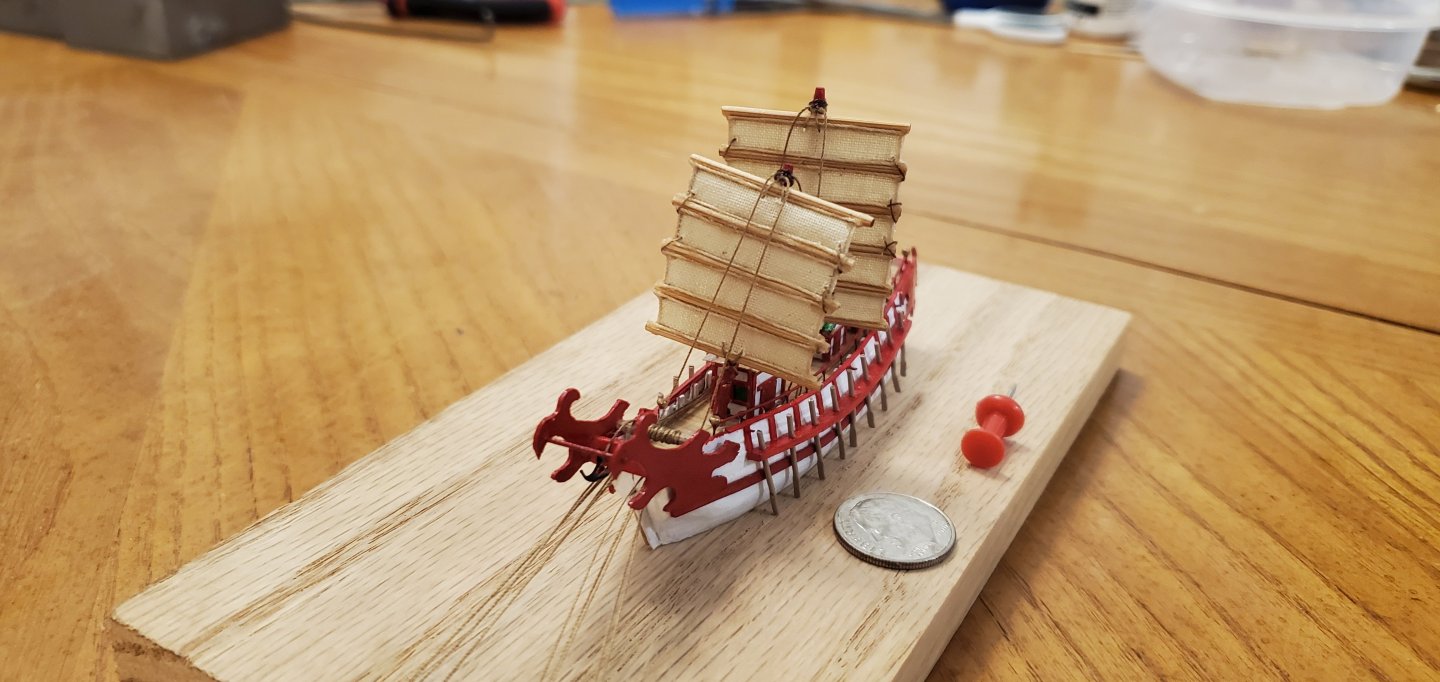
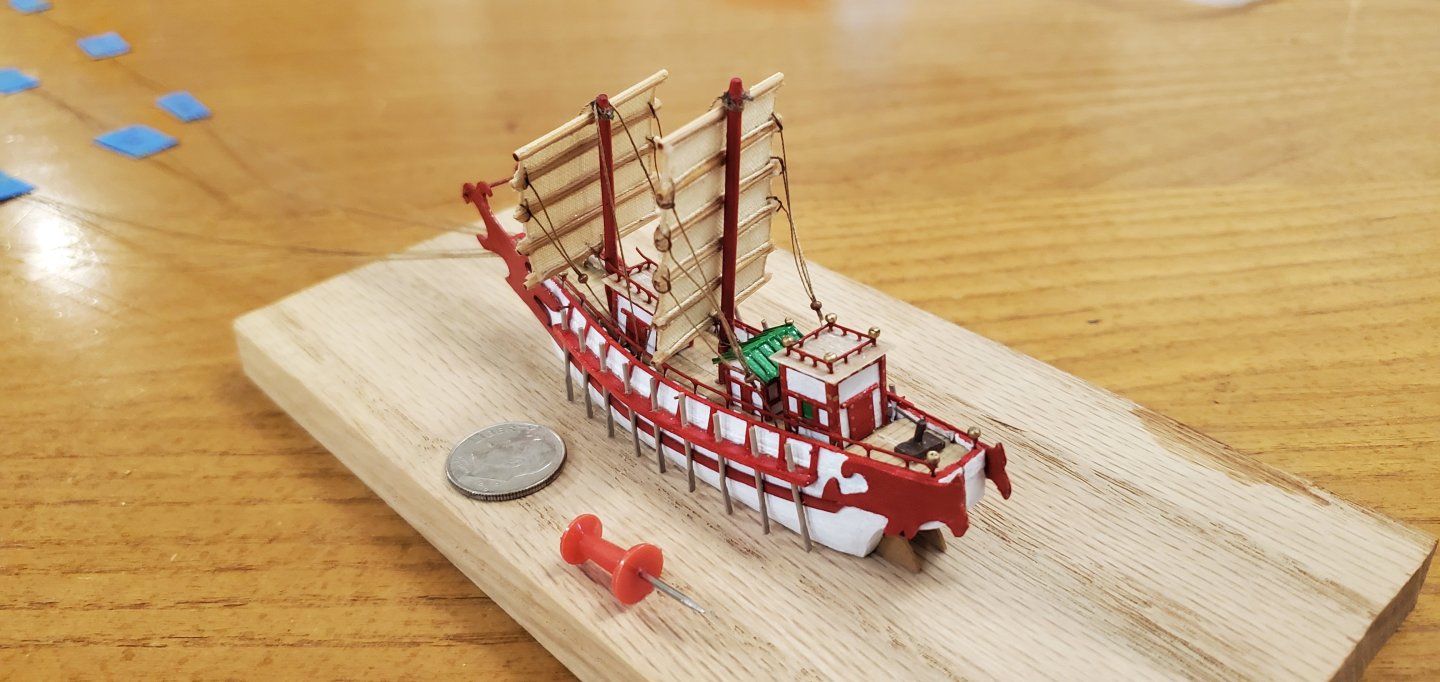
@lraymo - Thank you for the kind words! Almost time for the moment of truth! But how to manage the rigging was driving me nuts. The problem being that, because of the 3 large deck houses, the masts/sails had to be installed after the hull was in the bottle - meaning that the rigging could not be tied off to the ship in advance. The masts/sails would have to have their rigging attached before insertion. After insertion, all the lines would have to be tensioned and tied off inside the bottle. So the plan I came up with was to put a series of eye pins on each half of the deck just inside the bulwark. One end of the rigging lines would be attached to the masts/sails. The lines would then run thru the eye pins on each half of the hull and back out the bow. I would insert the 2 halves of the hull into the bottle with the rigging lines running thru the eye pins and then join the hull halves inside the bottle (careful to keep the rigging lines from falling in between the halves of the hull). To insert the mast/sail assembly, I would push it into the bottle while simultaneously pulling the other ends of the rigging lines thru the eye pins trying not to tangle things up during the process. If everything went well, I would be able to drop the end of the mast into it's hole in the deck, raise the mast, tension all the rigging lines, then cut them off. Arnold says... Before I got started, I figured I'd better take some pics of the ship with everything dry-fit in place. In the next post, I'll show how the insertion process went.


- 106 replies
-
- 19
-
-
-
- Kentoshi-Sen
- bottle
- (and 1 more)
-
Very handy tools! I also use them to square things up. Also, what is WOP?
-
Agree with Ken and Jim about the nice tension on the chains. That had to be harder than you make it sound to get it just right. Also, if you're looking to kill 2 birds with one stone, here's a suggestion for the onboard animal and broom.

- 732 replies
-
- 11
-
-
-
- Lula
- sternwheeler
- (and 1 more)
-
It looks lie a small bit of chatter from a planer, but as Wefalck said, it's hard to diagnose from the picture. What does the other side of the board look like?
- 312 replies
-
- 4
-
-
- Chile
- Latin America
- (and 6 more)
-
He should be. That is extraordinary work, Steve.
-
Excellent job on the planking, Paul. That's as good as I've seen.
-
This discussion reminds me of a quote from Antarctic explorer Douglas Mawson, aboard the SY Aurora on one of its voyages to the ice. He described the scene on the deck as follows, “The piles of loose gear presented an indescribable scene of chaos. The deck was so encumbered that only at rare times was it visible.”
- 732 replies
-
- 5
-
-
- Lula
- sternwheeler
- (and 1 more)
-
Of course you know what I would recommend for the ship's animal, don't you Keith!
- 732 replies
-
- 8
-
-
-
- Lula
- sternwheeler
- (and 1 more)
-
Magnificent work, Bryan! the paraphernalia inside the boat really add some nice detail. Well done!!
-
Here's my answer to that question, Pat - everything/nothing!
- 301 replies
-
- 5
-
-
- Constitution
- Bluejacket Shipcrafters
- (and 1 more)