

Gregory
-
Posts
3,170 -
Joined
-
Last visited
Content Type
Profiles
Forums
Gallery
Events
Everything posted by Gregory
-
 I think they are ' interesting'. They add some character . I like the slight caricature nature of some of the faces. I am at in a bit of a quandary about adding figures to a build. To be realistic, the sheer numbers would be distracting from what I want to showcase. I ponder the idea of maybe a single figure along the rail to add a sense of perspective. Otherwise I like the idea of including them in build photos , but not so much in the finished model. If I may clutter up your log a bit.😁
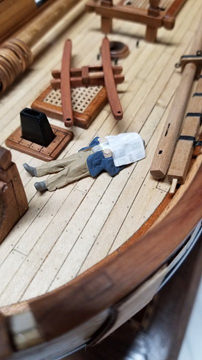
-
Interesting figures. What is your source for those?
-
pin vise and drill bits
Gregory replied to palmerit's topic in Modeling tools and Workshop Equipment
I have a couple of these from Amazon The chuck goes from .5 to 3mm according to the specs, but I'm sure I've gone smaller than .5 , but I mostly use the 1/8 shank carbide bits. It's got a real nice feel to it, and there is nothing in the build quality that makes me think it will not outlast me.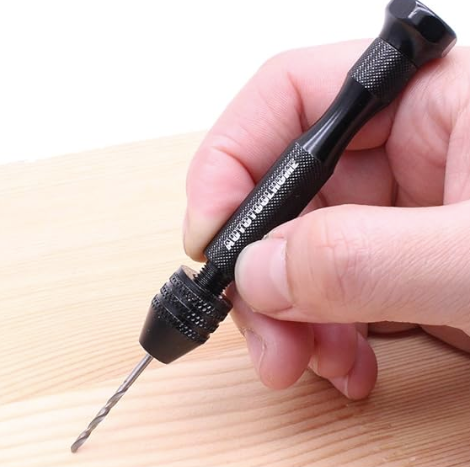
-
Are you going to do mostly right angle cuts? I put together very reliable miter that works with very thin saws and single edge razor blades. I you are interested I can put some pictures up. l also use my Proxxon FET for cutting thin stuff an don’t have trouble with tearing that can’t be remedied with light sanding if it needs it at all.
-
I’m sure a lot of instructions call for that kind of construction, but it’s fairly easy to do something like glue a small diameter dowel to the inside corners and place holes where needed in the deck. In the end, it’s what works best for you. For free standing parts like fife rails and such it’s a matter of coming up with a pinning solution. I’d be happy to provide an example If you would like.
-
I can’t think of any situation where I would glue anything directly to the deck. There would be some kind of pinning process that penetrated the deck, so that the finnish of the deck is not a factor.
-
how to value a pre 1950 model of the Santa Maria
Gregory replied to amuzed_traveler's topic in New member Introductions
What kind of estimate are you getting for the refurbishing? If you found a model like this in restored condition, in an antique store, I would be surprised if they would be asking more the $200. The value of something like this, is more as a family keepsake than a fine piece of art. -
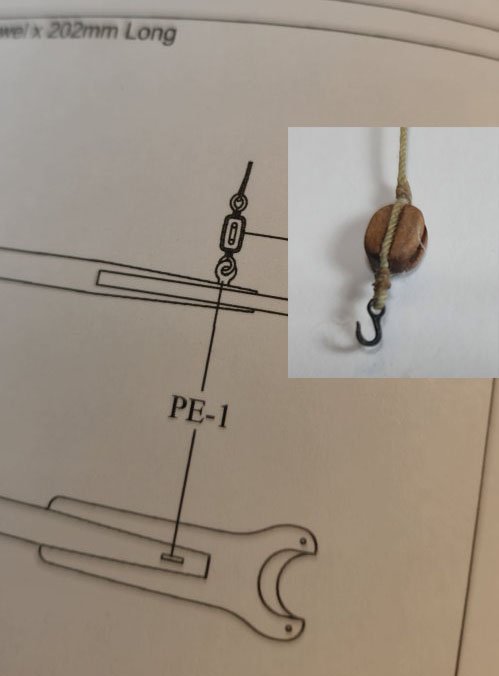
Here is a link to Chuck's stropping tutorial that @JacquesCousteau referred to. Block Stropping You might find a block stropped with a hook would be a better fit than the way the plans show. Will be easier to work with than having the line & block tied to the gaff.
-
Those deadeyes look really good. Did you add any finishing?
- 82 replies
-
- 1
-

-
- Yacht Mary
- Mamoli
- (and 1 more)
-
I don’t like to paint, so I look for different woods for contrast. I don’t have tools for milling beyond what I can do with my Proxxon FET. I have a laser for detail work. I go to Ocooch Hardwoods for exotic sheets . I like Rockler and Woodcraft for veneer. I’ll post some samples later of different colors I have used.
-
Fractal vise on kickstarter
Gregory replied to DavidG's topic in Modeling tools and Workshop Equipment
I just figured out this device is not available for purchase yet. You who are interested might offer your suggestions to make it better. -
FWIW You can download the instructions for Cheerful at the Syren site which will provide a lot of rigging detail. Glenn's Cheerful logs is a great go-to for rigging also.
- 83 replies
-
- 1
-
-
- Lady Nelson
- Amati
- (and 2 more)
-
If I were building the model I would combine information from the AOTS book and the movie replicas. This also sounds like the kind of information a competent builder would do the research for. PS The discussion you linked to above should be as good as it gets here at MSW.
- 1 reply
-
- 3
-
-
Mini Table Saw recommendations
Gregory replied to captainscott's topic in Modeling tools and Workshop Equipment
In my opinion it's very easy to set up. Just takes seconds to adjust the fence. Takes a few minutes to change blades- 10-15 max. I've never had a big project like strip cutting that it didn't do well. You will want to source some blades besides the Proxxon. Now, I'm talking about the FET.. I don't see the smaller KS 115 being a good choice for ship modeling. -
FaceBook miniature tools ads
Gregory replied to jmlyle's topic in Modeling tools and Workshop Equipment
I have an identical setup as yours including the rod modification. The one shown above from Innocraftsman, while it looks well made, looks limited in its usefulness. The clearance between the head and the table as well as no apparent head travel stop setting. -
FaceBook miniature tools ads
Gregory replied to jmlyle's topic in Modeling tools and Workshop Equipment
Table saw: $80 on Amazon The quality is probably adequate for small modeling jobs. Probably not up to precision thin strip ripping for planking. There are several variations as you will see on Amazon. I haven't seen anyone here talking about having one. Drill Press $90 on Amazon. There was a discussion about it here: Innocraftsman is just another storefront for a lot of those China sourced tools. Their prices are considerably more than other places like Amazon, Temu, Ali Express and others. -
FaceBook miniature tools ads
Gregory replied to jmlyle's topic in Modeling tools and Workshop Equipment
Whatever you are seeing on Facebook can probably be found on a site you would be more comfortable with like Amazon or Walmart These 'cheap' tools are all coming from China and can be found on may different sites. I never click through adds on Facebook because scams are rampant there. Checking here at MSW is always a good screening process. -
Those reef points on the model seem to be artistic license. It doesn't look to me, in light of the brails, the sail would lend itself to being reefed at that point. Then there was druxey's comment. P.S. I'm a little miffed now, because I built my Mary with those reef points because the sail drawn on the plans included them.
- 82 replies
-
- 3
-
-
- Yacht Mary
- Mamoli
- (and 1 more)
-
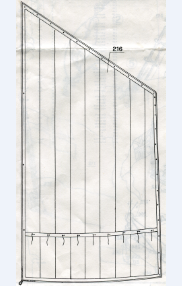
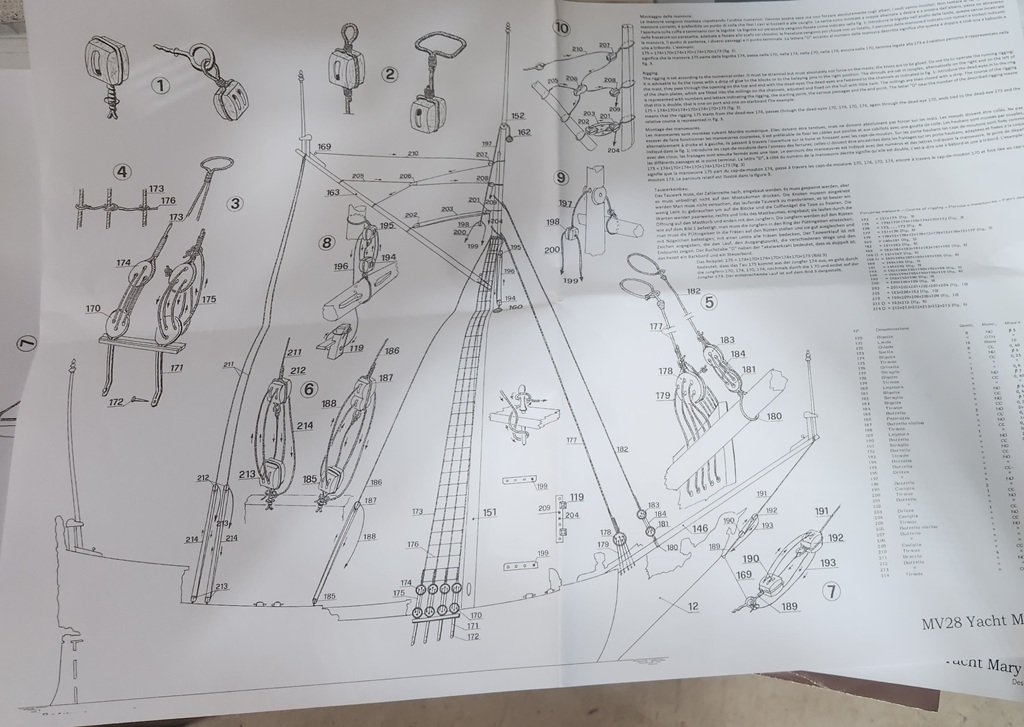
Mamoli traditionally has little in the way of useful instructions - how to - for inexperienced wooden kit builders. The original Mamoli plans were large 2-sided drawings that provided numbered part lists . The illustrations showed you how the various parts should look after assembly. Dusek has copied those plans on to several 16 x 12 sheets as well as at least one full size landscape view of the model. This is what the plans and instructions look like. The rigging instructions will look like this. Hope this helps.

-
The Mamoli rigging plan had the lines indicated here for furling. I suppose they have a formal name that I do no know.

- 82 replies
-
- 1
-
-
- Yacht Mary
- Mamoli
- (and 1 more)
-
CNC-Model Making
Gregory replied to Jefta's topic in CAD and 3D Modelling/Drafting Plans with Software
@Cleat Would you say Vcarve does a good job of converting a 2D image into a3D surface for carving? -
I remember someone mentioning a CA that is not as volatile as most. I’ll see if I can dig up the reference.
-
Great start on your re-boot of that model. Let me know if I'm cluttering up your log too much, but you have really got me thinking about going forward with my Mary II.. I found this superb link to a model by Lloyd McCaffery. There are a couple of downloadable PDF's of some of the details and also contemporary reference drawings/painting. Mamoli did a great job of creating the details of this kit.
- 82 replies
-
- 5
-
-
- Yacht Mary
- Mamoli
- (and 1 more)
-
"Trinidad" 1881 wreck located in Lake Michigan
Gregory replied to Ian_Grant's topic in Nautical/Naval History
Great! Here is a link to a 3D model of the wreck. It's included in the linked article but I thought I would provide a shortcut.. Schooner Trinidad (1867-1881) - 3D model by Zach Whitrock (@Whitrzac) [3d14b04]- 1 reply
-
- 3
-
-
CNC-Model Making
Gregory replied to Jefta's topic in CAD and 3D Modelling/Drafting Plans with Software
Did you by chance check out " Mesh Cam ". Your experience with VCarve has me leaning in that direction, but Mesh Cam looks pretty robust also. I like this info from their web site:
