HOLIDAY DONATION DRIVE - SUPPORT MSW - DO YOUR PART TO KEEP THIS GREAT FORUM GOING! (Only 75 donations so far out of 49,000 members - C'mon guys!)
×


Theodosius
-
Posts
345 -
Joined
-
Last visited
Content Type
Profiles
Forums
Gallery
Events
Everything posted by Theodosius
-
The extra rings on the guns look very authentical, I like that! I'm sure this is a hell of a work! The bulheads are just beautiful! No way not to show them, even if they might not be 'real' with the guns run out. But I have learned, that every model is in one or the other way not an exact replica of a special working-condition of the real thing! It only has to please us, the builders, don't they? 🙂
- 857 replies
-
- 2
-

-
- Sphinx
- Vanguard Models
- (and 1 more)
-
All the effort with filling/sanding of the white area pays out now! Looking very good!
- 476 replies
-
- 2
-

-
-
- sphinx
- vanguard models
- (and 1 more)
-
wow, this guns are realy small! 😄
-
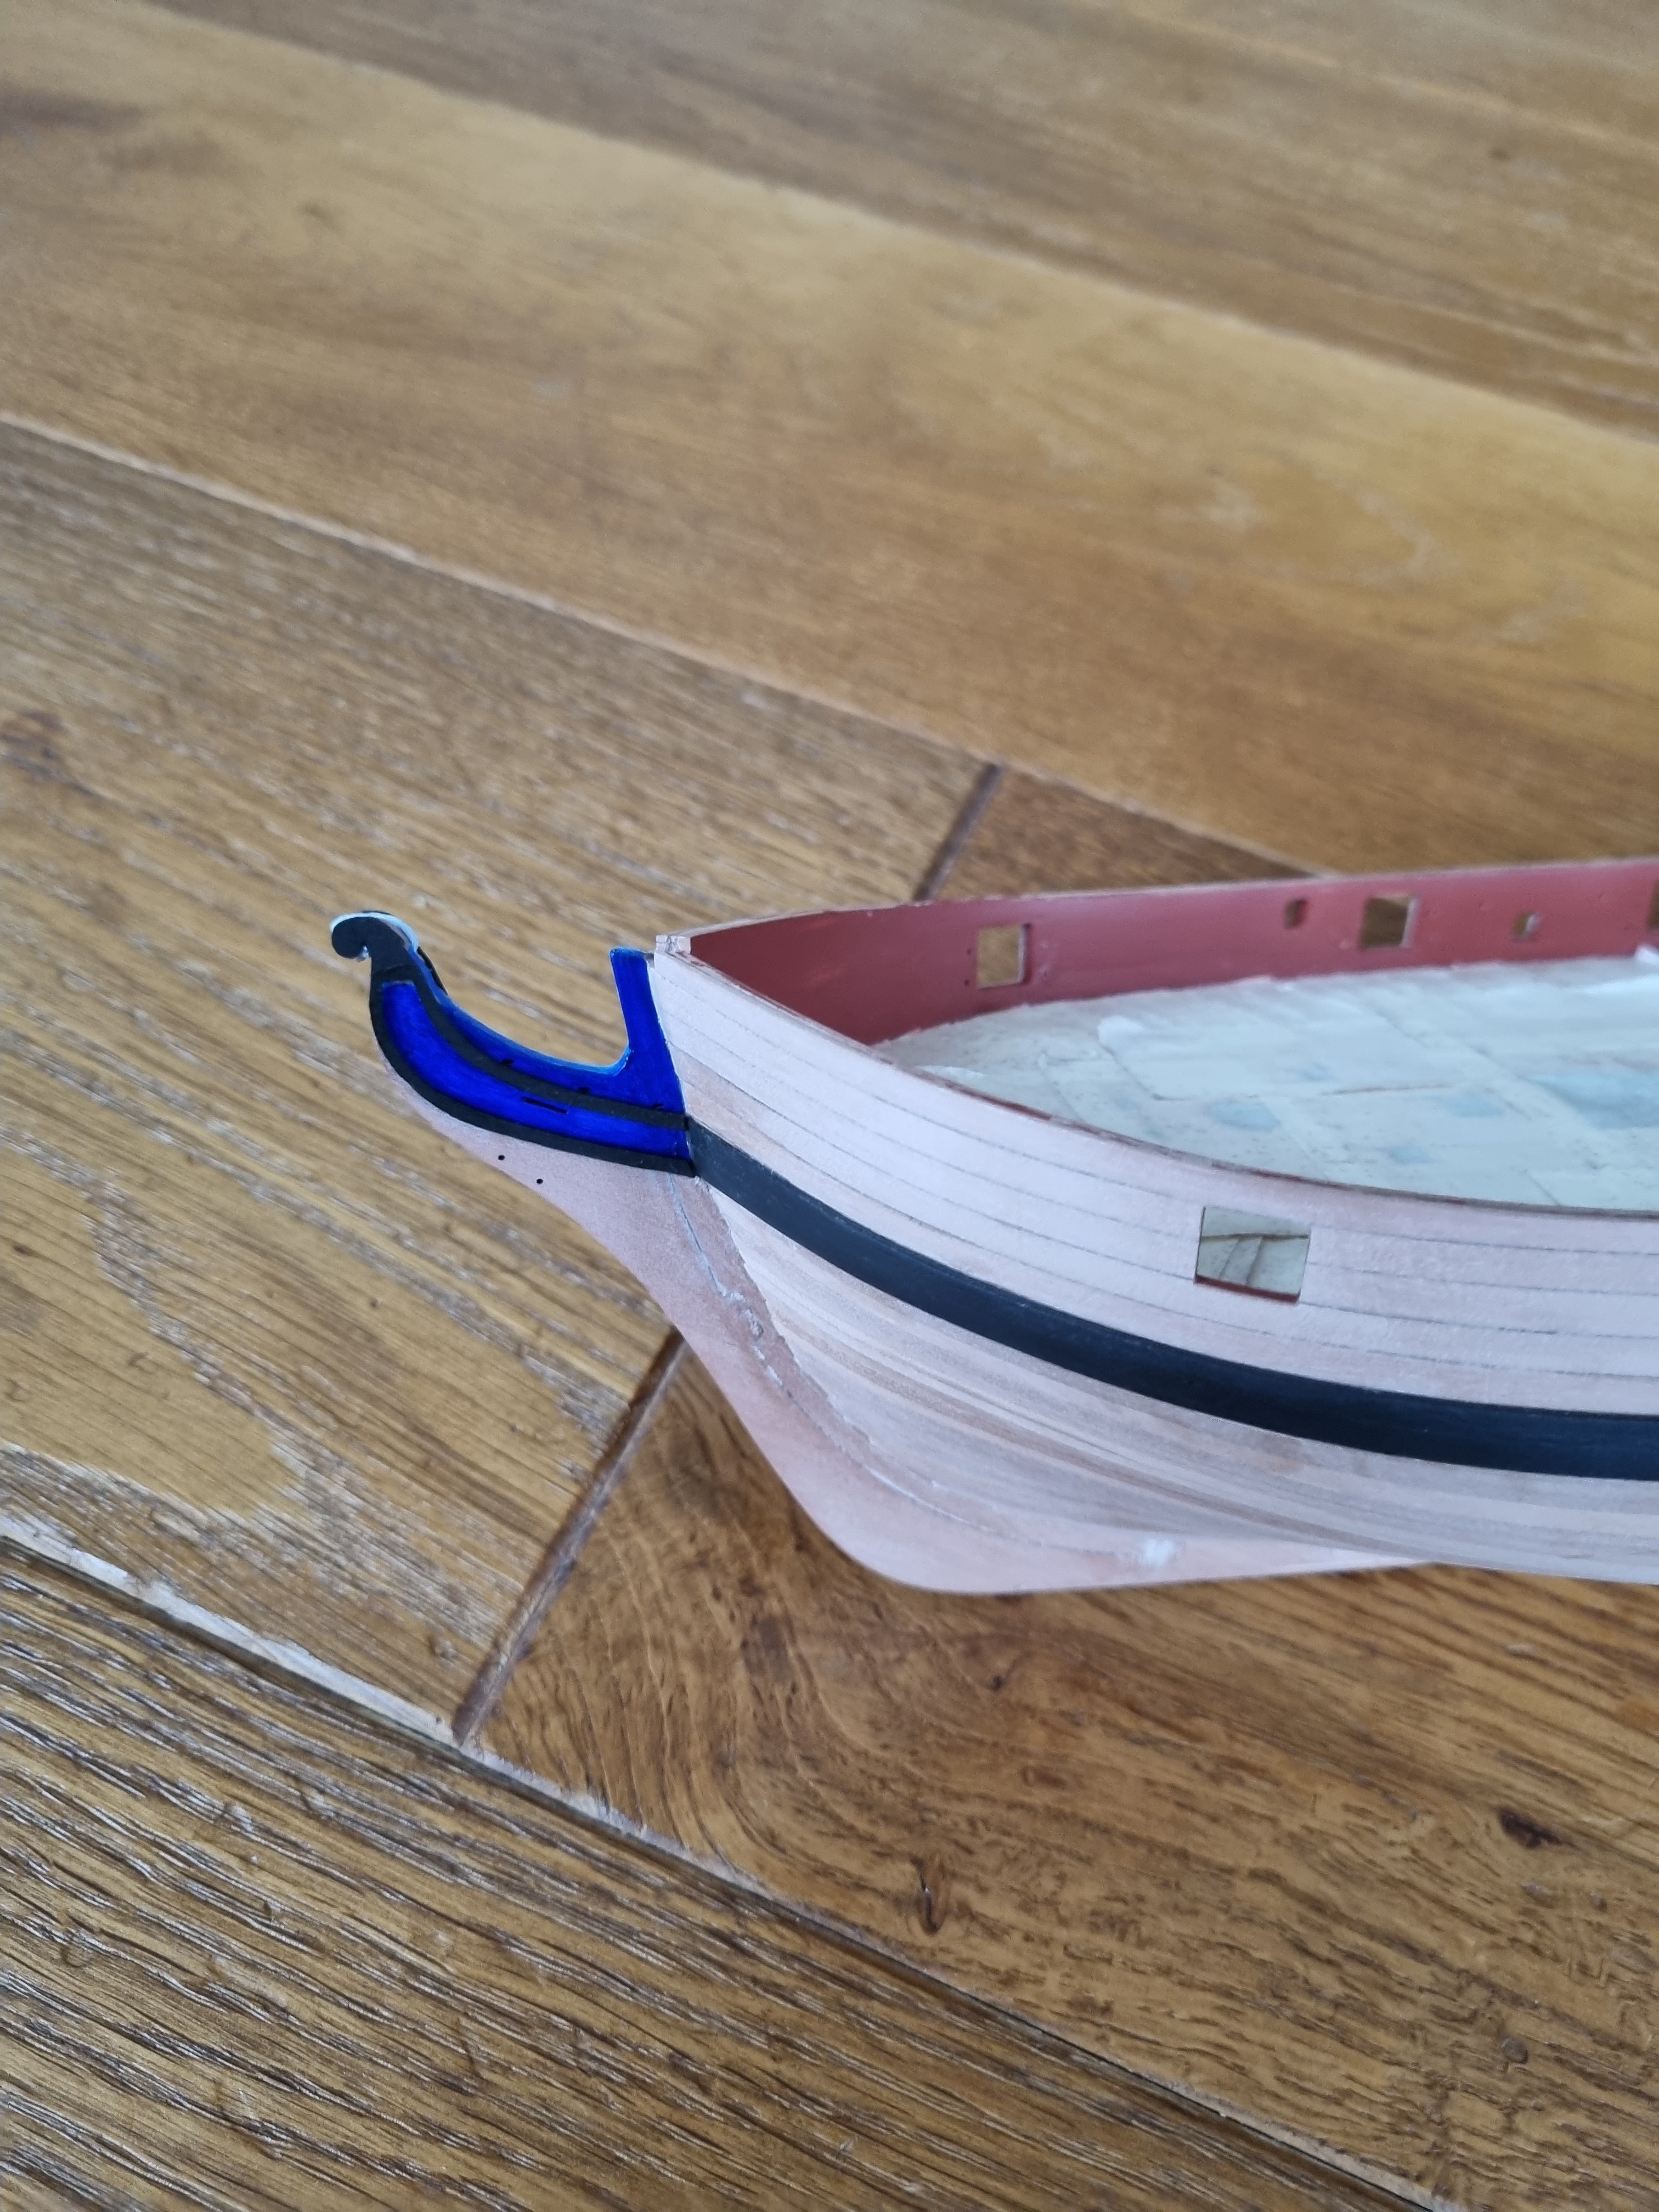
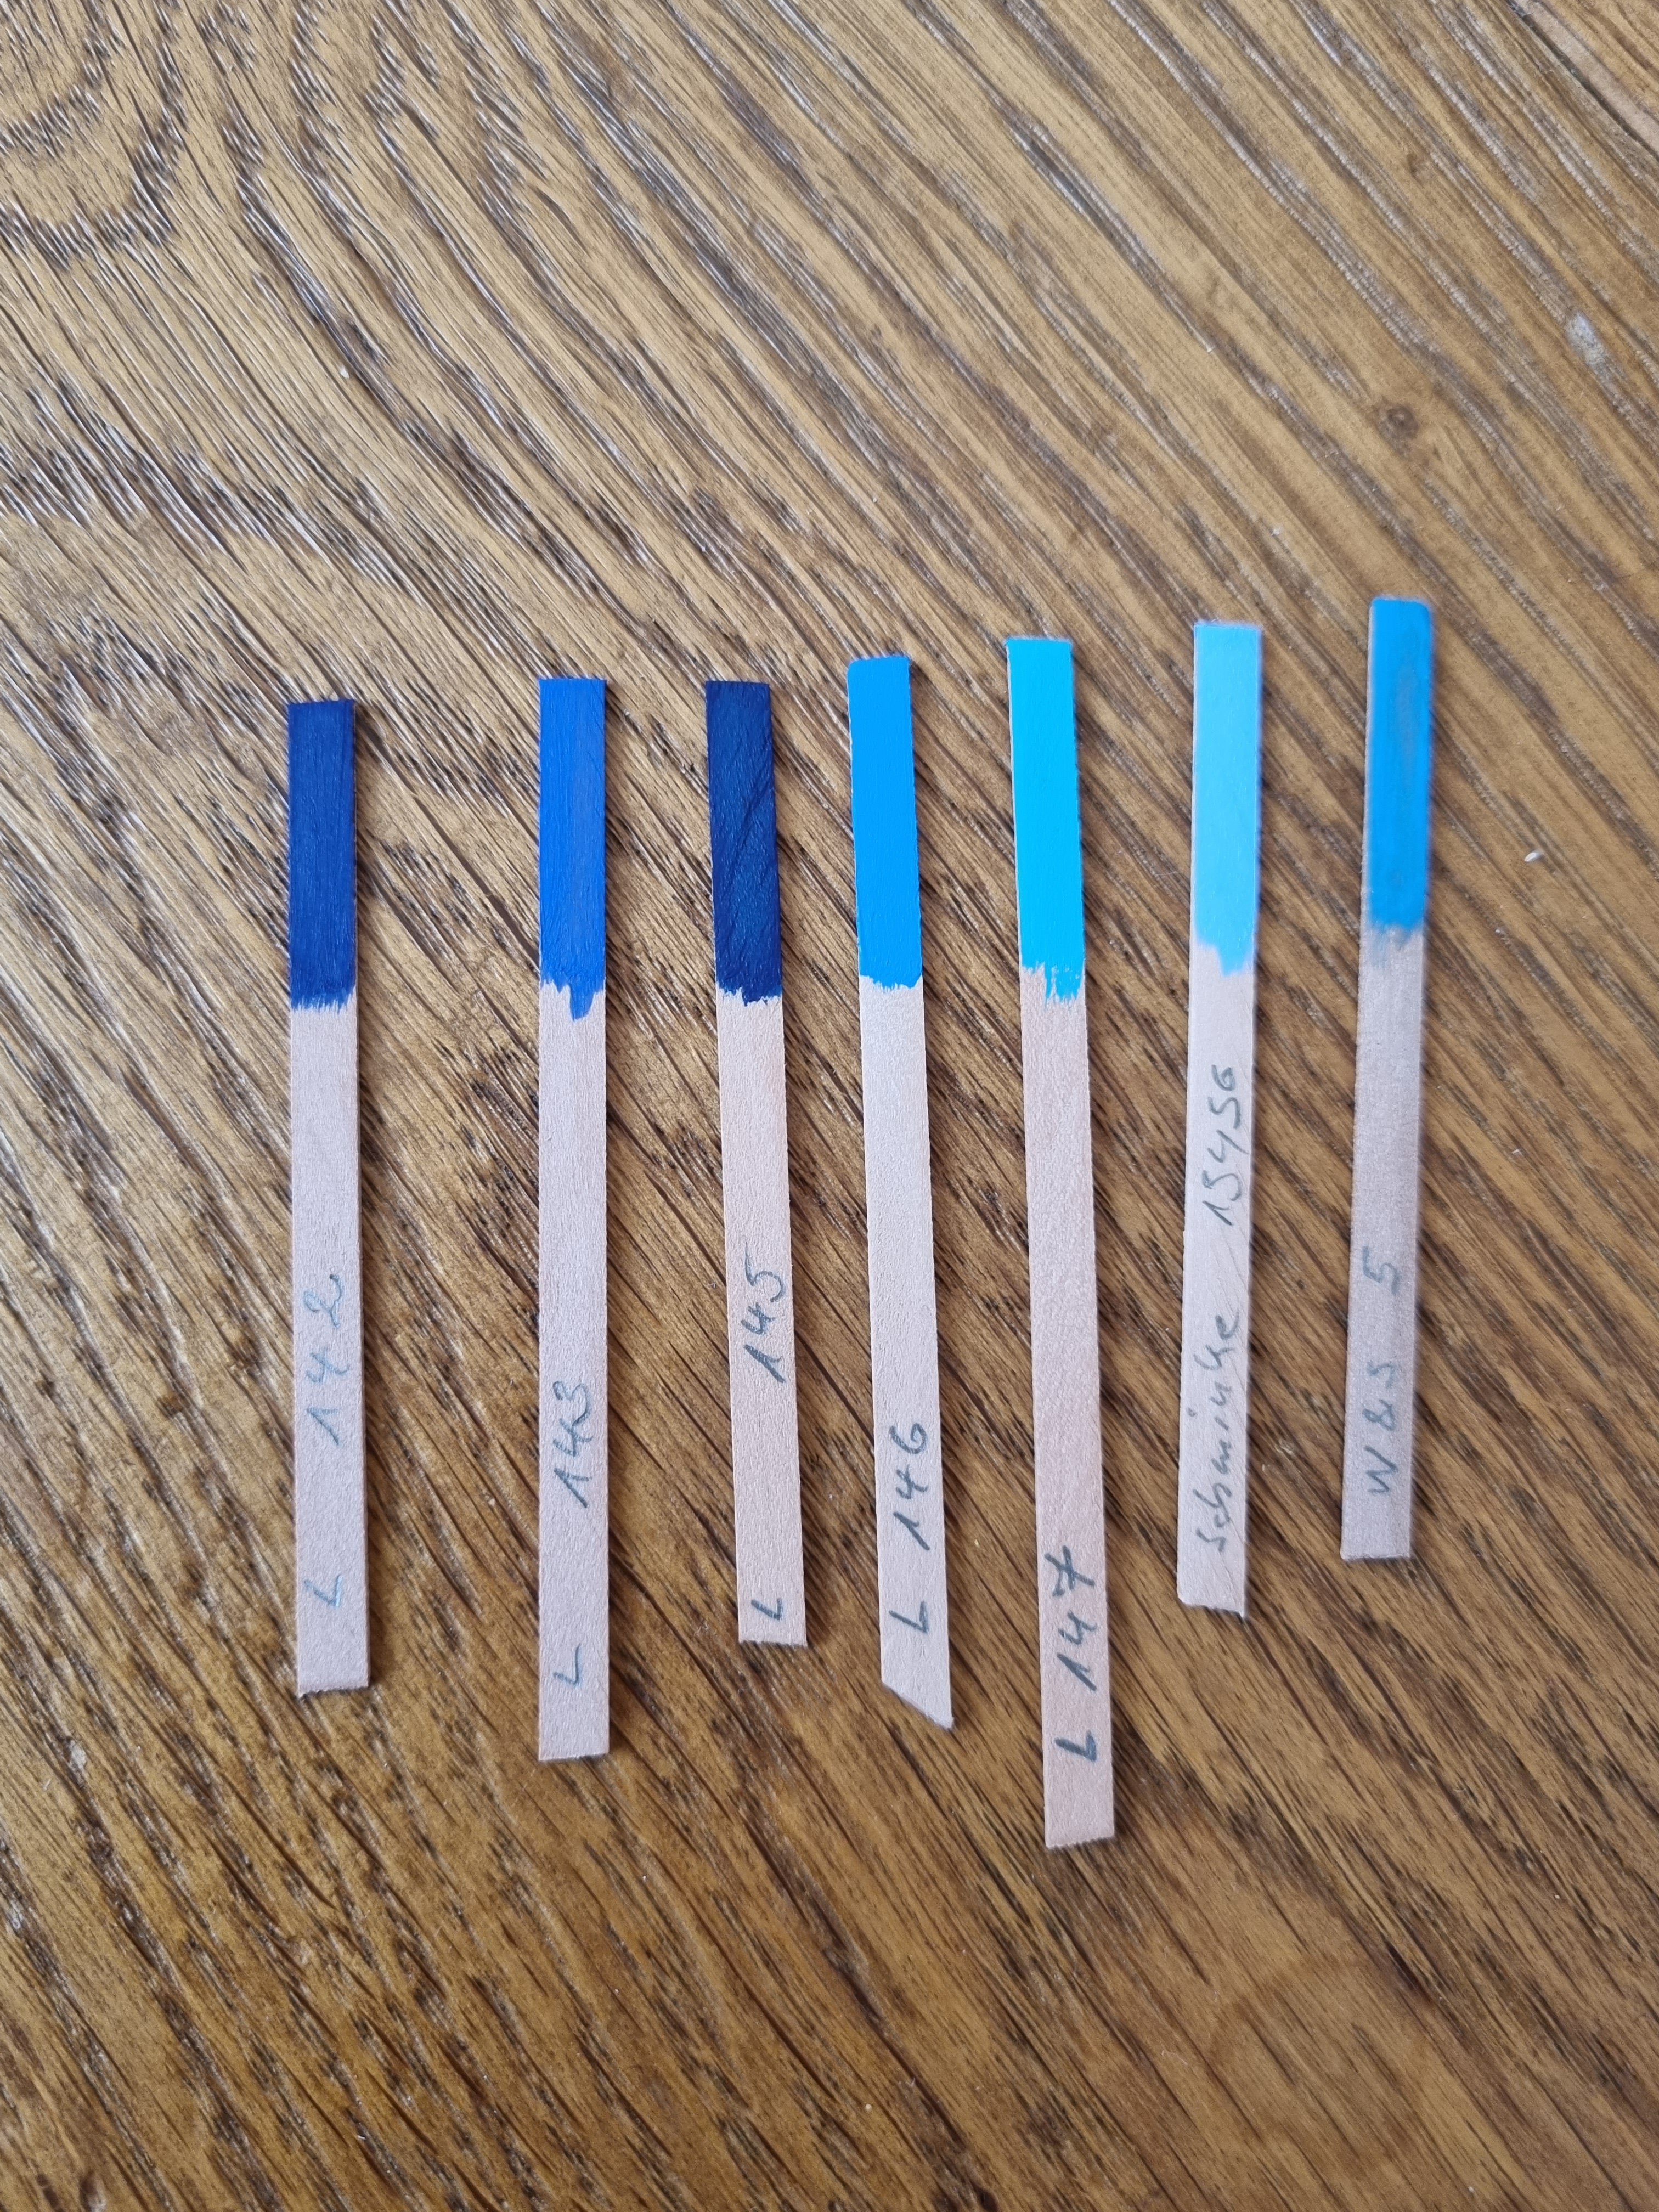
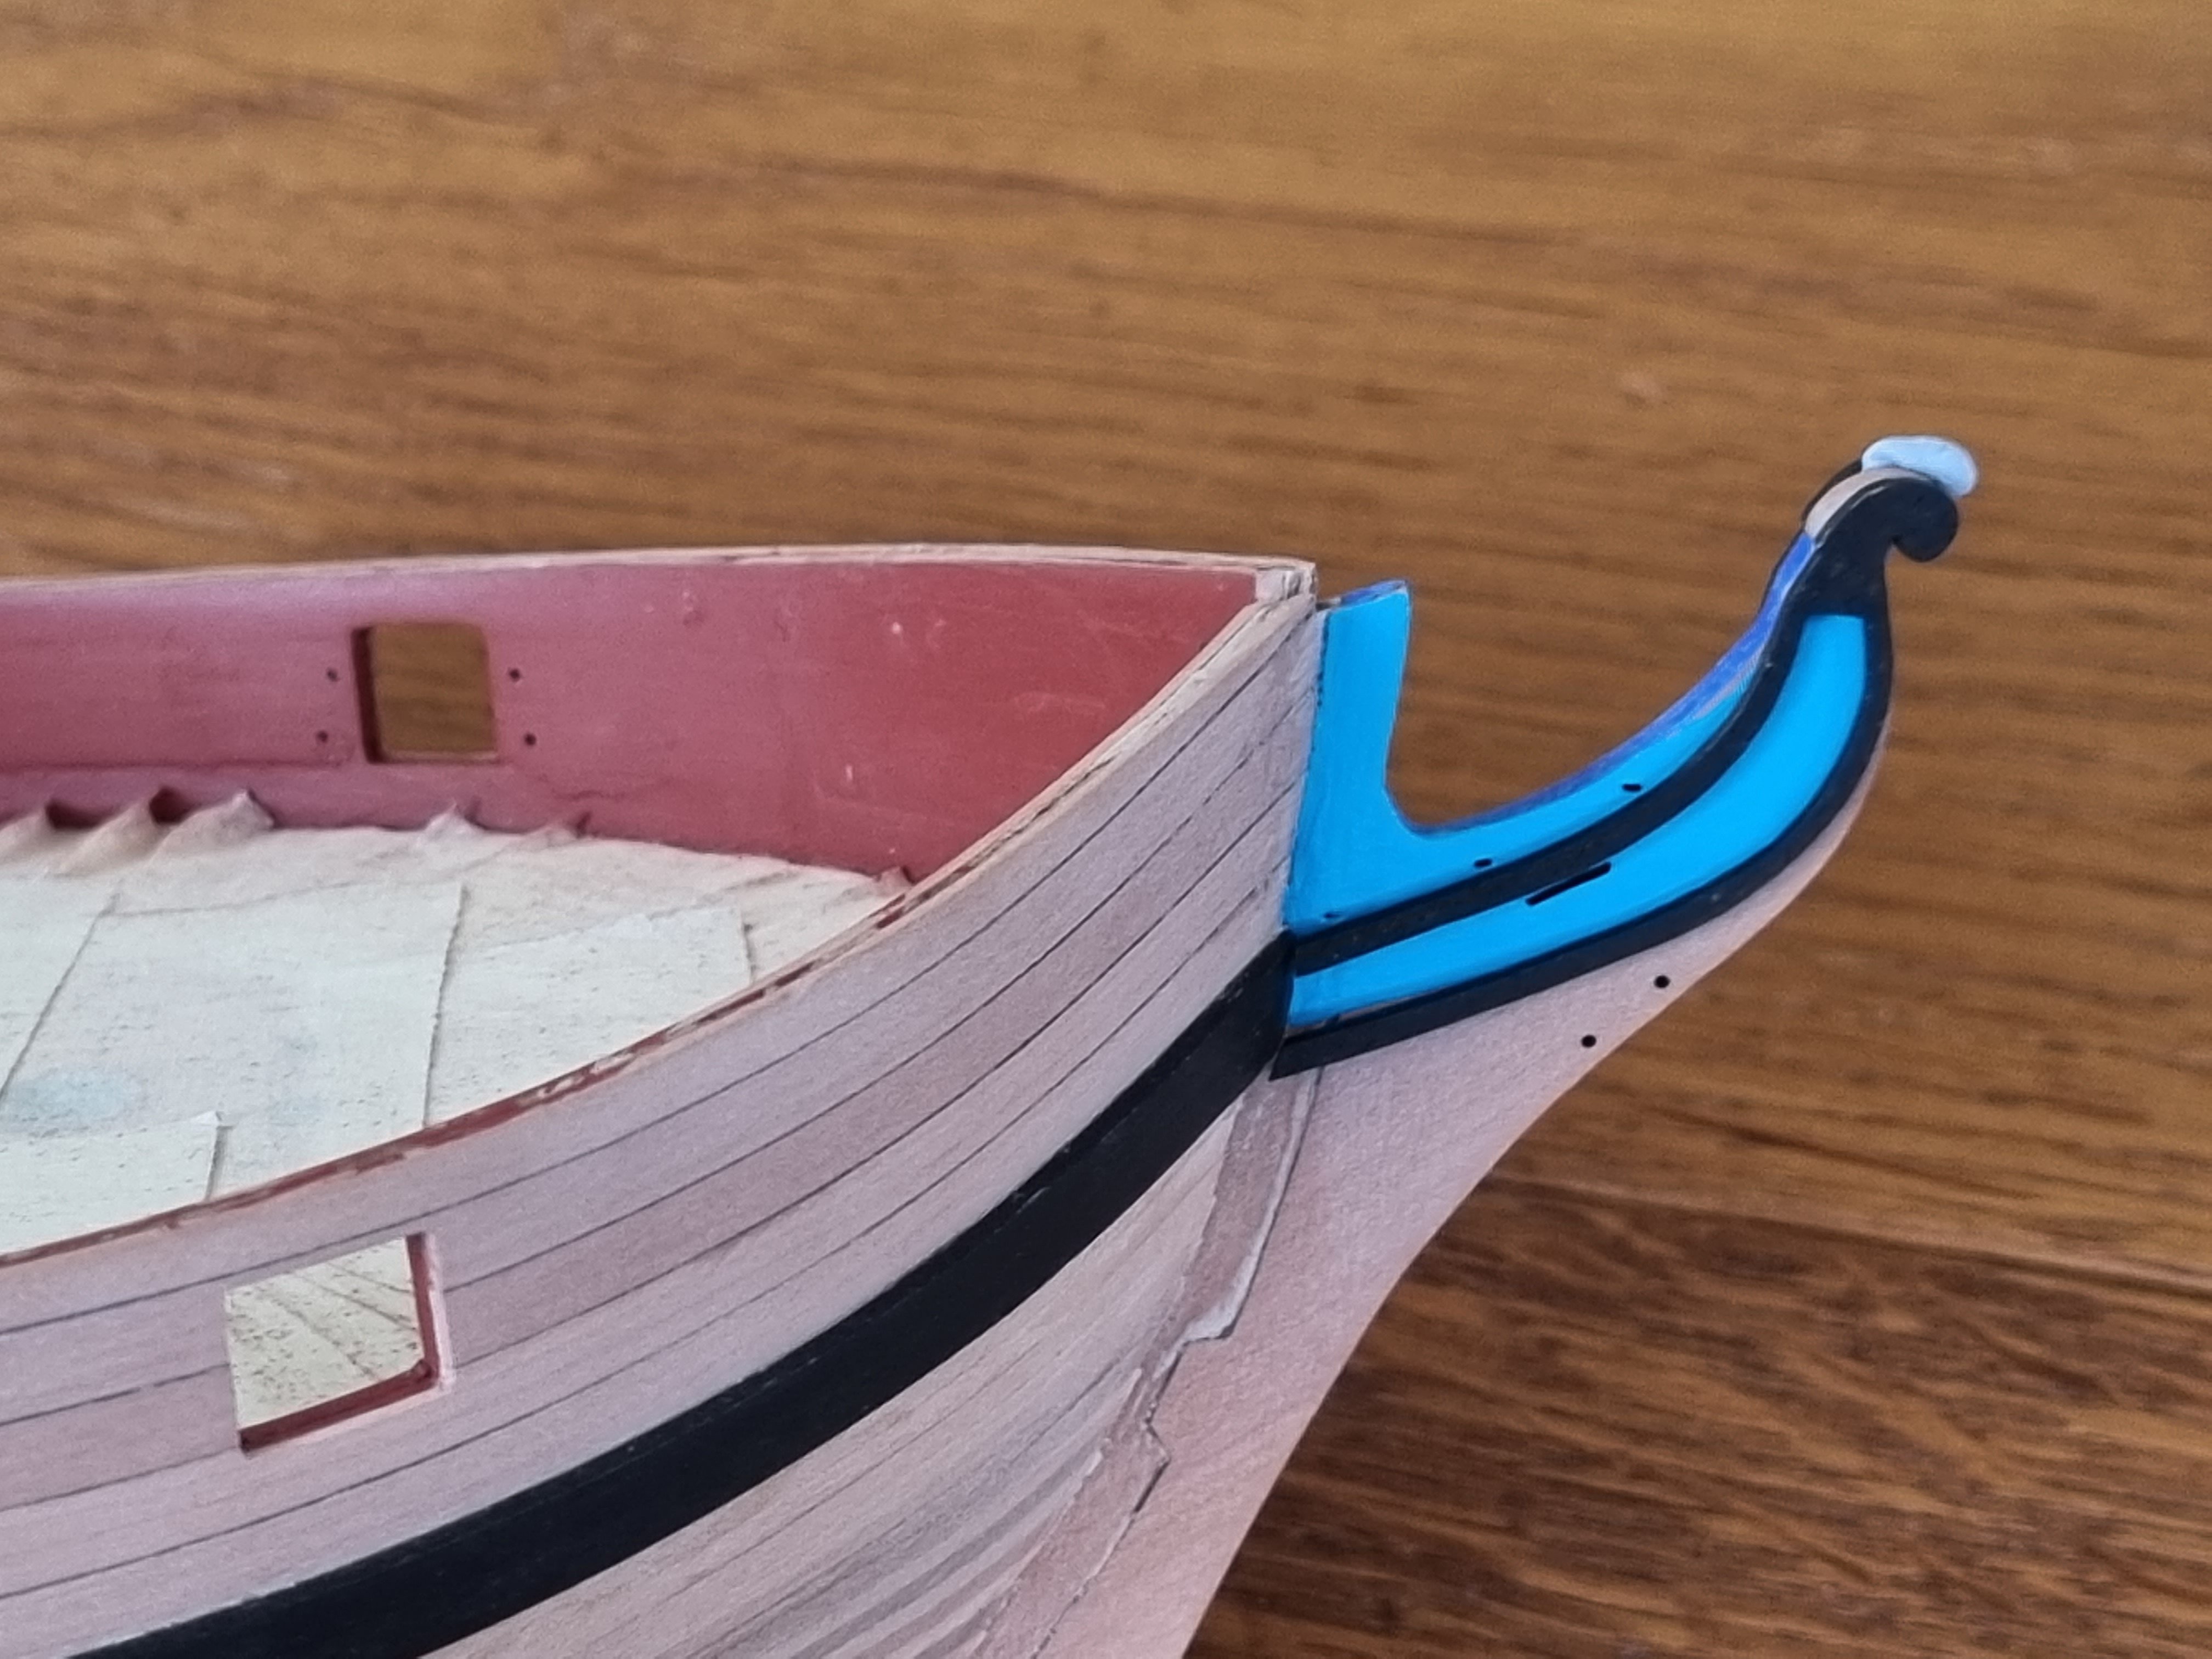
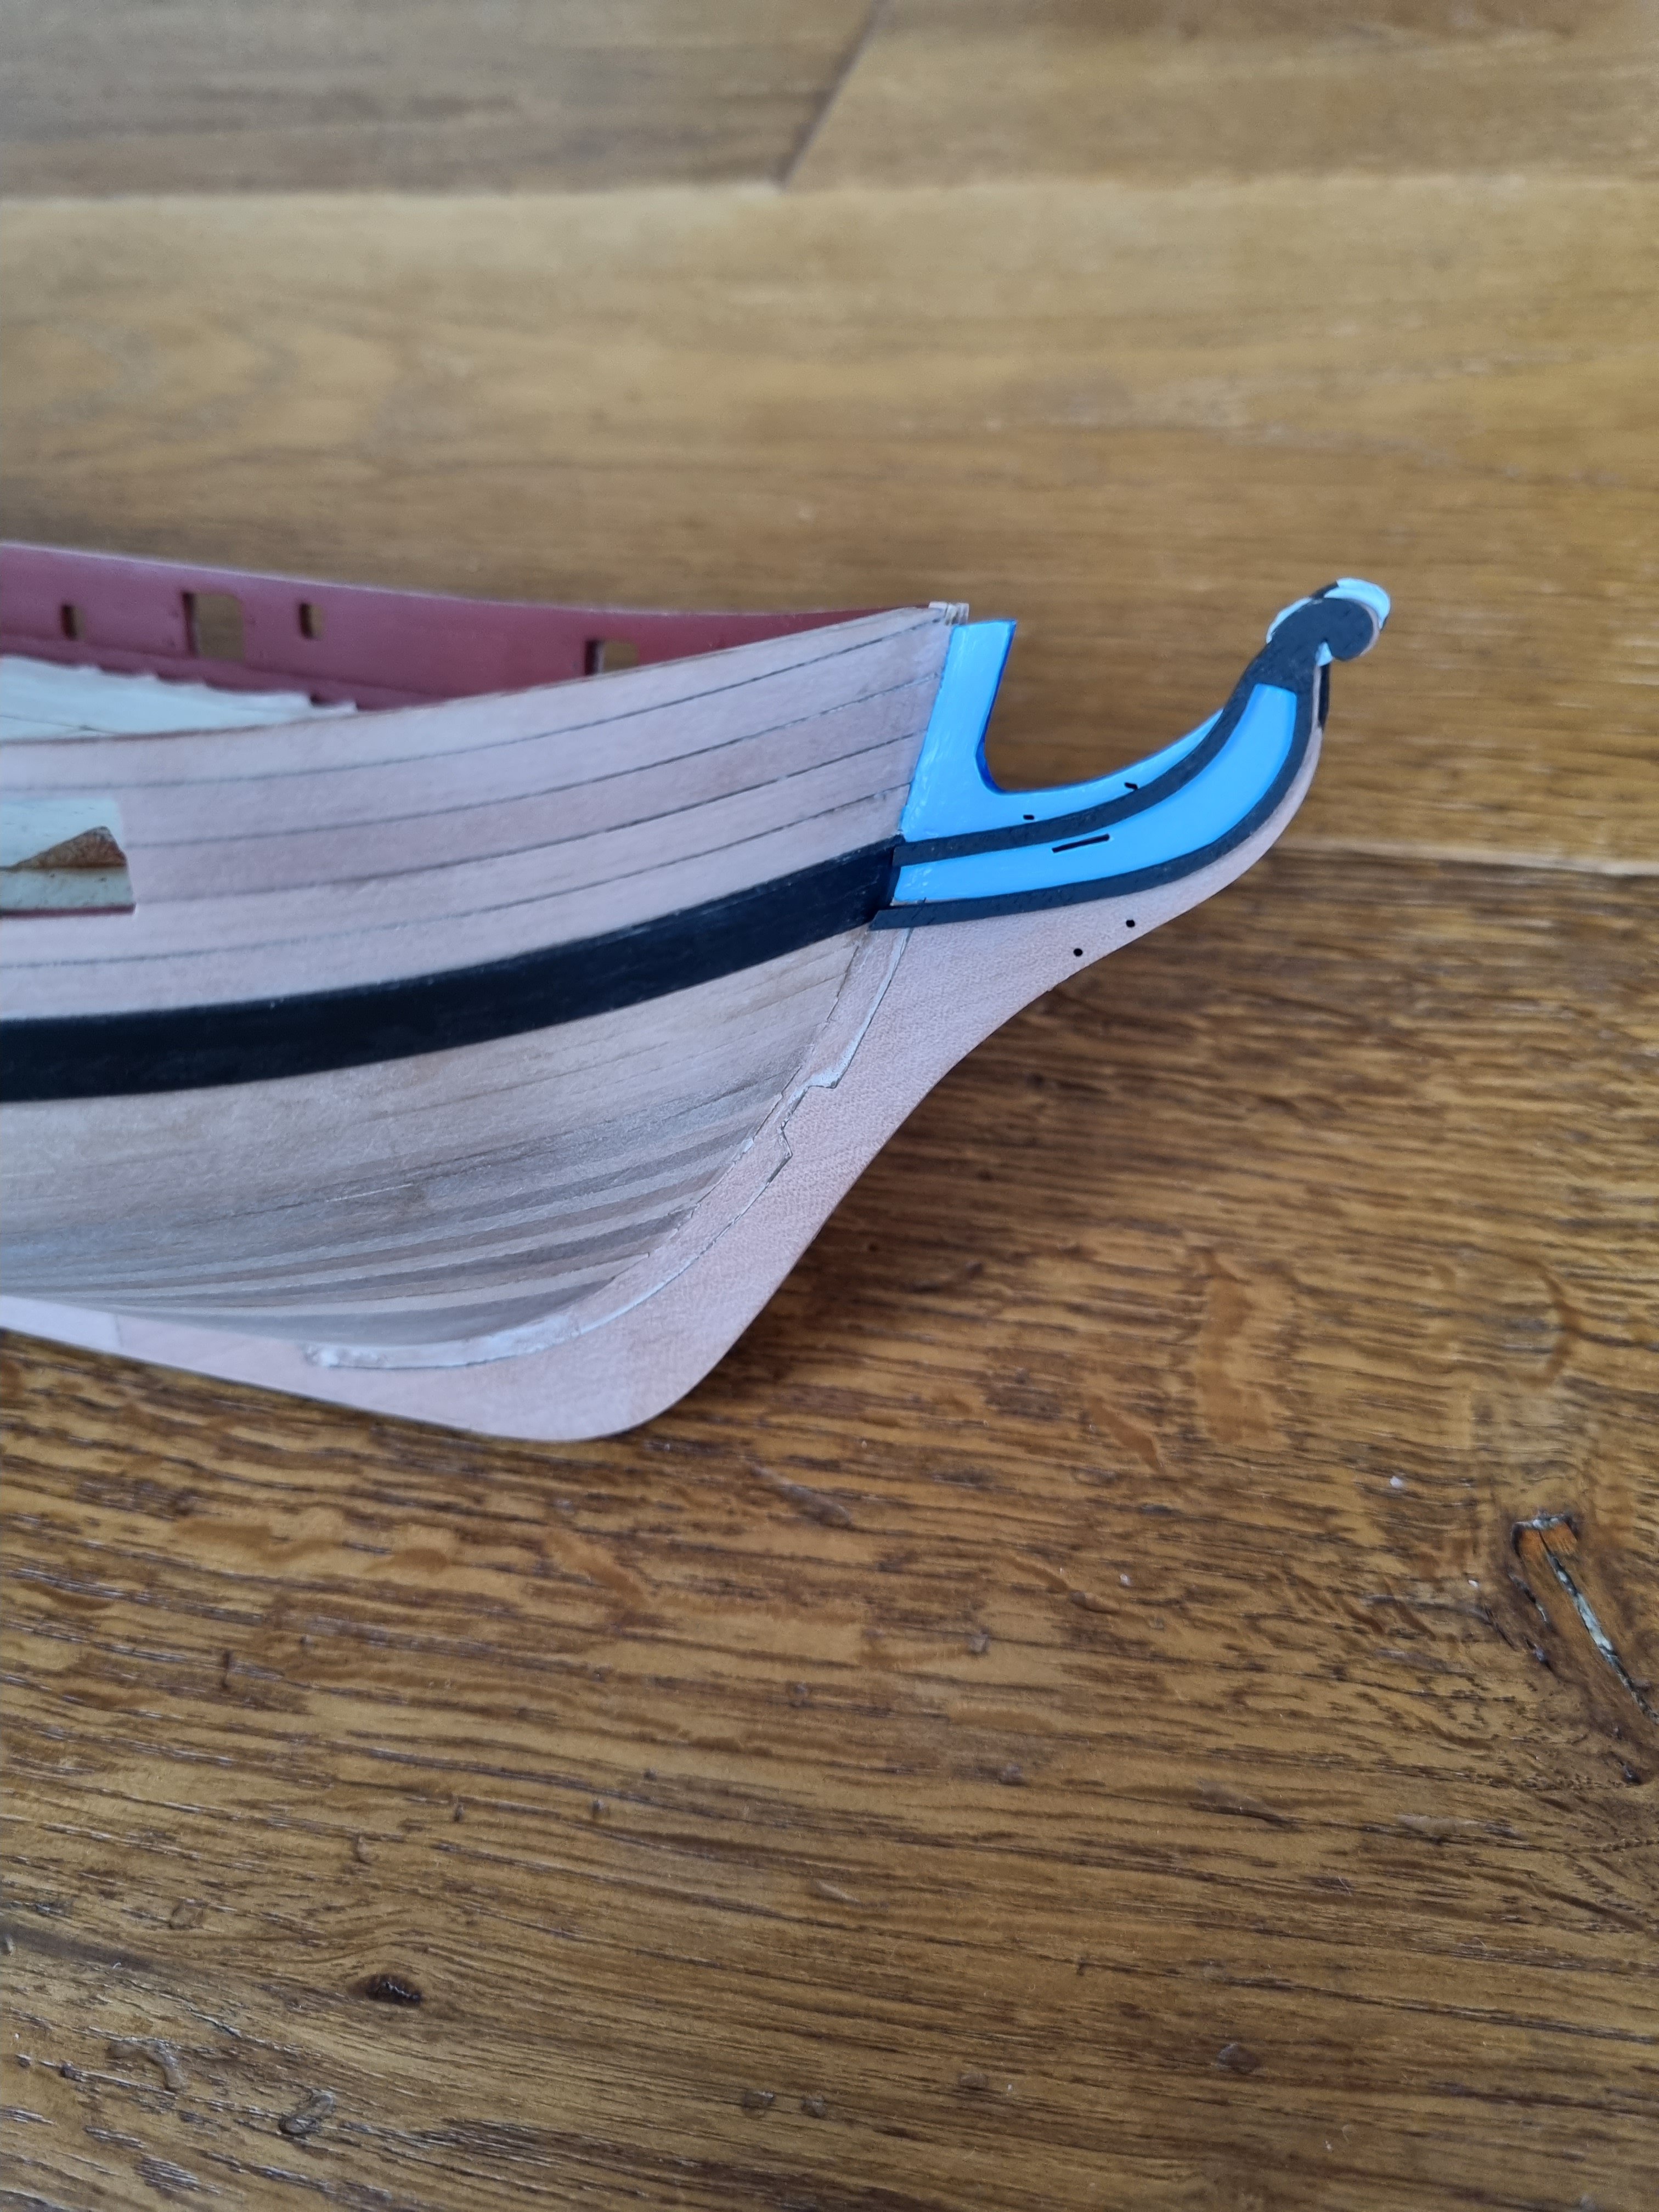
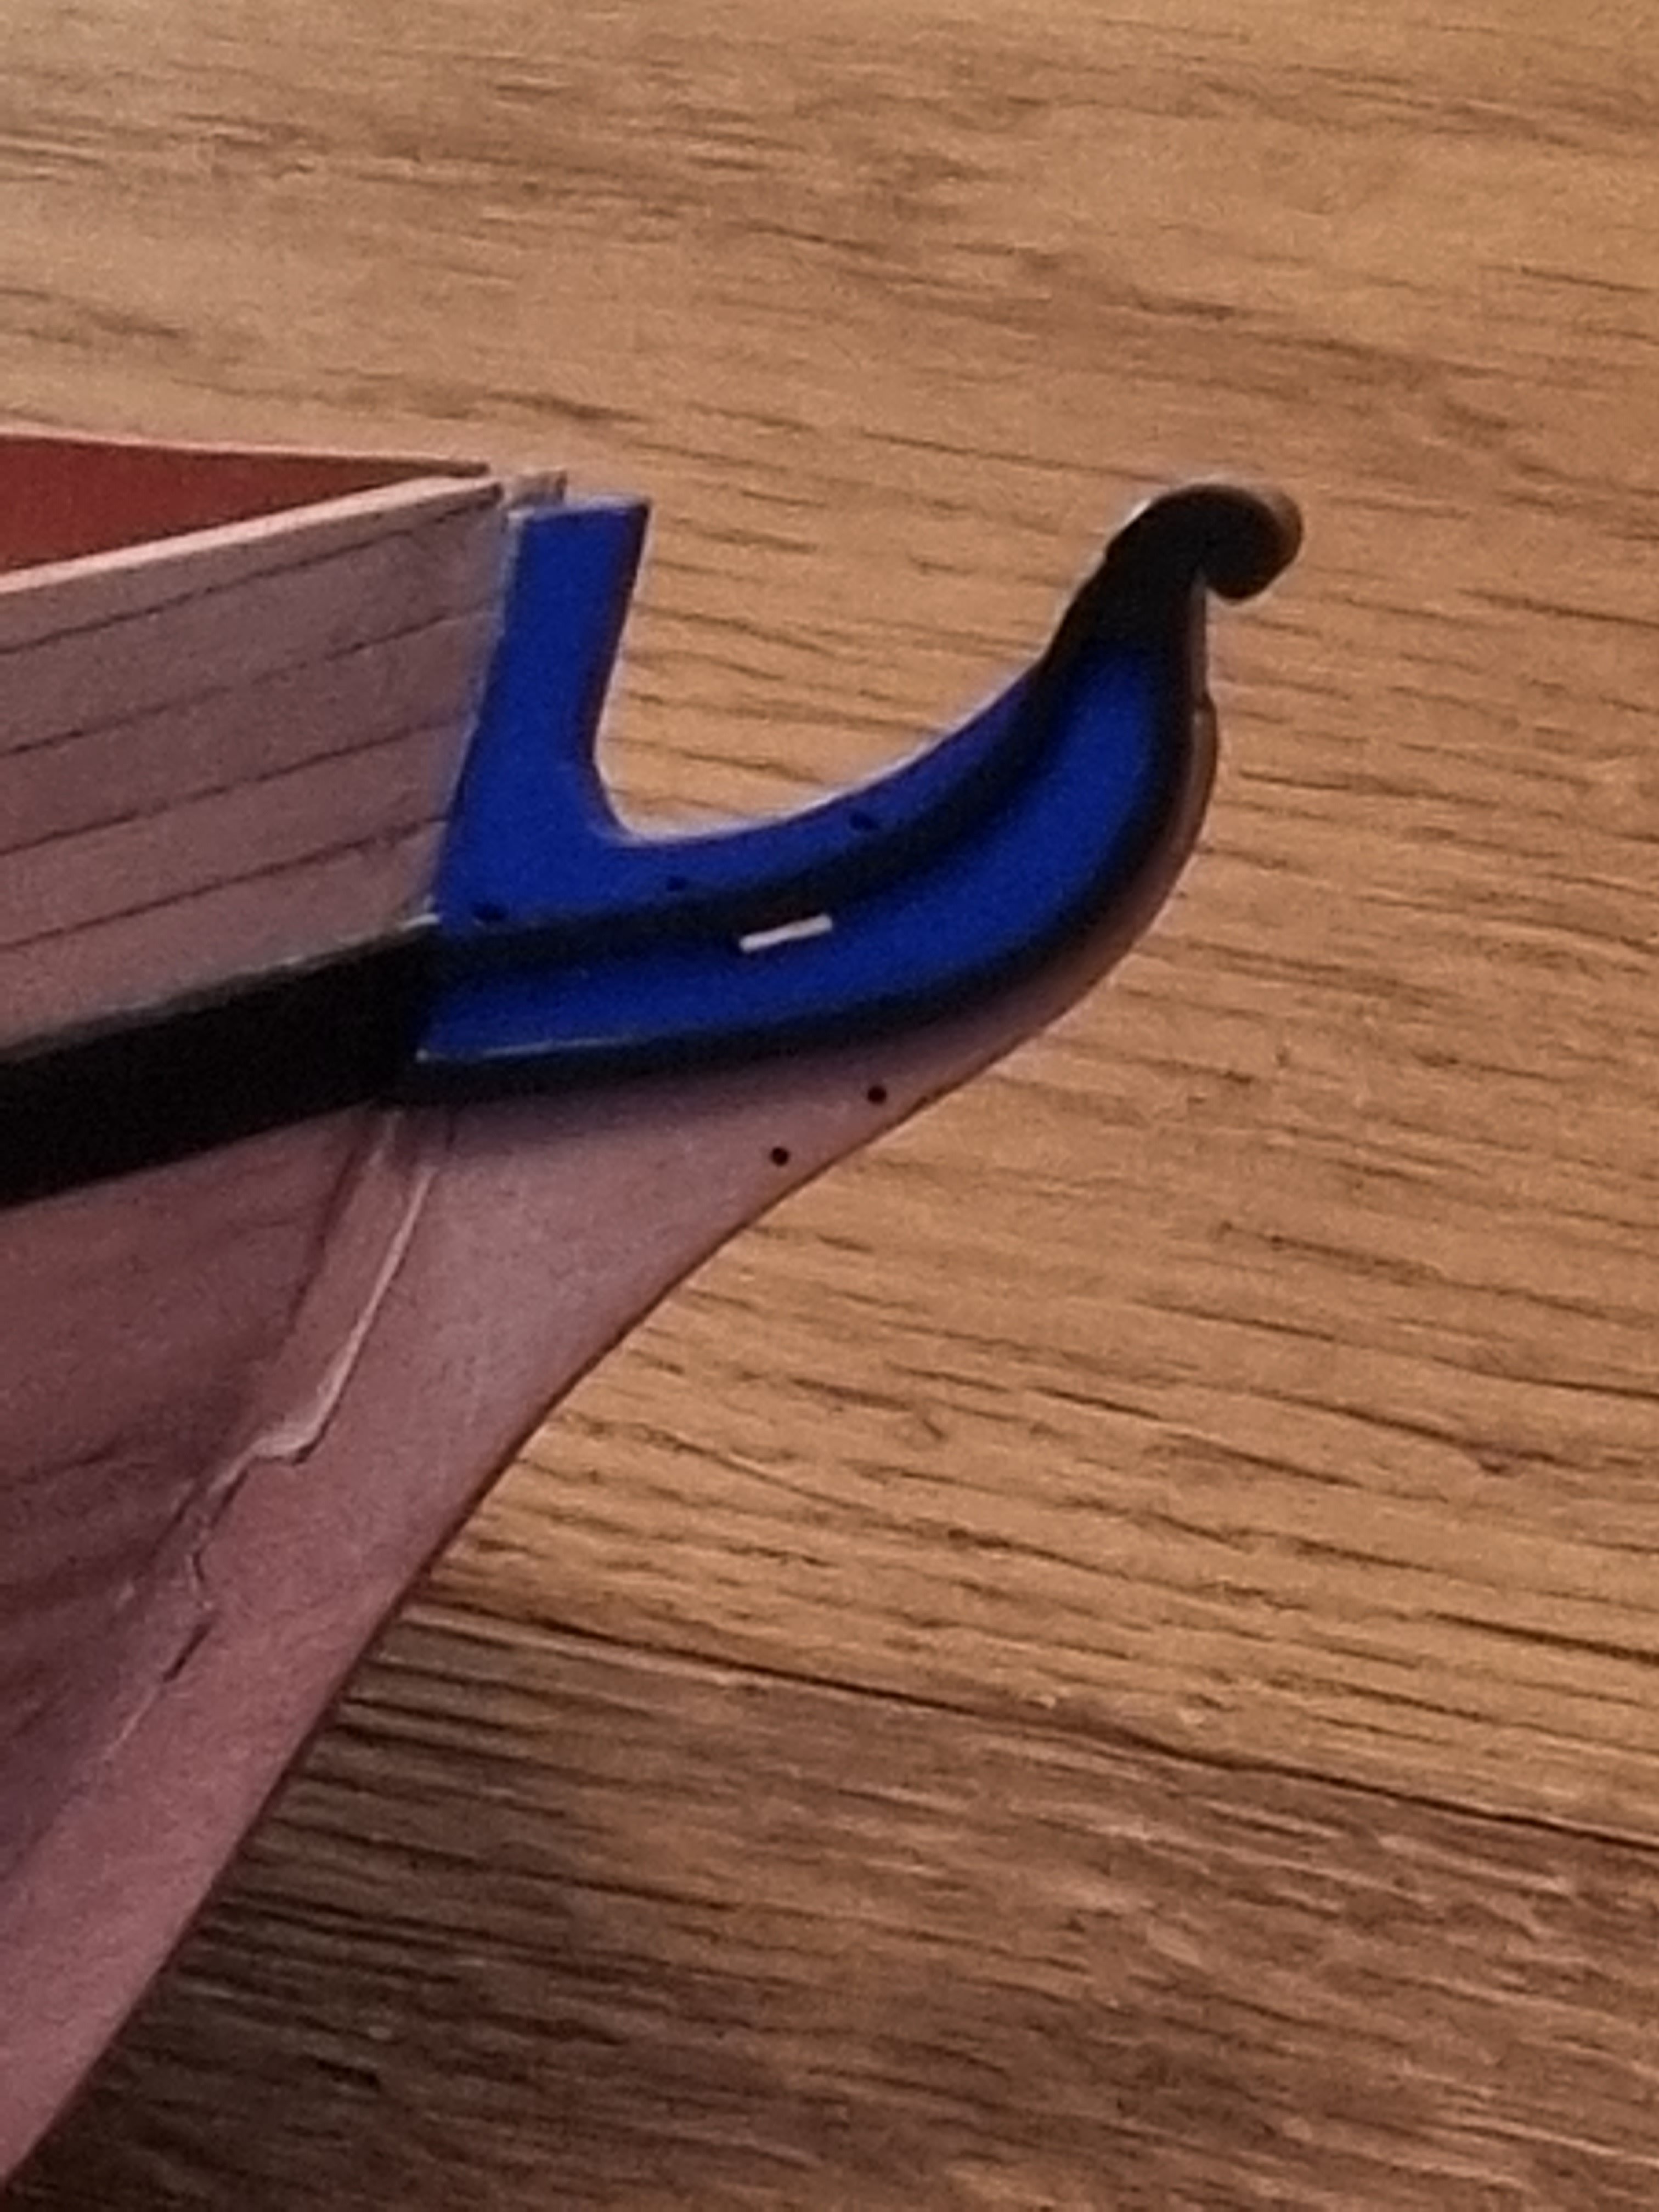
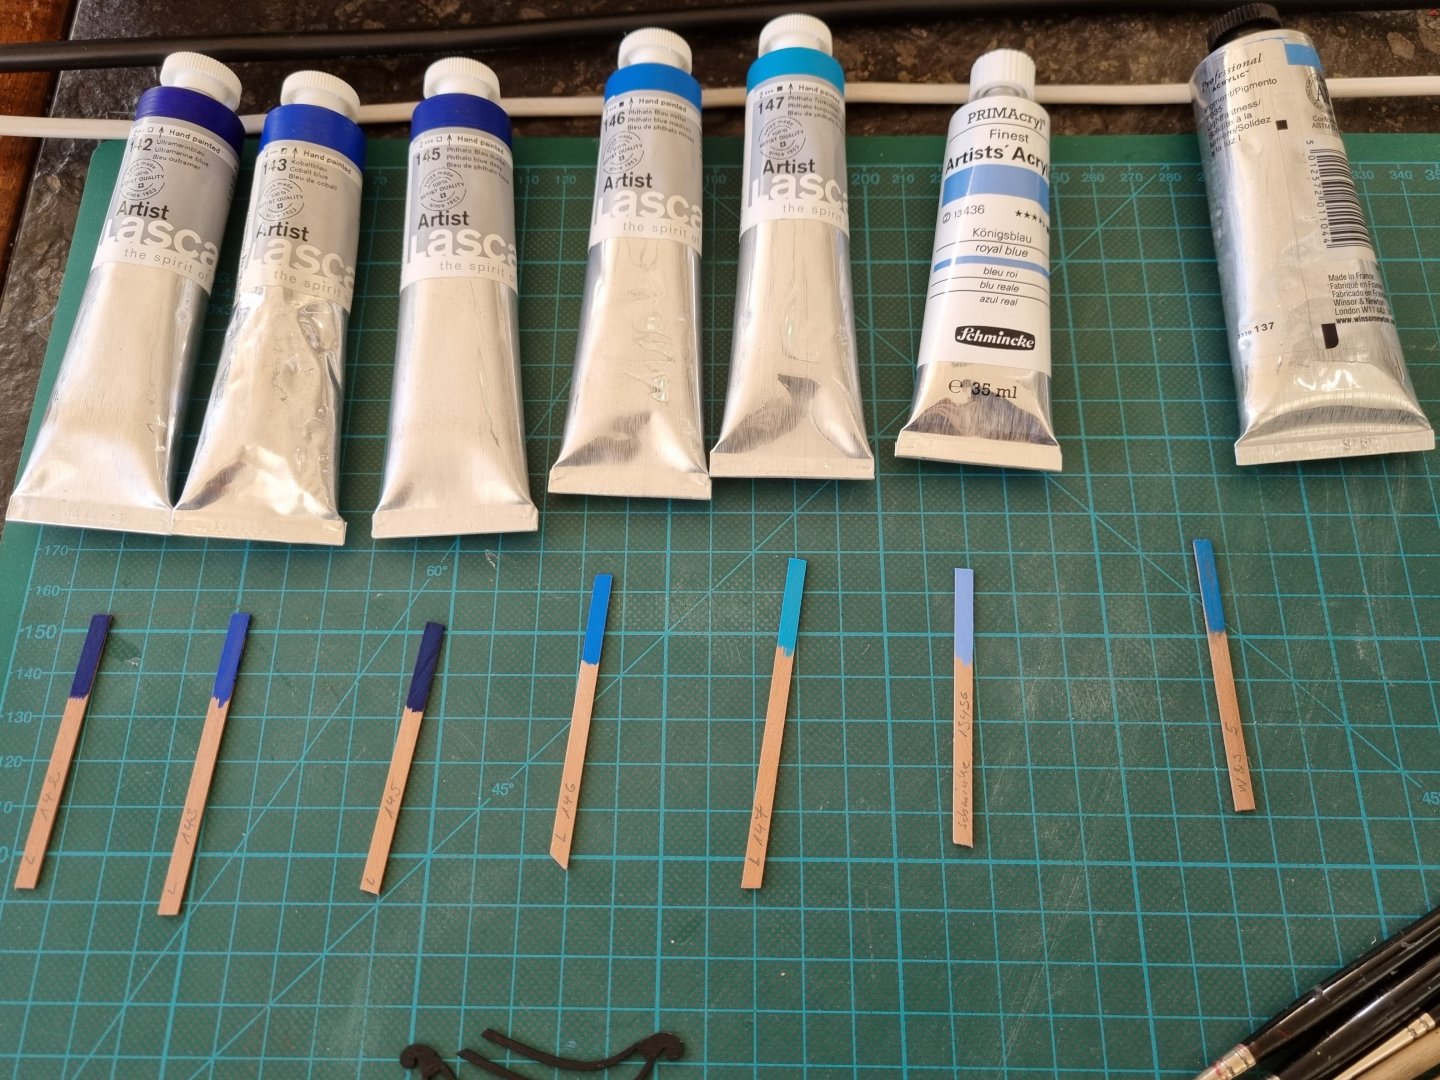
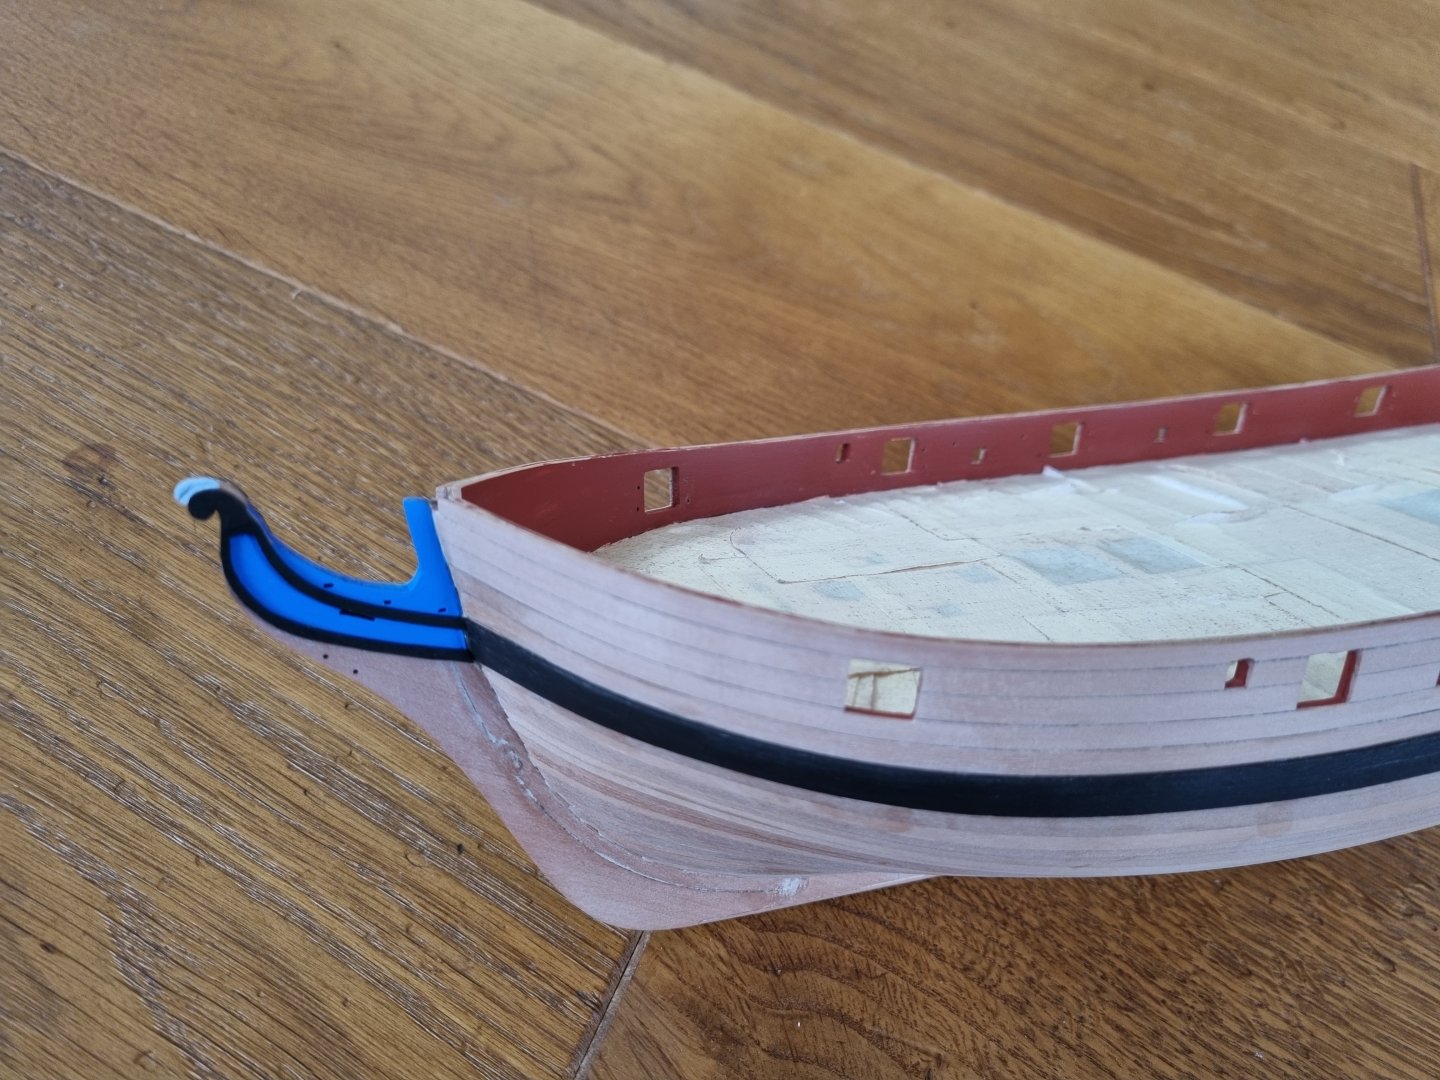
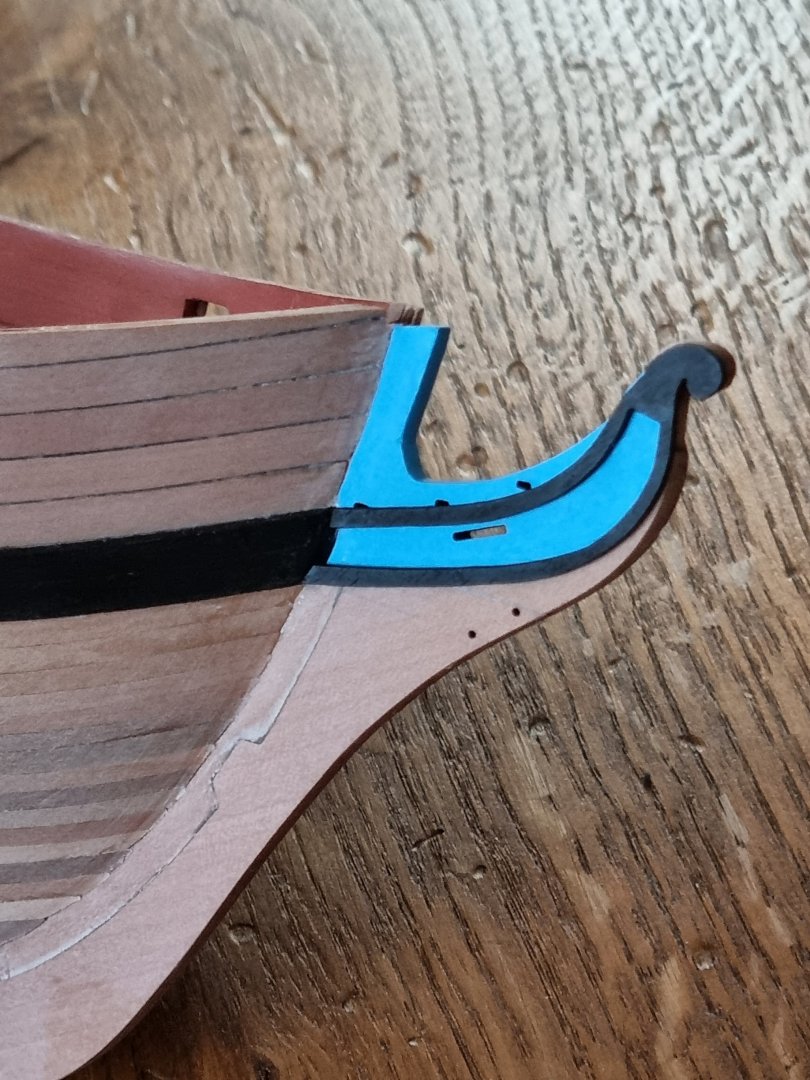
@BobG, @glennard2523: thank you both for your thumbs up! 🙂 @BobG: luckylie I don't have the claim to build historicaly accurate, but I need to like it, so I'm completly with you on that! 🙂 @glennard2523: thank you very much! 🙂 @PhillH: Thanks for your suggestion about the wipe on poly! I would love to test this, but I have no idear, what I have to look for!? I live in germany, so I need a product that I can get here. Anybody any tips on this? 🙂 Colours. Well, because still I wasn't very hapy with my blues, I decided to go all in. I entered the local artists supply and buy me a bunch of additional acrylic blues: I hold the test pieces next to the stem to decide which I want to give a try (just one example): The two I liked best found they're way to the model: Still not happy. But now, I know why I don't like it: all this colours are to powerfull, to shiny, to 'good' to match the oxide-red. So, another two trys. One with most palest and one with one of the two very dark ones: The coloured stem draw so much attention in this small area. Perhaps it would help to paint two blue lines on the hull like it is done on Flirt. Still not decided the oucome of my blue colored fight :-). But I can say, that I like, at least until now, the last two examples best. Perhaps I also try the darkest blue, we'll see :-).


-
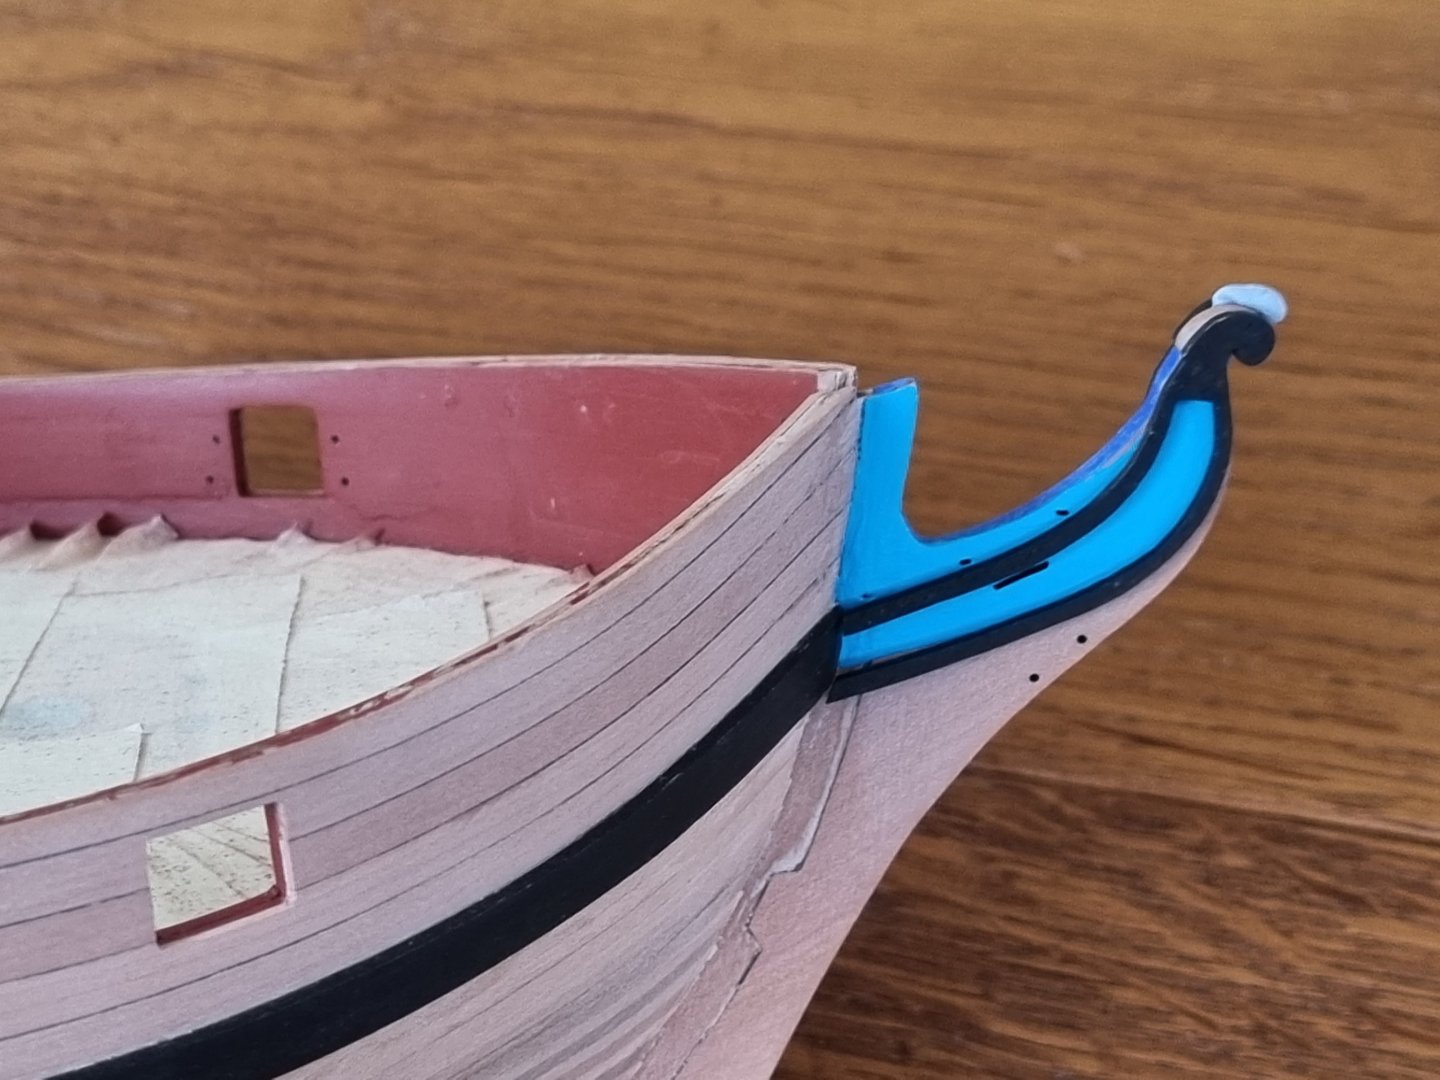
@BobG: thank's for your thumbs up! 🙂 Cobalt-blue, this is better, but I'm still not fully convinced:

-
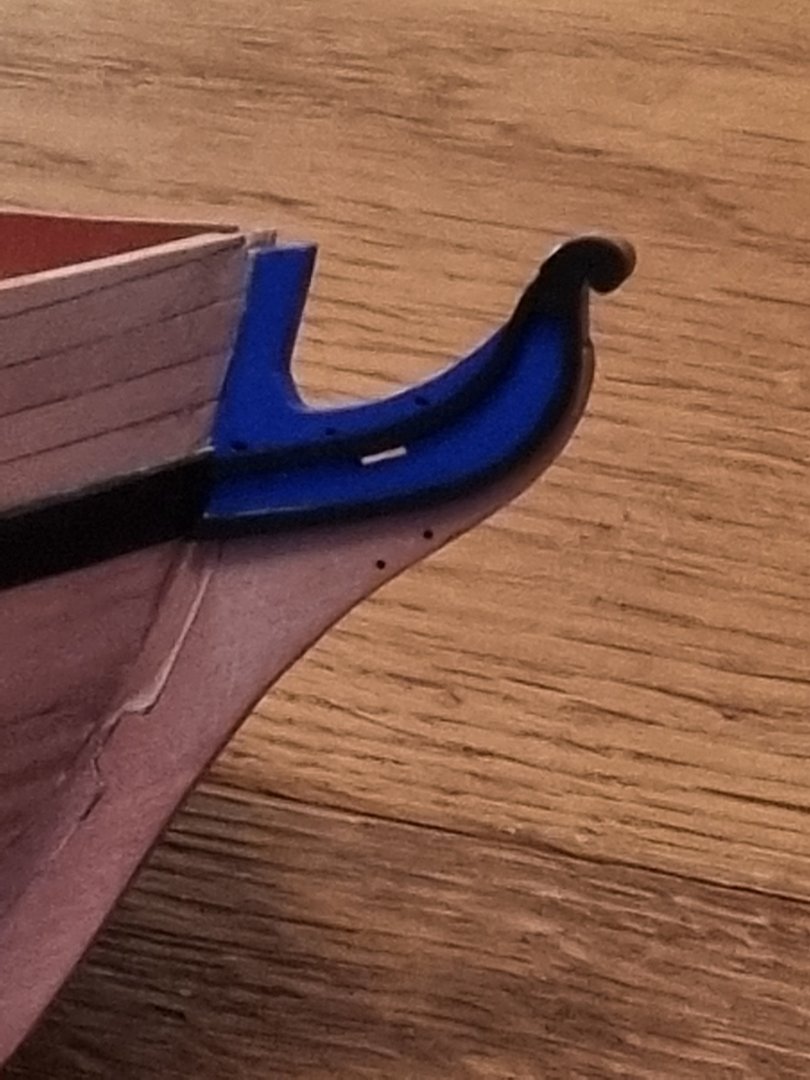
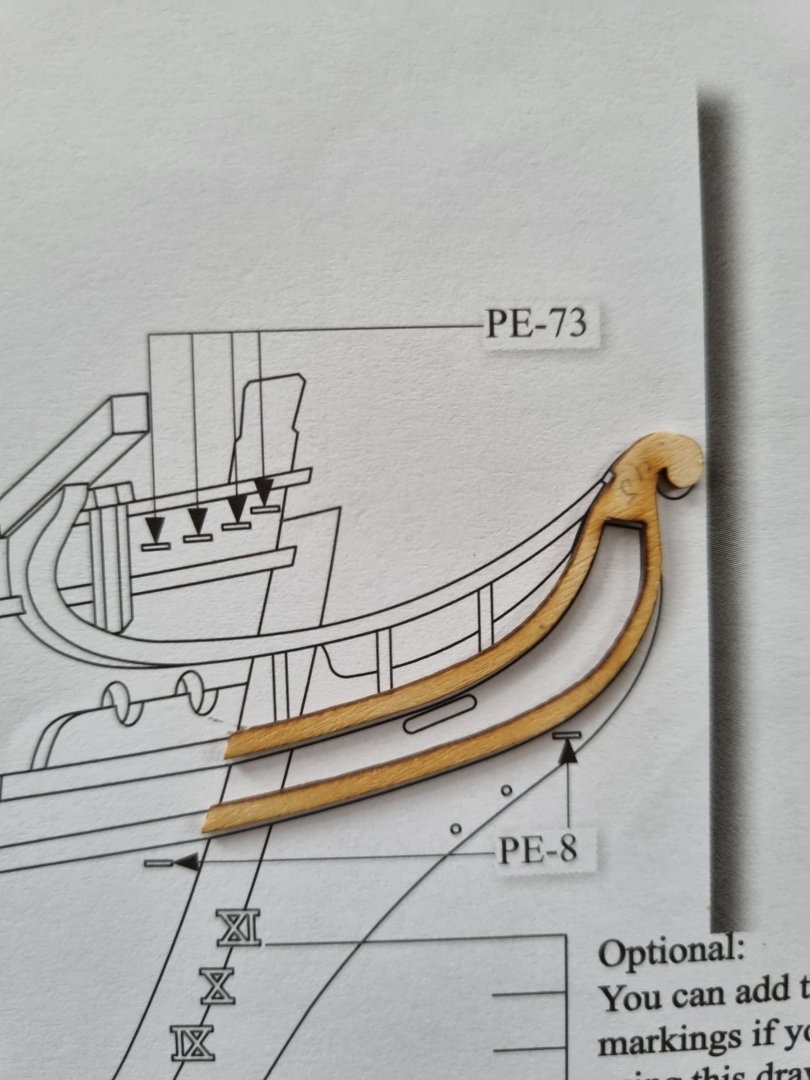
@SpyGlass, I'm very sure, that this is not the case! Perhaps some more sanding? And, don't do it too good! If you leave a very small gab between the planks, the black lining becomes more prominent. And everything I build needed more sanding than I initially thought it would need, and that was also the case at the bulwarks! Hope in the end you get the finish you're looking for! Ok, I could made first decisions! Because this parts: are made of ply, I need to paint them anyway, so I will paint something at the stem. Still undecidet of exact colour and how much I will paint. Made same tests: The colour is to shiny, but the only alternative I have here, is an oil based one, and I don't want to use oil colours. So, I need more and different blue ones, and, I'm not sure, if it would'nt be better to paint the inlay also black. It is a lot of blue that way. Or perhaps just a much darker blue, that goes more into black. Need more tests...
-
Ah, I see, and you allready wrote about this a bit earlier. Sry for not reading your posts with enough attention 🙂
- 857 replies
-
- 2
-
-
- Sphinx
- Vanguard Models
- (and 1 more)
-
Lol, I think I breaked the same rib during my ply-planking :-). But you nailed it a lot faster and with a better result than I did! Looks good, now the real fun can start, and I mean that not as a joke, I enjoyed the planking-process :-).
-
Great joy to read your log and see all your progress!
-
Beautiful ship and excellent build!
-
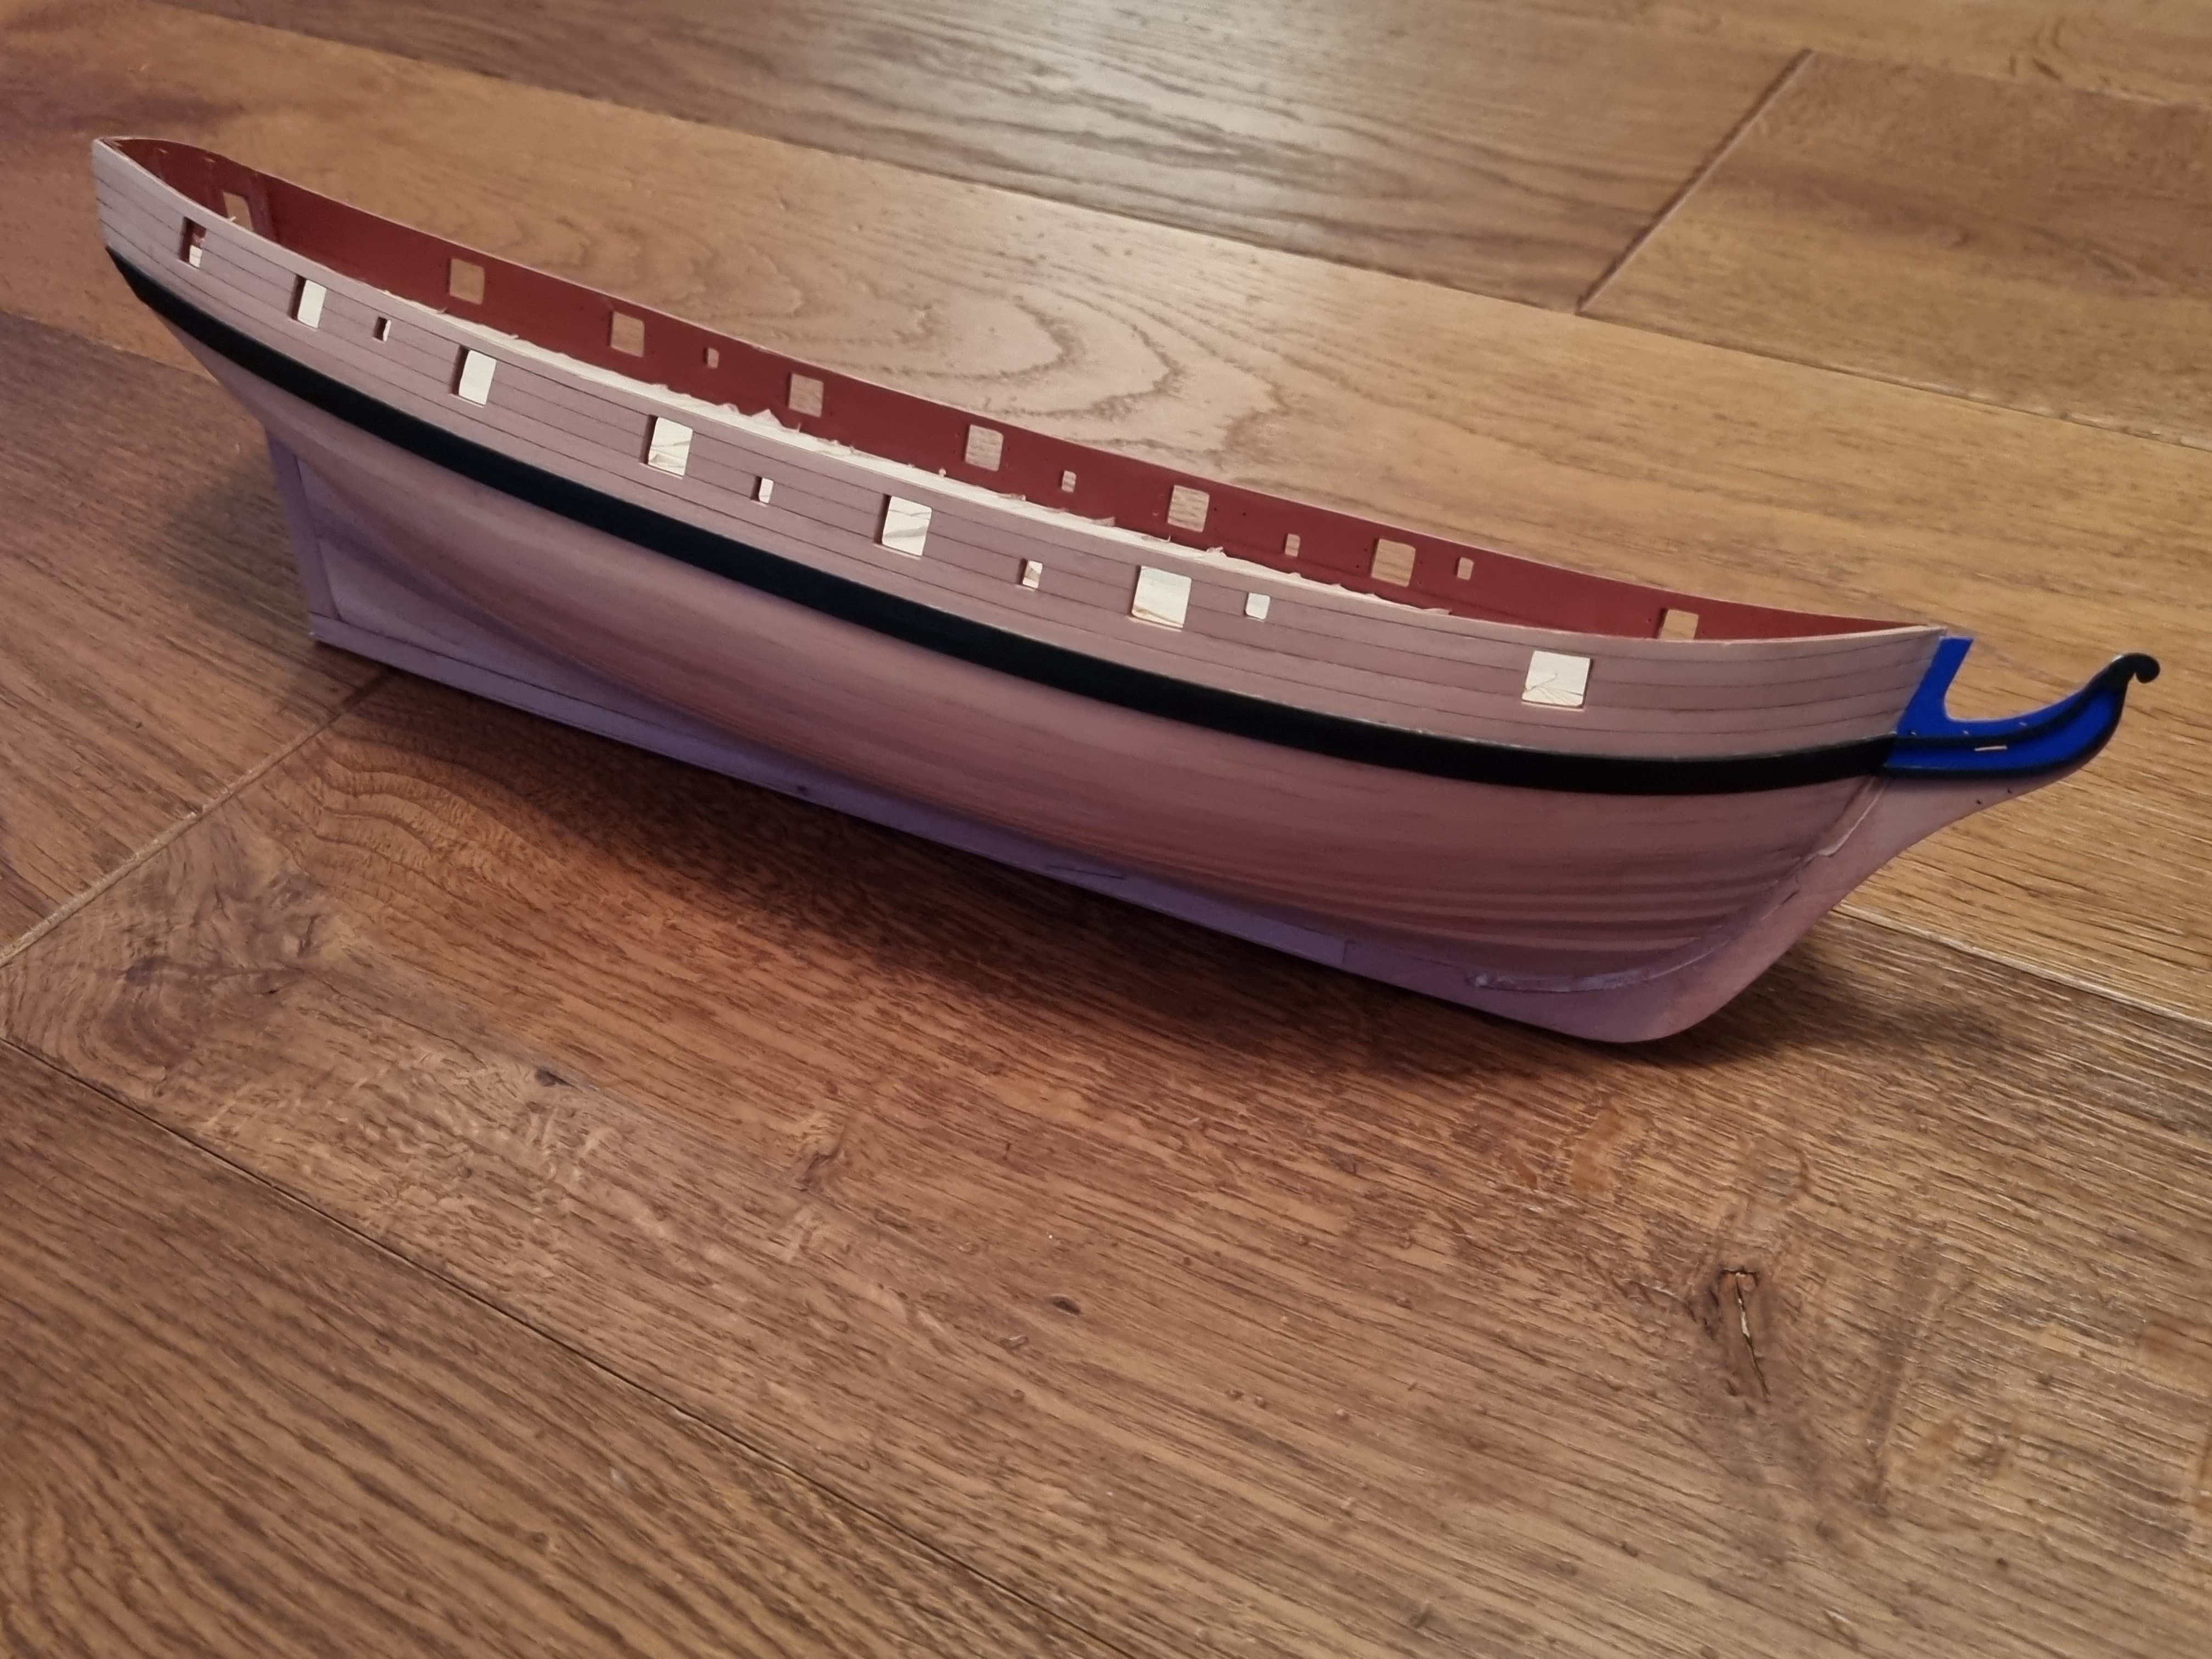
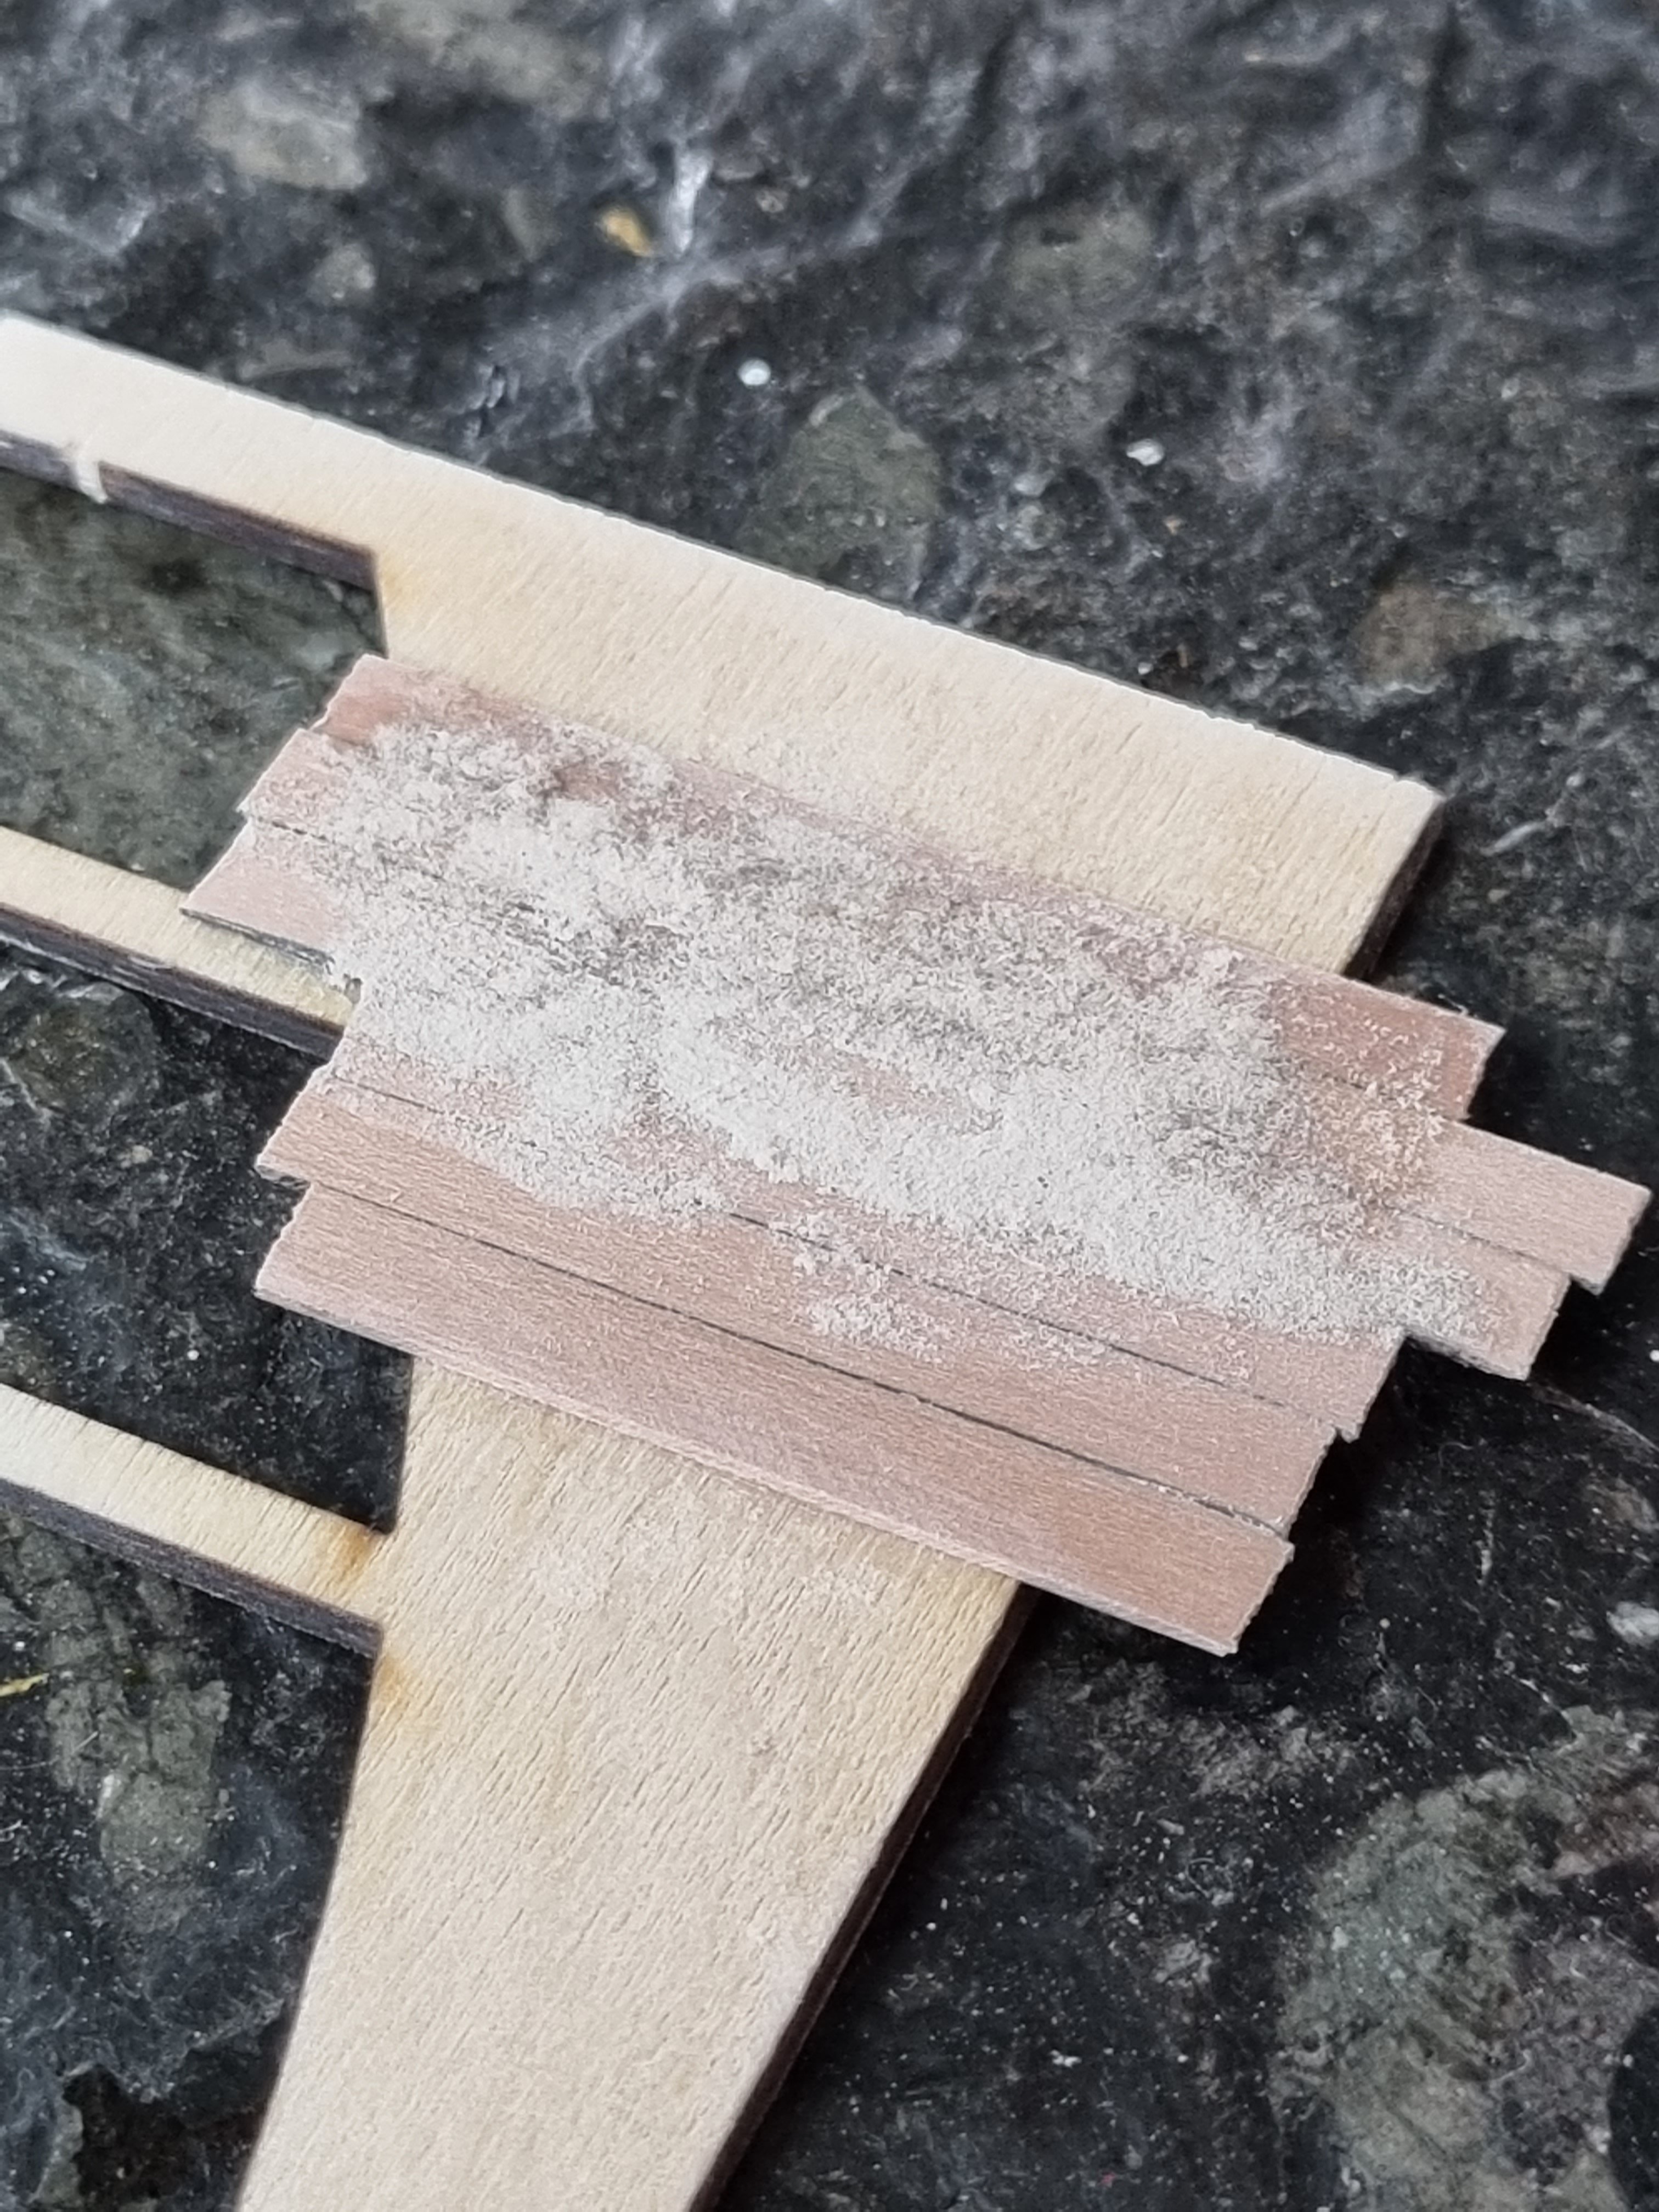
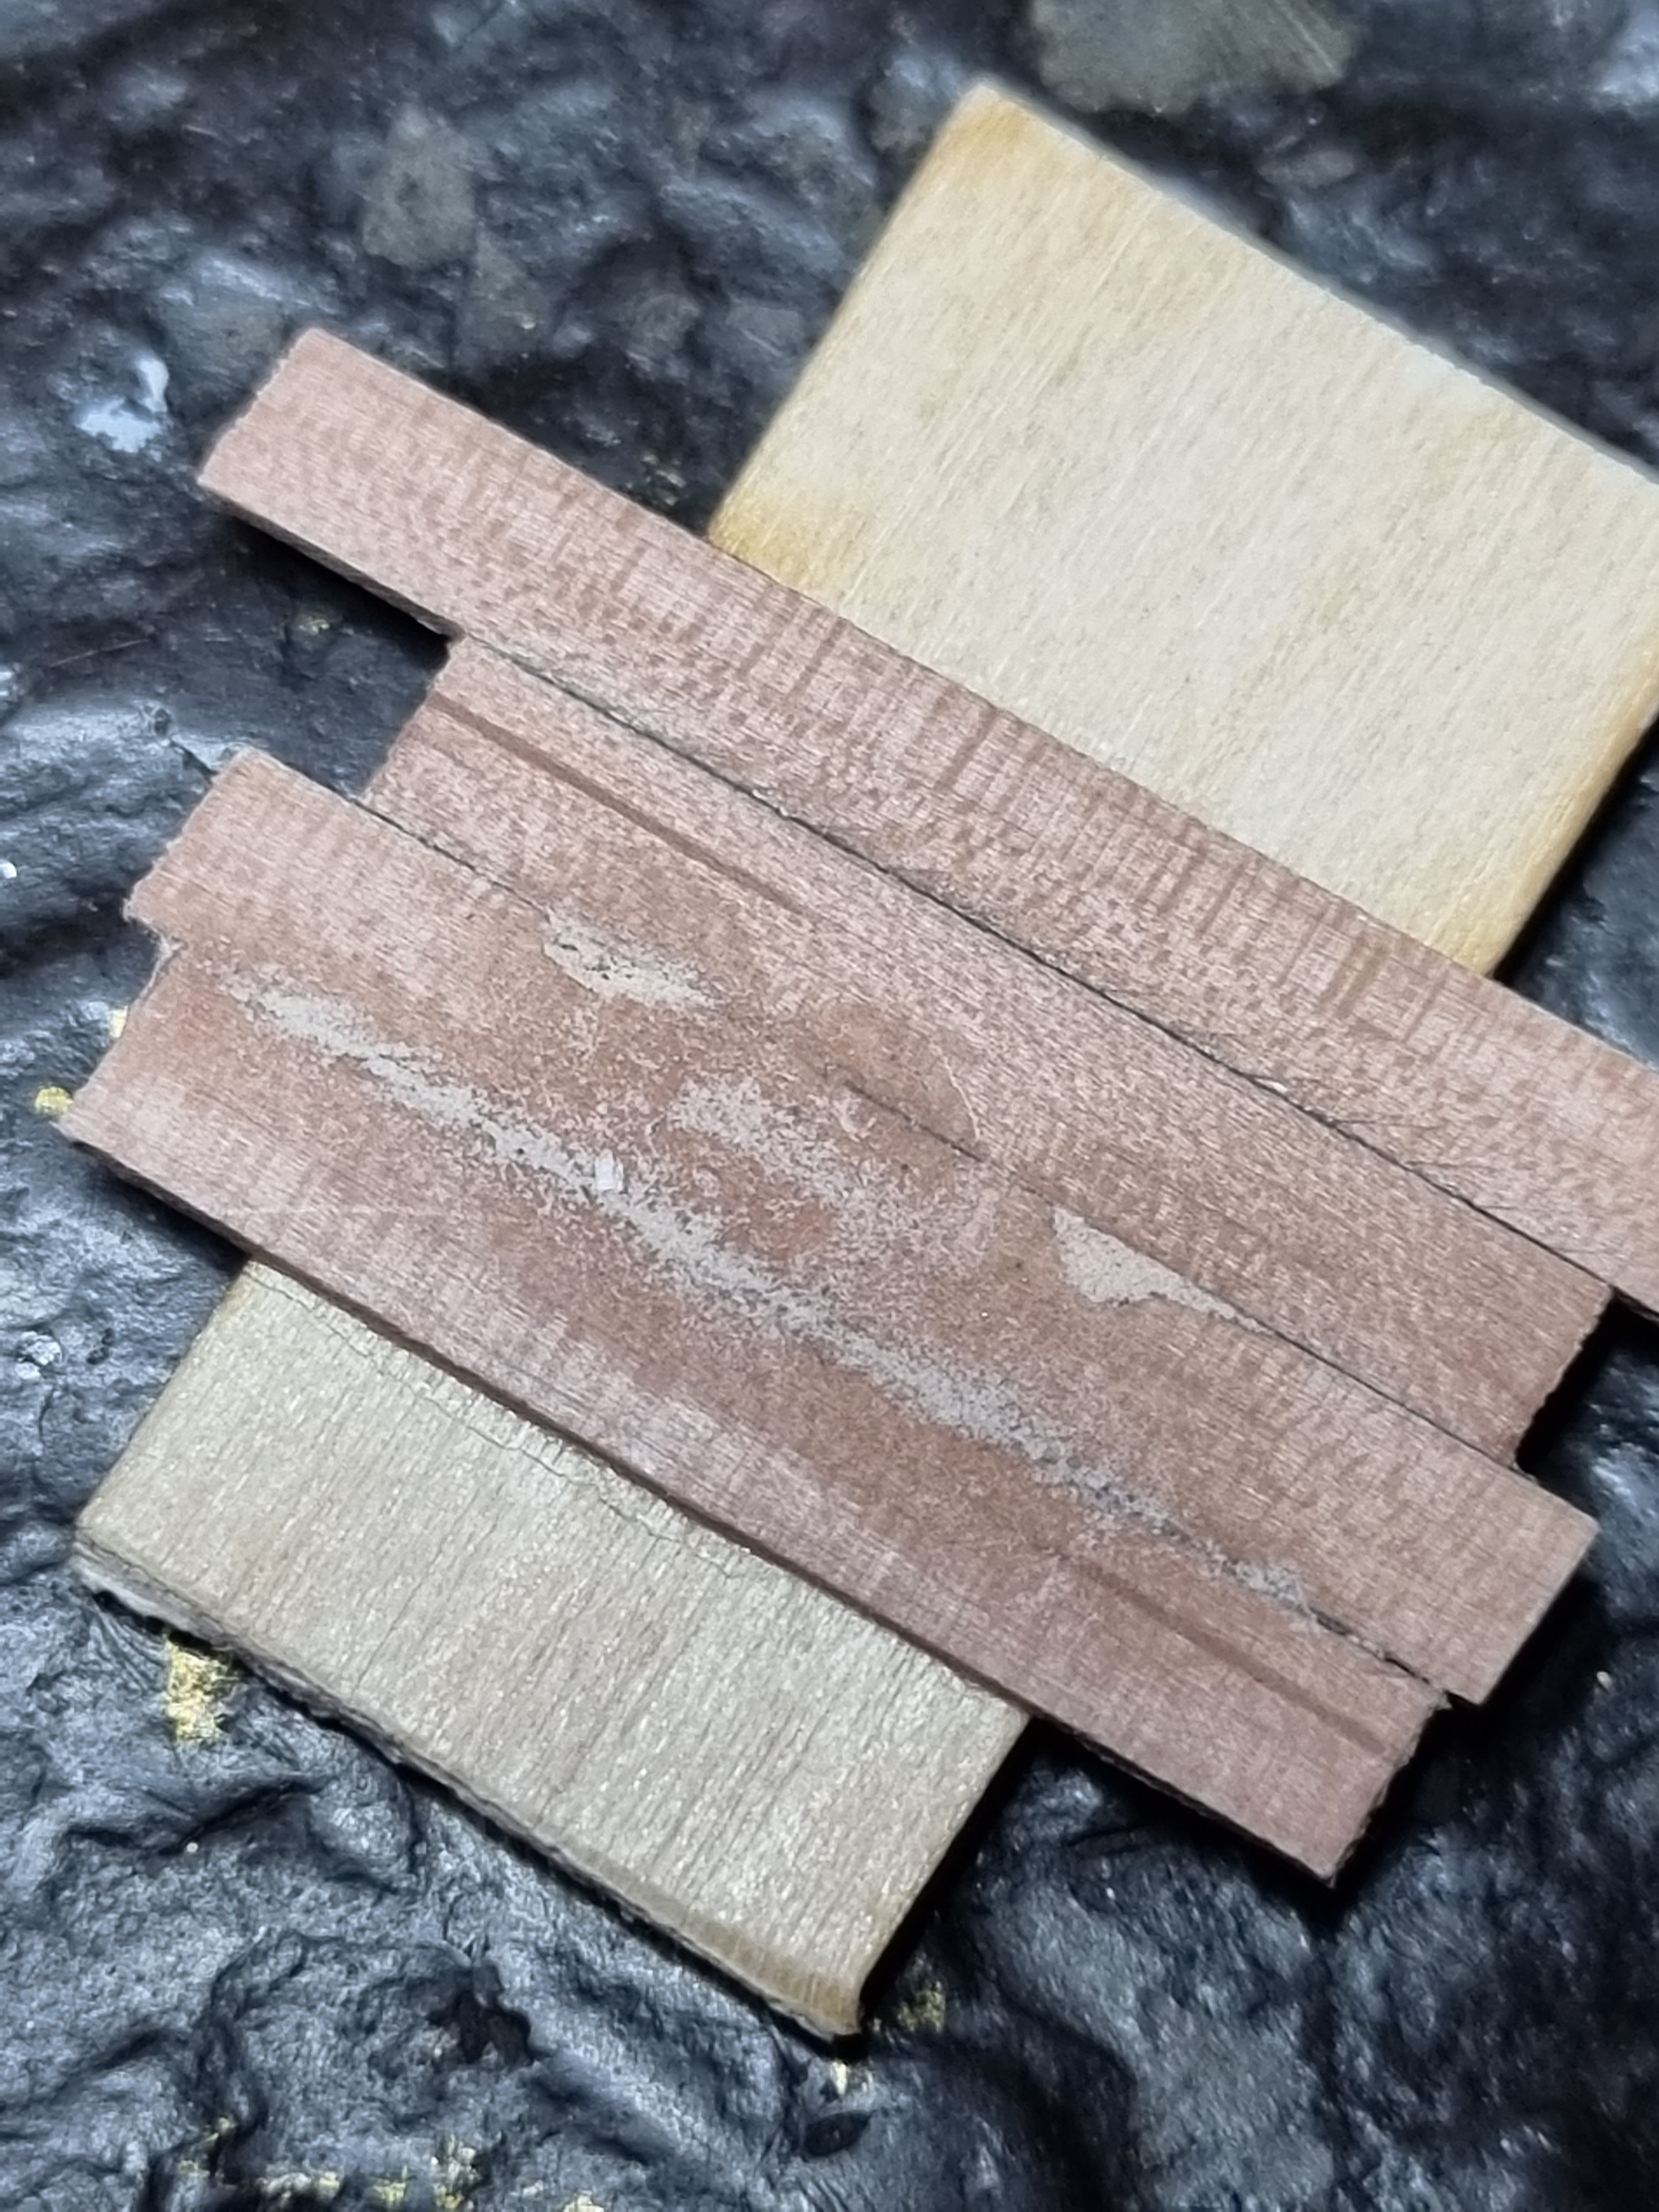
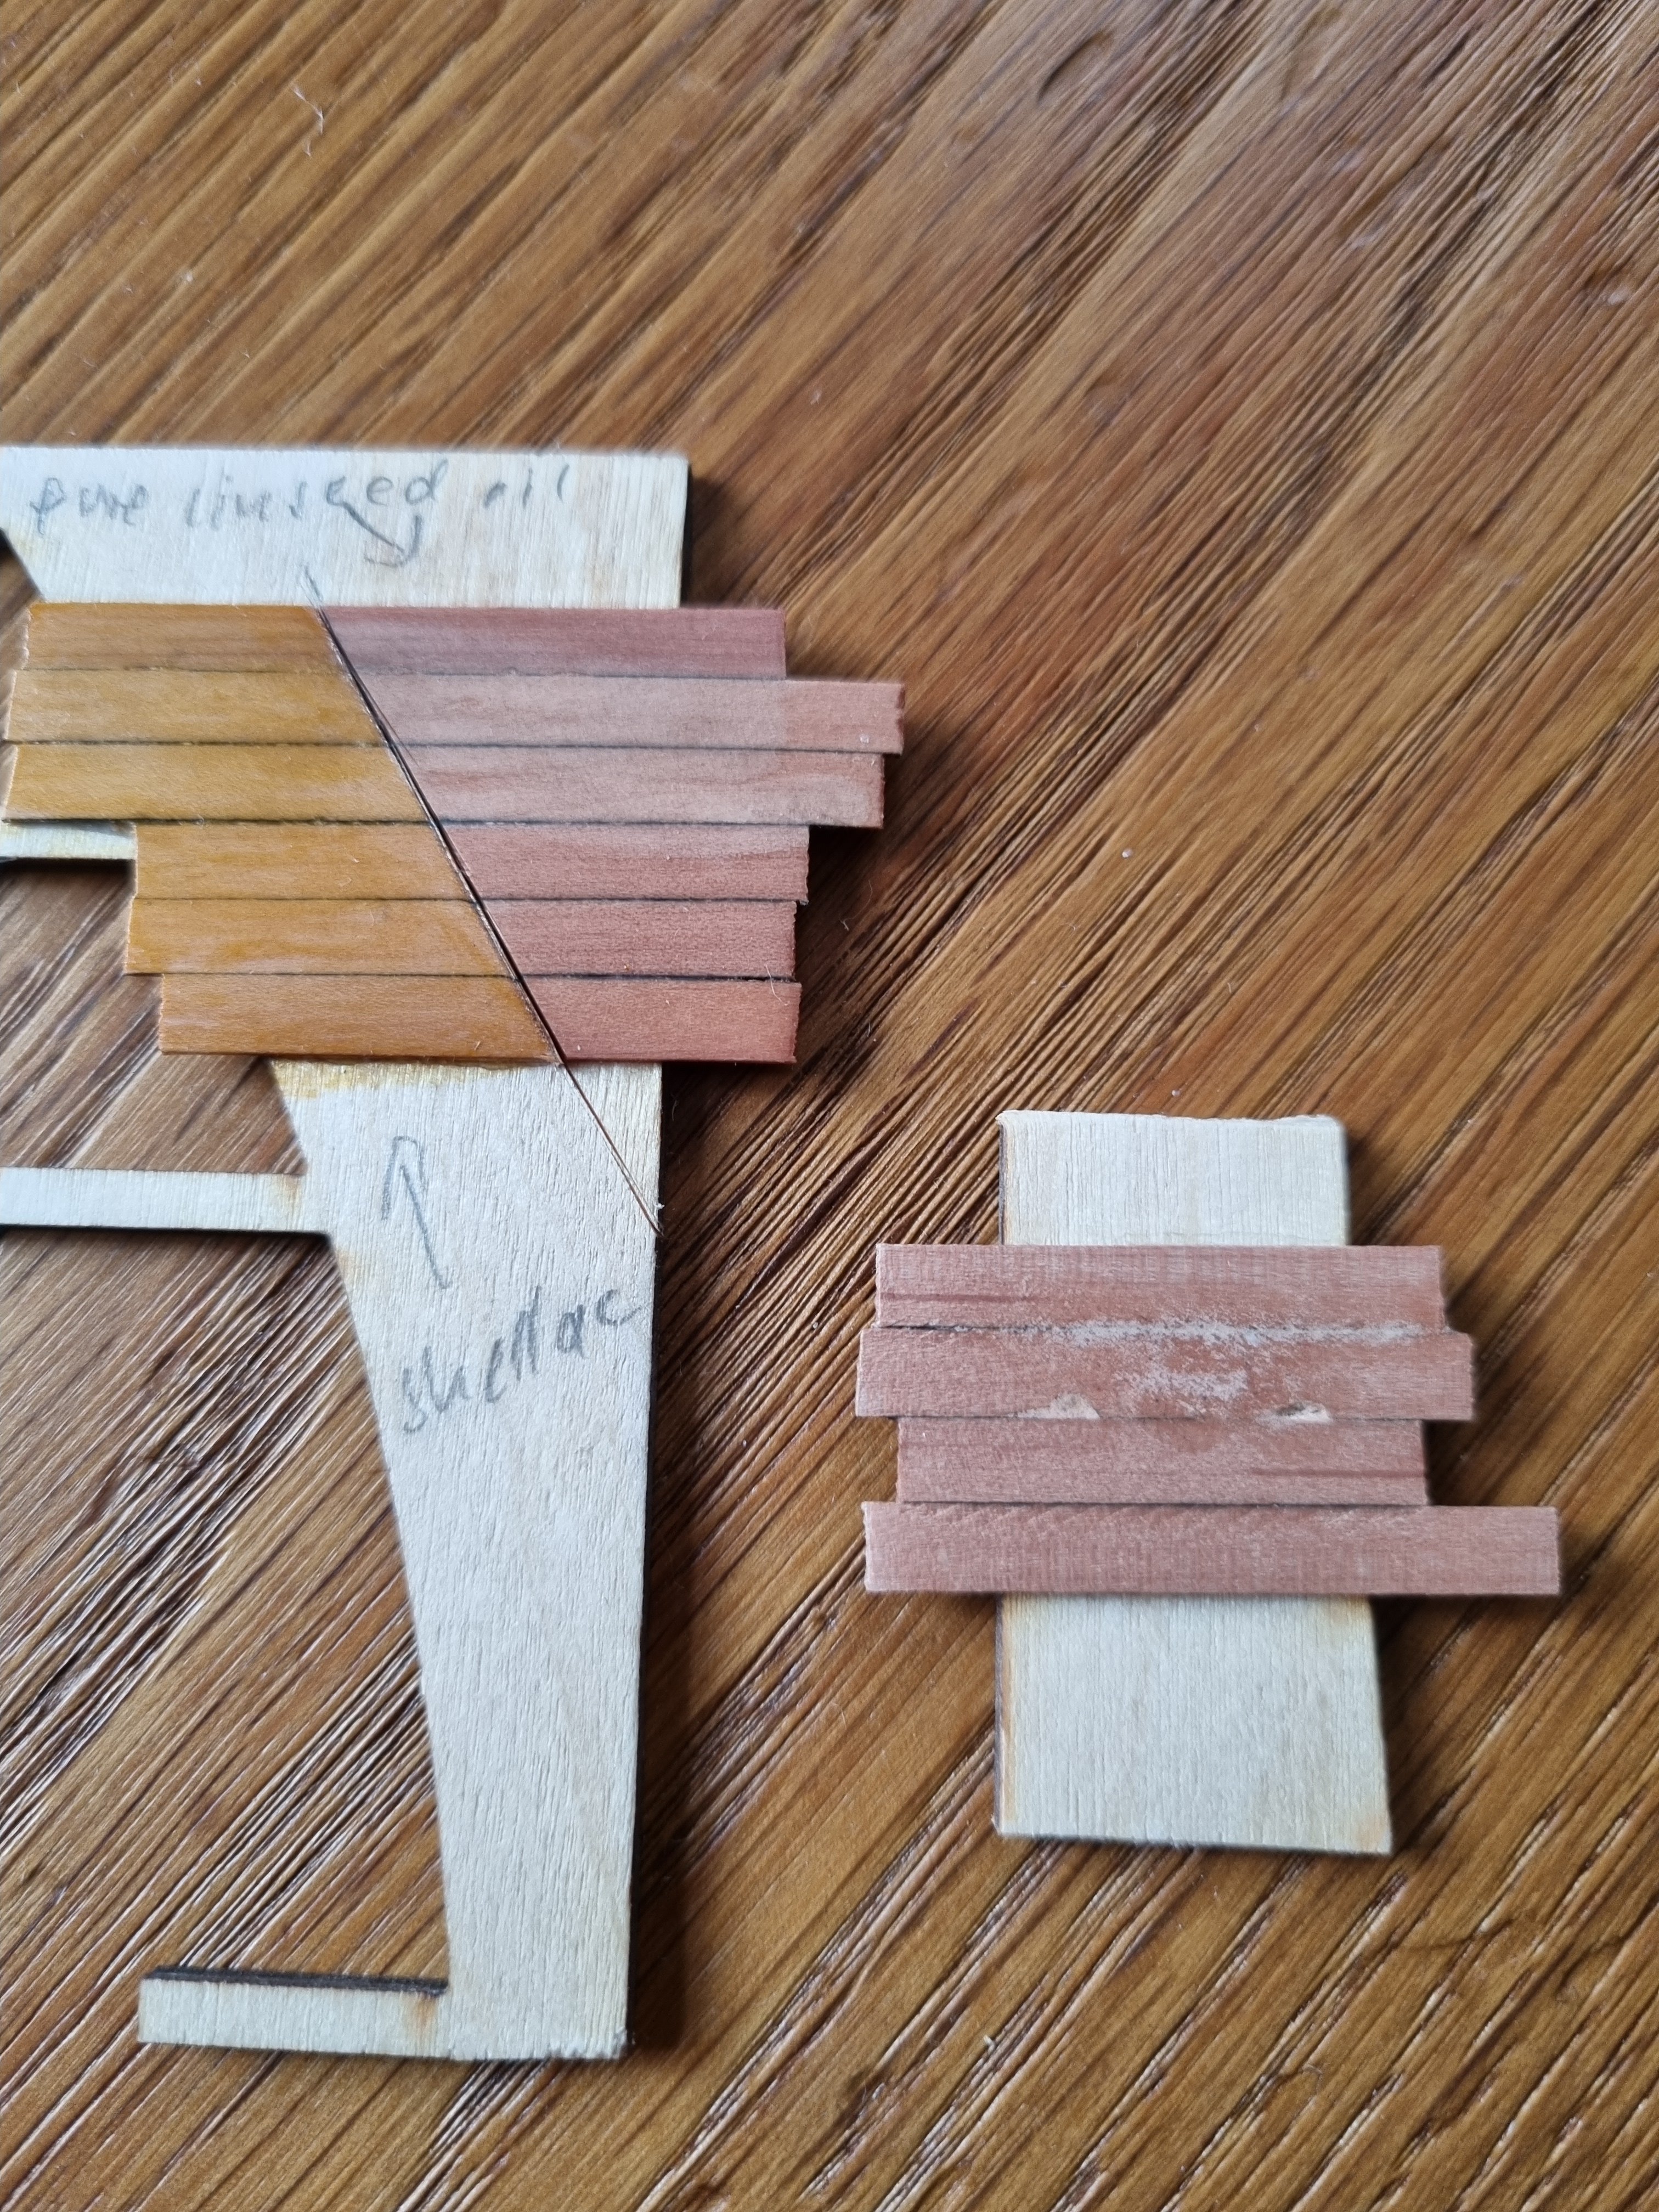
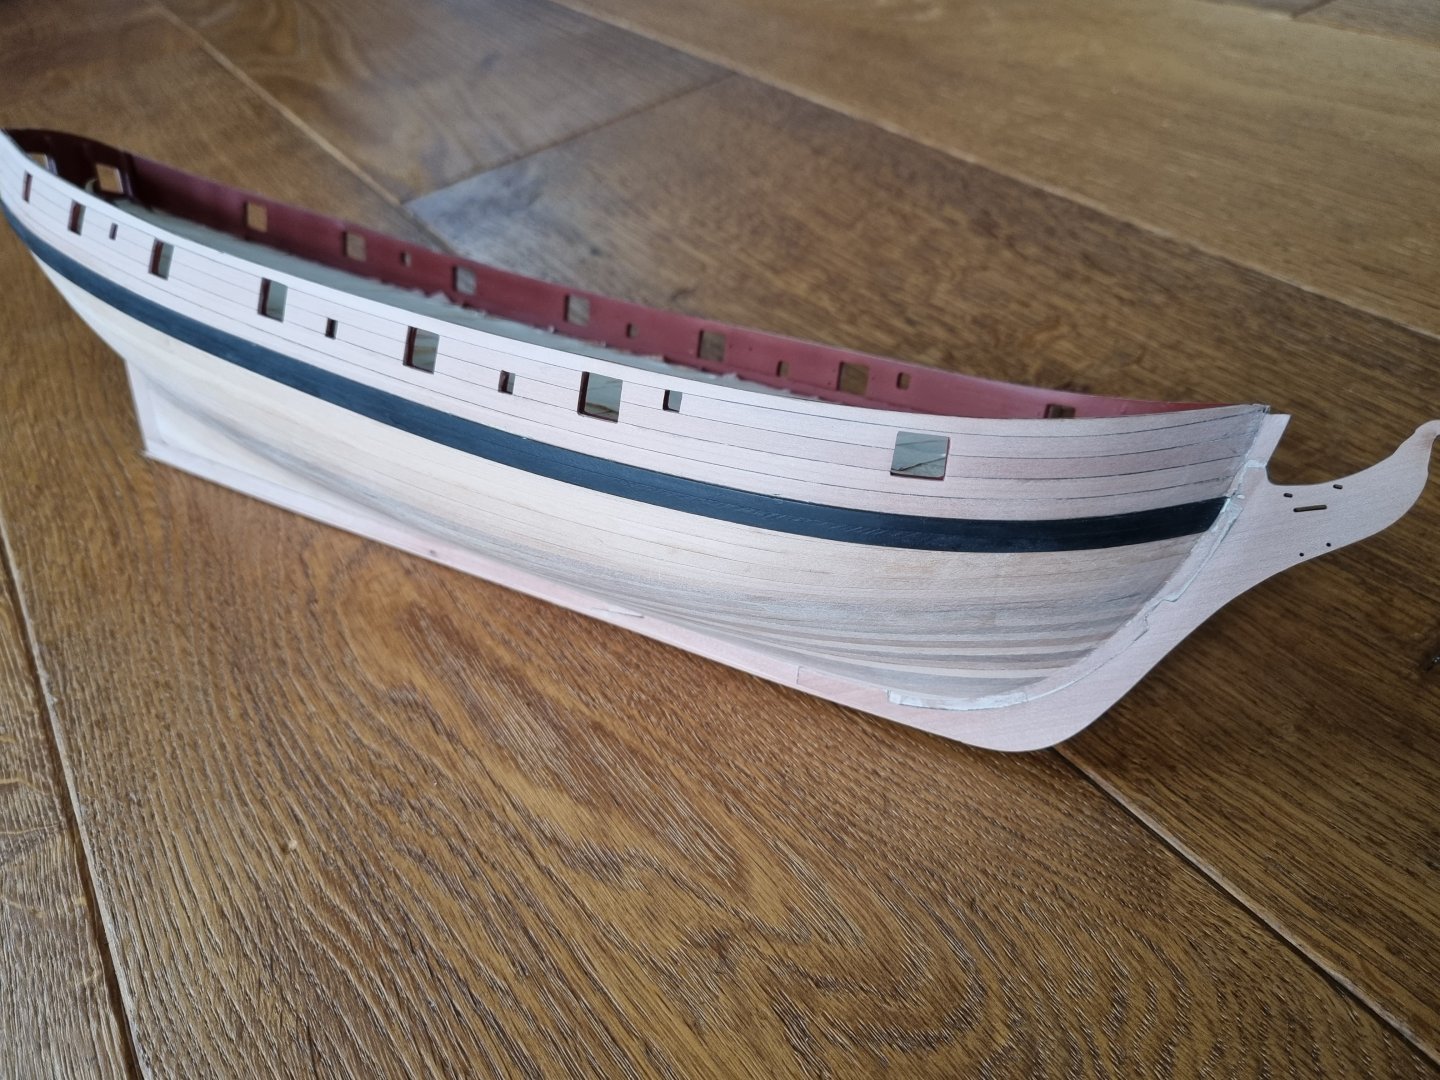
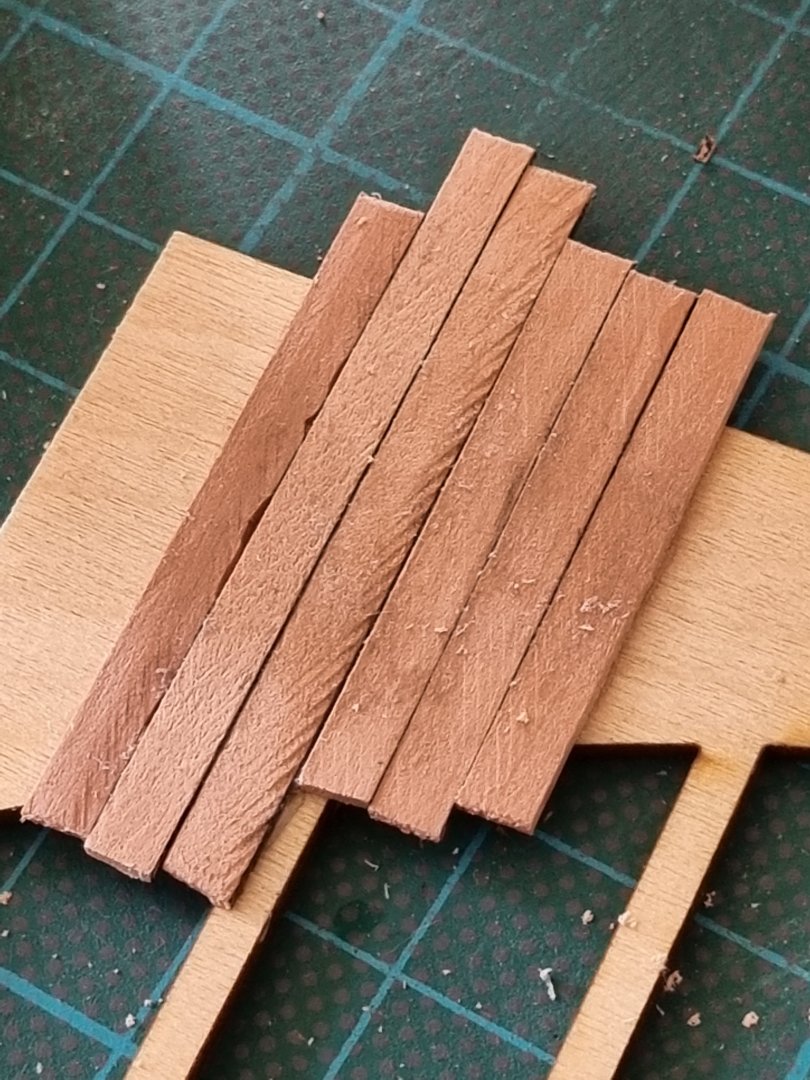
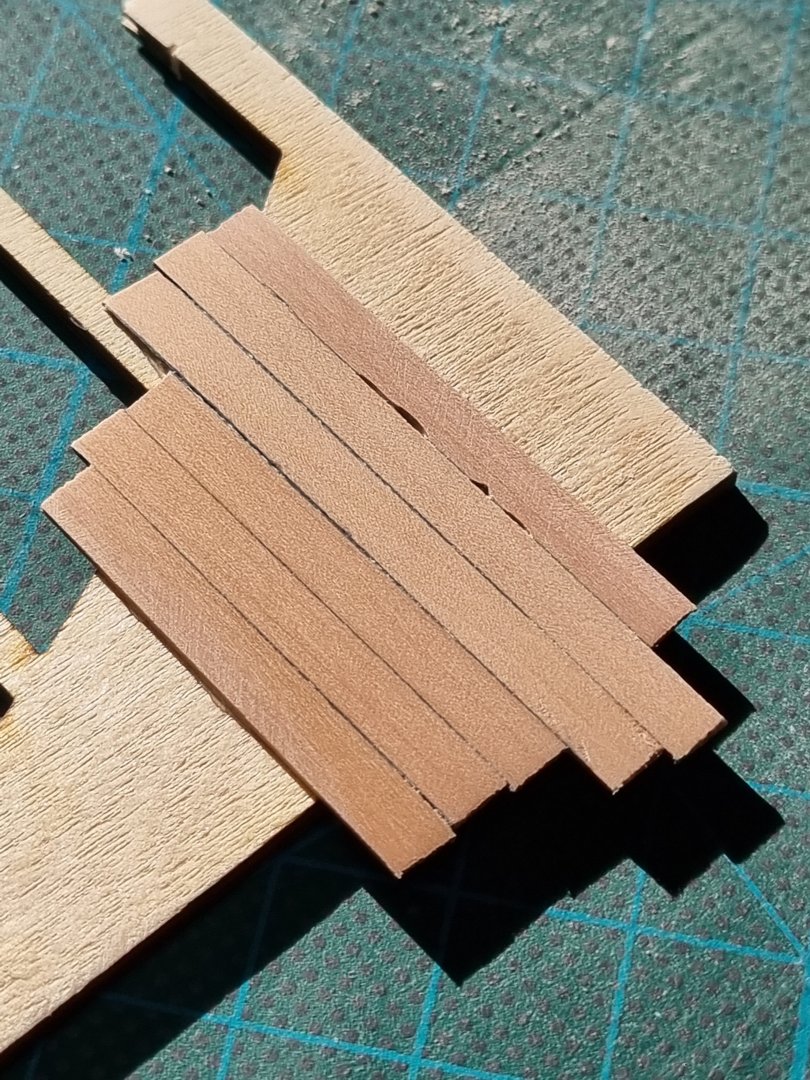
@BobG, @chris watton, @Blue Ensign, @BenD: thank you all for your thumbs up! Good motivation at the right time 🙂 @Blue Ensign: thank's a lot for your kind words! 🙂 Hello to the swarm intelligence, I need some advice :-). Because of the relative success of my planking as a whole, I run into some issues/problems! Let me explain: I decided to go Speedy on top of Flirt because of the coppering (ah, who don't like a little bit of bling bling on this beautiful ships :-)). Now, If I went the original way, copper the hull and paint the stem, I had no problems, but I fell in love with the wooden look of Speedy and I would like to preserve this. But, I needed a lot of filler (and not jet finished with the filling/sanding process) to get a good fit of the stem and keel: Now, if I want to save the wood look, I need something to save the nice wood-colour and also bring it all in line. For that I made the two test parts with lots of extra cracks in it to use a lot of the sand-dust-filler: The bigger one was then separated with a knife to get three areas for different coats. Now I used shellack, pure linseed oil and a matt varnish on water base. This is how it turns out: My first impressions: While the matt varnish gives the best colour (IMO) to the wood, it also even sharpens the difference between the dust-filler and the bare wood. Not what I was looking for. Unfortunatly. If my woodwork would have been of better quality, I would go this way! The shellack: it hides the dust-filler perfect! But, It was also the most complicated to add. It is not that easy to get a smooth, even and thin layer. And if it differs in thickness, it also differ in the colour. At least, it comes out quite yellowish. I'm not sure jet if I like it jet. I had promised me more of that. Last, the linseed oil: it also hides the filling perfect, even if I don't know if it last that way, because the oil does not cealing the wood, I think it would dissapear over time. What to do? I have not decided jet, and that slows down my work. Because now would be the time to either copper or paint the stem. Any idear from the community I did'nt know about jet? Thank you all in advance! 🙂


-
Great build so far! How's your second planking going? 🙂
-
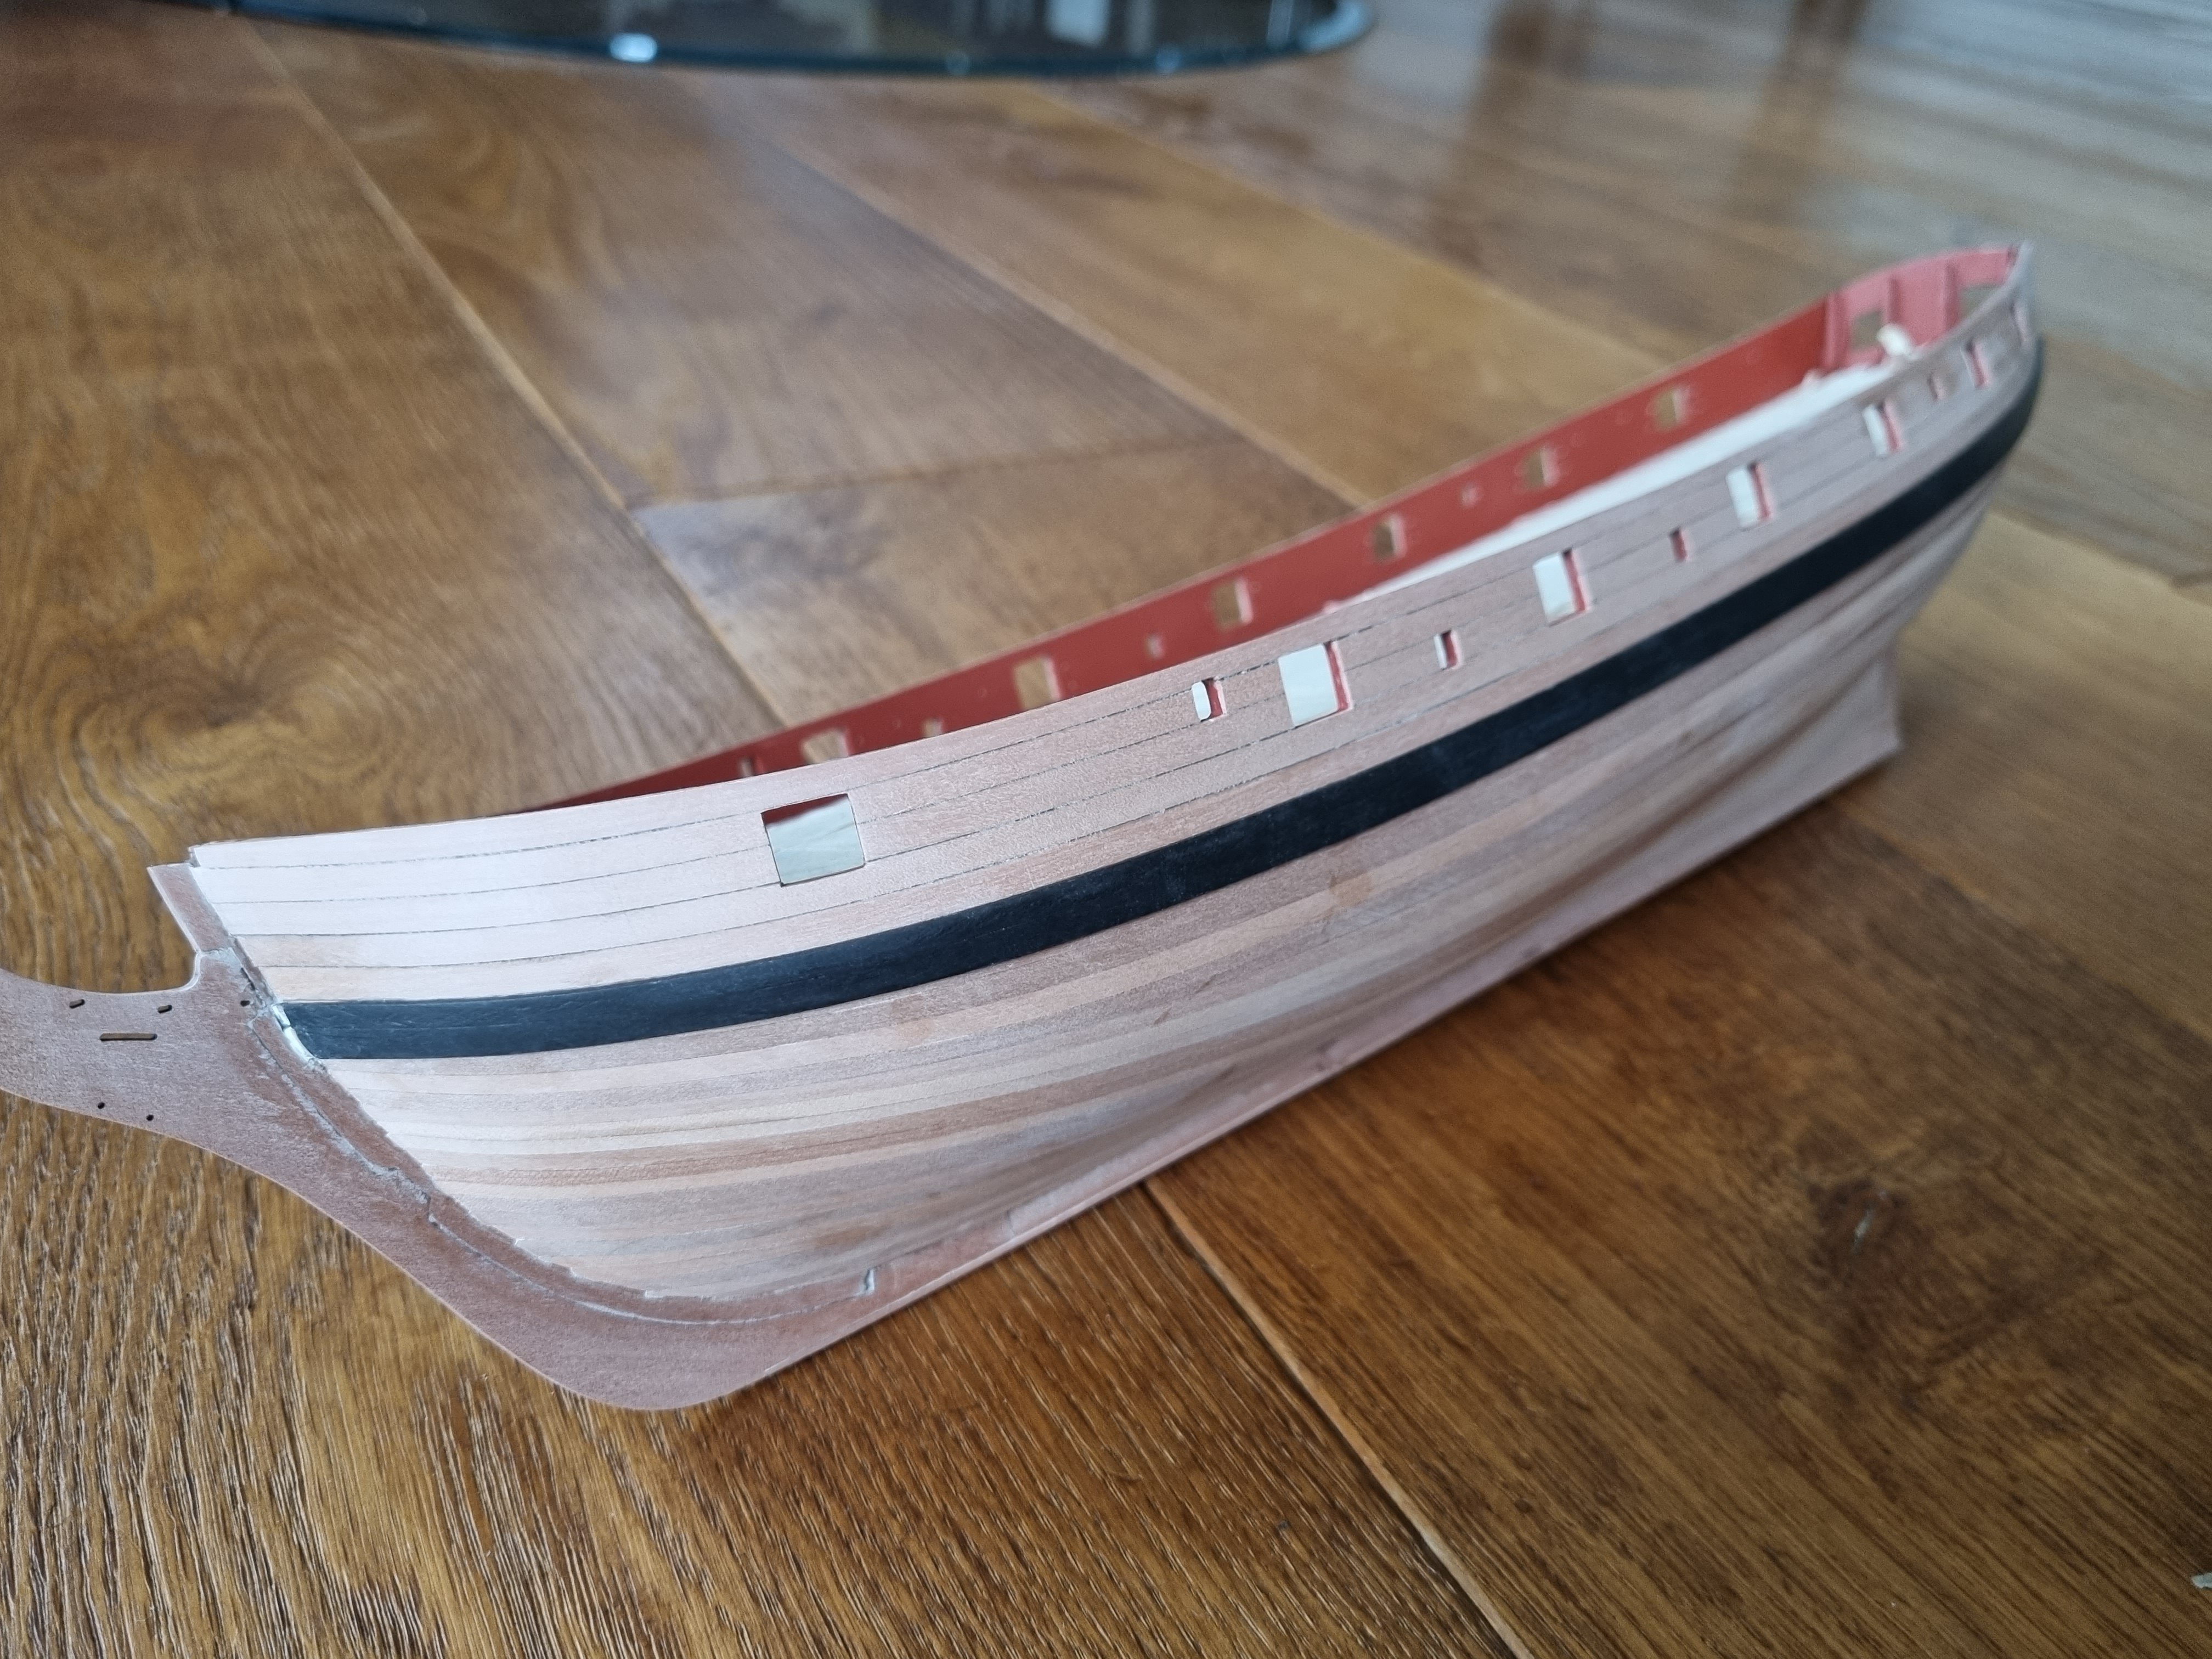
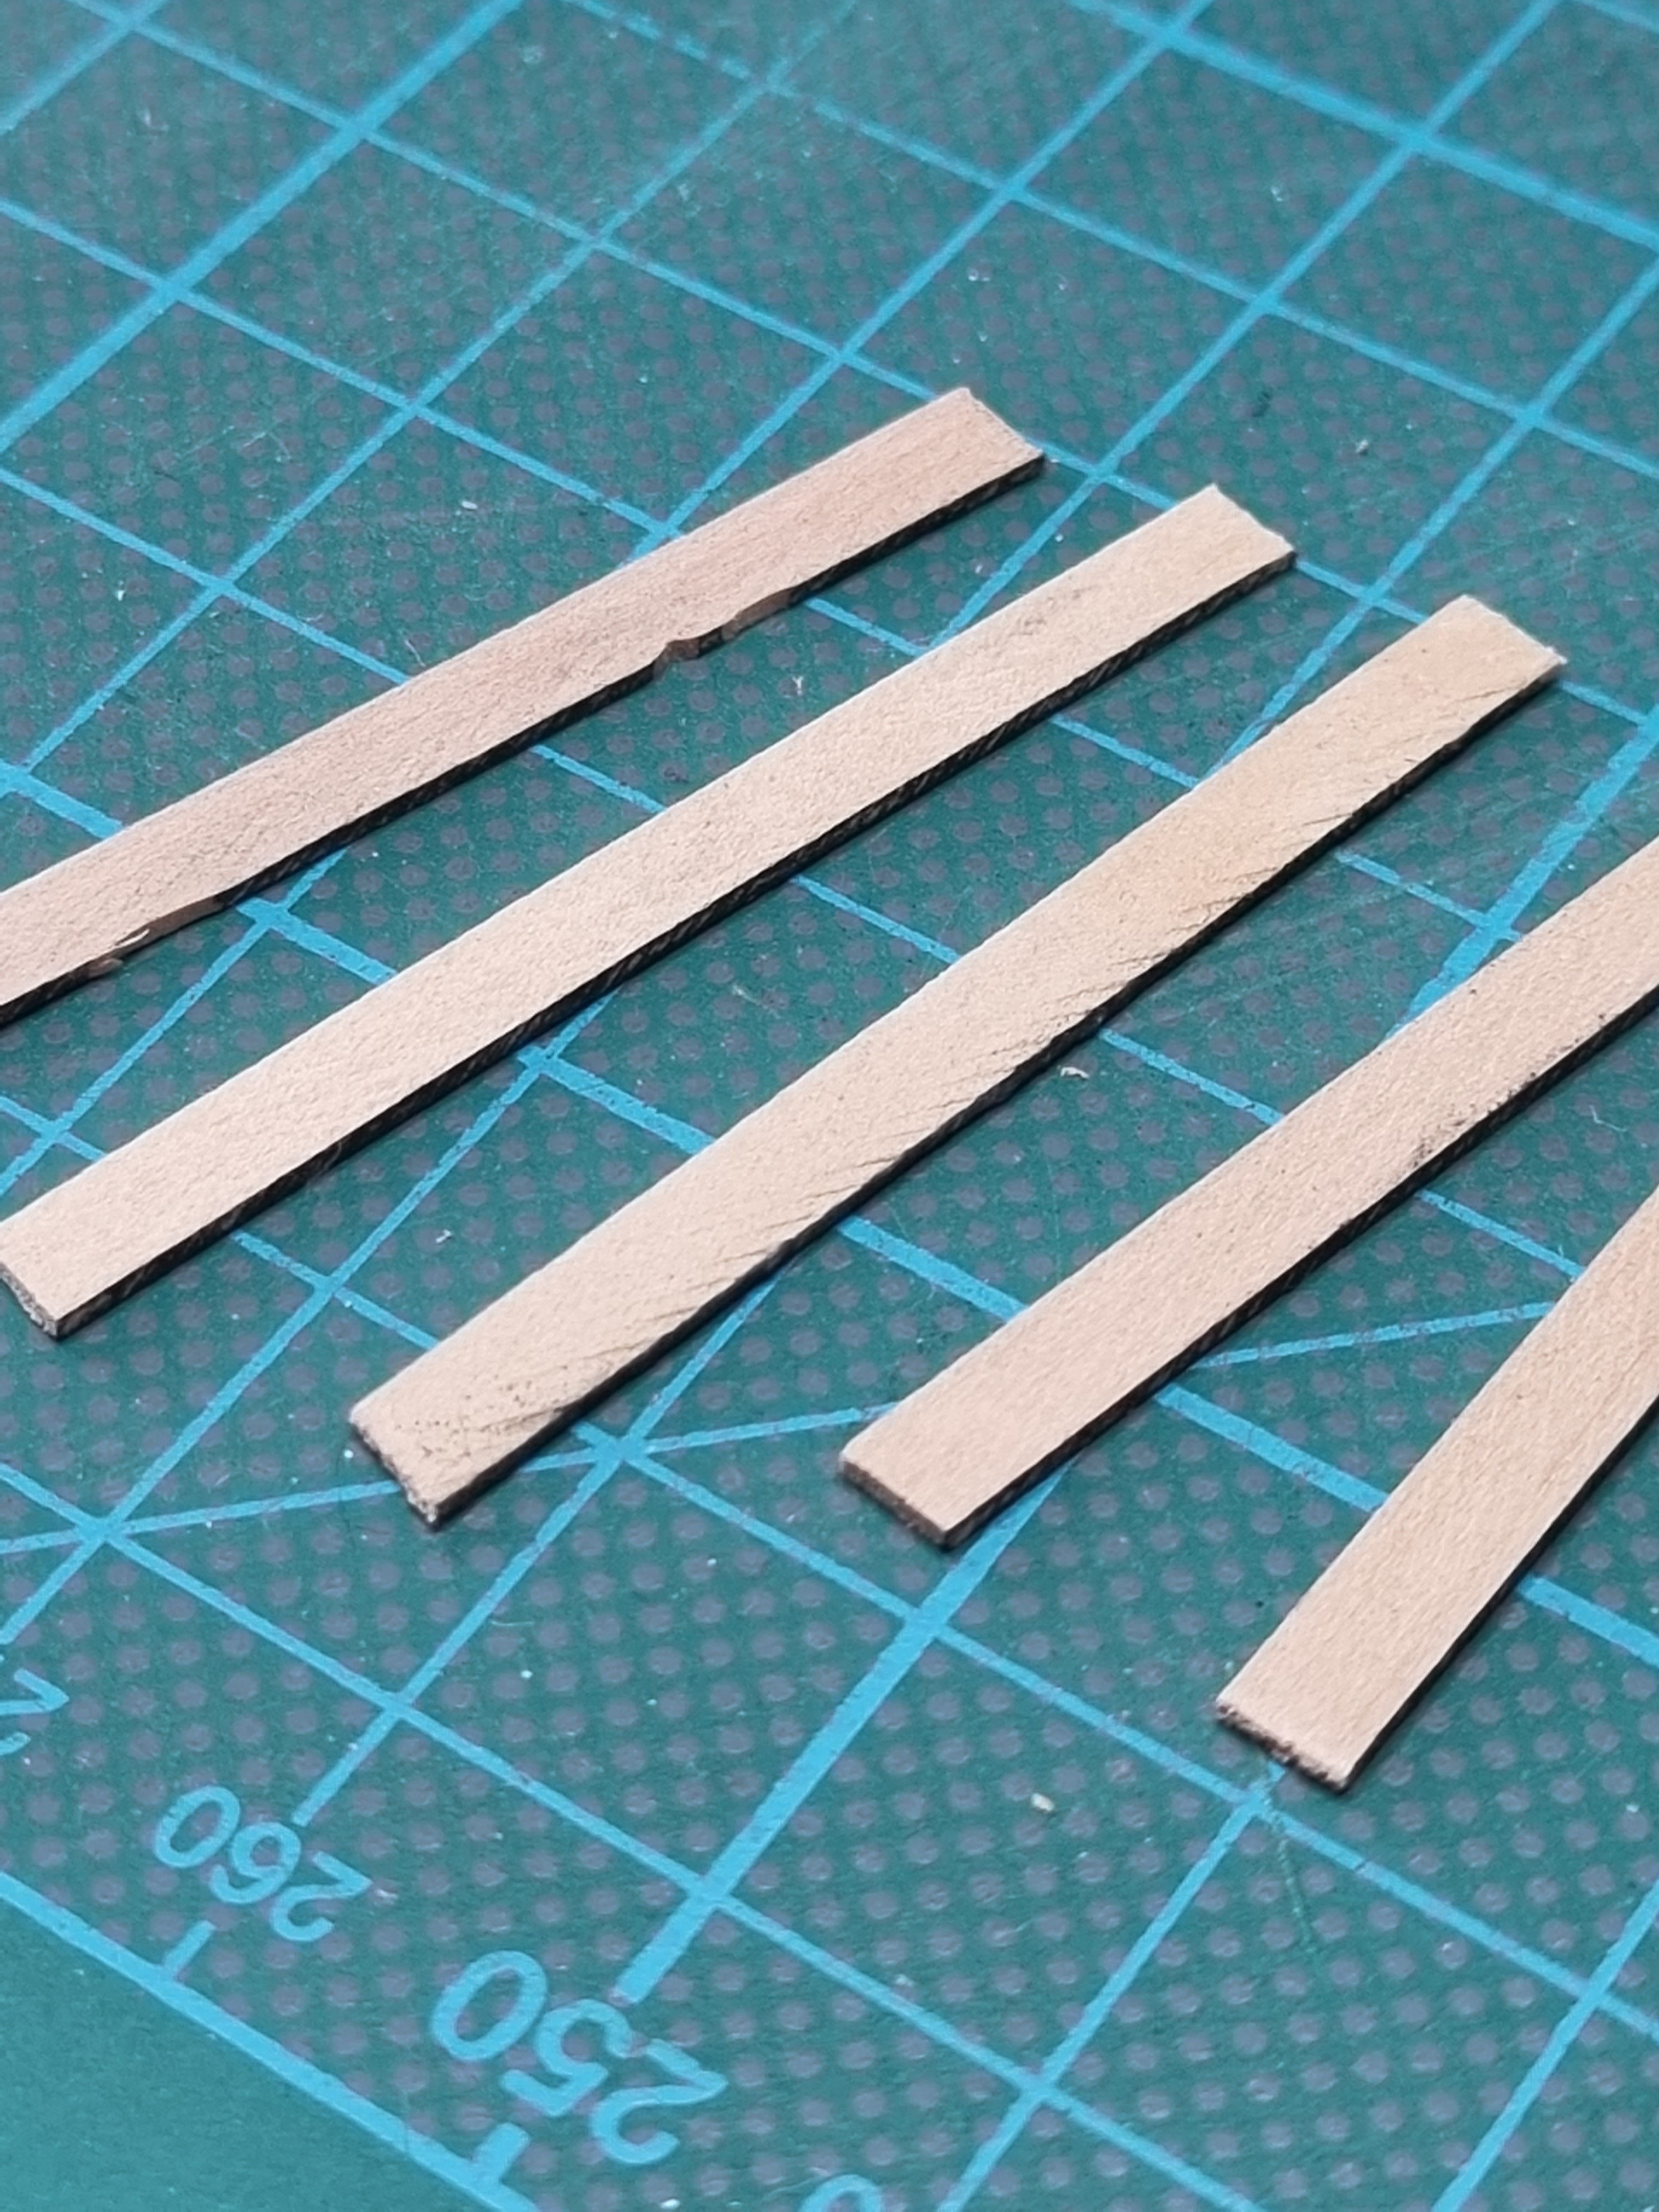
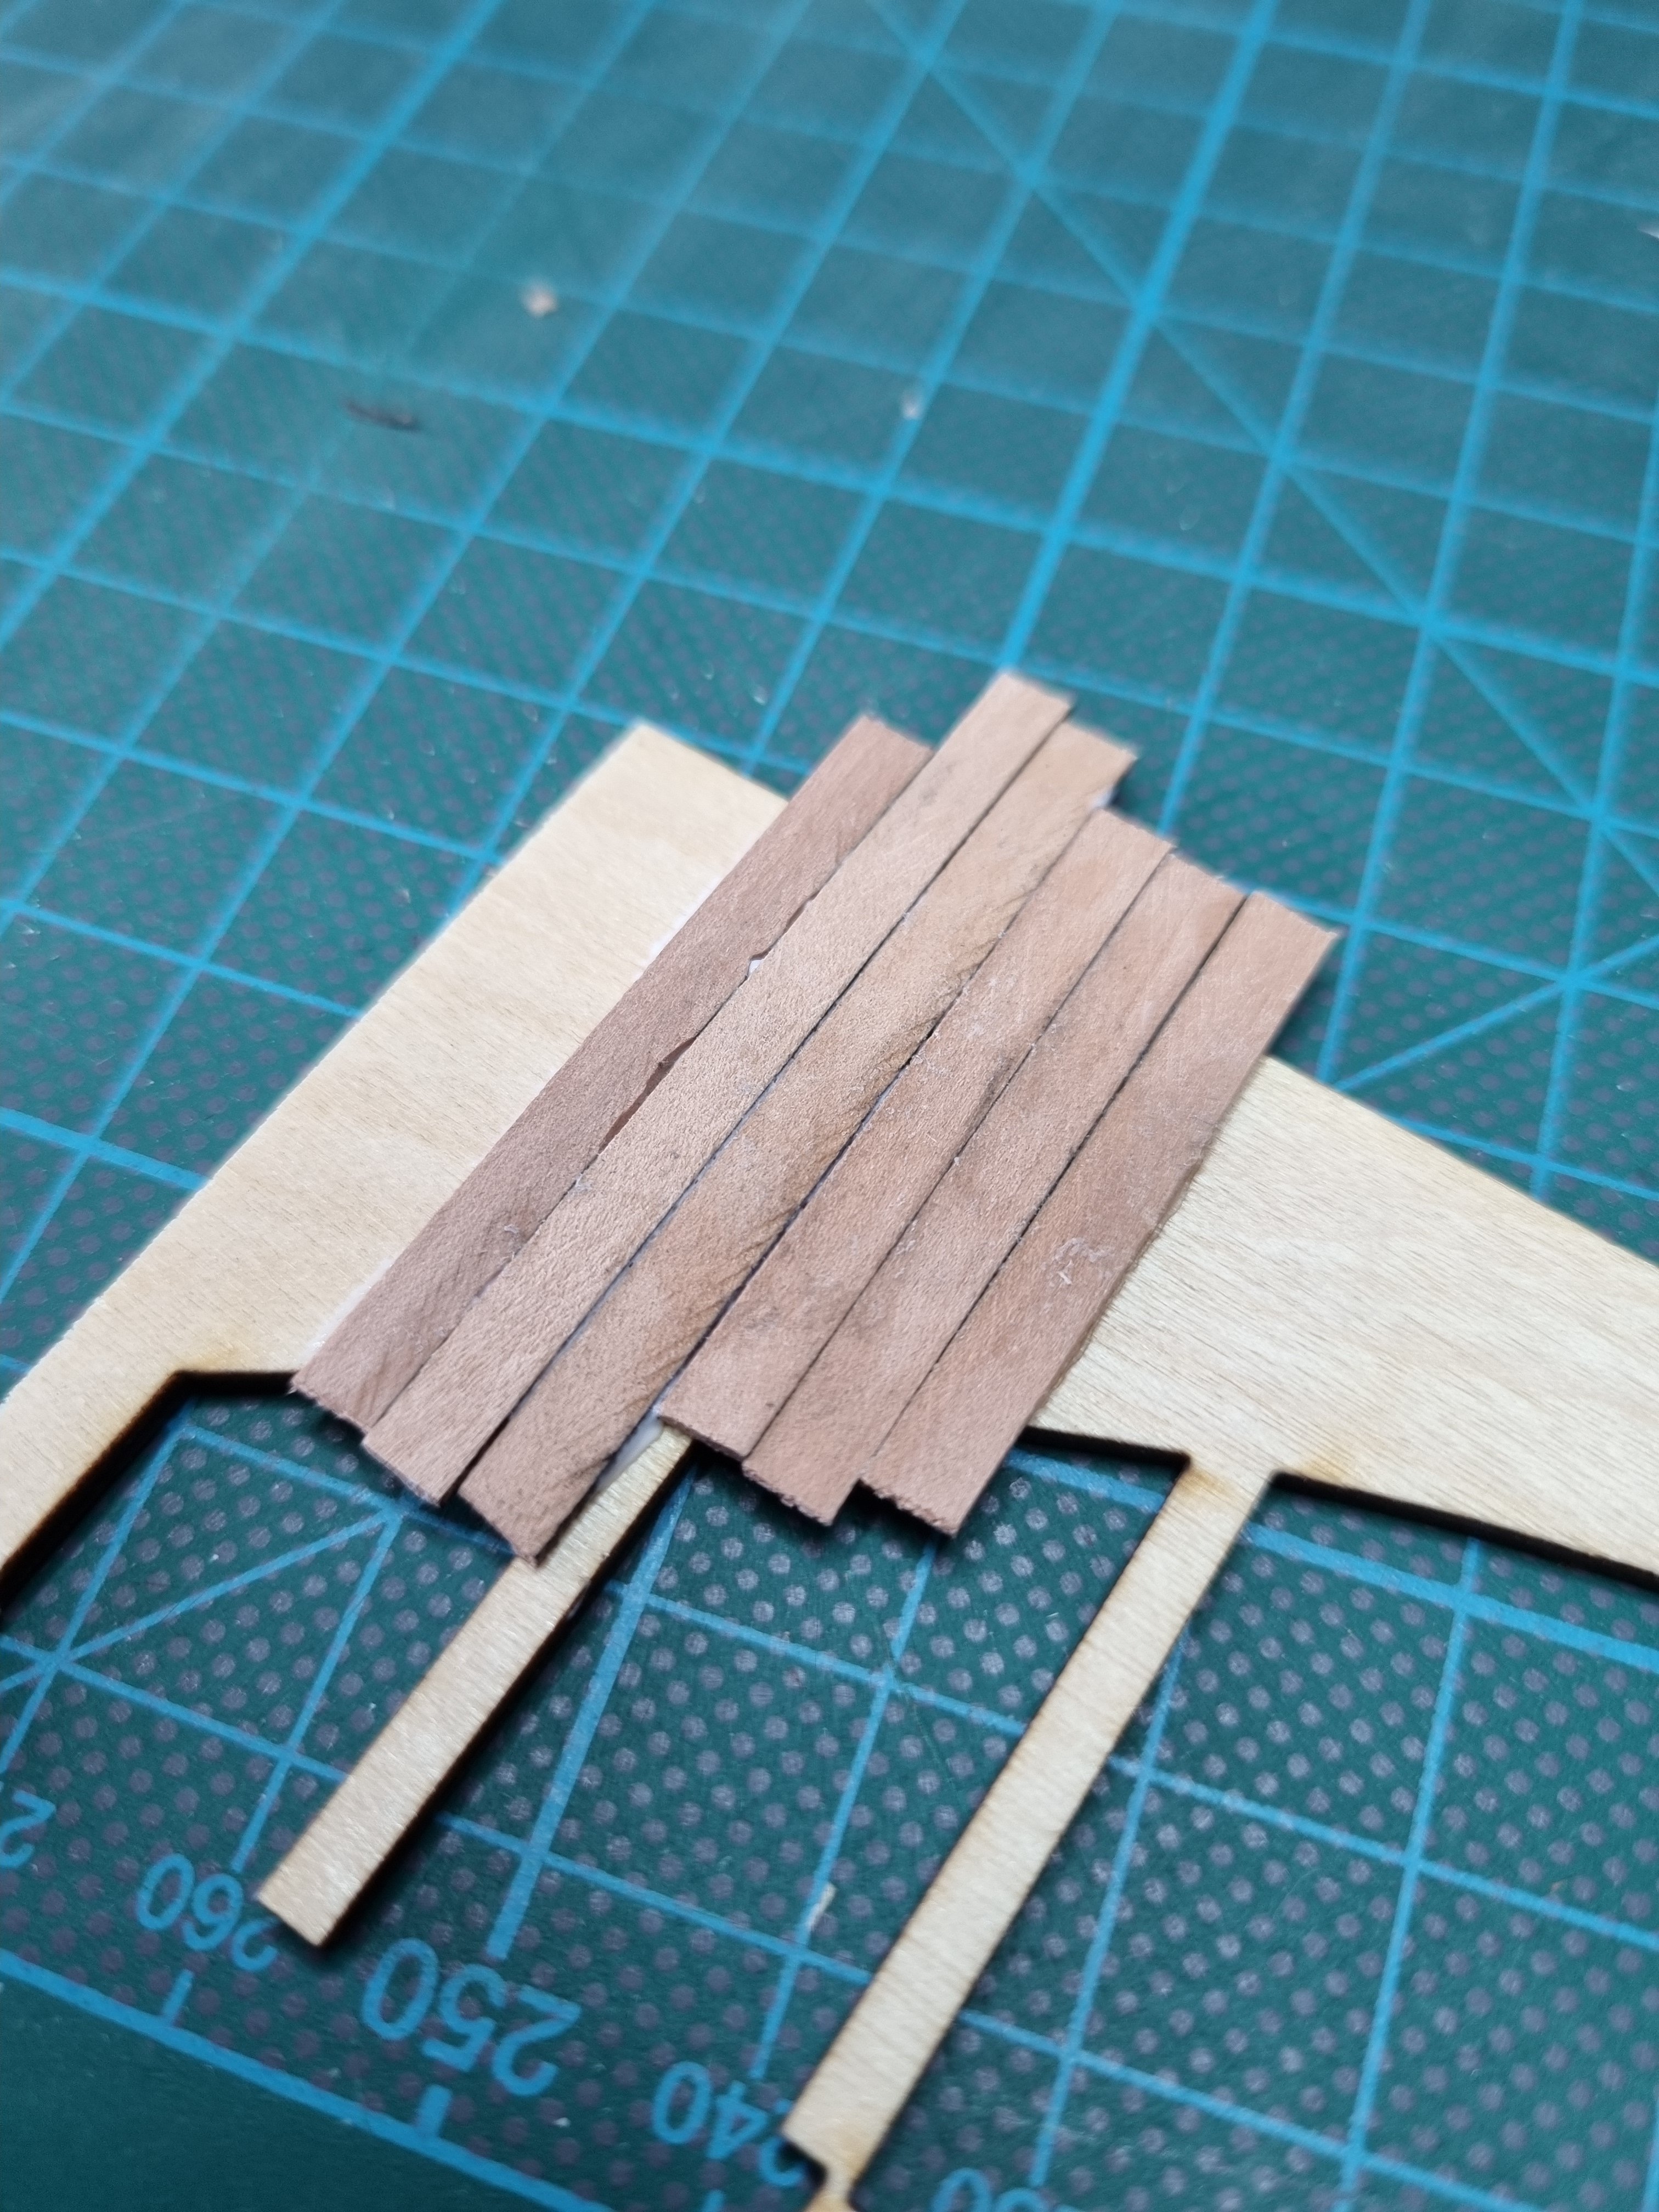
Ui, so much positive feedback! I love this community here :-). @KARAVOKIRIS, @PhilH, @BobG, @Katsumoto, @hollowneck, @Ondras71, @ccoyle, @DelF, @David Lester: thank you all very much for your thumbs up, much appreciated 🙂 @BobG: thank's for your kind words! I have learned during building, but still, every step I do, I find new things to do wrong, lol. The biggest problem: errors from earlier steps become later more prominent, in my experience. So I learn it the hard way, but I still enjoy the building process. What also has a learning curve is the photopgraphing: nowadays I can hide my errors better with better pictures... 🙂 @PhilH: thanky you Phill! Now I'm confidence that I can finish this! During my ply-gunport-pattern-desaster I was not so sure abaout this. And then I had that problem with the dents in the hull. I solved this, but now, while I'm adding the keel, I know what went wrong: Somehow I managed to let the whole hull to get warped! my Keel looks a little bit like a bana, if you look straight at it. This explains it all! Sure, if I won't post any pictures of this or don't write it here, nobody would know about this, but as more experienced builder than I am already pointed out: the community can do more with a log, if it don't spare the errors 🙂 @SpyGlass: I love to share my work, but I'm very sure, I'm not the first one doin it this way: I went the easy way: paint just one side with a black crayon: some leftovers glued on a piece of scrap-wood: sand it: profit: On this test piece, I was not as careful as on the real thing. How priment the plack line will turn out is now a question of how consistent you use the black crayon and how strong the planks are held together during the gluing process. Before I decided to go with the deck as per the kit provided, I did some tests for a potential do-it-yourself-deck, and then I tried paper inbetween the planks. Muuuuch better result, but also muuuuuuch more work lol. 🙂 Hope this helps.


-
Love your working-space with a that little boxes! 🙂 I'm a couch-table-builder, a lot of work to just get everything ready to build something and to remove it afterwards again. But, at least, I can build 🙂
-
Beautiful! 🙂
-
The faring looks good to me! There is one point I'm not so sure about: the stern counter, piece 38 on page 10 of the Flirt-manual. In the photos it looks like as if there is, at least the right side, not enough curve in there. It seems at is is more ore less completley flat. But it should follow a curve to match the curves on the bulwarks (37 at the end) and later the Stern Side Counter Timbers (57). It could only be the picture and I could be completly wrong, but when there is a little change needet, than perhaps better to look at it now :-). If it is to flat, it might be from the fact that you broke the Stern Frame Pattern (30&31), and perhaps you don't add enough power on the stern counter to form the curve to not break them again. And if so, perhaps it might be enough to just sand/file the needed curve into it. But, as I allready wrote: I might be completley wrong here, because such things are difficould to see on a picture :-). And I made the same experience: it feels so good to overcome the home made errors and tu build a wooden boat modell is quite satisfieying. So, can't wait for your next update. I hope you have not as much issues with the ply-gunport-patterns as I had! 🙂
-
I would say you doin justice to her 🙂
-
Yes, but I build HMS Speedy, the sisership. My log here is up to date, I think 🙂
-
I'm sure that the underwater-part in white will turn out great! 🙂
- 476 replies
-
- 2
-
-
-
- sphinx
- vanguard models
- (and 1 more)