


Michael_A
-
Posts
42 -
Joined
-
Last visited
Content Type
Profiles
Forums
Gallery
Events
Posts posted by Michael_A
-
-
Time to put on the two side planks! These are made from 1/16" 3ply birch plywood, from Boulter Plywood in Boston. It's an amazing material – stiff and very light – and the surface is very clean. Here's my first try at wrapping the ply around the hull:
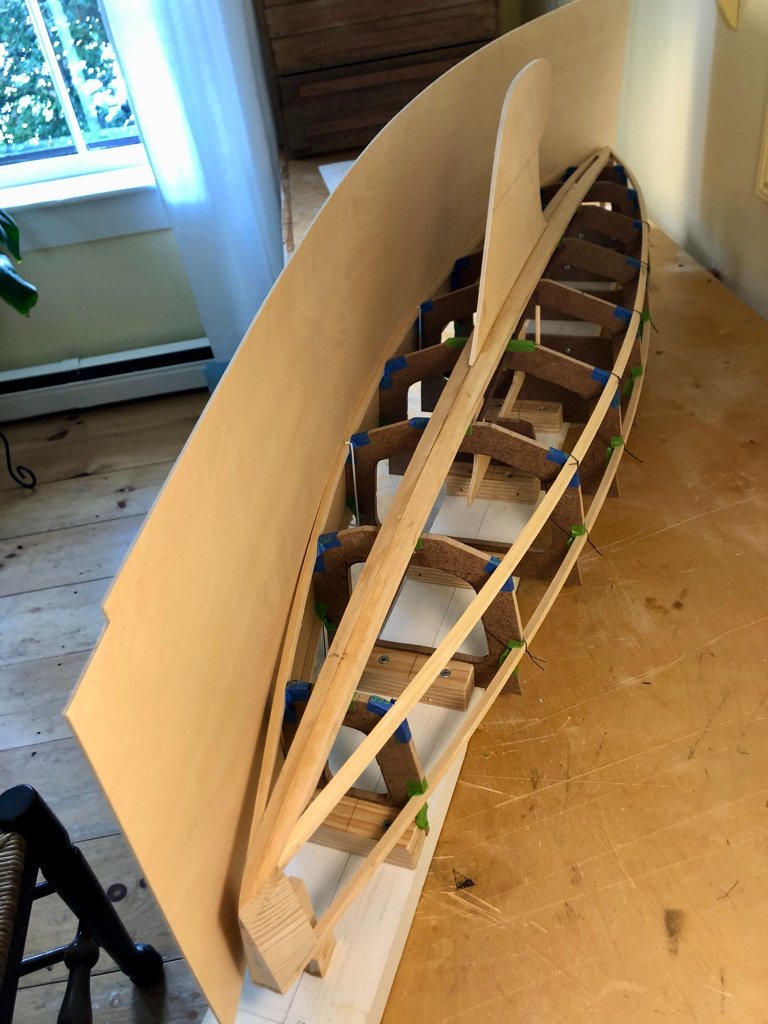
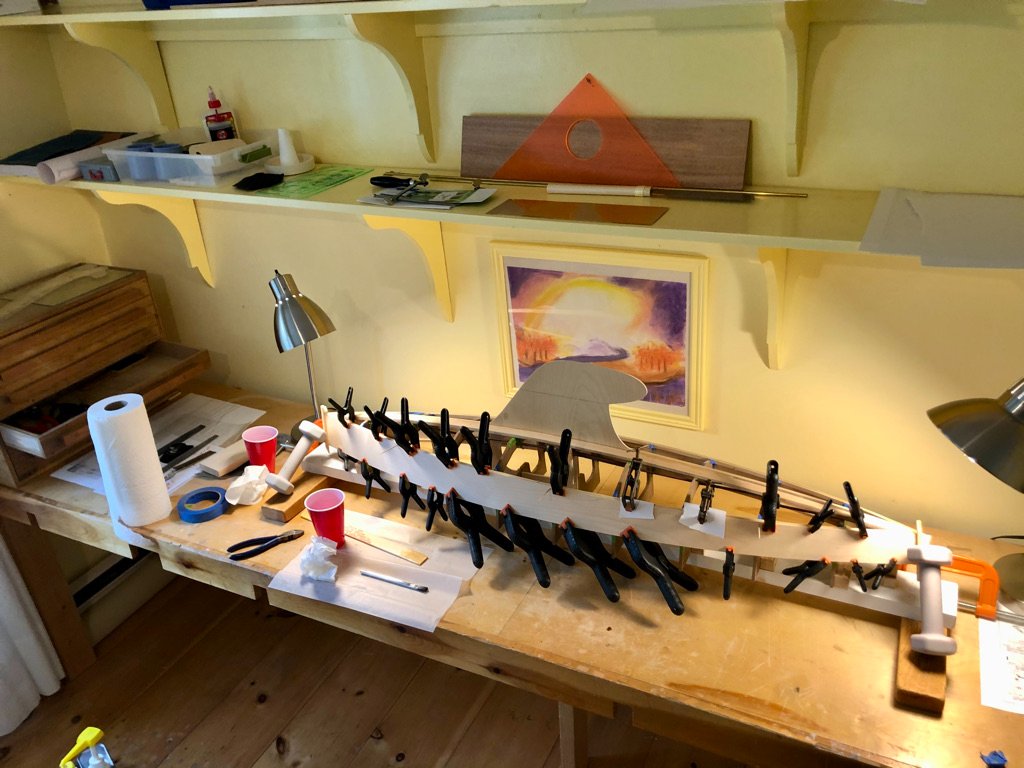
I epoxied the side onto the framework, holding it on with as many clamps as I own. I guess you can never have too many clamps!
I pinned the planks to the chine using toothpicks to prevent any shifting as the glue dried. The epoxy has no holding power when it is wet ....
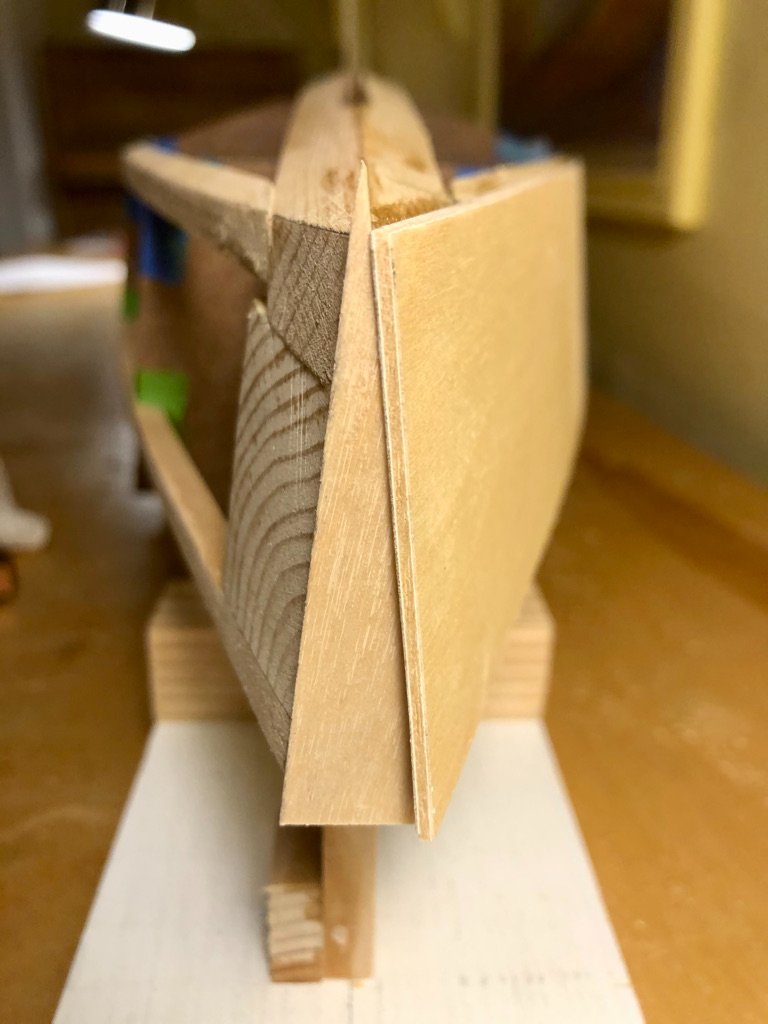
Finally, I made a tiny transom to cover the blocks at the stern (and bow). Eventually the bow will have a rounded "bumper" in case there are any collisions.
Next step is to put on the bottom. Back to you all soon!
-
Hi Faucon77,
How long is your model? And what wood is that for the decking? I can't tell if it is painted or stained; or if that is a natural wood color. I appreciate the character of the boat.
Michael
- Keith Black and mtaylor
-
 2
2
-
Jond, such a beautiful choice of a boat and the historic photos really add interest to the overall project. I am guessing when the schooner was fully loaded it would sit quite a bit lower in the water? I figure your hull is about 36" long at this point? I enjoy these larger scale builds.
-
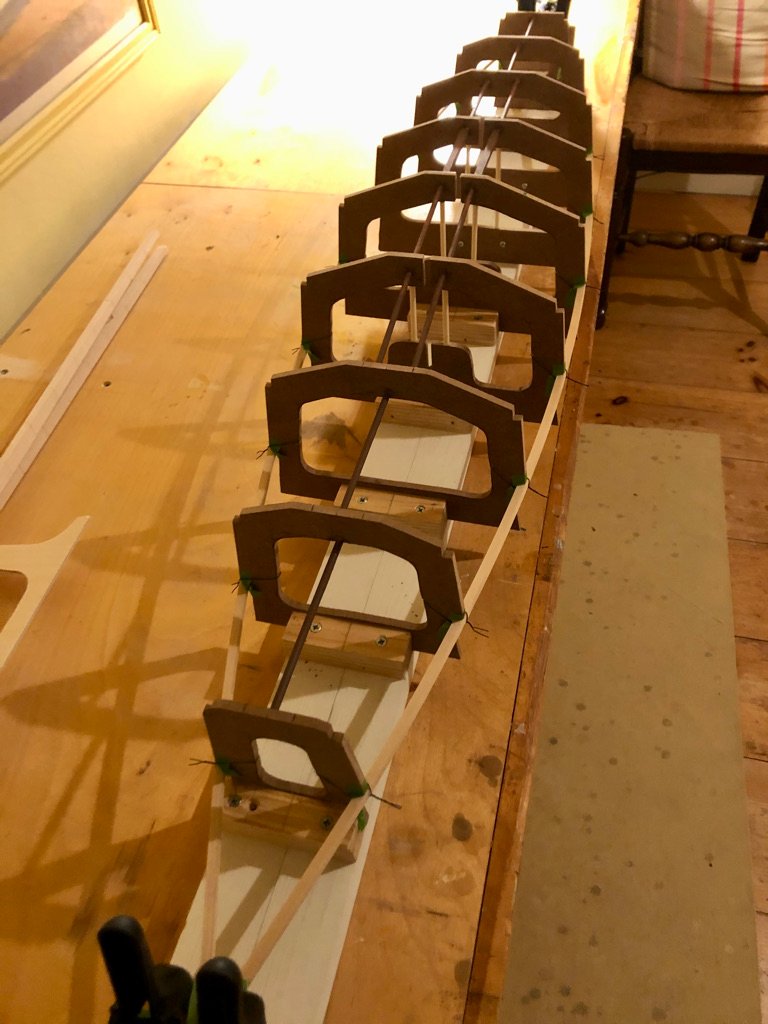
Hello all,
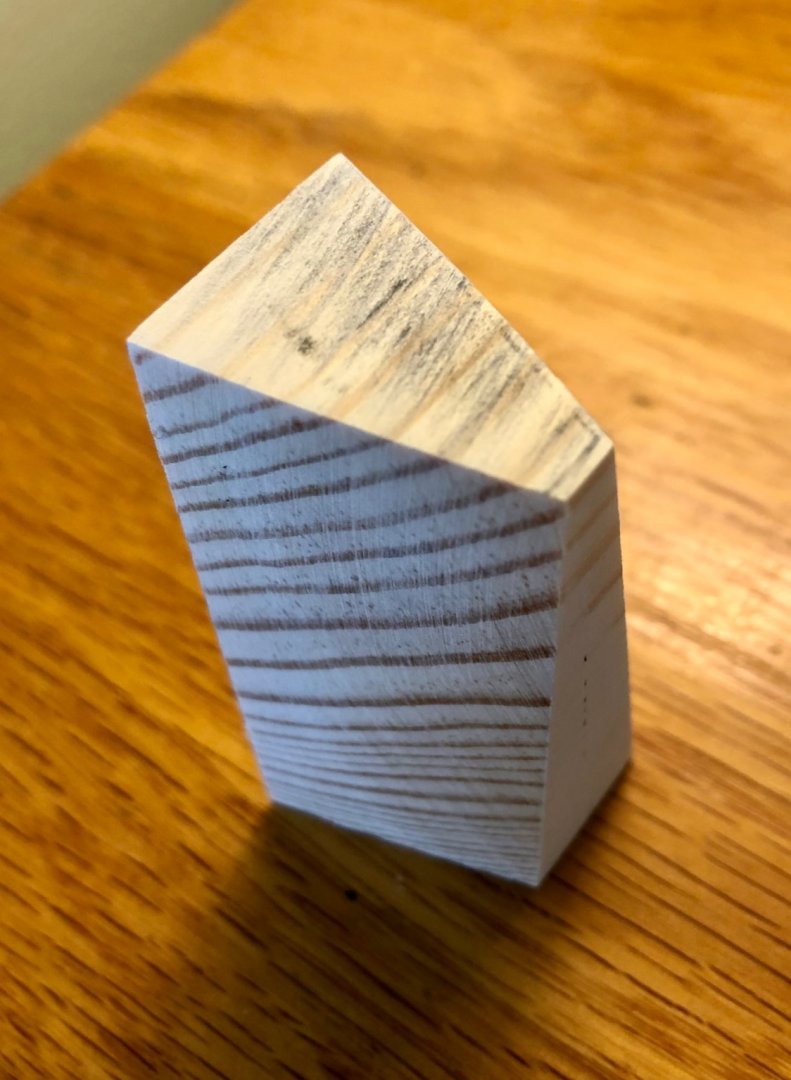
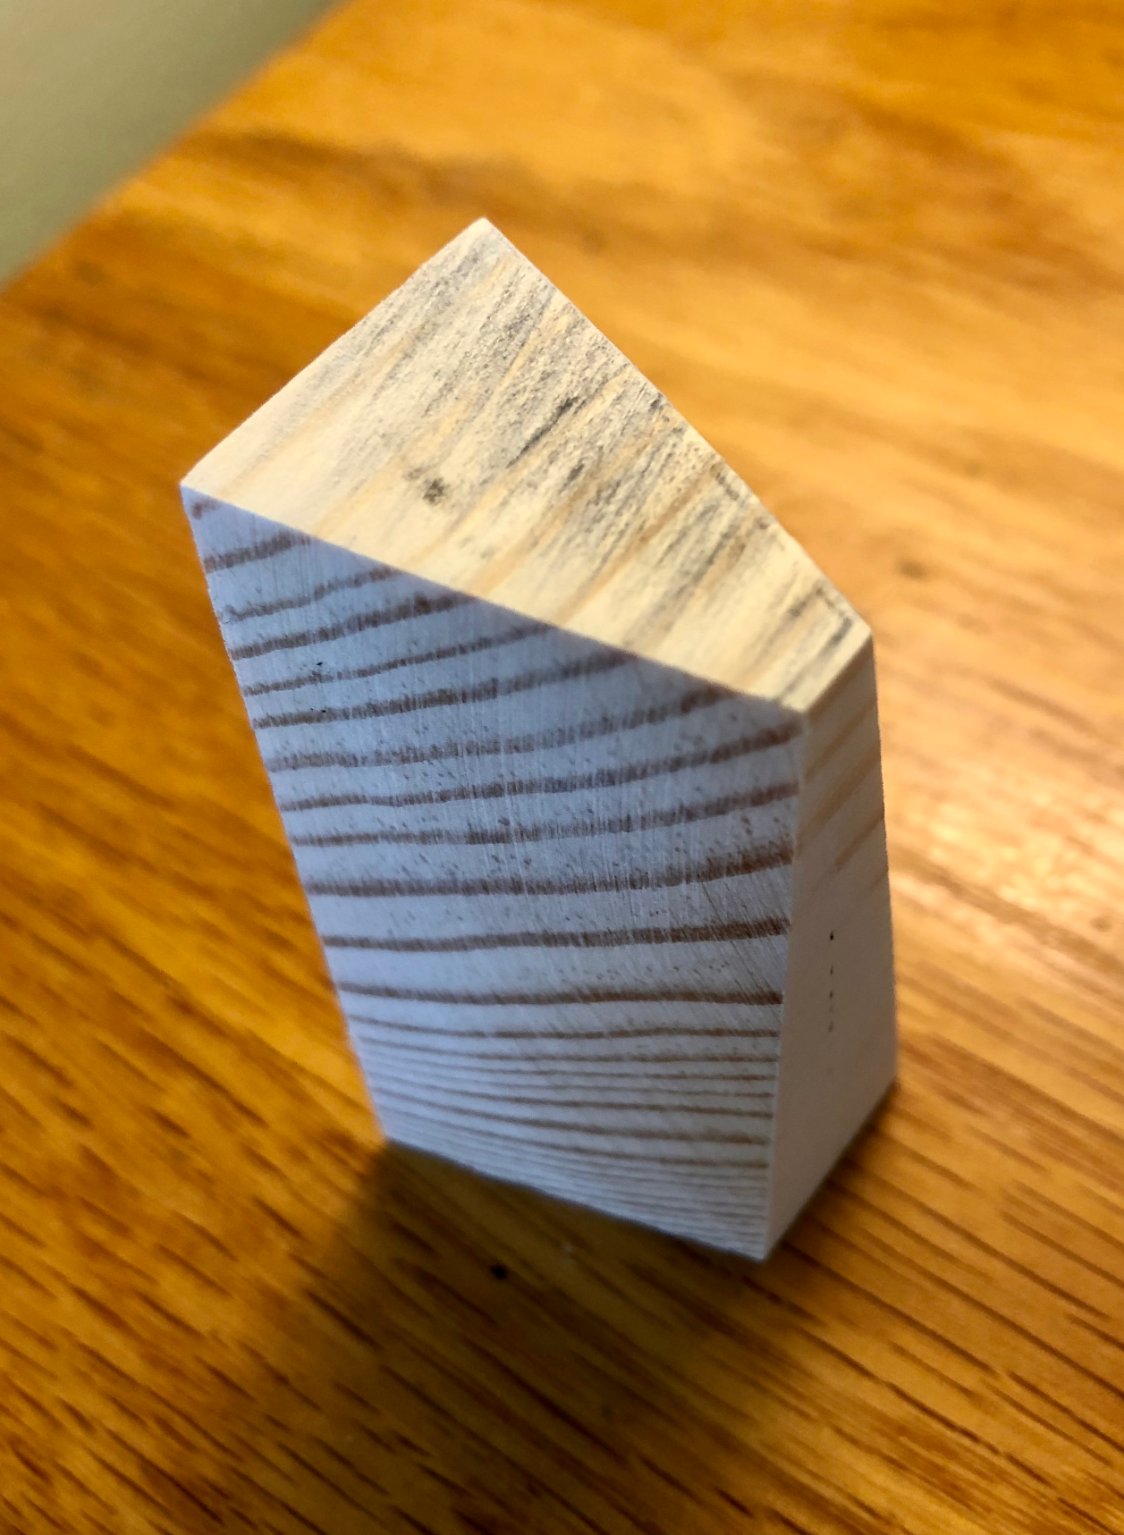
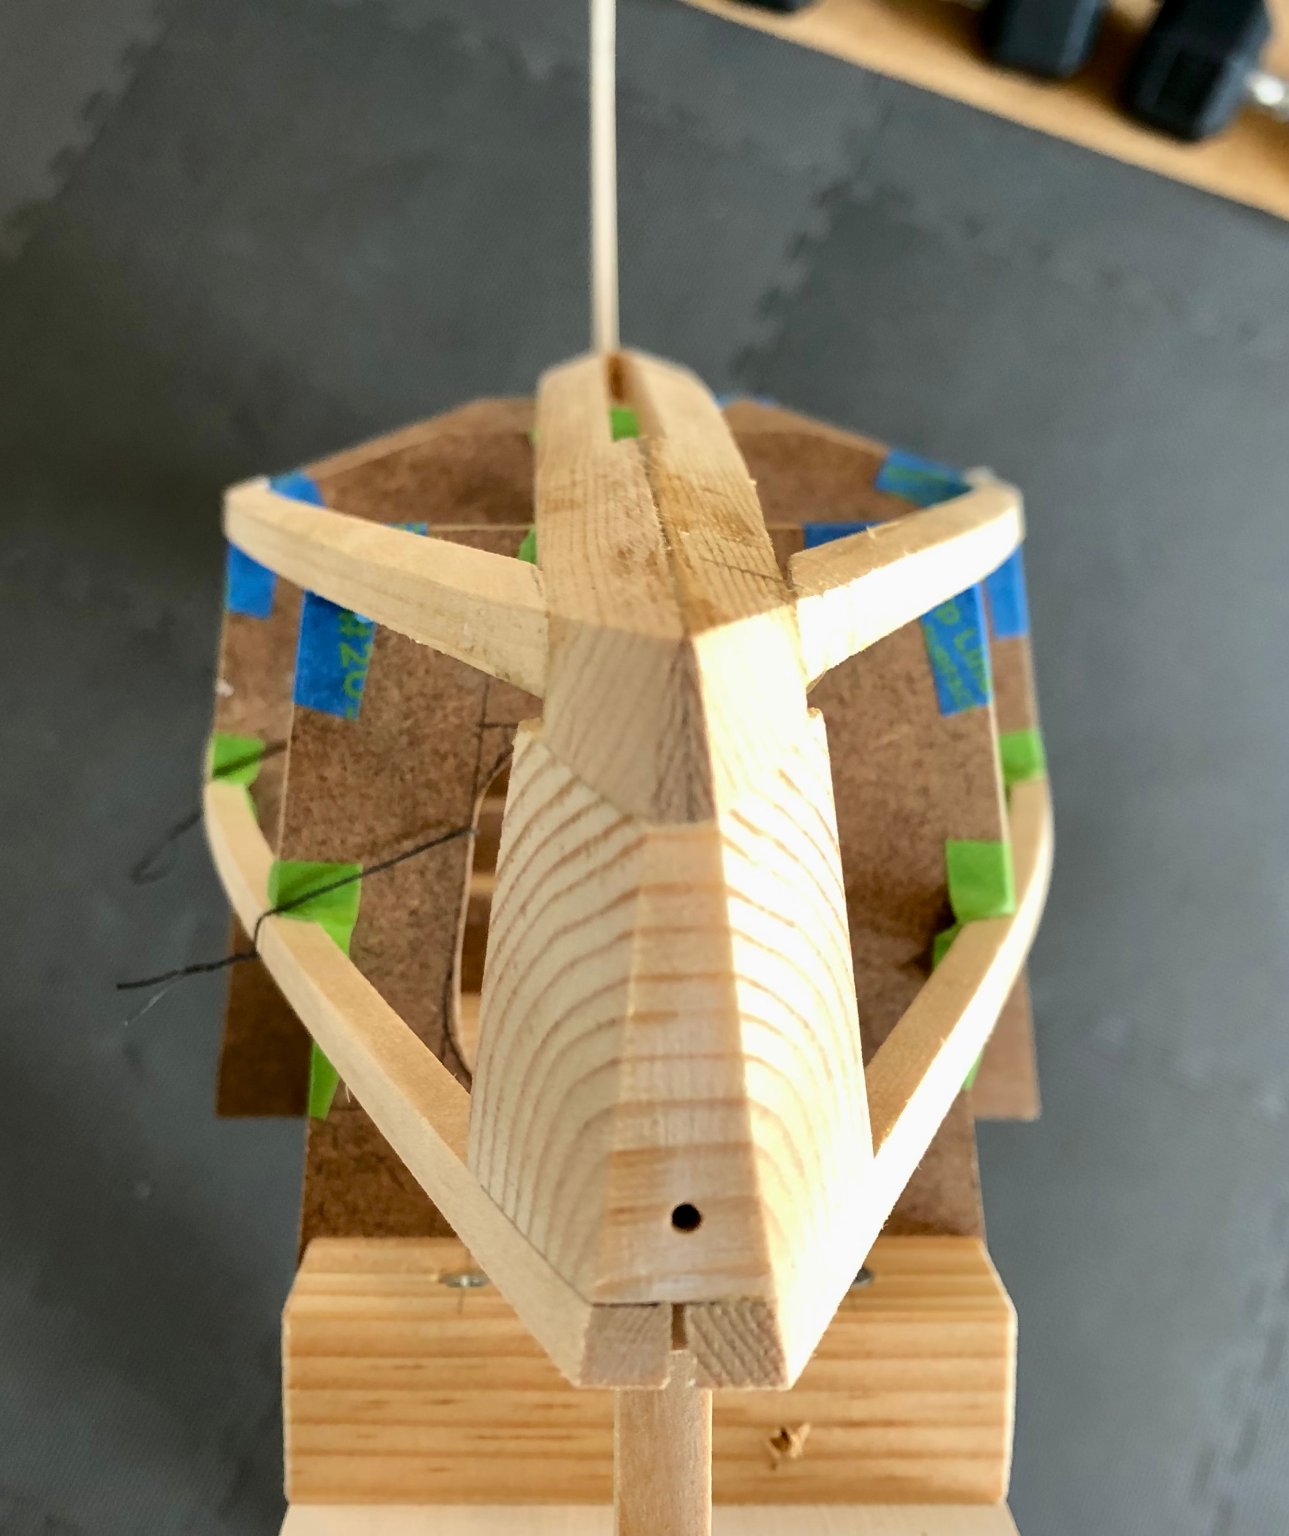
Now that I have the molds in place I decided to use a block for the stem and transom. It weighs a little extra but gives me plenty of gluing surface, and I don't think the weight will make a big difference. Fun to get all the angles squared away! I am using the second power tool I purchased for this project; a 12" disc sander from Harbor Freight. It works great.
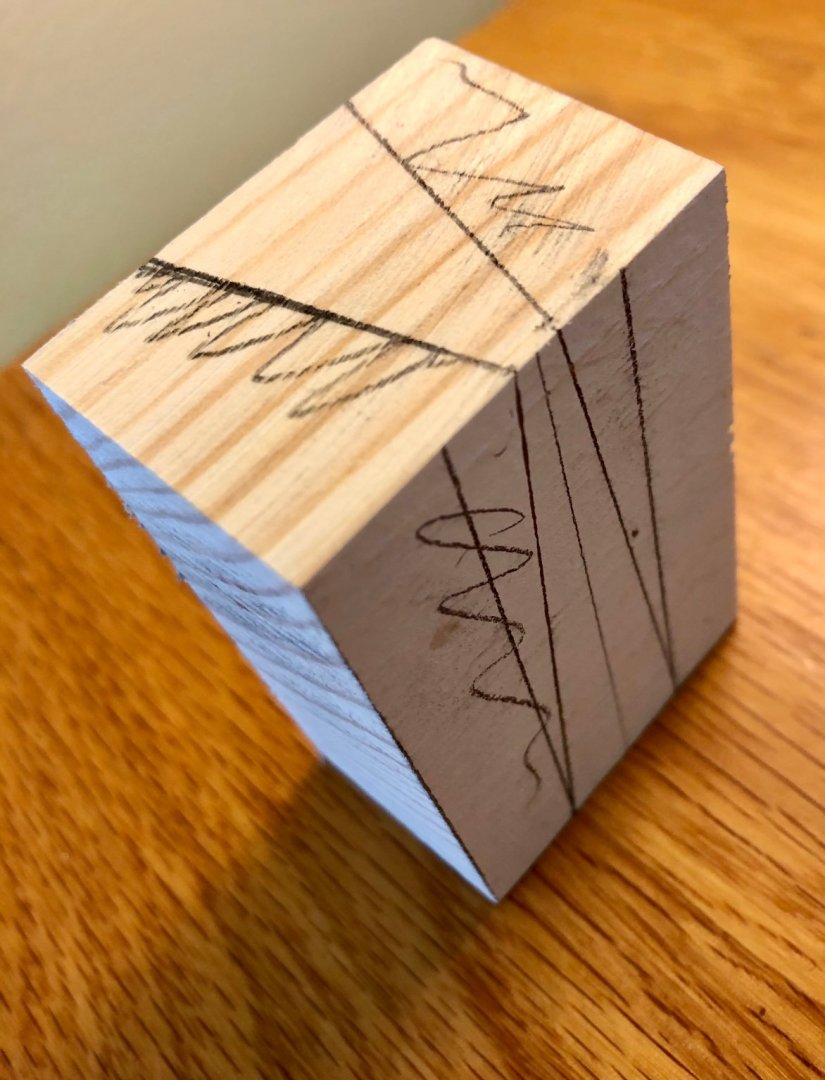
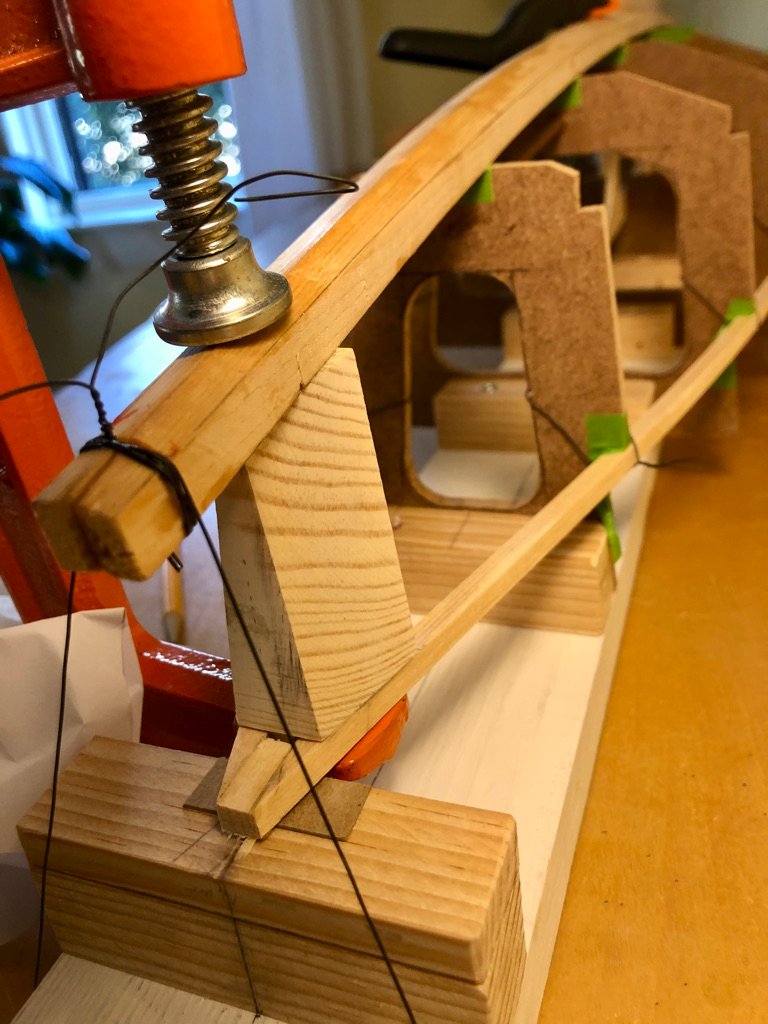
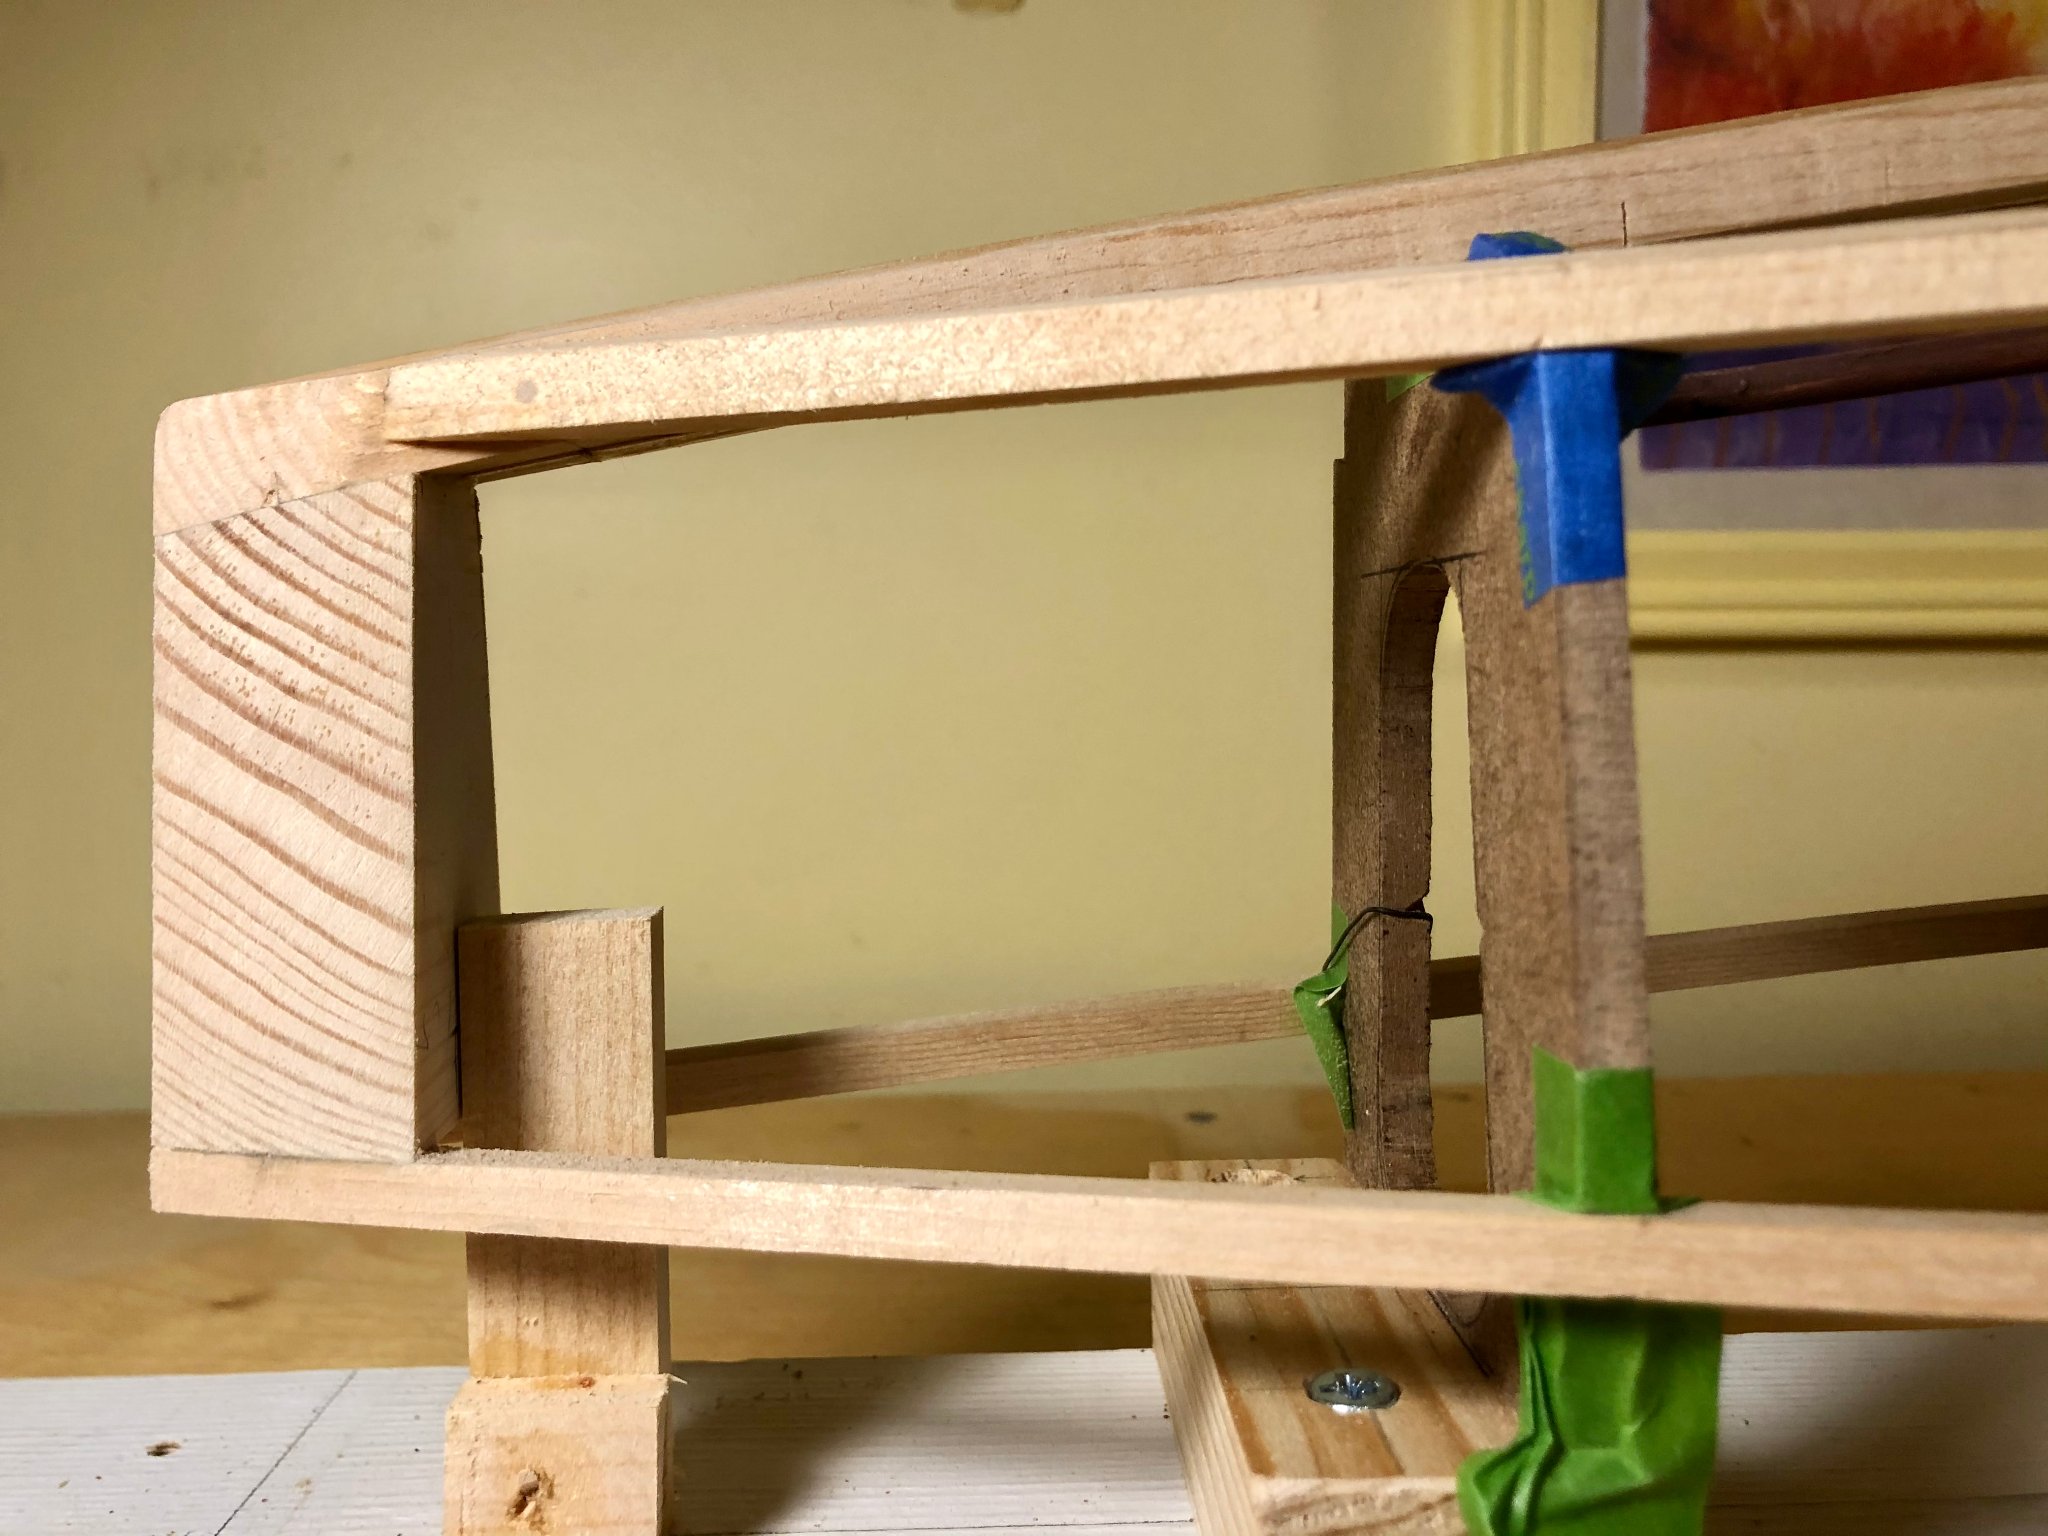
I glued the keelson over the molds and attached it to the sheer clamp using the blocks at both the stem and stern. Twisted wire worked well for the clamps.
Here's a view of everything so far, including the chine logs which I bevelled in advance.
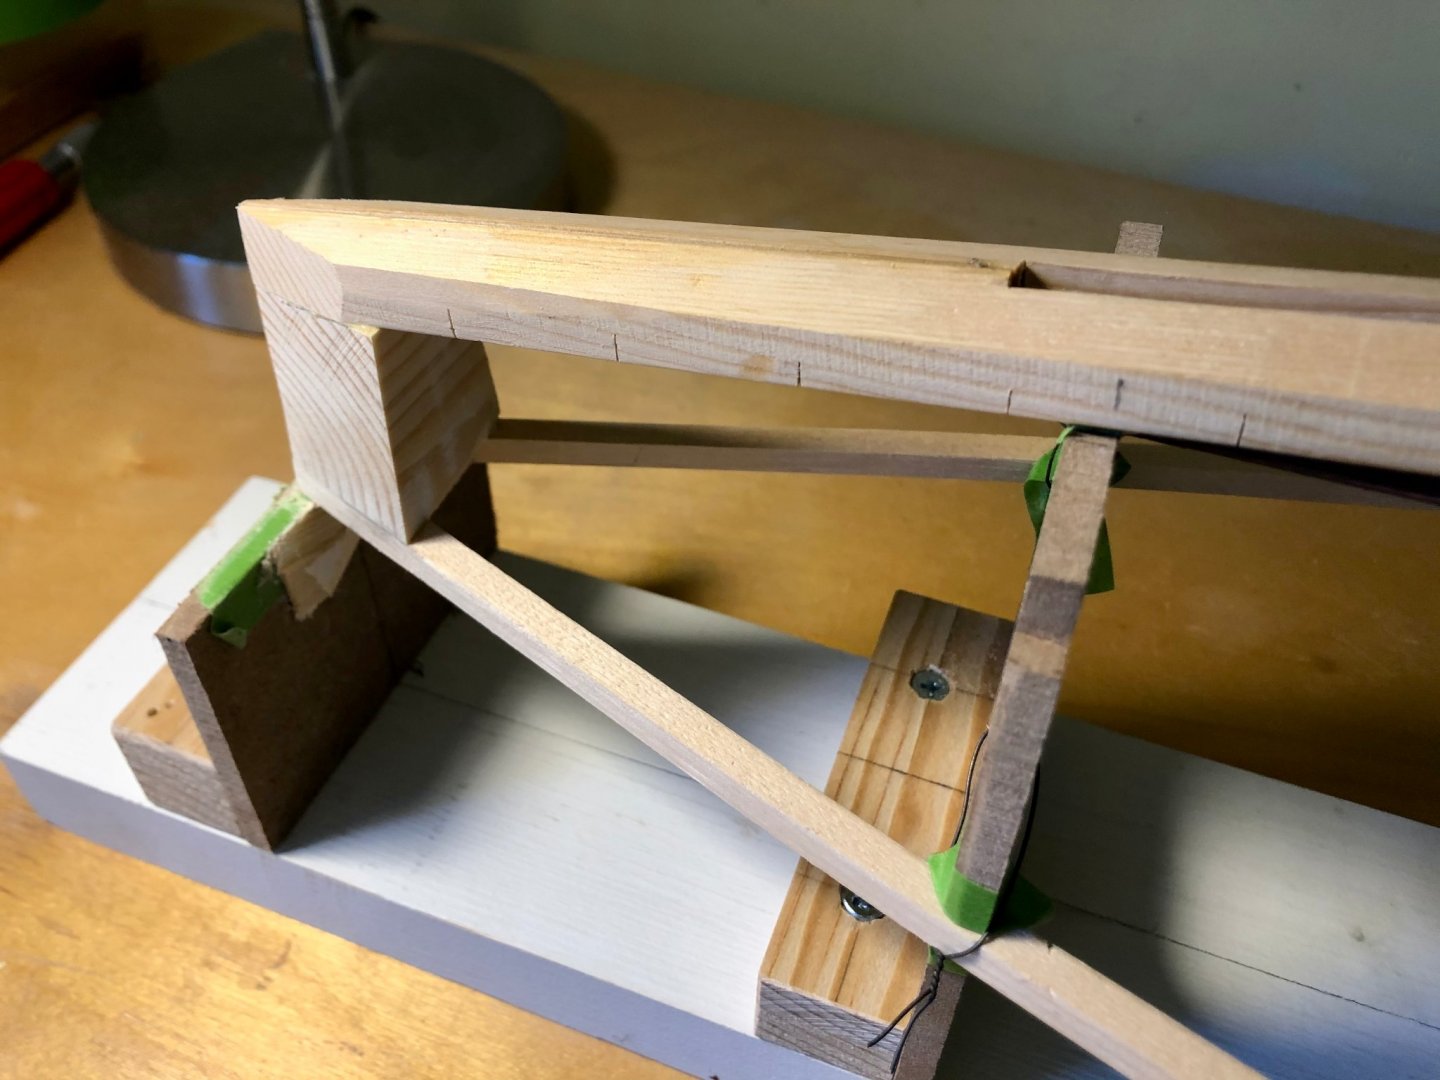
Note, the spruce keelson was too thick (too stiff) so I had to cut into it every few inches to make it more flexible.


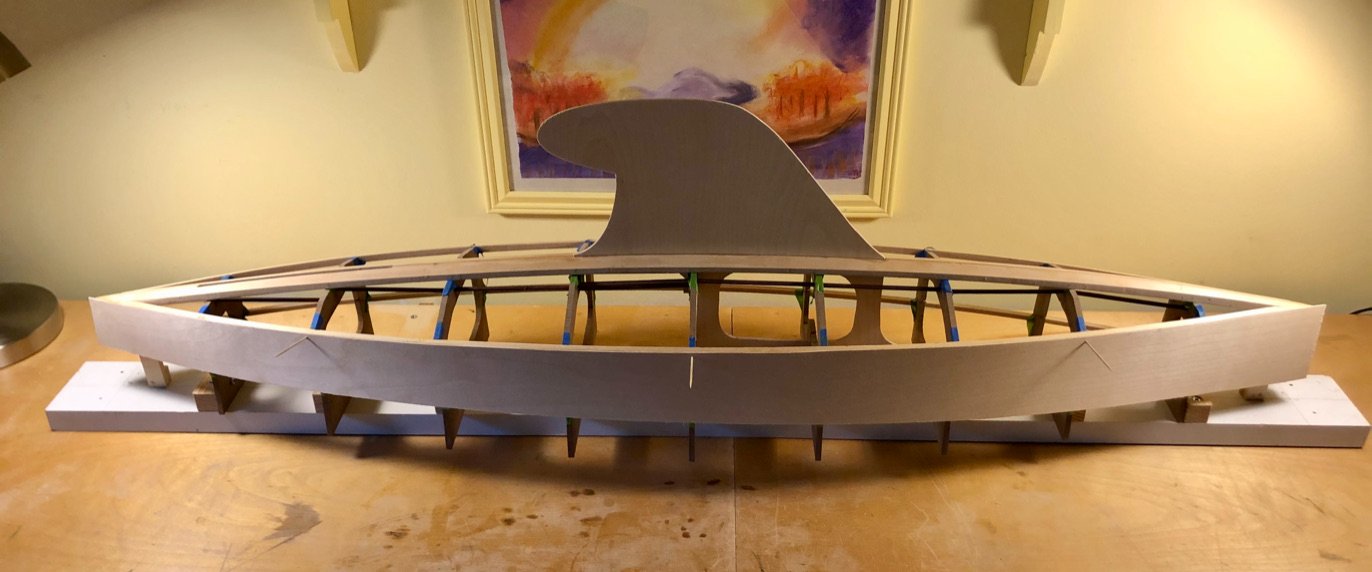
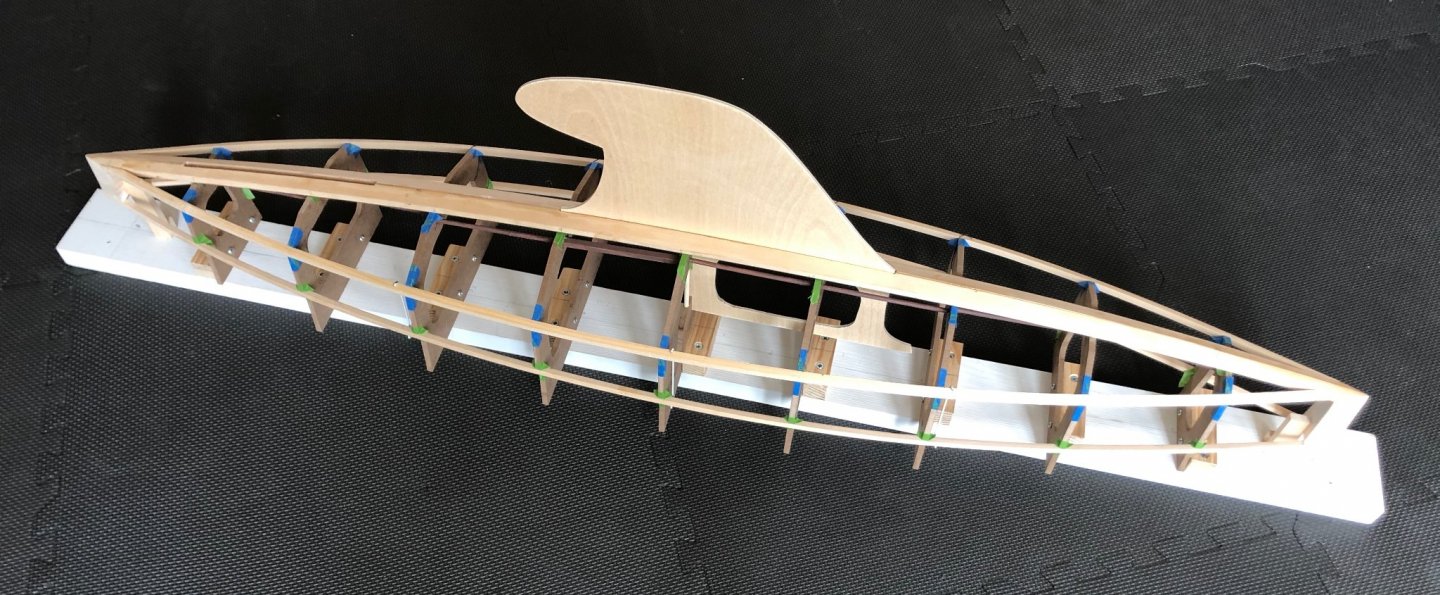
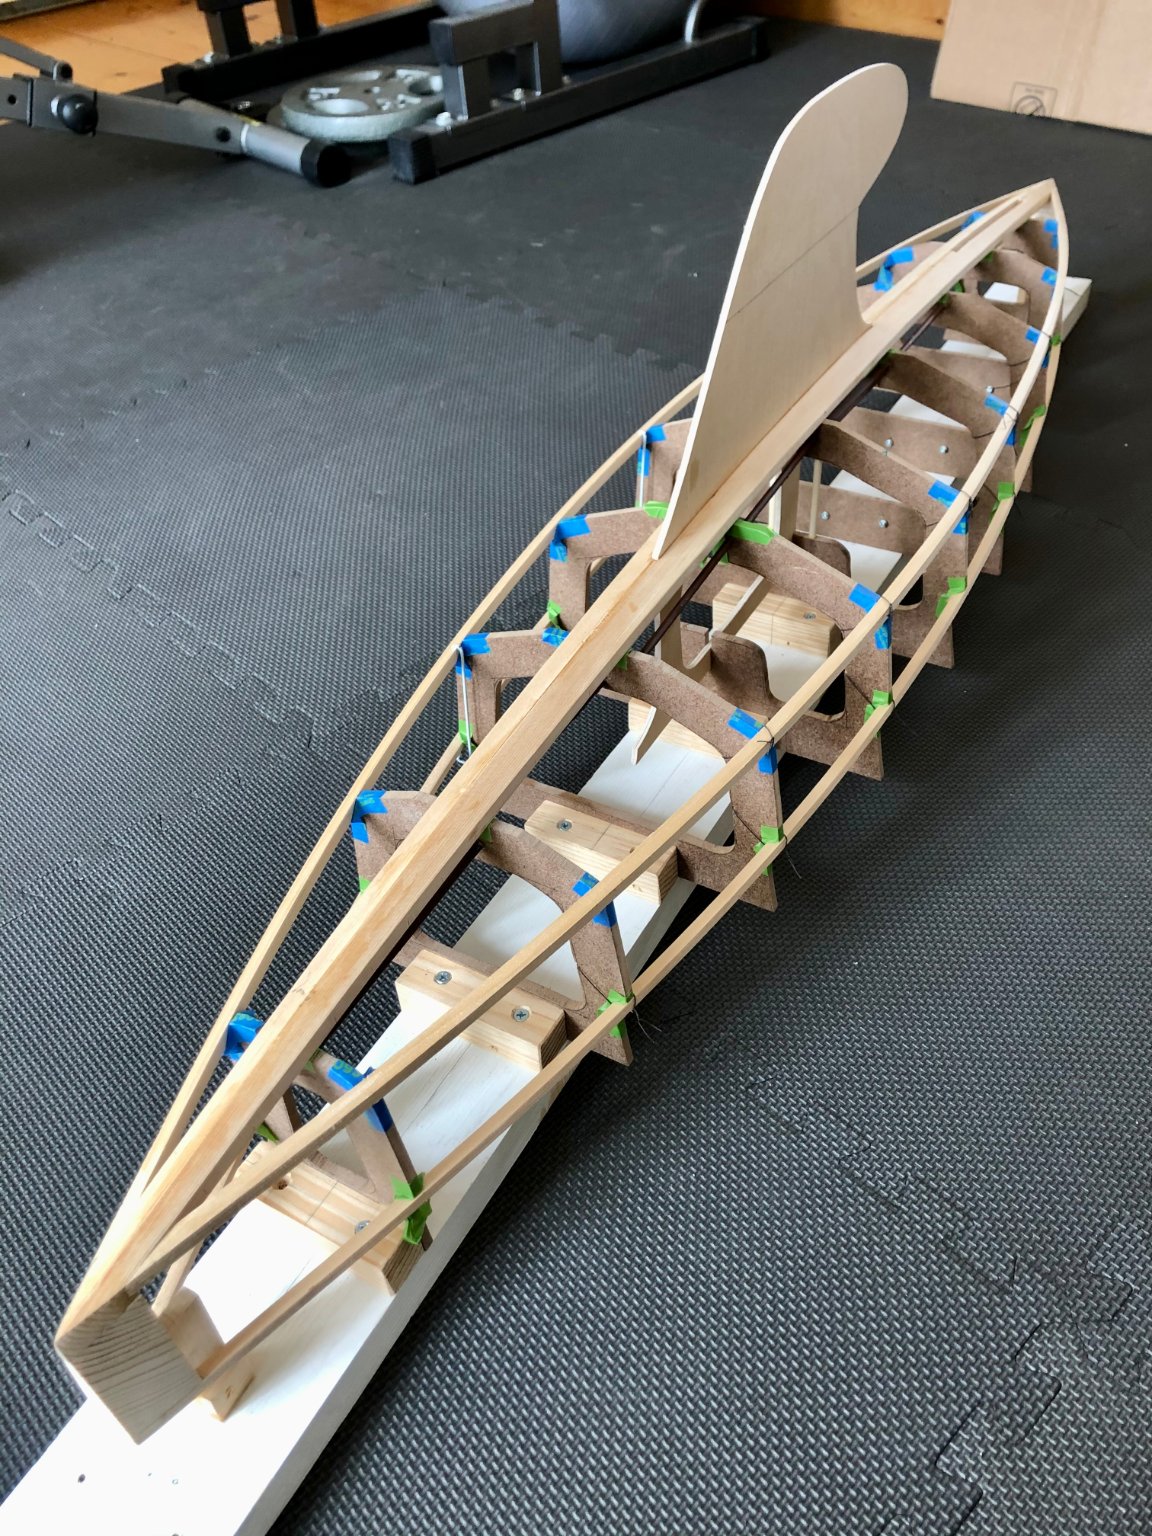
Starting to look more like a boat now! I have glued the keel fin into the keelson to make it one solid structure. I will reinforce the keel later as it has to hold a 10lb lead bulb.

Thanks for reading and I will post more progress soon. I hope you all had a great weekend!
-
-
Roger, Fascinating! Was the paper you used the thickness of office copy paper? Shellac on both sides? Do you think it would be possible to lay down a long pre-made strip, all at once? Or would that have caused alignment issues. Can't wait to see this once it is painted the final color which I assume will be darker.
- Keith Black, lmagna, Roger Pellett and 2 others
-
5
-
-
Hello everyone,
I started this model a few months ago and am creating this build log (my first) so I can show the progress to date and get advice moving forward. I have to say I am feeling a little nervous!
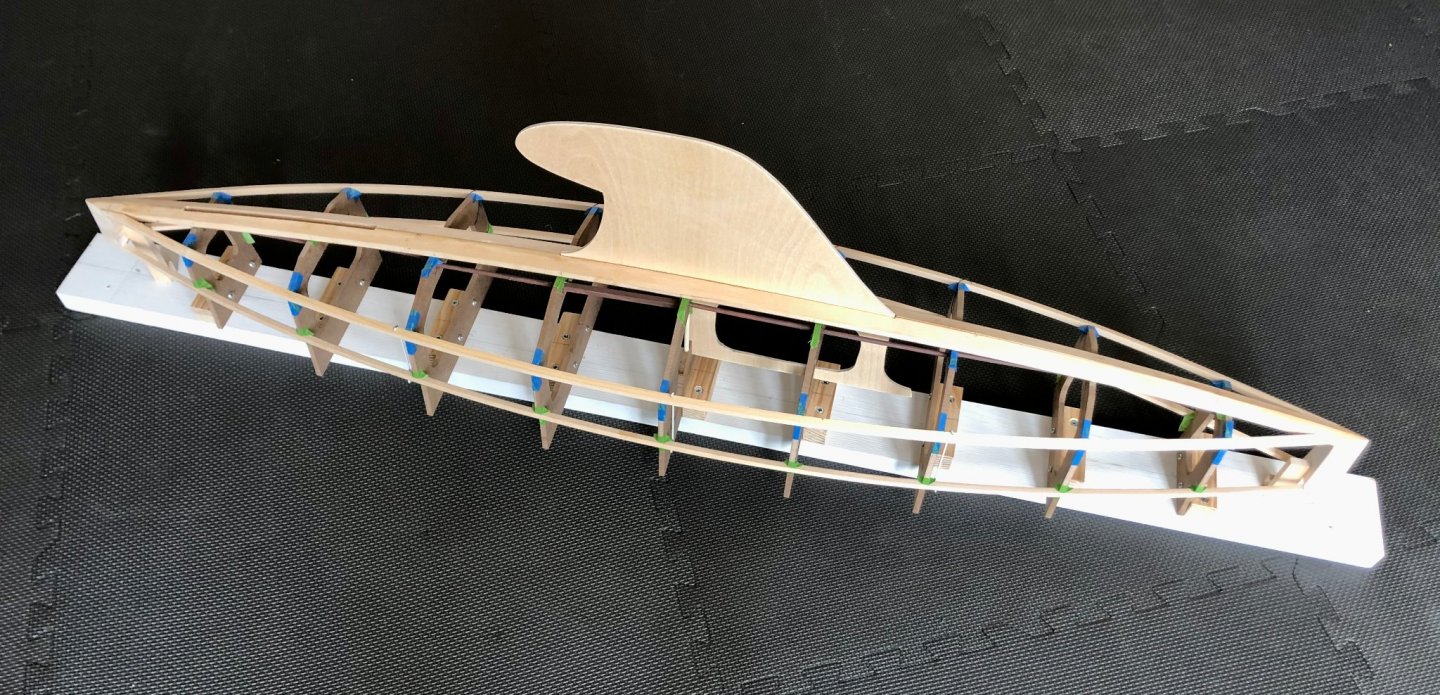
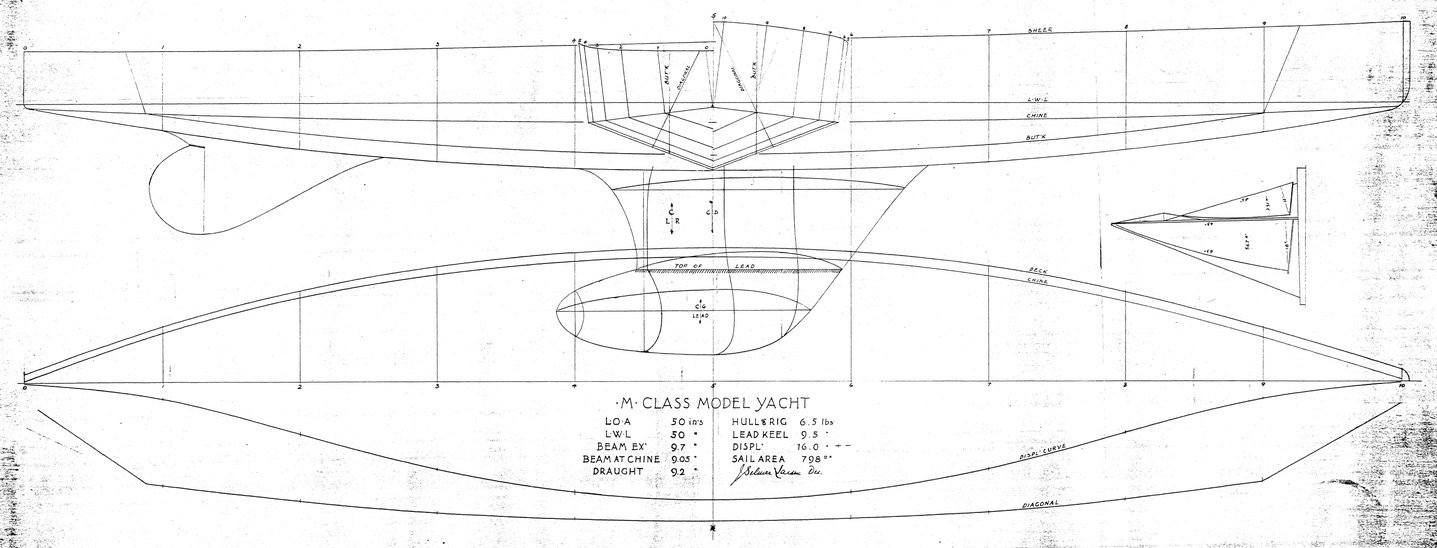
The boat is a 50" model yacht of the Marblehead class. This class was started in the Depression era when, like now, people had more free time on their hands. These models were designed to sail in ponds (like the one in Central Park in NYC). Initially they would sail on their own and be redirected by the owner at the edge of the pond, with a stick. Now, they are mostly radio control. I'm more interested in building than sailing so we'll see how far I progress in that area.The design is by J. Selmer Larson, a well-known sculptor during that time. I love the hull design and am interested in working with aircraft plywood.
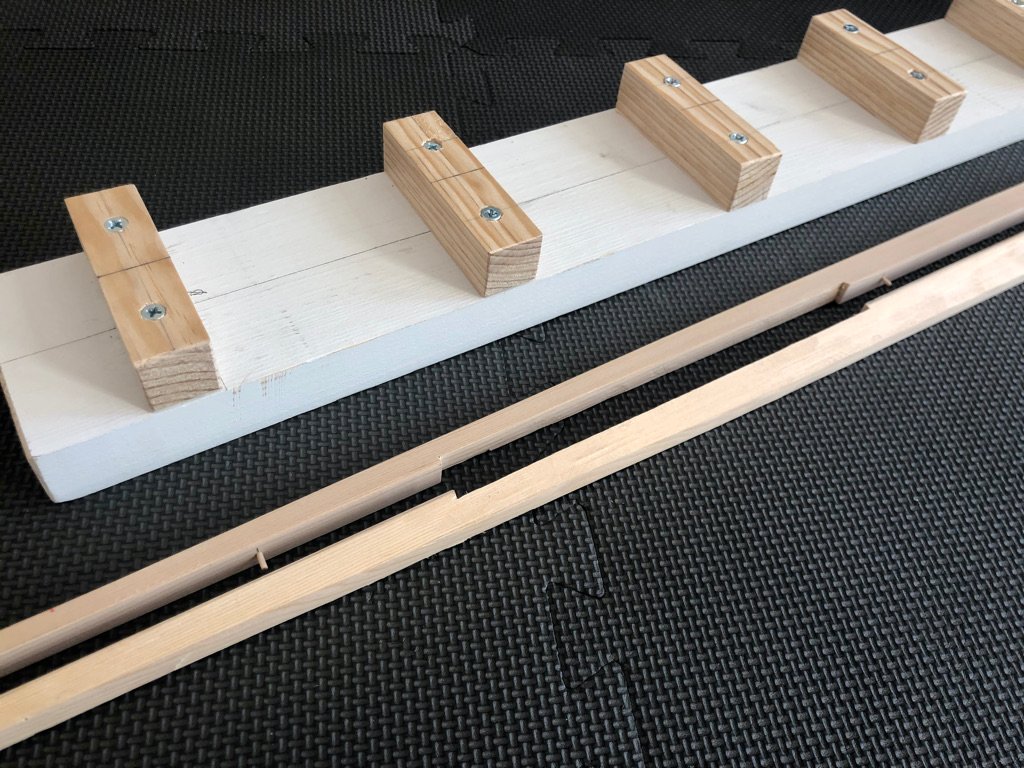
I am really interested in seeing how well I can do using the tools I already own – I don't want to buy a lot of stuff just for this model. Here's the strongback (materials from Home Depot) and the beginning of the keel. It's in two halves to make it easier to form. I don't own a table saw so most of my timber will be standard dimensional spruce.
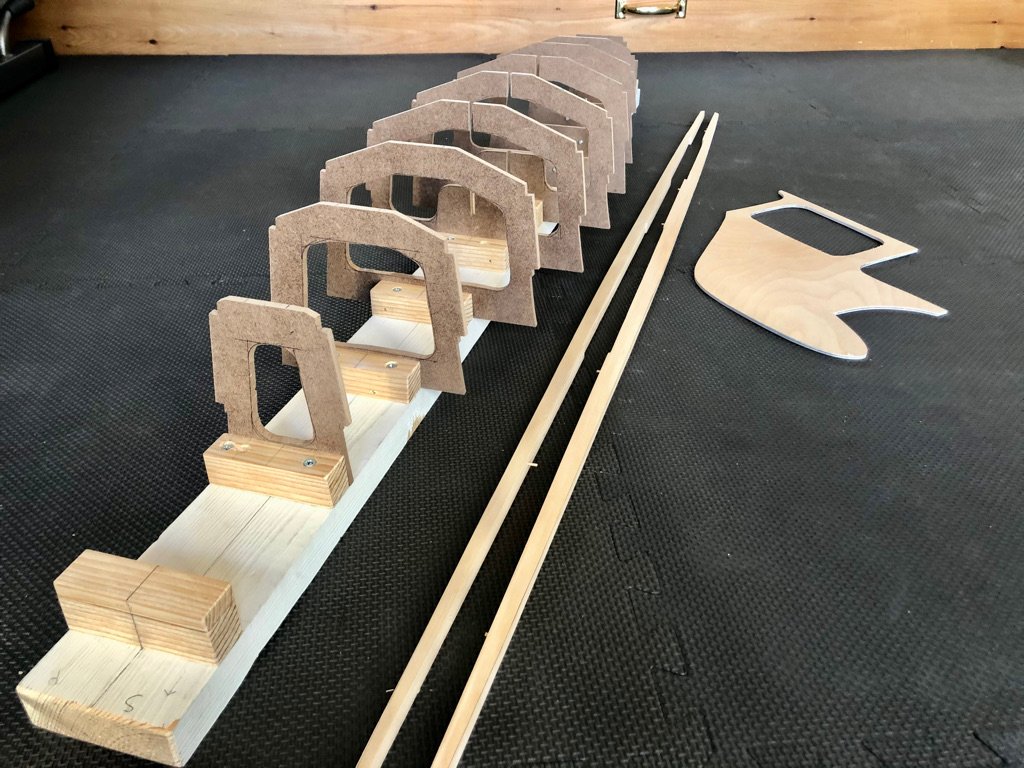
Here are the molds, and my first pass at the keel fin. Parts of the fin will extend up to the deck to support the mast. Molds are made of MDF and the fin is two layers of 1/16" aircraft plywood epoxied together; to be built up and strengthened later on. I do admit, I bought a nice jigsaw just for this model; even so the molds do not feel very accurate. I can fair up the hull later as I get more into it (I hope).
Sheer clamps are now on the molds. If I accomplish nothing else, I am proud of the joint!
") The hull is double ended so the bow is easy ... but then the stern has to be just right as there's no going back at that point.
The hull is double ended so the bow is easy ... but then the stern has to be just right as there's no going back at that point.

Here's the framework with the sheer clamps installed. It all feels a bit wobbly so I put some dowels between the molds to add some rigidity. If you look carefully you can see my high-tech twisted wire clamps. The green tape will help keep the boat itself from being glued to the molds. At least that is the plan. I"m not sure how I will get the boat out once it is planked either.
That's all for now! My main takeaway so far: A huge amount of thought and planning is required for each step. Once the planning is done the actual "work" takes very little time at all. I was surprised how far you have to think ahead to make sure everything will work out at the end. I'm guessing this is an experience most of you all are very familiar with.
Thank you all for your attention and I hope to post more soon.
-
Vaddoc,
It's great to see you back on the forum! The beech planking looks really nice now that it is smoothed up. Will you take it out of the moulds for work on the interior once you get the outside to your satisfaction?
Michael
-
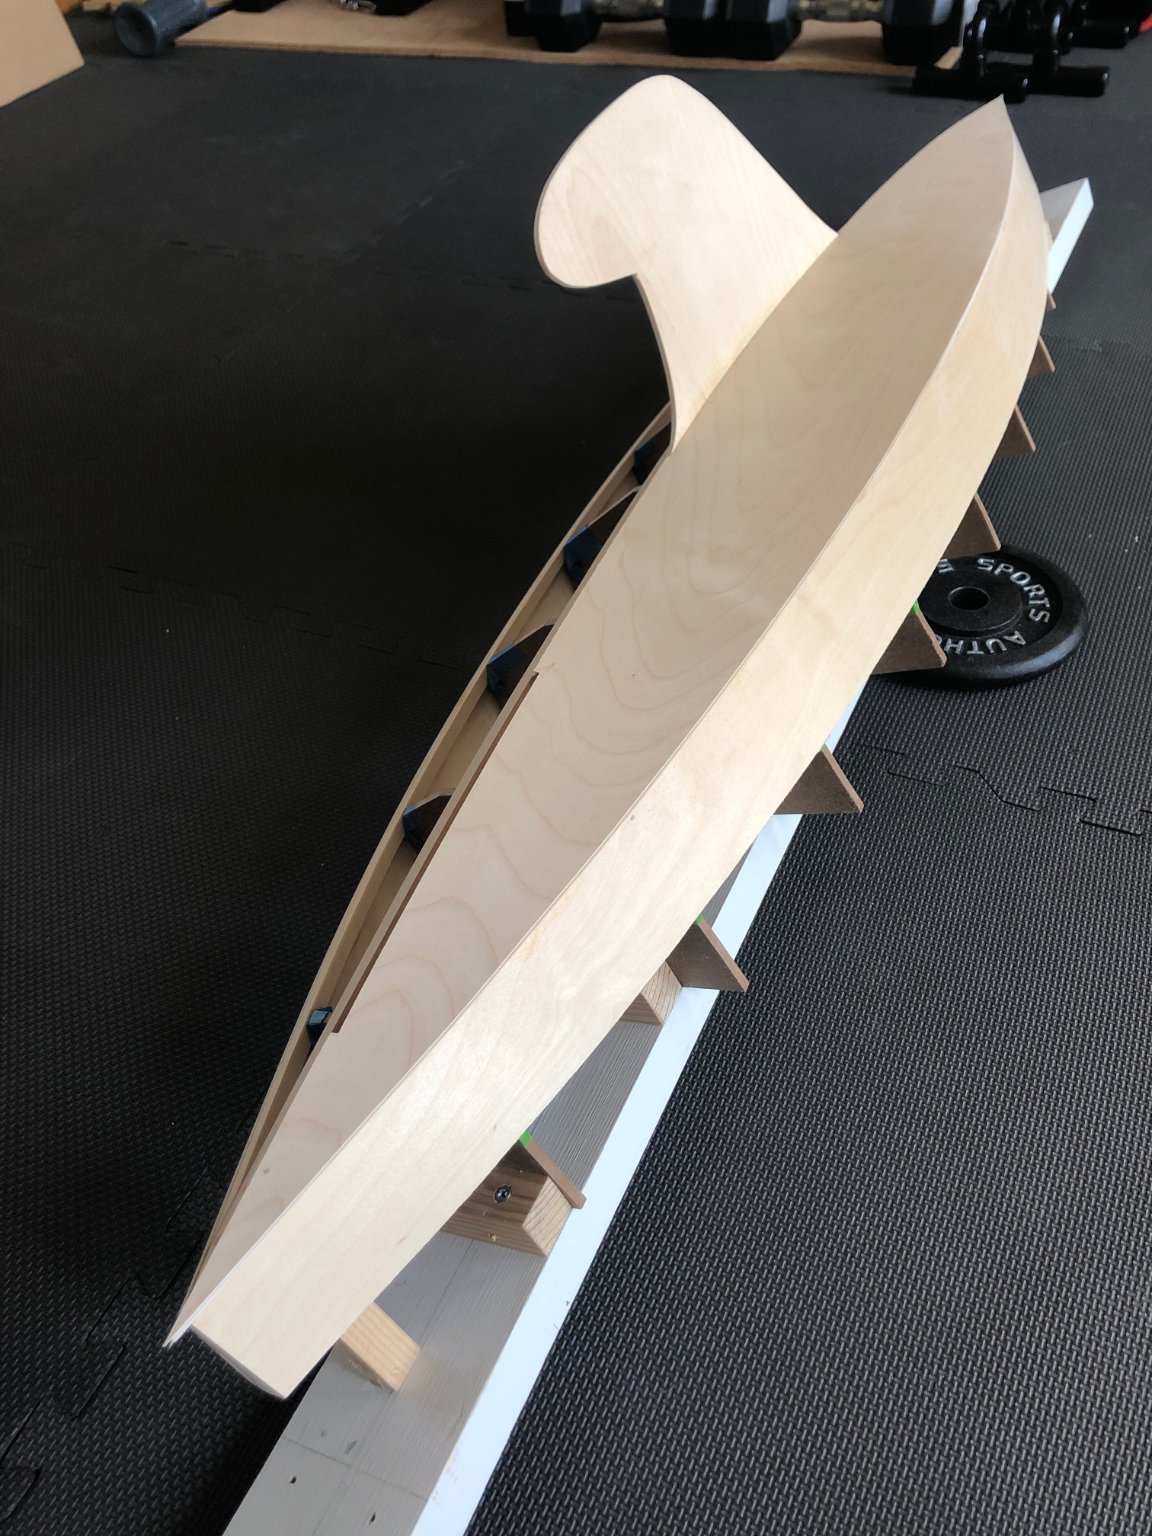
Hello all,
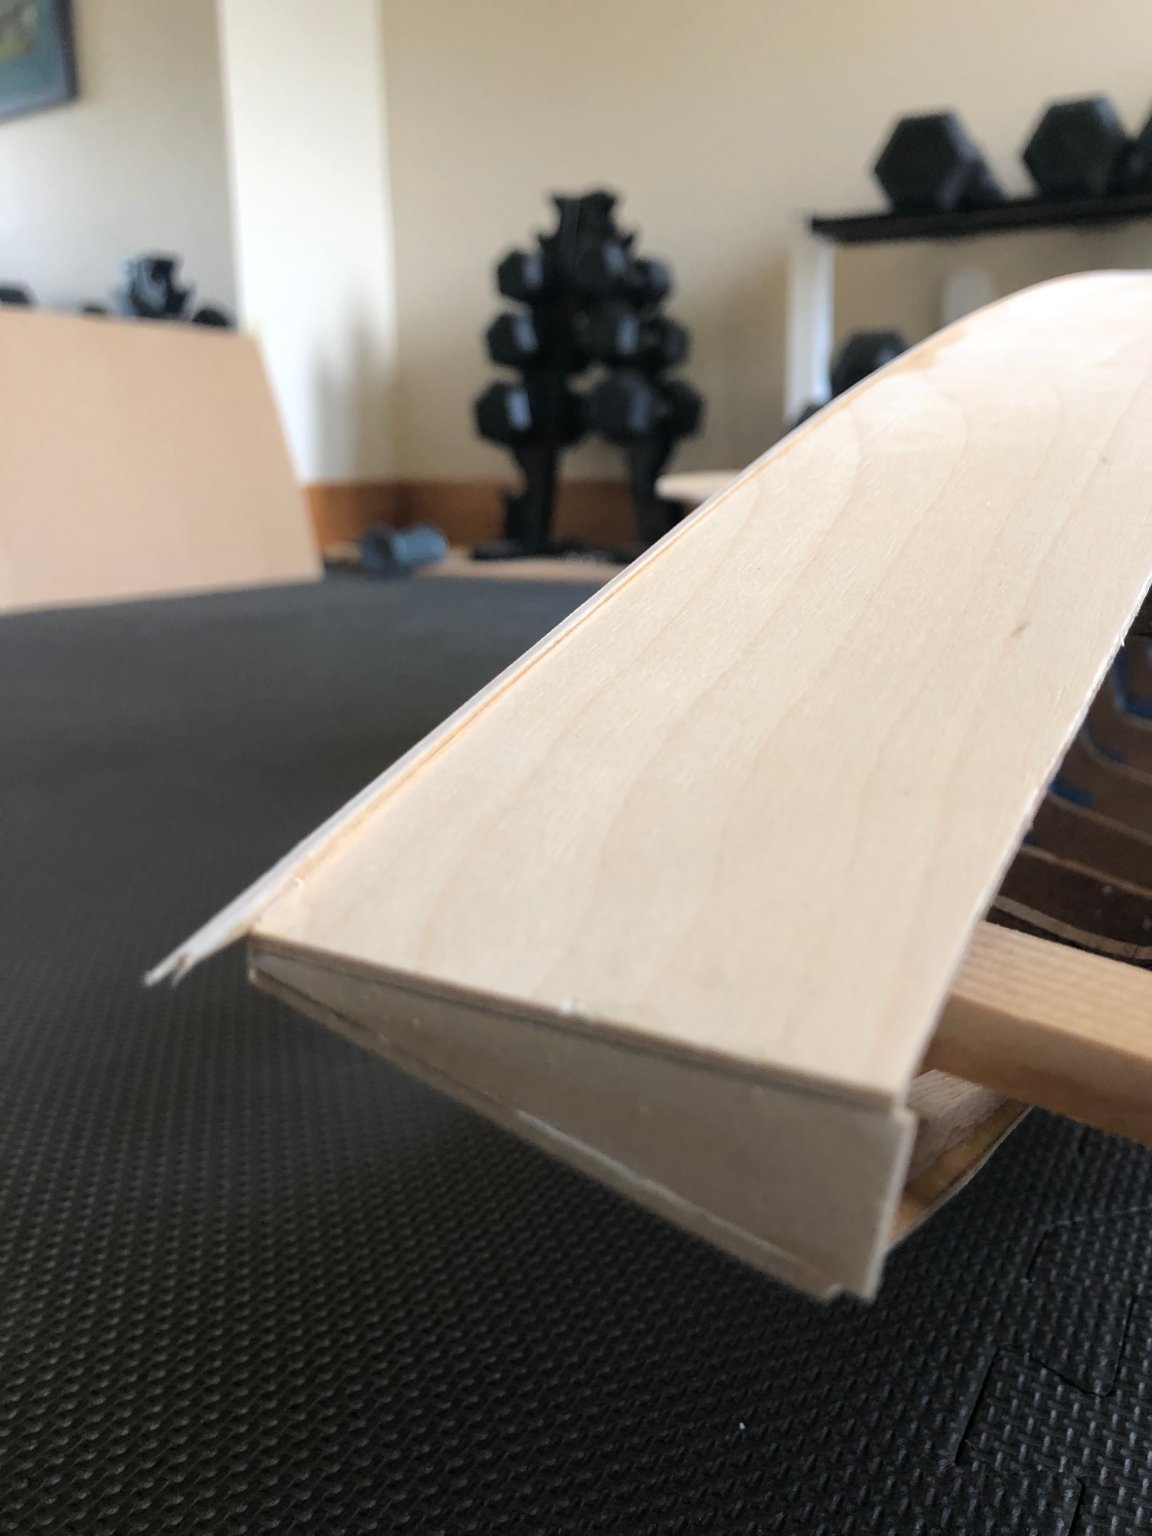
I am at a key point in my Marblehead model but am having a crisis in confidence. I have epoxied on a bottom "plank" of 1/16" plywood and it is overhanging the side by about 1/16". I need to bring it flush to the sides without damaging the finish of the plywood side planking which is actually a bit sensitive. The finish is very smooth and hard but it scratches, chips, tears easily if handled too roughly.
I can't mask the sides with tape because it lifts off the grain ...
Is this just a long slow careful sanding job or is there something I am missing?
The bottom is about 50" long and the corner in question is perfectly fair; and I"m wanting to keep it that way. The two photos show a general view and a closeup; hopefully this is enough to see what is going on.
Thanks,Michael


-
-
Nice job with the blocks! I'm working on a v-bottom model myself and have experienced first hand how many different planes intersect in this area. Howard Chapelle's writes about these blocks in "Boatbuilding" but even after reading several times I'm not entirely clear about them.
Michael
- thibaultron and Shore thing
-
2
-
Shore thing,
The V bottom looks nice. Can you show us a side view of your progress? It looks like no side planking is on yet? Seems like you are making the best of it, all things considering!
Michael
- Shore thing and thibaultron
-
2
-
Roger,
I find this fascinating! For the last few weeks I have been reading C. V. Waine's wonderful books on British Steam Coasters and am anxious to hear about both how you will plate this model; and what methods have been discarded as impractical. Please share as much as you can! Your posts are an inspiration for my next model which may well be a steel plated craft.
Michael- mtaylor, Canute, Keith Black and 1 other
-
4
-
TrippleV,
Those models look fabulous. What a treat to be able to devote some of your well-deserved new free time to this engaging hobby. I live just north of Boston and hope to be able to do the same sometime in the next number of years.
Michael
- Keith Black, lmagna and mtaylor
-
3
-
-
-
-
-
12 hours ago, mtaylor said:
Welcome to MSW, Michael. I'm not sure what you mean by "real models".... what your current project is fills that category very well.
Mark,
What I meant to say is that these Marblehead yachts are not "models" of full size yachts; but are actual sailboats with a set length of 50". So I wasn't certain if this build was appropriate for the forum. I will start up a build log soon and my next build will be a scale model of a full size boat. Still in the dreaming stage about that one ....
Michael
- mtaylor, Keith Black and ccoyle
-
3
-
Thanks Chris,
Well, "looking ahead" to retirement and actually doing it are two different things! I guess the main thing is I can devote a few hours every week to having fun doing this kind of thing & am not willing to put that off anymore.
I have been following your Sassafras build and that's exactly the kind of boat/project I love! Thanks for the advice.
Michael
- mtaylor, Keith Black and ccoyle
-
3
-
Vaddoc,
That looks fabulous. I like how you formed the outside of the stem ... just like Chapelle called out. I can't wait to see how this cleans up once you replace the screws!
Michael- vaddoc, Moab and FriedClams
-
3
-
Hello all,
I am so excited to have found this wonderful forum!
My name is Michael and I grew up on Long Island Sound in New York. My bookshelf in middle school was full of works by Chapelle, Skene, and others. I built my first boat model – Model Shipways "Gjoa" – with a saw, xacto knife, and sandpaper. During seventh grade I connected with Robert Pittaway in the small craft department at Mystic Seaport. I learned how to draft and Rob encouraged my designs and inspired me to build my first boat. Here's the "Cygnet" which must have weight 200 lbs.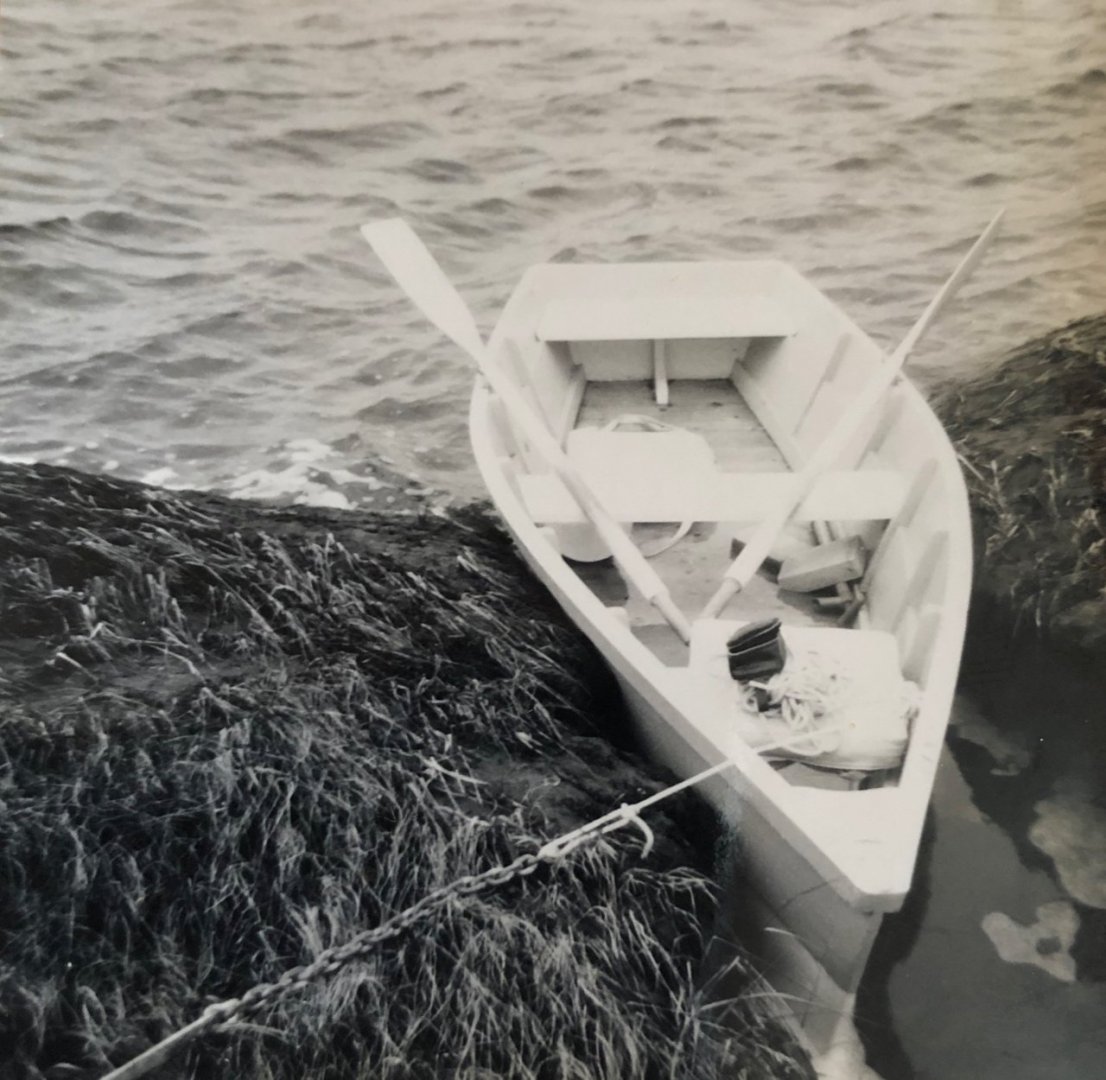
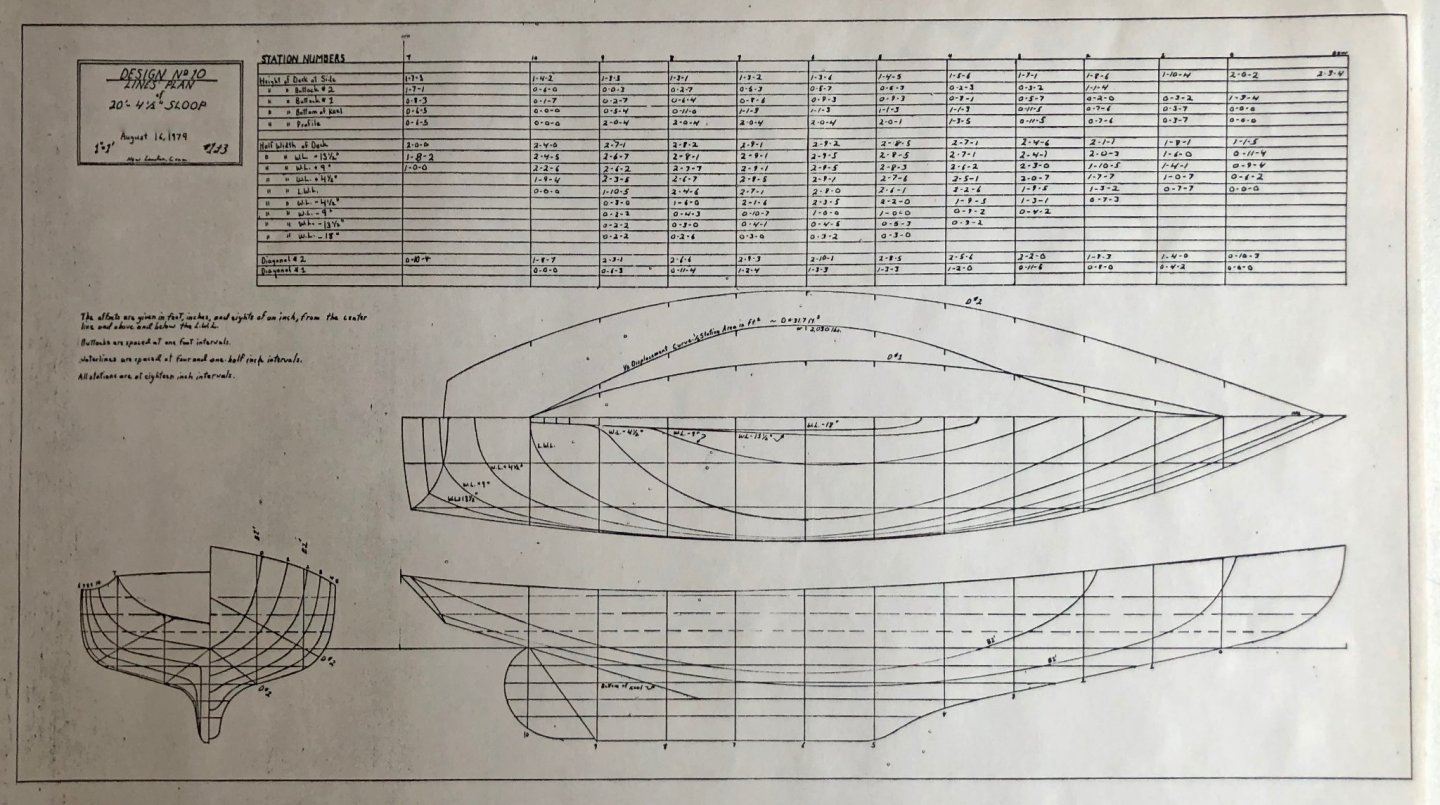
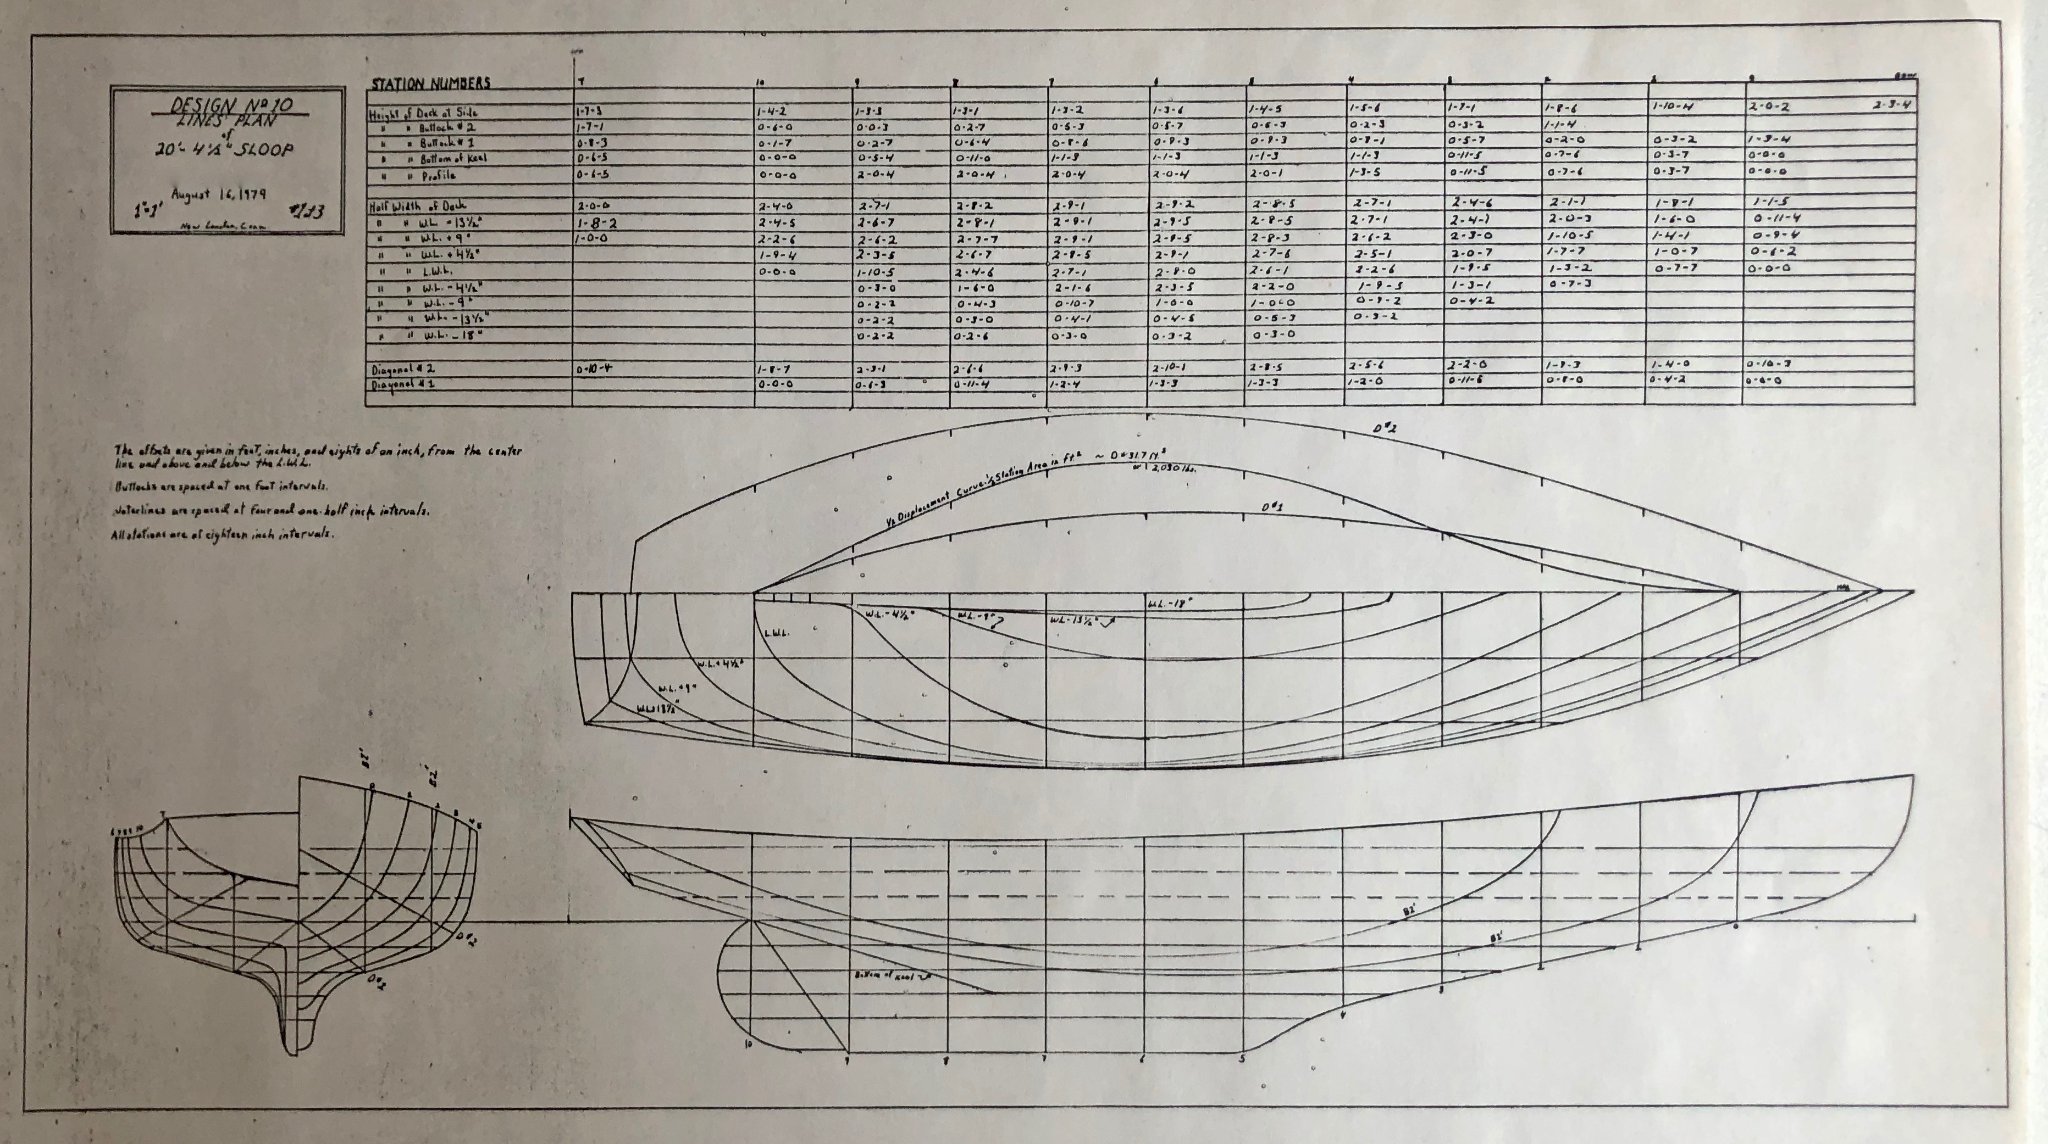
Here's a drawing back from 1979 when I was 16:
Decades passed and after many unfulfilling corporate jobs I got a job building architectural models. My five years at F.W. Dixon in Woburn, MA were the most fun of my entire career. In addition to learning from a crew of skilled modelmakers, we also had a pattern shop where I saw another world of craftsmanship. This was at a time when laser cutting was just beginning and I got really good at creating building facades from architectural drawings. Here's a photo of a model I helped create in the early '90s:

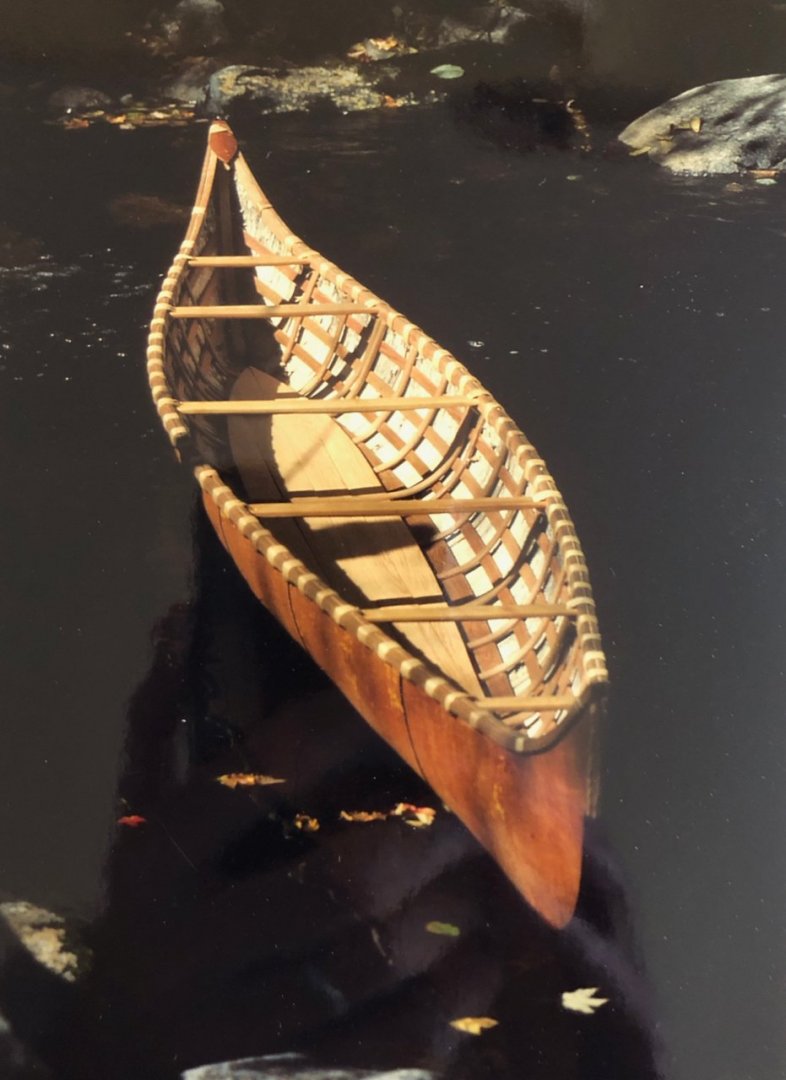
Later on I moved up to VT, built a birchbark canoe, and realized that while the problem-solving aspect of boatbuilding was extremely compelling, it was not the basis of a career for me.
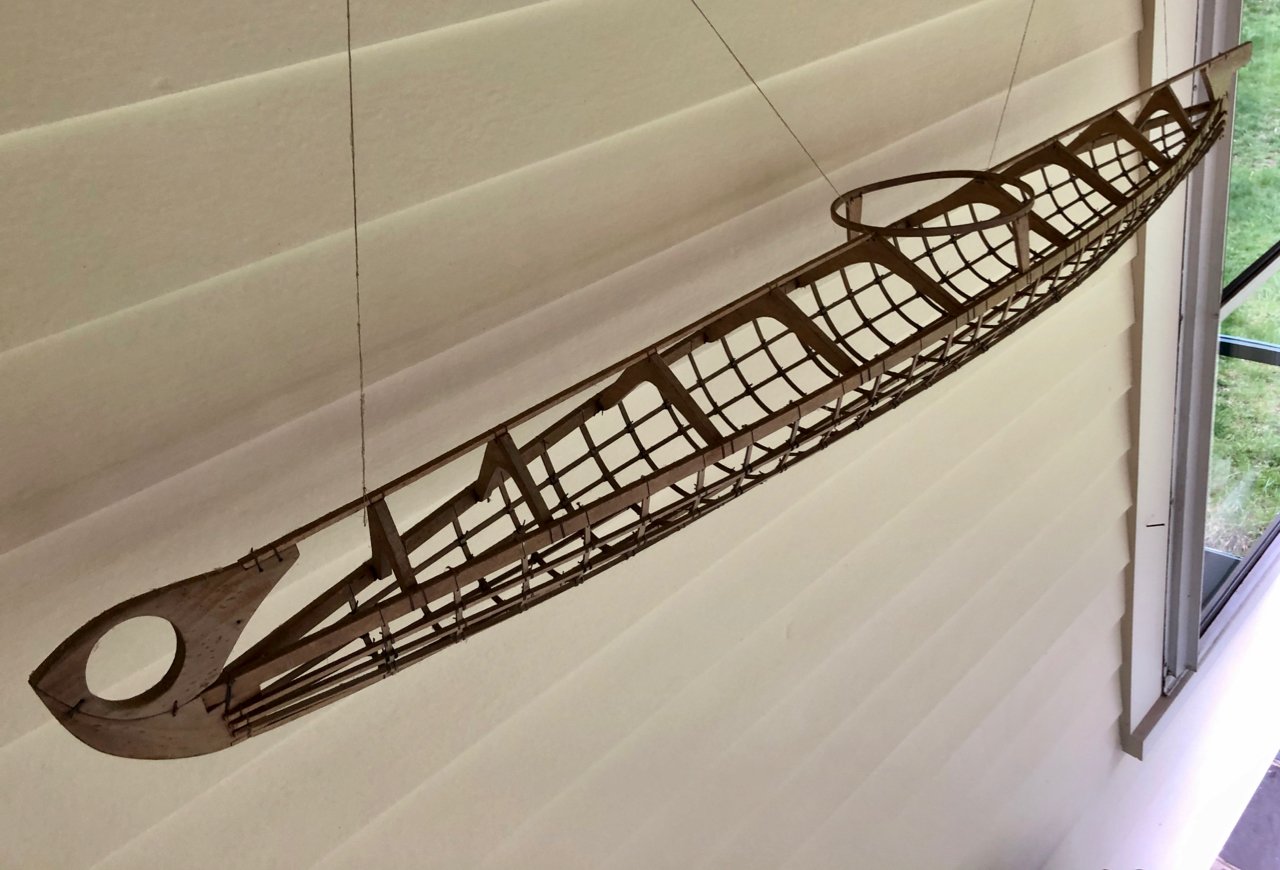
But I still enjoyed building models. Here's a 1:4 kayak I made by eye ....
And now, the present: I am still working but looking ahead to retirement. With more free time during the pandemic, the urge to work with my hands bubbled up. I cleaned up my old tools, cleared a workspace, and bought some of the books I had given away decades ago. Just before finding this forum, I started on a 50" Marblehead sailing yacht from some 1940s lines. Perhaps I will set it up for RC or maybe just free sailing. I can't wait to start a "real" ship model & build log but want to finish this one first!
For the moderators ... if I start a build log, what category would this go into?
Thanks all for reading this far, and I look forward to spending more time getting to know everyone here on the forum!
- JeffT, mtaylor, Keith Black and 1 other
-
4
-
Harvey, I love that ship. The second to last photo is my favorite. What a classic! And thanks for pointing out the Ferris book which I am still taking in page by page. I wish there were more resources online about these beautiful ships.
- Harvey Golden, mtaylor, Canute and 1 other
-
4


YOUNG AMERICA 1853 by Bitao - FINISHED - 1:72
in - Build logs for subjects built 1851 - 1900
Posted
Bitao, a breathtaking model. Really a stunning achievement on so many levels. Thanks for sharing with us all.
Michael