

luponero
-
Posts
235 -
Joined
-
Last visited
Content Type
Profiles
Forums
Gallery
Events
Posts posted by luponero
-
-
I thank Steven for the beautiful images of the carracks and the precious historical support he reports in the build, and "i like" that friends have posted
4 hours ago, Louie da fly said:quite a few carracks are shown in contemporary pictures with a dragon-head as a figurehead. And one of these has even been found on a Scandinavian wreck of the time.
I fully agree with what you reported above, I saw the "Carracca Venetian Carrack or Cocha 1/64 of woodrat", where this figurehead is made and a beautiful Venetian caracca with a very high level realization, and I am very pleased that from others Modelers from other countries there is such a profound knowledge of the ancient Venetian and Italian navy, lately I bought an old volume (which Steven would greatly appreciate), Le Navi di Nemi, by Paolo Ucelli which deals with the recovery of two Roman Imperial ships attributable to emperor Caligula (from 37-41 AD), sunk on the bottom of Lake Nemi, recovered in an archaeological undertaking conducted from 1928 to 1932. The recovery provided one of the most important contributions to the knowledge of Roman Roman technique, which I am looking at lately, neglecting the works on the Santa Maria, but the photographic documentation and the drawings of the construction plans as well as the historical narrative of the recovery is very close body especially next to the "air conditioner",
however I report the photos taken
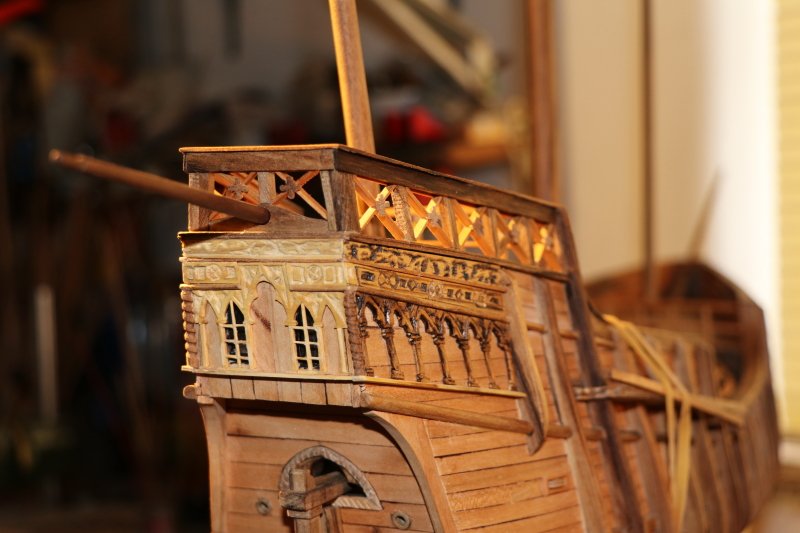
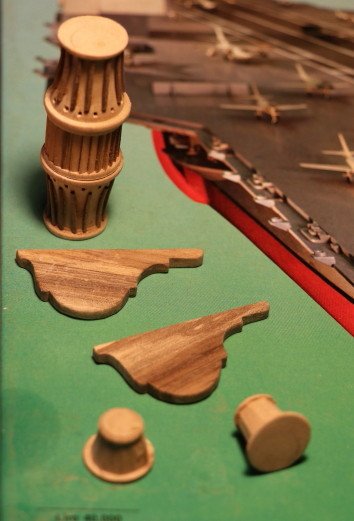
the boxwood moldings are very clear, and in my opinion they do not conform to the style of the caracca, so I aged them using the
bitumen of Judea, (as I will report later)
then the realization of the plaque in which the name of the ship is carved, the usual technique for the realization
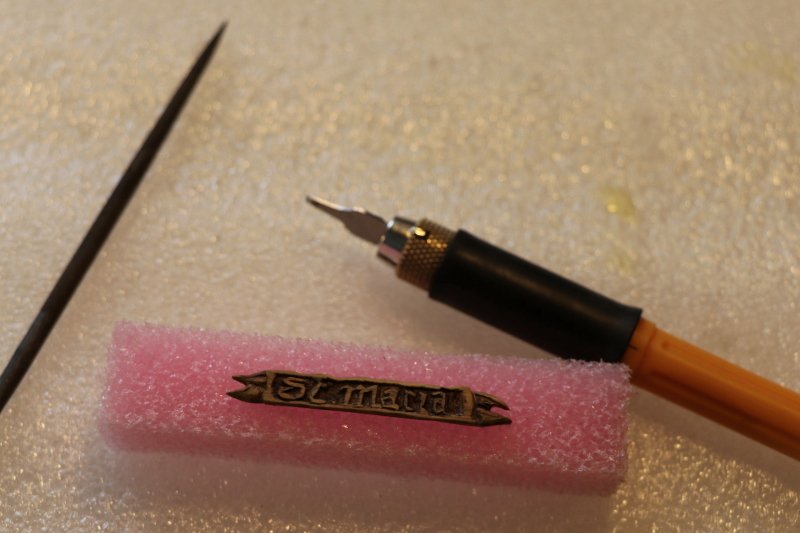
I glued the parts made and painted to the inside of the frame in which the blue effigy was placed, painting the hsalo with gold paint

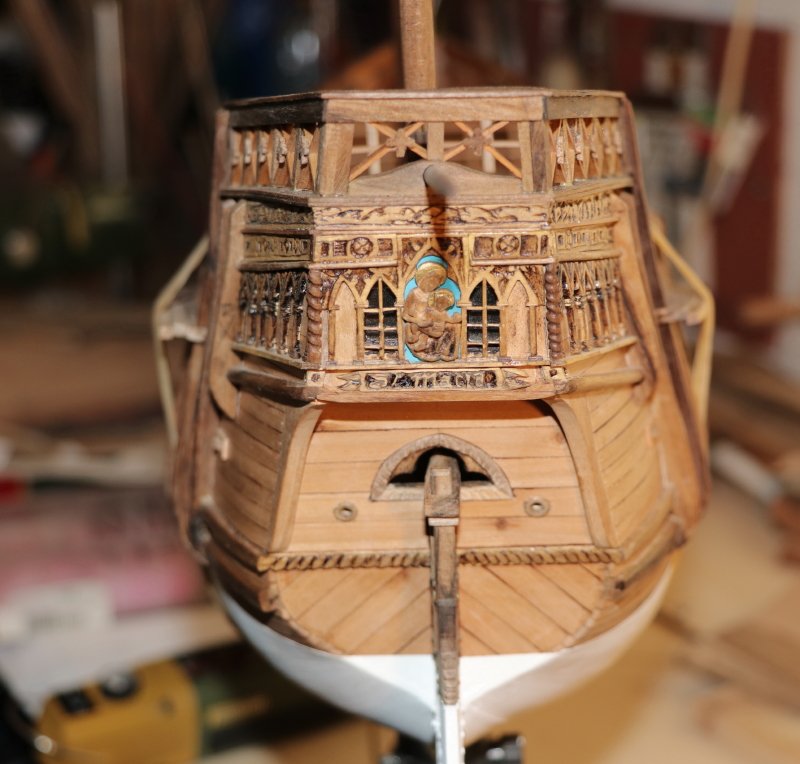
...I will have to revise the name of the Santa Maria, it does not seem to me that we read clearly
to the next
black Wolf
- mtaylor, cog, GrandpaPhil and 9 others
-
 12
12
-
The work on the moldings continued, I did not post the photos to avoid repetitions, as always the forecasts for their realization were different compared to the time necessary for their realization, I thought I would do everything in one day, in reality it took me
three days "beautiful full" in the laboratory, which as a result of the "high" temperatures of the past few days had become an incredible "oven",
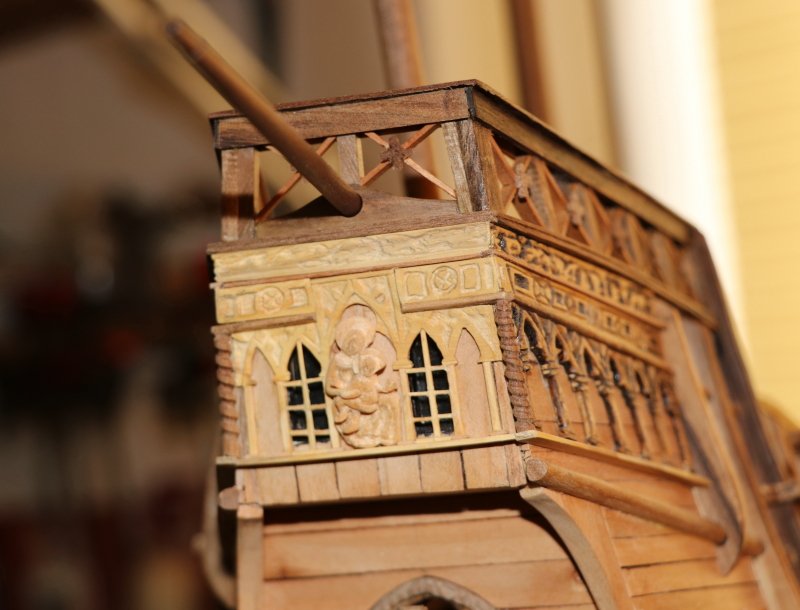
probably perhaps these hallucinations stimulated me in the realization of the Madonna with child, placed in the central part of the transom of the Santa Maria, for the realization I changed type of wood, instead of the boxwood I used the pine ( I don't know why, maybe the heat and hallucinations had given me my head !!!
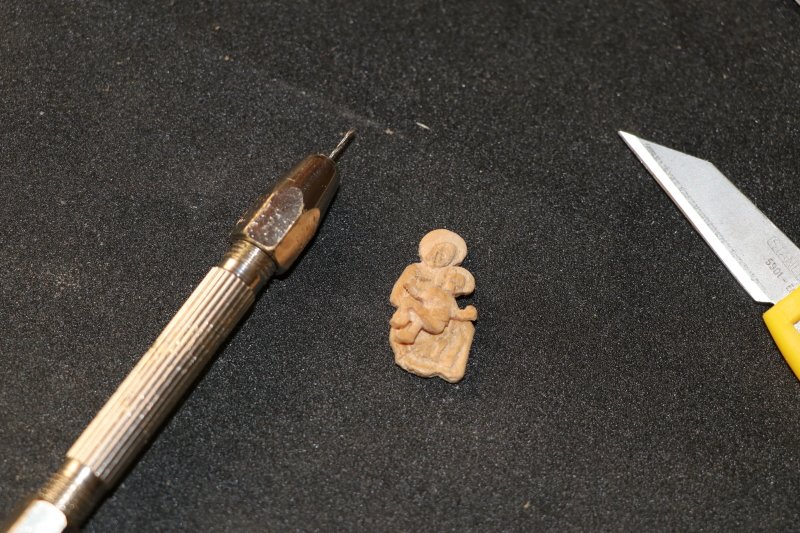
obviously the measurements are minimal, and to make them more "three-dimensional" I have made the figures separately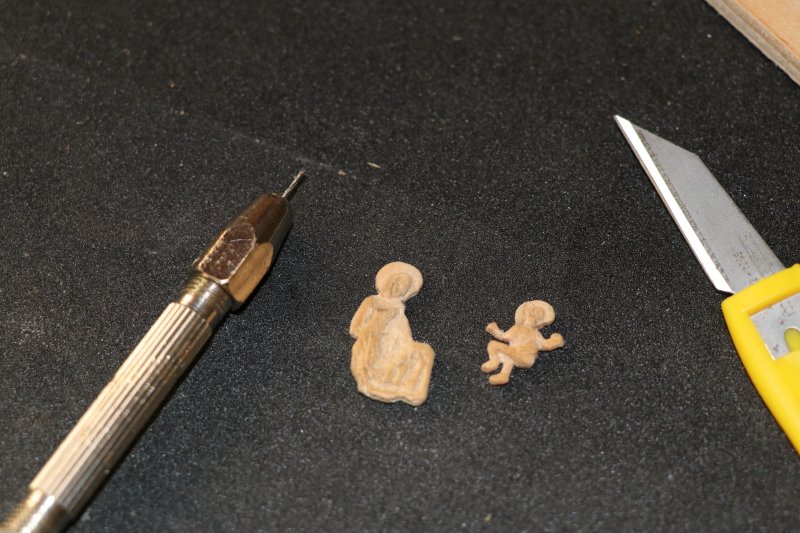
to rejoin them later
as previously mentioned, the scarce historical information of the ship does not provide precise indications, probably, the most logical realization should be an icon instead of a figurehead, but aesthetically it seemed to me more pleasant and corresponding
to the construction plans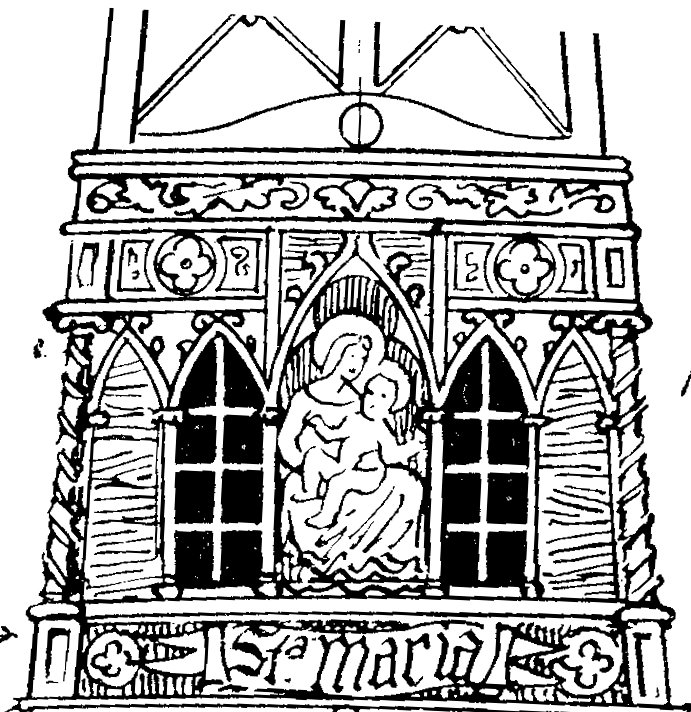
to the next
black Wolf
-
-
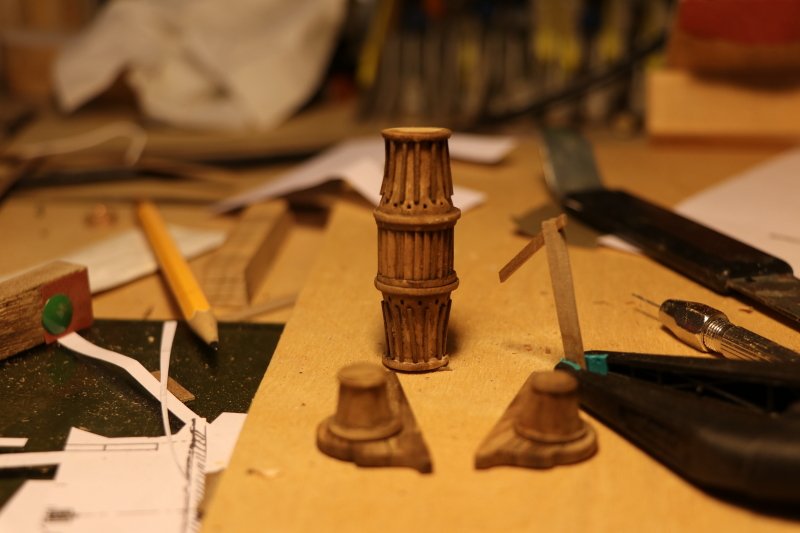
The carving works continued, using the classic manual tools,
knife,small iron file,sandpaper finally fine iron wool (steel wool ?)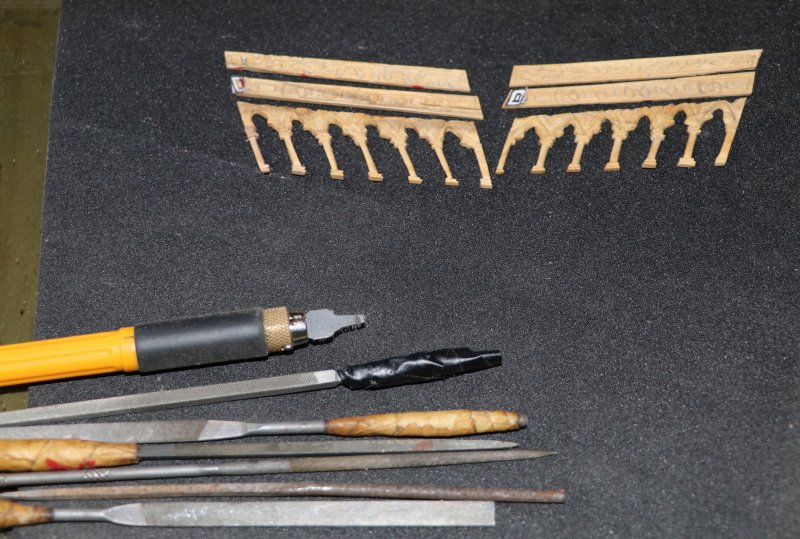
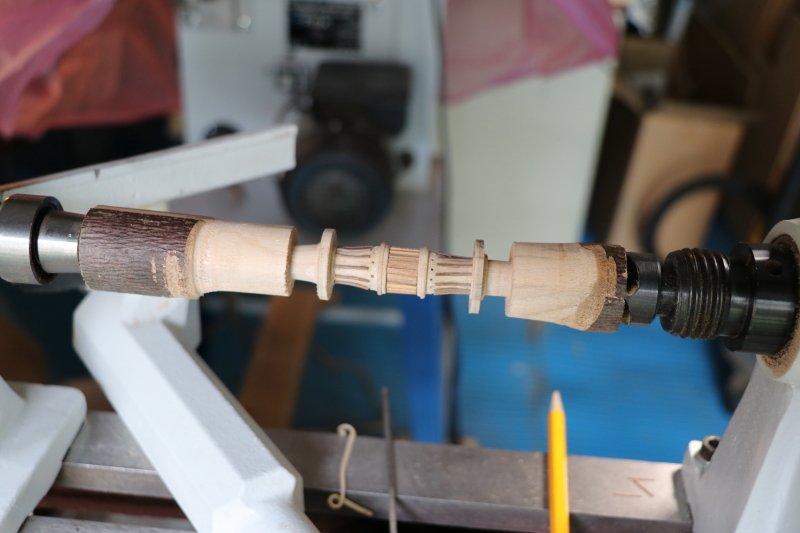
on the external part where the formwork ends there are two "twisted" columns
to achieve this I put a piece of rod between the tips and "hand-spouting" with the triangular file I opened the steps of the fillets widening later with the round file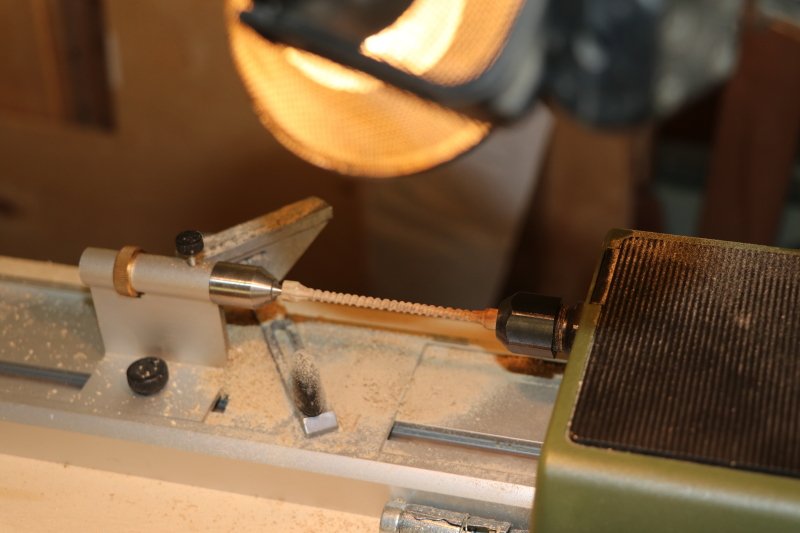
very slowly the work continues, ,, very slowly
black Wolf
- GrandpaPhil, mtbediz, Siggi52 and 4 others
-
7
-
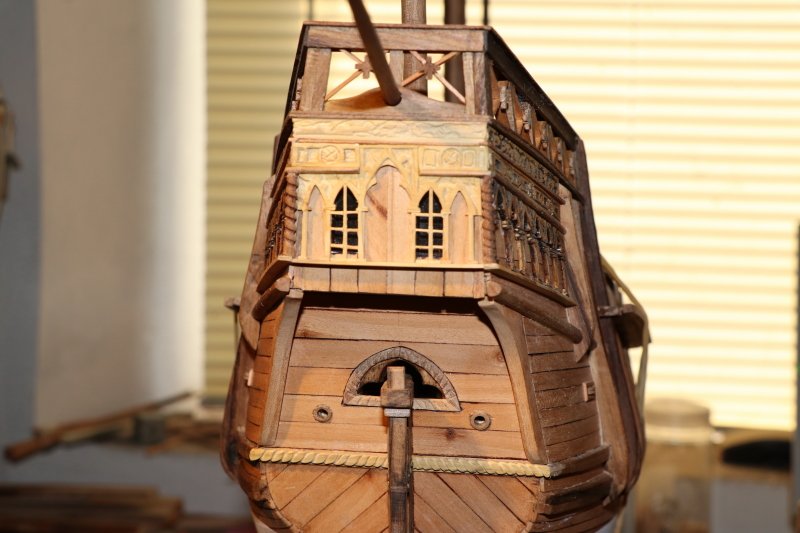
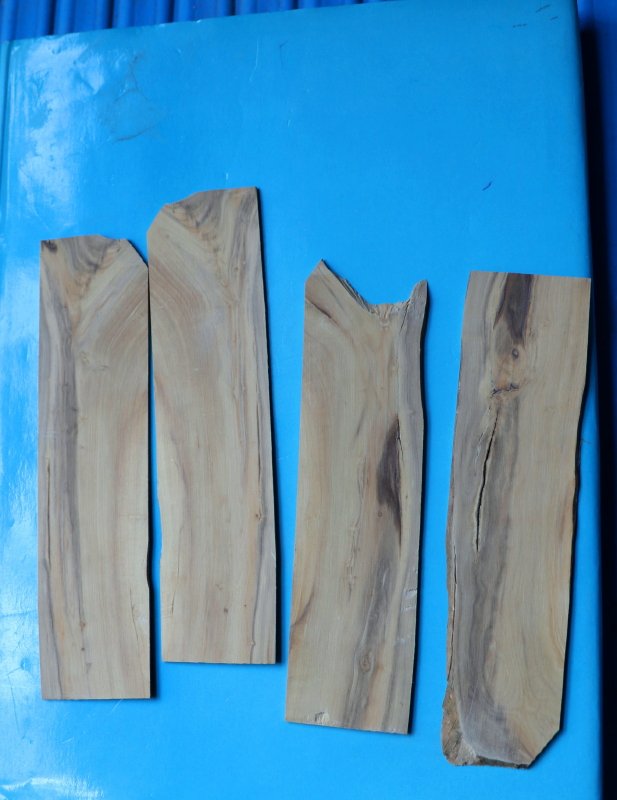
The model that I realize has on the aft part of the moldings, very probably it is a detail that usually was not realized in the caracche, but as previously pointed out there is no information deriving from reliable sources, while from the images of the Santa Maria model that came reproduced in 1892 by Fernandez-Duro, (of which I have reported images in previous posts) are visible, so I decided to do them.
The essence used is the boxwood, until a year ago it was a pleasant shrub to the sides of the road where I live, but due to a bacterium (which has made a massacre of this type of plant in Tuscany) it is dried for which the use partly for modeling (unfortunately)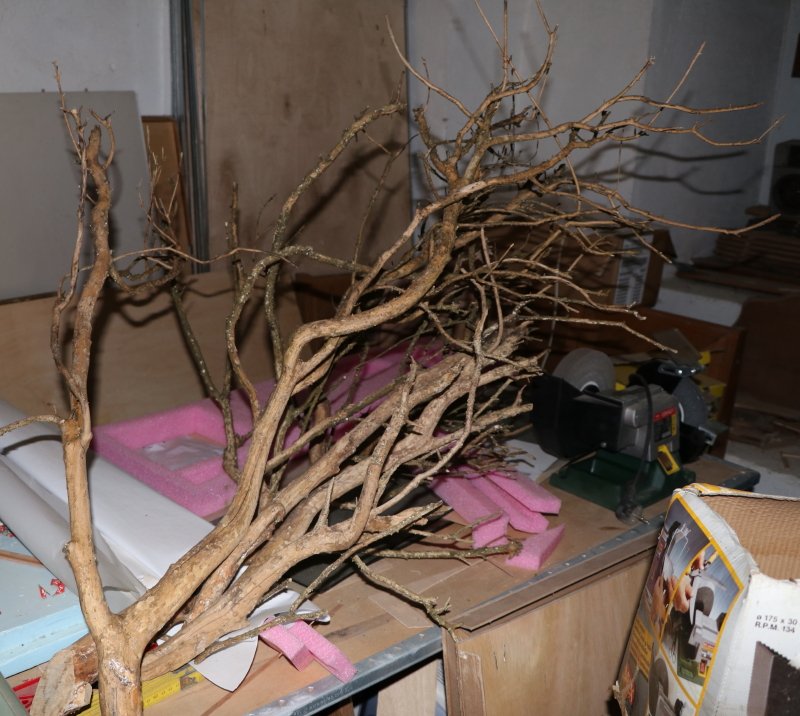
so I cut a piece of it and I made some tablets of a couple of mm thick 7/8 cm long and 3cm wide (I don't want to waste it, unfortunately, almost everything that was there was burned in early spring, but it is another story...)

as you can see it is not of a uniform color, probably because the part used is close to the final part of the trunk, however it is very hard
and carving it, also considering the "temperatures" of these days is quite challenging, the choice to carve it, instead of passing it with various cutters, is desired,
trying in this way to recreate the carving of the "medieval" period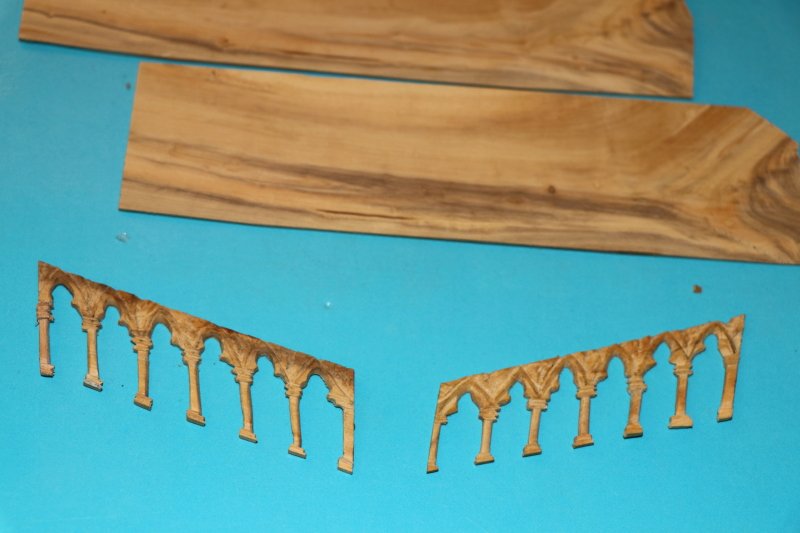
.... sweat and various ...
it was the beginning ....to the next
black Wolf
- Katoom, GrandpaPhil, mtaylor and 3 others
-
6
-
congratulations, great job
good boy !
black Wolf
- GrandpaPhil, mtaylor and Nikiforos
-
3
-
-
-
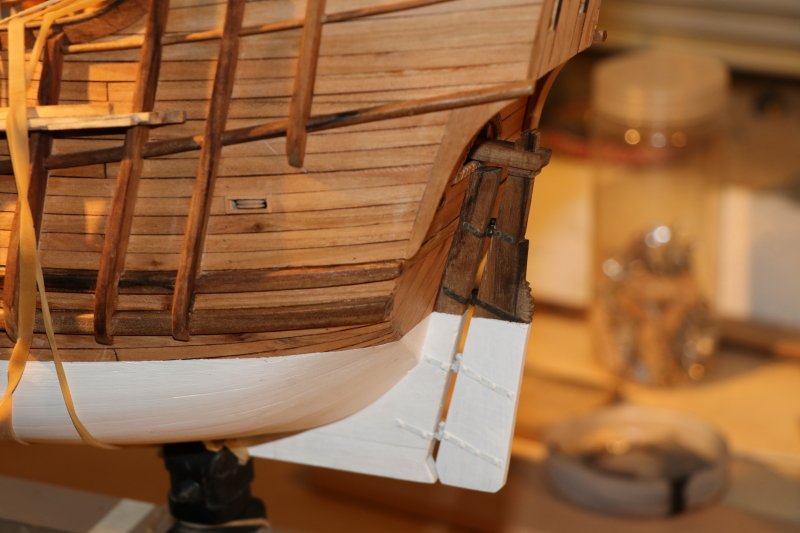
Lately the days are "hot" the temperatures are African and working is not easy so the rhythms have dropped significantly ...
I finished setting up the lifeboats making the oarlocks and oars and I fixed the rudder,

the bar and shovel that make up the rudder had been made for a long time I finally "remembered" to finish the work
and put it in its place
 using strips from the brass sheet, I used nails for the pins (with some modifications)
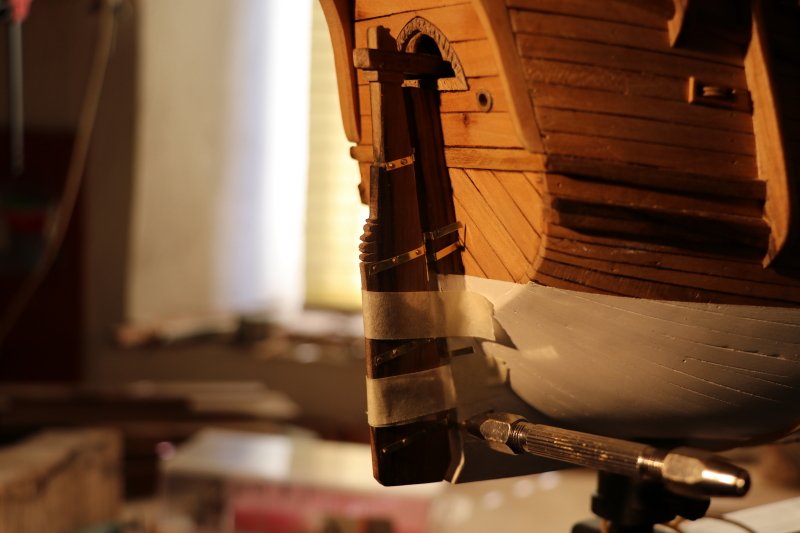
ending it with white paint
now I'm going to lie down in the "cellar" in the company of a bottle of beer,😏
to the next
black wolf
-
-
google, but I often do some "cappellata"
On 6/11/2019 at 7:02 PM, Katoom said:Funny! When we retire next year we are moving to our house in the Maremma and are really going to need to improve our Italian!
Maremma and Mugello are quite close ...
we can give each other mutual help -
hello Johann,
I don't want to ask how you do it, but only from which planet did you arrive? ☺️congratulations, you're super
- mtaylor, paulsutcliffe, billocrates and 2 others
-
5
-
sorry but the translator does not always translate correctly,
I am also an "expert" and as you can see the certainty of the construction details of a 1400/1500 ship is very uncertain, so I reproduced this (more conditioned by aesthetics than by logic), I tried to investigate also the situation concerning the ankles that he highlighted earlier from Jaager, but also on this particular I have not found certain material, only from the drawings of Fernadez-Duro there is an anklet next to the tree of the teacher that I tried to reproduce (???)
correct form:
I am not an expert....... there is an anklet near the mainmast
thanks to Mtylor for the last post corrections
and for Steven, for valuable information
by
(when I retire, I take an English course)
luponero (black wolf) 😉
-
Ringraziando gli amici per il loro apprezzamento e la visita nel wip, ho terminato l'aggiornamento con le ultime immagini della MS, come precedentemente mostrato, ho trattato le cannucce con olio color paglierino, anche se mancano ancora i dettagli, il colore paglierino l'olio consente di recuperare lo "stress" delle fibre del legno derivato dai vari processi precedenti conferendo alle essenze un aspetto più morbido e mielato, la noce assume una tonalità più scura (probabilmente la naturale reazione del tannino) la ciliegia è un altro la tonalità "miele" sicuramente, in entrambe le fibre esterne "si ammorbidiscono", se le parti vengono passate con un vecchio panno di lana, la superficie viene lucidata a raso, vale a dire l'effetto è molto bello e dà al legno un vista particolare, non ci sono problemi con l'incollaggio di altri pezzi di legno sulle superfici trattate,nel tempo, essendo un trattamento leggero perde le caratteristiche di lucidatura, l'unico difetto è che è più appropriato per il trattamento di mobili antichi che ha un modello navale se l'intento è quello di riprodursi naturalmente come avrebbe dovuto essere, sicuramente l'esposizione a gli agenti atmosferici e le stanze create in tempi "veloci" condizioni molto diverse da quelle ottenute con olio di paglia, tuttavia l'occhio vuole la sua parte,

I had prepared a treatment that serves in restoration to give the effect of aging to the wood giving the typical external saturation of the timber giving the typical gray color more or less blurred, typical on old wooden boats, certainly would have been more appropriate, but given that being vinegar based, so that it is fixed on the wood in a constant manner and strongly opacifies the nuances of the veins (and it is not possible to recover the colors once applied), I did not have the courage to apply it, perhaps wrongly, who knows ???
given that with the update between images and works they are "in line", I start with the work on the Santa Maria,
to the next
black Wolf
- Baker, mtbediz, GrandpaPhil and 6 others
-
9
-
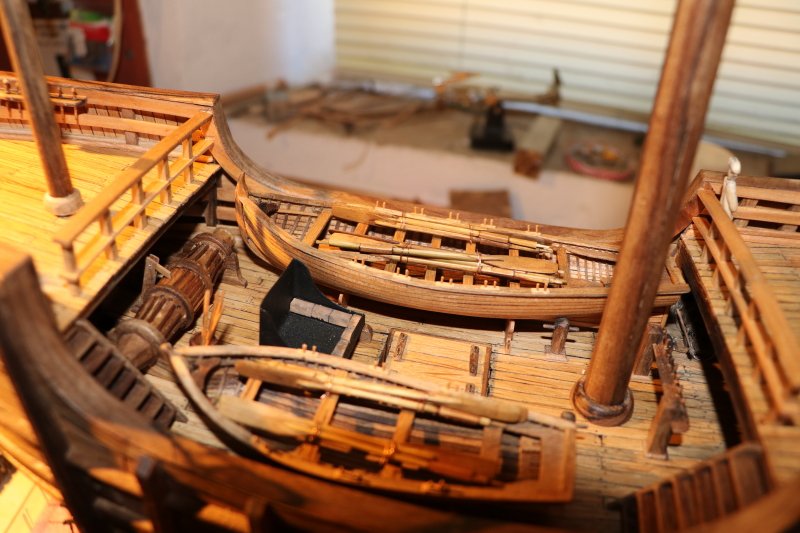
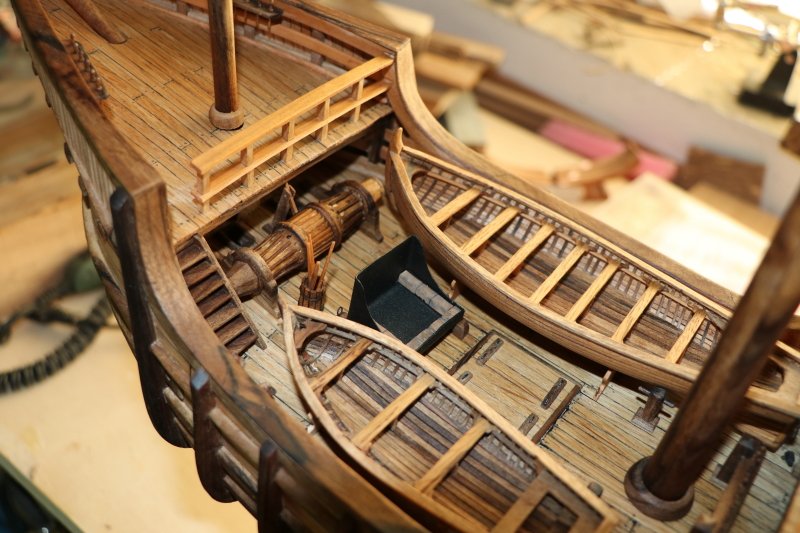
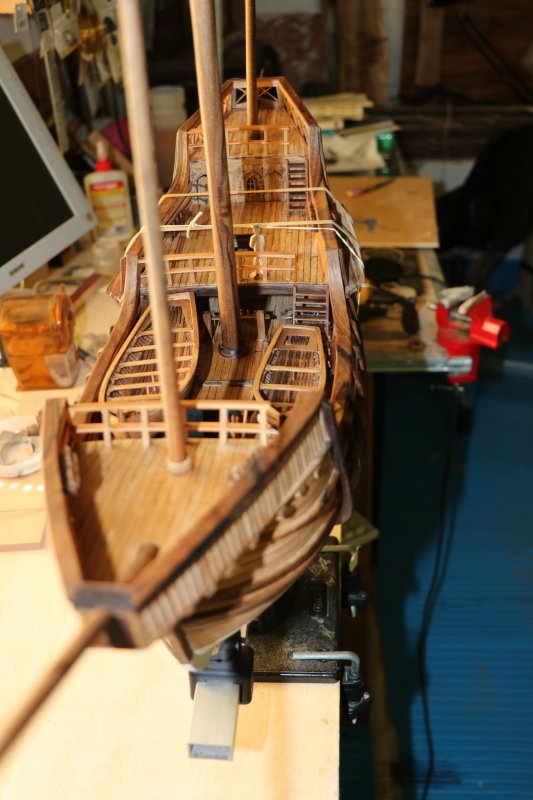
The construction of the lances went on, after the construction of the planking, in cherry for the longboat and in walnut for the lance, I detached the sloops from the silhouettes without problems, the adhesive tape put over the shapes avoided possible sticking between these and the ribbed allowing a gap between the silhouette and the boat without problem,
later I built other details that make up the lifeboats, the internal platforms and the seats
the construction went ahead with the placement of the rowing benches
finished I treated the straws with straw oil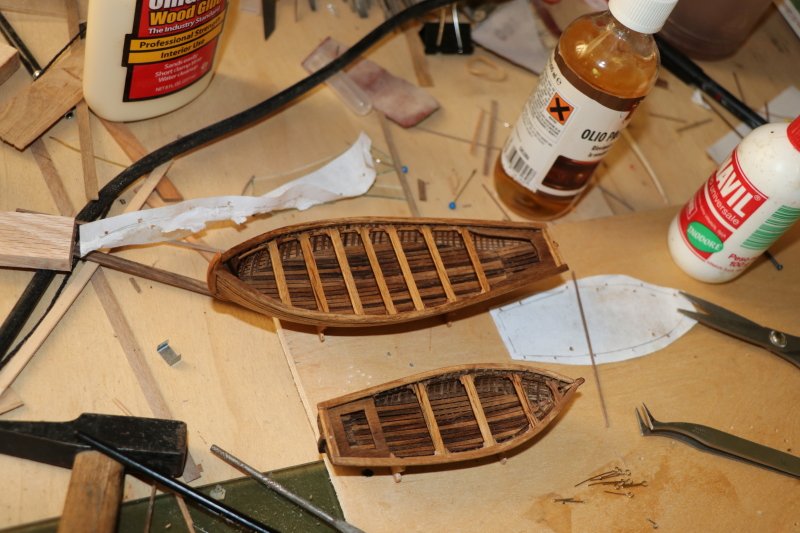
and I placed them on the bridge with the supports as shown in the construction plans
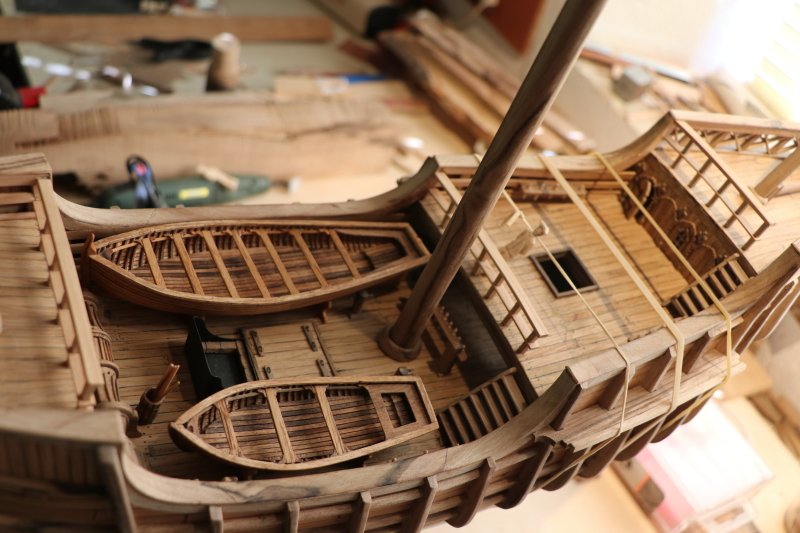
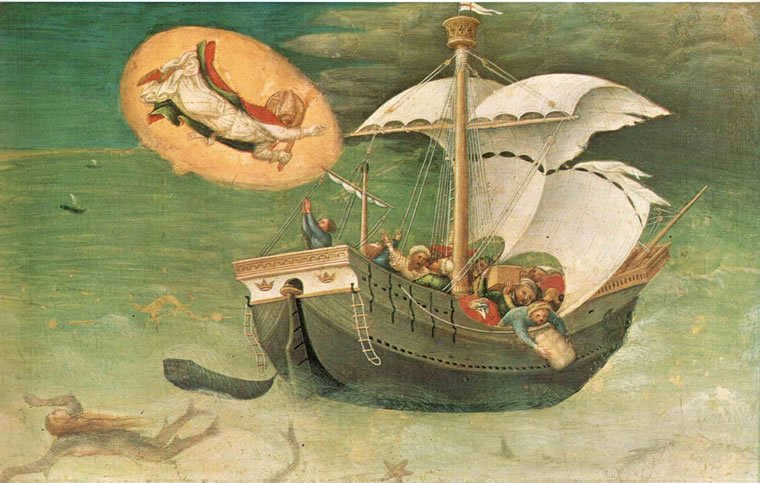
but as already seen from the drawings of Adametz, after the placing of the lifeboats on the bridge, the space on the same is reduced a great deal, in some images taken from paintings on medieval carracks the small boats are not seen on the bridge, in a painting of a "cocca"you see a towed boat, so I'm not sure to leave the boats on the bridge,detail taken from Polittico del Quaratesi - San Nicola placa fortunale- (Polyptych of the Quaratesi - San Nicola calm the storm)
so I am not sure to leave the boats on the bridge
greetings
black wolf
-
I thank friends for appreciation,
I saw the wart you made for the dromone, it's beautiful! Both as a piece and as a processing technique, sincere compliments,
I for the construction of the winch, in addition to having Adametez Construction Plans I saw the drawings shown in the monograph "The ships of Christopher Columbus" by the Shepherd, which is considered among the most complete monographs of the boats used by Colombo, the design of the SM. Fernandez-Duro (from 1892) to which some Adametz were inspired "remarkably", shows the longitudinal section in scale 1/100 of the SM, in which "half view" of the winch that I tried to reproduce is reported, this model is the one taken into consideration for the construction features of the "carrack", while the design of the SM attributed to Guillén in 1927 the "caravel" the drawing on the longitudinal plane of a very similar winch both as a form and with much smaller measurements (similar to those of Mary Rose, while in the THIRD floor of the building shown in the monograph, there are the construction plans
reproduced by Martinez-Hidalgo in 1964 (a carrack, also this) the winch is not horizontal as in the two previous drawings, but verticalwhat to say? I am also an "expert" and as you can see the certainty of the construction details of a 1400/1500 ship is very uncertain, so I reproduced this (more conditioned by aesthetics than by logic), I tried to investigate also the situation concerning the ankles that he highlighted earlier from Jaager, but also on this particular I have not found certain material, only from the drawings of Fernadez-Duro there is an anklet next to the tree of the teacher that I tried to reproduce (???)
"hoping that the translator works well"later I put the photos on the construction of the boats
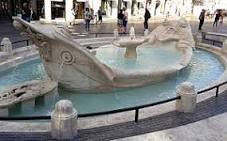
for now I bring this long boat, which is much more famous than that of Columbus,
is "the Barcaccia Fountain" in Piazza Di Spagna in Rome
I'm going to get my wife to work, otherwise she'll put me in irons ...
to the next
luponero
-
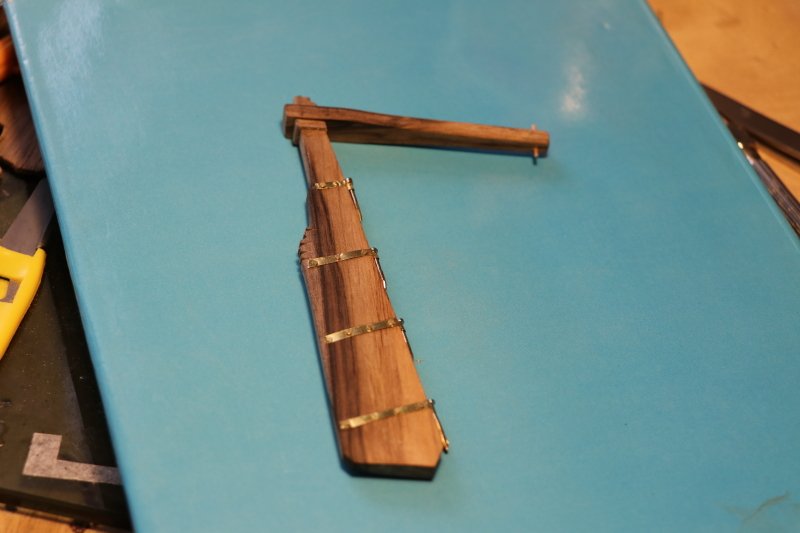
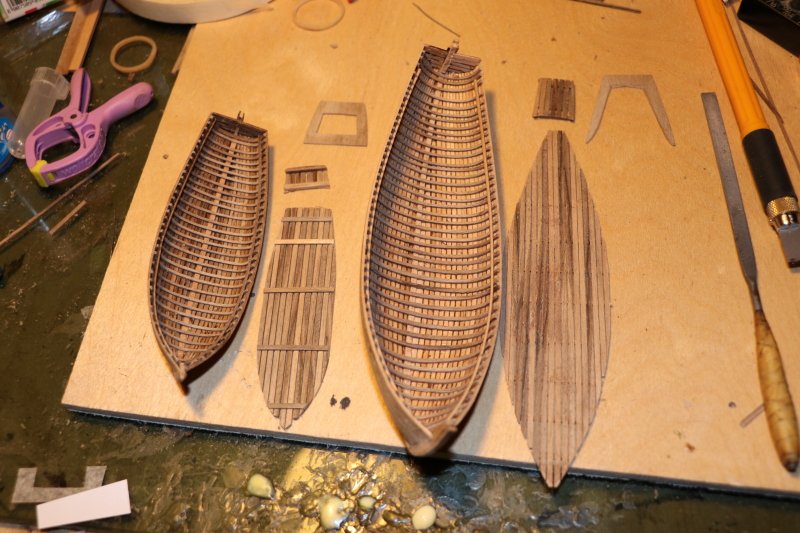
after the preparation of the reduced shapes I started laying the ribbed, finished the ribbed I applied the planking, strips of cherry 2mm wide, for the "longboat"
continuing the pose,
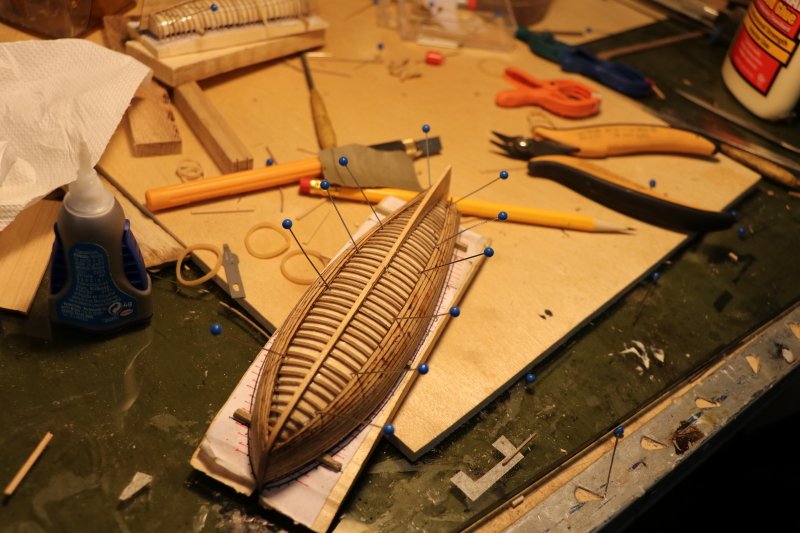
up to finish the planking,

what I insert now is a famous "longboat",
is in Rome in the square ??? (do you know which one ?)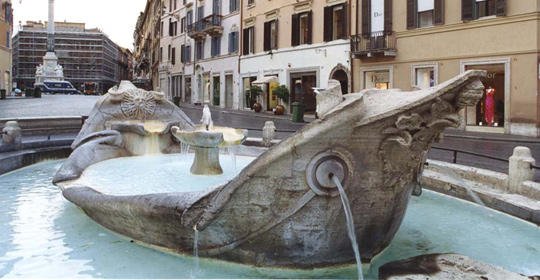
to the next
black Wolf
-
I thank my friends for their appreciation,
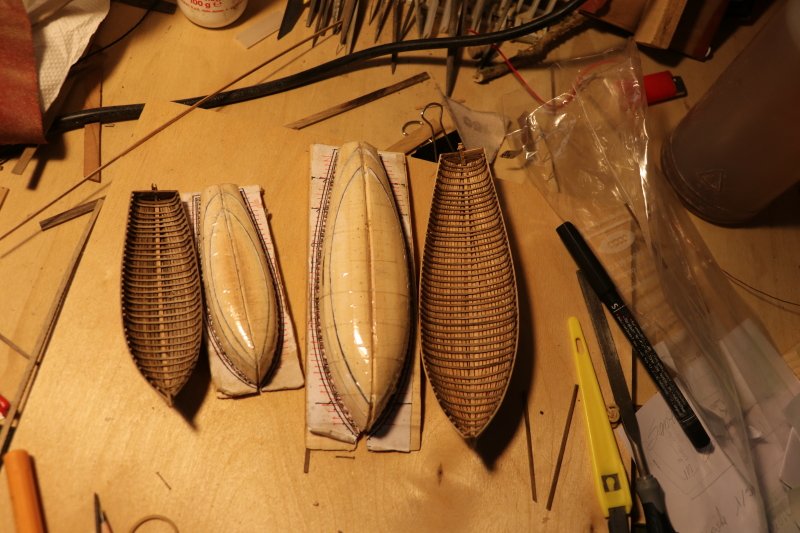
the construction continued with the construction of the lifeboats, a longboat and a lance,
and in my opinion also this realization taken from the construction plans used has aspects that were perhaps not those that actually were in reality (perhaps)
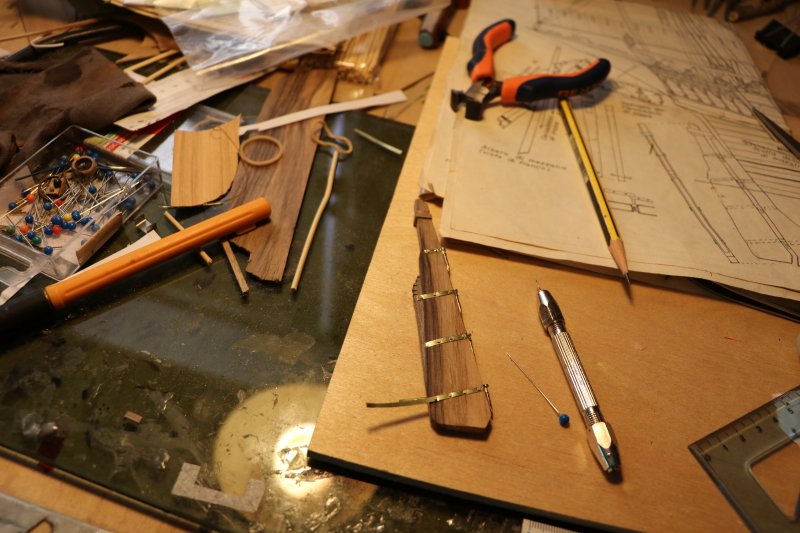
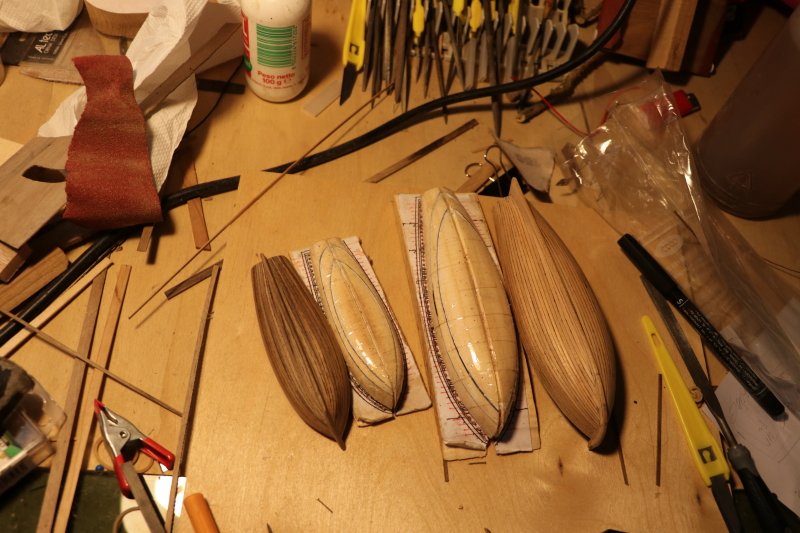
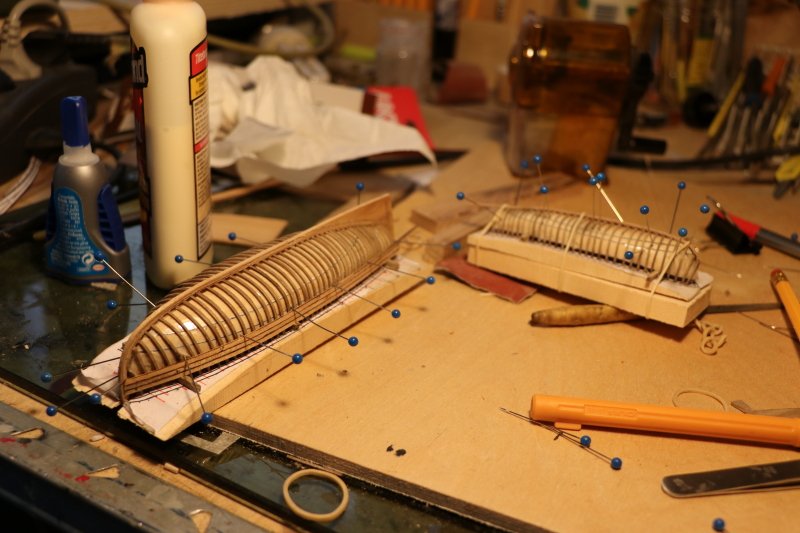
I used the "bread and butter" technique, preparing blocks of Swiss stone pine on which I reported the horizontal sections of the water lines, reducing them by 4 mm, compensating for the thickness of the ribs and planking
that I would use later,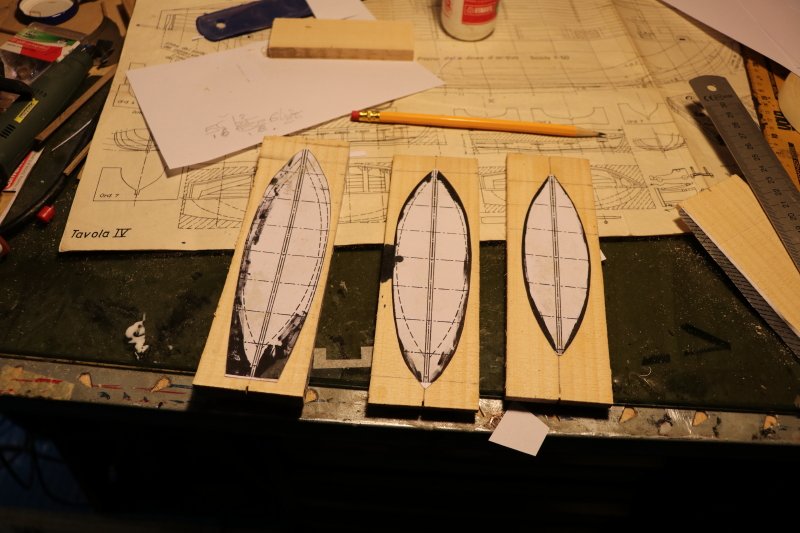
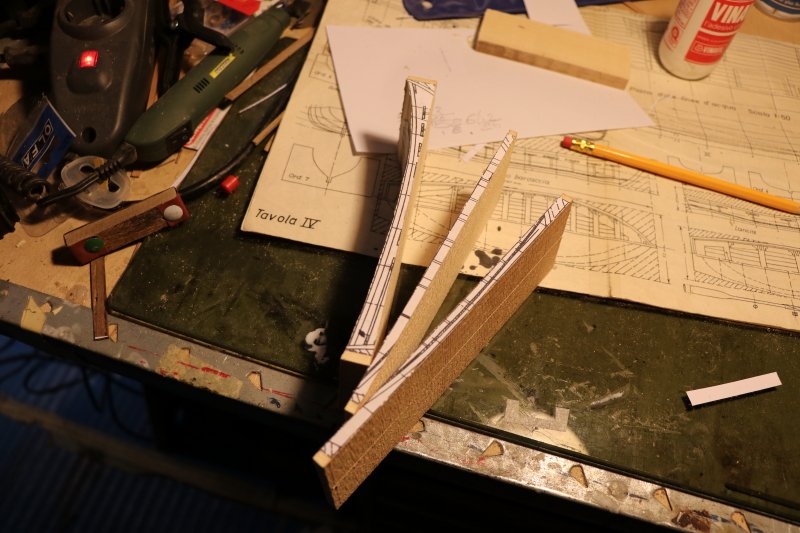
after having glued the three sections, taper the block until the lower part of the upper section mates with the contour of the lower water line, if done carefully you will get very precise pieces, (eventually you can make cardboard templates of the order to verify the correspondence of the curvature of the hull in the various points)
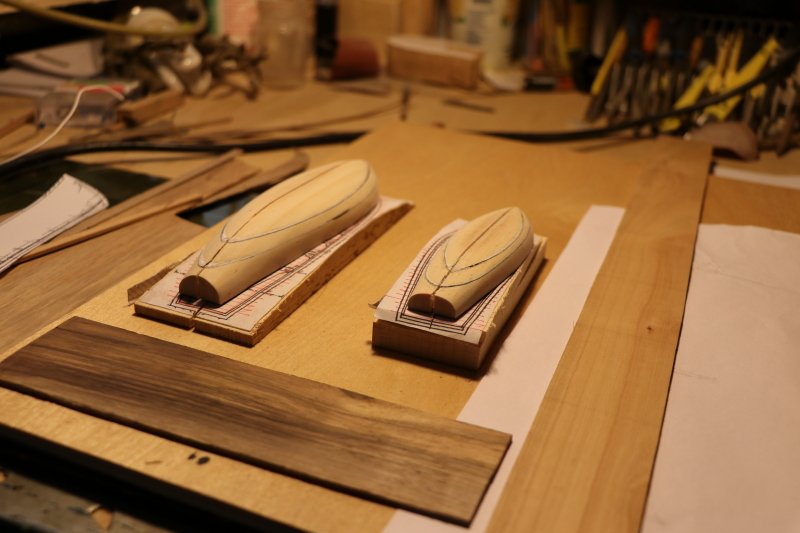
I forgot, it is fundamental to cut the central median of the block obtained with a depth of a few millimeters before starting the tapering, in which the keel will be subsequently inserted.

supporting the obtained part, on the longitudinal view of the lifeboat, which will serve for the realization of the ribbed
-
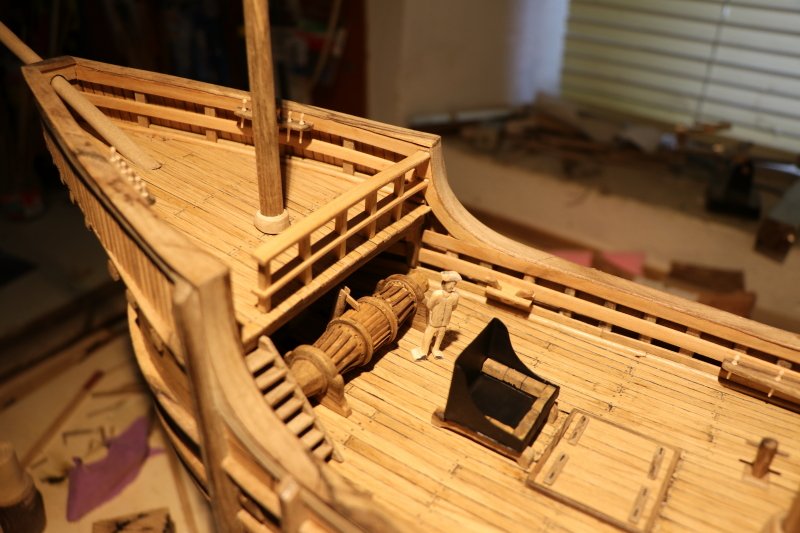
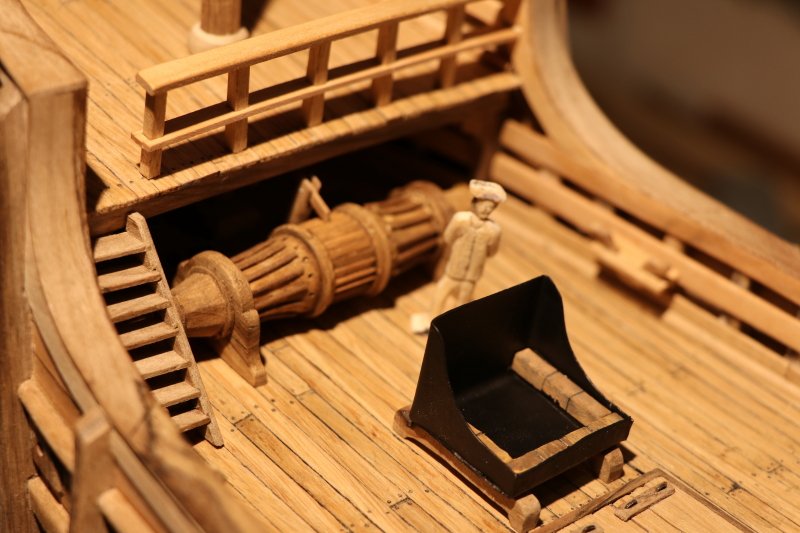
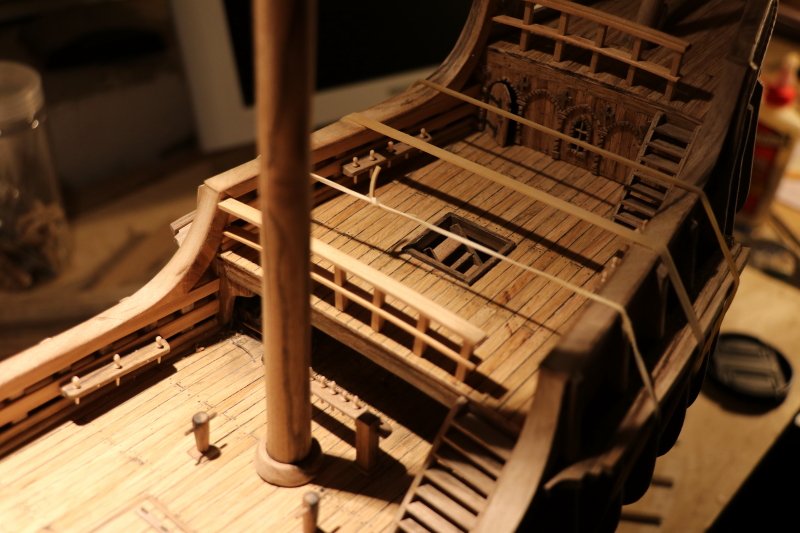
finished the pieces that make up the winch I painted them with bitumen I finished the kitchen and to see "the effect" I placed them, always without "sticking" them on the bridge
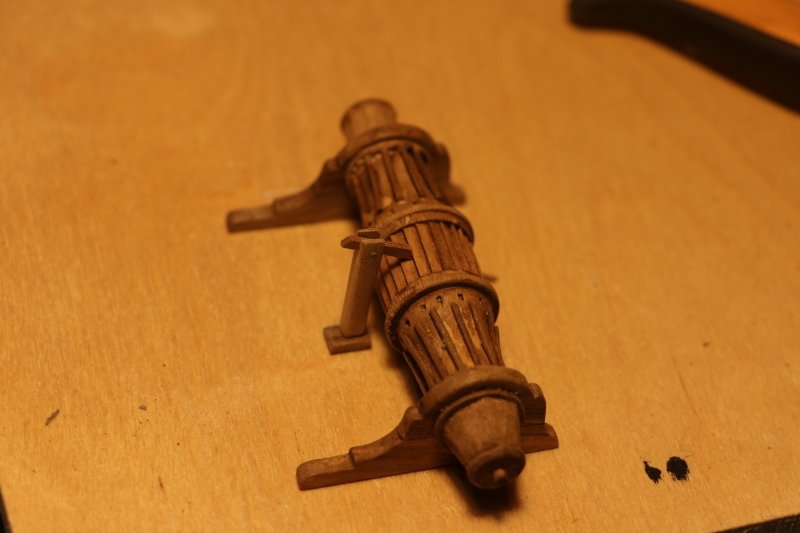
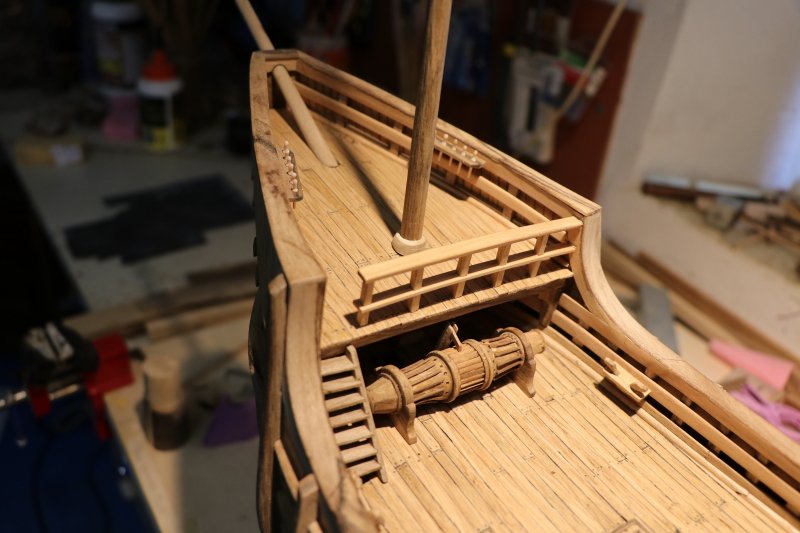
to check the ratio between the pieces reproduced in 1/50 scale I made a small man on a scale, I got a young "thin and long" sailor given the period in relation to the fact that the little man is 3.5 cm so should be a high 1.75 (considerable height in 1500) however, the exceptions were also in that period
")
to finish the bridge there were no lifeboats, which perhaps, given the characteristics, are among the most demanding details ...
to the next
luponero
- cog, Baker, GrandpaPhil and 1 other
-
4
-
It's been a long time since I've updated the site with the development of the works, which have gone ahead, from a point of view I would like to immediately put the last photo I made out of what is the "logic"
evolutionary,,,
after setting up the various situations I thought of making the horizontal winch,as a lumber I used linden and with the lathe I started working with it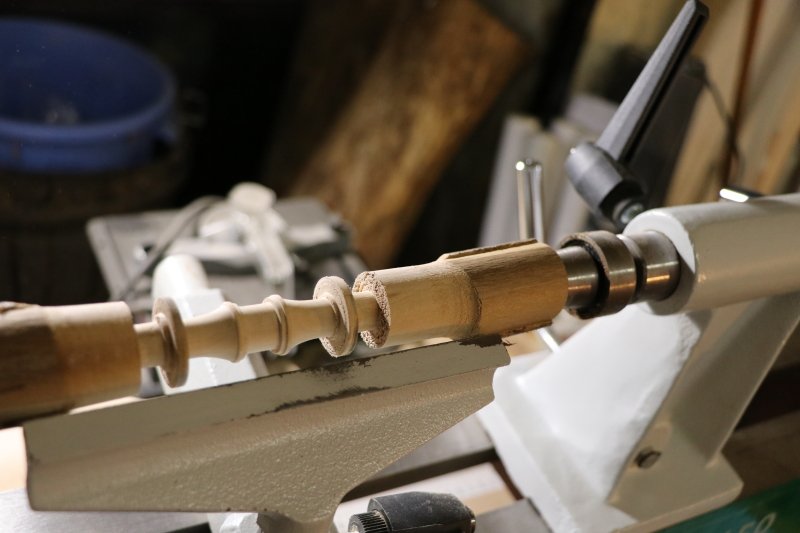
starting to assemble the constituent parts directly on the piece still between the tips of the lathe
developing the other parts that make up the winch
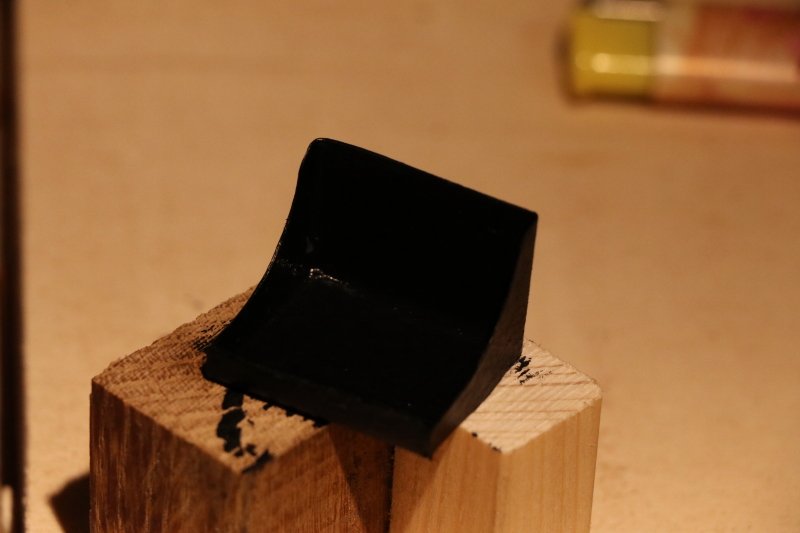
in front of the winch there is the kitchen, for its realization I used a small slab of lead painting it with black paint
- cog, GrandpaPhil and pjofc4
-
3
-
I honestly don't know, I tried searching on specialized sites but I couldn't find reliable information,
on the drawing by Adametez the belaying pins are reported, there are also cleats and lashing, which are still partly to be included,
while I believe that yours is a right observation, I try to find information about it
-
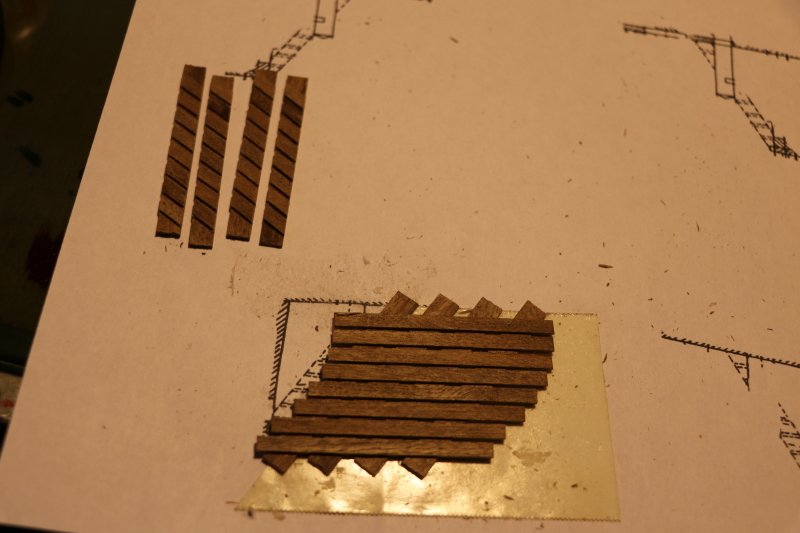
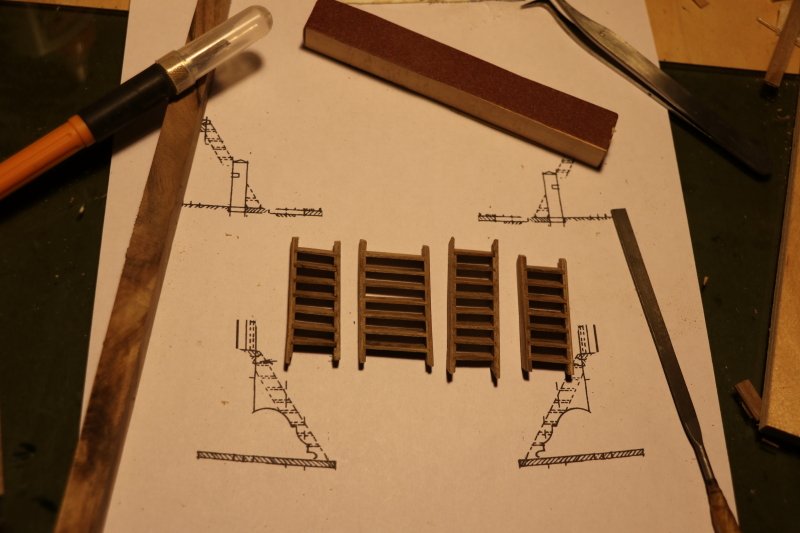
A constructive detail that takes me a long time and with not always satisfying results is the realization of the stairs, above all the realization of the joint on the upright that serves to give more solidity to the table that forms the step but this time for the realization of the ladders I used a different method which consists in using a double-sided tape on which the uprights are shown with the usual inclination they have on the boat compared to the vertical, thus preparing more uprights in "real" time, obviously also the other uprights that make up the staircase but with the opposite inclination, on the uprights it is brought back gluing in horizontal of the strips of height to scale to the raising of our step preparing with these what will be the joint, while the thickness of the listello will determine the thickness of the joint , in my case the strips are 3.5 mm wide with a thickness of 0.5 mm, once the preparation is finished the uprights are cut and the uprights are obtained with the risers and joints of the steps already prepared, it will be enough to cut them to the desired width and "insert" them in the space of the joint obtained previously,
in a short time I made the four scales
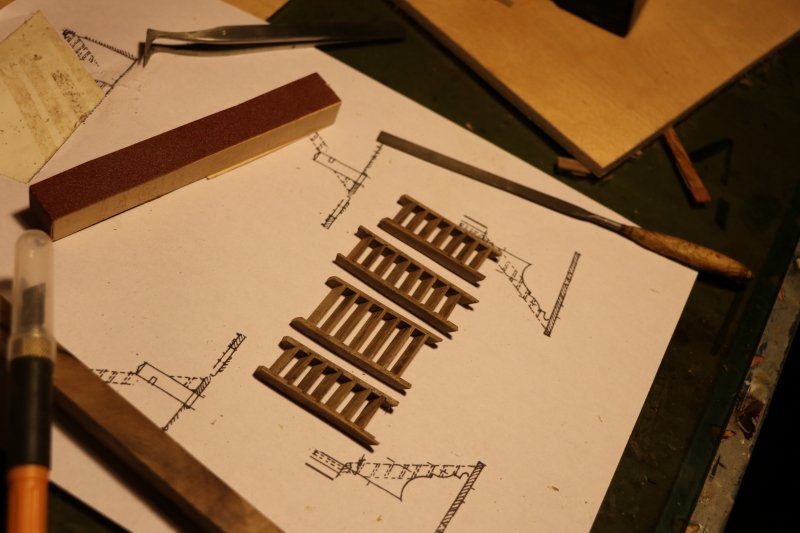
then I put them down
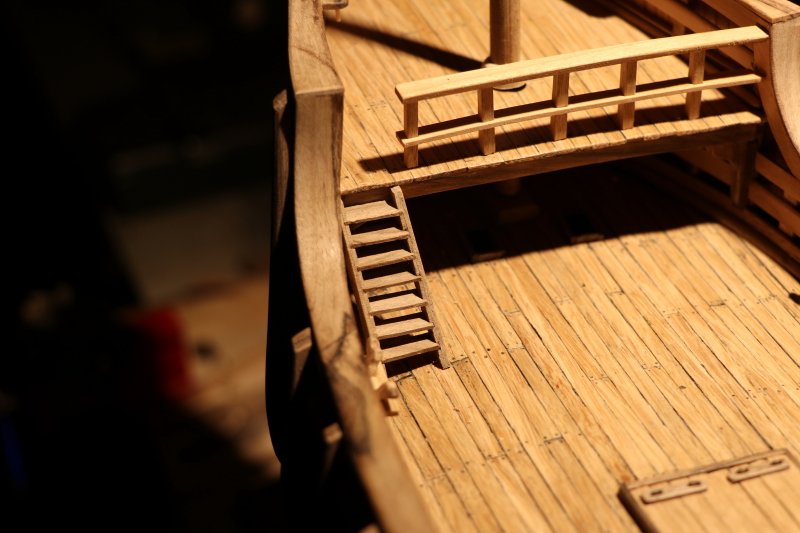

with this metedo I have significantly accelerated the realization of the "interlocking" stairs
to the next
black Wolf
- GrandpaPhil, cog, Baker and 3 others
-
6
-
Good work and very interesting historical study,
I'm doing the winch too, for now I haven't done the bars, and surely, like you, I'll have the usual problem,
Fabio
- CaptainSteve, EJ_L, mtaylor and 1 other
-
4
-

Hello from North Idaho
in New member Introductions
Posted
It happened to me too!
after 45 years I started making ship models again,
... passions are not forgotten ...
we are waiting for your work
black Wolf