

luponero
-
Posts
236 -
Joined
-
Last visited
Content Type
Profiles
Forums
Gallery
Events
Posts posted by luponero
-
-
very good, (I agree with Steven)
beautiful and precise realizationsincere congratulations
black Wolf
- Louie da fly, mtaylor and cog
-
 3
3
-
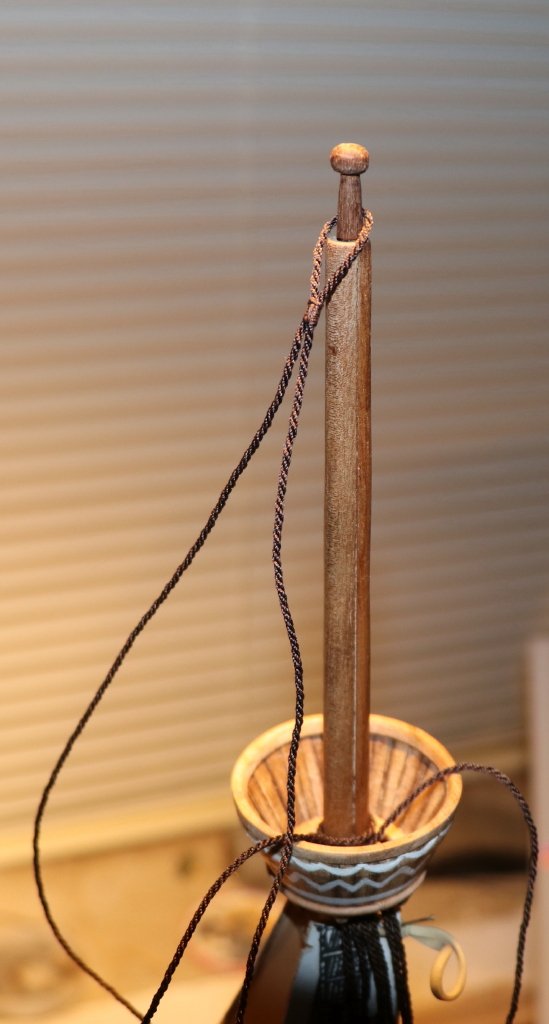
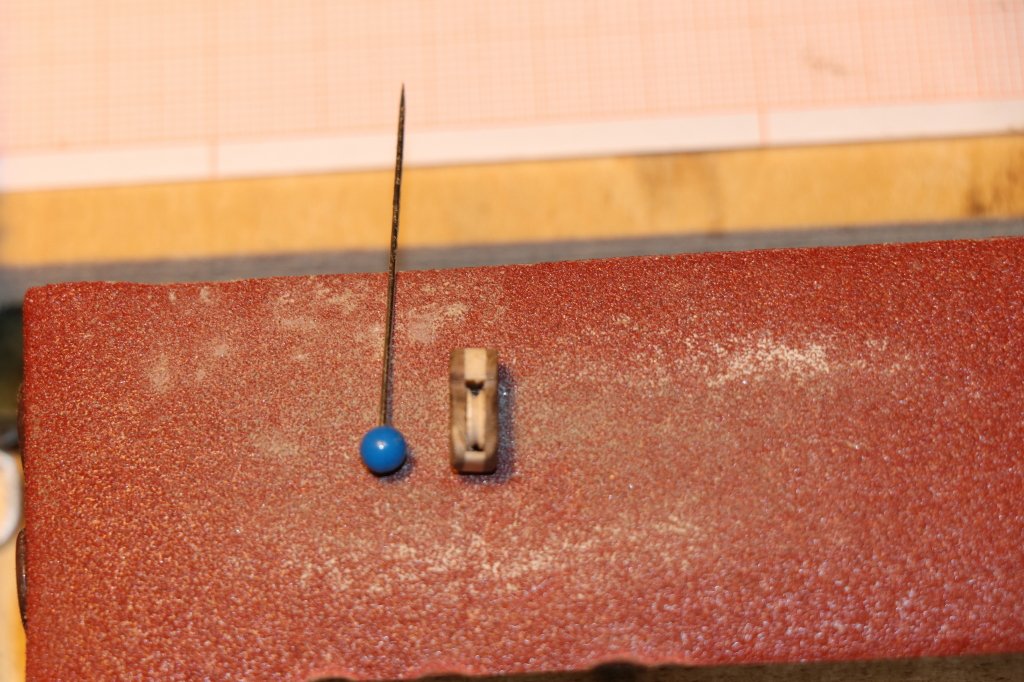
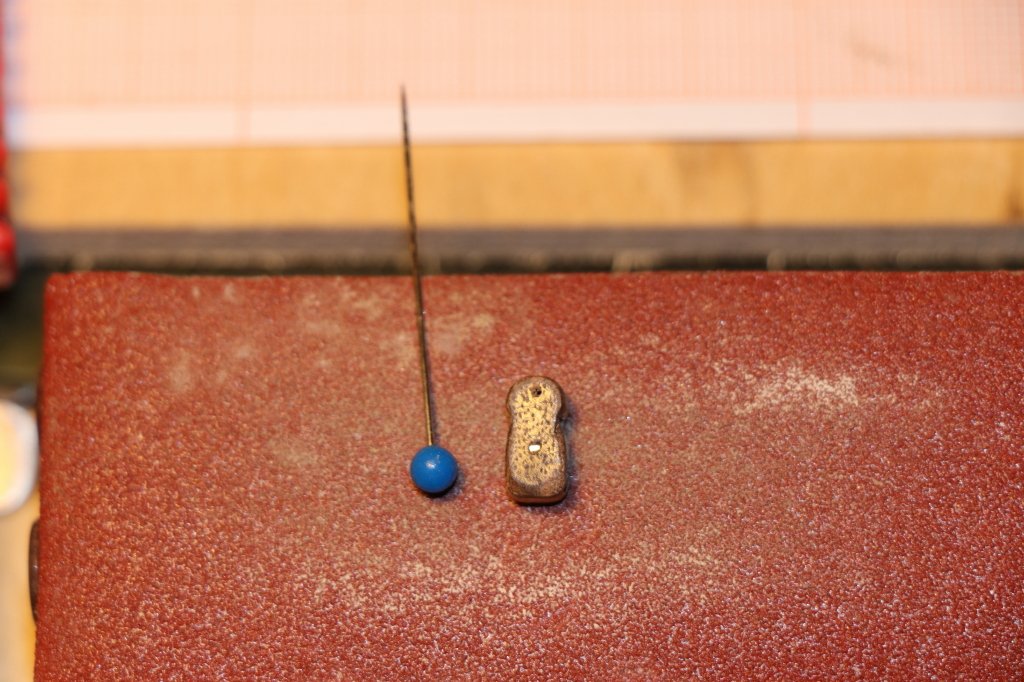
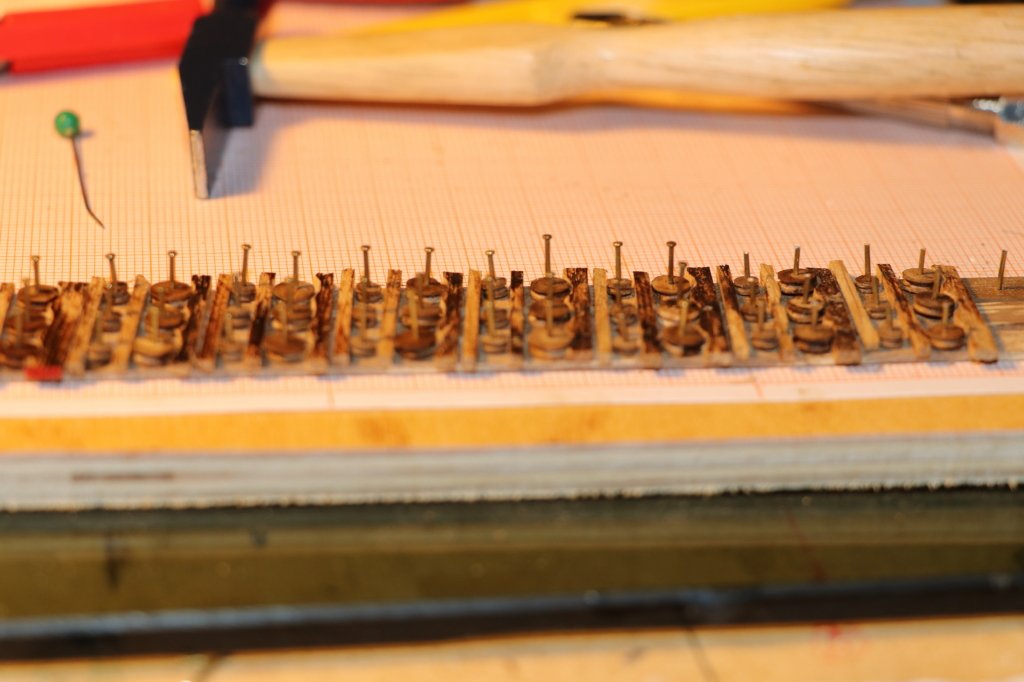
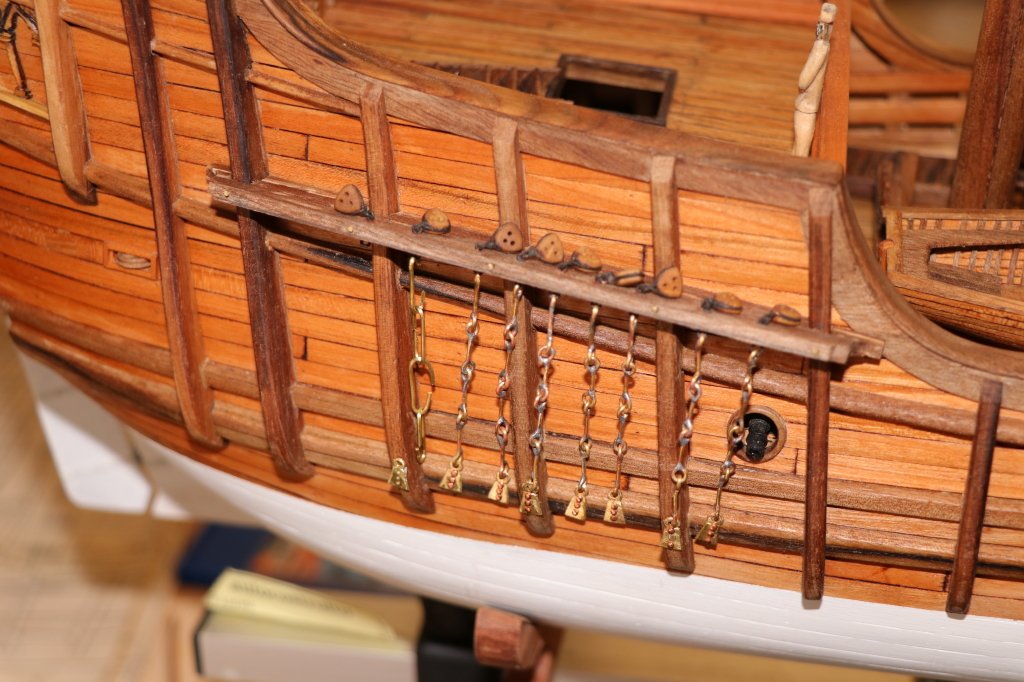
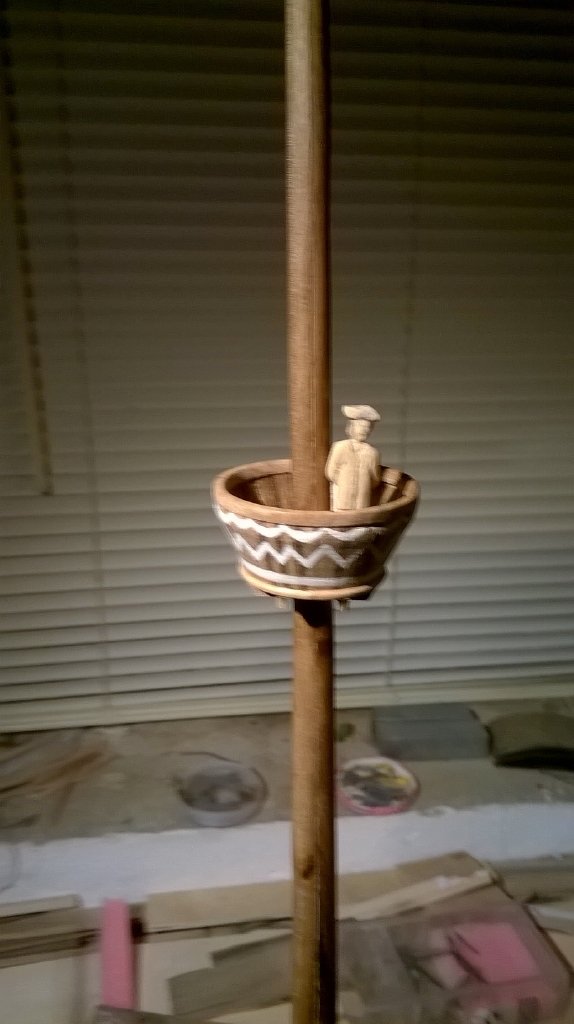
After the alternate laying with hatchings of the master mast (one on each side) I started to position the bigoted ones, the printing of the shrouds cloned from the construction planes and glued on a 2 mm plywood sheet positioned on the parasartie, allows the precise positioning of the bigoted (?)
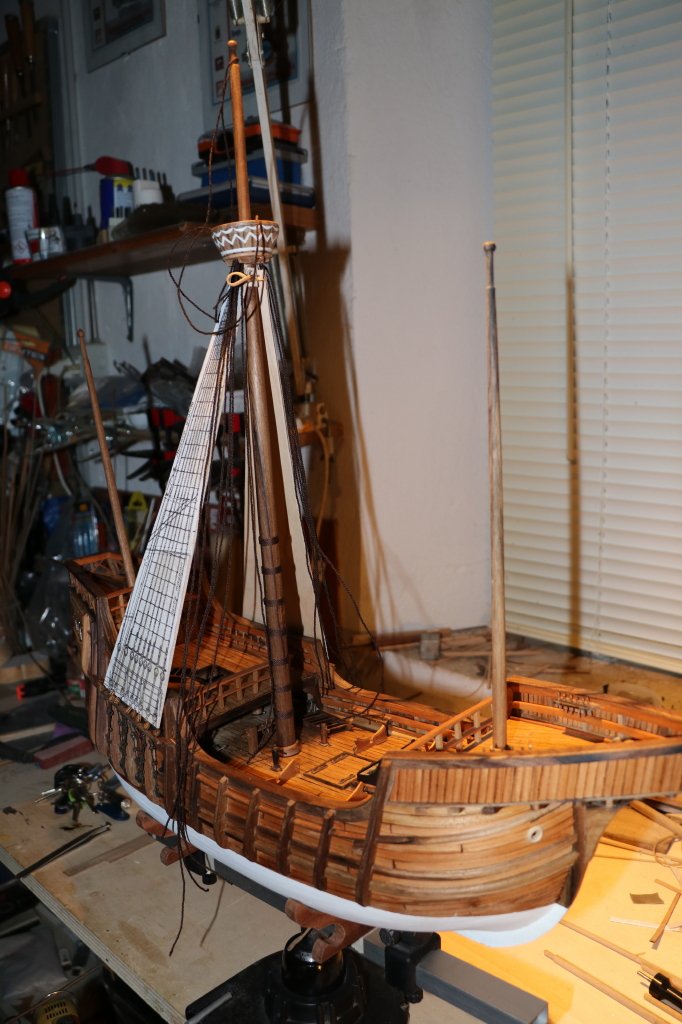
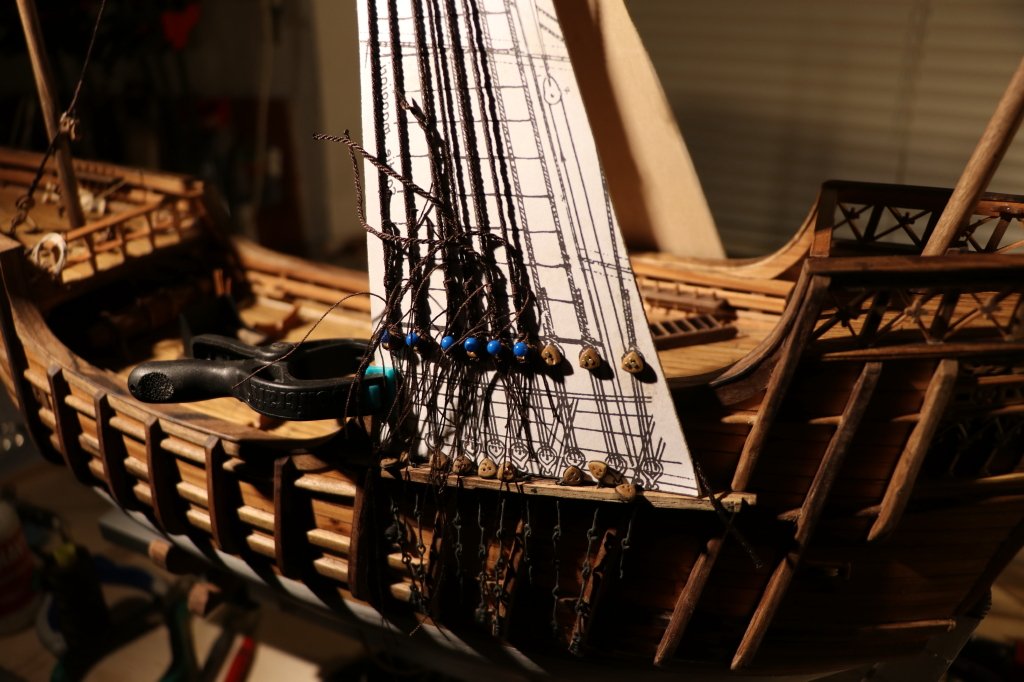
unfortunately it is not possible to correctly translate many ancient nautical terms, as "BIGOTTE" the translator distorts the meaning of many terms by which I use an image, bringing the term of the object into it, as follows
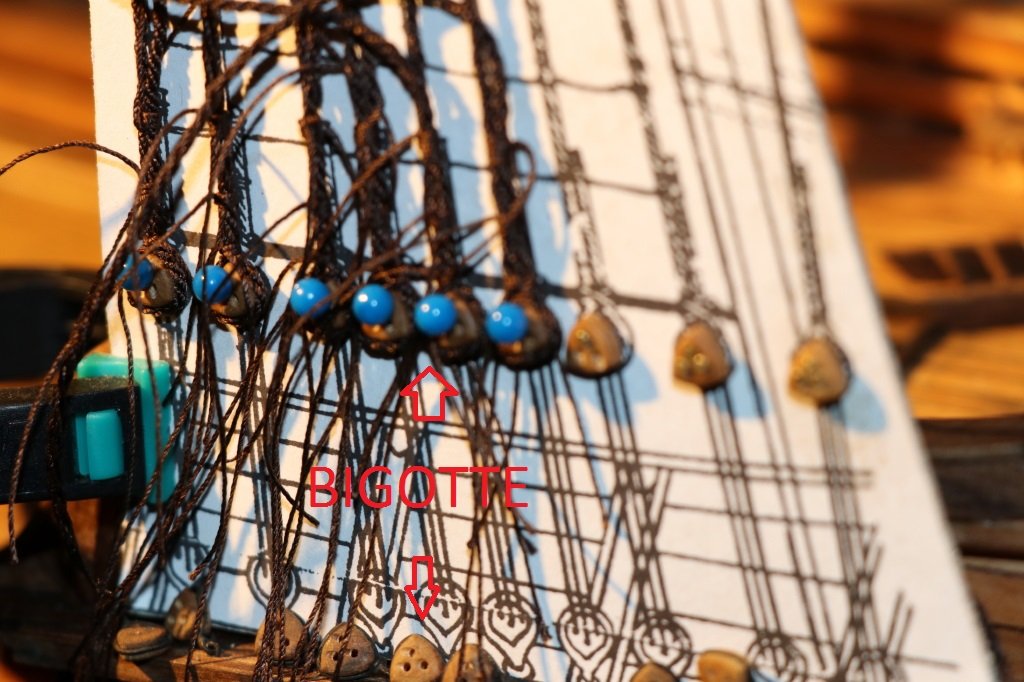
the use of pins, allows the forward and backward movement of the cables by not losing the alignment of the "bigotte"
this system is also useful after how much "griselle" will be laid,
finish the ties over the bigotte,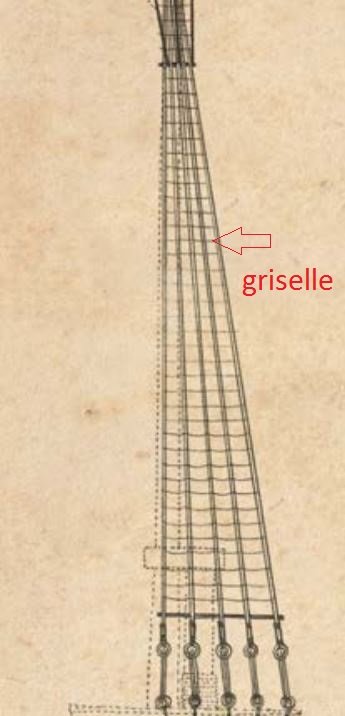
later I tied the "tarozzo" which is the first step of the griselle, it is a wooden step that is tied on the shrouds above the bigots and from the alignment to the "griselle",
I put an image where the "tarozzo" is reported and the "griselle" ligation method

the next step is the union of the bigots (arridatura), those on the parasartie with those of the shrouds,
(the translation of ancient nautical terms becomes very complex ...)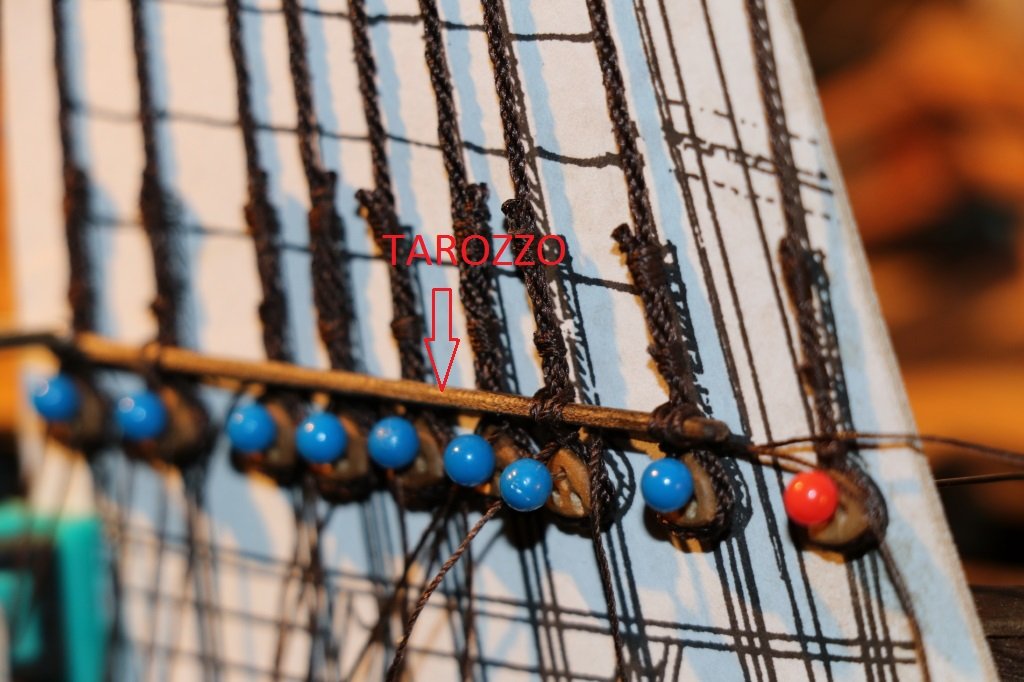
to the next
black Wolf

-
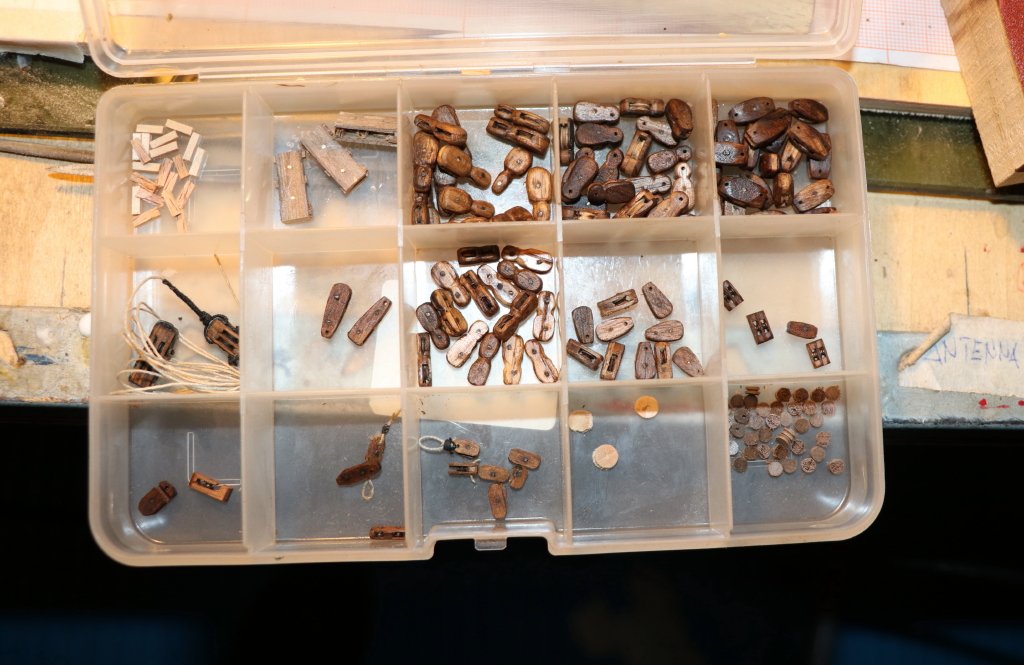
I stayed with the construction of the blocks, I always did some with the usual technique
changing the typology, (these are blocks used in the Middle Ages many times with a single pulley)
once the necessary quantity has been estimated I have completed the various forms
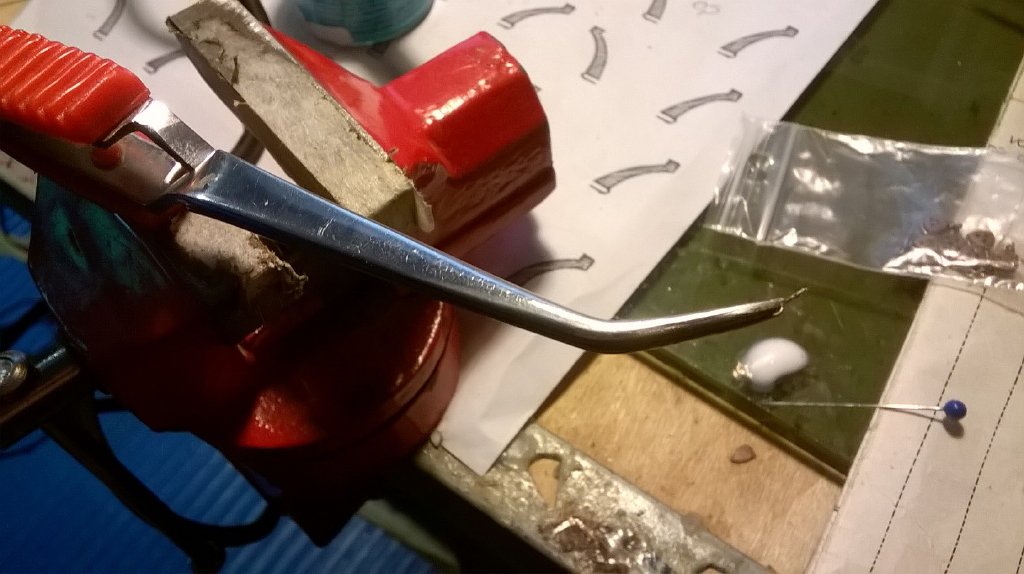
Once the blocks are finished, it is time to think about the creation of the rope for the maneuvers.
I started to prepare the ropes for the "sleeping" maneuvers, that is the ropes that had to hold firm trees against the action of winds and waves, to guarantee this condition the shrouds, shovels and backstays that were put in tension were necessary with the repetition carried out with the bigots and blocks.
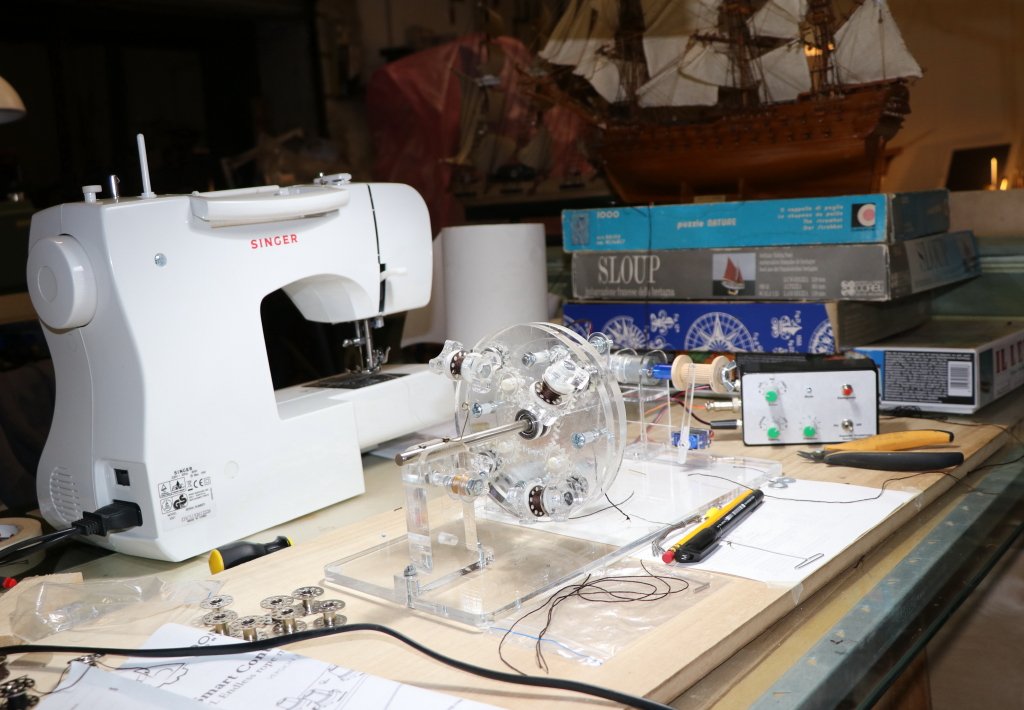
For the realization of the cordage I started with the production of cable-laid rope , for the committing of the cables I used Gutermann polyester yarns and a sewing machine, I had equipped myself also for seaming the sails, but the realization of the cordame was longer than expected, I started with the preparation of cables with both three and four strands, using different thicknesses of the yarns (wood) obtaining three-dimensional twisted cables, for the mainmast sheave and for the shrouds and backstay, trying to bring them back to scale (the shredder should be a cable of about 10 cm (on a scale of 1/50 = 2mm), sheaves greater than 8 cm (on a 1.7mm scale) the backstays of 6 cm ( 1.4mm) thus exchanging the various yarns I made the skeins (the machine has a seaming system that allows the realization of spools of continuous thread)
in the following photo, the sewing machine and the one for committing cables(hoping that the translation is understandable)
follow the various strings and ligature of the same
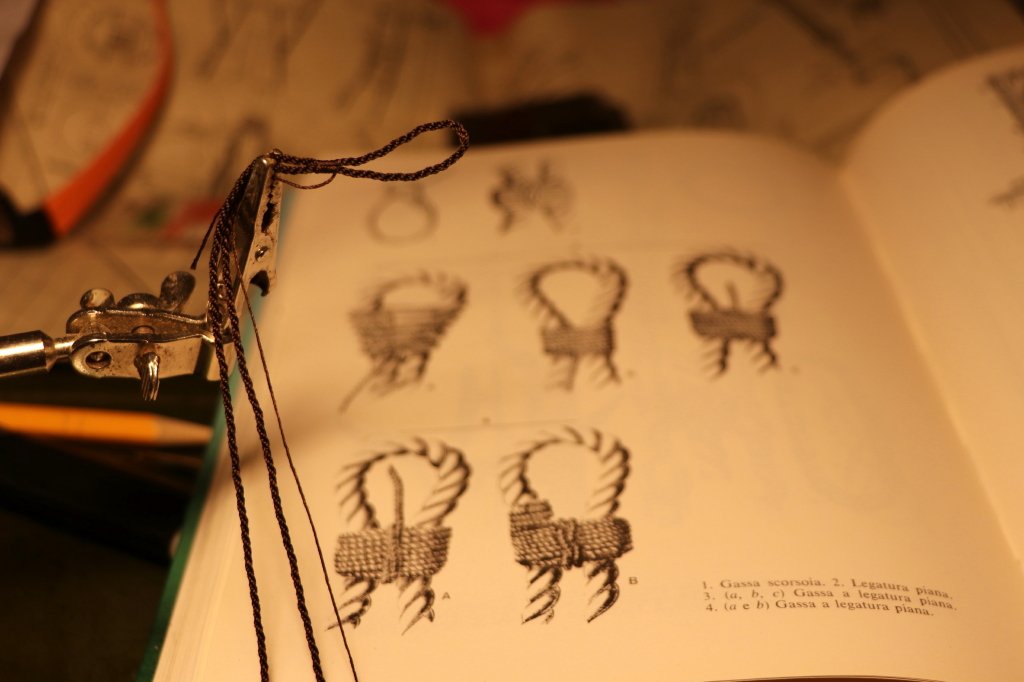
ligatures (flat gassa) are taken from a volume very famous for naval modeling in Italy "Naval models of Curti"
followed by some cables made
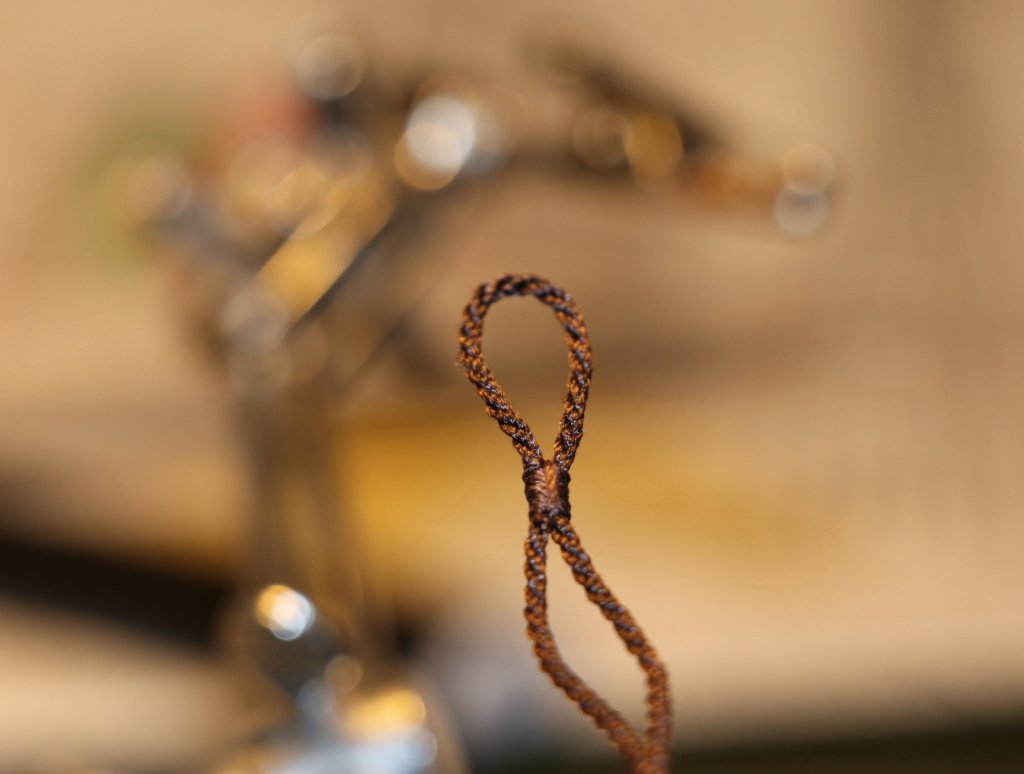
while the photo that follows this photo is the binding of the first double rigger in the mast inside the Crow's Nest
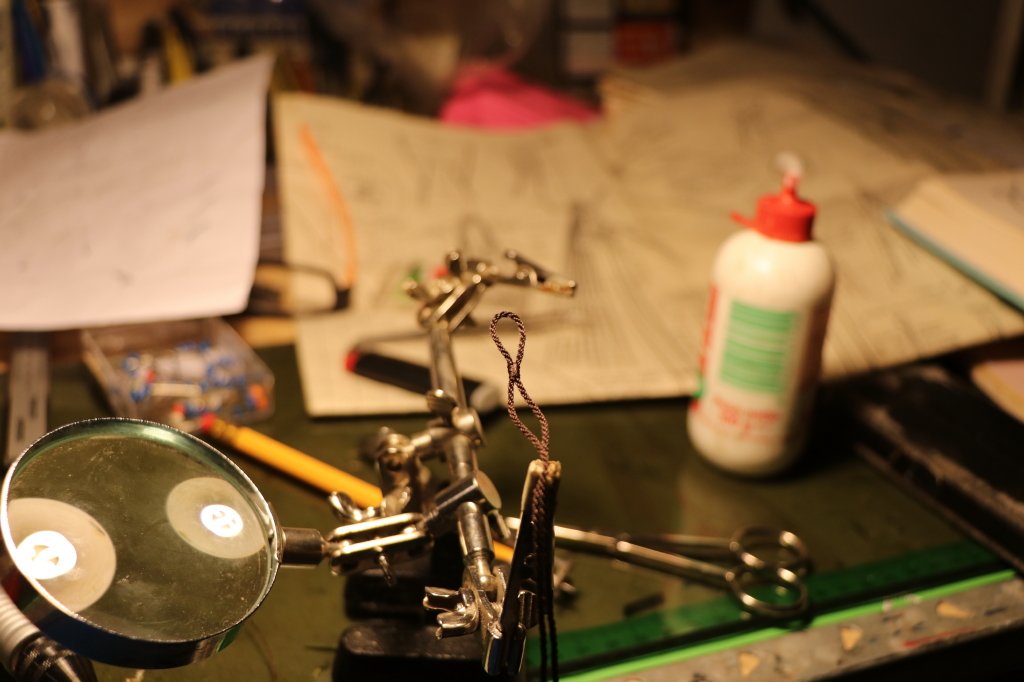
cordage is a very important and complex part, certainly a good "rope" made the difference for which there were different types of ropes and antifouling treatments, which I will illustrate later
to the next
black Wolf
- GrandpaPhil, cog, Baker and 3 others
-
6
-
-
Thank you friends for your appreciation,
in reality the needle with the blue head is not a needle,
it is a walking stick of a giant who lives in the Florentine hills ... ...
Fabio
- cog, Baker, Louie da fly and 1 other
-
4
-
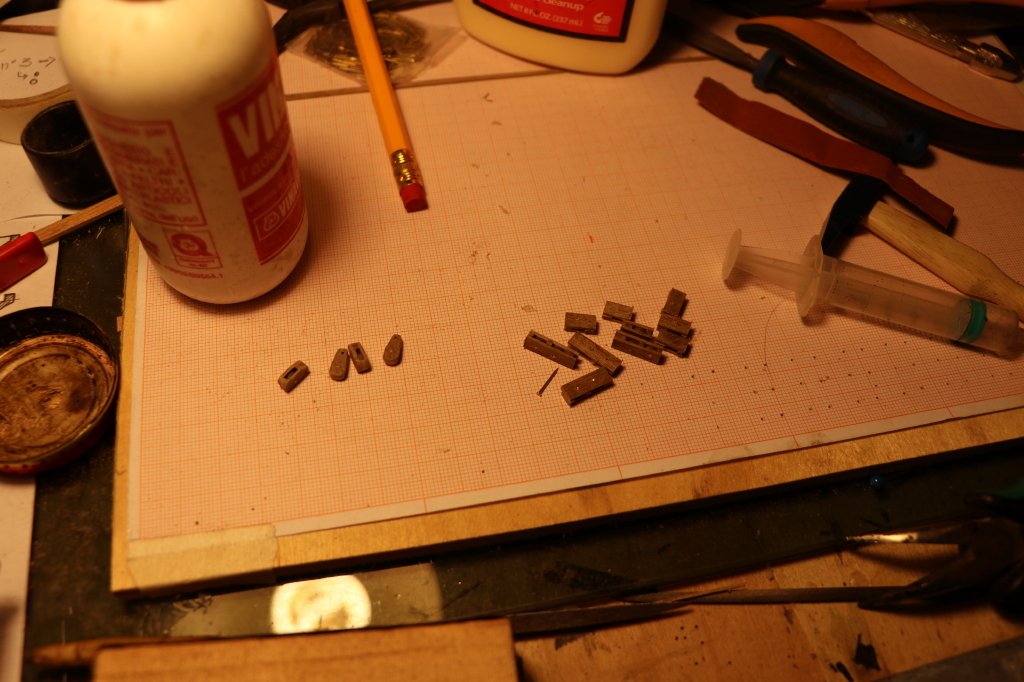
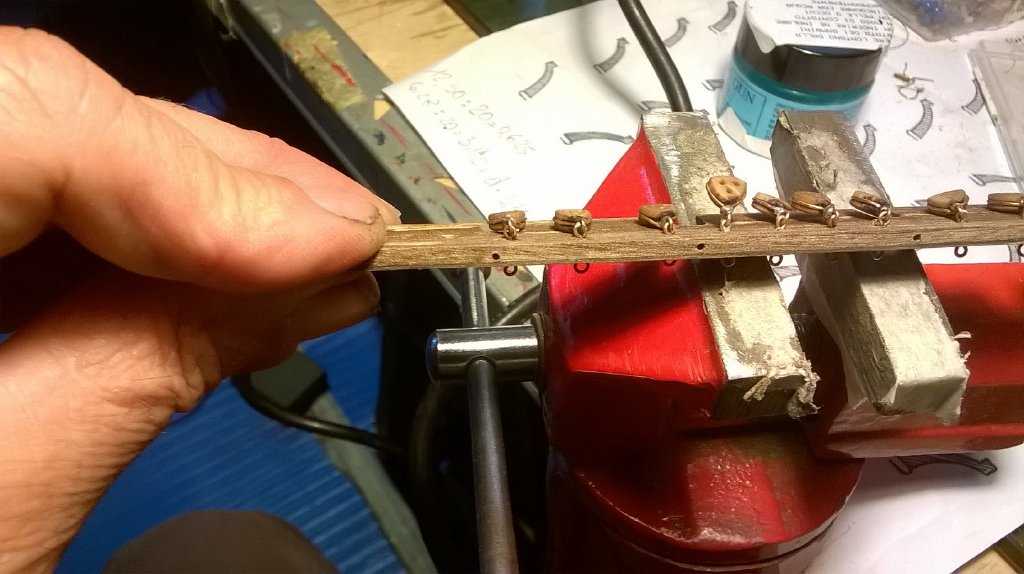
Afterwards I continued with the preparation of the blocks, changing the type and size, the only situation that is repeated that everyone has only one pulley
all in wood, except for the pulley pin, made of brass
this type of block is a "pastecca"
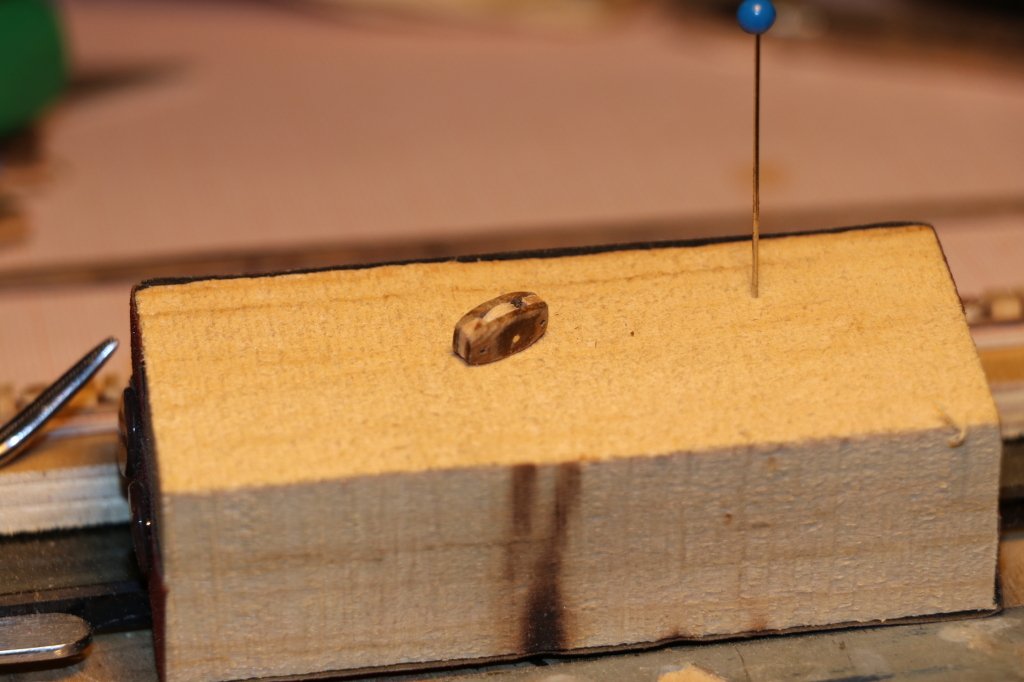
while these are "simple"
once taken the "way" the workmanship is simple and economic, they are different from those purchased, even those "violin" have the form of violins, which in reality is very different ,,,
I attach an image of a real "violin" block
I have made others that I still have to download photos from the camera,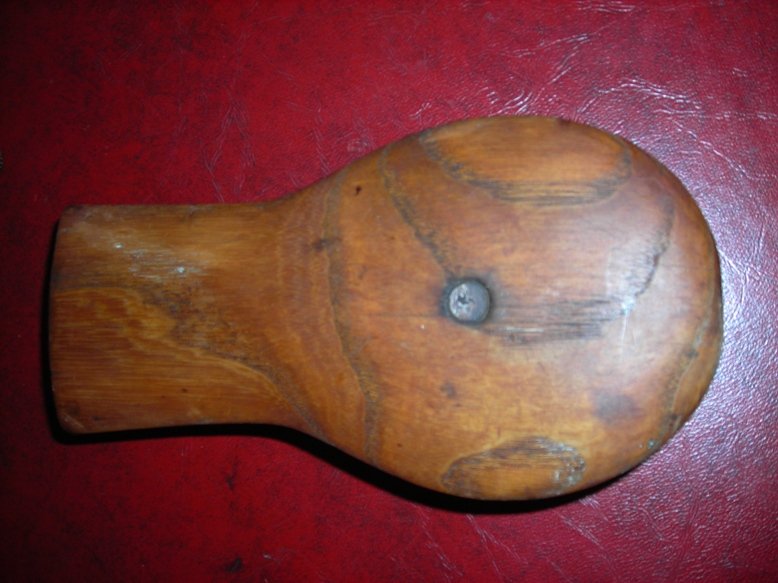
to the next
black Wolf- woodrat, JpR62, Louie da fly and 8 others
-
11
-
-
-
Hello Frank,
you are doing really well (and you are also right to check the developments on the monograph of the "fleur de lis")
the "long ships" have a special charm, impossible not to be captivated, when you have finished the Real, I will give you information and indications on monographs of the Venetian galleys, (which, with all due respect they were more evolved than the French galleys)
however you are very good, 😊black Wolf
-
-
-
-
-
Thank you friends, for your appreciation and your visit, both elements that are stimulating for a greater commitment,
I'm on leave "forced" for organizational reasons where I work, and this allows me to dedicate myself more to my "passions" updating the progress of the works almost daily (something that had not been possible previously for opposite situations, too much work)
later I burnished the brass using a very "good" gel burner that I purchased in a "well stocked" armory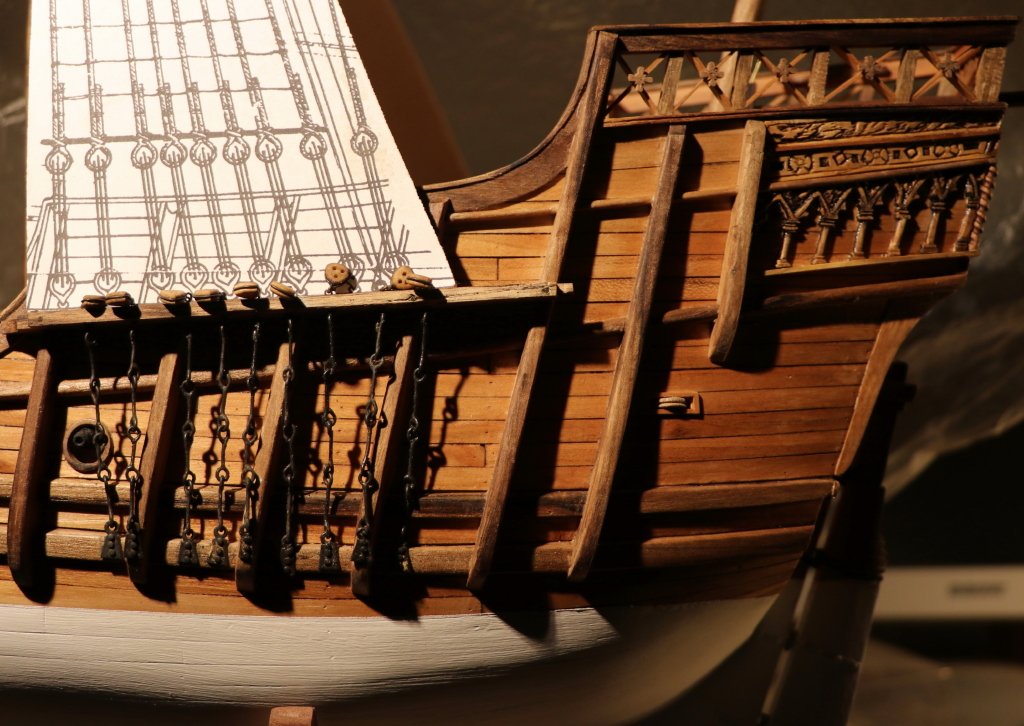
as I said the burner is a great product, the oxidation process is fast and stable on the brass, if left to act it also forms the "green patina" (typical in the oxidizing processes of different metals, giving a very realistic natural aspect, in this in case I didn't want to oxidize too much so I passed a little straw oil over it to soften and fix the oxidation)
in the picture you can also see the template on which the scale drawing of the tailoring is shown to have references when I will realize it, (after finishing and fixing the trees)
My intent was to start making the cordage, but I realized that I also lacked various blocks and crayons, essential elements, not for the shrouds but for the realization of the dormant maneuvers,
so I started doing some pieces.
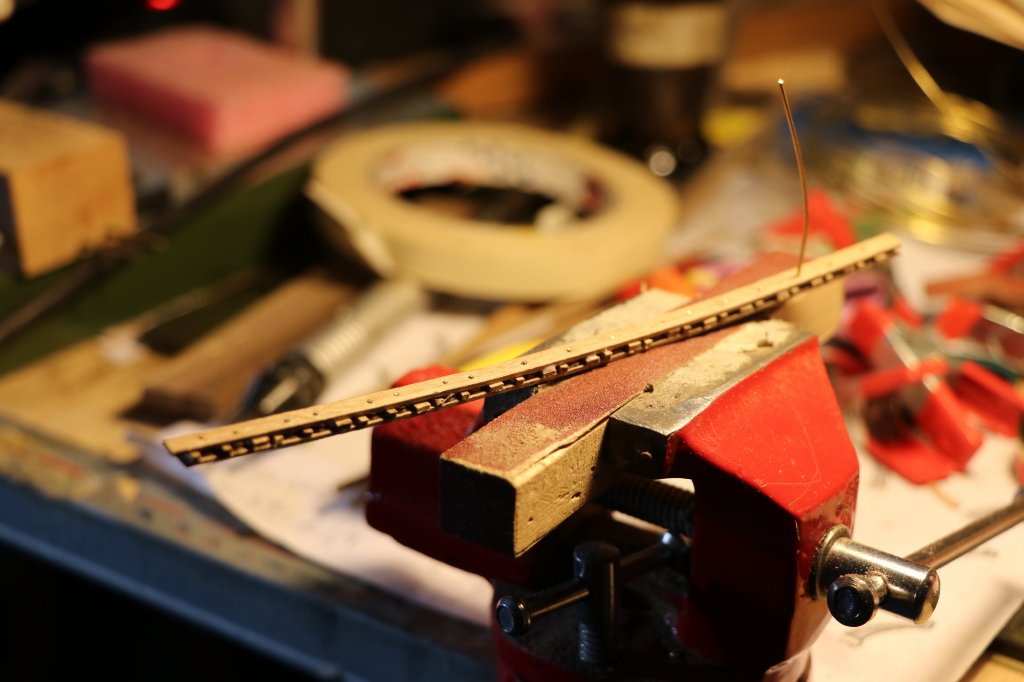
The decision taken is relative to the construction of wooden blocks, at the time the pulleys were not made of metal, but of wood, so I started making pulleys using the small lathe of Proxxon, which for small jobs is "the ace" (the top)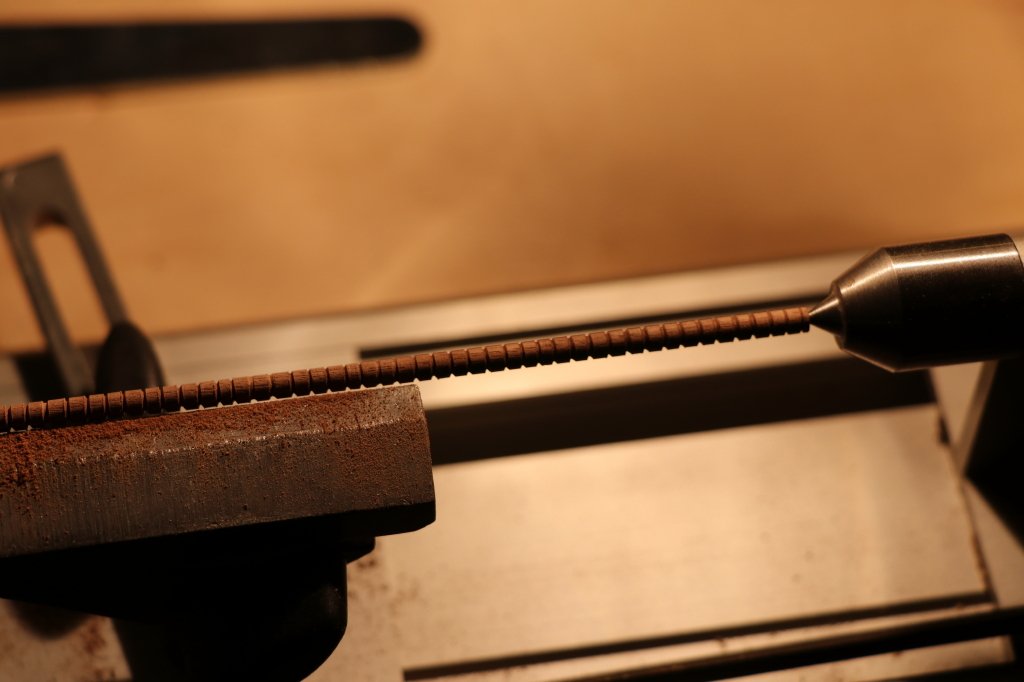
the rod used is the lime tree of d. of 4mm (it is part of the "buffer stock" that I made when some years ago they cut the linden trees of my country, I took some pieces, and obviously, like all our wood we work very well)
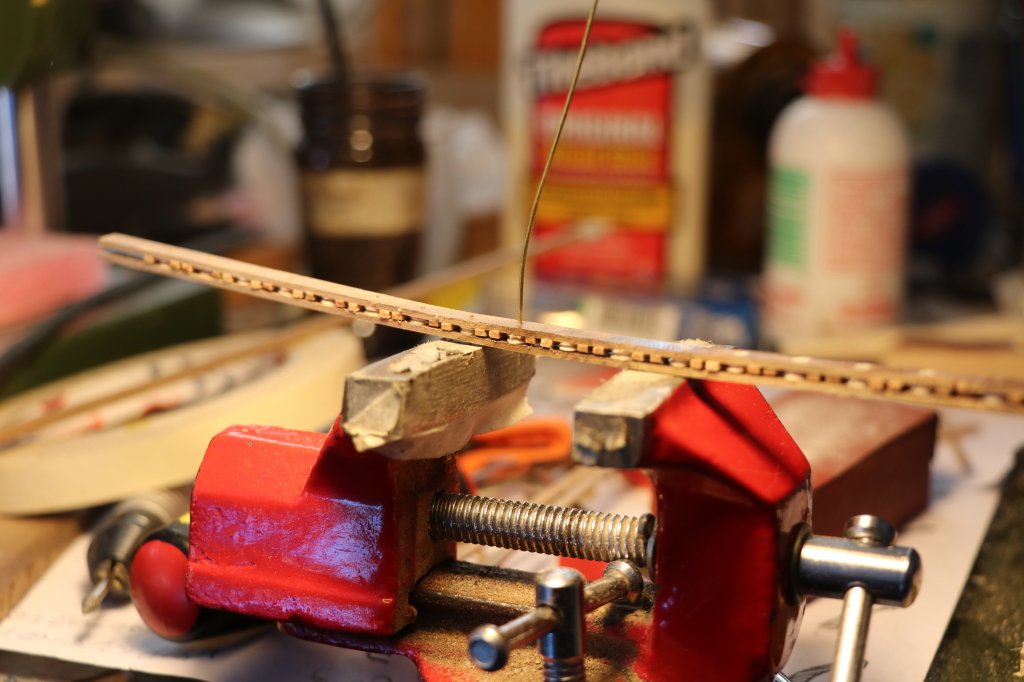
I made the grooves leaving the space between the throat and the throat to cut and pulleys with a single passage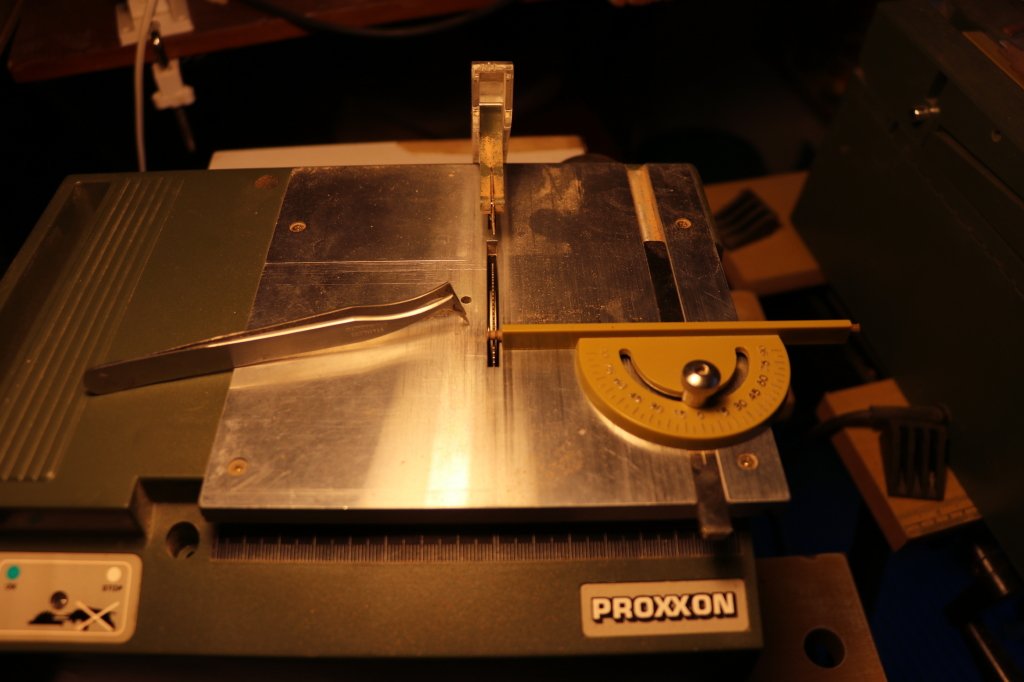
with the small disc saw the job is good, just keep the disc with tweezers while cutting to prevent it from flying away.
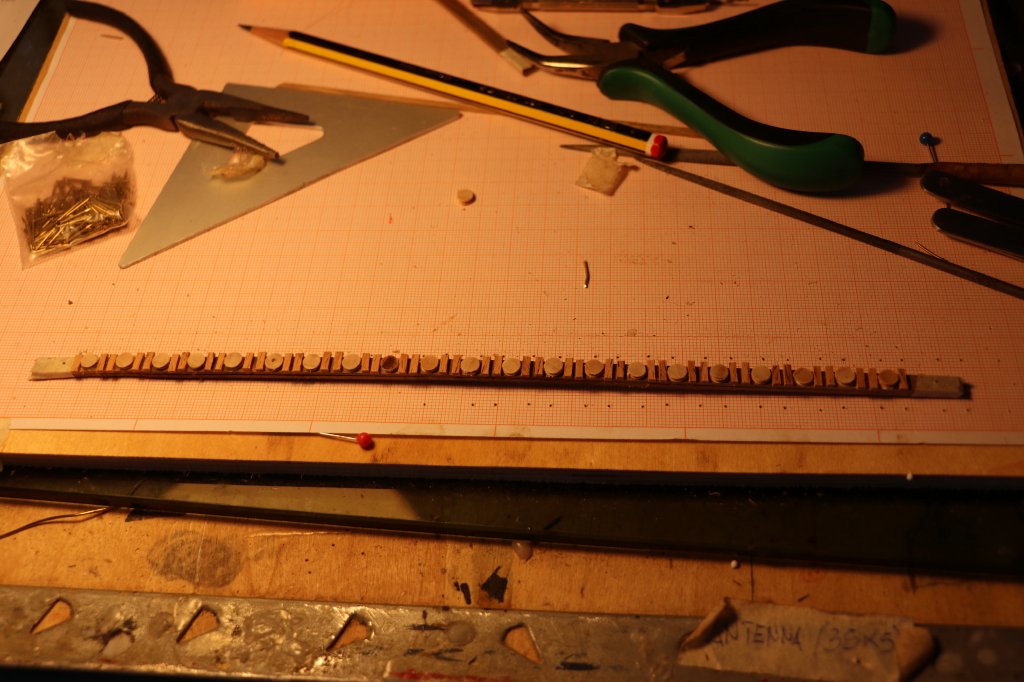
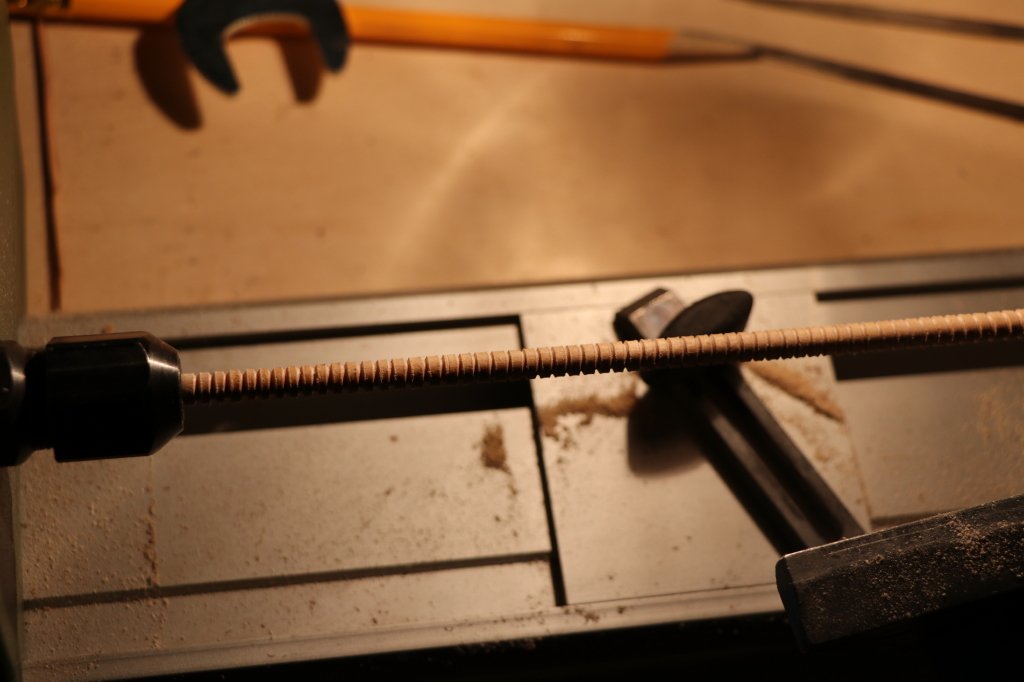
after making the 4 mm (20 cm) pulleys I made the smaller ones of the d. of 2.5 mm (12/13 cm) to start making the blocks called a violin (although in the late 1400s they did not really have the shape of the most recent ones), so I prepared the strips in various shapes to make them a little 'in "series"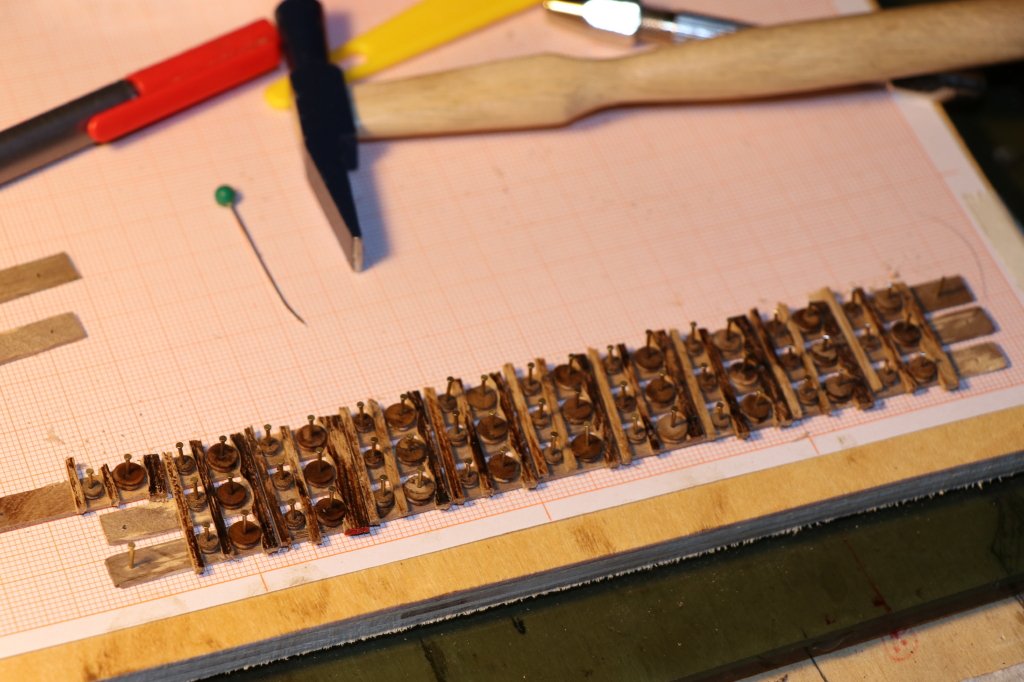
the graph paper does not actually serve for the positioning of the pulleys and the internal parts, also because the blocks are arranged in the horizontal part of the main strips (three), obviously the processing still includes passages before the conclusion,
to the next
black Wolf
-
it was a long time since I saw your work,
what to say, simply "stupendous"Fabio (luponero)
- Louie da fly and mtaylor
-
2
-
Fixed the bigoted (?) on the big table, welding the ring of the eyebolt to the tin-plated stem of the brass wire that is around the bigotta, I made the landra and the stirrup always in brass, using a sheet of 0.5 mm and a thread of 0 8mm
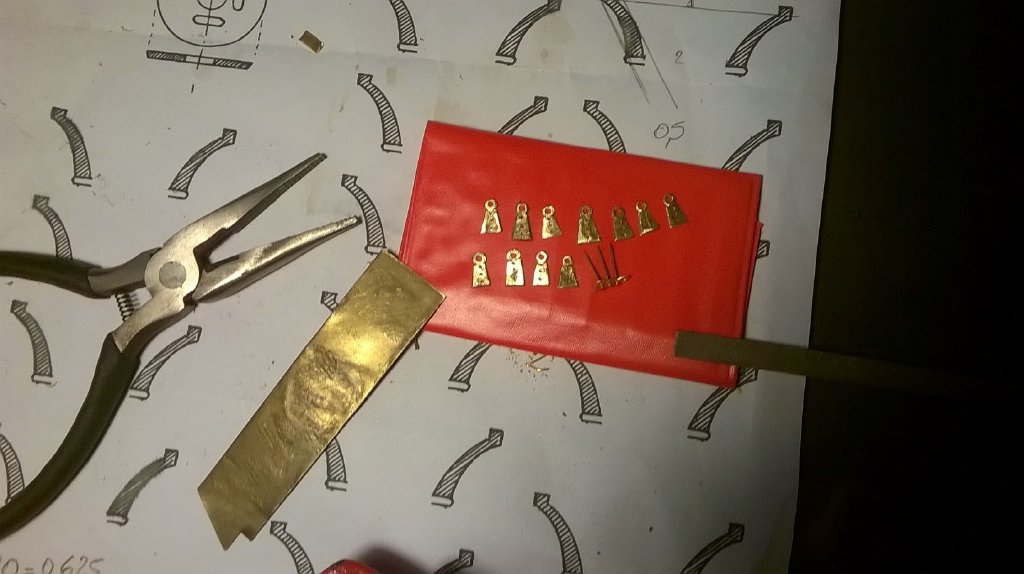
with the support (wood and nails) I folded the brass wire
later I welded with the tin and the "extinguished" (?) muriatic acid with zinc, the rings
placing the land (?) on the side of the ship, it is important to check the length of the rings before folding them by fixing the bracket with double-sided tape to check the measurements,
to the next,
tonight I'm going to "work" at the S.M.black Wolf
- Baker, GrandpaPhil, G.L. and 6 others
-
9
-
Several time has passed since the last build update, in part due to a "relaxation" of the construction phases
partly due to commitments on other stories, however, although at a slower rate the work on MS. have continued and restarted with the update,
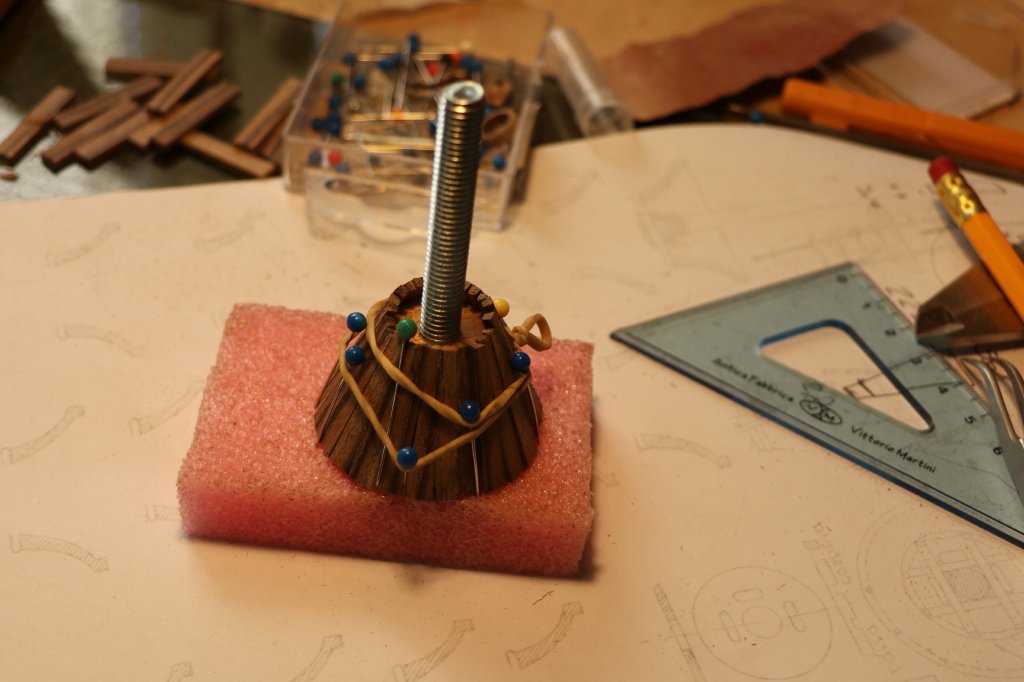
the realization of the main top was the next step, to do it I built a simple tool for the realization of the crow's head shown in Adametz's drawings, it is a bolt on which the two diameters in plywood (base and upper part) of the main top are reported )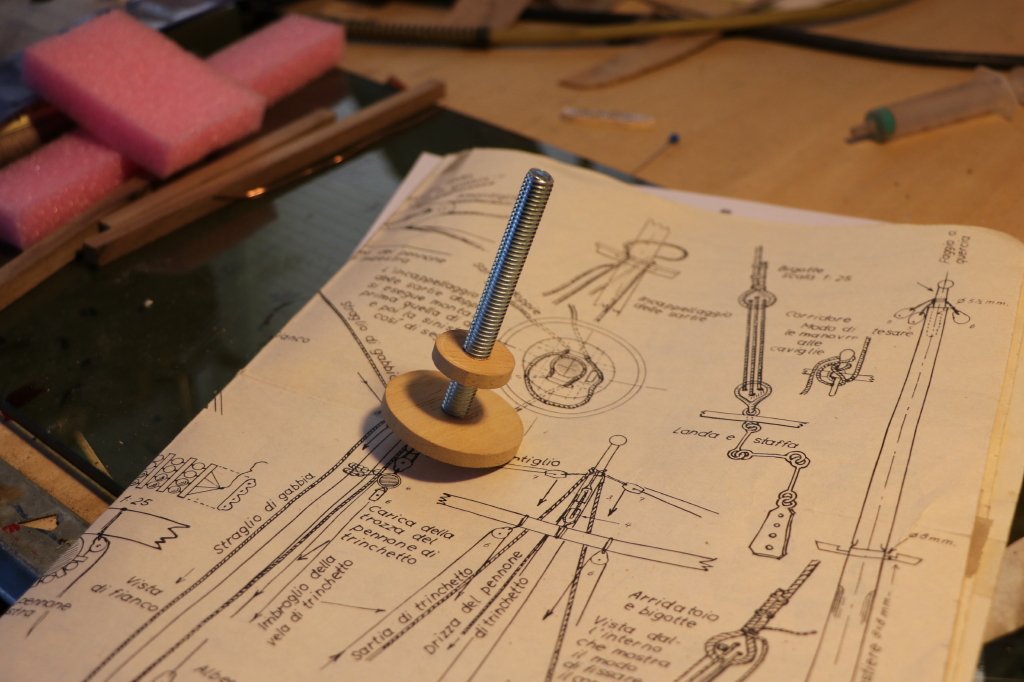
on which I made the vertical planks that make up the main top, then simply unscrew them to remove them and continue making the parts that make up the main top
and I returned the finishing piece to the lathe,
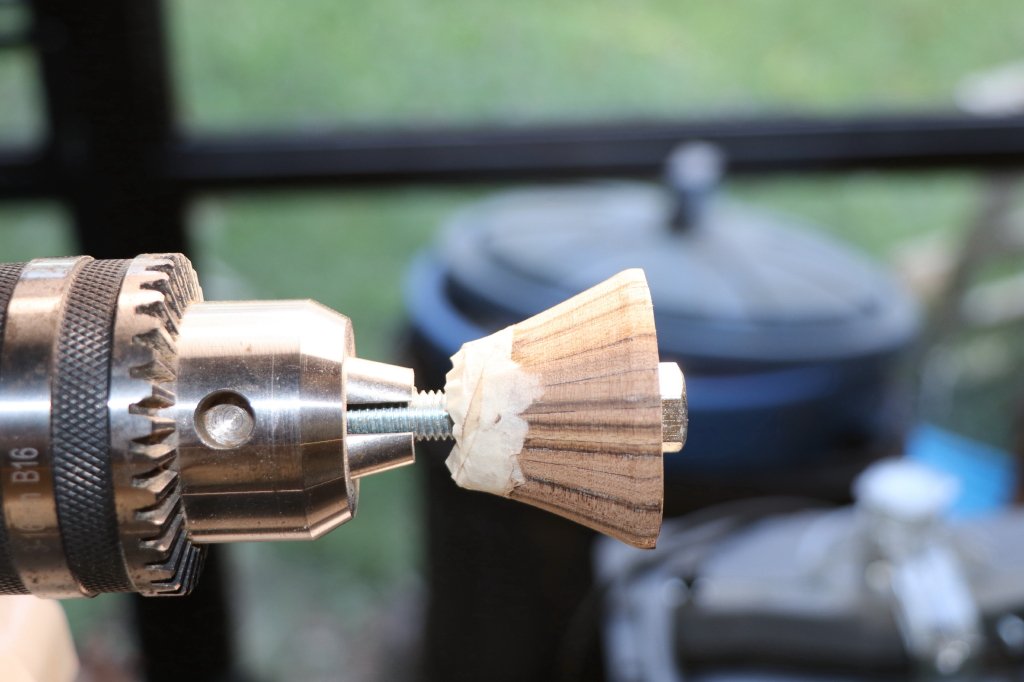
for a certain period I did not have the availability of the camera that I normally use, so I took some pictures with my cell phone, the only "decent" one is the one I present now that shows the main top finished, resting on mainmast
(the "decorative" motif shown on the coffo I took from the photos taken during the commemorative event for which the model designed by Duro was created, to which Adametz "was inspired" and of which I reported the images in previous posts)
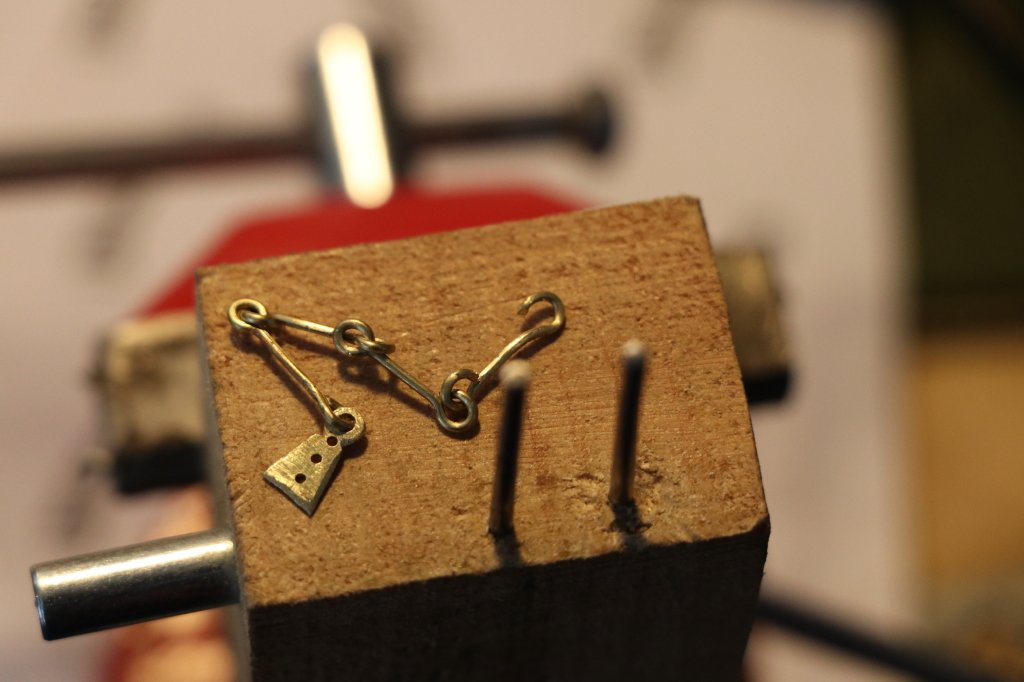
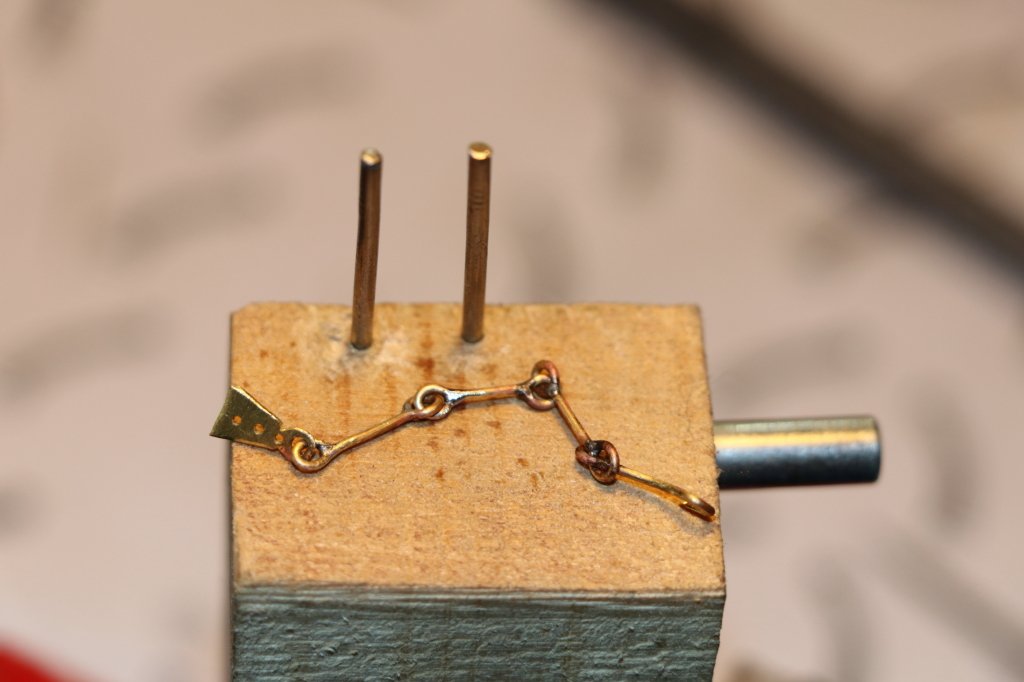
After the coffa I started working on the bigots that are used to make the shrouds, I had a few of the "triangular" ones purchased some years ago and that I had not used before, considering the shape of the same I thought of using them (avoiding build them ... and maybe part of it was a mistake)
I limited myself only to finish them by making with the brass wire the part that is used to fix the bigots at the big table and the lands
the following photo shows the ring (eyebolt) which is in the rear part of the big table and which will be welded to the upper part of the brass wire turned on the bigotta, thus fixing the bigotas firmly to the big table as shown in the images that follow,
to the next
black Wolf
- G.L., paulsutcliffe, Siggi52 and 2 others
-
5
-
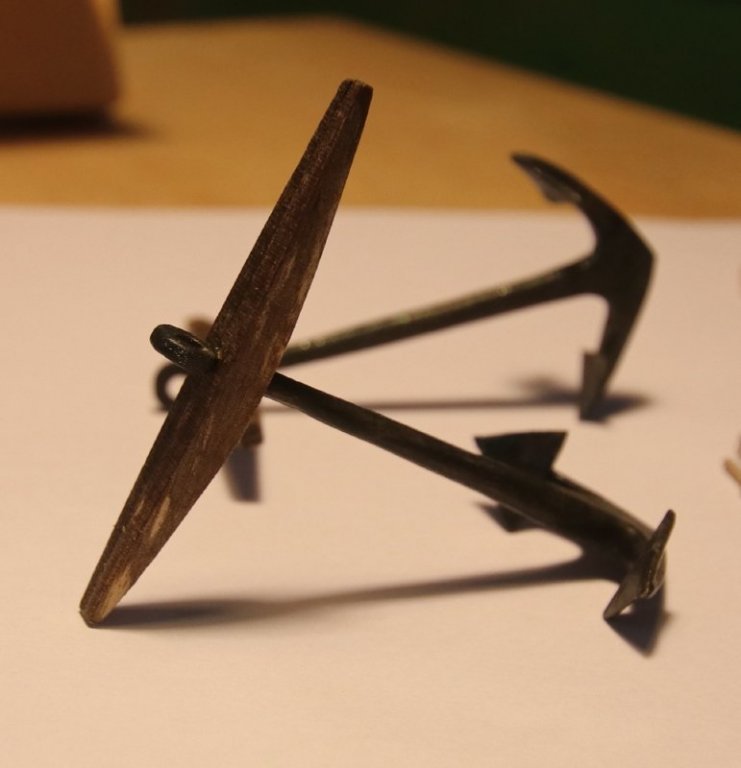
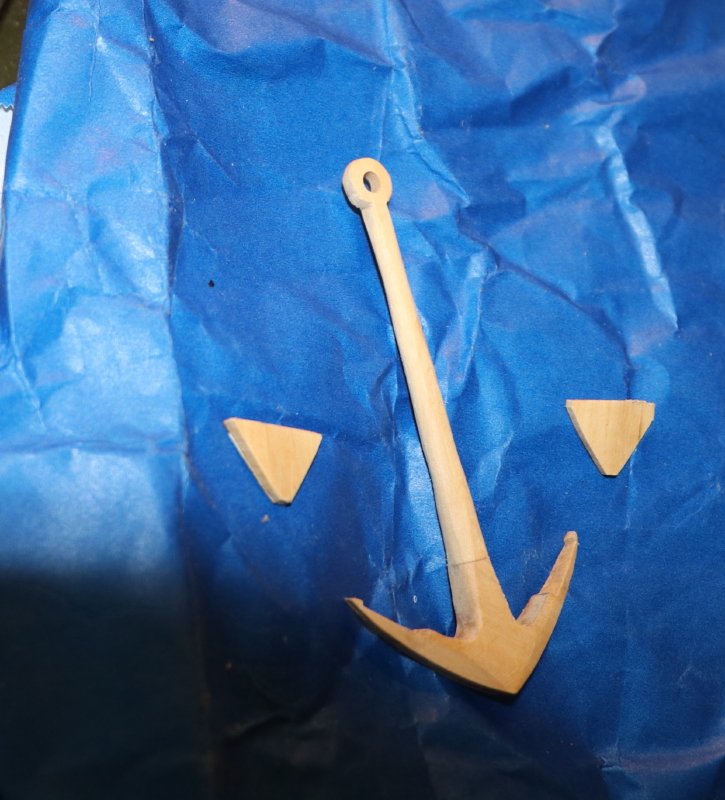
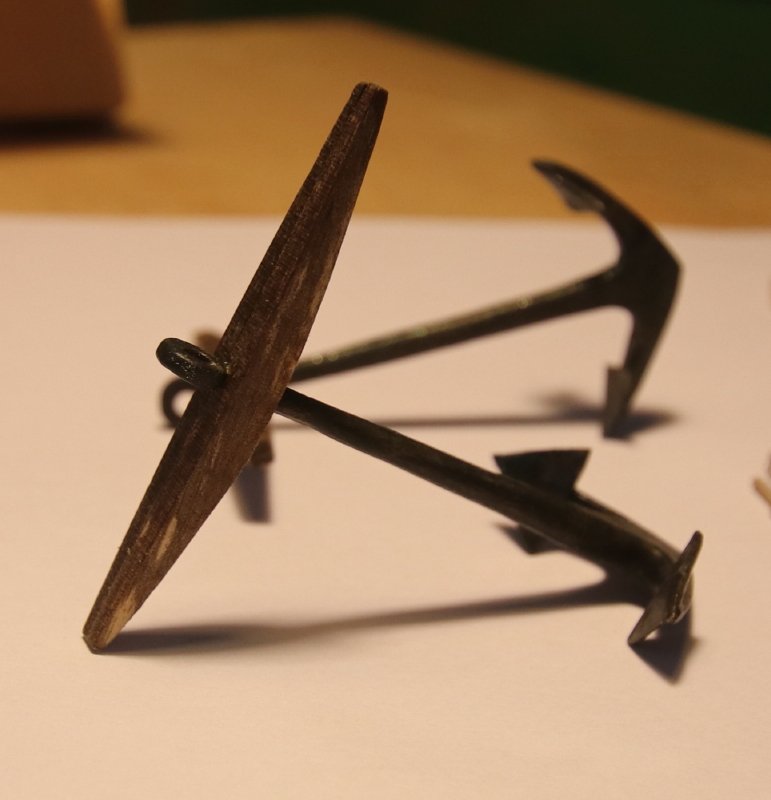
however the activity on the S.M. is taken up in the making of the anchors, using the boxwood, breaking down the structural parts that make up the anchor pasting afterwards
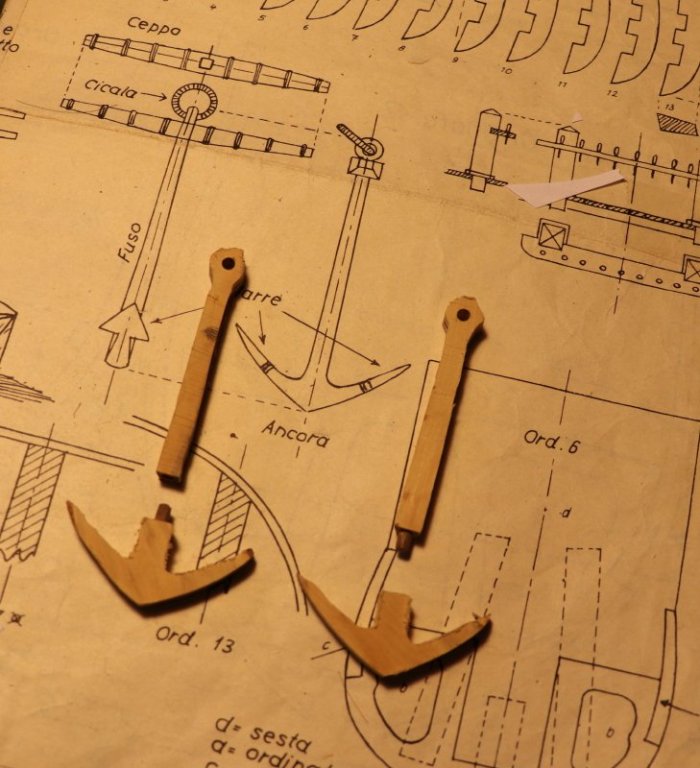
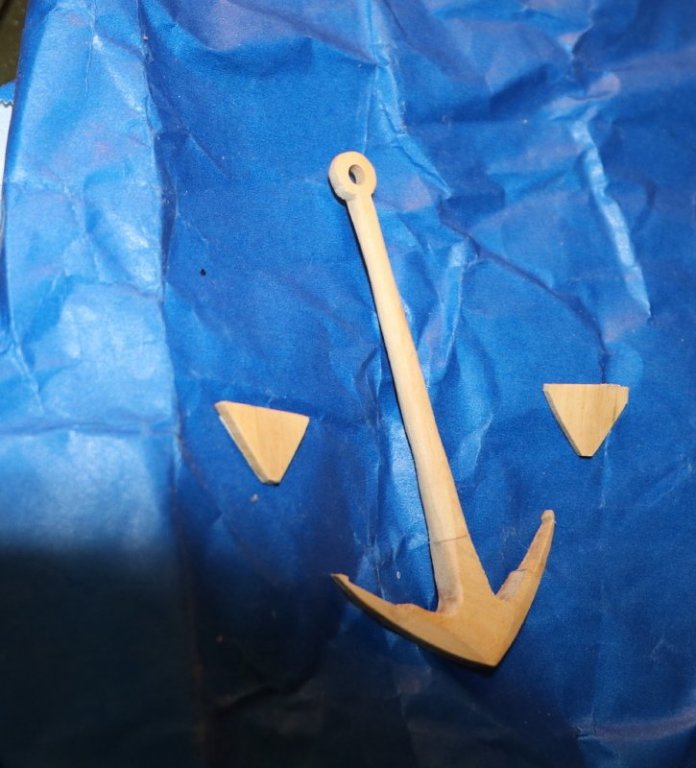
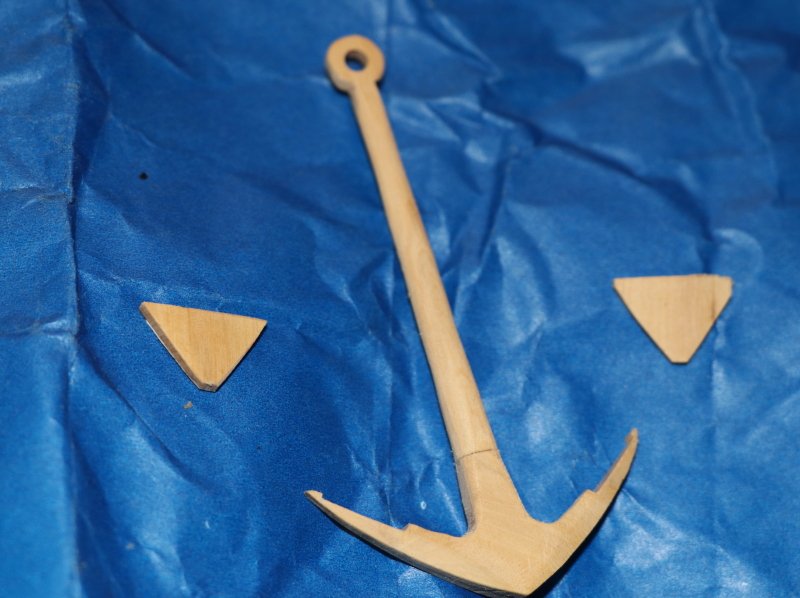
then I colored the anchor making the log (the boxwood allows the realization of pieces with a good precision)
when the anchors were finished, I started preparing the cleats by making them in more sizes (by now I had started, I will keep them as an escort)
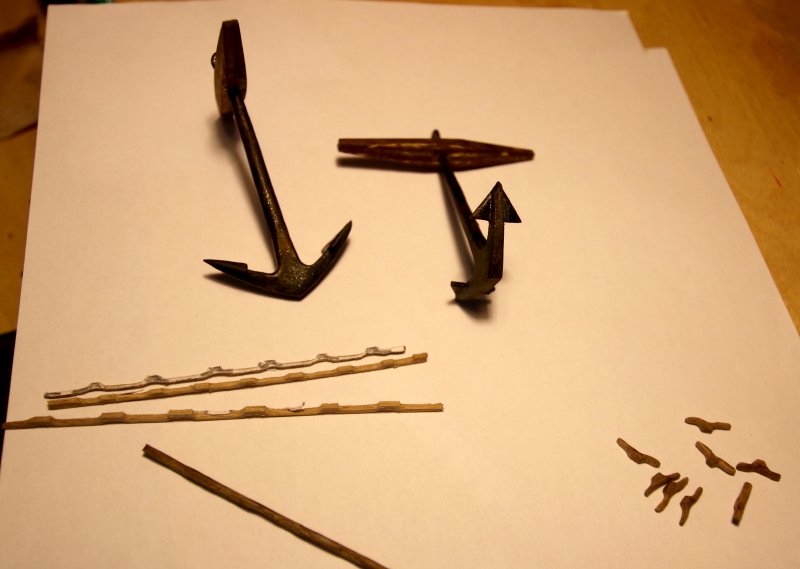
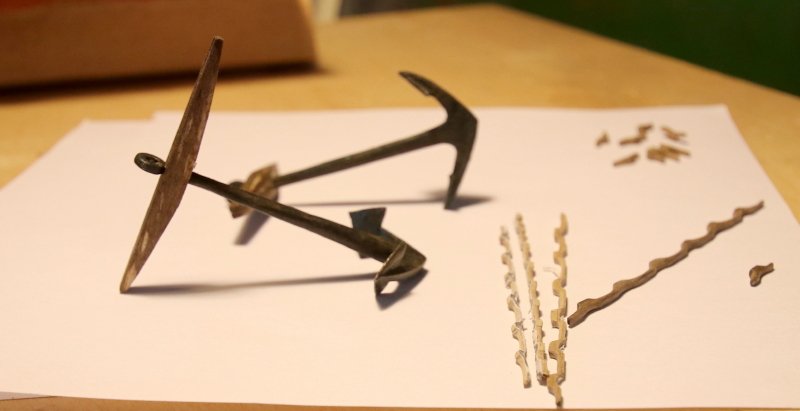
the cleats are of two types those placed on the inner part of the bulwarks
(the lower ones)
and those related to maneuvers (those above)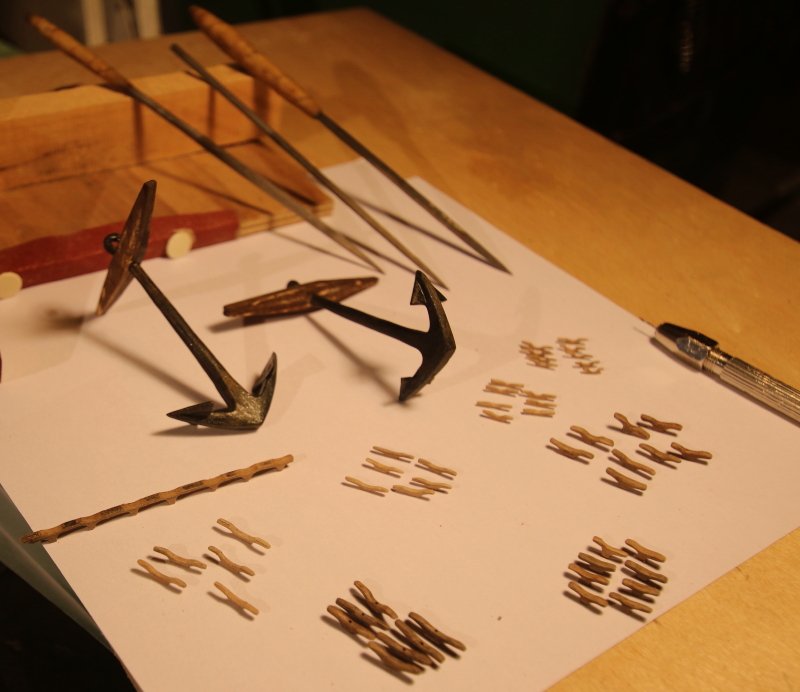
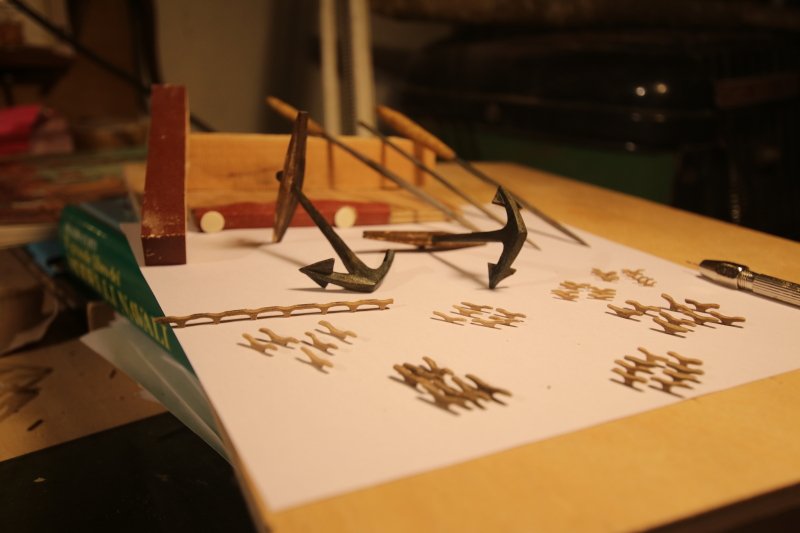
it took me one day to make the cleats (... if I bought them ....
but I like self building more)to the next
black wolf
-
Holidays are over,
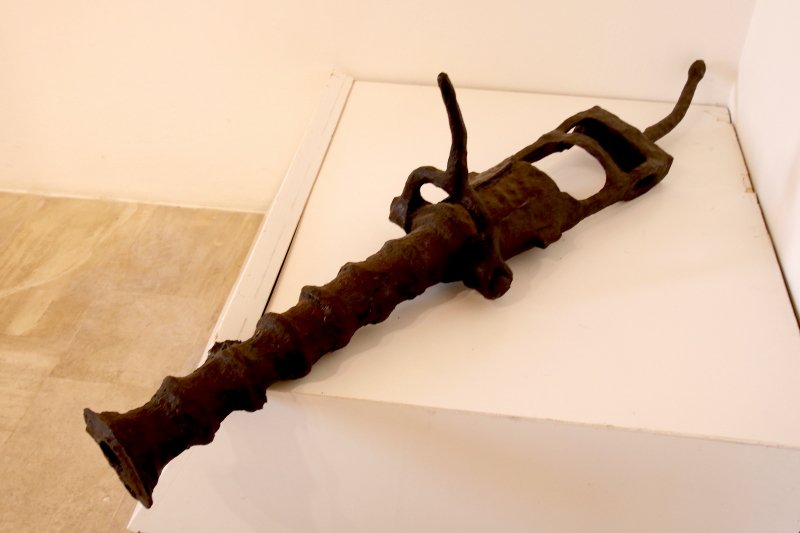
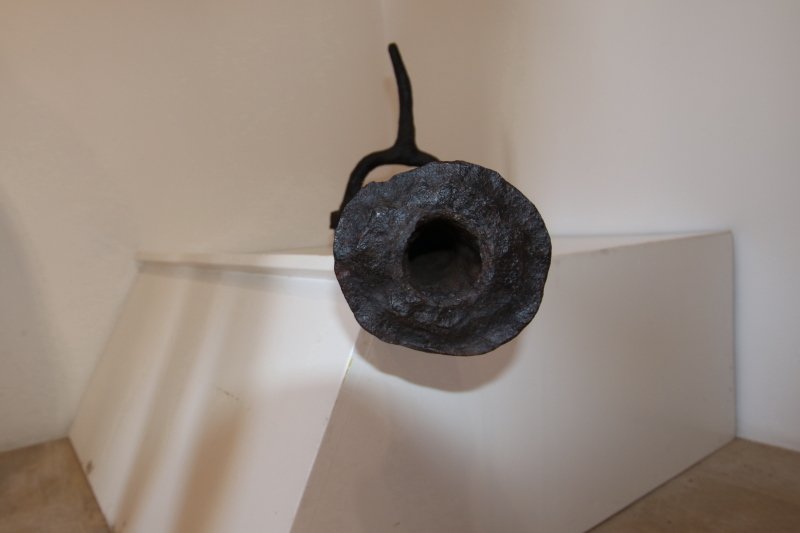
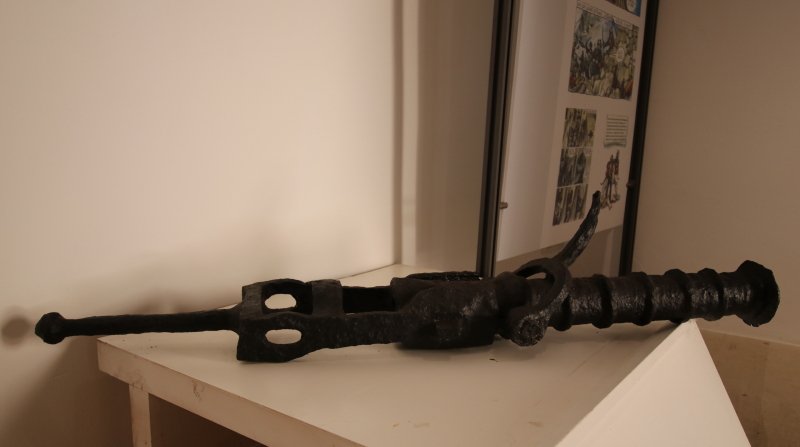
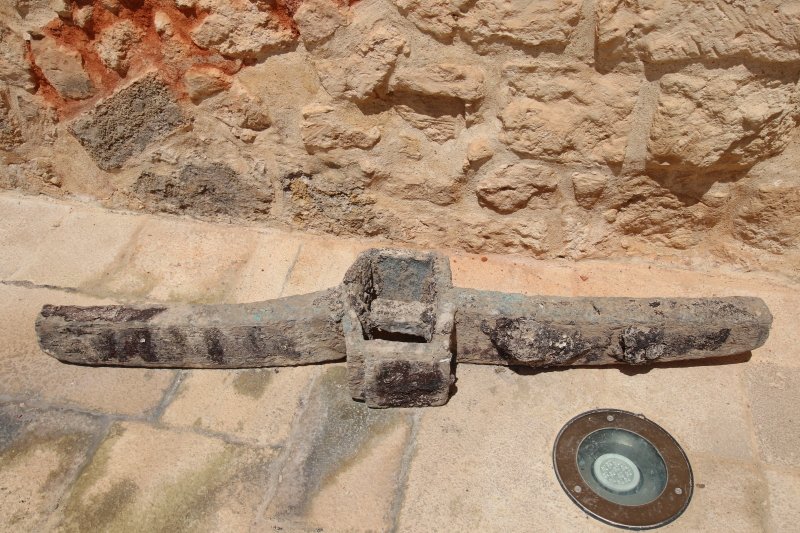
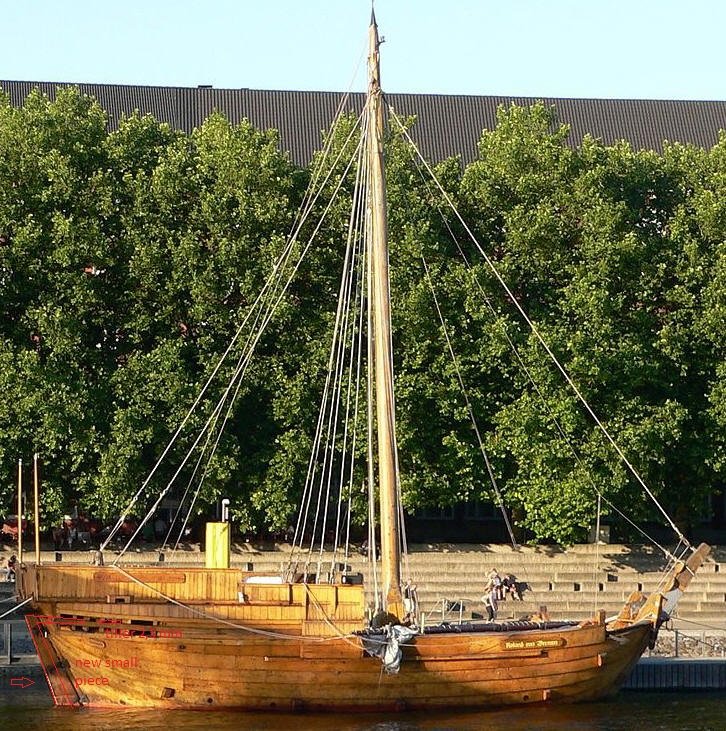
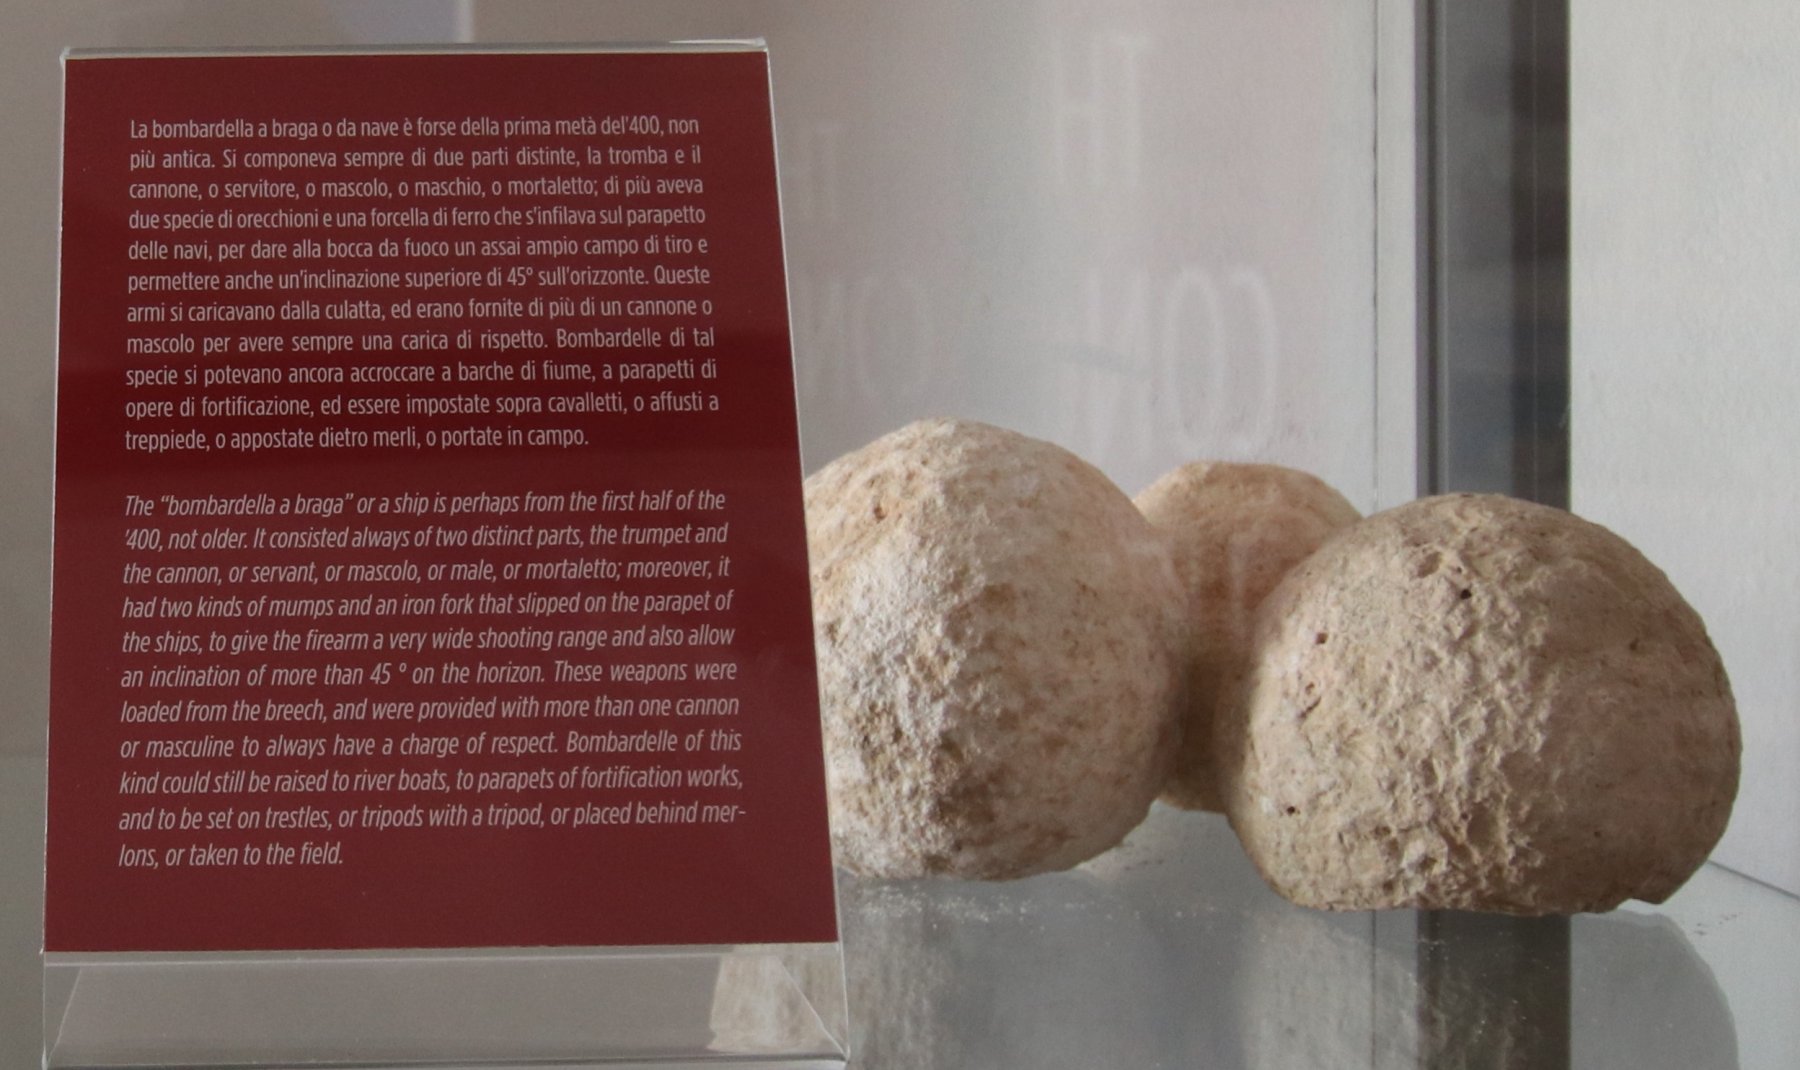
among the various situations I saw I was in the castle of Otranto, destroyed and rebuilt several times over time, the last reconstruction was carried out by the Aragons, certainly interesting and very beautiful but what allows me to insert it in the wip are the bombardelle inside the castle they are found in the sea very similar, as a shape, to those I tried to make in the Santa Maria, besides those there is an ancient cannon recovered in the stretch of sea in front of Otranto and a stock of a medieval anchor , in the first image besides the explanation on the right there are the stones with which both the bombarde and the bombardelle were loaded (with stones with smaller diameter)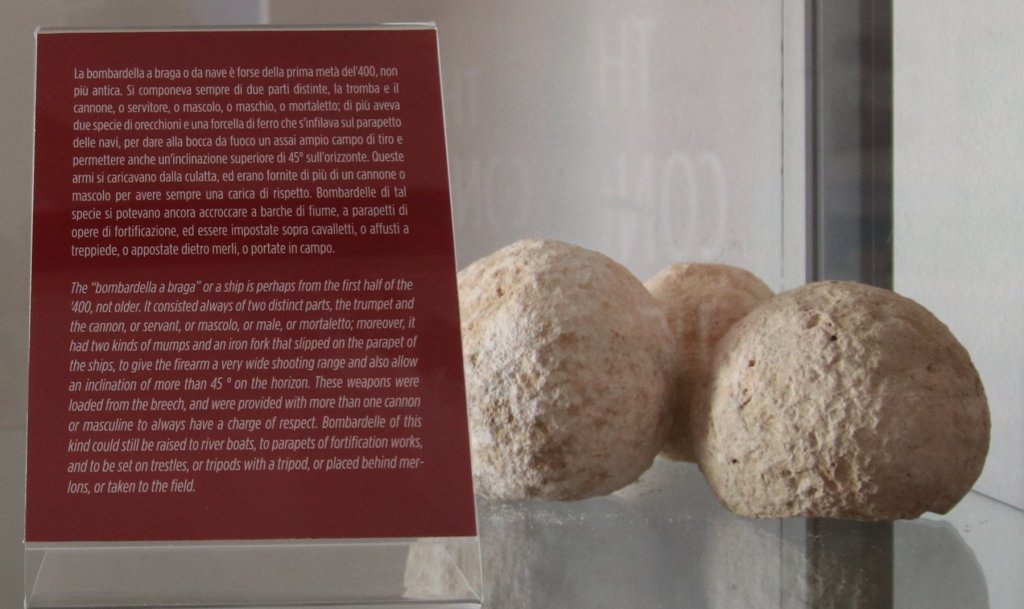
- mtaylor, GrandpaPhil and cog
-
3
-
-
hi Phil,
obviously you have to evaluate yourself if it is convenient to make the change,
Steven understood the change, I try to bring back photos
with changes in "red"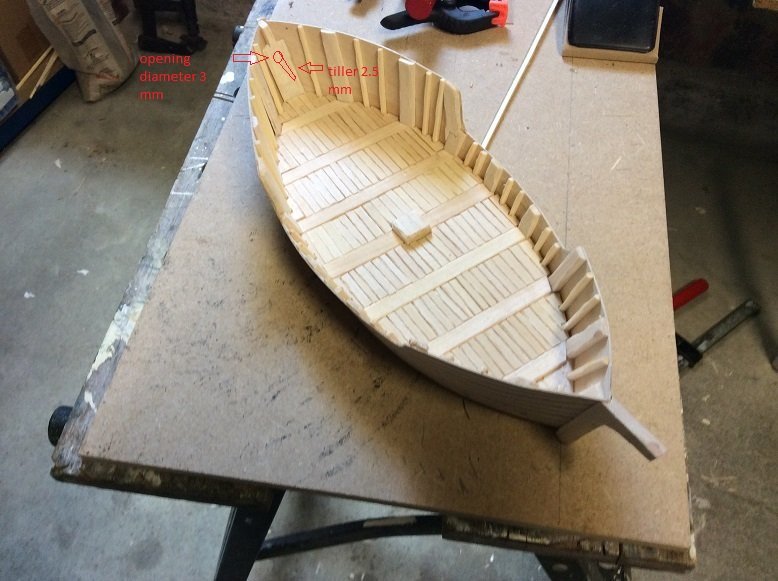
evaluates "if the game is not worth the candle" Italian proverb deriving from the French saying " “le saint (le jeu) ne vaut pas la chandelle”.
to the next
my friends, we are in about twenty daysFabio
alias luponero
- Boxbuilds, GrandpaPhil and mtaylor
-
3
-
Hi Phil,
I don't know Pathfinder, but from what I've seen your ability to make structural parts for use in the game is very positive and aesthetically pleasing, I agree with Mark
7 hours ago, mtaylor said:It seems you've climbed the learning curve
and I think it's very positive, probably like everyone, when we start new jobs the lack of experience can cause some mistakes, it's always like this at the beginning, but the determination and the passion will surely allow you to improve, avoiding small mistakes .. .
you can see if it is possible to recover, or in the worst condition to rebuild ... can't you open a small hole in the stern wheel prepare a rudder with the bar and stop it inside?
anyway go ahead, a good job will come, rest assured !!!
"hoping that the translator does a "good job"
good job
black Wolf
-
Thanks friends, for the nice words,
you are right PhilB, unfortunately some details remain under the bridges of the ship, bilge pumps, bombards and are not nearly visible,
(if I can be useful for information let me know)
now I do a bit of vacation I go to the beach for 2 weeks (in Puglia, southern Italy)
to the next
black wolf
-

 ,
,
Santa Maria by luponero - FINISHED - scale 1/50 - carrack - from diagrams of Adametz
in - Subjects built Up to and including 1500 AD
Posted
the color used is the one that in my opinion approaches t
I insert an image "in which some of the" technical "terms I used, of which I am not sure of the correct translation (hopefully well ...)
seen from inside the ship
the "flat" work is opposite to that used for the production of shrouds (torticcio cable) the reticulation was carried out after the "tarozzo" was scraped and as I said the method of using the shroud printing pasted on the 2mm plywood and positioned later on the parasartie and under the crow's nest it allows the realization of the various parts that make up the shrouds with relative ease, due to the fact that stopping the bigots with pins you have the space, pulling forward the bigoted, to work well, repositioning them later without losing the fundamental alignment (a method that I would advise) it is necessary to avoid the gluing of the runner until one is sure of having finished the work, obviously the displacement of the bigots necessarily causes the lengthening of the thread (runner) and in following the shortening, manageable or very difficult maneuvers, if the wire has been glued
the next step will be on making the "griselle" translation permitting,
to the next
black Wolf