

luponero
-
Posts
236 -
Joined
-
Last visited
Content Type
Profiles
Forums
Gallery
Events
Posts posted by luponero
-
-
On 1/4/2019 at 1:05 AM, cog said:
I have a question concerning the wood you prepare. How do you cut the initial branch/trunc to a smaller size which can be cut into wood for model building.
Ciao Cog,
after having cut off the initial branch, I decide how long it takes to mature according to the thickness with which I make the boards,
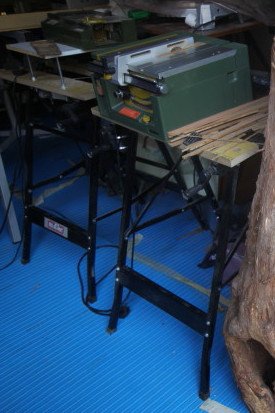
on average, to make a good seasoning it takes a year to season 1 cm of wood per side, so to make a maturing of a table of 2 cm it is necessary a year, usually I prepare tables with a thickness of 3 cm, for the seasoning it will be necessary for 1 and a half years, then I realize from the narrowest part of the table (3 cm) of the boards with a thickness greater than 1, 1.5 mm to finish with the thickness planer the desired thickness, both for the realization strips or other pieces of wood with proxxon disc saws
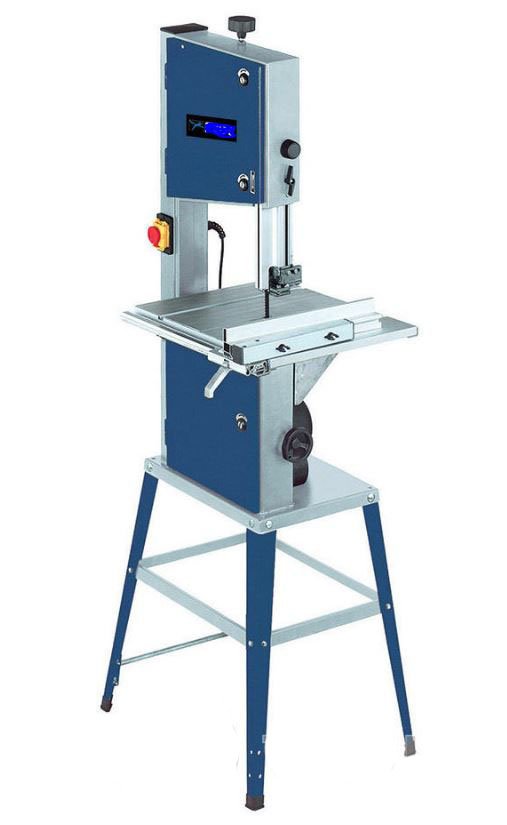
while for the realization of the boards I use a band saw,or a "carpenter friend" for boards over 10 cm wide

-
unfortunately there are 2 images (4 last and last 3) that have been inserted incorrectly, it is repetitions of previous images,
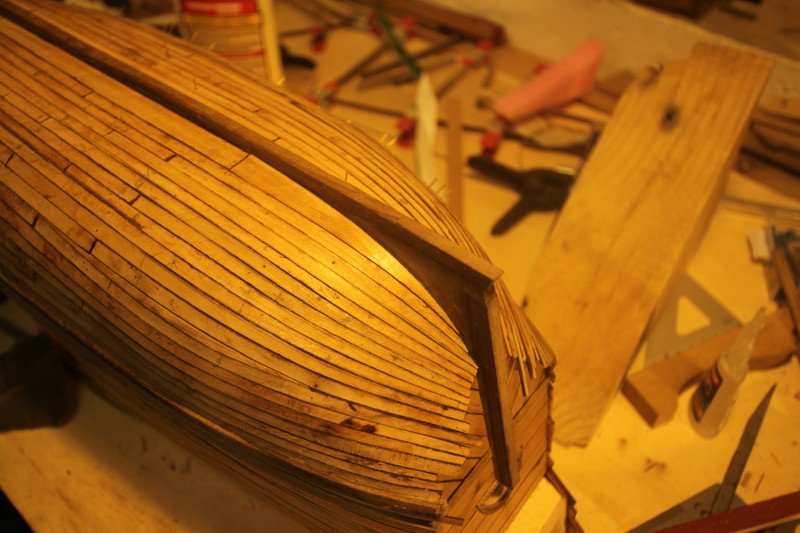
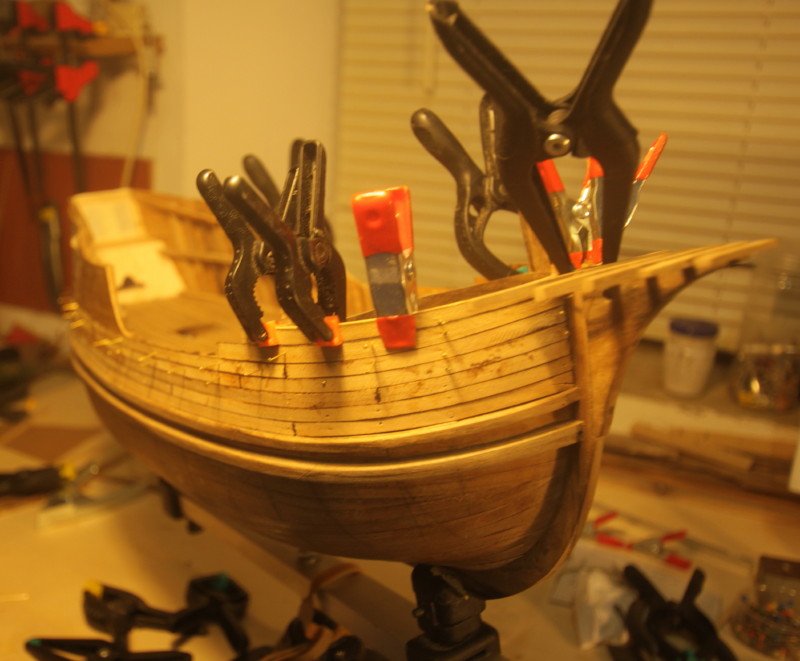
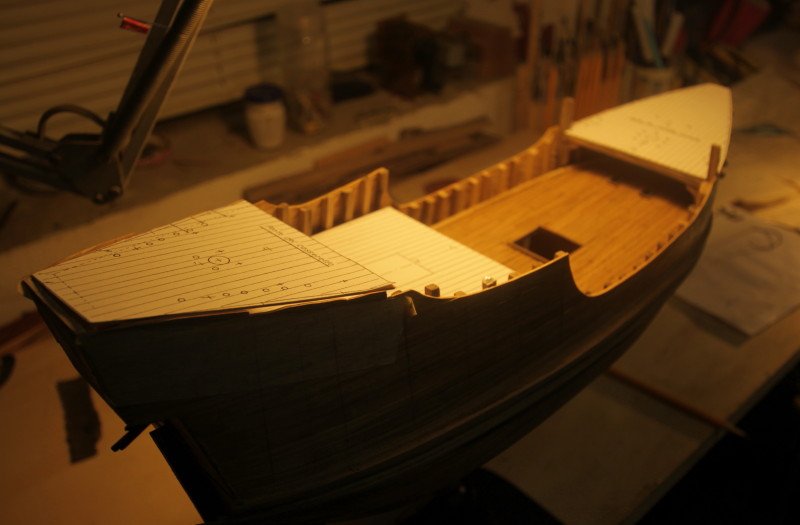
while the last image shows the end of the laying of the plating, for convenience I used only one strip, increasing the width of the strips, in this part I will paint with varnish the topside area
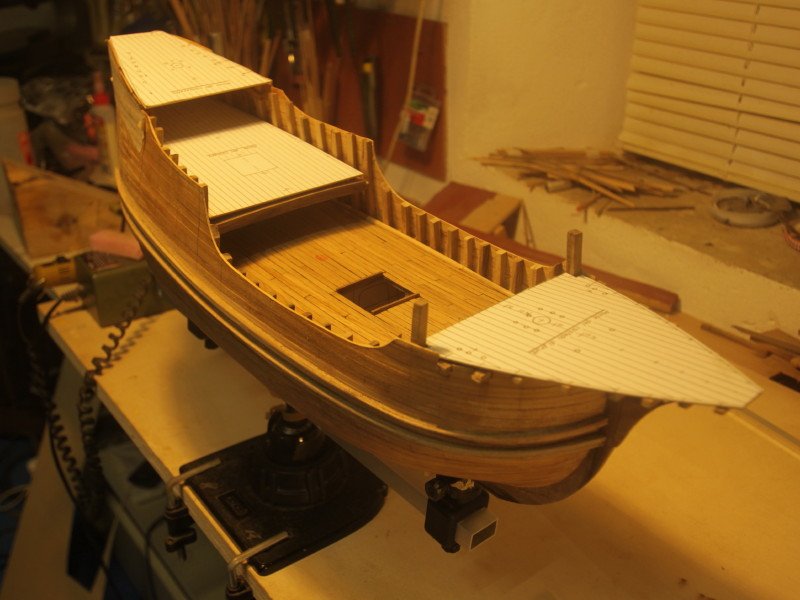
for tonight I finish updating the works,
there is little lack of updating in "real time" with the progress of the realization
to hear from us
luponero
luponero
-
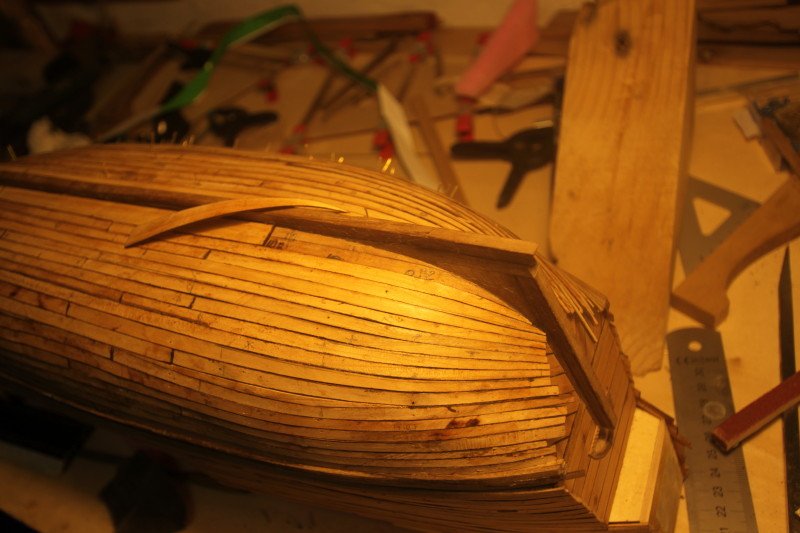
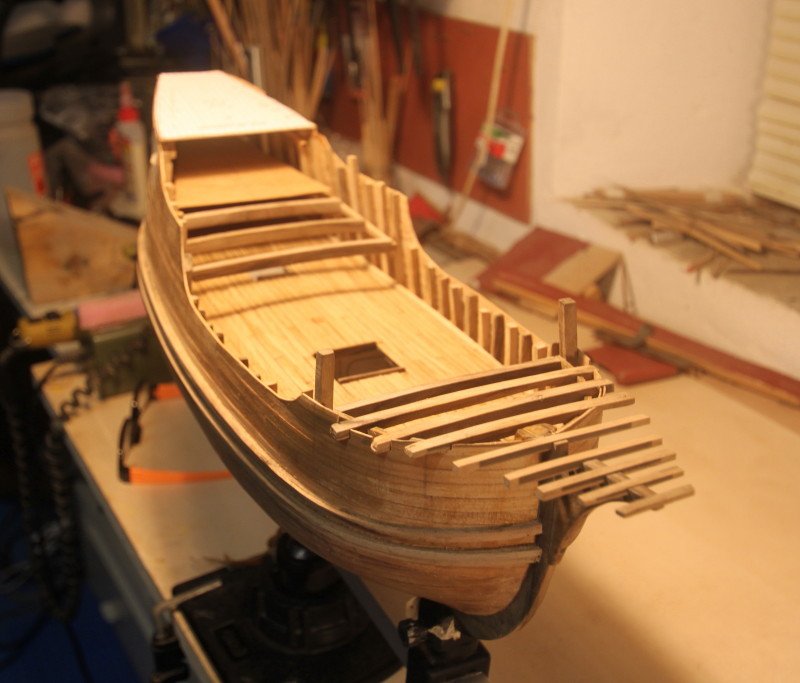
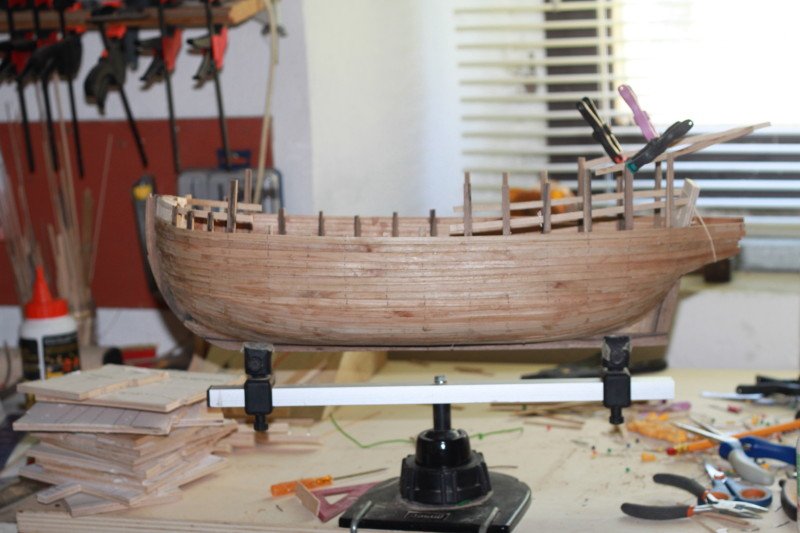
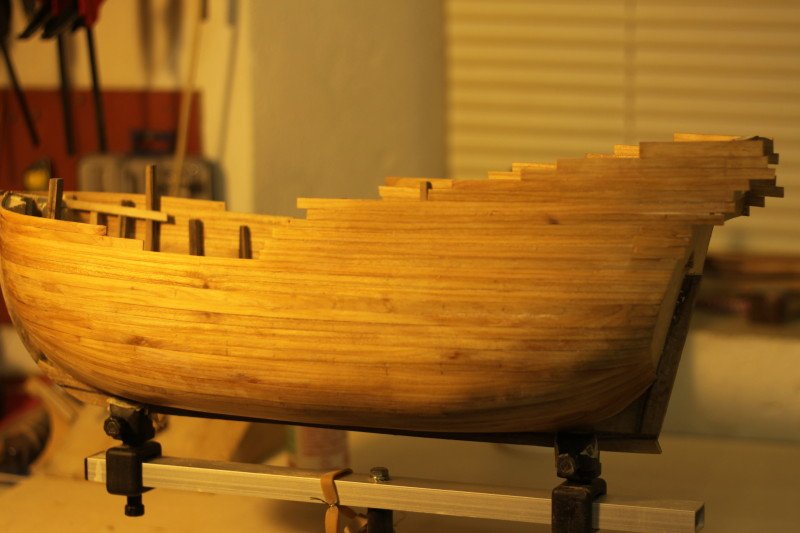
After laying the two "incintoni" I started laying the second planking, always with cherry wood, for the top of the side I did not taper the strips,
finished the upper part,
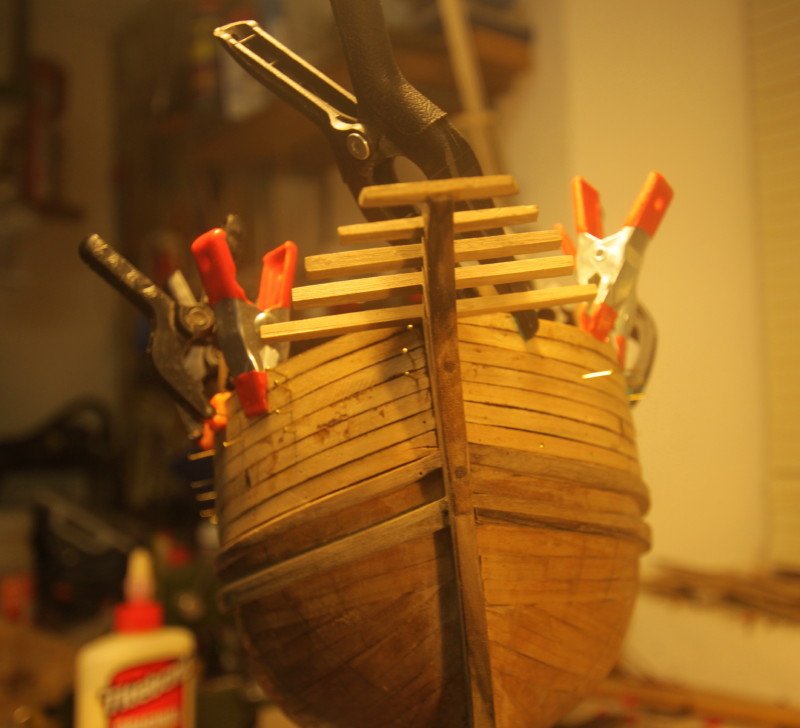
and also the part of the stern wall where there are bridges of the " cassero e casserotto"

I changed the width of the planking boards in the bridge of the drawbridge (6mm beginning, 10mm at the end)
The part of the lower planking to the main deck needs to be tapered both in the part of the bow and the stern, to maintain a distribution of the "harmonic" tables, (probably in reality, the distribution of the boards was less precise)
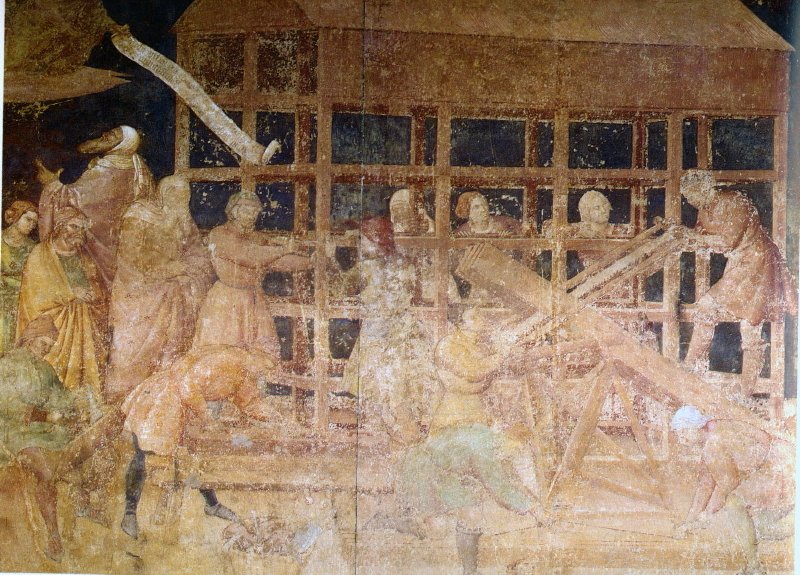
I presume that the realization of the planking was also conditioned by the "machines" used to make wooden planksthat were very simple and rudimentary and used by hand, brought back under a painting of the fifteenth century. in which we see the artisans of time at work,visible the "4-hand saw", used for the construction of timber boards
moving forward with the planking,
- tarbrush, Baker, paulsutcliffe and 3 others
-
 6
6
-
-
After reporting the points I reported the first band (incintone) was made with 4 x 2 mm squared walnut, joined together (as if they were a composite beam)
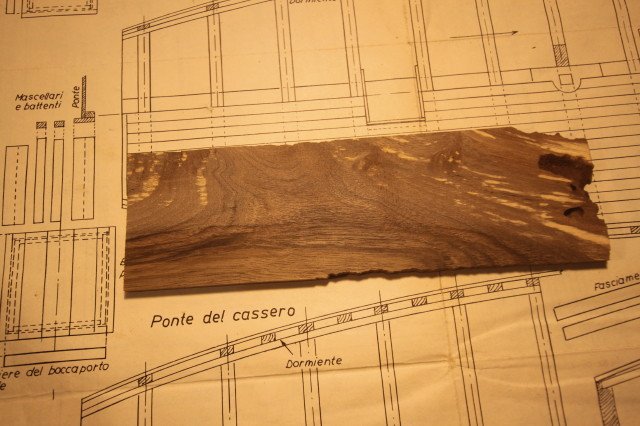
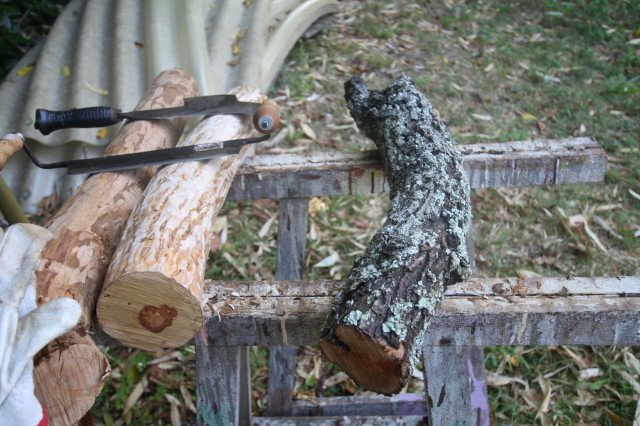
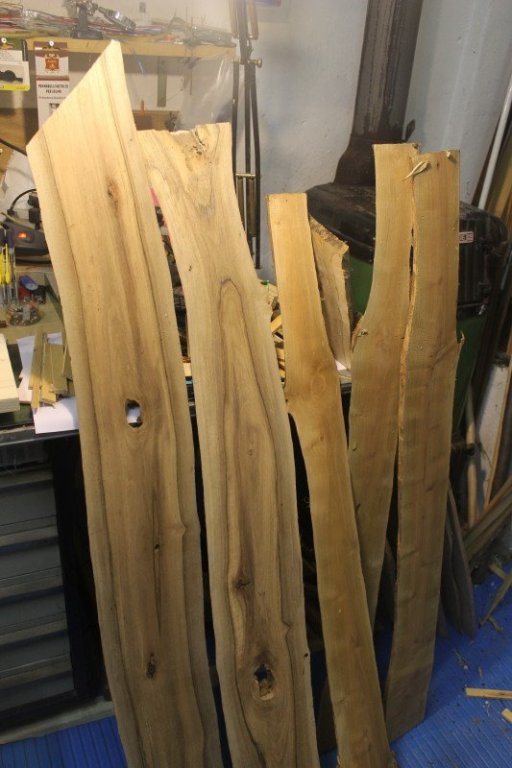
I bring back a piece of walnut board, which fell two years ago due to a strong storm, with which I made many tables (I think I can also make a large table for the house)
the beauty of this wood consists of the shades ranging from white to black on a base that the base ones, in addition to the color also varies the texture and hardness of the timber (clear = soft, dark = hard)
after the first "incintone" I put the second one, always walnut, always composed beam
to have more precise references, I brought back the false bridges of the upper castles

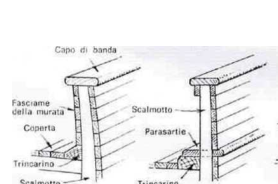
I also reported the "trincarino" would be the wooden board that ends the floor of the bridge,
( I report below a drawing with some parts of the parts in Italian )
with this I salute you, I go to sleep, maybe you are having breakfast
good night for me, good morning for you")
luponero
- davyboy, GrandpaPhil, cog and 3 others
-
6
-
Hi Steven,
I thank you for the compliments, I agree with you that the realization of a model with a zero build, is a special thing.
As you understood I live in the hills near Florence, in Italy, and this gives me the opportunity to find many types of timber, and even the recent storms caused by climate change have "unfortunately" allowed me to increase the amount of timber boards , as reported in the photos of the pear tree,
tonight I was going to insert some material and photos of the constructive updates, but I started to see your build on the dromone ...
very beautifull ! I spent two to three hours and I saw it until the p. 11
sincere congratulations, both for the historical part of the boat and for the construction, also before the Santa Maria, I built an ancient ship: an Etruscan vessel of the V-IV century. B.C. (some photos are in the "gallery")
Unfortunately, not knowing English I have to use the translator, which allows me to try to communicate with other friends this common "passion"
and even if in the translation, some words are distorted, "the passion" for the realization of naval models unites us
see you soon
(tomorrow I read the missing pages of your build)
luponero
(Fabio )
-
-
Hi Oliver,
I saw your construction site for the Santa Maria, your model is taken from a different design of what I'm doing,
what I see is that you have perseverance and passion, key features for this hobby, and more!
keep on doing so you have made "giant" steps and you will surely make other ones, your model, to be the first one is doing well!
the next will be better!
see you soon
luponero
- Oliver24 and Old Collingwood
-
2
-
-
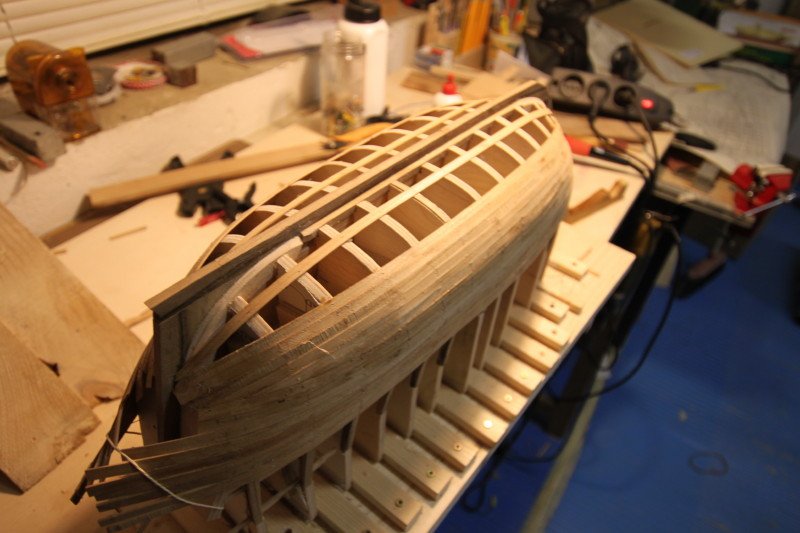
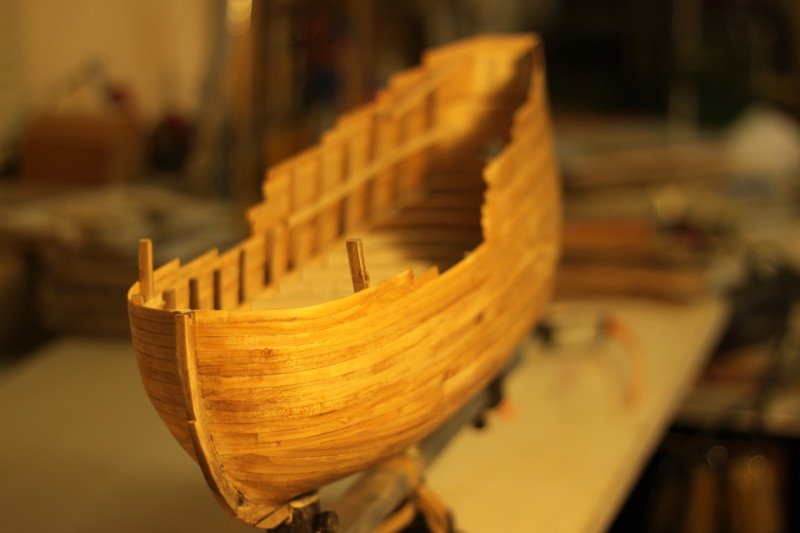
I started working on the construction of the foredeck building the openings in the plating to lay the "beams" that support the deck of the bridge, to give the usual inclination and check alignment using an aluminum "ruler"
( in the usual period, I have prepared pear wood, which I will need for the realization of the material for the realization of a next model,
it is necessary for maturing at least two years before using the chosen wood

the minimum time required for solid wood boards of 4cm )
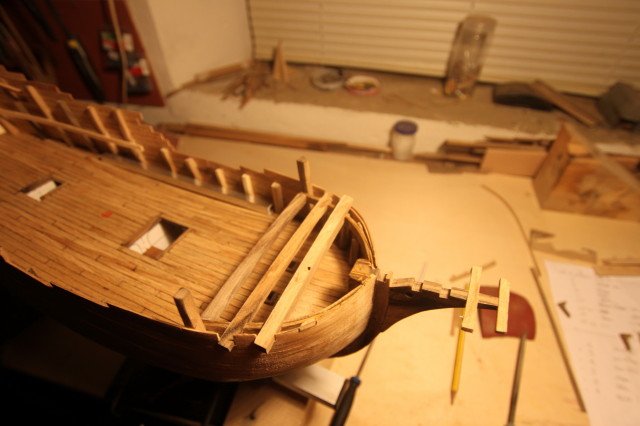

I had the need to put the castles of the formwork and the bow, to have the profile of the model and put the "incinconi" the long external longitudinal beams, with the plotter I made "longitudinal" prints reporting them on the model and I marked the heights of bridges and points where the "incinconi" should be reported, measuring the heights from the main bridge made (I do not know if the translator will correctly report what I wrote 😩 )
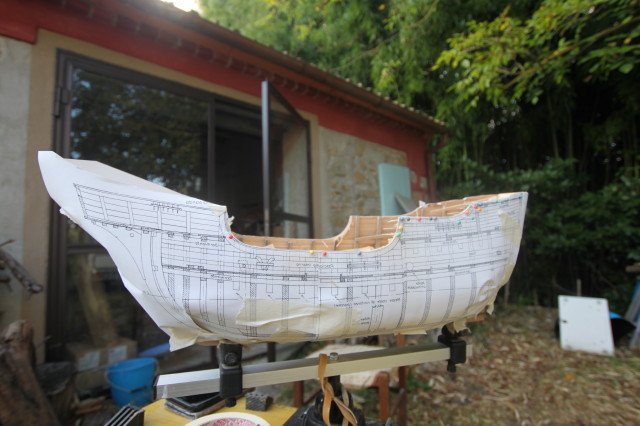
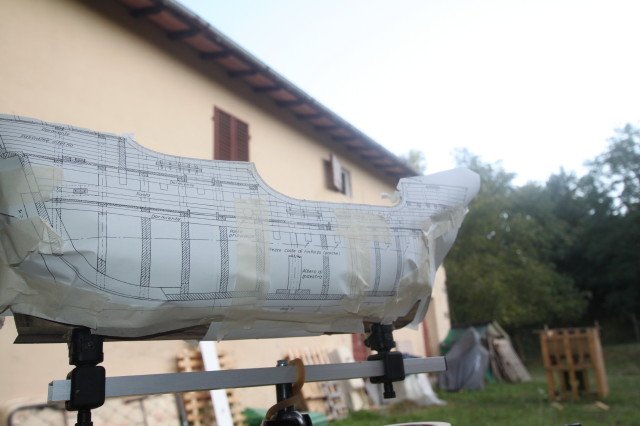
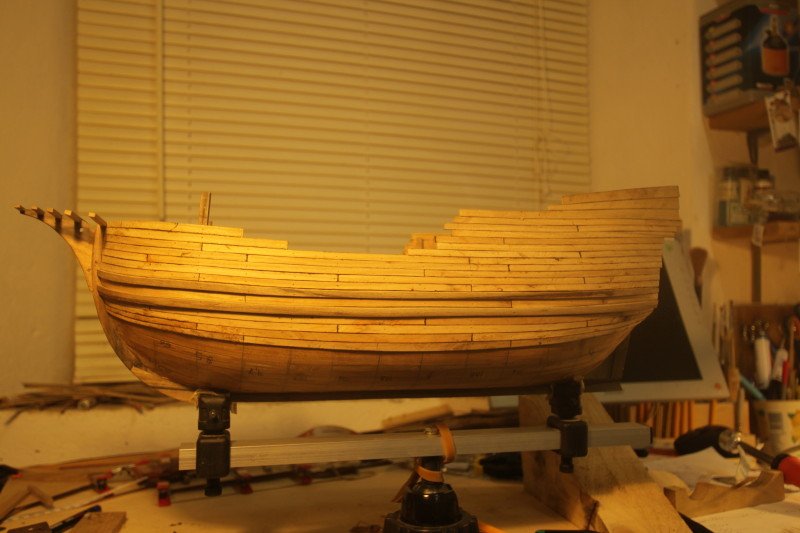
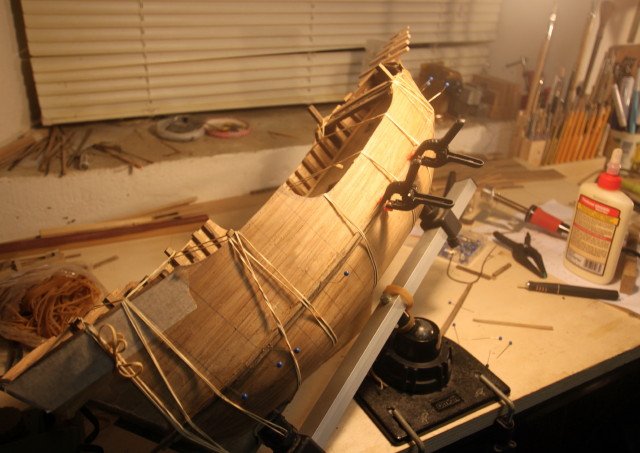
the wide "curves" of the caracca, are one of the most complex elements during the realization of the second plating, probably this peculiarity emerges in the realization in all the "round" ships, the plating is an element that arouses interesting discussions among the modellists, during the realization of the first I did not find many difficulties, I started the plating without setting the curvature of the strips compared to the curvature of the main bridge of the trend of elements that will be realized later and will characterize more the trend,
in the realization of the second "at sight" I will have to give the courses (the plating boards) a curvature and a tapering (thinning the boards) in a different way,
regards
luponero
- DORIS, GrandpaPhil, Siggi52 and 7 others
-
10
-
-
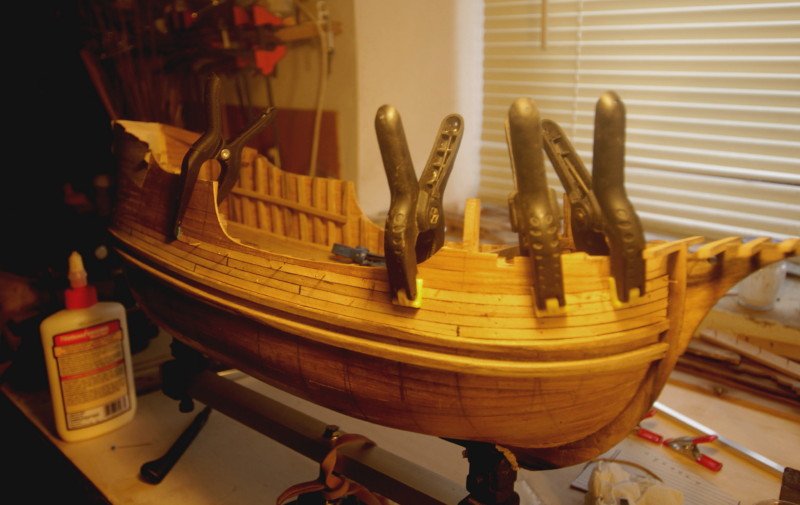
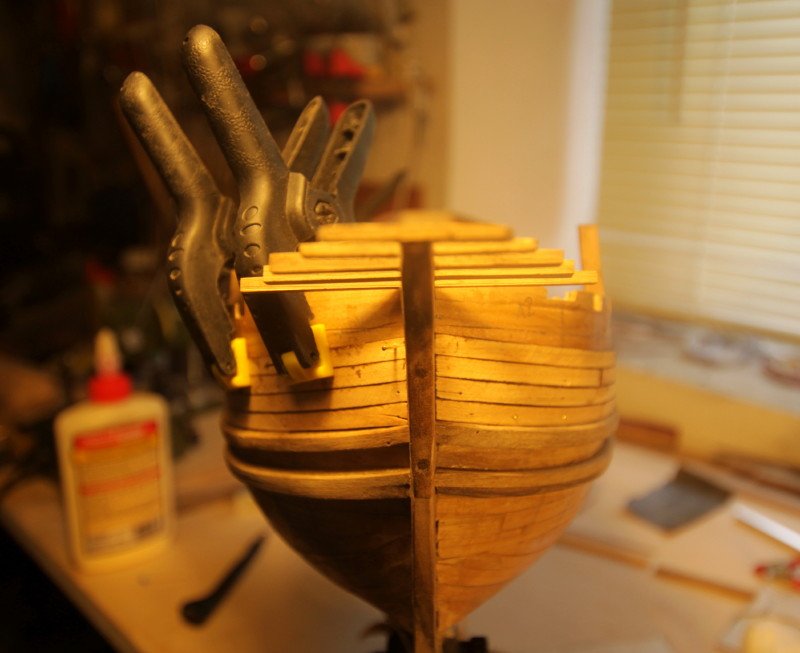
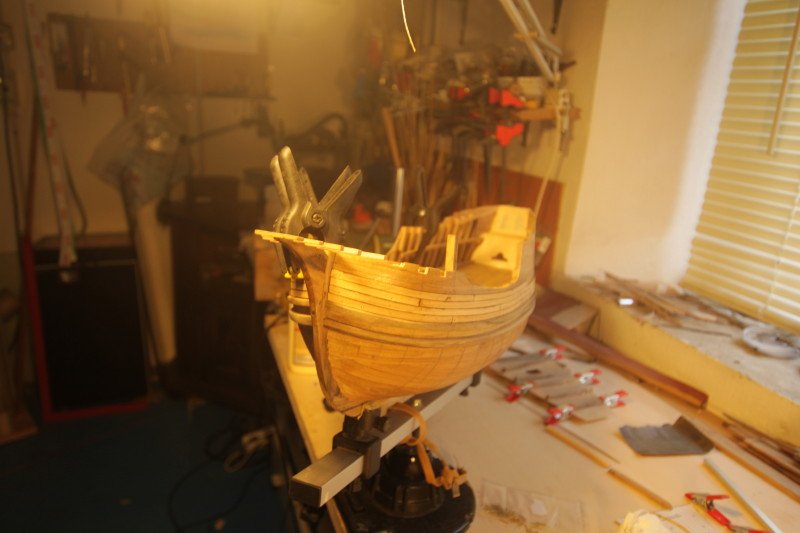
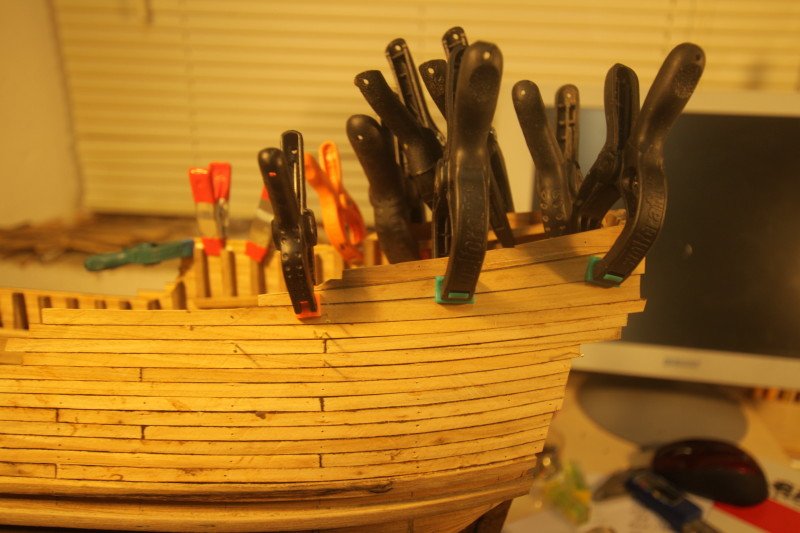
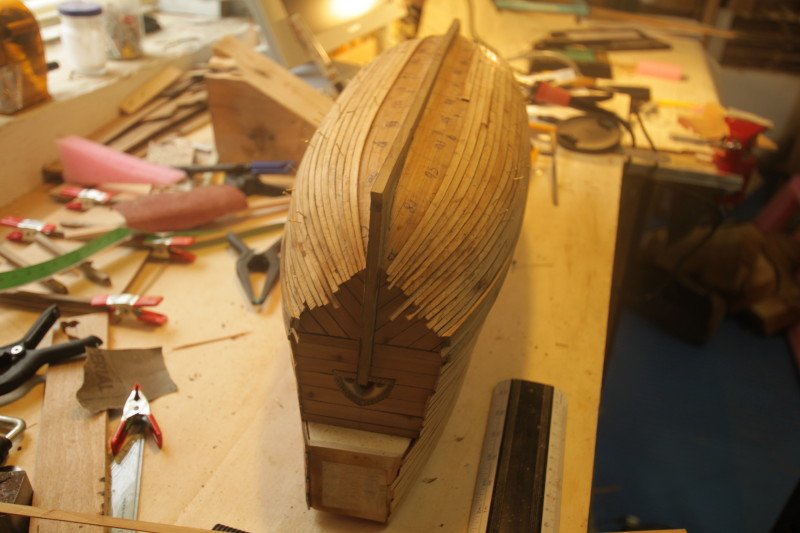
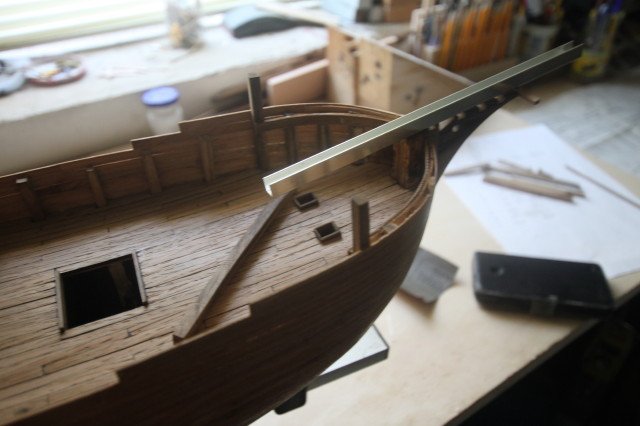
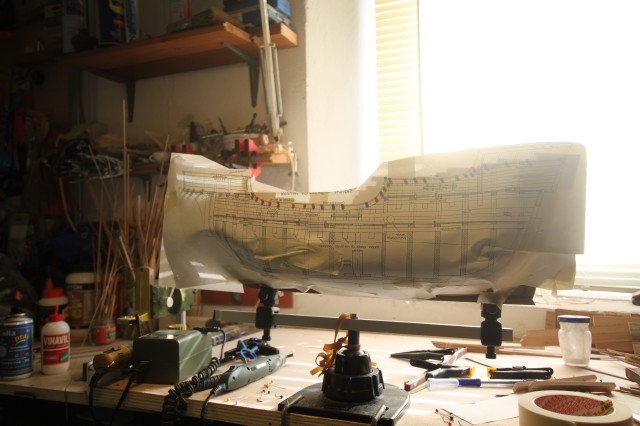
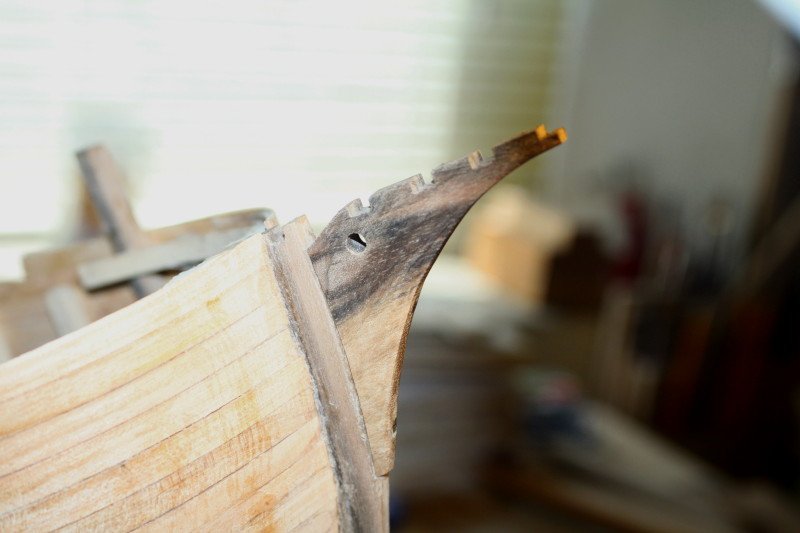
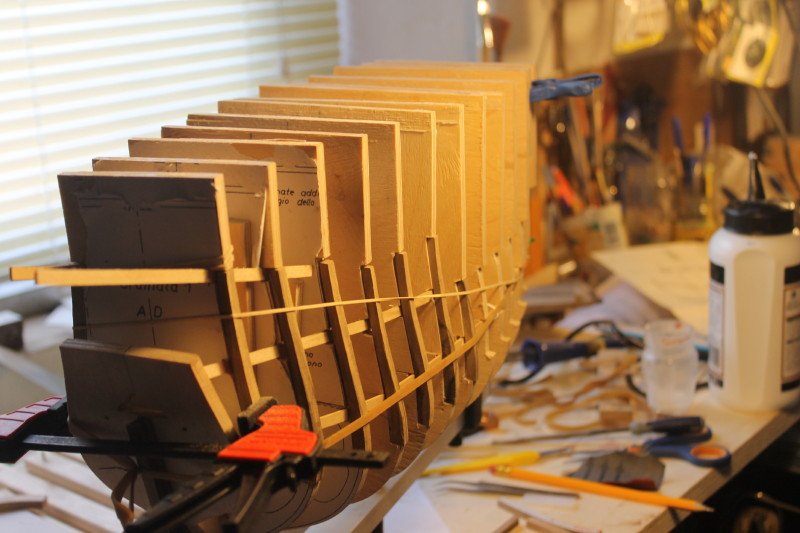
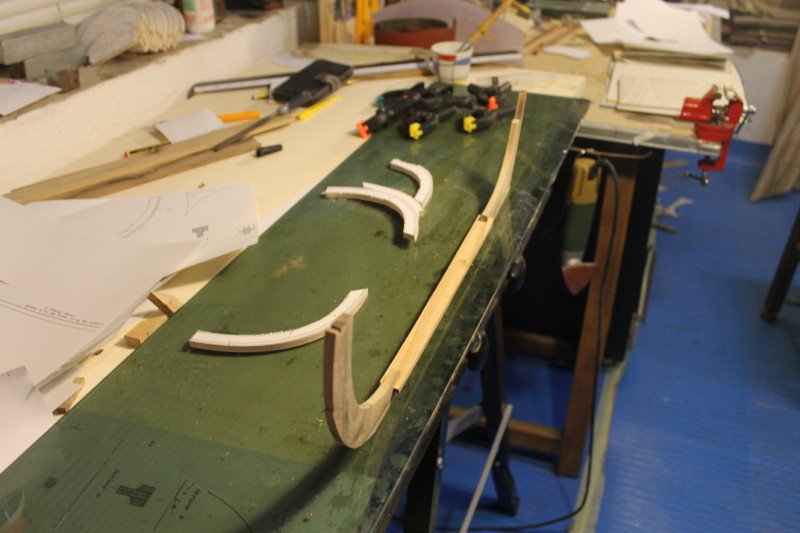
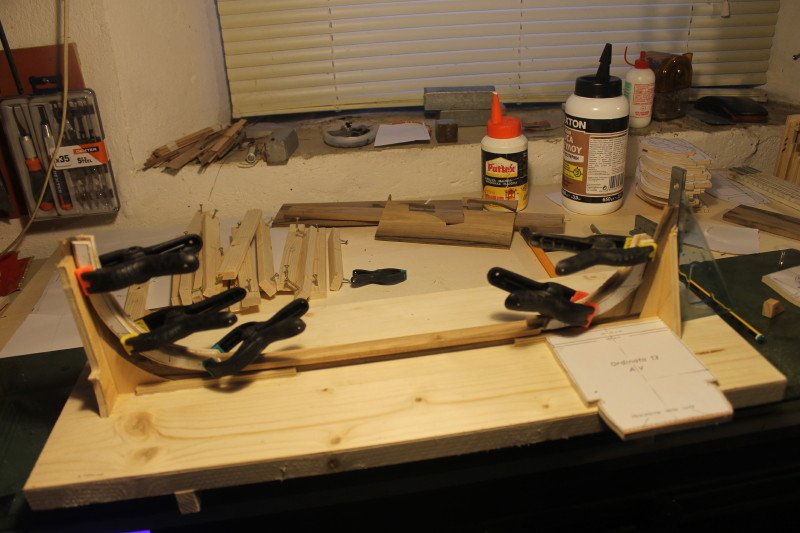
after finishing part of the first plating I worked on the tagliamare making it in walnut and preparing the bowsprit for bowsprit, then I stopped the piece by drilling holes and making wooden "nails"
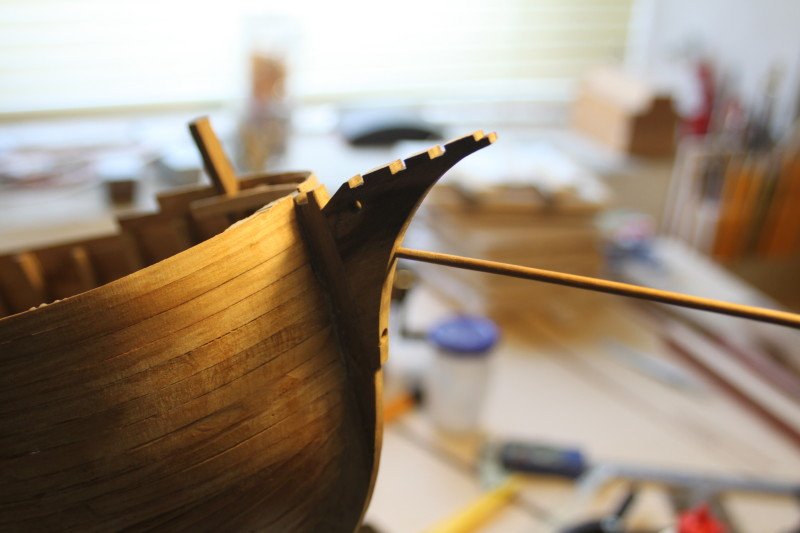
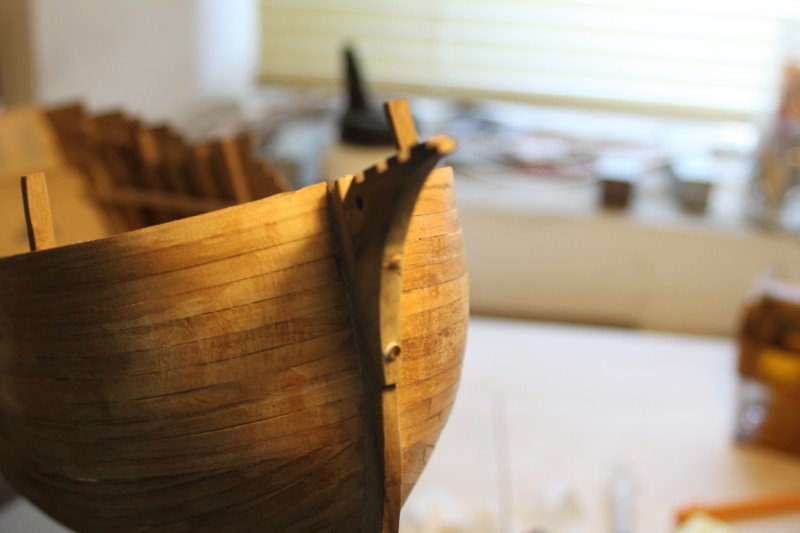
the nuances of the walnut colors give a very pleasant effect
to make the structure more resistant I made small pieces of cloth (raw linen) I soaked them in the glue, and I put them between ordered and hardy making them adhere to the battens, this metedo, as well as making it more resistant the structure should keep more stop the strips avoiding to create the openings between the strip and the strip
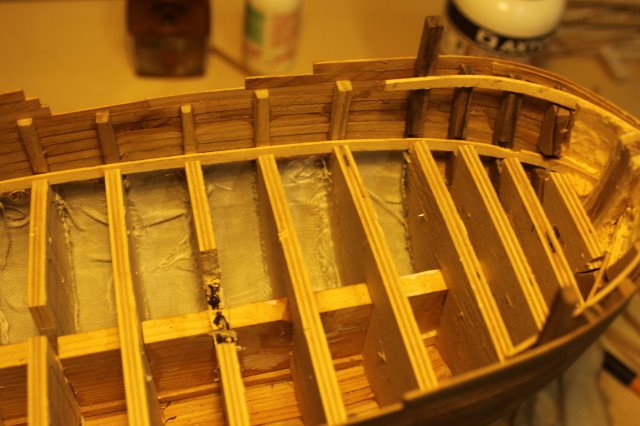
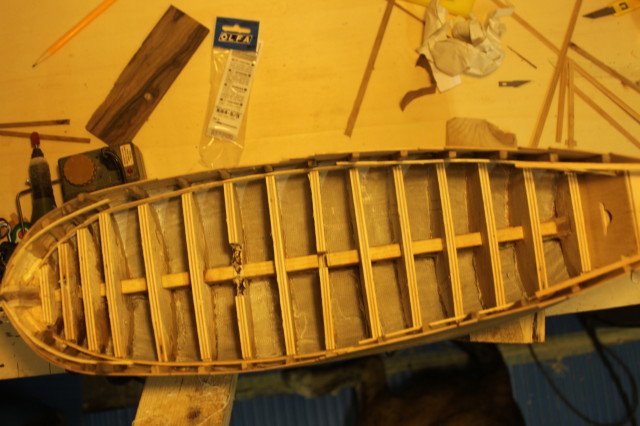
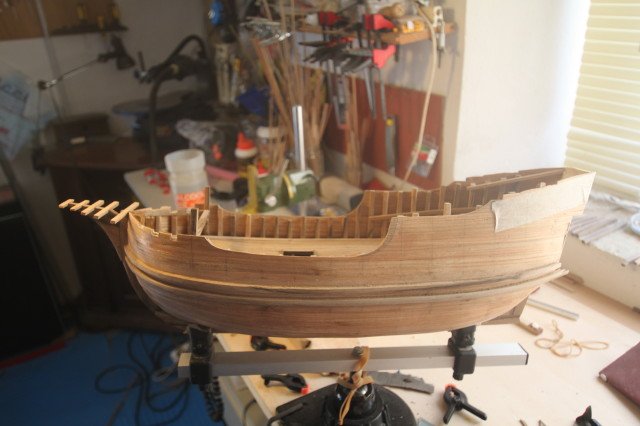
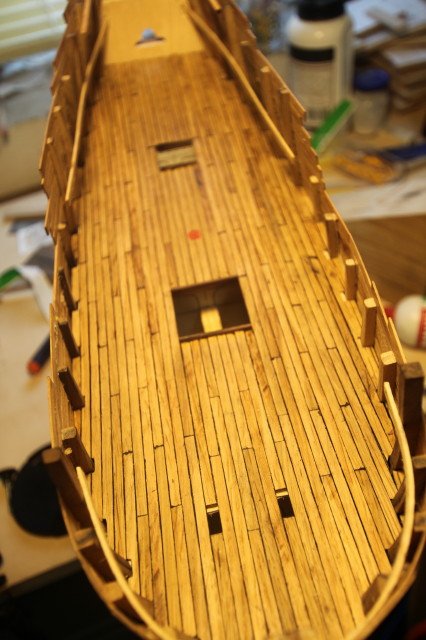
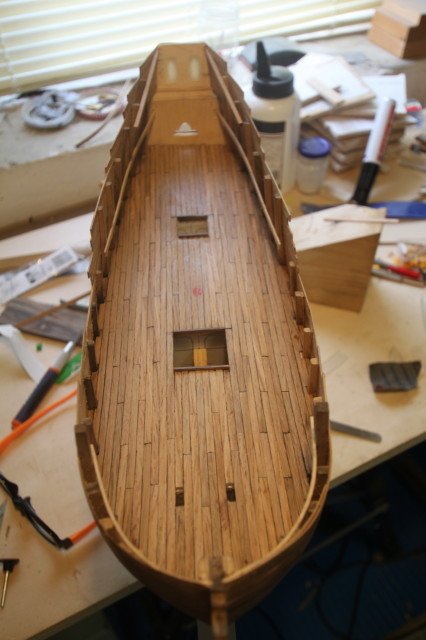
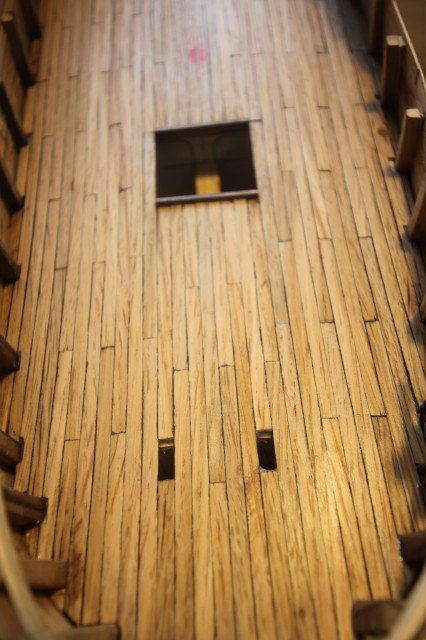
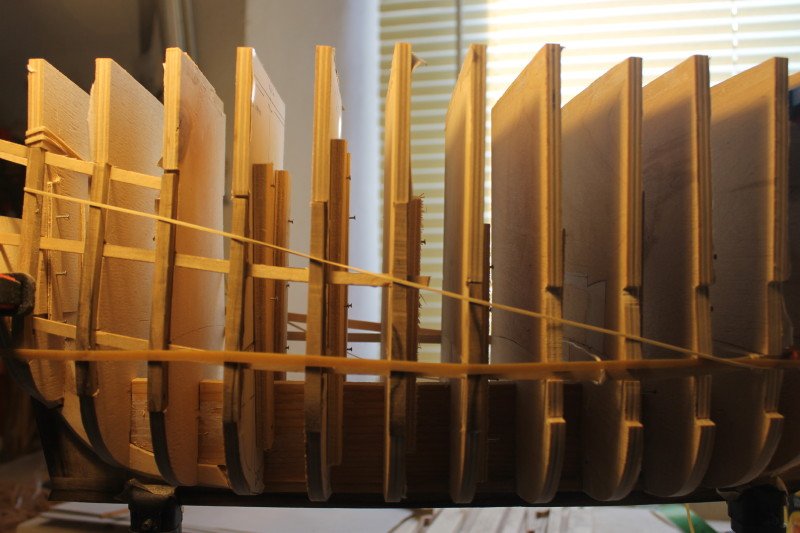
After the strength of the structure, I started working on the main bridge, after having reported the profile of the bridge shape on a 1 mm plywood, practicing the hatch openings and the "anchor hawser well",
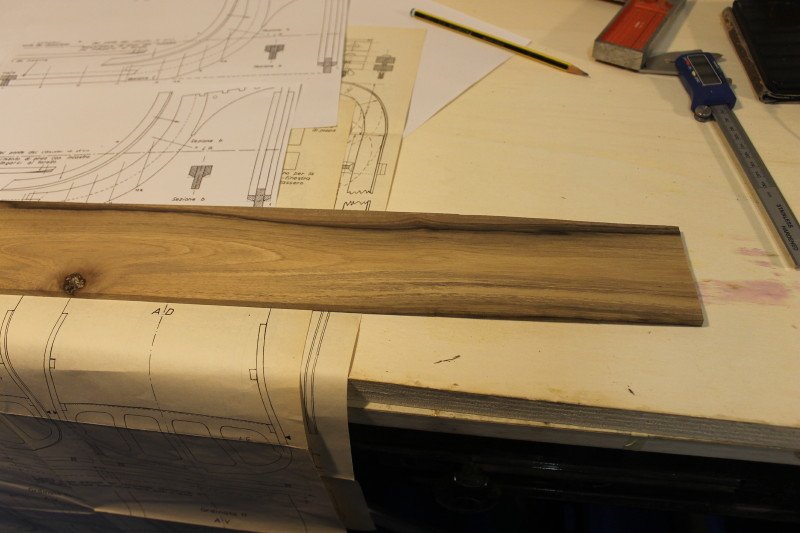
to make the plating boards I used oak wood, making three length measurements (showing them in 1/50 scale)I painted the edges of the strips of black, to imitate the "caulking" (waterproofing technique of the wooden hull)
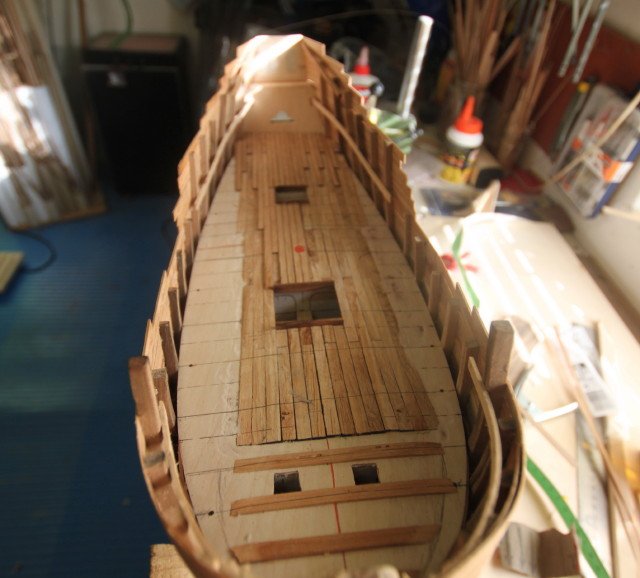
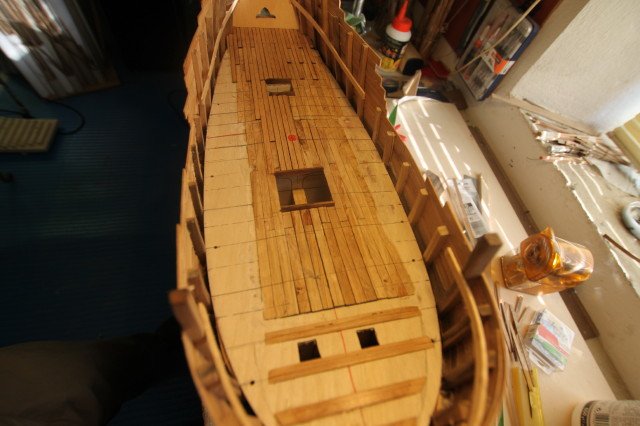
to make a correct "insellatura" (it is the longitudinal projection of the edge line, that is the intersection of the bridge with the walled side.) I had to put some pieces of strip on the false bridge, near the bow
in the division of the strips, I avoided putting the "short" pieces to try to maintain a visual and practical "harmony" of the bridge, even if in the 1400/1500 there was no "normative" for the laying of the boards that make up the floor of the bridge
In the plans of construction of Adametz (probabilities derived from the drawings of the Duro, attached to the book "The ships of Columbus" there are no indications for the installation)
Once the installation was finished, I painted the bridge with the "turapori" (wood preparation varnish)
with this update of the work I greet you
luponero
-
-
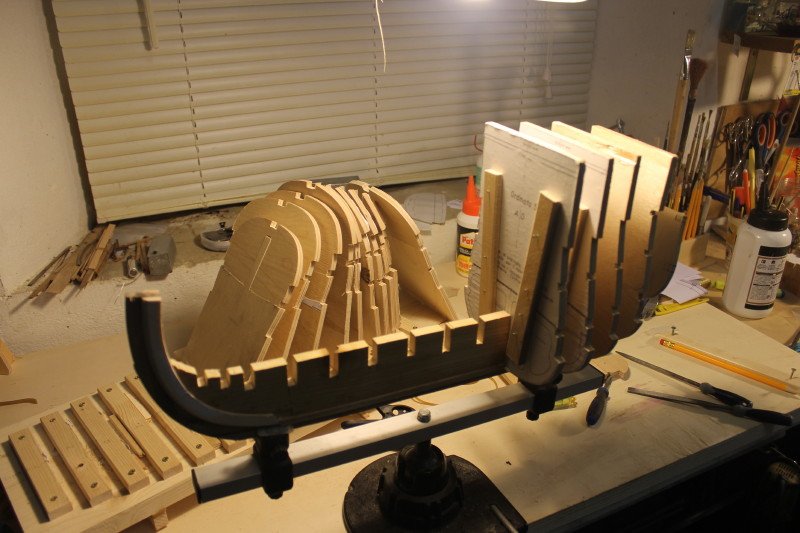
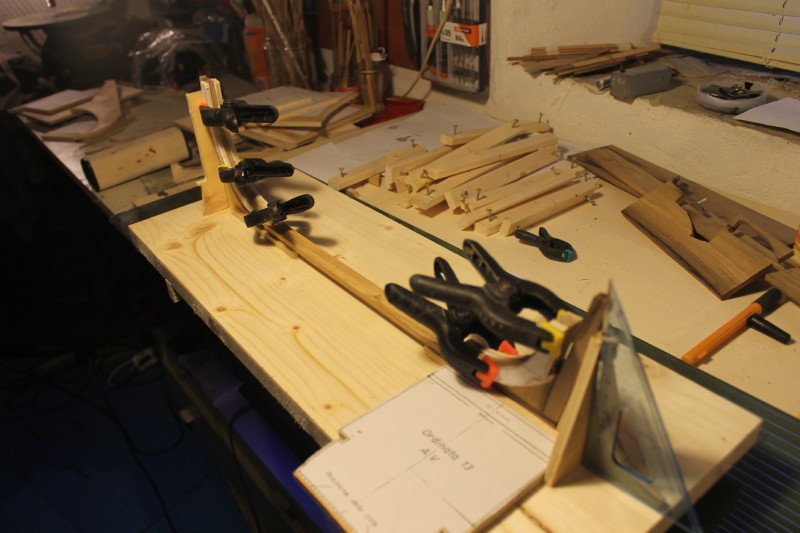
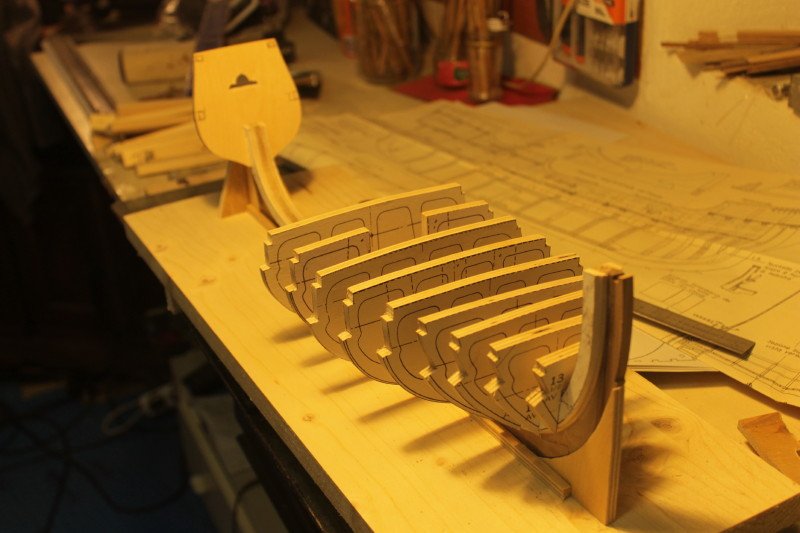
after placing the ordinates on the keel (without gluing them) I started to try the "sleepers" which are the internal horizontal beams
(I do not know if the terms used for the structural parts will be translated into the correct form)
I try to follow the part reported in the construction plans of Adametz, even if I am not very convinced of the final result
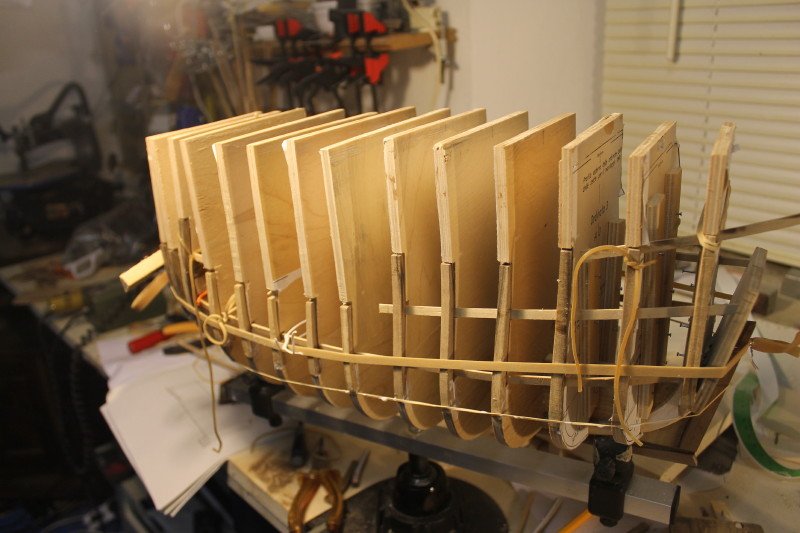
after trying the ordinates on the keel with the "sleepers" (the horizontal girder "I have reported the structure on the" ladder "
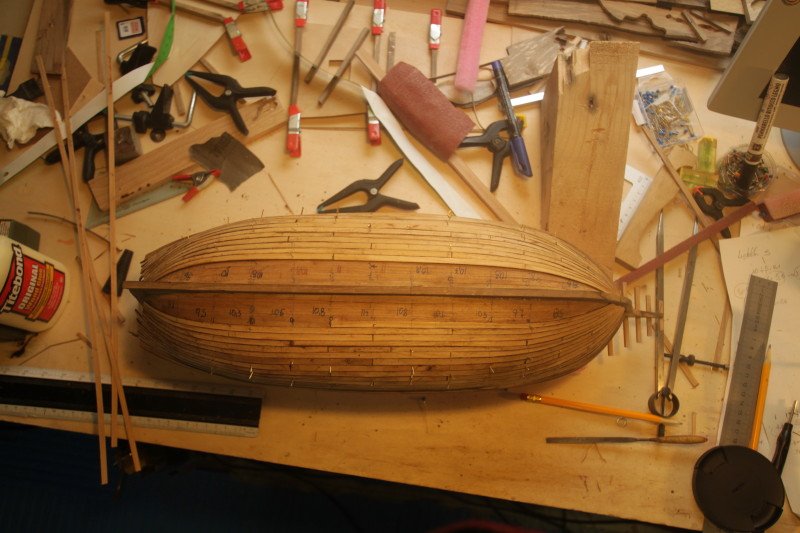
and I started making the first plating, using cherry strips of 5 mm and 2 mm thick (this is a cherry tree that I had to break down two years ago and with which I made some boards that I use to make the models naval)
I have no initial images of the laying of the planking (at that time I did not have a camera) so I insert images in which part of the planking had already been realized


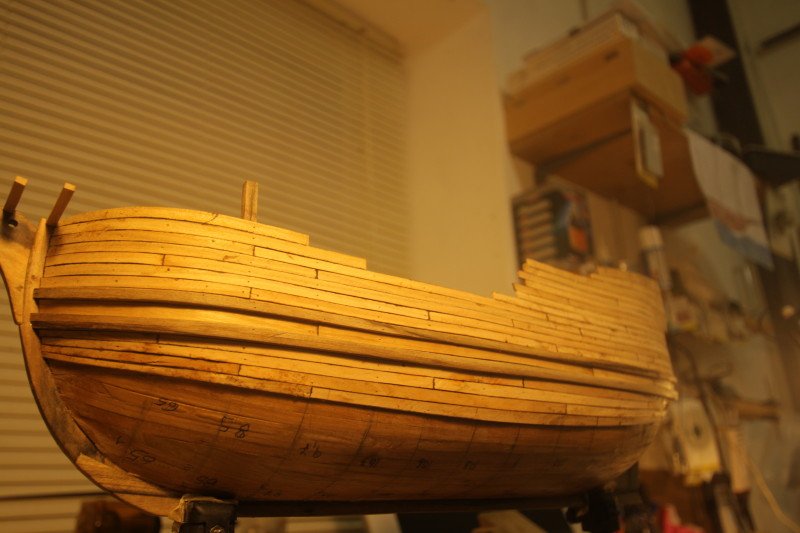
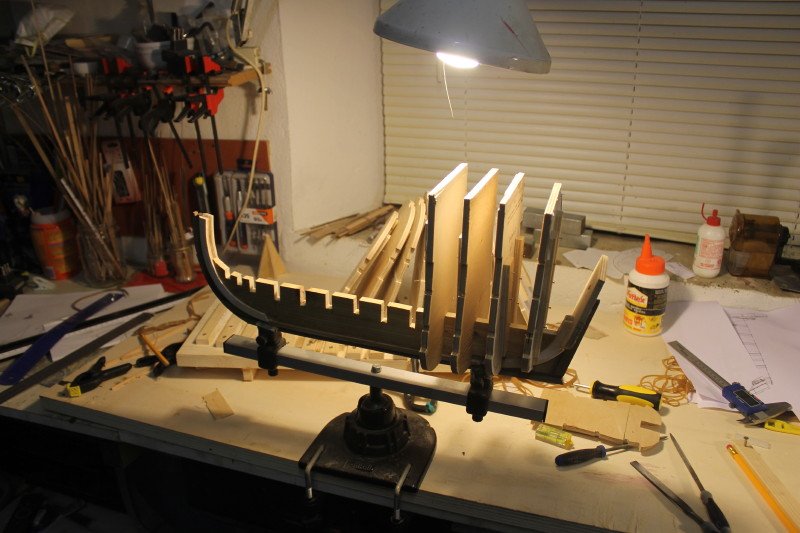
finished part of the first plating, I removed the model from the ladder to continue with the plating and finish the upper parts
using the abrasive paper (80) to smooth the plating
for tonight (in Florence it is 24.06) I finish here, trusting that the "translator" has done a good job
regards
black Wolf

-
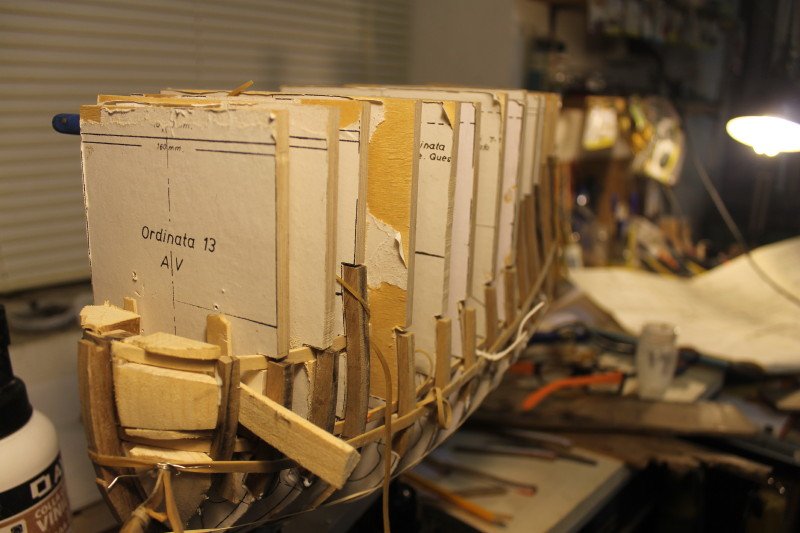
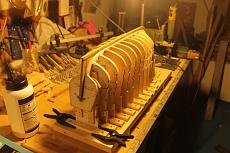
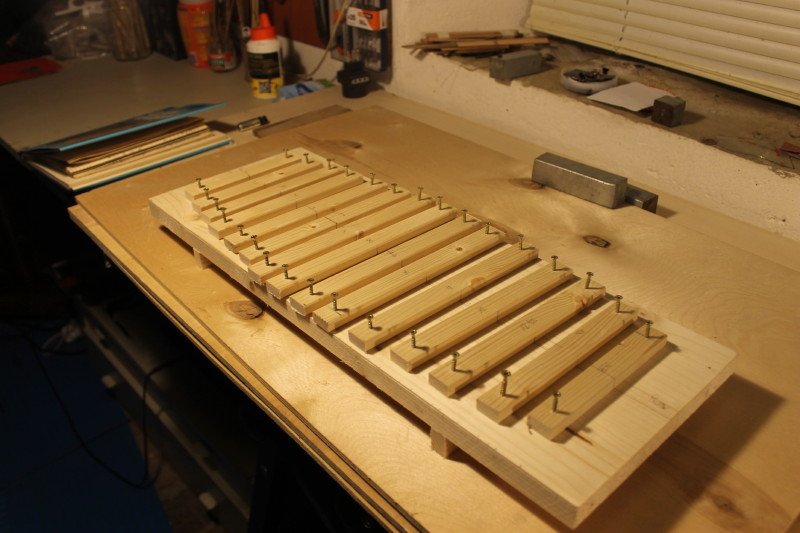
later I started assembling the upper and lower frames, following the method shown in the construction plans, joining them together with strips fixed with nails and positioning them on the ladder made as indicated,
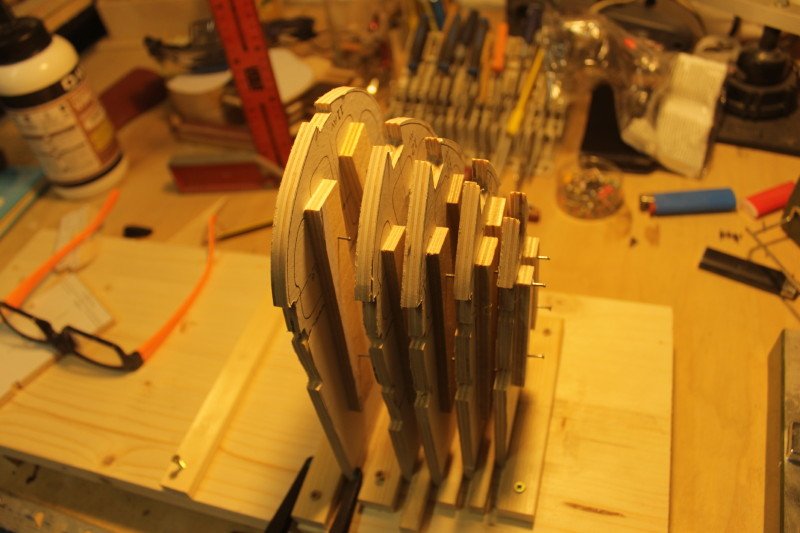
I was not very convinced of the structural part of the construction,
the ordinates seemed to me too heavy compared to the keel, in my opinion, Adametz,
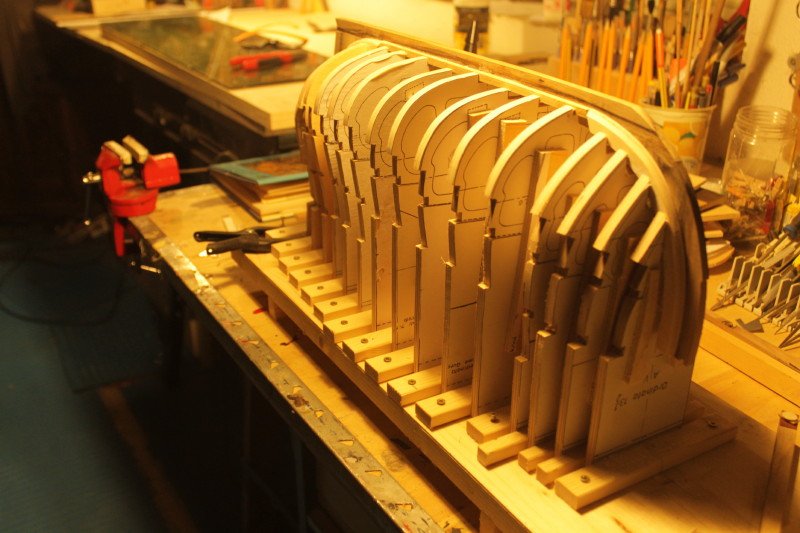
that has realized the construction plans bringing back also in the same supports for the realization, realizes a very fragile keel, that subsequently strengthened by making some modificationsin the original design, the ordinates have an opening in which the keel is inserted, which due to its small size, has no joint to bring the ordinate, then I made an additional piece that I stopped on the keel reinforcing it considerably and realizing the joints where the ordinates are blocked,
"not beautiful" solution but it certainly reinforced the structure considerably

- cog, paulsutcliffe, nikbud and 4 others
-
7
-
it seems that the translator has started doing his job, we hope well ...
the images that I insert and the description of the works, are not in "real time" I will try to recover the situation to get an update
of progressive work
after choosing the essences to be used, I cut and assemble the keel
with walnut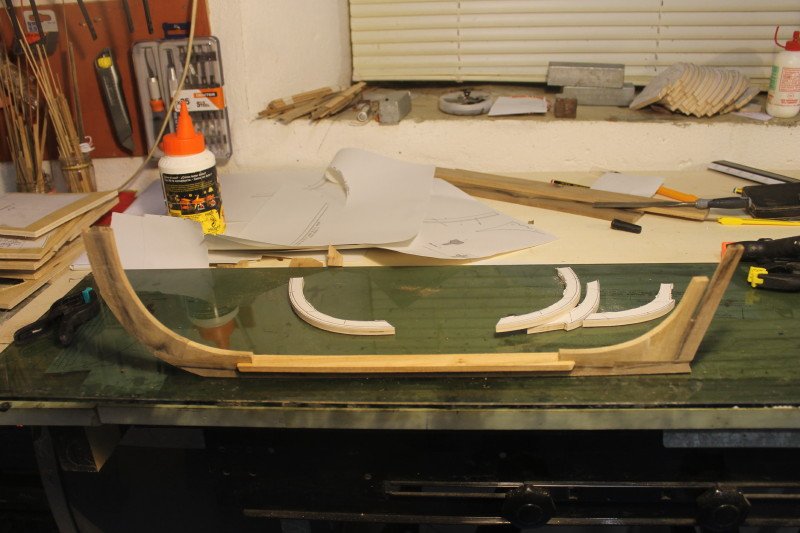
to reinforce the keel, I inserted a part in "beech"
I brought back the reinforcements of the bow and stern wheels
I started to put on the keel the ordinates made to have a more stable construction I had built a "ladder" (as seen in the photos above), which is not that shown in the attached planes, I made it to prevent the keel from coming distributed on the structure avoiding deformations that could derive from the thickness of the keel, (very small) while the upper and lower ordinates
they are 6mm thick, and very heavy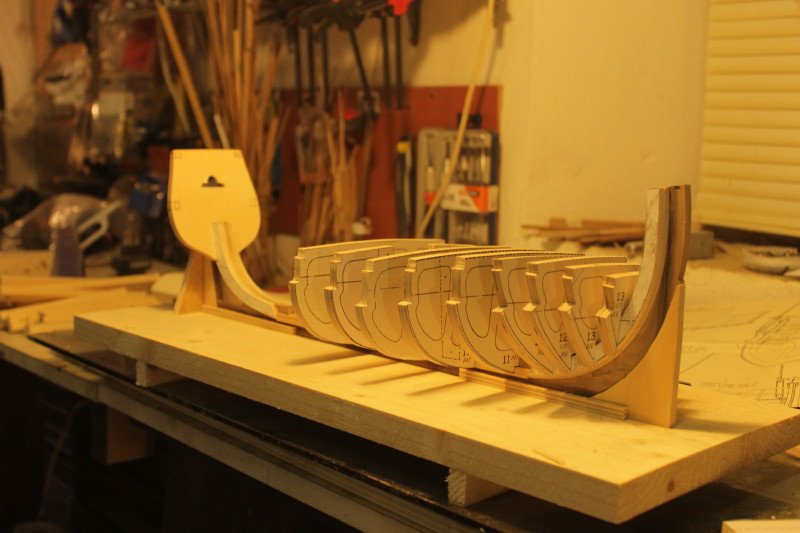
-
I apologize to the readers, my poor practice with the use of the translator and the "automatic" translation of the site to the fact that even the previous parts are in Italian, let's see if I can now correctly "set up" the program ,
in the parts before this I illustrated the type of wood used for the construction of the model: walnut, cherry later oak
timber I found where I live (hills of Mugello, near Florence) and which has my opinion, this timber is better than the one found in the building boxes and in the shops for modelingwe hope that the translator works well ...
- mtaylor and paulsutcliffe
-
2
-
-
Un po 'per curiosità, un po' per passione condivisa con molte persone, cerco di aprire questo wip su questo sito, (non so se scrivere in italiano, l'unica lingua che conosco "abbastanza" bene, causerà problemi per comunicare con gli altri, ma vediamo cosa succede, metto il traduttore in automatico ... vediamo se puoi farlo anche tu)
si tratta della costruzione della carovana di Santa Maria, forse uno dei modelli più realizzati da quasi tutti i modelli, i piani di costruzione sono racchiusi nel libro "Le navi di Colombo" di Heinrich Winter, è un sei tavoli in 1 / 50 scala in cui viene riportata la "caracca" (nao) di Cristoforo Colombo,
o almeno uno dei tentativi di riportare, come dovrebbe essere, la "nao" di Cristoforo, con cui nel 1492 attraversò l'Oceano Atlantico con intento di scoprire le Indie .....
un altro libro che ho e in cui sono riportati altri esempi di disegni sulla caravella è "La nave di Cristoforo Colombo" di Xavier Pastor,
Riporto seguendo la traduzione, senza inserire le immagini, sperando che il traduttore funzioni bene ....
Il libro di Winter ho avuto per diversi anni, ma non ero particolarmente attratto dalla modella, una delle modelle piu 'classiche, e inoltre' una nave "rotonda"
qualcosa che non si lega o si lega meglio con i miei gusti, perche fino ad oggi io avevo realizzato modelli di navi "lunghe", ma c'è sempre una prima volta ...
anche perché la realizzazione della caracca non è particolarmente complessa e questo modello mi permette di ricominciare con la realizzazione di un altro modello in un periodo in cui ha poco tempo,
quindi la decisione di iniziare con questo modello è stata presa non tanto per l'implementazione stessa, ma per il "bisogno" di condividere, "
così ho iniziato a guardare i tavoli fatti da Adametz,...............................
in cui viene anche riportata la costruzione di una particolare "scala" per l'attuazione delle ordinate sulla chiglia e della placcatura, che ho eseguito scrupolosamente, e che non avevo mai trovato in altri piani di costruzione
in pratica sulla scala si realizzerà in un "sottosopra" la parte iniziale dell'attuazione del modello, con le ordinate che aderiranno ai gradini della scala, almeno l'intento dovrebbe essere
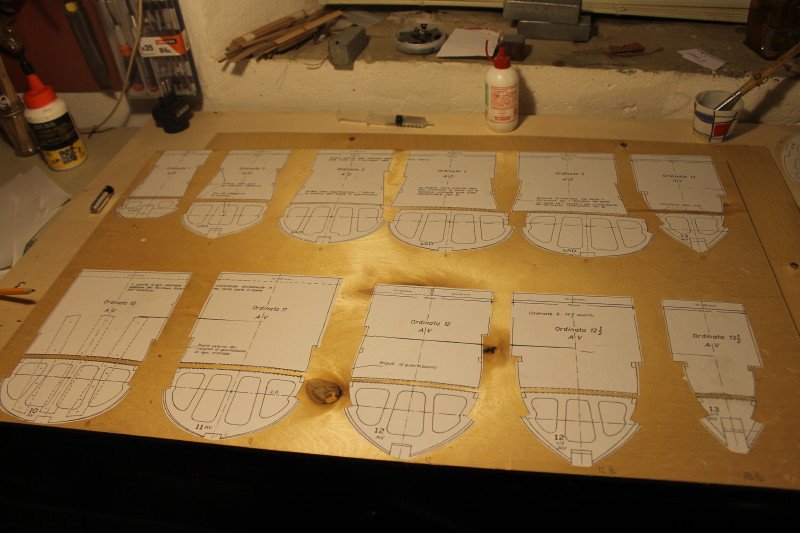
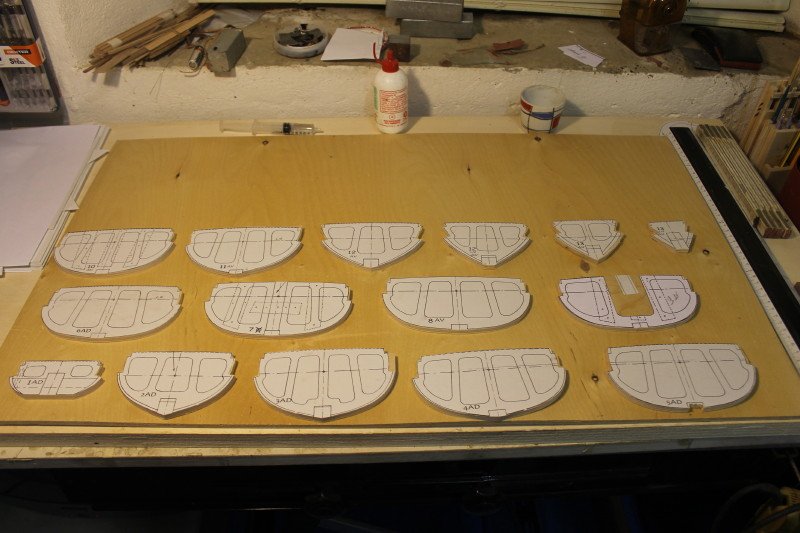
Questo vedremo ... ....La realizzazione del modello continua con il metodo delle ordinate per fare queste ho usato lo scanner e il programma di fotoritocco riportando sul compensato 6mm i telai superiore e inferiore,
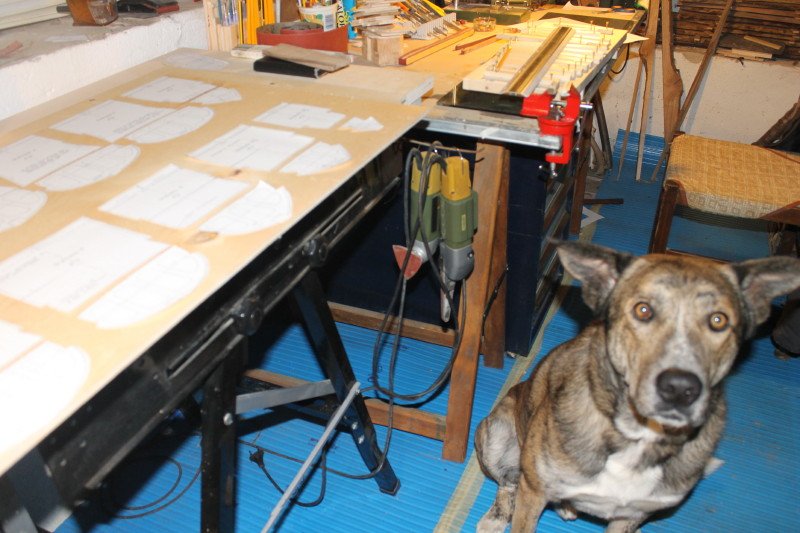
presente anche il fedele amico "Argo" (come il cane di Ulisse famoso personaggio dell'Odissea)
per la realizzazione del modello ho usato il legname che ho trovato nella zona in cui vivo (le colline del Mugello, vicino a Firenze)
il noce, la ciliegia
la noce e la ciliegia sono le piante che avevamo nella fattoria di casa, il noce è il mio preferito, sia per le "sfumature" che per la lavorazione stessa,non paragonabile con la noce che si acquista nel negozio e ciò che viene utilizzato nelle scatole di assemblaggio
-
Un po' per curiosità, un po' per passione condivisa con tante persone, provo ad aprire questo wip su questo sito, (non so se la scrittura in italiano, l' unica lingua che conosco "abbastanza" bene, provocherà dei problemi per comunicare con gli altri, ma proviamo a vedere cosa succede, io ho messo il traduttore in automatico... vediamo se potete farlo anche voi )
si tratta della costruzione della caracca Santa Maria, forse uno dei modelli maggiormente realizzati da quasi tutti i modellistici, i piani di costruzione sono allegati nel libro " Le navi di Colombo" di Heinrich Winter, si tratta di un sei tavole in scala 1/50 nel quale viene riportata la "caracca" (nao) di Cristoforo Colombo,
o almeno, uno dei tentativi di riportare, come doveva essere la "nao" di Cristoforo, con la quale nel 1492 attraverso l' oceano Atlantico con l' intento di scoprire le Indie.....
altro libro che ho e nel quale vengono riportati altri esempi di disegni sulla caravella è "The ship of Christopher Columbus" di Xavier Pastor,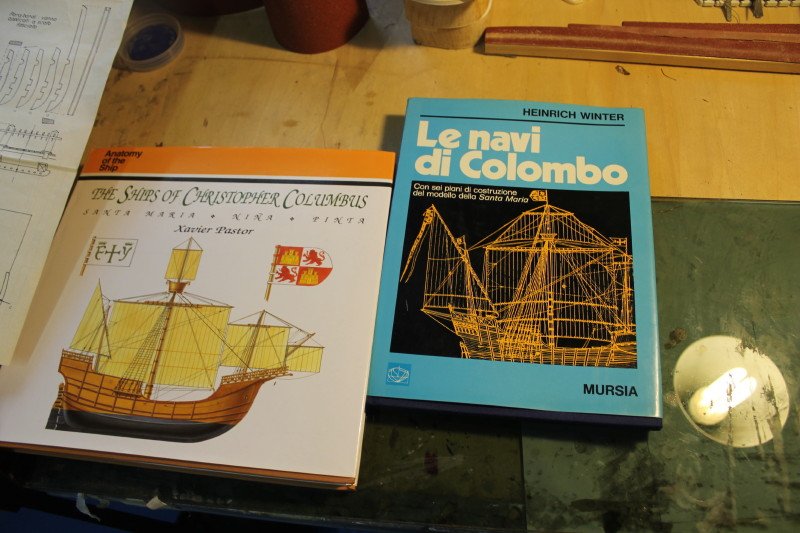
il libro di Winter lo avevo da diversi anni, ma non ero particolarmente attratto dal modello, uno tra i piu' classici modelli, e per di piu' di una nave "tonda"
cosa che non lega o meglio legava con il mio gusto, perchè fino ad oggi avevo realizzato modelli di nave "lunghe", ma c'è sempre una prima volta...
anche perché la realizzazione della caracca non è particolarmente complessa e questo modello mi permette di ripartire con la realizzazione di un altro modello in un periodo nel quale ho poco tempo,
per cui la decisione di partire con questo modello è stata presa non tanto per la realizzazione stessa, ma per il "bisogno" di ripartire,,,
per cui mi sono messo a guardare le tavole realizzate da Adametz,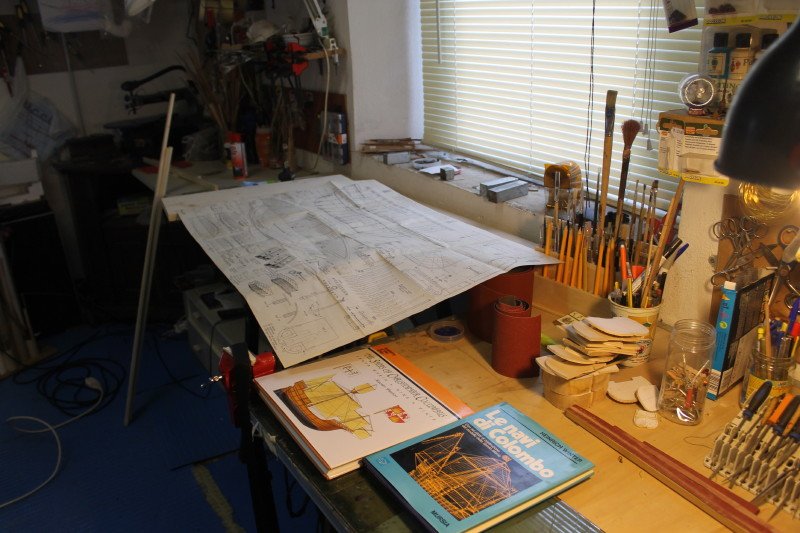
nelle quali viene riportato anche la costruzione di un particolare "scaletto" per la messa in opera delle ordinate sulla chiglia e il fasciame, cosa che ho realizzato scrupolosamente, e che non avevo mai trovato in altri piani costruttivi

in pratica sullo scaletto verrà realizzata in maniera "capovolta" la parte iniziale della realizzazione del modello, con le ordinate che andranno ad aderire alle battute riportate sullo scaletto, almeno l'intento dovrebbe essere
questo.......vedremosaluti a tutti
luponero
-
Ciao a tutti i modellisti,
sono un modellista fiorentino, da tempo mi diletto nella realizzazione di modelli navali statici,
con piacere auguro
"buona segatura a tutti i compagni d' avventura"
luponero

Santa Maria by luponero - FINISHED - scale 1/50 - carrack - from diagrams of Adametz
in - Subjects built Up to and including 1500 AD
Posted
The model of the Santa Maria that I am making is taken from the drawings of Adametz reported in the book "the ships of Columbus" by Winter, which I assume
were made by studying the model that you serve for the replica of the Santa Maria created by Fernandez-Duro in 1892 to commemorate the 400th
anniversary of the discovery of America, the ship was built in Cadiz carrying out a study carried out by the commission with the presidency of Captain Fernandez-Duro, which was built as if it were a "nao" (caracca) giving way to a series of interpretations and analysis by many scholars on the subject, as a result of the few artifacts on the boat, probably also the realization of Santa Maria as "nao" that I find a widespread support among the historians of the time, even if the ornamental details were unusual for a ship from the fifteenth century
I bring back some images of the era
consequently it seems to me normal that we are different models of the Santa Maria, partly the result of imagination and partly of study, but without having the certainty that the real ship sailed from the port of Pales, August 2, 1492, was like the one we realize , indirectly allowing everyone to argue that perhaps the model we are doing is the one most similar to the one that actually existed (and of which we do not have many certainties)