Tim Holt
-
Posts
196 -
Joined
-
Last visited
Content Type
Profiles
Forums
Gallery
Events
Everything posted by Tim Holt
-
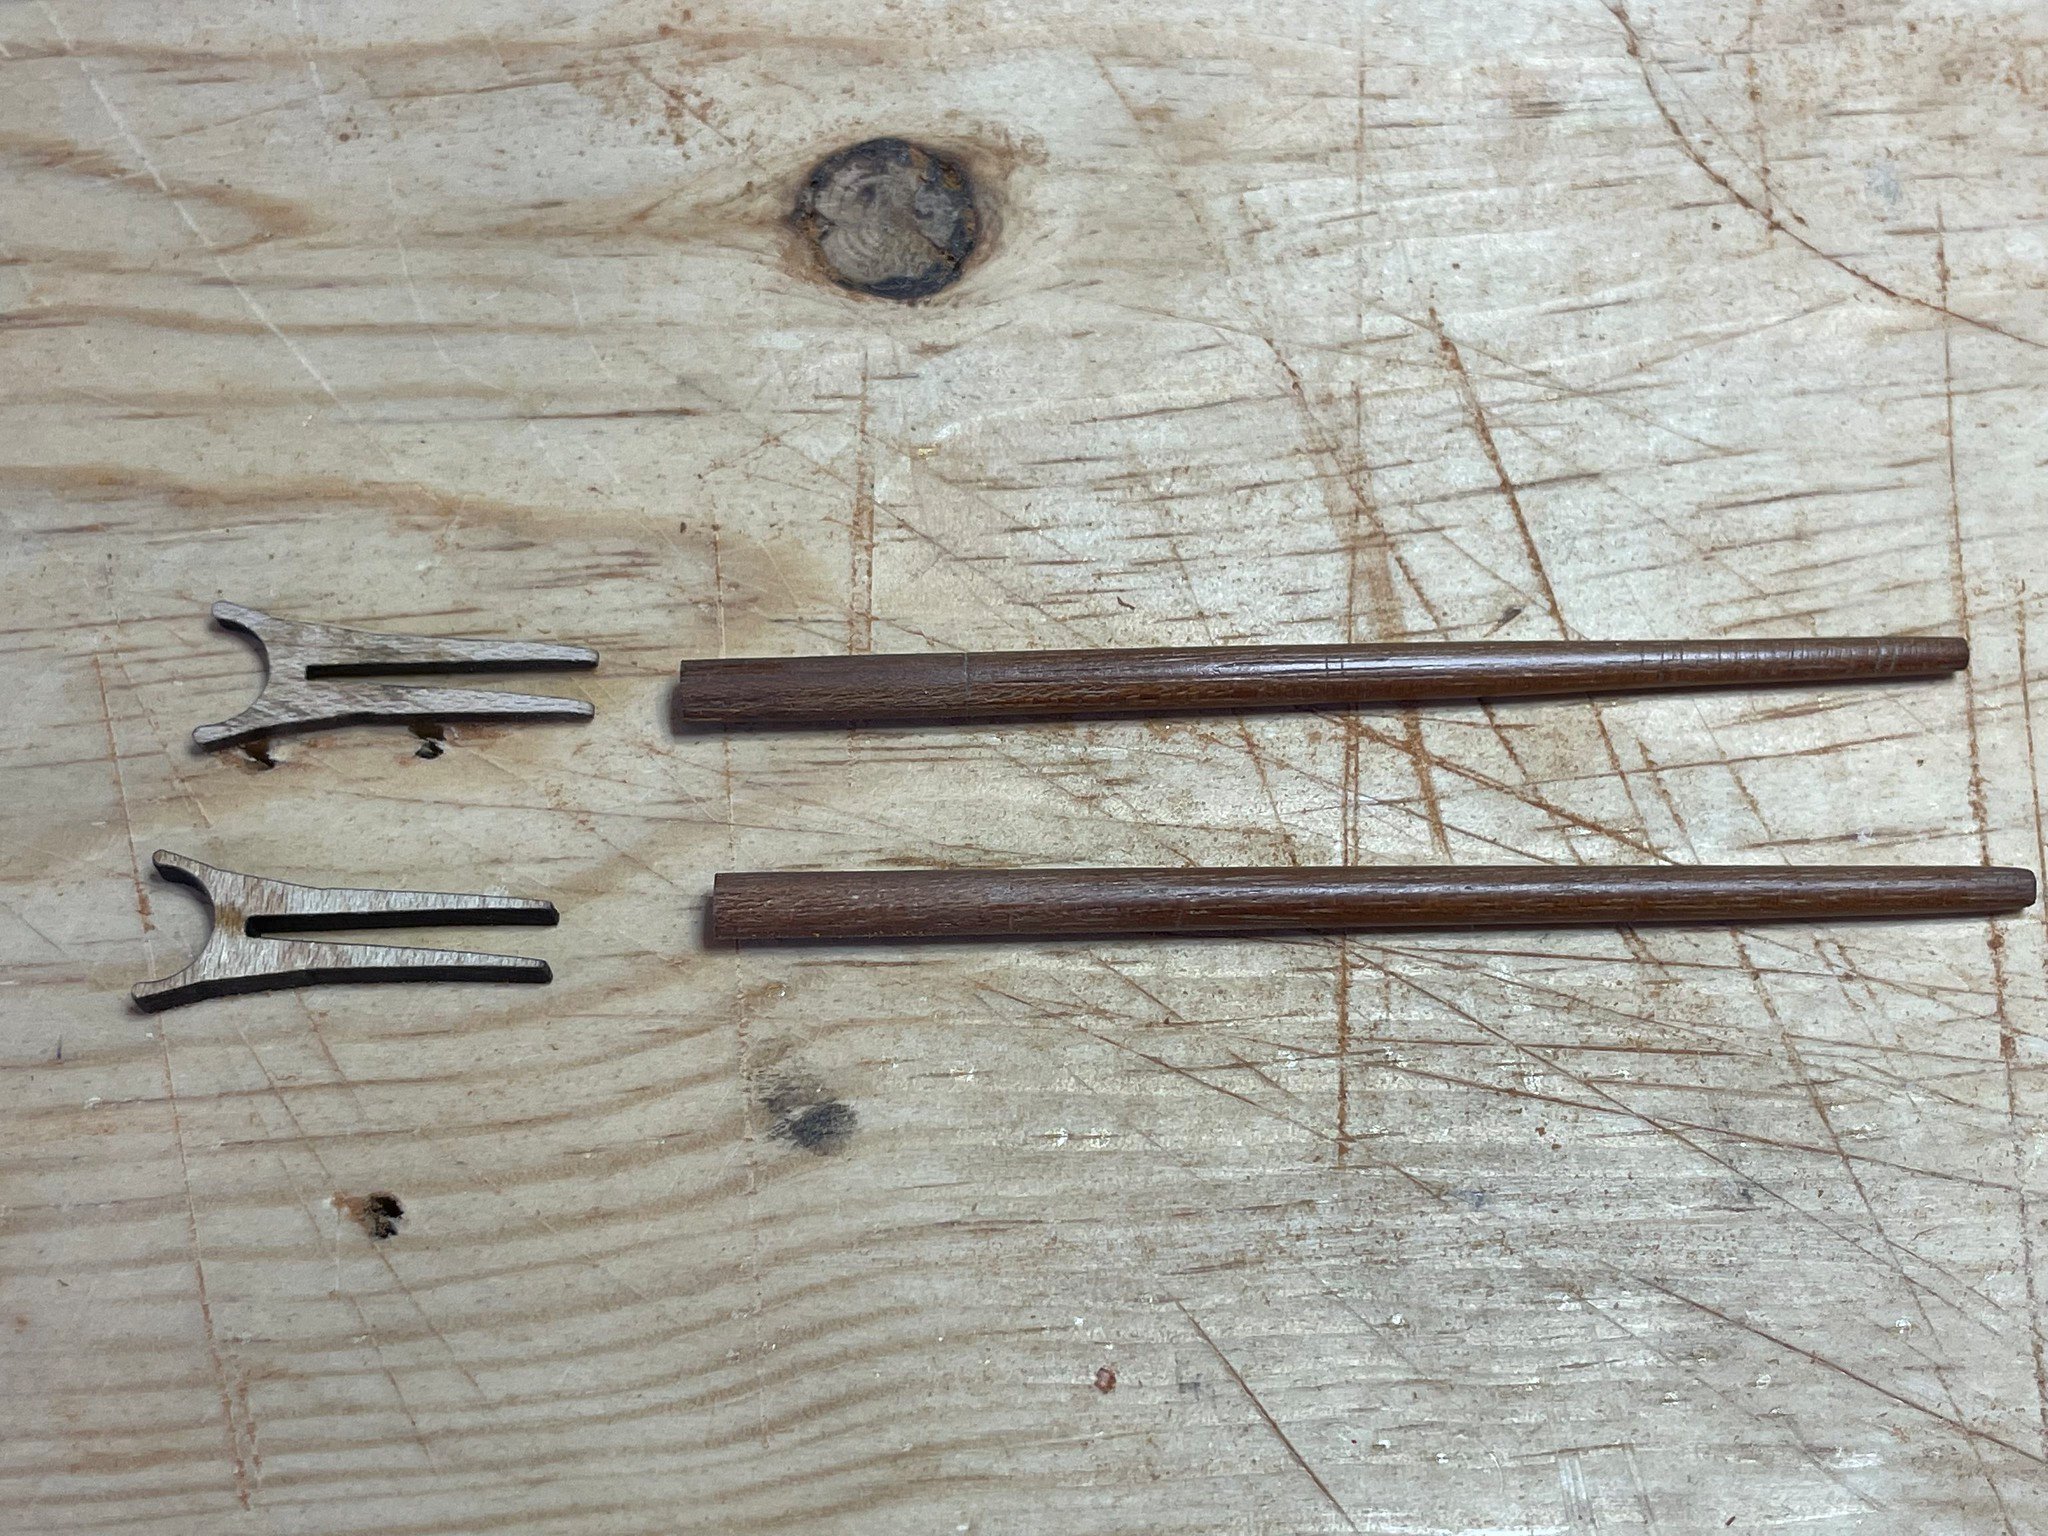
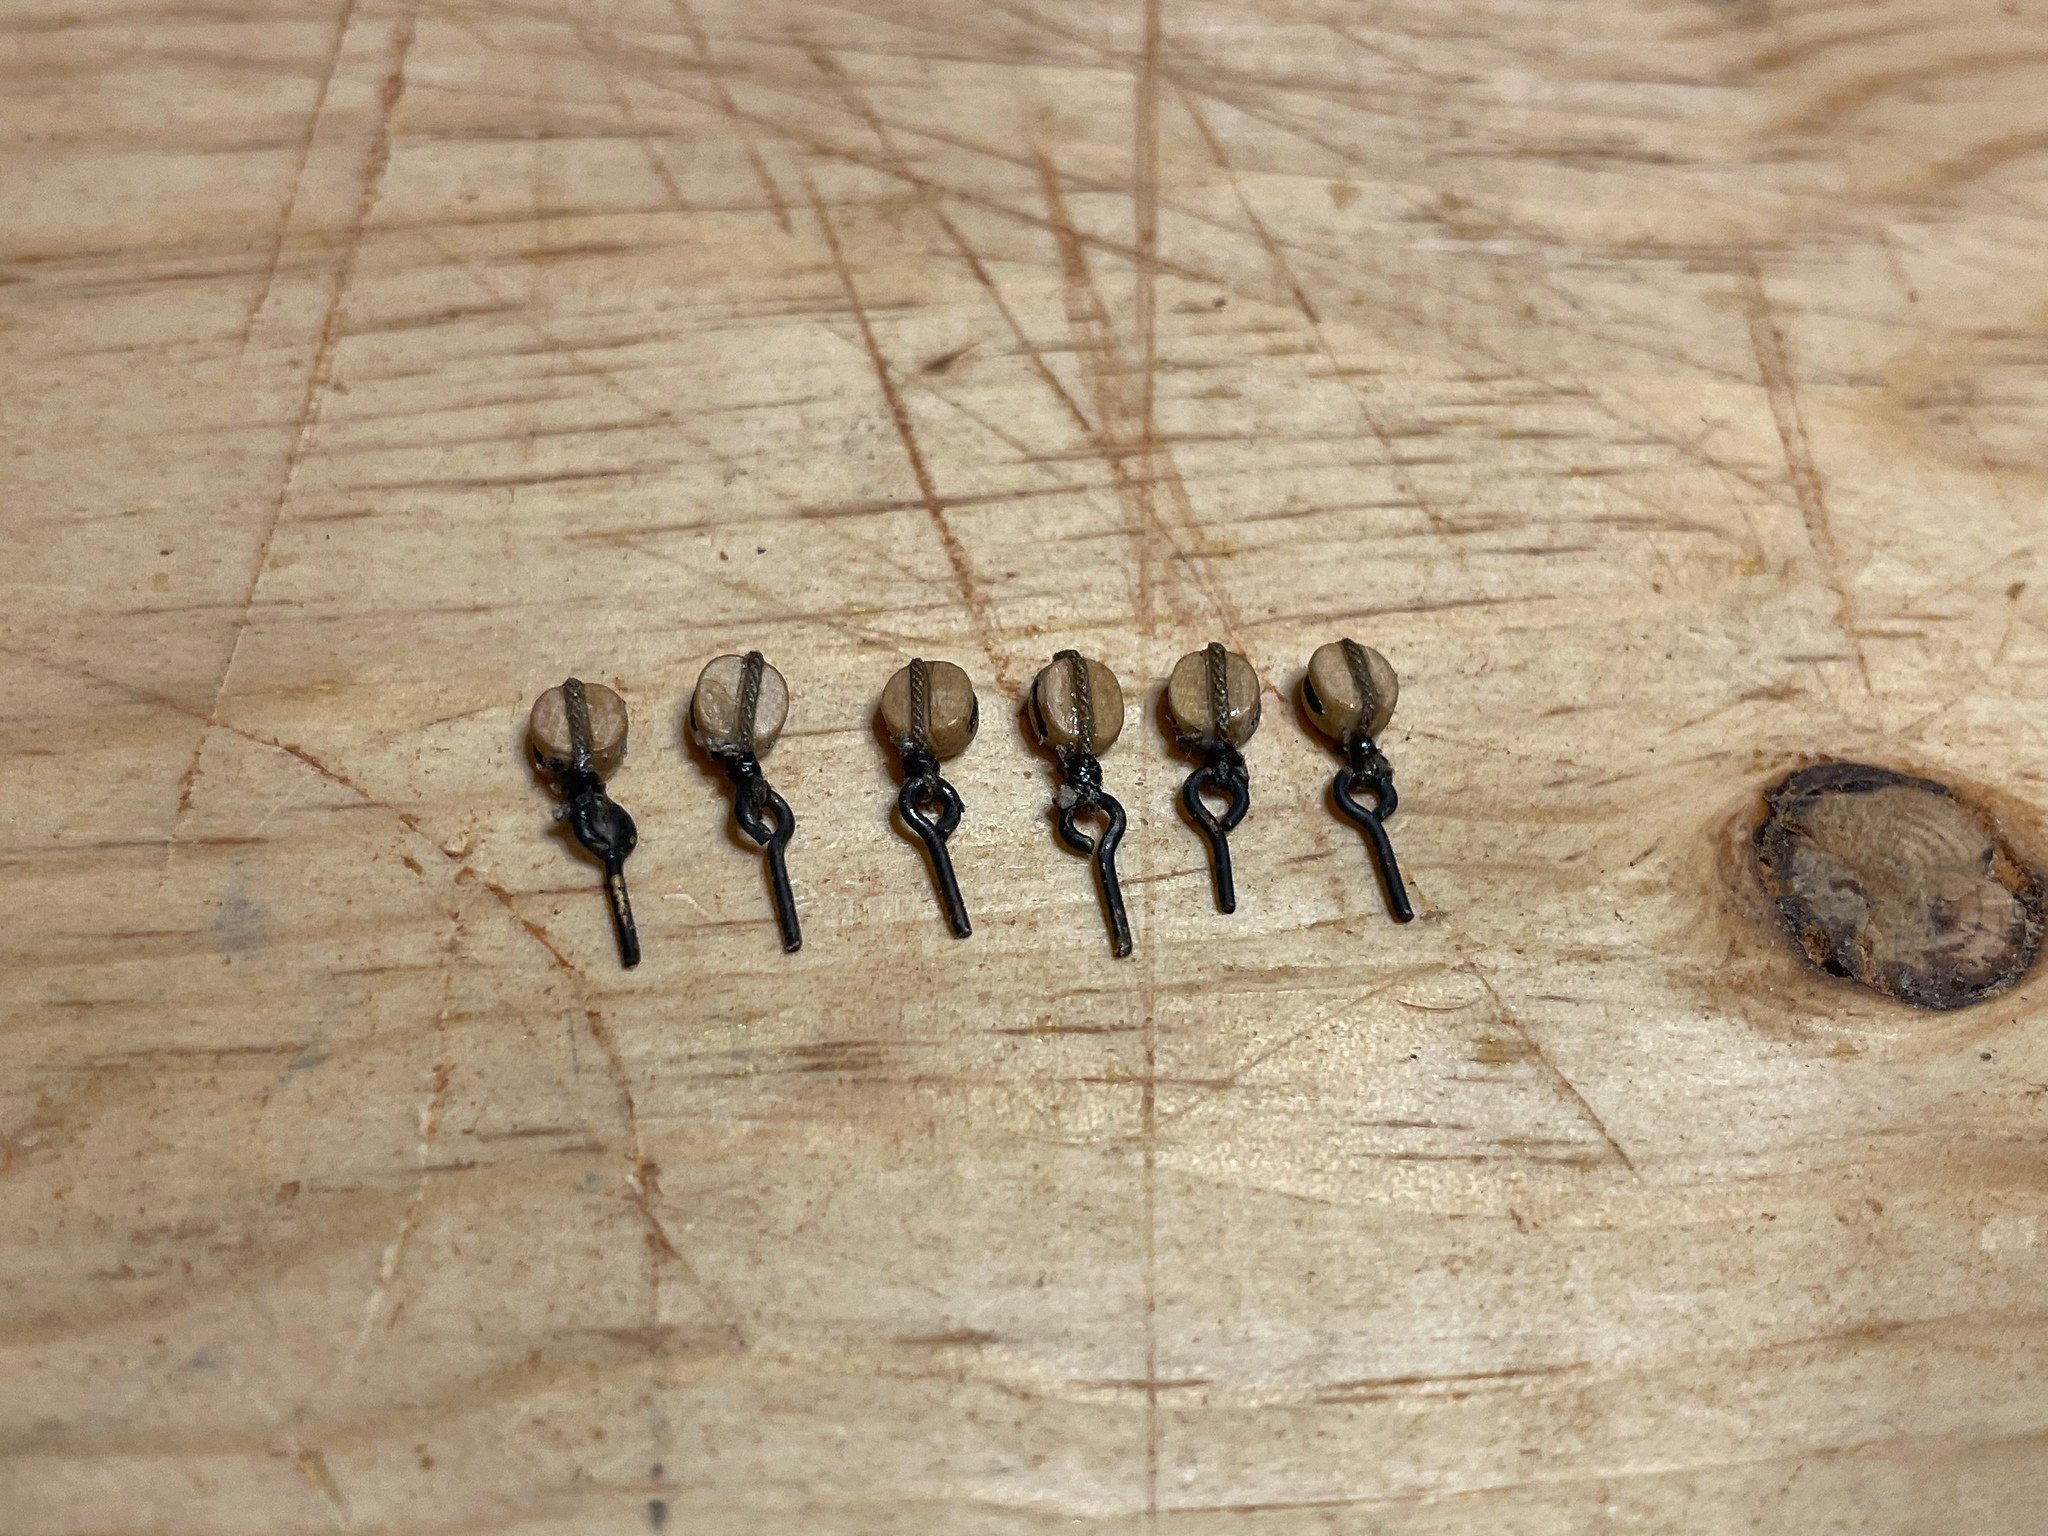
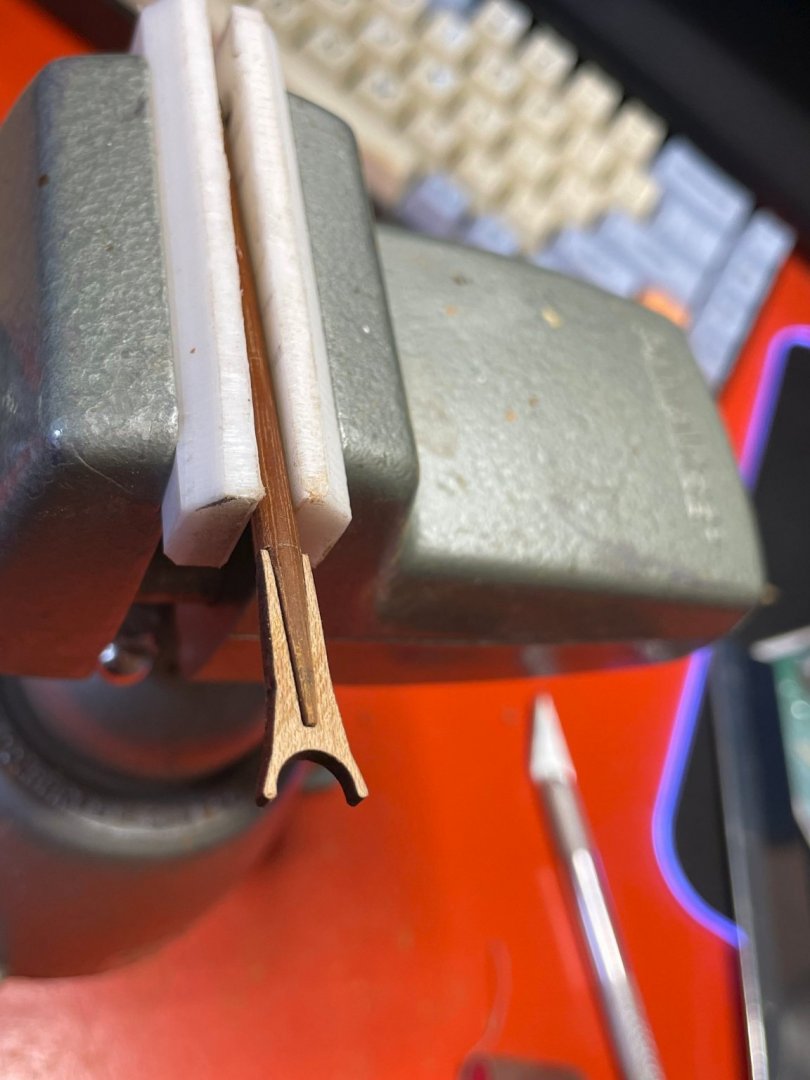
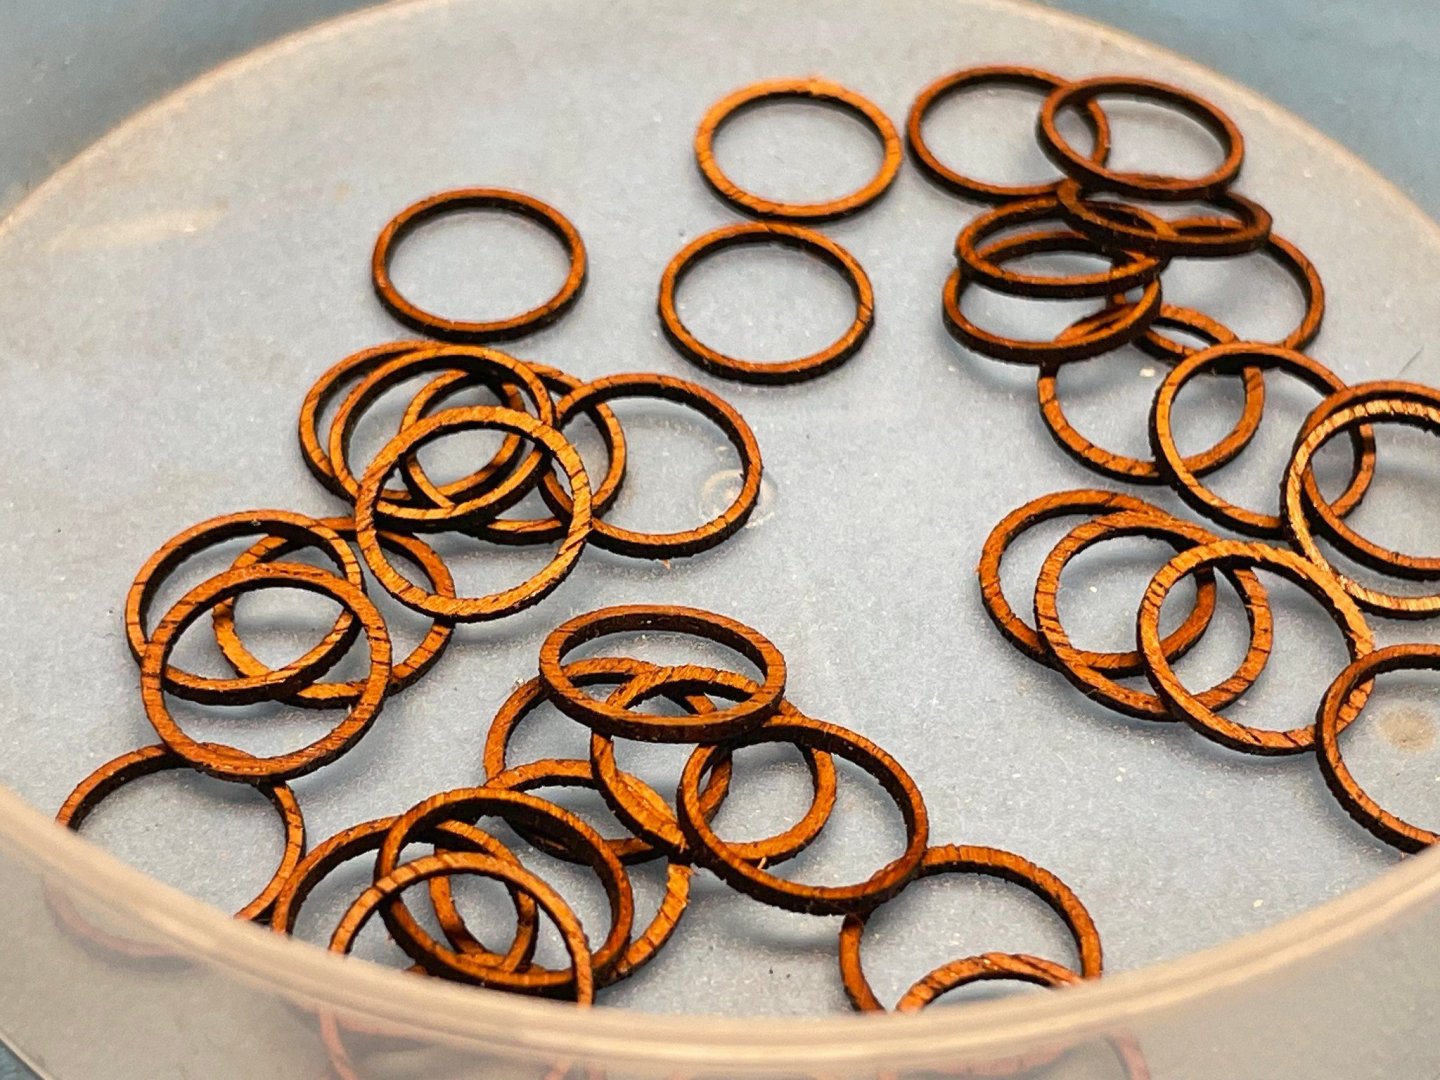
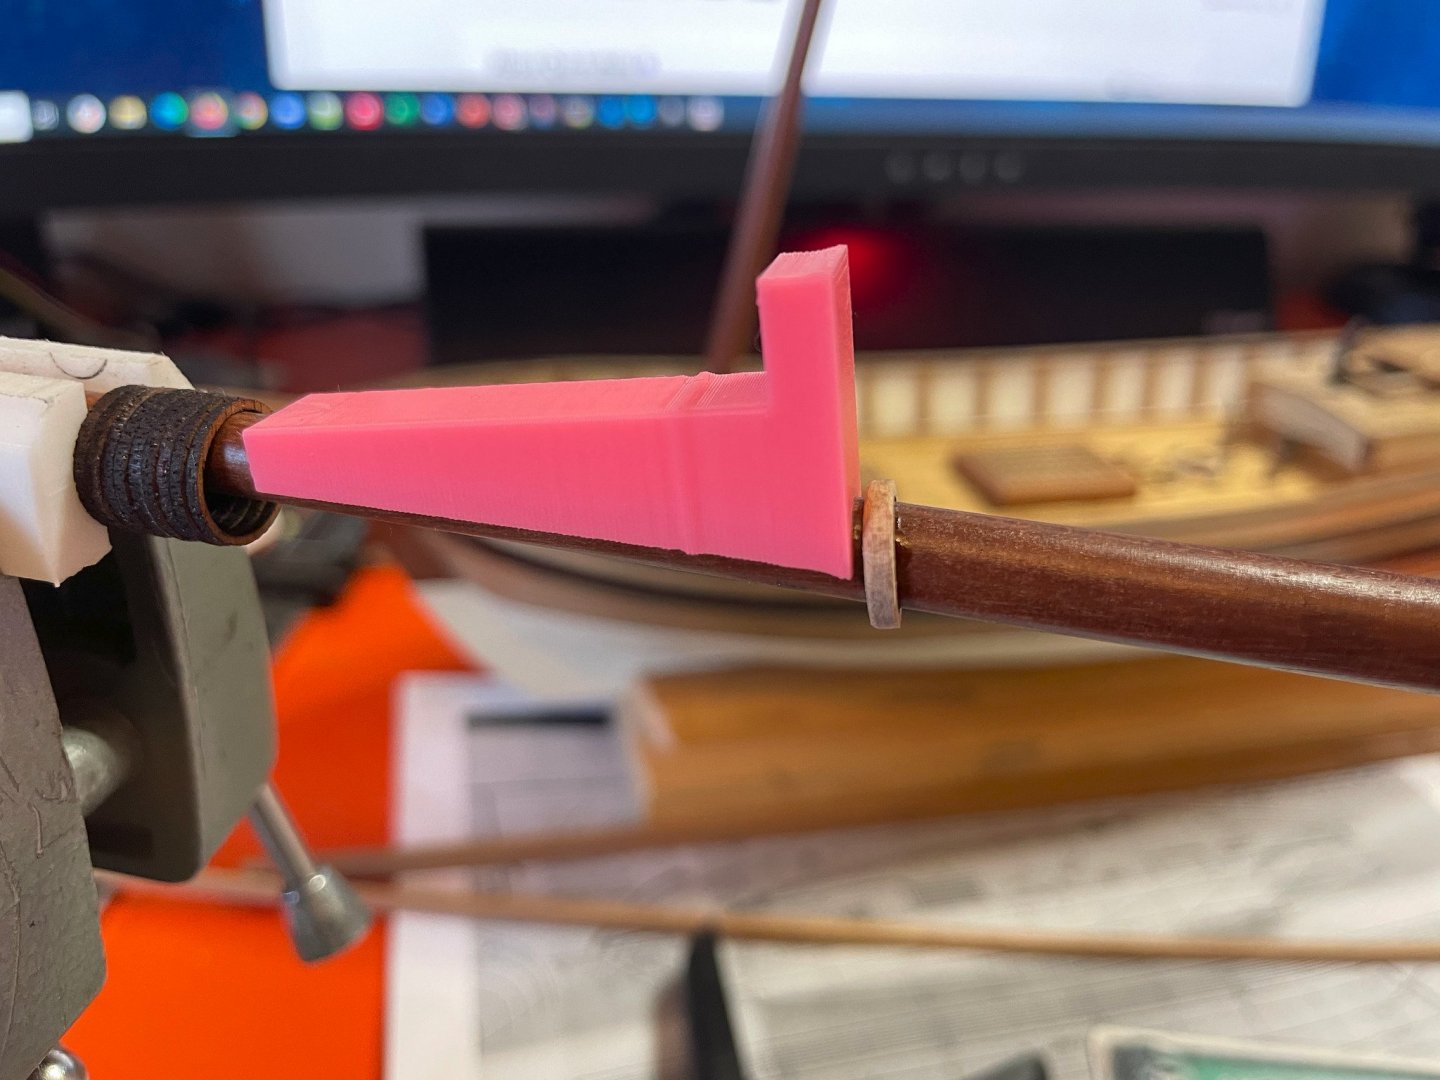
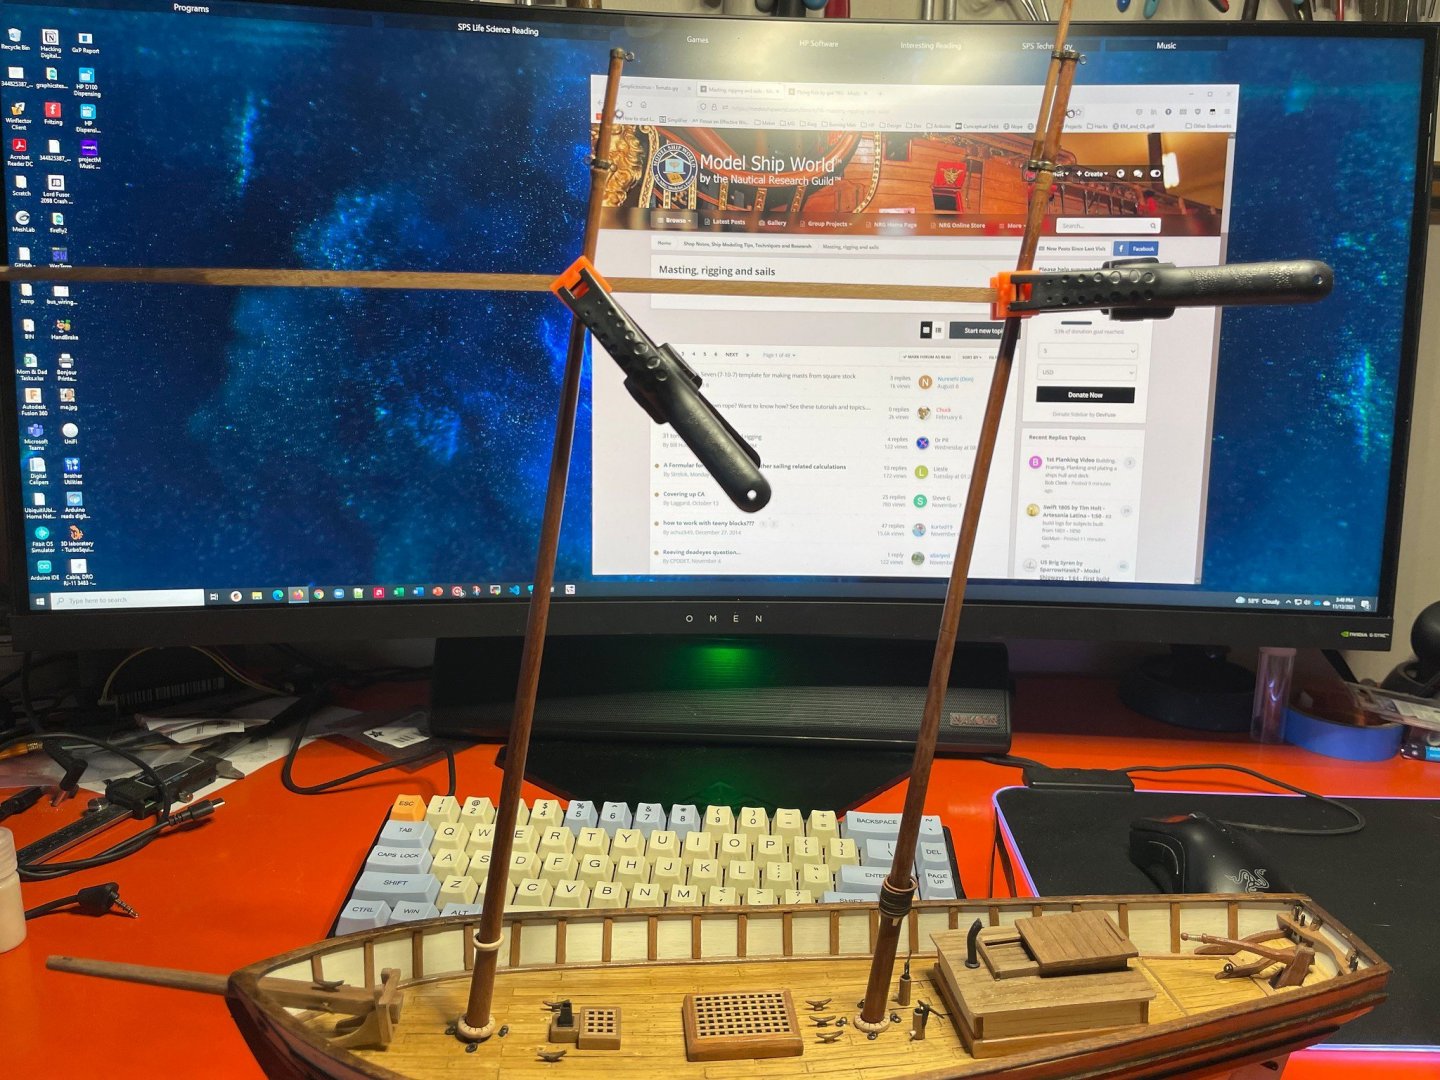
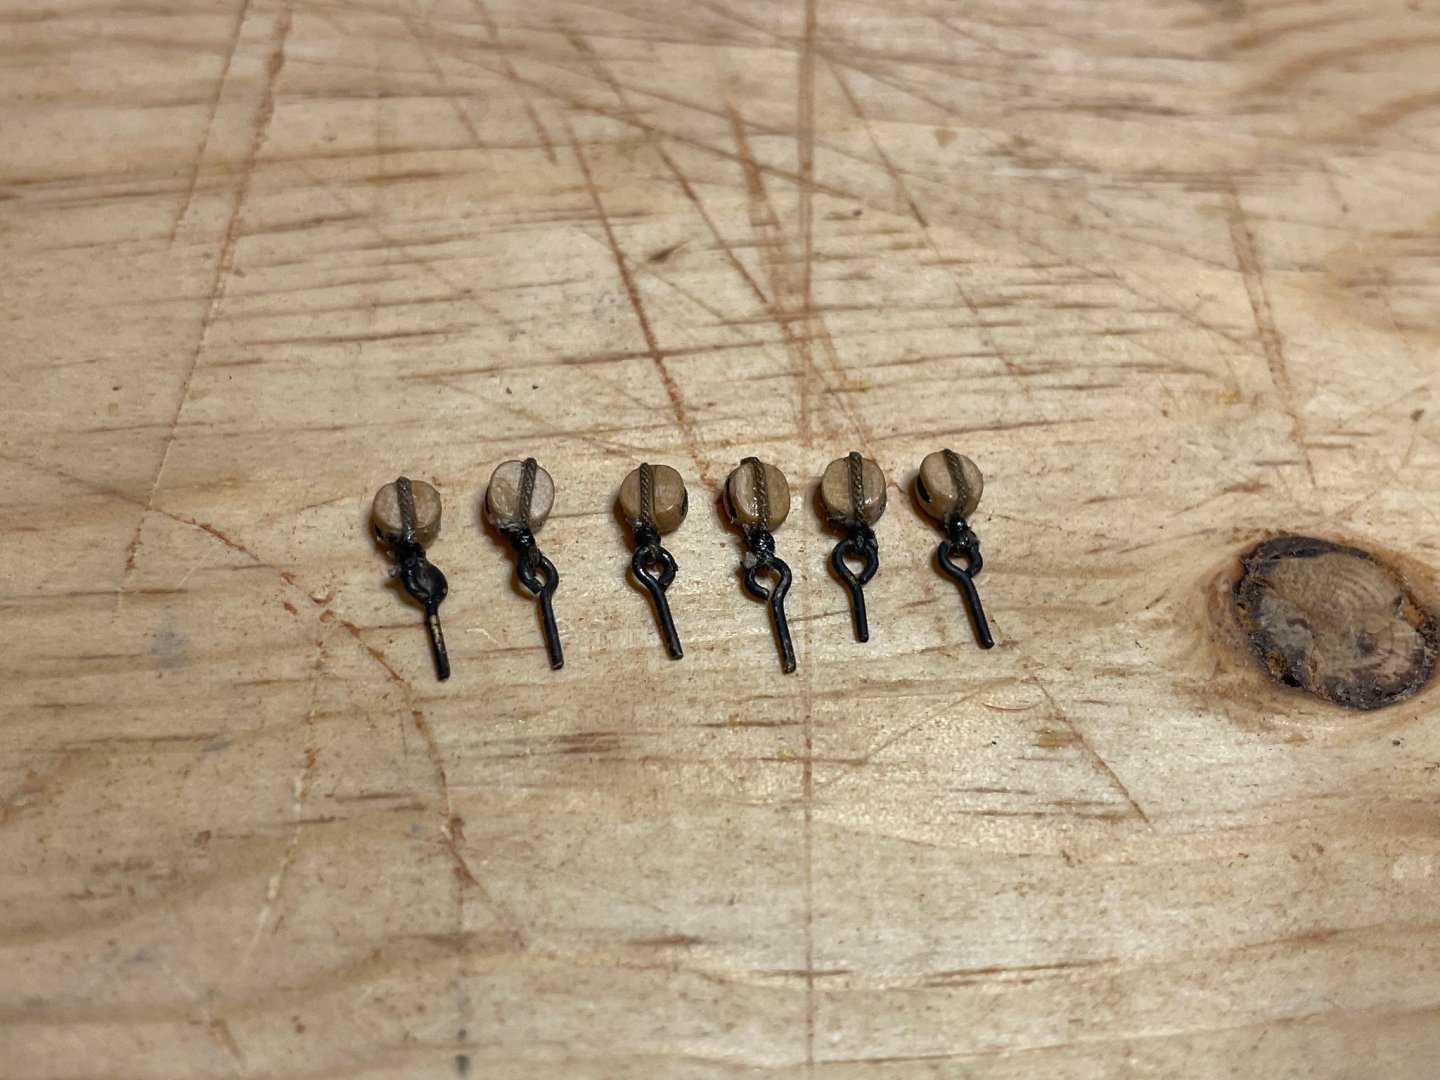
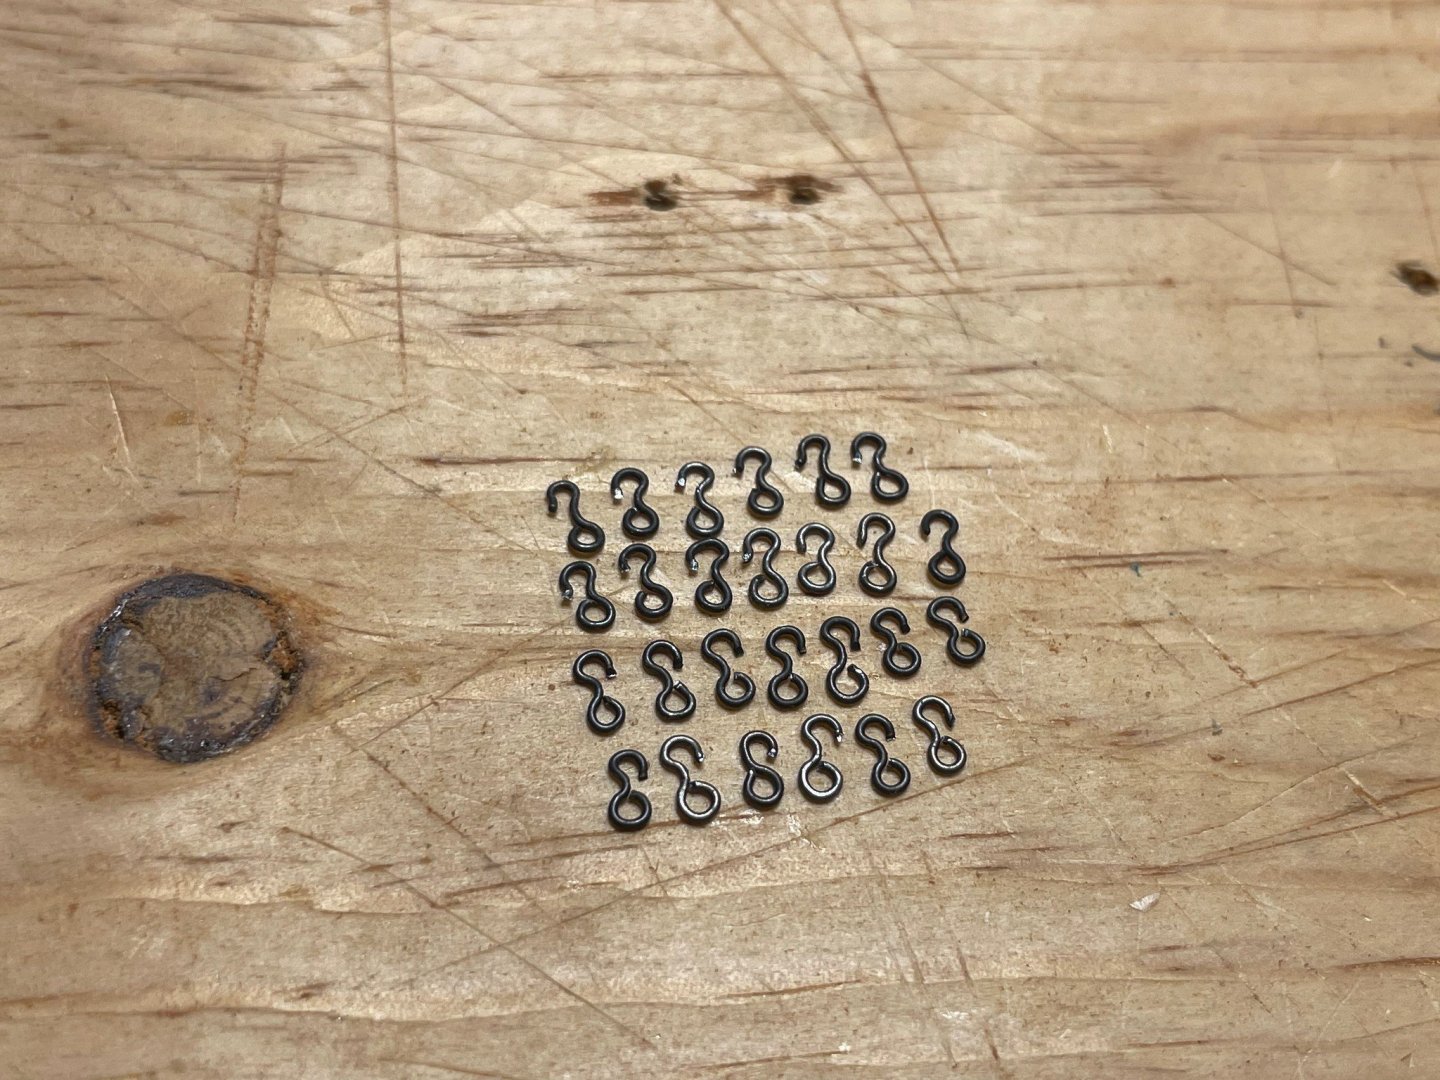
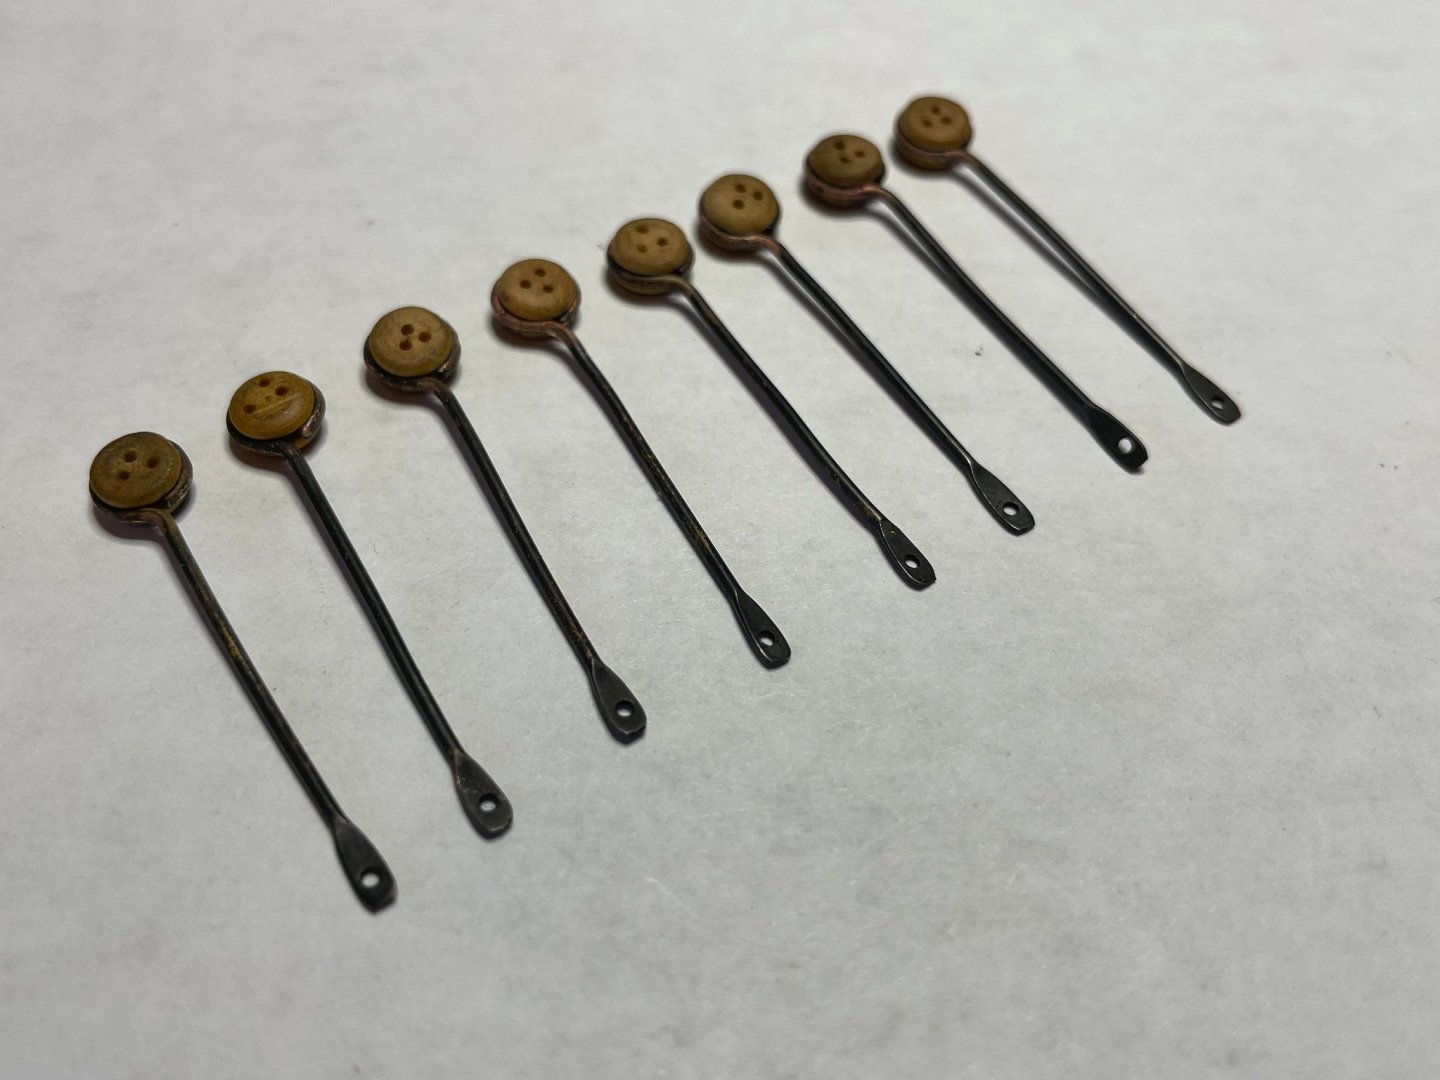
 Well you've convinced me - a used copy on the way from the UK at this point via AbeBooks... So some update on the build. I've finally started getting into the rigging, as well as the gaffs and main boom, and a few other things. First off some gaffs and gaff jaws. The jaws I laser cut out of some thin maple originally meant for violin sides. The gaff was tapered down then the jaw glued on. Final gaffs minus dark stain finish. Main boom was done the same way. On to the masts, I first cut a bunch of mast hoops out of some thin stock. They are pretty fragile but I like how they don't look too heavy. Also a lot better than the brass wire rings that came with the kit. Next I glued on a boom jaw support ring, using a 3D printed jig I'd made a while back to accurately angle the masts and help drilling a hole for the mast. Here is the main mast in place, with a laser cut base ring as well. I put a bit of PVA glue into the mast base to hold it in place. Second mast in place, with a cross piece clamped on to hold them parallel and at the same angle. Some 5/32" single blocks set up on eyes for putting on the deck and such. I also made a bunch of hooks as I might do some attachments with them. I just kept making them and slowly got more consistent with them. They are 24 gauge annealed wire, and bent with a fine tipped round nosed pliers. The key was just to keep making them until I started to get the rhythm of it. Some I like better than others and a certain number I just tossed. Lastly chain plates for the shrouds to follow...
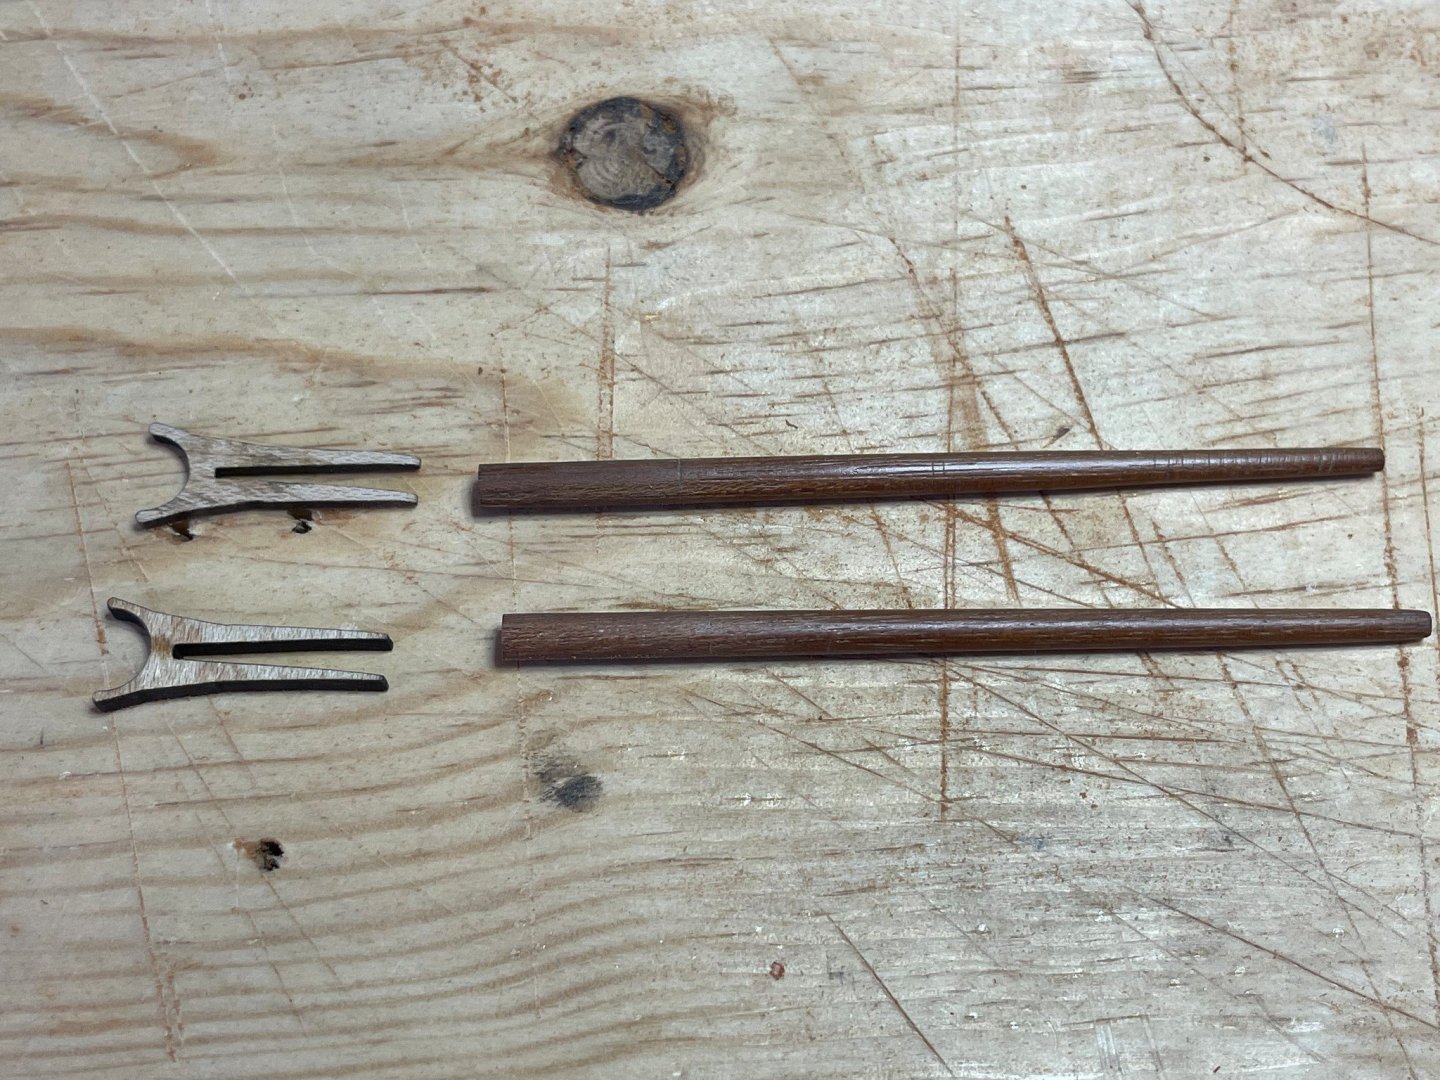


-
Hey that looks really nice! I think you'll agree that the rope and other things you can buy are much higher quality than what comes with the kit. I also bought all new blocks for mine from several sources.
- 21 replies
-
- 1
-

-
- Swift
- Artesania Latina
- (and 2 more)
-
Planking always brings up this tendency I have to put off things I'm not quite sure about, which is probably why I've had a few kits on the shelf for years
-
Thanks for sharing this. I had meant to add to my reply that basically I’m not sure about the anchor setup and figured I would leave that towards the end. Some things you can’t put off, some things you can! I have been using the plans and information on Model Shipways Katy of Norfolk as a guide for some things. Their plans are always nicely detailed it seems. I am also drawing a lot off Rigging Fore and Aft Craft by Lennarth Petersson. A lot of good detailed illustrations.
-
Thank you @GioMun. I just did a bit more work today and am getting some pictures ready. Have cleats on the deck now, as well as eyes. Also masts in place with some mast bands I cut on a laser cutter. I think they will look a lot better than the brass wire that came with the kit. I also have the main spanker boom in the works as well. I'm looking forward to the rigging!
-
Harold Hahn method
Tim Holt replied to Essayons's topic in Building, Framing, Planking and plating a ships hull and deck
I'm sorry but saying "just search or spend money" is not an answer. I have been searching. I'm seeing various styles specifically credited to that person. @Essayons what is it you mean by the method? -
Harold Hahn method
Tim Holt replied to Essayons's topic in Building, Framing, Planking and plating a ships hull and deck
Yea, sorry no that's not a good answer Some of you are talking about exposed frames and / or hiding / showing interiors, but google is also telling me it's about building it upside down. -
Harold Hahn method
Tim Holt replied to Essayons's topic in Building, Framing, Planking and plating a ships hull and deck
I think some of us would like to see a clear definition and examples of this method. I'm getting some hints from the comments, but examples (pictures and build logs) speak louder than words sometimes. It's worth pointing out that web searching is telling me he was a great artist and creator of prints as well as a model maker. I assume you're not talking about his direct art print creation methods? -
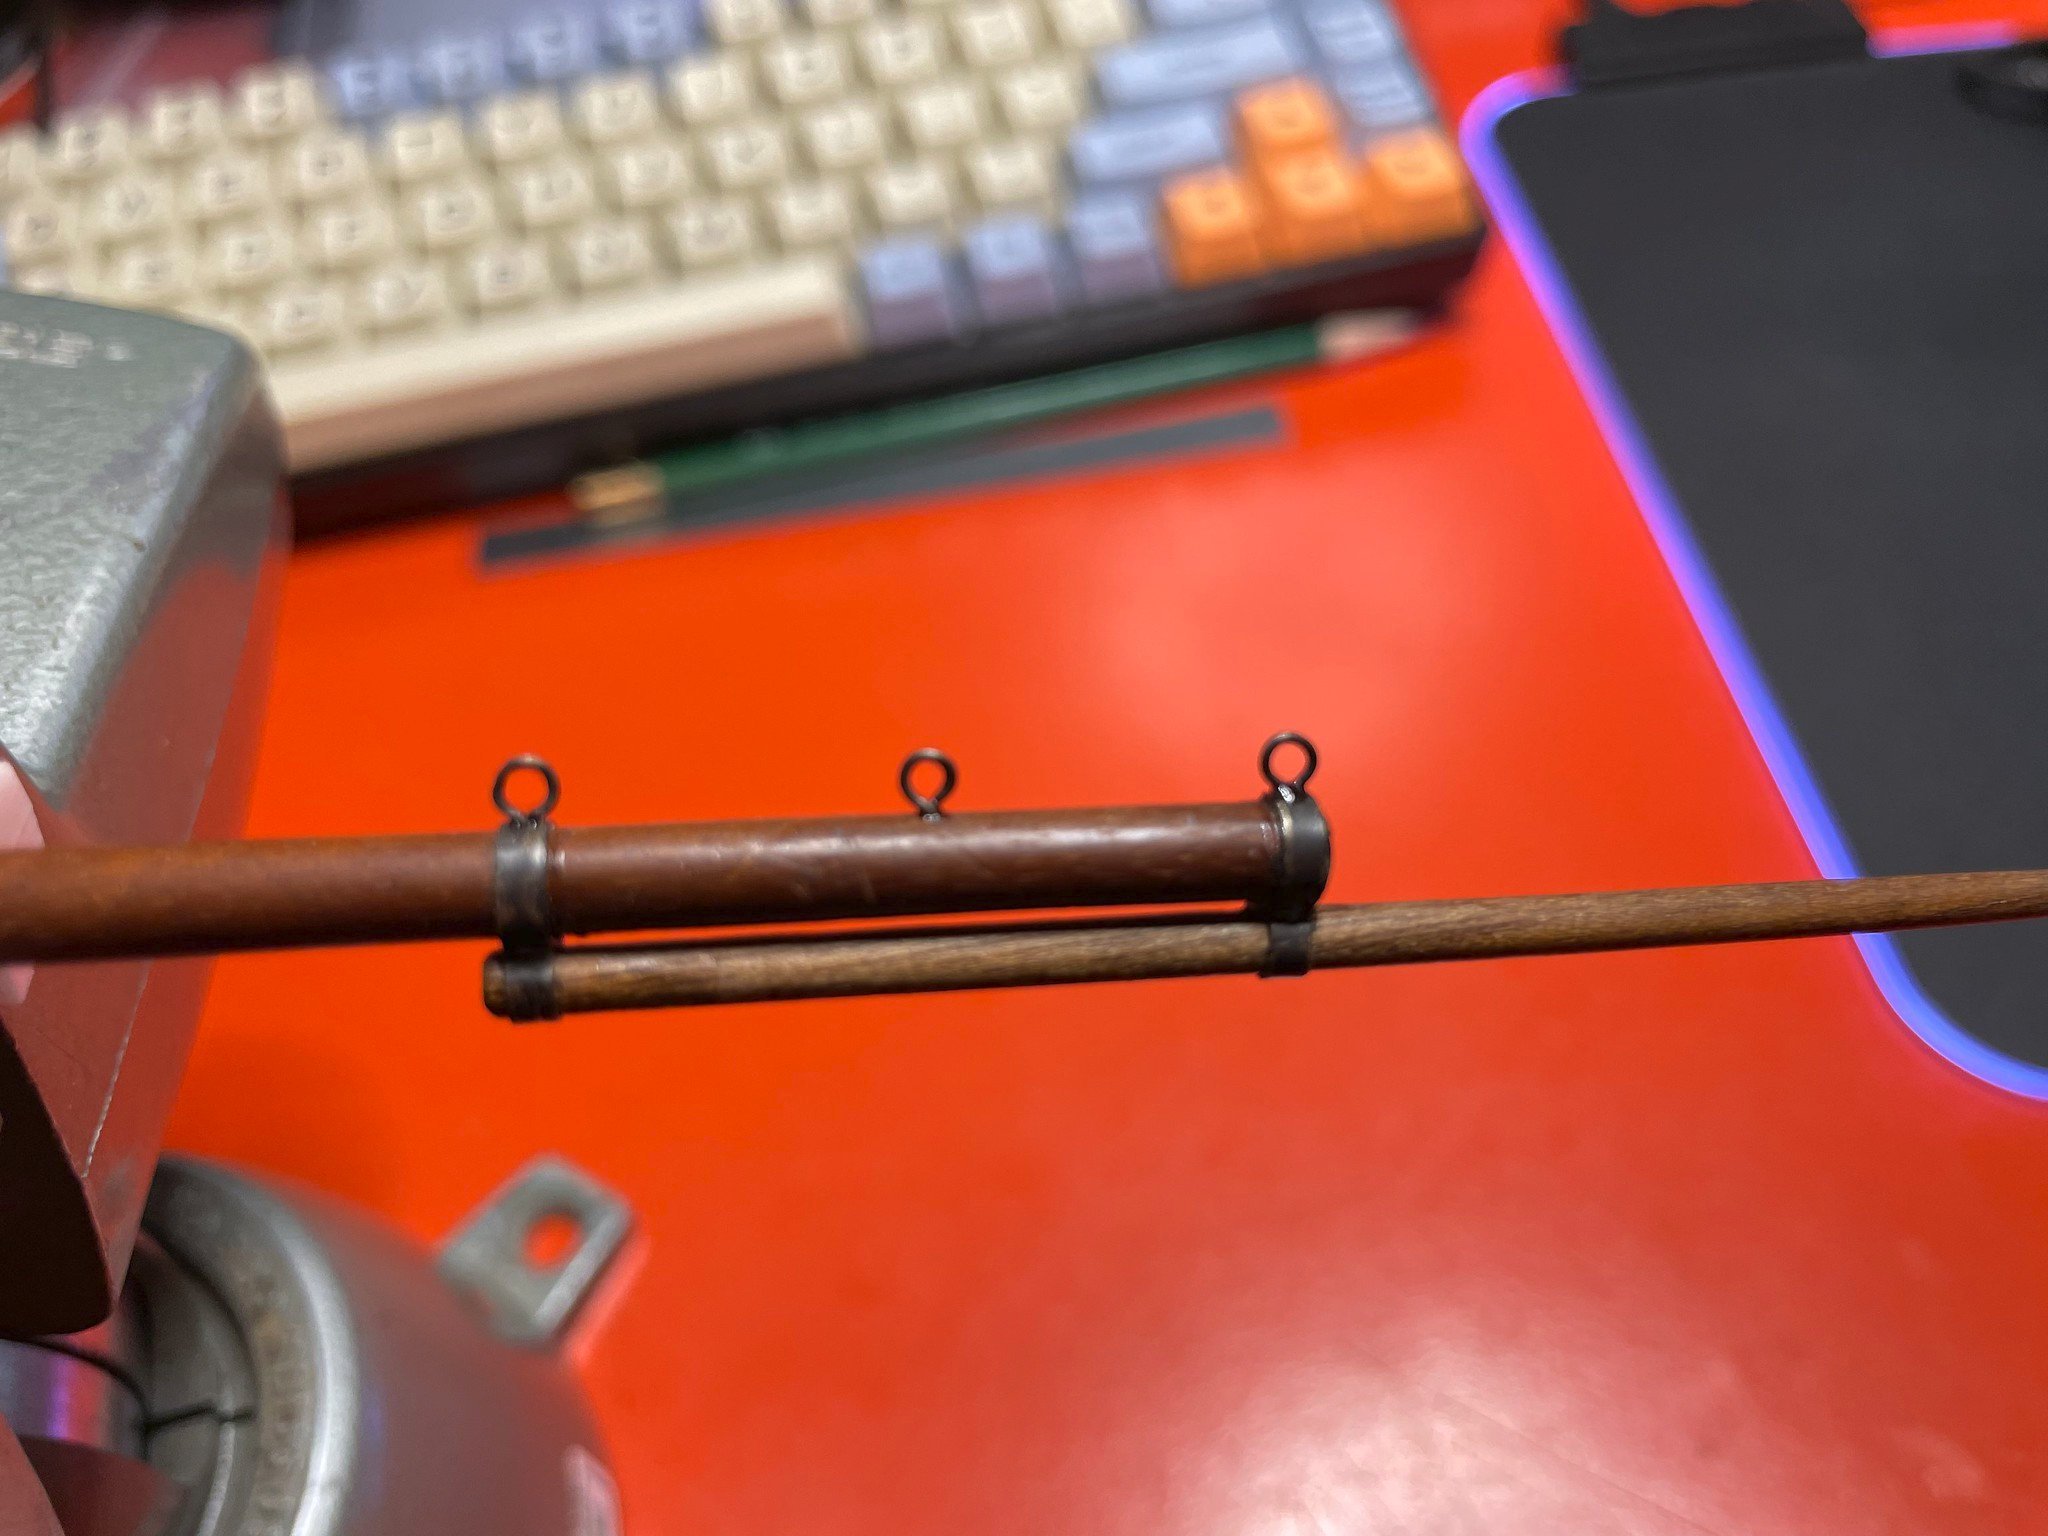
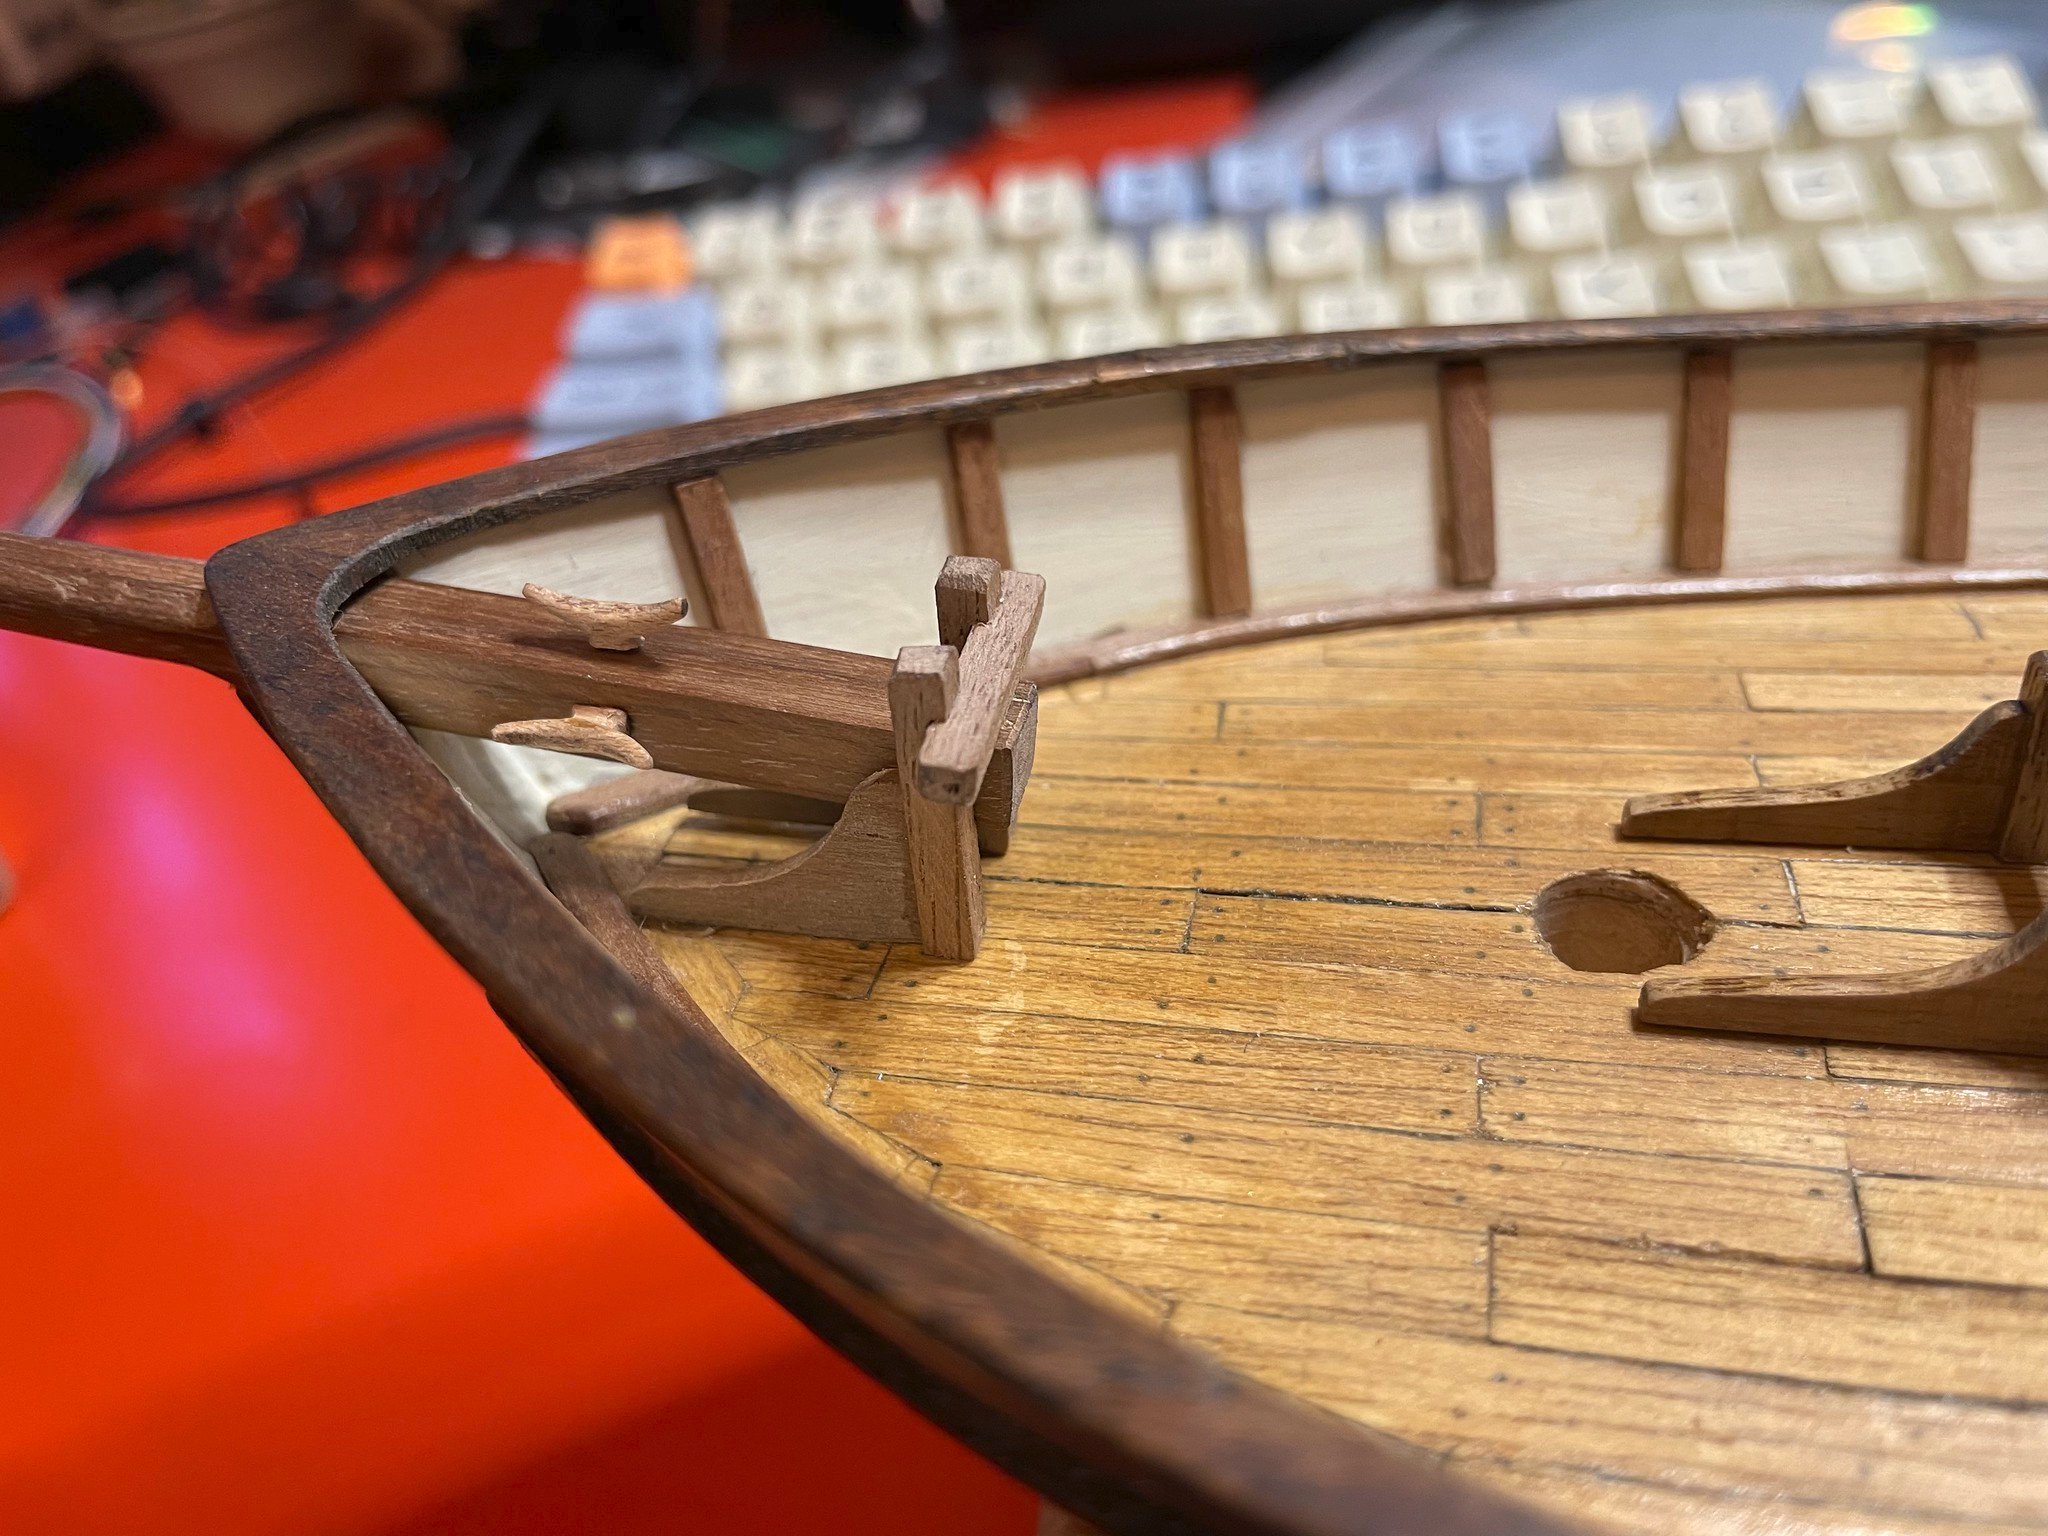
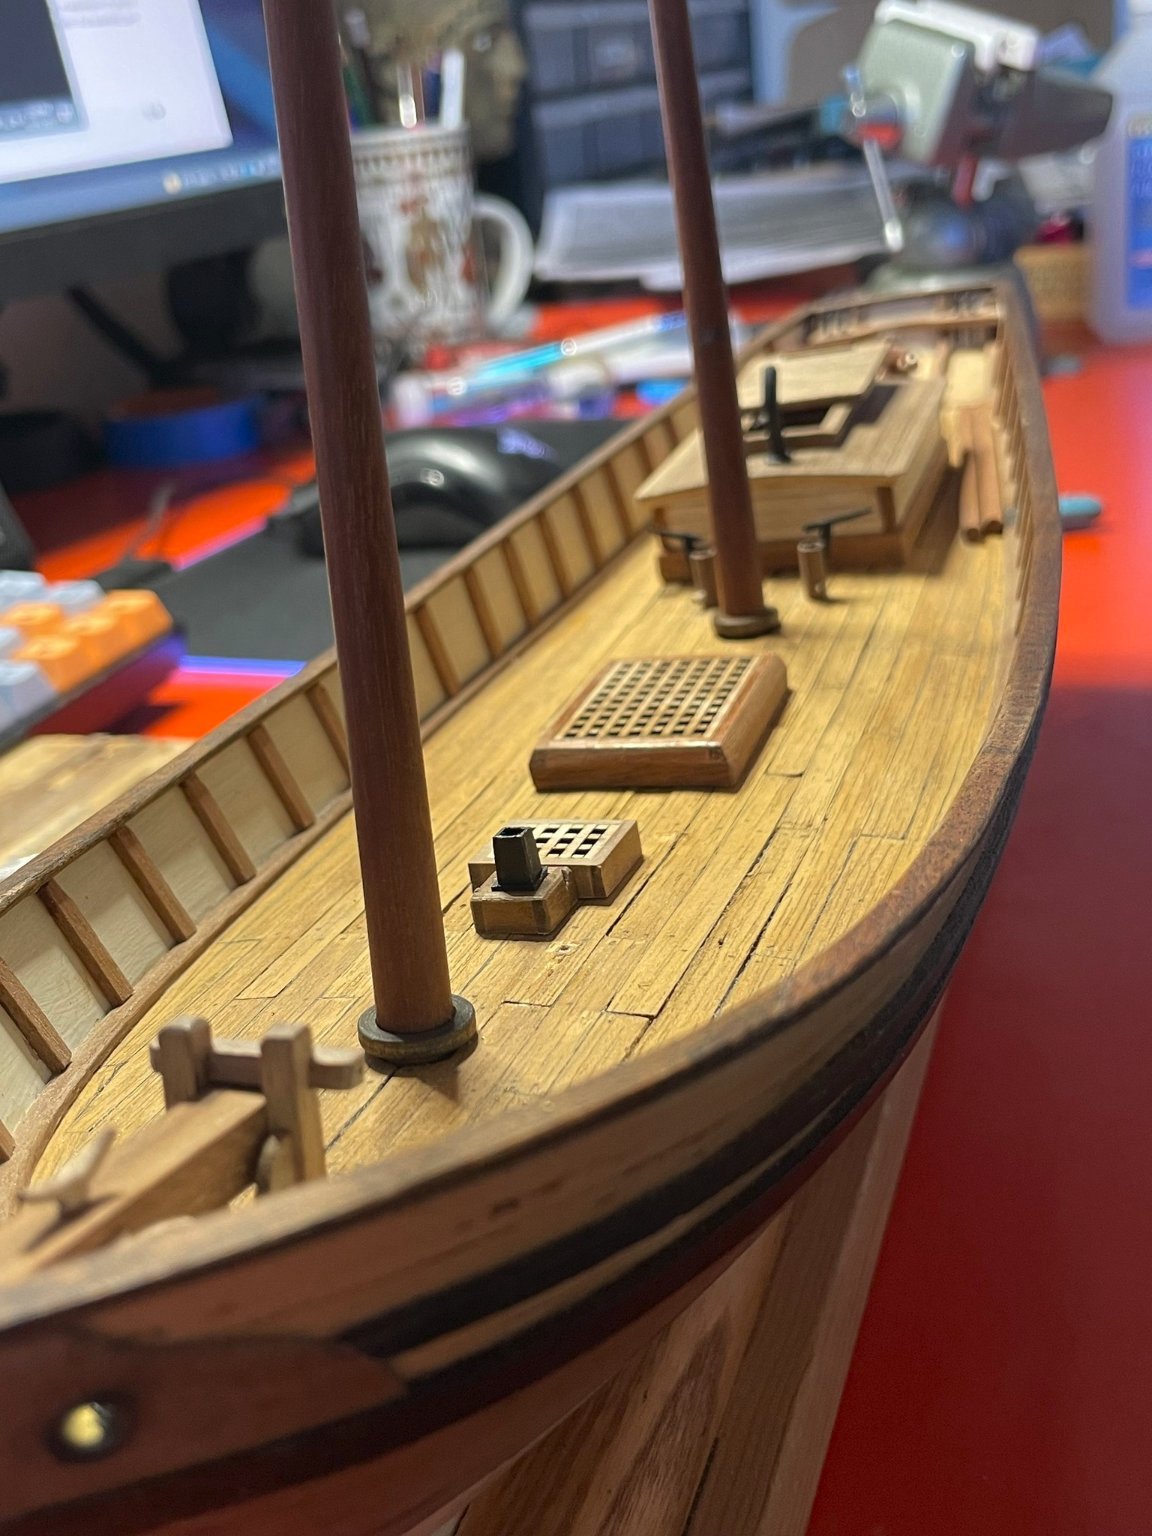
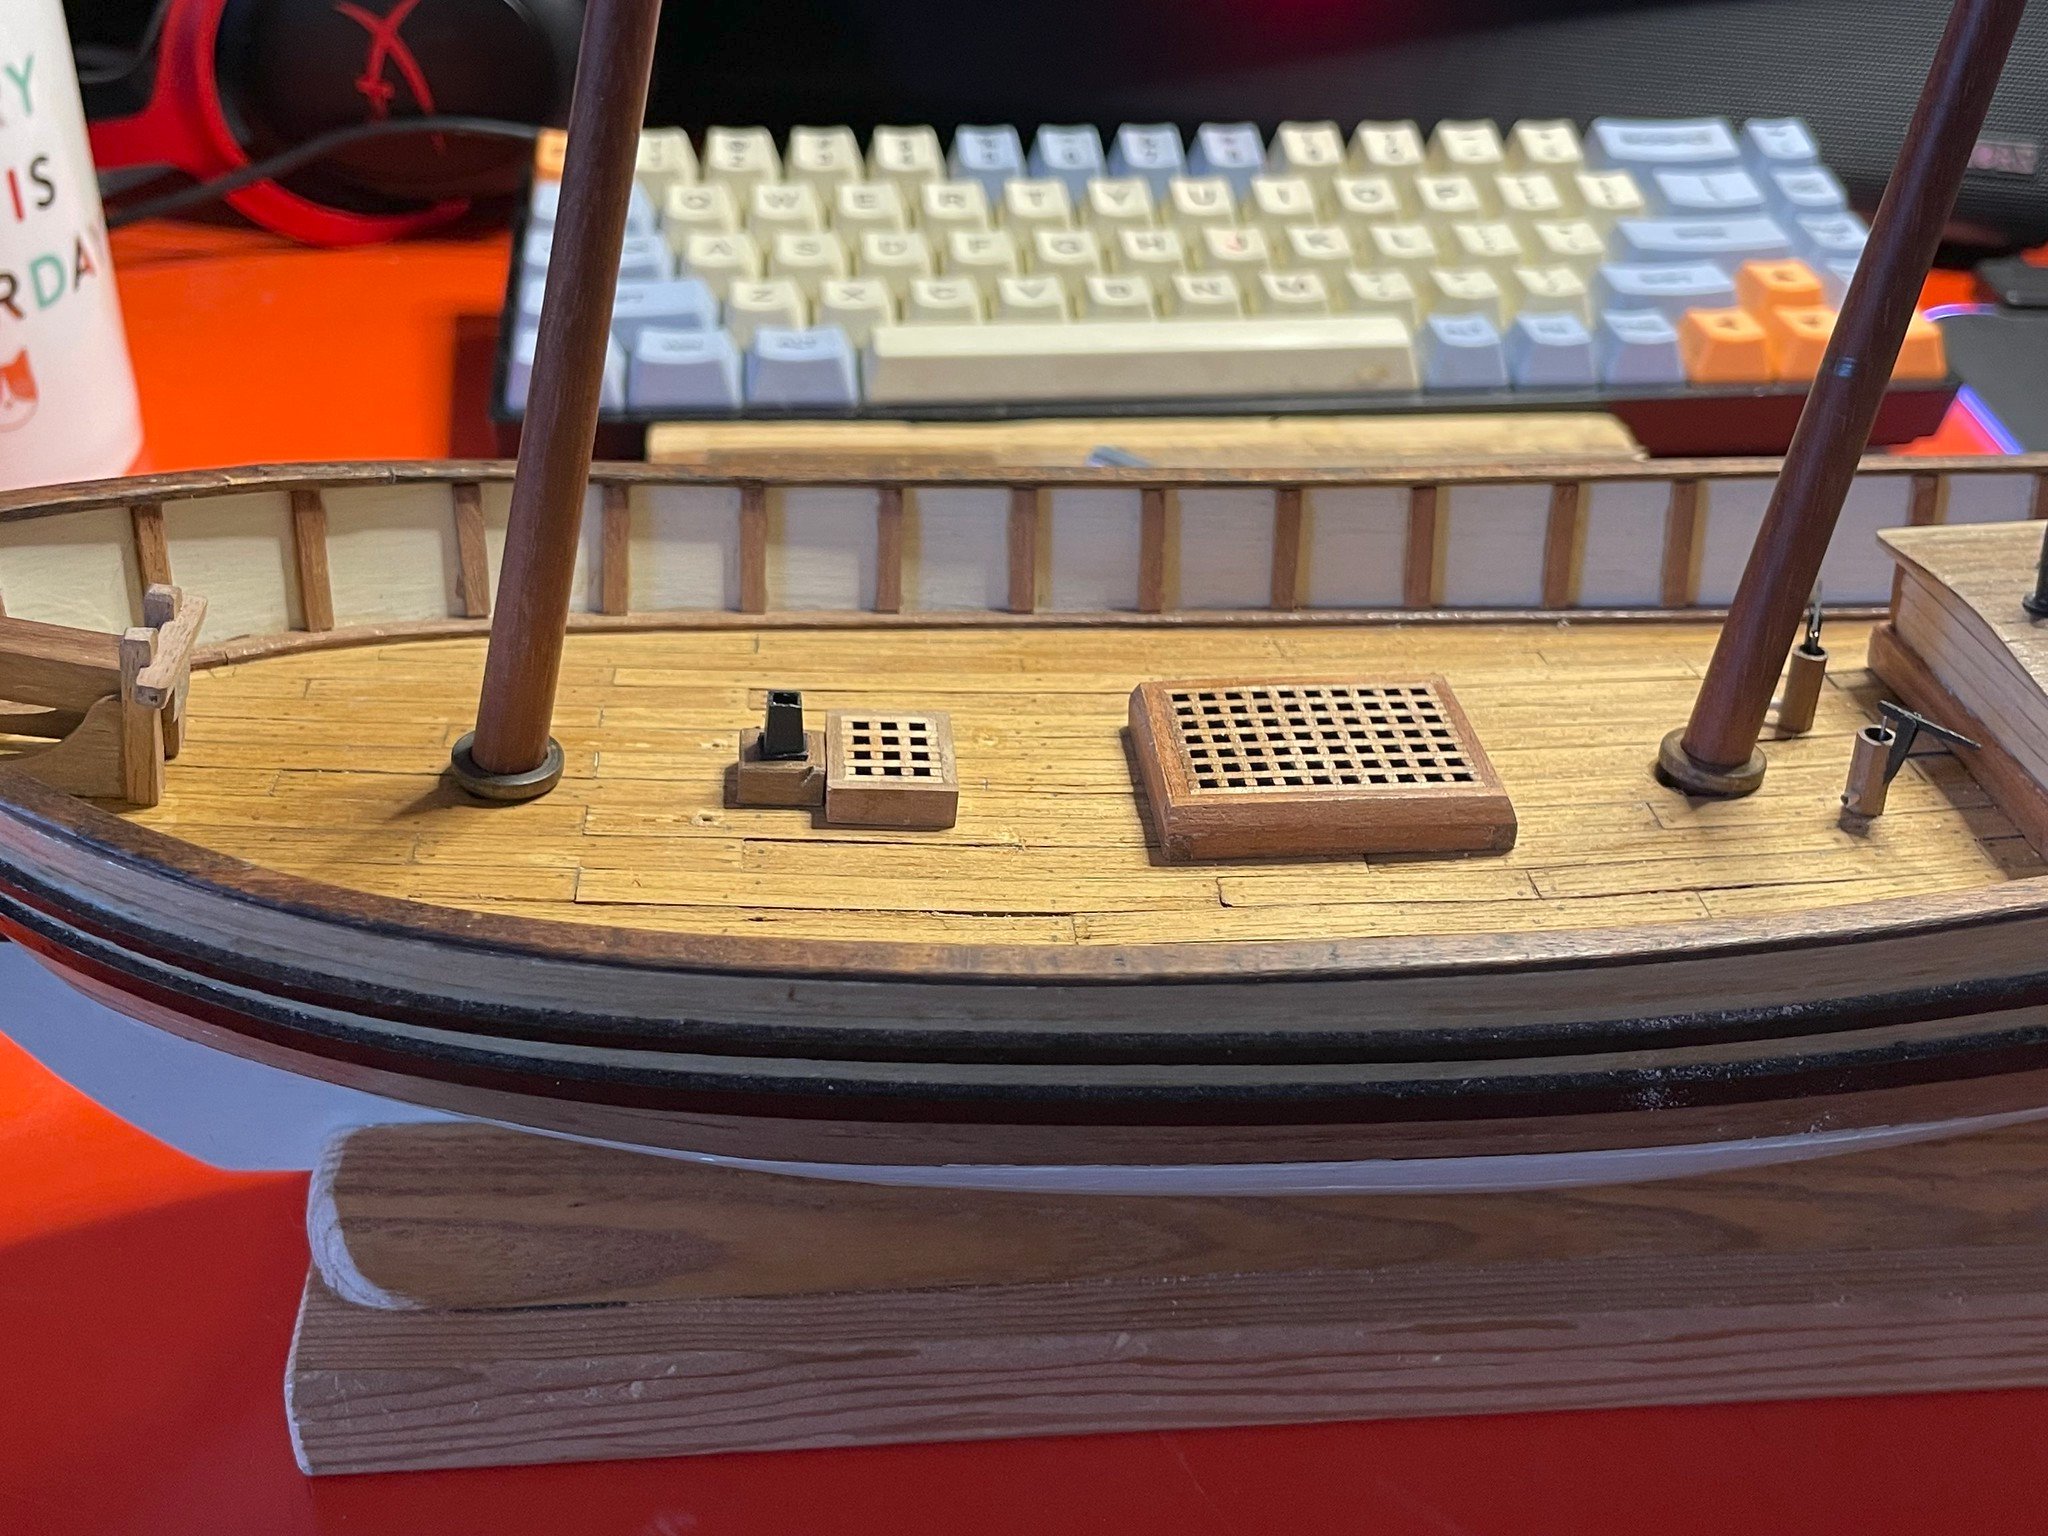
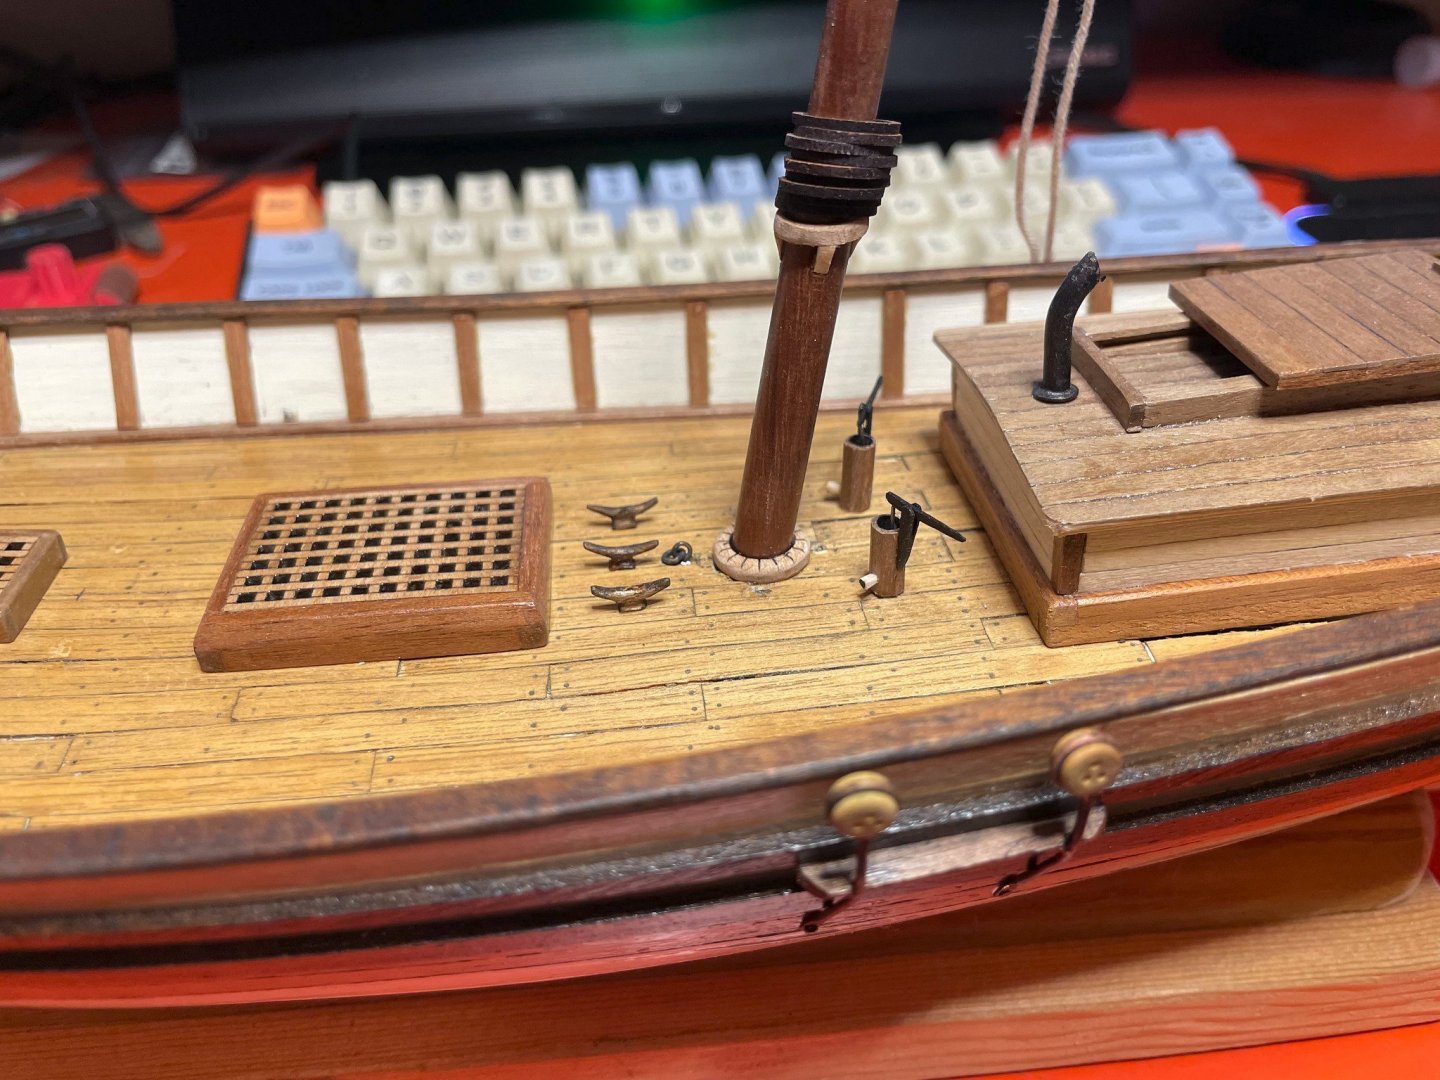
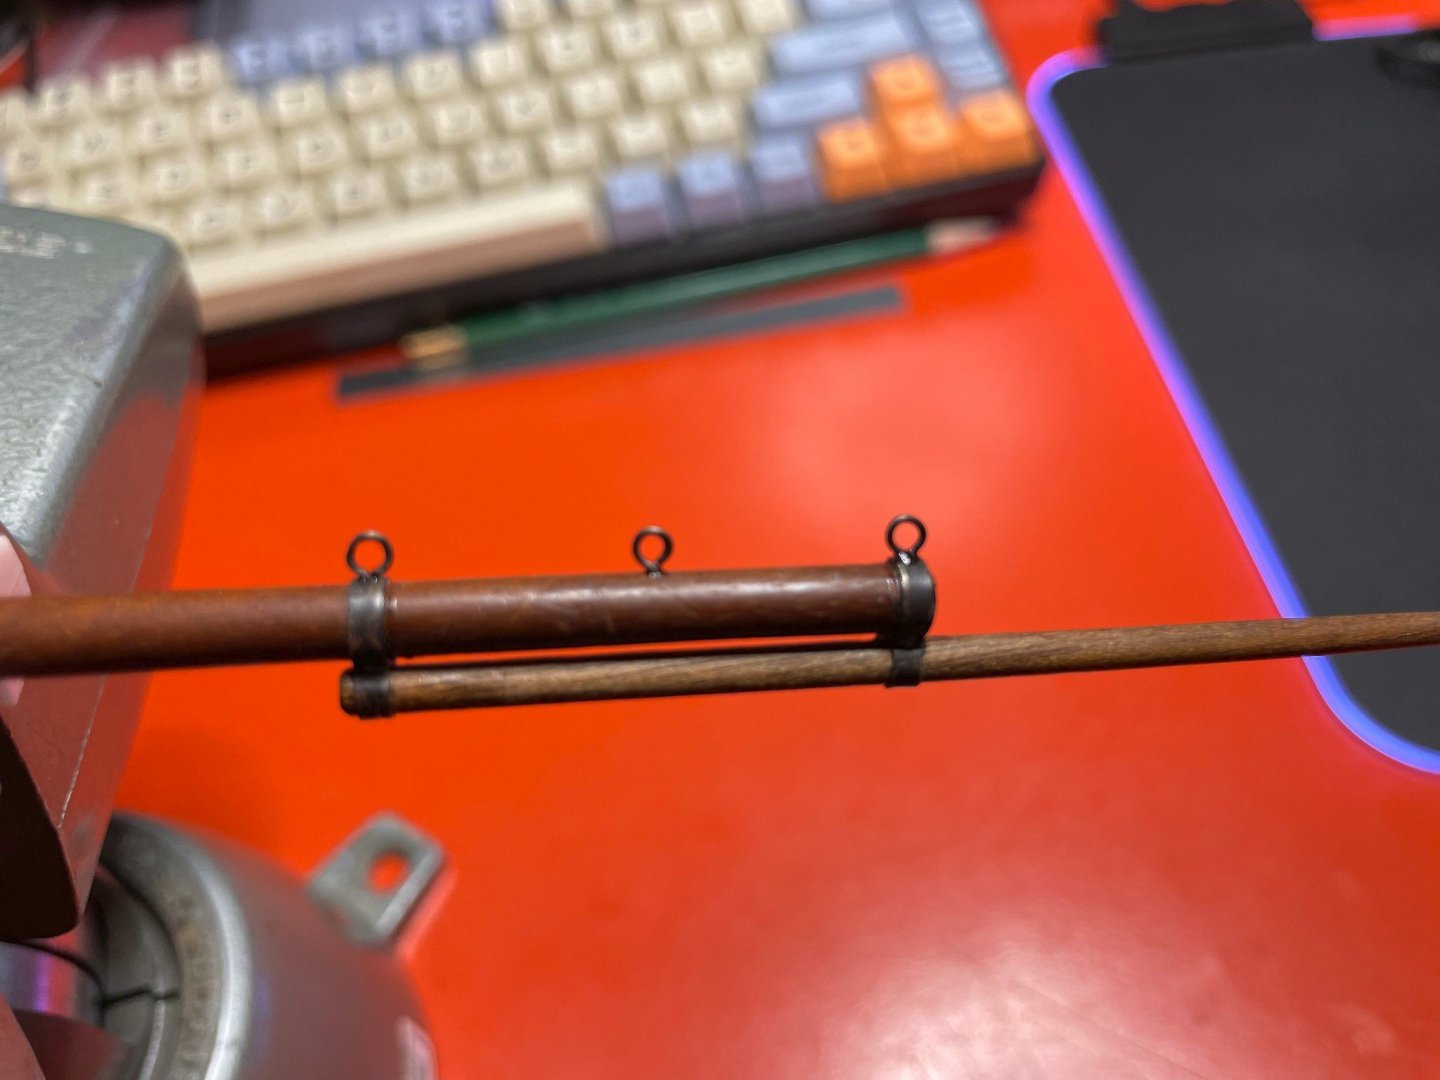
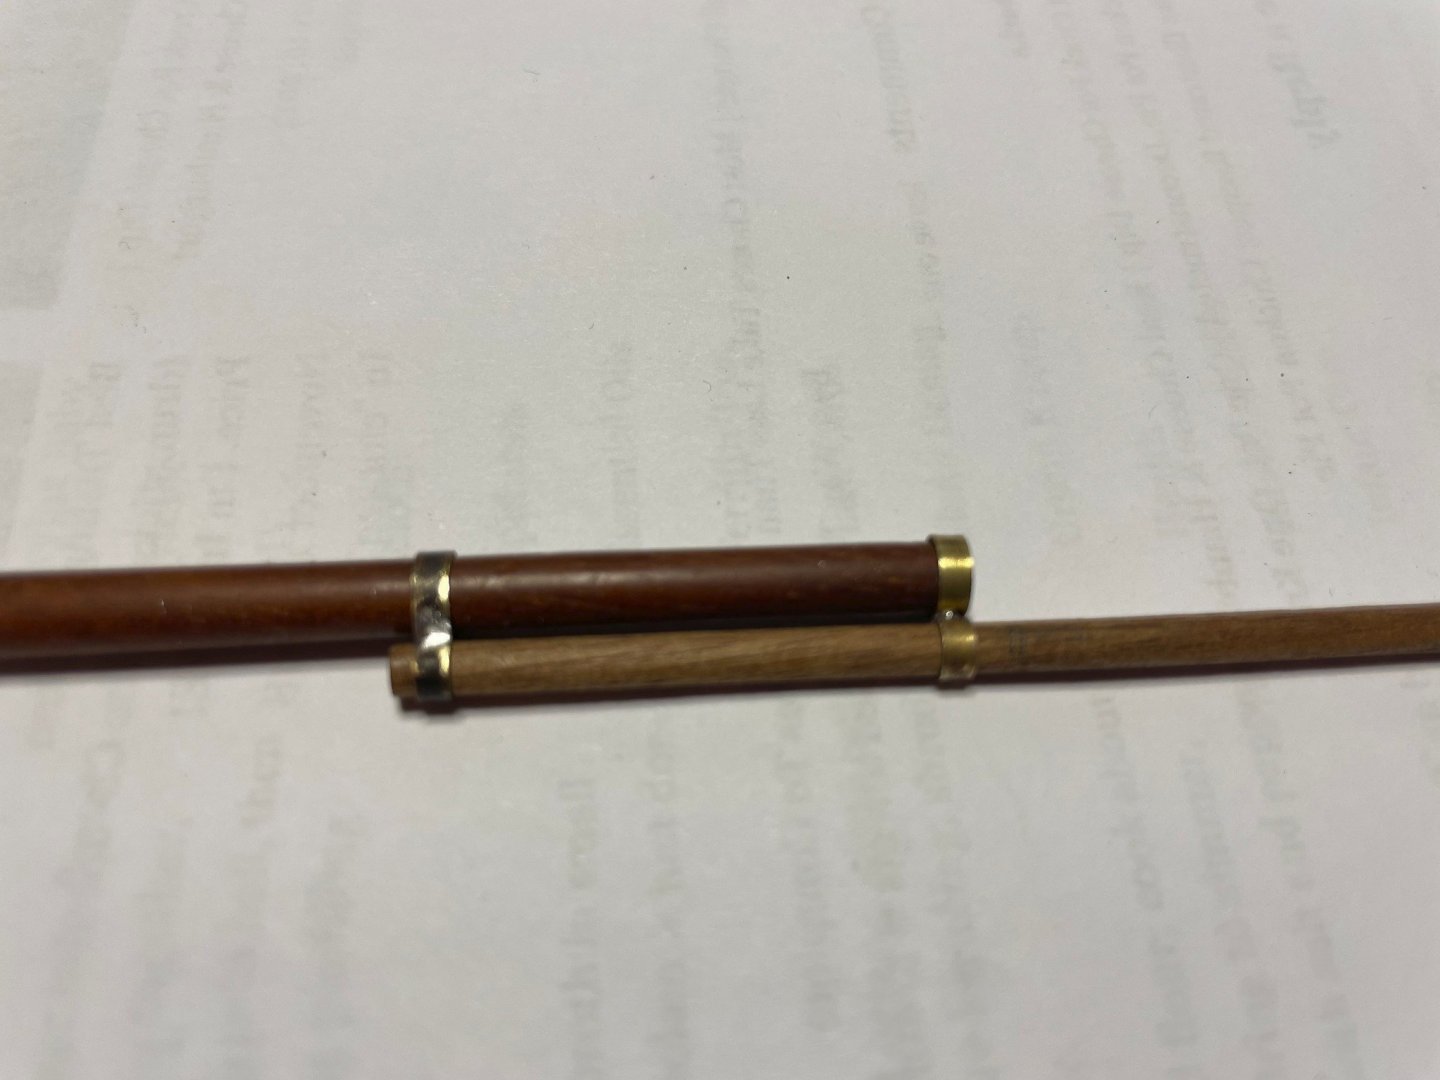
Well I have not posted much this last few months, but have not been totally idle. I've been exploring options for blocks as well as rope, with little packages from Syren, Crafty Sailor, Ropes of Scale, and Modeler's Sawmill showing up now and then. The blocks, line and fittings that came with the kit sort of made me shudder compared to what one can build or buy. The ones I've purchased are much much better. The other thing I've been doing is reading and poring over various options for how to rig the model. Given it's not based precisely on a real ship, and that the kit takes a lot of shortcuts, I've set a goal to perhaps build it a bit more realistically as I can. The deck layout I'm working with is close to the Katy of Norfolk model, along with Steel's Virginia pilot boat as shown in Chapelle's The Search for Speed Under Sail. I'm also using a lot of the Katy's instructions and plans as a guide for rigging. So here's what I've done in the last week after this extended "thinking about it" phase. There was a lot of experimenting and such before this , following the @Kevin Kenny method of challenges and learning where you keep making it until you like how it came out. I could just hear that, "spot on" when I made something I liked First, I joined the main mast and topmast with two soldered brass rings to hold them together. Dry fit of the rings... Below is the brass blackened and in place, with eyes in place. The two eyes on the bands actually go all the way through both masts to help give it some strength, and are glued in with epoxy. Blackening is with Birchwood Casey, which I've found most effective if diluted with an equal part water. Too strong and the etching rubs off too readily. Next up, the bowsprit. In truth to be more accurate the bulwarks should be minimal, with the bowsprit flush on the deck. But to make it work keeping the higher bulwarks, I made a bitt to hold it in place. In this dry-fit picture, ignore the bitt just aft the foremast hole - it was an experiment that I removed. Additionally, I did some work on the deck furniture. I kept the basic aft cabin design from the original kit, but scratch built a replacement as documented before. And instead of a second forward cabin, I went with a main hatch plus a small forward hatch/grate and stack. Here are two pictures of the deck arrangement with the new hatches and stack. It's all just dry fit at the moment. The main hatch is the fourth one I made before I liked the results. That said it might be a bit too heavy but I'll keep it.


- 44 replies
-
- 2
-
-
- first build
- Artesian Latina
- (and 1 more)
-
Unfortunately nothing like that on their website for those of us not in that area.
-
Laser Engraving/Cutting - Where To Start?
Tim Holt replied to Kevin-the-lubber's topic in 3D-Printing and Laser-Cutting.
As an Ender 3 owner, a few things kept me from exploring this route though I've been curious about it too. Foremost, I already have access to a Glowforge laser cutter via a Makerspace I help run. It's shown me the importance of a good ventilation system for smoke and fumes, but also the value and probably greater precision of a system designed for cutting from the get go. -
Pz.Kpfw. IV Ausf. G/H by CDW - Ryefield - 1:35 - PLASTIC
Tim Holt replied to CDW's topic in Non-ship/categorised builds
Hah - I hear you. In my past life, I was the original lead level designer for a game from Valve Software called Day of Defeat, which is a WW2 era shooter. I like the era and the whole idea of historical simulation, so that keeps me going. That and at 60+ I'm still able to keep my win average above 50% -
Pz.Kpfw. IV Ausf. G/H by CDW - Ryefield - 1:35 - PLASTIC
Tim Holt replied to CDW's topic in Non-ship/categorised builds
Out of curiosity, any of you tank model builders also into the online World of Tanks game? I spend too much time on it... -
Rotary tool recommendations, preferences
Tim Holt replied to Steve116's topic in Modeling tools and Workshop Equipment
A foot switch for hands-free use is good to have. -
Thanks - I used Chuck's approach of 1mm tubing for the ring, and 0.5mm solid for the hooks, and also a small piece to connect the ring ends. Just a touch of solder to hold it together, then brass blackening. I have to say your final comment about using a traveler just because it adds detail really was the reasoning that won me over. I saw it referenced a few times in a few books then finally in the Cheerful model, and that convinced me.
-
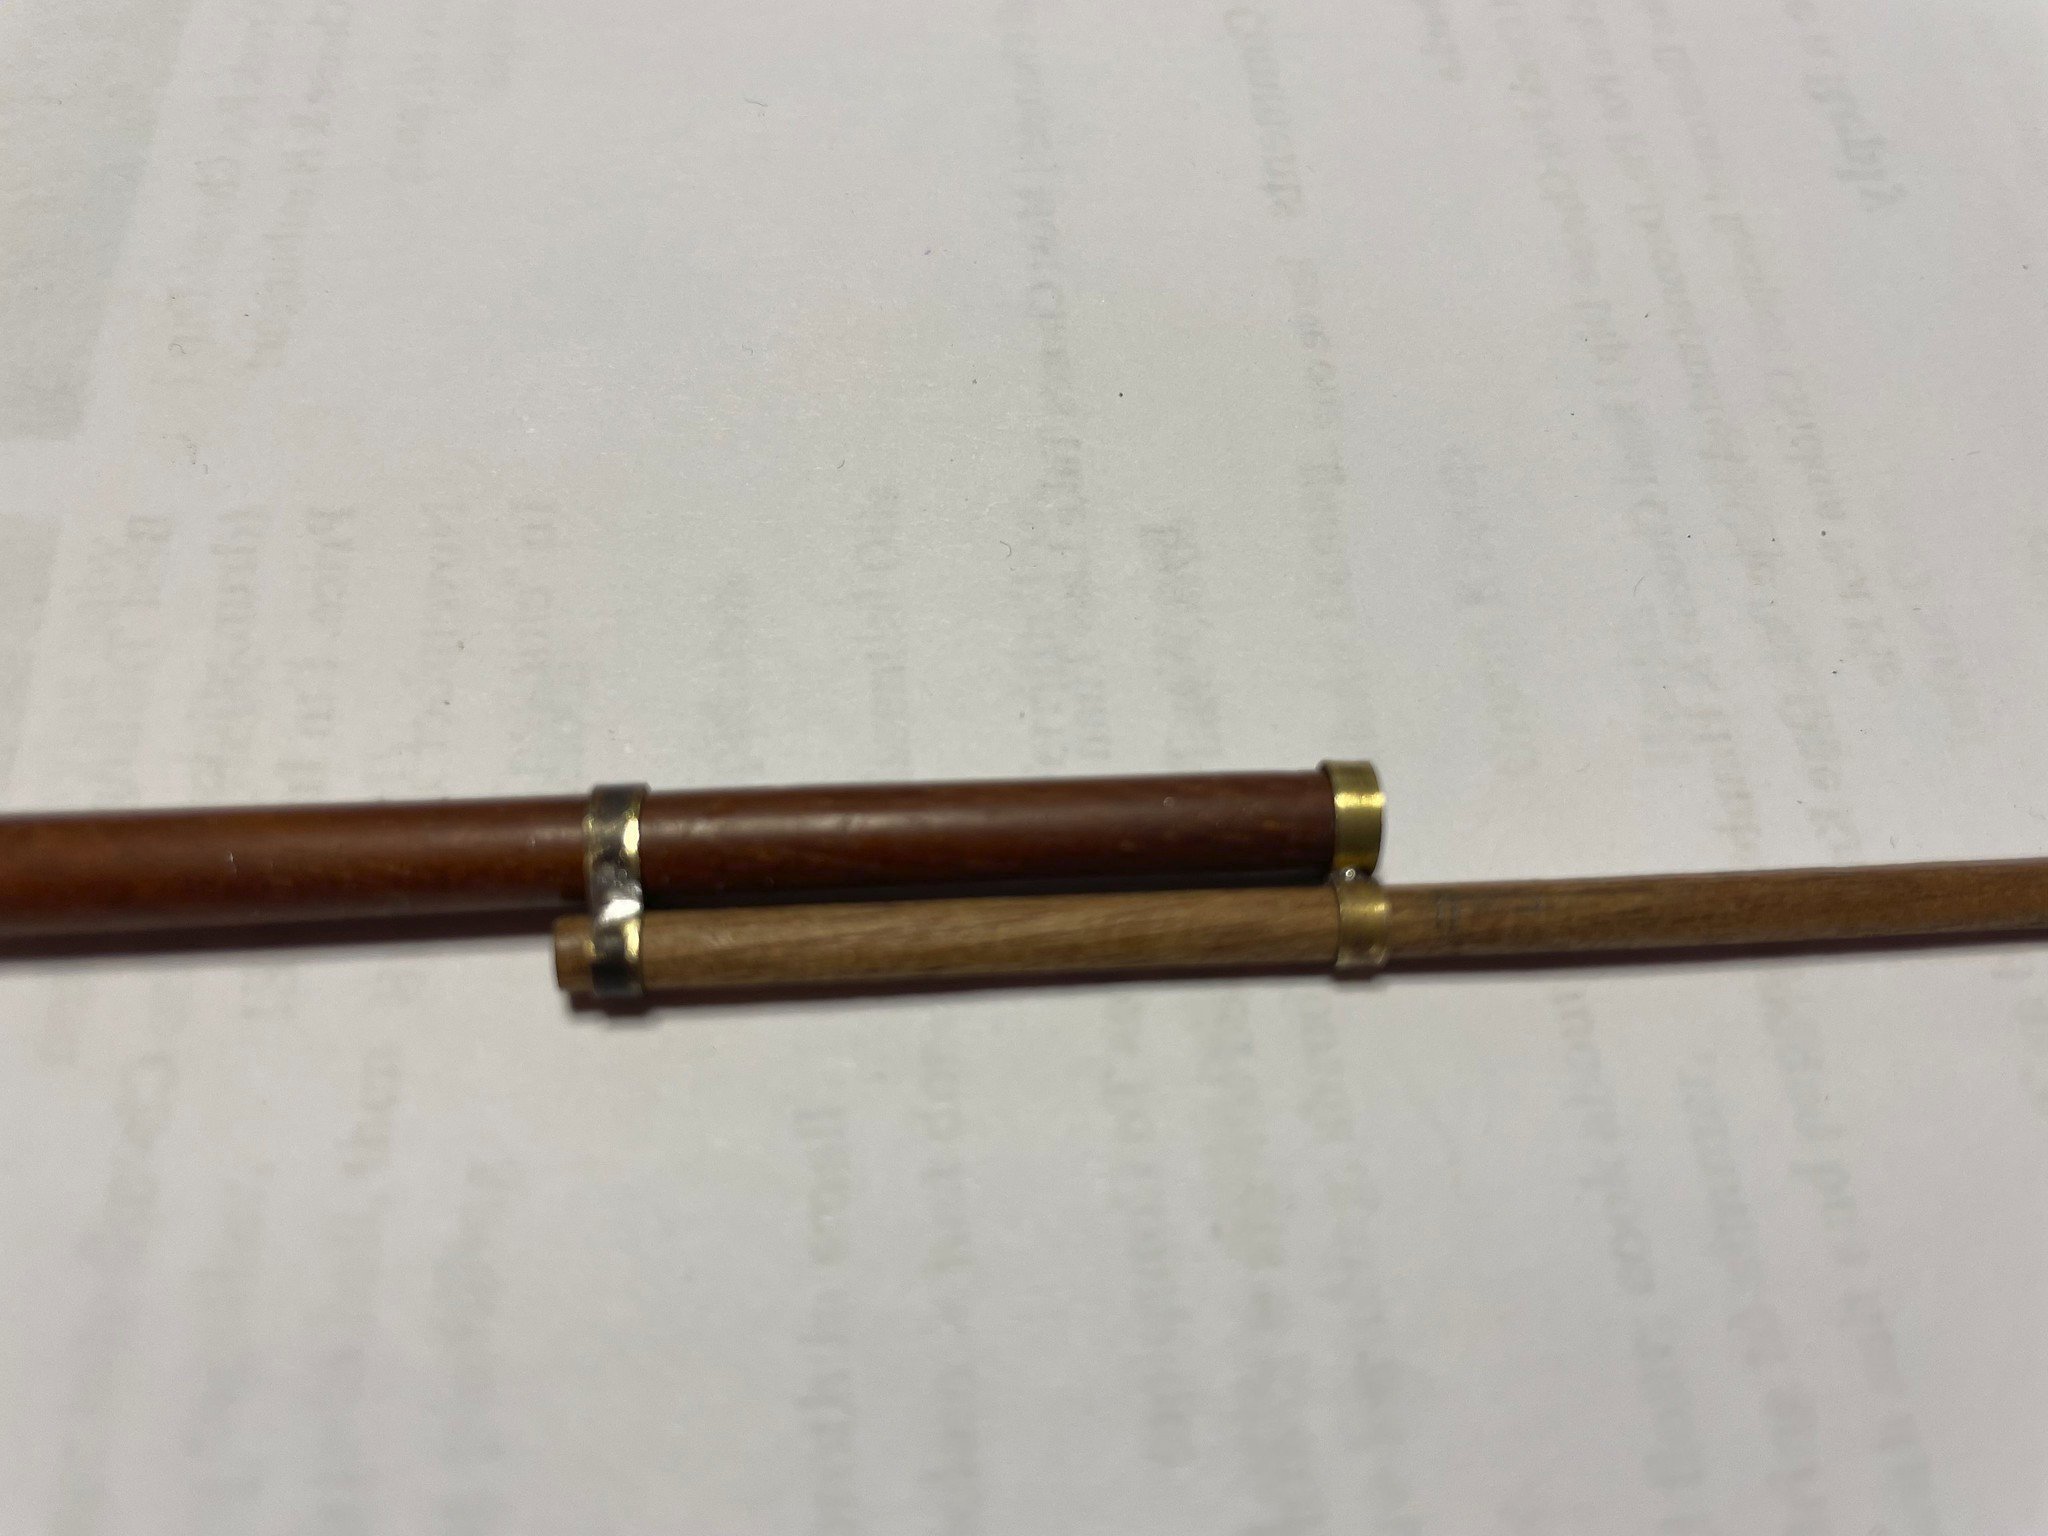
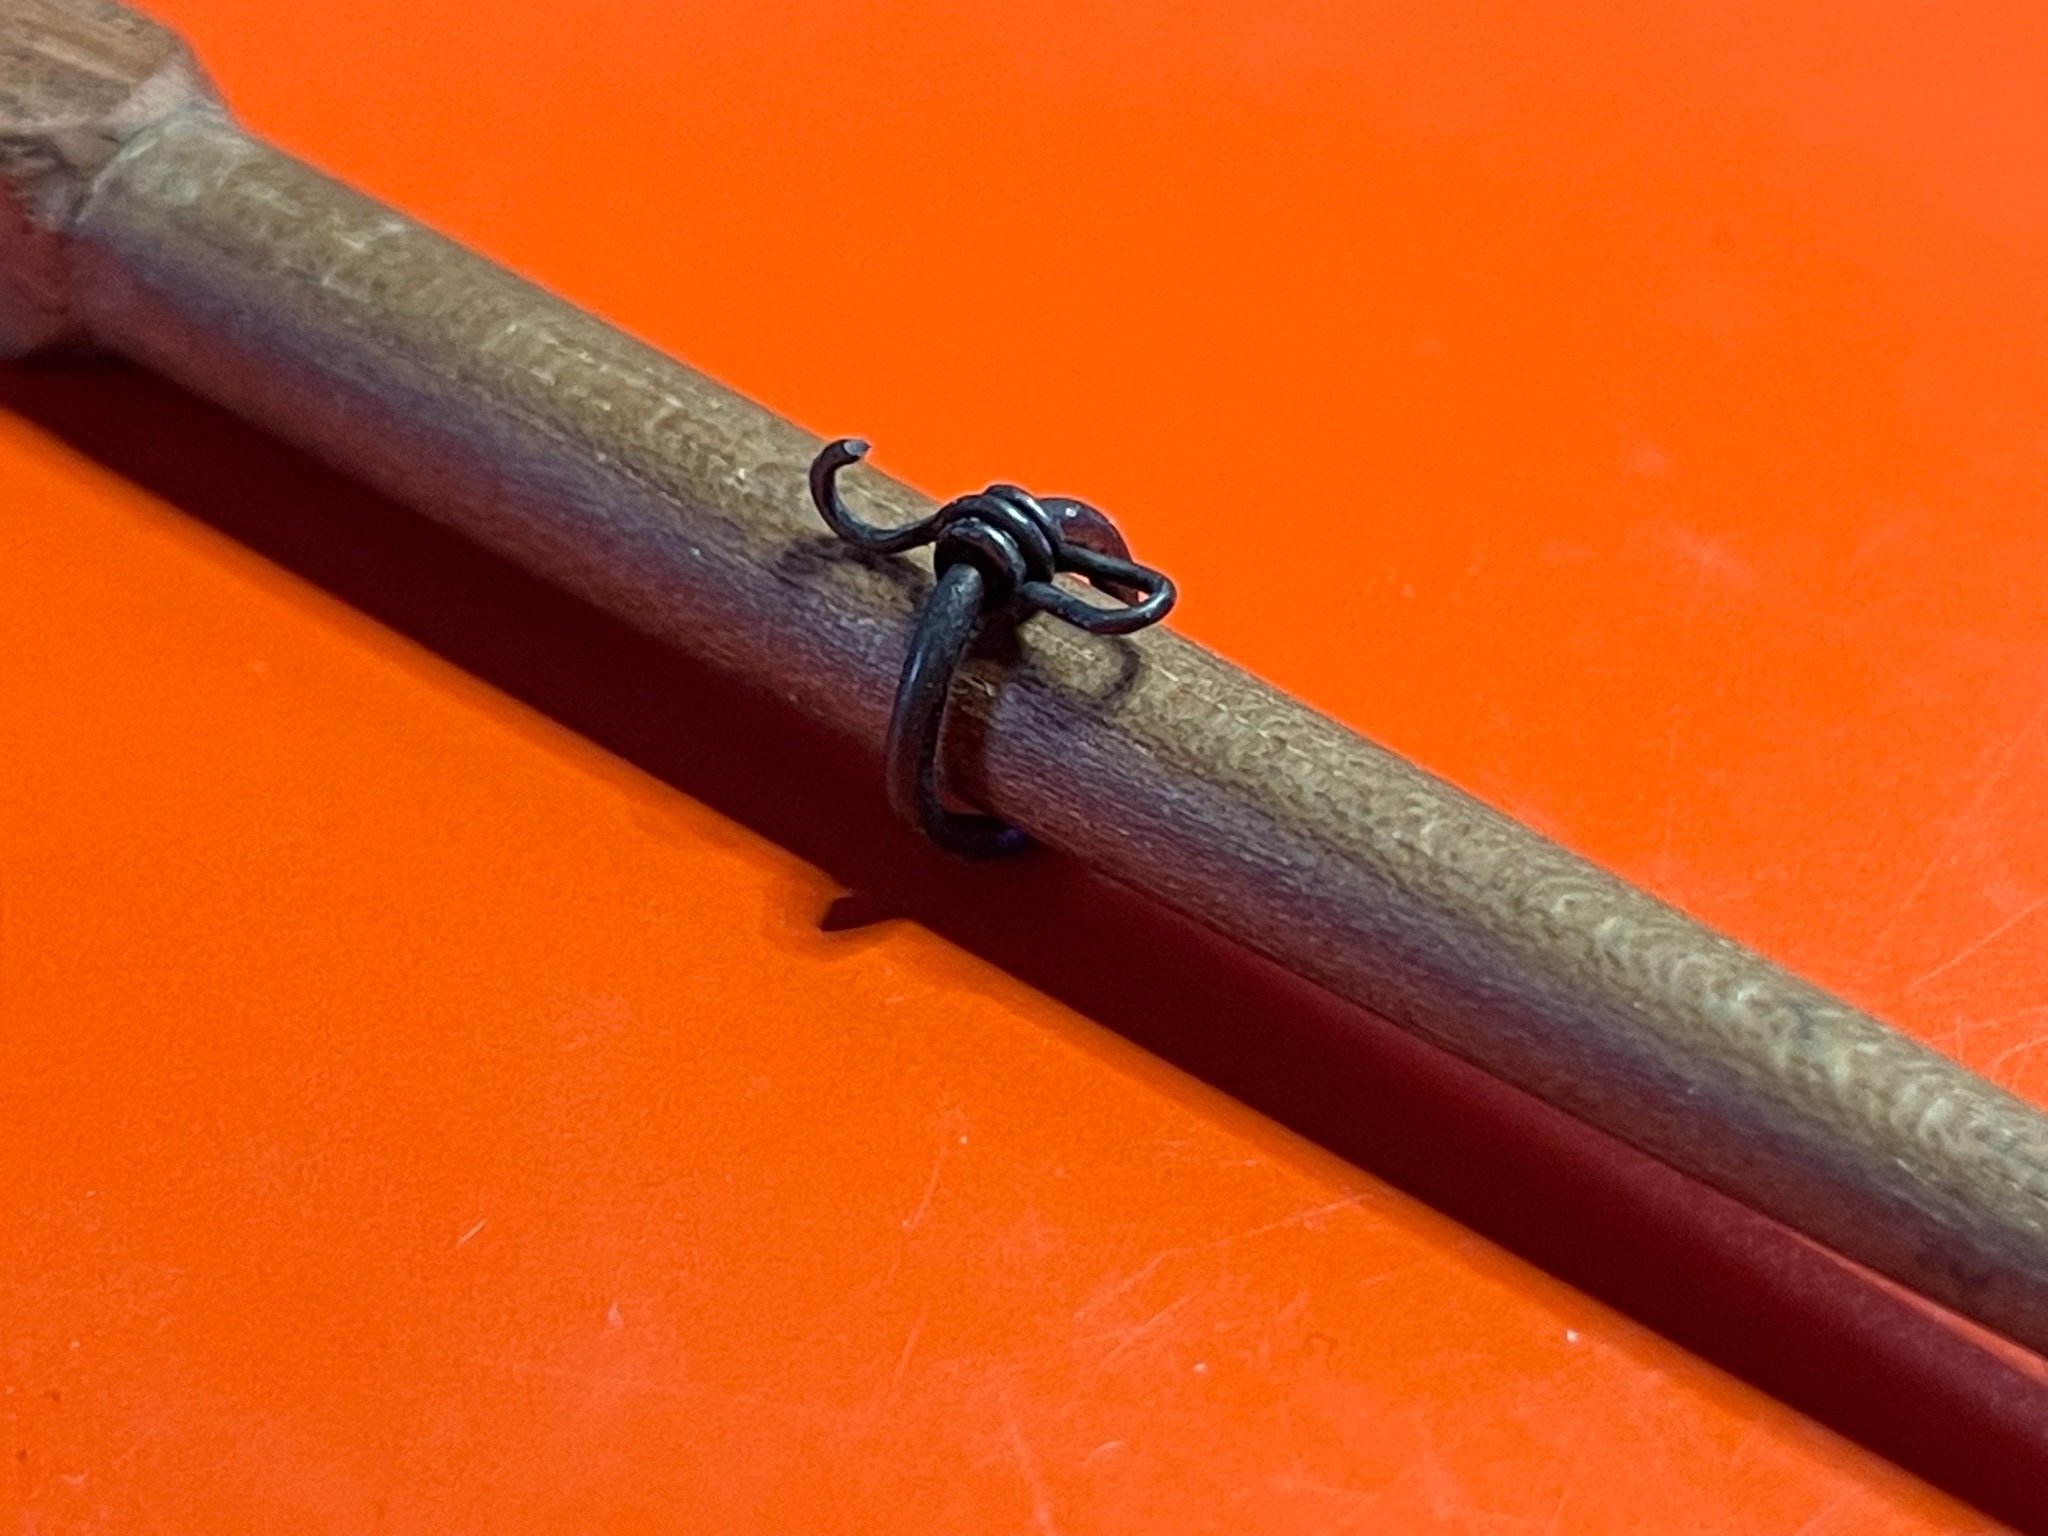
Thank you. I do have some new updates soon, as I've been both buying some nice scale rope as well as blocks to start working on the rigging. I had just recently attempted to drill out a sheave opening in the bowsprit, but managed to break it so building a new one. Here is a picture of a small traveler ring I recently made for the jib. My intent is to rig up the in-haul and out-haul to the traveller, and then the Jib Halyard hooked to it, as I don't intend to put sails on the model. And I can't wait to start putting some of the new line from Ropes of Scale onto things. Let the rigging begin!

- 44 replies
-
- 2
-
-
- first build
- Artesian Latina
- (and 1 more)
-
I am very happy to see this build. I too am working on the same model, and also doing some modifications to the design. Many things in the original beg to be brought to a point of better realism.
- 21 replies
-
- 1
-
-
- Swift
- Artesania Latina
- (and 2 more)
-
I’m looking forward to this. I’ve been interested in this kit for a while as it’s a more detailed version of the Artesania Latina Swift pilot boat, which I am working on. I’m currently working on remastering the rigging and deck layout on my AL Swift to match the Katy.
-
Making sheaves for blocks and bitt pins
Tim Holt replied to Kevin Kenny's topic in Masting, rigging and sails
McMaster-Carr has EVERYTHING. My daughter uses it for work (theater) and has spent enough that they sent her the paper catalog , which she passed on to me. It’s like the Sears Christmas catalog when you were a kid but a million times better. -
Very nice - it's interesting to see how this model compares to the Artesania Latina Swift kit. Pretty similar model though some different deck furniture.
-
Yes, I've been thinking this way too. Petersson's Rigging Fore-And-Aft Craft has some examples of this, like the Jib outhaul and inhaul on page 24 where the Halliard hook onto the ring/hoop around the bowsprit. One motivation for me was seeing how in one example I saw where the sheets were directly attached to the foresail's clew - not removable. I liked the idea of actually having the sheets present without having to include the sails, and perhaps how they could be present but "unhooked" from the clew. And then the quoted comment made me think perhaps of the use of minimal bolt ropes to give them a purchase. Like a lot of things on my current model, I'm probably just going to give it a try and see how it looks. Rope isn't the cheapest in the world, but I've got enough on the way from Ropes of Scale that I can experiment a bit. Hey I'm on my 5th deck grating version, so it's all part of learning. I'd also add that I'm doing a lot of modifications to deck and rigging for my run of the mill Swift kit. A lot of things are kind of "wrong" on it, and shortcuts were clearly taken with many things. The curse (or blessing) of picking up more and more reference books that show you just how it might really have been done.
-
Why do I get the feeling half of you are like, “That’s the dumbest thing I’ve ever heard of…”
-
User @John Fox III in the below comment mentions framing sail locations with just the bolt ropes when modeling without actual sails, which allows inclusion of sail rigging without the sails. I'm kind of intrigued by this idea, and curious if others have done this or have any examples of it.
-
Where to buy blocks, hearts, line etc...
Tim Holt replied to bobc622's topic in Masting, rigging and sails
Piggybacking on this question... When a seller lists the size of a heart (say, 5.5mm), what exactly is this dimension? Internal opening width or length? External width or length? -
Nice to find this log. I’ve got the same kit but it’s on the shelf at the moment. Agreed that some of the pre-made deck elements are well worth rebuilding.