HOLIDAY DONATION DRIVE - SUPPORT MSW - DO YOUR PART TO KEEP THIS GREAT FORUM GOING! (Only 13 donations so far - C'mon guys!)
×


Dan Vadas
-
Posts
3,261 -
Joined
-
Last visited
Content Type
Profiles
Forums
Gallery
Events
Everything posted by Dan Vadas
-
Thanks for the compliments Doris, I'm nowhere near your level of skill with card though . Hi David and welcome to my build log. Chris has given you good advice about not jumping straight into Bismarck as a first card build - it's not an easy one by any means. Card glue is fine for these models. I had one or two issues with the kit, nothing major and I think I covered them in my log so you may be able to avoid some of the errors I made which I later corrected. If you want a copy of the Part Finder spreadsheet I made, and also the translated instructions, send me a PM and I'll email them to you. The spreadsheet is particularly useful. Danny
-
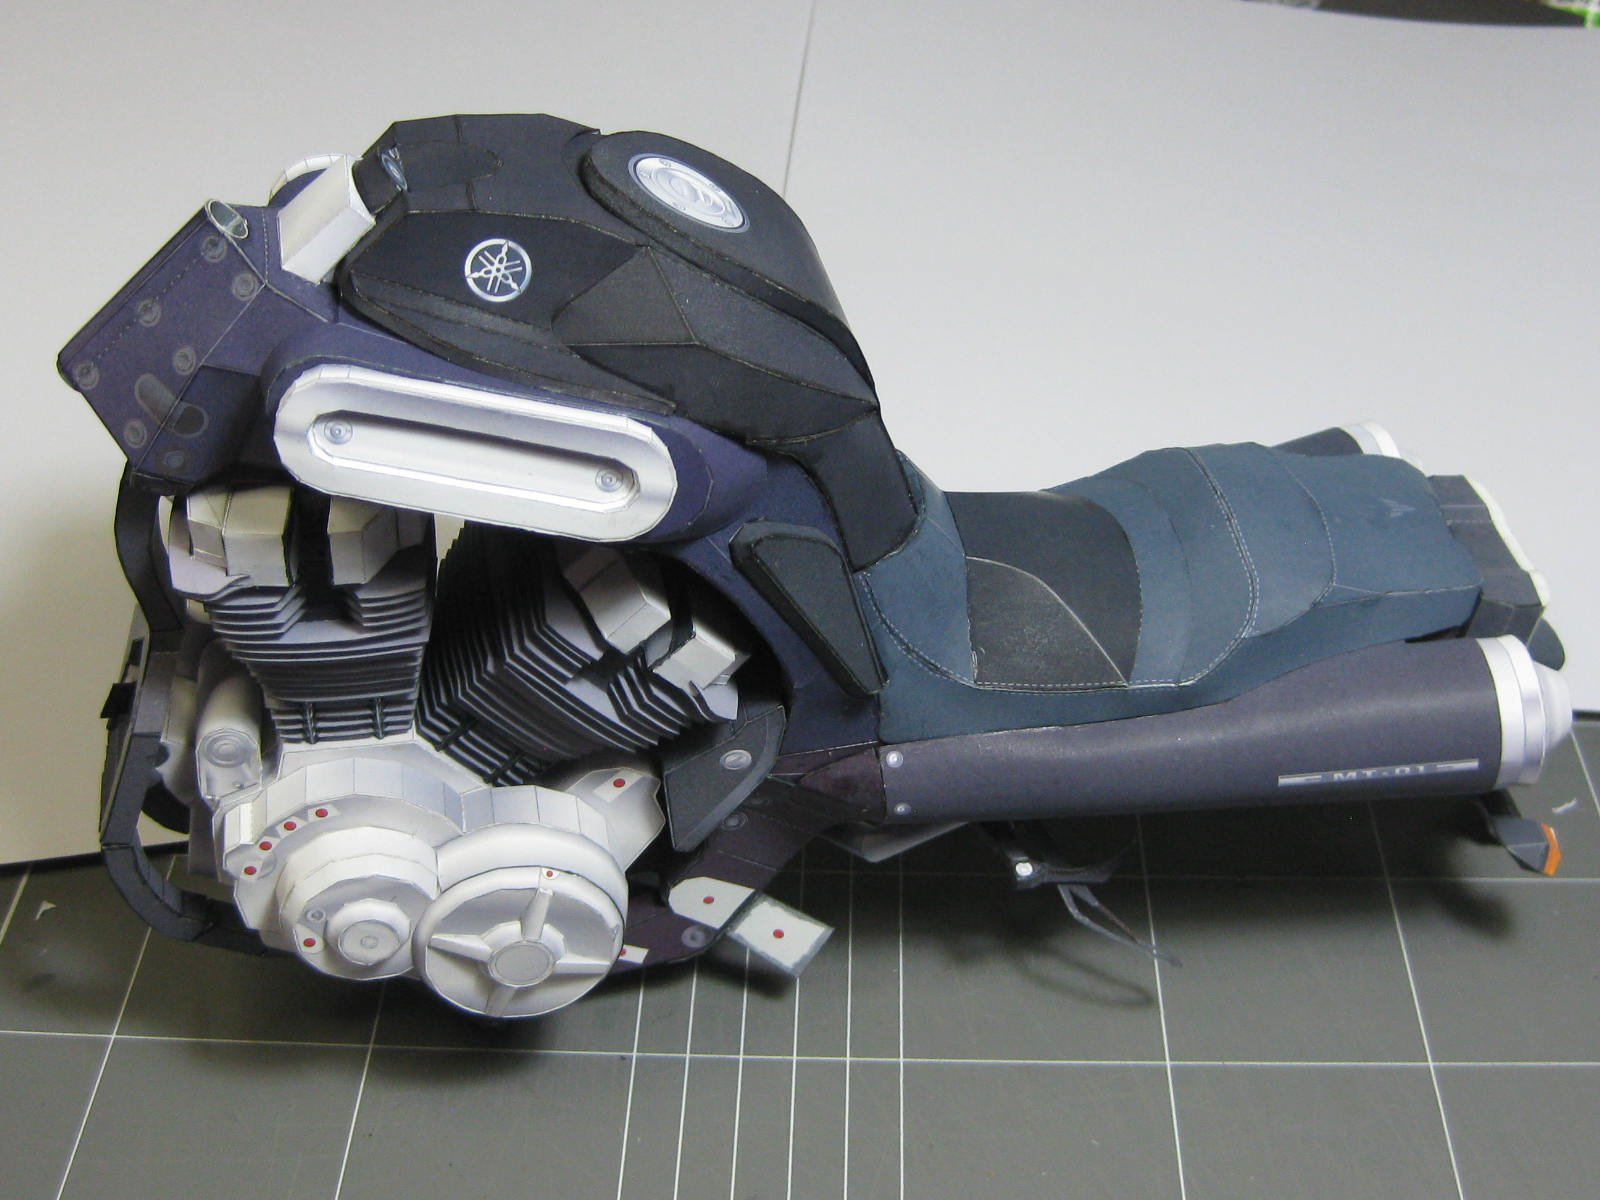
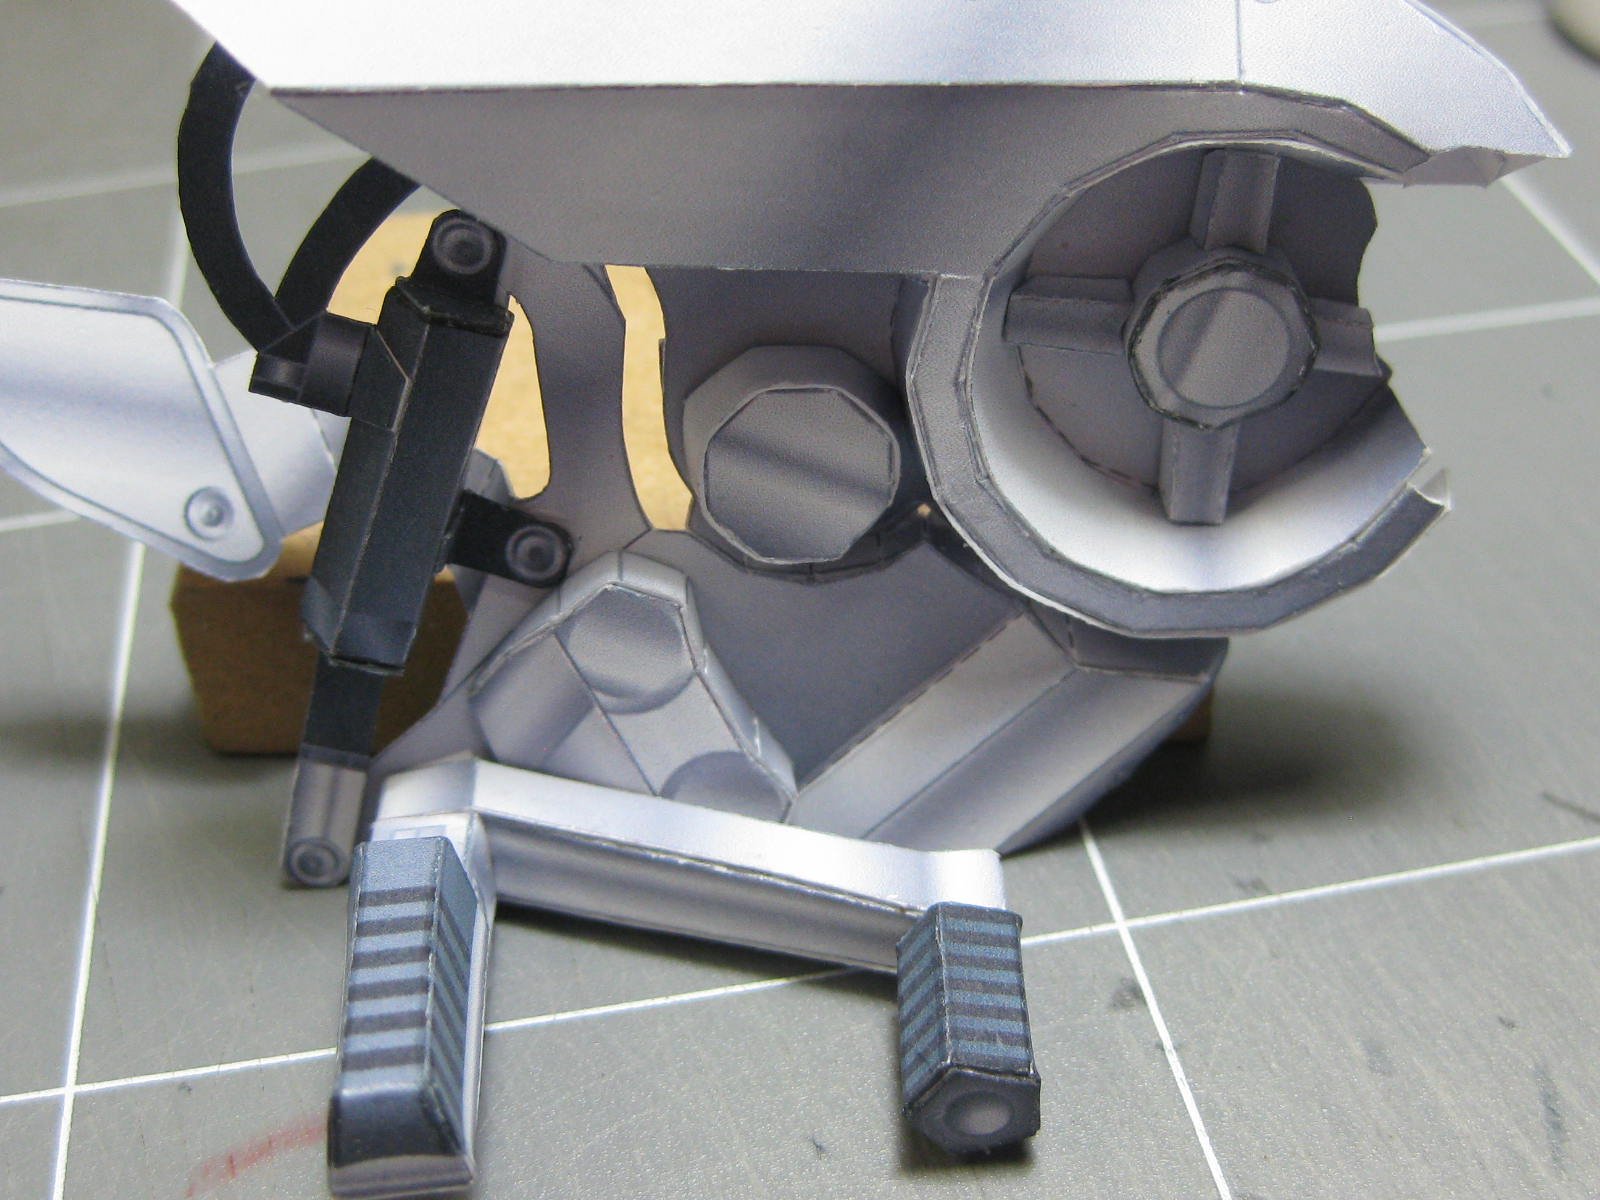
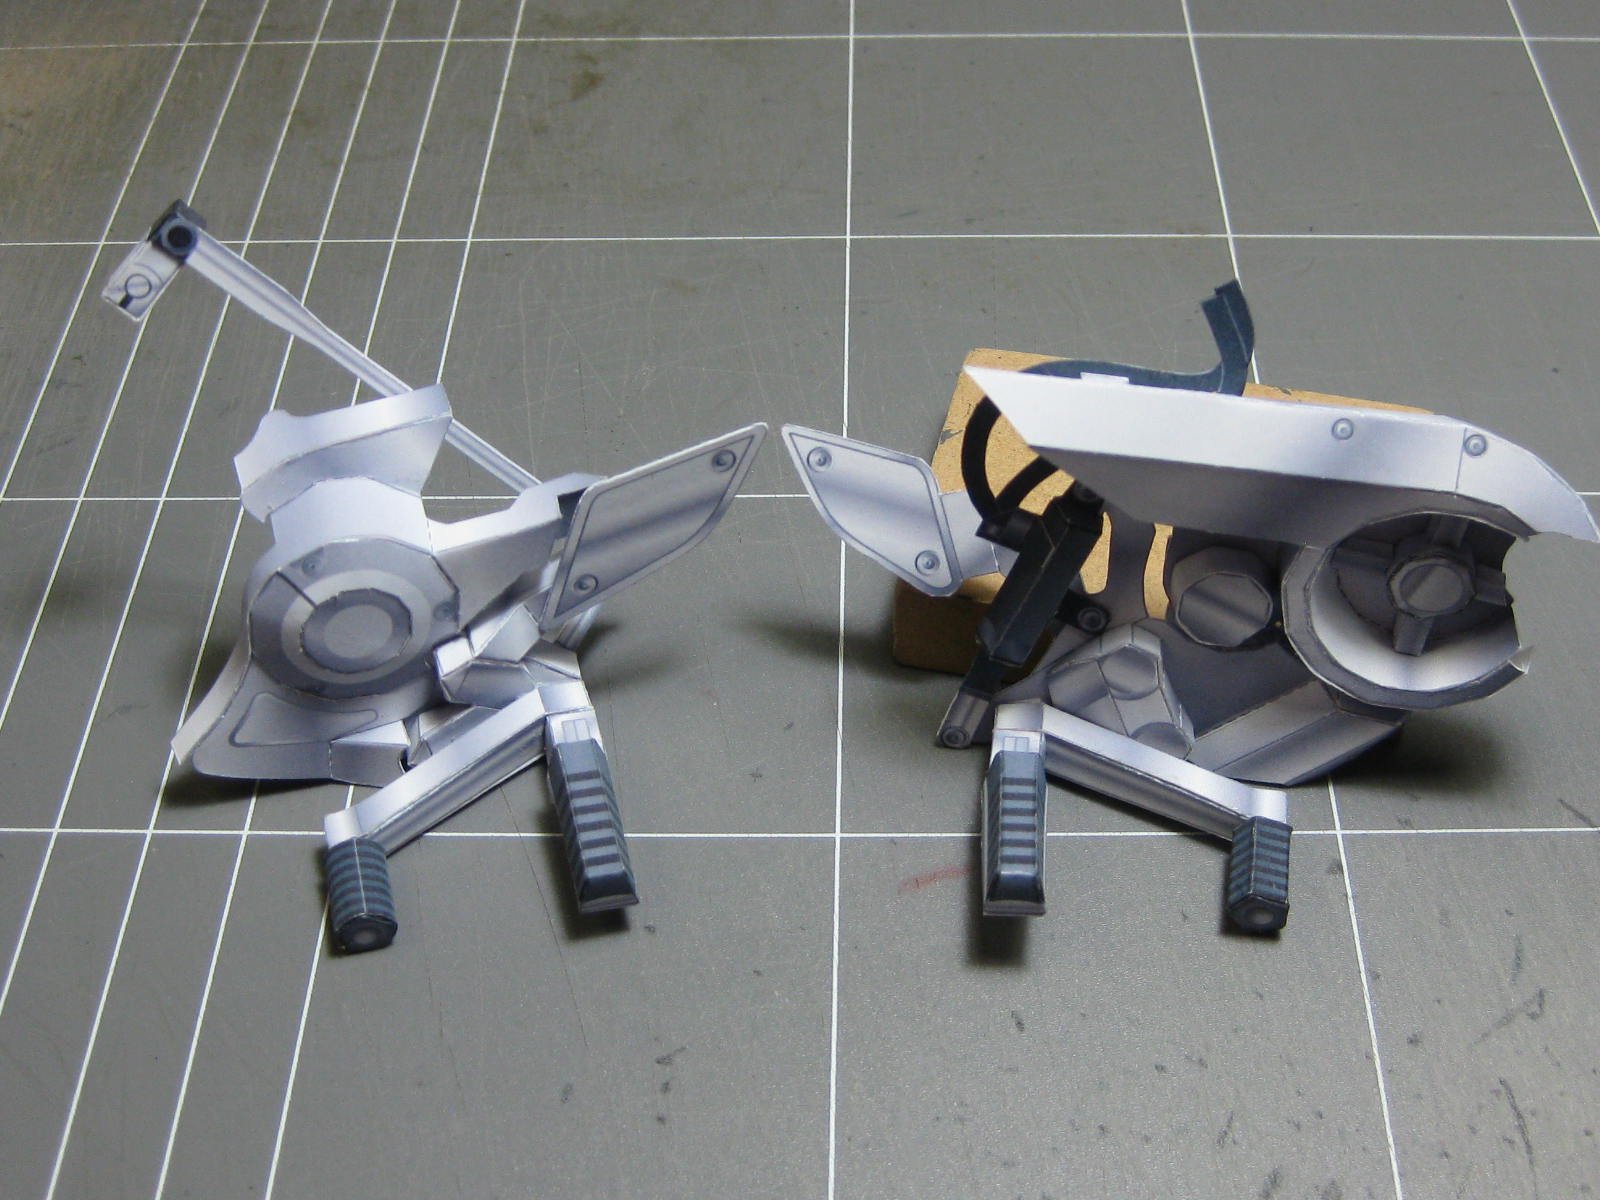
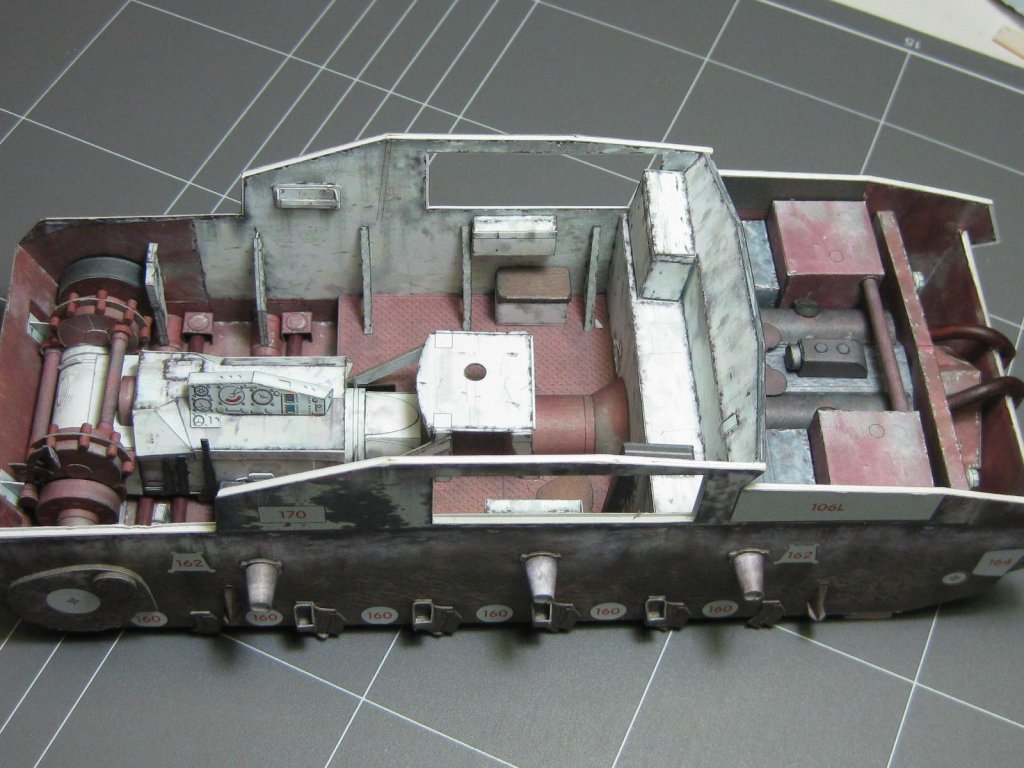
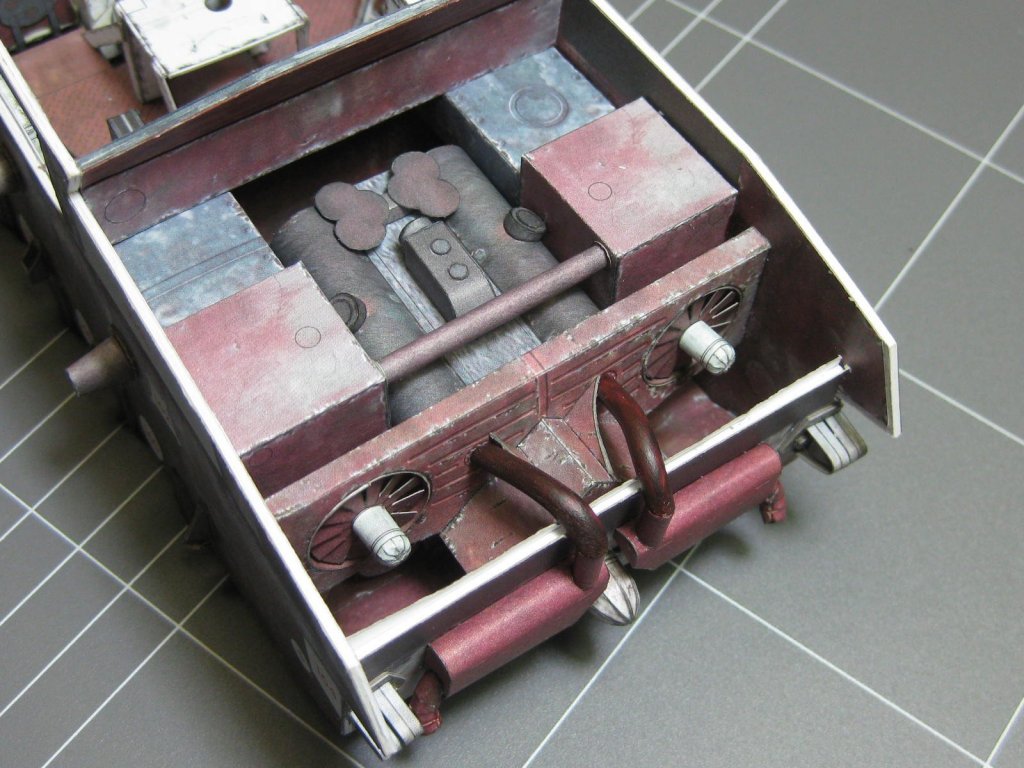
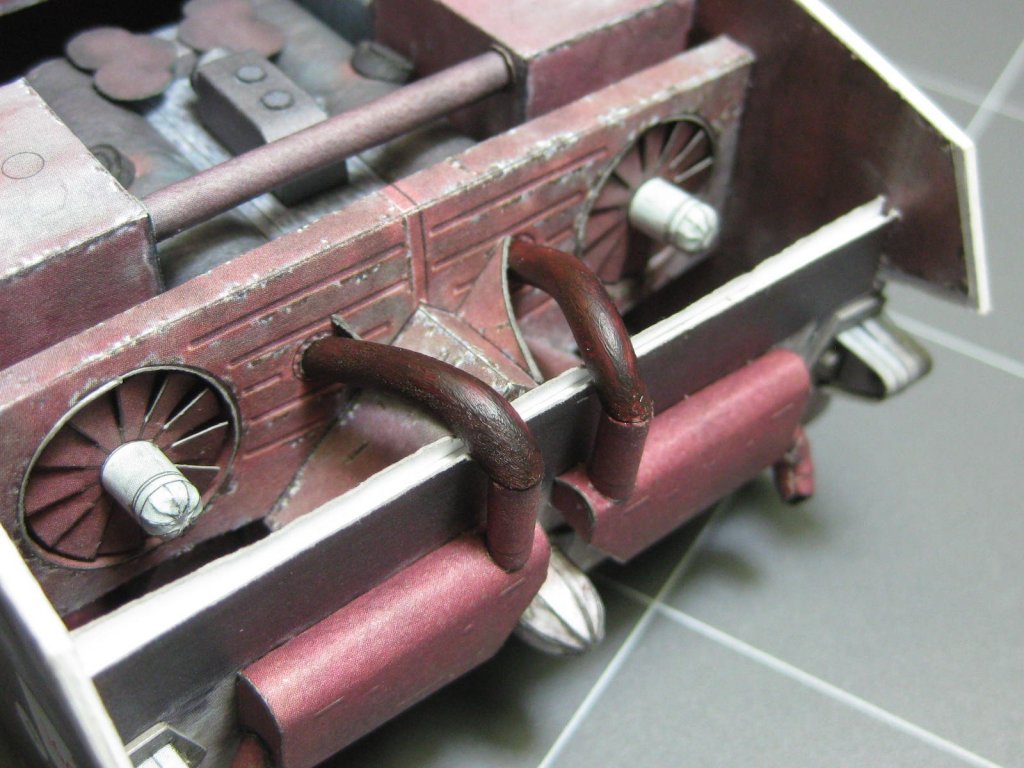
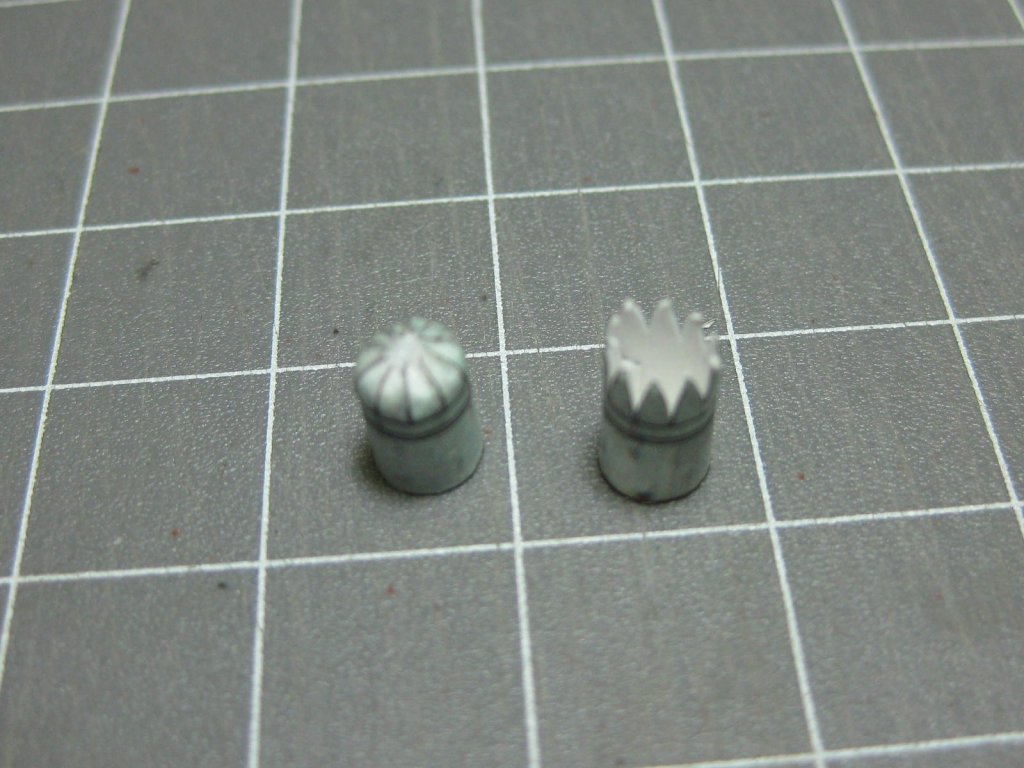
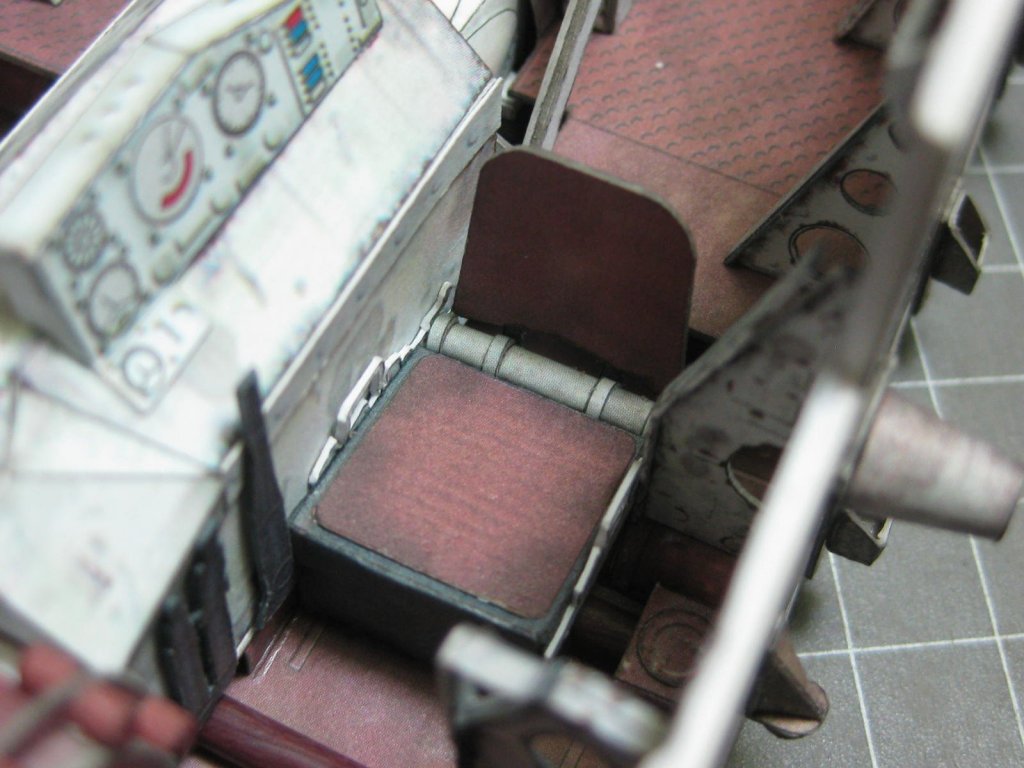
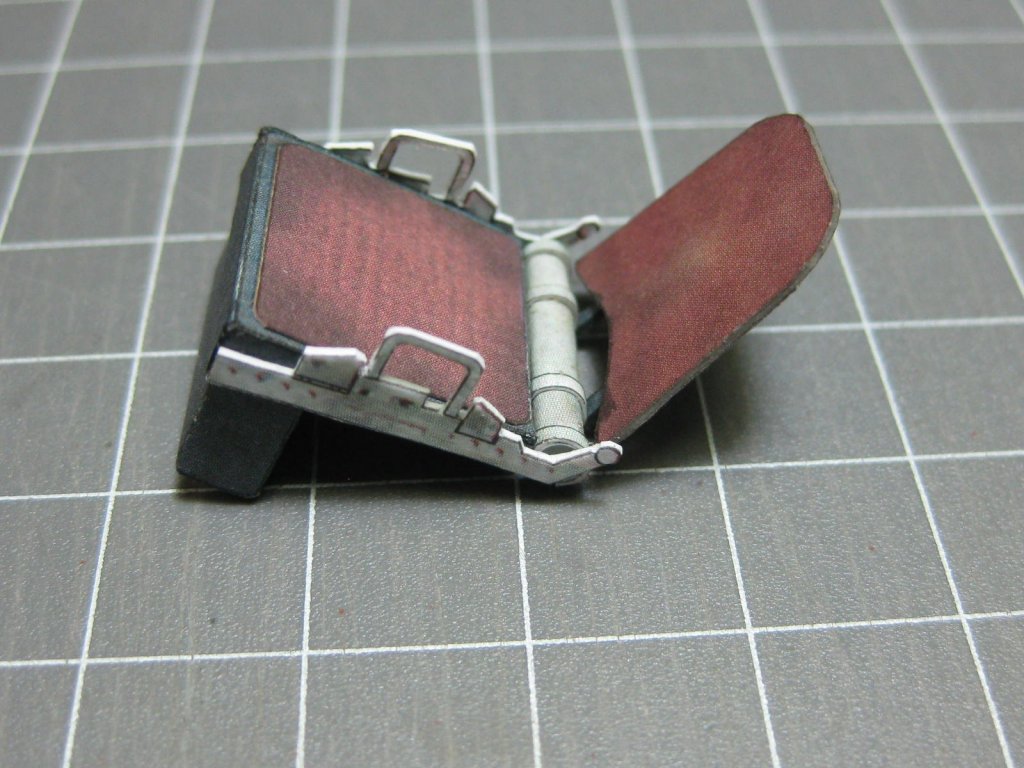
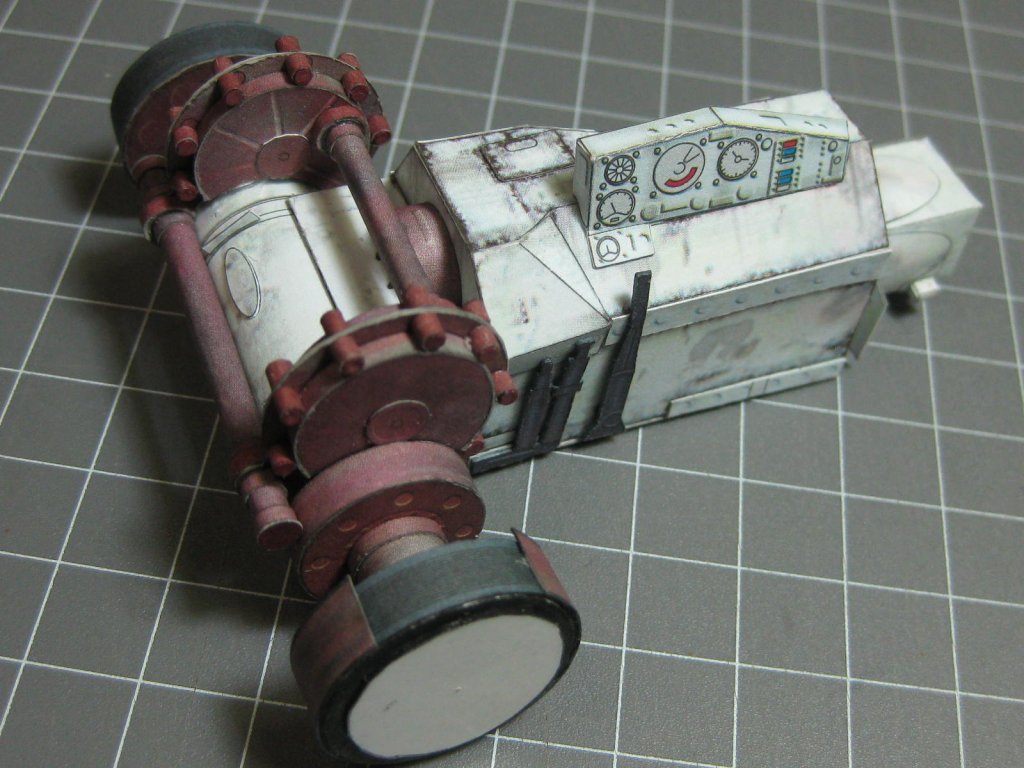
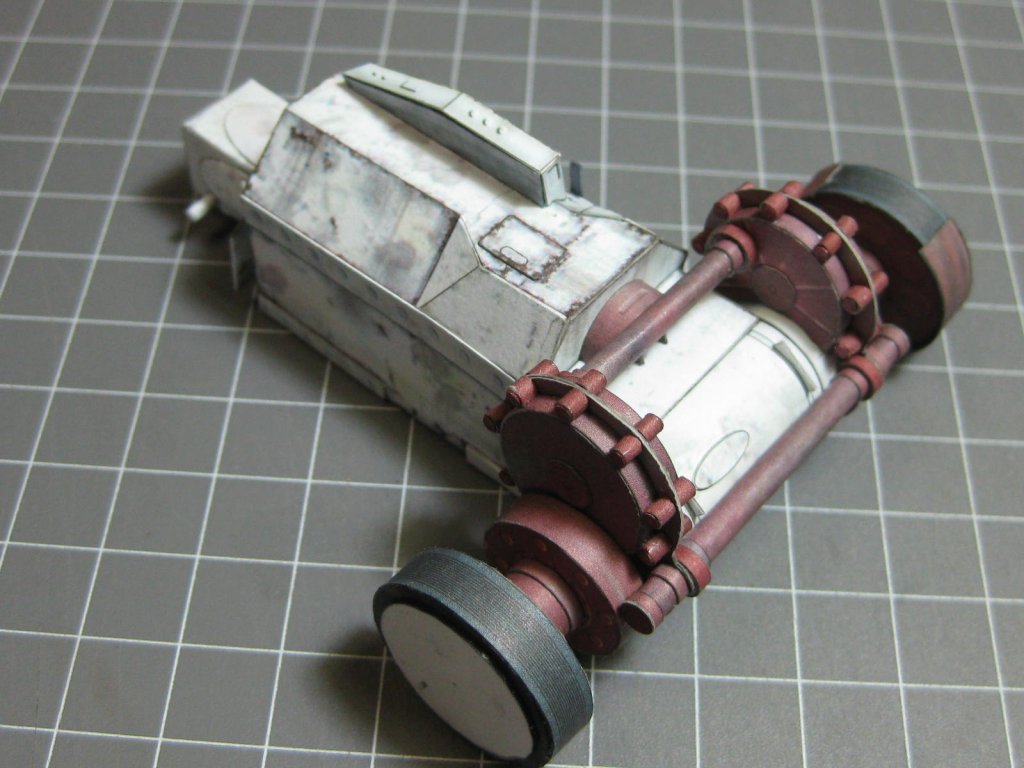
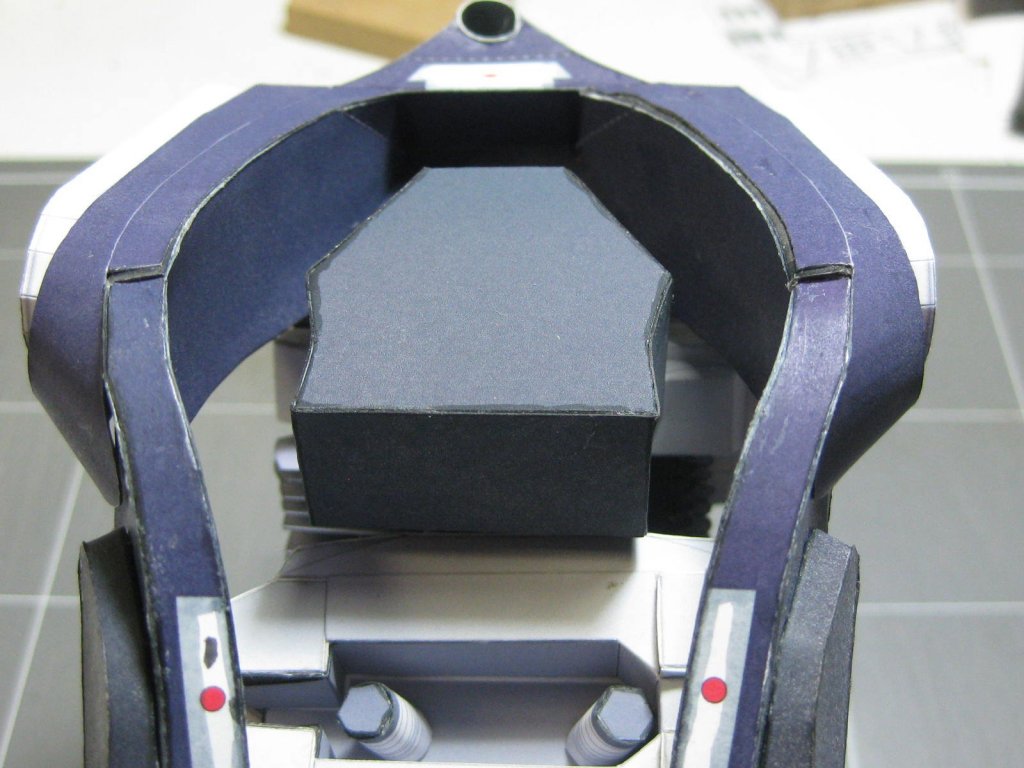
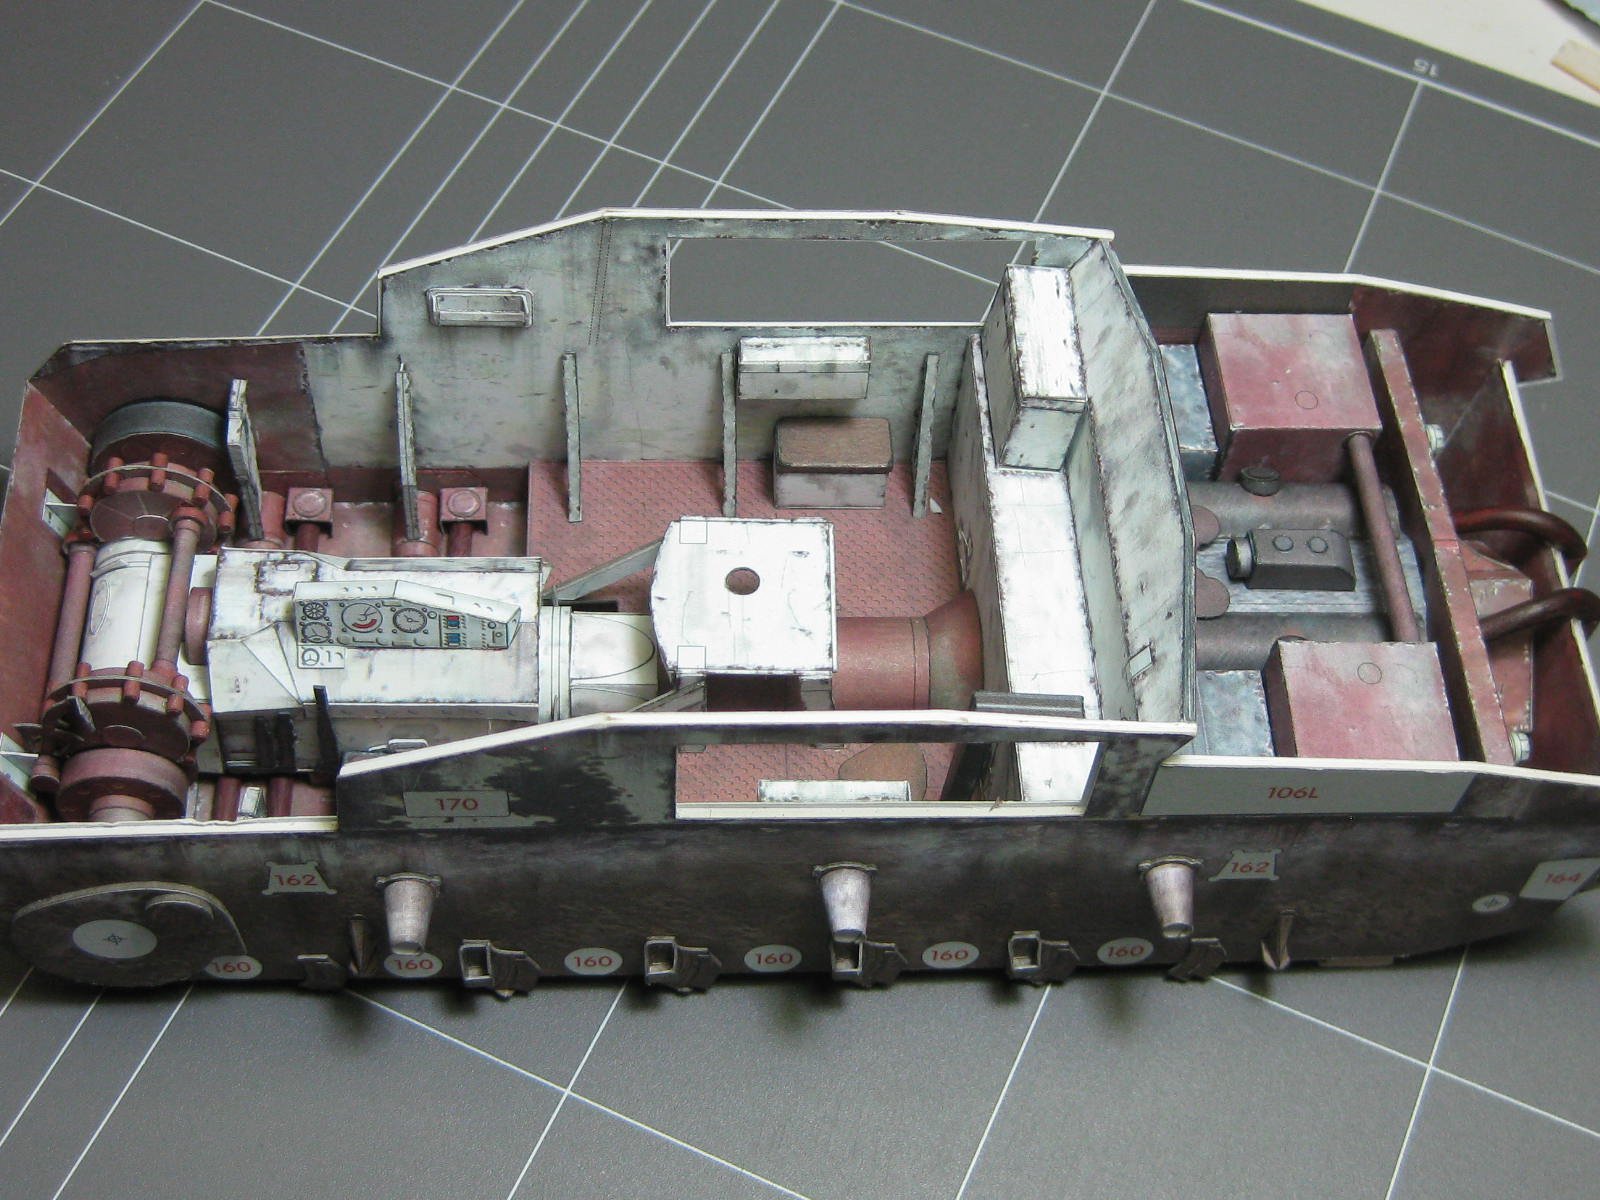
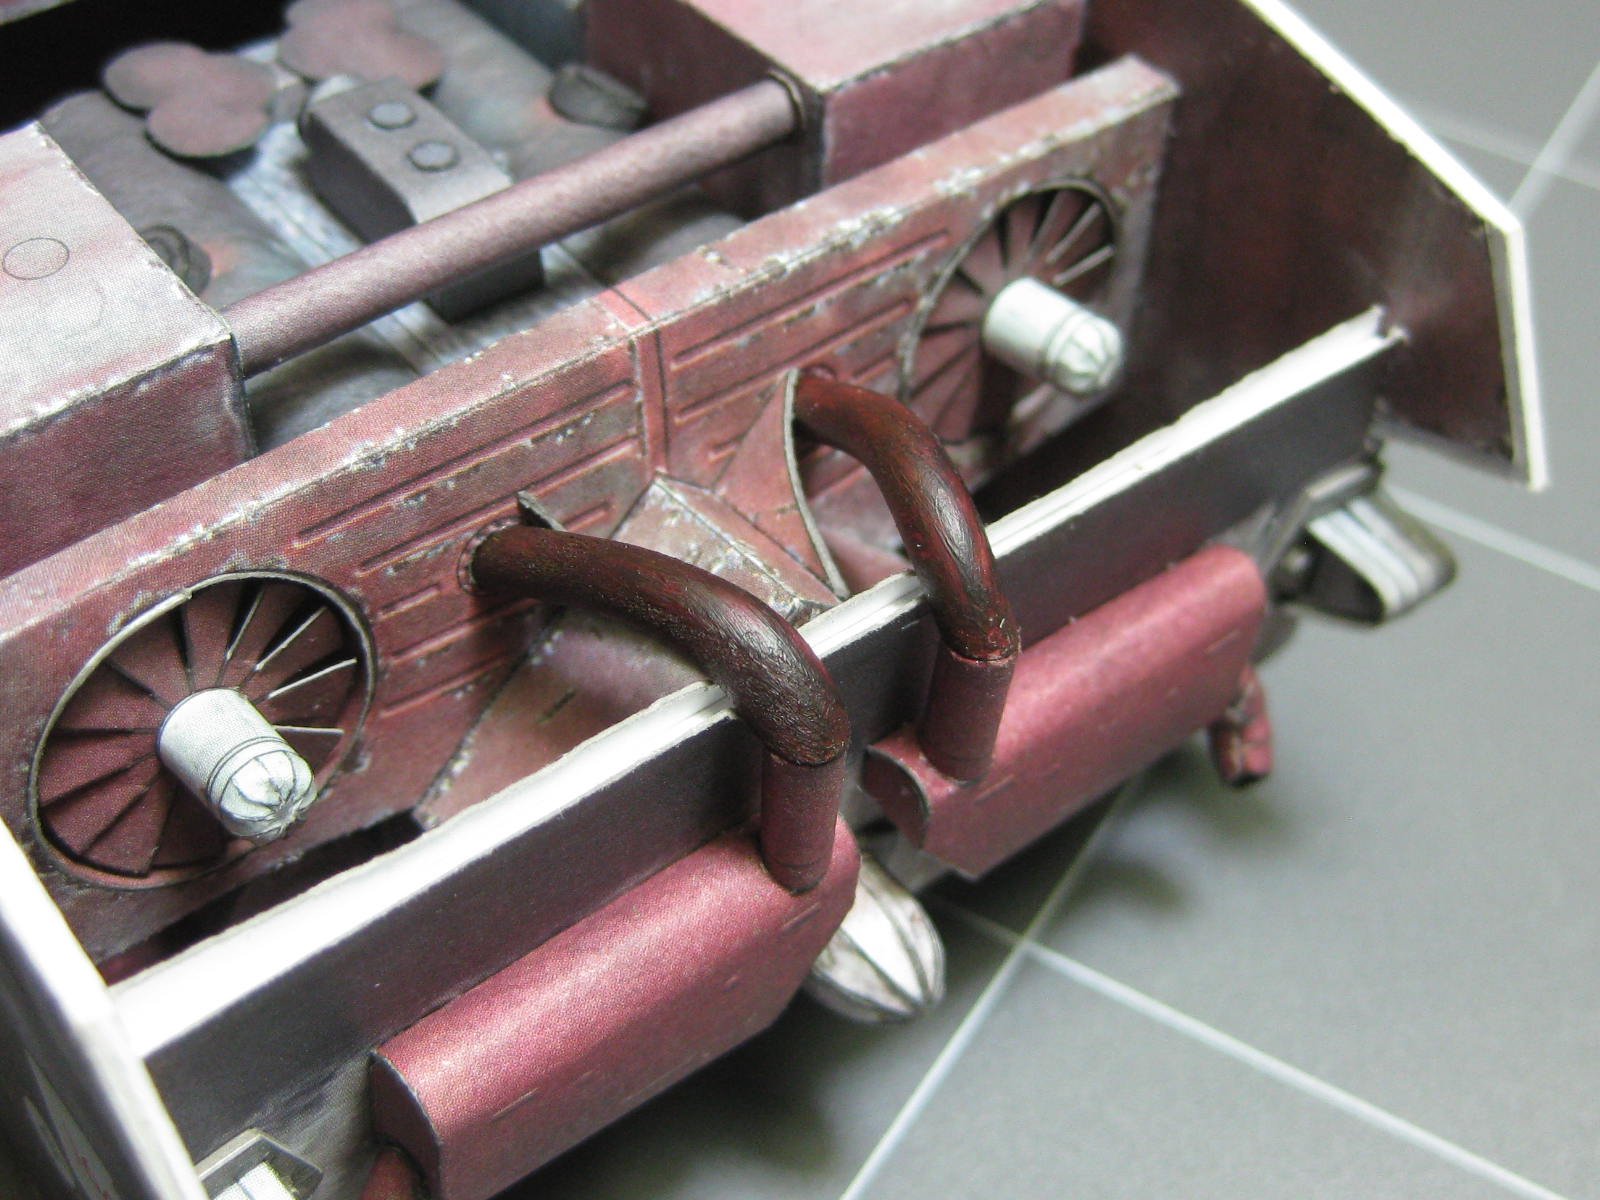
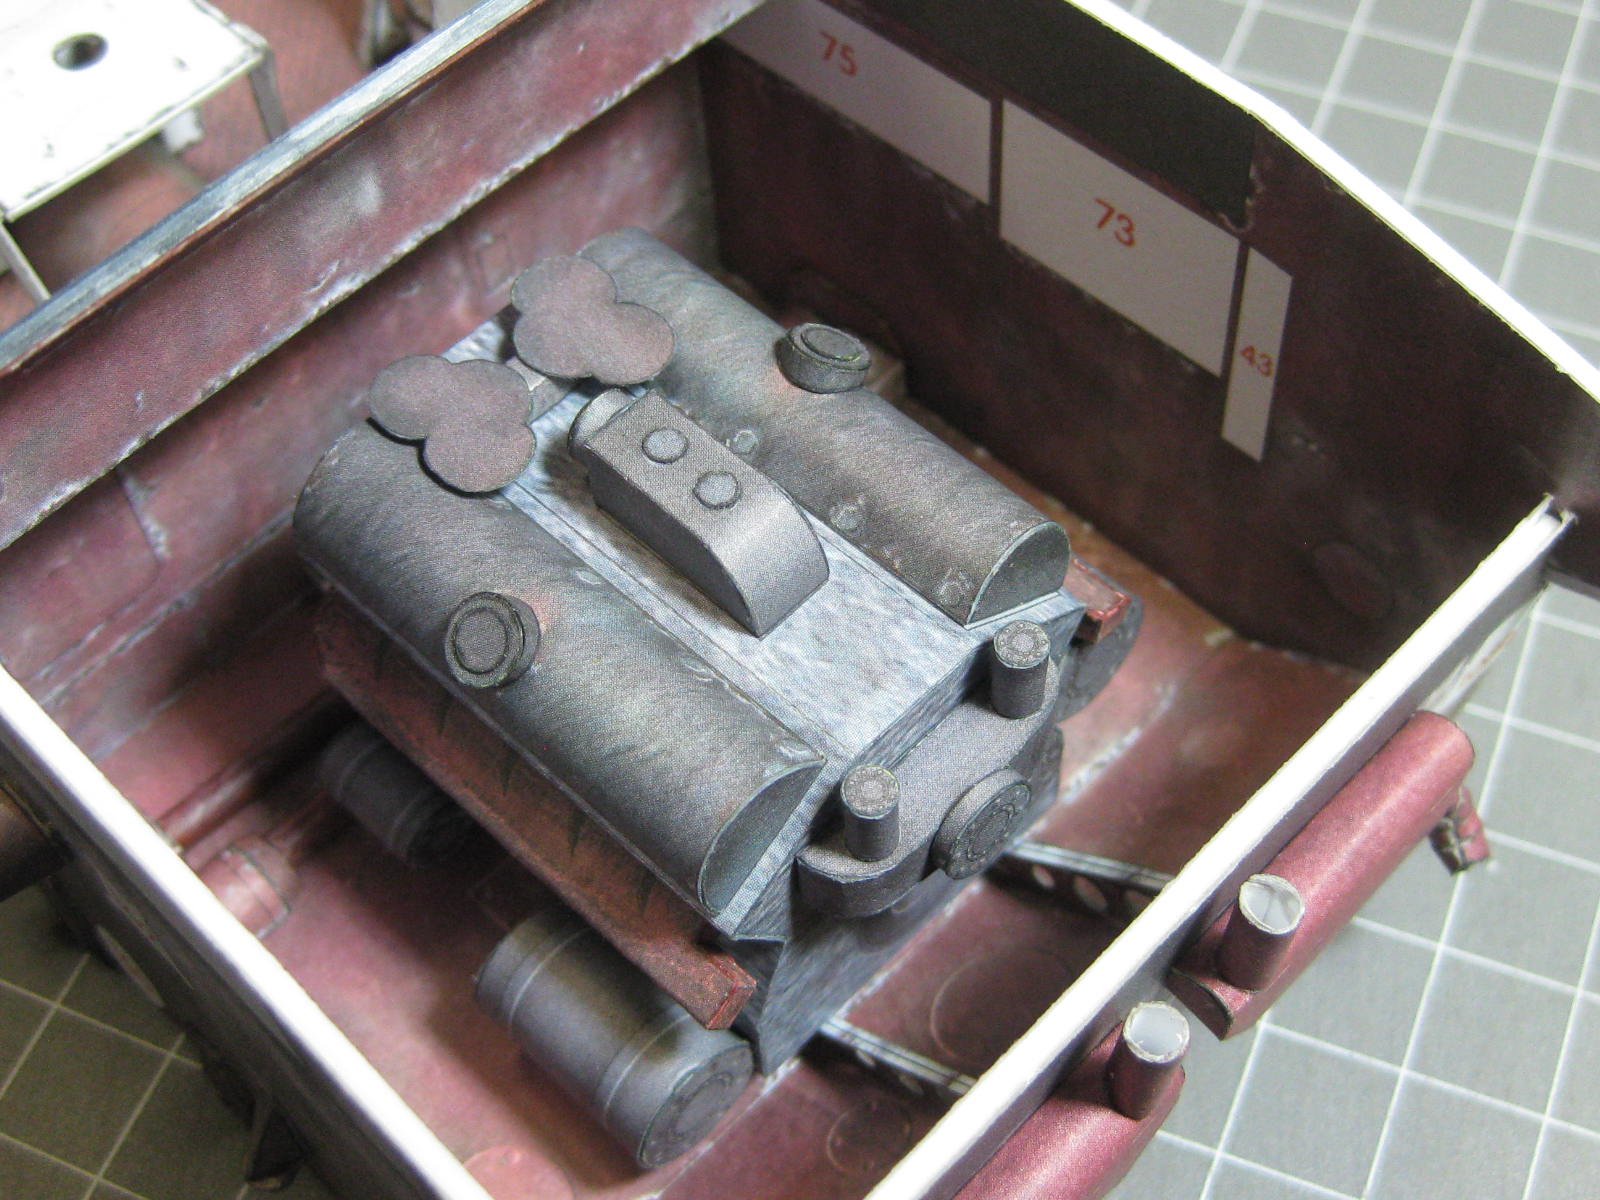
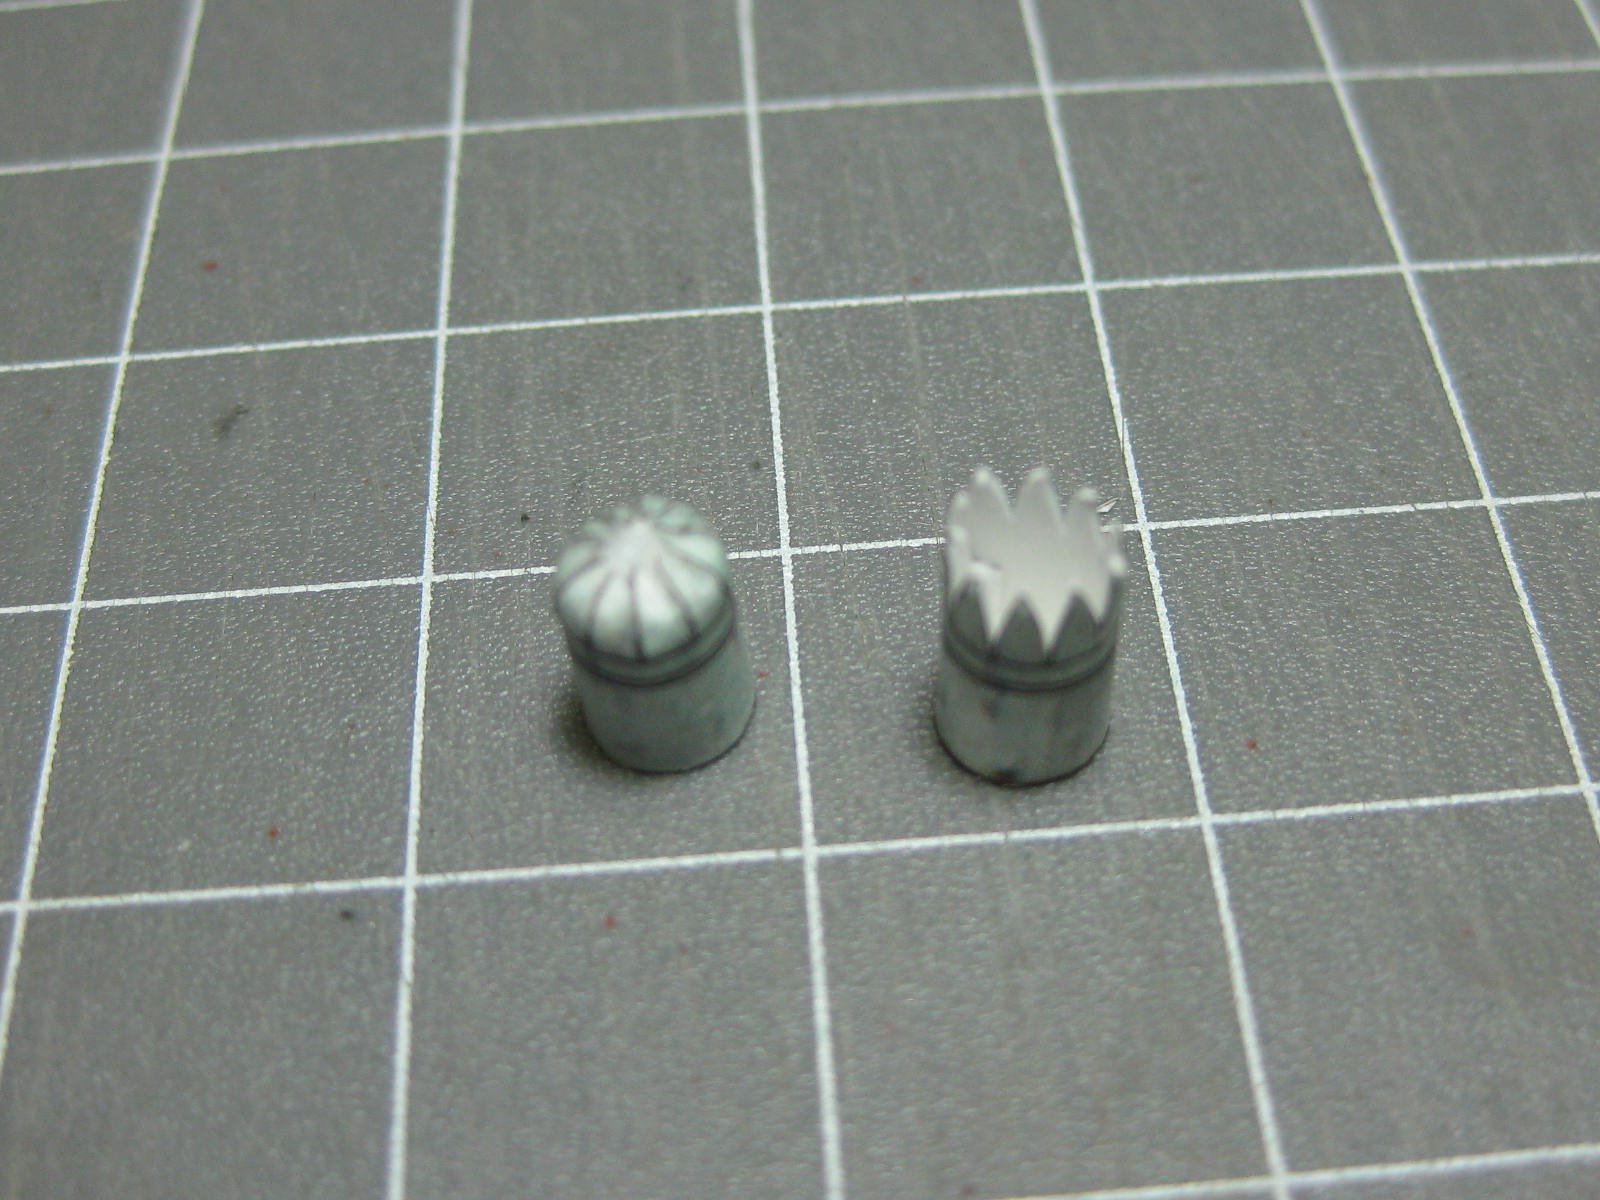
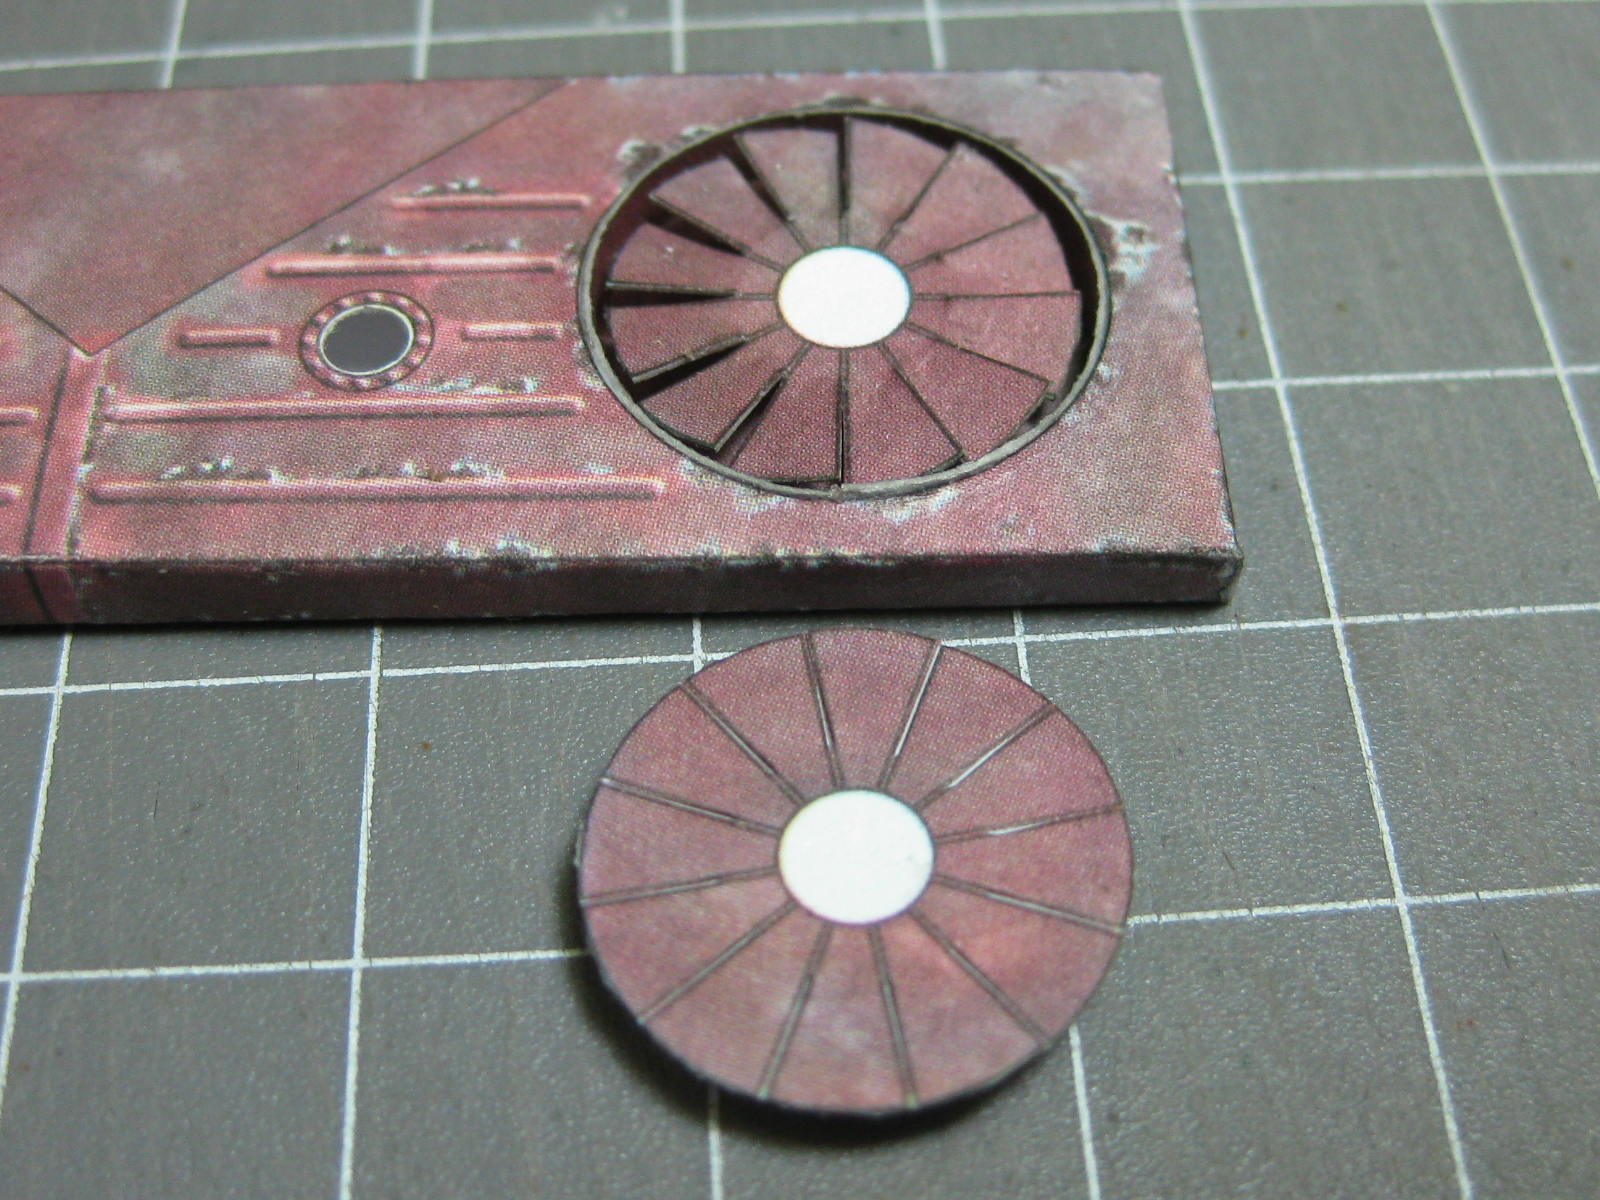
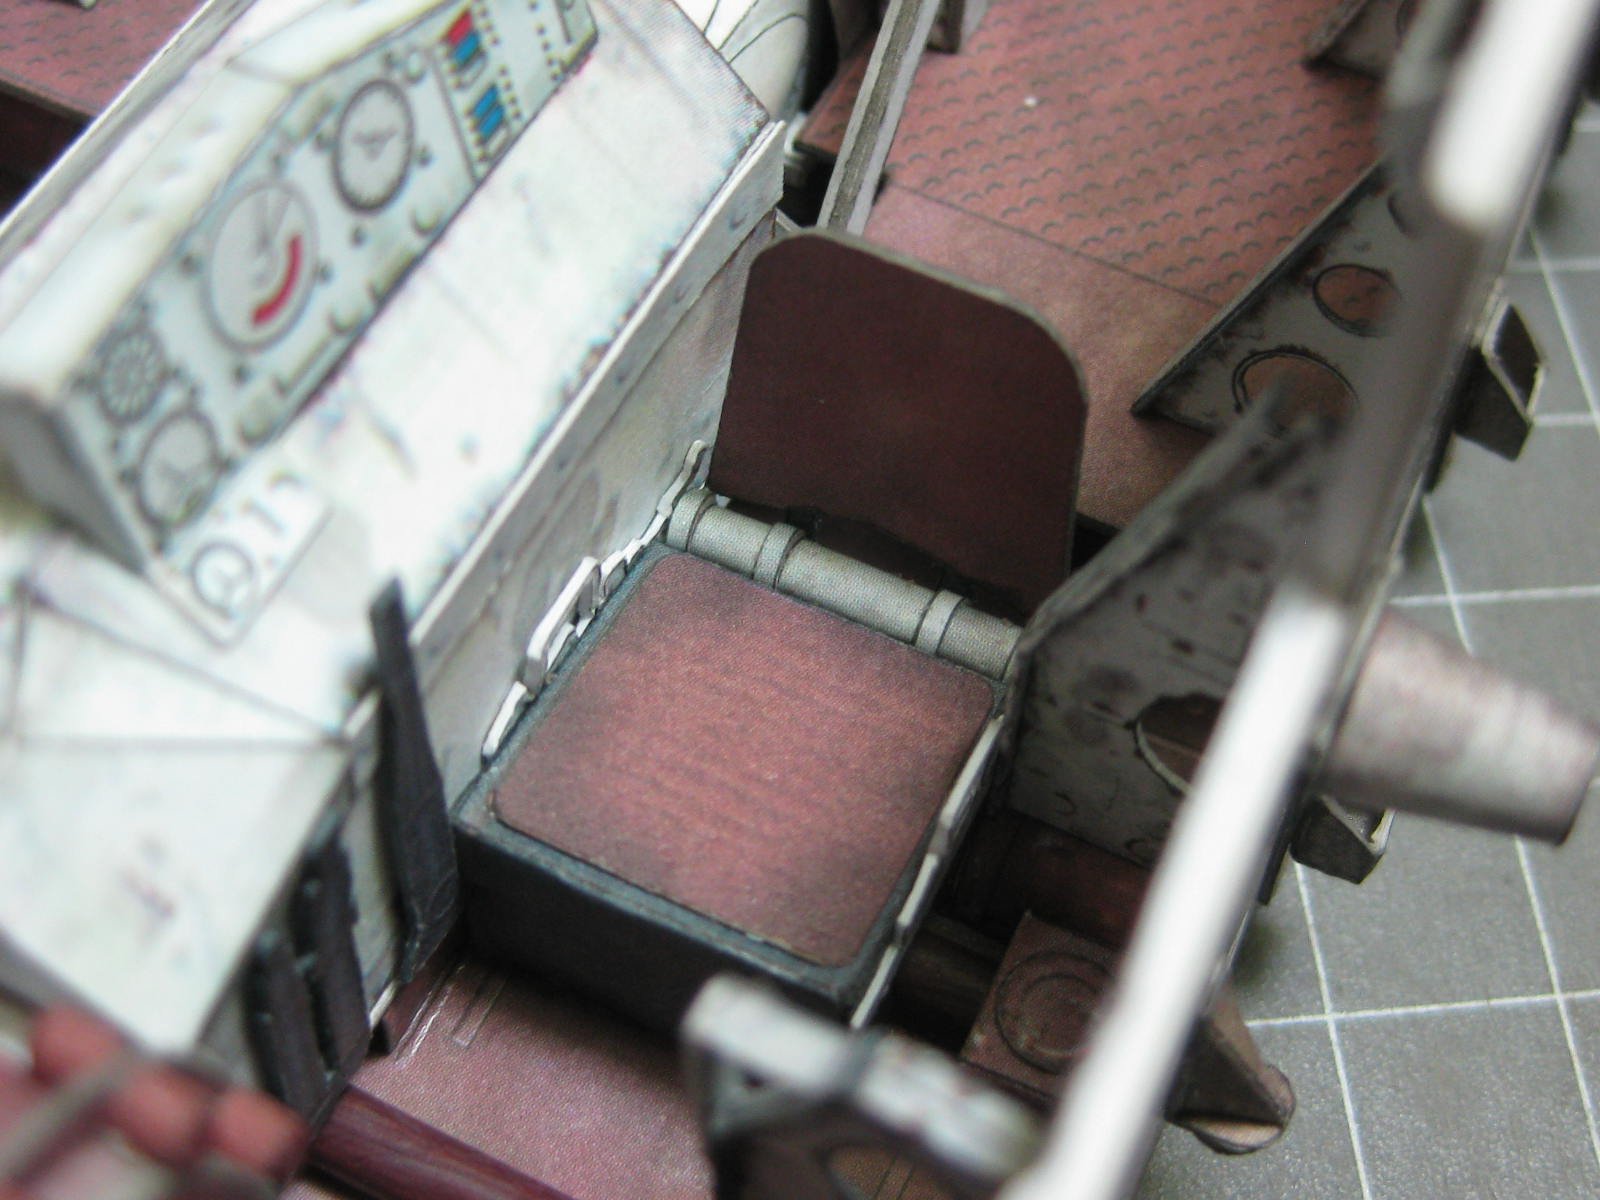
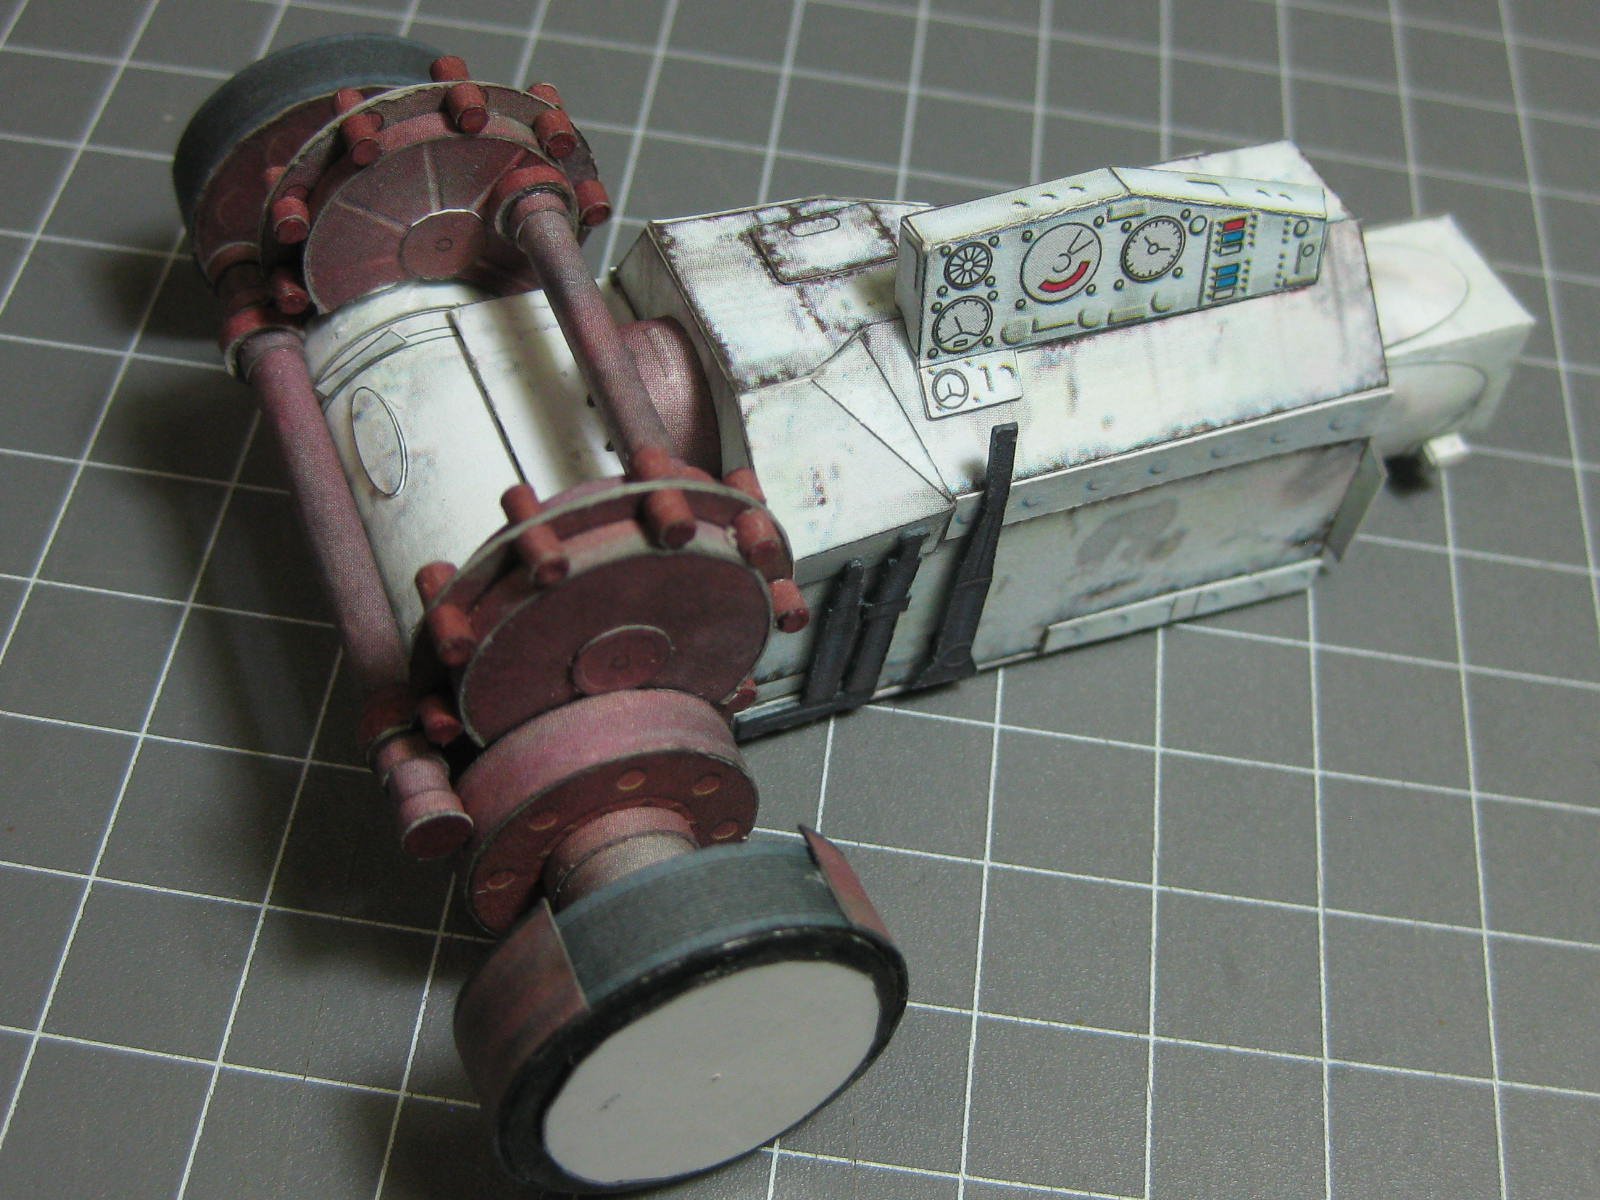
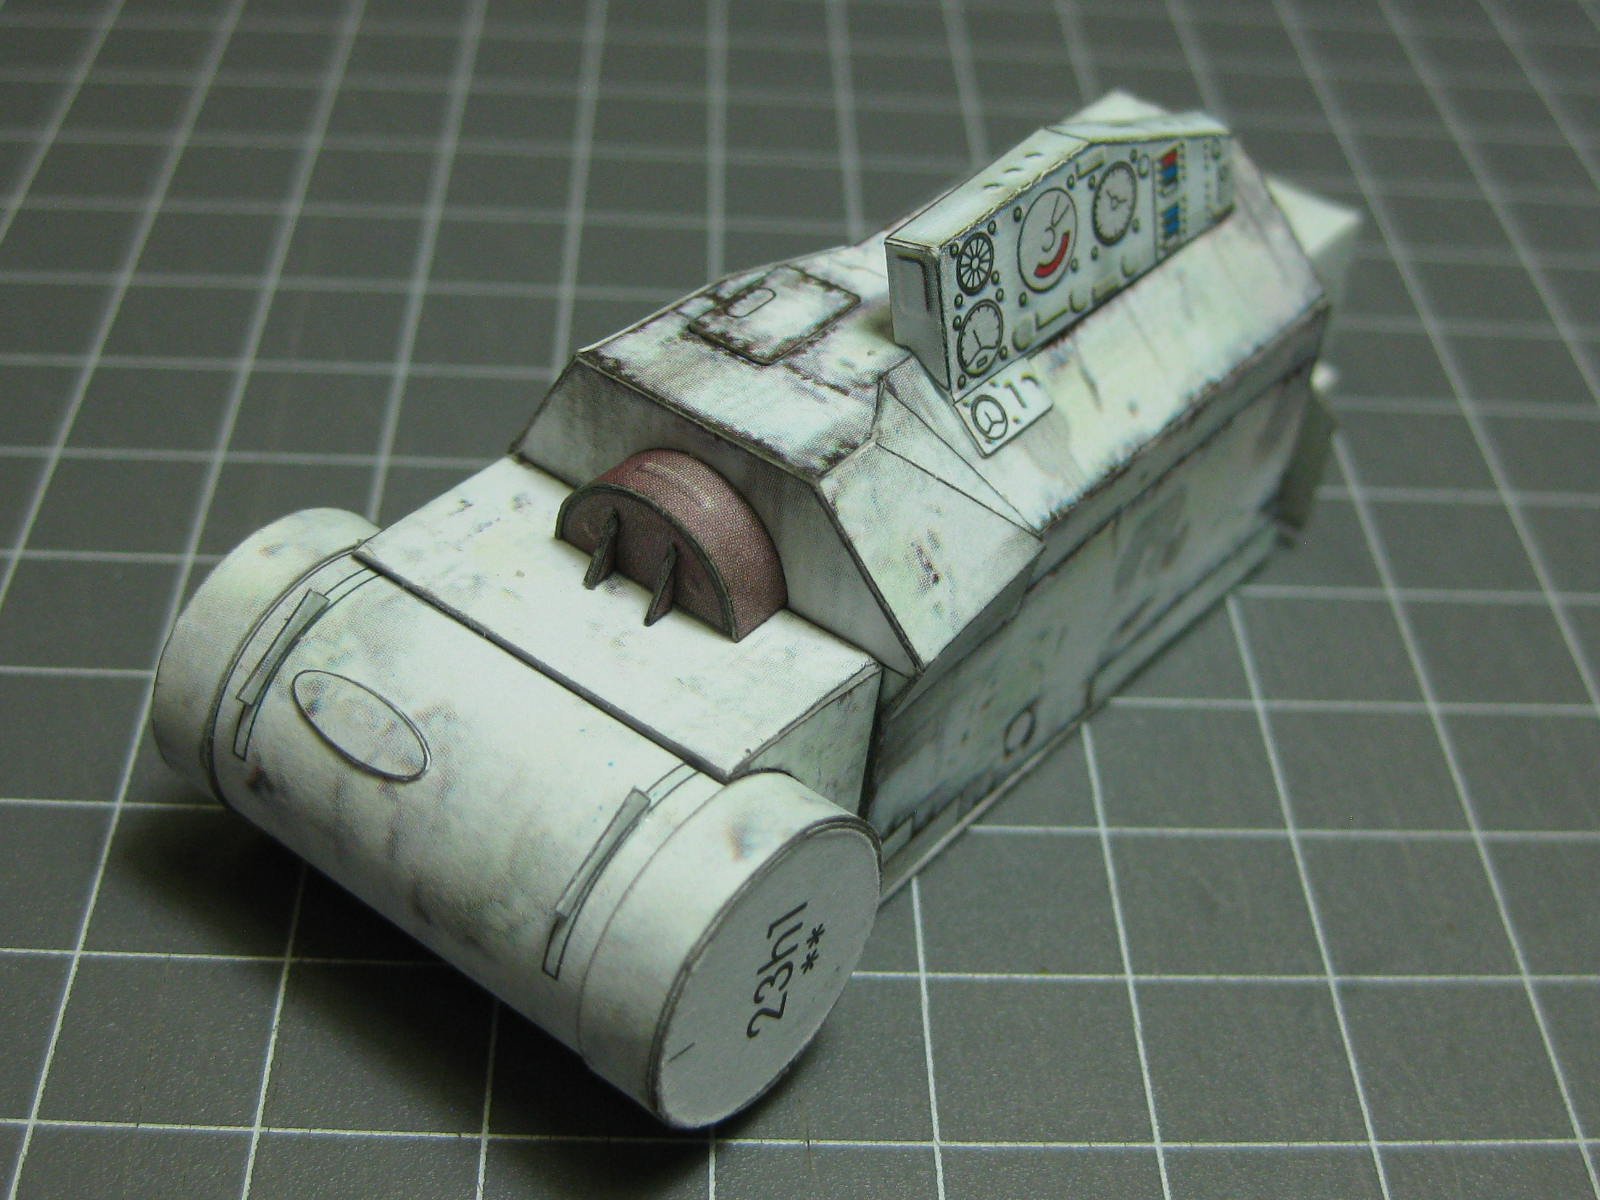
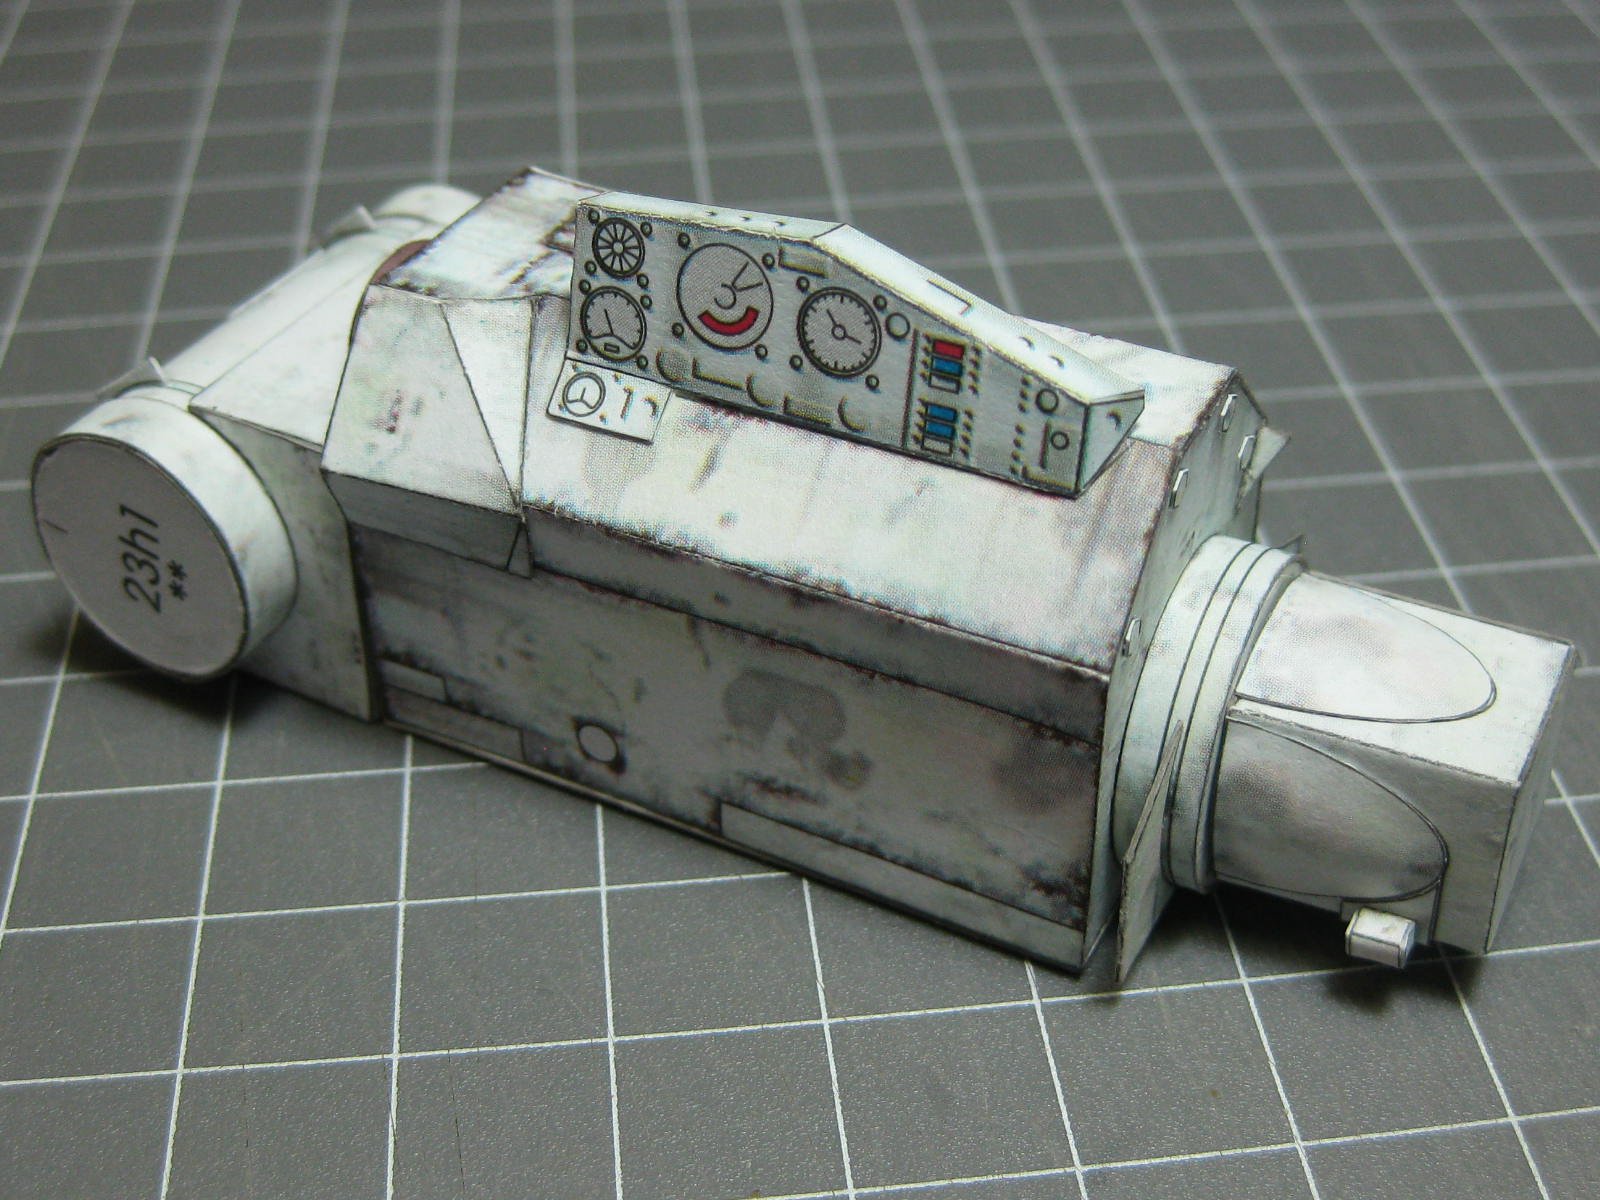
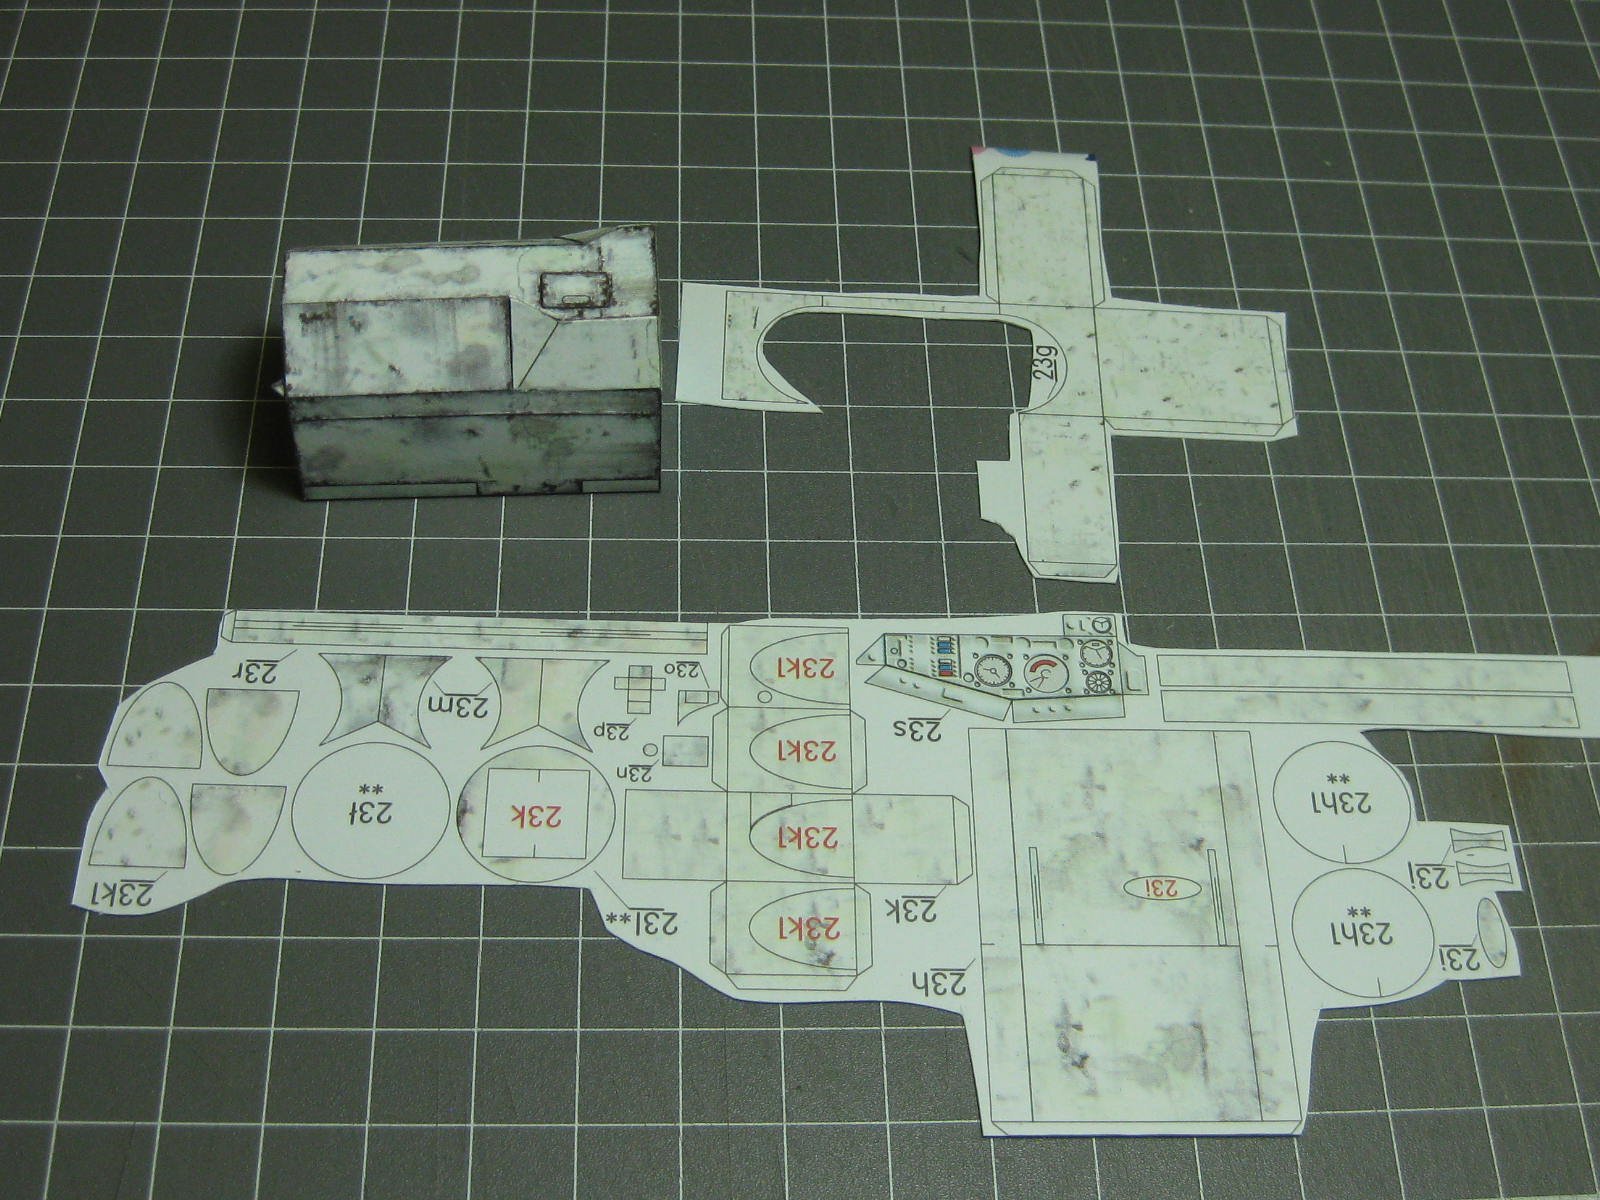
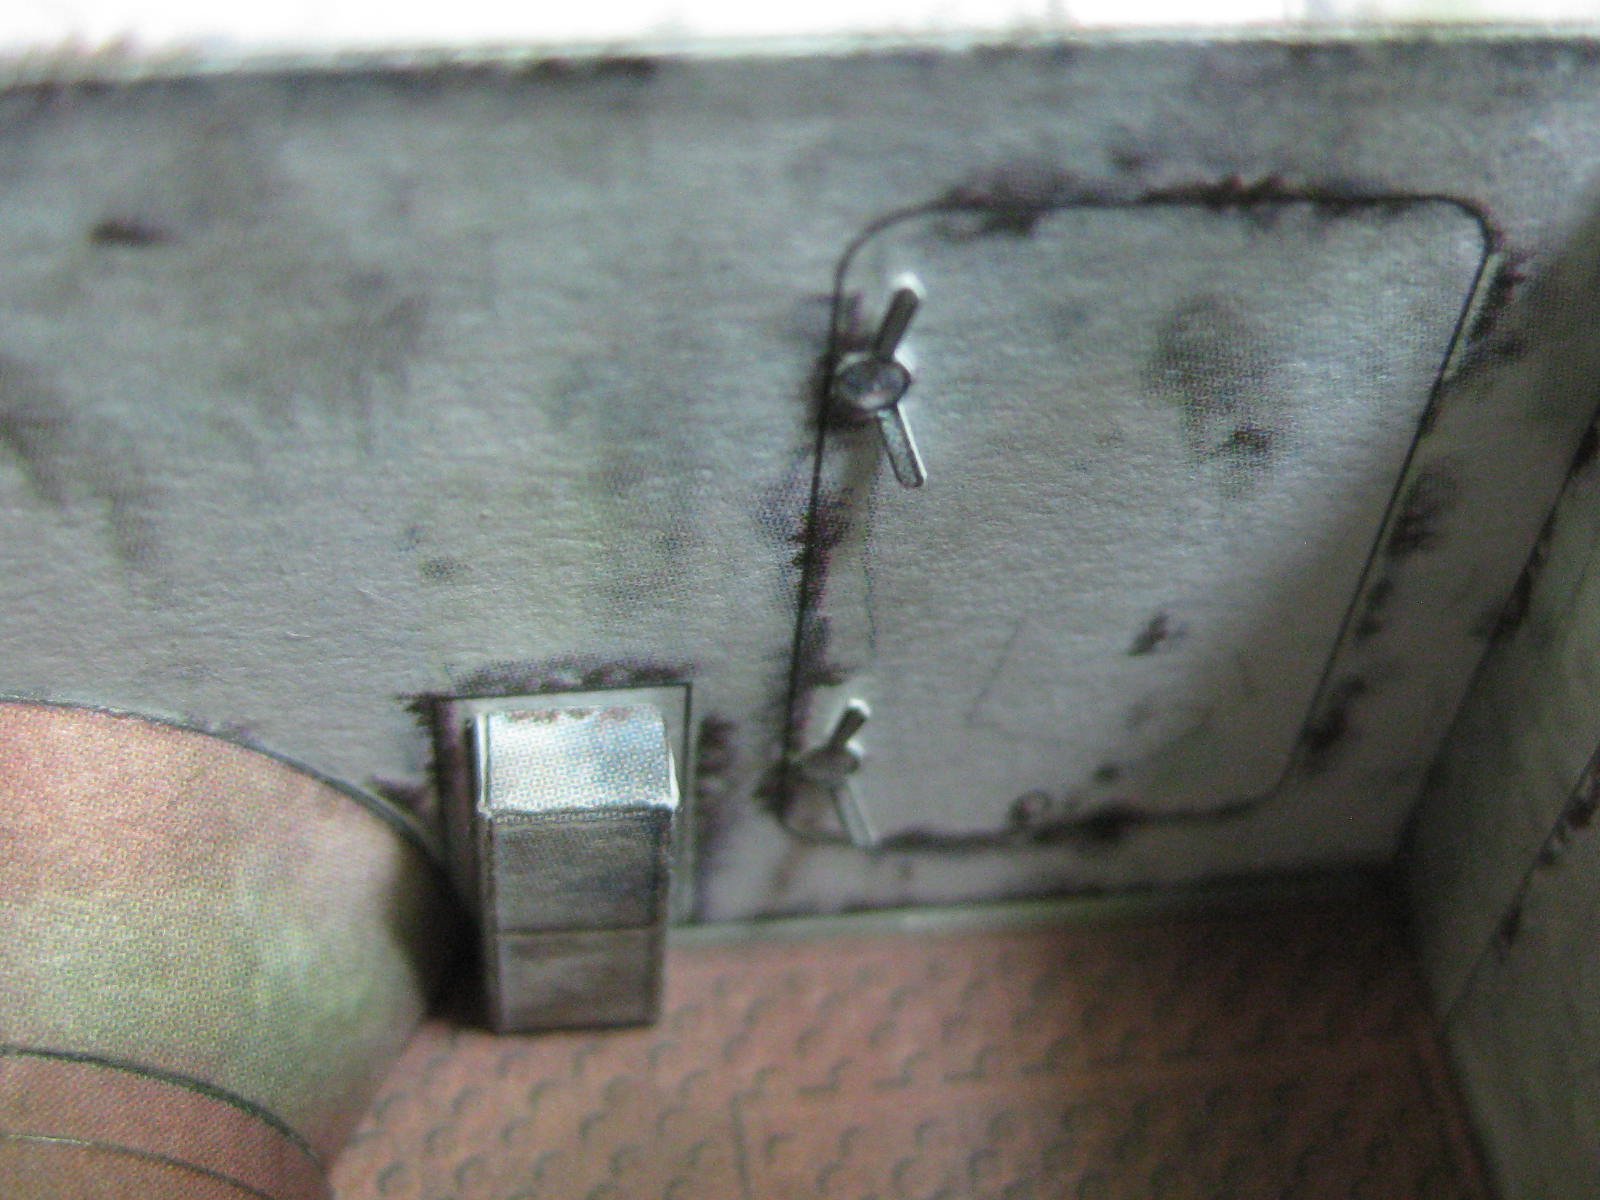
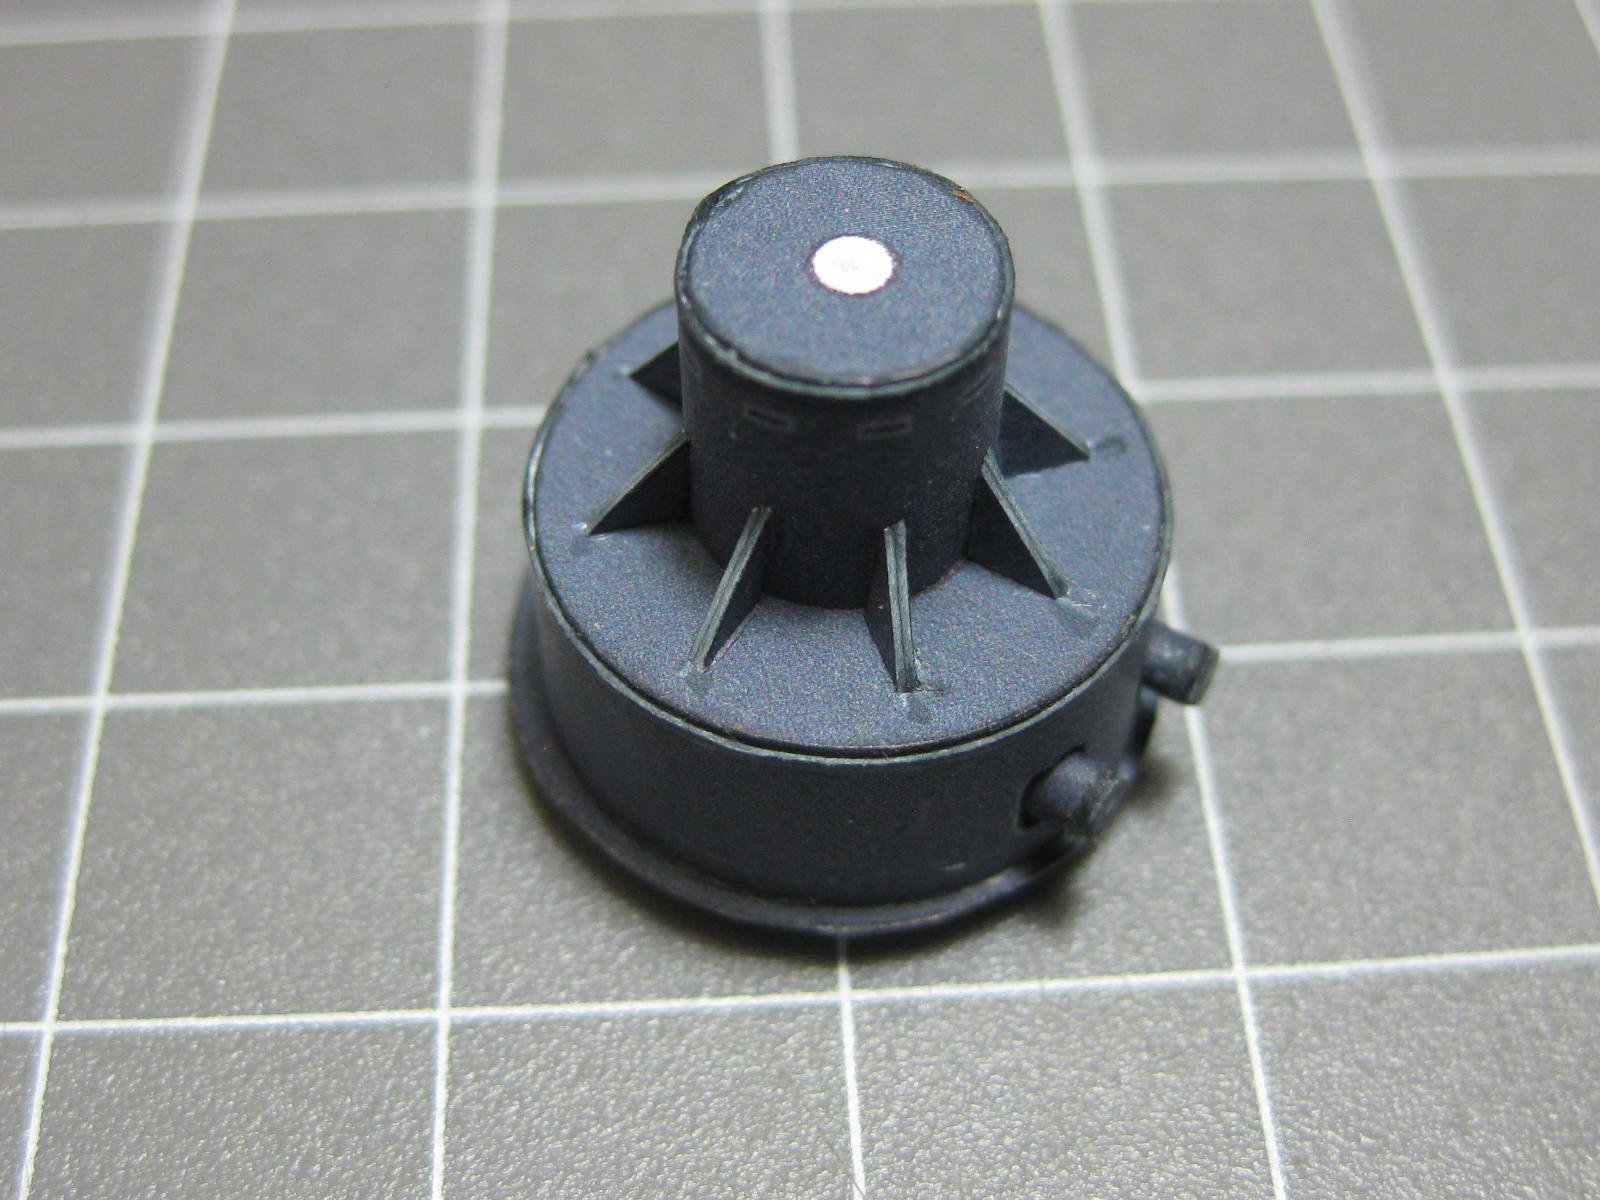
The driver's seat : The engine has a few details, most of which are completely hidden once it's fitted : I found out a bit too late that I'd fitted the engine a bit too far toward the rear. There were no pics or diagrams anywhere in the instructions as to where it should have fitted . It SHOULD have been hard against the firewall. I had a fair bit of modification to do to the radiator later on to get it to fit : The radiator and fans. The centres of the fan spindles took a bit of work : No parts were supplied in the kit for these two exhaust pipes, so I made them from PVC tubing, heated with a hot air gun to get the bends. It took a few goes to get two pieces which looked the same and actually fitted : My progress to date : Danny


- 92 replies
-
- 12
-

-
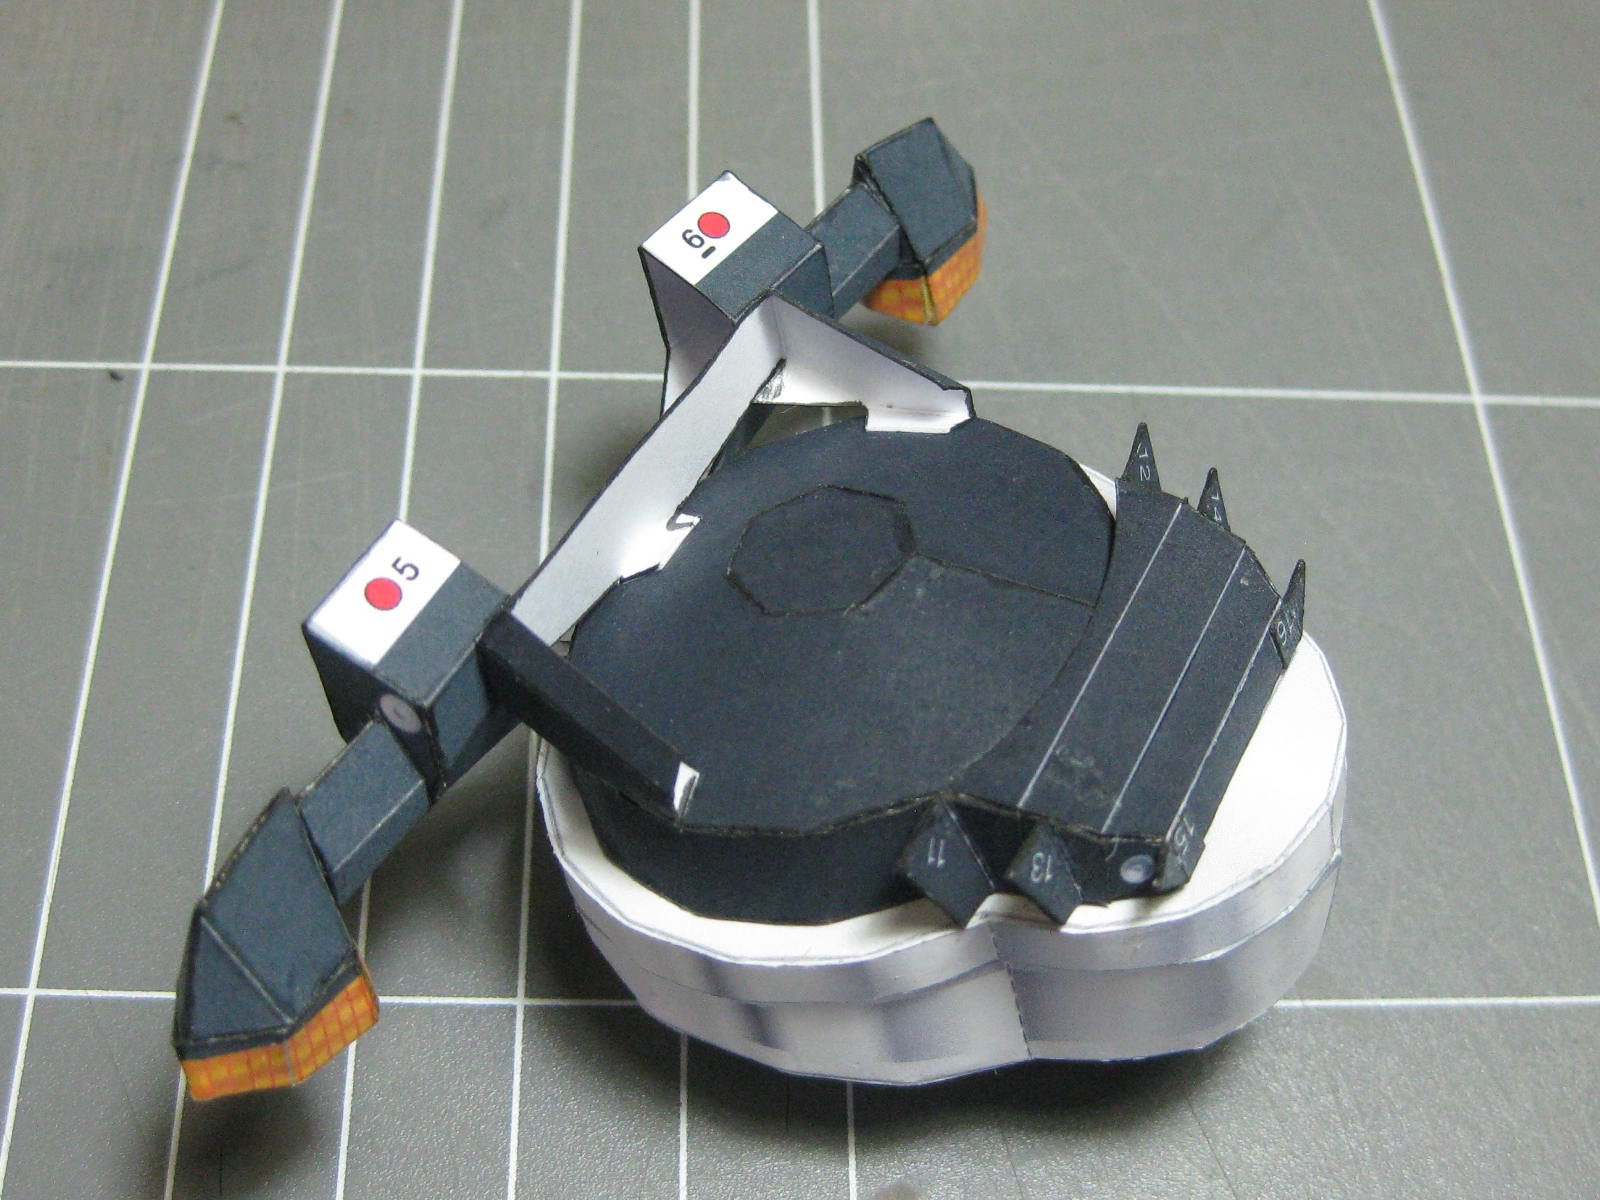
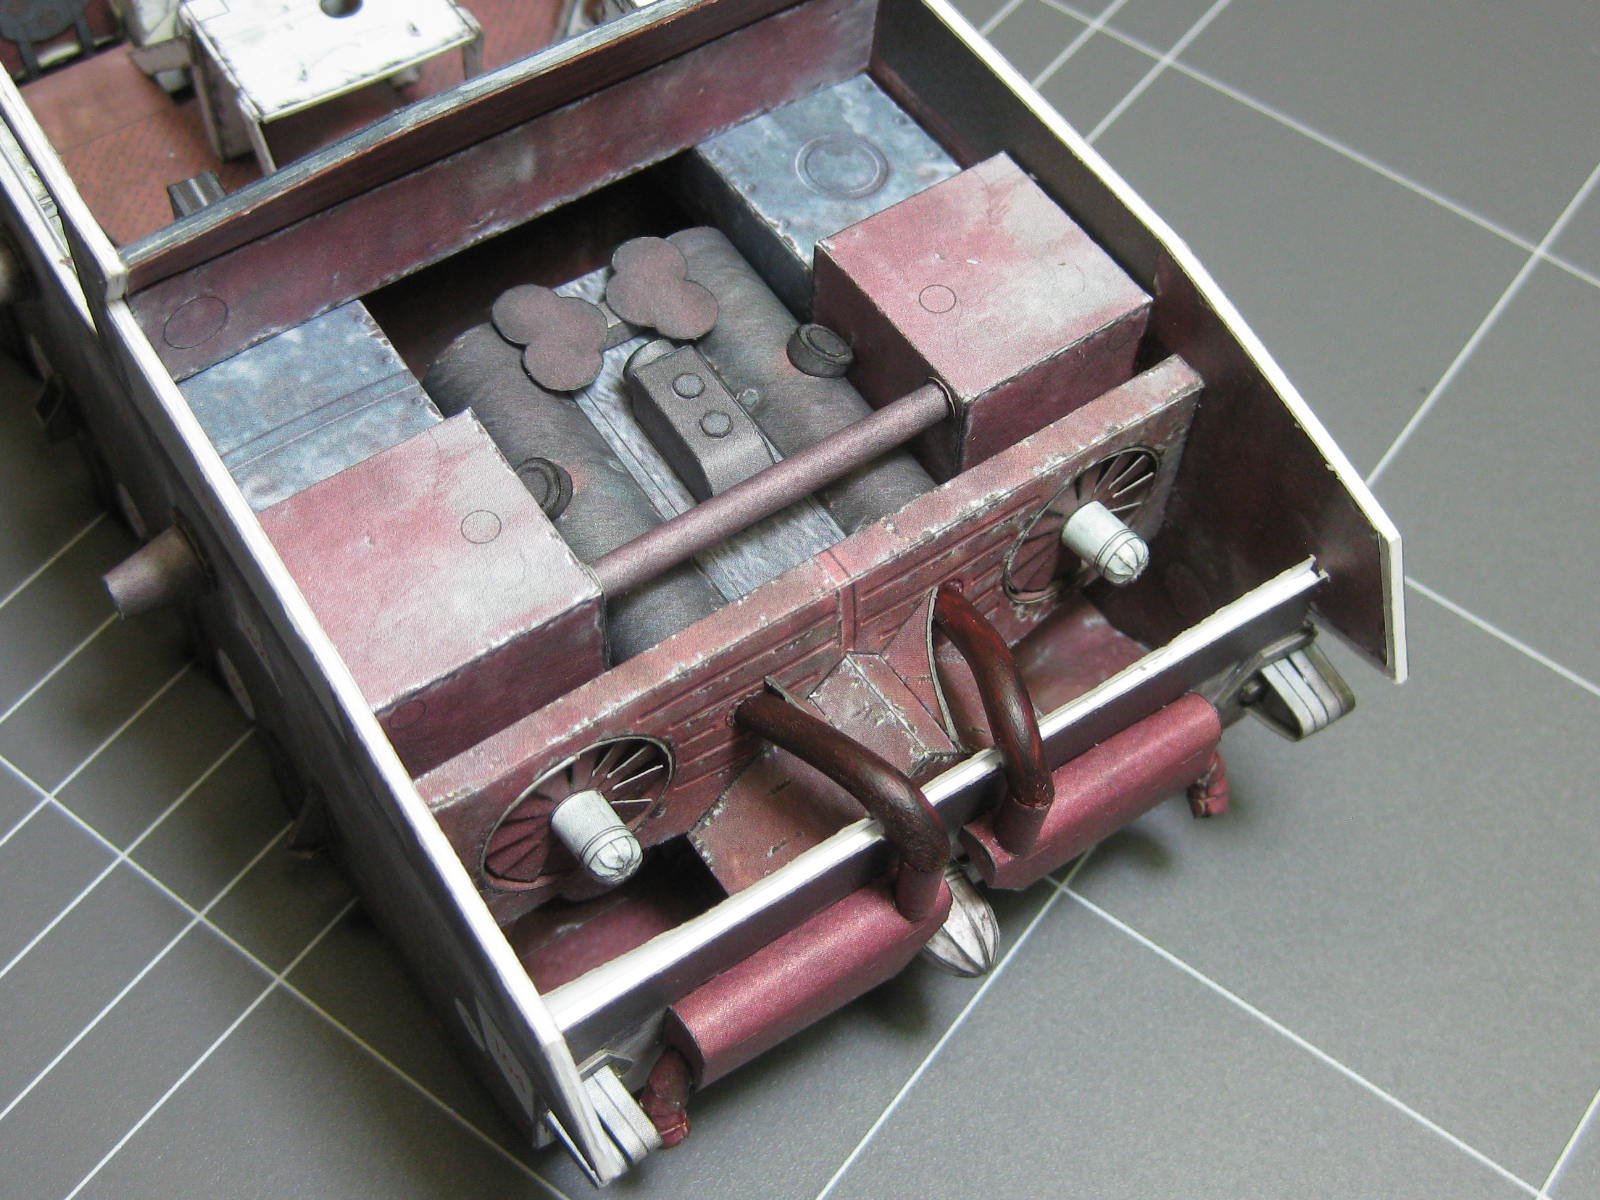
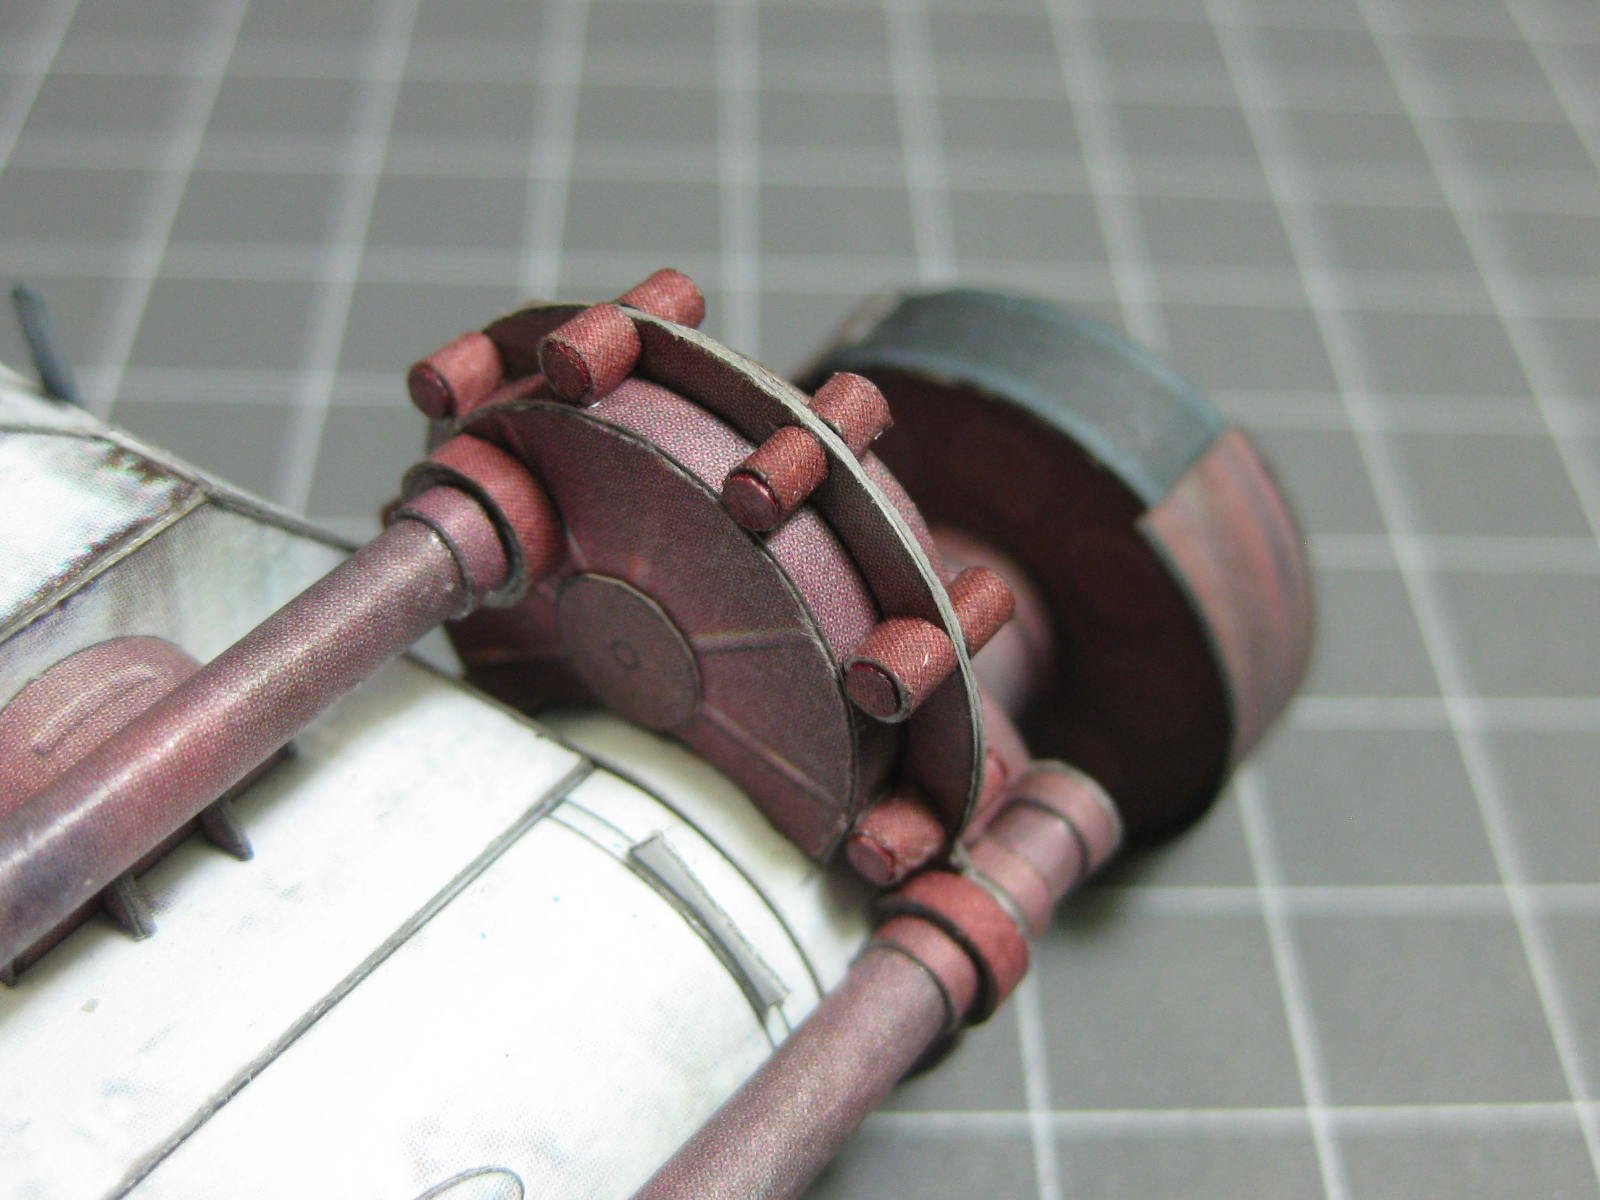
I needed to roll 28 small tubes, I'm not sure if they are supposed to be bolts, pins or whatever. The parts supplied in the kit were obviously wrong - the tubes are supposed to be 1.5mm diameter x 2.0mm long, but the kit parts were only 2.0mm square whereas a bit of very simple math comes up with a part that is 2.0mm x 4.8mm. I cut new parts from some left-over hull skin from Bismarck. The tubes were rolled around a 1.2mm drill bit : The assembled drive mechanism fitted to the gearbox : Danny


- 92 replies
-
- 13
-
-
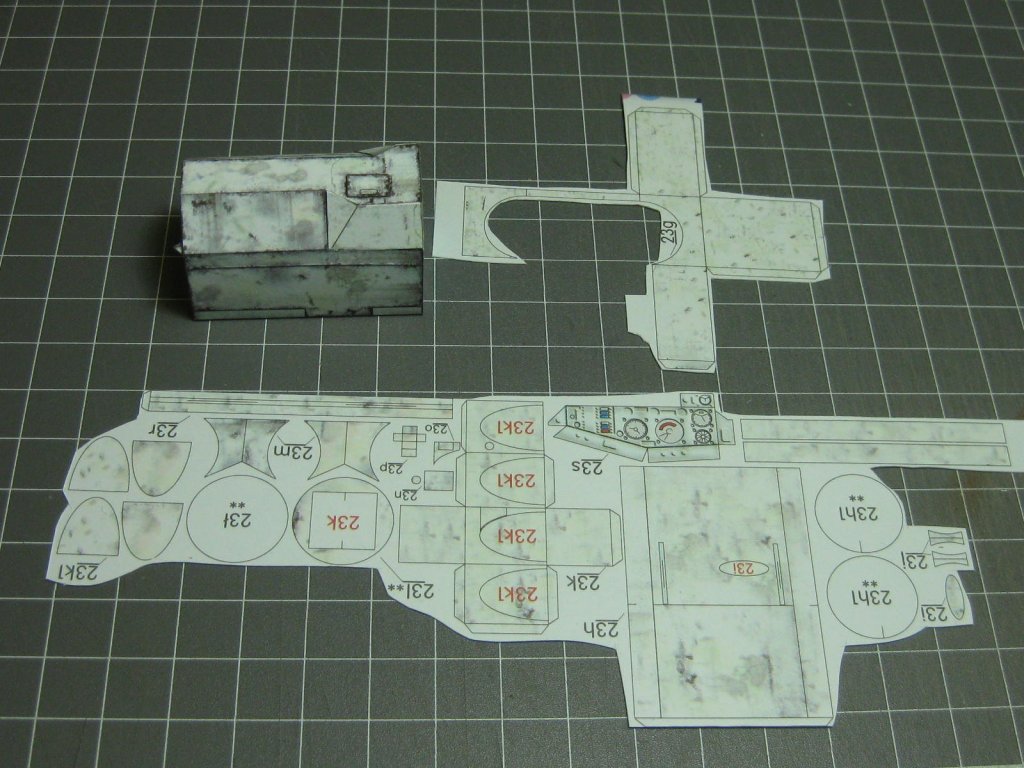
I go one better - I Scan and Save every sheet of parts as soon as I get the kit. That way I can not only find the odd part which I've already cut out (now what DID it look like?? ) but if something doesn't work properly I can print out a new page (or just the part itself) and re-make it. Danny
-
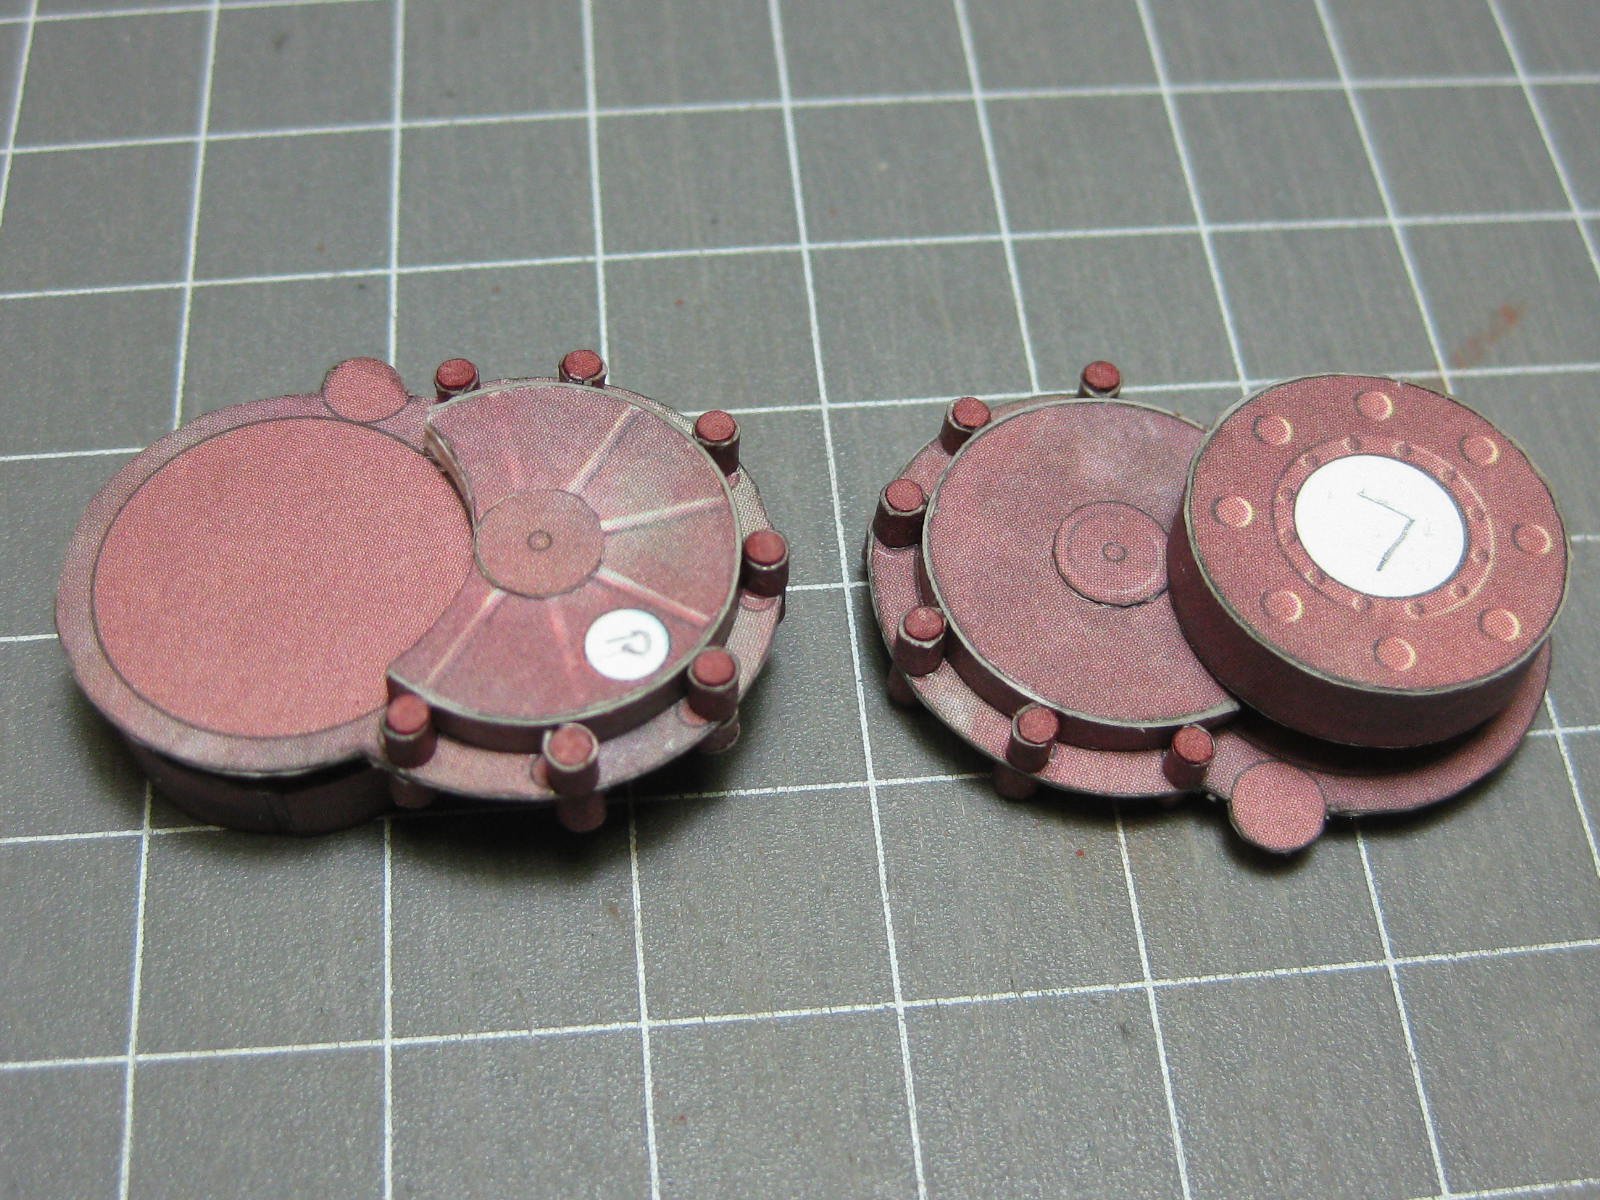
The Gearbox consists of about 40 parts. Here's a pic of some of them, the rest have already been put together : There are even four bolt heads : The finished box : Danny

- 92 replies
-
- 12
-
-
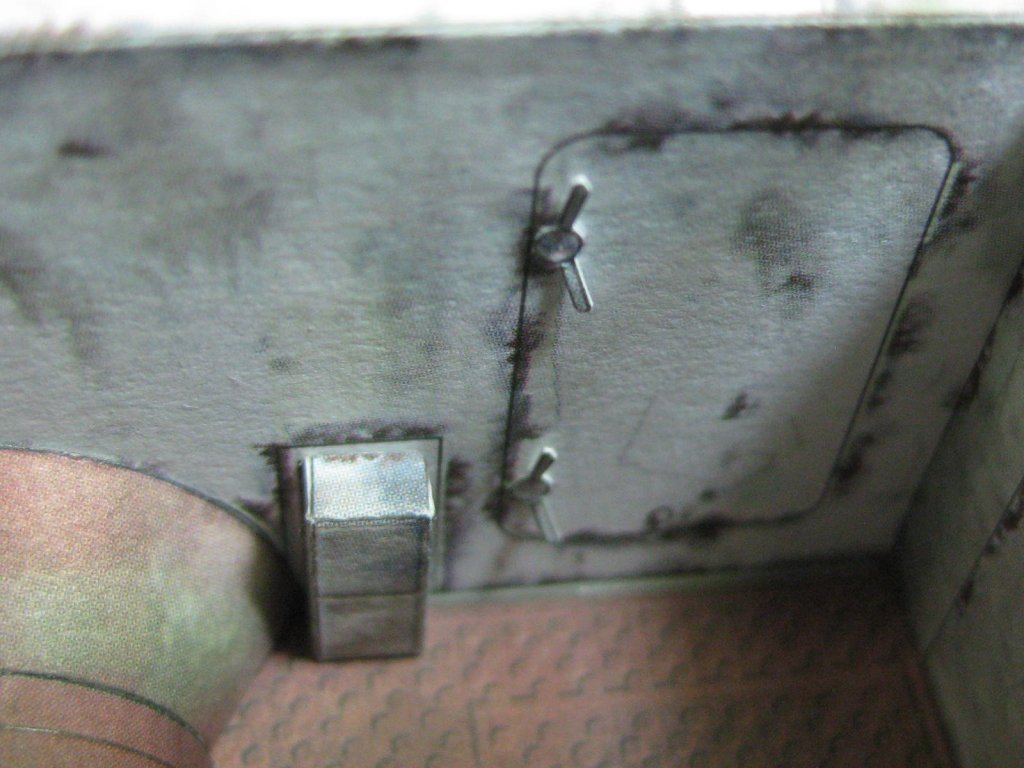
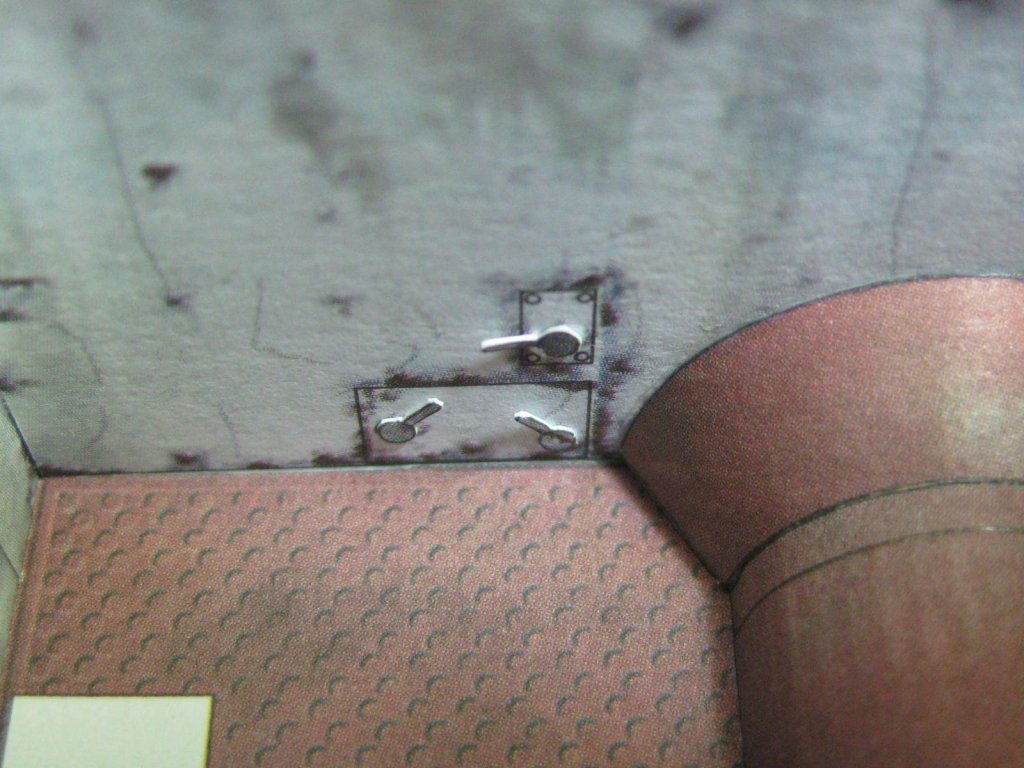
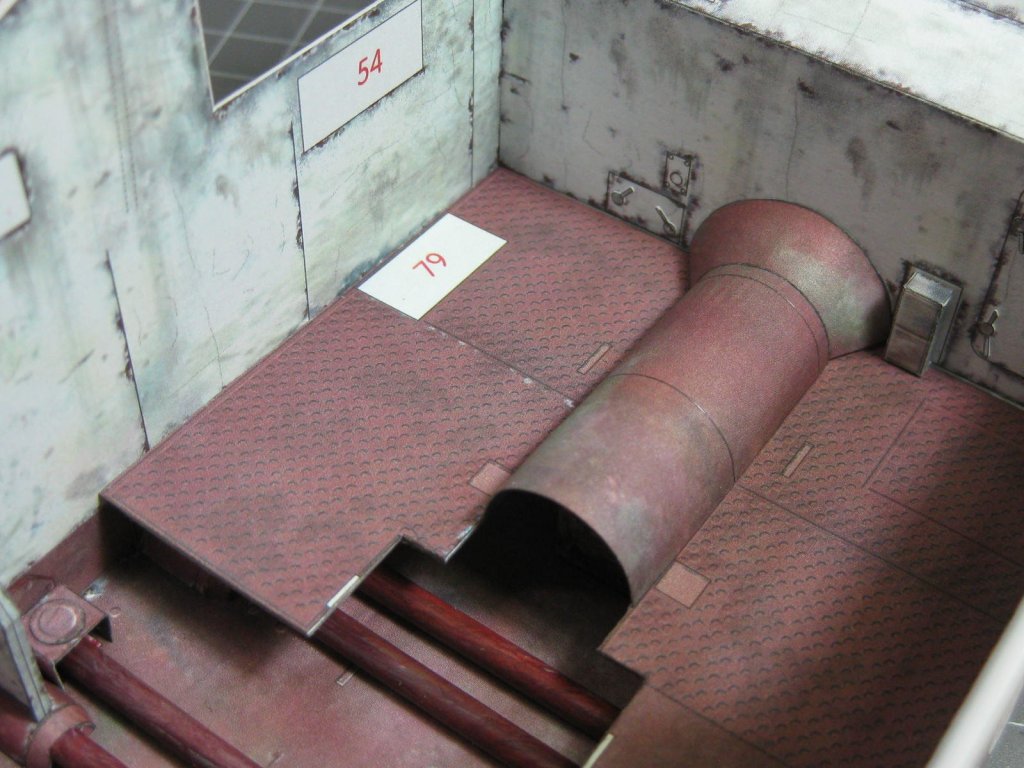
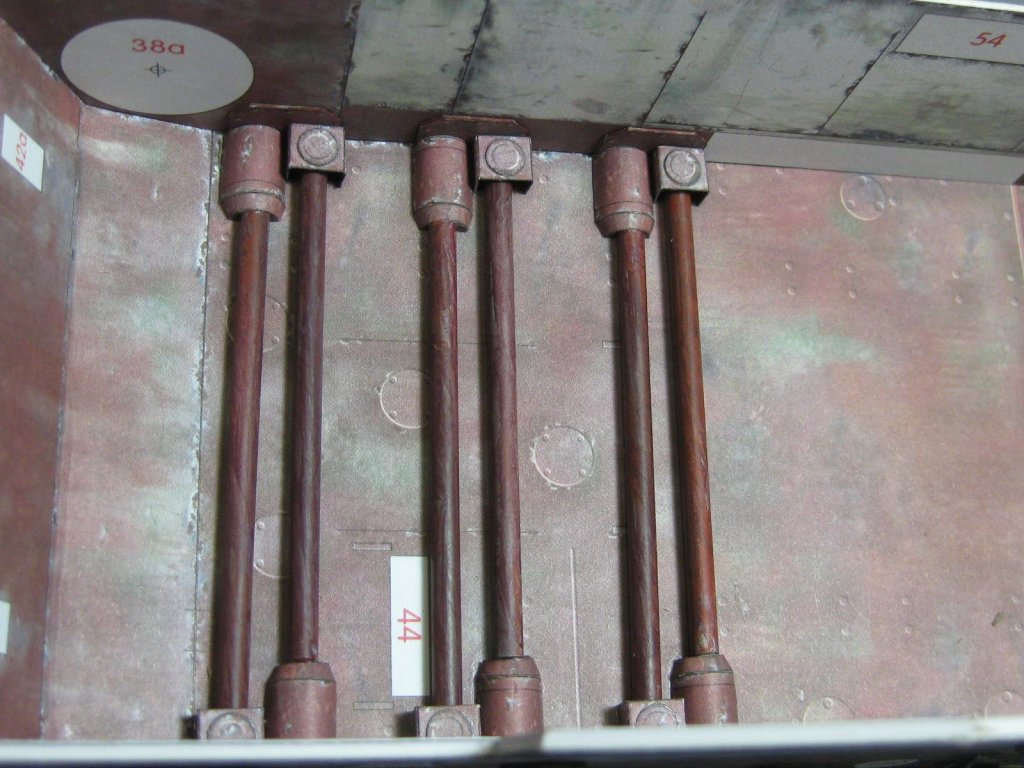
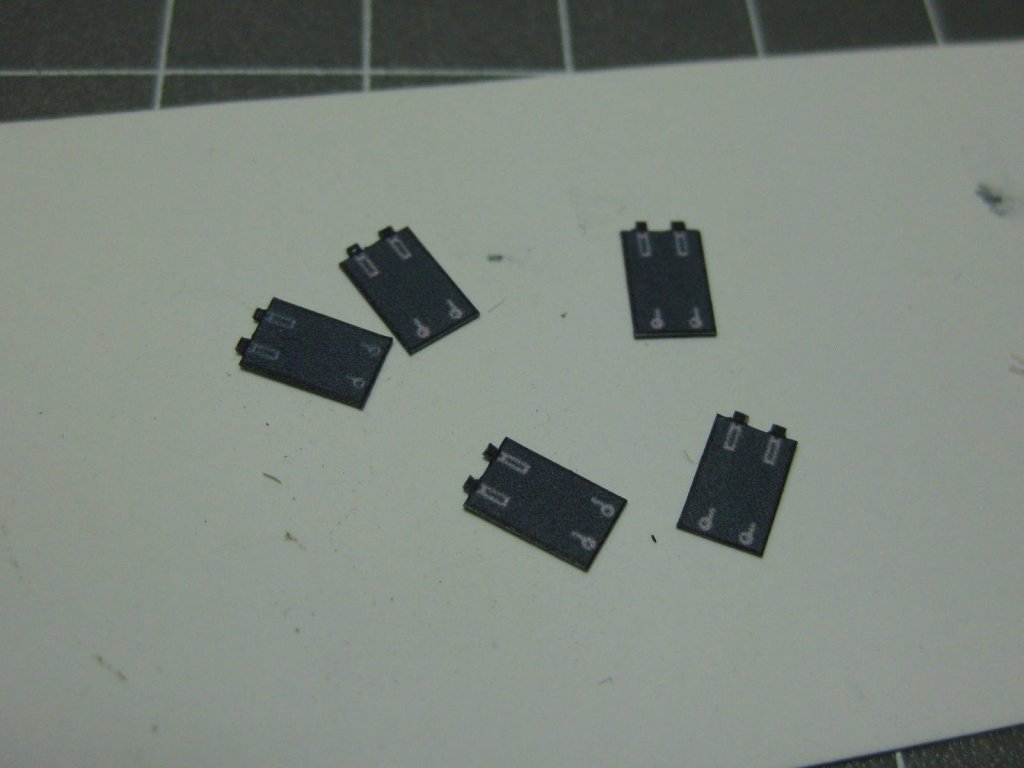
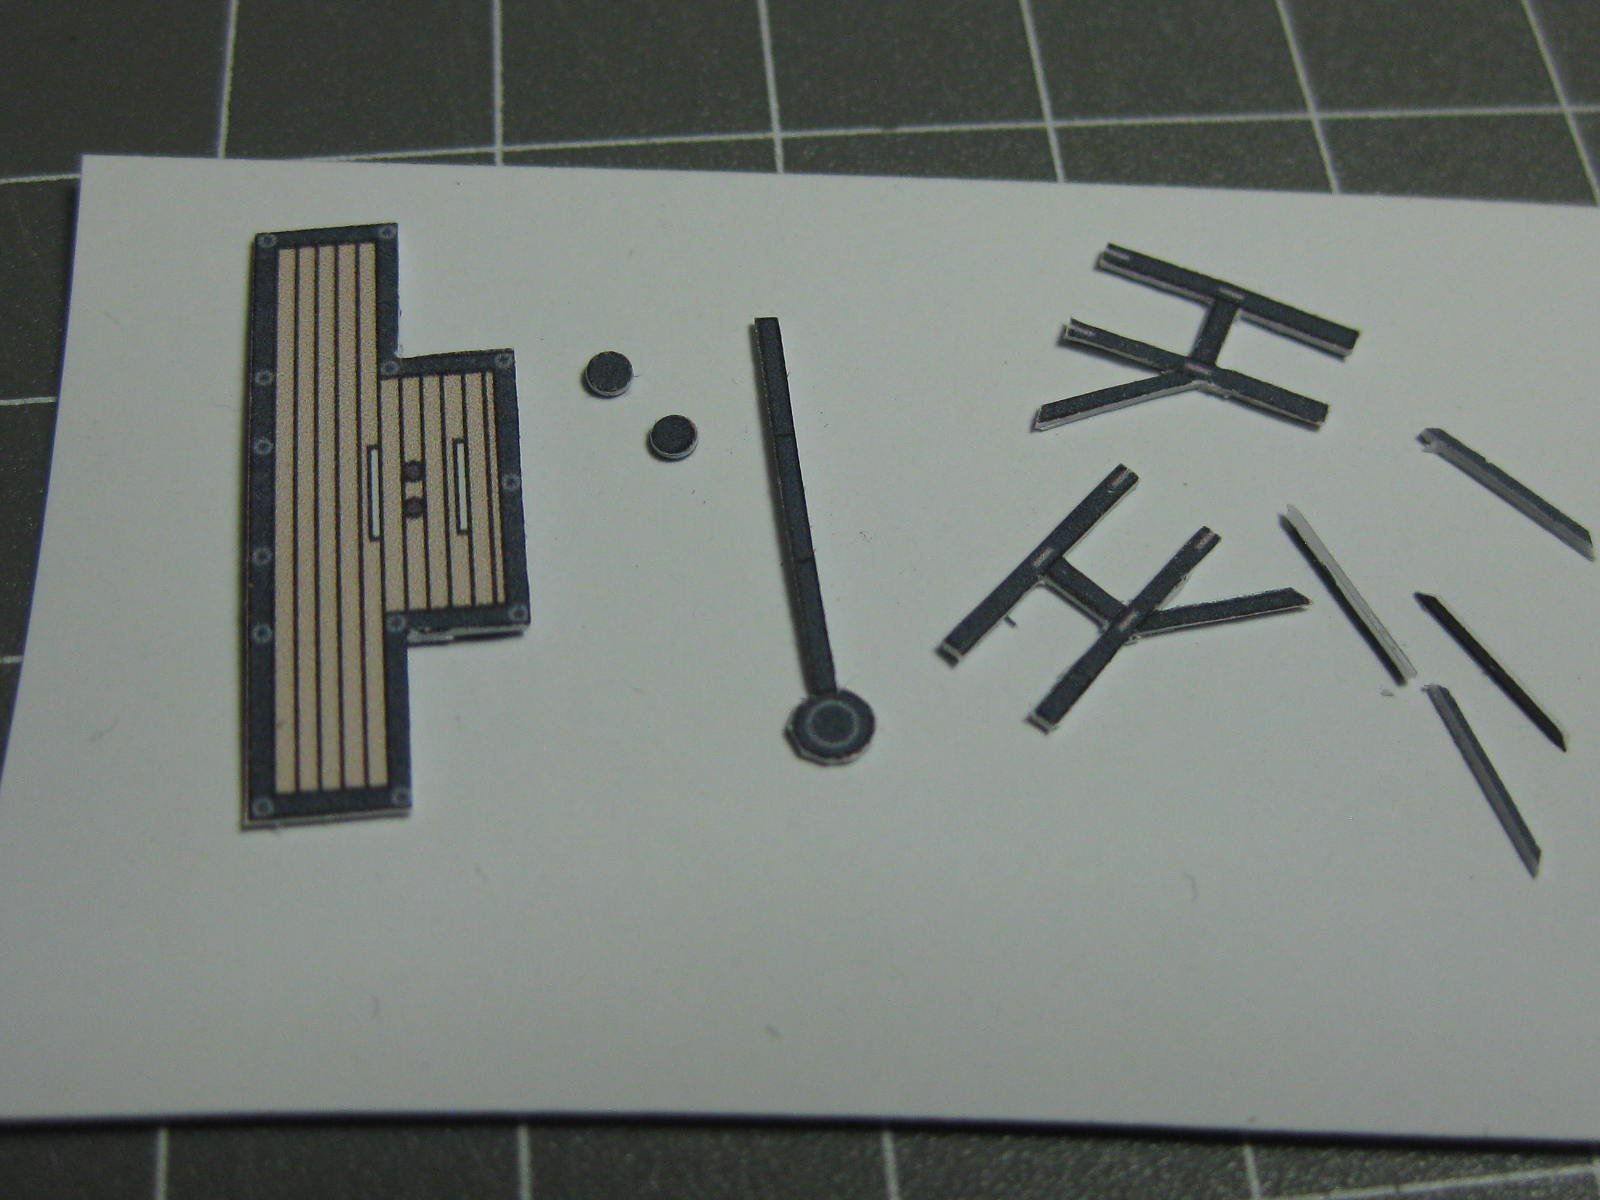
Thank you all. Fitting the interior skin looked like it may have a problem with alignment. I'm not going to second-guess it, I've made that mistake before, so I've glued it up by aligning a couple of areas where I knew it was right. The pics below show where it looks like the skin falls way short or overlaps - most likely it's actually OK : The Torsion Bar suspension comes next. I could have rolled paper tubes for the bars themselves, but the kit didn't supply any parts for these. Instead they had a template which I would have had to cut from plain paper and paint, or they suggested I could use wire. I chose PVC tubing, which was the right diameter and painted them to match the floor : Some of the side bracing. Once again I used my punch kit to make the holes : The transmission tunnel : Some tiny parts - the wingnuts that close the hatches : Danny

- 92 replies
-
- 10
-
-
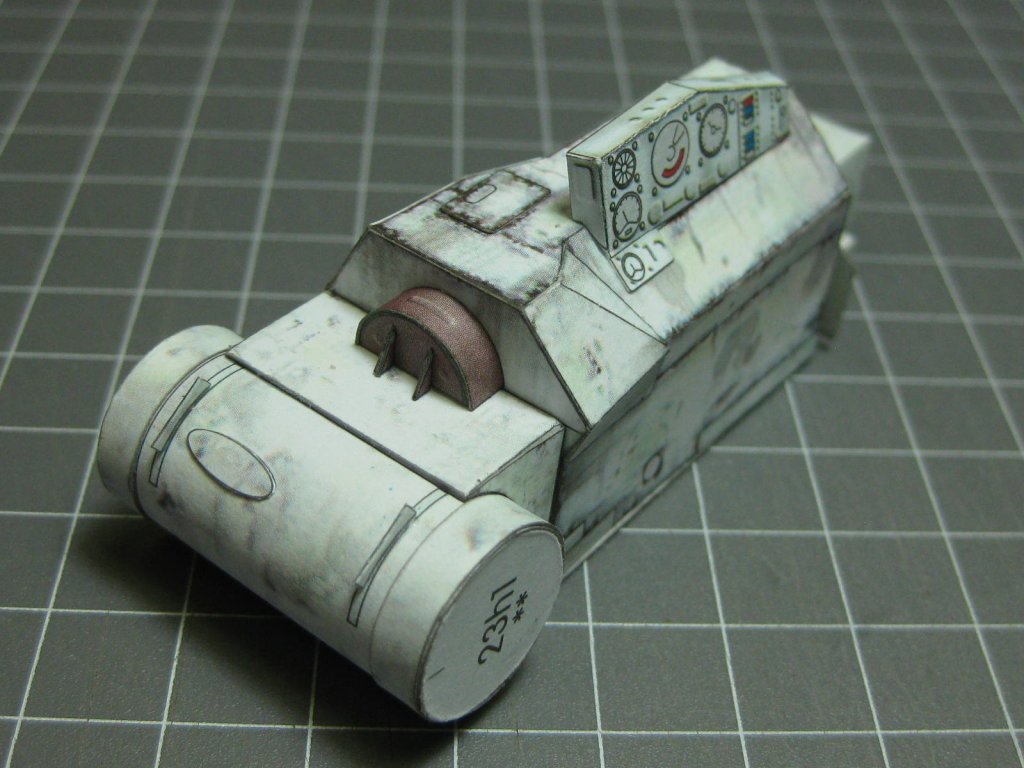
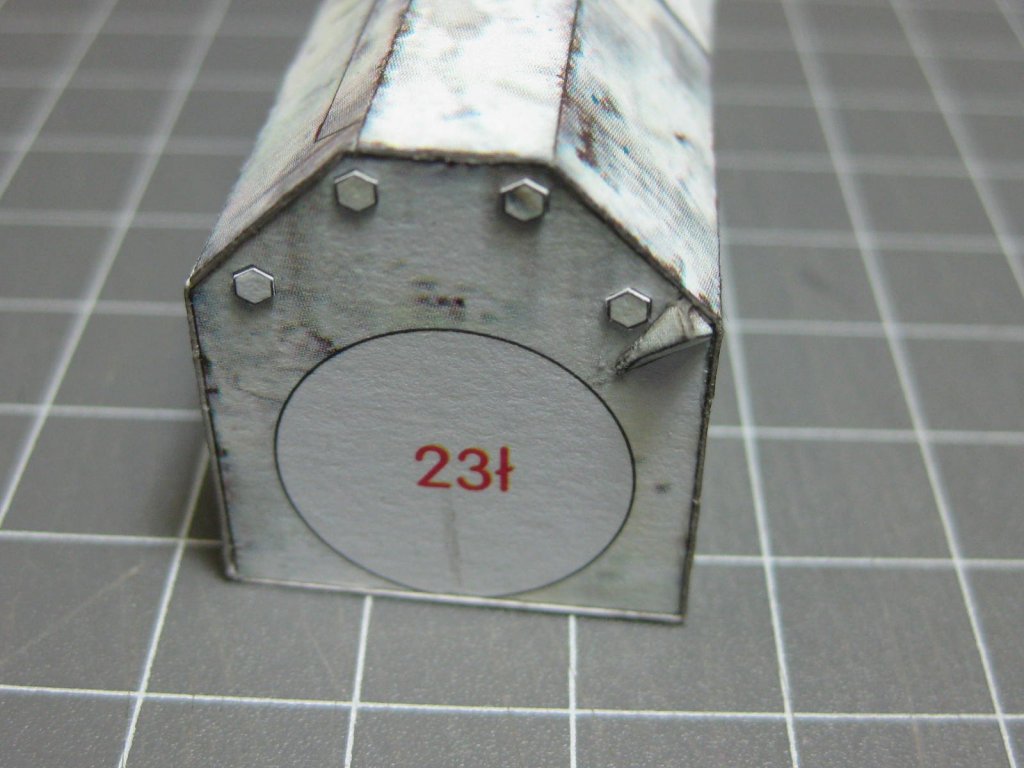
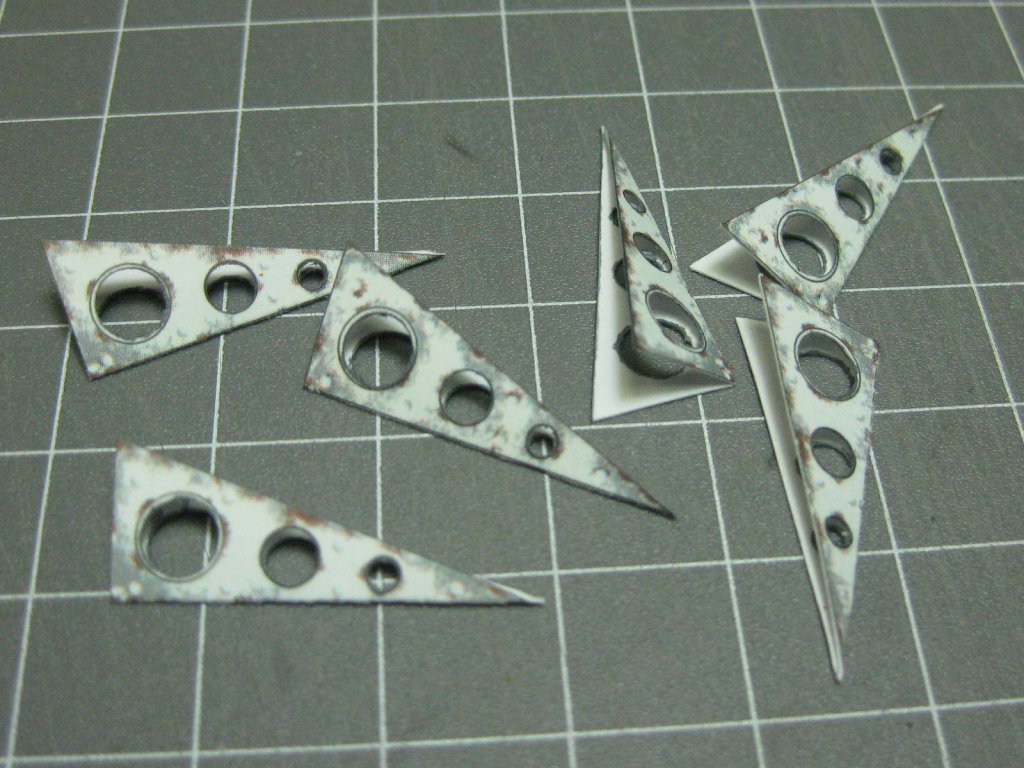
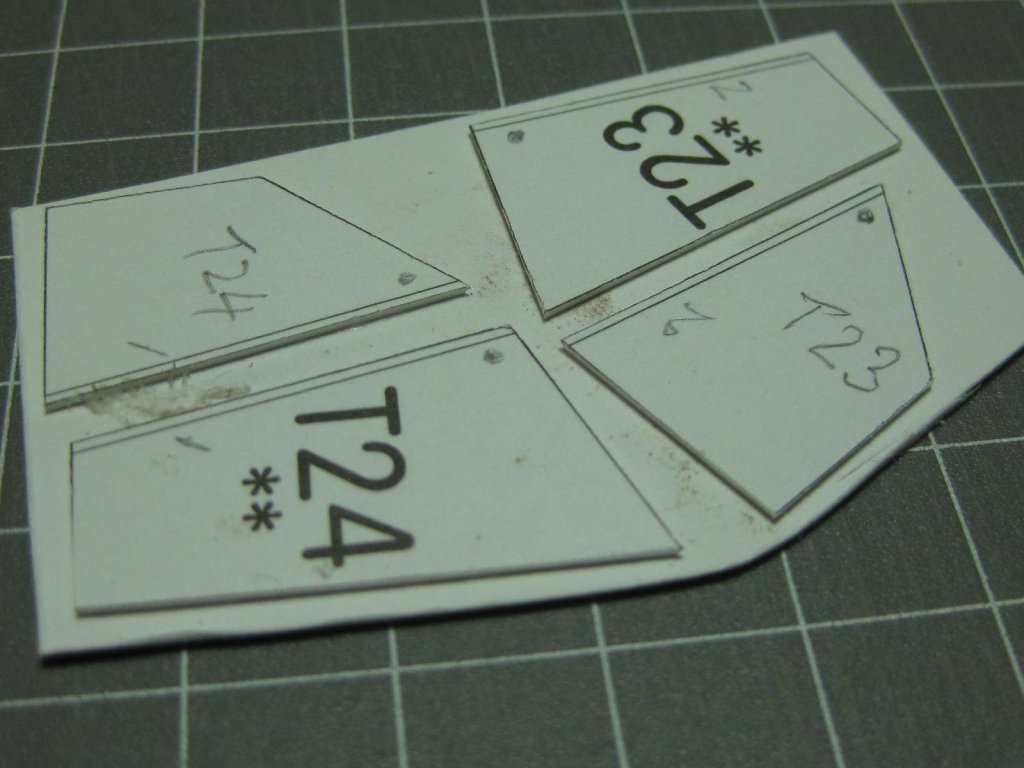
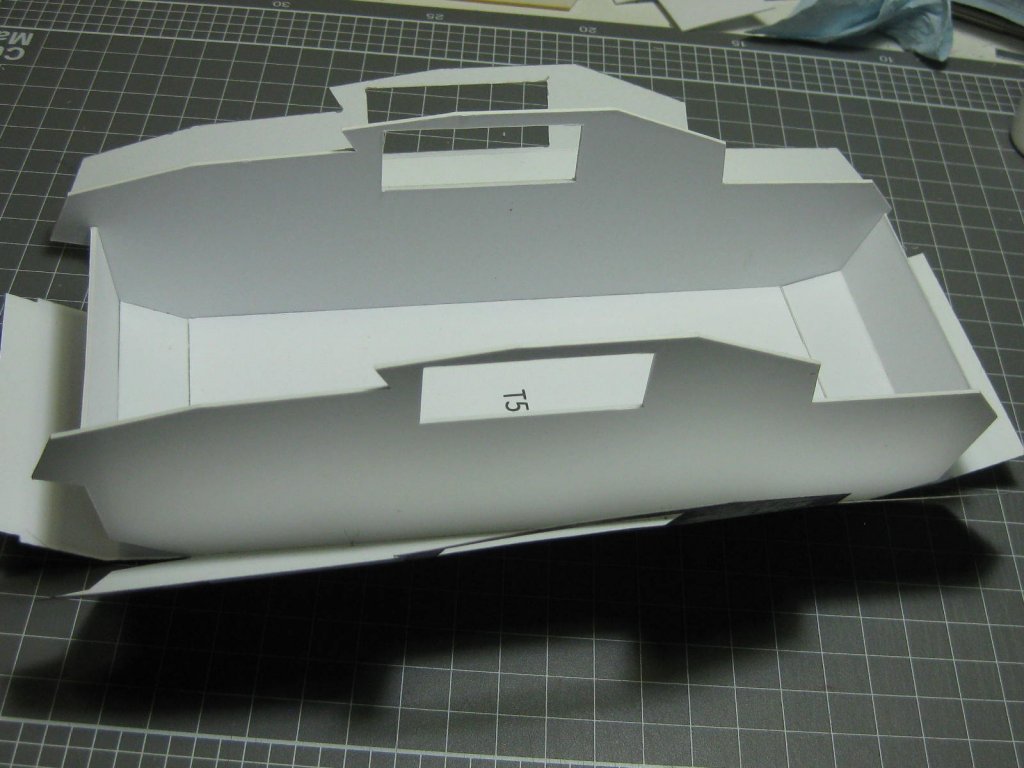
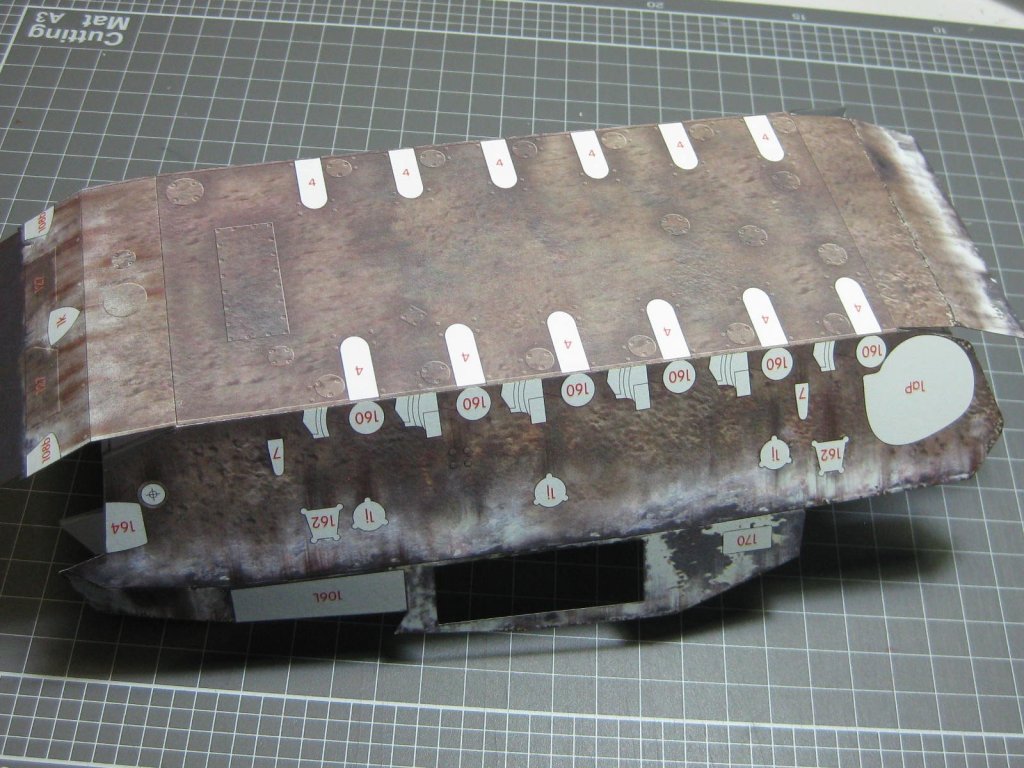
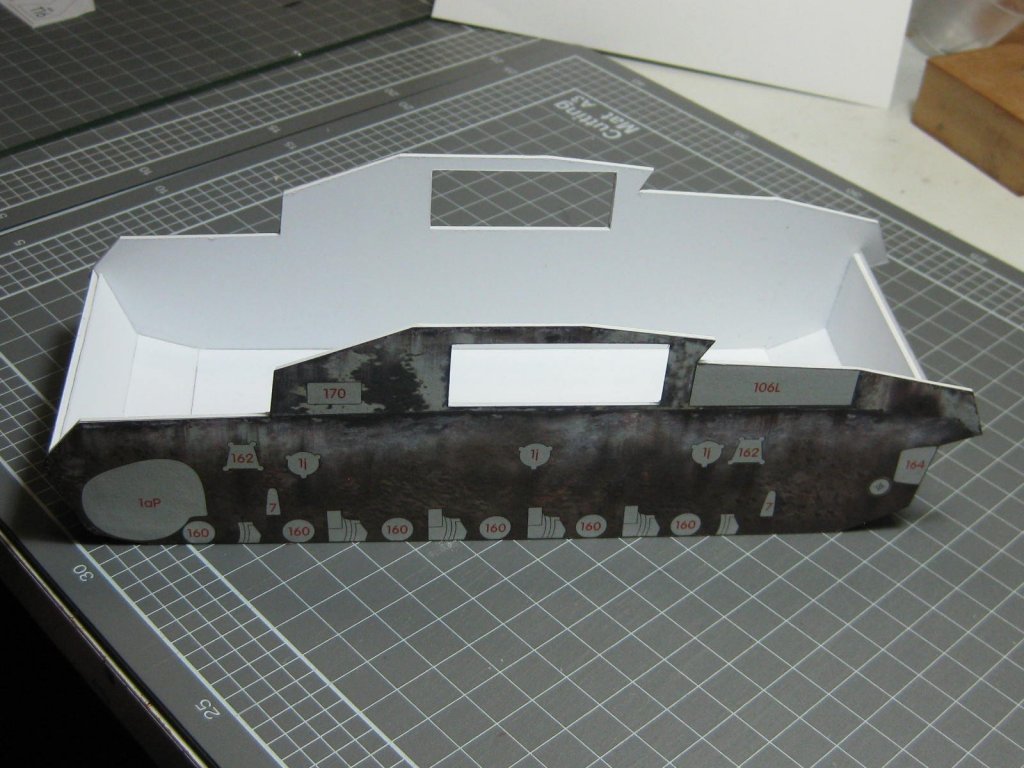
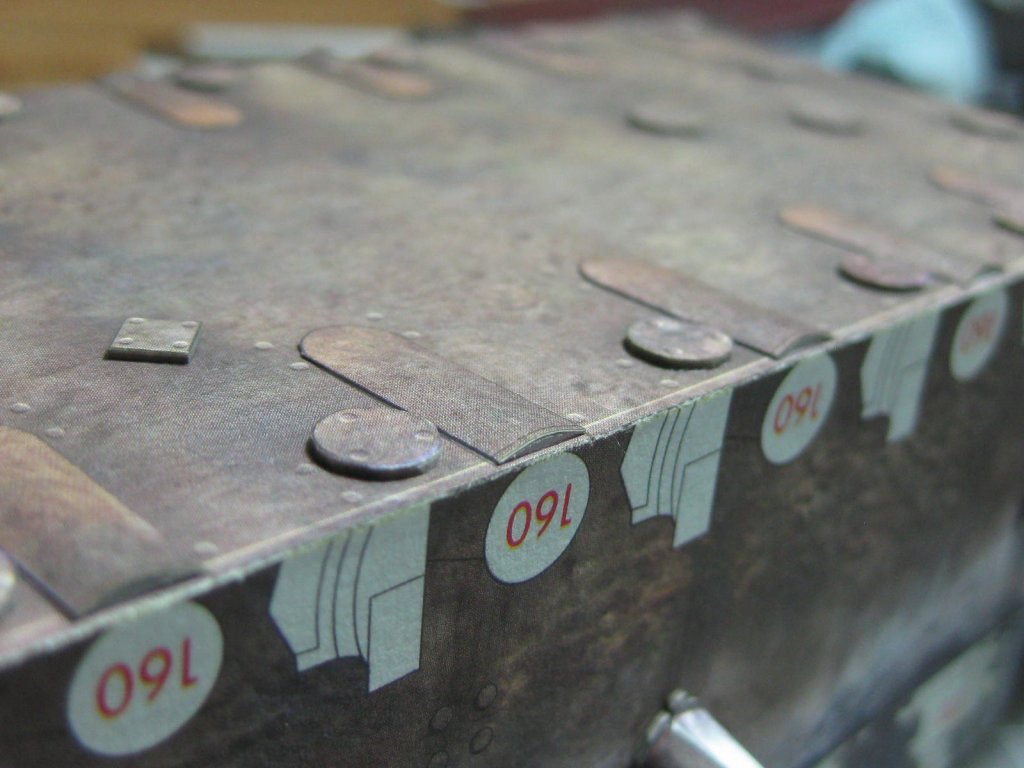
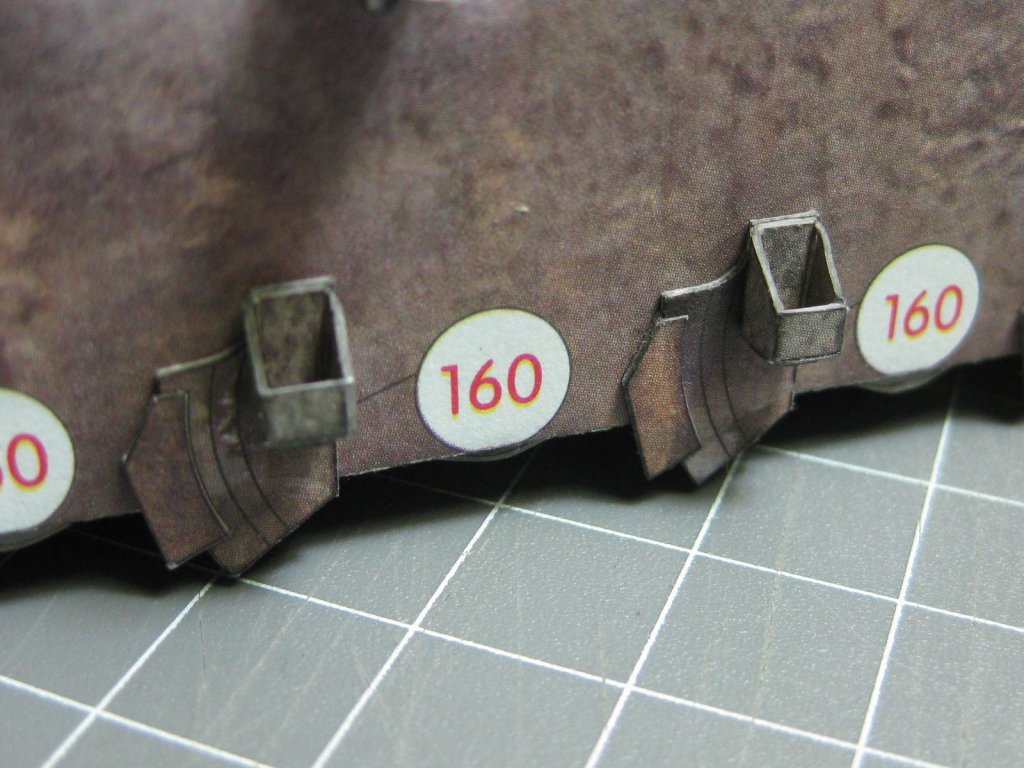
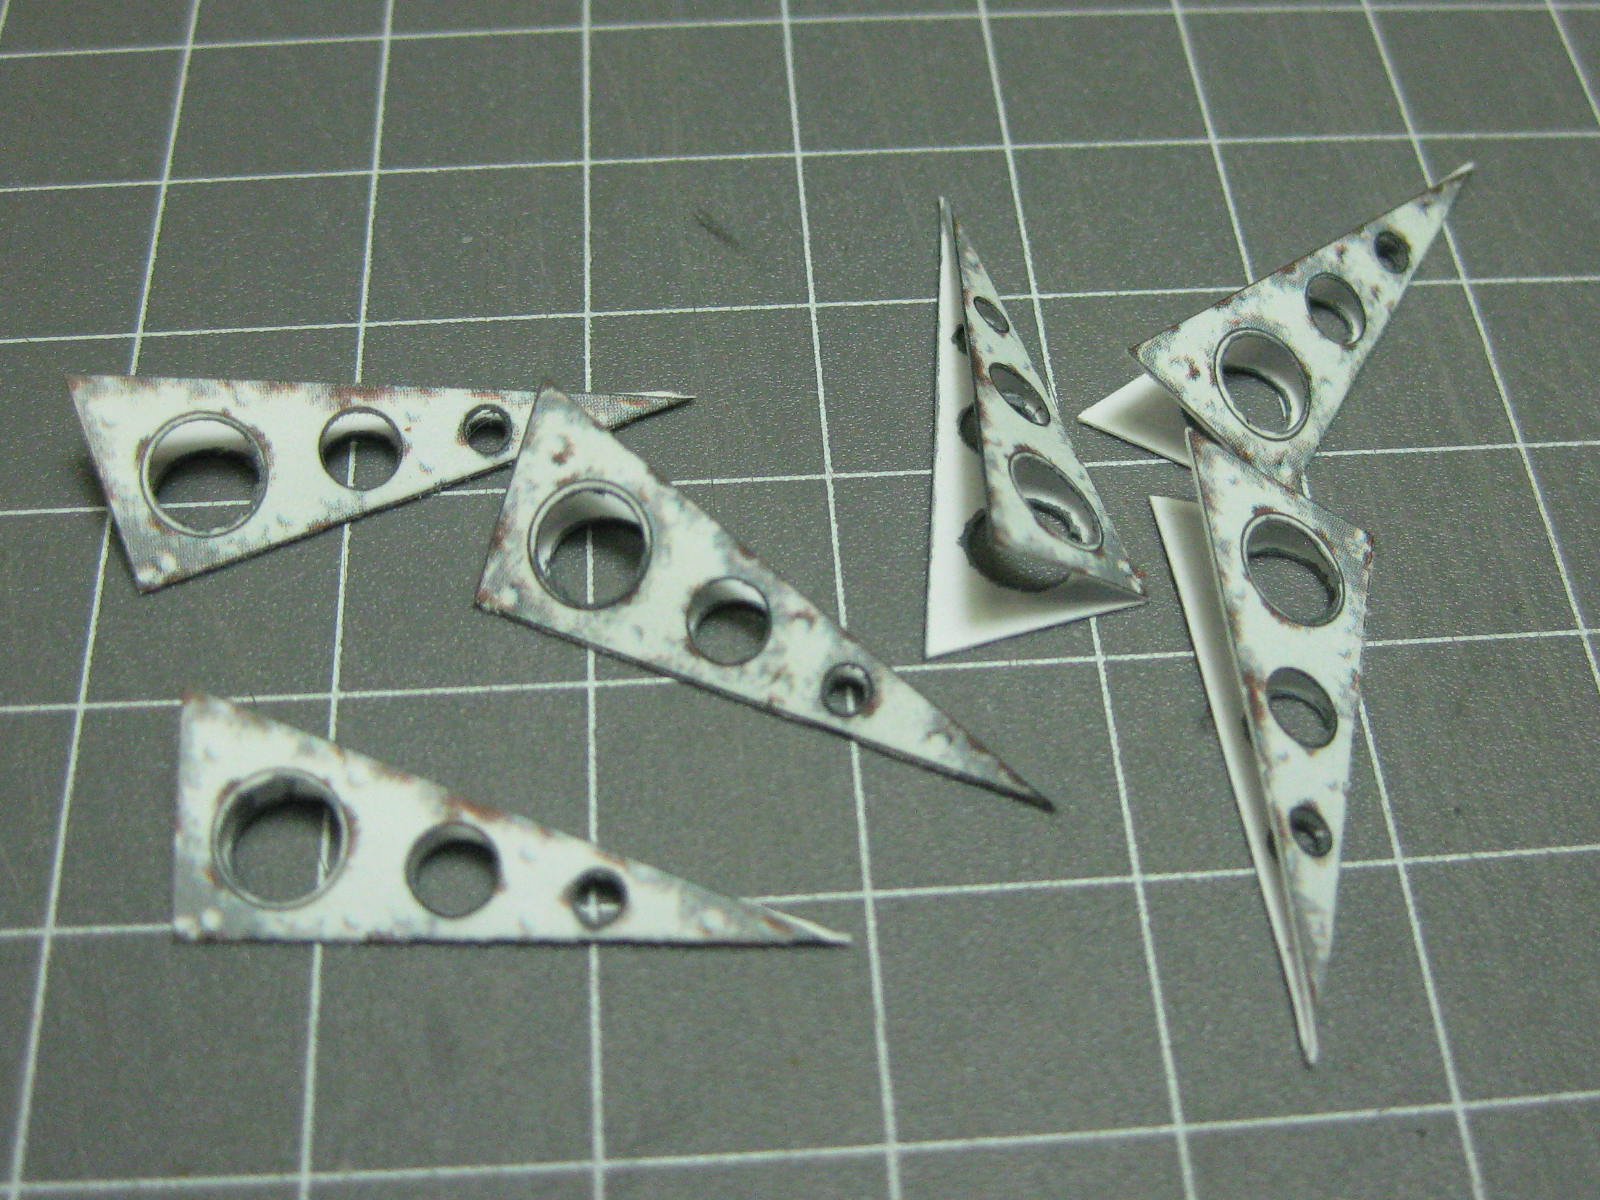
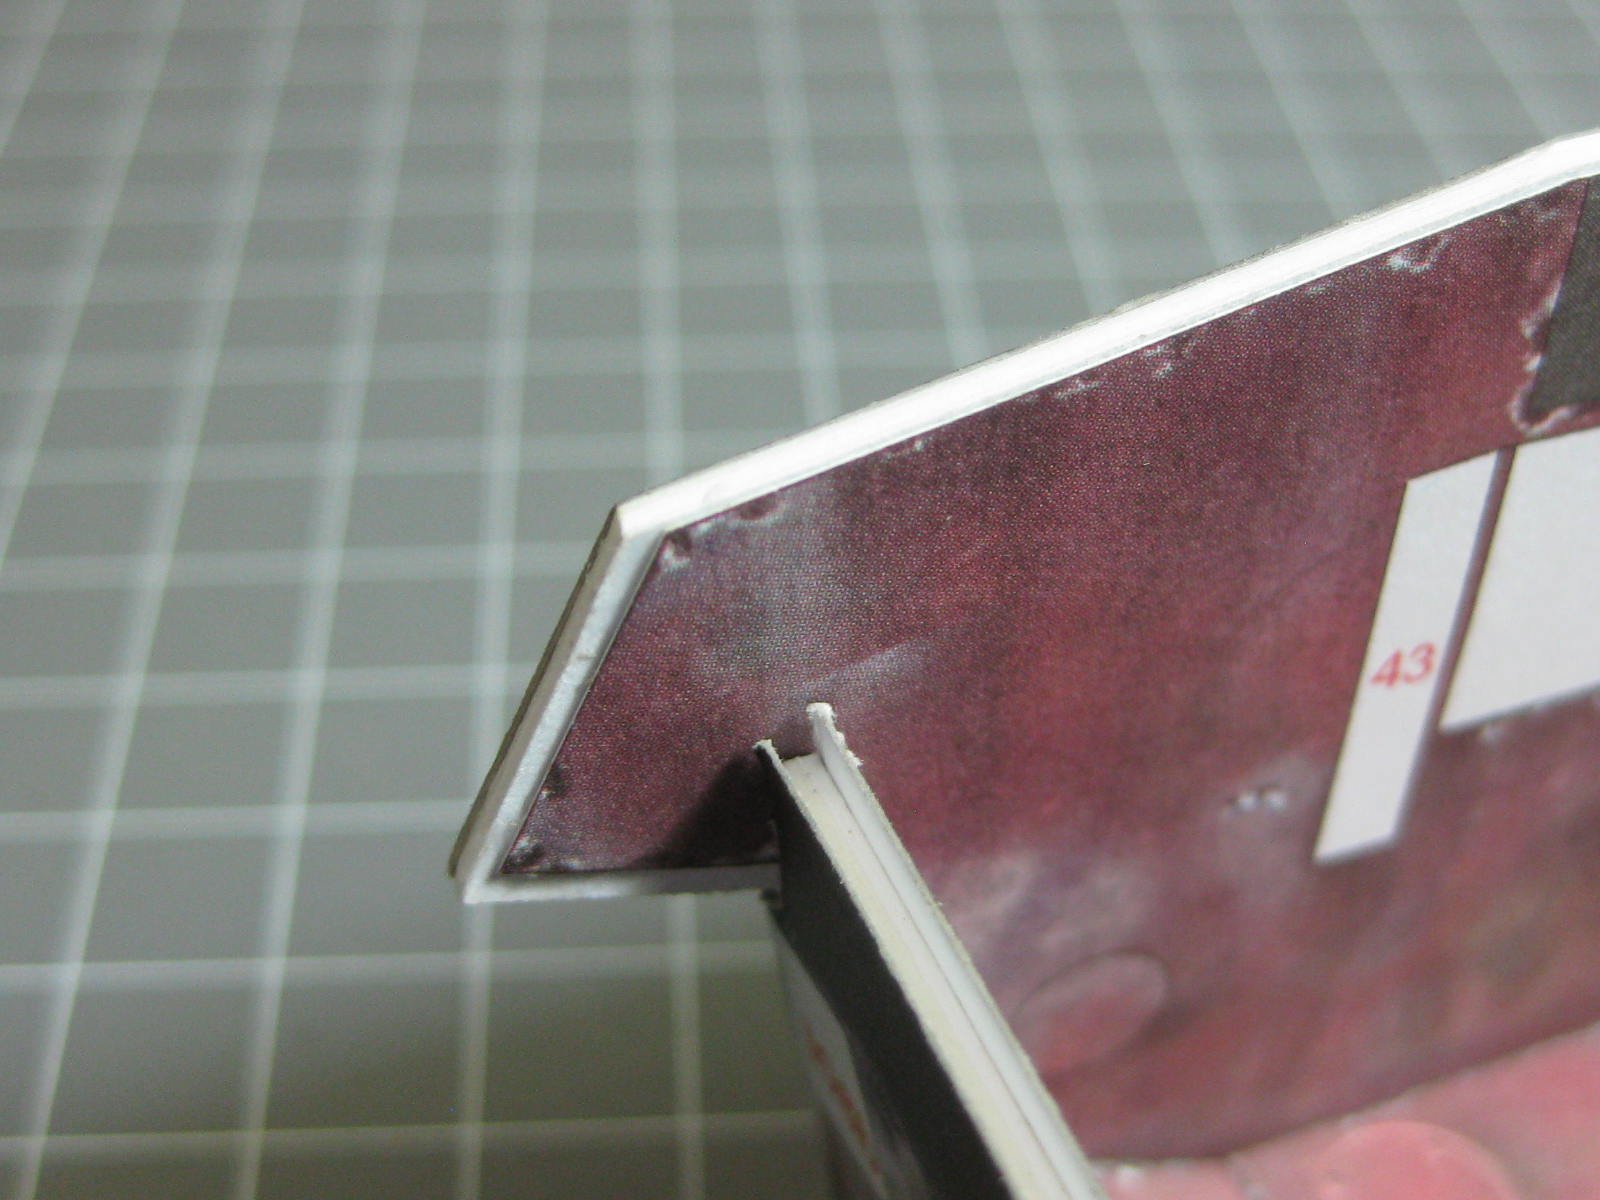
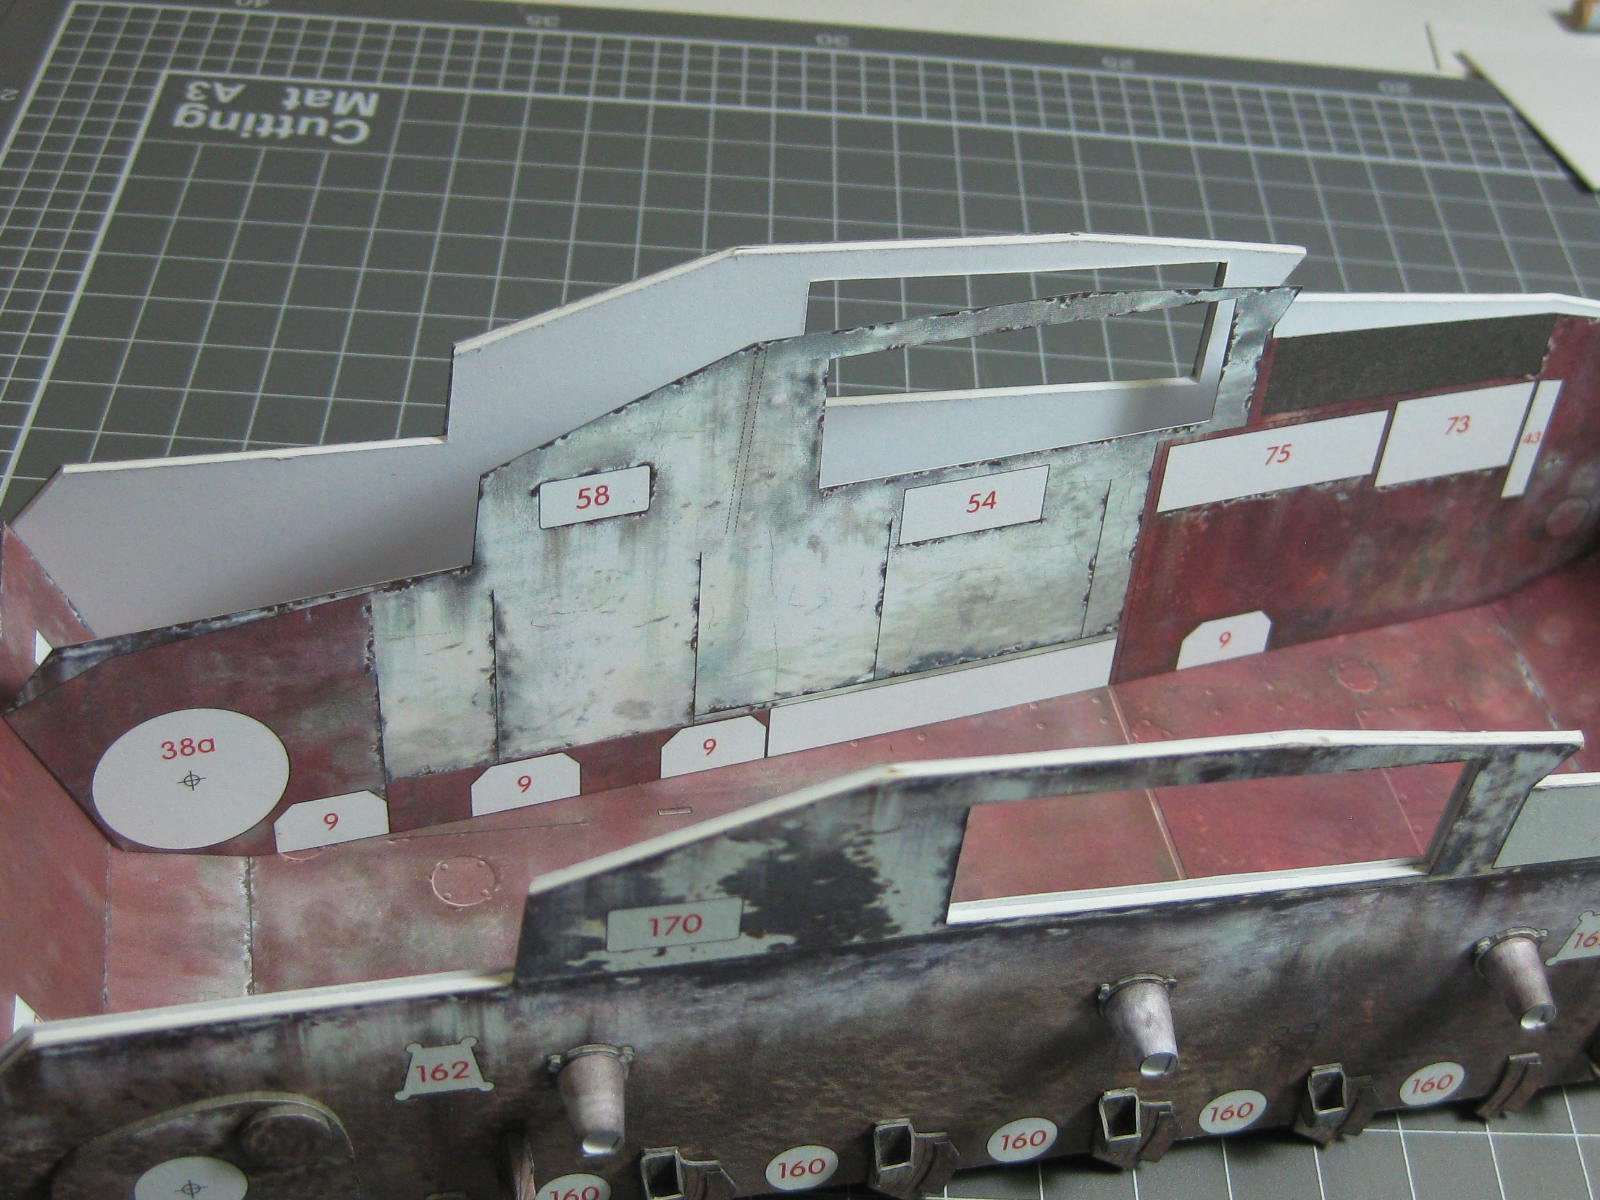
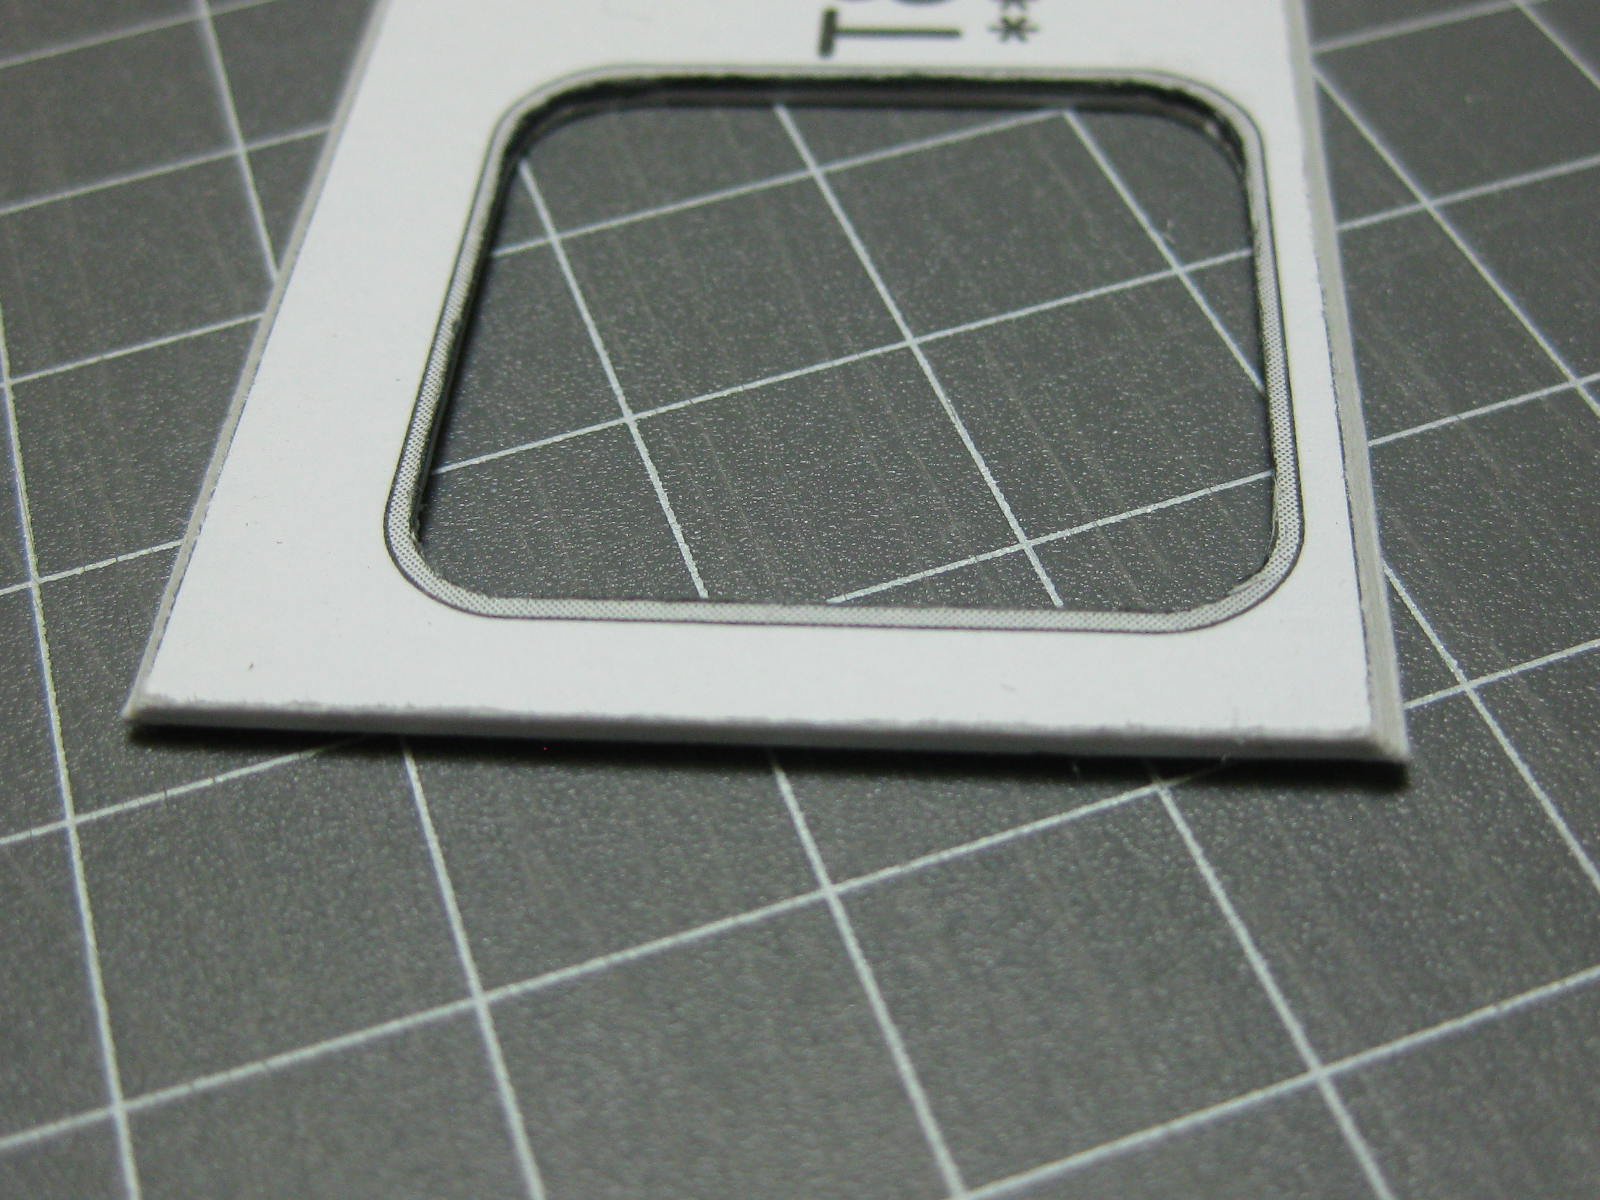
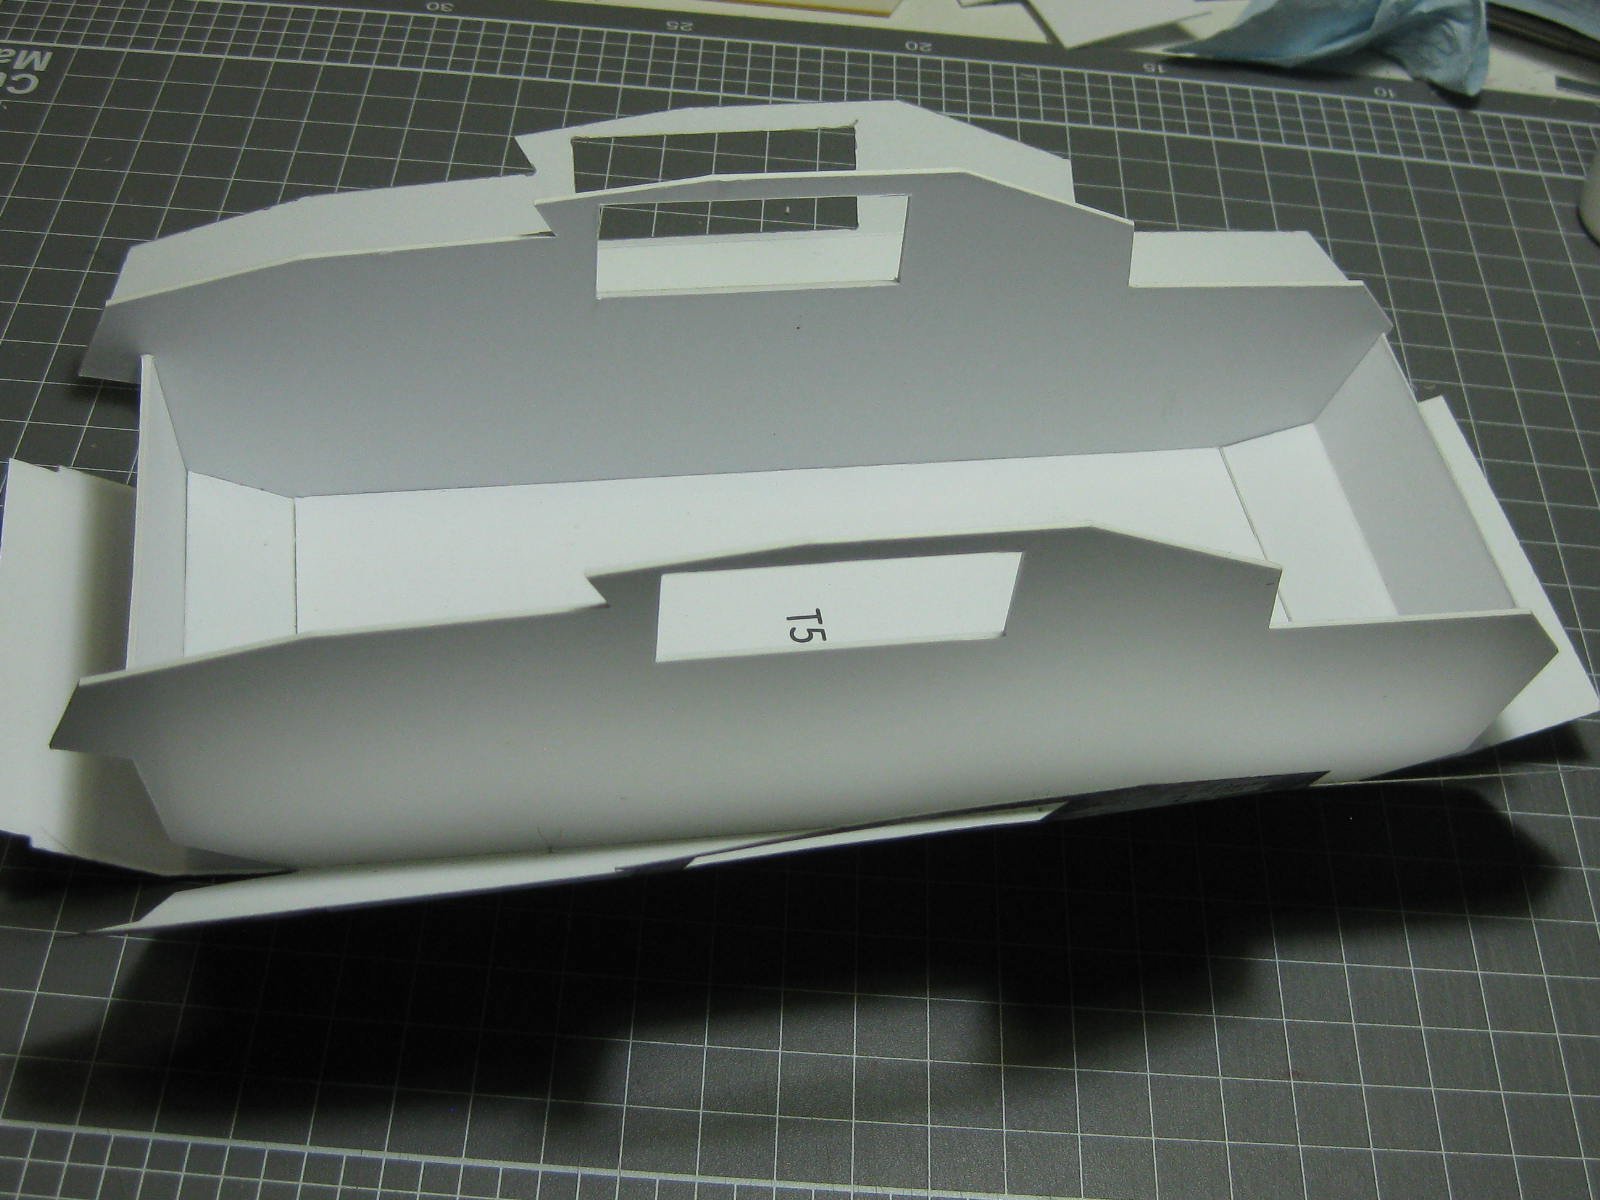
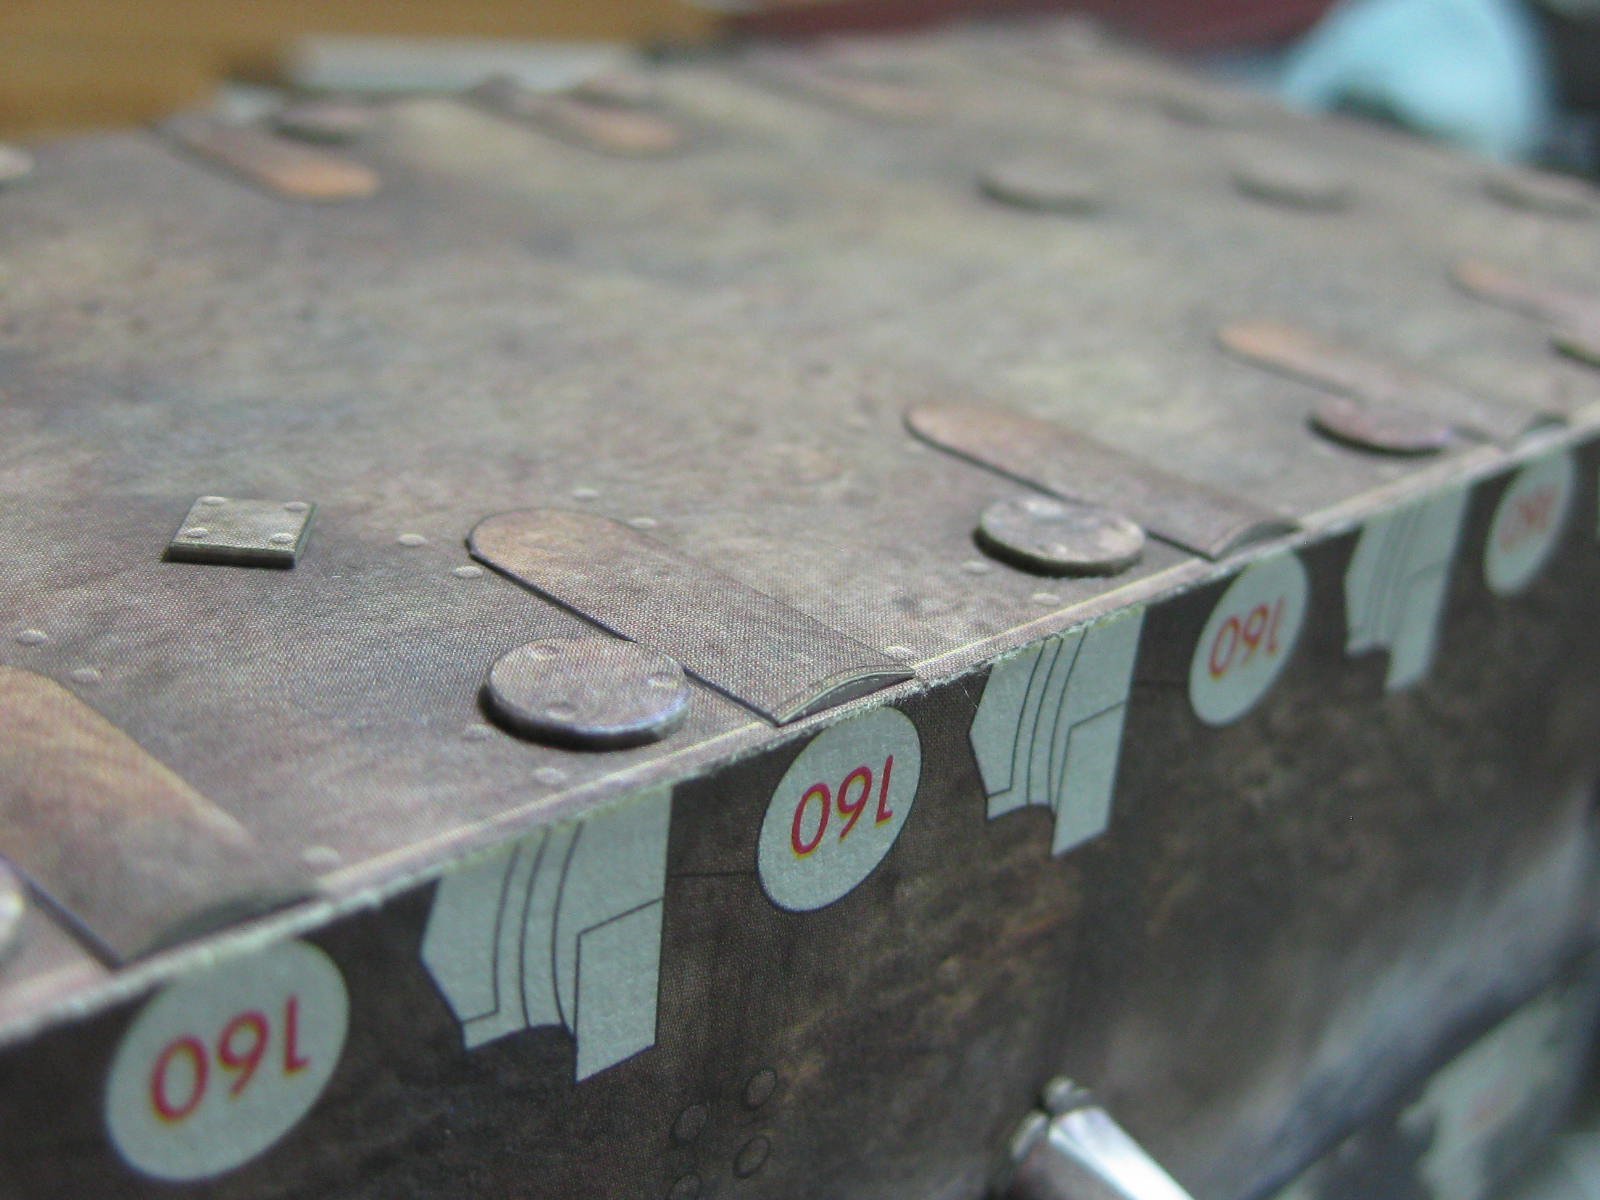
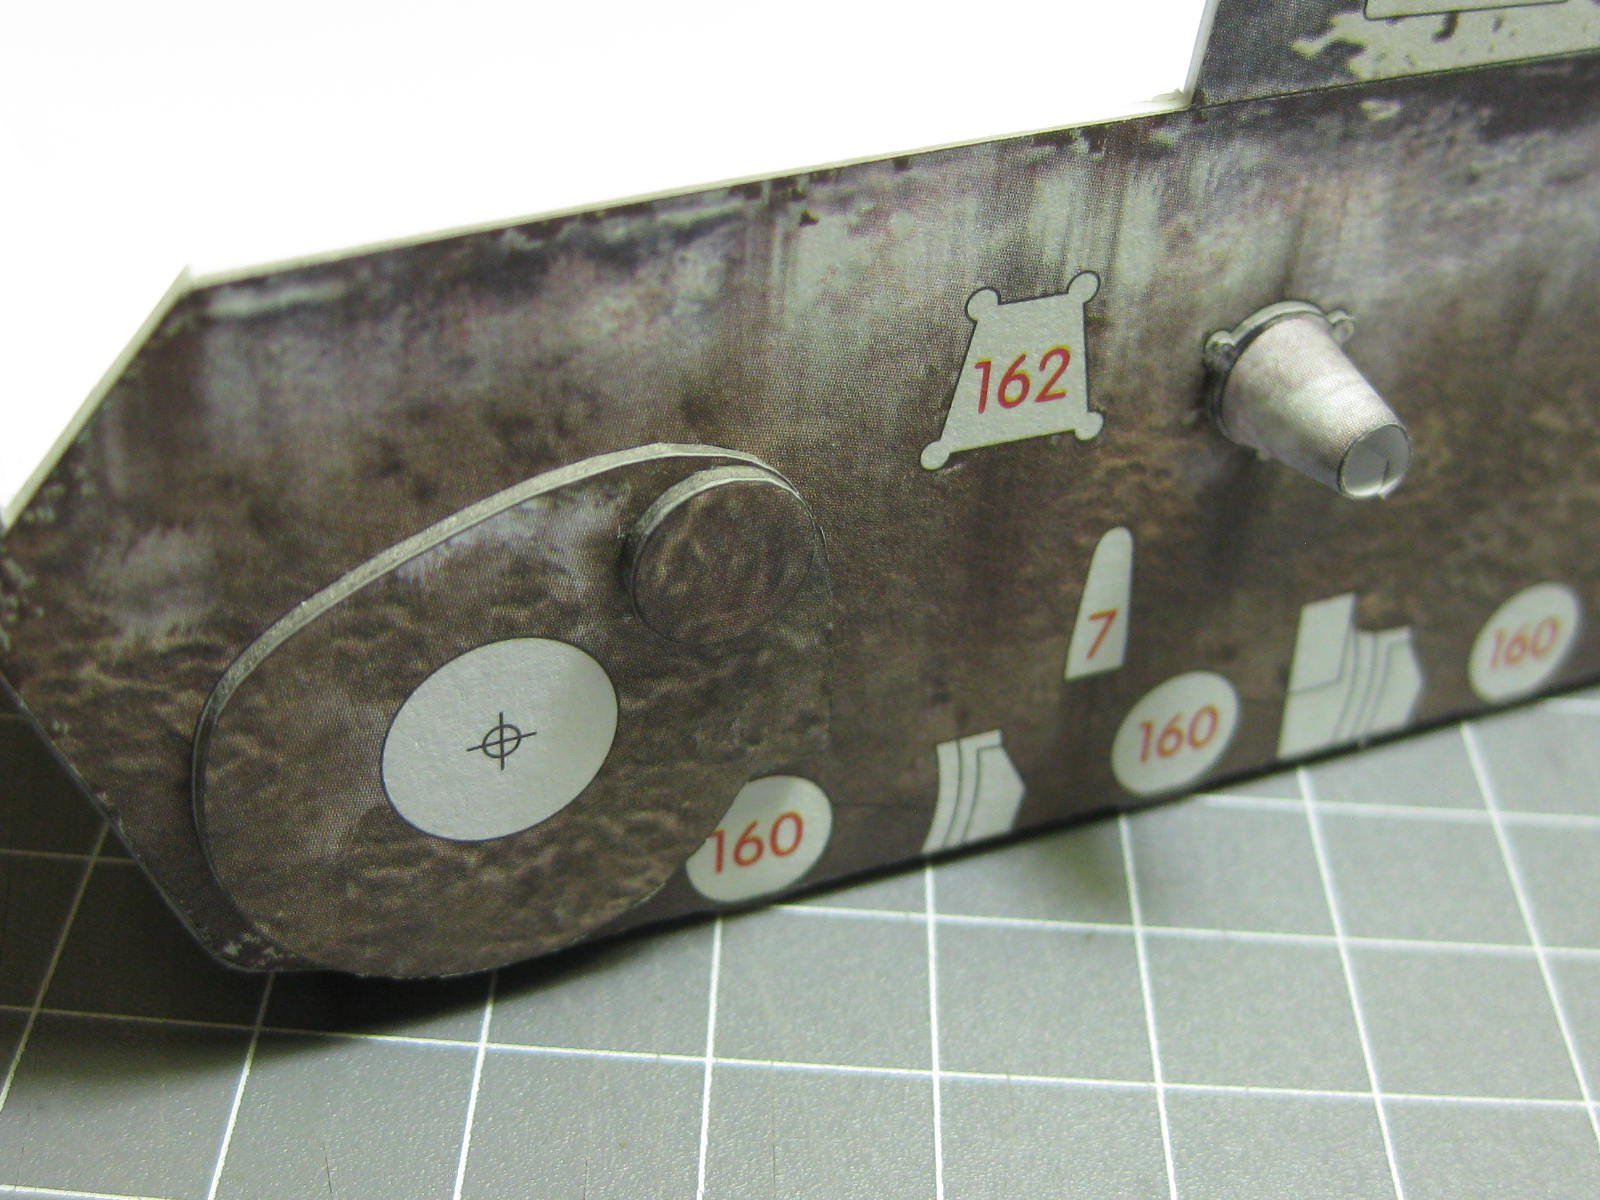
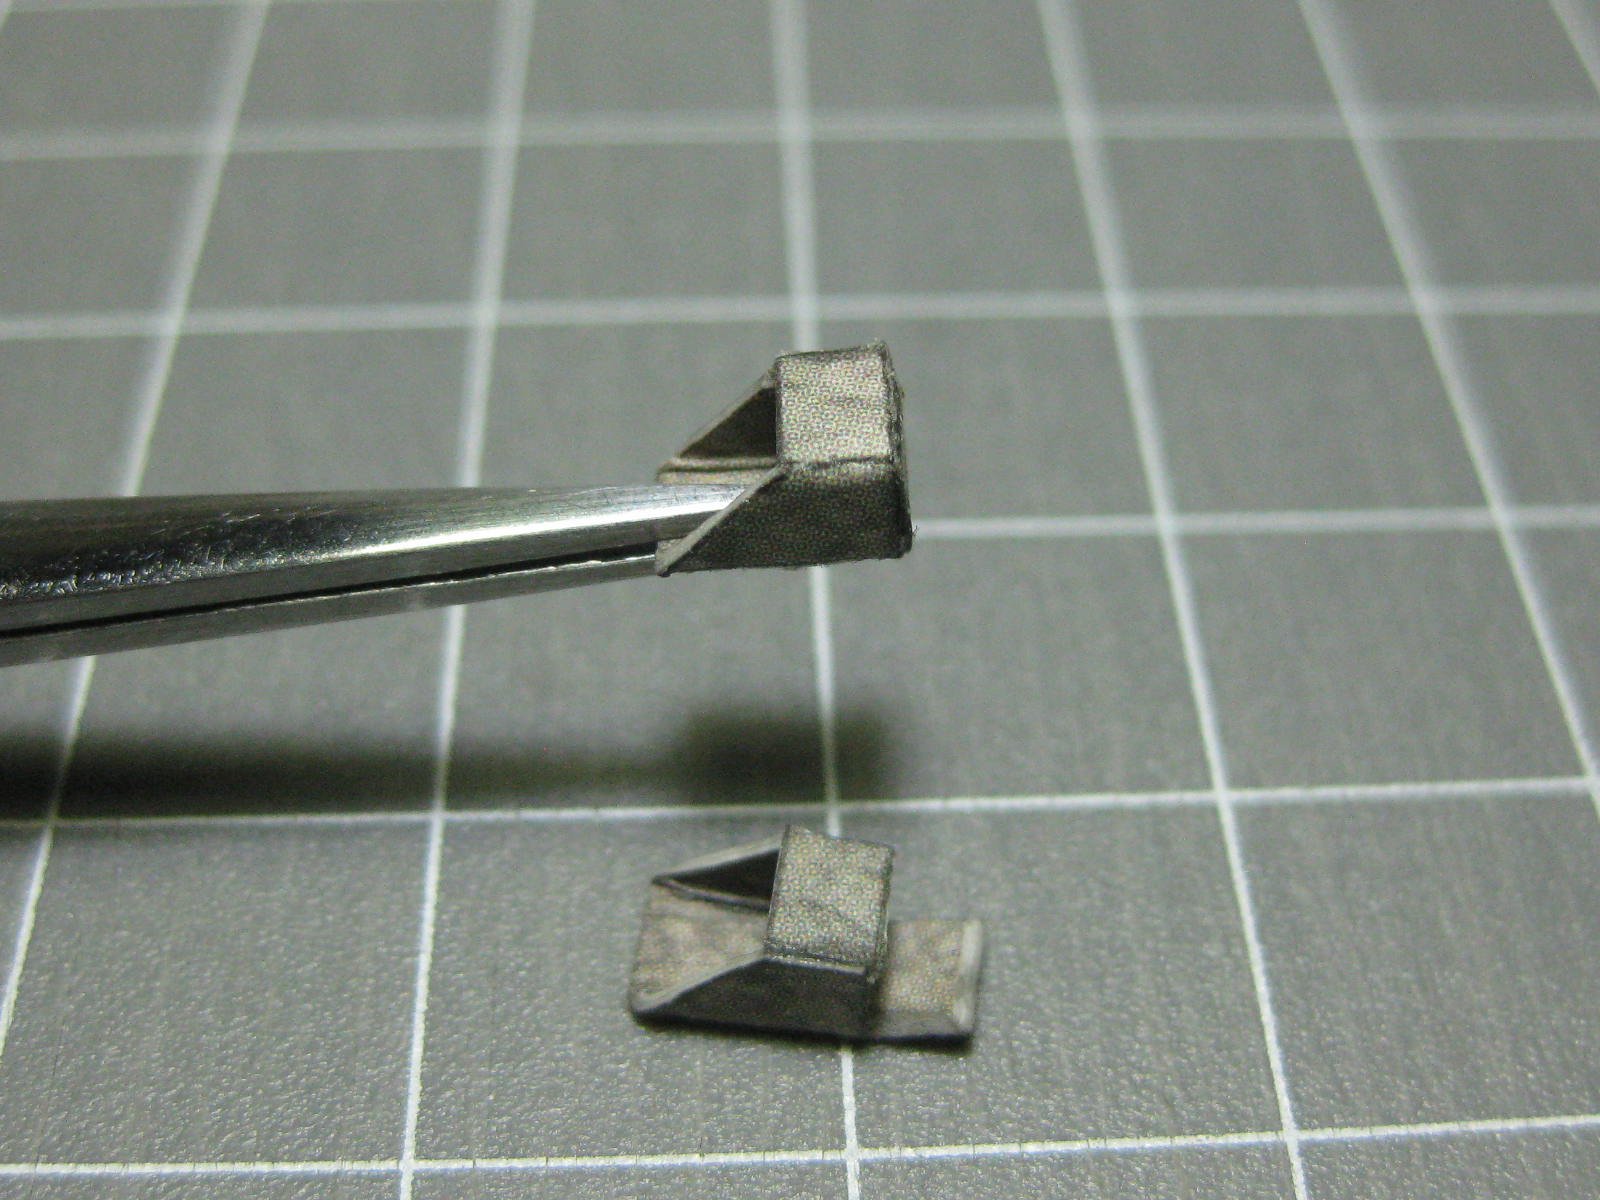
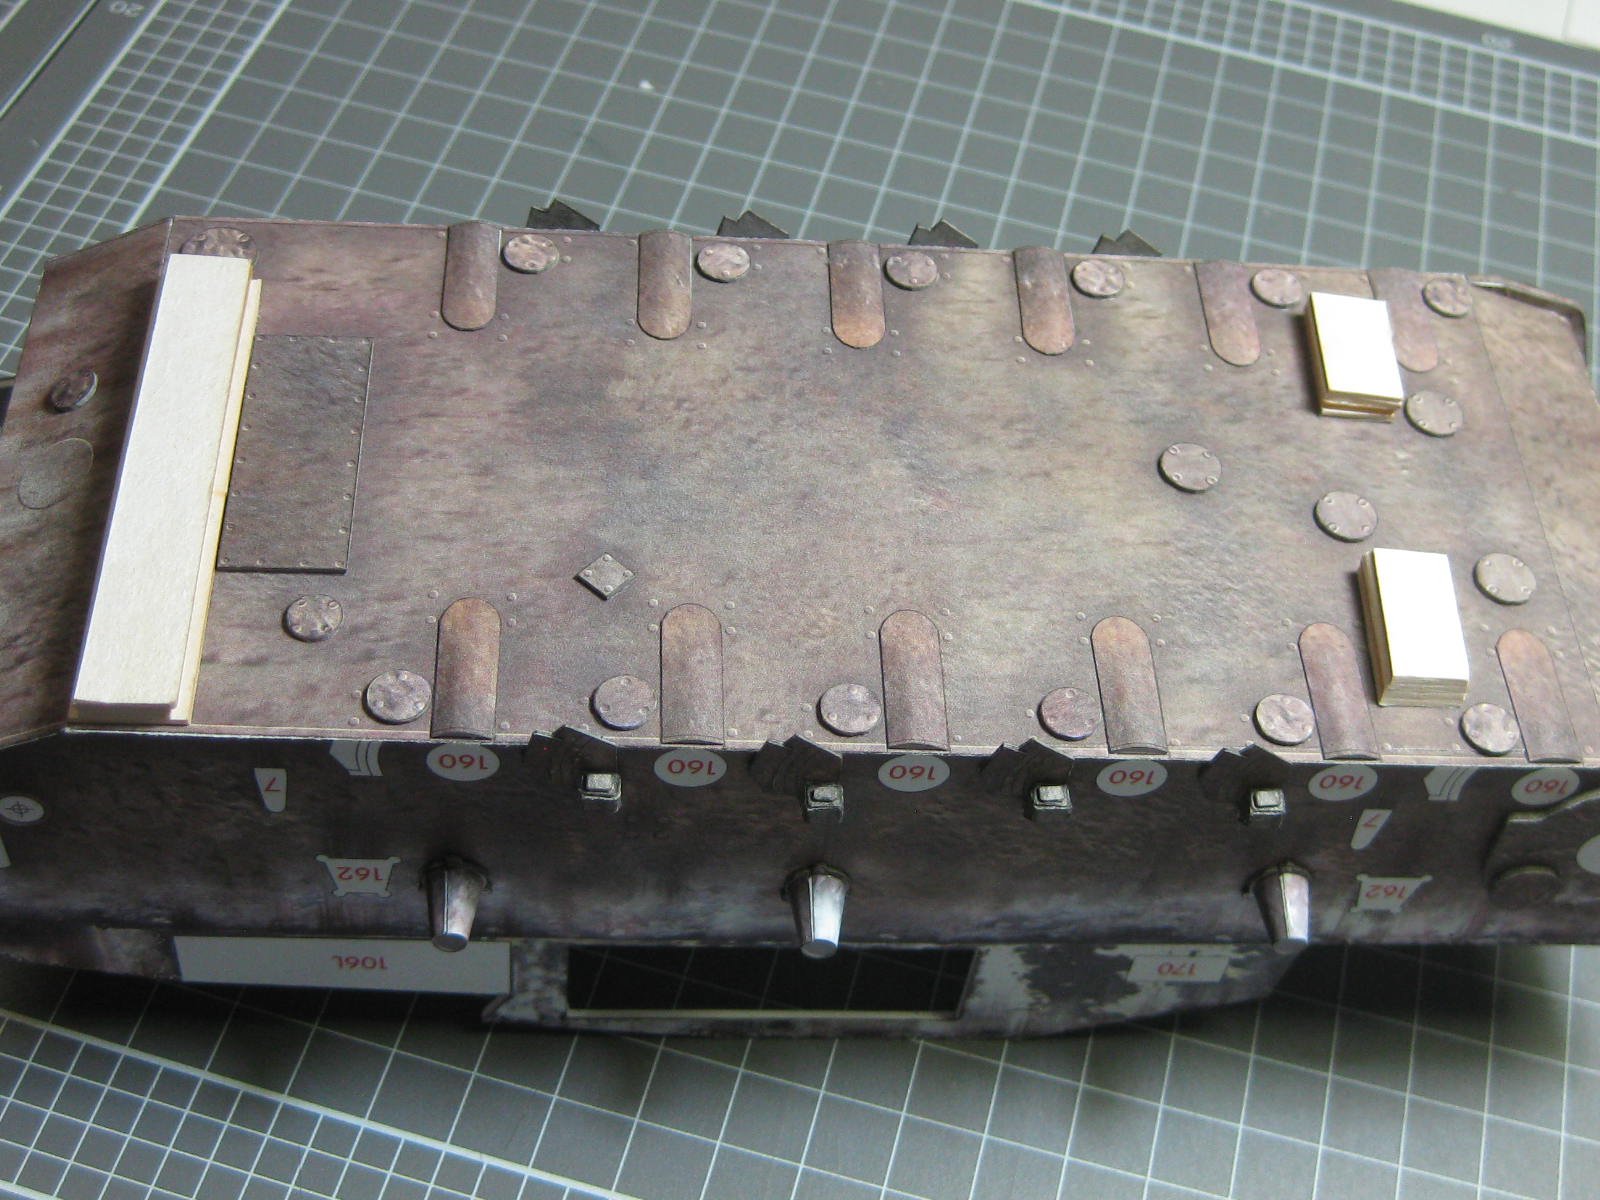
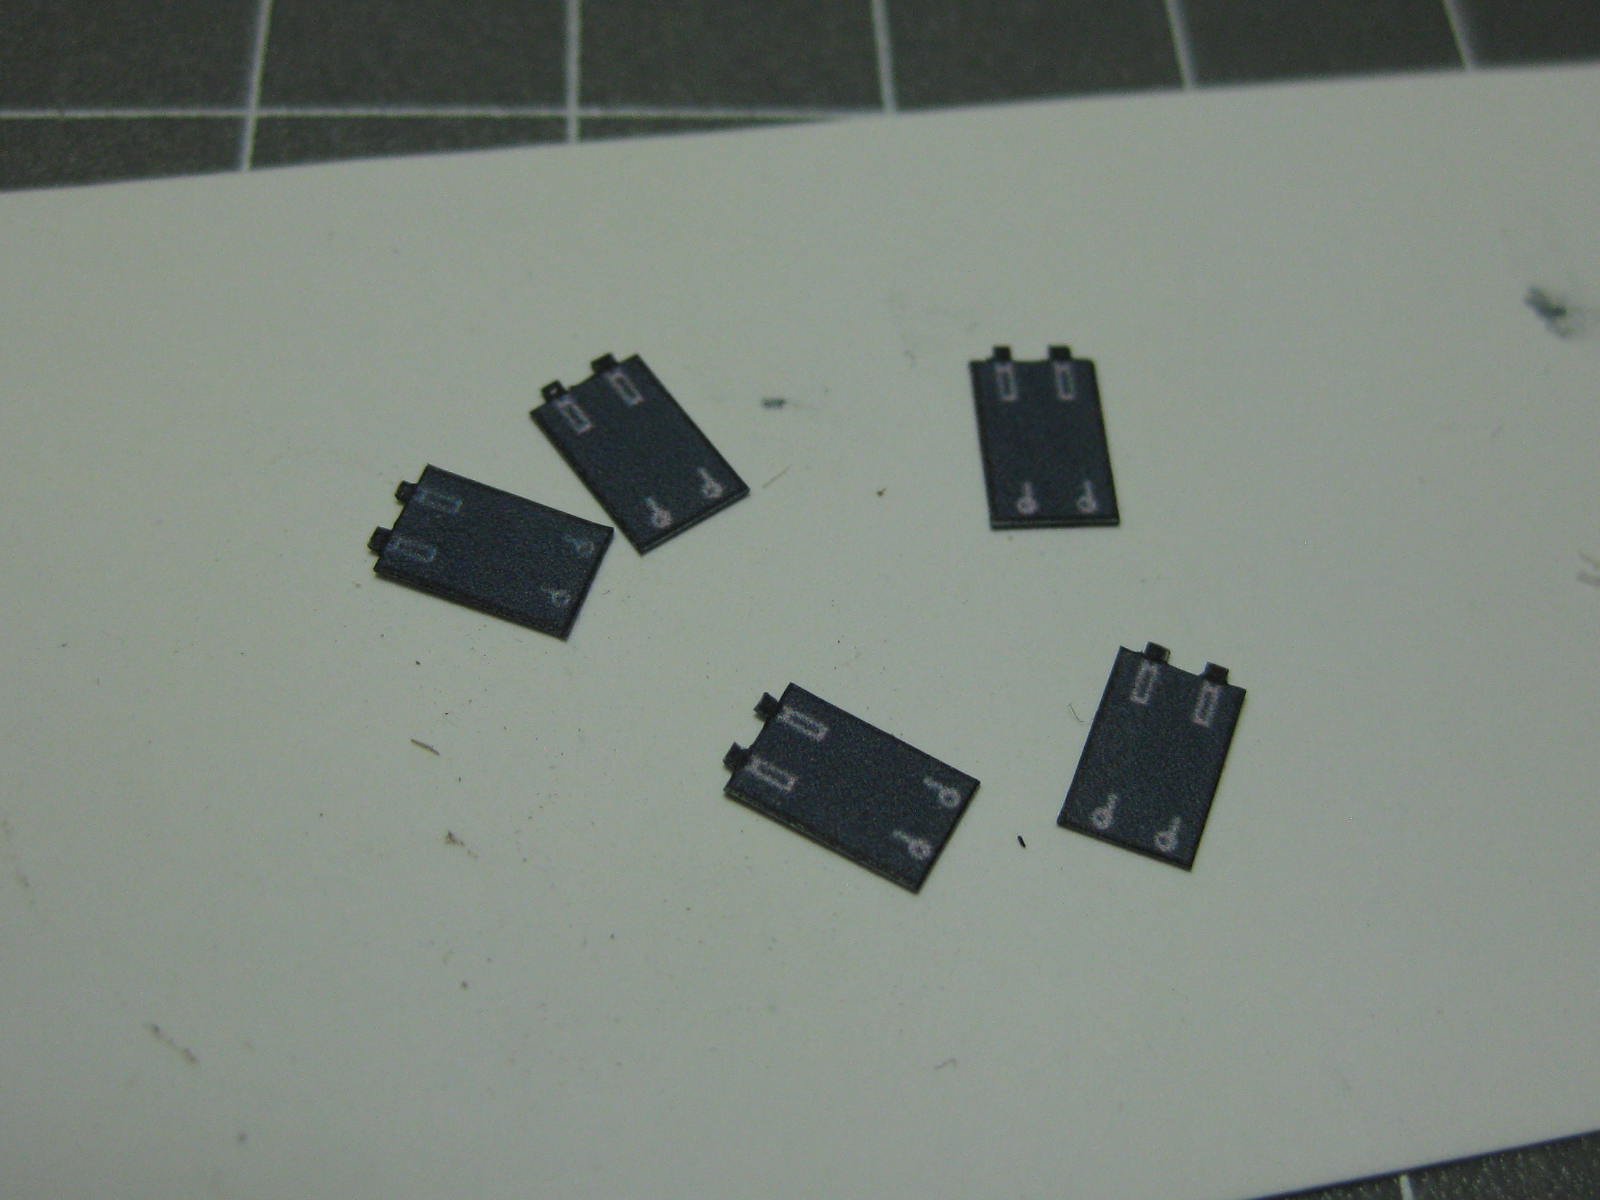
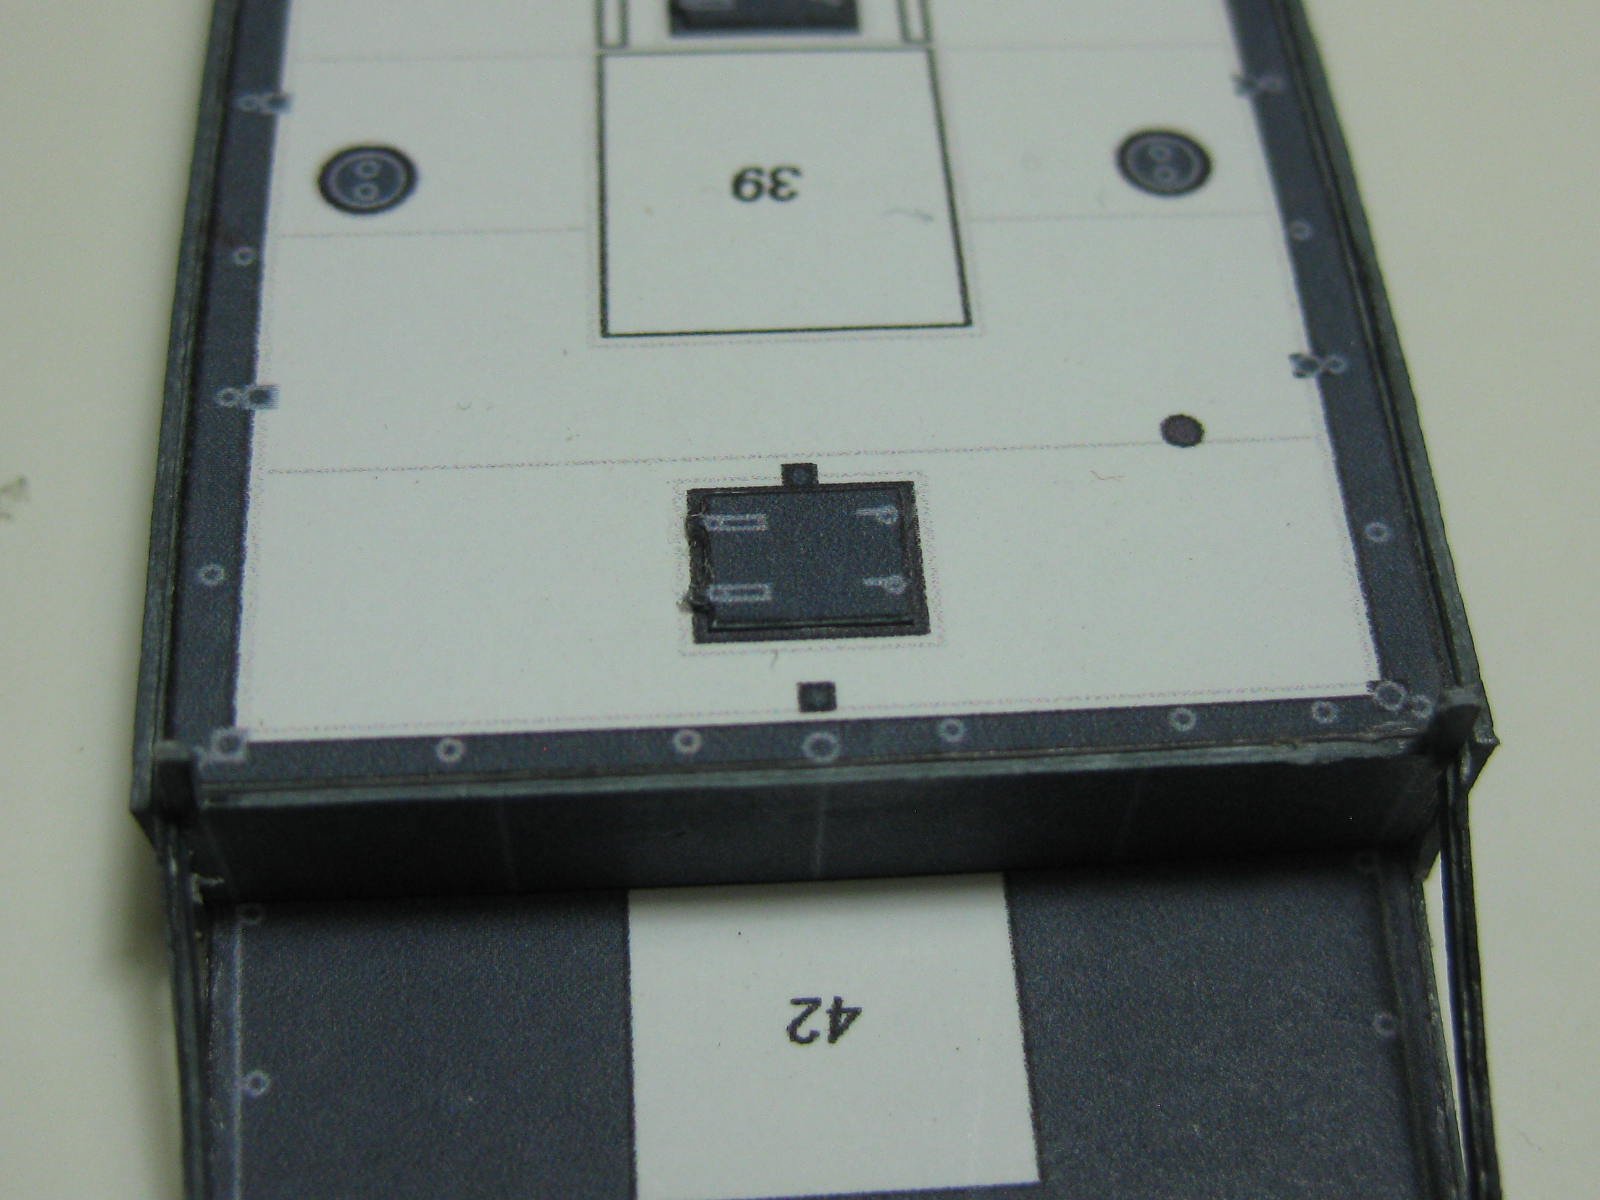
Hi Grant, yeah it's a bit different to what I'm used to . This kit also comes with a detailed cockpit and engine compartment, so that will be fun. As I didn't get any laser-cut framing etc for this model I've had to do it the hard way, glue the parts to 1mm card and cut out. I've found it's a lot easier and more accurate to actually glue it to some 0.5mm first, cut out the piece, and then glue it to another 0.5mm card and cut out again (the 2nd time is a lot easier). This ensures a much squarer cut without running off on an angle. I'm using fairly hard card, the "right" stuff is easier to cut but I've run out of large sections of it at the moment : Several parts require an angle to be cut on at least one edge. I use a scalpel to take off the bulk of the material, and finish off with a 150 grit sanding stick : Once the main hull was glued up it came time to fit the outer skin, which comes in one piece. It actually fit quite well : The lit supplies extra parts if you want a more "3D" effect than merely the printed covers etc. The longer pieces in the pic below are slightly rounded using a brass rod and a piece of high-density foam : The start of the suspension : These little (3mm) boxes were a bit more difficult to make than usual because they are double thickness. Despite that they turned out quite well : To avoid damaging the parts that protrude past the floor level while working on the rest of the hull I used double-sided tape to stick on some 4mm thick card packers : Danny


- 92 replies
-
- 13
-
-
Yeah, I know . But as I said at the beginning of the log - I don't know anything about building stagecoaches, so I went with the kit directions . BTW - not a bad replica of my model that they have in the bank's museum . Danny
-
It's 1/25 scale. I wouldn't doubt that there would be a lot of PE etc out there. This particular kit doesn't seem to have Laser-cut Treads, at least not from GPM as far as I could tell. I DID however, just now find THIS laser-cut set for the frame and wheels. Too late now, I'm already most of the way through laminating the paper templates for same . Besides, I'd have had to wait about a month to get it, plus pay nearly 30 Euros for a 5.50 Euro kit once the postage was added . Danny
-
Yeah - 5 pages out of the total 16 just for the tracks . Danny
-
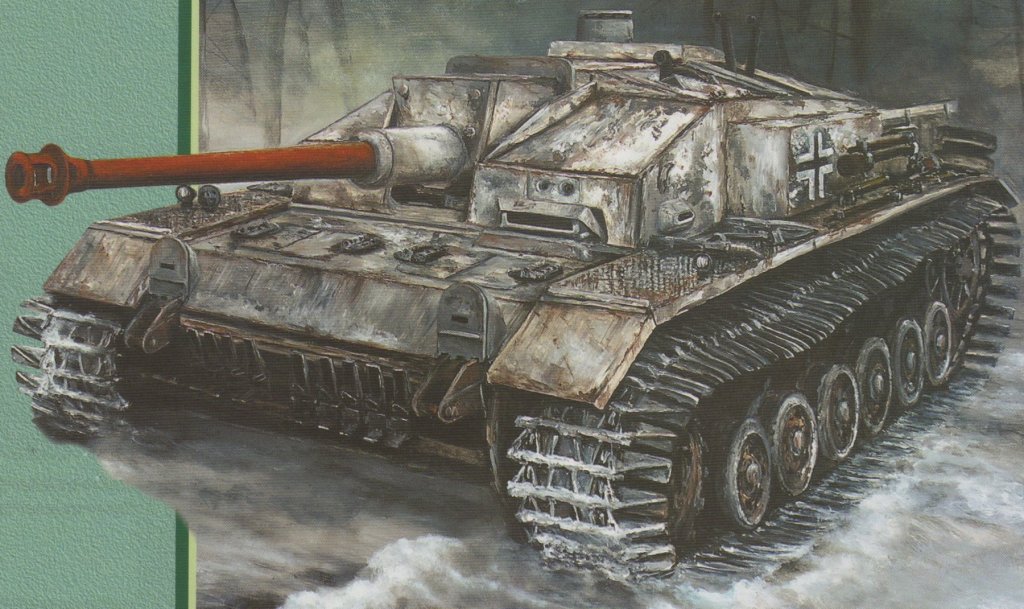
Hi all, My next Card model - a WW2 German Tank, the Stug 40. This kit is from GPM in Poland, but I bought mine through Fenten's in Brisbane for $35.00 including postage . Those of you who saw my GPM Bismarck may remember that I wasn't very happy with the quality of the kit, but this one seems to be OK so far (but I haven't really started yet ). Here's a pic of the cover art from the kit : I've made my usual preparations - cut out all the pages from the kit book, scanned them, placed them into a clear-leaf folder and made up the Part Finder Spreadsheet. I've also translated the Polish instructions well enough to work out what they mean. Now to start the real work. Danny
-
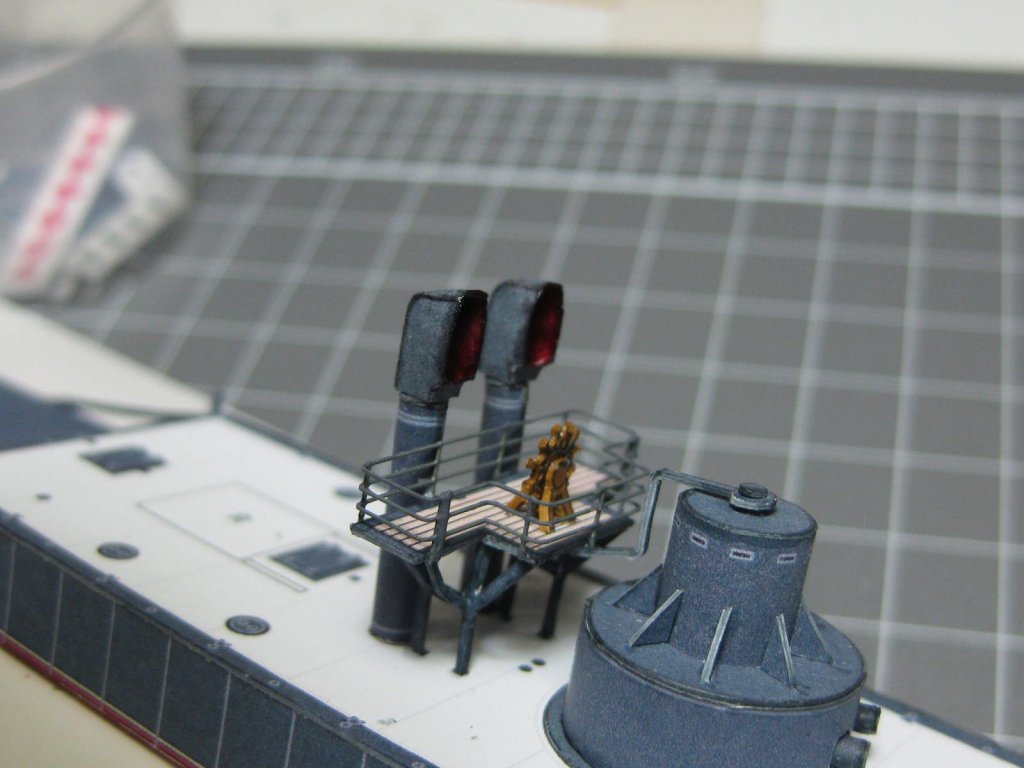
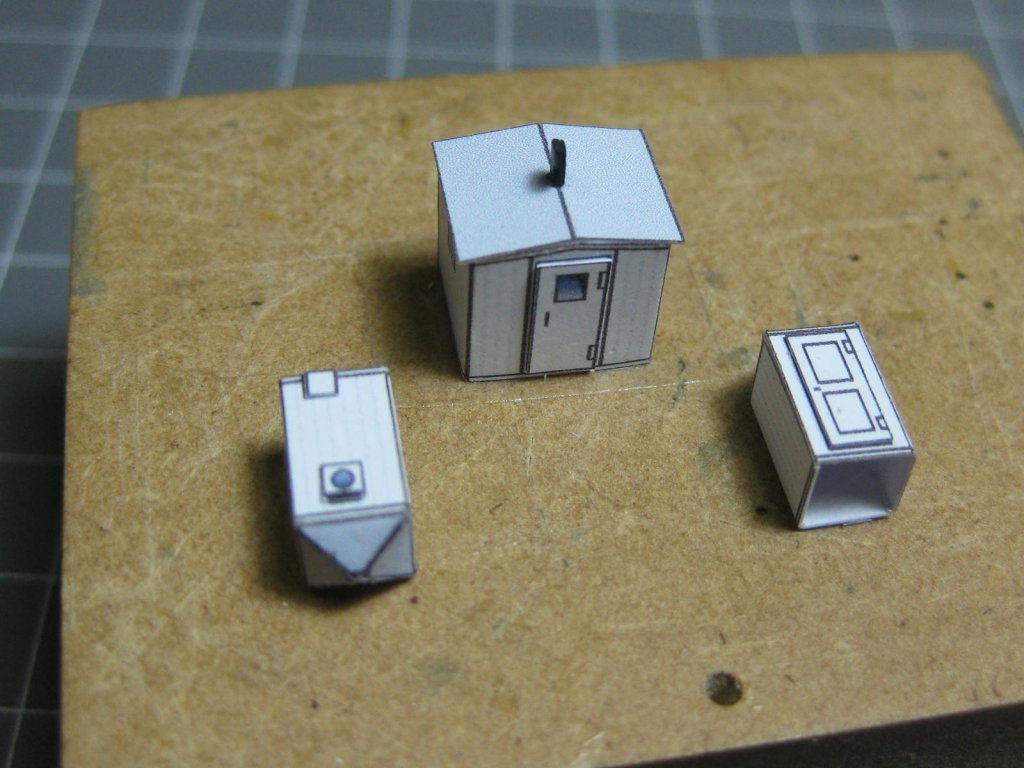
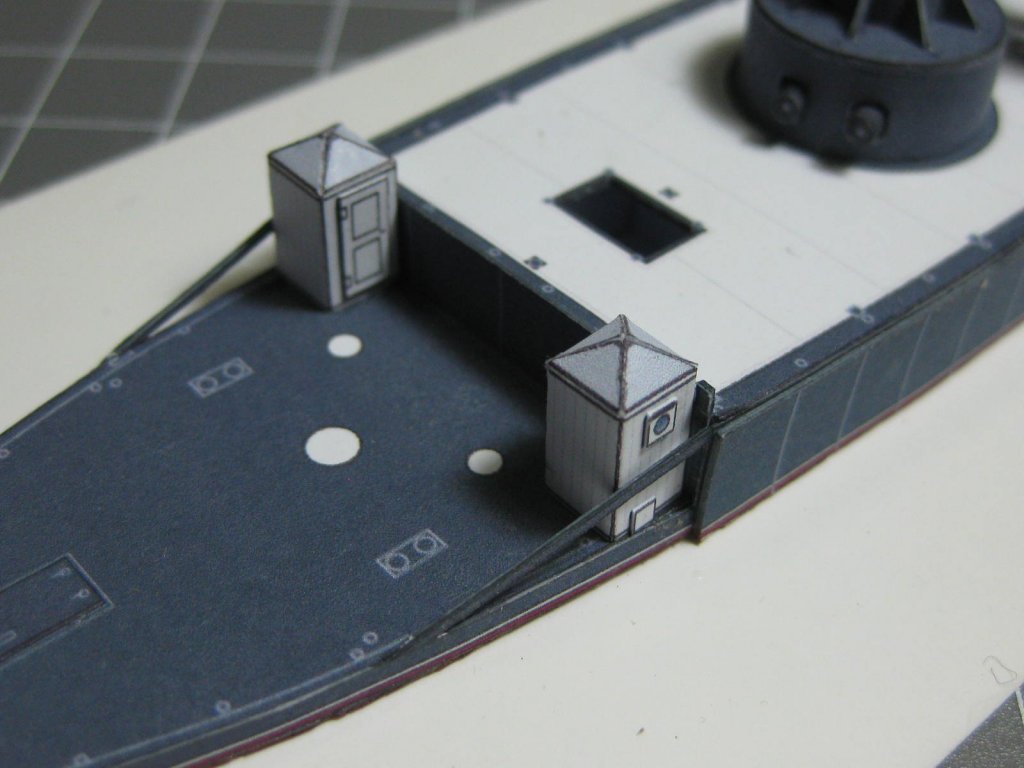
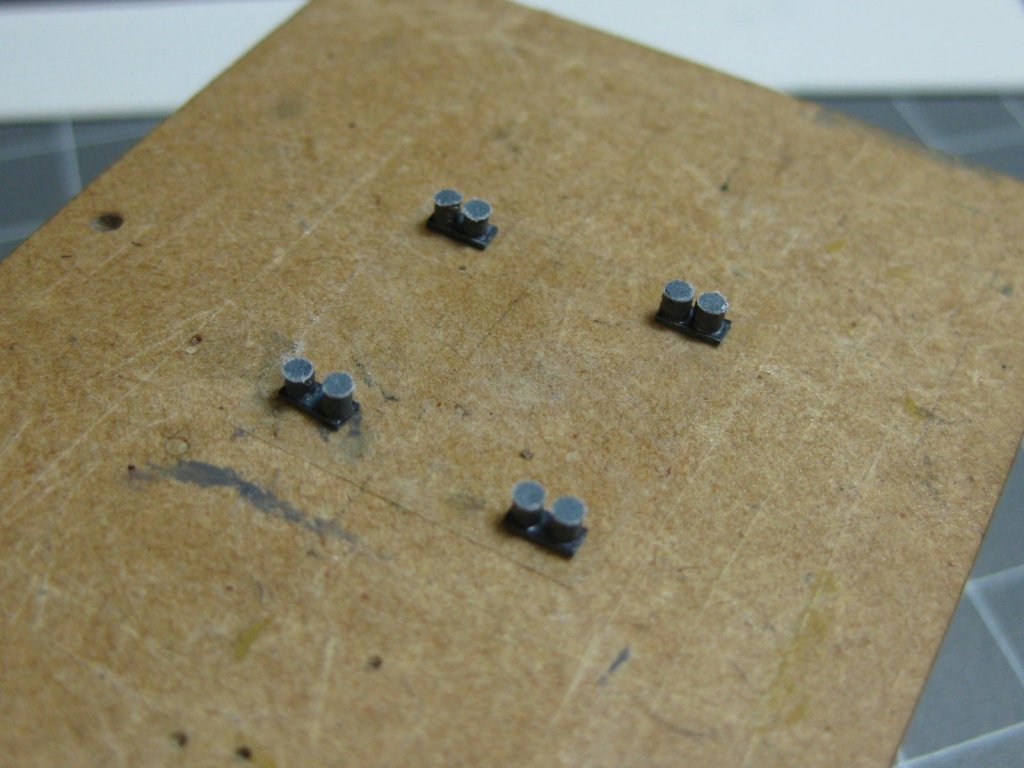
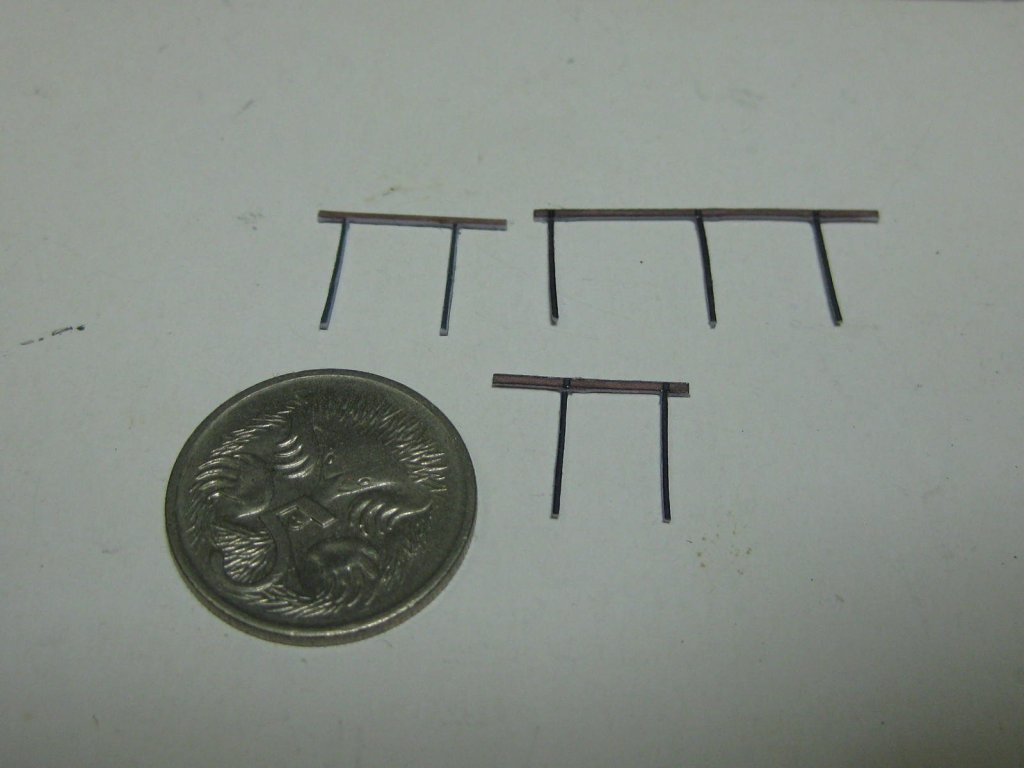
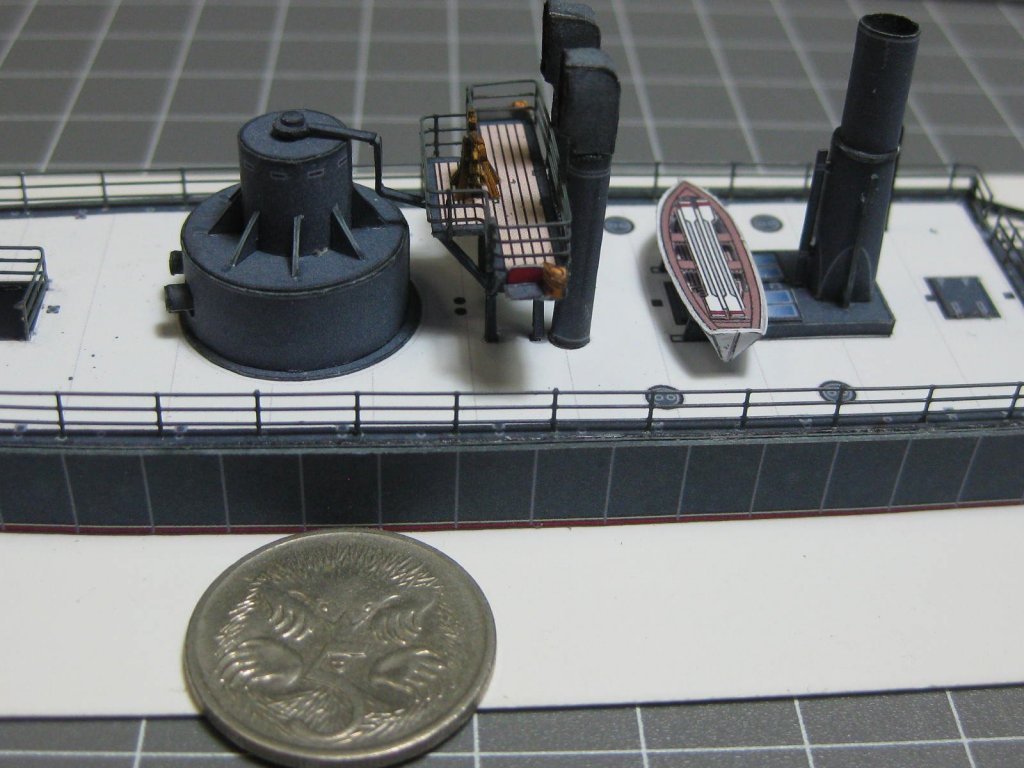
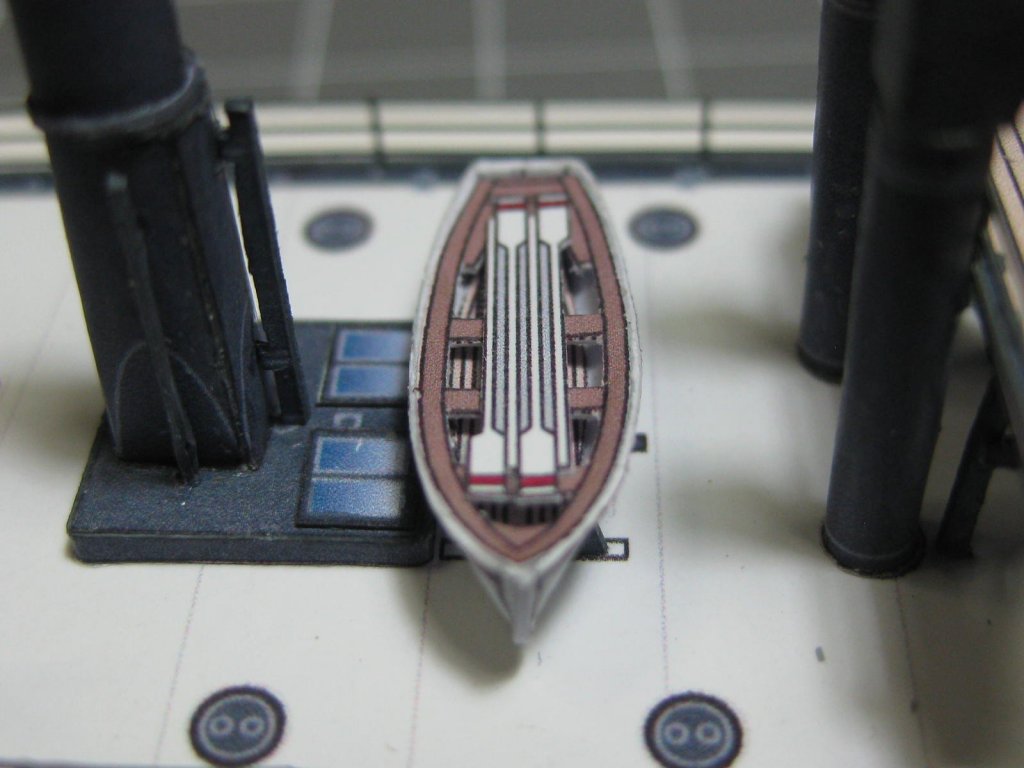
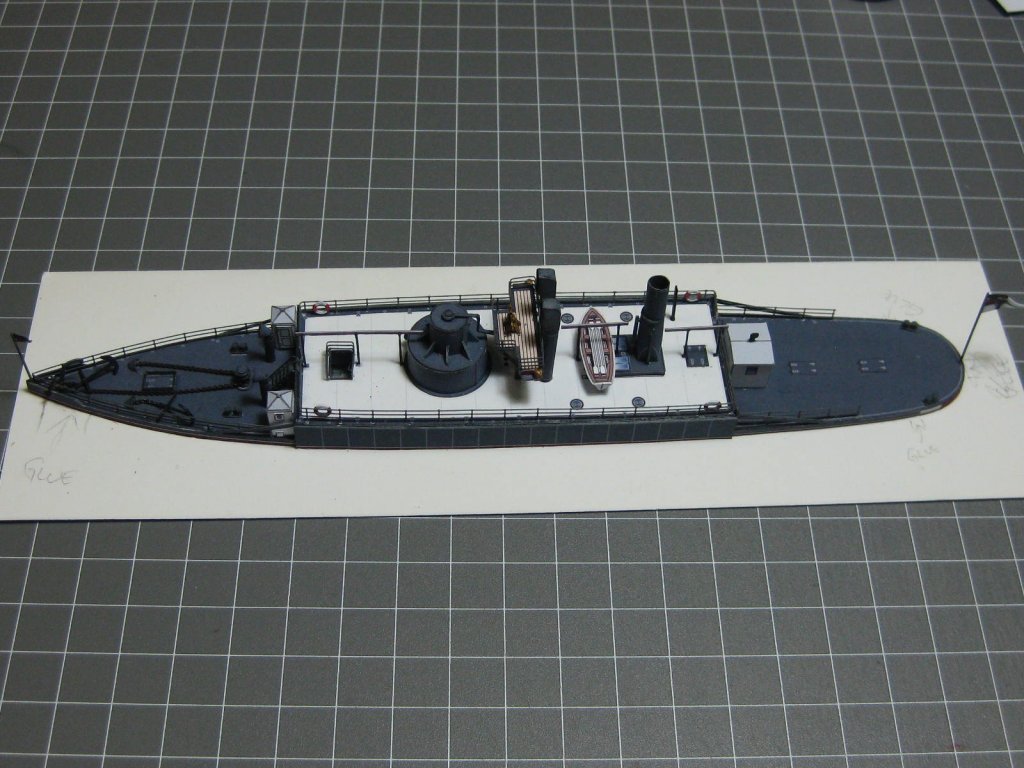
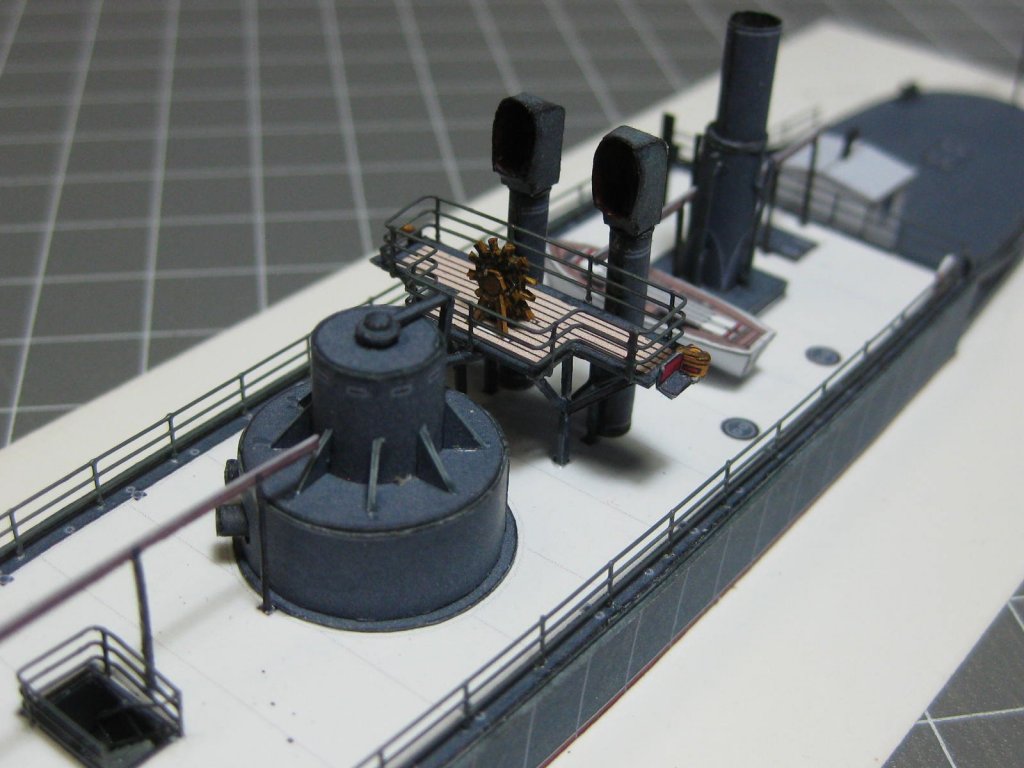
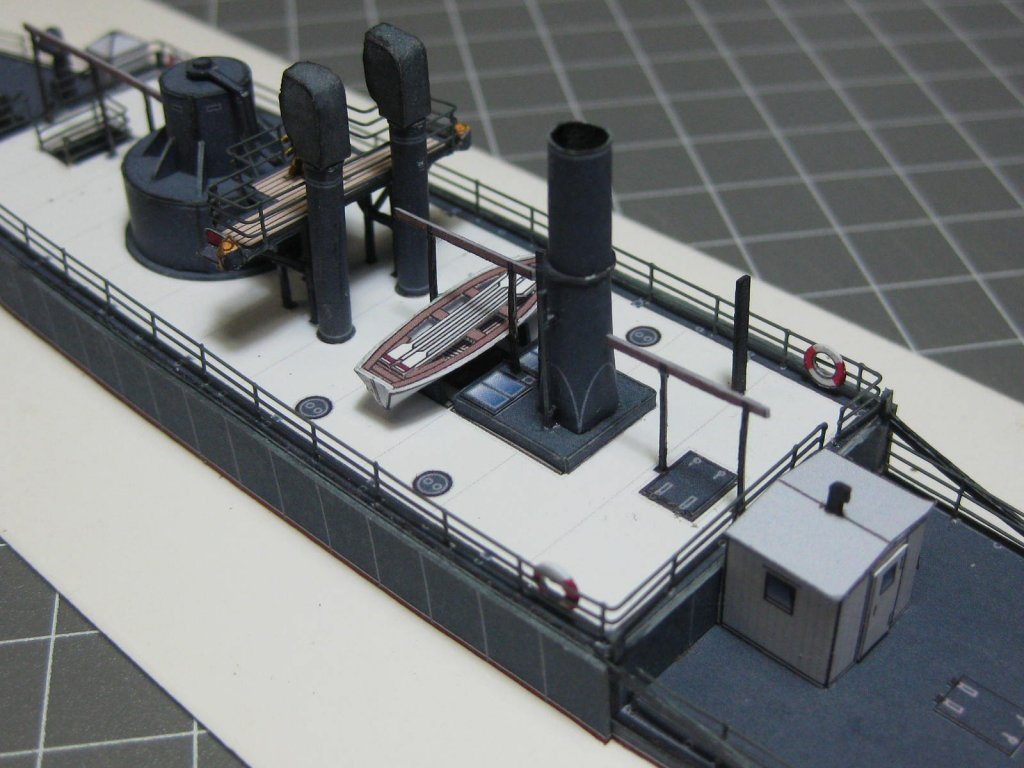
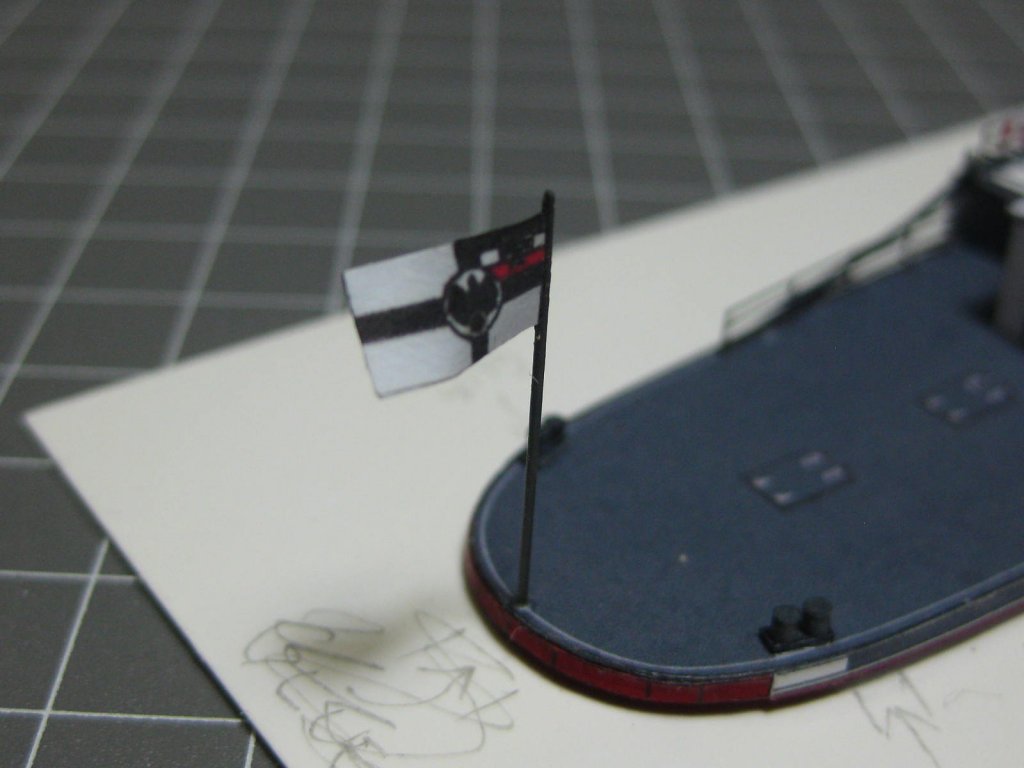
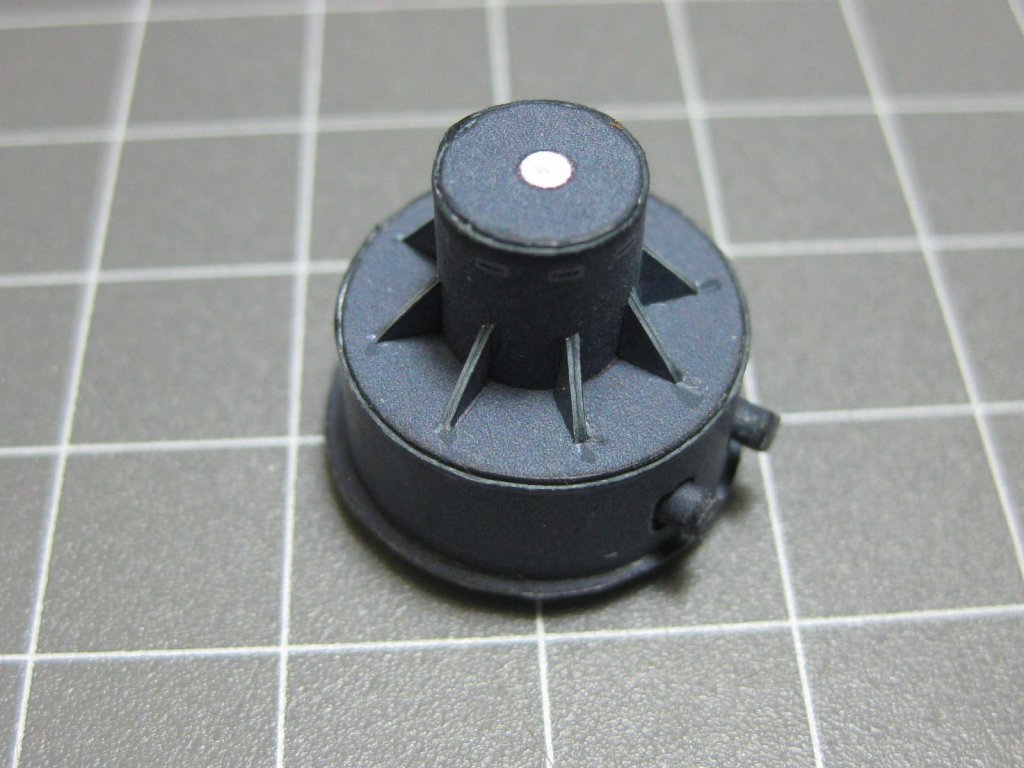
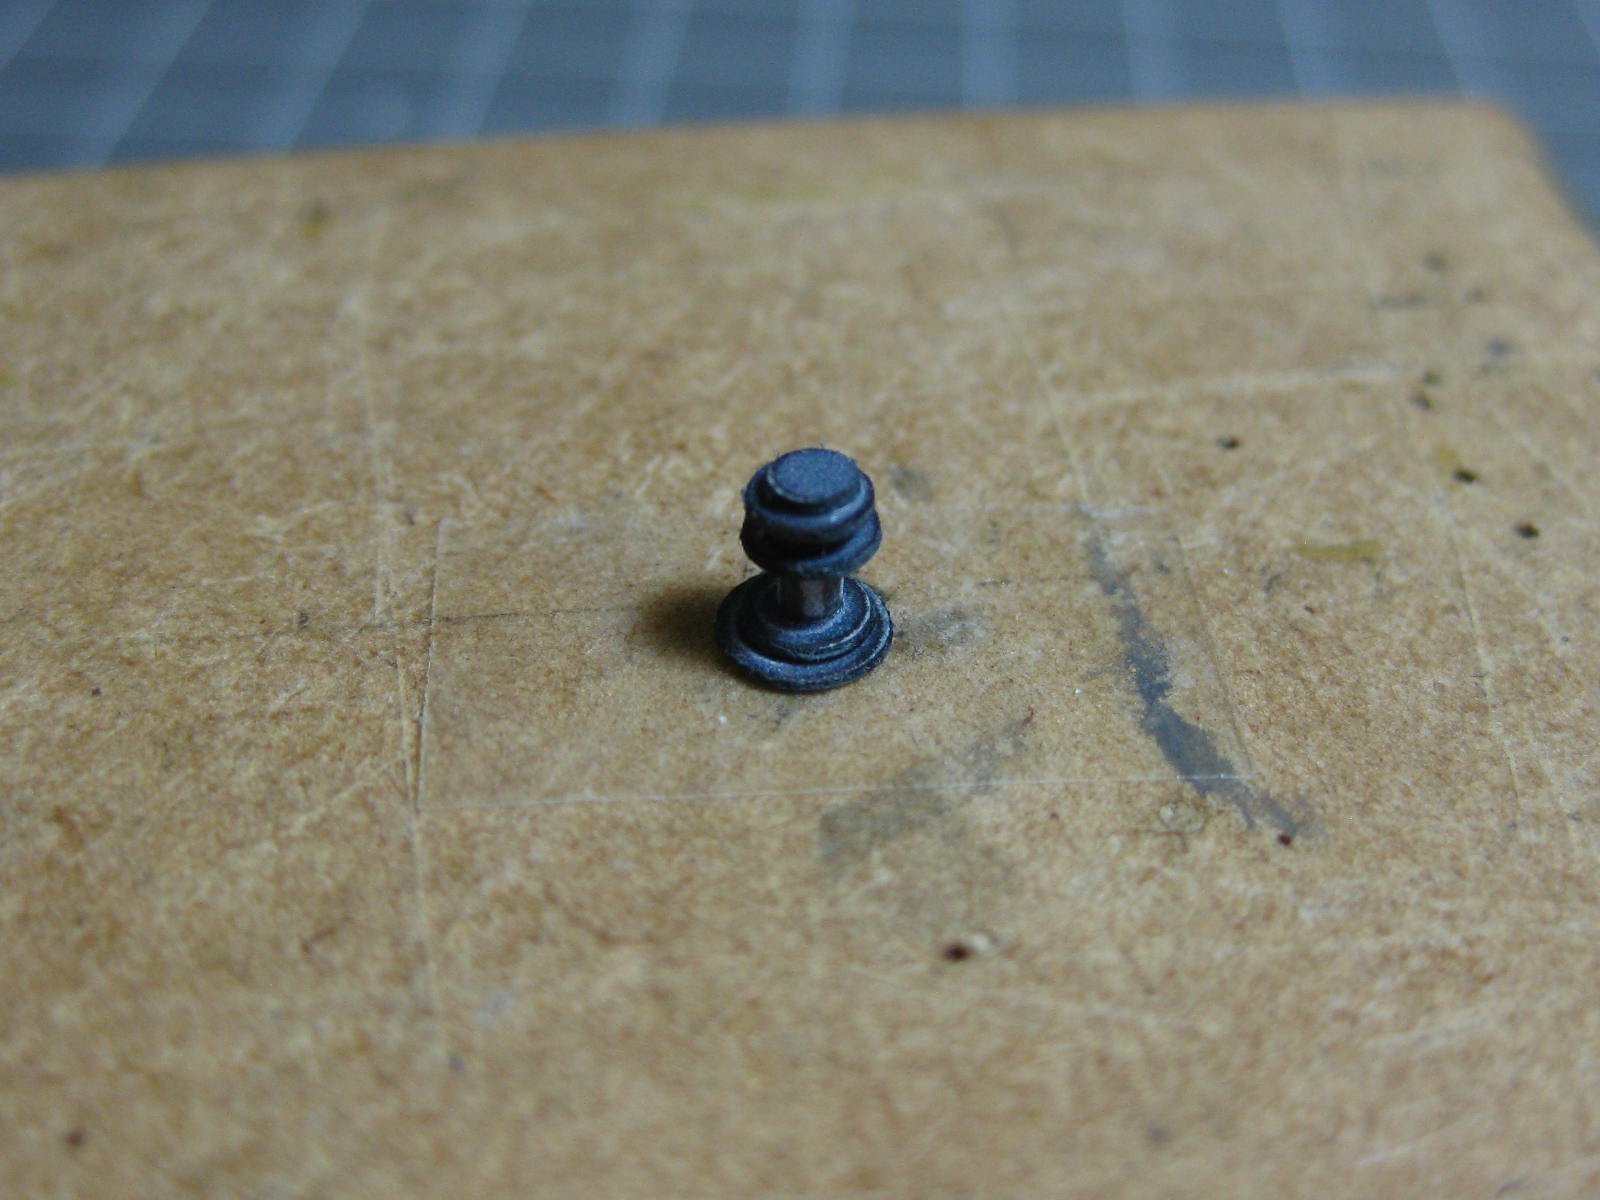
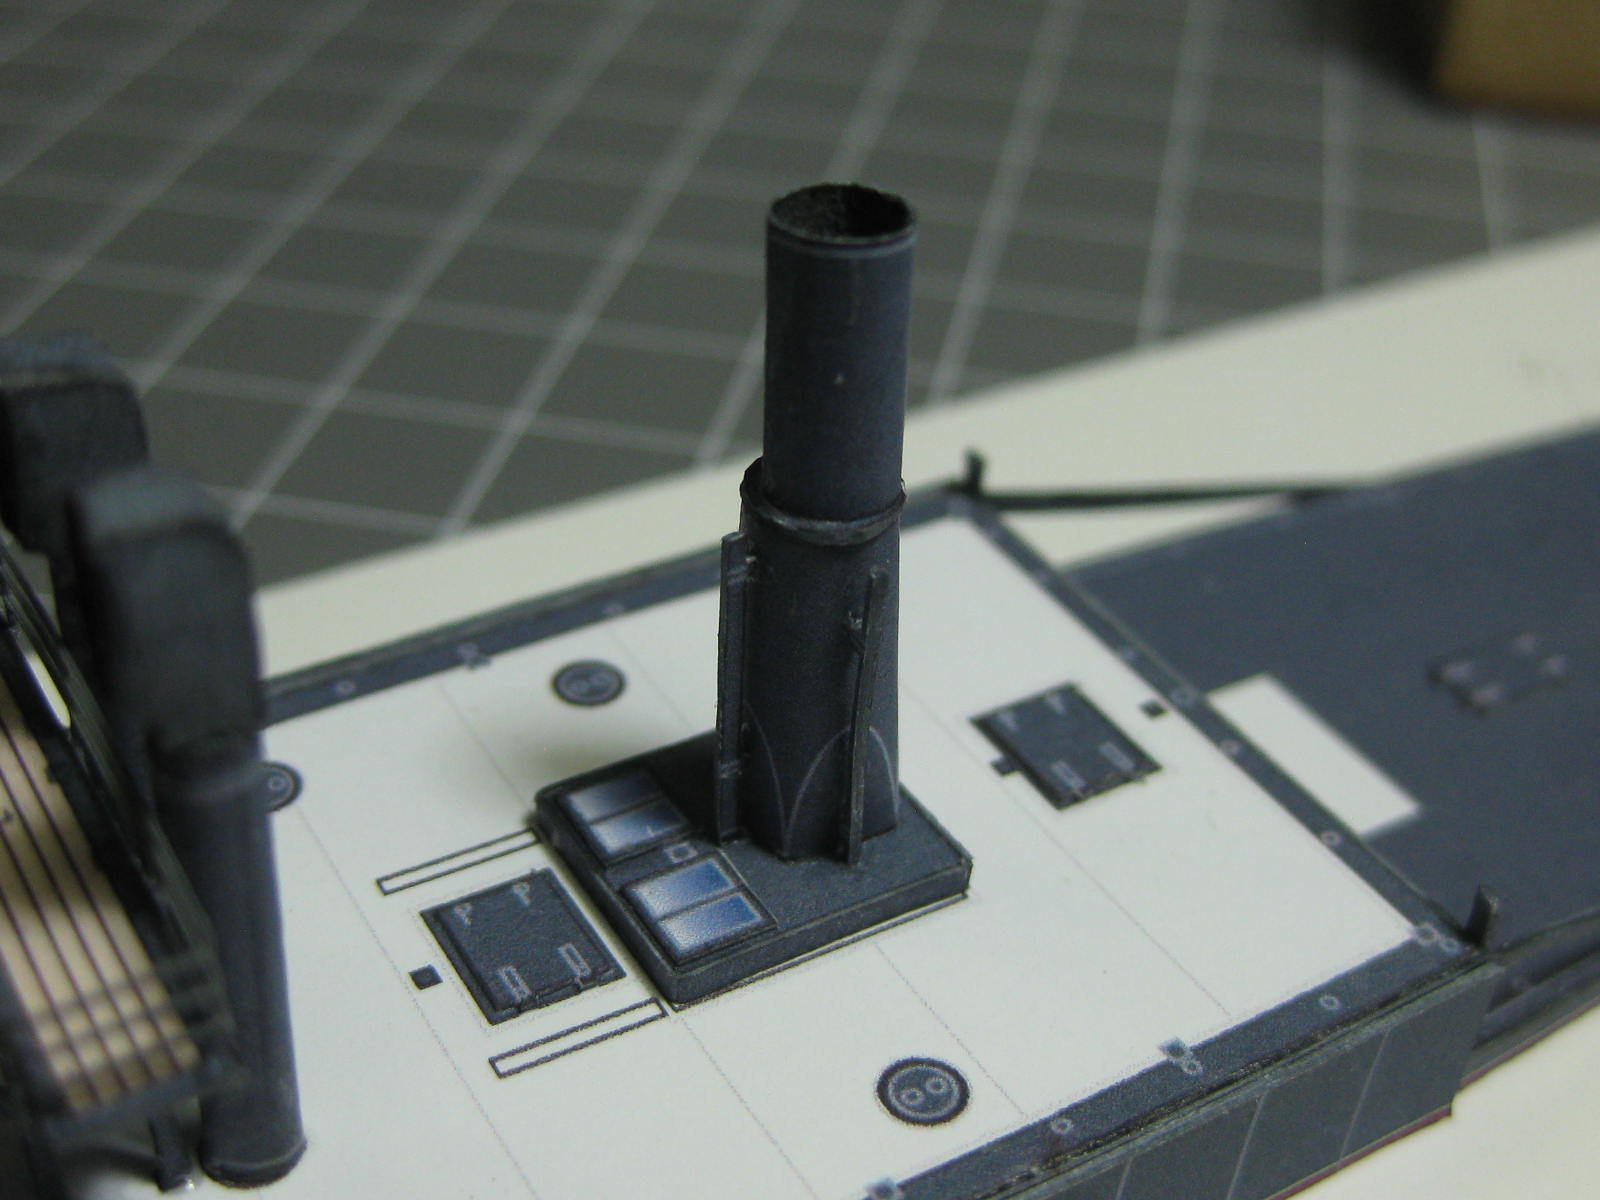
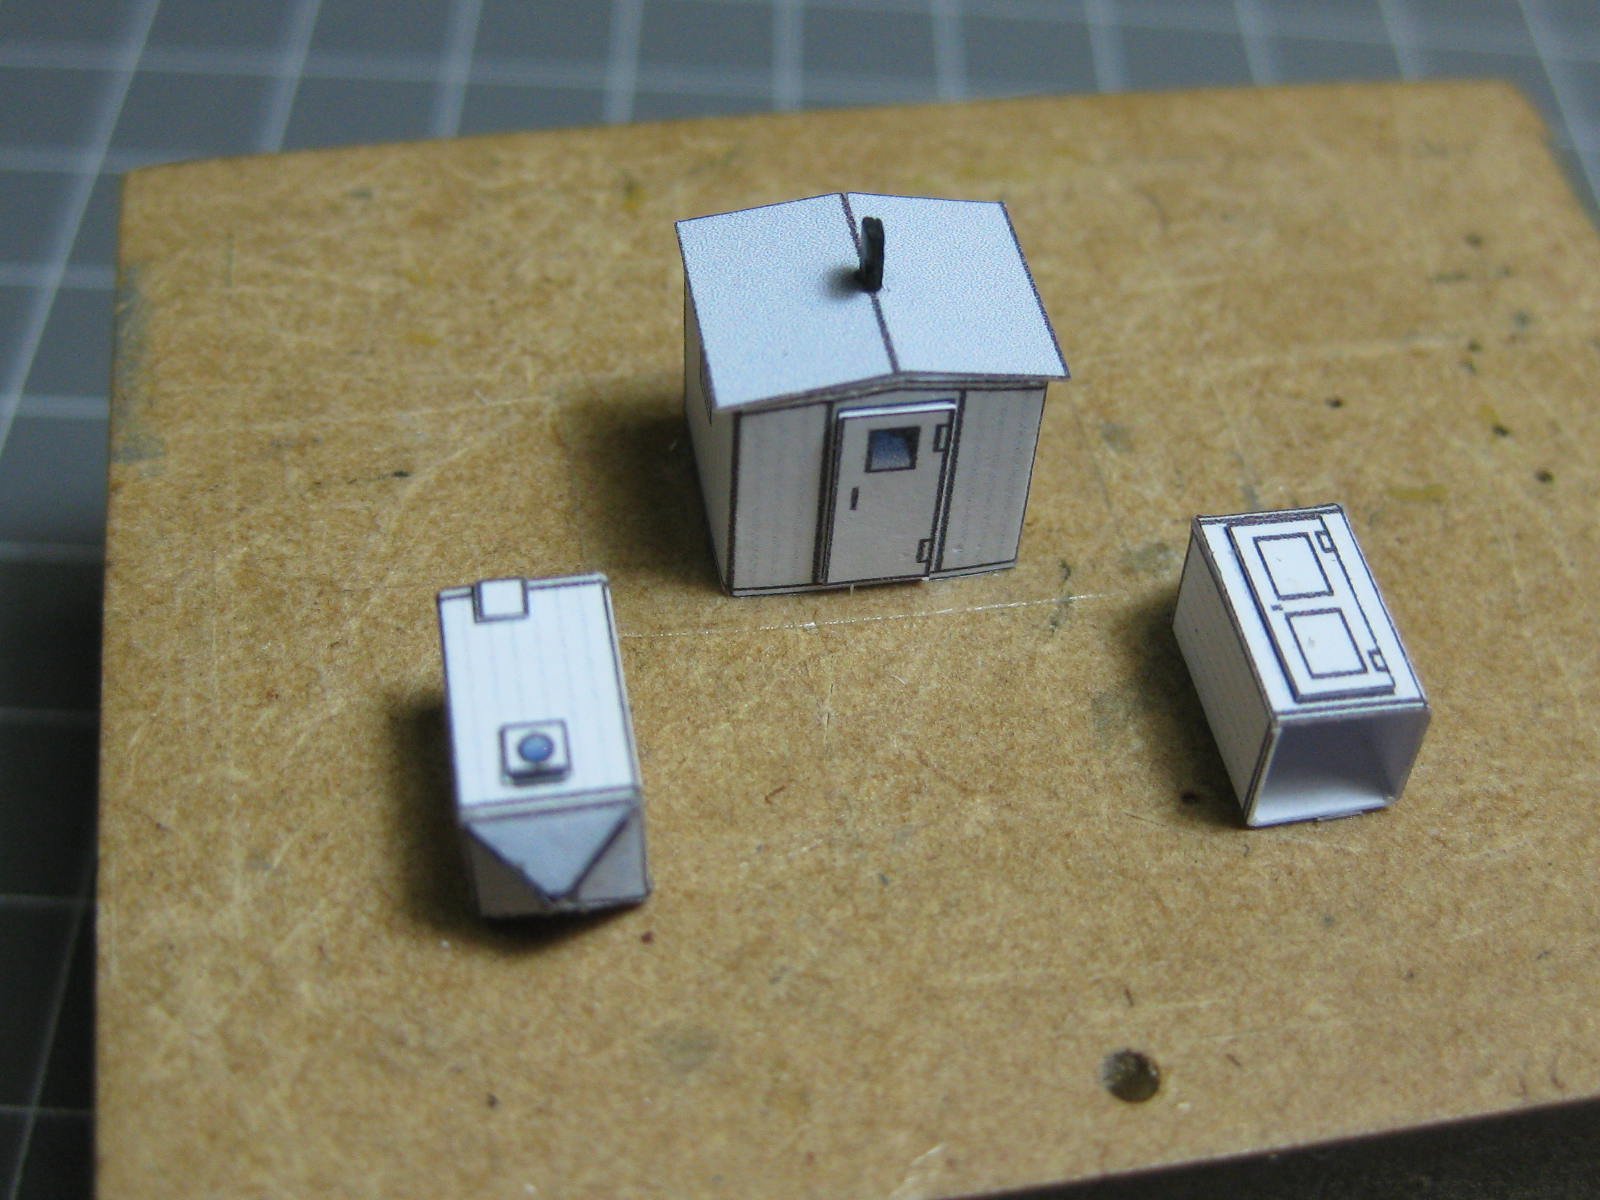
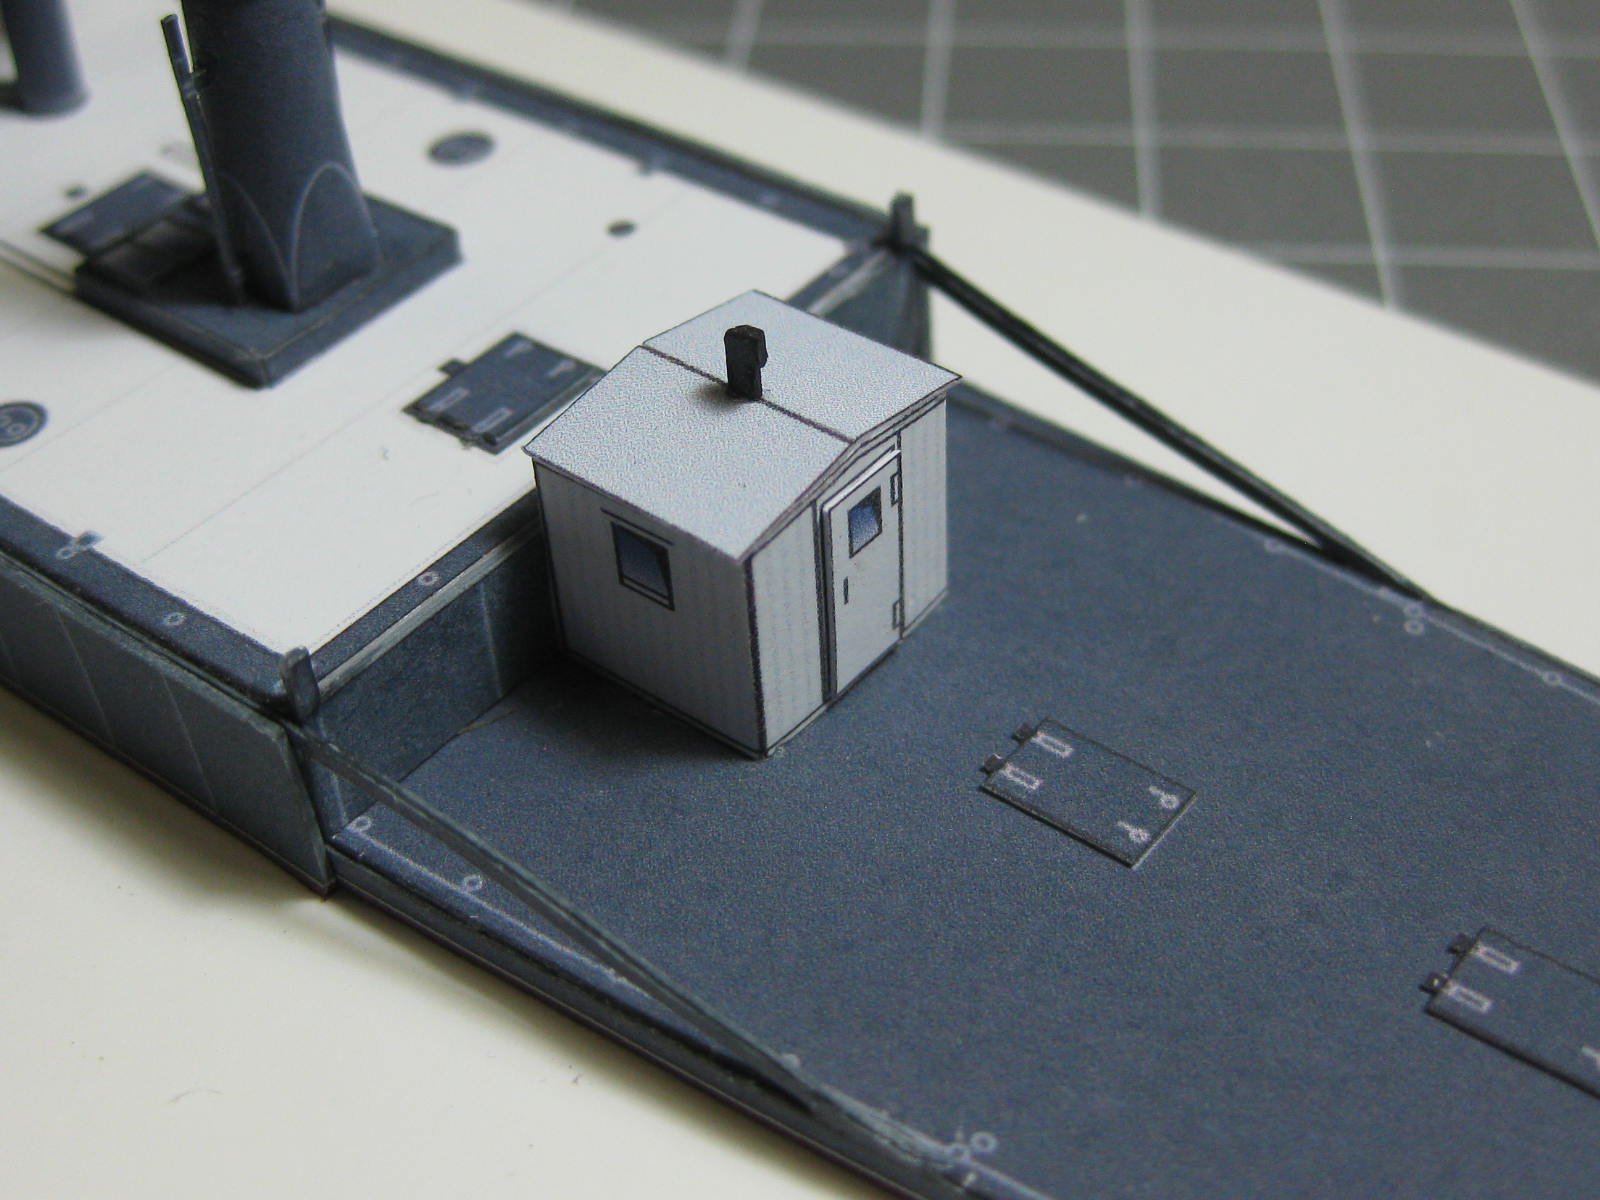
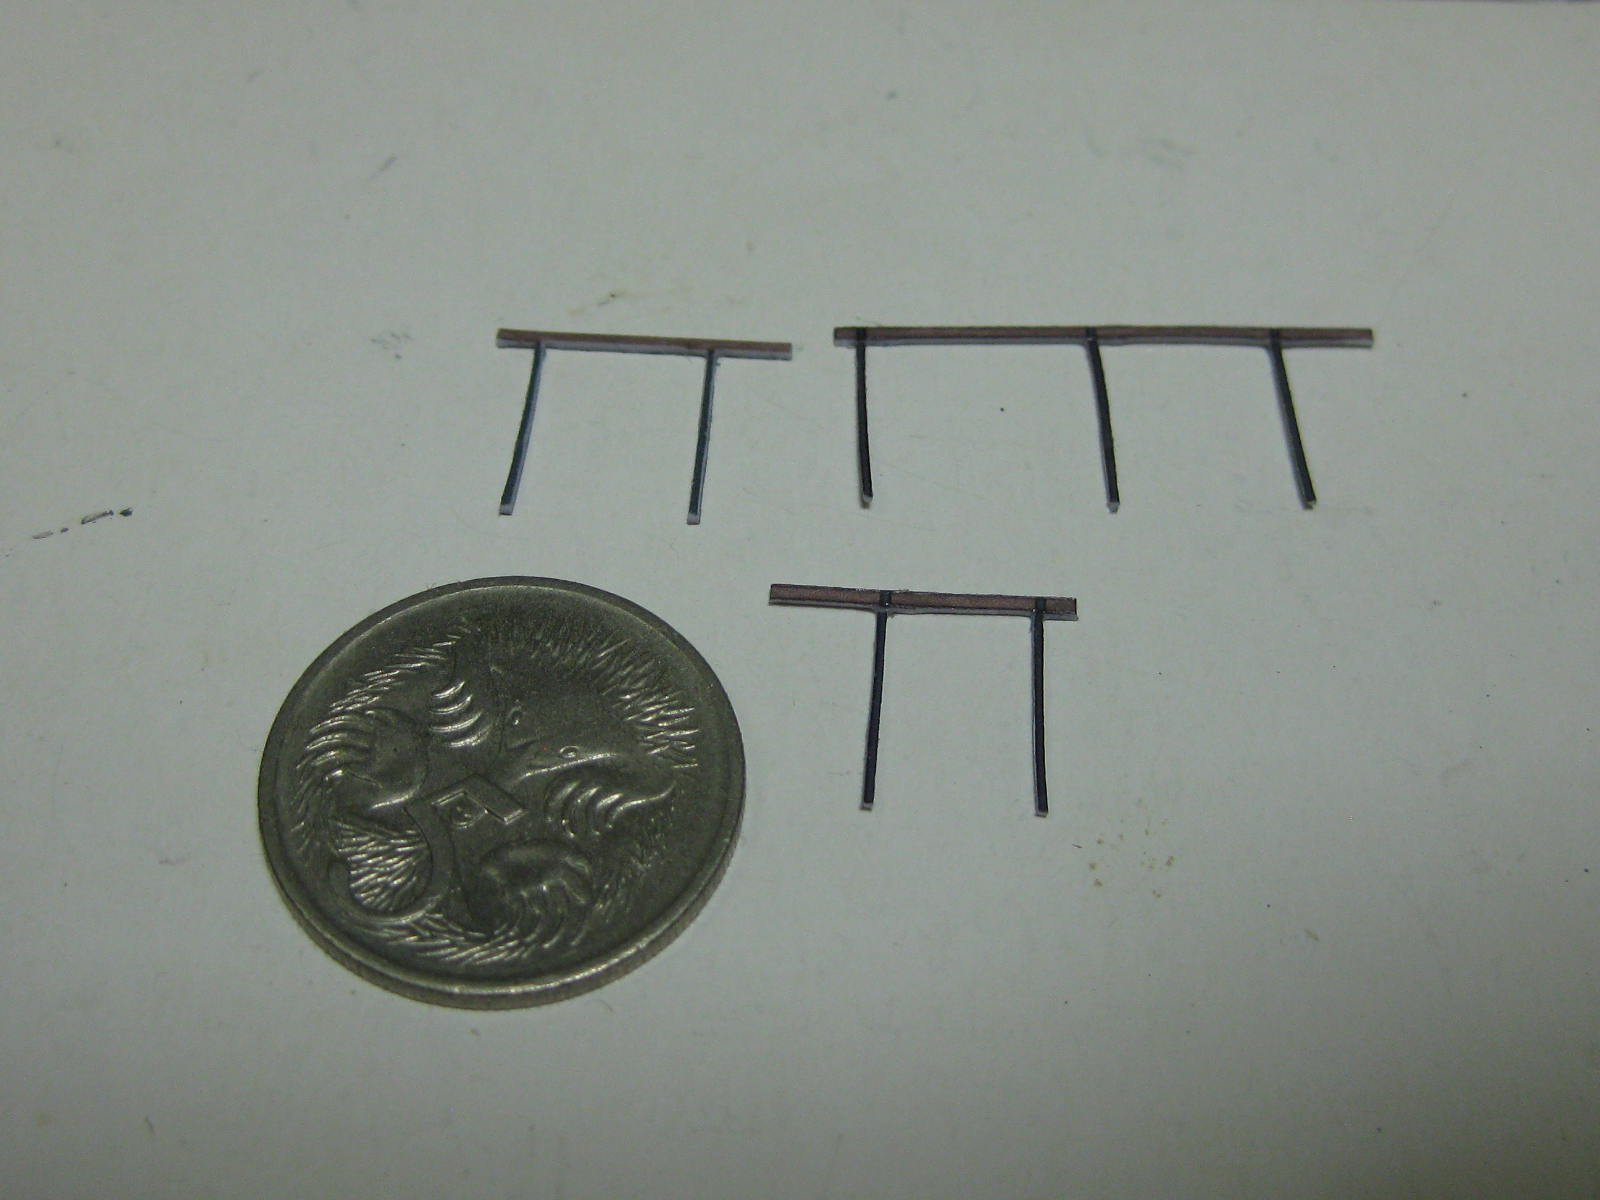
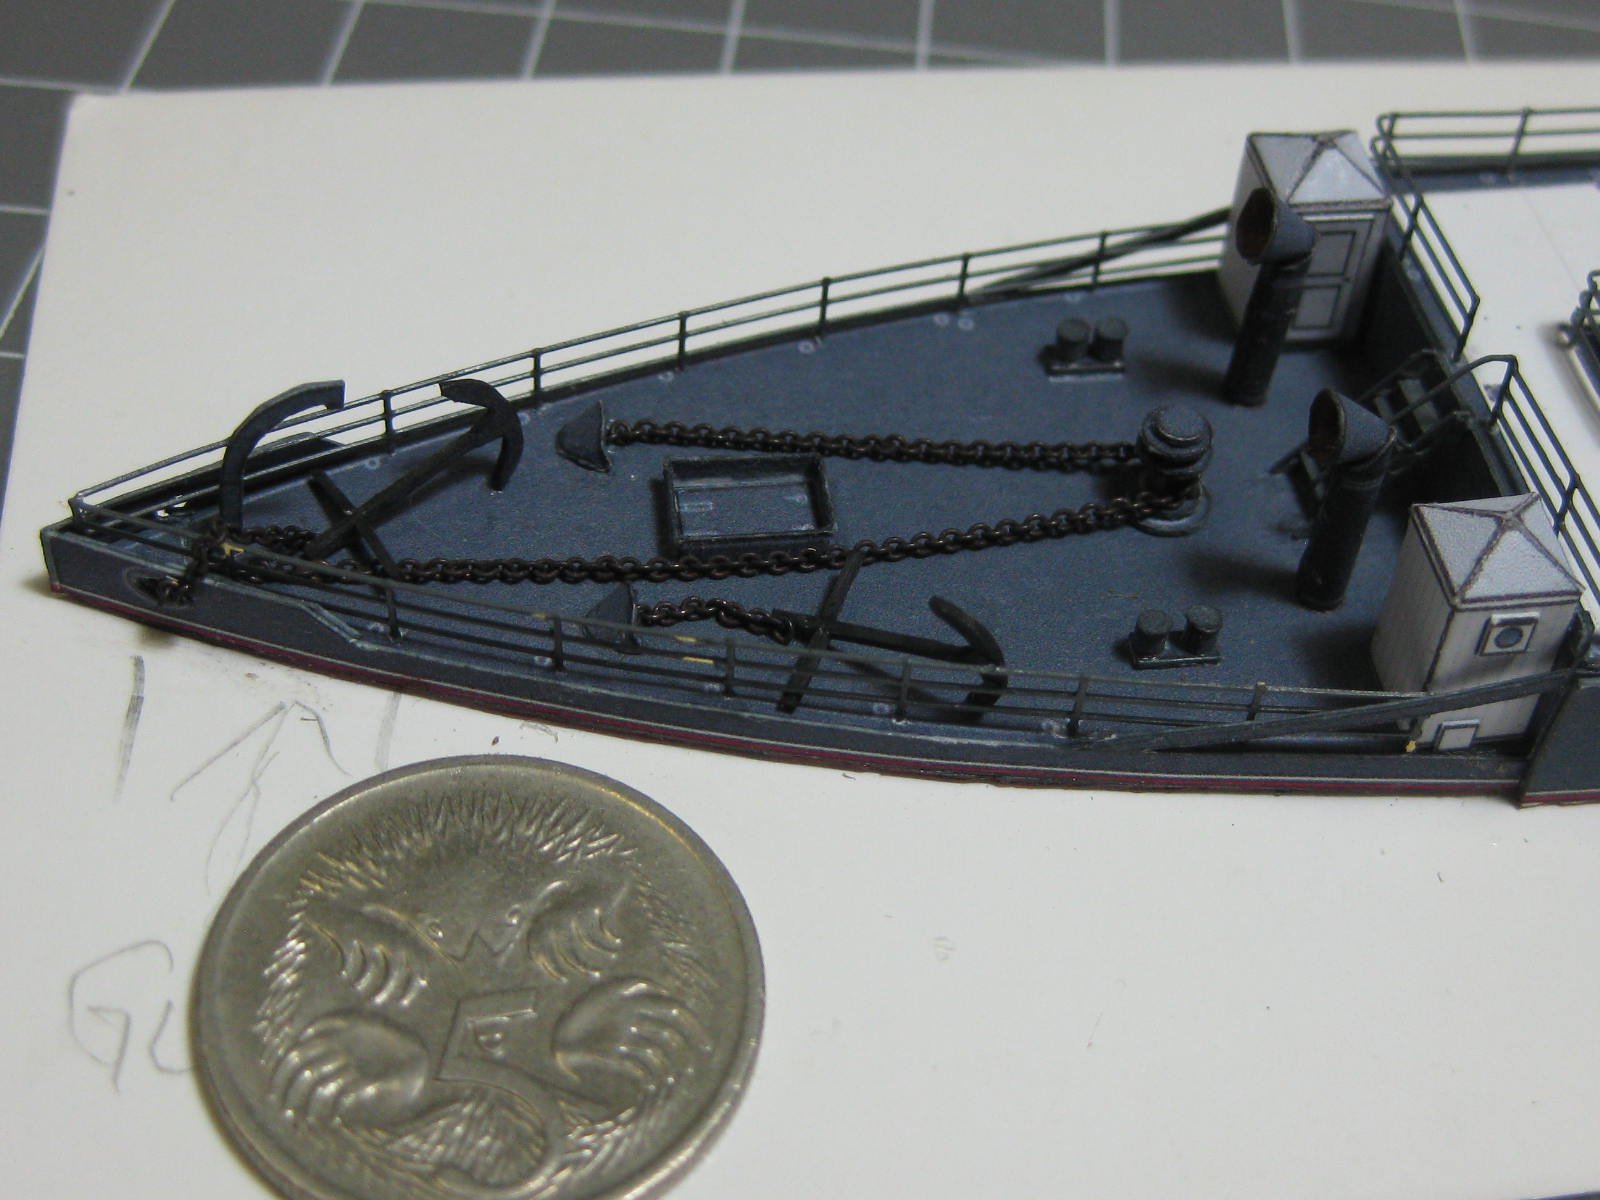
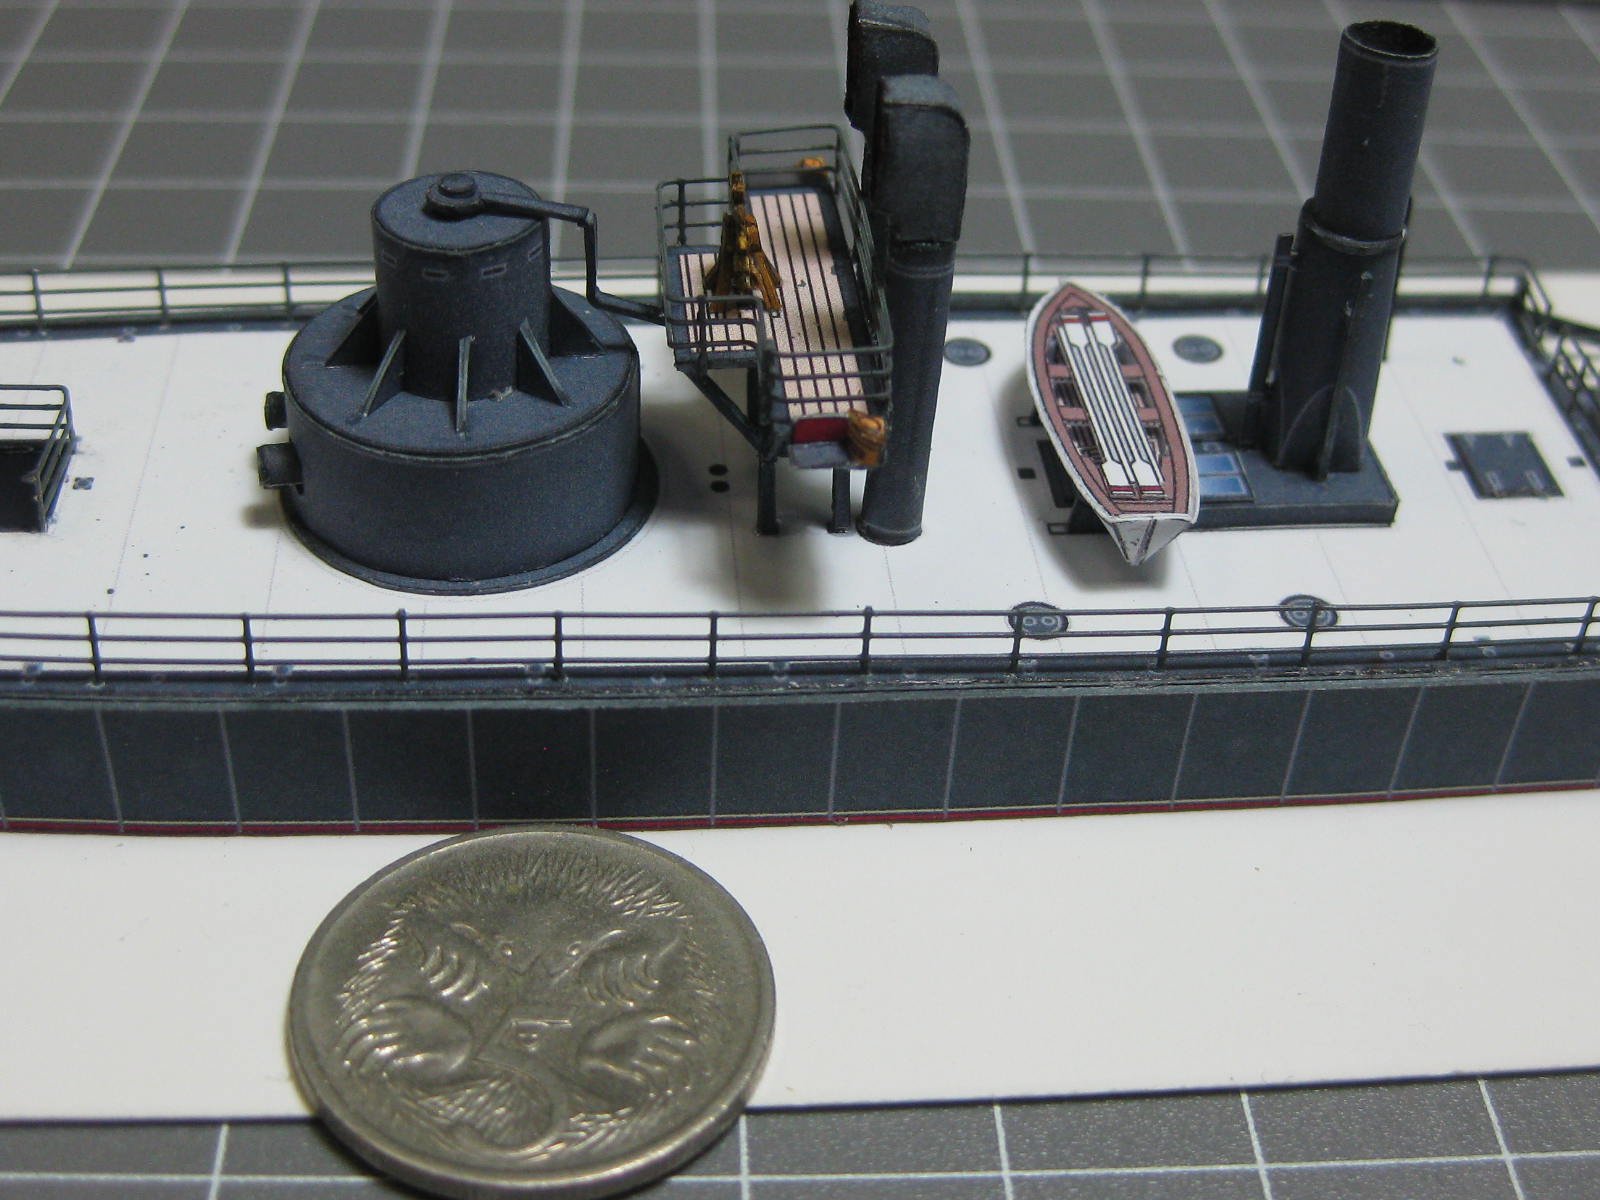
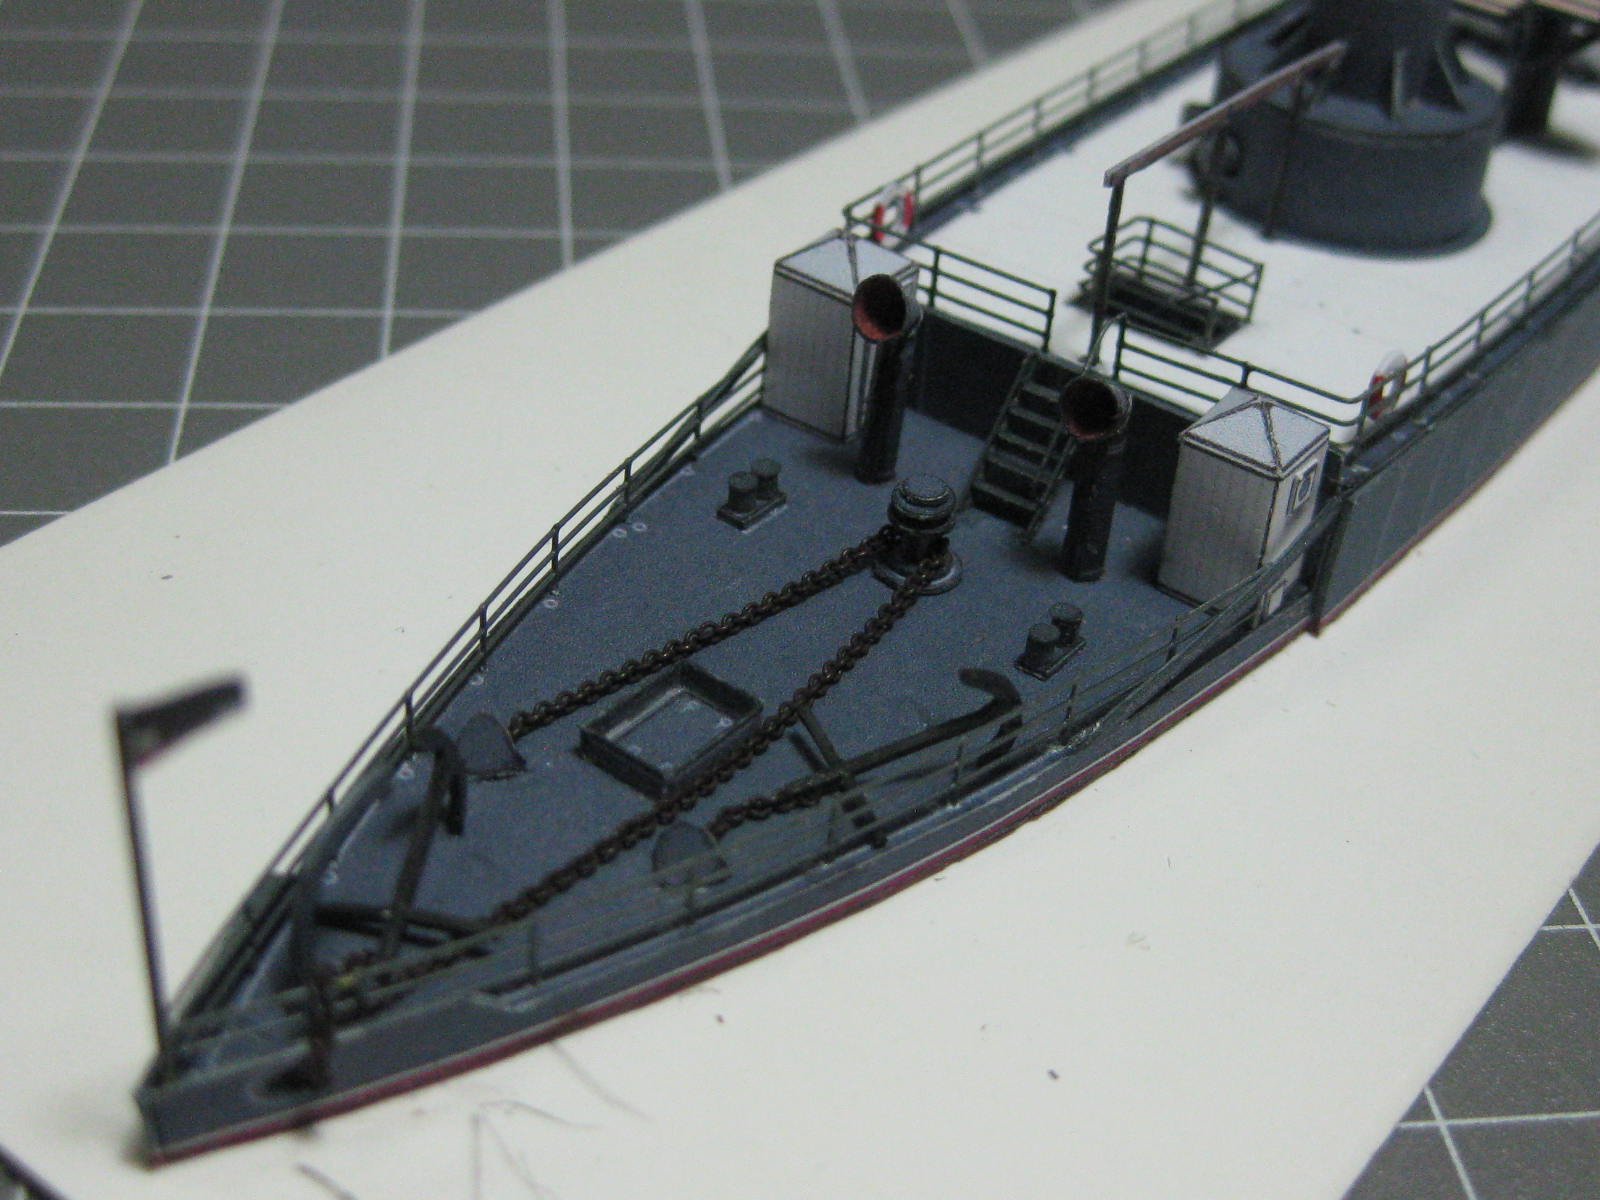
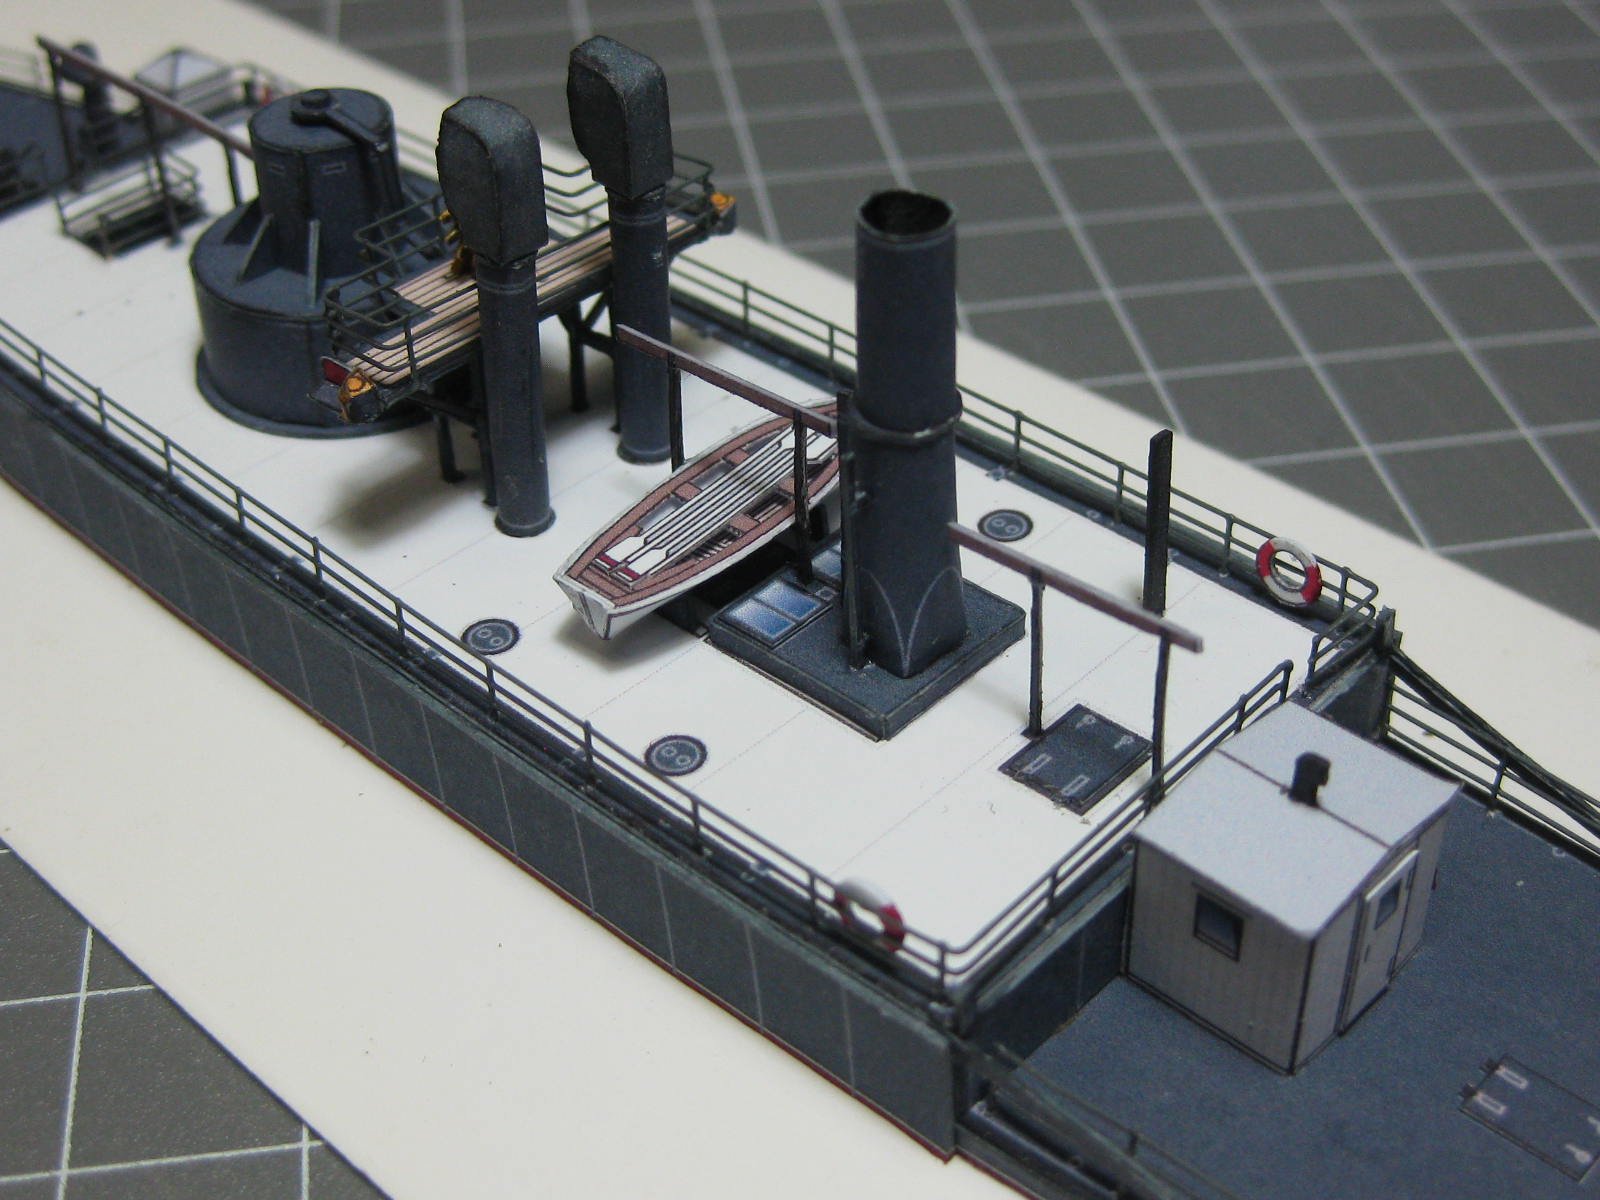
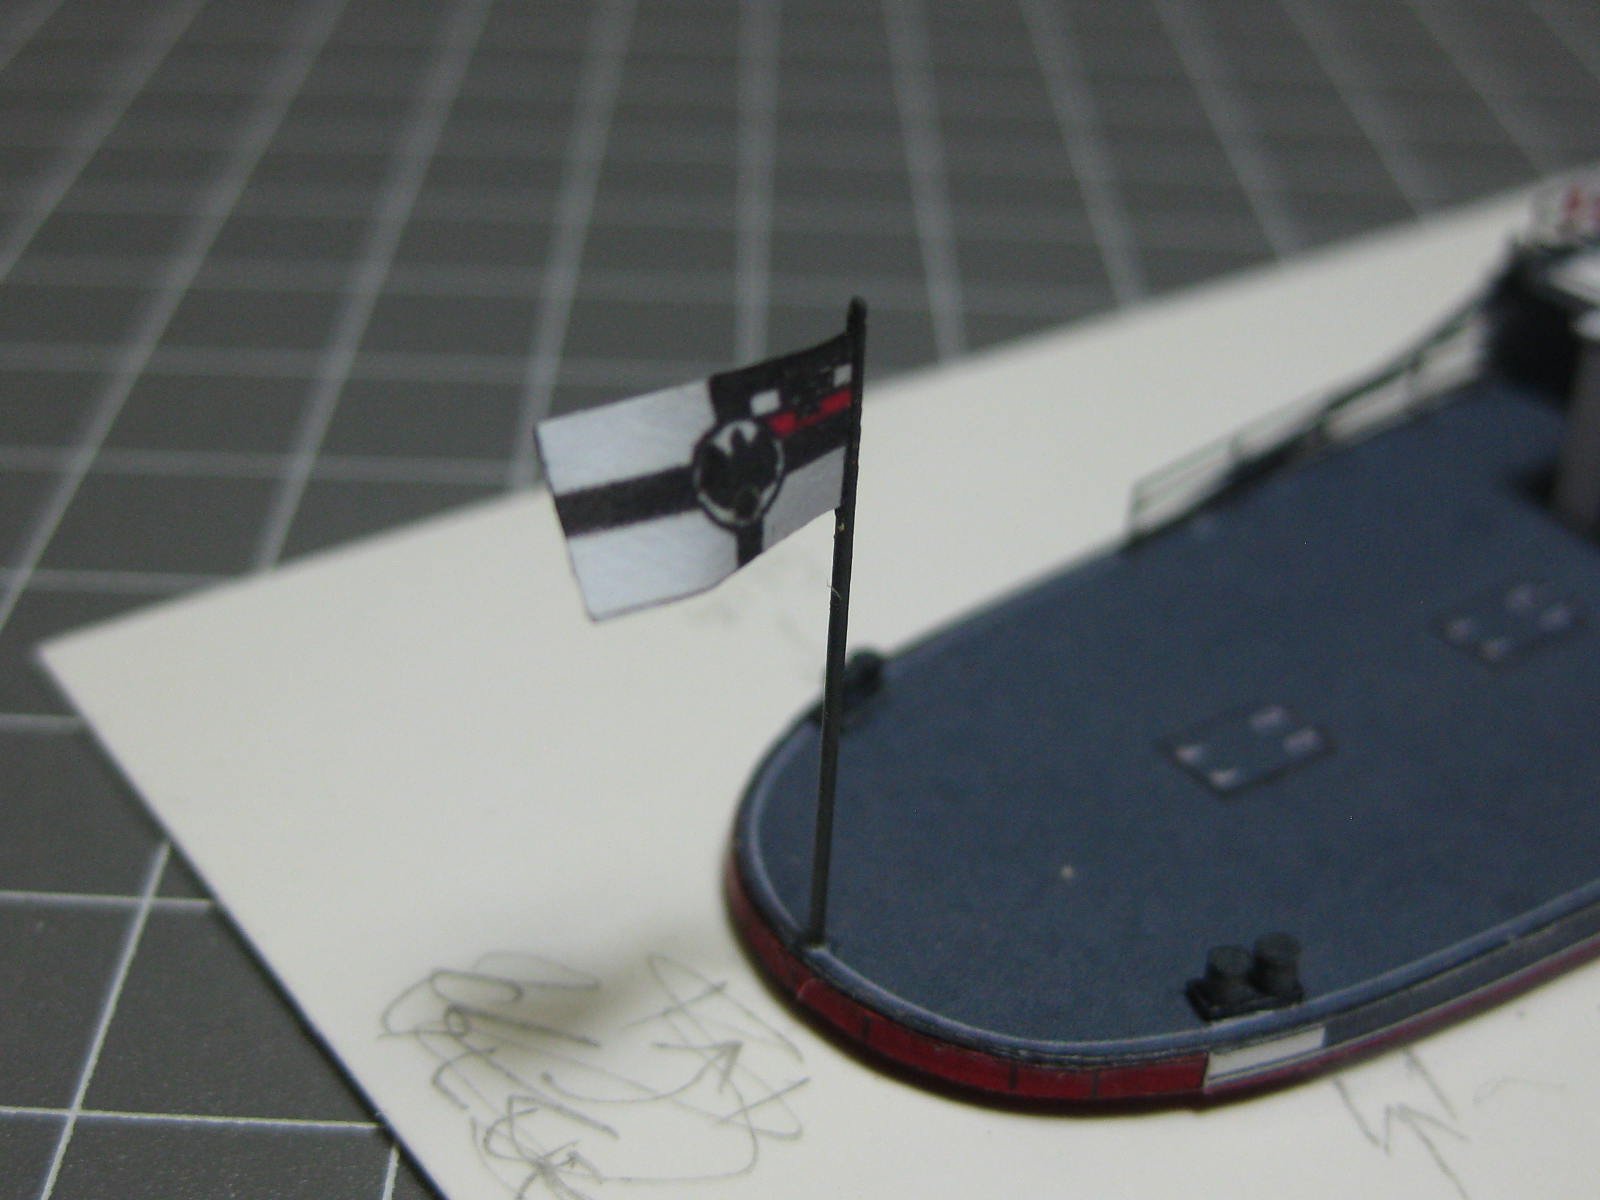
Believe it or not - I've finished this boat already . That only took 4 1/2 days. There are extra hatch covers which can be glued to the deck to make them look more realistic than simple printing : The bridge had some rather flimsy legs, but it all turned out OK with a bit of care : I've used some PE railings left over from one of my previous builds. This comes out a lot better than trying to make them from thread as the kit suggets : The ship's wheel took a lot of careful cutting. It's only 5mm in diameter between the tips of the spokes : I used my hole punch kit to make the various diameters of round pieces of the Capstan : The middle deck Ventilators. There are two smaller ones on the fore deck : The funnel has 3 steam pipes attached, which I cut from paper : The Galley and two Heads were pretty straight-forward, although I cut all the tabs off and edge-glued the various joins : The Bollards are the smallest ones I've made so far that use a rolled paper tube : If I thought the bridge legs were flimsy, they paled in comparison to the Awning Supports. I wicked some CA glue on the edges for strength : The Anchors and Chain. I used 40 link-per-inch : The ship's boat was quite easy to make. It consisted of a mere 4 parts : The tiny Navigation Lights were a bit of a pain to make : And some overview pics of the completed model. It is only 200mm long : The Companionway in this pic is also left-over PE. There is another behind it on the middle deck : And the last piece fitted (as usual) - the German Imperial Flag : I still need to make a base for the model. It will be a simple piece of Card, painted blue. My next model arrived yesterday - just in time . It's a WW2 German tank, a Stug 40. A link to the build log for it will appear in my signature when I get started on it. Danny


-
Nice work Ab . I'd like to see how you develop complex shapes like hull skins for card. Danny
- 65 replies
-
- 2
-
-
- fish hooker
- fishing
- (and 2 more)
-
Yamaha MT-01 by Dan Vadas - CARD - FINISHED
Dan Vadas replied to Dan Vadas's topic in Non-ship/categorised builds
Thanks Kevin. I'm going to stick with Card for a while yet as I don't have a workshop suitable for wood models at the moment. That may change in the future. BTW - I edited your Signature to make it a bit smaller. The links now work by clicking on the model's name instead of using a separate one. Thanks David. I'm a bit "over" these particular kits - they aren't particularly well designed. My next kit of a WW2 German Tank looks like it will be quite challenging . Danny -
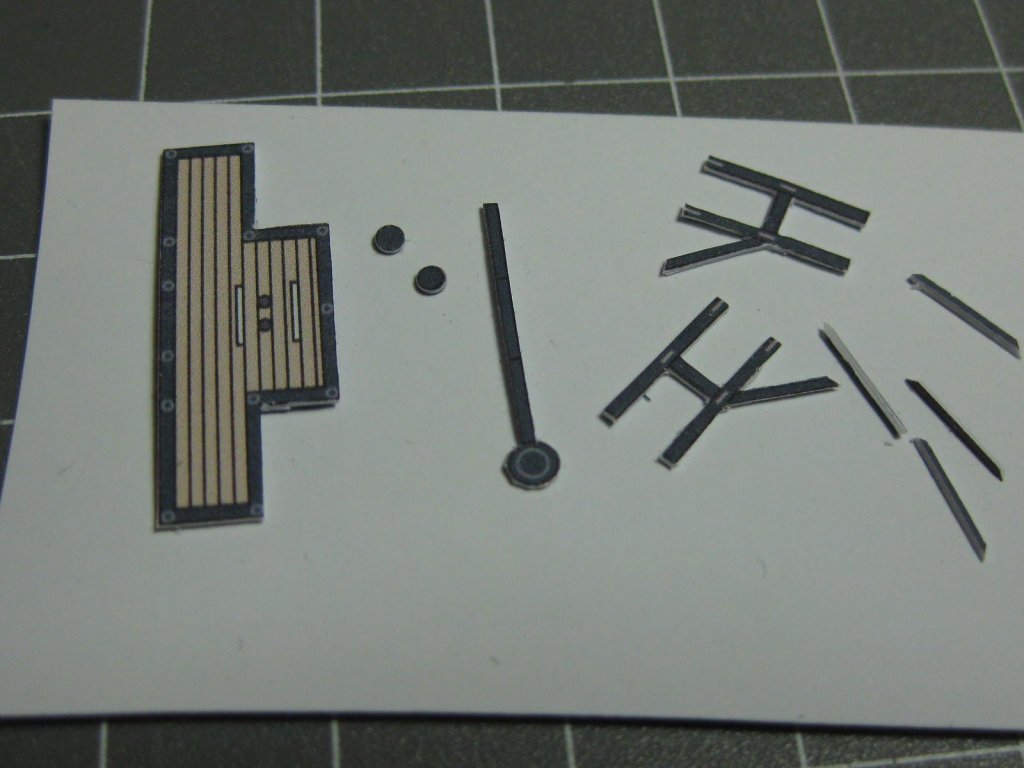
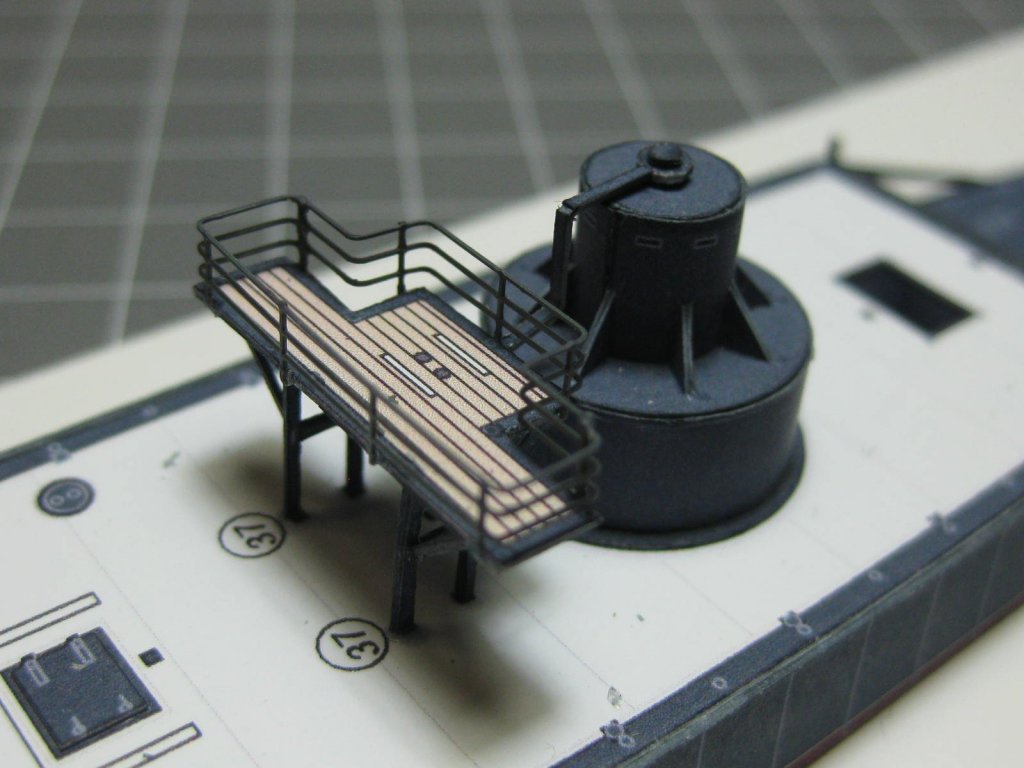
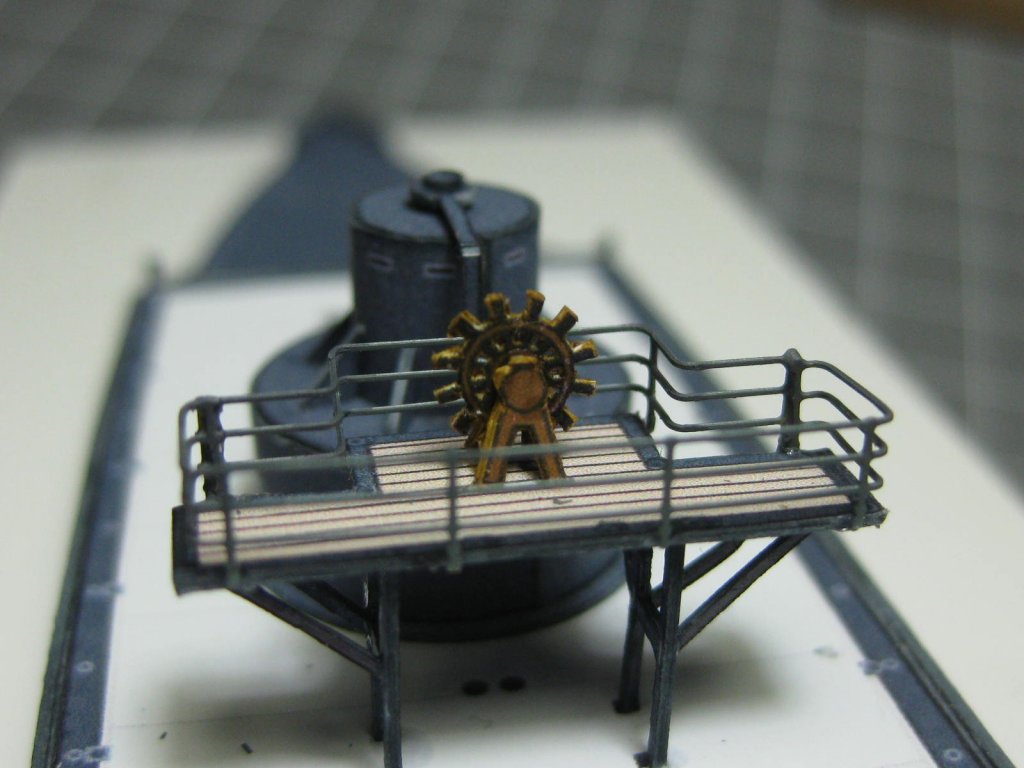
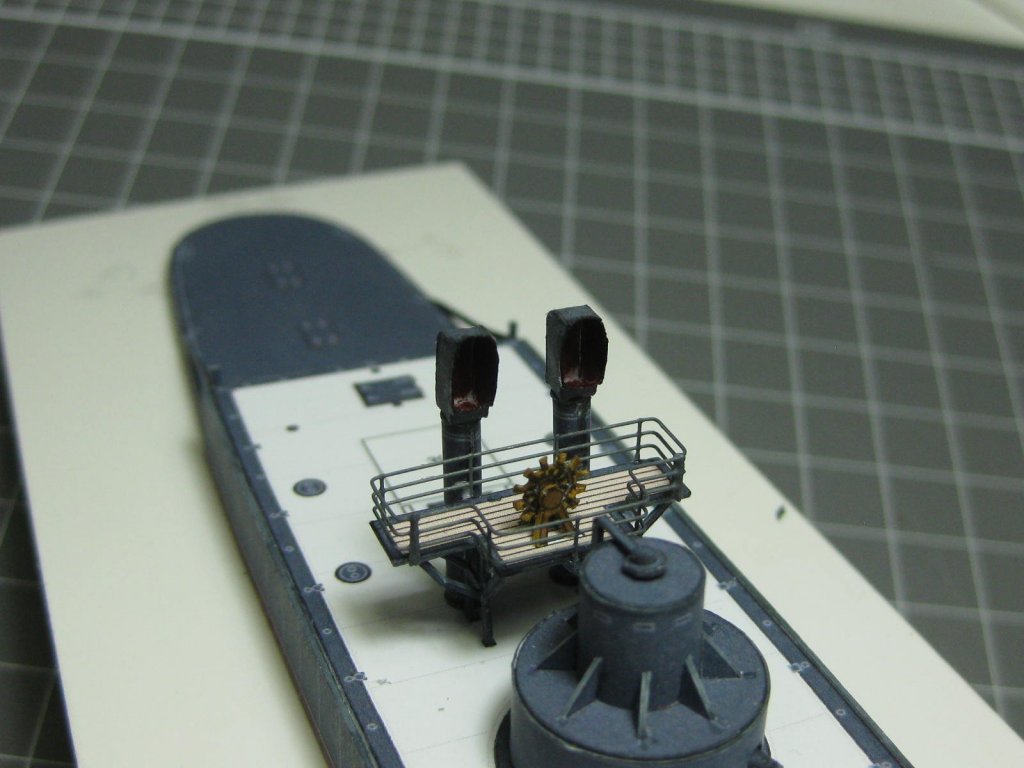
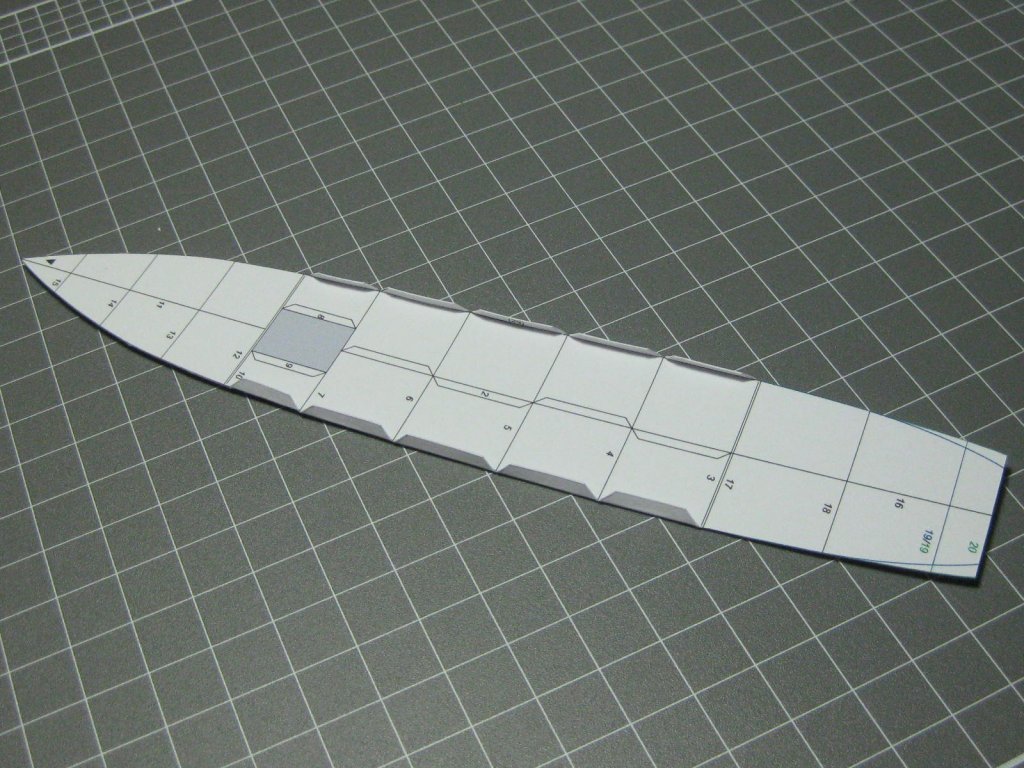
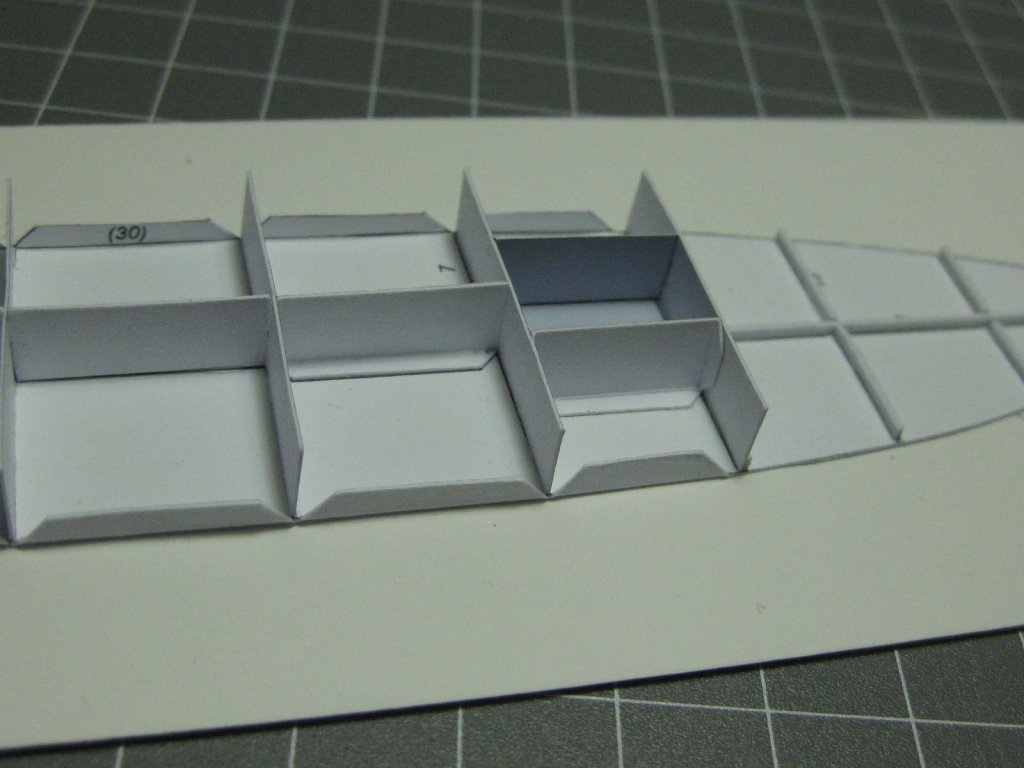
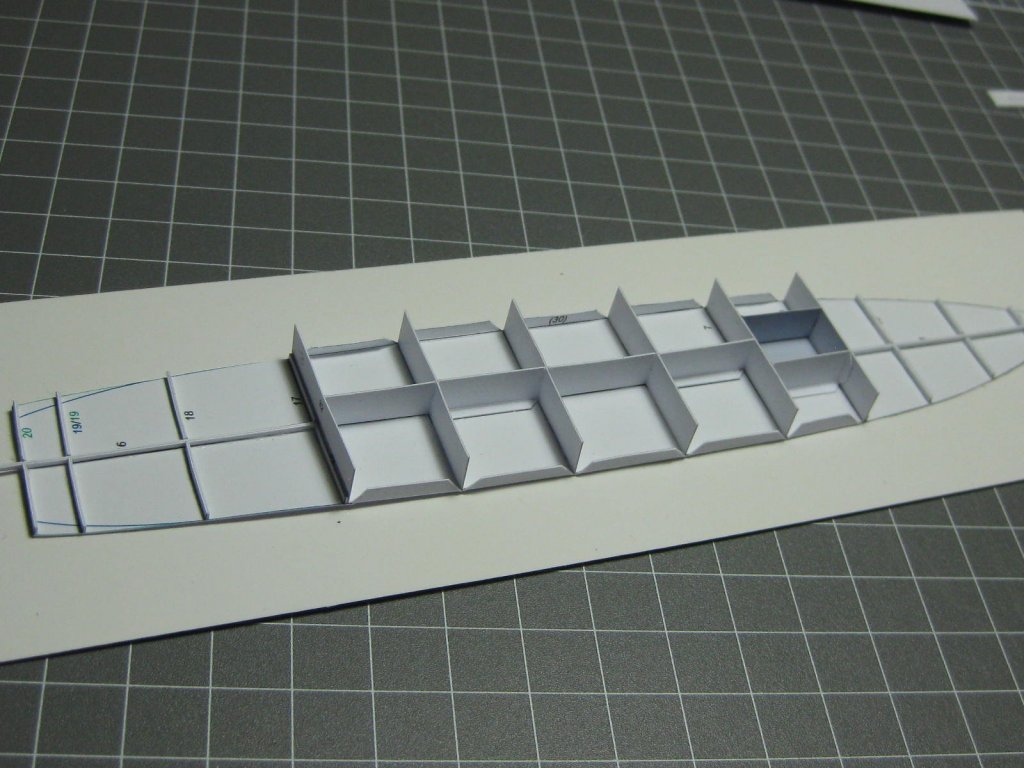
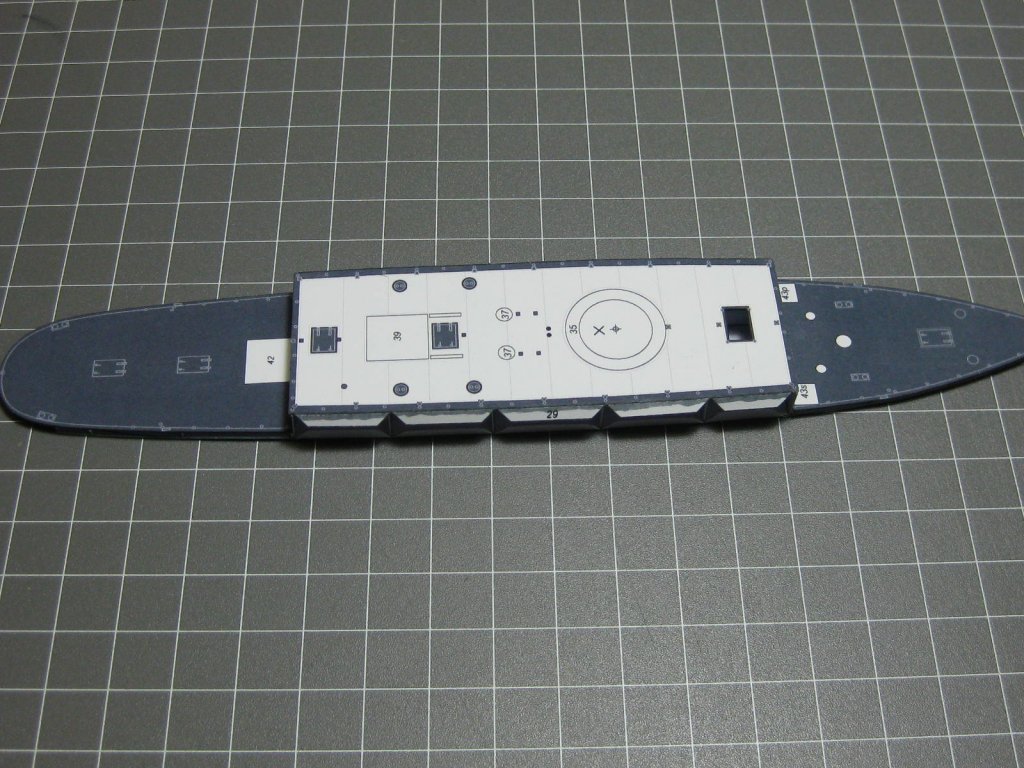
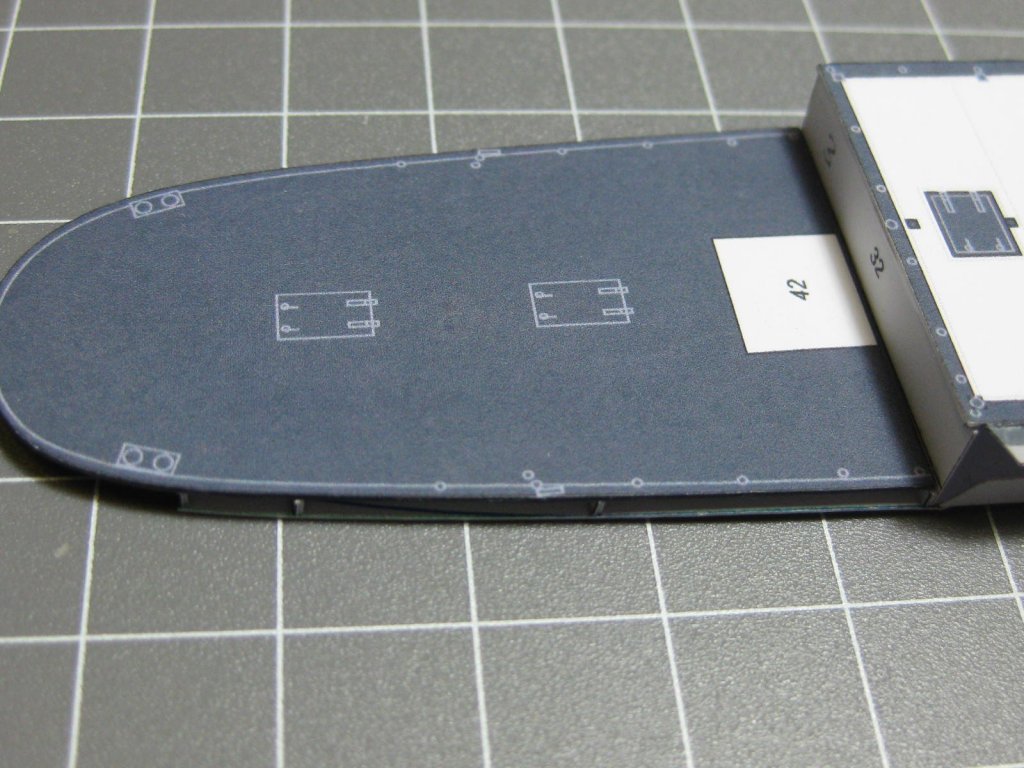
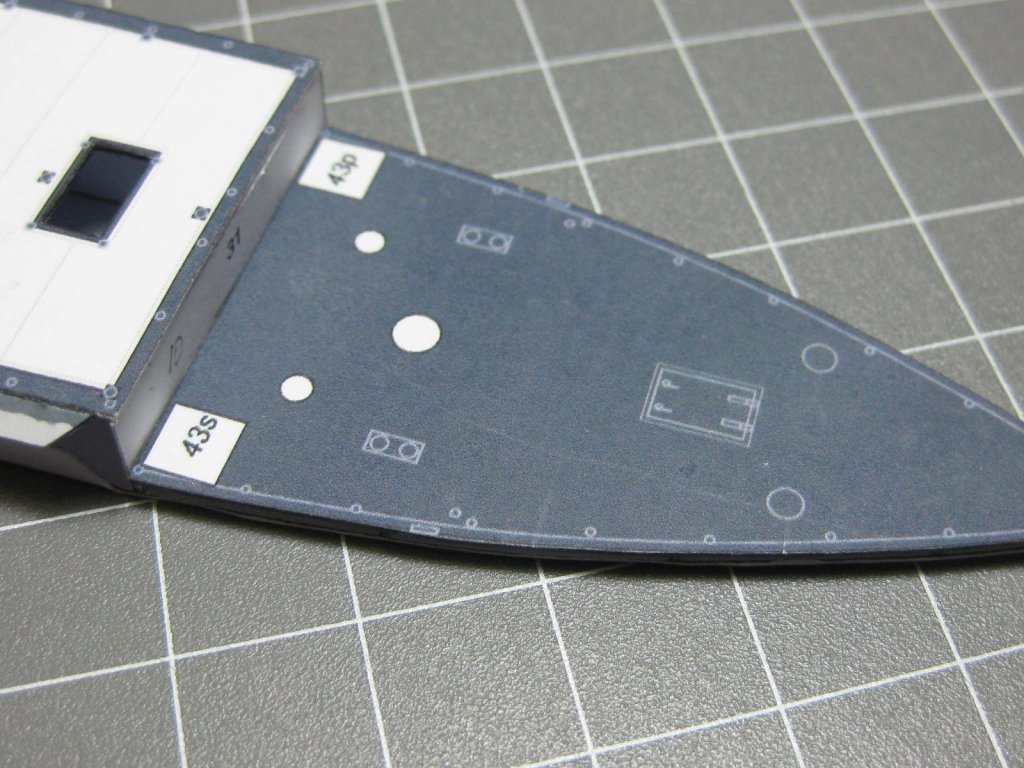
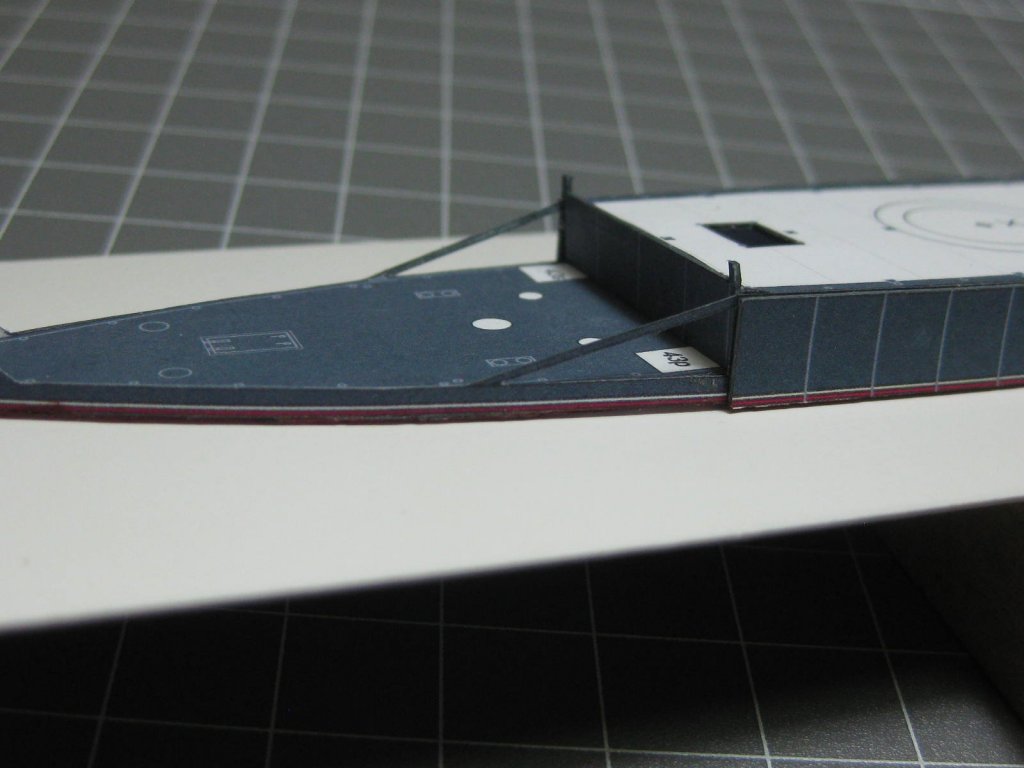
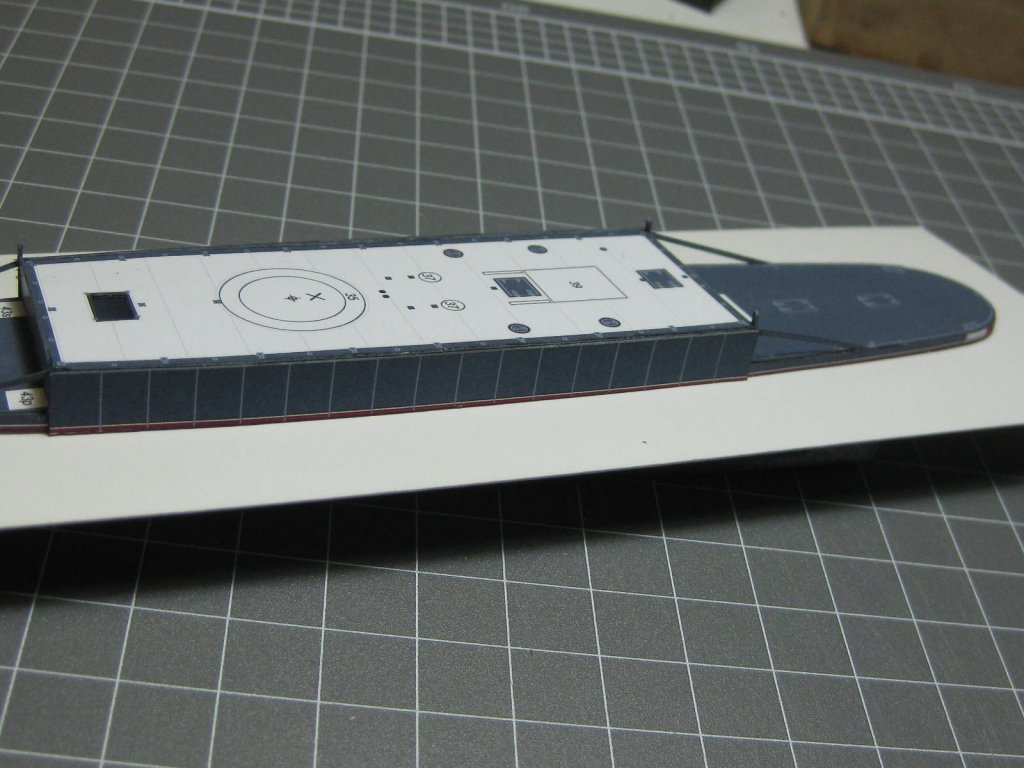
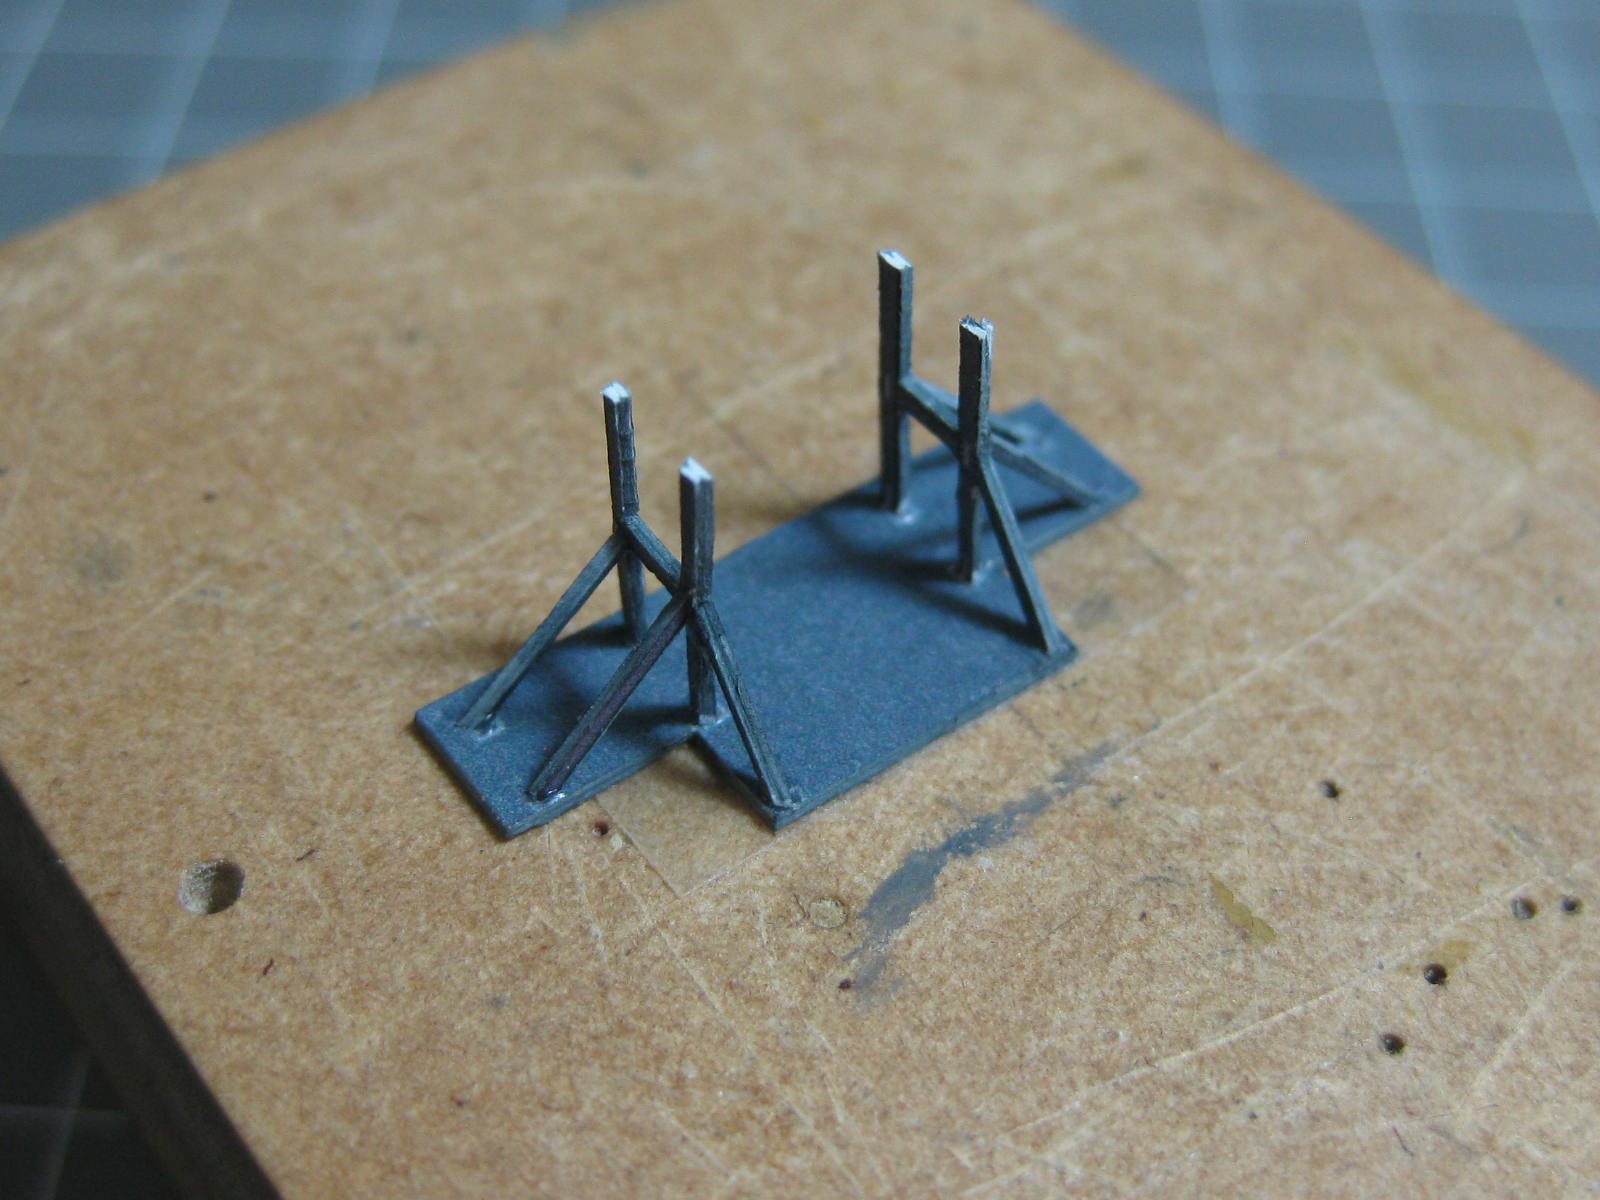
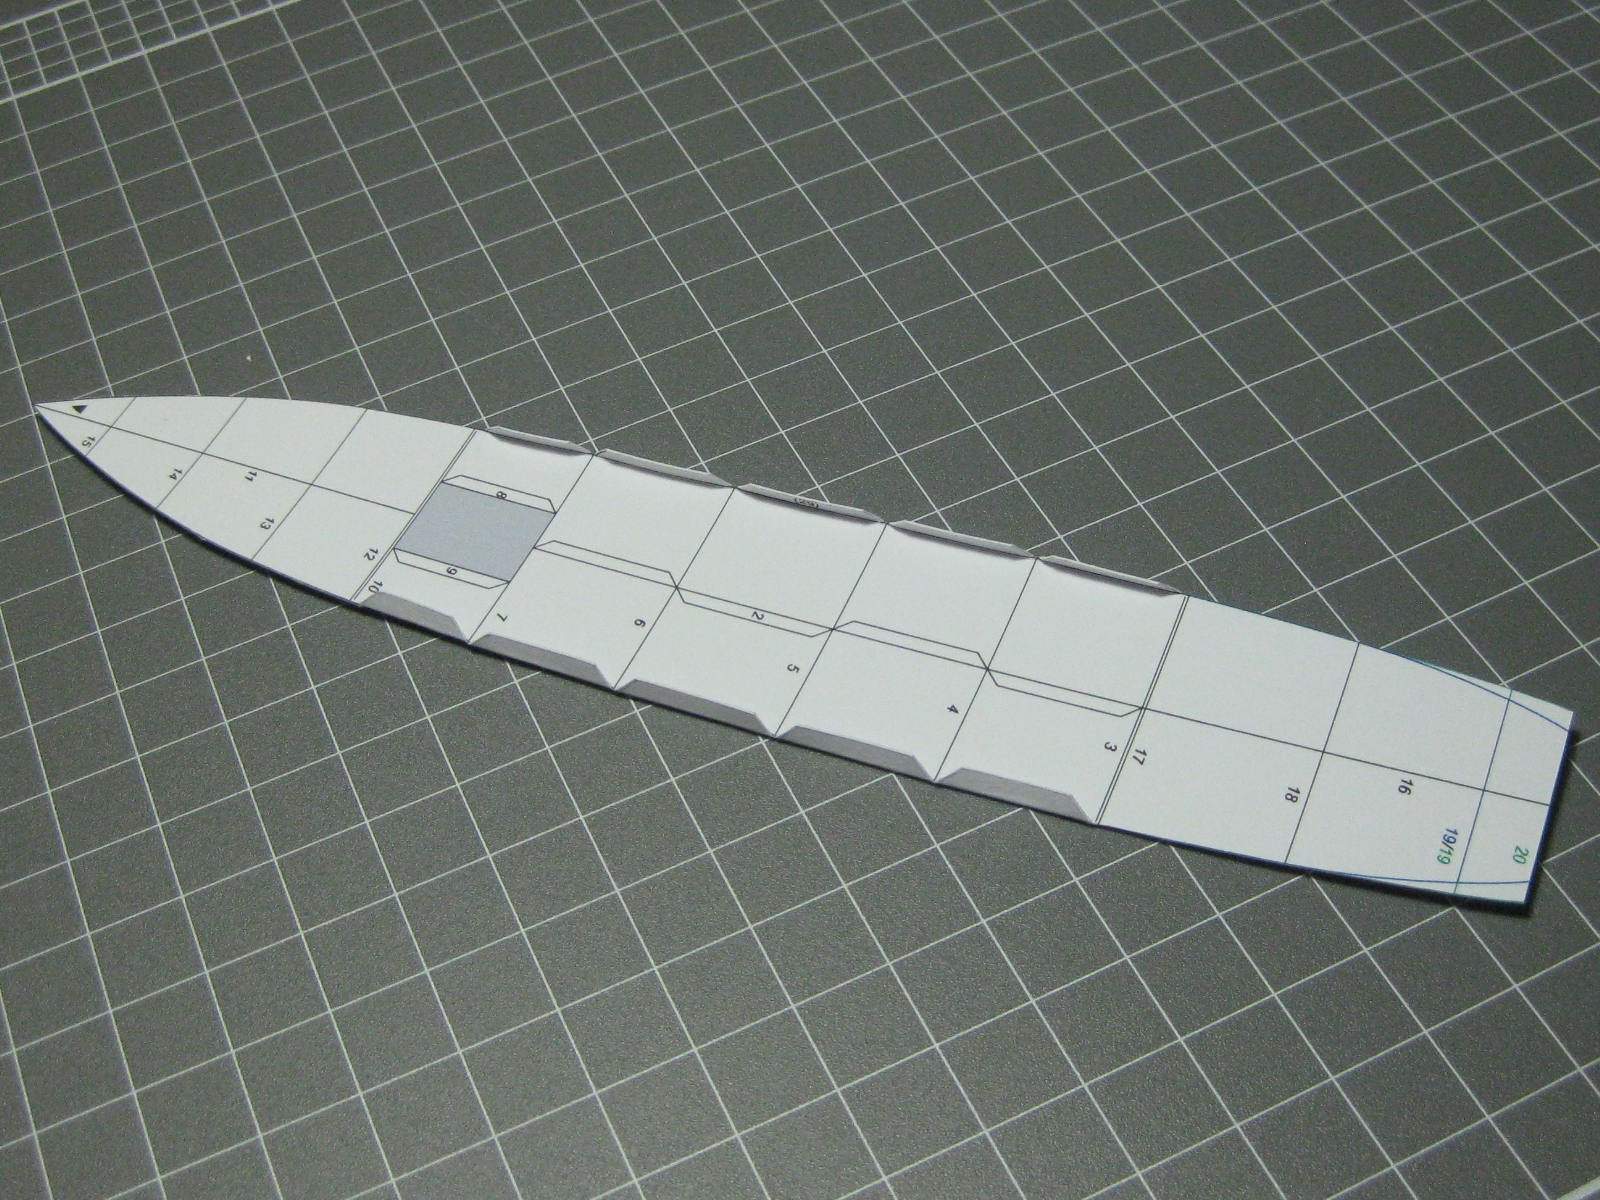
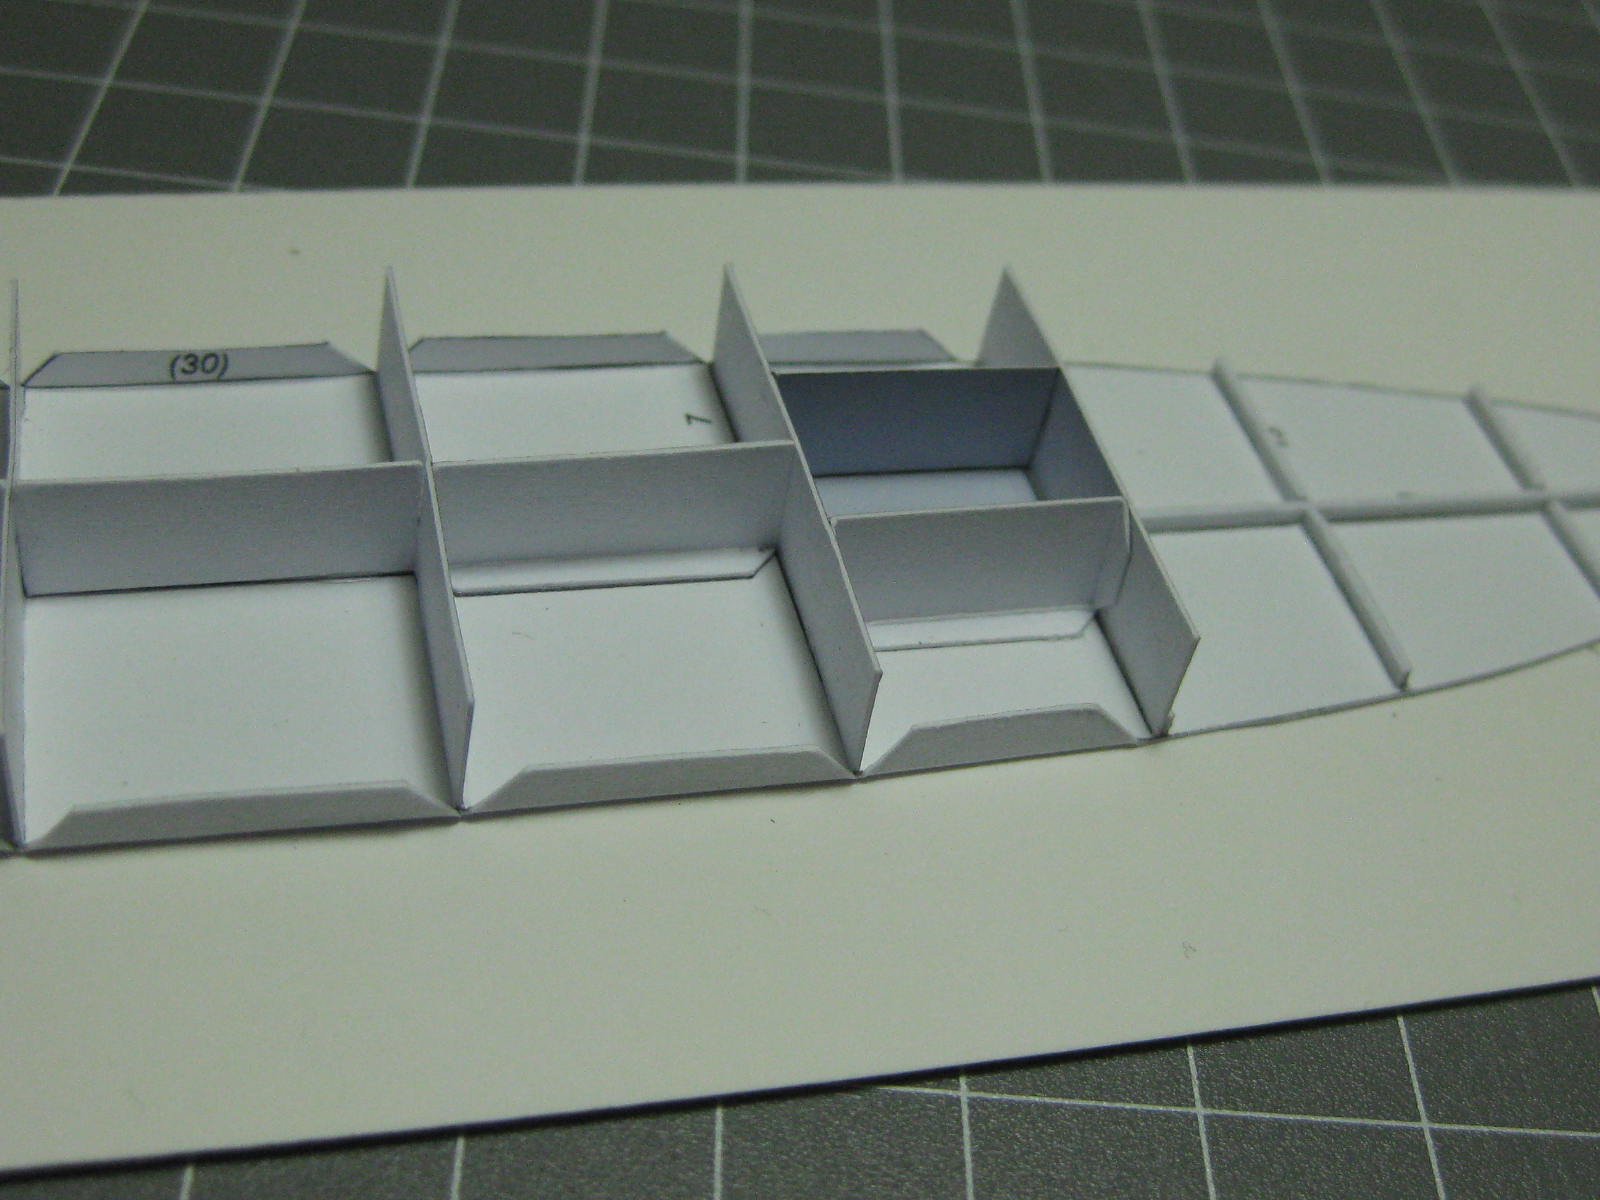
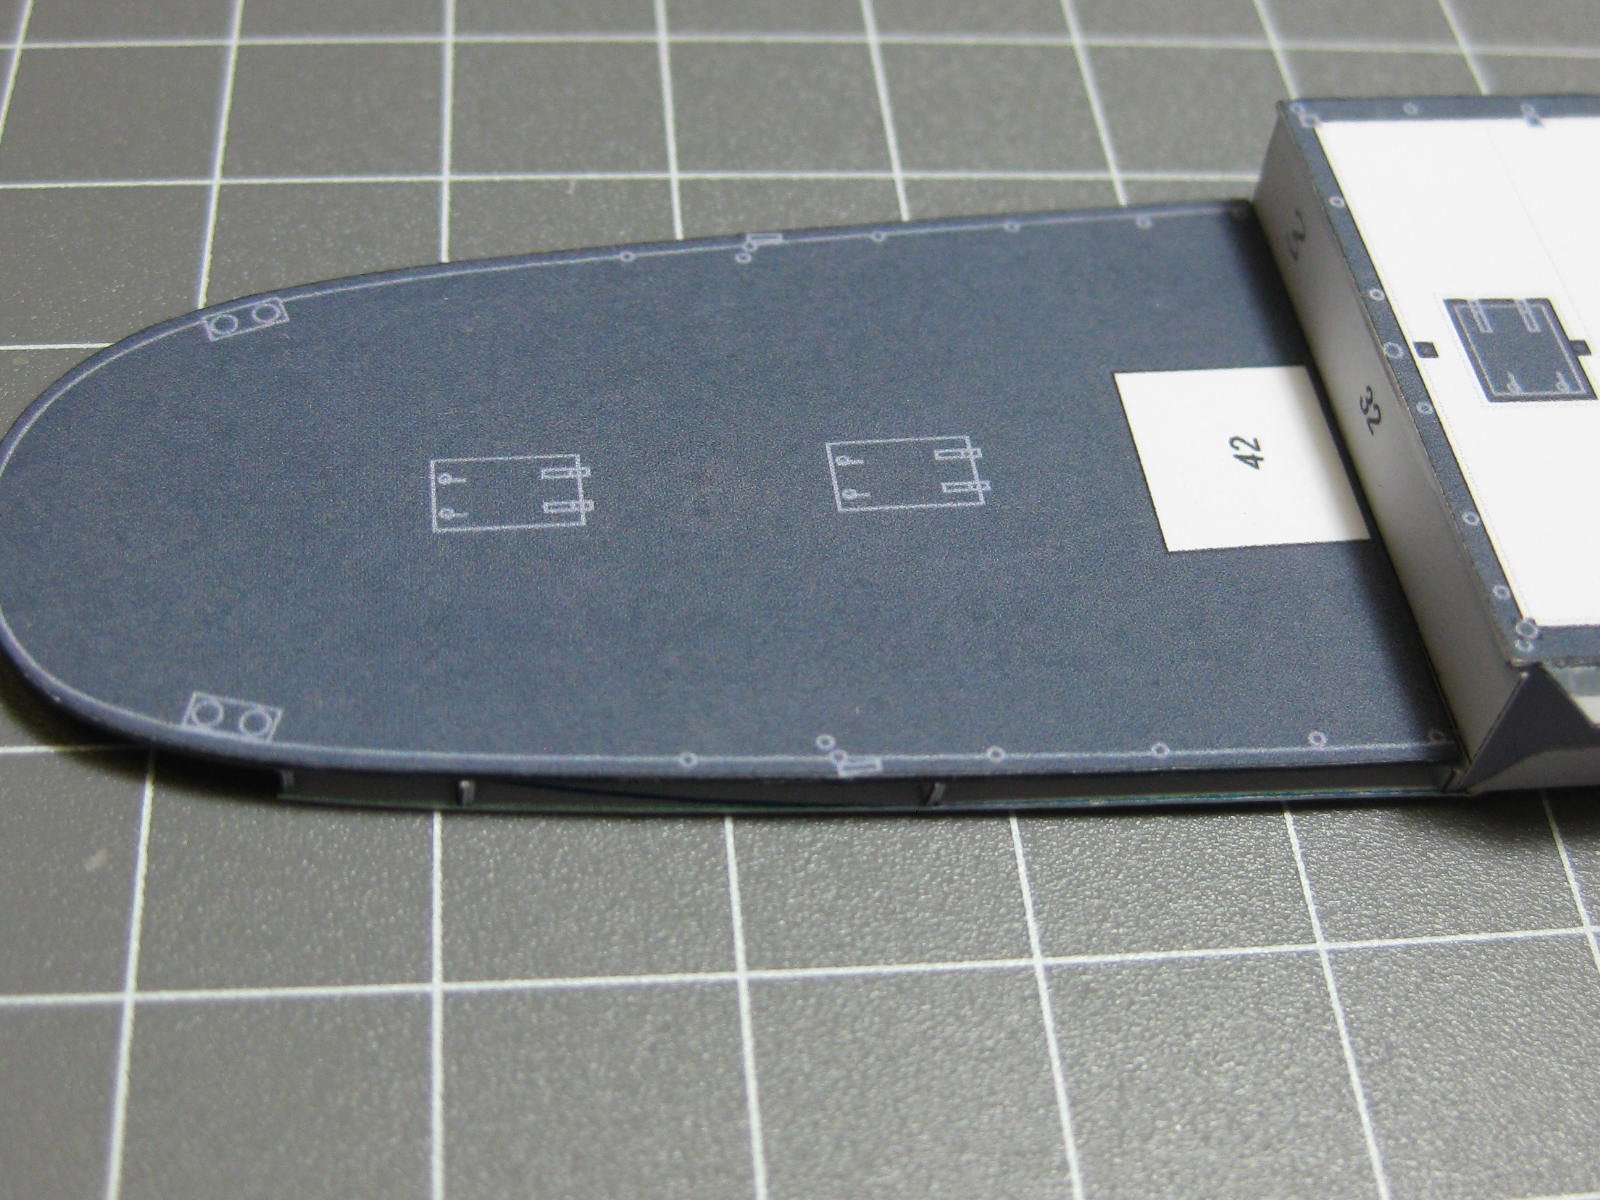
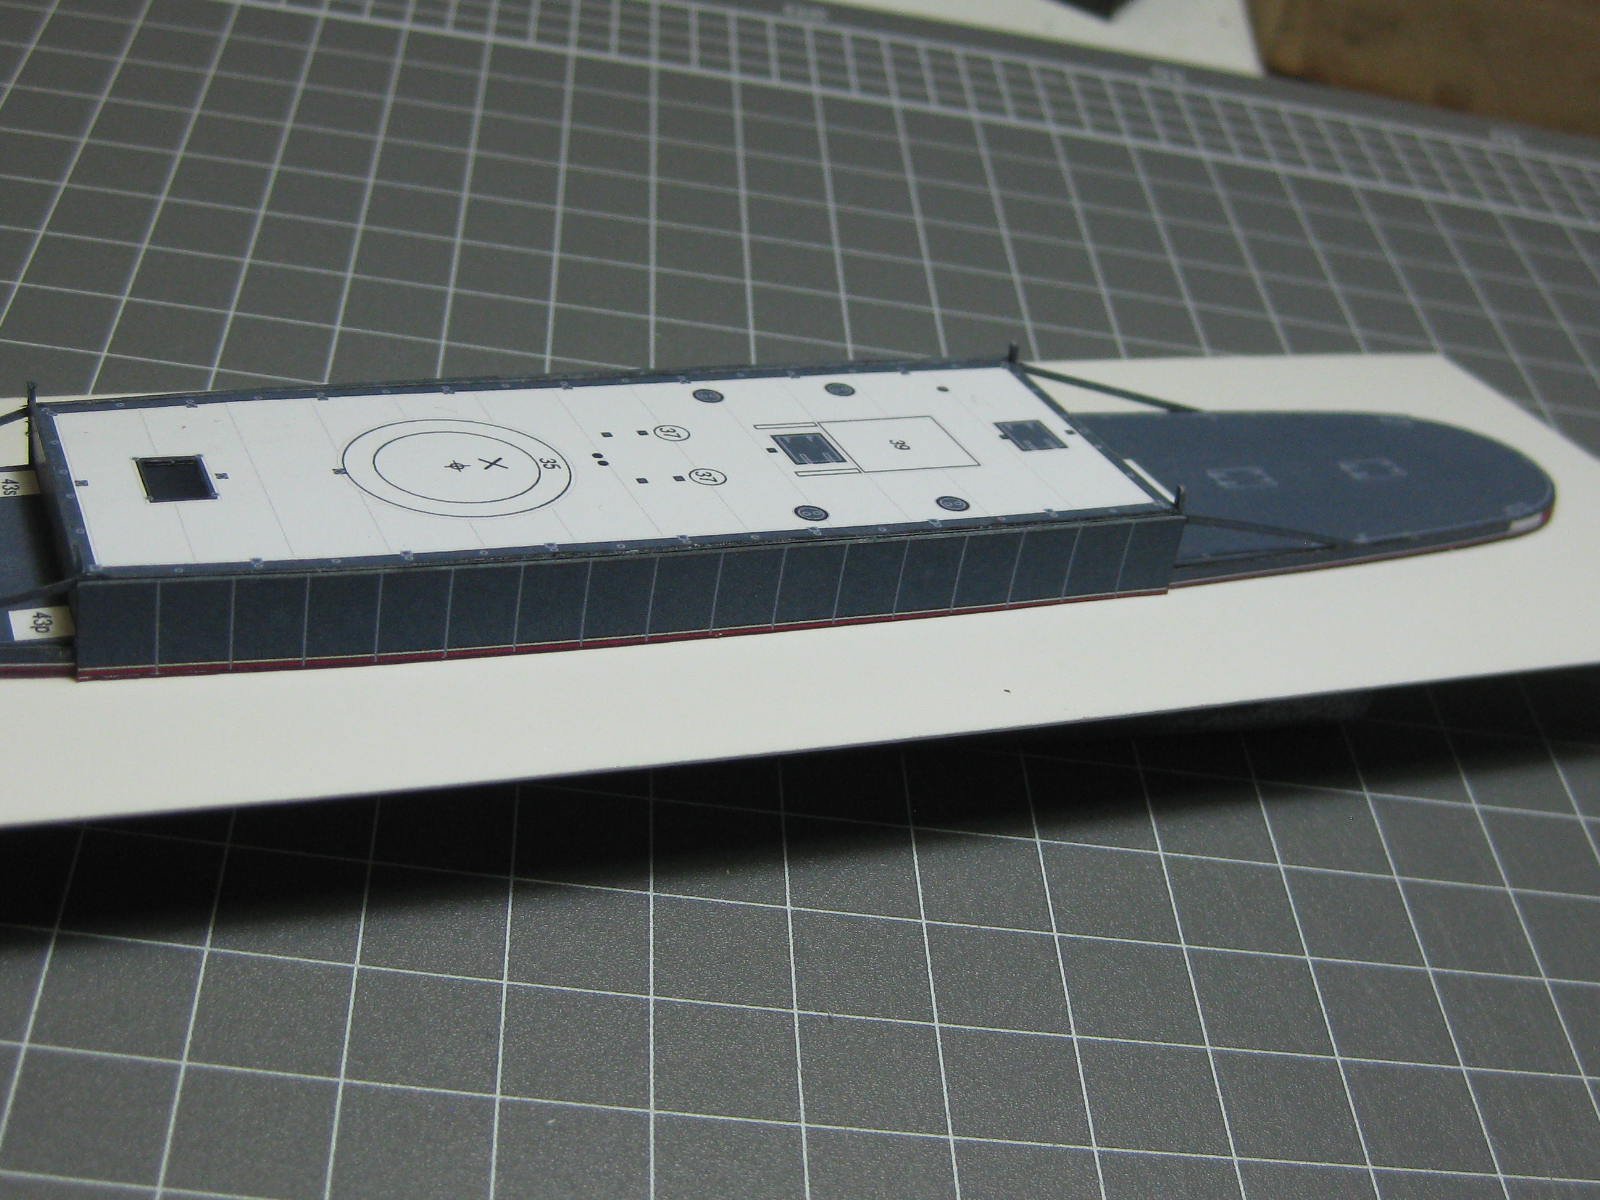
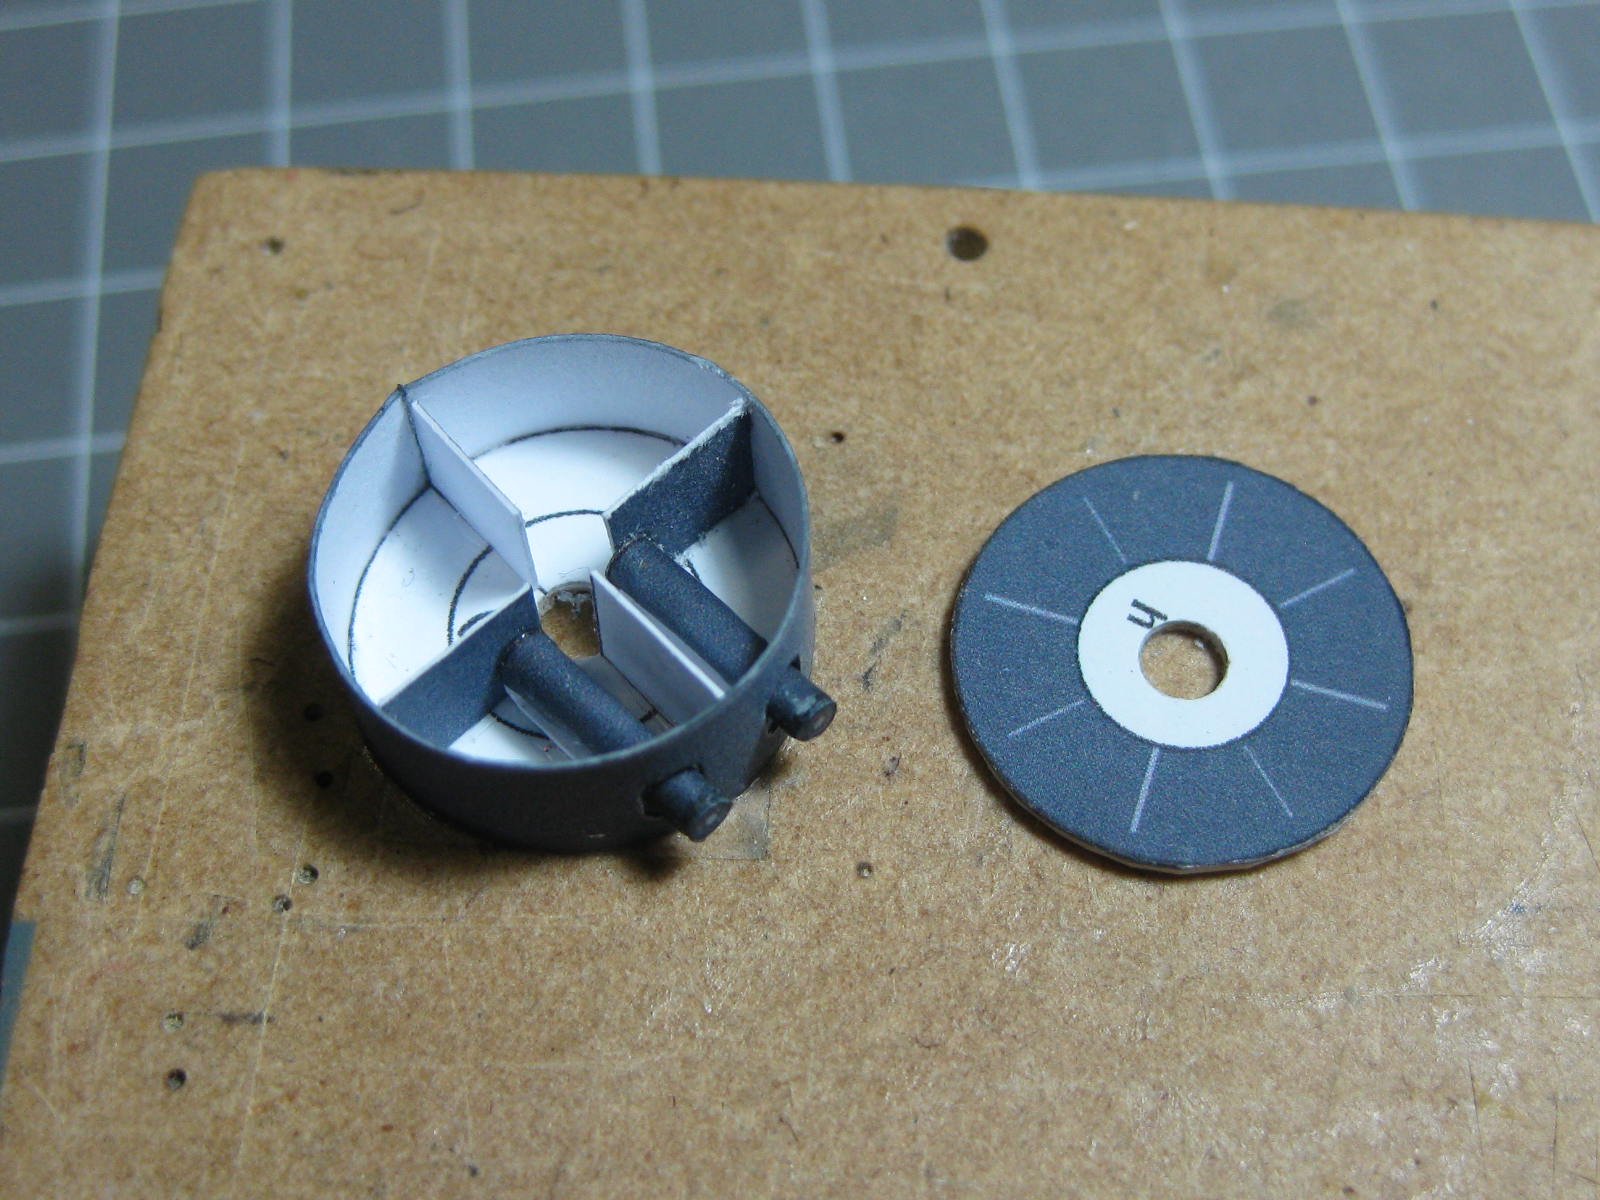
Hi all, here's a simple free download from Papershipwright of a German Monitor named Mosel. I'm building this while waiting for my next "real" model. It should only take me less than a week to build this one. Work starts with the bottom of the hull. This is a Waterline model, which simplifies everything a lot . There are five tabs on either side in the almost straight midsection : The internal bulkheads were fitted next : Then the three decks were laminated to 0.3mm card and fitted to the hull : Next the model was attached to a piece of heavy card as a "building board" using double-sided tape, and the sides were fitted. The support struts were rather flimsy until I glued a second piece inside them : I've made the Turret "turnable" : So far it's taken me 3 days to get to this stage. Danny


-
Yamaha MT-01 by Dan Vadas - CARD - FINISHED
Dan Vadas replied to Dan Vadas's topic in Non-ship/categorised builds
The model is now finished. I made a simple stand from cedar and gave everything a couple of coats of clear gloss : My next "real" model will be a WW2 tank made again from Card. While waiting for it I downloaded a fairly simple ship - a German Monitor named Mosel. A link to it can be found in my Signature. Danny.thumb.JPG.c60270d2ba3c71b5e365450ed54fad51.JPG)
.thumb.JPG.8ff15c8ba15752a8fc38fc20badc534d.JPG)
.thumb.JPG.d9e5b5ee9ae7ef2fcaa14be232e97137.JPG)
.thumb.JPG.600d4705c9712f07d836ab0514eaf128.JPG)
.thumb.JPG.7a741c1c7588c8c83b9be267f9dcdf24.JPG)
.thumb.JPG.fb8b055db36b49d8ac1eaf14ef4d6552.JPG)
.thumb.JPG.d83f1a86a457043e61309d83cd9e30eb.JPG)
.thumb.JPG.5ed73d94ffdf00b723dcfd3845ef63e9.JPG)
.thumb.JPG.d566ee4d1e1b75dd57220c4f515aba78.JPG)
- 34 replies
-
- 11
-
-
The idea with those is that you drill a hole about 2/3 the diameter of the thread first to make them easier to screw in. Danny
- 87 replies
-
- 3
-
-
- scottish maid
- artesania latina
- (and 1 more)
-
Yamaha MT-01 by Dan Vadas - CARD - FINISHED
Dan Vadas replied to Dan Vadas's topic in Non-ship/categorised builds
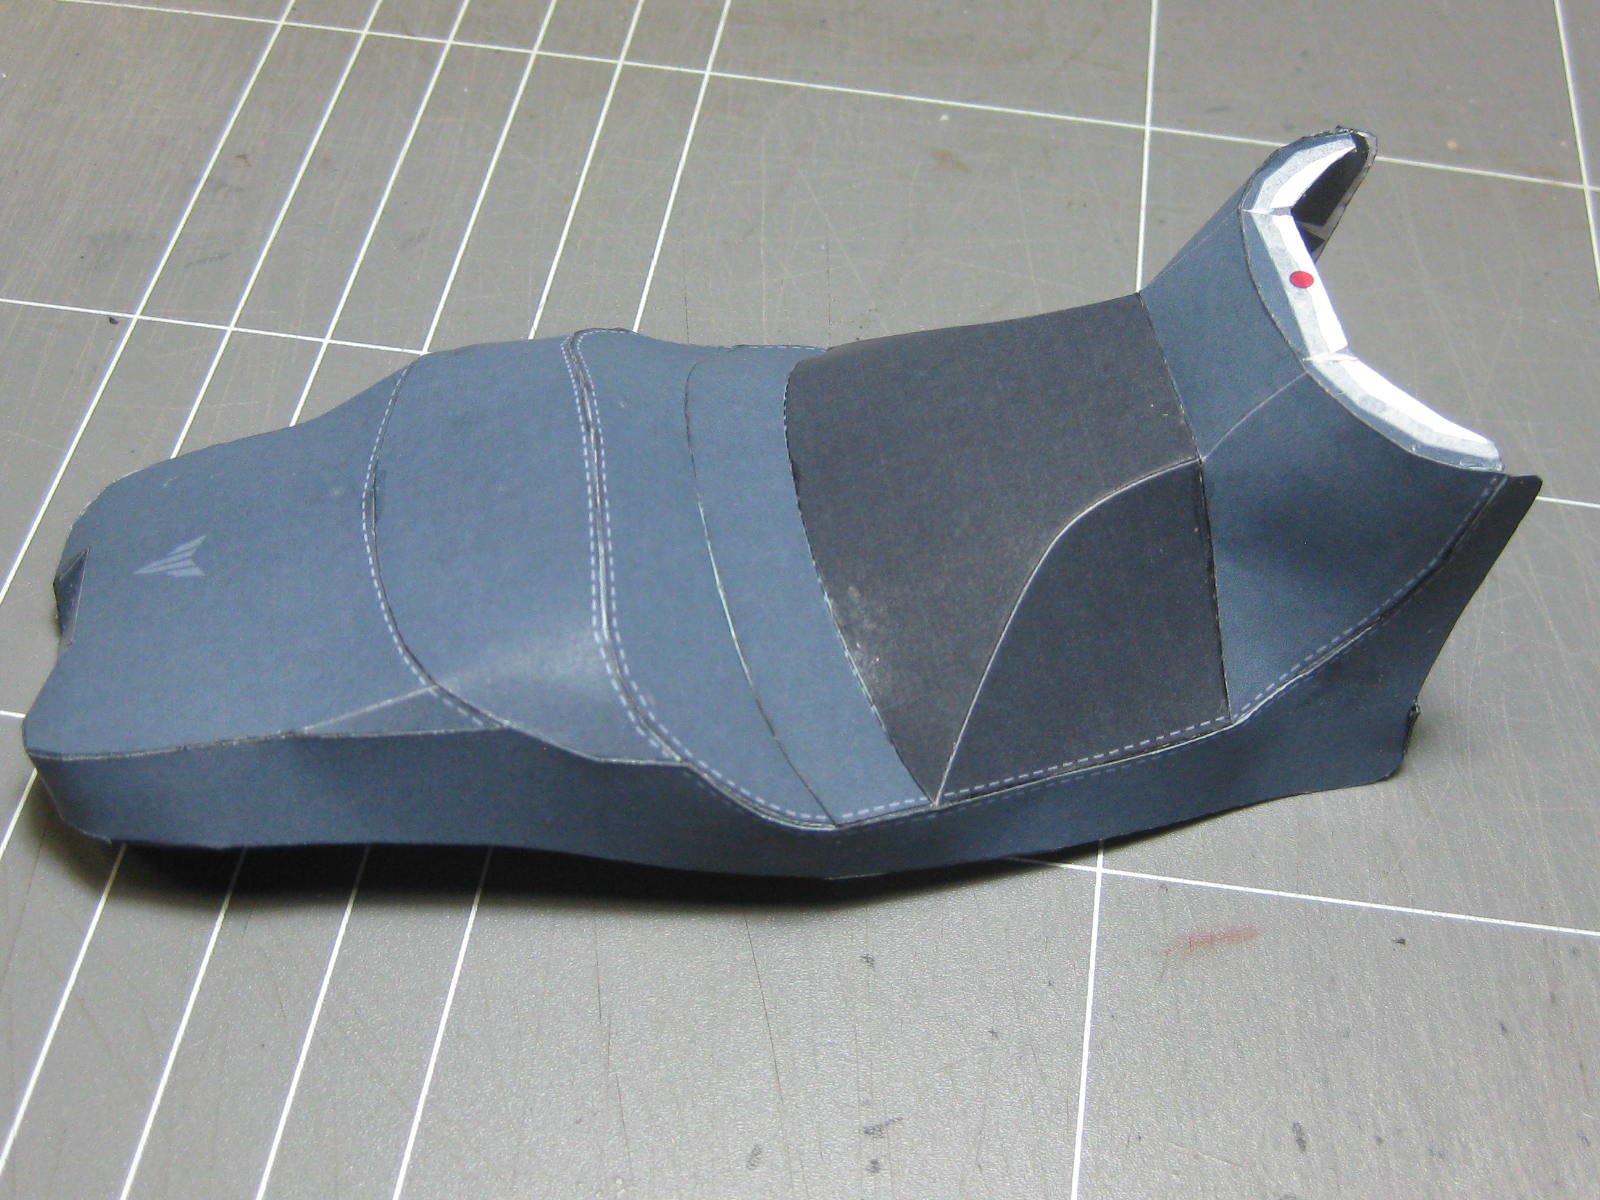
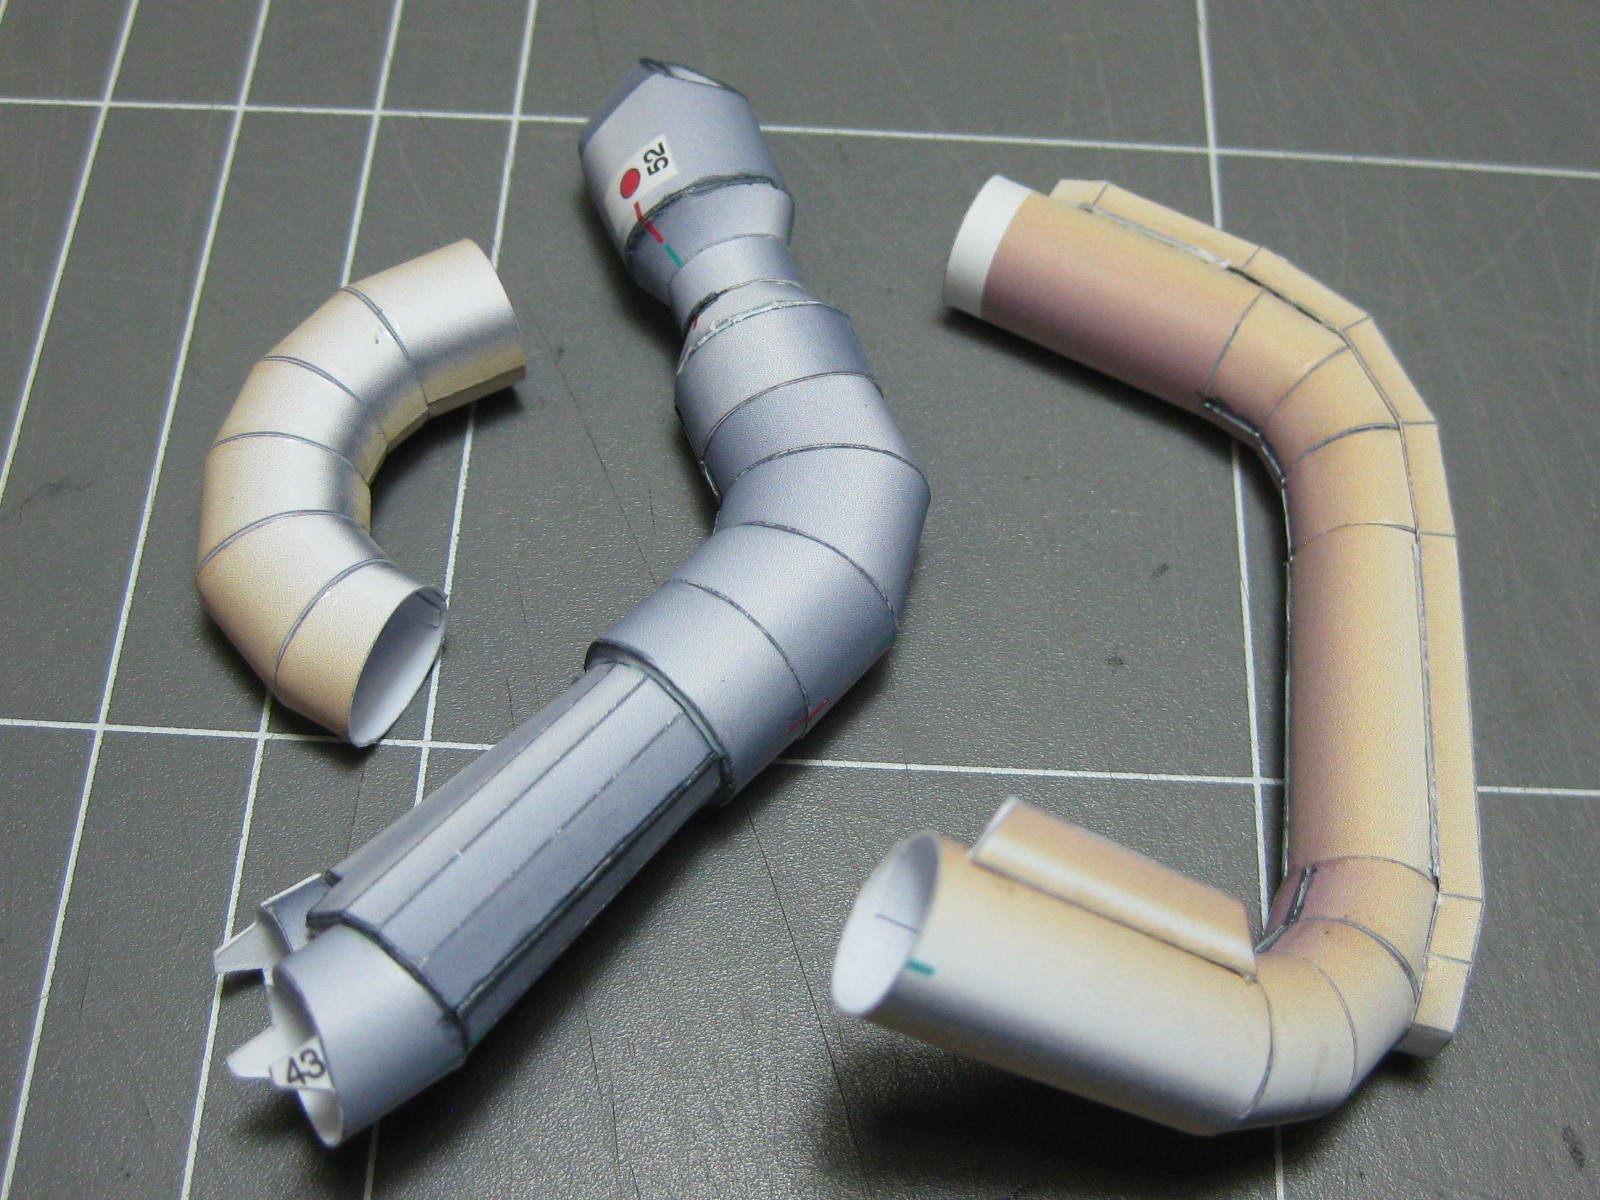
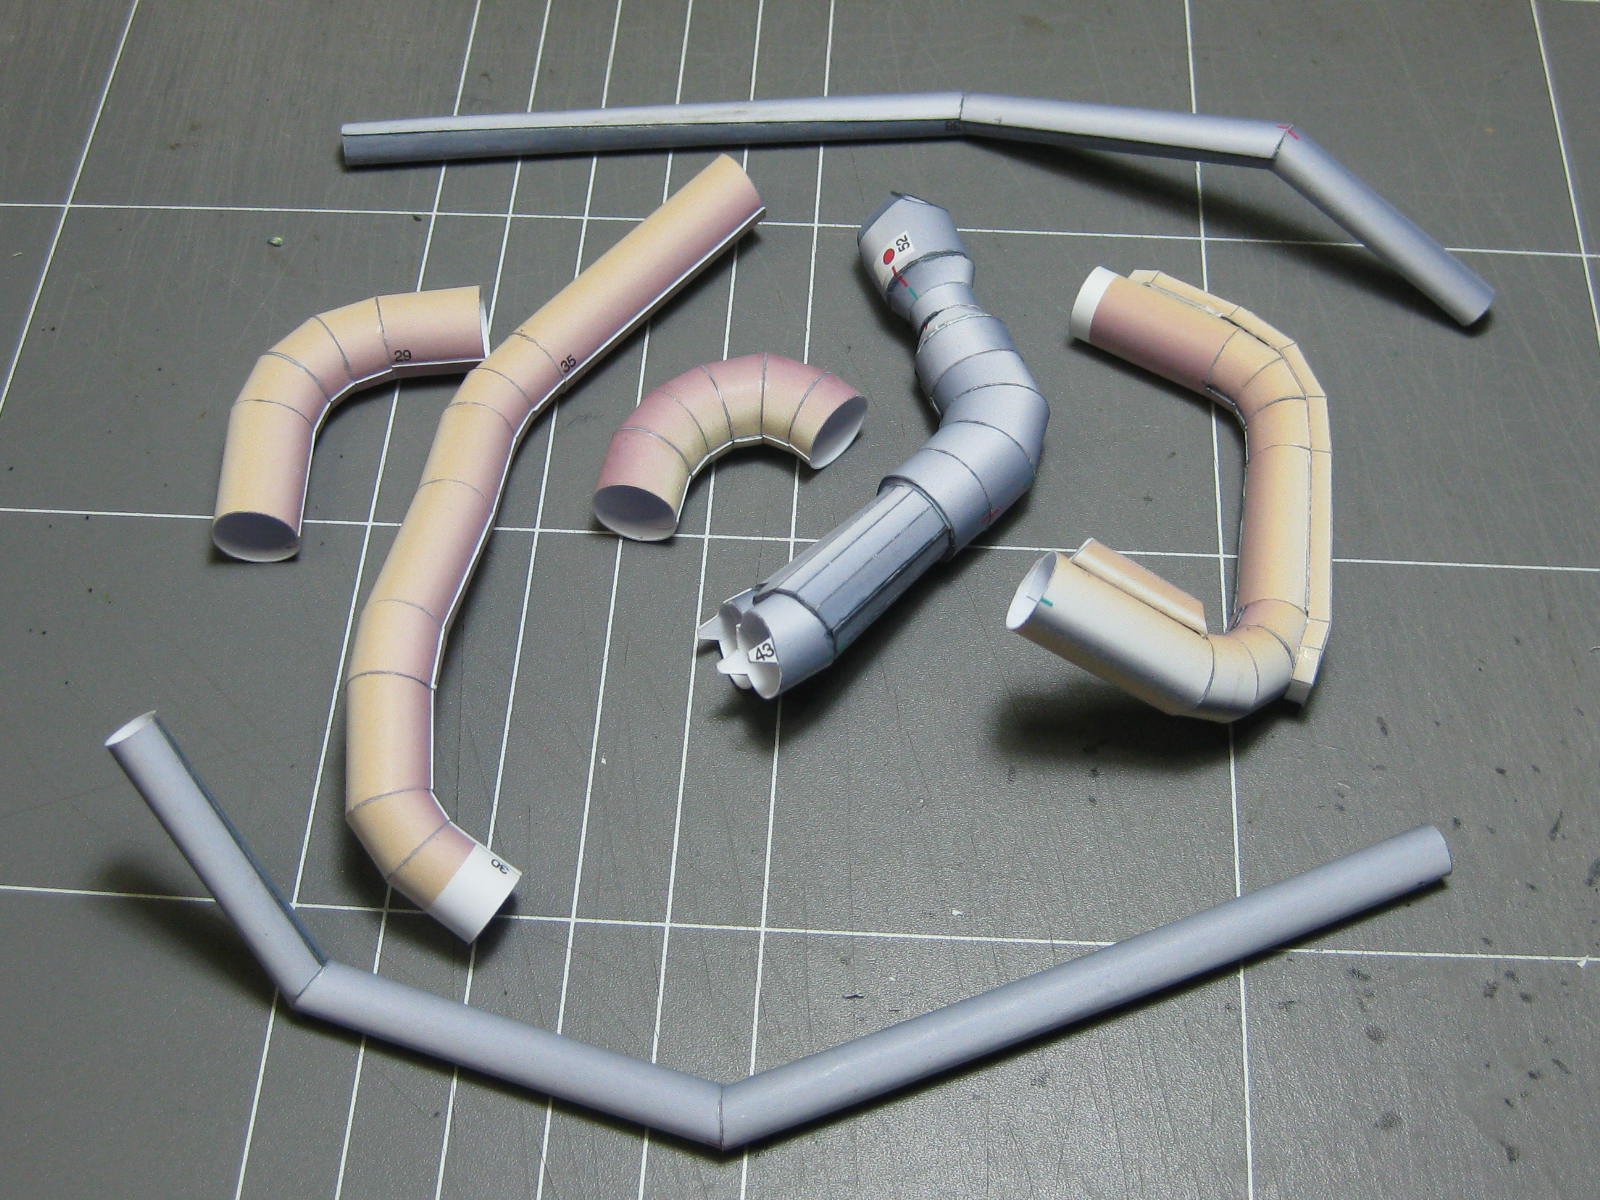
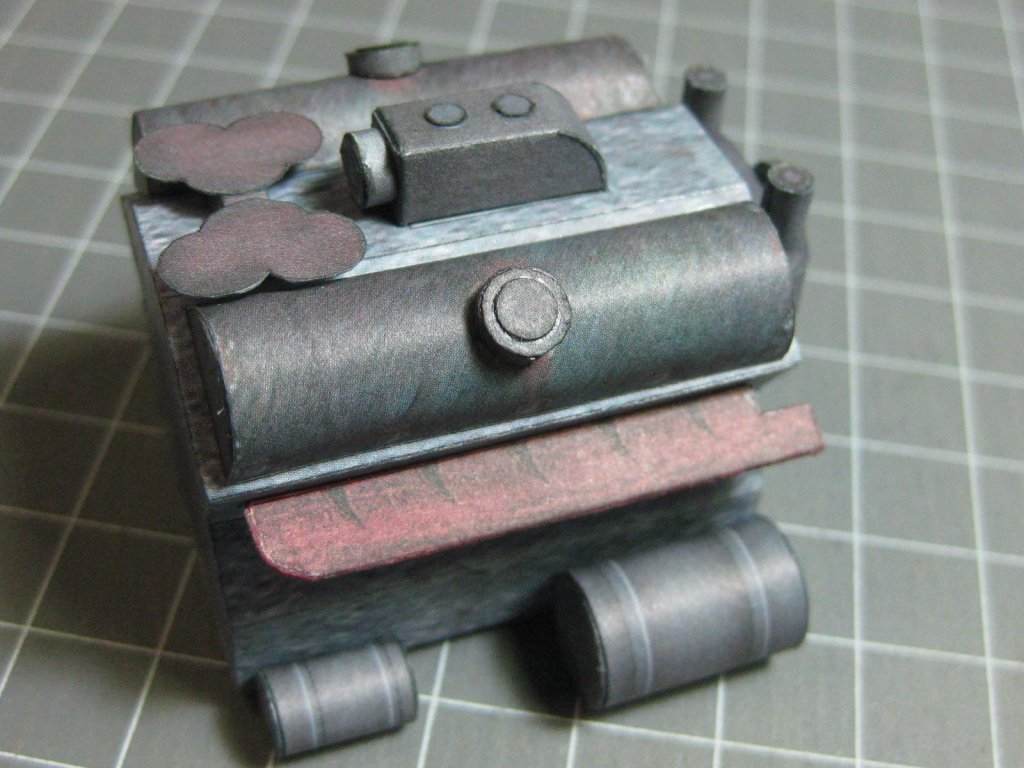
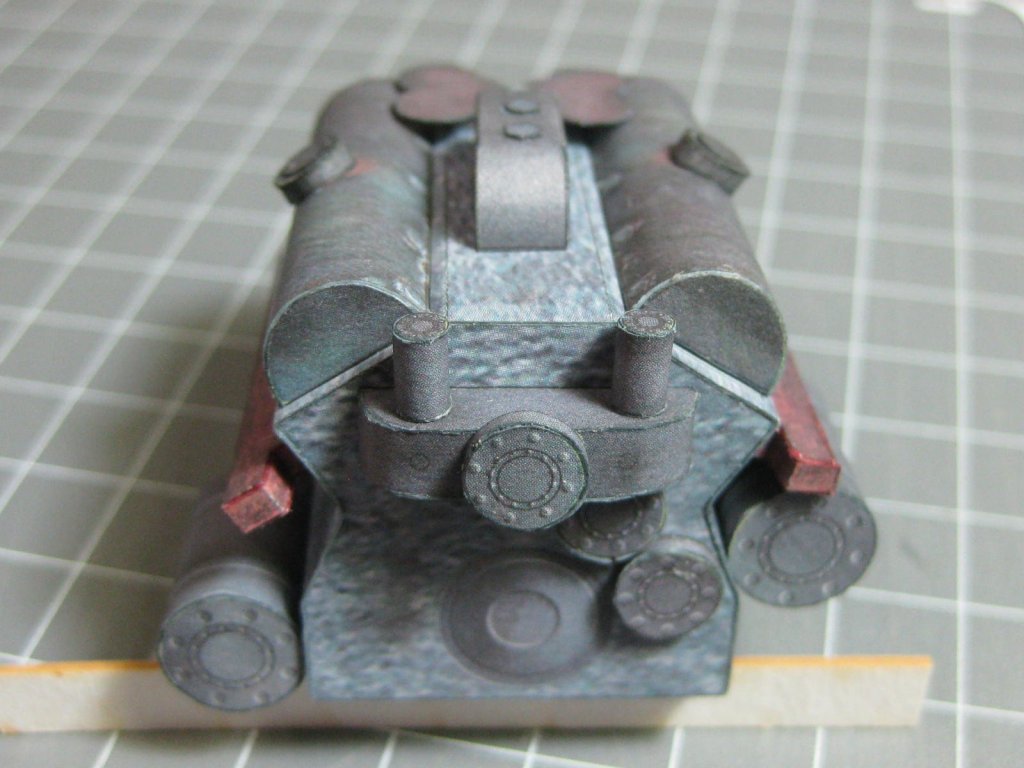
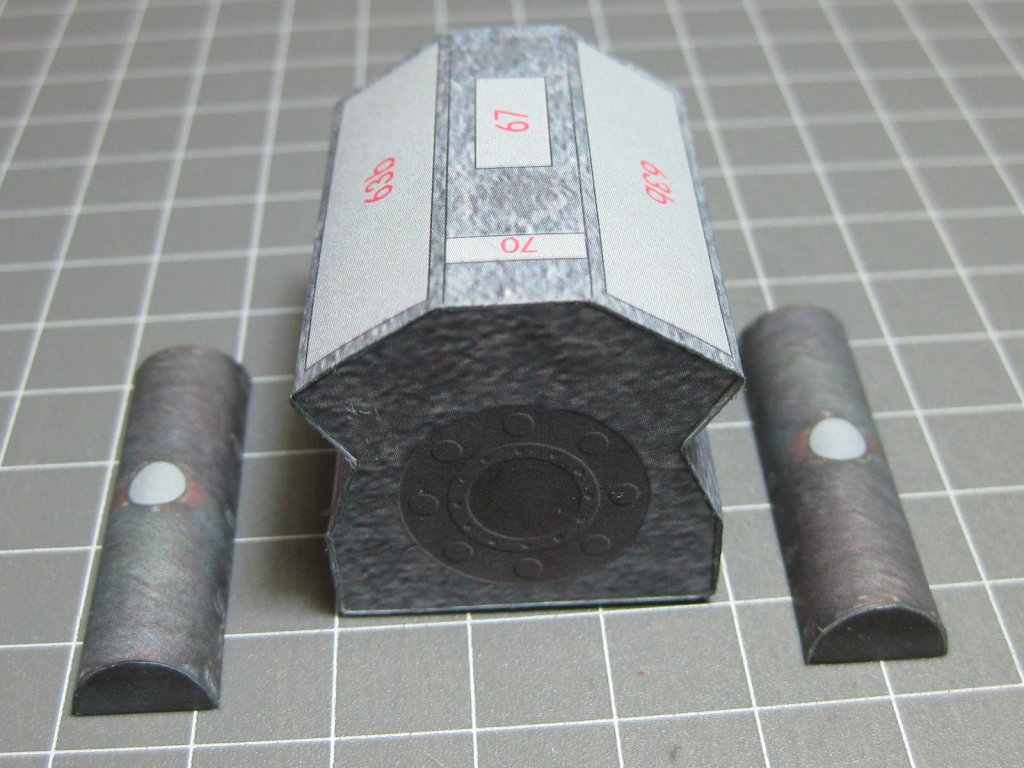
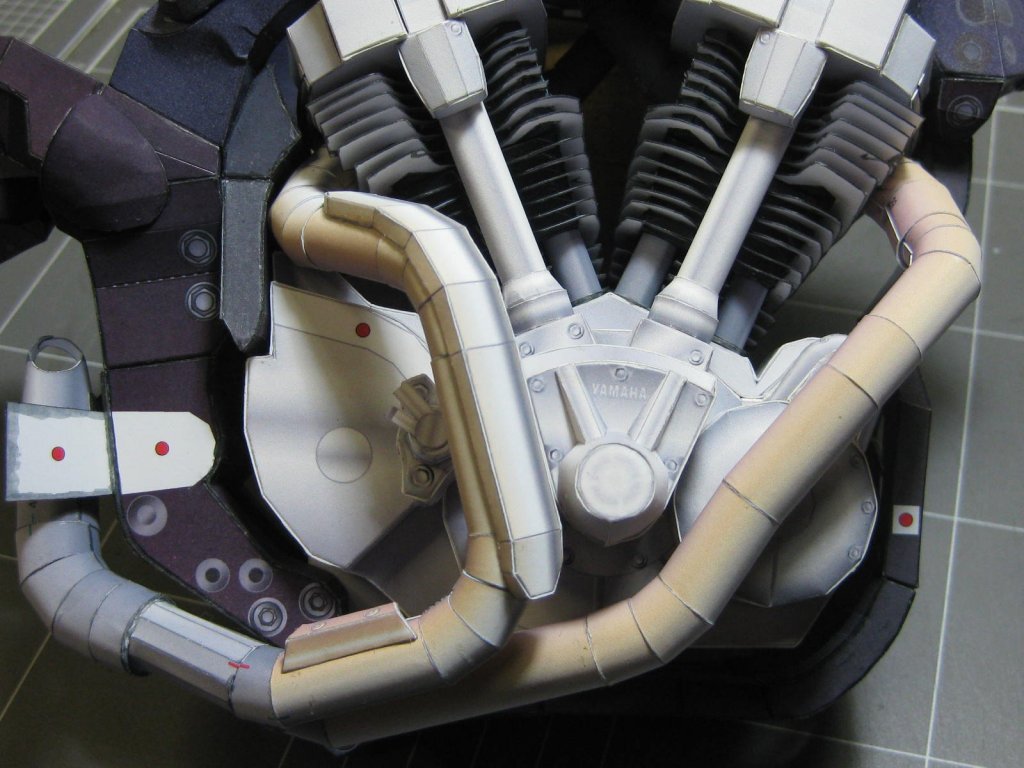
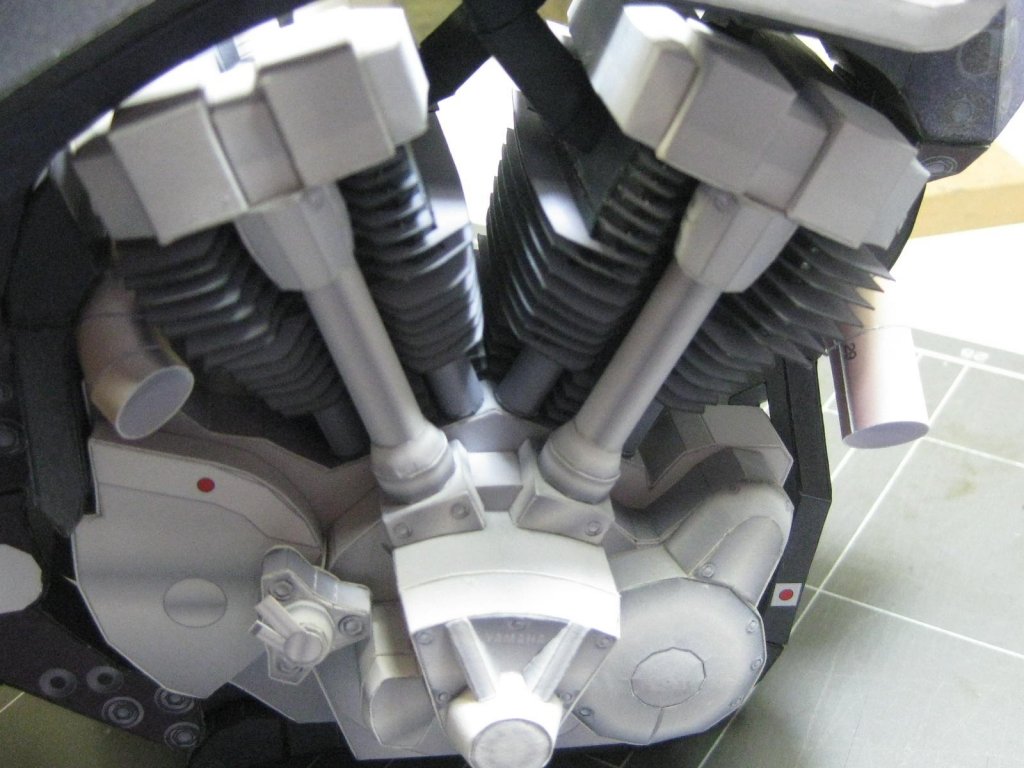
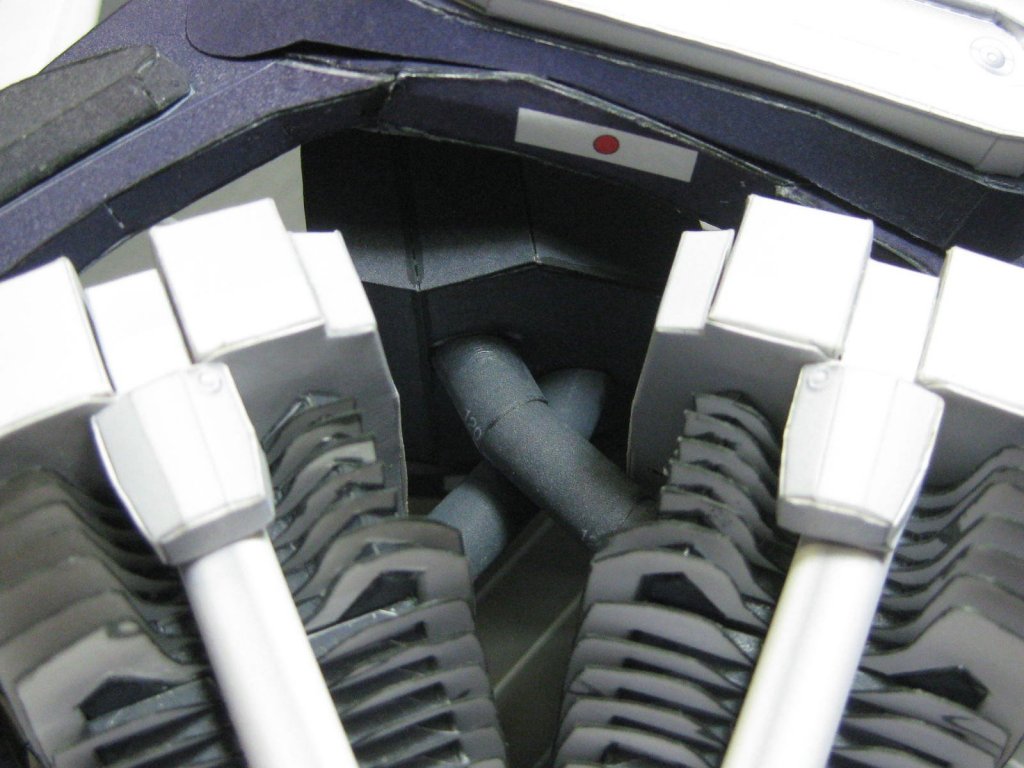
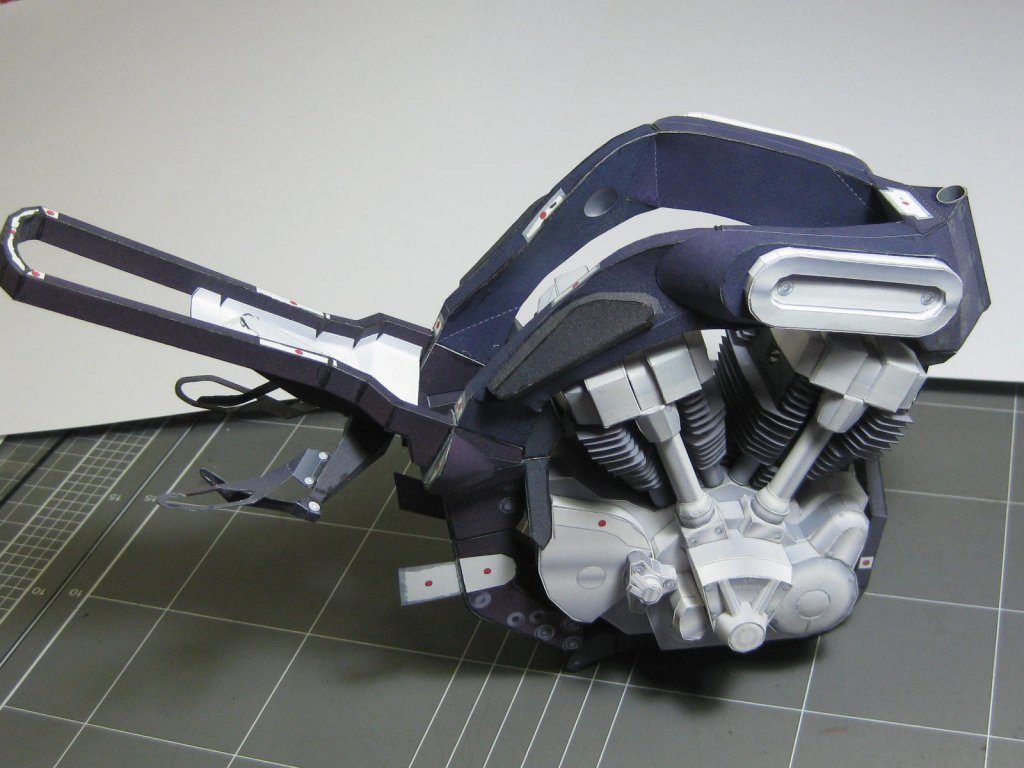
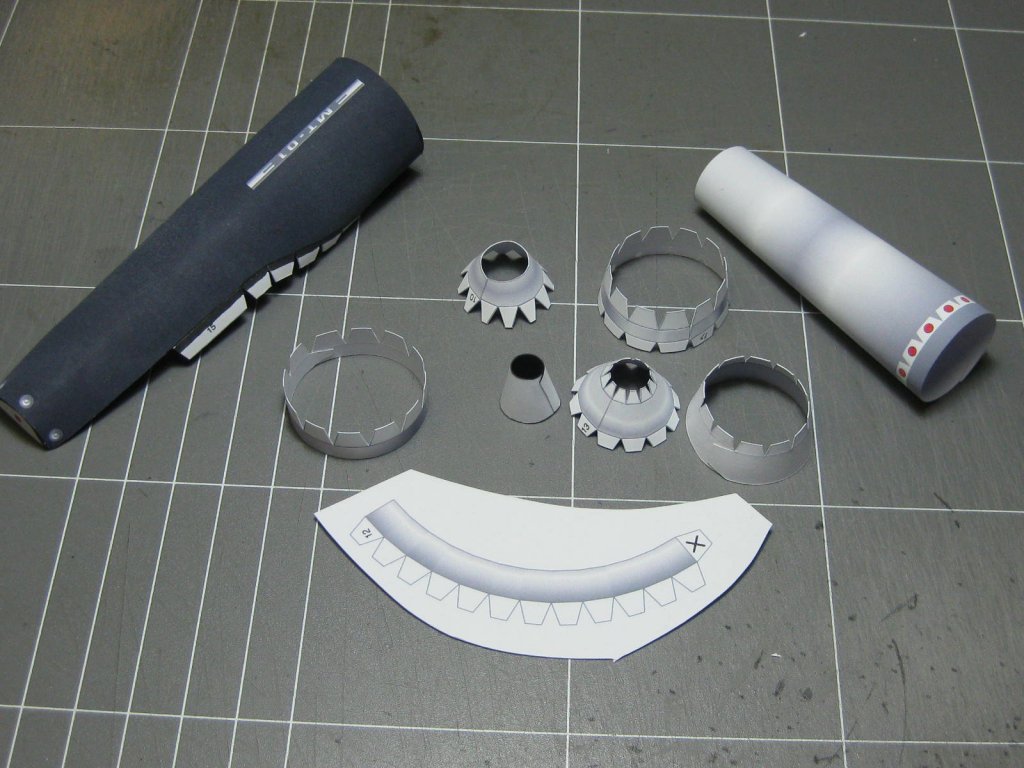
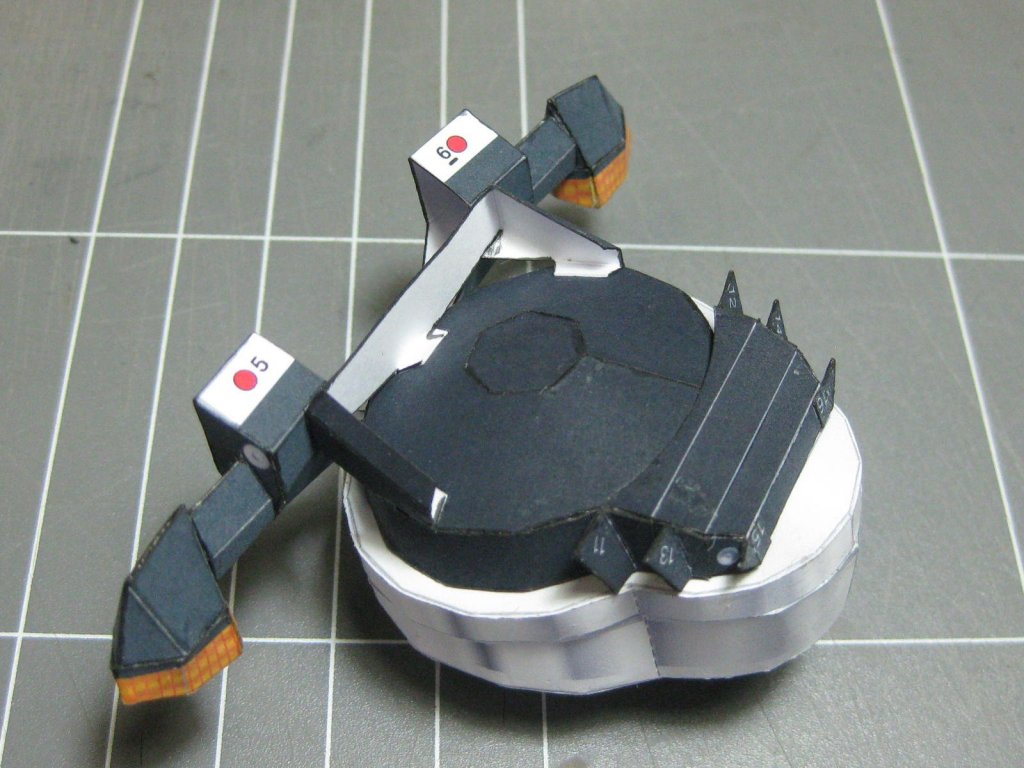
Fitting the motor to the frame : The airbox took a bit of tricky fitting, aligning the two pipes : The exhaust system fitted rather well, although I had to cut one piece off and re-align it slightly. I started by gluing the two short pipes into the barrels : The tank and seat had to be modified quite a bit before they'd fit properly. They both turned out OK : Danny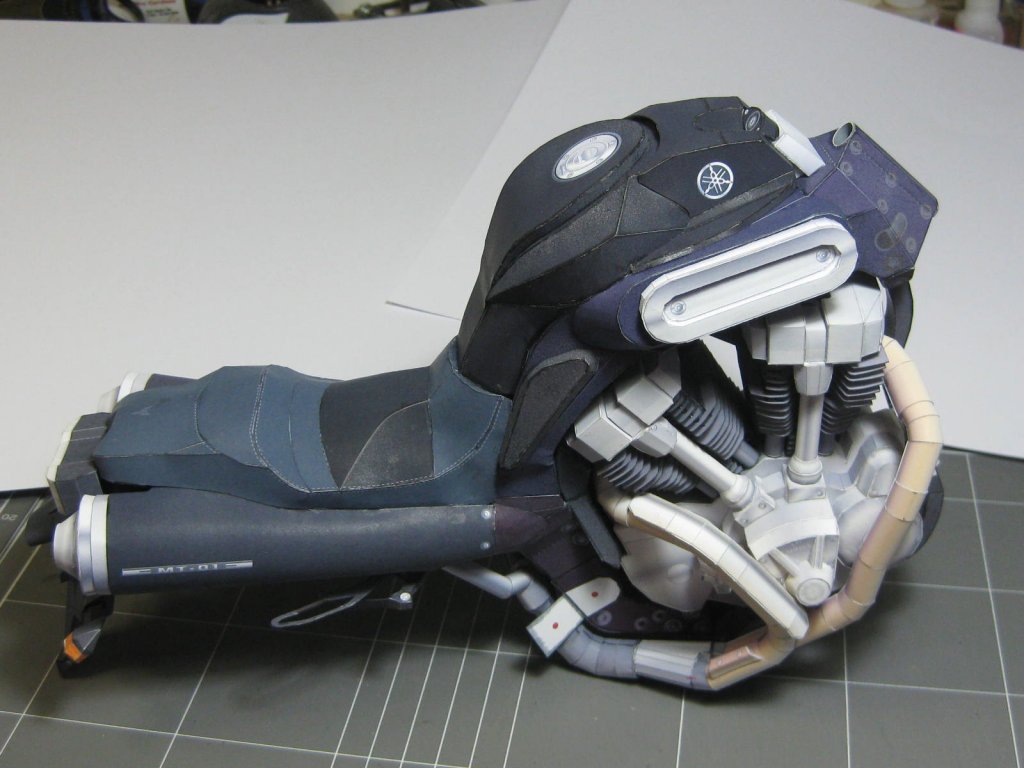

-
The text for the Link (Ship's Name) in all new build logs in the Quick-Find Indexes is a different colour to the others that have been there a while. It's something to do with the spreadsheet I use, and it changes to the "normal" colour eventually. I don't know why, and it's no big deal. The link works normally. Danny
- 87 replies
-
- 5
-
-
- scottish maid
- artesania latina
- (and 1 more)
-
Yamaha MT-01 by Dan Vadas - CARD - FINISHED
Dan Vadas replied to Dan Vadas's topic in Non-ship/categorised builds
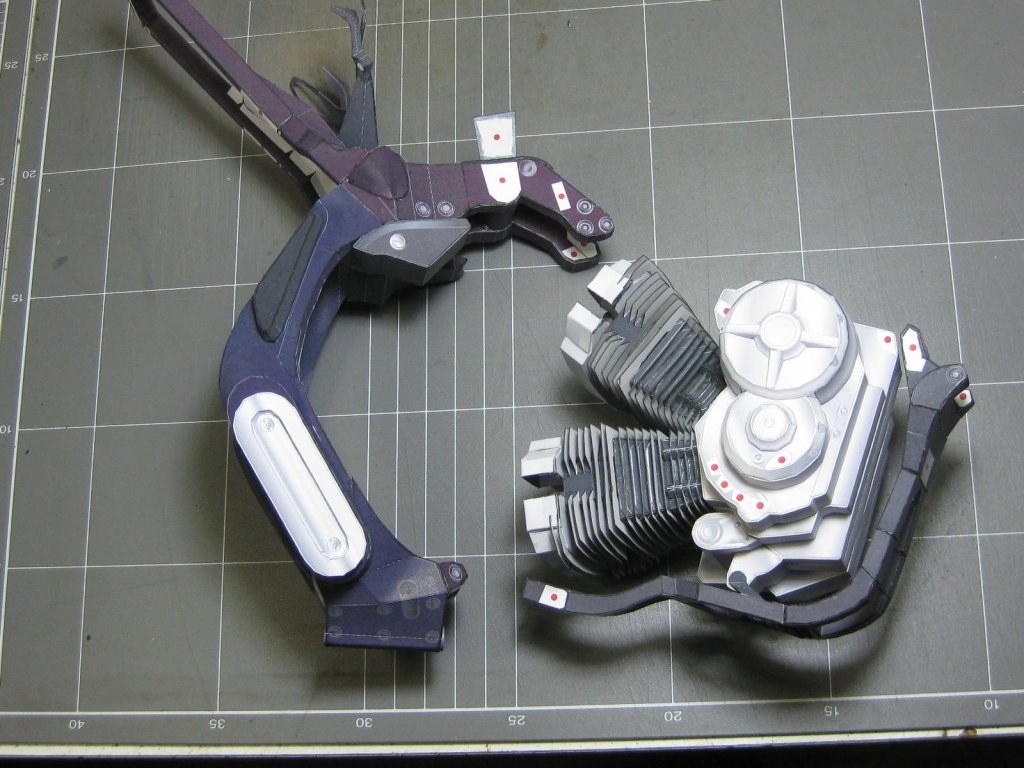
Thanks Popeye. The two crankcase side covers, footpegs and levers : That's all the parts finished and glued into modules. All that's left now is to glue all the modules together . Danny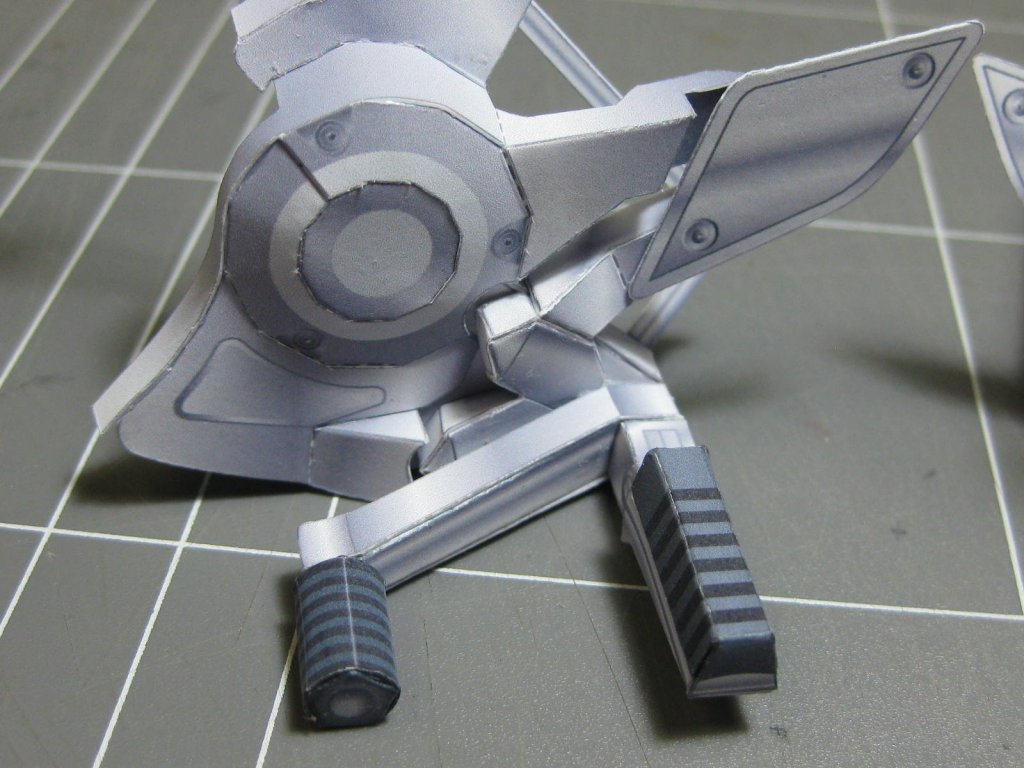


-
Yamaha MT-01 by Dan Vadas - CARD - FINISHED
Dan Vadas replied to Dan Vadas's topic in Non-ship/categorised builds
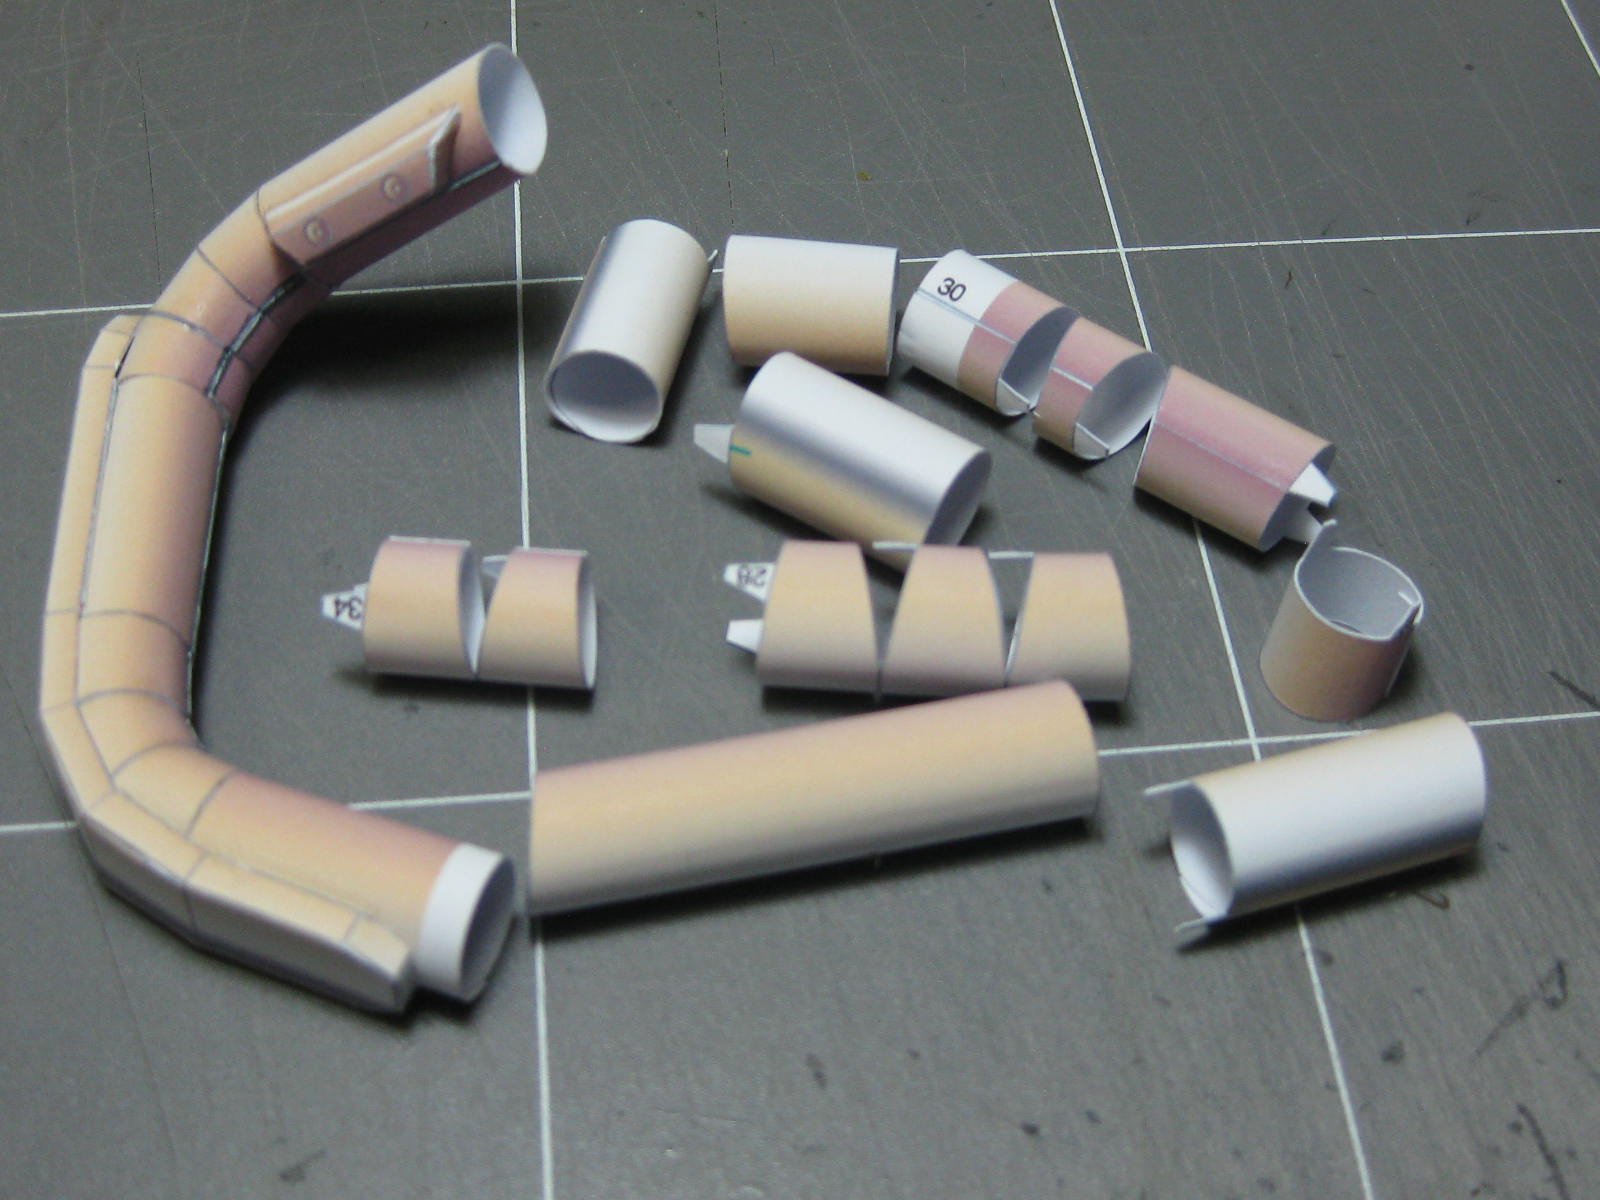
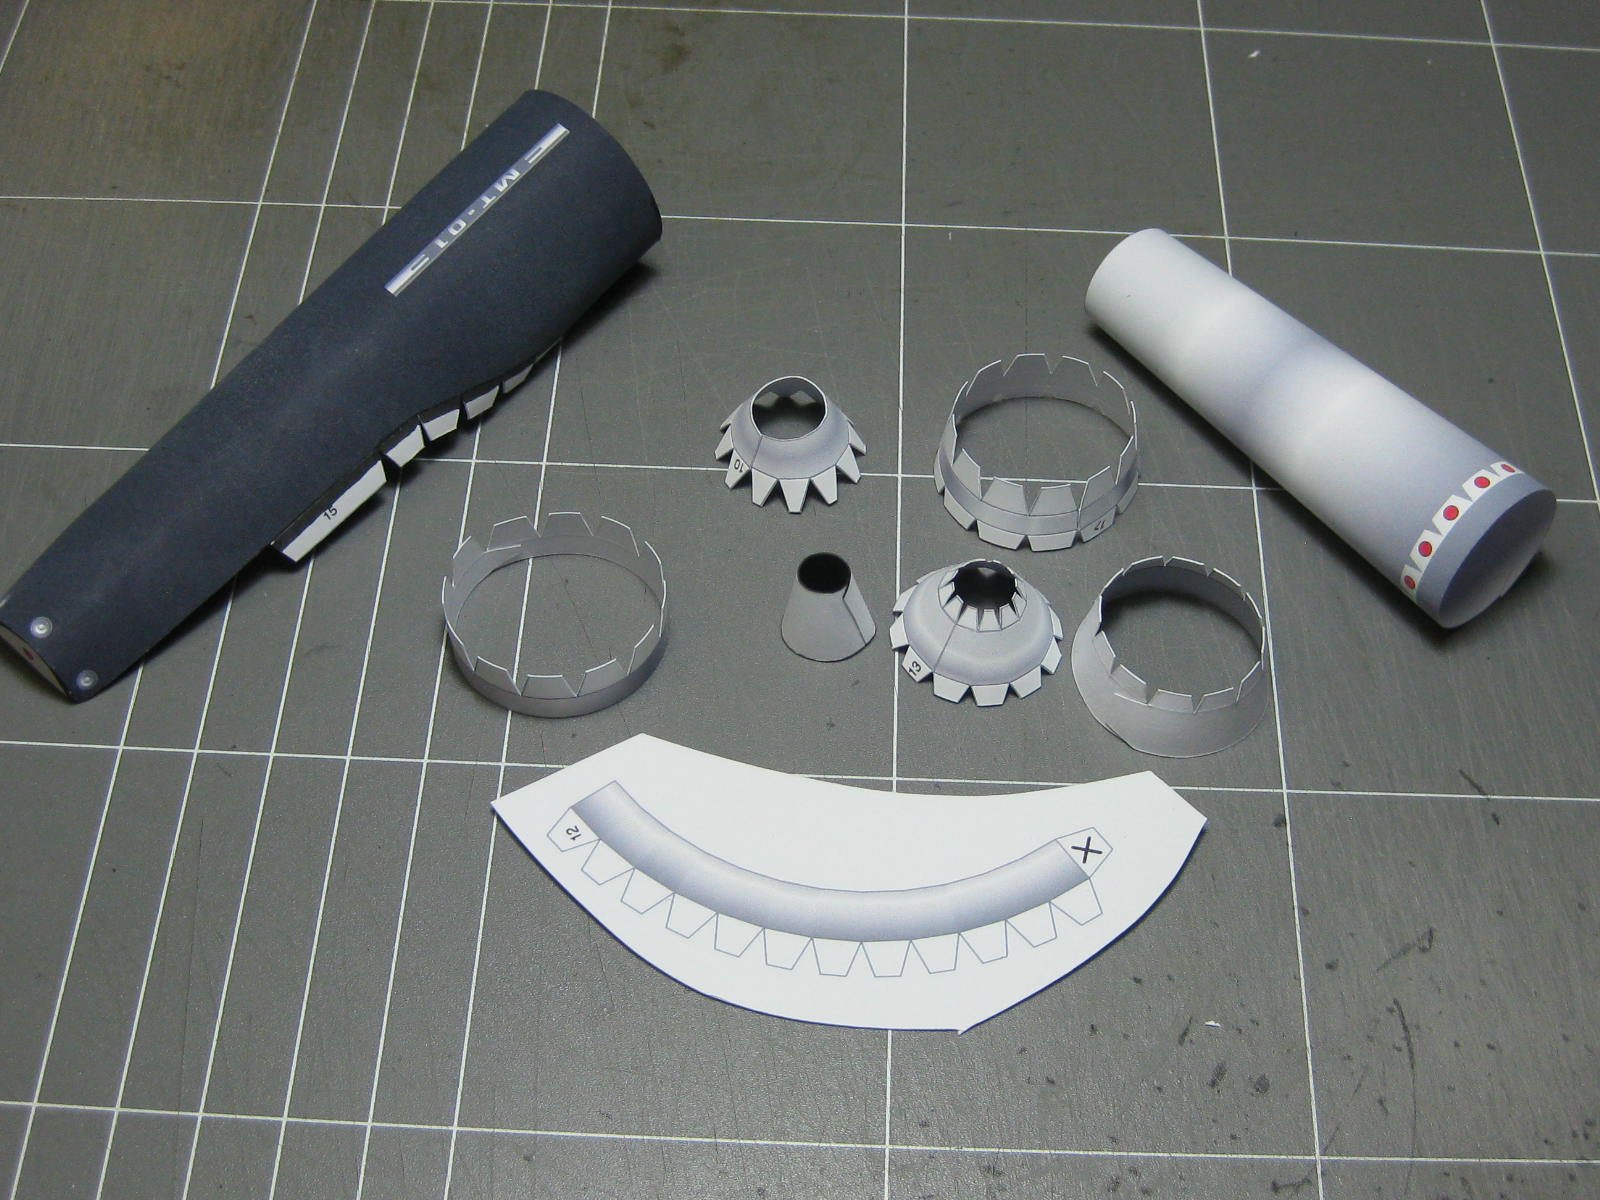
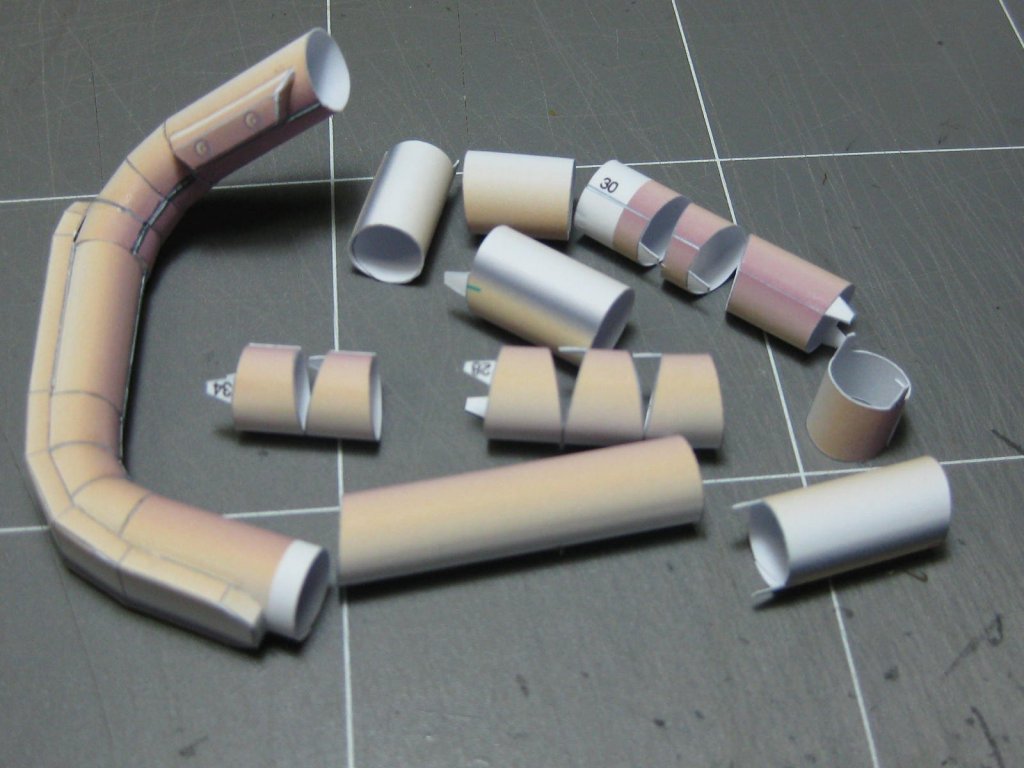
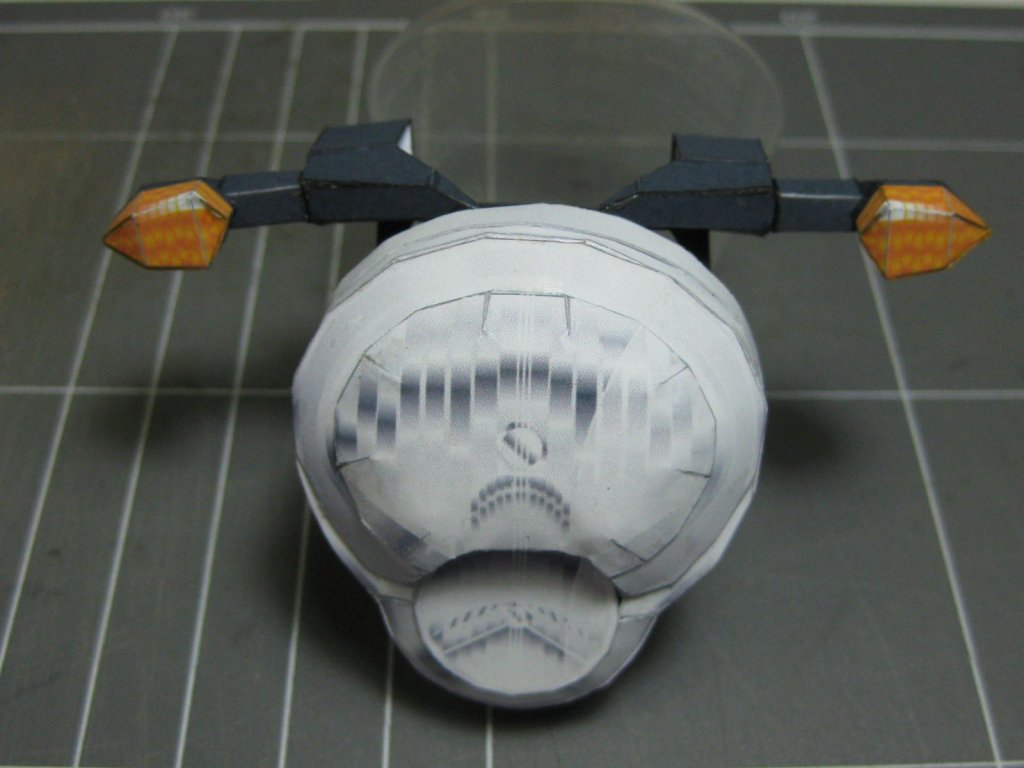
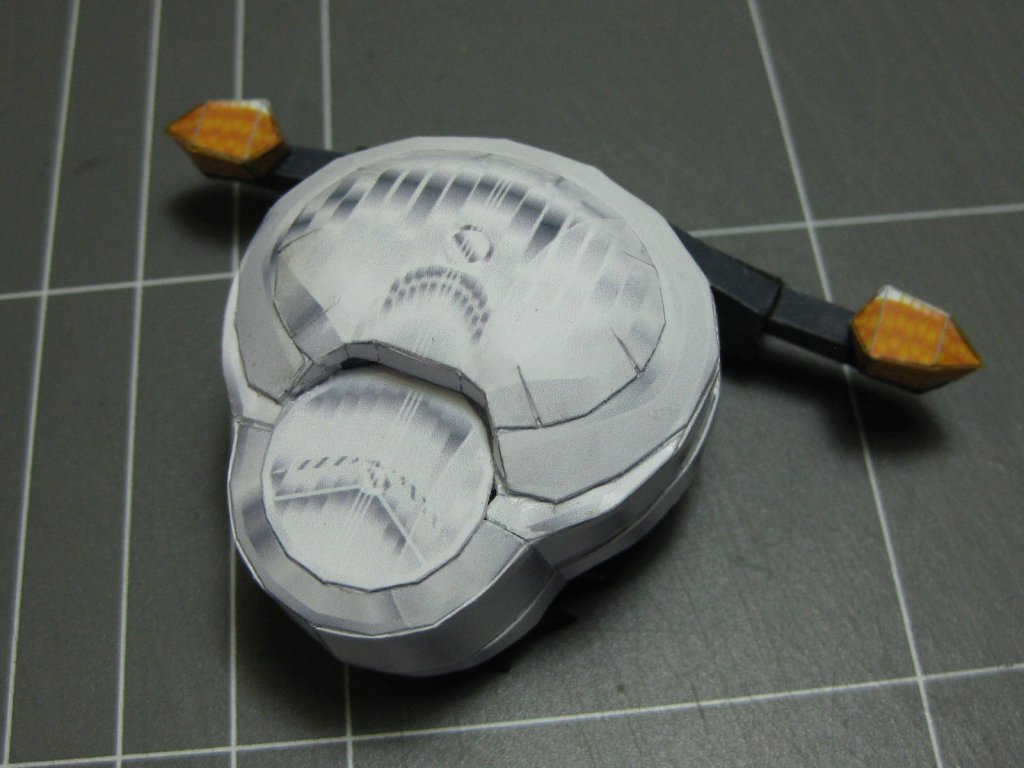
The Headlight : The exhaust system. Some sections are glued together after fitting the first ones : Finally, the seat : Danny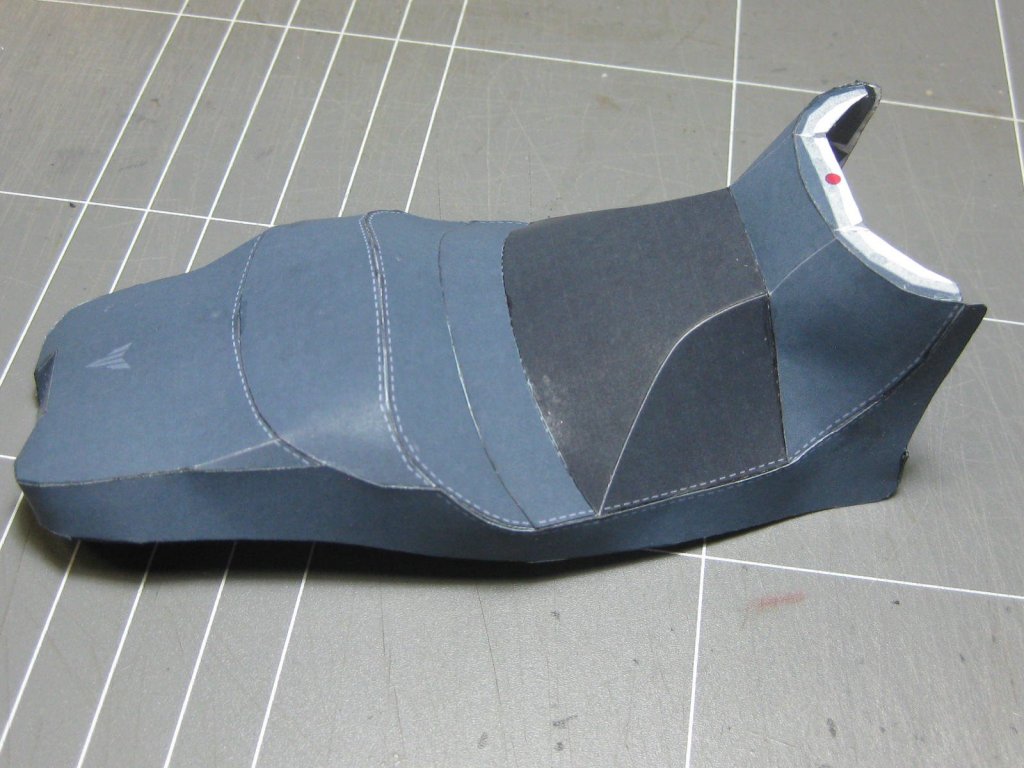


- 34 replies
-
- 13
-
-
Sanding and wicking - related issues?
Dan Vadas replied to Richmond's topic in Card and Paper Models
Probably a combination of things. I use a sanding stick fitted with 120 grit paper, and do my final sanding by running the stick downwards rather than horizontally. To clean up thickened edges use a sharp scalpel. I've never bothered with wicking CA on the edges of bulkheads. Practise makes perfect, you'll get better at it every time you do it . Danny -
Here is a link to Paper Shipwright, who have free downloads. And another from them of HMVS Cerberus, which was my first card model. Turned out fairly well. It comes in a printed version, which costs GBP 8.50, or a free download which you can print out yourself. Danny
-
Sure can Richmond. However if you can find laser-cut bulkheads for your kit it makes short work of a very time-consuming job. Danny
- 1 reply
-
- 4
-
-
Scharnhorst by CDW - Halinski - 1:200 - Card Model
Dan Vadas replied to CDW's topic in Card and Paper Models
I'm also looking forward to this build. Halinski are probably the best card kit maker, at least as far as I've found so far. Happy building . Danny


.JPG.002cd4aad8dce6264d42b59049bc65d3.JPG)
.JPG.78a38d278d0cd199ecb6c80477b916c9.JPG)
.JPG.dc045d51be2a21fc96a9622454d0e05f.JPG)
.JPG.c4976f81bb16dbe4eb9995259ca83c7a.JPG)
.JPG.d958d140be4e1c9339d0eb48486d60f7.JPG)
.JPG.f0d205ace180278804a8653d5acf508c.JPG)
.JPG.e5cf23090b9950a947ef19f0391931cc.JPG)
.JPG.b1e578e02c9370b73f8ee3ec5ee63ace.JPG)
.JPG.7db9159f14a2c51ca956e8e21777fb05.JPG)