Thukydides
-
Posts
1,362 -
Joined
-
Last visited
Content Type
Profiles
Forums
Gallery
Events
Everything posted by Thukydides
-
 I use liquitex: https://www.liquitex.com/en-ca/products/professional-acrylic-ink-cerulean-blue-hue But I know some people also like daler rowney. They are essentially pure pigment, no binder so they go on translucent and are very vibrant. If you have an airbrush they go on really nice through them. But you can also use a brush or mix them with varnish.
- 109 replies
-
- 6
-

-

-
- Ghost Ship
- Jenny
- (and 2 more)
-
You could also try inks. They give you very vibrant colours with little coverage.
- 109 replies
-
- 5
-
-
- Ghost Ship
- Jenny
- (and 2 more)
-
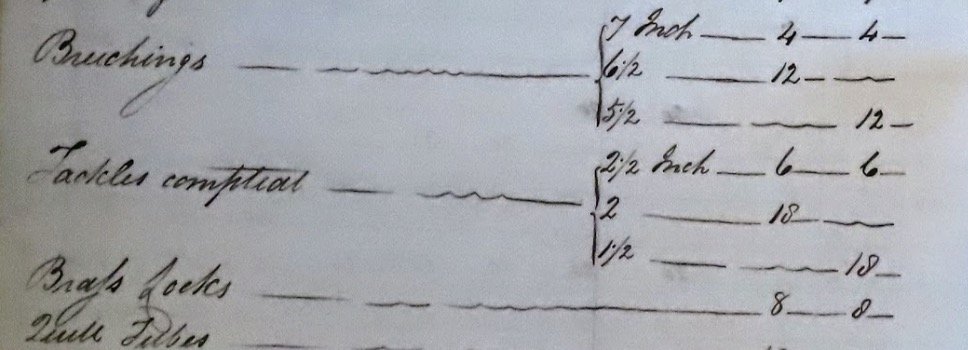
Yes the sizes for both the tackle and the breechings are the circumference in inches. There is some info on the length of the breechings and tackles in some of the tables, but I have not gotten round to trying to reconcile them yet.
-
That's a really nice drop strake, well done.
-
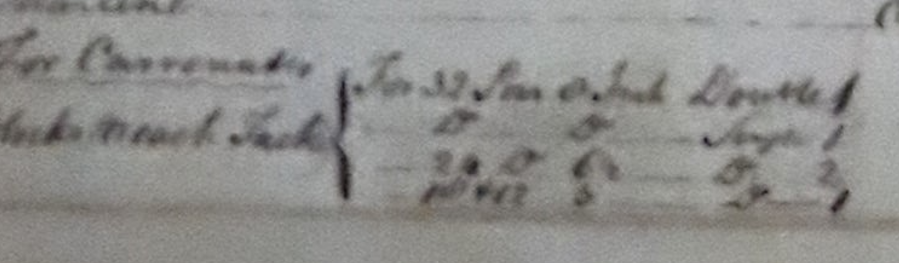
A further updated to this: I found a really interesting list of blocks used for carronades at the bottom of a table. This table is from 1796 and it shows the number and nature of the blocks for the tackle. Of particular interest is the fact that it appears that 18 and 12 pdr carronades only had one block for their tackle: For Carronades Blocks for each Tackle { For 32pr 8 inch Double 1 Ditto Ditto Single 1 24 Ditto 6 ½ Ditto 2 18 & 12 5 Ditto 1 EDIT: See below for a table summarizing all the info I have found in ADM 160/150 on breechings, blocks and gun tackles per gun. This is a combination of lists from 1794, 1796 and 1798. Breeching Size (in) Gun Tackle Size (in) Blocks (Single) Blocks (Double) Size (in) Number Size (in) Number Guns 32 pdr 7 3 10 2 10 2 24 pdr 6½ 3 10 2 10 2 18 pdr 5½ 2½ 8 2 8 2 12 pdr 5½ 2½ 8 2 8 2 9 pdr 4½ 2 6½ 4 6 pdr 4½ 2 6½ 4 4 pdr 3½ 1½ 5 4 Carronades 32 pdr 7 2½ 8 2 8 2 24 pdr 6½ 2 6½ 4 18 pdr 5½ 1½ 5 2 12 pdr 5½ 1½ 5 2
-
Welcome to MSW Jay.
-
Another update, I found another list that I had not previously noticed in the document specifically listing the stores for carronades. Unfortunately the part which lists the breechings appears to be incomplete as it only list the stores for 100 and 90 gun ships. However extrapolating from their carronade armament earlier in the same list we can at least get the sizes for tackles and breechings for 32, 24 and 18pdr carronades. The list is from 179? (I can’t make out the last number at the moment, my current guess is 1798) 32pdr - 7 in breeching 24pdr - 6 1/2 in breeching 18pdr - 5 1/2 in breeching Edit: I just noticed that no sizes are given smaller than 5 1/2 in breeching so we could possibly infer that they were used for 12pdr carronades. See below:

-
Frankly there are a lot of question marks about the bowlines in general on alert, but as I am not doing sails the general convention is to rig them to the yard the sail would be on. I am going for a no sails, but as much running rigging as I can possibly include sort of asthetic and they also help to steady the squaresail yard which has very little else bracing it. As previously noted I am not going to be securing them for a while to allow access so I have lots of time to consider where best to run them to. Thanks for your input :).
- 562 replies
-
- 5
-
-
- vanguard models
- alert
- (and 2 more)
-
Yes AOST. The bowlines for the topsail go out to the end of the bowsprit and then back to presumably the pin rack. However the bowlines for the squaresail are only shown on p107 with the line terminating on the tip of the cathead.
- 562 replies
-
- 1
-
-
- vanguard models
- alert
- (and 2 more)
-
This stage of the build is hard as you do a lot but there is not a lot to show as finished. The more of the rigging you can do off the model the easier it will be and better it will look. It is just hard to resist putting it on the model so you can see progress. Good work.
- 144 replies
-
- 4
-
-
- HMS Speedy
- Vanguard Models
- (and 1 more)
-
I never thought to check Petersson, I do have his book.
- 562 replies
-
- 1
-
-
- vanguard models
- alert
- (and 2 more)
-
So further to this discussion I am pretty sure the carronade breechings are not included in the above list of breechings. I was in the process of transcribing the list (see below). 100 90 74 64 50 44 38 36 32 28 24 20 18 Sloop Iron Ordnance with ship carriages complete 32pdr 30 20 20 24 28 26 22 18 30 20 26 20 28 26 12 42 40 22 22 26 9 10 12 10 10 24 22 20 6 6 6 6 4 2 18 4 3 ½ 12 12 12 12 12 12 12 12 12 12 12 Breechings 7in 60 56 56 6½ 42 52 44 5½ 63 105 42 39 33 73 42 39 39 4½ 27 18 9 9 15 15 9 42 36 30 27 3½ I found when I compared it to the establishment list for armament from the same document that the number of breechings pretty much exactly matches 2x the number of 32pdrs (7in) and 24pdrs (6.5in) and 1.5x all other calibres (18&12pdr 5.5in, 9&6pdr 4.5in). This suggests that they were not taking carronades into account in this list and so we are back to square 1. I am going to take a closer look at the second list as it differs a little in the number of breechings and see what I can find.
-
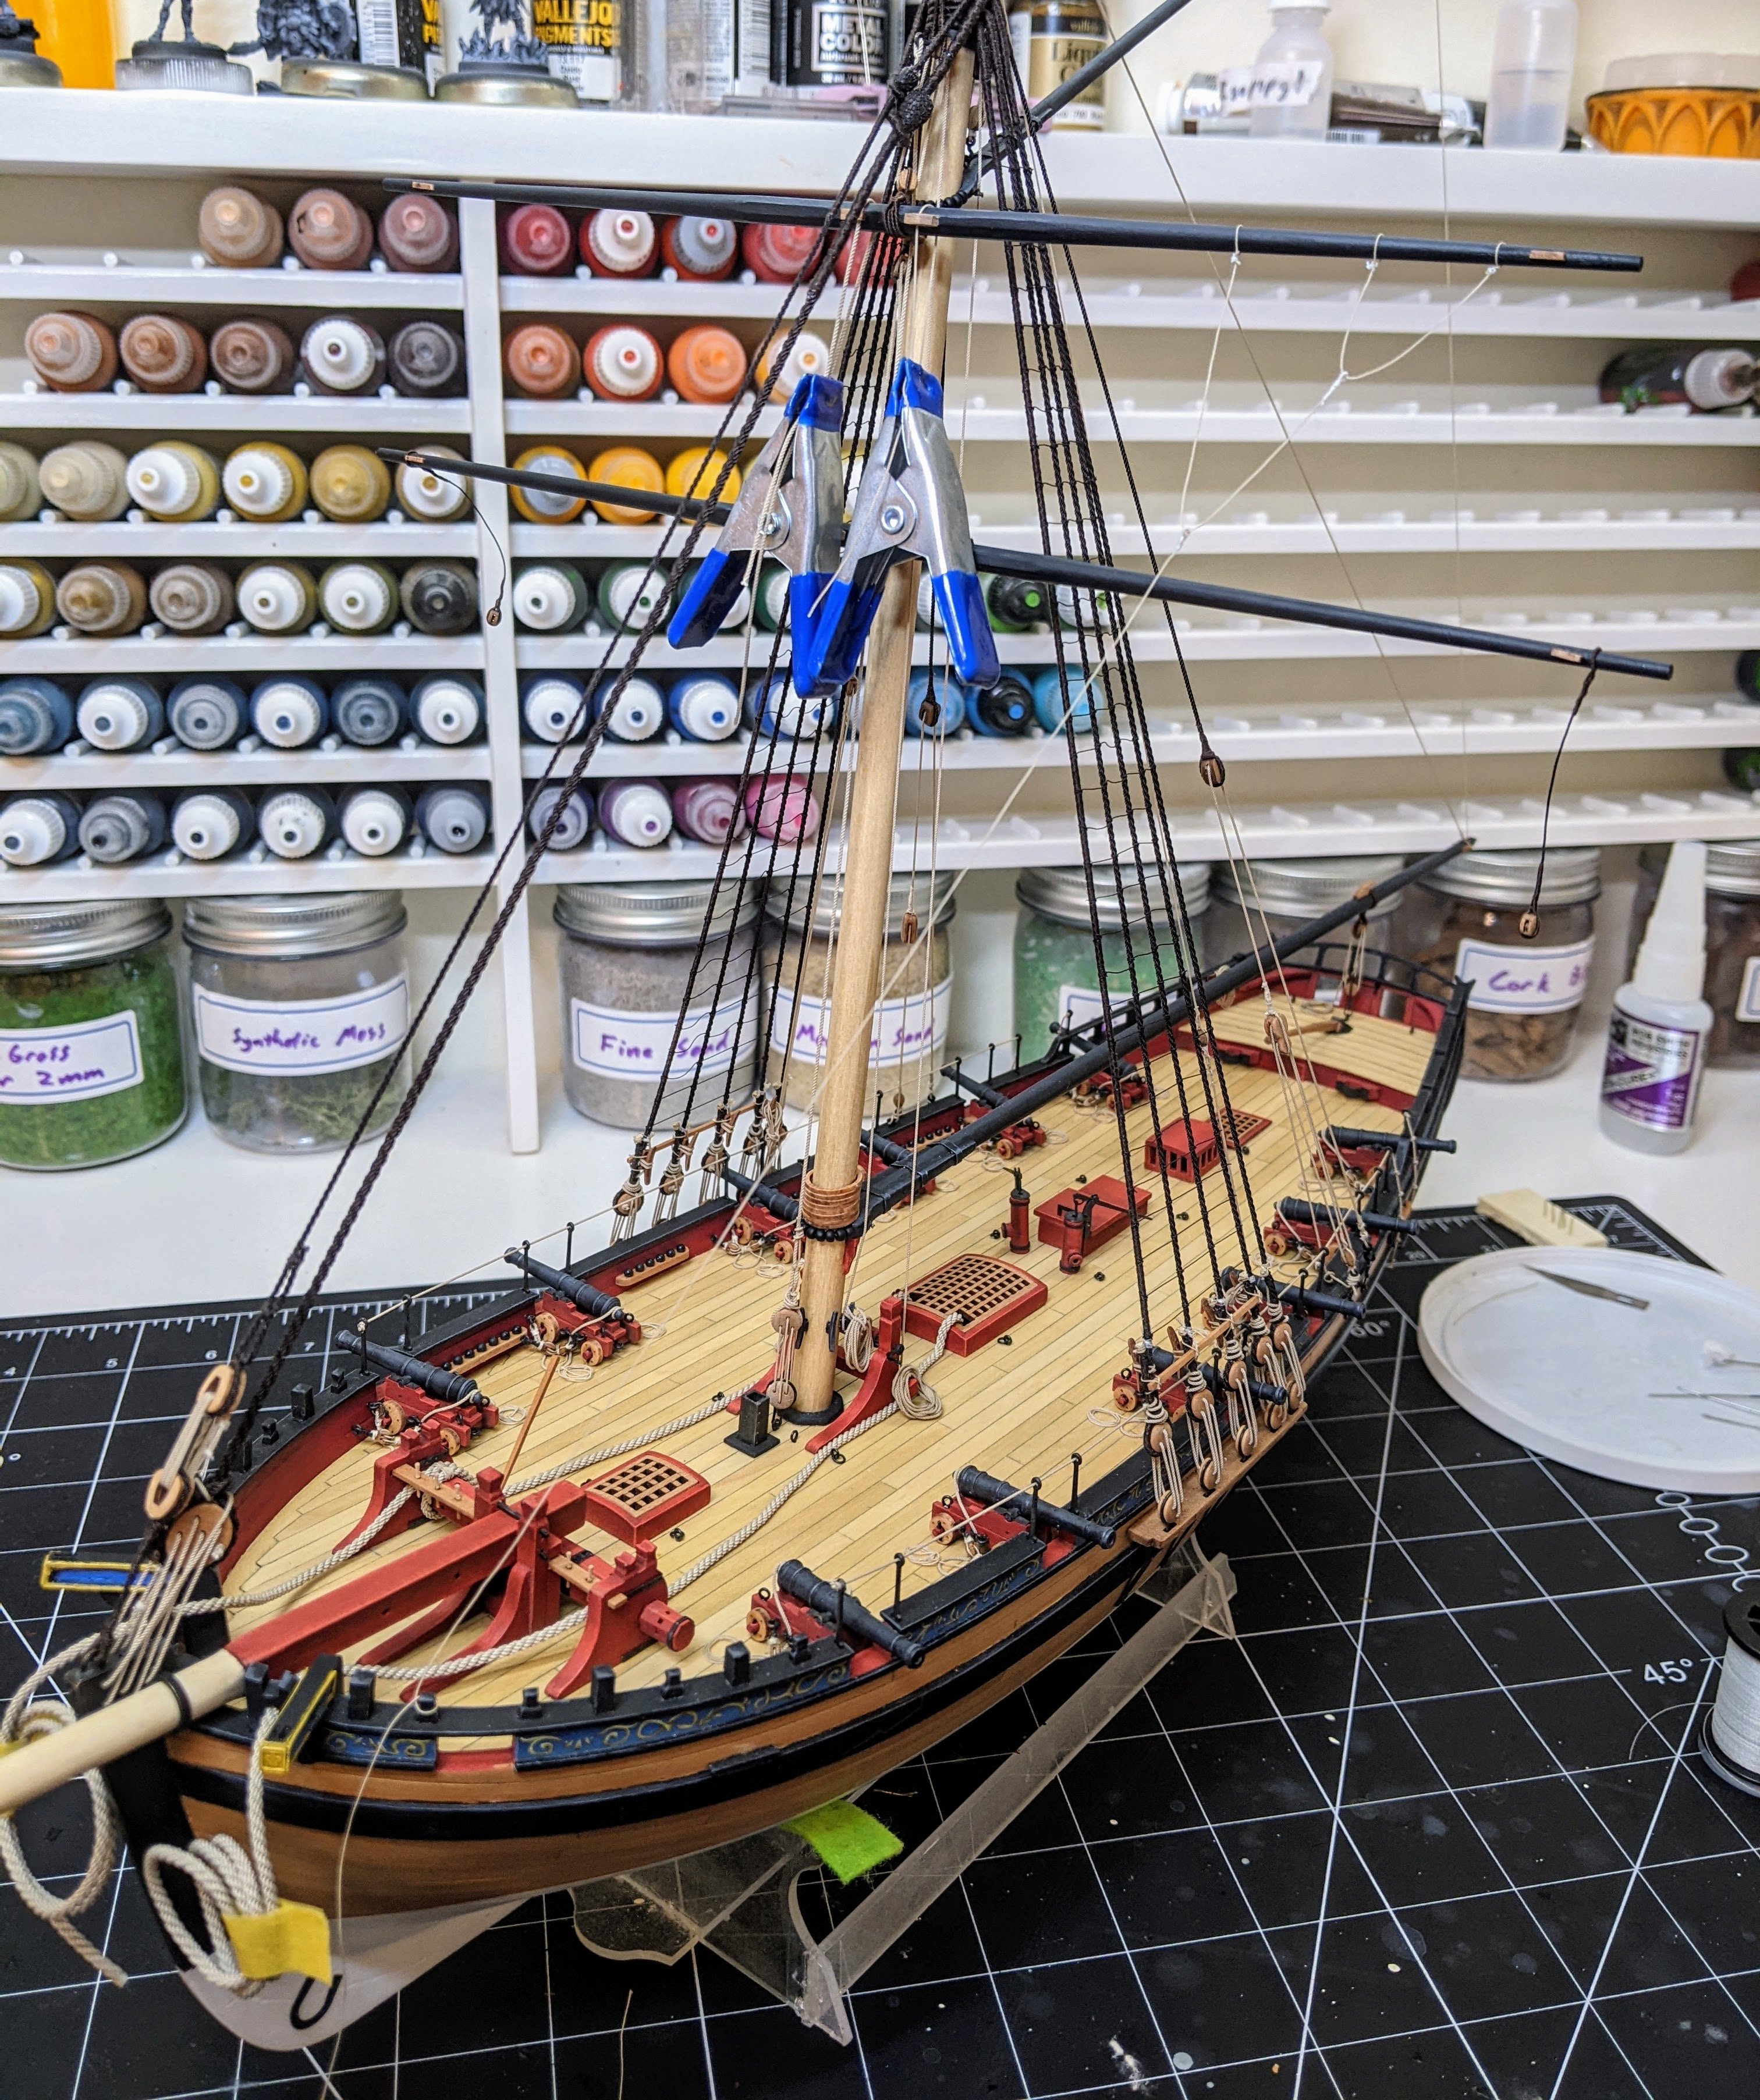
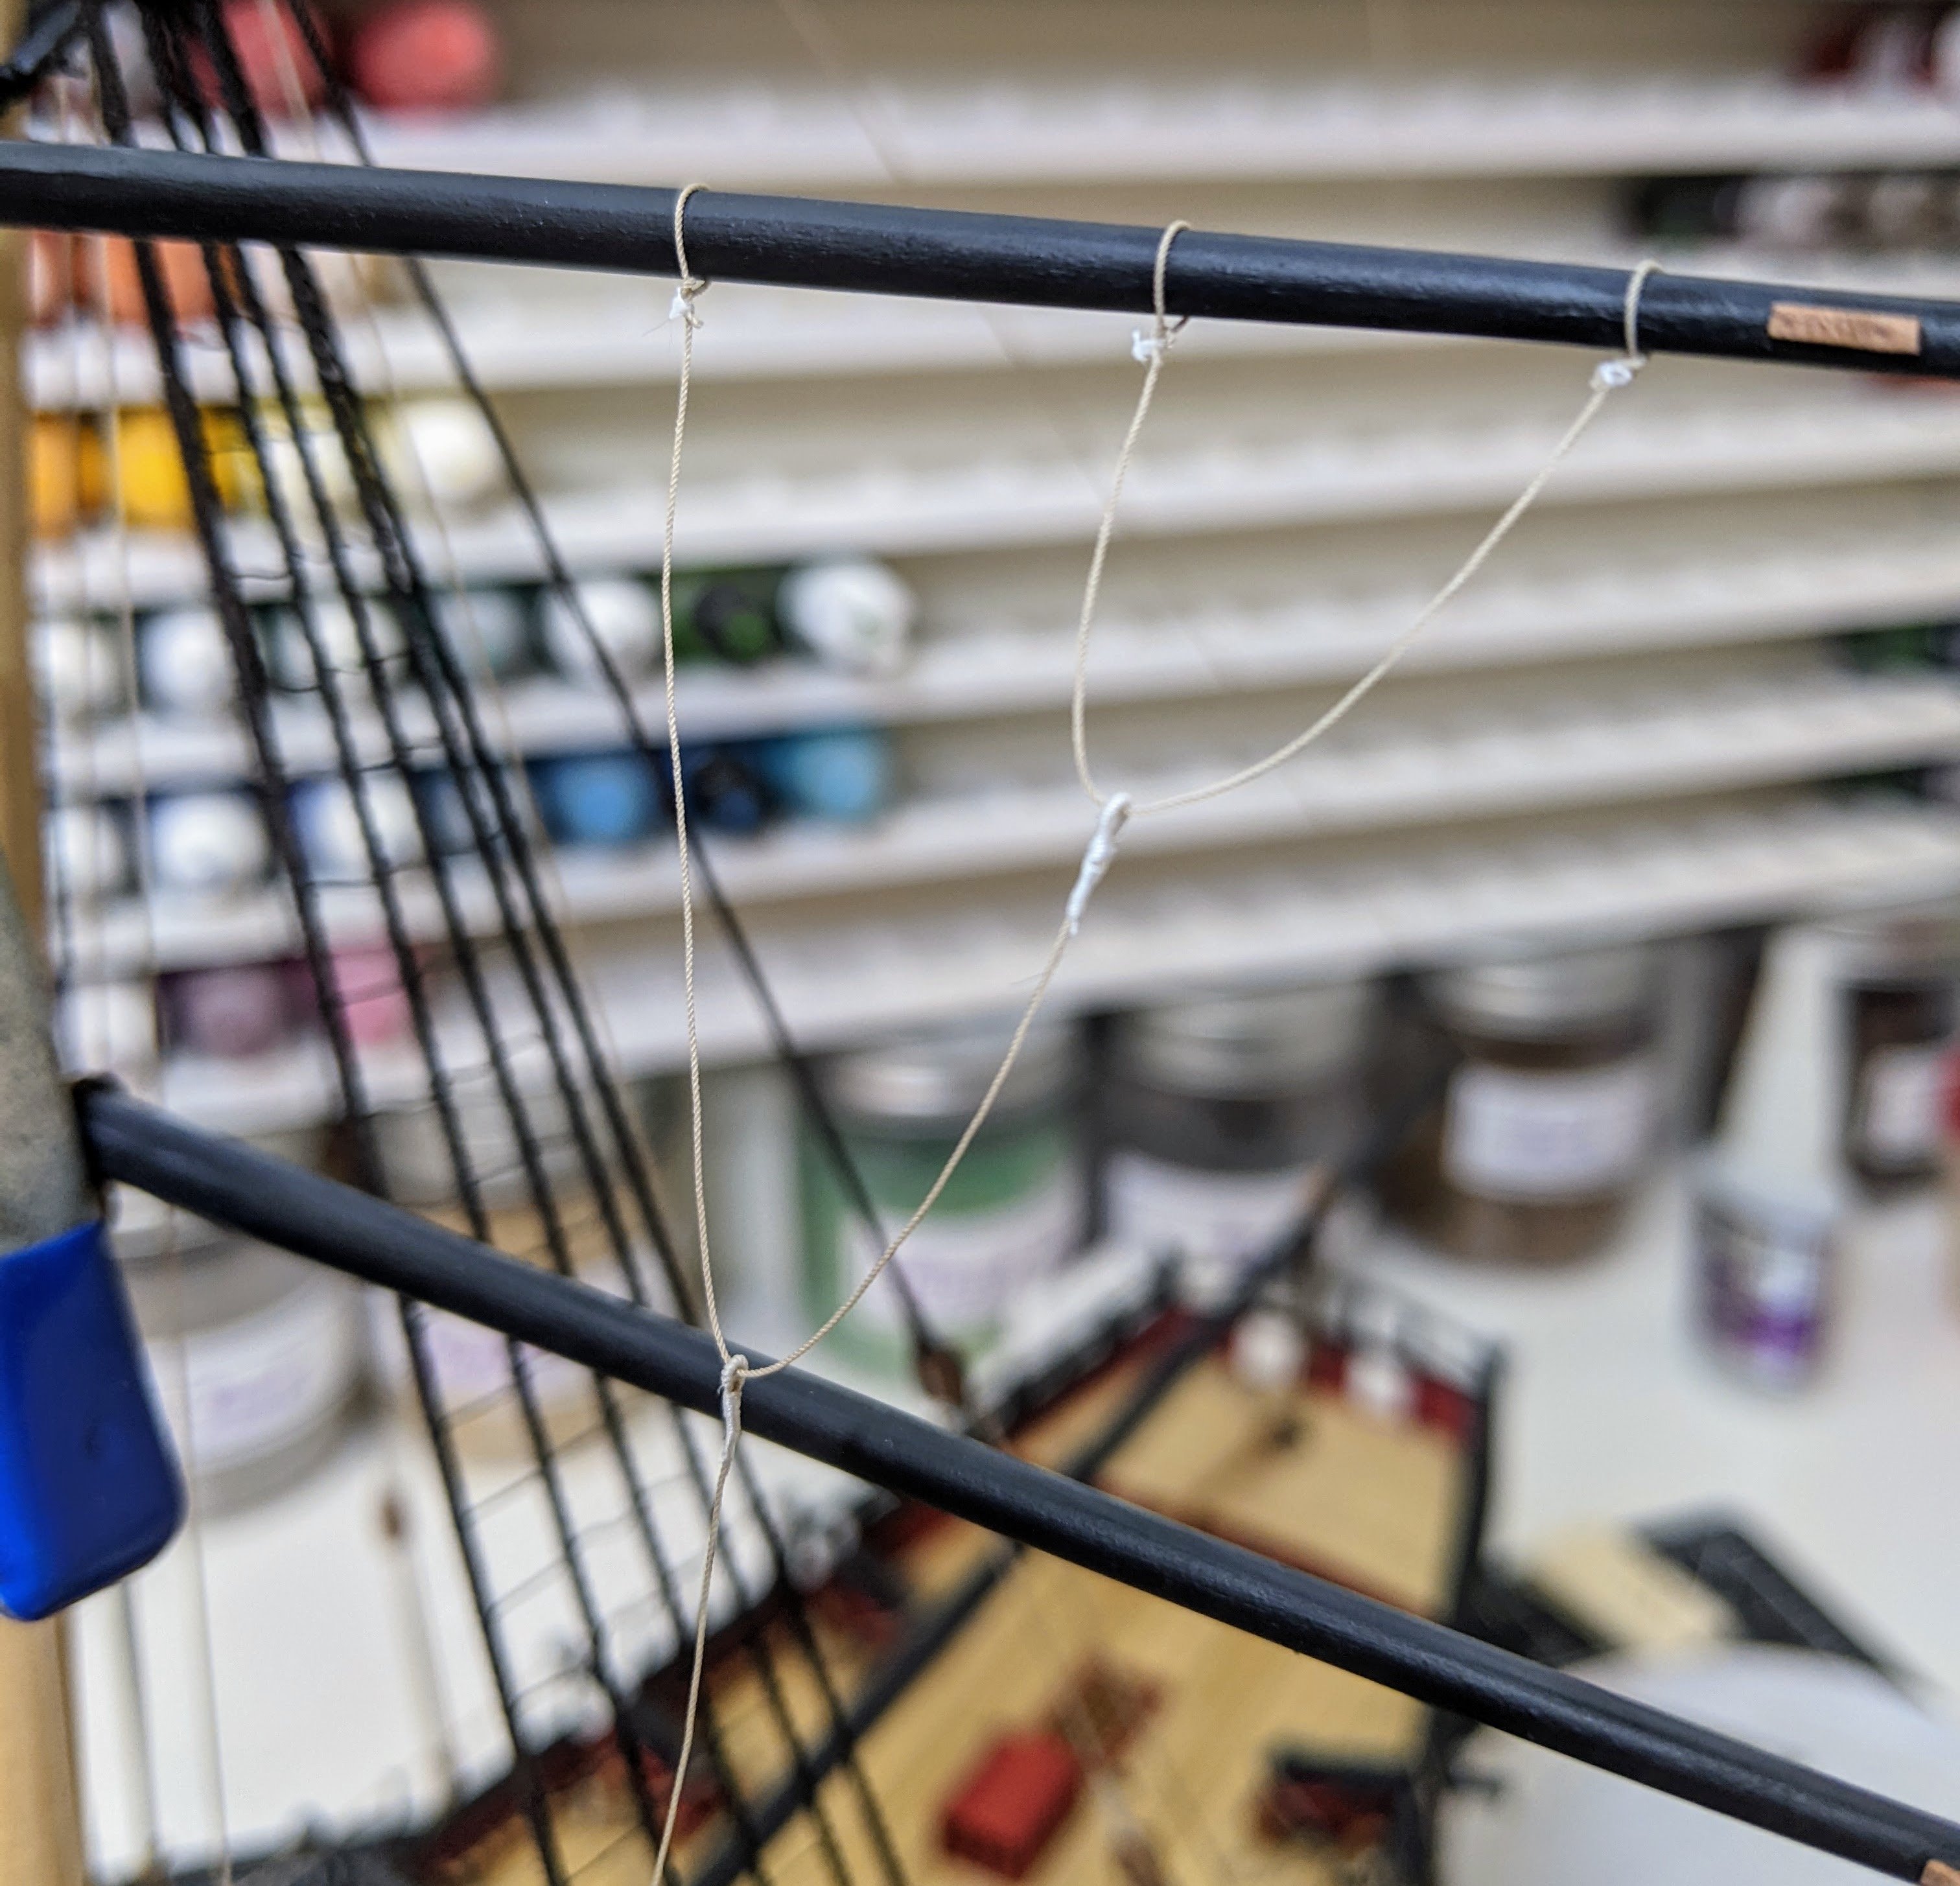
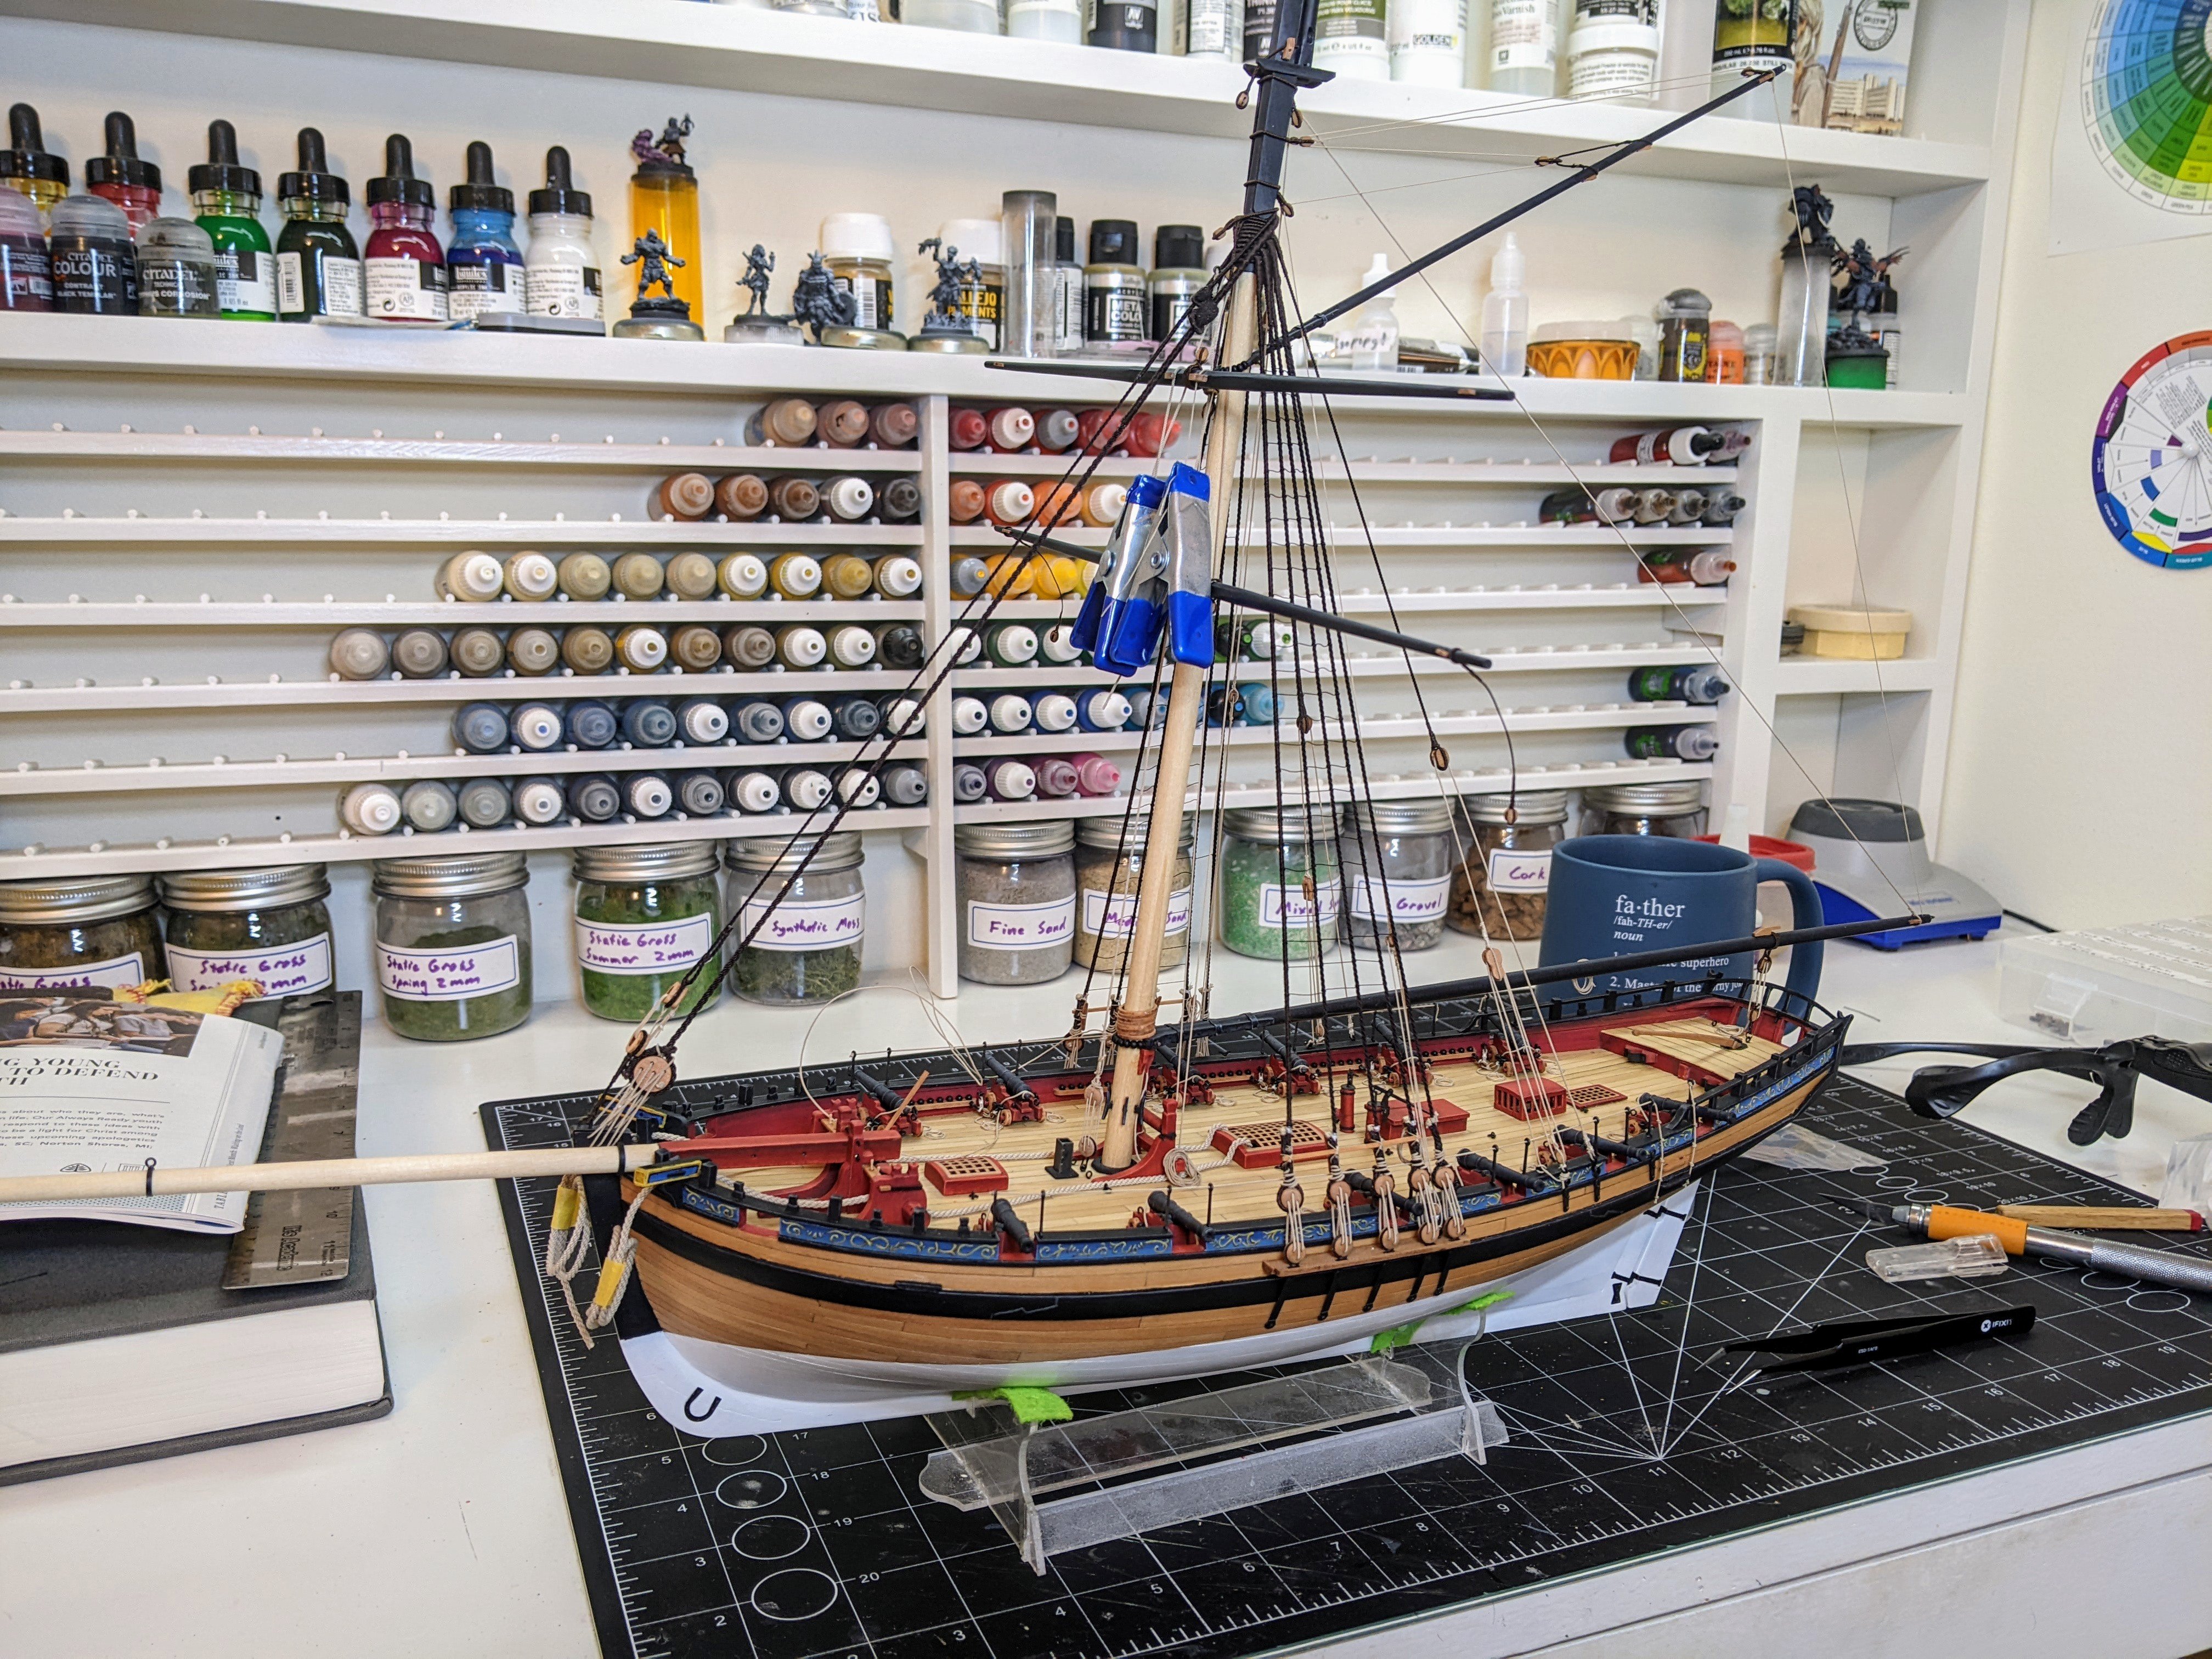
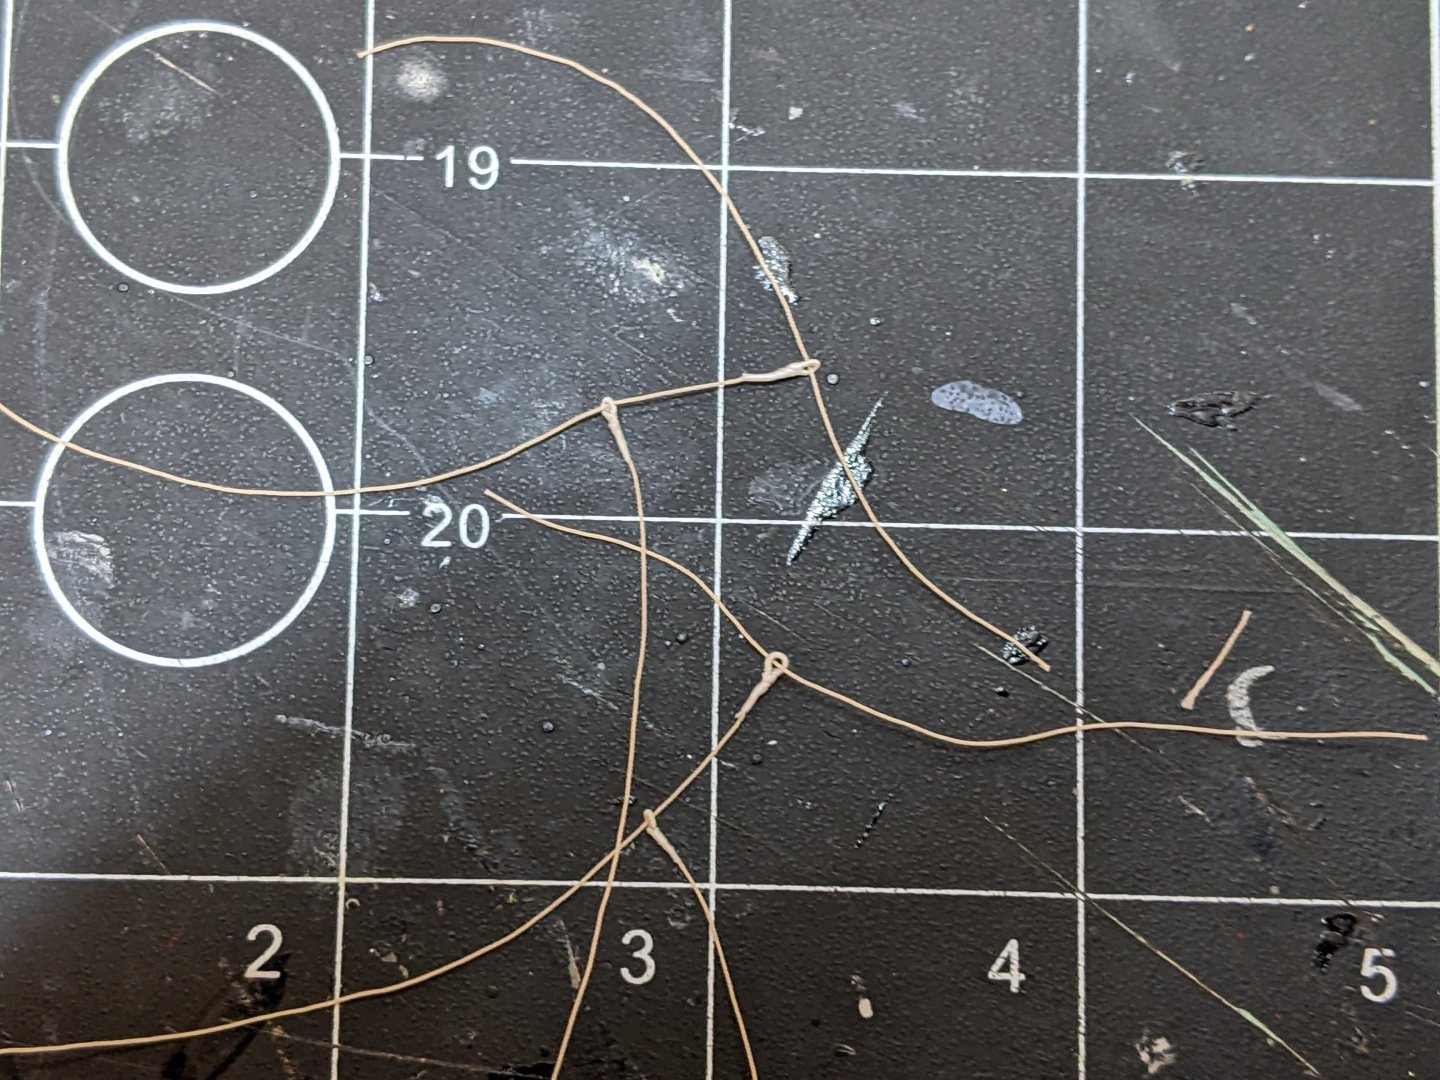
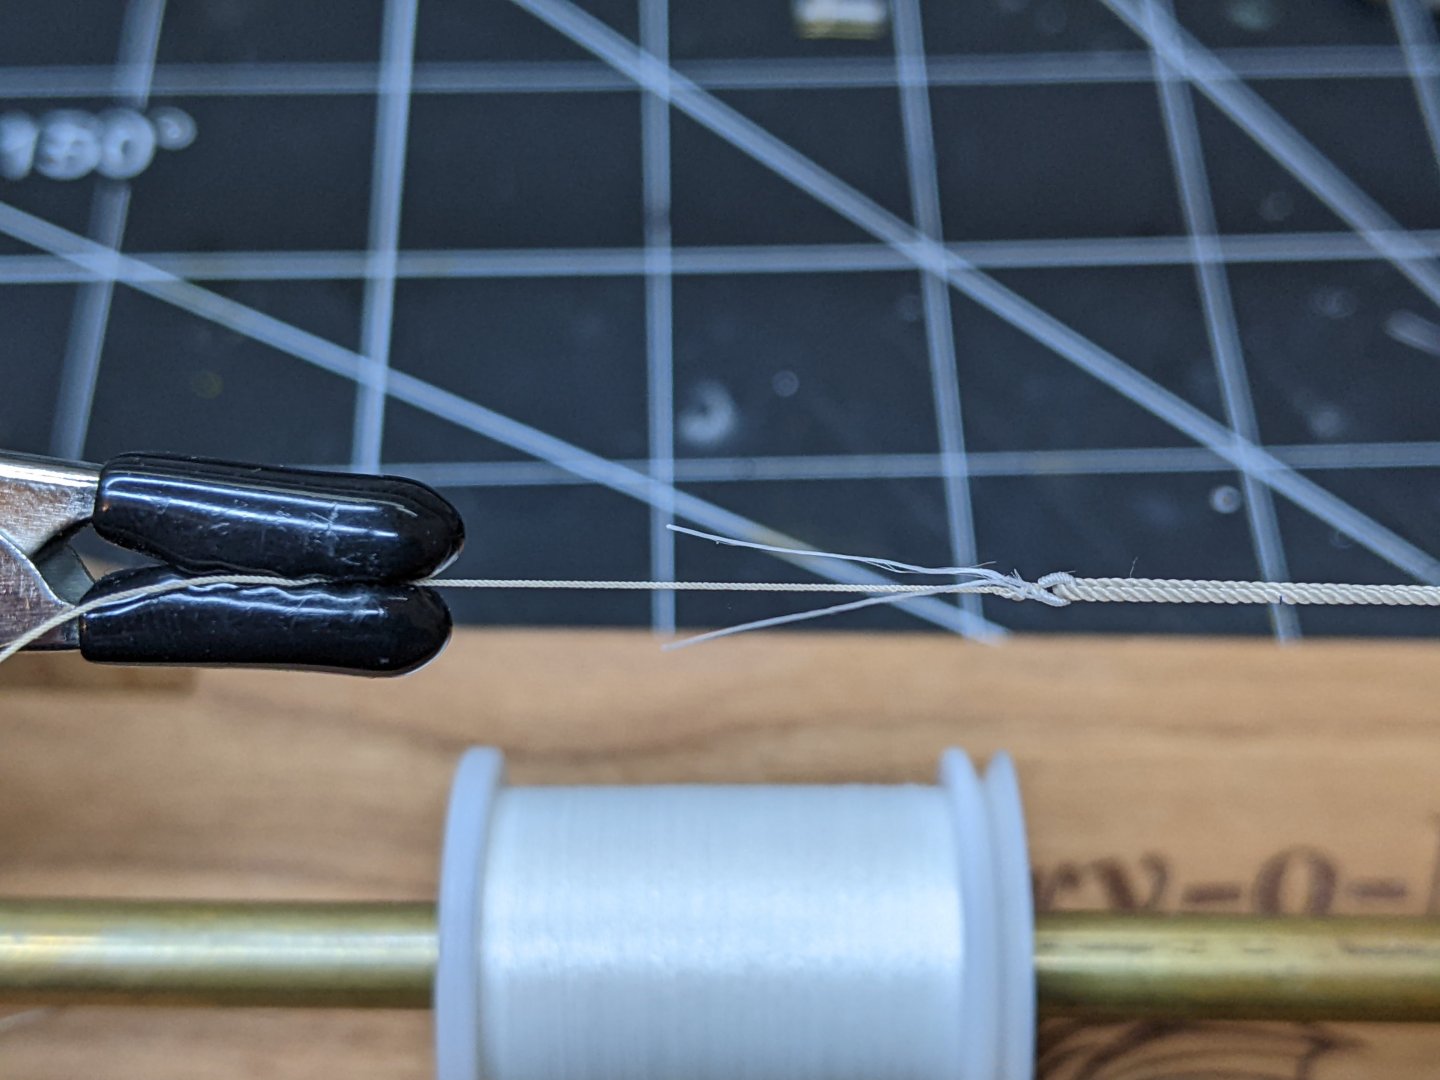
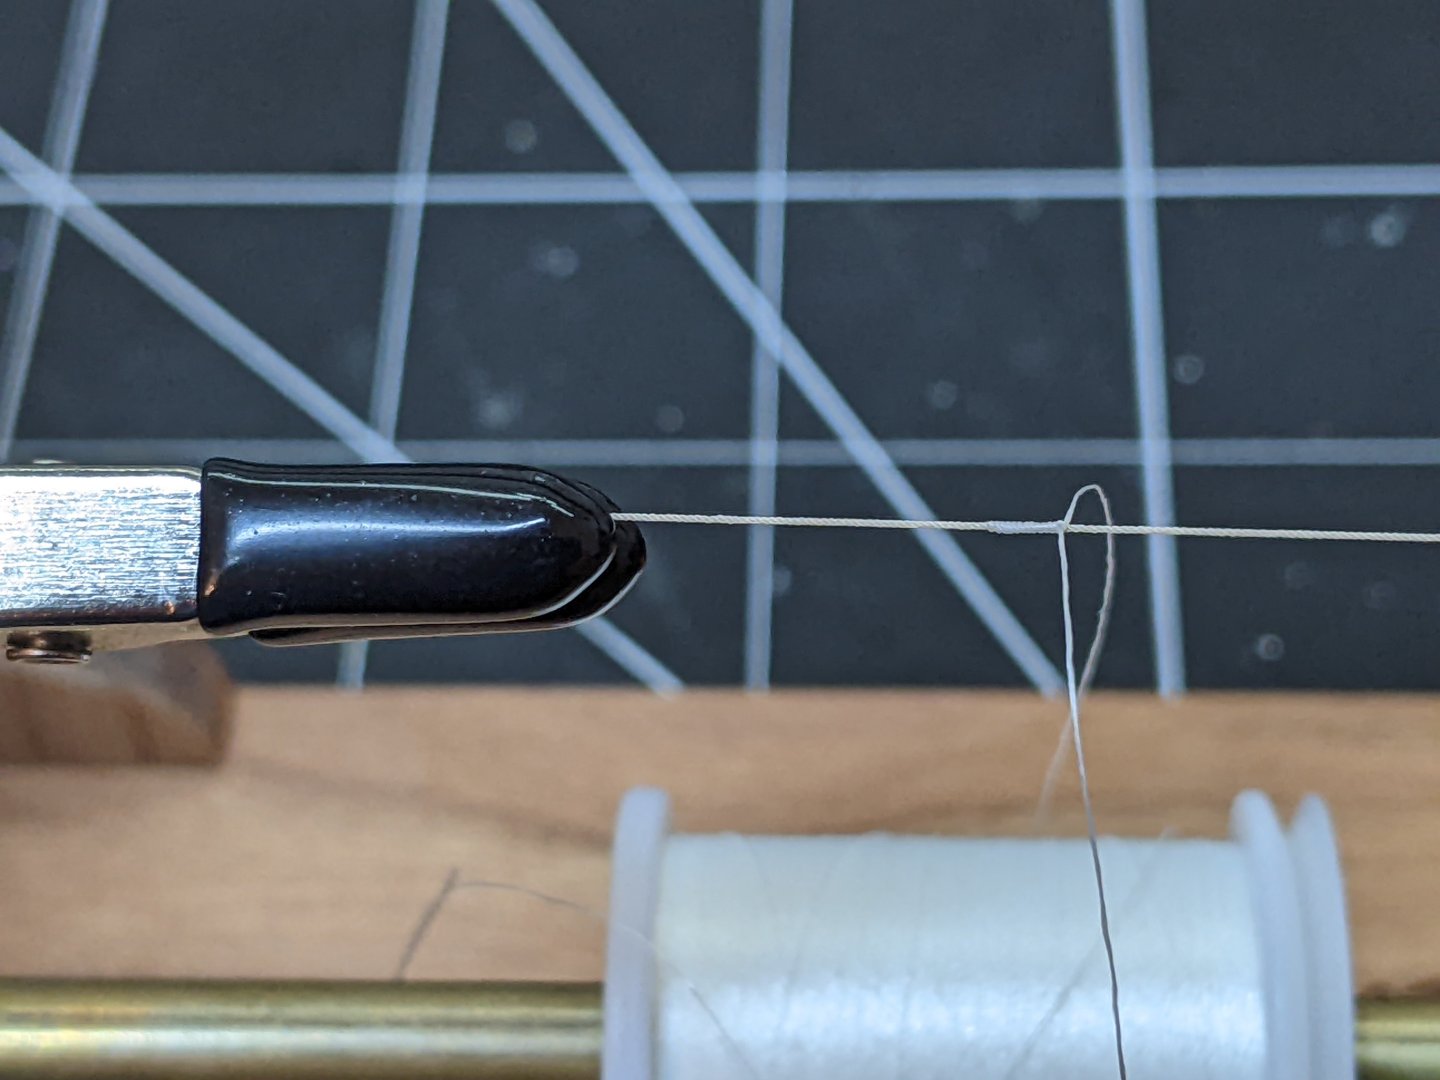
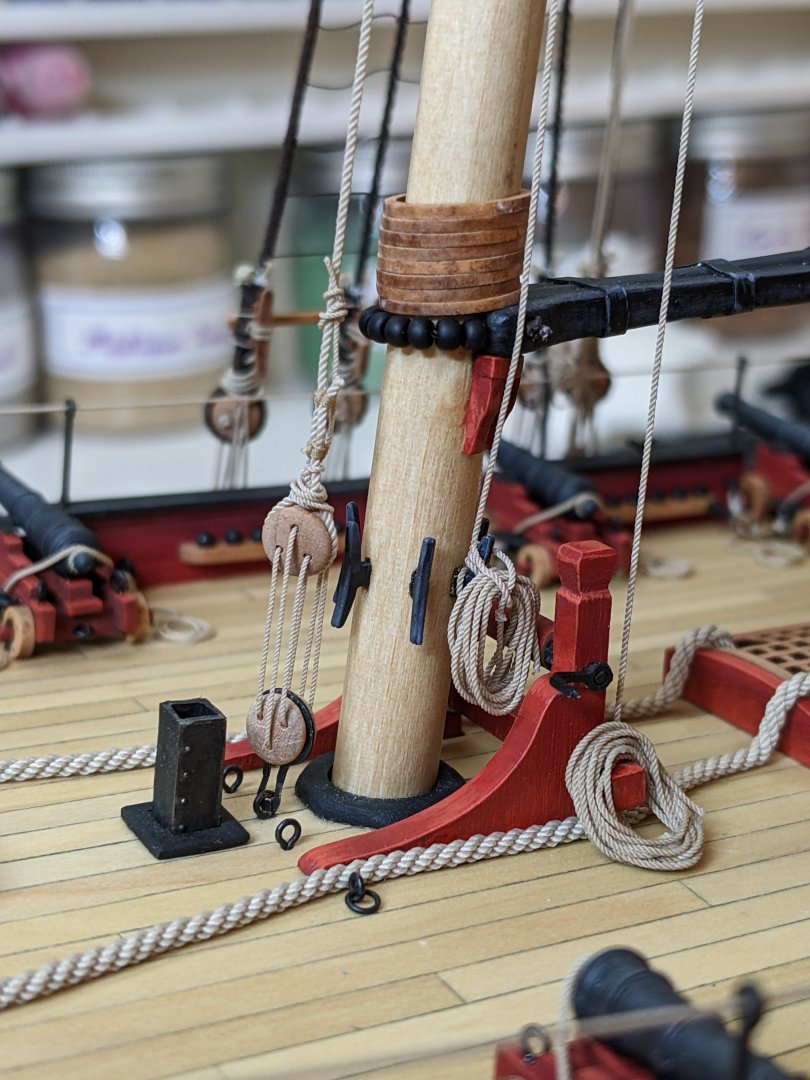
Log #81: Squaresail Bowlines Thank you again to everyone for all the kind words. As I have had the past few days off work continues briskly. I decided to tackle the squaresail bowlines next. After considering the matter for a while I decided to follow the diagram in Lees which shows them with a half hitch followed by a sizing. Technically there should be two sizings according to lees, but at the tiny scale we are working I felt that was bridge too far for me at the moment. To make sure everything was proportional, I did a lot of measuring and ratioing based on both Lees and Goodwin before I even started so that I knew the exact length of every piece I was going to make. First step is serve a length of line for the eye. Next I spliced the eye and served over the splice. This was done 4 times with 2 longer ropes for the falls and 2 smaller ones. Then I also added 2 lines with no serving on them. You can see both completed bowlines below. To attach them to the yard the method I came up with was to make the loops off model and then slide them onto the yard and pull them tight. Since the half hitch plus sizing essentially makes a noose that can be tightened as desired, it made the process of sizing and then positioning the bowlines much easier. This also enables me to adjust their positioning later to make sure they don’t interfere with the clew lines. And just for display I temporarily tied the line to a timber head at the bow. It is still not exactly clear to me where the squaresail bowlines are belayed to as Goodwin only shows them ending near the catheads, but doesn’t elaborate on what exactly they were tied to. I am going to do some more reading as they will be hanging loose for a while anyways to enable me to access the base of the mast. I still need to tie the second set to the other side of the yard, but this was all I had time for today.


- 562 replies
-
- 22
-
-
- vanguard models
- alert
- (and 2 more)
-
Seems like a bunch of work for minimal gain. Removing the base is not hard. That being said if you ever go down this route I would say the way to go to avoid too many different versions would be to include a base as a separate piece that anyone who wants can then glue to the figure. That way you don't have to produce two different types of models.
-
I did this and you have to be really gentle as resin is brittle. First I used a saw to cut off most of the excess, then once there was only the small bit near his feet I used a craft knife to carefully shave it off the bottom in thin layers. The key is to go slow, especially as you get nearer the feet. BE's suggestion of sanding down would also work. I wouldn't recommend power tools, I suspect you will end up breaking it.
-
Great job, it looks awesome
-
Check your local library, they may be able to bring it in for you. Also if you have a university in your area they may have it. I have a copy of Caruana on perpetual checkout from my local university library as no-one else is ever looking for it.
-
It was taken in 1808 just prior to her breakup which was common practice to document the ship. However there are many reasons to believe that it is consistent with her appearance much earlier at least as early as 1799, probably much earlier than that.
-
Nice work. If you look at the planking expansion there is also a drop plank at the stern in the first strake. https://www.rmg.co.uk/collections/objects/rmgc-object-83709
-
I had some time this morning to tidy up the lines so here is a minor update. I belayed the squaresail lift to one of the cleats on the mast. I also tied off the lanyards for the horse. I currently am using two clamps hanging by some spare rope to keep the squaresail yard lift under tension to set the shape of the rope. Next up are the bowlines for the squaresail yard. I really should have added these before I raised it, but I will do them now and let them hang loose so they don't get in the way.

- 562 replies
-
- 23
-

-
-
- vanguard models
- alert
- (and 2 more)
-
That is a lot of belaying pins
-
You should still do them off model. Just you are limited by the fact that you have to run the ropes through the rings on the guns. I did some posta on my method in my alert log. I like the base, she is looking nice.
- 96 replies
-
- 1
-
-
- Sphinx
- Vanguard Models
- (and 2 more)
-
Don't you have ring bolts? I am pretty sure some come with the kit.
- 125 replies
-
- 2
-
-
- Trial
- Vanguard Models
- (and 1 more)
-
It might be easier to do the breaching ropes off the model. Then you can attach them and the cannons to the ship. Also make sure they have enough length for the cannons to recoil.
- 125 replies
-
- 2
-
-
- Trial
- Vanguard Models
- (and 1 more)