Thukydides
-
Posts
1,369 -
Joined
-
Last visited
Content Type
Profiles
Forums
Gallery
Events
Everything posted by Thukydides
-
 Great job. This is how it starts, as you skills improve you start to realize with just a little bit more effort you could improve that other thing as well. Before you know it you are kitbashing everything.
 -
Yes, if Alert took three years (granted with a 6 month break in the middle) I expect this is going to take 5 or more. Apart from the larger size and all the extra time required to build everything from scratch, this time I have resolved that I must find sources (ideally primary ones) for just about everything so I imagine that is going to slow things down a lot. I am working on a research document which I am using to summarize and organize my thoughts and it has already reached 150 pages (and I haven't even begun researching the rigging).
-
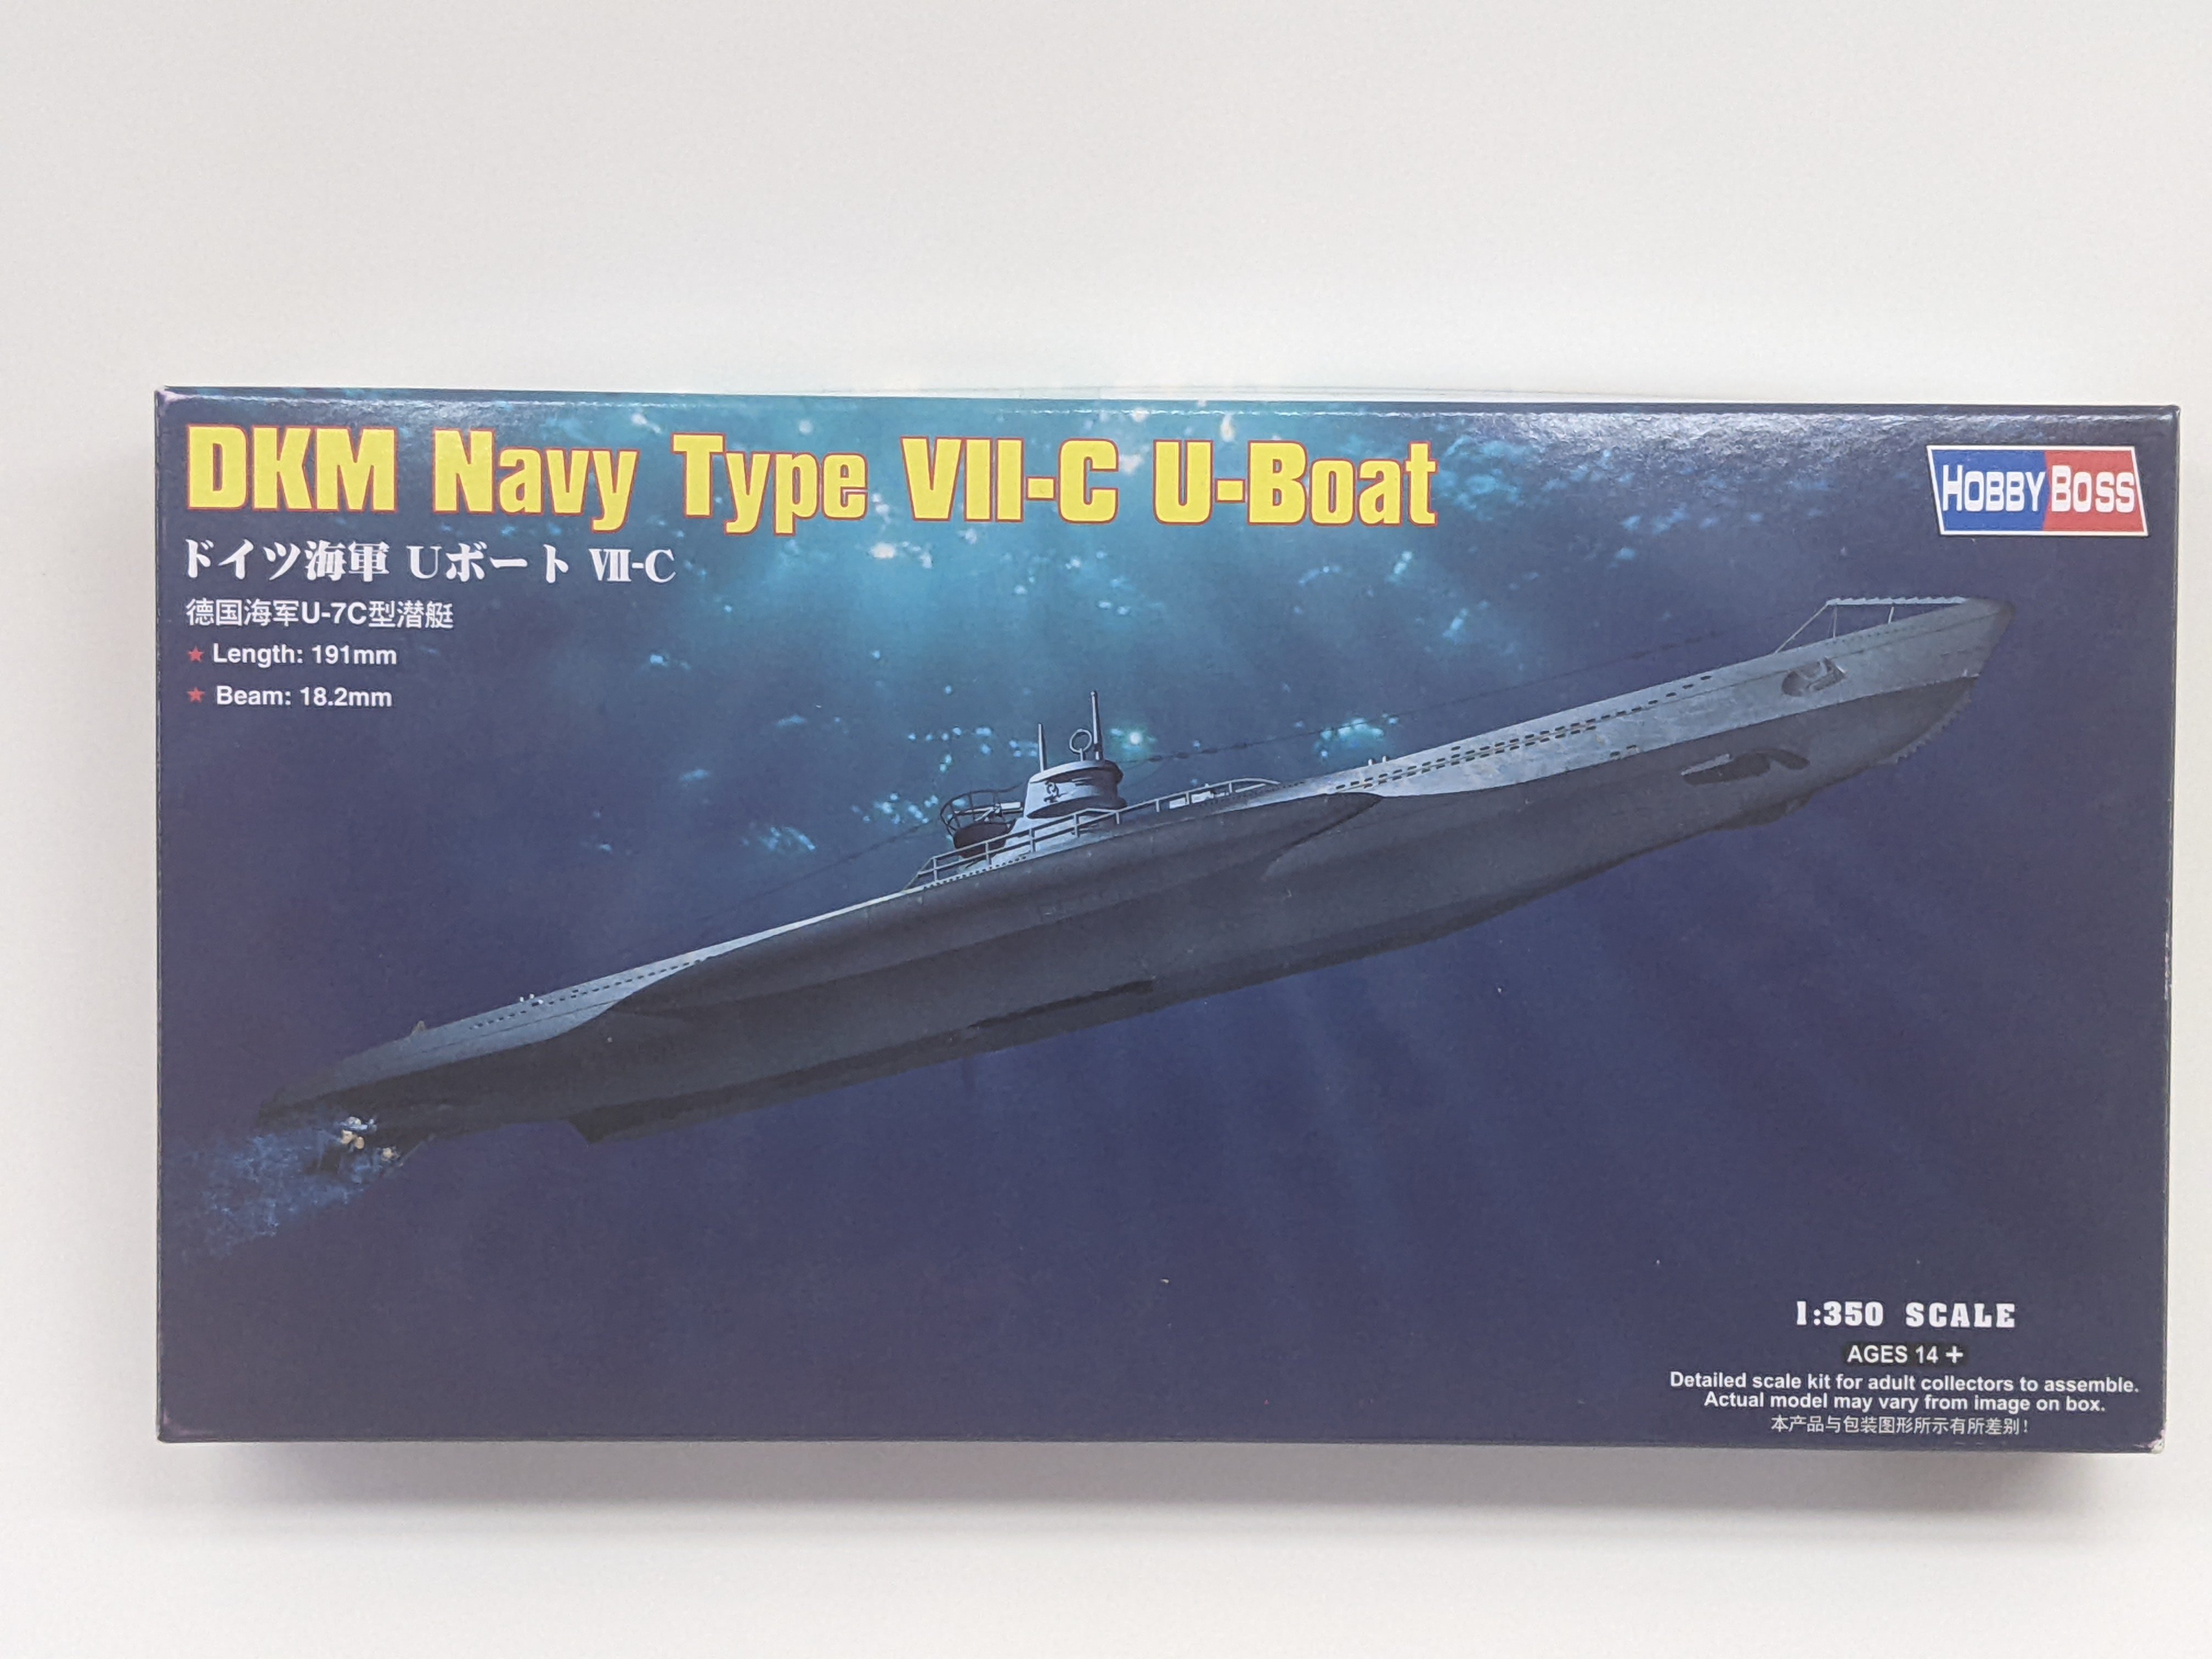
Thank you to everyone for your kind comments. I am glad so many of you have been able to come on this journey with me. I had previously promised I would talk more about what I plan next once Alert was complete so here is the current plan: I am planning to take a short break from wooden ship modeling to do a smaller plastic project. I will be building a Type VIIC Uboat using the Hobby Boss kit. I am planning to stick pretty close to the kit so don’t expect to see much bashing here. Only addition I am planning is to set her in a seascape. Though I don’t plan to post as much detail as in this log I will be documenting my progress here. My next wooden ship will be HMS Perseus, a 20 gun Sphinx class post ship. I had originally planned to kitbash the vanguard kit, but the number of changes I was planning got so long that I figured better just do it from scratch. I will be depicting her as she appeared around 1781 when commanded by Richard Dacres. I will be doing a detailed build log which you can find here. I don’t expect to start making sawdust for a few months yet. However, if you are interested in following me on a deep dive into the ship and the people who served on her I will be summarizing some of my research in the early log posts.
- 562 replies
-
- 10
-

-
- vanguard models
- alert
- (and 2 more)
-
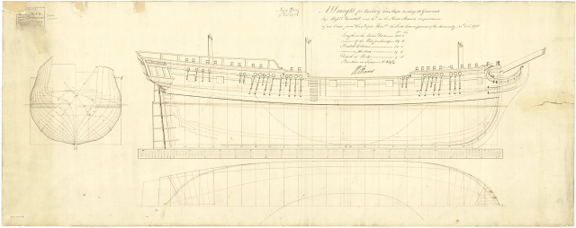
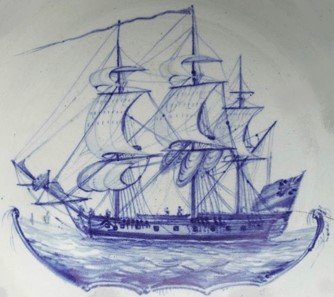
Log #1: Introduction HMS Perseus was a 20-gun Sphinx class post ship launched in 1776. Post ships were the smallest ship rated to be commanded by a post captain, larger than a sloop, but not as large as a frigate. She saw service in one of the most turbulent periods of the Royal Navy’s history. She took part in both the American revolutionary war and the French revolutionary war under at least 11 different commanders from Captain George Keith Elphinstone to Commander Thoms Searle. In many ways she was an example of the changing technology of naval combat being one of the first Royal Navy ships to be coppered and an early adopter of the carronade. Late in her career she was converted to a bomb ship before being broken up in 1805 after almost 30 years of service. I plan to depict Perseus as she appeared under the command of Captain James Dacres between 1780 and 1783. My goals for this build are: Build Quality - I learned a lot on Alert, but the quality of my work was not uniformly to a high standard. The goal for this build is to improve on my consistency to bring all parts of the model up to a higher standard. Historical Accuracy - I am aiming to make this as historically accurate a model as possible. As much as possible I am attempting to trace every aspect of the build back to primary sources. Artistic Coherence - At the end of the day the model is a piece of art and so it needs to aesthetically come together. Design decisions will also be informed by aesthetic considerations where there are more than one historically valid options.
-
Welcome to my build log for documenting progress on my scratch build of HMS Perseus using @Alex M's Sphinx plans as a starting point. In order to keep this organized I have reserved this first post for a table of contents in order to allow future readers to jump ahead to sections they are interested in if so desired. I will also include any significant resource links in this first post so they are all together in one place. Related Threads & Resources Transcription of the Contract for Perseus & Unicorn HM 20-Gun Ship Perseus Chapters 1-2 & Appendices Table of Contents Log #1: Introduction Log #2: Service History Part I - Design & Construction Log #3: Service History Part II - George Keith Elphinstone Log #4: Service History Part III - George Keith Elphinstone Continued Log #5: Design Considerations Log #6: Service History Part IV - James Richard Dacres Log #7: Service History Part V - St. Alban Roy, George Palmer and John Gibson Log #8: Service History Part VI - Conversion to an Unrated Bomb Ship Log #9: Researching the Knee of the Head Part I Log #10: Depictions of Perseus Log #11: Researching the Knee of the Head Part II Log #12: First Draft of the Research Document Log #13: A Research Rabbit Trail Log #14: Practice Makes Perfect Log #15: Construction Begins Log #16: The Build Board & Dry Fitting Log #17: The Platforms Log #18: Securing the Model Log #19: Beginning the Knee of the Head, Stem and Keel Log #20: Bolts, Joints & Corrections Log #21: Attaching the Keel Log #22: Shaping the Head Log #23: The First Bulkheads Log #24: Structural Supports & Fixing Mistakes Log #25: More Structural Supports and the Deck Sheer Log #26: Framing the Gun Ports Part I Log #27: Researching the Wales of Perseus Log #28: Framing the Gun Ports Part II Log #29: Researching the Figurehead Log #30: Framing the Stern Part I Log #31: Framing the Stern Part II Log #32: Research Document Draft 2
-
Welcome to my log for the Hobby Boss Type VIIC U Boat. This is intended to be a short side project and so this log will likely be used to document my progress rather than explaining my thought processes in detail. I am intending to keep kitbashing to a minimum on this build with the only significant addition likely to be placing the u boat in a seascape diorama. Here is a picture of the box, next week I will begin planning the build.

- 54 replies
-
- 13
-
-
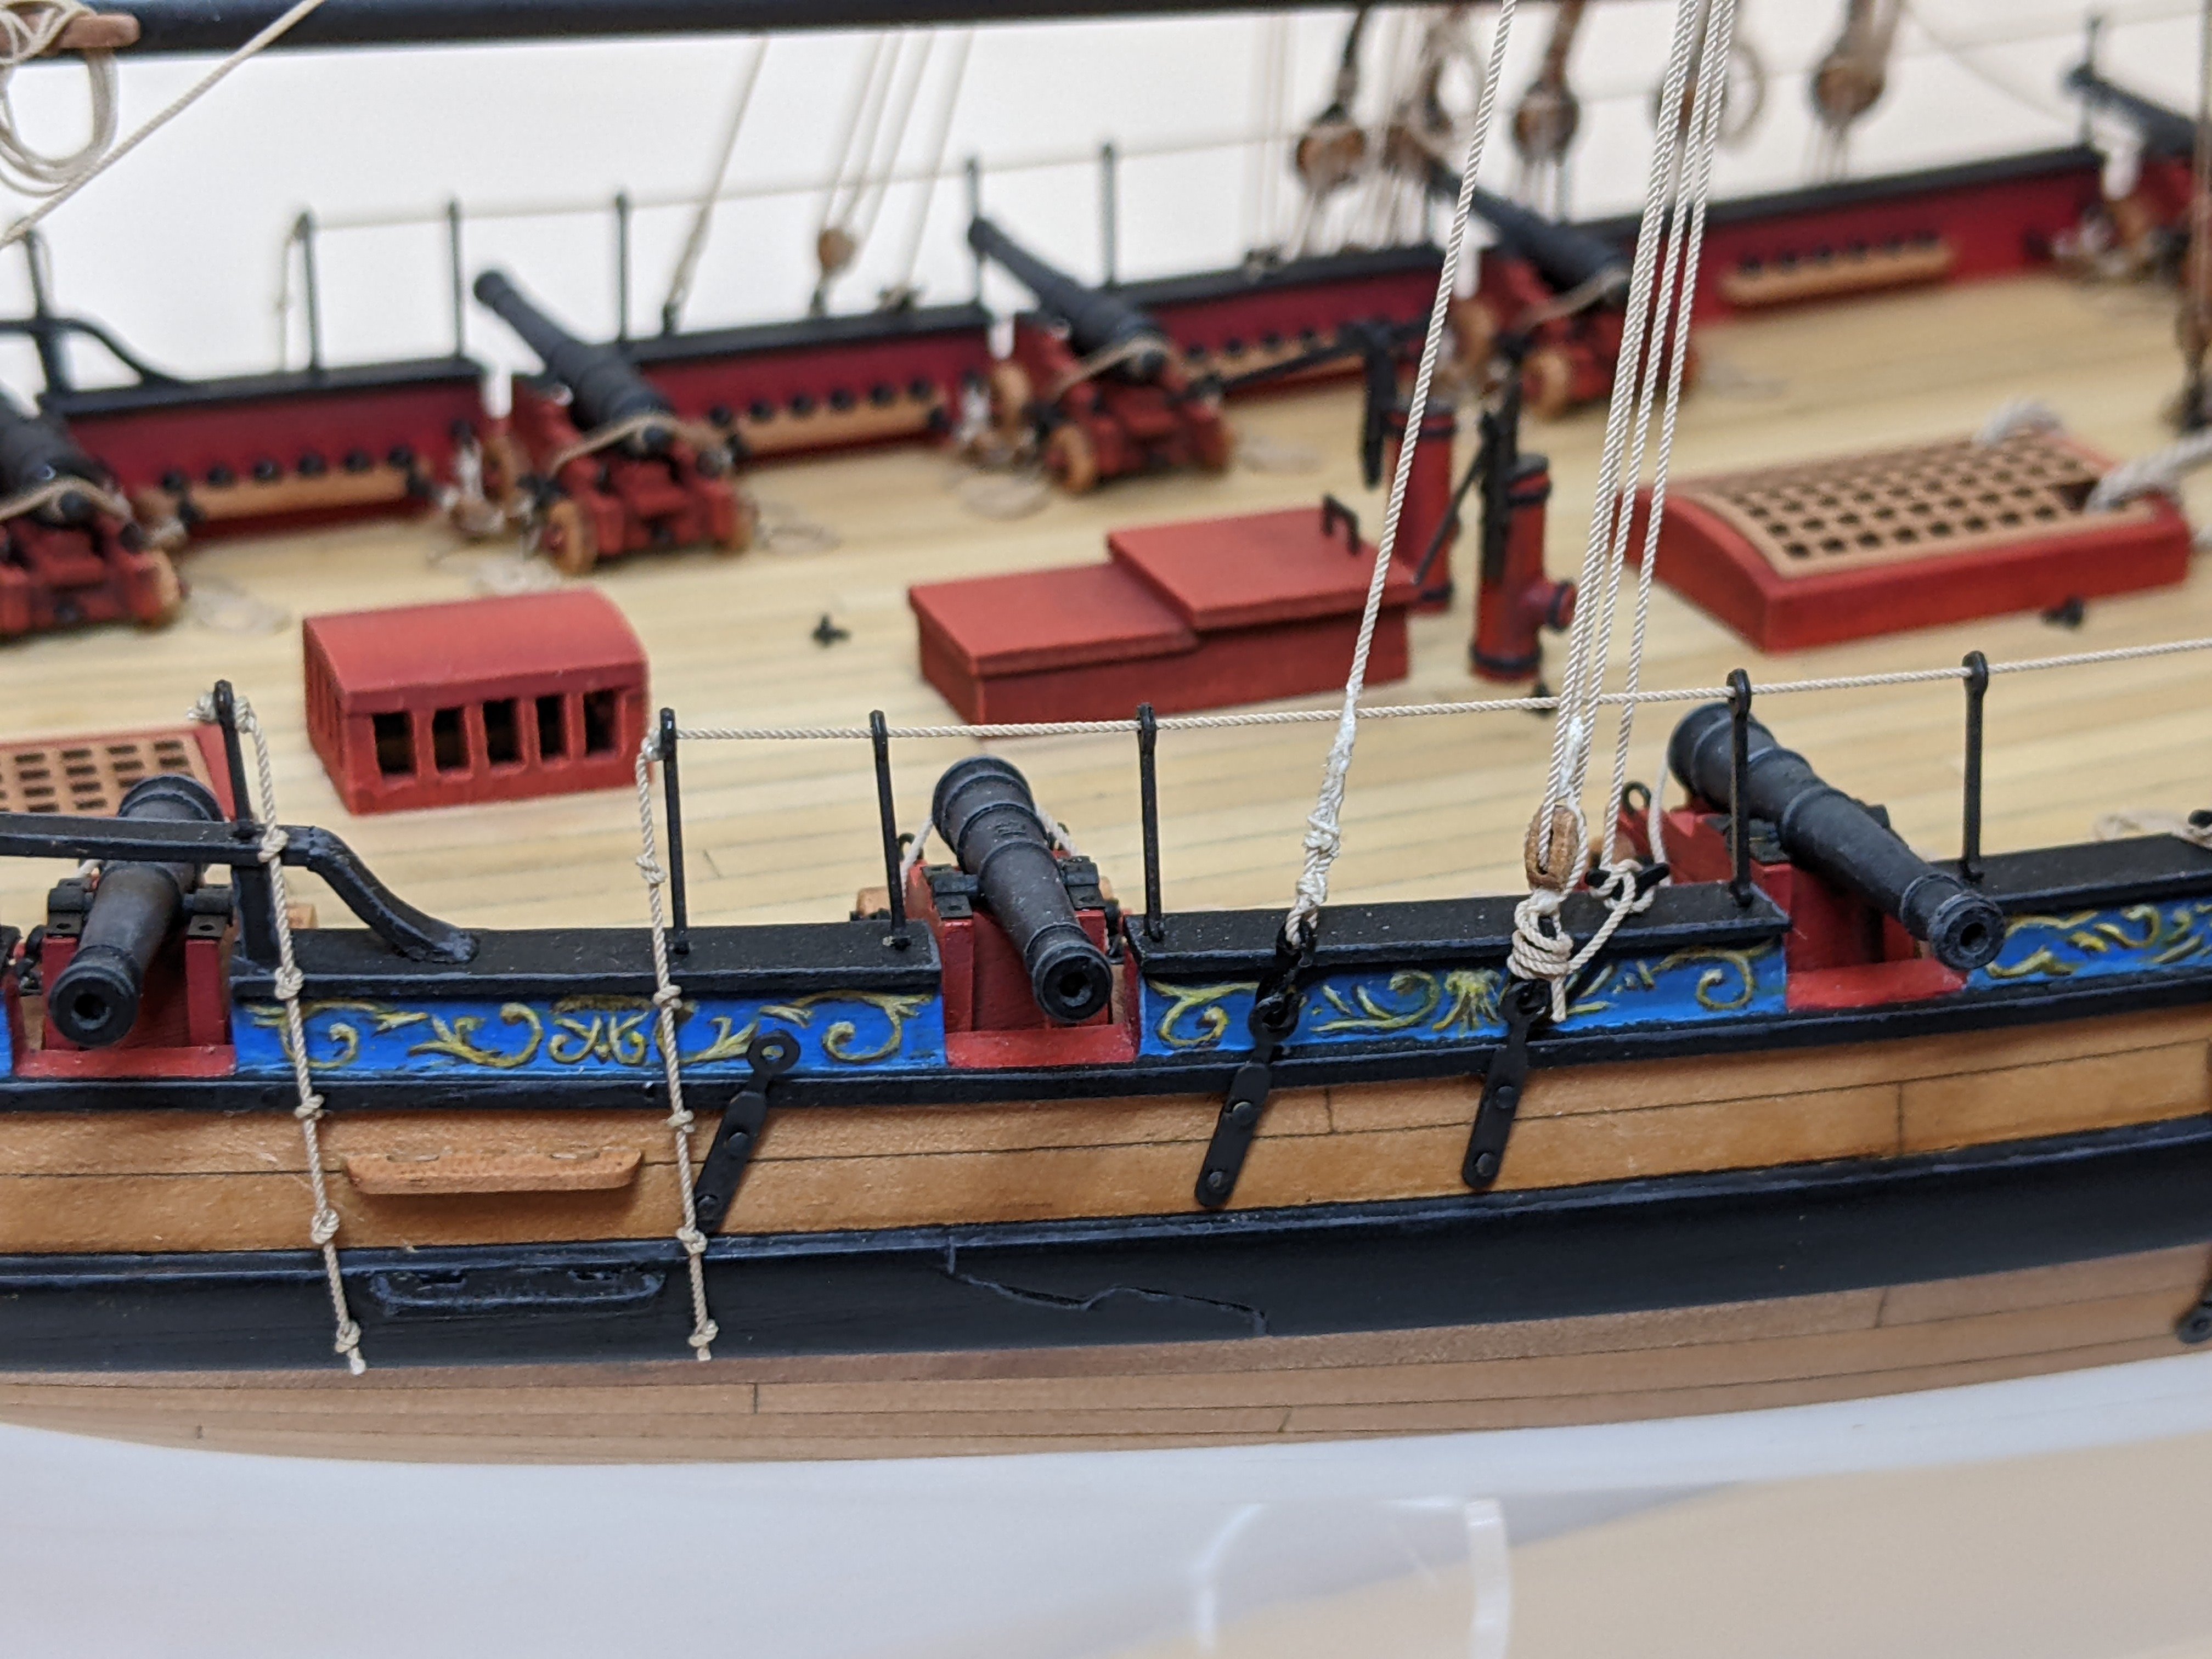
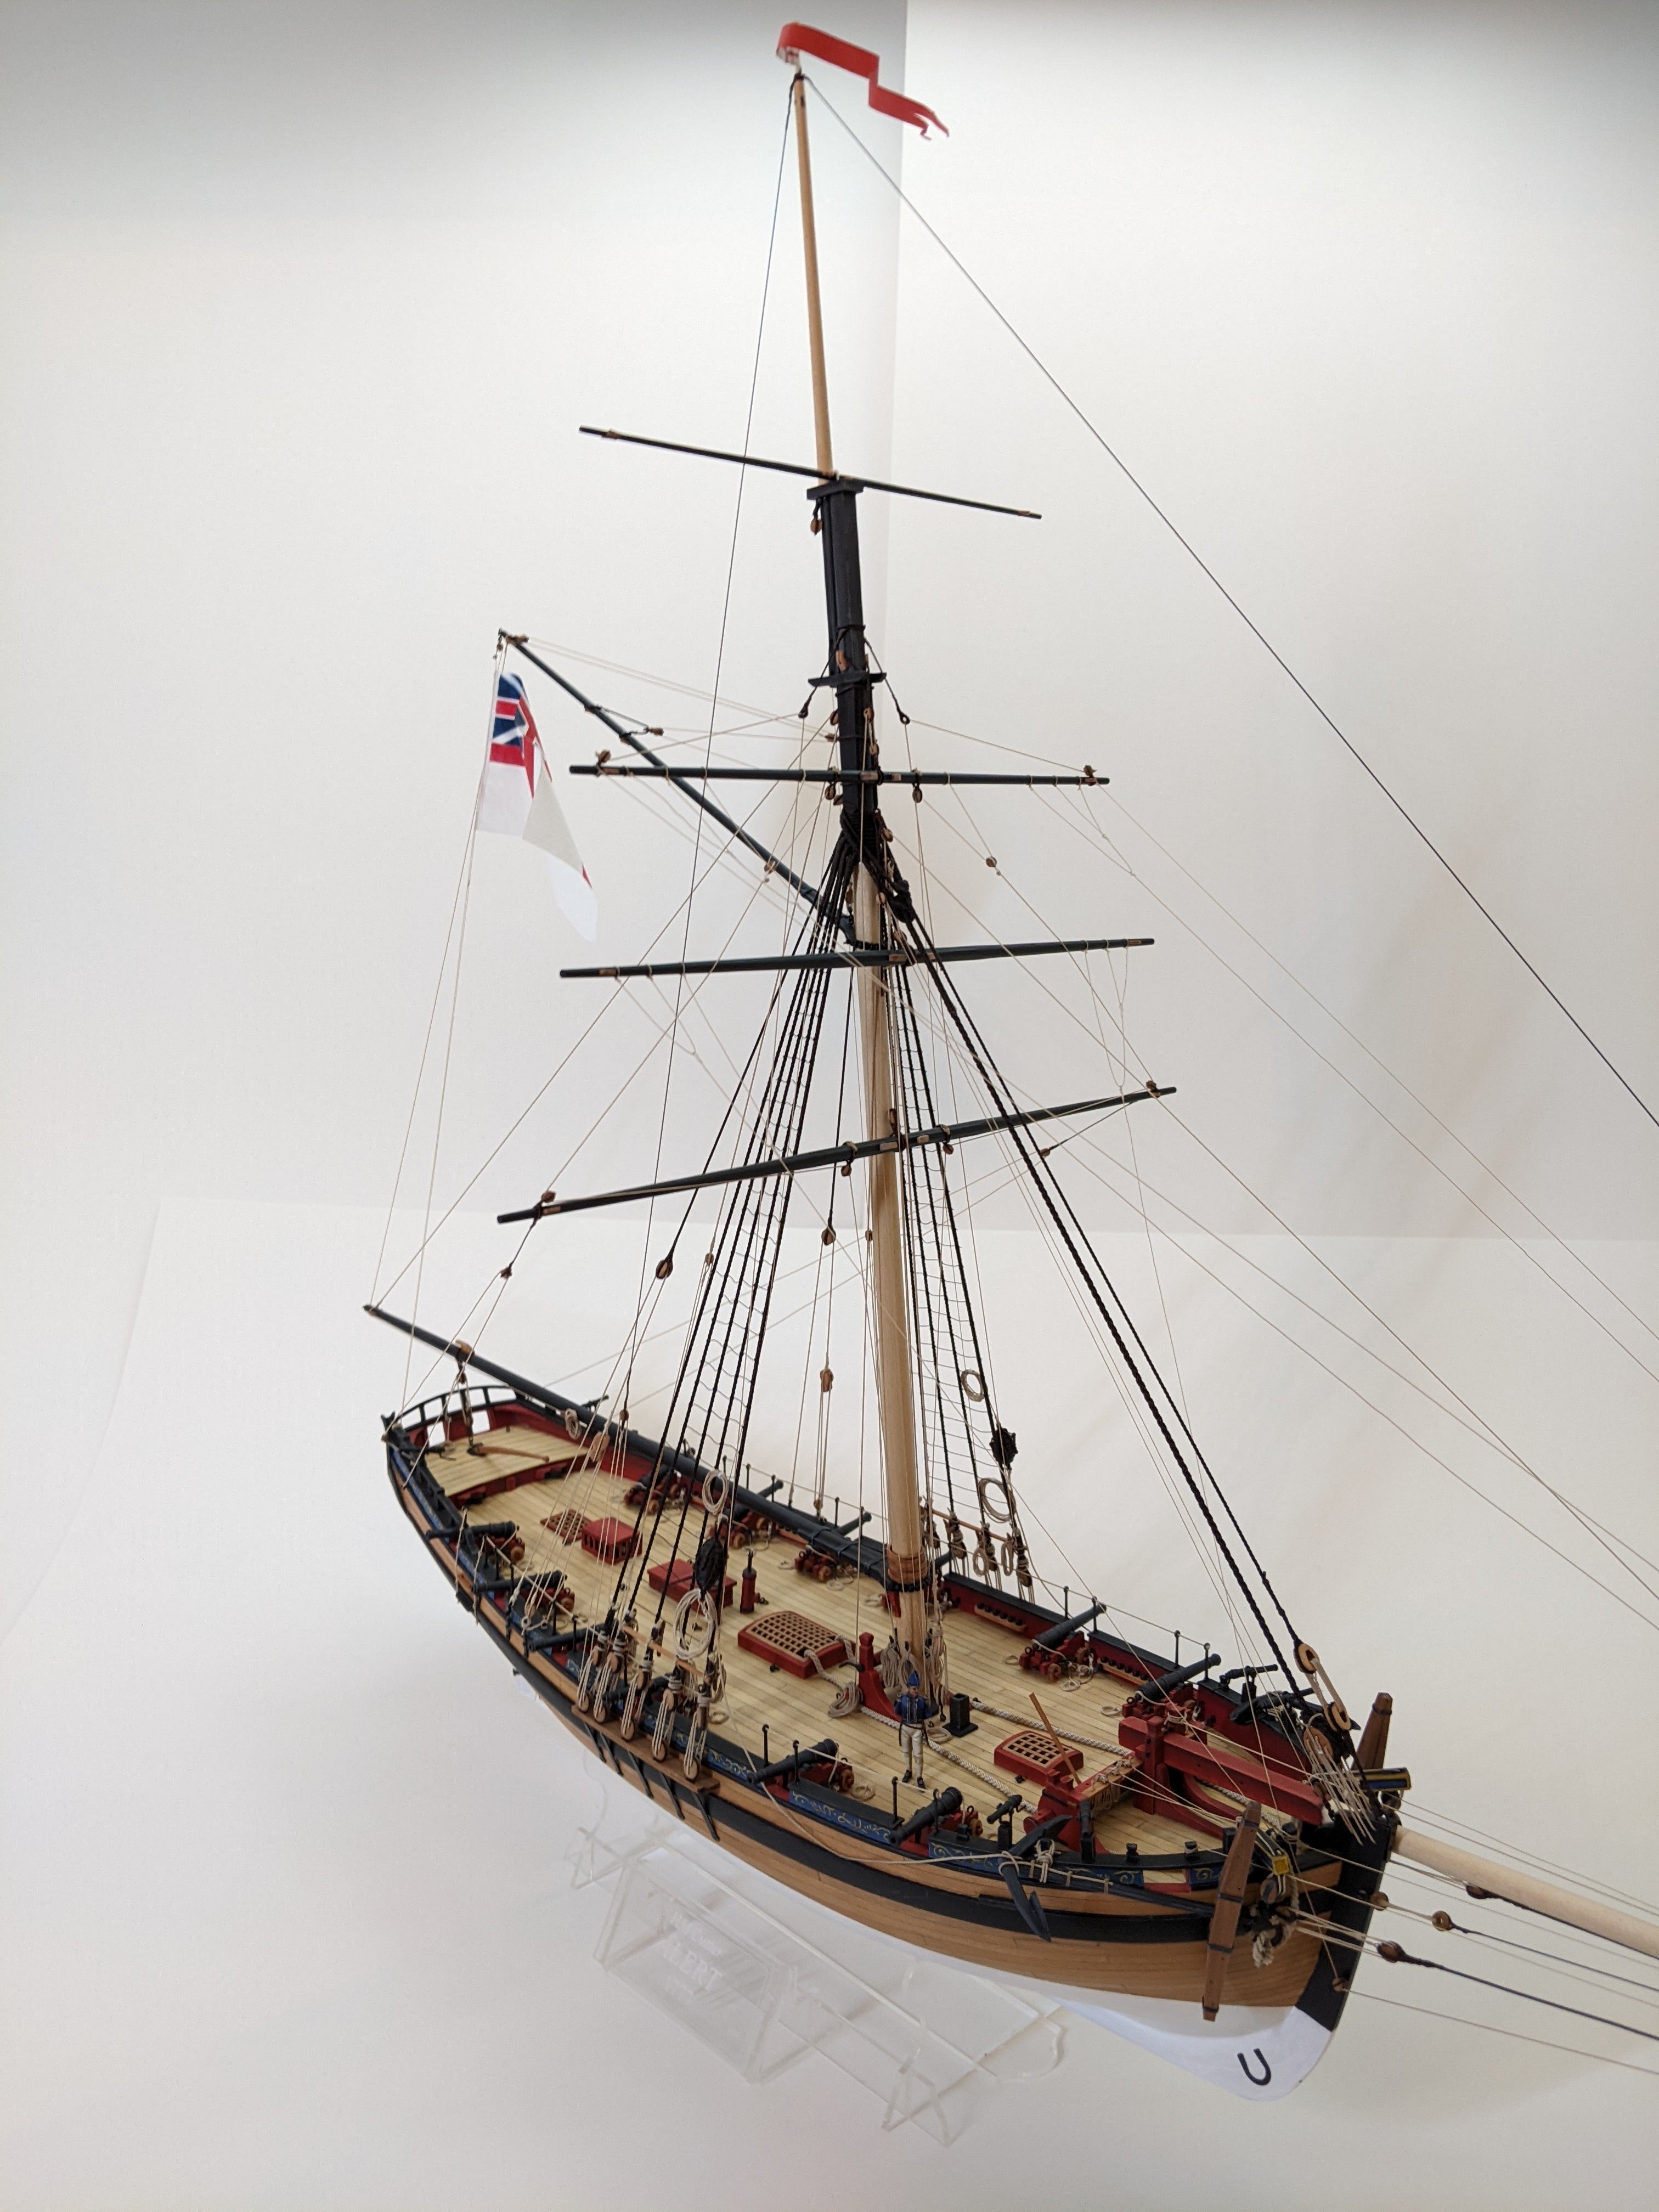
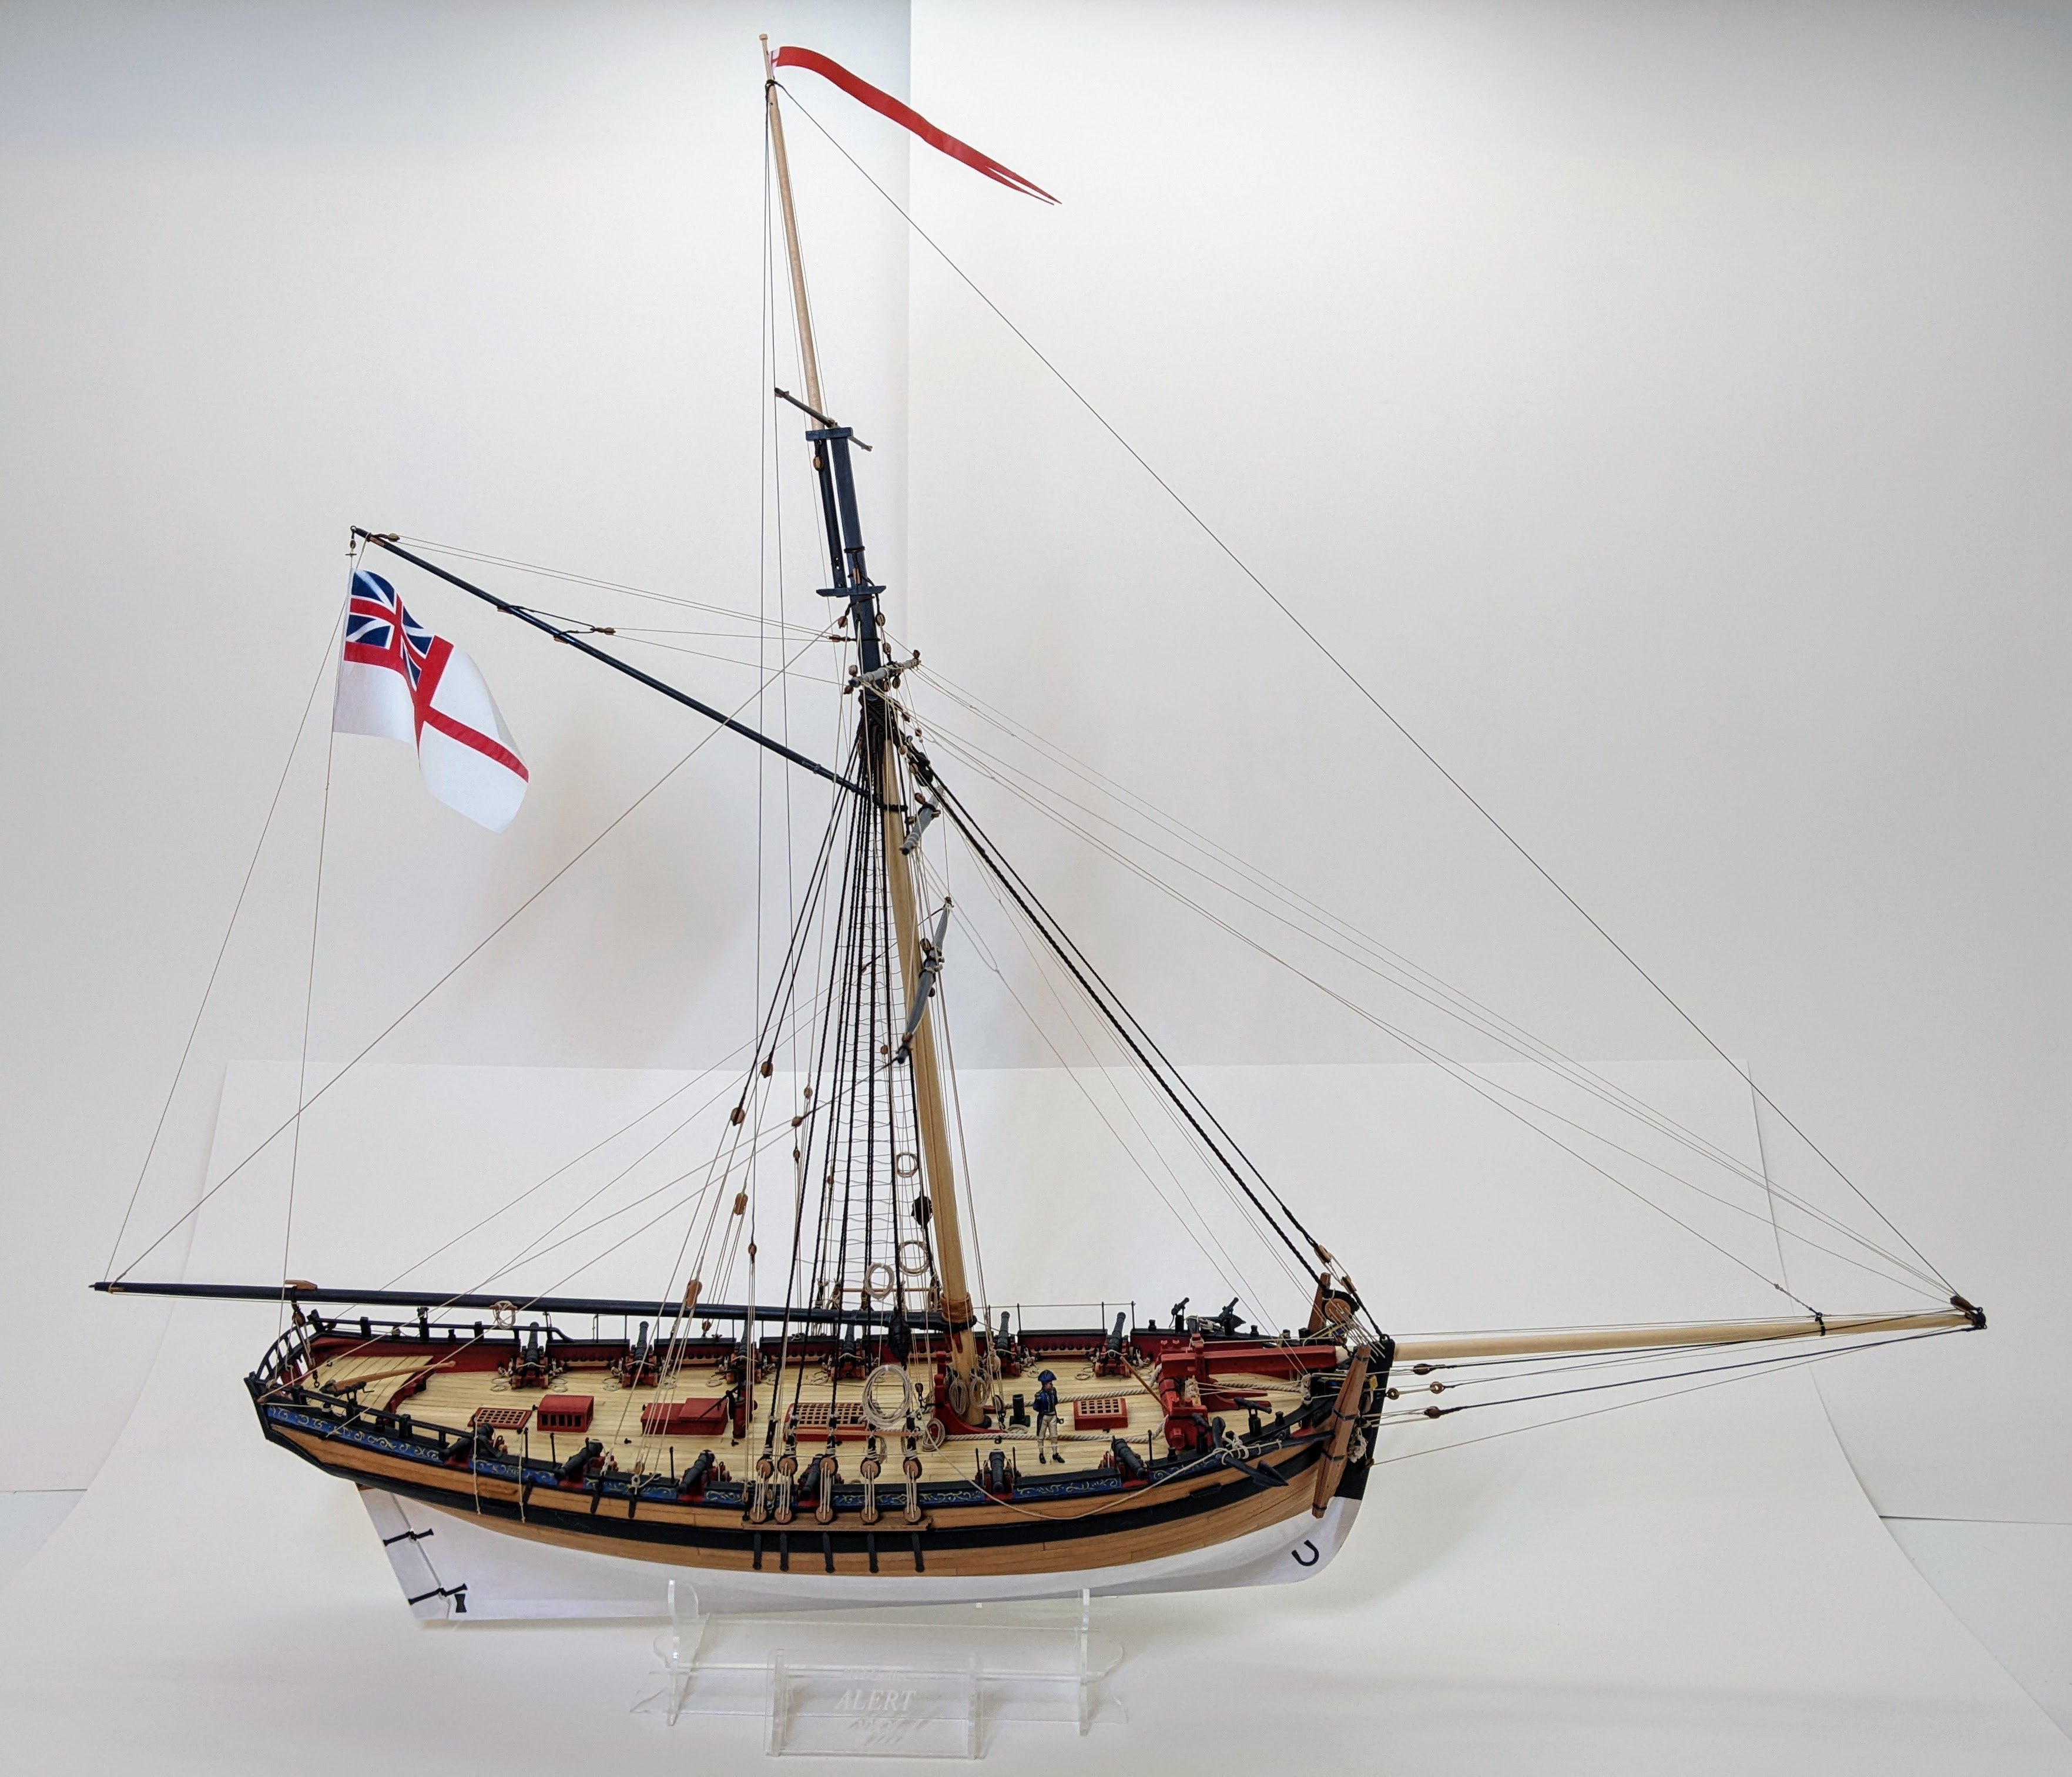
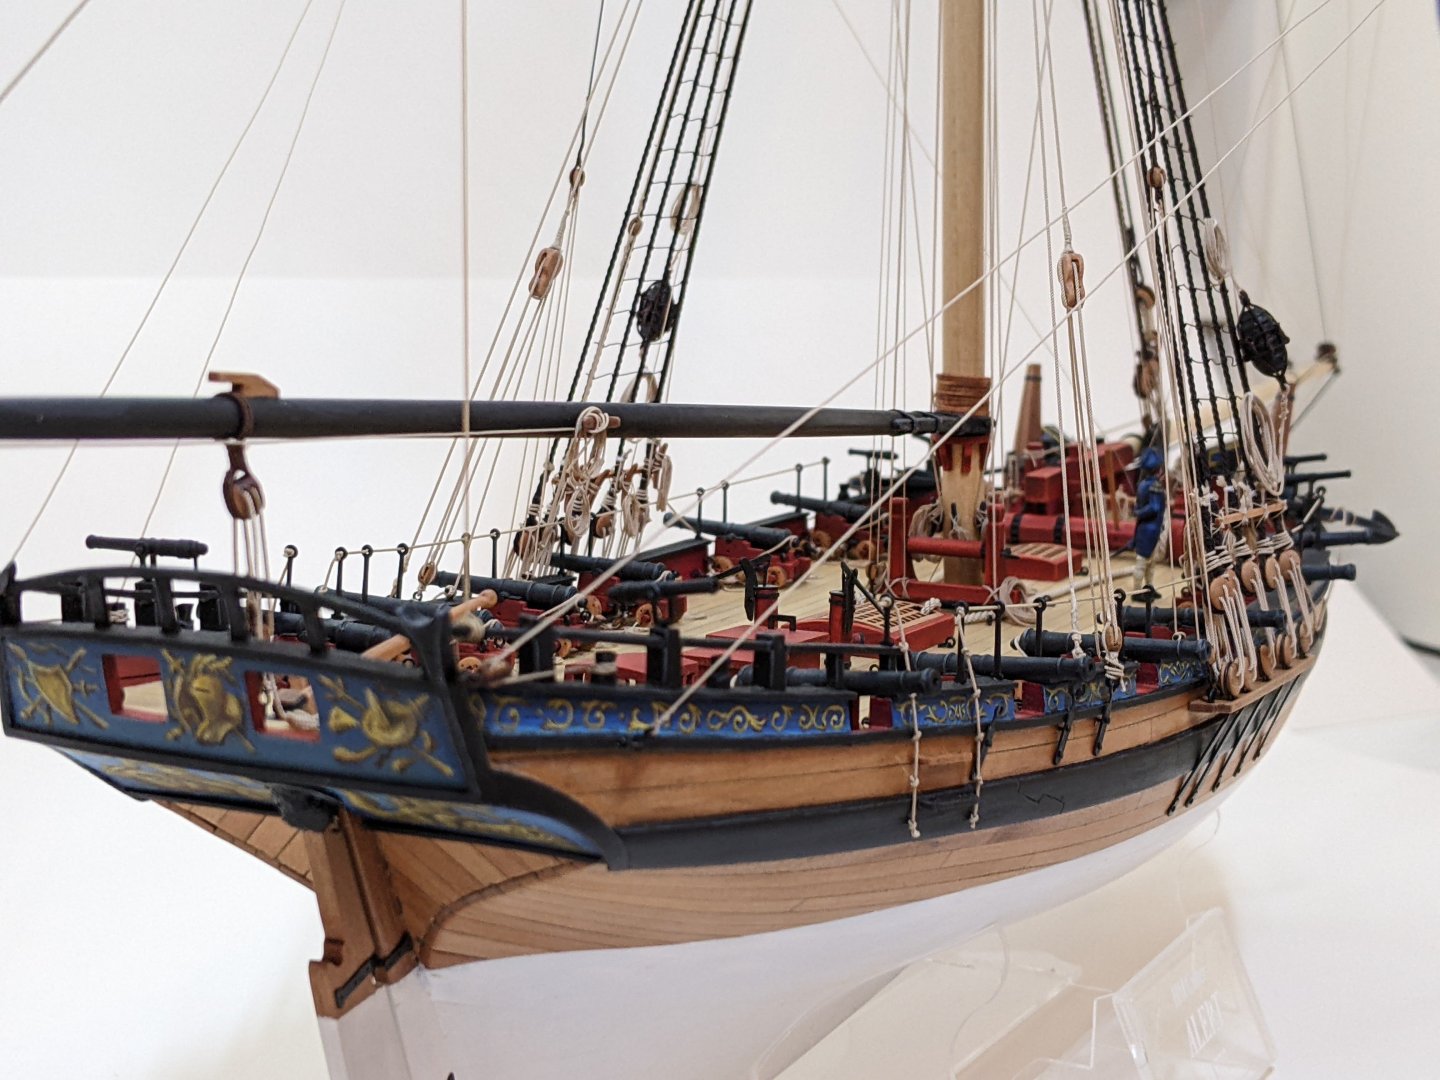
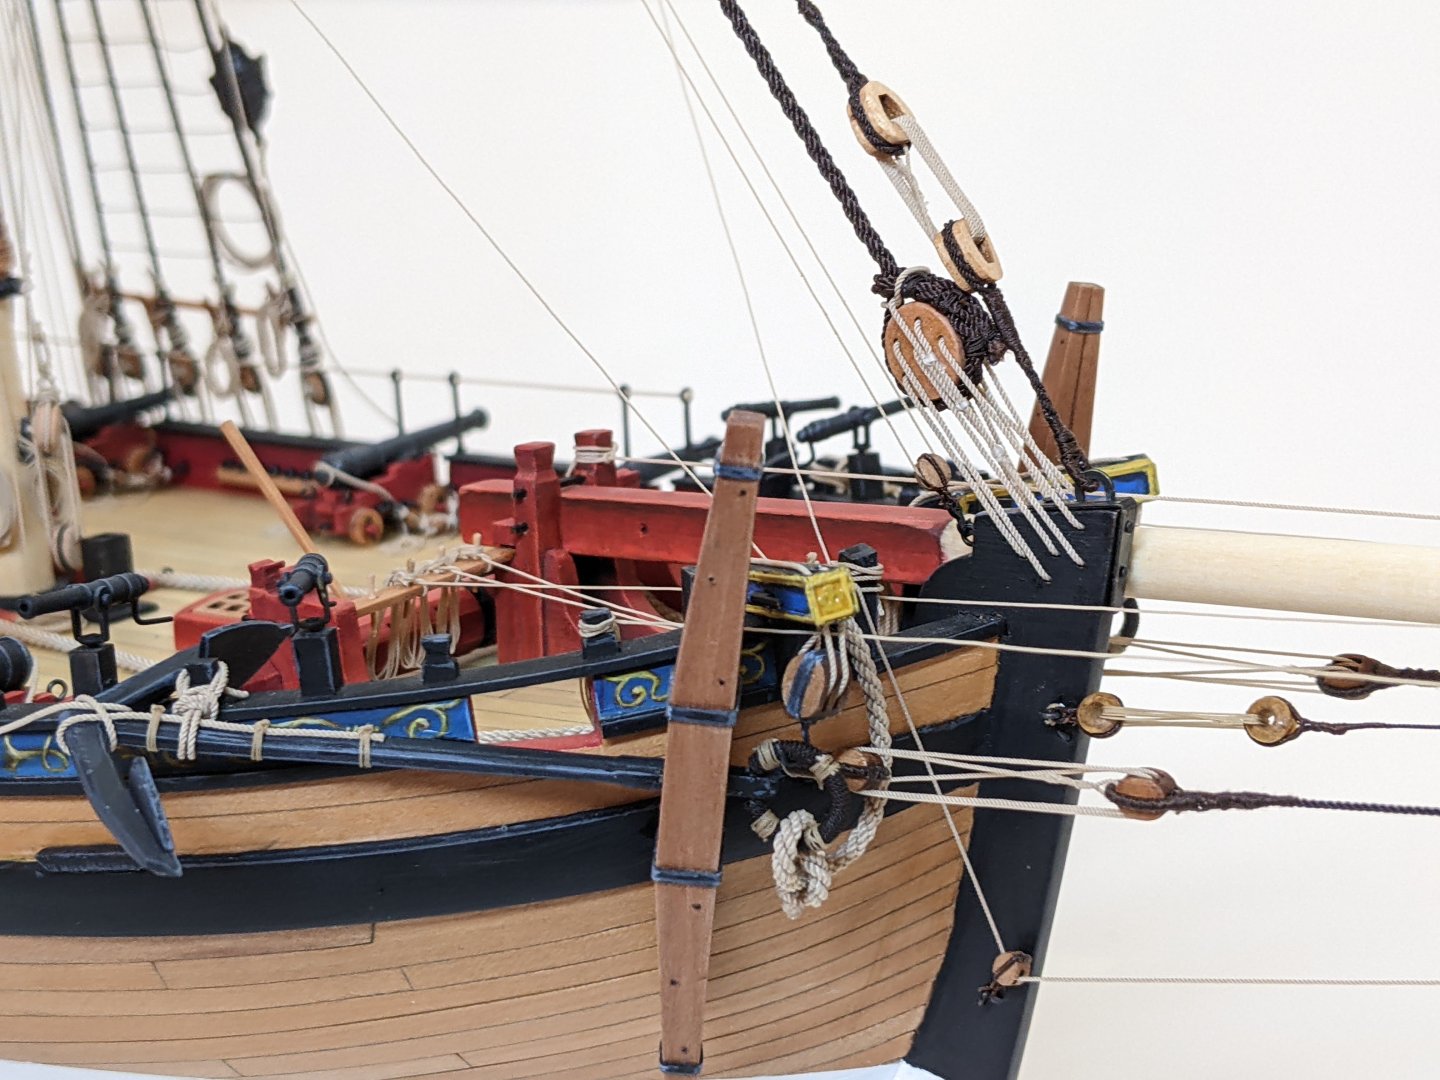
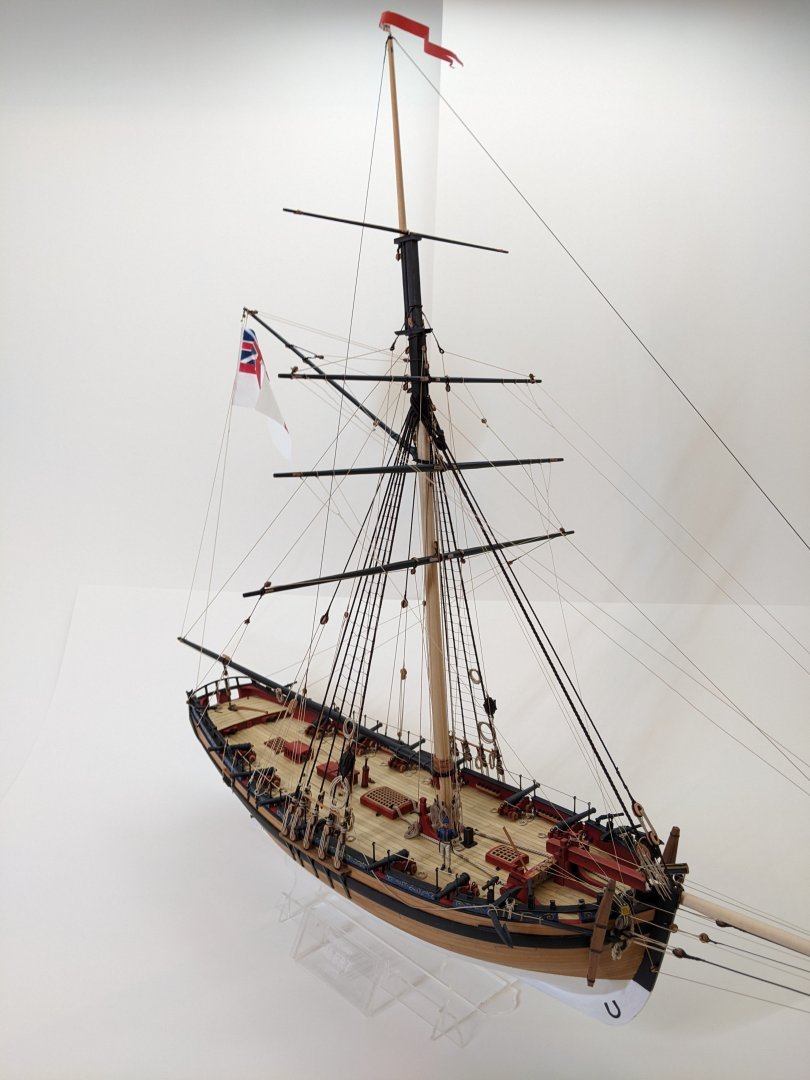
Log #96: Concluding Thoughts After 2 years, 11 months and 20 days, Alert is finally finished. Overall, looking back at the experience I can say that as a beginner I would wholeheartedly recommend the Vanguard Alert kit. It is easy to follow along with and you can build a great model out of the box while also having scope to make small improvements if you desire. The first picture I took of alert back on August 3, 2021 As a general rule, I stuck pretty close to the kit with this build making small improvements here and there where I felt comfortable. Most of the changes were made with the repurposing of kit parts or random household items I had on hand and I would say any beginner with a bit of patience should be able to do a similar level of kitbashing. The largest deviations were the replacement of the rope (courtesy of @BenD) and my decision to throw caution to the wind and attempt to replicate the Marshall painting decorations. The Marshall painting of Alert I would say I both overestimated and underestimated how hard building a model ship would be. Some parts turned out better than I had hoped while others fell short. However, as a learning experience I have no complaints. In the end I think it is fair to say that I achieved a unique look that I am proud of and I look forward to doing better on the next model. I want to take a moment to thank some people without whom I would never have been able to reach the finish line. @chris watton - I have long desired to make a ship model, but had no idea how I would even go about learning how to do such a thing. Chris’ excellent model made it possible for me to enter into what is a fairly overwhelming hobby in a way that I was able to slowly build the skills necessary to actually complete it. @Blue Ensign - BE’s Alert log was my second manual. I don’t know how many times I read it through, but it is safe to say that almost all of the changes and additions I made to the build had their inspiration in BE’s log. This model would be significantly worse had his log not been there for me to follow along with. All other Alert Build logs - I have read every word of each of them at least once and have taken lessons and inspiration from all of them. MSW - I couldn’t possibly name all of the people who made critical contributions at one time or another. Your many suggestions made the model better and It is highly likely that without all your encouragement I wouldn’t have made it to the finish line. So without further ado, here are some pictures of the finished model:


- 562 replies
-
- 38
-

-
-

-
- vanguard models
- alert
- (and 2 more)
-
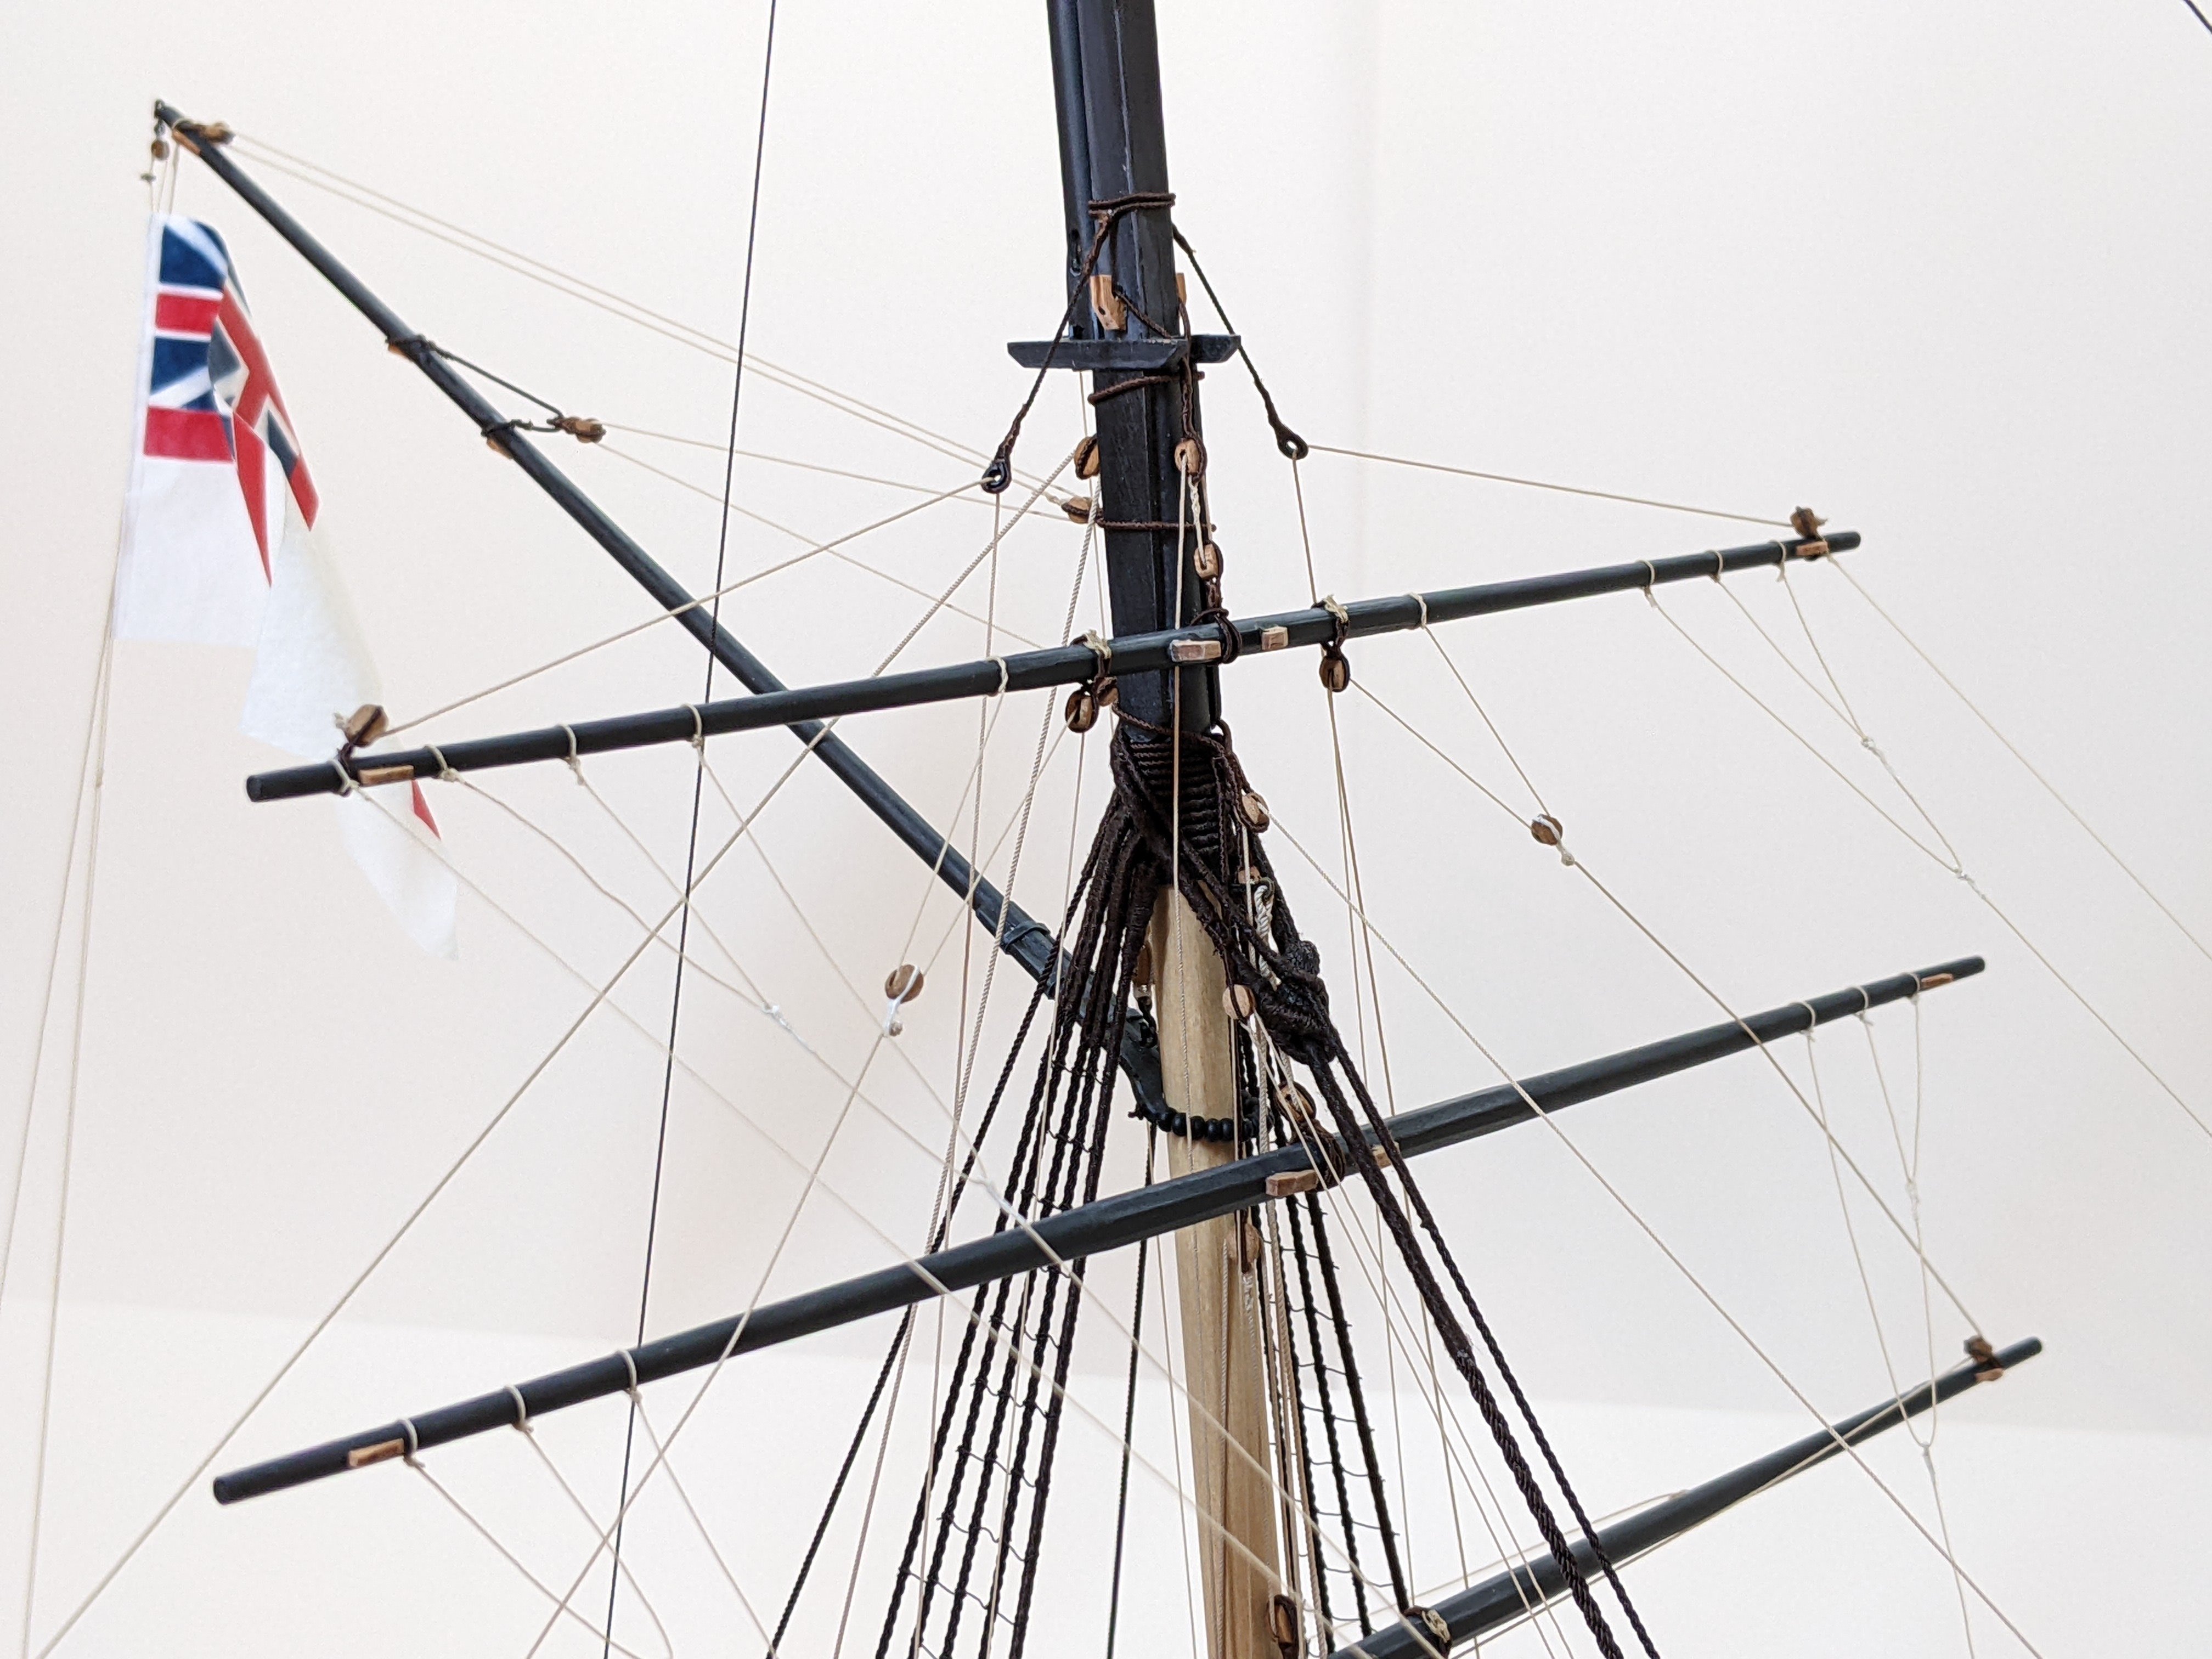
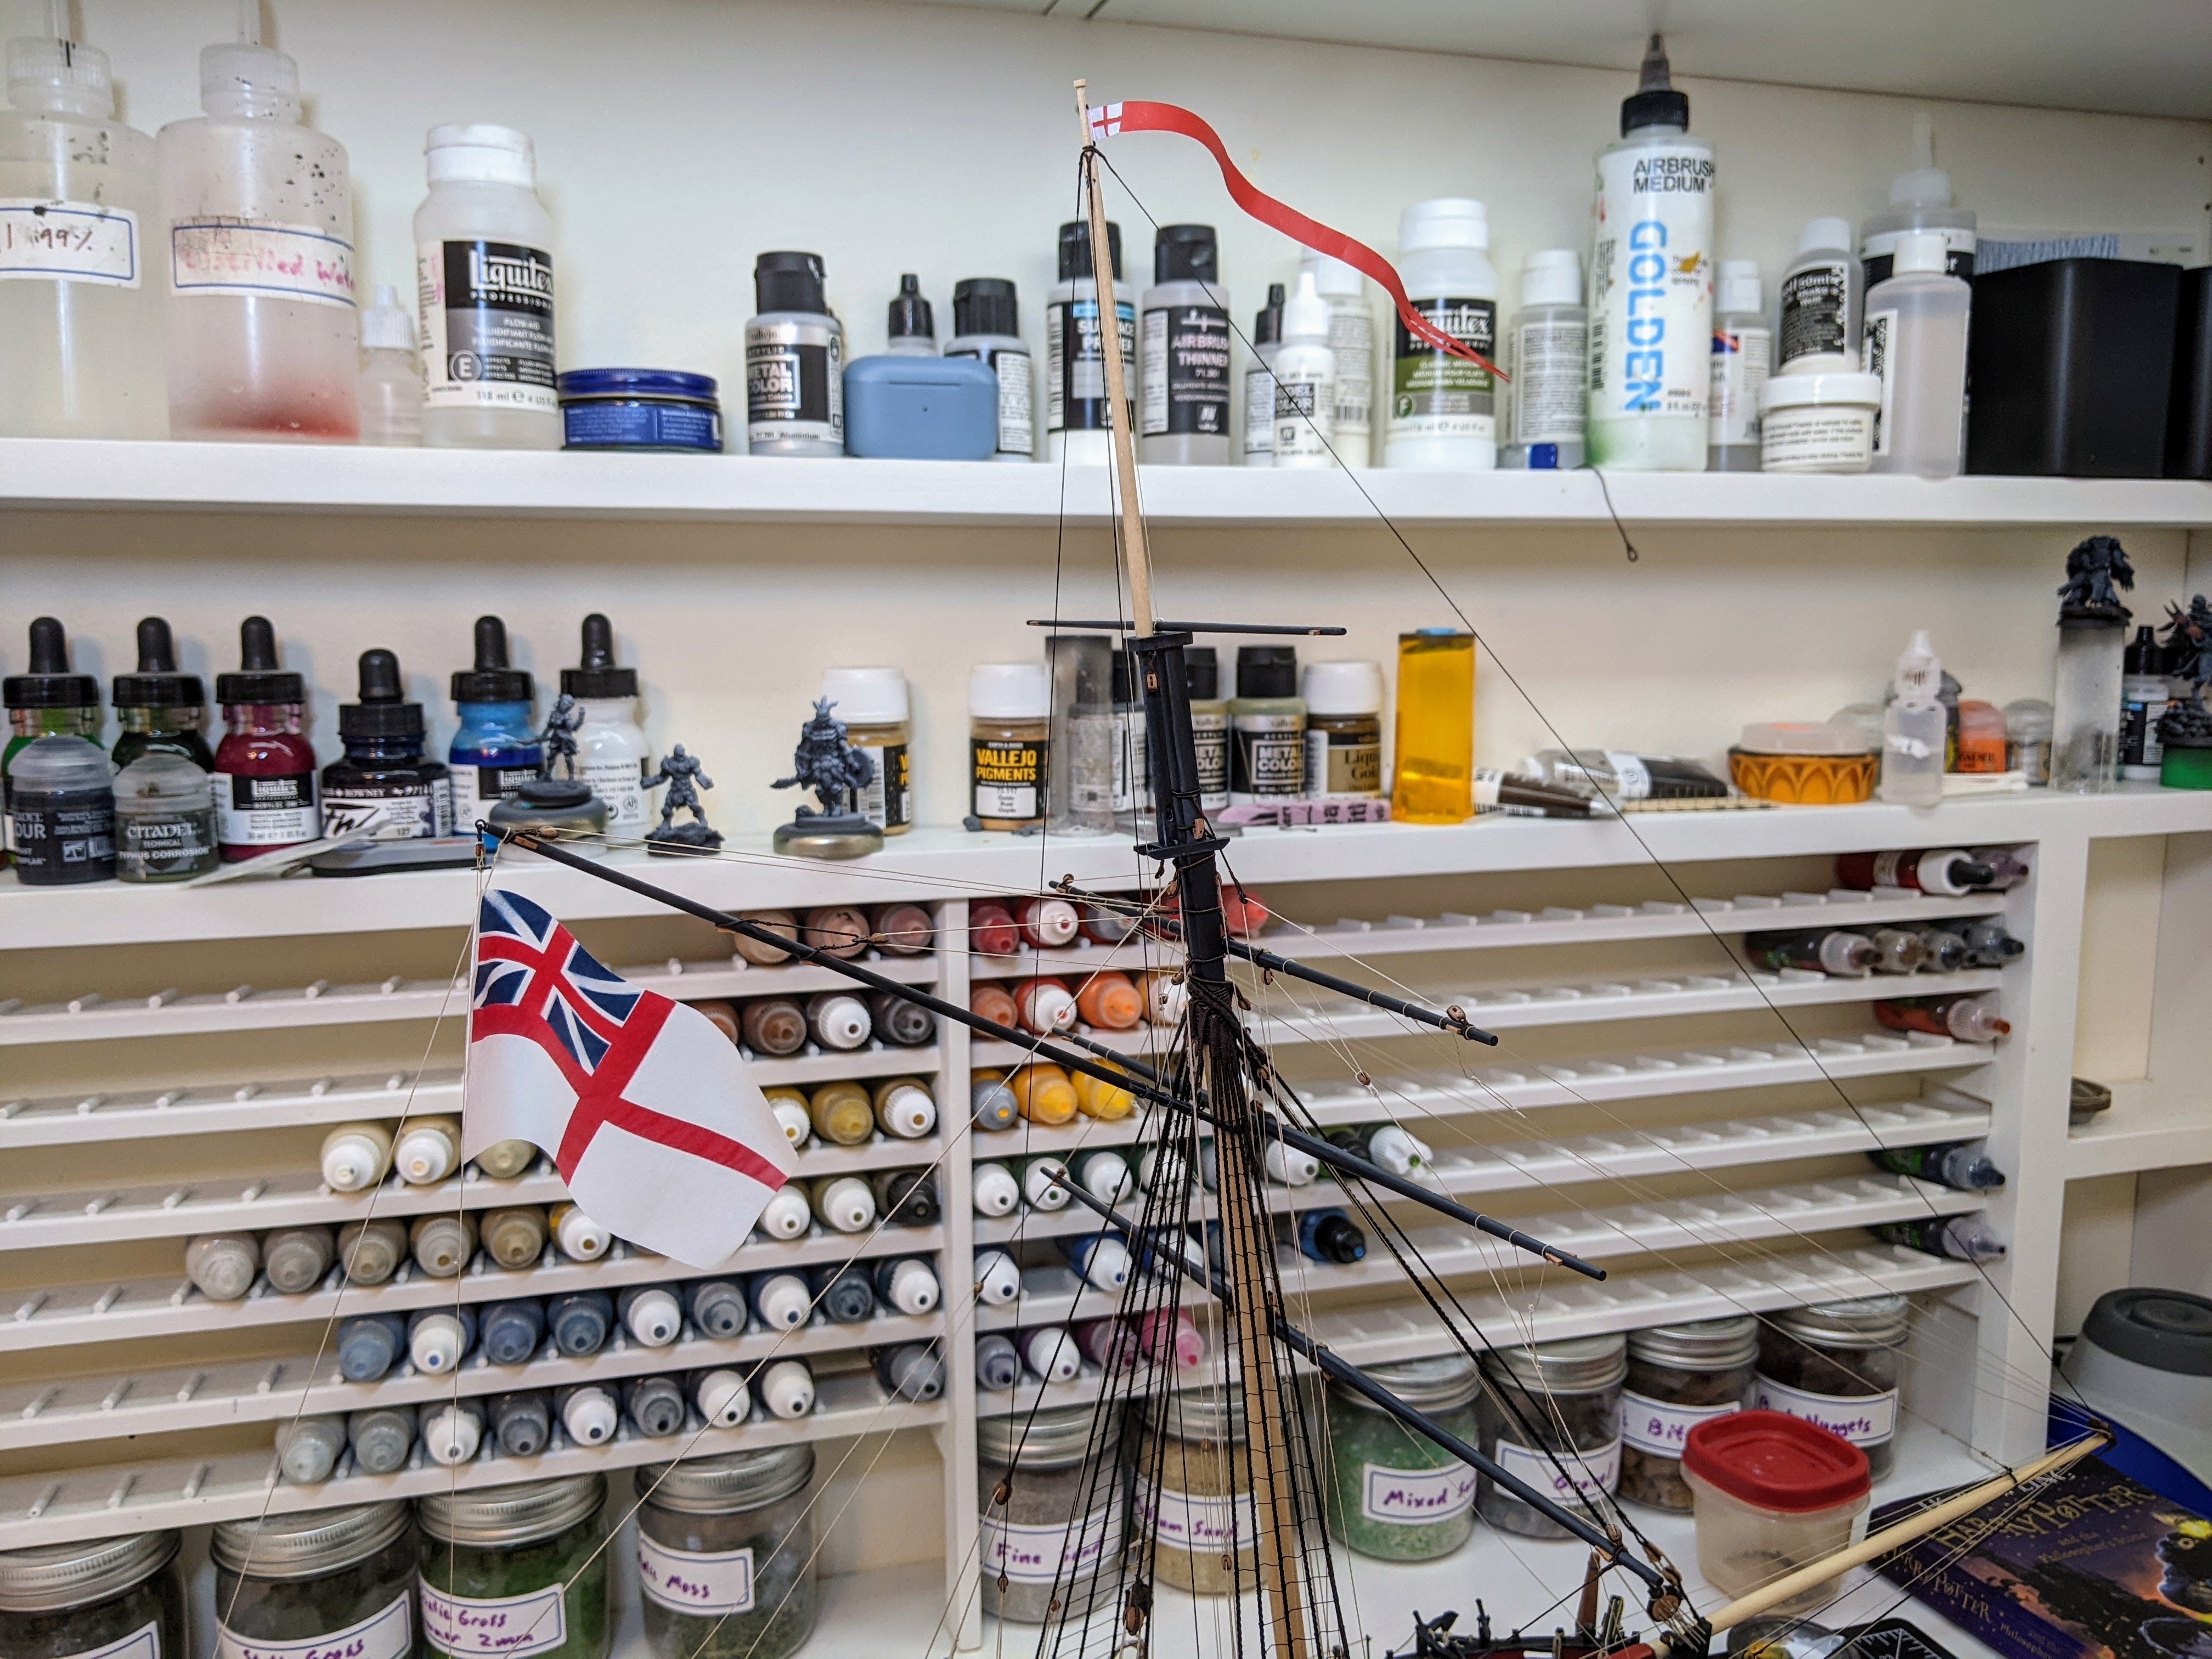
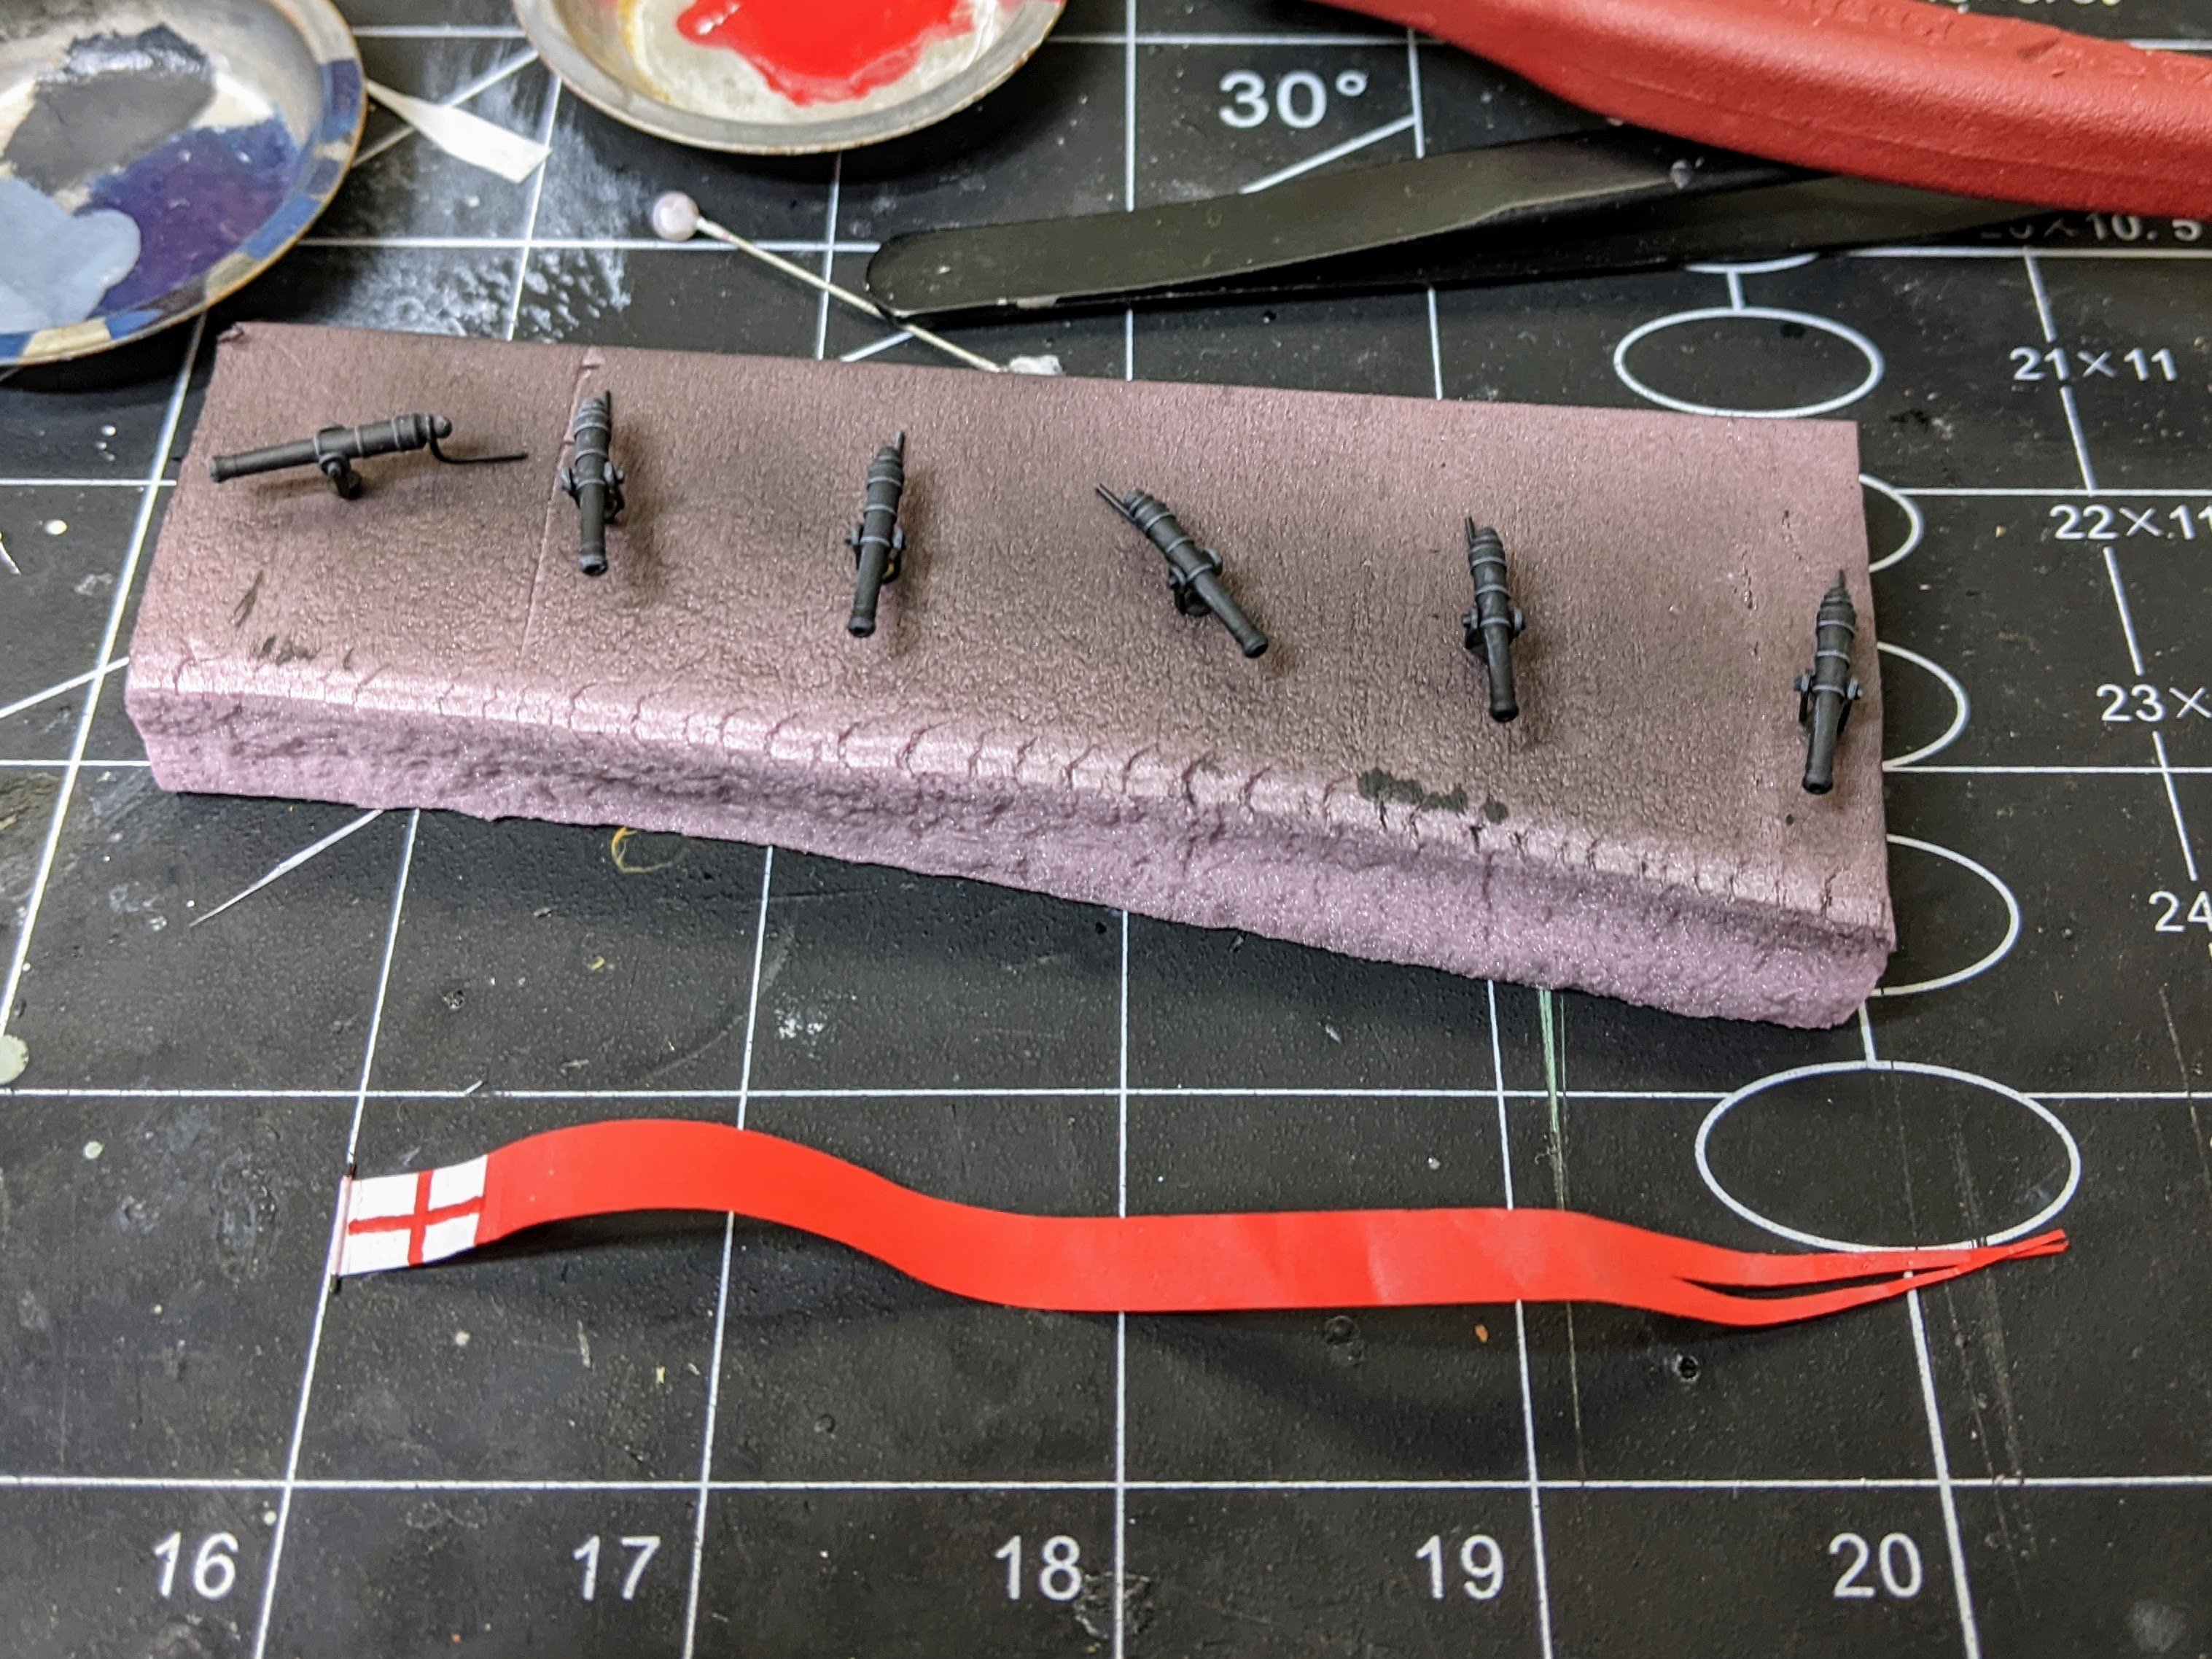
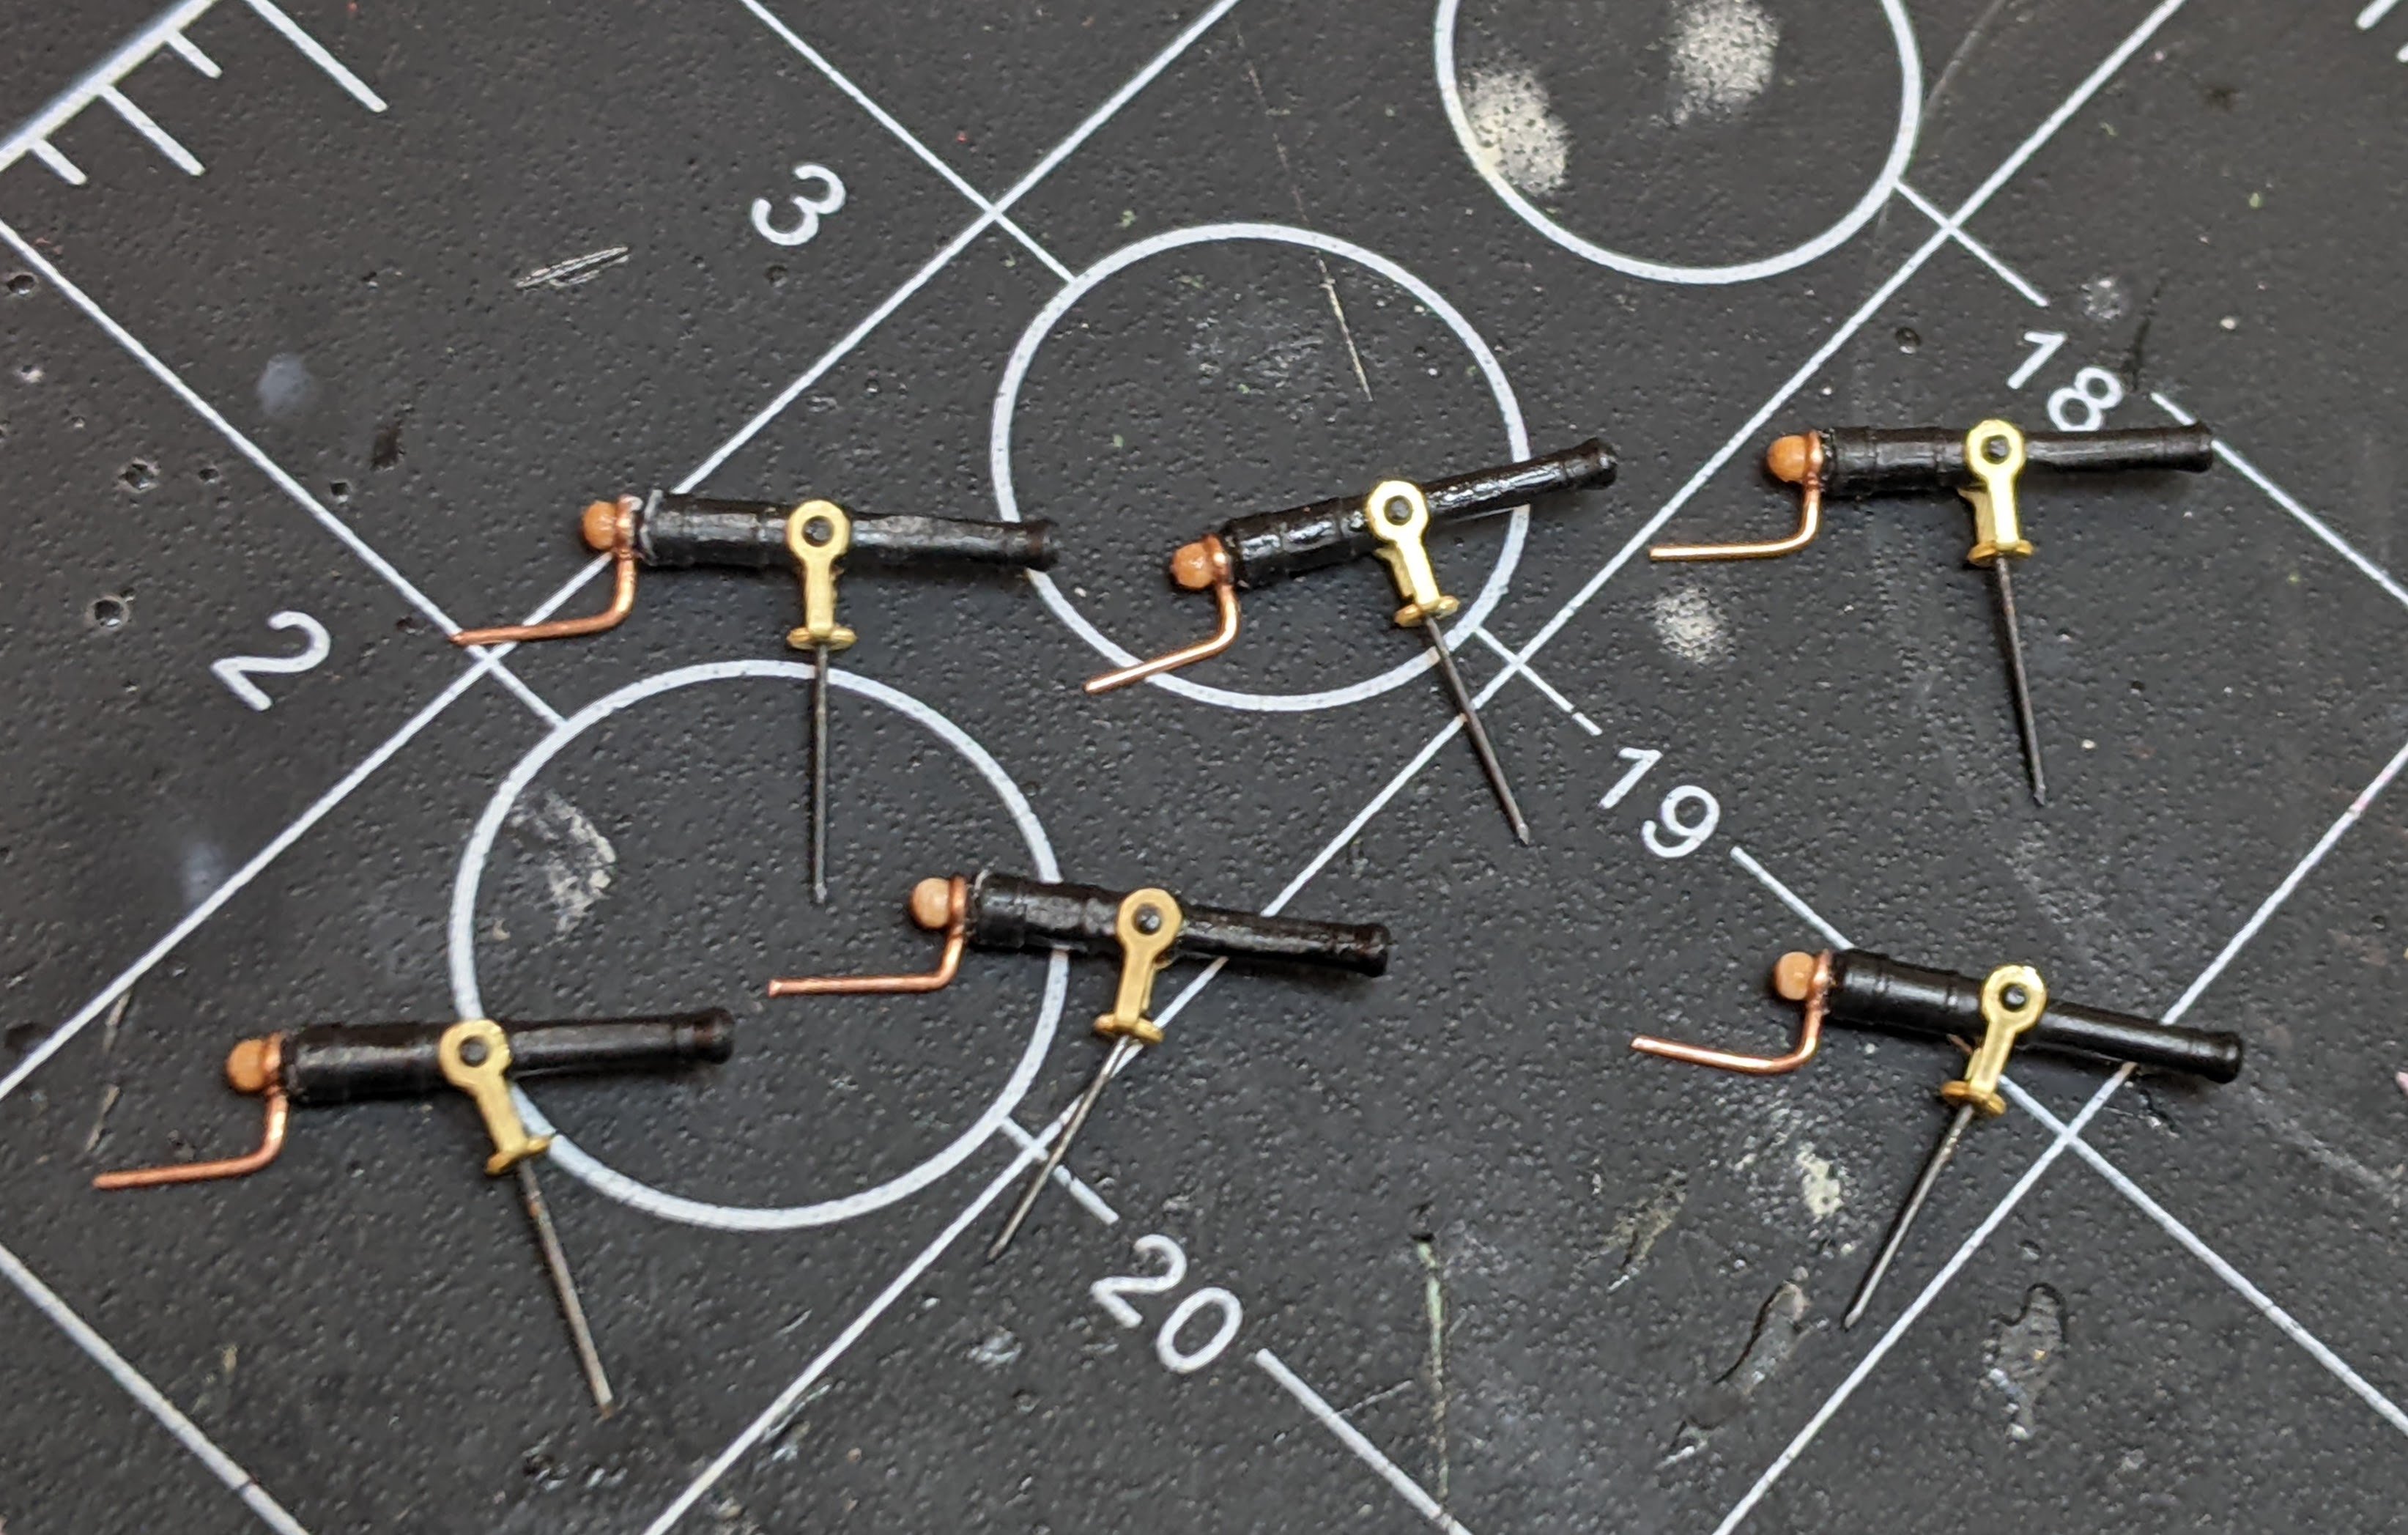
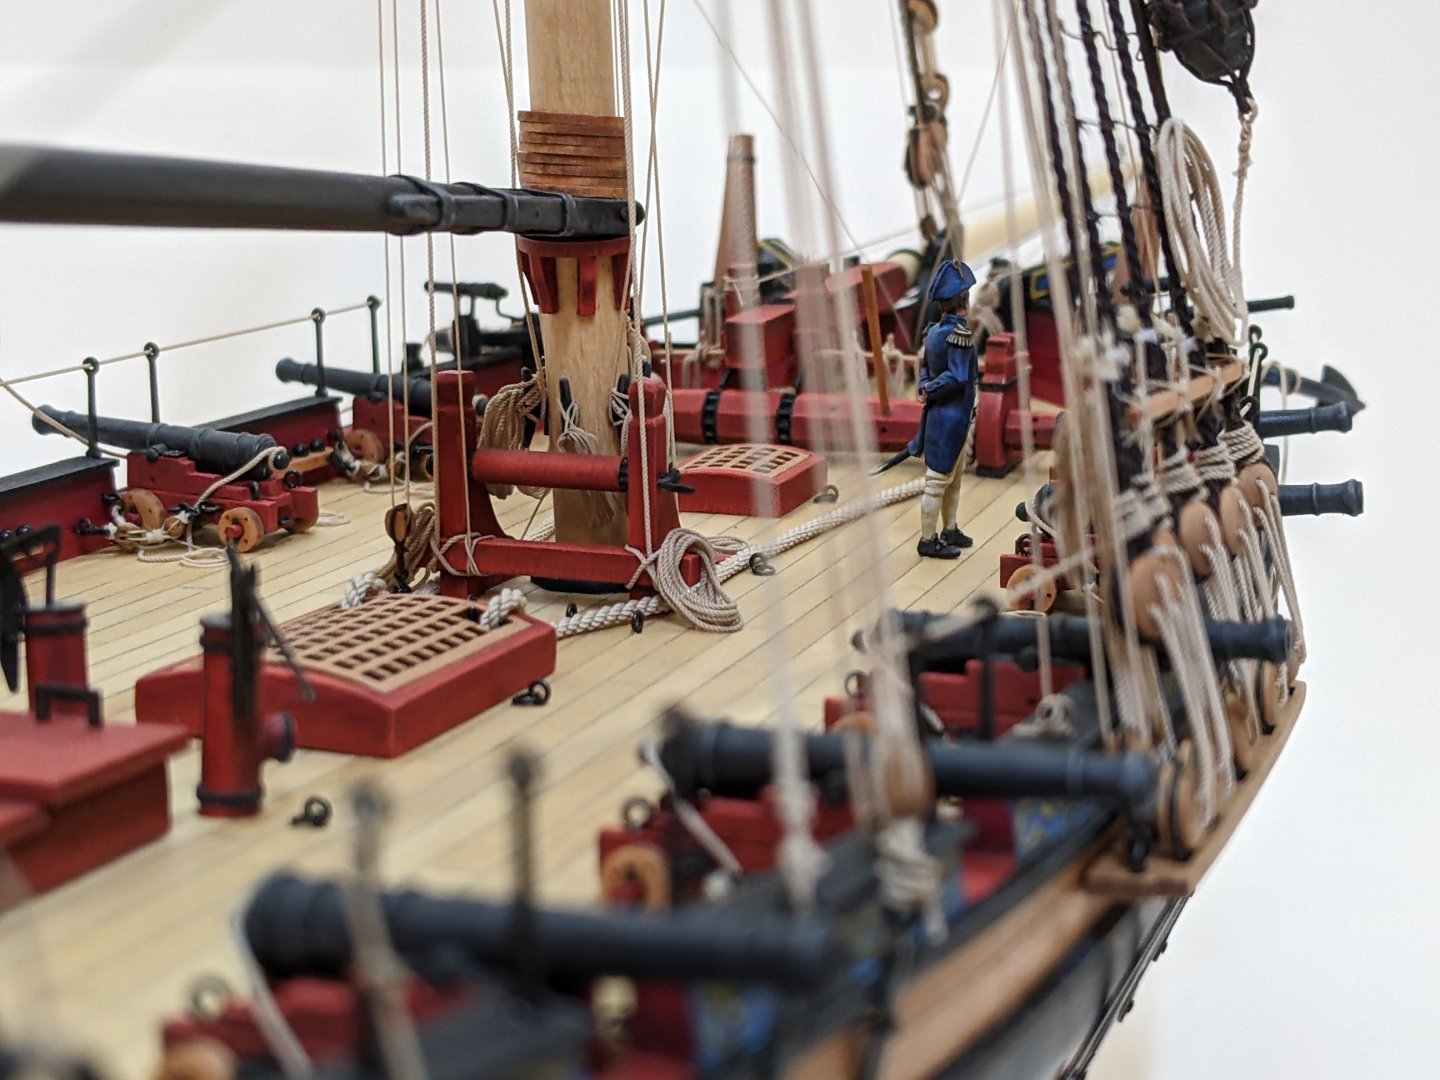
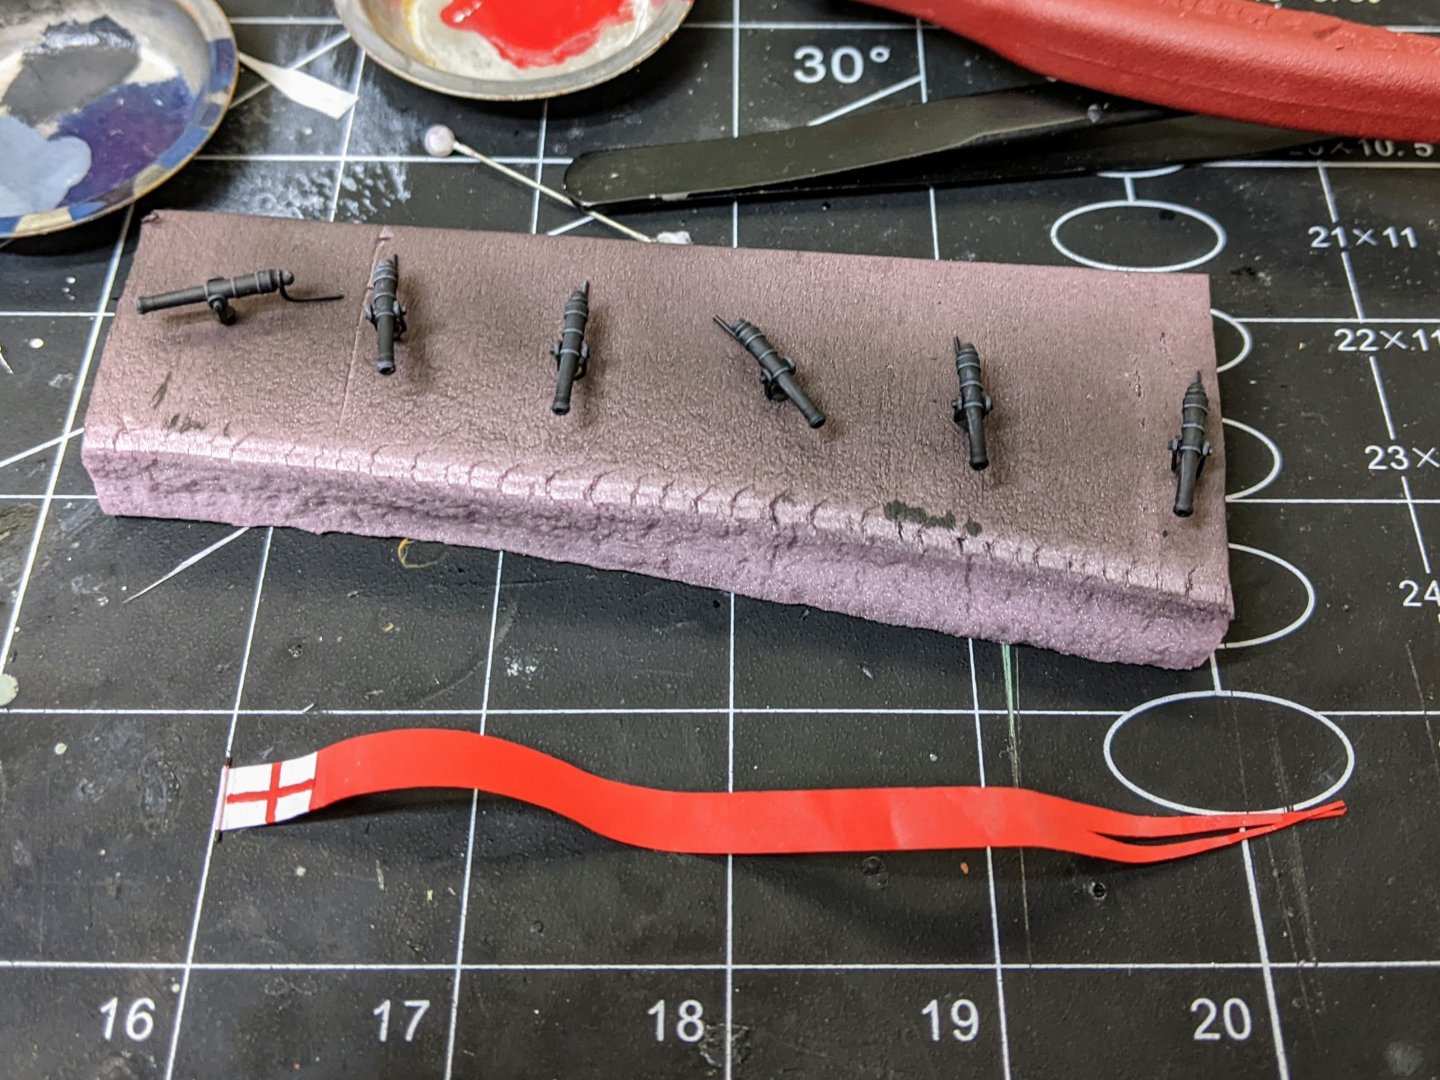
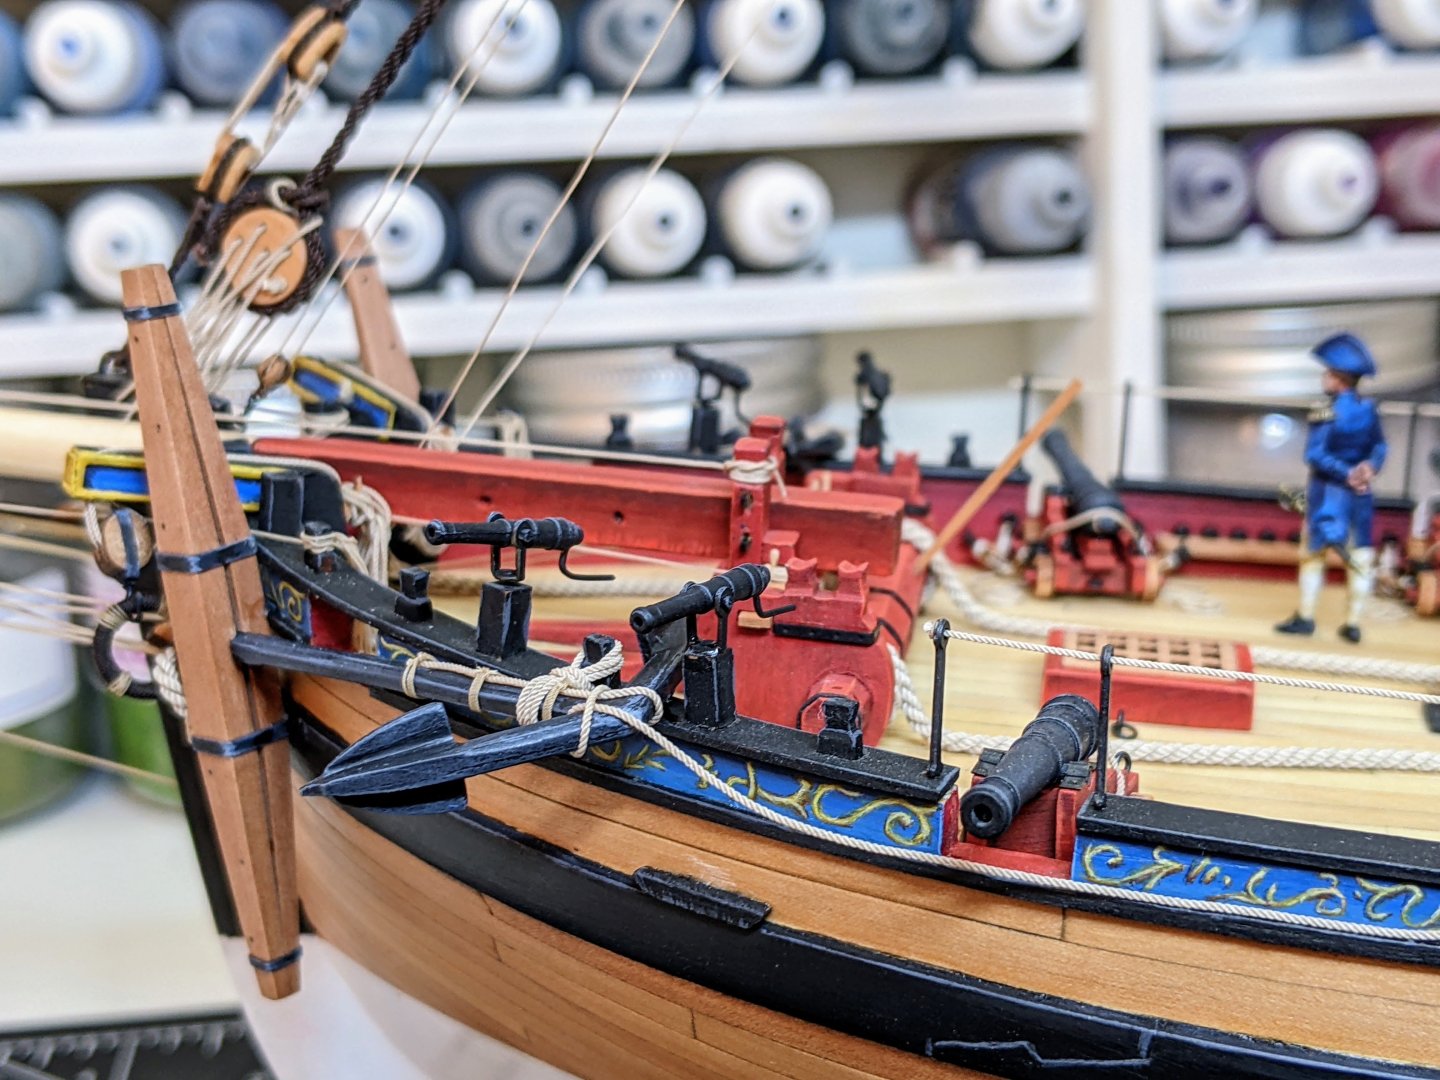
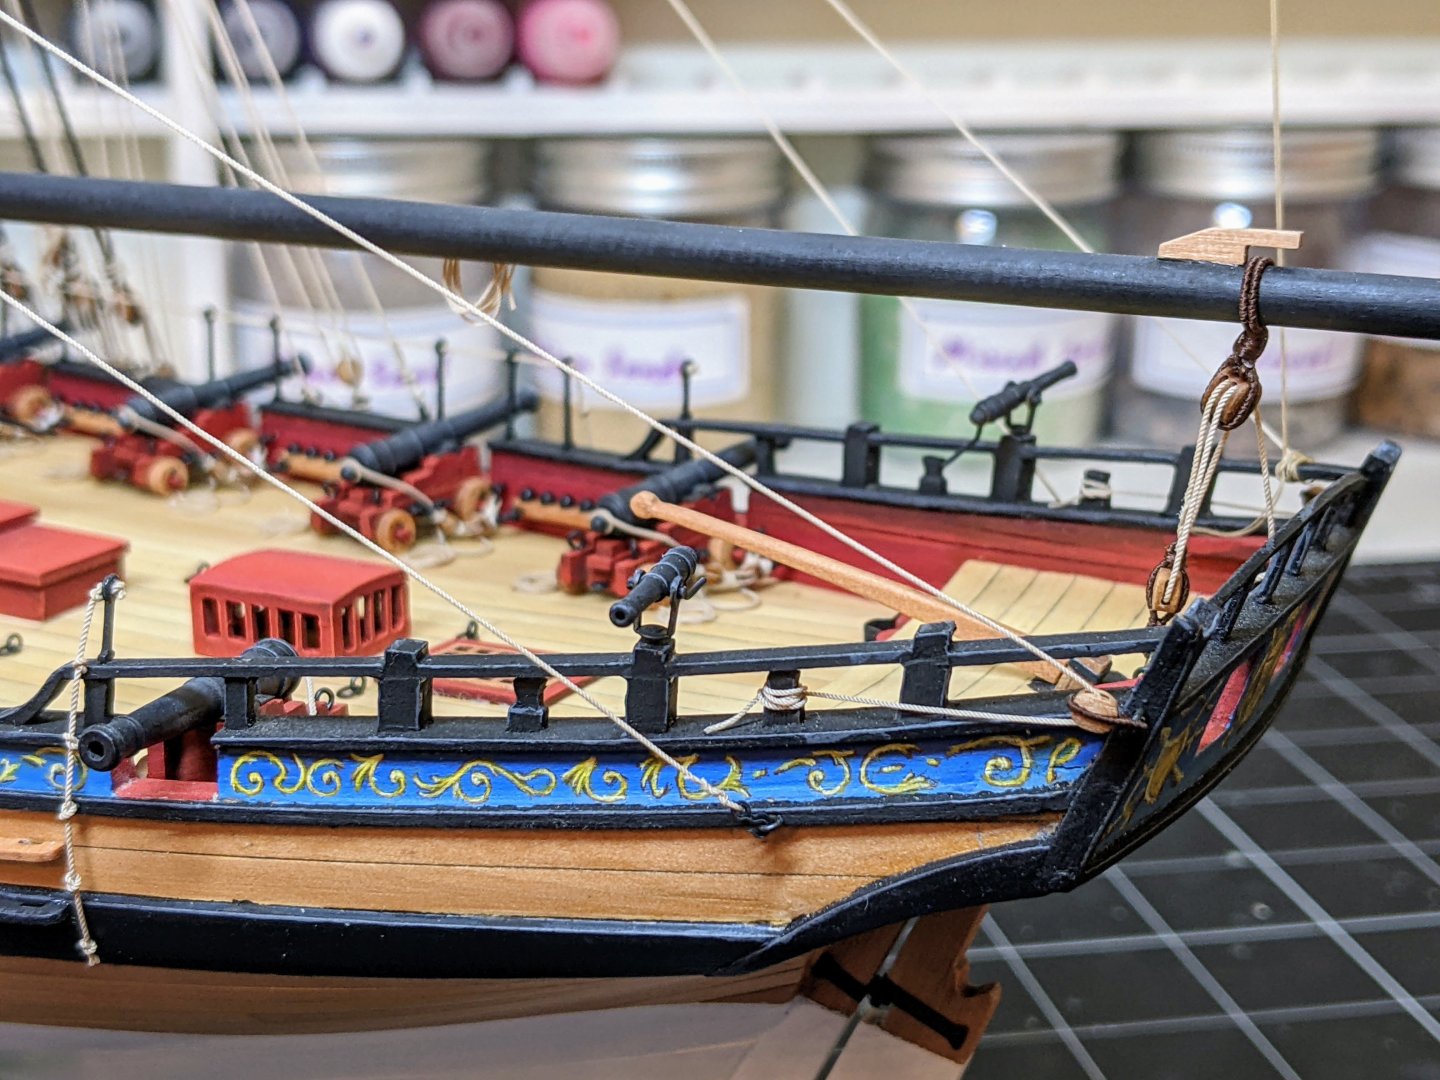
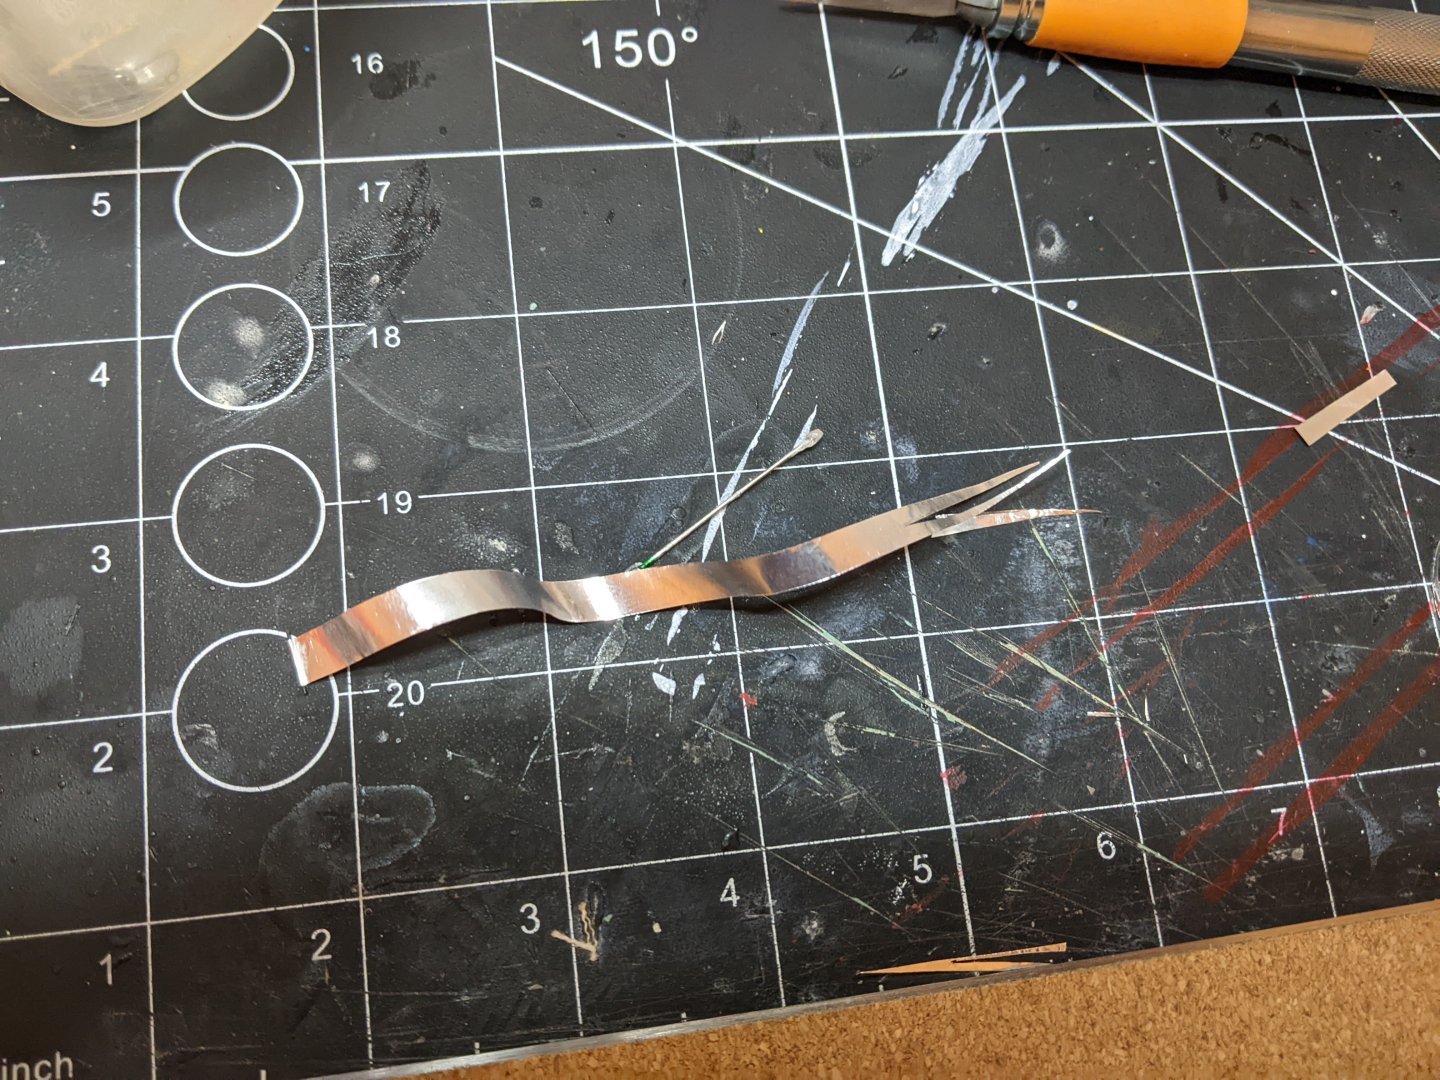
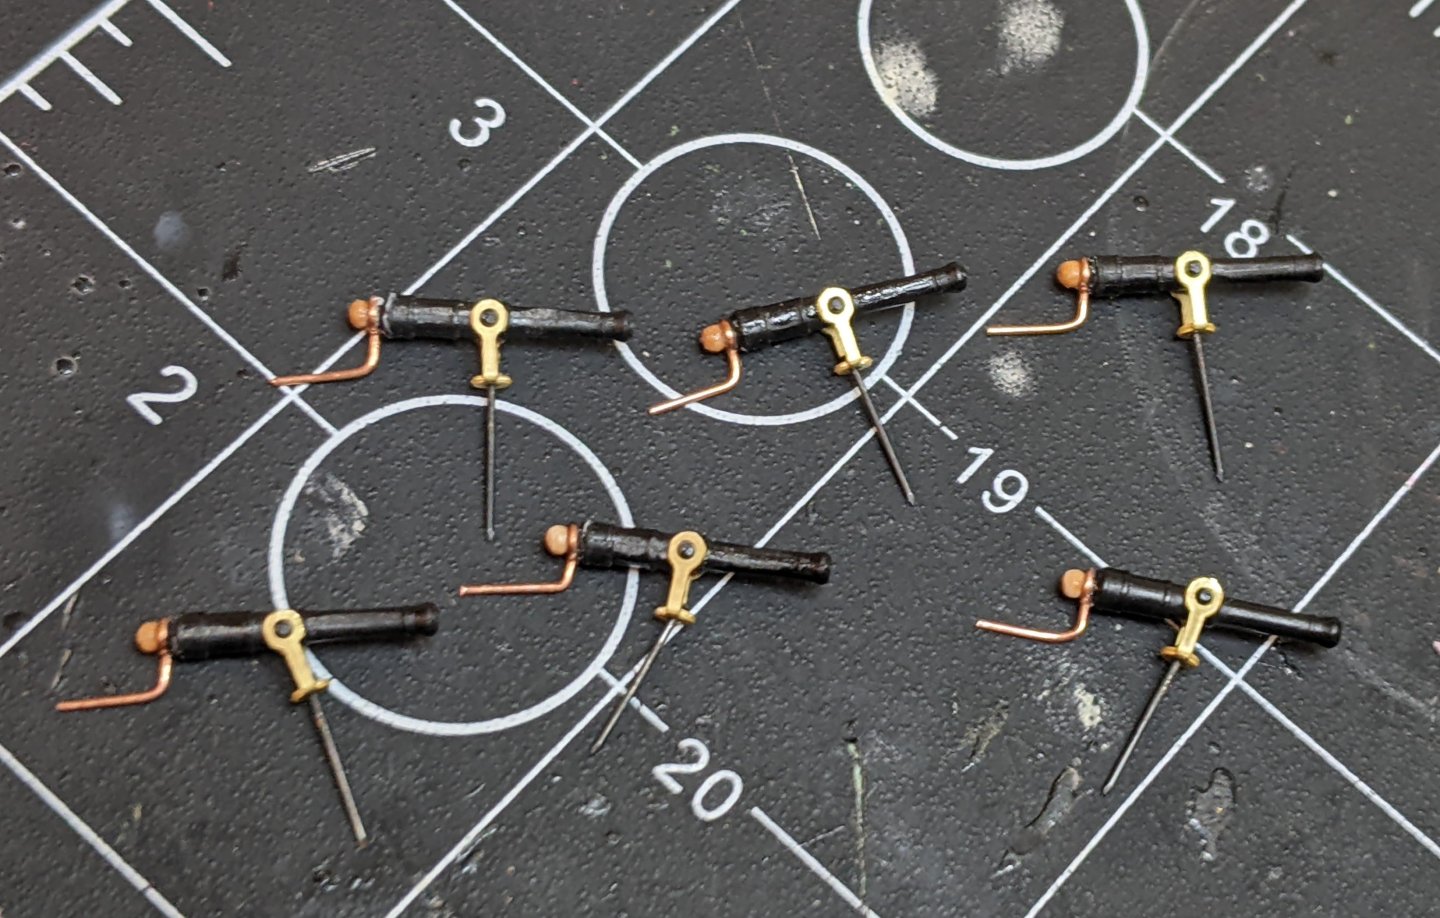
Log #95: The Swivel Guns & the Pennant I decided to only show half of the swivel guns so I assembled six of them. As with all PE I filed it down to make it look less bulky. The PE handles didn’t look like the pictures I found of them so I decided to do some modifications. I had some parrel beads I had bought which were much smaller than I thought they were. So they were no good for the gaff or boom, but they are about the right size for the cascable of a swivel gun. I also noticed that in the illustrations they appeared to have the handle wrapped around the cascable. I realized the eyebolts I had were about the right size for this. So I did a bit of mixing and matching and here was the result. For the pennant I mad a number of unsuccessful attempts with silkspan, but I couldn’t find a way to stiffen it enough to hold its shape given how long an thin it is. So in the end I had to use tin foil. I still had to shorten the pennant a bit, but next time I might try a heavier duty tin foil and that might work better. Then I painted it with my airbrush (thought the cross I painted by hand). At the same time I also primed the swivel guns. I then dry brushed them in the same way I did the cannons. I thought about trying to rig the pennant properly, but in the end I decided to just glue it to the mast as I need to keep it rigid. Then I drilled some holes and added the swivel guns.

- 562 replies
-
- 16
-
-
-
- vanguard models
- alert
- (and 2 more)
-
See below for some answers: A craft knife or a scalpel should be fine. Start with what you have on hand and if you find it isn't working feel free to try something else. I just used a normal exacto craft knife and I was fine. Nice tools are nice, but you can get away with cheap needle files for a kit. My recommendation is hold off on buying too many fancy tools until you are sure you need them. I just used cheap files for alert, though the ones you linked are really nice. Any razor saw will do. You don't really need this unless you are planning on doing some kitbashing. The only time I use my razor saw is when I am making parts from scratch to replace the kit versions. I would recommend a pin vice in most cases, a cheap one will do. Power tools near fragile objects can be dangerous. Any selection of small bits will do. HSS ones are better than carbide as the carbide ones have a tendancy to snap. I just use small pieces of sandpaper folded over. You can also glue sandpaper to popsicle sticks. Just pick up whatever is at your local hardware store. This is a bit more complicated. I would recommend starting with mid range synthetic brushes. Take a look at what you want to paint, you probably want a flat and a round and they should be as big as possible while still being small enough to get into the places you need them to get into. This is a bit later in the process so to be honest I wouldn't worry about this yet. Lots of time to read up on it when you get closer to painting. They are helpful for some of the PE as well, but I would wait on getting these till you find that you have a need. Again wait till later, you won't need these early on As noted Check out your local dollar store, they tend to have tonnes of these little clamps and since you need so many it helps that they are cheap. I just use HB Masking tape made for modeling is more exact than normal painters tape. Also it is thinner and less tacky (doesn't pull up your paint). Any modeling brand will do, I use tamiya. I made one myself by pulling the bristles out of an old small dollar store paintbrush. Get as big a one as your workspace will allow, that being said if you have old ones on hand free is best. I wouldn't recommend using your wife's current one, she might not be pleased when bits of glue are dried onto it.
- 177 replies
-
- 2
-
-
- Sherbourne
- vanguard models
- (and 3 more)
-
Sherbourne is a great choice. I think you will enjoy her. Vanguard is great because you can make a wonderful model out of the box and if you want to, some small adjustments can be done to really elevate the model (I would recommend getting some 3rd party blocks and rope when you get to the rigging stage). Take your time and remember this is not a race. Make sure you are reading ahead both in the instructions and build logs. Good luck.
- 177 replies
-
- 2
-
-
- Sherbourne
- vanguard models
- (and 3 more)
-
Planking being done is a very satisfying feeling. Better to get it done right than done fast :).
-
Welcome to MSW. Make sure you read as many other badger build logs as you can. There are a number of them on the forums and it is always better to learn from others mistakes 😄. I would also highly recommend starting a build log. It is the best way to get feedback and help.
-
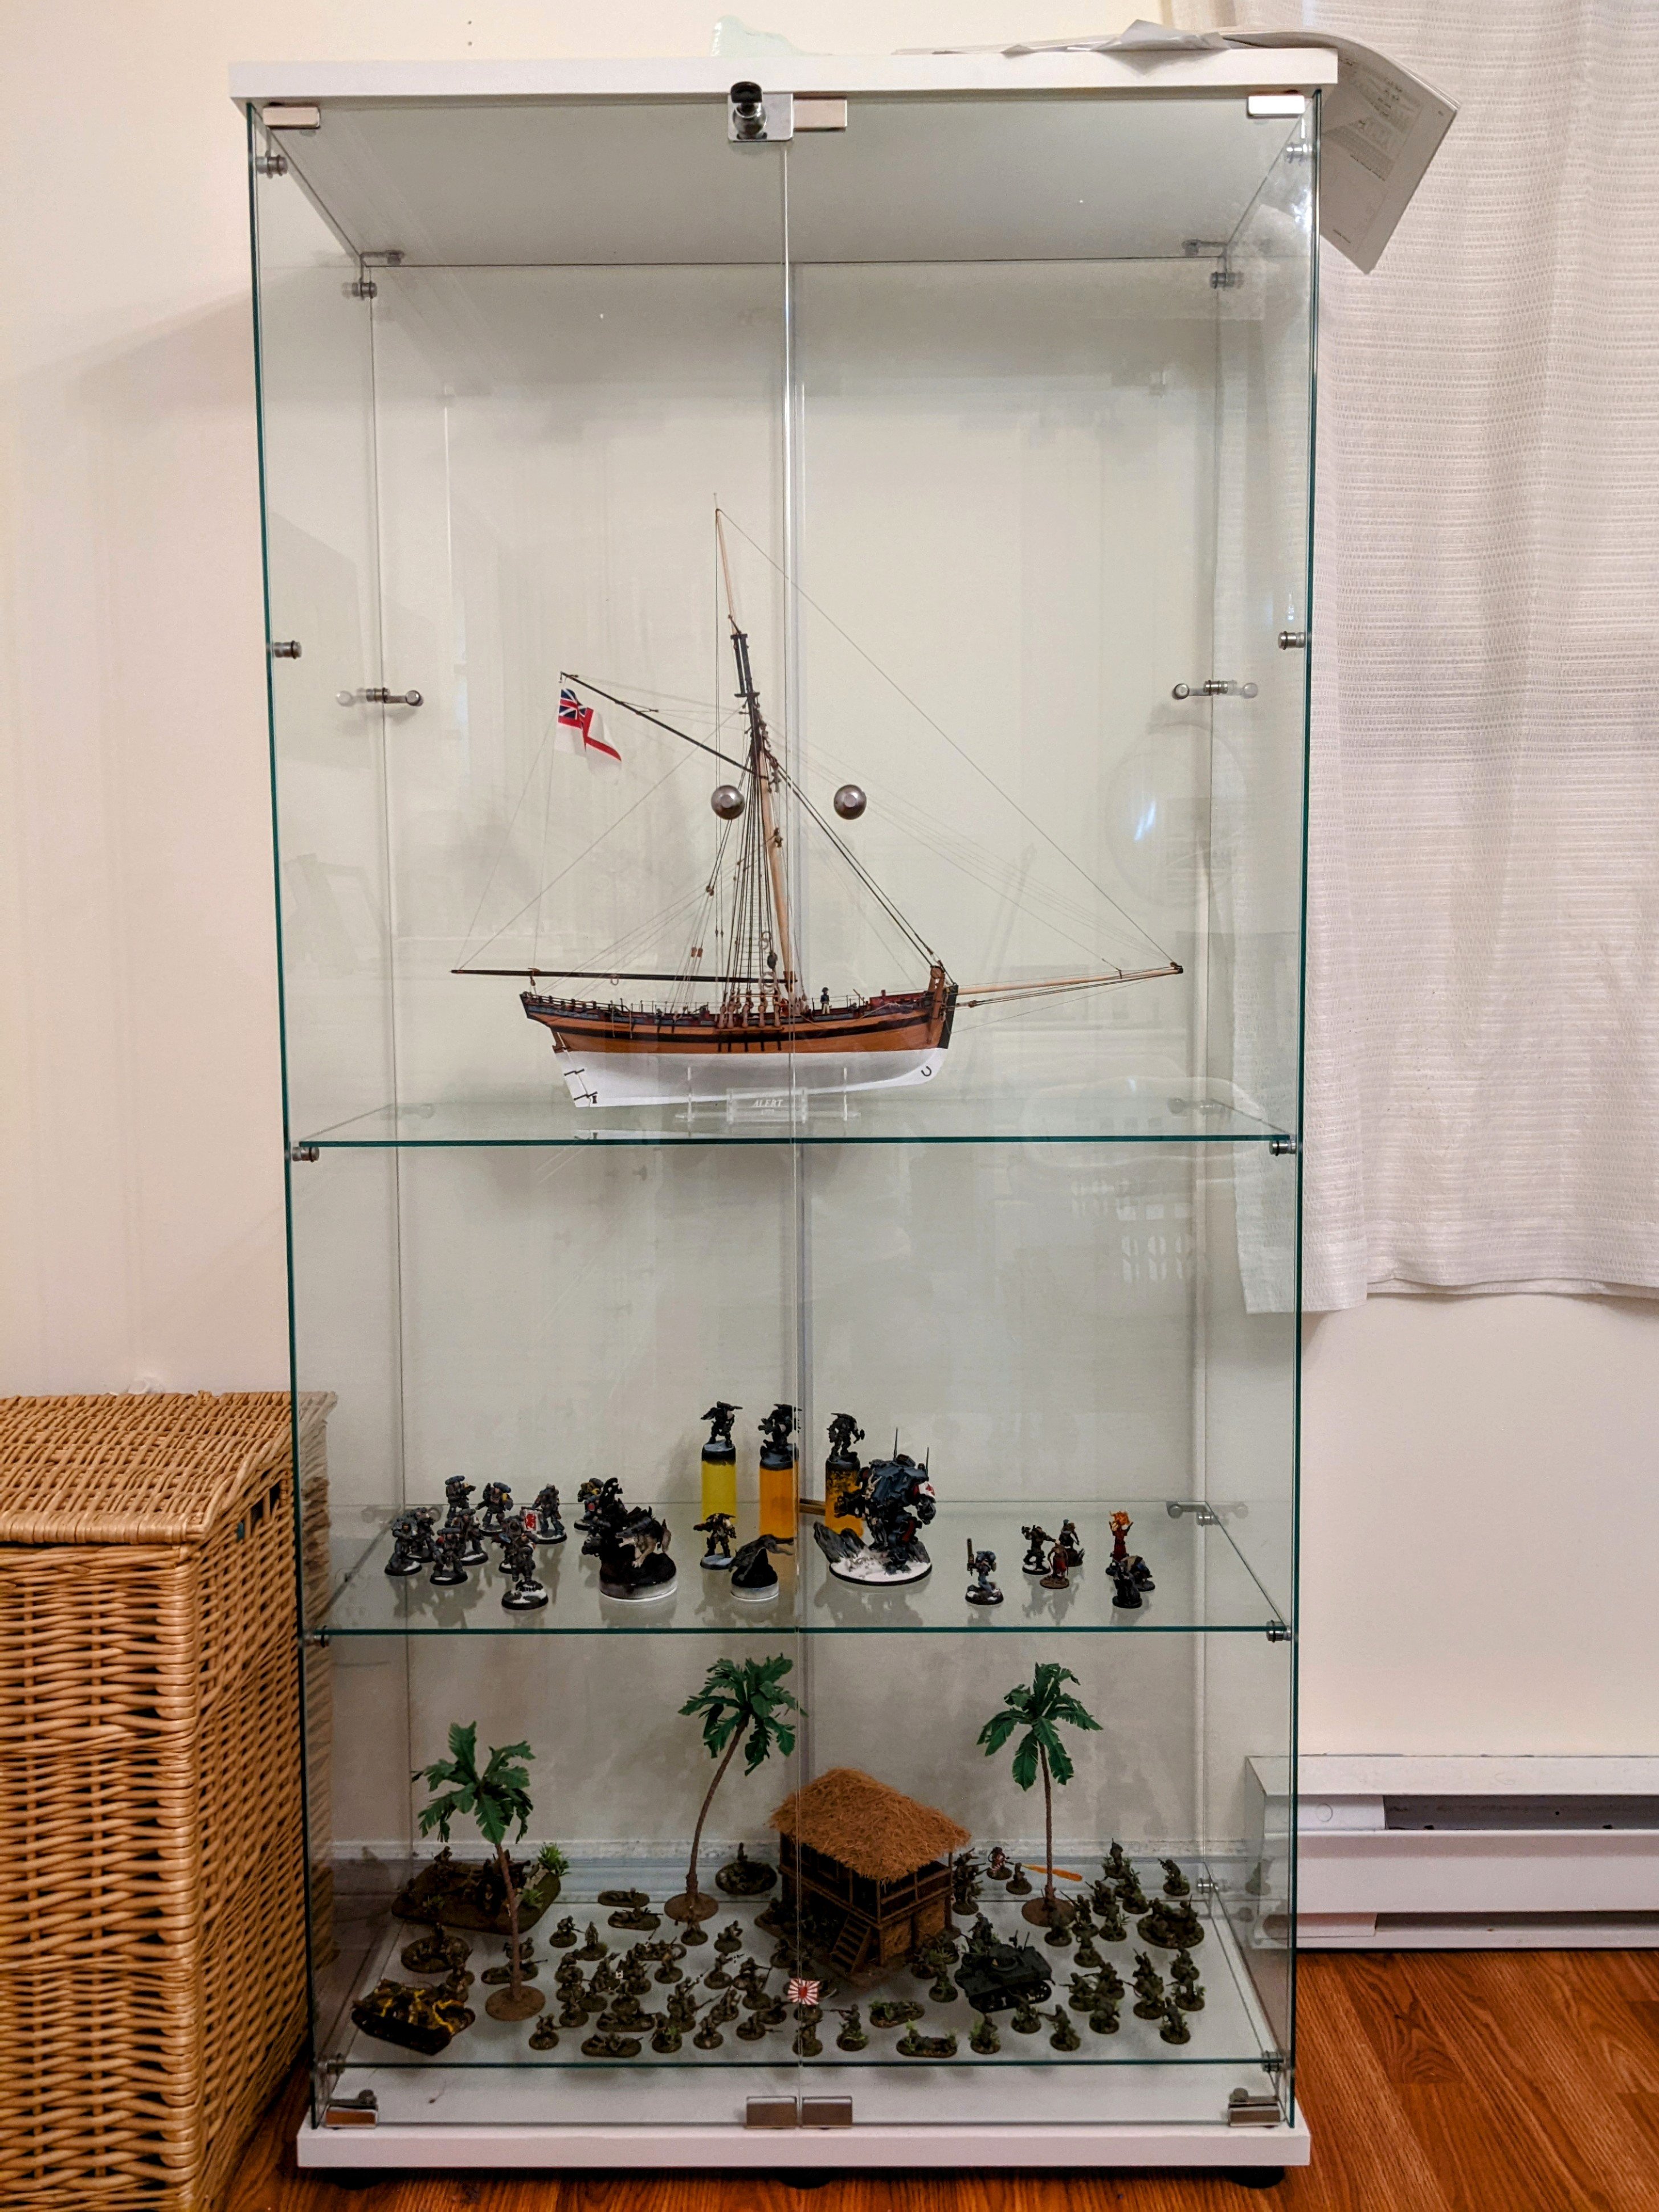
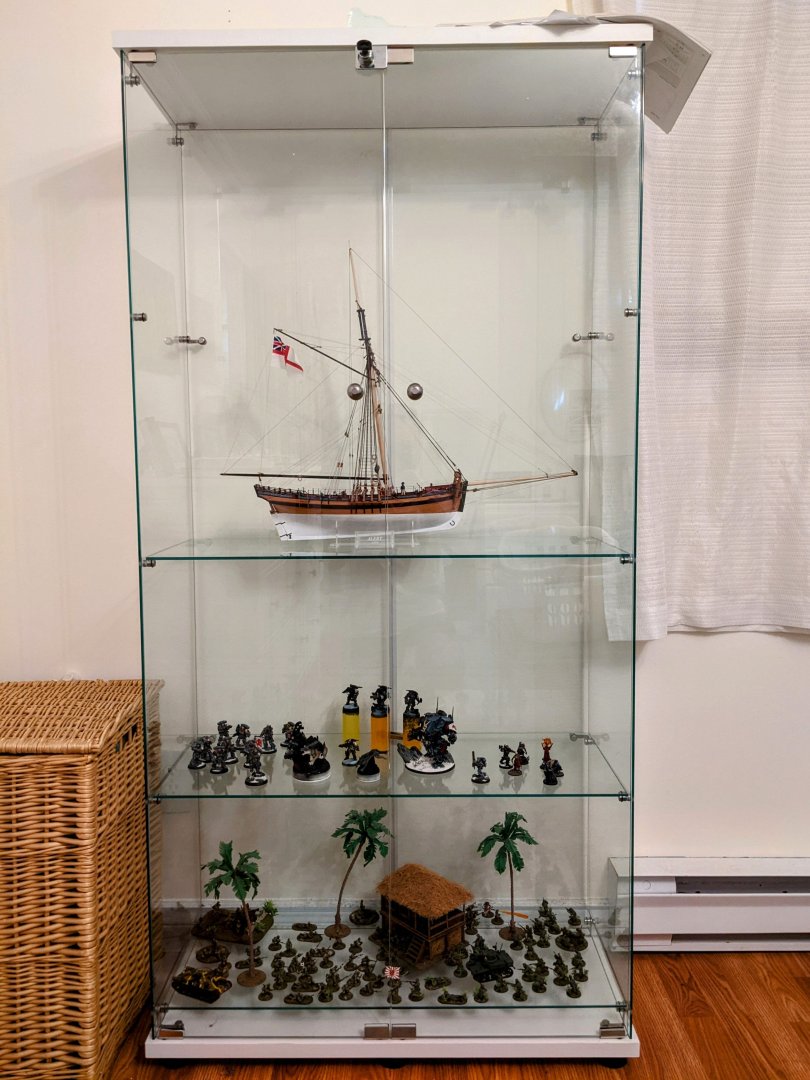
And for those asking earlier about a case, here she is in her cabinet.
- 562 replies
-
- 22
-
-
- vanguard models
- alert
- (and 2 more)
-
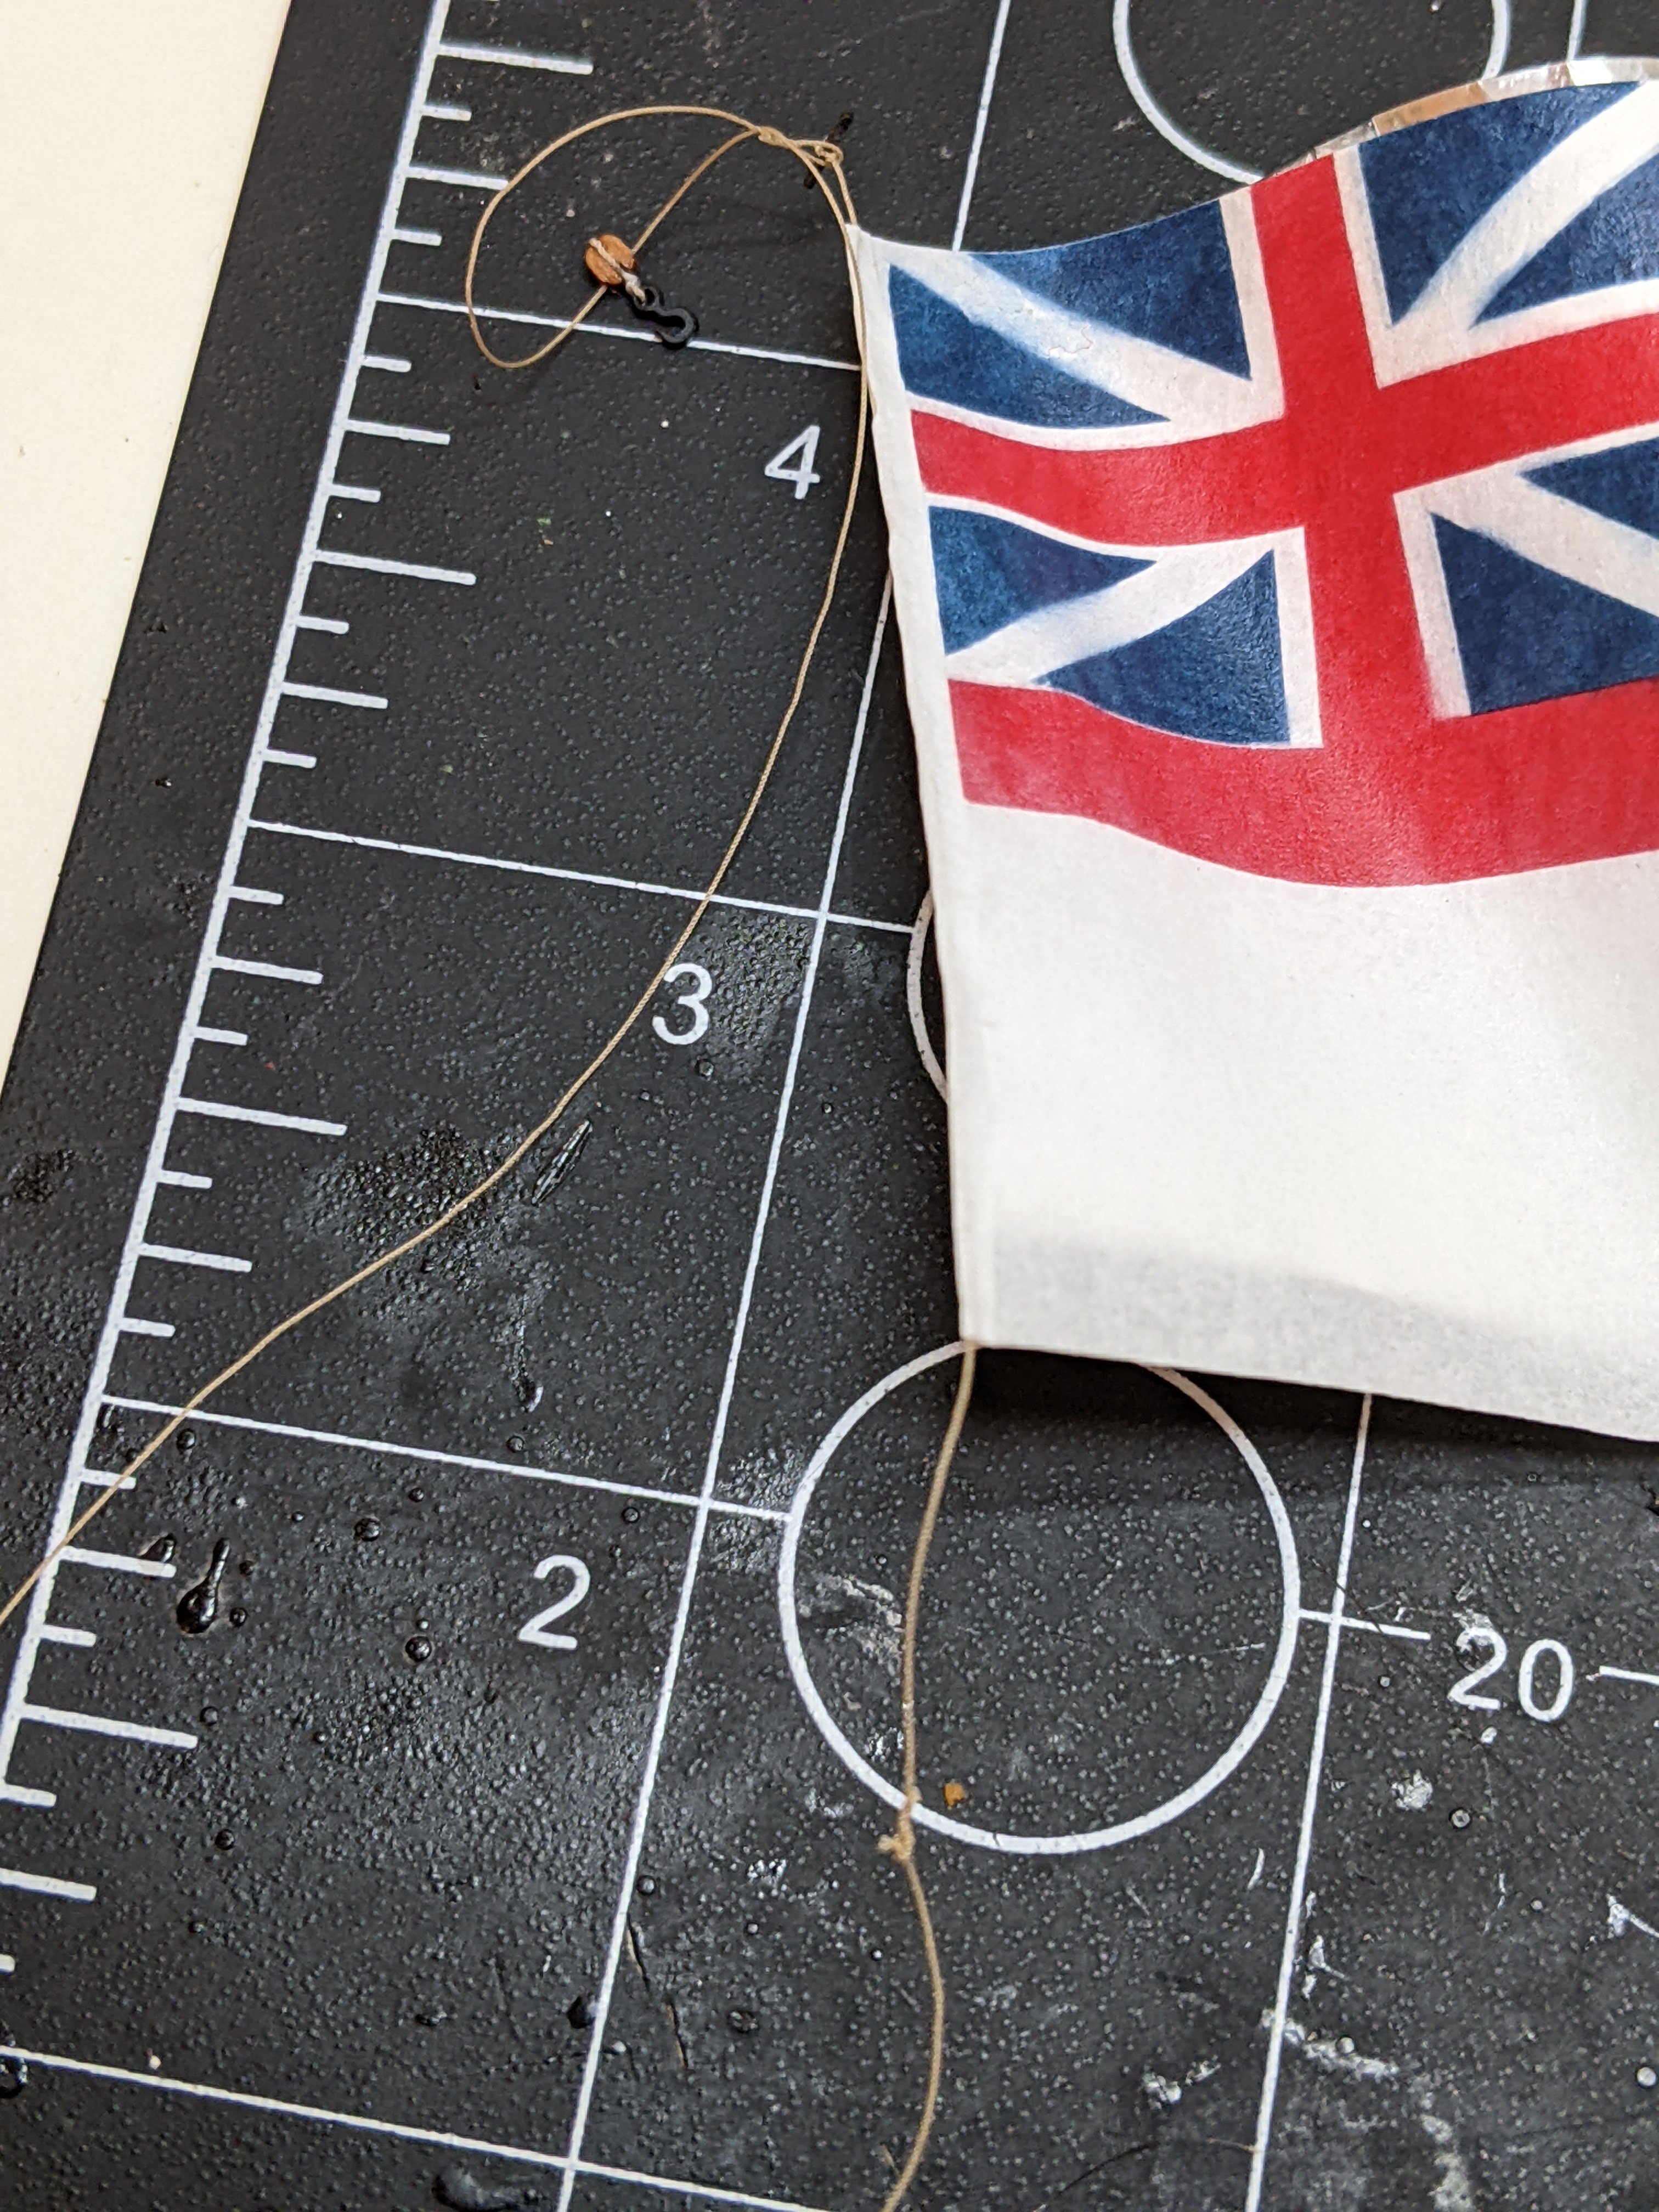
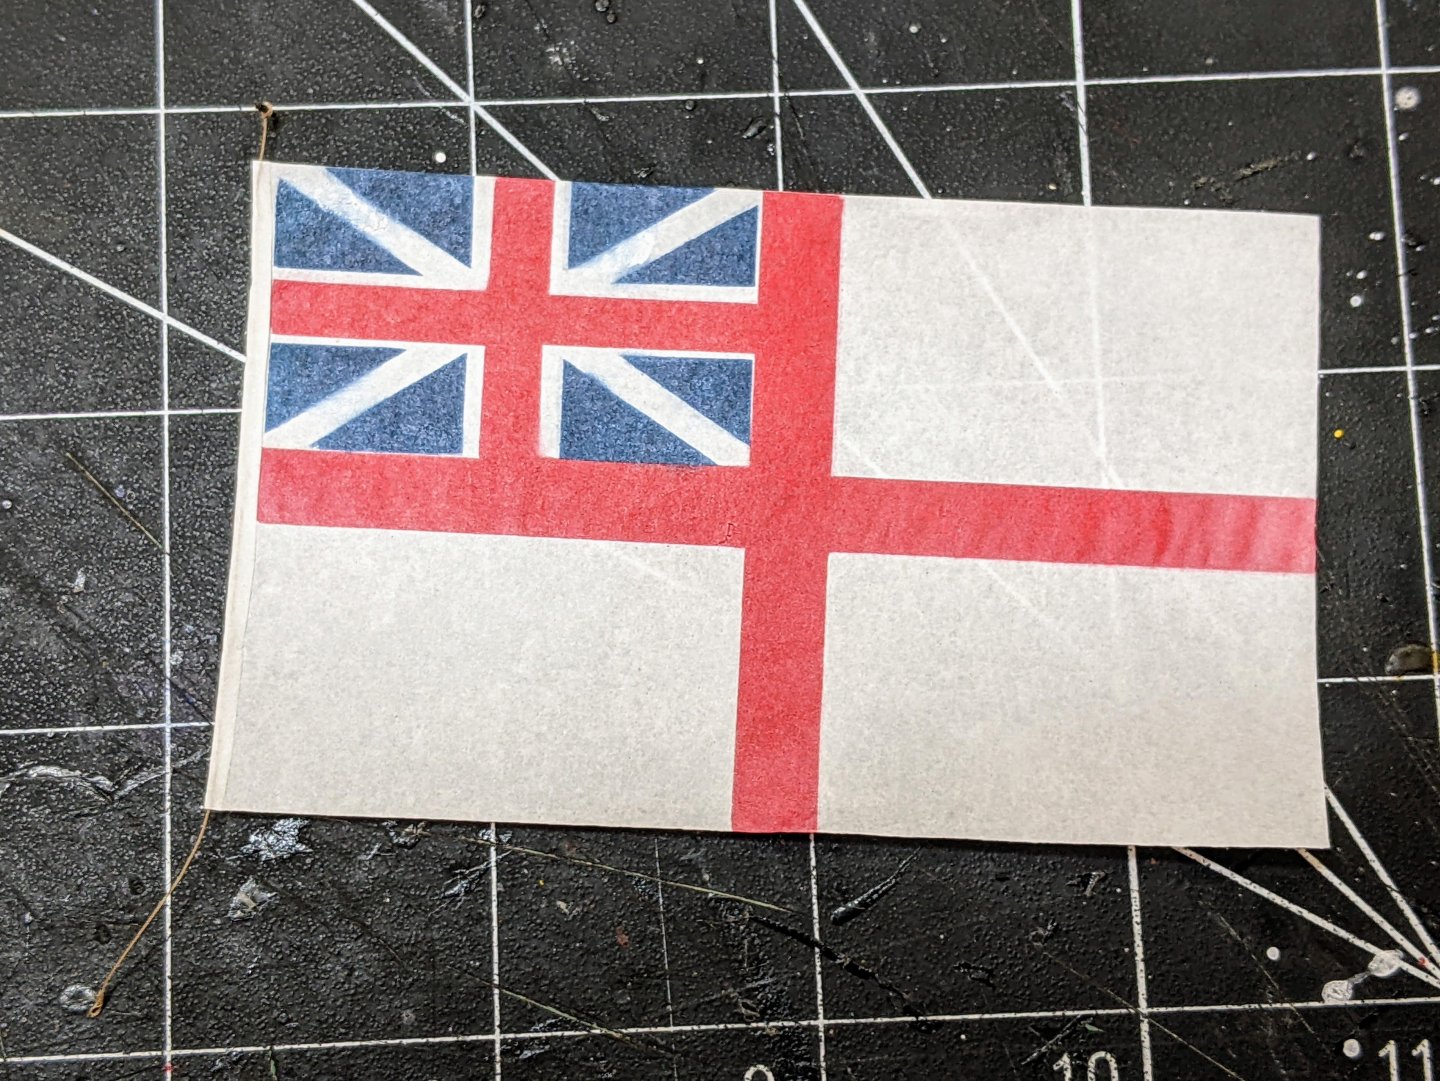
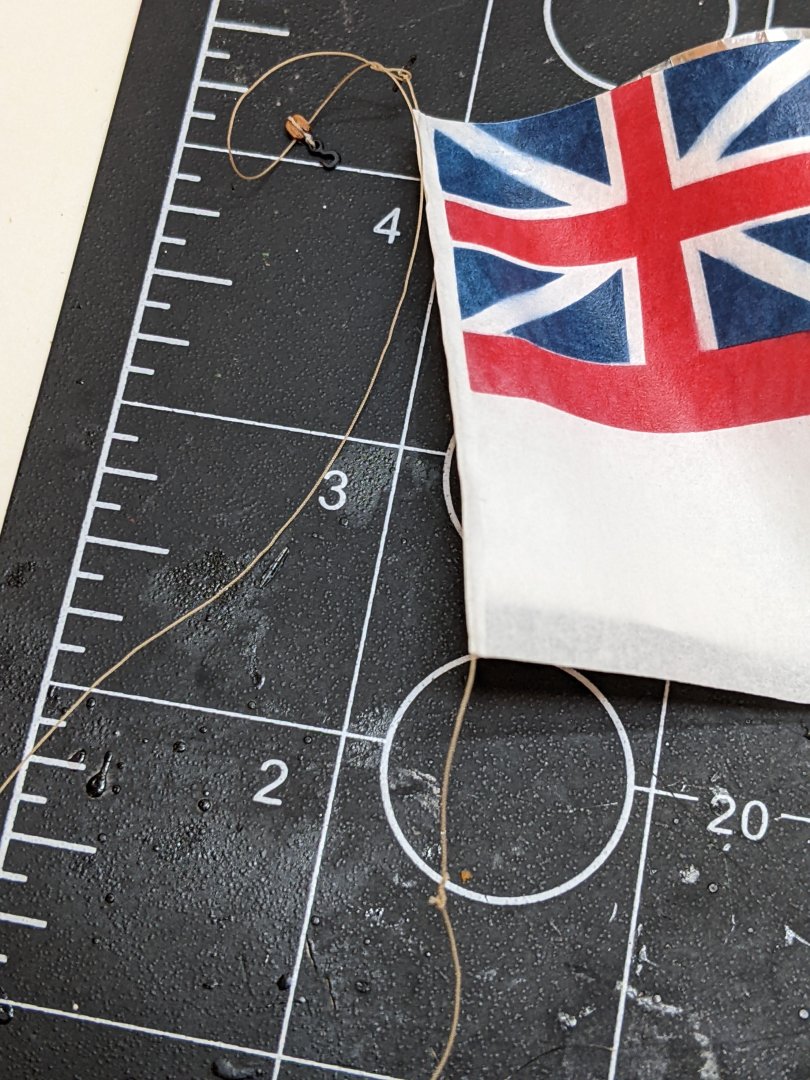
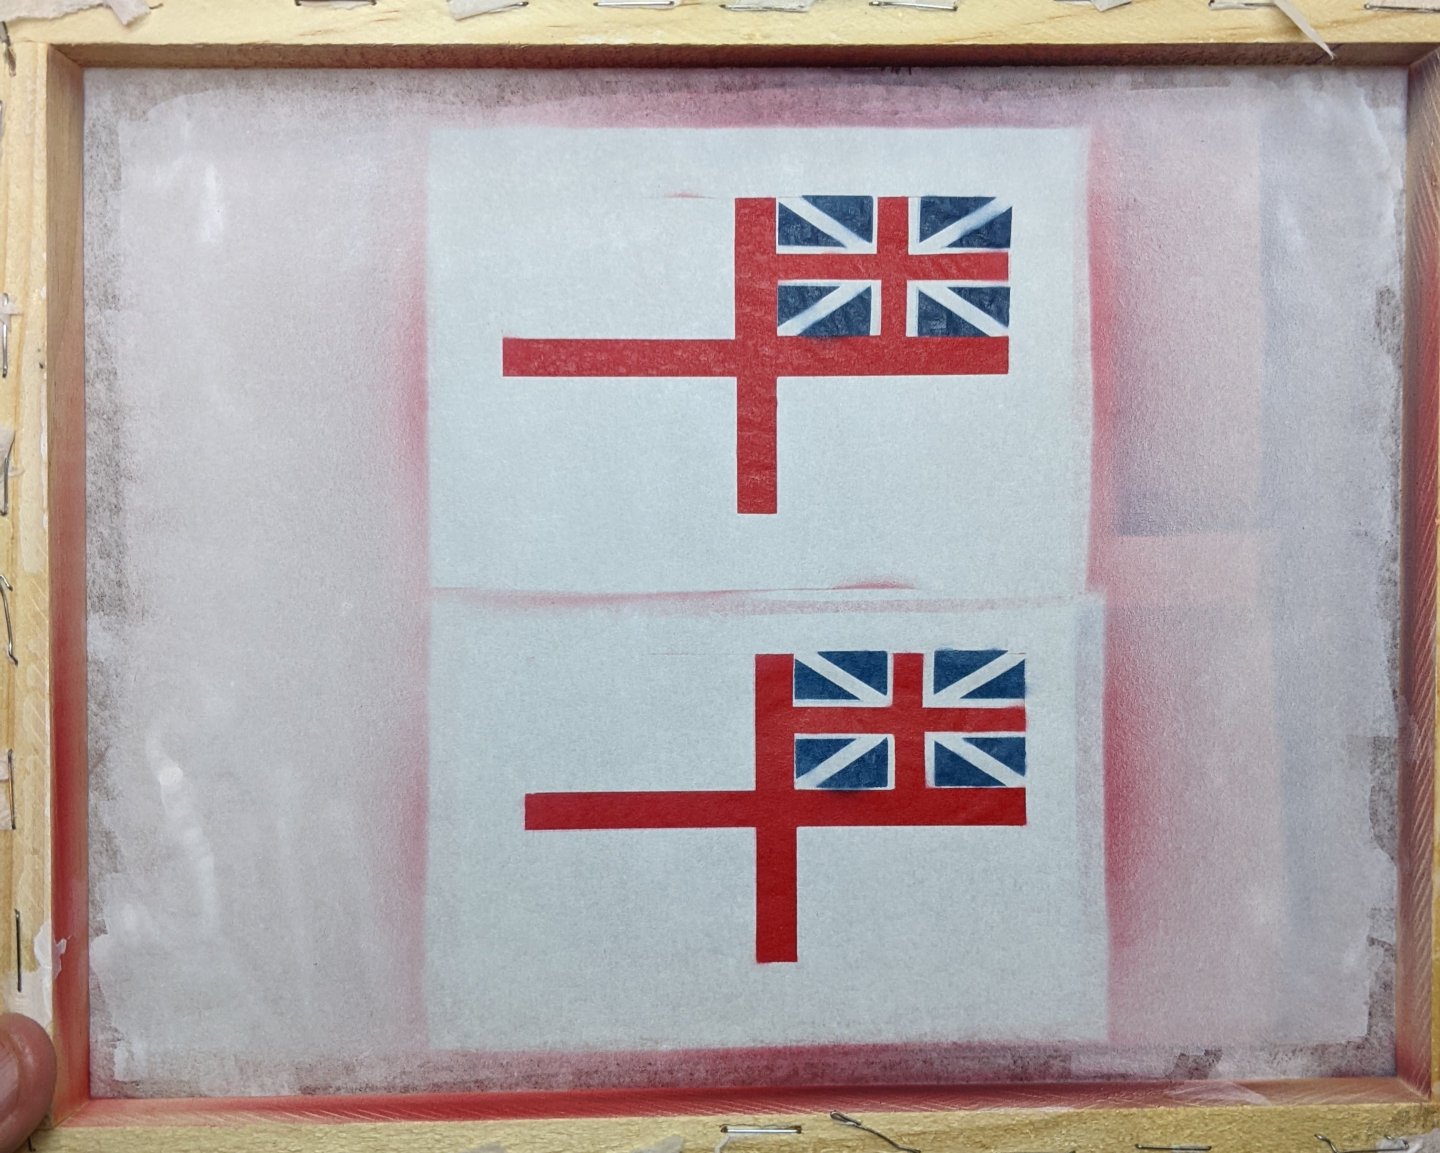
Yes I airbrushed both sides otherwise one side looks washed out. The ensign is slightly transparent, you can see in the picture where it is lying flat how the lines on the cutting mat are visible through the white. The first template for the red just gets placed on the front side and then the whole thing was flipped over so the front is lying flat on the desk. Then you are able to see through enough to line up the template on the back. When doing the blue it is a bit trickier to line up the front, you just need to do it several times to make sure everything lines up properly. Spraying ink with the airbrush is super easy, just make sure you do multiple thin coats. Let it build up the colour slowly or it may run or caus ripples in the paper. I should also mention in case it wasn't obvious that the paper I am using is silkspan. I don't know how well this would work with normal paper. Edit: I forgot to add that don't forget you need to mirror the templates on the back so remember that when you are printing them off in preparation for cutting.
- 562 replies
-
- 9
-
-
-
- vanguard models
- alert
- (and 2 more)
-
Lots of good advice in this thread. Model ships are a huge learning curve, but just about any mistake can be fixed. As has been suggested take a deep breath and go back and read a bunch of build logs and watch some planking tutorials. As @tmj said you may need to buy a few more strips, but it definitely can be fixed. Take your time. This is not a race. I am almost three years into my first model ship build. Good luck :).
-
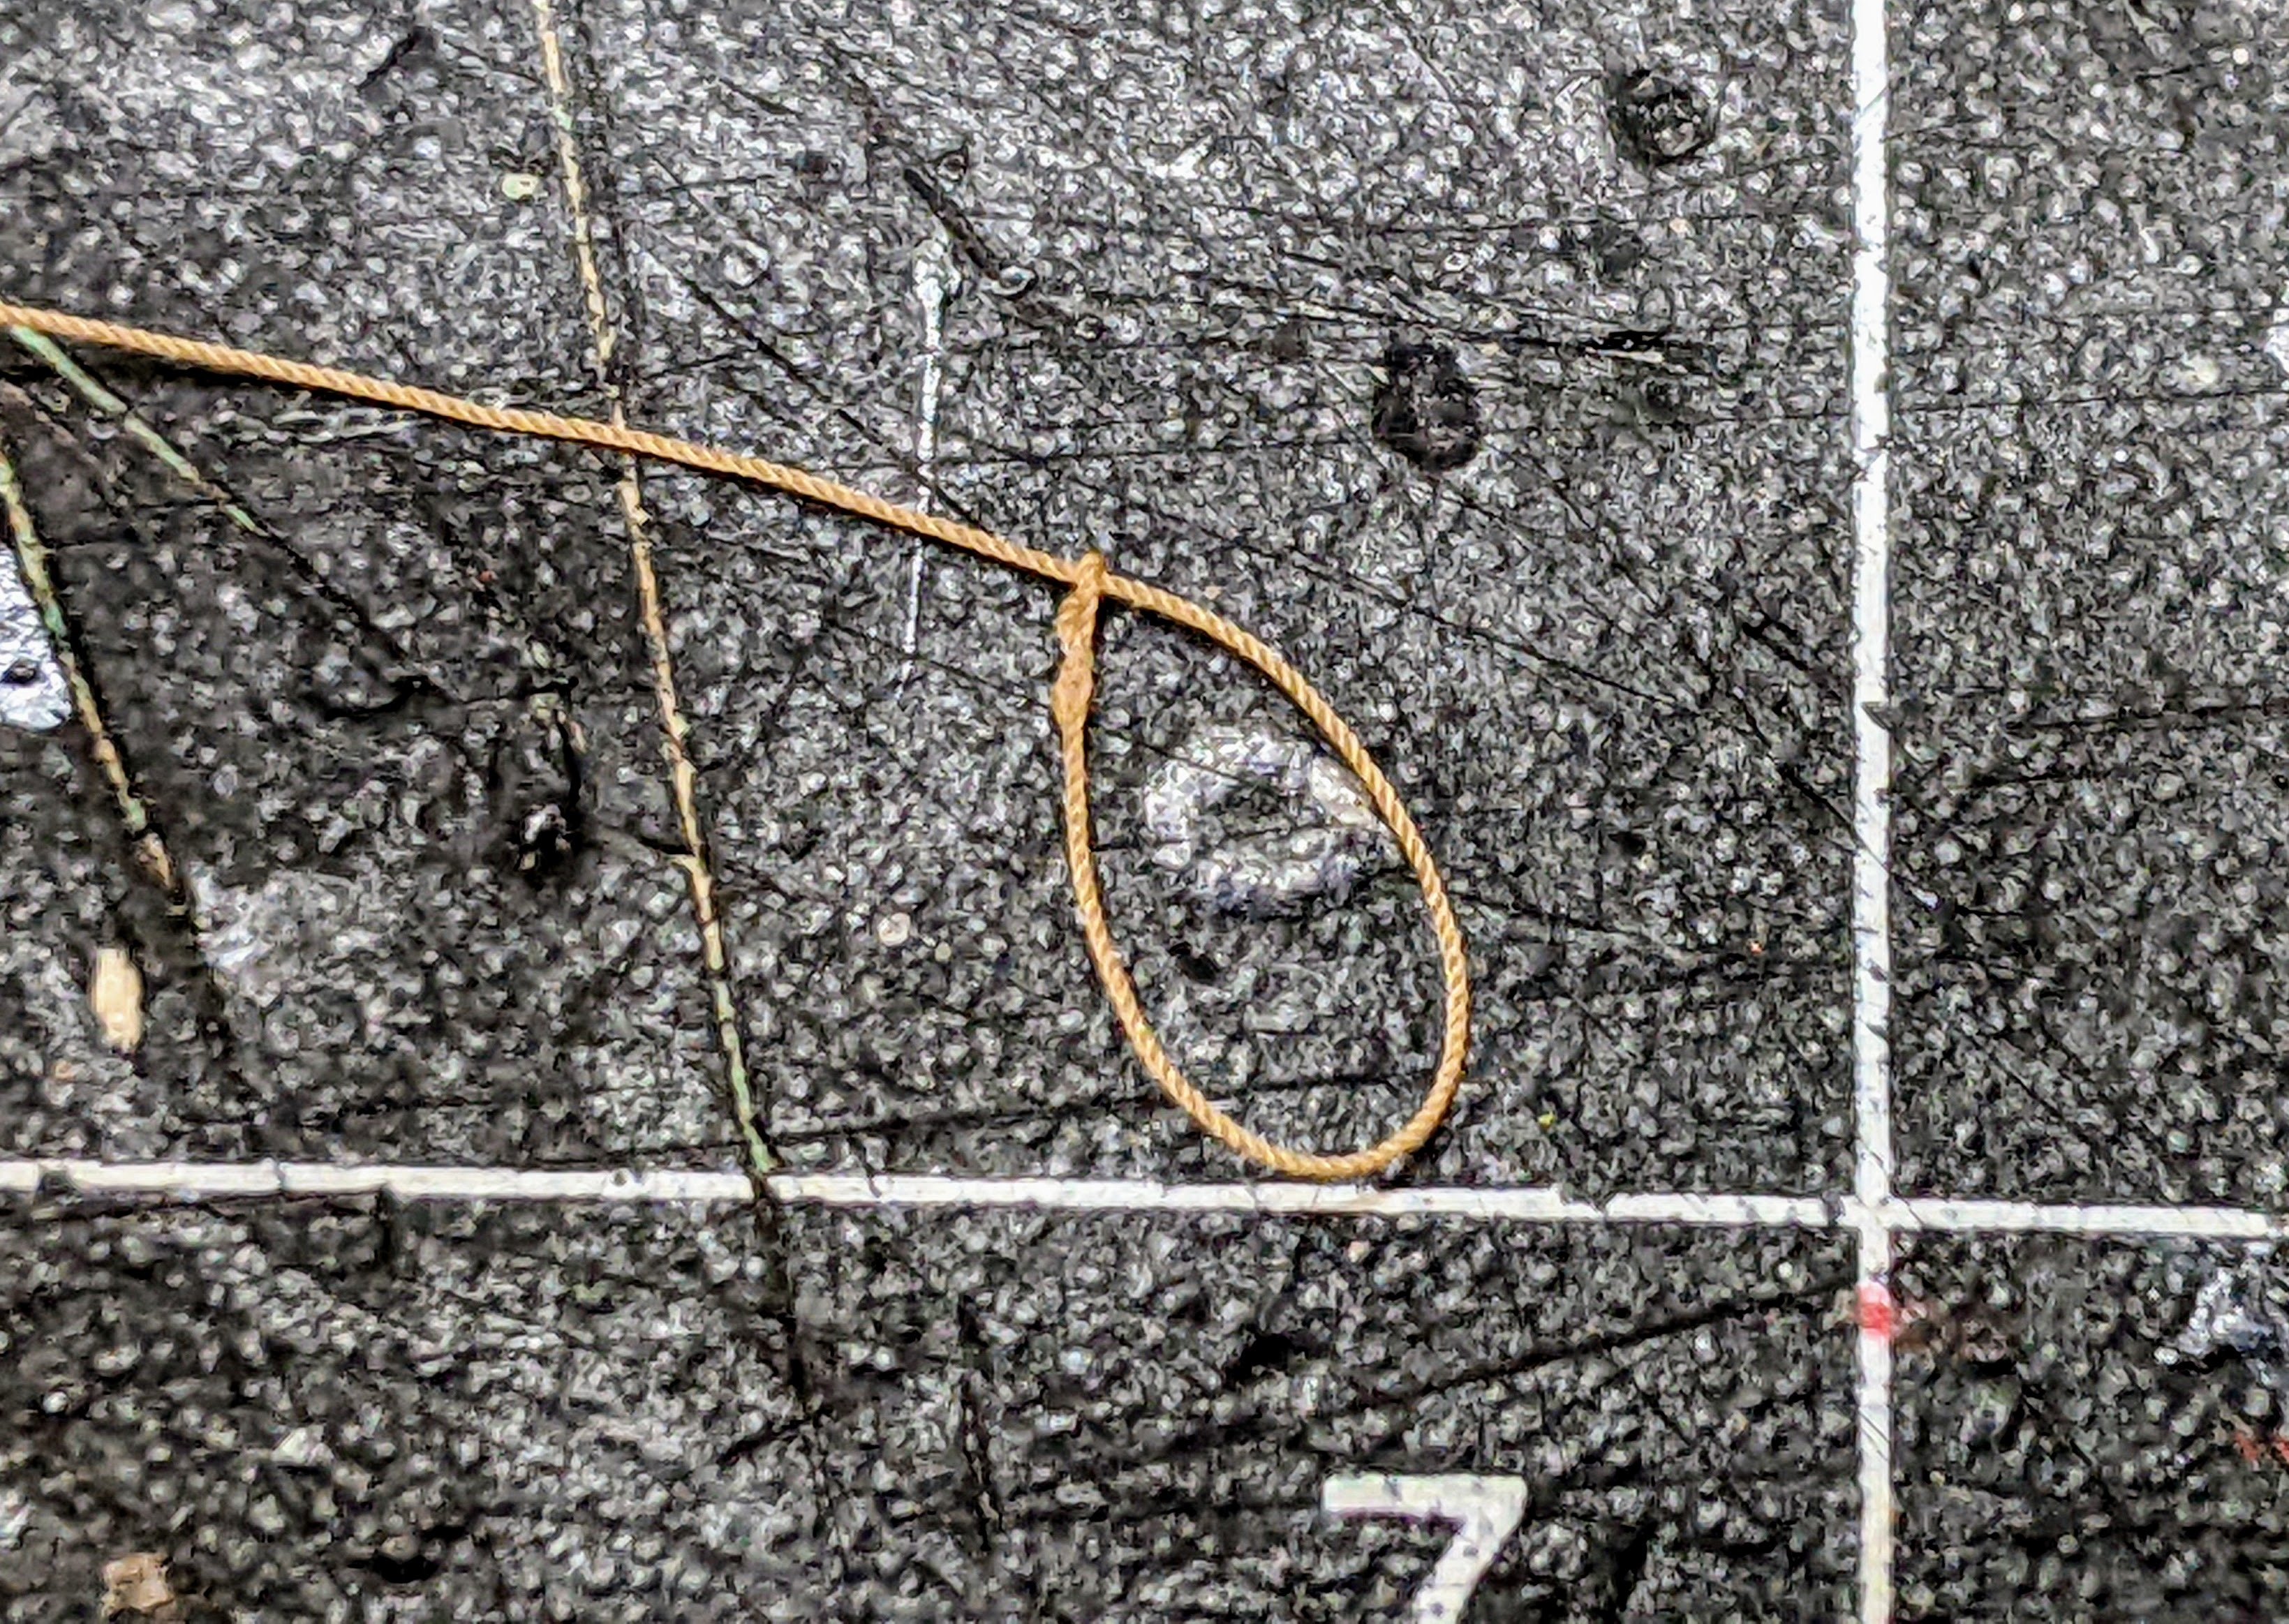
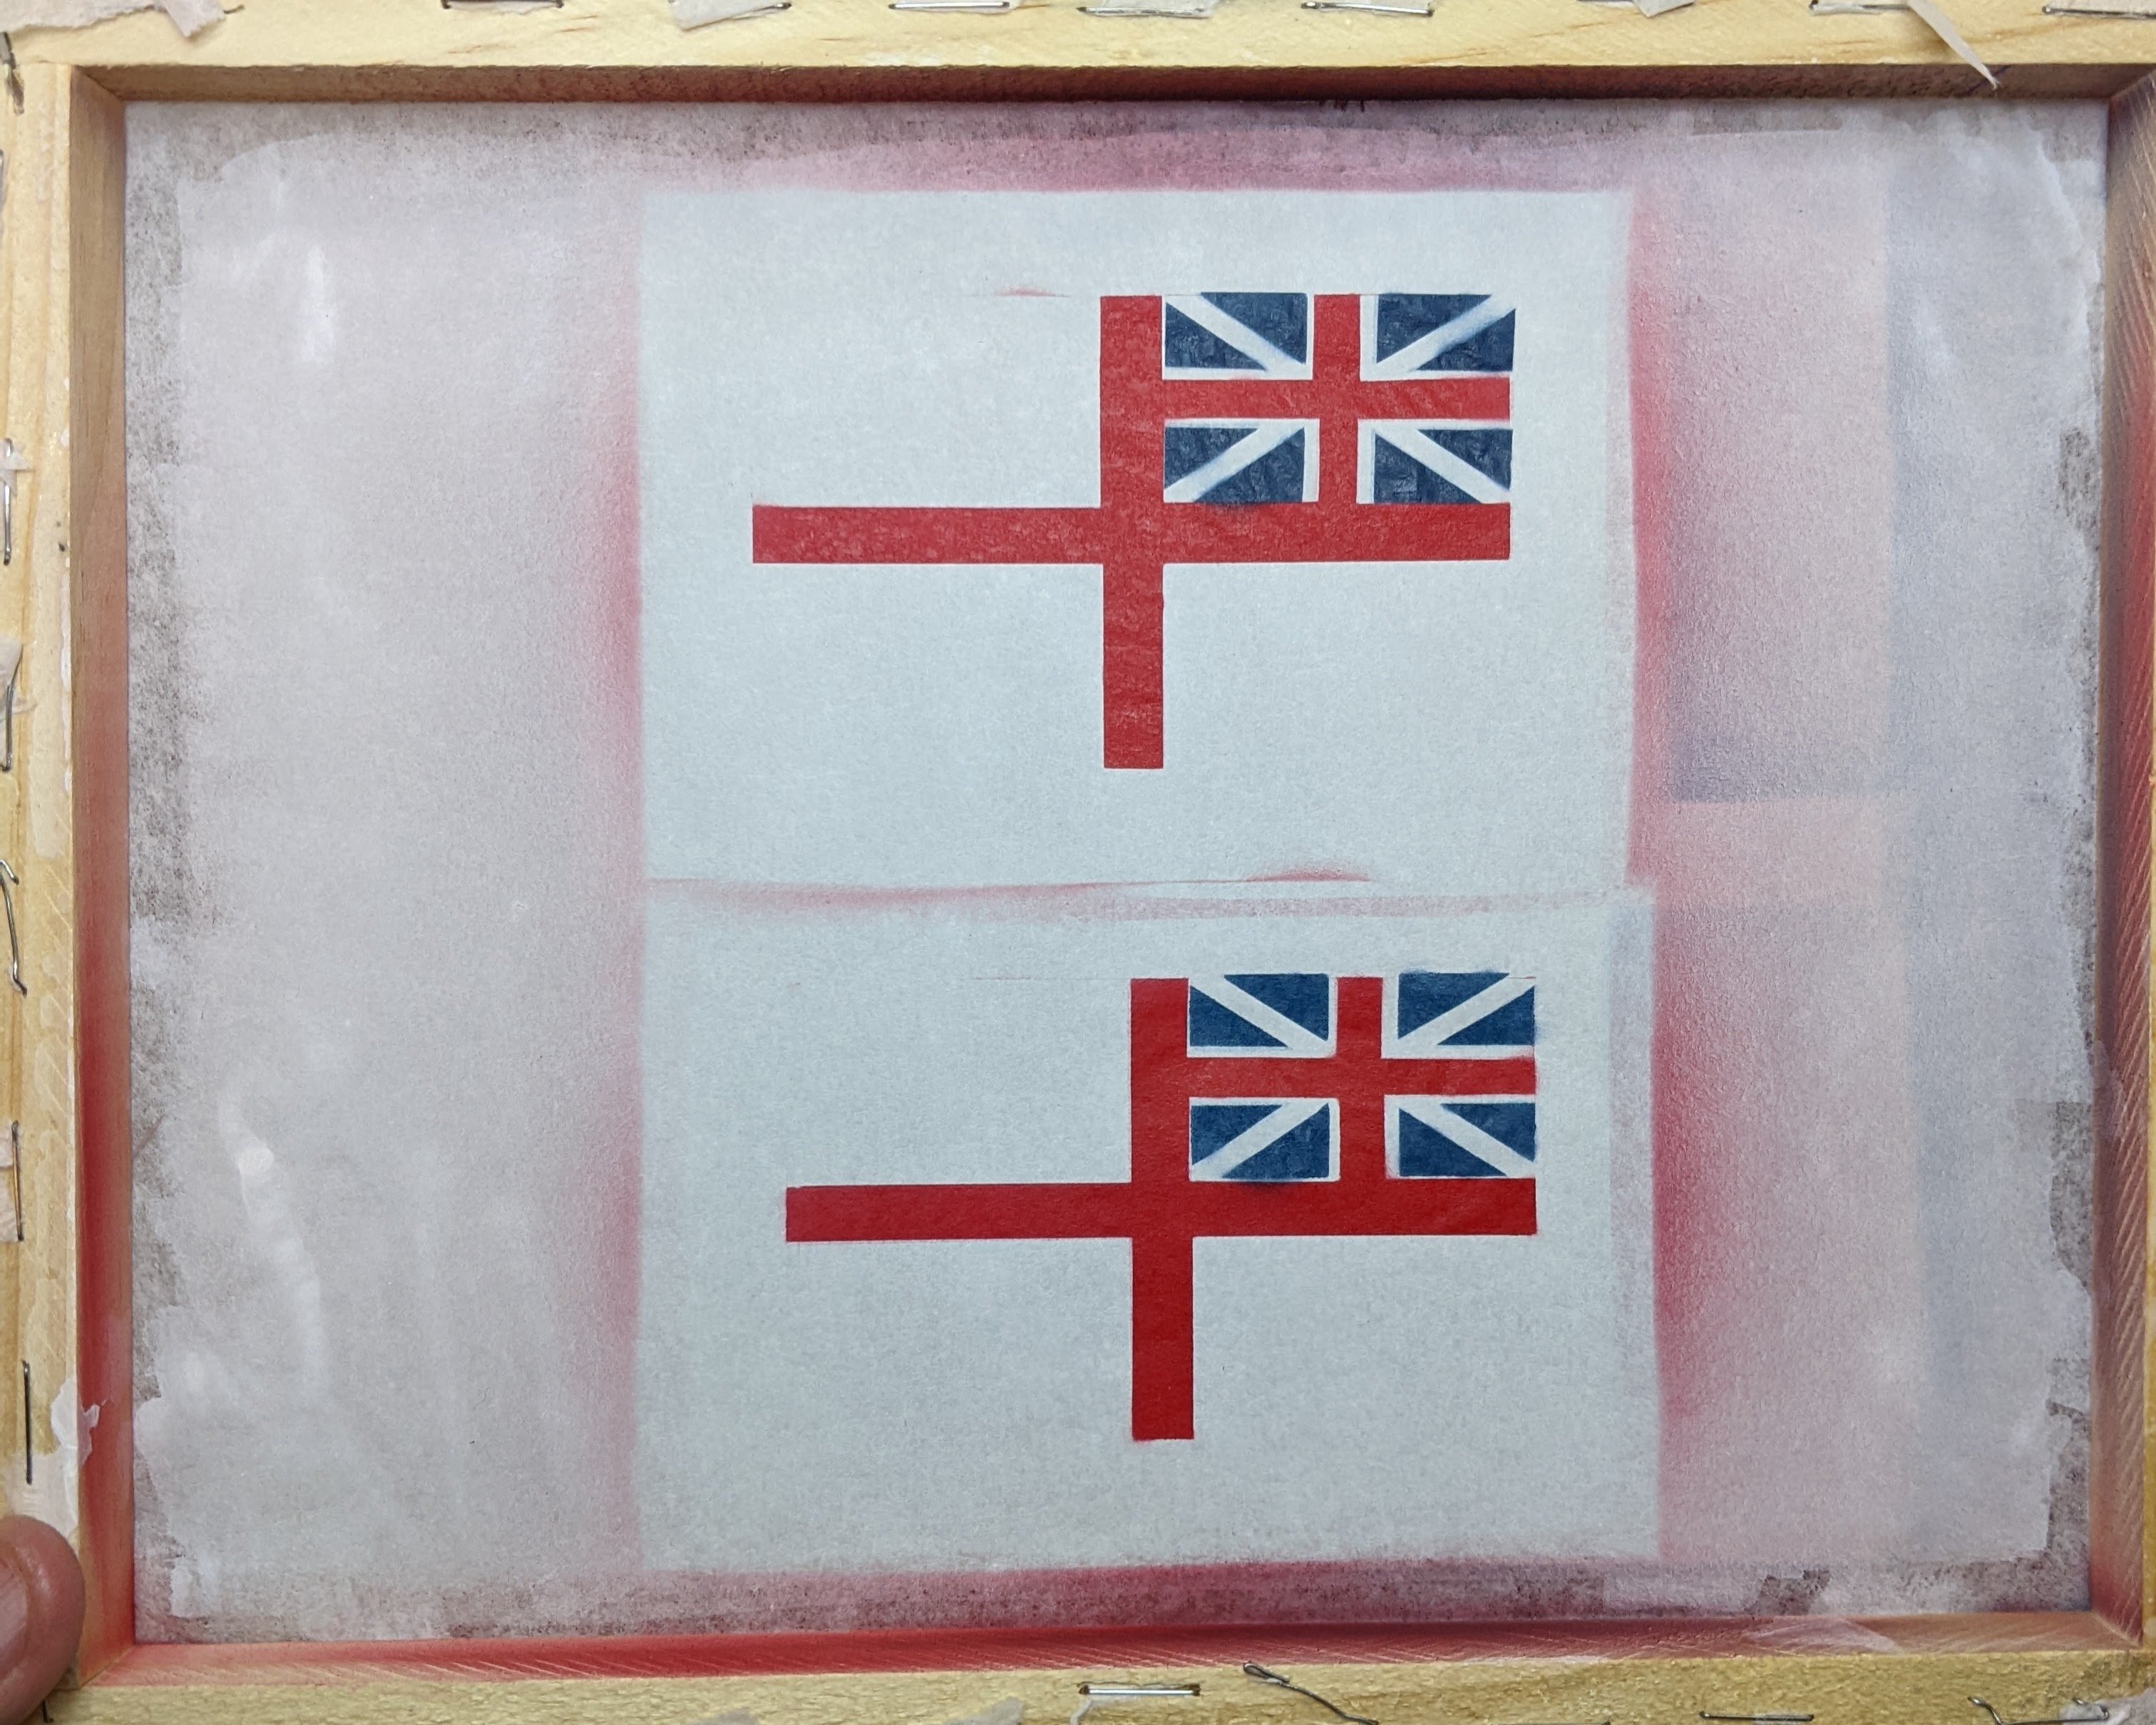
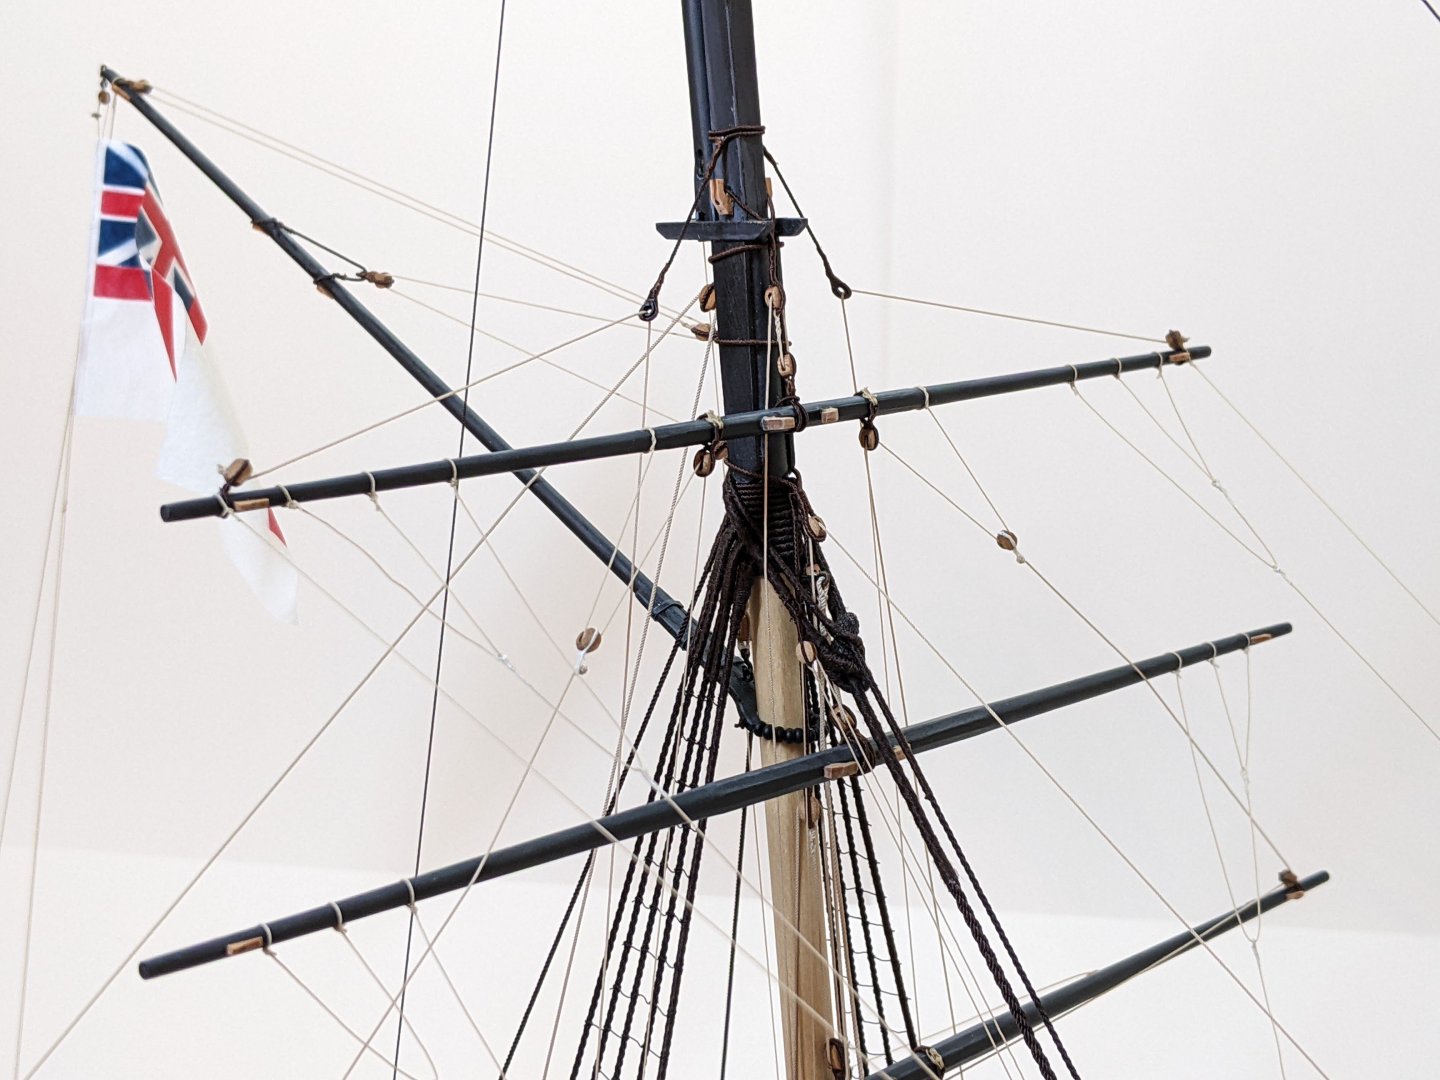
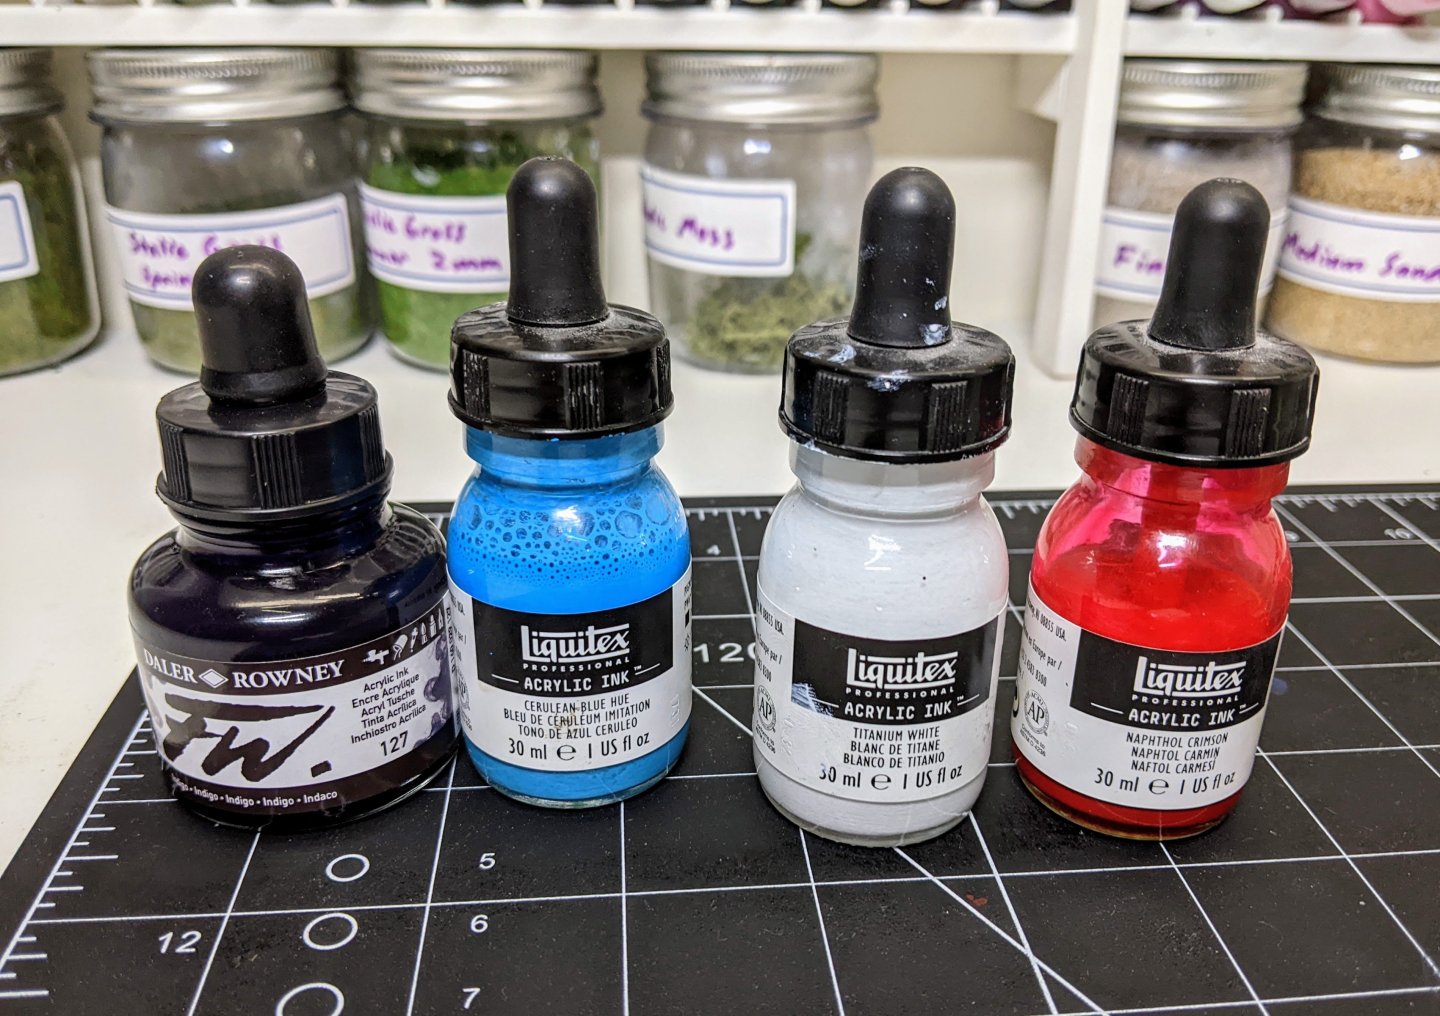
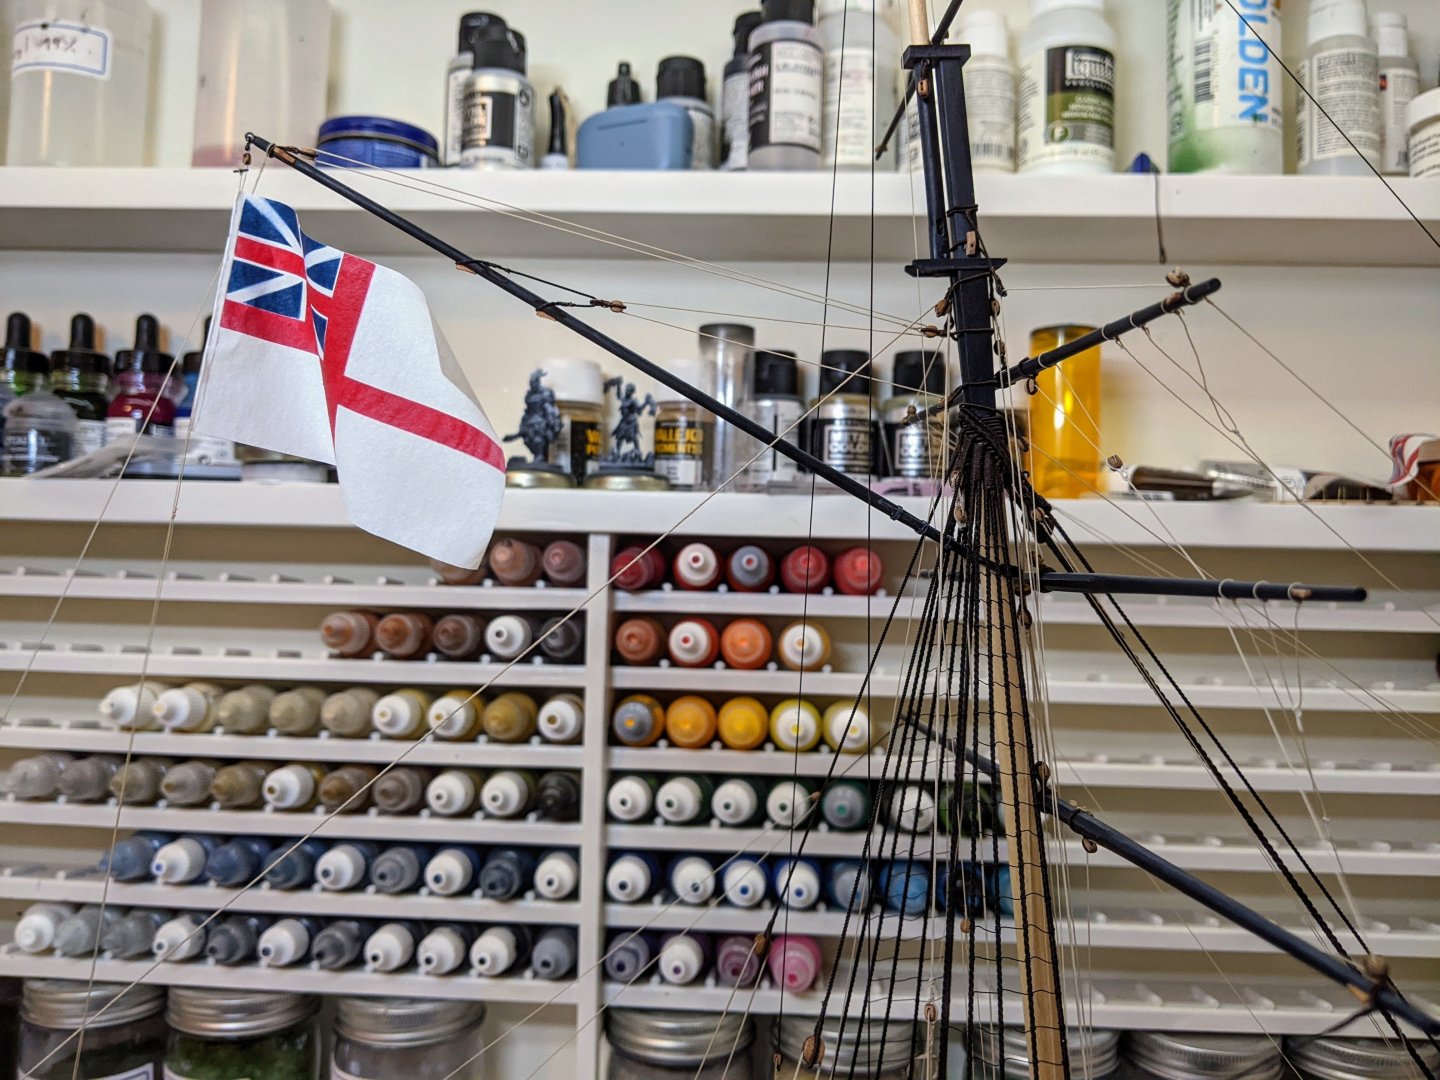
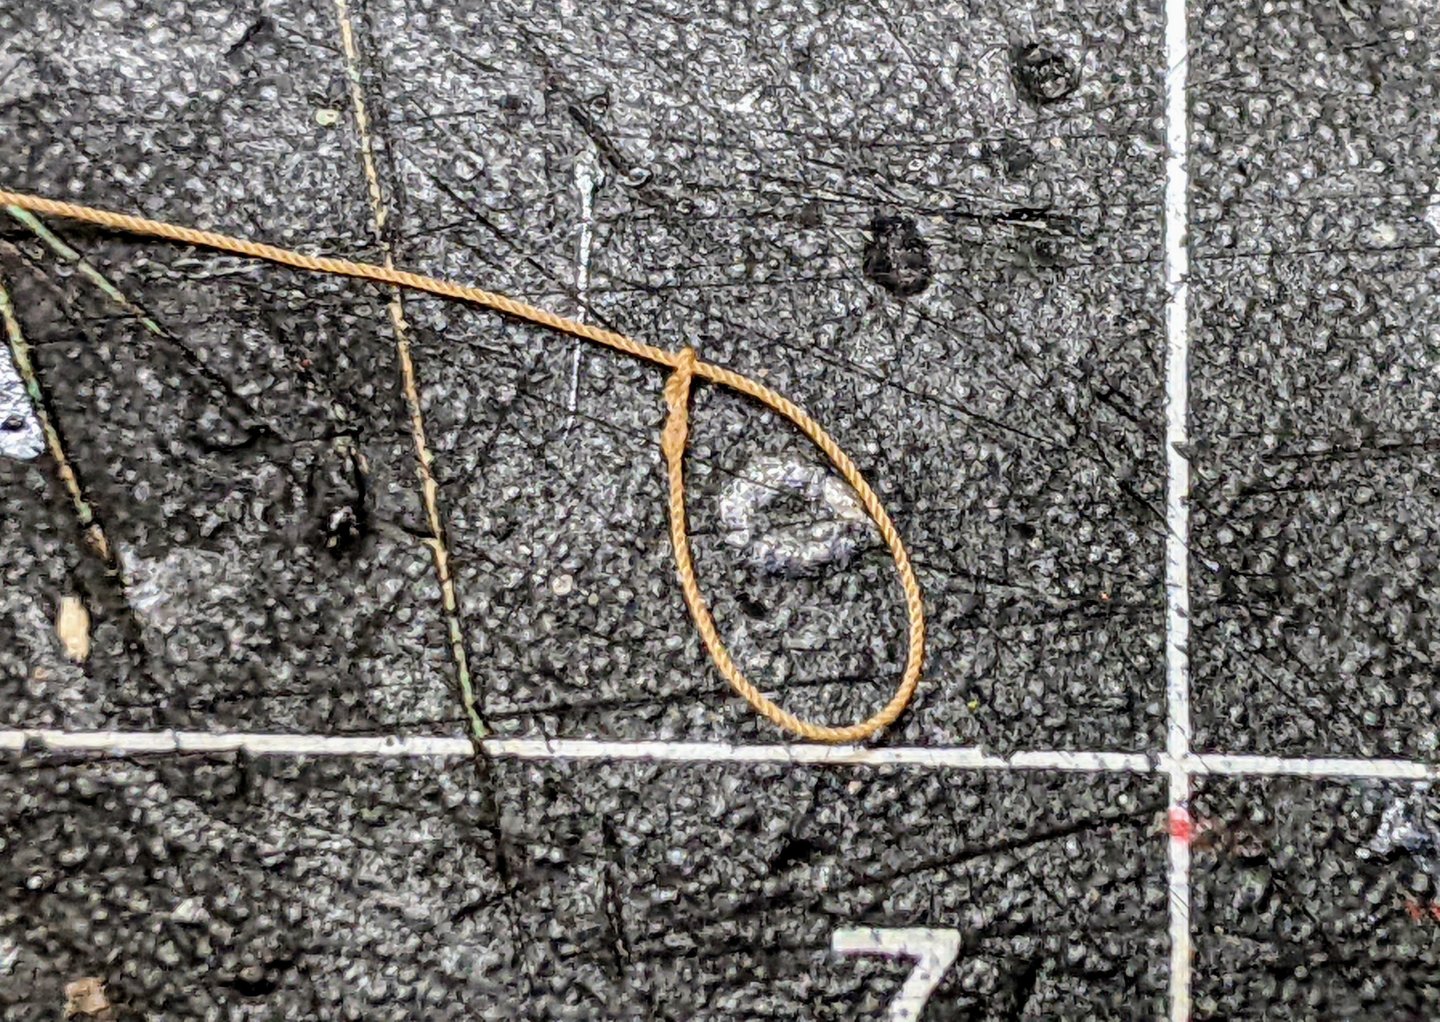
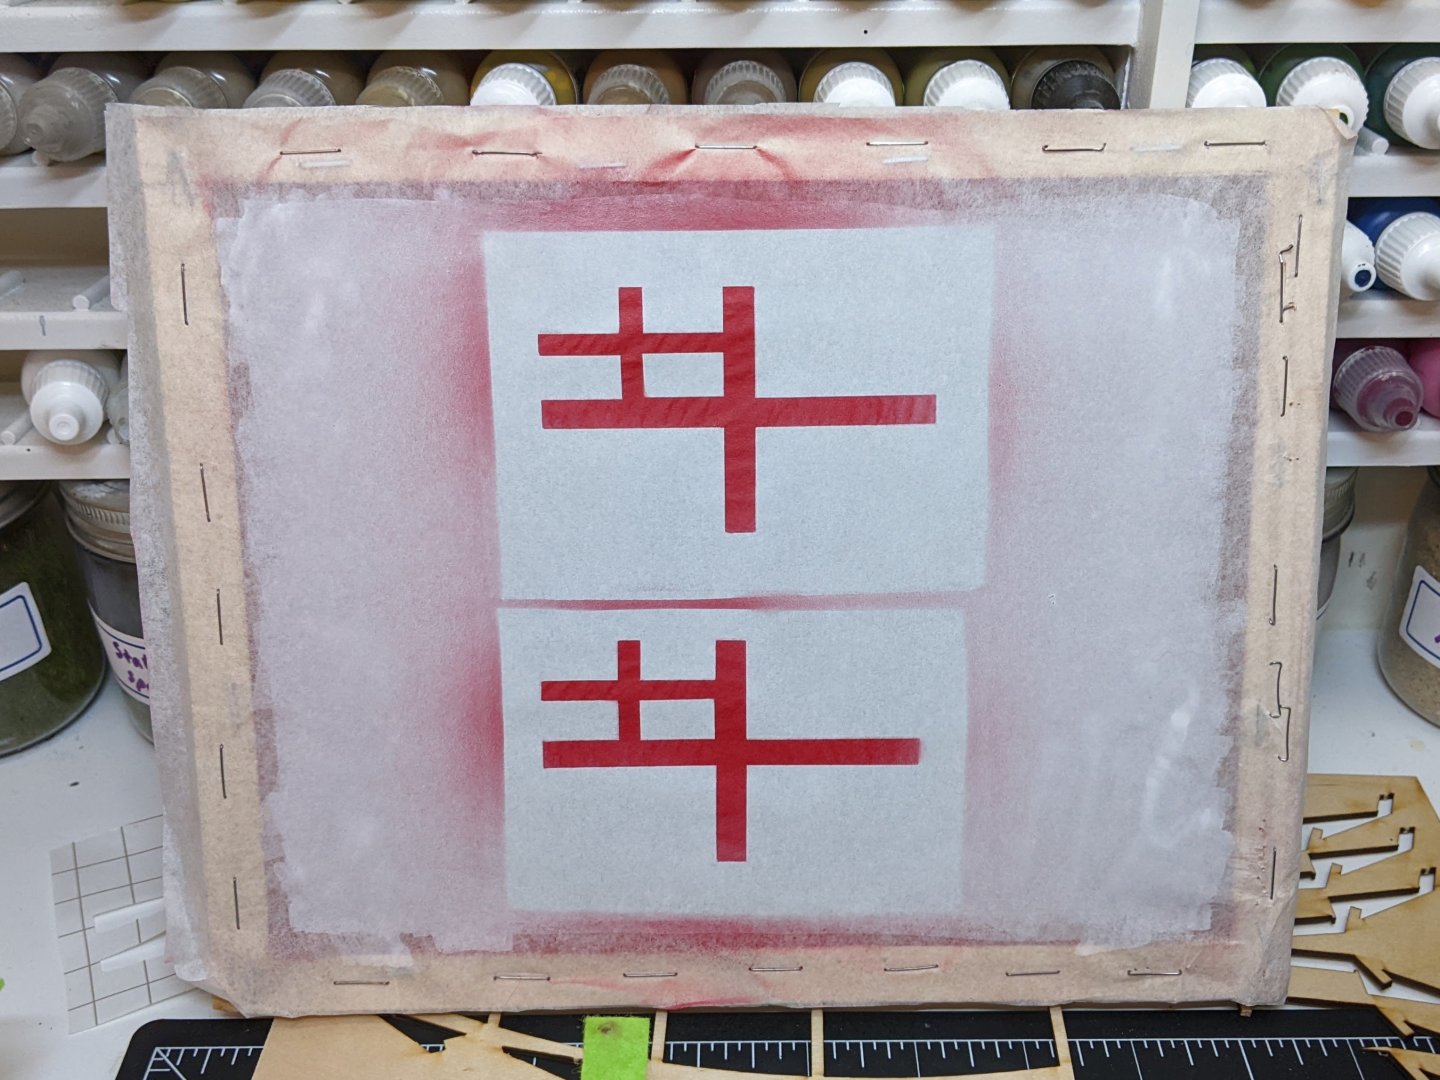
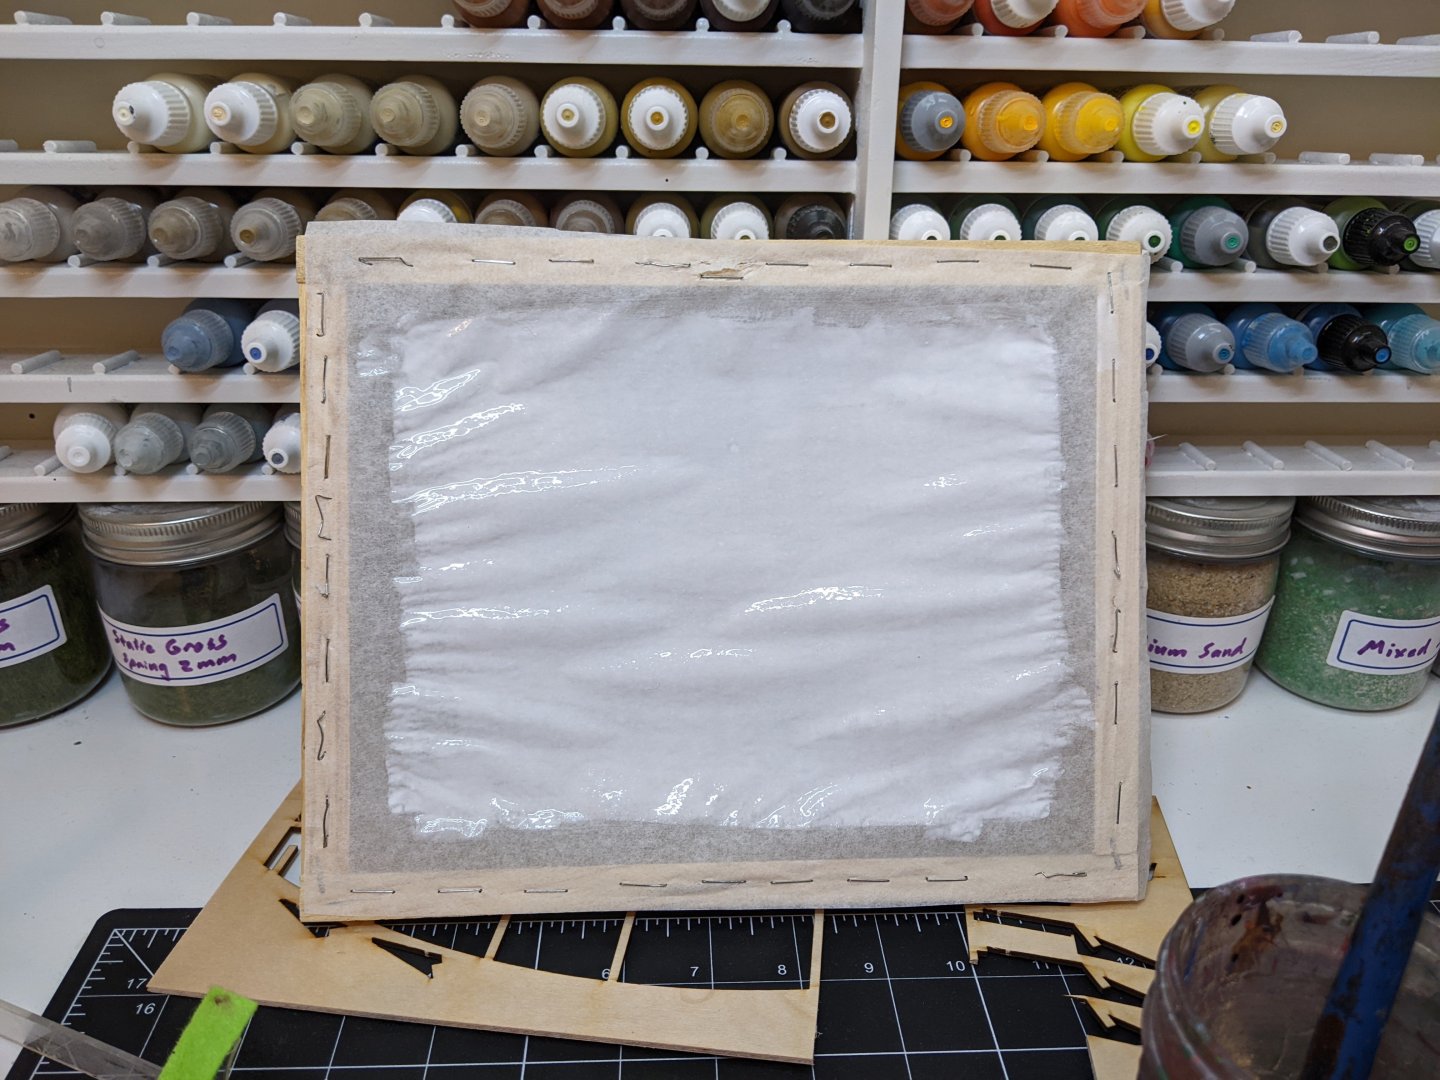
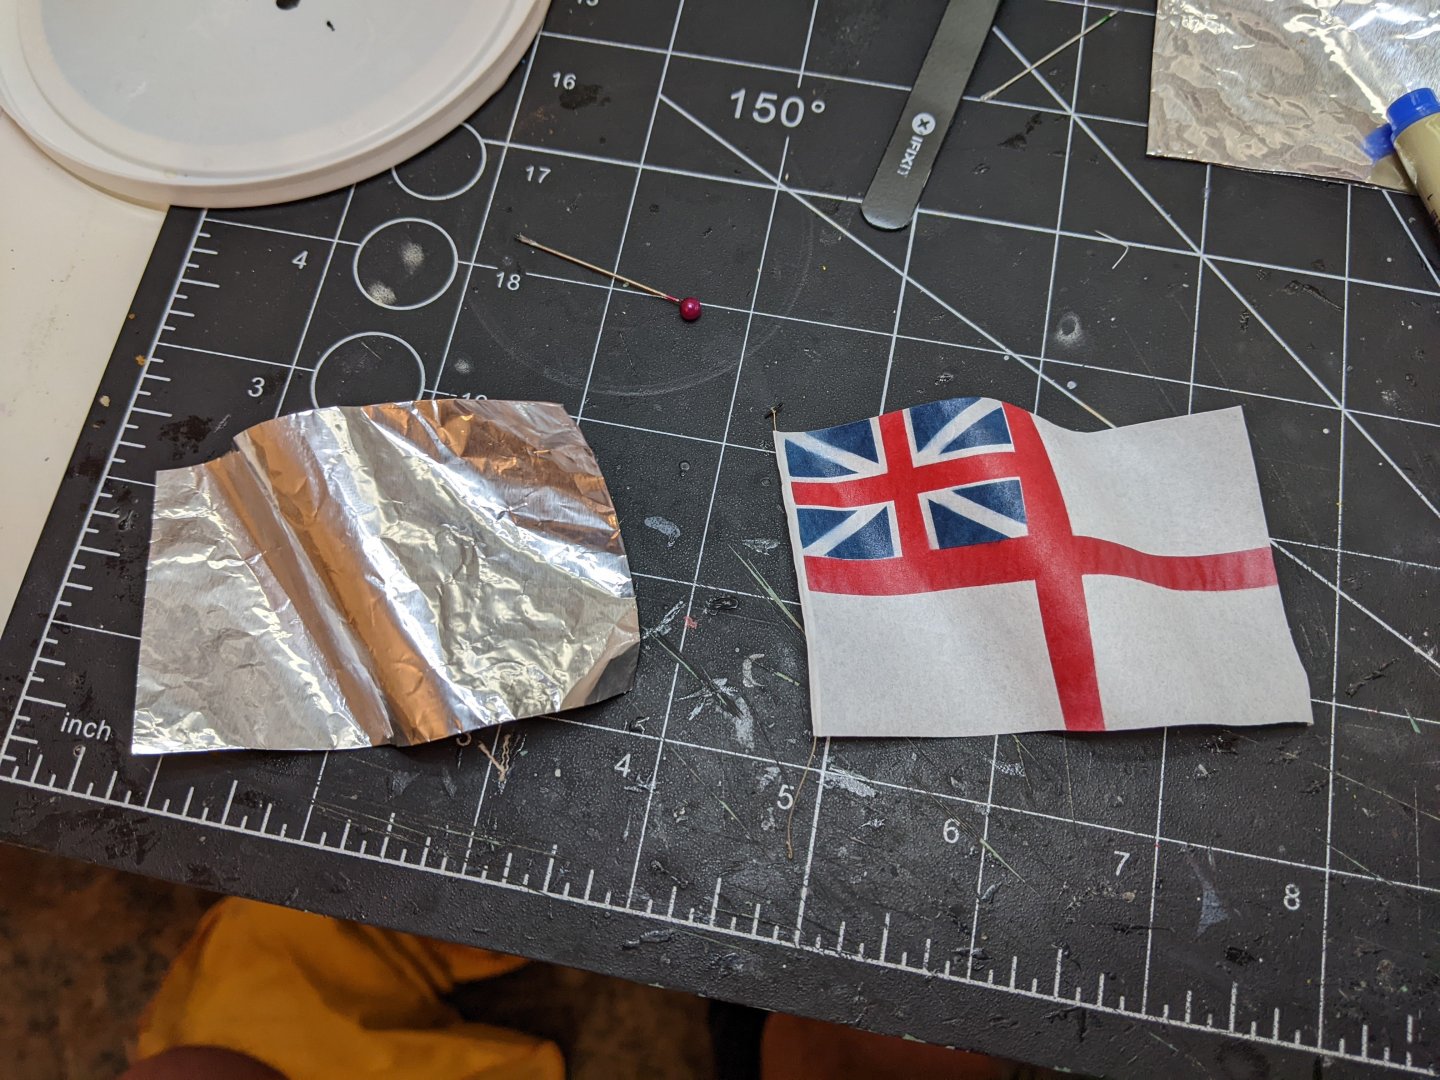
Log #94: The Ensign For a while now I have been experimenting in the background on the ensign. Some of you may have spotted a test version in the background of some of my pictures. These early attempts (and there were 4 or 5 of them) were about figuring out the best way forward to make the flag look like it was semi transparent like the real thing. The above example used the method described by BE[link], but I found it looked too solid and dark. I also found that getting crisp lines did not work out as well as I wanted painting by hand. I also struggled to avoid wrinkling the paper as I was continually wetting small parts of it. So after a bunch of experimentation I came up with the following method. Step 1 was to staple the paper (silkspan) to a frame to hold it tight and then coat it in a combination of watered down pva and white acrylic ink. I used a large flat brush and regular strokes to give a slight hint of brush lines. On the reverse I brushed perpendicular to the front so as to give the impression of a weave. You can’t really see much of this, but I found it gave the best looking white base. This ink, which I also used for the other colours, is essentially just pigment and water (no other additives). It has high pigmentation, but is very translucent so you can get bold colours without making it look like a thick layer of paint has been applied. See below for all the inks used in the flag. I used the same template as BE used and printed out pictures of the ensign on non-permanent full sheet labels. I then carefully cut out templates for each colour. Unfortunately I didn’t take any pictures of these, but you can see below the results after spraying the red ink with my airbrush. I added a small amount of airbrush medium to the ink to provide a tiny bit of binding agent. The reason I made two of them was that mistakes happen and this process takes a long time so I decided to make two and just take the better one. Once dry I placed the template for the blue (I used 3 parts of the dark blue ink with 1 part of the lighter blue plus a tiny bit of airbrush medium as before). You can see below the results as with much of my work there was a minor miss alignment, but I decided that one of them was good enough to not do the whole thing over again. Once everything was dry I cut the ensign off of the frame and proceeded to work on the ropes. I decided on 0.2mm rope so it is visually smaller than the other ropes in the area. For the toggle end I made a eye splice and then looped the rope on itself. I then pulled it tight around a spare off cut from an eyebolt. The other end of the ensign rope was formed into an eye splice and the edge of the ensign was folder over it. Next came the shaping of the flag. I experimented a bunch trying to find the best way to do this and in the end I found the following method worked best. I folded over a piece of tin foil and then cut this double thick piece to approximately the same size as the flag. Using round dowels and brush handles of various sizes I formed this tin foil into the shape I wanted. I placed the flag on the tin foil and blasted it with the hair dryer into the foil. This softened the pva in the flag and the wind blew it into the shape. I then allowed it to cool and it held its shape. Finally I attached an eye splice to the toggle and ran it through a 2mm block with a hook on it. This then looped around to tie onto the eye splice at the bottom of the ensign. I wasn’t sure of the correct way to secure this so used a single sheet knot which seemed fine. And here is the ensign on the model. After some thought I have decided I am not going to do the signal flags. I am still undecided on the pennant. I may make one and see how I like the look of it before deciding.
- 562 replies
-
- 27
-
-
-
- vanguard models
- alert
- (and 2 more)
-
I believe it is 3d printed not cast so you shouldn't need to clean it, but to be safe you could gently wash it with warm soapy water and an old toothbrush. Yes you should use a spray on primer. I would recommend one designed for miniature painting. Army painter, vallejo, citadel etc all sell spray cans of primer you can use. Just go to your local hobby shop and pick up whatever brand they happen to have. I would not use general purpose primers as the miniature ones are designed to go on in a much thinner coat. You don't want to hide all that nice detail with a thick coat of paint.
-
I know that at least by the end of the 18th century single double combos were in use for 12pdrs. For 9pdrs and below it would only be singles. Not sure how applicable this is to the mid 18th century. The following table is the sizes I found from ADM 160/150. Obviously this is general allocation of stores information and any given ship may have differed: Size & Number of Breechings, Tackle and Blocks Per Gun Circa 1794-1802 Breeching Size (in) Gun Tackle Size (in) Blocks (Single) Blocks (Double) Size (in) Number Size (in) Number Guns 32 pdr 7 3 10 2 10 2 24 pdr 6½ 3 10 2 10 2 18 pdr 5½ 2½ 8 2 8 2 12 pdr 5½ 2½ 8 2 8 2 9 pdr 4½ 2 6½ 4 6 pdr 4½ 2 6½ 4 4 pdr 3½ 1½ 5 4 Carronades 32 pdr 7 2½ 8 2 8 2 24 pdr 6½ 2 6½ 4 18 pdr 5½ 1½ 5 2 12 pdr 5½ 1½ 5 2 Speedwell is looking great chuck and those new blocks look really good, fantastic as always.
-
Looks very nice and organized. That is a lot of models you have in that display case.
-
I am planning to do a smaller plastic model as a sort of interim project though I am not sure if I will do a build log for it. It will mostly involve painting which is harder to convey in a build log, we'll see. For my next wooden ship model I am well into the research phase, but I will talk about it a bit more once I am fully done with Alert.
- 562 replies
-
- 10
-
-
- vanguard models
- alert
- (and 2 more)
-
Glenn you haven't wasted any time getting rolling on this one.